# Adafruit
> We wrote a basic library to help you work with the alphanumeric backpack. The library is written for the Arduino and will work with any Arduino as it just uses the I2C pins. The code is very portable
---
# Source: https://learn.adafruit.com/adafruit-led-backpack/0-54-alphanumeric-9b21a470-83ad-459c-af02-209d8d82c462.md
# Adafruit LED Backpacks
## Arduino Wiring and Setup
# Downloading the Arduino Library
We wrote a basic library to help you work with the alphanumeric backpack. The library is written for the Arduino and will work with any Arduino as it just uses the I2C pins. The code is very portable and can be easily adapted to any I2C-capable micro.
Begin by downloading our [Adafruit LED Backpack library](https://github.com/adafruit/Adafruit-LED-Backpack-Library "Link: https://github.com/adafruit/Adafruit-LED-Backpack-Library")and the [Adafruit GFX library](https://github.com/adafruit/Adafruit-GFX-Library) from the Arduino library manager.
Open up the Arduino library manager:

Search for the **Adafruit LED Backpack ** library and install it

When asked to install dependencies, click **Install all.**

We also have a great tutorial on Arduino library installation at:
[http://learn.adafruit.com/adafruit-all-about-arduino-libraries-install-use](http://learn.adafruit.com/adafruit-all-about-arduino-libraries-install-use "Link: http://learn.adafruit.com/adafruit-all-about-arduino-libraries-install-use")
Primary:
# Wiring STEMMA QT Version
Here is an example of the STEMMA QT version wired to a Metro using the STEMMA QT connector on the backpack.
- **Board 5V** to **backpack Vio (red wire)**
- **Board GND** to **backpack** **GND (black wire)**
- **Board SCL** to **backpack** **SCL (yellow wire)**
- **Board SDA** to **backpack** **SDA (blue wire)**

Here is an example of the STEMMA QT version wired to a Metro using a solderless breadboard. This example also includes how to wire up the VHi pin, which makes the LEDs appear brighter.
- **Board 5V** to **backpack Vio (long red wire)**
- **Board GND** to **backpack** **GND (black wire)**
- **Board SCL** to **backpack** **SCL (yellow wire)**
- **Board SDA** to **backpack** **SDA (blue wire)**
- **Backpack VIO** to **backpack VHi (short red wire)**

# Wiring Original Version
- Connect **CLK** to the I2C clock - on Arduino UNO thats Analog #5 (or SCL), on the Leonardo it's Digital #3, on the Mega it's digital #21
- Connect **DAT** to the I2C data - on Arduino UNO thats Analog #4 (or SDA), on the Leonardo it's Digital #2, on the Mega it's digital #20
- Connect **GND** to common ground
- Connect **VCC+** to power - 5V is best but 3V will work if that's all you've got (it will be dimmer)
- Connect **Vi2c** to your microcontroller's logic level (3-5V) - If you're using an Arduino, this is almost certainly 5V. If its a 3V Arduino such as a Due, connect it to 3V
Both **Vi2c** and **Vcc** MUST be connected to 3 to 5VDC! Vcc is for the LED driver power, Vi2c is what sets the logic level for communication to the chip.

# Load Demo
Restart the Arduino IDE and load up the **File→Adafruit\_LEDBackpack→quadalphanum** demo

Upload to your Arduino, and open up the Serial console at 9600 baud speed. You'll see each digit light up all the segments, then the display will scroll through the 'font table' showing every character that it knows how to display. Finally, you'll get a notice to start typing into the serial console. Type a message and hit return, you'll see it scroll onto the display!


# Library Reference
For the quad displays, we have a special object that can handle ascii data for easy printing.
You can create the object with
```
Adafruit_AlphaNum4 alpha4 = Adafruit_AlphaNum4();
```
There's no arguments or pins because the backpacks use the fixed I2C pins.
By default, the address is 0x70, but you can pass in the I2C address used when you initialize the display with **begin**
```
alpha4.begin(0x70); // pass in the address
```
Next up, the segments can be turned on/off for each digit by writing the 'raw' bitmap you want, for example, all the LEDs off on digit #3 is
```
alpha4.writeDigitRaw(3, 0x0);
```
All the segments on for digit #0 is
```
alpha4.writeDigitRaw(0, 0x3FFF);
```
This is the segment map:

the 16 bit digit you pass in for raw image has this mapping **:**
> 0 **DP N M L K J H G2 G1 F E D C B A**
The first bit isn't used, you can make it 0 or 1
To turn on just the **A** segment, use 0x0001
To turn on just the **G1** segment, use 0x0040
# ASCII data
If you're just looking to print 'text' you can use our font table, just pass in an ASCII character!
For example, to set digit #0 to **A** call:
```
alpha4.writeDigitAscii(0, 'A')
```
# Writing Data
Don't forget to 'write' the data to the display with
```
alpha4.writeDisplay();
```
That's what actually 'sets' the data onto the LEDs!

- [Previous Page](https://learn.adafruit.com/adafruit-led-backpack/0-54-alphanumeric-assembly.md)
- [Next Page](https://learn.adafruit.com/adafruit-led-backpack/0-54-alphanumeric-circuitpython-wiring-and-setup.md)
## Primary Products
### Adafruit Mini 8x8 LED Matrix w/I2C Backpack - Red
[Adafruit Mini 8x8 LED Matrix w/I2C Backpack - Red](https://www.adafruit.com/product/870)
What's better than a single LED? Lots of LEDs! A fun way to make a small display is to use an [8x8 matrix](https://www.adafruit.com/category/37_88) or a [4-digit 7-segment display](https://www.adafruit.com/category/37_103). Matrices like these are...
In Stock
[Buy Now](https://www.adafruit.com/product/870)
[Related Guides to the Product](https://learn.adafruit.com/products/870/guides)
### Adafruit Mini 8x8 LED Matrix w/I2C Backpack - Yellow
[Adafruit Mini 8x8 LED Matrix w/I2C Backpack - Yellow](https://www.adafruit.com/product/871)
What's better than a single LED? Lots of LEDs! A fun way to make a small display is to use an [8x8 matrix](https://www.adafruit.com/category/37_88) or a [4-digit 7-segment display](https://www.adafruit.com/category/37_103). Matrices like these are...
In Stock
[Buy Now](https://www.adafruit.com/product/871)
[Related Guides to the Product](https://learn.adafruit.com/products/871/guides)
### Adafruit Mini 0.8" 8x8 LED Matrix w/I2C Backpack - Yellow-Green
[Adafruit Mini 0.8" 8x8 LED Matrix w/I2C Backpack - Yellow-Green](https://www.adafruit.com/product/872)
What's better than a single LED? Lots of LEDs! A fun way to make a small display is to use an [8x8 matrix](https://www.adafruit.com/category/37_88) or a [4-digit 7-segment display](https://www.adafruit.com/category/37_103). Matrices like these are...
In Stock
[Buy Now](https://www.adafruit.com/product/872)
[Related Guides to the Product](https://learn.adafruit.com/products/872/guides)
### Adafruit 0.56" 4-Digit 7-Segment Display with I2C Backpack - Red
[Adafruit 0.56" 4-Digit 7-Segment Display with I2C Backpack - Red](https://www.adafruit.com/product/878)
What's better than a single LED? Lots of LEDs! A fun way to make a small display is to use an [8x8 matrix](https://www.adafruit.com/category/37_88) or a [4-digit 7-segment display](https://www.adafruit.com/category/37_103). Matrices like these are...
In Stock
[Buy Now](https://www.adafruit.com/product/878)
[Related Guides to the Product](https://learn.adafruit.com/products/878/guides)
### Adafruit 0.56" 4-Digit 7-Segment Display w/I2C Backpack - Yellow
[Adafruit 0.56" 4-Digit 7-Segment Display w/I2C Backpack - Yellow](https://www.adafruit.com/product/879)
What's better than a single LED? Lots of LEDs! A fun way to make a small display is to use an [8x8 matrix](https://www.adafruit.com/category/37_88) or a [4-digit 7-segment display](https://www.adafruit.com/category/37_103). Matrices like these are...
In Stock
[Buy Now](https://www.adafruit.com/product/879)
[Related Guides to the Product](https://learn.adafruit.com/products/879/guides)
### Adafruit 0.56" 4-Digit 7-Segment Display w/ I2C Backpack - Green
[Adafruit 0.56" 4-Digit 7-Segment Display w/ I2C Backpack - Green](https://www.adafruit.com/product/880)
What's better than a single LED? Lots of LEDs! A fun way to make a small display is to use an [8x8 matrix](https://www.adafruit.com/category/37_88) or a [4-digit 7-segment display](https://www.adafruit.com/category/37_103). Matrices like these are...
No Longer Stocked
[Buy Now](https://www.adafruit.com/product/880)
[Related Guides to the Product](https://learn.adafruit.com/products/880/guides)
### Adafruit 0.56" 4-Digit 7-Segment Display w/ I2C Backpack - Blue
[Adafruit 0.56" 4-Digit 7-Segment Display w/ I2C Backpack - Blue](https://www.adafruit.com/product/881)
What's better than a single LED? Lots of LEDs! A fun way to make a small display is to use an [8x8 matrix](https://www.adafruit.com/category/37_88) or a [4-digit 7-segment display](https://www.adafruit.com/category/37_103). Matrices like these are...
In Stock
[Buy Now](https://www.adafruit.com/product/881)
[Related Guides to the Product](https://learn.adafruit.com/products/881/guides)
### Adafruit Bicolor LED Square Pixel Matrix with I2C Backpack
[Adafruit Bicolor LED Square Pixel Matrix with I2C Backpack](https://www.adafruit.com/product/902)
What's better than a single LED? Lots of LEDs! A fun way to make a small colorful display is to use a [1.2" Bi-color 8x8 LED Matrix](http://www.adafruit.com/products/458). Matrices like these are 'multiplexed' - so to control all the 128 LEDs you need 24 pins....
In Stock
[Buy Now](https://www.adafruit.com/product/902)
[Related Guides to the Product](https://learn.adafruit.com/products/902/guides)
### Adafruit Mini 8x8 LED Matrix w/I2C Backpack - Blue
[Adafruit Mini 8x8 LED Matrix w/I2C Backpack - Blue](https://www.adafruit.com/product/959)
What's better than a single LED? Lots of LEDs! A fun way to make a small display is to use an [8x8 matrix](https://www.adafruit.com/category/37_88) or a [4-digit 7-segment display](https://www.adafruit.com/category/37_103). Matrices like these are...
In Stock
[Buy Now](https://www.adafruit.com/product/959)
[Related Guides to the Product](https://learn.adafruit.com/products/959/guides)
### Adafruit 0.56" 4-Digit 7-Segment Display w/I2C Backpack - White
[Adafruit 0.56" 4-Digit 7-Segment Display w/I2C Backpack - White](https://www.adafruit.com/product/1002)
What's better than a single LED? Lots of LEDs! A fun way to make a small display is to use an [8x8 matrix](https://www.adafruit.com/category/37_88) or a [4-digit 7-segment display](https://www.adafruit.com/category/37_103). Matrices like these are...
In Stock
[Buy Now](https://www.adafruit.com/product/1002)
[Related Guides to the Product](https://learn.adafruit.com/products/1002/guides)
### Adafruit 1.2" 8x8 LED Matrix Backpack
[Adafruit 1.2" 8x8 LED Matrix Backpack](https://www.adafruit.com/product/1048)
By popular request, you can now get our 8x8 LED backpacks without the LEDs! These backpacks feature an HT16K33 I2C LED driver, they're simple and easy to use - you can use [our very nice library for the backpacks to...](https://github.com/adafruit/Adafruit-LED-Backpack-Library)
In Stock
[Buy Now](https://www.adafruit.com/product/1048)
[Related Guides to the Product](https://learn.adafruit.com/products/1048/guides)
### Adafruit Small 1.2" 8x8 LED Matrix w/I2C Backpack - Red
[Adafruit Small 1.2" 8x8 LED Matrix w/I2C Backpack - Red](https://www.adafruit.com/product/1049)
What's better than a single LED? Lots of LEDs! A fun way to make a small display is to use an [8x8 matrix](https://www.adafruit.com/category/37_88) or a [4-digit 7-segment display](https://www.adafruit.com/category/37_103). Matrices like these are...
In Stock
[Buy Now](https://www.adafruit.com/product/1049)
[Related Guides to the Product](https://learn.adafruit.com/products/1049/guides)
### Adafruit Small 1.2" 8x8 LED Matrix w/I2C Backpack - Yellow
[Adafruit Small 1.2" 8x8 LED Matrix w/I2C Backpack - Yellow](https://www.adafruit.com/product/1050)
What's better than a single LED? Lots of LEDs! A fun way to make a small display is to use an [8x8 matrix](https://www.adafruit.com/category/37_88) or a [4-digit 7-segment display](https://www.adafruit.com/category/37_103). Matrices like these are...
In Stock
[Buy Now](https://www.adafruit.com/product/1050)
[Related Guides to the Product](https://learn.adafruit.com/products/1050/guides)
### Adafruit Small 1.2" 8x8 LED Matrix w/I2C Backpack - Blue
[Adafruit Small 1.2" 8x8 LED Matrix w/I2C Backpack - Blue](https://www.adafruit.com/product/1052)
What's better than a single LED? Lots of LEDs! A fun way to make a small display is to use an [8x8 matrix](https://www.adafruit.com/category/37_88) or a [4-digit 7-segment display](https://www.adafruit.com/category/37_103). Matrices like these are...
In Stock
[Buy Now](https://www.adafruit.com/product/1052)
[Related Guides to the Product](https://learn.adafruit.com/products/1052/guides)
### Adafruit Mini 8x8 LED Matrix w/I2C Backpack - Ultra Bright White
[Adafruit Mini 8x8 LED Matrix w/I2C Backpack - Ultra Bright White](https://www.adafruit.com/product/1080)
What's better than a single LED? Lots of LEDs! A fun way to make a small display is to use an [8x8 matrix](https://www.adafruit.com/category/37_88) or a [4-digit 7-segment display](https://www.adafruit.com/category/37_103). Matrices like these are...
In Stock
[Buy Now](https://www.adafruit.com/product/1080)
[Related Guides to the Product](https://learn.adafruit.com/products/1080/guides)
### Adafruit 1.2" 4-Digit 7-Segment Display w/I2C Backpack - Green
[Adafruit 1.2" 4-Digit 7-Segment Display w/I2C Backpack - Green](https://www.adafruit.com/product/1268)
What's better than a single LED? Lots of LEDs! A fun way to make a numeric display is to use a [4-digit 7-segment display](https://www.adafruit.com/category/37_103). LED matrices like these are 'multiplexed' - so to control all the seven-segment LEDs you need 14 pins....
No Longer Stocked
[Buy Now](https://www.adafruit.com/product/1268)
[Related Guides to the Product](https://learn.adafruit.com/products/1268/guides)
### Adafruit 1.2" 4-Digit 7-Segment Display w/I2C Backpack - Yellow
[Adafruit 1.2" 4-Digit 7-Segment Display w/I2C Backpack - Yellow](https://www.adafruit.com/product/1269)
What's better than a single LED? Lots of LEDs! A fun way to make a numeric display is to use a [4-digit 7-segment display](https://www.adafruit.com/category/37_103). LED matrices like these are 'multiplexed' - so to control all the seven-segment LEDs you need 14 pins....
In Stock
[Buy Now](https://www.adafruit.com/product/1269)
[Related Guides to the Product](https://learn.adafruit.com/products/1269/guides)
### Adafruit 1.2" 4-Digit 7-Segment Display w/I2C Backpack - Red
[Adafruit 1.2" 4-Digit 7-Segment Display w/I2C Backpack - Red](https://www.adafruit.com/product/1270)
What's better than a single LED? Lots of LEDs! A fun way to make a numeric display is to use a [4-digit 7-segment display](https://www.adafruit.com/category/37_103). LED matrices like these are 'multiplexed' - so to control all the seven-segment LEDs you need 14 pins....
In Stock
[Buy Now](https://www.adafruit.com/product/1270)
[Related Guides to the Product](https://learn.adafruit.com/products/1270/guides)
### Small 1.2" 8x8 Ultra Bright White LED Matrix + Backpack
[Small 1.2" 8x8 Ultra Bright White LED Matrix + Backpack](https://www.adafruit.com/product/1614)
What's better than a single LED? Lots of LEDs! A fun way to make a small display is to use an [8x8 matrix](https://www.adafruit.com/category/37_88) or a [4-digit 7-segment display](https://www.adafruit.com/category/37_103). Matrices like these are...
In Stock
[Buy Now](https://www.adafruit.com/product/1614)
[Related Guides to the Product](https://learn.adafruit.com/products/1614/guides)
### Adafruit Small 1.2" 8x8 LED Matrix w/I2C Backpack - Pure Green
[Adafruit Small 1.2" 8x8 LED Matrix w/I2C Backpack - Pure Green](https://www.adafruit.com/product/1632)
What's better than a single LED? Lots of LEDs! A fun way to make a small display is to use an [8x8 matrix](https://www.adafruit.com/category/37_88) or a [4-digit 7-segment display](https://www.adafruit.com/category/37_103). Matrices like these are...
In Stock
[Buy Now](https://www.adafruit.com/product/1632)
[Related Guides to the Product](https://learn.adafruit.com/products/1632/guides)
### Adafruit Mini 0.8" 8x8 LED Matrix w/I2C Backpack - Pure Green
[Adafruit Mini 0.8" 8x8 LED Matrix w/I2C Backpack - Pure Green](https://www.adafruit.com/product/1633)
What's better than a single LED? Lots of LEDs! A fun way to make a small display is to use an [8x8 matrix](https://www.adafruit.com/category/37_88) or a [4-digit 7-segment display](https://www.adafruit.com/category/37_103). Matrices like these are...
In Stock
[Buy Now](https://www.adafruit.com/product/1633)
[Related Guides to the Product](https://learn.adafruit.com/products/1633/guides)
### Bi-Color (Red/Green) 24-Bar Bargraph w/I2C Backpack Kit
[Bi-Color (Red/Green) 24-Bar Bargraph w/I2C Backpack Kit](https://www.adafruit.com/product/1721)
What's better than a single LED? Lots of LEDs! A fun way to make a small linear display is to use two 12-bar Bi-color bar-graphs. However, this LED bargraph is 'multiplexed' - so to control all the 48 LEDs you need a lot of pins.
Out of Stock
[Buy Now](https://www.adafruit.com/product/1721)
[Related Guides to the Product](https://learn.adafruit.com/products/1721/guides)
### Small 1.2" 8x8 Ultra Bright Square Amber LED Matrix + Backpack
[Small 1.2" 8x8 Ultra Bright Square Amber LED Matrix + Backpack](https://www.adafruit.com/product/1854)
What's better than a single LED? Lots of LEDs! Matrices like these are 'multiplexed' - so to control 64 LEDs you need 16 pins. That's a lot of pins, and there are [driver chips like the MAX7219](//www.adafruit.com/products/453) that can control a matrix for you but...
In Stock
[Buy Now](https://www.adafruit.com/product/1854)
[Related Guides to the Product](https://learn.adafruit.com/products/1854/guides)
### Small 1.2" 8x8 Ultra Bright Square Yellow LED Matrix + Backpack
[Small 1.2" 8x8 Ultra Bright Square Yellow LED Matrix + Backpack](https://www.adafruit.com/product/1855)
What's better than a single LED? Lots of LEDs! Matrices like these are 'multiplexed' - so to control 64 LEDs you need 16 pins. That's a lot of pins, and there are [driver chips like the MAX7219](//www.adafruit.com/products/453) that can control a matrix for you but...
In Stock
[Buy Now](https://www.adafruit.com/product/1855)
[Related Guides to the Product](https://learn.adafruit.com/products/1855/guides)
### Small 1.2" 8x8 Bright Square Pure Green LED Matrix + Backpack
[Small 1.2" 8x8 Bright Square Pure Green LED Matrix + Backpack](https://www.adafruit.com/product/1856)
What's better than a single LED? Lots of LEDs! Matrices like these are 'multiplexed' - so to control 64 LEDs you need 16 pins. That's a lot of pins, and there are [driver chips like the MAX7219](//www.adafruit.com/products/453) that can control a matrix for you but...
In Stock
[Buy Now](https://www.adafruit.com/product/1856)
[Related Guides to the Product](https://learn.adafruit.com/products/1856/guides)
### Small 1.2" 8x8 Ultra Bright Square White LED Matrix + Backpack
[Small 1.2" 8x8 Ultra Bright Square White LED Matrix + Backpack](https://www.adafruit.com/product/1857)
What's better than a single LED? Lots of LEDs! Matrices like these are 'multiplexed' - so to control 64 LEDs you need 16 pins. That's a lot of pins, and there are [driver chips like the MAX7219](//www.adafruit.com/products/453) that can control a matrix for you but...
In Stock
[Buy Now](https://www.adafruit.com/product/1857)
[Related Guides to the Product](https://learn.adafruit.com/products/1857/guides)
### Adafruit 14-segment LED Alphanumeric Backpack - STEMMA QT
[Adafruit 14-segment LED Alphanumeric Backpack - STEMMA QT](https://www.adafruit.com/product/1910)
By popular request, you can now get our 14-segment LED backpacks without the LEDs! These backpacks feature an HT16K33 I2C LED driver, they're simple and easy to use - you can use [our very nice library for the backpacks to...](https://github.com/adafruit/Adafruit-LED-Backpack-Library)
In Stock
[Buy Now](https://www.adafruit.com/product/1910)
[Related Guides to the Product](https://learn.adafruit.com/products/1910/guides)
### Quad Alphanumeric Display - Red 0.54" Digits w/ I2C Backpack
[Quad Alphanumeric Display - Red 0.54" Digits w/ I2C Backpack](https://www.adafruit.com/product/1911)
Display, elegantly, 012345678 or 9! Gaze, hypnotized, at ABCDEFGHIJKLM - well it can display the whole alphabet. You get the point. This is a nice, bright alphanumeric display that shows letters and numbers in a beautiful red hue. It's super bright and designed for viewing from distances...
In Stock
[Buy Now](https://www.adafruit.com/product/1911)
[Related Guides to the Product](https://learn.adafruit.com/products/1911/guides)
### Quad Alphanumeric Display - Blue 0.54" Digits w/ I2C Backpack
[Quad Alphanumeric Display - Blue 0.54" Digits w/ I2C Backpack](https://www.adafruit.com/product/1912)
Display, elegantly, 012345678 or 9! Gaze, hypnotized, at ABCDEFGHIJKLM - well it can display the whole alphabet. You get the point. This is a nice, bright alphanumeric display that shows letters and numbers in a beautiful blue hue. It's super bright and designed for viewing from distances...
In Stock
[Buy Now](https://www.adafruit.com/product/1912)
[Related Guides to the Product](https://learn.adafruit.com/products/1912/guides)
### 16x8 1.2" LED Matrix + Backpack - Ultra Bright Round Green LEDs
[16x8 1.2" LED Matrix + Backpack - Ultra Bright Round Green LEDs](https://www.adafruit.com/product/2035)
What's better than a single LED? Lots of LEDs! And what's better than lots of LEDs? **TWO TIMES AS MANY LEDS!!!**
With the 16x8 LED Matrix Backpack we've doubled your project's matrix capacity by making it super easy to get two separate 8x8 matrices onto...
In Stock
[Buy Now](https://www.adafruit.com/product/2035)
[Related Guides to the Product](https://learn.adafruit.com/products/2035/guides)
### 16x8 1.2" LED Matrix+Backpack UltraBright Round YellowGreen LEDs
[16x8 1.2" LED Matrix+Backpack UltraBright Round YellowGreen LEDs](https://www.adafruit.com/product/2036)
What's better than a single LED? Lots of LEDs! And what's better than lots of LEDs? **TWO TIMES AS MANY LEDS!!!**
With the 16x8 LED Matrix Backpack we've doubled your project's matrix capacity by making it super easy to get two separate 8x8 matrices onto...
In Stock
[Buy Now](https://www.adafruit.com/product/2036)
[Related Guides to the Product](https://learn.adafruit.com/products/2036/guides)
### 16x8 1.2" LED Matrix + Backpack - Ultra Bright Round Red LEDs
[16x8 1.2" LED Matrix + Backpack - Ultra Bright Round Red LEDs](https://www.adafruit.com/product/2037)
What's better than a single LED? Lots of LEDs! And what's better than lots of LEDs? **TWO TIMES AS MANY LEDS!!!**
With the 16x8 LED Matrix Backpack we've doubled your project's matrix capacity by making it super easy to get two separate 8x8 matrices onto...
In Stock
[Buy Now](https://www.adafruit.com/product/2037)
[Related Guides to the Product](https://learn.adafruit.com/products/2037/guides)
### 16x8 1.2" LED Matrix + Backpack - Ultra Bright Round White LEDs
[16x8 1.2" LED Matrix + Backpack - Ultra Bright Round White LEDs](https://www.adafruit.com/product/2038)
What's better than a single LED? Lots of LEDs! And what's better than lots of LEDs? **TWO TIMES AS MANY LEDS!!!**
With the 16x8 LED Matrix Backpack we've doubled your project's matrix capacity by making it super easy to get two separate 8x8 matrices onto...
In Stock
[Buy Now](https://www.adafruit.com/product/2038)
[Related Guides to the Product](https://learn.adafruit.com/products/2038/guides)
### 16x8 1.2" LED Matrix + Backpack - Ultra Bright Round Blue LEDs
[16x8 1.2" LED Matrix + Backpack - Ultra Bright Round Blue LEDs](https://www.adafruit.com/product/2039)
What's better than a single LED? Lots of LEDs! And what's better than lots of LEDs? **TWO TIMES AS MANY LEDS!!!**
With the 16x8 LED Matrix Backpack we've doubled your project's matrix capacity by making it super easy to get two separate 8x8 matrices onto...
In Stock
[Buy Now](https://www.adafruit.com/product/2039)
[Related Guides to the Product](https://learn.adafruit.com/products/2039/guides)
### 16x8 1.2" LED Matrix + Backpack - Ultra Bright Square Blue LEDs
[16x8 1.2" LED Matrix + Backpack - Ultra Bright Square Blue LEDs](https://www.adafruit.com/product/2040)
What's better than a single LED? Lots of LEDs! And what's better than lots of LEDs? **TWO TIMES AS MANY LEDS!!!**
With the 16x8 LED Matrix Backpack we've doubled your project's matrix capacity by making it super easy to get two separate 8x8 matrices onto...
In Stock
[Buy Now](https://www.adafruit.com/product/2040)
[Related Guides to the Product](https://learn.adafruit.com/products/2040/guides)
### 16x8 1.2" LED Matrix + Backpack - Ultra Bright Square Amber LEDs
[16x8 1.2" LED Matrix + Backpack - Ultra Bright Square Amber LEDs](https://www.adafruit.com/product/2041)
What's better than a single LED? Lots of LEDs! And what's better than lots of LEDs? **TWO TIMES AS MANY LEDS!!!**
With the 16x8 LED Matrix Backpack we've doubled your project's matrix capacity by making it super easy to get two separate 8x8 matrices onto...
In Stock
[Buy Now](https://www.adafruit.com/product/2041)
[Related Guides to the Product](https://learn.adafruit.com/products/2041/guides)
### 16x8 1.2" LED Matrix + Backpack - Ultra Bright Square Green LEDs
[16x8 1.2" LED Matrix + Backpack - Ultra Bright Square Green LEDs](https://www.adafruit.com/product/2042)
What's better than a single LED? Lots of LEDs! And what's better than lots of LEDs? **TWO TIMES AS MANY LEDS!!!**
With the 16x8 LED Matrix Backpack we've doubled your project's matrix capacity by making it super easy to get two separate 8x8 matrices onto...
In Stock
[Buy Now](https://www.adafruit.com/product/2042)
[Related Guides to the Product](https://learn.adafruit.com/products/2042/guides)
### 16x8 1.2" LED Matrix + Backpack -Ultra Bright Square Yellow LEDs
[16x8 1.2" LED Matrix + Backpack -Ultra Bright Square Yellow LEDs](https://www.adafruit.com/product/2043)
What's better than a single LED? Lots of LEDs! And what's better than lots of LEDs? **TWO TIMES AS MANY LEDS!!!**
With the 16x8 LED Matrix Backpack we've doubled your project's matrix capacity by making it super easy to get two separate 8x8 matrices onto...
In Stock
[Buy Now](https://www.adafruit.com/product/2043)
[Related Guides to the Product](https://learn.adafruit.com/products/2043/guides)
### 16x8 1.2" LED Matrix + Backpack - Ultra Bright Square White LEDs
[16x8 1.2" LED Matrix + Backpack - Ultra Bright Square White LEDs](https://www.adafruit.com/product/2044)
What's better than a single LED? Lots of LEDs! And what's better than lots of LEDs? **TWO TIMES AS MANY LEDS!!!**
With the 16x8 LED Matrix Backpack we've doubled your project's matrix capacity by making it super easy to get two separate 8x8 matrices onto...
In Stock
[Buy Now](https://www.adafruit.com/product/2044)
[Related Guides to the Product](https://learn.adafruit.com/products/2044/guides)
### 16x8 1.2" LED Matrix + Backpack-Ultra Bright Round Orange LEDs
[16x8 1.2" LED Matrix + Backpack-Ultra Bright Round Orange LEDs](https://www.adafruit.com/product/2052)
What's better than a single LED? Lots of LEDs! And what's better than lots of LEDs? **TWO TIMES AS MANY LEDS!!!**
With the 16x8 LED Matrix Backpack we've doubled your project's matrix capacity by making it super easy to get two separate 8x8 matrices onto...
In Stock
[Buy Now](https://www.adafruit.com/product/2052)
[Related Guides to the Product](https://learn.adafruit.com/products/2052/guides)
### 16x8 1.2" LED Matrices+Backpack Round LEDs in Various Colors
[16x8 1.2" LED Matrices+Backpack Round LEDs in Various Colors](https://www.adafruit.com/product/2054)
What's better than a single LED? Lots of LEDs! And what's better than lots of LEDs? **TWO TIMES AS MANY LEDS!!!**
With the 16x8 LED Matrix Backpack we've doubled your project's matrix capacity by making it super easy to get two separate 8x8 matrices onto...
Out of Stock
[Buy Now](https://www.adafruit.com/product/2054)
[Related Guides to the Product](https://learn.adafruit.com/products/2054/guides)
### Adafruit 8x16 LED Matrix FeatherWing w/o Matrices
[Adafruit 8x16 LED Matrix FeatherWing w/o Matrices](https://www.adafruit.com/product/3090)
You will chirp with delight when you see how easy it is to make your very own 8x16 LED matrix display for any Feather. At 0.8" square, the little [8x8 matrices](https://www.adafruit.com/new/?q=8x8%20miniature%20LED%20matrix&) have everything a big LED matrix has,...
Out of Stock
[Buy Now](https://www.adafruit.com/product/3090)
[Related Guides to the Product](https://learn.adafruit.com/products/3090/guides)
### Adafruit 14-segment LED Alphanumeric backpack (same as P1910)
[Adafruit 14-segment LED Alphanumeric backpack (same as P1910)](https://www.adafruit.com/product/3322)
Just the backpack + 4pin header
No Longer Stocked
[Buy Now](https://www.adafruit.com/product/3322)
[Related Guides to the Product](https://learn.adafruit.com/products/3322/guides)
## Featured Products
### Adafruit Small 1.2" 8x8 LED Matrix w/I2C Backpack - Yellow-Green
[Adafruit Small 1.2" 8x8 LED Matrix w/I2C Backpack - Yellow-Green](https://www.adafruit.com/product/1051)
What's better than a single LED? Lots of LEDs! A fun way to make a small display is to use an [8x8 matrix](https://www.adafruit.com/category/37_88) or a [4-digit 7-segment display](https://www.adafruit.com/category/37_103). Matrices like these are...
In Stock
[Buy Now](https://www.adafruit.com/product/1051)
[Related Guides to the Product](https://learn.adafruit.com/products/1051/guides)
### Small 1.2" 8x8 Ultra Bright Square Blue LED Matrix + Backpack
[Small 1.2" 8x8 Ultra Bright Square Blue LED Matrix + Backpack](https://www.adafruit.com/product/1853)
What's better than a single LED? Lots of LEDs! Matrices like these are 'multiplexed' - so to control 64 LEDs you need 16 pins. That's a lot of pins, and there are [driver chips like the MAX7219](//www.adafruit.com/products/453) that can control a matrix for you but...
In Stock
[Buy Now](https://www.adafruit.com/product/1853)
[Related Guides to the Product](https://learn.adafruit.com/products/1853/guides)
## Related Guides
- [LED Backpack Displays on Raspberry Pi and BeagleBone Black](https://learn.adafruit.com/led-backpack-displays-on-raspberry-pi-and-beaglebone-black.md)
- [Animating Multiple LED Backpacks](https://learn.adafruit.com/animating-multiple-led-backpacks.md)
- [Arduino GPS Clock](https://learn.adafruit.com/arduino-clock.md)
- [Raspberry Pi Physical Dashboard](https://learn.adafruit.com/raspberry-pi-physical-dashboard.md)
- [CircuitPython Hardware: LED Backpacks & FeatherWings](https://learn.adafruit.com/micropython-hardware-led-backpacks-and-featherwings.md)
- [Matrix and 7-Segment LED Backpack with the Raspberry Pi](https://learn.adafruit.com/matrix-7-segment-led-backpack-with-the-raspberry-pi.md)
- [DIY Pocket LED Gamer - Tiny Tetris!](https://learn.adafruit.com/diy-3d-printed-handheld-pocket-game-tiny-tetris-snake.md)
- [RGB LED Matrix Cube with 25,000 LEDs](https://learn.adafruit.com/rgb-led-matrix-cube-for-pi.md)
- [Creating GIFs for SmartMatrix](https://learn.adafruit.com/creating-gifs-for-smartmatrix.md)
- [Adafruit CharliePlex LED Matrix Bonnet](https://learn.adafruit.com/adafruit-charlieplex-bonnet.md)
- [Connecting a 16x32 RGB LED Matrix Panel to a Raspberry Pi](https://learn.adafruit.com/connecting-a-16x32-rgb-led-matrix-panel-to-a-raspberry-pi.md)
- [MicroPython Displays: Drawing Text](https://learn.adafruit.com/micropython-displays-drawing-text.md)
- [Heart Rate Badge](https://learn.adafruit.com/heart-rate-badge.md)
- [16x24 LED Matrix](https://learn.adafruit.com/16x24-led-matrix.md)
- [Adafruit IS31FL3741](https://learn.adafruit.com/adafruit-is31fl3741.md)
---
# Source: https://learn.adafruit.com/adafruit-led-backpack/0-54-alphanumeric-assembly.md
# Adafruit LED Backpacks
## Assembly
# Attaching the Backpack
The assembly photos below are the original version. Assembly is the same for both the original version and the STEMMA QT version.
Info:
When you buy a pack from Adafruit, it comes with the fully tested and assembled backpack as well as two dual 14-segment display in one of the colors we provide (say, red, yellow, blue or green). You'll need to solder the matrix onto the backpack but it's an easy task.

Remove the parts from packaging and place the LED matrices OVER the silkscreen side. **DO NOT PUT THE DISPLAY ON UPSIDE DOWN OR IT WONT WORK!! Check the image below to make sure the 'decimal point' dots are on the bottom, matching the silkscreen.**

Turn the backpack over so it is sitting flat on the matrix.


Solder all of the pins!


Clip the long pins.


Check your work, making sure each pin is nicely soldered, and there's no cold solder joints or shorted pins

# Attaching Header
## Prepare the header strip:
Cut the strip to length if necessary. It will be easier to solder if you insert it into a breadboard - **long pins down** 
## Add the Backpack:
Place the backpack board over the pins so that the short pins poke through the breakout pads
Solder all 5 pins!

That's it! now you're ready to run the firmware on your Arduino!
- [Previous Page](https://learn.adafruit.com/adafruit-led-backpack/pinouts.md)
- [Next Page](https://learn.adafruit.com/adafruit-led-backpack/0-54-alphanumeric-9b21a470-83ad-459c-af02-209d8d82c462.md)
## Primary Products
### Adafruit Mini 8x8 LED Matrix w/I2C Backpack - Red
[Adafruit Mini 8x8 LED Matrix w/I2C Backpack - Red](https://www.adafruit.com/product/870)
What's better than a single LED? Lots of LEDs! A fun way to make a small display is to use an [8x8 matrix](https://www.adafruit.com/category/37_88) or a [4-digit 7-segment display](https://www.adafruit.com/category/37_103). Matrices like these are...
In Stock
[Buy Now](https://www.adafruit.com/product/870)
[Related Guides to the Product](https://learn.adafruit.com/products/870/guides)
### Adafruit Mini 8x8 LED Matrix w/I2C Backpack - Yellow
[Adafruit Mini 8x8 LED Matrix w/I2C Backpack - Yellow](https://www.adafruit.com/product/871)
What's better than a single LED? Lots of LEDs! A fun way to make a small display is to use an [8x8 matrix](https://www.adafruit.com/category/37_88) or a [4-digit 7-segment display](https://www.adafruit.com/category/37_103). Matrices like these are...
In Stock
[Buy Now](https://www.adafruit.com/product/871)
[Related Guides to the Product](https://learn.adafruit.com/products/871/guides)
### Adafruit Mini 0.8" 8x8 LED Matrix w/I2C Backpack - Yellow-Green
[Adafruit Mini 0.8" 8x8 LED Matrix w/I2C Backpack - Yellow-Green](https://www.adafruit.com/product/872)
What's better than a single LED? Lots of LEDs! A fun way to make a small display is to use an [8x8 matrix](https://www.adafruit.com/category/37_88) or a [4-digit 7-segment display](https://www.adafruit.com/category/37_103). Matrices like these are...
In Stock
[Buy Now](https://www.adafruit.com/product/872)
[Related Guides to the Product](https://learn.adafruit.com/products/872/guides)
### Adafruit 0.56" 4-Digit 7-Segment Display with I2C Backpack - Red
[Adafruit 0.56" 4-Digit 7-Segment Display with I2C Backpack - Red](https://www.adafruit.com/product/878)
What's better than a single LED? Lots of LEDs! A fun way to make a small display is to use an [8x8 matrix](https://www.adafruit.com/category/37_88) or a [4-digit 7-segment display](https://www.adafruit.com/category/37_103). Matrices like these are...
In Stock
[Buy Now](https://www.adafruit.com/product/878)
[Related Guides to the Product](https://learn.adafruit.com/products/878/guides)
### Adafruit 0.56" 4-Digit 7-Segment Display w/I2C Backpack - Yellow
[Adafruit 0.56" 4-Digit 7-Segment Display w/I2C Backpack - Yellow](https://www.adafruit.com/product/879)
What's better than a single LED? Lots of LEDs! A fun way to make a small display is to use an [8x8 matrix](https://www.adafruit.com/category/37_88) or a [4-digit 7-segment display](https://www.adafruit.com/category/37_103). Matrices like these are...
In Stock
[Buy Now](https://www.adafruit.com/product/879)
[Related Guides to the Product](https://learn.adafruit.com/products/879/guides)
### Adafruit 0.56" 4-Digit 7-Segment Display w/ I2C Backpack - Green
[Adafruit 0.56" 4-Digit 7-Segment Display w/ I2C Backpack - Green](https://www.adafruit.com/product/880)
What's better than a single LED? Lots of LEDs! A fun way to make a small display is to use an [8x8 matrix](https://www.adafruit.com/category/37_88) or a [4-digit 7-segment display](https://www.adafruit.com/category/37_103). Matrices like these are...
No Longer Stocked
[Buy Now](https://www.adafruit.com/product/880)
[Related Guides to the Product](https://learn.adafruit.com/products/880/guides)
### Adafruit 0.56" 4-Digit 7-Segment Display w/ I2C Backpack - Blue
[Adafruit 0.56" 4-Digit 7-Segment Display w/ I2C Backpack - Blue](https://www.adafruit.com/product/881)
What's better than a single LED? Lots of LEDs! A fun way to make a small display is to use an [8x8 matrix](https://www.adafruit.com/category/37_88) or a [4-digit 7-segment display](https://www.adafruit.com/category/37_103). Matrices like these are...
In Stock
[Buy Now](https://www.adafruit.com/product/881)
[Related Guides to the Product](https://learn.adafruit.com/products/881/guides)
### Adafruit Bicolor LED Square Pixel Matrix with I2C Backpack
[Adafruit Bicolor LED Square Pixel Matrix with I2C Backpack](https://www.adafruit.com/product/902)
What's better than a single LED? Lots of LEDs! A fun way to make a small colorful display is to use a [1.2" Bi-color 8x8 LED Matrix](http://www.adafruit.com/products/458). Matrices like these are 'multiplexed' - so to control all the 128 LEDs you need 24 pins....
In Stock
[Buy Now](https://www.adafruit.com/product/902)
[Related Guides to the Product](https://learn.adafruit.com/products/902/guides)
### Adafruit Mini 8x8 LED Matrix w/I2C Backpack - Blue
[Adafruit Mini 8x8 LED Matrix w/I2C Backpack - Blue](https://www.adafruit.com/product/959)
What's better than a single LED? Lots of LEDs! A fun way to make a small display is to use an [8x8 matrix](https://www.adafruit.com/category/37_88) or a [4-digit 7-segment display](https://www.adafruit.com/category/37_103). Matrices like these are...
In Stock
[Buy Now](https://www.adafruit.com/product/959)
[Related Guides to the Product](https://learn.adafruit.com/products/959/guides)
### Adafruit 0.56" 4-Digit 7-Segment Display w/I2C Backpack - White
[Adafruit 0.56" 4-Digit 7-Segment Display w/I2C Backpack - White](https://www.adafruit.com/product/1002)
What's better than a single LED? Lots of LEDs! A fun way to make a small display is to use an [8x8 matrix](https://www.adafruit.com/category/37_88) or a [4-digit 7-segment display](https://www.adafruit.com/category/37_103). Matrices like these are...
In Stock
[Buy Now](https://www.adafruit.com/product/1002)
[Related Guides to the Product](https://learn.adafruit.com/products/1002/guides)
### Adafruit 1.2" 8x8 LED Matrix Backpack
[Adafruit 1.2" 8x8 LED Matrix Backpack](https://www.adafruit.com/product/1048)
By popular request, you can now get our 8x8 LED backpacks without the LEDs! These backpacks feature an HT16K33 I2C LED driver, they're simple and easy to use - you can use [our very nice library for the backpacks to...](https://github.com/adafruit/Adafruit-LED-Backpack-Library)
In Stock
[Buy Now](https://www.adafruit.com/product/1048)
[Related Guides to the Product](https://learn.adafruit.com/products/1048/guides)
### Adafruit Small 1.2" 8x8 LED Matrix w/I2C Backpack - Red
[Adafruit Small 1.2" 8x8 LED Matrix w/I2C Backpack - Red](https://www.adafruit.com/product/1049)
What's better than a single LED? Lots of LEDs! A fun way to make a small display is to use an [8x8 matrix](https://www.adafruit.com/category/37_88) or a [4-digit 7-segment display](https://www.adafruit.com/category/37_103). Matrices like these are...
In Stock
[Buy Now](https://www.adafruit.com/product/1049)
[Related Guides to the Product](https://learn.adafruit.com/products/1049/guides)
### Adafruit Small 1.2" 8x8 LED Matrix w/I2C Backpack - Yellow
[Adafruit Small 1.2" 8x8 LED Matrix w/I2C Backpack - Yellow](https://www.adafruit.com/product/1050)
What's better than a single LED? Lots of LEDs! A fun way to make a small display is to use an [8x8 matrix](https://www.adafruit.com/category/37_88) or a [4-digit 7-segment display](https://www.adafruit.com/category/37_103). Matrices like these are...
In Stock
[Buy Now](https://www.adafruit.com/product/1050)
[Related Guides to the Product](https://learn.adafruit.com/products/1050/guides)
### Adafruit Small 1.2" 8x8 LED Matrix w/I2C Backpack - Blue
[Adafruit Small 1.2" 8x8 LED Matrix w/I2C Backpack - Blue](https://www.adafruit.com/product/1052)
What's better than a single LED? Lots of LEDs! A fun way to make a small display is to use an [8x8 matrix](https://www.adafruit.com/category/37_88) or a [4-digit 7-segment display](https://www.adafruit.com/category/37_103). Matrices like these are...
In Stock
[Buy Now](https://www.adafruit.com/product/1052)
[Related Guides to the Product](https://learn.adafruit.com/products/1052/guides)
### Adafruit Mini 8x8 LED Matrix w/I2C Backpack - Ultra Bright White
[Adafruit Mini 8x8 LED Matrix w/I2C Backpack - Ultra Bright White](https://www.adafruit.com/product/1080)
What's better than a single LED? Lots of LEDs! A fun way to make a small display is to use an [8x8 matrix](https://www.adafruit.com/category/37_88) or a [4-digit 7-segment display](https://www.adafruit.com/category/37_103). Matrices like these are...
In Stock
[Buy Now](https://www.adafruit.com/product/1080)
[Related Guides to the Product](https://learn.adafruit.com/products/1080/guides)
### Adafruit 1.2" 4-Digit 7-Segment Display w/I2C Backpack - Green
[Adafruit 1.2" 4-Digit 7-Segment Display w/I2C Backpack - Green](https://www.adafruit.com/product/1268)
What's better than a single LED? Lots of LEDs! A fun way to make a numeric display is to use a [4-digit 7-segment display](https://www.adafruit.com/category/37_103). LED matrices like these are 'multiplexed' - so to control all the seven-segment LEDs you need 14 pins....
No Longer Stocked
[Buy Now](https://www.adafruit.com/product/1268)
[Related Guides to the Product](https://learn.adafruit.com/products/1268/guides)
### Adafruit 1.2" 4-Digit 7-Segment Display w/I2C Backpack - Yellow
[Adafruit 1.2" 4-Digit 7-Segment Display w/I2C Backpack - Yellow](https://www.adafruit.com/product/1269)
What's better than a single LED? Lots of LEDs! A fun way to make a numeric display is to use a [4-digit 7-segment display](https://www.adafruit.com/category/37_103). LED matrices like these are 'multiplexed' - so to control all the seven-segment LEDs you need 14 pins....
In Stock
[Buy Now](https://www.adafruit.com/product/1269)
[Related Guides to the Product](https://learn.adafruit.com/products/1269/guides)
### Adafruit 1.2" 4-Digit 7-Segment Display w/I2C Backpack - Red
[Adafruit 1.2" 4-Digit 7-Segment Display w/I2C Backpack - Red](https://www.adafruit.com/product/1270)
What's better than a single LED? Lots of LEDs! A fun way to make a numeric display is to use a [4-digit 7-segment display](https://www.adafruit.com/category/37_103). LED matrices like these are 'multiplexed' - so to control all the seven-segment LEDs you need 14 pins....
In Stock
[Buy Now](https://www.adafruit.com/product/1270)
[Related Guides to the Product](https://learn.adafruit.com/products/1270/guides)
### Small 1.2" 8x8 Ultra Bright White LED Matrix + Backpack
[Small 1.2" 8x8 Ultra Bright White LED Matrix + Backpack](https://www.adafruit.com/product/1614)
What's better than a single LED? Lots of LEDs! A fun way to make a small display is to use an [8x8 matrix](https://www.adafruit.com/category/37_88) or a [4-digit 7-segment display](https://www.adafruit.com/category/37_103). Matrices like these are...
In Stock
[Buy Now](https://www.adafruit.com/product/1614)
[Related Guides to the Product](https://learn.adafruit.com/products/1614/guides)
### Adafruit Small 1.2" 8x8 LED Matrix w/I2C Backpack - Pure Green
[Adafruit Small 1.2" 8x8 LED Matrix w/I2C Backpack - Pure Green](https://www.adafruit.com/product/1632)
What's better than a single LED? Lots of LEDs! A fun way to make a small display is to use an [8x8 matrix](https://www.adafruit.com/category/37_88) or a [4-digit 7-segment display](https://www.adafruit.com/category/37_103). Matrices like these are...
In Stock
[Buy Now](https://www.adafruit.com/product/1632)
[Related Guides to the Product](https://learn.adafruit.com/products/1632/guides)
### Adafruit Mini 0.8" 8x8 LED Matrix w/I2C Backpack - Pure Green
[Adafruit Mini 0.8" 8x8 LED Matrix w/I2C Backpack - Pure Green](https://www.adafruit.com/product/1633)
What's better than a single LED? Lots of LEDs! A fun way to make a small display is to use an [8x8 matrix](https://www.adafruit.com/category/37_88) or a [4-digit 7-segment display](https://www.adafruit.com/category/37_103). Matrices like these are...
In Stock
[Buy Now](https://www.adafruit.com/product/1633)
[Related Guides to the Product](https://learn.adafruit.com/products/1633/guides)
### Bi-Color (Red/Green) 24-Bar Bargraph w/I2C Backpack Kit
[Bi-Color (Red/Green) 24-Bar Bargraph w/I2C Backpack Kit](https://www.adafruit.com/product/1721)
What's better than a single LED? Lots of LEDs! A fun way to make a small linear display is to use two 12-bar Bi-color bar-graphs. However, this LED bargraph is 'multiplexed' - so to control all the 48 LEDs you need a lot of pins.
Out of Stock
[Buy Now](https://www.adafruit.com/product/1721)
[Related Guides to the Product](https://learn.adafruit.com/products/1721/guides)
### Small 1.2" 8x8 Ultra Bright Square Amber LED Matrix + Backpack
[Small 1.2" 8x8 Ultra Bright Square Amber LED Matrix + Backpack](https://www.adafruit.com/product/1854)
What's better than a single LED? Lots of LEDs! Matrices like these are 'multiplexed' - so to control 64 LEDs you need 16 pins. That's a lot of pins, and there are [driver chips like the MAX7219](//www.adafruit.com/products/453) that can control a matrix for you but...
In Stock
[Buy Now](https://www.adafruit.com/product/1854)
[Related Guides to the Product](https://learn.adafruit.com/products/1854/guides)
### Small 1.2" 8x8 Ultra Bright Square Yellow LED Matrix + Backpack
[Small 1.2" 8x8 Ultra Bright Square Yellow LED Matrix + Backpack](https://www.adafruit.com/product/1855)
What's better than a single LED? Lots of LEDs! Matrices like these are 'multiplexed' - so to control 64 LEDs you need 16 pins. That's a lot of pins, and there are [driver chips like the MAX7219](//www.adafruit.com/products/453) that can control a matrix for you but...
In Stock
[Buy Now](https://www.adafruit.com/product/1855)
[Related Guides to the Product](https://learn.adafruit.com/products/1855/guides)
### Small 1.2" 8x8 Bright Square Pure Green LED Matrix + Backpack
[Small 1.2" 8x8 Bright Square Pure Green LED Matrix + Backpack](https://www.adafruit.com/product/1856)
What's better than a single LED? Lots of LEDs! Matrices like these are 'multiplexed' - so to control 64 LEDs you need 16 pins. That's a lot of pins, and there are [driver chips like the MAX7219](//www.adafruit.com/products/453) that can control a matrix for you but...
In Stock
[Buy Now](https://www.adafruit.com/product/1856)
[Related Guides to the Product](https://learn.adafruit.com/products/1856/guides)
### Small 1.2" 8x8 Ultra Bright Square White LED Matrix + Backpack
[Small 1.2" 8x8 Ultra Bright Square White LED Matrix + Backpack](https://www.adafruit.com/product/1857)
What's better than a single LED? Lots of LEDs! Matrices like these are 'multiplexed' - so to control 64 LEDs you need 16 pins. That's a lot of pins, and there are [driver chips like the MAX7219](//www.adafruit.com/products/453) that can control a matrix for you but...
In Stock
[Buy Now](https://www.adafruit.com/product/1857)
[Related Guides to the Product](https://learn.adafruit.com/products/1857/guides)
### Adafruit 14-segment LED Alphanumeric Backpack - STEMMA QT
[Adafruit 14-segment LED Alphanumeric Backpack - STEMMA QT](https://www.adafruit.com/product/1910)
By popular request, you can now get our 14-segment LED backpacks without the LEDs! These backpacks feature an HT16K33 I2C LED driver, they're simple and easy to use - you can use [our very nice library for the backpacks to...](https://github.com/adafruit/Adafruit-LED-Backpack-Library)
In Stock
[Buy Now](https://www.adafruit.com/product/1910)
[Related Guides to the Product](https://learn.adafruit.com/products/1910/guides)
### Quad Alphanumeric Display - Red 0.54" Digits w/ I2C Backpack
[Quad Alphanumeric Display - Red 0.54" Digits w/ I2C Backpack](https://www.adafruit.com/product/1911)
Display, elegantly, 012345678 or 9! Gaze, hypnotized, at ABCDEFGHIJKLM - well it can display the whole alphabet. You get the point. This is a nice, bright alphanumeric display that shows letters and numbers in a beautiful red hue. It's super bright and designed for viewing from distances...
In Stock
[Buy Now](https://www.adafruit.com/product/1911)
[Related Guides to the Product](https://learn.adafruit.com/products/1911/guides)
### Quad Alphanumeric Display - Blue 0.54" Digits w/ I2C Backpack
[Quad Alphanumeric Display - Blue 0.54" Digits w/ I2C Backpack](https://www.adafruit.com/product/1912)
Display, elegantly, 012345678 or 9! Gaze, hypnotized, at ABCDEFGHIJKLM - well it can display the whole alphabet. You get the point. This is a nice, bright alphanumeric display that shows letters and numbers in a beautiful blue hue. It's super bright and designed for viewing from distances...
In Stock
[Buy Now](https://www.adafruit.com/product/1912)
[Related Guides to the Product](https://learn.adafruit.com/products/1912/guides)
### 16x8 1.2" LED Matrix + Backpack - Ultra Bright Round Green LEDs
[16x8 1.2" LED Matrix + Backpack - Ultra Bright Round Green LEDs](https://www.adafruit.com/product/2035)
What's better than a single LED? Lots of LEDs! And what's better than lots of LEDs? **TWO TIMES AS MANY LEDS!!!**
With the 16x8 LED Matrix Backpack we've doubled your project's matrix capacity by making it super easy to get two separate 8x8 matrices onto...
In Stock
[Buy Now](https://www.adafruit.com/product/2035)
[Related Guides to the Product](https://learn.adafruit.com/products/2035/guides)
### 16x8 1.2" LED Matrix+Backpack UltraBright Round YellowGreen LEDs
[16x8 1.2" LED Matrix+Backpack UltraBright Round YellowGreen LEDs](https://www.adafruit.com/product/2036)
What's better than a single LED? Lots of LEDs! And what's better than lots of LEDs? **TWO TIMES AS MANY LEDS!!!**
With the 16x8 LED Matrix Backpack we've doubled your project's matrix capacity by making it super easy to get two separate 8x8 matrices onto...
In Stock
[Buy Now](https://www.adafruit.com/product/2036)
[Related Guides to the Product](https://learn.adafruit.com/products/2036/guides)
### 16x8 1.2" LED Matrix + Backpack - Ultra Bright Round Red LEDs
[16x8 1.2" LED Matrix + Backpack - Ultra Bright Round Red LEDs](https://www.adafruit.com/product/2037)
What's better than a single LED? Lots of LEDs! And what's better than lots of LEDs? **TWO TIMES AS MANY LEDS!!!**
With the 16x8 LED Matrix Backpack we've doubled your project's matrix capacity by making it super easy to get two separate 8x8 matrices onto...
In Stock
[Buy Now](https://www.adafruit.com/product/2037)
[Related Guides to the Product](https://learn.adafruit.com/products/2037/guides)
### 16x8 1.2" LED Matrix + Backpack - Ultra Bright Round White LEDs
[16x8 1.2" LED Matrix + Backpack - Ultra Bright Round White LEDs](https://www.adafruit.com/product/2038)
What's better than a single LED? Lots of LEDs! And what's better than lots of LEDs? **TWO TIMES AS MANY LEDS!!!**
With the 16x8 LED Matrix Backpack we've doubled your project's matrix capacity by making it super easy to get two separate 8x8 matrices onto...
In Stock
[Buy Now](https://www.adafruit.com/product/2038)
[Related Guides to the Product](https://learn.adafruit.com/products/2038/guides)
### 16x8 1.2" LED Matrix + Backpack - Ultra Bright Round Blue LEDs
[16x8 1.2" LED Matrix + Backpack - Ultra Bright Round Blue LEDs](https://www.adafruit.com/product/2039)
What's better than a single LED? Lots of LEDs! And what's better than lots of LEDs? **TWO TIMES AS MANY LEDS!!!**
With the 16x8 LED Matrix Backpack we've doubled your project's matrix capacity by making it super easy to get two separate 8x8 matrices onto...
In Stock
[Buy Now](https://www.adafruit.com/product/2039)
[Related Guides to the Product](https://learn.adafruit.com/products/2039/guides)
### 16x8 1.2" LED Matrix + Backpack - Ultra Bright Square Blue LEDs
[16x8 1.2" LED Matrix + Backpack - Ultra Bright Square Blue LEDs](https://www.adafruit.com/product/2040)
What's better than a single LED? Lots of LEDs! And what's better than lots of LEDs? **TWO TIMES AS MANY LEDS!!!**
With the 16x8 LED Matrix Backpack we've doubled your project's matrix capacity by making it super easy to get two separate 8x8 matrices onto...
In Stock
[Buy Now](https://www.adafruit.com/product/2040)
[Related Guides to the Product](https://learn.adafruit.com/products/2040/guides)
### 16x8 1.2" LED Matrix + Backpack - Ultra Bright Square Amber LEDs
[16x8 1.2" LED Matrix + Backpack - Ultra Bright Square Amber LEDs](https://www.adafruit.com/product/2041)
What's better than a single LED? Lots of LEDs! And what's better than lots of LEDs? **TWO TIMES AS MANY LEDS!!!**
With the 16x8 LED Matrix Backpack we've doubled your project's matrix capacity by making it super easy to get two separate 8x8 matrices onto...
In Stock
[Buy Now](https://www.adafruit.com/product/2041)
[Related Guides to the Product](https://learn.adafruit.com/products/2041/guides)
### 16x8 1.2" LED Matrix + Backpack - Ultra Bright Square Green LEDs
[16x8 1.2" LED Matrix + Backpack - Ultra Bright Square Green LEDs](https://www.adafruit.com/product/2042)
What's better than a single LED? Lots of LEDs! And what's better than lots of LEDs? **TWO TIMES AS MANY LEDS!!!**
With the 16x8 LED Matrix Backpack we've doubled your project's matrix capacity by making it super easy to get two separate 8x8 matrices onto...
In Stock
[Buy Now](https://www.adafruit.com/product/2042)
[Related Guides to the Product](https://learn.adafruit.com/products/2042/guides)
### 16x8 1.2" LED Matrix + Backpack -Ultra Bright Square Yellow LEDs
[16x8 1.2" LED Matrix + Backpack -Ultra Bright Square Yellow LEDs](https://www.adafruit.com/product/2043)
What's better than a single LED? Lots of LEDs! And what's better than lots of LEDs? **TWO TIMES AS MANY LEDS!!!**
With the 16x8 LED Matrix Backpack we've doubled your project's matrix capacity by making it super easy to get two separate 8x8 matrices onto...
In Stock
[Buy Now](https://www.adafruit.com/product/2043)
[Related Guides to the Product](https://learn.adafruit.com/products/2043/guides)
### 16x8 1.2" LED Matrix + Backpack - Ultra Bright Square White LEDs
[16x8 1.2" LED Matrix + Backpack - Ultra Bright Square White LEDs](https://www.adafruit.com/product/2044)
What's better than a single LED? Lots of LEDs! And what's better than lots of LEDs? **TWO TIMES AS MANY LEDS!!!**
With the 16x8 LED Matrix Backpack we've doubled your project's matrix capacity by making it super easy to get two separate 8x8 matrices onto...
In Stock
[Buy Now](https://www.adafruit.com/product/2044)
[Related Guides to the Product](https://learn.adafruit.com/products/2044/guides)
### 16x8 1.2" LED Matrix + Backpack-Ultra Bright Round Orange LEDs
[16x8 1.2" LED Matrix + Backpack-Ultra Bright Round Orange LEDs](https://www.adafruit.com/product/2052)
What's better than a single LED? Lots of LEDs! And what's better than lots of LEDs? **TWO TIMES AS MANY LEDS!!!**
With the 16x8 LED Matrix Backpack we've doubled your project's matrix capacity by making it super easy to get two separate 8x8 matrices onto...
In Stock
[Buy Now](https://www.adafruit.com/product/2052)
[Related Guides to the Product](https://learn.adafruit.com/products/2052/guides)
### 16x8 1.2" LED Matrices+Backpack Round LEDs in Various Colors
[16x8 1.2" LED Matrices+Backpack Round LEDs in Various Colors](https://www.adafruit.com/product/2054)
What's better than a single LED? Lots of LEDs! And what's better than lots of LEDs? **TWO TIMES AS MANY LEDS!!!**
With the 16x8 LED Matrix Backpack we've doubled your project's matrix capacity by making it super easy to get two separate 8x8 matrices onto...
Out of Stock
[Buy Now](https://www.adafruit.com/product/2054)
[Related Guides to the Product](https://learn.adafruit.com/products/2054/guides)
### Adafruit 8x16 LED Matrix FeatherWing w/o Matrices
[Adafruit 8x16 LED Matrix FeatherWing w/o Matrices](https://www.adafruit.com/product/3090)
You will chirp with delight when you see how easy it is to make your very own 8x16 LED matrix display for any Feather. At 0.8" square, the little [8x8 matrices](https://www.adafruit.com/new/?q=8x8%20miniature%20LED%20matrix&) have everything a big LED matrix has,...
Out of Stock
[Buy Now](https://www.adafruit.com/product/3090)
[Related Guides to the Product](https://learn.adafruit.com/products/3090/guides)
### Adafruit 14-segment LED Alphanumeric backpack (same as P1910)
[Adafruit 14-segment LED Alphanumeric backpack (same as P1910)](https://www.adafruit.com/product/3322)
Just the backpack + 4pin header
No Longer Stocked
[Buy Now](https://www.adafruit.com/product/3322)
[Related Guides to the Product](https://learn.adafruit.com/products/3322/guides)
## Featured Products
### Adafruit Small 1.2" 8x8 LED Matrix w/I2C Backpack - Yellow-Green
[Adafruit Small 1.2" 8x8 LED Matrix w/I2C Backpack - Yellow-Green](https://www.adafruit.com/product/1051)
What's better than a single LED? Lots of LEDs! A fun way to make a small display is to use an [8x8 matrix](https://www.adafruit.com/category/37_88) or a [4-digit 7-segment display](https://www.adafruit.com/category/37_103). Matrices like these are...
In Stock
[Buy Now](https://www.adafruit.com/product/1051)
[Related Guides to the Product](https://learn.adafruit.com/products/1051/guides)
### Small 1.2" 8x8 Ultra Bright Square Blue LED Matrix + Backpack
[Small 1.2" 8x8 Ultra Bright Square Blue LED Matrix + Backpack](https://www.adafruit.com/product/1853)
What's better than a single LED? Lots of LEDs! Matrices like these are 'multiplexed' - so to control 64 LEDs you need 16 pins. That's a lot of pins, and there are [driver chips like the MAX7219](//www.adafruit.com/products/453) that can control a matrix for you but...
In Stock
[Buy Now](https://www.adafruit.com/product/1853)
[Related Guides to the Product](https://learn.adafruit.com/products/1853/guides)
## Related Guides
- [LED Backpack Displays on Raspberry Pi and BeagleBone Black](https://learn.adafruit.com/led-backpack-displays-on-raspberry-pi-and-beaglebone-black.md)
- [Animating Multiple LED Backpacks](https://learn.adafruit.com/animating-multiple-led-backpacks.md)
- [Arduino GPS Clock](https://learn.adafruit.com/arduino-clock.md)
- [Raspberry Pi Physical Dashboard](https://learn.adafruit.com/raspberry-pi-physical-dashboard.md)
- [CircuitPython Hardware: LED Backpacks & FeatherWings](https://learn.adafruit.com/micropython-hardware-led-backpacks-and-featherwings.md)
- [Matrix and 7-Segment LED Backpack with the Raspberry Pi](https://learn.adafruit.com/matrix-7-segment-led-backpack-with-the-raspberry-pi.md)
- [DIY Pocket LED Gamer - Tiny Tetris!](https://learn.adafruit.com/diy-3d-printed-handheld-pocket-game-tiny-tetris-snake.md)
- [RGB LED Matrix Cube with 25,000 LEDs](https://learn.adafruit.com/rgb-led-matrix-cube-for-pi.md)
- [Creating GIFs for SmartMatrix](https://learn.adafruit.com/creating-gifs-for-smartmatrix.md)
- [Adafruit CharliePlex LED Matrix Bonnet](https://learn.adafruit.com/adafruit-charlieplex-bonnet.md)
- [Connecting a 16x32 RGB LED Matrix Panel to a Raspberry Pi](https://learn.adafruit.com/connecting-a-16x32-rgb-led-matrix-panel-to-a-raspberry-pi.md)
- [MicroPython Displays: Drawing Text](https://learn.adafruit.com/micropython-displays-drawing-text.md)
- [Heart Rate Badge](https://learn.adafruit.com/heart-rate-badge.md)
- [16x24 LED Matrix](https://learn.adafruit.com/16x24-led-matrix.md)
- [Adafruit IS31FL3741](https://learn.adafruit.com/adafruit-is31fl3741.md)
---
# Source: https://learn.adafruit.com/adafruit-led-backpack/0-54-alphanumeric-circuitpython-and-python-usage.md
# Adafruit LED Backpacks
## CircuitPython and Python Usage
The following section will show how to control the LED backpack from the board's Python prompt / REPL. You'll walk through how to control the LED display and learn how to use the CircuitPython module built for the display.
First [connect to the board's serial REPL ](https://learn.adafruit.com/welcome-to-circuitpython/the-repl)so you are at the CircuitPython **\>\>\>** prompt.
## Initialization
First you'll need to initialize the I2C bus for your board. It's really easy, first import the necessary modules. In this case, you'll use `board` and `Seg14x4`.
Then just use `board.I2C()` to create the I2C instance using the default SCL and SDA pins (which will be marked on the boards pins if using a Feather or similar Adafruit board).
Then to initialize the display, you just pass `i2c` in.
Warning: When using the STEMMA QT port, some board may have an alternate I2C such as board.STEMMA_I2C().
```python
import board
from adafruit_ht16k33.segments import Seg14x4
i2c = board.I2C()
display = Seg14x4(i2c)
```
If you bridged the address pads on the back of the display, you could pass in the address. The addresses for the HT16K33 can range between 0x70 and 0x77 depending on which pads you have bridged, with 0x70 being used if you haven't bridged any of them. For instance, if you bridge only the **A0** pad, you would use `0x71` like this:
```python
display = Seg14x4(i2c, address=0x71)
```
If you intend to chain multiple displays together, you will need to alter the address of subsequent boards by [bridging the address pins in various combinations](https://learn.adafruit.com/adafruit-led-backpack/pinouts#address-jumper-pins-3127675). If you have an unsoldered board, and a board with the A0 pad solder-bridged, you would initialize the two displays as follows.
```python
display = Seg14x4(i2c, address=(0x70, 0x71))
```
To add further displays, [ensure the address is different on all of them](https://learn.adafruit.com/adafruit-led-backpack/pinouts#address-jumper-pins-3127675), and initialize it the same way as above, but add more comma-separated addresses to the `address=()` tuple.
## Setting the Brightness
You can set the brightness of the display, but changing it will set the brightness of the entire display and not individual segments. If can be adjusted in 1/16 increments **between 0 and 1.0** with 1.0 being the brightest. So to set the display to half brightness, you would use the following:
```python
display.brightness = 0.5
```
## Setting the Blink Rate
You can set the blink rate of the display, but changing it will set the brightness of the entire display and not individual segments. If can be adjusted in 1/4 increments **between 0 and 3** with 3 being the fastest blinking. So to set the display to blink at full speed, you would use the following:
```python
display.blink_rate = 3
```
## Printing Text
To print text to the display, you just use the print function. So if you want to print ABCD, you would use the following:
```python
display.print("ABCD")
```
## Printing Numbers
Printing numbers is done similar to printing text, except without the quotes, though you can still print numbers in a string as well.
```python
display.print(1234)
```
## Printing Hexidecimal Values
To print hexidecimal values, you use the `print_hex` function:
```python
display.print_hex(0x1A2B)
```
## Setting Individual Characters
To set individual characters, you simply treat the `display` object as a list and set it to the value that you would like.
```python
display[0] = '1'
display[1] = '2'
display[2] = 'A'
display[3] = 'B'
```
## Setting Individual Segments
To set individual segments to turn on or off, you would use the set\_digit\_raw function to pass the digit that you want to change and the bitmask. This can be really useful for creating your own characters. The bitmask corresponds to the following diagram. The highest bit is not used, so an X represents that spot to indicate that.

The bitmask is a 16-bit number that can be passed in as a single Hexidecimal, Decimal, or binary number. It can also be passed in as a list or tuple containing 2 separate 8-bit numbers. Here are some of the ways to set the digits. All of these different methods create a box with an X in the center:
```python
display.set_digit_raw(0, 0x2D3F)
display.set_digit_raw(1, 0b0010110100111111)
display.set_digit_raw(2, (0b00101101, 0b00111111))
display.set_digit_raw(3, [0x2D, 0x3F])
```

## Filling all Segments
To fill the entire display, just use the fill() function and pass in either 0 or 1 depending on whether you want all segments off or on. For instance, if you wanted to set everything to on, you would use:
```python
display.fill(1)
```
## Scrolling Display Manually
If you want to scroll the displayed data to the left, you can use the `scroll()` function. You can pass in the number of places that you want to scroll. The right-most digit will remain unchanged and you will need to set that manually. After scrolling, you will need to call the show function. For example if you wanted to print an A and then scroll it over to spaces, you would do the following.
```python
display.print("A")
display.scroll(2)
display[3] = " "
display.show()
```
## Displaying an Automatic Scrolling Marquee
To make displaying long text easier, you can use the marquee function. You just pass it the full string. Optionally, you can pass it the amount of delay between each character:
```python
display.marquee("This is a really long string ")
```

By default it is 0.25 seconds, but you can change this by providing a second parameter. You can optionally pass `False` for a third parameter if you would not like to have it loop. So if you wanted each character to display for half a second and didn't want it to loop, you would use the following:
```python
display.marquee('This is a really long string ', 0.5, False)
```
# Full Example
Click **Download Project Bundle** below to download a full example **code.py** and necessary libraries to run it.
https://github.com/adafruit/Adafruit_CircuitPython_HT16K33/blob/main/examples/ht16k33_segments_14x4_demo.py
- [Previous Page](https://learn.adafruit.com/adafruit-led-backpack/0-54-alphanumeric-python-wiring-and-setup.md)
- [Next Page](https://learn.adafruit.com/adafruit-led-backpack/0-dot-56-seven-segment-backpack.md)
## Primary Products
### Adafruit Mini 8x8 LED Matrix w/I2C Backpack - Red
[Adafruit Mini 8x8 LED Matrix w/I2C Backpack - Red](https://www.adafruit.com/product/870)
What's better than a single LED? Lots of LEDs! A fun way to make a small display is to use an [8x8 matrix](https://www.adafruit.com/category/37_88) or a [4-digit 7-segment display](https://www.adafruit.com/category/37_103). Matrices like these are...
In Stock
[Buy Now](https://www.adafruit.com/product/870)
[Related Guides to the Product](https://learn.adafruit.com/products/870/guides)
### Adafruit Mini 8x8 LED Matrix w/I2C Backpack - Yellow
[Adafruit Mini 8x8 LED Matrix w/I2C Backpack - Yellow](https://www.adafruit.com/product/871)
What's better than a single LED? Lots of LEDs! A fun way to make a small display is to use an [8x8 matrix](https://www.adafruit.com/category/37_88) or a [4-digit 7-segment display](https://www.adafruit.com/category/37_103). Matrices like these are...
In Stock
[Buy Now](https://www.adafruit.com/product/871)
[Related Guides to the Product](https://learn.adafruit.com/products/871/guides)
### Adafruit Mini 0.8" 8x8 LED Matrix w/I2C Backpack - Yellow-Green
[Adafruit Mini 0.8" 8x8 LED Matrix w/I2C Backpack - Yellow-Green](https://www.adafruit.com/product/872)
What's better than a single LED? Lots of LEDs! A fun way to make a small display is to use an [8x8 matrix](https://www.adafruit.com/category/37_88) or a [4-digit 7-segment display](https://www.adafruit.com/category/37_103). Matrices like these are...
In Stock
[Buy Now](https://www.adafruit.com/product/872)
[Related Guides to the Product](https://learn.adafruit.com/products/872/guides)
### Adafruit 0.56" 4-Digit 7-Segment Display with I2C Backpack - Red
[Adafruit 0.56" 4-Digit 7-Segment Display with I2C Backpack - Red](https://www.adafruit.com/product/878)
What's better than a single LED? Lots of LEDs! A fun way to make a small display is to use an [8x8 matrix](https://www.adafruit.com/category/37_88) or a [4-digit 7-segment display](https://www.adafruit.com/category/37_103). Matrices like these are...
In Stock
[Buy Now](https://www.adafruit.com/product/878)
[Related Guides to the Product](https://learn.adafruit.com/products/878/guides)
### Adafruit 0.56" 4-Digit 7-Segment Display w/I2C Backpack - Yellow
[Adafruit 0.56" 4-Digit 7-Segment Display w/I2C Backpack - Yellow](https://www.adafruit.com/product/879)
What's better than a single LED? Lots of LEDs! A fun way to make a small display is to use an [8x8 matrix](https://www.adafruit.com/category/37_88) or a [4-digit 7-segment display](https://www.adafruit.com/category/37_103). Matrices like these are...
In Stock
[Buy Now](https://www.adafruit.com/product/879)
[Related Guides to the Product](https://learn.adafruit.com/products/879/guides)
### Adafruit 0.56" 4-Digit 7-Segment Display w/ I2C Backpack - Green
[Adafruit 0.56" 4-Digit 7-Segment Display w/ I2C Backpack - Green](https://www.adafruit.com/product/880)
What's better than a single LED? Lots of LEDs! A fun way to make a small display is to use an [8x8 matrix](https://www.adafruit.com/category/37_88) or a [4-digit 7-segment display](https://www.adafruit.com/category/37_103). Matrices like these are...
No Longer Stocked
[Buy Now](https://www.adafruit.com/product/880)
[Related Guides to the Product](https://learn.adafruit.com/products/880/guides)
### Adafruit 0.56" 4-Digit 7-Segment Display w/ I2C Backpack - Blue
[Adafruit 0.56" 4-Digit 7-Segment Display w/ I2C Backpack - Blue](https://www.adafruit.com/product/881)
What's better than a single LED? Lots of LEDs! A fun way to make a small display is to use an [8x8 matrix](https://www.adafruit.com/category/37_88) or a [4-digit 7-segment display](https://www.adafruit.com/category/37_103). Matrices like these are...
In Stock
[Buy Now](https://www.adafruit.com/product/881)
[Related Guides to the Product](https://learn.adafruit.com/products/881/guides)
### Adafruit Bicolor LED Square Pixel Matrix with I2C Backpack
[Adafruit Bicolor LED Square Pixel Matrix with I2C Backpack](https://www.adafruit.com/product/902)
What's better than a single LED? Lots of LEDs! A fun way to make a small colorful display is to use a [1.2" Bi-color 8x8 LED Matrix](http://www.adafruit.com/products/458). Matrices like these are 'multiplexed' - so to control all the 128 LEDs you need 24 pins....
In Stock
[Buy Now](https://www.adafruit.com/product/902)
[Related Guides to the Product](https://learn.adafruit.com/products/902/guides)
### Adafruit Mini 8x8 LED Matrix w/I2C Backpack - Blue
[Adafruit Mini 8x8 LED Matrix w/I2C Backpack - Blue](https://www.adafruit.com/product/959)
What's better than a single LED? Lots of LEDs! A fun way to make a small display is to use an [8x8 matrix](https://www.adafruit.com/category/37_88) or a [4-digit 7-segment display](https://www.adafruit.com/category/37_103). Matrices like these are...
In Stock
[Buy Now](https://www.adafruit.com/product/959)
[Related Guides to the Product](https://learn.adafruit.com/products/959/guides)
### Adafruit 0.56" 4-Digit 7-Segment Display w/I2C Backpack - White
[Adafruit 0.56" 4-Digit 7-Segment Display w/I2C Backpack - White](https://www.adafruit.com/product/1002)
What's better than a single LED? Lots of LEDs! A fun way to make a small display is to use an [8x8 matrix](https://www.adafruit.com/category/37_88) or a [4-digit 7-segment display](https://www.adafruit.com/category/37_103). Matrices like these are...
In Stock
[Buy Now](https://www.adafruit.com/product/1002)
[Related Guides to the Product](https://learn.adafruit.com/products/1002/guides)
### Adafruit 1.2" 8x8 LED Matrix Backpack
[Adafruit 1.2" 8x8 LED Matrix Backpack](https://www.adafruit.com/product/1048)
By popular request, you can now get our 8x8 LED backpacks without the LEDs! These backpacks feature an HT16K33 I2C LED driver, they're simple and easy to use - you can use [our very nice library for the backpacks to...](https://github.com/adafruit/Adafruit-LED-Backpack-Library)
In Stock
[Buy Now](https://www.adafruit.com/product/1048)
[Related Guides to the Product](https://learn.adafruit.com/products/1048/guides)
### Adafruit Small 1.2" 8x8 LED Matrix w/I2C Backpack - Red
[Adafruit Small 1.2" 8x8 LED Matrix w/I2C Backpack - Red](https://www.adafruit.com/product/1049)
What's better than a single LED? Lots of LEDs! A fun way to make a small display is to use an [8x8 matrix](https://www.adafruit.com/category/37_88) or a [4-digit 7-segment display](https://www.adafruit.com/category/37_103). Matrices like these are...
In Stock
[Buy Now](https://www.adafruit.com/product/1049)
[Related Guides to the Product](https://learn.adafruit.com/products/1049/guides)
### Adafruit Small 1.2" 8x8 LED Matrix w/I2C Backpack - Yellow
[Adafruit Small 1.2" 8x8 LED Matrix w/I2C Backpack - Yellow](https://www.adafruit.com/product/1050)
What's better than a single LED? Lots of LEDs! A fun way to make a small display is to use an [8x8 matrix](https://www.adafruit.com/category/37_88) or a [4-digit 7-segment display](https://www.adafruit.com/category/37_103). Matrices like these are...
In Stock
[Buy Now](https://www.adafruit.com/product/1050)
[Related Guides to the Product](https://learn.adafruit.com/products/1050/guides)
### Adafruit Small 1.2" 8x8 LED Matrix w/I2C Backpack - Blue
[Adafruit Small 1.2" 8x8 LED Matrix w/I2C Backpack - Blue](https://www.adafruit.com/product/1052)
What's better than a single LED? Lots of LEDs! A fun way to make a small display is to use an [8x8 matrix](https://www.adafruit.com/category/37_88) or a [4-digit 7-segment display](https://www.adafruit.com/category/37_103). Matrices like these are...
In Stock
[Buy Now](https://www.adafruit.com/product/1052)
[Related Guides to the Product](https://learn.adafruit.com/products/1052/guides)
### Adafruit Mini 8x8 LED Matrix w/I2C Backpack - Ultra Bright White
[Adafruit Mini 8x8 LED Matrix w/I2C Backpack - Ultra Bright White](https://www.adafruit.com/product/1080)
What's better than a single LED? Lots of LEDs! A fun way to make a small display is to use an [8x8 matrix](https://www.adafruit.com/category/37_88) or a [4-digit 7-segment display](https://www.adafruit.com/category/37_103). Matrices like these are...
In Stock
[Buy Now](https://www.adafruit.com/product/1080)
[Related Guides to the Product](https://learn.adafruit.com/products/1080/guides)
### Adafruit 1.2" 4-Digit 7-Segment Display w/I2C Backpack - Green
[Adafruit 1.2" 4-Digit 7-Segment Display w/I2C Backpack - Green](https://www.adafruit.com/product/1268)
What's better than a single LED? Lots of LEDs! A fun way to make a numeric display is to use a [4-digit 7-segment display](https://www.adafruit.com/category/37_103). LED matrices like these are 'multiplexed' - so to control all the seven-segment LEDs you need 14 pins....
No Longer Stocked
[Buy Now](https://www.adafruit.com/product/1268)
[Related Guides to the Product](https://learn.adafruit.com/products/1268/guides)
### Adafruit 1.2" 4-Digit 7-Segment Display w/I2C Backpack - Yellow
[Adafruit 1.2" 4-Digit 7-Segment Display w/I2C Backpack - Yellow](https://www.adafruit.com/product/1269)
What's better than a single LED? Lots of LEDs! A fun way to make a numeric display is to use a [4-digit 7-segment display](https://www.adafruit.com/category/37_103). LED matrices like these are 'multiplexed' - so to control all the seven-segment LEDs you need 14 pins....
In Stock
[Buy Now](https://www.adafruit.com/product/1269)
[Related Guides to the Product](https://learn.adafruit.com/products/1269/guides)
### Adafruit 1.2" 4-Digit 7-Segment Display w/I2C Backpack - Red
[Adafruit 1.2" 4-Digit 7-Segment Display w/I2C Backpack - Red](https://www.adafruit.com/product/1270)
What's better than a single LED? Lots of LEDs! A fun way to make a numeric display is to use a [4-digit 7-segment display](https://www.adafruit.com/category/37_103). LED matrices like these are 'multiplexed' - so to control all the seven-segment LEDs you need 14 pins....
In Stock
[Buy Now](https://www.adafruit.com/product/1270)
[Related Guides to the Product](https://learn.adafruit.com/products/1270/guides)
### Small 1.2" 8x8 Ultra Bright White LED Matrix + Backpack
[Small 1.2" 8x8 Ultra Bright White LED Matrix + Backpack](https://www.adafruit.com/product/1614)
What's better than a single LED? Lots of LEDs! A fun way to make a small display is to use an [8x8 matrix](https://www.adafruit.com/category/37_88) or a [4-digit 7-segment display](https://www.adafruit.com/category/37_103). Matrices like these are...
In Stock
[Buy Now](https://www.adafruit.com/product/1614)
[Related Guides to the Product](https://learn.adafruit.com/products/1614/guides)
### Adafruit Small 1.2" 8x8 LED Matrix w/I2C Backpack - Pure Green
[Adafruit Small 1.2" 8x8 LED Matrix w/I2C Backpack - Pure Green](https://www.adafruit.com/product/1632)
What's better than a single LED? Lots of LEDs! A fun way to make a small display is to use an [8x8 matrix](https://www.adafruit.com/category/37_88) or a [4-digit 7-segment display](https://www.adafruit.com/category/37_103). Matrices like these are...
In Stock
[Buy Now](https://www.adafruit.com/product/1632)
[Related Guides to the Product](https://learn.adafruit.com/products/1632/guides)
### Adafruit Mini 0.8" 8x8 LED Matrix w/I2C Backpack - Pure Green
[Adafruit Mini 0.8" 8x8 LED Matrix w/I2C Backpack - Pure Green](https://www.adafruit.com/product/1633)
What's better than a single LED? Lots of LEDs! A fun way to make a small display is to use an [8x8 matrix](https://www.adafruit.com/category/37_88) or a [4-digit 7-segment display](https://www.adafruit.com/category/37_103). Matrices like these are...
In Stock
[Buy Now](https://www.adafruit.com/product/1633)
[Related Guides to the Product](https://learn.adafruit.com/products/1633/guides)
### Bi-Color (Red/Green) 24-Bar Bargraph w/I2C Backpack Kit
[Bi-Color (Red/Green) 24-Bar Bargraph w/I2C Backpack Kit](https://www.adafruit.com/product/1721)
What's better than a single LED? Lots of LEDs! A fun way to make a small linear display is to use two 12-bar Bi-color bar-graphs. However, this LED bargraph is 'multiplexed' - so to control all the 48 LEDs you need a lot of pins.
Out of Stock
[Buy Now](https://www.adafruit.com/product/1721)
[Related Guides to the Product](https://learn.adafruit.com/products/1721/guides)
### Small 1.2" 8x8 Ultra Bright Square Amber LED Matrix + Backpack
[Small 1.2" 8x8 Ultra Bright Square Amber LED Matrix + Backpack](https://www.adafruit.com/product/1854)
What's better than a single LED? Lots of LEDs! Matrices like these are 'multiplexed' - so to control 64 LEDs you need 16 pins. That's a lot of pins, and there are [driver chips like the MAX7219](//www.adafruit.com/products/453) that can control a matrix for you but...
In Stock
[Buy Now](https://www.adafruit.com/product/1854)
[Related Guides to the Product](https://learn.adafruit.com/products/1854/guides)
### Small 1.2" 8x8 Ultra Bright Square Yellow LED Matrix + Backpack
[Small 1.2" 8x8 Ultra Bright Square Yellow LED Matrix + Backpack](https://www.adafruit.com/product/1855)
What's better than a single LED? Lots of LEDs! Matrices like these are 'multiplexed' - so to control 64 LEDs you need 16 pins. That's a lot of pins, and there are [driver chips like the MAX7219](//www.adafruit.com/products/453) that can control a matrix for you but...
In Stock
[Buy Now](https://www.adafruit.com/product/1855)
[Related Guides to the Product](https://learn.adafruit.com/products/1855/guides)
### Small 1.2" 8x8 Bright Square Pure Green LED Matrix + Backpack
[Small 1.2" 8x8 Bright Square Pure Green LED Matrix + Backpack](https://www.adafruit.com/product/1856)
What's better than a single LED? Lots of LEDs! Matrices like these are 'multiplexed' - so to control 64 LEDs you need 16 pins. That's a lot of pins, and there are [driver chips like the MAX7219](//www.adafruit.com/products/453) that can control a matrix for you but...
In Stock
[Buy Now](https://www.adafruit.com/product/1856)
[Related Guides to the Product](https://learn.adafruit.com/products/1856/guides)
### Small 1.2" 8x8 Ultra Bright Square White LED Matrix + Backpack
[Small 1.2" 8x8 Ultra Bright Square White LED Matrix + Backpack](https://www.adafruit.com/product/1857)
What's better than a single LED? Lots of LEDs! Matrices like these are 'multiplexed' - so to control 64 LEDs you need 16 pins. That's a lot of pins, and there are [driver chips like the MAX7219](//www.adafruit.com/products/453) that can control a matrix for you but...
In Stock
[Buy Now](https://www.adafruit.com/product/1857)
[Related Guides to the Product](https://learn.adafruit.com/products/1857/guides)
### Adafruit 14-segment LED Alphanumeric Backpack - STEMMA QT
[Adafruit 14-segment LED Alphanumeric Backpack - STEMMA QT](https://www.adafruit.com/product/1910)
By popular request, you can now get our 14-segment LED backpacks without the LEDs! These backpacks feature an HT16K33 I2C LED driver, they're simple and easy to use - you can use [our very nice library for the backpacks to...](https://github.com/adafruit/Adafruit-LED-Backpack-Library)
In Stock
[Buy Now](https://www.adafruit.com/product/1910)
[Related Guides to the Product](https://learn.adafruit.com/products/1910/guides)
### Quad Alphanumeric Display - Red 0.54" Digits w/ I2C Backpack
[Quad Alphanumeric Display - Red 0.54" Digits w/ I2C Backpack](https://www.adafruit.com/product/1911)
Display, elegantly, 012345678 or 9! Gaze, hypnotized, at ABCDEFGHIJKLM - well it can display the whole alphabet. You get the point. This is a nice, bright alphanumeric display that shows letters and numbers in a beautiful red hue. It's super bright and designed for viewing from distances...
In Stock
[Buy Now](https://www.adafruit.com/product/1911)
[Related Guides to the Product](https://learn.adafruit.com/products/1911/guides)
### Quad Alphanumeric Display - Blue 0.54" Digits w/ I2C Backpack
[Quad Alphanumeric Display - Blue 0.54" Digits w/ I2C Backpack](https://www.adafruit.com/product/1912)
Display, elegantly, 012345678 or 9! Gaze, hypnotized, at ABCDEFGHIJKLM - well it can display the whole alphabet. You get the point. This is a nice, bright alphanumeric display that shows letters and numbers in a beautiful blue hue. It's super bright and designed for viewing from distances...
In Stock
[Buy Now](https://www.adafruit.com/product/1912)
[Related Guides to the Product](https://learn.adafruit.com/products/1912/guides)
### 16x8 1.2" LED Matrix + Backpack - Ultra Bright Round Green LEDs
[16x8 1.2" LED Matrix + Backpack - Ultra Bright Round Green LEDs](https://www.adafruit.com/product/2035)
What's better than a single LED? Lots of LEDs! And what's better than lots of LEDs? **TWO TIMES AS MANY LEDS!!!**
With the 16x8 LED Matrix Backpack we've doubled your project's matrix capacity by making it super easy to get two separate 8x8 matrices onto...
In Stock
[Buy Now](https://www.adafruit.com/product/2035)
[Related Guides to the Product](https://learn.adafruit.com/products/2035/guides)
### 16x8 1.2" LED Matrix+Backpack UltraBright Round YellowGreen LEDs
[16x8 1.2" LED Matrix+Backpack UltraBright Round YellowGreen LEDs](https://www.adafruit.com/product/2036)
What's better than a single LED? Lots of LEDs! And what's better than lots of LEDs? **TWO TIMES AS MANY LEDS!!!**
With the 16x8 LED Matrix Backpack we've doubled your project's matrix capacity by making it super easy to get two separate 8x8 matrices onto...
In Stock
[Buy Now](https://www.adafruit.com/product/2036)
[Related Guides to the Product](https://learn.adafruit.com/products/2036/guides)
### 16x8 1.2" LED Matrix + Backpack - Ultra Bright Round Red LEDs
[16x8 1.2" LED Matrix + Backpack - Ultra Bright Round Red LEDs](https://www.adafruit.com/product/2037)
What's better than a single LED? Lots of LEDs! And what's better than lots of LEDs? **TWO TIMES AS MANY LEDS!!!**
With the 16x8 LED Matrix Backpack we've doubled your project's matrix capacity by making it super easy to get two separate 8x8 matrices onto...
In Stock
[Buy Now](https://www.adafruit.com/product/2037)
[Related Guides to the Product](https://learn.adafruit.com/products/2037/guides)
### 16x8 1.2" LED Matrix + Backpack - Ultra Bright Round White LEDs
[16x8 1.2" LED Matrix + Backpack - Ultra Bright Round White LEDs](https://www.adafruit.com/product/2038)
What's better than a single LED? Lots of LEDs! And what's better than lots of LEDs? **TWO TIMES AS MANY LEDS!!!**
With the 16x8 LED Matrix Backpack we've doubled your project's matrix capacity by making it super easy to get two separate 8x8 matrices onto...
In Stock
[Buy Now](https://www.adafruit.com/product/2038)
[Related Guides to the Product](https://learn.adafruit.com/products/2038/guides)
### 16x8 1.2" LED Matrix + Backpack - Ultra Bright Round Blue LEDs
[16x8 1.2" LED Matrix + Backpack - Ultra Bright Round Blue LEDs](https://www.adafruit.com/product/2039)
What's better than a single LED? Lots of LEDs! And what's better than lots of LEDs? **TWO TIMES AS MANY LEDS!!!**
With the 16x8 LED Matrix Backpack we've doubled your project's matrix capacity by making it super easy to get two separate 8x8 matrices onto...
In Stock
[Buy Now](https://www.adafruit.com/product/2039)
[Related Guides to the Product](https://learn.adafruit.com/products/2039/guides)
### 16x8 1.2" LED Matrix + Backpack - Ultra Bright Square Blue LEDs
[16x8 1.2" LED Matrix + Backpack - Ultra Bright Square Blue LEDs](https://www.adafruit.com/product/2040)
What's better than a single LED? Lots of LEDs! And what's better than lots of LEDs? **TWO TIMES AS MANY LEDS!!!**
With the 16x8 LED Matrix Backpack we've doubled your project's matrix capacity by making it super easy to get two separate 8x8 matrices onto...
In Stock
[Buy Now](https://www.adafruit.com/product/2040)
[Related Guides to the Product](https://learn.adafruit.com/products/2040/guides)
### 16x8 1.2" LED Matrix + Backpack - Ultra Bright Square Amber LEDs
[16x8 1.2" LED Matrix + Backpack - Ultra Bright Square Amber LEDs](https://www.adafruit.com/product/2041)
What's better than a single LED? Lots of LEDs! And what's better than lots of LEDs? **TWO TIMES AS MANY LEDS!!!**
With the 16x8 LED Matrix Backpack we've doubled your project's matrix capacity by making it super easy to get two separate 8x8 matrices onto...
In Stock
[Buy Now](https://www.adafruit.com/product/2041)
[Related Guides to the Product](https://learn.adafruit.com/products/2041/guides)
### 16x8 1.2" LED Matrix + Backpack - Ultra Bright Square Green LEDs
[16x8 1.2" LED Matrix + Backpack - Ultra Bright Square Green LEDs](https://www.adafruit.com/product/2042)
What's better than a single LED? Lots of LEDs! And what's better than lots of LEDs? **TWO TIMES AS MANY LEDS!!!**
With the 16x8 LED Matrix Backpack we've doubled your project's matrix capacity by making it super easy to get two separate 8x8 matrices onto...
In Stock
[Buy Now](https://www.adafruit.com/product/2042)
[Related Guides to the Product](https://learn.adafruit.com/products/2042/guides)
### 16x8 1.2" LED Matrix + Backpack -Ultra Bright Square Yellow LEDs
[16x8 1.2" LED Matrix + Backpack -Ultra Bright Square Yellow LEDs](https://www.adafruit.com/product/2043)
What's better than a single LED? Lots of LEDs! And what's better than lots of LEDs? **TWO TIMES AS MANY LEDS!!!**
With the 16x8 LED Matrix Backpack we've doubled your project's matrix capacity by making it super easy to get two separate 8x8 matrices onto...
In Stock
[Buy Now](https://www.adafruit.com/product/2043)
[Related Guides to the Product](https://learn.adafruit.com/products/2043/guides)
### 16x8 1.2" LED Matrix + Backpack - Ultra Bright Square White LEDs
[16x8 1.2" LED Matrix + Backpack - Ultra Bright Square White LEDs](https://www.adafruit.com/product/2044)
What's better than a single LED? Lots of LEDs! And what's better than lots of LEDs? **TWO TIMES AS MANY LEDS!!!**
With the 16x8 LED Matrix Backpack we've doubled your project's matrix capacity by making it super easy to get two separate 8x8 matrices onto...
In Stock
[Buy Now](https://www.adafruit.com/product/2044)
[Related Guides to the Product](https://learn.adafruit.com/products/2044/guides)
### 16x8 1.2" LED Matrix + Backpack-Ultra Bright Round Orange LEDs
[16x8 1.2" LED Matrix + Backpack-Ultra Bright Round Orange LEDs](https://www.adafruit.com/product/2052)
What's better than a single LED? Lots of LEDs! And what's better than lots of LEDs? **TWO TIMES AS MANY LEDS!!!**
With the 16x8 LED Matrix Backpack we've doubled your project's matrix capacity by making it super easy to get two separate 8x8 matrices onto...
In Stock
[Buy Now](https://www.adafruit.com/product/2052)
[Related Guides to the Product](https://learn.adafruit.com/products/2052/guides)
### 16x8 1.2" LED Matrices+Backpack Round LEDs in Various Colors
[16x8 1.2" LED Matrices+Backpack Round LEDs in Various Colors](https://www.adafruit.com/product/2054)
What's better than a single LED? Lots of LEDs! And what's better than lots of LEDs? **TWO TIMES AS MANY LEDS!!!**
With the 16x8 LED Matrix Backpack we've doubled your project's matrix capacity by making it super easy to get two separate 8x8 matrices onto...
Out of Stock
[Buy Now](https://www.adafruit.com/product/2054)
[Related Guides to the Product](https://learn.adafruit.com/products/2054/guides)
### Adafruit 8x16 LED Matrix FeatherWing w/o Matrices
[Adafruit 8x16 LED Matrix FeatherWing w/o Matrices](https://www.adafruit.com/product/3090)
You will chirp with delight when you see how easy it is to make your very own 8x16 LED matrix display for any Feather. At 0.8" square, the little [8x8 matrices](https://www.adafruit.com/new/?q=8x8%20miniature%20LED%20matrix&) have everything a big LED matrix has,...
Out of Stock
[Buy Now](https://www.adafruit.com/product/3090)
[Related Guides to the Product](https://learn.adafruit.com/products/3090/guides)
### Adafruit 14-segment LED Alphanumeric backpack (same as P1910)
[Adafruit 14-segment LED Alphanumeric backpack (same as P1910)](https://www.adafruit.com/product/3322)
Just the backpack + 4pin header
No Longer Stocked
[Buy Now](https://www.adafruit.com/product/3322)
[Related Guides to the Product](https://learn.adafruit.com/products/3322/guides)
## Featured Products
### Adafruit Small 1.2" 8x8 LED Matrix w/I2C Backpack - Yellow-Green
[Adafruit Small 1.2" 8x8 LED Matrix w/I2C Backpack - Yellow-Green](https://www.adafruit.com/product/1051)
What's better than a single LED? Lots of LEDs! A fun way to make a small display is to use an [8x8 matrix](https://www.adafruit.com/category/37_88) or a [4-digit 7-segment display](https://www.adafruit.com/category/37_103). Matrices like these are...
In Stock
[Buy Now](https://www.adafruit.com/product/1051)
[Related Guides to the Product](https://learn.adafruit.com/products/1051/guides)
### Small 1.2" 8x8 Ultra Bright Square Blue LED Matrix + Backpack
[Small 1.2" 8x8 Ultra Bright Square Blue LED Matrix + Backpack](https://www.adafruit.com/product/1853)
What's better than a single LED? Lots of LEDs! Matrices like these are 'multiplexed' - so to control 64 LEDs you need 16 pins. That's a lot of pins, and there are [driver chips like the MAX7219](//www.adafruit.com/products/453) that can control a matrix for you but...
In Stock
[Buy Now](https://www.adafruit.com/product/1853)
[Related Guides to the Product](https://learn.adafruit.com/products/1853/guides)
## Related Guides
- [LED Backpack Displays on Raspberry Pi and BeagleBone Black](https://learn.adafruit.com/led-backpack-displays-on-raspberry-pi-and-beaglebone-black.md)
- [Animating Multiple LED Backpacks](https://learn.adafruit.com/animating-multiple-led-backpacks.md)
- [Arduino GPS Clock](https://learn.adafruit.com/arduino-clock.md)
- [Raspberry Pi Physical Dashboard](https://learn.adafruit.com/raspberry-pi-physical-dashboard.md)
- [CircuitPython Hardware: LED Backpacks & FeatherWings](https://learn.adafruit.com/micropython-hardware-led-backpacks-and-featherwings.md)
- [Matrix and 7-Segment LED Backpack with the Raspberry Pi](https://learn.adafruit.com/matrix-7-segment-led-backpack-with-the-raspberry-pi.md)
- [DIY Pocket LED Gamer - Tiny Tetris!](https://learn.adafruit.com/diy-3d-printed-handheld-pocket-game-tiny-tetris-snake.md)
- [RGB LED Matrix Cube with 25,000 LEDs](https://learn.adafruit.com/rgb-led-matrix-cube-for-pi.md)
- [Creating GIFs for SmartMatrix](https://learn.adafruit.com/creating-gifs-for-smartmatrix.md)
- [Adafruit CharliePlex LED Matrix Bonnet](https://learn.adafruit.com/adafruit-charlieplex-bonnet.md)
- [Connecting a 16x32 RGB LED Matrix Panel to a Raspberry Pi](https://learn.adafruit.com/connecting-a-16x32-rgb-led-matrix-panel-to-a-raspberry-pi.md)
- [MicroPython Displays: Drawing Text](https://learn.adafruit.com/micropython-displays-drawing-text.md)
- [Heart Rate Badge](https://learn.adafruit.com/heart-rate-badge.md)
- [16x24 LED Matrix](https://learn.adafruit.com/16x24-led-matrix.md)
- [Adafruit IS31FL3741](https://learn.adafruit.com/adafruit-is31fl3741.md)
---
# Source: https://learn.adafruit.com/adafruit-led-backpack/0-54-alphanumeric-circuitpython-wiring-and-setup.md
# Adafruit LED Backpacks
## CircuitPython Wiring and Setup
It's easy to use LED AlphaNumeric Displays with CircuitPython and the [Adafruit CircuitPython HT16K33](https://github.com/adafruit/Adafruit_CircuitPython_HT16K33) library. This module allows you to easily write CircuitPython code to control the display.
You can use this backpack with any CircuitPython microcontroller board.
First [assemble your AlphaNumeric Display](https://learn.adafruit.com/adafruit-led-backpack/0-54-alphanumeric-assembly).
# Wiring STEMMA QT Version
Here is an example of the STEMMA QT version wired to a Feather RP2040 using the STEMMA QT connector on the backpack.
- **Board 3.3V** to **backpack Vio (red wire)**
- **Board GND** to **backpack** **GND (black wire)**
- **Board SCL** to **backpack** **SCL (yellow wire)**
- **Board SDA** to **backpack** **SDA (blue wire)**

Here is an example of the STEMMA QT version wired to a Feather RP2040 using a solderless breadboard. This example also includes how to wire up the VHi pin, which makes the LEDs appear brighter.
- **Board 5V** to **backpack Vio (red wire connected along the bottom of the Feather)**
- **Board GND** to **backpack** **GND (black wire)**
- **Board SCL** to **backpack** **SCL (yellow wire)**
- **Board SDA** to **backpack** **SDA (blue wire)**
- **Board USB** to **backpack VHi (red wire connected along the top of the Feather)**

# Wiring Original Version
Connect the AlphaNumeric Display to your microcontroller board as shown below.
- **Microcontroller 3V ** to **AlphaNumeric Display I2C VIN**
- **Microcontroller 3V ** to **AlphaNumeric Display VIN**
- **Microcontroller GND ** to **AlphaNumeric Display GND**
- **Microcontroller SCL ** to **AlphaNumeric Display SCL**
- **Microcontroller SDA ** to **AlphaNumeric Display SDA**
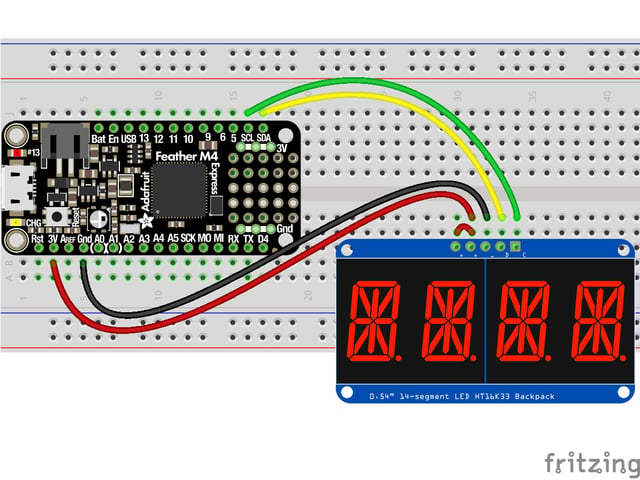
# HT16K33 Library Installation
To use with CircuitPython, you need to first install the HT16K33 library, and its dependencies, into the **lib** folder on your **CIRCUITPY** drive. Then you need to update **code.py** with the example script.
Thankfully, you can do this in one go. In the example below, click the **Download Project Bundle** button below to download the necessary libraries and the **code.py** file in a zip file. Extract the contents of the zip file, and copy the **entire **** lib ** ** folder ** ** and the ** ** code.py ** ** file **to your ** CIRCUITPY** drive.
Your **CIRCUITPY/lib** folder should contain the following folders:
- **adafruit\_bus\_device/**
- **adafruit\_ht16k33/**
https://github.com/adafruit/Adafruit_CircuitPython_HT16K33/blob/main/examples/ht16k33_segments_14x4_demo.py
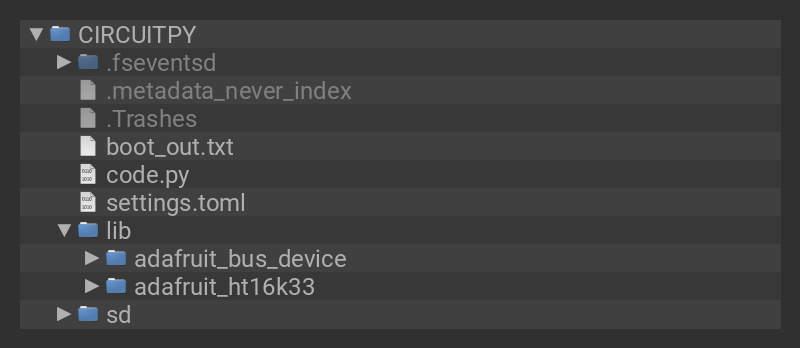
- [Previous Page](https://learn.adafruit.com/adafruit-led-backpack/0-54-alphanumeric-9b21a470-83ad-459c-af02-209d8d82c462.md)
- [Next Page](https://learn.adafruit.com/adafruit-led-backpack/0-54-alphanumeric-python-wiring-and-setup.md)
## Primary Products
### Adafruit Mini 8x8 LED Matrix w/I2C Backpack - Red
[Adafruit Mini 8x8 LED Matrix w/I2C Backpack - Red](https://www.adafruit.com/product/870)
What's better than a single LED? Lots of LEDs! A fun way to make a small display is to use an [8x8 matrix](https://www.adafruit.com/category/37_88) or a [4-digit 7-segment display](https://www.adafruit.com/category/37_103). Matrices like these are...
In Stock
[Buy Now](https://www.adafruit.com/product/870)
[Related Guides to the Product](https://learn.adafruit.com/products/870/guides)
### Adafruit Mini 8x8 LED Matrix w/I2C Backpack - Yellow
[Adafruit Mini 8x8 LED Matrix w/I2C Backpack - Yellow](https://www.adafruit.com/product/871)
What's better than a single LED? Lots of LEDs! A fun way to make a small display is to use an [8x8 matrix](https://www.adafruit.com/category/37_88) or a [4-digit 7-segment display](https://www.adafruit.com/category/37_103). Matrices like these are...
In Stock
[Buy Now](https://www.adafruit.com/product/871)
[Related Guides to the Product](https://learn.adafruit.com/products/871/guides)
### Adafruit Mini 0.8" 8x8 LED Matrix w/I2C Backpack - Yellow-Green
[Adafruit Mini 0.8" 8x8 LED Matrix w/I2C Backpack - Yellow-Green](https://www.adafruit.com/product/872)
What's better than a single LED? Lots of LEDs! A fun way to make a small display is to use an [8x8 matrix](https://www.adafruit.com/category/37_88) or a [4-digit 7-segment display](https://www.adafruit.com/category/37_103). Matrices like these are...
In Stock
[Buy Now](https://www.adafruit.com/product/872)
[Related Guides to the Product](https://learn.adafruit.com/products/872/guides)
### Adafruit 0.56" 4-Digit 7-Segment Display with I2C Backpack - Red
[Adafruit 0.56" 4-Digit 7-Segment Display with I2C Backpack - Red](https://www.adafruit.com/product/878)
What's better than a single LED? Lots of LEDs! A fun way to make a small display is to use an [8x8 matrix](https://www.adafruit.com/category/37_88) or a [4-digit 7-segment display](https://www.adafruit.com/category/37_103). Matrices like these are...
In Stock
[Buy Now](https://www.adafruit.com/product/878)
[Related Guides to the Product](https://learn.adafruit.com/products/878/guides)
### Adafruit 0.56" 4-Digit 7-Segment Display w/I2C Backpack - Yellow
[Adafruit 0.56" 4-Digit 7-Segment Display w/I2C Backpack - Yellow](https://www.adafruit.com/product/879)
What's better than a single LED? Lots of LEDs! A fun way to make a small display is to use an [8x8 matrix](https://www.adafruit.com/category/37_88) or a [4-digit 7-segment display](https://www.adafruit.com/category/37_103). Matrices like these are...
In Stock
[Buy Now](https://www.adafruit.com/product/879)
[Related Guides to the Product](https://learn.adafruit.com/products/879/guides)
### Adafruit 0.56" 4-Digit 7-Segment Display w/ I2C Backpack - Green
[Adafruit 0.56" 4-Digit 7-Segment Display w/ I2C Backpack - Green](https://www.adafruit.com/product/880)
What's better than a single LED? Lots of LEDs! A fun way to make a small display is to use an [8x8 matrix](https://www.adafruit.com/category/37_88) or a [4-digit 7-segment display](https://www.adafruit.com/category/37_103). Matrices like these are...
No Longer Stocked
[Buy Now](https://www.adafruit.com/product/880)
[Related Guides to the Product](https://learn.adafruit.com/products/880/guides)
### Adafruit 0.56" 4-Digit 7-Segment Display w/ I2C Backpack - Blue
[Adafruit 0.56" 4-Digit 7-Segment Display w/ I2C Backpack - Blue](https://www.adafruit.com/product/881)
What's better than a single LED? Lots of LEDs! A fun way to make a small display is to use an [8x8 matrix](https://www.adafruit.com/category/37_88) or a [4-digit 7-segment display](https://www.adafruit.com/category/37_103). Matrices like these are...
In Stock
[Buy Now](https://www.adafruit.com/product/881)
[Related Guides to the Product](https://learn.adafruit.com/products/881/guides)
### Adafruit Bicolor LED Square Pixel Matrix with I2C Backpack
[Adafruit Bicolor LED Square Pixel Matrix with I2C Backpack](https://www.adafruit.com/product/902)
What's better than a single LED? Lots of LEDs! A fun way to make a small colorful display is to use a [1.2" Bi-color 8x8 LED Matrix](http://www.adafruit.com/products/458). Matrices like these are 'multiplexed' - so to control all the 128 LEDs you need 24 pins....
In Stock
[Buy Now](https://www.adafruit.com/product/902)
[Related Guides to the Product](https://learn.adafruit.com/products/902/guides)
### Adafruit Mini 8x8 LED Matrix w/I2C Backpack - Blue
[Adafruit Mini 8x8 LED Matrix w/I2C Backpack - Blue](https://www.adafruit.com/product/959)
What's better than a single LED? Lots of LEDs! A fun way to make a small display is to use an [8x8 matrix](https://www.adafruit.com/category/37_88) or a [4-digit 7-segment display](https://www.adafruit.com/category/37_103). Matrices like these are...
In Stock
[Buy Now](https://www.adafruit.com/product/959)
[Related Guides to the Product](https://learn.adafruit.com/products/959/guides)
### Adafruit 0.56" 4-Digit 7-Segment Display w/I2C Backpack - White
[Adafruit 0.56" 4-Digit 7-Segment Display w/I2C Backpack - White](https://www.adafruit.com/product/1002)
What's better than a single LED? Lots of LEDs! A fun way to make a small display is to use an [8x8 matrix](https://www.adafruit.com/category/37_88) or a [4-digit 7-segment display](https://www.adafruit.com/category/37_103). Matrices like these are...
In Stock
[Buy Now](https://www.adafruit.com/product/1002)
[Related Guides to the Product](https://learn.adafruit.com/products/1002/guides)
### Adafruit 1.2" 8x8 LED Matrix Backpack
[Adafruit 1.2" 8x8 LED Matrix Backpack](https://www.adafruit.com/product/1048)
By popular request, you can now get our 8x8 LED backpacks without the LEDs! These backpacks feature an HT16K33 I2C LED driver, they're simple and easy to use - you can use [our very nice library for the backpacks to...](https://github.com/adafruit/Adafruit-LED-Backpack-Library)
In Stock
[Buy Now](https://www.adafruit.com/product/1048)
[Related Guides to the Product](https://learn.adafruit.com/products/1048/guides)
### Adafruit Small 1.2" 8x8 LED Matrix w/I2C Backpack - Red
[Adafruit Small 1.2" 8x8 LED Matrix w/I2C Backpack - Red](https://www.adafruit.com/product/1049)
What's better than a single LED? Lots of LEDs! A fun way to make a small display is to use an [8x8 matrix](https://www.adafruit.com/category/37_88) or a [4-digit 7-segment display](https://www.adafruit.com/category/37_103). Matrices like these are...
In Stock
[Buy Now](https://www.adafruit.com/product/1049)
[Related Guides to the Product](https://learn.adafruit.com/products/1049/guides)
### Adafruit Small 1.2" 8x8 LED Matrix w/I2C Backpack - Yellow
[Adafruit Small 1.2" 8x8 LED Matrix w/I2C Backpack - Yellow](https://www.adafruit.com/product/1050)
What's better than a single LED? Lots of LEDs! A fun way to make a small display is to use an [8x8 matrix](https://www.adafruit.com/category/37_88) or a [4-digit 7-segment display](https://www.adafruit.com/category/37_103). Matrices like these are...
In Stock
[Buy Now](https://www.adafruit.com/product/1050)
[Related Guides to the Product](https://learn.adafruit.com/products/1050/guides)
### Adafruit Small 1.2" 8x8 LED Matrix w/I2C Backpack - Blue
[Adafruit Small 1.2" 8x8 LED Matrix w/I2C Backpack - Blue](https://www.adafruit.com/product/1052)
What's better than a single LED? Lots of LEDs! A fun way to make a small display is to use an [8x8 matrix](https://www.adafruit.com/category/37_88) or a [4-digit 7-segment display](https://www.adafruit.com/category/37_103). Matrices like these are...
In Stock
[Buy Now](https://www.adafruit.com/product/1052)
[Related Guides to the Product](https://learn.adafruit.com/products/1052/guides)
### Adafruit Mini 8x8 LED Matrix w/I2C Backpack - Ultra Bright White
[Adafruit Mini 8x8 LED Matrix w/I2C Backpack - Ultra Bright White](https://www.adafruit.com/product/1080)
What's better than a single LED? Lots of LEDs! A fun way to make a small display is to use an [8x8 matrix](https://www.adafruit.com/category/37_88) or a [4-digit 7-segment display](https://www.adafruit.com/category/37_103). Matrices like these are...
In Stock
[Buy Now](https://www.adafruit.com/product/1080)
[Related Guides to the Product](https://learn.adafruit.com/products/1080/guides)
### Adafruit 1.2" 4-Digit 7-Segment Display w/I2C Backpack - Green
[Adafruit 1.2" 4-Digit 7-Segment Display w/I2C Backpack - Green](https://www.adafruit.com/product/1268)
What's better than a single LED? Lots of LEDs! A fun way to make a numeric display is to use a [4-digit 7-segment display](https://www.adafruit.com/category/37_103). LED matrices like these are 'multiplexed' - so to control all the seven-segment LEDs you need 14 pins....
No Longer Stocked
[Buy Now](https://www.adafruit.com/product/1268)
[Related Guides to the Product](https://learn.adafruit.com/products/1268/guides)
### Adafruit 1.2" 4-Digit 7-Segment Display w/I2C Backpack - Yellow
[Adafruit 1.2" 4-Digit 7-Segment Display w/I2C Backpack - Yellow](https://www.adafruit.com/product/1269)
What's better than a single LED? Lots of LEDs! A fun way to make a numeric display is to use a [4-digit 7-segment display](https://www.adafruit.com/category/37_103). LED matrices like these are 'multiplexed' - so to control all the seven-segment LEDs you need 14 pins....
In Stock
[Buy Now](https://www.adafruit.com/product/1269)
[Related Guides to the Product](https://learn.adafruit.com/products/1269/guides)
### Adafruit 1.2" 4-Digit 7-Segment Display w/I2C Backpack - Red
[Adafruit 1.2" 4-Digit 7-Segment Display w/I2C Backpack - Red](https://www.adafruit.com/product/1270)
What's better than a single LED? Lots of LEDs! A fun way to make a numeric display is to use a [4-digit 7-segment display](https://www.adafruit.com/category/37_103). LED matrices like these are 'multiplexed' - so to control all the seven-segment LEDs you need 14 pins....
In Stock
[Buy Now](https://www.adafruit.com/product/1270)
[Related Guides to the Product](https://learn.adafruit.com/products/1270/guides)
### Small 1.2" 8x8 Ultra Bright White LED Matrix + Backpack
[Small 1.2" 8x8 Ultra Bright White LED Matrix + Backpack](https://www.adafruit.com/product/1614)
What's better than a single LED? Lots of LEDs! A fun way to make a small display is to use an [8x8 matrix](https://www.adafruit.com/category/37_88) or a [4-digit 7-segment display](https://www.adafruit.com/category/37_103). Matrices like these are...
In Stock
[Buy Now](https://www.adafruit.com/product/1614)
[Related Guides to the Product](https://learn.adafruit.com/products/1614/guides)
### Adafruit Small 1.2" 8x8 LED Matrix w/I2C Backpack - Pure Green
[Adafruit Small 1.2" 8x8 LED Matrix w/I2C Backpack - Pure Green](https://www.adafruit.com/product/1632)
What's better than a single LED? Lots of LEDs! A fun way to make a small display is to use an [8x8 matrix](https://www.adafruit.com/category/37_88) or a [4-digit 7-segment display](https://www.adafruit.com/category/37_103). Matrices like these are...
In Stock
[Buy Now](https://www.adafruit.com/product/1632)
[Related Guides to the Product](https://learn.adafruit.com/products/1632/guides)
### Adafruit Mini 0.8" 8x8 LED Matrix w/I2C Backpack - Pure Green
[Adafruit Mini 0.8" 8x8 LED Matrix w/I2C Backpack - Pure Green](https://www.adafruit.com/product/1633)
What's better than a single LED? Lots of LEDs! A fun way to make a small display is to use an [8x8 matrix](https://www.adafruit.com/category/37_88) or a [4-digit 7-segment display](https://www.adafruit.com/category/37_103). Matrices like these are...
In Stock
[Buy Now](https://www.adafruit.com/product/1633)
[Related Guides to the Product](https://learn.adafruit.com/products/1633/guides)
### Bi-Color (Red/Green) 24-Bar Bargraph w/I2C Backpack Kit
[Bi-Color (Red/Green) 24-Bar Bargraph w/I2C Backpack Kit](https://www.adafruit.com/product/1721)
What's better than a single LED? Lots of LEDs! A fun way to make a small linear display is to use two 12-bar Bi-color bar-graphs. However, this LED bargraph is 'multiplexed' - so to control all the 48 LEDs you need a lot of pins.
Out of Stock
[Buy Now](https://www.adafruit.com/product/1721)
[Related Guides to the Product](https://learn.adafruit.com/products/1721/guides)
### Small 1.2" 8x8 Ultra Bright Square Amber LED Matrix + Backpack
[Small 1.2" 8x8 Ultra Bright Square Amber LED Matrix + Backpack](https://www.adafruit.com/product/1854)
What's better than a single LED? Lots of LEDs! Matrices like these are 'multiplexed' - so to control 64 LEDs you need 16 pins. That's a lot of pins, and there are [driver chips like the MAX7219](//www.adafruit.com/products/453) that can control a matrix for you but...
In Stock
[Buy Now](https://www.adafruit.com/product/1854)
[Related Guides to the Product](https://learn.adafruit.com/products/1854/guides)
### Small 1.2" 8x8 Ultra Bright Square Yellow LED Matrix + Backpack
[Small 1.2" 8x8 Ultra Bright Square Yellow LED Matrix + Backpack](https://www.adafruit.com/product/1855)
What's better than a single LED? Lots of LEDs! Matrices like these are 'multiplexed' - so to control 64 LEDs you need 16 pins. That's a lot of pins, and there are [driver chips like the MAX7219](//www.adafruit.com/products/453) that can control a matrix for you but...
In Stock
[Buy Now](https://www.adafruit.com/product/1855)
[Related Guides to the Product](https://learn.adafruit.com/products/1855/guides)
### Small 1.2" 8x8 Bright Square Pure Green LED Matrix + Backpack
[Small 1.2" 8x8 Bright Square Pure Green LED Matrix + Backpack](https://www.adafruit.com/product/1856)
What's better than a single LED? Lots of LEDs! Matrices like these are 'multiplexed' - so to control 64 LEDs you need 16 pins. That's a lot of pins, and there are [driver chips like the MAX7219](//www.adafruit.com/products/453) that can control a matrix for you but...
In Stock
[Buy Now](https://www.adafruit.com/product/1856)
[Related Guides to the Product](https://learn.adafruit.com/products/1856/guides)
### Small 1.2" 8x8 Ultra Bright Square White LED Matrix + Backpack
[Small 1.2" 8x8 Ultra Bright Square White LED Matrix + Backpack](https://www.adafruit.com/product/1857)
What's better than a single LED? Lots of LEDs! Matrices like these are 'multiplexed' - so to control 64 LEDs you need 16 pins. That's a lot of pins, and there are [driver chips like the MAX7219](//www.adafruit.com/products/453) that can control a matrix for you but...
In Stock
[Buy Now](https://www.adafruit.com/product/1857)
[Related Guides to the Product](https://learn.adafruit.com/products/1857/guides)
### Adafruit 14-segment LED Alphanumeric Backpack - STEMMA QT
[Adafruit 14-segment LED Alphanumeric Backpack - STEMMA QT](https://www.adafruit.com/product/1910)
By popular request, you can now get our 14-segment LED backpacks without the LEDs! These backpacks feature an HT16K33 I2C LED driver, they're simple and easy to use - you can use [our very nice library for the backpacks to...](https://github.com/adafruit/Adafruit-LED-Backpack-Library)
In Stock
[Buy Now](https://www.adafruit.com/product/1910)
[Related Guides to the Product](https://learn.adafruit.com/products/1910/guides)
### Quad Alphanumeric Display - Red 0.54" Digits w/ I2C Backpack
[Quad Alphanumeric Display - Red 0.54" Digits w/ I2C Backpack](https://www.adafruit.com/product/1911)
Display, elegantly, 012345678 or 9! Gaze, hypnotized, at ABCDEFGHIJKLM - well it can display the whole alphabet. You get the point. This is a nice, bright alphanumeric display that shows letters and numbers in a beautiful red hue. It's super bright and designed for viewing from distances...
In Stock
[Buy Now](https://www.adafruit.com/product/1911)
[Related Guides to the Product](https://learn.adafruit.com/products/1911/guides)
### Quad Alphanumeric Display - Blue 0.54" Digits w/ I2C Backpack
[Quad Alphanumeric Display - Blue 0.54" Digits w/ I2C Backpack](https://www.adafruit.com/product/1912)
Display, elegantly, 012345678 or 9! Gaze, hypnotized, at ABCDEFGHIJKLM - well it can display the whole alphabet. You get the point. This is a nice, bright alphanumeric display that shows letters and numbers in a beautiful blue hue. It's super bright and designed for viewing from distances...
In Stock
[Buy Now](https://www.adafruit.com/product/1912)
[Related Guides to the Product](https://learn.adafruit.com/products/1912/guides)
### 16x8 1.2" LED Matrix + Backpack - Ultra Bright Round Green LEDs
[16x8 1.2" LED Matrix + Backpack - Ultra Bright Round Green LEDs](https://www.adafruit.com/product/2035)
What's better than a single LED? Lots of LEDs! And what's better than lots of LEDs? **TWO TIMES AS MANY LEDS!!!**
With the 16x8 LED Matrix Backpack we've doubled your project's matrix capacity by making it super easy to get two separate 8x8 matrices onto...
In Stock
[Buy Now](https://www.adafruit.com/product/2035)
[Related Guides to the Product](https://learn.adafruit.com/products/2035/guides)
### 16x8 1.2" LED Matrix+Backpack UltraBright Round YellowGreen LEDs
[16x8 1.2" LED Matrix+Backpack UltraBright Round YellowGreen LEDs](https://www.adafruit.com/product/2036)
What's better than a single LED? Lots of LEDs! And what's better than lots of LEDs? **TWO TIMES AS MANY LEDS!!!**
With the 16x8 LED Matrix Backpack we've doubled your project's matrix capacity by making it super easy to get two separate 8x8 matrices onto...
In Stock
[Buy Now](https://www.adafruit.com/product/2036)
[Related Guides to the Product](https://learn.adafruit.com/products/2036/guides)
### 16x8 1.2" LED Matrix + Backpack - Ultra Bright Round Red LEDs
[16x8 1.2" LED Matrix + Backpack - Ultra Bright Round Red LEDs](https://www.adafruit.com/product/2037)
What's better than a single LED? Lots of LEDs! And what's better than lots of LEDs? **TWO TIMES AS MANY LEDS!!!**
With the 16x8 LED Matrix Backpack we've doubled your project's matrix capacity by making it super easy to get two separate 8x8 matrices onto...
In Stock
[Buy Now](https://www.adafruit.com/product/2037)
[Related Guides to the Product](https://learn.adafruit.com/products/2037/guides)
### 16x8 1.2" LED Matrix + Backpack - Ultra Bright Round White LEDs
[16x8 1.2" LED Matrix + Backpack - Ultra Bright Round White LEDs](https://www.adafruit.com/product/2038)
What's better than a single LED? Lots of LEDs! And what's better than lots of LEDs? **TWO TIMES AS MANY LEDS!!!**
With the 16x8 LED Matrix Backpack we've doubled your project's matrix capacity by making it super easy to get two separate 8x8 matrices onto...
In Stock
[Buy Now](https://www.adafruit.com/product/2038)
[Related Guides to the Product](https://learn.adafruit.com/products/2038/guides)
### 16x8 1.2" LED Matrix + Backpack - Ultra Bright Round Blue LEDs
[16x8 1.2" LED Matrix + Backpack - Ultra Bright Round Blue LEDs](https://www.adafruit.com/product/2039)
What's better than a single LED? Lots of LEDs! And what's better than lots of LEDs? **TWO TIMES AS MANY LEDS!!!**
With the 16x8 LED Matrix Backpack we've doubled your project's matrix capacity by making it super easy to get two separate 8x8 matrices onto...
In Stock
[Buy Now](https://www.adafruit.com/product/2039)
[Related Guides to the Product](https://learn.adafruit.com/products/2039/guides)
### 16x8 1.2" LED Matrix + Backpack - Ultra Bright Square Blue LEDs
[16x8 1.2" LED Matrix + Backpack - Ultra Bright Square Blue LEDs](https://www.adafruit.com/product/2040)
What's better than a single LED? Lots of LEDs! And what's better than lots of LEDs? **TWO TIMES AS MANY LEDS!!!**
With the 16x8 LED Matrix Backpack we've doubled your project's matrix capacity by making it super easy to get two separate 8x8 matrices onto...
In Stock
[Buy Now](https://www.adafruit.com/product/2040)
[Related Guides to the Product](https://learn.adafruit.com/products/2040/guides)
### 16x8 1.2" LED Matrix + Backpack - Ultra Bright Square Amber LEDs
[16x8 1.2" LED Matrix + Backpack - Ultra Bright Square Amber LEDs](https://www.adafruit.com/product/2041)
What's better than a single LED? Lots of LEDs! And what's better than lots of LEDs? **TWO TIMES AS MANY LEDS!!!**
With the 16x8 LED Matrix Backpack we've doubled your project's matrix capacity by making it super easy to get two separate 8x8 matrices onto...
In Stock
[Buy Now](https://www.adafruit.com/product/2041)
[Related Guides to the Product](https://learn.adafruit.com/products/2041/guides)
### 16x8 1.2" LED Matrix + Backpack - Ultra Bright Square Green LEDs
[16x8 1.2" LED Matrix + Backpack - Ultra Bright Square Green LEDs](https://www.adafruit.com/product/2042)
What's better than a single LED? Lots of LEDs! And what's better than lots of LEDs? **TWO TIMES AS MANY LEDS!!!**
With the 16x8 LED Matrix Backpack we've doubled your project's matrix capacity by making it super easy to get two separate 8x8 matrices onto...
In Stock
[Buy Now](https://www.adafruit.com/product/2042)
[Related Guides to the Product](https://learn.adafruit.com/products/2042/guides)
### 16x8 1.2" LED Matrix + Backpack -Ultra Bright Square Yellow LEDs
[16x8 1.2" LED Matrix + Backpack -Ultra Bright Square Yellow LEDs](https://www.adafruit.com/product/2043)
What's better than a single LED? Lots of LEDs! And what's better than lots of LEDs? **TWO TIMES AS MANY LEDS!!!**
With the 16x8 LED Matrix Backpack we've doubled your project's matrix capacity by making it super easy to get two separate 8x8 matrices onto...
In Stock
[Buy Now](https://www.adafruit.com/product/2043)
[Related Guides to the Product](https://learn.adafruit.com/products/2043/guides)
### 16x8 1.2" LED Matrix + Backpack - Ultra Bright Square White LEDs
[16x8 1.2" LED Matrix + Backpack - Ultra Bright Square White LEDs](https://www.adafruit.com/product/2044)
What's better than a single LED? Lots of LEDs! And what's better than lots of LEDs? **TWO TIMES AS MANY LEDS!!!**
With the 16x8 LED Matrix Backpack we've doubled your project's matrix capacity by making it super easy to get two separate 8x8 matrices onto...
In Stock
[Buy Now](https://www.adafruit.com/product/2044)
[Related Guides to the Product](https://learn.adafruit.com/products/2044/guides)
### 16x8 1.2" LED Matrix + Backpack-Ultra Bright Round Orange LEDs
[16x8 1.2" LED Matrix + Backpack-Ultra Bright Round Orange LEDs](https://www.adafruit.com/product/2052)
What's better than a single LED? Lots of LEDs! And what's better than lots of LEDs? **TWO TIMES AS MANY LEDS!!!**
With the 16x8 LED Matrix Backpack we've doubled your project's matrix capacity by making it super easy to get two separate 8x8 matrices onto...
In Stock
[Buy Now](https://www.adafruit.com/product/2052)
[Related Guides to the Product](https://learn.adafruit.com/products/2052/guides)
### 16x8 1.2" LED Matrices+Backpack Round LEDs in Various Colors
[16x8 1.2" LED Matrices+Backpack Round LEDs in Various Colors](https://www.adafruit.com/product/2054)
What's better than a single LED? Lots of LEDs! And what's better than lots of LEDs? **TWO TIMES AS MANY LEDS!!!**
With the 16x8 LED Matrix Backpack we've doubled your project's matrix capacity by making it super easy to get two separate 8x8 matrices onto...
Out of Stock
[Buy Now](https://www.adafruit.com/product/2054)
[Related Guides to the Product](https://learn.adafruit.com/products/2054/guides)
### Adafruit 8x16 LED Matrix FeatherWing w/o Matrices
[Adafruit 8x16 LED Matrix FeatherWing w/o Matrices](https://www.adafruit.com/product/3090)
You will chirp with delight when you see how easy it is to make your very own 8x16 LED matrix display for any Feather. At 0.8" square, the little [8x8 matrices](https://www.adafruit.com/new/?q=8x8%20miniature%20LED%20matrix&) have everything a big LED matrix has,...
Out of Stock
[Buy Now](https://www.adafruit.com/product/3090)
[Related Guides to the Product](https://learn.adafruit.com/products/3090/guides)
### Adafruit 14-segment LED Alphanumeric backpack (same as P1910)
[Adafruit 14-segment LED Alphanumeric backpack (same as P1910)](https://www.adafruit.com/product/3322)
Just the backpack + 4pin header
No Longer Stocked
[Buy Now](https://www.adafruit.com/product/3322)
[Related Guides to the Product](https://learn.adafruit.com/products/3322/guides)
## Featured Products
### Adafruit Small 1.2" 8x8 LED Matrix w/I2C Backpack - Yellow-Green
[Adafruit Small 1.2" 8x8 LED Matrix w/I2C Backpack - Yellow-Green](https://www.adafruit.com/product/1051)
What's better than a single LED? Lots of LEDs! A fun way to make a small display is to use an [8x8 matrix](https://www.adafruit.com/category/37_88) or a [4-digit 7-segment display](https://www.adafruit.com/category/37_103). Matrices like these are...
In Stock
[Buy Now](https://www.adafruit.com/product/1051)
[Related Guides to the Product](https://learn.adafruit.com/products/1051/guides)
### Small 1.2" 8x8 Ultra Bright Square Blue LED Matrix + Backpack
[Small 1.2" 8x8 Ultra Bright Square Blue LED Matrix + Backpack](https://www.adafruit.com/product/1853)
What's better than a single LED? Lots of LEDs! Matrices like these are 'multiplexed' - so to control 64 LEDs you need 16 pins. That's a lot of pins, and there are [driver chips like the MAX7219](//www.adafruit.com/products/453) that can control a matrix for you but...
In Stock
[Buy Now](https://www.adafruit.com/product/1853)
[Related Guides to the Product](https://learn.adafruit.com/products/1853/guides)
## Related Guides
- [LED Backpack Displays on Raspberry Pi and BeagleBone Black](https://learn.adafruit.com/led-backpack-displays-on-raspberry-pi-and-beaglebone-black.md)
- [Animating Multiple LED Backpacks](https://learn.adafruit.com/animating-multiple-led-backpacks.md)
- [Arduino GPS Clock](https://learn.adafruit.com/arduino-clock.md)
- [Raspberry Pi Physical Dashboard](https://learn.adafruit.com/raspberry-pi-physical-dashboard.md)
- [CircuitPython Hardware: LED Backpacks & FeatherWings](https://learn.adafruit.com/micropython-hardware-led-backpacks-and-featherwings.md)
- [Matrix and 7-Segment LED Backpack with the Raspberry Pi](https://learn.adafruit.com/matrix-7-segment-led-backpack-with-the-raspberry-pi.md)
- [DIY Pocket LED Gamer - Tiny Tetris!](https://learn.adafruit.com/diy-3d-printed-handheld-pocket-game-tiny-tetris-snake.md)
- [RGB LED Matrix Cube with 25,000 LEDs](https://learn.adafruit.com/rgb-led-matrix-cube-for-pi.md)
- [Creating GIFs for SmartMatrix](https://learn.adafruit.com/creating-gifs-for-smartmatrix.md)
- [Adafruit CharliePlex LED Matrix Bonnet](https://learn.adafruit.com/adafruit-charlieplex-bonnet.md)
- [Connecting a 16x32 RGB LED Matrix Panel to a Raspberry Pi](https://learn.adafruit.com/connecting-a-16x32-rgb-led-matrix-panel-to-a-raspberry-pi.md)
- [MicroPython Displays: Drawing Text](https://learn.adafruit.com/micropython-displays-drawing-text.md)
- [Heart Rate Badge](https://learn.adafruit.com/heart-rate-badge.md)
- [16x24 LED Matrix](https://learn.adafruit.com/16x24-led-matrix.md)
- [Adafruit IS31FL3741](https://learn.adafruit.com/adafruit-is31fl3741.md)
---
# Source: https://learn.adafruit.com/adafruit-led-backpack/0-54-alphanumeric-python-wiring-and-setup.md
# Adafruit LED Backpacks
## Python Wiring and Setup
# Wiring
It's easy to use AlphaNumeric Displays with Python and the [Adafruit CircuitPython HT16K33](https://github.com/adafruit/Adafruit_CircuitPython_HT16K33) library. This library allows you to easily write Python code to control the display.
This section will cover how to wire the AlphaNumeric Display to your Raspberry Pi. First assemble your AlphaNumeric Display.
Since there's _dozens_ of Linux computers/boards you can use, this guide will just show wiring for Raspberry Pi. For other platforms, [please visit the guide for CircuitPython on Linux to see whether your platform is supported](https://learn.adafruit.com/circuitpython-on-raspberrypi-linux).
Connect the AlphaNumeric Display as shown below to your Raspberry Pi.
## Wiring STEMMA QT Version
Here is an example of wiring the STEMMA QT version of the backpack to a Raspberry Pi using the STEMMA QT connector.
- **Pi GND ** to **backpack GND (black wire)**
- **Pi 3.3V ** to **backpack VIO (red wire)**
- **Pi SDA ** to **backpack SDA (blue wire)**
- **Pi SCL ** to **backpack SCL (yellow wire)**

Here is an example of wiring the STEMMA QT version of the backpack using a solderless breadboard. This example also includes how to wire up the VHi pin, which makes the LEDs appear brighter.
- **Pi GND ** to **backpack GND (black wire)**
- **Pi 3.3V ** to **backpack VIO (lower red wire)**
- **Pi SDA ** to **backpack SDA (blue wire)**
- **Pi SCL ** to **backpack SCL (yellow wire)**
- **Pi 5V** to **backpack VHi (upper red wire)**

## Wiring Original Version
- **Raspberry Pi 3.3V ** to **AlphaNumeric Display I2C VIN**
- **Raspberry Pi 3.3V ** to **AlphaNumeric Display VIN**
- **Raspberry Pi GND ** to **AlphaNumeric Display GND**
- **Raspberry Pi SCL ** to **AlphaNumeric Display SCL**
- **Raspberry Pi SDA ** to **AlphaNumeric Display SDA**

# Setup
You'll need to install the Adafruit\_Blinka library that provides the CircuitPython support in Python. This may also require enabling I2C on your platform and verifying you are running Python 3. [Since each platform is a little different, and Linux changes often, please visit the CircuitPython on Linux guide to get your computer ready](https://learn.adafruit.com/circuitpython-on-raspberrypi-linux)!
## Python Installation of HT16K33 Library
Once that's done, from your command line run the following command:
- `pip3 install adafruit-circuitpython-ht16k33`
If your default Python is version 3 you may need to run 'pip' instead. Just make sure you aren't trying to use CircuitPython on Python 2.x, it isn't supported!
If that complains about pip3 not being installed, then run this first to install it:
- `sudo apt-get install python3-pip`
## Pillow Library
You also need PIL, the Python Imaging Library, to allow using text with custom fonts. There are several system libraries that PIL relies on, so installing via a package manager is the easiest way to bring in everything:
- `sudo apt-get install python3-pil`
That's it. You should be ready to go.
- [Previous Page](https://learn.adafruit.com/adafruit-led-backpack/0-54-alphanumeric-circuitpython-wiring-and-setup.md)
- [Next Page](https://learn.adafruit.com/adafruit-led-backpack/0-54-alphanumeric-circuitpython-and-python-usage.md)
## Primary Products
### Adafruit Mini 8x8 LED Matrix w/I2C Backpack - Red
[Adafruit Mini 8x8 LED Matrix w/I2C Backpack - Red](https://www.adafruit.com/product/870)
What's better than a single LED? Lots of LEDs! A fun way to make a small display is to use an [8x8 matrix](https://www.adafruit.com/category/37_88) or a [4-digit 7-segment display](https://www.adafruit.com/category/37_103). Matrices like these are...
In Stock
[Buy Now](https://www.adafruit.com/product/870)
[Related Guides to the Product](https://learn.adafruit.com/products/870/guides)
### Adafruit Mini 8x8 LED Matrix w/I2C Backpack - Yellow
[Adafruit Mini 8x8 LED Matrix w/I2C Backpack - Yellow](https://www.adafruit.com/product/871)
What's better than a single LED? Lots of LEDs! A fun way to make a small display is to use an [8x8 matrix](https://www.adafruit.com/category/37_88) or a [4-digit 7-segment display](https://www.adafruit.com/category/37_103). Matrices like these are...
In Stock
[Buy Now](https://www.adafruit.com/product/871)
[Related Guides to the Product](https://learn.adafruit.com/products/871/guides)
### Adafruit Mini 0.8" 8x8 LED Matrix w/I2C Backpack - Yellow-Green
[Adafruit Mini 0.8" 8x8 LED Matrix w/I2C Backpack - Yellow-Green](https://www.adafruit.com/product/872)
What's better than a single LED? Lots of LEDs! A fun way to make a small display is to use an [8x8 matrix](https://www.adafruit.com/category/37_88) or a [4-digit 7-segment display](https://www.adafruit.com/category/37_103). Matrices like these are...
In Stock
[Buy Now](https://www.adafruit.com/product/872)
[Related Guides to the Product](https://learn.adafruit.com/products/872/guides)
### Adafruit 0.56" 4-Digit 7-Segment Display with I2C Backpack - Red
[Adafruit 0.56" 4-Digit 7-Segment Display with I2C Backpack - Red](https://www.adafruit.com/product/878)
What's better than a single LED? Lots of LEDs! A fun way to make a small display is to use an [8x8 matrix](https://www.adafruit.com/category/37_88) or a [4-digit 7-segment display](https://www.adafruit.com/category/37_103). Matrices like these are...
In Stock
[Buy Now](https://www.adafruit.com/product/878)
[Related Guides to the Product](https://learn.adafruit.com/products/878/guides)
### Adafruit 0.56" 4-Digit 7-Segment Display w/I2C Backpack - Yellow
[Adafruit 0.56" 4-Digit 7-Segment Display w/I2C Backpack - Yellow](https://www.adafruit.com/product/879)
What's better than a single LED? Lots of LEDs! A fun way to make a small display is to use an [8x8 matrix](https://www.adafruit.com/category/37_88) or a [4-digit 7-segment display](https://www.adafruit.com/category/37_103). Matrices like these are...
In Stock
[Buy Now](https://www.adafruit.com/product/879)
[Related Guides to the Product](https://learn.adafruit.com/products/879/guides)
### Adafruit 0.56" 4-Digit 7-Segment Display w/ I2C Backpack - Green
[Adafruit 0.56" 4-Digit 7-Segment Display w/ I2C Backpack - Green](https://www.adafruit.com/product/880)
What's better than a single LED? Lots of LEDs! A fun way to make a small display is to use an [8x8 matrix](https://www.adafruit.com/category/37_88) or a [4-digit 7-segment display](https://www.adafruit.com/category/37_103). Matrices like these are...
No Longer Stocked
[Buy Now](https://www.adafruit.com/product/880)
[Related Guides to the Product](https://learn.adafruit.com/products/880/guides)
### Adafruit 0.56" 4-Digit 7-Segment Display w/ I2C Backpack - Blue
[Adafruit 0.56" 4-Digit 7-Segment Display w/ I2C Backpack - Blue](https://www.adafruit.com/product/881)
What's better than a single LED? Lots of LEDs! A fun way to make a small display is to use an [8x8 matrix](https://www.adafruit.com/category/37_88) or a [4-digit 7-segment display](https://www.adafruit.com/category/37_103). Matrices like these are...
In Stock
[Buy Now](https://www.adafruit.com/product/881)
[Related Guides to the Product](https://learn.adafruit.com/products/881/guides)
### Adafruit Bicolor LED Square Pixel Matrix with I2C Backpack
[Adafruit Bicolor LED Square Pixel Matrix with I2C Backpack](https://www.adafruit.com/product/902)
What's better than a single LED? Lots of LEDs! A fun way to make a small colorful display is to use a [1.2" Bi-color 8x8 LED Matrix](http://www.adafruit.com/products/458). Matrices like these are 'multiplexed' - so to control all the 128 LEDs you need 24 pins....
In Stock
[Buy Now](https://www.adafruit.com/product/902)
[Related Guides to the Product](https://learn.adafruit.com/products/902/guides)
### Adafruit Mini 8x8 LED Matrix w/I2C Backpack - Blue
[Adafruit Mini 8x8 LED Matrix w/I2C Backpack - Blue](https://www.adafruit.com/product/959)
What's better than a single LED? Lots of LEDs! A fun way to make a small display is to use an [8x8 matrix](https://www.adafruit.com/category/37_88) or a [4-digit 7-segment display](https://www.adafruit.com/category/37_103). Matrices like these are...
In Stock
[Buy Now](https://www.adafruit.com/product/959)
[Related Guides to the Product](https://learn.adafruit.com/products/959/guides)
### Adafruit 0.56" 4-Digit 7-Segment Display w/I2C Backpack - White
[Adafruit 0.56" 4-Digit 7-Segment Display w/I2C Backpack - White](https://www.adafruit.com/product/1002)
What's better than a single LED? Lots of LEDs! A fun way to make a small display is to use an [8x8 matrix](https://www.adafruit.com/category/37_88) or a [4-digit 7-segment display](https://www.adafruit.com/category/37_103). Matrices like these are...
In Stock
[Buy Now](https://www.adafruit.com/product/1002)
[Related Guides to the Product](https://learn.adafruit.com/products/1002/guides)
### Adafruit 1.2" 8x8 LED Matrix Backpack
[Adafruit 1.2" 8x8 LED Matrix Backpack](https://www.adafruit.com/product/1048)
By popular request, you can now get our 8x8 LED backpacks without the LEDs! These backpacks feature an HT16K33 I2C LED driver, they're simple and easy to use - you can use [our very nice library for the backpacks to...](https://github.com/adafruit/Adafruit-LED-Backpack-Library)
In Stock
[Buy Now](https://www.adafruit.com/product/1048)
[Related Guides to the Product](https://learn.adafruit.com/products/1048/guides)
### Adafruit Small 1.2" 8x8 LED Matrix w/I2C Backpack - Red
[Adafruit Small 1.2" 8x8 LED Matrix w/I2C Backpack - Red](https://www.adafruit.com/product/1049)
What's better than a single LED? Lots of LEDs! A fun way to make a small display is to use an [8x8 matrix](https://www.adafruit.com/category/37_88) or a [4-digit 7-segment display](https://www.adafruit.com/category/37_103). Matrices like these are...
In Stock
[Buy Now](https://www.adafruit.com/product/1049)
[Related Guides to the Product](https://learn.adafruit.com/products/1049/guides)
### Adafruit Small 1.2" 8x8 LED Matrix w/I2C Backpack - Yellow
[Adafruit Small 1.2" 8x8 LED Matrix w/I2C Backpack - Yellow](https://www.adafruit.com/product/1050)
What's better than a single LED? Lots of LEDs! A fun way to make a small display is to use an [8x8 matrix](https://www.adafruit.com/category/37_88) or a [4-digit 7-segment display](https://www.adafruit.com/category/37_103). Matrices like these are...
In Stock
[Buy Now](https://www.adafruit.com/product/1050)
[Related Guides to the Product](https://learn.adafruit.com/products/1050/guides)
### Adafruit Small 1.2" 8x8 LED Matrix w/I2C Backpack - Blue
[Adafruit Small 1.2" 8x8 LED Matrix w/I2C Backpack - Blue](https://www.adafruit.com/product/1052)
What's better than a single LED? Lots of LEDs! A fun way to make a small display is to use an [8x8 matrix](https://www.adafruit.com/category/37_88) or a [4-digit 7-segment display](https://www.adafruit.com/category/37_103). Matrices like these are...
In Stock
[Buy Now](https://www.adafruit.com/product/1052)
[Related Guides to the Product](https://learn.adafruit.com/products/1052/guides)
### Adafruit Mini 8x8 LED Matrix w/I2C Backpack - Ultra Bright White
[Adafruit Mini 8x8 LED Matrix w/I2C Backpack - Ultra Bright White](https://www.adafruit.com/product/1080)
What's better than a single LED? Lots of LEDs! A fun way to make a small display is to use an [8x8 matrix](https://www.adafruit.com/category/37_88) or a [4-digit 7-segment display](https://www.adafruit.com/category/37_103). Matrices like these are...
In Stock
[Buy Now](https://www.adafruit.com/product/1080)
[Related Guides to the Product](https://learn.adafruit.com/products/1080/guides)
### Adafruit 1.2" 4-Digit 7-Segment Display w/I2C Backpack - Green
[Adafruit 1.2" 4-Digit 7-Segment Display w/I2C Backpack - Green](https://www.adafruit.com/product/1268)
What's better than a single LED? Lots of LEDs! A fun way to make a numeric display is to use a [4-digit 7-segment display](https://www.adafruit.com/category/37_103). LED matrices like these are 'multiplexed' - so to control all the seven-segment LEDs you need 14 pins....
No Longer Stocked
[Buy Now](https://www.adafruit.com/product/1268)
[Related Guides to the Product](https://learn.adafruit.com/products/1268/guides)
### Adafruit 1.2" 4-Digit 7-Segment Display w/I2C Backpack - Yellow
[Adafruit 1.2" 4-Digit 7-Segment Display w/I2C Backpack - Yellow](https://www.adafruit.com/product/1269)
What's better than a single LED? Lots of LEDs! A fun way to make a numeric display is to use a [4-digit 7-segment display](https://www.adafruit.com/category/37_103). LED matrices like these are 'multiplexed' - so to control all the seven-segment LEDs you need 14 pins....
In Stock
[Buy Now](https://www.adafruit.com/product/1269)
[Related Guides to the Product](https://learn.adafruit.com/products/1269/guides)
### Adafruit 1.2" 4-Digit 7-Segment Display w/I2C Backpack - Red
[Adafruit 1.2" 4-Digit 7-Segment Display w/I2C Backpack - Red](https://www.adafruit.com/product/1270)
What's better than a single LED? Lots of LEDs! A fun way to make a numeric display is to use a [4-digit 7-segment display](https://www.adafruit.com/category/37_103). LED matrices like these are 'multiplexed' - so to control all the seven-segment LEDs you need 14 pins....
In Stock
[Buy Now](https://www.adafruit.com/product/1270)
[Related Guides to the Product](https://learn.adafruit.com/products/1270/guides)
### Small 1.2" 8x8 Ultra Bright White LED Matrix + Backpack
[Small 1.2" 8x8 Ultra Bright White LED Matrix + Backpack](https://www.adafruit.com/product/1614)
What's better than a single LED? Lots of LEDs! A fun way to make a small display is to use an [8x8 matrix](https://www.adafruit.com/category/37_88) or a [4-digit 7-segment display](https://www.adafruit.com/category/37_103). Matrices like these are...
In Stock
[Buy Now](https://www.adafruit.com/product/1614)
[Related Guides to the Product](https://learn.adafruit.com/products/1614/guides)
### Adafruit Small 1.2" 8x8 LED Matrix w/I2C Backpack - Pure Green
[Adafruit Small 1.2" 8x8 LED Matrix w/I2C Backpack - Pure Green](https://www.adafruit.com/product/1632)
What's better than a single LED? Lots of LEDs! A fun way to make a small display is to use an [8x8 matrix](https://www.adafruit.com/category/37_88) or a [4-digit 7-segment display](https://www.adafruit.com/category/37_103). Matrices like these are...
In Stock
[Buy Now](https://www.adafruit.com/product/1632)
[Related Guides to the Product](https://learn.adafruit.com/products/1632/guides)
### Adafruit Mini 0.8" 8x8 LED Matrix w/I2C Backpack - Pure Green
[Adafruit Mini 0.8" 8x8 LED Matrix w/I2C Backpack - Pure Green](https://www.adafruit.com/product/1633)
What's better than a single LED? Lots of LEDs! A fun way to make a small display is to use an [8x8 matrix](https://www.adafruit.com/category/37_88) or a [4-digit 7-segment display](https://www.adafruit.com/category/37_103). Matrices like these are...
In Stock
[Buy Now](https://www.adafruit.com/product/1633)
[Related Guides to the Product](https://learn.adafruit.com/products/1633/guides)
### Bi-Color (Red/Green) 24-Bar Bargraph w/I2C Backpack Kit
[Bi-Color (Red/Green) 24-Bar Bargraph w/I2C Backpack Kit](https://www.adafruit.com/product/1721)
What's better than a single LED? Lots of LEDs! A fun way to make a small linear display is to use two 12-bar Bi-color bar-graphs. However, this LED bargraph is 'multiplexed' - so to control all the 48 LEDs you need a lot of pins.
Out of Stock
[Buy Now](https://www.adafruit.com/product/1721)
[Related Guides to the Product](https://learn.adafruit.com/products/1721/guides)
### Small 1.2" 8x8 Ultra Bright Square Amber LED Matrix + Backpack
[Small 1.2" 8x8 Ultra Bright Square Amber LED Matrix + Backpack](https://www.adafruit.com/product/1854)
What's better than a single LED? Lots of LEDs! Matrices like these are 'multiplexed' - so to control 64 LEDs you need 16 pins. That's a lot of pins, and there are [driver chips like the MAX7219](//www.adafruit.com/products/453) that can control a matrix for you but...
In Stock
[Buy Now](https://www.adafruit.com/product/1854)
[Related Guides to the Product](https://learn.adafruit.com/products/1854/guides)
### Small 1.2" 8x8 Ultra Bright Square Yellow LED Matrix + Backpack
[Small 1.2" 8x8 Ultra Bright Square Yellow LED Matrix + Backpack](https://www.adafruit.com/product/1855)
What's better than a single LED? Lots of LEDs! Matrices like these are 'multiplexed' - so to control 64 LEDs you need 16 pins. That's a lot of pins, and there are [driver chips like the MAX7219](//www.adafruit.com/products/453) that can control a matrix for you but...
In Stock
[Buy Now](https://www.adafruit.com/product/1855)
[Related Guides to the Product](https://learn.adafruit.com/products/1855/guides)
### Small 1.2" 8x8 Bright Square Pure Green LED Matrix + Backpack
[Small 1.2" 8x8 Bright Square Pure Green LED Matrix + Backpack](https://www.adafruit.com/product/1856)
What's better than a single LED? Lots of LEDs! Matrices like these are 'multiplexed' - so to control 64 LEDs you need 16 pins. That's a lot of pins, and there are [driver chips like the MAX7219](//www.adafruit.com/products/453) that can control a matrix for you but...
In Stock
[Buy Now](https://www.adafruit.com/product/1856)
[Related Guides to the Product](https://learn.adafruit.com/products/1856/guides)
### Small 1.2" 8x8 Ultra Bright Square White LED Matrix + Backpack
[Small 1.2" 8x8 Ultra Bright Square White LED Matrix + Backpack](https://www.adafruit.com/product/1857)
What's better than a single LED? Lots of LEDs! Matrices like these are 'multiplexed' - so to control 64 LEDs you need 16 pins. That's a lot of pins, and there are [driver chips like the MAX7219](//www.adafruit.com/products/453) that can control a matrix for you but...
In Stock
[Buy Now](https://www.adafruit.com/product/1857)
[Related Guides to the Product](https://learn.adafruit.com/products/1857/guides)
### Adafruit 14-segment LED Alphanumeric Backpack - STEMMA QT
[Adafruit 14-segment LED Alphanumeric Backpack - STEMMA QT](https://www.adafruit.com/product/1910)
By popular request, you can now get our 14-segment LED backpacks without the LEDs! These backpacks feature an HT16K33 I2C LED driver, they're simple and easy to use - you can use [our very nice library for the backpacks to...](https://github.com/adafruit/Adafruit-LED-Backpack-Library)
In Stock
[Buy Now](https://www.adafruit.com/product/1910)
[Related Guides to the Product](https://learn.adafruit.com/products/1910/guides)
### Quad Alphanumeric Display - Red 0.54" Digits w/ I2C Backpack
[Quad Alphanumeric Display - Red 0.54" Digits w/ I2C Backpack](https://www.adafruit.com/product/1911)
Display, elegantly, 012345678 or 9! Gaze, hypnotized, at ABCDEFGHIJKLM - well it can display the whole alphabet. You get the point. This is a nice, bright alphanumeric display that shows letters and numbers in a beautiful red hue. It's super bright and designed for viewing from distances...
In Stock
[Buy Now](https://www.adafruit.com/product/1911)
[Related Guides to the Product](https://learn.adafruit.com/products/1911/guides)
### Quad Alphanumeric Display - Blue 0.54" Digits w/ I2C Backpack
[Quad Alphanumeric Display - Blue 0.54" Digits w/ I2C Backpack](https://www.adafruit.com/product/1912)
Display, elegantly, 012345678 or 9! Gaze, hypnotized, at ABCDEFGHIJKLM - well it can display the whole alphabet. You get the point. This is a nice, bright alphanumeric display that shows letters and numbers in a beautiful blue hue. It's super bright and designed for viewing from distances...
In Stock
[Buy Now](https://www.adafruit.com/product/1912)
[Related Guides to the Product](https://learn.adafruit.com/products/1912/guides)
### 16x8 1.2" LED Matrix + Backpack - Ultra Bright Round Green LEDs
[16x8 1.2" LED Matrix + Backpack - Ultra Bright Round Green LEDs](https://www.adafruit.com/product/2035)
What's better than a single LED? Lots of LEDs! And what's better than lots of LEDs? **TWO TIMES AS MANY LEDS!!!**
With the 16x8 LED Matrix Backpack we've doubled your project's matrix capacity by making it super easy to get two separate 8x8 matrices onto...
In Stock
[Buy Now](https://www.adafruit.com/product/2035)
[Related Guides to the Product](https://learn.adafruit.com/products/2035/guides)
### 16x8 1.2" LED Matrix+Backpack UltraBright Round YellowGreen LEDs
[16x8 1.2" LED Matrix+Backpack UltraBright Round YellowGreen LEDs](https://www.adafruit.com/product/2036)
What's better than a single LED? Lots of LEDs! And what's better than lots of LEDs? **TWO TIMES AS MANY LEDS!!!**
With the 16x8 LED Matrix Backpack we've doubled your project's matrix capacity by making it super easy to get two separate 8x8 matrices onto...
In Stock
[Buy Now](https://www.adafruit.com/product/2036)
[Related Guides to the Product](https://learn.adafruit.com/products/2036/guides)
### 16x8 1.2" LED Matrix + Backpack - Ultra Bright Round Red LEDs
[16x8 1.2" LED Matrix + Backpack - Ultra Bright Round Red LEDs](https://www.adafruit.com/product/2037)
What's better than a single LED? Lots of LEDs! And what's better than lots of LEDs? **TWO TIMES AS MANY LEDS!!!**
With the 16x8 LED Matrix Backpack we've doubled your project's matrix capacity by making it super easy to get two separate 8x8 matrices onto...
In Stock
[Buy Now](https://www.adafruit.com/product/2037)
[Related Guides to the Product](https://learn.adafruit.com/products/2037/guides)
### 16x8 1.2" LED Matrix + Backpack - Ultra Bright Round White LEDs
[16x8 1.2" LED Matrix + Backpack - Ultra Bright Round White LEDs](https://www.adafruit.com/product/2038)
What's better than a single LED? Lots of LEDs! And what's better than lots of LEDs? **TWO TIMES AS MANY LEDS!!!**
With the 16x8 LED Matrix Backpack we've doubled your project's matrix capacity by making it super easy to get two separate 8x8 matrices onto...
In Stock
[Buy Now](https://www.adafruit.com/product/2038)
[Related Guides to the Product](https://learn.adafruit.com/products/2038/guides)
### 16x8 1.2" LED Matrix + Backpack - Ultra Bright Round Blue LEDs
[16x8 1.2" LED Matrix + Backpack - Ultra Bright Round Blue LEDs](https://www.adafruit.com/product/2039)
What's better than a single LED? Lots of LEDs! And what's better than lots of LEDs? **TWO TIMES AS MANY LEDS!!!**
With the 16x8 LED Matrix Backpack we've doubled your project's matrix capacity by making it super easy to get two separate 8x8 matrices onto...
In Stock
[Buy Now](https://www.adafruit.com/product/2039)
[Related Guides to the Product](https://learn.adafruit.com/products/2039/guides)
### 16x8 1.2" LED Matrix + Backpack - Ultra Bright Square Blue LEDs
[16x8 1.2" LED Matrix + Backpack - Ultra Bright Square Blue LEDs](https://www.adafruit.com/product/2040)
What's better than a single LED? Lots of LEDs! And what's better than lots of LEDs? **TWO TIMES AS MANY LEDS!!!**
With the 16x8 LED Matrix Backpack we've doubled your project's matrix capacity by making it super easy to get two separate 8x8 matrices onto...
In Stock
[Buy Now](https://www.adafruit.com/product/2040)
[Related Guides to the Product](https://learn.adafruit.com/products/2040/guides)
### 16x8 1.2" LED Matrix + Backpack - Ultra Bright Square Amber LEDs
[16x8 1.2" LED Matrix + Backpack - Ultra Bright Square Amber LEDs](https://www.adafruit.com/product/2041)
What's better than a single LED? Lots of LEDs! And what's better than lots of LEDs? **TWO TIMES AS MANY LEDS!!!**
With the 16x8 LED Matrix Backpack we've doubled your project's matrix capacity by making it super easy to get two separate 8x8 matrices onto...
In Stock
[Buy Now](https://www.adafruit.com/product/2041)
[Related Guides to the Product](https://learn.adafruit.com/products/2041/guides)
### 16x8 1.2" LED Matrix + Backpack - Ultra Bright Square Green LEDs
[16x8 1.2" LED Matrix + Backpack - Ultra Bright Square Green LEDs](https://www.adafruit.com/product/2042)
What's better than a single LED? Lots of LEDs! And what's better than lots of LEDs? **TWO TIMES AS MANY LEDS!!!**
With the 16x8 LED Matrix Backpack we've doubled your project's matrix capacity by making it super easy to get two separate 8x8 matrices onto...
In Stock
[Buy Now](https://www.adafruit.com/product/2042)
[Related Guides to the Product](https://learn.adafruit.com/products/2042/guides)
### 16x8 1.2" LED Matrix + Backpack -Ultra Bright Square Yellow LEDs
[16x8 1.2" LED Matrix + Backpack -Ultra Bright Square Yellow LEDs](https://www.adafruit.com/product/2043)
What's better than a single LED? Lots of LEDs! And what's better than lots of LEDs? **TWO TIMES AS MANY LEDS!!!**
With the 16x8 LED Matrix Backpack we've doubled your project's matrix capacity by making it super easy to get two separate 8x8 matrices onto...
In Stock
[Buy Now](https://www.adafruit.com/product/2043)
[Related Guides to the Product](https://learn.adafruit.com/products/2043/guides)
### 16x8 1.2" LED Matrix + Backpack - Ultra Bright Square White LEDs
[16x8 1.2" LED Matrix + Backpack - Ultra Bright Square White LEDs](https://www.adafruit.com/product/2044)
What's better than a single LED? Lots of LEDs! And what's better than lots of LEDs? **TWO TIMES AS MANY LEDS!!!**
With the 16x8 LED Matrix Backpack we've doubled your project's matrix capacity by making it super easy to get two separate 8x8 matrices onto...
In Stock
[Buy Now](https://www.adafruit.com/product/2044)
[Related Guides to the Product](https://learn.adafruit.com/products/2044/guides)
### 16x8 1.2" LED Matrix + Backpack-Ultra Bright Round Orange LEDs
[16x8 1.2" LED Matrix + Backpack-Ultra Bright Round Orange LEDs](https://www.adafruit.com/product/2052)
What's better than a single LED? Lots of LEDs! And what's better than lots of LEDs? **TWO TIMES AS MANY LEDS!!!**
With the 16x8 LED Matrix Backpack we've doubled your project's matrix capacity by making it super easy to get two separate 8x8 matrices onto...
In Stock
[Buy Now](https://www.adafruit.com/product/2052)
[Related Guides to the Product](https://learn.adafruit.com/products/2052/guides)
### 16x8 1.2" LED Matrices+Backpack Round LEDs in Various Colors
[16x8 1.2" LED Matrices+Backpack Round LEDs in Various Colors](https://www.adafruit.com/product/2054)
What's better than a single LED? Lots of LEDs! And what's better than lots of LEDs? **TWO TIMES AS MANY LEDS!!!**
With the 16x8 LED Matrix Backpack we've doubled your project's matrix capacity by making it super easy to get two separate 8x8 matrices onto...
Out of Stock
[Buy Now](https://www.adafruit.com/product/2054)
[Related Guides to the Product](https://learn.adafruit.com/products/2054/guides)
### Adafruit 8x16 LED Matrix FeatherWing w/o Matrices
[Adafruit 8x16 LED Matrix FeatherWing w/o Matrices](https://www.adafruit.com/product/3090)
You will chirp with delight when you see how easy it is to make your very own 8x16 LED matrix display for any Feather. At 0.8" square, the little [8x8 matrices](https://www.adafruit.com/new/?q=8x8%20miniature%20LED%20matrix&) have everything a big LED matrix has,...
Out of Stock
[Buy Now](https://www.adafruit.com/product/3090)
[Related Guides to the Product](https://learn.adafruit.com/products/3090/guides)
### Adafruit 14-segment LED Alphanumeric backpack (same as P1910)
[Adafruit 14-segment LED Alphanumeric backpack (same as P1910)](https://www.adafruit.com/product/3322)
Just the backpack + 4pin header
No Longer Stocked
[Buy Now](https://www.adafruit.com/product/3322)
[Related Guides to the Product](https://learn.adafruit.com/products/3322/guides)
## Featured Products
### Adafruit Small 1.2" 8x8 LED Matrix w/I2C Backpack - Yellow-Green
[Adafruit Small 1.2" 8x8 LED Matrix w/I2C Backpack - Yellow-Green](https://www.adafruit.com/product/1051)
What's better than a single LED? Lots of LEDs! A fun way to make a small display is to use an [8x8 matrix](https://www.adafruit.com/category/37_88) or a [4-digit 7-segment display](https://www.adafruit.com/category/37_103). Matrices like these are...
In Stock
[Buy Now](https://www.adafruit.com/product/1051)
[Related Guides to the Product](https://learn.adafruit.com/products/1051/guides)
### Small 1.2" 8x8 Ultra Bright Square Blue LED Matrix + Backpack
[Small 1.2" 8x8 Ultra Bright Square Blue LED Matrix + Backpack](https://www.adafruit.com/product/1853)
What's better than a single LED? Lots of LEDs! Matrices like these are 'multiplexed' - so to control 64 LEDs you need 16 pins. That's a lot of pins, and there are [driver chips like the MAX7219](//www.adafruit.com/products/453) that can control a matrix for you but...
In Stock
[Buy Now](https://www.adafruit.com/product/1853)
[Related Guides to the Product](https://learn.adafruit.com/products/1853/guides)
## Related Guides
- [LED Backpack Displays on Raspberry Pi and BeagleBone Black](https://learn.adafruit.com/led-backpack-displays-on-raspberry-pi-and-beaglebone-black.md)
- [Animating Multiple LED Backpacks](https://learn.adafruit.com/animating-multiple-led-backpacks.md)
- [Arduino GPS Clock](https://learn.adafruit.com/arduino-clock.md)
- [Raspberry Pi Physical Dashboard](https://learn.adafruit.com/raspberry-pi-physical-dashboard.md)
- [CircuitPython Hardware: LED Backpacks & FeatherWings](https://learn.adafruit.com/micropython-hardware-led-backpacks-and-featherwings.md)
- [Matrix and 7-Segment LED Backpack with the Raspberry Pi](https://learn.adafruit.com/matrix-7-segment-led-backpack-with-the-raspberry-pi.md)
- [DIY Pocket LED Gamer - Tiny Tetris!](https://learn.adafruit.com/diy-3d-printed-handheld-pocket-game-tiny-tetris-snake.md)
- [RGB LED Matrix Cube with 25,000 LEDs](https://learn.adafruit.com/rgb-led-matrix-cube-for-pi.md)
- [Creating GIFs for SmartMatrix](https://learn.adafruit.com/creating-gifs-for-smartmatrix.md)
- [Adafruit CharliePlex LED Matrix Bonnet](https://learn.adafruit.com/adafruit-charlieplex-bonnet.md)
- [Connecting a 16x32 RGB LED Matrix Panel to a Raspberry Pi](https://learn.adafruit.com/connecting-a-16x32-rgb-led-matrix-panel-to-a-raspberry-pi.md)
- [MicroPython Displays: Drawing Text](https://learn.adafruit.com/micropython-displays-drawing-text.md)
- [Heart Rate Badge](https://learn.adafruit.com/heart-rate-badge.md)
- [16x24 LED Matrix](https://learn.adafruit.com/16x24-led-matrix.md)
- [Adafruit IS31FL3741](https://learn.adafruit.com/adafruit-is31fl3741.md)
---
# Source: https://learn.adafruit.com/adafruit-led-backpack/0-54-alphanumeric.md
# Adafruit LED Backpacks
## 0.54" Alphanumeric Backpack
This version of the LED backpack is designed for two dual 14-segment "Alphanumeric" displays. These 14-segment displays normally require 18 pins (4 'characters' and 14 total segments each) This backpack solves the annoyance of using 18 pins or a bunch of chips by having an I2C constant-current matrix controller sit neatly on the back of the PCB. The controller chip takes care of everything, drawing all the LEDs in the background. All you have to do is write data to it using the 2-pin I2C interface.
There are three address select pins so you can select one of 8 addresses to control up to 8 of these on a single 2-pin I2C bus (as well as whatever other I2C chips or sensors you like). The driver chip can 'dim' the entire display from 1/16 brightness up to full brightness in 1/16th steps. It cannot dim individual LEDs, only the entire display at once.
To get you going fast, we have revised this popular board to be the same size and pinout as before but now with two [STEMMA QT connectors](https://learn.adafruit.com/introducing-adafruit-stemma-qt/what-is-stemma-qt) on either side that are compatible with the [SparkFun Qwiic](https://www.sparkfun.com/qwiic) I2C connectors. This allows you to make solderless connections between your development board and the HT16K33 or to chain it with a wide range of other sensors and accessories using a [**compatible cable**](https://www.adafruit.com/?q=stemma%20qt%20cable).

Info:

- [Previous Page](https://learn.adafruit.com/adafruit-led-backpack/1-2-16x8-matrix-circuitpython-and-python-usage.md)
- [Next Page](https://learn.adafruit.com/adafruit-led-backpack/pinouts.md)
## Primary Products
### Adafruit Mini 8x8 LED Matrix w/I2C Backpack - Red
[Adafruit Mini 8x8 LED Matrix w/I2C Backpack - Red](https://www.adafruit.com/product/870)
What's better than a single LED? Lots of LEDs! A fun way to make a small display is to use an [8x8 matrix](https://www.adafruit.com/category/37_88) or a [4-digit 7-segment display](https://www.adafruit.com/category/37_103). Matrices like these are...
In Stock
[Buy Now](https://www.adafruit.com/product/870)
[Related Guides to the Product](https://learn.adafruit.com/products/870/guides)
### Adafruit Mini 8x8 LED Matrix w/I2C Backpack - Yellow
[Adafruit Mini 8x8 LED Matrix w/I2C Backpack - Yellow](https://www.adafruit.com/product/871)
What's better than a single LED? Lots of LEDs! A fun way to make a small display is to use an [8x8 matrix](https://www.adafruit.com/category/37_88) or a [4-digit 7-segment display](https://www.adafruit.com/category/37_103). Matrices like these are...
In Stock
[Buy Now](https://www.adafruit.com/product/871)
[Related Guides to the Product](https://learn.adafruit.com/products/871/guides)
### Adafruit Mini 0.8" 8x8 LED Matrix w/I2C Backpack - Yellow-Green
[Adafruit Mini 0.8" 8x8 LED Matrix w/I2C Backpack - Yellow-Green](https://www.adafruit.com/product/872)
What's better than a single LED? Lots of LEDs! A fun way to make a small display is to use an [8x8 matrix](https://www.adafruit.com/category/37_88) or a [4-digit 7-segment display](https://www.adafruit.com/category/37_103). Matrices like these are...
In Stock
[Buy Now](https://www.adafruit.com/product/872)
[Related Guides to the Product](https://learn.adafruit.com/products/872/guides)
### Adafruit 0.56" 4-Digit 7-Segment Display with I2C Backpack - Red
[Adafruit 0.56" 4-Digit 7-Segment Display with I2C Backpack - Red](https://www.adafruit.com/product/878)
What's better than a single LED? Lots of LEDs! A fun way to make a small display is to use an [8x8 matrix](https://www.adafruit.com/category/37_88) or a [4-digit 7-segment display](https://www.adafruit.com/category/37_103). Matrices like these are...
In Stock
[Buy Now](https://www.adafruit.com/product/878)
[Related Guides to the Product](https://learn.adafruit.com/products/878/guides)
### Adafruit 0.56" 4-Digit 7-Segment Display w/I2C Backpack - Yellow
[Adafruit 0.56" 4-Digit 7-Segment Display w/I2C Backpack - Yellow](https://www.adafruit.com/product/879)
What's better than a single LED? Lots of LEDs! A fun way to make a small display is to use an [8x8 matrix](https://www.adafruit.com/category/37_88) or a [4-digit 7-segment display](https://www.adafruit.com/category/37_103). Matrices like these are...
In Stock
[Buy Now](https://www.adafruit.com/product/879)
[Related Guides to the Product](https://learn.adafruit.com/products/879/guides)
### Adafruit 0.56" 4-Digit 7-Segment Display w/ I2C Backpack - Green
[Adafruit 0.56" 4-Digit 7-Segment Display w/ I2C Backpack - Green](https://www.adafruit.com/product/880)
What's better than a single LED? Lots of LEDs! A fun way to make a small display is to use an [8x8 matrix](https://www.adafruit.com/category/37_88) or a [4-digit 7-segment display](https://www.adafruit.com/category/37_103). Matrices like these are...
No Longer Stocked
[Buy Now](https://www.adafruit.com/product/880)
[Related Guides to the Product](https://learn.adafruit.com/products/880/guides)
### Adafruit 0.56" 4-Digit 7-Segment Display w/ I2C Backpack - Blue
[Adafruit 0.56" 4-Digit 7-Segment Display w/ I2C Backpack - Blue](https://www.adafruit.com/product/881)
What's better than a single LED? Lots of LEDs! A fun way to make a small display is to use an [8x8 matrix](https://www.adafruit.com/category/37_88) or a [4-digit 7-segment display](https://www.adafruit.com/category/37_103). Matrices like these are...
In Stock
[Buy Now](https://www.adafruit.com/product/881)
[Related Guides to the Product](https://learn.adafruit.com/products/881/guides)
### Adafruit Bicolor LED Square Pixel Matrix with I2C Backpack
[Adafruit Bicolor LED Square Pixel Matrix with I2C Backpack](https://www.adafruit.com/product/902)
What's better than a single LED? Lots of LEDs! A fun way to make a small colorful display is to use a [1.2" Bi-color 8x8 LED Matrix](http://www.adafruit.com/products/458). Matrices like these are 'multiplexed' - so to control all the 128 LEDs you need 24 pins....
In Stock
[Buy Now](https://www.adafruit.com/product/902)
[Related Guides to the Product](https://learn.adafruit.com/products/902/guides)
### Adafruit Mini 8x8 LED Matrix w/I2C Backpack - Blue
[Adafruit Mini 8x8 LED Matrix w/I2C Backpack - Blue](https://www.adafruit.com/product/959)
What's better than a single LED? Lots of LEDs! A fun way to make a small display is to use an [8x8 matrix](https://www.adafruit.com/category/37_88) or a [4-digit 7-segment display](https://www.adafruit.com/category/37_103). Matrices like these are...
In Stock
[Buy Now](https://www.adafruit.com/product/959)
[Related Guides to the Product](https://learn.adafruit.com/products/959/guides)
### Adafruit 0.56" 4-Digit 7-Segment Display w/I2C Backpack - White
[Adafruit 0.56" 4-Digit 7-Segment Display w/I2C Backpack - White](https://www.adafruit.com/product/1002)
What's better than a single LED? Lots of LEDs! A fun way to make a small display is to use an [8x8 matrix](https://www.adafruit.com/category/37_88) or a [4-digit 7-segment display](https://www.adafruit.com/category/37_103). Matrices like these are...
In Stock
[Buy Now](https://www.adafruit.com/product/1002)
[Related Guides to the Product](https://learn.adafruit.com/products/1002/guides)
### Adafruit 1.2" 8x8 LED Matrix Backpack
[Adafruit 1.2" 8x8 LED Matrix Backpack](https://www.adafruit.com/product/1048)
By popular request, you can now get our 8x8 LED backpacks without the LEDs! These backpacks feature an HT16K33 I2C LED driver, they're simple and easy to use - you can use [our very nice library for the backpacks to...](https://github.com/adafruit/Adafruit-LED-Backpack-Library)
In Stock
[Buy Now](https://www.adafruit.com/product/1048)
[Related Guides to the Product](https://learn.adafruit.com/products/1048/guides)
### Adafruit Small 1.2" 8x8 LED Matrix w/I2C Backpack - Red
[Adafruit Small 1.2" 8x8 LED Matrix w/I2C Backpack - Red](https://www.adafruit.com/product/1049)
What's better than a single LED? Lots of LEDs! A fun way to make a small display is to use an [8x8 matrix](https://www.adafruit.com/category/37_88) or a [4-digit 7-segment display](https://www.adafruit.com/category/37_103). Matrices like these are...
In Stock
[Buy Now](https://www.adafruit.com/product/1049)
[Related Guides to the Product](https://learn.adafruit.com/products/1049/guides)
### Adafruit Small 1.2" 8x8 LED Matrix w/I2C Backpack - Yellow
[Adafruit Small 1.2" 8x8 LED Matrix w/I2C Backpack - Yellow](https://www.adafruit.com/product/1050)
What's better than a single LED? Lots of LEDs! A fun way to make a small display is to use an [8x8 matrix](https://www.adafruit.com/category/37_88) or a [4-digit 7-segment display](https://www.adafruit.com/category/37_103). Matrices like these are...
In Stock
[Buy Now](https://www.adafruit.com/product/1050)
[Related Guides to the Product](https://learn.adafruit.com/products/1050/guides)
### Adafruit Small 1.2" 8x8 LED Matrix w/I2C Backpack - Blue
[Adafruit Small 1.2" 8x8 LED Matrix w/I2C Backpack - Blue](https://www.adafruit.com/product/1052)
What's better than a single LED? Lots of LEDs! A fun way to make a small display is to use an [8x8 matrix](https://www.adafruit.com/category/37_88) or a [4-digit 7-segment display](https://www.adafruit.com/category/37_103). Matrices like these are...
In Stock
[Buy Now](https://www.adafruit.com/product/1052)
[Related Guides to the Product](https://learn.adafruit.com/products/1052/guides)
### Adafruit Mini 8x8 LED Matrix w/I2C Backpack - Ultra Bright White
[Adafruit Mini 8x8 LED Matrix w/I2C Backpack - Ultra Bright White](https://www.adafruit.com/product/1080)
What's better than a single LED? Lots of LEDs! A fun way to make a small display is to use an [8x8 matrix](https://www.adafruit.com/category/37_88) or a [4-digit 7-segment display](https://www.adafruit.com/category/37_103). Matrices like these are...
In Stock
[Buy Now](https://www.adafruit.com/product/1080)
[Related Guides to the Product](https://learn.adafruit.com/products/1080/guides)
### Adafruit 1.2" 4-Digit 7-Segment Display w/I2C Backpack - Green
[Adafruit 1.2" 4-Digit 7-Segment Display w/I2C Backpack - Green](https://www.adafruit.com/product/1268)
What's better than a single LED? Lots of LEDs! A fun way to make a numeric display is to use a [4-digit 7-segment display](https://www.adafruit.com/category/37_103). LED matrices like these are 'multiplexed' - so to control all the seven-segment LEDs you need 14 pins....
No Longer Stocked
[Buy Now](https://www.adafruit.com/product/1268)
[Related Guides to the Product](https://learn.adafruit.com/products/1268/guides)
### Adafruit 1.2" 4-Digit 7-Segment Display w/I2C Backpack - Yellow
[Adafruit 1.2" 4-Digit 7-Segment Display w/I2C Backpack - Yellow](https://www.adafruit.com/product/1269)
What's better than a single LED? Lots of LEDs! A fun way to make a numeric display is to use a [4-digit 7-segment display](https://www.adafruit.com/category/37_103). LED matrices like these are 'multiplexed' - so to control all the seven-segment LEDs you need 14 pins....
In Stock
[Buy Now](https://www.adafruit.com/product/1269)
[Related Guides to the Product](https://learn.adafruit.com/products/1269/guides)
### Adafruit 1.2" 4-Digit 7-Segment Display w/I2C Backpack - Red
[Adafruit 1.2" 4-Digit 7-Segment Display w/I2C Backpack - Red](https://www.adafruit.com/product/1270)
What's better than a single LED? Lots of LEDs! A fun way to make a numeric display is to use a [4-digit 7-segment display](https://www.adafruit.com/category/37_103). LED matrices like these are 'multiplexed' - so to control all the seven-segment LEDs you need 14 pins....
In Stock
[Buy Now](https://www.adafruit.com/product/1270)
[Related Guides to the Product](https://learn.adafruit.com/products/1270/guides)
### Small 1.2" 8x8 Ultra Bright White LED Matrix + Backpack
[Small 1.2" 8x8 Ultra Bright White LED Matrix + Backpack](https://www.adafruit.com/product/1614)
What's better than a single LED? Lots of LEDs! A fun way to make a small display is to use an [8x8 matrix](https://www.adafruit.com/category/37_88) or a [4-digit 7-segment display](https://www.adafruit.com/category/37_103). Matrices like these are...
In Stock
[Buy Now](https://www.adafruit.com/product/1614)
[Related Guides to the Product](https://learn.adafruit.com/products/1614/guides)
### Adafruit Small 1.2" 8x8 LED Matrix w/I2C Backpack - Pure Green
[Adafruit Small 1.2" 8x8 LED Matrix w/I2C Backpack - Pure Green](https://www.adafruit.com/product/1632)
What's better than a single LED? Lots of LEDs! A fun way to make a small display is to use an [8x8 matrix](https://www.adafruit.com/category/37_88) or a [4-digit 7-segment display](https://www.adafruit.com/category/37_103). Matrices like these are...
In Stock
[Buy Now](https://www.adafruit.com/product/1632)
[Related Guides to the Product](https://learn.adafruit.com/products/1632/guides)
### Adafruit Mini 0.8" 8x8 LED Matrix w/I2C Backpack - Pure Green
[Adafruit Mini 0.8" 8x8 LED Matrix w/I2C Backpack - Pure Green](https://www.adafruit.com/product/1633)
What's better than a single LED? Lots of LEDs! A fun way to make a small display is to use an [8x8 matrix](https://www.adafruit.com/category/37_88) or a [4-digit 7-segment display](https://www.adafruit.com/category/37_103). Matrices like these are...
In Stock
[Buy Now](https://www.adafruit.com/product/1633)
[Related Guides to the Product](https://learn.adafruit.com/products/1633/guides)
### Bi-Color (Red/Green) 24-Bar Bargraph w/I2C Backpack Kit
[Bi-Color (Red/Green) 24-Bar Bargraph w/I2C Backpack Kit](https://www.adafruit.com/product/1721)
What's better than a single LED? Lots of LEDs! A fun way to make a small linear display is to use two 12-bar Bi-color bar-graphs. However, this LED bargraph is 'multiplexed' - so to control all the 48 LEDs you need a lot of pins.
Out of Stock
[Buy Now](https://www.adafruit.com/product/1721)
[Related Guides to the Product](https://learn.adafruit.com/products/1721/guides)
### Small 1.2" 8x8 Ultra Bright Square Amber LED Matrix + Backpack
[Small 1.2" 8x8 Ultra Bright Square Amber LED Matrix + Backpack](https://www.adafruit.com/product/1854)
What's better than a single LED? Lots of LEDs! Matrices like these are 'multiplexed' - so to control 64 LEDs you need 16 pins. That's a lot of pins, and there are [driver chips like the MAX7219](//www.adafruit.com/products/453) that can control a matrix for you but...
In Stock
[Buy Now](https://www.adafruit.com/product/1854)
[Related Guides to the Product](https://learn.adafruit.com/products/1854/guides)
### Small 1.2" 8x8 Ultra Bright Square Yellow LED Matrix + Backpack
[Small 1.2" 8x8 Ultra Bright Square Yellow LED Matrix + Backpack](https://www.adafruit.com/product/1855)
What's better than a single LED? Lots of LEDs! Matrices like these are 'multiplexed' - so to control 64 LEDs you need 16 pins. That's a lot of pins, and there are [driver chips like the MAX7219](//www.adafruit.com/products/453) that can control a matrix for you but...
In Stock
[Buy Now](https://www.adafruit.com/product/1855)
[Related Guides to the Product](https://learn.adafruit.com/products/1855/guides)
### Small 1.2" 8x8 Bright Square Pure Green LED Matrix + Backpack
[Small 1.2" 8x8 Bright Square Pure Green LED Matrix + Backpack](https://www.adafruit.com/product/1856)
What's better than a single LED? Lots of LEDs! Matrices like these are 'multiplexed' - so to control 64 LEDs you need 16 pins. That's a lot of pins, and there are [driver chips like the MAX7219](//www.adafruit.com/products/453) that can control a matrix for you but...
In Stock
[Buy Now](https://www.adafruit.com/product/1856)
[Related Guides to the Product](https://learn.adafruit.com/products/1856/guides)
### Small 1.2" 8x8 Ultra Bright Square White LED Matrix + Backpack
[Small 1.2" 8x8 Ultra Bright Square White LED Matrix + Backpack](https://www.adafruit.com/product/1857)
What's better than a single LED? Lots of LEDs! Matrices like these are 'multiplexed' - so to control 64 LEDs you need 16 pins. That's a lot of pins, and there are [driver chips like the MAX7219](//www.adafruit.com/products/453) that can control a matrix for you but...
In Stock
[Buy Now](https://www.adafruit.com/product/1857)
[Related Guides to the Product](https://learn.adafruit.com/products/1857/guides)
### Adafruit 14-segment LED Alphanumeric Backpack - STEMMA QT
[Adafruit 14-segment LED Alphanumeric Backpack - STEMMA QT](https://www.adafruit.com/product/1910)
By popular request, you can now get our 14-segment LED backpacks without the LEDs! These backpacks feature an HT16K33 I2C LED driver, they're simple and easy to use - you can use [our very nice library for the backpacks to...](https://github.com/adafruit/Adafruit-LED-Backpack-Library)
In Stock
[Buy Now](https://www.adafruit.com/product/1910)
[Related Guides to the Product](https://learn.adafruit.com/products/1910/guides)
### Quad Alphanumeric Display - Red 0.54" Digits w/ I2C Backpack
[Quad Alphanumeric Display - Red 0.54" Digits w/ I2C Backpack](https://www.adafruit.com/product/1911)
Display, elegantly, 012345678 or 9! Gaze, hypnotized, at ABCDEFGHIJKLM - well it can display the whole alphabet. You get the point. This is a nice, bright alphanumeric display that shows letters and numbers in a beautiful red hue. It's super bright and designed for viewing from distances...
In Stock
[Buy Now](https://www.adafruit.com/product/1911)
[Related Guides to the Product](https://learn.adafruit.com/products/1911/guides)
### Quad Alphanumeric Display - Blue 0.54" Digits w/ I2C Backpack
[Quad Alphanumeric Display - Blue 0.54" Digits w/ I2C Backpack](https://www.adafruit.com/product/1912)
Display, elegantly, 012345678 or 9! Gaze, hypnotized, at ABCDEFGHIJKLM - well it can display the whole alphabet. You get the point. This is a nice, bright alphanumeric display that shows letters and numbers in a beautiful blue hue. It's super bright and designed for viewing from distances...
In Stock
[Buy Now](https://www.adafruit.com/product/1912)
[Related Guides to the Product](https://learn.adafruit.com/products/1912/guides)
### 16x8 1.2" LED Matrix + Backpack - Ultra Bright Round Green LEDs
[16x8 1.2" LED Matrix + Backpack - Ultra Bright Round Green LEDs](https://www.adafruit.com/product/2035)
What's better than a single LED? Lots of LEDs! And what's better than lots of LEDs? **TWO TIMES AS MANY LEDS!!!**
With the 16x8 LED Matrix Backpack we've doubled your project's matrix capacity by making it super easy to get two separate 8x8 matrices onto...
In Stock
[Buy Now](https://www.adafruit.com/product/2035)
[Related Guides to the Product](https://learn.adafruit.com/products/2035/guides)
### 16x8 1.2" LED Matrix+Backpack UltraBright Round YellowGreen LEDs
[16x8 1.2" LED Matrix+Backpack UltraBright Round YellowGreen LEDs](https://www.adafruit.com/product/2036)
What's better than a single LED? Lots of LEDs! And what's better than lots of LEDs? **TWO TIMES AS MANY LEDS!!!**
With the 16x8 LED Matrix Backpack we've doubled your project's matrix capacity by making it super easy to get two separate 8x8 matrices onto...
In Stock
[Buy Now](https://www.adafruit.com/product/2036)
[Related Guides to the Product](https://learn.adafruit.com/products/2036/guides)
### 16x8 1.2" LED Matrix + Backpack - Ultra Bright Round Red LEDs
[16x8 1.2" LED Matrix + Backpack - Ultra Bright Round Red LEDs](https://www.adafruit.com/product/2037)
What's better than a single LED? Lots of LEDs! And what's better than lots of LEDs? **TWO TIMES AS MANY LEDS!!!**
With the 16x8 LED Matrix Backpack we've doubled your project's matrix capacity by making it super easy to get two separate 8x8 matrices onto...
In Stock
[Buy Now](https://www.adafruit.com/product/2037)
[Related Guides to the Product](https://learn.adafruit.com/products/2037/guides)
### 16x8 1.2" LED Matrix + Backpack - Ultra Bright Round White LEDs
[16x8 1.2" LED Matrix + Backpack - Ultra Bright Round White LEDs](https://www.adafruit.com/product/2038)
What's better than a single LED? Lots of LEDs! And what's better than lots of LEDs? **TWO TIMES AS MANY LEDS!!!**
With the 16x8 LED Matrix Backpack we've doubled your project's matrix capacity by making it super easy to get two separate 8x8 matrices onto...
In Stock
[Buy Now](https://www.adafruit.com/product/2038)
[Related Guides to the Product](https://learn.adafruit.com/products/2038/guides)
### 16x8 1.2" LED Matrix + Backpack - Ultra Bright Round Blue LEDs
[16x8 1.2" LED Matrix + Backpack - Ultra Bright Round Blue LEDs](https://www.adafruit.com/product/2039)
What's better than a single LED? Lots of LEDs! And what's better than lots of LEDs? **TWO TIMES AS MANY LEDS!!!**
With the 16x8 LED Matrix Backpack we've doubled your project's matrix capacity by making it super easy to get two separate 8x8 matrices onto...
In Stock
[Buy Now](https://www.adafruit.com/product/2039)
[Related Guides to the Product](https://learn.adafruit.com/products/2039/guides)
### 16x8 1.2" LED Matrix + Backpack - Ultra Bright Square Blue LEDs
[16x8 1.2" LED Matrix + Backpack - Ultra Bright Square Blue LEDs](https://www.adafruit.com/product/2040)
What's better than a single LED? Lots of LEDs! And what's better than lots of LEDs? **TWO TIMES AS MANY LEDS!!!**
With the 16x8 LED Matrix Backpack we've doubled your project's matrix capacity by making it super easy to get two separate 8x8 matrices onto...
In Stock
[Buy Now](https://www.adafruit.com/product/2040)
[Related Guides to the Product](https://learn.adafruit.com/products/2040/guides)
### 16x8 1.2" LED Matrix + Backpack - Ultra Bright Square Amber LEDs
[16x8 1.2" LED Matrix + Backpack - Ultra Bright Square Amber LEDs](https://www.adafruit.com/product/2041)
What's better than a single LED? Lots of LEDs! And what's better than lots of LEDs? **TWO TIMES AS MANY LEDS!!!**
With the 16x8 LED Matrix Backpack we've doubled your project's matrix capacity by making it super easy to get two separate 8x8 matrices onto...
In Stock
[Buy Now](https://www.adafruit.com/product/2041)
[Related Guides to the Product](https://learn.adafruit.com/products/2041/guides)
### 16x8 1.2" LED Matrix + Backpack - Ultra Bright Square Green LEDs
[16x8 1.2" LED Matrix + Backpack - Ultra Bright Square Green LEDs](https://www.adafruit.com/product/2042)
What's better than a single LED? Lots of LEDs! And what's better than lots of LEDs? **TWO TIMES AS MANY LEDS!!!**
With the 16x8 LED Matrix Backpack we've doubled your project's matrix capacity by making it super easy to get two separate 8x8 matrices onto...
In Stock
[Buy Now](https://www.adafruit.com/product/2042)
[Related Guides to the Product](https://learn.adafruit.com/products/2042/guides)
### 16x8 1.2" LED Matrix + Backpack -Ultra Bright Square Yellow LEDs
[16x8 1.2" LED Matrix + Backpack -Ultra Bright Square Yellow LEDs](https://www.adafruit.com/product/2043)
What's better than a single LED? Lots of LEDs! And what's better than lots of LEDs? **TWO TIMES AS MANY LEDS!!!**
With the 16x8 LED Matrix Backpack we've doubled your project's matrix capacity by making it super easy to get two separate 8x8 matrices onto...
In Stock
[Buy Now](https://www.adafruit.com/product/2043)
[Related Guides to the Product](https://learn.adafruit.com/products/2043/guides)
### 16x8 1.2" LED Matrix + Backpack - Ultra Bright Square White LEDs
[16x8 1.2" LED Matrix + Backpack - Ultra Bright Square White LEDs](https://www.adafruit.com/product/2044)
What's better than a single LED? Lots of LEDs! And what's better than lots of LEDs? **TWO TIMES AS MANY LEDS!!!**
With the 16x8 LED Matrix Backpack we've doubled your project's matrix capacity by making it super easy to get two separate 8x8 matrices onto...
In Stock
[Buy Now](https://www.adafruit.com/product/2044)
[Related Guides to the Product](https://learn.adafruit.com/products/2044/guides)
### 16x8 1.2" LED Matrix + Backpack-Ultra Bright Round Orange LEDs
[16x8 1.2" LED Matrix + Backpack-Ultra Bright Round Orange LEDs](https://www.adafruit.com/product/2052)
What's better than a single LED? Lots of LEDs! And what's better than lots of LEDs? **TWO TIMES AS MANY LEDS!!!**
With the 16x8 LED Matrix Backpack we've doubled your project's matrix capacity by making it super easy to get two separate 8x8 matrices onto...
In Stock
[Buy Now](https://www.adafruit.com/product/2052)
[Related Guides to the Product](https://learn.adafruit.com/products/2052/guides)
### 16x8 1.2" LED Matrices+Backpack Round LEDs in Various Colors
[16x8 1.2" LED Matrices+Backpack Round LEDs in Various Colors](https://www.adafruit.com/product/2054)
What's better than a single LED? Lots of LEDs! And what's better than lots of LEDs? **TWO TIMES AS MANY LEDS!!!**
With the 16x8 LED Matrix Backpack we've doubled your project's matrix capacity by making it super easy to get two separate 8x8 matrices onto...
Out of Stock
[Buy Now](https://www.adafruit.com/product/2054)
[Related Guides to the Product](https://learn.adafruit.com/products/2054/guides)
### Adafruit 8x16 LED Matrix FeatherWing w/o Matrices
[Adafruit 8x16 LED Matrix FeatherWing w/o Matrices](https://www.adafruit.com/product/3090)
You will chirp with delight when you see how easy it is to make your very own 8x16 LED matrix display for any Feather. At 0.8" square, the little [8x8 matrices](https://www.adafruit.com/new/?q=8x8%20miniature%20LED%20matrix&) have everything a big LED matrix has,...
Out of Stock
[Buy Now](https://www.adafruit.com/product/3090)
[Related Guides to the Product](https://learn.adafruit.com/products/3090/guides)
### Adafruit 14-segment LED Alphanumeric backpack (same as P1910)
[Adafruit 14-segment LED Alphanumeric backpack (same as P1910)](https://www.adafruit.com/product/3322)
Just the backpack + 4pin header
No Longer Stocked
[Buy Now](https://www.adafruit.com/product/3322)
[Related Guides to the Product](https://learn.adafruit.com/products/3322/guides)
## Featured Products
### Adafruit Small 1.2" 8x8 LED Matrix w/I2C Backpack - Yellow-Green
[Adafruit Small 1.2" 8x8 LED Matrix w/I2C Backpack - Yellow-Green](https://www.adafruit.com/product/1051)
What's better than a single LED? Lots of LEDs! A fun way to make a small display is to use an [8x8 matrix](https://www.adafruit.com/category/37_88) or a [4-digit 7-segment display](https://www.adafruit.com/category/37_103). Matrices like these are...
In Stock
[Buy Now](https://www.adafruit.com/product/1051)
[Related Guides to the Product](https://learn.adafruit.com/products/1051/guides)
### Small 1.2" 8x8 Ultra Bright Square Blue LED Matrix + Backpack
[Small 1.2" 8x8 Ultra Bright Square Blue LED Matrix + Backpack](https://www.adafruit.com/product/1853)
What's better than a single LED? Lots of LEDs! Matrices like these are 'multiplexed' - so to control 64 LEDs you need 16 pins. That's a lot of pins, and there are [driver chips like the MAX7219](//www.adafruit.com/products/453) that can control a matrix for you but...
In Stock
[Buy Now](https://www.adafruit.com/product/1853)
[Related Guides to the Product](https://learn.adafruit.com/products/1853/guides)
## Related Guides
- [LED Backpack Displays on Raspberry Pi and BeagleBone Black](https://learn.adafruit.com/led-backpack-displays-on-raspberry-pi-and-beaglebone-black.md)
- [Animating Multiple LED Backpacks](https://learn.adafruit.com/animating-multiple-led-backpacks.md)
- [Arduino GPS Clock](https://learn.adafruit.com/arduino-clock.md)
- [Raspberry Pi Physical Dashboard](https://learn.adafruit.com/raspberry-pi-physical-dashboard.md)
- [CircuitPython Hardware: LED Backpacks & FeatherWings](https://learn.adafruit.com/micropython-hardware-led-backpacks-and-featherwings.md)
- [Matrix and 7-Segment LED Backpack with the Raspberry Pi](https://learn.adafruit.com/matrix-7-segment-led-backpack-with-the-raspberry-pi.md)
- [DIY Pocket LED Gamer - Tiny Tetris!](https://learn.adafruit.com/diy-3d-printed-handheld-pocket-game-tiny-tetris-snake.md)
- [RGB LED Matrix Cube with 25,000 LEDs](https://learn.adafruit.com/rgb-led-matrix-cube-for-pi.md)
- [Creating GIFs for SmartMatrix](https://learn.adafruit.com/creating-gifs-for-smartmatrix.md)
- [Adafruit CharliePlex LED Matrix Bonnet](https://learn.adafruit.com/adafruit-charlieplex-bonnet.md)
- [Connecting a 16x32 RGB LED Matrix Panel to a Raspberry Pi](https://learn.adafruit.com/connecting-a-16x32-rgb-led-matrix-panel-to-a-raspberry-pi.md)
- [MicroPython Displays: Drawing Text](https://learn.adafruit.com/micropython-displays-drawing-text.md)
- [Heart Rate Badge](https://learn.adafruit.com/heart-rate-badge.md)
- [16x24 LED Matrix](https://learn.adafruit.com/16x24-led-matrix.md)
- [Adafruit IS31FL3741](https://learn.adafruit.com/adafruit-is31fl3741.md)
---
# Source: https://learn.adafruit.com/adafruit-led-backpack/0-8-8x8-matrix-arduino-wiring-and-setup.md
# Adafruit LED Backpacks
## Arduino Wiring and Setup
Primary:
We wrote a basic library to help you work with the mini 8x8 matrix backpack. The library is written for the Arduino and will work with any Arduino as it just uses the I2C pins. The code is very portable and can be easily adapted to any I2C-capable micro.
Wiring to the matrix is really easy
- Connect **CLK** to the I2C clock - on Arduino UNO thats Analog #5 (or SCL), on the Leonardo its Digital #3, on the Mega its digital #21
- Connect **DAT** to the I2C data - on Arduino UNO thats Analog #4 (or SDA), on the Leonardo its Digital #2, on the Mega its digital #20
- Connect **GND** to common ground
- Connect **VCC+** to power - 5V is best but 3V also seems to work for 3V microcontrollers.
Next, download the **Adafruit LED Backpack ** library and the **Adafruit GFX ** library from the Arduino library manager.
Open up the Arduino library manager:

Search for the **Adafruit LED Backpack** library and install it

Search for the **Adafruit GFX ** library and install it

If using an earlier version of the Arduino IDE (prior to 1.8.10), also locate and install **Adafruit\_BusIO** (newer versions will install this dependency automatically).
Once you've restarted you should be able to select the **File→Examples→Adafruit\_LEDBackpack→matrix88** example sketch. Upload it to your Arduino as usual. You should see a basic test program that goes through a bunch of different drawing routines
We also have a great tutorial on Arduino library installation at:
[http://learn.adafruit.com/adafruit-all-about-arduino-libraries-install-use](http://learn.adafruit.com/adafruit-all-about-arduino-libraries-install-use "Link: http://learn.adafruit.com/adafruit-all-about-arduino-libraries-install-use")

Once you're happy that the matrix works, you can write your own sketches. The 8x8 matrix supports everything the Adafruit GFX library - drawing pixels, lines, rectancles, circles, triangles, roundrects, and small bitmaps. [For more details check out the GFX page which will detail all of the GFX routines](http://learn.adafruit.com/adafruit-gfx-graphics-library).
All the drawing routines only change the display memory kept by the Arduino. Don't forget to call **writeDisplay()** after drawing to 'save' the memory out to the matrix via I2C.
There are also a few small routines that are special to the matrix:
- **setBrightness(_brighness_)**- will let you change the overall brightness of the entire display. 0 is least bright, 15 is brightest and is what is initialized by the display when you start
- **blinkRate(_rate_)** - You can blink the entire display. 0 is no blinking. 1, 2 or 3 is for display blinking.
- [Previous Page](https://learn.adafruit.com/adafruit-led-backpack/0-8-8x8-matrix-assembly.md)
- [Next Page](https://learn.adafruit.com/adafruit-led-backpack/0-8-8x8-matrix-circuitpython-wiring-and-setup.md)
## Primary Products
### Adafruit Mini 8x8 LED Matrix w/I2C Backpack - Red
[Adafruit Mini 8x8 LED Matrix w/I2C Backpack - Red](https://www.adafruit.com/product/870)
What's better than a single LED? Lots of LEDs! A fun way to make a small display is to use an [8x8 matrix](https://www.adafruit.com/category/37_88) or a [4-digit 7-segment display](https://www.adafruit.com/category/37_103). Matrices like these are...
In Stock
[Buy Now](https://www.adafruit.com/product/870)
[Related Guides to the Product](https://learn.adafruit.com/products/870/guides)
### Adafruit Mini 8x8 LED Matrix w/I2C Backpack - Yellow
[Adafruit Mini 8x8 LED Matrix w/I2C Backpack - Yellow](https://www.adafruit.com/product/871)
What's better than a single LED? Lots of LEDs! A fun way to make a small display is to use an [8x8 matrix](https://www.adafruit.com/category/37_88) or a [4-digit 7-segment display](https://www.adafruit.com/category/37_103). Matrices like these are...
In Stock
[Buy Now](https://www.adafruit.com/product/871)
[Related Guides to the Product](https://learn.adafruit.com/products/871/guides)
### Adafruit Mini 0.8" 8x8 LED Matrix w/I2C Backpack - Yellow-Green
[Adafruit Mini 0.8" 8x8 LED Matrix w/I2C Backpack - Yellow-Green](https://www.adafruit.com/product/872)
What's better than a single LED? Lots of LEDs! A fun way to make a small display is to use an [8x8 matrix](https://www.adafruit.com/category/37_88) or a [4-digit 7-segment display](https://www.adafruit.com/category/37_103). Matrices like these are...
In Stock
[Buy Now](https://www.adafruit.com/product/872)
[Related Guides to the Product](https://learn.adafruit.com/products/872/guides)
### Adafruit 0.56" 4-Digit 7-Segment Display with I2C Backpack - Red
[Adafruit 0.56" 4-Digit 7-Segment Display with I2C Backpack - Red](https://www.adafruit.com/product/878)
What's better than a single LED? Lots of LEDs! A fun way to make a small display is to use an [8x8 matrix](https://www.adafruit.com/category/37_88) or a [4-digit 7-segment display](https://www.adafruit.com/category/37_103). Matrices like these are...
In Stock
[Buy Now](https://www.adafruit.com/product/878)
[Related Guides to the Product](https://learn.adafruit.com/products/878/guides)
### Adafruit 0.56" 4-Digit 7-Segment Display w/I2C Backpack - Yellow
[Adafruit 0.56" 4-Digit 7-Segment Display w/I2C Backpack - Yellow](https://www.adafruit.com/product/879)
What's better than a single LED? Lots of LEDs! A fun way to make a small display is to use an [8x8 matrix](https://www.adafruit.com/category/37_88) or a [4-digit 7-segment display](https://www.adafruit.com/category/37_103). Matrices like these are...
In Stock
[Buy Now](https://www.adafruit.com/product/879)
[Related Guides to the Product](https://learn.adafruit.com/products/879/guides)
### Adafruit 0.56" 4-Digit 7-Segment Display w/ I2C Backpack - Green
[Adafruit 0.56" 4-Digit 7-Segment Display w/ I2C Backpack - Green](https://www.adafruit.com/product/880)
What's better than a single LED? Lots of LEDs! A fun way to make a small display is to use an [8x8 matrix](https://www.adafruit.com/category/37_88) or a [4-digit 7-segment display](https://www.adafruit.com/category/37_103). Matrices like these are...
No Longer Stocked
[Buy Now](https://www.adafruit.com/product/880)
[Related Guides to the Product](https://learn.adafruit.com/products/880/guides)
### Adafruit 0.56" 4-Digit 7-Segment Display w/ I2C Backpack - Blue
[Adafruit 0.56" 4-Digit 7-Segment Display w/ I2C Backpack - Blue](https://www.adafruit.com/product/881)
What's better than a single LED? Lots of LEDs! A fun way to make a small display is to use an [8x8 matrix](https://www.adafruit.com/category/37_88) or a [4-digit 7-segment display](https://www.adafruit.com/category/37_103). Matrices like these are...
In Stock
[Buy Now](https://www.adafruit.com/product/881)
[Related Guides to the Product](https://learn.adafruit.com/products/881/guides)
### Adafruit Bicolor LED Square Pixel Matrix with I2C Backpack
[Adafruit Bicolor LED Square Pixel Matrix with I2C Backpack](https://www.adafruit.com/product/902)
What's better than a single LED? Lots of LEDs! A fun way to make a small colorful display is to use a [1.2" Bi-color 8x8 LED Matrix](http://www.adafruit.com/products/458). Matrices like these are 'multiplexed' - so to control all the 128 LEDs you need 24 pins....
In Stock
[Buy Now](https://www.adafruit.com/product/902)
[Related Guides to the Product](https://learn.adafruit.com/products/902/guides)
### Adafruit Mini 8x8 LED Matrix w/I2C Backpack - Blue
[Adafruit Mini 8x8 LED Matrix w/I2C Backpack - Blue](https://www.adafruit.com/product/959)
What's better than a single LED? Lots of LEDs! A fun way to make a small display is to use an [8x8 matrix](https://www.adafruit.com/category/37_88) or a [4-digit 7-segment display](https://www.adafruit.com/category/37_103). Matrices like these are...
In Stock
[Buy Now](https://www.adafruit.com/product/959)
[Related Guides to the Product](https://learn.adafruit.com/products/959/guides)
### Adafruit 0.56" 4-Digit 7-Segment Display w/I2C Backpack - White
[Adafruit 0.56" 4-Digit 7-Segment Display w/I2C Backpack - White](https://www.adafruit.com/product/1002)
What's better than a single LED? Lots of LEDs! A fun way to make a small display is to use an [8x8 matrix](https://www.adafruit.com/category/37_88) or a [4-digit 7-segment display](https://www.adafruit.com/category/37_103). Matrices like these are...
In Stock
[Buy Now](https://www.adafruit.com/product/1002)
[Related Guides to the Product](https://learn.adafruit.com/products/1002/guides)
### Adafruit 1.2" 8x8 LED Matrix Backpack
[Adafruit 1.2" 8x8 LED Matrix Backpack](https://www.adafruit.com/product/1048)
By popular request, you can now get our 8x8 LED backpacks without the LEDs! These backpacks feature an HT16K33 I2C LED driver, they're simple and easy to use - you can use [our very nice library for the backpacks to...](https://github.com/adafruit/Adafruit-LED-Backpack-Library)
In Stock
[Buy Now](https://www.adafruit.com/product/1048)
[Related Guides to the Product](https://learn.adafruit.com/products/1048/guides)
### Adafruit Small 1.2" 8x8 LED Matrix w/I2C Backpack - Red
[Adafruit Small 1.2" 8x8 LED Matrix w/I2C Backpack - Red](https://www.adafruit.com/product/1049)
What's better than a single LED? Lots of LEDs! A fun way to make a small display is to use an [8x8 matrix](https://www.adafruit.com/category/37_88) or a [4-digit 7-segment display](https://www.adafruit.com/category/37_103). Matrices like these are...
In Stock
[Buy Now](https://www.adafruit.com/product/1049)
[Related Guides to the Product](https://learn.adafruit.com/products/1049/guides)
### Adafruit Small 1.2" 8x8 LED Matrix w/I2C Backpack - Yellow
[Adafruit Small 1.2" 8x8 LED Matrix w/I2C Backpack - Yellow](https://www.adafruit.com/product/1050)
What's better than a single LED? Lots of LEDs! A fun way to make a small display is to use an [8x8 matrix](https://www.adafruit.com/category/37_88) or a [4-digit 7-segment display](https://www.adafruit.com/category/37_103). Matrices like these are...
In Stock
[Buy Now](https://www.adafruit.com/product/1050)
[Related Guides to the Product](https://learn.adafruit.com/products/1050/guides)
### Adafruit Small 1.2" 8x8 LED Matrix w/I2C Backpack - Blue
[Adafruit Small 1.2" 8x8 LED Matrix w/I2C Backpack - Blue](https://www.adafruit.com/product/1052)
What's better than a single LED? Lots of LEDs! A fun way to make a small display is to use an [8x8 matrix](https://www.adafruit.com/category/37_88) or a [4-digit 7-segment display](https://www.adafruit.com/category/37_103). Matrices like these are...
In Stock
[Buy Now](https://www.adafruit.com/product/1052)
[Related Guides to the Product](https://learn.adafruit.com/products/1052/guides)
### Adafruit Mini 8x8 LED Matrix w/I2C Backpack - Ultra Bright White
[Adafruit Mini 8x8 LED Matrix w/I2C Backpack - Ultra Bright White](https://www.adafruit.com/product/1080)
What's better than a single LED? Lots of LEDs! A fun way to make a small display is to use an [8x8 matrix](https://www.adafruit.com/category/37_88) or a [4-digit 7-segment display](https://www.adafruit.com/category/37_103). Matrices like these are...
In Stock
[Buy Now](https://www.adafruit.com/product/1080)
[Related Guides to the Product](https://learn.adafruit.com/products/1080/guides)
### Adafruit 1.2" 4-Digit 7-Segment Display w/I2C Backpack - Green
[Adafruit 1.2" 4-Digit 7-Segment Display w/I2C Backpack - Green](https://www.adafruit.com/product/1268)
What's better than a single LED? Lots of LEDs! A fun way to make a numeric display is to use a [4-digit 7-segment display](https://www.adafruit.com/category/37_103). LED matrices like these are 'multiplexed' - so to control all the seven-segment LEDs you need 14 pins....
No Longer Stocked
[Buy Now](https://www.adafruit.com/product/1268)
[Related Guides to the Product](https://learn.adafruit.com/products/1268/guides)
### Adafruit 1.2" 4-Digit 7-Segment Display w/I2C Backpack - Yellow
[Adafruit 1.2" 4-Digit 7-Segment Display w/I2C Backpack - Yellow](https://www.adafruit.com/product/1269)
What's better than a single LED? Lots of LEDs! A fun way to make a numeric display is to use a [4-digit 7-segment display](https://www.adafruit.com/category/37_103). LED matrices like these are 'multiplexed' - so to control all the seven-segment LEDs you need 14 pins....
In Stock
[Buy Now](https://www.adafruit.com/product/1269)
[Related Guides to the Product](https://learn.adafruit.com/products/1269/guides)
### Adafruit 1.2" 4-Digit 7-Segment Display w/I2C Backpack - Red
[Adafruit 1.2" 4-Digit 7-Segment Display w/I2C Backpack - Red](https://www.adafruit.com/product/1270)
What's better than a single LED? Lots of LEDs! A fun way to make a numeric display is to use a [4-digit 7-segment display](https://www.adafruit.com/category/37_103). LED matrices like these are 'multiplexed' - so to control all the seven-segment LEDs you need 14 pins....
In Stock
[Buy Now](https://www.adafruit.com/product/1270)
[Related Guides to the Product](https://learn.adafruit.com/products/1270/guides)
### Small 1.2" 8x8 Ultra Bright White LED Matrix + Backpack
[Small 1.2" 8x8 Ultra Bright White LED Matrix + Backpack](https://www.adafruit.com/product/1614)
What's better than a single LED? Lots of LEDs! A fun way to make a small display is to use an [8x8 matrix](https://www.adafruit.com/category/37_88) or a [4-digit 7-segment display](https://www.adafruit.com/category/37_103). Matrices like these are...
In Stock
[Buy Now](https://www.adafruit.com/product/1614)
[Related Guides to the Product](https://learn.adafruit.com/products/1614/guides)
### Adafruit Small 1.2" 8x8 LED Matrix w/I2C Backpack - Pure Green
[Adafruit Small 1.2" 8x8 LED Matrix w/I2C Backpack - Pure Green](https://www.adafruit.com/product/1632)
What's better than a single LED? Lots of LEDs! A fun way to make a small display is to use an [8x8 matrix](https://www.adafruit.com/category/37_88) or a [4-digit 7-segment display](https://www.adafruit.com/category/37_103). Matrices like these are...
In Stock
[Buy Now](https://www.adafruit.com/product/1632)
[Related Guides to the Product](https://learn.adafruit.com/products/1632/guides)
### Adafruit Mini 0.8" 8x8 LED Matrix w/I2C Backpack - Pure Green
[Adafruit Mini 0.8" 8x8 LED Matrix w/I2C Backpack - Pure Green](https://www.adafruit.com/product/1633)
What's better than a single LED? Lots of LEDs! A fun way to make a small display is to use an [8x8 matrix](https://www.adafruit.com/category/37_88) or a [4-digit 7-segment display](https://www.adafruit.com/category/37_103). Matrices like these are...
In Stock
[Buy Now](https://www.adafruit.com/product/1633)
[Related Guides to the Product](https://learn.adafruit.com/products/1633/guides)
### Bi-Color (Red/Green) 24-Bar Bargraph w/I2C Backpack Kit
[Bi-Color (Red/Green) 24-Bar Bargraph w/I2C Backpack Kit](https://www.adafruit.com/product/1721)
What's better than a single LED? Lots of LEDs! A fun way to make a small linear display is to use two 12-bar Bi-color bar-graphs. However, this LED bargraph is 'multiplexed' - so to control all the 48 LEDs you need a lot of pins.
Out of Stock
[Buy Now](https://www.adafruit.com/product/1721)
[Related Guides to the Product](https://learn.adafruit.com/products/1721/guides)
### Small 1.2" 8x8 Ultra Bright Square Amber LED Matrix + Backpack
[Small 1.2" 8x8 Ultra Bright Square Amber LED Matrix + Backpack](https://www.adafruit.com/product/1854)
What's better than a single LED? Lots of LEDs! Matrices like these are 'multiplexed' - so to control 64 LEDs you need 16 pins. That's a lot of pins, and there are [driver chips like the MAX7219](//www.adafruit.com/products/453) that can control a matrix for you but...
In Stock
[Buy Now](https://www.adafruit.com/product/1854)
[Related Guides to the Product](https://learn.adafruit.com/products/1854/guides)
### Small 1.2" 8x8 Ultra Bright Square Yellow LED Matrix + Backpack
[Small 1.2" 8x8 Ultra Bright Square Yellow LED Matrix + Backpack](https://www.adafruit.com/product/1855)
What's better than a single LED? Lots of LEDs! Matrices like these are 'multiplexed' - so to control 64 LEDs you need 16 pins. That's a lot of pins, and there are [driver chips like the MAX7219](//www.adafruit.com/products/453) that can control a matrix for you but...
In Stock
[Buy Now](https://www.adafruit.com/product/1855)
[Related Guides to the Product](https://learn.adafruit.com/products/1855/guides)
### Small 1.2" 8x8 Bright Square Pure Green LED Matrix + Backpack
[Small 1.2" 8x8 Bright Square Pure Green LED Matrix + Backpack](https://www.adafruit.com/product/1856)
What's better than a single LED? Lots of LEDs! Matrices like these are 'multiplexed' - so to control 64 LEDs you need 16 pins. That's a lot of pins, and there are [driver chips like the MAX7219](//www.adafruit.com/products/453) that can control a matrix for you but...
In Stock
[Buy Now](https://www.adafruit.com/product/1856)
[Related Guides to the Product](https://learn.adafruit.com/products/1856/guides)
### Small 1.2" 8x8 Ultra Bright Square White LED Matrix + Backpack
[Small 1.2" 8x8 Ultra Bright Square White LED Matrix + Backpack](https://www.adafruit.com/product/1857)
What's better than a single LED? Lots of LEDs! Matrices like these are 'multiplexed' - so to control 64 LEDs you need 16 pins. That's a lot of pins, and there are [driver chips like the MAX7219](//www.adafruit.com/products/453) that can control a matrix for you but...
In Stock
[Buy Now](https://www.adafruit.com/product/1857)
[Related Guides to the Product](https://learn.adafruit.com/products/1857/guides)
### Adafruit 14-segment LED Alphanumeric Backpack - STEMMA QT
[Adafruit 14-segment LED Alphanumeric Backpack - STEMMA QT](https://www.adafruit.com/product/1910)
By popular request, you can now get our 14-segment LED backpacks without the LEDs! These backpacks feature an HT16K33 I2C LED driver, they're simple and easy to use - you can use [our very nice library for the backpacks to...](https://github.com/adafruit/Adafruit-LED-Backpack-Library)
In Stock
[Buy Now](https://www.adafruit.com/product/1910)
[Related Guides to the Product](https://learn.adafruit.com/products/1910/guides)
### Quad Alphanumeric Display - Red 0.54" Digits w/ I2C Backpack
[Quad Alphanumeric Display - Red 0.54" Digits w/ I2C Backpack](https://www.adafruit.com/product/1911)
Display, elegantly, 012345678 or 9! Gaze, hypnotized, at ABCDEFGHIJKLM - well it can display the whole alphabet. You get the point. This is a nice, bright alphanumeric display that shows letters and numbers in a beautiful red hue. It's super bright and designed for viewing from distances...
In Stock
[Buy Now](https://www.adafruit.com/product/1911)
[Related Guides to the Product](https://learn.adafruit.com/products/1911/guides)
### Quad Alphanumeric Display - Blue 0.54" Digits w/ I2C Backpack
[Quad Alphanumeric Display - Blue 0.54" Digits w/ I2C Backpack](https://www.adafruit.com/product/1912)
Display, elegantly, 012345678 or 9! Gaze, hypnotized, at ABCDEFGHIJKLM - well it can display the whole alphabet. You get the point. This is a nice, bright alphanumeric display that shows letters and numbers in a beautiful blue hue. It's super bright and designed for viewing from distances...
In Stock
[Buy Now](https://www.adafruit.com/product/1912)
[Related Guides to the Product](https://learn.adafruit.com/products/1912/guides)
### 16x8 1.2" LED Matrix + Backpack - Ultra Bright Round Green LEDs
[16x8 1.2" LED Matrix + Backpack - Ultra Bright Round Green LEDs](https://www.adafruit.com/product/2035)
What's better than a single LED? Lots of LEDs! And what's better than lots of LEDs? **TWO TIMES AS MANY LEDS!!!**
With the 16x8 LED Matrix Backpack we've doubled your project's matrix capacity by making it super easy to get two separate 8x8 matrices onto...
In Stock
[Buy Now](https://www.adafruit.com/product/2035)
[Related Guides to the Product](https://learn.adafruit.com/products/2035/guides)
### 16x8 1.2" LED Matrix+Backpack UltraBright Round YellowGreen LEDs
[16x8 1.2" LED Matrix+Backpack UltraBright Round YellowGreen LEDs](https://www.adafruit.com/product/2036)
What's better than a single LED? Lots of LEDs! And what's better than lots of LEDs? **TWO TIMES AS MANY LEDS!!!**
With the 16x8 LED Matrix Backpack we've doubled your project's matrix capacity by making it super easy to get two separate 8x8 matrices onto...
In Stock
[Buy Now](https://www.adafruit.com/product/2036)
[Related Guides to the Product](https://learn.adafruit.com/products/2036/guides)
### 16x8 1.2" LED Matrix + Backpack - Ultra Bright Round Red LEDs
[16x8 1.2" LED Matrix + Backpack - Ultra Bright Round Red LEDs](https://www.adafruit.com/product/2037)
What's better than a single LED? Lots of LEDs! And what's better than lots of LEDs? **TWO TIMES AS MANY LEDS!!!**
With the 16x8 LED Matrix Backpack we've doubled your project's matrix capacity by making it super easy to get two separate 8x8 matrices onto...
In Stock
[Buy Now](https://www.adafruit.com/product/2037)
[Related Guides to the Product](https://learn.adafruit.com/products/2037/guides)
### 16x8 1.2" LED Matrix + Backpack - Ultra Bright Round White LEDs
[16x8 1.2" LED Matrix + Backpack - Ultra Bright Round White LEDs](https://www.adafruit.com/product/2038)
What's better than a single LED? Lots of LEDs! And what's better than lots of LEDs? **TWO TIMES AS MANY LEDS!!!**
With the 16x8 LED Matrix Backpack we've doubled your project's matrix capacity by making it super easy to get two separate 8x8 matrices onto...
In Stock
[Buy Now](https://www.adafruit.com/product/2038)
[Related Guides to the Product](https://learn.adafruit.com/products/2038/guides)
### 16x8 1.2" LED Matrix + Backpack - Ultra Bright Round Blue LEDs
[16x8 1.2" LED Matrix + Backpack - Ultra Bright Round Blue LEDs](https://www.adafruit.com/product/2039)
What's better than a single LED? Lots of LEDs! And what's better than lots of LEDs? **TWO TIMES AS MANY LEDS!!!**
With the 16x8 LED Matrix Backpack we've doubled your project's matrix capacity by making it super easy to get two separate 8x8 matrices onto...
In Stock
[Buy Now](https://www.adafruit.com/product/2039)
[Related Guides to the Product](https://learn.adafruit.com/products/2039/guides)
### 16x8 1.2" LED Matrix + Backpack - Ultra Bright Square Blue LEDs
[16x8 1.2" LED Matrix + Backpack - Ultra Bright Square Blue LEDs](https://www.adafruit.com/product/2040)
What's better than a single LED? Lots of LEDs! And what's better than lots of LEDs? **TWO TIMES AS MANY LEDS!!!**
With the 16x8 LED Matrix Backpack we've doubled your project's matrix capacity by making it super easy to get two separate 8x8 matrices onto...
In Stock
[Buy Now](https://www.adafruit.com/product/2040)
[Related Guides to the Product](https://learn.adafruit.com/products/2040/guides)
### 16x8 1.2" LED Matrix + Backpack - Ultra Bright Square Amber LEDs
[16x8 1.2" LED Matrix + Backpack - Ultra Bright Square Amber LEDs](https://www.adafruit.com/product/2041)
What's better than a single LED? Lots of LEDs! And what's better than lots of LEDs? **TWO TIMES AS MANY LEDS!!!**
With the 16x8 LED Matrix Backpack we've doubled your project's matrix capacity by making it super easy to get two separate 8x8 matrices onto...
In Stock
[Buy Now](https://www.adafruit.com/product/2041)
[Related Guides to the Product](https://learn.adafruit.com/products/2041/guides)
### 16x8 1.2" LED Matrix + Backpack - Ultra Bright Square Green LEDs
[16x8 1.2" LED Matrix + Backpack - Ultra Bright Square Green LEDs](https://www.adafruit.com/product/2042)
What's better than a single LED? Lots of LEDs! And what's better than lots of LEDs? **TWO TIMES AS MANY LEDS!!!**
With the 16x8 LED Matrix Backpack we've doubled your project's matrix capacity by making it super easy to get two separate 8x8 matrices onto...
In Stock
[Buy Now](https://www.adafruit.com/product/2042)
[Related Guides to the Product](https://learn.adafruit.com/products/2042/guides)
### 16x8 1.2" LED Matrix + Backpack -Ultra Bright Square Yellow LEDs
[16x8 1.2" LED Matrix + Backpack -Ultra Bright Square Yellow LEDs](https://www.adafruit.com/product/2043)
What's better than a single LED? Lots of LEDs! And what's better than lots of LEDs? **TWO TIMES AS MANY LEDS!!!**
With the 16x8 LED Matrix Backpack we've doubled your project's matrix capacity by making it super easy to get two separate 8x8 matrices onto...
In Stock
[Buy Now](https://www.adafruit.com/product/2043)
[Related Guides to the Product](https://learn.adafruit.com/products/2043/guides)
### 16x8 1.2" LED Matrix + Backpack - Ultra Bright Square White LEDs
[16x8 1.2" LED Matrix + Backpack - Ultra Bright Square White LEDs](https://www.adafruit.com/product/2044)
What's better than a single LED? Lots of LEDs! And what's better than lots of LEDs? **TWO TIMES AS MANY LEDS!!!**
With the 16x8 LED Matrix Backpack we've doubled your project's matrix capacity by making it super easy to get two separate 8x8 matrices onto...
In Stock
[Buy Now](https://www.adafruit.com/product/2044)
[Related Guides to the Product](https://learn.adafruit.com/products/2044/guides)
### 16x8 1.2" LED Matrix + Backpack-Ultra Bright Round Orange LEDs
[16x8 1.2" LED Matrix + Backpack-Ultra Bright Round Orange LEDs](https://www.adafruit.com/product/2052)
What's better than a single LED? Lots of LEDs! And what's better than lots of LEDs? **TWO TIMES AS MANY LEDS!!!**
With the 16x8 LED Matrix Backpack we've doubled your project's matrix capacity by making it super easy to get two separate 8x8 matrices onto...
In Stock
[Buy Now](https://www.adafruit.com/product/2052)
[Related Guides to the Product](https://learn.adafruit.com/products/2052/guides)
### 16x8 1.2" LED Matrices+Backpack Round LEDs in Various Colors
[16x8 1.2" LED Matrices+Backpack Round LEDs in Various Colors](https://www.adafruit.com/product/2054)
What's better than a single LED? Lots of LEDs! And what's better than lots of LEDs? **TWO TIMES AS MANY LEDS!!!**
With the 16x8 LED Matrix Backpack we've doubled your project's matrix capacity by making it super easy to get two separate 8x8 matrices onto...
Out of Stock
[Buy Now](https://www.adafruit.com/product/2054)
[Related Guides to the Product](https://learn.adafruit.com/products/2054/guides)
### Adafruit 8x16 LED Matrix FeatherWing w/o Matrices
[Adafruit 8x16 LED Matrix FeatherWing w/o Matrices](https://www.adafruit.com/product/3090)
You will chirp with delight when you see how easy it is to make your very own 8x16 LED matrix display for any Feather. At 0.8" square, the little [8x8 matrices](https://www.adafruit.com/new/?q=8x8%20miniature%20LED%20matrix&) have everything a big LED matrix has,...
Out of Stock
[Buy Now](https://www.adafruit.com/product/3090)
[Related Guides to the Product](https://learn.adafruit.com/products/3090/guides)
### Adafruit 14-segment LED Alphanumeric backpack (same as P1910)
[Adafruit 14-segment LED Alphanumeric backpack (same as P1910)](https://www.adafruit.com/product/3322)
Just the backpack + 4pin header
No Longer Stocked
[Buy Now](https://www.adafruit.com/product/3322)
[Related Guides to the Product](https://learn.adafruit.com/products/3322/guides)
## Featured Products
### Adafruit Small 1.2" 8x8 LED Matrix w/I2C Backpack - Yellow-Green
[Adafruit Small 1.2" 8x8 LED Matrix w/I2C Backpack - Yellow-Green](https://www.adafruit.com/product/1051)
What's better than a single LED? Lots of LEDs! A fun way to make a small display is to use an [8x8 matrix](https://www.adafruit.com/category/37_88) or a [4-digit 7-segment display](https://www.adafruit.com/category/37_103). Matrices like these are...
In Stock
[Buy Now](https://www.adafruit.com/product/1051)
[Related Guides to the Product](https://learn.adafruit.com/products/1051/guides)
### Small 1.2" 8x8 Ultra Bright Square Blue LED Matrix + Backpack
[Small 1.2" 8x8 Ultra Bright Square Blue LED Matrix + Backpack](https://www.adafruit.com/product/1853)
What's better than a single LED? Lots of LEDs! Matrices like these are 'multiplexed' - so to control 64 LEDs you need 16 pins. That's a lot of pins, and there are [driver chips like the MAX7219](//www.adafruit.com/products/453) that can control a matrix for you but...
In Stock
[Buy Now](https://www.adafruit.com/product/1853)
[Related Guides to the Product](https://learn.adafruit.com/products/1853/guides)
## Related Guides
- [LED Backpack Displays on Raspberry Pi and BeagleBone Black](https://learn.adafruit.com/led-backpack-displays-on-raspberry-pi-and-beaglebone-black.md)
- [Animating Multiple LED Backpacks](https://learn.adafruit.com/animating-multiple-led-backpacks.md)
- [Arduino GPS Clock](https://learn.adafruit.com/arduino-clock.md)
- [Raspberry Pi Physical Dashboard](https://learn.adafruit.com/raspberry-pi-physical-dashboard.md)
- [CircuitPython Hardware: LED Backpacks & FeatherWings](https://learn.adafruit.com/micropython-hardware-led-backpacks-and-featherwings.md)
- [Matrix and 7-Segment LED Backpack with the Raspberry Pi](https://learn.adafruit.com/matrix-7-segment-led-backpack-with-the-raspberry-pi.md)
- [DIY Pocket LED Gamer - Tiny Tetris!](https://learn.adafruit.com/diy-3d-printed-handheld-pocket-game-tiny-tetris-snake.md)
- [RGB LED Matrix Cube with 25,000 LEDs](https://learn.adafruit.com/rgb-led-matrix-cube-for-pi.md)
- [Creating GIFs for SmartMatrix](https://learn.adafruit.com/creating-gifs-for-smartmatrix.md)
- [Adafruit CharliePlex LED Matrix Bonnet](https://learn.adafruit.com/adafruit-charlieplex-bonnet.md)
- [Connecting a 16x32 RGB LED Matrix Panel to a Raspberry Pi](https://learn.adafruit.com/connecting-a-16x32-rgb-led-matrix-panel-to-a-raspberry-pi.md)
- [MicroPython Displays: Drawing Text](https://learn.adafruit.com/micropython-displays-drawing-text.md)
- [Heart Rate Badge](https://learn.adafruit.com/heart-rate-badge.md)
- [16x24 LED Matrix](https://learn.adafruit.com/16x24-led-matrix.md)
- [Adafruit IS31FL3741](https://learn.adafruit.com/adafruit-is31fl3741.md)
---
# Source: https://learn.adafruit.com/adafruit-led-backpack/0-8-8x8-matrix-assembly.md
# Adafruit LED Backpacks
## Assembly
Danger:
When you buy a pack from Adafruit, it comes with the fully tested and assembled backpack as well as a 8x8 matrix in one of the colors we provide (say, red, yellow or green). You'll need to solder the matrix onto the backpack but its an easy task.

Remove the parts from packaging and place the LED matrix OVER the silkscreen side. It can go 'either way' - the matrix is symmetric so as long as it goes onto the front it will work in any orientation. Do not solder the matrix over the chip on the back of the backpack - it will not work then!
Turn the backpack over so its sitting flat on the matrix.
Solder all 16 pins.
Clip the long pins.

Now you're ready to wire it up to a microcontroller. We'll assume you want to use a 4pin header. You can also of course solder wires directly. Place a 4-pin piece of header with the LONG pins down into the breadboard.
Place the soldered backpack on top of the header.
Solder 'em!
That's it! now you're ready to run the firmware!- [Previous Page](https://learn.adafruit.com/adafruit-led-backpack/0-8-8x8-matrix.md)
- [Next Page](https://learn.adafruit.com/adafruit-led-backpack/0-8-8x8-matrix-arduino-wiring-and-setup.md)
## Primary Products
### Adafruit Mini 8x8 LED Matrix w/I2C Backpack - Red
[Adafruit Mini 8x8 LED Matrix w/I2C Backpack - Red](https://www.adafruit.com/product/870)
What's better than a single LED? Lots of LEDs! A fun way to make a small display is to use an [8x8 matrix](https://www.adafruit.com/category/37_88) or a [4-digit 7-segment display](https://www.adafruit.com/category/37_103). Matrices like these are...
In Stock
[Buy Now](https://www.adafruit.com/product/870)
[Related Guides to the Product](https://learn.adafruit.com/products/870/guides)
### Adafruit Mini 8x8 LED Matrix w/I2C Backpack - Yellow
[Adafruit Mini 8x8 LED Matrix w/I2C Backpack - Yellow](https://www.adafruit.com/product/871)
What's better than a single LED? Lots of LEDs! A fun way to make a small display is to use an [8x8 matrix](https://www.adafruit.com/category/37_88) or a [4-digit 7-segment display](https://www.adafruit.com/category/37_103). Matrices like these are...
In Stock
[Buy Now](https://www.adafruit.com/product/871)
[Related Guides to the Product](https://learn.adafruit.com/products/871/guides)
### Adafruit Mini 0.8" 8x8 LED Matrix w/I2C Backpack - Yellow-Green
[Adafruit Mini 0.8" 8x8 LED Matrix w/I2C Backpack - Yellow-Green](https://www.adafruit.com/product/872)
What's better than a single LED? Lots of LEDs! A fun way to make a small display is to use an [8x8 matrix](https://www.adafruit.com/category/37_88) or a [4-digit 7-segment display](https://www.adafruit.com/category/37_103). Matrices like these are...
In Stock
[Buy Now](https://www.adafruit.com/product/872)
[Related Guides to the Product](https://learn.adafruit.com/products/872/guides)
### Adafruit 0.56" 4-Digit 7-Segment Display with I2C Backpack - Red
[Adafruit 0.56" 4-Digit 7-Segment Display with I2C Backpack - Red](https://www.adafruit.com/product/878)
What's better than a single LED? Lots of LEDs! A fun way to make a small display is to use an [8x8 matrix](https://www.adafruit.com/category/37_88) or a [4-digit 7-segment display](https://www.adafruit.com/category/37_103). Matrices like these are...
In Stock
[Buy Now](https://www.adafruit.com/product/878)
[Related Guides to the Product](https://learn.adafruit.com/products/878/guides)
### Adafruit 0.56" 4-Digit 7-Segment Display w/I2C Backpack - Yellow
[Adafruit 0.56" 4-Digit 7-Segment Display w/I2C Backpack - Yellow](https://www.adafruit.com/product/879)
What's better than a single LED? Lots of LEDs! A fun way to make a small display is to use an [8x8 matrix](https://www.adafruit.com/category/37_88) or a [4-digit 7-segment display](https://www.adafruit.com/category/37_103). Matrices like these are...
In Stock
[Buy Now](https://www.adafruit.com/product/879)
[Related Guides to the Product](https://learn.adafruit.com/products/879/guides)
### Adafruit 0.56" 4-Digit 7-Segment Display w/ I2C Backpack - Green
[Adafruit 0.56" 4-Digit 7-Segment Display w/ I2C Backpack - Green](https://www.adafruit.com/product/880)
What's better than a single LED? Lots of LEDs! A fun way to make a small display is to use an [8x8 matrix](https://www.adafruit.com/category/37_88) or a [4-digit 7-segment display](https://www.adafruit.com/category/37_103). Matrices like these are...
No Longer Stocked
[Buy Now](https://www.adafruit.com/product/880)
[Related Guides to the Product](https://learn.adafruit.com/products/880/guides)
### Adafruit 0.56" 4-Digit 7-Segment Display w/ I2C Backpack - Blue
[Adafruit 0.56" 4-Digit 7-Segment Display w/ I2C Backpack - Blue](https://www.adafruit.com/product/881)
What's better than a single LED? Lots of LEDs! A fun way to make a small display is to use an [8x8 matrix](https://www.adafruit.com/category/37_88) or a [4-digit 7-segment display](https://www.adafruit.com/category/37_103). Matrices like these are...
In Stock
[Buy Now](https://www.adafruit.com/product/881)
[Related Guides to the Product](https://learn.adafruit.com/products/881/guides)
### Adafruit Bicolor LED Square Pixel Matrix with I2C Backpack
[Adafruit Bicolor LED Square Pixel Matrix with I2C Backpack](https://www.adafruit.com/product/902)
What's better than a single LED? Lots of LEDs! A fun way to make a small colorful display is to use a [1.2" Bi-color 8x8 LED Matrix](http://www.adafruit.com/products/458). Matrices like these are 'multiplexed' - so to control all the 128 LEDs you need 24 pins....
In Stock
[Buy Now](https://www.adafruit.com/product/902)
[Related Guides to the Product](https://learn.adafruit.com/products/902/guides)
### Adafruit Mini 8x8 LED Matrix w/I2C Backpack - Blue
[Adafruit Mini 8x8 LED Matrix w/I2C Backpack - Blue](https://www.adafruit.com/product/959)
What's better than a single LED? Lots of LEDs! A fun way to make a small display is to use an [8x8 matrix](https://www.adafruit.com/category/37_88) or a [4-digit 7-segment display](https://www.adafruit.com/category/37_103). Matrices like these are...
In Stock
[Buy Now](https://www.adafruit.com/product/959)
[Related Guides to the Product](https://learn.adafruit.com/products/959/guides)
### Adafruit 0.56" 4-Digit 7-Segment Display w/I2C Backpack - White
[Adafruit 0.56" 4-Digit 7-Segment Display w/I2C Backpack - White](https://www.adafruit.com/product/1002)
What's better than a single LED? Lots of LEDs! A fun way to make a small display is to use an [8x8 matrix](https://www.adafruit.com/category/37_88) or a [4-digit 7-segment display](https://www.adafruit.com/category/37_103). Matrices like these are...
In Stock
[Buy Now](https://www.adafruit.com/product/1002)
[Related Guides to the Product](https://learn.adafruit.com/products/1002/guides)
### Adafruit 1.2" 8x8 LED Matrix Backpack
[Adafruit 1.2" 8x8 LED Matrix Backpack](https://www.adafruit.com/product/1048)
By popular request, you can now get our 8x8 LED backpacks without the LEDs! These backpacks feature an HT16K33 I2C LED driver, they're simple and easy to use - you can use [our very nice library for the backpacks to...](https://github.com/adafruit/Adafruit-LED-Backpack-Library)
In Stock
[Buy Now](https://www.adafruit.com/product/1048)
[Related Guides to the Product](https://learn.adafruit.com/products/1048/guides)
### Adafruit Small 1.2" 8x8 LED Matrix w/I2C Backpack - Red
[Adafruit Small 1.2" 8x8 LED Matrix w/I2C Backpack - Red](https://www.adafruit.com/product/1049)
What's better than a single LED? Lots of LEDs! A fun way to make a small display is to use an [8x8 matrix](https://www.adafruit.com/category/37_88) or a [4-digit 7-segment display](https://www.adafruit.com/category/37_103). Matrices like these are...
In Stock
[Buy Now](https://www.adafruit.com/product/1049)
[Related Guides to the Product](https://learn.adafruit.com/products/1049/guides)
### Adafruit Small 1.2" 8x8 LED Matrix w/I2C Backpack - Yellow
[Adafruit Small 1.2" 8x8 LED Matrix w/I2C Backpack - Yellow](https://www.adafruit.com/product/1050)
What's better than a single LED? Lots of LEDs! A fun way to make a small display is to use an [8x8 matrix](https://www.adafruit.com/category/37_88) or a [4-digit 7-segment display](https://www.adafruit.com/category/37_103). Matrices like these are...
In Stock
[Buy Now](https://www.adafruit.com/product/1050)
[Related Guides to the Product](https://learn.adafruit.com/products/1050/guides)
### Adafruit Small 1.2" 8x8 LED Matrix w/I2C Backpack - Blue
[Adafruit Small 1.2" 8x8 LED Matrix w/I2C Backpack - Blue](https://www.adafruit.com/product/1052)
What's better than a single LED? Lots of LEDs! A fun way to make a small display is to use an [8x8 matrix](https://www.adafruit.com/category/37_88) or a [4-digit 7-segment display](https://www.adafruit.com/category/37_103). Matrices like these are...
In Stock
[Buy Now](https://www.adafruit.com/product/1052)
[Related Guides to the Product](https://learn.adafruit.com/products/1052/guides)
### Adafruit Mini 8x8 LED Matrix w/I2C Backpack - Ultra Bright White
[Adafruit Mini 8x8 LED Matrix w/I2C Backpack - Ultra Bright White](https://www.adafruit.com/product/1080)
What's better than a single LED? Lots of LEDs! A fun way to make a small display is to use an [8x8 matrix](https://www.adafruit.com/category/37_88) or a [4-digit 7-segment display](https://www.adafruit.com/category/37_103). Matrices like these are...
In Stock
[Buy Now](https://www.adafruit.com/product/1080)
[Related Guides to the Product](https://learn.adafruit.com/products/1080/guides)
### Adafruit 1.2" 4-Digit 7-Segment Display w/I2C Backpack - Green
[Adafruit 1.2" 4-Digit 7-Segment Display w/I2C Backpack - Green](https://www.adafruit.com/product/1268)
What's better than a single LED? Lots of LEDs! A fun way to make a numeric display is to use a [4-digit 7-segment display](https://www.adafruit.com/category/37_103). LED matrices like these are 'multiplexed' - so to control all the seven-segment LEDs you need 14 pins....
No Longer Stocked
[Buy Now](https://www.adafruit.com/product/1268)
[Related Guides to the Product](https://learn.adafruit.com/products/1268/guides)
### Adafruit 1.2" 4-Digit 7-Segment Display w/I2C Backpack - Yellow
[Adafruit 1.2" 4-Digit 7-Segment Display w/I2C Backpack - Yellow](https://www.adafruit.com/product/1269)
What's better than a single LED? Lots of LEDs! A fun way to make a numeric display is to use a [4-digit 7-segment display](https://www.adafruit.com/category/37_103). LED matrices like these are 'multiplexed' - so to control all the seven-segment LEDs you need 14 pins....
In Stock
[Buy Now](https://www.adafruit.com/product/1269)
[Related Guides to the Product](https://learn.adafruit.com/products/1269/guides)
### Adafruit 1.2" 4-Digit 7-Segment Display w/I2C Backpack - Red
[Adafruit 1.2" 4-Digit 7-Segment Display w/I2C Backpack - Red](https://www.adafruit.com/product/1270)
What's better than a single LED? Lots of LEDs! A fun way to make a numeric display is to use a [4-digit 7-segment display](https://www.adafruit.com/category/37_103). LED matrices like these are 'multiplexed' - so to control all the seven-segment LEDs you need 14 pins....
In Stock
[Buy Now](https://www.adafruit.com/product/1270)
[Related Guides to the Product](https://learn.adafruit.com/products/1270/guides)
### Small 1.2" 8x8 Ultra Bright White LED Matrix + Backpack
[Small 1.2" 8x8 Ultra Bright White LED Matrix + Backpack](https://www.adafruit.com/product/1614)
What's better than a single LED? Lots of LEDs! A fun way to make a small display is to use an [8x8 matrix](https://www.adafruit.com/category/37_88) or a [4-digit 7-segment display](https://www.adafruit.com/category/37_103). Matrices like these are...
In Stock
[Buy Now](https://www.adafruit.com/product/1614)
[Related Guides to the Product](https://learn.adafruit.com/products/1614/guides)
### Adafruit Small 1.2" 8x8 LED Matrix w/I2C Backpack - Pure Green
[Adafruit Small 1.2" 8x8 LED Matrix w/I2C Backpack - Pure Green](https://www.adafruit.com/product/1632)
What's better than a single LED? Lots of LEDs! A fun way to make a small display is to use an [8x8 matrix](https://www.adafruit.com/category/37_88) or a [4-digit 7-segment display](https://www.adafruit.com/category/37_103). Matrices like these are...
In Stock
[Buy Now](https://www.adafruit.com/product/1632)
[Related Guides to the Product](https://learn.adafruit.com/products/1632/guides)
### Adafruit Mini 0.8" 8x8 LED Matrix w/I2C Backpack - Pure Green
[Adafruit Mini 0.8" 8x8 LED Matrix w/I2C Backpack - Pure Green](https://www.adafruit.com/product/1633)
What's better than a single LED? Lots of LEDs! A fun way to make a small display is to use an [8x8 matrix](https://www.adafruit.com/category/37_88) or a [4-digit 7-segment display](https://www.adafruit.com/category/37_103). Matrices like these are...
In Stock
[Buy Now](https://www.adafruit.com/product/1633)
[Related Guides to the Product](https://learn.adafruit.com/products/1633/guides)
### Bi-Color (Red/Green) 24-Bar Bargraph w/I2C Backpack Kit
[Bi-Color (Red/Green) 24-Bar Bargraph w/I2C Backpack Kit](https://www.adafruit.com/product/1721)
What's better than a single LED? Lots of LEDs! A fun way to make a small linear display is to use two 12-bar Bi-color bar-graphs. However, this LED bargraph is 'multiplexed' - so to control all the 48 LEDs you need a lot of pins.
Out of Stock
[Buy Now](https://www.adafruit.com/product/1721)
[Related Guides to the Product](https://learn.adafruit.com/products/1721/guides)
### Small 1.2" 8x8 Ultra Bright Square Amber LED Matrix + Backpack
[Small 1.2" 8x8 Ultra Bright Square Amber LED Matrix + Backpack](https://www.adafruit.com/product/1854)
What's better than a single LED? Lots of LEDs! Matrices like these are 'multiplexed' - so to control 64 LEDs you need 16 pins. That's a lot of pins, and there are [driver chips like the MAX7219](//www.adafruit.com/products/453) that can control a matrix for you but...
In Stock
[Buy Now](https://www.adafruit.com/product/1854)
[Related Guides to the Product](https://learn.adafruit.com/products/1854/guides)
### Small 1.2" 8x8 Ultra Bright Square Yellow LED Matrix + Backpack
[Small 1.2" 8x8 Ultra Bright Square Yellow LED Matrix + Backpack](https://www.adafruit.com/product/1855)
What's better than a single LED? Lots of LEDs! Matrices like these are 'multiplexed' - so to control 64 LEDs you need 16 pins. That's a lot of pins, and there are [driver chips like the MAX7219](//www.adafruit.com/products/453) that can control a matrix for you but...
In Stock
[Buy Now](https://www.adafruit.com/product/1855)
[Related Guides to the Product](https://learn.adafruit.com/products/1855/guides)
### Small 1.2" 8x8 Bright Square Pure Green LED Matrix + Backpack
[Small 1.2" 8x8 Bright Square Pure Green LED Matrix + Backpack](https://www.adafruit.com/product/1856)
What's better than a single LED? Lots of LEDs! Matrices like these are 'multiplexed' - so to control 64 LEDs you need 16 pins. That's a lot of pins, and there are [driver chips like the MAX7219](//www.adafruit.com/products/453) that can control a matrix for you but...
In Stock
[Buy Now](https://www.adafruit.com/product/1856)
[Related Guides to the Product](https://learn.adafruit.com/products/1856/guides)
### Small 1.2" 8x8 Ultra Bright Square White LED Matrix + Backpack
[Small 1.2" 8x8 Ultra Bright Square White LED Matrix + Backpack](https://www.adafruit.com/product/1857)
What's better than a single LED? Lots of LEDs! Matrices like these are 'multiplexed' - so to control 64 LEDs you need 16 pins. That's a lot of pins, and there are [driver chips like the MAX7219](//www.adafruit.com/products/453) that can control a matrix for you but...
In Stock
[Buy Now](https://www.adafruit.com/product/1857)
[Related Guides to the Product](https://learn.adafruit.com/products/1857/guides)
### Adafruit 14-segment LED Alphanumeric Backpack - STEMMA QT
[Adafruit 14-segment LED Alphanumeric Backpack - STEMMA QT](https://www.adafruit.com/product/1910)
By popular request, you can now get our 14-segment LED backpacks without the LEDs! These backpacks feature an HT16K33 I2C LED driver, they're simple and easy to use - you can use [our very nice library for the backpacks to...](https://github.com/adafruit/Adafruit-LED-Backpack-Library)
In Stock
[Buy Now](https://www.adafruit.com/product/1910)
[Related Guides to the Product](https://learn.adafruit.com/products/1910/guides)
### Quad Alphanumeric Display - Red 0.54" Digits w/ I2C Backpack
[Quad Alphanumeric Display - Red 0.54" Digits w/ I2C Backpack](https://www.adafruit.com/product/1911)
Display, elegantly, 012345678 or 9! Gaze, hypnotized, at ABCDEFGHIJKLM - well it can display the whole alphabet. You get the point. This is a nice, bright alphanumeric display that shows letters and numbers in a beautiful red hue. It's super bright and designed for viewing from distances...
In Stock
[Buy Now](https://www.adafruit.com/product/1911)
[Related Guides to the Product](https://learn.adafruit.com/products/1911/guides)
### Quad Alphanumeric Display - Blue 0.54" Digits w/ I2C Backpack
[Quad Alphanumeric Display - Blue 0.54" Digits w/ I2C Backpack](https://www.adafruit.com/product/1912)
Display, elegantly, 012345678 or 9! Gaze, hypnotized, at ABCDEFGHIJKLM - well it can display the whole alphabet. You get the point. This is a nice, bright alphanumeric display that shows letters and numbers in a beautiful blue hue. It's super bright and designed for viewing from distances...
In Stock
[Buy Now](https://www.adafruit.com/product/1912)
[Related Guides to the Product](https://learn.adafruit.com/products/1912/guides)
### 16x8 1.2" LED Matrix + Backpack - Ultra Bright Round Green LEDs
[16x8 1.2" LED Matrix + Backpack - Ultra Bright Round Green LEDs](https://www.adafruit.com/product/2035)
What's better than a single LED? Lots of LEDs! And what's better than lots of LEDs? **TWO TIMES AS MANY LEDS!!!**
With the 16x8 LED Matrix Backpack we've doubled your project's matrix capacity by making it super easy to get two separate 8x8 matrices onto...
In Stock
[Buy Now](https://www.adafruit.com/product/2035)
[Related Guides to the Product](https://learn.adafruit.com/products/2035/guides)
### 16x8 1.2" LED Matrix+Backpack UltraBright Round YellowGreen LEDs
[16x8 1.2" LED Matrix+Backpack UltraBright Round YellowGreen LEDs](https://www.adafruit.com/product/2036)
What's better than a single LED? Lots of LEDs! And what's better than lots of LEDs? **TWO TIMES AS MANY LEDS!!!**
With the 16x8 LED Matrix Backpack we've doubled your project's matrix capacity by making it super easy to get two separate 8x8 matrices onto...
In Stock
[Buy Now](https://www.adafruit.com/product/2036)
[Related Guides to the Product](https://learn.adafruit.com/products/2036/guides)
### 16x8 1.2" LED Matrix + Backpack - Ultra Bright Round Red LEDs
[16x8 1.2" LED Matrix + Backpack - Ultra Bright Round Red LEDs](https://www.adafruit.com/product/2037)
What's better than a single LED? Lots of LEDs! And what's better than lots of LEDs? **TWO TIMES AS MANY LEDS!!!**
With the 16x8 LED Matrix Backpack we've doubled your project's matrix capacity by making it super easy to get two separate 8x8 matrices onto...
In Stock
[Buy Now](https://www.adafruit.com/product/2037)
[Related Guides to the Product](https://learn.adafruit.com/products/2037/guides)
### 16x8 1.2" LED Matrix + Backpack - Ultra Bright Round White LEDs
[16x8 1.2" LED Matrix + Backpack - Ultra Bright Round White LEDs](https://www.adafruit.com/product/2038)
What's better than a single LED? Lots of LEDs! And what's better than lots of LEDs? **TWO TIMES AS MANY LEDS!!!**
With the 16x8 LED Matrix Backpack we've doubled your project's matrix capacity by making it super easy to get two separate 8x8 matrices onto...
In Stock
[Buy Now](https://www.adafruit.com/product/2038)
[Related Guides to the Product](https://learn.adafruit.com/products/2038/guides)
### 16x8 1.2" LED Matrix + Backpack - Ultra Bright Round Blue LEDs
[16x8 1.2" LED Matrix + Backpack - Ultra Bright Round Blue LEDs](https://www.adafruit.com/product/2039)
What's better than a single LED? Lots of LEDs! And what's better than lots of LEDs? **TWO TIMES AS MANY LEDS!!!**
With the 16x8 LED Matrix Backpack we've doubled your project's matrix capacity by making it super easy to get two separate 8x8 matrices onto...
In Stock
[Buy Now](https://www.adafruit.com/product/2039)
[Related Guides to the Product](https://learn.adafruit.com/products/2039/guides)
### 16x8 1.2" LED Matrix + Backpack - Ultra Bright Square Blue LEDs
[16x8 1.2" LED Matrix + Backpack - Ultra Bright Square Blue LEDs](https://www.adafruit.com/product/2040)
What's better than a single LED? Lots of LEDs! And what's better than lots of LEDs? **TWO TIMES AS MANY LEDS!!!**
With the 16x8 LED Matrix Backpack we've doubled your project's matrix capacity by making it super easy to get two separate 8x8 matrices onto...
In Stock
[Buy Now](https://www.adafruit.com/product/2040)
[Related Guides to the Product](https://learn.adafruit.com/products/2040/guides)
### 16x8 1.2" LED Matrix + Backpack - Ultra Bright Square Amber LEDs
[16x8 1.2" LED Matrix + Backpack - Ultra Bright Square Amber LEDs](https://www.adafruit.com/product/2041)
What's better than a single LED? Lots of LEDs! And what's better than lots of LEDs? **TWO TIMES AS MANY LEDS!!!**
With the 16x8 LED Matrix Backpack we've doubled your project's matrix capacity by making it super easy to get two separate 8x8 matrices onto...
In Stock
[Buy Now](https://www.adafruit.com/product/2041)
[Related Guides to the Product](https://learn.adafruit.com/products/2041/guides)
### 16x8 1.2" LED Matrix + Backpack - Ultra Bright Square Green LEDs
[16x8 1.2" LED Matrix + Backpack - Ultra Bright Square Green LEDs](https://www.adafruit.com/product/2042)
What's better than a single LED? Lots of LEDs! And what's better than lots of LEDs? **TWO TIMES AS MANY LEDS!!!**
With the 16x8 LED Matrix Backpack we've doubled your project's matrix capacity by making it super easy to get two separate 8x8 matrices onto...
In Stock
[Buy Now](https://www.adafruit.com/product/2042)
[Related Guides to the Product](https://learn.adafruit.com/products/2042/guides)
### 16x8 1.2" LED Matrix + Backpack -Ultra Bright Square Yellow LEDs
[16x8 1.2" LED Matrix + Backpack -Ultra Bright Square Yellow LEDs](https://www.adafruit.com/product/2043)
What's better than a single LED? Lots of LEDs! And what's better than lots of LEDs? **TWO TIMES AS MANY LEDS!!!**
With the 16x8 LED Matrix Backpack we've doubled your project's matrix capacity by making it super easy to get two separate 8x8 matrices onto...
In Stock
[Buy Now](https://www.adafruit.com/product/2043)
[Related Guides to the Product](https://learn.adafruit.com/products/2043/guides)
### 16x8 1.2" LED Matrix + Backpack - Ultra Bright Square White LEDs
[16x8 1.2" LED Matrix + Backpack - Ultra Bright Square White LEDs](https://www.adafruit.com/product/2044)
What's better than a single LED? Lots of LEDs! And what's better than lots of LEDs? **TWO TIMES AS MANY LEDS!!!**
With the 16x8 LED Matrix Backpack we've doubled your project's matrix capacity by making it super easy to get two separate 8x8 matrices onto...
In Stock
[Buy Now](https://www.adafruit.com/product/2044)
[Related Guides to the Product](https://learn.adafruit.com/products/2044/guides)
### 16x8 1.2" LED Matrix + Backpack-Ultra Bright Round Orange LEDs
[16x8 1.2" LED Matrix + Backpack-Ultra Bright Round Orange LEDs](https://www.adafruit.com/product/2052)
What's better than a single LED? Lots of LEDs! And what's better than lots of LEDs? **TWO TIMES AS MANY LEDS!!!**
With the 16x8 LED Matrix Backpack we've doubled your project's matrix capacity by making it super easy to get two separate 8x8 matrices onto...
In Stock
[Buy Now](https://www.adafruit.com/product/2052)
[Related Guides to the Product](https://learn.adafruit.com/products/2052/guides)
### 16x8 1.2" LED Matrices+Backpack Round LEDs in Various Colors
[16x8 1.2" LED Matrices+Backpack Round LEDs in Various Colors](https://www.adafruit.com/product/2054)
What's better than a single LED? Lots of LEDs! And what's better than lots of LEDs? **TWO TIMES AS MANY LEDS!!!**
With the 16x8 LED Matrix Backpack we've doubled your project's matrix capacity by making it super easy to get two separate 8x8 matrices onto...
Out of Stock
[Buy Now](https://www.adafruit.com/product/2054)
[Related Guides to the Product](https://learn.adafruit.com/products/2054/guides)
### Adafruit 8x16 LED Matrix FeatherWing w/o Matrices
[Adafruit 8x16 LED Matrix FeatherWing w/o Matrices](https://www.adafruit.com/product/3090)
You will chirp with delight when you see how easy it is to make your very own 8x16 LED matrix display for any Feather. At 0.8" square, the little [8x8 matrices](https://www.adafruit.com/new/?q=8x8%20miniature%20LED%20matrix&) have everything a big LED matrix has,...
Out of Stock
[Buy Now](https://www.adafruit.com/product/3090)
[Related Guides to the Product](https://learn.adafruit.com/products/3090/guides)
### Adafruit 14-segment LED Alphanumeric backpack (same as P1910)
[Adafruit 14-segment LED Alphanumeric backpack (same as P1910)](https://www.adafruit.com/product/3322)
Just the backpack + 4pin header
No Longer Stocked
[Buy Now](https://www.adafruit.com/product/3322)
[Related Guides to the Product](https://learn.adafruit.com/products/3322/guides)
## Featured Products
### Adafruit Small 1.2" 8x8 LED Matrix w/I2C Backpack - Yellow-Green
[Adafruit Small 1.2" 8x8 LED Matrix w/I2C Backpack - Yellow-Green](https://www.adafruit.com/product/1051)
What's better than a single LED? Lots of LEDs! A fun way to make a small display is to use an [8x8 matrix](https://www.adafruit.com/category/37_88) or a [4-digit 7-segment display](https://www.adafruit.com/category/37_103). Matrices like these are...
In Stock
[Buy Now](https://www.adafruit.com/product/1051)
[Related Guides to the Product](https://learn.adafruit.com/products/1051/guides)
### Small 1.2" 8x8 Ultra Bright Square Blue LED Matrix + Backpack
[Small 1.2" 8x8 Ultra Bright Square Blue LED Matrix + Backpack](https://www.adafruit.com/product/1853)
What's better than a single LED? Lots of LEDs! Matrices like these are 'multiplexed' - so to control 64 LEDs you need 16 pins. That's a lot of pins, and there are [driver chips like the MAX7219](//www.adafruit.com/products/453) that can control a matrix for you but...
In Stock
[Buy Now](https://www.adafruit.com/product/1853)
[Related Guides to the Product](https://learn.adafruit.com/products/1853/guides)
## Related Guides
- [LED Backpack Displays on Raspberry Pi and BeagleBone Black](https://learn.adafruit.com/led-backpack-displays-on-raspberry-pi-and-beaglebone-black.md)
- [Animating Multiple LED Backpacks](https://learn.adafruit.com/animating-multiple-led-backpacks.md)
- [Arduino GPS Clock](https://learn.adafruit.com/arduino-clock.md)
- [Raspberry Pi Physical Dashboard](https://learn.adafruit.com/raspberry-pi-physical-dashboard.md)
- [CircuitPython Hardware: LED Backpacks & FeatherWings](https://learn.adafruit.com/micropython-hardware-led-backpacks-and-featherwings.md)
- [Matrix and 7-Segment LED Backpack with the Raspberry Pi](https://learn.adafruit.com/matrix-7-segment-led-backpack-with-the-raspberry-pi.md)
- [DIY Pocket LED Gamer - Tiny Tetris!](https://learn.adafruit.com/diy-3d-printed-handheld-pocket-game-tiny-tetris-snake.md)
- [RGB LED Matrix Cube with 25,000 LEDs](https://learn.adafruit.com/rgb-led-matrix-cube-for-pi.md)
- [Creating GIFs for SmartMatrix](https://learn.adafruit.com/creating-gifs-for-smartmatrix.md)
- [Adafruit CharliePlex LED Matrix Bonnet](https://learn.adafruit.com/adafruit-charlieplex-bonnet.md)
- [Connecting a 16x32 RGB LED Matrix Panel to a Raspberry Pi](https://learn.adafruit.com/connecting-a-16x32-rgb-led-matrix-panel-to-a-raspberry-pi.md)
- [MicroPython Displays: Drawing Text](https://learn.adafruit.com/micropython-displays-drawing-text.md)
- [Heart Rate Badge](https://learn.adafruit.com/heart-rate-badge.md)
- [16x24 LED Matrix](https://learn.adafruit.com/16x24-led-matrix.md)
- [Adafruit IS31FL3741](https://learn.adafruit.com/adafruit-is31fl3741.md)
---
# Source: https://learn.adafruit.com/adafruit-led-backpack/0-8-8x8-matrix-circuitpython-and-python-usage.md
# Adafruit LED Backpacks
## CircuitPython and Python Usage
The following section will show how to control the LED backpack from the board's Python prompt / REPL. You'll walk through how to control the LED display and learn how to use the CircuitPython module built for the display.
First [connect to the board's serial REPL ](https://learn.adafruit.com/welcome-to-circuitpython/the-repl)so you are at the CircuitPython **\>\>\>** prompt.
## Initialization
First you'll need to initialize the I2C bus for your board. It's really easy, first import the necessary modules. In this case, we'll use `board` and `Matrix8x8`.
Then just use `board.I2C()` to create the I2C instance using the default SCL and SDA pins (which will be marked on the boards pins if using a Feather or similar Adafruit board).
Then to initialize the matrix, you just pass `i2c` in.
Warning: When using the STEMMA QT port, some board may have an alternate I2C such as board.STEMMA_I2C().
```python
import board
from adafruit_ht16k33.matrix import Matrix8x8
i2c = board.I2C()
matrix = Matrix8x8(i2c)
```
If you bridged the address pads on the back of the display, you could pass in the address. The addresses for the HT16K33 can range between 0x70 and 0x77 depending on which pads you have bridged, with 0x70 being used if you haven't bridged any of them. For instance, if you bridge only the **A0** pad, you would use `0x71` like this:
```python
matrix = Matrix8x8(i2c, address=0x71)
```
## Setting the Brightness
You can set the brightness of the display, but changing it will set the brightness of the entire display and not individual segments. If can be adjusted in 1/16 increments **between 0 and 1.0** with 1.0 being the brightest. So to set the display to half brightness, you would use the following:
```python
matrix.brightness = 0.5
```
## Setting the Blink Rate
You can set the blink rate of the display, but changing it will set the brightness of the entire display and not individual pixels. If can be adjusted in 1/4 increments **between 0 and 3** with 3 being the fastest blinking. So to set the display to blink at full speed, you would use the following:
```python
matrix.blink_rate = 3
```
## Setting Individual Pixels
To set individual pixels to on, you simply treat the `matrix` object as a multidimensional list and set it to 1.
```python
matrix[0, 0] = 1
matrix[4, 4] = 1
matrix[7, 7] = 1
```
## Filling the Entire Matrix
To fill the entire matrix, just use the fill() function and pass in either 0 or 1 depending on whether you want all pixels off or on. For instance, if you wanted to set everything to on, you would use:
```python
matrix.fill(1)
```
## Shifting the Matrix
To shift the pixels on the matrix, there are 5 functions you can use. The main function, called shift(), is used to shift the pixels, up, down, left, right, or even diagonally. By passing a positive number, it will shift the pixels right/up and passing a negative number will shift them left/down. For instance:
```python
matrix.shift(2, 0) # shift pixels to the right by 2
matrix.shift(-1, 0) # shift pixels to the left by 1
matrix.shift(0, -3) # shift pixels down by 3
matrix.shift(-2, 2) # shift pixels left by 2 and up by 2
```
You can pass `True` as a third parameter to loop all the pixels that get shifted off over to the other side.
```python
matrix.shift(2, 0, True) # loop pixels to the right by 2
matrix.shift(-1, 0, True) # loop pixels to the left by 1
matrix.shift(0, -3, True) # loop pixels down by 3
matrix.shift(-2, 2, True) # loop pixels left by 2 and up by 2
```
Additionally, there are a few convenience functions that will shift the pixels by one. These can also be passed a value of `True` to loop the pixels.
```python
matrix.shift_up() # Shift pixels up
matrix.shift_left() # Shift pixels left
matrix.shift_down() # Shift pixels down
matrix.shift_right() # Shift pixels right
matrix.shift_up(True) # Loop pixels up
matrix.shift_left(True) # Loop pixels left
matrix.shift_down(True) # Loop pixels down
matrix.shift_right(True) # Loop pixels right
```
## Displaying an Image (Pillow Only)
Additionally, when using with the Raspberry Pi, you can use the Pillow library to display an image to the Matrix. The image will need to be the same exact size as the Matrix. In this case, it should be **8x8** pixels. As an example, you can save the image below as **myimage.png**.

[Download Image](https://cdn-learn.adafruit.com/assets/assets/000/087/758/original/led_matrices_squares-mono-8x8.png?1580238605)
Then if you want to display the image called **myimage.png** , you would use something like this:
```python
import board
from PIL import Image
from adafruit_ht16k33 import matrix
matrix = matrix.Matrix8x8(board.I2C())
image = Image.open("myimage.png")
matrix.image(image)
```

- [Previous Page](https://learn.adafruit.com/adafruit-led-backpack/0-8-8x8-matrix-python-wiring-and-setup.md)
- [Next Page](https://learn.adafruit.com/adafruit-led-backpack/1-2-16x8-matrix.md)
## Primary Products
### Adafruit Mini 8x8 LED Matrix w/I2C Backpack - Red
[Adafruit Mini 8x8 LED Matrix w/I2C Backpack - Red](https://www.adafruit.com/product/870)
What's better than a single LED? Lots of LEDs! A fun way to make a small display is to use an [8x8 matrix](https://www.adafruit.com/category/37_88) or a [4-digit 7-segment display](https://www.adafruit.com/category/37_103). Matrices like these are...
In Stock
[Buy Now](https://www.adafruit.com/product/870)
[Related Guides to the Product](https://learn.adafruit.com/products/870/guides)
### Adafruit Mini 8x8 LED Matrix w/I2C Backpack - Yellow
[Adafruit Mini 8x8 LED Matrix w/I2C Backpack - Yellow](https://www.adafruit.com/product/871)
What's better than a single LED? Lots of LEDs! A fun way to make a small display is to use an [8x8 matrix](https://www.adafruit.com/category/37_88) or a [4-digit 7-segment display](https://www.adafruit.com/category/37_103). Matrices like these are...
In Stock
[Buy Now](https://www.adafruit.com/product/871)
[Related Guides to the Product](https://learn.adafruit.com/products/871/guides)
### Adafruit Mini 0.8" 8x8 LED Matrix w/I2C Backpack - Yellow-Green
[Adafruit Mini 0.8" 8x8 LED Matrix w/I2C Backpack - Yellow-Green](https://www.adafruit.com/product/872)
What's better than a single LED? Lots of LEDs! A fun way to make a small display is to use an [8x8 matrix](https://www.adafruit.com/category/37_88) or a [4-digit 7-segment display](https://www.adafruit.com/category/37_103). Matrices like these are...
In Stock
[Buy Now](https://www.adafruit.com/product/872)
[Related Guides to the Product](https://learn.adafruit.com/products/872/guides)
### Adafruit 0.56" 4-Digit 7-Segment Display with I2C Backpack - Red
[Adafruit 0.56" 4-Digit 7-Segment Display with I2C Backpack - Red](https://www.adafruit.com/product/878)
What's better than a single LED? Lots of LEDs! A fun way to make a small display is to use an [8x8 matrix](https://www.adafruit.com/category/37_88) or a [4-digit 7-segment display](https://www.adafruit.com/category/37_103). Matrices like these are...
In Stock
[Buy Now](https://www.adafruit.com/product/878)
[Related Guides to the Product](https://learn.adafruit.com/products/878/guides)
### Adafruit 0.56" 4-Digit 7-Segment Display w/I2C Backpack - Yellow
[Adafruit 0.56" 4-Digit 7-Segment Display w/I2C Backpack - Yellow](https://www.adafruit.com/product/879)
What's better than a single LED? Lots of LEDs! A fun way to make a small display is to use an [8x8 matrix](https://www.adafruit.com/category/37_88) or a [4-digit 7-segment display](https://www.adafruit.com/category/37_103). Matrices like these are...
In Stock
[Buy Now](https://www.adafruit.com/product/879)
[Related Guides to the Product](https://learn.adafruit.com/products/879/guides)
### Adafruit 0.56" 4-Digit 7-Segment Display w/ I2C Backpack - Green
[Adafruit 0.56" 4-Digit 7-Segment Display w/ I2C Backpack - Green](https://www.adafruit.com/product/880)
What's better than a single LED? Lots of LEDs! A fun way to make a small display is to use an [8x8 matrix](https://www.adafruit.com/category/37_88) or a [4-digit 7-segment display](https://www.adafruit.com/category/37_103). Matrices like these are...
No Longer Stocked
[Buy Now](https://www.adafruit.com/product/880)
[Related Guides to the Product](https://learn.adafruit.com/products/880/guides)
### Adafruit 0.56" 4-Digit 7-Segment Display w/ I2C Backpack - Blue
[Adafruit 0.56" 4-Digit 7-Segment Display w/ I2C Backpack - Blue](https://www.adafruit.com/product/881)
What's better than a single LED? Lots of LEDs! A fun way to make a small display is to use an [8x8 matrix](https://www.adafruit.com/category/37_88) or a [4-digit 7-segment display](https://www.adafruit.com/category/37_103). Matrices like these are...
In Stock
[Buy Now](https://www.adafruit.com/product/881)
[Related Guides to the Product](https://learn.adafruit.com/products/881/guides)
### Adafruit Bicolor LED Square Pixel Matrix with I2C Backpack
[Adafruit Bicolor LED Square Pixel Matrix with I2C Backpack](https://www.adafruit.com/product/902)
What's better than a single LED? Lots of LEDs! A fun way to make a small colorful display is to use a [1.2" Bi-color 8x8 LED Matrix](http://www.adafruit.com/products/458). Matrices like these are 'multiplexed' - so to control all the 128 LEDs you need 24 pins....
In Stock
[Buy Now](https://www.adafruit.com/product/902)
[Related Guides to the Product](https://learn.adafruit.com/products/902/guides)
### Adafruit Mini 8x8 LED Matrix w/I2C Backpack - Blue
[Adafruit Mini 8x8 LED Matrix w/I2C Backpack - Blue](https://www.adafruit.com/product/959)
What's better than a single LED? Lots of LEDs! A fun way to make a small display is to use an [8x8 matrix](https://www.adafruit.com/category/37_88) or a [4-digit 7-segment display](https://www.adafruit.com/category/37_103). Matrices like these are...
In Stock
[Buy Now](https://www.adafruit.com/product/959)
[Related Guides to the Product](https://learn.adafruit.com/products/959/guides)
### Adafruit 0.56" 4-Digit 7-Segment Display w/I2C Backpack - White
[Adafruit 0.56" 4-Digit 7-Segment Display w/I2C Backpack - White](https://www.adafruit.com/product/1002)
What's better than a single LED? Lots of LEDs! A fun way to make a small display is to use an [8x8 matrix](https://www.adafruit.com/category/37_88) or a [4-digit 7-segment display](https://www.adafruit.com/category/37_103). Matrices like these are...
In Stock
[Buy Now](https://www.adafruit.com/product/1002)
[Related Guides to the Product](https://learn.adafruit.com/products/1002/guides)
### Adafruit 1.2" 8x8 LED Matrix Backpack
[Adafruit 1.2" 8x8 LED Matrix Backpack](https://www.adafruit.com/product/1048)
By popular request, you can now get our 8x8 LED backpacks without the LEDs! These backpacks feature an HT16K33 I2C LED driver, they're simple and easy to use - you can use [our very nice library for the backpacks to...](https://github.com/adafruit/Adafruit-LED-Backpack-Library)
In Stock
[Buy Now](https://www.adafruit.com/product/1048)
[Related Guides to the Product](https://learn.adafruit.com/products/1048/guides)
### Adafruit Small 1.2" 8x8 LED Matrix w/I2C Backpack - Red
[Adafruit Small 1.2" 8x8 LED Matrix w/I2C Backpack - Red](https://www.adafruit.com/product/1049)
What's better than a single LED? Lots of LEDs! A fun way to make a small display is to use an [8x8 matrix](https://www.adafruit.com/category/37_88) or a [4-digit 7-segment display](https://www.adafruit.com/category/37_103). Matrices like these are...
In Stock
[Buy Now](https://www.adafruit.com/product/1049)
[Related Guides to the Product](https://learn.adafruit.com/products/1049/guides)
### Adafruit Small 1.2" 8x8 LED Matrix w/I2C Backpack - Yellow
[Adafruit Small 1.2" 8x8 LED Matrix w/I2C Backpack - Yellow](https://www.adafruit.com/product/1050)
What's better than a single LED? Lots of LEDs! A fun way to make a small display is to use an [8x8 matrix](https://www.adafruit.com/category/37_88) or a [4-digit 7-segment display](https://www.adafruit.com/category/37_103). Matrices like these are...
In Stock
[Buy Now](https://www.adafruit.com/product/1050)
[Related Guides to the Product](https://learn.adafruit.com/products/1050/guides)
### Adafruit Small 1.2" 8x8 LED Matrix w/I2C Backpack - Blue
[Adafruit Small 1.2" 8x8 LED Matrix w/I2C Backpack - Blue](https://www.adafruit.com/product/1052)
What's better than a single LED? Lots of LEDs! A fun way to make a small display is to use an [8x8 matrix](https://www.adafruit.com/category/37_88) or a [4-digit 7-segment display](https://www.adafruit.com/category/37_103). Matrices like these are...
In Stock
[Buy Now](https://www.adafruit.com/product/1052)
[Related Guides to the Product](https://learn.adafruit.com/products/1052/guides)
### Adafruit Mini 8x8 LED Matrix w/I2C Backpack - Ultra Bright White
[Adafruit Mini 8x8 LED Matrix w/I2C Backpack - Ultra Bright White](https://www.adafruit.com/product/1080)
What's better than a single LED? Lots of LEDs! A fun way to make a small display is to use an [8x8 matrix](https://www.adafruit.com/category/37_88) or a [4-digit 7-segment display](https://www.adafruit.com/category/37_103). Matrices like these are...
In Stock
[Buy Now](https://www.adafruit.com/product/1080)
[Related Guides to the Product](https://learn.adafruit.com/products/1080/guides)
### Adafruit 1.2" 4-Digit 7-Segment Display w/I2C Backpack - Green
[Adafruit 1.2" 4-Digit 7-Segment Display w/I2C Backpack - Green](https://www.adafruit.com/product/1268)
What's better than a single LED? Lots of LEDs! A fun way to make a numeric display is to use a [4-digit 7-segment display](https://www.adafruit.com/category/37_103). LED matrices like these are 'multiplexed' - so to control all the seven-segment LEDs you need 14 pins....
No Longer Stocked
[Buy Now](https://www.adafruit.com/product/1268)
[Related Guides to the Product](https://learn.adafruit.com/products/1268/guides)
### Adafruit 1.2" 4-Digit 7-Segment Display w/I2C Backpack - Yellow
[Adafruit 1.2" 4-Digit 7-Segment Display w/I2C Backpack - Yellow](https://www.adafruit.com/product/1269)
What's better than a single LED? Lots of LEDs! A fun way to make a numeric display is to use a [4-digit 7-segment display](https://www.adafruit.com/category/37_103). LED matrices like these are 'multiplexed' - so to control all the seven-segment LEDs you need 14 pins....
In Stock
[Buy Now](https://www.adafruit.com/product/1269)
[Related Guides to the Product](https://learn.adafruit.com/products/1269/guides)
### Adafruit 1.2" 4-Digit 7-Segment Display w/I2C Backpack - Red
[Adafruit 1.2" 4-Digit 7-Segment Display w/I2C Backpack - Red](https://www.adafruit.com/product/1270)
What's better than a single LED? Lots of LEDs! A fun way to make a numeric display is to use a [4-digit 7-segment display](https://www.adafruit.com/category/37_103). LED matrices like these are 'multiplexed' - so to control all the seven-segment LEDs you need 14 pins....
In Stock
[Buy Now](https://www.adafruit.com/product/1270)
[Related Guides to the Product](https://learn.adafruit.com/products/1270/guides)
### Small 1.2" 8x8 Ultra Bright White LED Matrix + Backpack
[Small 1.2" 8x8 Ultra Bright White LED Matrix + Backpack](https://www.adafruit.com/product/1614)
What's better than a single LED? Lots of LEDs! A fun way to make a small display is to use an [8x8 matrix](https://www.adafruit.com/category/37_88) or a [4-digit 7-segment display](https://www.adafruit.com/category/37_103). Matrices like these are...
In Stock
[Buy Now](https://www.adafruit.com/product/1614)
[Related Guides to the Product](https://learn.adafruit.com/products/1614/guides)
### Adafruit Small 1.2" 8x8 LED Matrix w/I2C Backpack - Pure Green
[Adafruit Small 1.2" 8x8 LED Matrix w/I2C Backpack - Pure Green](https://www.adafruit.com/product/1632)
What's better than a single LED? Lots of LEDs! A fun way to make a small display is to use an [8x8 matrix](https://www.adafruit.com/category/37_88) or a [4-digit 7-segment display](https://www.adafruit.com/category/37_103). Matrices like these are...
In Stock
[Buy Now](https://www.adafruit.com/product/1632)
[Related Guides to the Product](https://learn.adafruit.com/products/1632/guides)
### Adafruit Mini 0.8" 8x8 LED Matrix w/I2C Backpack - Pure Green
[Adafruit Mini 0.8" 8x8 LED Matrix w/I2C Backpack - Pure Green](https://www.adafruit.com/product/1633)
What's better than a single LED? Lots of LEDs! A fun way to make a small display is to use an [8x8 matrix](https://www.adafruit.com/category/37_88) or a [4-digit 7-segment display](https://www.adafruit.com/category/37_103). Matrices like these are...
In Stock
[Buy Now](https://www.adafruit.com/product/1633)
[Related Guides to the Product](https://learn.adafruit.com/products/1633/guides)
### Bi-Color (Red/Green) 24-Bar Bargraph w/I2C Backpack Kit
[Bi-Color (Red/Green) 24-Bar Bargraph w/I2C Backpack Kit](https://www.adafruit.com/product/1721)
What's better than a single LED? Lots of LEDs! A fun way to make a small linear display is to use two 12-bar Bi-color bar-graphs. However, this LED bargraph is 'multiplexed' - so to control all the 48 LEDs you need a lot of pins.
Out of Stock
[Buy Now](https://www.adafruit.com/product/1721)
[Related Guides to the Product](https://learn.adafruit.com/products/1721/guides)
### Small 1.2" 8x8 Ultra Bright Square Amber LED Matrix + Backpack
[Small 1.2" 8x8 Ultra Bright Square Amber LED Matrix + Backpack](https://www.adafruit.com/product/1854)
What's better than a single LED? Lots of LEDs! Matrices like these are 'multiplexed' - so to control 64 LEDs you need 16 pins. That's a lot of pins, and there are [driver chips like the MAX7219](//www.adafruit.com/products/453) that can control a matrix for you but...
In Stock
[Buy Now](https://www.adafruit.com/product/1854)
[Related Guides to the Product](https://learn.adafruit.com/products/1854/guides)
### Small 1.2" 8x8 Ultra Bright Square Yellow LED Matrix + Backpack
[Small 1.2" 8x8 Ultra Bright Square Yellow LED Matrix + Backpack](https://www.adafruit.com/product/1855)
What's better than a single LED? Lots of LEDs! Matrices like these are 'multiplexed' - so to control 64 LEDs you need 16 pins. That's a lot of pins, and there are [driver chips like the MAX7219](//www.adafruit.com/products/453) that can control a matrix for you but...
In Stock
[Buy Now](https://www.adafruit.com/product/1855)
[Related Guides to the Product](https://learn.adafruit.com/products/1855/guides)
### Small 1.2" 8x8 Bright Square Pure Green LED Matrix + Backpack
[Small 1.2" 8x8 Bright Square Pure Green LED Matrix + Backpack](https://www.adafruit.com/product/1856)
What's better than a single LED? Lots of LEDs! Matrices like these are 'multiplexed' - so to control 64 LEDs you need 16 pins. That's a lot of pins, and there are [driver chips like the MAX7219](//www.adafruit.com/products/453) that can control a matrix for you but...
In Stock
[Buy Now](https://www.adafruit.com/product/1856)
[Related Guides to the Product](https://learn.adafruit.com/products/1856/guides)
### Small 1.2" 8x8 Ultra Bright Square White LED Matrix + Backpack
[Small 1.2" 8x8 Ultra Bright Square White LED Matrix + Backpack](https://www.adafruit.com/product/1857)
What's better than a single LED? Lots of LEDs! Matrices like these are 'multiplexed' - so to control 64 LEDs you need 16 pins. That's a lot of pins, and there are [driver chips like the MAX7219](//www.adafruit.com/products/453) that can control a matrix for you but...
In Stock
[Buy Now](https://www.adafruit.com/product/1857)
[Related Guides to the Product](https://learn.adafruit.com/products/1857/guides)
### Adafruit 14-segment LED Alphanumeric Backpack - STEMMA QT
[Adafruit 14-segment LED Alphanumeric Backpack - STEMMA QT](https://www.adafruit.com/product/1910)
By popular request, you can now get our 14-segment LED backpacks without the LEDs! These backpacks feature an HT16K33 I2C LED driver, they're simple and easy to use - you can use [our very nice library for the backpacks to...](https://github.com/adafruit/Adafruit-LED-Backpack-Library)
In Stock
[Buy Now](https://www.adafruit.com/product/1910)
[Related Guides to the Product](https://learn.adafruit.com/products/1910/guides)
### Quad Alphanumeric Display - Red 0.54" Digits w/ I2C Backpack
[Quad Alphanumeric Display - Red 0.54" Digits w/ I2C Backpack](https://www.adafruit.com/product/1911)
Display, elegantly, 012345678 or 9! Gaze, hypnotized, at ABCDEFGHIJKLM - well it can display the whole alphabet. You get the point. This is a nice, bright alphanumeric display that shows letters and numbers in a beautiful red hue. It's super bright and designed for viewing from distances...
In Stock
[Buy Now](https://www.adafruit.com/product/1911)
[Related Guides to the Product](https://learn.adafruit.com/products/1911/guides)
### Quad Alphanumeric Display - Blue 0.54" Digits w/ I2C Backpack
[Quad Alphanumeric Display - Blue 0.54" Digits w/ I2C Backpack](https://www.adafruit.com/product/1912)
Display, elegantly, 012345678 or 9! Gaze, hypnotized, at ABCDEFGHIJKLM - well it can display the whole alphabet. You get the point. This is a nice, bright alphanumeric display that shows letters and numbers in a beautiful blue hue. It's super bright and designed for viewing from distances...
In Stock
[Buy Now](https://www.adafruit.com/product/1912)
[Related Guides to the Product](https://learn.adafruit.com/products/1912/guides)
### 16x8 1.2" LED Matrix + Backpack - Ultra Bright Round Green LEDs
[16x8 1.2" LED Matrix + Backpack - Ultra Bright Round Green LEDs](https://www.adafruit.com/product/2035)
What's better than a single LED? Lots of LEDs! And what's better than lots of LEDs? **TWO TIMES AS MANY LEDS!!!**
With the 16x8 LED Matrix Backpack we've doubled your project's matrix capacity by making it super easy to get two separate 8x8 matrices onto...
In Stock
[Buy Now](https://www.adafruit.com/product/2035)
[Related Guides to the Product](https://learn.adafruit.com/products/2035/guides)
### 16x8 1.2" LED Matrix+Backpack UltraBright Round YellowGreen LEDs
[16x8 1.2" LED Matrix+Backpack UltraBright Round YellowGreen LEDs](https://www.adafruit.com/product/2036)
What's better than a single LED? Lots of LEDs! And what's better than lots of LEDs? **TWO TIMES AS MANY LEDS!!!**
With the 16x8 LED Matrix Backpack we've doubled your project's matrix capacity by making it super easy to get two separate 8x8 matrices onto...
In Stock
[Buy Now](https://www.adafruit.com/product/2036)
[Related Guides to the Product](https://learn.adafruit.com/products/2036/guides)
### 16x8 1.2" LED Matrix + Backpack - Ultra Bright Round Red LEDs
[16x8 1.2" LED Matrix + Backpack - Ultra Bright Round Red LEDs](https://www.adafruit.com/product/2037)
What's better than a single LED? Lots of LEDs! And what's better than lots of LEDs? **TWO TIMES AS MANY LEDS!!!**
With the 16x8 LED Matrix Backpack we've doubled your project's matrix capacity by making it super easy to get two separate 8x8 matrices onto...
In Stock
[Buy Now](https://www.adafruit.com/product/2037)
[Related Guides to the Product](https://learn.adafruit.com/products/2037/guides)
### 16x8 1.2" LED Matrix + Backpack - Ultra Bright Round White LEDs
[16x8 1.2" LED Matrix + Backpack - Ultra Bright Round White LEDs](https://www.adafruit.com/product/2038)
What's better than a single LED? Lots of LEDs! And what's better than lots of LEDs? **TWO TIMES AS MANY LEDS!!!**
With the 16x8 LED Matrix Backpack we've doubled your project's matrix capacity by making it super easy to get two separate 8x8 matrices onto...
In Stock
[Buy Now](https://www.adafruit.com/product/2038)
[Related Guides to the Product](https://learn.adafruit.com/products/2038/guides)
### 16x8 1.2" LED Matrix + Backpack - Ultra Bright Round Blue LEDs
[16x8 1.2" LED Matrix + Backpack - Ultra Bright Round Blue LEDs](https://www.adafruit.com/product/2039)
What's better than a single LED? Lots of LEDs! And what's better than lots of LEDs? **TWO TIMES AS MANY LEDS!!!**
With the 16x8 LED Matrix Backpack we've doubled your project's matrix capacity by making it super easy to get two separate 8x8 matrices onto...
In Stock
[Buy Now](https://www.adafruit.com/product/2039)
[Related Guides to the Product](https://learn.adafruit.com/products/2039/guides)
### 16x8 1.2" LED Matrix + Backpack - Ultra Bright Square Blue LEDs
[16x8 1.2" LED Matrix + Backpack - Ultra Bright Square Blue LEDs](https://www.adafruit.com/product/2040)
What's better than a single LED? Lots of LEDs! And what's better than lots of LEDs? **TWO TIMES AS MANY LEDS!!!**
With the 16x8 LED Matrix Backpack we've doubled your project's matrix capacity by making it super easy to get two separate 8x8 matrices onto...
In Stock
[Buy Now](https://www.adafruit.com/product/2040)
[Related Guides to the Product](https://learn.adafruit.com/products/2040/guides)
### 16x8 1.2" LED Matrix + Backpack - Ultra Bright Square Amber LEDs
[16x8 1.2" LED Matrix + Backpack - Ultra Bright Square Amber LEDs](https://www.adafruit.com/product/2041)
What's better than a single LED? Lots of LEDs! And what's better than lots of LEDs? **TWO TIMES AS MANY LEDS!!!**
With the 16x8 LED Matrix Backpack we've doubled your project's matrix capacity by making it super easy to get two separate 8x8 matrices onto...
In Stock
[Buy Now](https://www.adafruit.com/product/2041)
[Related Guides to the Product](https://learn.adafruit.com/products/2041/guides)
### 16x8 1.2" LED Matrix + Backpack - Ultra Bright Square Green LEDs
[16x8 1.2" LED Matrix + Backpack - Ultra Bright Square Green LEDs](https://www.adafruit.com/product/2042)
What's better than a single LED? Lots of LEDs! And what's better than lots of LEDs? **TWO TIMES AS MANY LEDS!!!**
With the 16x8 LED Matrix Backpack we've doubled your project's matrix capacity by making it super easy to get two separate 8x8 matrices onto...
In Stock
[Buy Now](https://www.adafruit.com/product/2042)
[Related Guides to the Product](https://learn.adafruit.com/products/2042/guides)
### 16x8 1.2" LED Matrix + Backpack -Ultra Bright Square Yellow LEDs
[16x8 1.2" LED Matrix + Backpack -Ultra Bright Square Yellow LEDs](https://www.adafruit.com/product/2043)
What's better than a single LED? Lots of LEDs! And what's better than lots of LEDs? **TWO TIMES AS MANY LEDS!!!**
With the 16x8 LED Matrix Backpack we've doubled your project's matrix capacity by making it super easy to get two separate 8x8 matrices onto...
In Stock
[Buy Now](https://www.adafruit.com/product/2043)
[Related Guides to the Product](https://learn.adafruit.com/products/2043/guides)
### 16x8 1.2" LED Matrix + Backpack - Ultra Bright Square White LEDs
[16x8 1.2" LED Matrix + Backpack - Ultra Bright Square White LEDs](https://www.adafruit.com/product/2044)
What's better than a single LED? Lots of LEDs! And what's better than lots of LEDs? **TWO TIMES AS MANY LEDS!!!**
With the 16x8 LED Matrix Backpack we've doubled your project's matrix capacity by making it super easy to get two separate 8x8 matrices onto...
In Stock
[Buy Now](https://www.adafruit.com/product/2044)
[Related Guides to the Product](https://learn.adafruit.com/products/2044/guides)
### 16x8 1.2" LED Matrix + Backpack-Ultra Bright Round Orange LEDs
[16x8 1.2" LED Matrix + Backpack-Ultra Bright Round Orange LEDs](https://www.adafruit.com/product/2052)
What's better than a single LED? Lots of LEDs! And what's better than lots of LEDs? **TWO TIMES AS MANY LEDS!!!**
With the 16x8 LED Matrix Backpack we've doubled your project's matrix capacity by making it super easy to get two separate 8x8 matrices onto...
In Stock
[Buy Now](https://www.adafruit.com/product/2052)
[Related Guides to the Product](https://learn.adafruit.com/products/2052/guides)
### 16x8 1.2" LED Matrices+Backpack Round LEDs in Various Colors
[16x8 1.2" LED Matrices+Backpack Round LEDs in Various Colors](https://www.adafruit.com/product/2054)
What's better than a single LED? Lots of LEDs! And what's better than lots of LEDs? **TWO TIMES AS MANY LEDS!!!**
With the 16x8 LED Matrix Backpack we've doubled your project's matrix capacity by making it super easy to get two separate 8x8 matrices onto...
Out of Stock
[Buy Now](https://www.adafruit.com/product/2054)
[Related Guides to the Product](https://learn.adafruit.com/products/2054/guides)
### Adafruit 8x16 LED Matrix FeatherWing w/o Matrices
[Adafruit 8x16 LED Matrix FeatherWing w/o Matrices](https://www.adafruit.com/product/3090)
You will chirp with delight when you see how easy it is to make your very own 8x16 LED matrix display for any Feather. At 0.8" square, the little [8x8 matrices](https://www.adafruit.com/new/?q=8x8%20miniature%20LED%20matrix&) have everything a big LED matrix has,...
Out of Stock
[Buy Now](https://www.adafruit.com/product/3090)
[Related Guides to the Product](https://learn.adafruit.com/products/3090/guides)
### Adafruit 14-segment LED Alphanumeric backpack (same as P1910)
[Adafruit 14-segment LED Alphanumeric backpack (same as P1910)](https://www.adafruit.com/product/3322)
Just the backpack + 4pin header
No Longer Stocked
[Buy Now](https://www.adafruit.com/product/3322)
[Related Guides to the Product](https://learn.adafruit.com/products/3322/guides)
## Featured Products
### Adafruit Small 1.2" 8x8 LED Matrix w/I2C Backpack - Yellow-Green
[Adafruit Small 1.2" 8x8 LED Matrix w/I2C Backpack - Yellow-Green](https://www.adafruit.com/product/1051)
What's better than a single LED? Lots of LEDs! A fun way to make a small display is to use an [8x8 matrix](https://www.adafruit.com/category/37_88) or a [4-digit 7-segment display](https://www.adafruit.com/category/37_103). Matrices like these are...
In Stock
[Buy Now](https://www.adafruit.com/product/1051)
[Related Guides to the Product](https://learn.adafruit.com/products/1051/guides)
### Small 1.2" 8x8 Ultra Bright Square Blue LED Matrix + Backpack
[Small 1.2" 8x8 Ultra Bright Square Blue LED Matrix + Backpack](https://www.adafruit.com/product/1853)
What's better than a single LED? Lots of LEDs! Matrices like these are 'multiplexed' - so to control 64 LEDs you need 16 pins. That's a lot of pins, and there are [driver chips like the MAX7219](//www.adafruit.com/products/453) that can control a matrix for you but...
In Stock
[Buy Now](https://www.adafruit.com/product/1853)
[Related Guides to the Product](https://learn.adafruit.com/products/1853/guides)
## Related Guides
- [LED Backpack Displays on Raspberry Pi and BeagleBone Black](https://learn.adafruit.com/led-backpack-displays-on-raspberry-pi-and-beaglebone-black.md)
- [Animating Multiple LED Backpacks](https://learn.adafruit.com/animating-multiple-led-backpacks.md)
- [Arduino GPS Clock](https://learn.adafruit.com/arduino-clock.md)
- [Raspberry Pi Physical Dashboard](https://learn.adafruit.com/raspberry-pi-physical-dashboard.md)
- [CircuitPython Hardware: LED Backpacks & FeatherWings](https://learn.adafruit.com/micropython-hardware-led-backpacks-and-featherwings.md)
- [Matrix and 7-Segment LED Backpack with the Raspberry Pi](https://learn.adafruit.com/matrix-7-segment-led-backpack-with-the-raspberry-pi.md)
- [DIY Pocket LED Gamer - Tiny Tetris!](https://learn.adafruit.com/diy-3d-printed-handheld-pocket-game-tiny-tetris-snake.md)
- [RGB LED Matrix Cube with 25,000 LEDs](https://learn.adafruit.com/rgb-led-matrix-cube-for-pi.md)
- [Creating GIFs for SmartMatrix](https://learn.adafruit.com/creating-gifs-for-smartmatrix.md)
- [Adafruit CharliePlex LED Matrix Bonnet](https://learn.adafruit.com/adafruit-charlieplex-bonnet.md)
- [Connecting a 16x32 RGB LED Matrix Panel to a Raspberry Pi](https://learn.adafruit.com/connecting-a-16x32-rgb-led-matrix-panel-to-a-raspberry-pi.md)
- [MicroPython Displays: Drawing Text](https://learn.adafruit.com/micropython-displays-drawing-text.md)
- [Heart Rate Badge](https://learn.adafruit.com/heart-rate-badge.md)
- [16x24 LED Matrix](https://learn.adafruit.com/16x24-led-matrix.md)
- [Adafruit IS31FL3741](https://learn.adafruit.com/adafruit-is31fl3741.md)
---
# Source: https://learn.adafruit.com/adafruit-led-backpack/0-8-8x8-matrix-circuitpython-wiring-and-setup.md
# Adafruit LED Backpacks
## CircuitPython Wiring and Setup
# Wiring
It's easy to use LED Matrices with CircuitPython and the [Adafruit CircuitPython HT16K33](https://github.com/adafruit/Adafruit_CircuitPython_HT16K33) library. This module allows you to easily write CircuitPython code to control the display.
You can use this sensor with any CircuitPython microcontroller board.
We'll cover how to wire the LED Matrix to your CircuitPython microcontroller board. First assemble your LED Matrix.
Connect the LED Matrix to your microcontroller board as shown below.
- **Microcontroller 3V ** to **LED Matrix VIN**
- **Microcontroller GND ** to **LED Matrix GND**
- **Microcontroller SCL ** to **LED Matrix SCL**
- **Microcontroller SDA ** to **LED Matrix SDA**

[Download Fritzing Object](https://cdn-learn.adafruit.com/assets/assets/000/087/060/original/feather-m4-1.2-8x8.fzz?1579283216)
# Library Setup
To use the LED backpack with your [Adafruit CircuitPython](https://learn.adafruit.com/welcome-to-circuitpython/overview) board you'll need to install the [Adafruit\_CircuitPython\_HT16K33](https://github.com/adafruit/Adafruit_CircuitPython_HT16K33) library on your board.
First make sure you are running the [latest version of Adafruit CircuitPython](https://github.com/adafruit/circuitpython/releases) for your board. Next you'll need to install the necessary libraries to use the hardware--read below and carefully follow the referenced steps to find and install these libraries from [Adafruit's CircuitPython library bundle](https://github.com/adafruit/Adafruit_CircuitPython_Bundle).
## Bundle Install
For express boards that have extra flash storage, like the Feather/Metro M0 express and Circuit Playground express, you can easily install the necessary libraries with [Adafruit's CircuitPython bundle](https://github.com/adafruit/Adafruit_CircuitPython_Bundle). This is an all-in-one package that includes the necessary libraries to use the LED backpack display with CircuitPython. For details on installing the bundle, read about [CircuitPython Libraries](https://learn.adafruit.com/welcome-to-circuitpython/circuitpython-libraries).
Remember for non-express boards like the Trinket M0, Gemma M0, and Feather/Metro M0 basic you'll need to [manually install the necessary libraries](https://learn.adafruit.com/welcome-to-circuitpython/circuitpython-libraries#non-express-boards-11-13) from the bundle:
- **adafruit\_ht16k33**
- **adafruit\_bus\_device**
If your board supports USB mass storage, like the M0-based boards, then simply drag the files to the board's file system. **Note on boards without external SPI flash, like a Feather M0 or Trinket/Gemma M0, you might run into issues on Mac OSX with hidden files taking up too much space when drag and drop copying, [see this page for a workaround](../../../../micropython-for-samd21/usb-mass-storage#mac-osx-file-copy-issues).**
Before continuing make sure your board's **lib** folder or root filesystem has at least the **adafruit\_ht16k33** and **adafruit\_bus\_device** folders/modules copied over.

- [Previous Page](https://learn.adafruit.com/adafruit-led-backpack/0-8-8x8-matrix-arduino-wiring-and-setup.md)
- [Next Page](https://learn.adafruit.com/adafruit-led-backpack/0-8-8x8-matrix-python-wiring-and-setup.md)
## Primary Products
### Adafruit Mini 8x8 LED Matrix w/I2C Backpack - Red
[Adafruit Mini 8x8 LED Matrix w/I2C Backpack - Red](https://www.adafruit.com/product/870)
What's better than a single LED? Lots of LEDs! A fun way to make a small display is to use an [8x8 matrix](https://www.adafruit.com/category/37_88) or a [4-digit 7-segment display](https://www.adafruit.com/category/37_103). Matrices like these are...
In Stock
[Buy Now](https://www.adafruit.com/product/870)
[Related Guides to the Product](https://learn.adafruit.com/products/870/guides)
### Adafruit Mini 8x8 LED Matrix w/I2C Backpack - Yellow
[Adafruit Mini 8x8 LED Matrix w/I2C Backpack - Yellow](https://www.adafruit.com/product/871)
What's better than a single LED? Lots of LEDs! A fun way to make a small display is to use an [8x8 matrix](https://www.adafruit.com/category/37_88) or a [4-digit 7-segment display](https://www.adafruit.com/category/37_103). Matrices like these are...
In Stock
[Buy Now](https://www.adafruit.com/product/871)
[Related Guides to the Product](https://learn.adafruit.com/products/871/guides)
### Adafruit Mini 0.8" 8x8 LED Matrix w/I2C Backpack - Yellow-Green
[Adafruit Mini 0.8" 8x8 LED Matrix w/I2C Backpack - Yellow-Green](https://www.adafruit.com/product/872)
What's better than a single LED? Lots of LEDs! A fun way to make a small display is to use an [8x8 matrix](https://www.adafruit.com/category/37_88) or a [4-digit 7-segment display](https://www.adafruit.com/category/37_103). Matrices like these are...
In Stock
[Buy Now](https://www.adafruit.com/product/872)
[Related Guides to the Product](https://learn.adafruit.com/products/872/guides)
### Adafruit 0.56" 4-Digit 7-Segment Display with I2C Backpack - Red
[Adafruit 0.56" 4-Digit 7-Segment Display with I2C Backpack - Red](https://www.adafruit.com/product/878)
What's better than a single LED? Lots of LEDs! A fun way to make a small display is to use an [8x8 matrix](https://www.adafruit.com/category/37_88) or a [4-digit 7-segment display](https://www.adafruit.com/category/37_103). Matrices like these are...
In Stock
[Buy Now](https://www.adafruit.com/product/878)
[Related Guides to the Product](https://learn.adafruit.com/products/878/guides)
### Adafruit 0.56" 4-Digit 7-Segment Display w/I2C Backpack - Yellow
[Adafruit 0.56" 4-Digit 7-Segment Display w/I2C Backpack - Yellow](https://www.adafruit.com/product/879)
What's better than a single LED? Lots of LEDs! A fun way to make a small display is to use an [8x8 matrix](https://www.adafruit.com/category/37_88) or a [4-digit 7-segment display](https://www.adafruit.com/category/37_103). Matrices like these are...
In Stock
[Buy Now](https://www.adafruit.com/product/879)
[Related Guides to the Product](https://learn.adafruit.com/products/879/guides)
### Adafruit 0.56" 4-Digit 7-Segment Display w/ I2C Backpack - Green
[Adafruit 0.56" 4-Digit 7-Segment Display w/ I2C Backpack - Green](https://www.adafruit.com/product/880)
What's better than a single LED? Lots of LEDs! A fun way to make a small display is to use an [8x8 matrix](https://www.adafruit.com/category/37_88) or a [4-digit 7-segment display](https://www.adafruit.com/category/37_103). Matrices like these are...
No Longer Stocked
[Buy Now](https://www.adafruit.com/product/880)
[Related Guides to the Product](https://learn.adafruit.com/products/880/guides)
### Adafruit 0.56" 4-Digit 7-Segment Display w/ I2C Backpack - Blue
[Adafruit 0.56" 4-Digit 7-Segment Display w/ I2C Backpack - Blue](https://www.adafruit.com/product/881)
What's better than a single LED? Lots of LEDs! A fun way to make a small display is to use an [8x8 matrix](https://www.adafruit.com/category/37_88) or a [4-digit 7-segment display](https://www.adafruit.com/category/37_103). Matrices like these are...
In Stock
[Buy Now](https://www.adafruit.com/product/881)
[Related Guides to the Product](https://learn.adafruit.com/products/881/guides)
### Adafruit Bicolor LED Square Pixel Matrix with I2C Backpack
[Adafruit Bicolor LED Square Pixel Matrix with I2C Backpack](https://www.adafruit.com/product/902)
What's better than a single LED? Lots of LEDs! A fun way to make a small colorful display is to use a [1.2" Bi-color 8x8 LED Matrix](http://www.adafruit.com/products/458). Matrices like these are 'multiplexed' - so to control all the 128 LEDs you need 24 pins....
In Stock
[Buy Now](https://www.adafruit.com/product/902)
[Related Guides to the Product](https://learn.adafruit.com/products/902/guides)
### Adafruit Mini 8x8 LED Matrix w/I2C Backpack - Blue
[Adafruit Mini 8x8 LED Matrix w/I2C Backpack - Blue](https://www.adafruit.com/product/959)
What's better than a single LED? Lots of LEDs! A fun way to make a small display is to use an [8x8 matrix](https://www.adafruit.com/category/37_88) or a [4-digit 7-segment display](https://www.adafruit.com/category/37_103). Matrices like these are...
In Stock
[Buy Now](https://www.adafruit.com/product/959)
[Related Guides to the Product](https://learn.adafruit.com/products/959/guides)
### Adafruit 0.56" 4-Digit 7-Segment Display w/I2C Backpack - White
[Adafruit 0.56" 4-Digit 7-Segment Display w/I2C Backpack - White](https://www.adafruit.com/product/1002)
What's better than a single LED? Lots of LEDs! A fun way to make a small display is to use an [8x8 matrix](https://www.adafruit.com/category/37_88) or a [4-digit 7-segment display](https://www.adafruit.com/category/37_103). Matrices like these are...
In Stock
[Buy Now](https://www.adafruit.com/product/1002)
[Related Guides to the Product](https://learn.adafruit.com/products/1002/guides)
### Adafruit 1.2" 8x8 LED Matrix Backpack
[Adafruit 1.2" 8x8 LED Matrix Backpack](https://www.adafruit.com/product/1048)
By popular request, you can now get our 8x8 LED backpacks without the LEDs! These backpacks feature an HT16K33 I2C LED driver, they're simple and easy to use - you can use [our very nice library for the backpacks to...](https://github.com/adafruit/Adafruit-LED-Backpack-Library)
In Stock
[Buy Now](https://www.adafruit.com/product/1048)
[Related Guides to the Product](https://learn.adafruit.com/products/1048/guides)
### Adafruit Small 1.2" 8x8 LED Matrix w/I2C Backpack - Red
[Adafruit Small 1.2" 8x8 LED Matrix w/I2C Backpack - Red](https://www.adafruit.com/product/1049)
What's better than a single LED? Lots of LEDs! A fun way to make a small display is to use an [8x8 matrix](https://www.adafruit.com/category/37_88) or a [4-digit 7-segment display](https://www.adafruit.com/category/37_103). Matrices like these are...
In Stock
[Buy Now](https://www.adafruit.com/product/1049)
[Related Guides to the Product](https://learn.adafruit.com/products/1049/guides)
### Adafruit Small 1.2" 8x8 LED Matrix w/I2C Backpack - Yellow
[Adafruit Small 1.2" 8x8 LED Matrix w/I2C Backpack - Yellow](https://www.adafruit.com/product/1050)
What's better than a single LED? Lots of LEDs! A fun way to make a small display is to use an [8x8 matrix](https://www.adafruit.com/category/37_88) or a [4-digit 7-segment display](https://www.adafruit.com/category/37_103). Matrices like these are...
In Stock
[Buy Now](https://www.adafruit.com/product/1050)
[Related Guides to the Product](https://learn.adafruit.com/products/1050/guides)
### Adafruit Small 1.2" 8x8 LED Matrix w/I2C Backpack - Blue
[Adafruit Small 1.2" 8x8 LED Matrix w/I2C Backpack - Blue](https://www.adafruit.com/product/1052)
What's better than a single LED? Lots of LEDs! A fun way to make a small display is to use an [8x8 matrix](https://www.adafruit.com/category/37_88) or a [4-digit 7-segment display](https://www.adafruit.com/category/37_103). Matrices like these are...
In Stock
[Buy Now](https://www.adafruit.com/product/1052)
[Related Guides to the Product](https://learn.adafruit.com/products/1052/guides)
### Adafruit Mini 8x8 LED Matrix w/I2C Backpack - Ultra Bright White
[Adafruit Mini 8x8 LED Matrix w/I2C Backpack - Ultra Bright White](https://www.adafruit.com/product/1080)
What's better than a single LED? Lots of LEDs! A fun way to make a small display is to use an [8x8 matrix](https://www.adafruit.com/category/37_88) or a [4-digit 7-segment display](https://www.adafruit.com/category/37_103). Matrices like these are...
In Stock
[Buy Now](https://www.adafruit.com/product/1080)
[Related Guides to the Product](https://learn.adafruit.com/products/1080/guides)
### Adafruit 1.2" 4-Digit 7-Segment Display w/I2C Backpack - Green
[Adafruit 1.2" 4-Digit 7-Segment Display w/I2C Backpack - Green](https://www.adafruit.com/product/1268)
What's better than a single LED? Lots of LEDs! A fun way to make a numeric display is to use a [4-digit 7-segment display](https://www.adafruit.com/category/37_103). LED matrices like these are 'multiplexed' - so to control all the seven-segment LEDs you need 14 pins....
No Longer Stocked
[Buy Now](https://www.adafruit.com/product/1268)
[Related Guides to the Product](https://learn.adafruit.com/products/1268/guides)
### Adafruit 1.2" 4-Digit 7-Segment Display w/I2C Backpack - Yellow
[Adafruit 1.2" 4-Digit 7-Segment Display w/I2C Backpack - Yellow](https://www.adafruit.com/product/1269)
What's better than a single LED? Lots of LEDs! A fun way to make a numeric display is to use a [4-digit 7-segment display](https://www.adafruit.com/category/37_103). LED matrices like these are 'multiplexed' - so to control all the seven-segment LEDs you need 14 pins....
In Stock
[Buy Now](https://www.adafruit.com/product/1269)
[Related Guides to the Product](https://learn.adafruit.com/products/1269/guides)
### Adafruit 1.2" 4-Digit 7-Segment Display w/I2C Backpack - Red
[Adafruit 1.2" 4-Digit 7-Segment Display w/I2C Backpack - Red](https://www.adafruit.com/product/1270)
What's better than a single LED? Lots of LEDs! A fun way to make a numeric display is to use a [4-digit 7-segment display](https://www.adafruit.com/category/37_103). LED matrices like these are 'multiplexed' - so to control all the seven-segment LEDs you need 14 pins....
In Stock
[Buy Now](https://www.adafruit.com/product/1270)
[Related Guides to the Product](https://learn.adafruit.com/products/1270/guides)
### Small 1.2" 8x8 Ultra Bright White LED Matrix + Backpack
[Small 1.2" 8x8 Ultra Bright White LED Matrix + Backpack](https://www.adafruit.com/product/1614)
What's better than a single LED? Lots of LEDs! A fun way to make a small display is to use an [8x8 matrix](https://www.adafruit.com/category/37_88) or a [4-digit 7-segment display](https://www.adafruit.com/category/37_103). Matrices like these are...
In Stock
[Buy Now](https://www.adafruit.com/product/1614)
[Related Guides to the Product](https://learn.adafruit.com/products/1614/guides)
### Adafruit Small 1.2" 8x8 LED Matrix w/I2C Backpack - Pure Green
[Adafruit Small 1.2" 8x8 LED Matrix w/I2C Backpack - Pure Green](https://www.adafruit.com/product/1632)
What's better than a single LED? Lots of LEDs! A fun way to make a small display is to use an [8x8 matrix](https://www.adafruit.com/category/37_88) or a [4-digit 7-segment display](https://www.adafruit.com/category/37_103). Matrices like these are...
In Stock
[Buy Now](https://www.adafruit.com/product/1632)
[Related Guides to the Product](https://learn.adafruit.com/products/1632/guides)
### Adafruit Mini 0.8" 8x8 LED Matrix w/I2C Backpack - Pure Green
[Adafruit Mini 0.8" 8x8 LED Matrix w/I2C Backpack - Pure Green](https://www.adafruit.com/product/1633)
What's better than a single LED? Lots of LEDs! A fun way to make a small display is to use an [8x8 matrix](https://www.adafruit.com/category/37_88) or a [4-digit 7-segment display](https://www.adafruit.com/category/37_103). Matrices like these are...
In Stock
[Buy Now](https://www.adafruit.com/product/1633)
[Related Guides to the Product](https://learn.adafruit.com/products/1633/guides)
### Bi-Color (Red/Green) 24-Bar Bargraph w/I2C Backpack Kit
[Bi-Color (Red/Green) 24-Bar Bargraph w/I2C Backpack Kit](https://www.adafruit.com/product/1721)
What's better than a single LED? Lots of LEDs! A fun way to make a small linear display is to use two 12-bar Bi-color bar-graphs. However, this LED bargraph is 'multiplexed' - so to control all the 48 LEDs you need a lot of pins.
Out of Stock
[Buy Now](https://www.adafruit.com/product/1721)
[Related Guides to the Product](https://learn.adafruit.com/products/1721/guides)
### Small 1.2" 8x8 Ultra Bright Square Amber LED Matrix + Backpack
[Small 1.2" 8x8 Ultra Bright Square Amber LED Matrix + Backpack](https://www.adafruit.com/product/1854)
What's better than a single LED? Lots of LEDs! Matrices like these are 'multiplexed' - so to control 64 LEDs you need 16 pins. That's a lot of pins, and there are [driver chips like the MAX7219](//www.adafruit.com/products/453) that can control a matrix for you but...
In Stock
[Buy Now](https://www.adafruit.com/product/1854)
[Related Guides to the Product](https://learn.adafruit.com/products/1854/guides)
### Small 1.2" 8x8 Ultra Bright Square Yellow LED Matrix + Backpack
[Small 1.2" 8x8 Ultra Bright Square Yellow LED Matrix + Backpack](https://www.adafruit.com/product/1855)
What's better than a single LED? Lots of LEDs! Matrices like these are 'multiplexed' - so to control 64 LEDs you need 16 pins. That's a lot of pins, and there are [driver chips like the MAX7219](//www.adafruit.com/products/453) that can control a matrix for you but...
In Stock
[Buy Now](https://www.adafruit.com/product/1855)
[Related Guides to the Product](https://learn.adafruit.com/products/1855/guides)
### Small 1.2" 8x8 Bright Square Pure Green LED Matrix + Backpack
[Small 1.2" 8x8 Bright Square Pure Green LED Matrix + Backpack](https://www.adafruit.com/product/1856)
What's better than a single LED? Lots of LEDs! Matrices like these are 'multiplexed' - so to control 64 LEDs you need 16 pins. That's a lot of pins, and there are [driver chips like the MAX7219](//www.adafruit.com/products/453) that can control a matrix for you but...
In Stock
[Buy Now](https://www.adafruit.com/product/1856)
[Related Guides to the Product](https://learn.adafruit.com/products/1856/guides)
### Small 1.2" 8x8 Ultra Bright Square White LED Matrix + Backpack
[Small 1.2" 8x8 Ultra Bright Square White LED Matrix + Backpack](https://www.adafruit.com/product/1857)
What's better than a single LED? Lots of LEDs! Matrices like these are 'multiplexed' - so to control 64 LEDs you need 16 pins. That's a lot of pins, and there are [driver chips like the MAX7219](//www.adafruit.com/products/453) that can control a matrix for you but...
In Stock
[Buy Now](https://www.adafruit.com/product/1857)
[Related Guides to the Product](https://learn.adafruit.com/products/1857/guides)
### Adafruit 14-segment LED Alphanumeric Backpack - STEMMA QT
[Adafruit 14-segment LED Alphanumeric Backpack - STEMMA QT](https://www.adafruit.com/product/1910)
By popular request, you can now get our 14-segment LED backpacks without the LEDs! These backpacks feature an HT16K33 I2C LED driver, they're simple and easy to use - you can use [our very nice library for the backpacks to...](https://github.com/adafruit/Adafruit-LED-Backpack-Library)
In Stock
[Buy Now](https://www.adafruit.com/product/1910)
[Related Guides to the Product](https://learn.adafruit.com/products/1910/guides)
### Quad Alphanumeric Display - Red 0.54" Digits w/ I2C Backpack
[Quad Alphanumeric Display - Red 0.54" Digits w/ I2C Backpack](https://www.adafruit.com/product/1911)
Display, elegantly, 012345678 or 9! Gaze, hypnotized, at ABCDEFGHIJKLM - well it can display the whole alphabet. You get the point. This is a nice, bright alphanumeric display that shows letters and numbers in a beautiful red hue. It's super bright and designed for viewing from distances...
In Stock
[Buy Now](https://www.adafruit.com/product/1911)
[Related Guides to the Product](https://learn.adafruit.com/products/1911/guides)
### Quad Alphanumeric Display - Blue 0.54" Digits w/ I2C Backpack
[Quad Alphanumeric Display - Blue 0.54" Digits w/ I2C Backpack](https://www.adafruit.com/product/1912)
Display, elegantly, 012345678 or 9! Gaze, hypnotized, at ABCDEFGHIJKLM - well it can display the whole alphabet. You get the point. This is a nice, bright alphanumeric display that shows letters and numbers in a beautiful blue hue. It's super bright and designed for viewing from distances...
In Stock
[Buy Now](https://www.adafruit.com/product/1912)
[Related Guides to the Product](https://learn.adafruit.com/products/1912/guides)
### 16x8 1.2" LED Matrix + Backpack - Ultra Bright Round Green LEDs
[16x8 1.2" LED Matrix + Backpack - Ultra Bright Round Green LEDs](https://www.adafruit.com/product/2035)
What's better than a single LED? Lots of LEDs! And what's better than lots of LEDs? **TWO TIMES AS MANY LEDS!!!**
With the 16x8 LED Matrix Backpack we've doubled your project's matrix capacity by making it super easy to get two separate 8x8 matrices onto...
In Stock
[Buy Now](https://www.adafruit.com/product/2035)
[Related Guides to the Product](https://learn.adafruit.com/products/2035/guides)
### 16x8 1.2" LED Matrix+Backpack UltraBright Round YellowGreen LEDs
[16x8 1.2" LED Matrix+Backpack UltraBright Round YellowGreen LEDs](https://www.adafruit.com/product/2036)
What's better than a single LED? Lots of LEDs! And what's better than lots of LEDs? **TWO TIMES AS MANY LEDS!!!**
With the 16x8 LED Matrix Backpack we've doubled your project's matrix capacity by making it super easy to get two separate 8x8 matrices onto...
In Stock
[Buy Now](https://www.adafruit.com/product/2036)
[Related Guides to the Product](https://learn.adafruit.com/products/2036/guides)
### 16x8 1.2" LED Matrix + Backpack - Ultra Bright Round Red LEDs
[16x8 1.2" LED Matrix + Backpack - Ultra Bright Round Red LEDs](https://www.adafruit.com/product/2037)
What's better than a single LED? Lots of LEDs! And what's better than lots of LEDs? **TWO TIMES AS MANY LEDS!!!**
With the 16x8 LED Matrix Backpack we've doubled your project's matrix capacity by making it super easy to get two separate 8x8 matrices onto...
In Stock
[Buy Now](https://www.adafruit.com/product/2037)
[Related Guides to the Product](https://learn.adafruit.com/products/2037/guides)
### 16x8 1.2" LED Matrix + Backpack - Ultra Bright Round White LEDs
[16x8 1.2" LED Matrix + Backpack - Ultra Bright Round White LEDs](https://www.adafruit.com/product/2038)
What's better than a single LED? Lots of LEDs! And what's better than lots of LEDs? **TWO TIMES AS MANY LEDS!!!**
With the 16x8 LED Matrix Backpack we've doubled your project's matrix capacity by making it super easy to get two separate 8x8 matrices onto...
In Stock
[Buy Now](https://www.adafruit.com/product/2038)
[Related Guides to the Product](https://learn.adafruit.com/products/2038/guides)
### 16x8 1.2" LED Matrix + Backpack - Ultra Bright Round Blue LEDs
[16x8 1.2" LED Matrix + Backpack - Ultra Bright Round Blue LEDs](https://www.adafruit.com/product/2039)
What's better than a single LED? Lots of LEDs! And what's better than lots of LEDs? **TWO TIMES AS MANY LEDS!!!**
With the 16x8 LED Matrix Backpack we've doubled your project's matrix capacity by making it super easy to get two separate 8x8 matrices onto...
In Stock
[Buy Now](https://www.adafruit.com/product/2039)
[Related Guides to the Product](https://learn.adafruit.com/products/2039/guides)
### 16x8 1.2" LED Matrix + Backpack - Ultra Bright Square Blue LEDs
[16x8 1.2" LED Matrix + Backpack - Ultra Bright Square Blue LEDs](https://www.adafruit.com/product/2040)
What's better than a single LED? Lots of LEDs! And what's better than lots of LEDs? **TWO TIMES AS MANY LEDS!!!**
With the 16x8 LED Matrix Backpack we've doubled your project's matrix capacity by making it super easy to get two separate 8x8 matrices onto...
In Stock
[Buy Now](https://www.adafruit.com/product/2040)
[Related Guides to the Product](https://learn.adafruit.com/products/2040/guides)
### 16x8 1.2" LED Matrix + Backpack - Ultra Bright Square Amber LEDs
[16x8 1.2" LED Matrix + Backpack - Ultra Bright Square Amber LEDs](https://www.adafruit.com/product/2041)
What's better than a single LED? Lots of LEDs! And what's better than lots of LEDs? **TWO TIMES AS MANY LEDS!!!**
With the 16x8 LED Matrix Backpack we've doubled your project's matrix capacity by making it super easy to get two separate 8x8 matrices onto...
In Stock
[Buy Now](https://www.adafruit.com/product/2041)
[Related Guides to the Product](https://learn.adafruit.com/products/2041/guides)
### 16x8 1.2" LED Matrix + Backpack - Ultra Bright Square Green LEDs
[16x8 1.2" LED Matrix + Backpack - Ultra Bright Square Green LEDs](https://www.adafruit.com/product/2042)
What's better than a single LED? Lots of LEDs! And what's better than lots of LEDs? **TWO TIMES AS MANY LEDS!!!**
With the 16x8 LED Matrix Backpack we've doubled your project's matrix capacity by making it super easy to get two separate 8x8 matrices onto...
In Stock
[Buy Now](https://www.adafruit.com/product/2042)
[Related Guides to the Product](https://learn.adafruit.com/products/2042/guides)
### 16x8 1.2" LED Matrix + Backpack -Ultra Bright Square Yellow LEDs
[16x8 1.2" LED Matrix + Backpack -Ultra Bright Square Yellow LEDs](https://www.adafruit.com/product/2043)
What's better than a single LED? Lots of LEDs! And what's better than lots of LEDs? **TWO TIMES AS MANY LEDS!!!**
With the 16x8 LED Matrix Backpack we've doubled your project's matrix capacity by making it super easy to get two separate 8x8 matrices onto...
In Stock
[Buy Now](https://www.adafruit.com/product/2043)
[Related Guides to the Product](https://learn.adafruit.com/products/2043/guides)
### 16x8 1.2" LED Matrix + Backpack - Ultra Bright Square White LEDs
[16x8 1.2" LED Matrix + Backpack - Ultra Bright Square White LEDs](https://www.adafruit.com/product/2044)
What's better than a single LED? Lots of LEDs! And what's better than lots of LEDs? **TWO TIMES AS MANY LEDS!!!**
With the 16x8 LED Matrix Backpack we've doubled your project's matrix capacity by making it super easy to get two separate 8x8 matrices onto...
In Stock
[Buy Now](https://www.adafruit.com/product/2044)
[Related Guides to the Product](https://learn.adafruit.com/products/2044/guides)
### 16x8 1.2" LED Matrix + Backpack-Ultra Bright Round Orange LEDs
[16x8 1.2" LED Matrix + Backpack-Ultra Bright Round Orange LEDs](https://www.adafruit.com/product/2052)
What's better than a single LED? Lots of LEDs! And what's better than lots of LEDs? **TWO TIMES AS MANY LEDS!!!**
With the 16x8 LED Matrix Backpack we've doubled your project's matrix capacity by making it super easy to get two separate 8x8 matrices onto...
In Stock
[Buy Now](https://www.adafruit.com/product/2052)
[Related Guides to the Product](https://learn.adafruit.com/products/2052/guides)
### 16x8 1.2" LED Matrices+Backpack Round LEDs in Various Colors
[16x8 1.2" LED Matrices+Backpack Round LEDs in Various Colors](https://www.adafruit.com/product/2054)
What's better than a single LED? Lots of LEDs! And what's better than lots of LEDs? **TWO TIMES AS MANY LEDS!!!**
With the 16x8 LED Matrix Backpack we've doubled your project's matrix capacity by making it super easy to get two separate 8x8 matrices onto...
Out of Stock
[Buy Now](https://www.adafruit.com/product/2054)
[Related Guides to the Product](https://learn.adafruit.com/products/2054/guides)
### Adafruit 8x16 LED Matrix FeatherWing w/o Matrices
[Adafruit 8x16 LED Matrix FeatherWing w/o Matrices](https://www.adafruit.com/product/3090)
You will chirp with delight when you see how easy it is to make your very own 8x16 LED matrix display for any Feather. At 0.8" square, the little [8x8 matrices](https://www.adafruit.com/new/?q=8x8%20miniature%20LED%20matrix&) have everything a big LED matrix has,...
Out of Stock
[Buy Now](https://www.adafruit.com/product/3090)
[Related Guides to the Product](https://learn.adafruit.com/products/3090/guides)
### Adafruit 14-segment LED Alphanumeric backpack (same as P1910)
[Adafruit 14-segment LED Alphanumeric backpack (same as P1910)](https://www.adafruit.com/product/3322)
Just the backpack + 4pin header
No Longer Stocked
[Buy Now](https://www.adafruit.com/product/3322)
[Related Guides to the Product](https://learn.adafruit.com/products/3322/guides)
## Featured Products
### Adafruit Small 1.2" 8x8 LED Matrix w/I2C Backpack - Yellow-Green
[Adafruit Small 1.2" 8x8 LED Matrix w/I2C Backpack - Yellow-Green](https://www.adafruit.com/product/1051)
What's better than a single LED? Lots of LEDs! A fun way to make a small display is to use an [8x8 matrix](https://www.adafruit.com/category/37_88) or a [4-digit 7-segment display](https://www.adafruit.com/category/37_103). Matrices like these are...
In Stock
[Buy Now](https://www.adafruit.com/product/1051)
[Related Guides to the Product](https://learn.adafruit.com/products/1051/guides)
### Small 1.2" 8x8 Ultra Bright Square Blue LED Matrix + Backpack
[Small 1.2" 8x8 Ultra Bright Square Blue LED Matrix + Backpack](https://www.adafruit.com/product/1853)
What's better than a single LED? Lots of LEDs! Matrices like these are 'multiplexed' - so to control 64 LEDs you need 16 pins. That's a lot of pins, and there are [driver chips like the MAX7219](//www.adafruit.com/products/453) that can control a matrix for you but...
In Stock
[Buy Now](https://www.adafruit.com/product/1853)
[Related Guides to the Product](https://learn.adafruit.com/products/1853/guides)
## Related Guides
- [LED Backpack Displays on Raspberry Pi and BeagleBone Black](https://learn.adafruit.com/led-backpack-displays-on-raspberry-pi-and-beaglebone-black.md)
- [Animating Multiple LED Backpacks](https://learn.adafruit.com/animating-multiple-led-backpacks.md)
- [Arduino GPS Clock](https://learn.adafruit.com/arduino-clock.md)
- [Raspberry Pi Physical Dashboard](https://learn.adafruit.com/raspberry-pi-physical-dashboard.md)
- [CircuitPython Hardware: LED Backpacks & FeatherWings](https://learn.adafruit.com/micropython-hardware-led-backpacks-and-featherwings.md)
- [Matrix and 7-Segment LED Backpack with the Raspberry Pi](https://learn.adafruit.com/matrix-7-segment-led-backpack-with-the-raspberry-pi.md)
- [DIY Pocket LED Gamer - Tiny Tetris!](https://learn.adafruit.com/diy-3d-printed-handheld-pocket-game-tiny-tetris-snake.md)
- [RGB LED Matrix Cube with 25,000 LEDs](https://learn.adafruit.com/rgb-led-matrix-cube-for-pi.md)
- [Creating GIFs for SmartMatrix](https://learn.adafruit.com/creating-gifs-for-smartmatrix.md)
- [Adafruit CharliePlex LED Matrix Bonnet](https://learn.adafruit.com/adafruit-charlieplex-bonnet.md)
- [Connecting a 16x32 RGB LED Matrix Panel to a Raspberry Pi](https://learn.adafruit.com/connecting-a-16x32-rgb-led-matrix-panel-to-a-raspberry-pi.md)
- [MicroPython Displays: Drawing Text](https://learn.adafruit.com/micropython-displays-drawing-text.md)
- [Heart Rate Badge](https://learn.adafruit.com/heart-rate-badge.md)
- [16x24 LED Matrix](https://learn.adafruit.com/16x24-led-matrix.md)
- [Adafruit IS31FL3741](https://learn.adafruit.com/adafruit-is31fl3741.md)
---
# Source: https://learn.adafruit.com/adafruit-led-backpack/0-8-8x8-matrix-python-wiring-and-setup.md
# Adafruit LED Backpacks
## Python Wiring and Setup
# Wiring
It's easy to use LED Matrices with Python and the [Adafruit CircuitPython HT16K33](https://github.com/adafruit/Adafruit_CircuitPython_HT16K33) library. This library allows you to easily write Python code to control the display.
We'll cover how to wire the LED Matrix to your Raspberry Pi. First assemble your LED Matrix.
Since there's _dozens_ of Linux computers/boards you can use we will show wiring for Raspberry Pi. For other platforms, [please visit the guide for CircuitPython on Linux to see whether your platform is supported](https://learn.adafruit.com/circuitpython-on-raspberrypi-linux).
Connect the LED Matrix as shown below to your Raspberry Pi.
- **Raspberry Pi 3.3V ** to ** LED Matrix VIN**
- **Raspberry Pi GND ** to **LED Matrix GND**
- **Raspberry Pi SCL ** to **LED Matrix SCL**
- **Raspberry Pi SDA ** to **LED Matrix SDA**

[Download Fritzing Object](https://cdn-learn.adafruit.com/assets/assets/000/087/061/original/raspberry-pi-1.2-8x8.fzz?1579283236)
# Setup
You'll need to install the Adafruit\_Blinka library that provides the CircuitPython support in Python. This may also require enabling I2C on your platform and verifying you are running Python 3. [Since each platform is a little different, and Linux changes often, please visit the CircuitPython on Linux guide to get your computer ready](https://learn.adafruit.com/circuitpython-on-raspberrypi-linux)!
## Python Installation of HT16K33 Library
Once that's done, from your command line run the following command:
- `pip3 install adafruit-circuitpython-ht16k33`
If your default Python is version 3 you may need to run 'pip' instead. Just make sure you aren't trying to use CircuitPython on Python 2.x, it isn't supported!
If that complains about pip3 not being installed, then run this first to install it:
- `sudo apt-get install python3-pip`
## Pillow Library
We also need PIL, the Python Imaging Library, to allow using text with custom fonts. There are several system libraries that PIL relies on, so installing via a package manager is the easiest way to bring in everything:
- `sudo apt-get install python3-pil`
That's it. You should be ready to go.
- [Previous Page](https://learn.adafruit.com/adafruit-led-backpack/0-8-8x8-matrix-circuitpython-wiring-and-setup.md)
- [Next Page](https://learn.adafruit.com/adafruit-led-backpack/0-8-8x8-matrix-circuitpython-and-python-usage.md)
## Primary Products
### Adafruit Mini 8x8 LED Matrix w/I2C Backpack - Red
[Adafruit Mini 8x8 LED Matrix w/I2C Backpack - Red](https://www.adafruit.com/product/870)
What's better than a single LED? Lots of LEDs! A fun way to make a small display is to use an [8x8 matrix](https://www.adafruit.com/category/37_88) or a [4-digit 7-segment display](https://www.adafruit.com/category/37_103). Matrices like these are...
In Stock
[Buy Now](https://www.adafruit.com/product/870)
[Related Guides to the Product](https://learn.adafruit.com/products/870/guides)
### Adafruit Mini 8x8 LED Matrix w/I2C Backpack - Yellow
[Adafruit Mini 8x8 LED Matrix w/I2C Backpack - Yellow](https://www.adafruit.com/product/871)
What's better than a single LED? Lots of LEDs! A fun way to make a small display is to use an [8x8 matrix](https://www.adafruit.com/category/37_88) or a [4-digit 7-segment display](https://www.adafruit.com/category/37_103). Matrices like these are...
In Stock
[Buy Now](https://www.adafruit.com/product/871)
[Related Guides to the Product](https://learn.adafruit.com/products/871/guides)
### Adafruit Mini 0.8" 8x8 LED Matrix w/I2C Backpack - Yellow-Green
[Adafruit Mini 0.8" 8x8 LED Matrix w/I2C Backpack - Yellow-Green](https://www.adafruit.com/product/872)
What's better than a single LED? Lots of LEDs! A fun way to make a small display is to use an [8x8 matrix](https://www.adafruit.com/category/37_88) or a [4-digit 7-segment display](https://www.adafruit.com/category/37_103). Matrices like these are...
In Stock
[Buy Now](https://www.adafruit.com/product/872)
[Related Guides to the Product](https://learn.adafruit.com/products/872/guides)
### Adafruit 0.56" 4-Digit 7-Segment Display with I2C Backpack - Red
[Adafruit 0.56" 4-Digit 7-Segment Display with I2C Backpack - Red](https://www.adafruit.com/product/878)
What's better than a single LED? Lots of LEDs! A fun way to make a small display is to use an [8x8 matrix](https://www.adafruit.com/category/37_88) or a [4-digit 7-segment display](https://www.adafruit.com/category/37_103). Matrices like these are...
In Stock
[Buy Now](https://www.adafruit.com/product/878)
[Related Guides to the Product](https://learn.adafruit.com/products/878/guides)
### Adafruit 0.56" 4-Digit 7-Segment Display w/I2C Backpack - Yellow
[Adafruit 0.56" 4-Digit 7-Segment Display w/I2C Backpack - Yellow](https://www.adafruit.com/product/879)
What's better than a single LED? Lots of LEDs! A fun way to make a small display is to use an [8x8 matrix](https://www.adafruit.com/category/37_88) or a [4-digit 7-segment display](https://www.adafruit.com/category/37_103). Matrices like these are...
In Stock
[Buy Now](https://www.adafruit.com/product/879)
[Related Guides to the Product](https://learn.adafruit.com/products/879/guides)
### Adafruit 0.56" 4-Digit 7-Segment Display w/ I2C Backpack - Green
[Adafruit 0.56" 4-Digit 7-Segment Display w/ I2C Backpack - Green](https://www.adafruit.com/product/880)
What's better than a single LED? Lots of LEDs! A fun way to make a small display is to use an [8x8 matrix](https://www.adafruit.com/category/37_88) or a [4-digit 7-segment display](https://www.adafruit.com/category/37_103). Matrices like these are...
No Longer Stocked
[Buy Now](https://www.adafruit.com/product/880)
[Related Guides to the Product](https://learn.adafruit.com/products/880/guides)
### Adafruit 0.56" 4-Digit 7-Segment Display w/ I2C Backpack - Blue
[Adafruit 0.56" 4-Digit 7-Segment Display w/ I2C Backpack - Blue](https://www.adafruit.com/product/881)
What's better than a single LED? Lots of LEDs! A fun way to make a small display is to use an [8x8 matrix](https://www.adafruit.com/category/37_88) or a [4-digit 7-segment display](https://www.adafruit.com/category/37_103). Matrices like these are...
In Stock
[Buy Now](https://www.adafruit.com/product/881)
[Related Guides to the Product](https://learn.adafruit.com/products/881/guides)
### Adafruit Bicolor LED Square Pixel Matrix with I2C Backpack
[Adafruit Bicolor LED Square Pixel Matrix with I2C Backpack](https://www.adafruit.com/product/902)
What's better than a single LED? Lots of LEDs! A fun way to make a small colorful display is to use a [1.2" Bi-color 8x8 LED Matrix](http://www.adafruit.com/products/458). Matrices like these are 'multiplexed' - so to control all the 128 LEDs you need 24 pins....
In Stock
[Buy Now](https://www.adafruit.com/product/902)
[Related Guides to the Product](https://learn.adafruit.com/products/902/guides)
### Adafruit Mini 8x8 LED Matrix w/I2C Backpack - Blue
[Adafruit Mini 8x8 LED Matrix w/I2C Backpack - Blue](https://www.adafruit.com/product/959)
What's better than a single LED? Lots of LEDs! A fun way to make a small display is to use an [8x8 matrix](https://www.adafruit.com/category/37_88) or a [4-digit 7-segment display](https://www.adafruit.com/category/37_103). Matrices like these are...
In Stock
[Buy Now](https://www.adafruit.com/product/959)
[Related Guides to the Product](https://learn.adafruit.com/products/959/guides)
### Adafruit 0.56" 4-Digit 7-Segment Display w/I2C Backpack - White
[Adafruit 0.56" 4-Digit 7-Segment Display w/I2C Backpack - White](https://www.adafruit.com/product/1002)
What's better than a single LED? Lots of LEDs! A fun way to make a small display is to use an [8x8 matrix](https://www.adafruit.com/category/37_88) or a [4-digit 7-segment display](https://www.adafruit.com/category/37_103). Matrices like these are...
In Stock
[Buy Now](https://www.adafruit.com/product/1002)
[Related Guides to the Product](https://learn.adafruit.com/products/1002/guides)
### Adafruit 1.2" 8x8 LED Matrix Backpack
[Adafruit 1.2" 8x8 LED Matrix Backpack](https://www.adafruit.com/product/1048)
By popular request, you can now get our 8x8 LED backpacks without the LEDs! These backpacks feature an HT16K33 I2C LED driver, they're simple and easy to use - you can use [our very nice library for the backpacks to...](https://github.com/adafruit/Adafruit-LED-Backpack-Library)
In Stock
[Buy Now](https://www.adafruit.com/product/1048)
[Related Guides to the Product](https://learn.adafruit.com/products/1048/guides)
### Adafruit Small 1.2" 8x8 LED Matrix w/I2C Backpack - Red
[Adafruit Small 1.2" 8x8 LED Matrix w/I2C Backpack - Red](https://www.adafruit.com/product/1049)
What's better than a single LED? Lots of LEDs! A fun way to make a small display is to use an [8x8 matrix](https://www.adafruit.com/category/37_88) or a [4-digit 7-segment display](https://www.adafruit.com/category/37_103). Matrices like these are...
In Stock
[Buy Now](https://www.adafruit.com/product/1049)
[Related Guides to the Product](https://learn.adafruit.com/products/1049/guides)
### Adafruit Small 1.2" 8x8 LED Matrix w/I2C Backpack - Yellow
[Adafruit Small 1.2" 8x8 LED Matrix w/I2C Backpack - Yellow](https://www.adafruit.com/product/1050)
What's better than a single LED? Lots of LEDs! A fun way to make a small display is to use an [8x8 matrix](https://www.adafruit.com/category/37_88) or a [4-digit 7-segment display](https://www.adafruit.com/category/37_103). Matrices like these are...
In Stock
[Buy Now](https://www.adafruit.com/product/1050)
[Related Guides to the Product](https://learn.adafruit.com/products/1050/guides)
### Adafruit Small 1.2" 8x8 LED Matrix w/I2C Backpack - Blue
[Adafruit Small 1.2" 8x8 LED Matrix w/I2C Backpack - Blue](https://www.adafruit.com/product/1052)
What's better than a single LED? Lots of LEDs! A fun way to make a small display is to use an [8x8 matrix](https://www.adafruit.com/category/37_88) or a [4-digit 7-segment display](https://www.adafruit.com/category/37_103). Matrices like these are...
In Stock
[Buy Now](https://www.adafruit.com/product/1052)
[Related Guides to the Product](https://learn.adafruit.com/products/1052/guides)
### Adafruit Mini 8x8 LED Matrix w/I2C Backpack - Ultra Bright White
[Adafruit Mini 8x8 LED Matrix w/I2C Backpack - Ultra Bright White](https://www.adafruit.com/product/1080)
What's better than a single LED? Lots of LEDs! A fun way to make a small display is to use an [8x8 matrix](https://www.adafruit.com/category/37_88) or a [4-digit 7-segment display](https://www.adafruit.com/category/37_103). Matrices like these are...
In Stock
[Buy Now](https://www.adafruit.com/product/1080)
[Related Guides to the Product](https://learn.adafruit.com/products/1080/guides)
### Adafruit 1.2" 4-Digit 7-Segment Display w/I2C Backpack - Green
[Adafruit 1.2" 4-Digit 7-Segment Display w/I2C Backpack - Green](https://www.adafruit.com/product/1268)
What's better than a single LED? Lots of LEDs! A fun way to make a numeric display is to use a [4-digit 7-segment display](https://www.adafruit.com/category/37_103). LED matrices like these are 'multiplexed' - so to control all the seven-segment LEDs you need 14 pins....
No Longer Stocked
[Buy Now](https://www.adafruit.com/product/1268)
[Related Guides to the Product](https://learn.adafruit.com/products/1268/guides)
### Adafruit 1.2" 4-Digit 7-Segment Display w/I2C Backpack - Yellow
[Adafruit 1.2" 4-Digit 7-Segment Display w/I2C Backpack - Yellow](https://www.adafruit.com/product/1269)
What's better than a single LED? Lots of LEDs! A fun way to make a numeric display is to use a [4-digit 7-segment display](https://www.adafruit.com/category/37_103). LED matrices like these are 'multiplexed' - so to control all the seven-segment LEDs you need 14 pins....
In Stock
[Buy Now](https://www.adafruit.com/product/1269)
[Related Guides to the Product](https://learn.adafruit.com/products/1269/guides)
### Adafruit 1.2" 4-Digit 7-Segment Display w/I2C Backpack - Red
[Adafruit 1.2" 4-Digit 7-Segment Display w/I2C Backpack - Red](https://www.adafruit.com/product/1270)
What's better than a single LED? Lots of LEDs! A fun way to make a numeric display is to use a [4-digit 7-segment display](https://www.adafruit.com/category/37_103). LED matrices like these are 'multiplexed' - so to control all the seven-segment LEDs you need 14 pins....
In Stock
[Buy Now](https://www.adafruit.com/product/1270)
[Related Guides to the Product](https://learn.adafruit.com/products/1270/guides)
### Small 1.2" 8x8 Ultra Bright White LED Matrix + Backpack
[Small 1.2" 8x8 Ultra Bright White LED Matrix + Backpack](https://www.adafruit.com/product/1614)
What's better than a single LED? Lots of LEDs! A fun way to make a small display is to use an [8x8 matrix](https://www.adafruit.com/category/37_88) or a [4-digit 7-segment display](https://www.adafruit.com/category/37_103). Matrices like these are...
In Stock
[Buy Now](https://www.adafruit.com/product/1614)
[Related Guides to the Product](https://learn.adafruit.com/products/1614/guides)
### Adafruit Small 1.2" 8x8 LED Matrix w/I2C Backpack - Pure Green
[Adafruit Small 1.2" 8x8 LED Matrix w/I2C Backpack - Pure Green](https://www.adafruit.com/product/1632)
What's better than a single LED? Lots of LEDs! A fun way to make a small display is to use an [8x8 matrix](https://www.adafruit.com/category/37_88) or a [4-digit 7-segment display](https://www.adafruit.com/category/37_103). Matrices like these are...
In Stock
[Buy Now](https://www.adafruit.com/product/1632)
[Related Guides to the Product](https://learn.adafruit.com/products/1632/guides)
### Adafruit Mini 0.8" 8x8 LED Matrix w/I2C Backpack - Pure Green
[Adafruit Mini 0.8" 8x8 LED Matrix w/I2C Backpack - Pure Green](https://www.adafruit.com/product/1633)
What's better than a single LED? Lots of LEDs! A fun way to make a small display is to use an [8x8 matrix](https://www.adafruit.com/category/37_88) or a [4-digit 7-segment display](https://www.adafruit.com/category/37_103). Matrices like these are...
In Stock
[Buy Now](https://www.adafruit.com/product/1633)
[Related Guides to the Product](https://learn.adafruit.com/products/1633/guides)
### Bi-Color (Red/Green) 24-Bar Bargraph w/I2C Backpack Kit
[Bi-Color (Red/Green) 24-Bar Bargraph w/I2C Backpack Kit](https://www.adafruit.com/product/1721)
What's better than a single LED? Lots of LEDs! A fun way to make a small linear display is to use two 12-bar Bi-color bar-graphs. However, this LED bargraph is 'multiplexed' - so to control all the 48 LEDs you need a lot of pins.
Out of Stock
[Buy Now](https://www.adafruit.com/product/1721)
[Related Guides to the Product](https://learn.adafruit.com/products/1721/guides)
### Small 1.2" 8x8 Ultra Bright Square Amber LED Matrix + Backpack
[Small 1.2" 8x8 Ultra Bright Square Amber LED Matrix + Backpack](https://www.adafruit.com/product/1854)
What's better than a single LED? Lots of LEDs! Matrices like these are 'multiplexed' - so to control 64 LEDs you need 16 pins. That's a lot of pins, and there are [driver chips like the MAX7219](//www.adafruit.com/products/453) that can control a matrix for you but...
In Stock
[Buy Now](https://www.adafruit.com/product/1854)
[Related Guides to the Product](https://learn.adafruit.com/products/1854/guides)
### Small 1.2" 8x8 Ultra Bright Square Yellow LED Matrix + Backpack
[Small 1.2" 8x8 Ultra Bright Square Yellow LED Matrix + Backpack](https://www.adafruit.com/product/1855)
What's better than a single LED? Lots of LEDs! Matrices like these are 'multiplexed' - so to control 64 LEDs you need 16 pins. That's a lot of pins, and there are [driver chips like the MAX7219](//www.adafruit.com/products/453) that can control a matrix for you but...
In Stock
[Buy Now](https://www.adafruit.com/product/1855)
[Related Guides to the Product](https://learn.adafruit.com/products/1855/guides)
### Small 1.2" 8x8 Bright Square Pure Green LED Matrix + Backpack
[Small 1.2" 8x8 Bright Square Pure Green LED Matrix + Backpack](https://www.adafruit.com/product/1856)
What's better than a single LED? Lots of LEDs! Matrices like these are 'multiplexed' - so to control 64 LEDs you need 16 pins. That's a lot of pins, and there are [driver chips like the MAX7219](//www.adafruit.com/products/453) that can control a matrix for you but...
In Stock
[Buy Now](https://www.adafruit.com/product/1856)
[Related Guides to the Product](https://learn.adafruit.com/products/1856/guides)
### Small 1.2" 8x8 Ultra Bright Square White LED Matrix + Backpack
[Small 1.2" 8x8 Ultra Bright Square White LED Matrix + Backpack](https://www.adafruit.com/product/1857)
What's better than a single LED? Lots of LEDs! Matrices like these are 'multiplexed' - so to control 64 LEDs you need 16 pins. That's a lot of pins, and there are [driver chips like the MAX7219](//www.adafruit.com/products/453) that can control a matrix for you but...
In Stock
[Buy Now](https://www.adafruit.com/product/1857)
[Related Guides to the Product](https://learn.adafruit.com/products/1857/guides)
### Adafruit 14-segment LED Alphanumeric Backpack - STEMMA QT
[Adafruit 14-segment LED Alphanumeric Backpack - STEMMA QT](https://www.adafruit.com/product/1910)
By popular request, you can now get our 14-segment LED backpacks without the LEDs! These backpacks feature an HT16K33 I2C LED driver, they're simple and easy to use - you can use [our very nice library for the backpacks to...](https://github.com/adafruit/Adafruit-LED-Backpack-Library)
In Stock
[Buy Now](https://www.adafruit.com/product/1910)
[Related Guides to the Product](https://learn.adafruit.com/products/1910/guides)
### Quad Alphanumeric Display - Red 0.54" Digits w/ I2C Backpack
[Quad Alphanumeric Display - Red 0.54" Digits w/ I2C Backpack](https://www.adafruit.com/product/1911)
Display, elegantly, 012345678 or 9! Gaze, hypnotized, at ABCDEFGHIJKLM - well it can display the whole alphabet. You get the point. This is a nice, bright alphanumeric display that shows letters and numbers in a beautiful red hue. It's super bright and designed for viewing from distances...
In Stock
[Buy Now](https://www.adafruit.com/product/1911)
[Related Guides to the Product](https://learn.adafruit.com/products/1911/guides)
### Quad Alphanumeric Display - Blue 0.54" Digits w/ I2C Backpack
[Quad Alphanumeric Display - Blue 0.54" Digits w/ I2C Backpack](https://www.adafruit.com/product/1912)
Display, elegantly, 012345678 or 9! Gaze, hypnotized, at ABCDEFGHIJKLM - well it can display the whole alphabet. You get the point. This is a nice, bright alphanumeric display that shows letters and numbers in a beautiful blue hue. It's super bright and designed for viewing from distances...
In Stock
[Buy Now](https://www.adafruit.com/product/1912)
[Related Guides to the Product](https://learn.adafruit.com/products/1912/guides)
### 16x8 1.2" LED Matrix + Backpack - Ultra Bright Round Green LEDs
[16x8 1.2" LED Matrix + Backpack - Ultra Bright Round Green LEDs](https://www.adafruit.com/product/2035)
What's better than a single LED? Lots of LEDs! And what's better than lots of LEDs? **TWO TIMES AS MANY LEDS!!!**
With the 16x8 LED Matrix Backpack we've doubled your project's matrix capacity by making it super easy to get two separate 8x8 matrices onto...
In Stock
[Buy Now](https://www.adafruit.com/product/2035)
[Related Guides to the Product](https://learn.adafruit.com/products/2035/guides)
### 16x8 1.2" LED Matrix+Backpack UltraBright Round YellowGreen LEDs
[16x8 1.2" LED Matrix+Backpack UltraBright Round YellowGreen LEDs](https://www.adafruit.com/product/2036)
What's better than a single LED? Lots of LEDs! And what's better than lots of LEDs? **TWO TIMES AS MANY LEDS!!!**
With the 16x8 LED Matrix Backpack we've doubled your project's matrix capacity by making it super easy to get two separate 8x8 matrices onto...
In Stock
[Buy Now](https://www.adafruit.com/product/2036)
[Related Guides to the Product](https://learn.adafruit.com/products/2036/guides)
### 16x8 1.2" LED Matrix + Backpack - Ultra Bright Round Red LEDs
[16x8 1.2" LED Matrix + Backpack - Ultra Bright Round Red LEDs](https://www.adafruit.com/product/2037)
What's better than a single LED? Lots of LEDs! And what's better than lots of LEDs? **TWO TIMES AS MANY LEDS!!!**
With the 16x8 LED Matrix Backpack we've doubled your project's matrix capacity by making it super easy to get two separate 8x8 matrices onto...
In Stock
[Buy Now](https://www.adafruit.com/product/2037)
[Related Guides to the Product](https://learn.adafruit.com/products/2037/guides)
### 16x8 1.2" LED Matrix + Backpack - Ultra Bright Round White LEDs
[16x8 1.2" LED Matrix + Backpack - Ultra Bright Round White LEDs](https://www.adafruit.com/product/2038)
What's better than a single LED? Lots of LEDs! And what's better than lots of LEDs? **TWO TIMES AS MANY LEDS!!!**
With the 16x8 LED Matrix Backpack we've doubled your project's matrix capacity by making it super easy to get two separate 8x8 matrices onto...
In Stock
[Buy Now](https://www.adafruit.com/product/2038)
[Related Guides to the Product](https://learn.adafruit.com/products/2038/guides)
### 16x8 1.2" LED Matrix + Backpack - Ultra Bright Round Blue LEDs
[16x8 1.2" LED Matrix + Backpack - Ultra Bright Round Blue LEDs](https://www.adafruit.com/product/2039)
What's better than a single LED? Lots of LEDs! And what's better than lots of LEDs? **TWO TIMES AS MANY LEDS!!!**
With the 16x8 LED Matrix Backpack we've doubled your project's matrix capacity by making it super easy to get two separate 8x8 matrices onto...
In Stock
[Buy Now](https://www.adafruit.com/product/2039)
[Related Guides to the Product](https://learn.adafruit.com/products/2039/guides)
### 16x8 1.2" LED Matrix + Backpack - Ultra Bright Square Blue LEDs
[16x8 1.2" LED Matrix + Backpack - Ultra Bright Square Blue LEDs](https://www.adafruit.com/product/2040)
What's better than a single LED? Lots of LEDs! And what's better than lots of LEDs? **TWO TIMES AS MANY LEDS!!!**
With the 16x8 LED Matrix Backpack we've doubled your project's matrix capacity by making it super easy to get two separate 8x8 matrices onto...
In Stock
[Buy Now](https://www.adafruit.com/product/2040)
[Related Guides to the Product](https://learn.adafruit.com/products/2040/guides)
### 16x8 1.2" LED Matrix + Backpack - Ultra Bright Square Amber LEDs
[16x8 1.2" LED Matrix + Backpack - Ultra Bright Square Amber LEDs](https://www.adafruit.com/product/2041)
What's better than a single LED? Lots of LEDs! And what's better than lots of LEDs? **TWO TIMES AS MANY LEDS!!!**
With the 16x8 LED Matrix Backpack we've doubled your project's matrix capacity by making it super easy to get two separate 8x8 matrices onto...
In Stock
[Buy Now](https://www.adafruit.com/product/2041)
[Related Guides to the Product](https://learn.adafruit.com/products/2041/guides)
### 16x8 1.2" LED Matrix + Backpack - Ultra Bright Square Green LEDs
[16x8 1.2" LED Matrix + Backpack - Ultra Bright Square Green LEDs](https://www.adafruit.com/product/2042)
What's better than a single LED? Lots of LEDs! And what's better than lots of LEDs? **TWO TIMES AS MANY LEDS!!!**
With the 16x8 LED Matrix Backpack we've doubled your project's matrix capacity by making it super easy to get two separate 8x8 matrices onto...
In Stock
[Buy Now](https://www.adafruit.com/product/2042)
[Related Guides to the Product](https://learn.adafruit.com/products/2042/guides)
### 16x8 1.2" LED Matrix + Backpack -Ultra Bright Square Yellow LEDs
[16x8 1.2" LED Matrix + Backpack -Ultra Bright Square Yellow LEDs](https://www.adafruit.com/product/2043)
What's better than a single LED? Lots of LEDs! And what's better than lots of LEDs? **TWO TIMES AS MANY LEDS!!!**
With the 16x8 LED Matrix Backpack we've doubled your project's matrix capacity by making it super easy to get two separate 8x8 matrices onto...
In Stock
[Buy Now](https://www.adafruit.com/product/2043)
[Related Guides to the Product](https://learn.adafruit.com/products/2043/guides)
### 16x8 1.2" LED Matrix + Backpack - Ultra Bright Square White LEDs
[16x8 1.2" LED Matrix + Backpack - Ultra Bright Square White LEDs](https://www.adafruit.com/product/2044)
What's better than a single LED? Lots of LEDs! And what's better than lots of LEDs? **TWO TIMES AS MANY LEDS!!!**
With the 16x8 LED Matrix Backpack we've doubled your project's matrix capacity by making it super easy to get two separate 8x8 matrices onto...
In Stock
[Buy Now](https://www.adafruit.com/product/2044)
[Related Guides to the Product](https://learn.adafruit.com/products/2044/guides)
### 16x8 1.2" LED Matrix + Backpack-Ultra Bright Round Orange LEDs
[16x8 1.2" LED Matrix + Backpack-Ultra Bright Round Orange LEDs](https://www.adafruit.com/product/2052)
What's better than a single LED? Lots of LEDs! And what's better than lots of LEDs? **TWO TIMES AS MANY LEDS!!!**
With the 16x8 LED Matrix Backpack we've doubled your project's matrix capacity by making it super easy to get two separate 8x8 matrices onto...
In Stock
[Buy Now](https://www.adafruit.com/product/2052)
[Related Guides to the Product](https://learn.adafruit.com/products/2052/guides)
### 16x8 1.2" LED Matrices+Backpack Round LEDs in Various Colors
[16x8 1.2" LED Matrices+Backpack Round LEDs in Various Colors](https://www.adafruit.com/product/2054)
What's better than a single LED? Lots of LEDs! And what's better than lots of LEDs? **TWO TIMES AS MANY LEDS!!!**
With the 16x8 LED Matrix Backpack we've doubled your project's matrix capacity by making it super easy to get two separate 8x8 matrices onto...
Out of Stock
[Buy Now](https://www.adafruit.com/product/2054)
[Related Guides to the Product](https://learn.adafruit.com/products/2054/guides)
### Adafruit 8x16 LED Matrix FeatherWing w/o Matrices
[Adafruit 8x16 LED Matrix FeatherWing w/o Matrices](https://www.adafruit.com/product/3090)
You will chirp with delight when you see how easy it is to make your very own 8x16 LED matrix display for any Feather. At 0.8" square, the little [8x8 matrices](https://www.adafruit.com/new/?q=8x8%20miniature%20LED%20matrix&) have everything a big LED matrix has,...
Out of Stock
[Buy Now](https://www.adafruit.com/product/3090)
[Related Guides to the Product](https://learn.adafruit.com/products/3090/guides)
### Adafruit 14-segment LED Alphanumeric backpack (same as P1910)
[Adafruit 14-segment LED Alphanumeric backpack (same as P1910)](https://www.adafruit.com/product/3322)
Just the backpack + 4pin header
No Longer Stocked
[Buy Now](https://www.adafruit.com/product/3322)
[Related Guides to the Product](https://learn.adafruit.com/products/3322/guides)
## Featured Products
### Adafruit Small 1.2" 8x8 LED Matrix w/I2C Backpack - Yellow-Green
[Adafruit Small 1.2" 8x8 LED Matrix w/I2C Backpack - Yellow-Green](https://www.adafruit.com/product/1051)
What's better than a single LED? Lots of LEDs! A fun way to make a small display is to use an [8x8 matrix](https://www.adafruit.com/category/37_88) or a [4-digit 7-segment display](https://www.adafruit.com/category/37_103). Matrices like these are...
In Stock
[Buy Now](https://www.adafruit.com/product/1051)
[Related Guides to the Product](https://learn.adafruit.com/products/1051/guides)
### Small 1.2" 8x8 Ultra Bright Square Blue LED Matrix + Backpack
[Small 1.2" 8x8 Ultra Bright Square Blue LED Matrix + Backpack](https://www.adafruit.com/product/1853)
What's better than a single LED? Lots of LEDs! Matrices like these are 'multiplexed' - so to control 64 LEDs you need 16 pins. That's a lot of pins, and there are [driver chips like the MAX7219](//www.adafruit.com/products/453) that can control a matrix for you but...
In Stock
[Buy Now](https://www.adafruit.com/product/1853)
[Related Guides to the Product](https://learn.adafruit.com/products/1853/guides)
## Related Guides
- [LED Backpack Displays on Raspberry Pi and BeagleBone Black](https://learn.adafruit.com/led-backpack-displays-on-raspberry-pi-and-beaglebone-black.md)
- [Animating Multiple LED Backpacks](https://learn.adafruit.com/animating-multiple-led-backpacks.md)
- [Arduino GPS Clock](https://learn.adafruit.com/arduino-clock.md)
- [Raspberry Pi Physical Dashboard](https://learn.adafruit.com/raspberry-pi-physical-dashboard.md)
- [CircuitPython Hardware: LED Backpacks & FeatherWings](https://learn.adafruit.com/micropython-hardware-led-backpacks-and-featherwings.md)
- [Matrix and 7-Segment LED Backpack with the Raspberry Pi](https://learn.adafruit.com/matrix-7-segment-led-backpack-with-the-raspberry-pi.md)
- [DIY Pocket LED Gamer - Tiny Tetris!](https://learn.adafruit.com/diy-3d-printed-handheld-pocket-game-tiny-tetris-snake.md)
- [RGB LED Matrix Cube with 25,000 LEDs](https://learn.adafruit.com/rgb-led-matrix-cube-for-pi.md)
- [Creating GIFs for SmartMatrix](https://learn.adafruit.com/creating-gifs-for-smartmatrix.md)
- [Adafruit CharliePlex LED Matrix Bonnet](https://learn.adafruit.com/adafruit-charlieplex-bonnet.md)
- [Connecting a 16x32 RGB LED Matrix Panel to a Raspberry Pi](https://learn.adafruit.com/connecting-a-16x32-rgb-led-matrix-panel-to-a-raspberry-pi.md)
- [MicroPython Displays: Drawing Text](https://learn.adafruit.com/micropython-displays-drawing-text.md)
- [Heart Rate Badge](https://learn.adafruit.com/heart-rate-badge.md)
- [16x24 LED Matrix](https://learn.adafruit.com/16x24-led-matrix.md)
- [Adafruit IS31FL3741](https://learn.adafruit.com/adafruit-is31fl3741.md)
---
# Source: https://learn.adafruit.com/adafruit-led-backpack/0-8-8x8-matrix.md
# Adafruit LED Backpacks
## 0.8" 8x8 Matrix
This version of the LED backpack is designed for these very cute miniature 8x8 matrices. They measure only 0.8"x0.8" so its a shame to use a massive array of chips to control it. This backpack solves the annoyance of using 16 pins or a bunch of chips by having an I2C constant-current matrix controller sit neatly on the back of the PCB. The controller chip takes care of everything, drawing all 64 LEDs in the background. All you have to do is write data to it using the 2-pin I2C interface. There are two address select pins so you can select one of 4 addresses to control up to 4 of these on a single 2-pin I2C bus (as well as whatever other I2C chips or sensors you like). The driver chip can 'dim' the entire display from 1/16 brightness up to full brightness in 1/16th steps. It cannot dim individual LEDs, only the entire display at once.

- [Previous Page](https://learn.adafruit.com/adafruit-led-backpack/1-2-8x8-circuitpython-and-python-usage.md)
- [Next Page](https://learn.adafruit.com/adafruit-led-backpack/0-8-8x8-matrix-assembly.md)
## Primary Products
### Adafruit Mini 8x8 LED Matrix w/I2C Backpack - Red
[Adafruit Mini 8x8 LED Matrix w/I2C Backpack - Red](https://www.adafruit.com/product/870)
What's better than a single LED? Lots of LEDs! A fun way to make a small display is to use an [8x8 matrix](https://www.adafruit.com/category/37_88) or a [4-digit 7-segment display](https://www.adafruit.com/category/37_103). Matrices like these are...
In Stock
[Buy Now](https://www.adafruit.com/product/870)
[Related Guides to the Product](https://learn.adafruit.com/products/870/guides)
### Adafruit Mini 8x8 LED Matrix w/I2C Backpack - Yellow
[Adafruit Mini 8x8 LED Matrix w/I2C Backpack - Yellow](https://www.adafruit.com/product/871)
What's better than a single LED? Lots of LEDs! A fun way to make a small display is to use an [8x8 matrix](https://www.adafruit.com/category/37_88) or a [4-digit 7-segment display](https://www.adafruit.com/category/37_103). Matrices like these are...
In Stock
[Buy Now](https://www.adafruit.com/product/871)
[Related Guides to the Product](https://learn.adafruit.com/products/871/guides)
### Adafruit Mini 0.8" 8x8 LED Matrix w/I2C Backpack - Yellow-Green
[Adafruit Mini 0.8" 8x8 LED Matrix w/I2C Backpack - Yellow-Green](https://www.adafruit.com/product/872)
What's better than a single LED? Lots of LEDs! A fun way to make a small display is to use an [8x8 matrix](https://www.adafruit.com/category/37_88) or a [4-digit 7-segment display](https://www.adafruit.com/category/37_103). Matrices like these are...
In Stock
[Buy Now](https://www.adafruit.com/product/872)
[Related Guides to the Product](https://learn.adafruit.com/products/872/guides)
### Adafruit 0.56" 4-Digit 7-Segment Display with I2C Backpack - Red
[Adafruit 0.56" 4-Digit 7-Segment Display with I2C Backpack - Red](https://www.adafruit.com/product/878)
What's better than a single LED? Lots of LEDs! A fun way to make a small display is to use an [8x8 matrix](https://www.adafruit.com/category/37_88) or a [4-digit 7-segment display](https://www.adafruit.com/category/37_103). Matrices like these are...
In Stock
[Buy Now](https://www.adafruit.com/product/878)
[Related Guides to the Product](https://learn.adafruit.com/products/878/guides)
### Adafruit 0.56" 4-Digit 7-Segment Display w/I2C Backpack - Yellow
[Adafruit 0.56" 4-Digit 7-Segment Display w/I2C Backpack - Yellow](https://www.adafruit.com/product/879)
What's better than a single LED? Lots of LEDs! A fun way to make a small display is to use an [8x8 matrix](https://www.adafruit.com/category/37_88) or a [4-digit 7-segment display](https://www.adafruit.com/category/37_103). Matrices like these are...
In Stock
[Buy Now](https://www.adafruit.com/product/879)
[Related Guides to the Product](https://learn.adafruit.com/products/879/guides)
### Adafruit 0.56" 4-Digit 7-Segment Display w/ I2C Backpack - Green
[Adafruit 0.56" 4-Digit 7-Segment Display w/ I2C Backpack - Green](https://www.adafruit.com/product/880)
What's better than a single LED? Lots of LEDs! A fun way to make a small display is to use an [8x8 matrix](https://www.adafruit.com/category/37_88) or a [4-digit 7-segment display](https://www.adafruit.com/category/37_103). Matrices like these are...
No Longer Stocked
[Buy Now](https://www.adafruit.com/product/880)
[Related Guides to the Product](https://learn.adafruit.com/products/880/guides)
### Adafruit 0.56" 4-Digit 7-Segment Display w/ I2C Backpack - Blue
[Adafruit 0.56" 4-Digit 7-Segment Display w/ I2C Backpack - Blue](https://www.adafruit.com/product/881)
What's better than a single LED? Lots of LEDs! A fun way to make a small display is to use an [8x8 matrix](https://www.adafruit.com/category/37_88) or a [4-digit 7-segment display](https://www.adafruit.com/category/37_103). Matrices like these are...
In Stock
[Buy Now](https://www.adafruit.com/product/881)
[Related Guides to the Product](https://learn.adafruit.com/products/881/guides)
### Adafruit Bicolor LED Square Pixel Matrix with I2C Backpack
[Adafruit Bicolor LED Square Pixel Matrix with I2C Backpack](https://www.adafruit.com/product/902)
What's better than a single LED? Lots of LEDs! A fun way to make a small colorful display is to use a [1.2" Bi-color 8x8 LED Matrix](http://www.adafruit.com/products/458). Matrices like these are 'multiplexed' - so to control all the 128 LEDs you need 24 pins....
In Stock
[Buy Now](https://www.adafruit.com/product/902)
[Related Guides to the Product](https://learn.adafruit.com/products/902/guides)
### Adafruit Mini 8x8 LED Matrix w/I2C Backpack - Blue
[Adafruit Mini 8x8 LED Matrix w/I2C Backpack - Blue](https://www.adafruit.com/product/959)
What's better than a single LED? Lots of LEDs! A fun way to make a small display is to use an [8x8 matrix](https://www.adafruit.com/category/37_88) or a [4-digit 7-segment display](https://www.adafruit.com/category/37_103). Matrices like these are...
In Stock
[Buy Now](https://www.adafruit.com/product/959)
[Related Guides to the Product](https://learn.adafruit.com/products/959/guides)
### Adafruit 0.56" 4-Digit 7-Segment Display w/I2C Backpack - White
[Adafruit 0.56" 4-Digit 7-Segment Display w/I2C Backpack - White](https://www.adafruit.com/product/1002)
What's better than a single LED? Lots of LEDs! A fun way to make a small display is to use an [8x8 matrix](https://www.adafruit.com/category/37_88) or a [4-digit 7-segment display](https://www.adafruit.com/category/37_103). Matrices like these are...
In Stock
[Buy Now](https://www.adafruit.com/product/1002)
[Related Guides to the Product](https://learn.adafruit.com/products/1002/guides)
### Adafruit 1.2" 8x8 LED Matrix Backpack
[Adafruit 1.2" 8x8 LED Matrix Backpack](https://www.adafruit.com/product/1048)
By popular request, you can now get our 8x8 LED backpacks without the LEDs! These backpacks feature an HT16K33 I2C LED driver, they're simple and easy to use - you can use [our very nice library for the backpacks to...](https://github.com/adafruit/Adafruit-LED-Backpack-Library)
In Stock
[Buy Now](https://www.adafruit.com/product/1048)
[Related Guides to the Product](https://learn.adafruit.com/products/1048/guides)
### Adafruit Small 1.2" 8x8 LED Matrix w/I2C Backpack - Red
[Adafruit Small 1.2" 8x8 LED Matrix w/I2C Backpack - Red](https://www.adafruit.com/product/1049)
What's better than a single LED? Lots of LEDs! A fun way to make a small display is to use an [8x8 matrix](https://www.adafruit.com/category/37_88) or a [4-digit 7-segment display](https://www.adafruit.com/category/37_103). Matrices like these are...
In Stock
[Buy Now](https://www.adafruit.com/product/1049)
[Related Guides to the Product](https://learn.adafruit.com/products/1049/guides)
### Adafruit Small 1.2" 8x8 LED Matrix w/I2C Backpack - Yellow
[Adafruit Small 1.2" 8x8 LED Matrix w/I2C Backpack - Yellow](https://www.adafruit.com/product/1050)
What's better than a single LED? Lots of LEDs! A fun way to make a small display is to use an [8x8 matrix](https://www.adafruit.com/category/37_88) or a [4-digit 7-segment display](https://www.adafruit.com/category/37_103). Matrices like these are...
In Stock
[Buy Now](https://www.adafruit.com/product/1050)
[Related Guides to the Product](https://learn.adafruit.com/products/1050/guides)
### Adafruit Small 1.2" 8x8 LED Matrix w/I2C Backpack - Blue
[Adafruit Small 1.2" 8x8 LED Matrix w/I2C Backpack - Blue](https://www.adafruit.com/product/1052)
What's better than a single LED? Lots of LEDs! A fun way to make a small display is to use an [8x8 matrix](https://www.adafruit.com/category/37_88) or a [4-digit 7-segment display](https://www.adafruit.com/category/37_103). Matrices like these are...
In Stock
[Buy Now](https://www.adafruit.com/product/1052)
[Related Guides to the Product](https://learn.adafruit.com/products/1052/guides)
### Adafruit Mini 8x8 LED Matrix w/I2C Backpack - Ultra Bright White
[Adafruit Mini 8x8 LED Matrix w/I2C Backpack - Ultra Bright White](https://www.adafruit.com/product/1080)
What's better than a single LED? Lots of LEDs! A fun way to make a small display is to use an [8x8 matrix](https://www.adafruit.com/category/37_88) or a [4-digit 7-segment display](https://www.adafruit.com/category/37_103). Matrices like these are...
In Stock
[Buy Now](https://www.adafruit.com/product/1080)
[Related Guides to the Product](https://learn.adafruit.com/products/1080/guides)
### Adafruit 1.2" 4-Digit 7-Segment Display w/I2C Backpack - Green
[Adafruit 1.2" 4-Digit 7-Segment Display w/I2C Backpack - Green](https://www.adafruit.com/product/1268)
What's better than a single LED? Lots of LEDs! A fun way to make a numeric display is to use a [4-digit 7-segment display](https://www.adafruit.com/category/37_103). LED matrices like these are 'multiplexed' - so to control all the seven-segment LEDs you need 14 pins....
No Longer Stocked
[Buy Now](https://www.adafruit.com/product/1268)
[Related Guides to the Product](https://learn.adafruit.com/products/1268/guides)
### Adafruit 1.2" 4-Digit 7-Segment Display w/I2C Backpack - Yellow
[Adafruit 1.2" 4-Digit 7-Segment Display w/I2C Backpack - Yellow](https://www.adafruit.com/product/1269)
What's better than a single LED? Lots of LEDs! A fun way to make a numeric display is to use a [4-digit 7-segment display](https://www.adafruit.com/category/37_103). LED matrices like these are 'multiplexed' - so to control all the seven-segment LEDs you need 14 pins....
In Stock
[Buy Now](https://www.adafruit.com/product/1269)
[Related Guides to the Product](https://learn.adafruit.com/products/1269/guides)
### Adafruit 1.2" 4-Digit 7-Segment Display w/I2C Backpack - Red
[Adafruit 1.2" 4-Digit 7-Segment Display w/I2C Backpack - Red](https://www.adafruit.com/product/1270)
What's better than a single LED? Lots of LEDs! A fun way to make a numeric display is to use a [4-digit 7-segment display](https://www.adafruit.com/category/37_103). LED matrices like these are 'multiplexed' - so to control all the seven-segment LEDs you need 14 pins....
In Stock
[Buy Now](https://www.adafruit.com/product/1270)
[Related Guides to the Product](https://learn.adafruit.com/products/1270/guides)
### Small 1.2" 8x8 Ultra Bright White LED Matrix + Backpack
[Small 1.2" 8x8 Ultra Bright White LED Matrix + Backpack](https://www.adafruit.com/product/1614)
What's better than a single LED? Lots of LEDs! A fun way to make a small display is to use an [8x8 matrix](https://www.adafruit.com/category/37_88) or a [4-digit 7-segment display](https://www.adafruit.com/category/37_103). Matrices like these are...
In Stock
[Buy Now](https://www.adafruit.com/product/1614)
[Related Guides to the Product](https://learn.adafruit.com/products/1614/guides)
### Adafruit Small 1.2" 8x8 LED Matrix w/I2C Backpack - Pure Green
[Adafruit Small 1.2" 8x8 LED Matrix w/I2C Backpack - Pure Green](https://www.adafruit.com/product/1632)
What's better than a single LED? Lots of LEDs! A fun way to make a small display is to use an [8x8 matrix](https://www.adafruit.com/category/37_88) or a [4-digit 7-segment display](https://www.adafruit.com/category/37_103). Matrices like these are...
In Stock
[Buy Now](https://www.adafruit.com/product/1632)
[Related Guides to the Product](https://learn.adafruit.com/products/1632/guides)
### Adafruit Mini 0.8" 8x8 LED Matrix w/I2C Backpack - Pure Green
[Adafruit Mini 0.8" 8x8 LED Matrix w/I2C Backpack - Pure Green](https://www.adafruit.com/product/1633)
What's better than a single LED? Lots of LEDs! A fun way to make a small display is to use an [8x8 matrix](https://www.adafruit.com/category/37_88) or a [4-digit 7-segment display](https://www.adafruit.com/category/37_103). Matrices like these are...
In Stock
[Buy Now](https://www.adafruit.com/product/1633)
[Related Guides to the Product](https://learn.adafruit.com/products/1633/guides)
### Bi-Color (Red/Green) 24-Bar Bargraph w/I2C Backpack Kit
[Bi-Color (Red/Green) 24-Bar Bargraph w/I2C Backpack Kit](https://www.adafruit.com/product/1721)
What's better than a single LED? Lots of LEDs! A fun way to make a small linear display is to use two 12-bar Bi-color bar-graphs. However, this LED bargraph is 'multiplexed' - so to control all the 48 LEDs you need a lot of pins.
Out of Stock
[Buy Now](https://www.adafruit.com/product/1721)
[Related Guides to the Product](https://learn.adafruit.com/products/1721/guides)
### Small 1.2" 8x8 Ultra Bright Square Amber LED Matrix + Backpack
[Small 1.2" 8x8 Ultra Bright Square Amber LED Matrix + Backpack](https://www.adafruit.com/product/1854)
What's better than a single LED? Lots of LEDs! Matrices like these are 'multiplexed' - so to control 64 LEDs you need 16 pins. That's a lot of pins, and there are [driver chips like the MAX7219](//www.adafruit.com/products/453) that can control a matrix for you but...
In Stock
[Buy Now](https://www.adafruit.com/product/1854)
[Related Guides to the Product](https://learn.adafruit.com/products/1854/guides)
### Small 1.2" 8x8 Ultra Bright Square Yellow LED Matrix + Backpack
[Small 1.2" 8x8 Ultra Bright Square Yellow LED Matrix + Backpack](https://www.adafruit.com/product/1855)
What's better than a single LED? Lots of LEDs! Matrices like these are 'multiplexed' - so to control 64 LEDs you need 16 pins. That's a lot of pins, and there are [driver chips like the MAX7219](//www.adafruit.com/products/453) that can control a matrix for you but...
In Stock
[Buy Now](https://www.adafruit.com/product/1855)
[Related Guides to the Product](https://learn.adafruit.com/products/1855/guides)
### Small 1.2" 8x8 Bright Square Pure Green LED Matrix + Backpack
[Small 1.2" 8x8 Bright Square Pure Green LED Matrix + Backpack](https://www.adafruit.com/product/1856)
What's better than a single LED? Lots of LEDs! Matrices like these are 'multiplexed' - so to control 64 LEDs you need 16 pins. That's a lot of pins, and there are [driver chips like the MAX7219](//www.adafruit.com/products/453) that can control a matrix for you but...
In Stock
[Buy Now](https://www.adafruit.com/product/1856)
[Related Guides to the Product](https://learn.adafruit.com/products/1856/guides)
### Small 1.2" 8x8 Ultra Bright Square White LED Matrix + Backpack
[Small 1.2" 8x8 Ultra Bright Square White LED Matrix + Backpack](https://www.adafruit.com/product/1857)
What's better than a single LED? Lots of LEDs! Matrices like these are 'multiplexed' - so to control 64 LEDs you need 16 pins. That's a lot of pins, and there are [driver chips like the MAX7219](//www.adafruit.com/products/453) that can control a matrix for you but...
In Stock
[Buy Now](https://www.adafruit.com/product/1857)
[Related Guides to the Product](https://learn.adafruit.com/products/1857/guides)
### Adafruit 14-segment LED Alphanumeric Backpack - STEMMA QT
[Adafruit 14-segment LED Alphanumeric Backpack - STEMMA QT](https://www.adafruit.com/product/1910)
By popular request, you can now get our 14-segment LED backpacks without the LEDs! These backpacks feature an HT16K33 I2C LED driver, they're simple and easy to use - you can use [our very nice library for the backpacks to...](https://github.com/adafruit/Adafruit-LED-Backpack-Library)
In Stock
[Buy Now](https://www.adafruit.com/product/1910)
[Related Guides to the Product](https://learn.adafruit.com/products/1910/guides)
### Quad Alphanumeric Display - Red 0.54" Digits w/ I2C Backpack
[Quad Alphanumeric Display - Red 0.54" Digits w/ I2C Backpack](https://www.adafruit.com/product/1911)
Display, elegantly, 012345678 or 9! Gaze, hypnotized, at ABCDEFGHIJKLM - well it can display the whole alphabet. You get the point. This is a nice, bright alphanumeric display that shows letters and numbers in a beautiful red hue. It's super bright and designed for viewing from distances...
In Stock
[Buy Now](https://www.adafruit.com/product/1911)
[Related Guides to the Product](https://learn.adafruit.com/products/1911/guides)
### Quad Alphanumeric Display - Blue 0.54" Digits w/ I2C Backpack
[Quad Alphanumeric Display - Blue 0.54" Digits w/ I2C Backpack](https://www.adafruit.com/product/1912)
Display, elegantly, 012345678 or 9! Gaze, hypnotized, at ABCDEFGHIJKLM - well it can display the whole alphabet. You get the point. This is a nice, bright alphanumeric display that shows letters and numbers in a beautiful blue hue. It's super bright and designed for viewing from distances...
In Stock
[Buy Now](https://www.adafruit.com/product/1912)
[Related Guides to the Product](https://learn.adafruit.com/products/1912/guides)
### 16x8 1.2" LED Matrix + Backpack - Ultra Bright Round Green LEDs
[16x8 1.2" LED Matrix + Backpack - Ultra Bright Round Green LEDs](https://www.adafruit.com/product/2035)
What's better than a single LED? Lots of LEDs! And what's better than lots of LEDs? **TWO TIMES AS MANY LEDS!!!**
With the 16x8 LED Matrix Backpack we've doubled your project's matrix capacity by making it super easy to get two separate 8x8 matrices onto...
In Stock
[Buy Now](https://www.adafruit.com/product/2035)
[Related Guides to the Product](https://learn.adafruit.com/products/2035/guides)
### 16x8 1.2" LED Matrix+Backpack UltraBright Round YellowGreen LEDs
[16x8 1.2" LED Matrix+Backpack UltraBright Round YellowGreen LEDs](https://www.adafruit.com/product/2036)
What's better than a single LED? Lots of LEDs! And what's better than lots of LEDs? **TWO TIMES AS MANY LEDS!!!**
With the 16x8 LED Matrix Backpack we've doubled your project's matrix capacity by making it super easy to get two separate 8x8 matrices onto...
In Stock
[Buy Now](https://www.adafruit.com/product/2036)
[Related Guides to the Product](https://learn.adafruit.com/products/2036/guides)
### 16x8 1.2" LED Matrix + Backpack - Ultra Bright Round Red LEDs
[16x8 1.2" LED Matrix + Backpack - Ultra Bright Round Red LEDs](https://www.adafruit.com/product/2037)
What's better than a single LED? Lots of LEDs! And what's better than lots of LEDs? **TWO TIMES AS MANY LEDS!!!**
With the 16x8 LED Matrix Backpack we've doubled your project's matrix capacity by making it super easy to get two separate 8x8 matrices onto...
In Stock
[Buy Now](https://www.adafruit.com/product/2037)
[Related Guides to the Product](https://learn.adafruit.com/products/2037/guides)
### 16x8 1.2" LED Matrix + Backpack - Ultra Bright Round White LEDs
[16x8 1.2" LED Matrix + Backpack - Ultra Bright Round White LEDs](https://www.adafruit.com/product/2038)
What's better than a single LED? Lots of LEDs! And what's better than lots of LEDs? **TWO TIMES AS MANY LEDS!!!**
With the 16x8 LED Matrix Backpack we've doubled your project's matrix capacity by making it super easy to get two separate 8x8 matrices onto...
In Stock
[Buy Now](https://www.adafruit.com/product/2038)
[Related Guides to the Product](https://learn.adafruit.com/products/2038/guides)
### 16x8 1.2" LED Matrix + Backpack - Ultra Bright Round Blue LEDs
[16x8 1.2" LED Matrix + Backpack - Ultra Bright Round Blue LEDs](https://www.adafruit.com/product/2039)
What's better than a single LED? Lots of LEDs! And what's better than lots of LEDs? **TWO TIMES AS MANY LEDS!!!**
With the 16x8 LED Matrix Backpack we've doubled your project's matrix capacity by making it super easy to get two separate 8x8 matrices onto...
In Stock
[Buy Now](https://www.adafruit.com/product/2039)
[Related Guides to the Product](https://learn.adafruit.com/products/2039/guides)
### 16x8 1.2" LED Matrix + Backpack - Ultra Bright Square Blue LEDs
[16x8 1.2" LED Matrix + Backpack - Ultra Bright Square Blue LEDs](https://www.adafruit.com/product/2040)
What's better than a single LED? Lots of LEDs! And what's better than lots of LEDs? **TWO TIMES AS MANY LEDS!!!**
With the 16x8 LED Matrix Backpack we've doubled your project's matrix capacity by making it super easy to get two separate 8x8 matrices onto...
In Stock
[Buy Now](https://www.adafruit.com/product/2040)
[Related Guides to the Product](https://learn.adafruit.com/products/2040/guides)
### 16x8 1.2" LED Matrix + Backpack - Ultra Bright Square Amber LEDs
[16x8 1.2" LED Matrix + Backpack - Ultra Bright Square Amber LEDs](https://www.adafruit.com/product/2041)
What's better than a single LED? Lots of LEDs! And what's better than lots of LEDs? **TWO TIMES AS MANY LEDS!!!**
With the 16x8 LED Matrix Backpack we've doubled your project's matrix capacity by making it super easy to get two separate 8x8 matrices onto...
In Stock
[Buy Now](https://www.adafruit.com/product/2041)
[Related Guides to the Product](https://learn.adafruit.com/products/2041/guides)
### 16x8 1.2" LED Matrix + Backpack - Ultra Bright Square Green LEDs
[16x8 1.2" LED Matrix + Backpack - Ultra Bright Square Green LEDs](https://www.adafruit.com/product/2042)
What's better than a single LED? Lots of LEDs! And what's better than lots of LEDs? **TWO TIMES AS MANY LEDS!!!**
With the 16x8 LED Matrix Backpack we've doubled your project's matrix capacity by making it super easy to get two separate 8x8 matrices onto...
In Stock
[Buy Now](https://www.adafruit.com/product/2042)
[Related Guides to the Product](https://learn.adafruit.com/products/2042/guides)
### 16x8 1.2" LED Matrix + Backpack -Ultra Bright Square Yellow LEDs
[16x8 1.2" LED Matrix + Backpack -Ultra Bright Square Yellow LEDs](https://www.adafruit.com/product/2043)
What's better than a single LED? Lots of LEDs! And what's better than lots of LEDs? **TWO TIMES AS MANY LEDS!!!**
With the 16x8 LED Matrix Backpack we've doubled your project's matrix capacity by making it super easy to get two separate 8x8 matrices onto...
In Stock
[Buy Now](https://www.adafruit.com/product/2043)
[Related Guides to the Product](https://learn.adafruit.com/products/2043/guides)
### 16x8 1.2" LED Matrix + Backpack - Ultra Bright Square White LEDs
[16x8 1.2" LED Matrix + Backpack - Ultra Bright Square White LEDs](https://www.adafruit.com/product/2044)
What's better than a single LED? Lots of LEDs! And what's better than lots of LEDs? **TWO TIMES AS MANY LEDS!!!**
With the 16x8 LED Matrix Backpack we've doubled your project's matrix capacity by making it super easy to get two separate 8x8 matrices onto...
In Stock
[Buy Now](https://www.adafruit.com/product/2044)
[Related Guides to the Product](https://learn.adafruit.com/products/2044/guides)
### 16x8 1.2" LED Matrix + Backpack-Ultra Bright Round Orange LEDs
[16x8 1.2" LED Matrix + Backpack-Ultra Bright Round Orange LEDs](https://www.adafruit.com/product/2052)
What's better than a single LED? Lots of LEDs! And what's better than lots of LEDs? **TWO TIMES AS MANY LEDS!!!**
With the 16x8 LED Matrix Backpack we've doubled your project's matrix capacity by making it super easy to get two separate 8x8 matrices onto...
In Stock
[Buy Now](https://www.adafruit.com/product/2052)
[Related Guides to the Product](https://learn.adafruit.com/products/2052/guides)
### 16x8 1.2" LED Matrices+Backpack Round LEDs in Various Colors
[16x8 1.2" LED Matrices+Backpack Round LEDs in Various Colors](https://www.adafruit.com/product/2054)
What's better than a single LED? Lots of LEDs! And what's better than lots of LEDs? **TWO TIMES AS MANY LEDS!!!**
With the 16x8 LED Matrix Backpack we've doubled your project's matrix capacity by making it super easy to get two separate 8x8 matrices onto...
Out of Stock
[Buy Now](https://www.adafruit.com/product/2054)
[Related Guides to the Product](https://learn.adafruit.com/products/2054/guides)
### Adafruit 8x16 LED Matrix FeatherWing w/o Matrices
[Adafruit 8x16 LED Matrix FeatherWing w/o Matrices](https://www.adafruit.com/product/3090)
You will chirp with delight when you see how easy it is to make your very own 8x16 LED matrix display for any Feather. At 0.8" square, the little [8x8 matrices](https://www.adafruit.com/new/?q=8x8%20miniature%20LED%20matrix&) have everything a big LED matrix has,...
Out of Stock
[Buy Now](https://www.adafruit.com/product/3090)
[Related Guides to the Product](https://learn.adafruit.com/products/3090/guides)
### Adafruit 14-segment LED Alphanumeric backpack (same as P1910)
[Adafruit 14-segment LED Alphanumeric backpack (same as P1910)](https://www.adafruit.com/product/3322)
Just the backpack + 4pin header
No Longer Stocked
[Buy Now](https://www.adafruit.com/product/3322)
[Related Guides to the Product](https://learn.adafruit.com/products/3322/guides)
## Featured Products
### Adafruit Small 1.2" 8x8 LED Matrix w/I2C Backpack - Yellow-Green
[Adafruit Small 1.2" 8x8 LED Matrix w/I2C Backpack - Yellow-Green](https://www.adafruit.com/product/1051)
What's better than a single LED? Lots of LEDs! A fun way to make a small display is to use an [8x8 matrix](https://www.adafruit.com/category/37_88) or a [4-digit 7-segment display](https://www.adafruit.com/category/37_103). Matrices like these are...
In Stock
[Buy Now](https://www.adafruit.com/product/1051)
[Related Guides to the Product](https://learn.adafruit.com/products/1051/guides)
### Small 1.2" 8x8 Ultra Bright Square Blue LED Matrix + Backpack
[Small 1.2" 8x8 Ultra Bright Square Blue LED Matrix + Backpack](https://www.adafruit.com/product/1853)
What's better than a single LED? Lots of LEDs! Matrices like these are 'multiplexed' - so to control 64 LEDs you need 16 pins. That's a lot of pins, and there are [driver chips like the MAX7219](//www.adafruit.com/products/453) that can control a matrix for you but...
In Stock
[Buy Now](https://www.adafruit.com/product/1853)
[Related Guides to the Product](https://learn.adafruit.com/products/1853/guides)
## Related Guides
- [LED Backpack Displays on Raspberry Pi and BeagleBone Black](https://learn.adafruit.com/led-backpack-displays-on-raspberry-pi-and-beaglebone-black.md)
- [Animating Multiple LED Backpacks](https://learn.adafruit.com/animating-multiple-led-backpacks.md)
- [Arduino GPS Clock](https://learn.adafruit.com/arduino-clock.md)
- [Raspberry Pi Physical Dashboard](https://learn.adafruit.com/raspberry-pi-physical-dashboard.md)
- [CircuitPython Hardware: LED Backpacks & FeatherWings](https://learn.adafruit.com/micropython-hardware-led-backpacks-and-featherwings.md)
- [Matrix and 7-Segment LED Backpack with the Raspberry Pi](https://learn.adafruit.com/matrix-7-segment-led-backpack-with-the-raspberry-pi.md)
- [DIY Pocket LED Gamer - Tiny Tetris!](https://learn.adafruit.com/diy-3d-printed-handheld-pocket-game-tiny-tetris-snake.md)
- [RGB LED Matrix Cube with 25,000 LEDs](https://learn.adafruit.com/rgb-led-matrix-cube-for-pi.md)
- [Creating GIFs for SmartMatrix](https://learn.adafruit.com/creating-gifs-for-smartmatrix.md)
- [Adafruit CharliePlex LED Matrix Bonnet](https://learn.adafruit.com/adafruit-charlieplex-bonnet.md)
- [Connecting a 16x32 RGB LED Matrix Panel to a Raspberry Pi](https://learn.adafruit.com/connecting-a-16x32-rgb-led-matrix-panel-to-a-raspberry-pi.md)
- [MicroPython Displays: Drawing Text](https://learn.adafruit.com/micropython-displays-drawing-text.md)
- [Heart Rate Badge](https://learn.adafruit.com/heart-rate-badge.md)
- [16x24 LED Matrix](https://learn.adafruit.com/16x24-led-matrix.md)
- [Adafruit IS31FL3741](https://learn.adafruit.com/adafruit-is31fl3741.md)
---
# Source: https://learn.adafruit.com/adafruit-led-backpack/0-dot-56-seven-segment-backpack-arduino-setup.md
# Adafruit LED Backpacks
## Arduino Setup
Primary:
## Seven-Segment Backpack Firmware
We wrote a basic library to help you work with the 7-segment backpack. The library is written for the Arduino and will work with any Arduino as it just uses the I2C pins. The code is very portable and can be easily adapted to any I2C-capable micro.
Wiring to the matrix is really easy
- Connect **CLK** to the I2C clock - on Arduino UNO thats Analog #5 (or SCL), on the Leonardo it's Digital #3, on the Mega it's digital #21
- Connect **DAT** to the I2C data - on Arduino UNO thats Analog #4 (or SDA), on the Leonardo it's Digital #2, on the Mega it's digital #20
- Connect **GND** to common ground
- Connect **VCC+** to power - 5V is best but 3V also seems to work for 3V microcontrollers.
If using the STEMMA QT version of the backpack, simply plug in the STEMMA QT connectors between boards.
Next, download the **Adafruit LED Backpack ** library and the **Adafruit GFX ** library from the Arduino library manager.
Open up the Arduino library manager:

Search for the **Adafruit LED Backpack ** library and install it

Search for the **Adafruit GFX ** library and install it

If using an earlier version of the Arduino IDE (prior to 1.8.10), also locate and install **Adafruit\_BusIO** (newer versions will install this dependency automatically).
Once you've restarted you should be able to select the **File→Examples→Adafruit\_LEDBackpack→sevenseg** example sketch. Upload it to your Arduino as usual. You should see a basic test program that goes through a bunch of different routines.
We also have a great tutorial on Arduino library installation at:
[http://learn.adafruit.com/adafruit-all-about-arduino-libraries-install-use](http://learn.adafruit.com/adafruit-all-about-arduino-libraries-install-use "Link: http://learn.adafruit.com/adafruit-all-about-arduino-libraries-install-use")

Warning:
Once you're happy that the matrix works, you can write your own sketches.
There's a few ways you can draw to the display. The easiest is to just call **print -** just like you do with **Serial**
- **print(_variable_**_,_**HEX) -** this will print a hexidecimal number, from 0000 up to FFFF
- **print(_variable_**_,_**DEC)** or **print(_variable_) -** this will print a decimal integer, from 0000 up to 9999
If you need more control, you can call **writeDigitNum(_location_, _number_)** - this will write the _number_ (0-9) to a single location. Location #0 is all the way to the left, location #2 is the colon dots so you probably want to skip it, location #4 is all the way to the right. If you want a decimal point, call **writeDigitNum(_location_, _number_, true)** which will paint the decimal point. To draw the colon, use**drawColon(_true_** _or_ **_false_)**
If you want even more control, you can call **writeDigitRaw(_location_,_bitmask_)** to draw a raw 8-bit mask (as stored in a uint8\_t) to that location.
All the drawing routines only change the display memory kept by the Arduino. Don't forget to call **writeDisplay()** after drawing to 'save' the memory out to the matrix via I2C.
There are also a few small routines that are special to the backpack:
- **setBrightness(_brightness_)**- will let you change the overall brightness of the entire display. 0 is least bright, 15 is brightest and is what is initialized by the display when you start
- **blinkRate(_rate_)** - You can blink the entire display. 0 is no blinking. 1, 2 or 3 is for display blinking.
- [Previous Page](https://learn.adafruit.com/adafruit-led-backpack/0-dot-56-seven-segment-backpack-assembly.md)
- [Next Page](https://learn.adafruit.com/adafruit-led-backpack/0-dot-56-seven-segment-backpack-circuitpython-wiring-and-setup.md)
## Primary Products
### Adafruit Mini 8x8 LED Matrix w/I2C Backpack - Red
[Adafruit Mini 8x8 LED Matrix w/I2C Backpack - Red](https://www.adafruit.com/product/870)
What's better than a single LED? Lots of LEDs! A fun way to make a small display is to use an [8x8 matrix](https://www.adafruit.com/category/37_88) or a [4-digit 7-segment display](https://www.adafruit.com/category/37_103). Matrices like these are...
In Stock
[Buy Now](https://www.adafruit.com/product/870)
[Related Guides to the Product](https://learn.adafruit.com/products/870/guides)
### Adafruit Mini 8x8 LED Matrix w/I2C Backpack - Yellow
[Adafruit Mini 8x8 LED Matrix w/I2C Backpack - Yellow](https://www.adafruit.com/product/871)
What's better than a single LED? Lots of LEDs! A fun way to make a small display is to use an [8x8 matrix](https://www.adafruit.com/category/37_88) or a [4-digit 7-segment display](https://www.adafruit.com/category/37_103). Matrices like these are...
In Stock
[Buy Now](https://www.adafruit.com/product/871)
[Related Guides to the Product](https://learn.adafruit.com/products/871/guides)
### Adafruit Mini 0.8" 8x8 LED Matrix w/I2C Backpack - Yellow-Green
[Adafruit Mini 0.8" 8x8 LED Matrix w/I2C Backpack - Yellow-Green](https://www.adafruit.com/product/872)
What's better than a single LED? Lots of LEDs! A fun way to make a small display is to use an [8x8 matrix](https://www.adafruit.com/category/37_88) or a [4-digit 7-segment display](https://www.adafruit.com/category/37_103). Matrices like these are...
In Stock
[Buy Now](https://www.adafruit.com/product/872)
[Related Guides to the Product](https://learn.adafruit.com/products/872/guides)
### Adafruit 0.56" 4-Digit 7-Segment Display with I2C Backpack - Red
[Adafruit 0.56" 4-Digit 7-Segment Display with I2C Backpack - Red](https://www.adafruit.com/product/878)
What's better than a single LED? Lots of LEDs! A fun way to make a small display is to use an [8x8 matrix](https://www.adafruit.com/category/37_88) or a [4-digit 7-segment display](https://www.adafruit.com/category/37_103). Matrices like these are...
In Stock
[Buy Now](https://www.adafruit.com/product/878)
[Related Guides to the Product](https://learn.adafruit.com/products/878/guides)
### Adafruit 0.56" 4-Digit 7-Segment Display w/I2C Backpack - Yellow
[Adafruit 0.56" 4-Digit 7-Segment Display w/I2C Backpack - Yellow](https://www.adafruit.com/product/879)
What's better than a single LED? Lots of LEDs! A fun way to make a small display is to use an [8x8 matrix](https://www.adafruit.com/category/37_88) or a [4-digit 7-segment display](https://www.adafruit.com/category/37_103). Matrices like these are...
In Stock
[Buy Now](https://www.adafruit.com/product/879)
[Related Guides to the Product](https://learn.adafruit.com/products/879/guides)
### Adafruit 0.56" 4-Digit 7-Segment Display w/ I2C Backpack - Green
[Adafruit 0.56" 4-Digit 7-Segment Display w/ I2C Backpack - Green](https://www.adafruit.com/product/880)
What's better than a single LED? Lots of LEDs! A fun way to make a small display is to use an [8x8 matrix](https://www.adafruit.com/category/37_88) or a [4-digit 7-segment display](https://www.adafruit.com/category/37_103). Matrices like these are...
No Longer Stocked
[Buy Now](https://www.adafruit.com/product/880)
[Related Guides to the Product](https://learn.adafruit.com/products/880/guides)
### Adafruit 0.56" 4-Digit 7-Segment Display w/ I2C Backpack - Blue
[Adafruit 0.56" 4-Digit 7-Segment Display w/ I2C Backpack - Blue](https://www.adafruit.com/product/881)
What's better than a single LED? Lots of LEDs! A fun way to make a small display is to use an [8x8 matrix](https://www.adafruit.com/category/37_88) or a [4-digit 7-segment display](https://www.adafruit.com/category/37_103). Matrices like these are...
In Stock
[Buy Now](https://www.adafruit.com/product/881)
[Related Guides to the Product](https://learn.adafruit.com/products/881/guides)
### Adafruit Bicolor LED Square Pixel Matrix with I2C Backpack
[Adafruit Bicolor LED Square Pixel Matrix with I2C Backpack](https://www.adafruit.com/product/902)
What's better than a single LED? Lots of LEDs! A fun way to make a small colorful display is to use a [1.2" Bi-color 8x8 LED Matrix](http://www.adafruit.com/products/458). Matrices like these are 'multiplexed' - so to control all the 128 LEDs you need 24 pins....
In Stock
[Buy Now](https://www.adafruit.com/product/902)
[Related Guides to the Product](https://learn.adafruit.com/products/902/guides)
### Adafruit Mini 8x8 LED Matrix w/I2C Backpack - Blue
[Adafruit Mini 8x8 LED Matrix w/I2C Backpack - Blue](https://www.adafruit.com/product/959)
What's better than a single LED? Lots of LEDs! A fun way to make a small display is to use an [8x8 matrix](https://www.adafruit.com/category/37_88) or a [4-digit 7-segment display](https://www.adafruit.com/category/37_103). Matrices like these are...
In Stock
[Buy Now](https://www.adafruit.com/product/959)
[Related Guides to the Product](https://learn.adafruit.com/products/959/guides)
### Adafruit 0.56" 4-Digit 7-Segment Display w/I2C Backpack - White
[Adafruit 0.56" 4-Digit 7-Segment Display w/I2C Backpack - White](https://www.adafruit.com/product/1002)
What's better than a single LED? Lots of LEDs! A fun way to make a small display is to use an [8x8 matrix](https://www.adafruit.com/category/37_88) or a [4-digit 7-segment display](https://www.adafruit.com/category/37_103). Matrices like these are...
In Stock
[Buy Now](https://www.adafruit.com/product/1002)
[Related Guides to the Product](https://learn.adafruit.com/products/1002/guides)
### Adafruit 1.2" 8x8 LED Matrix Backpack
[Adafruit 1.2" 8x8 LED Matrix Backpack](https://www.adafruit.com/product/1048)
By popular request, you can now get our 8x8 LED backpacks without the LEDs! These backpacks feature an HT16K33 I2C LED driver, they're simple and easy to use - you can use [our very nice library for the backpacks to...](https://github.com/adafruit/Adafruit-LED-Backpack-Library)
In Stock
[Buy Now](https://www.adafruit.com/product/1048)
[Related Guides to the Product](https://learn.adafruit.com/products/1048/guides)
### Adafruit Small 1.2" 8x8 LED Matrix w/I2C Backpack - Red
[Adafruit Small 1.2" 8x8 LED Matrix w/I2C Backpack - Red](https://www.adafruit.com/product/1049)
What's better than a single LED? Lots of LEDs! A fun way to make a small display is to use an [8x8 matrix](https://www.adafruit.com/category/37_88) or a [4-digit 7-segment display](https://www.adafruit.com/category/37_103). Matrices like these are...
In Stock
[Buy Now](https://www.adafruit.com/product/1049)
[Related Guides to the Product](https://learn.adafruit.com/products/1049/guides)
### Adafruit Small 1.2" 8x8 LED Matrix w/I2C Backpack - Yellow
[Adafruit Small 1.2" 8x8 LED Matrix w/I2C Backpack - Yellow](https://www.adafruit.com/product/1050)
What's better than a single LED? Lots of LEDs! A fun way to make a small display is to use an [8x8 matrix](https://www.adafruit.com/category/37_88) or a [4-digit 7-segment display](https://www.adafruit.com/category/37_103). Matrices like these are...
In Stock
[Buy Now](https://www.adafruit.com/product/1050)
[Related Guides to the Product](https://learn.adafruit.com/products/1050/guides)
### Adafruit Small 1.2" 8x8 LED Matrix w/I2C Backpack - Blue
[Adafruit Small 1.2" 8x8 LED Matrix w/I2C Backpack - Blue](https://www.adafruit.com/product/1052)
What's better than a single LED? Lots of LEDs! A fun way to make a small display is to use an [8x8 matrix](https://www.adafruit.com/category/37_88) or a [4-digit 7-segment display](https://www.adafruit.com/category/37_103). Matrices like these are...
In Stock
[Buy Now](https://www.adafruit.com/product/1052)
[Related Guides to the Product](https://learn.adafruit.com/products/1052/guides)
### Adafruit Mini 8x8 LED Matrix w/I2C Backpack - Ultra Bright White
[Adafruit Mini 8x8 LED Matrix w/I2C Backpack - Ultra Bright White](https://www.adafruit.com/product/1080)
What's better than a single LED? Lots of LEDs! A fun way to make a small display is to use an [8x8 matrix](https://www.adafruit.com/category/37_88) or a [4-digit 7-segment display](https://www.adafruit.com/category/37_103). Matrices like these are...
In Stock
[Buy Now](https://www.adafruit.com/product/1080)
[Related Guides to the Product](https://learn.adafruit.com/products/1080/guides)
### Adafruit 1.2" 4-Digit 7-Segment Display w/I2C Backpack - Green
[Adafruit 1.2" 4-Digit 7-Segment Display w/I2C Backpack - Green](https://www.adafruit.com/product/1268)
What's better than a single LED? Lots of LEDs! A fun way to make a numeric display is to use a [4-digit 7-segment display](https://www.adafruit.com/category/37_103). LED matrices like these are 'multiplexed' - so to control all the seven-segment LEDs you need 14 pins....
No Longer Stocked
[Buy Now](https://www.adafruit.com/product/1268)
[Related Guides to the Product](https://learn.adafruit.com/products/1268/guides)
### Adafruit 1.2" 4-Digit 7-Segment Display w/I2C Backpack - Yellow
[Adafruit 1.2" 4-Digit 7-Segment Display w/I2C Backpack - Yellow](https://www.adafruit.com/product/1269)
What's better than a single LED? Lots of LEDs! A fun way to make a numeric display is to use a [4-digit 7-segment display](https://www.adafruit.com/category/37_103). LED matrices like these are 'multiplexed' - so to control all the seven-segment LEDs you need 14 pins....
In Stock
[Buy Now](https://www.adafruit.com/product/1269)
[Related Guides to the Product](https://learn.adafruit.com/products/1269/guides)
### Adafruit 1.2" 4-Digit 7-Segment Display w/I2C Backpack - Red
[Adafruit 1.2" 4-Digit 7-Segment Display w/I2C Backpack - Red](https://www.adafruit.com/product/1270)
What's better than a single LED? Lots of LEDs! A fun way to make a numeric display is to use a [4-digit 7-segment display](https://www.adafruit.com/category/37_103). LED matrices like these are 'multiplexed' - so to control all the seven-segment LEDs you need 14 pins....
In Stock
[Buy Now](https://www.adafruit.com/product/1270)
[Related Guides to the Product](https://learn.adafruit.com/products/1270/guides)
### Small 1.2" 8x8 Ultra Bright White LED Matrix + Backpack
[Small 1.2" 8x8 Ultra Bright White LED Matrix + Backpack](https://www.adafruit.com/product/1614)
What's better than a single LED? Lots of LEDs! A fun way to make a small display is to use an [8x8 matrix](https://www.adafruit.com/category/37_88) or a [4-digit 7-segment display](https://www.adafruit.com/category/37_103). Matrices like these are...
In Stock
[Buy Now](https://www.adafruit.com/product/1614)
[Related Guides to the Product](https://learn.adafruit.com/products/1614/guides)
### Adafruit Small 1.2" 8x8 LED Matrix w/I2C Backpack - Pure Green
[Adafruit Small 1.2" 8x8 LED Matrix w/I2C Backpack - Pure Green](https://www.adafruit.com/product/1632)
What's better than a single LED? Lots of LEDs! A fun way to make a small display is to use an [8x8 matrix](https://www.adafruit.com/category/37_88) or a [4-digit 7-segment display](https://www.adafruit.com/category/37_103). Matrices like these are...
In Stock
[Buy Now](https://www.adafruit.com/product/1632)
[Related Guides to the Product](https://learn.adafruit.com/products/1632/guides)
### Adafruit Mini 0.8" 8x8 LED Matrix w/I2C Backpack - Pure Green
[Adafruit Mini 0.8" 8x8 LED Matrix w/I2C Backpack - Pure Green](https://www.adafruit.com/product/1633)
What's better than a single LED? Lots of LEDs! A fun way to make a small display is to use an [8x8 matrix](https://www.adafruit.com/category/37_88) or a [4-digit 7-segment display](https://www.adafruit.com/category/37_103). Matrices like these are...
In Stock
[Buy Now](https://www.adafruit.com/product/1633)
[Related Guides to the Product](https://learn.adafruit.com/products/1633/guides)
### Bi-Color (Red/Green) 24-Bar Bargraph w/I2C Backpack Kit
[Bi-Color (Red/Green) 24-Bar Bargraph w/I2C Backpack Kit](https://www.adafruit.com/product/1721)
What's better than a single LED? Lots of LEDs! A fun way to make a small linear display is to use two 12-bar Bi-color bar-graphs. However, this LED bargraph is 'multiplexed' - so to control all the 48 LEDs you need a lot of pins.
Out of Stock
[Buy Now](https://www.adafruit.com/product/1721)
[Related Guides to the Product](https://learn.adafruit.com/products/1721/guides)
### Small 1.2" 8x8 Ultra Bright Square Amber LED Matrix + Backpack
[Small 1.2" 8x8 Ultra Bright Square Amber LED Matrix + Backpack](https://www.adafruit.com/product/1854)
What's better than a single LED? Lots of LEDs! Matrices like these are 'multiplexed' - so to control 64 LEDs you need 16 pins. That's a lot of pins, and there are [driver chips like the MAX7219](//www.adafruit.com/products/453) that can control a matrix for you but...
In Stock
[Buy Now](https://www.adafruit.com/product/1854)
[Related Guides to the Product](https://learn.adafruit.com/products/1854/guides)
### Small 1.2" 8x8 Ultra Bright Square Yellow LED Matrix + Backpack
[Small 1.2" 8x8 Ultra Bright Square Yellow LED Matrix + Backpack](https://www.adafruit.com/product/1855)
What's better than a single LED? Lots of LEDs! Matrices like these are 'multiplexed' - so to control 64 LEDs you need 16 pins. That's a lot of pins, and there are [driver chips like the MAX7219](//www.adafruit.com/products/453) that can control a matrix for you but...
In Stock
[Buy Now](https://www.adafruit.com/product/1855)
[Related Guides to the Product](https://learn.adafruit.com/products/1855/guides)
### Small 1.2" 8x8 Bright Square Pure Green LED Matrix + Backpack
[Small 1.2" 8x8 Bright Square Pure Green LED Matrix + Backpack](https://www.adafruit.com/product/1856)
What's better than a single LED? Lots of LEDs! Matrices like these are 'multiplexed' - so to control 64 LEDs you need 16 pins. That's a lot of pins, and there are [driver chips like the MAX7219](//www.adafruit.com/products/453) that can control a matrix for you but...
In Stock
[Buy Now](https://www.adafruit.com/product/1856)
[Related Guides to the Product](https://learn.adafruit.com/products/1856/guides)
### Small 1.2" 8x8 Ultra Bright Square White LED Matrix + Backpack
[Small 1.2" 8x8 Ultra Bright Square White LED Matrix + Backpack](https://www.adafruit.com/product/1857)
What's better than a single LED? Lots of LEDs! Matrices like these are 'multiplexed' - so to control 64 LEDs you need 16 pins. That's a lot of pins, and there are [driver chips like the MAX7219](//www.adafruit.com/products/453) that can control a matrix for you but...
In Stock
[Buy Now](https://www.adafruit.com/product/1857)
[Related Guides to the Product](https://learn.adafruit.com/products/1857/guides)
### Adafruit 14-segment LED Alphanumeric Backpack - STEMMA QT
[Adafruit 14-segment LED Alphanumeric Backpack - STEMMA QT](https://www.adafruit.com/product/1910)
By popular request, you can now get our 14-segment LED backpacks without the LEDs! These backpacks feature an HT16K33 I2C LED driver, they're simple and easy to use - you can use [our very nice library for the backpacks to...](https://github.com/adafruit/Adafruit-LED-Backpack-Library)
In Stock
[Buy Now](https://www.adafruit.com/product/1910)
[Related Guides to the Product](https://learn.adafruit.com/products/1910/guides)
### Quad Alphanumeric Display - Red 0.54" Digits w/ I2C Backpack
[Quad Alphanumeric Display - Red 0.54" Digits w/ I2C Backpack](https://www.adafruit.com/product/1911)
Display, elegantly, 012345678 or 9! Gaze, hypnotized, at ABCDEFGHIJKLM - well it can display the whole alphabet. You get the point. This is a nice, bright alphanumeric display that shows letters and numbers in a beautiful red hue. It's super bright and designed for viewing from distances...
In Stock
[Buy Now](https://www.adafruit.com/product/1911)
[Related Guides to the Product](https://learn.adafruit.com/products/1911/guides)
### Quad Alphanumeric Display - Blue 0.54" Digits w/ I2C Backpack
[Quad Alphanumeric Display - Blue 0.54" Digits w/ I2C Backpack](https://www.adafruit.com/product/1912)
Display, elegantly, 012345678 or 9! Gaze, hypnotized, at ABCDEFGHIJKLM - well it can display the whole alphabet. You get the point. This is a nice, bright alphanumeric display that shows letters and numbers in a beautiful blue hue. It's super bright and designed for viewing from distances...
In Stock
[Buy Now](https://www.adafruit.com/product/1912)
[Related Guides to the Product](https://learn.adafruit.com/products/1912/guides)
### 16x8 1.2" LED Matrix + Backpack - Ultra Bright Round Green LEDs
[16x8 1.2" LED Matrix + Backpack - Ultra Bright Round Green LEDs](https://www.adafruit.com/product/2035)
What's better than a single LED? Lots of LEDs! And what's better than lots of LEDs? **TWO TIMES AS MANY LEDS!!!**
With the 16x8 LED Matrix Backpack we've doubled your project's matrix capacity by making it super easy to get two separate 8x8 matrices onto...
In Stock
[Buy Now](https://www.adafruit.com/product/2035)
[Related Guides to the Product](https://learn.adafruit.com/products/2035/guides)
### 16x8 1.2" LED Matrix+Backpack UltraBright Round YellowGreen LEDs
[16x8 1.2" LED Matrix+Backpack UltraBright Round YellowGreen LEDs](https://www.adafruit.com/product/2036)
What's better than a single LED? Lots of LEDs! And what's better than lots of LEDs? **TWO TIMES AS MANY LEDS!!!**
With the 16x8 LED Matrix Backpack we've doubled your project's matrix capacity by making it super easy to get two separate 8x8 matrices onto...
In Stock
[Buy Now](https://www.adafruit.com/product/2036)
[Related Guides to the Product](https://learn.adafruit.com/products/2036/guides)
### 16x8 1.2" LED Matrix + Backpack - Ultra Bright Round Red LEDs
[16x8 1.2" LED Matrix + Backpack - Ultra Bright Round Red LEDs](https://www.adafruit.com/product/2037)
What's better than a single LED? Lots of LEDs! And what's better than lots of LEDs? **TWO TIMES AS MANY LEDS!!!**
With the 16x8 LED Matrix Backpack we've doubled your project's matrix capacity by making it super easy to get two separate 8x8 matrices onto...
In Stock
[Buy Now](https://www.adafruit.com/product/2037)
[Related Guides to the Product](https://learn.adafruit.com/products/2037/guides)
### 16x8 1.2" LED Matrix + Backpack - Ultra Bright Round White LEDs
[16x8 1.2" LED Matrix + Backpack - Ultra Bright Round White LEDs](https://www.adafruit.com/product/2038)
What's better than a single LED? Lots of LEDs! And what's better than lots of LEDs? **TWO TIMES AS MANY LEDS!!!**
With the 16x8 LED Matrix Backpack we've doubled your project's matrix capacity by making it super easy to get two separate 8x8 matrices onto...
In Stock
[Buy Now](https://www.adafruit.com/product/2038)
[Related Guides to the Product](https://learn.adafruit.com/products/2038/guides)
### 16x8 1.2" LED Matrix + Backpack - Ultra Bright Round Blue LEDs
[16x8 1.2" LED Matrix + Backpack - Ultra Bright Round Blue LEDs](https://www.adafruit.com/product/2039)
What's better than a single LED? Lots of LEDs! And what's better than lots of LEDs? **TWO TIMES AS MANY LEDS!!!**
With the 16x8 LED Matrix Backpack we've doubled your project's matrix capacity by making it super easy to get two separate 8x8 matrices onto...
In Stock
[Buy Now](https://www.adafruit.com/product/2039)
[Related Guides to the Product](https://learn.adafruit.com/products/2039/guides)
### 16x8 1.2" LED Matrix + Backpack - Ultra Bright Square Blue LEDs
[16x8 1.2" LED Matrix + Backpack - Ultra Bright Square Blue LEDs](https://www.adafruit.com/product/2040)
What's better than a single LED? Lots of LEDs! And what's better than lots of LEDs? **TWO TIMES AS MANY LEDS!!!**
With the 16x8 LED Matrix Backpack we've doubled your project's matrix capacity by making it super easy to get two separate 8x8 matrices onto...
In Stock
[Buy Now](https://www.adafruit.com/product/2040)
[Related Guides to the Product](https://learn.adafruit.com/products/2040/guides)
### 16x8 1.2" LED Matrix + Backpack - Ultra Bright Square Amber LEDs
[16x8 1.2" LED Matrix + Backpack - Ultra Bright Square Amber LEDs](https://www.adafruit.com/product/2041)
What's better than a single LED? Lots of LEDs! And what's better than lots of LEDs? **TWO TIMES AS MANY LEDS!!!**
With the 16x8 LED Matrix Backpack we've doubled your project's matrix capacity by making it super easy to get two separate 8x8 matrices onto...
In Stock
[Buy Now](https://www.adafruit.com/product/2041)
[Related Guides to the Product](https://learn.adafruit.com/products/2041/guides)
### 16x8 1.2" LED Matrix + Backpack - Ultra Bright Square Green LEDs
[16x8 1.2" LED Matrix + Backpack - Ultra Bright Square Green LEDs](https://www.adafruit.com/product/2042)
What's better than a single LED? Lots of LEDs! And what's better than lots of LEDs? **TWO TIMES AS MANY LEDS!!!**
With the 16x8 LED Matrix Backpack we've doubled your project's matrix capacity by making it super easy to get two separate 8x8 matrices onto...
In Stock
[Buy Now](https://www.adafruit.com/product/2042)
[Related Guides to the Product](https://learn.adafruit.com/products/2042/guides)
### 16x8 1.2" LED Matrix + Backpack -Ultra Bright Square Yellow LEDs
[16x8 1.2" LED Matrix + Backpack -Ultra Bright Square Yellow LEDs](https://www.adafruit.com/product/2043)
What's better than a single LED? Lots of LEDs! And what's better than lots of LEDs? **TWO TIMES AS MANY LEDS!!!**
With the 16x8 LED Matrix Backpack we've doubled your project's matrix capacity by making it super easy to get two separate 8x8 matrices onto...
In Stock
[Buy Now](https://www.adafruit.com/product/2043)
[Related Guides to the Product](https://learn.adafruit.com/products/2043/guides)
### 16x8 1.2" LED Matrix + Backpack - Ultra Bright Square White LEDs
[16x8 1.2" LED Matrix + Backpack - Ultra Bright Square White LEDs](https://www.adafruit.com/product/2044)
What's better than a single LED? Lots of LEDs! And what's better than lots of LEDs? **TWO TIMES AS MANY LEDS!!!**
With the 16x8 LED Matrix Backpack we've doubled your project's matrix capacity by making it super easy to get two separate 8x8 matrices onto...
In Stock
[Buy Now](https://www.adafruit.com/product/2044)
[Related Guides to the Product](https://learn.adafruit.com/products/2044/guides)
### 16x8 1.2" LED Matrix + Backpack-Ultra Bright Round Orange LEDs
[16x8 1.2" LED Matrix + Backpack-Ultra Bright Round Orange LEDs](https://www.adafruit.com/product/2052)
What's better than a single LED? Lots of LEDs! And what's better than lots of LEDs? **TWO TIMES AS MANY LEDS!!!**
With the 16x8 LED Matrix Backpack we've doubled your project's matrix capacity by making it super easy to get two separate 8x8 matrices onto...
In Stock
[Buy Now](https://www.adafruit.com/product/2052)
[Related Guides to the Product](https://learn.adafruit.com/products/2052/guides)
### 16x8 1.2" LED Matrices+Backpack Round LEDs in Various Colors
[16x8 1.2" LED Matrices+Backpack Round LEDs in Various Colors](https://www.adafruit.com/product/2054)
What's better than a single LED? Lots of LEDs! And what's better than lots of LEDs? **TWO TIMES AS MANY LEDS!!!**
With the 16x8 LED Matrix Backpack we've doubled your project's matrix capacity by making it super easy to get two separate 8x8 matrices onto...
Out of Stock
[Buy Now](https://www.adafruit.com/product/2054)
[Related Guides to the Product](https://learn.adafruit.com/products/2054/guides)
### Adafruit 8x16 LED Matrix FeatherWing w/o Matrices
[Adafruit 8x16 LED Matrix FeatherWing w/o Matrices](https://www.adafruit.com/product/3090)
You will chirp with delight when you see how easy it is to make your very own 8x16 LED matrix display for any Feather. At 0.8" square, the little [8x8 matrices](https://www.adafruit.com/new/?q=8x8%20miniature%20LED%20matrix&) have everything a big LED matrix has,...
Out of Stock
[Buy Now](https://www.adafruit.com/product/3090)
[Related Guides to the Product](https://learn.adafruit.com/products/3090/guides)
### Adafruit 14-segment LED Alphanumeric backpack (same as P1910)
[Adafruit 14-segment LED Alphanumeric backpack (same as P1910)](https://www.adafruit.com/product/3322)
Just the backpack + 4pin header
No Longer Stocked
[Buy Now](https://www.adafruit.com/product/3322)
[Related Guides to the Product](https://learn.adafruit.com/products/3322/guides)
## Featured Products
### Adafruit Small 1.2" 8x8 LED Matrix w/I2C Backpack - Yellow-Green
[Adafruit Small 1.2" 8x8 LED Matrix w/I2C Backpack - Yellow-Green](https://www.adafruit.com/product/1051)
What's better than a single LED? Lots of LEDs! A fun way to make a small display is to use an [8x8 matrix](https://www.adafruit.com/category/37_88) or a [4-digit 7-segment display](https://www.adafruit.com/category/37_103). Matrices like these are...
In Stock
[Buy Now](https://www.adafruit.com/product/1051)
[Related Guides to the Product](https://learn.adafruit.com/products/1051/guides)
### Small 1.2" 8x8 Ultra Bright Square Blue LED Matrix + Backpack
[Small 1.2" 8x8 Ultra Bright Square Blue LED Matrix + Backpack](https://www.adafruit.com/product/1853)
What's better than a single LED? Lots of LEDs! Matrices like these are 'multiplexed' - so to control 64 LEDs you need 16 pins. That's a lot of pins, and there are [driver chips like the MAX7219](//www.adafruit.com/products/453) that can control a matrix for you but...
In Stock
[Buy Now](https://www.adafruit.com/product/1853)
[Related Guides to the Product](https://learn.adafruit.com/products/1853/guides)
## Related Guides
- [LED Backpack Displays on Raspberry Pi and BeagleBone Black](https://learn.adafruit.com/led-backpack-displays-on-raspberry-pi-and-beaglebone-black.md)
- [Animating Multiple LED Backpacks](https://learn.adafruit.com/animating-multiple-led-backpacks.md)
- [Arduino GPS Clock](https://learn.adafruit.com/arduino-clock.md)
- [Raspberry Pi Physical Dashboard](https://learn.adafruit.com/raspberry-pi-physical-dashboard.md)
- [CircuitPython Hardware: LED Backpacks & FeatherWings](https://learn.adafruit.com/micropython-hardware-led-backpacks-and-featherwings.md)
- [Matrix and 7-Segment LED Backpack with the Raspberry Pi](https://learn.adafruit.com/matrix-7-segment-led-backpack-with-the-raspberry-pi.md)
- [DIY Pocket LED Gamer - Tiny Tetris!](https://learn.adafruit.com/diy-3d-printed-handheld-pocket-game-tiny-tetris-snake.md)
- [RGB LED Matrix Cube with 25,000 LEDs](https://learn.adafruit.com/rgb-led-matrix-cube-for-pi.md)
- [Creating GIFs for SmartMatrix](https://learn.adafruit.com/creating-gifs-for-smartmatrix.md)
- [Adafruit CharliePlex LED Matrix Bonnet](https://learn.adafruit.com/adafruit-charlieplex-bonnet.md)
- [Connecting a 16x32 RGB LED Matrix Panel to a Raspberry Pi](https://learn.adafruit.com/connecting-a-16x32-rgb-led-matrix-panel-to-a-raspberry-pi.md)
- [MicroPython Displays: Drawing Text](https://learn.adafruit.com/micropython-displays-drawing-text.md)
- [Heart Rate Badge](https://learn.adafruit.com/heart-rate-badge.md)
- [16x24 LED Matrix](https://learn.adafruit.com/16x24-led-matrix.md)
- [Adafruit IS31FL3741](https://learn.adafruit.com/adafruit-is31fl3741.md)
---
# Source: https://learn.adafruit.com/adafruit-led-backpack/0-dot-56-seven-segment-backpack-assembly.md
# Adafruit LED Backpacks
## Assembly and Arduino Wiring
For the STEMMA QT version, you can solder the headers on, or you can simply use a STEMMA QT cable!
- **Backpack + (VCC)** to **microcontroller 5V** (if using a board with 5V logic, otherwise use 3V for boards with 3V logic) **(red wire)**
- **Backpack - (GND)** to **microcontroller GND (black wire)**
- **Backpack D (SDA)** to **microcontroller SDA (blue wire)**
- **Backpack C (SCL)** to **microcontroller SCL (yellow wire)**


To assemble the LED backpack, follow along below.
Info:
When you buy a pack from Adafruit, it comes with the fully tested and assembled backpack as well as a 7-segment display in one of the colors we provide (say, red, yellow, blue or green). You'll need to solder the matrix onto the backpack but it's an easy task.

Remove the parts from packaging and place the LED matrix OVER the silkscreen side. **DO NOT PUT THE DISPLAY ON UPSIDE DOWN OR IT WONT WORK!! Check the image below to make sure the 'decimal point' dots are on the bottom, matching the silkscreen.** 
Turn the backpack over so it is sitting flat on the matrix.

Solder all 14 pins.
Clip the long pins.

Now you're ready to wire it up to a microcontroller. We'll assume you want to use a 4pin header. You can also of course solder wires directly. Place a 4-pin piece of header with the LONG pins down into the breadboard.
Place the soldered backpack on top of the header and Solder 'em!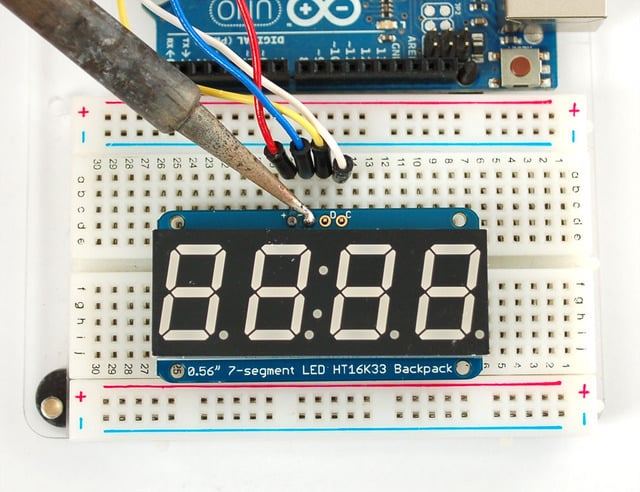
That's it! now you're ready to run the firmware!- [Previous Page](https://learn.adafruit.com/adafruit-led-backpack/0-dot-56-seven-segment-backpack.md)
- [Next Page](https://learn.adafruit.com/adafruit-led-backpack/0-dot-56-seven-segment-backpack-arduino-setup.md)
## Primary Products
### Adafruit Mini 8x8 LED Matrix w/I2C Backpack - Red
[Adafruit Mini 8x8 LED Matrix w/I2C Backpack - Red](https://www.adafruit.com/product/870)
What's better than a single LED? Lots of LEDs! A fun way to make a small display is to use an [8x8 matrix](https://www.adafruit.com/category/37_88) or a [4-digit 7-segment display](https://www.adafruit.com/category/37_103). Matrices like these are...
In Stock
[Buy Now](https://www.adafruit.com/product/870)
[Related Guides to the Product](https://learn.adafruit.com/products/870/guides)
### Adafruit Mini 8x8 LED Matrix w/I2C Backpack - Yellow
[Adafruit Mini 8x8 LED Matrix w/I2C Backpack - Yellow](https://www.adafruit.com/product/871)
What's better than a single LED? Lots of LEDs! A fun way to make a small display is to use an [8x8 matrix](https://www.adafruit.com/category/37_88) or a [4-digit 7-segment display](https://www.adafruit.com/category/37_103). Matrices like these are...
In Stock
[Buy Now](https://www.adafruit.com/product/871)
[Related Guides to the Product](https://learn.adafruit.com/products/871/guides)
### Adafruit Mini 0.8" 8x8 LED Matrix w/I2C Backpack - Yellow-Green
[Adafruit Mini 0.8" 8x8 LED Matrix w/I2C Backpack - Yellow-Green](https://www.adafruit.com/product/872)
What's better than a single LED? Lots of LEDs! A fun way to make a small display is to use an [8x8 matrix](https://www.adafruit.com/category/37_88) or a [4-digit 7-segment display](https://www.adafruit.com/category/37_103). Matrices like these are...
In Stock
[Buy Now](https://www.adafruit.com/product/872)
[Related Guides to the Product](https://learn.adafruit.com/products/872/guides)
### Adafruit 0.56" 4-Digit 7-Segment Display with I2C Backpack - Red
[Adafruit 0.56" 4-Digit 7-Segment Display with I2C Backpack - Red](https://www.adafruit.com/product/878)
What's better than a single LED? Lots of LEDs! A fun way to make a small display is to use an [8x8 matrix](https://www.adafruit.com/category/37_88) or a [4-digit 7-segment display](https://www.adafruit.com/category/37_103). Matrices like these are...
In Stock
[Buy Now](https://www.adafruit.com/product/878)
[Related Guides to the Product](https://learn.adafruit.com/products/878/guides)
### Adafruit 0.56" 4-Digit 7-Segment Display w/I2C Backpack - Yellow
[Adafruit 0.56" 4-Digit 7-Segment Display w/I2C Backpack - Yellow](https://www.adafruit.com/product/879)
What's better than a single LED? Lots of LEDs! A fun way to make a small display is to use an [8x8 matrix](https://www.adafruit.com/category/37_88) or a [4-digit 7-segment display](https://www.adafruit.com/category/37_103). Matrices like these are...
In Stock
[Buy Now](https://www.adafruit.com/product/879)
[Related Guides to the Product](https://learn.adafruit.com/products/879/guides)
### Adafruit 0.56" 4-Digit 7-Segment Display w/ I2C Backpack - Green
[Adafruit 0.56" 4-Digit 7-Segment Display w/ I2C Backpack - Green](https://www.adafruit.com/product/880)
What's better than a single LED? Lots of LEDs! A fun way to make a small display is to use an [8x8 matrix](https://www.adafruit.com/category/37_88) or a [4-digit 7-segment display](https://www.adafruit.com/category/37_103). Matrices like these are...
No Longer Stocked
[Buy Now](https://www.adafruit.com/product/880)
[Related Guides to the Product](https://learn.adafruit.com/products/880/guides)
### Adafruit 0.56" 4-Digit 7-Segment Display w/ I2C Backpack - Blue
[Adafruit 0.56" 4-Digit 7-Segment Display w/ I2C Backpack - Blue](https://www.adafruit.com/product/881)
What's better than a single LED? Lots of LEDs! A fun way to make a small display is to use an [8x8 matrix](https://www.adafruit.com/category/37_88) or a [4-digit 7-segment display](https://www.adafruit.com/category/37_103). Matrices like these are...
In Stock
[Buy Now](https://www.adafruit.com/product/881)
[Related Guides to the Product](https://learn.adafruit.com/products/881/guides)
### Adafruit Bicolor LED Square Pixel Matrix with I2C Backpack
[Adafruit Bicolor LED Square Pixel Matrix with I2C Backpack](https://www.adafruit.com/product/902)
What's better than a single LED? Lots of LEDs! A fun way to make a small colorful display is to use a [1.2" Bi-color 8x8 LED Matrix](http://www.adafruit.com/products/458). Matrices like these are 'multiplexed' - so to control all the 128 LEDs you need 24 pins....
In Stock
[Buy Now](https://www.adafruit.com/product/902)
[Related Guides to the Product](https://learn.adafruit.com/products/902/guides)
### Adafruit Mini 8x8 LED Matrix w/I2C Backpack - Blue
[Adafruit Mini 8x8 LED Matrix w/I2C Backpack - Blue](https://www.adafruit.com/product/959)
What's better than a single LED? Lots of LEDs! A fun way to make a small display is to use an [8x8 matrix](https://www.adafruit.com/category/37_88) or a [4-digit 7-segment display](https://www.adafruit.com/category/37_103). Matrices like these are...
In Stock
[Buy Now](https://www.adafruit.com/product/959)
[Related Guides to the Product](https://learn.adafruit.com/products/959/guides)
### Adafruit 0.56" 4-Digit 7-Segment Display w/I2C Backpack - White
[Adafruit 0.56" 4-Digit 7-Segment Display w/I2C Backpack - White](https://www.adafruit.com/product/1002)
What's better than a single LED? Lots of LEDs! A fun way to make a small display is to use an [8x8 matrix](https://www.adafruit.com/category/37_88) or a [4-digit 7-segment display](https://www.adafruit.com/category/37_103). Matrices like these are...
In Stock
[Buy Now](https://www.adafruit.com/product/1002)
[Related Guides to the Product](https://learn.adafruit.com/products/1002/guides)
### Adafruit 1.2" 8x8 LED Matrix Backpack
[Adafruit 1.2" 8x8 LED Matrix Backpack](https://www.adafruit.com/product/1048)
By popular request, you can now get our 8x8 LED backpacks without the LEDs! These backpacks feature an HT16K33 I2C LED driver, they're simple and easy to use - you can use [our very nice library for the backpacks to...](https://github.com/adafruit/Adafruit-LED-Backpack-Library)
In Stock
[Buy Now](https://www.adafruit.com/product/1048)
[Related Guides to the Product](https://learn.adafruit.com/products/1048/guides)
### Adafruit Small 1.2" 8x8 LED Matrix w/I2C Backpack - Red
[Adafruit Small 1.2" 8x8 LED Matrix w/I2C Backpack - Red](https://www.adafruit.com/product/1049)
What's better than a single LED? Lots of LEDs! A fun way to make a small display is to use an [8x8 matrix](https://www.adafruit.com/category/37_88) or a [4-digit 7-segment display](https://www.adafruit.com/category/37_103). Matrices like these are...
In Stock
[Buy Now](https://www.adafruit.com/product/1049)
[Related Guides to the Product](https://learn.adafruit.com/products/1049/guides)
### Adafruit Small 1.2" 8x8 LED Matrix w/I2C Backpack - Yellow
[Adafruit Small 1.2" 8x8 LED Matrix w/I2C Backpack - Yellow](https://www.adafruit.com/product/1050)
What's better than a single LED? Lots of LEDs! A fun way to make a small display is to use an [8x8 matrix](https://www.adafruit.com/category/37_88) or a [4-digit 7-segment display](https://www.adafruit.com/category/37_103). Matrices like these are...
In Stock
[Buy Now](https://www.adafruit.com/product/1050)
[Related Guides to the Product](https://learn.adafruit.com/products/1050/guides)
### Adafruit Small 1.2" 8x8 LED Matrix w/I2C Backpack - Blue
[Adafruit Small 1.2" 8x8 LED Matrix w/I2C Backpack - Blue](https://www.adafruit.com/product/1052)
What's better than a single LED? Lots of LEDs! A fun way to make a small display is to use an [8x8 matrix](https://www.adafruit.com/category/37_88) or a [4-digit 7-segment display](https://www.adafruit.com/category/37_103). Matrices like these are...
In Stock
[Buy Now](https://www.adafruit.com/product/1052)
[Related Guides to the Product](https://learn.adafruit.com/products/1052/guides)
### Adafruit Mini 8x8 LED Matrix w/I2C Backpack - Ultra Bright White
[Adafruit Mini 8x8 LED Matrix w/I2C Backpack - Ultra Bright White](https://www.adafruit.com/product/1080)
What's better than a single LED? Lots of LEDs! A fun way to make a small display is to use an [8x8 matrix](https://www.adafruit.com/category/37_88) or a [4-digit 7-segment display](https://www.adafruit.com/category/37_103). Matrices like these are...
In Stock
[Buy Now](https://www.adafruit.com/product/1080)
[Related Guides to the Product](https://learn.adafruit.com/products/1080/guides)
### Adafruit 1.2" 4-Digit 7-Segment Display w/I2C Backpack - Green
[Adafruit 1.2" 4-Digit 7-Segment Display w/I2C Backpack - Green](https://www.adafruit.com/product/1268)
What's better than a single LED? Lots of LEDs! A fun way to make a numeric display is to use a [4-digit 7-segment display](https://www.adafruit.com/category/37_103). LED matrices like these are 'multiplexed' - so to control all the seven-segment LEDs you need 14 pins....
No Longer Stocked
[Buy Now](https://www.adafruit.com/product/1268)
[Related Guides to the Product](https://learn.adafruit.com/products/1268/guides)
### Adafruit 1.2" 4-Digit 7-Segment Display w/I2C Backpack - Yellow
[Adafruit 1.2" 4-Digit 7-Segment Display w/I2C Backpack - Yellow](https://www.adafruit.com/product/1269)
What's better than a single LED? Lots of LEDs! A fun way to make a numeric display is to use a [4-digit 7-segment display](https://www.adafruit.com/category/37_103). LED matrices like these are 'multiplexed' - so to control all the seven-segment LEDs you need 14 pins....
In Stock
[Buy Now](https://www.adafruit.com/product/1269)
[Related Guides to the Product](https://learn.adafruit.com/products/1269/guides)
### Adafruit 1.2" 4-Digit 7-Segment Display w/I2C Backpack - Red
[Adafruit 1.2" 4-Digit 7-Segment Display w/I2C Backpack - Red](https://www.adafruit.com/product/1270)
What's better than a single LED? Lots of LEDs! A fun way to make a numeric display is to use a [4-digit 7-segment display](https://www.adafruit.com/category/37_103). LED matrices like these are 'multiplexed' - so to control all the seven-segment LEDs you need 14 pins....
In Stock
[Buy Now](https://www.adafruit.com/product/1270)
[Related Guides to the Product](https://learn.adafruit.com/products/1270/guides)
### Small 1.2" 8x8 Ultra Bright White LED Matrix + Backpack
[Small 1.2" 8x8 Ultra Bright White LED Matrix + Backpack](https://www.adafruit.com/product/1614)
What's better than a single LED? Lots of LEDs! A fun way to make a small display is to use an [8x8 matrix](https://www.adafruit.com/category/37_88) or a [4-digit 7-segment display](https://www.adafruit.com/category/37_103). Matrices like these are...
In Stock
[Buy Now](https://www.adafruit.com/product/1614)
[Related Guides to the Product](https://learn.adafruit.com/products/1614/guides)
### Adafruit Small 1.2" 8x8 LED Matrix w/I2C Backpack - Pure Green
[Adafruit Small 1.2" 8x8 LED Matrix w/I2C Backpack - Pure Green](https://www.adafruit.com/product/1632)
What's better than a single LED? Lots of LEDs! A fun way to make a small display is to use an [8x8 matrix](https://www.adafruit.com/category/37_88) or a [4-digit 7-segment display](https://www.adafruit.com/category/37_103). Matrices like these are...
In Stock
[Buy Now](https://www.adafruit.com/product/1632)
[Related Guides to the Product](https://learn.adafruit.com/products/1632/guides)
### Adafruit Mini 0.8" 8x8 LED Matrix w/I2C Backpack - Pure Green
[Adafruit Mini 0.8" 8x8 LED Matrix w/I2C Backpack - Pure Green](https://www.adafruit.com/product/1633)
What's better than a single LED? Lots of LEDs! A fun way to make a small display is to use an [8x8 matrix](https://www.adafruit.com/category/37_88) or a [4-digit 7-segment display](https://www.adafruit.com/category/37_103). Matrices like these are...
In Stock
[Buy Now](https://www.adafruit.com/product/1633)
[Related Guides to the Product](https://learn.adafruit.com/products/1633/guides)
### Bi-Color (Red/Green) 24-Bar Bargraph w/I2C Backpack Kit
[Bi-Color (Red/Green) 24-Bar Bargraph w/I2C Backpack Kit](https://www.adafruit.com/product/1721)
What's better than a single LED? Lots of LEDs! A fun way to make a small linear display is to use two 12-bar Bi-color bar-graphs. However, this LED bargraph is 'multiplexed' - so to control all the 48 LEDs you need a lot of pins.
Out of Stock
[Buy Now](https://www.adafruit.com/product/1721)
[Related Guides to the Product](https://learn.adafruit.com/products/1721/guides)
### Small 1.2" 8x8 Ultra Bright Square Amber LED Matrix + Backpack
[Small 1.2" 8x8 Ultra Bright Square Amber LED Matrix + Backpack](https://www.adafruit.com/product/1854)
What's better than a single LED? Lots of LEDs! Matrices like these are 'multiplexed' - so to control 64 LEDs you need 16 pins. That's a lot of pins, and there are [driver chips like the MAX7219](//www.adafruit.com/products/453) that can control a matrix for you but...
In Stock
[Buy Now](https://www.adafruit.com/product/1854)
[Related Guides to the Product](https://learn.adafruit.com/products/1854/guides)
### Small 1.2" 8x8 Ultra Bright Square Yellow LED Matrix + Backpack
[Small 1.2" 8x8 Ultra Bright Square Yellow LED Matrix + Backpack](https://www.adafruit.com/product/1855)
What's better than a single LED? Lots of LEDs! Matrices like these are 'multiplexed' - so to control 64 LEDs you need 16 pins. That's a lot of pins, and there are [driver chips like the MAX7219](//www.adafruit.com/products/453) that can control a matrix for you but...
In Stock
[Buy Now](https://www.adafruit.com/product/1855)
[Related Guides to the Product](https://learn.adafruit.com/products/1855/guides)
### Small 1.2" 8x8 Bright Square Pure Green LED Matrix + Backpack
[Small 1.2" 8x8 Bright Square Pure Green LED Matrix + Backpack](https://www.adafruit.com/product/1856)
What's better than a single LED? Lots of LEDs! Matrices like these are 'multiplexed' - so to control 64 LEDs you need 16 pins. That's a lot of pins, and there are [driver chips like the MAX7219](//www.adafruit.com/products/453) that can control a matrix for you but...
In Stock
[Buy Now](https://www.adafruit.com/product/1856)
[Related Guides to the Product](https://learn.adafruit.com/products/1856/guides)
### Small 1.2" 8x8 Ultra Bright Square White LED Matrix + Backpack
[Small 1.2" 8x8 Ultra Bright Square White LED Matrix + Backpack](https://www.adafruit.com/product/1857)
What's better than a single LED? Lots of LEDs! Matrices like these are 'multiplexed' - so to control 64 LEDs you need 16 pins. That's a lot of pins, and there are [driver chips like the MAX7219](//www.adafruit.com/products/453) that can control a matrix for you but...
In Stock
[Buy Now](https://www.adafruit.com/product/1857)
[Related Guides to the Product](https://learn.adafruit.com/products/1857/guides)
### Adafruit 14-segment LED Alphanumeric Backpack - STEMMA QT
[Adafruit 14-segment LED Alphanumeric Backpack - STEMMA QT](https://www.adafruit.com/product/1910)
By popular request, you can now get our 14-segment LED backpacks without the LEDs! These backpacks feature an HT16K33 I2C LED driver, they're simple and easy to use - you can use [our very nice library for the backpacks to...](https://github.com/adafruit/Adafruit-LED-Backpack-Library)
In Stock
[Buy Now](https://www.adafruit.com/product/1910)
[Related Guides to the Product](https://learn.adafruit.com/products/1910/guides)
### Quad Alphanumeric Display - Red 0.54" Digits w/ I2C Backpack
[Quad Alphanumeric Display - Red 0.54" Digits w/ I2C Backpack](https://www.adafruit.com/product/1911)
Display, elegantly, 012345678 or 9! Gaze, hypnotized, at ABCDEFGHIJKLM - well it can display the whole alphabet. You get the point. This is a nice, bright alphanumeric display that shows letters and numbers in a beautiful red hue. It's super bright and designed for viewing from distances...
In Stock
[Buy Now](https://www.adafruit.com/product/1911)
[Related Guides to the Product](https://learn.adafruit.com/products/1911/guides)
### Quad Alphanumeric Display - Blue 0.54" Digits w/ I2C Backpack
[Quad Alphanumeric Display - Blue 0.54" Digits w/ I2C Backpack](https://www.adafruit.com/product/1912)
Display, elegantly, 012345678 or 9! Gaze, hypnotized, at ABCDEFGHIJKLM - well it can display the whole alphabet. You get the point. This is a nice, bright alphanumeric display that shows letters and numbers in a beautiful blue hue. It's super bright and designed for viewing from distances...
In Stock
[Buy Now](https://www.adafruit.com/product/1912)
[Related Guides to the Product](https://learn.adafruit.com/products/1912/guides)
### 16x8 1.2" LED Matrix + Backpack - Ultra Bright Round Green LEDs
[16x8 1.2" LED Matrix + Backpack - Ultra Bright Round Green LEDs](https://www.adafruit.com/product/2035)
What's better than a single LED? Lots of LEDs! And what's better than lots of LEDs? **TWO TIMES AS MANY LEDS!!!**
With the 16x8 LED Matrix Backpack we've doubled your project's matrix capacity by making it super easy to get two separate 8x8 matrices onto...
In Stock
[Buy Now](https://www.adafruit.com/product/2035)
[Related Guides to the Product](https://learn.adafruit.com/products/2035/guides)
### 16x8 1.2" LED Matrix+Backpack UltraBright Round YellowGreen LEDs
[16x8 1.2" LED Matrix+Backpack UltraBright Round YellowGreen LEDs](https://www.adafruit.com/product/2036)
What's better than a single LED? Lots of LEDs! And what's better than lots of LEDs? **TWO TIMES AS MANY LEDS!!!**
With the 16x8 LED Matrix Backpack we've doubled your project's matrix capacity by making it super easy to get two separate 8x8 matrices onto...
In Stock
[Buy Now](https://www.adafruit.com/product/2036)
[Related Guides to the Product](https://learn.adafruit.com/products/2036/guides)
### 16x8 1.2" LED Matrix + Backpack - Ultra Bright Round Red LEDs
[16x8 1.2" LED Matrix + Backpack - Ultra Bright Round Red LEDs](https://www.adafruit.com/product/2037)
What's better than a single LED? Lots of LEDs! And what's better than lots of LEDs? **TWO TIMES AS MANY LEDS!!!**
With the 16x8 LED Matrix Backpack we've doubled your project's matrix capacity by making it super easy to get two separate 8x8 matrices onto...
In Stock
[Buy Now](https://www.adafruit.com/product/2037)
[Related Guides to the Product](https://learn.adafruit.com/products/2037/guides)
### 16x8 1.2" LED Matrix + Backpack - Ultra Bright Round White LEDs
[16x8 1.2" LED Matrix + Backpack - Ultra Bright Round White LEDs](https://www.adafruit.com/product/2038)
What's better than a single LED? Lots of LEDs! And what's better than lots of LEDs? **TWO TIMES AS MANY LEDS!!!**
With the 16x8 LED Matrix Backpack we've doubled your project's matrix capacity by making it super easy to get two separate 8x8 matrices onto...
In Stock
[Buy Now](https://www.adafruit.com/product/2038)
[Related Guides to the Product](https://learn.adafruit.com/products/2038/guides)
### 16x8 1.2" LED Matrix + Backpack - Ultra Bright Round Blue LEDs
[16x8 1.2" LED Matrix + Backpack - Ultra Bright Round Blue LEDs](https://www.adafruit.com/product/2039)
What's better than a single LED? Lots of LEDs! And what's better than lots of LEDs? **TWO TIMES AS MANY LEDS!!!**
With the 16x8 LED Matrix Backpack we've doubled your project's matrix capacity by making it super easy to get two separate 8x8 matrices onto...
In Stock
[Buy Now](https://www.adafruit.com/product/2039)
[Related Guides to the Product](https://learn.adafruit.com/products/2039/guides)
### 16x8 1.2" LED Matrix + Backpack - Ultra Bright Square Blue LEDs
[16x8 1.2" LED Matrix + Backpack - Ultra Bright Square Blue LEDs](https://www.adafruit.com/product/2040)
What's better than a single LED? Lots of LEDs! And what's better than lots of LEDs? **TWO TIMES AS MANY LEDS!!!**
With the 16x8 LED Matrix Backpack we've doubled your project's matrix capacity by making it super easy to get two separate 8x8 matrices onto...
In Stock
[Buy Now](https://www.adafruit.com/product/2040)
[Related Guides to the Product](https://learn.adafruit.com/products/2040/guides)
### 16x8 1.2" LED Matrix + Backpack - Ultra Bright Square Amber LEDs
[16x8 1.2" LED Matrix + Backpack - Ultra Bright Square Amber LEDs](https://www.adafruit.com/product/2041)
What's better than a single LED? Lots of LEDs! And what's better than lots of LEDs? **TWO TIMES AS MANY LEDS!!!**
With the 16x8 LED Matrix Backpack we've doubled your project's matrix capacity by making it super easy to get two separate 8x8 matrices onto...
In Stock
[Buy Now](https://www.adafruit.com/product/2041)
[Related Guides to the Product](https://learn.adafruit.com/products/2041/guides)
### 16x8 1.2" LED Matrix + Backpack - Ultra Bright Square Green LEDs
[16x8 1.2" LED Matrix + Backpack - Ultra Bright Square Green LEDs](https://www.adafruit.com/product/2042)
What's better than a single LED? Lots of LEDs! And what's better than lots of LEDs? **TWO TIMES AS MANY LEDS!!!**
With the 16x8 LED Matrix Backpack we've doubled your project's matrix capacity by making it super easy to get two separate 8x8 matrices onto...
In Stock
[Buy Now](https://www.adafruit.com/product/2042)
[Related Guides to the Product](https://learn.adafruit.com/products/2042/guides)
### 16x8 1.2" LED Matrix + Backpack -Ultra Bright Square Yellow LEDs
[16x8 1.2" LED Matrix + Backpack -Ultra Bright Square Yellow LEDs](https://www.adafruit.com/product/2043)
What's better than a single LED? Lots of LEDs! And what's better than lots of LEDs? **TWO TIMES AS MANY LEDS!!!**
With the 16x8 LED Matrix Backpack we've doubled your project's matrix capacity by making it super easy to get two separate 8x8 matrices onto...
In Stock
[Buy Now](https://www.adafruit.com/product/2043)
[Related Guides to the Product](https://learn.adafruit.com/products/2043/guides)
### 16x8 1.2" LED Matrix + Backpack - Ultra Bright Square White LEDs
[16x8 1.2" LED Matrix + Backpack - Ultra Bright Square White LEDs](https://www.adafruit.com/product/2044)
What's better than a single LED? Lots of LEDs! And what's better than lots of LEDs? **TWO TIMES AS MANY LEDS!!!**
With the 16x8 LED Matrix Backpack we've doubled your project's matrix capacity by making it super easy to get two separate 8x8 matrices onto...
In Stock
[Buy Now](https://www.adafruit.com/product/2044)
[Related Guides to the Product](https://learn.adafruit.com/products/2044/guides)
### 16x8 1.2" LED Matrix + Backpack-Ultra Bright Round Orange LEDs
[16x8 1.2" LED Matrix + Backpack-Ultra Bright Round Orange LEDs](https://www.adafruit.com/product/2052)
What's better than a single LED? Lots of LEDs! And what's better than lots of LEDs? **TWO TIMES AS MANY LEDS!!!**
With the 16x8 LED Matrix Backpack we've doubled your project's matrix capacity by making it super easy to get two separate 8x8 matrices onto...
In Stock
[Buy Now](https://www.adafruit.com/product/2052)
[Related Guides to the Product](https://learn.adafruit.com/products/2052/guides)
### 16x8 1.2" LED Matrices+Backpack Round LEDs in Various Colors
[16x8 1.2" LED Matrices+Backpack Round LEDs in Various Colors](https://www.adafruit.com/product/2054)
What's better than a single LED? Lots of LEDs! And what's better than lots of LEDs? **TWO TIMES AS MANY LEDS!!!**
With the 16x8 LED Matrix Backpack we've doubled your project's matrix capacity by making it super easy to get two separate 8x8 matrices onto...
Out of Stock
[Buy Now](https://www.adafruit.com/product/2054)
[Related Guides to the Product](https://learn.adafruit.com/products/2054/guides)
### Adafruit 8x16 LED Matrix FeatherWing w/o Matrices
[Adafruit 8x16 LED Matrix FeatherWing w/o Matrices](https://www.adafruit.com/product/3090)
You will chirp with delight when you see how easy it is to make your very own 8x16 LED matrix display for any Feather. At 0.8" square, the little [8x8 matrices](https://www.adafruit.com/new/?q=8x8%20miniature%20LED%20matrix&) have everything a big LED matrix has,...
Out of Stock
[Buy Now](https://www.adafruit.com/product/3090)
[Related Guides to the Product](https://learn.adafruit.com/products/3090/guides)
### Adafruit 14-segment LED Alphanumeric backpack (same as P1910)
[Adafruit 14-segment LED Alphanumeric backpack (same as P1910)](https://www.adafruit.com/product/3322)
Just the backpack + 4pin header
No Longer Stocked
[Buy Now](https://www.adafruit.com/product/3322)
[Related Guides to the Product](https://learn.adafruit.com/products/3322/guides)
## Featured Products
### Adafruit Small 1.2" 8x8 LED Matrix w/I2C Backpack - Yellow-Green
[Adafruit Small 1.2" 8x8 LED Matrix w/I2C Backpack - Yellow-Green](https://www.adafruit.com/product/1051)
What's better than a single LED? Lots of LEDs! A fun way to make a small display is to use an [8x8 matrix](https://www.adafruit.com/category/37_88) or a [4-digit 7-segment display](https://www.adafruit.com/category/37_103). Matrices like these are...
In Stock
[Buy Now](https://www.adafruit.com/product/1051)
[Related Guides to the Product](https://learn.adafruit.com/products/1051/guides)
### Small 1.2" 8x8 Ultra Bright Square Blue LED Matrix + Backpack
[Small 1.2" 8x8 Ultra Bright Square Blue LED Matrix + Backpack](https://www.adafruit.com/product/1853)
What's better than a single LED? Lots of LEDs! Matrices like these are 'multiplexed' - so to control 64 LEDs you need 16 pins. That's a lot of pins, and there are [driver chips like the MAX7219](//www.adafruit.com/products/453) that can control a matrix for you but...
In Stock
[Buy Now](https://www.adafruit.com/product/1853)
[Related Guides to the Product](https://learn.adafruit.com/products/1853/guides)
## Related Guides
- [LED Backpack Displays on Raspberry Pi and BeagleBone Black](https://learn.adafruit.com/led-backpack-displays-on-raspberry-pi-and-beaglebone-black.md)
- [Animating Multiple LED Backpacks](https://learn.adafruit.com/animating-multiple-led-backpacks.md)
- [Arduino GPS Clock](https://learn.adafruit.com/arduino-clock.md)
- [Raspberry Pi Physical Dashboard](https://learn.adafruit.com/raspberry-pi-physical-dashboard.md)
- [CircuitPython Hardware: LED Backpacks & FeatherWings](https://learn.adafruit.com/micropython-hardware-led-backpacks-and-featherwings.md)
- [Matrix and 7-Segment LED Backpack with the Raspberry Pi](https://learn.adafruit.com/matrix-7-segment-led-backpack-with-the-raspberry-pi.md)
- [DIY Pocket LED Gamer - Tiny Tetris!](https://learn.adafruit.com/diy-3d-printed-handheld-pocket-game-tiny-tetris-snake.md)
- [RGB LED Matrix Cube with 25,000 LEDs](https://learn.adafruit.com/rgb-led-matrix-cube-for-pi.md)
- [Creating GIFs for SmartMatrix](https://learn.adafruit.com/creating-gifs-for-smartmatrix.md)
- [Adafruit CharliePlex LED Matrix Bonnet](https://learn.adafruit.com/adafruit-charlieplex-bonnet.md)
- [Connecting a 16x32 RGB LED Matrix Panel to a Raspberry Pi](https://learn.adafruit.com/connecting-a-16x32-rgb-led-matrix-panel-to-a-raspberry-pi.md)
- [MicroPython Displays: Drawing Text](https://learn.adafruit.com/micropython-displays-drawing-text.md)
- [Heart Rate Badge](https://learn.adafruit.com/heart-rate-badge.md)
- [16x24 LED Matrix](https://learn.adafruit.com/16x24-led-matrix.md)
- [Adafruit IS31FL3741](https://learn.adafruit.com/adafruit-is31fl3741.md)
---
# Source: https://learn.adafruit.com/adafruit-led-backpack/0-dot-56-seven-segment-backpack-circuitpython-and-python-usage.md
# Adafruit LED Backpacks
## CircuitPython and Python Usage
The following section will show how to control the LED backpack from the board's Python prompt / REPL. You'll walk through how to control the LED display and learn how to use the CircuitPython module built for the display.
First [connect to the board's serial REPL ](https://learn.adafruit.com/welcome-to-circuitpython/the-repl)so you are at the CircuitPython **\>\>\>** prompt.
## Initialization
First you'll need to initialize the I2C bus for your board. It's really easy, first import the necessary modules. In this case, we'll use `board` and `Seg7x4`.
Then just use `board.I2C()` to create the I2C instance using the default SCL and SDA pins (which will be marked on the boards pins if using a Feather or similar Adafruit board).
Then to initialize the display, you just pass `i2c` in.
Warning: When using the STEMMA QT port, some board may have an alternate I2C such as board.STEMMA_I2C().
```python
import board
from adafruit_ht16k33.segments import Seg7x4
i2c = board.I2C()
display = Seg7x4(i2c)
```
If you bridged the address pads on the back of the display, you could pass in the address. The addresses for the HT16K33 can range between 0x70 and 0x77 depending on which pads you have bridged, with 0x70 being used if you haven't bridged any of them. For instance, if you bridge only the **A0** pad, you would use `0x71` like this:
```python
display = Seg7x4(i2c, address=0x71)
```
If you intend to chain multiple displays together, you will need to alter the address of subsequent boards by [bridging the address pins in various combinations](https://learn.adafruit.com/adafruit-led-backpack/pinouts#address-jumper-pins-3127675). If you have an unsoldered board, and a board with the A0 pad solder-bridged, you would initialisz the two displays as follows.
```python
display = Seg14x4(i2c, address=(0x70, 0x71))
```
To add further displays, [ensure the address is different on all of them](https://learn.adafruit.com/adafruit-led-backpack/pinouts#address-jumper-pins-3127675), and initialize it the same way as above, but add more comma-separated addresses to the `address=()` tuple.
## Setting the Brightness
You can set the brightness of the display, but changing it will set the brightness of the entire display and not individual segments. If can be adjusted in 1/16 increments **between 0 and 1.0** with 1.0 being the brightest. So to set the display to half brightness, you would use the following:
```python
display.brightness = 0.5
```
## Setting the Blink Rate
You can set the blink rate of the display, but changing it will set the brightness of the entire display and not individual segments. If can be adjusted in 1/4 increments **between 0 and 3** with 3 being the fastest blinking. So to set the display to blink at full speed, you would use the following:
```python
display.blink_rate = 3
```
## Printing Text
To print text to the display, you just use the print function. For the 7-segment display, valid characters are 0-9, letters A-F, a period, a hyphen, and a space. So if we want to print ABCD, we would use the following:
```python
display.print("ABCD")
```
## Printing Numbers
Printing numbers is done similar to printing text, except without the quotes, though you can still print numbers in a string as well.
```python
display.print(1234)
```
## Printing Hexadecimal Values
To print hexadecimal values, you use the `print_hex` function:
```python
display.print_hex(0x1A2B)
```
## Setting Individual Characters
To set individual characters, you simply treat the `display` object as a list and set it to the value that you would like.
```python
display[0] = '1'
display[1] = '2'
display[2] = 'A'
display[3] = 'B'
```
## Setting Individual Segments
To set individual segments to turn on or off, you would use the set\_digit\_raw function to pass the digit that you want to change and the bitmask. This can be really useful for creating your own characters. The bitmask corresponds to the following diagram:

The bitmask is a single 8-bit number that can be passed in as a single Hexadecimal, Decimal, or binary number. This will use a couple different methods to display `8.8.EE`:
```python
display.set_digit_raw(0, 0xFF)
display.set_digit_raw(1, 0b11111111)
display.set_digit_raw(2, 0x79)
display.set_digit_raw(3, 0b01111001)
```

## Filling all Segments
To fill the entire display, just use the fill() function and pass in either 0 or 1 depending on whether you want all segments off or on. For instance, if you wanted to set everything to on, you would use:
```python
display.fill(1)
```
## Scrolling Display Manually
If you want to scroll the displayed data to the left, you can use the `scroll()` function. You can pass in the number of places that you want to scroll. The right-most digit will remain unchanged and you will need to set that manually. After scrolling, you will need to call the show function. For example if you wanted to print an A and then scroll it over to spaces, you would do the following.
```python
display.print("A")
display.scroll(2)
display[3] = " "
display.show()
```
## Displaying the Colon
There are a couple of different ways to display a colon on the 7-segment display. The first and easiest way is to use the print function:
```python
display.print("12:30")
```
The other way to control it is to access the colon with the colon property and set it to `True` or `False`:
```python
display.colon = False
```
## Displaying an Automatic Scrolling Marquee
To make displaying long text easier, we've added a marquee function. You just pass it the full string. Optionally, you can pass it the amount of delay between each character. This may be useful for displaying an IP address, a phone number, or other numeric data:
```python
display.marquee('192.168.100.102... ')
```

By default it is 0.25 seconds, but you can change this by providing a second parameter. You can optionally pass `False` for a third parameter if you would not like to have it loop. So if you wanted each character to display for half a second and didn't want it to loop, you would use the following:
```python
display.marquee('192.168.100.102... ', 0.5, False)
```
- [Previous Page](https://learn.adafruit.com/adafruit-led-backpack/0-dot-56-seven-segment-backpack-python-wiring-and-setup.md)
- [Next Page](https://learn.adafruit.com/adafruit-led-backpack/1-2-inch-7-segment-backpack.md)
## Primary Products
### Adafruit Mini 8x8 LED Matrix w/I2C Backpack - Red
[Adafruit Mini 8x8 LED Matrix w/I2C Backpack - Red](https://www.adafruit.com/product/870)
What's better than a single LED? Lots of LEDs! A fun way to make a small display is to use an [8x8 matrix](https://www.adafruit.com/category/37_88) or a [4-digit 7-segment display](https://www.adafruit.com/category/37_103). Matrices like these are...
In Stock
[Buy Now](https://www.adafruit.com/product/870)
[Related Guides to the Product](https://learn.adafruit.com/products/870/guides)
### Adafruit Mini 8x8 LED Matrix w/I2C Backpack - Yellow
[Adafruit Mini 8x8 LED Matrix w/I2C Backpack - Yellow](https://www.adafruit.com/product/871)
What's better than a single LED? Lots of LEDs! A fun way to make a small display is to use an [8x8 matrix](https://www.adafruit.com/category/37_88) or a [4-digit 7-segment display](https://www.adafruit.com/category/37_103). Matrices like these are...
In Stock
[Buy Now](https://www.adafruit.com/product/871)
[Related Guides to the Product](https://learn.adafruit.com/products/871/guides)
### Adafruit Mini 0.8" 8x8 LED Matrix w/I2C Backpack - Yellow-Green
[Adafruit Mini 0.8" 8x8 LED Matrix w/I2C Backpack - Yellow-Green](https://www.adafruit.com/product/872)
What's better than a single LED? Lots of LEDs! A fun way to make a small display is to use an [8x8 matrix](https://www.adafruit.com/category/37_88) or a [4-digit 7-segment display](https://www.adafruit.com/category/37_103). Matrices like these are...
In Stock
[Buy Now](https://www.adafruit.com/product/872)
[Related Guides to the Product](https://learn.adafruit.com/products/872/guides)
### Adafruit 0.56" 4-Digit 7-Segment Display with I2C Backpack - Red
[Adafruit 0.56" 4-Digit 7-Segment Display with I2C Backpack - Red](https://www.adafruit.com/product/878)
What's better than a single LED? Lots of LEDs! A fun way to make a small display is to use an [8x8 matrix](https://www.adafruit.com/category/37_88) or a [4-digit 7-segment display](https://www.adafruit.com/category/37_103). Matrices like these are...
In Stock
[Buy Now](https://www.adafruit.com/product/878)
[Related Guides to the Product](https://learn.adafruit.com/products/878/guides)
### Adafruit 0.56" 4-Digit 7-Segment Display w/I2C Backpack - Yellow
[Adafruit 0.56" 4-Digit 7-Segment Display w/I2C Backpack - Yellow](https://www.adafruit.com/product/879)
What's better than a single LED? Lots of LEDs! A fun way to make a small display is to use an [8x8 matrix](https://www.adafruit.com/category/37_88) or a [4-digit 7-segment display](https://www.adafruit.com/category/37_103). Matrices like these are...
In Stock
[Buy Now](https://www.adafruit.com/product/879)
[Related Guides to the Product](https://learn.adafruit.com/products/879/guides)
### Adafruit 0.56" 4-Digit 7-Segment Display w/ I2C Backpack - Green
[Adafruit 0.56" 4-Digit 7-Segment Display w/ I2C Backpack - Green](https://www.adafruit.com/product/880)
What's better than a single LED? Lots of LEDs! A fun way to make a small display is to use an [8x8 matrix](https://www.adafruit.com/category/37_88) or a [4-digit 7-segment display](https://www.adafruit.com/category/37_103). Matrices like these are...
No Longer Stocked
[Buy Now](https://www.adafruit.com/product/880)
[Related Guides to the Product](https://learn.adafruit.com/products/880/guides)
### Adafruit 0.56" 4-Digit 7-Segment Display w/ I2C Backpack - Blue
[Adafruit 0.56" 4-Digit 7-Segment Display w/ I2C Backpack - Blue](https://www.adafruit.com/product/881)
What's better than a single LED? Lots of LEDs! A fun way to make a small display is to use an [8x8 matrix](https://www.adafruit.com/category/37_88) or a [4-digit 7-segment display](https://www.adafruit.com/category/37_103). Matrices like these are...
In Stock
[Buy Now](https://www.adafruit.com/product/881)
[Related Guides to the Product](https://learn.adafruit.com/products/881/guides)
### Adafruit Bicolor LED Square Pixel Matrix with I2C Backpack
[Adafruit Bicolor LED Square Pixel Matrix with I2C Backpack](https://www.adafruit.com/product/902)
What's better than a single LED? Lots of LEDs! A fun way to make a small colorful display is to use a [1.2" Bi-color 8x8 LED Matrix](http://www.adafruit.com/products/458). Matrices like these are 'multiplexed' - so to control all the 128 LEDs you need 24 pins....
In Stock
[Buy Now](https://www.adafruit.com/product/902)
[Related Guides to the Product](https://learn.adafruit.com/products/902/guides)
### Adafruit Mini 8x8 LED Matrix w/I2C Backpack - Blue
[Adafruit Mini 8x8 LED Matrix w/I2C Backpack - Blue](https://www.adafruit.com/product/959)
What's better than a single LED? Lots of LEDs! A fun way to make a small display is to use an [8x8 matrix](https://www.adafruit.com/category/37_88) or a [4-digit 7-segment display](https://www.adafruit.com/category/37_103). Matrices like these are...
In Stock
[Buy Now](https://www.adafruit.com/product/959)
[Related Guides to the Product](https://learn.adafruit.com/products/959/guides)
### Adafruit 0.56" 4-Digit 7-Segment Display w/I2C Backpack - White
[Adafruit 0.56" 4-Digit 7-Segment Display w/I2C Backpack - White](https://www.adafruit.com/product/1002)
What's better than a single LED? Lots of LEDs! A fun way to make a small display is to use an [8x8 matrix](https://www.adafruit.com/category/37_88) or a [4-digit 7-segment display](https://www.adafruit.com/category/37_103). Matrices like these are...
In Stock
[Buy Now](https://www.adafruit.com/product/1002)
[Related Guides to the Product](https://learn.adafruit.com/products/1002/guides)
### Adafruit 1.2" 8x8 LED Matrix Backpack
[Adafruit 1.2" 8x8 LED Matrix Backpack](https://www.adafruit.com/product/1048)
By popular request, you can now get our 8x8 LED backpacks without the LEDs! These backpacks feature an HT16K33 I2C LED driver, they're simple and easy to use - you can use [our very nice library for the backpacks to...](https://github.com/adafruit/Adafruit-LED-Backpack-Library)
In Stock
[Buy Now](https://www.adafruit.com/product/1048)
[Related Guides to the Product](https://learn.adafruit.com/products/1048/guides)
### Adafruit Small 1.2" 8x8 LED Matrix w/I2C Backpack - Red
[Adafruit Small 1.2" 8x8 LED Matrix w/I2C Backpack - Red](https://www.adafruit.com/product/1049)
What's better than a single LED? Lots of LEDs! A fun way to make a small display is to use an [8x8 matrix](https://www.adafruit.com/category/37_88) or a [4-digit 7-segment display](https://www.adafruit.com/category/37_103). Matrices like these are...
In Stock
[Buy Now](https://www.adafruit.com/product/1049)
[Related Guides to the Product](https://learn.adafruit.com/products/1049/guides)
### Adafruit Small 1.2" 8x8 LED Matrix w/I2C Backpack - Yellow
[Adafruit Small 1.2" 8x8 LED Matrix w/I2C Backpack - Yellow](https://www.adafruit.com/product/1050)
What's better than a single LED? Lots of LEDs! A fun way to make a small display is to use an [8x8 matrix](https://www.adafruit.com/category/37_88) or a [4-digit 7-segment display](https://www.adafruit.com/category/37_103). Matrices like these are...
In Stock
[Buy Now](https://www.adafruit.com/product/1050)
[Related Guides to the Product](https://learn.adafruit.com/products/1050/guides)
### Adafruit Small 1.2" 8x8 LED Matrix w/I2C Backpack - Blue
[Adafruit Small 1.2" 8x8 LED Matrix w/I2C Backpack - Blue](https://www.adafruit.com/product/1052)
What's better than a single LED? Lots of LEDs! A fun way to make a small display is to use an [8x8 matrix](https://www.adafruit.com/category/37_88) or a [4-digit 7-segment display](https://www.adafruit.com/category/37_103). Matrices like these are...
In Stock
[Buy Now](https://www.adafruit.com/product/1052)
[Related Guides to the Product](https://learn.adafruit.com/products/1052/guides)
### Adafruit Mini 8x8 LED Matrix w/I2C Backpack - Ultra Bright White
[Adafruit Mini 8x8 LED Matrix w/I2C Backpack - Ultra Bright White](https://www.adafruit.com/product/1080)
What's better than a single LED? Lots of LEDs! A fun way to make a small display is to use an [8x8 matrix](https://www.adafruit.com/category/37_88) or a [4-digit 7-segment display](https://www.adafruit.com/category/37_103). Matrices like these are...
In Stock
[Buy Now](https://www.adafruit.com/product/1080)
[Related Guides to the Product](https://learn.adafruit.com/products/1080/guides)
### Adafruit 1.2" 4-Digit 7-Segment Display w/I2C Backpack - Green
[Adafruit 1.2" 4-Digit 7-Segment Display w/I2C Backpack - Green](https://www.adafruit.com/product/1268)
What's better than a single LED? Lots of LEDs! A fun way to make a numeric display is to use a [4-digit 7-segment display](https://www.adafruit.com/category/37_103). LED matrices like these are 'multiplexed' - so to control all the seven-segment LEDs you need 14 pins....
No Longer Stocked
[Buy Now](https://www.adafruit.com/product/1268)
[Related Guides to the Product](https://learn.adafruit.com/products/1268/guides)
### Adafruit 1.2" 4-Digit 7-Segment Display w/I2C Backpack - Yellow
[Adafruit 1.2" 4-Digit 7-Segment Display w/I2C Backpack - Yellow](https://www.adafruit.com/product/1269)
What's better than a single LED? Lots of LEDs! A fun way to make a numeric display is to use a [4-digit 7-segment display](https://www.adafruit.com/category/37_103). LED matrices like these are 'multiplexed' - so to control all the seven-segment LEDs you need 14 pins....
In Stock
[Buy Now](https://www.adafruit.com/product/1269)
[Related Guides to the Product](https://learn.adafruit.com/products/1269/guides)
### Adafruit 1.2" 4-Digit 7-Segment Display w/I2C Backpack - Red
[Adafruit 1.2" 4-Digit 7-Segment Display w/I2C Backpack - Red](https://www.adafruit.com/product/1270)
What's better than a single LED? Lots of LEDs! A fun way to make a numeric display is to use a [4-digit 7-segment display](https://www.adafruit.com/category/37_103). LED matrices like these are 'multiplexed' - so to control all the seven-segment LEDs you need 14 pins....
In Stock
[Buy Now](https://www.adafruit.com/product/1270)
[Related Guides to the Product](https://learn.adafruit.com/products/1270/guides)
### Small 1.2" 8x8 Ultra Bright White LED Matrix + Backpack
[Small 1.2" 8x8 Ultra Bright White LED Matrix + Backpack](https://www.adafruit.com/product/1614)
What's better than a single LED? Lots of LEDs! A fun way to make a small display is to use an [8x8 matrix](https://www.adafruit.com/category/37_88) or a [4-digit 7-segment display](https://www.adafruit.com/category/37_103). Matrices like these are...
In Stock
[Buy Now](https://www.adafruit.com/product/1614)
[Related Guides to the Product](https://learn.adafruit.com/products/1614/guides)
### Adafruit Small 1.2" 8x8 LED Matrix w/I2C Backpack - Pure Green
[Adafruit Small 1.2" 8x8 LED Matrix w/I2C Backpack - Pure Green](https://www.adafruit.com/product/1632)
What's better than a single LED? Lots of LEDs! A fun way to make a small display is to use an [8x8 matrix](https://www.adafruit.com/category/37_88) or a [4-digit 7-segment display](https://www.adafruit.com/category/37_103). Matrices like these are...
In Stock
[Buy Now](https://www.adafruit.com/product/1632)
[Related Guides to the Product](https://learn.adafruit.com/products/1632/guides)
### Adafruit Mini 0.8" 8x8 LED Matrix w/I2C Backpack - Pure Green
[Adafruit Mini 0.8" 8x8 LED Matrix w/I2C Backpack - Pure Green](https://www.adafruit.com/product/1633)
What's better than a single LED? Lots of LEDs! A fun way to make a small display is to use an [8x8 matrix](https://www.adafruit.com/category/37_88) or a [4-digit 7-segment display](https://www.adafruit.com/category/37_103). Matrices like these are...
In Stock
[Buy Now](https://www.adafruit.com/product/1633)
[Related Guides to the Product](https://learn.adafruit.com/products/1633/guides)
### Bi-Color (Red/Green) 24-Bar Bargraph w/I2C Backpack Kit
[Bi-Color (Red/Green) 24-Bar Bargraph w/I2C Backpack Kit](https://www.adafruit.com/product/1721)
What's better than a single LED? Lots of LEDs! A fun way to make a small linear display is to use two 12-bar Bi-color bar-graphs. However, this LED bargraph is 'multiplexed' - so to control all the 48 LEDs you need a lot of pins.
Out of Stock
[Buy Now](https://www.adafruit.com/product/1721)
[Related Guides to the Product](https://learn.adafruit.com/products/1721/guides)
### Small 1.2" 8x8 Ultra Bright Square Amber LED Matrix + Backpack
[Small 1.2" 8x8 Ultra Bright Square Amber LED Matrix + Backpack](https://www.adafruit.com/product/1854)
What's better than a single LED? Lots of LEDs! Matrices like these are 'multiplexed' - so to control 64 LEDs you need 16 pins. That's a lot of pins, and there are [driver chips like the MAX7219](//www.adafruit.com/products/453) that can control a matrix for you but...
In Stock
[Buy Now](https://www.adafruit.com/product/1854)
[Related Guides to the Product](https://learn.adafruit.com/products/1854/guides)
### Small 1.2" 8x8 Ultra Bright Square Yellow LED Matrix + Backpack
[Small 1.2" 8x8 Ultra Bright Square Yellow LED Matrix + Backpack](https://www.adafruit.com/product/1855)
What's better than a single LED? Lots of LEDs! Matrices like these are 'multiplexed' - so to control 64 LEDs you need 16 pins. That's a lot of pins, and there are [driver chips like the MAX7219](//www.adafruit.com/products/453) that can control a matrix for you but...
In Stock
[Buy Now](https://www.adafruit.com/product/1855)
[Related Guides to the Product](https://learn.adafruit.com/products/1855/guides)
### Small 1.2" 8x8 Bright Square Pure Green LED Matrix + Backpack
[Small 1.2" 8x8 Bright Square Pure Green LED Matrix + Backpack](https://www.adafruit.com/product/1856)
What's better than a single LED? Lots of LEDs! Matrices like these are 'multiplexed' - so to control 64 LEDs you need 16 pins. That's a lot of pins, and there are [driver chips like the MAX7219](//www.adafruit.com/products/453) that can control a matrix for you but...
In Stock
[Buy Now](https://www.adafruit.com/product/1856)
[Related Guides to the Product](https://learn.adafruit.com/products/1856/guides)
### Small 1.2" 8x8 Ultra Bright Square White LED Matrix + Backpack
[Small 1.2" 8x8 Ultra Bright Square White LED Matrix + Backpack](https://www.adafruit.com/product/1857)
What's better than a single LED? Lots of LEDs! Matrices like these are 'multiplexed' - so to control 64 LEDs you need 16 pins. That's a lot of pins, and there are [driver chips like the MAX7219](//www.adafruit.com/products/453) that can control a matrix for you but...
In Stock
[Buy Now](https://www.adafruit.com/product/1857)
[Related Guides to the Product](https://learn.adafruit.com/products/1857/guides)
### Adafruit 14-segment LED Alphanumeric Backpack - STEMMA QT
[Adafruit 14-segment LED Alphanumeric Backpack - STEMMA QT](https://www.adafruit.com/product/1910)
By popular request, you can now get our 14-segment LED backpacks without the LEDs! These backpacks feature an HT16K33 I2C LED driver, they're simple and easy to use - you can use [our very nice library for the backpacks to...](https://github.com/adafruit/Adafruit-LED-Backpack-Library)
In Stock
[Buy Now](https://www.adafruit.com/product/1910)
[Related Guides to the Product](https://learn.adafruit.com/products/1910/guides)
### Quad Alphanumeric Display - Red 0.54" Digits w/ I2C Backpack
[Quad Alphanumeric Display - Red 0.54" Digits w/ I2C Backpack](https://www.adafruit.com/product/1911)
Display, elegantly, 012345678 or 9! Gaze, hypnotized, at ABCDEFGHIJKLM - well it can display the whole alphabet. You get the point. This is a nice, bright alphanumeric display that shows letters and numbers in a beautiful red hue. It's super bright and designed for viewing from distances...
In Stock
[Buy Now](https://www.adafruit.com/product/1911)
[Related Guides to the Product](https://learn.adafruit.com/products/1911/guides)
### Quad Alphanumeric Display - Blue 0.54" Digits w/ I2C Backpack
[Quad Alphanumeric Display - Blue 0.54" Digits w/ I2C Backpack](https://www.adafruit.com/product/1912)
Display, elegantly, 012345678 or 9! Gaze, hypnotized, at ABCDEFGHIJKLM - well it can display the whole alphabet. You get the point. This is a nice, bright alphanumeric display that shows letters and numbers in a beautiful blue hue. It's super bright and designed for viewing from distances...
In Stock
[Buy Now](https://www.adafruit.com/product/1912)
[Related Guides to the Product](https://learn.adafruit.com/products/1912/guides)
### 16x8 1.2" LED Matrix + Backpack - Ultra Bright Round Green LEDs
[16x8 1.2" LED Matrix + Backpack - Ultra Bright Round Green LEDs](https://www.adafruit.com/product/2035)
What's better than a single LED? Lots of LEDs! And what's better than lots of LEDs? **TWO TIMES AS MANY LEDS!!!**
With the 16x8 LED Matrix Backpack we've doubled your project's matrix capacity by making it super easy to get two separate 8x8 matrices onto...
In Stock
[Buy Now](https://www.adafruit.com/product/2035)
[Related Guides to the Product](https://learn.adafruit.com/products/2035/guides)
### 16x8 1.2" LED Matrix+Backpack UltraBright Round YellowGreen LEDs
[16x8 1.2" LED Matrix+Backpack UltraBright Round YellowGreen LEDs](https://www.adafruit.com/product/2036)
What's better than a single LED? Lots of LEDs! And what's better than lots of LEDs? **TWO TIMES AS MANY LEDS!!!**
With the 16x8 LED Matrix Backpack we've doubled your project's matrix capacity by making it super easy to get two separate 8x8 matrices onto...
In Stock
[Buy Now](https://www.adafruit.com/product/2036)
[Related Guides to the Product](https://learn.adafruit.com/products/2036/guides)
### 16x8 1.2" LED Matrix + Backpack - Ultra Bright Round Red LEDs
[16x8 1.2" LED Matrix + Backpack - Ultra Bright Round Red LEDs](https://www.adafruit.com/product/2037)
What's better than a single LED? Lots of LEDs! And what's better than lots of LEDs? **TWO TIMES AS MANY LEDS!!!**
With the 16x8 LED Matrix Backpack we've doubled your project's matrix capacity by making it super easy to get two separate 8x8 matrices onto...
In Stock
[Buy Now](https://www.adafruit.com/product/2037)
[Related Guides to the Product](https://learn.adafruit.com/products/2037/guides)
### 16x8 1.2" LED Matrix + Backpack - Ultra Bright Round White LEDs
[16x8 1.2" LED Matrix + Backpack - Ultra Bright Round White LEDs](https://www.adafruit.com/product/2038)
What's better than a single LED? Lots of LEDs! And what's better than lots of LEDs? **TWO TIMES AS MANY LEDS!!!**
With the 16x8 LED Matrix Backpack we've doubled your project's matrix capacity by making it super easy to get two separate 8x8 matrices onto...
In Stock
[Buy Now](https://www.adafruit.com/product/2038)
[Related Guides to the Product](https://learn.adafruit.com/products/2038/guides)
### 16x8 1.2" LED Matrix + Backpack - Ultra Bright Round Blue LEDs
[16x8 1.2" LED Matrix + Backpack - Ultra Bright Round Blue LEDs](https://www.adafruit.com/product/2039)
What's better than a single LED? Lots of LEDs! And what's better than lots of LEDs? **TWO TIMES AS MANY LEDS!!!**
With the 16x8 LED Matrix Backpack we've doubled your project's matrix capacity by making it super easy to get two separate 8x8 matrices onto...
In Stock
[Buy Now](https://www.adafruit.com/product/2039)
[Related Guides to the Product](https://learn.adafruit.com/products/2039/guides)
### 16x8 1.2" LED Matrix + Backpack - Ultra Bright Square Blue LEDs
[16x8 1.2" LED Matrix + Backpack - Ultra Bright Square Blue LEDs](https://www.adafruit.com/product/2040)
What's better than a single LED? Lots of LEDs! And what's better than lots of LEDs? **TWO TIMES AS MANY LEDS!!!**
With the 16x8 LED Matrix Backpack we've doubled your project's matrix capacity by making it super easy to get two separate 8x8 matrices onto...
In Stock
[Buy Now](https://www.adafruit.com/product/2040)
[Related Guides to the Product](https://learn.adafruit.com/products/2040/guides)
### 16x8 1.2" LED Matrix + Backpack - Ultra Bright Square Amber LEDs
[16x8 1.2" LED Matrix + Backpack - Ultra Bright Square Amber LEDs](https://www.adafruit.com/product/2041)
What's better than a single LED? Lots of LEDs! And what's better than lots of LEDs? **TWO TIMES AS MANY LEDS!!!**
With the 16x8 LED Matrix Backpack we've doubled your project's matrix capacity by making it super easy to get two separate 8x8 matrices onto...
In Stock
[Buy Now](https://www.adafruit.com/product/2041)
[Related Guides to the Product](https://learn.adafruit.com/products/2041/guides)
### 16x8 1.2" LED Matrix + Backpack - Ultra Bright Square Green LEDs
[16x8 1.2" LED Matrix + Backpack - Ultra Bright Square Green LEDs](https://www.adafruit.com/product/2042)
What's better than a single LED? Lots of LEDs! And what's better than lots of LEDs? **TWO TIMES AS MANY LEDS!!!**
With the 16x8 LED Matrix Backpack we've doubled your project's matrix capacity by making it super easy to get two separate 8x8 matrices onto...
In Stock
[Buy Now](https://www.adafruit.com/product/2042)
[Related Guides to the Product](https://learn.adafruit.com/products/2042/guides)
### 16x8 1.2" LED Matrix + Backpack -Ultra Bright Square Yellow LEDs
[16x8 1.2" LED Matrix + Backpack -Ultra Bright Square Yellow LEDs](https://www.adafruit.com/product/2043)
What's better than a single LED? Lots of LEDs! And what's better than lots of LEDs? **TWO TIMES AS MANY LEDS!!!**
With the 16x8 LED Matrix Backpack we've doubled your project's matrix capacity by making it super easy to get two separate 8x8 matrices onto...
In Stock
[Buy Now](https://www.adafruit.com/product/2043)
[Related Guides to the Product](https://learn.adafruit.com/products/2043/guides)
### 16x8 1.2" LED Matrix + Backpack - Ultra Bright Square White LEDs
[16x8 1.2" LED Matrix + Backpack - Ultra Bright Square White LEDs](https://www.adafruit.com/product/2044)
What's better than a single LED? Lots of LEDs! And what's better than lots of LEDs? **TWO TIMES AS MANY LEDS!!!**
With the 16x8 LED Matrix Backpack we've doubled your project's matrix capacity by making it super easy to get two separate 8x8 matrices onto...
In Stock
[Buy Now](https://www.adafruit.com/product/2044)
[Related Guides to the Product](https://learn.adafruit.com/products/2044/guides)
### 16x8 1.2" LED Matrix + Backpack-Ultra Bright Round Orange LEDs
[16x8 1.2" LED Matrix + Backpack-Ultra Bright Round Orange LEDs](https://www.adafruit.com/product/2052)
What's better than a single LED? Lots of LEDs! And what's better than lots of LEDs? **TWO TIMES AS MANY LEDS!!!**
With the 16x8 LED Matrix Backpack we've doubled your project's matrix capacity by making it super easy to get two separate 8x8 matrices onto...
In Stock
[Buy Now](https://www.adafruit.com/product/2052)
[Related Guides to the Product](https://learn.adafruit.com/products/2052/guides)
### 16x8 1.2" LED Matrices+Backpack Round LEDs in Various Colors
[16x8 1.2" LED Matrices+Backpack Round LEDs in Various Colors](https://www.adafruit.com/product/2054)
What's better than a single LED? Lots of LEDs! And what's better than lots of LEDs? **TWO TIMES AS MANY LEDS!!!**
With the 16x8 LED Matrix Backpack we've doubled your project's matrix capacity by making it super easy to get two separate 8x8 matrices onto...
Out of Stock
[Buy Now](https://www.adafruit.com/product/2054)
[Related Guides to the Product](https://learn.adafruit.com/products/2054/guides)
### Adafruit 8x16 LED Matrix FeatherWing w/o Matrices
[Adafruit 8x16 LED Matrix FeatherWing w/o Matrices](https://www.adafruit.com/product/3090)
You will chirp with delight when you see how easy it is to make your very own 8x16 LED matrix display for any Feather. At 0.8" square, the little [8x8 matrices](https://www.adafruit.com/new/?q=8x8%20miniature%20LED%20matrix&) have everything a big LED matrix has,...
Out of Stock
[Buy Now](https://www.adafruit.com/product/3090)
[Related Guides to the Product](https://learn.adafruit.com/products/3090/guides)
### Adafruit 14-segment LED Alphanumeric backpack (same as P1910)
[Adafruit 14-segment LED Alphanumeric backpack (same as P1910)](https://www.adafruit.com/product/3322)
Just the backpack + 4pin header
No Longer Stocked
[Buy Now](https://www.adafruit.com/product/3322)
[Related Guides to the Product](https://learn.adafruit.com/products/3322/guides)
## Featured Products
### Adafruit Small 1.2" 8x8 LED Matrix w/I2C Backpack - Yellow-Green
[Adafruit Small 1.2" 8x8 LED Matrix w/I2C Backpack - Yellow-Green](https://www.adafruit.com/product/1051)
What's better than a single LED? Lots of LEDs! A fun way to make a small display is to use an [8x8 matrix](https://www.adafruit.com/category/37_88) or a [4-digit 7-segment display](https://www.adafruit.com/category/37_103). Matrices like these are...
In Stock
[Buy Now](https://www.adafruit.com/product/1051)
[Related Guides to the Product](https://learn.adafruit.com/products/1051/guides)
### Small 1.2" 8x8 Ultra Bright Square Blue LED Matrix + Backpack
[Small 1.2" 8x8 Ultra Bright Square Blue LED Matrix + Backpack](https://www.adafruit.com/product/1853)
What's better than a single LED? Lots of LEDs! Matrices like these are 'multiplexed' - so to control 64 LEDs you need 16 pins. That's a lot of pins, and there are [driver chips like the MAX7219](//www.adafruit.com/products/453) that can control a matrix for you but...
In Stock
[Buy Now](https://www.adafruit.com/product/1853)
[Related Guides to the Product](https://learn.adafruit.com/products/1853/guides)
## Related Guides
- [LED Backpack Displays on Raspberry Pi and BeagleBone Black](https://learn.adafruit.com/led-backpack-displays-on-raspberry-pi-and-beaglebone-black.md)
- [Animating Multiple LED Backpacks](https://learn.adafruit.com/animating-multiple-led-backpacks.md)
- [Arduino GPS Clock](https://learn.adafruit.com/arduino-clock.md)
- [Raspberry Pi Physical Dashboard](https://learn.adafruit.com/raspberry-pi-physical-dashboard.md)
- [CircuitPython Hardware: LED Backpacks & FeatherWings](https://learn.adafruit.com/micropython-hardware-led-backpacks-and-featherwings.md)
- [Matrix and 7-Segment LED Backpack with the Raspberry Pi](https://learn.adafruit.com/matrix-7-segment-led-backpack-with-the-raspberry-pi.md)
- [DIY Pocket LED Gamer - Tiny Tetris!](https://learn.adafruit.com/diy-3d-printed-handheld-pocket-game-tiny-tetris-snake.md)
- [RGB LED Matrix Cube with 25,000 LEDs](https://learn.adafruit.com/rgb-led-matrix-cube-for-pi.md)
- [Creating GIFs for SmartMatrix](https://learn.adafruit.com/creating-gifs-for-smartmatrix.md)
- [Adafruit CharliePlex LED Matrix Bonnet](https://learn.adafruit.com/adafruit-charlieplex-bonnet.md)
- [Connecting a 16x32 RGB LED Matrix Panel to a Raspberry Pi](https://learn.adafruit.com/connecting-a-16x32-rgb-led-matrix-panel-to-a-raspberry-pi.md)
- [MicroPython Displays: Drawing Text](https://learn.adafruit.com/micropython-displays-drawing-text.md)
- [Heart Rate Badge](https://learn.adafruit.com/heart-rate-badge.md)
- [16x24 LED Matrix](https://learn.adafruit.com/16x24-led-matrix.md)
- [Adafruit IS31FL3741](https://learn.adafruit.com/adafruit-is31fl3741.md)
---
# Source: https://learn.adafruit.com/adafruit-led-backpack/0-dot-56-seven-segment-backpack-circuitpython-wiring-and-setup.md
# Adafruit LED Backpacks
## CircuitPython Wiring and Setup
# Wiring
It's easy to use LED 7-Segment Displays with CircuitPython and the [Adafruit CircuitPython HT16K33](https://github.com/adafruit/Adafruit_CircuitPython_HT16K33) library. This module allows you to easily write CircuitPython code to control the display.
You can use this sensor with any CircuitPython microcontroller board.
We'll cover how to wire the 7-Segment Display to your CircuitPython microcontroller board. First assemble your 7-Segment Display.
Connect the 7-Segment Display to your microcontroller board as shown below.
- **Microcontroller 3V ** to **7-Segment Display VIN (red wire)**
- **Microcontroller GND ** to **7-Segment Display GND (black wire)**
- **Microcontroller SCL ** to **7-Segment Display SCL (yellow wire)**
- **Microcontroller SDA ** to **7-Segment Display SDA (blue wire)**


[Download Fritzing Object](https://cdn-learn.adafruit.com/assets/assets/000/087/713/original/feather-m4-7-segment.fzz?1580170381)
# Library Setup
To use the LED backpack with your [Adafruit CircuitPython](https://learn.adafruit.com/welcome-to-circuitpython/overview) board you'll need to install the [Adafruit\_CircuitPython\_HT16K33](https://github.com/adafruit/Adafruit_CircuitPython_HT16K33) library on your board.
First make sure you are running the [latest version of Adafruit CircuitPython](https://github.com/adafruit/circuitpython/releases) for your board. Next you'll need to install the necessary libraries to use the hardware--read below and carefully follow the referenced steps to find and install these libraries from [Adafruit's CircuitPython library bundle](https://github.com/adafruit/Adafruit_CircuitPython_Bundle).
## Bundle Install
For express boards that have extra flash storage, like the Feather/Metro M0 express and Circuit Playground express, you can easily install the necessary libraries with [Adafruit's CircuitPython bundle](https://github.com/adafruit/Adafruit_CircuitPython_Bundle). This is an all-in-one package that includes the necessary libraries to use the LED backpack display with CircuitPython. For details on installing the bundle, read about [CircuitPython Libraries](https://learn.adafruit.com/welcome-to-circuitpython/circuitpython-libraries).
Remember for non-express boards like the Trinket M0, Gemma M0, and Feather/Metro M0 basic you'll need to [manually install the necessary libraries](https://learn.adafruit.com/welcome-to-circuitpython/circuitpython-libraries#non-express-boards-11-13) from the bundle:
- **adafruit\_ht16k33**
- **adafruit\_bus\_device**
If your board supports USB mass storage, like the M0-based boards, then simply drag the files to the board's file system. **Note on boards without external SPI flash, like a Feather M0 or Trinket/Gemma M0, you might run into issues on Mac OSX with hidden files taking up too much space when drag and drop copying, [see this page for a workaround](../../../../micropython-for-samd21/usb-mass-storage#mac-osx-file-copy-issues).**
Before continuing make sure your board's **lib** folder or root filesystem has at least the **adafruit\_ht16k33** and **adafruit\_bus\_device** folders/modules copied over.

- [Previous Page](https://learn.adafruit.com/adafruit-led-backpack/0-dot-56-seven-segment-backpack-arduino-setup.md)
- [Next Page](https://learn.adafruit.com/adafruit-led-backpack/0-dot-56-seven-segment-backpack-python-wiring-and-setup.md)
## Primary Products
### Adafruit Mini 8x8 LED Matrix w/I2C Backpack - Red
[Adafruit Mini 8x8 LED Matrix w/I2C Backpack - Red](https://www.adafruit.com/product/870)
What's better than a single LED? Lots of LEDs! A fun way to make a small display is to use an [8x8 matrix](https://www.adafruit.com/category/37_88) or a [4-digit 7-segment display](https://www.adafruit.com/category/37_103). Matrices like these are...
In Stock
[Buy Now](https://www.adafruit.com/product/870)
[Related Guides to the Product](https://learn.adafruit.com/products/870/guides)
### Adafruit Mini 8x8 LED Matrix w/I2C Backpack - Yellow
[Adafruit Mini 8x8 LED Matrix w/I2C Backpack - Yellow](https://www.adafruit.com/product/871)
What's better than a single LED? Lots of LEDs! A fun way to make a small display is to use an [8x8 matrix](https://www.adafruit.com/category/37_88) or a [4-digit 7-segment display](https://www.adafruit.com/category/37_103). Matrices like these are...
In Stock
[Buy Now](https://www.adafruit.com/product/871)
[Related Guides to the Product](https://learn.adafruit.com/products/871/guides)
### Adafruit Mini 0.8" 8x8 LED Matrix w/I2C Backpack - Yellow-Green
[Adafruit Mini 0.8" 8x8 LED Matrix w/I2C Backpack - Yellow-Green](https://www.adafruit.com/product/872)
What's better than a single LED? Lots of LEDs! A fun way to make a small display is to use an [8x8 matrix](https://www.adafruit.com/category/37_88) or a [4-digit 7-segment display](https://www.adafruit.com/category/37_103). Matrices like these are...
In Stock
[Buy Now](https://www.adafruit.com/product/872)
[Related Guides to the Product](https://learn.adafruit.com/products/872/guides)
### Adafruit 0.56" 4-Digit 7-Segment Display with I2C Backpack - Red
[Adafruit 0.56" 4-Digit 7-Segment Display with I2C Backpack - Red](https://www.adafruit.com/product/878)
What's better than a single LED? Lots of LEDs! A fun way to make a small display is to use an [8x8 matrix](https://www.adafruit.com/category/37_88) or a [4-digit 7-segment display](https://www.adafruit.com/category/37_103). Matrices like these are...
In Stock
[Buy Now](https://www.adafruit.com/product/878)
[Related Guides to the Product](https://learn.adafruit.com/products/878/guides)
### Adafruit 0.56" 4-Digit 7-Segment Display w/I2C Backpack - Yellow
[Adafruit 0.56" 4-Digit 7-Segment Display w/I2C Backpack - Yellow](https://www.adafruit.com/product/879)
What's better than a single LED? Lots of LEDs! A fun way to make a small display is to use an [8x8 matrix](https://www.adafruit.com/category/37_88) or a [4-digit 7-segment display](https://www.adafruit.com/category/37_103). Matrices like these are...
In Stock
[Buy Now](https://www.adafruit.com/product/879)
[Related Guides to the Product](https://learn.adafruit.com/products/879/guides)
### Adafruit 0.56" 4-Digit 7-Segment Display w/ I2C Backpack - Green
[Adafruit 0.56" 4-Digit 7-Segment Display w/ I2C Backpack - Green](https://www.adafruit.com/product/880)
What's better than a single LED? Lots of LEDs! A fun way to make a small display is to use an [8x8 matrix](https://www.adafruit.com/category/37_88) or a [4-digit 7-segment display](https://www.adafruit.com/category/37_103). Matrices like these are...
No Longer Stocked
[Buy Now](https://www.adafruit.com/product/880)
[Related Guides to the Product](https://learn.adafruit.com/products/880/guides)
### Adafruit 0.56" 4-Digit 7-Segment Display w/ I2C Backpack - Blue
[Adafruit 0.56" 4-Digit 7-Segment Display w/ I2C Backpack - Blue](https://www.adafruit.com/product/881)
What's better than a single LED? Lots of LEDs! A fun way to make a small display is to use an [8x8 matrix](https://www.adafruit.com/category/37_88) or a [4-digit 7-segment display](https://www.adafruit.com/category/37_103). Matrices like these are...
In Stock
[Buy Now](https://www.adafruit.com/product/881)
[Related Guides to the Product](https://learn.adafruit.com/products/881/guides)
### Adafruit Bicolor LED Square Pixel Matrix with I2C Backpack
[Adafruit Bicolor LED Square Pixel Matrix with I2C Backpack](https://www.adafruit.com/product/902)
What's better than a single LED? Lots of LEDs! A fun way to make a small colorful display is to use a [1.2" Bi-color 8x8 LED Matrix](http://www.adafruit.com/products/458). Matrices like these are 'multiplexed' - so to control all the 128 LEDs you need 24 pins....
In Stock
[Buy Now](https://www.adafruit.com/product/902)
[Related Guides to the Product](https://learn.adafruit.com/products/902/guides)
### Adafruit Mini 8x8 LED Matrix w/I2C Backpack - Blue
[Adafruit Mini 8x8 LED Matrix w/I2C Backpack - Blue](https://www.adafruit.com/product/959)
What's better than a single LED? Lots of LEDs! A fun way to make a small display is to use an [8x8 matrix](https://www.adafruit.com/category/37_88) or a [4-digit 7-segment display](https://www.adafruit.com/category/37_103). Matrices like these are...
In Stock
[Buy Now](https://www.adafruit.com/product/959)
[Related Guides to the Product](https://learn.adafruit.com/products/959/guides)
### Adafruit 0.56" 4-Digit 7-Segment Display w/I2C Backpack - White
[Adafruit 0.56" 4-Digit 7-Segment Display w/I2C Backpack - White](https://www.adafruit.com/product/1002)
What's better than a single LED? Lots of LEDs! A fun way to make a small display is to use an [8x8 matrix](https://www.adafruit.com/category/37_88) or a [4-digit 7-segment display](https://www.adafruit.com/category/37_103). Matrices like these are...
In Stock
[Buy Now](https://www.adafruit.com/product/1002)
[Related Guides to the Product](https://learn.adafruit.com/products/1002/guides)
### Adafruit 1.2" 8x8 LED Matrix Backpack
[Adafruit 1.2" 8x8 LED Matrix Backpack](https://www.adafruit.com/product/1048)
By popular request, you can now get our 8x8 LED backpacks without the LEDs! These backpacks feature an HT16K33 I2C LED driver, they're simple and easy to use - you can use [our very nice library for the backpacks to...](https://github.com/adafruit/Adafruit-LED-Backpack-Library)
In Stock
[Buy Now](https://www.adafruit.com/product/1048)
[Related Guides to the Product](https://learn.adafruit.com/products/1048/guides)
### Adafruit Small 1.2" 8x8 LED Matrix w/I2C Backpack - Red
[Adafruit Small 1.2" 8x8 LED Matrix w/I2C Backpack - Red](https://www.adafruit.com/product/1049)
What's better than a single LED? Lots of LEDs! A fun way to make a small display is to use an [8x8 matrix](https://www.adafruit.com/category/37_88) or a [4-digit 7-segment display](https://www.adafruit.com/category/37_103). Matrices like these are...
In Stock
[Buy Now](https://www.adafruit.com/product/1049)
[Related Guides to the Product](https://learn.adafruit.com/products/1049/guides)
### Adafruit Small 1.2" 8x8 LED Matrix w/I2C Backpack - Yellow
[Adafruit Small 1.2" 8x8 LED Matrix w/I2C Backpack - Yellow](https://www.adafruit.com/product/1050)
What's better than a single LED? Lots of LEDs! A fun way to make a small display is to use an [8x8 matrix](https://www.adafruit.com/category/37_88) or a [4-digit 7-segment display](https://www.adafruit.com/category/37_103). Matrices like these are...
In Stock
[Buy Now](https://www.adafruit.com/product/1050)
[Related Guides to the Product](https://learn.adafruit.com/products/1050/guides)
### Adafruit Small 1.2" 8x8 LED Matrix w/I2C Backpack - Blue
[Adafruit Small 1.2" 8x8 LED Matrix w/I2C Backpack - Blue](https://www.adafruit.com/product/1052)
What's better than a single LED? Lots of LEDs! A fun way to make a small display is to use an [8x8 matrix](https://www.adafruit.com/category/37_88) or a [4-digit 7-segment display](https://www.adafruit.com/category/37_103). Matrices like these are...
In Stock
[Buy Now](https://www.adafruit.com/product/1052)
[Related Guides to the Product](https://learn.adafruit.com/products/1052/guides)
### Adafruit Mini 8x8 LED Matrix w/I2C Backpack - Ultra Bright White
[Adafruit Mini 8x8 LED Matrix w/I2C Backpack - Ultra Bright White](https://www.adafruit.com/product/1080)
What's better than a single LED? Lots of LEDs! A fun way to make a small display is to use an [8x8 matrix](https://www.adafruit.com/category/37_88) or a [4-digit 7-segment display](https://www.adafruit.com/category/37_103). Matrices like these are...
In Stock
[Buy Now](https://www.adafruit.com/product/1080)
[Related Guides to the Product](https://learn.adafruit.com/products/1080/guides)
### Adafruit 1.2" 4-Digit 7-Segment Display w/I2C Backpack - Green
[Adafruit 1.2" 4-Digit 7-Segment Display w/I2C Backpack - Green](https://www.adafruit.com/product/1268)
What's better than a single LED? Lots of LEDs! A fun way to make a numeric display is to use a [4-digit 7-segment display](https://www.adafruit.com/category/37_103). LED matrices like these are 'multiplexed' - so to control all the seven-segment LEDs you need 14 pins....
No Longer Stocked
[Buy Now](https://www.adafruit.com/product/1268)
[Related Guides to the Product](https://learn.adafruit.com/products/1268/guides)
### Adafruit 1.2" 4-Digit 7-Segment Display w/I2C Backpack - Yellow
[Adafruit 1.2" 4-Digit 7-Segment Display w/I2C Backpack - Yellow](https://www.adafruit.com/product/1269)
What's better than a single LED? Lots of LEDs! A fun way to make a numeric display is to use a [4-digit 7-segment display](https://www.adafruit.com/category/37_103). LED matrices like these are 'multiplexed' - so to control all the seven-segment LEDs you need 14 pins....
In Stock
[Buy Now](https://www.adafruit.com/product/1269)
[Related Guides to the Product](https://learn.adafruit.com/products/1269/guides)
### Adafruit 1.2" 4-Digit 7-Segment Display w/I2C Backpack - Red
[Adafruit 1.2" 4-Digit 7-Segment Display w/I2C Backpack - Red](https://www.adafruit.com/product/1270)
What's better than a single LED? Lots of LEDs! A fun way to make a numeric display is to use a [4-digit 7-segment display](https://www.adafruit.com/category/37_103). LED matrices like these are 'multiplexed' - so to control all the seven-segment LEDs you need 14 pins....
In Stock
[Buy Now](https://www.adafruit.com/product/1270)
[Related Guides to the Product](https://learn.adafruit.com/products/1270/guides)
### Small 1.2" 8x8 Ultra Bright White LED Matrix + Backpack
[Small 1.2" 8x8 Ultra Bright White LED Matrix + Backpack](https://www.adafruit.com/product/1614)
What's better than a single LED? Lots of LEDs! A fun way to make a small display is to use an [8x8 matrix](https://www.adafruit.com/category/37_88) or a [4-digit 7-segment display](https://www.adafruit.com/category/37_103). Matrices like these are...
In Stock
[Buy Now](https://www.adafruit.com/product/1614)
[Related Guides to the Product](https://learn.adafruit.com/products/1614/guides)
### Adafruit Small 1.2" 8x8 LED Matrix w/I2C Backpack - Pure Green
[Adafruit Small 1.2" 8x8 LED Matrix w/I2C Backpack - Pure Green](https://www.adafruit.com/product/1632)
What's better than a single LED? Lots of LEDs! A fun way to make a small display is to use an [8x8 matrix](https://www.adafruit.com/category/37_88) or a [4-digit 7-segment display](https://www.adafruit.com/category/37_103). Matrices like these are...
In Stock
[Buy Now](https://www.adafruit.com/product/1632)
[Related Guides to the Product](https://learn.adafruit.com/products/1632/guides)
### Adafruit Mini 0.8" 8x8 LED Matrix w/I2C Backpack - Pure Green
[Adafruit Mini 0.8" 8x8 LED Matrix w/I2C Backpack - Pure Green](https://www.adafruit.com/product/1633)
What's better than a single LED? Lots of LEDs! A fun way to make a small display is to use an [8x8 matrix](https://www.adafruit.com/category/37_88) or a [4-digit 7-segment display](https://www.adafruit.com/category/37_103). Matrices like these are...
In Stock
[Buy Now](https://www.adafruit.com/product/1633)
[Related Guides to the Product](https://learn.adafruit.com/products/1633/guides)
### Bi-Color (Red/Green) 24-Bar Bargraph w/I2C Backpack Kit
[Bi-Color (Red/Green) 24-Bar Bargraph w/I2C Backpack Kit](https://www.adafruit.com/product/1721)
What's better than a single LED? Lots of LEDs! A fun way to make a small linear display is to use two 12-bar Bi-color bar-graphs. However, this LED bargraph is 'multiplexed' - so to control all the 48 LEDs you need a lot of pins.
Out of Stock
[Buy Now](https://www.adafruit.com/product/1721)
[Related Guides to the Product](https://learn.adafruit.com/products/1721/guides)
### Small 1.2" 8x8 Ultra Bright Square Amber LED Matrix + Backpack
[Small 1.2" 8x8 Ultra Bright Square Amber LED Matrix + Backpack](https://www.adafruit.com/product/1854)
What's better than a single LED? Lots of LEDs! Matrices like these are 'multiplexed' - so to control 64 LEDs you need 16 pins. That's a lot of pins, and there are [driver chips like the MAX7219](//www.adafruit.com/products/453) that can control a matrix for you but...
In Stock
[Buy Now](https://www.adafruit.com/product/1854)
[Related Guides to the Product](https://learn.adafruit.com/products/1854/guides)
### Small 1.2" 8x8 Ultra Bright Square Yellow LED Matrix + Backpack
[Small 1.2" 8x8 Ultra Bright Square Yellow LED Matrix + Backpack](https://www.adafruit.com/product/1855)
What's better than a single LED? Lots of LEDs! Matrices like these are 'multiplexed' - so to control 64 LEDs you need 16 pins. That's a lot of pins, and there are [driver chips like the MAX7219](//www.adafruit.com/products/453) that can control a matrix for you but...
In Stock
[Buy Now](https://www.adafruit.com/product/1855)
[Related Guides to the Product](https://learn.adafruit.com/products/1855/guides)
### Small 1.2" 8x8 Bright Square Pure Green LED Matrix + Backpack
[Small 1.2" 8x8 Bright Square Pure Green LED Matrix + Backpack](https://www.adafruit.com/product/1856)
What's better than a single LED? Lots of LEDs! Matrices like these are 'multiplexed' - so to control 64 LEDs you need 16 pins. That's a lot of pins, and there are [driver chips like the MAX7219](//www.adafruit.com/products/453) that can control a matrix for you but...
In Stock
[Buy Now](https://www.adafruit.com/product/1856)
[Related Guides to the Product](https://learn.adafruit.com/products/1856/guides)
### Small 1.2" 8x8 Ultra Bright Square White LED Matrix + Backpack
[Small 1.2" 8x8 Ultra Bright Square White LED Matrix + Backpack](https://www.adafruit.com/product/1857)
What's better than a single LED? Lots of LEDs! Matrices like these are 'multiplexed' - so to control 64 LEDs you need 16 pins. That's a lot of pins, and there are [driver chips like the MAX7219](//www.adafruit.com/products/453) that can control a matrix for you but...
In Stock
[Buy Now](https://www.adafruit.com/product/1857)
[Related Guides to the Product](https://learn.adafruit.com/products/1857/guides)
### Adafruit 14-segment LED Alphanumeric Backpack - STEMMA QT
[Adafruit 14-segment LED Alphanumeric Backpack - STEMMA QT](https://www.adafruit.com/product/1910)
By popular request, you can now get our 14-segment LED backpacks without the LEDs! These backpacks feature an HT16K33 I2C LED driver, they're simple and easy to use - you can use [our very nice library for the backpacks to...](https://github.com/adafruit/Adafruit-LED-Backpack-Library)
In Stock
[Buy Now](https://www.adafruit.com/product/1910)
[Related Guides to the Product](https://learn.adafruit.com/products/1910/guides)
### Quad Alphanumeric Display - Red 0.54" Digits w/ I2C Backpack
[Quad Alphanumeric Display - Red 0.54" Digits w/ I2C Backpack](https://www.adafruit.com/product/1911)
Display, elegantly, 012345678 or 9! Gaze, hypnotized, at ABCDEFGHIJKLM - well it can display the whole alphabet. You get the point. This is a nice, bright alphanumeric display that shows letters and numbers in a beautiful red hue. It's super bright and designed for viewing from distances...
In Stock
[Buy Now](https://www.adafruit.com/product/1911)
[Related Guides to the Product](https://learn.adafruit.com/products/1911/guides)
### Quad Alphanumeric Display - Blue 0.54" Digits w/ I2C Backpack
[Quad Alphanumeric Display - Blue 0.54" Digits w/ I2C Backpack](https://www.adafruit.com/product/1912)
Display, elegantly, 012345678 or 9! Gaze, hypnotized, at ABCDEFGHIJKLM - well it can display the whole alphabet. You get the point. This is a nice, bright alphanumeric display that shows letters and numbers in a beautiful blue hue. It's super bright and designed for viewing from distances...
In Stock
[Buy Now](https://www.adafruit.com/product/1912)
[Related Guides to the Product](https://learn.adafruit.com/products/1912/guides)
### 16x8 1.2" LED Matrix + Backpack - Ultra Bright Round Green LEDs
[16x8 1.2" LED Matrix + Backpack - Ultra Bright Round Green LEDs](https://www.adafruit.com/product/2035)
What's better than a single LED? Lots of LEDs! And what's better than lots of LEDs? **TWO TIMES AS MANY LEDS!!!**
With the 16x8 LED Matrix Backpack we've doubled your project's matrix capacity by making it super easy to get two separate 8x8 matrices onto...
In Stock
[Buy Now](https://www.adafruit.com/product/2035)
[Related Guides to the Product](https://learn.adafruit.com/products/2035/guides)
### 16x8 1.2" LED Matrix+Backpack UltraBright Round YellowGreen LEDs
[16x8 1.2" LED Matrix+Backpack UltraBright Round YellowGreen LEDs](https://www.adafruit.com/product/2036)
What's better than a single LED? Lots of LEDs! And what's better than lots of LEDs? **TWO TIMES AS MANY LEDS!!!**
With the 16x8 LED Matrix Backpack we've doubled your project's matrix capacity by making it super easy to get two separate 8x8 matrices onto...
In Stock
[Buy Now](https://www.adafruit.com/product/2036)
[Related Guides to the Product](https://learn.adafruit.com/products/2036/guides)
### 16x8 1.2" LED Matrix + Backpack - Ultra Bright Round Red LEDs
[16x8 1.2" LED Matrix + Backpack - Ultra Bright Round Red LEDs](https://www.adafruit.com/product/2037)
What's better than a single LED? Lots of LEDs! And what's better than lots of LEDs? **TWO TIMES AS MANY LEDS!!!**
With the 16x8 LED Matrix Backpack we've doubled your project's matrix capacity by making it super easy to get two separate 8x8 matrices onto...
In Stock
[Buy Now](https://www.adafruit.com/product/2037)
[Related Guides to the Product](https://learn.adafruit.com/products/2037/guides)
### 16x8 1.2" LED Matrix + Backpack - Ultra Bright Round White LEDs
[16x8 1.2" LED Matrix + Backpack - Ultra Bright Round White LEDs](https://www.adafruit.com/product/2038)
What's better than a single LED? Lots of LEDs! And what's better than lots of LEDs? **TWO TIMES AS MANY LEDS!!!**
With the 16x8 LED Matrix Backpack we've doubled your project's matrix capacity by making it super easy to get two separate 8x8 matrices onto...
In Stock
[Buy Now](https://www.adafruit.com/product/2038)
[Related Guides to the Product](https://learn.adafruit.com/products/2038/guides)
### 16x8 1.2" LED Matrix + Backpack - Ultra Bright Round Blue LEDs
[16x8 1.2" LED Matrix + Backpack - Ultra Bright Round Blue LEDs](https://www.adafruit.com/product/2039)
What's better than a single LED? Lots of LEDs! And what's better than lots of LEDs? **TWO TIMES AS MANY LEDS!!!**
With the 16x8 LED Matrix Backpack we've doubled your project's matrix capacity by making it super easy to get two separate 8x8 matrices onto...
In Stock
[Buy Now](https://www.adafruit.com/product/2039)
[Related Guides to the Product](https://learn.adafruit.com/products/2039/guides)
### 16x8 1.2" LED Matrix + Backpack - Ultra Bright Square Blue LEDs
[16x8 1.2" LED Matrix + Backpack - Ultra Bright Square Blue LEDs](https://www.adafruit.com/product/2040)
What's better than a single LED? Lots of LEDs! And what's better than lots of LEDs? **TWO TIMES AS MANY LEDS!!!**
With the 16x8 LED Matrix Backpack we've doubled your project's matrix capacity by making it super easy to get two separate 8x8 matrices onto...
In Stock
[Buy Now](https://www.adafruit.com/product/2040)
[Related Guides to the Product](https://learn.adafruit.com/products/2040/guides)
### 16x8 1.2" LED Matrix + Backpack - Ultra Bright Square Amber LEDs
[16x8 1.2" LED Matrix + Backpack - Ultra Bright Square Amber LEDs](https://www.adafruit.com/product/2041)
What's better than a single LED? Lots of LEDs! And what's better than lots of LEDs? **TWO TIMES AS MANY LEDS!!!**
With the 16x8 LED Matrix Backpack we've doubled your project's matrix capacity by making it super easy to get two separate 8x8 matrices onto...
In Stock
[Buy Now](https://www.adafruit.com/product/2041)
[Related Guides to the Product](https://learn.adafruit.com/products/2041/guides)
### 16x8 1.2" LED Matrix + Backpack - Ultra Bright Square Green LEDs
[16x8 1.2" LED Matrix + Backpack - Ultra Bright Square Green LEDs](https://www.adafruit.com/product/2042)
What's better than a single LED? Lots of LEDs! And what's better than lots of LEDs? **TWO TIMES AS MANY LEDS!!!**
With the 16x8 LED Matrix Backpack we've doubled your project's matrix capacity by making it super easy to get two separate 8x8 matrices onto...
In Stock
[Buy Now](https://www.adafruit.com/product/2042)
[Related Guides to the Product](https://learn.adafruit.com/products/2042/guides)
### 16x8 1.2" LED Matrix + Backpack -Ultra Bright Square Yellow LEDs
[16x8 1.2" LED Matrix + Backpack -Ultra Bright Square Yellow LEDs](https://www.adafruit.com/product/2043)
What's better than a single LED? Lots of LEDs! And what's better than lots of LEDs? **TWO TIMES AS MANY LEDS!!!**
With the 16x8 LED Matrix Backpack we've doubled your project's matrix capacity by making it super easy to get two separate 8x8 matrices onto...
In Stock
[Buy Now](https://www.adafruit.com/product/2043)
[Related Guides to the Product](https://learn.adafruit.com/products/2043/guides)
### 16x8 1.2" LED Matrix + Backpack - Ultra Bright Square White LEDs
[16x8 1.2" LED Matrix + Backpack - Ultra Bright Square White LEDs](https://www.adafruit.com/product/2044)
What's better than a single LED? Lots of LEDs! And what's better than lots of LEDs? **TWO TIMES AS MANY LEDS!!!**
With the 16x8 LED Matrix Backpack we've doubled your project's matrix capacity by making it super easy to get two separate 8x8 matrices onto...
In Stock
[Buy Now](https://www.adafruit.com/product/2044)
[Related Guides to the Product](https://learn.adafruit.com/products/2044/guides)
### 16x8 1.2" LED Matrix + Backpack-Ultra Bright Round Orange LEDs
[16x8 1.2" LED Matrix + Backpack-Ultra Bright Round Orange LEDs](https://www.adafruit.com/product/2052)
What's better than a single LED? Lots of LEDs! And what's better than lots of LEDs? **TWO TIMES AS MANY LEDS!!!**
With the 16x8 LED Matrix Backpack we've doubled your project's matrix capacity by making it super easy to get two separate 8x8 matrices onto...
In Stock
[Buy Now](https://www.adafruit.com/product/2052)
[Related Guides to the Product](https://learn.adafruit.com/products/2052/guides)
### 16x8 1.2" LED Matrices+Backpack Round LEDs in Various Colors
[16x8 1.2" LED Matrices+Backpack Round LEDs in Various Colors](https://www.adafruit.com/product/2054)
What's better than a single LED? Lots of LEDs! And what's better than lots of LEDs? **TWO TIMES AS MANY LEDS!!!**
With the 16x8 LED Matrix Backpack we've doubled your project's matrix capacity by making it super easy to get two separate 8x8 matrices onto...
Out of Stock
[Buy Now](https://www.adafruit.com/product/2054)
[Related Guides to the Product](https://learn.adafruit.com/products/2054/guides)
### Adafruit 8x16 LED Matrix FeatherWing w/o Matrices
[Adafruit 8x16 LED Matrix FeatherWing w/o Matrices](https://www.adafruit.com/product/3090)
You will chirp with delight when you see how easy it is to make your very own 8x16 LED matrix display for any Feather. At 0.8" square, the little [8x8 matrices](https://www.adafruit.com/new/?q=8x8%20miniature%20LED%20matrix&) have everything a big LED matrix has,...
Out of Stock
[Buy Now](https://www.adafruit.com/product/3090)
[Related Guides to the Product](https://learn.adafruit.com/products/3090/guides)
### Adafruit 14-segment LED Alphanumeric backpack (same as P1910)
[Adafruit 14-segment LED Alphanumeric backpack (same as P1910)](https://www.adafruit.com/product/3322)
Just the backpack + 4pin header
No Longer Stocked
[Buy Now](https://www.adafruit.com/product/3322)
[Related Guides to the Product](https://learn.adafruit.com/products/3322/guides)
## Featured Products
### Adafruit Small 1.2" 8x8 LED Matrix w/I2C Backpack - Yellow-Green
[Adafruit Small 1.2" 8x8 LED Matrix w/I2C Backpack - Yellow-Green](https://www.adafruit.com/product/1051)
What's better than a single LED? Lots of LEDs! A fun way to make a small display is to use an [8x8 matrix](https://www.adafruit.com/category/37_88) or a [4-digit 7-segment display](https://www.adafruit.com/category/37_103). Matrices like these are...
In Stock
[Buy Now](https://www.adafruit.com/product/1051)
[Related Guides to the Product](https://learn.adafruit.com/products/1051/guides)
### Small 1.2" 8x8 Ultra Bright Square Blue LED Matrix + Backpack
[Small 1.2" 8x8 Ultra Bright Square Blue LED Matrix + Backpack](https://www.adafruit.com/product/1853)
What's better than a single LED? Lots of LEDs! Matrices like these are 'multiplexed' - so to control 64 LEDs you need 16 pins. That's a lot of pins, and there are [driver chips like the MAX7219](//www.adafruit.com/products/453) that can control a matrix for you but...
In Stock
[Buy Now](https://www.adafruit.com/product/1853)
[Related Guides to the Product](https://learn.adafruit.com/products/1853/guides)
## Related Guides
- [LED Backpack Displays on Raspberry Pi and BeagleBone Black](https://learn.adafruit.com/led-backpack-displays-on-raspberry-pi-and-beaglebone-black.md)
- [Animating Multiple LED Backpacks](https://learn.adafruit.com/animating-multiple-led-backpacks.md)
- [Arduino GPS Clock](https://learn.adafruit.com/arduino-clock.md)
- [Raspberry Pi Physical Dashboard](https://learn.adafruit.com/raspberry-pi-physical-dashboard.md)
- [CircuitPython Hardware: LED Backpacks & FeatherWings](https://learn.adafruit.com/micropython-hardware-led-backpacks-and-featherwings.md)
- [Matrix and 7-Segment LED Backpack with the Raspberry Pi](https://learn.adafruit.com/matrix-7-segment-led-backpack-with-the-raspberry-pi.md)
- [DIY Pocket LED Gamer - Tiny Tetris!](https://learn.adafruit.com/diy-3d-printed-handheld-pocket-game-tiny-tetris-snake.md)
- [RGB LED Matrix Cube with 25,000 LEDs](https://learn.adafruit.com/rgb-led-matrix-cube-for-pi.md)
- [Creating GIFs for SmartMatrix](https://learn.adafruit.com/creating-gifs-for-smartmatrix.md)
- [Adafruit CharliePlex LED Matrix Bonnet](https://learn.adafruit.com/adafruit-charlieplex-bonnet.md)
- [Connecting a 16x32 RGB LED Matrix Panel to a Raspberry Pi](https://learn.adafruit.com/connecting-a-16x32-rgb-led-matrix-panel-to-a-raspberry-pi.md)
- [MicroPython Displays: Drawing Text](https://learn.adafruit.com/micropython-displays-drawing-text.md)
- [Heart Rate Badge](https://learn.adafruit.com/heart-rate-badge.md)
- [16x24 LED Matrix](https://learn.adafruit.com/16x24-led-matrix.md)
- [Adafruit IS31FL3741](https://learn.adafruit.com/adafruit-is31fl3741.md)
---
# Source: https://learn.adafruit.com/adafruit-led-backpack/0-dot-56-seven-segment-backpack-python-wiring-and-setup.md
# Adafruit LED Backpacks
## Python Wiring and Setup
# Wiring
It's easy to use 7-Segment Displays with Python and the [Adafruit CircuitPython HT16K33](https://github.com/adafruit/Adafruit_CircuitPython_HT16K33) library. This library allows you to easily write Python code to control the display.
We'll cover how to wire the 7-Segment Display to your Raspberry Pi. First assemble your 7-Segment Display.
Since there's _dozens_ of Linux computers/boards you can use we will show wiring for Raspberry Pi. For other platforms, [please visit the guide for CircuitPython on Linux to see whether your platform is supported](https://learn.adafruit.com/circuitpython-on-raspberrypi-linux).
Connect the 7-Segment Display as shown below to your Raspberry Pi.
- **Raspberry Pi 3.3V ** to **7-Segment Display VIN (red wire)**
- **Raspberry Pi GND ** to **7-Segment Display GND (black wire)**
- **Raspberry Pi SCL ** to **7-Segment Display SCL (yellow wire)**
- **Raspberry Pi SDA ** to **7-Segment Display SDA (blue wire)**


[Download Fritzing Object](https://cdn-learn.adafruit.com/assets/assets/000/087/712/original/raspberry-pi-7-segment.fzz?1580170350)
# Setup
You'll need to install the Adafruit\_Blinka library that provides the CircuitPython support in Python. This may also require enabling I2C on your platform and verifying you are running Python 3. [Since each platform is a little different, and Linux changes often, please visit the CircuitPython on Linux guide to get your computer ready](https://learn.adafruit.com/circuitpython-on-raspberrypi-linux)!
## Python Installation of HT16K33 Library
Once that's done, from your command line run the following command:
- `pip3 install adafruit-circuitpython-ht16k33`
If your default Python is version 3 you may need to run 'pip' instead. Just make sure you aren't trying to use CircuitPython on Python 2.x, it isn't supported!
If that complains about pip3 not being installed, then run this first to install it:
- `sudo apt-get install python3-pip`
## Pillow Library
We also need PIL, the Python Imaging Library, to allow using text with custom fonts. There are several system libraries that PIL relies on, so installing via a package manager is the easiest way to bring in everything:
- `sudo apt-get install python3-pil`
That's it. You should be ready to go.
- [Previous Page](https://learn.adafruit.com/adafruit-led-backpack/0-dot-56-seven-segment-backpack-circuitpython-wiring-and-setup.md)
- [Next Page](https://learn.adafruit.com/adafruit-led-backpack/0-dot-56-seven-segment-backpack-circuitpython-and-python-usage.md)
## Primary Products
### Adafruit Mini 8x8 LED Matrix w/I2C Backpack - Red
[Adafruit Mini 8x8 LED Matrix w/I2C Backpack - Red](https://www.adafruit.com/product/870)
What's better than a single LED? Lots of LEDs! A fun way to make a small display is to use an [8x8 matrix](https://www.adafruit.com/category/37_88) or a [4-digit 7-segment display](https://www.adafruit.com/category/37_103). Matrices like these are...
In Stock
[Buy Now](https://www.adafruit.com/product/870)
[Related Guides to the Product](https://learn.adafruit.com/products/870/guides)
### Adafruit Mini 8x8 LED Matrix w/I2C Backpack - Yellow
[Adafruit Mini 8x8 LED Matrix w/I2C Backpack - Yellow](https://www.adafruit.com/product/871)
What's better than a single LED? Lots of LEDs! A fun way to make a small display is to use an [8x8 matrix](https://www.adafruit.com/category/37_88) or a [4-digit 7-segment display](https://www.adafruit.com/category/37_103). Matrices like these are...
In Stock
[Buy Now](https://www.adafruit.com/product/871)
[Related Guides to the Product](https://learn.adafruit.com/products/871/guides)
### Adafruit Mini 0.8" 8x8 LED Matrix w/I2C Backpack - Yellow-Green
[Adafruit Mini 0.8" 8x8 LED Matrix w/I2C Backpack - Yellow-Green](https://www.adafruit.com/product/872)
What's better than a single LED? Lots of LEDs! A fun way to make a small display is to use an [8x8 matrix](https://www.adafruit.com/category/37_88) or a [4-digit 7-segment display](https://www.adafruit.com/category/37_103). Matrices like these are...
In Stock
[Buy Now](https://www.adafruit.com/product/872)
[Related Guides to the Product](https://learn.adafruit.com/products/872/guides)
### Adafruit 0.56" 4-Digit 7-Segment Display with I2C Backpack - Red
[Adafruit 0.56" 4-Digit 7-Segment Display with I2C Backpack - Red](https://www.adafruit.com/product/878)
What's better than a single LED? Lots of LEDs! A fun way to make a small display is to use an [8x8 matrix](https://www.adafruit.com/category/37_88) or a [4-digit 7-segment display](https://www.adafruit.com/category/37_103). Matrices like these are...
In Stock
[Buy Now](https://www.adafruit.com/product/878)
[Related Guides to the Product](https://learn.adafruit.com/products/878/guides)
### Adafruit 0.56" 4-Digit 7-Segment Display w/I2C Backpack - Yellow
[Adafruit 0.56" 4-Digit 7-Segment Display w/I2C Backpack - Yellow](https://www.adafruit.com/product/879)
What's better than a single LED? Lots of LEDs! A fun way to make a small display is to use an [8x8 matrix](https://www.adafruit.com/category/37_88) or a [4-digit 7-segment display](https://www.adafruit.com/category/37_103). Matrices like these are...
In Stock
[Buy Now](https://www.adafruit.com/product/879)
[Related Guides to the Product](https://learn.adafruit.com/products/879/guides)
### Adafruit 0.56" 4-Digit 7-Segment Display w/ I2C Backpack - Green
[Adafruit 0.56" 4-Digit 7-Segment Display w/ I2C Backpack - Green](https://www.adafruit.com/product/880)
What's better than a single LED? Lots of LEDs! A fun way to make a small display is to use an [8x8 matrix](https://www.adafruit.com/category/37_88) or a [4-digit 7-segment display](https://www.adafruit.com/category/37_103). Matrices like these are...
No Longer Stocked
[Buy Now](https://www.adafruit.com/product/880)
[Related Guides to the Product](https://learn.adafruit.com/products/880/guides)
### Adafruit 0.56" 4-Digit 7-Segment Display w/ I2C Backpack - Blue
[Adafruit 0.56" 4-Digit 7-Segment Display w/ I2C Backpack - Blue](https://www.adafruit.com/product/881)
What's better than a single LED? Lots of LEDs! A fun way to make a small display is to use an [8x8 matrix](https://www.adafruit.com/category/37_88) or a [4-digit 7-segment display](https://www.adafruit.com/category/37_103). Matrices like these are...
In Stock
[Buy Now](https://www.adafruit.com/product/881)
[Related Guides to the Product](https://learn.adafruit.com/products/881/guides)
### Adafruit Bicolor LED Square Pixel Matrix with I2C Backpack
[Adafruit Bicolor LED Square Pixel Matrix with I2C Backpack](https://www.adafruit.com/product/902)
What's better than a single LED? Lots of LEDs! A fun way to make a small colorful display is to use a [1.2" Bi-color 8x8 LED Matrix](http://www.adafruit.com/products/458). Matrices like these are 'multiplexed' - so to control all the 128 LEDs you need 24 pins....
In Stock
[Buy Now](https://www.adafruit.com/product/902)
[Related Guides to the Product](https://learn.adafruit.com/products/902/guides)
### Adafruit Mini 8x8 LED Matrix w/I2C Backpack - Blue
[Adafruit Mini 8x8 LED Matrix w/I2C Backpack - Blue](https://www.adafruit.com/product/959)
What's better than a single LED? Lots of LEDs! A fun way to make a small display is to use an [8x8 matrix](https://www.adafruit.com/category/37_88) or a [4-digit 7-segment display](https://www.adafruit.com/category/37_103). Matrices like these are...
In Stock
[Buy Now](https://www.adafruit.com/product/959)
[Related Guides to the Product](https://learn.adafruit.com/products/959/guides)
### Adafruit 0.56" 4-Digit 7-Segment Display w/I2C Backpack - White
[Adafruit 0.56" 4-Digit 7-Segment Display w/I2C Backpack - White](https://www.adafruit.com/product/1002)
What's better than a single LED? Lots of LEDs! A fun way to make a small display is to use an [8x8 matrix](https://www.adafruit.com/category/37_88) or a [4-digit 7-segment display](https://www.adafruit.com/category/37_103). Matrices like these are...
In Stock
[Buy Now](https://www.adafruit.com/product/1002)
[Related Guides to the Product](https://learn.adafruit.com/products/1002/guides)
### Adafruit 1.2" 8x8 LED Matrix Backpack
[Adafruit 1.2" 8x8 LED Matrix Backpack](https://www.adafruit.com/product/1048)
By popular request, you can now get our 8x8 LED backpacks without the LEDs! These backpacks feature an HT16K33 I2C LED driver, they're simple and easy to use - you can use [our very nice library for the backpacks to...](https://github.com/adafruit/Adafruit-LED-Backpack-Library)
In Stock
[Buy Now](https://www.adafruit.com/product/1048)
[Related Guides to the Product](https://learn.adafruit.com/products/1048/guides)
### Adafruit Small 1.2" 8x8 LED Matrix w/I2C Backpack - Red
[Adafruit Small 1.2" 8x8 LED Matrix w/I2C Backpack - Red](https://www.adafruit.com/product/1049)
What's better than a single LED? Lots of LEDs! A fun way to make a small display is to use an [8x8 matrix](https://www.adafruit.com/category/37_88) or a [4-digit 7-segment display](https://www.adafruit.com/category/37_103). Matrices like these are...
In Stock
[Buy Now](https://www.adafruit.com/product/1049)
[Related Guides to the Product](https://learn.adafruit.com/products/1049/guides)
### Adafruit Small 1.2" 8x8 LED Matrix w/I2C Backpack - Yellow
[Adafruit Small 1.2" 8x8 LED Matrix w/I2C Backpack - Yellow](https://www.adafruit.com/product/1050)
What's better than a single LED? Lots of LEDs! A fun way to make a small display is to use an [8x8 matrix](https://www.adafruit.com/category/37_88) or a [4-digit 7-segment display](https://www.adafruit.com/category/37_103). Matrices like these are...
In Stock
[Buy Now](https://www.adafruit.com/product/1050)
[Related Guides to the Product](https://learn.adafruit.com/products/1050/guides)
### Adafruit Small 1.2" 8x8 LED Matrix w/I2C Backpack - Blue
[Adafruit Small 1.2" 8x8 LED Matrix w/I2C Backpack - Blue](https://www.adafruit.com/product/1052)
What's better than a single LED? Lots of LEDs! A fun way to make a small display is to use an [8x8 matrix](https://www.adafruit.com/category/37_88) or a [4-digit 7-segment display](https://www.adafruit.com/category/37_103). Matrices like these are...
In Stock
[Buy Now](https://www.adafruit.com/product/1052)
[Related Guides to the Product](https://learn.adafruit.com/products/1052/guides)
### Adafruit Mini 8x8 LED Matrix w/I2C Backpack - Ultra Bright White
[Adafruit Mini 8x8 LED Matrix w/I2C Backpack - Ultra Bright White](https://www.adafruit.com/product/1080)
What's better than a single LED? Lots of LEDs! A fun way to make a small display is to use an [8x8 matrix](https://www.adafruit.com/category/37_88) or a [4-digit 7-segment display](https://www.adafruit.com/category/37_103). Matrices like these are...
In Stock
[Buy Now](https://www.adafruit.com/product/1080)
[Related Guides to the Product](https://learn.adafruit.com/products/1080/guides)
### Adafruit 1.2" 4-Digit 7-Segment Display w/I2C Backpack - Green
[Adafruit 1.2" 4-Digit 7-Segment Display w/I2C Backpack - Green](https://www.adafruit.com/product/1268)
What's better than a single LED? Lots of LEDs! A fun way to make a numeric display is to use a [4-digit 7-segment display](https://www.adafruit.com/category/37_103). LED matrices like these are 'multiplexed' - so to control all the seven-segment LEDs you need 14 pins....
No Longer Stocked
[Buy Now](https://www.adafruit.com/product/1268)
[Related Guides to the Product](https://learn.adafruit.com/products/1268/guides)
### Adafruit 1.2" 4-Digit 7-Segment Display w/I2C Backpack - Yellow
[Adafruit 1.2" 4-Digit 7-Segment Display w/I2C Backpack - Yellow](https://www.adafruit.com/product/1269)
What's better than a single LED? Lots of LEDs! A fun way to make a numeric display is to use a [4-digit 7-segment display](https://www.adafruit.com/category/37_103). LED matrices like these are 'multiplexed' - so to control all the seven-segment LEDs you need 14 pins....
In Stock
[Buy Now](https://www.adafruit.com/product/1269)
[Related Guides to the Product](https://learn.adafruit.com/products/1269/guides)
### Adafruit 1.2" 4-Digit 7-Segment Display w/I2C Backpack - Red
[Adafruit 1.2" 4-Digit 7-Segment Display w/I2C Backpack - Red](https://www.adafruit.com/product/1270)
What's better than a single LED? Lots of LEDs! A fun way to make a numeric display is to use a [4-digit 7-segment display](https://www.adafruit.com/category/37_103). LED matrices like these are 'multiplexed' - so to control all the seven-segment LEDs you need 14 pins....
In Stock
[Buy Now](https://www.adafruit.com/product/1270)
[Related Guides to the Product](https://learn.adafruit.com/products/1270/guides)
### Small 1.2" 8x8 Ultra Bright White LED Matrix + Backpack
[Small 1.2" 8x8 Ultra Bright White LED Matrix + Backpack](https://www.adafruit.com/product/1614)
What's better than a single LED? Lots of LEDs! A fun way to make a small display is to use an [8x8 matrix](https://www.adafruit.com/category/37_88) or a [4-digit 7-segment display](https://www.adafruit.com/category/37_103). Matrices like these are...
In Stock
[Buy Now](https://www.adafruit.com/product/1614)
[Related Guides to the Product](https://learn.adafruit.com/products/1614/guides)
### Adafruit Small 1.2" 8x8 LED Matrix w/I2C Backpack - Pure Green
[Adafruit Small 1.2" 8x8 LED Matrix w/I2C Backpack - Pure Green](https://www.adafruit.com/product/1632)
What's better than a single LED? Lots of LEDs! A fun way to make a small display is to use an [8x8 matrix](https://www.adafruit.com/category/37_88) or a [4-digit 7-segment display](https://www.adafruit.com/category/37_103). Matrices like these are...
In Stock
[Buy Now](https://www.adafruit.com/product/1632)
[Related Guides to the Product](https://learn.adafruit.com/products/1632/guides)
### Adafruit Mini 0.8" 8x8 LED Matrix w/I2C Backpack - Pure Green
[Adafruit Mini 0.8" 8x8 LED Matrix w/I2C Backpack - Pure Green](https://www.adafruit.com/product/1633)
What's better than a single LED? Lots of LEDs! A fun way to make a small display is to use an [8x8 matrix](https://www.adafruit.com/category/37_88) or a [4-digit 7-segment display](https://www.adafruit.com/category/37_103). Matrices like these are...
In Stock
[Buy Now](https://www.adafruit.com/product/1633)
[Related Guides to the Product](https://learn.adafruit.com/products/1633/guides)
### Bi-Color (Red/Green) 24-Bar Bargraph w/I2C Backpack Kit
[Bi-Color (Red/Green) 24-Bar Bargraph w/I2C Backpack Kit](https://www.adafruit.com/product/1721)
What's better than a single LED? Lots of LEDs! A fun way to make a small linear display is to use two 12-bar Bi-color bar-graphs. However, this LED bargraph is 'multiplexed' - so to control all the 48 LEDs you need a lot of pins.
Out of Stock
[Buy Now](https://www.adafruit.com/product/1721)
[Related Guides to the Product](https://learn.adafruit.com/products/1721/guides)
### Small 1.2" 8x8 Ultra Bright Square Amber LED Matrix + Backpack
[Small 1.2" 8x8 Ultra Bright Square Amber LED Matrix + Backpack](https://www.adafruit.com/product/1854)
What's better than a single LED? Lots of LEDs! Matrices like these are 'multiplexed' - so to control 64 LEDs you need 16 pins. That's a lot of pins, and there are [driver chips like the MAX7219](//www.adafruit.com/products/453) that can control a matrix for you but...
In Stock
[Buy Now](https://www.adafruit.com/product/1854)
[Related Guides to the Product](https://learn.adafruit.com/products/1854/guides)
### Small 1.2" 8x8 Ultra Bright Square Yellow LED Matrix + Backpack
[Small 1.2" 8x8 Ultra Bright Square Yellow LED Matrix + Backpack](https://www.adafruit.com/product/1855)
What's better than a single LED? Lots of LEDs! Matrices like these are 'multiplexed' - so to control 64 LEDs you need 16 pins. That's a lot of pins, and there are [driver chips like the MAX7219](//www.adafruit.com/products/453) that can control a matrix for you but...
In Stock
[Buy Now](https://www.adafruit.com/product/1855)
[Related Guides to the Product](https://learn.adafruit.com/products/1855/guides)
### Small 1.2" 8x8 Bright Square Pure Green LED Matrix + Backpack
[Small 1.2" 8x8 Bright Square Pure Green LED Matrix + Backpack](https://www.adafruit.com/product/1856)
What's better than a single LED? Lots of LEDs! Matrices like these are 'multiplexed' - so to control 64 LEDs you need 16 pins. That's a lot of pins, and there are [driver chips like the MAX7219](//www.adafruit.com/products/453) that can control a matrix for you but...
In Stock
[Buy Now](https://www.adafruit.com/product/1856)
[Related Guides to the Product](https://learn.adafruit.com/products/1856/guides)
### Small 1.2" 8x8 Ultra Bright Square White LED Matrix + Backpack
[Small 1.2" 8x8 Ultra Bright Square White LED Matrix + Backpack](https://www.adafruit.com/product/1857)
What's better than a single LED? Lots of LEDs! Matrices like these are 'multiplexed' - so to control 64 LEDs you need 16 pins. That's a lot of pins, and there are [driver chips like the MAX7219](//www.adafruit.com/products/453) that can control a matrix for you but...
In Stock
[Buy Now](https://www.adafruit.com/product/1857)
[Related Guides to the Product](https://learn.adafruit.com/products/1857/guides)
### Adafruit 14-segment LED Alphanumeric Backpack - STEMMA QT
[Adafruit 14-segment LED Alphanumeric Backpack - STEMMA QT](https://www.adafruit.com/product/1910)
By popular request, you can now get our 14-segment LED backpacks without the LEDs! These backpacks feature an HT16K33 I2C LED driver, they're simple and easy to use - you can use [our very nice library for the backpacks to...](https://github.com/adafruit/Adafruit-LED-Backpack-Library)
In Stock
[Buy Now](https://www.adafruit.com/product/1910)
[Related Guides to the Product](https://learn.adafruit.com/products/1910/guides)
### Quad Alphanumeric Display - Red 0.54" Digits w/ I2C Backpack
[Quad Alphanumeric Display - Red 0.54" Digits w/ I2C Backpack](https://www.adafruit.com/product/1911)
Display, elegantly, 012345678 or 9! Gaze, hypnotized, at ABCDEFGHIJKLM - well it can display the whole alphabet. You get the point. This is a nice, bright alphanumeric display that shows letters and numbers in a beautiful red hue. It's super bright and designed for viewing from distances...
In Stock
[Buy Now](https://www.adafruit.com/product/1911)
[Related Guides to the Product](https://learn.adafruit.com/products/1911/guides)
### Quad Alphanumeric Display - Blue 0.54" Digits w/ I2C Backpack
[Quad Alphanumeric Display - Blue 0.54" Digits w/ I2C Backpack](https://www.adafruit.com/product/1912)
Display, elegantly, 012345678 or 9! Gaze, hypnotized, at ABCDEFGHIJKLM - well it can display the whole alphabet. You get the point. This is a nice, bright alphanumeric display that shows letters and numbers in a beautiful blue hue. It's super bright and designed for viewing from distances...
In Stock
[Buy Now](https://www.adafruit.com/product/1912)
[Related Guides to the Product](https://learn.adafruit.com/products/1912/guides)
### 16x8 1.2" LED Matrix + Backpack - Ultra Bright Round Green LEDs
[16x8 1.2" LED Matrix + Backpack - Ultra Bright Round Green LEDs](https://www.adafruit.com/product/2035)
What's better than a single LED? Lots of LEDs! And what's better than lots of LEDs? **TWO TIMES AS MANY LEDS!!!**
With the 16x8 LED Matrix Backpack we've doubled your project's matrix capacity by making it super easy to get two separate 8x8 matrices onto...
In Stock
[Buy Now](https://www.adafruit.com/product/2035)
[Related Guides to the Product](https://learn.adafruit.com/products/2035/guides)
### 16x8 1.2" LED Matrix+Backpack UltraBright Round YellowGreen LEDs
[16x8 1.2" LED Matrix+Backpack UltraBright Round YellowGreen LEDs](https://www.adafruit.com/product/2036)
What's better than a single LED? Lots of LEDs! And what's better than lots of LEDs? **TWO TIMES AS MANY LEDS!!!**
With the 16x8 LED Matrix Backpack we've doubled your project's matrix capacity by making it super easy to get two separate 8x8 matrices onto...
In Stock
[Buy Now](https://www.adafruit.com/product/2036)
[Related Guides to the Product](https://learn.adafruit.com/products/2036/guides)
### 16x8 1.2" LED Matrix + Backpack - Ultra Bright Round Red LEDs
[16x8 1.2" LED Matrix + Backpack - Ultra Bright Round Red LEDs](https://www.adafruit.com/product/2037)
What's better than a single LED? Lots of LEDs! And what's better than lots of LEDs? **TWO TIMES AS MANY LEDS!!!**
With the 16x8 LED Matrix Backpack we've doubled your project's matrix capacity by making it super easy to get two separate 8x8 matrices onto...
In Stock
[Buy Now](https://www.adafruit.com/product/2037)
[Related Guides to the Product](https://learn.adafruit.com/products/2037/guides)
### 16x8 1.2" LED Matrix + Backpack - Ultra Bright Round White LEDs
[16x8 1.2" LED Matrix + Backpack - Ultra Bright Round White LEDs](https://www.adafruit.com/product/2038)
What's better than a single LED? Lots of LEDs! And what's better than lots of LEDs? **TWO TIMES AS MANY LEDS!!!**
With the 16x8 LED Matrix Backpack we've doubled your project's matrix capacity by making it super easy to get two separate 8x8 matrices onto...
In Stock
[Buy Now](https://www.adafruit.com/product/2038)
[Related Guides to the Product](https://learn.adafruit.com/products/2038/guides)
### 16x8 1.2" LED Matrix + Backpack - Ultra Bright Round Blue LEDs
[16x8 1.2" LED Matrix + Backpack - Ultra Bright Round Blue LEDs](https://www.adafruit.com/product/2039)
What's better than a single LED? Lots of LEDs! And what's better than lots of LEDs? **TWO TIMES AS MANY LEDS!!!**
With the 16x8 LED Matrix Backpack we've doubled your project's matrix capacity by making it super easy to get two separate 8x8 matrices onto...
In Stock
[Buy Now](https://www.adafruit.com/product/2039)
[Related Guides to the Product](https://learn.adafruit.com/products/2039/guides)
### 16x8 1.2" LED Matrix + Backpack - Ultra Bright Square Blue LEDs
[16x8 1.2" LED Matrix + Backpack - Ultra Bright Square Blue LEDs](https://www.adafruit.com/product/2040)
What's better than a single LED? Lots of LEDs! And what's better than lots of LEDs? **TWO TIMES AS MANY LEDS!!!**
With the 16x8 LED Matrix Backpack we've doubled your project's matrix capacity by making it super easy to get two separate 8x8 matrices onto...
In Stock
[Buy Now](https://www.adafruit.com/product/2040)
[Related Guides to the Product](https://learn.adafruit.com/products/2040/guides)
### 16x8 1.2" LED Matrix + Backpack - Ultra Bright Square Amber LEDs
[16x8 1.2" LED Matrix + Backpack - Ultra Bright Square Amber LEDs](https://www.adafruit.com/product/2041)
What's better than a single LED? Lots of LEDs! And what's better than lots of LEDs? **TWO TIMES AS MANY LEDS!!!**
With the 16x8 LED Matrix Backpack we've doubled your project's matrix capacity by making it super easy to get two separate 8x8 matrices onto...
In Stock
[Buy Now](https://www.adafruit.com/product/2041)
[Related Guides to the Product](https://learn.adafruit.com/products/2041/guides)
### 16x8 1.2" LED Matrix + Backpack - Ultra Bright Square Green LEDs
[16x8 1.2" LED Matrix + Backpack - Ultra Bright Square Green LEDs](https://www.adafruit.com/product/2042)
What's better than a single LED? Lots of LEDs! And what's better than lots of LEDs? **TWO TIMES AS MANY LEDS!!!**
With the 16x8 LED Matrix Backpack we've doubled your project's matrix capacity by making it super easy to get two separate 8x8 matrices onto...
In Stock
[Buy Now](https://www.adafruit.com/product/2042)
[Related Guides to the Product](https://learn.adafruit.com/products/2042/guides)
### 16x8 1.2" LED Matrix + Backpack -Ultra Bright Square Yellow LEDs
[16x8 1.2" LED Matrix + Backpack -Ultra Bright Square Yellow LEDs](https://www.adafruit.com/product/2043)
What's better than a single LED? Lots of LEDs! And what's better than lots of LEDs? **TWO TIMES AS MANY LEDS!!!**
With the 16x8 LED Matrix Backpack we've doubled your project's matrix capacity by making it super easy to get two separate 8x8 matrices onto...
In Stock
[Buy Now](https://www.adafruit.com/product/2043)
[Related Guides to the Product](https://learn.adafruit.com/products/2043/guides)
### 16x8 1.2" LED Matrix + Backpack - Ultra Bright Square White LEDs
[16x8 1.2" LED Matrix + Backpack - Ultra Bright Square White LEDs](https://www.adafruit.com/product/2044)
What's better than a single LED? Lots of LEDs! And what's better than lots of LEDs? **TWO TIMES AS MANY LEDS!!!**
With the 16x8 LED Matrix Backpack we've doubled your project's matrix capacity by making it super easy to get two separate 8x8 matrices onto...
In Stock
[Buy Now](https://www.adafruit.com/product/2044)
[Related Guides to the Product](https://learn.adafruit.com/products/2044/guides)
### 16x8 1.2" LED Matrix + Backpack-Ultra Bright Round Orange LEDs
[16x8 1.2" LED Matrix + Backpack-Ultra Bright Round Orange LEDs](https://www.adafruit.com/product/2052)
What's better than a single LED? Lots of LEDs! And what's better than lots of LEDs? **TWO TIMES AS MANY LEDS!!!**
With the 16x8 LED Matrix Backpack we've doubled your project's matrix capacity by making it super easy to get two separate 8x8 matrices onto...
In Stock
[Buy Now](https://www.adafruit.com/product/2052)
[Related Guides to the Product](https://learn.adafruit.com/products/2052/guides)
### 16x8 1.2" LED Matrices+Backpack Round LEDs in Various Colors
[16x8 1.2" LED Matrices+Backpack Round LEDs in Various Colors](https://www.adafruit.com/product/2054)
What's better than a single LED? Lots of LEDs! And what's better than lots of LEDs? **TWO TIMES AS MANY LEDS!!!**
With the 16x8 LED Matrix Backpack we've doubled your project's matrix capacity by making it super easy to get two separate 8x8 matrices onto...
Out of Stock
[Buy Now](https://www.adafruit.com/product/2054)
[Related Guides to the Product](https://learn.adafruit.com/products/2054/guides)
### Adafruit 8x16 LED Matrix FeatherWing w/o Matrices
[Adafruit 8x16 LED Matrix FeatherWing w/o Matrices](https://www.adafruit.com/product/3090)
You will chirp with delight when you see how easy it is to make your very own 8x16 LED matrix display for any Feather. At 0.8" square, the little [8x8 matrices](https://www.adafruit.com/new/?q=8x8%20miniature%20LED%20matrix&) have everything a big LED matrix has,...
Out of Stock
[Buy Now](https://www.adafruit.com/product/3090)
[Related Guides to the Product](https://learn.adafruit.com/products/3090/guides)
### Adafruit 14-segment LED Alphanumeric backpack (same as P1910)
[Adafruit 14-segment LED Alphanumeric backpack (same as P1910)](https://www.adafruit.com/product/3322)
Just the backpack + 4pin header
No Longer Stocked
[Buy Now](https://www.adafruit.com/product/3322)
[Related Guides to the Product](https://learn.adafruit.com/products/3322/guides)
## Featured Products
### Adafruit Small 1.2" 8x8 LED Matrix w/I2C Backpack - Yellow-Green
[Adafruit Small 1.2" 8x8 LED Matrix w/I2C Backpack - Yellow-Green](https://www.adafruit.com/product/1051)
What's better than a single LED? Lots of LEDs! A fun way to make a small display is to use an [8x8 matrix](https://www.adafruit.com/category/37_88) or a [4-digit 7-segment display](https://www.adafruit.com/category/37_103). Matrices like these are...
In Stock
[Buy Now](https://www.adafruit.com/product/1051)
[Related Guides to the Product](https://learn.adafruit.com/products/1051/guides)
### Small 1.2" 8x8 Ultra Bright Square Blue LED Matrix + Backpack
[Small 1.2" 8x8 Ultra Bright Square Blue LED Matrix + Backpack](https://www.adafruit.com/product/1853)
What's better than a single LED? Lots of LEDs! Matrices like these are 'multiplexed' - so to control 64 LEDs you need 16 pins. That's a lot of pins, and there are [driver chips like the MAX7219](//www.adafruit.com/products/453) that can control a matrix for you but...
In Stock
[Buy Now](https://www.adafruit.com/product/1853)
[Related Guides to the Product](https://learn.adafruit.com/products/1853/guides)
## Related Guides
- [LED Backpack Displays on Raspberry Pi and BeagleBone Black](https://learn.adafruit.com/led-backpack-displays-on-raspberry-pi-and-beaglebone-black.md)
- [Animating Multiple LED Backpacks](https://learn.adafruit.com/animating-multiple-led-backpacks.md)
- [Arduino GPS Clock](https://learn.adafruit.com/arduino-clock.md)
- [Raspberry Pi Physical Dashboard](https://learn.adafruit.com/raspberry-pi-physical-dashboard.md)
- [CircuitPython Hardware: LED Backpacks & FeatherWings](https://learn.adafruit.com/micropython-hardware-led-backpacks-and-featherwings.md)
- [Matrix and 7-Segment LED Backpack with the Raspberry Pi](https://learn.adafruit.com/matrix-7-segment-led-backpack-with-the-raspberry-pi.md)
- [DIY Pocket LED Gamer - Tiny Tetris!](https://learn.adafruit.com/diy-3d-printed-handheld-pocket-game-tiny-tetris-snake.md)
- [RGB LED Matrix Cube with 25,000 LEDs](https://learn.adafruit.com/rgb-led-matrix-cube-for-pi.md)
- [Creating GIFs for SmartMatrix](https://learn.adafruit.com/creating-gifs-for-smartmatrix.md)
- [Adafruit CharliePlex LED Matrix Bonnet](https://learn.adafruit.com/adafruit-charlieplex-bonnet.md)
- [Connecting a 16x32 RGB LED Matrix Panel to a Raspberry Pi](https://learn.adafruit.com/connecting-a-16x32-rgb-led-matrix-panel-to-a-raspberry-pi.md)
- [MicroPython Displays: Drawing Text](https://learn.adafruit.com/micropython-displays-drawing-text.md)
- [Heart Rate Badge](https://learn.adafruit.com/heart-rate-badge.md)
- [16x24 LED Matrix](https://learn.adafruit.com/16x24-led-matrix.md)
- [Adafruit IS31FL3741](https://learn.adafruit.com/adafruit-is31fl3741.md)
---
# Source: https://learn.adafruit.com/adafruit-led-backpack/0-dot-56-seven-segment-backpack.md
# Adafruit LED Backpacks
## 0.56" 7-Segment Backpack
This version of the LED backpack is designed for these big bright 7-segment displays. These 7-segment displays normally require 13 pins (5 'characters' and 8 total segments each) This backpack solves the annoyance of using 13 pins or a bunch of chips by having an I2C constant-current matrix controller sit neatly on the back of the PCB. The controller chip takes care of everything, drawing all the LEDs in the background. All you have to do is write data to it using the 2-pin I2C interface. There are three address select pins so you can select one of 8 addresses to control up to 8 of these on a single 2-pin I2C bus (as well as whatever other I2C chips or sensors you like). The driver chip can 'dim' the entire display from 1/16 brightness up to full brightness in 1/16th steps. It cannot dim individual LEDs, only the entire display at once.
To get you going fast, we have revised this popular board to be the same size and pinout as before but now with two [STEMMA QT connectors](https://learn.adafruit.com/introducing-adafruit-stemma-qt/what-is-stemma-qt) on either side that are compatible with the [SparkFun Qwiic](https://www.sparkfun.com/qwiic) I2C connectors. This allows you to make solderless connections between your development board and the HT16K33 or to chain it with a wide range of other sensors and accessories using a [**compatible cable**](https://www.adafruit.com/?q=stemma%20qt%20cable).
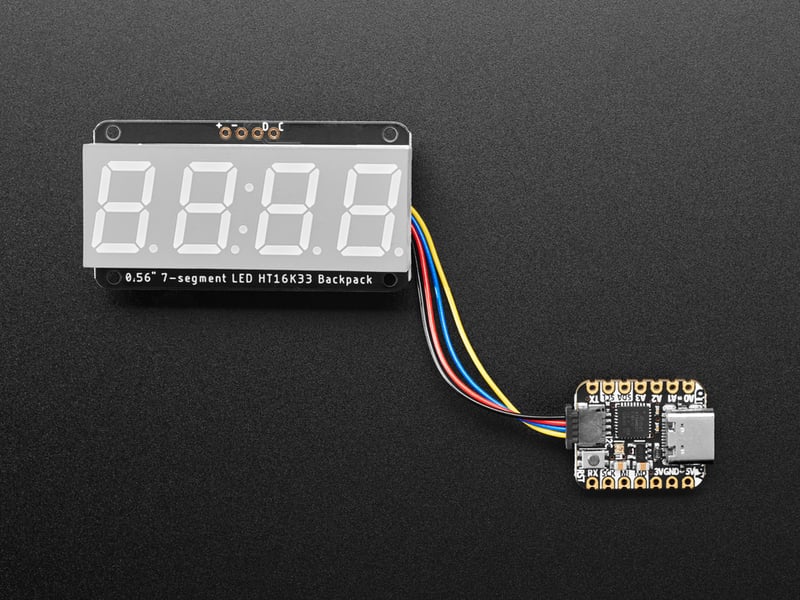

- [Previous Page](https://learn.adafruit.com/adafruit-led-backpack/0-54-alphanumeric-circuitpython-and-python-usage.md)
- [Next Page](https://learn.adafruit.com/adafruit-led-backpack/0-dot-56-seven-segment-backpack-assembly.md)
## Primary Products
### Adafruit Mini 8x8 LED Matrix w/I2C Backpack - Red
[Adafruit Mini 8x8 LED Matrix w/I2C Backpack - Red](https://www.adafruit.com/product/870)
What's better than a single LED? Lots of LEDs! A fun way to make a small display is to use an [8x8 matrix](https://www.adafruit.com/category/37_88) or a [4-digit 7-segment display](https://www.adafruit.com/category/37_103). Matrices like these are...
In Stock
[Buy Now](https://www.adafruit.com/product/870)
[Related Guides to the Product](https://learn.adafruit.com/products/870/guides)
### Adafruit Mini 8x8 LED Matrix w/I2C Backpack - Yellow
[Adafruit Mini 8x8 LED Matrix w/I2C Backpack - Yellow](https://www.adafruit.com/product/871)
What's better than a single LED? Lots of LEDs! A fun way to make a small display is to use an [8x8 matrix](https://www.adafruit.com/category/37_88) or a [4-digit 7-segment display](https://www.adafruit.com/category/37_103). Matrices like these are...
In Stock
[Buy Now](https://www.adafruit.com/product/871)
[Related Guides to the Product](https://learn.adafruit.com/products/871/guides)
### Adafruit Mini 0.8" 8x8 LED Matrix w/I2C Backpack - Yellow-Green
[Adafruit Mini 0.8" 8x8 LED Matrix w/I2C Backpack - Yellow-Green](https://www.adafruit.com/product/872)
What's better than a single LED? Lots of LEDs! A fun way to make a small display is to use an [8x8 matrix](https://www.adafruit.com/category/37_88) or a [4-digit 7-segment display](https://www.adafruit.com/category/37_103). Matrices like these are...
In Stock
[Buy Now](https://www.adafruit.com/product/872)
[Related Guides to the Product](https://learn.adafruit.com/products/872/guides)
### Adafruit 0.56" 4-Digit 7-Segment Display with I2C Backpack - Red
[Adafruit 0.56" 4-Digit 7-Segment Display with I2C Backpack - Red](https://www.adafruit.com/product/878)
What's better than a single LED? Lots of LEDs! A fun way to make a small display is to use an [8x8 matrix](https://www.adafruit.com/category/37_88) or a [4-digit 7-segment display](https://www.adafruit.com/category/37_103). Matrices like these are...
In Stock
[Buy Now](https://www.adafruit.com/product/878)
[Related Guides to the Product](https://learn.adafruit.com/products/878/guides)
### Adafruit 0.56" 4-Digit 7-Segment Display w/I2C Backpack - Yellow
[Adafruit 0.56" 4-Digit 7-Segment Display w/I2C Backpack - Yellow](https://www.adafruit.com/product/879)
What's better than a single LED? Lots of LEDs! A fun way to make a small display is to use an [8x8 matrix](https://www.adafruit.com/category/37_88) or a [4-digit 7-segment display](https://www.adafruit.com/category/37_103). Matrices like these are...
In Stock
[Buy Now](https://www.adafruit.com/product/879)
[Related Guides to the Product](https://learn.adafruit.com/products/879/guides)
### Adafruit 0.56" 4-Digit 7-Segment Display w/ I2C Backpack - Green
[Adafruit 0.56" 4-Digit 7-Segment Display w/ I2C Backpack - Green](https://www.adafruit.com/product/880)
What's better than a single LED? Lots of LEDs! A fun way to make a small display is to use an [8x8 matrix](https://www.adafruit.com/category/37_88) or a [4-digit 7-segment display](https://www.adafruit.com/category/37_103). Matrices like these are...
No Longer Stocked
[Buy Now](https://www.adafruit.com/product/880)
[Related Guides to the Product](https://learn.adafruit.com/products/880/guides)
### Adafruit 0.56" 4-Digit 7-Segment Display w/ I2C Backpack - Blue
[Adafruit 0.56" 4-Digit 7-Segment Display w/ I2C Backpack - Blue](https://www.adafruit.com/product/881)
What's better than a single LED? Lots of LEDs! A fun way to make a small display is to use an [8x8 matrix](https://www.adafruit.com/category/37_88) or a [4-digit 7-segment display](https://www.adafruit.com/category/37_103). Matrices like these are...
In Stock
[Buy Now](https://www.adafruit.com/product/881)
[Related Guides to the Product](https://learn.adafruit.com/products/881/guides)
### Adafruit Bicolor LED Square Pixel Matrix with I2C Backpack
[Adafruit Bicolor LED Square Pixel Matrix with I2C Backpack](https://www.adafruit.com/product/902)
What's better than a single LED? Lots of LEDs! A fun way to make a small colorful display is to use a [1.2" Bi-color 8x8 LED Matrix](http://www.adafruit.com/products/458). Matrices like these are 'multiplexed' - so to control all the 128 LEDs you need 24 pins....
In Stock
[Buy Now](https://www.adafruit.com/product/902)
[Related Guides to the Product](https://learn.adafruit.com/products/902/guides)
### Adafruit Mini 8x8 LED Matrix w/I2C Backpack - Blue
[Adafruit Mini 8x8 LED Matrix w/I2C Backpack - Blue](https://www.adafruit.com/product/959)
What's better than a single LED? Lots of LEDs! A fun way to make a small display is to use an [8x8 matrix](https://www.adafruit.com/category/37_88) or a [4-digit 7-segment display](https://www.adafruit.com/category/37_103). Matrices like these are...
In Stock
[Buy Now](https://www.adafruit.com/product/959)
[Related Guides to the Product](https://learn.adafruit.com/products/959/guides)
### Adafruit 0.56" 4-Digit 7-Segment Display w/I2C Backpack - White
[Adafruit 0.56" 4-Digit 7-Segment Display w/I2C Backpack - White](https://www.adafruit.com/product/1002)
What's better than a single LED? Lots of LEDs! A fun way to make a small display is to use an [8x8 matrix](https://www.adafruit.com/category/37_88) or a [4-digit 7-segment display](https://www.adafruit.com/category/37_103). Matrices like these are...
In Stock
[Buy Now](https://www.adafruit.com/product/1002)
[Related Guides to the Product](https://learn.adafruit.com/products/1002/guides)
### Adafruit 1.2" 8x8 LED Matrix Backpack
[Adafruit 1.2" 8x8 LED Matrix Backpack](https://www.adafruit.com/product/1048)
By popular request, you can now get our 8x8 LED backpacks without the LEDs! These backpacks feature an HT16K33 I2C LED driver, they're simple and easy to use - you can use [our very nice library for the backpacks to...](https://github.com/adafruit/Adafruit-LED-Backpack-Library)
In Stock
[Buy Now](https://www.adafruit.com/product/1048)
[Related Guides to the Product](https://learn.adafruit.com/products/1048/guides)
### Adafruit Small 1.2" 8x8 LED Matrix w/I2C Backpack - Red
[Adafruit Small 1.2" 8x8 LED Matrix w/I2C Backpack - Red](https://www.adafruit.com/product/1049)
What's better than a single LED? Lots of LEDs! A fun way to make a small display is to use an [8x8 matrix](https://www.adafruit.com/category/37_88) or a [4-digit 7-segment display](https://www.adafruit.com/category/37_103). Matrices like these are...
In Stock
[Buy Now](https://www.adafruit.com/product/1049)
[Related Guides to the Product](https://learn.adafruit.com/products/1049/guides)
### Adafruit Small 1.2" 8x8 LED Matrix w/I2C Backpack - Yellow
[Adafruit Small 1.2" 8x8 LED Matrix w/I2C Backpack - Yellow](https://www.adafruit.com/product/1050)
What's better than a single LED? Lots of LEDs! A fun way to make a small display is to use an [8x8 matrix](https://www.adafruit.com/category/37_88) or a [4-digit 7-segment display](https://www.adafruit.com/category/37_103). Matrices like these are...
In Stock
[Buy Now](https://www.adafruit.com/product/1050)
[Related Guides to the Product](https://learn.adafruit.com/products/1050/guides)
### Adafruit Small 1.2" 8x8 LED Matrix w/I2C Backpack - Blue
[Adafruit Small 1.2" 8x8 LED Matrix w/I2C Backpack - Blue](https://www.adafruit.com/product/1052)
What's better than a single LED? Lots of LEDs! A fun way to make a small display is to use an [8x8 matrix](https://www.adafruit.com/category/37_88) or a [4-digit 7-segment display](https://www.adafruit.com/category/37_103). Matrices like these are...
In Stock
[Buy Now](https://www.adafruit.com/product/1052)
[Related Guides to the Product](https://learn.adafruit.com/products/1052/guides)
### Adafruit Mini 8x8 LED Matrix w/I2C Backpack - Ultra Bright White
[Adafruit Mini 8x8 LED Matrix w/I2C Backpack - Ultra Bright White](https://www.adafruit.com/product/1080)
What's better than a single LED? Lots of LEDs! A fun way to make a small display is to use an [8x8 matrix](https://www.adafruit.com/category/37_88) or a [4-digit 7-segment display](https://www.adafruit.com/category/37_103). Matrices like these are...
In Stock
[Buy Now](https://www.adafruit.com/product/1080)
[Related Guides to the Product](https://learn.adafruit.com/products/1080/guides)
### Adafruit 1.2" 4-Digit 7-Segment Display w/I2C Backpack - Green
[Adafruit 1.2" 4-Digit 7-Segment Display w/I2C Backpack - Green](https://www.adafruit.com/product/1268)
What's better than a single LED? Lots of LEDs! A fun way to make a numeric display is to use a [4-digit 7-segment display](https://www.adafruit.com/category/37_103). LED matrices like these are 'multiplexed' - so to control all the seven-segment LEDs you need 14 pins....
No Longer Stocked
[Buy Now](https://www.adafruit.com/product/1268)
[Related Guides to the Product](https://learn.adafruit.com/products/1268/guides)
### Adafruit 1.2" 4-Digit 7-Segment Display w/I2C Backpack - Yellow
[Adafruit 1.2" 4-Digit 7-Segment Display w/I2C Backpack - Yellow](https://www.adafruit.com/product/1269)
What's better than a single LED? Lots of LEDs! A fun way to make a numeric display is to use a [4-digit 7-segment display](https://www.adafruit.com/category/37_103). LED matrices like these are 'multiplexed' - so to control all the seven-segment LEDs you need 14 pins....
In Stock
[Buy Now](https://www.adafruit.com/product/1269)
[Related Guides to the Product](https://learn.adafruit.com/products/1269/guides)
### Adafruit 1.2" 4-Digit 7-Segment Display w/I2C Backpack - Red
[Adafruit 1.2" 4-Digit 7-Segment Display w/I2C Backpack - Red](https://www.adafruit.com/product/1270)
What's better than a single LED? Lots of LEDs! A fun way to make a numeric display is to use a [4-digit 7-segment display](https://www.adafruit.com/category/37_103). LED matrices like these are 'multiplexed' - so to control all the seven-segment LEDs you need 14 pins....
In Stock
[Buy Now](https://www.adafruit.com/product/1270)
[Related Guides to the Product](https://learn.adafruit.com/products/1270/guides)
### Small 1.2" 8x8 Ultra Bright White LED Matrix + Backpack
[Small 1.2" 8x8 Ultra Bright White LED Matrix + Backpack](https://www.adafruit.com/product/1614)
What's better than a single LED? Lots of LEDs! A fun way to make a small display is to use an [8x8 matrix](https://www.adafruit.com/category/37_88) or a [4-digit 7-segment display](https://www.adafruit.com/category/37_103). Matrices like these are...
In Stock
[Buy Now](https://www.adafruit.com/product/1614)
[Related Guides to the Product](https://learn.adafruit.com/products/1614/guides)
### Adafruit Small 1.2" 8x8 LED Matrix w/I2C Backpack - Pure Green
[Adafruit Small 1.2" 8x8 LED Matrix w/I2C Backpack - Pure Green](https://www.adafruit.com/product/1632)
What's better than a single LED? Lots of LEDs! A fun way to make a small display is to use an [8x8 matrix](https://www.adafruit.com/category/37_88) or a [4-digit 7-segment display](https://www.adafruit.com/category/37_103). Matrices like these are...
In Stock
[Buy Now](https://www.adafruit.com/product/1632)
[Related Guides to the Product](https://learn.adafruit.com/products/1632/guides)
### Adafruit Mini 0.8" 8x8 LED Matrix w/I2C Backpack - Pure Green
[Adafruit Mini 0.8" 8x8 LED Matrix w/I2C Backpack - Pure Green](https://www.adafruit.com/product/1633)
What's better than a single LED? Lots of LEDs! A fun way to make a small display is to use an [8x8 matrix](https://www.adafruit.com/category/37_88) or a [4-digit 7-segment display](https://www.adafruit.com/category/37_103). Matrices like these are...
In Stock
[Buy Now](https://www.adafruit.com/product/1633)
[Related Guides to the Product](https://learn.adafruit.com/products/1633/guides)
### Bi-Color (Red/Green) 24-Bar Bargraph w/I2C Backpack Kit
[Bi-Color (Red/Green) 24-Bar Bargraph w/I2C Backpack Kit](https://www.adafruit.com/product/1721)
What's better than a single LED? Lots of LEDs! A fun way to make a small linear display is to use two 12-bar Bi-color bar-graphs. However, this LED bargraph is 'multiplexed' - so to control all the 48 LEDs you need a lot of pins.
Out of Stock
[Buy Now](https://www.adafruit.com/product/1721)
[Related Guides to the Product](https://learn.adafruit.com/products/1721/guides)
### Small 1.2" 8x8 Ultra Bright Square Amber LED Matrix + Backpack
[Small 1.2" 8x8 Ultra Bright Square Amber LED Matrix + Backpack](https://www.adafruit.com/product/1854)
What's better than a single LED? Lots of LEDs! Matrices like these are 'multiplexed' - so to control 64 LEDs you need 16 pins. That's a lot of pins, and there are [driver chips like the MAX7219](//www.adafruit.com/products/453) that can control a matrix for you but...
In Stock
[Buy Now](https://www.adafruit.com/product/1854)
[Related Guides to the Product](https://learn.adafruit.com/products/1854/guides)
### Small 1.2" 8x8 Ultra Bright Square Yellow LED Matrix + Backpack
[Small 1.2" 8x8 Ultra Bright Square Yellow LED Matrix + Backpack](https://www.adafruit.com/product/1855)
What's better than a single LED? Lots of LEDs! Matrices like these are 'multiplexed' - so to control 64 LEDs you need 16 pins. That's a lot of pins, and there are [driver chips like the MAX7219](//www.adafruit.com/products/453) that can control a matrix for you but...
In Stock
[Buy Now](https://www.adafruit.com/product/1855)
[Related Guides to the Product](https://learn.adafruit.com/products/1855/guides)
### Small 1.2" 8x8 Bright Square Pure Green LED Matrix + Backpack
[Small 1.2" 8x8 Bright Square Pure Green LED Matrix + Backpack](https://www.adafruit.com/product/1856)
What's better than a single LED? Lots of LEDs! Matrices like these are 'multiplexed' - so to control 64 LEDs you need 16 pins. That's a lot of pins, and there are [driver chips like the MAX7219](//www.adafruit.com/products/453) that can control a matrix for you but...
In Stock
[Buy Now](https://www.adafruit.com/product/1856)
[Related Guides to the Product](https://learn.adafruit.com/products/1856/guides)
### Small 1.2" 8x8 Ultra Bright Square White LED Matrix + Backpack
[Small 1.2" 8x8 Ultra Bright Square White LED Matrix + Backpack](https://www.adafruit.com/product/1857)
What's better than a single LED? Lots of LEDs! Matrices like these are 'multiplexed' - so to control 64 LEDs you need 16 pins. That's a lot of pins, and there are [driver chips like the MAX7219](//www.adafruit.com/products/453) that can control a matrix for you but...
In Stock
[Buy Now](https://www.adafruit.com/product/1857)
[Related Guides to the Product](https://learn.adafruit.com/products/1857/guides)
### Adafruit 14-segment LED Alphanumeric Backpack - STEMMA QT
[Adafruit 14-segment LED Alphanumeric Backpack - STEMMA QT](https://www.adafruit.com/product/1910)
By popular request, you can now get our 14-segment LED backpacks without the LEDs! These backpacks feature an HT16K33 I2C LED driver, they're simple and easy to use - you can use [our very nice library for the backpacks to...](https://github.com/adafruit/Adafruit-LED-Backpack-Library)
In Stock
[Buy Now](https://www.adafruit.com/product/1910)
[Related Guides to the Product](https://learn.adafruit.com/products/1910/guides)
### Quad Alphanumeric Display - Red 0.54" Digits w/ I2C Backpack
[Quad Alphanumeric Display - Red 0.54" Digits w/ I2C Backpack](https://www.adafruit.com/product/1911)
Display, elegantly, 012345678 or 9! Gaze, hypnotized, at ABCDEFGHIJKLM - well it can display the whole alphabet. You get the point. This is a nice, bright alphanumeric display that shows letters and numbers in a beautiful red hue. It's super bright and designed for viewing from distances...
In Stock
[Buy Now](https://www.adafruit.com/product/1911)
[Related Guides to the Product](https://learn.adafruit.com/products/1911/guides)
### Quad Alphanumeric Display - Blue 0.54" Digits w/ I2C Backpack
[Quad Alphanumeric Display - Blue 0.54" Digits w/ I2C Backpack](https://www.adafruit.com/product/1912)
Display, elegantly, 012345678 or 9! Gaze, hypnotized, at ABCDEFGHIJKLM - well it can display the whole alphabet. You get the point. This is a nice, bright alphanumeric display that shows letters and numbers in a beautiful blue hue. It's super bright and designed for viewing from distances...
In Stock
[Buy Now](https://www.adafruit.com/product/1912)
[Related Guides to the Product](https://learn.adafruit.com/products/1912/guides)
### 16x8 1.2" LED Matrix + Backpack - Ultra Bright Round Green LEDs
[16x8 1.2" LED Matrix + Backpack - Ultra Bright Round Green LEDs](https://www.adafruit.com/product/2035)
What's better than a single LED? Lots of LEDs! And what's better than lots of LEDs? **TWO TIMES AS MANY LEDS!!!**
With the 16x8 LED Matrix Backpack we've doubled your project's matrix capacity by making it super easy to get two separate 8x8 matrices onto...
In Stock
[Buy Now](https://www.adafruit.com/product/2035)
[Related Guides to the Product](https://learn.adafruit.com/products/2035/guides)
### 16x8 1.2" LED Matrix+Backpack UltraBright Round YellowGreen LEDs
[16x8 1.2" LED Matrix+Backpack UltraBright Round YellowGreen LEDs](https://www.adafruit.com/product/2036)
What's better than a single LED? Lots of LEDs! And what's better than lots of LEDs? **TWO TIMES AS MANY LEDS!!!**
With the 16x8 LED Matrix Backpack we've doubled your project's matrix capacity by making it super easy to get two separate 8x8 matrices onto...
In Stock
[Buy Now](https://www.adafruit.com/product/2036)
[Related Guides to the Product](https://learn.adafruit.com/products/2036/guides)
### 16x8 1.2" LED Matrix + Backpack - Ultra Bright Round Red LEDs
[16x8 1.2" LED Matrix + Backpack - Ultra Bright Round Red LEDs](https://www.adafruit.com/product/2037)
What's better than a single LED? Lots of LEDs! And what's better than lots of LEDs? **TWO TIMES AS MANY LEDS!!!**
With the 16x8 LED Matrix Backpack we've doubled your project's matrix capacity by making it super easy to get two separate 8x8 matrices onto...
In Stock
[Buy Now](https://www.adafruit.com/product/2037)
[Related Guides to the Product](https://learn.adafruit.com/products/2037/guides)
### 16x8 1.2" LED Matrix + Backpack - Ultra Bright Round White LEDs
[16x8 1.2" LED Matrix + Backpack - Ultra Bright Round White LEDs](https://www.adafruit.com/product/2038)
What's better than a single LED? Lots of LEDs! And what's better than lots of LEDs? **TWO TIMES AS MANY LEDS!!!**
With the 16x8 LED Matrix Backpack we've doubled your project's matrix capacity by making it super easy to get two separate 8x8 matrices onto...
In Stock
[Buy Now](https://www.adafruit.com/product/2038)
[Related Guides to the Product](https://learn.adafruit.com/products/2038/guides)
### 16x8 1.2" LED Matrix + Backpack - Ultra Bright Round Blue LEDs
[16x8 1.2" LED Matrix + Backpack - Ultra Bright Round Blue LEDs](https://www.adafruit.com/product/2039)
What's better than a single LED? Lots of LEDs! And what's better than lots of LEDs? **TWO TIMES AS MANY LEDS!!!**
With the 16x8 LED Matrix Backpack we've doubled your project's matrix capacity by making it super easy to get two separate 8x8 matrices onto...
In Stock
[Buy Now](https://www.adafruit.com/product/2039)
[Related Guides to the Product](https://learn.adafruit.com/products/2039/guides)
### 16x8 1.2" LED Matrix + Backpack - Ultra Bright Square Blue LEDs
[16x8 1.2" LED Matrix + Backpack - Ultra Bright Square Blue LEDs](https://www.adafruit.com/product/2040)
What's better than a single LED? Lots of LEDs! And what's better than lots of LEDs? **TWO TIMES AS MANY LEDS!!!**
With the 16x8 LED Matrix Backpack we've doubled your project's matrix capacity by making it super easy to get two separate 8x8 matrices onto...
In Stock
[Buy Now](https://www.adafruit.com/product/2040)
[Related Guides to the Product](https://learn.adafruit.com/products/2040/guides)
### 16x8 1.2" LED Matrix + Backpack - Ultra Bright Square Amber LEDs
[16x8 1.2" LED Matrix + Backpack - Ultra Bright Square Amber LEDs](https://www.adafruit.com/product/2041)
What's better than a single LED? Lots of LEDs! And what's better than lots of LEDs? **TWO TIMES AS MANY LEDS!!!**
With the 16x8 LED Matrix Backpack we've doubled your project's matrix capacity by making it super easy to get two separate 8x8 matrices onto...
In Stock
[Buy Now](https://www.adafruit.com/product/2041)
[Related Guides to the Product](https://learn.adafruit.com/products/2041/guides)
### 16x8 1.2" LED Matrix + Backpack - Ultra Bright Square Green LEDs
[16x8 1.2" LED Matrix + Backpack - Ultra Bright Square Green LEDs](https://www.adafruit.com/product/2042)
What's better than a single LED? Lots of LEDs! And what's better than lots of LEDs? **TWO TIMES AS MANY LEDS!!!**
With the 16x8 LED Matrix Backpack we've doubled your project's matrix capacity by making it super easy to get two separate 8x8 matrices onto...
In Stock
[Buy Now](https://www.adafruit.com/product/2042)
[Related Guides to the Product](https://learn.adafruit.com/products/2042/guides)
### 16x8 1.2" LED Matrix + Backpack -Ultra Bright Square Yellow LEDs
[16x8 1.2" LED Matrix + Backpack -Ultra Bright Square Yellow LEDs](https://www.adafruit.com/product/2043)
What's better than a single LED? Lots of LEDs! And what's better than lots of LEDs? **TWO TIMES AS MANY LEDS!!!**
With the 16x8 LED Matrix Backpack we've doubled your project's matrix capacity by making it super easy to get two separate 8x8 matrices onto...
In Stock
[Buy Now](https://www.adafruit.com/product/2043)
[Related Guides to the Product](https://learn.adafruit.com/products/2043/guides)
### 16x8 1.2" LED Matrix + Backpack - Ultra Bright Square White LEDs
[16x8 1.2" LED Matrix + Backpack - Ultra Bright Square White LEDs](https://www.adafruit.com/product/2044)
What's better than a single LED? Lots of LEDs! And what's better than lots of LEDs? **TWO TIMES AS MANY LEDS!!!**
With the 16x8 LED Matrix Backpack we've doubled your project's matrix capacity by making it super easy to get two separate 8x8 matrices onto...
In Stock
[Buy Now](https://www.adafruit.com/product/2044)
[Related Guides to the Product](https://learn.adafruit.com/products/2044/guides)
### 16x8 1.2" LED Matrix + Backpack-Ultra Bright Round Orange LEDs
[16x8 1.2" LED Matrix + Backpack-Ultra Bright Round Orange LEDs](https://www.adafruit.com/product/2052)
What's better than a single LED? Lots of LEDs! And what's better than lots of LEDs? **TWO TIMES AS MANY LEDS!!!**
With the 16x8 LED Matrix Backpack we've doubled your project's matrix capacity by making it super easy to get two separate 8x8 matrices onto...
In Stock
[Buy Now](https://www.adafruit.com/product/2052)
[Related Guides to the Product](https://learn.adafruit.com/products/2052/guides)
### 16x8 1.2" LED Matrices+Backpack Round LEDs in Various Colors
[16x8 1.2" LED Matrices+Backpack Round LEDs in Various Colors](https://www.adafruit.com/product/2054)
What's better than a single LED? Lots of LEDs! And what's better than lots of LEDs? **TWO TIMES AS MANY LEDS!!!**
With the 16x8 LED Matrix Backpack we've doubled your project's matrix capacity by making it super easy to get two separate 8x8 matrices onto...
Out of Stock
[Buy Now](https://www.adafruit.com/product/2054)
[Related Guides to the Product](https://learn.adafruit.com/products/2054/guides)
### Adafruit 8x16 LED Matrix FeatherWing w/o Matrices
[Adafruit 8x16 LED Matrix FeatherWing w/o Matrices](https://www.adafruit.com/product/3090)
You will chirp with delight when you see how easy it is to make your very own 8x16 LED matrix display for any Feather. At 0.8" square, the little [8x8 matrices](https://www.adafruit.com/new/?q=8x8%20miniature%20LED%20matrix&) have everything a big LED matrix has,...
Out of Stock
[Buy Now](https://www.adafruit.com/product/3090)
[Related Guides to the Product](https://learn.adafruit.com/products/3090/guides)
### Adafruit 14-segment LED Alphanumeric backpack (same as P1910)
[Adafruit 14-segment LED Alphanumeric backpack (same as P1910)](https://www.adafruit.com/product/3322)
Just the backpack + 4pin header
No Longer Stocked
[Buy Now](https://www.adafruit.com/product/3322)
[Related Guides to the Product](https://learn.adafruit.com/products/3322/guides)
## Featured Products
### Adafruit Small 1.2" 8x8 LED Matrix w/I2C Backpack - Yellow-Green
[Adafruit Small 1.2" 8x8 LED Matrix w/I2C Backpack - Yellow-Green](https://www.adafruit.com/product/1051)
What's better than a single LED? Lots of LEDs! A fun way to make a small display is to use an [8x8 matrix](https://www.adafruit.com/category/37_88) or a [4-digit 7-segment display](https://www.adafruit.com/category/37_103). Matrices like these are...
In Stock
[Buy Now](https://www.adafruit.com/product/1051)
[Related Guides to the Product](https://learn.adafruit.com/products/1051/guides)
### Small 1.2" 8x8 Ultra Bright Square Blue LED Matrix + Backpack
[Small 1.2" 8x8 Ultra Bright Square Blue LED Matrix + Backpack](https://www.adafruit.com/product/1853)
What's better than a single LED? Lots of LEDs! Matrices like these are 'multiplexed' - so to control 64 LEDs you need 16 pins. That's a lot of pins, and there are [driver chips like the MAX7219](//www.adafruit.com/products/453) that can control a matrix for you but...
In Stock
[Buy Now](https://www.adafruit.com/product/1853)
[Related Guides to the Product](https://learn.adafruit.com/products/1853/guides)
## Related Guides
- [LED Backpack Displays on Raspberry Pi and BeagleBone Black](https://learn.adafruit.com/led-backpack-displays-on-raspberry-pi-and-beaglebone-black.md)
- [Animating Multiple LED Backpacks](https://learn.adafruit.com/animating-multiple-led-backpacks.md)
- [Arduino GPS Clock](https://learn.adafruit.com/arduino-clock.md)
- [Raspberry Pi Physical Dashboard](https://learn.adafruit.com/raspberry-pi-physical-dashboard.md)
- [CircuitPython Hardware: LED Backpacks & FeatherWings](https://learn.adafruit.com/micropython-hardware-led-backpacks-and-featherwings.md)
- [Matrix and 7-Segment LED Backpack with the Raspberry Pi](https://learn.adafruit.com/matrix-7-segment-led-backpack-with-the-raspberry-pi.md)
- [DIY Pocket LED Gamer - Tiny Tetris!](https://learn.adafruit.com/diy-3d-printed-handheld-pocket-game-tiny-tetris-snake.md)
- [RGB LED Matrix Cube with 25,000 LEDs](https://learn.adafruit.com/rgb-led-matrix-cube-for-pi.md)
- [Creating GIFs for SmartMatrix](https://learn.adafruit.com/creating-gifs-for-smartmatrix.md)
- [Adafruit CharliePlex LED Matrix Bonnet](https://learn.adafruit.com/adafruit-charlieplex-bonnet.md)
- [Connecting a 16x32 RGB LED Matrix Panel to a Raspberry Pi](https://learn.adafruit.com/connecting-a-16x32-rgb-led-matrix-panel-to-a-raspberry-pi.md)
- [MicroPython Displays: Drawing Text](https://learn.adafruit.com/micropython-displays-drawing-text.md)
- [Heart Rate Badge](https://learn.adafruit.com/heart-rate-badge.md)
- [16x24 LED Matrix](https://learn.adafruit.com/16x24-led-matrix.md)
- [Adafruit IS31FL3741](https://learn.adafruit.com/adafruit-is31fl3741.md)
---
# Source: https://learn.adafruit.com/096-mini-color-oled.md
# 0.96" mini Color OLED
## Overview
We love our black and white monochrome displays but we also like to dabble with some color now and then. Our new 0.96" color OLED displays are perfect when you need an ultra-small display with vivid, high-contrast 16-bit color. The visible portion of the OLED measures 0.96" diagonal and contains 96x64 RGB pixels, each one made of red, green and blue OLEDs. Each pixel can be set with 16-bits of resolution for a large range of colors. Because the display uses OLEDs, there is no backlight, and the contrast is very high (black is really black). We picked this display for its excellent color, this is the nicest mini OLED we could find!
This OLED uses the SSD1331 driver chip, which manages the display. You can talk to the driver chip using either 3 or 4-wire write-only SPI (clock, data, chip select, data/command and an optional reset pin) or standard 8-bit parallel 8080/6800 which also permits reading pixel data from the display. Our example code shows how to use SPI since for such a display, its plenty fast. Inlcuded on the fully assembled breakout is the OLED display and a small boost converter (required for providing 12V to the OLED) and a microSD card holder. Our example code shows how to read a bitmap from the uSD card and display it all via SPI.
The logic levels for the microSD ard and OLED are 3.3V max. In order to make this breakout usable for bidirectional 8-bit and SPI interfaces, we left out an on-board level shifter. However, we include a DIP chip 75LVC245 8-bit level converter chip and our tutorial shows how to wire it to an Arduino so that you can use the breakout with 5V logic such as that of an Arduino. If you have a 3.3V logic level microcontroller system, you can skip the level shifter.
Of course, we wouldn't just leave you with a datasheet and a "good luck!" - we've written a full open source graphics library that can draw pixels, lines, rectangles, circles, text and bitmaps as well as example code and a wiring tutorial. The code is written for Arduino but can be easily ported to your favorite microcontroller!
[Pick one up today from the adafruit shop!](http://www.adafruit.com/products/684)
**Please note:** all OLEDs have a “half life” — their brightness naturally diminishes over time, albeit over _many thousands_ of hours. This makes them a poor choice for always-on 24/7/365 use. Best to **turn off the display** when inactive, or consider using a **color LCD** for continuously running projects.
- [Next Page](https://learn.adafruit.com/096-mini-color-oled/power.md)
## Featured Products
### OLED Breakout Board - 16-bit Color 0.96" w/microSD holder
[OLED Breakout Board - 16-bit Color 0.96" w/microSD holder](https://www.adafruit.com/product/684)
We love our black and white monochrome displays but we also like to dabble with some color now and then. Our new 0.96" color OLED displays are perfect when you need an ultra-small display with vivid, high-contrast 16-bit color. The visible portion of the OLED measures 0.96" diagonal...
In Stock
[Buy Now](https://www.adafruit.com/product/684)
[Related Guides to the Product](https://learn.adafruit.com/products/684/guides)
### Adafruit METRO 328 Fully Assembled - Arduino IDE compatible
[Adafruit METRO 328 Fully Assembled - Arduino IDE compatible](https://www.adafruit.com/product/50)
We sure love the ATmega328 here at Adafruit, and we use them _a lot_ for our own projects. The processor has plenty of GPIO, Analog inputs, hardware UART SPI and I2C, timers and PWM galore - just enough for most simple projects. When we need to go small, we use a
Out of Stock
[Buy Now](https://www.adafruit.com/product/50)
[Related Guides to the Product](https://learn.adafruit.com/products/50/guides)
### Breadboarding wire bundle
[Breadboarding wire bundle](https://www.adafruit.com/product/153)
75 flexible stranded core wires with stiff ends molded on in red, orange, yellow, green, blue, brown, black and white. These are a major improvement over the "box of bent wires" that are sometimes sold with breadboards, and faster than stripping your own solid core wires. Makes...
In Stock
[Buy Now](https://www.adafruit.com/product/153)
[Related Guides to the Product](https://learn.adafruit.com/products/153/guides)
## Related Guides
- [Tiny Arduino Music Visualizer](https://learn.adafruit.com/piccolo.md)
- [Create an Internet of Things Dashboard with Adafruit IO](https://learn.adafruit.com/create-an-internet-of-things-dashboard-with-adafruit-dot-io.md)
- [Adafruit Ultimate GPS](https://learn.adafruit.com/adafruit-ultimate-gps.md)
- [Ladyada's Learn Arduino - Lesson #0](https://learn.adafruit.com/ladyadas-learn-arduino-lesson-number-0.md)
- [Arduino Lesson 15. DC Motor Reversing](https://learn.adafruit.com/adafruit-arduino-lesson-15-dc-motor-reversing.md)
- [Wireless Gardening with Arduino + CC3000 WiFi Modules](https://learn.adafruit.com/wireless-gardening-arduino-cc3000-wifi-modules.md)
- [Arduino Lesson 9. Sensing Light](https://learn.adafruit.com/adafruit-arduino-lesson-9-sensing-light.md)
- [Low Power Coin Cell Voltage Logger](https://learn.adafruit.com/low-power-coin-cell-voltage-logger.md)
- [LSM303 Accelerometer + Compass Breakout](https://learn.adafruit.com/lsm303-accelerometer-slash-compass-breakout.md)
- [Skill Badge Requirements: Microcontrollers](https://learn.adafruit.com/skill-badge-requirements-microcontrollers.md)
- [WiFi Weather Station](https://learn.adafruit.com/wifi-weather-station-arduino-cc3000.md)
- [Adafruit Proto Shield for Arduino](https://learn.adafruit.com/adafruit-proto-shield-arduino.md)
- [Electronic Demon Costume](https://learn.adafruit.com/electronic-demon-costume.md)
- [DIY 8x2 LCD Shield](https://learn.adafruit.com/diy-8x2-lcd-shield.md)
- [Circuit Playground Sound-Controlled Robot](https://learn.adafruit.com/circuit-playground-sound-controlled-robot.md)
---
# Source: https://learn.adafruit.com/adafruit-led-backpack/1-2-16x8-matrix-arduino-setup.md
# Adafruit LED Backpacks
## Arduino Setup
Primary:
## 16x8 Matrix Software
We wrote a basic library to help you work with the 16x8 matrix backpack. The library is written for the Arduino and will work with any Arduino as it just uses the I2C pins. The code is very portable and can be easily adapted to any I2C-capable micro.
Wiring to the matrix is really easy
- Connect **CLK** to the I2C clock - on Arduino UNO thats Analog #5 (or SCL), on the Leonardo its Digital #3, on the Mega its digital #21
- Connect **DAT** to the I2C data - on Arduino UNO thats Analog #4 (or SDA), on the Leonardo its Digital #2, on the Mega its digital #20
- Connect **GND** to common ground
- Connect **VCC+** to power - 5V is best but 3V also seems to work for 3V microcontrollers.
Next, download the **Adafruit LED Backpack ** library and the **Adafruit GFX ** library from the Arduino library manager.
Open up the Arduino library manager:

Search for the **Adafruit LED Backpack ** library and install it

Search for the **Adafruit GFX ** library and install it

If using an earlier version of the Arduino IDE (prior to 1.8.10), also locate and install **Adafruit\_BusIO** (newer versions will install this dependency automatically).
You should now be able to select the **File→Examples→Adafruit\_LEDBackpack→matrix88** example sketch. Upload it to your Arduino as usual. You should see a basic test program that goes through a bunch of different drawing routine
We also have a great tutorial on Arduino library installation at:
[http://learn.adafruit.com/adafruit-all-about-arduino-libraries-install-use](http://learn.adafruit.com/adafruit-all-about-arduino-libraries-install-use "Link: http://learn.adafruit.com/adafruit-all-about-arduino-libraries-install-use")

Once you're happy that the matrix works, you can write your own sketches. The 8x8 matrix supports everything the Adafruit GFX library - drawing pixels, lines, rectancles, circles, triangles, roundrects, and small bitmaps. [For more details check out the GFX page which will detail all of the GFX routines](http://learn.adafruit.com/adafruit-gfx-graphics-library).
All the drawing routines only change the display memory kept by the Arduino. Don't forget to call **writeDisplay()** after drawing to 'save' the memory out to the matrix via I2C.
There are also a few small routines that are special to the matrix:
- **setBrightness(_brighness_)**- will let you change the overall brightness of the entire display. 0 is least bright, 15 is brightest and is what is initialized by the display when you start. You can call this function at any time to change the brightness of the -entire- display
- **blinkRate(_rate_)** - You can blink the entire display. 0 is no blinking. 1, 2 or 3 is for display blinking.You can call this function at any time to change the blink rate of the -entire- display
The default orientation for graphics commands on this display places pixel (0,0) at the top-left when the header is at the left and Adafruit logo at the right. To use the matrix as shown above (header at top, logo at bottom), call matrix.setRotation(3) before issuing graphics commands.

- [Previous Page](https://learn.adafruit.com/adafruit-led-backpack/1-2-16x8-matrix.md)
- [Next Page](https://learn.adafruit.com/adafruit-led-backpack/1-2-16x8-matrix-circuitpython-wiring-and-setup.md)
## Primary Products
### Adafruit Mini 8x8 LED Matrix w/I2C Backpack - Red
[Adafruit Mini 8x8 LED Matrix w/I2C Backpack - Red](https://www.adafruit.com/product/870)
What's better than a single LED? Lots of LEDs! A fun way to make a small display is to use an [8x8 matrix](https://www.adafruit.com/category/37_88) or a [4-digit 7-segment display](https://www.adafruit.com/category/37_103). Matrices like these are...
In Stock
[Buy Now](https://www.adafruit.com/product/870)
[Related Guides to the Product](https://learn.adafruit.com/products/870/guides)
### Adafruit Mini 8x8 LED Matrix w/I2C Backpack - Yellow
[Adafruit Mini 8x8 LED Matrix w/I2C Backpack - Yellow](https://www.adafruit.com/product/871)
What's better than a single LED? Lots of LEDs! A fun way to make a small display is to use an [8x8 matrix](https://www.adafruit.com/category/37_88) or a [4-digit 7-segment display](https://www.adafruit.com/category/37_103). Matrices like these are...
In Stock
[Buy Now](https://www.adafruit.com/product/871)
[Related Guides to the Product](https://learn.adafruit.com/products/871/guides)
### Adafruit Mini 0.8" 8x8 LED Matrix w/I2C Backpack - Yellow-Green
[Adafruit Mini 0.8" 8x8 LED Matrix w/I2C Backpack - Yellow-Green](https://www.adafruit.com/product/872)
What's better than a single LED? Lots of LEDs! A fun way to make a small display is to use an [8x8 matrix](https://www.adafruit.com/category/37_88) or a [4-digit 7-segment display](https://www.adafruit.com/category/37_103). Matrices like these are...
In Stock
[Buy Now](https://www.adafruit.com/product/872)
[Related Guides to the Product](https://learn.adafruit.com/products/872/guides)
### Adafruit 0.56" 4-Digit 7-Segment Display with I2C Backpack - Red
[Adafruit 0.56" 4-Digit 7-Segment Display with I2C Backpack - Red](https://www.adafruit.com/product/878)
What's better than a single LED? Lots of LEDs! A fun way to make a small display is to use an [8x8 matrix](https://www.adafruit.com/category/37_88) or a [4-digit 7-segment display](https://www.adafruit.com/category/37_103). Matrices like these are...
In Stock
[Buy Now](https://www.adafruit.com/product/878)
[Related Guides to the Product](https://learn.adafruit.com/products/878/guides)
### Adafruit 0.56" 4-Digit 7-Segment Display w/I2C Backpack - Yellow
[Adafruit 0.56" 4-Digit 7-Segment Display w/I2C Backpack - Yellow](https://www.adafruit.com/product/879)
What's better than a single LED? Lots of LEDs! A fun way to make a small display is to use an [8x8 matrix](https://www.adafruit.com/category/37_88) or a [4-digit 7-segment display](https://www.adafruit.com/category/37_103). Matrices like these are...
In Stock
[Buy Now](https://www.adafruit.com/product/879)
[Related Guides to the Product](https://learn.adafruit.com/products/879/guides)
### Adafruit 0.56" 4-Digit 7-Segment Display w/ I2C Backpack - Green
[Adafruit 0.56" 4-Digit 7-Segment Display w/ I2C Backpack - Green](https://www.adafruit.com/product/880)
What's better than a single LED? Lots of LEDs! A fun way to make a small display is to use an [8x8 matrix](https://www.adafruit.com/category/37_88) or a [4-digit 7-segment display](https://www.adafruit.com/category/37_103). Matrices like these are...
No Longer Stocked
[Buy Now](https://www.adafruit.com/product/880)
[Related Guides to the Product](https://learn.adafruit.com/products/880/guides)
### Adafruit 0.56" 4-Digit 7-Segment Display w/ I2C Backpack - Blue
[Adafruit 0.56" 4-Digit 7-Segment Display w/ I2C Backpack - Blue](https://www.adafruit.com/product/881)
What's better than a single LED? Lots of LEDs! A fun way to make a small display is to use an [8x8 matrix](https://www.adafruit.com/category/37_88) or a [4-digit 7-segment display](https://www.adafruit.com/category/37_103). Matrices like these are...
In Stock
[Buy Now](https://www.adafruit.com/product/881)
[Related Guides to the Product](https://learn.adafruit.com/products/881/guides)
### Adafruit Bicolor LED Square Pixel Matrix with I2C Backpack
[Adafruit Bicolor LED Square Pixel Matrix with I2C Backpack](https://www.adafruit.com/product/902)
What's better than a single LED? Lots of LEDs! A fun way to make a small colorful display is to use a [1.2" Bi-color 8x8 LED Matrix](http://www.adafruit.com/products/458). Matrices like these are 'multiplexed' - so to control all the 128 LEDs you need 24 pins....
In Stock
[Buy Now](https://www.adafruit.com/product/902)
[Related Guides to the Product](https://learn.adafruit.com/products/902/guides)
### Adafruit Mini 8x8 LED Matrix w/I2C Backpack - Blue
[Adafruit Mini 8x8 LED Matrix w/I2C Backpack - Blue](https://www.adafruit.com/product/959)
What's better than a single LED? Lots of LEDs! A fun way to make a small display is to use an [8x8 matrix](https://www.adafruit.com/category/37_88) or a [4-digit 7-segment display](https://www.adafruit.com/category/37_103). Matrices like these are...
In Stock
[Buy Now](https://www.adafruit.com/product/959)
[Related Guides to the Product](https://learn.adafruit.com/products/959/guides)
### Adafruit 0.56" 4-Digit 7-Segment Display w/I2C Backpack - White
[Adafruit 0.56" 4-Digit 7-Segment Display w/I2C Backpack - White](https://www.adafruit.com/product/1002)
What's better than a single LED? Lots of LEDs! A fun way to make a small display is to use an [8x8 matrix](https://www.adafruit.com/category/37_88) or a [4-digit 7-segment display](https://www.adafruit.com/category/37_103). Matrices like these are...
In Stock
[Buy Now](https://www.adafruit.com/product/1002)
[Related Guides to the Product](https://learn.adafruit.com/products/1002/guides)
### Adafruit 1.2" 8x8 LED Matrix Backpack
[Adafruit 1.2" 8x8 LED Matrix Backpack](https://www.adafruit.com/product/1048)
By popular request, you can now get our 8x8 LED backpacks without the LEDs! These backpacks feature an HT16K33 I2C LED driver, they're simple and easy to use - you can use [our very nice library for the backpacks to...](https://github.com/adafruit/Adafruit-LED-Backpack-Library)
In Stock
[Buy Now](https://www.adafruit.com/product/1048)
[Related Guides to the Product](https://learn.adafruit.com/products/1048/guides)
### Adafruit Small 1.2" 8x8 LED Matrix w/I2C Backpack - Red
[Adafruit Small 1.2" 8x8 LED Matrix w/I2C Backpack - Red](https://www.adafruit.com/product/1049)
What's better than a single LED? Lots of LEDs! A fun way to make a small display is to use an [8x8 matrix](https://www.adafruit.com/category/37_88) or a [4-digit 7-segment display](https://www.adafruit.com/category/37_103). Matrices like these are...
In Stock
[Buy Now](https://www.adafruit.com/product/1049)
[Related Guides to the Product](https://learn.adafruit.com/products/1049/guides)
### Adafruit Small 1.2" 8x8 LED Matrix w/I2C Backpack - Yellow
[Adafruit Small 1.2" 8x8 LED Matrix w/I2C Backpack - Yellow](https://www.adafruit.com/product/1050)
What's better than a single LED? Lots of LEDs! A fun way to make a small display is to use an [8x8 matrix](https://www.adafruit.com/category/37_88) or a [4-digit 7-segment display](https://www.adafruit.com/category/37_103). Matrices like these are...
In Stock
[Buy Now](https://www.adafruit.com/product/1050)
[Related Guides to the Product](https://learn.adafruit.com/products/1050/guides)
### Adafruit Small 1.2" 8x8 LED Matrix w/I2C Backpack - Blue
[Adafruit Small 1.2" 8x8 LED Matrix w/I2C Backpack - Blue](https://www.adafruit.com/product/1052)
What's better than a single LED? Lots of LEDs! A fun way to make a small display is to use an [8x8 matrix](https://www.adafruit.com/category/37_88) or a [4-digit 7-segment display](https://www.adafruit.com/category/37_103). Matrices like these are...
In Stock
[Buy Now](https://www.adafruit.com/product/1052)
[Related Guides to the Product](https://learn.adafruit.com/products/1052/guides)
### Adafruit Mini 8x8 LED Matrix w/I2C Backpack - Ultra Bright White
[Adafruit Mini 8x8 LED Matrix w/I2C Backpack - Ultra Bright White](https://www.adafruit.com/product/1080)
What's better than a single LED? Lots of LEDs! A fun way to make a small display is to use an [8x8 matrix](https://www.adafruit.com/category/37_88) or a [4-digit 7-segment display](https://www.adafruit.com/category/37_103). Matrices like these are...
In Stock
[Buy Now](https://www.adafruit.com/product/1080)
[Related Guides to the Product](https://learn.adafruit.com/products/1080/guides)
### Adafruit 1.2" 4-Digit 7-Segment Display w/I2C Backpack - Green
[Adafruit 1.2" 4-Digit 7-Segment Display w/I2C Backpack - Green](https://www.adafruit.com/product/1268)
What's better than a single LED? Lots of LEDs! A fun way to make a numeric display is to use a [4-digit 7-segment display](https://www.adafruit.com/category/37_103). LED matrices like these are 'multiplexed' - so to control all the seven-segment LEDs you need 14 pins....
No Longer Stocked
[Buy Now](https://www.adafruit.com/product/1268)
[Related Guides to the Product](https://learn.adafruit.com/products/1268/guides)
### Adafruit 1.2" 4-Digit 7-Segment Display w/I2C Backpack - Yellow
[Adafruit 1.2" 4-Digit 7-Segment Display w/I2C Backpack - Yellow](https://www.adafruit.com/product/1269)
What's better than a single LED? Lots of LEDs! A fun way to make a numeric display is to use a [4-digit 7-segment display](https://www.adafruit.com/category/37_103). LED matrices like these are 'multiplexed' - so to control all the seven-segment LEDs you need 14 pins....
In Stock
[Buy Now](https://www.adafruit.com/product/1269)
[Related Guides to the Product](https://learn.adafruit.com/products/1269/guides)
### Adafruit 1.2" 4-Digit 7-Segment Display w/I2C Backpack - Red
[Adafruit 1.2" 4-Digit 7-Segment Display w/I2C Backpack - Red](https://www.adafruit.com/product/1270)
What's better than a single LED? Lots of LEDs! A fun way to make a numeric display is to use a [4-digit 7-segment display](https://www.adafruit.com/category/37_103). LED matrices like these are 'multiplexed' - so to control all the seven-segment LEDs you need 14 pins....
In Stock
[Buy Now](https://www.adafruit.com/product/1270)
[Related Guides to the Product](https://learn.adafruit.com/products/1270/guides)
### Small 1.2" 8x8 Ultra Bright White LED Matrix + Backpack
[Small 1.2" 8x8 Ultra Bright White LED Matrix + Backpack](https://www.adafruit.com/product/1614)
What's better than a single LED? Lots of LEDs! A fun way to make a small display is to use an [8x8 matrix](https://www.adafruit.com/category/37_88) or a [4-digit 7-segment display](https://www.adafruit.com/category/37_103). Matrices like these are...
In Stock
[Buy Now](https://www.adafruit.com/product/1614)
[Related Guides to the Product](https://learn.adafruit.com/products/1614/guides)
### Adafruit Small 1.2" 8x8 LED Matrix w/I2C Backpack - Pure Green
[Adafruit Small 1.2" 8x8 LED Matrix w/I2C Backpack - Pure Green](https://www.adafruit.com/product/1632)
What's better than a single LED? Lots of LEDs! A fun way to make a small display is to use an [8x8 matrix](https://www.adafruit.com/category/37_88) or a [4-digit 7-segment display](https://www.adafruit.com/category/37_103). Matrices like these are...
In Stock
[Buy Now](https://www.adafruit.com/product/1632)
[Related Guides to the Product](https://learn.adafruit.com/products/1632/guides)
### Adafruit Mini 0.8" 8x8 LED Matrix w/I2C Backpack - Pure Green
[Adafruit Mini 0.8" 8x8 LED Matrix w/I2C Backpack - Pure Green](https://www.adafruit.com/product/1633)
What's better than a single LED? Lots of LEDs! A fun way to make a small display is to use an [8x8 matrix](https://www.adafruit.com/category/37_88) or a [4-digit 7-segment display](https://www.adafruit.com/category/37_103). Matrices like these are...
In Stock
[Buy Now](https://www.adafruit.com/product/1633)
[Related Guides to the Product](https://learn.adafruit.com/products/1633/guides)
### Bi-Color (Red/Green) 24-Bar Bargraph w/I2C Backpack Kit
[Bi-Color (Red/Green) 24-Bar Bargraph w/I2C Backpack Kit](https://www.adafruit.com/product/1721)
What's better than a single LED? Lots of LEDs! A fun way to make a small linear display is to use two 12-bar Bi-color bar-graphs. However, this LED bargraph is 'multiplexed' - so to control all the 48 LEDs you need a lot of pins.
Out of Stock
[Buy Now](https://www.adafruit.com/product/1721)
[Related Guides to the Product](https://learn.adafruit.com/products/1721/guides)
### Small 1.2" 8x8 Ultra Bright Square Amber LED Matrix + Backpack
[Small 1.2" 8x8 Ultra Bright Square Amber LED Matrix + Backpack](https://www.adafruit.com/product/1854)
What's better than a single LED? Lots of LEDs! Matrices like these are 'multiplexed' - so to control 64 LEDs you need 16 pins. That's a lot of pins, and there are [driver chips like the MAX7219](//www.adafruit.com/products/453) that can control a matrix for you but...
In Stock
[Buy Now](https://www.adafruit.com/product/1854)
[Related Guides to the Product](https://learn.adafruit.com/products/1854/guides)
### Small 1.2" 8x8 Ultra Bright Square Yellow LED Matrix + Backpack
[Small 1.2" 8x8 Ultra Bright Square Yellow LED Matrix + Backpack](https://www.adafruit.com/product/1855)
What's better than a single LED? Lots of LEDs! Matrices like these are 'multiplexed' - so to control 64 LEDs you need 16 pins. That's a lot of pins, and there are [driver chips like the MAX7219](//www.adafruit.com/products/453) that can control a matrix for you but...
In Stock
[Buy Now](https://www.adafruit.com/product/1855)
[Related Guides to the Product](https://learn.adafruit.com/products/1855/guides)
### Small 1.2" 8x8 Bright Square Pure Green LED Matrix + Backpack
[Small 1.2" 8x8 Bright Square Pure Green LED Matrix + Backpack](https://www.adafruit.com/product/1856)
What's better than a single LED? Lots of LEDs! Matrices like these are 'multiplexed' - so to control 64 LEDs you need 16 pins. That's a lot of pins, and there are [driver chips like the MAX7219](//www.adafruit.com/products/453) that can control a matrix for you but...
In Stock
[Buy Now](https://www.adafruit.com/product/1856)
[Related Guides to the Product](https://learn.adafruit.com/products/1856/guides)
### Small 1.2" 8x8 Ultra Bright Square White LED Matrix + Backpack
[Small 1.2" 8x8 Ultra Bright Square White LED Matrix + Backpack](https://www.adafruit.com/product/1857)
What's better than a single LED? Lots of LEDs! Matrices like these are 'multiplexed' - so to control 64 LEDs you need 16 pins. That's a lot of pins, and there are [driver chips like the MAX7219](//www.adafruit.com/products/453) that can control a matrix for you but...
In Stock
[Buy Now](https://www.adafruit.com/product/1857)
[Related Guides to the Product](https://learn.adafruit.com/products/1857/guides)
### Adafruit 14-segment LED Alphanumeric Backpack - STEMMA QT
[Adafruit 14-segment LED Alphanumeric Backpack - STEMMA QT](https://www.adafruit.com/product/1910)
By popular request, you can now get our 14-segment LED backpacks without the LEDs! These backpacks feature an HT16K33 I2C LED driver, they're simple and easy to use - you can use [our very nice library for the backpacks to...](https://github.com/adafruit/Adafruit-LED-Backpack-Library)
In Stock
[Buy Now](https://www.adafruit.com/product/1910)
[Related Guides to the Product](https://learn.adafruit.com/products/1910/guides)
### Quad Alphanumeric Display - Red 0.54" Digits w/ I2C Backpack
[Quad Alphanumeric Display - Red 0.54" Digits w/ I2C Backpack](https://www.adafruit.com/product/1911)
Display, elegantly, 012345678 or 9! Gaze, hypnotized, at ABCDEFGHIJKLM - well it can display the whole alphabet. You get the point. This is a nice, bright alphanumeric display that shows letters and numbers in a beautiful red hue. It's super bright and designed for viewing from distances...
In Stock
[Buy Now](https://www.adafruit.com/product/1911)
[Related Guides to the Product](https://learn.adafruit.com/products/1911/guides)
### Quad Alphanumeric Display - Blue 0.54" Digits w/ I2C Backpack
[Quad Alphanumeric Display - Blue 0.54" Digits w/ I2C Backpack](https://www.adafruit.com/product/1912)
Display, elegantly, 012345678 or 9! Gaze, hypnotized, at ABCDEFGHIJKLM - well it can display the whole alphabet. You get the point. This is a nice, bright alphanumeric display that shows letters and numbers in a beautiful blue hue. It's super bright and designed for viewing from distances...
In Stock
[Buy Now](https://www.adafruit.com/product/1912)
[Related Guides to the Product](https://learn.adafruit.com/products/1912/guides)
### 16x8 1.2" LED Matrix + Backpack - Ultra Bright Round Green LEDs
[16x8 1.2" LED Matrix + Backpack - Ultra Bright Round Green LEDs](https://www.adafruit.com/product/2035)
What's better than a single LED? Lots of LEDs! And what's better than lots of LEDs? **TWO TIMES AS MANY LEDS!!!**
With the 16x8 LED Matrix Backpack we've doubled your project's matrix capacity by making it super easy to get two separate 8x8 matrices onto...
In Stock
[Buy Now](https://www.adafruit.com/product/2035)
[Related Guides to the Product](https://learn.adafruit.com/products/2035/guides)
### 16x8 1.2" LED Matrix+Backpack UltraBright Round YellowGreen LEDs
[16x8 1.2" LED Matrix+Backpack UltraBright Round YellowGreen LEDs](https://www.adafruit.com/product/2036)
What's better than a single LED? Lots of LEDs! And what's better than lots of LEDs? **TWO TIMES AS MANY LEDS!!!**
With the 16x8 LED Matrix Backpack we've doubled your project's matrix capacity by making it super easy to get two separate 8x8 matrices onto...
In Stock
[Buy Now](https://www.adafruit.com/product/2036)
[Related Guides to the Product](https://learn.adafruit.com/products/2036/guides)
### 16x8 1.2" LED Matrix + Backpack - Ultra Bright Round Red LEDs
[16x8 1.2" LED Matrix + Backpack - Ultra Bright Round Red LEDs](https://www.adafruit.com/product/2037)
What's better than a single LED? Lots of LEDs! And what's better than lots of LEDs? **TWO TIMES AS MANY LEDS!!!**
With the 16x8 LED Matrix Backpack we've doubled your project's matrix capacity by making it super easy to get two separate 8x8 matrices onto...
In Stock
[Buy Now](https://www.adafruit.com/product/2037)
[Related Guides to the Product](https://learn.adafruit.com/products/2037/guides)
### 16x8 1.2" LED Matrix + Backpack - Ultra Bright Round White LEDs
[16x8 1.2" LED Matrix + Backpack - Ultra Bright Round White LEDs](https://www.adafruit.com/product/2038)
What's better than a single LED? Lots of LEDs! And what's better than lots of LEDs? **TWO TIMES AS MANY LEDS!!!**
With the 16x8 LED Matrix Backpack we've doubled your project's matrix capacity by making it super easy to get two separate 8x8 matrices onto...
In Stock
[Buy Now](https://www.adafruit.com/product/2038)
[Related Guides to the Product](https://learn.adafruit.com/products/2038/guides)
### 16x8 1.2" LED Matrix + Backpack - Ultra Bright Round Blue LEDs
[16x8 1.2" LED Matrix + Backpack - Ultra Bright Round Blue LEDs](https://www.adafruit.com/product/2039)
What's better than a single LED? Lots of LEDs! And what's better than lots of LEDs? **TWO TIMES AS MANY LEDS!!!**
With the 16x8 LED Matrix Backpack we've doubled your project's matrix capacity by making it super easy to get two separate 8x8 matrices onto...
In Stock
[Buy Now](https://www.adafruit.com/product/2039)
[Related Guides to the Product](https://learn.adafruit.com/products/2039/guides)
### 16x8 1.2" LED Matrix + Backpack - Ultra Bright Square Blue LEDs
[16x8 1.2" LED Matrix + Backpack - Ultra Bright Square Blue LEDs](https://www.adafruit.com/product/2040)
What's better than a single LED? Lots of LEDs! And what's better than lots of LEDs? **TWO TIMES AS MANY LEDS!!!**
With the 16x8 LED Matrix Backpack we've doubled your project's matrix capacity by making it super easy to get two separate 8x8 matrices onto...
In Stock
[Buy Now](https://www.adafruit.com/product/2040)
[Related Guides to the Product](https://learn.adafruit.com/products/2040/guides)
### 16x8 1.2" LED Matrix + Backpack - Ultra Bright Square Amber LEDs
[16x8 1.2" LED Matrix + Backpack - Ultra Bright Square Amber LEDs](https://www.adafruit.com/product/2041)
What's better than a single LED? Lots of LEDs! And what's better than lots of LEDs? **TWO TIMES AS MANY LEDS!!!**
With the 16x8 LED Matrix Backpack we've doubled your project's matrix capacity by making it super easy to get two separate 8x8 matrices onto...
In Stock
[Buy Now](https://www.adafruit.com/product/2041)
[Related Guides to the Product](https://learn.adafruit.com/products/2041/guides)
### 16x8 1.2" LED Matrix + Backpack - Ultra Bright Square Green LEDs
[16x8 1.2" LED Matrix + Backpack - Ultra Bright Square Green LEDs](https://www.adafruit.com/product/2042)
What's better than a single LED? Lots of LEDs! And what's better than lots of LEDs? **TWO TIMES AS MANY LEDS!!!**
With the 16x8 LED Matrix Backpack we've doubled your project's matrix capacity by making it super easy to get two separate 8x8 matrices onto...
In Stock
[Buy Now](https://www.adafruit.com/product/2042)
[Related Guides to the Product](https://learn.adafruit.com/products/2042/guides)
### 16x8 1.2" LED Matrix + Backpack -Ultra Bright Square Yellow LEDs
[16x8 1.2" LED Matrix + Backpack -Ultra Bright Square Yellow LEDs](https://www.adafruit.com/product/2043)
What's better than a single LED? Lots of LEDs! And what's better than lots of LEDs? **TWO TIMES AS MANY LEDS!!!**
With the 16x8 LED Matrix Backpack we've doubled your project's matrix capacity by making it super easy to get two separate 8x8 matrices onto...
In Stock
[Buy Now](https://www.adafruit.com/product/2043)
[Related Guides to the Product](https://learn.adafruit.com/products/2043/guides)
### 16x8 1.2" LED Matrix + Backpack - Ultra Bright Square White LEDs
[16x8 1.2" LED Matrix + Backpack - Ultra Bright Square White LEDs](https://www.adafruit.com/product/2044)
What's better than a single LED? Lots of LEDs! And what's better than lots of LEDs? **TWO TIMES AS MANY LEDS!!!**
With the 16x8 LED Matrix Backpack we've doubled your project's matrix capacity by making it super easy to get two separate 8x8 matrices onto...
In Stock
[Buy Now](https://www.adafruit.com/product/2044)
[Related Guides to the Product](https://learn.adafruit.com/products/2044/guides)
### 16x8 1.2" LED Matrix + Backpack-Ultra Bright Round Orange LEDs
[16x8 1.2" LED Matrix + Backpack-Ultra Bright Round Orange LEDs](https://www.adafruit.com/product/2052)
What's better than a single LED? Lots of LEDs! And what's better than lots of LEDs? **TWO TIMES AS MANY LEDS!!!**
With the 16x8 LED Matrix Backpack we've doubled your project's matrix capacity by making it super easy to get two separate 8x8 matrices onto...
In Stock
[Buy Now](https://www.adafruit.com/product/2052)
[Related Guides to the Product](https://learn.adafruit.com/products/2052/guides)
### 16x8 1.2" LED Matrices+Backpack Round LEDs in Various Colors
[16x8 1.2" LED Matrices+Backpack Round LEDs in Various Colors](https://www.adafruit.com/product/2054)
What's better than a single LED? Lots of LEDs! And what's better than lots of LEDs? **TWO TIMES AS MANY LEDS!!!**
With the 16x8 LED Matrix Backpack we've doubled your project's matrix capacity by making it super easy to get two separate 8x8 matrices onto...
Out of Stock
[Buy Now](https://www.adafruit.com/product/2054)
[Related Guides to the Product](https://learn.adafruit.com/products/2054/guides)
### Adafruit 8x16 LED Matrix FeatherWing w/o Matrices
[Adafruit 8x16 LED Matrix FeatherWing w/o Matrices](https://www.adafruit.com/product/3090)
You will chirp with delight when you see how easy it is to make your very own 8x16 LED matrix display for any Feather. At 0.8" square, the little [8x8 matrices](https://www.adafruit.com/new/?q=8x8%20miniature%20LED%20matrix&) have everything a big LED matrix has,...
Out of Stock
[Buy Now](https://www.adafruit.com/product/3090)
[Related Guides to the Product](https://learn.adafruit.com/products/3090/guides)
### Adafruit 14-segment LED Alphanumeric backpack (same as P1910)
[Adafruit 14-segment LED Alphanumeric backpack (same as P1910)](https://www.adafruit.com/product/3322)
Just the backpack + 4pin header
No Longer Stocked
[Buy Now](https://www.adafruit.com/product/3322)
[Related Guides to the Product](https://learn.adafruit.com/products/3322/guides)
## Featured Products
### Adafruit Small 1.2" 8x8 LED Matrix w/I2C Backpack - Yellow-Green
[Adafruit Small 1.2" 8x8 LED Matrix w/I2C Backpack - Yellow-Green](https://www.adafruit.com/product/1051)
What's better than a single LED? Lots of LEDs! A fun way to make a small display is to use an [8x8 matrix](https://www.adafruit.com/category/37_88) or a [4-digit 7-segment display](https://www.adafruit.com/category/37_103). Matrices like these are...
In Stock
[Buy Now](https://www.adafruit.com/product/1051)
[Related Guides to the Product](https://learn.adafruit.com/products/1051/guides)
### Small 1.2" 8x8 Ultra Bright Square Blue LED Matrix + Backpack
[Small 1.2" 8x8 Ultra Bright Square Blue LED Matrix + Backpack](https://www.adafruit.com/product/1853)
What's better than a single LED? Lots of LEDs! Matrices like these are 'multiplexed' - so to control 64 LEDs you need 16 pins. That's a lot of pins, and there are [driver chips like the MAX7219](//www.adafruit.com/products/453) that can control a matrix for you but...
In Stock
[Buy Now](https://www.adafruit.com/product/1853)
[Related Guides to the Product](https://learn.adafruit.com/products/1853/guides)
## Related Guides
- [LED Backpack Displays on Raspberry Pi and BeagleBone Black](https://learn.adafruit.com/led-backpack-displays-on-raspberry-pi-and-beaglebone-black.md)
- [Animating Multiple LED Backpacks](https://learn.adafruit.com/animating-multiple-led-backpacks.md)
- [Arduino GPS Clock](https://learn.adafruit.com/arduino-clock.md)
- [Raspberry Pi Physical Dashboard](https://learn.adafruit.com/raspberry-pi-physical-dashboard.md)
- [CircuitPython Hardware: LED Backpacks & FeatherWings](https://learn.adafruit.com/micropython-hardware-led-backpacks-and-featherwings.md)
- [Matrix and 7-Segment LED Backpack with the Raspberry Pi](https://learn.adafruit.com/matrix-7-segment-led-backpack-with-the-raspberry-pi.md)
- [DIY Pocket LED Gamer - Tiny Tetris!](https://learn.adafruit.com/diy-3d-printed-handheld-pocket-game-tiny-tetris-snake.md)
- [RGB LED Matrix Cube with 25,000 LEDs](https://learn.adafruit.com/rgb-led-matrix-cube-for-pi.md)
- [Creating GIFs for SmartMatrix](https://learn.adafruit.com/creating-gifs-for-smartmatrix.md)
- [Adafruit CharliePlex LED Matrix Bonnet](https://learn.adafruit.com/adafruit-charlieplex-bonnet.md)
- [Connecting a 16x32 RGB LED Matrix Panel to a Raspberry Pi](https://learn.adafruit.com/connecting-a-16x32-rgb-led-matrix-panel-to-a-raspberry-pi.md)
- [MicroPython Displays: Drawing Text](https://learn.adafruit.com/micropython-displays-drawing-text.md)
- [Heart Rate Badge](https://learn.adafruit.com/heart-rate-badge.md)
- [16x24 LED Matrix](https://learn.adafruit.com/16x24-led-matrix.md)
- [Adafruit IS31FL3741](https://learn.adafruit.com/adafruit-is31fl3741.md)
---
# Source: https://learn.adafruit.com/adafruit-led-backpack/1-2-16x8-matrix-circuitpython-and-python-usage.md
# Adafruit LED Backpacks
## CircuitPython and Python Usage
The following section will show how to control the LED backpack from the board's Python prompt / REPL. You'll walk through how to control the LED matrix display and learn how to use the CircuitPython module built for the display.
First, [connect to the board's serial REPL ](https://learn.adafruit.com/welcome-to-circuitpython/the-repl)so you are at the CircuitPython **\>\>\>** prompt.
## Initialization
First you'll need to initialize the I2C bus for your board. It's really easy, first import the necessary modules. In this case, we'll use `board` and `MatrixBackpack16x8`.
Then just use `board.I2C()` to create the I2C instance using the default SCL and SDA pins (which will be marked on the boards pins if using a Feather or similar Adafruit board).
Then to initialize the matrix, you just pass `i2c` in.
Warning: When using the STEMMA QT port, some board may have an alternate I2C such as board.STEMMA_I2C().
```python
import board
from adafruit_ht16k33.matrix import MatrixBackpack16x8
i2c = board.I2C()
matrix = MatrixBackpack16x8(i2c)
```
If you bridged the address pads on the back of the display, you could pass in the address. The addresses for the HT16K33 can range between 0x70 and 0x77 depending on which pads you have bridged, with 0x70 being used if you haven't bridged any of them. For instance, if you bridge only the **A0** pad, you would use `0x71` like this:
```python
matrix = MatrixBackpack16x8(i2c, address=0x71)
```
## Setting the Brightness
You can set the brightness of the display, but changing it will set the brightness of the entire display and not individual segments. If can be adjusted in 1/16 increments **between 0 and 1.0** with 1.0 being the brightest. So to set the display to half brightness, you would use the following:
```python
display.brightness = 0.5
```
## Setting the Blink Rate
You can set the blink rate of the display, but changing it will set the brightness of the entire display and not individual pixels. If can be adjusted in 1/4 increments **between 0 and 3** with 3 being the fastest blinking. So to set the display to blink at full speed, you would use the following:
```python
display.blink_rate = 3
```
## Setting Individual Pixels
To set individual pixels to on, you simply treat the `matrix` object as a multidimensional list and set it to 1.
```python
matrix[0, 0] = 1
matrix[4, 4] = 1
matrix[7, 7] = 1
```
## Filling the Entire Matrix
To fill the entire matrix, just use the fill() function and pass in either 0 or 1 depending on whether you want all pixels off or on. For instance, if you wanted to set everything to on, you would use:
```python
matrix.fill(1)
```
## Shifting the Matrix
To shift the pixels on the matrix, there are 5 functions you can use. The main function, called shift(), is used to shift the pixels, up, down, left, right, or even diagonally. By passing a positive number, it will shift the pixels right/up and passing a negative number will shift them left/down. For instance:
```python
matrix.shift(2, 0) # shift pixels to the right by 2
matrix.shift(-1, 0) # shift pixels to the left by 1
matrix.shift(0, -3) # shift pixels down by 3
matrix.shift(-2, 2) # shift pixels left by 2 and up by 2
```
You can pass `True` as a third parameter to loop all the pixels that get shifted off over to the other side.
```python
matrix.shift(2, 0, True) # loop pixels to the right by 2
matrix.shift(-1, 0, True) # loop pixels to the left by 1
matrix.shift(0, -3, True) # loop pixels down by 3
matrix.shift(-2, 2, True) # loop pixels left by 2 and up by 2
```
Additionally, there are a few convenience functions that will shift the pixels by one. These can also be passed a value of `True` to loop the pixels.
```python
matrix.shift_up() # Shift pixels up
matrix.shift_left() # Shift pixels left
matrix.shift_down() # Shift pixels down
matrix.shift_right() # Shift pixels right
matrix.shift_up(True) # Loop pixels up
matrix.shift_left(True) # Loop pixels left
matrix.shift_down(True) # Loop pixels down
matrix.shift_right(True) # Loop pixels right
```
Here's what shifting a smiley face to the right looks like:

## Displaying an Image (Pillow Only)
Additionally, when using with the Raspberry Pi, you can use the Pillow library to display an image to the Matrix. The image will need to be the same exact size as the Matrix. In this case, it should be **16x8** pixels. As an example, you can save the image below as **myimage.png**.

[Download Image](https://cdn-learn.adafruit.com/assets/assets/000/087/760/original/led_matrices_squares-mono-16x8.png?1580238757)
Then if you want to display the image called **myimage.png** , you would use something like this:
```python
import board
from PIL import Image
from adafruit_ht16k33 import matrix
matrix = matrix.MatrixBackpack16x8(board.I2C())
image = Image.open("myimage.png")
matrix.image(image)
```

- [Previous Page](https://learn.adafruit.com/adafruit-led-backpack/1-2-16x8-matrix-python-wiring-and-setup.md)
- [Next Page](https://learn.adafruit.com/adafruit-led-backpack/0-54-alphanumeric.md)
## Primary Products
### Adafruit Mini 8x8 LED Matrix w/I2C Backpack - Red
[Adafruit Mini 8x8 LED Matrix w/I2C Backpack - Red](https://www.adafruit.com/product/870)
What's better than a single LED? Lots of LEDs! A fun way to make a small display is to use an [8x8 matrix](https://www.adafruit.com/category/37_88) or a [4-digit 7-segment display](https://www.adafruit.com/category/37_103). Matrices like these are...
In Stock
[Buy Now](https://www.adafruit.com/product/870)
[Related Guides to the Product](https://learn.adafruit.com/products/870/guides)
### Adafruit Mini 8x8 LED Matrix w/I2C Backpack - Yellow
[Adafruit Mini 8x8 LED Matrix w/I2C Backpack - Yellow](https://www.adafruit.com/product/871)
What's better than a single LED? Lots of LEDs! A fun way to make a small display is to use an [8x8 matrix](https://www.adafruit.com/category/37_88) or a [4-digit 7-segment display](https://www.adafruit.com/category/37_103). Matrices like these are...
In Stock
[Buy Now](https://www.adafruit.com/product/871)
[Related Guides to the Product](https://learn.adafruit.com/products/871/guides)
### Adafruit Mini 0.8" 8x8 LED Matrix w/I2C Backpack - Yellow-Green
[Adafruit Mini 0.8" 8x8 LED Matrix w/I2C Backpack - Yellow-Green](https://www.adafruit.com/product/872)
What's better than a single LED? Lots of LEDs! A fun way to make a small display is to use an [8x8 matrix](https://www.adafruit.com/category/37_88) or a [4-digit 7-segment display](https://www.adafruit.com/category/37_103). Matrices like these are...
In Stock
[Buy Now](https://www.adafruit.com/product/872)
[Related Guides to the Product](https://learn.adafruit.com/products/872/guides)
### Adafruit 0.56" 4-Digit 7-Segment Display with I2C Backpack - Red
[Adafruit 0.56" 4-Digit 7-Segment Display with I2C Backpack - Red](https://www.adafruit.com/product/878)
What's better than a single LED? Lots of LEDs! A fun way to make a small display is to use an [8x8 matrix](https://www.adafruit.com/category/37_88) or a [4-digit 7-segment display](https://www.adafruit.com/category/37_103). Matrices like these are...
In Stock
[Buy Now](https://www.adafruit.com/product/878)
[Related Guides to the Product](https://learn.adafruit.com/products/878/guides)
### Adafruit 0.56" 4-Digit 7-Segment Display w/I2C Backpack - Yellow
[Adafruit 0.56" 4-Digit 7-Segment Display w/I2C Backpack - Yellow](https://www.adafruit.com/product/879)
What's better than a single LED? Lots of LEDs! A fun way to make a small display is to use an [8x8 matrix](https://www.adafruit.com/category/37_88) or a [4-digit 7-segment display](https://www.adafruit.com/category/37_103). Matrices like these are...
In Stock
[Buy Now](https://www.adafruit.com/product/879)
[Related Guides to the Product](https://learn.adafruit.com/products/879/guides)
### Adafruit 0.56" 4-Digit 7-Segment Display w/ I2C Backpack - Green
[Adafruit 0.56" 4-Digit 7-Segment Display w/ I2C Backpack - Green](https://www.adafruit.com/product/880)
What's better than a single LED? Lots of LEDs! A fun way to make a small display is to use an [8x8 matrix](https://www.adafruit.com/category/37_88) or a [4-digit 7-segment display](https://www.adafruit.com/category/37_103). Matrices like these are...
No Longer Stocked
[Buy Now](https://www.adafruit.com/product/880)
[Related Guides to the Product](https://learn.adafruit.com/products/880/guides)
### Adafruit 0.56" 4-Digit 7-Segment Display w/ I2C Backpack - Blue
[Adafruit 0.56" 4-Digit 7-Segment Display w/ I2C Backpack - Blue](https://www.adafruit.com/product/881)
What's better than a single LED? Lots of LEDs! A fun way to make a small display is to use an [8x8 matrix](https://www.adafruit.com/category/37_88) or a [4-digit 7-segment display](https://www.adafruit.com/category/37_103). Matrices like these are...
In Stock
[Buy Now](https://www.adafruit.com/product/881)
[Related Guides to the Product](https://learn.adafruit.com/products/881/guides)
### Adafruit Bicolor LED Square Pixel Matrix with I2C Backpack
[Adafruit Bicolor LED Square Pixel Matrix with I2C Backpack](https://www.adafruit.com/product/902)
What's better than a single LED? Lots of LEDs! A fun way to make a small colorful display is to use a [1.2" Bi-color 8x8 LED Matrix](http://www.adafruit.com/products/458). Matrices like these are 'multiplexed' - so to control all the 128 LEDs you need 24 pins....
In Stock
[Buy Now](https://www.adafruit.com/product/902)
[Related Guides to the Product](https://learn.adafruit.com/products/902/guides)
### Adafruit Mini 8x8 LED Matrix w/I2C Backpack - Blue
[Adafruit Mini 8x8 LED Matrix w/I2C Backpack - Blue](https://www.adafruit.com/product/959)
What's better than a single LED? Lots of LEDs! A fun way to make a small display is to use an [8x8 matrix](https://www.adafruit.com/category/37_88) or a [4-digit 7-segment display](https://www.adafruit.com/category/37_103). Matrices like these are...
In Stock
[Buy Now](https://www.adafruit.com/product/959)
[Related Guides to the Product](https://learn.adafruit.com/products/959/guides)
### Adafruit 0.56" 4-Digit 7-Segment Display w/I2C Backpack - White
[Adafruit 0.56" 4-Digit 7-Segment Display w/I2C Backpack - White](https://www.adafruit.com/product/1002)
What's better than a single LED? Lots of LEDs! A fun way to make a small display is to use an [8x8 matrix](https://www.adafruit.com/category/37_88) or a [4-digit 7-segment display](https://www.adafruit.com/category/37_103). Matrices like these are...
In Stock
[Buy Now](https://www.adafruit.com/product/1002)
[Related Guides to the Product](https://learn.adafruit.com/products/1002/guides)
### Adafruit 1.2" 8x8 LED Matrix Backpack
[Adafruit 1.2" 8x8 LED Matrix Backpack](https://www.adafruit.com/product/1048)
By popular request, you can now get our 8x8 LED backpacks without the LEDs! These backpacks feature an HT16K33 I2C LED driver, they're simple and easy to use - you can use [our very nice library for the backpacks to...](https://github.com/adafruit/Adafruit-LED-Backpack-Library)
In Stock
[Buy Now](https://www.adafruit.com/product/1048)
[Related Guides to the Product](https://learn.adafruit.com/products/1048/guides)
### Adafruit Small 1.2" 8x8 LED Matrix w/I2C Backpack - Red
[Adafruit Small 1.2" 8x8 LED Matrix w/I2C Backpack - Red](https://www.adafruit.com/product/1049)
What's better than a single LED? Lots of LEDs! A fun way to make a small display is to use an [8x8 matrix](https://www.adafruit.com/category/37_88) or a [4-digit 7-segment display](https://www.adafruit.com/category/37_103). Matrices like these are...
In Stock
[Buy Now](https://www.adafruit.com/product/1049)
[Related Guides to the Product](https://learn.adafruit.com/products/1049/guides)
### Adafruit Small 1.2" 8x8 LED Matrix w/I2C Backpack - Yellow
[Adafruit Small 1.2" 8x8 LED Matrix w/I2C Backpack - Yellow](https://www.adafruit.com/product/1050)
What's better than a single LED? Lots of LEDs! A fun way to make a small display is to use an [8x8 matrix](https://www.adafruit.com/category/37_88) or a [4-digit 7-segment display](https://www.adafruit.com/category/37_103). Matrices like these are...
In Stock
[Buy Now](https://www.adafruit.com/product/1050)
[Related Guides to the Product](https://learn.adafruit.com/products/1050/guides)
### Adafruit Small 1.2" 8x8 LED Matrix w/I2C Backpack - Blue
[Adafruit Small 1.2" 8x8 LED Matrix w/I2C Backpack - Blue](https://www.adafruit.com/product/1052)
What's better than a single LED? Lots of LEDs! A fun way to make a small display is to use an [8x8 matrix](https://www.adafruit.com/category/37_88) or a [4-digit 7-segment display](https://www.adafruit.com/category/37_103). Matrices like these are...
In Stock
[Buy Now](https://www.adafruit.com/product/1052)
[Related Guides to the Product](https://learn.adafruit.com/products/1052/guides)
### Adafruit Mini 8x8 LED Matrix w/I2C Backpack - Ultra Bright White
[Adafruit Mini 8x8 LED Matrix w/I2C Backpack - Ultra Bright White](https://www.adafruit.com/product/1080)
What's better than a single LED? Lots of LEDs! A fun way to make a small display is to use an [8x8 matrix](https://www.adafruit.com/category/37_88) or a [4-digit 7-segment display](https://www.adafruit.com/category/37_103). Matrices like these are...
In Stock
[Buy Now](https://www.adafruit.com/product/1080)
[Related Guides to the Product](https://learn.adafruit.com/products/1080/guides)
### Adafruit 1.2" 4-Digit 7-Segment Display w/I2C Backpack - Green
[Adafruit 1.2" 4-Digit 7-Segment Display w/I2C Backpack - Green](https://www.adafruit.com/product/1268)
What's better than a single LED? Lots of LEDs! A fun way to make a numeric display is to use a [4-digit 7-segment display](https://www.adafruit.com/category/37_103). LED matrices like these are 'multiplexed' - so to control all the seven-segment LEDs you need 14 pins....
No Longer Stocked
[Buy Now](https://www.adafruit.com/product/1268)
[Related Guides to the Product](https://learn.adafruit.com/products/1268/guides)
### Adafruit 1.2" 4-Digit 7-Segment Display w/I2C Backpack - Yellow
[Adafruit 1.2" 4-Digit 7-Segment Display w/I2C Backpack - Yellow](https://www.adafruit.com/product/1269)
What's better than a single LED? Lots of LEDs! A fun way to make a numeric display is to use a [4-digit 7-segment display](https://www.adafruit.com/category/37_103). LED matrices like these are 'multiplexed' - so to control all the seven-segment LEDs you need 14 pins....
In Stock
[Buy Now](https://www.adafruit.com/product/1269)
[Related Guides to the Product](https://learn.adafruit.com/products/1269/guides)
### Adafruit 1.2" 4-Digit 7-Segment Display w/I2C Backpack - Red
[Adafruit 1.2" 4-Digit 7-Segment Display w/I2C Backpack - Red](https://www.adafruit.com/product/1270)
What's better than a single LED? Lots of LEDs! A fun way to make a numeric display is to use a [4-digit 7-segment display](https://www.adafruit.com/category/37_103). LED matrices like these are 'multiplexed' - so to control all the seven-segment LEDs you need 14 pins....
In Stock
[Buy Now](https://www.adafruit.com/product/1270)
[Related Guides to the Product](https://learn.adafruit.com/products/1270/guides)
### Small 1.2" 8x8 Ultra Bright White LED Matrix + Backpack
[Small 1.2" 8x8 Ultra Bright White LED Matrix + Backpack](https://www.adafruit.com/product/1614)
What's better than a single LED? Lots of LEDs! A fun way to make a small display is to use an [8x8 matrix](https://www.adafruit.com/category/37_88) or a [4-digit 7-segment display](https://www.adafruit.com/category/37_103). Matrices like these are...
In Stock
[Buy Now](https://www.adafruit.com/product/1614)
[Related Guides to the Product](https://learn.adafruit.com/products/1614/guides)
### Adafruit Small 1.2" 8x8 LED Matrix w/I2C Backpack - Pure Green
[Adafruit Small 1.2" 8x8 LED Matrix w/I2C Backpack - Pure Green](https://www.adafruit.com/product/1632)
What's better than a single LED? Lots of LEDs! A fun way to make a small display is to use an [8x8 matrix](https://www.adafruit.com/category/37_88) or a [4-digit 7-segment display](https://www.adafruit.com/category/37_103). Matrices like these are...
In Stock
[Buy Now](https://www.adafruit.com/product/1632)
[Related Guides to the Product](https://learn.adafruit.com/products/1632/guides)
### Adafruit Mini 0.8" 8x8 LED Matrix w/I2C Backpack - Pure Green
[Adafruit Mini 0.8" 8x8 LED Matrix w/I2C Backpack - Pure Green](https://www.adafruit.com/product/1633)
What's better than a single LED? Lots of LEDs! A fun way to make a small display is to use an [8x8 matrix](https://www.adafruit.com/category/37_88) or a [4-digit 7-segment display](https://www.adafruit.com/category/37_103). Matrices like these are...
In Stock
[Buy Now](https://www.adafruit.com/product/1633)
[Related Guides to the Product](https://learn.adafruit.com/products/1633/guides)
### Bi-Color (Red/Green) 24-Bar Bargraph w/I2C Backpack Kit
[Bi-Color (Red/Green) 24-Bar Bargraph w/I2C Backpack Kit](https://www.adafruit.com/product/1721)
What's better than a single LED? Lots of LEDs! A fun way to make a small linear display is to use two 12-bar Bi-color bar-graphs. However, this LED bargraph is 'multiplexed' - so to control all the 48 LEDs you need a lot of pins.
Out of Stock
[Buy Now](https://www.adafruit.com/product/1721)
[Related Guides to the Product](https://learn.adafruit.com/products/1721/guides)
### Small 1.2" 8x8 Ultra Bright Square Amber LED Matrix + Backpack
[Small 1.2" 8x8 Ultra Bright Square Amber LED Matrix + Backpack](https://www.adafruit.com/product/1854)
What's better than a single LED? Lots of LEDs! Matrices like these are 'multiplexed' - so to control 64 LEDs you need 16 pins. That's a lot of pins, and there are [driver chips like the MAX7219](//www.adafruit.com/products/453) that can control a matrix for you but...
In Stock
[Buy Now](https://www.adafruit.com/product/1854)
[Related Guides to the Product](https://learn.adafruit.com/products/1854/guides)
### Small 1.2" 8x8 Ultra Bright Square Yellow LED Matrix + Backpack
[Small 1.2" 8x8 Ultra Bright Square Yellow LED Matrix + Backpack](https://www.adafruit.com/product/1855)
What's better than a single LED? Lots of LEDs! Matrices like these are 'multiplexed' - so to control 64 LEDs you need 16 pins. That's a lot of pins, and there are [driver chips like the MAX7219](//www.adafruit.com/products/453) that can control a matrix for you but...
In Stock
[Buy Now](https://www.adafruit.com/product/1855)
[Related Guides to the Product](https://learn.adafruit.com/products/1855/guides)
### Small 1.2" 8x8 Bright Square Pure Green LED Matrix + Backpack
[Small 1.2" 8x8 Bright Square Pure Green LED Matrix + Backpack](https://www.adafruit.com/product/1856)
What's better than a single LED? Lots of LEDs! Matrices like these are 'multiplexed' - so to control 64 LEDs you need 16 pins. That's a lot of pins, and there are [driver chips like the MAX7219](//www.adafruit.com/products/453) that can control a matrix for you but...
In Stock
[Buy Now](https://www.adafruit.com/product/1856)
[Related Guides to the Product](https://learn.adafruit.com/products/1856/guides)
### Small 1.2" 8x8 Ultra Bright Square White LED Matrix + Backpack
[Small 1.2" 8x8 Ultra Bright Square White LED Matrix + Backpack](https://www.adafruit.com/product/1857)
What's better than a single LED? Lots of LEDs! Matrices like these are 'multiplexed' - so to control 64 LEDs you need 16 pins. That's a lot of pins, and there are [driver chips like the MAX7219](//www.adafruit.com/products/453) that can control a matrix for you but...
In Stock
[Buy Now](https://www.adafruit.com/product/1857)
[Related Guides to the Product](https://learn.adafruit.com/products/1857/guides)
### Adafruit 14-segment LED Alphanumeric Backpack - STEMMA QT
[Adafruit 14-segment LED Alphanumeric Backpack - STEMMA QT](https://www.adafruit.com/product/1910)
By popular request, you can now get our 14-segment LED backpacks without the LEDs! These backpacks feature an HT16K33 I2C LED driver, they're simple and easy to use - you can use [our very nice library for the backpacks to...](https://github.com/adafruit/Adafruit-LED-Backpack-Library)
In Stock
[Buy Now](https://www.adafruit.com/product/1910)
[Related Guides to the Product](https://learn.adafruit.com/products/1910/guides)
### Quad Alphanumeric Display - Red 0.54" Digits w/ I2C Backpack
[Quad Alphanumeric Display - Red 0.54" Digits w/ I2C Backpack](https://www.adafruit.com/product/1911)
Display, elegantly, 012345678 or 9! Gaze, hypnotized, at ABCDEFGHIJKLM - well it can display the whole alphabet. You get the point. This is a nice, bright alphanumeric display that shows letters and numbers in a beautiful red hue. It's super bright and designed for viewing from distances...
In Stock
[Buy Now](https://www.adafruit.com/product/1911)
[Related Guides to the Product](https://learn.adafruit.com/products/1911/guides)
### Quad Alphanumeric Display - Blue 0.54" Digits w/ I2C Backpack
[Quad Alphanumeric Display - Blue 0.54" Digits w/ I2C Backpack](https://www.adafruit.com/product/1912)
Display, elegantly, 012345678 or 9! Gaze, hypnotized, at ABCDEFGHIJKLM - well it can display the whole alphabet. You get the point. This is a nice, bright alphanumeric display that shows letters and numbers in a beautiful blue hue. It's super bright and designed for viewing from distances...
In Stock
[Buy Now](https://www.adafruit.com/product/1912)
[Related Guides to the Product](https://learn.adafruit.com/products/1912/guides)
### 16x8 1.2" LED Matrix + Backpack - Ultra Bright Round Green LEDs
[16x8 1.2" LED Matrix + Backpack - Ultra Bright Round Green LEDs](https://www.adafruit.com/product/2035)
What's better than a single LED? Lots of LEDs! And what's better than lots of LEDs? **TWO TIMES AS MANY LEDS!!!**
With the 16x8 LED Matrix Backpack we've doubled your project's matrix capacity by making it super easy to get two separate 8x8 matrices onto...
In Stock
[Buy Now](https://www.adafruit.com/product/2035)
[Related Guides to the Product](https://learn.adafruit.com/products/2035/guides)
### 16x8 1.2" LED Matrix+Backpack UltraBright Round YellowGreen LEDs
[16x8 1.2" LED Matrix+Backpack UltraBright Round YellowGreen LEDs](https://www.adafruit.com/product/2036)
What's better than a single LED? Lots of LEDs! And what's better than lots of LEDs? **TWO TIMES AS MANY LEDS!!!**
With the 16x8 LED Matrix Backpack we've doubled your project's matrix capacity by making it super easy to get two separate 8x8 matrices onto...
In Stock
[Buy Now](https://www.adafruit.com/product/2036)
[Related Guides to the Product](https://learn.adafruit.com/products/2036/guides)
### 16x8 1.2" LED Matrix + Backpack - Ultra Bright Round Red LEDs
[16x8 1.2" LED Matrix + Backpack - Ultra Bright Round Red LEDs](https://www.adafruit.com/product/2037)
What's better than a single LED? Lots of LEDs! And what's better than lots of LEDs? **TWO TIMES AS MANY LEDS!!!**
With the 16x8 LED Matrix Backpack we've doubled your project's matrix capacity by making it super easy to get two separate 8x8 matrices onto...
In Stock
[Buy Now](https://www.adafruit.com/product/2037)
[Related Guides to the Product](https://learn.adafruit.com/products/2037/guides)
### 16x8 1.2" LED Matrix + Backpack - Ultra Bright Round White LEDs
[16x8 1.2" LED Matrix + Backpack - Ultra Bright Round White LEDs](https://www.adafruit.com/product/2038)
What's better than a single LED? Lots of LEDs! And what's better than lots of LEDs? **TWO TIMES AS MANY LEDS!!!**
With the 16x8 LED Matrix Backpack we've doubled your project's matrix capacity by making it super easy to get two separate 8x8 matrices onto...
In Stock
[Buy Now](https://www.adafruit.com/product/2038)
[Related Guides to the Product](https://learn.adafruit.com/products/2038/guides)
### 16x8 1.2" LED Matrix + Backpack - Ultra Bright Round Blue LEDs
[16x8 1.2" LED Matrix + Backpack - Ultra Bright Round Blue LEDs](https://www.adafruit.com/product/2039)
What's better than a single LED? Lots of LEDs! And what's better than lots of LEDs? **TWO TIMES AS MANY LEDS!!!**
With the 16x8 LED Matrix Backpack we've doubled your project's matrix capacity by making it super easy to get two separate 8x8 matrices onto...
In Stock
[Buy Now](https://www.adafruit.com/product/2039)
[Related Guides to the Product](https://learn.adafruit.com/products/2039/guides)
### 16x8 1.2" LED Matrix + Backpack - Ultra Bright Square Blue LEDs
[16x8 1.2" LED Matrix + Backpack - Ultra Bright Square Blue LEDs](https://www.adafruit.com/product/2040)
What's better than a single LED? Lots of LEDs! And what's better than lots of LEDs? **TWO TIMES AS MANY LEDS!!!**
With the 16x8 LED Matrix Backpack we've doubled your project's matrix capacity by making it super easy to get two separate 8x8 matrices onto...
In Stock
[Buy Now](https://www.adafruit.com/product/2040)
[Related Guides to the Product](https://learn.adafruit.com/products/2040/guides)
### 16x8 1.2" LED Matrix + Backpack - Ultra Bright Square Amber LEDs
[16x8 1.2" LED Matrix + Backpack - Ultra Bright Square Amber LEDs](https://www.adafruit.com/product/2041)
What's better than a single LED? Lots of LEDs! And what's better than lots of LEDs? **TWO TIMES AS MANY LEDS!!!**
With the 16x8 LED Matrix Backpack we've doubled your project's matrix capacity by making it super easy to get two separate 8x8 matrices onto...
In Stock
[Buy Now](https://www.adafruit.com/product/2041)
[Related Guides to the Product](https://learn.adafruit.com/products/2041/guides)
### 16x8 1.2" LED Matrix + Backpack - Ultra Bright Square Green LEDs
[16x8 1.2" LED Matrix + Backpack - Ultra Bright Square Green LEDs](https://www.adafruit.com/product/2042)
What's better than a single LED? Lots of LEDs! And what's better than lots of LEDs? **TWO TIMES AS MANY LEDS!!!**
With the 16x8 LED Matrix Backpack we've doubled your project's matrix capacity by making it super easy to get two separate 8x8 matrices onto...
In Stock
[Buy Now](https://www.adafruit.com/product/2042)
[Related Guides to the Product](https://learn.adafruit.com/products/2042/guides)
### 16x8 1.2" LED Matrix + Backpack -Ultra Bright Square Yellow LEDs
[16x8 1.2" LED Matrix + Backpack -Ultra Bright Square Yellow LEDs](https://www.adafruit.com/product/2043)
What's better than a single LED? Lots of LEDs! And what's better than lots of LEDs? **TWO TIMES AS MANY LEDS!!!**
With the 16x8 LED Matrix Backpack we've doubled your project's matrix capacity by making it super easy to get two separate 8x8 matrices onto...
In Stock
[Buy Now](https://www.adafruit.com/product/2043)
[Related Guides to the Product](https://learn.adafruit.com/products/2043/guides)
### 16x8 1.2" LED Matrix + Backpack - Ultra Bright Square White LEDs
[16x8 1.2" LED Matrix + Backpack - Ultra Bright Square White LEDs](https://www.adafruit.com/product/2044)
What's better than a single LED? Lots of LEDs! And what's better than lots of LEDs? **TWO TIMES AS MANY LEDS!!!**
With the 16x8 LED Matrix Backpack we've doubled your project's matrix capacity by making it super easy to get two separate 8x8 matrices onto...
In Stock
[Buy Now](https://www.adafruit.com/product/2044)
[Related Guides to the Product](https://learn.adafruit.com/products/2044/guides)
### 16x8 1.2" LED Matrix + Backpack-Ultra Bright Round Orange LEDs
[16x8 1.2" LED Matrix + Backpack-Ultra Bright Round Orange LEDs](https://www.adafruit.com/product/2052)
What's better than a single LED? Lots of LEDs! And what's better than lots of LEDs? **TWO TIMES AS MANY LEDS!!!**
With the 16x8 LED Matrix Backpack we've doubled your project's matrix capacity by making it super easy to get two separate 8x8 matrices onto...
In Stock
[Buy Now](https://www.adafruit.com/product/2052)
[Related Guides to the Product](https://learn.adafruit.com/products/2052/guides)
### 16x8 1.2" LED Matrices+Backpack Round LEDs in Various Colors
[16x8 1.2" LED Matrices+Backpack Round LEDs in Various Colors](https://www.adafruit.com/product/2054)
What's better than a single LED? Lots of LEDs! And what's better than lots of LEDs? **TWO TIMES AS MANY LEDS!!!**
With the 16x8 LED Matrix Backpack we've doubled your project's matrix capacity by making it super easy to get two separate 8x8 matrices onto...
Out of Stock
[Buy Now](https://www.adafruit.com/product/2054)
[Related Guides to the Product](https://learn.adafruit.com/products/2054/guides)
### Adafruit 8x16 LED Matrix FeatherWing w/o Matrices
[Adafruit 8x16 LED Matrix FeatherWing w/o Matrices](https://www.adafruit.com/product/3090)
You will chirp with delight when you see how easy it is to make your very own 8x16 LED matrix display for any Feather. At 0.8" square, the little [8x8 matrices](https://www.adafruit.com/new/?q=8x8%20miniature%20LED%20matrix&) have everything a big LED matrix has,...
Out of Stock
[Buy Now](https://www.adafruit.com/product/3090)
[Related Guides to the Product](https://learn.adafruit.com/products/3090/guides)
### Adafruit 14-segment LED Alphanumeric backpack (same as P1910)
[Adafruit 14-segment LED Alphanumeric backpack (same as P1910)](https://www.adafruit.com/product/3322)
Just the backpack + 4pin header
No Longer Stocked
[Buy Now](https://www.adafruit.com/product/3322)
[Related Guides to the Product](https://learn.adafruit.com/products/3322/guides)
## Featured Products
### Adafruit Small 1.2" 8x8 LED Matrix w/I2C Backpack - Yellow-Green
[Adafruit Small 1.2" 8x8 LED Matrix w/I2C Backpack - Yellow-Green](https://www.adafruit.com/product/1051)
What's better than a single LED? Lots of LEDs! A fun way to make a small display is to use an [8x8 matrix](https://www.adafruit.com/category/37_88) or a [4-digit 7-segment display](https://www.adafruit.com/category/37_103). Matrices like these are...
In Stock
[Buy Now](https://www.adafruit.com/product/1051)
[Related Guides to the Product](https://learn.adafruit.com/products/1051/guides)
### Small 1.2" 8x8 Ultra Bright Square Blue LED Matrix + Backpack
[Small 1.2" 8x8 Ultra Bright Square Blue LED Matrix + Backpack](https://www.adafruit.com/product/1853)
What's better than a single LED? Lots of LEDs! Matrices like these are 'multiplexed' - so to control 64 LEDs you need 16 pins. That's a lot of pins, and there are [driver chips like the MAX7219](//www.adafruit.com/products/453) that can control a matrix for you but...
In Stock
[Buy Now](https://www.adafruit.com/product/1853)
[Related Guides to the Product](https://learn.adafruit.com/products/1853/guides)
## Related Guides
- [LED Backpack Displays on Raspberry Pi and BeagleBone Black](https://learn.adafruit.com/led-backpack-displays-on-raspberry-pi-and-beaglebone-black.md)
- [Animating Multiple LED Backpacks](https://learn.adafruit.com/animating-multiple-led-backpacks.md)
- [Arduino GPS Clock](https://learn.adafruit.com/arduino-clock.md)
- [Raspberry Pi Physical Dashboard](https://learn.adafruit.com/raspberry-pi-physical-dashboard.md)
- [CircuitPython Hardware: LED Backpacks & FeatherWings](https://learn.adafruit.com/micropython-hardware-led-backpacks-and-featherwings.md)
- [Matrix and 7-Segment LED Backpack with the Raspberry Pi](https://learn.adafruit.com/matrix-7-segment-led-backpack-with-the-raspberry-pi.md)
- [DIY Pocket LED Gamer - Tiny Tetris!](https://learn.adafruit.com/diy-3d-printed-handheld-pocket-game-tiny-tetris-snake.md)
- [RGB LED Matrix Cube with 25,000 LEDs](https://learn.adafruit.com/rgb-led-matrix-cube-for-pi.md)
- [Creating GIFs for SmartMatrix](https://learn.adafruit.com/creating-gifs-for-smartmatrix.md)
- [Adafruit CharliePlex LED Matrix Bonnet](https://learn.adafruit.com/adafruit-charlieplex-bonnet.md)
- [Connecting a 16x32 RGB LED Matrix Panel to a Raspberry Pi](https://learn.adafruit.com/connecting-a-16x32-rgb-led-matrix-panel-to-a-raspberry-pi.md)
- [MicroPython Displays: Drawing Text](https://learn.adafruit.com/micropython-displays-drawing-text.md)
- [Heart Rate Badge](https://learn.adafruit.com/heart-rate-badge.md)
- [16x24 LED Matrix](https://learn.adafruit.com/16x24-led-matrix.md)
- [Adafruit IS31FL3741](https://learn.adafruit.com/adafruit-is31fl3741.md)
---
# Source: https://learn.adafruit.com/adafruit-led-backpack/1-2-16x8-matrix-circuitpython-wiring-and-setup.md
# Adafruit LED Backpacks
## CircuitPython Wiring and Setup
# Wiring
It's easy to use LED Matrices with CircuitPython and the [Adafruit CircuitPython HT16K33](https://github.com/adafruit/Adafruit_CircuitPython_HT16K33) library. This module allows you to easily write CircuitPython code to control the display.
You can use this sensor with any CircuitPython microcontroller board.
We'll cover how to wire the LED Matrix to your CircuitPython microcontroller board. First assemble your LED Matrix.
Connect the LED Matrix to your microcontroller board as shown below.
- **Microcontroller 3V ** to **LED Matrix VIN**
- **Microcontroller GND ** to **LED Matrix GND**
- **Microcontroller SCL ** to **LED Matrix SCL**
- **Microcontroller SDA ** to **LED Matrix SDA**

[Download Fritzing Object](https://cdn-learn.adafruit.com/assets/assets/000/087/059/original/feather-m4-1.2-16x8.fzz?1579283184)
# Library Setup
To use the LED backpack with your [Adafruit CircuitPython](https://learn.adafruit.com/welcome-to-circuitpython/overview) board you'll need to install the [Adafruit\_CircuitPython\_HT16K33](https://github.com/adafruit/Adafruit_CircuitPython_HT16K33) library on your board.
First make sure you are running the [latest version of Adafruit CircuitPython](https://github.com/adafruit/circuitpython/releases) for your board. Next you'll need to install the necessary libraries to use the hardware--read below and carefully follow the referenced steps to find and install these libraries from [Adafruit's CircuitPython library bundle](https://github.com/adafruit/Adafruit_CircuitPython_Bundle).
## Bundle Install
For express boards that have extra flash storage, like the Feather/Metro M0 express and Circuit Playground express, you can easily install the necessary libraries with [Adafruit's CircuitPython bundle](https://github.com/adafruit/Adafruit_CircuitPython_Bundle). This is an all-in-one package that includes the necessary libraries to use the LED backpack display with CircuitPython. For details on installing the bundle, read about [CircuitPython Libraries](https://learn.adafruit.com/welcome-to-circuitpython/circuitpython-libraries).
Remember for non-express boards like the Trinket M0, Gemma M0, and Feather/Metro M0 basic you'll need to [manually install the necessary libraries](https://learn.adafruit.com/welcome-to-circuitpython/circuitpython-libraries#non-express-boards-11-13) from the bundle:
- **adafruit\_ht16k33**
- **adafruit\_bus\_device**
If your board supports USB mass storage, like the M0-based boards, then simply drag the files to the board's file system. **Note on boards without external SPI flash, like a Feather M0 or Trinket/Gemma M0, you might run into issues on Mac OSX with hidden files taking up too much space when drag and drop copying, [see this page for a workaround](../../../../micropython-for-samd21/usb-mass-storage#mac-osx-file-copy-issues).**
Before continuing make sure your board's **lib** folder or root filesystem has at least the **adafruit\_ht16k33** and **adafruit\_bus\_device** folders/modules copied over.

- [Previous Page](https://learn.adafruit.com/adafruit-led-backpack/1-2-16x8-matrix-arduino-setup.md)
- [Next Page](https://learn.adafruit.com/adafruit-led-backpack/1-2-16x8-matrix-python-wiring-and-setup.md)
## Primary Products
### Adafruit Mini 8x8 LED Matrix w/I2C Backpack - Red
[Adafruit Mini 8x8 LED Matrix w/I2C Backpack - Red](https://www.adafruit.com/product/870)
What's better than a single LED? Lots of LEDs! A fun way to make a small display is to use an [8x8 matrix](https://www.adafruit.com/category/37_88) or a [4-digit 7-segment display](https://www.adafruit.com/category/37_103). Matrices like these are...
In Stock
[Buy Now](https://www.adafruit.com/product/870)
[Related Guides to the Product](https://learn.adafruit.com/products/870/guides)
### Adafruit Mini 8x8 LED Matrix w/I2C Backpack - Yellow
[Adafruit Mini 8x8 LED Matrix w/I2C Backpack - Yellow](https://www.adafruit.com/product/871)
What's better than a single LED? Lots of LEDs! A fun way to make a small display is to use an [8x8 matrix](https://www.adafruit.com/category/37_88) or a [4-digit 7-segment display](https://www.adafruit.com/category/37_103). Matrices like these are...
In Stock
[Buy Now](https://www.adafruit.com/product/871)
[Related Guides to the Product](https://learn.adafruit.com/products/871/guides)
### Adafruit Mini 0.8" 8x8 LED Matrix w/I2C Backpack - Yellow-Green
[Adafruit Mini 0.8" 8x8 LED Matrix w/I2C Backpack - Yellow-Green](https://www.adafruit.com/product/872)
What's better than a single LED? Lots of LEDs! A fun way to make a small display is to use an [8x8 matrix](https://www.adafruit.com/category/37_88) or a [4-digit 7-segment display](https://www.adafruit.com/category/37_103). Matrices like these are...
In Stock
[Buy Now](https://www.adafruit.com/product/872)
[Related Guides to the Product](https://learn.adafruit.com/products/872/guides)
### Adafruit 0.56" 4-Digit 7-Segment Display with I2C Backpack - Red
[Adafruit 0.56" 4-Digit 7-Segment Display with I2C Backpack - Red](https://www.adafruit.com/product/878)
What's better than a single LED? Lots of LEDs! A fun way to make a small display is to use an [8x8 matrix](https://www.adafruit.com/category/37_88) or a [4-digit 7-segment display](https://www.adafruit.com/category/37_103). Matrices like these are...
In Stock
[Buy Now](https://www.adafruit.com/product/878)
[Related Guides to the Product](https://learn.adafruit.com/products/878/guides)
### Adafruit 0.56" 4-Digit 7-Segment Display w/I2C Backpack - Yellow
[Adafruit 0.56" 4-Digit 7-Segment Display w/I2C Backpack - Yellow](https://www.adafruit.com/product/879)
What's better than a single LED? Lots of LEDs! A fun way to make a small display is to use an [8x8 matrix](https://www.adafruit.com/category/37_88) or a [4-digit 7-segment display](https://www.adafruit.com/category/37_103). Matrices like these are...
In Stock
[Buy Now](https://www.adafruit.com/product/879)
[Related Guides to the Product](https://learn.adafruit.com/products/879/guides)
### Adafruit 0.56" 4-Digit 7-Segment Display w/ I2C Backpack - Green
[Adafruit 0.56" 4-Digit 7-Segment Display w/ I2C Backpack - Green](https://www.adafruit.com/product/880)
What's better than a single LED? Lots of LEDs! A fun way to make a small display is to use an [8x8 matrix](https://www.adafruit.com/category/37_88) or a [4-digit 7-segment display](https://www.adafruit.com/category/37_103). Matrices like these are...
No Longer Stocked
[Buy Now](https://www.adafruit.com/product/880)
[Related Guides to the Product](https://learn.adafruit.com/products/880/guides)
### Adafruit 0.56" 4-Digit 7-Segment Display w/ I2C Backpack - Blue
[Adafruit 0.56" 4-Digit 7-Segment Display w/ I2C Backpack - Blue](https://www.adafruit.com/product/881)
What's better than a single LED? Lots of LEDs! A fun way to make a small display is to use an [8x8 matrix](https://www.adafruit.com/category/37_88) or a [4-digit 7-segment display](https://www.adafruit.com/category/37_103). Matrices like these are...
In Stock
[Buy Now](https://www.adafruit.com/product/881)
[Related Guides to the Product](https://learn.adafruit.com/products/881/guides)
### Adafruit Bicolor LED Square Pixel Matrix with I2C Backpack
[Adafruit Bicolor LED Square Pixel Matrix with I2C Backpack](https://www.adafruit.com/product/902)
What's better than a single LED? Lots of LEDs! A fun way to make a small colorful display is to use a [1.2" Bi-color 8x8 LED Matrix](http://www.adafruit.com/products/458). Matrices like these are 'multiplexed' - so to control all the 128 LEDs you need 24 pins....
In Stock
[Buy Now](https://www.adafruit.com/product/902)
[Related Guides to the Product](https://learn.adafruit.com/products/902/guides)
### Adafruit Mini 8x8 LED Matrix w/I2C Backpack - Blue
[Adafruit Mini 8x8 LED Matrix w/I2C Backpack - Blue](https://www.adafruit.com/product/959)
What's better than a single LED? Lots of LEDs! A fun way to make a small display is to use an [8x8 matrix](https://www.adafruit.com/category/37_88) or a [4-digit 7-segment display](https://www.adafruit.com/category/37_103). Matrices like these are...
In Stock
[Buy Now](https://www.adafruit.com/product/959)
[Related Guides to the Product](https://learn.adafruit.com/products/959/guides)
### Adafruit 0.56" 4-Digit 7-Segment Display w/I2C Backpack - White
[Adafruit 0.56" 4-Digit 7-Segment Display w/I2C Backpack - White](https://www.adafruit.com/product/1002)
What's better than a single LED? Lots of LEDs! A fun way to make a small display is to use an [8x8 matrix](https://www.adafruit.com/category/37_88) or a [4-digit 7-segment display](https://www.adafruit.com/category/37_103). Matrices like these are...
In Stock
[Buy Now](https://www.adafruit.com/product/1002)
[Related Guides to the Product](https://learn.adafruit.com/products/1002/guides)
### Adafruit 1.2" 8x8 LED Matrix Backpack
[Adafruit 1.2" 8x8 LED Matrix Backpack](https://www.adafruit.com/product/1048)
By popular request, you can now get our 8x8 LED backpacks without the LEDs! These backpacks feature an HT16K33 I2C LED driver, they're simple and easy to use - you can use [our very nice library for the backpacks to...](https://github.com/adafruit/Adafruit-LED-Backpack-Library)
In Stock
[Buy Now](https://www.adafruit.com/product/1048)
[Related Guides to the Product](https://learn.adafruit.com/products/1048/guides)
### Adafruit Small 1.2" 8x8 LED Matrix w/I2C Backpack - Red
[Adafruit Small 1.2" 8x8 LED Matrix w/I2C Backpack - Red](https://www.adafruit.com/product/1049)
What's better than a single LED? Lots of LEDs! A fun way to make a small display is to use an [8x8 matrix](https://www.adafruit.com/category/37_88) or a [4-digit 7-segment display](https://www.adafruit.com/category/37_103). Matrices like these are...
In Stock
[Buy Now](https://www.adafruit.com/product/1049)
[Related Guides to the Product](https://learn.adafruit.com/products/1049/guides)
### Adafruit Small 1.2" 8x8 LED Matrix w/I2C Backpack - Yellow
[Adafruit Small 1.2" 8x8 LED Matrix w/I2C Backpack - Yellow](https://www.adafruit.com/product/1050)
What's better than a single LED? Lots of LEDs! A fun way to make a small display is to use an [8x8 matrix](https://www.adafruit.com/category/37_88) or a [4-digit 7-segment display](https://www.adafruit.com/category/37_103). Matrices like these are...
In Stock
[Buy Now](https://www.adafruit.com/product/1050)
[Related Guides to the Product](https://learn.adafruit.com/products/1050/guides)
### Adafruit Small 1.2" 8x8 LED Matrix w/I2C Backpack - Blue
[Adafruit Small 1.2" 8x8 LED Matrix w/I2C Backpack - Blue](https://www.adafruit.com/product/1052)
What's better than a single LED? Lots of LEDs! A fun way to make a small display is to use an [8x8 matrix](https://www.adafruit.com/category/37_88) or a [4-digit 7-segment display](https://www.adafruit.com/category/37_103). Matrices like these are...
In Stock
[Buy Now](https://www.adafruit.com/product/1052)
[Related Guides to the Product](https://learn.adafruit.com/products/1052/guides)
### Adafruit Mini 8x8 LED Matrix w/I2C Backpack - Ultra Bright White
[Adafruit Mini 8x8 LED Matrix w/I2C Backpack - Ultra Bright White](https://www.adafruit.com/product/1080)
What's better than a single LED? Lots of LEDs! A fun way to make a small display is to use an [8x8 matrix](https://www.adafruit.com/category/37_88) or a [4-digit 7-segment display](https://www.adafruit.com/category/37_103). Matrices like these are...
In Stock
[Buy Now](https://www.adafruit.com/product/1080)
[Related Guides to the Product](https://learn.adafruit.com/products/1080/guides)
### Adafruit 1.2" 4-Digit 7-Segment Display w/I2C Backpack - Green
[Adafruit 1.2" 4-Digit 7-Segment Display w/I2C Backpack - Green](https://www.adafruit.com/product/1268)
What's better than a single LED? Lots of LEDs! A fun way to make a numeric display is to use a [4-digit 7-segment display](https://www.adafruit.com/category/37_103). LED matrices like these are 'multiplexed' - so to control all the seven-segment LEDs you need 14 pins....
No Longer Stocked
[Buy Now](https://www.adafruit.com/product/1268)
[Related Guides to the Product](https://learn.adafruit.com/products/1268/guides)
### Adafruit 1.2" 4-Digit 7-Segment Display w/I2C Backpack - Yellow
[Adafruit 1.2" 4-Digit 7-Segment Display w/I2C Backpack - Yellow](https://www.adafruit.com/product/1269)
What's better than a single LED? Lots of LEDs! A fun way to make a numeric display is to use a [4-digit 7-segment display](https://www.adafruit.com/category/37_103). LED matrices like these are 'multiplexed' - so to control all the seven-segment LEDs you need 14 pins....
In Stock
[Buy Now](https://www.adafruit.com/product/1269)
[Related Guides to the Product](https://learn.adafruit.com/products/1269/guides)
### Adafruit 1.2" 4-Digit 7-Segment Display w/I2C Backpack - Red
[Adafruit 1.2" 4-Digit 7-Segment Display w/I2C Backpack - Red](https://www.adafruit.com/product/1270)
What's better than a single LED? Lots of LEDs! A fun way to make a numeric display is to use a [4-digit 7-segment display](https://www.adafruit.com/category/37_103). LED matrices like these are 'multiplexed' - so to control all the seven-segment LEDs you need 14 pins....
In Stock
[Buy Now](https://www.adafruit.com/product/1270)
[Related Guides to the Product](https://learn.adafruit.com/products/1270/guides)
### Small 1.2" 8x8 Ultra Bright White LED Matrix + Backpack
[Small 1.2" 8x8 Ultra Bright White LED Matrix + Backpack](https://www.adafruit.com/product/1614)
What's better than a single LED? Lots of LEDs! A fun way to make a small display is to use an [8x8 matrix](https://www.adafruit.com/category/37_88) or a [4-digit 7-segment display](https://www.adafruit.com/category/37_103). Matrices like these are...
In Stock
[Buy Now](https://www.adafruit.com/product/1614)
[Related Guides to the Product](https://learn.adafruit.com/products/1614/guides)
### Adafruit Small 1.2" 8x8 LED Matrix w/I2C Backpack - Pure Green
[Adafruit Small 1.2" 8x8 LED Matrix w/I2C Backpack - Pure Green](https://www.adafruit.com/product/1632)
What's better than a single LED? Lots of LEDs! A fun way to make a small display is to use an [8x8 matrix](https://www.adafruit.com/category/37_88) or a [4-digit 7-segment display](https://www.adafruit.com/category/37_103). Matrices like these are...
In Stock
[Buy Now](https://www.adafruit.com/product/1632)
[Related Guides to the Product](https://learn.adafruit.com/products/1632/guides)
### Adafruit Mini 0.8" 8x8 LED Matrix w/I2C Backpack - Pure Green
[Adafruit Mini 0.8" 8x8 LED Matrix w/I2C Backpack - Pure Green](https://www.adafruit.com/product/1633)
What's better than a single LED? Lots of LEDs! A fun way to make a small display is to use an [8x8 matrix](https://www.adafruit.com/category/37_88) or a [4-digit 7-segment display](https://www.adafruit.com/category/37_103). Matrices like these are...
In Stock
[Buy Now](https://www.adafruit.com/product/1633)
[Related Guides to the Product](https://learn.adafruit.com/products/1633/guides)
### Bi-Color (Red/Green) 24-Bar Bargraph w/I2C Backpack Kit
[Bi-Color (Red/Green) 24-Bar Bargraph w/I2C Backpack Kit](https://www.adafruit.com/product/1721)
What's better than a single LED? Lots of LEDs! A fun way to make a small linear display is to use two 12-bar Bi-color bar-graphs. However, this LED bargraph is 'multiplexed' - so to control all the 48 LEDs you need a lot of pins.
Out of Stock
[Buy Now](https://www.adafruit.com/product/1721)
[Related Guides to the Product](https://learn.adafruit.com/products/1721/guides)
### Small 1.2" 8x8 Ultra Bright Square Amber LED Matrix + Backpack
[Small 1.2" 8x8 Ultra Bright Square Amber LED Matrix + Backpack](https://www.adafruit.com/product/1854)
What's better than a single LED? Lots of LEDs! Matrices like these are 'multiplexed' - so to control 64 LEDs you need 16 pins. That's a lot of pins, and there are [driver chips like the MAX7219](//www.adafruit.com/products/453) that can control a matrix for you but...
In Stock
[Buy Now](https://www.adafruit.com/product/1854)
[Related Guides to the Product](https://learn.adafruit.com/products/1854/guides)
### Small 1.2" 8x8 Ultra Bright Square Yellow LED Matrix + Backpack
[Small 1.2" 8x8 Ultra Bright Square Yellow LED Matrix + Backpack](https://www.adafruit.com/product/1855)
What's better than a single LED? Lots of LEDs! Matrices like these are 'multiplexed' - so to control 64 LEDs you need 16 pins. That's a lot of pins, and there are [driver chips like the MAX7219](//www.adafruit.com/products/453) that can control a matrix for you but...
In Stock
[Buy Now](https://www.adafruit.com/product/1855)
[Related Guides to the Product](https://learn.adafruit.com/products/1855/guides)
### Small 1.2" 8x8 Bright Square Pure Green LED Matrix + Backpack
[Small 1.2" 8x8 Bright Square Pure Green LED Matrix + Backpack](https://www.adafruit.com/product/1856)
What's better than a single LED? Lots of LEDs! Matrices like these are 'multiplexed' - so to control 64 LEDs you need 16 pins. That's a lot of pins, and there are [driver chips like the MAX7219](//www.adafruit.com/products/453) that can control a matrix for you but...
In Stock
[Buy Now](https://www.adafruit.com/product/1856)
[Related Guides to the Product](https://learn.adafruit.com/products/1856/guides)
### Small 1.2" 8x8 Ultra Bright Square White LED Matrix + Backpack
[Small 1.2" 8x8 Ultra Bright Square White LED Matrix + Backpack](https://www.adafruit.com/product/1857)
What's better than a single LED? Lots of LEDs! Matrices like these are 'multiplexed' - so to control 64 LEDs you need 16 pins. That's a lot of pins, and there are [driver chips like the MAX7219](//www.adafruit.com/products/453) that can control a matrix for you but...
In Stock
[Buy Now](https://www.adafruit.com/product/1857)
[Related Guides to the Product](https://learn.adafruit.com/products/1857/guides)
### Adafruit 14-segment LED Alphanumeric Backpack - STEMMA QT
[Adafruit 14-segment LED Alphanumeric Backpack - STEMMA QT](https://www.adafruit.com/product/1910)
By popular request, you can now get our 14-segment LED backpacks without the LEDs! These backpacks feature an HT16K33 I2C LED driver, they're simple and easy to use - you can use [our very nice library for the backpacks to...](https://github.com/adafruit/Adafruit-LED-Backpack-Library)
In Stock
[Buy Now](https://www.adafruit.com/product/1910)
[Related Guides to the Product](https://learn.adafruit.com/products/1910/guides)
### Quad Alphanumeric Display - Red 0.54" Digits w/ I2C Backpack
[Quad Alphanumeric Display - Red 0.54" Digits w/ I2C Backpack](https://www.adafruit.com/product/1911)
Display, elegantly, 012345678 or 9! Gaze, hypnotized, at ABCDEFGHIJKLM - well it can display the whole alphabet. You get the point. This is a nice, bright alphanumeric display that shows letters and numbers in a beautiful red hue. It's super bright and designed for viewing from distances...
In Stock
[Buy Now](https://www.adafruit.com/product/1911)
[Related Guides to the Product](https://learn.adafruit.com/products/1911/guides)
### Quad Alphanumeric Display - Blue 0.54" Digits w/ I2C Backpack
[Quad Alphanumeric Display - Blue 0.54" Digits w/ I2C Backpack](https://www.adafruit.com/product/1912)
Display, elegantly, 012345678 or 9! Gaze, hypnotized, at ABCDEFGHIJKLM - well it can display the whole alphabet. You get the point. This is a nice, bright alphanumeric display that shows letters and numbers in a beautiful blue hue. It's super bright and designed for viewing from distances...
In Stock
[Buy Now](https://www.adafruit.com/product/1912)
[Related Guides to the Product](https://learn.adafruit.com/products/1912/guides)
### 16x8 1.2" LED Matrix + Backpack - Ultra Bright Round Green LEDs
[16x8 1.2" LED Matrix + Backpack - Ultra Bright Round Green LEDs](https://www.adafruit.com/product/2035)
What's better than a single LED? Lots of LEDs! And what's better than lots of LEDs? **TWO TIMES AS MANY LEDS!!!**
With the 16x8 LED Matrix Backpack we've doubled your project's matrix capacity by making it super easy to get two separate 8x8 matrices onto...
In Stock
[Buy Now](https://www.adafruit.com/product/2035)
[Related Guides to the Product](https://learn.adafruit.com/products/2035/guides)
### 16x8 1.2" LED Matrix+Backpack UltraBright Round YellowGreen LEDs
[16x8 1.2" LED Matrix+Backpack UltraBright Round YellowGreen LEDs](https://www.adafruit.com/product/2036)
What's better than a single LED? Lots of LEDs! And what's better than lots of LEDs? **TWO TIMES AS MANY LEDS!!!**
With the 16x8 LED Matrix Backpack we've doubled your project's matrix capacity by making it super easy to get two separate 8x8 matrices onto...
In Stock
[Buy Now](https://www.adafruit.com/product/2036)
[Related Guides to the Product](https://learn.adafruit.com/products/2036/guides)
### 16x8 1.2" LED Matrix + Backpack - Ultra Bright Round Red LEDs
[16x8 1.2" LED Matrix + Backpack - Ultra Bright Round Red LEDs](https://www.adafruit.com/product/2037)
What's better than a single LED? Lots of LEDs! And what's better than lots of LEDs? **TWO TIMES AS MANY LEDS!!!**
With the 16x8 LED Matrix Backpack we've doubled your project's matrix capacity by making it super easy to get two separate 8x8 matrices onto...
In Stock
[Buy Now](https://www.adafruit.com/product/2037)
[Related Guides to the Product](https://learn.adafruit.com/products/2037/guides)
### 16x8 1.2" LED Matrix + Backpack - Ultra Bright Round White LEDs
[16x8 1.2" LED Matrix + Backpack - Ultra Bright Round White LEDs](https://www.adafruit.com/product/2038)
What's better than a single LED? Lots of LEDs! And what's better than lots of LEDs? **TWO TIMES AS MANY LEDS!!!**
With the 16x8 LED Matrix Backpack we've doubled your project's matrix capacity by making it super easy to get two separate 8x8 matrices onto...
In Stock
[Buy Now](https://www.adafruit.com/product/2038)
[Related Guides to the Product](https://learn.adafruit.com/products/2038/guides)
### 16x8 1.2" LED Matrix + Backpack - Ultra Bright Round Blue LEDs
[16x8 1.2" LED Matrix + Backpack - Ultra Bright Round Blue LEDs](https://www.adafruit.com/product/2039)
What's better than a single LED? Lots of LEDs! And what's better than lots of LEDs? **TWO TIMES AS MANY LEDS!!!**
With the 16x8 LED Matrix Backpack we've doubled your project's matrix capacity by making it super easy to get two separate 8x8 matrices onto...
In Stock
[Buy Now](https://www.adafruit.com/product/2039)
[Related Guides to the Product](https://learn.adafruit.com/products/2039/guides)
### 16x8 1.2" LED Matrix + Backpack - Ultra Bright Square Blue LEDs
[16x8 1.2" LED Matrix + Backpack - Ultra Bright Square Blue LEDs](https://www.adafruit.com/product/2040)
What's better than a single LED? Lots of LEDs! And what's better than lots of LEDs? **TWO TIMES AS MANY LEDS!!!**
With the 16x8 LED Matrix Backpack we've doubled your project's matrix capacity by making it super easy to get two separate 8x8 matrices onto...
In Stock
[Buy Now](https://www.adafruit.com/product/2040)
[Related Guides to the Product](https://learn.adafruit.com/products/2040/guides)
### 16x8 1.2" LED Matrix + Backpack - Ultra Bright Square Amber LEDs
[16x8 1.2" LED Matrix + Backpack - Ultra Bright Square Amber LEDs](https://www.adafruit.com/product/2041)
What's better than a single LED? Lots of LEDs! And what's better than lots of LEDs? **TWO TIMES AS MANY LEDS!!!**
With the 16x8 LED Matrix Backpack we've doubled your project's matrix capacity by making it super easy to get two separate 8x8 matrices onto...
In Stock
[Buy Now](https://www.adafruit.com/product/2041)
[Related Guides to the Product](https://learn.adafruit.com/products/2041/guides)
### 16x8 1.2" LED Matrix + Backpack - Ultra Bright Square Green LEDs
[16x8 1.2" LED Matrix + Backpack - Ultra Bright Square Green LEDs](https://www.adafruit.com/product/2042)
What's better than a single LED? Lots of LEDs! And what's better than lots of LEDs? **TWO TIMES AS MANY LEDS!!!**
With the 16x8 LED Matrix Backpack we've doubled your project's matrix capacity by making it super easy to get two separate 8x8 matrices onto...
In Stock
[Buy Now](https://www.adafruit.com/product/2042)
[Related Guides to the Product](https://learn.adafruit.com/products/2042/guides)
### 16x8 1.2" LED Matrix + Backpack -Ultra Bright Square Yellow LEDs
[16x8 1.2" LED Matrix + Backpack -Ultra Bright Square Yellow LEDs](https://www.adafruit.com/product/2043)
What's better than a single LED? Lots of LEDs! And what's better than lots of LEDs? **TWO TIMES AS MANY LEDS!!!**
With the 16x8 LED Matrix Backpack we've doubled your project's matrix capacity by making it super easy to get two separate 8x8 matrices onto...
In Stock
[Buy Now](https://www.adafruit.com/product/2043)
[Related Guides to the Product](https://learn.adafruit.com/products/2043/guides)
### 16x8 1.2" LED Matrix + Backpack - Ultra Bright Square White LEDs
[16x8 1.2" LED Matrix + Backpack - Ultra Bright Square White LEDs](https://www.adafruit.com/product/2044)
What's better than a single LED? Lots of LEDs! And what's better than lots of LEDs? **TWO TIMES AS MANY LEDS!!!**
With the 16x8 LED Matrix Backpack we've doubled your project's matrix capacity by making it super easy to get two separate 8x8 matrices onto...
In Stock
[Buy Now](https://www.adafruit.com/product/2044)
[Related Guides to the Product](https://learn.adafruit.com/products/2044/guides)
### 16x8 1.2" LED Matrix + Backpack-Ultra Bright Round Orange LEDs
[16x8 1.2" LED Matrix + Backpack-Ultra Bright Round Orange LEDs](https://www.adafruit.com/product/2052)
What's better than a single LED? Lots of LEDs! And what's better than lots of LEDs? **TWO TIMES AS MANY LEDS!!!**
With the 16x8 LED Matrix Backpack we've doubled your project's matrix capacity by making it super easy to get two separate 8x8 matrices onto...
In Stock
[Buy Now](https://www.adafruit.com/product/2052)
[Related Guides to the Product](https://learn.adafruit.com/products/2052/guides)
### 16x8 1.2" LED Matrices+Backpack Round LEDs in Various Colors
[16x8 1.2" LED Matrices+Backpack Round LEDs in Various Colors](https://www.adafruit.com/product/2054)
What's better than a single LED? Lots of LEDs! And what's better than lots of LEDs? **TWO TIMES AS MANY LEDS!!!**
With the 16x8 LED Matrix Backpack we've doubled your project's matrix capacity by making it super easy to get two separate 8x8 matrices onto...
Out of Stock
[Buy Now](https://www.adafruit.com/product/2054)
[Related Guides to the Product](https://learn.adafruit.com/products/2054/guides)
### Adafruit 8x16 LED Matrix FeatherWing w/o Matrices
[Adafruit 8x16 LED Matrix FeatherWing w/o Matrices](https://www.adafruit.com/product/3090)
You will chirp with delight when you see how easy it is to make your very own 8x16 LED matrix display for any Feather. At 0.8" square, the little [8x8 matrices](https://www.adafruit.com/new/?q=8x8%20miniature%20LED%20matrix&) have everything a big LED matrix has,...
Out of Stock
[Buy Now](https://www.adafruit.com/product/3090)
[Related Guides to the Product](https://learn.adafruit.com/products/3090/guides)
### Adafruit 14-segment LED Alphanumeric backpack (same as P1910)
[Adafruit 14-segment LED Alphanumeric backpack (same as P1910)](https://www.adafruit.com/product/3322)
Just the backpack + 4pin header
No Longer Stocked
[Buy Now](https://www.adafruit.com/product/3322)
[Related Guides to the Product](https://learn.adafruit.com/products/3322/guides)
## Featured Products
### Adafruit Small 1.2" 8x8 LED Matrix w/I2C Backpack - Yellow-Green
[Adafruit Small 1.2" 8x8 LED Matrix w/I2C Backpack - Yellow-Green](https://www.adafruit.com/product/1051)
What's better than a single LED? Lots of LEDs! A fun way to make a small display is to use an [8x8 matrix](https://www.adafruit.com/category/37_88) or a [4-digit 7-segment display](https://www.adafruit.com/category/37_103). Matrices like these are...
In Stock
[Buy Now](https://www.adafruit.com/product/1051)
[Related Guides to the Product](https://learn.adafruit.com/products/1051/guides)
### Small 1.2" 8x8 Ultra Bright Square Blue LED Matrix + Backpack
[Small 1.2" 8x8 Ultra Bright Square Blue LED Matrix + Backpack](https://www.adafruit.com/product/1853)
What's better than a single LED? Lots of LEDs! Matrices like these are 'multiplexed' - so to control 64 LEDs you need 16 pins. That's a lot of pins, and there are [driver chips like the MAX7219](//www.adafruit.com/products/453) that can control a matrix for you but...
In Stock
[Buy Now](https://www.adafruit.com/product/1853)
[Related Guides to the Product](https://learn.adafruit.com/products/1853/guides)
## Related Guides
- [LED Backpack Displays on Raspberry Pi and BeagleBone Black](https://learn.adafruit.com/led-backpack-displays-on-raspberry-pi-and-beaglebone-black.md)
- [Animating Multiple LED Backpacks](https://learn.adafruit.com/animating-multiple-led-backpacks.md)
- [Arduino GPS Clock](https://learn.adafruit.com/arduino-clock.md)
- [Raspberry Pi Physical Dashboard](https://learn.adafruit.com/raspberry-pi-physical-dashboard.md)
- [CircuitPython Hardware: LED Backpacks & FeatherWings](https://learn.adafruit.com/micropython-hardware-led-backpacks-and-featherwings.md)
- [Matrix and 7-Segment LED Backpack with the Raspberry Pi](https://learn.adafruit.com/matrix-7-segment-led-backpack-with-the-raspberry-pi.md)
- [DIY Pocket LED Gamer - Tiny Tetris!](https://learn.adafruit.com/diy-3d-printed-handheld-pocket-game-tiny-tetris-snake.md)
- [RGB LED Matrix Cube with 25,000 LEDs](https://learn.adafruit.com/rgb-led-matrix-cube-for-pi.md)
- [Creating GIFs for SmartMatrix](https://learn.adafruit.com/creating-gifs-for-smartmatrix.md)
- [Adafruit CharliePlex LED Matrix Bonnet](https://learn.adafruit.com/adafruit-charlieplex-bonnet.md)
- [Connecting a 16x32 RGB LED Matrix Panel to a Raspberry Pi](https://learn.adafruit.com/connecting-a-16x32-rgb-led-matrix-panel-to-a-raspberry-pi.md)
- [MicroPython Displays: Drawing Text](https://learn.adafruit.com/micropython-displays-drawing-text.md)
- [Heart Rate Badge](https://learn.adafruit.com/heart-rate-badge.md)
- [16x24 LED Matrix](https://learn.adafruit.com/16x24-led-matrix.md)
- [Adafruit IS31FL3741](https://learn.adafruit.com/adafruit-is31fl3741.md)
---
# Source: https://learn.adafruit.com/adafruit-led-backpack/1-2-16x8-matrix-python-wiring-and-setup.md
# Adafruit LED Backpacks
## Python Wiring and Setup
# Wiring
It's easy to use LED Matrices with Python and the [Adafruit CircuitPython HT16K33](https://github.com/adafruit/Adafruit_CircuitPython_HT16K33) library. This library allows you to easily write Python code to control the display.
We'll cover how to wire the LED Matrix to your Raspberry Pi. First assemble your LED Matrix.
Since there's _dozens_ of Linux computers/boards you can use we will show wiring for Raspberry Pi. For other platforms, [please visit the guide for CircuitPython on Linux to see whether your platform is supported](https://learn.adafruit.com/circuitpython-on-raspberrypi-linux).
Connect the LED Matrix as shown below to your Raspberry Pi.
- **Raspberry Pi 3.3V ** to **LED Matrix VIN**
- **Raspberry Pi GND ** to **LED Matrix GND**
- **Raspberry Pi SCL ** to **LED Matrix SCL**
- **Raspberry Pi SDA ** to **LED Matrix SDA**

[Download Fritzing Object](https://cdn-learn.adafruit.com/assets/assets/000/087/305/original/raspberry-pi-alphanum.fzz?1579660445)
# Setup
You'll need to install the Adafruit\_Blinka library that provides the CircuitPython support in Python. This may also require enabling I2C on your platform and verifying you are running Python 3. [Since each platform is a little different, and Linux changes often, please visit the CircuitPython on Linux guide to get your computer ready](https://learn.adafruit.com/circuitpython-on-raspberrypi-linux)!
## Python Installation of HT16K33 Library
Once that's done, from your command line run the following command:
- `pip3 install adafruit-circuitpython-ht16k33`
If your default Python is version 3 you may need to run 'pip' instead. Just make sure you aren't trying to use CircuitPython on Python 2.x, it isn't supported!
If that complains about pip3 not being installed, then run this first to install it:
- `sudo apt-get install python3-pip`
## Pillow Library
We also need PIL, the Python Imaging Library, to allow using text with custom fonts. There are several system libraries that PIL relies on, so installing via a package manager is the easiest way to bring in everything:
- `sudo apt-get install python3-pil`
That's it. You should be ready to go.
- [Previous Page](https://learn.adafruit.com/adafruit-led-backpack/1-2-16x8-matrix-circuitpython-wiring-and-setup.md)
- [Next Page](https://learn.adafruit.com/adafruit-led-backpack/1-2-16x8-matrix-circuitpython-and-python-usage.md)
## Primary Products
### Adafruit Mini 8x8 LED Matrix w/I2C Backpack - Red
[Adafruit Mini 8x8 LED Matrix w/I2C Backpack - Red](https://www.adafruit.com/product/870)
What's better than a single LED? Lots of LEDs! A fun way to make a small display is to use an [8x8 matrix](https://www.adafruit.com/category/37_88) or a [4-digit 7-segment display](https://www.adafruit.com/category/37_103). Matrices like these are...
In Stock
[Buy Now](https://www.adafruit.com/product/870)
[Related Guides to the Product](https://learn.adafruit.com/products/870/guides)
### Adafruit Mini 8x8 LED Matrix w/I2C Backpack - Yellow
[Adafruit Mini 8x8 LED Matrix w/I2C Backpack - Yellow](https://www.adafruit.com/product/871)
What's better than a single LED? Lots of LEDs! A fun way to make a small display is to use an [8x8 matrix](https://www.adafruit.com/category/37_88) or a [4-digit 7-segment display](https://www.adafruit.com/category/37_103). Matrices like these are...
In Stock
[Buy Now](https://www.adafruit.com/product/871)
[Related Guides to the Product](https://learn.adafruit.com/products/871/guides)
### Adafruit Mini 0.8" 8x8 LED Matrix w/I2C Backpack - Yellow-Green
[Adafruit Mini 0.8" 8x8 LED Matrix w/I2C Backpack - Yellow-Green](https://www.adafruit.com/product/872)
What's better than a single LED? Lots of LEDs! A fun way to make a small display is to use an [8x8 matrix](https://www.adafruit.com/category/37_88) or a [4-digit 7-segment display](https://www.adafruit.com/category/37_103). Matrices like these are...
In Stock
[Buy Now](https://www.adafruit.com/product/872)
[Related Guides to the Product](https://learn.adafruit.com/products/872/guides)
### Adafruit 0.56" 4-Digit 7-Segment Display with I2C Backpack - Red
[Adafruit 0.56" 4-Digit 7-Segment Display with I2C Backpack - Red](https://www.adafruit.com/product/878)
What's better than a single LED? Lots of LEDs! A fun way to make a small display is to use an [8x8 matrix](https://www.adafruit.com/category/37_88) or a [4-digit 7-segment display](https://www.adafruit.com/category/37_103). Matrices like these are...
In Stock
[Buy Now](https://www.adafruit.com/product/878)
[Related Guides to the Product](https://learn.adafruit.com/products/878/guides)
### Adafruit 0.56" 4-Digit 7-Segment Display w/I2C Backpack - Yellow
[Adafruit 0.56" 4-Digit 7-Segment Display w/I2C Backpack - Yellow](https://www.adafruit.com/product/879)
What's better than a single LED? Lots of LEDs! A fun way to make a small display is to use an [8x8 matrix](https://www.adafruit.com/category/37_88) or a [4-digit 7-segment display](https://www.adafruit.com/category/37_103). Matrices like these are...
In Stock
[Buy Now](https://www.adafruit.com/product/879)
[Related Guides to the Product](https://learn.adafruit.com/products/879/guides)
### Adafruit 0.56" 4-Digit 7-Segment Display w/ I2C Backpack - Green
[Adafruit 0.56" 4-Digit 7-Segment Display w/ I2C Backpack - Green](https://www.adafruit.com/product/880)
What's better than a single LED? Lots of LEDs! A fun way to make a small display is to use an [8x8 matrix](https://www.adafruit.com/category/37_88) or a [4-digit 7-segment display](https://www.adafruit.com/category/37_103). Matrices like these are...
No Longer Stocked
[Buy Now](https://www.adafruit.com/product/880)
[Related Guides to the Product](https://learn.adafruit.com/products/880/guides)
### Adafruit 0.56" 4-Digit 7-Segment Display w/ I2C Backpack - Blue
[Adafruit 0.56" 4-Digit 7-Segment Display w/ I2C Backpack - Blue](https://www.adafruit.com/product/881)
What's better than a single LED? Lots of LEDs! A fun way to make a small display is to use an [8x8 matrix](https://www.adafruit.com/category/37_88) or a [4-digit 7-segment display](https://www.adafruit.com/category/37_103). Matrices like these are...
In Stock
[Buy Now](https://www.adafruit.com/product/881)
[Related Guides to the Product](https://learn.adafruit.com/products/881/guides)
### Adafruit Bicolor LED Square Pixel Matrix with I2C Backpack
[Adafruit Bicolor LED Square Pixel Matrix with I2C Backpack](https://www.adafruit.com/product/902)
What's better than a single LED? Lots of LEDs! A fun way to make a small colorful display is to use a [1.2" Bi-color 8x8 LED Matrix](http://www.adafruit.com/products/458). Matrices like these are 'multiplexed' - so to control all the 128 LEDs you need 24 pins....
In Stock
[Buy Now](https://www.adafruit.com/product/902)
[Related Guides to the Product](https://learn.adafruit.com/products/902/guides)
### Adafruit Mini 8x8 LED Matrix w/I2C Backpack - Blue
[Adafruit Mini 8x8 LED Matrix w/I2C Backpack - Blue](https://www.adafruit.com/product/959)
What's better than a single LED? Lots of LEDs! A fun way to make a small display is to use an [8x8 matrix](https://www.adafruit.com/category/37_88) or a [4-digit 7-segment display](https://www.adafruit.com/category/37_103). Matrices like these are...
In Stock
[Buy Now](https://www.adafruit.com/product/959)
[Related Guides to the Product](https://learn.adafruit.com/products/959/guides)
### Adafruit 0.56" 4-Digit 7-Segment Display w/I2C Backpack - White
[Adafruit 0.56" 4-Digit 7-Segment Display w/I2C Backpack - White](https://www.adafruit.com/product/1002)
What's better than a single LED? Lots of LEDs! A fun way to make a small display is to use an [8x8 matrix](https://www.adafruit.com/category/37_88) or a [4-digit 7-segment display](https://www.adafruit.com/category/37_103). Matrices like these are...
In Stock
[Buy Now](https://www.adafruit.com/product/1002)
[Related Guides to the Product](https://learn.adafruit.com/products/1002/guides)
### Adafruit 1.2" 8x8 LED Matrix Backpack
[Adafruit 1.2" 8x8 LED Matrix Backpack](https://www.adafruit.com/product/1048)
By popular request, you can now get our 8x8 LED backpacks without the LEDs! These backpacks feature an HT16K33 I2C LED driver, they're simple and easy to use - you can use [our very nice library for the backpacks to...](https://github.com/adafruit/Adafruit-LED-Backpack-Library)
In Stock
[Buy Now](https://www.adafruit.com/product/1048)
[Related Guides to the Product](https://learn.adafruit.com/products/1048/guides)
### Adafruit Small 1.2" 8x8 LED Matrix w/I2C Backpack - Red
[Adafruit Small 1.2" 8x8 LED Matrix w/I2C Backpack - Red](https://www.adafruit.com/product/1049)
What's better than a single LED? Lots of LEDs! A fun way to make a small display is to use an [8x8 matrix](https://www.adafruit.com/category/37_88) or a [4-digit 7-segment display](https://www.adafruit.com/category/37_103). Matrices like these are...
In Stock
[Buy Now](https://www.adafruit.com/product/1049)
[Related Guides to the Product](https://learn.adafruit.com/products/1049/guides)
### Adafruit Small 1.2" 8x8 LED Matrix w/I2C Backpack - Yellow
[Adafruit Small 1.2" 8x8 LED Matrix w/I2C Backpack - Yellow](https://www.adafruit.com/product/1050)
What's better than a single LED? Lots of LEDs! A fun way to make a small display is to use an [8x8 matrix](https://www.adafruit.com/category/37_88) or a [4-digit 7-segment display](https://www.adafruit.com/category/37_103). Matrices like these are...
In Stock
[Buy Now](https://www.adafruit.com/product/1050)
[Related Guides to the Product](https://learn.adafruit.com/products/1050/guides)
### Adafruit Small 1.2" 8x8 LED Matrix w/I2C Backpack - Blue
[Adafruit Small 1.2" 8x8 LED Matrix w/I2C Backpack - Blue](https://www.adafruit.com/product/1052)
What's better than a single LED? Lots of LEDs! A fun way to make a small display is to use an [8x8 matrix](https://www.adafruit.com/category/37_88) or a [4-digit 7-segment display](https://www.adafruit.com/category/37_103). Matrices like these are...
In Stock
[Buy Now](https://www.adafruit.com/product/1052)
[Related Guides to the Product](https://learn.adafruit.com/products/1052/guides)
### Adafruit Mini 8x8 LED Matrix w/I2C Backpack - Ultra Bright White
[Adafruit Mini 8x8 LED Matrix w/I2C Backpack - Ultra Bright White](https://www.adafruit.com/product/1080)
What's better than a single LED? Lots of LEDs! A fun way to make a small display is to use an [8x8 matrix](https://www.adafruit.com/category/37_88) or a [4-digit 7-segment display](https://www.adafruit.com/category/37_103). Matrices like these are...
In Stock
[Buy Now](https://www.adafruit.com/product/1080)
[Related Guides to the Product](https://learn.adafruit.com/products/1080/guides)
### Adafruit 1.2" 4-Digit 7-Segment Display w/I2C Backpack - Green
[Adafruit 1.2" 4-Digit 7-Segment Display w/I2C Backpack - Green](https://www.adafruit.com/product/1268)
What's better than a single LED? Lots of LEDs! A fun way to make a numeric display is to use a [4-digit 7-segment display](https://www.adafruit.com/category/37_103). LED matrices like these are 'multiplexed' - so to control all the seven-segment LEDs you need 14 pins....
No Longer Stocked
[Buy Now](https://www.adafruit.com/product/1268)
[Related Guides to the Product](https://learn.adafruit.com/products/1268/guides)
### Adafruit 1.2" 4-Digit 7-Segment Display w/I2C Backpack - Yellow
[Adafruit 1.2" 4-Digit 7-Segment Display w/I2C Backpack - Yellow](https://www.adafruit.com/product/1269)
What's better than a single LED? Lots of LEDs! A fun way to make a numeric display is to use a [4-digit 7-segment display](https://www.adafruit.com/category/37_103). LED matrices like these are 'multiplexed' - so to control all the seven-segment LEDs you need 14 pins....
In Stock
[Buy Now](https://www.adafruit.com/product/1269)
[Related Guides to the Product](https://learn.adafruit.com/products/1269/guides)
### Adafruit 1.2" 4-Digit 7-Segment Display w/I2C Backpack - Red
[Adafruit 1.2" 4-Digit 7-Segment Display w/I2C Backpack - Red](https://www.adafruit.com/product/1270)
What's better than a single LED? Lots of LEDs! A fun way to make a numeric display is to use a [4-digit 7-segment display](https://www.adafruit.com/category/37_103). LED matrices like these are 'multiplexed' - so to control all the seven-segment LEDs you need 14 pins....
In Stock
[Buy Now](https://www.adafruit.com/product/1270)
[Related Guides to the Product](https://learn.adafruit.com/products/1270/guides)
### Small 1.2" 8x8 Ultra Bright White LED Matrix + Backpack
[Small 1.2" 8x8 Ultra Bright White LED Matrix + Backpack](https://www.adafruit.com/product/1614)
What's better than a single LED? Lots of LEDs! A fun way to make a small display is to use an [8x8 matrix](https://www.adafruit.com/category/37_88) or a [4-digit 7-segment display](https://www.adafruit.com/category/37_103). Matrices like these are...
In Stock
[Buy Now](https://www.adafruit.com/product/1614)
[Related Guides to the Product](https://learn.adafruit.com/products/1614/guides)
### Adafruit Small 1.2" 8x8 LED Matrix w/I2C Backpack - Pure Green
[Adafruit Small 1.2" 8x8 LED Matrix w/I2C Backpack - Pure Green](https://www.adafruit.com/product/1632)
What's better than a single LED? Lots of LEDs! A fun way to make a small display is to use an [8x8 matrix](https://www.adafruit.com/category/37_88) or a [4-digit 7-segment display](https://www.adafruit.com/category/37_103). Matrices like these are...
In Stock
[Buy Now](https://www.adafruit.com/product/1632)
[Related Guides to the Product](https://learn.adafruit.com/products/1632/guides)
### Adafruit Mini 0.8" 8x8 LED Matrix w/I2C Backpack - Pure Green
[Adafruit Mini 0.8" 8x8 LED Matrix w/I2C Backpack - Pure Green](https://www.adafruit.com/product/1633)
What's better than a single LED? Lots of LEDs! A fun way to make a small display is to use an [8x8 matrix](https://www.adafruit.com/category/37_88) or a [4-digit 7-segment display](https://www.adafruit.com/category/37_103). Matrices like these are...
In Stock
[Buy Now](https://www.adafruit.com/product/1633)
[Related Guides to the Product](https://learn.adafruit.com/products/1633/guides)
### Bi-Color (Red/Green) 24-Bar Bargraph w/I2C Backpack Kit
[Bi-Color (Red/Green) 24-Bar Bargraph w/I2C Backpack Kit](https://www.adafruit.com/product/1721)
What's better than a single LED? Lots of LEDs! A fun way to make a small linear display is to use two 12-bar Bi-color bar-graphs. However, this LED bargraph is 'multiplexed' - so to control all the 48 LEDs you need a lot of pins.
Out of Stock
[Buy Now](https://www.adafruit.com/product/1721)
[Related Guides to the Product](https://learn.adafruit.com/products/1721/guides)
### Small 1.2" 8x8 Ultra Bright Square Amber LED Matrix + Backpack
[Small 1.2" 8x8 Ultra Bright Square Amber LED Matrix + Backpack](https://www.adafruit.com/product/1854)
What's better than a single LED? Lots of LEDs! Matrices like these are 'multiplexed' - so to control 64 LEDs you need 16 pins. That's a lot of pins, and there are [driver chips like the MAX7219](//www.adafruit.com/products/453) that can control a matrix for you but...
In Stock
[Buy Now](https://www.adafruit.com/product/1854)
[Related Guides to the Product](https://learn.adafruit.com/products/1854/guides)
### Small 1.2" 8x8 Ultra Bright Square Yellow LED Matrix + Backpack
[Small 1.2" 8x8 Ultra Bright Square Yellow LED Matrix + Backpack](https://www.adafruit.com/product/1855)
What's better than a single LED? Lots of LEDs! Matrices like these are 'multiplexed' - so to control 64 LEDs you need 16 pins. That's a lot of pins, and there are [driver chips like the MAX7219](//www.adafruit.com/products/453) that can control a matrix for you but...
In Stock
[Buy Now](https://www.adafruit.com/product/1855)
[Related Guides to the Product](https://learn.adafruit.com/products/1855/guides)
### Small 1.2" 8x8 Bright Square Pure Green LED Matrix + Backpack
[Small 1.2" 8x8 Bright Square Pure Green LED Matrix + Backpack](https://www.adafruit.com/product/1856)
What's better than a single LED? Lots of LEDs! Matrices like these are 'multiplexed' - so to control 64 LEDs you need 16 pins. That's a lot of pins, and there are [driver chips like the MAX7219](//www.adafruit.com/products/453) that can control a matrix for you but...
In Stock
[Buy Now](https://www.adafruit.com/product/1856)
[Related Guides to the Product](https://learn.adafruit.com/products/1856/guides)
### Small 1.2" 8x8 Ultra Bright Square White LED Matrix + Backpack
[Small 1.2" 8x8 Ultra Bright Square White LED Matrix + Backpack](https://www.adafruit.com/product/1857)
What's better than a single LED? Lots of LEDs! Matrices like these are 'multiplexed' - so to control 64 LEDs you need 16 pins. That's a lot of pins, and there are [driver chips like the MAX7219](//www.adafruit.com/products/453) that can control a matrix for you but...
In Stock
[Buy Now](https://www.adafruit.com/product/1857)
[Related Guides to the Product](https://learn.adafruit.com/products/1857/guides)
### Adafruit 14-segment LED Alphanumeric Backpack - STEMMA QT
[Adafruit 14-segment LED Alphanumeric Backpack - STEMMA QT](https://www.adafruit.com/product/1910)
By popular request, you can now get our 14-segment LED backpacks without the LEDs! These backpacks feature an HT16K33 I2C LED driver, they're simple and easy to use - you can use [our very nice library for the backpacks to...](https://github.com/adafruit/Adafruit-LED-Backpack-Library)
In Stock
[Buy Now](https://www.adafruit.com/product/1910)
[Related Guides to the Product](https://learn.adafruit.com/products/1910/guides)
### Quad Alphanumeric Display - Red 0.54" Digits w/ I2C Backpack
[Quad Alphanumeric Display - Red 0.54" Digits w/ I2C Backpack](https://www.adafruit.com/product/1911)
Display, elegantly, 012345678 or 9! Gaze, hypnotized, at ABCDEFGHIJKLM - well it can display the whole alphabet. You get the point. This is a nice, bright alphanumeric display that shows letters and numbers in a beautiful red hue. It's super bright and designed for viewing from distances...
In Stock
[Buy Now](https://www.adafruit.com/product/1911)
[Related Guides to the Product](https://learn.adafruit.com/products/1911/guides)
### Quad Alphanumeric Display - Blue 0.54" Digits w/ I2C Backpack
[Quad Alphanumeric Display - Blue 0.54" Digits w/ I2C Backpack](https://www.adafruit.com/product/1912)
Display, elegantly, 012345678 or 9! Gaze, hypnotized, at ABCDEFGHIJKLM - well it can display the whole alphabet. You get the point. This is a nice, bright alphanumeric display that shows letters and numbers in a beautiful blue hue. It's super bright and designed for viewing from distances...
In Stock
[Buy Now](https://www.adafruit.com/product/1912)
[Related Guides to the Product](https://learn.adafruit.com/products/1912/guides)
### 16x8 1.2" LED Matrix + Backpack - Ultra Bright Round Green LEDs
[16x8 1.2" LED Matrix + Backpack - Ultra Bright Round Green LEDs](https://www.adafruit.com/product/2035)
What's better than a single LED? Lots of LEDs! And what's better than lots of LEDs? **TWO TIMES AS MANY LEDS!!!**
With the 16x8 LED Matrix Backpack we've doubled your project's matrix capacity by making it super easy to get two separate 8x8 matrices onto...
In Stock
[Buy Now](https://www.adafruit.com/product/2035)
[Related Guides to the Product](https://learn.adafruit.com/products/2035/guides)
### 16x8 1.2" LED Matrix+Backpack UltraBright Round YellowGreen LEDs
[16x8 1.2" LED Matrix+Backpack UltraBright Round YellowGreen LEDs](https://www.adafruit.com/product/2036)
What's better than a single LED? Lots of LEDs! And what's better than lots of LEDs? **TWO TIMES AS MANY LEDS!!!**
With the 16x8 LED Matrix Backpack we've doubled your project's matrix capacity by making it super easy to get two separate 8x8 matrices onto...
In Stock
[Buy Now](https://www.adafruit.com/product/2036)
[Related Guides to the Product](https://learn.adafruit.com/products/2036/guides)
### 16x8 1.2" LED Matrix + Backpack - Ultra Bright Round Red LEDs
[16x8 1.2" LED Matrix + Backpack - Ultra Bright Round Red LEDs](https://www.adafruit.com/product/2037)
What's better than a single LED? Lots of LEDs! And what's better than lots of LEDs? **TWO TIMES AS MANY LEDS!!!**
With the 16x8 LED Matrix Backpack we've doubled your project's matrix capacity by making it super easy to get two separate 8x8 matrices onto...
In Stock
[Buy Now](https://www.adafruit.com/product/2037)
[Related Guides to the Product](https://learn.adafruit.com/products/2037/guides)
### 16x8 1.2" LED Matrix + Backpack - Ultra Bright Round White LEDs
[16x8 1.2" LED Matrix + Backpack - Ultra Bright Round White LEDs](https://www.adafruit.com/product/2038)
What's better than a single LED? Lots of LEDs! And what's better than lots of LEDs? **TWO TIMES AS MANY LEDS!!!**
With the 16x8 LED Matrix Backpack we've doubled your project's matrix capacity by making it super easy to get two separate 8x8 matrices onto...
In Stock
[Buy Now](https://www.adafruit.com/product/2038)
[Related Guides to the Product](https://learn.adafruit.com/products/2038/guides)
### 16x8 1.2" LED Matrix + Backpack - Ultra Bright Round Blue LEDs
[16x8 1.2" LED Matrix + Backpack - Ultra Bright Round Blue LEDs](https://www.adafruit.com/product/2039)
What's better than a single LED? Lots of LEDs! And what's better than lots of LEDs? **TWO TIMES AS MANY LEDS!!!**
With the 16x8 LED Matrix Backpack we've doubled your project's matrix capacity by making it super easy to get two separate 8x8 matrices onto...
In Stock
[Buy Now](https://www.adafruit.com/product/2039)
[Related Guides to the Product](https://learn.adafruit.com/products/2039/guides)
### 16x8 1.2" LED Matrix + Backpack - Ultra Bright Square Blue LEDs
[16x8 1.2" LED Matrix + Backpack - Ultra Bright Square Blue LEDs](https://www.adafruit.com/product/2040)
What's better than a single LED? Lots of LEDs! And what's better than lots of LEDs? **TWO TIMES AS MANY LEDS!!!**
With the 16x8 LED Matrix Backpack we've doubled your project's matrix capacity by making it super easy to get two separate 8x8 matrices onto...
In Stock
[Buy Now](https://www.adafruit.com/product/2040)
[Related Guides to the Product](https://learn.adafruit.com/products/2040/guides)
### 16x8 1.2" LED Matrix + Backpack - Ultra Bright Square Amber LEDs
[16x8 1.2" LED Matrix + Backpack - Ultra Bright Square Amber LEDs](https://www.adafruit.com/product/2041)
What's better than a single LED? Lots of LEDs! And what's better than lots of LEDs? **TWO TIMES AS MANY LEDS!!!**
With the 16x8 LED Matrix Backpack we've doubled your project's matrix capacity by making it super easy to get two separate 8x8 matrices onto...
In Stock
[Buy Now](https://www.adafruit.com/product/2041)
[Related Guides to the Product](https://learn.adafruit.com/products/2041/guides)
### 16x8 1.2" LED Matrix + Backpack - Ultra Bright Square Green LEDs
[16x8 1.2" LED Matrix + Backpack - Ultra Bright Square Green LEDs](https://www.adafruit.com/product/2042)
What's better than a single LED? Lots of LEDs! And what's better than lots of LEDs? **TWO TIMES AS MANY LEDS!!!**
With the 16x8 LED Matrix Backpack we've doubled your project's matrix capacity by making it super easy to get two separate 8x8 matrices onto...
In Stock
[Buy Now](https://www.adafruit.com/product/2042)
[Related Guides to the Product](https://learn.adafruit.com/products/2042/guides)
### 16x8 1.2" LED Matrix + Backpack -Ultra Bright Square Yellow LEDs
[16x8 1.2" LED Matrix + Backpack -Ultra Bright Square Yellow LEDs](https://www.adafruit.com/product/2043)
What's better than a single LED? Lots of LEDs! And what's better than lots of LEDs? **TWO TIMES AS MANY LEDS!!!**
With the 16x8 LED Matrix Backpack we've doubled your project's matrix capacity by making it super easy to get two separate 8x8 matrices onto...
In Stock
[Buy Now](https://www.adafruit.com/product/2043)
[Related Guides to the Product](https://learn.adafruit.com/products/2043/guides)
### 16x8 1.2" LED Matrix + Backpack - Ultra Bright Square White LEDs
[16x8 1.2" LED Matrix + Backpack - Ultra Bright Square White LEDs](https://www.adafruit.com/product/2044)
What's better than a single LED? Lots of LEDs! And what's better than lots of LEDs? **TWO TIMES AS MANY LEDS!!!**
With the 16x8 LED Matrix Backpack we've doubled your project's matrix capacity by making it super easy to get two separate 8x8 matrices onto...
In Stock
[Buy Now](https://www.adafruit.com/product/2044)
[Related Guides to the Product](https://learn.adafruit.com/products/2044/guides)
### 16x8 1.2" LED Matrix + Backpack-Ultra Bright Round Orange LEDs
[16x8 1.2" LED Matrix + Backpack-Ultra Bright Round Orange LEDs](https://www.adafruit.com/product/2052)
What's better than a single LED? Lots of LEDs! And what's better than lots of LEDs? **TWO TIMES AS MANY LEDS!!!**
With the 16x8 LED Matrix Backpack we've doubled your project's matrix capacity by making it super easy to get two separate 8x8 matrices onto...
In Stock
[Buy Now](https://www.adafruit.com/product/2052)
[Related Guides to the Product](https://learn.adafruit.com/products/2052/guides)
### 16x8 1.2" LED Matrices+Backpack Round LEDs in Various Colors
[16x8 1.2" LED Matrices+Backpack Round LEDs in Various Colors](https://www.adafruit.com/product/2054)
What's better than a single LED? Lots of LEDs! And what's better than lots of LEDs? **TWO TIMES AS MANY LEDS!!!**
With the 16x8 LED Matrix Backpack we've doubled your project's matrix capacity by making it super easy to get two separate 8x8 matrices onto...
Out of Stock
[Buy Now](https://www.adafruit.com/product/2054)
[Related Guides to the Product](https://learn.adafruit.com/products/2054/guides)
### Adafruit 8x16 LED Matrix FeatherWing w/o Matrices
[Adafruit 8x16 LED Matrix FeatherWing w/o Matrices](https://www.adafruit.com/product/3090)
You will chirp with delight when you see how easy it is to make your very own 8x16 LED matrix display for any Feather. At 0.8" square, the little [8x8 matrices](https://www.adafruit.com/new/?q=8x8%20miniature%20LED%20matrix&) have everything a big LED matrix has,...
Out of Stock
[Buy Now](https://www.adafruit.com/product/3090)
[Related Guides to the Product](https://learn.adafruit.com/products/3090/guides)
### Adafruit 14-segment LED Alphanumeric backpack (same as P1910)
[Adafruit 14-segment LED Alphanumeric backpack (same as P1910)](https://www.adafruit.com/product/3322)
Just the backpack + 4pin header
No Longer Stocked
[Buy Now](https://www.adafruit.com/product/3322)
[Related Guides to the Product](https://learn.adafruit.com/products/3322/guides)
## Featured Products
### Adafruit Small 1.2" 8x8 LED Matrix w/I2C Backpack - Yellow-Green
[Adafruit Small 1.2" 8x8 LED Matrix w/I2C Backpack - Yellow-Green](https://www.adafruit.com/product/1051)
What's better than a single LED? Lots of LEDs! A fun way to make a small display is to use an [8x8 matrix](https://www.adafruit.com/category/37_88) or a [4-digit 7-segment display](https://www.adafruit.com/category/37_103). Matrices like these are...
In Stock
[Buy Now](https://www.adafruit.com/product/1051)
[Related Guides to the Product](https://learn.adafruit.com/products/1051/guides)
### Small 1.2" 8x8 Ultra Bright Square Blue LED Matrix + Backpack
[Small 1.2" 8x8 Ultra Bright Square Blue LED Matrix + Backpack](https://www.adafruit.com/product/1853)
What's better than a single LED? Lots of LEDs! Matrices like these are 'multiplexed' - so to control 64 LEDs you need 16 pins. That's a lot of pins, and there are [driver chips like the MAX7219](//www.adafruit.com/products/453) that can control a matrix for you but...
In Stock
[Buy Now](https://www.adafruit.com/product/1853)
[Related Guides to the Product](https://learn.adafruit.com/products/1853/guides)
## Related Guides
- [LED Backpack Displays on Raspberry Pi and BeagleBone Black](https://learn.adafruit.com/led-backpack-displays-on-raspberry-pi-and-beaglebone-black.md)
- [Animating Multiple LED Backpacks](https://learn.adafruit.com/animating-multiple-led-backpacks.md)
- [Arduino GPS Clock](https://learn.adafruit.com/arduino-clock.md)
- [Raspberry Pi Physical Dashboard](https://learn.adafruit.com/raspberry-pi-physical-dashboard.md)
- [CircuitPython Hardware: LED Backpacks & FeatherWings](https://learn.adafruit.com/micropython-hardware-led-backpacks-and-featherwings.md)
- [Matrix and 7-Segment LED Backpack with the Raspberry Pi](https://learn.adafruit.com/matrix-7-segment-led-backpack-with-the-raspberry-pi.md)
- [DIY Pocket LED Gamer - Tiny Tetris!](https://learn.adafruit.com/diy-3d-printed-handheld-pocket-game-tiny-tetris-snake.md)
- [RGB LED Matrix Cube with 25,000 LEDs](https://learn.adafruit.com/rgb-led-matrix-cube-for-pi.md)
- [Creating GIFs for SmartMatrix](https://learn.adafruit.com/creating-gifs-for-smartmatrix.md)
- [Adafruit CharliePlex LED Matrix Bonnet](https://learn.adafruit.com/adafruit-charlieplex-bonnet.md)
- [Connecting a 16x32 RGB LED Matrix Panel to a Raspberry Pi](https://learn.adafruit.com/connecting-a-16x32-rgb-led-matrix-panel-to-a-raspberry-pi.md)
- [MicroPython Displays: Drawing Text](https://learn.adafruit.com/micropython-displays-drawing-text.md)
- [Heart Rate Badge](https://learn.adafruit.com/heart-rate-badge.md)
- [16x24 LED Matrix](https://learn.adafruit.com/16x24-led-matrix.md)
- [Adafruit IS31FL3741](https://learn.adafruit.com/adafruit-is31fl3741.md)
---
# Source: https://learn.adafruit.com/adafruit-led-backpack/1-2-16x8-matrix.md
# Adafruit LED Backpacks
## 1.2" 16x8 Matrix
With the 16x8 LED Matrix we've doubled your project's matrix capacity by making it super easy to get two separate 8x8 matrices onto one handy board! This version of the LED backpack is designed for two of the 1.2" 8x8 matrices. They measure only 1.2"x1.2" so its a shame to use a massive array of chips to control it. This backpack solves the annoyance of using 32 pins or a bunch of chips by having an I2C constant-current matrix controller sit neatly on the back of the PCB. The controller chip takes care of everything, drawing all 128 LEDs in the background. All you have to do is write data to it using the 2-pin I2C interface. There are two address select pins so you can select one of 8 addresses to control up to 8 of these on a single 2-pin I2C bus (as well as whatever other I2C chips or sensors you like). The driver chip can 'dim' the entire display from 1/16 brightness up to full brightness in 1/16th steps. It cannot dim individual LEDs, only the entire display at once.

Assembling the 1.2" 16x8 backpack is nearly the same as the 1.2" 8x8, so you can [follow that page](https://learn.adafruit.com/adafruit-led-backpack/1-2-8x8-matrix-assembly) for directions, only difference is there’s two matrices to install now.
The printed-on edge of the matrices face the white dots on the PCB, and there’s a single set of address selection pads; the pair is addressed as one larger unit, not set independently.

- [Previous Page](https://learn.adafruit.com/adafruit-led-backpack/0-8-8x8-matrix-circuitpython-and-python-usage.md)
- [Next Page](https://learn.adafruit.com/adafruit-led-backpack/1-2-16x8-matrix-arduino-setup.md)
## Primary Products
### Adafruit Mini 8x8 LED Matrix w/I2C Backpack - Red
[Adafruit Mini 8x8 LED Matrix w/I2C Backpack - Red](https://www.adafruit.com/product/870)
What's better than a single LED? Lots of LEDs! A fun way to make a small display is to use an [8x8 matrix](https://www.adafruit.com/category/37_88) or a [4-digit 7-segment display](https://www.adafruit.com/category/37_103). Matrices like these are...
In Stock
[Buy Now](https://www.adafruit.com/product/870)
[Related Guides to the Product](https://learn.adafruit.com/products/870/guides)
### Adafruit Mini 8x8 LED Matrix w/I2C Backpack - Yellow
[Adafruit Mini 8x8 LED Matrix w/I2C Backpack - Yellow](https://www.adafruit.com/product/871)
What's better than a single LED? Lots of LEDs! A fun way to make a small display is to use an [8x8 matrix](https://www.adafruit.com/category/37_88) or a [4-digit 7-segment display](https://www.adafruit.com/category/37_103). Matrices like these are...
In Stock
[Buy Now](https://www.adafruit.com/product/871)
[Related Guides to the Product](https://learn.adafruit.com/products/871/guides)
### Adafruit Mini 0.8" 8x8 LED Matrix w/I2C Backpack - Yellow-Green
[Adafruit Mini 0.8" 8x8 LED Matrix w/I2C Backpack - Yellow-Green](https://www.adafruit.com/product/872)
What's better than a single LED? Lots of LEDs! A fun way to make a small display is to use an [8x8 matrix](https://www.adafruit.com/category/37_88) or a [4-digit 7-segment display](https://www.adafruit.com/category/37_103). Matrices like these are...
In Stock
[Buy Now](https://www.adafruit.com/product/872)
[Related Guides to the Product](https://learn.adafruit.com/products/872/guides)
### Adafruit 0.56" 4-Digit 7-Segment Display with I2C Backpack - Red
[Adafruit 0.56" 4-Digit 7-Segment Display with I2C Backpack - Red](https://www.adafruit.com/product/878)
What's better than a single LED? Lots of LEDs! A fun way to make a small display is to use an [8x8 matrix](https://www.adafruit.com/category/37_88) or a [4-digit 7-segment display](https://www.adafruit.com/category/37_103). Matrices like these are...
In Stock
[Buy Now](https://www.adafruit.com/product/878)
[Related Guides to the Product](https://learn.adafruit.com/products/878/guides)
### Adafruit 0.56" 4-Digit 7-Segment Display w/I2C Backpack - Yellow
[Adafruit 0.56" 4-Digit 7-Segment Display w/I2C Backpack - Yellow](https://www.adafruit.com/product/879)
What's better than a single LED? Lots of LEDs! A fun way to make a small display is to use an [8x8 matrix](https://www.adafruit.com/category/37_88) or a [4-digit 7-segment display](https://www.adafruit.com/category/37_103). Matrices like these are...
In Stock
[Buy Now](https://www.adafruit.com/product/879)
[Related Guides to the Product](https://learn.adafruit.com/products/879/guides)
### Adafruit 0.56" 4-Digit 7-Segment Display w/ I2C Backpack - Green
[Adafruit 0.56" 4-Digit 7-Segment Display w/ I2C Backpack - Green](https://www.adafruit.com/product/880)
What's better than a single LED? Lots of LEDs! A fun way to make a small display is to use an [8x8 matrix](https://www.adafruit.com/category/37_88) or a [4-digit 7-segment display](https://www.adafruit.com/category/37_103). Matrices like these are...
No Longer Stocked
[Buy Now](https://www.adafruit.com/product/880)
[Related Guides to the Product](https://learn.adafruit.com/products/880/guides)
### Adafruit 0.56" 4-Digit 7-Segment Display w/ I2C Backpack - Blue
[Adafruit 0.56" 4-Digit 7-Segment Display w/ I2C Backpack - Blue](https://www.adafruit.com/product/881)
What's better than a single LED? Lots of LEDs! A fun way to make a small display is to use an [8x8 matrix](https://www.adafruit.com/category/37_88) or a [4-digit 7-segment display](https://www.adafruit.com/category/37_103). Matrices like these are...
In Stock
[Buy Now](https://www.adafruit.com/product/881)
[Related Guides to the Product](https://learn.adafruit.com/products/881/guides)
### Adafruit Bicolor LED Square Pixel Matrix with I2C Backpack
[Adafruit Bicolor LED Square Pixel Matrix with I2C Backpack](https://www.adafruit.com/product/902)
What's better than a single LED? Lots of LEDs! A fun way to make a small colorful display is to use a [1.2" Bi-color 8x8 LED Matrix](http://www.adafruit.com/products/458). Matrices like these are 'multiplexed' - so to control all the 128 LEDs you need 24 pins....
In Stock
[Buy Now](https://www.adafruit.com/product/902)
[Related Guides to the Product](https://learn.adafruit.com/products/902/guides)
### Adafruit Mini 8x8 LED Matrix w/I2C Backpack - Blue
[Adafruit Mini 8x8 LED Matrix w/I2C Backpack - Blue](https://www.adafruit.com/product/959)
What's better than a single LED? Lots of LEDs! A fun way to make a small display is to use an [8x8 matrix](https://www.adafruit.com/category/37_88) or a [4-digit 7-segment display](https://www.adafruit.com/category/37_103). Matrices like these are...
In Stock
[Buy Now](https://www.adafruit.com/product/959)
[Related Guides to the Product](https://learn.adafruit.com/products/959/guides)
### Adafruit 0.56" 4-Digit 7-Segment Display w/I2C Backpack - White
[Adafruit 0.56" 4-Digit 7-Segment Display w/I2C Backpack - White](https://www.adafruit.com/product/1002)
What's better than a single LED? Lots of LEDs! A fun way to make a small display is to use an [8x8 matrix](https://www.adafruit.com/category/37_88) or a [4-digit 7-segment display](https://www.adafruit.com/category/37_103). Matrices like these are...
In Stock
[Buy Now](https://www.adafruit.com/product/1002)
[Related Guides to the Product](https://learn.adafruit.com/products/1002/guides)
### Adafruit 1.2" 8x8 LED Matrix Backpack
[Adafruit 1.2" 8x8 LED Matrix Backpack](https://www.adafruit.com/product/1048)
By popular request, you can now get our 8x8 LED backpacks without the LEDs! These backpacks feature an HT16K33 I2C LED driver, they're simple and easy to use - you can use [our very nice library for the backpacks to...](https://github.com/adafruit/Adafruit-LED-Backpack-Library)
In Stock
[Buy Now](https://www.adafruit.com/product/1048)
[Related Guides to the Product](https://learn.adafruit.com/products/1048/guides)
### Adafruit Small 1.2" 8x8 LED Matrix w/I2C Backpack - Red
[Adafruit Small 1.2" 8x8 LED Matrix w/I2C Backpack - Red](https://www.adafruit.com/product/1049)
What's better than a single LED? Lots of LEDs! A fun way to make a small display is to use an [8x8 matrix](https://www.adafruit.com/category/37_88) or a [4-digit 7-segment display](https://www.adafruit.com/category/37_103). Matrices like these are...
In Stock
[Buy Now](https://www.adafruit.com/product/1049)
[Related Guides to the Product](https://learn.adafruit.com/products/1049/guides)
### Adafruit Small 1.2" 8x8 LED Matrix w/I2C Backpack - Yellow
[Adafruit Small 1.2" 8x8 LED Matrix w/I2C Backpack - Yellow](https://www.adafruit.com/product/1050)
What's better than a single LED? Lots of LEDs! A fun way to make a small display is to use an [8x8 matrix](https://www.adafruit.com/category/37_88) or a [4-digit 7-segment display](https://www.adafruit.com/category/37_103). Matrices like these are...
In Stock
[Buy Now](https://www.adafruit.com/product/1050)
[Related Guides to the Product](https://learn.adafruit.com/products/1050/guides)
### Adafruit Small 1.2" 8x8 LED Matrix w/I2C Backpack - Blue
[Adafruit Small 1.2" 8x8 LED Matrix w/I2C Backpack - Blue](https://www.adafruit.com/product/1052)
What's better than a single LED? Lots of LEDs! A fun way to make a small display is to use an [8x8 matrix](https://www.adafruit.com/category/37_88) or a [4-digit 7-segment display](https://www.adafruit.com/category/37_103). Matrices like these are...
In Stock
[Buy Now](https://www.adafruit.com/product/1052)
[Related Guides to the Product](https://learn.adafruit.com/products/1052/guides)
### Adafruit Mini 8x8 LED Matrix w/I2C Backpack - Ultra Bright White
[Adafruit Mini 8x8 LED Matrix w/I2C Backpack - Ultra Bright White](https://www.adafruit.com/product/1080)
What's better than a single LED? Lots of LEDs! A fun way to make a small display is to use an [8x8 matrix](https://www.adafruit.com/category/37_88) or a [4-digit 7-segment display](https://www.adafruit.com/category/37_103). Matrices like these are...
In Stock
[Buy Now](https://www.adafruit.com/product/1080)
[Related Guides to the Product](https://learn.adafruit.com/products/1080/guides)
### Adafruit 1.2" 4-Digit 7-Segment Display w/I2C Backpack - Green
[Adafruit 1.2" 4-Digit 7-Segment Display w/I2C Backpack - Green](https://www.adafruit.com/product/1268)
What's better than a single LED? Lots of LEDs! A fun way to make a numeric display is to use a [4-digit 7-segment display](https://www.adafruit.com/category/37_103). LED matrices like these are 'multiplexed' - so to control all the seven-segment LEDs you need 14 pins....
No Longer Stocked
[Buy Now](https://www.adafruit.com/product/1268)
[Related Guides to the Product](https://learn.adafruit.com/products/1268/guides)
### Adafruit 1.2" 4-Digit 7-Segment Display w/I2C Backpack - Yellow
[Adafruit 1.2" 4-Digit 7-Segment Display w/I2C Backpack - Yellow](https://www.adafruit.com/product/1269)
What's better than a single LED? Lots of LEDs! A fun way to make a numeric display is to use a [4-digit 7-segment display](https://www.adafruit.com/category/37_103). LED matrices like these are 'multiplexed' - so to control all the seven-segment LEDs you need 14 pins....
In Stock
[Buy Now](https://www.adafruit.com/product/1269)
[Related Guides to the Product](https://learn.adafruit.com/products/1269/guides)
### Adafruit 1.2" 4-Digit 7-Segment Display w/I2C Backpack - Red
[Adafruit 1.2" 4-Digit 7-Segment Display w/I2C Backpack - Red](https://www.adafruit.com/product/1270)
What's better than a single LED? Lots of LEDs! A fun way to make a numeric display is to use a [4-digit 7-segment display](https://www.adafruit.com/category/37_103). LED matrices like these are 'multiplexed' - so to control all the seven-segment LEDs you need 14 pins....
In Stock
[Buy Now](https://www.adafruit.com/product/1270)
[Related Guides to the Product](https://learn.adafruit.com/products/1270/guides)
### Small 1.2" 8x8 Ultra Bright White LED Matrix + Backpack
[Small 1.2" 8x8 Ultra Bright White LED Matrix + Backpack](https://www.adafruit.com/product/1614)
What's better than a single LED? Lots of LEDs! A fun way to make a small display is to use an [8x8 matrix](https://www.adafruit.com/category/37_88) or a [4-digit 7-segment display](https://www.adafruit.com/category/37_103). Matrices like these are...
In Stock
[Buy Now](https://www.adafruit.com/product/1614)
[Related Guides to the Product](https://learn.adafruit.com/products/1614/guides)
### Adafruit Small 1.2" 8x8 LED Matrix w/I2C Backpack - Pure Green
[Adafruit Small 1.2" 8x8 LED Matrix w/I2C Backpack - Pure Green](https://www.adafruit.com/product/1632)
What's better than a single LED? Lots of LEDs! A fun way to make a small display is to use an [8x8 matrix](https://www.adafruit.com/category/37_88) or a [4-digit 7-segment display](https://www.adafruit.com/category/37_103). Matrices like these are...
In Stock
[Buy Now](https://www.adafruit.com/product/1632)
[Related Guides to the Product](https://learn.adafruit.com/products/1632/guides)
### Adafruit Mini 0.8" 8x8 LED Matrix w/I2C Backpack - Pure Green
[Adafruit Mini 0.8" 8x8 LED Matrix w/I2C Backpack - Pure Green](https://www.adafruit.com/product/1633)
What's better than a single LED? Lots of LEDs! A fun way to make a small display is to use an [8x8 matrix](https://www.adafruit.com/category/37_88) or a [4-digit 7-segment display](https://www.adafruit.com/category/37_103). Matrices like these are...
In Stock
[Buy Now](https://www.adafruit.com/product/1633)
[Related Guides to the Product](https://learn.adafruit.com/products/1633/guides)
### Bi-Color (Red/Green) 24-Bar Bargraph w/I2C Backpack Kit
[Bi-Color (Red/Green) 24-Bar Bargraph w/I2C Backpack Kit](https://www.adafruit.com/product/1721)
What's better than a single LED? Lots of LEDs! A fun way to make a small linear display is to use two 12-bar Bi-color bar-graphs. However, this LED bargraph is 'multiplexed' - so to control all the 48 LEDs you need a lot of pins.
Out of Stock
[Buy Now](https://www.adafruit.com/product/1721)
[Related Guides to the Product](https://learn.adafruit.com/products/1721/guides)
### Small 1.2" 8x8 Ultra Bright Square Amber LED Matrix + Backpack
[Small 1.2" 8x8 Ultra Bright Square Amber LED Matrix + Backpack](https://www.adafruit.com/product/1854)
What's better than a single LED? Lots of LEDs! Matrices like these are 'multiplexed' - so to control 64 LEDs you need 16 pins. That's a lot of pins, and there are [driver chips like the MAX7219](//www.adafruit.com/products/453) that can control a matrix for you but...
In Stock
[Buy Now](https://www.adafruit.com/product/1854)
[Related Guides to the Product](https://learn.adafruit.com/products/1854/guides)
### Small 1.2" 8x8 Ultra Bright Square Yellow LED Matrix + Backpack
[Small 1.2" 8x8 Ultra Bright Square Yellow LED Matrix + Backpack](https://www.adafruit.com/product/1855)
What's better than a single LED? Lots of LEDs! Matrices like these are 'multiplexed' - so to control 64 LEDs you need 16 pins. That's a lot of pins, and there are [driver chips like the MAX7219](//www.adafruit.com/products/453) that can control a matrix for you but...
In Stock
[Buy Now](https://www.adafruit.com/product/1855)
[Related Guides to the Product](https://learn.adafruit.com/products/1855/guides)
### Small 1.2" 8x8 Bright Square Pure Green LED Matrix + Backpack
[Small 1.2" 8x8 Bright Square Pure Green LED Matrix + Backpack](https://www.adafruit.com/product/1856)
What's better than a single LED? Lots of LEDs! Matrices like these are 'multiplexed' - so to control 64 LEDs you need 16 pins. That's a lot of pins, and there are [driver chips like the MAX7219](//www.adafruit.com/products/453) that can control a matrix for you but...
In Stock
[Buy Now](https://www.adafruit.com/product/1856)
[Related Guides to the Product](https://learn.adafruit.com/products/1856/guides)
### Small 1.2" 8x8 Ultra Bright Square White LED Matrix + Backpack
[Small 1.2" 8x8 Ultra Bright Square White LED Matrix + Backpack](https://www.adafruit.com/product/1857)
What's better than a single LED? Lots of LEDs! Matrices like these are 'multiplexed' - so to control 64 LEDs you need 16 pins. That's a lot of pins, and there are [driver chips like the MAX7219](//www.adafruit.com/products/453) that can control a matrix for you but...
In Stock
[Buy Now](https://www.adafruit.com/product/1857)
[Related Guides to the Product](https://learn.adafruit.com/products/1857/guides)
### Adafruit 14-segment LED Alphanumeric Backpack - STEMMA QT
[Adafruit 14-segment LED Alphanumeric Backpack - STEMMA QT](https://www.adafruit.com/product/1910)
By popular request, you can now get our 14-segment LED backpacks without the LEDs! These backpacks feature an HT16K33 I2C LED driver, they're simple and easy to use - you can use [our very nice library for the backpacks to...](https://github.com/adafruit/Adafruit-LED-Backpack-Library)
In Stock
[Buy Now](https://www.adafruit.com/product/1910)
[Related Guides to the Product](https://learn.adafruit.com/products/1910/guides)
### Quad Alphanumeric Display - Red 0.54" Digits w/ I2C Backpack
[Quad Alphanumeric Display - Red 0.54" Digits w/ I2C Backpack](https://www.adafruit.com/product/1911)
Display, elegantly, 012345678 or 9! Gaze, hypnotized, at ABCDEFGHIJKLM - well it can display the whole alphabet. You get the point. This is a nice, bright alphanumeric display that shows letters and numbers in a beautiful red hue. It's super bright and designed for viewing from distances...
In Stock
[Buy Now](https://www.adafruit.com/product/1911)
[Related Guides to the Product](https://learn.adafruit.com/products/1911/guides)
### Quad Alphanumeric Display - Blue 0.54" Digits w/ I2C Backpack
[Quad Alphanumeric Display - Blue 0.54" Digits w/ I2C Backpack](https://www.adafruit.com/product/1912)
Display, elegantly, 012345678 or 9! Gaze, hypnotized, at ABCDEFGHIJKLM - well it can display the whole alphabet. You get the point. This is a nice, bright alphanumeric display that shows letters and numbers in a beautiful blue hue. It's super bright and designed for viewing from distances...
In Stock
[Buy Now](https://www.adafruit.com/product/1912)
[Related Guides to the Product](https://learn.adafruit.com/products/1912/guides)
### 16x8 1.2" LED Matrix + Backpack - Ultra Bright Round Green LEDs
[16x8 1.2" LED Matrix + Backpack - Ultra Bright Round Green LEDs](https://www.adafruit.com/product/2035)
What's better than a single LED? Lots of LEDs! And what's better than lots of LEDs? **TWO TIMES AS MANY LEDS!!!**
With the 16x8 LED Matrix Backpack we've doubled your project's matrix capacity by making it super easy to get two separate 8x8 matrices onto...
In Stock
[Buy Now](https://www.adafruit.com/product/2035)
[Related Guides to the Product](https://learn.adafruit.com/products/2035/guides)
### 16x8 1.2" LED Matrix+Backpack UltraBright Round YellowGreen LEDs
[16x8 1.2" LED Matrix+Backpack UltraBright Round YellowGreen LEDs](https://www.adafruit.com/product/2036)
What's better than a single LED? Lots of LEDs! And what's better than lots of LEDs? **TWO TIMES AS MANY LEDS!!!**
With the 16x8 LED Matrix Backpack we've doubled your project's matrix capacity by making it super easy to get two separate 8x8 matrices onto...
In Stock
[Buy Now](https://www.adafruit.com/product/2036)
[Related Guides to the Product](https://learn.adafruit.com/products/2036/guides)
### 16x8 1.2" LED Matrix + Backpack - Ultra Bright Round Red LEDs
[16x8 1.2" LED Matrix + Backpack - Ultra Bright Round Red LEDs](https://www.adafruit.com/product/2037)
What's better than a single LED? Lots of LEDs! And what's better than lots of LEDs? **TWO TIMES AS MANY LEDS!!!**
With the 16x8 LED Matrix Backpack we've doubled your project's matrix capacity by making it super easy to get two separate 8x8 matrices onto...
In Stock
[Buy Now](https://www.adafruit.com/product/2037)
[Related Guides to the Product](https://learn.adafruit.com/products/2037/guides)
### 16x8 1.2" LED Matrix + Backpack - Ultra Bright Round White LEDs
[16x8 1.2" LED Matrix + Backpack - Ultra Bright Round White LEDs](https://www.adafruit.com/product/2038)
What's better than a single LED? Lots of LEDs! And what's better than lots of LEDs? **TWO TIMES AS MANY LEDS!!!**
With the 16x8 LED Matrix Backpack we've doubled your project's matrix capacity by making it super easy to get two separate 8x8 matrices onto...
In Stock
[Buy Now](https://www.adafruit.com/product/2038)
[Related Guides to the Product](https://learn.adafruit.com/products/2038/guides)
### 16x8 1.2" LED Matrix + Backpack - Ultra Bright Round Blue LEDs
[16x8 1.2" LED Matrix + Backpack - Ultra Bright Round Blue LEDs](https://www.adafruit.com/product/2039)
What's better than a single LED? Lots of LEDs! And what's better than lots of LEDs? **TWO TIMES AS MANY LEDS!!!**
With the 16x8 LED Matrix Backpack we've doubled your project's matrix capacity by making it super easy to get two separate 8x8 matrices onto...
In Stock
[Buy Now](https://www.adafruit.com/product/2039)
[Related Guides to the Product](https://learn.adafruit.com/products/2039/guides)
### 16x8 1.2" LED Matrix + Backpack - Ultra Bright Square Blue LEDs
[16x8 1.2" LED Matrix + Backpack - Ultra Bright Square Blue LEDs](https://www.adafruit.com/product/2040)
What's better than a single LED? Lots of LEDs! And what's better than lots of LEDs? **TWO TIMES AS MANY LEDS!!!**
With the 16x8 LED Matrix Backpack we've doubled your project's matrix capacity by making it super easy to get two separate 8x8 matrices onto...
In Stock
[Buy Now](https://www.adafruit.com/product/2040)
[Related Guides to the Product](https://learn.adafruit.com/products/2040/guides)
### 16x8 1.2" LED Matrix + Backpack - Ultra Bright Square Amber LEDs
[16x8 1.2" LED Matrix + Backpack - Ultra Bright Square Amber LEDs](https://www.adafruit.com/product/2041)
What's better than a single LED? Lots of LEDs! And what's better than lots of LEDs? **TWO TIMES AS MANY LEDS!!!**
With the 16x8 LED Matrix Backpack we've doubled your project's matrix capacity by making it super easy to get two separate 8x8 matrices onto...
In Stock
[Buy Now](https://www.adafruit.com/product/2041)
[Related Guides to the Product](https://learn.adafruit.com/products/2041/guides)
### 16x8 1.2" LED Matrix + Backpack - Ultra Bright Square Green LEDs
[16x8 1.2" LED Matrix + Backpack - Ultra Bright Square Green LEDs](https://www.adafruit.com/product/2042)
What's better than a single LED? Lots of LEDs! And what's better than lots of LEDs? **TWO TIMES AS MANY LEDS!!!**
With the 16x8 LED Matrix Backpack we've doubled your project's matrix capacity by making it super easy to get two separate 8x8 matrices onto...
In Stock
[Buy Now](https://www.adafruit.com/product/2042)
[Related Guides to the Product](https://learn.adafruit.com/products/2042/guides)
### 16x8 1.2" LED Matrix + Backpack -Ultra Bright Square Yellow LEDs
[16x8 1.2" LED Matrix + Backpack -Ultra Bright Square Yellow LEDs](https://www.adafruit.com/product/2043)
What's better than a single LED? Lots of LEDs! And what's better than lots of LEDs? **TWO TIMES AS MANY LEDS!!!**
With the 16x8 LED Matrix Backpack we've doubled your project's matrix capacity by making it super easy to get two separate 8x8 matrices onto...
In Stock
[Buy Now](https://www.adafruit.com/product/2043)
[Related Guides to the Product](https://learn.adafruit.com/products/2043/guides)
### 16x8 1.2" LED Matrix + Backpack - Ultra Bright Square White LEDs
[16x8 1.2" LED Matrix + Backpack - Ultra Bright Square White LEDs](https://www.adafruit.com/product/2044)
What's better than a single LED? Lots of LEDs! And what's better than lots of LEDs? **TWO TIMES AS MANY LEDS!!!**
With the 16x8 LED Matrix Backpack we've doubled your project's matrix capacity by making it super easy to get two separate 8x8 matrices onto...
In Stock
[Buy Now](https://www.adafruit.com/product/2044)
[Related Guides to the Product](https://learn.adafruit.com/products/2044/guides)
### 16x8 1.2" LED Matrix + Backpack-Ultra Bright Round Orange LEDs
[16x8 1.2" LED Matrix + Backpack-Ultra Bright Round Orange LEDs](https://www.adafruit.com/product/2052)
What's better than a single LED? Lots of LEDs! And what's better than lots of LEDs? **TWO TIMES AS MANY LEDS!!!**
With the 16x8 LED Matrix Backpack we've doubled your project's matrix capacity by making it super easy to get two separate 8x8 matrices onto...
In Stock
[Buy Now](https://www.adafruit.com/product/2052)
[Related Guides to the Product](https://learn.adafruit.com/products/2052/guides)
### 16x8 1.2" LED Matrices+Backpack Round LEDs in Various Colors
[16x8 1.2" LED Matrices+Backpack Round LEDs in Various Colors](https://www.adafruit.com/product/2054)
What's better than a single LED? Lots of LEDs! And what's better than lots of LEDs? **TWO TIMES AS MANY LEDS!!!**
With the 16x8 LED Matrix Backpack we've doubled your project's matrix capacity by making it super easy to get two separate 8x8 matrices onto...
Out of Stock
[Buy Now](https://www.adafruit.com/product/2054)
[Related Guides to the Product](https://learn.adafruit.com/products/2054/guides)
### Adafruit 8x16 LED Matrix FeatherWing w/o Matrices
[Adafruit 8x16 LED Matrix FeatherWing w/o Matrices](https://www.adafruit.com/product/3090)
You will chirp with delight when you see how easy it is to make your very own 8x16 LED matrix display for any Feather. At 0.8" square, the little [8x8 matrices](https://www.adafruit.com/new/?q=8x8%20miniature%20LED%20matrix&) have everything a big LED matrix has,...
Out of Stock
[Buy Now](https://www.adafruit.com/product/3090)
[Related Guides to the Product](https://learn.adafruit.com/products/3090/guides)
### Adafruit 14-segment LED Alphanumeric backpack (same as P1910)
[Adafruit 14-segment LED Alphanumeric backpack (same as P1910)](https://www.adafruit.com/product/3322)
Just the backpack + 4pin header
No Longer Stocked
[Buy Now](https://www.adafruit.com/product/3322)
[Related Guides to the Product](https://learn.adafruit.com/products/3322/guides)
## Featured Products
### Adafruit Small 1.2" 8x8 LED Matrix w/I2C Backpack - Yellow-Green
[Adafruit Small 1.2" 8x8 LED Matrix w/I2C Backpack - Yellow-Green](https://www.adafruit.com/product/1051)
What's better than a single LED? Lots of LEDs! A fun way to make a small display is to use an [8x8 matrix](https://www.adafruit.com/category/37_88) or a [4-digit 7-segment display](https://www.adafruit.com/category/37_103). Matrices like these are...
In Stock
[Buy Now](https://www.adafruit.com/product/1051)
[Related Guides to the Product](https://learn.adafruit.com/products/1051/guides)
### Small 1.2" 8x8 Ultra Bright Square Blue LED Matrix + Backpack
[Small 1.2" 8x8 Ultra Bright Square Blue LED Matrix + Backpack](https://www.adafruit.com/product/1853)
What's better than a single LED? Lots of LEDs! Matrices like these are 'multiplexed' - so to control 64 LEDs you need 16 pins. That's a lot of pins, and there are [driver chips like the MAX7219](//www.adafruit.com/products/453) that can control a matrix for you but...
In Stock
[Buy Now](https://www.adafruit.com/product/1853)
[Related Guides to the Product](https://learn.adafruit.com/products/1853/guides)
## Related Guides
- [LED Backpack Displays on Raspberry Pi and BeagleBone Black](https://learn.adafruit.com/led-backpack-displays-on-raspberry-pi-and-beaglebone-black.md)
- [Animating Multiple LED Backpacks](https://learn.adafruit.com/animating-multiple-led-backpacks.md)
- [Arduino GPS Clock](https://learn.adafruit.com/arduino-clock.md)
- [Raspberry Pi Physical Dashboard](https://learn.adafruit.com/raspberry-pi-physical-dashboard.md)
- [CircuitPython Hardware: LED Backpacks & FeatherWings](https://learn.adafruit.com/micropython-hardware-led-backpacks-and-featherwings.md)
- [Matrix and 7-Segment LED Backpack with the Raspberry Pi](https://learn.adafruit.com/matrix-7-segment-led-backpack-with-the-raspberry-pi.md)
- [DIY Pocket LED Gamer - Tiny Tetris!](https://learn.adafruit.com/diy-3d-printed-handheld-pocket-game-tiny-tetris-snake.md)
- [RGB LED Matrix Cube with 25,000 LEDs](https://learn.adafruit.com/rgb-led-matrix-cube-for-pi.md)
- [Creating GIFs for SmartMatrix](https://learn.adafruit.com/creating-gifs-for-smartmatrix.md)
- [Adafruit CharliePlex LED Matrix Bonnet](https://learn.adafruit.com/adafruit-charlieplex-bonnet.md)
- [Connecting a 16x32 RGB LED Matrix Panel to a Raspberry Pi](https://learn.adafruit.com/connecting-a-16x32-rgb-led-matrix-panel-to-a-raspberry-pi.md)
- [MicroPython Displays: Drawing Text](https://learn.adafruit.com/micropython-displays-drawing-text.md)
- [Heart Rate Badge](https://learn.adafruit.com/heart-rate-badge.md)
- [16x24 LED Matrix](https://learn.adafruit.com/16x24-led-matrix.md)
- [Adafruit IS31FL3741](https://learn.adafruit.com/adafruit-is31fl3741.md)
---
# Source: https://learn.adafruit.com/adafruit-led-backpack/1-2-8x8-arduino-wiring-and-setup.md
# Adafruit LED Backpacks
## Arduino Setup
Primary:
## Mini 8x8 Matrix Software
We wrote a basic library to help you work with the mini 8x8 matrix backpack. The library is written for the Arduino and will work with any Arduino as it just uses the I2C pins. The code is very portable and can be easily adapted to any I2C-capable micro.
Wiring to the matrix is really easy
- Connect **CLK** to the I2C clock - on Arduino UNO thats Analog #5 (or SCL), on the Leonardo its Digital #3, on the Mega its digital #21
- Connect **DAT** to the I2C data - on Arduino UNO thats Analog #4 (or SDA), on the Leonardo its Digital #2, on the Mega its digital #20
- Connect **GND** to common ground
- Connect **VCC+** to power - 5V is best but 3V also seems to work for 3V microcontrollers.
Next, download the **Adafruit LED Backpack ** library and the **Adafruit GFX ** library from the Arduino library manager.
Open up the Arduino library manager:

Search for the **Adafruit LED Backpack ** library and install it

Search for the **Adafruit GFX ** library and install it

If using an earlier version of the Arduino IDE (prior to 1.8.10), also locate and install **Adafruit\_BusIO** (newer versions will install this dependency automatically).
You should now be able to select the **File→Examples→Adafruit\_LEDBackpack→matrix88** example sketch. Upload it to your Arduino as usual. You should see a basic test program that goes through a bunch of different drawing routine
We also have a great tutorial on Arduino library installation at:
[http://learn.adafruit.com/adafruit-all-about-arduino-libraries-install-use](http://learn.adafruit.com/adafruit-all-about-arduino-libraries-install-use "Link: http://learn.adafruit.com/adafruit-all-about-arduino-libraries-install-use")

Once you're happy that the matrix works, you can write your own sketches. The 8x8 matrix supports everything the Adafruit GFX library - drawing pixels, lines, rectancles, circles, triangles, roundrects, and small bitmaps. [For more details check out the GFX page which will detail all of the GFX routines](http://learn.adafruit.com/adafruit-gfx-graphics-library).
All the drawing routines only change the display memory kept by the Arduino. Don't forget to call **writeDisplay()** after drawing to 'save' the memory out to the matrix via I2C.
There are also a few small routines that are special to the matrix:
- **setBrightness(_brighness_)**- will let you change the overall brightness of the entire display. 0 is least bright, 15 is brightest and is what is initialized by the display when you start. You can call this function at any time to change the brightness of the -entire- display
- **blinkRate(_rate_)** - You can blink the entire display. 0 is no blinking. 1, 2 or 3 is for display blinking.You can call this function at any time to change the blink rate of the -entire- display
The default orientation for graphics commands on this display places pixel (0,0) at the top-left when the header is at the left and Adafruit logo at the right. To use the matrix as shown above (header at top, logo at bottom), call matrix.setRotation(3) before issuing graphics commands.

- [Previous Page](https://learn.adafruit.com/adafruit-led-backpack/1-2-8x8-matrix-assembly.md)
- [Next Page](https://learn.adafruit.com/adafruit-led-backpack/1-2-8x8-circuitpython-wiring-and-setup.md)
## Primary Products
### Adafruit Mini 8x8 LED Matrix w/I2C Backpack - Red
[Adafruit Mini 8x8 LED Matrix w/I2C Backpack - Red](https://www.adafruit.com/product/870)
What's better than a single LED? Lots of LEDs! A fun way to make a small display is to use an [8x8 matrix](https://www.adafruit.com/category/37_88) or a [4-digit 7-segment display](https://www.adafruit.com/category/37_103). Matrices like these are...
In Stock
[Buy Now](https://www.adafruit.com/product/870)
[Related Guides to the Product](https://learn.adafruit.com/products/870/guides)
### Adafruit Mini 8x8 LED Matrix w/I2C Backpack - Yellow
[Adafruit Mini 8x8 LED Matrix w/I2C Backpack - Yellow](https://www.adafruit.com/product/871)
What's better than a single LED? Lots of LEDs! A fun way to make a small display is to use an [8x8 matrix](https://www.adafruit.com/category/37_88) or a [4-digit 7-segment display](https://www.adafruit.com/category/37_103). Matrices like these are...
In Stock
[Buy Now](https://www.adafruit.com/product/871)
[Related Guides to the Product](https://learn.adafruit.com/products/871/guides)
### Adafruit Mini 0.8" 8x8 LED Matrix w/I2C Backpack - Yellow-Green
[Adafruit Mini 0.8" 8x8 LED Matrix w/I2C Backpack - Yellow-Green](https://www.adafruit.com/product/872)
What's better than a single LED? Lots of LEDs! A fun way to make a small display is to use an [8x8 matrix](https://www.adafruit.com/category/37_88) or a [4-digit 7-segment display](https://www.adafruit.com/category/37_103). Matrices like these are...
In Stock
[Buy Now](https://www.adafruit.com/product/872)
[Related Guides to the Product](https://learn.adafruit.com/products/872/guides)
### Adafruit 0.56" 4-Digit 7-Segment Display with I2C Backpack - Red
[Adafruit 0.56" 4-Digit 7-Segment Display with I2C Backpack - Red](https://www.adafruit.com/product/878)
What's better than a single LED? Lots of LEDs! A fun way to make a small display is to use an [8x8 matrix](https://www.adafruit.com/category/37_88) or a [4-digit 7-segment display](https://www.adafruit.com/category/37_103). Matrices like these are...
In Stock
[Buy Now](https://www.adafruit.com/product/878)
[Related Guides to the Product](https://learn.adafruit.com/products/878/guides)
### Adafruit 0.56" 4-Digit 7-Segment Display w/I2C Backpack - Yellow
[Adafruit 0.56" 4-Digit 7-Segment Display w/I2C Backpack - Yellow](https://www.adafruit.com/product/879)
What's better than a single LED? Lots of LEDs! A fun way to make a small display is to use an [8x8 matrix](https://www.adafruit.com/category/37_88) or a [4-digit 7-segment display](https://www.adafruit.com/category/37_103). Matrices like these are...
In Stock
[Buy Now](https://www.adafruit.com/product/879)
[Related Guides to the Product](https://learn.adafruit.com/products/879/guides)
### Adafruit 0.56" 4-Digit 7-Segment Display w/ I2C Backpack - Green
[Adafruit 0.56" 4-Digit 7-Segment Display w/ I2C Backpack - Green](https://www.adafruit.com/product/880)
What's better than a single LED? Lots of LEDs! A fun way to make a small display is to use an [8x8 matrix](https://www.adafruit.com/category/37_88) or a [4-digit 7-segment display](https://www.adafruit.com/category/37_103). Matrices like these are...
No Longer Stocked
[Buy Now](https://www.adafruit.com/product/880)
[Related Guides to the Product](https://learn.adafruit.com/products/880/guides)
### Adafruit 0.56" 4-Digit 7-Segment Display w/ I2C Backpack - Blue
[Adafruit 0.56" 4-Digit 7-Segment Display w/ I2C Backpack - Blue](https://www.adafruit.com/product/881)
What's better than a single LED? Lots of LEDs! A fun way to make a small display is to use an [8x8 matrix](https://www.adafruit.com/category/37_88) or a [4-digit 7-segment display](https://www.adafruit.com/category/37_103). Matrices like these are...
In Stock
[Buy Now](https://www.adafruit.com/product/881)
[Related Guides to the Product](https://learn.adafruit.com/products/881/guides)
### Adafruit Bicolor LED Square Pixel Matrix with I2C Backpack
[Adafruit Bicolor LED Square Pixel Matrix with I2C Backpack](https://www.adafruit.com/product/902)
What's better than a single LED? Lots of LEDs! A fun way to make a small colorful display is to use a [1.2" Bi-color 8x8 LED Matrix](http://www.adafruit.com/products/458). Matrices like these are 'multiplexed' - so to control all the 128 LEDs you need 24 pins....
In Stock
[Buy Now](https://www.adafruit.com/product/902)
[Related Guides to the Product](https://learn.adafruit.com/products/902/guides)
### Adafruit Mini 8x8 LED Matrix w/I2C Backpack - Blue
[Adafruit Mini 8x8 LED Matrix w/I2C Backpack - Blue](https://www.adafruit.com/product/959)
What's better than a single LED? Lots of LEDs! A fun way to make a small display is to use an [8x8 matrix](https://www.adafruit.com/category/37_88) or a [4-digit 7-segment display](https://www.adafruit.com/category/37_103). Matrices like these are...
In Stock
[Buy Now](https://www.adafruit.com/product/959)
[Related Guides to the Product](https://learn.adafruit.com/products/959/guides)
### Adafruit 0.56" 4-Digit 7-Segment Display w/I2C Backpack - White
[Adafruit 0.56" 4-Digit 7-Segment Display w/I2C Backpack - White](https://www.adafruit.com/product/1002)
What's better than a single LED? Lots of LEDs! A fun way to make a small display is to use an [8x8 matrix](https://www.adafruit.com/category/37_88) or a [4-digit 7-segment display](https://www.adafruit.com/category/37_103). Matrices like these are...
In Stock
[Buy Now](https://www.adafruit.com/product/1002)
[Related Guides to the Product](https://learn.adafruit.com/products/1002/guides)
### Adafruit 1.2" 8x8 LED Matrix Backpack
[Adafruit 1.2" 8x8 LED Matrix Backpack](https://www.adafruit.com/product/1048)
By popular request, you can now get our 8x8 LED backpacks without the LEDs! These backpacks feature an HT16K33 I2C LED driver, they're simple and easy to use - you can use [our very nice library for the backpacks to...](https://github.com/adafruit/Adafruit-LED-Backpack-Library)
In Stock
[Buy Now](https://www.adafruit.com/product/1048)
[Related Guides to the Product](https://learn.adafruit.com/products/1048/guides)
### Adafruit Small 1.2" 8x8 LED Matrix w/I2C Backpack - Red
[Adafruit Small 1.2" 8x8 LED Matrix w/I2C Backpack - Red](https://www.adafruit.com/product/1049)
What's better than a single LED? Lots of LEDs! A fun way to make a small display is to use an [8x8 matrix](https://www.adafruit.com/category/37_88) or a [4-digit 7-segment display](https://www.adafruit.com/category/37_103). Matrices like these are...
In Stock
[Buy Now](https://www.adafruit.com/product/1049)
[Related Guides to the Product](https://learn.adafruit.com/products/1049/guides)
### Adafruit Small 1.2" 8x8 LED Matrix w/I2C Backpack - Yellow
[Adafruit Small 1.2" 8x8 LED Matrix w/I2C Backpack - Yellow](https://www.adafruit.com/product/1050)
What's better than a single LED? Lots of LEDs! A fun way to make a small display is to use an [8x8 matrix](https://www.adafruit.com/category/37_88) or a [4-digit 7-segment display](https://www.adafruit.com/category/37_103). Matrices like these are...
In Stock
[Buy Now](https://www.adafruit.com/product/1050)
[Related Guides to the Product](https://learn.adafruit.com/products/1050/guides)
### Adafruit Small 1.2" 8x8 LED Matrix w/I2C Backpack - Blue
[Adafruit Small 1.2" 8x8 LED Matrix w/I2C Backpack - Blue](https://www.adafruit.com/product/1052)
What's better than a single LED? Lots of LEDs! A fun way to make a small display is to use an [8x8 matrix](https://www.adafruit.com/category/37_88) or a [4-digit 7-segment display](https://www.adafruit.com/category/37_103). Matrices like these are...
In Stock
[Buy Now](https://www.adafruit.com/product/1052)
[Related Guides to the Product](https://learn.adafruit.com/products/1052/guides)
### Adafruit Mini 8x8 LED Matrix w/I2C Backpack - Ultra Bright White
[Adafruit Mini 8x8 LED Matrix w/I2C Backpack - Ultra Bright White](https://www.adafruit.com/product/1080)
What's better than a single LED? Lots of LEDs! A fun way to make a small display is to use an [8x8 matrix](https://www.adafruit.com/category/37_88) or a [4-digit 7-segment display](https://www.adafruit.com/category/37_103). Matrices like these are...
In Stock
[Buy Now](https://www.adafruit.com/product/1080)
[Related Guides to the Product](https://learn.adafruit.com/products/1080/guides)
### Adafruit 1.2" 4-Digit 7-Segment Display w/I2C Backpack - Green
[Adafruit 1.2" 4-Digit 7-Segment Display w/I2C Backpack - Green](https://www.adafruit.com/product/1268)
What's better than a single LED? Lots of LEDs! A fun way to make a numeric display is to use a [4-digit 7-segment display](https://www.adafruit.com/category/37_103). LED matrices like these are 'multiplexed' - so to control all the seven-segment LEDs you need 14 pins....
No Longer Stocked
[Buy Now](https://www.adafruit.com/product/1268)
[Related Guides to the Product](https://learn.adafruit.com/products/1268/guides)
### Adafruit 1.2" 4-Digit 7-Segment Display w/I2C Backpack - Yellow
[Adafruit 1.2" 4-Digit 7-Segment Display w/I2C Backpack - Yellow](https://www.adafruit.com/product/1269)
What's better than a single LED? Lots of LEDs! A fun way to make a numeric display is to use a [4-digit 7-segment display](https://www.adafruit.com/category/37_103). LED matrices like these are 'multiplexed' - so to control all the seven-segment LEDs you need 14 pins....
In Stock
[Buy Now](https://www.adafruit.com/product/1269)
[Related Guides to the Product](https://learn.adafruit.com/products/1269/guides)
### Adafruit 1.2" 4-Digit 7-Segment Display w/I2C Backpack - Red
[Adafruit 1.2" 4-Digit 7-Segment Display w/I2C Backpack - Red](https://www.adafruit.com/product/1270)
What's better than a single LED? Lots of LEDs! A fun way to make a numeric display is to use a [4-digit 7-segment display](https://www.adafruit.com/category/37_103). LED matrices like these are 'multiplexed' - so to control all the seven-segment LEDs you need 14 pins....
In Stock
[Buy Now](https://www.adafruit.com/product/1270)
[Related Guides to the Product](https://learn.adafruit.com/products/1270/guides)
### Small 1.2" 8x8 Ultra Bright White LED Matrix + Backpack
[Small 1.2" 8x8 Ultra Bright White LED Matrix + Backpack](https://www.adafruit.com/product/1614)
What's better than a single LED? Lots of LEDs! A fun way to make a small display is to use an [8x8 matrix](https://www.adafruit.com/category/37_88) or a [4-digit 7-segment display](https://www.adafruit.com/category/37_103). Matrices like these are...
In Stock
[Buy Now](https://www.adafruit.com/product/1614)
[Related Guides to the Product](https://learn.adafruit.com/products/1614/guides)
### Adafruit Small 1.2" 8x8 LED Matrix w/I2C Backpack - Pure Green
[Adafruit Small 1.2" 8x8 LED Matrix w/I2C Backpack - Pure Green](https://www.adafruit.com/product/1632)
What's better than a single LED? Lots of LEDs! A fun way to make a small display is to use an [8x8 matrix](https://www.adafruit.com/category/37_88) or a [4-digit 7-segment display](https://www.adafruit.com/category/37_103). Matrices like these are...
In Stock
[Buy Now](https://www.adafruit.com/product/1632)
[Related Guides to the Product](https://learn.adafruit.com/products/1632/guides)
### Adafruit Mini 0.8" 8x8 LED Matrix w/I2C Backpack - Pure Green
[Adafruit Mini 0.8" 8x8 LED Matrix w/I2C Backpack - Pure Green](https://www.adafruit.com/product/1633)
What's better than a single LED? Lots of LEDs! A fun way to make a small display is to use an [8x8 matrix](https://www.adafruit.com/category/37_88) or a [4-digit 7-segment display](https://www.adafruit.com/category/37_103). Matrices like these are...
In Stock
[Buy Now](https://www.adafruit.com/product/1633)
[Related Guides to the Product](https://learn.adafruit.com/products/1633/guides)
### Bi-Color (Red/Green) 24-Bar Bargraph w/I2C Backpack Kit
[Bi-Color (Red/Green) 24-Bar Bargraph w/I2C Backpack Kit](https://www.adafruit.com/product/1721)
What's better than a single LED? Lots of LEDs! A fun way to make a small linear display is to use two 12-bar Bi-color bar-graphs. However, this LED bargraph is 'multiplexed' - so to control all the 48 LEDs you need a lot of pins.
Out of Stock
[Buy Now](https://www.adafruit.com/product/1721)
[Related Guides to the Product](https://learn.adafruit.com/products/1721/guides)
### Small 1.2" 8x8 Ultra Bright Square Amber LED Matrix + Backpack
[Small 1.2" 8x8 Ultra Bright Square Amber LED Matrix + Backpack](https://www.adafruit.com/product/1854)
What's better than a single LED? Lots of LEDs! Matrices like these are 'multiplexed' - so to control 64 LEDs you need 16 pins. That's a lot of pins, and there are [driver chips like the MAX7219](//www.adafruit.com/products/453) that can control a matrix for you but...
In Stock
[Buy Now](https://www.adafruit.com/product/1854)
[Related Guides to the Product](https://learn.adafruit.com/products/1854/guides)
### Small 1.2" 8x8 Ultra Bright Square Yellow LED Matrix + Backpack
[Small 1.2" 8x8 Ultra Bright Square Yellow LED Matrix + Backpack](https://www.adafruit.com/product/1855)
What's better than a single LED? Lots of LEDs! Matrices like these are 'multiplexed' - so to control 64 LEDs you need 16 pins. That's a lot of pins, and there are [driver chips like the MAX7219](//www.adafruit.com/products/453) that can control a matrix for you but...
In Stock
[Buy Now](https://www.adafruit.com/product/1855)
[Related Guides to the Product](https://learn.adafruit.com/products/1855/guides)
### Small 1.2" 8x8 Bright Square Pure Green LED Matrix + Backpack
[Small 1.2" 8x8 Bright Square Pure Green LED Matrix + Backpack](https://www.adafruit.com/product/1856)
What's better than a single LED? Lots of LEDs! Matrices like these are 'multiplexed' - so to control 64 LEDs you need 16 pins. That's a lot of pins, and there are [driver chips like the MAX7219](//www.adafruit.com/products/453) that can control a matrix for you but...
In Stock
[Buy Now](https://www.adafruit.com/product/1856)
[Related Guides to the Product](https://learn.adafruit.com/products/1856/guides)
### Small 1.2" 8x8 Ultra Bright Square White LED Matrix + Backpack
[Small 1.2" 8x8 Ultra Bright Square White LED Matrix + Backpack](https://www.adafruit.com/product/1857)
What's better than a single LED? Lots of LEDs! Matrices like these are 'multiplexed' - so to control 64 LEDs you need 16 pins. That's a lot of pins, and there are [driver chips like the MAX7219](//www.adafruit.com/products/453) that can control a matrix for you but...
In Stock
[Buy Now](https://www.adafruit.com/product/1857)
[Related Guides to the Product](https://learn.adafruit.com/products/1857/guides)
### Adafruit 14-segment LED Alphanumeric Backpack - STEMMA QT
[Adafruit 14-segment LED Alphanumeric Backpack - STEMMA QT](https://www.adafruit.com/product/1910)
By popular request, you can now get our 14-segment LED backpacks without the LEDs! These backpacks feature an HT16K33 I2C LED driver, they're simple and easy to use - you can use [our very nice library for the backpacks to...](https://github.com/adafruit/Adafruit-LED-Backpack-Library)
In Stock
[Buy Now](https://www.adafruit.com/product/1910)
[Related Guides to the Product](https://learn.adafruit.com/products/1910/guides)
### Quad Alphanumeric Display - Red 0.54" Digits w/ I2C Backpack
[Quad Alphanumeric Display - Red 0.54" Digits w/ I2C Backpack](https://www.adafruit.com/product/1911)
Display, elegantly, 012345678 or 9! Gaze, hypnotized, at ABCDEFGHIJKLM - well it can display the whole alphabet. You get the point. This is a nice, bright alphanumeric display that shows letters and numbers in a beautiful red hue. It's super bright and designed for viewing from distances...
In Stock
[Buy Now](https://www.adafruit.com/product/1911)
[Related Guides to the Product](https://learn.adafruit.com/products/1911/guides)
### Quad Alphanumeric Display - Blue 0.54" Digits w/ I2C Backpack
[Quad Alphanumeric Display - Blue 0.54" Digits w/ I2C Backpack](https://www.adafruit.com/product/1912)
Display, elegantly, 012345678 or 9! Gaze, hypnotized, at ABCDEFGHIJKLM - well it can display the whole alphabet. You get the point. This is a nice, bright alphanumeric display that shows letters and numbers in a beautiful blue hue. It's super bright and designed for viewing from distances...
In Stock
[Buy Now](https://www.adafruit.com/product/1912)
[Related Guides to the Product](https://learn.adafruit.com/products/1912/guides)
### 16x8 1.2" LED Matrix + Backpack - Ultra Bright Round Green LEDs
[16x8 1.2" LED Matrix + Backpack - Ultra Bright Round Green LEDs](https://www.adafruit.com/product/2035)
What's better than a single LED? Lots of LEDs! And what's better than lots of LEDs? **TWO TIMES AS MANY LEDS!!!**
With the 16x8 LED Matrix Backpack we've doubled your project's matrix capacity by making it super easy to get two separate 8x8 matrices onto...
In Stock
[Buy Now](https://www.adafruit.com/product/2035)
[Related Guides to the Product](https://learn.adafruit.com/products/2035/guides)
### 16x8 1.2" LED Matrix+Backpack UltraBright Round YellowGreen LEDs
[16x8 1.2" LED Matrix+Backpack UltraBright Round YellowGreen LEDs](https://www.adafruit.com/product/2036)
What's better than a single LED? Lots of LEDs! And what's better than lots of LEDs? **TWO TIMES AS MANY LEDS!!!**
With the 16x8 LED Matrix Backpack we've doubled your project's matrix capacity by making it super easy to get two separate 8x8 matrices onto...
In Stock
[Buy Now](https://www.adafruit.com/product/2036)
[Related Guides to the Product](https://learn.adafruit.com/products/2036/guides)
### 16x8 1.2" LED Matrix + Backpack - Ultra Bright Round Red LEDs
[16x8 1.2" LED Matrix + Backpack - Ultra Bright Round Red LEDs](https://www.adafruit.com/product/2037)
What's better than a single LED? Lots of LEDs! And what's better than lots of LEDs? **TWO TIMES AS MANY LEDS!!!**
With the 16x8 LED Matrix Backpack we've doubled your project's matrix capacity by making it super easy to get two separate 8x8 matrices onto...
In Stock
[Buy Now](https://www.adafruit.com/product/2037)
[Related Guides to the Product](https://learn.adafruit.com/products/2037/guides)
### 16x8 1.2" LED Matrix + Backpack - Ultra Bright Round White LEDs
[16x8 1.2" LED Matrix + Backpack - Ultra Bright Round White LEDs](https://www.adafruit.com/product/2038)
What's better than a single LED? Lots of LEDs! And what's better than lots of LEDs? **TWO TIMES AS MANY LEDS!!!**
With the 16x8 LED Matrix Backpack we've doubled your project's matrix capacity by making it super easy to get two separate 8x8 matrices onto...
In Stock
[Buy Now](https://www.adafruit.com/product/2038)
[Related Guides to the Product](https://learn.adafruit.com/products/2038/guides)
### 16x8 1.2" LED Matrix + Backpack - Ultra Bright Round Blue LEDs
[16x8 1.2" LED Matrix + Backpack - Ultra Bright Round Blue LEDs](https://www.adafruit.com/product/2039)
What's better than a single LED? Lots of LEDs! And what's better than lots of LEDs? **TWO TIMES AS MANY LEDS!!!**
With the 16x8 LED Matrix Backpack we've doubled your project's matrix capacity by making it super easy to get two separate 8x8 matrices onto...
In Stock
[Buy Now](https://www.adafruit.com/product/2039)
[Related Guides to the Product](https://learn.adafruit.com/products/2039/guides)
### 16x8 1.2" LED Matrix + Backpack - Ultra Bright Square Blue LEDs
[16x8 1.2" LED Matrix + Backpack - Ultra Bright Square Blue LEDs](https://www.adafruit.com/product/2040)
What's better than a single LED? Lots of LEDs! And what's better than lots of LEDs? **TWO TIMES AS MANY LEDS!!!**
With the 16x8 LED Matrix Backpack we've doubled your project's matrix capacity by making it super easy to get two separate 8x8 matrices onto...
In Stock
[Buy Now](https://www.adafruit.com/product/2040)
[Related Guides to the Product](https://learn.adafruit.com/products/2040/guides)
### 16x8 1.2" LED Matrix + Backpack - Ultra Bright Square Amber LEDs
[16x8 1.2" LED Matrix + Backpack - Ultra Bright Square Amber LEDs](https://www.adafruit.com/product/2041)
What's better than a single LED? Lots of LEDs! And what's better than lots of LEDs? **TWO TIMES AS MANY LEDS!!!**
With the 16x8 LED Matrix Backpack we've doubled your project's matrix capacity by making it super easy to get two separate 8x8 matrices onto...
In Stock
[Buy Now](https://www.adafruit.com/product/2041)
[Related Guides to the Product](https://learn.adafruit.com/products/2041/guides)
### 16x8 1.2" LED Matrix + Backpack - Ultra Bright Square Green LEDs
[16x8 1.2" LED Matrix + Backpack - Ultra Bright Square Green LEDs](https://www.adafruit.com/product/2042)
What's better than a single LED? Lots of LEDs! And what's better than lots of LEDs? **TWO TIMES AS MANY LEDS!!!**
With the 16x8 LED Matrix Backpack we've doubled your project's matrix capacity by making it super easy to get two separate 8x8 matrices onto...
In Stock
[Buy Now](https://www.adafruit.com/product/2042)
[Related Guides to the Product](https://learn.adafruit.com/products/2042/guides)
### 16x8 1.2" LED Matrix + Backpack -Ultra Bright Square Yellow LEDs
[16x8 1.2" LED Matrix + Backpack -Ultra Bright Square Yellow LEDs](https://www.adafruit.com/product/2043)
What's better than a single LED? Lots of LEDs! And what's better than lots of LEDs? **TWO TIMES AS MANY LEDS!!!**
With the 16x8 LED Matrix Backpack we've doubled your project's matrix capacity by making it super easy to get two separate 8x8 matrices onto...
In Stock
[Buy Now](https://www.adafruit.com/product/2043)
[Related Guides to the Product](https://learn.adafruit.com/products/2043/guides)
### 16x8 1.2" LED Matrix + Backpack - Ultra Bright Square White LEDs
[16x8 1.2" LED Matrix + Backpack - Ultra Bright Square White LEDs](https://www.adafruit.com/product/2044)
What's better than a single LED? Lots of LEDs! And what's better than lots of LEDs? **TWO TIMES AS MANY LEDS!!!**
With the 16x8 LED Matrix Backpack we've doubled your project's matrix capacity by making it super easy to get two separate 8x8 matrices onto...
In Stock
[Buy Now](https://www.adafruit.com/product/2044)
[Related Guides to the Product](https://learn.adafruit.com/products/2044/guides)
### 16x8 1.2" LED Matrix + Backpack-Ultra Bright Round Orange LEDs
[16x8 1.2" LED Matrix + Backpack-Ultra Bright Round Orange LEDs](https://www.adafruit.com/product/2052)
What's better than a single LED? Lots of LEDs! And what's better than lots of LEDs? **TWO TIMES AS MANY LEDS!!!**
With the 16x8 LED Matrix Backpack we've doubled your project's matrix capacity by making it super easy to get two separate 8x8 matrices onto...
In Stock
[Buy Now](https://www.adafruit.com/product/2052)
[Related Guides to the Product](https://learn.adafruit.com/products/2052/guides)
### 16x8 1.2" LED Matrices+Backpack Round LEDs in Various Colors
[16x8 1.2" LED Matrices+Backpack Round LEDs in Various Colors](https://www.adafruit.com/product/2054)
What's better than a single LED? Lots of LEDs! And what's better than lots of LEDs? **TWO TIMES AS MANY LEDS!!!**
With the 16x8 LED Matrix Backpack we've doubled your project's matrix capacity by making it super easy to get two separate 8x8 matrices onto...
Out of Stock
[Buy Now](https://www.adafruit.com/product/2054)
[Related Guides to the Product](https://learn.adafruit.com/products/2054/guides)
### Adafruit 8x16 LED Matrix FeatherWing w/o Matrices
[Adafruit 8x16 LED Matrix FeatherWing w/o Matrices](https://www.adafruit.com/product/3090)
You will chirp with delight when you see how easy it is to make your very own 8x16 LED matrix display for any Feather. At 0.8" square, the little [8x8 matrices](https://www.adafruit.com/new/?q=8x8%20miniature%20LED%20matrix&) have everything a big LED matrix has,...
Out of Stock
[Buy Now](https://www.adafruit.com/product/3090)
[Related Guides to the Product](https://learn.adafruit.com/products/3090/guides)
### Adafruit 14-segment LED Alphanumeric backpack (same as P1910)
[Adafruit 14-segment LED Alphanumeric backpack (same as P1910)](https://www.adafruit.com/product/3322)
Just the backpack + 4pin header
No Longer Stocked
[Buy Now](https://www.adafruit.com/product/3322)
[Related Guides to the Product](https://learn.adafruit.com/products/3322/guides)
## Featured Products
### Adafruit Small 1.2" 8x8 LED Matrix w/I2C Backpack - Yellow-Green
[Adafruit Small 1.2" 8x8 LED Matrix w/I2C Backpack - Yellow-Green](https://www.adafruit.com/product/1051)
What's better than a single LED? Lots of LEDs! A fun way to make a small display is to use an [8x8 matrix](https://www.adafruit.com/category/37_88) or a [4-digit 7-segment display](https://www.adafruit.com/category/37_103). Matrices like these are...
In Stock
[Buy Now](https://www.adafruit.com/product/1051)
[Related Guides to the Product](https://learn.adafruit.com/products/1051/guides)
### Small 1.2" 8x8 Ultra Bright Square Blue LED Matrix + Backpack
[Small 1.2" 8x8 Ultra Bright Square Blue LED Matrix + Backpack](https://www.adafruit.com/product/1853)
What's better than a single LED? Lots of LEDs! Matrices like these are 'multiplexed' - so to control 64 LEDs you need 16 pins. That's a lot of pins, and there are [driver chips like the MAX7219](//www.adafruit.com/products/453) that can control a matrix for you but...
In Stock
[Buy Now](https://www.adafruit.com/product/1853)
[Related Guides to the Product](https://learn.adafruit.com/products/1853/guides)
## Related Guides
- [LED Backpack Displays on Raspberry Pi and BeagleBone Black](https://learn.adafruit.com/led-backpack-displays-on-raspberry-pi-and-beaglebone-black.md)
- [Animating Multiple LED Backpacks](https://learn.adafruit.com/animating-multiple-led-backpacks.md)
- [Arduino GPS Clock](https://learn.adafruit.com/arduino-clock.md)
- [Raspberry Pi Physical Dashboard](https://learn.adafruit.com/raspberry-pi-physical-dashboard.md)
- [CircuitPython Hardware: LED Backpacks & FeatherWings](https://learn.adafruit.com/micropython-hardware-led-backpacks-and-featherwings.md)
- [Matrix and 7-Segment LED Backpack with the Raspberry Pi](https://learn.adafruit.com/matrix-7-segment-led-backpack-with-the-raspberry-pi.md)
- [DIY Pocket LED Gamer - Tiny Tetris!](https://learn.adafruit.com/diy-3d-printed-handheld-pocket-game-tiny-tetris-snake.md)
- [RGB LED Matrix Cube with 25,000 LEDs](https://learn.adafruit.com/rgb-led-matrix-cube-for-pi.md)
- [Creating GIFs for SmartMatrix](https://learn.adafruit.com/creating-gifs-for-smartmatrix.md)
- [Adafruit CharliePlex LED Matrix Bonnet](https://learn.adafruit.com/adafruit-charlieplex-bonnet.md)
- [Connecting a 16x32 RGB LED Matrix Panel to a Raspberry Pi](https://learn.adafruit.com/connecting-a-16x32-rgb-led-matrix-panel-to-a-raspberry-pi.md)
- [MicroPython Displays: Drawing Text](https://learn.adafruit.com/micropython-displays-drawing-text.md)
- [Heart Rate Badge](https://learn.adafruit.com/heart-rate-badge.md)
- [16x24 LED Matrix](https://learn.adafruit.com/16x24-led-matrix.md)
- [Adafruit IS31FL3741](https://learn.adafruit.com/adafruit-is31fl3741.md)
---
# Source: https://learn.adafruit.com/adafruit-led-backpack/1-2-8x8-circuitpython-and-python-usage.md
# Adafruit LED Backpacks
## CircuitPython and Python Usage
The following section will show how to control the LED backpack from the board's Python prompt / REPL. You'll walk through how to control the LED display and learn how to use the CircuitPython module built for the display.
First [connect to the board's serial REPL ](https://learn.adafruit.com/welcome-to-circuitpython/the-repl)so you are at the CircuitPython **\>\>\>** prompt.
## Initialization
First you'll need to initialize the I2C bus for your board. It's really easy, first import the necessary modules. In this case, we'll use `board` and `Matrix8x8`.
Then just use `board.I2C()` to create the I2C instance using the default SCL and SDA pins (which will be marked on the boards pins if using a Feather or similar Adafruit board).
Then to initialize the matrix, you just pass `i2c` in.
Warning: When using the STEMMA QT port, some board may have an alternate I2C such as board.STEMMA_I2C().
```python
import board
from adafruit_ht16k33.matrix import Matrix8x8
i2c = board.I2C()
matrix = Matrix8x8(i2c)
```
If you bridged the address pads on the back of the display, you could pass in the address. The addresses for the HT16K33 can range between 0x70 and 0x77 depending on which pads you have bridged, with 0x70 being used if you haven't bridged any of them. For instance, if you bridge only the **A0** pad, you would use `0x71` like this:
```python
matrix = Matrix8x8(i2c, address=0x71)
```
## Setting the Brightness
You can set the brightness of the display, but changing it will set the brightness of the entire display and not individual segments. If can be adjusted in 1/16 increments **between 0 and 1.0** with 1.0 being the brightest. So to set the display to half brightness, you would use the following:
```python
matrix.brightness = 0.5
```
## Setting the Blink Rate
You can set the blink rate of the display, but changing it will set the brightness of the entire display and not individual pixels. If can be adjusted in 1/4 increments **between 0 and 3** with 3 being the fastest blinking. So to set the display to blink at full speed, you would use the following:
```python
matrix.blink_rate = 3
```
## Setting Individual Pixels
To set individual pixels to on, you simply treat the `matrix` object as a multidimensional list and set it to 1.
```python
matrix[0, 0] = 1
matrix[4, 4] = 1
matrix[7, 7] = 1
```
## Filling the Entire Matrix
To fill the entire matrix, just use the fill() function and pass in either 0 or 1 depending on whether you want all pixels off or on. For instance, if you wanted to set everything to on, you would use:
```python
matrix.fill(1)
```
## Shifting the Matrix
To shift the pixels on the matrix, there are 5 functions you can use. The main function, called shift(), is used to shift the pixels, up, down, left, right, or even diagonally. By passing a positive number, it will shift the pixels right/up and passing a negative number will shift them left/down. For instance:
```python
matrix.shift(2, 0) # shift pixels to the right by 2
matrix.shift(-1, 0) # shift pixels to the left by 1
matrix.shift(0, -3) # shift pixels down by 3
matrix.shift(-2, 2) # shift pixels left by 2 and up by 2
```
You can pass `True` as a third parameter to loop all the pixels that get shifted off over to the other side.
```python
matrix.shift(2, 0, True) # loop pixels to the right by 2
matrix.shift(-1, 0, True) # loop pixels to the left by 1
matrix.shift(0, -3, True) # loop pixels down by 3
matrix.shift(-2, 2, True) # loop pixels left by 2 and up by 2
```
Additionally, there are a few convenience functions that will shift the pixels by one. These can also be passed a value of `True` to loop the pixels.
```python
matrix.shift_up() # Shift pixels up
matrix.shift_left() # Shift pixels left
matrix.shift_down() # Shift pixels down
matrix.shift_right() # Shift pixels right
matrix.shift_up(True) # Loop pixels up
matrix.shift_left(True) # Loop pixels left
matrix.shift_down(True) # Loop pixels down
matrix.shift_right(True) # Loop pixels right
```
## Displaying an Image (Pillow Only)
Additionally, when using with the Raspberry Pi, you can use the Pillow library to display an image to the Matrix. The image will need to be the same exact size as the Matrix. In this case, it should be **8x8** pixels. As an example, you can save the image below as **myimage.png**.

[Download Image](https://cdn-learn.adafruit.com/assets/assets/000/087/758/original/led_matrices_squares-mono-8x8.png?1580238605)
Then if you want to display the image called **myimage.png** , you would use something like this:
```python
import board
from PIL import Image
from adafruit_ht16k33 import matrix
matrix = matrix.Matrix8x8(board.I2C())
image = Image.open("myimage.png")
matrix.image(image)
```

- [Previous Page](https://learn.adafruit.com/adafruit-led-backpack/1-2-8x8-python-wiring-and-setup.md)
- [Next Page](https://learn.adafruit.com/adafruit-led-backpack/0-8-8x8-matrix.md)
## Primary Products
### Adafruit Mini 8x8 LED Matrix w/I2C Backpack - Red
[Adafruit Mini 8x8 LED Matrix w/I2C Backpack - Red](https://www.adafruit.com/product/870)
What's better than a single LED? Lots of LEDs! A fun way to make a small display is to use an [8x8 matrix](https://www.adafruit.com/category/37_88) or a [4-digit 7-segment display](https://www.adafruit.com/category/37_103). Matrices like these are...
In Stock
[Buy Now](https://www.adafruit.com/product/870)
[Related Guides to the Product](https://learn.adafruit.com/products/870/guides)
### Adafruit Mini 8x8 LED Matrix w/I2C Backpack - Yellow
[Adafruit Mini 8x8 LED Matrix w/I2C Backpack - Yellow](https://www.adafruit.com/product/871)
What's better than a single LED? Lots of LEDs! A fun way to make a small display is to use an [8x8 matrix](https://www.adafruit.com/category/37_88) or a [4-digit 7-segment display](https://www.adafruit.com/category/37_103). Matrices like these are...
In Stock
[Buy Now](https://www.adafruit.com/product/871)
[Related Guides to the Product](https://learn.adafruit.com/products/871/guides)
### Adafruit Mini 0.8" 8x8 LED Matrix w/I2C Backpack - Yellow-Green
[Adafruit Mini 0.8" 8x8 LED Matrix w/I2C Backpack - Yellow-Green](https://www.adafruit.com/product/872)
What's better than a single LED? Lots of LEDs! A fun way to make a small display is to use an [8x8 matrix](https://www.adafruit.com/category/37_88) or a [4-digit 7-segment display](https://www.adafruit.com/category/37_103). Matrices like these are...
In Stock
[Buy Now](https://www.adafruit.com/product/872)
[Related Guides to the Product](https://learn.adafruit.com/products/872/guides)
### Adafruit 0.56" 4-Digit 7-Segment Display with I2C Backpack - Red
[Adafruit 0.56" 4-Digit 7-Segment Display with I2C Backpack - Red](https://www.adafruit.com/product/878)
What's better than a single LED? Lots of LEDs! A fun way to make a small display is to use an [8x8 matrix](https://www.adafruit.com/category/37_88) or a [4-digit 7-segment display](https://www.adafruit.com/category/37_103). Matrices like these are...
In Stock
[Buy Now](https://www.adafruit.com/product/878)
[Related Guides to the Product](https://learn.adafruit.com/products/878/guides)
### Adafruit 0.56" 4-Digit 7-Segment Display w/I2C Backpack - Yellow
[Adafruit 0.56" 4-Digit 7-Segment Display w/I2C Backpack - Yellow](https://www.adafruit.com/product/879)
What's better than a single LED? Lots of LEDs! A fun way to make a small display is to use an [8x8 matrix](https://www.adafruit.com/category/37_88) or a [4-digit 7-segment display](https://www.adafruit.com/category/37_103). Matrices like these are...
In Stock
[Buy Now](https://www.adafruit.com/product/879)
[Related Guides to the Product](https://learn.adafruit.com/products/879/guides)
### Adafruit 0.56" 4-Digit 7-Segment Display w/ I2C Backpack - Green
[Adafruit 0.56" 4-Digit 7-Segment Display w/ I2C Backpack - Green](https://www.adafruit.com/product/880)
What's better than a single LED? Lots of LEDs! A fun way to make a small display is to use an [8x8 matrix](https://www.adafruit.com/category/37_88) or a [4-digit 7-segment display](https://www.adafruit.com/category/37_103). Matrices like these are...
No Longer Stocked
[Buy Now](https://www.adafruit.com/product/880)
[Related Guides to the Product](https://learn.adafruit.com/products/880/guides)
### Adafruit 0.56" 4-Digit 7-Segment Display w/ I2C Backpack - Blue
[Adafruit 0.56" 4-Digit 7-Segment Display w/ I2C Backpack - Blue](https://www.adafruit.com/product/881)
What's better than a single LED? Lots of LEDs! A fun way to make a small display is to use an [8x8 matrix](https://www.adafruit.com/category/37_88) or a [4-digit 7-segment display](https://www.adafruit.com/category/37_103). Matrices like these are...
In Stock
[Buy Now](https://www.adafruit.com/product/881)
[Related Guides to the Product](https://learn.adafruit.com/products/881/guides)
### Adafruit Bicolor LED Square Pixel Matrix with I2C Backpack
[Adafruit Bicolor LED Square Pixel Matrix with I2C Backpack](https://www.adafruit.com/product/902)
What's better than a single LED? Lots of LEDs! A fun way to make a small colorful display is to use a [1.2" Bi-color 8x8 LED Matrix](http://www.adafruit.com/products/458). Matrices like these are 'multiplexed' - so to control all the 128 LEDs you need 24 pins....
In Stock
[Buy Now](https://www.adafruit.com/product/902)
[Related Guides to the Product](https://learn.adafruit.com/products/902/guides)
### Adafruit Mini 8x8 LED Matrix w/I2C Backpack - Blue
[Adafruit Mini 8x8 LED Matrix w/I2C Backpack - Blue](https://www.adafruit.com/product/959)
What's better than a single LED? Lots of LEDs! A fun way to make a small display is to use an [8x8 matrix](https://www.adafruit.com/category/37_88) or a [4-digit 7-segment display](https://www.adafruit.com/category/37_103). Matrices like these are...
In Stock
[Buy Now](https://www.adafruit.com/product/959)
[Related Guides to the Product](https://learn.adafruit.com/products/959/guides)
### Adafruit 0.56" 4-Digit 7-Segment Display w/I2C Backpack - White
[Adafruit 0.56" 4-Digit 7-Segment Display w/I2C Backpack - White](https://www.adafruit.com/product/1002)
What's better than a single LED? Lots of LEDs! A fun way to make a small display is to use an [8x8 matrix](https://www.adafruit.com/category/37_88) or a [4-digit 7-segment display](https://www.adafruit.com/category/37_103). Matrices like these are...
In Stock
[Buy Now](https://www.adafruit.com/product/1002)
[Related Guides to the Product](https://learn.adafruit.com/products/1002/guides)
### Adafruit 1.2" 8x8 LED Matrix Backpack
[Adafruit 1.2" 8x8 LED Matrix Backpack](https://www.adafruit.com/product/1048)
By popular request, you can now get our 8x8 LED backpacks without the LEDs! These backpacks feature an HT16K33 I2C LED driver, they're simple and easy to use - you can use [our very nice library for the backpacks to...](https://github.com/adafruit/Adafruit-LED-Backpack-Library)
In Stock
[Buy Now](https://www.adafruit.com/product/1048)
[Related Guides to the Product](https://learn.adafruit.com/products/1048/guides)
### Adafruit Small 1.2" 8x8 LED Matrix w/I2C Backpack - Red
[Adafruit Small 1.2" 8x8 LED Matrix w/I2C Backpack - Red](https://www.adafruit.com/product/1049)
What's better than a single LED? Lots of LEDs! A fun way to make a small display is to use an [8x8 matrix](https://www.adafruit.com/category/37_88) or a [4-digit 7-segment display](https://www.adafruit.com/category/37_103). Matrices like these are...
In Stock
[Buy Now](https://www.adafruit.com/product/1049)
[Related Guides to the Product](https://learn.adafruit.com/products/1049/guides)
### Adafruit Small 1.2" 8x8 LED Matrix w/I2C Backpack - Yellow
[Adafruit Small 1.2" 8x8 LED Matrix w/I2C Backpack - Yellow](https://www.adafruit.com/product/1050)
What's better than a single LED? Lots of LEDs! A fun way to make a small display is to use an [8x8 matrix](https://www.adafruit.com/category/37_88) or a [4-digit 7-segment display](https://www.adafruit.com/category/37_103). Matrices like these are...
In Stock
[Buy Now](https://www.adafruit.com/product/1050)
[Related Guides to the Product](https://learn.adafruit.com/products/1050/guides)
### Adafruit Small 1.2" 8x8 LED Matrix w/I2C Backpack - Blue
[Adafruit Small 1.2" 8x8 LED Matrix w/I2C Backpack - Blue](https://www.adafruit.com/product/1052)
What's better than a single LED? Lots of LEDs! A fun way to make a small display is to use an [8x8 matrix](https://www.adafruit.com/category/37_88) or a [4-digit 7-segment display](https://www.adafruit.com/category/37_103). Matrices like these are...
In Stock
[Buy Now](https://www.adafruit.com/product/1052)
[Related Guides to the Product](https://learn.adafruit.com/products/1052/guides)
### Adafruit Mini 8x8 LED Matrix w/I2C Backpack - Ultra Bright White
[Adafruit Mini 8x8 LED Matrix w/I2C Backpack - Ultra Bright White](https://www.adafruit.com/product/1080)
What's better than a single LED? Lots of LEDs! A fun way to make a small display is to use an [8x8 matrix](https://www.adafruit.com/category/37_88) or a [4-digit 7-segment display](https://www.adafruit.com/category/37_103). Matrices like these are...
In Stock
[Buy Now](https://www.adafruit.com/product/1080)
[Related Guides to the Product](https://learn.adafruit.com/products/1080/guides)
### Adafruit 1.2" 4-Digit 7-Segment Display w/I2C Backpack - Green
[Adafruit 1.2" 4-Digit 7-Segment Display w/I2C Backpack - Green](https://www.adafruit.com/product/1268)
What's better than a single LED? Lots of LEDs! A fun way to make a numeric display is to use a [4-digit 7-segment display](https://www.adafruit.com/category/37_103). LED matrices like these are 'multiplexed' - so to control all the seven-segment LEDs you need 14 pins....
No Longer Stocked
[Buy Now](https://www.adafruit.com/product/1268)
[Related Guides to the Product](https://learn.adafruit.com/products/1268/guides)
### Adafruit 1.2" 4-Digit 7-Segment Display w/I2C Backpack - Yellow
[Adafruit 1.2" 4-Digit 7-Segment Display w/I2C Backpack - Yellow](https://www.adafruit.com/product/1269)
What's better than a single LED? Lots of LEDs! A fun way to make a numeric display is to use a [4-digit 7-segment display](https://www.adafruit.com/category/37_103). LED matrices like these are 'multiplexed' - so to control all the seven-segment LEDs you need 14 pins....
In Stock
[Buy Now](https://www.adafruit.com/product/1269)
[Related Guides to the Product](https://learn.adafruit.com/products/1269/guides)
### Adafruit 1.2" 4-Digit 7-Segment Display w/I2C Backpack - Red
[Adafruit 1.2" 4-Digit 7-Segment Display w/I2C Backpack - Red](https://www.adafruit.com/product/1270)
What's better than a single LED? Lots of LEDs! A fun way to make a numeric display is to use a [4-digit 7-segment display](https://www.adafruit.com/category/37_103). LED matrices like these are 'multiplexed' - so to control all the seven-segment LEDs you need 14 pins....
In Stock
[Buy Now](https://www.adafruit.com/product/1270)
[Related Guides to the Product](https://learn.adafruit.com/products/1270/guides)
### Small 1.2" 8x8 Ultra Bright White LED Matrix + Backpack
[Small 1.2" 8x8 Ultra Bright White LED Matrix + Backpack](https://www.adafruit.com/product/1614)
What's better than a single LED? Lots of LEDs! A fun way to make a small display is to use an [8x8 matrix](https://www.adafruit.com/category/37_88) or a [4-digit 7-segment display](https://www.adafruit.com/category/37_103). Matrices like these are...
In Stock
[Buy Now](https://www.adafruit.com/product/1614)
[Related Guides to the Product](https://learn.adafruit.com/products/1614/guides)
### Adafruit Small 1.2" 8x8 LED Matrix w/I2C Backpack - Pure Green
[Adafruit Small 1.2" 8x8 LED Matrix w/I2C Backpack - Pure Green](https://www.adafruit.com/product/1632)
What's better than a single LED? Lots of LEDs! A fun way to make a small display is to use an [8x8 matrix](https://www.adafruit.com/category/37_88) or a [4-digit 7-segment display](https://www.adafruit.com/category/37_103). Matrices like these are...
In Stock
[Buy Now](https://www.adafruit.com/product/1632)
[Related Guides to the Product](https://learn.adafruit.com/products/1632/guides)
### Adafruit Mini 0.8" 8x8 LED Matrix w/I2C Backpack - Pure Green
[Adafruit Mini 0.8" 8x8 LED Matrix w/I2C Backpack - Pure Green](https://www.adafruit.com/product/1633)
What's better than a single LED? Lots of LEDs! A fun way to make a small display is to use an [8x8 matrix](https://www.adafruit.com/category/37_88) or a [4-digit 7-segment display](https://www.adafruit.com/category/37_103). Matrices like these are...
In Stock
[Buy Now](https://www.adafruit.com/product/1633)
[Related Guides to the Product](https://learn.adafruit.com/products/1633/guides)
### Bi-Color (Red/Green) 24-Bar Bargraph w/I2C Backpack Kit
[Bi-Color (Red/Green) 24-Bar Bargraph w/I2C Backpack Kit](https://www.adafruit.com/product/1721)
What's better than a single LED? Lots of LEDs! A fun way to make a small linear display is to use two 12-bar Bi-color bar-graphs. However, this LED bargraph is 'multiplexed' - so to control all the 48 LEDs you need a lot of pins.
Out of Stock
[Buy Now](https://www.adafruit.com/product/1721)
[Related Guides to the Product](https://learn.adafruit.com/products/1721/guides)
### Small 1.2" 8x8 Ultra Bright Square Amber LED Matrix + Backpack
[Small 1.2" 8x8 Ultra Bright Square Amber LED Matrix + Backpack](https://www.adafruit.com/product/1854)
What's better than a single LED? Lots of LEDs! Matrices like these are 'multiplexed' - so to control 64 LEDs you need 16 pins. That's a lot of pins, and there are [driver chips like the MAX7219](//www.adafruit.com/products/453) that can control a matrix for you but...
In Stock
[Buy Now](https://www.adafruit.com/product/1854)
[Related Guides to the Product](https://learn.adafruit.com/products/1854/guides)
### Small 1.2" 8x8 Ultra Bright Square Yellow LED Matrix + Backpack
[Small 1.2" 8x8 Ultra Bright Square Yellow LED Matrix + Backpack](https://www.adafruit.com/product/1855)
What's better than a single LED? Lots of LEDs! Matrices like these are 'multiplexed' - so to control 64 LEDs you need 16 pins. That's a lot of pins, and there are [driver chips like the MAX7219](//www.adafruit.com/products/453) that can control a matrix for you but...
In Stock
[Buy Now](https://www.adafruit.com/product/1855)
[Related Guides to the Product](https://learn.adafruit.com/products/1855/guides)
### Small 1.2" 8x8 Bright Square Pure Green LED Matrix + Backpack
[Small 1.2" 8x8 Bright Square Pure Green LED Matrix + Backpack](https://www.adafruit.com/product/1856)
What's better than a single LED? Lots of LEDs! Matrices like these are 'multiplexed' - so to control 64 LEDs you need 16 pins. That's a lot of pins, and there are [driver chips like the MAX7219](//www.adafruit.com/products/453) that can control a matrix for you but...
In Stock
[Buy Now](https://www.adafruit.com/product/1856)
[Related Guides to the Product](https://learn.adafruit.com/products/1856/guides)
### Small 1.2" 8x8 Ultra Bright Square White LED Matrix + Backpack
[Small 1.2" 8x8 Ultra Bright Square White LED Matrix + Backpack](https://www.adafruit.com/product/1857)
What's better than a single LED? Lots of LEDs! Matrices like these are 'multiplexed' - so to control 64 LEDs you need 16 pins. That's a lot of pins, and there are [driver chips like the MAX7219](//www.adafruit.com/products/453) that can control a matrix for you but...
In Stock
[Buy Now](https://www.adafruit.com/product/1857)
[Related Guides to the Product](https://learn.adafruit.com/products/1857/guides)
### Adafruit 14-segment LED Alphanumeric Backpack - STEMMA QT
[Adafruit 14-segment LED Alphanumeric Backpack - STEMMA QT](https://www.adafruit.com/product/1910)
By popular request, you can now get our 14-segment LED backpacks without the LEDs! These backpacks feature an HT16K33 I2C LED driver, they're simple and easy to use - you can use [our very nice library for the backpacks to...](https://github.com/adafruit/Adafruit-LED-Backpack-Library)
In Stock
[Buy Now](https://www.adafruit.com/product/1910)
[Related Guides to the Product](https://learn.adafruit.com/products/1910/guides)
### Quad Alphanumeric Display - Red 0.54" Digits w/ I2C Backpack
[Quad Alphanumeric Display - Red 0.54" Digits w/ I2C Backpack](https://www.adafruit.com/product/1911)
Display, elegantly, 012345678 or 9! Gaze, hypnotized, at ABCDEFGHIJKLM - well it can display the whole alphabet. You get the point. This is a nice, bright alphanumeric display that shows letters and numbers in a beautiful red hue. It's super bright and designed for viewing from distances...
In Stock
[Buy Now](https://www.adafruit.com/product/1911)
[Related Guides to the Product](https://learn.adafruit.com/products/1911/guides)
### Quad Alphanumeric Display - Blue 0.54" Digits w/ I2C Backpack
[Quad Alphanumeric Display - Blue 0.54" Digits w/ I2C Backpack](https://www.adafruit.com/product/1912)
Display, elegantly, 012345678 or 9! Gaze, hypnotized, at ABCDEFGHIJKLM - well it can display the whole alphabet. You get the point. This is a nice, bright alphanumeric display that shows letters and numbers in a beautiful blue hue. It's super bright and designed for viewing from distances...
In Stock
[Buy Now](https://www.adafruit.com/product/1912)
[Related Guides to the Product](https://learn.adafruit.com/products/1912/guides)
### 16x8 1.2" LED Matrix + Backpack - Ultra Bright Round Green LEDs
[16x8 1.2" LED Matrix + Backpack - Ultra Bright Round Green LEDs](https://www.adafruit.com/product/2035)
What's better than a single LED? Lots of LEDs! And what's better than lots of LEDs? **TWO TIMES AS MANY LEDS!!!**
With the 16x8 LED Matrix Backpack we've doubled your project's matrix capacity by making it super easy to get two separate 8x8 matrices onto...
In Stock
[Buy Now](https://www.adafruit.com/product/2035)
[Related Guides to the Product](https://learn.adafruit.com/products/2035/guides)
### 16x8 1.2" LED Matrix+Backpack UltraBright Round YellowGreen LEDs
[16x8 1.2" LED Matrix+Backpack UltraBright Round YellowGreen LEDs](https://www.adafruit.com/product/2036)
What's better than a single LED? Lots of LEDs! And what's better than lots of LEDs? **TWO TIMES AS MANY LEDS!!!**
With the 16x8 LED Matrix Backpack we've doubled your project's matrix capacity by making it super easy to get two separate 8x8 matrices onto...
In Stock
[Buy Now](https://www.adafruit.com/product/2036)
[Related Guides to the Product](https://learn.adafruit.com/products/2036/guides)
### 16x8 1.2" LED Matrix + Backpack - Ultra Bright Round Red LEDs
[16x8 1.2" LED Matrix + Backpack - Ultra Bright Round Red LEDs](https://www.adafruit.com/product/2037)
What's better than a single LED? Lots of LEDs! And what's better than lots of LEDs? **TWO TIMES AS MANY LEDS!!!**
With the 16x8 LED Matrix Backpack we've doubled your project's matrix capacity by making it super easy to get two separate 8x8 matrices onto...
In Stock
[Buy Now](https://www.adafruit.com/product/2037)
[Related Guides to the Product](https://learn.adafruit.com/products/2037/guides)
### 16x8 1.2" LED Matrix + Backpack - Ultra Bright Round White LEDs
[16x8 1.2" LED Matrix + Backpack - Ultra Bright Round White LEDs](https://www.adafruit.com/product/2038)
What's better than a single LED? Lots of LEDs! And what's better than lots of LEDs? **TWO TIMES AS MANY LEDS!!!**
With the 16x8 LED Matrix Backpack we've doubled your project's matrix capacity by making it super easy to get two separate 8x8 matrices onto...
In Stock
[Buy Now](https://www.adafruit.com/product/2038)
[Related Guides to the Product](https://learn.adafruit.com/products/2038/guides)
### 16x8 1.2" LED Matrix + Backpack - Ultra Bright Round Blue LEDs
[16x8 1.2" LED Matrix + Backpack - Ultra Bright Round Blue LEDs](https://www.adafruit.com/product/2039)
What's better than a single LED? Lots of LEDs! And what's better than lots of LEDs? **TWO TIMES AS MANY LEDS!!!**
With the 16x8 LED Matrix Backpack we've doubled your project's matrix capacity by making it super easy to get two separate 8x8 matrices onto...
In Stock
[Buy Now](https://www.adafruit.com/product/2039)
[Related Guides to the Product](https://learn.adafruit.com/products/2039/guides)
### 16x8 1.2" LED Matrix + Backpack - Ultra Bright Square Blue LEDs
[16x8 1.2" LED Matrix + Backpack - Ultra Bright Square Blue LEDs](https://www.adafruit.com/product/2040)
What's better than a single LED? Lots of LEDs! And what's better than lots of LEDs? **TWO TIMES AS MANY LEDS!!!**
With the 16x8 LED Matrix Backpack we've doubled your project's matrix capacity by making it super easy to get two separate 8x8 matrices onto...
In Stock
[Buy Now](https://www.adafruit.com/product/2040)
[Related Guides to the Product](https://learn.adafruit.com/products/2040/guides)
### 16x8 1.2" LED Matrix + Backpack - Ultra Bright Square Amber LEDs
[16x8 1.2" LED Matrix + Backpack - Ultra Bright Square Amber LEDs](https://www.adafruit.com/product/2041)
What's better than a single LED? Lots of LEDs! And what's better than lots of LEDs? **TWO TIMES AS MANY LEDS!!!**
With the 16x8 LED Matrix Backpack we've doubled your project's matrix capacity by making it super easy to get two separate 8x8 matrices onto...
In Stock
[Buy Now](https://www.adafruit.com/product/2041)
[Related Guides to the Product](https://learn.adafruit.com/products/2041/guides)
### 16x8 1.2" LED Matrix + Backpack - Ultra Bright Square Green LEDs
[16x8 1.2" LED Matrix + Backpack - Ultra Bright Square Green LEDs](https://www.adafruit.com/product/2042)
What's better than a single LED? Lots of LEDs! And what's better than lots of LEDs? **TWO TIMES AS MANY LEDS!!!**
With the 16x8 LED Matrix Backpack we've doubled your project's matrix capacity by making it super easy to get two separate 8x8 matrices onto...
In Stock
[Buy Now](https://www.adafruit.com/product/2042)
[Related Guides to the Product](https://learn.adafruit.com/products/2042/guides)
### 16x8 1.2" LED Matrix + Backpack -Ultra Bright Square Yellow LEDs
[16x8 1.2" LED Matrix + Backpack -Ultra Bright Square Yellow LEDs](https://www.adafruit.com/product/2043)
What's better than a single LED? Lots of LEDs! And what's better than lots of LEDs? **TWO TIMES AS MANY LEDS!!!**
With the 16x8 LED Matrix Backpack we've doubled your project's matrix capacity by making it super easy to get two separate 8x8 matrices onto...
In Stock
[Buy Now](https://www.adafruit.com/product/2043)
[Related Guides to the Product](https://learn.adafruit.com/products/2043/guides)
### 16x8 1.2" LED Matrix + Backpack - Ultra Bright Square White LEDs
[16x8 1.2" LED Matrix + Backpack - Ultra Bright Square White LEDs](https://www.adafruit.com/product/2044)
What's better than a single LED? Lots of LEDs! And what's better than lots of LEDs? **TWO TIMES AS MANY LEDS!!!**
With the 16x8 LED Matrix Backpack we've doubled your project's matrix capacity by making it super easy to get two separate 8x8 matrices onto...
In Stock
[Buy Now](https://www.adafruit.com/product/2044)
[Related Guides to the Product](https://learn.adafruit.com/products/2044/guides)
### 16x8 1.2" LED Matrix + Backpack-Ultra Bright Round Orange LEDs
[16x8 1.2" LED Matrix + Backpack-Ultra Bright Round Orange LEDs](https://www.adafruit.com/product/2052)
What's better than a single LED? Lots of LEDs! And what's better than lots of LEDs? **TWO TIMES AS MANY LEDS!!!**
With the 16x8 LED Matrix Backpack we've doubled your project's matrix capacity by making it super easy to get two separate 8x8 matrices onto...
In Stock
[Buy Now](https://www.adafruit.com/product/2052)
[Related Guides to the Product](https://learn.adafruit.com/products/2052/guides)
### 16x8 1.2" LED Matrices+Backpack Round LEDs in Various Colors
[16x8 1.2" LED Matrices+Backpack Round LEDs in Various Colors](https://www.adafruit.com/product/2054)
What's better than a single LED? Lots of LEDs! And what's better than lots of LEDs? **TWO TIMES AS MANY LEDS!!!**
With the 16x8 LED Matrix Backpack we've doubled your project's matrix capacity by making it super easy to get two separate 8x8 matrices onto...
Out of Stock
[Buy Now](https://www.adafruit.com/product/2054)
[Related Guides to the Product](https://learn.adafruit.com/products/2054/guides)
### Adafruit 8x16 LED Matrix FeatherWing w/o Matrices
[Adafruit 8x16 LED Matrix FeatherWing w/o Matrices](https://www.adafruit.com/product/3090)
You will chirp with delight when you see how easy it is to make your very own 8x16 LED matrix display for any Feather. At 0.8" square, the little [8x8 matrices](https://www.adafruit.com/new/?q=8x8%20miniature%20LED%20matrix&) have everything a big LED matrix has,...
Out of Stock
[Buy Now](https://www.adafruit.com/product/3090)
[Related Guides to the Product](https://learn.adafruit.com/products/3090/guides)
### Adafruit 14-segment LED Alphanumeric backpack (same as P1910)
[Adafruit 14-segment LED Alphanumeric backpack (same as P1910)](https://www.adafruit.com/product/3322)
Just the backpack + 4pin header
No Longer Stocked
[Buy Now](https://www.adafruit.com/product/3322)
[Related Guides to the Product](https://learn.adafruit.com/products/3322/guides)
## Featured Products
### Adafruit Small 1.2" 8x8 LED Matrix w/I2C Backpack - Yellow-Green
[Adafruit Small 1.2" 8x8 LED Matrix w/I2C Backpack - Yellow-Green](https://www.adafruit.com/product/1051)
What's better than a single LED? Lots of LEDs! A fun way to make a small display is to use an [8x8 matrix](https://www.adafruit.com/category/37_88) or a [4-digit 7-segment display](https://www.adafruit.com/category/37_103). Matrices like these are...
In Stock
[Buy Now](https://www.adafruit.com/product/1051)
[Related Guides to the Product](https://learn.adafruit.com/products/1051/guides)
### Small 1.2" 8x8 Ultra Bright Square Blue LED Matrix + Backpack
[Small 1.2" 8x8 Ultra Bright Square Blue LED Matrix + Backpack](https://www.adafruit.com/product/1853)
What's better than a single LED? Lots of LEDs! Matrices like these are 'multiplexed' - so to control 64 LEDs you need 16 pins. That's a lot of pins, and there are [driver chips like the MAX7219](//www.adafruit.com/products/453) that can control a matrix for you but...
In Stock
[Buy Now](https://www.adafruit.com/product/1853)
[Related Guides to the Product](https://learn.adafruit.com/products/1853/guides)
## Related Guides
- [LED Backpack Displays on Raspberry Pi and BeagleBone Black](https://learn.adafruit.com/led-backpack-displays-on-raspberry-pi-and-beaglebone-black.md)
- [Animating Multiple LED Backpacks](https://learn.adafruit.com/animating-multiple-led-backpacks.md)
- [Arduino GPS Clock](https://learn.adafruit.com/arduino-clock.md)
- [Raspberry Pi Physical Dashboard](https://learn.adafruit.com/raspberry-pi-physical-dashboard.md)
- [CircuitPython Hardware: LED Backpacks & FeatherWings](https://learn.adafruit.com/micropython-hardware-led-backpacks-and-featherwings.md)
- [Matrix and 7-Segment LED Backpack with the Raspberry Pi](https://learn.adafruit.com/matrix-7-segment-led-backpack-with-the-raspberry-pi.md)
- [DIY Pocket LED Gamer - Tiny Tetris!](https://learn.adafruit.com/diy-3d-printed-handheld-pocket-game-tiny-tetris-snake.md)
- [RGB LED Matrix Cube with 25,000 LEDs](https://learn.adafruit.com/rgb-led-matrix-cube-for-pi.md)
- [Creating GIFs for SmartMatrix](https://learn.adafruit.com/creating-gifs-for-smartmatrix.md)
- [Adafruit CharliePlex LED Matrix Bonnet](https://learn.adafruit.com/adafruit-charlieplex-bonnet.md)
- [Connecting a 16x32 RGB LED Matrix Panel to a Raspberry Pi](https://learn.adafruit.com/connecting-a-16x32-rgb-led-matrix-panel-to-a-raspberry-pi.md)
- [MicroPython Displays: Drawing Text](https://learn.adafruit.com/micropython-displays-drawing-text.md)
- [Heart Rate Badge](https://learn.adafruit.com/heart-rate-badge.md)
- [16x24 LED Matrix](https://learn.adafruit.com/16x24-led-matrix.md)
- [Adafruit IS31FL3741](https://learn.adafruit.com/adafruit-is31fl3741.md)
---
# Source: https://learn.adafruit.com/adafruit-led-backpack/1-2-8x8-circuitpython-wiring-and-setup.md
# Adafruit LED Backpacks
## CircuitPython Wiring and Setup
# Wiring
It's easy to use LED Matrices with CircuitPython and the [Adafruit CircuitPython HT16K33](https://github.com/adafruit/Adafruit_CircuitPython_HT16K33) library. This module allows you to easily write CircuitPython code to control the display.
You can use this sensor with any CircuitPython microcontroller board.
We'll cover how to wire the LED Matrix to your CircuitPython microcontroller board. First assemble your LED Matrix.
Connect the LED Matrix to your microcontroller board as shown below.
- **Microcontroller 3V ** to **LED Matrix VIN**
- **Microcontroller GND ** to **LED Matrix GND**
- **Microcontroller SCL ** to **LED Matrix SCL**
- **Microcontroller SDA ** to **LED Matrix SDA**

[Download Fritzing Object](https://cdn-learn.adafruit.com/assets/assets/000/087/060/original/feather-m4-1.2-8x8.fzz?1579283216)
# Library Setup
To use the LED backpack with your [Adafruit CircuitPython](https://learn.adafruit.com/welcome-to-circuitpython/overview) board you'll need to install the [Adafruit\_CircuitPython\_HT16K33](https://github.com/adafruit/Adafruit_CircuitPython_HT16K33) library on your board.
First make sure you are running the [latest version of Adafruit CircuitPython](https://github.com/adafruit/circuitpython/releases) for your board. Next you'll need to install the necessary libraries to use the hardware--read below and carefully follow the referenced steps to find and install these libraries from [Adafruit's CircuitPython library bundle](https://github.com/adafruit/Adafruit_CircuitPython_Bundle).
## Bundle Install
For express boards that have extra flash storage, like the Feather/Metro M0 express and Circuit Playground express, you can easily install the necessary libraries with [Adafruit's CircuitPython bundle](https://github.com/adafruit/Adafruit_CircuitPython_Bundle). This is an all-in-one package that includes the necessary libraries to use the LED backpack display with CircuitPython. For details on installing the bundle, read about [CircuitPython Libraries](https://learn.adafruit.com/welcome-to-circuitpython/circuitpython-libraries).
Remember for non-express boards like the Trinket M0, Gemma M0, and Feather/Metro M0 basic you'll need to [manually install the necessary libraries](https://learn.adafruit.com/welcome-to-circuitpython/circuitpython-libraries#non-express-boards-11-13) from the bundle:
- **adafruit\_ht16k33**
- **adafruit\_bus\_device**
If your board supports USB mass storage, like the M0-based boards, then simply drag the files to the board's file system. **Note on boards without external SPI flash, like a Feather M0 or Trinket/Gemma M0, you might run into issues on Mac OSX with hidden files taking up too much space when drag and drop copying, [see this page for a workaround](../../../../micropython-for-samd21/usb-mass-storage#mac-osx-file-copy-issues).**
Before continuing make sure your board's **lib** folder or root filesystem has at least the **adafruit\_ht16k33** and **adafruit\_bus\_device** folders/modules copied over.

- [Previous Page](https://learn.adafruit.com/adafruit-led-backpack/1-2-8x8-arduino-wiring-and-setup.md)
- [Next Page](https://learn.adafruit.com/adafruit-led-backpack/1-2-8x8-python-wiring-and-setup.md)
## Primary Products
### Adafruit Mini 8x8 LED Matrix w/I2C Backpack - Red
[Adafruit Mini 8x8 LED Matrix w/I2C Backpack - Red](https://www.adafruit.com/product/870)
What's better than a single LED? Lots of LEDs! A fun way to make a small display is to use an [8x8 matrix](https://www.adafruit.com/category/37_88) or a [4-digit 7-segment display](https://www.adafruit.com/category/37_103). Matrices like these are...
In Stock
[Buy Now](https://www.adafruit.com/product/870)
[Related Guides to the Product](https://learn.adafruit.com/products/870/guides)
### Adafruit Mini 8x8 LED Matrix w/I2C Backpack - Yellow
[Adafruit Mini 8x8 LED Matrix w/I2C Backpack - Yellow](https://www.adafruit.com/product/871)
What's better than a single LED? Lots of LEDs! A fun way to make a small display is to use an [8x8 matrix](https://www.adafruit.com/category/37_88) or a [4-digit 7-segment display](https://www.adafruit.com/category/37_103). Matrices like these are...
In Stock
[Buy Now](https://www.adafruit.com/product/871)
[Related Guides to the Product](https://learn.adafruit.com/products/871/guides)
### Adafruit Mini 0.8" 8x8 LED Matrix w/I2C Backpack - Yellow-Green
[Adafruit Mini 0.8" 8x8 LED Matrix w/I2C Backpack - Yellow-Green](https://www.adafruit.com/product/872)
What's better than a single LED? Lots of LEDs! A fun way to make a small display is to use an [8x8 matrix](https://www.adafruit.com/category/37_88) or a [4-digit 7-segment display](https://www.adafruit.com/category/37_103). Matrices like these are...
In Stock
[Buy Now](https://www.adafruit.com/product/872)
[Related Guides to the Product](https://learn.adafruit.com/products/872/guides)
### Adafruit 0.56" 4-Digit 7-Segment Display with I2C Backpack - Red
[Adafruit 0.56" 4-Digit 7-Segment Display with I2C Backpack - Red](https://www.adafruit.com/product/878)
What's better than a single LED? Lots of LEDs! A fun way to make a small display is to use an [8x8 matrix](https://www.adafruit.com/category/37_88) or a [4-digit 7-segment display](https://www.adafruit.com/category/37_103). Matrices like these are...
In Stock
[Buy Now](https://www.adafruit.com/product/878)
[Related Guides to the Product](https://learn.adafruit.com/products/878/guides)
### Adafruit 0.56" 4-Digit 7-Segment Display w/I2C Backpack - Yellow
[Adafruit 0.56" 4-Digit 7-Segment Display w/I2C Backpack - Yellow](https://www.adafruit.com/product/879)
What's better than a single LED? Lots of LEDs! A fun way to make a small display is to use an [8x8 matrix](https://www.adafruit.com/category/37_88) or a [4-digit 7-segment display](https://www.adafruit.com/category/37_103). Matrices like these are...
In Stock
[Buy Now](https://www.adafruit.com/product/879)
[Related Guides to the Product](https://learn.adafruit.com/products/879/guides)
### Adafruit 0.56" 4-Digit 7-Segment Display w/ I2C Backpack - Green
[Adafruit 0.56" 4-Digit 7-Segment Display w/ I2C Backpack - Green](https://www.adafruit.com/product/880)
What's better than a single LED? Lots of LEDs! A fun way to make a small display is to use an [8x8 matrix](https://www.adafruit.com/category/37_88) or a [4-digit 7-segment display](https://www.adafruit.com/category/37_103). Matrices like these are...
No Longer Stocked
[Buy Now](https://www.adafruit.com/product/880)
[Related Guides to the Product](https://learn.adafruit.com/products/880/guides)
### Adafruit 0.56" 4-Digit 7-Segment Display w/ I2C Backpack - Blue
[Adafruit 0.56" 4-Digit 7-Segment Display w/ I2C Backpack - Blue](https://www.adafruit.com/product/881)
What's better than a single LED? Lots of LEDs! A fun way to make a small display is to use an [8x8 matrix](https://www.adafruit.com/category/37_88) or a [4-digit 7-segment display](https://www.adafruit.com/category/37_103). Matrices like these are...
In Stock
[Buy Now](https://www.adafruit.com/product/881)
[Related Guides to the Product](https://learn.adafruit.com/products/881/guides)
### Adafruit Bicolor LED Square Pixel Matrix with I2C Backpack
[Adafruit Bicolor LED Square Pixel Matrix with I2C Backpack](https://www.adafruit.com/product/902)
What's better than a single LED? Lots of LEDs! A fun way to make a small colorful display is to use a [1.2" Bi-color 8x8 LED Matrix](http://www.adafruit.com/products/458). Matrices like these are 'multiplexed' - so to control all the 128 LEDs you need 24 pins....
In Stock
[Buy Now](https://www.adafruit.com/product/902)
[Related Guides to the Product](https://learn.adafruit.com/products/902/guides)
### Adafruit Mini 8x8 LED Matrix w/I2C Backpack - Blue
[Adafruit Mini 8x8 LED Matrix w/I2C Backpack - Blue](https://www.adafruit.com/product/959)
What's better than a single LED? Lots of LEDs! A fun way to make a small display is to use an [8x8 matrix](https://www.adafruit.com/category/37_88) or a [4-digit 7-segment display](https://www.adafruit.com/category/37_103). Matrices like these are...
In Stock
[Buy Now](https://www.adafruit.com/product/959)
[Related Guides to the Product](https://learn.adafruit.com/products/959/guides)
### Adafruit 0.56" 4-Digit 7-Segment Display w/I2C Backpack - White
[Adafruit 0.56" 4-Digit 7-Segment Display w/I2C Backpack - White](https://www.adafruit.com/product/1002)
What's better than a single LED? Lots of LEDs! A fun way to make a small display is to use an [8x8 matrix](https://www.adafruit.com/category/37_88) or a [4-digit 7-segment display](https://www.adafruit.com/category/37_103). Matrices like these are...
In Stock
[Buy Now](https://www.adafruit.com/product/1002)
[Related Guides to the Product](https://learn.adafruit.com/products/1002/guides)
### Adafruit 1.2" 8x8 LED Matrix Backpack
[Adafruit 1.2" 8x8 LED Matrix Backpack](https://www.adafruit.com/product/1048)
By popular request, you can now get our 8x8 LED backpacks without the LEDs! These backpacks feature an HT16K33 I2C LED driver, they're simple and easy to use - you can use [our very nice library for the backpacks to...](https://github.com/adafruit/Adafruit-LED-Backpack-Library)
In Stock
[Buy Now](https://www.adafruit.com/product/1048)
[Related Guides to the Product](https://learn.adafruit.com/products/1048/guides)
### Adafruit Small 1.2" 8x8 LED Matrix w/I2C Backpack - Red
[Adafruit Small 1.2" 8x8 LED Matrix w/I2C Backpack - Red](https://www.adafruit.com/product/1049)
What's better than a single LED? Lots of LEDs! A fun way to make a small display is to use an [8x8 matrix](https://www.adafruit.com/category/37_88) or a [4-digit 7-segment display](https://www.adafruit.com/category/37_103). Matrices like these are...
In Stock
[Buy Now](https://www.adafruit.com/product/1049)
[Related Guides to the Product](https://learn.adafruit.com/products/1049/guides)
### Adafruit Small 1.2" 8x8 LED Matrix w/I2C Backpack - Yellow
[Adafruit Small 1.2" 8x8 LED Matrix w/I2C Backpack - Yellow](https://www.adafruit.com/product/1050)
What's better than a single LED? Lots of LEDs! A fun way to make a small display is to use an [8x8 matrix](https://www.adafruit.com/category/37_88) or a [4-digit 7-segment display](https://www.adafruit.com/category/37_103). Matrices like these are...
In Stock
[Buy Now](https://www.adafruit.com/product/1050)
[Related Guides to the Product](https://learn.adafruit.com/products/1050/guides)
### Adafruit Small 1.2" 8x8 LED Matrix w/I2C Backpack - Blue
[Adafruit Small 1.2" 8x8 LED Matrix w/I2C Backpack - Blue](https://www.adafruit.com/product/1052)
What's better than a single LED? Lots of LEDs! A fun way to make a small display is to use an [8x8 matrix](https://www.adafruit.com/category/37_88) or a [4-digit 7-segment display](https://www.adafruit.com/category/37_103). Matrices like these are...
In Stock
[Buy Now](https://www.adafruit.com/product/1052)
[Related Guides to the Product](https://learn.adafruit.com/products/1052/guides)
### Adafruit Mini 8x8 LED Matrix w/I2C Backpack - Ultra Bright White
[Adafruit Mini 8x8 LED Matrix w/I2C Backpack - Ultra Bright White](https://www.adafruit.com/product/1080)
What's better than a single LED? Lots of LEDs! A fun way to make a small display is to use an [8x8 matrix](https://www.adafruit.com/category/37_88) or a [4-digit 7-segment display](https://www.adafruit.com/category/37_103). Matrices like these are...
In Stock
[Buy Now](https://www.adafruit.com/product/1080)
[Related Guides to the Product](https://learn.adafruit.com/products/1080/guides)
### Adafruit 1.2" 4-Digit 7-Segment Display w/I2C Backpack - Green
[Adafruit 1.2" 4-Digit 7-Segment Display w/I2C Backpack - Green](https://www.adafruit.com/product/1268)
What's better than a single LED? Lots of LEDs! A fun way to make a numeric display is to use a [4-digit 7-segment display](https://www.adafruit.com/category/37_103). LED matrices like these are 'multiplexed' - so to control all the seven-segment LEDs you need 14 pins....
No Longer Stocked
[Buy Now](https://www.adafruit.com/product/1268)
[Related Guides to the Product](https://learn.adafruit.com/products/1268/guides)
### Adafruit 1.2" 4-Digit 7-Segment Display w/I2C Backpack - Yellow
[Adafruit 1.2" 4-Digit 7-Segment Display w/I2C Backpack - Yellow](https://www.adafruit.com/product/1269)
What's better than a single LED? Lots of LEDs! A fun way to make a numeric display is to use a [4-digit 7-segment display](https://www.adafruit.com/category/37_103). LED matrices like these are 'multiplexed' - so to control all the seven-segment LEDs you need 14 pins....
In Stock
[Buy Now](https://www.adafruit.com/product/1269)
[Related Guides to the Product](https://learn.adafruit.com/products/1269/guides)
### Adafruit 1.2" 4-Digit 7-Segment Display w/I2C Backpack - Red
[Adafruit 1.2" 4-Digit 7-Segment Display w/I2C Backpack - Red](https://www.adafruit.com/product/1270)
What's better than a single LED? Lots of LEDs! A fun way to make a numeric display is to use a [4-digit 7-segment display](https://www.adafruit.com/category/37_103). LED matrices like these are 'multiplexed' - so to control all the seven-segment LEDs you need 14 pins....
In Stock
[Buy Now](https://www.adafruit.com/product/1270)
[Related Guides to the Product](https://learn.adafruit.com/products/1270/guides)
### Small 1.2" 8x8 Ultra Bright White LED Matrix + Backpack
[Small 1.2" 8x8 Ultra Bright White LED Matrix + Backpack](https://www.adafruit.com/product/1614)
What's better than a single LED? Lots of LEDs! A fun way to make a small display is to use an [8x8 matrix](https://www.adafruit.com/category/37_88) or a [4-digit 7-segment display](https://www.adafruit.com/category/37_103). Matrices like these are...
In Stock
[Buy Now](https://www.adafruit.com/product/1614)
[Related Guides to the Product](https://learn.adafruit.com/products/1614/guides)
### Adafruit Small 1.2" 8x8 LED Matrix w/I2C Backpack - Pure Green
[Adafruit Small 1.2" 8x8 LED Matrix w/I2C Backpack - Pure Green](https://www.adafruit.com/product/1632)
What's better than a single LED? Lots of LEDs! A fun way to make a small display is to use an [8x8 matrix](https://www.adafruit.com/category/37_88) or a [4-digit 7-segment display](https://www.adafruit.com/category/37_103). Matrices like these are...
In Stock
[Buy Now](https://www.adafruit.com/product/1632)
[Related Guides to the Product](https://learn.adafruit.com/products/1632/guides)
### Adafruit Mini 0.8" 8x8 LED Matrix w/I2C Backpack - Pure Green
[Adafruit Mini 0.8" 8x8 LED Matrix w/I2C Backpack - Pure Green](https://www.adafruit.com/product/1633)
What's better than a single LED? Lots of LEDs! A fun way to make a small display is to use an [8x8 matrix](https://www.adafruit.com/category/37_88) or a [4-digit 7-segment display](https://www.adafruit.com/category/37_103). Matrices like these are...
In Stock
[Buy Now](https://www.adafruit.com/product/1633)
[Related Guides to the Product](https://learn.adafruit.com/products/1633/guides)
### Bi-Color (Red/Green) 24-Bar Bargraph w/I2C Backpack Kit
[Bi-Color (Red/Green) 24-Bar Bargraph w/I2C Backpack Kit](https://www.adafruit.com/product/1721)
What's better than a single LED? Lots of LEDs! A fun way to make a small linear display is to use two 12-bar Bi-color bar-graphs. However, this LED bargraph is 'multiplexed' - so to control all the 48 LEDs you need a lot of pins.
Out of Stock
[Buy Now](https://www.adafruit.com/product/1721)
[Related Guides to the Product](https://learn.adafruit.com/products/1721/guides)
### Small 1.2" 8x8 Ultra Bright Square Amber LED Matrix + Backpack
[Small 1.2" 8x8 Ultra Bright Square Amber LED Matrix + Backpack](https://www.adafruit.com/product/1854)
What's better than a single LED? Lots of LEDs! Matrices like these are 'multiplexed' - so to control 64 LEDs you need 16 pins. That's a lot of pins, and there are [driver chips like the MAX7219](//www.adafruit.com/products/453) that can control a matrix for you but...
In Stock
[Buy Now](https://www.adafruit.com/product/1854)
[Related Guides to the Product](https://learn.adafruit.com/products/1854/guides)
### Small 1.2" 8x8 Ultra Bright Square Yellow LED Matrix + Backpack
[Small 1.2" 8x8 Ultra Bright Square Yellow LED Matrix + Backpack](https://www.adafruit.com/product/1855)
What's better than a single LED? Lots of LEDs! Matrices like these are 'multiplexed' - so to control 64 LEDs you need 16 pins. That's a lot of pins, and there are [driver chips like the MAX7219](//www.adafruit.com/products/453) that can control a matrix for you but...
In Stock
[Buy Now](https://www.adafruit.com/product/1855)
[Related Guides to the Product](https://learn.adafruit.com/products/1855/guides)
### Small 1.2" 8x8 Bright Square Pure Green LED Matrix + Backpack
[Small 1.2" 8x8 Bright Square Pure Green LED Matrix + Backpack](https://www.adafruit.com/product/1856)
What's better than a single LED? Lots of LEDs! Matrices like these are 'multiplexed' - so to control 64 LEDs you need 16 pins. That's a lot of pins, and there are [driver chips like the MAX7219](//www.adafruit.com/products/453) that can control a matrix for you but...
In Stock
[Buy Now](https://www.adafruit.com/product/1856)
[Related Guides to the Product](https://learn.adafruit.com/products/1856/guides)
### Small 1.2" 8x8 Ultra Bright Square White LED Matrix + Backpack
[Small 1.2" 8x8 Ultra Bright Square White LED Matrix + Backpack](https://www.adafruit.com/product/1857)
What's better than a single LED? Lots of LEDs! Matrices like these are 'multiplexed' - so to control 64 LEDs you need 16 pins. That's a lot of pins, and there are [driver chips like the MAX7219](//www.adafruit.com/products/453) that can control a matrix for you but...
In Stock
[Buy Now](https://www.adafruit.com/product/1857)
[Related Guides to the Product](https://learn.adafruit.com/products/1857/guides)
### Adafruit 14-segment LED Alphanumeric Backpack - STEMMA QT
[Adafruit 14-segment LED Alphanumeric Backpack - STEMMA QT](https://www.adafruit.com/product/1910)
By popular request, you can now get our 14-segment LED backpacks without the LEDs! These backpacks feature an HT16K33 I2C LED driver, they're simple and easy to use - you can use [our very nice library for the backpacks to...](https://github.com/adafruit/Adafruit-LED-Backpack-Library)
In Stock
[Buy Now](https://www.adafruit.com/product/1910)
[Related Guides to the Product](https://learn.adafruit.com/products/1910/guides)
### Quad Alphanumeric Display - Red 0.54" Digits w/ I2C Backpack
[Quad Alphanumeric Display - Red 0.54" Digits w/ I2C Backpack](https://www.adafruit.com/product/1911)
Display, elegantly, 012345678 or 9! Gaze, hypnotized, at ABCDEFGHIJKLM - well it can display the whole alphabet. You get the point. This is a nice, bright alphanumeric display that shows letters and numbers in a beautiful red hue. It's super bright and designed for viewing from distances...
In Stock
[Buy Now](https://www.adafruit.com/product/1911)
[Related Guides to the Product](https://learn.adafruit.com/products/1911/guides)
### Quad Alphanumeric Display - Blue 0.54" Digits w/ I2C Backpack
[Quad Alphanumeric Display - Blue 0.54" Digits w/ I2C Backpack](https://www.adafruit.com/product/1912)
Display, elegantly, 012345678 or 9! Gaze, hypnotized, at ABCDEFGHIJKLM - well it can display the whole alphabet. You get the point. This is a nice, bright alphanumeric display that shows letters and numbers in a beautiful blue hue. It's super bright and designed for viewing from distances...
In Stock
[Buy Now](https://www.adafruit.com/product/1912)
[Related Guides to the Product](https://learn.adafruit.com/products/1912/guides)
### 16x8 1.2" LED Matrix + Backpack - Ultra Bright Round Green LEDs
[16x8 1.2" LED Matrix + Backpack - Ultra Bright Round Green LEDs](https://www.adafruit.com/product/2035)
What's better than a single LED? Lots of LEDs! And what's better than lots of LEDs? **TWO TIMES AS MANY LEDS!!!**
With the 16x8 LED Matrix Backpack we've doubled your project's matrix capacity by making it super easy to get two separate 8x8 matrices onto...
In Stock
[Buy Now](https://www.adafruit.com/product/2035)
[Related Guides to the Product](https://learn.adafruit.com/products/2035/guides)
### 16x8 1.2" LED Matrix+Backpack UltraBright Round YellowGreen LEDs
[16x8 1.2" LED Matrix+Backpack UltraBright Round YellowGreen LEDs](https://www.adafruit.com/product/2036)
What's better than a single LED? Lots of LEDs! And what's better than lots of LEDs? **TWO TIMES AS MANY LEDS!!!**
With the 16x8 LED Matrix Backpack we've doubled your project's matrix capacity by making it super easy to get two separate 8x8 matrices onto...
In Stock
[Buy Now](https://www.adafruit.com/product/2036)
[Related Guides to the Product](https://learn.adafruit.com/products/2036/guides)
### 16x8 1.2" LED Matrix + Backpack - Ultra Bright Round Red LEDs
[16x8 1.2" LED Matrix + Backpack - Ultra Bright Round Red LEDs](https://www.adafruit.com/product/2037)
What's better than a single LED? Lots of LEDs! And what's better than lots of LEDs? **TWO TIMES AS MANY LEDS!!!**
With the 16x8 LED Matrix Backpack we've doubled your project's matrix capacity by making it super easy to get two separate 8x8 matrices onto...
In Stock
[Buy Now](https://www.adafruit.com/product/2037)
[Related Guides to the Product](https://learn.adafruit.com/products/2037/guides)
### 16x8 1.2" LED Matrix + Backpack - Ultra Bright Round White LEDs
[16x8 1.2" LED Matrix + Backpack - Ultra Bright Round White LEDs](https://www.adafruit.com/product/2038)
What's better than a single LED? Lots of LEDs! And what's better than lots of LEDs? **TWO TIMES AS MANY LEDS!!!**
With the 16x8 LED Matrix Backpack we've doubled your project's matrix capacity by making it super easy to get two separate 8x8 matrices onto...
In Stock
[Buy Now](https://www.adafruit.com/product/2038)
[Related Guides to the Product](https://learn.adafruit.com/products/2038/guides)
### 16x8 1.2" LED Matrix + Backpack - Ultra Bright Round Blue LEDs
[16x8 1.2" LED Matrix + Backpack - Ultra Bright Round Blue LEDs](https://www.adafruit.com/product/2039)
What's better than a single LED? Lots of LEDs! And what's better than lots of LEDs? **TWO TIMES AS MANY LEDS!!!**
With the 16x8 LED Matrix Backpack we've doubled your project's matrix capacity by making it super easy to get two separate 8x8 matrices onto...
In Stock
[Buy Now](https://www.adafruit.com/product/2039)
[Related Guides to the Product](https://learn.adafruit.com/products/2039/guides)
### 16x8 1.2" LED Matrix + Backpack - Ultra Bright Square Blue LEDs
[16x8 1.2" LED Matrix + Backpack - Ultra Bright Square Blue LEDs](https://www.adafruit.com/product/2040)
What's better than a single LED? Lots of LEDs! And what's better than lots of LEDs? **TWO TIMES AS MANY LEDS!!!**
With the 16x8 LED Matrix Backpack we've doubled your project's matrix capacity by making it super easy to get two separate 8x8 matrices onto...
In Stock
[Buy Now](https://www.adafruit.com/product/2040)
[Related Guides to the Product](https://learn.adafruit.com/products/2040/guides)
### 16x8 1.2" LED Matrix + Backpack - Ultra Bright Square Amber LEDs
[16x8 1.2" LED Matrix + Backpack - Ultra Bright Square Amber LEDs](https://www.adafruit.com/product/2041)
What's better than a single LED? Lots of LEDs! And what's better than lots of LEDs? **TWO TIMES AS MANY LEDS!!!**
With the 16x8 LED Matrix Backpack we've doubled your project's matrix capacity by making it super easy to get two separate 8x8 matrices onto...
In Stock
[Buy Now](https://www.adafruit.com/product/2041)
[Related Guides to the Product](https://learn.adafruit.com/products/2041/guides)
### 16x8 1.2" LED Matrix + Backpack - Ultra Bright Square Green LEDs
[16x8 1.2" LED Matrix + Backpack - Ultra Bright Square Green LEDs](https://www.adafruit.com/product/2042)
What's better than a single LED? Lots of LEDs! And what's better than lots of LEDs? **TWO TIMES AS MANY LEDS!!!**
With the 16x8 LED Matrix Backpack we've doubled your project's matrix capacity by making it super easy to get two separate 8x8 matrices onto...
In Stock
[Buy Now](https://www.adafruit.com/product/2042)
[Related Guides to the Product](https://learn.adafruit.com/products/2042/guides)
### 16x8 1.2" LED Matrix + Backpack -Ultra Bright Square Yellow LEDs
[16x8 1.2" LED Matrix + Backpack -Ultra Bright Square Yellow LEDs](https://www.adafruit.com/product/2043)
What's better than a single LED? Lots of LEDs! And what's better than lots of LEDs? **TWO TIMES AS MANY LEDS!!!**
With the 16x8 LED Matrix Backpack we've doubled your project's matrix capacity by making it super easy to get two separate 8x8 matrices onto...
In Stock
[Buy Now](https://www.adafruit.com/product/2043)
[Related Guides to the Product](https://learn.adafruit.com/products/2043/guides)
### 16x8 1.2" LED Matrix + Backpack - Ultra Bright Square White LEDs
[16x8 1.2" LED Matrix + Backpack - Ultra Bright Square White LEDs](https://www.adafruit.com/product/2044)
What's better than a single LED? Lots of LEDs! And what's better than lots of LEDs? **TWO TIMES AS MANY LEDS!!!**
With the 16x8 LED Matrix Backpack we've doubled your project's matrix capacity by making it super easy to get two separate 8x8 matrices onto...
In Stock
[Buy Now](https://www.adafruit.com/product/2044)
[Related Guides to the Product](https://learn.adafruit.com/products/2044/guides)
### 16x8 1.2" LED Matrix + Backpack-Ultra Bright Round Orange LEDs
[16x8 1.2" LED Matrix + Backpack-Ultra Bright Round Orange LEDs](https://www.adafruit.com/product/2052)
What's better than a single LED? Lots of LEDs! And what's better than lots of LEDs? **TWO TIMES AS MANY LEDS!!!**
With the 16x8 LED Matrix Backpack we've doubled your project's matrix capacity by making it super easy to get two separate 8x8 matrices onto...
In Stock
[Buy Now](https://www.adafruit.com/product/2052)
[Related Guides to the Product](https://learn.adafruit.com/products/2052/guides)
### 16x8 1.2" LED Matrices+Backpack Round LEDs in Various Colors
[16x8 1.2" LED Matrices+Backpack Round LEDs in Various Colors](https://www.adafruit.com/product/2054)
What's better than a single LED? Lots of LEDs! And what's better than lots of LEDs? **TWO TIMES AS MANY LEDS!!!**
With the 16x8 LED Matrix Backpack we've doubled your project's matrix capacity by making it super easy to get two separate 8x8 matrices onto...
Out of Stock
[Buy Now](https://www.adafruit.com/product/2054)
[Related Guides to the Product](https://learn.adafruit.com/products/2054/guides)
### Adafruit 8x16 LED Matrix FeatherWing w/o Matrices
[Adafruit 8x16 LED Matrix FeatherWing w/o Matrices](https://www.adafruit.com/product/3090)
You will chirp with delight when you see how easy it is to make your very own 8x16 LED matrix display for any Feather. At 0.8" square, the little [8x8 matrices](https://www.adafruit.com/new/?q=8x8%20miniature%20LED%20matrix&) have everything a big LED matrix has,...
Out of Stock
[Buy Now](https://www.adafruit.com/product/3090)
[Related Guides to the Product](https://learn.adafruit.com/products/3090/guides)
### Adafruit 14-segment LED Alphanumeric backpack (same as P1910)
[Adafruit 14-segment LED Alphanumeric backpack (same as P1910)](https://www.adafruit.com/product/3322)
Just the backpack + 4pin header
No Longer Stocked
[Buy Now](https://www.adafruit.com/product/3322)
[Related Guides to the Product](https://learn.adafruit.com/products/3322/guides)
## Featured Products
### Adafruit Small 1.2" 8x8 LED Matrix w/I2C Backpack - Yellow-Green
[Adafruit Small 1.2" 8x8 LED Matrix w/I2C Backpack - Yellow-Green](https://www.adafruit.com/product/1051)
What's better than a single LED? Lots of LEDs! A fun way to make a small display is to use an [8x8 matrix](https://www.adafruit.com/category/37_88) or a [4-digit 7-segment display](https://www.adafruit.com/category/37_103). Matrices like these are...
In Stock
[Buy Now](https://www.adafruit.com/product/1051)
[Related Guides to the Product](https://learn.adafruit.com/products/1051/guides)
### Small 1.2" 8x8 Ultra Bright Square Blue LED Matrix + Backpack
[Small 1.2" 8x8 Ultra Bright Square Blue LED Matrix + Backpack](https://www.adafruit.com/product/1853)
What's better than a single LED? Lots of LEDs! Matrices like these are 'multiplexed' - so to control 64 LEDs you need 16 pins. That's a lot of pins, and there are [driver chips like the MAX7219](//www.adafruit.com/products/453) that can control a matrix for you but...
In Stock
[Buy Now](https://www.adafruit.com/product/1853)
[Related Guides to the Product](https://learn.adafruit.com/products/1853/guides)
## Related Guides
- [LED Backpack Displays on Raspberry Pi and BeagleBone Black](https://learn.adafruit.com/led-backpack-displays-on-raspberry-pi-and-beaglebone-black.md)
- [Animating Multiple LED Backpacks](https://learn.adafruit.com/animating-multiple-led-backpacks.md)
- [Arduino GPS Clock](https://learn.adafruit.com/arduino-clock.md)
- [Raspberry Pi Physical Dashboard](https://learn.adafruit.com/raspberry-pi-physical-dashboard.md)
- [CircuitPython Hardware: LED Backpacks & FeatherWings](https://learn.adafruit.com/micropython-hardware-led-backpacks-and-featherwings.md)
- [Matrix and 7-Segment LED Backpack with the Raspberry Pi](https://learn.adafruit.com/matrix-7-segment-led-backpack-with-the-raspberry-pi.md)
- [DIY Pocket LED Gamer - Tiny Tetris!](https://learn.adafruit.com/diy-3d-printed-handheld-pocket-game-tiny-tetris-snake.md)
- [RGB LED Matrix Cube with 25,000 LEDs](https://learn.adafruit.com/rgb-led-matrix-cube-for-pi.md)
- [Creating GIFs for SmartMatrix](https://learn.adafruit.com/creating-gifs-for-smartmatrix.md)
- [Adafruit CharliePlex LED Matrix Bonnet](https://learn.adafruit.com/adafruit-charlieplex-bonnet.md)
- [Connecting a 16x32 RGB LED Matrix Panel to a Raspberry Pi](https://learn.adafruit.com/connecting-a-16x32-rgb-led-matrix-panel-to-a-raspberry-pi.md)
- [MicroPython Displays: Drawing Text](https://learn.adafruit.com/micropython-displays-drawing-text.md)
- [Heart Rate Badge](https://learn.adafruit.com/heart-rate-badge.md)
- [16x24 LED Matrix](https://learn.adafruit.com/16x24-led-matrix.md)
- [Adafruit IS31FL3741](https://learn.adafruit.com/adafruit-is31fl3741.md)
---
# Source: https://learn.adafruit.com/adafruit-led-backpack/1-2-8x8-matrix-assembly.md
# Adafruit LED Backpacks
## Assembly
Danger:
When you buy a pack from Adafruit, it comes with the fully tested and assembled backpack as well as a 8x8 matrix in one of the colors we provide (say, red, yellow or green). You'll need to solder the matrix onto the backpack but its an easy task.

**WATCH OUT! THE MATRIX MUST BE INSTALLED THE RIGHT WAY!**
First look for the line of text on the side of the LED matrix

**WATCH OUT! THE MATRIX MUST BE INSTALLED THE RIGHT WAY!**
Find the corner of the backpack with a filled in dot. Make sure that the text on the side of the matrix is on the same side as the filled dot

**WATCH OUT! THE MATRIX MUST BE INSTALLED THE RIGHT WAY!**
Slide the matrix into the backpack and flip it over. Triple check that the text is on the same side as the **From Adafruit** text

Solder in all 16 pins
Then clip the matrix leads short


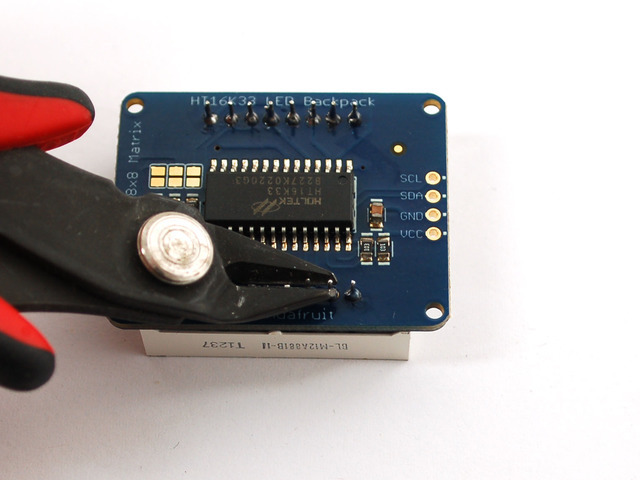
Now you're ready to wire it up to a microcontroller. We'll assume you want to use a 4pin header. You can also of course solder wires directly. Place a 4-pin piece of header with the LONG pins down into the breadboard.

Place the soldered backpack on top of the header.
Solder the four pins


That's it! now you're ready to run the firmware!
- [Previous Page](https://learn.adafruit.com/adafruit-led-backpack/1-2-8x8-matrix.md)
- [Next Page](https://learn.adafruit.com/adafruit-led-backpack/1-2-8x8-arduino-wiring-and-setup.md)
## Primary Products
### Adafruit Mini 8x8 LED Matrix w/I2C Backpack - Red
[Adafruit Mini 8x8 LED Matrix w/I2C Backpack - Red](https://www.adafruit.com/product/870)
What's better than a single LED? Lots of LEDs! A fun way to make a small display is to use an [8x8 matrix](https://www.adafruit.com/category/37_88) or a [4-digit 7-segment display](https://www.adafruit.com/category/37_103). Matrices like these are...
In Stock
[Buy Now](https://www.adafruit.com/product/870)
[Related Guides to the Product](https://learn.adafruit.com/products/870/guides)
### Adafruit Mini 8x8 LED Matrix w/I2C Backpack - Yellow
[Adafruit Mini 8x8 LED Matrix w/I2C Backpack - Yellow](https://www.adafruit.com/product/871)
What's better than a single LED? Lots of LEDs! A fun way to make a small display is to use an [8x8 matrix](https://www.adafruit.com/category/37_88) or a [4-digit 7-segment display](https://www.adafruit.com/category/37_103). Matrices like these are...
In Stock
[Buy Now](https://www.adafruit.com/product/871)
[Related Guides to the Product](https://learn.adafruit.com/products/871/guides)
### Adafruit Mini 0.8" 8x8 LED Matrix w/I2C Backpack - Yellow-Green
[Adafruit Mini 0.8" 8x8 LED Matrix w/I2C Backpack - Yellow-Green](https://www.adafruit.com/product/872)
What's better than a single LED? Lots of LEDs! A fun way to make a small display is to use an [8x8 matrix](https://www.adafruit.com/category/37_88) or a [4-digit 7-segment display](https://www.adafruit.com/category/37_103). Matrices like these are...
In Stock
[Buy Now](https://www.adafruit.com/product/872)
[Related Guides to the Product](https://learn.adafruit.com/products/872/guides)
### Adafruit 0.56" 4-Digit 7-Segment Display with I2C Backpack - Red
[Adafruit 0.56" 4-Digit 7-Segment Display with I2C Backpack - Red](https://www.adafruit.com/product/878)
What's better than a single LED? Lots of LEDs! A fun way to make a small display is to use an [8x8 matrix](https://www.adafruit.com/category/37_88) or a [4-digit 7-segment display](https://www.adafruit.com/category/37_103). Matrices like these are...
In Stock
[Buy Now](https://www.adafruit.com/product/878)
[Related Guides to the Product](https://learn.adafruit.com/products/878/guides)
### Adafruit 0.56" 4-Digit 7-Segment Display w/I2C Backpack - Yellow
[Adafruit 0.56" 4-Digit 7-Segment Display w/I2C Backpack - Yellow](https://www.adafruit.com/product/879)
What's better than a single LED? Lots of LEDs! A fun way to make a small display is to use an [8x8 matrix](https://www.adafruit.com/category/37_88) or a [4-digit 7-segment display](https://www.adafruit.com/category/37_103). Matrices like these are...
In Stock
[Buy Now](https://www.adafruit.com/product/879)
[Related Guides to the Product](https://learn.adafruit.com/products/879/guides)
### Adafruit 0.56" 4-Digit 7-Segment Display w/ I2C Backpack - Green
[Adafruit 0.56" 4-Digit 7-Segment Display w/ I2C Backpack - Green](https://www.adafruit.com/product/880)
What's better than a single LED? Lots of LEDs! A fun way to make a small display is to use an [8x8 matrix](https://www.adafruit.com/category/37_88) or a [4-digit 7-segment display](https://www.adafruit.com/category/37_103). Matrices like these are...
No Longer Stocked
[Buy Now](https://www.adafruit.com/product/880)
[Related Guides to the Product](https://learn.adafruit.com/products/880/guides)
### Adafruit 0.56" 4-Digit 7-Segment Display w/ I2C Backpack - Blue
[Adafruit 0.56" 4-Digit 7-Segment Display w/ I2C Backpack - Blue](https://www.adafruit.com/product/881)
What's better than a single LED? Lots of LEDs! A fun way to make a small display is to use an [8x8 matrix](https://www.adafruit.com/category/37_88) or a [4-digit 7-segment display](https://www.adafruit.com/category/37_103). Matrices like these are...
In Stock
[Buy Now](https://www.adafruit.com/product/881)
[Related Guides to the Product](https://learn.adafruit.com/products/881/guides)
### Adafruit Bicolor LED Square Pixel Matrix with I2C Backpack
[Adafruit Bicolor LED Square Pixel Matrix with I2C Backpack](https://www.adafruit.com/product/902)
What's better than a single LED? Lots of LEDs! A fun way to make a small colorful display is to use a [1.2" Bi-color 8x8 LED Matrix](http://www.adafruit.com/products/458). Matrices like these are 'multiplexed' - so to control all the 128 LEDs you need 24 pins....
In Stock
[Buy Now](https://www.adafruit.com/product/902)
[Related Guides to the Product](https://learn.adafruit.com/products/902/guides)
### Adafruit Mini 8x8 LED Matrix w/I2C Backpack - Blue
[Adafruit Mini 8x8 LED Matrix w/I2C Backpack - Blue](https://www.adafruit.com/product/959)
What's better than a single LED? Lots of LEDs! A fun way to make a small display is to use an [8x8 matrix](https://www.adafruit.com/category/37_88) or a [4-digit 7-segment display](https://www.adafruit.com/category/37_103). Matrices like these are...
In Stock
[Buy Now](https://www.adafruit.com/product/959)
[Related Guides to the Product](https://learn.adafruit.com/products/959/guides)
### Adafruit 0.56" 4-Digit 7-Segment Display w/I2C Backpack - White
[Adafruit 0.56" 4-Digit 7-Segment Display w/I2C Backpack - White](https://www.adafruit.com/product/1002)
What's better than a single LED? Lots of LEDs! A fun way to make a small display is to use an [8x8 matrix](https://www.adafruit.com/category/37_88) or a [4-digit 7-segment display](https://www.adafruit.com/category/37_103). Matrices like these are...
In Stock
[Buy Now](https://www.adafruit.com/product/1002)
[Related Guides to the Product](https://learn.adafruit.com/products/1002/guides)
### Adafruit 1.2" 8x8 LED Matrix Backpack
[Adafruit 1.2" 8x8 LED Matrix Backpack](https://www.adafruit.com/product/1048)
By popular request, you can now get our 8x8 LED backpacks without the LEDs! These backpacks feature an HT16K33 I2C LED driver, they're simple and easy to use - you can use [our very nice library for the backpacks to...](https://github.com/adafruit/Adafruit-LED-Backpack-Library)
In Stock
[Buy Now](https://www.adafruit.com/product/1048)
[Related Guides to the Product](https://learn.adafruit.com/products/1048/guides)
### Adafruit Small 1.2" 8x8 LED Matrix w/I2C Backpack - Red
[Adafruit Small 1.2" 8x8 LED Matrix w/I2C Backpack - Red](https://www.adafruit.com/product/1049)
What's better than a single LED? Lots of LEDs! A fun way to make a small display is to use an [8x8 matrix](https://www.adafruit.com/category/37_88) or a [4-digit 7-segment display](https://www.adafruit.com/category/37_103). Matrices like these are...
In Stock
[Buy Now](https://www.adafruit.com/product/1049)
[Related Guides to the Product](https://learn.adafruit.com/products/1049/guides)
### Adafruit Small 1.2" 8x8 LED Matrix w/I2C Backpack - Yellow
[Adafruit Small 1.2" 8x8 LED Matrix w/I2C Backpack - Yellow](https://www.adafruit.com/product/1050)
What's better than a single LED? Lots of LEDs! A fun way to make a small display is to use an [8x8 matrix](https://www.adafruit.com/category/37_88) or a [4-digit 7-segment display](https://www.adafruit.com/category/37_103). Matrices like these are...
In Stock
[Buy Now](https://www.adafruit.com/product/1050)
[Related Guides to the Product](https://learn.adafruit.com/products/1050/guides)
### Adafruit Small 1.2" 8x8 LED Matrix w/I2C Backpack - Blue
[Adafruit Small 1.2" 8x8 LED Matrix w/I2C Backpack - Blue](https://www.adafruit.com/product/1052)
What's better than a single LED? Lots of LEDs! A fun way to make a small display is to use an [8x8 matrix](https://www.adafruit.com/category/37_88) or a [4-digit 7-segment display](https://www.adafruit.com/category/37_103). Matrices like these are...
In Stock
[Buy Now](https://www.adafruit.com/product/1052)
[Related Guides to the Product](https://learn.adafruit.com/products/1052/guides)
### Adafruit Mini 8x8 LED Matrix w/I2C Backpack - Ultra Bright White
[Adafruit Mini 8x8 LED Matrix w/I2C Backpack - Ultra Bright White](https://www.adafruit.com/product/1080)
What's better than a single LED? Lots of LEDs! A fun way to make a small display is to use an [8x8 matrix](https://www.adafruit.com/category/37_88) or a [4-digit 7-segment display](https://www.adafruit.com/category/37_103). Matrices like these are...
In Stock
[Buy Now](https://www.adafruit.com/product/1080)
[Related Guides to the Product](https://learn.adafruit.com/products/1080/guides)
### Adafruit 1.2" 4-Digit 7-Segment Display w/I2C Backpack - Green
[Adafruit 1.2" 4-Digit 7-Segment Display w/I2C Backpack - Green](https://www.adafruit.com/product/1268)
What's better than a single LED? Lots of LEDs! A fun way to make a numeric display is to use a [4-digit 7-segment display](https://www.adafruit.com/category/37_103). LED matrices like these are 'multiplexed' - so to control all the seven-segment LEDs you need 14 pins....
No Longer Stocked
[Buy Now](https://www.adafruit.com/product/1268)
[Related Guides to the Product](https://learn.adafruit.com/products/1268/guides)
### Adafruit 1.2" 4-Digit 7-Segment Display w/I2C Backpack - Yellow
[Adafruit 1.2" 4-Digit 7-Segment Display w/I2C Backpack - Yellow](https://www.adafruit.com/product/1269)
What's better than a single LED? Lots of LEDs! A fun way to make a numeric display is to use a [4-digit 7-segment display](https://www.adafruit.com/category/37_103). LED matrices like these are 'multiplexed' - so to control all the seven-segment LEDs you need 14 pins....
In Stock
[Buy Now](https://www.adafruit.com/product/1269)
[Related Guides to the Product](https://learn.adafruit.com/products/1269/guides)
### Adafruit 1.2" 4-Digit 7-Segment Display w/I2C Backpack - Red
[Adafruit 1.2" 4-Digit 7-Segment Display w/I2C Backpack - Red](https://www.adafruit.com/product/1270)
What's better than a single LED? Lots of LEDs! A fun way to make a numeric display is to use a [4-digit 7-segment display](https://www.adafruit.com/category/37_103). LED matrices like these are 'multiplexed' - so to control all the seven-segment LEDs you need 14 pins....
In Stock
[Buy Now](https://www.adafruit.com/product/1270)
[Related Guides to the Product](https://learn.adafruit.com/products/1270/guides)
### Small 1.2" 8x8 Ultra Bright White LED Matrix + Backpack
[Small 1.2" 8x8 Ultra Bright White LED Matrix + Backpack](https://www.adafruit.com/product/1614)
What's better than a single LED? Lots of LEDs! A fun way to make a small display is to use an [8x8 matrix](https://www.adafruit.com/category/37_88) or a [4-digit 7-segment display](https://www.adafruit.com/category/37_103). Matrices like these are...
In Stock
[Buy Now](https://www.adafruit.com/product/1614)
[Related Guides to the Product](https://learn.adafruit.com/products/1614/guides)
### Adafruit Small 1.2" 8x8 LED Matrix w/I2C Backpack - Pure Green
[Adafruit Small 1.2" 8x8 LED Matrix w/I2C Backpack - Pure Green](https://www.adafruit.com/product/1632)
What's better than a single LED? Lots of LEDs! A fun way to make a small display is to use an [8x8 matrix](https://www.adafruit.com/category/37_88) or a [4-digit 7-segment display](https://www.adafruit.com/category/37_103). Matrices like these are...
In Stock
[Buy Now](https://www.adafruit.com/product/1632)
[Related Guides to the Product](https://learn.adafruit.com/products/1632/guides)
### Adafruit Mini 0.8" 8x8 LED Matrix w/I2C Backpack - Pure Green
[Adafruit Mini 0.8" 8x8 LED Matrix w/I2C Backpack - Pure Green](https://www.adafruit.com/product/1633)
What's better than a single LED? Lots of LEDs! A fun way to make a small display is to use an [8x8 matrix](https://www.adafruit.com/category/37_88) or a [4-digit 7-segment display](https://www.adafruit.com/category/37_103). Matrices like these are...
In Stock
[Buy Now](https://www.adafruit.com/product/1633)
[Related Guides to the Product](https://learn.adafruit.com/products/1633/guides)
### Bi-Color (Red/Green) 24-Bar Bargraph w/I2C Backpack Kit
[Bi-Color (Red/Green) 24-Bar Bargraph w/I2C Backpack Kit](https://www.adafruit.com/product/1721)
What's better than a single LED? Lots of LEDs! A fun way to make a small linear display is to use two 12-bar Bi-color bar-graphs. However, this LED bargraph is 'multiplexed' - so to control all the 48 LEDs you need a lot of pins.
Out of Stock
[Buy Now](https://www.adafruit.com/product/1721)
[Related Guides to the Product](https://learn.adafruit.com/products/1721/guides)
### Small 1.2" 8x8 Ultra Bright Square Amber LED Matrix + Backpack
[Small 1.2" 8x8 Ultra Bright Square Amber LED Matrix + Backpack](https://www.adafruit.com/product/1854)
What's better than a single LED? Lots of LEDs! Matrices like these are 'multiplexed' - so to control 64 LEDs you need 16 pins. That's a lot of pins, and there are [driver chips like the MAX7219](//www.adafruit.com/products/453) that can control a matrix for you but...
In Stock
[Buy Now](https://www.adafruit.com/product/1854)
[Related Guides to the Product](https://learn.adafruit.com/products/1854/guides)
### Small 1.2" 8x8 Ultra Bright Square Yellow LED Matrix + Backpack
[Small 1.2" 8x8 Ultra Bright Square Yellow LED Matrix + Backpack](https://www.adafruit.com/product/1855)
What's better than a single LED? Lots of LEDs! Matrices like these are 'multiplexed' - so to control 64 LEDs you need 16 pins. That's a lot of pins, and there are [driver chips like the MAX7219](//www.adafruit.com/products/453) that can control a matrix for you but...
In Stock
[Buy Now](https://www.adafruit.com/product/1855)
[Related Guides to the Product](https://learn.adafruit.com/products/1855/guides)
### Small 1.2" 8x8 Bright Square Pure Green LED Matrix + Backpack
[Small 1.2" 8x8 Bright Square Pure Green LED Matrix + Backpack](https://www.adafruit.com/product/1856)
What's better than a single LED? Lots of LEDs! Matrices like these are 'multiplexed' - so to control 64 LEDs you need 16 pins. That's a lot of pins, and there are [driver chips like the MAX7219](//www.adafruit.com/products/453) that can control a matrix for you but...
In Stock
[Buy Now](https://www.adafruit.com/product/1856)
[Related Guides to the Product](https://learn.adafruit.com/products/1856/guides)
### Small 1.2" 8x8 Ultra Bright Square White LED Matrix + Backpack
[Small 1.2" 8x8 Ultra Bright Square White LED Matrix + Backpack](https://www.adafruit.com/product/1857)
What's better than a single LED? Lots of LEDs! Matrices like these are 'multiplexed' - so to control 64 LEDs you need 16 pins. That's a lot of pins, and there are [driver chips like the MAX7219](//www.adafruit.com/products/453) that can control a matrix for you but...
In Stock
[Buy Now](https://www.adafruit.com/product/1857)
[Related Guides to the Product](https://learn.adafruit.com/products/1857/guides)
### Adafruit 14-segment LED Alphanumeric Backpack - STEMMA QT
[Adafruit 14-segment LED Alphanumeric Backpack - STEMMA QT](https://www.adafruit.com/product/1910)
By popular request, you can now get our 14-segment LED backpacks without the LEDs! These backpacks feature an HT16K33 I2C LED driver, they're simple and easy to use - you can use [our very nice library for the backpacks to...](https://github.com/adafruit/Adafruit-LED-Backpack-Library)
In Stock
[Buy Now](https://www.adafruit.com/product/1910)
[Related Guides to the Product](https://learn.adafruit.com/products/1910/guides)
### Quad Alphanumeric Display - Red 0.54" Digits w/ I2C Backpack
[Quad Alphanumeric Display - Red 0.54" Digits w/ I2C Backpack](https://www.adafruit.com/product/1911)
Display, elegantly, 012345678 or 9! Gaze, hypnotized, at ABCDEFGHIJKLM - well it can display the whole alphabet. You get the point. This is a nice, bright alphanumeric display that shows letters and numbers in a beautiful red hue. It's super bright and designed for viewing from distances...
In Stock
[Buy Now](https://www.adafruit.com/product/1911)
[Related Guides to the Product](https://learn.adafruit.com/products/1911/guides)
### Quad Alphanumeric Display - Blue 0.54" Digits w/ I2C Backpack
[Quad Alphanumeric Display - Blue 0.54" Digits w/ I2C Backpack](https://www.adafruit.com/product/1912)
Display, elegantly, 012345678 or 9! Gaze, hypnotized, at ABCDEFGHIJKLM - well it can display the whole alphabet. You get the point. This is a nice, bright alphanumeric display that shows letters and numbers in a beautiful blue hue. It's super bright and designed for viewing from distances...
In Stock
[Buy Now](https://www.adafruit.com/product/1912)
[Related Guides to the Product](https://learn.adafruit.com/products/1912/guides)
### 16x8 1.2" LED Matrix + Backpack - Ultra Bright Round Green LEDs
[16x8 1.2" LED Matrix + Backpack - Ultra Bright Round Green LEDs](https://www.adafruit.com/product/2035)
What's better than a single LED? Lots of LEDs! And what's better than lots of LEDs? **TWO TIMES AS MANY LEDS!!!**
With the 16x8 LED Matrix Backpack we've doubled your project's matrix capacity by making it super easy to get two separate 8x8 matrices onto...
In Stock
[Buy Now](https://www.adafruit.com/product/2035)
[Related Guides to the Product](https://learn.adafruit.com/products/2035/guides)
### 16x8 1.2" LED Matrix+Backpack UltraBright Round YellowGreen LEDs
[16x8 1.2" LED Matrix+Backpack UltraBright Round YellowGreen LEDs](https://www.adafruit.com/product/2036)
What's better than a single LED? Lots of LEDs! And what's better than lots of LEDs? **TWO TIMES AS MANY LEDS!!!**
With the 16x8 LED Matrix Backpack we've doubled your project's matrix capacity by making it super easy to get two separate 8x8 matrices onto...
In Stock
[Buy Now](https://www.adafruit.com/product/2036)
[Related Guides to the Product](https://learn.adafruit.com/products/2036/guides)
### 16x8 1.2" LED Matrix + Backpack - Ultra Bright Round Red LEDs
[16x8 1.2" LED Matrix + Backpack - Ultra Bright Round Red LEDs](https://www.adafruit.com/product/2037)
What's better than a single LED? Lots of LEDs! And what's better than lots of LEDs? **TWO TIMES AS MANY LEDS!!!**
With the 16x8 LED Matrix Backpack we've doubled your project's matrix capacity by making it super easy to get two separate 8x8 matrices onto...
In Stock
[Buy Now](https://www.adafruit.com/product/2037)
[Related Guides to the Product](https://learn.adafruit.com/products/2037/guides)
### 16x8 1.2" LED Matrix + Backpack - Ultra Bright Round White LEDs
[16x8 1.2" LED Matrix + Backpack - Ultra Bright Round White LEDs](https://www.adafruit.com/product/2038)
What's better than a single LED? Lots of LEDs! And what's better than lots of LEDs? **TWO TIMES AS MANY LEDS!!!**
With the 16x8 LED Matrix Backpack we've doubled your project's matrix capacity by making it super easy to get two separate 8x8 matrices onto...
In Stock
[Buy Now](https://www.adafruit.com/product/2038)
[Related Guides to the Product](https://learn.adafruit.com/products/2038/guides)
### 16x8 1.2" LED Matrix + Backpack - Ultra Bright Round Blue LEDs
[16x8 1.2" LED Matrix + Backpack - Ultra Bright Round Blue LEDs](https://www.adafruit.com/product/2039)
What's better than a single LED? Lots of LEDs! And what's better than lots of LEDs? **TWO TIMES AS MANY LEDS!!!**
With the 16x8 LED Matrix Backpack we've doubled your project's matrix capacity by making it super easy to get two separate 8x8 matrices onto...
In Stock
[Buy Now](https://www.adafruit.com/product/2039)
[Related Guides to the Product](https://learn.adafruit.com/products/2039/guides)
### 16x8 1.2" LED Matrix + Backpack - Ultra Bright Square Blue LEDs
[16x8 1.2" LED Matrix + Backpack - Ultra Bright Square Blue LEDs](https://www.adafruit.com/product/2040)
What's better than a single LED? Lots of LEDs! And what's better than lots of LEDs? **TWO TIMES AS MANY LEDS!!!**
With the 16x8 LED Matrix Backpack we've doubled your project's matrix capacity by making it super easy to get two separate 8x8 matrices onto...
In Stock
[Buy Now](https://www.adafruit.com/product/2040)
[Related Guides to the Product](https://learn.adafruit.com/products/2040/guides)
### 16x8 1.2" LED Matrix + Backpack - Ultra Bright Square Amber LEDs
[16x8 1.2" LED Matrix + Backpack - Ultra Bright Square Amber LEDs](https://www.adafruit.com/product/2041)
What's better than a single LED? Lots of LEDs! And what's better than lots of LEDs? **TWO TIMES AS MANY LEDS!!!**
With the 16x8 LED Matrix Backpack we've doubled your project's matrix capacity by making it super easy to get two separate 8x8 matrices onto...
In Stock
[Buy Now](https://www.adafruit.com/product/2041)
[Related Guides to the Product](https://learn.adafruit.com/products/2041/guides)
### 16x8 1.2" LED Matrix + Backpack - Ultra Bright Square Green LEDs
[16x8 1.2" LED Matrix + Backpack - Ultra Bright Square Green LEDs](https://www.adafruit.com/product/2042)
What's better than a single LED? Lots of LEDs! And what's better than lots of LEDs? **TWO TIMES AS MANY LEDS!!!**
With the 16x8 LED Matrix Backpack we've doubled your project's matrix capacity by making it super easy to get two separate 8x8 matrices onto...
In Stock
[Buy Now](https://www.adafruit.com/product/2042)
[Related Guides to the Product](https://learn.adafruit.com/products/2042/guides)
### 16x8 1.2" LED Matrix + Backpack -Ultra Bright Square Yellow LEDs
[16x8 1.2" LED Matrix + Backpack -Ultra Bright Square Yellow LEDs](https://www.adafruit.com/product/2043)
What's better than a single LED? Lots of LEDs! And what's better than lots of LEDs? **TWO TIMES AS MANY LEDS!!!**
With the 16x8 LED Matrix Backpack we've doubled your project's matrix capacity by making it super easy to get two separate 8x8 matrices onto...
In Stock
[Buy Now](https://www.adafruit.com/product/2043)
[Related Guides to the Product](https://learn.adafruit.com/products/2043/guides)
### 16x8 1.2" LED Matrix + Backpack - Ultra Bright Square White LEDs
[16x8 1.2" LED Matrix + Backpack - Ultra Bright Square White LEDs](https://www.adafruit.com/product/2044)
What's better than a single LED? Lots of LEDs! And what's better than lots of LEDs? **TWO TIMES AS MANY LEDS!!!**
With the 16x8 LED Matrix Backpack we've doubled your project's matrix capacity by making it super easy to get two separate 8x8 matrices onto...
In Stock
[Buy Now](https://www.adafruit.com/product/2044)
[Related Guides to the Product](https://learn.adafruit.com/products/2044/guides)
### 16x8 1.2" LED Matrix + Backpack-Ultra Bright Round Orange LEDs
[16x8 1.2" LED Matrix + Backpack-Ultra Bright Round Orange LEDs](https://www.adafruit.com/product/2052)
What's better than a single LED? Lots of LEDs! And what's better than lots of LEDs? **TWO TIMES AS MANY LEDS!!!**
With the 16x8 LED Matrix Backpack we've doubled your project's matrix capacity by making it super easy to get two separate 8x8 matrices onto...
In Stock
[Buy Now](https://www.adafruit.com/product/2052)
[Related Guides to the Product](https://learn.adafruit.com/products/2052/guides)
### 16x8 1.2" LED Matrices+Backpack Round LEDs in Various Colors
[16x8 1.2" LED Matrices+Backpack Round LEDs in Various Colors](https://www.adafruit.com/product/2054)
What's better than a single LED? Lots of LEDs! And what's better than lots of LEDs? **TWO TIMES AS MANY LEDS!!!**
With the 16x8 LED Matrix Backpack we've doubled your project's matrix capacity by making it super easy to get two separate 8x8 matrices onto...
Out of Stock
[Buy Now](https://www.adafruit.com/product/2054)
[Related Guides to the Product](https://learn.adafruit.com/products/2054/guides)
### Adafruit 8x16 LED Matrix FeatherWing w/o Matrices
[Adafruit 8x16 LED Matrix FeatherWing w/o Matrices](https://www.adafruit.com/product/3090)
You will chirp with delight when you see how easy it is to make your very own 8x16 LED matrix display for any Feather. At 0.8" square, the little [8x8 matrices](https://www.adafruit.com/new/?q=8x8%20miniature%20LED%20matrix&) have everything a big LED matrix has,...
Out of Stock
[Buy Now](https://www.adafruit.com/product/3090)
[Related Guides to the Product](https://learn.adafruit.com/products/3090/guides)
### Adafruit 14-segment LED Alphanumeric backpack (same as P1910)
[Adafruit 14-segment LED Alphanumeric backpack (same as P1910)](https://www.adafruit.com/product/3322)
Just the backpack + 4pin header
No Longer Stocked
[Buy Now](https://www.adafruit.com/product/3322)
[Related Guides to the Product](https://learn.adafruit.com/products/3322/guides)
## Featured Products
### Adafruit Small 1.2" 8x8 LED Matrix w/I2C Backpack - Yellow-Green
[Adafruit Small 1.2" 8x8 LED Matrix w/I2C Backpack - Yellow-Green](https://www.adafruit.com/product/1051)
What's better than a single LED? Lots of LEDs! A fun way to make a small display is to use an [8x8 matrix](https://www.adafruit.com/category/37_88) or a [4-digit 7-segment display](https://www.adafruit.com/category/37_103). Matrices like these are...
In Stock
[Buy Now](https://www.adafruit.com/product/1051)
[Related Guides to the Product](https://learn.adafruit.com/products/1051/guides)
### Small 1.2" 8x8 Ultra Bright Square Blue LED Matrix + Backpack
[Small 1.2" 8x8 Ultra Bright Square Blue LED Matrix + Backpack](https://www.adafruit.com/product/1853)
What's better than a single LED? Lots of LEDs! Matrices like these are 'multiplexed' - so to control 64 LEDs you need 16 pins. That's a lot of pins, and there are [driver chips like the MAX7219](//www.adafruit.com/products/453) that can control a matrix for you but...
In Stock
[Buy Now](https://www.adafruit.com/product/1853)
[Related Guides to the Product](https://learn.adafruit.com/products/1853/guides)
## Related Guides
- [LED Backpack Displays on Raspberry Pi and BeagleBone Black](https://learn.adafruit.com/led-backpack-displays-on-raspberry-pi-and-beaglebone-black.md)
- [Animating Multiple LED Backpacks](https://learn.adafruit.com/animating-multiple-led-backpacks.md)
- [Arduino GPS Clock](https://learn.adafruit.com/arduino-clock.md)
- [Raspberry Pi Physical Dashboard](https://learn.adafruit.com/raspberry-pi-physical-dashboard.md)
- [CircuitPython Hardware: LED Backpacks & FeatherWings](https://learn.adafruit.com/micropython-hardware-led-backpacks-and-featherwings.md)
- [Matrix and 7-Segment LED Backpack with the Raspberry Pi](https://learn.adafruit.com/matrix-7-segment-led-backpack-with-the-raspberry-pi.md)
- [DIY Pocket LED Gamer - Tiny Tetris!](https://learn.adafruit.com/diy-3d-printed-handheld-pocket-game-tiny-tetris-snake.md)
- [RGB LED Matrix Cube with 25,000 LEDs](https://learn.adafruit.com/rgb-led-matrix-cube-for-pi.md)
- [Creating GIFs for SmartMatrix](https://learn.adafruit.com/creating-gifs-for-smartmatrix.md)
- [Adafruit CharliePlex LED Matrix Bonnet](https://learn.adafruit.com/adafruit-charlieplex-bonnet.md)
- [Connecting a 16x32 RGB LED Matrix Panel to a Raspberry Pi](https://learn.adafruit.com/connecting-a-16x32-rgb-led-matrix-panel-to-a-raspberry-pi.md)
- [MicroPython Displays: Drawing Text](https://learn.adafruit.com/micropython-displays-drawing-text.md)
- [Heart Rate Badge](https://learn.adafruit.com/heart-rate-badge.md)
- [16x24 LED Matrix](https://learn.adafruit.com/16x24-led-matrix.md)
- [Adafruit IS31FL3741](https://learn.adafruit.com/adafruit-is31fl3741.md)
---
# Source: https://learn.adafruit.com/adafruit-led-backpack/1-2-8x8-matrix.md
# Adafruit LED Backpacks
## 1.2" 8x8 Matrix
This version of the LED backpack is designed for the 1.2" 8x8 matrices. They measure only 1.2"x1.2" so its a shame to use a massive array of chips to control it. This backpack solves the annoyance of using 16 pins or a bunch of chips by having an I2C constant-current matrix controller sit neatly on the back of the PCB. The controller chip takes care of everything, drawing all 64 LEDs in the background. All you have to do is write data to it using the 2-pin I2C interface. There are two address select pins so you can select one of 8 addresses to control up to 8 of these on a single 2-pin I2C bus (as well as whatever other I2C chips or sensors you like). The driver chip can 'dim' the entire display from 1/16 brightness up to full brightness in 1/16th steps. It cannot dim individual LEDs, only the entire display at once.

- [Previous Page](https://learn.adafruit.com/adafruit-led-backpack/overview.md)
- [Next Page](https://learn.adafruit.com/adafruit-led-backpack/1-2-8x8-matrix-assembly.md)
## Primary Products
### Adafruit Mini 8x8 LED Matrix w/I2C Backpack - Red
[Adafruit Mini 8x8 LED Matrix w/I2C Backpack - Red](https://www.adafruit.com/product/870)
What's better than a single LED? Lots of LEDs! A fun way to make a small display is to use an [8x8 matrix](https://www.adafruit.com/category/37_88) or a [4-digit 7-segment display](https://www.adafruit.com/category/37_103). Matrices like these are...
In Stock
[Buy Now](https://www.adafruit.com/product/870)
[Related Guides to the Product](https://learn.adafruit.com/products/870/guides)
### Adafruit Mini 8x8 LED Matrix w/I2C Backpack - Yellow
[Adafruit Mini 8x8 LED Matrix w/I2C Backpack - Yellow](https://www.adafruit.com/product/871)
What's better than a single LED? Lots of LEDs! A fun way to make a small display is to use an [8x8 matrix](https://www.adafruit.com/category/37_88) or a [4-digit 7-segment display](https://www.adafruit.com/category/37_103). Matrices like these are...
In Stock
[Buy Now](https://www.adafruit.com/product/871)
[Related Guides to the Product](https://learn.adafruit.com/products/871/guides)
### Adafruit Mini 0.8" 8x8 LED Matrix w/I2C Backpack - Yellow-Green
[Adafruit Mini 0.8" 8x8 LED Matrix w/I2C Backpack - Yellow-Green](https://www.adafruit.com/product/872)
What's better than a single LED? Lots of LEDs! A fun way to make a small display is to use an [8x8 matrix](https://www.adafruit.com/category/37_88) or a [4-digit 7-segment display](https://www.adafruit.com/category/37_103). Matrices like these are...
In Stock
[Buy Now](https://www.adafruit.com/product/872)
[Related Guides to the Product](https://learn.adafruit.com/products/872/guides)
### Adafruit 0.56" 4-Digit 7-Segment Display with I2C Backpack - Red
[Adafruit 0.56" 4-Digit 7-Segment Display with I2C Backpack - Red](https://www.adafruit.com/product/878)
What's better than a single LED? Lots of LEDs! A fun way to make a small display is to use an [8x8 matrix](https://www.adafruit.com/category/37_88) or a [4-digit 7-segment display](https://www.adafruit.com/category/37_103). Matrices like these are...
In Stock
[Buy Now](https://www.adafruit.com/product/878)
[Related Guides to the Product](https://learn.adafruit.com/products/878/guides)
### Adafruit 0.56" 4-Digit 7-Segment Display w/I2C Backpack - Yellow
[Adafruit 0.56" 4-Digit 7-Segment Display w/I2C Backpack - Yellow](https://www.adafruit.com/product/879)
What's better than a single LED? Lots of LEDs! A fun way to make a small display is to use an [8x8 matrix](https://www.adafruit.com/category/37_88) or a [4-digit 7-segment display](https://www.adafruit.com/category/37_103). Matrices like these are...
In Stock
[Buy Now](https://www.adafruit.com/product/879)
[Related Guides to the Product](https://learn.adafruit.com/products/879/guides)
### Adafruit 0.56" 4-Digit 7-Segment Display w/ I2C Backpack - Green
[Adafruit 0.56" 4-Digit 7-Segment Display w/ I2C Backpack - Green](https://www.adafruit.com/product/880)
What's better than a single LED? Lots of LEDs! A fun way to make a small display is to use an [8x8 matrix](https://www.adafruit.com/category/37_88) or a [4-digit 7-segment display](https://www.adafruit.com/category/37_103). Matrices like these are...
No Longer Stocked
[Buy Now](https://www.adafruit.com/product/880)
[Related Guides to the Product](https://learn.adafruit.com/products/880/guides)
### Adafruit 0.56" 4-Digit 7-Segment Display w/ I2C Backpack - Blue
[Adafruit 0.56" 4-Digit 7-Segment Display w/ I2C Backpack - Blue](https://www.adafruit.com/product/881)
What's better than a single LED? Lots of LEDs! A fun way to make a small display is to use an [8x8 matrix](https://www.adafruit.com/category/37_88) or a [4-digit 7-segment display](https://www.adafruit.com/category/37_103). Matrices like these are...
In Stock
[Buy Now](https://www.adafruit.com/product/881)
[Related Guides to the Product](https://learn.adafruit.com/products/881/guides)
### Adafruit Bicolor LED Square Pixel Matrix with I2C Backpack
[Adafruit Bicolor LED Square Pixel Matrix with I2C Backpack](https://www.adafruit.com/product/902)
What's better than a single LED? Lots of LEDs! A fun way to make a small colorful display is to use a [1.2" Bi-color 8x8 LED Matrix](http://www.adafruit.com/products/458). Matrices like these are 'multiplexed' - so to control all the 128 LEDs you need 24 pins....
In Stock
[Buy Now](https://www.adafruit.com/product/902)
[Related Guides to the Product](https://learn.adafruit.com/products/902/guides)
### Adafruit Mini 8x8 LED Matrix w/I2C Backpack - Blue
[Adafruit Mini 8x8 LED Matrix w/I2C Backpack - Blue](https://www.adafruit.com/product/959)
What's better than a single LED? Lots of LEDs! A fun way to make a small display is to use an [8x8 matrix](https://www.adafruit.com/category/37_88) or a [4-digit 7-segment display](https://www.adafruit.com/category/37_103). Matrices like these are...
In Stock
[Buy Now](https://www.adafruit.com/product/959)
[Related Guides to the Product](https://learn.adafruit.com/products/959/guides)
### Adafruit 0.56" 4-Digit 7-Segment Display w/I2C Backpack - White
[Adafruit 0.56" 4-Digit 7-Segment Display w/I2C Backpack - White](https://www.adafruit.com/product/1002)
What's better than a single LED? Lots of LEDs! A fun way to make a small display is to use an [8x8 matrix](https://www.adafruit.com/category/37_88) or a [4-digit 7-segment display](https://www.adafruit.com/category/37_103). Matrices like these are...
In Stock
[Buy Now](https://www.adafruit.com/product/1002)
[Related Guides to the Product](https://learn.adafruit.com/products/1002/guides)
### Adafruit 1.2" 8x8 LED Matrix Backpack
[Adafruit 1.2" 8x8 LED Matrix Backpack](https://www.adafruit.com/product/1048)
By popular request, you can now get our 8x8 LED backpacks without the LEDs! These backpacks feature an HT16K33 I2C LED driver, they're simple and easy to use - you can use [our very nice library for the backpacks to...](https://github.com/adafruit/Adafruit-LED-Backpack-Library)
In Stock
[Buy Now](https://www.adafruit.com/product/1048)
[Related Guides to the Product](https://learn.adafruit.com/products/1048/guides)
### Adafruit Small 1.2" 8x8 LED Matrix w/I2C Backpack - Red
[Adafruit Small 1.2" 8x8 LED Matrix w/I2C Backpack - Red](https://www.adafruit.com/product/1049)
What's better than a single LED? Lots of LEDs! A fun way to make a small display is to use an [8x8 matrix](https://www.adafruit.com/category/37_88) or a [4-digit 7-segment display](https://www.adafruit.com/category/37_103). Matrices like these are...
In Stock
[Buy Now](https://www.adafruit.com/product/1049)
[Related Guides to the Product](https://learn.adafruit.com/products/1049/guides)
### Adafruit Small 1.2" 8x8 LED Matrix w/I2C Backpack - Yellow
[Adafruit Small 1.2" 8x8 LED Matrix w/I2C Backpack - Yellow](https://www.adafruit.com/product/1050)
What's better than a single LED? Lots of LEDs! A fun way to make a small display is to use an [8x8 matrix](https://www.adafruit.com/category/37_88) or a [4-digit 7-segment display](https://www.adafruit.com/category/37_103). Matrices like these are...
In Stock
[Buy Now](https://www.adafruit.com/product/1050)
[Related Guides to the Product](https://learn.adafruit.com/products/1050/guides)
### Adafruit Small 1.2" 8x8 LED Matrix w/I2C Backpack - Blue
[Adafruit Small 1.2" 8x8 LED Matrix w/I2C Backpack - Blue](https://www.adafruit.com/product/1052)
What's better than a single LED? Lots of LEDs! A fun way to make a small display is to use an [8x8 matrix](https://www.adafruit.com/category/37_88) or a [4-digit 7-segment display](https://www.adafruit.com/category/37_103). Matrices like these are...
In Stock
[Buy Now](https://www.adafruit.com/product/1052)
[Related Guides to the Product](https://learn.adafruit.com/products/1052/guides)
### Adafruit Mini 8x8 LED Matrix w/I2C Backpack - Ultra Bright White
[Adafruit Mini 8x8 LED Matrix w/I2C Backpack - Ultra Bright White](https://www.adafruit.com/product/1080)
What's better than a single LED? Lots of LEDs! A fun way to make a small display is to use an [8x8 matrix](https://www.adafruit.com/category/37_88) or a [4-digit 7-segment display](https://www.adafruit.com/category/37_103). Matrices like these are...
In Stock
[Buy Now](https://www.adafruit.com/product/1080)
[Related Guides to the Product](https://learn.adafruit.com/products/1080/guides)
### Adafruit 1.2" 4-Digit 7-Segment Display w/I2C Backpack - Green
[Adafruit 1.2" 4-Digit 7-Segment Display w/I2C Backpack - Green](https://www.adafruit.com/product/1268)
What's better than a single LED? Lots of LEDs! A fun way to make a numeric display is to use a [4-digit 7-segment display](https://www.adafruit.com/category/37_103). LED matrices like these are 'multiplexed' - so to control all the seven-segment LEDs you need 14 pins....
No Longer Stocked
[Buy Now](https://www.adafruit.com/product/1268)
[Related Guides to the Product](https://learn.adafruit.com/products/1268/guides)
### Adafruit 1.2" 4-Digit 7-Segment Display w/I2C Backpack - Yellow
[Adafruit 1.2" 4-Digit 7-Segment Display w/I2C Backpack - Yellow](https://www.adafruit.com/product/1269)
What's better than a single LED? Lots of LEDs! A fun way to make a numeric display is to use a [4-digit 7-segment display](https://www.adafruit.com/category/37_103). LED matrices like these are 'multiplexed' - so to control all the seven-segment LEDs you need 14 pins....
In Stock
[Buy Now](https://www.adafruit.com/product/1269)
[Related Guides to the Product](https://learn.adafruit.com/products/1269/guides)
### Adafruit 1.2" 4-Digit 7-Segment Display w/I2C Backpack - Red
[Adafruit 1.2" 4-Digit 7-Segment Display w/I2C Backpack - Red](https://www.adafruit.com/product/1270)
What's better than a single LED? Lots of LEDs! A fun way to make a numeric display is to use a [4-digit 7-segment display](https://www.adafruit.com/category/37_103). LED matrices like these are 'multiplexed' - so to control all the seven-segment LEDs you need 14 pins....
In Stock
[Buy Now](https://www.adafruit.com/product/1270)
[Related Guides to the Product](https://learn.adafruit.com/products/1270/guides)
### Small 1.2" 8x8 Ultra Bright White LED Matrix + Backpack
[Small 1.2" 8x8 Ultra Bright White LED Matrix + Backpack](https://www.adafruit.com/product/1614)
What's better than a single LED? Lots of LEDs! A fun way to make a small display is to use an [8x8 matrix](https://www.adafruit.com/category/37_88) or a [4-digit 7-segment display](https://www.adafruit.com/category/37_103). Matrices like these are...
In Stock
[Buy Now](https://www.adafruit.com/product/1614)
[Related Guides to the Product](https://learn.adafruit.com/products/1614/guides)
### Adafruit Small 1.2" 8x8 LED Matrix w/I2C Backpack - Pure Green
[Adafruit Small 1.2" 8x8 LED Matrix w/I2C Backpack - Pure Green](https://www.adafruit.com/product/1632)
What's better than a single LED? Lots of LEDs! A fun way to make a small display is to use an [8x8 matrix](https://www.adafruit.com/category/37_88) or a [4-digit 7-segment display](https://www.adafruit.com/category/37_103). Matrices like these are...
In Stock
[Buy Now](https://www.adafruit.com/product/1632)
[Related Guides to the Product](https://learn.adafruit.com/products/1632/guides)
### Adafruit Mini 0.8" 8x8 LED Matrix w/I2C Backpack - Pure Green
[Adafruit Mini 0.8" 8x8 LED Matrix w/I2C Backpack - Pure Green](https://www.adafruit.com/product/1633)
What's better than a single LED? Lots of LEDs! A fun way to make a small display is to use an [8x8 matrix](https://www.adafruit.com/category/37_88) or a [4-digit 7-segment display](https://www.adafruit.com/category/37_103). Matrices like these are...
In Stock
[Buy Now](https://www.adafruit.com/product/1633)
[Related Guides to the Product](https://learn.adafruit.com/products/1633/guides)
### Bi-Color (Red/Green) 24-Bar Bargraph w/I2C Backpack Kit
[Bi-Color (Red/Green) 24-Bar Bargraph w/I2C Backpack Kit](https://www.adafruit.com/product/1721)
What's better than a single LED? Lots of LEDs! A fun way to make a small linear display is to use two 12-bar Bi-color bar-graphs. However, this LED bargraph is 'multiplexed' - so to control all the 48 LEDs you need a lot of pins.
Out of Stock
[Buy Now](https://www.adafruit.com/product/1721)
[Related Guides to the Product](https://learn.adafruit.com/products/1721/guides)
### Small 1.2" 8x8 Ultra Bright Square Amber LED Matrix + Backpack
[Small 1.2" 8x8 Ultra Bright Square Amber LED Matrix + Backpack](https://www.adafruit.com/product/1854)
What's better than a single LED? Lots of LEDs! Matrices like these are 'multiplexed' - so to control 64 LEDs you need 16 pins. That's a lot of pins, and there are [driver chips like the MAX7219](//www.adafruit.com/products/453) that can control a matrix for you but...
In Stock
[Buy Now](https://www.adafruit.com/product/1854)
[Related Guides to the Product](https://learn.adafruit.com/products/1854/guides)
### Small 1.2" 8x8 Ultra Bright Square Yellow LED Matrix + Backpack
[Small 1.2" 8x8 Ultra Bright Square Yellow LED Matrix + Backpack](https://www.adafruit.com/product/1855)
What's better than a single LED? Lots of LEDs! Matrices like these are 'multiplexed' - so to control 64 LEDs you need 16 pins. That's a lot of pins, and there are [driver chips like the MAX7219](//www.adafruit.com/products/453) that can control a matrix for you but...
In Stock
[Buy Now](https://www.adafruit.com/product/1855)
[Related Guides to the Product](https://learn.adafruit.com/products/1855/guides)
### Small 1.2" 8x8 Bright Square Pure Green LED Matrix + Backpack
[Small 1.2" 8x8 Bright Square Pure Green LED Matrix + Backpack](https://www.adafruit.com/product/1856)
What's better than a single LED? Lots of LEDs! Matrices like these are 'multiplexed' - so to control 64 LEDs you need 16 pins. That's a lot of pins, and there are [driver chips like the MAX7219](//www.adafruit.com/products/453) that can control a matrix for you but...
In Stock
[Buy Now](https://www.adafruit.com/product/1856)
[Related Guides to the Product](https://learn.adafruit.com/products/1856/guides)
### Small 1.2" 8x8 Ultra Bright Square White LED Matrix + Backpack
[Small 1.2" 8x8 Ultra Bright Square White LED Matrix + Backpack](https://www.adafruit.com/product/1857)
What's better than a single LED? Lots of LEDs! Matrices like these are 'multiplexed' - so to control 64 LEDs you need 16 pins. That's a lot of pins, and there are [driver chips like the MAX7219](//www.adafruit.com/products/453) that can control a matrix for you but...
In Stock
[Buy Now](https://www.adafruit.com/product/1857)
[Related Guides to the Product](https://learn.adafruit.com/products/1857/guides)
### Adafruit 14-segment LED Alphanumeric Backpack - STEMMA QT
[Adafruit 14-segment LED Alphanumeric Backpack - STEMMA QT](https://www.adafruit.com/product/1910)
By popular request, you can now get our 14-segment LED backpacks without the LEDs! These backpacks feature an HT16K33 I2C LED driver, they're simple and easy to use - you can use [our very nice library for the backpacks to...](https://github.com/adafruit/Adafruit-LED-Backpack-Library)
In Stock
[Buy Now](https://www.adafruit.com/product/1910)
[Related Guides to the Product](https://learn.adafruit.com/products/1910/guides)
### Quad Alphanumeric Display - Red 0.54" Digits w/ I2C Backpack
[Quad Alphanumeric Display - Red 0.54" Digits w/ I2C Backpack](https://www.adafruit.com/product/1911)
Display, elegantly, 012345678 or 9! Gaze, hypnotized, at ABCDEFGHIJKLM - well it can display the whole alphabet. You get the point. This is a nice, bright alphanumeric display that shows letters and numbers in a beautiful red hue. It's super bright and designed for viewing from distances...
In Stock
[Buy Now](https://www.adafruit.com/product/1911)
[Related Guides to the Product](https://learn.adafruit.com/products/1911/guides)
### Quad Alphanumeric Display - Blue 0.54" Digits w/ I2C Backpack
[Quad Alphanumeric Display - Blue 0.54" Digits w/ I2C Backpack](https://www.adafruit.com/product/1912)
Display, elegantly, 012345678 or 9! Gaze, hypnotized, at ABCDEFGHIJKLM - well it can display the whole alphabet. You get the point. This is a nice, bright alphanumeric display that shows letters and numbers in a beautiful blue hue. It's super bright and designed for viewing from distances...
In Stock
[Buy Now](https://www.adafruit.com/product/1912)
[Related Guides to the Product](https://learn.adafruit.com/products/1912/guides)
### 16x8 1.2" LED Matrix + Backpack - Ultra Bright Round Green LEDs
[16x8 1.2" LED Matrix + Backpack - Ultra Bright Round Green LEDs](https://www.adafruit.com/product/2035)
What's better than a single LED? Lots of LEDs! And what's better than lots of LEDs? **TWO TIMES AS MANY LEDS!!!**
With the 16x8 LED Matrix Backpack we've doubled your project's matrix capacity by making it super easy to get two separate 8x8 matrices onto...
In Stock
[Buy Now](https://www.adafruit.com/product/2035)
[Related Guides to the Product](https://learn.adafruit.com/products/2035/guides)
### 16x8 1.2" LED Matrix+Backpack UltraBright Round YellowGreen LEDs
[16x8 1.2" LED Matrix+Backpack UltraBright Round YellowGreen LEDs](https://www.adafruit.com/product/2036)
What's better than a single LED? Lots of LEDs! And what's better than lots of LEDs? **TWO TIMES AS MANY LEDS!!!**
With the 16x8 LED Matrix Backpack we've doubled your project's matrix capacity by making it super easy to get two separate 8x8 matrices onto...
In Stock
[Buy Now](https://www.adafruit.com/product/2036)
[Related Guides to the Product](https://learn.adafruit.com/products/2036/guides)
### 16x8 1.2" LED Matrix + Backpack - Ultra Bright Round Red LEDs
[16x8 1.2" LED Matrix + Backpack - Ultra Bright Round Red LEDs](https://www.adafruit.com/product/2037)
What's better than a single LED? Lots of LEDs! And what's better than lots of LEDs? **TWO TIMES AS MANY LEDS!!!**
With the 16x8 LED Matrix Backpack we've doubled your project's matrix capacity by making it super easy to get two separate 8x8 matrices onto...
In Stock
[Buy Now](https://www.adafruit.com/product/2037)
[Related Guides to the Product](https://learn.adafruit.com/products/2037/guides)
### 16x8 1.2" LED Matrix + Backpack - Ultra Bright Round White LEDs
[16x8 1.2" LED Matrix + Backpack - Ultra Bright Round White LEDs](https://www.adafruit.com/product/2038)
What's better than a single LED? Lots of LEDs! And what's better than lots of LEDs? **TWO TIMES AS MANY LEDS!!!**
With the 16x8 LED Matrix Backpack we've doubled your project's matrix capacity by making it super easy to get two separate 8x8 matrices onto...
In Stock
[Buy Now](https://www.adafruit.com/product/2038)
[Related Guides to the Product](https://learn.adafruit.com/products/2038/guides)
### 16x8 1.2" LED Matrix + Backpack - Ultra Bright Round Blue LEDs
[16x8 1.2" LED Matrix + Backpack - Ultra Bright Round Blue LEDs](https://www.adafruit.com/product/2039)
What's better than a single LED? Lots of LEDs! And what's better than lots of LEDs? **TWO TIMES AS MANY LEDS!!!**
With the 16x8 LED Matrix Backpack we've doubled your project's matrix capacity by making it super easy to get two separate 8x8 matrices onto...
In Stock
[Buy Now](https://www.adafruit.com/product/2039)
[Related Guides to the Product](https://learn.adafruit.com/products/2039/guides)
### 16x8 1.2" LED Matrix + Backpack - Ultra Bright Square Blue LEDs
[16x8 1.2" LED Matrix + Backpack - Ultra Bright Square Blue LEDs](https://www.adafruit.com/product/2040)
What's better than a single LED? Lots of LEDs! And what's better than lots of LEDs? **TWO TIMES AS MANY LEDS!!!**
With the 16x8 LED Matrix Backpack we've doubled your project's matrix capacity by making it super easy to get two separate 8x8 matrices onto...
In Stock
[Buy Now](https://www.adafruit.com/product/2040)
[Related Guides to the Product](https://learn.adafruit.com/products/2040/guides)
### 16x8 1.2" LED Matrix + Backpack - Ultra Bright Square Amber LEDs
[16x8 1.2" LED Matrix + Backpack - Ultra Bright Square Amber LEDs](https://www.adafruit.com/product/2041)
What's better than a single LED? Lots of LEDs! And what's better than lots of LEDs? **TWO TIMES AS MANY LEDS!!!**
With the 16x8 LED Matrix Backpack we've doubled your project's matrix capacity by making it super easy to get two separate 8x8 matrices onto...
In Stock
[Buy Now](https://www.adafruit.com/product/2041)
[Related Guides to the Product](https://learn.adafruit.com/products/2041/guides)
### 16x8 1.2" LED Matrix + Backpack - Ultra Bright Square Green LEDs
[16x8 1.2" LED Matrix + Backpack - Ultra Bright Square Green LEDs](https://www.adafruit.com/product/2042)
What's better than a single LED? Lots of LEDs! And what's better than lots of LEDs? **TWO TIMES AS MANY LEDS!!!**
With the 16x8 LED Matrix Backpack we've doubled your project's matrix capacity by making it super easy to get two separate 8x8 matrices onto...
In Stock
[Buy Now](https://www.adafruit.com/product/2042)
[Related Guides to the Product](https://learn.adafruit.com/products/2042/guides)
### 16x8 1.2" LED Matrix + Backpack -Ultra Bright Square Yellow LEDs
[16x8 1.2" LED Matrix + Backpack -Ultra Bright Square Yellow LEDs](https://www.adafruit.com/product/2043)
What's better than a single LED? Lots of LEDs! And what's better than lots of LEDs? **TWO TIMES AS MANY LEDS!!!**
With the 16x8 LED Matrix Backpack we've doubled your project's matrix capacity by making it super easy to get two separate 8x8 matrices onto...
In Stock
[Buy Now](https://www.adafruit.com/product/2043)
[Related Guides to the Product](https://learn.adafruit.com/products/2043/guides)
### 16x8 1.2" LED Matrix + Backpack - Ultra Bright Square White LEDs
[16x8 1.2" LED Matrix + Backpack - Ultra Bright Square White LEDs](https://www.adafruit.com/product/2044)
What's better than a single LED? Lots of LEDs! And what's better than lots of LEDs? **TWO TIMES AS MANY LEDS!!!**
With the 16x8 LED Matrix Backpack we've doubled your project's matrix capacity by making it super easy to get two separate 8x8 matrices onto...
In Stock
[Buy Now](https://www.adafruit.com/product/2044)
[Related Guides to the Product](https://learn.adafruit.com/products/2044/guides)
### 16x8 1.2" LED Matrix + Backpack-Ultra Bright Round Orange LEDs
[16x8 1.2" LED Matrix + Backpack-Ultra Bright Round Orange LEDs](https://www.adafruit.com/product/2052)
What's better than a single LED? Lots of LEDs! And what's better than lots of LEDs? **TWO TIMES AS MANY LEDS!!!**
With the 16x8 LED Matrix Backpack we've doubled your project's matrix capacity by making it super easy to get two separate 8x8 matrices onto...
In Stock
[Buy Now](https://www.adafruit.com/product/2052)
[Related Guides to the Product](https://learn.adafruit.com/products/2052/guides)
### 16x8 1.2" LED Matrices+Backpack Round LEDs in Various Colors
[16x8 1.2" LED Matrices+Backpack Round LEDs in Various Colors](https://www.adafruit.com/product/2054)
What's better than a single LED? Lots of LEDs! And what's better than lots of LEDs? **TWO TIMES AS MANY LEDS!!!**
With the 16x8 LED Matrix Backpack we've doubled your project's matrix capacity by making it super easy to get two separate 8x8 matrices onto...
Out of Stock
[Buy Now](https://www.adafruit.com/product/2054)
[Related Guides to the Product](https://learn.adafruit.com/products/2054/guides)
### Adafruit 8x16 LED Matrix FeatherWing w/o Matrices
[Adafruit 8x16 LED Matrix FeatherWing w/o Matrices](https://www.adafruit.com/product/3090)
You will chirp with delight when you see how easy it is to make your very own 8x16 LED matrix display for any Feather. At 0.8" square, the little [8x8 matrices](https://www.adafruit.com/new/?q=8x8%20miniature%20LED%20matrix&) have everything a big LED matrix has,...
Out of Stock
[Buy Now](https://www.adafruit.com/product/3090)
[Related Guides to the Product](https://learn.adafruit.com/products/3090/guides)
### Adafruit 14-segment LED Alphanumeric backpack (same as P1910)
[Adafruit 14-segment LED Alphanumeric backpack (same as P1910)](https://www.adafruit.com/product/3322)
Just the backpack + 4pin header
No Longer Stocked
[Buy Now](https://www.adafruit.com/product/3322)
[Related Guides to the Product](https://learn.adafruit.com/products/3322/guides)
## Featured Products
### Adafruit Small 1.2" 8x8 LED Matrix w/I2C Backpack - Yellow-Green
[Adafruit Small 1.2" 8x8 LED Matrix w/I2C Backpack - Yellow-Green](https://www.adafruit.com/product/1051)
What's better than a single LED? Lots of LEDs! A fun way to make a small display is to use an [8x8 matrix](https://www.adafruit.com/category/37_88) or a [4-digit 7-segment display](https://www.adafruit.com/category/37_103). Matrices like these are...
In Stock
[Buy Now](https://www.adafruit.com/product/1051)
[Related Guides to the Product](https://learn.adafruit.com/products/1051/guides)
### Small 1.2" 8x8 Ultra Bright Square Blue LED Matrix + Backpack
[Small 1.2" 8x8 Ultra Bright Square Blue LED Matrix + Backpack](https://www.adafruit.com/product/1853)
What's better than a single LED? Lots of LEDs! Matrices like these are 'multiplexed' - so to control 64 LEDs you need 16 pins. That's a lot of pins, and there are [driver chips like the MAX7219](//www.adafruit.com/products/453) that can control a matrix for you but...
In Stock
[Buy Now](https://www.adafruit.com/product/1853)
[Related Guides to the Product](https://learn.adafruit.com/products/1853/guides)
## Related Guides
- [LED Backpack Displays on Raspberry Pi and BeagleBone Black](https://learn.adafruit.com/led-backpack-displays-on-raspberry-pi-and-beaglebone-black.md)
- [Animating Multiple LED Backpacks](https://learn.adafruit.com/animating-multiple-led-backpacks.md)
- [Arduino GPS Clock](https://learn.adafruit.com/arduino-clock.md)
- [Raspberry Pi Physical Dashboard](https://learn.adafruit.com/raspberry-pi-physical-dashboard.md)
- [CircuitPython Hardware: LED Backpacks & FeatherWings](https://learn.adafruit.com/micropython-hardware-led-backpacks-and-featherwings.md)
- [Matrix and 7-Segment LED Backpack with the Raspberry Pi](https://learn.adafruit.com/matrix-7-segment-led-backpack-with-the-raspberry-pi.md)
- [DIY Pocket LED Gamer - Tiny Tetris!](https://learn.adafruit.com/diy-3d-printed-handheld-pocket-game-tiny-tetris-snake.md)
- [RGB LED Matrix Cube with 25,000 LEDs](https://learn.adafruit.com/rgb-led-matrix-cube-for-pi.md)
- [Creating GIFs for SmartMatrix](https://learn.adafruit.com/creating-gifs-for-smartmatrix.md)
- [Adafruit CharliePlex LED Matrix Bonnet](https://learn.adafruit.com/adafruit-charlieplex-bonnet.md)
- [Connecting a 16x32 RGB LED Matrix Panel to a Raspberry Pi](https://learn.adafruit.com/connecting-a-16x32-rgb-led-matrix-panel-to-a-raspberry-pi.md)
- [MicroPython Displays: Drawing Text](https://learn.adafruit.com/micropython-displays-drawing-text.md)
- [Heart Rate Badge](https://learn.adafruit.com/heart-rate-badge.md)
- [16x24 LED Matrix](https://learn.adafruit.com/16x24-led-matrix.md)
- [Adafruit IS31FL3741](https://learn.adafruit.com/adafruit-is31fl3741.md)
---
# Source: https://learn.adafruit.com/adafruit-led-backpack/1-2-8x8-python-wiring-and-setup.md
# Adafruit LED Backpacks
## Python Wiring and Setup
# Wiring
It's easy to use LED Matrices with Python and the [Adafruit CircuitPython HT16K33](https://github.com/adafruit/Adafruit_CircuitPython_HT16K33) library. This library allows you to easily write Python code to control the display.
We'll cover how to wire the LED Matrix to your Raspberry Pi. First assemble your LED Matrix.
Since there's _dozens_ of Linux computers/boards you can use we will show wiring for Raspberry Pi. For other platforms, [please visit the guide for CircuitPython on Linux to see whether your platform is supported](https://learn.adafruit.com/circuitpython-on-raspberrypi-linux).
Connect the LED Matrix as shown below to your Raspberry Pi.
- **Raspberry Pi 3.3V ** to ** LED Matrix VIN**
- **Raspberry Pi GND ** to **LED Matrix GND**
- **Raspberry Pi SCL ** to **LED Matrix SCL**
- **Raspberry Pi SDA ** to **LED Matrix SDA**

[Download Fritzing Object](https://cdn-learn.adafruit.com/assets/assets/000/087/061/original/raspberry-pi-1.2-8x8.fzz?1579283236)
# Setup
You'll need to install the Adafruit\_Blinka library that provides the CircuitPython support in Python. This may also require enabling I2C on your platform and verifying you are running Python 3. [Since each platform is a little different, and Linux changes often, please visit the CircuitPython on Linux guide to get your computer ready](https://learn.adafruit.com/circuitpython-on-raspberrypi-linux)!
## Python Installation of HT16K33 Library
Once that's done, from your command line run the following command:
- `pip3 install adafruit-circuitpython-ht16k33`
If your default Python is version 3 you may need to run 'pip' instead. Just make sure you aren't trying to use CircuitPython on Python 2.x, it isn't supported!
If that complains about pip3 not being installed, then run this first to install it:
- `sudo apt-get install python3-pip`
## Pillow Library
We also need PIL, the Python Imaging Library, to allow using text with custom fonts. There are several system libraries that PIL relies on, so installing via a package manager is the easiest way to bring in everything:
- `sudo apt-get install python3-pil`
That's it. You should be ready to go.
- [Previous Page](https://learn.adafruit.com/adafruit-led-backpack/1-2-8x8-circuitpython-wiring-and-setup.md)
- [Next Page](https://learn.adafruit.com/adafruit-led-backpack/1-2-8x8-circuitpython-and-python-usage.md)
## Primary Products
### Adafruit Mini 8x8 LED Matrix w/I2C Backpack - Red
[Adafruit Mini 8x8 LED Matrix w/I2C Backpack - Red](https://www.adafruit.com/product/870)
What's better than a single LED? Lots of LEDs! A fun way to make a small display is to use an [8x8 matrix](https://www.adafruit.com/category/37_88) or a [4-digit 7-segment display](https://www.adafruit.com/category/37_103). Matrices like these are...
In Stock
[Buy Now](https://www.adafruit.com/product/870)
[Related Guides to the Product](https://learn.adafruit.com/products/870/guides)
### Adafruit Mini 8x8 LED Matrix w/I2C Backpack - Yellow
[Adafruit Mini 8x8 LED Matrix w/I2C Backpack - Yellow](https://www.adafruit.com/product/871)
What's better than a single LED? Lots of LEDs! A fun way to make a small display is to use an [8x8 matrix](https://www.adafruit.com/category/37_88) or a [4-digit 7-segment display](https://www.adafruit.com/category/37_103). Matrices like these are...
In Stock
[Buy Now](https://www.adafruit.com/product/871)
[Related Guides to the Product](https://learn.adafruit.com/products/871/guides)
### Adafruit Mini 0.8" 8x8 LED Matrix w/I2C Backpack - Yellow-Green
[Adafruit Mini 0.8" 8x8 LED Matrix w/I2C Backpack - Yellow-Green](https://www.adafruit.com/product/872)
What's better than a single LED? Lots of LEDs! A fun way to make a small display is to use an [8x8 matrix](https://www.adafruit.com/category/37_88) or a [4-digit 7-segment display](https://www.adafruit.com/category/37_103). Matrices like these are...
In Stock
[Buy Now](https://www.adafruit.com/product/872)
[Related Guides to the Product](https://learn.adafruit.com/products/872/guides)
### Adafruit 0.56" 4-Digit 7-Segment Display with I2C Backpack - Red
[Adafruit 0.56" 4-Digit 7-Segment Display with I2C Backpack - Red](https://www.adafruit.com/product/878)
What's better than a single LED? Lots of LEDs! A fun way to make a small display is to use an [8x8 matrix](https://www.adafruit.com/category/37_88) or a [4-digit 7-segment display](https://www.adafruit.com/category/37_103). Matrices like these are...
In Stock
[Buy Now](https://www.adafruit.com/product/878)
[Related Guides to the Product](https://learn.adafruit.com/products/878/guides)
### Adafruit 0.56" 4-Digit 7-Segment Display w/I2C Backpack - Yellow
[Adafruit 0.56" 4-Digit 7-Segment Display w/I2C Backpack - Yellow](https://www.adafruit.com/product/879)
What's better than a single LED? Lots of LEDs! A fun way to make a small display is to use an [8x8 matrix](https://www.adafruit.com/category/37_88) or a [4-digit 7-segment display](https://www.adafruit.com/category/37_103). Matrices like these are...
In Stock
[Buy Now](https://www.adafruit.com/product/879)
[Related Guides to the Product](https://learn.adafruit.com/products/879/guides)
### Adafruit 0.56" 4-Digit 7-Segment Display w/ I2C Backpack - Green
[Adafruit 0.56" 4-Digit 7-Segment Display w/ I2C Backpack - Green](https://www.adafruit.com/product/880)
What's better than a single LED? Lots of LEDs! A fun way to make a small display is to use an [8x8 matrix](https://www.adafruit.com/category/37_88) or a [4-digit 7-segment display](https://www.adafruit.com/category/37_103). Matrices like these are...
No Longer Stocked
[Buy Now](https://www.adafruit.com/product/880)
[Related Guides to the Product](https://learn.adafruit.com/products/880/guides)
### Adafruit 0.56" 4-Digit 7-Segment Display w/ I2C Backpack - Blue
[Adafruit 0.56" 4-Digit 7-Segment Display w/ I2C Backpack - Blue](https://www.adafruit.com/product/881)
What's better than a single LED? Lots of LEDs! A fun way to make a small display is to use an [8x8 matrix](https://www.adafruit.com/category/37_88) or a [4-digit 7-segment display](https://www.adafruit.com/category/37_103). Matrices like these are...
In Stock
[Buy Now](https://www.adafruit.com/product/881)
[Related Guides to the Product](https://learn.adafruit.com/products/881/guides)
### Adafruit Bicolor LED Square Pixel Matrix with I2C Backpack
[Adafruit Bicolor LED Square Pixel Matrix with I2C Backpack](https://www.adafruit.com/product/902)
What's better than a single LED? Lots of LEDs! A fun way to make a small colorful display is to use a [1.2" Bi-color 8x8 LED Matrix](http://www.adafruit.com/products/458). Matrices like these are 'multiplexed' - so to control all the 128 LEDs you need 24 pins....
In Stock
[Buy Now](https://www.adafruit.com/product/902)
[Related Guides to the Product](https://learn.adafruit.com/products/902/guides)
### Adafruit Mini 8x8 LED Matrix w/I2C Backpack - Blue
[Adafruit Mini 8x8 LED Matrix w/I2C Backpack - Blue](https://www.adafruit.com/product/959)
What's better than a single LED? Lots of LEDs! A fun way to make a small display is to use an [8x8 matrix](https://www.adafruit.com/category/37_88) or a [4-digit 7-segment display](https://www.adafruit.com/category/37_103). Matrices like these are...
In Stock
[Buy Now](https://www.adafruit.com/product/959)
[Related Guides to the Product](https://learn.adafruit.com/products/959/guides)
### Adafruit 0.56" 4-Digit 7-Segment Display w/I2C Backpack - White
[Adafruit 0.56" 4-Digit 7-Segment Display w/I2C Backpack - White](https://www.adafruit.com/product/1002)
What's better than a single LED? Lots of LEDs! A fun way to make a small display is to use an [8x8 matrix](https://www.adafruit.com/category/37_88) or a [4-digit 7-segment display](https://www.adafruit.com/category/37_103). Matrices like these are...
In Stock
[Buy Now](https://www.adafruit.com/product/1002)
[Related Guides to the Product](https://learn.adafruit.com/products/1002/guides)
### Adafruit 1.2" 8x8 LED Matrix Backpack
[Adafruit 1.2" 8x8 LED Matrix Backpack](https://www.adafruit.com/product/1048)
By popular request, you can now get our 8x8 LED backpacks without the LEDs! These backpacks feature an HT16K33 I2C LED driver, they're simple and easy to use - you can use [our very nice library for the backpacks to...](https://github.com/adafruit/Adafruit-LED-Backpack-Library)
In Stock
[Buy Now](https://www.adafruit.com/product/1048)
[Related Guides to the Product](https://learn.adafruit.com/products/1048/guides)
### Adafruit Small 1.2" 8x8 LED Matrix w/I2C Backpack - Red
[Adafruit Small 1.2" 8x8 LED Matrix w/I2C Backpack - Red](https://www.adafruit.com/product/1049)
What's better than a single LED? Lots of LEDs! A fun way to make a small display is to use an [8x8 matrix](https://www.adafruit.com/category/37_88) or a [4-digit 7-segment display](https://www.adafruit.com/category/37_103). Matrices like these are...
In Stock
[Buy Now](https://www.adafruit.com/product/1049)
[Related Guides to the Product](https://learn.adafruit.com/products/1049/guides)
### Adafruit Small 1.2" 8x8 LED Matrix w/I2C Backpack - Yellow
[Adafruit Small 1.2" 8x8 LED Matrix w/I2C Backpack - Yellow](https://www.adafruit.com/product/1050)
What's better than a single LED? Lots of LEDs! A fun way to make a small display is to use an [8x8 matrix](https://www.adafruit.com/category/37_88) or a [4-digit 7-segment display](https://www.adafruit.com/category/37_103). Matrices like these are...
In Stock
[Buy Now](https://www.adafruit.com/product/1050)
[Related Guides to the Product](https://learn.adafruit.com/products/1050/guides)
### Adafruit Small 1.2" 8x8 LED Matrix w/I2C Backpack - Blue
[Adafruit Small 1.2" 8x8 LED Matrix w/I2C Backpack - Blue](https://www.adafruit.com/product/1052)
What's better than a single LED? Lots of LEDs! A fun way to make a small display is to use an [8x8 matrix](https://www.adafruit.com/category/37_88) or a [4-digit 7-segment display](https://www.adafruit.com/category/37_103). Matrices like these are...
In Stock
[Buy Now](https://www.adafruit.com/product/1052)
[Related Guides to the Product](https://learn.adafruit.com/products/1052/guides)
### Adafruit Mini 8x8 LED Matrix w/I2C Backpack - Ultra Bright White
[Adafruit Mini 8x8 LED Matrix w/I2C Backpack - Ultra Bright White](https://www.adafruit.com/product/1080)
What's better than a single LED? Lots of LEDs! A fun way to make a small display is to use an [8x8 matrix](https://www.adafruit.com/category/37_88) or a [4-digit 7-segment display](https://www.adafruit.com/category/37_103). Matrices like these are...
In Stock
[Buy Now](https://www.adafruit.com/product/1080)
[Related Guides to the Product](https://learn.adafruit.com/products/1080/guides)
### Adafruit 1.2" 4-Digit 7-Segment Display w/I2C Backpack - Green
[Adafruit 1.2" 4-Digit 7-Segment Display w/I2C Backpack - Green](https://www.adafruit.com/product/1268)
What's better than a single LED? Lots of LEDs! A fun way to make a numeric display is to use a [4-digit 7-segment display](https://www.adafruit.com/category/37_103). LED matrices like these are 'multiplexed' - so to control all the seven-segment LEDs you need 14 pins....
No Longer Stocked
[Buy Now](https://www.adafruit.com/product/1268)
[Related Guides to the Product](https://learn.adafruit.com/products/1268/guides)
### Adafruit 1.2" 4-Digit 7-Segment Display w/I2C Backpack - Yellow
[Adafruit 1.2" 4-Digit 7-Segment Display w/I2C Backpack - Yellow](https://www.adafruit.com/product/1269)
What's better than a single LED? Lots of LEDs! A fun way to make a numeric display is to use a [4-digit 7-segment display](https://www.adafruit.com/category/37_103). LED matrices like these are 'multiplexed' - so to control all the seven-segment LEDs you need 14 pins....
In Stock
[Buy Now](https://www.adafruit.com/product/1269)
[Related Guides to the Product](https://learn.adafruit.com/products/1269/guides)
### Adafruit 1.2" 4-Digit 7-Segment Display w/I2C Backpack - Red
[Adafruit 1.2" 4-Digit 7-Segment Display w/I2C Backpack - Red](https://www.adafruit.com/product/1270)
What's better than a single LED? Lots of LEDs! A fun way to make a numeric display is to use a [4-digit 7-segment display](https://www.adafruit.com/category/37_103). LED matrices like these are 'multiplexed' - so to control all the seven-segment LEDs you need 14 pins....
In Stock
[Buy Now](https://www.adafruit.com/product/1270)
[Related Guides to the Product](https://learn.adafruit.com/products/1270/guides)
### Small 1.2" 8x8 Ultra Bright White LED Matrix + Backpack
[Small 1.2" 8x8 Ultra Bright White LED Matrix + Backpack](https://www.adafruit.com/product/1614)
What's better than a single LED? Lots of LEDs! A fun way to make a small display is to use an [8x8 matrix](https://www.adafruit.com/category/37_88) or a [4-digit 7-segment display](https://www.adafruit.com/category/37_103). Matrices like these are...
In Stock
[Buy Now](https://www.adafruit.com/product/1614)
[Related Guides to the Product](https://learn.adafruit.com/products/1614/guides)
### Adafruit Small 1.2" 8x8 LED Matrix w/I2C Backpack - Pure Green
[Adafruit Small 1.2" 8x8 LED Matrix w/I2C Backpack - Pure Green](https://www.adafruit.com/product/1632)
What's better than a single LED? Lots of LEDs! A fun way to make a small display is to use an [8x8 matrix](https://www.adafruit.com/category/37_88) or a [4-digit 7-segment display](https://www.adafruit.com/category/37_103). Matrices like these are...
In Stock
[Buy Now](https://www.adafruit.com/product/1632)
[Related Guides to the Product](https://learn.adafruit.com/products/1632/guides)
### Adafruit Mini 0.8" 8x8 LED Matrix w/I2C Backpack - Pure Green
[Adafruit Mini 0.8" 8x8 LED Matrix w/I2C Backpack - Pure Green](https://www.adafruit.com/product/1633)
What's better than a single LED? Lots of LEDs! A fun way to make a small display is to use an [8x8 matrix](https://www.adafruit.com/category/37_88) or a [4-digit 7-segment display](https://www.adafruit.com/category/37_103). Matrices like these are...
In Stock
[Buy Now](https://www.adafruit.com/product/1633)
[Related Guides to the Product](https://learn.adafruit.com/products/1633/guides)
### Bi-Color (Red/Green) 24-Bar Bargraph w/I2C Backpack Kit
[Bi-Color (Red/Green) 24-Bar Bargraph w/I2C Backpack Kit](https://www.adafruit.com/product/1721)
What's better than a single LED? Lots of LEDs! A fun way to make a small linear display is to use two 12-bar Bi-color bar-graphs. However, this LED bargraph is 'multiplexed' - so to control all the 48 LEDs you need a lot of pins.
Out of Stock
[Buy Now](https://www.adafruit.com/product/1721)
[Related Guides to the Product](https://learn.adafruit.com/products/1721/guides)
### Small 1.2" 8x8 Ultra Bright Square Amber LED Matrix + Backpack
[Small 1.2" 8x8 Ultra Bright Square Amber LED Matrix + Backpack](https://www.adafruit.com/product/1854)
What's better than a single LED? Lots of LEDs! Matrices like these are 'multiplexed' - so to control 64 LEDs you need 16 pins. That's a lot of pins, and there are [driver chips like the MAX7219](//www.adafruit.com/products/453) that can control a matrix for you but...
In Stock
[Buy Now](https://www.adafruit.com/product/1854)
[Related Guides to the Product](https://learn.adafruit.com/products/1854/guides)
### Small 1.2" 8x8 Ultra Bright Square Yellow LED Matrix + Backpack
[Small 1.2" 8x8 Ultra Bright Square Yellow LED Matrix + Backpack](https://www.adafruit.com/product/1855)
What's better than a single LED? Lots of LEDs! Matrices like these are 'multiplexed' - so to control 64 LEDs you need 16 pins. That's a lot of pins, and there are [driver chips like the MAX7219](//www.adafruit.com/products/453) that can control a matrix for you but...
In Stock
[Buy Now](https://www.adafruit.com/product/1855)
[Related Guides to the Product](https://learn.adafruit.com/products/1855/guides)
### Small 1.2" 8x8 Bright Square Pure Green LED Matrix + Backpack
[Small 1.2" 8x8 Bright Square Pure Green LED Matrix + Backpack](https://www.adafruit.com/product/1856)
What's better than a single LED? Lots of LEDs! Matrices like these are 'multiplexed' - so to control 64 LEDs you need 16 pins. That's a lot of pins, and there are [driver chips like the MAX7219](//www.adafruit.com/products/453) that can control a matrix for you but...
In Stock
[Buy Now](https://www.adafruit.com/product/1856)
[Related Guides to the Product](https://learn.adafruit.com/products/1856/guides)
### Small 1.2" 8x8 Ultra Bright Square White LED Matrix + Backpack
[Small 1.2" 8x8 Ultra Bright Square White LED Matrix + Backpack](https://www.adafruit.com/product/1857)
What's better than a single LED? Lots of LEDs! Matrices like these are 'multiplexed' - so to control 64 LEDs you need 16 pins. That's a lot of pins, and there are [driver chips like the MAX7219](//www.adafruit.com/products/453) that can control a matrix for you but...
In Stock
[Buy Now](https://www.adafruit.com/product/1857)
[Related Guides to the Product](https://learn.adafruit.com/products/1857/guides)
### Adafruit 14-segment LED Alphanumeric Backpack - STEMMA QT
[Adafruit 14-segment LED Alphanumeric Backpack - STEMMA QT](https://www.adafruit.com/product/1910)
By popular request, you can now get our 14-segment LED backpacks without the LEDs! These backpacks feature an HT16K33 I2C LED driver, they're simple and easy to use - you can use [our very nice library for the backpacks to...](https://github.com/adafruit/Adafruit-LED-Backpack-Library)
In Stock
[Buy Now](https://www.adafruit.com/product/1910)
[Related Guides to the Product](https://learn.adafruit.com/products/1910/guides)
### Quad Alphanumeric Display - Red 0.54" Digits w/ I2C Backpack
[Quad Alphanumeric Display - Red 0.54" Digits w/ I2C Backpack](https://www.adafruit.com/product/1911)
Display, elegantly, 012345678 or 9! Gaze, hypnotized, at ABCDEFGHIJKLM - well it can display the whole alphabet. You get the point. This is a nice, bright alphanumeric display that shows letters and numbers in a beautiful red hue. It's super bright and designed for viewing from distances...
In Stock
[Buy Now](https://www.adafruit.com/product/1911)
[Related Guides to the Product](https://learn.adafruit.com/products/1911/guides)
### Quad Alphanumeric Display - Blue 0.54" Digits w/ I2C Backpack
[Quad Alphanumeric Display - Blue 0.54" Digits w/ I2C Backpack](https://www.adafruit.com/product/1912)
Display, elegantly, 012345678 or 9! Gaze, hypnotized, at ABCDEFGHIJKLM - well it can display the whole alphabet. You get the point. This is a nice, bright alphanumeric display that shows letters and numbers in a beautiful blue hue. It's super bright and designed for viewing from distances...
In Stock
[Buy Now](https://www.adafruit.com/product/1912)
[Related Guides to the Product](https://learn.adafruit.com/products/1912/guides)
### 16x8 1.2" LED Matrix + Backpack - Ultra Bright Round Green LEDs
[16x8 1.2" LED Matrix + Backpack - Ultra Bright Round Green LEDs](https://www.adafruit.com/product/2035)
What's better than a single LED? Lots of LEDs! And what's better than lots of LEDs? **TWO TIMES AS MANY LEDS!!!**
With the 16x8 LED Matrix Backpack we've doubled your project's matrix capacity by making it super easy to get two separate 8x8 matrices onto...
In Stock
[Buy Now](https://www.adafruit.com/product/2035)
[Related Guides to the Product](https://learn.adafruit.com/products/2035/guides)
### 16x8 1.2" LED Matrix+Backpack UltraBright Round YellowGreen LEDs
[16x8 1.2" LED Matrix+Backpack UltraBright Round YellowGreen LEDs](https://www.adafruit.com/product/2036)
What's better than a single LED? Lots of LEDs! And what's better than lots of LEDs? **TWO TIMES AS MANY LEDS!!!**
With the 16x8 LED Matrix Backpack we've doubled your project's matrix capacity by making it super easy to get two separate 8x8 matrices onto...
In Stock
[Buy Now](https://www.adafruit.com/product/2036)
[Related Guides to the Product](https://learn.adafruit.com/products/2036/guides)
### 16x8 1.2" LED Matrix + Backpack - Ultra Bright Round Red LEDs
[16x8 1.2" LED Matrix + Backpack - Ultra Bright Round Red LEDs](https://www.adafruit.com/product/2037)
What's better than a single LED? Lots of LEDs! And what's better than lots of LEDs? **TWO TIMES AS MANY LEDS!!!**
With the 16x8 LED Matrix Backpack we've doubled your project's matrix capacity by making it super easy to get two separate 8x8 matrices onto...
In Stock
[Buy Now](https://www.adafruit.com/product/2037)
[Related Guides to the Product](https://learn.adafruit.com/products/2037/guides)
### 16x8 1.2" LED Matrix + Backpack - Ultra Bright Round White LEDs
[16x8 1.2" LED Matrix + Backpack - Ultra Bright Round White LEDs](https://www.adafruit.com/product/2038)
What's better than a single LED? Lots of LEDs! And what's better than lots of LEDs? **TWO TIMES AS MANY LEDS!!!**
With the 16x8 LED Matrix Backpack we've doubled your project's matrix capacity by making it super easy to get two separate 8x8 matrices onto...
In Stock
[Buy Now](https://www.adafruit.com/product/2038)
[Related Guides to the Product](https://learn.adafruit.com/products/2038/guides)
### 16x8 1.2" LED Matrix + Backpack - Ultra Bright Round Blue LEDs
[16x8 1.2" LED Matrix + Backpack - Ultra Bright Round Blue LEDs](https://www.adafruit.com/product/2039)
What's better than a single LED? Lots of LEDs! And what's better than lots of LEDs? **TWO TIMES AS MANY LEDS!!!**
With the 16x8 LED Matrix Backpack we've doubled your project's matrix capacity by making it super easy to get two separate 8x8 matrices onto...
In Stock
[Buy Now](https://www.adafruit.com/product/2039)
[Related Guides to the Product](https://learn.adafruit.com/products/2039/guides)
### 16x8 1.2" LED Matrix + Backpack - Ultra Bright Square Blue LEDs
[16x8 1.2" LED Matrix + Backpack - Ultra Bright Square Blue LEDs](https://www.adafruit.com/product/2040)
What's better than a single LED? Lots of LEDs! And what's better than lots of LEDs? **TWO TIMES AS MANY LEDS!!!**
With the 16x8 LED Matrix Backpack we've doubled your project's matrix capacity by making it super easy to get two separate 8x8 matrices onto...
In Stock
[Buy Now](https://www.adafruit.com/product/2040)
[Related Guides to the Product](https://learn.adafruit.com/products/2040/guides)
### 16x8 1.2" LED Matrix + Backpack - Ultra Bright Square Amber LEDs
[16x8 1.2" LED Matrix + Backpack - Ultra Bright Square Amber LEDs](https://www.adafruit.com/product/2041)
What's better than a single LED? Lots of LEDs! And what's better than lots of LEDs? **TWO TIMES AS MANY LEDS!!!**
With the 16x8 LED Matrix Backpack we've doubled your project's matrix capacity by making it super easy to get two separate 8x8 matrices onto...
In Stock
[Buy Now](https://www.adafruit.com/product/2041)
[Related Guides to the Product](https://learn.adafruit.com/products/2041/guides)
### 16x8 1.2" LED Matrix + Backpack - Ultra Bright Square Green LEDs
[16x8 1.2" LED Matrix + Backpack - Ultra Bright Square Green LEDs](https://www.adafruit.com/product/2042)
What's better than a single LED? Lots of LEDs! And what's better than lots of LEDs? **TWO TIMES AS MANY LEDS!!!**
With the 16x8 LED Matrix Backpack we've doubled your project's matrix capacity by making it super easy to get two separate 8x8 matrices onto...
In Stock
[Buy Now](https://www.adafruit.com/product/2042)
[Related Guides to the Product](https://learn.adafruit.com/products/2042/guides)
### 16x8 1.2" LED Matrix + Backpack -Ultra Bright Square Yellow LEDs
[16x8 1.2" LED Matrix + Backpack -Ultra Bright Square Yellow LEDs](https://www.adafruit.com/product/2043)
What's better than a single LED? Lots of LEDs! And what's better than lots of LEDs? **TWO TIMES AS MANY LEDS!!!**
With the 16x8 LED Matrix Backpack we've doubled your project's matrix capacity by making it super easy to get two separate 8x8 matrices onto...
In Stock
[Buy Now](https://www.adafruit.com/product/2043)
[Related Guides to the Product](https://learn.adafruit.com/products/2043/guides)
### 16x8 1.2" LED Matrix + Backpack - Ultra Bright Square White LEDs
[16x8 1.2" LED Matrix + Backpack - Ultra Bright Square White LEDs](https://www.adafruit.com/product/2044)
What's better than a single LED? Lots of LEDs! And what's better than lots of LEDs? **TWO TIMES AS MANY LEDS!!!**
With the 16x8 LED Matrix Backpack we've doubled your project's matrix capacity by making it super easy to get two separate 8x8 matrices onto...
In Stock
[Buy Now](https://www.adafruit.com/product/2044)
[Related Guides to the Product](https://learn.adafruit.com/products/2044/guides)
### 16x8 1.2" LED Matrix + Backpack-Ultra Bright Round Orange LEDs
[16x8 1.2" LED Matrix + Backpack-Ultra Bright Round Orange LEDs](https://www.adafruit.com/product/2052)
What's better than a single LED? Lots of LEDs! And what's better than lots of LEDs? **TWO TIMES AS MANY LEDS!!!**
With the 16x8 LED Matrix Backpack we've doubled your project's matrix capacity by making it super easy to get two separate 8x8 matrices onto...
In Stock
[Buy Now](https://www.adafruit.com/product/2052)
[Related Guides to the Product](https://learn.adafruit.com/products/2052/guides)
### 16x8 1.2" LED Matrices+Backpack Round LEDs in Various Colors
[16x8 1.2" LED Matrices+Backpack Round LEDs in Various Colors](https://www.adafruit.com/product/2054)
What's better than a single LED? Lots of LEDs! And what's better than lots of LEDs? **TWO TIMES AS MANY LEDS!!!**
With the 16x8 LED Matrix Backpack we've doubled your project's matrix capacity by making it super easy to get two separate 8x8 matrices onto...
Out of Stock
[Buy Now](https://www.adafruit.com/product/2054)
[Related Guides to the Product](https://learn.adafruit.com/products/2054/guides)
### Adafruit 8x16 LED Matrix FeatherWing w/o Matrices
[Adafruit 8x16 LED Matrix FeatherWing w/o Matrices](https://www.adafruit.com/product/3090)
You will chirp with delight when you see how easy it is to make your very own 8x16 LED matrix display for any Feather. At 0.8" square, the little [8x8 matrices](https://www.adafruit.com/new/?q=8x8%20miniature%20LED%20matrix&) have everything a big LED matrix has,...
Out of Stock
[Buy Now](https://www.adafruit.com/product/3090)
[Related Guides to the Product](https://learn.adafruit.com/products/3090/guides)
### Adafruit 14-segment LED Alphanumeric backpack (same as P1910)
[Adafruit 14-segment LED Alphanumeric backpack (same as P1910)](https://www.adafruit.com/product/3322)
Just the backpack + 4pin header
No Longer Stocked
[Buy Now](https://www.adafruit.com/product/3322)
[Related Guides to the Product](https://learn.adafruit.com/products/3322/guides)
## Featured Products
### Adafruit Small 1.2" 8x8 LED Matrix w/I2C Backpack - Yellow-Green
[Adafruit Small 1.2" 8x8 LED Matrix w/I2C Backpack - Yellow-Green](https://www.adafruit.com/product/1051)
What's better than a single LED? Lots of LEDs! A fun way to make a small display is to use an [8x8 matrix](https://www.adafruit.com/category/37_88) or a [4-digit 7-segment display](https://www.adafruit.com/category/37_103). Matrices like these are...
In Stock
[Buy Now](https://www.adafruit.com/product/1051)
[Related Guides to the Product](https://learn.adafruit.com/products/1051/guides)
### Small 1.2" 8x8 Ultra Bright Square Blue LED Matrix + Backpack
[Small 1.2" 8x8 Ultra Bright Square Blue LED Matrix + Backpack](https://www.adafruit.com/product/1853)
What's better than a single LED? Lots of LEDs! Matrices like these are 'multiplexed' - so to control 64 LEDs you need 16 pins. That's a lot of pins, and there are [driver chips like the MAX7219](//www.adafruit.com/products/453) that can control a matrix for you but...
In Stock
[Buy Now](https://www.adafruit.com/product/1853)
[Related Guides to the Product](https://learn.adafruit.com/products/1853/guides)
## Related Guides
- [LED Backpack Displays on Raspberry Pi and BeagleBone Black](https://learn.adafruit.com/led-backpack-displays-on-raspberry-pi-and-beaglebone-black.md)
- [Animating Multiple LED Backpacks](https://learn.adafruit.com/animating-multiple-led-backpacks.md)
- [Arduino GPS Clock](https://learn.adafruit.com/arduino-clock.md)
- [Raspberry Pi Physical Dashboard](https://learn.adafruit.com/raspberry-pi-physical-dashboard.md)
- [CircuitPython Hardware: LED Backpacks & FeatherWings](https://learn.adafruit.com/micropython-hardware-led-backpacks-and-featherwings.md)
- [Matrix and 7-Segment LED Backpack with the Raspberry Pi](https://learn.adafruit.com/matrix-7-segment-led-backpack-with-the-raspberry-pi.md)
- [DIY Pocket LED Gamer - Tiny Tetris!](https://learn.adafruit.com/diy-3d-printed-handheld-pocket-game-tiny-tetris-snake.md)
- [RGB LED Matrix Cube with 25,000 LEDs](https://learn.adafruit.com/rgb-led-matrix-cube-for-pi.md)
- [Creating GIFs for SmartMatrix](https://learn.adafruit.com/creating-gifs-for-smartmatrix.md)
- [Adafruit CharliePlex LED Matrix Bonnet](https://learn.adafruit.com/adafruit-charlieplex-bonnet.md)
- [Connecting a 16x32 RGB LED Matrix Panel to a Raspberry Pi](https://learn.adafruit.com/connecting-a-16x32-rgb-led-matrix-panel-to-a-raspberry-pi.md)
- [MicroPython Displays: Drawing Text](https://learn.adafruit.com/micropython-displays-drawing-text.md)
- [Heart Rate Badge](https://learn.adafruit.com/heart-rate-badge.md)
- [16x24 LED Matrix](https://learn.adafruit.com/16x24-led-matrix.md)
- [Adafruit IS31FL3741](https://learn.adafruit.com/adafruit-is31fl3741.md)
---
# Source: https://learn.adafruit.com/adafruit-led-backpack/1-2-inch-7-segment-backpack-arduino-wiring-and-setup.md
# Adafruit LED Backpacks
## Arduino Wiring and Setup
Primary:
Now you are ready to wire it to your microcontroller. The required connections are:
- **"D"** - I2C Data Pin (SDA)
- **"C"** - I2C Clock Pin (SCL)
- **"+"** - 5v. (Will not run on 3.3v!)
- **"-"** - GND
- **"IO"** - I2C bus voltage.
Due to the size of this display, there are 2 LEDs in series for each segment. Because of this, the display requires 5v to run. It will not run on 3.3v.
For use with 3.3v processors, connect the IO pin to 3.3v. This will keep the I2C bus signals at a safe level for your processor.
With 5v processors like the Arduino UNO, this pin can be connected to either 5v or 3.3v. (use 3.3v if there will be other 3.3v devices on the bus) ## Arduino Wiring - R3 and later
**Connect:**
- D **→** SDA
- C **→** SCL
- + **→** 5v
- - **→** GND
- IO **→** jumper to + for 5v.

## Arduino Due and Other 3.3v Processors
**Connect:**
- D **→** SDA
- C **→** SCL
- + **→** 5v
- - **→** GND
- IO **→** 3.3v

## Arduino "Classic" Wiring
**Connect:**
- D **→** Analog-4 or Digital 20 for the Mega
- C **→** Analog-5 or Digital 21 for the Mega
- + **→** 5v
- - **→** GND
- IO **→** jumper to + for 5v.

OK, now on to the firmware!
## Seven-Segment Backpack Firmware
Our 7-segment backpack library makes it easy to program these displays. The library is written for the Arduino and will work with any Arduino as it just uses the I2C pins. The code is very portable and can be easily adapted to any I2C-capable micro.
Download the **Adafruit LED Backpack ** library and the **Adafruit GFX ** library from the Arduino library manager.
Open up the Arduino library manager:

Search for the **Adafruit LED Backpack ** library and install it

Search for the **Adafruit GFX ** library and install it

If using an earlier version of the Arduino IDE (prior to 1.8.10), also locate and install **Adafruit\_BusIO** (newer versions will install this dependency automatically).
We also have a great tutorial on Arduino library installation at:
[http://learn.adafruit.com/adafruit-all-about-arduino-libraries-install-use](http://learn.adafruit.com/adafruit-all-about-arduino-libraries-install-use "Link: http://learn.adafruit.com/adafruit-all-about-arduino-libraries-install-use")
You should now be able to select the **File→Examples→Adafruit\_LEDBackpack→sevenseg** example sketch. Upload it to your Arduino as usual. You should see a "sevenseg" example sketch that will demonstrate various capabilities of the library and the display.
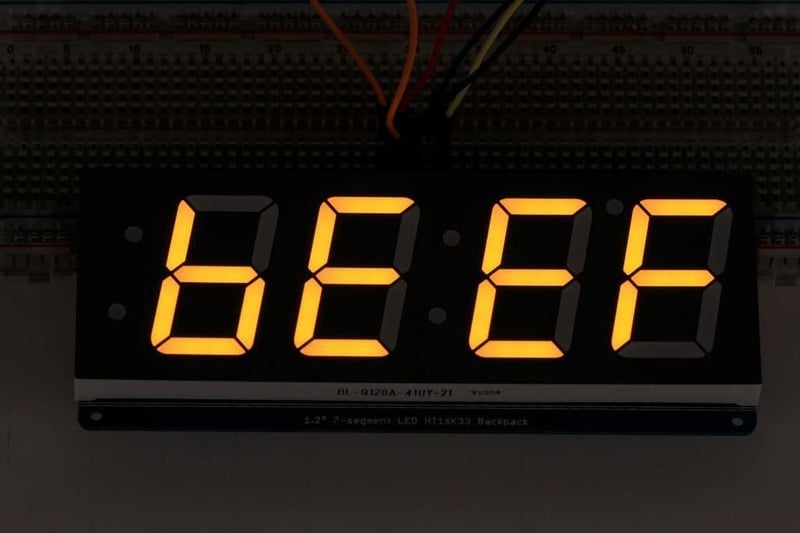
Once you're happy that the matrix works, you can write your own sketches.
There's a few ways you can draw to the display. The easiest is to just call **print -** just like you do with **Serial**
- **print(_variable_**_,_**HEX) -** this will print a hexadecimal number, from 0000 up to FFFF
- **print(_variable_**_,_**DEC)** or **print(_variable_) -** this will print a decimal integer, from 0000 up to 9999
If you need more control, you can call **writeDigitNum(_location_, _number_)** - this will write the _number_ (0-9) to a single location. Location #0 is all the way to the left, location #2 is the colon dots so you probably want to skip it, location #4 is all the way to the right.
To control the colon and decimal points, use the writeDigitRaw(location, bitmap) function. (Note that both dots of the center colon are wired together internal to the display, so it is not possible to address them separately.) Specify 2 for the location and the bits are mapped as follows:
- 0x02 - center colon (both dots)
- 0x04 - left colon - lower dot
- 0x08 - left colon - upper dot
- 0x10 - decimal point (upper right)
If you want a decimal point, call **writeDigitNum(_location_, _number_, true)** which will paint the decimal point. To draw the colon, use **drawColon(_true_** _or_ **_false_)**
If you want full control of the segments in all digits, you can call **writeDigitRaw(_location_, _bitmask_)** to draw a raw 8-bit mask (as stored in a uint8\_t) to any location.
All the drawing routines only change the display memory kept by the Arduino. Don't forget to call **writeDisplay()** after drawing to 'save' the memory out to the matrix via I2C.
There are also a few small routines that are special to the backpack:
- **setBrightness(_brightness_)**- will let you change the overall brightness of the entire display. 0 is least bright, 15 is brightest and is what is initialized by the display when you start
- **blinkRate(_rate_)** - You can blink the entire display. 0 is no blinking. 1, 2 or 3 is for display blinking.
- [Previous Page](https://learn.adafruit.com/adafruit-led-backpack/1-2-inch-7-segment-backpack-assembly.md)
- [Next Page](https://learn.adafruit.com/adafruit-led-backpack/circuitpython-wiring-and-setup-2666a265-2d8e-4cde-bcb8-dadc29b6b8fa.md)
## Primary Products
### Adafruit Mini 8x8 LED Matrix w/I2C Backpack - Red
[Adafruit Mini 8x8 LED Matrix w/I2C Backpack - Red](https://www.adafruit.com/product/870)
What's better than a single LED? Lots of LEDs! A fun way to make a small display is to use an [8x8 matrix](https://www.adafruit.com/category/37_88) or a [4-digit 7-segment display](https://www.adafruit.com/category/37_103). Matrices like these are...
In Stock
[Buy Now](https://www.adafruit.com/product/870)
[Related Guides to the Product](https://learn.adafruit.com/products/870/guides)
### Adafruit Mini 8x8 LED Matrix w/I2C Backpack - Yellow
[Adafruit Mini 8x8 LED Matrix w/I2C Backpack - Yellow](https://www.adafruit.com/product/871)
What's better than a single LED? Lots of LEDs! A fun way to make a small display is to use an [8x8 matrix](https://www.adafruit.com/category/37_88) or a [4-digit 7-segment display](https://www.adafruit.com/category/37_103). Matrices like these are...
In Stock
[Buy Now](https://www.adafruit.com/product/871)
[Related Guides to the Product](https://learn.adafruit.com/products/871/guides)
### Adafruit Mini 0.8" 8x8 LED Matrix w/I2C Backpack - Yellow-Green
[Adafruit Mini 0.8" 8x8 LED Matrix w/I2C Backpack - Yellow-Green](https://www.adafruit.com/product/872)
What's better than a single LED? Lots of LEDs! A fun way to make a small display is to use an [8x8 matrix](https://www.adafruit.com/category/37_88) or a [4-digit 7-segment display](https://www.adafruit.com/category/37_103). Matrices like these are...
In Stock
[Buy Now](https://www.adafruit.com/product/872)
[Related Guides to the Product](https://learn.adafruit.com/products/872/guides)
### Adafruit 0.56" 4-Digit 7-Segment Display with I2C Backpack - Red
[Adafruit 0.56" 4-Digit 7-Segment Display with I2C Backpack - Red](https://www.adafruit.com/product/878)
What's better than a single LED? Lots of LEDs! A fun way to make a small display is to use an [8x8 matrix](https://www.adafruit.com/category/37_88) or a [4-digit 7-segment display](https://www.adafruit.com/category/37_103). Matrices like these are...
In Stock
[Buy Now](https://www.adafruit.com/product/878)
[Related Guides to the Product](https://learn.adafruit.com/products/878/guides)
### Adafruit 0.56" 4-Digit 7-Segment Display w/I2C Backpack - Yellow
[Adafruit 0.56" 4-Digit 7-Segment Display w/I2C Backpack - Yellow](https://www.adafruit.com/product/879)
What's better than a single LED? Lots of LEDs! A fun way to make a small display is to use an [8x8 matrix](https://www.adafruit.com/category/37_88) or a [4-digit 7-segment display](https://www.adafruit.com/category/37_103). Matrices like these are...
In Stock
[Buy Now](https://www.adafruit.com/product/879)
[Related Guides to the Product](https://learn.adafruit.com/products/879/guides)
### Adafruit 0.56" 4-Digit 7-Segment Display w/ I2C Backpack - Green
[Adafruit 0.56" 4-Digit 7-Segment Display w/ I2C Backpack - Green](https://www.adafruit.com/product/880)
What's better than a single LED? Lots of LEDs! A fun way to make a small display is to use an [8x8 matrix](https://www.adafruit.com/category/37_88) or a [4-digit 7-segment display](https://www.adafruit.com/category/37_103). Matrices like these are...
No Longer Stocked
[Buy Now](https://www.adafruit.com/product/880)
[Related Guides to the Product](https://learn.adafruit.com/products/880/guides)
### Adafruit 0.56" 4-Digit 7-Segment Display w/ I2C Backpack - Blue
[Adafruit 0.56" 4-Digit 7-Segment Display w/ I2C Backpack - Blue](https://www.adafruit.com/product/881)
What's better than a single LED? Lots of LEDs! A fun way to make a small display is to use an [8x8 matrix](https://www.adafruit.com/category/37_88) or a [4-digit 7-segment display](https://www.adafruit.com/category/37_103). Matrices like these are...
In Stock
[Buy Now](https://www.adafruit.com/product/881)
[Related Guides to the Product](https://learn.adafruit.com/products/881/guides)
### Adafruit Bicolor LED Square Pixel Matrix with I2C Backpack
[Adafruit Bicolor LED Square Pixel Matrix with I2C Backpack](https://www.adafruit.com/product/902)
What's better than a single LED? Lots of LEDs! A fun way to make a small colorful display is to use a [1.2" Bi-color 8x8 LED Matrix](http://www.adafruit.com/products/458). Matrices like these are 'multiplexed' - so to control all the 128 LEDs you need 24 pins....
In Stock
[Buy Now](https://www.adafruit.com/product/902)
[Related Guides to the Product](https://learn.adafruit.com/products/902/guides)
### Adafruit Mini 8x8 LED Matrix w/I2C Backpack - Blue
[Adafruit Mini 8x8 LED Matrix w/I2C Backpack - Blue](https://www.adafruit.com/product/959)
What's better than a single LED? Lots of LEDs! A fun way to make a small display is to use an [8x8 matrix](https://www.adafruit.com/category/37_88) or a [4-digit 7-segment display](https://www.adafruit.com/category/37_103). Matrices like these are...
In Stock
[Buy Now](https://www.adafruit.com/product/959)
[Related Guides to the Product](https://learn.adafruit.com/products/959/guides)
### Adafruit 0.56" 4-Digit 7-Segment Display w/I2C Backpack - White
[Adafruit 0.56" 4-Digit 7-Segment Display w/I2C Backpack - White](https://www.adafruit.com/product/1002)
What's better than a single LED? Lots of LEDs! A fun way to make a small display is to use an [8x8 matrix](https://www.adafruit.com/category/37_88) or a [4-digit 7-segment display](https://www.adafruit.com/category/37_103). Matrices like these are...
In Stock
[Buy Now](https://www.adafruit.com/product/1002)
[Related Guides to the Product](https://learn.adafruit.com/products/1002/guides)
### Adafruit 1.2" 8x8 LED Matrix Backpack
[Adafruit 1.2" 8x8 LED Matrix Backpack](https://www.adafruit.com/product/1048)
By popular request, you can now get our 8x8 LED backpacks without the LEDs! These backpacks feature an HT16K33 I2C LED driver, they're simple and easy to use - you can use [our very nice library for the backpacks to...](https://github.com/adafruit/Adafruit-LED-Backpack-Library)
In Stock
[Buy Now](https://www.adafruit.com/product/1048)
[Related Guides to the Product](https://learn.adafruit.com/products/1048/guides)
### Adafruit Small 1.2" 8x8 LED Matrix w/I2C Backpack - Red
[Adafruit Small 1.2" 8x8 LED Matrix w/I2C Backpack - Red](https://www.adafruit.com/product/1049)
What's better than a single LED? Lots of LEDs! A fun way to make a small display is to use an [8x8 matrix](https://www.adafruit.com/category/37_88) or a [4-digit 7-segment display](https://www.adafruit.com/category/37_103). Matrices like these are...
In Stock
[Buy Now](https://www.adafruit.com/product/1049)
[Related Guides to the Product](https://learn.adafruit.com/products/1049/guides)
### Adafruit Small 1.2" 8x8 LED Matrix w/I2C Backpack - Yellow
[Adafruit Small 1.2" 8x8 LED Matrix w/I2C Backpack - Yellow](https://www.adafruit.com/product/1050)
What's better than a single LED? Lots of LEDs! A fun way to make a small display is to use an [8x8 matrix](https://www.adafruit.com/category/37_88) or a [4-digit 7-segment display](https://www.adafruit.com/category/37_103). Matrices like these are...
In Stock
[Buy Now](https://www.adafruit.com/product/1050)
[Related Guides to the Product](https://learn.adafruit.com/products/1050/guides)
### Adafruit Small 1.2" 8x8 LED Matrix w/I2C Backpack - Blue
[Adafruit Small 1.2" 8x8 LED Matrix w/I2C Backpack - Blue](https://www.adafruit.com/product/1052)
What's better than a single LED? Lots of LEDs! A fun way to make a small display is to use an [8x8 matrix](https://www.adafruit.com/category/37_88) or a [4-digit 7-segment display](https://www.adafruit.com/category/37_103). Matrices like these are...
In Stock
[Buy Now](https://www.adafruit.com/product/1052)
[Related Guides to the Product](https://learn.adafruit.com/products/1052/guides)
### Adafruit Mini 8x8 LED Matrix w/I2C Backpack - Ultra Bright White
[Adafruit Mini 8x8 LED Matrix w/I2C Backpack - Ultra Bright White](https://www.adafruit.com/product/1080)
What's better than a single LED? Lots of LEDs! A fun way to make a small display is to use an [8x8 matrix](https://www.adafruit.com/category/37_88) or a [4-digit 7-segment display](https://www.adafruit.com/category/37_103). Matrices like these are...
In Stock
[Buy Now](https://www.adafruit.com/product/1080)
[Related Guides to the Product](https://learn.adafruit.com/products/1080/guides)
### Adafruit 1.2" 4-Digit 7-Segment Display w/I2C Backpack - Green
[Adafruit 1.2" 4-Digit 7-Segment Display w/I2C Backpack - Green](https://www.adafruit.com/product/1268)
What's better than a single LED? Lots of LEDs! A fun way to make a numeric display is to use a [4-digit 7-segment display](https://www.adafruit.com/category/37_103). LED matrices like these are 'multiplexed' - so to control all the seven-segment LEDs you need 14 pins....
No Longer Stocked
[Buy Now](https://www.adafruit.com/product/1268)
[Related Guides to the Product](https://learn.adafruit.com/products/1268/guides)
### Adafruit 1.2" 4-Digit 7-Segment Display w/I2C Backpack - Yellow
[Adafruit 1.2" 4-Digit 7-Segment Display w/I2C Backpack - Yellow](https://www.adafruit.com/product/1269)
What's better than a single LED? Lots of LEDs! A fun way to make a numeric display is to use a [4-digit 7-segment display](https://www.adafruit.com/category/37_103). LED matrices like these are 'multiplexed' - so to control all the seven-segment LEDs you need 14 pins....
In Stock
[Buy Now](https://www.adafruit.com/product/1269)
[Related Guides to the Product](https://learn.adafruit.com/products/1269/guides)
### Adafruit 1.2" 4-Digit 7-Segment Display w/I2C Backpack - Red
[Adafruit 1.2" 4-Digit 7-Segment Display w/I2C Backpack - Red](https://www.adafruit.com/product/1270)
What's better than a single LED? Lots of LEDs! A fun way to make a numeric display is to use a [4-digit 7-segment display](https://www.adafruit.com/category/37_103). LED matrices like these are 'multiplexed' - so to control all the seven-segment LEDs you need 14 pins....
In Stock
[Buy Now](https://www.adafruit.com/product/1270)
[Related Guides to the Product](https://learn.adafruit.com/products/1270/guides)
### Small 1.2" 8x8 Ultra Bright White LED Matrix + Backpack
[Small 1.2" 8x8 Ultra Bright White LED Matrix + Backpack](https://www.adafruit.com/product/1614)
What's better than a single LED? Lots of LEDs! A fun way to make a small display is to use an [8x8 matrix](https://www.adafruit.com/category/37_88) or a [4-digit 7-segment display](https://www.adafruit.com/category/37_103). Matrices like these are...
In Stock
[Buy Now](https://www.adafruit.com/product/1614)
[Related Guides to the Product](https://learn.adafruit.com/products/1614/guides)
### Adafruit Small 1.2" 8x8 LED Matrix w/I2C Backpack - Pure Green
[Adafruit Small 1.2" 8x8 LED Matrix w/I2C Backpack - Pure Green](https://www.adafruit.com/product/1632)
What's better than a single LED? Lots of LEDs! A fun way to make a small display is to use an [8x8 matrix](https://www.adafruit.com/category/37_88) or a [4-digit 7-segment display](https://www.adafruit.com/category/37_103). Matrices like these are...
In Stock
[Buy Now](https://www.adafruit.com/product/1632)
[Related Guides to the Product](https://learn.adafruit.com/products/1632/guides)
### Adafruit Mini 0.8" 8x8 LED Matrix w/I2C Backpack - Pure Green
[Adafruit Mini 0.8" 8x8 LED Matrix w/I2C Backpack - Pure Green](https://www.adafruit.com/product/1633)
What's better than a single LED? Lots of LEDs! A fun way to make a small display is to use an [8x8 matrix](https://www.adafruit.com/category/37_88) or a [4-digit 7-segment display](https://www.adafruit.com/category/37_103). Matrices like these are...
In Stock
[Buy Now](https://www.adafruit.com/product/1633)
[Related Guides to the Product](https://learn.adafruit.com/products/1633/guides)
### Bi-Color (Red/Green) 24-Bar Bargraph w/I2C Backpack Kit
[Bi-Color (Red/Green) 24-Bar Bargraph w/I2C Backpack Kit](https://www.adafruit.com/product/1721)
What's better than a single LED? Lots of LEDs! A fun way to make a small linear display is to use two 12-bar Bi-color bar-graphs. However, this LED bargraph is 'multiplexed' - so to control all the 48 LEDs you need a lot of pins.
Out of Stock
[Buy Now](https://www.adafruit.com/product/1721)
[Related Guides to the Product](https://learn.adafruit.com/products/1721/guides)
### Small 1.2" 8x8 Ultra Bright Square Amber LED Matrix + Backpack
[Small 1.2" 8x8 Ultra Bright Square Amber LED Matrix + Backpack](https://www.adafruit.com/product/1854)
What's better than a single LED? Lots of LEDs! Matrices like these are 'multiplexed' - so to control 64 LEDs you need 16 pins. That's a lot of pins, and there are [driver chips like the MAX7219](//www.adafruit.com/products/453) that can control a matrix for you but...
In Stock
[Buy Now](https://www.adafruit.com/product/1854)
[Related Guides to the Product](https://learn.adafruit.com/products/1854/guides)
### Small 1.2" 8x8 Ultra Bright Square Yellow LED Matrix + Backpack
[Small 1.2" 8x8 Ultra Bright Square Yellow LED Matrix + Backpack](https://www.adafruit.com/product/1855)
What's better than a single LED? Lots of LEDs! Matrices like these are 'multiplexed' - so to control 64 LEDs you need 16 pins. That's a lot of pins, and there are [driver chips like the MAX7219](//www.adafruit.com/products/453) that can control a matrix for you but...
In Stock
[Buy Now](https://www.adafruit.com/product/1855)
[Related Guides to the Product](https://learn.adafruit.com/products/1855/guides)
### Small 1.2" 8x8 Bright Square Pure Green LED Matrix + Backpack
[Small 1.2" 8x8 Bright Square Pure Green LED Matrix + Backpack](https://www.adafruit.com/product/1856)
What's better than a single LED? Lots of LEDs! Matrices like these are 'multiplexed' - so to control 64 LEDs you need 16 pins. That's a lot of pins, and there are [driver chips like the MAX7219](//www.adafruit.com/products/453) that can control a matrix for you but...
In Stock
[Buy Now](https://www.adafruit.com/product/1856)
[Related Guides to the Product](https://learn.adafruit.com/products/1856/guides)
### Small 1.2" 8x8 Ultra Bright Square White LED Matrix + Backpack
[Small 1.2" 8x8 Ultra Bright Square White LED Matrix + Backpack](https://www.adafruit.com/product/1857)
What's better than a single LED? Lots of LEDs! Matrices like these are 'multiplexed' - so to control 64 LEDs you need 16 pins. That's a lot of pins, and there are [driver chips like the MAX7219](//www.adafruit.com/products/453) that can control a matrix for you but...
In Stock
[Buy Now](https://www.adafruit.com/product/1857)
[Related Guides to the Product](https://learn.adafruit.com/products/1857/guides)
### Adafruit 14-segment LED Alphanumeric Backpack - STEMMA QT
[Adafruit 14-segment LED Alphanumeric Backpack - STEMMA QT](https://www.adafruit.com/product/1910)
By popular request, you can now get our 14-segment LED backpacks without the LEDs! These backpacks feature an HT16K33 I2C LED driver, they're simple and easy to use - you can use [our very nice library for the backpacks to...](https://github.com/adafruit/Adafruit-LED-Backpack-Library)
In Stock
[Buy Now](https://www.adafruit.com/product/1910)
[Related Guides to the Product](https://learn.adafruit.com/products/1910/guides)
### Quad Alphanumeric Display - Red 0.54" Digits w/ I2C Backpack
[Quad Alphanumeric Display - Red 0.54" Digits w/ I2C Backpack](https://www.adafruit.com/product/1911)
Display, elegantly, 012345678 or 9! Gaze, hypnotized, at ABCDEFGHIJKLM - well it can display the whole alphabet. You get the point. This is a nice, bright alphanumeric display that shows letters and numbers in a beautiful red hue. It's super bright and designed for viewing from distances...
In Stock
[Buy Now](https://www.adafruit.com/product/1911)
[Related Guides to the Product](https://learn.adafruit.com/products/1911/guides)
### Quad Alphanumeric Display - Blue 0.54" Digits w/ I2C Backpack
[Quad Alphanumeric Display - Blue 0.54" Digits w/ I2C Backpack](https://www.adafruit.com/product/1912)
Display, elegantly, 012345678 or 9! Gaze, hypnotized, at ABCDEFGHIJKLM - well it can display the whole alphabet. You get the point. This is a nice, bright alphanumeric display that shows letters and numbers in a beautiful blue hue. It's super bright and designed for viewing from distances...
In Stock
[Buy Now](https://www.adafruit.com/product/1912)
[Related Guides to the Product](https://learn.adafruit.com/products/1912/guides)
### 16x8 1.2" LED Matrix + Backpack - Ultra Bright Round Green LEDs
[16x8 1.2" LED Matrix + Backpack - Ultra Bright Round Green LEDs](https://www.adafruit.com/product/2035)
What's better than a single LED? Lots of LEDs! And what's better than lots of LEDs? **TWO TIMES AS MANY LEDS!!!**
With the 16x8 LED Matrix Backpack we've doubled your project's matrix capacity by making it super easy to get two separate 8x8 matrices onto...
In Stock
[Buy Now](https://www.adafruit.com/product/2035)
[Related Guides to the Product](https://learn.adafruit.com/products/2035/guides)
### 16x8 1.2" LED Matrix+Backpack UltraBright Round YellowGreen LEDs
[16x8 1.2" LED Matrix+Backpack UltraBright Round YellowGreen LEDs](https://www.adafruit.com/product/2036)
What's better than a single LED? Lots of LEDs! And what's better than lots of LEDs? **TWO TIMES AS MANY LEDS!!!**
With the 16x8 LED Matrix Backpack we've doubled your project's matrix capacity by making it super easy to get two separate 8x8 matrices onto...
In Stock
[Buy Now](https://www.adafruit.com/product/2036)
[Related Guides to the Product](https://learn.adafruit.com/products/2036/guides)
### 16x8 1.2" LED Matrix + Backpack - Ultra Bright Round Red LEDs
[16x8 1.2" LED Matrix + Backpack - Ultra Bright Round Red LEDs](https://www.adafruit.com/product/2037)
What's better than a single LED? Lots of LEDs! And what's better than lots of LEDs? **TWO TIMES AS MANY LEDS!!!**
With the 16x8 LED Matrix Backpack we've doubled your project's matrix capacity by making it super easy to get two separate 8x8 matrices onto...
In Stock
[Buy Now](https://www.adafruit.com/product/2037)
[Related Guides to the Product](https://learn.adafruit.com/products/2037/guides)
### 16x8 1.2" LED Matrix + Backpack - Ultra Bright Round White LEDs
[16x8 1.2" LED Matrix + Backpack - Ultra Bright Round White LEDs](https://www.adafruit.com/product/2038)
What's better than a single LED? Lots of LEDs! And what's better than lots of LEDs? **TWO TIMES AS MANY LEDS!!!**
With the 16x8 LED Matrix Backpack we've doubled your project's matrix capacity by making it super easy to get two separate 8x8 matrices onto...
In Stock
[Buy Now](https://www.adafruit.com/product/2038)
[Related Guides to the Product](https://learn.adafruit.com/products/2038/guides)
### 16x8 1.2" LED Matrix + Backpack - Ultra Bright Round Blue LEDs
[16x8 1.2" LED Matrix + Backpack - Ultra Bright Round Blue LEDs](https://www.adafruit.com/product/2039)
What's better than a single LED? Lots of LEDs! And what's better than lots of LEDs? **TWO TIMES AS MANY LEDS!!!**
With the 16x8 LED Matrix Backpack we've doubled your project's matrix capacity by making it super easy to get two separate 8x8 matrices onto...
In Stock
[Buy Now](https://www.adafruit.com/product/2039)
[Related Guides to the Product](https://learn.adafruit.com/products/2039/guides)
### 16x8 1.2" LED Matrix + Backpack - Ultra Bright Square Blue LEDs
[16x8 1.2" LED Matrix + Backpack - Ultra Bright Square Blue LEDs](https://www.adafruit.com/product/2040)
What's better than a single LED? Lots of LEDs! And what's better than lots of LEDs? **TWO TIMES AS MANY LEDS!!!**
With the 16x8 LED Matrix Backpack we've doubled your project's matrix capacity by making it super easy to get two separate 8x8 matrices onto...
In Stock
[Buy Now](https://www.adafruit.com/product/2040)
[Related Guides to the Product](https://learn.adafruit.com/products/2040/guides)
### 16x8 1.2" LED Matrix + Backpack - Ultra Bright Square Amber LEDs
[16x8 1.2" LED Matrix + Backpack - Ultra Bright Square Amber LEDs](https://www.adafruit.com/product/2041)
What's better than a single LED? Lots of LEDs! And what's better than lots of LEDs? **TWO TIMES AS MANY LEDS!!!**
With the 16x8 LED Matrix Backpack we've doubled your project's matrix capacity by making it super easy to get two separate 8x8 matrices onto...
In Stock
[Buy Now](https://www.adafruit.com/product/2041)
[Related Guides to the Product](https://learn.adafruit.com/products/2041/guides)
### 16x8 1.2" LED Matrix + Backpack - Ultra Bright Square Green LEDs
[16x8 1.2" LED Matrix + Backpack - Ultra Bright Square Green LEDs](https://www.adafruit.com/product/2042)
What's better than a single LED? Lots of LEDs! And what's better than lots of LEDs? **TWO TIMES AS MANY LEDS!!!**
With the 16x8 LED Matrix Backpack we've doubled your project's matrix capacity by making it super easy to get two separate 8x8 matrices onto...
In Stock
[Buy Now](https://www.adafruit.com/product/2042)
[Related Guides to the Product](https://learn.adafruit.com/products/2042/guides)
### 16x8 1.2" LED Matrix + Backpack -Ultra Bright Square Yellow LEDs
[16x8 1.2" LED Matrix + Backpack -Ultra Bright Square Yellow LEDs](https://www.adafruit.com/product/2043)
What's better than a single LED? Lots of LEDs! And what's better than lots of LEDs? **TWO TIMES AS MANY LEDS!!!**
With the 16x8 LED Matrix Backpack we've doubled your project's matrix capacity by making it super easy to get two separate 8x8 matrices onto...
In Stock
[Buy Now](https://www.adafruit.com/product/2043)
[Related Guides to the Product](https://learn.adafruit.com/products/2043/guides)
### 16x8 1.2" LED Matrix + Backpack - Ultra Bright Square White LEDs
[16x8 1.2" LED Matrix + Backpack - Ultra Bright Square White LEDs](https://www.adafruit.com/product/2044)
What's better than a single LED? Lots of LEDs! And what's better than lots of LEDs? **TWO TIMES AS MANY LEDS!!!**
With the 16x8 LED Matrix Backpack we've doubled your project's matrix capacity by making it super easy to get two separate 8x8 matrices onto...
In Stock
[Buy Now](https://www.adafruit.com/product/2044)
[Related Guides to the Product](https://learn.adafruit.com/products/2044/guides)
### 16x8 1.2" LED Matrix + Backpack-Ultra Bright Round Orange LEDs
[16x8 1.2" LED Matrix + Backpack-Ultra Bright Round Orange LEDs](https://www.adafruit.com/product/2052)
What's better than a single LED? Lots of LEDs! And what's better than lots of LEDs? **TWO TIMES AS MANY LEDS!!!**
With the 16x8 LED Matrix Backpack we've doubled your project's matrix capacity by making it super easy to get two separate 8x8 matrices onto...
In Stock
[Buy Now](https://www.adafruit.com/product/2052)
[Related Guides to the Product](https://learn.adafruit.com/products/2052/guides)
### 16x8 1.2" LED Matrices+Backpack Round LEDs in Various Colors
[16x8 1.2" LED Matrices+Backpack Round LEDs in Various Colors](https://www.adafruit.com/product/2054)
What's better than a single LED? Lots of LEDs! And what's better than lots of LEDs? **TWO TIMES AS MANY LEDS!!!**
With the 16x8 LED Matrix Backpack we've doubled your project's matrix capacity by making it super easy to get two separate 8x8 matrices onto...
Out of Stock
[Buy Now](https://www.adafruit.com/product/2054)
[Related Guides to the Product](https://learn.adafruit.com/products/2054/guides)
### Adafruit 8x16 LED Matrix FeatherWing w/o Matrices
[Adafruit 8x16 LED Matrix FeatherWing w/o Matrices](https://www.adafruit.com/product/3090)
You will chirp with delight when you see how easy it is to make your very own 8x16 LED matrix display for any Feather. At 0.8" square, the little [8x8 matrices](https://www.adafruit.com/new/?q=8x8%20miniature%20LED%20matrix&) have everything a big LED matrix has,...
Out of Stock
[Buy Now](https://www.adafruit.com/product/3090)
[Related Guides to the Product](https://learn.adafruit.com/products/3090/guides)
### Adafruit 14-segment LED Alphanumeric backpack (same as P1910)
[Adafruit 14-segment LED Alphanumeric backpack (same as P1910)](https://www.adafruit.com/product/3322)
Just the backpack + 4pin header
No Longer Stocked
[Buy Now](https://www.adafruit.com/product/3322)
[Related Guides to the Product](https://learn.adafruit.com/products/3322/guides)
## Featured Products
### Adafruit Small 1.2" 8x8 LED Matrix w/I2C Backpack - Yellow-Green
[Adafruit Small 1.2" 8x8 LED Matrix w/I2C Backpack - Yellow-Green](https://www.adafruit.com/product/1051)
What's better than a single LED? Lots of LEDs! A fun way to make a small display is to use an [8x8 matrix](https://www.adafruit.com/category/37_88) or a [4-digit 7-segment display](https://www.adafruit.com/category/37_103). Matrices like these are...
In Stock
[Buy Now](https://www.adafruit.com/product/1051)
[Related Guides to the Product](https://learn.adafruit.com/products/1051/guides)
### Small 1.2" 8x8 Ultra Bright Square Blue LED Matrix + Backpack
[Small 1.2" 8x8 Ultra Bright Square Blue LED Matrix + Backpack](https://www.adafruit.com/product/1853)
What's better than a single LED? Lots of LEDs! Matrices like these are 'multiplexed' - so to control 64 LEDs you need 16 pins. That's a lot of pins, and there are [driver chips like the MAX7219](//www.adafruit.com/products/453) that can control a matrix for you but...
In Stock
[Buy Now](https://www.adafruit.com/product/1853)
[Related Guides to the Product](https://learn.adafruit.com/products/1853/guides)
## Related Guides
- [LED Backpack Displays on Raspberry Pi and BeagleBone Black](https://learn.adafruit.com/led-backpack-displays-on-raspberry-pi-and-beaglebone-black.md)
- [Animating Multiple LED Backpacks](https://learn.adafruit.com/animating-multiple-led-backpacks.md)
- [Arduino GPS Clock](https://learn.adafruit.com/arduino-clock.md)
- [Raspberry Pi Physical Dashboard](https://learn.adafruit.com/raspberry-pi-physical-dashboard.md)
- [CircuitPython Hardware: LED Backpacks & FeatherWings](https://learn.adafruit.com/micropython-hardware-led-backpacks-and-featherwings.md)
- [Matrix and 7-Segment LED Backpack with the Raspberry Pi](https://learn.adafruit.com/matrix-7-segment-led-backpack-with-the-raspberry-pi.md)
- [DIY Pocket LED Gamer - Tiny Tetris!](https://learn.adafruit.com/diy-3d-printed-handheld-pocket-game-tiny-tetris-snake.md)
- [RGB LED Matrix Cube with 25,000 LEDs](https://learn.adafruit.com/rgb-led-matrix-cube-for-pi.md)
- [Creating GIFs for SmartMatrix](https://learn.adafruit.com/creating-gifs-for-smartmatrix.md)
- [Adafruit CharliePlex LED Matrix Bonnet](https://learn.adafruit.com/adafruit-charlieplex-bonnet.md)
- [Connecting a 16x32 RGB LED Matrix Panel to a Raspberry Pi](https://learn.adafruit.com/connecting-a-16x32-rgb-led-matrix-panel-to-a-raspberry-pi.md)
- [MicroPython Displays: Drawing Text](https://learn.adafruit.com/micropython-displays-drawing-text.md)
- [Heart Rate Badge](https://learn.adafruit.com/heart-rate-badge.md)
- [16x24 LED Matrix](https://learn.adafruit.com/16x24-led-matrix.md)
- [Adafruit IS31FL3741](https://learn.adafruit.com/adafruit-is31fl3741.md)
---
# Source: https://learn.adafruit.com/adafruit-led-backpack/1-2-inch-7-segment-backpack-assembly.md
# Adafruit LED Backpacks
## Assembly
When you buy a pack from Adafruit, it comes with the fully tested and assembled backpack as well as a 7-segment display in one of the colors we provide (say, red, yellow, blue or green). You'll need to solder the matrix onto the backpack but its an easy task.

Remove the parts from packaging and place the LED matrix OVER the silkscreen side. **DO NOT PUT THE DISPLAY ON UPSIDE DOWN OR IT WONT WORK!! Check the image below to make sure the 'decimal point' dots are in the same location as the ones on the silkscreen.**

Turn the backpack over so its sitting flat on the matrix and ready to solder.

Then solder each pin. There are 8 on each end for a total of 16.

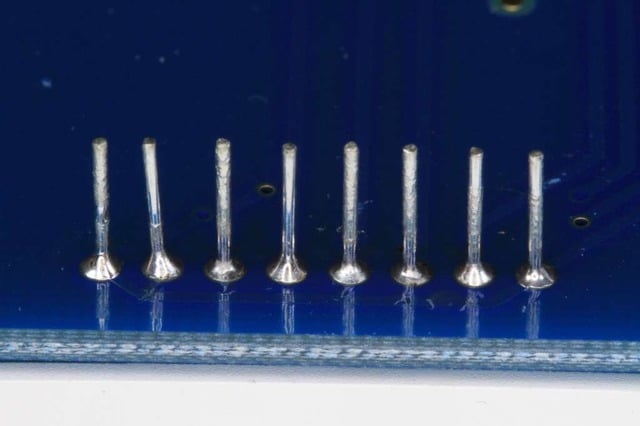
That completes the basic assembly. For use on a breadboard, you will want to also install a 5-pin header on the edge of the board.
Clip the long pins close to the board.

Cut the header strip to length if necessary and insert LONG pins down into the breadboard.


Then solder all 5 pins.


- [Previous Page](https://learn.adafruit.com/adafruit-led-backpack/1-2-inch-7-segment-backpack.md)
- [Next Page](https://learn.adafruit.com/adafruit-led-backpack/1-2-inch-7-segment-backpack-arduino-wiring-and-setup.md)
## Primary Products
### Adafruit Mini 8x8 LED Matrix w/I2C Backpack - Red
[Adafruit Mini 8x8 LED Matrix w/I2C Backpack - Red](https://www.adafruit.com/product/870)
What's better than a single LED? Lots of LEDs! A fun way to make a small display is to use an [8x8 matrix](https://www.adafruit.com/category/37_88) or a [4-digit 7-segment display](https://www.adafruit.com/category/37_103). Matrices like these are...
In Stock
[Buy Now](https://www.adafruit.com/product/870)
[Related Guides to the Product](https://learn.adafruit.com/products/870/guides)
### Adafruit Mini 8x8 LED Matrix w/I2C Backpack - Yellow
[Adafruit Mini 8x8 LED Matrix w/I2C Backpack - Yellow](https://www.adafruit.com/product/871)
What's better than a single LED? Lots of LEDs! A fun way to make a small display is to use an [8x8 matrix](https://www.adafruit.com/category/37_88) or a [4-digit 7-segment display](https://www.adafruit.com/category/37_103). Matrices like these are...
In Stock
[Buy Now](https://www.adafruit.com/product/871)
[Related Guides to the Product](https://learn.adafruit.com/products/871/guides)
### Adafruit Mini 0.8" 8x8 LED Matrix w/I2C Backpack - Yellow-Green
[Adafruit Mini 0.8" 8x8 LED Matrix w/I2C Backpack - Yellow-Green](https://www.adafruit.com/product/872)
What's better than a single LED? Lots of LEDs! A fun way to make a small display is to use an [8x8 matrix](https://www.adafruit.com/category/37_88) or a [4-digit 7-segment display](https://www.adafruit.com/category/37_103). Matrices like these are...
In Stock
[Buy Now](https://www.adafruit.com/product/872)
[Related Guides to the Product](https://learn.adafruit.com/products/872/guides)
### Adafruit 0.56" 4-Digit 7-Segment Display with I2C Backpack - Red
[Adafruit 0.56" 4-Digit 7-Segment Display with I2C Backpack - Red](https://www.adafruit.com/product/878)
What's better than a single LED? Lots of LEDs! A fun way to make a small display is to use an [8x8 matrix](https://www.adafruit.com/category/37_88) or a [4-digit 7-segment display](https://www.adafruit.com/category/37_103). Matrices like these are...
In Stock
[Buy Now](https://www.adafruit.com/product/878)
[Related Guides to the Product](https://learn.adafruit.com/products/878/guides)
### Adafruit 0.56" 4-Digit 7-Segment Display w/I2C Backpack - Yellow
[Adafruit 0.56" 4-Digit 7-Segment Display w/I2C Backpack - Yellow](https://www.adafruit.com/product/879)
What's better than a single LED? Lots of LEDs! A fun way to make a small display is to use an [8x8 matrix](https://www.adafruit.com/category/37_88) or a [4-digit 7-segment display](https://www.adafruit.com/category/37_103). Matrices like these are...
In Stock
[Buy Now](https://www.adafruit.com/product/879)
[Related Guides to the Product](https://learn.adafruit.com/products/879/guides)
### Adafruit 0.56" 4-Digit 7-Segment Display w/ I2C Backpack - Green
[Adafruit 0.56" 4-Digit 7-Segment Display w/ I2C Backpack - Green](https://www.adafruit.com/product/880)
What's better than a single LED? Lots of LEDs! A fun way to make a small display is to use an [8x8 matrix](https://www.adafruit.com/category/37_88) or a [4-digit 7-segment display](https://www.adafruit.com/category/37_103). Matrices like these are...
No Longer Stocked
[Buy Now](https://www.adafruit.com/product/880)
[Related Guides to the Product](https://learn.adafruit.com/products/880/guides)
### Adafruit 0.56" 4-Digit 7-Segment Display w/ I2C Backpack - Blue
[Adafruit 0.56" 4-Digit 7-Segment Display w/ I2C Backpack - Blue](https://www.adafruit.com/product/881)
What's better than a single LED? Lots of LEDs! A fun way to make a small display is to use an [8x8 matrix](https://www.adafruit.com/category/37_88) or a [4-digit 7-segment display](https://www.adafruit.com/category/37_103). Matrices like these are...
In Stock
[Buy Now](https://www.adafruit.com/product/881)
[Related Guides to the Product](https://learn.adafruit.com/products/881/guides)
### Adafruit Bicolor LED Square Pixel Matrix with I2C Backpack
[Adafruit Bicolor LED Square Pixel Matrix with I2C Backpack](https://www.adafruit.com/product/902)
What's better than a single LED? Lots of LEDs! A fun way to make a small colorful display is to use a [1.2" Bi-color 8x8 LED Matrix](http://www.adafruit.com/products/458). Matrices like these are 'multiplexed' - so to control all the 128 LEDs you need 24 pins....
In Stock
[Buy Now](https://www.adafruit.com/product/902)
[Related Guides to the Product](https://learn.adafruit.com/products/902/guides)
### Adafruit Mini 8x8 LED Matrix w/I2C Backpack - Blue
[Adafruit Mini 8x8 LED Matrix w/I2C Backpack - Blue](https://www.adafruit.com/product/959)
What's better than a single LED? Lots of LEDs! A fun way to make a small display is to use an [8x8 matrix](https://www.adafruit.com/category/37_88) or a [4-digit 7-segment display](https://www.adafruit.com/category/37_103). Matrices like these are...
In Stock
[Buy Now](https://www.adafruit.com/product/959)
[Related Guides to the Product](https://learn.adafruit.com/products/959/guides)
### Adafruit 0.56" 4-Digit 7-Segment Display w/I2C Backpack - White
[Adafruit 0.56" 4-Digit 7-Segment Display w/I2C Backpack - White](https://www.adafruit.com/product/1002)
What's better than a single LED? Lots of LEDs! A fun way to make a small display is to use an [8x8 matrix](https://www.adafruit.com/category/37_88) or a [4-digit 7-segment display](https://www.adafruit.com/category/37_103). Matrices like these are...
In Stock
[Buy Now](https://www.adafruit.com/product/1002)
[Related Guides to the Product](https://learn.adafruit.com/products/1002/guides)
### Adafruit 1.2" 8x8 LED Matrix Backpack
[Adafruit 1.2" 8x8 LED Matrix Backpack](https://www.adafruit.com/product/1048)
By popular request, you can now get our 8x8 LED backpacks without the LEDs! These backpacks feature an HT16K33 I2C LED driver, they're simple and easy to use - you can use [our very nice library for the backpacks to...](https://github.com/adafruit/Adafruit-LED-Backpack-Library)
In Stock
[Buy Now](https://www.adafruit.com/product/1048)
[Related Guides to the Product](https://learn.adafruit.com/products/1048/guides)
### Adafruit Small 1.2" 8x8 LED Matrix w/I2C Backpack - Red
[Adafruit Small 1.2" 8x8 LED Matrix w/I2C Backpack - Red](https://www.adafruit.com/product/1049)
What's better than a single LED? Lots of LEDs! A fun way to make a small display is to use an [8x8 matrix](https://www.adafruit.com/category/37_88) or a [4-digit 7-segment display](https://www.adafruit.com/category/37_103). Matrices like these are...
In Stock
[Buy Now](https://www.adafruit.com/product/1049)
[Related Guides to the Product](https://learn.adafruit.com/products/1049/guides)
### Adafruit Small 1.2" 8x8 LED Matrix w/I2C Backpack - Yellow
[Adafruit Small 1.2" 8x8 LED Matrix w/I2C Backpack - Yellow](https://www.adafruit.com/product/1050)
What's better than a single LED? Lots of LEDs! A fun way to make a small display is to use an [8x8 matrix](https://www.adafruit.com/category/37_88) or a [4-digit 7-segment display](https://www.adafruit.com/category/37_103). Matrices like these are...
In Stock
[Buy Now](https://www.adafruit.com/product/1050)
[Related Guides to the Product](https://learn.adafruit.com/products/1050/guides)
### Adafruit Small 1.2" 8x8 LED Matrix w/I2C Backpack - Blue
[Adafruit Small 1.2" 8x8 LED Matrix w/I2C Backpack - Blue](https://www.adafruit.com/product/1052)
What's better than a single LED? Lots of LEDs! A fun way to make a small display is to use an [8x8 matrix](https://www.adafruit.com/category/37_88) or a [4-digit 7-segment display](https://www.adafruit.com/category/37_103). Matrices like these are...
In Stock
[Buy Now](https://www.adafruit.com/product/1052)
[Related Guides to the Product](https://learn.adafruit.com/products/1052/guides)
### Adafruit Mini 8x8 LED Matrix w/I2C Backpack - Ultra Bright White
[Adafruit Mini 8x8 LED Matrix w/I2C Backpack - Ultra Bright White](https://www.adafruit.com/product/1080)
What's better than a single LED? Lots of LEDs! A fun way to make a small display is to use an [8x8 matrix](https://www.adafruit.com/category/37_88) or a [4-digit 7-segment display](https://www.adafruit.com/category/37_103). Matrices like these are...
In Stock
[Buy Now](https://www.adafruit.com/product/1080)
[Related Guides to the Product](https://learn.adafruit.com/products/1080/guides)
### Adafruit 1.2" 4-Digit 7-Segment Display w/I2C Backpack - Green
[Adafruit 1.2" 4-Digit 7-Segment Display w/I2C Backpack - Green](https://www.adafruit.com/product/1268)
What's better than a single LED? Lots of LEDs! A fun way to make a numeric display is to use a [4-digit 7-segment display](https://www.adafruit.com/category/37_103). LED matrices like these are 'multiplexed' - so to control all the seven-segment LEDs you need 14 pins....
No Longer Stocked
[Buy Now](https://www.adafruit.com/product/1268)
[Related Guides to the Product](https://learn.adafruit.com/products/1268/guides)
### Adafruit 1.2" 4-Digit 7-Segment Display w/I2C Backpack - Yellow
[Adafruit 1.2" 4-Digit 7-Segment Display w/I2C Backpack - Yellow](https://www.adafruit.com/product/1269)
What's better than a single LED? Lots of LEDs! A fun way to make a numeric display is to use a [4-digit 7-segment display](https://www.adafruit.com/category/37_103). LED matrices like these are 'multiplexed' - so to control all the seven-segment LEDs you need 14 pins....
In Stock
[Buy Now](https://www.adafruit.com/product/1269)
[Related Guides to the Product](https://learn.adafruit.com/products/1269/guides)
### Adafruit 1.2" 4-Digit 7-Segment Display w/I2C Backpack - Red
[Adafruit 1.2" 4-Digit 7-Segment Display w/I2C Backpack - Red](https://www.adafruit.com/product/1270)
What's better than a single LED? Lots of LEDs! A fun way to make a numeric display is to use a [4-digit 7-segment display](https://www.adafruit.com/category/37_103). LED matrices like these are 'multiplexed' - so to control all the seven-segment LEDs you need 14 pins....
In Stock
[Buy Now](https://www.adafruit.com/product/1270)
[Related Guides to the Product](https://learn.adafruit.com/products/1270/guides)
### Small 1.2" 8x8 Ultra Bright White LED Matrix + Backpack
[Small 1.2" 8x8 Ultra Bright White LED Matrix + Backpack](https://www.adafruit.com/product/1614)
What's better than a single LED? Lots of LEDs! A fun way to make a small display is to use an [8x8 matrix](https://www.adafruit.com/category/37_88) or a [4-digit 7-segment display](https://www.adafruit.com/category/37_103). Matrices like these are...
In Stock
[Buy Now](https://www.adafruit.com/product/1614)
[Related Guides to the Product](https://learn.adafruit.com/products/1614/guides)
### Adafruit Small 1.2" 8x8 LED Matrix w/I2C Backpack - Pure Green
[Adafruit Small 1.2" 8x8 LED Matrix w/I2C Backpack - Pure Green](https://www.adafruit.com/product/1632)
What's better than a single LED? Lots of LEDs! A fun way to make a small display is to use an [8x8 matrix](https://www.adafruit.com/category/37_88) or a [4-digit 7-segment display](https://www.adafruit.com/category/37_103). Matrices like these are...
In Stock
[Buy Now](https://www.adafruit.com/product/1632)
[Related Guides to the Product](https://learn.adafruit.com/products/1632/guides)
### Adafruit Mini 0.8" 8x8 LED Matrix w/I2C Backpack - Pure Green
[Adafruit Mini 0.8" 8x8 LED Matrix w/I2C Backpack - Pure Green](https://www.adafruit.com/product/1633)
What's better than a single LED? Lots of LEDs! A fun way to make a small display is to use an [8x8 matrix](https://www.adafruit.com/category/37_88) or a [4-digit 7-segment display](https://www.adafruit.com/category/37_103). Matrices like these are...
In Stock
[Buy Now](https://www.adafruit.com/product/1633)
[Related Guides to the Product](https://learn.adafruit.com/products/1633/guides)
### Bi-Color (Red/Green) 24-Bar Bargraph w/I2C Backpack Kit
[Bi-Color (Red/Green) 24-Bar Bargraph w/I2C Backpack Kit](https://www.adafruit.com/product/1721)
What's better than a single LED? Lots of LEDs! A fun way to make a small linear display is to use two 12-bar Bi-color bar-graphs. However, this LED bargraph is 'multiplexed' - so to control all the 48 LEDs you need a lot of pins.
Out of Stock
[Buy Now](https://www.adafruit.com/product/1721)
[Related Guides to the Product](https://learn.adafruit.com/products/1721/guides)
### Small 1.2" 8x8 Ultra Bright Square Amber LED Matrix + Backpack
[Small 1.2" 8x8 Ultra Bright Square Amber LED Matrix + Backpack](https://www.adafruit.com/product/1854)
What's better than a single LED? Lots of LEDs! Matrices like these are 'multiplexed' - so to control 64 LEDs you need 16 pins. That's a lot of pins, and there are [driver chips like the MAX7219](//www.adafruit.com/products/453) that can control a matrix for you but...
In Stock
[Buy Now](https://www.adafruit.com/product/1854)
[Related Guides to the Product](https://learn.adafruit.com/products/1854/guides)
### Small 1.2" 8x8 Ultra Bright Square Yellow LED Matrix + Backpack
[Small 1.2" 8x8 Ultra Bright Square Yellow LED Matrix + Backpack](https://www.adafruit.com/product/1855)
What's better than a single LED? Lots of LEDs! Matrices like these are 'multiplexed' - so to control 64 LEDs you need 16 pins. That's a lot of pins, and there are [driver chips like the MAX7219](//www.adafruit.com/products/453) that can control a matrix for you but...
In Stock
[Buy Now](https://www.adafruit.com/product/1855)
[Related Guides to the Product](https://learn.adafruit.com/products/1855/guides)
### Small 1.2" 8x8 Bright Square Pure Green LED Matrix + Backpack
[Small 1.2" 8x8 Bright Square Pure Green LED Matrix + Backpack](https://www.adafruit.com/product/1856)
What's better than a single LED? Lots of LEDs! Matrices like these are 'multiplexed' - so to control 64 LEDs you need 16 pins. That's a lot of pins, and there are [driver chips like the MAX7219](//www.adafruit.com/products/453) that can control a matrix for you but...
In Stock
[Buy Now](https://www.adafruit.com/product/1856)
[Related Guides to the Product](https://learn.adafruit.com/products/1856/guides)
### Small 1.2" 8x8 Ultra Bright Square White LED Matrix + Backpack
[Small 1.2" 8x8 Ultra Bright Square White LED Matrix + Backpack](https://www.adafruit.com/product/1857)
What's better than a single LED? Lots of LEDs! Matrices like these are 'multiplexed' - so to control 64 LEDs you need 16 pins. That's a lot of pins, and there are [driver chips like the MAX7219](//www.adafruit.com/products/453) that can control a matrix for you but...
In Stock
[Buy Now](https://www.adafruit.com/product/1857)
[Related Guides to the Product](https://learn.adafruit.com/products/1857/guides)
### Adafruit 14-segment LED Alphanumeric Backpack - STEMMA QT
[Adafruit 14-segment LED Alphanumeric Backpack - STEMMA QT](https://www.adafruit.com/product/1910)
By popular request, you can now get our 14-segment LED backpacks without the LEDs! These backpacks feature an HT16K33 I2C LED driver, they're simple and easy to use - you can use [our very nice library for the backpacks to...](https://github.com/adafruit/Adafruit-LED-Backpack-Library)
In Stock
[Buy Now](https://www.adafruit.com/product/1910)
[Related Guides to the Product](https://learn.adafruit.com/products/1910/guides)
### Quad Alphanumeric Display - Red 0.54" Digits w/ I2C Backpack
[Quad Alphanumeric Display - Red 0.54" Digits w/ I2C Backpack](https://www.adafruit.com/product/1911)
Display, elegantly, 012345678 or 9! Gaze, hypnotized, at ABCDEFGHIJKLM - well it can display the whole alphabet. You get the point. This is a nice, bright alphanumeric display that shows letters and numbers in a beautiful red hue. It's super bright and designed for viewing from distances...
In Stock
[Buy Now](https://www.adafruit.com/product/1911)
[Related Guides to the Product](https://learn.adafruit.com/products/1911/guides)
### Quad Alphanumeric Display - Blue 0.54" Digits w/ I2C Backpack
[Quad Alphanumeric Display - Blue 0.54" Digits w/ I2C Backpack](https://www.adafruit.com/product/1912)
Display, elegantly, 012345678 or 9! Gaze, hypnotized, at ABCDEFGHIJKLM - well it can display the whole alphabet. You get the point. This is a nice, bright alphanumeric display that shows letters and numbers in a beautiful blue hue. It's super bright and designed for viewing from distances...
In Stock
[Buy Now](https://www.adafruit.com/product/1912)
[Related Guides to the Product](https://learn.adafruit.com/products/1912/guides)
### 16x8 1.2" LED Matrix + Backpack - Ultra Bright Round Green LEDs
[16x8 1.2" LED Matrix + Backpack - Ultra Bright Round Green LEDs](https://www.adafruit.com/product/2035)
What's better than a single LED? Lots of LEDs! And what's better than lots of LEDs? **TWO TIMES AS MANY LEDS!!!**
With the 16x8 LED Matrix Backpack we've doubled your project's matrix capacity by making it super easy to get two separate 8x8 matrices onto...
In Stock
[Buy Now](https://www.adafruit.com/product/2035)
[Related Guides to the Product](https://learn.adafruit.com/products/2035/guides)
### 16x8 1.2" LED Matrix+Backpack UltraBright Round YellowGreen LEDs
[16x8 1.2" LED Matrix+Backpack UltraBright Round YellowGreen LEDs](https://www.adafruit.com/product/2036)
What's better than a single LED? Lots of LEDs! And what's better than lots of LEDs? **TWO TIMES AS MANY LEDS!!!**
With the 16x8 LED Matrix Backpack we've doubled your project's matrix capacity by making it super easy to get two separate 8x8 matrices onto...
In Stock
[Buy Now](https://www.adafruit.com/product/2036)
[Related Guides to the Product](https://learn.adafruit.com/products/2036/guides)
### 16x8 1.2" LED Matrix + Backpack - Ultra Bright Round Red LEDs
[16x8 1.2" LED Matrix + Backpack - Ultra Bright Round Red LEDs](https://www.adafruit.com/product/2037)
What's better than a single LED? Lots of LEDs! And what's better than lots of LEDs? **TWO TIMES AS MANY LEDS!!!**
With the 16x8 LED Matrix Backpack we've doubled your project's matrix capacity by making it super easy to get two separate 8x8 matrices onto...
In Stock
[Buy Now](https://www.adafruit.com/product/2037)
[Related Guides to the Product](https://learn.adafruit.com/products/2037/guides)
### 16x8 1.2" LED Matrix + Backpack - Ultra Bright Round White LEDs
[16x8 1.2" LED Matrix + Backpack - Ultra Bright Round White LEDs](https://www.adafruit.com/product/2038)
What's better than a single LED? Lots of LEDs! And what's better than lots of LEDs? **TWO TIMES AS MANY LEDS!!!**
With the 16x8 LED Matrix Backpack we've doubled your project's matrix capacity by making it super easy to get two separate 8x8 matrices onto...
In Stock
[Buy Now](https://www.adafruit.com/product/2038)
[Related Guides to the Product](https://learn.adafruit.com/products/2038/guides)
### 16x8 1.2" LED Matrix + Backpack - Ultra Bright Round Blue LEDs
[16x8 1.2" LED Matrix + Backpack - Ultra Bright Round Blue LEDs](https://www.adafruit.com/product/2039)
What's better than a single LED? Lots of LEDs! And what's better than lots of LEDs? **TWO TIMES AS MANY LEDS!!!**
With the 16x8 LED Matrix Backpack we've doubled your project's matrix capacity by making it super easy to get two separate 8x8 matrices onto...
In Stock
[Buy Now](https://www.adafruit.com/product/2039)
[Related Guides to the Product](https://learn.adafruit.com/products/2039/guides)
### 16x8 1.2" LED Matrix + Backpack - Ultra Bright Square Blue LEDs
[16x8 1.2" LED Matrix + Backpack - Ultra Bright Square Blue LEDs](https://www.adafruit.com/product/2040)
What's better than a single LED? Lots of LEDs! And what's better than lots of LEDs? **TWO TIMES AS MANY LEDS!!!**
With the 16x8 LED Matrix Backpack we've doubled your project's matrix capacity by making it super easy to get two separate 8x8 matrices onto...
In Stock
[Buy Now](https://www.adafruit.com/product/2040)
[Related Guides to the Product](https://learn.adafruit.com/products/2040/guides)
### 16x8 1.2" LED Matrix + Backpack - Ultra Bright Square Amber LEDs
[16x8 1.2" LED Matrix + Backpack - Ultra Bright Square Amber LEDs](https://www.adafruit.com/product/2041)
What's better than a single LED? Lots of LEDs! And what's better than lots of LEDs? **TWO TIMES AS MANY LEDS!!!**
With the 16x8 LED Matrix Backpack we've doubled your project's matrix capacity by making it super easy to get two separate 8x8 matrices onto...
In Stock
[Buy Now](https://www.adafruit.com/product/2041)
[Related Guides to the Product](https://learn.adafruit.com/products/2041/guides)
### 16x8 1.2" LED Matrix + Backpack - Ultra Bright Square Green LEDs
[16x8 1.2" LED Matrix + Backpack - Ultra Bright Square Green LEDs](https://www.adafruit.com/product/2042)
What's better than a single LED? Lots of LEDs! And what's better than lots of LEDs? **TWO TIMES AS MANY LEDS!!!**
With the 16x8 LED Matrix Backpack we've doubled your project's matrix capacity by making it super easy to get two separate 8x8 matrices onto...
In Stock
[Buy Now](https://www.adafruit.com/product/2042)
[Related Guides to the Product](https://learn.adafruit.com/products/2042/guides)
### 16x8 1.2" LED Matrix + Backpack -Ultra Bright Square Yellow LEDs
[16x8 1.2" LED Matrix + Backpack -Ultra Bright Square Yellow LEDs](https://www.adafruit.com/product/2043)
What's better than a single LED? Lots of LEDs! And what's better than lots of LEDs? **TWO TIMES AS MANY LEDS!!!**
With the 16x8 LED Matrix Backpack we've doubled your project's matrix capacity by making it super easy to get two separate 8x8 matrices onto...
In Stock
[Buy Now](https://www.adafruit.com/product/2043)
[Related Guides to the Product](https://learn.adafruit.com/products/2043/guides)
### 16x8 1.2" LED Matrix + Backpack - Ultra Bright Square White LEDs
[16x8 1.2" LED Matrix + Backpack - Ultra Bright Square White LEDs](https://www.adafruit.com/product/2044)
What's better than a single LED? Lots of LEDs! And what's better than lots of LEDs? **TWO TIMES AS MANY LEDS!!!**
With the 16x8 LED Matrix Backpack we've doubled your project's matrix capacity by making it super easy to get two separate 8x8 matrices onto...
In Stock
[Buy Now](https://www.adafruit.com/product/2044)
[Related Guides to the Product](https://learn.adafruit.com/products/2044/guides)
### 16x8 1.2" LED Matrix + Backpack-Ultra Bright Round Orange LEDs
[16x8 1.2" LED Matrix + Backpack-Ultra Bright Round Orange LEDs](https://www.adafruit.com/product/2052)
What's better than a single LED? Lots of LEDs! And what's better than lots of LEDs? **TWO TIMES AS MANY LEDS!!!**
With the 16x8 LED Matrix Backpack we've doubled your project's matrix capacity by making it super easy to get two separate 8x8 matrices onto...
In Stock
[Buy Now](https://www.adafruit.com/product/2052)
[Related Guides to the Product](https://learn.adafruit.com/products/2052/guides)
### 16x8 1.2" LED Matrices+Backpack Round LEDs in Various Colors
[16x8 1.2" LED Matrices+Backpack Round LEDs in Various Colors](https://www.adafruit.com/product/2054)
What's better than a single LED? Lots of LEDs! And what's better than lots of LEDs? **TWO TIMES AS MANY LEDS!!!**
With the 16x8 LED Matrix Backpack we've doubled your project's matrix capacity by making it super easy to get two separate 8x8 matrices onto...
Out of Stock
[Buy Now](https://www.adafruit.com/product/2054)
[Related Guides to the Product](https://learn.adafruit.com/products/2054/guides)
### Adafruit 8x16 LED Matrix FeatherWing w/o Matrices
[Adafruit 8x16 LED Matrix FeatherWing w/o Matrices](https://www.adafruit.com/product/3090)
You will chirp with delight when you see how easy it is to make your very own 8x16 LED matrix display for any Feather. At 0.8" square, the little [8x8 matrices](https://www.adafruit.com/new/?q=8x8%20miniature%20LED%20matrix&) have everything a big LED matrix has,...
Out of Stock
[Buy Now](https://www.adafruit.com/product/3090)
[Related Guides to the Product](https://learn.adafruit.com/products/3090/guides)
### Adafruit 14-segment LED Alphanumeric backpack (same as P1910)
[Adafruit 14-segment LED Alphanumeric backpack (same as P1910)](https://www.adafruit.com/product/3322)
Just the backpack + 4pin header
No Longer Stocked
[Buy Now](https://www.adafruit.com/product/3322)
[Related Guides to the Product](https://learn.adafruit.com/products/3322/guides)
## Featured Products
### Adafruit Small 1.2" 8x8 LED Matrix w/I2C Backpack - Yellow-Green
[Adafruit Small 1.2" 8x8 LED Matrix w/I2C Backpack - Yellow-Green](https://www.adafruit.com/product/1051)
What's better than a single LED? Lots of LEDs! A fun way to make a small display is to use an [8x8 matrix](https://www.adafruit.com/category/37_88) or a [4-digit 7-segment display](https://www.adafruit.com/category/37_103). Matrices like these are...
In Stock
[Buy Now](https://www.adafruit.com/product/1051)
[Related Guides to the Product](https://learn.adafruit.com/products/1051/guides)
### Small 1.2" 8x8 Ultra Bright Square Blue LED Matrix + Backpack
[Small 1.2" 8x8 Ultra Bright Square Blue LED Matrix + Backpack](https://www.adafruit.com/product/1853)
What's better than a single LED? Lots of LEDs! Matrices like these are 'multiplexed' - so to control 64 LEDs you need 16 pins. That's a lot of pins, and there are [driver chips like the MAX7219](//www.adafruit.com/products/453) that can control a matrix for you but...
In Stock
[Buy Now](https://www.adafruit.com/product/1853)
[Related Guides to the Product](https://learn.adafruit.com/products/1853/guides)
## Related Guides
- [LED Backpack Displays on Raspberry Pi and BeagleBone Black](https://learn.adafruit.com/led-backpack-displays-on-raspberry-pi-and-beaglebone-black.md)
- [Animating Multiple LED Backpacks](https://learn.adafruit.com/animating-multiple-led-backpacks.md)
- [Arduino GPS Clock](https://learn.adafruit.com/arduino-clock.md)
- [Raspberry Pi Physical Dashboard](https://learn.adafruit.com/raspberry-pi-physical-dashboard.md)
- [CircuitPython Hardware: LED Backpacks & FeatherWings](https://learn.adafruit.com/micropython-hardware-led-backpacks-and-featherwings.md)
- [Matrix and 7-Segment LED Backpack with the Raspberry Pi](https://learn.adafruit.com/matrix-7-segment-led-backpack-with-the-raspberry-pi.md)
- [DIY Pocket LED Gamer - Tiny Tetris!](https://learn.adafruit.com/diy-3d-printed-handheld-pocket-game-tiny-tetris-snake.md)
- [RGB LED Matrix Cube with 25,000 LEDs](https://learn.adafruit.com/rgb-led-matrix-cube-for-pi.md)
- [Creating GIFs for SmartMatrix](https://learn.adafruit.com/creating-gifs-for-smartmatrix.md)
- [Adafruit CharliePlex LED Matrix Bonnet](https://learn.adafruit.com/adafruit-charlieplex-bonnet.md)
- [Connecting a 16x32 RGB LED Matrix Panel to a Raspberry Pi](https://learn.adafruit.com/connecting-a-16x32-rgb-led-matrix-panel-to-a-raspberry-pi.md)
- [MicroPython Displays: Drawing Text](https://learn.adafruit.com/micropython-displays-drawing-text.md)
- [Heart Rate Badge](https://learn.adafruit.com/heart-rate-badge.md)
- [16x24 LED Matrix](https://learn.adafruit.com/16x24-led-matrix.md)
- [Adafruit IS31FL3741](https://learn.adafruit.com/adafruit-is31fl3741.md)
---
# Source: https://learn.adafruit.com/adafruit-led-backpack/1-2-inch-7-segment-backpack.md
# Adafruit LED Backpacks
## 1.2" 7-segment Backpack
These backpacks drive the massive 1.2" 7-segment modules. With 2 leds per segment these make a gorgeous and impressive display. The 7-segment displays normally require 16 pins to drive. This backpack uses an I2C constant-current matrix controller on the back of the PCB, so you only need 2 pins to drive it!
The controller chip takes care of multiplexing all the LEDs in the background. All you have to do is write data to it using the 2-pin I2C interface. There are three address select pins so you can select one of 8 addresses to control up to 8 of these on a single 2-pin I2C bus (as well as whatever other I2C chips or sensors you like). The driver chip can 'dim' the entire display from 1/16 brightness up to full brightness in 1/16th steps. It cannot dim individual LEDs, only the entire display at once.
**New! As of June 13, 2023** we have updated the backpack board to have a 5V boost converter which means you can use it with 3.3V power and get nice bright LED segments without having to wire up a separate 5V power supply. It also has Stemma QT ports for plug-n-play connectivity

- [Previous Page](https://learn.adafruit.com/adafruit-led-backpack/0-dot-56-seven-segment-backpack-circuitpython-and-python-usage.md)
- [Next Page](https://learn.adafruit.com/adafruit-led-backpack/1-2-inch-7-segment-backpack-assembly.md)
## Primary Products
### Adafruit Mini 8x8 LED Matrix w/I2C Backpack - Red
[Adafruit Mini 8x8 LED Matrix w/I2C Backpack - Red](https://www.adafruit.com/product/870)
What's better than a single LED? Lots of LEDs! A fun way to make a small display is to use an [8x8 matrix](https://www.adafruit.com/category/37_88) or a [4-digit 7-segment display](https://www.adafruit.com/category/37_103). Matrices like these are...
In Stock
[Buy Now](https://www.adafruit.com/product/870)
[Related Guides to the Product](https://learn.adafruit.com/products/870/guides)
### Adafruit Mini 8x8 LED Matrix w/I2C Backpack - Yellow
[Adafruit Mini 8x8 LED Matrix w/I2C Backpack - Yellow](https://www.adafruit.com/product/871)
What's better than a single LED? Lots of LEDs! A fun way to make a small display is to use an [8x8 matrix](https://www.adafruit.com/category/37_88) or a [4-digit 7-segment display](https://www.adafruit.com/category/37_103). Matrices like these are...
In Stock
[Buy Now](https://www.adafruit.com/product/871)
[Related Guides to the Product](https://learn.adafruit.com/products/871/guides)
### Adafruit Mini 0.8" 8x8 LED Matrix w/I2C Backpack - Yellow-Green
[Adafruit Mini 0.8" 8x8 LED Matrix w/I2C Backpack - Yellow-Green](https://www.adafruit.com/product/872)
What's better than a single LED? Lots of LEDs! A fun way to make a small display is to use an [8x8 matrix](https://www.adafruit.com/category/37_88) or a [4-digit 7-segment display](https://www.adafruit.com/category/37_103). Matrices like these are...
In Stock
[Buy Now](https://www.adafruit.com/product/872)
[Related Guides to the Product](https://learn.adafruit.com/products/872/guides)
### Adafruit 0.56" 4-Digit 7-Segment Display with I2C Backpack - Red
[Adafruit 0.56" 4-Digit 7-Segment Display with I2C Backpack - Red](https://www.adafruit.com/product/878)
What's better than a single LED? Lots of LEDs! A fun way to make a small display is to use an [8x8 matrix](https://www.adafruit.com/category/37_88) or a [4-digit 7-segment display](https://www.adafruit.com/category/37_103). Matrices like these are...
In Stock
[Buy Now](https://www.adafruit.com/product/878)
[Related Guides to the Product](https://learn.adafruit.com/products/878/guides)
### Adafruit 0.56" 4-Digit 7-Segment Display w/I2C Backpack - Yellow
[Adafruit 0.56" 4-Digit 7-Segment Display w/I2C Backpack - Yellow](https://www.adafruit.com/product/879)
What's better than a single LED? Lots of LEDs! A fun way to make a small display is to use an [8x8 matrix](https://www.adafruit.com/category/37_88) or a [4-digit 7-segment display](https://www.adafruit.com/category/37_103). Matrices like these are...
In Stock
[Buy Now](https://www.adafruit.com/product/879)
[Related Guides to the Product](https://learn.adafruit.com/products/879/guides)
### Adafruit 0.56" 4-Digit 7-Segment Display w/ I2C Backpack - Green
[Adafruit 0.56" 4-Digit 7-Segment Display w/ I2C Backpack - Green](https://www.adafruit.com/product/880)
What's better than a single LED? Lots of LEDs! A fun way to make a small display is to use an [8x8 matrix](https://www.adafruit.com/category/37_88) or a [4-digit 7-segment display](https://www.adafruit.com/category/37_103). Matrices like these are...
No Longer Stocked
[Buy Now](https://www.adafruit.com/product/880)
[Related Guides to the Product](https://learn.adafruit.com/products/880/guides)
### Adafruit 0.56" 4-Digit 7-Segment Display w/ I2C Backpack - Blue
[Adafruit 0.56" 4-Digit 7-Segment Display w/ I2C Backpack - Blue](https://www.adafruit.com/product/881)
What's better than a single LED? Lots of LEDs! A fun way to make a small display is to use an [8x8 matrix](https://www.adafruit.com/category/37_88) or a [4-digit 7-segment display](https://www.adafruit.com/category/37_103). Matrices like these are...
In Stock
[Buy Now](https://www.adafruit.com/product/881)
[Related Guides to the Product](https://learn.adafruit.com/products/881/guides)
### Adafruit Bicolor LED Square Pixel Matrix with I2C Backpack
[Adafruit Bicolor LED Square Pixel Matrix with I2C Backpack](https://www.adafruit.com/product/902)
What's better than a single LED? Lots of LEDs! A fun way to make a small colorful display is to use a [1.2" Bi-color 8x8 LED Matrix](http://www.adafruit.com/products/458). Matrices like these are 'multiplexed' - so to control all the 128 LEDs you need 24 pins....
In Stock
[Buy Now](https://www.adafruit.com/product/902)
[Related Guides to the Product](https://learn.adafruit.com/products/902/guides)
### Adafruit Mini 8x8 LED Matrix w/I2C Backpack - Blue
[Adafruit Mini 8x8 LED Matrix w/I2C Backpack - Blue](https://www.adafruit.com/product/959)
What's better than a single LED? Lots of LEDs! A fun way to make a small display is to use an [8x8 matrix](https://www.adafruit.com/category/37_88) or a [4-digit 7-segment display](https://www.adafruit.com/category/37_103). Matrices like these are...
In Stock
[Buy Now](https://www.adafruit.com/product/959)
[Related Guides to the Product](https://learn.adafruit.com/products/959/guides)
### Adafruit 0.56" 4-Digit 7-Segment Display w/I2C Backpack - White
[Adafruit 0.56" 4-Digit 7-Segment Display w/I2C Backpack - White](https://www.adafruit.com/product/1002)
What's better than a single LED? Lots of LEDs! A fun way to make a small display is to use an [8x8 matrix](https://www.adafruit.com/category/37_88) or a [4-digit 7-segment display](https://www.adafruit.com/category/37_103). Matrices like these are...
In Stock
[Buy Now](https://www.adafruit.com/product/1002)
[Related Guides to the Product](https://learn.adafruit.com/products/1002/guides)
### Adafruit 1.2" 8x8 LED Matrix Backpack
[Adafruit 1.2" 8x8 LED Matrix Backpack](https://www.adafruit.com/product/1048)
By popular request, you can now get our 8x8 LED backpacks without the LEDs! These backpacks feature an HT16K33 I2C LED driver, they're simple and easy to use - you can use [our very nice library for the backpacks to...](https://github.com/adafruit/Adafruit-LED-Backpack-Library)
In Stock
[Buy Now](https://www.adafruit.com/product/1048)
[Related Guides to the Product](https://learn.adafruit.com/products/1048/guides)
### Adafruit Small 1.2" 8x8 LED Matrix w/I2C Backpack - Red
[Adafruit Small 1.2" 8x8 LED Matrix w/I2C Backpack - Red](https://www.adafruit.com/product/1049)
What's better than a single LED? Lots of LEDs! A fun way to make a small display is to use an [8x8 matrix](https://www.adafruit.com/category/37_88) or a [4-digit 7-segment display](https://www.adafruit.com/category/37_103). Matrices like these are...
In Stock
[Buy Now](https://www.adafruit.com/product/1049)
[Related Guides to the Product](https://learn.adafruit.com/products/1049/guides)
### Adafruit Small 1.2" 8x8 LED Matrix w/I2C Backpack - Yellow
[Adafruit Small 1.2" 8x8 LED Matrix w/I2C Backpack - Yellow](https://www.adafruit.com/product/1050)
What's better than a single LED? Lots of LEDs! A fun way to make a small display is to use an [8x8 matrix](https://www.adafruit.com/category/37_88) or a [4-digit 7-segment display](https://www.adafruit.com/category/37_103). Matrices like these are...
In Stock
[Buy Now](https://www.adafruit.com/product/1050)
[Related Guides to the Product](https://learn.adafruit.com/products/1050/guides)
### Adafruit Small 1.2" 8x8 LED Matrix w/I2C Backpack - Blue
[Adafruit Small 1.2" 8x8 LED Matrix w/I2C Backpack - Blue](https://www.adafruit.com/product/1052)
What's better than a single LED? Lots of LEDs! A fun way to make a small display is to use an [8x8 matrix](https://www.adafruit.com/category/37_88) or a [4-digit 7-segment display](https://www.adafruit.com/category/37_103). Matrices like these are...
In Stock
[Buy Now](https://www.adafruit.com/product/1052)
[Related Guides to the Product](https://learn.adafruit.com/products/1052/guides)
### Adafruit Mini 8x8 LED Matrix w/I2C Backpack - Ultra Bright White
[Adafruit Mini 8x8 LED Matrix w/I2C Backpack - Ultra Bright White](https://www.adafruit.com/product/1080)
What's better than a single LED? Lots of LEDs! A fun way to make a small display is to use an [8x8 matrix](https://www.adafruit.com/category/37_88) or a [4-digit 7-segment display](https://www.adafruit.com/category/37_103). Matrices like these are...
In Stock
[Buy Now](https://www.adafruit.com/product/1080)
[Related Guides to the Product](https://learn.adafruit.com/products/1080/guides)
### Adafruit 1.2" 4-Digit 7-Segment Display w/I2C Backpack - Green
[Adafruit 1.2" 4-Digit 7-Segment Display w/I2C Backpack - Green](https://www.adafruit.com/product/1268)
What's better than a single LED? Lots of LEDs! A fun way to make a numeric display is to use a [4-digit 7-segment display](https://www.adafruit.com/category/37_103). LED matrices like these are 'multiplexed' - so to control all the seven-segment LEDs you need 14 pins....
No Longer Stocked
[Buy Now](https://www.adafruit.com/product/1268)
[Related Guides to the Product](https://learn.adafruit.com/products/1268/guides)
### Adafruit 1.2" 4-Digit 7-Segment Display w/I2C Backpack - Yellow
[Adafruit 1.2" 4-Digit 7-Segment Display w/I2C Backpack - Yellow](https://www.adafruit.com/product/1269)
What's better than a single LED? Lots of LEDs! A fun way to make a numeric display is to use a [4-digit 7-segment display](https://www.adafruit.com/category/37_103). LED matrices like these are 'multiplexed' - so to control all the seven-segment LEDs you need 14 pins....
In Stock
[Buy Now](https://www.adafruit.com/product/1269)
[Related Guides to the Product](https://learn.adafruit.com/products/1269/guides)
### Adafruit 1.2" 4-Digit 7-Segment Display w/I2C Backpack - Red
[Adafruit 1.2" 4-Digit 7-Segment Display w/I2C Backpack - Red](https://www.adafruit.com/product/1270)
What's better than a single LED? Lots of LEDs! A fun way to make a numeric display is to use a [4-digit 7-segment display](https://www.adafruit.com/category/37_103). LED matrices like these are 'multiplexed' - so to control all the seven-segment LEDs you need 14 pins....
In Stock
[Buy Now](https://www.adafruit.com/product/1270)
[Related Guides to the Product](https://learn.adafruit.com/products/1270/guides)
### Small 1.2" 8x8 Ultra Bright White LED Matrix + Backpack
[Small 1.2" 8x8 Ultra Bright White LED Matrix + Backpack](https://www.adafruit.com/product/1614)
What's better than a single LED? Lots of LEDs! A fun way to make a small display is to use an [8x8 matrix](https://www.adafruit.com/category/37_88) or a [4-digit 7-segment display](https://www.adafruit.com/category/37_103). Matrices like these are...
In Stock
[Buy Now](https://www.adafruit.com/product/1614)
[Related Guides to the Product](https://learn.adafruit.com/products/1614/guides)
### Adafruit Small 1.2" 8x8 LED Matrix w/I2C Backpack - Pure Green
[Adafruit Small 1.2" 8x8 LED Matrix w/I2C Backpack - Pure Green](https://www.adafruit.com/product/1632)
What's better than a single LED? Lots of LEDs! A fun way to make a small display is to use an [8x8 matrix](https://www.adafruit.com/category/37_88) or a [4-digit 7-segment display](https://www.adafruit.com/category/37_103). Matrices like these are...
In Stock
[Buy Now](https://www.adafruit.com/product/1632)
[Related Guides to the Product](https://learn.adafruit.com/products/1632/guides)
### Adafruit Mini 0.8" 8x8 LED Matrix w/I2C Backpack - Pure Green
[Adafruit Mini 0.8" 8x8 LED Matrix w/I2C Backpack - Pure Green](https://www.adafruit.com/product/1633)
What's better than a single LED? Lots of LEDs! A fun way to make a small display is to use an [8x8 matrix](https://www.adafruit.com/category/37_88) or a [4-digit 7-segment display](https://www.adafruit.com/category/37_103). Matrices like these are...
In Stock
[Buy Now](https://www.adafruit.com/product/1633)
[Related Guides to the Product](https://learn.adafruit.com/products/1633/guides)
### Bi-Color (Red/Green) 24-Bar Bargraph w/I2C Backpack Kit
[Bi-Color (Red/Green) 24-Bar Bargraph w/I2C Backpack Kit](https://www.adafruit.com/product/1721)
What's better than a single LED? Lots of LEDs! A fun way to make a small linear display is to use two 12-bar Bi-color bar-graphs. However, this LED bargraph is 'multiplexed' - so to control all the 48 LEDs you need a lot of pins.
Out of Stock
[Buy Now](https://www.adafruit.com/product/1721)
[Related Guides to the Product](https://learn.adafruit.com/products/1721/guides)
### Small 1.2" 8x8 Ultra Bright Square Amber LED Matrix + Backpack
[Small 1.2" 8x8 Ultra Bright Square Amber LED Matrix + Backpack](https://www.adafruit.com/product/1854)
What's better than a single LED? Lots of LEDs! Matrices like these are 'multiplexed' - so to control 64 LEDs you need 16 pins. That's a lot of pins, and there are [driver chips like the MAX7219](//www.adafruit.com/products/453) that can control a matrix for you but...
In Stock
[Buy Now](https://www.adafruit.com/product/1854)
[Related Guides to the Product](https://learn.adafruit.com/products/1854/guides)
### Small 1.2" 8x8 Ultra Bright Square Yellow LED Matrix + Backpack
[Small 1.2" 8x8 Ultra Bright Square Yellow LED Matrix + Backpack](https://www.adafruit.com/product/1855)
What's better than a single LED? Lots of LEDs! Matrices like these are 'multiplexed' - so to control 64 LEDs you need 16 pins. That's a lot of pins, and there are [driver chips like the MAX7219](//www.adafruit.com/products/453) that can control a matrix for you but...
In Stock
[Buy Now](https://www.adafruit.com/product/1855)
[Related Guides to the Product](https://learn.adafruit.com/products/1855/guides)
### Small 1.2" 8x8 Bright Square Pure Green LED Matrix + Backpack
[Small 1.2" 8x8 Bright Square Pure Green LED Matrix + Backpack](https://www.adafruit.com/product/1856)
What's better than a single LED? Lots of LEDs! Matrices like these are 'multiplexed' - so to control 64 LEDs you need 16 pins. That's a lot of pins, and there are [driver chips like the MAX7219](//www.adafruit.com/products/453) that can control a matrix for you but...
In Stock
[Buy Now](https://www.adafruit.com/product/1856)
[Related Guides to the Product](https://learn.adafruit.com/products/1856/guides)
### Small 1.2" 8x8 Ultra Bright Square White LED Matrix + Backpack
[Small 1.2" 8x8 Ultra Bright Square White LED Matrix + Backpack](https://www.adafruit.com/product/1857)
What's better than a single LED? Lots of LEDs! Matrices like these are 'multiplexed' - so to control 64 LEDs you need 16 pins. That's a lot of pins, and there are [driver chips like the MAX7219](//www.adafruit.com/products/453) that can control a matrix for you but...
In Stock
[Buy Now](https://www.adafruit.com/product/1857)
[Related Guides to the Product](https://learn.adafruit.com/products/1857/guides)
### Adafruit 14-segment LED Alphanumeric Backpack - STEMMA QT
[Adafruit 14-segment LED Alphanumeric Backpack - STEMMA QT](https://www.adafruit.com/product/1910)
By popular request, you can now get our 14-segment LED backpacks without the LEDs! These backpacks feature an HT16K33 I2C LED driver, they're simple and easy to use - you can use [our very nice library for the backpacks to...](https://github.com/adafruit/Adafruit-LED-Backpack-Library)
In Stock
[Buy Now](https://www.adafruit.com/product/1910)
[Related Guides to the Product](https://learn.adafruit.com/products/1910/guides)
### Quad Alphanumeric Display - Red 0.54" Digits w/ I2C Backpack
[Quad Alphanumeric Display - Red 0.54" Digits w/ I2C Backpack](https://www.adafruit.com/product/1911)
Display, elegantly, 012345678 or 9! Gaze, hypnotized, at ABCDEFGHIJKLM - well it can display the whole alphabet. You get the point. This is a nice, bright alphanumeric display that shows letters and numbers in a beautiful red hue. It's super bright and designed for viewing from distances...
In Stock
[Buy Now](https://www.adafruit.com/product/1911)
[Related Guides to the Product](https://learn.adafruit.com/products/1911/guides)
### Quad Alphanumeric Display - Blue 0.54" Digits w/ I2C Backpack
[Quad Alphanumeric Display - Blue 0.54" Digits w/ I2C Backpack](https://www.adafruit.com/product/1912)
Display, elegantly, 012345678 or 9! Gaze, hypnotized, at ABCDEFGHIJKLM - well it can display the whole alphabet. You get the point. This is a nice, bright alphanumeric display that shows letters and numbers in a beautiful blue hue. It's super bright and designed for viewing from distances...
In Stock
[Buy Now](https://www.adafruit.com/product/1912)
[Related Guides to the Product](https://learn.adafruit.com/products/1912/guides)
### 16x8 1.2" LED Matrix + Backpack - Ultra Bright Round Green LEDs
[16x8 1.2" LED Matrix + Backpack - Ultra Bright Round Green LEDs](https://www.adafruit.com/product/2035)
What's better than a single LED? Lots of LEDs! And what's better than lots of LEDs? **TWO TIMES AS MANY LEDS!!!**
With the 16x8 LED Matrix Backpack we've doubled your project's matrix capacity by making it super easy to get two separate 8x8 matrices onto...
In Stock
[Buy Now](https://www.adafruit.com/product/2035)
[Related Guides to the Product](https://learn.adafruit.com/products/2035/guides)
### 16x8 1.2" LED Matrix+Backpack UltraBright Round YellowGreen LEDs
[16x8 1.2" LED Matrix+Backpack UltraBright Round YellowGreen LEDs](https://www.adafruit.com/product/2036)
What's better than a single LED? Lots of LEDs! And what's better than lots of LEDs? **TWO TIMES AS MANY LEDS!!!**
With the 16x8 LED Matrix Backpack we've doubled your project's matrix capacity by making it super easy to get two separate 8x8 matrices onto...
In Stock
[Buy Now](https://www.adafruit.com/product/2036)
[Related Guides to the Product](https://learn.adafruit.com/products/2036/guides)
### 16x8 1.2" LED Matrix + Backpack - Ultra Bright Round Red LEDs
[16x8 1.2" LED Matrix + Backpack - Ultra Bright Round Red LEDs](https://www.adafruit.com/product/2037)
What's better than a single LED? Lots of LEDs! And what's better than lots of LEDs? **TWO TIMES AS MANY LEDS!!!**
With the 16x8 LED Matrix Backpack we've doubled your project's matrix capacity by making it super easy to get two separate 8x8 matrices onto...
In Stock
[Buy Now](https://www.adafruit.com/product/2037)
[Related Guides to the Product](https://learn.adafruit.com/products/2037/guides)
### 16x8 1.2" LED Matrix + Backpack - Ultra Bright Round White LEDs
[16x8 1.2" LED Matrix + Backpack - Ultra Bright Round White LEDs](https://www.adafruit.com/product/2038)
What's better than a single LED? Lots of LEDs! And what's better than lots of LEDs? **TWO TIMES AS MANY LEDS!!!**
With the 16x8 LED Matrix Backpack we've doubled your project's matrix capacity by making it super easy to get two separate 8x8 matrices onto...
In Stock
[Buy Now](https://www.adafruit.com/product/2038)
[Related Guides to the Product](https://learn.adafruit.com/products/2038/guides)
### 16x8 1.2" LED Matrix + Backpack - Ultra Bright Round Blue LEDs
[16x8 1.2" LED Matrix + Backpack - Ultra Bright Round Blue LEDs](https://www.adafruit.com/product/2039)
What's better than a single LED? Lots of LEDs! And what's better than lots of LEDs? **TWO TIMES AS MANY LEDS!!!**
With the 16x8 LED Matrix Backpack we've doubled your project's matrix capacity by making it super easy to get two separate 8x8 matrices onto...
In Stock
[Buy Now](https://www.adafruit.com/product/2039)
[Related Guides to the Product](https://learn.adafruit.com/products/2039/guides)
### 16x8 1.2" LED Matrix + Backpack - Ultra Bright Square Blue LEDs
[16x8 1.2" LED Matrix + Backpack - Ultra Bright Square Blue LEDs](https://www.adafruit.com/product/2040)
What's better than a single LED? Lots of LEDs! And what's better than lots of LEDs? **TWO TIMES AS MANY LEDS!!!**
With the 16x8 LED Matrix Backpack we've doubled your project's matrix capacity by making it super easy to get two separate 8x8 matrices onto...
In Stock
[Buy Now](https://www.adafruit.com/product/2040)
[Related Guides to the Product](https://learn.adafruit.com/products/2040/guides)
### 16x8 1.2" LED Matrix + Backpack - Ultra Bright Square Amber LEDs
[16x8 1.2" LED Matrix + Backpack - Ultra Bright Square Amber LEDs](https://www.adafruit.com/product/2041)
What's better than a single LED? Lots of LEDs! And what's better than lots of LEDs? **TWO TIMES AS MANY LEDS!!!**
With the 16x8 LED Matrix Backpack we've doubled your project's matrix capacity by making it super easy to get two separate 8x8 matrices onto...
In Stock
[Buy Now](https://www.adafruit.com/product/2041)
[Related Guides to the Product](https://learn.adafruit.com/products/2041/guides)
### 16x8 1.2" LED Matrix + Backpack - Ultra Bright Square Green LEDs
[16x8 1.2" LED Matrix + Backpack - Ultra Bright Square Green LEDs](https://www.adafruit.com/product/2042)
What's better than a single LED? Lots of LEDs! And what's better than lots of LEDs? **TWO TIMES AS MANY LEDS!!!**
With the 16x8 LED Matrix Backpack we've doubled your project's matrix capacity by making it super easy to get two separate 8x8 matrices onto...
In Stock
[Buy Now](https://www.adafruit.com/product/2042)
[Related Guides to the Product](https://learn.adafruit.com/products/2042/guides)
### 16x8 1.2" LED Matrix + Backpack -Ultra Bright Square Yellow LEDs
[16x8 1.2" LED Matrix + Backpack -Ultra Bright Square Yellow LEDs](https://www.adafruit.com/product/2043)
What's better than a single LED? Lots of LEDs! And what's better than lots of LEDs? **TWO TIMES AS MANY LEDS!!!**
With the 16x8 LED Matrix Backpack we've doubled your project's matrix capacity by making it super easy to get two separate 8x8 matrices onto...
In Stock
[Buy Now](https://www.adafruit.com/product/2043)
[Related Guides to the Product](https://learn.adafruit.com/products/2043/guides)
### 16x8 1.2" LED Matrix + Backpack - Ultra Bright Square White LEDs
[16x8 1.2" LED Matrix + Backpack - Ultra Bright Square White LEDs](https://www.adafruit.com/product/2044)
What's better than a single LED? Lots of LEDs! And what's better than lots of LEDs? **TWO TIMES AS MANY LEDS!!!**
With the 16x8 LED Matrix Backpack we've doubled your project's matrix capacity by making it super easy to get two separate 8x8 matrices onto...
In Stock
[Buy Now](https://www.adafruit.com/product/2044)
[Related Guides to the Product](https://learn.adafruit.com/products/2044/guides)
### 16x8 1.2" LED Matrix + Backpack-Ultra Bright Round Orange LEDs
[16x8 1.2" LED Matrix + Backpack-Ultra Bright Round Orange LEDs](https://www.adafruit.com/product/2052)
What's better than a single LED? Lots of LEDs! And what's better than lots of LEDs? **TWO TIMES AS MANY LEDS!!!**
With the 16x8 LED Matrix Backpack we've doubled your project's matrix capacity by making it super easy to get two separate 8x8 matrices onto...
In Stock
[Buy Now](https://www.adafruit.com/product/2052)
[Related Guides to the Product](https://learn.adafruit.com/products/2052/guides)
### 16x8 1.2" LED Matrices+Backpack Round LEDs in Various Colors
[16x8 1.2" LED Matrices+Backpack Round LEDs in Various Colors](https://www.adafruit.com/product/2054)
What's better than a single LED? Lots of LEDs! And what's better than lots of LEDs? **TWO TIMES AS MANY LEDS!!!**
With the 16x8 LED Matrix Backpack we've doubled your project's matrix capacity by making it super easy to get two separate 8x8 matrices onto...
Out of Stock
[Buy Now](https://www.adafruit.com/product/2054)
[Related Guides to the Product](https://learn.adafruit.com/products/2054/guides)
### Adafruit 8x16 LED Matrix FeatherWing w/o Matrices
[Adafruit 8x16 LED Matrix FeatherWing w/o Matrices](https://www.adafruit.com/product/3090)
You will chirp with delight when you see how easy it is to make your very own 8x16 LED matrix display for any Feather. At 0.8" square, the little [8x8 matrices](https://www.adafruit.com/new/?q=8x8%20miniature%20LED%20matrix&) have everything a big LED matrix has,...
Out of Stock
[Buy Now](https://www.adafruit.com/product/3090)
[Related Guides to the Product](https://learn.adafruit.com/products/3090/guides)
### Adafruit 14-segment LED Alphanumeric backpack (same as P1910)
[Adafruit 14-segment LED Alphanumeric backpack (same as P1910)](https://www.adafruit.com/product/3322)
Just the backpack + 4pin header
No Longer Stocked
[Buy Now](https://www.adafruit.com/product/3322)
[Related Guides to the Product](https://learn.adafruit.com/products/3322/guides)
## Featured Products
### Adafruit Small 1.2" 8x8 LED Matrix w/I2C Backpack - Yellow-Green
[Adafruit Small 1.2" 8x8 LED Matrix w/I2C Backpack - Yellow-Green](https://www.adafruit.com/product/1051)
What's better than a single LED? Lots of LEDs! A fun way to make a small display is to use an [8x8 matrix](https://www.adafruit.com/category/37_88) or a [4-digit 7-segment display](https://www.adafruit.com/category/37_103). Matrices like these are...
In Stock
[Buy Now](https://www.adafruit.com/product/1051)
[Related Guides to the Product](https://learn.adafruit.com/products/1051/guides)
### Small 1.2" 8x8 Ultra Bright Square Blue LED Matrix + Backpack
[Small 1.2" 8x8 Ultra Bright Square Blue LED Matrix + Backpack](https://www.adafruit.com/product/1853)
What's better than a single LED? Lots of LEDs! Matrices like these are 'multiplexed' - so to control 64 LEDs you need 16 pins. That's a lot of pins, and there are [driver chips like the MAX7219](//www.adafruit.com/products/453) that can control a matrix for you but...
In Stock
[Buy Now](https://www.adafruit.com/product/1853)
[Related Guides to the Product](https://learn.adafruit.com/products/1853/guides)
## Related Guides
- [LED Backpack Displays on Raspberry Pi and BeagleBone Black](https://learn.adafruit.com/led-backpack-displays-on-raspberry-pi-and-beaglebone-black.md)
- [Animating Multiple LED Backpacks](https://learn.adafruit.com/animating-multiple-led-backpacks.md)
- [Arduino GPS Clock](https://learn.adafruit.com/arduino-clock.md)
- [Raspberry Pi Physical Dashboard](https://learn.adafruit.com/raspberry-pi-physical-dashboard.md)
- [CircuitPython Hardware: LED Backpacks & FeatherWings](https://learn.adafruit.com/micropython-hardware-led-backpacks-and-featherwings.md)
- [Matrix and 7-Segment LED Backpack with the Raspberry Pi](https://learn.adafruit.com/matrix-7-segment-led-backpack-with-the-raspberry-pi.md)
- [DIY Pocket LED Gamer - Tiny Tetris!](https://learn.adafruit.com/diy-3d-printed-handheld-pocket-game-tiny-tetris-snake.md)
- [RGB LED Matrix Cube with 25,000 LEDs](https://learn.adafruit.com/rgb-led-matrix-cube-for-pi.md)
- [Creating GIFs for SmartMatrix](https://learn.adafruit.com/creating-gifs-for-smartmatrix.md)
- [Adafruit CharliePlex LED Matrix Bonnet](https://learn.adafruit.com/adafruit-charlieplex-bonnet.md)
- [Connecting a 16x32 RGB LED Matrix Panel to a Raspberry Pi](https://learn.adafruit.com/connecting-a-16x32-rgb-led-matrix-panel-to-a-raspberry-pi.md)
- [MicroPython Displays: Drawing Text](https://learn.adafruit.com/micropython-displays-drawing-text.md)
- [Heart Rate Badge](https://learn.adafruit.com/heart-rate-badge.md)
- [16x24 LED Matrix](https://learn.adafruit.com/16x24-led-matrix.md)
- [Adafruit IS31FL3741](https://learn.adafruit.com/adafruit-is31fl3741.md)
---
# Source: https://learn.adafruit.com/1-8-tft-display.md
# 1.8" TFT Display Breakout and Shield
## Overview

This tutorial is for our 1.8" diagonal TFT display. It comes packaged as a breakout or as an Arduino shield. Both styles have a microSD interface for storing files and images. These are both great ways to add a small, colorful and bright display to any project. Since the display uses 4-wire SPI to communicate and has its own pixel-addressable frame buffer, it requires little memory and only a few pins. This makes it ideal for use with small microcontrollers.

This display breakout comes with an EYESPI connector! This 18-pin 0.5mm pitch FPC connector has a flip-top connector for using a flex cable to hook up your display. It enables you to avoid soldering and get your display up off of the breadboard! Consider it a sort of "STEMMA QT for displays" - a way to quickly connect and extend display wiring that uses a lot of SPI pins. It also allows for communicating with displays over longer distances. The [EYESPI flex cables](https://www.adafruit.com/?q=eyespi+cable&sort=BestMatch) are available in multiple lengths to suit any project. This is especially useful for projects where you want your display mounted separate from your microcontroller.
The shield version plugs directly into an Arduino with no wiring required. The breakout version can be used with every kind of microcontroller.

The 1.8" display has 128x160 color pixels. Unlike the low cost "Nokia 6110" and similar LCD displays, which are CSTN type and thus have poor color and slow refresh, this display is a true TFT! The TFT driver (ST7735R) can display full 18-bit color (262,144 shades!). And the LCD will always come with the same driver chip so there's no worries that your code will not work from one to the other.
Both boards have the TFT soldered on (it uses a delicate flex-circuit connector) as well as a ultra-low-dropout 3.3V regulator and a 3/5V level shifter so you can use it with 3.3V **or** 5V power and logic. These also include a microSD card holder so you can easily load full color bitmaps from a FAT16/FAT32 formatted microSD card. And on the Shield version, we've added a nifty 5-way joystick navigation switch!
**You can pick up one of these displays in the Adafruit shop!** [1.8" 18-bit color TFT breakout](http://www.adafruit.com/products/358 "Link: http://www.adafruit.com/products/358")
[1.8" 18-bit Color TFT Shield](http://www.adafruit.com/products/802 "Link: http://www.adafruit.com/products/802")
- [Next Page](https://learn.adafruit.com/1-8-tft-display/breakout-pinouts.md)
## Featured Products
### Breadboarding wire bundle
[Breadboarding wire bundle](https://www.adafruit.com/product/153)
75 flexible stranded core wires with stiff ends molded on in red, orange, yellow, green, blue, brown, black and white. These are a major improvement over the "box of bent wires" that are sometimes sold with breadboards, and faster than stripping your own solid core wires. Makes...
In Stock
[Buy Now](https://www.adafruit.com/product/153)
[Related Guides to the Product](https://learn.adafruit.com/products/153/guides)
### Adafruit METRO 328 Fully Assembled - Arduino IDE compatible
[Adafruit METRO 328 Fully Assembled - Arduino IDE compatible](https://www.adafruit.com/product/50)
We sure love the ATmega328 here at Adafruit, and we use them _a lot_ for our own projects. The processor has plenty of GPIO, Analog inputs, hardware UART SPI and I2C, timers and PWM galore - just enough for most simple projects. When we need to go small, we use a
Out of Stock
[Buy Now](https://www.adafruit.com/product/50)
[Related Guides to the Product](https://learn.adafruit.com/products/50/guides)
### Half Sized Premium Breadboard - 400 Tie Points
[Half Sized Premium Breadboard - 400 Tie Points](https://www.adafruit.com/product/64)
This is a cute, half-size breadboard with 400 tie points, good for small projects. It's 3.25" x 2.2" / 8.3cm x 5.5cm with a standard double-strip in the middle and two power rails on both sides. You can pull the power rails off easily to make the breadboard as...
In Stock
[Buy Now](https://www.adafruit.com/product/64)
[Related Guides to the Product](https://learn.adafruit.com/products/64/guides)
### 1.8" Color TFT LCD display with MicroSD Card Breakout
[1.8" Color TFT LCD display with MicroSD Card Breakout](https://www.adafruit.com/product/358)
This lovely little display breakout is the best way to add a small, colorful and bright display to any project. Since the display uses 4-wire SPI to communicate and has its own pixel-addressable frame buffer, it can be used with every kind of microcontroller. Even a very small one with low...
Out of Stock
[Buy Now](https://www.adafruit.com/product/358)
[Related Guides to the Product](https://learn.adafruit.com/products/358/guides)
### Adafruit 1.8" Color TFT Shield w/microSD and Joystick
[Adafruit 1.8" Color TFT Shield w/microSD and Joystick](https://www.adafruit.com/product/802)
This lovely little shield is the best way to add a small, colorful and bright display to any project. We took our popular 1.8" TFT breakout board and remixed it into an Arduino shield complete with microSD card slot and a 5-way joystick navigation switch and three selection buttons! Since...
In Stock
[Buy Now](https://www.adafruit.com/product/802)
[Related Guides to the Product](https://learn.adafruit.com/products/802/guides)
### 1.8" SPI TFT display, 160x128 18-bit color - ST7735R driver
[1.8" SPI TFT display, 160x128 18-bit color - ST7735R driver](https://www.adafruit.com/product/618)
We just love this little 1.8" TFT display, with true TFT color (up to 18-bits per pixel!), fine 160x128 resolution, two white LED backlight that runs on 3.3V and a very easy SPI interface that requires only 4 or 5 digital pins to send pixels to the display.
**Please...**
Out of Stock
[Buy Now](https://www.adafruit.com/product/618)
[Related Guides to the Product](https://learn.adafruit.com/products/618/guides)
## Related Guides
- [Wave Shield](https://learn.adafruit.com/adafruit-wave-shield-audio-shield-for-arduino.md)
- [Adafruit 2.8" TFT Touch Shield v2 - Capacitive or Resistive](https://learn.adafruit.com/adafruit-2-8-tft-touch-shield-v2.md)
- [How to Build a Testing Jig](https://learn.adafruit.com/how-to-build-a-testing-fixture.md)
- [Create an Internet of Things Dashboard with Adafruit IO](https://learn.adafruit.com/create-an-internet-of-things-dashboard-with-adafruit-dot-io.md)
- [Let’s Put LEDs in Things!](https://learn.adafruit.com/lets-put-leds-in-things.md)
- [Tiny Arduino Music Visualizer](https://learn.adafruit.com/piccolo.md)
- [Circuit Playground Sound-Controlled Robot](https://learn.adafruit.com/circuit-playground-sound-controlled-robot.md)
- [Adafruit 1.27" and 1.5" Color OLED Breakout Board](https://learn.adafruit.com/adafruit-1-5-color-oled-breakout-board.md)
- [Arduino Lesson 15. DC Motor Reversing](https://learn.adafruit.com/adafruit-arduino-lesson-15-dc-motor-reversing.md)
- [TTL Serial Camera](https://learn.adafruit.com/ttl-serial-camera.md)
- [Analog Feedback Servos](https://learn.adafruit.com/analog-feedback-servos.md)
- [Geofencing with the FONA 808 & Adafruit IO](https://learn.adafruit.com/geofencing-with-the-fona-808-and-adafruit-io.md)
- [Arduino GPS Clock](https://learn.adafruit.com/arduino-clock.md)
- [Adafruit Data Logger Shield](https://learn.adafruit.com/adafruit-data-logger-shield.md)
- [Making Adabot: Part 2](https://learn.adafruit.com/making-adabot-part-2.md)
---
# Source: https://learn.adafruit.com/1-8-tft-display/1-8-tft-shield.md
# 1.8" TFT Display Breakout and Shield
## 1.8" TFT Shield V2
Let's take a tour of the 1.8" TFT Shield

# TFT Display
In the center is the 1.8" TFT display. This display is full color (16-bit RGB), 128x160 pixels, and has a backlight. The display receives data over SPI plus two pins:
- SCK - SPI Clock
- MOSI - SPI Data
- Digital 10 - Chip Select
- Digital 8 - Data/Command Select
The TFT reset is connected to the seesaw chip. The backlight is also PWM controlled by the seesaw chip. The 4 SPI+control pins, however, must be controlled directly by the Arduino

# Buttons & Joystick
In addition of the display, you also get a bunch of user-interface buttons.
In the top left is the **Reset** button, this will reset the shield and Arduino when pressed. It is connected directly to the Reset pins
There are three buttons labeled **A B C** below the TFT, these are connected to the seesaw chip. You can read the values over I2C
To the right of the TFT is a 5-way joystick. It can be pushed up/down/left/right and select (in). It is connected to the seesaw chip, you can read the joystick over I2C

# SD Card
The micro SD card slot can be used to read/write data from any micro SD card using the Arduino libraries. The SD card is connected to the SPI pins as well as **Digital #4** for **Chip Select**
The SD card is not required for use, but it's handy for storing images

# seesaw I2C Expander
Instead of taking up a bunch of GPIO pins to read the buttons and joystick, as well as controlling the TFT backlight, we use an I2C expander chip called the **seesaw**. It is connected to the SDA/SCL pins and can read/write pins with our library. This saves a ton of pins and then you can always use the I2C pins for other sensors, as long as the address doesnt conflict
**Don't forget!** Since the seesaw chip is used for the TFT backlight and reset, **you need to activate it even if you are not reading the buttons or joystick.**

- [Previous Page](https://learn.adafruit.com/1-8-tft-display/python-usage.md)
- [Next Page](https://learn.adafruit.com/1-8-tft-display/testing-the-shield.md)
## Featured Products
### Breadboarding wire bundle
[Breadboarding wire bundle](https://www.adafruit.com/product/153)
75 flexible stranded core wires with stiff ends molded on in red, orange, yellow, green, blue, brown, black and white. These are a major improvement over the "box of bent wires" that are sometimes sold with breadboards, and faster than stripping your own solid core wires. Makes...
In Stock
[Buy Now](https://www.adafruit.com/product/153)
[Related Guides to the Product](https://learn.adafruit.com/products/153/guides)
### Adafruit METRO 328 Fully Assembled - Arduino IDE compatible
[Adafruit METRO 328 Fully Assembled - Arduino IDE compatible](https://www.adafruit.com/product/50)
We sure love the ATmega328 here at Adafruit, and we use them _a lot_ for our own projects. The processor has plenty of GPIO, Analog inputs, hardware UART SPI and I2C, timers and PWM galore - just enough for most simple projects. When we need to go small, we use a
Out of Stock
[Buy Now](https://www.adafruit.com/product/50)
[Related Guides to the Product](https://learn.adafruit.com/products/50/guides)
### Half Sized Premium Breadboard - 400 Tie Points
[Half Sized Premium Breadboard - 400 Tie Points](https://www.adafruit.com/product/64)
This is a cute, half-size breadboard with 400 tie points, good for small projects. It's 3.25" x 2.2" / 8.3cm x 5.5cm with a standard double-strip in the middle and two power rails on both sides. You can pull the power rails off easily to make the breadboard as...
In Stock
[Buy Now](https://www.adafruit.com/product/64)
[Related Guides to the Product](https://learn.adafruit.com/products/64/guides)
### 1.8" Color TFT LCD display with MicroSD Card Breakout
[1.8" Color TFT LCD display with MicroSD Card Breakout](https://www.adafruit.com/product/358)
This lovely little display breakout is the best way to add a small, colorful and bright display to any project. Since the display uses 4-wire SPI to communicate and has its own pixel-addressable frame buffer, it can be used with every kind of microcontroller. Even a very small one with low...
Out of Stock
[Buy Now](https://www.adafruit.com/product/358)
[Related Guides to the Product](https://learn.adafruit.com/products/358/guides)
### Adafruit 1.8" Color TFT Shield w/microSD and Joystick
[Adafruit 1.8" Color TFT Shield w/microSD and Joystick](https://www.adafruit.com/product/802)
This lovely little shield is the best way to add a small, colorful and bright display to any project. We took our popular 1.8" TFT breakout board and remixed it into an Arduino shield complete with microSD card slot and a 5-way joystick navigation switch and three selection buttons! Since...
In Stock
[Buy Now](https://www.adafruit.com/product/802)
[Related Guides to the Product](https://learn.adafruit.com/products/802/guides)
### 1.8" SPI TFT display, 160x128 18-bit color - ST7735R driver
[1.8" SPI TFT display, 160x128 18-bit color - ST7735R driver](https://www.adafruit.com/product/618)
We just love this little 1.8" TFT display, with true TFT color (up to 18-bits per pixel!), fine 160x128 resolution, two white LED backlight that runs on 3.3V and a very easy SPI interface that requires only 4 or 5 digital pins to send pixels to the display.
**Please...**
Out of Stock
[Buy Now](https://www.adafruit.com/product/618)
[Related Guides to the Product](https://learn.adafruit.com/products/618/guides)
## Related Guides
- [Wave Shield](https://learn.adafruit.com/adafruit-wave-shield-audio-shield-for-arduino.md)
- [Adafruit 2.8" TFT Touch Shield v2 - Capacitive or Resistive](https://learn.adafruit.com/adafruit-2-8-tft-touch-shield-v2.md)
- [How to Build a Testing Jig](https://learn.adafruit.com/how-to-build-a-testing-fixture.md)
- [Create an Internet of Things Dashboard with Adafruit IO](https://learn.adafruit.com/create-an-internet-of-things-dashboard-with-adafruit-dot-io.md)
- [Let’s Put LEDs in Things!](https://learn.adafruit.com/lets-put-leds-in-things.md)
- [Tiny Arduino Music Visualizer](https://learn.adafruit.com/piccolo.md)
- [Circuit Playground Sound-Controlled Robot](https://learn.adafruit.com/circuit-playground-sound-controlled-robot.md)
- [Adafruit 1.27" and 1.5" Color OLED Breakout Board](https://learn.adafruit.com/adafruit-1-5-color-oled-breakout-board.md)
- [Arduino Lesson 15. DC Motor Reversing](https://learn.adafruit.com/adafruit-arduino-lesson-15-dc-motor-reversing.md)
- [TTL Serial Camera](https://learn.adafruit.com/ttl-serial-camera.md)
- [Analog Feedback Servos](https://learn.adafruit.com/analog-feedback-servos.md)
- [Geofencing with the FONA 808 & Adafruit IO](https://learn.adafruit.com/geofencing-with-the-fona-808-and-adafruit-io.md)
- [Arduino GPS Clock](https://learn.adafruit.com/arduino-clock.md)
- [Adafruit Data Logger Shield](https://learn.adafruit.com/adafruit-data-logger-shield.md)
- [Making Adabot: Part 2](https://learn.adafruit.com/making-adabot-part-2.md)
---
# Source: https://learn.adafruit.com/12mm-led-pixels.md
# 12mm LED Pixels
## Overview

RGB Pixels are digitally-controllable lights you can set to any color, or animate. Each pixel contains an RGB LED and a controller chip molded into a 'dot' of silicone, with flanges so they can be pushed into holes in thin sheet material. The dots are waterproof and rugged — they're typically used to make outdoor signs.

12mm RGB pixels come in two different shapes: “bullet” (thin) and “square” (flat). Both use the same type of LED, driver chip and data protocols…the main difference is how they can be mounted: bullets fit better into narrow spaces, while squares are better suited to shallow spaces.

Both types use an 8mm diffused RGB LED (“12mm” refers to the size of the mounting hole for installation) — diffused pixels mix colors nicer. At **5 volts** , they draw a maximum of **60 milliamps** per pixel: 20 mA each for red, green and blue.
The LED pixels are spaced along a strand of ribbon cable, with about **3 inches (75mm)** between pixels. If additional distance is needed you can cut the ribbon cable and solder 4 wires to extend the gap to the desired length.

Each pixel contains a small microchip within the silicone dot. The WS2801 LED driver chip is custom designed for this purpose. We provide an Arduino library for communicating with the pixels (explained in subsequent pages), but if you want to write your own code for other microcontrollers, they’re very easy to communicate with using an SPI-like protocol. For each pixel, one “shifts out” 24 bits of color information — the first data out corresponds to the pixel closest to the microcontroller. To write colors to 10 LEDs, you would issue 240 bits (10 \* 24). Following the data, a 500 microsecond pause will then “latch” the data and display the new LED colors.
- [Next Page](https://learn.adafruit.com/12mm-led-pixels/project-ideas.md)
## Featured Products
### 12mm Diffused Flat Digital RGB LED Pixels (Strand of 25)
[12mm Diffused Flat Digital RGB LED Pixels (Strand of 25)](https://www.adafruit.com/product/738)
RGB Pixels are digitally-controllable lights you can set to any color, or animate. Each RGB LED and controller chip is molded into a 'dot' of silicone. The dots are weatherproof and rugged. There are four flanges molded in so that you can 'push' them into a 12mm drill hole in...
In Stock
[Buy Now](https://www.adafruit.com/product/738)
[Related Guides to the Product](https://learn.adafruit.com/products/738/guides)
### 12mm Diffused Thin Digital RGB LED Pixels (Strand of 25)
[12mm Diffused Thin Digital RGB LED Pixels (Strand of 25)](https://www.adafruit.com/product/322)
RGB Pixels are digitally-controllable lights you can set to any color, or animate. Each RGB LED and controller chip is molded into a 'dot' of silicone. The dots are weatherproof and rugged. There are four flanges molded in so that you can 'push' them into a 12mm drill hole in...
No Longer Stocked
[Buy Now](https://www.adafruit.com/product/322)
[Related Guides to the Product](https://learn.adafruit.com/products/322/guides)
### 5V 10A switching power supply
[5V 10A switching power supply](https://www.adafruit.com/product/658)
This is a beefy switching supply, for when you need a lot of power! It can supply 5V DC up to 10 Amps, running from 110V or 220V power (the plug it comes with is for US/Canada/Japan but you can use any plug adapter for your country, or just replace the cable with a standard computer/appliance...
Out of Stock
[Buy Now](https://www.adafruit.com/product/658)
[Related Guides to the Product](https://learn.adafruit.com/products/658/guides)
### 5V 2A (2000mA) switching power supply - UL Listed
[5V 2A (2000mA) switching power supply - UL Listed](https://www.adafruit.com/product/276)
This is an FCC/CE certified and UL listed power supply. Need a lot of 5V power? This switching supply gives a clean regulated 5V output at up to 2000mA. 110 or 240 input, so it works in any country. The plugs are "US 2-prong" style so you may need a plug adapter, but you can pick one...
In Stock
[Buy Now](https://www.adafruit.com/product/276)
[Related Guides to the Product](https://learn.adafruit.com/products/276/guides)
### Female DC Power adapter - 2.1mm jack to screw terminal block
[Female DC Power adapter - 2.1mm jack to screw terminal block](https://www.adafruit.com/product/368)
If you need to connect a DC power wall wart to a board that doesn't have a DC jack - this adapter will come in very handy! There is a 2.1mm DC jack on one end, and a screw terminal block on the other. The terminals are labeled with positive/negative assuming a positive-tip configuration...
In Stock
[Buy Now](https://www.adafruit.com/product/368)
[Related Guides to the Product](https://learn.adafruit.com/products/368/guides)
### 4-pin JST SM Plug + Receptacle Cable Set
[4-pin JST SM Plug + Receptacle Cable Set](https://www.adafruit.com/product/578)
These 4-wire cables are 15cm long and come as a set, one side has a JST SM type connector plug on the end. The other side has a matching JST SM type receptacle connector. They are good for whenever you have 4 wires you want to be able to plug and unplug. We like the solid and compact nature of...
In Stock
[Buy Now](https://www.adafruit.com/product/578)
[Related Guides to the Product](https://learn.adafruit.com/products/578/guides)
## Related Guides
- [Bluefruit Controlled Macetech RGB LED Shades](https://learn.adafruit.com/ledshades.md)
- [Make it Glow: NeoPixel and LED Diffusion Tips & Tricks](https://learn.adafruit.com/make-it-glow-neopixel-and-led-diffusion-tips-tricks.md)
- [Starduino: 8-Bit Super Mario Tree Topper](https://learn.adafruit.com/starduino-neopixel-8-bit-mario-star-tree-topper.md)
- [NeoPixel Ring Clock](https://learn.adafruit.com/neopixel-ring-clock.md)
- [Star Fragment IoT Lamp](https://learn.adafruit.com/star-fragment-iot-lamp.md)
- [Talking Musical NeoPixel Clock with Infrared, BLE and Touch Controls](https://learn.adafruit.com/talking-musical-neo-pixel-clock-with-infrared-ble-and-touch-controls.md)
- [Perfect Pitch Machine](https://learn.adafruit.com/perfect-pitch-machine.md)
- [CheerLights](https://learn.adafruit.com/cheerlights.md)
- [NeuroDreamer Teardown](https://learn.adafruit.com/neurodreamer-teardown.md)
- [Holiday Lights: Easy DIY Christmas Wreath & Garland with WLED](https://learn.adafruit.com/holiday-garland-decor-app-control-with-no-coding.md)
- [Adafruit IO Home: Security ](https://learn.adafruit.com/adafruit-io-home-security.md)
- [Adafruit NeoPot](https://learn.adafruit.com/adafruit-neopot.md)
- [NeoKey Socket Breakout with NeoPixel for MX and CHOC Key Switches](https://learn.adafruit.com/neokey-breakout.md)
- [NeoPixie Dust Bag](https://learn.adafruit.com/neopixel-pixie-dust-bag.md)
- [Multi-tasking the Arduino - Part 3](https://learn.adafruit.com/multi-tasking-the-arduino-part-3.md)
---
# Source: https://learn.adafruit.com/matrix-7-segment-led-backpack-with-the-raspberry-pi/14-segment-alphanumeric-display.md
# Matrix and 7-Segment LED Backpack with the Raspberry Pi
## 14-Segment Alphanumeric Display

## CircuitPython Code
The 14 segment alphanumeric display is demonstrated in the **alphanum4\_test.py** script in the examples folder. If you run this example it will scroll a text message across the display. The message if followed by a run down of various integer, decimal, hex and character values. This display is great for showing complete text messages because the 14 segment displays are very flexible.
With the 14 segment display the usage is very similar to the 7 segment display above.
https://github.com/adafruit/Adafruit_Learning_System_Guides/blob/main/Matrix_7-Segment_LED_Backpack_Raspberry_Pi/alphanum4_test/code.py
## Download and Run the Code
We can easily copy this code onto our Pi's home directory using the 'wget' command and then run it using the following commands.
```
cd
wget https://raw.githubusercontent.com/adafruit/Adafruit_Learning_System_Guides/master/Matrix_7-Segment_LED_Backpack_Raspberry_Pi/alphanum4_test.py
python3 alphanum4_test.py
```
- [Previous Page](https://learn.adafruit.com/matrix-7-segment-led-backpack-with-the-raspberry-pi/7-segment-clock.md)
## Featured Products
### Adafruit 0.56" 4-Digit 7-Segment Display w/ I2C Backpack - Blue
[Adafruit 0.56" 4-Digit 7-Segment Display w/ I2C Backpack - Blue](https://www.adafruit.com/product/881)
What's better than a single LED? Lots of LEDs! A fun way to make a small display is to use an [8x8 matrix](https://www.adafruit.com/category/37_88) or a [4-digit 7-segment display](https://www.adafruit.com/category/37_103). Matrices like these are...
In Stock
[Buy Now](https://www.adafruit.com/product/881)
[Related Guides to the Product](https://learn.adafruit.com/products/881/guides)
### Adafruit Mini 0.8" 8x8 LED Matrix w/I2C Backpack - Yellow-Green
[Adafruit Mini 0.8" 8x8 LED Matrix w/I2C Backpack - Yellow-Green](https://www.adafruit.com/product/872)
What's better than a single LED? Lots of LEDs! A fun way to make a small display is to use an [8x8 matrix](https://www.adafruit.com/category/37_88) or a [4-digit 7-segment display](https://www.adafruit.com/category/37_103). Matrices like these are...
In Stock
[Buy Now](https://www.adafruit.com/product/872)
[Related Guides to the Product](https://learn.adafruit.com/products/872/guides)
### Adafruit Bicolor LED Square Pixel Matrix with I2C Backpack
[Adafruit Bicolor LED Square Pixel Matrix with I2C Backpack](https://www.adafruit.com/product/902)
What's better than a single LED? Lots of LEDs! A fun way to make a small colorful display is to use a [1.2" Bi-color 8x8 LED Matrix](http://www.adafruit.com/products/458). Matrices like these are 'multiplexed' - so to control all the 128 LEDs you need 24 pins....
In Stock
[Buy Now](https://www.adafruit.com/product/902)
[Related Guides to the Product](https://learn.adafruit.com/products/902/guides)
### Quad Alphanumeric Display - Blue 0.54" Digits w/ I2C Backpack
[Quad Alphanumeric Display - Blue 0.54" Digits w/ I2C Backpack](https://www.adafruit.com/product/1912)
Display, elegantly, 012345678 or 9! Gaze, hypnotized, at ABCDEFGHIJKLM - well it can display the whole alphabet. You get the point. This is a nice, bright alphanumeric display that shows letters and numbers in a beautiful blue hue. It's super bright and designed for viewing from distances...
In Stock
[Buy Now](https://www.adafruit.com/product/1912)
[Related Guides to the Product](https://learn.adafruit.com/products/1912/guides)
### Bi-Color (Red/Green) 24-Bar Bargraph w/I2C Backpack Kit
[Bi-Color (Red/Green) 24-Bar Bargraph w/I2C Backpack Kit](https://www.adafruit.com/product/1721)
What's better than a single LED? Lots of LEDs! A fun way to make a small linear display is to use two 12-bar Bi-color bar-graphs. However, this LED bargraph is 'multiplexed' - so to control all the 48 LEDs you need a lot of pins.
In Stock
[Buy Now](https://www.adafruit.com/product/1721)
[Related Guides to the Product](https://learn.adafruit.com/products/1721/guides)
### Raspberry Pi 3 - Model B+ - 1.4GHz Cortex-A53 with 1GB RAM
[Raspberry Pi 3 - Model B+ - 1.4GHz Cortex-A53 with 1GB RAM](https://www.adafruit.com/product/3775)
The Raspberry Pi 3 Model B is the most popular Raspberry Pi computer made, and the Pi Foundation knows you can always make a good thing _better_! And what could make the Pi 3 better? How about a _faster_ processor, 5 GHz WiFi, and updated Ethernet chip with PoE capability?...
In Stock
[Buy Now](https://www.adafruit.com/product/3775)
[Related Guides to the Product](https://learn.adafruit.com/products/3775/guides)
### Assembled Pi Cobbler Plus - Breakout Cable
[Assembled Pi Cobbler Plus - Breakout Cable](https://www.adafruit.com/product/2029)
The Raspberry Pi B+ / Pi 2 / Pi 3 / Pi 4 has landed on the Maker World like a 40-GPIO pinned, quad-USB ported, credit card sized bomb of DIY joy. And while you can use most of our great Model B accessories by hooking up our [downgrade...](https://www.adafruit.com/product/1986)
In Stock
[Buy Now](https://www.adafruit.com/product/2029)
[Related Guides to the Product](https://learn.adafruit.com/products/2029/guides)
## Related Guides
- [Adafruit LED Backpacks](https://learn.adafruit.com/adafruit-led-backpack.md)
- [Animating Multiple LED Backpacks](https://learn.adafruit.com/animating-multiple-led-backpacks.md)
- [CircuitPython Hardware: LED Backpacks & FeatherWings](https://learn.adafruit.com/micropython-hardware-led-backpacks-and-featherwings.md)
- [Raspberry Pi Physical Dashboard](https://learn.adafruit.com/raspberry-pi-physical-dashboard.md)
- [Raspberry Pi Analog to Digital Converters](https://learn.adafruit.com/raspberry-pi-analog-to-digital-converters.md)
- [Trinket / Gemma Space Invader Pendant](https://learn.adafruit.com/trinket-slash-gemma-space-invader-pendant.md)
- [Circadian Pi Desk Light](https://learn.adafruit.com/circadian-pi-desk-light.md)
- [LED Backpack Displays on Raspberry Pi and BeagleBone Black](https://learn.adafruit.com/led-backpack-displays-on-raspberry-pi-and-beaglebone-black.md)
- [Speech Synthesis on the Raspberry Pi](https://learn.adafruit.com/speech-synthesis-on-the-raspberry-pi.md)
- [Circle of Fifths Euclidean Synth with synthio and CircuitPython](https://learn.adafruit.com/circle-of-fifths-euclidean-synth-with-synthio-and-circuitpython.md)
- [Tiny Arduino Music Visualizer](https://learn.adafruit.com/piccolo.md)
- [Personalized NextBus ESP8266 Transit Clock](https://learn.adafruit.com/personalized-esp8266-transit-clock.md)
- [Playing sounds and using buttons with Raspberry Pi](https://learn.adafruit.com/playing-sounds-and-using-buttons-with-raspberry-pi.md)
- [Adafruit Microphone Amplifier Breakout](https://learn.adafruit.com/adafruit-microphone-amplifier-breakout.md)
- [RGB Matrix New York Times Title Scroller](https://learn.adafruit.com/rgb-matix-nyt-text-scroller.md)
---
# Source: https://learn.adafruit.com/16-channel-pwm-servo-driver.md
# Adafruit PCA9685 16-Channel Servo Driver
## Overview

Driving servo motors with the Arduino Servo library is pretty easy, but each one consumes a precious pin - not to mention some Arduino processing power. The Adafruit 16-Channel 12-bit PWM/Servo Driver will drive up to 16 servos over I2C with only 2 pins. The on-board PWM controller will drive all 16 channels simultaneously with no additional Arduino processing overhead. What's more, you can chain up to 62 of them to control up to 992 servos - all with the same 2 pins!
The Adafruit PWM/Servo Driver is the perfect solution for any project that requires a lot of servos.

- [Next Page](https://learn.adafruit.com/16-channel-pwm-servo-driver/pinouts.md)
## Featured Products
### Micro servo
[Micro servo](https://www.adafruit.com/product/169)
Tiny little servo can rotate approximately 180 degrees (90 in each direction) and works just like the standard kinds you're used to but _smaller_. You can use any servo code, hardware, or library to control these servos. Good for beginners who want to make stuff move without...
In Stock
[Buy Now](https://www.adafruit.com/product/169)
[Related Guides to the Product](https://learn.adafruit.com/products/169/guides)
### Standard servo - TowerPro SG-5010
[Standard servo - TowerPro SG-5010](https://www.adafruit.com/product/155)
This high-torque standard servo can rotate approximately 180 degrees (90 in each direction). You can use any servo code, hardware, or library to control these servos. Good for beginners who want to make stuff move without building a motor controller with feedback & gearbox. Comes with 3...
In Stock
[Buy Now](https://www.adafruit.com/product/155)
[Related Guides to the Product](https://learn.adafruit.com/products/155/guides)
### Continuous Rotation Servo
[Continuous Rotation Servo](https://www.adafruit.com/product/154)
This servo rotates fully forward or backward instead of moving to a position. You can use any servo code, hardware, or library to control these servos. Good for making simple moving robots. Comes with four different horns, as shown.
To control with an Arduino, we suggest connecting...
In Stock
[Buy Now](https://www.adafruit.com/product/154)
[Related Guides to the Product](https://learn.adafruit.com/products/154/guides)
### Adafruit 16-Channel 12-bit PWM/Servo Driver - I2C interface
[Adafruit 16-Channel 12-bit PWM/Servo Driver - I2C interface](https://www.adafruit.com/product/815)
You want to make a cool robot, maybe a hexapod walker, or maybe just a piece of art with a lot of moving parts. Or maybe you want to drive a lot of LEDs with precise PWM output. Then you realize that your microcontroller has a limited number of PWM outputs! What now? You could give up OR you...
In Stock
[Buy Now](https://www.adafruit.com/product/815)
[Related Guides to the Product](https://learn.adafruit.com/products/815/guides)
### Adafruit METRO 328 Fully Assembled - Arduino IDE compatible
[Adafruit METRO 328 Fully Assembled - Arduino IDE compatible](https://www.adafruit.com/product/50)
We sure love the ATmega328 here at Adafruit, and we use them _a lot_ for our own projects. The processor has plenty of GPIO, Analog inputs, hardware UART SPI and I2C, timers and PWM galore - just enough for most simple projects. When we need to go small, we use a
Out of Stock
[Buy Now](https://www.adafruit.com/product/50)
[Related Guides to the Product](https://learn.adafruit.com/products/50/guides)
## Related Guides
- [LED Tricks: Gamma Correction](https://learn.adafruit.com/led-tricks-gamma-correction.md)
- [MIDI Controlled Robot Lyre with CircuitPython](https://learn.adafruit.com/midi-controlled-robot-lyre-with-circuitpython.md)
- [Photocells](https://learn.adafruit.com/photocells.md)
- [Bluetooth Temperature & Humidity Sensor](https://learn.adafruit.com/bluetooth-temperature-and-humidity-sensor.md)
- [Wave Shield Voice Changer](https://learn.adafruit.com/wave-shield-voice-changer.md)
- [Arduino Lesson 2. LEDs](https://learn.adafruit.com/adafruit-arduino-lesson-2-leds.md)
- [Arduino Lesson 17. Email Sending Movement Detector](https://learn.adafruit.com/arduino-lesson-17-email-sending-movement-detector.md)
- [NeoPixel Painter](https://learn.adafruit.com/neopixel-painter.md)
- [Arduino Lesson 11. LCD Displays - Part 1](https://learn.adafruit.com/adafruit-arduino-lesson-11-lcd-displays-1.md)
- [Adafruit PN532 RFID/NFC Breakout and Shield](https://learn.adafruit.com/adafruit-pn532-rfid-nfc.md)
- [Silicone Robo-Tentacle](https://learn.adafruit.com/silicone-robo-tentacle.md)
- [Sending an SMS with Temboo](https://learn.adafruit.com/sending-an-sms-with-temboo.md)
- [Adafruit Proto Shield for Arduino](https://learn.adafruit.com/adafruit-proto-shield-arduino.md)
- [Programming Arduino with Android and Windows Tablets](https://learn.adafruit.com/programming-arduino-with-android-and-windows-tablets.md)
- [DS1307 Real Time Clock Breakout Board Kit](https://learn.adafruit.com/ds1307-real-time-clock-breakout-board-kit.md)
---
# Source: https://learn.adafruit.com/2-2-tft-display.md
# 2.2" TFT Display
## Overview

This lovely little display breakout is the best way to add a small, colorful and bright display to any project. Since the display uses 4-wire SPI to communicate and has its own pixel-addressable frame buffer, it can be used with every kind of microcontroller. Even a very small one with low memory and few pins available!
Warning:

This display comes with an EYESPI connector! This 18-pin 0.5mm pitch FPC connector has a flip-top connector for using a flex cable to hook up your display. It enables you to avoid soldering and get your display up off of the breadboard! Consider it a sort of "STEMMA QT for displays" - a way to quickly connect and extend display wiring that uses a lot of SPI pins. It also allows for communicating with displays over longer distances. The [EYESPI flex cables](https://www.adafruit.com/?q=eyespi+cable&sort=BestMatch) are available in multiple lengths to suit any project. This is especially useful for projects where you want your display mounted separate from your microcontroller.

The 2.2" display has 320x240 color pixels. Unlike the low cost "Nokia 6110" and similar LCD displays, which are CSTN type and thus have poor color and slow refresh, this display is a true TFT! The TFT driver (ILI9340) can display full 16-bit color. And the LCD will always come with the same driver chip so there's no worries that your code will not work from one to the other.

The breakout has the TFT display soldered on (it uses a delicate flex-circuit connector) as well as a ultra-low-dropout 3.3V regulator and a 3/5V level shifter so you can use it with 3.3V or 5V power and logic. We also had a little space so we placed a microSD card holder so you can easily load full color bitmaps from a FAT16/FAT32 formatted microSD card. The microSD card is not included [but you can pick one up here](http://www.adafruit.com/products/102 "Link: http://www.adafruit.com/products/102").
- [Next Page](https://learn.adafruit.com/2-2-tft-display/pinouts.md)
## Featured Products
### 2.2" 18-bit color TFT LCD display with microSD card breakout
[2.2" 18-bit color TFT LCD display with microSD card breakout](https://www.adafruit.com/product/1480)
This lovely little display breakout is the best way to add a small, colorful, and bright display to any project. Since the display uses 4-wire SPI to communicate and has its own pixel-addressable frame buffer, it can be used with every kind of microcontroller. Even a very small one with low...
In Stock
[Buy Now](https://www.adafruit.com/product/1480)
[Related Guides to the Product](https://learn.adafruit.com/products/1480/guides)
### Breadboarding wire bundle
[Breadboarding wire bundle](https://www.adafruit.com/product/153)
75 flexible stranded core wires with stiff ends molded on in red, orange, yellow, green, blue, brown, black and white. These are a major improvement over the "box of bent wires" that are sometimes sold with breadboards, and faster than stripping your own solid core wires. Makes...
In Stock
[Buy Now](https://www.adafruit.com/product/153)
[Related Guides to the Product](https://learn.adafruit.com/products/153/guides)
### Adafruit METRO 328 Fully Assembled - Arduino IDE compatible
[Adafruit METRO 328 Fully Assembled - Arduino IDE compatible](https://www.adafruit.com/product/50)
We sure love the ATmega328 here at Adafruit, and we use them _a lot_ for our own projects. The processor has plenty of GPIO, Analog inputs, hardware UART SPI and I2C, timers and PWM galore - just enough for most simple projects. When we need to go small, we use a
Out of Stock
[Buy Now](https://www.adafruit.com/product/50)
[Related Guides to the Product](https://learn.adafruit.com/products/50/guides)
### Half Sized Premium Breadboard - 400 Tie Points
[Half Sized Premium Breadboard - 400 Tie Points](https://www.adafruit.com/product/64)
This is a cute, half-size breadboard with 400 tie points, good for small projects. It's 3.25" x 2.2" / 8.3cm x 5.5cm with a standard double-strip in the middle and two power rails on both sides. You can pull the power rails off easily to make the breadboard as...
In Stock
[Buy Now](https://www.adafruit.com/product/64)
[Related Guides to the Product](https://learn.adafruit.com/products/64/guides)
## Related Guides
- [Affordable HAL 9000 Replica](https://learn.adafruit.com/hal-9000-replica.md)
- [Arduino Lesson 3. RGB LEDs](https://learn.adafruit.com/adafruit-arduino-lesson-3-rgb-leds.md)
- [NeoPixel Painter](https://learn.adafruit.com/neopixel-painter.md)
- [Adafruit 16-channel PWM/Servo Shield](https://learn.adafruit.com/adafruit-16-channel-pwm-slash-servo-shield.md)
- [Adafruit 2.8" TFT Touch Shield v2 - Capacitive or Resistive](https://learn.adafruit.com/adafruit-2-8-tft-touch-shield-v2.md)
- [Bluetooth Temperature & Humidity Sensor](https://learn.adafruit.com/bluetooth-temperature-and-humidity-sensor.md)
- [Arduino Lesson 17. Email Sending Movement Detector](https://learn.adafruit.com/arduino-lesson-17-email-sending-movement-detector.md)
- [TTL Serial Camera](https://learn.adafruit.com/ttl-serial-camera.md)
- [Arduino Lesson 2. LEDs](https://learn.adafruit.com/adafruit-arduino-lesson-2-leds.md)
- [Adafruit 1.27" and 1.5" Color OLED Breakout Board](https://learn.adafruit.com/adafruit-1-5-color-oled-breakout-board.md)
- [Arduino Lesson 5. The Serial Monitor](https://learn.adafruit.com/adafruit-arduino-lesson-5-the-serial-monitor.md)
- [RePaper eInk Development Board](https://learn.adafruit.com/repaper-eink-development-board.md)
- [Wave Shield Voice Changer](https://learn.adafruit.com/wave-shield-voice-changer.md)
- [Adafruit Proto Screw Shield](https://learn.adafruit.com/adafruit-proto-screw-shield.md)
- [Arduino Lesson 6. Digital Inputs](https://learn.adafruit.com/adafruit-arduino-lesson-6-digital-inputs.md)
---
# Source: https://learn.adafruit.com/2-8-tft-touch-shield.md
# 2.8" TFT Touch Shield
## Overview

Spice up your Arduino project with a beautiful large touchscreen display shield with built in microSD card connection. This TFT display is big (2.8" diagonal) bright (4 white-LED backlight) and colorful (18-bit 262,000 different shades)! 240x320 pixels with individual pixel control. It has way more resolution than a black and white 128x64 display. As a bonus, this display has a resistive touchscreen attached to it already, so you can detect finger presses anywhere on the screen.
The shield is fully assembled, tested and ready to go. No wiring, no soldering! Simply plug it in and load up our library - you'll have it running in under 10 minutes!
This display shield has a controller built into it with RAM buffering, so that almost no work is done by the microcontroller. The shield does require a lot of pins: 12 lines total for the display, 13 total if you use the microSD card

Of course, we wouldn't just leave you with a datasheet and a "good luck!" - [we've written a full open source graphics library that can draw pixels, lines, rectangles, circles and text](https://github.com/adafruit/TFTLCD-Library "Link: https://github.com/adafruit/TFTLCD-Library"). We[also have a touch screen library that detects x, y and z (pressure)](https://github.com/adafruit/Touch-Screen-Library) and example code to demonstrate all of it. The code is written for Arduino but can be easily ported to your favorite microcontroller!
**[Pick one up today at the Adafruit Shop!](http://www.adafruit.com/products/376 "Link: http://www.adafruit.com/products/376")**
**Specifications:**
- 2.8" diagonal LCD TFT display
- 240x320 resolution, 18-bit (262,000) color
- [ILI9325 (datasheet)](http://www.adafruit.com/datasheets/ILI9325.pdf) or [ILI9328 (datasheet)](http://www.adafruit.com/datasheets/ILI9328.pdf "Link: http://www.adafruit.com/datasheets/ILI9328.pdf") controller with built in video RAM buffer
- 8 bit digital interface, plus 4 control lines
- Uses digital pins 5-13 and analog 0-3. That means you can use digital pins 2, 3 and analog 4 and 5. Pin 12 is available if not using the microSD
- Works with any Arduino '328 or Mega
- 5V compatible! Use with 3.3V or 5V logic
- Onboard 3.3V @ 300mA LDO regulator
- 4 white LED backlight. On by default but you can connect the transistor to a digital pin for backlight control
- 4-wire resistive touchscreen
- [Next Page](https://learn.adafruit.com/2-8-tft-touch-shield/faq.md)
## Featured Products
### Adafruit METRO 328 Fully Assembled - Arduino IDE compatible
[Adafruit METRO 328 Fully Assembled - Arduino IDE compatible](https://www.adafruit.com/product/50)
We sure love the ATmega328 here at Adafruit, and we use them _a lot_ for our own projects. The processor has plenty of GPIO, Analog inputs, hardware UART SPI and I2C, timers and PWM galore - just enough for most simple projects. When we need to go small, we use a
Out of Stock
[Buy Now](https://www.adafruit.com/product/50)
[Related Guides to the Product](https://learn.adafruit.com/products/50/guides)
## Related Guides
- [LED Lightbox](https://learn.adafruit.com/led-lightbox.md)
- [Trinket Audio Player](https://learn.adafruit.com/trinket-audio-player.md)
- [Geofencing with the FONA 808 & Adafruit IO](https://learn.adafruit.com/geofencing-with-the-fona-808-and-adafruit-io.md)
- [Adafruit Analog Accelerometer Breakouts](https://learn.adafruit.com/adafruit-analog-accelerometer-breakouts.md)
- [Electronic Demon Costume](https://learn.adafruit.com/electronic-demon-costume.md)
- [Adafruit Ultimate GPS Logger Shield](https://learn.adafruit.com/adafruit-ultimate-gps-logger-shield.md)
- [Mini Thermal Receipt Printers](https://learn.adafruit.com/mini-thermal-receipt-printer.md)
- [Bluefruit LE Connect for iOS and Android](https://learn.adafruit.com/bluefruit-le-connect.md)
- [Introducing Adafruit Trellis ](https://learn.adafruit.com/adafruit-trellis-diy-open-source-led-keypad.md)
- [Arduino Lesson 9. Sensing Light](https://learn.adafruit.com/adafruit-arduino-lesson-9-sensing-light.md)
- [36mm LED Pixels](https://learn.adafruit.com/36mm-led-pixels.md)
- [Adafruit 16-channel PWM/Servo Shield](https://learn.adafruit.com/adafruit-16-channel-pwm-slash-servo-shield.md)
- [Naughty or Nice Machine](https://learn.adafruit.com/naughty-or-nice-machine.md)
- [Wireless Gardening with Arduino + CC3000 WiFi Modules](https://learn.adafruit.com/wireless-gardening-arduino-cc3000-wifi-modules.md)
- [LSM303 Accelerometer + Compass Breakout](https://learn.adafruit.com/lsm303-accelerometer-slash-compass-breakout.md)
---
# Source: https://learn.adafruit.com/2-8-tft-touchscreen.md
# 2.8" TFT Touchscreen
## Overview
Info:

Add some jazz & pizazz to your project with a color touchscreen LCD. This TFT display is big (2.8" diagonal) bright (4 white-LED backlight) and colorful (16-bit 262,000 different shades)! 240x320 pixels with individual pixel control, this has way more resolution than a black and white 128x64 display. As a bonus, this display has a resistive touchscreen attached to it already, so you can detect finger presses anywhere on the screen.
This display has a controller built into it with RAM buffering, so that almost no work is done by the microcontroller. You'll need 8 digital data lines and 4 or 5 digital control lines to read and write to the display (12 lines total). 4 pins are required for the touch screen (2 digital, 2 analog) but because of the way resistive touch screens work, we can share pins with the LCD so the entire setup can be run by 12 pins (10 digital, 2 analog).
Of course, we wouldn't just leave you with a datasheet and a "good luck!" - [we've written a full open source graphics library that can draw pixels, lines, rectangles, circles and text](https://github.com/adafruit/TFTLCD-Library) . We[also have a touch screen library that detects x, y and z (pressure)](https://github.com/adafruit/Touch-Screen-Library) and example code to demonstrate all of it. The code is written for Arduino but can be easily ported to your favorite microcontroller!
**[Pick one up today at the Adafruit Shop!](http://www.adafruit.com/index.php?main_page=product_info&cPath=37&products_id=335)**
**Specifications:**
- 2.8" diagonal LCD TFT display
- 240x320 resolution, 16-bit (262,000) color
- [ILI9325 (datasheet)](http://www.adafruit.com/datasheets/ILI9325.pdf) or [ILI9328 (datasheet)](http://www.adafruit.com/datasheets/ILI9328.pdf) controller with built in video RAM buffer
- 8 bit digital interface, plus 4 or 5 control lines
- 5V compatible! Use with 3.3V or 5V logic
- Onboard 3.3V @ 150mA LDO regulator
- 4 white LED backlight, transistor connected so you can PWM dim the backlight
- 1x20 header for easy breadboarding, or 2x10 header for cable connection
- 4 x 0.125"/3mm mounting holes with tabs
- 4-wire resistive touchscreen


**This guide is specifically for the TFT LCD** breakout board **. There's a** [**separate tutorial for the Arduino shield**](http://learn.adafruit.com/2-8-tft-touch-shield) **version of this display.**
- [Next Page](https://learn.adafruit.com/2-8-tft-touchscreen/connection-options.md)
## Featured Products
### Adafruit METRO 328 Fully Assembled - Arduino IDE compatible
[Adafruit METRO 328 Fully Assembled - Arduino IDE compatible](https://www.adafruit.com/product/50)
We sure love the ATmega328 here at Adafruit, and we use them _a lot_ for our own projects. The processor has plenty of GPIO, Analog inputs, hardware UART SPI and I2C, timers and PWM galore - just enough for most simple projects. When we need to go small, we use a
Out of Stock
[Buy Now](https://www.adafruit.com/product/50)
[Related Guides to the Product](https://learn.adafruit.com/products/50/guides)
### Breadboarding wire bundle
[Breadboarding wire bundle](https://www.adafruit.com/product/153)
75 flexible stranded core wires with stiff ends molded on in red, orange, yellow, green, blue, brown, black and white. These are a major improvement over the "box of bent wires" that are sometimes sold with breadboards, and faster than stripping your own solid core wires. Makes...
In Stock
[Buy Now](https://www.adafruit.com/product/153)
[Related Guides to the Product](https://learn.adafruit.com/products/153/guides)
### Half Sized Premium Breadboard - 400 Tie Points
[Half Sized Premium Breadboard - 400 Tie Points](https://www.adafruit.com/product/64)
This is a cute, half-size breadboard with 400 tie points, good for small projects. It's 3.25" x 2.2" / 8.3cm x 5.5cm with a standard double-strip in the middle and two power rails on both sides. You can pull the power rails off easily to make the breadboard as...
In Stock
[Buy Now](https://www.adafruit.com/product/64)
[Related Guides to the Product](https://learn.adafruit.com/products/64/guides)
### MicroSD card breakout board+
[MicroSD card breakout board+](https://www.adafruit.com/product/254)
Not just a simple breakout board, this microSD adapter goes the extra mile - designed for ease of use.
- Onboard 5v-\>3v regulator provides 150mA for power-hungry cards
- 3v level shifting means you can use this with ease on either 3v or 5v systems
- Uses a proper level...
In Stock
[Buy Now](https://www.adafruit.com/product/254)
[Related Guides to the Product](https://learn.adafruit.com/products/254/guides)
## Related Guides
- [Adafruit Motor Shield](https://learn.adafruit.com/adafruit-motor-shield.md)
- [Photocells](https://learn.adafruit.com/photocells.md)
- [Circuit Playground: D is for Diode](https://learn.adafruit.com/circuit-playground-d-is-for-diode.md)
- [Micro SD Card Breakout Board Tutorial](https://learn.adafruit.com/adafruit-micro-sd-breakout-board-card-tutorial.md)
- [0.96" mini Color OLED](https://learn.adafruit.com/096-mini-color-oled.md)
- [Halloween Pumpkin](https://learn.adafruit.com/halloween-pumpkin.md)
- [Multi-tasking the Arduino - Part 1](https://learn.adafruit.com/multi-tasking-the-arduino-part-1.md)
- [Low Power WiFi Datalogger](https://learn.adafruit.com/low-power-wifi-datalogging.md)
- [Arduino Lesson 3. RGB LEDs](https://learn.adafruit.com/adafruit-arduino-lesson-3-rgb-leds.md)
- [Create an Internet of Things Dashboard with Adafruit IO](https://learn.adafruit.com/create-an-internet-of-things-dashboard-with-adafruit-dot-io.md)
- [Adafruit 4-Channel ADC Breakouts](https://learn.adafruit.com/adafruit-4-channel-adc-breakouts.md)
- [Trinket Audio Player](https://learn.adafruit.com/trinket-audio-player.md)
- [TTL Serial Camera](https://learn.adafruit.com/ttl-serial-camera.md)
- [Wave Shield Voice Changer](https://learn.adafruit.com/wave-shield-voice-changer.md)
- [All About Arduino Libraries](https://learn.adafruit.com/adafruit-all-about-arduino-libraries-install-use.md)
---
# Source: https://learn.adafruit.com/20mm-led-pixels.md
# 20mm LED Pixels
## Overview
Info:
RGB Pixels are digitally-controllable lights you can set to any color, or animate. Each pixel contains an RGB LED and a controller chip molded into a 'dot' of silicone, with flanges so they can be pushed into holes in thin sheet material. The dots are waterproof and rugged — they're typically used to make outdoor signs.
**Basic stats**
- 20mm diameter round waterproof pixels
- Approximately 3 inches (75mm) apart on 4-pin strand
- 5 Volts DC, 60 milliamps max per pixel (all LEDs on, full white)
- LPD6803 LED driver chip provides 15-bit color: [Datasheet](http://www.adafruit.com/datasheets/LPD6803.pdf)
- 2-pin SPI-like protocol — easy for Arduino and other microcontrollers
Here is a video showing our similar 12mm dots running a test pattern:
http://www.flickr.com/photos/adafruit/5262163094/
These pixels use a "5050" clear RGB LED and are brighter than our 12mm pixels. The trade off is that they are not diffused, so the color mixing is not as nice; close up, you can see the three separate LEDs. At 5 Volts, they draw a maximum of 60 mA per pixel: 20mA each for red, green and blue.
The LED pixels are spaced along a strand of ribbon cable, with about 3 inches or 75mm between pixels. If additional distance is needed you can cut the ribbon cable and solder 4 wires to extend the gap to the desired length.
Each pixel contains a small microchip within the silicone dot. The LPD6803 LED driver chip is custom designed for this purpose. These chips are very simple to communicate with — all they do is shift color data in from one pin and out another. To issue data from a microcontroller such as an Arduino, one "shifts out" 16 bits of color information. To write data to 10 LEDs, you would issue 160 bits (10 \* 16). Following the data, 32 zero bits will "latch" the data and show the new LED colors.
This chip can handle PWM for controlling color brightness, all it needs is a 'pixel PWM clock' which sets the PWM speed. The faster the clock, the smoother the color…but this signal has to travel all the way down the strand, so it can't be too fast or it'll snag the chips.
An interesting point is that the PWM clock is the same as the data clock. This is nice in that it saves a pin, but does mean that data must be carefully synchronized to the PWM counter in order to avoid unsightly flicker. This is okay but a little annoying because the PWM clock must be continuously issued, and on the Arduino this requires a timer interrupt and costs a fair chunk of CPU performance. We provide an Arduino library that takes care of all this unpleasantness behind the scenes, so you won’t have to fuss with the details.
- [Next Page](https://learn.adafruit.com/20mm-led-pixels/wiring.md)
## Featured Products
### Adafruit METRO 328 Fully Assembled - Arduino IDE compatible
[Adafruit METRO 328 Fully Assembled - Arduino IDE compatible](https://www.adafruit.com/product/50)
We sure love the ATmega328 here at Adafruit, and we use them _a lot_ for our own projects. The processor has plenty of GPIO, Analog inputs, hardware UART SPI and I2C, timers and PWM galore - just enough for most simple projects. When we need to go small, we use a
Out of Stock
[Buy Now](https://www.adafruit.com/product/50)
[Related Guides to the Product](https://learn.adafruit.com/products/50/guides)
### Female DC Power adapter - 2.1mm jack to screw terminal block
[Female DC Power adapter - 2.1mm jack to screw terminal block](https://www.adafruit.com/product/368)
If you need to connect a DC power wall wart to a board that doesn't have a DC jack - this adapter will come in very handy! There is a 2.1mm DC jack on one end, and a screw terminal block on the other. The terminals are labeled with positive/negative assuming a positive-tip configuration...
In Stock
[Buy Now](https://www.adafruit.com/product/368)
[Related Guides to the Product](https://learn.adafruit.com/products/368/guides)
### 5V 10A switching power supply
[5V 10A switching power supply](https://www.adafruit.com/product/658)
This is a beefy switching supply, for when you need a lot of power! It can supply 5V DC up to 10 Amps, running from 110V or 220V power (the plug it comes with is for US/Canada/Japan but you can use any plug adapter for your country, or just replace the cable with a standard computer/appliance...
Out of Stock
[Buy Now](https://www.adafruit.com/product/658)
[Related Guides to the Product](https://learn.adafruit.com/products/658/guides)
### 5V 2A (2000mA) switching power supply - UL Listed
[5V 2A (2000mA) switching power supply - UL Listed](https://www.adafruit.com/product/276)
This is an FCC/CE certified and UL listed power supply. Need a lot of 5V power? This switching supply gives a clean regulated 5V output at up to 2000mA. 110 or 240 input, so it works in any country. The plugs are "US 2-prong" style so you may need a plug adapter, but you can pick one...
In Stock
[Buy Now](https://www.adafruit.com/product/276)
[Related Guides to the Product](https://learn.adafruit.com/products/276/guides)
## Related Guides
- [Animating Multiple LED Backpacks](https://learn.adafruit.com/animating-multiple-led-backpacks.md)
- [How to Choose a Microcontroller](https://learn.adafruit.com/how-to-choose-a-microcontroller.md)
- [Circuit Playground: D is for Diode](https://learn.adafruit.com/circuit-playground-d-is-for-diode.md)
- [Reverse Geocache Box](https://learn.adafruit.com/reverse-geocache-engagement-box.md)
- [Sending an SMS with Temboo](https://learn.adafruit.com/sending-an-sms-with-temboo.md)
- [Arduino "Hunt The Wumpus"](https://learn.adafruit.com/arduino-hunt-the-wumpus.md)
- [Arduino Lesson 13. DC Motors](https://learn.adafruit.com/adafruit-arduino-lesson-13-dc-motors.md)
- [2.8" TFT Touch Shield](https://learn.adafruit.com/2-8-tft-touch-shield.md)
- [Wave Shield Voice Changer](https://learn.adafruit.com/wave-shield-voice-changer.md)
- [Using NeoPixels and Servos Together](https://learn.adafruit.com/neopixels-and-servos.md)
- [Arduino Lesson 15. DC Motor Reversing](https://learn.adafruit.com/adafruit-arduino-lesson-15-dc-motor-reversing.md)
- [Arduino Lesson 6. Digital Inputs](https://learn.adafruit.com/adafruit-arduino-lesson-6-digital-inputs.md)
- [Skill Badge Requirements: Microcontrollers](https://learn.adafruit.com/skill-badge-requirements-microcontrollers.md)
- [Arduino Lesson 8. Analog Inputs](https://learn.adafruit.com/adafruit-arduino-lesson-8-analog-inputs.md)
- [8BitBox](https://learn.adafruit.com/8bitbox.md)
---
# Source: https://learn.adafruit.com/arduino-tips-tricks-and-techniques/3-3v-conversion.md
# Arduino Tips, Tricks, and Techniques
## 3.3V Conversion
## Introduction
Arduino UNO's and many other Arduino boards run on 5 volts, which for a long time was the 'standard' voltage for hobbyist electronics and microcontrollers. But now the coolest new sensors, displays and chips are 3.3V and are not 5V compatible. For example, XBee radios, and SD cards and acellerometers all run on 3.3V logic and power. If you tried to connect to them with 5V you could damage the internals of the accessory.
We use chips like the [CD4050 to do level conversion](http://www.adafruit.com/partfinder/ic?s%5B%5D=cd4050#logic) but if you are using a lot of 3.3V devices, maybe you're just better off upgrading the entire Arduino to run from 3.3V!
To do that, we will replace the regulator so that the DC barrel jack goes to a 3.3v type regulator, not a 5V. And then reconfigure the 5V usb power line so it goes through the regulator as well.
## Replace the Regulator
The default regulator is a 5.0V type, but we want 3.3V out, so we'll need to replace it. We'll use a 1117-3.3V (there are a few manufacturers of 1117 regulators, just like the 7805 is made by many factories) regulator in a TO-252-3 package. It looks like this:

You can get these from any electronics component shop, [for example here is the digikey link](http://search.digikey.com/scripts/DkSearch/dksus.dll?Detail&name=NCP1117DT33GOS-ND).
To start, we'll need to remove the old regulator. The easiest way to do that is to first clip the two legs.

Then you'll need to heat the tab up to get it liquid so you can lift off the old part. Although it may seem counter intuitive, its best to **add** some solder to the tab, melt it on with your iron, this will improve the heat conduction since the tab is so large.

Clean up the tabs and remove any clipped parts still stuck on.
Now line up the new 3.3V regulator, and solder the tab first, use plenty of solder and be patient, the tab acts like a heat sink.
Then do the two legs.
## Replacing the Fuse
The next part is a little tricky, the USB jack gives us exactly 5V already, and normally that is tied to the output of the voltage regulator (essentially, its got a little circuitry that connects it when the DC jack is not powered).
The easiest way to make the USB 5V also go through the regulator is to remove the fuse and solder a diode from the USB output to the regulator input.
[You can use any power diode, a 1N4001 is perfect](http://www.adafruit.com/partfinder/diodes#power_blocking "Link: http://www.adafruit.com/partfinder/diodes#power\_blocking") and only a few pennies.
The trade off is now there is no 500 mA fuse for the USB jack. The good news is that computers will have their own fuses on the USB connector (inside the computer) so its not likely you will destroy your PC. But be aware that you're losing a little safety.
Heat the fuse with your soldering iron, again adding solder may help thermal conductivity. Since the fuse is very conductive you can probably just heat one side for a while and both ends will melt.

Clip the diode short and bend the leads over. Solder the side without a stripe (anode) to the old fuse pad, nearest the board edge. Solder the striped end (cathode) to the right hand leg of the regulator.
The Arduino will still automatically select whichever power plug is giving you more power.

That's it! You are now 3.3V powered. This is a little lower than the power/frequency specification for the AVR chips since they ought to have about 3.6V to run 16Mhz but its _probably_ not going to be an issue since AVRs can be overclocked a little.- [Previous Page](https://learn.adafruit.com/arduino-tips-tricks-and-techniques/upgrade.md)
- [Next Page](https://learn.adafruit.com/arduino-tips-tricks-and-techniques/arduino-hacks.md)
## Featured Products
### Adafruit METRO 328 Fully Assembled - Arduino IDE compatible
[Adafruit METRO 328 Fully Assembled - Arduino IDE compatible](https://www.adafruit.com/product/50)
We sure love the ATmega328 here at Adafruit, and we use them _a lot_ for our own projects. The processor has plenty of GPIO, Analog inputs, hardware UART SPI and I2C, timers and PWM galore - just enough for most simple projects. When we need to go small, we use a
Out of Stock
[Buy Now](https://www.adafruit.com/product/50)
[Related Guides to the Product](https://learn.adafruit.com/products/50/guides)
### Arduino bootloader-programmed chip (Atmega328P)
[Arduino bootloader-programmed chip (Atmega328P)](https://www.adafruit.com/product/123)
This is a preprogrammed Atmega328P chip, useful if you want to make your own Arduino-compatible or repair a damaged chip on an exisiting Arduino UNO, Duemilanove, Diecimila, or NG!
This chip is programmed with 'ADAboot', my version of the bootloader that is...
Out of Stock
[Buy Now](https://www.adafruit.com/product/123)
[Related Guides to the Product](https://learn.adafruit.com/products/123/guides)
## Related Guides
- [NeoPixel Painter](https://learn.adafruit.com/neopixel-painter.md)
- [Adafruit Proto Shield for Arduino](https://learn.adafruit.com/adafruit-proto-shield-arduino.md)
- [Deciphering Strange Arduino Code](https://learn.adafruit.com/deciphering-strange-arduino-code.md)
- [Affordable HAL 9000 Replica](https://learn.adafruit.com/hal-9000-replica.md)
- [WiFi Candy Bowl Monitor](https://learn.adafruit.com/wifi-candy-bowl.md)
- [Arduino Lesson 1. Blink](https://learn.adafruit.com/adafruit-arduino-lesson-1-blink.md)
- [Using NeoPixels and Servos Together](https://learn.adafruit.com/neopixels-and-servos.md)
- [Adafruit 2.8" TFT Touch Shield v2 - Capacitive or Resistive](https://learn.adafruit.com/adafruit-2-8-tft-touch-shield-v2.md)
- [LSM303 Accelerometer + Compass Breakout](https://learn.adafruit.com/lsm303-accelerometer-slash-compass-breakout.md)
- [1,500 NeoPixel LED Curtain with Raspberry Pi and Fadecandy](https://learn.adafruit.com/1500-neopixel-led-curtain-with-raspberry-pi-fadecandy.md)
- [Arduino Lesson 8. Analog Inputs](https://learn.adafruit.com/adafruit-arduino-lesson-8-analog-inputs.md)
- [8BitBox](https://learn.adafruit.com/8bitbox.md)
- [Animating Multiple LED Backpacks](https://learn.adafruit.com/animating-multiple-led-backpacks.md)
- [WiFi Controlled LED Christmahanukwanzaa Tree](https://learn.adafruit.com/wifi-controlled-led-christmahanukwanzaa-tree.md)
- [Reverse Geocache Box](https://learn.adafruit.com/reverse-geocache-engagement-box.md)
---
# Source: https://learn.adafruit.com/32x16-32x32-rgb-led-matrix.md
# RGB LED Matrix Basics
## Overview
This guide is for boards in the **ARDUINO ecosystem**. We have a [different guide for Raspberry Pi](https://learn.adafruit.com/adafruit-rgb-matrix-plus-real-time-clock-hat-for-raspberry-pi), and another for [CircuitPython](https://learn.adafruit.com/rgb-led-matrices-matrix-panels-with-circuitpython).
Arduino Uno is limited to 32x16 pixels, single-buffered.
Info:

Bring a little bit of Times Square into your home with our RGB LED matrix panels. These panels are normally used to make video walls — here in New York we see them on the sides of buses and on bus stops — to display animations or short video clips. We thought they looked really cool so we picked up a few boxes from the factory. One has 512 bright RGB LEDs arranged in a 16x32 grid on the front, the other has 1024 LEDs in a 32x32 grid. On the back is a PCB with IDC connectors (one set for input, one for output: in theory you can chain these together) and 12 16-bit latches that allow you to drive the display with a 1:8 (16x32) or 1:16 (32x32) scan rate.
# **COMPATIBLE HARDWARE**
The following boards are **plug-and-play ready** with the RGB Matrix Shield and software mentioned in this guide:
- **Adafruit Metro M0**
- **Arduino Zero**
- **Arduino Uno** (or compatible ATmega328P boards) — **limited to 32x16 matrix** , no double-buffering (needed for flicker-free animation)
The following are supported by the software, but require **additional wiring or jumpers** to use the RGB Matrix Shield:
- **Arduino Mega** (or compatible ATmega2560 boards)
- **Adafruit Metro M4**
- **Adafruit Metro RP2350** (requires address pins {A, B, C, D} get jumper wires)
The following are **NOT supported** by the software or shield:
- **Arduino Leonardo** (or compatible ATmega32U4 boards) (though the same form factor, the Uno and Leonardo route different shield connections to the microcontroller)
- **Netduino** and other Arduino-alikes not mentioned in above lists (but other libraries or shields might exist elsewhere)
- **Teensy** (but see the **SmartLED** Shields and software for Teensy 3.X and 4.X, which provide excellent performance)
- **Raspberry Pi** (but there are different [Bonnets](https://learn.adafruit.com/adafruit-rgb-matrix-bonnet-for-raspberry-pi) and [HATs](https://learn.adafruit.com/adafruit-rgb-matrix-plus-real-time-clock-hat-for-raspberry-pi) for this)
# **COMPATIBLE SOFTWARE**
The software support for driving the RGB matrix panels has evolved with time and the availability of newer, more powerful Arduino boards. **There are currently two different Arduino libraries.** Which library to use depends on the Arduino board being used.
- [RGB matrix Panel](https://github.com/adafruit/RGB-matrix-Panel) - This is the older, original library and is covered later in this guide. Use this library with an **Arduino UNO** or **Arduino Mega**.
- [Adafruit Protomatter](https://github.com/adafruit/Adafruit_Protomatter) - This is a newer library covered in a [separate guide](https://learn.adafruit.com/adafruit-protomatter-rgb-matrix-library/overview). Use this library with an **Arduino Zero** , **Metro M0** , **Metro M4** , **RP2040** based board, **ESP32** based board, or other supported **32bit boards**. [See the Protomatter guide for more details.](https://learn.adafruit.com/adafruit-protomatter-rgb-matrix-library/overview)

These panels require 12 or 13 digital pins (6 bit data, 6 or 7 bit control) and a good 5V power supply, at least a couple amps per panel. We suggest our 2A (or larger) regulated 5V adapters and either a terminal block DC jack, or solder a jack from our DC extension cord. Please read the rest of our tutorial for more details!
Keep in mind that these displays are normally designed to be driven by FPGAs or other high speed processors; they do not have built in PWM control of any kind. Instead, you're supposed to redraw the screen over and over to 'manually' PWM the whole thing. On a 16 MHz Arduino, we managed to squeeze 12-bit color (4096 colors) but this display would really shine if driven by an FPGA, CPLD, Propeller, XMOS or other high speed multi-processor controller.

Of course, we wouldn't leave you with a datasheet and a "good luck!" We have a full wiring diagrams and working Arduino library code with examples from drawing pixels, lines, rectangles, circles and text. You'll get your color blasting within the hour! On most Arduino-compatible boards, you'll need 12 digital pins, and about 800 bytes of RAM to hold the 12-bit color image (double that for the 32x32 matrix, double again for smooth double-buffered animation).
Danger:
- [Next Page](https://learn.adafruit.com/32x16-32x32-rgb-led-matrix/powering.md)
## Featured Products
### Medium 16x32 RGB LED matrix panel - 6mm Pitch
[Medium 16x32 RGB LED matrix panel - 6mm Pitch](https://www.adafruit.com/product/420)
Bring a little bit of Times Square into your home with this 16 x 32 RGB LED matrix panel. These panels are normally used to make video walls, here in New York we see them on the sides of busses and bus stops, to display animations or short video clips. We thought they looked really cool so we...
In Stock
[Buy Now](https://www.adafruit.com/product/420)
[Related Guides to the Product](https://learn.adafruit.com/products/420/guides)
### 32x32 RGB LED Matrix Panel - 4mm Pitch
[32x32 RGB LED Matrix Panel - 4mm Pitch](https://www.adafruit.com/product/607)
Bring a little bit of Times Square into your home with this totally adorable 5 inch square 32 x 32 RGB LED matrix panel. These panels are normally used to make video walls, here in New York we see them on the sides of busses and bus stops, to display animations or short video clips. We thought...
In Stock
[Buy Now](https://www.adafruit.com/product/607)
[Related Guides to the Product](https://learn.adafruit.com/products/607/guides)
### 32x32 RGB LED Matrix Panel - 5mm Pitch
[32x32 RGB LED Matrix Panel - 5mm Pitch](https://www.adafruit.com/product/2026)
Bring a little bit of Times Square into your home with this sweet 32 x 32 square RGB LED matrix panel. These panels are normally used to make video walls, here in New York we see them on the sides of busses and bus stops, to display animations or short video clips. We thought they looked...
In Stock
[Buy Now](https://www.adafruit.com/product/2026)
[Related Guides to the Product](https://learn.adafruit.com/products/2026/guides)
### 32x32 RGB LED Matrix Panel - 6mm pitch
[32x32 RGB LED Matrix Panel - 6mm pitch](https://www.adafruit.com/product/1484)
Bring a little bit of Times Square into your home with this sweet 32 x 32 square RGB LED matrix panel. These panels are normally used to make video walls, here in New York we see them on the sides of busses and bus stops, to display animations or short video clips. We thought they looked...
In Stock
[Buy Now](https://www.adafruit.com/product/1484)
[Related Guides to the Product](https://learn.adafruit.com/products/1484/guides)
### 64x32 RGB LED Matrix - 3mm pitch
[64x32 RGB LED Matrix - 3mm pitch](https://www.adafruit.com/product/2279)
Bring a little bit of Times Square into your home with this sweet 64 x 32 square RGB LED matrix panel. These panels are normally used to make video walls, here in New York we see them on the sides of busses and bus stops, to display animations or short video clips. We thought they looked...
In Stock
[Buy Now](https://www.adafruit.com/product/2279)
[Related Guides to the Product](https://learn.adafruit.com/products/2279/guides)
### 64x32 RGB LED Matrix - 4mm pitch
[64x32 RGB LED Matrix - 4mm pitch](https://www.adafruit.com/product/2278)
Bring a little bit of Times Square into your home with this sweet 64 x 32 square RGB LED matrix panel. These panels are normally used to make video walls, here in New York we see them on the sides of busses and bus stops, to display animations or short video clips. We thought they looked...
Out of Stock
[Buy Now](https://www.adafruit.com/product/2278)
[Related Guides to the Product](https://learn.adafruit.com/products/2278/guides)
### 64x32 RGB LED Matrix - 5mm pitch
[64x32 RGB LED Matrix - 5mm pitch](https://www.adafruit.com/product/2277)
Bring a little bit of Times Square into your home with this sweet 64x32 square RGB LED matrix panel. These panels are normally used to make video walls, here in New York we see them on the sides of busses and bus stops, to display animations or short video clips. We thought they looked really...
In Stock
[Buy Now](https://www.adafruit.com/product/2277)
[Related Guides to the Product](https://learn.adafruit.com/products/2277/guides)
### 64x32 RGB LED Matrix - 6mm pitch
[64x32 RGB LED Matrix - 6mm pitch](https://www.adafruit.com/product/2276)
Bring a little bit of Times Square into your home with this sweet 64x32 square RGB LED matrix panel. These panels are normally used to make video walls, here in New York we see them on the sides of busses and bus stops, to display animations or short video clips. We thought they looked really...
In Stock
[Buy Now](https://www.adafruit.com/product/2276)
[Related Guides to the Product](https://learn.adafruit.com/products/2276/guides)
## Related Guides
- [Adafruit Metro M0 Express](https://learn.adafruit.com/adafruit-metro-m0-express.md)
- [Adafruit Metro M4 Express featuring ATSAMD51](https://learn.adafruit.com/adafruit-metro-m4-express-featuring-atsamd51.md)
- [CircuitPython 101: Basic Builtin Data Structures](https://learn.adafruit.com/basic-datastructures-in-circuitpython.md)
- [Adafruit Ultimate GPS](https://learn.adafruit.com/adafruit-ultimate-gps.md)
- [WiFi Controlled LED Christmahanukwanzaa Tree](https://learn.adafruit.com/wifi-controlled-led-christmahanukwanzaa-tree.md)
- [Stream Deck controlled RGB Message Panel using Adafruit IO](https://learn.adafruit.com/stream-deck-controlled-rgb-message-panel-using-adafruit-io.md)
- [Memories of an Arduino](https://learn.adafruit.com/memories-of-an-arduino.md)
- [Matrix Portal Stained Glass with WLED](https://learn.adafruit.com/matrix-portal-stained-glass-with-wled.md)
- [Sous-vide controller powered by Arduino - The SousViduino!](https://learn.adafruit.com/sous-vide-powered-by-arduino-the-sous-viduino.md)
- [LED Matrix Sports Scoreboard](https://learn.adafruit.com/led-matrix-sports-scoreboard.md)
- [Creating MatrixPortal Projects with CircuitPython](https://learn.adafruit.com/creating-projects-with-the-circuitpython-matrixportal-library.md)
- [Introducing Adafruit Trellis ](https://learn.adafruit.com/adafruit-trellis-diy-open-source-led-keypad.md)
- [CircuitPython Hardware: Charlieplex LED Matrix](https://learn.adafruit.com/micropython-hardware-charlieplex-led-matrix.md)
- [CircuitPython Display Support Using displayio](https://learn.adafruit.com/circuitpython-display-support-using-displayio.md)
- [Arduino Lesson 16. Stepper Motors](https://learn.adafruit.com/adafruit-arduino-lesson-16-stepper-motors.md)
- [2.8" TFT Touchscreen](https://learn.adafruit.com/2-8-tft-touchscreen.md)
- [SmartMatrix Animated GIF Player](https://learn.adafruit.com/smartmatrix-animated-gif-player.md)
---
# Source: https://learn.adafruit.com/36mm-led-pixels.md
# 36mm LED Pixels
## Overview

RGB Pixels are digitally-controllable lights you can set to any color, or animate. Each pixel contains four RGB LEDs and a controller chip in a sturdy metal housing. The pixel is then 'flooded' with epoxy to make it waterproof. These are fairly large pixels but they have a lot of nice mounting options, such as two metal flanges on the side and a 0.15"/4mm diameter hole in the middle so you can screw them directly onto a surface. They're typically used to make outdoor signs. Compared to our other LED dots, these are much bigger and much brighter, good for larger scale installations.
At **12 volts** , they draw a maximum of **120 milliamps** per pixel: 40 mA each for red, green and blue.
The LED pixels are spaced along a strand of ribbon cable, with about **3 inches (75mm)** between pixels. If additional distance is needed you can cut the ribbon cable and solder 4 wires to extend the gap to the desired length.

Each pixel contains a small microchip. The WS2801 LED driver chip is custom designed for this purpose. We provide an Arduino library for communicating with the pixels (explained in subsequent pages), but if you want to write your own code for other microcontrollers, they’re very easy to communicate with using an SPI-like protocol. For each pixel, one “shifts out” 24 bits of color information — the first data out corresponds to the pixel closest to the microcontroller. To write colors to 10 LEDs, you would issue 240 bytes (10 \* 24). Following the data, a 500 microsecond pause will then “latch” the data and display the new LED colors.
- [Next Page](https://learn.adafruit.com/36mm-led-pixels/project-ideas.md)
## Featured Products
### Adafruit METRO 328 Fully Assembled - Arduino IDE compatible
[Adafruit METRO 328 Fully Assembled - Arduino IDE compatible](https://www.adafruit.com/product/50)
We sure love the ATmega328 here at Adafruit, and we use them _a lot_ for our own projects. The processor has plenty of GPIO, Analog inputs, hardware UART SPI and I2C, timers and PWM galore - just enough for most simple projects. When we need to go small, we use a
Out of Stock
[Buy Now](https://www.adafruit.com/product/50)
[Related Guides to the Product](https://learn.adafruit.com/products/50/guides)
### Female DC Power adapter - 2.1mm jack to screw terminal block
[Female DC Power adapter - 2.1mm jack to screw terminal block](https://www.adafruit.com/product/368)
If you need to connect a DC power wall wart to a board that doesn't have a DC jack - this adapter will come in very handy! There is a 2.1mm DC jack on one end, and a screw terminal block on the other. The terminals are labeled with positive/negative assuming a positive-tip configuration...
In Stock
[Buy Now](https://www.adafruit.com/product/368)
[Related Guides to the Product](https://learn.adafruit.com/products/368/guides)
### 12V 5A switching power supply
[12V 5A switching power supply](https://www.adafruit.com/product/352)
This is a beefy switching supply, for when you need a lot of power! It can supply 12V DC up to 5 Amps, running from 110V or 220V power (the plug it comes with is for US/Canada/Japan but you can use any plug adapter for your country, or just replace the cable with a standard 'figure-8'...
In Stock
[Buy Now](https://www.adafruit.com/product/352)
[Related Guides to the Product](https://learn.adafruit.com/products/352/guides)
### 36mm Square 12V Digital RGB LED Pixels (Strand of 20)
[36mm Square 12V Digital RGB LED Pixels (Strand of 20)](https://www.adafruit.com/product/683)
RGB Pixels are digitally-controllable lights you can set to any color, or animate. Each metal 'pixel square' contains 4 RGB LEDs and a controller chip soldered to a PCB. The pixel is then 'flooded' with epoxy to make it water resistant, however we cannot say 100% waterproof you...
No Longer Stocked
[Buy Now](https://www.adafruit.com/product/683)
[Related Guides to the Product](https://learn.adafruit.com/products/683/guides)
## Related Guides
- [Adafruit Data Logger Shield](https://learn.adafruit.com/adafruit-data-logger-shield.md)
- [Track Your Treats: Halloween Candy GPS Tracker](https://learn.adafruit.com/track-your-treats-halloween-candy-gps-tracker.md)
- [Adafruit 1.27" and 1.5" Color OLED Breakout Board](https://learn.adafruit.com/adafruit-1-5-color-oled-breakout-board.md)
- [Adafruit Proto Shield for Arduino](https://learn.adafruit.com/adafruit-proto-shield-arduino.md)
- [Adafruit 16-channel PWM/Servo Shield](https://learn.adafruit.com/adafruit-16-channel-pwm-slash-servo-shield.md)
- [Light Meter](https://learn.adafruit.com/light-meter.md)
- [Cloud Thermometer](https://learn.adafruit.com/cloud-thermometer.md)
- [Character LCDs](https://learn.adafruit.com/character-lcds.md)
- [Ladyada's Learn Arduino - Lesson #0](https://learn.adafruit.com/ladyadas-learn-arduino-lesson-number-0.md)
- [Program an AVR or Arduino Using Raspberry Pi GPIO](https://learn.adafruit.com/program-an-avr-or-arduino-using-raspberry-pi-gpio-pins.md)
- [Arduino Lesson 17. Email Sending Movement Detector](https://learn.adafruit.com/arduino-lesson-17-email-sending-movement-detector.md)
- [Arduino Prototyping Mounting Plate](https://learn.adafruit.com/arduino-prototyping-mounting-plate.md)
- [Analog Feedback Servos](https://learn.adafruit.com/analog-feedback-servos.md)
- [All About Arduino Libraries](https://learn.adafruit.com/adafruit-all-about-arduino-libraries-install-use.md)
- [Trainable Robotic Arm](https://learn.adafruit.com/trainable-robotic-arm.md)
---
# Source: https://learn.adafruit.com/skill-badge-guide-3d-printing/3d-printing-overview.md
# Skill Badge Guide: 3D Printing
## 3D Printing Overview

The 3D printer uses a process called _fused deposition modeling_ to construct a solid object from a virtual model. This process involves the controlled deposition of a molten feed stock, typically ABS or PLA plastic, onto a build surface where layer-by-layer the model emerges. Each 3D printer features a series of motors to move the three axis and the extruder, and a controller to move the motors and manage the build process.
- [Next Page](https://learn.adafruit.com/skill-badge-guide-3d-printing/understanding-the-technology.md)
## Featured Products
### 3D printing - Skill badge, iron-on patch
[3D printing - Skill badge, iron-on patch](https://www.adafruit.com/product/490)
You can 3D print! Adafruit offers a fun and exciting "badges" of achievement for electronics, science and engineering. We believe everyone should be able to be rewarded for learning a useful skill, a badge is just one of the many ways to show and share.
This is the "I...
No Longer Stocked
[Buy Now](https://www.adafruit.com/product/490)
[Related Guides to the Product](https://learn.adafruit.com/products/490/guides)
### 3D printing - Sticker!
[3D printing - Sticker!](https://www.adafruit.com/product/649)
You can 3D print! Adafruit offers a fun and exciting stickers to celebrate achievement for electronics, science and engineering. We believe everyone should be able to be rewarded for learning a useful skill, a sticker is just one of the many ways to show and share.
This is the...
No Longer Stocked
[Buy Now](https://www.adafruit.com/product/649)
[Related Guides to the Product](https://learn.adafruit.com/products/649/guides)
### Flashforge Creator PRO
[Flashforge Creator PRO](https://www.adafruit.com/product/2742)
The **Flashforge Creator Pro** is the latest addition to FlashForge’s Creator family, built upon an open source platform.
Based on proven design of the Creator X chassis, the Pro is now enclosed so you can print ABS better and more efficient than ever. The upgraded...
No Longer Stocked
[Buy Now](https://www.adafruit.com/product/2742)
[Related Guides to the Product](https://learn.adafruit.com/products/2742/guides)
### PrintrBot Simple Metal 3D Printer - Black - Assembled
[PrintrBot Simple Metal 3D Printer - Black - Assembled](https://www.adafruit.com/product/1760)
New from Printrbot, the Metal Simple is a brand new rock solid, all metal, fully-assembled Printrbot Simple! As opposed to the [Printrbot Simple Kit](http://www.adafruit.com/products/1735), all of the laser cut wood parts have been replaced by rock solid metal and assembled. In...
No Longer Stocked
[Buy Now](https://www.adafruit.com/product/1760)
[Related Guides to the Product](https://learn.adafruit.com/products/1760/guides)
### Ultimaker 2+ 3D Printer
[Ultimaker 2+ 3D Printer](https://www.adafruit.com/product/2673)
The **Ultimaker 2+** is one of our favorite 3D printers on the market. It's a well-built open-source compact machine with an excellent UX. Every inch of the Ultimaker 2+ is designed to create the most effortless and reliable 3D printing experience ever!
No Longer Stocked
[Buy Now](https://www.adafruit.com/product/2673)
[Related Guides to the Product](https://learn.adafruit.com/products/2673/guides)
### Micro 3D Printer - Black - Retail Edition
[Micro 3D Printer - Black - Retail Edition](https://www.adafruit.com/product/2933)
The magic of 3D printing is now more affordable and accessible than ever! Meet The **Micro 3D Printer** by [M3D](https://printm3d.com/), the first truly consumer 3D printer. Sporting a compact design, user-friendly software, and replaceable print beds and nozzles,...
No Longer Stocked
[Buy Now](https://www.adafruit.com/product/2933)
[Related Guides to the Product](https://learn.adafruit.com/products/2933/guides)
### Filament for 3D Printers in Various Colors and Types
[Filament for 3D Printers in Various Colors and Types](https://www.adafruit.com/product/2080)
Having a 3D printer without filament is sort of like having a regular printer without paper or ink. And while a lot of printers come with some filament there's a good chance you've been printing up a storm and need something new. That's why we've started carrying a...
Out of Stock
[Buy Now](https://www.adafruit.com/product/2080)
[Related Guides to the Product](https://learn.adafruit.com/products/2080/guides)
## Related Guides
- [Mario Magic Wand](https://learn.adafruit.com/mario-magic-wand.md)
- [Case for HUSB238 Breakout](https://learn.adafruit.com/case-for-husb238.md)
- [3D Printed RFID NFC Rings](https://learn.adafruit.com/3d-printed-rfid-nfc-rings.md)
- [AI 3D Printed Figure](https://learn.adafruit.com/ai-figure.md)
- [Ultrasonic Ruler](https://learn.adafruit.com/ultrasonic-ruler.md)
- [Magnet Bottle Holder](https://learn.adafruit.com/magnet-bottle-holder.md)
- [Printy Boost: Reimagining a Classic Adafruit Kit](https://learn.adafruit.com/printy-boost-reimagining-a-classic-adafruit-kit.md)
- [CYBERDECK Expansion Plate](https://learn.adafruit.com/cyberdeck-plate.md)
- [PyPortal Case](https://learn.adafruit.com/pyportal-case.md)
- [3D Printed LED Buckle](https://learn.adafruit.com/3d-printed-led-buckle.md)
- [CLUE Slim Case](https://learn.adafruit.com/clue-slim-case.md)
- [Adafruit Desktop 3D Printer Buyers Guide](https://learn.adafruit.com/adafruit-desktop-3d-printer-selection-guide.md)
- [3D Printed Animatronic Robot Head](https://learn.adafruit.com/3d-printed-animatronic-robot-head.md)
- [New Years Eve Ball Drop](https://learn.adafruit.com/new-years-eve-ball-drop.md)
- [3D Printed Battery Adapter for Camera-Mount LED Panel](https://learn.adafruit.com/3d-printed-battery-adapter-for-camera-mount-led-panel.md)
---
# Source: https://learn.adafruit.com/diy-wifi-raspberry-pi-touch-cam/3d-printing-the-enclosure.md
# DIY WiFi Raspberry Pi Touchscreen Camera
## 3D Printing an Enclosure
Danger:
http://www.youtube.com/watch?v=eKDlB2iRlkw

## 3D Print a Camera Enclosure!
We designed a multi-part enclosure that snap fits together. Optimized for PLA to print without any rafts or supports! Follow our recommend print/slicing settings for best results. Our assembly guide walks your through the process of putting it together. [Download STLs](http://www.thingiverse.com/thing:244361)
## Snap-fit color enclosure
Print pitouch-cover.stl file in a different color for a stylish look. We used transparent green PLA for the cover and true white for the rest, but you can choose any color you like. ## Optional Parts
- **pitouch-tripod.stl** If you don't want a Tripod Mount
- **pitouch-band.stl** If you don't want Grippy edges
- **pitouch-camring.stl** If you don't want interchangeable lenses.

- [Previous Page](https://learn.adafruit.com/diy-wifi-raspberry-pi-touch-cam/next-steps-dot-dot-dot.md)
- [Next Page](https://learn.adafruit.com/diy-wifi-raspberry-pi-touch-cam/assembling-enclosure.md)
## Featured Products
### Raspberry Pi DIY Camera Pack
[Raspberry Pi DIY Camera Pack](https://www.adafruit.com/product/3275)
If the holidays promise anything, it’s almost certainly a deluge of photographs. Instead of taking out your smartphones, why not build your own camera?
With one of Adafruit’s best selling screens and an official Raspberry Pi camera, you’ll be ready to set up your very...
Out of Stock
[Buy Now](https://www.adafruit.com/product/3275)
[Related Guides to the Product](https://learn.adafruit.com/products/3275/guides)
### PiTFT Plus Assembled 320x240 2.8" TFT + Resistive Touchscreen
[PiTFT Plus Assembled 320x240 2.8" TFT + Resistive Touchscreen](https://www.adafruit.com/product/2298)
Is this not the cutest little display for the Raspberry Pi? It features a 2.8" display with 320x240 16-bit color pixels and a resistive touch overlay. The plate uses the high speed SPI interface on the Pi and can use the mini display as a console, X window port, displaying images or...
Out of Stock
[Buy Now](https://www.adafruit.com/product/2298)
[Related Guides to the Product](https://learn.adafruit.com/products/2298/guides)
### PiTFT Plus 320x240 3.2" TFT + Resistive Touchscreen
[PiTFT Plus 320x240 3.2" TFT + Resistive Touchscreen](https://www.adafruit.com/product/2616)
Is this not the cutest little display for the Raspberry Pi? It features a 3.2" display with 320x240 16-bit color pixels and a resistive touch overlay. The plate uses the high speed SPI interface on the Pi and can use the mini display as a console, X window port, displaying images or...
Out of Stock
[Buy Now](https://www.adafruit.com/product/2616)
[Related Guides to the Product](https://learn.adafruit.com/products/2616/guides)
### Adafruit PiTFT 2.4" HAT Mini Kit - 320x240 TFT Touchscreen
[Adafruit PiTFT 2.4" HAT Mini Kit - 320x240 TFT Touchscreen](https://www.adafruit.com/product/2455)
Is this not the cutest little display for the Raspberry Pi? It features a 2.4" display with 320x240 16-bit color pixels and a resistive touch overlay. The HAT uses the high speed SPI interface on the Pi and can use the mini display as a console, X window port, displaying images or video...
Out of Stock
[Buy Now](https://www.adafruit.com/product/2455)
[Related Guides to the Product](https://learn.adafruit.com/products/2455/guides)
### Adafruit PiTFT - 320x240 2.8" TFT+Touchscreen for Raspberry Pi
[Adafruit PiTFT - 320x240 2.8" TFT+Touchscreen for Raspberry Pi](https://www.adafruit.com/product/1601)
Is this not the cutest little display for the Raspberry Pi? It features a 2.8" display with 320x240 16-bit color pixels and a resistive touch overlay. The plate uses the high speed SPI interface on the Pi and can use the mini display as a console, X window port, displaying images or video...
Out of Stock
[Buy Now](https://www.adafruit.com/product/1601)
[Related Guides to the Product](https://learn.adafruit.com/products/1601/guides)
### Raspberry Pi 3 - Model B - ARMv8 with 1G RAM
[Raspberry Pi 3 - Model B - ARMv8 with 1G RAM](https://www.adafruit.com/product/3055)
Did you really think the Raspberry Pi would stop getting better? At this point, we sound like a broken record, extolling on the new Pi’s myriad improvements like we’re surprised that the folks at the Raspberry Pi Foundation are continuously making their flagship board better. ...
In Stock
[Buy Now](https://www.adafruit.com/product/3055)
[Related Guides to the Product](https://learn.adafruit.com/products/3055/guides)
### Raspberry Pi 2 - Model B v1.2 - ARM Cortex-A53 with 1G RAM
[Raspberry Pi 2 - Model B v1.2 - ARM Cortex-A53 with 1G RAM](https://www.adafruit.com/product/2358)
Didn't think the Raspberry Pi could get any better? You're in for a big surprise! The Raspberry Pi 2 Model B is out and it's amazing! With an upgraded ARM Cortex-A53 quad-core processor, Dual Core VideoCore IV Multimedia coprocessor, and a full Gigabyte of RAM, this...
No Longer Stocked
[Buy Now](https://www.adafruit.com/product/2358)
[Related Guides to the Product](https://learn.adafruit.com/products/2358/guides)
### Raspberry Pi Model A+ 512MB RAM
[Raspberry Pi Model A+ 512MB RAM](https://www.adafruit.com/product/2266)
**Note:** As of August 10th, 2016 the Raspberry Pi A+ now includes 512 MB of RAM!
The Raspberry Pi Model A+ is the perfect board for the minimalist Pi fan. This low-cost Pi uses the same processor as the model B+, but does away with the Ethernet jack and three of the USB...
No Longer Stocked
[Buy Now](https://www.adafruit.com/product/2266)
[Related Guides to the Product](https://learn.adafruit.com/products/2266/guides)
## Related Guides
- [Kali Linux on the Raspberry Pi with the PiTFT](https://learn.adafruit.com/kali-linux-on-the-raspberry-pi-with-the-pitft.md)
- [PiPhone - A Raspberry Pi based Cellphone](https://learn.adafruit.com/piphone-a-raspberry-pi-based-cellphone.md)
- [Processing on the Raspberry Pi & PiTFT](https://learn.adafruit.com/processing-on-the-raspberry-pi-and-pitft.md)
- [PiGRRL 2](https://learn.adafruit.com/pigrrl-2.md)
- [RasPipe: A Raspberry Pi Pipeline Viewer, Part 2](https://learn.adafruit.com/raspipe-a-raspberry-pi-pipeline-viewer-part-2.md)
- [Monitor PiCam and temperature on a PiTFT via adafruit.io](https://learn.adafruit.com/monitor-picam-and-temperature-on-a-pitft-via-adafruit-dot-io.md)
- [AstroPrint 3D Printing](https://learn.adafruit.com/astroprint-3d-printing.md)
- [Touchscreen Pi Timelapse Controller](https://learn.adafruit.com/touchscreen-pi-timelapse-controller.md)
- [Using the Slamtec RPLIDAR on a Raspberry Pi](https://learn.adafruit.com/slamtec-rplidar-on-pi.md)
- [Adafruit AMG8833 8x8 Thermal Camera Sensor](https://learn.adafruit.com/adafruit-amg8833-8x8-thermal-camera-sensor.md)
- [Pi Hole Ad Detection Display with PiTFT](https://learn.adafruit.com/pi-hole-ad-pitft-tft-detection-display.md)
- [SnapPiCam Raspberry Pi Camera](https://learn.adafruit.com/snappicam-raspberry-pi-camera.md)
- [JOY of Arcada — USB Game Pad for Adafruit PyGamer and PyBadge](https://learn.adafruit.com/joy-of-arcada-usb-game-pad-for-adafruit-pygamer-pybadge.md)
- [Go Fishing with Rotary Encoders](https://learn.adafruit.com/gone-fishing-game.md)
- [Set up and Blink - MATLAB and Simulink with Raspberry Pi](https://learn.adafruit.com/how-to-use-matlab-and-simulink-with-raspberry-pi.md)
---
# Source: https://learn.adafruit.com/matrix-7-segment-led-backpack-with-the-raspberry-pi/7-segment-clock.md
# Matrix and 7-Segment LED Backpack with the Raspberry Pi
## 7-Segment Clock

## CircuitPython Code
Display the system time on a four digit seven segment display.
https://github.com/adafruit/Adafruit_Learning_System_Guides/blob/main/Matrix_7-Segment_LED_Backpack_Raspberry_Pi/sevensegment_clock/code.py
## Download and Run the Code
We can easily copy this code onto our Pi's home directory using the 'wget' command and then run it using the following commands.
```
cd
wget https://raw.githubusercontent.com/adafruit/Adafruit_Learning_System_Guides/master/Matrix_7-Segment_LED_Backpack_Raspberry_Pi/sevensegment_clock.py
python3 ./sevensegment_clock.py
```
You should see the time appear on your 7-segment display in 24-hour format with a slow blinking colon. It should look like this:
http://www.youtube.com/watch?v=AAgTe27reIk
- [Previous Page](https://learn.adafruit.com/matrix-7-segment-led-backpack-with-the-raspberry-pi/bicolor-bar-graph-24.md)
- [Next Page](https://learn.adafruit.com/matrix-7-segment-led-backpack-with-the-raspberry-pi/14-segment-alphanumeric-display.md)
## Featured Products
### Adafruit 0.56" 4-Digit 7-Segment Display w/ I2C Backpack - Blue
[Adafruit 0.56" 4-Digit 7-Segment Display w/ I2C Backpack - Blue](https://www.adafruit.com/product/881)
What's better than a single LED? Lots of LEDs! A fun way to make a small display is to use an [8x8 matrix](https://www.adafruit.com/category/37_88) or a [4-digit 7-segment display](https://www.adafruit.com/category/37_103). Matrices like these are...
In Stock
[Buy Now](https://www.adafruit.com/product/881)
[Related Guides to the Product](https://learn.adafruit.com/products/881/guides)
### Adafruit Mini 0.8" 8x8 LED Matrix w/I2C Backpack - Yellow-Green
[Adafruit Mini 0.8" 8x8 LED Matrix w/I2C Backpack - Yellow-Green](https://www.adafruit.com/product/872)
What's better than a single LED? Lots of LEDs! A fun way to make a small display is to use an [8x8 matrix](https://www.adafruit.com/category/37_88) or a [4-digit 7-segment display](https://www.adafruit.com/category/37_103). Matrices like these are...
In Stock
[Buy Now](https://www.adafruit.com/product/872)
[Related Guides to the Product](https://learn.adafruit.com/products/872/guides)
### Adafruit Bicolor LED Square Pixel Matrix with I2C Backpack
[Adafruit Bicolor LED Square Pixel Matrix with I2C Backpack](https://www.adafruit.com/product/902)
What's better than a single LED? Lots of LEDs! A fun way to make a small colorful display is to use a [1.2" Bi-color 8x8 LED Matrix](http://www.adafruit.com/products/458). Matrices like these are 'multiplexed' - so to control all the 128 LEDs you need 24 pins....
In Stock
[Buy Now](https://www.adafruit.com/product/902)
[Related Guides to the Product](https://learn.adafruit.com/products/902/guides)
### Quad Alphanumeric Display - Blue 0.54" Digits w/ I2C Backpack
[Quad Alphanumeric Display - Blue 0.54" Digits w/ I2C Backpack](https://www.adafruit.com/product/1912)
Display, elegantly, 012345678 or 9! Gaze, hypnotized, at ABCDEFGHIJKLM - well it can display the whole alphabet. You get the point. This is a nice, bright alphanumeric display that shows letters and numbers in a beautiful blue hue. It's super bright and designed for viewing from distances...
In Stock
[Buy Now](https://www.adafruit.com/product/1912)
[Related Guides to the Product](https://learn.adafruit.com/products/1912/guides)
### Bi-Color (Red/Green) 24-Bar Bargraph w/I2C Backpack Kit
[Bi-Color (Red/Green) 24-Bar Bargraph w/I2C Backpack Kit](https://www.adafruit.com/product/1721)
What's better than a single LED? Lots of LEDs! A fun way to make a small linear display is to use two 12-bar Bi-color bar-graphs. However, this LED bargraph is 'multiplexed' - so to control all the 48 LEDs you need a lot of pins.
In Stock
[Buy Now](https://www.adafruit.com/product/1721)
[Related Guides to the Product](https://learn.adafruit.com/products/1721/guides)
### Raspberry Pi 3 - Model B+ - 1.4GHz Cortex-A53 with 1GB RAM
[Raspberry Pi 3 - Model B+ - 1.4GHz Cortex-A53 with 1GB RAM](https://www.adafruit.com/product/3775)
The Raspberry Pi 3 Model B is the most popular Raspberry Pi computer made, and the Pi Foundation knows you can always make a good thing _better_! And what could make the Pi 3 better? How about a _faster_ processor, 5 GHz WiFi, and updated Ethernet chip with PoE capability?...
In Stock
[Buy Now](https://www.adafruit.com/product/3775)
[Related Guides to the Product](https://learn.adafruit.com/products/3775/guides)
### Assembled Pi Cobbler Plus - Breakout Cable
[Assembled Pi Cobbler Plus - Breakout Cable](https://www.adafruit.com/product/2029)
The Raspberry Pi B+ / Pi 2 / Pi 3 / Pi 4 has landed on the Maker World like a 40-GPIO pinned, quad-USB ported, credit card sized bomb of DIY joy. And while you can use most of our great Model B accessories by hooking up our [downgrade...](https://www.adafruit.com/product/1986)
In Stock
[Buy Now](https://www.adafruit.com/product/2029)
[Related Guides to the Product](https://learn.adafruit.com/products/2029/guides)
## Related Guides
- [Adafruit LED Backpacks](https://learn.adafruit.com/adafruit-led-backpack.md)
- [Animating Multiple LED Backpacks](https://learn.adafruit.com/animating-multiple-led-backpacks.md)
- [CircuitPython Hardware: LED Backpacks & FeatherWings](https://learn.adafruit.com/micropython-hardware-led-backpacks-and-featherwings.md)
- [Raspberry Pi Physical Dashboard](https://learn.adafruit.com/raspberry-pi-physical-dashboard.md)
- [Raspberry Pi Analog to Digital Converters](https://learn.adafruit.com/raspberry-pi-analog-to-digital-converters.md)
- [Trinket / Gemma Space Invader Pendant](https://learn.adafruit.com/trinket-slash-gemma-space-invader-pendant.md)
- [Circadian Pi Desk Light](https://learn.adafruit.com/circadian-pi-desk-light.md)
- [LED Backpack Displays on Raspberry Pi and BeagleBone Black](https://learn.adafruit.com/led-backpack-displays-on-raspberry-pi-and-beaglebone-black.md)
- [Speech Synthesis on the Raspberry Pi](https://learn.adafruit.com/speech-synthesis-on-the-raspberry-pi.md)
- [Circle of Fifths Euclidean Synth with synthio and CircuitPython](https://learn.adafruit.com/circle-of-fifths-euclidean-synth-with-synthio-and-circuitpython.md)
- [Tiny Arduino Music Visualizer](https://learn.adafruit.com/piccolo.md)
- [Personalized NextBus ESP8266 Transit Clock](https://learn.adafruit.com/personalized-esp8266-transit-clock.md)
- [Playing sounds and using buttons with Raspberry Pi](https://learn.adafruit.com/playing-sounds-and-using-buttons-with-raspberry-pi.md)
- [Adafruit Microphone Amplifier Breakout](https://learn.adafruit.com/adafruit-microphone-amplifier-breakout.md)
- [RGB Matrix New York Times Title Scroller](https://learn.adafruit.com/rgb-matix-nyt-text-scroller.md)
---
# Source: https://learn.adafruit.com/matrix-7-segment-led-backpack-with-the-raspberry-pi/7-segment-test.md
# Matrix and 7-Segment LED Backpack with the Raspberry Pi
## 7-Segment

## CircuitPython Code
The following code illustrates how to display integers, characters, floating point, hex values and toggle the colon on a 7-segment display.
https://github.com/adafruit/Adafruit_Learning_System_Guides/blob/main/Matrix_7-Segment_LED_Backpack_Raspberry_Pi/sevensegment_test/code.py
## Download and Run the Code
We can easily copy this code onto our Pi's home directory using the 'wget' command and then run it using the following commands.
```
cd
wget https://raw.githubusercontent.com/adafruit/Adafruit_Learning_System_Guides/master/Matrix_7-Segment_LED_Backpack_Raspberry_Pi/sevensegment_test.py
python3 ./sevensegment_test.py
```
This will briefly scroll through printing integers, floating point values, some text characters and hex values on a seven segment display.
- [Previous Page](https://learn.adafruit.com/matrix-7-segment-led-backpack-with-the-raspberry-pi/matrix-bicolor-test.md)
- [Next Page](https://learn.adafruit.com/matrix-7-segment-led-backpack-with-the-raspberry-pi/bicolor-bar-graph-24.md)
## Featured Products
### Adafruit 0.56" 4-Digit 7-Segment Display w/ I2C Backpack - Blue
[Adafruit 0.56" 4-Digit 7-Segment Display w/ I2C Backpack - Blue](https://www.adafruit.com/product/881)
What's better than a single LED? Lots of LEDs! A fun way to make a small display is to use an [8x8 matrix](https://www.adafruit.com/category/37_88) or a [4-digit 7-segment display](https://www.adafruit.com/category/37_103). Matrices like these are...
In Stock
[Buy Now](https://www.adafruit.com/product/881)
[Related Guides to the Product](https://learn.adafruit.com/products/881/guides)
### Adafruit Mini 0.8" 8x8 LED Matrix w/I2C Backpack - Yellow-Green
[Adafruit Mini 0.8" 8x8 LED Matrix w/I2C Backpack - Yellow-Green](https://www.adafruit.com/product/872)
What's better than a single LED? Lots of LEDs! A fun way to make a small display is to use an [8x8 matrix](https://www.adafruit.com/category/37_88) or a [4-digit 7-segment display](https://www.adafruit.com/category/37_103). Matrices like these are...
In Stock
[Buy Now](https://www.adafruit.com/product/872)
[Related Guides to the Product](https://learn.adafruit.com/products/872/guides)
### Adafruit Bicolor LED Square Pixel Matrix with I2C Backpack
[Adafruit Bicolor LED Square Pixel Matrix with I2C Backpack](https://www.adafruit.com/product/902)
What's better than a single LED? Lots of LEDs! A fun way to make a small colorful display is to use a [1.2" Bi-color 8x8 LED Matrix](http://www.adafruit.com/products/458). Matrices like these are 'multiplexed' - so to control all the 128 LEDs you need 24 pins....
In Stock
[Buy Now](https://www.adafruit.com/product/902)
[Related Guides to the Product](https://learn.adafruit.com/products/902/guides)
### Quad Alphanumeric Display - Blue 0.54" Digits w/ I2C Backpack
[Quad Alphanumeric Display - Blue 0.54" Digits w/ I2C Backpack](https://www.adafruit.com/product/1912)
Display, elegantly, 012345678 or 9! Gaze, hypnotized, at ABCDEFGHIJKLM - well it can display the whole alphabet. You get the point. This is a nice, bright alphanumeric display that shows letters and numbers in a beautiful blue hue. It's super bright and designed for viewing from distances...
In Stock
[Buy Now](https://www.adafruit.com/product/1912)
[Related Guides to the Product](https://learn.adafruit.com/products/1912/guides)
### Bi-Color (Red/Green) 24-Bar Bargraph w/I2C Backpack Kit
[Bi-Color (Red/Green) 24-Bar Bargraph w/I2C Backpack Kit](https://www.adafruit.com/product/1721)
What's better than a single LED? Lots of LEDs! A fun way to make a small linear display is to use two 12-bar Bi-color bar-graphs. However, this LED bargraph is 'multiplexed' - so to control all the 48 LEDs you need a lot of pins.
In Stock
[Buy Now](https://www.adafruit.com/product/1721)
[Related Guides to the Product](https://learn.adafruit.com/products/1721/guides)
### Raspberry Pi 3 - Model B+ - 1.4GHz Cortex-A53 with 1GB RAM
[Raspberry Pi 3 - Model B+ - 1.4GHz Cortex-A53 with 1GB RAM](https://www.adafruit.com/product/3775)
The Raspberry Pi 3 Model B is the most popular Raspberry Pi computer made, and the Pi Foundation knows you can always make a good thing _better_! And what could make the Pi 3 better? How about a _faster_ processor, 5 GHz WiFi, and updated Ethernet chip with PoE capability?...
In Stock
[Buy Now](https://www.adafruit.com/product/3775)
[Related Guides to the Product](https://learn.adafruit.com/products/3775/guides)
### Assembled Pi Cobbler Plus - Breakout Cable
[Assembled Pi Cobbler Plus - Breakout Cable](https://www.adafruit.com/product/2029)
The Raspberry Pi B+ / Pi 2 / Pi 3 / Pi 4 has landed on the Maker World like a 40-GPIO pinned, quad-USB ported, credit card sized bomb of DIY joy. And while you can use most of our great Model B accessories by hooking up our [downgrade...](https://www.adafruit.com/product/1986)
In Stock
[Buy Now](https://www.adafruit.com/product/2029)
[Related Guides to the Product](https://learn.adafruit.com/products/2029/guides)
## Related Guides
- [Adafruit LED Backpacks](https://learn.adafruit.com/adafruit-led-backpack.md)
- [Animating Multiple LED Backpacks](https://learn.adafruit.com/animating-multiple-led-backpacks.md)
- [CircuitPython Hardware: LED Backpacks & FeatherWings](https://learn.adafruit.com/micropython-hardware-led-backpacks-and-featherwings.md)
- [Raspberry Pi Physical Dashboard](https://learn.adafruit.com/raspberry-pi-physical-dashboard.md)
- [Raspberry Pi Analog to Digital Converters](https://learn.adafruit.com/raspberry-pi-analog-to-digital-converters.md)
- [Trinket / Gemma Space Invader Pendant](https://learn.adafruit.com/trinket-slash-gemma-space-invader-pendant.md)
- [Circadian Pi Desk Light](https://learn.adafruit.com/circadian-pi-desk-light.md)
- [LED Backpack Displays on Raspberry Pi and BeagleBone Black](https://learn.adafruit.com/led-backpack-displays-on-raspberry-pi-and-beaglebone-black.md)
- [Speech Synthesis on the Raspberry Pi](https://learn.adafruit.com/speech-synthesis-on-the-raspberry-pi.md)
- [Circle of Fifths Euclidean Synth with synthio and CircuitPython](https://learn.adafruit.com/circle-of-fifths-euclidean-synth-with-synthio-and-circuitpython.md)
- [Tiny Arduino Music Visualizer](https://learn.adafruit.com/piccolo.md)
- [Personalized NextBus ESP8266 Transit Clock](https://learn.adafruit.com/personalized-esp8266-transit-clock.md)
- [Playing sounds and using buttons with Raspberry Pi](https://learn.adafruit.com/playing-sounds-and-using-buttons-with-raspberry-pi.md)
- [Adafruit Microphone Amplifier Breakout](https://learn.adafruit.com/adafruit-microphone-amplifier-breakout.md)
- [RGB Matrix New York Times Title Scroller](https://learn.adafruit.com/rgb-matix-nyt-text-scroller.md)
---
# Source: https://learn.adafruit.com/battery-power-for-led-pixels-and-strips/about-batteries.md
# Battery Power for LED Pixels and Strips
## About Batteries
Different battery types have different output voltages…a function of their internal chemistry. Among common household batteries — the kinds you might find at the grocery store — there are two major types:
Rechargeable nickel metal hydride (NiMH) cells output **1.2 Volts** , as do nickel cadmium (NiCd) cells. The latter have fallen out of favor for a number of reasons, but maybe you still have a few around the house.
These cells are more expensive up front, and require a charger. But for frequent use, they can be more economical in the long run.

Single-use, disposable alkaline cells output **1.5 Volts**.
Though not reusable, for _occasional_ use they may be more economical. But the main benefit is their ubiquity — replacements can be bought almost anywhere, important when you’re away from home and a charger.

(We’re using approximate numbers here. Actual output will vary by some fraction of a volt depending on the cell’s age, state of discharge, temperature and other factors. For most casual projects, these small factors can be ignored for simplicity’s sake.)
When cells are wired _in series_ (joined end to end, as when installed in our [4X AA battery holder](http://adafruit.com/products/830)), **add up the voltages to determine the total output:**

4 NiMH cells = 4.8 Volts total. That’s right in our target voltage range, making it perfect for the LED strips! **If you’re using rechargeables, the 4 cell holder can be used directly to power your project.** 
| 4 alkaline cells = 6.0 Volts total. Uh oh… **that's too much!** If connected directly to an LED strip, this will burn it out. Fortunately, there’s an easy workaround… |

- [Previous Page](https://learn.adafruit.com/battery-power-for-led-pixels-and-strips/overview.md)
- [Next Page](https://learn.adafruit.com/battery-power-for-led-pixels-and-strips/diode.md)
## Featured Products
### Digital programmable LED belt kit
[Digital programmable LED belt kit](https://www.adafruit.com/product/332)
By popular demand, we now have a project tutorial for how to make your own programmable, ultra-blinky LED belt. Perfect for parties, raves, parades, weddings, funerals, and bar mitzvahs. Wear it with pride, wear it with blinky! Follow our soldering tutorial to build your own heirloom LED belt,...
No Longer Stocked
[Buy Now](https://www.adafruit.com/product/332)
[Related Guides to the Product](https://learn.adafruit.com/products/332/guides)
### Alkaline AAA batteries - 2 pack
[Alkaline AAA batteries - 2 pack](https://www.adafruit.com/product/617)
Battery power for your portable project! These batteries are good quality at a good price, and work fantastic with any of the kits or projects in the shop that use AAA's. This is a pack of **2 AAA batteries**.
These batteries are Alkaline (MnO2) chemistry,...
No Longer Stocked
[Buy Now](https://www.adafruit.com/product/617)
[Related Guides to the Product](https://learn.adafruit.com/products/617/guides)
### 1N4001 Diode - 10 pack
[1N4001 Diode - 10 pack](https://www.adafruit.com/product/755)
This here is a 10 pack of the classic 1N4001 power blocking diode. These are good for reverse polarity protection (put it between your DC power jack and circuitry to avoid a negative-voltage that would zap your delicate electronics), kickback protection (place across your solenoids, relays...
In Stock
[Buy Now](https://www.adafruit.com/product/755)
[Related Guides to the Product](https://learn.adafruit.com/products/755/guides)
### 4 x AA Battery Holder with On/Off Switch
[4 x AA Battery Holder with On/Off Switch](https://www.adafruit.com/product/830)
Make a nice portable power pack with this 4 x AA battery holder. It fits any alkaline or rechargeable AA batteries in series. There's a snap on cover and an on/off switch which can be handy when wiring to something without a switch.
**New**! We now have 0.1" headers...
In Stock
[Buy Now](https://www.adafruit.com/product/830)
[Related Guides to the Product](https://learn.adafruit.com/products/830/guides)
### 12mm Diffused Flat Digital RGB LED Pixels (Strand of 25)
[12mm Diffused Flat Digital RGB LED Pixels (Strand of 25)](https://www.adafruit.com/product/738)
RGB Pixels are digitally-controllable lights you can set to any color, or animate. Each RGB LED and controller chip is molded into a 'dot' of silicone. The dots are weatherproof and rugged. There are four flanges molded in so that you can 'push' them into a 12mm drill hole in...
In Stock
[Buy Now](https://www.adafruit.com/product/738)
[Related Guides to the Product](https://learn.adafruit.com/products/738/guides)
### 12mm Diffused Thin Digital RGB LED Pixels (Strand of 25)
[12mm Diffused Thin Digital RGB LED Pixels (Strand of 25)](https://www.adafruit.com/product/322)
RGB Pixels are digitally-controllable lights you can set to any color, or animate. Each RGB LED and controller chip is molded into a 'dot' of silicone. The dots are weatherproof and rugged. There are four flanges molded in so that you can 'push' them into a 12mm drill hole in...
No Longer Stocked
[Buy Now](https://www.adafruit.com/product/322)
[Related Guides to the Product](https://learn.adafruit.com/products/322/guides)
### Digital RGB LED Weatherproof Strip - LPD8806 32 LED 5m
[Digital RGB LED Weatherproof Strip - LPD8806 32 LED 5m](https://www.adafruit.com/product/306)
These LED strips are fun and glowy. There are 32 RGB LEDs per meter, and you can control each LED individually! Yes, that's right, this is the digitally-addressable type of LED strip. You can set the color of each LED's red, green and blue component with 7-bit PWM precision (so 21-bit...
In Stock
[Buy Now](https://www.adafruit.com/product/306)
[Related Guides to the Product](https://learn.adafruit.com/products/306/guides)
## Related Guides
- [LPD8806 Digital RGB LED Strip](https://learn.adafruit.com/digital-led-strip.md)
- [Meeting Time Keeper Stick](https://learn.adafruit.com/meeting-time-keeper-stick-with-cpx.md)
- [Deluxe 4x4 NeoPixel Keypad](https://learn.adafruit.com/deluxe-4x4-neopixel-neokey-keypad.md)
- [Circuit Playground Express Rocket Lamp](https://learn.adafruit.com/cpx-rocket-lamp.md)
- [Mystery Box: Crypto Countdown Case](https://learn.adafruit.com/mystery-box-crypto-countdown-case.md)
- [MicroBlocks Circuit Playground Express Ornament](https://learn.adafruit.com/microblocks-circuitplayground-express-ornament.md)
- [Adafruit NeoSlider](https://learn.adafruit.com/adafruit-neoslider.md)
- [MIDI Stomping Pads](https://learn.adafruit.com/midi-stomping-pads.md)
- [Tent Lantern](https://learn.adafruit.com/tent-lantern.md)
- [Sword & Wand Prop Effects with Circuit Playground](https://learn.adafruit.com/sword-and-wand-prop-effects-with-circuit-playground.md)
- [Arduino Lesson 6. Digital Inputs](https://learn.adafruit.com/adafruit-arduino-lesson-6-digital-inputs.md)
- [Bedazzler](https://learn.adafruit.com/bedazzler.md)
- [Reindeer Solder Kit by Phyx](https://learn.adafruit.com/reindeer-solder-kit-by-phyx.md)
- [Guardian Shield+ Zelda Breath of the Wild](https://learn.adafruit.com/guardian-shield-zelda-breath-of-the-wild.md)
- [Adafruit TPS61169 Constant Current Boost Converter for LEDs](https://learn.adafruit.com/adafruit-tps61169-constant-current-boost-converter-for-leds.md)
- [reef-pi Guide 5: Light Controller](https://learn.adafruit.com/reef-pi-lighting-controller.md)
---
# Source: https://learn.adafruit.com/adafruit-pn532-rfid-nfc/about-nfc.md
# Adafruit PN532 RFID/NFC Breakout and Shield
## About NFC
## NFC (Near Field Communication)
NFC (Near Field Communication) is a set of short-range (typically up to 10cm) wireless communication technologies designed to offer light-weight and secure communication between two devices. While NFC was invented by NXP (Phillips at the time), Nokia and Sony, the main body behind the NFC 'standard' today is the [NFC Forum](http://www.nfc-forum.org/home/ "Link: http://www.nfc-forum.org/home/"), who are responsible for publishing and maintaining a variety of standards relating to NFC technology.
NFC operates at 13.56MHz, and is based around an "initiator" and "target" model where the initiator generates a small magnetic field that powers the target, meaning that the target does not require a power source. This means of communication is referred to as **Passive Communication** , and is used to read and write to small, inexpensive 13.56MHz RFID tags based on standards like ISO14443A. **Active communication** (peer-to-peer) is also possible when both devices are powered, where each device alternately creates its own magentic field, with the secondary device as a target and vice versa in continuous rotation.## Passive Communication: ISO14443A Cards (Mifare, etc.)
While the PN53x family of transceivers from NXP are compatible with a number of 13.56MHz RFID card standards, by far the most popular standard is ISO14443A. A variety of manufacturers produce ISO14443A compatible cards or chips, but the most common are based around the **Mifare** family from NXP. Mifare Classic and Mifare Ultralight are probably the most frequently encountered and useful for basic projects, though many tags with improved security and encryption also exist (Mifare DESFire, etc.). All of the tags sold at adafruit.com are Mifare Classic 1K, meaning that they contains 1K (1024 bytes) of programmable EEPROM memory which can be read and modified in passive mode by the initiator device (the PN532).
While all ISO14443A cards share certain common characteristics on the highest level (defined by the four part standard), each set of Mifare chips (Classic, Ultralight, Plus, DESFire, etc.) has it's own features and peculiarities. The two most common formats are described below.
- [Mifare Classic](http://learn.adafruit.com/adafruit-pn532-rfid-nfc "Link: http://learn.adafruit.com/adafruit-pn532-rfid-nfc"): These cards are extremely common, and contain 1K or 4K of EEPROM, with basic security for each 64 byte (1K/4K cards) or 256 byte (4K cards) sector.
- [Mifare Ultralight](http://learn.adafruit.com/adafruit-pn532-rfid-nfc): Contains 512 bytes of EEPROM, including 32-bits of OTP memory. These tags are inexpensive, often come in sticker format and are are frequently used for transportation ticketing, concert tickets, etc.
## Active Communication (Peer-to-Peer)
Active or "Peer-to-Peer" communication is still based around the Initiator/Target model described earlier, but both devices are actively powered and switch roles from being an Initiator or a Target during the communication. When one device is initiating a conversation with the other, it enables it's magnetic field and the receiving device listens in (with it's own magnetic field disabled). Afterwards, the target/recipient device may need to respond and will in turn activate it's own magnetic field and the original device will be configured as the target. Despite two devices being present, only one magnetic field is active at a time, with each device constantly enabling or disabling its own magnetic field.
ToDo: Add better description of active mode, but I need to test it out a bit first myself!
## NFC Data Exchange Format (NDEF)
The NFC Data Exchange Format (NDEF) is a standardised data format that can be used to exchange information between any compatible NFC device and another NFC device or tag. The data format consists of **NDEF Messages** and **NDEF Records**. The standard is maintained by the NFC Forum and is freely available for consultation but requires accepting a license agreement to [download](http://www.nfc-forum.org/specs/spec_list/).
The NDEF format is used to store and exchange information like URIs, plain text, etc., using a commonly understood format. NFC tags like Mifare Classic cards can be configured as NDEF tags, and data written to them by one NFC device (NDEF Records) can be understood and accessed by any other NDEF compatible device. NDEF messages can also be used to exchange data between two active NFC devices in "peer-to-peer" mode. By adhering to the NDEF data exchange format during communication, devices that would otherwise have no meaningful knowledge of each other or common language are able to share data in an organised, mutually understandable manner.
The NDEF standard includes numerous **Record Type Definitions (RTDs)** that define how information like URIs should be stored, and each NDEF device, tag or message can contained multiple RTDs. Standard RTD definitions are described in "NFC Record Type Definition (RTD) Specification” maintained by the NFC Forum.
\* [NDEF Overview](http://learn.adafruit.com/adafruit-pn532-rfid-nfc): This page offers a more detailed explanation of NDEF, including how Mifare Classic cards can be used to store NDEF messages.
**NOTE** : The dedicated NDEF page is still a work in progress and some information is currently incomplete.
## Reading
For more details about NFC/RFID and this chip we suggest the following fantastic resources:
- [RFID selection guide](http://www.adafruit.com/datasheets/rfid%20guide.pdf "Link: http://www.adafruit.com/datasheets/rfid%20guide.pdf") - a lot of details about RFID in general
- [Nokia's Introduction to NFC ](http://www.adafruit.com/datasheets/Introduction_to_NFC_v1_0_en.pdf)- a lot of details about NFC in general
- [NXP S50 chip datasheet](http://www.adafruit.com/datasheets/S50.pdf "Link: http://www.adafruit.com/datasheets/S50.pdf") , the chip _inside_ MiFare classic tags
- [NXP PN532 Short Form Datasheet](http://www.adafruit.com/datasheets/pn532ds.pdf "Link: http://www.adafruit.com/datasheets/pn532ds.pdf")
- [NXP PN532 Long Form Datasheet](http://www.adafruit.com/datasheets/pn532longds.pdf)
- [NXP PN532 User Manual](http://www.adafruit.com/datasheets/pn532um.pdf "Link: http://www.adafruit.com/datasheets/pn532um.pdf")
- [NXP PN532 App Note](http://www.adafruit.com/datasheets/PN532C106_Application%20Note_v1.2.pdf)
- [Using PN532 with libnfc](http://www.microbuilder.eu/Blog/11-02-19/Using_libnfc_with_the_PN532_Linux.aspx "Link: http://www.microbuilder.eu/Blog/11-02-19/Using\_libnfc\_with\_the\_PN532\_Linux.aspx")
- [NFC Glossary](http://www.nfc-research.at/index.php?id=40)
- [Previous Page](https://learn.adafruit.com/adafruit-pn532-rfid-nfc/python-circuitpython.md)
- [Next Page](https://learn.adafruit.com/adafruit-pn532-rfid-nfc/mifare.md)
## Featured Products
### PN532 NFC/RFID controller breakout board
[PN532 NFC/RFID controller breakout board](https://www.adafruit.com/product/364)
The PN532 is the most popular NFC chip, and is what is embedded in pretty much every phone or device that does NFC. It can pretty much do it all, such as read and write to tags and cards, communicate with phones (say for payment processing), and 'act' like a NFC tag. If you want to do...
Out of Stock
[Buy Now](https://www.adafruit.com/product/364)
[Related Guides to the Product](https://learn.adafruit.com/products/364/guides)
### Adafruit METRO 328 Fully Assembled - Arduino IDE compatible
[Adafruit METRO 328 Fully Assembled - Arduino IDE compatible](https://www.adafruit.com/product/50)
We sure love the ATmega328 here at Adafruit, and we use them _a lot_ for our own projects. The processor has plenty of GPIO, Analog inputs, hardware UART SPI and I2C, timers and PWM galore - just enough for most simple projects. When we need to go small, we use a
Out of Stock
[Buy Now](https://www.adafruit.com/product/50)
[Related Guides to the Product](https://learn.adafruit.com/products/50/guides)
### Breadboarding wire bundle
[Breadboarding wire bundle](https://www.adafruit.com/product/153)
75 flexible stranded core wires with stiff ends molded on in red, orange, yellow, green, blue, brown, black and white. These are a major improvement over the "box of bent wires" that are sometimes sold with breadboards, and faster than stripping your own solid core wires. Makes...
In Stock
[Buy Now](https://www.adafruit.com/product/153)
[Related Guides to the Product](https://learn.adafruit.com/products/153/guides)
### Adafruit PN532 NFC/RFID Controller Shield for Arduino + Extras
[Adafruit PN532 NFC/RFID Controller Shield for Arduino + Extras](https://www.adafruit.com/product/789)
We've taken our popular Adafruit PN532 breakout board and turned it into a shield - the perfect tool for any 13.56MHz RFID or NFC application. The Adafruit NFC shield uses the PN532 chip-set (the most popular NFC chip on the market) and is what is embedded in pretty much every phone or...
In Stock
[Buy Now](https://www.adafruit.com/product/789)
[Related Guides to the Product](https://learn.adafruit.com/products/789/guides)
### 13.56MHz RFID/NFC Card - Classic 1K
[13.56MHz RFID/NFC Card - Classic 1K](https://www.adafruit.com/product/359)
This is a blank 13.56MHz RFID/NFC card - often used for train/bus passes but also found in other systems where a proximity card is desired. The tag contains a small RFID chip and an antenna, and is passively powered by the reader/writer when placed a couple inches away.
These can be...
In Stock
[Buy Now](https://www.adafruit.com/product/359)
[Related Guides to the Product](https://learn.adafruit.com/products/359/guides)
### 13.56MHz RFID/NFC White Tag - Classic 1K
[13.56MHz RFID/NFC White Tag - Classic 1K](https://www.adafruit.com/product/360)
This is a blank 13.56MHz RFID/NFC laundry tag - often used for laundry but also general tagging. The tag contains a small RFID chip and an antenna, and is passively powered by the reader/writer when placed a couple inches away.
These can be read by almost any 13.56MHz RFID/NFC...
In Stock
[Buy Now](https://www.adafruit.com/product/360)
[Related Guides to the Product](https://learn.adafruit.com/products/360/guides)
### 13.56MHz RFID/NFC Clear Tag - Classic 1K
[13.56MHz RFID/NFC Clear Tag - Classic 1K](https://www.adafruit.com/product/361)
This is a blank 13.56MHz Classic 'laundry' tag - often used for laundry or identification but also found in other systems where a small proximity card is desired. This one is clear! The tag contains a small RFID chip and an antenna, and is passively powered by the reader/writer...
In Stock
[Buy Now](https://www.adafruit.com/product/361)
[Related Guides to the Product](https://learn.adafruit.com/products/361/guides)
### 13.56MHz RFID/NFC Sticker - Classic 1K
[13.56MHz RFID/NFC Sticker - Classic 1K](https://www.adafruit.com/product/362)
This is a blank 13.56MHz RFID/NFC sticker - often used for inventory uses but also wherever a sticker is desired. The tag contains a small RFID chip and an antenna, and is passively powered by the reader/writer when placed a couple inches away.
These can be read by almost any...
In Stock
[Buy Now](https://www.adafruit.com/product/362)
[Related Guides to the Product](https://learn.adafruit.com/products/362/guides)
## Related Guides
- [How to Choose a Microcontroller](https://learn.adafruit.com/how-to-choose-a-microcontroller.md)
- [Sous-vide controller powered by Arduino - The SousViduino!](https://learn.adafruit.com/sous-vide-powered-by-arduino-the-sous-viduino.md)
- [Arduino Lesson 13. DC Motors](https://learn.adafruit.com/adafruit-arduino-lesson-13-dc-motors.md)
- [Naughty or Nice Machine](https://learn.adafruit.com/naughty-or-nice-machine.md)
- [Wave Shield Voice Changer](https://learn.adafruit.com/wave-shield-voice-changer.md)
- [Adafruit INA219 Current Sensor Breakout](https://learn.adafruit.com/adafruit-ina219-current-sensor-breakout.md)
- [Low Power Coin Cell Voltage Logger](https://learn.adafruit.com/low-power-coin-cell-voltage-logger.md)
- [Analog Feedback Servos](https://learn.adafruit.com/analog-feedback-servos.md)
- [Tiny Arduino Music Visualizer](https://learn.adafruit.com/piccolo.md)
- [Adafruit Ultimate GPS Logger Shield](https://learn.adafruit.com/adafruit-ultimate-gps-logger-shield.md)
- [Ladyada's Learn Arduino - Lesson #0](https://learn.adafruit.com/ladyadas-learn-arduino-lesson-number-0.md)
- [Mini Thermal Receipt Printers](https://learn.adafruit.com/mini-thermal-receipt-printer.md)
- [Arduino Prototyping Mounting Plate](https://learn.adafruit.com/arduino-prototyping-mounting-plate.md)
- [LED Lightbox](https://learn.adafruit.com/led-lightbox.md)
- [NFC Ring Password Helper](https://learn.adafruit.com/nfc-ring-password-helper.md)
---
# Source: https://learn.adafruit.com/bone-box/access.md
# Bone Box
## Access
To access the board or cape later, it's not necessary to rewind this entire process — most of the parts can be left in place! Just loosen the front case screws 1/8", tip the front face back and pivot the case upward:

- [Previous Page](https://learn.adafruit.com/bone-box/assembly.md)
## Primary Products
### Adafruit Bone Box - Enclosure for Beagle Bone/Beagle Bone Black
[Adafruit Bone Box - Enclosure for Beagle Bone/Beagle Bone Black](https://www.adafruit.com/product/699)
Pack up your [Beagle Bone](http://www.adafruit.com/products/513) or [Beagle Bone Black](http://www.adafruit.com/products/1278) in this lovely clear plastic case. We designed this case to be the ideal enclosure, with plenty of elegant details to make it useful to you!
No Longer Stocked
[Buy Now](https://www.adafruit.com/product/699)
[Related Guides to the Product](https://learn.adafruit.com/products/699/guides)
## Related Guides
- [Measuring Temperature with a BeagleBone Black](https://learn.adafruit.com/measuring-temperature-with-a-beaglebone-black.md)
- [Measuring Light with a BeagleBone Black](https://learn.adafruit.com/measuring-light-with-a-beaglebone-black.md)
- [Adding a Real Time Clock to BeagleBone Black](https://learn.adafruit.com/adding-a-real-time-clock-to-beaglebone-black.md)
- [Setting up IO Python Library on BeagleBone Black](https://learn.adafruit.com/setting-up-io-python-library-on-beaglebone-black.md)
- [Nokia 5110/3310 LCD Python Library](https://learn.adafruit.com/nokia-5110-3310-lcd-python-library.md)
- [BNO055 Absolute Orientation Sensor with Raspberry Pi & BeagleBone Black](https://learn.adafruit.com/bno055-absolute-orientation-sensor-with-raspberry-pi-and-beaglebone-black.md)
- [Adafruit WebIDE](https://learn.adafruit.com/webide.md)
- [MCP9808 Temperature Sensor Python Library](https://learn.adafruit.com/mcp9808-temperature-sensor-python-library.md)
- [FONA Tethering to Raspberry Pi or BeagleBone Black](https://learn.adafruit.com/fona-tethering-to-raspberry-pi-or-beaglebone-black.md)
- [Setting up WiFi with BeagleBone Black](https://learn.adafruit.com/setting-up-wifi-with-beaglebone-black.md)
- [LedGames - a BeagleBone Black 64x64 LED Game](https://learn.adafruit.com/ledgames-beaglebone-black-64x64-led-game.md)
- [TMP006 Temperature Sensor Python Library](https://learn.adafruit.com/tmp006-temperature-sensor-python-library.md)
- [MPR121 Capacitive Touch Sensor on Raspberry Pi & BeagleBone Black](https://learn.adafruit.com/mpr121-capacitive-touch-sensor-on-raspberry-pi-and-beaglebone-black.md)
- [Blinking an LED with BeagleBone Black](https://learn.adafruit.com/blinking-an-led-with-beaglebone-black.md)
- [RePaper eInk Development Board for ARM + GNU/Linux](https://learn.adafruit.com/repaper-eink-development-board-arm-linux-raspberry-pi-beagle-bone-black.md)
---
# Source: https://learn.adafruit.com/adafruit-16-channel-servo-driver-with-raspberry-pi.md
# Adafruit 16 Channel Servo Driver with Raspberry Pi
## Overview
Servo motors are often driven using the PWM outputs available on most embedded MCUs. But while the Pi does have native HW support for PWM, there is only one PWM channel available to users at GPIO18. That kind of limits your options if you need to drive more than one servo or if you also want to dim an LED or do some sort of other PWM goodness as well. Thankfully ... the PI **does** have HW I2C available, which we can use to communicate with a PWM driver like the PCA9685, used on Adafruit's 16-channel 12-bit PWM/Servo Driver!
Using this breakout, you can easily drive up to 16 servo motors on your Raspberry Pi using our painless Python library and this tutorial.
Note this cannot be used for driving anything other than analog (1-2 millisecond pulse drive) servos. DC motors, AC motors and 100% digital servos are not going to work. (Note that most 'digital servos' still use the analog pulse interface and are suitable for use with this controller.)
Danger:
# What you'll need
We'll be using the following items in this tutorial:
- [Adafruit 16-Channel 12-bit PWM/Servo Driver](http://adafruit.com/products/815 "Link: http://adafruit.com/products/815")
- Servo Motor: [Standard Servo](http://www.adafruit.com/products/155 "Link: http://www.adafruit.com/products/155") or [Continuous Rotation Servo](http://www.adafruit.com/products/154 "Link: http://www.adafruit.com/products/154")
- [Female 2.1mm DC Power Adapter](http://www.adafruit.com/products/368 "Link: http://www.adafruit.com/products/368")
- [5V 2A Power Supply](http://www.adafruit.com/products/276)
- [Next Page](https://learn.adafruit.com/adafruit-16-channel-servo-driver-with-raspberry-pi/configuring-your-pi-for-i2c.md)
## Featured Products
### 5V 2A (2000mA) switching power supply - UL Listed
[5V 2A (2000mA) switching power supply - UL Listed](https://www.adafruit.com/product/276)
This is an FCC/CE certified and UL listed power supply. Need a lot of 5V power? This switching supply gives a clean regulated 5V output at up to 2000mA. 110 or 240 input, so it works in any country. The plugs are "US 2-prong" style so you may need a plug adapter, but you can pick one...
In Stock
[Buy Now](https://www.adafruit.com/product/276)
[Related Guides to the Product](https://learn.adafruit.com/products/276/guides)
### Female DC Power adapter - 2.1mm jack to screw terminal block
[Female DC Power adapter - 2.1mm jack to screw terminal block](https://www.adafruit.com/product/368)
If you need to connect a DC power wall wart to a board that doesn't have a DC jack - this adapter will come in very handy! There is a 2.1mm DC jack on one end, and a screw terminal block on the other. The terminals are labeled with positive/negative assuming a positive-tip configuration...
In Stock
[Buy Now](https://www.adafruit.com/product/368)
[Related Guides to the Product](https://learn.adafruit.com/products/368/guides)
### Standard servo - TowerPro SG-5010
[Standard servo - TowerPro SG-5010](https://www.adafruit.com/product/155)
This high-torque standard servo can rotate approximately 180 degrees (90 in each direction). You can use any servo code, hardware, or library to control these servos. Good for beginners who want to make stuff move without building a motor controller with feedback & gearbox. Comes with 3...
In Stock
[Buy Now](https://www.adafruit.com/product/155)
[Related Guides to the Product](https://learn.adafruit.com/products/155/guides)
### Continuous Rotation Servo
[Continuous Rotation Servo](https://www.adafruit.com/product/154)
This servo rotates fully forward or backward instead of moving to a position. You can use any servo code, hardware, or library to control these servos. Good for making simple moving robots. Comes with four different horns, as shown.
To control with an Arduino, we suggest connecting...
In Stock
[Buy Now](https://www.adafruit.com/product/154)
[Related Guides to the Product](https://learn.adafruit.com/products/154/guides)
### Adafruit 16-Channel 12-bit PWM/Servo Driver - I2C interface
[Adafruit 16-Channel 12-bit PWM/Servo Driver - I2C interface](https://www.adafruit.com/product/815)
You want to make a cool robot, maybe a hexapod walker, or maybe just a piece of art with a lot of moving parts. Or maybe you want to drive a lot of LEDs with precise PWM output. Then you realize that your microcontroller has a limited number of PWM outputs! What now? You could give up OR you...
In Stock
[Buy Now](https://www.adafruit.com/product/815)
[Related Guides to the Product](https://learn.adafruit.com/products/815/guides)
### Half Sized Premium Breadboard - 400 Tie Points
[Half Sized Premium Breadboard - 400 Tie Points](https://www.adafruit.com/product/64)
This is a cute, half-size breadboard with 400 tie points, good for small projects. It's 3.25" x 2.2" / 8.3cm x 5.5cm with a standard double-strip in the middle and two power rails on both sides. You can pull the power rails off easily to make the breadboard as...
In Stock
[Buy Now](https://www.adafruit.com/product/64)
[Related Guides to the Product](https://learn.adafruit.com/products/64/guides)
### Breadboarding wire bundle
[Breadboarding wire bundle](https://www.adafruit.com/product/153)
75 flexible stranded core wires with stiff ends molded on in red, orange, yellow, green, blue, brown, black and white. These are a major improvement over the "box of bent wires" that are sometimes sold with breadboards, and faster than stripping your own solid core wires. Makes...
In Stock
[Buy Now](https://www.adafruit.com/product/153)
[Related Guides to the Product](https://learn.adafruit.com/products/153/guides)
## Related Guides
- [Raspberry Pi Wifi-Controlled Cat Laser Toy](https://learn.adafruit.com/raspberry-pi-wifi-controlled-cat-laser-toy.md)
- [Adafruit PCA9685 16-Channel Servo Driver](https://learn.adafruit.com/16-channel-pwm-servo-driver.md)
- [CircuitPython Hardware: PCA9685 PWM & Servo Driver](https://learn.adafruit.com/micropython-hardware-pca9685-pwm-and-servo-driver.md)
- [LED Tricks: Gamma Correction](https://learn.adafruit.com/led-tricks-gamma-correction.md)
- [Adafruit Motor Selection Guide](https://learn.adafruit.com/adafruit-motor-selection-guide.md)
- [Adafruit IO Basics: Analog Output](https://learn.adafruit.com/adafruit-io-basics-analog-output.md)
- [MIDI Controlled Robot Lyre with CircuitPython](https://learn.adafruit.com/midi-controlled-robot-lyre-with-circuitpython.md)
- [Digital Circuits 4: Sequential Circuits](https://learn.adafruit.com/digital-circuits-4-sequential-circuits.md)
- [MASLOW: an Open WiFi Detector with Adafruit Pro Trinket and CC3000](https://learn.adafruit.com/wifi-hotspot-finder-adafruit-pro-trinket-cc3000.md)
- [Current Limiting Stepper Driver with DRV8871](https://learn.adafruit.com/current-limiting-stepper-driver-with-drv8871.md)
- [CRICKIT Flippy Robot](https://learn.adafruit.com/crickit-flippy-robot.md)
- [Adafruit NFC/RFID on Raspberry Pi](https://learn.adafruit.com/adafruit-nfc-rfid-on-raspberry-pi.md)
- [Stumble-Bot](https://learn.adafruit.com/stumble-bot-with-circuit-playground-and-crickit.md)
- [Adabot Toy Robot Friend](https://learn.adafruit.com/adabot-rp2040.md)
- [Making PCB Jewelry & Art with Gingerbread and KiCad](https://learn.adafruit.com/making-pcb-art-with-gingerbread-and-kicad.md)
---
# Source: https://learn.adafruit.com/adafruit-16x2-character-lcd-plus-keypad-for-raspberry-pi.md
# Adafruit 16x2 Character LCD + Keypad for Raspberry Pi
## Overview

This new Adafruit plate makes it easy to use a 16x2 Character LCD. We really like the range of LCDs we stock in the shop, such as our classic [blue & white](http://www.adafruit.com/products/181 "Link: http://www.adafruit.com/products/181") as well as the fancy [RGB negative](http://www.adafruit.com/products/399 "Link: http://www.adafruit.com/products/399") and [RGB positive](http://www.adafruit.com/products/398). Unfortunately, these LCDs do require quite a few digital pins, 6 to control the LCD and then perhaps another 3 to control the RGB backlight for a total of 9 pins. That's nearly all the GPIO available on a Raspberry Pi!

With this in mind, we wanted to make it easier for people to get these LCD into their projects so we devised a Pi plate that lets you control **a 16x2 Character LCD, up to 3 backlight pins AND 5 keypad pins using only the two I2C pins on the Pi!** The best part is you don't really lose those two pins either, since you can stick i2c-based sensors, RTCs, etc and have them share the I2C bus. This is a super slick way to add a display without all the wiring hassle.

Info:
This plate is perfect for when you want to build a stand-alone project with its own user interface. The 4 directional buttons plus select button allows basic control without having to attach a bulky computer.
The kit is designed for any Raspberry Pi - version 1 and 2.
[If you want plug in a Cobbler or Gertboard at the same time, check out our Stacking Header, you can fit an IDC cable over it if the Plate is assembled with this part.](http://www.adafruit.com/products/1112 "Link: http://www.adafruit.com/products/1112")
- [Next Page](https://learn.adafruit.com/adafruit-16x2-character-lcd-plus-keypad-for-raspberry-pi/parts-list.md)
## Featured Products
### Stacking Header for Raspberry Pi - 2x13 Extra Tall
[Stacking Header for Raspberry Pi - 2x13 Extra Tall](https://www.adafruit.com/product/1112)
Stack multiple plates, breakouts etc onto your Raspberry Pi with this custom-made extra-tall and extra-long 2x13 female header. The female header part has extra spaces to make it 13.6mm tall: when placed on your Pi, a PCB will clear the Ethernet and USB jacks. The stacky pin part is also...
In Stock
[Buy Now](https://www.adafruit.com/product/1112)
[Related Guides to the Product](https://learn.adafruit.com/products/1112/guides)
### Adafruit RGB Positive 16x2 LCD+Keypad Kit for Raspberry Pi
[Adafruit RGB Positive 16x2 LCD+Keypad Kit for Raspberry Pi](https://www.adafruit.com/product/1109)
This new Adafruit Pi Plate makes it easy to use an RGB 16x2 Character LCD. We really like the RGB Character LCDs we stock in the shop. (For RGB we have [RGB negative](http://www.adafruit.com/products/399) and [RGB positive](http://www.adafruit.com/products/398).)...
Out of Stock
[Buy Now](https://www.adafruit.com/product/1109)
[Related Guides to the Product](https://learn.adafruit.com/products/1109/guides)
### Adafruit RGB Negative 16x2 LCD+Keypad Kit for Raspberry Pi
[Adafruit RGB Negative 16x2 LCD+Keypad Kit for Raspberry Pi](https://www.adafruit.com/product/1110)
This new Adafruit Pi Plate makes it easy to use an RGB 16x2 Character LCD. We really like the RGB Character LCDs we stock in the shop. (For RGB we have [RGB negative](http://www.adafruit.com/products/399) and [RGB positive](http://www.adafruit.com/products/398).)...
Out of Stock
[Buy Now](https://www.adafruit.com/product/1110)
[Related Guides to the Product](https://learn.adafruit.com/products/1110/guides)
### Adafruit Blue&White 16x2 LCD+Keypad Kit for Raspberry Pi
[Adafruit Blue&White 16x2 LCD+Keypad Kit for Raspberry Pi](https://www.adafruit.com/product/1115)
This new Adafruit Pi Plate makes it easy to use a blue and white 16x2 Character LCD. [We really like the 16x2 Character LCDs we stock in the shop](http://www.adafruit.com/products/181). Unfortunately, these LCDs do require quite a few digital pins, 6 to control the LCD and then...
Out of Stock
[Buy Now](https://www.adafruit.com/product/1115)
[Related Guides to the Product](https://learn.adafruit.com/products/1115/guides)
## Related Guides
- [Adafruit Class Library for Windows IoT Core](https://learn.adafruit.com/adafruit-class-library-for-windows-iot-core.md)
- [Raspberry Pi WiFi Radio](https://learn.adafruit.com/pi-wifi-radio.md)
- [Character LCD with Raspberry Pi or BeagleBone Black](https://learn.adafruit.com/character-lcd-with-raspberry-pi-or-beaglebone-black.md)
- [PiGRRL 2](https://learn.adafruit.com/pigrrl-2.md)
- [LED Backpack Displays on Raspberry Pi and BeagleBone Black](https://learn.adafruit.com/led-backpack-displays-on-raspberry-pi-and-beaglebone-black.md)
- [Adafruit's Raspberry Pi Lesson 3. Network Setup](https://learn.adafruit.com/adafruits-raspberry-pi-lesson-3-network-setup.md)
- [Pocket PiGRRL](https://learn.adafruit.com/pocket-pigrrl.md)
- [Ultimate Youtube Live Camera](https://learn.adafruit.com/ultimate-youtube-live-camera.md)
- [Adafruit's Raspberry Pi Lesson 12. Sensing Movement](https://learn.adafruit.com/adafruits-raspberry-pi-lesson-12-sensing-movement.md)
- [Drive a 16x2 LCD with the Raspberry Pi](https://learn.adafruit.com/drive-a-16x2-lcd-directly-with-a-raspberry-pi.md)
- [PyPortal LIFX Lighting Controller ](https://learn.adafruit.com/pyportal-lifx-lighting-controller.md)
- [Nokia 5110/3310 LCD Python Library](https://learn.adafruit.com/nokia-5110-3310-lcd-python-library.md)
- [Portable Solar Charging Tracker](https://learn.adafruit.com/portable-solar-charging-tracker.md)
- [Introducing the Raspberry Pi 2 - Model B](https://learn.adafruit.com/introducing-the-raspberry-pi-2-model-b.md)
- [Creepy Face Tracking Portrait](https://learn.adafruit.com/creepy-face-tracking-portrait.md)
---
# Source: https://learn.adafruit.com/adafruit-4-channel-adc-breakouts.md
# Adafruit 4-Channel ADC Breakouts
## Overview


The ADS1115 and ADS1015 4-channel breakout boards are perfect for adding high-resolution analog to digital conversion to any microprocessor-based project. These boards can run with power and logic signals between 2v to 5v, so they are compatible with all common 3.3v and 5v processors. As many of 4 of these boards can be controlled from the same 2-wire I2C bus, giving you up to 16 single-ended or 8 differential channels. A programmable gain amplifier provides up to x16 gain for small signals.
These two boards are very similar, differing only in resolution and speed. The ADS1115 provides 16-bit precision at 860 samples/second, while the ADS1015 provides 12-bit precision at 3300 samples/second.

To get you going fast, we spun up a custom-made PCB in the[ **STEMMA QT** form factor](https://www.adafruit.com/?q=stemma%20qt%20sensor "STEMMA QT form factor"), making it easy to interface with. The [STEMMA QT connectors](https://learn.adafruit.com/introducing-adafruit-stemma-qt/what-is-stemma-qt) on either side are compatible with the [SparkFun Qwiic](https://www.sparkfun.com/qwiic) I2C connectors. This allows you to make solderless connections between your development board and either the ADS1115 or ADS1015. You can chain the boards with a wide range of other sensors and accessories using a [**compatible cable**](https://www.adafruit.com/?q=stemma%20qt%20cable).

## ADS1115 Features:
- WIDE SUPPLY RANGE: 2.0V to 5.5V
- LOW CURRENT CONSUMPTION: Continuous Mode: Only 150µA Single-Shot Mode: Auto Shut-Down
- PROGRAMMABLE DATA RATE: 8SPS to 860SPS
- INTERNAL LOW-DRIFT VOLTAGE REFERENCE
- INTERNAL OSCILLATOR
- INTERNAL PGA
- I2C INTERFACE: Pin-Selectable Addresses
- FOUR SINGLE-ENDED OR TWO DIFFERENTIAL INPUTS
- PROGRAMMABLE COMPARATOR
- This board/chip uses I2C 7-bit addresses between 0x48-0x4B, selectable with jumpers

## ADS1015 Features:
- WIDE SUPPLY RANGE: 2.0V to 5.5V
- LOW CURRENT CONSUMPTION: Continuous Mode: Only 150µA Single-Shot Mode: Auto Shut-Down
- PROGRAMMABLE DATA RATE: 128SPS to 3.3kSPS
- INTERNAL LOW-DRIFT VOLTAGE REFERENCE
- INTERNAL OSCILLATOR
- INTERNAL PGA
- I2C INTERFACE: Pin-Selectable Addresses
- FOUR SINGLE-ENDED OR TWO DIFFERENTIAL INPUTS
- PROGRAMMABLE COMPARATOR
- This board/chip uses I2C 7-bit addresses between 0x48-0x4B, selectable with jumpers

Info:

- [Next Page](https://learn.adafruit.com/adafruit-4-channel-adc-breakouts/pinouts.md)
## Featured Products
### ADS1115 16-Bit ADC - 4 Channel with Programmable Gain Amplifier
[ADS1115 16-Bit ADC - 4 Channel with Programmable Gain Amplifier](https://www.adafruit.com/product/1085)
For microcontrollers without an analog-to-digital converter or when you want a higher-precision ADC, the ADS1115 provides 16-bit precision at 860 samples/second over I2C. The chip can be configured as 4 single-ended input channels, or two differential channels. As a nice bonus, it even...
In Stock
[Buy Now](https://www.adafruit.com/product/1085)
[Related Guides to the Product](https://learn.adafruit.com/products/1085/guides)
### ADS1015 12-Bit ADC - 4 Channel with Programmable Gain Amplifier
[ADS1015 12-Bit ADC - 4 Channel with Programmable Gain Amplifier](https://www.adafruit.com/product/1083)
For microcontrollers without an analog-to-digital converter or when you want a higher-precision ADC, the ADS1015 provides 12-bit precision at 3300 samples/second over I2C. The chip can be configured as 4 single-ended input channels or two differential channels. As a nice bonus, it even...
In Stock
[Buy Now](https://www.adafruit.com/product/1083)
[Related Guides to the Product](https://learn.adafruit.com/products/1083/guides)
### STEMMA QT / Qwiic JST SH 4-Pin Cable - 50mm Long
[STEMMA QT / Qwiic JST SH 4-Pin Cable - 50mm Long](https://www.adafruit.com/product/4399)
This 4-wire cable is 50mm / 1.9" long and fitted with JST SH female 4-pin connectors on both ends. Compared with the chunkier JST PH these are 1mm pitch instead of 2mm, but still have a nice latching feel, while being easy to insert and remove.
In Stock
[Buy Now](https://www.adafruit.com/product/4399)
[Related Guides to the Product](https://learn.adafruit.com/products/4399/guides)
### Adafruit Assembled Pi Cobbler Breakout + Cable for Raspberry Pi
[Adafruit Assembled Pi Cobbler Breakout + Cable for Raspberry Pi](https://www.adafruit.com/product/914)
Now that you've finally got your hands on a [Raspberry Pi® Model B](http://www.raspberrypi.org/), you're probably itching to make some fun embedded computer projects with it. What you need is an add on prototyping Pi Cobbler from Adafruit, which can break out all those...
No Longer Stocked
[Buy Now](https://www.adafruit.com/product/914)
[Related Guides to the Product](https://learn.adafruit.com/products/914/guides)
### Adafruit METRO 328 Fully Assembled - Arduino IDE compatible
[Adafruit METRO 328 Fully Assembled - Arduino IDE compatible](https://www.adafruit.com/product/50)
We sure love the ATmega328 here at Adafruit, and we use them _a lot_ for our own projects. The processor has plenty of GPIO, Analog inputs, hardware UART SPI and I2C, timers and PWM galore - just enough for most simple projects. When we need to go small, we use a
Out of Stock
[Buy Now](https://www.adafruit.com/product/50)
[Related Guides to the Product](https://learn.adafruit.com/products/50/guides)
### Full Sized Premium Breadboard - 830 Tie Points
[Full Sized Premium Breadboard - 830 Tie Points](https://www.adafruit.com/product/239)
This is a 'full-size' premium quality breadboard, 830 tie points. Good for small and medium projects. It's 2.2" x 7" (5.5 cm x 17 cm) with a standard double-strip in the middle and two power rails on both sides. You can pull the power rails off easily to make the...
In Stock
[Buy Now](https://www.adafruit.com/product/239)
[Related Guides to the Product](https://learn.adafruit.com/products/239/guides)
## Related Guides
- [Animating Multiple LED Backpacks](https://learn.adafruit.com/animating-multiple-led-backpacks.md)
- [Arduino Lesson 16. Stepper Motors](https://learn.adafruit.com/adafruit-arduino-lesson-16-stepper-motors.md)
- [Bluetooth Temperature & Humidity Sensor](https://learn.adafruit.com/bluetooth-temperature-and-humidity-sensor.md)
- [Light Meter](https://learn.adafruit.com/light-meter.md)
- [Making Adabot: Part 2](https://learn.adafruit.com/making-adabot-part-2.md)
- [Silicone Robo-Tentacle](https://learn.adafruit.com/silicone-robo-tentacle.md)
- [Digital Circuits 7: MCUs... how do they work?](https://learn.adafruit.com/mcus-how-do-they-work.md)
- [Adafruit Motor Shield](https://learn.adafruit.com/adafruit-motor-shield.md)
- [Remote controlled door lock using a fingerprint sensor & Adafruit IO](https://learn.adafruit.com/remote-controlled-door-lock-using-a-fingerprint-sensor-and-adafruit-io.md)
- [Adafruit 16-channel PWM/Servo Shield](https://learn.adafruit.com/adafruit-16-channel-pwm-slash-servo-shield.md)
- [Wireless Gardening with Arduino + CC3000 WiFi Modules](https://learn.adafruit.com/wireless-gardening-arduino-cc3000-wifi-modules.md)
- [Sous-vide controller powered by Arduino - The SousViduino!](https://learn.adafruit.com/sous-vide-powered-by-arduino-the-sous-viduino.md)
- [Arduino GPS Clock](https://learn.adafruit.com/arduino-clock.md)
- [I2C Addresses and Troublesome Chips](https://learn.adafruit.com/i2c-addresses.md)
- [Adafruit INA219 Current Sensor Breakout](https://learn.adafruit.com/adafruit-ina219-current-sensor-breakout.md)
---
# Source: https://learn.adafruit.com/skill-badge-sash/adafruit-academy.md
# Skill Badge Sash
## Adafruit Academy
- [Previous Page](https://learn.adafruit.com/skill-badge-sash/wear-it.md)
## Featured Products
### LEDs - Skill badge, iron-on patch
[LEDs - Skill badge, iron-on patch](https://www.adafruit.com/product/479)
You learned LEDs! (Light-emitting diodes)... Adafruit offers a fun and exciting "badges" of achievement for electronics, science and engineering. We believe everyone should be able to be rewarded for learning a useful skill, a badge is just one of the many ways to show and share.
No Longer Stocked
[Buy Now](https://www.adafruit.com/product/479)
[Related Guides to the Product](https://learn.adafruit.com/products/479/guides)
### Learn to program "Hello world" - Skill badge, iron-on patch
[Learn to program "Hello world" - Skill badge, iron-on patch](https://www.adafruit.com/product/478)
You can write code! Adafruit offers a fun and exciting "badges" of achievement for electronics, science and engineering. We believe everyone should be able to be rewarded for learning a useful skill, a badge is just one of the many ways to show and share.
This is the...
No Longer Stocked
[Buy Now](https://www.adafruit.com/product/478)
[Related Guides to the Product](https://learn.adafruit.com/products/478/guides)
### Learn to solder - Skill badge, iron-on patch
[Learn to solder - Skill badge, iron-on patch](https://www.adafruit.com/product/465)
You can solder! Adafruit offers a fun and exciting "badges" of achievement for electronics, science and engineering. We believe everyone should be able to be rewarded for learning a useful skill, a badge is just one of the many ways to show and share.
This is the "I...
No Longer Stocked
[Buy Now](https://www.adafruit.com/product/465)
[Related Guides to the Product](https://learn.adafruit.com/products/465/guides)
## Related Guides
- [Collin's Lab: Solar](https://learn.adafruit.com/collins-lab-solar.md)
- [Cartoon Network MakeCode: Garnet's Palm Gems from Steven Universe](https://learn.adafruit.com/cartoon-network-makecode-garnet-s-palm-gems-from-steven-universe.md)
- [No-Sew LED Wristband](https://learn.adafruit.com/no-sew-led-wristband.md)
- [MicroCode for micro:bit](https://learn.adafruit.com/microcode-for-microbit.md)
- [Adafruit New York and NYC DOE vendor information ](https://learn.adafruit.com/educational-orders-for-educators-based-in-new-york.md)
- [Getting Started With Steven Universe](https://learn.adafruit.com/getting-started-with-steven-universe.md)
- [Visual Studio Code for Education... and CircuitPython](https://learn.adafruit.com/visual-studio-code-for-education-and-circuitpython.md)
- [Makecode para la Circuit Playground Express](https://learn.adafruit.com/makecode-es.md)
- [Share your work with Adafruit Playground!](https://learn.adafruit.com/adafruit-playground-notes.md)
- [Buttermilk Boat with Circuit Playground Express](https://learn.adafruit.com/boat-with-circuit-playground-express.md)
- [Mouse Painter: Emulate Mice with MakeCode ](https://learn.adafruit.com/mouse-painter-emulate-mice-with-makecode.md)
- [Best Beginner Boards for Teachers](https://learn.adafruit.com/best-beginner-boards-for-teachers.md)
- [Anatomical 3D Printed Beating Heart with MakeCode](https://learn.adafruit.com/anatomical-3d-printed-beating-heart-with-makecode.md)
- [MakeCode for Circuit Playground Express](https://learn.adafruit.com/makecode.md)
- [Trash Panda](https://learn.adafruit.com/trash-panda-circuit-python-crickit.md)
---
# Source: https://learn.adafruit.com/adafruit-analog-accelerometer-breakouts.md
# Adafruit Analog Accelerometer Breakouts
## Overview
The ADXL335 , ADXL326 and ADXL377 are low-power, 3-axis MEMS accelerometer modules with ratiometric analog voltage outputs. The Adafruit Breakout boards for these modules feature on-board 3.3v voltage regulation which makes them simple to interface with 5v microcontrollers such as the Arduino.
**The ADXL335** can measure at least +/- 3G in the X, Y and Z axis. It is perfect for high-resolution static acceleration measurements such as tilt-sensing, as well as for moderate dynamic accelerations from motion, shock or vibration.
**The ADXL326** can measure at least +/- 16G(!) in the X, Y and Z axis. It is ideal for measuring more dynamic accelerations from high-performance land and air vehicles as well as for shock and impact measurements.
**The ADXL377** can measure at least +/- 200G(!) in the X, Y and Z axis. This is the sensor for measuring extreme dynamic accelerations encountered in applications such as rocketry experiments and high-impact shock measurements.
## How it Works:
## MEMS - Micro Electro-Mechanical Systems
The sensor consists of a micro-machined structure on a silicon wafer. The structure is suspended by polysilicon springs which allow it to deflect in the when subject to acceleration in the X, Y and/or Z axis. Deflection causes a change in capacitance between fixed plates and plates attached to the suspended structure. This change in capacitance on each axis is converted to an output voltage proportional to the acceleration on that axis.
## Ratiometric Output
Ratiometric output means that the output voltage increases linearly with acceleration over the range.
- For the ADXL335, that is approximately 0v at -3G to 3.3v at +3G.
- For the ADXL326, that is approximately 0v at -16G to 3.3v at +16G.
- For the ADXL377, that is approximately 0v at -200G to 3.3v at +200G.
- For all modules, the output at 0G in each axis, is about 1/2 full-scale, or 1.65v.
Info:
- [Next Page](https://learn.adafruit.com/adafruit-analog-accelerometer-breakouts/assembly.md)
## Featured Products
### ADXL335 - 5V ready triple-axis accelerometer (+-3g analog out)
[ADXL335 - 5V ready triple-axis accelerometer (+-3g analog out)](https://www.adafruit.com/product/163)
We've updated our favorite triple-axis accelerometer to now have an on-board 3.3V regulator - making it a perfect choice for interfacing with a 5V microcontroller such as the Arduino. This breakout comes with 3 analog outputs for X, Y and Z axis measurements on a 0.75"x0.75"...
In Stock
[Buy Now](https://www.adafruit.com/product/163)
[Related Guides to the Product](https://learn.adafruit.com/products/163/guides)
### ADXL326 - 5V ready triple-axis accelerometer (+-16g analog out)
[ADXL326 - 5V ready triple-axis accelerometer (+-16g analog out)](https://www.adafruit.com/product/1018)
We've now got a wider range version of favorite triple-axis accelerometer - it even has an on-board 3.3V regulator - making it a perfect choice for interfacing with a 5V microcontroller such as the Arduino. This breakout comes with 3 analog outputs for X, Y and Z axis measurements on a...
In Stock
[Buy Now](https://www.adafruit.com/product/1018)
[Related Guides to the Product](https://learn.adafruit.com/products/1018/guides)
### Adafruit METRO 328 Fully Assembled - Arduino IDE compatible
[Adafruit METRO 328 Fully Assembled - Arduino IDE compatible](https://www.adafruit.com/product/50)
We sure love the ATmega328 here at Adafruit, and we use them _a lot_ for our own projects. The processor has plenty of GPIO, Analog inputs, hardware UART SPI and I2C, timers and PWM galore - just enough for most simple projects. When we need to go small, we use a
Out of Stock
[Buy Now](https://www.adafruit.com/product/50)
[Related Guides to the Product](https://learn.adafruit.com/products/50/guides)
### ADXL377 - High-G Triple-Axis Accelerometer (+-200g Analog Out)
[ADXL377 - High-G Triple-Axis Accelerometer (+-200g Analog Out)](https://www.adafruit.com/product/1413)
**Discontinued -** **you can grab the ** [ADXL375 - High G Accelerometer (+-200g) with I2C and SPI - STEMMA QT / Qwiic](https://www.adafruit.com/product/5374) **instead! **
**Please note: The ADXL377 is "End of Life", **
No Longer Stocked
[Buy Now](https://www.adafruit.com/product/1413)
[Related Guides to the Product](https://learn.adafruit.com/products/1413/guides)
## Related Guides
- [Bluetooth Temperature & Humidity Sensor](https://learn.adafruit.com/bluetooth-temperature-and-humidity-sensor.md)
- [Trinket Audio Player](https://learn.adafruit.com/trinket-audio-player.md)
- [Arduino Prototyping Mounting Plate](https://learn.adafruit.com/arduino-prototyping-mounting-plate.md)
- [Tiny Arduino Music Visualizer](https://learn.adafruit.com/piccolo.md)
- [Wireless Power Switch with Arduino & the CC3000 WiFi Chip](https://learn.adafruit.com/wireless-power-switch-with-arduino-and-the-cc3000-wifi-chip.md)
- [WiFi Controlled LED Christmahanukwanzaa Tree](https://learn.adafruit.com/wifi-controlled-led-christmahanukwanzaa-tree.md)
- [FTDI Friend](https://learn.adafruit.com/ftdi-friend.md)
- [Adafruit 1.14" 240x135 Color TFT Breakout LCD Display](https://learn.adafruit.com/adafruit-1-14-240x135-color-tft-breakout.md)
- [Adafruit AirLift Shield - ESP32 WiFi Co-Processor](https://learn.adafruit.com/adafruit-airlift-shield-esp32-wifi-co-processor.md)
- [How to Build a Testing Jig](https://learn.adafruit.com/how-to-build-a-testing-fixture.md)
- [TMP36 Temperature Sensor](https://learn.adafruit.com/tmp36-temperature-sensor.md)
- [Nokia 5110/3310 Monochrome LCD](https://learn.adafruit.com/nokia-5110-3310-monochrome-lcd.md)
- [Electronic Demon Costume](https://learn.adafruit.com/electronic-demon-costume.md)
- [Ladyada's Bento Box](https://learn.adafruit.com/lady-adas-bento-box.md)
- [Low Power WiFi Datalogger](https://learn.adafruit.com/low-power-wifi-datalogging.md)
---
# Source: https://learn.adafruit.com/adafruit-arduino-lesson-1-blink.md
# Arduino Lesson 1. Blink
## Overview
In this lesson, you will learn how program your Arduino to make the Arduino's built-in LED blink.

- [Next Page](https://learn.adafruit.com/adafruit-arduino-lesson-1-blink/parts.md)
## Featured Products
### Adafruit METRO 328 Fully Assembled - Arduino IDE compatible
[Adafruit METRO 328 Fully Assembled - Arduino IDE compatible](https://www.adafruit.com/product/50)
We sure love the ATmega328 here at Adafruit, and we use them _a lot_ for our own projects. The processor has plenty of GPIO, Analog inputs, hardware UART SPI and I2C, timers and PWM galore - just enough for most simple projects. When we need to go small, we use a
Out of Stock
[Buy Now](https://www.adafruit.com/product/50)
[Related Guides to the Product](https://learn.adafruit.com/products/50/guides)
### USB Cable - Standard A-B
[USB Cable - Standard A-B](https://www.adafruit.com/product/62)
This here is your standard A-B USB cable, for USB 1.1 or 2.0. Perfect for connecting a PC to your Arduino, USBtinyISP (among other things).
3 feet / 1 meter long
Color may vary!
In Stock
[Buy Now](https://www.adafruit.com/product/62)
[Related Guides to the Product](https://learn.adafruit.com/products/62/guides)
## Related Guides
- [WiFi Weather Station](https://learn.adafruit.com/wifi-weather-station-arduino-cc3000.md)
- [Naughty or Nice Machine](https://learn.adafruit.com/naughty-or-nice-machine.md)
- [Adafruit VS1053 MP3/AAC/Ogg/MIDI/WAV Codec Breakout Tutorial](https://learn.adafruit.com/adafruit-vs1053-mp3-aac-ogg-midi-wav-play-and-record-codec-tutorial.md)
- [How to program a Zumo Robot with Simulink](https://learn.adafruit.com/zumo-robot-control-with-simulink.md)
- [DIY 8x2 LCD Shield](https://learn.adafruit.com/diy-8x2-lcd-shield.md)
- [3D Printed Animatronic Robot Head](https://learn.adafruit.com/3d-printed-animatronic-robot-head.md)
- [Arduino Lesson 7. Make an RGB LED Fader](https://learn.adafruit.com/adafruit-arduino-lesson-7-make-an-rgb-led-fader.md)
- [WiFi Controlled LED Christmahanukwanzaa Tree](https://learn.adafruit.com/wifi-controlled-led-christmahanukwanzaa-tree.md)
- [Light Meter](https://learn.adafruit.com/light-meter.md)
- [1,500 NeoPixel LED Curtain with Raspberry Pi and Fadecandy](https://learn.adafruit.com/1500-neopixel-led-curtain-with-raspberry-pi-fadecandy.md)
- [Trellis 3D Printed Enclosure](https://learn.adafruit.com/trellis-3d-printed-enclosure.md)
- [Deciphering Strange Arduino Code](https://learn.adafruit.com/deciphering-strange-arduino-code.md)
- [Collin's Lab: MIDI](https://learn.adafruit.com/collins-lab-midi.md)
- [Tiny Arduino Music Visualizer](https://learn.adafruit.com/piccolo.md)
- [Adafruit Music Maker Shield](https://learn.adafruit.com/adafruit-music-maker-shield-vs1053-mp3-wav-wave-ogg-vorbis-player.md)
---
# Source: https://learn.adafruit.com/adafruit-arduino-lesson-10-making-sounds.md
# Arduino Lesson 10. Making Sounds
## Overview
In this lesson, you will learn how to make sounds with your Arduino. First you will make the Arduino play a 'musical' scale and then combine this with a photocell, to make a Theremin-like instrument that changes the pitch played as you wave your hand over the photocell.

- [Next Page](https://learn.adafruit.com/adafruit-arduino-lesson-10-making-sounds/parts.md)
## Featured Products
### Piezo Buzzer
[Piezo Buzzer](https://www.adafruit.com/product/160)
Piezo buzzers are used for making beeps, tones and alerts. This one is petite but loud! Drive it with 3-30V peak-to-peak square wave. To use, connect one pin to ground (either one) and the other pin to a square wave out from a timer or microcontroller. For the loudest tones, stay around 4 KHz,...
In Stock
[Buy Now](https://www.adafruit.com/product/160)
[Related Guides to the Product](https://learn.adafruit.com/products/160/guides)
### Photo cell (CdS photoresistor)
[Photo cell (CdS photoresistor)](https://www.adafruit.com/product/161)
CdS cells are little light sensors. As the squiggly face is exposed to more light, the resistance goes down. When it's light, the resistance is about ~1KΩ, when dark it goes up to ~10KΩ.
To use, connect one side of the photocell (either one, it's symmetric) to power...
In Stock
[Buy Now](https://www.adafruit.com/product/161)
[Related Guides to the Product](https://learn.adafruit.com/products/161/guides)
### Premium Male/Male Jumper Wires - 40 x 6" (150mm)
[Premium Male/Male Jumper Wires - 40 x 6" (150mm)](https://www.adafruit.com/product/758)
Handy for making wire harnesses or jumpering between headers on PCB's. These premium jumper wires are 6" (150mm) long and come in a 'strip' of 40 (4 pieces of each of ten rainbow colors). They have 0.1" male header contacts on either end and fit cleanly next to each other...
In Stock
[Buy Now](https://www.adafruit.com/product/758)
[Related Guides to the Product](https://learn.adafruit.com/products/758/guides)
### Half Sized Premium Breadboard - 400 Tie Points
[Half Sized Premium Breadboard - 400 Tie Points](https://www.adafruit.com/product/64)
This is a cute, half-size breadboard with 400 tie points, good for small projects. It's 3.25" x 2.2" / 8.3cm x 5.5cm with a standard double-strip in the middle and two power rails on both sides. You can pull the power rails off easily to make the breadboard as...
In Stock
[Buy Now](https://www.adafruit.com/product/64)
[Related Guides to the Product](https://learn.adafruit.com/products/64/guides)
### Adafruit METRO 328 Fully Assembled - Arduino IDE compatible
[Adafruit METRO 328 Fully Assembled - Arduino IDE compatible](https://www.adafruit.com/product/50)
We sure love the ATmega328 here at Adafruit, and we use them _a lot_ for our own projects. The processor has plenty of GPIO, Analog inputs, hardware UART SPI and I2C, timers and PWM galore - just enough for most simple projects. When we need to go small, we use a
Out of Stock
[Buy Now](https://www.adafruit.com/product/50)
[Related Guides to the Product](https://learn.adafruit.com/products/50/guides)
## Related Guides
- [Multi-tasking the Arduino - Part 2](https://learn.adafruit.com/multi-tasking-the-arduino-part-2.md)
- [Adafruit PCA9685 16-Channel Servo Driver](https://learn.adafruit.com/16-channel-pwm-servo-driver.md)
- [Adafruit CC3000 WiFi and Xively](https://learn.adafruit.com/adafruit-cc3000-wifi-and-xively.md)
- [Trellis 3D Printed Enclosure](https://learn.adafruit.com/trellis-3d-printed-enclosure.md)
- [Remote controlled door lock using a fingerprint sensor & Adafruit IO](https://learn.adafruit.com/remote-controlled-door-lock-using-a-fingerprint-sensor-and-adafruit-io.md)
- [Smart Measuring Cup](https://learn.adafruit.com/smart-measuring-cup.md)
- [0.96" mini Color OLED](https://learn.adafruit.com/096-mini-color-oled.md)
- [Adafruit Analog Accelerometer Breakouts](https://learn.adafruit.com/adafruit-analog-accelerometer-breakouts.md)
- [Circuit Playground: D is for Diode](https://learn.adafruit.com/circuit-playground-d-is-for-diode.md)
- [TMP36 Temperature Sensor](https://learn.adafruit.com/tmp36-temperature-sensor.md)
- [RGB LED Matrix Basics](https://learn.adafruit.com/32x16-32x32-rgb-led-matrix.md)
- [Automatic Monitor Color Temperature Adjustment](https://learn.adafruit.com/automatic-monitor-color-temperature-adjustment.md)
- [Line Following Zumo Robot Using Simulink](https://learn.adafruit.com/line-following-zumo-robot-programmed-with-simulink.md)
- [Wireless Game Show Poppers for the Classroom!](https://learn.adafruit.com/wireless-game-show-poppers.md)
- [Arduino Lesson 4. Eight LEDs and a Shift Register](https://learn.adafruit.com/adafruit-arduino-lesson-4-eight-leds.md)
---
# Source: https://learn.adafruit.com/adafruit-arduino-lesson-11-lcd-displays-1.md
# Arduino Lesson 11. LCD Displays - Part 1
## Overview
In this lesson, you will learn how to wire up and use an alphanumeric LCD display.

The display has an LED backlight and can display two rows with up to 16 characters on each row. You can see the rectangles for each character on the display and the pixels that make up each character. The display is just white on blue and is intended for showing text.
In this lesson, we will run the Arduino example program for the LCD library, but in the next lesson, we will get our display to show the temperature and light level, using sensors.
- [Next Page](https://learn.adafruit.com/adafruit-arduino-lesson-11-lcd-displays-1/parts.md)
## Featured Products
### Standard LCD 16x2 + extras
[Standard LCD 16x2 + extras](https://www.adafruit.com/product/181)
Standard HD44780 LCDs are useful for creating standalone projects.
- 16 characters wide, 2 rows
- White text on blue background
- Connection port is 0.1" pitch, single row for easy breadboarding and wiring
- Pins are documented on the back of the LCD to assist...
In Stock
[Buy Now](https://www.adafruit.com/product/181)
[Related Guides to the Product](https://learn.adafruit.com/products/181/guides)
### Premium Male/Male Jumper Wires - 40 x 6" (150mm)
[Premium Male/Male Jumper Wires - 40 x 6" (150mm)](https://www.adafruit.com/product/758)
Handy for making wire harnesses or jumpering between headers on PCB's. These premium jumper wires are 6" (150mm) long and come in a 'strip' of 40 (4 pieces of each of ten rainbow colors). They have 0.1" male header contacts on either end and fit cleanly next to each other...
In Stock
[Buy Now](https://www.adafruit.com/product/758)
[Related Guides to the Product](https://learn.adafruit.com/products/758/guides)
### Half Sized Premium Breadboard - 400 Tie Points
[Half Sized Premium Breadboard - 400 Tie Points](https://www.adafruit.com/product/64)
This is a cute, half-size breadboard with 400 tie points, good for small projects. It's 3.25" x 2.2" / 8.3cm x 5.5cm with a standard double-strip in the middle and two power rails on both sides. You can pull the power rails off easily to make the breadboard as...
In Stock
[Buy Now](https://www.adafruit.com/product/64)
[Related Guides to the Product](https://learn.adafruit.com/products/64/guides)
### Adafruit METRO 328 Fully Assembled - Arduino IDE compatible
[Adafruit METRO 328 Fully Assembled - Arduino IDE compatible](https://www.adafruit.com/product/50)
We sure love the ATmega328 here at Adafruit, and we use them _a lot_ for our own projects. The processor has plenty of GPIO, Analog inputs, hardware UART SPI and I2C, timers and PWM galore - just enough for most simple projects. When we need to go small, we use a
Out of Stock
[Buy Now](https://www.adafruit.com/product/50)
[Related Guides to the Product](https://learn.adafruit.com/products/50/guides)
## Related Guides
- [2.2" TFT Display](https://learn.adafruit.com/2-2-tft-display.md)
- [Bluetooth Temperature & Humidity Sensor](https://learn.adafruit.com/bluetooth-temperature-and-humidity-sensor.md)
- [Wave Shield Voice Changer](https://learn.adafruit.com/wave-shield-voice-changer.md)
- [Adafruit Music Maker Shield](https://learn.adafruit.com/adafruit-music-maker-shield-vs1053-mp3-wav-wave-ogg-vorbis-player.md)
- [Introducing Adafruit Trellis ](https://learn.adafruit.com/adafruit-trellis-diy-open-source-led-keypad.md)
- [Arduino Lesson 13. DC Motors](https://learn.adafruit.com/adafruit-arduino-lesson-13-dc-motors.md)
- [RePaper eInk Development Board](https://learn.adafruit.com/repaper-eink-development-board.md)
- [Bluefruit LE Connect for iOS and Android](https://learn.adafruit.com/bluefruit-le-connect.md)
- [Memories of an Arduino](https://learn.adafruit.com/memories-of-an-arduino.md)
- [Wireless Power Switch with Arduino & the CC3000 WiFi Chip](https://learn.adafruit.com/wireless-power-switch-with-arduino-and-the-cc3000-wifi-chip.md)
- [Adafruit Analog Accelerometer Breakouts](https://learn.adafruit.com/adafruit-analog-accelerometer-breakouts.md)
- [Smart Measuring Cup](https://learn.adafruit.com/smart-measuring-cup.md)
- [Programming Arduino with Android and Windows Tablets](https://learn.adafruit.com/programming-arduino-with-android-and-windows-tablets.md)
- [Ladyada's Learn Arduino - Lesson #1](https://learn.adafruit.com/ladyadas-learn-arduino-lesson-number-1.md)
- [SMS Texting Pet Food Dish](https://learn.adafruit.com/sms-texting-pet-food-dish.md)
---
# Source: https://learn.adafruit.com/adafruit-arduino-lesson-12-lcd-displays-part-2.md
# Arduino Lesson 12. LCD Displays - Part 2
## Overview
In this lesson, you will build on what we have learnt in lesson 11 and use a LCD display to show the temperature and light intensity.

Light intensity is measured using the same photocell that you used in lesson 9.
To measure the temperature, you will use a temperature measurement chip. This device has just three leads two for 5V and GND and the third lead is connected directly to an analog input on the Arduino.
- [Next Page](https://learn.adafruit.com/adafruit-arduino-lesson-12-lcd-displays-part-2/parts.md)
## Featured Products
### TMP36 - Analog Temperature sensor
[TMP36 - Analog Temperature sensor](https://www.adafruit.com/product/165)
Wide range, low power temperature sensor outputs an analog voltage that is proportional to the ambient temperature. To use, connect pin 1 (left) to power (between 2.7 and 5.5V), pin 3 (right) to ground, and pin 2 to analog in on your microcontroller. The voltage out is 0V at -50°C and...
In Stock
[Buy Now](https://www.adafruit.com/product/165)
[Related Guides to the Product](https://learn.adafruit.com/products/165/guides)
### Standard LCD 16x2 + extras
[Standard LCD 16x2 + extras](https://www.adafruit.com/product/181)
Standard HD44780 LCDs are useful for creating standalone projects.
- 16 characters wide, 2 rows
- White text on blue background
- Connection port is 0.1" pitch, single row for easy breadboarding and wiring
- Pins are documented on the back of the LCD to assist...
In Stock
[Buy Now](https://www.adafruit.com/product/181)
[Related Guides to the Product](https://learn.adafruit.com/products/181/guides)
### Photo cell (CdS photoresistor)
[Photo cell (CdS photoresistor)](https://www.adafruit.com/product/161)
CdS cells are little light sensors. As the squiggly face is exposed to more light, the resistance goes down. When it's light, the resistance is about ~1KΩ, when dark it goes up to ~10KΩ.
To use, connect one side of the photocell (either one, it's symmetric) to power...
In Stock
[Buy Now](https://www.adafruit.com/product/161)
[Related Guides to the Product](https://learn.adafruit.com/products/161/guides)
### Premium Male/Male Jumper Wires - 40 x 6" (150mm)
[Premium Male/Male Jumper Wires - 40 x 6" (150mm)](https://www.adafruit.com/product/758)
Handy for making wire harnesses or jumpering between headers on PCB's. These premium jumper wires are 6" (150mm) long and come in a 'strip' of 40 (4 pieces of each of ten rainbow colors). They have 0.1" male header contacts on either end and fit cleanly next to each other...
In Stock
[Buy Now](https://www.adafruit.com/product/758)
[Related Guides to the Product](https://learn.adafruit.com/products/758/guides)
### Half Sized Premium Breadboard - 400 Tie Points
[Half Sized Premium Breadboard - 400 Tie Points](https://www.adafruit.com/product/64)
This is a cute, half-size breadboard with 400 tie points, good for small projects. It's 3.25" x 2.2" / 8.3cm x 5.5cm with a standard double-strip in the middle and two power rails on both sides. You can pull the power rails off easily to make the breadboard as...
In Stock
[Buy Now](https://www.adafruit.com/product/64)
[Related Guides to the Product](https://learn.adafruit.com/products/64/guides)
### Adafruit METRO 328 Fully Assembled - Arduino IDE compatible
[Adafruit METRO 328 Fully Assembled - Arduino IDE compatible](https://www.adafruit.com/product/50)
We sure love the ATmega328 here at Adafruit, and we use them _a lot_ for our own projects. The processor has plenty of GPIO, Analog inputs, hardware UART SPI and I2C, timers and PWM galore - just enough for most simple projects. When we need to go small, we use a
Out of Stock
[Buy Now](https://www.adafruit.com/product/50)
[Related Guides to the Product](https://learn.adafruit.com/products/50/guides)
## Related Guides
- [Arduino Lesson 1. Blink](https://learn.adafruit.com/adafruit-arduino-lesson-1-blink.md)
- [Circuit Playground: D is for Diode](https://learn.adafruit.com/circuit-playground-d-is-for-diode.md)
- [Trellis 3D Printed Enclosure](https://learn.adafruit.com/trellis-3d-printed-enclosure.md)
- [3D Printed Animatronic Robot Head](https://learn.adafruit.com/3d-printed-animatronic-robot-head.md)
- [Multi-tasking the Arduino - Part 2](https://learn.adafruit.com/multi-tasking-the-arduino-part-2.md)
- [Adafruit 1.14" 240x135 Color TFT Breakout LCD Display](https://learn.adafruit.com/adafruit-1-14-240x135-color-tft-breakout.md)
- [Ladyada's Bento Box](https://learn.adafruit.com/lady-adas-bento-box.md)
- [Let’s Put LEDs in Things!](https://learn.adafruit.com/lets-put-leds-in-things.md)
- [Reverse Geocache Box](https://learn.adafruit.com/reverse-geocache-engagement-box.md)
- [Smart Measuring Cup](https://learn.adafruit.com/smart-measuring-cup.md)
- [2.8" TFT Touchscreen](https://learn.adafruit.com/2-8-tft-touchscreen.md)
- [DS1307 Real Time Clock Breakout Board Kit](https://learn.adafruit.com/ds1307-real-time-clock-breakout-board-kit.md)
- [All About Arduino Libraries](https://learn.adafruit.com/adafruit-all-about-arduino-libraries-install-use.md)
- [Babel Fish](https://learn.adafruit.com/babel-fish.md)
- [RePaper eInk Development Board](https://learn.adafruit.com/repaper-eink-development-board.md)
---
# Source: https://learn.adafruit.com/adafruit-arduino-lesson-13-dc-motors.md
# Arduino Lesson 13. DC Motors
## Overview
In this lesson, you will learn how to control a small DC motor using an Arduino and a transistor.

You will use an Arduino analog output (PWM) to control the speed of the motor by sending a number between 0 and 255 from the Serial Monitor.
- [Next Page](https://learn.adafruit.com/adafruit-arduino-lesson-13-dc-motors/parts.md)
## Featured Products
### NPN Bipolar Transistors (PN2222) - 10 pack
[NPN Bipolar Transistors (PN2222) - 10 pack](https://www.adafruit.com/product/756)
Transistors are powerful little electronic switches, and we really like these NPN transistors whenever we need to control medium-power electronics such as small motors, solenoids, or IR LEDs. We find them so handy, they come in a pack of 10!
Each transistor is a general-purpose...
In Stock
[Buy Now](https://www.adafruit.com/product/756)
[Related Guides to the Product](https://learn.adafruit.com/products/756/guides)
### DC Toy / Hobby Motor - 130 Size
[DC Toy / Hobby Motor - 130 Size](https://www.adafruit.com/product/711)
These are standard '130 size' DC hobby motors. They come with a wider operating range than most toy motors: from 4.5 to 9VDC instead of 1.5-4.5V. This range makes them perfect for controlling with an Adafruit Motor Shield, or with an Arduino where you are more likely to have 5 or 9V...
In Stock
[Buy Now](https://www.adafruit.com/product/711)
[Related Guides to the Product](https://learn.adafruit.com/products/711/guides)
### Premium Male/Male Jumper Wires - 40 x 6" (150mm)
[Premium Male/Male Jumper Wires - 40 x 6" (150mm)](https://www.adafruit.com/product/758)
Handy for making wire harnesses or jumpering between headers on PCB's. These premium jumper wires are 6" (150mm) long and come in a 'strip' of 40 (4 pieces of each of ten rainbow colors). They have 0.1" male header contacts on either end and fit cleanly next to each other...
In Stock
[Buy Now](https://www.adafruit.com/product/758)
[Related Guides to the Product](https://learn.adafruit.com/products/758/guides)
### Half Sized Premium Breadboard - 400 Tie Points
[Half Sized Premium Breadboard - 400 Tie Points](https://www.adafruit.com/product/64)
This is a cute, half-size breadboard with 400 tie points, good for small projects. It's 3.25" x 2.2" / 8.3cm x 5.5cm with a standard double-strip in the middle and two power rails on both sides. You can pull the power rails off easily to make the breadboard as...
In Stock
[Buy Now](https://www.adafruit.com/product/64)
[Related Guides to the Product](https://learn.adafruit.com/products/64/guides)
### Adafruit METRO 328 Fully Assembled - Arduino IDE compatible
[Adafruit METRO 328 Fully Assembled - Arduino IDE compatible](https://www.adafruit.com/product/50)
We sure love the ATmega328 here at Adafruit, and we use them _a lot_ for our own projects. The processor has plenty of GPIO, Analog inputs, hardware UART SPI and I2C, timers and PWM galore - just enough for most simple projects. When we need to go small, we use a
Out of Stock
[Buy Now](https://www.adafruit.com/product/50)
[Related Guides to the Product](https://learn.adafruit.com/products/50/guides)
## Related Guides
- [Reverse Geocache Box](https://learn.adafruit.com/reverse-geocache-engagement-box.md)
- [Programming Arduino with Android and Windows Tablets](https://learn.adafruit.com/programming-arduino-with-android-and-windows-tablets.md)
- [Arduino Lesson 16. Stepper Motors](https://learn.adafruit.com/adafruit-arduino-lesson-16-stepper-motors.md)
- [Arduino Lesson 4. Eight LEDs and a Shift Register](https://learn.adafruit.com/adafruit-arduino-lesson-4-eight-leds.md)
- [Arduino Lesson 3. RGB LEDs](https://learn.adafruit.com/adafruit-arduino-lesson-3-rgb-leds.md)
- [2.2" TFT Display](https://learn.adafruit.com/2-2-tft-display.md)
- [Arduino Lesson 17. Email Sending Movement Detector](https://learn.adafruit.com/arduino-lesson-17-email-sending-movement-detector.md)
- [Wave Shield Talking Clock](https://learn.adafruit.com/wave-shield-talking-clock.md)
- [Using NeoPixels and Servos Together](https://learn.adafruit.com/neopixels-and-servos.md)
- [Ladyada's Bento Box](https://learn.adafruit.com/lady-adas-bento-box.md)
- [Memories of an Arduino](https://learn.adafruit.com/memories-of-an-arduino.md)
- [Arduino Lesson 7. Make an RGB LED Fader](https://learn.adafruit.com/adafruit-arduino-lesson-7-make-an-rgb-led-fader.md)
- [Arduino Ethernet + SD Card](https://learn.adafruit.com/arduino-ethernet-sd-card.md)
- [1,500 NeoPixel LED Curtain with Raspberry Pi and Fadecandy](https://learn.adafruit.com/1500-neopixel-led-curtain-with-raspberry-pi-fadecandy.md)
- [Bluetooth Controlled Motorized Camera Slider](https://learn.adafruit.com/bluetooth-motorized-camera-slider.md)
---
# Source: https://learn.adafruit.com/adafruit-arduino-lesson-14-servo-motors.md
# Arduino Lesson 14. Servo Motors
## Overview
In this lesson, you will learn how to control a servo motor using an Arduino.
Firstly, you will get the servo to sweep back and forth automatically and then you will add a pot to control the position of the servo.

- [Next Page](https://learn.adafruit.com/adafruit-arduino-lesson-14-servo-motors/parts.md)
## Featured Products
### Standard servo - TowerPro SG-5010
[Standard servo - TowerPro SG-5010](https://www.adafruit.com/product/155)
This high-torque standard servo can rotate approximately 180 degrees (90 in each direction). You can use any servo code, hardware, or library to control these servos. Good for beginners who want to make stuff move without building a motor controller with feedback & gearbox. Comes with 3...
In Stock
[Buy Now](https://www.adafruit.com/product/155)
[Related Guides to the Product](https://learn.adafruit.com/products/155/guides)
### Premium Male/Male Jumper Wires - 40 x 6" (150mm)
[Premium Male/Male Jumper Wires - 40 x 6" (150mm)](https://www.adafruit.com/product/758)
Handy for making wire harnesses or jumpering between headers on PCB's. These premium jumper wires are 6" (150mm) long and come in a 'strip' of 40 (4 pieces of each of ten rainbow colors). They have 0.1" male header contacts on either end and fit cleanly next to each other...
In Stock
[Buy Now](https://www.adafruit.com/product/758)
[Related Guides to the Product](https://learn.adafruit.com/products/758/guides)
### Half Sized Premium Breadboard - 400 Tie Points
[Half Sized Premium Breadboard - 400 Tie Points](https://www.adafruit.com/product/64)
This is a cute, half-size breadboard with 400 tie points, good for small projects. It's 3.25" x 2.2" / 8.3cm x 5.5cm with a standard double-strip in the middle and two power rails on both sides. You can pull the power rails off easily to make the breadboard as...
In Stock
[Buy Now](https://www.adafruit.com/product/64)
[Related Guides to the Product](https://learn.adafruit.com/products/64/guides)
### Adafruit METRO 328 Fully Assembled - Arduino IDE compatible
[Adafruit METRO 328 Fully Assembled - Arduino IDE compatible](https://www.adafruit.com/product/50)
We sure love the ATmega328 here at Adafruit, and we use them _a lot_ for our own projects. The processor has plenty of GPIO, Analog inputs, hardware UART SPI and I2C, timers and PWM galore - just enough for most simple projects. When we need to go small, we use a
Out of Stock
[Buy Now](https://www.adafruit.com/product/50)
[Related Guides to the Product](https://learn.adafruit.com/products/50/guides)
### Micro servo
[Micro servo](https://www.adafruit.com/product/169)
Tiny little servo can rotate approximately 180 degrees (90 in each direction) and works just like the standard kinds you're used to but _smaller_. You can use any servo code, hardware, or library to control these servos. Good for beginners who want to make stuff move without...
In Stock
[Buy Now](https://www.adafruit.com/product/169)
[Related Guides to the Product](https://learn.adafruit.com/products/169/guides)
### Standard Size - High Torque - Metal Gear Servo
[Standard Size - High Torque - Metal Gear Servo](https://www.adafruit.com/product/1142)
This high-torque standard servo now comes in a metal-gear flavor, for extra-high torque (10 kg\*cm!) and reliability! It can rotate at least 120 degrees (60 in each direction) with a classic 1.5-2.5ms pulse, but if you can extend your pulses it can go up to about 170 degrees - it varies a bit...
In Stock
[Buy Now](https://www.adafruit.com/product/1142)
[Related Guides to the Product](https://learn.adafruit.com/products/1142/guides)
### Micro Servo - MG90D High Torque Metal Gear
[Micro Servo - MG90D High Torque Metal Gear](https://www.adafruit.com/product/1143)
Add more power to your robot with this metal-geared MG90D servo. The tiny little servo can rotate approximately 90 degrees (45 in each direction) and works just like the standard kinds you're used to but _smaller_. You can use any servo code, hardware, or library to control...
Out of Stock
[Buy Now](https://www.adafruit.com/product/1143)
[Related Guides to the Product](https://learn.adafruit.com/products/1143/guides)
## Related Guides
- [Arduino Tips, Tricks, and Techniques](https://learn.adafruit.com/arduino-tips-tricks-and-techniques.md)
- [Light Meter](https://learn.adafruit.com/light-meter.md)
- [Arduino Lesson 4. Eight LEDs and a Shift Register](https://learn.adafruit.com/adafruit-arduino-lesson-4-eight-leds.md)
- [Adafruit Arduino Selection Guide](https://learn.adafruit.com/adafruit-arduino-selection-guide.md)
- [Smart Measuring Cup](https://learn.adafruit.com/smart-measuring-cup.md)
- [Low Power WiFi Datalogger](https://learn.adafruit.com/low-power-wifi-datalogging.md)
- [Electronic Demon Costume](https://learn.adafruit.com/electronic-demon-costume.md)
- [Photocells](https://learn.adafruit.com/photocells.md)
- [Wave Shield Talking Clock](https://learn.adafruit.com/wave-shield-talking-clock.md)
- [WiFi Weather Station](https://learn.adafruit.com/wifi-weather-station-arduino-cc3000.md)
- [Adafruit Data Logger Shield](https://learn.adafruit.com/adafruit-data-logger-shield.md)
- [Ladyada's Learn Arduino - Lesson #1](https://learn.adafruit.com/ladyadas-learn-arduino-lesson-number-1.md)
- [Collin's Lab: MIDI](https://learn.adafruit.com/collins-lab-midi.md)
- [Arduino Lesson 7. Make an RGB LED Fader](https://learn.adafruit.com/adafruit-arduino-lesson-7-make-an-rgb-led-fader.md)
- [Geofencing with the FONA 808 & Adafruit IO](https://learn.adafruit.com/geofencing-with-the-fona-808-and-adafruit-io.md)
---
# Source: https://learn.adafruit.com/adafruit-arduino-lesson-15-dc-motor-reversing.md
# Arduino Lesson 15. DC Motor Reversing
## Overview
In this lesson, you will learn how to control both the direction and speed of a small DC motor using an Arduino and the L293D motor driver chip.

The project uses a pot to control the speed of the motor and a push button to control the direction.
- [Next Page](https://learn.adafruit.com/adafruit-arduino-lesson-15-dc-motor-reversing/parts.md)
## Featured Products
### Dual H-Bridge Motor Driver for DC or Steppers - 600mA - L293D
[Dual H-Bridge Motor Driver for DC or Steppers - 600mA - L293D](https://www.adafruit.com/product/807)
Run four solenoids, two DC motors, or one bi-polar or uni-polar stepper with up to 600mA per channel using the L293D. These are perhaps better known as "the drivers in our Adafruit Motorshield". If you accidentally damaged the drivers in a shield, you can use one of these puppies to...
In Stock
[Buy Now](https://www.adafruit.com/product/807)
[Related Guides to the Product](https://learn.adafruit.com/products/807/guides)
### DC Toy / Hobby Motor - 130 Size
[DC Toy / Hobby Motor - 130 Size](https://www.adafruit.com/product/711)
These are standard '130 size' DC hobby motors. They come with a wider operating range than most toy motors: from 4.5 to 9VDC instead of 1.5-4.5V. This range makes them perfect for controlling with an Adafruit Motor Shield, or with an Arduino where you are more likely to have 5 or 9V...
In Stock
[Buy Now](https://www.adafruit.com/product/711)
[Related Guides to the Product](https://learn.adafruit.com/products/711/guides)
### Premium Male/Male Jumper Wires - 40 x 6" (150mm)
[Premium Male/Male Jumper Wires - 40 x 6" (150mm)](https://www.adafruit.com/product/758)
Handy for making wire harnesses or jumpering between headers on PCB's. These premium jumper wires are 6" (150mm) long and come in a 'strip' of 40 (4 pieces of each of ten rainbow colors). They have 0.1" male header contacts on either end and fit cleanly next to each other...
In Stock
[Buy Now](https://www.adafruit.com/product/758)
[Related Guides to the Product](https://learn.adafruit.com/products/758/guides)
### Half Sized Premium Breadboard - 400 Tie Points
[Half Sized Premium Breadboard - 400 Tie Points](https://www.adafruit.com/product/64)
This is a cute, half-size breadboard with 400 tie points, good for small projects. It's 3.25" x 2.2" / 8.3cm x 5.5cm with a standard double-strip in the middle and two power rails on both sides. You can pull the power rails off easily to make the breadboard as...
In Stock
[Buy Now](https://www.adafruit.com/product/64)
[Related Guides to the Product](https://learn.adafruit.com/products/64/guides)
### Adafruit METRO 328 Fully Assembled - Arduino IDE compatible
[Adafruit METRO 328 Fully Assembled - Arduino IDE compatible](https://www.adafruit.com/product/50)
We sure love the ATmega328 here at Adafruit, and we use them _a lot_ for our own projects. The processor has plenty of GPIO, Analog inputs, hardware UART SPI and I2C, timers and PWM galore - just enough for most simple projects. When we need to go small, we use a
Out of Stock
[Buy Now](https://www.adafruit.com/product/50)
[Related Guides to the Product](https://learn.adafruit.com/products/50/guides)
## Related Guides
- [Arduino Lesson 4. Eight LEDs and a Shift Register](https://learn.adafruit.com/adafruit-arduino-lesson-4-eight-leds.md)
- [Wave Shield Voice Changer](https://learn.adafruit.com/wave-shield-voice-changer.md)
- [Adafruit 1.14" 240x135 Color TFT Breakout LCD Display](https://learn.adafruit.com/adafruit-1-14-240x135-color-tft-breakout.md)
- [Wireless Game Show Poppers for the Classroom!](https://learn.adafruit.com/wireless-game-show-poppers.md)
- [Adafruit IO Basics: NeoPixel Controller](https://learn.adafruit.com/adafruit-io-basics-neopixel-controller.md)
- [Track Your Treats: Halloween Candy GPS Tracker](https://learn.adafruit.com/track-your-treats-halloween-candy-gps-tracker.md)
- [20mm LED Pixels](https://learn.adafruit.com/20mm-led-pixels.md)
- [0.96" mini Color OLED](https://learn.adafruit.com/096-mini-color-oled.md)
- [Arduino Lesson 5. The Serial Monitor](https://learn.adafruit.com/adafruit-arduino-lesson-5-the-serial-monitor.md)
- [Halloween Pumpkin](https://learn.adafruit.com/halloween-pumpkin.md)
- [Arduino Lesson 8. Analog Inputs](https://learn.adafruit.com/adafruit-arduino-lesson-8-analog-inputs.md)
- [Arduino Lesson 9. Sensing Light](https://learn.adafruit.com/adafruit-arduino-lesson-9-sensing-light.md)
- [Low Power Coin Cell Voltage Logger](https://learn.adafruit.com/low-power-coin-cell-voltage-logger.md)
- [Line Following Zumo Robot Using Simulink](https://learn.adafruit.com/line-following-zumo-robot-programmed-with-simulink.md)
- [Multi-tasking the Arduino - Part 2](https://learn.adafruit.com/multi-tasking-the-arduino-part-2.md)
---
# Source: https://learn.adafruit.com/adafruit-arduino-lesson-16-stepper-motors.md
# Arduino Lesson 16. Stepper Motors
## Overview
Stepper motors fall somewhere in between a regular DC motor and a servo motor. They have the advantage that they can be positioned accurately, moved forward or backwards one 'step' at a time, but they can also rotate continuously.
In this lesson you will learn how to control a stepper motor using your Arduino and the same L293D motor control chip that you used with the DC motor in lesson 15.

- [Next Page](https://learn.adafruit.com/adafruit-arduino-lesson-16-stepper-motors/parts.md)
## Featured Products
### Small Reduction Stepper Motor - 5VDC 32-Step 1/16 Gearing
[Small Reduction Stepper Motor - 5VDC 32-Step 1/16 Gearing](https://www.adafruit.com/product/858)
This is a great first stepper motor, good for small projects and experimenting with steppers. This uni-polar motor has a built-in mounting plate with two mounting holes. There are only 32 steps (11.25 degree) per revolution, and inside is a 1/16 reduction gear set. (Actually it's...
In Stock
[Buy Now](https://www.adafruit.com/product/858)
[Related Guides to the Product](https://learn.adafruit.com/products/858/guides)
### Dual H-Bridge Motor Driver for DC or Steppers - 600mA - L293D
[Dual H-Bridge Motor Driver for DC or Steppers - 600mA - L293D](https://www.adafruit.com/product/807)
Run four solenoids, two DC motors, or one bi-polar or uni-polar stepper with up to 600mA per channel using the L293D. These are perhaps better known as "the drivers in our Adafruit Motorshield". If you accidentally damaged the drivers in a shield, you can use one of these puppies to...
In Stock
[Buy Now](https://www.adafruit.com/product/807)
[Related Guides to the Product](https://learn.adafruit.com/products/807/guides)
### Premium Male/Male Jumper Wires - 40 x 6" (150mm)
[Premium Male/Male Jumper Wires - 40 x 6" (150mm)](https://www.adafruit.com/product/758)
Handy for making wire harnesses or jumpering between headers on PCB's. These premium jumper wires are 6" (150mm) long and come in a 'strip' of 40 (4 pieces of each of ten rainbow colors). They have 0.1" male header contacts on either end and fit cleanly next to each other...
In Stock
[Buy Now](https://www.adafruit.com/product/758)
[Related Guides to the Product](https://learn.adafruit.com/products/758/guides)
### Half Sized Premium Breadboard - 400 Tie Points
[Half Sized Premium Breadboard - 400 Tie Points](https://www.adafruit.com/product/64)
This is a cute, half-size breadboard with 400 tie points, good for small projects. It's 3.25" x 2.2" / 8.3cm x 5.5cm with a standard double-strip in the middle and two power rails on both sides. You can pull the power rails off easily to make the breadboard as...
In Stock
[Buy Now](https://www.adafruit.com/product/64)
[Related Guides to the Product](https://learn.adafruit.com/products/64/guides)
### Adafruit METRO 328 Fully Assembled - Arduino IDE compatible
[Adafruit METRO 328 Fully Assembled - Arduino IDE compatible](https://www.adafruit.com/product/50)
We sure love the ATmega328 here at Adafruit, and we use them _a lot_ for our own projects. The processor has plenty of GPIO, Analog inputs, hardware UART SPI and I2C, timers and PWM galore - just enough for most simple projects. When we need to go small, we use a
Out of Stock
[Buy Now](https://www.adafruit.com/product/50)
[Related Guides to the Product](https://learn.adafruit.com/products/50/guides)
## Related Guides
- [Silicone Robo-Tentacle](https://learn.adafruit.com/silicone-robo-tentacle.md)
- [Arduino Lesson 13. DC Motors](https://learn.adafruit.com/adafruit-arduino-lesson-13-dc-motors.md)
- [Adafruit AirLift Shield - ESP32 WiFi Co-Processor](https://learn.adafruit.com/adafruit-airlift-shield-esp32-wifi-co-processor.md)
- [RePaper eInk Development Board](https://learn.adafruit.com/repaper-eink-development-board.md)
- [Memories of an Arduino](https://learn.adafruit.com/memories-of-an-arduino.md)
- [Adafruit Proto Screw Shield](https://learn.adafruit.com/adafruit-proto-screw-shield.md)
- [Circuit Playground Sound-Controlled Robot](https://learn.adafruit.com/circuit-playground-sound-controlled-robot.md)
- [Arduino Lesson 8. Analog Inputs](https://learn.adafruit.com/adafruit-arduino-lesson-8-analog-inputs.md)
- [Arduino GPS Clock](https://learn.adafruit.com/arduino-clock.md)
- [Current Limiting Stepper Driver with DRV8871](https://learn.adafruit.com/current-limiting-stepper-driver-with-drv8871.md)
- [Adafruit IO Basics: NeoPixel Controller](https://learn.adafruit.com/adafruit-io-basics-neopixel-controller.md)
- [Tiny Arduino Music Visualizer](https://learn.adafruit.com/piccolo.md)
- [WiFi Weather Station](https://learn.adafruit.com/wifi-weather-station-arduino-cc3000.md)
- [How to Find Hidden COM Ports](https://learn.adafruit.com/how-to-find-hidden-com-ports.md)
- [Collin's Lab: MIDI](https://learn.adafruit.com/collins-lab-midi.md)
---
# Source: https://learn.adafruit.com/adafruit-arduino-lesson-2-leds.md
# Arduino Lesson 2. LEDs
## Overview
In this lesson, you will learn how to change the brightness of an LED by using different values of resistor.

- [Next Page](https://learn.adafruit.com/adafruit-arduino-lesson-2-leds/parts.md)
## Featured Products
### Adafruit METRO 328 Fully Assembled - Arduino IDE compatible
[Adafruit METRO 328 Fully Assembled - Arduino IDE compatible](https://www.adafruit.com/product/50)
We sure love the ATmega328 here at Adafruit, and we use them _a lot_ for our own projects. The processor has plenty of GPIO, Analog inputs, hardware UART SPI and I2C, timers and PWM galore - just enough for most simple projects. When we need to go small, we use a
Out of Stock
[Buy Now](https://www.adafruit.com/product/50)
[Related Guides to the Product](https://learn.adafruit.com/products/50/guides)
### Diffused Red 5mm LED (25 pack)
[Diffused Red 5mm LED (25 pack)](https://www.adafruit.com/product/299)
Need some indicators? We are big fans of these diffused red LEDs, in fact we use them exclusively in our kits. They are fairly bright so they can be seen in daytime, and from any angle. They go easily into a breadboard and will add that extra zing to your project.
- Pack of 25...
In Stock
[Buy Now](https://www.adafruit.com/product/299)
[Related Guides to the Product](https://learn.adafruit.com/products/299/guides)
### Half Sized Premium Breadboard - 400 Tie Points
[Half Sized Premium Breadboard - 400 Tie Points](https://www.adafruit.com/product/64)
This is a cute, half-size breadboard with 400 tie points, good for small projects. It's 3.25" x 2.2" / 8.3cm x 5.5cm with a standard double-strip in the middle and two power rails on both sides. You can pull the power rails off easily to make the breadboard as...
In Stock
[Buy Now](https://www.adafruit.com/product/64)
[Related Guides to the Product](https://learn.adafruit.com/products/64/guides)
### Premium Male/Male Jumper Wires - 40 x 6" (150mm)
[Premium Male/Male Jumper Wires - 40 x 6" (150mm)](https://www.adafruit.com/product/758)
Handy for making wire harnesses or jumpering between headers on PCB's. These premium jumper wires are 6" (150mm) long and come in a 'strip' of 40 (4 pieces of each of ten rainbow colors). They have 0.1" male header contacts on either end and fit cleanly next to each other...
In Stock
[Buy Now](https://www.adafruit.com/product/758)
[Related Guides to the Product](https://learn.adafruit.com/products/758/guides)
## Related Guides
- [LSM303 Accelerometer + Compass Breakout](https://learn.adafruit.com/lsm303-accelerometer-slash-compass-breakout.md)
- [Arduino Lesson 6. Digital Inputs](https://learn.adafruit.com/adafruit-arduino-lesson-6-digital-inputs.md)
- [WiFi Candy Bowl Monitor](https://learn.adafruit.com/wifi-candy-bowl.md)
- [Arduino Lesson 12. LCD Displays - Part 2](https://learn.adafruit.com/adafruit-arduino-lesson-12-lcd-displays-part-2.md)
- [Character LCDs](https://learn.adafruit.com/character-lcds.md)
- [Silicone Robo-Tentacle](https://learn.adafruit.com/silicone-robo-tentacle.md)
- [Arduino Ethernet + SD Card](https://learn.adafruit.com/arduino-ethernet-sd-card.md)
- [Arduino Lesson 15. DC Motor Reversing](https://learn.adafruit.com/adafruit-arduino-lesson-15-dc-motor-reversing.md)
- [Arduin-o-Phone](https://learn.adafruit.com/arduin-o-phone-arduino-powered-diy-cellphone.md)
- [Remote controlled door lock using a fingerprint sensor & Adafruit IO](https://learn.adafruit.com/remote-controlled-door-lock-using-a-fingerprint-sensor-and-adafruit-io.md)
- [Adafruit 4-Channel ADC Breakouts](https://learn.adafruit.com/adafruit-4-channel-adc-breakouts.md)
- [Ladyada's Learn Arduino - Lesson #2](https://learn.adafruit.com/ladyadas-learn-arduino-lesson-number-2.md)
- [Adafruit 2.8" TFT Touch Shield v2 - Capacitive or Resistive](https://learn.adafruit.com/adafruit-2-8-tft-touch-shield-v2.md)
- [Arduino Lesson 4. Eight LEDs and a Shift Register](https://learn.adafruit.com/adafruit-arduino-lesson-4-eight-leds.md)
- [2.8" TFT Touch Shield](https://learn.adafruit.com/2-8-tft-touch-shield.md)
---
# Source: https://learn.adafruit.com/adafruit-arduino-lesson-3-rgb-leds.md
# Arduino Lesson 3. RGB LEDs
## Overview
In this lesson, you will learn how to use a RGB (Red Green Blue) LED with an Arduino.
You will use the _analogWrite_ function of Arduino to control the color of the LED.

At first glance, RGB (Red, Green, Blue) LEDs look just like regular LEDs, however, inside the usual LED package, there are actually three LEDs, one red, one green and yes, one blue. By controlling the brightness of each of the individual LEDs you can mix pretty much any color you want.
We mix colors just like you would mix audio with a 'mixing board' or paint on a palette - by adjusting the brightness of each of the three LEDs. The hard way to do this would be to use different value resistors (or variable resistors) as we played with in lesson 2. That's a lot of work! Fortunately for us, the Arduino has an _analogWrite_ function that you can use with pins marked with a ~ to output a variable amount of power to the appropriate LEDs.
- [Next Page](https://learn.adafruit.com/adafruit-arduino-lesson-3-rgb-leds/parts.md)
## Featured Products
### Adafruit METRO 328 Fully Assembled - Arduino IDE compatible
[Adafruit METRO 328 Fully Assembled - Arduino IDE compatible](https://www.adafruit.com/product/50)
We sure love the ATmega328 here at Adafruit, and we use them _a lot_ for our own projects. The processor has plenty of GPIO, Analog inputs, hardware UART SPI and I2C, timers and PWM galore - just enough for most simple projects. When we need to go small, we use a
Out of Stock
[Buy Now](https://www.adafruit.com/product/50)
[Related Guides to the Product](https://learn.adafruit.com/products/50/guides)
### Premium Male/Male Jumper Wires - 40 x 6" (150mm)
[Premium Male/Male Jumper Wires - 40 x 6" (150mm)](https://www.adafruit.com/product/758)
Handy for making wire harnesses or jumpering between headers on PCB's. These premium jumper wires are 6" (150mm) long and come in a 'strip' of 40 (4 pieces of each of ten rainbow colors). They have 0.1" male header contacts on either end and fit cleanly next to each other...
In Stock
[Buy Now](https://www.adafruit.com/product/758)
[Related Guides to the Product](https://learn.adafruit.com/products/758/guides)
### Half Sized Premium Breadboard - 400 Tie Points
[Half Sized Premium Breadboard - 400 Tie Points](https://www.adafruit.com/product/64)
This is a cute, half-size breadboard with 400 tie points, good for small projects. It's 3.25" x 2.2" / 8.3cm x 5.5cm with a standard double-strip in the middle and two power rails on both sides. You can pull the power rails off easily to make the breadboard as...
In Stock
[Buy Now](https://www.adafruit.com/product/64)
[Related Guides to the Product](https://learn.adafruit.com/products/64/guides)
### Diffused RGB (tri-color) LED
[Diffused RGB (tri-color) LED](https://www.adafruit.com/product/159)
Diffused 5mm tri-color LED with separate red, green and blue LED chips inside! Nice indicator, and fun to color-swirl. 60 degree viewing angle. We like diffused RGB LEDs because they color mix inside instead of appearing as 3 distinct LEDs.
These are Common-Anode type which means you...
In Stock
[Buy Now](https://www.adafruit.com/product/159)
[Related Guides to the Product](https://learn.adafruit.com/products/159/guides)
## Related Guides
- [Geofencing with the FONA 808 & Adafruit IO](https://learn.adafruit.com/geofencing-with-the-fona-808-and-adafruit-io.md)
- [Adafruit Motor Shield](https://learn.adafruit.com/adafruit-motor-shield.md)
- [Sous-vide controller powered by Arduino - The SousViduino!](https://learn.adafruit.com/sous-vide-powered-by-arduino-the-sous-viduino.md)
- [Wave Shield Voice Changer](https://learn.adafruit.com/wave-shield-voice-changer.md)
- [Arduino Lesson 5. The Serial Monitor](https://learn.adafruit.com/adafruit-arduino-lesson-5-the-serial-monitor.md)
- [Trinket Audio Player](https://learn.adafruit.com/trinket-audio-player.md)
- [Circuit Playground: D is for Diode](https://learn.adafruit.com/circuit-playground-d-is-for-diode.md)
- [Wave Shield](https://learn.adafruit.com/adafruit-wave-shield-audio-shield-for-arduino.md)
- [Arduino Lesson 0. Getting Started](https://learn.adafruit.com/lesson-0-getting-started.md)
- [Current Limiting Stepper Driver with DRV8871](https://learn.adafruit.com/current-limiting-stepper-driver-with-drv8871.md)
- [RePaper eInk Development Board](https://learn.adafruit.com/repaper-eink-development-board.md)
- [Adafruit AirLift Shield - ESP32 WiFi Co-Processor](https://learn.adafruit.com/adafruit-airlift-shield-esp32-wifi-co-processor.md)
- [Low Power WiFi Datalogger](https://learn.adafruit.com/low-power-wifi-datalogging.md)
- [Babel Fish](https://learn.adafruit.com/babel-fish.md)
- [Arduino Lesson 2. LEDs](https://learn.adafruit.com/adafruit-arduino-lesson-2-leds.md)
---
# Source: https://learn.adafruit.com/adafruit-arduino-lesson-4-eight-leds.md
# Arduino Lesson 4. Eight LEDs and a Shift Register
## Overview
In this lesson, you will learn how to use eight large red LEDs with an Arduino without needing to give up 8 output pins!

Although you could wire up eight LEDs each with a resistor to an Arduino pin (like we did for an RGB LED in Lesson 2) you would rapidly start to run out of pins on your Arduino. If you don't have a lot of stuff connected to your 'duino it's OK to do so - but often times we want buttons, sensors, servos, etc and before you know it you've got no pins left. So, instead of doing that, you are going to use a chip called the **74HC595 Serial to Parallel Converter**. This chip has eight outputs (perfect) and three inputs that you use to feed data into it a bit at a time.
This chip makes it a little slower to drive the LEDs (you can only change the LEDs about 500,000 times a second instead of 8,000,000 a second) but it's still really really fast, way faster than humans can detect, so it's worth it!
- [Next Page](https://learn.adafruit.com/adafruit-arduino-lesson-4-eight-leds/parts.md)
## Featured Products
### Adafruit METRO 328 Fully Assembled - Arduino IDE compatible
[Adafruit METRO 328 Fully Assembled - Arduino IDE compatible](https://www.adafruit.com/product/50)
We sure love the ATmega328 here at Adafruit, and we use them _a lot_ for our own projects. The processor has plenty of GPIO, Analog inputs, hardware UART SPI and I2C, timers and PWM galore - just enough for most simple projects. When we need to go small, we use a
Out of Stock
[Buy Now](https://www.adafruit.com/product/50)
[Related Guides to the Product](https://learn.adafruit.com/products/50/guides)
### 74HC595 Shift Register - 3 pack
[74HC595 Shift Register - 3 pack](https://www.adafruit.com/product/450)
Add lots more outputs to a microcontroller system with chainable shift registers. These chips take a serial input (SPI) of 1 byte (8 bits) and then output those digital bits onto 8 pins. You can chain them together so putting three in a row with the serial output of one plugged into the serial...
In Stock
[Buy Now](https://www.adafruit.com/product/450)
[Related Guides to the Product](https://learn.adafruit.com/products/450/guides)
### Diffused Red 5mm LED (25 pack)
[Diffused Red 5mm LED (25 pack)](https://www.adafruit.com/product/299)
Need some indicators? We are big fans of these diffused red LEDs, in fact we use them exclusively in our kits. They are fairly bright so they can be seen in daytime, and from any angle. They go easily into a breadboard and will add that extra zing to your project.
- Pack of 25...
In Stock
[Buy Now](https://www.adafruit.com/product/299)
[Related Guides to the Product](https://learn.adafruit.com/products/299/guides)
### Premium Male/Male Jumper Wires - 40 x 6" (150mm)
[Premium Male/Male Jumper Wires - 40 x 6" (150mm)](https://www.adafruit.com/product/758)
Handy for making wire harnesses or jumpering between headers on PCB's. These premium jumper wires are 6" (150mm) long and come in a 'strip' of 40 (4 pieces of each of ten rainbow colors). They have 0.1" male header contacts on either end and fit cleanly next to each other...
In Stock
[Buy Now](https://www.adafruit.com/product/758)
[Related Guides to the Product](https://learn.adafruit.com/products/758/guides)
### Half Sized Premium Breadboard - 400 Tie Points
[Half Sized Premium Breadboard - 400 Tie Points](https://www.adafruit.com/product/64)
This is a cute, half-size breadboard with 400 tie points, good for small projects. It's 3.25" x 2.2" / 8.3cm x 5.5cm with a standard double-strip in the middle and two power rails on both sides. You can pull the power rails off easily to make the breadboard as...
In Stock
[Buy Now](https://www.adafruit.com/product/64)
[Related Guides to the Product](https://learn.adafruit.com/products/64/guides)
## Related Guides
- [74HC595 Shift Register](https://learn.adafruit.com/74hc595.md)
- [Adafruit 16-channel PWM/Servo Shield](https://learn.adafruit.com/adafruit-16-channel-pwm-slash-servo-shield.md)
- [Affordable HAL 9000 Replica](https://learn.adafruit.com/hal-9000-replica.md)
- [Mini Thermal Receipt Printers](https://learn.adafruit.com/mini-thermal-receipt-printer.md)
- [Wave Shield Voice Changer](https://learn.adafruit.com/wave-shield-voice-changer.md)
- [Metal Inlay Capacitive Touch Buttons](https://learn.adafruit.com/metal-inlay-capacitive-touch-buttons.md)
- [Adafruit 2.8" TFT Touch Shield v2 - Capacitive or Resistive](https://learn.adafruit.com/adafruit-2-8-tft-touch-shield-v2.md)
- [Arduino Lesson 13. DC Motors](https://learn.adafruit.com/adafruit-arduino-lesson-13-dc-motors.md)
- [Arduino GPS Clock](https://learn.adafruit.com/arduino-clock.md)
- [Line Following Zumo Robot Using Simulink](https://learn.adafruit.com/line-following-zumo-robot-programmed-with-simulink.md)
- [Arduino Lesson 11. LCD Displays - Part 1](https://learn.adafruit.com/adafruit-arduino-lesson-11-lcd-displays-1.md)
- [Adafruit AirLift Shield - ESP32 WiFi Co-Processor](https://learn.adafruit.com/adafruit-airlift-shield-esp32-wifi-co-processor.md)
- [Current Limiting Stepper Driver with DRV8871](https://learn.adafruit.com/current-limiting-stepper-driver-with-drv8871.md)
- [Naughty or Nice Machine](https://learn.adafruit.com/naughty-or-nice-machine.md)
- [Smart Cocktail Shaker](https://learn.adafruit.com/smart-cocktail-shaker.md)
- [Arduino Tips, Tricks, and Techniques](https://learn.adafruit.com/arduino-tips-tricks-and-techniques.md)
---
# Source: https://learn.adafruit.com/adafruit-arduino-lesson-5-the-serial-monitor.md
# Arduino Lesson 5. The Serial Monitor
## Overview
In this lesson, you will build on lesson 4, adding the facility to control the LEDs from your computer using the Arduino Serial Monitor. The serial monitor is the 'tether' between the computer and your Arduino - it lets you send and receive text messages, handy for debugging and also controlling the Arduino from a keyboard!

For example, you will be able to send commands from your computer to turn on LEDs.
In this lesson, you will use exactly the same parts and a similar breadboard layout as Lesson 4. So, if you have not already done so, follow lesson 4 now.
- [Next Page](https://learn.adafruit.com/adafruit-arduino-lesson-5-the-serial-monitor/the-serial-monitor.md)
## Featured Products
### USB Cable - Standard A-B
[USB Cable - Standard A-B](https://www.adafruit.com/product/62)
This here is your standard A-B USB cable, for USB 1.1 or 2.0. Perfect for connecting a PC to your Arduino, USBtinyISP (among other things).
3 feet / 1 meter long
Color may vary!
In Stock
[Buy Now](https://www.adafruit.com/product/62)
[Related Guides to the Product](https://learn.adafruit.com/products/62/guides)
### Diffused Red 5mm LED (25 pack)
[Diffused Red 5mm LED (25 pack)](https://www.adafruit.com/product/299)
Need some indicators? We are big fans of these diffused red LEDs, in fact we use them exclusively in our kits. They are fairly bright so they can be seen in daytime, and from any angle. They go easily into a breadboard and will add that extra zing to your project.
- Pack of 25...
In Stock
[Buy Now](https://www.adafruit.com/product/299)
[Related Guides to the Product](https://learn.adafruit.com/products/299/guides)
### 74HC595 Shift Register - 3 pack
[74HC595 Shift Register - 3 pack](https://www.adafruit.com/product/450)
Add lots more outputs to a microcontroller system with chainable shift registers. These chips take a serial input (SPI) of 1 byte (8 bits) and then output those digital bits onto 8 pins. You can chain them together so putting three in a row with the serial output of one plugged into the serial...
In Stock
[Buy Now](https://www.adafruit.com/product/450)
[Related Guides to the Product](https://learn.adafruit.com/products/450/guides)
### Premium Male/Male Jumper Wires - 40 x 6" (150mm)
[Premium Male/Male Jumper Wires - 40 x 6" (150mm)](https://www.adafruit.com/product/758)
Handy for making wire harnesses or jumpering between headers on PCB's. These premium jumper wires are 6" (150mm) long and come in a 'strip' of 40 (4 pieces of each of ten rainbow colors). They have 0.1" male header contacts on either end and fit cleanly next to each other...
In Stock
[Buy Now](https://www.adafruit.com/product/758)
[Related Guides to the Product](https://learn.adafruit.com/products/758/guides)
### Half Sized Premium Breadboard - 400 Tie Points
[Half Sized Premium Breadboard - 400 Tie Points](https://www.adafruit.com/product/64)
This is a cute, half-size breadboard with 400 tie points, good for small projects. It's 3.25" x 2.2" / 8.3cm x 5.5cm with a standard double-strip in the middle and two power rails on both sides. You can pull the power rails off easily to make the breadboard as...
In Stock
[Buy Now](https://www.adafruit.com/product/64)
[Related Guides to the Product](https://learn.adafruit.com/products/64/guides)
### Adafruit METRO 328 Fully Assembled - Arduino IDE compatible
[Adafruit METRO 328 Fully Assembled - Arduino IDE compatible](https://www.adafruit.com/product/50)
We sure love the ATmega328 here at Adafruit, and we use them _a lot_ for our own projects. The processor has plenty of GPIO, Analog inputs, hardware UART SPI and I2C, timers and PWM galore - just enough for most simple projects. When we need to go small, we use a
Out of Stock
[Buy Now](https://www.adafruit.com/product/50)
[Related Guides to the Product](https://learn.adafruit.com/products/50/guides)
## Related Guides
- [74HC595 Shift Register](https://learn.adafruit.com/74hc595.md)
- [Adafruit Music Maker Shield](https://learn.adafruit.com/adafruit-music-maker-shield-vs1053-mp3-wav-wave-ogg-vorbis-player.md)
- [Wave Shield Talking Clock](https://learn.adafruit.com/wave-shield-talking-clock.md)
- [Arduino Lesson 4. Eight LEDs and a Shift Register](https://learn.adafruit.com/adafruit-arduino-lesson-4-eight-leds.md)
- [Character LCDs](https://learn.adafruit.com/character-lcds.md)
- [Arduino Lesson 10. Making Sounds](https://learn.adafruit.com/adafruit-arduino-lesson-10-making-sounds.md)
- [WiFi Weather Station](https://learn.adafruit.com/wifi-weather-station-arduino-cc3000.md)
- [Reverse Geocache Box](https://learn.adafruit.com/reverse-geocache-engagement-box.md)
- [36mm LED Pixels](https://learn.adafruit.com/36mm-led-pixels.md)
- [Ladyada's Learn Arduino - Lesson #2](https://learn.adafruit.com/ladyadas-learn-arduino-lesson-number-2.md)
- [Automatic Monitor Color Temperature Adjustment](https://learn.adafruit.com/automatic-monitor-color-temperature-adjustment.md)
- [Low Power WiFi Datalogger](https://learn.adafruit.com/low-power-wifi-datalogging.md)
- [LED Lightbox](https://learn.adafruit.com/led-lightbox.md)
- [Arduino Lesson 11. LCD Displays - Part 1](https://learn.adafruit.com/adafruit-arduino-lesson-11-lcd-displays-1.md)
- [Adafruit Data Logger Shield](https://learn.adafruit.com/adafruit-data-logger-shield.md)
- [Bluefruit LE Connect for iOS and Android](https://learn.adafruit.com/bluefruit-le-connect.md)
---
# Source: https://learn.adafruit.com/adafruit-arduino-lesson-6-digital-inputs.md
# Arduino Lesson 6. Digital Inputs
## Overview
In this lesson, you will learn to use push buttons with digital inputs to turn an LED on and off.

Pressing the button nearer the top of the breadboard will turn the LED on, pressing the other button will turn the LED off.
- [Next Page](https://learn.adafruit.com/adafruit-arduino-lesson-6-digital-inputs/parts.md)
## Featured Products
### Tactile Button switch (6mm) x 20 pack
[Tactile Button switch (6mm) x 20 pack](https://www.adafruit.com/product/367)
Little clicky switches are standard input "buttons" on electronic projects. These work best in a PCB but [can be used on a solderless breadboard as shown in this tutorial](https://learn.adafruit.com/adafruit-arduino-lesson-6-digital-inputs?view=all). The pins are normally...
In Stock
[Buy Now](https://www.adafruit.com/product/367)
[Related Guides to the Product](https://learn.adafruit.com/products/367/guides)
### USB Cable - Standard A-B
[USB Cable - Standard A-B](https://www.adafruit.com/product/62)
This here is your standard A-B USB cable, for USB 1.1 or 2.0. Perfect for connecting a PC to your Arduino, USBtinyISP (among other things).
3 feet / 1 meter long
Color may vary!
In Stock
[Buy Now](https://www.adafruit.com/product/62)
[Related Guides to the Product](https://learn.adafruit.com/products/62/guides)
### Diffused Red 5mm LED (25 pack)
[Diffused Red 5mm LED (25 pack)](https://www.adafruit.com/product/299)
Need some indicators? We are big fans of these diffused red LEDs, in fact we use them exclusively in our kits. They are fairly bright so they can be seen in daytime, and from any angle. They go easily into a breadboard and will add that extra zing to your project.
- Pack of 25...
In Stock
[Buy Now](https://www.adafruit.com/product/299)
[Related Guides to the Product](https://learn.adafruit.com/products/299/guides)
### Premium Male/Male Jumper Wires - 40 x 6" (150mm)
[Premium Male/Male Jumper Wires - 40 x 6" (150mm)](https://www.adafruit.com/product/758)
Handy for making wire harnesses or jumpering between headers on PCB's. These premium jumper wires are 6" (150mm) long and come in a 'strip' of 40 (4 pieces of each of ten rainbow colors). They have 0.1" male header contacts on either end and fit cleanly next to each other...
In Stock
[Buy Now](https://www.adafruit.com/product/758)
[Related Guides to the Product](https://learn.adafruit.com/products/758/guides)
### Half Sized Premium Breadboard - 400 Tie Points
[Half Sized Premium Breadboard - 400 Tie Points](https://www.adafruit.com/product/64)
This is a cute, half-size breadboard with 400 tie points, good for small projects. It's 3.25" x 2.2" / 8.3cm x 5.5cm with a standard double-strip in the middle and two power rails on both sides. You can pull the power rails off easily to make the breadboard as...
In Stock
[Buy Now](https://www.adafruit.com/product/64)
[Related Guides to the Product](https://learn.adafruit.com/products/64/guides)
### Adafruit METRO 328 Fully Assembled - Arduino IDE compatible
[Adafruit METRO 328 Fully Assembled - Arduino IDE compatible](https://www.adafruit.com/product/50)
We sure love the ATmega328 here at Adafruit, and we use them _a lot_ for our own projects. The processor has plenty of GPIO, Analog inputs, hardware UART SPI and I2C, timers and PWM galore - just enough for most simple projects. When we need to go small, we use a
Out of Stock
[Buy Now](https://www.adafruit.com/product/50)
[Related Guides to the Product](https://learn.adafruit.com/products/50/guides)
## Related Guides
- [Ladyada's Learn Arduino - Lesson #0](https://learn.adafruit.com/ladyadas-learn-arduino-lesson-number-0.md)
- [0.96" mini Color OLED](https://learn.adafruit.com/096-mini-color-oled.md)
- [Bluefruit LE Connect for iOS and Android](https://learn.adafruit.com/bluefruit-le-connect.md)
- [TMP36 Temperature Sensor](https://learn.adafruit.com/tmp36-temperature-sensor.md)
- [Circuit Playground: D is for Diode](https://learn.adafruit.com/circuit-playground-d-is-for-diode.md)
- [Babel Fish](https://learn.adafruit.com/babel-fish.md)
- [Adafruit 1.27" and 1.5" Color OLED Breakout Board](https://learn.adafruit.com/adafruit-1-5-color-oled-breakout-board.md)
- [Adafruit VS1053 MP3/AAC/Ogg/MIDI/WAV Codec Breakout Tutorial](https://learn.adafruit.com/adafruit-vs1053-mp3-aac-ogg-midi-wav-play-and-record-codec-tutorial.md)
- [Electronic Demon Costume](https://learn.adafruit.com/electronic-demon-costume.md)
- [Introducing Adafruit Trellis ](https://learn.adafruit.com/adafruit-trellis-diy-open-source-led-keypad.md)
- [Adafruit Analog Accelerometer Breakouts](https://learn.adafruit.com/adafruit-analog-accelerometer-breakouts.md)
- [8BitBox](https://learn.adafruit.com/8bitbox.md)
- [DIY 8x2 LCD Shield](https://learn.adafruit.com/diy-8x2-lcd-shield.md)
- [Skill Badge Requirements: Microcontrollers](https://learn.adafruit.com/skill-badge-requirements-microcontrollers.md)
- [Arduino Ethernet + SD Card](https://learn.adafruit.com/arduino-ethernet-sd-card.md)
---
# Source: https://learn.adafruit.com/adafruit-arduino-lesson-7-make-an-rgb-led-fader.md
# Arduino Lesson 7. Make an RGB LED Fader
## Overview
In this lesson, you will be combining some of the things that you learnt in earlier lessons to use three push switches (from lesson 6) to control the color of the RGB LED that you used in lesson 3 in order to make a Color Organ!

- [Next Page](https://learn.adafruit.com/adafruit-arduino-lesson-7-make-an-rgb-led-fader/parts.md)
## Featured Products
### Tactile Button switch (6mm) x 20 pack
[Tactile Button switch (6mm) x 20 pack](https://www.adafruit.com/product/367)
Little clicky switches are standard input "buttons" on electronic projects. These work best in a PCB but [can be used on a solderless breadboard as shown in this tutorial](https://learn.adafruit.com/adafruit-arduino-lesson-6-digital-inputs?view=all). The pins are normally...
In Stock
[Buy Now](https://www.adafruit.com/product/367)
[Related Guides to the Product](https://learn.adafruit.com/products/367/guides)
### USB Cable - Standard A-B
[USB Cable - Standard A-B](https://www.adafruit.com/product/62)
This here is your standard A-B USB cable, for USB 1.1 or 2.0. Perfect for connecting a PC to your Arduino, USBtinyISP (among other things).
3 feet / 1 meter long
Color may vary!
In Stock
[Buy Now](https://www.adafruit.com/product/62)
[Related Guides to the Product](https://learn.adafruit.com/products/62/guides)
### Premium Male/Male Jumper Wires - 40 x 6" (150mm)
[Premium Male/Male Jumper Wires - 40 x 6" (150mm)](https://www.adafruit.com/product/758)
Handy for making wire harnesses or jumpering between headers on PCB's. These premium jumper wires are 6" (150mm) long and come in a 'strip' of 40 (4 pieces of each of ten rainbow colors). They have 0.1" male header contacts on either end and fit cleanly next to each other...
In Stock
[Buy Now](https://www.adafruit.com/product/758)
[Related Guides to the Product](https://learn.adafruit.com/products/758/guides)
### Half Sized Premium Breadboard - 400 Tie Points
[Half Sized Premium Breadboard - 400 Tie Points](https://www.adafruit.com/product/64)
This is a cute, half-size breadboard with 400 tie points, good for small projects. It's 3.25" x 2.2" / 8.3cm x 5.5cm with a standard double-strip in the middle and two power rails on both sides. You can pull the power rails off easily to make the breadboard as...
In Stock
[Buy Now](https://www.adafruit.com/product/64)
[Related Guides to the Product](https://learn.adafruit.com/products/64/guides)
### Adafruit METRO 328 Fully Assembled - Arduino IDE compatible
[Adafruit METRO 328 Fully Assembled - Arduino IDE compatible](https://www.adafruit.com/product/50)
We sure love the ATmega328 here at Adafruit, and we use them _a lot_ for our own projects. The processor has plenty of GPIO, Analog inputs, hardware UART SPI and I2C, timers and PWM galore - just enough for most simple projects. When we need to go small, we use a
Out of Stock
[Buy Now](https://www.adafruit.com/product/50)
[Related Guides to the Product](https://learn.adafruit.com/products/50/guides)
## Related Guides
- [Adafruit AirLift Shield - ESP32 WiFi Co-Processor](https://learn.adafruit.com/adafruit-airlift-shield-esp32-wifi-co-processor.md)
- [Wireless Power Switch with Arduino & the CC3000 WiFi Chip](https://learn.adafruit.com/wireless-power-switch-with-arduino-and-the-cc3000-wifi-chip.md)
- [Multi-tasking the Arduino - Part 2](https://learn.adafruit.com/multi-tasking-the-arduino-part-2.md)
- [Ladyada's Learn Arduino - Lesson #2](https://learn.adafruit.com/ladyadas-learn-arduino-lesson-number-2.md)
- [Skill Badge Requirements: Microcontrollers](https://learn.adafruit.com/skill-badge-requirements-microcontrollers.md)
- [Adafruit PN532 RFID/NFC Breakout and Shield](https://learn.adafruit.com/adafruit-pn532-rfid-nfc.md)
- [How to Build a Testing Jig](https://learn.adafruit.com/how-to-build-a-testing-fixture.md)
- [0.96" mini Color OLED](https://learn.adafruit.com/096-mini-color-oled.md)
- [Adafruit Music Maker Shield](https://learn.adafruit.com/adafruit-music-maker-shield-vs1053-mp3-wav-wave-ogg-vorbis-player.md)
- [Collin's Lab: MIDI](https://learn.adafruit.com/collins-lab-midi.md)
- [Arduino Lesson 14. Servo Motors](https://learn.adafruit.com/adafruit-arduino-lesson-14-servo-motors.md)
- [Arduino Tips, Tricks, and Techniques](https://learn.adafruit.com/arduino-tips-tricks-and-techniques.md)
- [Arduino GPS Clock](https://learn.adafruit.com/arduino-clock.md)
- [WiFi Controlled LED Christmahanukwanzaa Tree](https://learn.adafruit.com/wifi-controlled-led-christmahanukwanzaa-tree.md)
- [Low Power Coin Cell Voltage Logger](https://learn.adafruit.com/low-power-coin-cell-voltage-logger.md)
---
# Source: https://learn.adafruit.com/adafruit-arduino-lesson-8-analog-inputs.md
# Arduino Lesson 8. Analog Inputs
## Overview
In this lesson, you will start by using the Serial Monitor to display analog readings, and then extend the project using eight LEDs from lesson 4, so that you can control the number of LEDs that are lit by turning the knob on a variable resistor.

- [Next Page](https://learn.adafruit.com/adafruit-arduino-lesson-8-analog-inputs/parts.md)
## Featured Products
### Breadboard trim potentiometer
[Breadboard trim potentiometer](https://www.adafruit.com/product/356)
These are our favorite trim pots, perfect for breadboarding and prototyping. They have a long grippy adjustment knob and with 0.1" spacing, they plug into breadboards or perfboards with ease.
This is the same pot that comes with our character LCDs and tutorial...
In Stock
[Buy Now](https://www.adafruit.com/product/356)
[Related Guides to the Product](https://learn.adafruit.com/products/356/guides)
### Diffused Red 5mm LED (25 pack)
[Diffused Red 5mm LED (25 pack)](https://www.adafruit.com/product/299)
Need some indicators? We are big fans of these diffused red LEDs, in fact we use them exclusively in our kits. They are fairly bright so they can be seen in daytime, and from any angle. They go easily into a breadboard and will add that extra zing to your project.
- Pack of 25...
In Stock
[Buy Now](https://www.adafruit.com/product/299)
[Related Guides to the Product](https://learn.adafruit.com/products/299/guides)
### 74HC595 Shift Register - 3 pack
[74HC595 Shift Register - 3 pack](https://www.adafruit.com/product/450)
Add lots more outputs to a microcontroller system with chainable shift registers. These chips take a serial input (SPI) of 1 byte (8 bits) and then output those digital bits onto 8 pins. You can chain them together so putting three in a row with the serial output of one plugged into the serial...
In Stock
[Buy Now](https://www.adafruit.com/product/450)
[Related Guides to the Product](https://learn.adafruit.com/products/450/guides)
### Premium Male/Male Jumper Wires - 40 x 6" (150mm)
[Premium Male/Male Jumper Wires - 40 x 6" (150mm)](https://www.adafruit.com/product/758)
Handy for making wire harnesses or jumpering between headers on PCB's. These premium jumper wires are 6" (150mm) long and come in a 'strip' of 40 (4 pieces of each of ten rainbow colors). They have 0.1" male header contacts on either end and fit cleanly next to each other...
In Stock
[Buy Now](https://www.adafruit.com/product/758)
[Related Guides to the Product](https://learn.adafruit.com/products/758/guides)
### Half Sized Premium Breadboard - 400 Tie Points
[Half Sized Premium Breadboard - 400 Tie Points](https://www.adafruit.com/product/64)
This is a cute, half-size breadboard with 400 tie points, good for small projects. It's 3.25" x 2.2" / 8.3cm x 5.5cm with a standard double-strip in the middle and two power rails on both sides. You can pull the power rails off easily to make the breadboard as...
In Stock
[Buy Now](https://www.adafruit.com/product/64)
[Related Guides to the Product](https://learn.adafruit.com/products/64/guides)
### Adafruit METRO 328 Fully Assembled - Arduino IDE compatible
[Adafruit METRO 328 Fully Assembled - Arduino IDE compatible](https://www.adafruit.com/product/50)
We sure love the ATmega328 here at Adafruit, and we use them _a lot_ for our own projects. The processor has plenty of GPIO, Analog inputs, hardware UART SPI and I2C, timers and PWM galore - just enough for most simple projects. When we need to go small, we use a
Out of Stock
[Buy Now](https://www.adafruit.com/product/50)
[Related Guides to the Product](https://learn.adafruit.com/products/50/guides)
## Related Guides
- [74HC595 Shift Register](https://learn.adafruit.com/74hc595.md)
- [8BitBox](https://learn.adafruit.com/8bitbox.md)
- [Adafruit Data Logger Shield](https://learn.adafruit.com/adafruit-data-logger-shield.md)
- [Adafruit Music Maker Shield](https://learn.adafruit.com/adafruit-music-maker-shield-vs1053-mp3-wav-wave-ogg-vorbis-player.md)
- [Adalight Project Pack](https://learn.adafruit.com/adalight-diy-ambient-tv-lighting.md)
- [OLED TRON Clock](https://learn.adafruit.com/oled-tron-clock.md)
- [Arduino "Hunt The Wumpus"](https://learn.adafruit.com/arduino-hunt-the-wumpus.md)
- [Arduino Tips, Tricks, and Techniques](https://learn.adafruit.com/arduino-tips-tricks-and-techniques.md)
- [NeoPixel Painter](https://learn.adafruit.com/neopixel-painter.md)
- [1,500 NeoPixel LED Curtain with Raspberry Pi and Fadecandy](https://learn.adafruit.com/1500-neopixel-led-curtain-with-raspberry-pi-fadecandy.md)
- [Arduin-o-Phone](https://learn.adafruit.com/arduin-o-phone-arduino-powered-diy-cellphone.md)
- [LED Lightbox](https://learn.adafruit.com/led-lightbox.md)
- [Arduino Lesson 3. RGB LEDs](https://learn.adafruit.com/adafruit-arduino-lesson-3-rgb-leds.md)
- [Wave Shield](https://learn.adafruit.com/adafruit-wave-shield-audio-shield-for-arduino.md)
- [Making Adabot: Part 2](https://learn.adafruit.com/making-adabot-part-2.md)
- [RePaper eInk Development Board](https://learn.adafruit.com/repaper-eink-development-board.md)
---
# Source: https://learn.adafruit.com/adafruit-arduino-lesson-9-sensing-light.md
# Arduino Lesson 9. Sensing Light
## Overview
In this lesson, you will learn how to measure light intensity using an Analog Input. You will build on lesson 8 and use the level of light to control the number of LEDs to be lit.

The photocell is at the bottom of the breadboard, where the pot was in lesson 8.
- [Next Page](https://learn.adafruit.com/adafruit-arduino-lesson-9-sensing-light/parts.md)
## Featured Products
### Photo cell (CdS photoresistor)
[Photo cell (CdS photoresistor)](https://www.adafruit.com/product/161)
CdS cells are little light sensors. As the squiggly face is exposed to more light, the resistance goes down. When it's light, the resistance is about ~1KΩ, when dark it goes up to ~10KΩ.
To use, connect one side of the photocell (either one, it's symmetric) to power...
In Stock
[Buy Now](https://www.adafruit.com/product/161)
[Related Guides to the Product](https://learn.adafruit.com/products/161/guides)
### Diffused Red 5mm LED (25 pack)
[Diffused Red 5mm LED (25 pack)](https://www.adafruit.com/product/299)
Need some indicators? We are big fans of these diffused red LEDs, in fact we use them exclusively in our kits. They are fairly bright so they can be seen in daytime, and from any angle. They go easily into a breadboard and will add that extra zing to your project.
- Pack of 25...
In Stock
[Buy Now](https://www.adafruit.com/product/299)
[Related Guides to the Product](https://learn.adafruit.com/products/299/guides)
### Premium Male/Male Jumper Wires - 40 x 6" (150mm)
[Premium Male/Male Jumper Wires - 40 x 6" (150mm)](https://www.adafruit.com/product/758)
Handy for making wire harnesses or jumpering between headers on PCB's. These premium jumper wires are 6" (150mm) long and come in a 'strip' of 40 (4 pieces of each of ten rainbow colors). They have 0.1" male header contacts on either end and fit cleanly next to each other...
In Stock
[Buy Now](https://www.adafruit.com/product/758)
[Related Guides to the Product](https://learn.adafruit.com/products/758/guides)
### Half Sized Premium Breadboard - 400 Tie Points
[Half Sized Premium Breadboard - 400 Tie Points](https://www.adafruit.com/product/64)
This is a cute, half-size breadboard with 400 tie points, good for small projects. It's 3.25" x 2.2" / 8.3cm x 5.5cm with a standard double-strip in the middle and two power rails on both sides. You can pull the power rails off easily to make the breadboard as...
In Stock
[Buy Now](https://www.adafruit.com/product/64)
[Related Guides to the Product](https://learn.adafruit.com/products/64/guides)
### Adafruit METRO 328 Fully Assembled - Arduino IDE compatible
[Adafruit METRO 328 Fully Assembled - Arduino IDE compatible](https://www.adafruit.com/product/50)
We sure love the ATmega328 here at Adafruit, and we use them _a lot_ for our own projects. The processor has plenty of GPIO, Analog inputs, hardware UART SPI and I2C, timers and PWM galore - just enough for most simple projects. When we need to go small, we use a
Out of Stock
[Buy Now](https://www.adafruit.com/product/50)
[Related Guides to the Product](https://learn.adafruit.com/products/50/guides)
## Related Guides
- [Adafruit Arduino Selection Guide](https://learn.adafruit.com/adafruit-arduino-selection-guide.md)
- [IR Sensor](https://learn.adafruit.com/ir-sensor.md)
- [How to Choose a Microcontroller](https://learn.adafruit.com/how-to-choose-a-microcontroller.md)
- [Adafruit 1.14" 240x135 Color TFT Breakout LCD Display](https://learn.adafruit.com/adafruit-1-14-240x135-color-tft-breakout.md)
- [Adafruit Ultimate GPS](https://learn.adafruit.com/adafruit-ultimate-gps.md)
- [Reverse Geocache Box](https://learn.adafruit.com/reverse-geocache-engagement-box.md)
- [Ladyada's Learn Arduino - Lesson #0](https://learn.adafruit.com/ladyadas-learn-arduino-lesson-number-0.md)
- [How to Find Hidden COM Ports](https://learn.adafruit.com/how-to-find-hidden-com-ports.md)
- [Sending an SMS with Temboo](https://learn.adafruit.com/sending-an-sms-with-temboo.md)
- [Ladyada's Learn Arduino - Lesson #2](https://learn.adafruit.com/ladyadas-learn-arduino-lesson-number-2.md)
- [Arduino Lesson 14. Servo Motors](https://learn.adafruit.com/adafruit-arduino-lesson-14-servo-motors.md)
- [0.96" mini Color OLED](https://learn.adafruit.com/096-mini-color-oled.md)
- [Line Following Zumo Robot Using Simulink](https://learn.adafruit.com/line-following-zumo-robot-programmed-with-simulink.md)
- [Arduino Prototyping Mounting Plate](https://learn.adafruit.com/arduino-prototyping-mounting-plate.md)
- [Babel Fish](https://learn.adafruit.com/babel-fish.md)
---
# Source: https://learn.adafruit.com/beaglebone/adafruit-forums.md
# BeagleBone
## Adafruit Forums
- [Previous Page](https://learn.adafruit.com/beaglebone/wifi.md)
- [Next Page](https://learn.adafruit.com/beaglebone/downloads.md)
## Featured Products
### Adafruit Beagle Bone Black Starter Pack
[Adafruit Beagle Bone Black Starter Pack](https://www.adafruit.com/product/703)
If you've heard about the Beagle Bone Black and you want to hit the ground running, this starter pack is for you. We've picked out everything you need to start out, with essential parts and accessories to save on a bundle.
Includes:
-
No Longer Stocked
[Buy Now](https://www.adafruit.com/product/703)
[Related Guides to the Product](https://learn.adafruit.com/products/703/guides)
### Miniature WiFi (802.11b/g/n) Module: For Raspberry Pi and more
[Miniature WiFi (802.11b/g/n) Module: For Raspberry Pi and more](https://www.adafruit.com/product/814)
Make your Internet of Things device cable-free by adding WiFi. Take advantage of the Raspberry Pi and Beagle Bone's USB port to add a low cost, but high-reliability wireless link. We tried half a dozen modules to find one that works well with the Pi and Bone without the need of recompiling...
No Longer Stocked
[Buy Now](https://www.adafruit.com/product/814)
[Related Guides to the Product](https://learn.adafruit.com/products/814/guides)
### Ethernet Cable - 10 ft long
[Ethernet Cable - 10 ft long](https://www.adafruit.com/product/730)
We have so many Internet-connected goodies in the shop, we figured it's time to carry a cable so you can easily connect them up! This cable is 10 feet long, black and has all 8 wires installed. Perfect for use with the [BeagleBone](http://www.adafruit.com/products/513),
No Longer Stocked
[Buy Now](https://www.adafruit.com/product/730)
[Related Guides to the Product](https://learn.adafruit.com/products/730/guides)
### 5V 2A (2000mA) switching power supply - UL Listed
[5V 2A (2000mA) switching power supply - UL Listed](https://www.adafruit.com/product/276)
This is an FCC/CE certified and UL listed power supply. Need a lot of 5V power? This switching supply gives a clean regulated 5V output at up to 2000mA. 110 or 240 input, so it works in any country. The plugs are "US 2-prong" style so you may need a plug adapter, but you can pick one...
In Stock
[Buy Now](https://www.adafruit.com/product/276)
[Related Guides to the Product](https://learn.adafruit.com/products/276/guides)
## Related Guides
- [MPR121 Capacitive Touch Sensor on Raspberry Pi & BeagleBone Black](https://learn.adafruit.com/mpr121-capacitive-touch-sensor-on-raspberry-pi-and-beaglebone-black.md)
- [BNO055 Absolute Orientation Sensor with Raspberry Pi & BeagleBone Black](https://learn.adafruit.com/bno055-absolute-orientation-sensor-with-raspberry-pi-and-beaglebone-black.md)
- [Setting up WiFi with BeagleBone Black](https://learn.adafruit.com/setting-up-wifi-with-beaglebone-black.md)
- [SSD1306 OLED Displays with Raspberry Pi and BeagleBone Black](https://learn.adafruit.com/ssd1306-oled-displays-with-raspberry-pi-and-beaglebone-black.md)
- [Fading a RGB LED on BeagleBone Black](https://learn.adafruit.com/fading-a-rgb-led-on-beaglebone-black.md)
- [DHT Humidity Sensing on Raspberry Pi or Beaglebone Black with GDocs Logging](https://learn.adafruit.com/dht-humidity-sensing-on-raspberry-pi-with-gdocs-logging.md)
- [Running Programs Automatically on Your Tiny Computer](https://learn.adafruit.com/running-programs-automatically-on-your-tiny-computer.md)
- [Blinking an LED with BeagleBone Black](https://learn.adafruit.com/blinking-an-led-with-beaglebone-black.md)
- [MAX31855 Thermocouple Sensor Python Library](https://learn.adafruit.com/max31855-thermocouple-python-library.md)
- [Character LCD with Raspberry Pi or BeagleBone Black](https://learn.adafruit.com/character-lcd-with-raspberry-pi-or-beaglebone-black.md)
- [Connecting a Push Button to BeagleBone Black](https://learn.adafruit.com/connecting-a-push-button-to-beaglebone-black.md)
- [Bone Box](https://learn.adafruit.com/bone-box.md)
- [Nokia 5110/3310 LCD Python Library](https://learn.adafruit.com/nokia-5110-3310-lcd-python-library.md)
- [Controlling a Servo with a BeagleBone Black](https://learn.adafruit.com/controlling-a-servo-with-a-beaglebone-black.md)
- [Bonjour (Zeroconf) Networking for Windows and Linux](https://learn.adafruit.com/bonjour-zeroconf-networking-for-windows-and-linux.md)
---
# Source: https://learn.adafruit.com/adafruit-gfx-graphics-library.md
# Adafruit GFX Graphics Library
## Overview

The **Adafruit\_GFX library for Arduino** provides a common syntax and set of graphics functions for all of our LCD and OLED displays and LED matrices. This allows Arduino sketches to easily be adapted between display types with minimal fuss…and any new features, performance improvements and bug fixes will immediately apply across our complete offering of color displays.
Adafruit\_GFX always works together with an _additional_ library unique to each specific display type. These can be installed using the **Arduino Library Manager**. From the Arduino “Sketch” menu, select “Include Library,” then “Manage Libraries…”

In the Arduino Library Manager window, search for a display’s driver type (e.g. “SSD1325”) and the appropriate Adafruit library can be found in the results. Required companion libraries (“dependencies,” like Adafruit\_GFX or Adafruit\_BusIO) now get installed **automatically**. If using an older version of the Arduino IDE, you’ll have to search for and install those additional libraries manually.

Some of the libraries that operate alongside Adafruit\_GFX include:
- [RGBmatrixPanel](https://github.com/adafruit/RGB-matrix-Panel "Link: https://github.com/adafruit/RGB-matrix-Panel"), for our [16x32](http://www.adafruit.com/products/420) and [32x32](http://www.adafruit.com/products/607) RGB LED matrix panels.
- [Adafruit\_TFTLCD](https://github.com/adafruit/TFTLCD-Library "Link: https://github.com/adafruit/TFTLCD-Library"), for our 2.8" [TFT LCD touchscreen breakout](http://www.adafruit.com/products/335) and [TFT Touch Shield for Arduino](http://www.adafruit.com/products/376).
- [Adafruit\_HX8340B](https://github.com/adafruit/Adafruit-HX8340B), for our [2.2" TFT Display with microSD](http://www.adafruit.com/products/797).
- [Adafruit\_ST7735](https://github.com/adafruit/Adafruit-ST7735-Library), for our [1.8" TFT Display with microSD](http://www.adafruit.com/products/358).
- [Adafruit\_PCD8544](https://github.com/adafruit/Adafruit-PCD8544-Nokia-5110-LCD-library), for the [Nokia 5110/3310 monochrome LCD](http://www.adafruit.com/products/338).
- [Adafruit-Graphic-VFD-Display-Library](https://github.com/adafruit/Adafruit-Graphic-VFD-Display-Library), for our [128x64 Graphic VFD](https://www.adafruit.com/products/773).
- [Adafruit-SSD1331-OLED-Driver-Library-for-Arduino](https://github.com/adafruit/Adafruit-SSD1331-OLED-Driver-Library-for-Arduino) for the [0.96" 16-bit Color OLED w/microSD Holder](http://www.adafruit.com/products/684).
- [Adafruit\_SSD1306](https://github.com/adafruit/Adafruit_SSD1306) for the Monochrome [128x64](https://www.adafruit.com/products/326) and [128x32](https://www.adafruit.com/products/661) OLEDs.
And many others, except for some very early “retired” products. Remember, just search for the display driver type in the Arduino Library manager, install, and the rest is automatic now.
The libraries are written in C++ for Arduino but could easily be ported to any microcontroller by rewriting the low-level pin access functions.
# The Old Way
Much older versions of the Arduino IDE software require installing libraries manually; the Arduino Library Manager did not yet exist. If using an early version of the Arduino software, this might be a good time to upgrade. Otherwise, [this tutorial explains how to install and use Arduino libraries](http://learn.adafruit.com/arduino-tips-tricks-and-techniques/arduino-libraries). Here are links to download the GFX and BusIO libraries directly (use the links above to get the corresponding display-specific libraries):
[Download Adafruit_GFX Library](https://github.com/adafruit/Adafruit-GFX-Library/archive/master.zip)
[Download Adafruit_BusIO Library](https://github.com/adafruit/Adafruit_BusIO/archive/master.zip)
# Accessing GFX Functions
Any Arduino sketch using Adafruit\_GFX needs to **#include two libraries**. You’ll see this in most examples, near the top of the code. The first, `Adafruit_GFX.h`, declares a common set of graphics functions such as shapes and colors (explained on subsequent pages). The second _completely depends_ on whatever display you’re using…it might be `Adafruit_ST7789.h` (for certain color displays), `Adafruit_SSD1306.h` (for certain monochrome OLEDs) or _something else…_the guide or product page for the display will tell you which library to install. The very top of a sketch then usually resembles something like this:
```cpp
#include <Adafruit_GFX.h> // Core graphics library
#include <Adafruit_ST7789.h> // Hardware-specific library for ST7789
```
- [Next Page](https://learn.adafruit.com/adafruit-gfx-graphics-library/coordinate-system-and-units.md)
## Related Guides
- [AdaBox 019](https://learn.adafruit.com/adabox019.md)
- [Sous-vide controller powered by Arduino - The SousViduino!](https://learn.adafruit.com/sous-vide-powered-by-arduino-the-sous-viduino.md)
- [Adafruit 128x64 OLED Bonnet for Raspberry Pi](https://learn.adafruit.com/adafruit-128x64-oled-bonnet-for-raspberry-pi.md)
- [Adafruit IO IOT Hub with the Adafruit FunHouse](https://learn.adafruit.com/adafruit-io-hub-with-the-adafruit-funhouse.md)
- [HalloWing Flapping Bat](https://learn.adafruit.com/hallowing-flapping-bat.md)
- [CircuitPython OLED and Dual Knob Sketcher](https://learn.adafruit.com/circuitpython-oled-knob-sketcher.md)
- [Monochrome OLED Breakouts](https://learn.adafruit.com/monochrome-oled-breakouts.md)
- [4x4 Rotary Encoder MIDI Messenger](https://learn.adafruit.com/4x4-rotary-encoder-midi-messenger.md)
- [Pico W HTTP Server with CircuitPython](https://learn.adafruit.com/pico-w-http-server-with-circuitpython.md)
- [Capturing Camera Images with CircuitPython](https://learn.adafruit.com/capturing-camera-images-with-circuitpython.md)
- [WiFi OLED Display Badge](https://learn.adafruit.com/digital-display-badge.md)
- [Trinket Ultrasonic Rangefinder](https://learn.adafruit.com/trinket-ultrasonic-rangefinder.md)
- [PyPortal Adafruit Quote Book](https://learn.adafruit.com/pyportal-adafruit-quote-board.md)
- [2.8" TFT Touchscreen](https://learn.adafruit.com/2-8-tft-touchscreen.md)
- [Magic Storybook with ChatGPT](https://learn.adafruit.com/magic-storybook-with-chatgpt.md)
---
# Source: https://learn.adafruit.com/2-2-tft-display/adafruit-gfx-library.md
# 2.2" TFT Display
## Adafruit GFX Library
We've written a full graphics library specifically for this display which will get you up and running quickly. The code is written in C/C++ for Arduino but is easy to port to any microcontroller by rewritting the low level pin access functions. Here are some of the functions we've included in the library.
The TFT LCD library is based off of the Adafruit GFX graphics core library. GFX has many ready to go functions that should help you start out with your project. Its not exhaustive and we'll try to update it if we find a really useful function. Right now it supports pixels, lines, rectangles, circles, round-rects, triangles and printing text as well as rotation.
[Read more about it here!](http://learn.adafruit.com/adafruit-gfx-graphics-library)

## Bitmaps
In this example, we'll show how to display a 220x176 pixel full color bitmap from a microSD card.

We have an example sketch in the library showing how to display full color bitmap images stored on an SD card. You'll need a [microSD card such as this one](http://www.adafruit.com/products/102 "Link: http://www.adafruit.com/products/102"). You'll also need to be running Arduino 1.0 or later, as the SD library was updated.
You'll also need an image. [We suggest starting with this bitmap of a rose](http://learn.adafruit.com/system/assets/assets/000/010/144/original/rose.bmp). If you want to later use your own image, use an image editing tool and crop your image to no larger than 160 pixels high and 128 pixels wide. Save it as a 24-bit color **BMP** file - it must be 24-bit color format to work, even if it was originally a 16-bit color image - becaue of the way BMPs are stored and displayed!
Names for bitmap files **must not exceed 8 characters with a 3 character extension**. "mybitmap.bmp" is fine. "myotherbitmap.bmp" is too long and will not be readable by the SD file system.
Copy the **rose.bmp** to the microSD card and insert it into the back of the breakout board.

Wire up the TFT according to the high-speed SPI diagram above. Test that your wiring is correct by uploading the graphics test sketch with the high speed SPI line uncommented and the flexible-low-speed wiring commented.
Once you are sure that the TFT is wired correctly, add the two wires for talking to the SD card. Connect **CDCS** (the unconnected pin in the middle) to digital pin **4** (you can change this later to any pin you want) that's the orange wire below. Connect **MISO** (last unconnected pin) to the Arduino's hardware SPI **MISO** pin, that's the white wire below. For Classic arduinos, this is pin **12**. For Mega's this is pin **50**. You can't change the **MISO** pin, its fixed in the chip hardware.

Now load the **bitmap** example sketch into the Arduino. It should display the parrot image. If you have any problems, check the serial console for any messages such as not being able to initialize the microSD card or not finding the image.

- [Previous Page](https://learn.adafruit.com/2-2-tft-display/arduino-code.md)
- [Next Page](https://learn.adafruit.com/2-2-tft-display/bitmaps.md)
## Featured Products
### 2.2" 18-bit color TFT LCD display with microSD card breakout
[2.2" 18-bit color TFT LCD display with microSD card breakout](https://www.adafruit.com/product/1480)
This lovely little display breakout is the best way to add a small, colorful, and bright display to any project. Since the display uses 4-wire SPI to communicate and has its own pixel-addressable frame buffer, it can be used with every kind of microcontroller. Even a very small one with low...
In Stock
[Buy Now](https://www.adafruit.com/product/1480)
[Related Guides to the Product](https://learn.adafruit.com/products/1480/guides)
### Breadboarding wire bundle
[Breadboarding wire bundle](https://www.adafruit.com/product/153)
75 flexible stranded core wires with stiff ends molded on in red, orange, yellow, green, blue, brown, black and white. These are a major improvement over the "box of bent wires" that are sometimes sold with breadboards, and faster than stripping your own solid core wires. Makes...
In Stock
[Buy Now](https://www.adafruit.com/product/153)
[Related Guides to the Product](https://learn.adafruit.com/products/153/guides)
### Adafruit METRO 328 Fully Assembled - Arduino IDE compatible
[Adafruit METRO 328 Fully Assembled - Arduino IDE compatible](https://www.adafruit.com/product/50)
We sure love the ATmega328 here at Adafruit, and we use them _a lot_ for our own projects. The processor has plenty of GPIO, Analog inputs, hardware UART SPI and I2C, timers and PWM galore - just enough for most simple projects. When we need to go small, we use a
Out of Stock
[Buy Now](https://www.adafruit.com/product/50)
[Related Guides to the Product](https://learn.adafruit.com/products/50/guides)
### Half Sized Premium Breadboard - 400 Tie Points
[Half Sized Premium Breadboard - 400 Tie Points](https://www.adafruit.com/product/64)
This is a cute, half-size breadboard with 400 tie points, good for small projects. It's 3.25" x 2.2" / 8.3cm x 5.5cm with a standard double-strip in the middle and two power rails on both sides. You can pull the power rails off easily to make the breadboard as...
In Stock
[Buy Now](https://www.adafruit.com/product/64)
[Related Guides to the Product](https://learn.adafruit.com/products/64/guides)
## Related Guides
- [Affordable HAL 9000 Replica](https://learn.adafruit.com/hal-9000-replica.md)
- [Arduino Lesson 3. RGB LEDs](https://learn.adafruit.com/adafruit-arduino-lesson-3-rgb-leds.md)
- [NeoPixel Painter](https://learn.adafruit.com/neopixel-painter.md)
- [Adafruit 16-channel PWM/Servo Shield](https://learn.adafruit.com/adafruit-16-channel-pwm-slash-servo-shield.md)
- [Adafruit 2.8" TFT Touch Shield v2 - Capacitive or Resistive](https://learn.adafruit.com/adafruit-2-8-tft-touch-shield-v2.md)
- [Bluetooth Temperature & Humidity Sensor](https://learn.adafruit.com/bluetooth-temperature-and-humidity-sensor.md)
- [Arduino Lesson 17. Email Sending Movement Detector](https://learn.adafruit.com/arduino-lesson-17-email-sending-movement-detector.md)
- [TTL Serial Camera](https://learn.adafruit.com/ttl-serial-camera.md)
- [Arduino Lesson 2. LEDs](https://learn.adafruit.com/adafruit-arduino-lesson-2-leds.md)
- [Adafruit 1.27" and 1.5" Color OLED Breakout Board](https://learn.adafruit.com/adafruit-1-5-color-oled-breakout-board.md)
- [Arduino Lesson 5. The Serial Monitor](https://learn.adafruit.com/adafruit-arduino-lesson-5-the-serial-monitor.md)
- [RePaper eInk Development Board](https://learn.adafruit.com/repaper-eink-development-board.md)
- [Wave Shield Voice Changer](https://learn.adafruit.com/wave-shield-voice-changer.md)
- [Adafruit Proto Screw Shield](https://learn.adafruit.com/adafruit-proto-screw-shield.md)
- [Arduino Lesson 6. Digital Inputs](https://learn.adafruit.com/adafruit-arduino-lesson-6-digital-inputs.md)
---
# Source: https://learn.adafruit.com/adafruit-guide-excellent-soldering.md
# Adafruit Guide To Excellent Soldering
## Tools
https://www.youtube.com/watch?v=QKbJxytERvg

# Building a Soldering Toolkit
If you are just getting started in Electronics, [Ladyada's Electronics Toolkit](http://www.adafruit.com/products/136) (pictured above) is a great kit full of quality tools - including everything you need to make great solder joints. If you would rather build your toolkit piece-by-piece, read on.
Also see this handy video.
### Collin's Lab: Soldering - Video
[Collin's Lab: Soldering](https://learn.adafruit.com/collins-lab-soldering)
[Video](https://learn.adafruit.com/collins-lab-soldering/video)
# Choosing a Soldering Iron
There are many types of soldering irons. For most Adafruit kits and projects, you will want a pencil-style soldering iron with 25 watts or more.
An under-powered iron is a poor investment. It will end up costing you more in ruined kits and damaged components.
- It will take longer to heat the joint, allowing heat to spread to the component being soldered - potentially overheating and damaging the component.
- Longer heating times will also give more time for oxides to form on the surfaces being soldered. This will prevent the solder from flowing and result in a poor joint.
- Longer recovery times between joints can result in frustration, 'cold joints' or both.
You don't need to spend a fortune to get a good iron. Advanced features such as temperature control and interchangeable tips are nice to have, but not essential for hobbiest-level work.
## Basic Irons
There are many basic pencil style irons that are suitable for hobbiest use. But you will need one that is capable of heating the joints quickly enough. Choose an iron with 25 watts at a minimum.

## Better Irons
An adjustable temperature iron with a little more power will give you a bit more control and allow you to work faster. The [Adjustable 30W 110v Soldering Iron](http://www.adafruit.com/products/180 "Link: http://www.adafruit.com/products/180") in the store is an excellent choice.
This iron is also available as part of [Ladyada's Electronics Toolkit](https://www.adafruit.com/products/136), which contains many other essential soldering tools.
## Best Irons
A professional-style temperature-controlled iron with interchangeable tips and 50 watts or more of power is a joy to work with. Feedback control keeps the tip temperature at precisely the level you set. The extra watts speed recovery time so that you can work faster. Interchangeable tips let you select the ideal tip shape for specialized work.
The 65 watt [Hakko FX-888](http://www.adafruit.com/products/303 "Link: http://www.adafruit.com/products/303") is an excellent professional quality soldering iron. The Weller WES51 or WESD51 are also excellent choices for serious electronics work.
# Irons to avoid
In addition to underpowered irons, there are several types of irons to avoid for general circuit-board work. ## For emergencies only:
These irons are handy for occasions when you have no place to plug in a regular soldering iron. But they are not the best choice for a primary soldering tool:
- **Butane Powered Irons** have plenty of power but are difficult to control.
- **Battery Powered Irons** are generally underpowered for most work.

## Not for circuit board use:
These tools are not suitable for circuit board work:
- **Torches** of any kind are not suitable for electronics work and will damage your circuit boards.
- **Soldering Guns** are OK for working with heavy gauge wires, but don't have the precision necessary for soldering delicate electronics components.
- _ **Cold-Heat** _ **™**** **Irons inject current into the joint to heat the tip. This current can be damaging to sensitive electronic components. Avoid these irons for electronics work.

# Essential Tools and Supplies:
These tools are the bare-minimum essentials required for soldering:
##
## Stand
If your soldering iron does not have a built-in stand, you will need a safe place to rest the hot iron between uses. A [Soldering Iron Stand](http://www.adafruit.com/products/150) will keep your iron from rolling around and protect both you and your work surface from burns.
Most stand holders come with a wet and/or metal sponge and tray for cleaning your soldering iron.

## Solder
Standard [60/40 lead/tin Rosin Core Solder](http://www.adafruit.com/products/145 "Link: http://www.adafruit.com/products/145") is the easiest type to work with.

Lead-free solder is generally considered safer than leaded solder because lead is poisonous and can cause serious health issues. Lead can build up in the body over time from inhalation, ingestion, or skin contact. The soldering process exposes workers to lead-contaminated dust and fumes, and leaded solder can release lead fumes when heated. However, the amounts of lead in traditional leaded solder are usually too low to cause immediate health issues.
Non-leaded solder may require more soldering iron heat than leaded solder and may need more flux.
Students should confer with their teachers on the preferred formulation.
Warning: If doing more than a few solder joints, look to be in a ventilated area, outdoors, or use a fan with a filter to catch any "smoke"/fumes.
### USB Rechargeable Mini Solder Fume Extractor - Overview
[USB Rechargeable Mini Solder Fume Extractor](https://learn.adafruit.com/usb-rechargeable-mini-solder-fume-extractor)
[Overview](https://learn.adafruit.com/usb-rechargeable-mini-solder-fume-extractor/overview)
Danger:
## Diagonal Cutters
You will also need a pair of [Diagonal Cutters](http://www.adafruit.com/products/152 "Link: http://www.adafruit.com/products/152") for trimming component leads after soldering.
# Other Handy Tools and Supplies
These are some other tools and supplies you might find useful when working on soldering projects.
## Vise
A vise holds your work steady as you solder. This is important for both safety and sound joints. The[ Panavise Jr](http://www.adafruit.com/products/151) is an ideal size for most Adafruit kits and projects.

## Third Hand
A [Helping Third Hand](http://www.adafruit.com/products/291 "Link: http://www.adafruit.com/products/291") Tool is good for smaller boards, or to hold things in place while terminating or splicing wires.

## Solder Sucker
A [Solder Sucker](https://www.adafruit.com/products/148) is a very helpful tools for removing excess solder or when you need to de-solder a joint. As the name implies, this device literally sucks the solder out of the joint. 
## Solder Wick
[Solder Wick](https://www.adafruit.com/products/149 "Link: https://www.adafruit.com/products/149") is another way to clean excess solder from a joint. Unlike the solder sucker, the wick soaks up the molten solder.

- [Next Page](https://learn.adafruit.com/adafruit-guide-excellent-soldering/preparation.md)
## Featured Products
### Panavise Jr.
[Panavise Jr.](https://www.adafruit.com/product/151)
The best mini-vise for working on smaller PCBs (2.875" or less in one dimension)! The jaws are strong plastic that wont damage the PCB and doesn't mind if you hit it with the soldering iron by accident. Made in the USA.
- The easy-to-use single knob controls head movement...
No Longer Stocked
[Buy Now](https://www.adafruit.com/product/151)
[Related Guides to the Product](https://learn.adafruit.com/products/151/guides)
### Hakko Professional Quality 20-30 AWG Wire Strippers
[Hakko Professional Quality 20-30 AWG Wire Strippers](https://www.adafruit.com/product/527)
These are the finest wire strippers we have used, and if you have to do a lot of wiring, you will agree! They have soft rounded grips - very comfortable to use, and precision ground notches that do a perfect job every time. No more yanking or twisting to strip wires cleanly and quickly.
In Stock
[Buy Now](https://www.adafruit.com/product/527)
[Related Guides to the Product](https://learn.adafruit.com/products/527/guides)
### Mini Solder spool - 60/40 lead rosin-core solder 0.3mm diameter
[Mini Solder spool - 60/40 lead rosin-core solder 0.3mm diameter](https://www.adafruit.com/product/145)
If you want to make a kit you'll need some solder. This 100g (about 1/4 lb) spool is just the right amount, not too much (like 1 lb spools) and not too little (like those little 'pocket clip' vials). 0.3mm diameter, 60/40 'no clean' rosin core. Good for all through-hole...
In Stock
[Buy Now](https://www.adafruit.com/product/145)
[Related Guides to the Product](https://learn.adafruit.com/products/145/guides)
### Solder sucker
[Solder sucker](https://www.adafruit.com/product/148)
Strangely enough, that's the technical term for this desoldering vacuum tool. Useful in cleaning up mistakes, every electrical engineer has one of these on their desk.
To use, depress the end to engage the vacuum. Then heat up the to-be-desoldered joint until it is liquid. With your...
In Stock
[Buy Now](https://www.adafruit.com/product/148)
[Related Guides to the Product](https://learn.adafruit.com/products/148/guides)
### Solder wick - 1.5mm wide and 1.5m / 5 feet long
[Solder wick - 1.5mm wide and 1.5m / 5 feet long](https://www.adafruit.com/product/149)
Used along with the solder sucker to clean up soldering messes. Wick really comes in handy when soldering or desoldering surface-mount parts. Even if you don't have the best iron for SMT work, a bit of wick will fix it up.
1.5mm wick, and 1.5m long, so you have plenty to work...
Out of Stock
[Buy Now](https://www.adafruit.com/product/149)
[Related Guides to the Product](https://learn.adafruit.com/products/149/guides)
### Soldering iron stand
[Soldering iron stand](https://www.adafruit.com/product/150)
A real stand with sponge and solidly-built sheet metal holder prevents your iron from 'rolling away' or burning a hole in the table. If you're starting out and have a 'pen type' soldering iron, this is essential for your safety. Comes with a sponge, too!
****
Out of Stock
[Buy Now](https://www.adafruit.com/product/150)
[Related Guides to the Product](https://learn.adafruit.com/products/150/guides)
### Adjustable 30W 110V soldering iron
[Adjustable 30W 110V soldering iron](https://www.adafruit.com/product/180)
This 'pen-style' soldering iron is just about the best entry-level tool I've seen. It's not as powerful as a Weller WES51 but it _is_ self-contained and easy to use. With proper care, it will last for many years. Turn it off when not in use, clean the plated tip with a...
No Longer Stocked
[Buy Now](https://www.adafruit.com/product/180)
[Related Guides to the Product](https://learn.adafruit.com/products/180/guides)
### Learn to solder - Skill badge, iron-on patch
[Learn to solder - Skill badge, iron-on patch](https://www.adafruit.com/product/465)
You can solder! Adafruit offers a fun and exciting "badges" of achievement for electronics, science and engineering. We believe everyone should be able to be rewarded for learning a useful skill, a badge is just one of the many ways to show and share.
This is the "I...
No Longer Stocked
[Buy Now](https://www.adafruit.com/product/465)
[Related Guides to the Product](https://learn.adafruit.com/products/465/guides)
## Related Guides
- [Blinka Says Tabletop Arcade Game](https://learn.adafruit.com/blinka-says-tabletop-arcade-game.md)
- [Water Drip Dress with Oozemaster 3000](https://learn.adafruit.com/water-drip-dress-with-oozemaster-3000.md)
- [Floor Lamp with NeoPixels and WLED Custom Animations](https://learn.adafruit.com/floor-lamp-with-wled.md)
- [Space Shuttle Discovery Solder Kit by Phyx](https://learn.adafruit.com/space-shuttle-discovery-solder-kit.md)
- [USB Rechargeable Mini Solder Fume Extractor](https://learn.adafruit.com/usb-rechargeable-mini-solder-fume-extractor.md)
- [Cartoon Character Clock](https://learn.adafruit.com/cartoon-character-clock.md)
- [Collin's Lab: Soldering](https://learn.adafruit.com/collins-lab-soldering.md)
- [SMT Breadboard Prototyping Using Breakout PCBs](https://learn.adafruit.com/smt-prototyping-using-breakout-pcbs.md)
- [Motion-Activated Solder Fume Extractor With Lamp](https://learn.adafruit.com/motion-activated-solder-fume-extractor-with-lamp.md)
- [Color Balancing Video Camera Light feat. DotStars](https://learn.adafruit.com/color-balancing-light-box-with-dotstar-cool-warm-white-leds.md)
- [Ambient Sound Machine](https://learn.adafruit.com/ambient-machine.md)
- [DIY On/Off JST Switch Adapter](https://learn.adafruit.com/on-slash-off-switches.md)
- [IoT Moon Phase Guide](https://learn.adafruit.com/moon-phase.md)
- [CNC Rotary Macropad](https://learn.adafruit.com/cnc-rotary-macropad.md)
- [Secret Hollow Book Intrusion Detector](https://learn.adafruit.com/secret-hollow-book.md)
---
# Source: https://learn.adafruit.com/adafruit-ina219-current-sensor-breakout.md
# Adafruit INA219 Current Sensor Breakout
## Overview

The INA219B breakout board and the INA219 FeatherWing will solve all your power-monitoring problems. Instead of struggling with two multimeters, you can use this breakout to measure both the high side voltage and DC current draw over I2C with 1% precision.
As if that weren't enough, we've now also added[ SparkFun qwiic](https://www.sparkfun.com/qwiic) compatible **[STEMMA QT](https://learn.adafruit.com/introducing-adafruit-stemma-qt)** connectors for the I2C bus **so you don't even need to solder the I2C and power lines.**
Just wire up to your favorite micro using a [STEMMA QT adapter cable.](https://www.adafruit.com/?q=stemma%20qt%20cable) The Stemma QT connectors also mean the INA219 can be used with our [various associated accessories.](https://www.adafruit.com/?q=JST%20SH%204) [QT Cable is not included, but we have a variety in the shop](https://www.adafruit.com/?q=stemma+qt+cable&sort=BestMatch).

## Why the High Side?
Most current-measuring devices such as our current panel meter are only good for _low side_ measuring. That means that unless you want to get a battery involved, you have to stick the measurement resistor between the target ground and true ground.
Since the voltage drop across the resistor is proportional to the current draw, this means that the ground reference will change with varying current. Having a shifting ground reference can cause problems for many circuits.
The INA219B chip is much smarter - it can handle high side current measuring, up to +26VDC, even though it is powered with 3 or 5V. It will also report back that high side voltage, which is great for tracking battery life or solar panels.

## How does it work?
A precision amplifier measures the voltage across the 0.1 ohm, 1% sense resistor.
Since the amplifier maximum input difference is ±320mV this means it can measure up to ±3.2 Amps. With the internal 12 bit ADC, the resolution at ±3.2A range is 0.8mA. With the internal gain set at the minimum of div8, the max current is ±400mA and the resolution is 0.1mA. Advanced hackers can remove the 0.1 ohm current sense resistor and replace it with their own to change the range (say a 0.01 ohm to measure up 32 Amps with a resolution of 8mA)
Danger:
Info:

- [Next Page](https://learn.adafruit.com/adafruit-ina219-current-sensor-breakout/pinouts.md)
## Featured Products
### INA219 High Side DC Current Sensor Breakout - 26V ±3.2A Max
[INA219 High Side DC Current Sensor Breakout - 26V ±3.2A Max](https://www.adafruit.com/product/904)
This breakout board will solve all your power-monitoring problems. Instead of struggling with two multimeters, you can just use the handy INA219 chip on this breakout to both measure both the high side voltage and DC current draw over I2C with ±1% precision.
**Please...**
In Stock
[Buy Now](https://www.adafruit.com/product/904)
[Related Guides to the Product](https://learn.adafruit.com/products/904/guides)
### STEMMA QT / Qwiic JST SH 4-pin Cable - 100mm Long
[STEMMA QT / Qwiic JST SH 4-pin Cable - 100mm Long](https://www.adafruit.com/product/4210)
This 4-wire cable is a little over 100mm / 4" long and fitted with JST-SH female 4-pin connectors on both ends. Compared with the chunkier JST-PH these are 1mm pitch instead of 2mm, but still have a nice latching feel, while being easy to insert and remove.
In Stock
[Buy Now](https://www.adafruit.com/product/4210)
[Related Guides to the Product](https://learn.adafruit.com/products/4210/guides)
### STEMMA QT / Qwiic JST SH 4-pin to Premium Male Headers Cable
[STEMMA QT / Qwiic JST SH 4-pin to Premium Male Headers Cable](https://www.adafruit.com/product/4209)
This 4-wire cable is a little over 150mm / 6" long and fitted with JST-SH female 4-pin connectors on one end and premium Dupont male headers on the other. Compared with the chunkier JST-PH these are 1mm pitch instead of 2mm, but still have a nice latching feel, while being easy to insert...
Out of Stock
[Buy Now](https://www.adafruit.com/product/4209)
[Related Guides to the Product](https://learn.adafruit.com/products/4209/guides)
### Premium Male/Male Jumper Wires - 40 x 6" (150mm)
[Premium Male/Male Jumper Wires - 40 x 6" (150mm)](https://www.adafruit.com/product/758)
Handy for making wire harnesses or jumpering between headers on PCB's. These premium jumper wires are 6" (150mm) long and come in a 'strip' of 40 (4 pieces of each of ten rainbow colors). They have 0.1" male header contacts on either end and fit cleanly next to each other...
Out of Stock
[Buy Now](https://www.adafruit.com/product/758)
[Related Guides to the Product](https://learn.adafruit.com/products/758/guides)
### Full Sized Premium Breadboard - 830 Tie Points
[Full Sized Premium Breadboard - 830 Tie Points](https://www.adafruit.com/product/239)
This is a 'full-size' premium quality breadboard, 830 tie points. Good for small and medium projects. It's 2.2" x 7" (5.5 cm x 17 cm) with a standard double-strip in the middle and two power rails on both sides. You can pull the power rails off easily to make the...
In Stock
[Buy Now](https://www.adafruit.com/product/239)
[Related Guides to the Product](https://learn.adafruit.com/products/239/guides)
### Adafruit INA219 FeatherWing
[Adafruit INA219 FeatherWing](https://www.adafruit.com/product/3650)
The **INA219 FeatherWing** makes power-monitoring problems a thing of the past. Instead of struggling with two multimeters, you can just use the handy INA219 chip on this breakout to measure both the high side voltage and DC current draw over I2C with 1% precision....
In Stock
[Buy Now](https://www.adafruit.com/product/3650)
[Related Guides to the Product](https://learn.adafruit.com/products/3650/guides)
### Adafruit METRO 328 Fully Assembled - Arduino IDE compatible
[Adafruit METRO 328 Fully Assembled - Arduino IDE compatible](https://www.adafruit.com/product/50)
We sure love the ATmega328 here at Adafruit, and we use them _a lot_ for our own projects. The processor has plenty of GPIO, Analog inputs, hardware UART SPI and I2C, timers and PWM galore - just enough for most simple projects. When we need to go small, we use a
Out of Stock
[Buy Now](https://www.adafruit.com/product/50)
[Related Guides to the Product](https://learn.adafruit.com/products/50/guides)
## Related Guides
- [Remote controlled door lock using a fingerprint sensor & Adafruit IO](https://learn.adafruit.com/remote-controlled-door-lock-using-a-fingerprint-sensor-and-adafruit-io.md)
- [WiFi Controlled Mobile Robot](https://learn.adafruit.com/wifi-controlled-mobile-robot.md)
- [Arduino Lesson 14. Servo Motors](https://learn.adafruit.com/adafruit-arduino-lesson-14-servo-motors.md)
- [Geofencing with the FONA 808 & Adafruit IO](https://learn.adafruit.com/geofencing-with-the-fona-808-and-adafruit-io.md)
- [Let’s Put LEDs in Things!](https://learn.adafruit.com/lets-put-leds-in-things.md)
- [Adafruit CC3000 WiFi and Xively](https://learn.adafruit.com/adafruit-cc3000-wifi-and-xively.md)
- [Adafruit AirLift Shield - ESP32 WiFi Co-Processor](https://learn.adafruit.com/adafruit-airlift-shield-esp32-wifi-co-processor.md)
- [Wave Shield Talking Clock](https://learn.adafruit.com/wave-shield-talking-clock.md)
- [Ladyada's Learn Arduino - Lesson #0](https://learn.adafruit.com/ladyadas-learn-arduino-lesson-number-0.md)
- [2.2" TFT Display](https://learn.adafruit.com/2-2-tft-display.md)
- [LED Lightbox](https://learn.adafruit.com/led-lightbox.md)
- [Arduino Prototyping Mounting Plate](https://learn.adafruit.com/arduino-prototyping-mounting-plate.md)
- [How to Choose a Microcontroller](https://learn.adafruit.com/how-to-choose-a-microcontroller.md)
- [Arduino Lesson 16. Stepper Motors](https://learn.adafruit.com/adafruit-arduino-lesson-16-stepper-motors.md)
- [Arduino Lesson 8. Analog Inputs](https://learn.adafruit.com/adafruit-arduino-lesson-8-analog-inputs.md)
---
# Source: https://learn.adafruit.com/adafruit-led-backpack.md
# Adafruit LED Backpacks
## Overview
What's better than a single LED? Lots of LEDs! A fun way to make a small display is to use an [8x8 matrix](https://www.adafruit.com/category/37_88 "Link: https://www.adafruit.com/category/37\_88") or a [4-digit 7-segment display](https://www.adafruit.com/category/37_103). Matrices like these are 'multiplexed' - so to control 64 LEDs you need 16 pins. That's a lot of pins, and there are [driver chips like the MAX7219](https://www.adafruit.com/products/453 "Link: https://www.adafruit.com/products/453") that can control a matrix for you but there's a lot of wiring to set up and they take up a ton of space. Here at Adafruit we feel your pain! After all, wouldn't it be awesome if you could control a matrix without tons of wiring? That's where these adorable LED matrix backpacks come in.
We have them in quite a few flavors!
- [Adorable Mini 8x8](https://www.adafruit.com/search?q=mini+8x8+backpack "Link: https://www.adafruit.com/search?q=mini+8x8+backpack")
- [Classic 1.2" 8x8 (round and square dots)](https://www.adafruit.com/search?q=1.2%22+8x8+backpack "Link: https://www.adafruit.com/search?q=1.2%22+8x8+backpack")
- [Mini 1.2" 16x8 (round and square dots)](https://www.adafruit.com/search?q=1.2%22+16x8+backpack "Link: https://www.adafruit.com/search?q=1.2%22+16x8+backpack")
- [4-digit 0.56" 7-segment](https://www.adafruit.com/search?q=7-segment+backpack+0.56 "Link: https://www.adafruit.com/search?q=7-segment+backpack+0.56")
- [4-digit 1.2" 7-segment](https://www.adafruit.com/search?q=4-digit+7-segment+1.2%22 "Link: https://www.adafruit.com/search?q=4-digit+7-segment+1.2%22")
- [4-digit 0.54" 14-segment Alphanumeric](https://www.adafruit.com/search?q=alphanumeric+backpack "Link: https://www.adafruit.com/search?q=alphanumeric+backpack")
- [Bi-color 8x8](https://www.adafruit.com/products/902 "Link: https://www.adafruit.com/products/902")
- [Bi-color Bargraph](https://www.adafruit.com/products/1721 "Link: https://www.adafruit.com/products/1721")


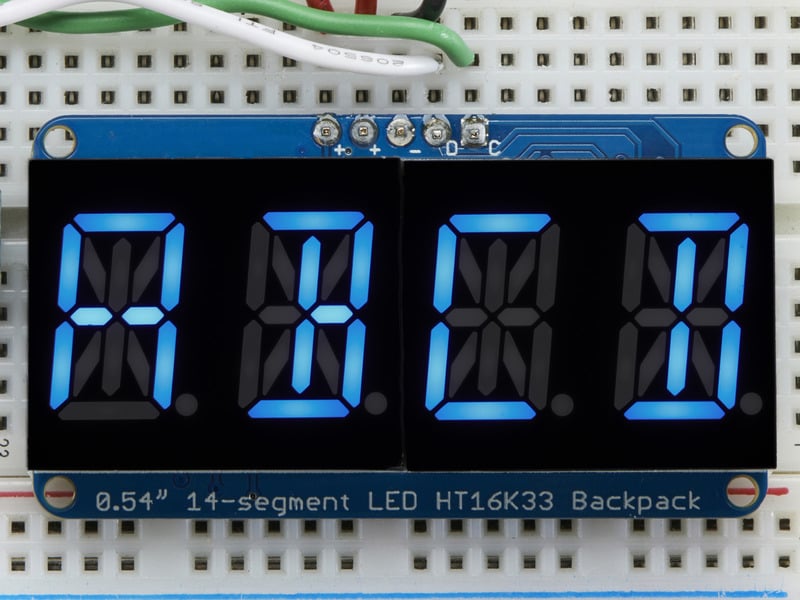
The matrices use a driver chip that does all the heavy lifting for you: They have a built in clock so they multiplex the display. They use constant-current drivers for ultra-bright, consistent color (the images above are photographed at the dimmest setting to avoid overloading our camera!), 1/16 step display dimming, all via a simple I2C interface. The backpacks come with address-selection jumpers so you can connect up to four mini 8x8's or eight 7-segments (or a combination, such as four mini 8x8's and four 7-segments, etc) on a single I2C bus.
The product kit comes with a fully tested and assembled LED backpack, a 4-pin header and the matrix of your choice. A bit of soldering is required to attach the matrix onto the backpack but it's very easy to do and only takes about 5 minutes.
Of course, in classic Adafruit fashion, we also have a detailed tutorial showing you how to solder, wire and control the display. We even wrote a very nice library for the backpacks so you can get running in under half an hour, displaying images on the matrix or numbers on the 7-segment. If you've been eyeing matrix displays but hesitated because of the complexity, his is the solution you've been looking for!
- [Next Page](https://learn.adafruit.com/adafruit-led-backpack/1-2-8x8-matrix.md)
## Primary Products
### Adafruit Mini 8x8 LED Matrix w/I2C Backpack - Red
[Adafruit Mini 8x8 LED Matrix w/I2C Backpack - Red](https://www.adafruit.com/product/870)
What's better than a single LED? Lots of LEDs! A fun way to make a small display is to use an [8x8 matrix](https://www.adafruit.com/category/37_88) or a [4-digit 7-segment display](https://www.adafruit.com/category/37_103). Matrices like these are...
In Stock
[Buy Now](https://www.adafruit.com/product/870)
[Related Guides to the Product](https://learn.adafruit.com/products/870/guides)
### Adafruit Mini 8x8 LED Matrix w/I2C Backpack - Yellow
[Adafruit Mini 8x8 LED Matrix w/I2C Backpack - Yellow](https://www.adafruit.com/product/871)
What's better than a single LED? Lots of LEDs! A fun way to make a small display is to use an [8x8 matrix](https://www.adafruit.com/category/37_88) or a [4-digit 7-segment display](https://www.adafruit.com/category/37_103). Matrices like these are...
In Stock
[Buy Now](https://www.adafruit.com/product/871)
[Related Guides to the Product](https://learn.adafruit.com/products/871/guides)
### Adafruit Mini 0.8" 8x8 LED Matrix w/I2C Backpack - Yellow-Green
[Adafruit Mini 0.8" 8x8 LED Matrix w/I2C Backpack - Yellow-Green](https://www.adafruit.com/product/872)
What's better than a single LED? Lots of LEDs! A fun way to make a small display is to use an [8x8 matrix](https://www.adafruit.com/category/37_88) or a [4-digit 7-segment display](https://www.adafruit.com/category/37_103). Matrices like these are...
In Stock
[Buy Now](https://www.adafruit.com/product/872)
[Related Guides to the Product](https://learn.adafruit.com/products/872/guides)
### Adafruit 0.56" 4-Digit 7-Segment Display with I2C Backpack - Red
[Adafruit 0.56" 4-Digit 7-Segment Display with I2C Backpack - Red](https://www.adafruit.com/product/878)
What's better than a single LED? Lots of LEDs! A fun way to make a small display is to use an [8x8 matrix](https://www.adafruit.com/category/37_88) or a [4-digit 7-segment display](https://www.adafruit.com/category/37_103). Matrices like these are...
In Stock
[Buy Now](https://www.adafruit.com/product/878)
[Related Guides to the Product](https://learn.adafruit.com/products/878/guides)
### Adafruit 0.56" 4-Digit 7-Segment Display w/I2C Backpack - Yellow
[Adafruit 0.56" 4-Digit 7-Segment Display w/I2C Backpack - Yellow](https://www.adafruit.com/product/879)
What's better than a single LED? Lots of LEDs! A fun way to make a small display is to use an [8x8 matrix](https://www.adafruit.com/category/37_88) or a [4-digit 7-segment display](https://www.adafruit.com/category/37_103). Matrices like these are...
In Stock
[Buy Now](https://www.adafruit.com/product/879)
[Related Guides to the Product](https://learn.adafruit.com/products/879/guides)
### Adafruit 0.56" 4-Digit 7-Segment Display w/ I2C Backpack - Green
[Adafruit 0.56" 4-Digit 7-Segment Display w/ I2C Backpack - Green](https://www.adafruit.com/product/880)
What's better than a single LED? Lots of LEDs! A fun way to make a small display is to use an [8x8 matrix](https://www.adafruit.com/category/37_88) or a [4-digit 7-segment display](https://www.adafruit.com/category/37_103). Matrices like these are...
No Longer Stocked
[Buy Now](https://www.adafruit.com/product/880)
[Related Guides to the Product](https://learn.adafruit.com/products/880/guides)
### Adafruit 0.56" 4-Digit 7-Segment Display w/ I2C Backpack - Blue
[Adafruit 0.56" 4-Digit 7-Segment Display w/ I2C Backpack - Blue](https://www.adafruit.com/product/881)
What's better than a single LED? Lots of LEDs! A fun way to make a small display is to use an [8x8 matrix](https://www.adafruit.com/category/37_88) or a [4-digit 7-segment display](https://www.adafruit.com/category/37_103). Matrices like these are...
In Stock
[Buy Now](https://www.adafruit.com/product/881)
[Related Guides to the Product](https://learn.adafruit.com/products/881/guides)
### Adafruit Bicolor LED Square Pixel Matrix with I2C Backpack
[Adafruit Bicolor LED Square Pixel Matrix with I2C Backpack](https://www.adafruit.com/product/902)
What's better than a single LED? Lots of LEDs! A fun way to make a small colorful display is to use a [1.2" Bi-color 8x8 LED Matrix](http://www.adafruit.com/products/458). Matrices like these are 'multiplexed' - so to control all the 128 LEDs you need 24 pins....
In Stock
[Buy Now](https://www.adafruit.com/product/902)
[Related Guides to the Product](https://learn.adafruit.com/products/902/guides)
### Adafruit Mini 8x8 LED Matrix w/I2C Backpack - Blue
[Adafruit Mini 8x8 LED Matrix w/I2C Backpack - Blue](https://www.adafruit.com/product/959)
What's better than a single LED? Lots of LEDs! A fun way to make a small display is to use an [8x8 matrix](https://www.adafruit.com/category/37_88) or a [4-digit 7-segment display](https://www.adafruit.com/category/37_103). Matrices like these are...
In Stock
[Buy Now](https://www.adafruit.com/product/959)
[Related Guides to the Product](https://learn.adafruit.com/products/959/guides)
### Adafruit 0.56" 4-Digit 7-Segment Display w/I2C Backpack - White
[Adafruit 0.56" 4-Digit 7-Segment Display w/I2C Backpack - White](https://www.adafruit.com/product/1002)
What's better than a single LED? Lots of LEDs! A fun way to make a small display is to use an [8x8 matrix](https://www.adafruit.com/category/37_88) or a [4-digit 7-segment display](https://www.adafruit.com/category/37_103). Matrices like these are...
In Stock
[Buy Now](https://www.adafruit.com/product/1002)
[Related Guides to the Product](https://learn.adafruit.com/products/1002/guides)
### Adafruit 1.2" 8x8 LED Matrix Backpack
[Adafruit 1.2" 8x8 LED Matrix Backpack](https://www.adafruit.com/product/1048)
By popular request, you can now get our 8x8 LED backpacks without the LEDs! These backpacks feature an HT16K33 I2C LED driver, they're simple and easy to use - you can use [our very nice library for the backpacks to...](https://github.com/adafruit/Adafruit-LED-Backpack-Library)
In Stock
[Buy Now](https://www.adafruit.com/product/1048)
[Related Guides to the Product](https://learn.adafruit.com/products/1048/guides)
### Adafruit Small 1.2" 8x8 LED Matrix w/I2C Backpack - Red
[Adafruit Small 1.2" 8x8 LED Matrix w/I2C Backpack - Red](https://www.adafruit.com/product/1049)
What's better than a single LED? Lots of LEDs! A fun way to make a small display is to use an [8x8 matrix](https://www.adafruit.com/category/37_88) or a [4-digit 7-segment display](https://www.adafruit.com/category/37_103). Matrices like these are...
In Stock
[Buy Now](https://www.adafruit.com/product/1049)
[Related Guides to the Product](https://learn.adafruit.com/products/1049/guides)
### Adafruit Small 1.2" 8x8 LED Matrix w/I2C Backpack - Yellow
[Adafruit Small 1.2" 8x8 LED Matrix w/I2C Backpack - Yellow](https://www.adafruit.com/product/1050)
What's better than a single LED? Lots of LEDs! A fun way to make a small display is to use an [8x8 matrix](https://www.adafruit.com/category/37_88) or a [4-digit 7-segment display](https://www.adafruit.com/category/37_103). Matrices like these are...
In Stock
[Buy Now](https://www.adafruit.com/product/1050)
[Related Guides to the Product](https://learn.adafruit.com/products/1050/guides)
### Adafruit Small 1.2" 8x8 LED Matrix w/I2C Backpack - Blue
[Adafruit Small 1.2" 8x8 LED Matrix w/I2C Backpack - Blue](https://www.adafruit.com/product/1052)
What's better than a single LED? Lots of LEDs! A fun way to make a small display is to use an [8x8 matrix](https://www.adafruit.com/category/37_88) or a [4-digit 7-segment display](https://www.adafruit.com/category/37_103). Matrices like these are...
In Stock
[Buy Now](https://www.adafruit.com/product/1052)
[Related Guides to the Product](https://learn.adafruit.com/products/1052/guides)
### Adafruit Mini 8x8 LED Matrix w/I2C Backpack - Ultra Bright White
[Adafruit Mini 8x8 LED Matrix w/I2C Backpack - Ultra Bright White](https://www.adafruit.com/product/1080)
What's better than a single LED? Lots of LEDs! A fun way to make a small display is to use an [8x8 matrix](https://www.adafruit.com/category/37_88) or a [4-digit 7-segment display](https://www.adafruit.com/category/37_103). Matrices like these are...
In Stock
[Buy Now](https://www.adafruit.com/product/1080)
[Related Guides to the Product](https://learn.adafruit.com/products/1080/guides)
### Adafruit 1.2" 4-Digit 7-Segment Display w/I2C Backpack - Green
[Adafruit 1.2" 4-Digit 7-Segment Display w/I2C Backpack - Green](https://www.adafruit.com/product/1268)
What's better than a single LED? Lots of LEDs! A fun way to make a numeric display is to use a [4-digit 7-segment display](https://www.adafruit.com/category/37_103). LED matrices like these are 'multiplexed' - so to control all the seven-segment LEDs you need 14 pins....
No Longer Stocked
[Buy Now](https://www.adafruit.com/product/1268)
[Related Guides to the Product](https://learn.adafruit.com/products/1268/guides)
### Adafruit 1.2" 4-Digit 7-Segment Display w/I2C Backpack - Yellow
[Adafruit 1.2" 4-Digit 7-Segment Display w/I2C Backpack - Yellow](https://www.adafruit.com/product/1269)
What's better than a single LED? Lots of LEDs! A fun way to make a numeric display is to use a [4-digit 7-segment display](https://www.adafruit.com/category/37_103). LED matrices like these are 'multiplexed' - so to control all the seven-segment LEDs you need 14 pins....
In Stock
[Buy Now](https://www.adafruit.com/product/1269)
[Related Guides to the Product](https://learn.adafruit.com/products/1269/guides)
### Adafruit 1.2" 4-Digit 7-Segment Display w/I2C Backpack - Red
[Adafruit 1.2" 4-Digit 7-Segment Display w/I2C Backpack - Red](https://www.adafruit.com/product/1270)
What's better than a single LED? Lots of LEDs! A fun way to make a numeric display is to use a [4-digit 7-segment display](https://www.adafruit.com/category/37_103). LED matrices like these are 'multiplexed' - so to control all the seven-segment LEDs you need 14 pins....
In Stock
[Buy Now](https://www.adafruit.com/product/1270)
[Related Guides to the Product](https://learn.adafruit.com/products/1270/guides)
### Small 1.2" 8x8 Ultra Bright White LED Matrix + Backpack
[Small 1.2" 8x8 Ultra Bright White LED Matrix + Backpack](https://www.adafruit.com/product/1614)
What's better than a single LED? Lots of LEDs! A fun way to make a small display is to use an [8x8 matrix](https://www.adafruit.com/category/37_88) or a [4-digit 7-segment display](https://www.adafruit.com/category/37_103). Matrices like these are...
In Stock
[Buy Now](https://www.adafruit.com/product/1614)
[Related Guides to the Product](https://learn.adafruit.com/products/1614/guides)
### Adafruit Small 1.2" 8x8 LED Matrix w/I2C Backpack - Pure Green
[Adafruit Small 1.2" 8x8 LED Matrix w/I2C Backpack - Pure Green](https://www.adafruit.com/product/1632)
What's better than a single LED? Lots of LEDs! A fun way to make a small display is to use an [8x8 matrix](https://www.adafruit.com/category/37_88) or a [4-digit 7-segment display](https://www.adafruit.com/category/37_103). Matrices like these are...
In Stock
[Buy Now](https://www.adafruit.com/product/1632)
[Related Guides to the Product](https://learn.adafruit.com/products/1632/guides)
### Adafruit Mini 0.8" 8x8 LED Matrix w/I2C Backpack - Pure Green
[Adafruit Mini 0.8" 8x8 LED Matrix w/I2C Backpack - Pure Green](https://www.adafruit.com/product/1633)
What's better than a single LED? Lots of LEDs! A fun way to make a small display is to use an [8x8 matrix](https://www.adafruit.com/category/37_88) or a [4-digit 7-segment display](https://www.adafruit.com/category/37_103). Matrices like these are...
In Stock
[Buy Now](https://www.adafruit.com/product/1633)
[Related Guides to the Product](https://learn.adafruit.com/products/1633/guides)
### Bi-Color (Red/Green) 24-Bar Bargraph w/I2C Backpack Kit
[Bi-Color (Red/Green) 24-Bar Bargraph w/I2C Backpack Kit](https://www.adafruit.com/product/1721)
What's better than a single LED? Lots of LEDs! A fun way to make a small linear display is to use two 12-bar Bi-color bar-graphs. However, this LED bargraph is 'multiplexed' - so to control all the 48 LEDs you need a lot of pins.
Out of Stock
[Buy Now](https://www.adafruit.com/product/1721)
[Related Guides to the Product](https://learn.adafruit.com/products/1721/guides)
### Small 1.2" 8x8 Ultra Bright Square Amber LED Matrix + Backpack
[Small 1.2" 8x8 Ultra Bright Square Amber LED Matrix + Backpack](https://www.adafruit.com/product/1854)
What's better than a single LED? Lots of LEDs! Matrices like these are 'multiplexed' - so to control 64 LEDs you need 16 pins. That's a lot of pins, and there are [driver chips like the MAX7219](//www.adafruit.com/products/453) that can control a matrix for you but...
In Stock
[Buy Now](https://www.adafruit.com/product/1854)
[Related Guides to the Product](https://learn.adafruit.com/products/1854/guides)
### Small 1.2" 8x8 Ultra Bright Square Yellow LED Matrix + Backpack
[Small 1.2" 8x8 Ultra Bright Square Yellow LED Matrix + Backpack](https://www.adafruit.com/product/1855)
What's better than a single LED? Lots of LEDs! Matrices like these are 'multiplexed' - so to control 64 LEDs you need 16 pins. That's a lot of pins, and there are [driver chips like the MAX7219](//www.adafruit.com/products/453) that can control a matrix for you but...
In Stock
[Buy Now](https://www.adafruit.com/product/1855)
[Related Guides to the Product](https://learn.adafruit.com/products/1855/guides)
### Small 1.2" 8x8 Bright Square Pure Green LED Matrix + Backpack
[Small 1.2" 8x8 Bright Square Pure Green LED Matrix + Backpack](https://www.adafruit.com/product/1856)
What's better than a single LED? Lots of LEDs! Matrices like these are 'multiplexed' - so to control 64 LEDs you need 16 pins. That's a lot of pins, and there are [driver chips like the MAX7219](//www.adafruit.com/products/453) that can control a matrix for you but...
In Stock
[Buy Now](https://www.adafruit.com/product/1856)
[Related Guides to the Product](https://learn.adafruit.com/products/1856/guides)
### Small 1.2" 8x8 Ultra Bright Square White LED Matrix + Backpack
[Small 1.2" 8x8 Ultra Bright Square White LED Matrix + Backpack](https://www.adafruit.com/product/1857)
What's better than a single LED? Lots of LEDs! Matrices like these are 'multiplexed' - so to control 64 LEDs you need 16 pins. That's a lot of pins, and there are [driver chips like the MAX7219](//www.adafruit.com/products/453) that can control a matrix for you but...
In Stock
[Buy Now](https://www.adafruit.com/product/1857)
[Related Guides to the Product](https://learn.adafruit.com/products/1857/guides)
### Adafruit 14-segment LED Alphanumeric Backpack - STEMMA QT
[Adafruit 14-segment LED Alphanumeric Backpack - STEMMA QT](https://www.adafruit.com/product/1910)
By popular request, you can now get our 14-segment LED backpacks without the LEDs! These backpacks feature an HT16K33 I2C LED driver, they're simple and easy to use - you can use [our very nice library for the backpacks to...](https://github.com/adafruit/Adafruit-LED-Backpack-Library)
In Stock
[Buy Now](https://www.adafruit.com/product/1910)
[Related Guides to the Product](https://learn.adafruit.com/products/1910/guides)
### Quad Alphanumeric Display - Red 0.54" Digits w/ I2C Backpack
[Quad Alphanumeric Display - Red 0.54" Digits w/ I2C Backpack](https://www.adafruit.com/product/1911)
Display, elegantly, 012345678 or 9! Gaze, hypnotized, at ABCDEFGHIJKLM - well it can display the whole alphabet. You get the point. This is a nice, bright alphanumeric display that shows letters and numbers in a beautiful red hue. It's super bright and designed for viewing from distances...
In Stock
[Buy Now](https://www.adafruit.com/product/1911)
[Related Guides to the Product](https://learn.adafruit.com/products/1911/guides)
### Quad Alphanumeric Display - Blue 0.54" Digits w/ I2C Backpack
[Quad Alphanumeric Display - Blue 0.54" Digits w/ I2C Backpack](https://www.adafruit.com/product/1912)
Display, elegantly, 012345678 or 9! Gaze, hypnotized, at ABCDEFGHIJKLM - well it can display the whole alphabet. You get the point. This is a nice, bright alphanumeric display that shows letters and numbers in a beautiful blue hue. It's super bright and designed for viewing from distances...
In Stock
[Buy Now](https://www.adafruit.com/product/1912)
[Related Guides to the Product](https://learn.adafruit.com/products/1912/guides)
### 16x8 1.2" LED Matrix + Backpack - Ultra Bright Round Green LEDs
[16x8 1.2" LED Matrix + Backpack - Ultra Bright Round Green LEDs](https://www.adafruit.com/product/2035)
What's better than a single LED? Lots of LEDs! And what's better than lots of LEDs? **TWO TIMES AS MANY LEDS!!!**
With the 16x8 LED Matrix Backpack we've doubled your project's matrix capacity by making it super easy to get two separate 8x8 matrices onto...
In Stock
[Buy Now](https://www.adafruit.com/product/2035)
[Related Guides to the Product](https://learn.adafruit.com/products/2035/guides)
### 16x8 1.2" LED Matrix+Backpack UltraBright Round YellowGreen LEDs
[16x8 1.2" LED Matrix+Backpack UltraBright Round YellowGreen LEDs](https://www.adafruit.com/product/2036)
What's better than a single LED? Lots of LEDs! And what's better than lots of LEDs? **TWO TIMES AS MANY LEDS!!!**
With the 16x8 LED Matrix Backpack we've doubled your project's matrix capacity by making it super easy to get two separate 8x8 matrices onto...
In Stock
[Buy Now](https://www.adafruit.com/product/2036)
[Related Guides to the Product](https://learn.adafruit.com/products/2036/guides)
### 16x8 1.2" LED Matrix + Backpack - Ultra Bright Round Red LEDs
[16x8 1.2" LED Matrix + Backpack - Ultra Bright Round Red LEDs](https://www.adafruit.com/product/2037)
What's better than a single LED? Lots of LEDs! And what's better than lots of LEDs? **TWO TIMES AS MANY LEDS!!!**
With the 16x8 LED Matrix Backpack we've doubled your project's matrix capacity by making it super easy to get two separate 8x8 matrices onto...
In Stock
[Buy Now](https://www.adafruit.com/product/2037)
[Related Guides to the Product](https://learn.adafruit.com/products/2037/guides)
### 16x8 1.2" LED Matrix + Backpack - Ultra Bright Round White LEDs
[16x8 1.2" LED Matrix + Backpack - Ultra Bright Round White LEDs](https://www.adafruit.com/product/2038)
What's better than a single LED? Lots of LEDs! And what's better than lots of LEDs? **TWO TIMES AS MANY LEDS!!!**
With the 16x8 LED Matrix Backpack we've doubled your project's matrix capacity by making it super easy to get two separate 8x8 matrices onto...
In Stock
[Buy Now](https://www.adafruit.com/product/2038)
[Related Guides to the Product](https://learn.adafruit.com/products/2038/guides)
### 16x8 1.2" LED Matrix + Backpack - Ultra Bright Round Blue LEDs
[16x8 1.2" LED Matrix + Backpack - Ultra Bright Round Blue LEDs](https://www.adafruit.com/product/2039)
What's better than a single LED? Lots of LEDs! And what's better than lots of LEDs? **TWO TIMES AS MANY LEDS!!!**
With the 16x8 LED Matrix Backpack we've doubled your project's matrix capacity by making it super easy to get two separate 8x8 matrices onto...
In Stock
[Buy Now](https://www.adafruit.com/product/2039)
[Related Guides to the Product](https://learn.adafruit.com/products/2039/guides)
### 16x8 1.2" LED Matrix + Backpack - Ultra Bright Square Blue LEDs
[16x8 1.2" LED Matrix + Backpack - Ultra Bright Square Blue LEDs](https://www.adafruit.com/product/2040)
What's better than a single LED? Lots of LEDs! And what's better than lots of LEDs? **TWO TIMES AS MANY LEDS!!!**
With the 16x8 LED Matrix Backpack we've doubled your project's matrix capacity by making it super easy to get two separate 8x8 matrices onto...
In Stock
[Buy Now](https://www.adafruit.com/product/2040)
[Related Guides to the Product](https://learn.adafruit.com/products/2040/guides)
### 16x8 1.2" LED Matrix + Backpack - Ultra Bright Square Amber LEDs
[16x8 1.2" LED Matrix + Backpack - Ultra Bright Square Amber LEDs](https://www.adafruit.com/product/2041)
What's better than a single LED? Lots of LEDs! And what's better than lots of LEDs? **TWO TIMES AS MANY LEDS!!!**
With the 16x8 LED Matrix Backpack we've doubled your project's matrix capacity by making it super easy to get two separate 8x8 matrices onto...
In Stock
[Buy Now](https://www.adafruit.com/product/2041)
[Related Guides to the Product](https://learn.adafruit.com/products/2041/guides)
### 16x8 1.2" LED Matrix + Backpack - Ultra Bright Square Green LEDs
[16x8 1.2" LED Matrix + Backpack - Ultra Bright Square Green LEDs](https://www.adafruit.com/product/2042)
What's better than a single LED? Lots of LEDs! And what's better than lots of LEDs? **TWO TIMES AS MANY LEDS!!!**
With the 16x8 LED Matrix Backpack we've doubled your project's matrix capacity by making it super easy to get two separate 8x8 matrices onto...
In Stock
[Buy Now](https://www.adafruit.com/product/2042)
[Related Guides to the Product](https://learn.adafruit.com/products/2042/guides)
### 16x8 1.2" LED Matrix + Backpack -Ultra Bright Square Yellow LEDs
[16x8 1.2" LED Matrix + Backpack -Ultra Bright Square Yellow LEDs](https://www.adafruit.com/product/2043)
What's better than a single LED? Lots of LEDs! And what's better than lots of LEDs? **TWO TIMES AS MANY LEDS!!!**
With the 16x8 LED Matrix Backpack we've doubled your project's matrix capacity by making it super easy to get two separate 8x8 matrices onto...
In Stock
[Buy Now](https://www.adafruit.com/product/2043)
[Related Guides to the Product](https://learn.adafruit.com/products/2043/guides)
### 16x8 1.2" LED Matrix + Backpack - Ultra Bright Square White LEDs
[16x8 1.2" LED Matrix + Backpack - Ultra Bright Square White LEDs](https://www.adafruit.com/product/2044)
What's better than a single LED? Lots of LEDs! And what's better than lots of LEDs? **TWO TIMES AS MANY LEDS!!!**
With the 16x8 LED Matrix Backpack we've doubled your project's matrix capacity by making it super easy to get two separate 8x8 matrices onto...
In Stock
[Buy Now](https://www.adafruit.com/product/2044)
[Related Guides to the Product](https://learn.adafruit.com/products/2044/guides)
### 16x8 1.2" LED Matrix + Backpack-Ultra Bright Round Orange LEDs
[16x8 1.2" LED Matrix + Backpack-Ultra Bright Round Orange LEDs](https://www.adafruit.com/product/2052)
What's better than a single LED? Lots of LEDs! And what's better than lots of LEDs? **TWO TIMES AS MANY LEDS!!!**
With the 16x8 LED Matrix Backpack we've doubled your project's matrix capacity by making it super easy to get two separate 8x8 matrices onto...
In Stock
[Buy Now](https://www.adafruit.com/product/2052)
[Related Guides to the Product](https://learn.adafruit.com/products/2052/guides)
### 16x8 1.2" LED Matrices+Backpack Round LEDs in Various Colors
[16x8 1.2" LED Matrices+Backpack Round LEDs in Various Colors](https://www.adafruit.com/product/2054)
What's better than a single LED? Lots of LEDs! And what's better than lots of LEDs? **TWO TIMES AS MANY LEDS!!!**
With the 16x8 LED Matrix Backpack we've doubled your project's matrix capacity by making it super easy to get two separate 8x8 matrices onto...
Out of Stock
[Buy Now](https://www.adafruit.com/product/2054)
[Related Guides to the Product](https://learn.adafruit.com/products/2054/guides)
### Adafruit 8x16 LED Matrix FeatherWing w/o Matrices
[Adafruit 8x16 LED Matrix FeatherWing w/o Matrices](https://www.adafruit.com/product/3090)
You will chirp with delight when you see how easy it is to make your very own 8x16 LED matrix display for any Feather. At 0.8" square, the little [8x8 matrices](https://www.adafruit.com/new/?q=8x8%20miniature%20LED%20matrix&) have everything a big LED matrix has,...
Out of Stock
[Buy Now](https://www.adafruit.com/product/3090)
[Related Guides to the Product](https://learn.adafruit.com/products/3090/guides)
### Adafruit 14-segment LED Alphanumeric backpack (same as P1910)
[Adafruit 14-segment LED Alphanumeric backpack (same as P1910)](https://www.adafruit.com/product/3322)
Just the backpack + 4pin header
No Longer Stocked
[Buy Now](https://www.adafruit.com/product/3322)
[Related Guides to the Product](https://learn.adafruit.com/products/3322/guides)
## Featured Products
### Adafruit Small 1.2" 8x8 LED Matrix w/I2C Backpack - Yellow-Green
[Adafruit Small 1.2" 8x8 LED Matrix w/I2C Backpack - Yellow-Green](https://www.adafruit.com/product/1051)
What's better than a single LED? Lots of LEDs! A fun way to make a small display is to use an [8x8 matrix](https://www.adafruit.com/category/37_88) or a [4-digit 7-segment display](https://www.adafruit.com/category/37_103). Matrices like these are...
In Stock
[Buy Now](https://www.adafruit.com/product/1051)
[Related Guides to the Product](https://learn.adafruit.com/products/1051/guides)
### Small 1.2" 8x8 Ultra Bright Square Blue LED Matrix + Backpack
[Small 1.2" 8x8 Ultra Bright Square Blue LED Matrix + Backpack](https://www.adafruit.com/product/1853)
What's better than a single LED? Lots of LEDs! Matrices like these are 'multiplexed' - so to control 64 LEDs you need 16 pins. That's a lot of pins, and there are [driver chips like the MAX7219](//www.adafruit.com/products/453) that can control a matrix for you but...
In Stock
[Buy Now](https://www.adafruit.com/product/1853)
[Related Guides to the Product](https://learn.adafruit.com/products/1853/guides)
## Related Guides
- [LED Backpack Displays on Raspberry Pi and BeagleBone Black](https://learn.adafruit.com/led-backpack-displays-on-raspberry-pi-and-beaglebone-black.md)
- [Animating Multiple LED Backpacks](https://learn.adafruit.com/animating-multiple-led-backpacks.md)
- [Arduino GPS Clock](https://learn.adafruit.com/arduino-clock.md)
- [Raspberry Pi Physical Dashboard](https://learn.adafruit.com/raspberry-pi-physical-dashboard.md)
- [CircuitPython Hardware: LED Backpacks & FeatherWings](https://learn.adafruit.com/micropython-hardware-led-backpacks-and-featherwings.md)
- [Matrix and 7-Segment LED Backpack with the Raspberry Pi](https://learn.adafruit.com/matrix-7-segment-led-backpack-with-the-raspberry-pi.md)
- [DIY Pocket LED Gamer - Tiny Tetris!](https://learn.adafruit.com/diy-3d-printed-handheld-pocket-game-tiny-tetris-snake.md)
- [RGB LED Matrix Cube with 25,000 LEDs](https://learn.adafruit.com/rgb-led-matrix-cube-for-pi.md)
- [Creating GIFs for SmartMatrix](https://learn.adafruit.com/creating-gifs-for-smartmatrix.md)
- [Adafruit CharliePlex LED Matrix Bonnet](https://learn.adafruit.com/adafruit-charlieplex-bonnet.md)
- [Connecting a 16x32 RGB LED Matrix Panel to a Raspberry Pi](https://learn.adafruit.com/connecting-a-16x32-rgb-led-matrix-panel-to-a-raspberry-pi.md)
- [MicroPython Displays: Drawing Text](https://learn.adafruit.com/micropython-displays-drawing-text.md)
- [Heart Rate Badge](https://learn.adafruit.com/heart-rate-badge.md)
- [16x24 LED Matrix](https://learn.adafruit.com/16x24-led-matrix.md)
- [Adafruit IS31FL3741](https://learn.adafruit.com/adafruit-is31fl3741.md)
---
# Source: https://learn.adafruit.com/adafruit-microphone-amplifier-breakout.md
# Adafruit Microphone Amplifier Breakout
## Overview

This guide shows how to connect the Adafruit Electret Microphone Amplifier to measure sound levels with your Arduino.
The Microphone Amplifier mates an [Electret Capsule Microphone](http://www.adafruit.com/datasheets/CMA-4544PF-W.pdf) with a [MAX4466 Operational Amplifier](http://www.adafruit.com/datasheets/MAX4465-MAX4469.pdf) optimized for use in microphone pre-amplifier applications. The flexible supply voltage and and adjustable gain make this module adaptable to a wide variety of audio applications.
## Specifications:
- Supply Voltage: 2.4v-5v
- Output: Rail-to-Rail - up to to 5vp-p
- Frequency Response: 20Hz - 20 KHz
- Adjustable Gain 25x-125x
- [Available From: Adafruit of course!](http://www.adafruit.com/products/1063 "Link: http://www.adafruit.com/products/1063")
- [Next Page](https://learn.adafruit.com/adafruit-microphone-amplifier-breakout/assembly-and-wiring.md)
## Featured Products
### Electret Microphone Amplifier - MAX4466 with Adjustable Gain
[Electret Microphone Amplifier - MAX4466 with Adjustable Gain](https://www.adafruit.com/product/1063)
Add an ear to your project with this well-designed electret microphone amplifier. This fully assembled and tested board comes with a 20-20KHz electret microphone soldered on. For the amplification, we use the Maxim MAX4466, an op-amp specifically designed for this delicate task! The amplifier...
In Stock
[Buy Now](https://www.adafruit.com/product/1063)
[Related Guides to the Product](https://learn.adafruit.com/products/1063/guides)
### Adafruit Bicolor LED Square Pixel Matrix with I2C Backpack
[Adafruit Bicolor LED Square Pixel Matrix with I2C Backpack](https://www.adafruit.com/product/902)
What's better than a single LED? Lots of LEDs! A fun way to make a small colorful display is to use a [1.2" Bi-color 8x8 LED Matrix](http://www.adafruit.com/products/458). Matrices like these are 'multiplexed' - so to control all the 128 LEDs you need 24 pins....
In Stock
[Buy Now](https://www.adafruit.com/product/902)
[Related Guides to the Product](https://learn.adafruit.com/products/902/guides)
### Tiny Premium Breadboard
[Tiny Premium Breadboard](https://www.adafruit.com/product/65)
This is a tiny little breadboard... half the size of a half-size breadboard!
**As of Sep 8, 2022** - This Tiny breadboard has been updated to make plugging and un-plugging boards and headers a buttery-smooth operation. Updated design also includes a metal...
In Stock
[Buy Now](https://www.adafruit.com/product/65)
[Related Guides to the Product](https://learn.adafruit.com/products/65/guides)
## Related Guides
- [Adafruit LED Backpacks](https://learn.adafruit.com/adafruit-led-backpack.md)
- [3D Printed Animatronic Robot Head](https://learn.adafruit.com/3d-printed-animatronic-robot-head.md)
- [Animating Multiple LED Backpacks](https://learn.adafruit.com/animating-multiple-led-backpacks.md)
- [Tiny Arduino Music Visualizer](https://learn.adafruit.com/piccolo.md)
- [LED Ampli-Tie](https://learn.adafruit.com/led-ampli-tie.md)
- [Wave Shield Voice Changer](https://learn.adafruit.com/wave-shield-voice-changer.md)
- [Battery Powered Raspberry Pi Displays w/RaspiRobot Shield](https://learn.adafruit.com/raspirobot-battery-powered-raspberry-pi-displays.md)
- [Trinket Sound-Reactive LED Color Organ](https://learn.adafruit.com/trinket-sound-reactive-led-color-organ.md)
- [Electronic Demon Costume](https://learn.adafruit.com/electronic-demon-costume.md)
- [FFT: Fun with Fourier Transforms](https://learn.adafruit.com/fft-fun-with-fourier-transforms.md)
- [CircuitPython Hardware: LED Backpacks & FeatherWings](https://learn.adafruit.com/micropython-hardware-led-backpacks-and-featherwings.md)
- [3D Printed Wireless MIDI Controller Guitar](https://learn.adafruit.com/ez-key-wireless-midi-controller-guitar.md)
- [Matrix and 7-Segment LED Backpack with the Raspberry Pi](https://learn.adafruit.com/matrix-7-segment-led-backpack-with-the-raspberry-pi.md)
- [Circle of Fifths Euclidean Synth with synthio and CircuitPython](https://learn.adafruit.com/circle-of-fifths-euclidean-synth-with-synthio-and-circuitpython.md)
- [Adafruit STSPIN220 Stepper Motor Driver Breakout Board](https://learn.adafruit.com/adafruit-stspin220-stepper-motor-driver-breakout-board.md)
---
# Source: https://learn.adafruit.com/adafruit-motor-shield.md
# Adafruit Motor Shield
## Overview
Warning:

Arduino is a great starting point for electronics, and with a motor shield it can also be a nice tidy platform for robotics and mechatronics. Here is a design for a full-featured motor shield that will be able to power many simple to medium-complexity projects.
- **2 connections for 5V 'hobby' servos** connected to the Arduino's high-resolution dedicated timer - no jitter!
- **Up to 4 bi-directional DC** motors with individual 8-bit speed selection (so, about 0.5% resolution)
- **Up to 2 stepper motors** (unipolar or bipolar) with single coil, double coil, interleaved or micro-stepping.
- 4 H-Bridges: L293D chipset provides 0.6A per bridge (1.2A peak) with thermal shutdown protection, 4.5V to 25V
- Pull down resistors keep motors disabled during power-up
- Big terminal block connectors to easily hook up wires (10-22AWG) and power
- Arduino reset button brought up top
- 2-pin terminal block to connect external power, for seperate logic/motor supplies
- Tested compatible with Mega, Diecimila, & Duemilanove
- [Full kit available for purchase from the Adafruit shop.](http://adafruit.com/products/81 "Link: http://adafruit.com/products/81")
- [Download the easy-to-use Arduino software libraries and you're ready to go!](http://learn.adafruit.com/adafruit-motor-shield/downloads)

- [Next Page](https://learn.adafruit.com/adafruit-motor-shield/faq.md)
## Featured Products
### Adafruit METRO 328 Fully Assembled - Arduino IDE compatible
[Adafruit METRO 328 Fully Assembled - Arduino IDE compatible](https://www.adafruit.com/product/50)
We sure love the ATmega328 here at Adafruit, and we use them _a lot_ for our own projects. The processor has plenty of GPIO, Analog inputs, hardware UART SPI and I2C, timers and PWM galore - just enough for most simple projects. When we need to go small, we use a
Out of Stock
[Buy Now](https://www.adafruit.com/product/50)
[Related Guides to the Product](https://learn.adafruit.com/products/50/guides)
## Related Guides
- [Adafruit Proto Shield for Arduino](https://learn.adafruit.com/adafruit-proto-shield-arduino.md)
- [Analog Feedback Servos](https://learn.adafruit.com/analog-feedback-servos.md)
- [All About Arduino Libraries](https://learn.adafruit.com/adafruit-all-about-arduino-libraries-install-use.md)
- [RePaper eInk Development Board](https://learn.adafruit.com/repaper-eink-development-board.md)
- [Multi-tasking the Arduino - Part 2](https://learn.adafruit.com/multi-tasking-the-arduino-part-2.md)
- [Bluetooth Controlled Motorized Camera Slider](https://learn.adafruit.com/bluetooth-motorized-camera-slider.md)
- [Electronic Demon Costume](https://learn.adafruit.com/electronic-demon-costume.md)
- [Adafruit INA219 Current Sensor Breakout](https://learn.adafruit.com/adafruit-ina219-current-sensor-breakout.md)
- [Ladyada's Learn Arduino - Lesson #2](https://learn.adafruit.com/ladyadas-learn-arduino-lesson-number-2.md)
- [Arduino Lesson 6. Digital Inputs](https://learn.adafruit.com/adafruit-arduino-lesson-6-digital-inputs.md)
- [2.2" TFT Display](https://learn.adafruit.com/2-2-tft-display.md)
- [Arduino Lesson 2. LEDs](https://learn.adafruit.com/adafruit-arduino-lesson-2-leds.md)
- [Collin's Lab: MIDI](https://learn.adafruit.com/collins-lab-midi.md)
- [1,500 NeoPixel LED Curtain with Raspberry Pi and Fadecandy](https://learn.adafruit.com/1500-neopixel-led-curtain-with-raspberry-pi-fadecandy.md)
- [Programming Arduino with Android and Windows Tablets](https://learn.adafruit.com/programming-arduino-with-android-and-windows-tablets.md)
---
# Source: https://learn.adafruit.com/adafruit-nfc-rfid-on-raspberry-pi.md
# Adafruit NFC/RFID on Raspberry Pi
## Overview

Interested in adding some NFC (near-field communication) fun and excitement to your Raspberry Pi? You're in luck!
A big advantage of Linux is that it includes a large number of software “stacks” developed by the open source community, and you get to take advantage of all that hard work simply by using or installing the right library.
NFC is no exception here, with [_libnfc_](https://github.com/nfc-tools/libnfc) having been around for a quite some time—in fact, it's the original reason the NFC Breakout was developed! libnfc is a library for **C programmers**. For Python and CircuitPython, there’s [an equivalent module](https://learn.adafruit.com/adafruit-pn532-rfid-nfc/python-circuitpython).
To get libnfc playing well with your Pi and your Adafruit NFC breakout you'll need to make some minor configuration changes to the system and install some code, but it's pretty painless, and this tutorial will show you everything you need to do to start writing your own NFC-enabled apps on the Pi!
**This guide assumes you have some version of Raspberry Pi OS already running, that the system is network-connected and so forth. We have [a series of tutorials for first-time users](https://learn.adafruit.com/adafruit-raspberry-pi-lesson-1-preparing-and-sd-card-for-your-raspberry-pi/overview) if you need some help with those steps.**
- [Next Page](https://learn.adafruit.com/adafruit-nfc-rfid-on-raspberry-pi/pi-serial-port.md)
## Featured Products
### 13.56MHz RFID/NFC tag assortment - Classic 1K
[13.56MHz RFID/NFC tag assortment - Classic 1K](https://www.adafruit.com/product/365)
One of each of our favorite 13.56MHz RFID/NFC Classic 1K tags - 5 in total!
- [Credit card size](http://www.adafruit.com/products/359)
- [1" diameter 'laundry' clear tag](http://www.adafruit.com/products/361)
-
No Longer Stocked
[Buy Now](https://www.adafruit.com/product/365)
[Related Guides to the Product](https://learn.adafruit.com/products/365/guides)
### 13.56MHz RFID/NFC Clear Keychain Fob - Classic 1K
[13.56MHz RFID/NFC Clear Keychain Fob - Classic 1K](https://www.adafruit.com/product/363)
This is a blank 13.56MHz RFID/NFC keychain fob - often used for keys but also an easy way to tag something. The tag contains a small RFID chip and an antenna, and is passively powered by the reader/writer when placed a couple inches away.
These can be read by almost any 13.56MHz...
No Longer Stocked
[Buy Now](https://www.adafruit.com/product/363)
[Related Guides to the Product](https://learn.adafruit.com/products/363/guides)
### 13.56MHz RFID/NFC Bracelet - Classic 1K
[13.56MHz RFID/NFC Bracelet - Classic 1K](https://www.adafruit.com/product/921)
This is a blank 13.56MHz RFID/NFC silicone bracelet. The tag contains a small RFID chip and an antenna, and is passively powered by the reader/writer when placed a couple inches away.
These can be read by almost any 13.56MHz RFID/NFC reader but make sure it can handle ISO/IEC...
In Stock
[Buy Now](https://www.adafruit.com/product/921)
[Related Guides to the Product](https://learn.adafruit.com/products/921/guides)
### 13.56MHz RFID/NFC Charm - Classic 1K
[13.56MHz RFID/NFC Charm - Classic 1K](https://www.adafruit.com/product/884)
This is a blank 13.56MHz RFID/NFC embedded in a phone charm - often used for train/bus passes but also found in other systems where a proximity card is desired. The tag contains a small RFID chip and an antenna, and is passively powered by the reader/writer when placed a couple inches...
No Longer Stocked
[Buy Now](https://www.adafruit.com/product/884)
[Related Guides to the Product](https://learn.adafruit.com/products/884/guides)
### 13.56MHz RFID/NFC Clear Tag - Classic 1K
[13.56MHz RFID/NFC Clear Tag - Classic 1K](https://www.adafruit.com/product/361)
This is a blank 13.56MHz Classic 'laundry' tag - often used for laundry or identification but also found in other systems where a small proximity card is desired. This one is clear! The tag contains a small RFID chip and an antenna, and is passively powered by the reader/writer...
Out of Stock
[Buy Now](https://www.adafruit.com/product/361)
[Related Guides to the Product](https://learn.adafruit.com/products/361/guides)
### 13.56MHz RFID/NFC White Tag - Classic 1K
[13.56MHz RFID/NFC White Tag - Classic 1K](https://www.adafruit.com/product/360)
This is a blank 13.56MHz RFID/NFC laundry tag - often used for laundry but also general tagging. The tag contains a small RFID chip and an antenna, and is passively powered by the reader/writer when placed a couple inches away.
These can be read by almost any 13.56MHz RFID/NFC...
In Stock
[Buy Now](https://www.adafruit.com/product/360)
[Related Guides to the Product](https://learn.adafruit.com/products/360/guides)
### 13.56MHz RFID/NFC Card - Classic 1K
[13.56MHz RFID/NFC Card - Classic 1K](https://www.adafruit.com/product/359)
This is a blank 13.56MHz RFID/NFC card - often used for train/bus passes but also found in other systems where a proximity card is desired. The tag contains a small RFID chip and an antenna, and is passively powered by the reader/writer when placed a couple inches away.
These can be...
In Stock
[Buy Now](https://www.adafruit.com/product/359)
[Related Guides to the Product](https://learn.adafruit.com/products/359/guides)
### Adafruit Assembled Pi Cobbler Breakout + Cable for Raspberry Pi
[Adafruit Assembled Pi Cobbler Breakout + Cable for Raspberry Pi](https://www.adafruit.com/product/914)
Now that you've finally got your hands on a [Raspberry Pi® Model B](http://www.raspberrypi.org/), you're probably itching to make some fun embedded computer projects with it. What you need is an add on prototyping Pi Cobbler from Adafruit, which can break out all those...
No Longer Stocked
[Buy Now](https://www.adafruit.com/product/914)
[Related Guides to the Product](https://learn.adafruit.com/products/914/guides)
## Related Guides
- [I2C Addresses and Troublesome Chips](https://learn.adafruit.com/i2c-addresses.md)
- [Collin's Lab: RFID](https://learn.adafruit.com/collins-lab-rfid.md)
- [Mystery Box: Remote Chess Board Puzzle Lock](https://learn.adafruit.com/mystery-box-remote-chess-board-puzzle-lock.md)
- [Raspberry Pi NFC Minecraft Blocks](https://learn.adafruit.com/raspberry-pi-nfc-minecraft-blocks.md)
- [NFC Raspberry Pi Media Player](https://learn.adafruit.com/nfc-raspberry-pi-media-player.md)
- [Adafruit PN532 RFID/NFC Breakout and Shield](https://learn.adafruit.com/adafruit-pn532-rfid-nfc.md)
- [Adafruit's Raspberry Pi Lesson 9. Controlling a DC Motor](https://learn.adafruit.com/adafruit-raspberry-pi-lesson-9-controlling-a-dc-motor.md)
- [Adafruit's Raspberry Pi Lesson 5. Using a Console Cable](https://learn.adafruit.com/adafruits-raspberry-pi-lesson-5-using-a-console-cable.md)
- [Pi Box](https://learn.adafruit.com/pi-box.md)
- [Piezo Ring Tones with Raspberry Pi](https://learn.adafruit.com/piezo-ring-tones-with-raspberry-pi.md)
- [Cloud Cam: Internet-Connected Security Camera](https://learn.adafruit.com/cloud-cam-connected-raspberry-pi-security-camera.md)
- [Set up and Blink - MATLAB and Simulink with Raspberry Pi](https://learn.adafruit.com/how-to-use-matlab-and-simulink-with-raspberry-pi.md)
- [Battery Powered Raspberry Pi Displays w/RaspiRobot Shield](https://learn.adafruit.com/raspirobot-battery-powered-raspberry-pi-displays.md)
- [Adafruit's Raspberry Pi Lesson 13. Power Control](https://learn.adafruit.com/adafruits-raspberry-pi-lesson-13-power-control.md)
- [Raspberry Pi Thermal Printer One Time Pads](https://learn.adafruit.com/raspberry-pi-thermal-printer-one-time-pads.md)
---
# Source: https://learn.adafruit.com/adafruit-optical-fingerprint-sensor.md
# Adafruit Optical Fingerprint Sensor
## Overview

Secure your project with biometrics - this all-in-one optical fingerprint sensor will make adding fingerprint detection and verification super simple. These modules are typically used in safes - there's a high powered DSP chip that does the image rendering, calculation, feature-finding and searching. Connect to any microcontroller or system with TTL serial, and send packets of data to take photos, detect prints, hash and search. You can also enroll new fingers directly - up to 162 finger prints can be stored in the onboard FLASH memory.
http://youtu.be/1diFaa5OsFg
We like this particular sensor because not only is it easy to use, it also comes with fairly straight-forward Windows software that makes testing the module simple - you can even enroll using the software and see an image of the fingerprint on your computer screen. But, of course, we wouldn't leave you a datasheet and a "good luck!" -[we wrote a full Arduino library so that you can get running in under 10 minutes. The library can enroll and search so its perfect for any project](https://github.com/adafruit/Adafruit-Fingerprint-Sensor-Library "Link: https://github.com/adafruit/Adafruit-Fingerprint-Sensor-Library"). We've also [written a detailed tutorial on wiring and use](http://learn.adafruit.com/adafruit-optical-fingerprint-sensor). This is by far the best fingerprint sensor you can get.
- **Supply voltage:** 3.6 - 6.0VDC
- **Operating current:** 120mA max
- **Peak current:** 150mA max
- **Fingerprint imaging time:** \<1.0 seconds
- **Window area:** 14mm x 18mm
- **Signature file:** 256 bytes
- **Template file:** 512 bytes
- **Storage capacity:** 162 templates
- **Safety ratings** (1-5 low to high safety)
- **False Acceptance Rate:** \<0.001% (Security level 3)
- **False Reject Rate:** \<1.0% (Security level 3)
- **Interface:** TTL Serial
- **Baud rate:** 9600, 19200, 28800, 38400, 57600 (default is 57600)
- **Working temperature rating:** -20C to +50C
- **Working humidy:** 40%-85% RH
- **Full Dimensions:** 56 x 20 x 21.5mm
- **Exposed Dimensions** (when placed in box): 21mm x 21mm x 21mm triangular
- **Weight:** 20 grams
- [Next Page](https://learn.adafruit.com/adafruit-optical-fingerprint-sensor/enrolling-vs-searching.md)
## Featured Products
### Fingerprint sensor
[Fingerprint sensor](https://www.adafruit.com/product/751)
Secure your project with biometrics - this all-in-one optical fingerprint sensor will make adding fingerprint detection and verification super simple. These modules are typically used in safes - there's a high powered DSP chip that does the image rendering, calculation, feature-finding and...
No Longer Stocked
[Buy Now](https://www.adafruit.com/product/751)
[Related Guides to the Product](https://learn.adafruit.com/products/751/guides)
### Rugged Panel Mount Fingerprint Sensor with Bi-Color LED Ring
[Rugged Panel Mount Fingerprint Sensor with Bi-Color LED Ring](https://www.adafruit.com/product/4651)
Secure your project with biometrics - this all-in-one optical fingerprint sensor will make adding fingerprint detection and verification super simple. It even has an LED ring built around the detection pad, which can be set to red, blue or purple (as well as some fading/blinking effects) for a...
In Stock
[Buy Now](https://www.adafruit.com/product/4651)
[Related Guides to the Product](https://learn.adafruit.com/products/4651/guides)
### Adafruit METRO 328 Fully Assembled - Arduino IDE compatible
[Adafruit METRO 328 Fully Assembled - Arduino IDE compatible](https://www.adafruit.com/product/50)
We sure love the ATmega328 here at Adafruit, and we use them _a lot_ for our own projects. The processor has plenty of GPIO, Analog inputs, hardware UART SPI and I2C, timers and PWM galore - just enough for most simple projects. When we need to go small, we use a
Out of Stock
[Buy Now](https://www.adafruit.com/product/50)
[Related Guides to the Product](https://learn.adafruit.com/products/50/guides)
### Breadboarding wire bundle
[Breadboarding wire bundle](https://www.adafruit.com/product/153)
75 flexible stranded core wires with stiff ends molded on in red, orange, yellow, green, blue, brown, black and white. These are a major improvement over the "box of bent wires" that are sometimes sold with breadboards, and faster than stripping your own solid core wires. Makes...
In Stock
[Buy Now](https://www.adafruit.com/product/153)
[Related Guides to the Product](https://learn.adafruit.com/products/153/guides)
## Related Guides
- [A REST API for Arduino & the CC3000 WiFi Chip](https://learn.adafruit.com/a-rest-api-for-arduino-and-the-cc3000-wifi-chip.md)
- [Analog Feedback Servos](https://learn.adafruit.com/analog-feedback-servos.md)
- [Adafruit 4-Channel ADC Breakouts](https://learn.adafruit.com/adafruit-4-channel-adc-breakouts.md)
- [Collin's Lab: MIDI](https://learn.adafruit.com/collins-lab-midi.md)
- [Adafruit PN532 RFID/NFC Breakout and Shield](https://learn.adafruit.com/adafruit-pn532-rfid-nfc.md)
- [Adafruit AirLift Shield - ESP32 WiFi Co-Processor](https://learn.adafruit.com/adafruit-airlift-shield-esp32-wifi-co-processor.md)
- [8BitBox](https://learn.adafruit.com/8bitbox.md)
- [Geofencing with the FONA 808 & Adafruit IO](https://learn.adafruit.com/geofencing-with-the-fona-808-and-adafruit-io.md)
- [1,500 NeoPixel LED Curtain with Raspberry Pi and Fadecandy](https://learn.adafruit.com/1500-neopixel-led-curtain-with-raspberry-pi-fadecandy.md)
- [Photocells](https://learn.adafruit.com/photocells.md)
- [Automatic Monitor Color Temperature Adjustment](https://learn.adafruit.com/automatic-monitor-color-temperature-adjustment.md)
- [Arduino Lesson 15. DC Motor Reversing](https://learn.adafruit.com/adafruit-arduino-lesson-15-dc-motor-reversing.md)
- [Adafruit 1.14" 240x135 Color TFT Breakout LCD Display](https://learn.adafruit.com/adafruit-1-14-240x135-color-tft-breakout.md)
- [How to Find Hidden COM Ports](https://learn.adafruit.com/how-to-find-hidden-com-ports.md)
- [Low Power Coin Cell Voltage Logger](https://learn.adafruit.com/low-power-coin-cell-voltage-logger.md)
---
# Source: https://learn.adafruit.com/adafruit-pi-cobbler-kit.md
# Adafruit Pi Cobbler Kit
## Overview

Now that you've finally got your hands on a [Raspberry Pi®](http://www.raspberrypi.org/), you're probably itching to make some fun embedded computer projects with it. What you need is an add on prototyping Pi Cobbler from Adafruit, which can break out all those tasty power, GPIO, I2C and SPI pins from the 26 pin header onto a solderless breadboard. This mini kit will make "cobbling together" prototypes with the Pi super easy.
The Pi Cobbler mini kit comes with a 26 pin ribbon cable, a custom PCB, ribbon cable socket and header pins. A little soldering is required to put it together but its really easy, even a beginner can do it in 15 minutes! Once soldered together, the cable plugs between the Pi computer and the Cobbler breakout. The Cobbler can plug into any solderless breadboard (or even a prototyping board like the PermaProto). The Cobbler PCB has all the pins labeled nicely so you can go forth and build circuits without keeping a pin-out printout at your desk. We think this will make it more fun to expand the Pi and build custom circuitry with it.
**Please note, this kit only contains a 26 pin ribbon cable, a custom PCB, ribbon cable socket and header pins.** A Raspberry Pi, breadboard, breadboarding wires, cables, components, case, power supply, etc is not included! We do stock many of those items in the shop, so check those out as well!

- [Next Page](https://learn.adafruit.com/adafruit-pi-cobbler-kit/solder-it.md)
## Featured Products
### Adafruit Assembled Pi Cobbler Breakout + Cable for Raspberry Pi
[Adafruit Assembled Pi Cobbler Breakout + Cable for Raspberry Pi](https://www.adafruit.com/product/914)
Now that you've finally got your hands on a [Raspberry Pi® Model B](http://www.raspberrypi.org/), you're probably itching to make some fun embedded computer projects with it. What you need is an add on prototyping Pi Cobbler from Adafruit, which can break out all those...
No Longer Stocked
[Buy Now](https://www.adafruit.com/product/914)
[Related Guides to the Product](https://learn.adafruit.com/products/914/guides)
### Full Sized Premium Breadboard - 830 Tie Points
[Full Sized Premium Breadboard - 830 Tie Points](https://www.adafruit.com/product/239)
This is a 'full-size' premium quality breadboard, 830 tie points. Good for small and medium projects. It's 2.2" x 7" (5.5 cm x 17 cm) with a standard double-strip in the middle and two power rails on both sides. You can pull the power rails off easily to make the...
In Stock
[Buy Now](https://www.adafruit.com/product/239)
[Related Guides to the Product](https://learn.adafruit.com/products/239/guides)
### Adafruit Pi Unassembled T-Cobbler Breakout Kit for Raspberry Pi
[Adafruit Pi Unassembled T-Cobbler Breakout Kit for Raspberry Pi](https://www.adafruit.com/product/1105)
Now that you've finally got your hands on a [Raspberry Pi®](http://www.raspberrypi.org/), you're probably itching to make some fun embedded computer projects with it. What you need is an add on prototyping Pi T-Cobbler from Adafruit, which can break out all those tasty...
No Longer Stocked
[Buy Now](https://www.adafruit.com/product/1105)
[Related Guides to the Product](https://learn.adafruit.com/products/1105/guides)
## Related Guides
- [Adafruit's Raspberry Pi Lesson 13. Power Control](https://learn.adafruit.com/adafruits-raspberry-pi-lesson-13-power-control.md)
- [Raspberry Pi Pipboy 3000](https://learn.adafruit.com/raspberry-pi-pipboy-3000.md)
- [Raspberry Pi Thermal Printer One Time Pads](https://learn.adafruit.com/raspberry-pi-thermal-printer-one-time-pads.md)
- [Raspberry Pi Zero NPR One Radio](https://learn.adafruit.com/raspberry-pi-zero-npr-one-radio.md)
- [Read-Only Raspberry Pi](https://learn.adafruit.com/read-only-raspberry-pi.md)
- [Networked Thermal Printer using Raspberry Pi and CUPS](https://learn.adafruit.com/networked-thermal-printer-using-cups-and-raspberry-pi.md)
- [Using a Mini PAL/NTSC Display with a Raspberry Pi](https://learn.adafruit.com/using-a-mini-pal-ntsc-display-with-a-raspberry-pi.md)
- [Raspberry Pi Care and Troubleshooting](https://learn.adafruit.com/raspberry-pi-care-and-troubleshooting.md)
- [Set up Home Assistant with a Raspberry Pi](https://learn.adafruit.com/set-up-home-assistant-with-a-raspberry-pi.md)
- [5" Display Kippah Portable Raspberry Pi](https://learn.adafruit.com/portable-kippah-pi.md)
- [piBeacon - DIY Beacon with a Raspberry Pi](https://learn.adafruit.com/pibeacon-ibeacon-with-a-raspberry-pi.md)
- [SSD1306 OLED Displays with Raspberry Pi and BeagleBone Black](https://learn.adafruit.com/ssd1306-oled-displays-with-raspberry-pi-and-beaglebone-black.md)
- [How we designed an injection-molded case](https://learn.adafruit.com/how-we-designed-an-injection-molded-case-for-raspberry-pi.md)
- [7” Portable Multitouch Raspberry Pi Tablet](https://learn.adafruit.com/7-portable-raspberry-pi-multitouch-tablet.md)
- [PiGRRL 2](https://learn.adafruit.com/pigrrl-2.md)
---
# Source: https://learn.adafruit.com/adafruits-raspberry-pi-lesson-4-gpio-setup/adafruit-pi-code.md
# Adafruit's Raspberry Pi Lesson 4. GPIO Setup
## Adafruit Pi Code
To make life easy for those wishing to experiment with attaching electronics to their Pi, Adafruit have produced an extensive and extremely useful collection of code. This includes simple [CircuitPython Libraries](https://learn.adafruit.com/circuitpython-on-raspberrypi-linux/overview) for a large number of modules, including displays, sensors, actuators and more.
To fetch this code, you need to use some software called 'git'. .
You will find the icon for a Terminal on your desktop.

Before we go any further, issue the following commands in a Terminal. This will ensure your packages are up to date. It does not matter which directory you are in.
```
sudo apt-get update
sudo apt-get upgrade -y
sudo apt-get dist-upgrade -y
```

Run the following command to install the **adafruit\_blinka** CircuitPython Libraries.
```auto
sudo apt install python3-pip
pip3 install adafruit-blinka
```

- [Previous Page](https://learn.adafruit.com/adafruits-raspberry-pi-lesson-4-gpio-setup/the-gpio-connector.md)
- [Next Page](https://learn.adafruit.com/adafruits-raspberry-pi-lesson-4-gpio-setup/configuring-i2c.md)
## Featured Products
### Assembled Pi Cobbler Plus - Breakout Cable
[Assembled Pi Cobbler Plus - Breakout Cable](https://www.adafruit.com/product/2029)
The Raspberry Pi B+ / Pi 2 / Pi 3 / Pi 4 has landed on the Maker World like a 40-GPIO pinned, quad-USB ported, credit card sized bomb of DIY joy. And while you can use most of our great Model B accessories by hooking up our [downgrade...](https://www.adafruit.com/product/1986)
In Stock
[Buy Now](https://www.adafruit.com/product/2029)
[Related Guides to the Product](https://learn.adafruit.com/products/2029/guides)
### Assembled Pi T-Cobbler Plus - GPIO Breakout
[Assembled Pi T-Cobbler Plus - GPIO Breakout](https://www.adafruit.com/product/2028)
**This is the assembled version of the Pi T-Cobbler Plus. It only works with the Raspberry Pi Model Zero, A+, B+, Pi 2, Pi 3 & Pi 4!** (Any Pi with 2x20 connector)
The Raspberry Pi has landed on the Maker World like a 40-GPIO pinned, quad-USB ported, credit...
In Stock
[Buy Now](https://www.adafruit.com/product/2028)
[Related Guides to the Product](https://learn.adafruit.com/products/2028/guides)
### Raspberry Pi 3 Model B Starter Pack - Includes a Raspberry Pi 3
[Raspberry Pi 3 Model B Starter Pack - Includes a Raspberry Pi 3](https://www.adafruit.com/product/3058)
Gotta say - this new Pi 3 is fly. All the cool kids are going to have it - but all the coolest kids are also going to have a big pack of super cool accessories.
We've hand chosen these accessories as the perfect accompaniment to your new Raspberry Pi 3 - Model B. It's...
No Longer Stocked
[Buy Now](https://www.adafruit.com/product/3058)
[Related Guides to the Product](https://learn.adafruit.com/products/3058/guides)
### Adafruit Assembled Pi Cobbler Breakout + Cable for Raspberry Pi
[Adafruit Assembled Pi Cobbler Breakout + Cable for Raspberry Pi](https://www.adafruit.com/product/914)
Now that you've finally got your hands on a [Raspberry Pi® Model B](http://www.raspberrypi.org/), you're probably itching to make some fun embedded computer projects with it. What you need is an add on prototyping Pi Cobbler from Adafruit, which can break out all those...
No Longer Stocked
[Buy Now](https://www.adafruit.com/product/914)
[Related Guides to the Product](https://learn.adafruit.com/products/914/guides)
### Budget Pack for Raspberry Pi 1 Model B (Doesn't include RasPi)
[Budget Pack for Raspberry Pi 1 Model B (Doesn't include RasPi)](https://www.adafruit.com/product/965)
An optimized collection of parts and pieces to experiment with Raspberry Pi at home, school or work. Great for students and those that want to get their feet wet, no soldering required! **THIS PACK DOES NOT INCLUDE A RASPBERRY PI 1 MODEL B and is NOT compatible with Model B+ or Raspberry Pi...**
No Longer Stocked
[Buy Now](https://www.adafruit.com/product/965)
[Related Guides to the Product](https://learn.adafruit.com/products/965/guides)
### GPIO Ribbon Cable for Raspberry Pi Model A and B - 26 pin
[GPIO Ribbon Cable for Raspberry Pi Model A and B - 26 pin](https://www.adafruit.com/product/862)
That new Raspberry Pi® Model A or B computer you just got has a row of 2x13 pin headers soldered on - those are the GPIO (general purpose input/output) pins and for those of us who like to hack electronics they are where the real fun is. By programming the Pi, you can twiddle those pins...
In Stock
[Buy Now](https://www.adafruit.com/product/862)
[Related Guides to the Product](https://learn.adafruit.com/products/862/guides)
### Programming the Raspberry Pi: Getting Started with Python
[Programming the Raspberry Pi: Getting Started with Python](https://www.adafruit.com/product/1089)
**Program your own Raspberry Pi projects!**
An updated guide to programming your own Raspberry Pi projects. Learn to create inventive programs and fun games on your powerful Raspberry Pi--with no programming experience required. **This practical book has been revised...**
In Stock
[Buy Now](https://www.adafruit.com/product/1089)
[Related Guides to the Product](https://learn.adafruit.com/products/1089/guides)
## Related Guides
- [Adafruit's Raspberry Pi Lesson 11. DS18B20 Temperature Sensing](https://learn.adafruit.com/adafruits-raspberry-pi-lesson-11-ds18b20-temperature-sensing.md)
- [Drive a 16x2 LCD with the Raspberry Pi](https://learn.adafruit.com/drive-a-16x2-lcd-directly-with-a-raspberry-pi.md)
- [Capacitive Touch Sensors on the Raspberry Pi](https://learn.adafruit.com/capacitive-touch-sensors-on-the-raspberry-pi.md)
- [Circadian Pi Desk Light](https://learn.adafruit.com/circadian-pi-desk-light.md)
- [Windows IoT Core Application Development: Headless Blinky](https://learn.adafruit.com/windows-iot-application-development-headless-application.md)
- [Node.js Embedded Development on the Raspberry Pi](https://learn.adafruit.com/node-embedded-development.md)
- [Single Channel LoRaWAN Gateway for Raspberry Pi](https://learn.adafruit.com/raspberry-pi-single-channel-lorawan-gateway.md)
- [Basic Resistor Sensor Reading on Raspberry Pi](https://learn.adafruit.com/basic-resistor-sensor-reading-on-raspberry-pi.md)
- [Raspberry Pi E-mail Notifier Using LEDs](https://learn.adafruit.com/raspberry-pi-e-mail-notifier-using-leds.md)
- [LoRa and LoRaWAN Radio for Raspberry Pi](https://learn.adafruit.com/lora-and-lorawan-radio-for-raspberry-pi.md)
- [Adafruit's Raspberry Pi Lesson 13. Power Control](https://learn.adafruit.com/adafruits-raspberry-pi-lesson-13-power-control.md)
- [Matrix and 7-Segment LED Backpack with the Raspberry Pi](https://learn.adafruit.com/matrix-7-segment-led-backpack-with-the-raspberry-pi.md)
- [Adafruit's Raspberry Pi Lesson 12. Sensing Movement](https://learn.adafruit.com/adafruits-raspberry-pi-lesson-12-sensing-movement.md)
- [Setting up a Raspberry Pi with NOOBS](https://learn.adafruit.com/setting-up-a-raspberry-pi-with-noobs.md)
- [Processing on the Raspberry Pi & PiTFT](https://learn.adafruit.com/processing-on-the-raspberry-pi-and-pitft.md)
---
# Source: https://learn.adafruit.com/adafruit-pn532-rfid-nfc.md
# Adafruit PN532 RFID/NFC Breakout and Shield
## Overview
Hey! So this is not a full tutorial, its just a quickstart guide while we do more research into RFID/NFC. There's a lot of info here but not everything is explained in detail. We hope to fill out the tutorial but there's not a lot of good information about NFC so it's taking a bit of time!- [Next Page](https://learn.adafruit.com/adafruit-pn532-rfid-nfc/breakout-wiring.md)
## Featured Products
### PN532 NFC/RFID controller breakout board
[PN532 NFC/RFID controller breakout board](https://www.adafruit.com/product/364)
The PN532 is the most popular NFC chip, and is what is embedded in pretty much every phone or device that does NFC. It can pretty much do it all, such as read and write to tags and cards, communicate with phones (say for payment processing), and 'act' like a NFC tag. If you want to do...
Out of Stock
[Buy Now](https://www.adafruit.com/product/364)
[Related Guides to the Product](https://learn.adafruit.com/products/364/guides)
### Adafruit METRO 328 Fully Assembled - Arduino IDE compatible
[Adafruit METRO 328 Fully Assembled - Arduino IDE compatible](https://www.adafruit.com/product/50)
We sure love the ATmega328 here at Adafruit, and we use them _a lot_ for our own projects. The processor has plenty of GPIO, Analog inputs, hardware UART SPI and I2C, timers and PWM galore - just enough for most simple projects. When we need to go small, we use a
Out of Stock
[Buy Now](https://www.adafruit.com/product/50)
[Related Guides to the Product](https://learn.adafruit.com/products/50/guides)
### Breadboarding wire bundle
[Breadboarding wire bundle](https://www.adafruit.com/product/153)
75 flexible stranded core wires with stiff ends molded on in red, orange, yellow, green, blue, brown, black and white. These are a major improvement over the "box of bent wires" that are sometimes sold with breadboards, and faster than stripping your own solid core wires. Makes...
In Stock
[Buy Now](https://www.adafruit.com/product/153)
[Related Guides to the Product](https://learn.adafruit.com/products/153/guides)
### Adafruit PN532 NFC/RFID Controller Shield for Arduino + Extras
[Adafruit PN532 NFC/RFID Controller Shield for Arduino + Extras](https://www.adafruit.com/product/789)
We've taken our popular Adafruit PN532 breakout board and turned it into a shield - the perfect tool for any 13.56MHz RFID or NFC application. The Adafruit NFC shield uses the PN532 chip-set (the most popular NFC chip on the market) and is what is embedded in pretty much every phone or...
In Stock
[Buy Now](https://www.adafruit.com/product/789)
[Related Guides to the Product](https://learn.adafruit.com/products/789/guides)
### 13.56MHz RFID/NFC Card - Classic 1K
[13.56MHz RFID/NFC Card - Classic 1K](https://www.adafruit.com/product/359)
This is a blank 13.56MHz RFID/NFC card - often used for train/bus passes but also found in other systems where a proximity card is desired. The tag contains a small RFID chip and an antenna, and is passively powered by the reader/writer when placed a couple inches away.
These can be...
In Stock
[Buy Now](https://www.adafruit.com/product/359)
[Related Guides to the Product](https://learn.adafruit.com/products/359/guides)
### 13.56MHz RFID/NFC White Tag - Classic 1K
[13.56MHz RFID/NFC White Tag - Classic 1K](https://www.adafruit.com/product/360)
This is a blank 13.56MHz RFID/NFC laundry tag - often used for laundry but also general tagging. The tag contains a small RFID chip and an antenna, and is passively powered by the reader/writer when placed a couple inches away.
These can be read by almost any 13.56MHz RFID/NFC...
In Stock
[Buy Now](https://www.adafruit.com/product/360)
[Related Guides to the Product](https://learn.adafruit.com/products/360/guides)
### 13.56MHz RFID/NFC Clear Tag - Classic 1K
[13.56MHz RFID/NFC Clear Tag - Classic 1K](https://www.adafruit.com/product/361)
This is a blank 13.56MHz Classic 'laundry' tag - often used for laundry or identification but also found in other systems where a small proximity card is desired. This one is clear! The tag contains a small RFID chip and an antenna, and is passively powered by the reader/writer...
In Stock
[Buy Now](https://www.adafruit.com/product/361)
[Related Guides to the Product](https://learn.adafruit.com/products/361/guides)
### 13.56MHz RFID/NFC Sticker - Classic 1K
[13.56MHz RFID/NFC Sticker - Classic 1K](https://www.adafruit.com/product/362)
This is a blank 13.56MHz RFID/NFC sticker - often used for inventory uses but also wherever a sticker is desired. The tag contains a small RFID chip and an antenna, and is passively powered by the reader/writer when placed a couple inches away.
These can be read by almost any...
In Stock
[Buy Now](https://www.adafruit.com/product/362)
[Related Guides to the Product](https://learn.adafruit.com/products/362/guides)
## Related Guides
- [How to Choose a Microcontroller](https://learn.adafruit.com/how-to-choose-a-microcontroller.md)
- [Sous-vide controller powered by Arduino - The SousViduino!](https://learn.adafruit.com/sous-vide-powered-by-arduino-the-sous-viduino.md)
- [Arduino Lesson 13. DC Motors](https://learn.adafruit.com/adafruit-arduino-lesson-13-dc-motors.md)
- [Naughty or Nice Machine](https://learn.adafruit.com/naughty-or-nice-machine.md)
- [Wave Shield Voice Changer](https://learn.adafruit.com/wave-shield-voice-changer.md)
- [Adafruit INA219 Current Sensor Breakout](https://learn.adafruit.com/adafruit-ina219-current-sensor-breakout.md)
- [Low Power Coin Cell Voltage Logger](https://learn.adafruit.com/low-power-coin-cell-voltage-logger.md)
- [Analog Feedback Servos](https://learn.adafruit.com/analog-feedback-servos.md)
- [Tiny Arduino Music Visualizer](https://learn.adafruit.com/piccolo.md)
- [Adafruit Ultimate GPS Logger Shield](https://learn.adafruit.com/adafruit-ultimate-gps-logger-shield.md)
- [Ladyada's Learn Arduino - Lesson #0](https://learn.adafruit.com/ladyadas-learn-arduino-lesson-number-0.md)
- [Mini Thermal Receipt Printers](https://learn.adafruit.com/mini-thermal-receipt-printer.md)
- [Arduino Prototyping Mounting Plate](https://learn.adafruit.com/arduino-prototyping-mounting-plate.md)
- [LED Lightbox](https://learn.adafruit.com/led-lightbox.md)
- [NFC Ring Password Helper](https://learn.adafruit.com/nfc-ring-password-helper.md)
---
# Source: https://learn.adafruit.com/adafruit-prototyping-pi-plate.md
# Adafruit Prototyping Pi Plate
## Overview

Now that you've finally got your hands on a [Raspberry Pi®](http://www.raspberrypi.org/), you're probably itching to make some fun embedded computer projects with it. What you need is an add on prototyping Pi Plate from Adafruit, which can snap onto the Pi main board assembly (and is removable later if you wish) and gives you all sorts of prototyping goodness to make building on top of the Pi super easy.
We added lots of basic but essential goodies. First up, there's a big prototyping area, half of which is 'breadboard' style and half of which is 'perfboard' style so you can wire up DIP chips, sensors, and the like. Along the edges of the proto area, all the GPIO/I2C/SPI and power pins are broken out to 0.1" stips so you can easily connect to them. On the edges of the prototyping area, all of the breakout pins are also connected to labeled 3.5mm screw-terminal blocks. This makes it easy to semi-permanently wire in sensors, LEDs, etc. There's also a 4-block terminal block broken out to 0.1" pads for general non-GPIO wiring. Finally, we had a little space remaining over the metal connectors so we put in an SOIC surface mount chip breakout area, for those chips that dont come in DIP format.
- [Next Page](https://learn.adafruit.com/adafruit-prototyping-pi-plate/solder-it.md)
## Featured Products
### Raspberry Pi - Skill badge, iron-on patch
[Raspberry Pi - Skill badge, iron-on patch](https://www.adafruit.com/product/906)
You are learning to use the small Linux based board, the Raspberry Pi! Adafruit offers a fun and exciting "badges" of achievement for electronics, science and engineering. We believe everyone should be able to be rewarded for learning a useful skill, a badge is just one of the many...
In Stock
[Buy Now](https://www.adafruit.com/product/906)
[Related Guides to the Product](https://learn.adafruit.com/products/906/guides)
### Adafruit Pi Box - Enclosure for Raspberry Pi Model A or B
[Adafruit Pi Box - Enclosure for Raspberry Pi Model A or B](https://www.adafruit.com/product/859)
**Discontinued** - you can grab [Adafruit Pi Box Plus - Enclosure for RasPi Model B+/Pi 2/ Pi 3](https://www.adafruit.com/product/1985) instead!
**We're still selling this classic Adafruit case for those who specifically want it but **
No Longer Stocked
[Buy Now](https://www.adafruit.com/product/859)
[Related Guides to the Product](https://learn.adafruit.com/products/859/guides)
### Adafruit Prototyping Pi Plate Kit for Raspberry Pi
[Adafruit Prototyping Pi Plate Kit for Raspberry Pi](https://www.adafruit.com/product/801)
Now that you've finally got your hands on a [Raspberry Pi®](http://www.raspberrypi.org/), you're probably itching to make some fun embedded computer projects with it. What you need is an add on prototyping Pi Plate from Adafruit, which can snap onto the Pi PCB (and is...
No Longer Stocked
[Buy Now](https://www.adafruit.com/product/801)
[Related Guides to the Product](https://learn.adafruit.com/products/801/guides)
## Related Guides
- [Skill Badge Requirements: Raspberry Pi](https://learn.adafruit.com/skill-badge-requirements-raspberry-pi.md)
- [Adafruit Raspberry Pi Educational Linux Distro](https://learn.adafruit.com/adafruit-raspberry-pi-educational-linux-distro.md)
- [Internet of Things Printer for Raspberry Pi](https://learn.adafruit.com/pi-thermal-printer.md)
- [piBeacon - DIY Beacon with a Raspberry Pi](https://learn.adafruit.com/pibeacon-ibeacon-with-a-raspberry-pi.md)
- [Adafruit Shield Compatibility Guide](https://learn.adafruit.com/adafruit-shield-compatibility.md)
- [Adafruit Powerboost 1000 Basic](https://learn.adafruit.com/adafruit-powerboost-1000-basic.md)
- [3.5" PiTFT OctoPrint Rig](https://learn.adafruit.com/3-dot-5-pitft-octoprint-rig.md)
- [Wave Shield](https://learn.adafruit.com/adafruit-wave-shield-audio-shield-for-arduino.md)
- [How we designed an injection-molded case](https://learn.adafruit.com/how-we-designed-an-injection-molded-case-for-raspberry-pi.md)
- [Micro SD Card Breakout Board Tutorial](https://learn.adafruit.com/adafruit-micro-sd-breakout-board-card-tutorial.md)
- [Adafruit HX711 24-bit ADC](https://learn.adafruit.com/adafruit-hx711-24-bit-adc.md)
- [NextBus transit clock for Raspberry Pi](https://learn.adafruit.com/nextbus-transit-clock-for-raspberry-pi.md)
- [Adafruit LSM9DS0 Accelerometer + Gyro + Magnetometer 9-DOF Breakouts](https://learn.adafruit.com/adafruit-lsm9ds0-accelerometer-gyro-magnetometer-9-dof-breakouts.md)
- [Best Beginner Boards for Teachers](https://learn.adafruit.com/best-beginner-boards-for-teachers.md)
- [PM2.5 Air Quality Sensor](https://learn.adafruit.com/pm25-air-quality-sensor.md)
---
# Source: https://learn.adafruit.com/adafruit-raspberry-pi-educational-linux-distro.md
# Adafruit Raspberry Pi Educational Linux Distro
## Overview

Its been a few years since we released Occidentalis. At the time, the standard Raspbian distribution was still very young and we found a lot of ways to add more hardware support.
However, nowadays the now named [Raspberry Pi OS](https://www.raspberrypi.com/software/) is quite mature as software goes and has integrated a lot of the modifications!
[So, instead of trying to keep up with continuous Raspbian releases, we created a Pi Bootstrapper, a program that you can run on your computer (or Pi) which will install a lot of our favorite tools and support for you! Check it out here](https://github.com/adafruit/Adafruit-Pi-Finder#adafruit-raspberry-pi-finder)
- [Next Page](https://learn.adafruit.com/adafruit-raspberry-pi-educational-linux-distro/occidentalis-v0-dot-3.md)
## Featured Products
### USB MicroSD Card Reader/Writer - microSD / microSDHC / microSDXC
[USB MicroSD Card Reader/Writer - microSD / microSDHC / microSDXC](https://www.adafruit.com/product/939)
This is the cutest little microSD card reader/writer - but don't be fooled by its adorableness! It's wicked fast and supports up to 64 GB SDXC cards! Simply slide the card into the edge and plug it into your computer. No drivers are required, it shows up as a standard 'Mass...
No Longer Stocked
[Buy Now](https://www.adafruit.com/product/939)
[Related Guides to the Product](https://learn.adafruit.com/products/939/guides)
### Raspberry Pi - Skill badge, iron-on patch
[Raspberry Pi - Skill badge, iron-on patch](https://www.adafruit.com/product/906)
You are learning to use the small Linux based board, the Raspberry Pi! Adafruit offers a fun and exciting "badges" of achievement for electronics, science and engineering. We believe everyone should be able to be rewarded for learning a useful skill, a badge is just one of the many...
In Stock
[Buy Now](https://www.adafruit.com/product/906)
[Related Guides to the Product](https://learn.adafruit.com/products/906/guides)
### SD/MicroSD Memory Card (8 GB SDHC)
[SD/MicroSD Memory Card (8 GB SDHC)](https://www.adafruit.com/product/1294)
Add mega-storage in a jiffy using this 8 GB class 4 micro-SD card. It comes with a SD adapter so you can use it with any of our shields or adapters. Preformatted to FAT so it works out of the box with our projects. Tested and works great with our
In Stock
[Buy Now](https://www.adafruit.com/product/1294)
[Related Guides to the Product](https://learn.adafruit.com/products/1294/guides)
## Related Guides
- [Internet of Things Printer for Raspberry Pi](https://learn.adafruit.com/pi-thermal-printer.md)
- [Skill Badge Requirements: Raspberry Pi](https://learn.adafruit.com/skill-badge-requirements-raspberry-pi.md)
- [Adafruit Prototyping Pi Plate](https://learn.adafruit.com/adafruit-prototyping-pi-plate.md)
- [Adafruit's Raspberry Pi Lesson 2. First Time Configuration](https://learn.adafruit.com/adafruits-raspberry-pi-lesson-2-first-time-configuration.md)
- [Raspberry Pi Kernel-o-Matic](https://learn.adafruit.com/raspberry-pi-kernel-o-matic.md)
- [Raspberry Pi Analog to Digital Converters](https://learn.adafruit.com/raspberry-pi-analog-to-digital-converters.md)
- [Controlling Motors using the Raspberry Pi and RasPiRobot Board V2](https://learn.adafruit.com/controlling-motors-using-the-raspberry-pi-and-raspirobot-board-v2.md)
- [CircuitPython Libraries on Linux and Orange Pi](https://learn.adafruit.com/circuitpython-on-orangepi-linux.md)
- [Raspberry Pi as an Ad Blocking Access Point](https://learn.adafruit.com/raspberry-pi-as-an-ad-blocking-access-point.md)
- [Using an External Drive as a Raspberry Pi Root Filesystem](https://learn.adafruit.com/external-drive-as-raspberry-pi-root.md)
- [Teddy Ruxpin Rebuild](https://learn.adafruit.com/teddy-ruxpin-rebuild.md)
- [RasPipe: A Raspberry Pi Pipeline Viewer, Part 1](https://learn.adafruit.com/raspipe-a-raspberry-pi-pipeline-viewer.md)
- [Running Programs Automatically on Your Tiny Computer](https://learn.adafruit.com/running-programs-automatically-on-your-tiny-computer.md)
- [Speech Synthesis on the Raspberry Pi](https://learn.adafruit.com/speech-synthesis-on-the-raspberry-pi.md)
- [Read-Only Raspberry Pi](https://learn.adafruit.com/read-only-raspberry-pi.md)
---
# Source: https://learn.adafruit.com/adafruit-raspberry-pi-lesson-1-preparing-and-sd-card-for-your-raspberry-pi.md
# Adafruit's Raspberry Pi Lesson 1. Preparing an SD Card for your Raspberry Pi
## Overview
When you buy a Raspberry Pi, it may or may not be sold with an SD card. The SD card is important because this is where the Raspberry Pi keeps its operating system and is also where you will store your documents and programs.

Even if your Pi came with an SD card with an operating system on, it is a good idea to update it to the latest version, as improvements and bug fixes are going in all the time. Since putting the operating system onto an SD card wipes everything else off the card, it is worth considering using a USB flash drive for your documents, so that when you install a new version of the operating system, you don't have the complication of copying them off somewhere safe before reformatting the SD card.
If your Pi did not come with an SD card then the minimum size you should get is 8GB, but buy a bigger SD card if you think you will need the space. (If you're planning to store media files or work with other SD card images on your Pi, you probably need a bigger card.)
This lesson shows you how to create an SD card for your Raspberry Pi.
- [Next Page](https://learn.adafruit.com/adafruit-raspberry-pi-lesson-1-preparing-and-sd-card-for-your-raspberry-pi/you-will-need.md)
## Featured Products
### Raspberry Pi 3 - Model B+ - 1.4GHz Cortex-A53 with 1GB RAM
[Raspberry Pi 3 - Model B+ - 1.4GHz Cortex-A53 with 1GB RAM](https://www.adafruit.com/product/3775)
The Raspberry Pi 3 Model B is the most popular Raspberry Pi computer made, and the Pi Foundation knows you can always make a good thing _better_! And what could make the Pi 3 better? How about a _faster_ processor, 5 GHz WiFi, and updated Ethernet chip with PoE capability?...
In Stock
[Buy Now](https://www.adafruit.com/product/3775)
[Related Guides to the Product](https://learn.adafruit.com/products/3775/guides)
### Raspberry Pi 2 Model B Starter Pack - Includes a Raspberry Pi 2
[Raspberry Pi 2 Model B Starter Pack - Includes a Raspberry Pi 2](https://www.adafruit.com/product/2380)
Why not trick out your fresh new board with some accessories? The Pi 2 is a big deal - a big, big deal. It has an upgraded ARMv7 multicore procssor and a full Gigabyte of RAM - meaning you're going to see ~2x the performance on processor-upgrade only and 4x on average for...
No Longer Stocked
[Buy Now](https://www.adafruit.com/product/2380)
[Related Guides to the Product](https://learn.adafruit.com/products/2380/guides)
### Budget Pack for Raspberry Pi 1 Model B (Doesn't include RasPi)
[Budget Pack for Raspberry Pi 1 Model B (Doesn't include RasPi)](https://www.adafruit.com/product/965)
An optimized collection of parts and pieces to experiment with Raspberry Pi at home, school or work. Great for students and those that want to get their feet wet, no soldering required! **THIS PACK DOES NOT INCLUDE A RASPBERRY PI 1 MODEL B and is NOT compatible with Model B+ or Raspberry Pi...**
No Longer Stocked
[Buy Now](https://www.adafruit.com/product/965)
[Related Guides to the Product](https://learn.adafruit.com/products/965/guides)
### USB MicroSD Card Reader/Writer - microSD / microSDHC / microSDXC
[USB MicroSD Card Reader/Writer - microSD / microSDHC / microSDXC](https://www.adafruit.com/product/939)
This is the cutest little microSD card reader/writer - but don't be fooled by its adorableness! It's wicked fast and supports up to 64 GB SDXC cards! Simply slide the card into the edge and plug it into your computer. No drivers are required, it shows up as a standard 'Mass...
No Longer Stocked
[Buy Now](https://www.adafruit.com/product/939)
[Related Guides to the Product](https://learn.adafruit.com/products/939/guides)
### SD/MicroSD Memory Card - 16GB Class 10 - Adapter Included
[SD/MicroSD Memory Card - 16GB Class 10 - Adapter Included](https://www.adafruit.com/product/2693)
Add speedy mega-storage in a jiffy using this 16 GB Class 10 micro-SD card. It comes with a SD adapter so you can use it with any of our shields or adapters! Preformatted to FAT so it works out of the box with our projects. Works great with any device in the Adafruit shop that uses micro-SD...
No Longer Stocked
[Buy Now](https://www.adafruit.com/product/2693)
[Related Guides to the Product](https://learn.adafruit.com/products/2693/guides)
### SD/MicroSD Memory Card (8 GB SDHC)
[SD/MicroSD Memory Card (8 GB SDHC)](https://www.adafruit.com/product/1294)
Add mega-storage in a jiffy using this 8 GB class 4 micro-SD card. It comes with a SD adapter so you can use it with any of our shields or adapters. Preformatted to FAT so it works out of the box with our projects. Tested and works great with our
In Stock
[Buy Now](https://www.adafruit.com/product/1294)
[Related Guides to the Product](https://learn.adafruit.com/products/1294/guides)
### Raspberry Pi 1 Model B Starter Pack - Includes a Raspberry Pi
[Raspberry Pi 1 Model B Starter Pack - Includes a Raspberry Pi](https://www.adafruit.com/product/1014)
You want to get hacking with your Pi fast, right? Get everything you need to start with the Adafruit Starter Pack for Raspberry Pi. It's the perfect accompaniment to your new Pi, everything you need to boot up your Pi Model B and get going. **We pre-assemble the Cobbler for you, no...**
No Longer Stocked
[Buy Now](https://www.adafruit.com/product/1014)
[Related Guides to the Product](https://learn.adafruit.com/products/1014/guides)
### Low-profile microSD card adapter for Raspberry Pi
[Low-profile microSD card adapter for Raspberry Pi](https://www.adafruit.com/product/966)
Make your Pi a little slimmer with this microSD card adapter board. It slides in where the SD card goes but is half the length. Pop in a microSD card for a sleeker machine. The microSD card holder is a push-push type so you can push on the edge that sticks out to remove the card when...
No Longer Stocked
[Buy Now](https://www.adafruit.com/product/966)
[Related Guides to the Product](https://learn.adafruit.com/products/966/guides)
## Related Guides
- [Press Your Button for Raspberry Pi](https://learn.adafruit.com/press-your-button-for-raspberry-pi.md)
- [Adafruit's Raspberry Pi Lesson 5. Using a Console Cable](https://learn.adafruit.com/adafruits-raspberry-pi-lesson-5-using-a-console-cable.md)
- [Adafruit's Raspberry Pi Lesson 2. First Time Configuration](https://learn.adafruit.com/adafruits-raspberry-pi-lesson-2-first-time-configuration.md)
- [Raspberry Pi as an Ad Blocking Access Point](https://learn.adafruit.com/raspberry-pi-as-an-ad-blocking-access-point.md)
- [Set up and Blink - MATLAB and Simulink with Raspberry Pi](https://learn.adafruit.com/how-to-use-matlab-and-simulink-with-raspberry-pi.md)
- [Pi Video Output Using pygame](https://learn.adafruit.com/pi-video-output-using-pygame.md)
- [Drive a 16x2 LCD with the Raspberry Pi](https://learn.adafruit.com/drive-a-16x2-lcd-directly-with-a-raspberry-pi.md)
- [Adafruit's Raspberry Pi Lesson 4. GPIO Setup](https://learn.adafruit.com/adafruits-raspberry-pi-lesson-4-gpio-setup.md)
- [Windows IoT Core Application Management](https://learn.adafruit.com/windows-iot-application-management.md)
- [Read-Only Raspberry Pi](https://learn.adafruit.com/read-only-raspberry-pi.md)
- [Getting Started With Windows IoT Core on Raspberry Pi](https://learn.adafruit.com/getting-started-with-windows-iot-on-raspberry-pi.md)
- [Adafruit NFC/RFID on Raspberry Pi](https://learn.adafruit.com/adafruit-nfc-rfid-on-raspberry-pi.md)
- [Windows IoT Core Application Development: Headless Blinky](https://learn.adafruit.com/windows-iot-application-development-headless-application.md)
- [USB Audio Cards with a Raspberry Pi ](https://learn.adafruit.com/usb-audio-cards-with-a-raspberry-pi.md)
- [Node.js Embedded Development on the Raspberry Pi](https://learn.adafruit.com/node-embedded-development.md)
---
# Source: https://learn.adafruit.com/adafruit-raspberry-pi-lesson-7-remote-control-with-vnc.md
# Adafruit's Raspberry Pi Lesson 7. Remote Control with VNC
## Overview
In this lesson we will explain how to install and use VNC on your raspberry Pi. This will allow you to see your Raspberry Pi's desktop remotely in a graphical way, using the mouse as if you were sitting in front of your Pi.

Connecting to a Pi like this can save on desktop clutter, and the problem of having multiple keyboards and mice all over the place. It also means you can put your Pi somewhere else on the network, but still control it.
- [Next Page](https://learn.adafruit.com/adafruit-raspberry-pi-lesson-7-remote-control-with-vnc/installing-vnc.md)
## Featured Products
### Budget Pack for Raspberry Pi 1 Model B (Doesn't include RasPi)
[Budget Pack for Raspberry Pi 1 Model B (Doesn't include RasPi)](https://www.adafruit.com/product/965)
An optimized collection of parts and pieces to experiment with Raspberry Pi at home, school or work. Great for students and those that want to get their feet wet, no soldering required! **THIS PACK DOES NOT INCLUDE A RASPBERRY PI 1 MODEL B and is NOT compatible with Model B+ or Raspberry Pi...**
No Longer Stocked
[Buy Now](https://www.adafruit.com/product/965)
[Related Guides to the Product](https://learn.adafruit.com/products/965/guides)
### Programming the Raspberry Pi: Getting Started with Python
[Programming the Raspberry Pi: Getting Started with Python](https://www.adafruit.com/product/1089)
**Program your own Raspberry Pi projects!**
An updated guide to programming your own Raspberry Pi projects. Learn to create inventive programs and fun games on your powerful Raspberry Pi--with no programming experience required. **This practical book has been revised...**
In Stock
[Buy Now](https://www.adafruit.com/product/1089)
[Related Guides to the Product](https://learn.adafruit.com/products/1089/guides)
## Related Guides
- [Using a Mini PAL/NTSC Display with a Raspberry Pi](https://learn.adafruit.com/using-a-mini-pal-ntsc-display-with-a-raspberry-pi.md)
- [Arm-based IoT Kit for Cloud IoT Core - Getting Started](https://learn.adafruit.com/raspberry-pi-3-and-sensor-kit-for-google-cloud-iot-core.md)
- [Windows IoT Core Application Development: Headless Blinky](https://learn.adafruit.com/windows-iot-application-development-headless-application.md)
- [Simple Raspberry Pi Robot](https://learn.adafruit.com/simple-raspberry-pi-robot.md)
- [NeoPixels on Raspberry Pi](https://learn.adafruit.com/neopixels-on-raspberry-pi.md)
- [Portable 5in Monitor with HDMI](https://learn.adafruit.com/portable-5in-monitor-with-hdmi.md)
- [2.2" PiTFT HAT Enclosure](https://learn.adafruit.com/3d-printed-2-2-pitft-raspberry-pi-a-plus-enclosure.md)
- [Bluefruit LE Python Library](https://learn.adafruit.com/bluefruit-le-python-library.md)
- [Adafruit Pi Cobbler Kit](https://learn.adafruit.com/adafruit-pi-cobbler-kit.md)
- [Naughty or Nice Machine](https://learn.adafruit.com/naughty-or-nice-machine.md)
- [DHT Humidity Sensing on Raspberry Pi or Beaglebone Black with GDocs Logging](https://learn.adafruit.com/dht-humidity-sensing-on-raspberry-pi-with-gdocs-logging.md)
- [Adafruit's Raspberry Pi Lesson 1. Preparing an SD Card for your Raspberry Pi](https://learn.adafruit.com/adafruit-raspberry-pi-lesson-1-preparing-and-sd-card-for-your-raspberry-pi.md)
- [Mini Raspberry Pi Handheld Notebook](https://learn.adafruit.com/mini-raspberry-pi-handheld-notebook-palmtop.md)
- [Pi Box](https://learn.adafruit.com/pi-box.md)
- [Running Programs Automatically on Your Tiny Computer](https://learn.adafruit.com/running-programs-automatically-on-your-tiny-computer.md)
---
# Source: https://learn.adafruit.com/adafruit-triple-axis-gyro-breakout.md
# Adafruit Triple Axis Gyro Breakout
## Overview
The Adafruit Triple Axis Gyro Breakout is based on the STMicro [L3GD20 MEMS digital output gyroscope chip](http://www.st.com/internet/com/TECHNICAL_RESOURCES/TECHNICAL_LITERATURE/DATASHEET/DM00036465.pdf "Link: http://www.st.com/internet/com/TECHNICAL\_RESOURCES/TECHNICAL\_LITERATURE/DATASHEET/DM00036465.pdf"). We include a 3.3v regulator on board for compatibility with 5v controllers like the Arduino. And there are 4 holes so that it can be rigidly mounted.

## How it Works:
The triple-axis gyro sensor is a MEMS (Micro Electrical Mechanical System) device consisting of 3 micro-machined 'tuning fork' structures on a silicon wafer. These structures are designed to vibrate when stimulated by an electrical signal. When rotated about the axis of the tuning fork, the tines will deflect due to the [Coriolis force](http://en.wikipedia.org/wiki/Coriolis_effect). This deflection is proportional to the speed of rotation.
The 3 MEMS structures are arranged orthogonally, on the X, Y and Z axis. Deflection on each tuning fork is detected as a change in capacitance between sensing plates built into the MEMS structure and converted to a degrees-per-second rotation rate for each of the three axis.
For a more detailed description of MEMS Gyros, see [MEMS Gyroscopes and their applications](http://clifton.mech.northwestern.edu/~me381/project/done/Gyroscope.pdf "Link: http://clifton.mech.northwestern.edu/~me381/project/done/Gyroscope.pdf"). and [Everything about STMicroelectronics’ 3-axis digital MEMS ](http://www.st.com/internet/com/TECHNICAL_RESOURCES/TECHNICAL_LITERATURE/TECHNICAL_ARTICLE/DM00034730.pdf)[gyroscopes](http://www.st.com/internet/com/TECHNICAL_RESOURCES/TECHNICAL_LITERATURE/TECHNICAL_ARTICLE/DM00034730.pdf).
## What can it do?
Gyroscopes are useful for many types of motion sensing applications. They are often paired with [accelerometers](http://learn.adafruit.com/adafruit-analog-accelerometer-breakouts/overview) for inertial guidance systems, 3D motion capture and inverted pendulum (e.g. Segway) type applications. The L3GD20 is particularly versatile, with three full axes of sensing, selectable ±250, ±500, and ±2000 degree-per-second sensitivity ranges and built-in high/low pass filtering.
## [Ladyada's Triple Gyro Special!](https://www.adafruit.com/products/1032 "Link: https://www.adafruit.com/products/1032")
3 micro-machined gyros with I2C, SPI and a 3v regulator on a bite-sized breakout board.
_(Tomato, onion and tzatziki sauce extra.)_- [Next Page](https://learn.adafruit.com/adafruit-triple-axis-gyro-breakout/assembly-and-wiring.md)
## Featured Products
### L3GD20H Triple-Axis Gyro Breakout Board - L3GD20/L3G4200 Upgrade
[L3GD20H Triple-Axis Gyro Breakout Board - L3GD20/L3G4200 Upgrade](https://www.adafruit.com/product/1032)
A gyroscope is a type of sensor that can sense twisting and turning motions. Often paired with an accelerometer, you can use these to do 3D motion capture and inertial measurement (that is - you can tell how an object is moving!) As these sensors become more popular and easier to manufacture,...
In Stock
[Buy Now](https://www.adafruit.com/product/1032)
[Related Guides to the Product](https://learn.adafruit.com/products/1032/guides)
## Related Guides
- [Adafruit 9-DOF IMU Breakout](https://learn.adafruit.com/adafruit-9-dof-imu-breakout.md)
- [Adafruit 10-DOF IMU Breakout](https://learn.adafruit.com/adafruit-10-dof-imu-breakout-lsm303-l3gd20-bmp180.md)
- [Comparing Gyroscope Datasheets](https://learn.adafruit.com/comparing-gyroscope-datasheets.md)
- [I2C Addresses and Troublesome Chips](https://learn.adafruit.com/i2c-addresses.md)
- [AdaBox 015](https://learn.adafruit.com/adabox015.md)
- [LSM303 Accelerometer + Compass Breakout](https://learn.adafruit.com/lsm303-accelerometer-slash-compass-breakout.md)
- [micro:bit Lesson 1. Using the Built-in Sensors](https://learn.adafruit.com/micro-bit-lesson-1-using-the-built-in-sensors.md)
- [Mystery Box: Shutterglass Chamber](https://learn.adafruit.com/shutterglass-chamber.md)
- [CircuitPython Libraries on Linux and Raspberry Pi](https://learn.adafruit.com/circuitpython-on-raspberrypi-linux.md)
- [Using IFTTT with Adafruit IO to Make an IoT Door Detector](https://learn.adafruit.com/using-ifttt-with-adafruit-io.md)
- [itsaSNAP Apple Health Status Board](https://learn.adafruit.com/itssnap-apple-fitness-status-board.md)
- [IoT Filament Sensor](https://learn.adafruit.com/iot-filament-sensor.md)
- [Adafruit Analog Accelerometer Breakouts](https://learn.adafruit.com/adafruit-analog-accelerometer-breakouts.md)
- [MLX90393 Wide-Range 3-Axis Magnetometer](https://learn.adafruit.com/mlx90393-wide-range-3-axis-magnetometer.md)
- [Raspberry Pi I2C Clock Stretching Fixes](https://learn.adafruit.com/raspberry-pi-i2c-clock-stretching-fixes.md)
---
# Source: https://learn.adafruit.com/adafruit-ultimate-gps.md
# Adafruit Ultimate GPS
## Overview

We carry a few different GPS modules here in the Adafruit shop, but none that satisfied our every desire - that's why we designed this little GPS breakout board. We believe this is the **Ultimate** GPS module, so we named it that. It's got everything you want and more:
- -165 dBm sensitivity, 10 Hz updates, 66 channels
- 5V friendly design and only 20mA current draw
- Breadboard friendly + two mounting holes
- RTC battery-compatible
- Built-in datalogging
- PPS output on fix
- Internal patch antenna + u.FL connector for external active antenna
- Fix status LED
Primary: Note there are two versions of the breakout board: one to wire to projects via serial lines & read from a microcontroller (#746) and one meant to connect to a USB cable to an appropriate computer (#4279) which is not programmable in Arduino. Be sure you find the directions for the version you are interested in.
The breakout is built around the MTK3339 chipset, a no-nonsense, high-quality GPS module that can track up to 22 satellites on 66 channels, has an excellent high-sensitivity receiver (-165 dB tracking!), and a built in antenna. It can do up to 10 location updates a second for high speed, high sensitivity logging or tracking. Power usage is incredibly low, only 20 mA during navigation.

## Ultimate GPS Breakout Board
**The Breadboard Breakout board comes with:** a ultra-low dropout 3.3V regulator so you can power it with 3.3-5VDC in, 5V level safe inputs, ENABLE pin so you can turn off the module using any microcontroller pin or switch, a footprint for optional CR1220 coin cell to keep the RTC running and allow warm starts and a tiny bright red LED. The LED blinks at about 1Hz while it's searching for satellites and blinks once every 15 seconds when a fix is found to conserve power. If you want to have an LED on all the time, we also provide the FIX signal out on a pin so you can put an external LED on.
## Ultimate GPS USB Board
**The USB Breakout board comes with:** 4-pin USB breakout for direct-soldering or connection to a USB host, two yellow receive/transmit LEDs let you know when data is being transmitted to or from the GPS module serial interface, a footprint for optional CR1220 coin cell to keep the RTC running and allow warm starts and a tiny bright red LED. The LED blinks at about 1Hz while it's searching for satellites and blinks once every 15 seconds when a fix is found to conserve power. If you want to have an LED on all the time, we also provide the FIX signal out on a pin so you can put an external LED on.

Info:

## Antenna Usage

Two features that really stand out about version 3 MTK3339-based module is the external antenna functionality and the the built in data-logging capability. The module has a standard ceramic patch antenna that gives it -165 dB sensitivity, but when you want to have a bigger antenna, you can snap on any 3V active GPS antenna via the uFL connector. The module will automatically detect the active antenna and switch over! [Most GPS antennas use SMA connectors so you may want to pick up one of our uFL to SMA adapters.](http://www.adafruit.com/products/851 "Link: http://www.adafruit.com/products/851")
The other cool feature of the new MTK3339-based module (which we have tested with great success) is the built in datalogging ability. Since there is a microcontroller inside the module, with some empty FLASH memory, the newest firmware now allows sending commands to do internal logging to that FLASH. The only thing is that you do need to have a microcontroller send the "Start Logging" command. However, after that message is sent, the microcontroller can go to sleep and does not need to wake up to talk to the GPS anymore to reduce power consumption. The time, date, longitude, latitude, and height is logged every 15 seconds and only when there is a fix. The internal FLASH can store about 16 hours of data, it will automatically append data so you don't have to worry about accidentally losing data if power is lost. It is not possible to change what is logged and how often, as its hardcoded into the module but we found that this arrangement covers many of the most common GPS datalogging requirements.
## [Pick one up today at the Adafruit shop!](http://www.adafruit.com/products/746 "Link: http://www.adafruit.com/products/746")
## Specifications:
Module specs:
- Satellites: 22 tracking, 66 searching
- Patch Antenna Size: 15mm x 15mm x 4mm
- Update rate: 1 to 10 Hz
- Position Accuracy: 1.8 meters
- Velocity Accuracy: 0.1 meters/s
- Warm/cold start: 34 seconds
- Acquisition sensitivity: -145 dBm
- Tracking sensitivity: -165 dBm
- Maximum Velocity: 515m/s
- Vin range: 3.0-5.5VDC
- MTK3339 Operating current: 25mA tracking, 20 mA current draw during navigation
- Output: NMEA 0183, 9600 baud default
- DGPS/WAAS/EGNOS supported
- FCC E911 compliance and AGPS support (Offline mode : EPO valid up to 14 days )
- Up to 210 PRN channels
- Jammer detection and reduction
- Multi-path detection and compensation
Breakout board details:
- Weight (not including coin cell or holder): 8.5g
- Dimensions (not including coin cell or holder): 25.5mm x 35mm x 6.5mm / 1.0" x 1.35" x 0.25"
If you purchased a module before March 26th, 2012 and it says MTK3329 on the silkscreen, you have the PA6B version of this breakout with the MT3329 chipset. The MTK3329 does not have built in datalogging. If your module has sharpie marker crossing out the MTK3329 text or there is no text, you have a PA6C MTK3339 with datalogging ability. If you have the version with "v3" next to the name, you have the PA6H which has PPS output and external-antenna support.
This tutorial assumes you have a '3339 type module.
- [Next Page](https://learn.adafruit.com/adafruit-ultimate-gps/pinouts.md)
## Featured Products
### Adafruit Ultimate GPS Breakout - 66 channel w/10 Hz updates
[Adafruit Ultimate GPS Breakout - 66 channel w/10 Hz updates](https://www.adafruit.com/product/746)
We carry a few different GPS modules here in the Adafruit shop, but none that satisfied our every desire - that's why we designed this little GPS breakout board. We believe this is the **Ultimate** GPS module, so we named it that. It's got everything you want and...
In Stock
[Buy Now](https://www.adafruit.com/product/746)
[Related Guides to the Product](https://learn.adafruit.com/products/746/guides)
### Adafruit Ultimate GPS GNSS with USB - 99 channel w/10 Hz updates
[Adafruit Ultimate GPS GNSS with USB - 99 channel w/10 Hz updates](https://www.adafruit.com/product/4279)
The Ultimate GPS module you know and love has a _glow-up_ to let it be easily used with any computer, not just microcontrollers! With the built-in USB-to-Serial converter, you can now plug-n-play the Ultimate GPS into your computer, laptop, embedded Linux computer, and more. Power and...
In Stock
[Buy Now](https://www.adafruit.com/product/4279)
[Related Guides to the Product](https://learn.adafruit.com/products/4279/guides)
### Adafruit METRO 328 Fully Assembled - Arduino IDE compatible
[Adafruit METRO 328 Fully Assembled - Arduino IDE compatible](https://www.adafruit.com/product/50)
We sure love the ATmega328 here at Adafruit, and we use them _a lot_ for our own projects. The processor has plenty of GPIO, Analog inputs, hardware UART SPI and I2C, timers and PWM galore - just enough for most simple projects. When we need to go small, we use a
Out of Stock
[Buy Now](https://www.adafruit.com/product/50)
[Related Guides to the Product](https://learn.adafruit.com/products/50/guides)
### GPS Antenna - External Active Antenna - 3-5V 28dB 5 Meter SMA
[GPS Antenna - External Active Antenna - 3-5V 28dB 5 Meter SMA](https://www.adafruit.com/product/960)
Give your Ultimate GPS V3 a boost with this external active antenna. This GPS antenna draws about 10mA and will give you an additional 28 dB of gain. It's got a 5 meter long cable so it will easily reach wherever you need it to. The antenna is magnetic so it will stick to the top of a car...
In Stock
[Buy Now](https://www.adafruit.com/product/960)
[Related Guides to the Product](https://learn.adafruit.com/products/960/guides)
### SMA to uFL/u.FL/IPX/IPEX RF Adapter Cable
[SMA to uFL/u.FL/IPX/IPEX RF Adapter Cable](https://www.adafruit.com/product/851)
This RF adapter cable is super handy for anyone doing RF work. Often times, small electronics save space by having a pick-and-placeable u.FL connector (also called uFL, IPEX, IPAX, IPX, MHF, and AM). But most antennas have SMA or RP-SMA connectors on them. This little cable will bridge the...
In Stock
[Buy Now](https://www.adafruit.com/product/851)
[Related Guides to the Product](https://learn.adafruit.com/products/851/guides)
### CR1220 12mm Diameter - 3V Lithium Coin Cell Battery
[CR1220 12mm Diameter - 3V Lithium Coin Cell Battery](https://www.adafruit.com/product/380)
These are the highest quality & capacity batteries, the same as shipped with the iCufflinks, iNecklace, Datalogging and GPS Shields, GPS HAT, etc. One battery per order (you'll want one battery per cufflink or pendant.)
Brand may vary but all battery brands are verified...
Out of Stock
[Buy Now](https://www.adafruit.com/product/380)
[Related Guides to the Product](https://learn.adafruit.com/products/380/guides)
### Breadboarding wire bundle
[Breadboarding wire bundle](https://www.adafruit.com/product/153)
75 flexible stranded core wires with stiff ends molded on in red, orange, yellow, green, blue, brown, black and white. These are a major improvement over the "box of bent wires" that are sometimes sold with breadboards, and faster than stripping your own solid core wires. Makes...
In Stock
[Buy Now](https://www.adafruit.com/product/153)
[Related Guides to the Product](https://learn.adafruit.com/products/153/guides)
### Half Sized Premium Breadboard - 400 Tie Points
[Half Sized Premium Breadboard - 400 Tie Points](https://www.adafruit.com/product/64)
This is a cute, half-size breadboard with 400 tie points, good for small projects. It's 3.25" x 2.2" / 8.3cm x 5.5cm with a standard double-strip in the middle and two power rails on both sides. You can pull the power rails off easily to make the breadboard as...
In Stock
[Buy Now](https://www.adafruit.com/product/64)
[Related Guides to the Product](https://learn.adafruit.com/products/64/guides)
## Related Guides
- [Reverse Geocache Box](https://learn.adafruit.com/reverse-geocache-engagement-box.md)
- [Ladyada's Learn Arduino - Lesson #2](https://learn.adafruit.com/ladyadas-learn-arduino-lesson-number-2.md)
- [Wave Shield Talking Clock](https://learn.adafruit.com/wave-shield-talking-clock.md)
- [Wireless Game Show Poppers for the Classroom!](https://learn.adafruit.com/wireless-game-show-poppers.md)
- [Wireless Gardening with Arduino + CC3000 WiFi Modules](https://learn.adafruit.com/wireless-gardening-arduino-cc3000-wifi-modules.md)
- [CircuitPython Essentials](https://learn.adafruit.com/circuitpython-essentials.md)
- [CircuitPython Libraries on Linux and ODROID C2](https://learn.adafruit.com/circuitpython-libaries-linux-odroid-c2.md)
- [2.2" TFT Display](https://learn.adafruit.com/2-2-tft-display.md)
- [RGB LED Matrix Basics](https://learn.adafruit.com/32x16-32x32-rgb-led-matrix.md)
- [Halloween Pumpkin](https://learn.adafruit.com/halloween-pumpkin.md)
- [Remote controlled door lock using a fingerprint sensor & Adafruit IO](https://learn.adafruit.com/remote-controlled-door-lock-using-a-fingerprint-sensor-and-adafruit-io.md)
- [Automatic Monitor Color Temperature Adjustment](https://learn.adafruit.com/automatic-monitor-color-temperature-adjustment.md)
- [Animating Multiple LED Backpacks](https://learn.adafruit.com/animating-multiple-led-backpacks.md)
- [Skill Badge Requirements: Microcontrollers](https://learn.adafruit.com/skill-badge-requirements-microcontrollers.md)
- [RePaper eInk Development Board](https://learn.adafruit.com/repaper-eink-development-board.md)
---
# Source: https://learn.adafruit.com/adafruits-raspberry-pi-lesson-2-first-time-configuration.md
# Adafruit's Raspberry Pi Lesson 2. First Time Configuration
## Overview
In the first lesson of this series, we showed you how to prepare an SD card containing an operating system for your Raspberry Pi. In this lesson, we will show you how to setup your Raspberry Pi the first time you boot it up.

We do this using a tool called Raspi-Config that runs automatically the first time you boot your Raspberry Pi. This starts before the windowing system and so you have to use the cursor keys and Return key to navigate the menu system.
It is a bit like adjusting the BIOS settings on a PC, once you have things right, you probably won't need it again. We will start with the options that are most important and then look at some of the other options that you may wish to configure.
- [Next Page](https://learn.adafruit.com/adafruits-raspberry-pi-lesson-2-first-time-configuration/using-the-whole-sd-card.md)
## Featured Products
### Raspberry Pi 1 Model B Starter Pack - Includes a Raspberry Pi
[Raspberry Pi 1 Model B Starter Pack - Includes a Raspberry Pi](https://www.adafruit.com/product/1014)
You want to get hacking with your Pi fast, right? Get everything you need to start with the Adafruit Starter Pack for Raspberry Pi. It's the perfect accompaniment to your new Pi, everything you need to boot up your Pi Model B and get going. **We pre-assemble the Cobbler for you, no...**
No Longer Stocked
[Buy Now](https://www.adafruit.com/product/1014)
[Related Guides to the Product](https://learn.adafruit.com/products/1014/guides)
### Programming the Raspberry Pi: Getting Started with Python
[Programming the Raspberry Pi: Getting Started with Python](https://www.adafruit.com/product/1089)
**Program your own Raspberry Pi projects!**
An updated guide to programming your own Raspberry Pi projects. Learn to create inventive programs and fun games on your powerful Raspberry Pi--with no programming experience required. **This practical book has been revised...**
In Stock
[Buy Now](https://www.adafruit.com/product/1089)
[Related Guides to the Product](https://learn.adafruit.com/products/1089/guides)
### Budget Pack for Raspberry Pi 1 Model B (Doesn't include RasPi)
[Budget Pack for Raspberry Pi 1 Model B (Doesn't include RasPi)](https://www.adafruit.com/product/965)
An optimized collection of parts and pieces to experiment with Raspberry Pi at home, school or work. Great for students and those that want to get their feet wet, no soldering required! **THIS PACK DOES NOT INCLUDE A RASPBERRY PI 1 MODEL B and is NOT compatible with Model B+ or Raspberry Pi...**
No Longer Stocked
[Buy Now](https://www.adafruit.com/product/965)
[Related Guides to the Product](https://learn.adafruit.com/products/965/guides)
### Miniature Wireless USB Keyboard with Touchpad
[Miniature Wireless USB Keyboard with Touchpad](https://www.adafruit.com/product/922)
Add a miniature wireless controller to your computer project with this combination keyboard and touchpad. We found the smallest wireless USB keyboard available, a mere 6" x 2.4" x 0.5" (152mm x 59mm x 12.5mm)! It's small but usable to make a great accompaniment to a computer...
In Stock
[Buy Now](https://www.adafruit.com/product/922)
[Related Guides to the Product](https://learn.adafruit.com/products/922/guides)
### NTSC/PAL (Television) TFT Display - 4.3" Diagonal
[NTSC/PAL (Television) TFT Display - 4.3" Diagonal](https://www.adafruit.com/product/946)
Yes, this is an adorable small television! The visible display measures only 4.3" (11cm) diagonal, the TFT comes with a NTSC/PAL driver board, enclosure and stand. The display is very easy to use - simply connect 12VDC to the 2.1mm center-positive DC jack (or use the cable and connect to...
No Longer Stocked
[Buy Now](https://www.adafruit.com/product/946)
[Related Guides to the Product](https://learn.adafruit.com/products/946/guides)
### NTSC/PAL (Television) TFT Display - 7" Diagonal
[NTSC/PAL (Television) TFT Display - 7" Diagonal](https://www.adafruit.com/product/947)
Yes, this is an adorable small television! The visible display measures only 7" (17.8cm) diagonal, the TFT comes with a NTSC/PAL driver board, enclosure and stand. The display is very easy to use - simply connect the included 12VDC adapter to the 2.1mm center-positive DC jack, then...
No Longer Stocked
[Buy Now](https://www.adafruit.com/product/947)
[Related Guides to the Product](https://learn.adafruit.com/products/947/guides)
## Related Guides
- [Adafruit RGB Matrix + Real Time Clock HAT for Raspberry Pi](https://learn.adafruit.com/adafruit-rgb-matrix-plus-real-time-clock-hat-for-raspberry-pi.md)
- [Adafruit PiTFT 3.5" Touch Screen for Raspberry Pi](https://learn.adafruit.com/adafruit-pitft-3-dot-5-touch-screen-for-raspberry-pi.md)
- [Raspberry Pi Hosting Node-Red](https://learn.adafruit.com/raspberry-pi-hosting-node-red.md)
- [Windows IoT Core Application Development: Headed Blinky](https://learn.adafruit.com/windows-iot-application-development-headed-blinky.md)
- [Bonjour (Zeroconf) Networking for Windows and Linux](https://learn.adafruit.com/bonjour-zeroconf-networking-for-windows-and-linux.md)
- [Raspberry Pi Thermal Printer One Time Pads](https://learn.adafruit.com/raspberry-pi-thermal-printer-one-time-pads.md)
- [10" Raspberry Pi Desktop](https://learn.adafruit.com/10-raspberry-pi-desktop.md)
- [What is the Command Line?](https://learn.adafruit.com/what-is-the-command-line.md)
- [Adafruit's Raspberry Pi Lesson 6. Using SSH](https://learn.adafruit.com/adafruits-raspberry-pi-lesson-6-using-ssh.md)
- [Adafruit Prototyping Pi Plate](https://learn.adafruit.com/adafruit-prototyping-pi-plate.md)
- [CircuitPython Libraries on Linux and the 96Boards DragonBoard 410c](https://learn.adafruit.com/circuitpython-libraries-on-linux-and-the-96boards-dragonboard-410c.md)
- [Getting Started With Windows IoT Core on Raspberry Pi](https://learn.adafruit.com/getting-started-with-windows-iot-on-raspberry-pi.md)
- [Raspberry Pi Computer Quick-Start](https://learn.adafruit.com/raspberry-pi-computer-quick-start.md)
- [Adafruit Ultimate GPS with gpsd](https://learn.adafruit.com/adafruit-ultimate-gps-on-the-raspberry-pi.md)
- [Adafruit's Raspberry Pi Lesson 9. Controlling a DC Motor](https://learn.adafruit.com/adafruit-raspberry-pi-lesson-9-controlling-a-dc-motor.md)
---
# Source: https://learn.adafruit.com/adafruits-raspberry-pi-lesson-3-network-setup.md
# Adafruit's Raspberry Pi Lesson 3. Network Setup
## Overview
One of the first things that you will want to do is to get your Raspberry Pi connected up to the Internet.
In this lesson, you will learn how to:
- Connect using an Ethernet cable
- Connect using WiFi
- Find out the IP address of your Raspberry Pi

- [Next Page](https://learn.adafruit.com/adafruits-raspberry-pi-lesson-3-network-setup/using-a-wired-network.md)
## Featured Products
### Raspberry Pi 3 - Model B+ - 1.4GHz Cortex-A53 with 1GB RAM
[Raspberry Pi 3 - Model B+ - 1.4GHz Cortex-A53 with 1GB RAM](https://www.adafruit.com/product/3775)
The Raspberry Pi 3 Model B is the most popular Raspberry Pi computer made, and the Pi Foundation knows you can always make a good thing _better_! And what could make the Pi 3 better? How about a _faster_ processor, 5 GHz WiFi, and updated Ethernet chip with PoE capability?...
In Stock
[Buy Now](https://www.adafruit.com/product/3775)
[Related Guides to the Product](https://learn.adafruit.com/products/3775/guides)
### Budget Pack for Raspberry Pi 1 Model B (Doesn't include RasPi)
[Budget Pack for Raspberry Pi 1 Model B (Doesn't include RasPi)](https://www.adafruit.com/product/965)
An optimized collection of parts and pieces to experiment with Raspberry Pi at home, school or work. Great for students and those that want to get their feet wet, no soldering required! **THIS PACK DOES NOT INCLUDE A RASPBERRY PI 1 MODEL B and is NOT compatible with Model B+ or Raspberry Pi...**
No Longer Stocked
[Buy Now](https://www.adafruit.com/product/965)
[Related Guides to the Product](https://learn.adafruit.com/products/965/guides)
### USB WiFi (802.11b/g/n) Module: For Raspberry Pi and more
[USB WiFi (802.11b/g/n) Module: For Raspberry Pi and more](https://www.adafruit.com/product/1012)
Make your Internet of Things device cable-free by adding WiFi. Take advantage of the Raspberry Pi and Beagle Bone's USB port to add a low cost, but high-reliability wireless link. We tried half a dozen modules to find one that works well with the Pi and Bone without the need of recompiling...
In Stock
[Buy Now](https://www.adafruit.com/product/1012)
[Related Guides to the Product](https://learn.adafruit.com/products/1012/guides)
### USB WiFi (802.11b/g/n) Module with Antenna for Raspberry Pi
[USB WiFi (802.11b/g/n) Module with Antenna for Raspberry Pi](https://www.adafruit.com/product/1030)
Discontinued - [**you can grab** USB WiFi (802.11b/g/n) Module: For Raspberry Pi and more **instead! **](https://www.adafruit.com/product/1012)
Make your Internet of Things device cable-free by adding super WiFi. Take advantage of the Raspberry Pi and Beagle...
No Longer Stocked
[Buy Now](https://www.adafruit.com/product/1030)
[Related Guides to the Product](https://learn.adafruit.com/products/1030/guides)
### Miniature WiFi (802.11b/g/n) Module: For Raspberry Pi and more
[Miniature WiFi (802.11b/g/n) Module: For Raspberry Pi and more](https://www.adafruit.com/product/814)
Make your Internet of Things device cable-free by adding WiFi. Take advantage of the Raspberry Pi and Beagle Bone's USB port to add a low cost, but high-reliability wireless link. We tried half a dozen modules to find one that works well with the Pi and Bone without the need of recompiling...
No Longer Stocked
[Buy Now](https://www.adafruit.com/product/814)
[Related Guides to the Product](https://learn.adafruit.com/products/814/guides)
### Programming the Raspberry Pi: Getting Started with Python
[Programming the Raspberry Pi: Getting Started with Python](https://www.adafruit.com/product/1089)
**Program your own Raspberry Pi projects!**
An updated guide to programming your own Raspberry Pi projects. Learn to create inventive programs and fun games on your powerful Raspberry Pi--with no programming experience required. **This practical book has been revised...**
In Stock
[Buy Now](https://www.adafruit.com/product/1089)
[Related Guides to the Product](https://learn.adafruit.com/products/1089/guides)
### Ethernet Cable - 3 ft long
[Ethernet Cable - 3 ft long](https://www.adafruit.com/product/995)
We have so many Internet-connected goodies in the shop, we figured it's time to carry a cable so you can easily connect them up! This cable is 3 feet long, comes in Adafruit black and has all 8 wires installed. Perfect for use with the
No Longer Stocked
[Buy Now](https://www.adafruit.com/product/995)
[Related Guides to the Product](https://learn.adafruit.com/products/995/guides)
### USB 2.0 Powered Hub - 7 Ports with 5V 2A Power Supply
[USB 2.0 Powered Hub - 7 Ports with 5V 2A Power Supply](https://www.adafruit.com/product/961)
Add lots more USB capability to your Raspberry Pi or computer using this powered USB 2.0 hub. It adds a full **seven powered ports** , all at USB 2.0 speeds so you can use video cameras and other high speed devices (cheaper hubs are v1.1 and not as fast!)
The extra sauce...
No Longer Stocked
[Buy Now](https://www.adafruit.com/product/961)
[Related Guides to the Product](https://learn.adafruit.com/products/961/guides)
## Related Guides
- [Introducing the Raspberry Pi Zero](https://learn.adafruit.com/introducing-the-raspberry-pi-zero.md)
- [Cloud Cam: Internet-Connected Security Camera](https://learn.adafruit.com/cloud-cam-connected-raspberry-pi-security-camera.md)
- [Resizing the Raspberry Pi Boot Partition](https://learn.adafruit.com/resizing-raspberry-pi-boot-partition.md)
- [Raspberry Pi as an Ad Blocking Access Point](https://learn.adafruit.com/raspberry-pi-as-an-ad-blocking-access-point.md)
- [Web Enabled PIXEL on Raspberry Pi](https://learn.adafruit.com/web-enabled-pixel-on-raspberry-pi.md)
- [Adafruit Raspberry Pi Educational Linux Distro](https://learn.adafruit.com/adafruit-raspberry-pi-educational-linux-distro.md)
- [Arm-based IoT Kit for Cloud IoT Core - Getting Started](https://learn.adafruit.com/raspberry-pi-3-and-sensor-kit-for-google-cloud-iot-core.md)
- [Adafruit's Raspberry Pi Lesson 10. Stepper Motors](https://learn.adafruit.com/adafruits-raspberry-pi-lesson-10-stepper-motors.md)
- [A Sillier Mousetrap: Logging Mouse Data to Adafruit IO with the Raspberry Pi](https://learn.adafruit.com/a-sillier-mousetrap-logging-mouse-data-to-adafruit-io-with-the-raspberry-pi.md)
- [Cupcade: the Raspberry Pi Micro Arcade Cabinet](https://learn.adafruit.com/cupcade-raspberry-pi-micro-mini-arcade-game-cabinet.md)
- [Adafruit 128x64 OLED Bonnet for Raspberry Pi](https://learn.adafruit.com/adafruit-128x64-oled-bonnet-for-raspberry-pi.md)
- [Controlling Motors using the Raspberry Pi and RasPiRobot Board V2](https://learn.adafruit.com/controlling-motors-using-the-raspberry-pi-and-raspirobot-board-v2.md)
- [Adafruit PiTFT 3.5" Touch Screen for Raspberry Pi](https://learn.adafruit.com/adafruit-pitft-3-dot-5-touch-screen-for-raspberry-pi.md)
- [Processing on the Raspberry Pi & PiTFT](https://learn.adafruit.com/processing-on-the-raspberry-pi-and-pitft.md)
- [Large Pi-based Thermometer and Clock](https://learn.adafruit.com/large-pi-based-thermometer-and-clock.md)
---
# Source: https://learn.adafruit.com/adafruits-raspberry-pi-lesson-4-gpio-setup.md
# Adafruit's Raspberry Pi Lesson 4. GPIO Setup
## Overview
One of the great things about the Raspberry Pi is that it has a GPIO connector to which you can attach external hardware.

The GPIO connector actually has a number of different types of connection on them. There are:
- True GPIO (General Purpose Input Output) pins that you can use to turn LEDs on and off etc.
- I2C interface pins that allow you to connect hardware modules with just two control pins
- SPI interface with SPI devices, a similar concept to I2C but a different standard
- Serial Rx and Tx pins for communication with serial peripherals
In this tutorial, you are not actually building anything, but you will learn how to configure your Raspberry Pi and install useful libraries ready to start attaching some external electronics to it.
Info:
- [Next Page](https://learn.adafruit.com/adafruits-raspberry-pi-lesson-4-gpio-setup/the-gpio-connector.md)
## Featured Products
### Assembled Pi Cobbler Plus - Breakout Cable
[Assembled Pi Cobbler Plus - Breakout Cable](https://www.adafruit.com/product/2029)
The Raspberry Pi B+ / Pi 2 / Pi 3 / Pi 4 has landed on the Maker World like a 40-GPIO pinned, quad-USB ported, credit card sized bomb of DIY joy. And while you can use most of our great Model B accessories by hooking up our [downgrade...](https://www.adafruit.com/product/1986)
In Stock
[Buy Now](https://www.adafruit.com/product/2029)
[Related Guides to the Product](https://learn.adafruit.com/products/2029/guides)
### Assembled Pi T-Cobbler Plus - GPIO Breakout
[Assembled Pi T-Cobbler Plus - GPIO Breakout](https://www.adafruit.com/product/2028)
**This is the assembled version of the Pi T-Cobbler Plus. It only works with the Raspberry Pi Model Zero, A+, B+, Pi 2, Pi 3 & Pi 4!** (Any Pi with 2x20 connector)
The Raspberry Pi has landed on the Maker World like a 40-GPIO pinned, quad-USB ported, credit...
In Stock
[Buy Now](https://www.adafruit.com/product/2028)
[Related Guides to the Product](https://learn.adafruit.com/products/2028/guides)
### Raspberry Pi 3 Model B Starter Pack - Includes a Raspberry Pi 3
[Raspberry Pi 3 Model B Starter Pack - Includes a Raspberry Pi 3](https://www.adafruit.com/product/3058)
Gotta say - this new Pi 3 is fly. All the cool kids are going to have it - but all the coolest kids are also going to have a big pack of super cool accessories.
We've hand chosen these accessories as the perfect accompaniment to your new Raspberry Pi 3 - Model B. It's...
No Longer Stocked
[Buy Now](https://www.adafruit.com/product/3058)
[Related Guides to the Product](https://learn.adafruit.com/products/3058/guides)
### Adafruit Assembled Pi Cobbler Breakout + Cable for Raspberry Pi
[Adafruit Assembled Pi Cobbler Breakout + Cable for Raspberry Pi](https://www.adafruit.com/product/914)
Now that you've finally got your hands on a [Raspberry Pi® Model B](http://www.raspberrypi.org/), you're probably itching to make some fun embedded computer projects with it. What you need is an add on prototyping Pi Cobbler from Adafruit, which can break out all those...
No Longer Stocked
[Buy Now](https://www.adafruit.com/product/914)
[Related Guides to the Product](https://learn.adafruit.com/products/914/guides)
### Budget Pack for Raspberry Pi 1 Model B (Doesn't include RasPi)
[Budget Pack for Raspberry Pi 1 Model B (Doesn't include RasPi)](https://www.adafruit.com/product/965)
An optimized collection of parts and pieces to experiment with Raspberry Pi at home, school or work. Great for students and those that want to get their feet wet, no soldering required! **THIS PACK DOES NOT INCLUDE A RASPBERRY PI 1 MODEL B and is NOT compatible with Model B+ or Raspberry Pi...**
No Longer Stocked
[Buy Now](https://www.adafruit.com/product/965)
[Related Guides to the Product](https://learn.adafruit.com/products/965/guides)
### GPIO Ribbon Cable for Raspberry Pi Model A and B - 26 pin
[GPIO Ribbon Cable for Raspberry Pi Model A and B - 26 pin](https://www.adafruit.com/product/862)
That new Raspberry Pi® Model A or B computer you just got has a row of 2x13 pin headers soldered on - those are the GPIO (general purpose input/output) pins and for those of us who like to hack electronics they are where the real fun is. By programming the Pi, you can twiddle those pins...
In Stock
[Buy Now](https://www.adafruit.com/product/862)
[Related Guides to the Product](https://learn.adafruit.com/products/862/guides)
### Programming the Raspberry Pi: Getting Started with Python
[Programming the Raspberry Pi: Getting Started with Python](https://www.adafruit.com/product/1089)
**Program your own Raspberry Pi projects!**
An updated guide to programming your own Raspberry Pi projects. Learn to create inventive programs and fun games on your powerful Raspberry Pi--with no programming experience required. **This practical book has been revised...**
In Stock
[Buy Now](https://www.adafruit.com/product/1089)
[Related Guides to the Product](https://learn.adafruit.com/products/1089/guides)
## Related Guides
- [Adafruit's Raspberry Pi Lesson 11. DS18B20 Temperature Sensing](https://learn.adafruit.com/adafruits-raspberry-pi-lesson-11-ds18b20-temperature-sensing.md)
- [Drive a 16x2 LCD with the Raspberry Pi](https://learn.adafruit.com/drive-a-16x2-lcd-directly-with-a-raspberry-pi.md)
- [Capacitive Touch Sensors on the Raspberry Pi](https://learn.adafruit.com/capacitive-touch-sensors-on-the-raspberry-pi.md)
- [Circadian Pi Desk Light](https://learn.adafruit.com/circadian-pi-desk-light.md)
- [Windows IoT Core Application Development: Headless Blinky](https://learn.adafruit.com/windows-iot-application-development-headless-application.md)
- [Node.js Embedded Development on the Raspberry Pi](https://learn.adafruit.com/node-embedded-development.md)
- [Single Channel LoRaWAN Gateway for Raspberry Pi](https://learn.adafruit.com/raspberry-pi-single-channel-lorawan-gateway.md)
- [Basic Resistor Sensor Reading on Raspberry Pi](https://learn.adafruit.com/basic-resistor-sensor-reading-on-raspberry-pi.md)
- [Raspberry Pi E-mail Notifier Using LEDs](https://learn.adafruit.com/raspberry-pi-e-mail-notifier-using-leds.md)
- [LoRa and LoRaWAN Radio for Raspberry Pi](https://learn.adafruit.com/lora-and-lorawan-radio-for-raspberry-pi.md)
- [Adafruit's Raspberry Pi Lesson 13. Power Control](https://learn.adafruit.com/adafruits-raspberry-pi-lesson-13-power-control.md)
- [Matrix and 7-Segment LED Backpack with the Raspberry Pi](https://learn.adafruit.com/matrix-7-segment-led-backpack-with-the-raspberry-pi.md)
- [Adafruit's Raspberry Pi Lesson 12. Sensing Movement](https://learn.adafruit.com/adafruits-raspberry-pi-lesson-12-sensing-movement.md)
- [Setting up a Raspberry Pi with NOOBS](https://learn.adafruit.com/setting-up-a-raspberry-pi-with-noobs.md)
- [Processing on the Raspberry Pi & PiTFT](https://learn.adafruit.com/processing-on-the-raspberry-pi-and-pitft.md)
---
# Source: https://learn.adafruit.com/adafruits-raspberry-pi-lesson-5-using-a-console-cable.md
# Adafruit's Raspberry Pi Lesson 5. Using a Console Cable
## Overview
In this lesson you will learn how to remote control your Raspberry Pi with a console cable.

The great advantage of connecting this way is that it can even supply the power for your Pi and you do not need keyboard, mouse or display attached to the Pi to log into it.
You will need to install terminal emulation software (Putty) if you are using Windows and also USB drivers for the Console Lead. The Mac Terminal comes with its own software.
The Raspberry Pi uses its built-in serial port to allow devices to connect to its console and issue commands just as if you were logged in.
In the next lesson, we will look at another way of doing much the same thing but over a local network using something called SSH.
- [Next Page](https://learn.adafruit.com/adafruits-raspberry-pi-lesson-5-using-a-console-cable/you-will-need.md)
## Featured Products
### Budget Pack for Raspberry Pi 1 Model B (Doesn't include RasPi)
[Budget Pack for Raspberry Pi 1 Model B (Doesn't include RasPi)](https://www.adafruit.com/product/965)
An optimized collection of parts and pieces to experiment with Raspberry Pi at home, school or work. Great for students and those that want to get their feet wet, no soldering required! **THIS PACK DOES NOT INCLUDE A RASPBERRY PI 1 MODEL B and is NOT compatible with Model B+ or Raspberry Pi...**
No Longer Stocked
[Buy Now](https://www.adafruit.com/product/965)
[Related Guides to the Product](https://learn.adafruit.com/products/965/guides)
### USB to TTL Serial Cable - Debug / Console Cable for Raspberry Pi
[USB to TTL Serial Cable - Debug / Console Cable for Raspberry Pi](https://www.adafruit.com/product/954)
The cable is easiest way ever to connect to your microcontroller/Raspberry Pi/WiFi router serial console port. Inside the big USB plug is a USB\<-\>Serial conversion chip and at the end of the 36" cable are four wire - red power, black ground, white RX into USB port, and green TX out...
In Stock
[Buy Now](https://www.adafruit.com/product/954)
[Related Guides to the Product](https://learn.adafruit.com/products/954/guides)
### Programming the Raspberry Pi: Getting Started with Python
[Programming the Raspberry Pi: Getting Started with Python](https://www.adafruit.com/product/1089)
**Program your own Raspberry Pi projects!**
An updated guide to programming your own Raspberry Pi projects. Learn to create inventive programs and fun games on your powerful Raspberry Pi--with no programming experience required. **This practical book has been revised...**
In Stock
[Buy Now](https://www.adafruit.com/product/1089)
[Related Guides to the Product](https://learn.adafruit.com/products/1089/guides)
### Raspberry Pi Model B starter pack Doesn't include Raspberry Pi 1
[Raspberry Pi Model B starter pack Doesn't include Raspberry Pi 1](https://www.adafruit.com/product/955)
You want to get hacking with your Pi fast, right? Get everything you need to start with the Adafruit Starter Pack for Raspberry Pi. It's the perfect accompaniment to your new Pi, everything you need to get a distro image loaded and running. **We even pre-assemble the Cobbler for you,...**
No Longer Stocked
[Buy Now](https://www.adafruit.com/product/955)
[Related Guides to the Product](https://learn.adafruit.com/products/955/guides)
### Raspberry Pi 1 Model B Starter Pack - Includes a Raspberry Pi
[Raspberry Pi 1 Model B Starter Pack - Includes a Raspberry Pi](https://www.adafruit.com/product/1014)
You want to get hacking with your Pi fast, right? Get everything you need to start with the Adafruit Starter Pack for Raspberry Pi. It's the perfect accompaniment to your new Pi, everything you need to boot up your Pi Model B and get going. **We pre-assemble the Cobbler for you, no...**
No Longer Stocked
[Buy Now](https://www.adafruit.com/product/1014)
[Related Guides to the Product](https://learn.adafruit.com/products/1014/guides)
### Raspberry Pi 3 - Model B - ARMv8 with 1G RAM
[Raspberry Pi 3 - Model B - ARMv8 with 1G RAM](https://www.adafruit.com/product/3055)
Did you really think the Raspberry Pi would stop getting better? At this point, we sound like a broken record, extolling on the new Pi’s myriad improvements like we’re surprised that the folks at the Raspberry Pi Foundation are continuously making their flagship board better. ...
In Stock
[Buy Now](https://www.adafruit.com/product/3055)
[Related Guides to the Product](https://learn.adafruit.com/products/3055/guides)
### Raspberry Pi Zero - Version 1.3
[Raspberry Pi Zero - Version 1.3](https://www.adafruit.com/product/2885)
At first glance, the Pi Zero isn't much. It just looks like a slimmed down version of the Raspberry Pi we know and love. But when we started to think of the possibilities - [and what a well-chosen set of accessories could add](https://www.adafruit.com/product/2816) -...
Out of Stock
[Buy Now](https://www.adafruit.com/product/2885)
[Related Guides to the Product](https://learn.adafruit.com/products/2885/guides)
### Raspberry Pi Model A+ 512MB RAM
[Raspberry Pi Model A+ 512MB RAM](https://www.adafruit.com/product/2266)
**Note:** As of August 10th, 2016 the Raspberry Pi A+ now includes 512 MB of RAM!
The Raspberry Pi Model A+ is the perfect board for the minimalist Pi fan. This low-cost Pi uses the same processor as the model B+, but does away with the Ethernet jack and three of the USB...
No Longer Stocked
[Buy Now](https://www.adafruit.com/product/2266)
[Related Guides to the Product](https://learn.adafruit.com/products/2266/guides)
## Related Guides
- [Windows IoT Core Application Development: Headless Blinky](https://learn.adafruit.com/windows-iot-application-development-headless-application.md)
- [Adafruit's Raspberry Pi Lesson 4. GPIO Setup](https://learn.adafruit.com/adafruits-raspberry-pi-lesson-4-gpio-setup.md)
- [Introducing the Raspberry Pi Model B+](https://learn.adafruit.com/introducing-the-raspberry-pi-model-b-plus-plus-differences-vs-model-b.md)
- [Adafruit Raspberry Pi Educational Linux Distro](https://learn.adafruit.com/adafruit-raspberry-pi-educational-linux-distro.md)
- [NeoPixels on Raspberry Pi](https://learn.adafruit.com/neopixels-on-raspberry-pi.md)
- [Controlling Motors using the Raspberry Pi and RasPiRobot Board V2](https://learn.adafruit.com/controlling-motors-using-the-raspberry-pi-and-raspirobot-board-v2.md)
- [Pi Video Output Using pygame](https://learn.adafruit.com/pi-video-output-using-pygame.md)
- [Windows IoT Core Application Development: Headed Blinky](https://learn.adafruit.com/windows-iot-application-development-headed-blinky.md)
- [Capacitive Touch Sensors on the Raspberry Pi](https://learn.adafruit.com/capacitive-touch-sensors-on-the-raspberry-pi.md)
- [Introducing the Raspberry Pi Zero](https://learn.adafruit.com/introducing-the-raspberry-pi-zero.md)
- [Send Raspberry Pi Data to COSM](https://learn.adafruit.com/send-raspberry-pi-data-to-cosm.md)
- [Getting Started With Windows IoT Core on Raspberry Pi](https://learn.adafruit.com/getting-started-with-windows-iot-on-raspberry-pi.md)
- [Node.js Embedded Development on the Raspberry Pi](https://learn.adafruit.com/node-embedded-development.md)
- [Using an External Drive as a Raspberry Pi Root Filesystem](https://learn.adafruit.com/external-drive-as-raspberry-pi-root.md)
- [Debugging with the Raspberry Pi WebIDE](https://learn.adafruit.com/debugging-with-the-raspberry-pi-webide.md)
---
# Source: https://learn.adafruit.com/adafruits-raspberry-pi-lesson-6-using-ssh.md
# Adafruit's Raspberry Pi Lesson 6. Using SSH
## Overview
In this lesson you will learn how to remote control your Raspberry Pi over your local network using Secure Shell (SSH).

A common reason for remote controlling your Pi from another computer (like your laptop or desktop) is that you may be using your Pi solely to control some electronics and therefore not need a keyboard, mouse and monitor, other than for setting it up.
It also can just save on desktop clutter, and the problem of having multiple keyboards and mice all over the place.
- [Next Page](https://learn.adafruit.com/adafruits-raspberry-pi-lesson-6-using-ssh/enabling-ssh.md)
## Featured Products
### Budget Pack for Raspberry Pi 1 Model B (Doesn't include RasPi)
[Budget Pack for Raspberry Pi 1 Model B (Doesn't include RasPi)](https://www.adafruit.com/product/965)
An optimized collection of parts and pieces to experiment with Raspberry Pi at home, school or work. Great for students and those that want to get their feet wet, no soldering required! **THIS PACK DOES NOT INCLUDE A RASPBERRY PI 1 MODEL B and is NOT compatible with Model B+ or Raspberry Pi...**
No Longer Stocked
[Buy Now](https://www.adafruit.com/product/965)
[Related Guides to the Product](https://learn.adafruit.com/products/965/guides)
### Programming the Raspberry Pi: Getting Started with Python
[Programming the Raspberry Pi: Getting Started with Python](https://www.adafruit.com/product/1089)
**Program your own Raspberry Pi projects!**
An updated guide to programming your own Raspberry Pi projects. Learn to create inventive programs and fun games on your powerful Raspberry Pi--with no programming experience required. **This practical book has been revised...**
In Stock
[Buy Now](https://www.adafruit.com/product/1089)
[Related Guides to the Product](https://learn.adafruit.com/products/1089/guides)
## Related Guides
- [Raspberry Gear](https://learn.adafruit.com/raspberry-gear.md)
- [Raspberry Pi Thermal Printer One Time Pads](https://learn.adafruit.com/raspberry-pi-thermal-printer-one-time-pads.md)
- [A DigitalOcean droplet in 10 minutes](https://learn.adafruit.com/a-digitalocean-droplet-in-10-minutes.md)
- [Raspberry Pi Kernel-o-Matic](https://learn.adafruit.com/raspberry-pi-kernel-o-matic.md)
- [7" Portable HDMI Monitor](https://learn.adafruit.com/7-hdmi-portable-monitor.md)
- [Using OSC to Communicate with a Raspberry Pi](https://learn.adafruit.com/raspberry-pi-open-sound-control.md)
- [DotStar Pi Painter](https://learn.adafruit.com/dotstar-pi-painter.md)
- [Raspberry Pi Computer Quick-Start](https://learn.adafruit.com/raspberry-pi-computer-quick-start.md)
- [Wood Case for Raspberry Pi 3](https://learn.adafruit.com/wood-case-for-raspberry-pi-3.md)
- [Using an External Drive as a Raspberry Pi Root Filesystem](https://learn.adafruit.com/external-drive-as-raspberry-pi-root.md)
- [Getting Started With Windows IoT Core on Raspberry Pi](https://learn.adafruit.com/getting-started-with-windows-iot-on-raspberry-pi.md)
- [Pi Box](https://learn.adafruit.com/pi-box.md)
- [Kali Linux on the Raspberry Pi with the PiTFT](https://learn.adafruit.com/kali-linux-on-the-raspberry-pi-with-the-pitft.md)
- [Raspberry Pi RGB LED Matrix Webapp](https://learn.adafruit.com/raspberry-pi-rgb-led-matrix-webapp.md)
- [Raspberry Pi Pygame UI basics](https://learn.adafruit.com/raspberry-pi-pygame-ui-basics.md)
---
# Source: https://learn.adafruit.com/adafruits-raspberry-pi-lesson-8-using-a-servo-motor.md
# Adafruit's Raspberry Pi Lesson 8. Using a Servo Motor
## Overview
This lesson describes how to control a single servo motor using Python.

Servo motors are controlled by pulses of varying lengths. This requires fairly accurate timing. The Raspberry Pi has one pin that generates pulses in hardware, without having to rely on the operating system.
- [Next Page](https://learn.adafruit.com/adafruits-raspberry-pi-lesson-8-using-a-servo-motor/parts.md)
## Featured Products
### Budget Pack for Raspberry Pi 1 Model B (Doesn't include RasPi)
[Budget Pack for Raspberry Pi 1 Model B (Doesn't include RasPi)](https://www.adafruit.com/product/965)
An optimized collection of parts and pieces to experiment with Raspberry Pi at home, school or work. Great for students and those that want to get their feet wet, no soldering required! **THIS PACK DOES NOT INCLUDE A RASPBERRY PI 1 MODEL B and is NOT compatible with Model B+ or Raspberry Pi...**
No Longer Stocked
[Buy Now](https://www.adafruit.com/product/965)
[Related Guides to the Product](https://learn.adafruit.com/products/965/guides)
### Adafruit Assembled Pi Cobbler Breakout + Cable for Raspberry Pi
[Adafruit Assembled Pi Cobbler Breakout + Cable for Raspberry Pi](https://www.adafruit.com/product/914)
Now that you've finally got your hands on a [Raspberry Pi® Model B](http://www.raspberrypi.org/), you're probably itching to make some fun embedded computer projects with it. What you need is an add on prototyping Pi Cobbler from Adafruit, which can break out all those...
No Longer Stocked
[Buy Now](https://www.adafruit.com/product/914)
[Related Guides to the Product](https://learn.adafruit.com/products/914/guides)
### Premium Male/Male Jumper Wires - 40 x 6" (150mm)
[Premium Male/Male Jumper Wires - 40 x 6" (150mm)](https://www.adafruit.com/product/758)
Handy for making wire harnesses or jumpering between headers on PCB's. These premium jumper wires are 6" (150mm) long and come in a 'strip' of 40 (4 pieces of each of ten rainbow colors). They have 0.1" male header contacts on either end and fit cleanly next to each other...
In Stock
[Buy Now](https://www.adafruit.com/product/758)
[Related Guides to the Product](https://learn.adafruit.com/products/758/guides)
### Standard servo - TowerPro SG-5010
[Standard servo - TowerPro SG-5010](https://www.adafruit.com/product/155)
This high-torque standard servo can rotate approximately 180 degrees (90 in each direction). You can use any servo code, hardware, or library to control these servos. Good for beginners who want to make stuff move without building a motor controller with feedback & gearbox. Comes with 3...
In Stock
[Buy Now](https://www.adafruit.com/product/155)
[Related Guides to the Product](https://learn.adafruit.com/products/155/guides)
### Half Sized Premium Breadboard - 400 Tie Points
[Half Sized Premium Breadboard - 400 Tie Points](https://www.adafruit.com/product/64)
This is a cute, half-size breadboard with 400 tie points, good for small projects. It's 3.25" x 2.2" / 8.3cm x 5.5cm with a standard double-strip in the middle and two power rails on both sides. You can pull the power rails off easily to make the breadboard as...
In Stock
[Buy Now](https://www.adafruit.com/product/64)
[Related Guides to the Product](https://learn.adafruit.com/products/64/guides)
### 4 x AA Battery Holder with On/Off Switch
[4 x AA Battery Holder with On/Off Switch](https://www.adafruit.com/product/830)
Make a nice portable power pack with this 4 x AA battery holder. It fits any alkaline or rechargeable AA batteries in series. There's a snap on cover and an on/off switch which can be handy when wiring to something without a switch.
**New**! We now have 0.1" headers...
In Stock
[Buy Now](https://www.adafruit.com/product/830)
[Related Guides to the Product](https://learn.adafruit.com/products/830/guides)
### Programming the Raspberry Pi: Getting Started with Python
[Programming the Raspberry Pi: Getting Started with Python](https://www.adafruit.com/product/1089)
**Program your own Raspberry Pi projects!**
An updated guide to programming your own Raspberry Pi projects. Learn to create inventive programs and fun games on your powerful Raspberry Pi--with no programming experience required. **This practical book has been revised...**
In Stock
[Buy Now](https://www.adafruit.com/product/1089)
[Related Guides to the Product](https://learn.adafruit.com/products/1089/guides)
## Related Guides
- [Cam Follower Automaton](https://learn.adafruit.com/cam-follower-automaton.md)
- [Slider Crank Mechanism -- from Cardboard and Craft Sticks](https://learn.adafruit.com/cardboard-slider-crank.md)
- [Mini Pan-Tilt Kit Assembly](https://learn.adafruit.com/mini-pan-tilt-kit-assembly.md)
- [Internet of Things Printer for Raspberry Pi](https://learn.adafruit.com/pi-thermal-printer.md)
- [Adafruit 16 Channel Servo Driver with Raspberry Pi](https://learn.adafruit.com/adafruit-16-channel-servo-driver-with-raspberry-pi.md)
- [Getting Started With Windows IoT Core on Raspberry Pi](https://learn.adafruit.com/getting-started-with-windows-iot-on-raspberry-pi.md)
- [DHT Humidity Sensing on Raspberry Pi or Beaglebone Black with GDocs Logging](https://learn.adafruit.com/dht-humidity-sensing-on-raspberry-pi-with-gdocs-logging.md)
- [Debugging with the Raspberry Pi WebIDE](https://learn.adafruit.com/debugging-with-the-raspberry-pi-webide.md)
- [Windows IoT Core Application Management](https://learn.adafruit.com/windows-iot-application-management.md)
- [Stepper Motor Turntable](https://learn.adafruit.com/stepper-motor-turntable.md)
- [Animatronic Fizzgig MonsterM4sk Puppet](https://learn.adafruit.com/animatronic-fizzgig-monsterm4sk-puppet.md)
- [7" Portable HDMI Monitor](https://learn.adafruit.com/7-hdmi-portable-monitor.md)
- [Adafruit RGB Matrix + Real Time Clock HAT for Raspberry Pi](https://learn.adafruit.com/adafruit-rgb-matrix-plus-real-time-clock-hat-for-raspberry-pi.md)
- [Press Your Button for Raspberry Pi](https://learn.adafruit.com/press-your-button-for-raspberry-pi.md)
- [Adafruit 16-Channel PWM/Servo HAT & Bonnet for Raspberry Pi](https://learn.adafruit.com/adafruit-16-channel-pwm-servo-hat-for-raspberry-pi.md)
---
# Source: https://learn.adafruit.com/adalight-diy-ambient-tv-lighting.md
# Adalight Project Pack
## Overview
**PLEASE NOTE: we’re retiring this guide but keeping the information up for anyone who might learn from the ideas and code. It relies on an old version of Processing (at some point may stop working on new hardware), recent operating systems are more restrictive about screen capture, and the LEDs used are much less common now than NeoPixels. It _can_ still run with some extra work, but there’s better alternatives now, Google for “DIY Ambilight clone” for others’ projects!**
**Adalight** is a do-it-yourself LED project kit that adds realtime ambient lighting effects to your computer monitor or home theater media PC. Inspired by the [Ambilight](http://en.wikipedia.org/wiki/Ambilight) feature of Philips’ LCD HDTVs, Adalight adds pop to TV shows, movies or games!http://vimeo.com/30043456
Adalight relies on the fact that many people now have a computer in their living room for streaming video. Our special software continually analyzes the content of the screen to generate an immersive lighting display. It is not a “pass through” device and does not work with your cable TV box or game console, only computer-driven content.
The system is built upon some of the most popular cross-platform, open-source tools, so it works equally well on Windows, Mac or Linux computers. Technical users can climb in and make their own changes — larger displays, multiple monitor support, or adding new features.
**Every monitor is a little different, so this project requires a bit of “maker ingenuity” to complete. Please read through the complete tutorial ahead of time for ideas on parts and tools you may need.**
- [Next Page](https://learn.adafruit.com/adalight-diy-ambient-tv-lighting/pieces.md)
## Featured Products
### Adalight - DIY Ambient Monitor Lighting Project Pack
[Adalight - DIY Ambient Monitor Lighting Project Pack](https://www.adafruit.com/product/461)
Build your own ambient-light addition for a monitor or media PC television with the Adalight project pack! This project pack is for our ["Adalight" project tutorial](http://learn.adafruit.com/adalight-diy-ambient-tv-lighting). By running the Processing code on your...
No Longer Stocked
[Buy Now](https://www.adafruit.com/product/461)
[Related Guides to the Product](https://learn.adafruit.com/products/461/guides)
### 12mm Diffused Thin Digital RGB LED Pixels (Strand of 25)
[12mm Diffused Thin Digital RGB LED Pixels (Strand of 25)](https://www.adafruit.com/product/322)
RGB Pixels are digitally-controllable lights you can set to any color, or animate. Each RGB LED and controller chip is molded into a 'dot' of silicone. The dots are weatherproof and rugged. There are four flanges molded in so that you can 'push' them into a 12mm drill hole in...
No Longer Stocked
[Buy Now](https://www.adafruit.com/product/322)
[Related Guides to the Product](https://learn.adafruit.com/products/322/guides)
### 12mm Diffused Flat Digital RGB LED Pixels (Strand of 25)
[12mm Diffused Flat Digital RGB LED Pixels (Strand of 25)](https://www.adafruit.com/product/738)
RGB Pixels are digitally-controllable lights you can set to any color, or animate. Each RGB LED and controller chip is molded into a 'dot' of silicone. The dots are weatherproof and rugged. There are four flanges molded in so that you can 'push' them into a 12mm drill hole in...
In Stock
[Buy Now](https://www.adafruit.com/product/738)
[Related Guides to the Product](https://learn.adafruit.com/products/738/guides)
### Adafruit METRO 328 Fully Assembled - Arduino IDE compatible
[Adafruit METRO 328 Fully Assembled - Arduino IDE compatible](https://www.adafruit.com/product/50)
We sure love the ATmega328 here at Adafruit, and we use them _a lot_ for our own projects. The processor has plenty of GPIO, Analog inputs, hardware UART SPI and I2C, timers and PWM galore - just enough for most simple projects. When we need to go small, we use a
Out of Stock
[Buy Now](https://www.adafruit.com/product/50)
[Related Guides to the Product](https://learn.adafruit.com/products/50/guides)
### Female DC Power adapter - 2.1mm jack to screw terminal block
[Female DC Power adapter - 2.1mm jack to screw terminal block](https://www.adafruit.com/product/368)
If you need to connect a DC power wall wart to a board that doesn't have a DC jack - this adapter will come in very handy! There is a 2.1mm DC jack on one end, and a screw terminal block on the other. The terminals are labeled with positive/negative assuming a positive-tip configuration...
In Stock
[Buy Now](https://www.adafruit.com/product/368)
[Related Guides to the Product](https://learn.adafruit.com/products/368/guides)
### 5V 2A (2000mA) switching power supply - UL Listed
[5V 2A (2000mA) switching power supply - UL Listed](https://www.adafruit.com/product/276)
This is an FCC/CE certified and UL listed power supply. Need a lot of 5V power? This switching supply gives a clean regulated 5V output at up to 2000mA. 110 or 240 input, so it works in any country. The plugs are "US 2-prong" style so you may need a plug adapter, but you can pick one...
In Stock
[Buy Now](https://www.adafruit.com/product/276)
[Related Guides to the Product](https://learn.adafruit.com/products/276/guides)
### Breadboarding wire bundle
[Breadboarding wire bundle](https://www.adafruit.com/product/153)
75 flexible stranded core wires with stiff ends molded on in red, orange, yellow, green, blue, brown, black and white. These are a major improvement over the "box of bent wires" that are sometimes sold with breadboards, and faster than stripping your own solid core wires. Makes...
In Stock
[Buy Now](https://www.adafruit.com/product/153)
[Related Guides to the Product](https://learn.adafruit.com/products/153/guides)
## Related Guides
- [2.2" TFT Display](https://learn.adafruit.com/2-2-tft-display.md)
- [Arduin-o-Phone](https://learn.adafruit.com/arduin-o-phone-arduino-powered-diy-cellphone.md)
- [Adafruit CC3000 WiFi and Xively](https://learn.adafruit.com/adafruit-cc3000-wifi-and-xively.md)
- [Analog Feedback Servos](https://learn.adafruit.com/analog-feedback-servos.md)
- [Ladyada's Learn Arduino - Lesson #0](https://learn.adafruit.com/ladyadas-learn-arduino-lesson-number-0.md)
- [Adafruit 1.27" and 1.5" Color OLED Breakout Board](https://learn.adafruit.com/adafruit-1-5-color-oled-breakout-board.md)
- [Bluetooth Temperature & Humidity Sensor](https://learn.adafruit.com/bluetooth-temperature-and-humidity-sensor.md)
- [Arduino Lesson 7. Make an RGB LED Fader](https://learn.adafruit.com/adafruit-arduino-lesson-7-make-an-rgb-led-fader.md)
- [Wave Shield](https://learn.adafruit.com/adafruit-wave-shield-audio-shield-for-arduino.md)
- [Adafruit 1.14" 240x135 Color TFT Breakout LCD Display](https://learn.adafruit.com/adafruit-1-14-240x135-color-tft-breakout.md)
- [Adafruit Arduino Selection Guide](https://learn.adafruit.com/adafruit-arduino-selection-guide.md)
- [Arduino Lesson 3. RGB LEDs](https://learn.adafruit.com/adafruit-arduino-lesson-3-rgb-leds.md)
- [Character LCDs](https://learn.adafruit.com/character-lcds.md)
- [Arduino Lesson 11. LCD Displays - Part 1](https://learn.adafruit.com/adafruit-arduino-lesson-11-lcd-displays-1.md)
- [RGB LED Matrix Basics](https://learn.adafruit.com/32x16-32x32-rgb-led-matrix.md)
---
# Source: https://learn.adafruit.com/pi-wifi-radio/add-lcd-plate.md
# Raspberry Pi WiFi Radio
## LCD and Final Configuration
**If you haven’t already assembled the LCD Pi Plate, do that step now.** [**Here’s a tutorial to guide you through the assembly**](http://learn.adafruit.com/adafruit-16x2-character-lcd-plus-keypad-for-raspberry-pi)**.
Raspberry Pi Model A users:**
the LCD Pi Plate is normally assembled with a rubber bumper near one corner for stability atop the Raspberry Pi. This bumper rests on the Ethernet jack, which is only present on the _Model B_ board. Model A users will need to find a suitable alternative to the bumper, non-conductive and about 5/8" tall. A cork or rubber eraser trimmed to size can work, a 5/8" nylon PC board spacer if you have one, or a 2x2 Lego® brick set on its side. 
Danger:
If using the Pi Box case, [follow this tutorial](http://learn.adafruit.com/pi-box) to install the Raspberry Pi inside, leaving the top of the case off.
Align the 26-pin headers on the LCD plate and Raspberry Pi, and install the plate by pressing straight down gently.
Connect power to the Raspberry Pi. The red power light should come on. If not, there might be a soldering mistake on the LCD Pi Plate board.
Allow 30 seconds to a minute for the Raspberry Pi to fully boot and situate itself on the network. At this point, you should be able to log in from a terminal over ssh, e.g.:
**ssh pi@192.168.0.6** (or whatever address the system reported during the configuration process)
If you previously installed netatalk (optional), and if you changed the Raspberry Pi’s default hostname, you might be able to use:
**ssh pi@pandora.local**
Danger:
You should be successfully logged into the system at this point.
First, let’s test the LCD and buttons:
```
cd Python-WiFi-Radio
sudo python Adafruit_CharLCDPlate.py
```
If using an RGB-backlit LCD, the program should cycle through different backlight colors (with the Blue & White LCD, it will flash on and off a few times). Then it will ask you to try pressing buttons.
Adjust the Contrast dial (using a small screwdriver if necessary) until the text is sharp and legible.
When finished, press Control+C to exit. The LCD is ready!
Next, let’s try our radio software:
```
sudo python PiPhi.py
```
This is our own “wrapper” for pianobar, allowing us to use the LCD and buttons to interact with that program. If all goes well, the system should report its network address, fetch a list of stations from the Pandora server and start playing. If not, refer to the Troubleshooting page.
With only a few buttons available, we’ve condensed only the most essential functions to this program. If you need to configure your Pandora account (such as adding new stations to the list), use a web browser to access the Pandora web site.
From left to right, the button functions are:
- Play/Pause (tap once to pause, again to play, or hold for three seconds to exit the program).
- Station select (brings up a menu — can then use the up and down buttons to pick a station — press this button again to activate, or the Play/Pause button to cancel).
- Volume Up/Down (two buttons, one above the other)
- Next Track
Take a moment to experiment with the buttons and familiarize yourself with their use. If everything seems to be working, we’ll do some final configuration to make the system truly standalone. To exit from the PiPhi program, hold down Select (the leftmost button) for 3+ seconds.
Recent builds of pianobar seem resistant to quitting when the PiPhi.py script exits. If that occurs — if music is still playing even though you’ve quit the program — type:
```
sudo killall pianobar
```
This is only a potential issue during testing — once it’s set up as a fully standalone device with auto-start and shutdown, you shouldn't experience this problem.
## Final Configuration and Auto-Start
First, **cd** to the directory with the PiPhi.py script (you should already be there if you've followed the steps till now!) and edit the PiPhi.py script:
```
nano PiPhi.py
```
Two lines near the start of the code (around line 26) are of interest:
```
RGB_LCD = False # Set to 'True' if using color backlit LCD
HALT_ON_EXIT = False # Set to 'True' to shut down system when exiting
```
If you’ve opted for an RGB-backlit LCD, change the first of these lines to:
```
RGB_LCD = True
```
Since our goal is a standalone system with no keyboard or monitor, we need some way to issue an orderly shutdown (Linux systems don’t like it when you just pull the plug). To make the 3-second button press shut down the system (rather than just exit to a command line prompt), change the second line to:
```
HALT_ON_EXIT = True
```
Nearly there! Now we just need to set up the system to start our program upon booting.
```
sudo nano /etc/rc.local
```
Before the final “exit 0” line, insert these two lines:
```
cd /home/pi/Python-WiFi-Radio
python PiPhi.py &
```
If you downloaded or otherwise placed the radio software in a different location, the first line should be changed accordingly. “sudo” isn’t necessary here because the rc.local script is already run as root.
Reboot the system to test the startup function:
```
sudo reboot
```
After 30 seconds to a minute, you should see the backlight turn on and music will begin. If not, connect to the system using ssh and confirm the configuration steps above.
- [Previous Page](https://learn.adafruit.com/pi-wifi-radio/raspberry-pi-setup-3-of-3.md)
- [Next Page](https://learn.adafruit.com/pi-wifi-radio/troubleshooting.md)
## Featured Products
### Raspberry Pi 3 - Model B+ - 1.4GHz Cortex-A53 with 1GB RAM
[Raspberry Pi 3 - Model B+ - 1.4GHz Cortex-A53 with 1GB RAM](https://www.adafruit.com/product/3775)
The Raspberry Pi 3 Model B is the most popular Raspberry Pi computer made, and the Pi Foundation knows you can always make a good thing _better_! And what could make the Pi 3 better? How about a _faster_ processor, 5 GHz WiFi, and updated Ethernet chip with PoE capability?...
In Stock
[Buy Now](https://www.adafruit.com/product/3775)
[Related Guides to the Product](https://learn.adafruit.com/products/3775/guides)
### SD/MicroSD Memory Card (8 GB SDHC)
[SD/MicroSD Memory Card (8 GB SDHC)](https://www.adafruit.com/product/1294)
Add mega-storage in a jiffy using this 8 GB class 4 micro-SD card. It comes with a SD adapter so you can use it with any of our shields or adapters. Preformatted to FAT so it works out of the box with our projects. Tested and works great with our
In Stock
[Buy Now](https://www.adafruit.com/product/1294)
[Related Guides to the Product](https://learn.adafruit.com/products/1294/guides)
### 5V 2.5A Switching Power Supply with 20AWG MicroUSB Cable
[5V 2.5A Switching Power Supply with 20AWG MicroUSB Cable](https://www.adafruit.com/product/1995)
Our all-in-one 5V 2.5 Amp + MicroUSB cable power adapter is the perfect choice for powering single-board computers like Raspberry Pi, BeagleBone, or anything else that's power-hungry!
This adapter was specifically designed to provide 5.25V, not 5V, but we still call it a 5V USB...
Out of Stock
[Buy Now](https://www.adafruit.com/product/1995)
[Related Guides to the Product](https://learn.adafruit.com/products/1995/guides)
### Adafruit RGB Positive 16x2 LCD+Keypad Kit for Raspberry Pi
[Adafruit RGB Positive 16x2 LCD+Keypad Kit for Raspberry Pi](https://www.adafruit.com/product/1109)
This new Adafruit Pi Plate makes it easy to use an RGB 16x2 Character LCD. We really like the RGB Character LCDs we stock in the shop. (For RGB we have [RGB negative](http://www.adafruit.com/products/399) and [RGB positive](http://www.adafruit.com/products/398).)...
Out of Stock
[Buy Now](https://www.adafruit.com/product/1109)
[Related Guides to the Product](https://learn.adafruit.com/products/1109/guides)
### Adafruit RGB Negative 16x2 LCD+Keypad Kit for Raspberry Pi
[Adafruit RGB Negative 16x2 LCD+Keypad Kit for Raspberry Pi](https://www.adafruit.com/product/1110)
This new Adafruit Pi Plate makes it easy to use an RGB 16x2 Character LCD. We really like the RGB Character LCDs we stock in the shop. (For RGB we have [RGB negative](http://www.adafruit.com/products/399) and [RGB positive](http://www.adafruit.com/products/398).)...
Out of Stock
[Buy Now](https://www.adafruit.com/product/1110)
[Related Guides to the Product](https://learn.adafruit.com/products/1110/guides)
### Adafruit Blue&White 16x2 LCD+Keypad Kit for Raspberry Pi
[Adafruit Blue&White 16x2 LCD+Keypad Kit for Raspberry Pi](https://www.adafruit.com/product/1115)
This new Adafruit Pi Plate makes it easy to use a blue and white 16x2 Character LCD. [We really like the 16x2 Character LCDs we stock in the shop](http://www.adafruit.com/products/181). Unfortunately, these LCDs do require quite a few digital pins, 6 to control the LCD and then...
Out of Stock
[Buy Now](https://www.adafruit.com/product/1115)
[Related Guides to the Product](https://learn.adafruit.com/products/1115/guides)
### Adafruit Raspberry Pi B+ / Pi 2 / Pi 3 Case - Smoke Base
[Adafruit Raspberry Pi B+ / Pi 2 / Pi 3 Case - Smoke Base](https://www.adafruit.com/product/2258)
It took awhile to perfect - but that's okay since we can now safely say that the Adafruit case for Raspberry Pi Model B+ / Pi 2 / Pi 3 is The Single Greatest Raspberry Pi Model B+ Case Ever.
This enclosure was designed by Mike Doell - just like our...
In Stock
[Buy Now](https://www.adafruit.com/product/2258)
[Related Guides to the Product](https://learn.adafruit.com/products/2258/guides)
### Miniature WiFi (802.11b/g/n) Module: For Raspberry Pi and more
[Miniature WiFi (802.11b/g/n) Module: For Raspberry Pi and more](https://www.adafruit.com/product/814)
Make your Internet of Things device cable-free by adding WiFi. Take advantage of the Raspberry Pi and Beagle Bone's USB port to add a low cost, but high-reliability wireless link. We tried half a dozen modules to find one that works well with the Pi and Bone without the need of recompiling...
No Longer Stocked
[Buy Now](https://www.adafruit.com/product/814)
[Related Guides to the Product](https://learn.adafruit.com/products/814/guides)
## Related Guides
- [Adafruit Class Library for Windows IoT Core](https://learn.adafruit.com/adafruit-class-library-for-windows-iot-core.md)
- [Character LCD with Raspberry Pi or BeagleBone Black](https://learn.adafruit.com/character-lcd-with-raspberry-pi-or-beaglebone-black.md)
- [Adafruit 16x2 Character LCD + Keypad for Raspberry Pi](https://learn.adafruit.com/adafruit-16x2-character-lcd-plus-keypad-for-raspberry-pi.md)
- [Onion Pi](https://learn.adafruit.com/onion-pi.md)
- [Monitor Your Home With the Raspberry Pi B+](https://learn.adafruit.com/monitor-your-home-with-the-raspberry-pi-b-plus.md)
- [Pi Hole Ad Detection Display with PiTFT](https://learn.adafruit.com/pi-hole-ad-pitft-tft-detection-display.md)
- [Introducing the Raspberry Pi 2 - Model B](https://learn.adafruit.com/introducing-the-raspberry-pi-2-model-b.md)
- [Setting up a Raspberry Pi as a WiFi Access Point](https://learn.adafruit.com/setting-up-a-raspberry-pi-as-a-wifi-access-point.md)
- [Playing sounds and using buttons with Raspberry Pi](https://learn.adafruit.com/playing-sounds-and-using-buttons-with-raspberry-pi.md)
- [Adafruit RGB Matrix + Real Time Clock HAT for Raspberry Pi](https://learn.adafruit.com/adafruit-rgb-matrix-plus-real-time-clock-hat-for-raspberry-pi.md)
- [Raspberry Pi as an Ad Blocking Access Point](https://learn.adafruit.com/raspberry-pi-as-an-ad-blocking-access-point.md)
- [Internet of Things Printer for Raspberry Pi](https://learn.adafruit.com/pi-thermal-printer.md)
- [Adafruit Prototyping Pi Plate](https://learn.adafruit.com/adafruit-prototyping-pi-plate.md)
- [Node.js Embedded Development on the Raspberry Pi](https://learn.adafruit.com/node-embedded-development.md)
- [Matrix and 7-Segment LED Backpack with the Raspberry Pi](https://learn.adafruit.com/matrix-7-segment-led-backpack-with-the-raspberry-pi.md)
---
# Source: https://learn.adafruit.com/flora-pixel-brooch/add-more-pixels.md
# Source: https://learn.adafruit.com/flora-rgb-smart-pixels/add-more-pixels.md
# Sewable NeoPixels
## Sewing more pixels
https://youtu.be/eGtGoPhjmcc

The pixels are chainable - so you only need 1 pin/wire to control as many LEDs as you like. They're easy to sew, and the chainable design means no crossed [conductive threads](http://www.adafruit.com/products/641). The output of one pixel connects directly to the input of the next.
To begin sewing, stitch around the data pin of your microcontroller ( **A1** on Circuit Playground, **D1** on GEMMA or Gemma M0 and **D6** on FLORA are ideal because they're right between power and ground), and stitch over to your first pixel.

Make sure that each arrow points away from the microcontroller in a line. Stitch around the input pad tightly, even knotting the thread here to form an extra sturdy connection.

Stitch back to the thread origin and tie the two ends in a square knot. Use clear nail polish to seal this knot and pull the ends tight until it dries. Do not clip the thread tails until later on.

All the positive pads (marked with a **+** ) connect together to form one power bus. Likewise all the negative pads (marked with a **-** ) connect together to form one ground bus.

Here's what a three-pixel circuit looks like from the back. See the individual data connections in the center and the continuous power and ground buses above and below?

Double check your knots are secure before clipping all your thread tails. Clean up your work space so there aren't any stray bits of conductive thread hanging around.

Visually inspect your circuit to check for shorts or stray threads.

Plug your microcontroller into your computer with a USB cable. Change the number of pixels in the Arduino sketch or MakeCode project to match the number of pixels in your projects, and make sure the pin number matches what you sewed to. Upload the strandtest sample code as you did when testing a pixel earlier in this guide. Your pixels should light up and animate different colors and patterns.
If they don't all come on or some later in the chain are flickering, your stitches might not be snug enough against the pads of the circuit board. Double check your sewing and reinforce it where necessary (with the circuit off/unplugged).

The library for these pixels is very similar to our [Adafruit\_WS2801](http://learn.adafruit.com/12mm-led-pixels/code "Link: http://learn.adafruit.com/12mm-led-pixels/code")[library for other types of RGB pixels](http://learn.adafruit.com/12mm-led-pixels/code "Link: http://learn.adafruit.com/12mm-led-pixels/code").
- [Previous Page](https://learn.adafruit.com/flora-rgb-smart-pixels/run-pixel-test-code.md)
- [Next Page](https://learn.adafruit.com/flora-rgb-smart-pixels/project-ideas.md)
## Featured Products
### Flora RGB Smart NeoPixel version 3 - Pack of 4
[Flora RGB Smart NeoPixel version 3 - Pack of 4](https://www.adafruit.com/product/1260)
What's a wearable project without LEDs? Our favorite part of the Flora platform is these tiny smart pixels. Designed specifically for wearables, these updated Flora NeoPixels have ultra-cool technology: these ultra-bright LEDs have a constant-current driver cooked right into the LED...
In Stock
[Buy Now](https://www.adafruit.com/product/1260)
[Related Guides to the Product](https://learn.adafruit.com/products/1260/guides)
### Flora RGB Smart NeoPixel version 3 - Sheet of 20
[Flora RGB Smart NeoPixel version 3 - Sheet of 20](https://www.adafruit.com/product/1559)
So, you want lots and lots of NeoPixels? And you want them for less? Not a problem! Here's a sheet of Flora NeoPixels fresh from the (reflow) oven. Cut them off as you need 'em and save a pretty penny while you're at it.
**Each order comes with 20 pixels on a...**
In Stock
[Buy Now](https://www.adafruit.com/product/1559)
[Related Guides to the Product](https://learn.adafruit.com/products/1559/guides)
### Circuit Playground Express
[Circuit Playground Express](https://www.adafruit.com/product/3333)
**Circuit Playground Express** is the next step towards a perfect introduction to electronics and programming. We've taken the original Circuit Playground Classic and made it even better! Not only did we pack even more sensors in, we also made it even easier to...
In Stock
[Buy Now](https://www.adafruit.com/product/3333)
[Related Guides to the Product](https://learn.adafruit.com/products/3333/guides)
### Adafruit GEMMA M0 - Miniature wearable electronic platform
[Adafruit GEMMA M0 - Miniature wearable electronic platform](https://www.adafruit.com/product/3501)
The **Adafruit Gemma M0** is a super small microcontroller board, with just enough built-in to create many simple projects. It may look small and cute: round, about the size of a quarter, with friendly alligator-clip sew pads. But do not be fooled! The Gemma M0 is incredibly...
In Stock
[Buy Now](https://www.adafruit.com/product/3501)
[Related Guides to the Product](https://learn.adafruit.com/products/3501/guides)
### FLORA - Wearable electronic platform: Arduino-compatible
[FLORA - Wearable electronic platform: Arduino-compatible](https://www.adafruit.com/product/659)
FLORA is Adafruit's fully-featured wearable electronics platform. It's a round, sewable, Arduino-compatible microcontroller designed to empower amazing wearables projects.FLORA comes with Adafruit's support, [tutorials and...](http://learn.adafruit.com/category/flora)
In Stock
[Buy Now](https://www.adafruit.com/product/659)
[Related Guides to the Product](https://learn.adafruit.com/products/659/guides)
### Small Alligator Clip Test Lead (set of 12)
[Small Alligator Clip Test Lead (set of 12)](https://www.adafruit.com/product/1008)
Connect this to that without soldering using these handy mini alligator clip test leads. 15" cables with alligator clip on each end, color coded. You get 12 pieces in 6 colors. Strong and grippy, these always come in handy! We often use these in conjunction with a multimeter so we...
In Stock
[Buy Now](https://www.adafruit.com/product/1008)
[Related Guides to the Product](https://learn.adafruit.com/products/1008/guides)
### Short Wire Alligator Clip Test Lead (set of 12)
[Short Wire Alligator Clip Test Lead (set of 12)](https://www.adafruit.com/product/1592)
Connect this to that without soldering using these handy mini alligator clip test leads. Approximately 4.5" overall cables with alligator clip on each end, color coded. You get 12 pieces in 6 colors. Strong and grippy, these always come in handy! We often use these in conjunction with a...
In Stock
[Buy Now](https://www.adafruit.com/product/1592)
[Related Guides to the Product](https://learn.adafruit.com/products/1592/guides)
### Stainless Thin Conductive Thread - 2 ply - 23 meter/76 ft
[Stainless Thin Conductive Thread - 2 ply - 23 meter/76 ft](https://www.adafruit.com/product/640)
After months of searching, we finally have what we consider to be the ultimate conductive thread. It's thin, strong, smooth, and made completely of 316L stainless steel. Once you start working with this thread you'll quickly agree its optimal for any wearables work!
This...
In Stock
[Buy Now](https://www.adafruit.com/product/640)
[Related Guides to the Product](https://learn.adafruit.com/products/640/guides)
## Related Guides
- [Adafruit Circuit Playground Express](https://learn.adafruit.com/adafruit-circuit-playground-express.md)
- [Plush Game Controller](https://learn.adafruit.com/plush-game-controller.md)
- [Twinkling Neopixel Parasol](https://learn.adafruit.com/twinkling-led-parasol.md)
- [NYE Circuit Playground Drop](https://learn.adafruit.com/nye-circuit-playground-drop.md)
- [Mason Jar Snow Globe](https://learn.adafruit.com/snow-globe-makecode.md)
- [FLORA and GEMMA ICSP](https://learn.adafruit.com/flora-and-gemma-isp.md)
- [Crickit Powered Dancin' Snowman!](https://learn.adafruit.com/crickit-powered-dancin-snowman.md)
- [Circuit Playground Express Spooky Laughing Box](https://learn.adafruit.com/spooky-circuit-playground-express-mystery-box.md)
- [GEMMA Hoop Earrings](https://learn.adafruit.com/gemma-hoop-earrings.md)
- [LEGO Compatible Crickit Rover](https://learn.adafruit.com/lego-compatible-crickit-rover.md)
- [Debugging the SAMD21 with GDB](https://learn.adafruit.com/debugging-the-samd21-with-gdb.md)
- [3D Printed LED Fire Horns](https://learn.adafruit.com/3d-printed-led-fire-horns.md)
- [PianoGlove](https://learn.adafruit.com/pianoglove.md)
- [Circuit Playground Express Serial Communications](https://learn.adafruit.com/circuit-playground-express-serial-communications.md)
- [Motion Gift Box](https://learn.adafruit.com/motion-gift-box.md)
- [Kaleidoscope Eyes (Trinket-Powered NeoPixel LED Ring Goggles)](https://learn.adafruit.com/kaleidoscope-eyes-neopixel-led-goggles-trinket-gemma.md)
---
# Source: https://learn.adafruit.com/flora-snaps/add-more-snaps.md
# Flora Snaps
## Add more snaps

Repeat the tinning and soldering process for whichever pads you need access to on the Flora for your project.
If your circuit design only uses pads on one edge of the board, solder studs to one or more pads directly across the circular board to serve as anchors (these will act as mechanical connectors only). Three areas of contact around the circle is even better. Or just solder a stud to every pad for maximum future-compatibility!

Try to space the studs evenly while leaving as much clearance between snaps as possible.
- [Previous Page](https://learn.adafruit.com/flora-snaps/solder-snap-stem.md)
- [Next Page](https://learn.adafruit.com/flora-snaps/testing-and-troubleshooting.md)
## Featured Products
### FLORA - Wearable electronic platform: Arduino-compatible
[FLORA - Wearable electronic platform: Arduino-compatible](https://www.adafruit.com/product/659)
FLORA is Adafruit's fully-featured wearable electronics platform. It's a round, sewable, Arduino-compatible microcontroller designed to empower amazing wearables projects.FLORA comes with Adafruit's support, [tutorials and...](http://learn.adafruit.com/category/flora)
In Stock
[Buy Now](https://www.adafruit.com/product/659)
[Related Guides to the Product](https://learn.adafruit.com/products/659/guides)
### Sewable Snaps - 5mm Diameter - Card of 24
[Sewable Snaps - 5mm Diameter - Card of 24](https://www.adafruit.com/product/1126)
The small 5mm size of these tin-plated brass snaps means they fit perfectly on Flora's pads! Snaps make a great connector for wearables-- solder one side to the board and sew the other to your project with conductive thread! This card comes with 24 complete snaps (socket and stud...
In Stock
[Buy Now](https://www.adafruit.com/product/1126)
[Related Guides to the Product](https://learn.adafruit.com/products/1126/guides)
### Needle set - 3/9 sizes - 20 needles
[Needle set - 3/9 sizes - 20 needles](https://www.adafruit.com/product/615)
Mighty needles, sew like the wind! This needle set is the only one you'll need for any sort of hand sewing, especially using our conductive thread and wearable electronics parts.
Each pack contains 20 gold-eye sharps, with eye sizes ranging from #3 (1.75" long) to #9...
Out of Stock
[Buy Now](https://www.adafruit.com/product/615)
[Related Guides to the Product](https://learn.adafruit.com/products/615/guides)
### Stainless Medium Conductive Thread - 3 ply - 18 meter/60 ft
[Stainless Medium Conductive Thread - 3 ply - 18 meter/60 ft](https://www.adafruit.com/product/641)
After months of searching, we finally have what we consider to be the ultimate conductive thread. It's thin, strong, smooth, and made completely of 316L stainless steel. Once you start working with this thread you'll quickly agree its optimal for any wearables work!
This...
Out of Stock
[Buy Now](https://www.adafruit.com/product/641)
[Related Guides to the Product](https://learn.adafruit.com/products/641/guides)
### Getting Started with Adafruit FLORA
[Getting Started with Adafruit FLORA](https://www.adafruit.com/product/1839)
**Making Wearables with an Arduino-Compatible Electronics Platform**
This book introduces readers to building wearable electronics projects using Adafruit's tiny FLORA board: at 4.4 grams, and only 1.75 inches in diameter, and featuring Arduino compatibility, it's the...
No Longer Stocked
[Buy Now](https://www.adafruit.com/product/1839)
[Related Guides to the Product](https://learn.adafruit.com/products/1839/guides)
### Getting Started with Adafruit FLORA Book Pack
[Getting Started with Adafruit FLORA Book Pack](https://www.adafruit.com/product/2404)
Pickup a copy of [Getting Started with Adafruit FLORA](https://www.adafruit.com/products/1839) and then hit the ground running with everything that you need to become an [Adafruit FLORA](https://www.adafruit.com/products/659) supreme being!
This pack is...
No Longer Stocked
[Buy Now](https://www.adafruit.com/product/2404)
[Related Guides to the Product](https://learn.adafruit.com/products/2404/guides)
### FLORA Sensor Pack
[FLORA Sensor Pack](https://www.adafruit.com/product/1458)
Sense the world around you! The FLORA Sensor Pack includes many types of sensors for your wearable enjoyment. Sense motion, direction, color, light levels, touch, and connections with FLORA sensor breakouts and conductive materials, and a few NeoPixels for experimenting with displaying your...
No Longer Stocked
[Buy Now](https://www.adafruit.com/product/1458)
[Related Guides to the Product](https://learn.adafruit.com/products/1458/guides)
### FLORA GPS Starter Pack
[FLORA GPS Starter Pack](https://www.adafruit.com/product/1090)
Get started with the fabulous Adafruit Flora platform with this lovely starter kit. Included are plenty of parts to make a few different fun projects! There's a Flora motherboard, a GPS module that can also perform location datalogging, eight ultra-bright chainable RGB pixels, a battery...
No Longer Stocked
[Buy Now](https://www.adafruit.com/product/1090)
[Related Guides to the Product](https://learn.adafruit.com/products/1090/guides)
## Related Guides
- [Firewalker LED Sneakers](https://learn.adafruit.com/firewalker-led-sneakers.md)
- [Datalogging Hat with FLORA BLE](https://learn.adafruit.com/datalogging-hat-with-flora-ble.md)
- [Chameleon Scarf](https://learn.adafruit.com/chameleon-scarf.md)
- [Flora TSL2561 Lux Sensor](https://learn.adafruit.com/flora-lux-sensor.md)
- [Adafruit Arduino Selection Guide](https://learn.adafruit.com/adafruit-arduino-selection-guide.md)
- [Flora GPS Jacket](https://learn.adafruit.com/flora-gps-jacket.md)
- [Glowing Skullcandy Headphones Mod](https://learn.adafruit.com/glowing-skullcandy-headphones-mod.md)
- [Flora MIDI Drum Glove](https://learn.adafruit.com/midi-drum-glove.md)
- [How to Find Hidden COM Ports](https://learn.adafruit.com/how-to-find-hidden-com-ports.md)
- [EEG Costume Cap](https://learn.adafruit.com/eeg-costume-cap.md)
- [Getting Started with FLORA](https://learn.adafruit.com/getting-started-with-flora.md)
- [FLORA and GEMMA ICSP](https://learn.adafruit.com/flora-and-gemma-isp.md)
- [NeoPixel Ring Clock](https://learn.adafruit.com/neopixel-ring-clock.md)
- [LED Ampli-Tie](https://learn.adafruit.com/led-ampli-tie.md)
- [Lumo Lift Teardown](https://learn.adafruit.com/lumo-lift-teardown.md)
---
# Source: https://learn.adafruit.com/adding-a-real-time-clock-to-raspberry-pi.md
# Adding a Real Time Clock to Raspberry Pi
## Overview
Warning:
The Raspberry Pi is designed to be an ultra-low cost computer, so a lot of things we are used to on a computer have been left out. For example, your laptop and computer have a little coin-battery-powered 'Real Time Clock' (RTC) module, which keeps time even when the power is off, or the battery removed. To keep costs low and the size small, an RTC is not included with the Raspberry Pi. Instead, the Pi is intended to be connected to the Internet via Ethernet or WiFi, updating the time automatically from the global **ntp** (nework time protocol) servers
For stand-alone projects with no network connection, you will not be able to keep the time when the power goes out. So in this project we will show you how to add a low cost battery-backed RTC to your Pi to keep time!
- [Next Page](https://learn.adafruit.com/adding-a-real-time-clock-to-raspberry-pi/wiring-the-rtc.md)
## Featured Products
### Adafruit PiRTC - PCF8523 Real Time Clock for Raspberry Pi
[Adafruit PiRTC - PCF8523 Real Time Clock for Raspberry Pi](https://www.adafruit.com/product/3386)
This is a great battery-backed real time clock (RTC) that allows your Raspberry Pi project to keep track of time if the power is lost. Perfect for data-logging, clock-building, time-stamping, timers and alarms, etc. Equipped with **PCF8523** RTC, it works great with the...
In Stock
[Buy Now](https://www.adafruit.com/product/3386)
[Related Guides to the Product](https://learn.adafruit.com/products/3386/guides)
### Adafruit PiRTC - Precise DS3231 Real Time Clock for Raspberry Pi
[Adafruit PiRTC - Precise DS3231 Real Time Clock for Raspberry Pi](https://www.adafruit.com/product/4282)
This is the best battery-backed real time clock (RTC) you can get that allows your Raspberry Pi project to keep track of time if the power is lost. Perfect for data-logging, clock-building, NTP servers, time-stamping, timers and alarms, etc. Equipped with **a genuine DS3231** RTC,...
In Stock
[Buy Now](https://www.adafruit.com/product/4282)
[Related Guides to the Product](https://learn.adafruit.com/products/4282/guides)
### Adafruit PCF8523 Real Time Clock Assembled Breakout Board
[Adafruit PCF8523 Real Time Clock Assembled Breakout Board](https://www.adafruit.com/product/3295)
This is a great battery-backed real time clock (RTC) that allows your microcontroller project to keep track of time even if it is reprogrammed, or if the power is lost. Perfect for datalogging, clock-building, time stamping, timers and alarms, etc. Equipped...
In Stock
[Buy Now](https://www.adafruit.com/product/3295)
[Related Guides to the Product](https://learn.adafruit.com/products/3295/guides)
### Adafruit DS1307 Real Time Clock Assembled Breakout Board
[Adafruit DS1307 Real Time Clock Assembled Breakout Board](https://www.adafruit.com/product/3296)
This is a great battery-backed real time clock (RTC) that allows your microcontroller project to keep track of time even if it is reprogrammed, or if the power is lost. Perfect for datalogging, clock-building, time stamping, timers and alarms, etc. The **DS1307** is the most...
In Stock
[Buy Now](https://www.adafruit.com/product/3296)
[Related Guides to the Product](https://learn.adafruit.com/products/3296/guides)
### ChronoDot - Ultra-precise Real Time Clock
[ChronoDot - Ultra-precise Real Time Clock](https://www.adafruit.com/product/255)
The **ChronoDot V3** is the latest version of macetech’s popular ChronoDot line of products. Designed during the Great Chip Shortage, it uses the newly-released MAX31328 temperature-compensated real-time clock chip. However, it remains pin- and code-compatible with the older...
In Stock
[Buy Now](https://www.adafruit.com/product/255)
[Related Guides to the Product](https://learn.adafruit.com/products/255/guides)
### Adafruit DS3231 Precision RTC Breakout
[Adafruit DS3231 Precision RTC Breakout](https://www.adafruit.com/product/3013)
The datasheet for the **DS3231** explains that this part is an "Extremely Accurate I²C-Integrated RTC/TCXO/Crystal". And, hey, it does exactly what it says on the tin! This **Real Time Clock (RTC)** is the most precise you can get in a small, low power...
In Stock
[Buy Now](https://www.adafruit.com/product/3013)
[Related Guides to the Product](https://learn.adafruit.com/products/3013/guides)
### CR1220 12mm Diameter - 3V Lithium Coin Cell Battery
[CR1220 12mm Diameter - 3V Lithium Coin Cell Battery](https://www.adafruit.com/product/380)
These are the highest quality & capacity batteries, the same as shipped with the iCufflinks, iNecklace, Datalogging and GPS Shields, GPS HAT, etc. One battery per order (you'll want one battery per cufflink or pendant.)
Brand may vary but all battery brands are verified...
In Stock
[Buy Now](https://www.adafruit.com/product/380)
[Related Guides to the Product](https://learn.adafruit.com/products/380/guides)
### DS1307 Real Time Clock breakout board kit
[DS1307 Real Time Clock breakout board kit](https://www.adafruit.com/product/264)
**[We've upgraded this RTC breakout and made it even easier to use! Now available as a fully assembled board, it has the same components, chip, size, etc but you don't have to put it together. It's also less expensive! Check out...](https://www.adafruit.com/product/3296)**
No Longer Stocked
[Buy Now](https://www.adafruit.com/product/264)
[Related Guides to the Product](https://learn.adafruit.com/products/264/guides)
## Related Guides
- [I2C Addresses and Troublesome Chips](https://learn.adafruit.com/i2c-addresses.md)
- [DS1307 Real Time Clock Breakout Board Kit](https://learn.adafruit.com/ds1307-real-time-clock-breakout-board-kit.md)
- [NeoPixel 60 Ring Wall Clock](https://learn.adafruit.com/neopixel-60-ring-clock.md)
- [NeoMatrix 8x8 Word Clock](https://learn.adafruit.com/neomatrix-8x8-word-clock.md)
- [Adafruit DS3231 Precision RTC Breakout](https://learn.adafruit.com/adafruit-ds3231-precision-rtc-breakout.md)
- [MacroPad 2FA TOTP Authentication Friend](https://learn.adafruit.com/macropad-2fa-totp-authentication-friend.md)
- [Plotting Offline Data - JSONL to CSV files, filters and graphs](https://learn.adafruit.com/plotting-offline-data-jsonl-to-csv-files-filters-and-graphs.md)
- [Large Pi-based Thermometer and Clock](https://learn.adafruit.com/large-pi-based-thermometer-and-clock.md)
- [Blahaj Alarm and Lamp](https://learn.adafruit.com/blahaj-alarm.md)
- [Prop-Maker Feather Talking Adabot Clock](https://learn.adafruit.com/prop-maker-feather-talking-adabot-clock.md)
- [Playing sounds and using buttons with Raspberry Pi](https://learn.adafruit.com/playing-sounds-and-using-buttons-with-raspberry-pi.md)
- [Monitor PiCam and temperature on a PiTFT via adafruit.io](https://learn.adafruit.com/monitor-picam-and-temperature-on-a-pitft-via-adafruit-dot-io.md)
- [DotStar Pi Painter](https://learn.adafruit.com/dotstar-pi-painter.md)
- [NextBus transit clock for Raspberry Pi](https://learn.adafruit.com/nextbus-transit-clock-for-raspberry-pi.md)
- [Wood Case for Raspberry Pi 3](https://learn.adafruit.com/wood-case-for-raspberry-pi-3.md)
---
# Source: https://learn.adafruit.com/usb-snes-gamepad/adding-the-accelerometer.md
# USB SNES Gamepad
## Adding the Accelerometer
Now we will add in the accelerometer to create a tilt-activated mouse. Nearly any accelerometer will do, but the easiest to use is an analog output one. The ADXL335 will work great. First we will power the chip by providing 3.3V (not 5.0V) and ground from the Teensy, then connect the three analog outputs (X Y and Z) to three analog inputs. Finally, we will add Mouse'ing code to the sketch so that Mouse movement events are sent when the controller is tilted.Cut a piece of ribbon cable down, we'll use Brown for Ground, Red for +3V, then Orange Yellow and Green for X Y and Z respectively.
We tore the brown wire off so that it wouldnt be twisted.
The ADXL335 requires 3V power, so don't connect it to VCC (5V) instead, we'll use the 3V that the teensy provides - it uses that voltage for the USB communication, you can't draw more than maybe 20-40mA which is plenty for this but not enough for perhaps a bunch of LEDs! Brown connects to the second GND pin.
Next connect X Y and Z to F5, F4 and F1 (don't use F0!)
You should now try out the next sketch, **[teensySNES\_test2.ino](https://github.com/adafruit/Adafruit_Learning_System_Guides/blob/master/USB_SNES_Gamepad/teensySNES_test2/teensySNES_test2.ino)** which will move the mouse as you tilt the controller.
https://github.com/adafruit/Adafruit_Learning_System_Guides/blob/main/USB_SNES_Gamepad/teensySNES_test2/teensySNES_test2.ino
- [Previous Page](https://learn.adafruit.com/usb-snes-gamepad/programming-the-teensy.md)
- [Next Page](https://learn.adafruit.com/usb-snes-gamepad/closing-it-up.md)
## Featured Products
### SNES Controller
[SNES Controller](https://www.adafruit.com/product/131)
A third-party SNES (Super Nintendo/Famicom) controller. Works great with Fuzeboxen as well!
No Longer Stocked
[Buy Now](https://www.adafruit.com/product/131)
[Related Guides to the Product](https://learn.adafruit.com/products/131/guides)
### ADXL335 - 5V ready triple-axis accelerometer (+-3g analog out)
[ADXL335 - 5V ready triple-axis accelerometer (+-3g analog out)](https://www.adafruit.com/product/163)
We've updated our favorite triple-axis accelerometer to now have an on-board 3.3V regulator - making it a perfect choice for interfacing with a 5V microcontroller such as the Arduino. This breakout comes with 3 analog outputs for X, Y and Z axis measurements on a 0.75"x0.75"...
In Stock
[Buy Now](https://www.adafruit.com/product/163)
[Related Guides to the Product](https://learn.adafruit.com/products/163/guides)
### USB cable - A/MiniB
[USB cable - A/MiniB](https://www.adafruit.com/product/260)
This here is your standard A-miniB USB cable, for USB 1.1 or 2.0. Perfect for connecting a PC to your Teensy v2, USB Lipo charger w/Mini B connector, among other things.
Approximately 3 feet / 1 meter long
Color may vary!
No Longer Stocked
[Buy Now](https://www.adafruit.com/product/260)
[Related Guides to the Product](https://learn.adafruit.com/products/260/guides)
### Teensy (ATmega32u4 USB dev board) 2.0
[Teensy (ATmega32u4 USB dev board) 2.0](https://www.adafruit.com/product/199)
Discontinued - **you can grab** [Adafruit ItsyBitsy 32u4 - 5V 16MHz](https://www.adafruit.com/product/3677) **instead!**
The Teensy 2.0 is a complete USB-based microcontoller development system, in a very small footprint! All programming is done via the USB port. No...
No Longer Stocked
[Buy Now](https://www.adafruit.com/product/199)
[Related Guides to the Product](https://learn.adafruit.com/products/199/guides)
### Premium Female/Male 'Extension' Jumper Wires - 20 x 6"
[Premium Female/Male 'Extension' Jumper Wires - 20 x 6"](https://www.adafruit.com/product/1954)
These Female/Male Extension jumper wires are handy for making wire harnesses or jumpering between headers on PCB's. These premium jumper wires are 6" (150mm) long and come in a 'strip' of 20 (2 pieces of each of ten rainbow colors). They have 0.1" male header...
In Stock
[Buy Now](https://www.adafruit.com/product/1954)
[Related Guides to the Product](https://learn.adafruit.com/products/1954/guides)
## Related Guides
- [Adafruit Analog Accelerometer Breakouts](https://learn.adafruit.com/adafruit-analog-accelerometer-breakouts.md)
- [HID Reporter](https://learn.adafruit.com/hid-reporter.md)
- [Gravatars: What they are and how to add or change one](https://learn.adafruit.com/gravatars-what-they-are-and-how-to-add-or-change-one.md)
- [Two Player Game System for PyGamer and RFM69HCW Radio Wing](https://learn.adafruit.com/two-player-game-system-for-pygamer-and-rfm69hcw-radio-wing.md)
- [PyPortal 2FA TOTP Authentication Friend](https://learn.adafruit.com/pyportal-2fa-totp-authentication-friend.md)
- [Dragon Drop: a CircuitPython Game for MacroPad](https://learn.adafruit.com/dragon-drop-a-circuitpython-game-for-macropad.md)
- [NeoTrellis M4 Animated Dice Roller](https://learn.adafruit.com/neotrellis-dice.md)
- [Instagram Photo Frame](https://learn.adafruit.com/instagram-photo-frame.md)
- [BlueLive: Livestream Studio switcher controller](https://learn.adafruit.com/bluelive.md)
- [DIY Turbo Button Controller - HID Remapper](https://learn.adafruit.com/diy-turbo-button-controller-hid-remapper.md)
- [ESP32 PlayStation Controller](https://learn.adafruit.com/esp32-playstation-controller.md)
- [Fruit Jam Chyron](https://learn.adafruit.com/fruit-jam-chyron.md)
- [Custom Color Palettes for MakeCode Arcade Games](https://learn.adafruit.com/custom-color-palettes-for-makecode-arcade-games.md)
- [DIY Welded Bike Stand](https://learn.adafruit.com/diy-welded-bike-stand.md)
- [CircuitPython Stage game library](https://learn.adafruit.com/circuitpython-stage-game-library.md)
---
# Source: https://learn.adafruit.com/how-to-make-a-pogo-pin-test-jig/advanced-pogo-jigs.md
# How to Make a Pogo Pin Test Jig
## Advanced Pogo Jigs
For more complicated projects, you may need to have a complicated testing procedure in which case we can make multi-step testers that also keep the PCB held down with little ears!
(We totally saw this and stole the idea from someone online but we can't find the link anymore, sorry!)
The plastic pieces hold down the PCB against the pogo bed. This tester, when used with a little batch script, performs the following test:
1. Reprograms the board's fuses and flash with a bootloader (via the ISP port). For this part we're using the Arduino as an ISP programmer (there's a sketch that does this)
2. The computer then bootloads (via USB) a pin-by-pin testing program
3. Once the board indicates the test completed, the computer erases the testing program
## Various Types of Pogo Pins

There are various types, sizes and lengths of pogo pins. When you are designing your particular project, you will want to check the fit of your board against the pins to ensure a good mechanical fit. Pins to short or too long may not make the desired electrical connection you are planning.

[This article by DigiKey](https://www.digikey.com/en/articles/the-basics-of-pogo-pin-connectors) is good at explaining pogo pins.
## Pogo Pins – Collin’s Lab Notes
https://youtu.be/NGZ_vd6qmeQ
- [Previous Page](https://learn.adafruit.com/how-to-make-a-pogo-pin-test-jig/testing.md)
## Featured Products
### Pogo Pin Probe Clip
[Pogo Pin Probe Clip](https://www.adafruit.com/product/1969)
The Pogo Pin Probe Clip is a great way to test and connect with pin-point accuracy without soldering! It's sort of like an [alligator clip](https://www.adafruit.com/product/321) with a built-in springy pogo pin - so you can connect to any PCB pad for 'scoping, analyzing, or...
In Stock
[Buy Now](https://www.adafruit.com/product/1969)
[Related Guides to the Product](https://learn.adafruit.com/products/1969/guides)
### Pogo Pins "Spear Head" (10 pack)
[Pogo Pins "Spear Head" (10 pack)](https://www.adafruit.com/product/394)
Pogo pins are little spring-loaded contacts, very handy for making jigs, or making momentary (but electrically solid) contacts. We use them by the dozen for making programming and testing jigs but they're handy also if say you want to JTAG program a board that you cant solder headers to -...
In Stock
[Buy Now](https://www.adafruit.com/product/394)
[Related Guides to the Product](https://learn.adafruit.com/products/394/guides)
### Pogo Pins "Cupped Head" (10 pack)
[Pogo Pins "Cupped Head" (10 pack)](https://www.adafruit.com/product/2428)
Pogo pins are little spring-loaded contacts, very handy for making jigs, or making momentary (but electrically solid) contacts. We use them by the dozen for making programming and testing jigs but they're handy also if say you want to JTAG program a board that you cant solder headers to -...
In Stock
[Buy Now](https://www.adafruit.com/product/2428)
[Related Guides to the Product](https://learn.adafruit.com/products/2428/guides)
### Pogo Pins "Crown Head" (10 pack)
[Pogo Pins "Crown Head" (10 pack)](https://www.adafruit.com/product/2429)
Pogo pins are little spring-loaded contacts, very handy for making jigs, or making momentary (but electrically solid) contacts. We use them by the dozen for making programming and testing jigs but they're handy also if say you want to JTAG program a board that you cant solder headers to -...
In Stock
[Buy Now](https://www.adafruit.com/product/2429)
[Related Guides to the Product](https://learn.adafruit.com/products/2429/guides)
### Pogo Pins "Needle Head" (10 pack)
[Pogo Pins "Needle Head" (10 pack)](https://www.adafruit.com/product/2430)
Pogo pins are little spring-loaded contacts, very handy for making jigs, or making momentary (but electrically solid) contacts. We use them by the dozen for making programming and testing jigs but they're handy also if say you want to JTAG program a board that you cant solder headers to -...
In Stock
[Buy Now](https://www.adafruit.com/product/2430)
[Related Guides to the Product](https://learn.adafruit.com/products/2430/guides)
### Toggle Clamp - Large Size
[Toggle Clamp - Large Size](https://www.adafruit.com/product/2457)
\*Ka-thunk\* Pin down that PCB with our **Toggle Clamp** , a sturdy and reliable way to quickly press and release with precision! A pogo-pin bed is a great way to connect and test boards without any soldering, but you have to somehow get that PCB aligned right and evenly pressed down...
In Stock
[Buy Now](https://www.adafruit.com/product/2457)
[Related Guides to the Product](https://learn.adafruit.com/products/2457/guides)
### Toggle Clamp - Medium Flip-up Style
[Toggle Clamp - Medium Flip-up Style](https://www.adafruit.com/product/2456)
\*Ka-thunk\* Pin down that little PCB with our **Toggle Clamp** , a sturdy and reliable way to quickly press and release with precision! A pogo-pin bed is a great way to connect and test boards without any soldering, but you have to somehow get that PCB aligned right and evenly...
In Stock
[Buy Now](https://www.adafruit.com/product/2456)
[Related Guides to the Product](https://learn.adafruit.com/products/2456/guides)
### Toggle Clamp - Small Flip-down Style
[Toggle Clamp - Small Flip-down Style](https://www.adafruit.com/product/2459)
\*Ka-thunk\* Pin down that PCB with our **Toggle Clamp** , a sturdy and reliable way to quickly press and release with precision! A pogo-pin bed is a great way to connect and test boards without any soldering, but you have to somehow get that PCB aligned right and evenly pressed...
In Stock
[Buy Now](https://www.adafruit.com/product/2459)
[Related Guides to the Product](https://learn.adafruit.com/products/2459/guides)
## Related Guides
- [DIY 3D Printing Filament](https://learn.adafruit.com/diy-3d-printing-filament.md)
- [Standalone AVR Chip Programmer](https://learn.adafruit.com/standalone-avr-chip-programmer.md)
- [How we designed an injection-molded case](https://learn.adafruit.com/how-we-designed-an-injection-molded-case-for-raspberry-pi.md)
- [Metal Parts from 3D Prints](https://learn.adafruit.com/metal-parts-from-3d-prints.md)
- [KTOWN's Ultimate Creating Parts in Eagle Tutorial](https://learn.adafruit.com/ktowns-ultimate-creating-parts-in-eagle-tutorial.md)
- [Maker Business & Manufacturing Software - Our Tips & Tricks](https://learn.adafruit.com/maker-business-manufacturing-software-our-tips-and-tricks.md)
- [Adafruit Pinguin for EAGLE CAD](https://learn.adafruit.com/adafruit-pinguin-for-eagle-cad.md)
- [Laser-Cut Enclosure Design](https://learn.adafruit.com/laser-cut-enclosure-design.md)
- [How to Sign Windows Drivers & Executables](https://learn.adafruit.com/how-to-sign-windows-drivers-installer.md)
- [SMT Manufacturing](https://learn.adafruit.com/smt-manufacturing.md)
- [All About Laser Cutters](https://learn.adafruit.com/all-about-laser-cutters.md)
- [Shop Tips & Tricks](https://learn.adafruit.com/shop-tips-and-tricks.md)
- [How to convert Eagle PCBs to 3D Models in Fusion 360](https://learn.adafruit.com/how-to-convert-eagle-pcbs-to-3d-models-in-fusion-360.md)
- [Creating Accurate Footprints in Eagle](https://learn.adafruit.com/creating-accurate-footprints-in-eagle.md)
- [Make your own PCB with Eagle, OSH Park, and Adafruit!](https://learn.adafruit.com/making-pcbs-with-oshpark-and-eagle.md)
---
# Source: https://learn.adafruit.com/digital-led-strip/advanced-separating-strips.md
# LPD8806 Digital RGB LED Strip
## Advanced: Separating Strips
All our LED strips are manufactured in 1/2 meter long sections, and these sections are then joined to produce strips up to 5 meters long. For other lengths, you can normally cut the flex strip between each pair of LEDs…but if this coincides with one of those 1/2 meter joins, you must instead pull apart the soldered sections. It’s not terribly hard, but worth documenting!
For this, we use the wide flat tip on our METCAL iron. A wide tip isn’t required but it sure is handy!

Using an X-acto knife, cut two slices from the top on either side of the solder connection:


Then slice the rubber coating between the two cuts you made:


Pull off the thin rubber piece between the cuts:

Press the soldering iron against the four joints while pulling the two pieces apart:


Cut the remaining rubber underneath with scissors:

Thats it!

- [Previous Page](https://learn.adafruit.com/digital-led-strip/troubleshooting.md)
- [Next Page](https://learn.adafruit.com/digital-led-strip/f-a-q.md)
## Primary Products
### Digital RGB LED Weatherproof Strip - LPD8806 32 LED 5m
[Digital RGB LED Weatherproof Strip - LPD8806 32 LED 5m](https://www.adafruit.com/product/306)
These LED strips are fun and glowy. There are 32 RGB LEDs per meter, and you can control each LED individually! Yes, that's right, this is the digitally-addressable type of LED strip. You can set the color of each LED's red, green and blue component with 7-bit PWM precision (so 21-bit...
In Stock
[Buy Now](https://www.adafruit.com/product/306)
[Related Guides to the Product](https://learn.adafruit.com/products/306/guides)
## Featured Products
### Female DC Power adapter - 2.1mm jack to screw terminal block
[Female DC Power adapter - 2.1mm jack to screw terminal block](https://www.adafruit.com/product/368)
If you need to connect a DC power wall wart to a board that doesn't have a DC jack - this adapter will come in very handy! There is a 2.1mm DC jack on one end, and a screw terminal block on the other. The terminals are labeled with positive/negative assuming a positive-tip configuration...
In Stock
[Buy Now](https://www.adafruit.com/product/368)
[Related Guides to the Product](https://learn.adafruit.com/products/368/guides)
### 5V 10A switching power supply
[5V 10A switching power supply](https://www.adafruit.com/product/658)
This is a beefy switching supply, for when you need a lot of power! It can supply 5V DC up to 10 Amps, running from 110V or 220V power (the plug it comes with is for US/Canada/Japan but you can use any plug adapter for your country, or just replace the cable with a standard computer/appliance...
Out of Stock
[Buy Now](https://www.adafruit.com/product/658)
[Related Guides to the Product](https://learn.adafruit.com/products/658/guides)
### 5V 4A (4000mA) switching power supply - UL Listed
[5V 4A (4000mA) switching power supply - UL Listed](https://www.adafruit.com/product/1466)
Need a lot of 5V power? This switching supply gives a clean regulated 5V output at up to **4 Amps** (4000mA). 110 or 240 input, so it works in any country. The plugs are "US 2-prong" style so you may need a plug adapter, but you can pick one up at any hardware store for $1 or so,...
In Stock
[Buy Now](https://www.adafruit.com/product/1466)
[Related Guides to the Product](https://learn.adafruit.com/products/1466/guides)
### 5V 2A (2000mA) switching power supply - UL Listed
[5V 2A (2000mA) switching power supply - UL Listed](https://www.adafruit.com/product/276)
This is an FCC/CE certified and UL listed power supply. Need a lot of 5V power? This switching supply gives a clean regulated 5V output at up to 2000mA. 110 or 240 input, so it works in any country. The plugs are "US 2-prong" style so you may need a plug adapter, but you can pick one...
In Stock
[Buy Now](https://www.adafruit.com/product/276)
[Related Guides to the Product](https://learn.adafruit.com/products/276/guides)
### 4-pin JST SM Plug + Receptacle Cable Set
[4-pin JST SM Plug + Receptacle Cable Set](https://www.adafruit.com/product/578)
These 4-wire cables are 15cm long and come as a set, one side has a JST SM type connector plug on the end. The other side has a matching JST SM type receptacle connector. They are good for whenever you have 4 wires you want to be able to plug and unplug. We like the solid and compact nature of...
In Stock
[Buy Now](https://www.adafruit.com/product/578)
[Related Guides to the Product](https://learn.adafruit.com/products/578/guides)
## Related Guides
- [NeoPixel Painter](https://learn.adafruit.com/neopixel-painter.md)
- [The Pixif](https://learn.adafruit.com/the-pixif.md)
- [Genesis Poi: DotStar LED Persistence-of-Vision](https://learn.adafruit.com/genesis-poi-dotstar-led-persistence-of-vision-poi.md)
- [Monster Matrix with WLED](https://learn.adafruit.com/monster-matrix-with-wled.md)
- [Playa Festival Bike](https://learn.adafruit.com/playa-festival-bike.md)
- [Halo Energy Sword](https://learn.adafruit.com/halo-energy-sword.md)
- [Magic Band Reader](https://learn.adafruit.com/magic-band-reader.md)
- [CLUE Vertical Garden Weather Visualizer](https://learn.adafruit.com/clue-vertical-garden-weather-visualizer.md)
- [Gemma Firewalker Lite Sneakers](https://learn.adafruit.com/gemma-led-sneakers.md)
- [NeoPixel Mini VU Meter](https://learn.adafruit.com/neopixel-mini-vu-meter.md)
- [CircuitPython Animated Holiday Wreath Lights](https://learn.adafruit.com/circuitpython-animated-holiday-wreath-lights.md)
- [Remote Controlled LED Tea Light Sconce](https://learn.adafruit.com/remote-controlled-led-candelabra.md)
- [Toddler Timer](https://learn.adafruit.com/toddler-timer.md)
- [Stick Person Costume with Neon LED Strips](https://learn.adafruit.com/led-neon-stick-person-costume.md)
- [The PICsellator](https://learn.adafruit.com/the-picsellator.md)
---
# Source: https://learn.adafruit.com/adalight-diy-ambient-tv-lighting/advanced-topics.md
# Adalight Project Pack
## Advanced Topics
This tutorial focused on the 25 LED Adalight project pack, which is good for monitors up to 27 inches diagonal. Some users want to build a larger rig for their living room TV. This can be done without too much trouble…but, just like the LED mount required some creative problem solving, boosting Adalight with additional LEDs will require some planning and a willingness to improvise in order to fit your specific situation.
The first thing needed is a more potent power supply. The 2 Amp supply included with the project pack is perfect for one strand of RGB pixels, but for two to six strands (50 to 150 LEDs) you’ll instead want to use our [5 Volt 10 Amp power supply](https://www.adafruit.com/products/658):

Wiring for 50 LEDs is super easy: follow the wiring diagram that was given for the standard project pack (substituting the larger power supply above). Just as before, the DC jack adapter connects to the extra red and blue wires at the end of the first strand of LEDs. Then plug the second strand of LEDs into the end receptacle, and make sure all spare red/blue end wires are insulated or trimmed. Done! The second strand receives power through the mating connector.

Wiring for 75, 100 or more LEDs is a little more complicated. You’ll need some additional wire for distributing power, and a bit of soldering may be required.
The trick here is to minimize the length that power needs to travel along the LED strands. This ensures better brightness and more uniform color. As explained in the project pack tutorial, 5V can be applied at either end of a strand. We exploit this in the 50 LED setup above by connecting power near the middle…25 LEDs are powered in one direction, and 25 the other.
With _more_ than 50 LEDs you’ll need to provide additional connections for power. This could be done at the start of every strand…but using the same trick as above, it’s also possible to alternate strands: for 100 pixels, connect power to the wires at the end of the first and third strands, and the others will receive power through the mating connectors.

Distribute power using extra wires connected at the DC jack. You can screw down two or sometimes three wires in each terminal. If that’s too crowded or if you want more secure connections, solder your own “Y” connections and insulate these with heat-shrink tube.
To connect to the strand power wires, you can either solder and insulate these connections, or use [Euro-style terminal blocks](http://adafruit.com/products/677) — these can be clipped apart to provide two + and two – junctions.
# Software Adjustments for Larger Setups
No changes are required in the Arduino software; it’s designed to work with arbitrarily large LED setups. If you’ve already uploaded the code to the Arduino board, you do not need to repeat this process.
The Adalight Processing sketch will require modification. This is the tricky part that’s specific to your setup…it’s not a simple copy-and-paste change, because televisions have different bezel sizes, stands, speakers or other obstructions to take into account. Arts and crafts time!
We need to sketch out a grid that’s close to the shape of the screen, with the right number of squares around the perimeter to match our LED strands. It’s recommended that you try a few sizes and iterations on paper. You don’t _have_ to put LEDs in the corner squares (some users don’t like the look and will skip them), and in the end you might end up with a few more LEDs than grid squares — that’s okay, you can bundle the extra unused LEDs behind the screen.
Number the columns starting from 0 at the left, and the rows starting from 0 at the top. We’ll need these coordinates later for telling the software the position of each LED pixel. One common arrangement with 50-pixel installations has 17 squares across and 10 squares down, because it’s close to the 16:9 aspect ratio of most HDTVs. Grid location (0,0) will then refer to the top left square, and (16,9) to the bottom right.
I like to put the first LED (the one closest to the Arduino) at the bottom center of the screen, because the USB and power cords can be bundled alongside other cables already coming from the display. But you can start at any position, whatever works best with your own telly.

(This is the view from the front of the screen. When installing the LEDs on the back, you’ll want to mirror the layout, flipping everything left-to-right.)
Open the Adalight sketch in Processing and look for the following block of code starting around line 68:

The two numbers highlighted above should be changed to the width and height of your grid (17 and 10 for our sample grid above). Leave the initial '0' untouched. And you can ignore the second line (in gray) — that’s for multiple monitor setups.
Next, look for this block of code, starting around line 87:

Each set of three numbers in curly brackets {a,b,c} represents one LED pixel, specified in-order along the strand (the first set is pixel #1, second set is pixel #2, and so forth). The first number of each set should always be 0, while the second and third numbers are the column and row (or “x” and “y” coordinates) of that pixel. For our 50 LED sample grid above, the first pixel (at the bottom center) would be {0,8,9}, the second pixel {0,7,9}, progressing around the perimeter in the order we chose earlier. (More hints: pixel #11 is at {0,0,7}, pixel #30 is at {0,12,0}, and pixel #40 is at {0,16,6}…see how it works?)
If you try to run the modified program but it throws an error, you’ve probably mis-typed one of these number sets. Make sure there are three numbers in each set, separated with commas both between numbers and between sets.
# Building a Standalone Adalight Program
Once the Processing sketch is working to your satisfaction, you can build a double-clickable standalone version that doesn’t require running the Processing IDE every time.
Load the Adalight.pde sketch in Processing. Then, from the “File” menu, select “Export Application.” Select your OS type, do not check the full-screen option, then click the “Export” button. This will create an application folder containing the standalone program and some support files. You can quit Processing now and just use the standalone version.
We’ve experimented with a stealth windowless version of Adalight…can’t say for certain how reliable this technique will be across all different systems, but you can try out the technique [described in this this forum discussion](http://forums.adafruit.com/viewtopic.php?f=47&t=29978 "Link: http://forums.adafruit.com/viewtopic.php?f=47&t=29978") and see what you get.
# Third-Party Software Options
If editing Processing code isn’t your style, there are third-party software options that can also drive Adalight.
Because we didn’t write these packages and aren’t familiar with their inner workings, we can’t provide technical support. If you’re having trouble getting an Adalight system up and running, we’ll always ask that you start with the Processing sketch first. Once that’s working, then feel free to explore.
We’ve found [Lightpack](http://code.google.com/p/light-pack/) to be easy to use with a nice GUI and good performance. Don’t download the firmware file, just the software — with Adalight mode selected, this works with our LEDstream sketch already on the Arduino. The [Russian site for Lightpack](http://code.google.com/p/lightpack/) is a little more bleeding-edge, and includes Mac and Linux versions.
[Boblight](http://code.google.com/p/boblight/) is another popular choice among Linux users. This is perhaps the most complex to set up, even moreso than the Processing code. With the right plug-in it’s said to also work with [xbmc](http://xbmc.org), but we’ve never gotten this far with it.
- [Previous Page](https://learn.adafruit.com/adalight-diy-ambient-tv-lighting/troubleshooting.md)
## Featured Products
### Adalight - DIY Ambient Monitor Lighting Project Pack
[Adalight - DIY Ambient Monitor Lighting Project Pack](https://www.adafruit.com/product/461)
Build your own ambient-light addition for a monitor or media PC television with the Adalight project pack! This project pack is for our ["Adalight" project tutorial](http://learn.adafruit.com/adalight-diy-ambient-tv-lighting). By running the Processing code on your...
No Longer Stocked
[Buy Now](https://www.adafruit.com/product/461)
[Related Guides to the Product](https://learn.adafruit.com/products/461/guides)
### 12mm Diffused Thin Digital RGB LED Pixels (Strand of 25)
[12mm Diffused Thin Digital RGB LED Pixels (Strand of 25)](https://www.adafruit.com/product/322)
RGB Pixels are digitally-controllable lights you can set to any color, or animate. Each RGB LED and controller chip is molded into a 'dot' of silicone. The dots are weatherproof and rugged. There are four flanges molded in so that you can 'push' them into a 12mm drill hole in...
No Longer Stocked
[Buy Now](https://www.adafruit.com/product/322)
[Related Guides to the Product](https://learn.adafruit.com/products/322/guides)
### 12mm Diffused Flat Digital RGB LED Pixels (Strand of 25)
[12mm Diffused Flat Digital RGB LED Pixels (Strand of 25)](https://www.adafruit.com/product/738)
RGB Pixels are digitally-controllable lights you can set to any color, or animate. Each RGB LED and controller chip is molded into a 'dot' of silicone. The dots are weatherproof and rugged. There are four flanges molded in so that you can 'push' them into a 12mm drill hole in...
In Stock
[Buy Now](https://www.adafruit.com/product/738)
[Related Guides to the Product](https://learn.adafruit.com/products/738/guides)
### Adafruit METRO 328 Fully Assembled - Arduino IDE compatible
[Adafruit METRO 328 Fully Assembled - Arduino IDE compatible](https://www.adafruit.com/product/50)
We sure love the ATmega328 here at Adafruit, and we use them _a lot_ for our own projects. The processor has plenty of GPIO, Analog inputs, hardware UART SPI and I2C, timers and PWM galore - just enough for most simple projects. When we need to go small, we use a
Out of Stock
[Buy Now](https://www.adafruit.com/product/50)
[Related Guides to the Product](https://learn.adafruit.com/products/50/guides)
### Female DC Power adapter - 2.1mm jack to screw terminal block
[Female DC Power adapter - 2.1mm jack to screw terminal block](https://www.adafruit.com/product/368)
If you need to connect a DC power wall wart to a board that doesn't have a DC jack - this adapter will come in very handy! There is a 2.1mm DC jack on one end, and a screw terminal block on the other. The terminals are labeled with positive/negative assuming a positive-tip configuration...
In Stock
[Buy Now](https://www.adafruit.com/product/368)
[Related Guides to the Product](https://learn.adafruit.com/products/368/guides)
### 5V 2A (2000mA) switching power supply - UL Listed
[5V 2A (2000mA) switching power supply - UL Listed](https://www.adafruit.com/product/276)
This is an FCC/CE certified and UL listed power supply. Need a lot of 5V power? This switching supply gives a clean regulated 5V output at up to 2000mA. 110 or 240 input, so it works in any country. The plugs are "US 2-prong" style so you may need a plug adapter, but you can pick one...
In Stock
[Buy Now](https://www.adafruit.com/product/276)
[Related Guides to the Product](https://learn.adafruit.com/products/276/guides)
### Breadboarding wire bundle
[Breadboarding wire bundle](https://www.adafruit.com/product/153)
75 flexible stranded core wires with stiff ends molded on in red, orange, yellow, green, blue, brown, black and white. These are a major improvement over the "box of bent wires" that are sometimes sold with breadboards, and faster than stripping your own solid core wires. Makes...
In Stock
[Buy Now](https://www.adafruit.com/product/153)
[Related Guides to the Product](https://learn.adafruit.com/products/153/guides)
## Related Guides
- [2.2" TFT Display](https://learn.adafruit.com/2-2-tft-display.md)
- [Arduin-o-Phone](https://learn.adafruit.com/arduin-o-phone-arduino-powered-diy-cellphone.md)
- [Adafruit CC3000 WiFi and Xively](https://learn.adafruit.com/adafruit-cc3000-wifi-and-xively.md)
- [Analog Feedback Servos](https://learn.adafruit.com/analog-feedback-servos.md)
- [Ladyada's Learn Arduino - Lesson #0](https://learn.adafruit.com/ladyadas-learn-arduino-lesson-number-0.md)
- [Adafruit 1.27" and 1.5" Color OLED Breakout Board](https://learn.adafruit.com/adafruit-1-5-color-oled-breakout-board.md)
- [Bluetooth Temperature & Humidity Sensor](https://learn.adafruit.com/bluetooth-temperature-and-humidity-sensor.md)
- [Arduino Lesson 7. Make an RGB LED Fader](https://learn.adafruit.com/adafruit-arduino-lesson-7-make-an-rgb-led-fader.md)
- [Wave Shield](https://learn.adafruit.com/adafruit-wave-shield-audio-shield-for-arduino.md)
- [Adafruit 1.14" 240x135 Color TFT Breakout LCD Display](https://learn.adafruit.com/adafruit-1-14-240x135-color-tft-breakout.md)
- [Adafruit Arduino Selection Guide](https://learn.adafruit.com/adafruit-arduino-selection-guide.md)
- [Arduino Lesson 3. RGB LEDs](https://learn.adafruit.com/adafruit-arduino-lesson-3-rgb-leds.md)
- [Character LCDs](https://learn.adafruit.com/character-lcds.md)
- [Arduino Lesson 11. LCD Displays - Part 1](https://learn.adafruit.com/adafruit-arduino-lesson-11-lcd-displays-1.md)
- [RGB LED Matrix Basics](https://learn.adafruit.com/32x16-32x32-rgb-led-matrix.md)
---
# Source: https://learn.adafruit.com/hl1606-led-strip/advanced-usage.md
# HL1606 LED Strip
## Advanced Usage
Now that you have the basics down, we can get a little more complicated. The really fun part about color LEDs is not just having 8 primary colors but having hundreds or thousands of colors! Again, as we said before, the HL1606 is a rather stupid chip, it is just a shift register. It doesn't really have a PWM system built in which is why it is so low power and low cost. However, we can coax it into display many colors by writing data to the strip _really fast_. This will PWM the entire strip and will create a blended color effect.
The trade off with the added color-space is that we need to use an interrupt (we use timer #2) to refresh the strip constantly and that the arduino has to do a bunch of crunching in the background.
**Pro:** Hundreds/thousands of colors!
**Con: ** Uses timer #2, must use hardware SPI on pins 11, and 13, uses background CPU.
To wire this up, we'll have to make a small change. The clock and data lines must now connect to the hardware SPI pins to be fast enough. On atmega168/328 Arduinos, this means 11 and 13 are used for **Data** and **Clock** output (for the Mega, pins 51 and 52). The **latch pin** (L) can be any pin but pin 10 (Arduino) or 53 (Mega) but it **MUST BE AN OUTPUT!**

[Now visit our github repository](https://github.com/adafruit/HL1606-LED-Strip-PWM) and click on the **Download ZIP** button near the top left to download a zip of the library and examples. Uncompress the folder, rename it **HL1606stripPWM** and make sure that inside that folder is the cpp and .h files. Then copy it to your Documents/Arduino/Libraries folder. [See our tutorial for more details](http://learn.adafruit.com/arduino-tips-tricks-and-techniques/arduino-libraries "Link: http://learn.adafruit.com/arduino-tips-tricks-and-techniques/arduino-libraries").
Restart the Arduino software. You should see a new **example** folder called **HL1606stripPWM** and inside, an example called **colorswirl**. Upload that sketch to your Arduino. You should see the following:
http://www.flickr.com/photos/adafruit/5388068211/
(Our camera's sensor didn't film the PWMing very well, its not that flickery in person)
This sketch and library is a little more complex than the one before but should be pretty easy to adapt. Change the object instantiation so the first argument is the number of LEDs in the strip.
```
HL1606stripPWM strip = HL1606stripPWM(32, latchPin);
```
You can then set the color LED resolution, hardware SPI interface speed and how long you're willing to spend on PWMing the strip:
```
// You can customize/control the pulse width modulation and color
// resolution by setting how many bits of PWM you want per LED
// For example, 3 bits is 8 different PWM values per LED and 9 bits, 512
// values for full color. 4 bits is 16 PWM per LED, 12 bit color with
// 4096 different colors available.
// Increasing the PWMbits by 1 means you need *TWICE* as much CPU !!!
// We suggest starting with 3 and tweaking the other variables to get
// the fastest SPI and maximum CPU. Then try upping this to 4. For short
// strips (like 1 meter) that are ok with SPIdiv of 16, you can try 5
strip.setPWMbits(3);
// We use the built-in hardware SPI module. We can change the speed
// of the module to push data out faster. In theory, HL1606's should work with
// the SPI divider set to 16 but we found that this makes some strips
// spaz out. Start with 32 and once it works try reducing it to 16
// If you're lucky, you can even try 8
// Valid divider values are: 2, 4, 8, 16, 32, 64, and 128, dont try others!
strip.setSPIdivider(32);
// all the hard work of running the strip is done in an interrupt
// we can configure the interrupt so that we spend more or less
// time running the strip, letting you do other stuff like sensors
// or an LED or whatever. Set it between 0 and 100, where 100 means
// higher quality colorstrip display but no time for anything else.
strip.setCPUmax(70); // 70% is what we start at
```
The initial settings are a good place to start. You can then tweak the values as necessary. Although it may seem like 70% CPU is a lot, the vast majority of Arduino projects we have seen use only maybe 10% of the CPU usage, a lot of time is spent waiting for input.
Updating the SPI divider to be lower (faster) is 'free' so do that first. Then you can change the PWMbits as you'd like, and finally the CPU max to get good refresh performance.
- [Previous Page](https://learn.adafruit.com/hl1606-led-strip/basic-usage.md)
## Related Guides
- [Pocket Galaxy](https://learn.adafruit.com/pocket-galaxy.md)
- [Mailbox Notification Service](https://learn.adafruit.com/mailbox-notification-service.md)
- [Digital LED Belt](https://learn.adafruit.com/digital-led-belt.md)
- [Bike Wheel POV Display](https://learn.adafruit.com/bike-wheel-pov-display.md)
- [NeoPixel Bracelet](https://learn.adafruit.com/neopixel-bracelet.md)
- [Magic Band Reader](https://learn.adafruit.com/magic-band-reader.md)
- [HalloWing Light Paintstick](https://learn.adafruit.com/hallowing-light-paintstick.md)
- [Stick Person Costume with Neon LED Strips](https://learn.adafruit.com/led-neon-stick-person-costume.md)
- [Light-Up Reactive Ukulele](https://learn.adafruit.com/light-up-reactive-ukulele.md)
- [Gemma 3D Printed Tree Topper](https://learn.adafruit.com/gemma-3d-printed-tree-topper.md)
- [NeoPixel Infinity Mirror Coaster](https://learn.adafruit.com/infinity-mirror-coaster.md)
- [Halloween Skeleton Transformation Illusion Prop](https://learn.adafruit.com/halloween-skeleton-transformation-illusion-prop.md)
- [Magic Mirror with Glowing Secret Messages](https://learn.adafruit.com/magic-mirror-with-glowing-secret-messages.md)
- [Monster Matrix with WLED](https://learn.adafruit.com/monster-matrix-with-wled.md)
- [Mini Neon Sign Prop & n00ds Booster Case](https://learn.adafruit.com/nood-booster-case.md)
---
# Source: https://learn.adafruit.com/adafruit-motor-shield/af-dcmotor-class.md
# Adafruit Motor Shield
## AF_DCMotor Class
Warning:

The AF\_DCMotor class provides speed and direction control for up to four DC motors when used with the Adafruit Motor Shield. To use this in a sketch you must first add the following line at the beginning of your sketch:
```
#include <AFMotor.h>
```
# **AF\_DCMotor _motorname_(_portnum_, _freq_)**
> This is the constructor for a DC motor. Call this constructor once for each motor in your sketch. Each motor instance must have a different name as in the example below.
**Parameters: **
- **port num ** - selects which channel (1-4) of the motor controller the motor will be connected to
- **freq ** - selects the PWM frequency. If no frequency is specified, 1KHz is used by default.
> > Frequencies for channel 1 & 2 are:
> >
> > - MOTOR12\_64KHZ
> > - MOTOR12\_8KHZ
> > - MOTOR12\_2KHZ
> > - MOTOR12\_1KHZ
> >
> > Frequencies for channel 3 & 4 are:
> >
> > - MOTOR34\_64KHZ
> > - MOTOR34\_8KHZ
> > - MOTOR34\_1KHZ
**Example:** ```
AF_DCMotor motor4(4); // define motor on channel 4 with 1KHz default PWM
AF_DCMotor left_motor(1, MOTOR12_64KHZ); // define motor on channel 1 with 64KHz PWM
```

_ **Note:** Higher frequencies will produce less audible hum in operation, but may result in lower torque with some motors._# **setSpeed(_speed_)**
> Sets the speed of the motor.
**Parameters:**
- **speed** - Valid values for 'speed' are between 0 and 255 with 0 being off and 255 as full throttle.
**Example:** _ **Note** _ **:** _ DC Motor response is not typically linear, and so the actual RPM will not necessarily be proportional to the programmed speed._# **run(_cmd_)**
> Sets the run-mode of the motor.
**Parameters:**
- **cmd ** - the desired run mode for the motor
> Valid values for cmd are:
>
> - **FORWARD ** - run forward (actual direction of rotation will depend on motor wiring)
> - **BACKWARD ** - run backwards (rotation will be in the opposite direction from FORWARD)
> - **RELEASE ** - Stop the motor. This removes power from the motor and is equivalent to setSpeed(0). The motor shield does not implement dynamic breaking, so the motor may take some time to spin down
**Example:** ```
motor.run(FORWARD);
delay(1000); // run forward for 1 second
motor.run(RELEASE);
delay(100); // 'coast' for 1/10 second
motor.run(BACKWARDS); // run in reverse
```
- [Previous Page](https://learn.adafruit.com/adafruit-motor-shield/using-dc-motors.md)
- [Next Page](https://learn.adafruit.com/adafruit-motor-shield/af-stepper-class.md)
## Featured Products
### Adafruit METRO 328 Fully Assembled - Arduino IDE compatible
[Adafruit METRO 328 Fully Assembled - Arduino IDE compatible](https://www.adafruit.com/product/50)
We sure love the ATmega328 here at Adafruit, and we use them _a lot_ for our own projects. The processor has plenty of GPIO, Analog inputs, hardware UART SPI and I2C, timers and PWM galore - just enough for most simple projects. When we need to go small, we use a
Out of Stock
[Buy Now](https://www.adafruit.com/product/50)
[Related Guides to the Product](https://learn.adafruit.com/products/50/guides)
## Related Guides
- [Adafruit Proto Shield for Arduino](https://learn.adafruit.com/adafruit-proto-shield-arduino.md)
- [Analog Feedback Servos](https://learn.adafruit.com/analog-feedback-servos.md)
- [All About Arduino Libraries](https://learn.adafruit.com/adafruit-all-about-arduino-libraries-install-use.md)
- [RePaper eInk Development Board](https://learn.adafruit.com/repaper-eink-development-board.md)
- [Multi-tasking the Arduino - Part 2](https://learn.adafruit.com/multi-tasking-the-arduino-part-2.md)
- [Bluetooth Controlled Motorized Camera Slider](https://learn.adafruit.com/bluetooth-motorized-camera-slider.md)
- [Electronic Demon Costume](https://learn.adafruit.com/electronic-demon-costume.md)
- [Adafruit INA219 Current Sensor Breakout](https://learn.adafruit.com/adafruit-ina219-current-sensor-breakout.md)
- [Ladyada's Learn Arduino - Lesson #2](https://learn.adafruit.com/ladyadas-learn-arduino-lesson-number-2.md)
- [Arduino Lesson 6. Digital Inputs](https://learn.adafruit.com/adafruit-arduino-lesson-6-digital-inputs.md)
- [2.2" TFT Display](https://learn.adafruit.com/2-2-tft-display.md)
- [Arduino Lesson 2. LEDs](https://learn.adafruit.com/adafruit-arduino-lesson-2-leds.md)
- [Collin's Lab: MIDI](https://learn.adafruit.com/collins-lab-midi.md)
- [1,500 NeoPixel LED Curtain with Raspberry Pi and Fadecandy](https://learn.adafruit.com/1500-neopixel-led-curtain-with-raspberry-pi-fadecandy.md)
- [Programming Arduino with Android and Windows Tablets](https://learn.adafruit.com/programming-arduino-with-android-and-windows-tablets.md)
---
# Source: https://learn.adafruit.com/afmotor-library-reference/af-dcmotor.md
# AFMotor Library Reference
## AF_DCMotor Class

The AF\_DCMotor class provides speed and direction control for up to four DC motors when used with the Adafruit Motor Shield. To use this in a sketch you must first add the following line at the beginning of your sketch:
```
#include <AFMotor.h>
```
# **AF\_DCMotor _motorname_(_portnum_, _freq_)**
> This is the constructor for a DC motor. Call this constructor once for each motor in your sketch. Each motor instance must have a different name as in the example below.
**Parameters:**
- **port num** - selects which channel (1-4) of the motor controller the motor will be connected to
- **freq** - selects the PWM frequency. If no frequency is specified, 1KHz is used by default.
> > Frequencies for channel 1 & 2 are:
> >
> > - MOTOR12\_64KHZ
> > - MOTOR12\_8KHZ
> > - MOTOR12\_2KHZ
> > - MOTOR12\_1KHZ
> >
> > Frequencies for channel 3 & 4 are:
> >
> > - MOTOR34\_64KHZ
> > - MOTOR34\_8KHZ
> > - MOTOR34\_1KHZ
**Example:**
```
AF_DCMotor motor4(4); // define motor on channel 4 with 1KHz default PWM
AF_DCMotor left_motor(1, MOTOR12_64KHZ); // define motor on channel 1 with 64KHz PWM
```

_ **Note:** Higher frequencies will produce less audible hum in operation, but may result in lower torque with some motors._
# **setSpeed(_speed_)**
> Sets the speed of the motor.
**Parameters:**
- **speed** - Valid values for 'speed' are between 0 and 255 with 0 being off and 255 as full throttle.
**Example:**
```
motor1.setSpeed(255); // Set motor 1 to maximum speed
motor4.setSpeed(127); // Set motor 4 to half speed
```
_ **Note** _ **:** _DC Motor response is not typically linear, and so the actual RPM will not necessarily be proportional to the programmed speed._
# **run(_cmd_)**
> Sets the run-mode of the motor.
**Parameters:**
- **cmd** - the desired run mode for the motor
> Valid values for cmd are:
>
> - **FORWARD** - run forward (actual direction of rotation will depend on motor wiring)
> - **BACKWARD** - run backwards (rotation will be in the opposite direction from FORWARD)
> - **RELEASE** - Stop the motor. This removes power from the motor and is equivalent to setSpeed(0). The motor shield does not implement dynamic breaking, so the motor may take some time to spin down
**Example:** ```
motor.run(FORWARD);
delay(1000); // run forward for 1 second
motor.run(RELEASE);
delay(100); // 'coast' for 1/10 second
motor.run(BACKWARDS); // run in reverse
```
- [Next Page](https://learn.adafruit.com/afmotor-library-reference/af-stepper-class.md)
## Related Guides
- [Adafruit NeoKey 5x6 Ortho Snap-Apart](https://learn.adafruit.com/adafruit-neokey-5x6-ortho-snap-apart.md)
- [Adafruit Stepper + DC Motor FeatherWing](https://learn.adafruit.com/adafruit-stepper-dc-motor-featherwing.md)
- [Adafruit PCA9685 16-Channel Servo Driver](https://learn.adafruit.com/16-channel-pwm-servo-driver.md)
- [Circuit Playground Sound-Controlled Robot](https://learn.adafruit.com/circuit-playground-sound-controlled-robot.md)
- [Adafruit Pro Trinket LiPoly/LiIon Backpack](https://learn.adafruit.com/adafruit-pro-trinket-lipoly-slash-liion-backpack.md)
- [FTDI Friend](https://learn.adafruit.com/ftdi-friend.md)
- [LOVE Light](https://learn.adafruit.com/love-light.md)
- [MCP3008 - 8-Channel 10-Bit ADC With SPI Interface](https://learn.adafruit.com/mcp3008-spi-adc.md)
- [Adafruit 16-Channel PWM/Servo HAT & Bonnet for Raspberry Pi](https://learn.adafruit.com/adafruit-16-channel-pwm-servo-hat-for-raspberry-pi.md)
- [Adafruit TPS61169 Constant Current Boost Converter for LEDs](https://learn.adafruit.com/adafruit-tps61169-constant-current-boost-converter-for-leds.md)
- [Makey Paper Craft ](https://learn.adafruit.com/makey-paper-craft.md)
- [Adafruit Chainable DS18B20 Extender Breakout](https://learn.adafruit.com/adafruit-chainable-ds18b20-extender-breakout.md)
- [TSL2561 Luminosity Sensor](https://learn.adafruit.com/tsl2561.md)
- [Adafruit PowerBoost 500 Shield](https://learn.adafruit.com/adafruit-powerboost-500-shield-rechargeable-battery-pack.md)
- [Circuit Playground: R is for Robots](https://learn.adafruit.com/circuit-playground-r-is-for-robots.md)
---
# Source: https://learn.adafruit.com/adafruit-motor-shield/af-stepper-class.md
# Source: https://learn.adafruit.com/afmotor-library-reference/af-stepper-class.md
# AFMotor Library Reference
## AF_Stepper Class

The AF\_Stepper class provides single and multi-step control for up to 2 stepper motors when used with the Adafruit Motor Shield. To use this in a sketch you must first add the following line at the beginning of your sketch:
```
#include <AFMotor.h>
```
# AF\_Stepper _steppername_(_steps_, _portnumber_)
The AF\_Stepper constructor defines a stepper motor. Call this once for each stepper motor in your sketch. Each stepper motor instance must have a unique name as in the example below.
**Parameters:**
- **steps** - declare the number of steps per revolution for your motor.
- **num** - declare how the motor will be wired to the shield.
> Valid values for 'num' are 1 (channels 1 & 2) and 2 (channels 3 & 4).
**Example:**

```
AF_Stepper Stepper1(48, 1); // A 48-step-per-revolution motor on channels 1 & 2
AF_Stepper Stepper2(200, 2); // A 200-step-per-revolution motor on channels 3 & 4
```
# step(_steps, direction, style_)
Step the motor.
**Parameters:**
- **steps** - the number of steps to turn
- **direction** - the direction of rotation ( **FORWARD** or **BACKWARD** )
- **style** - the style of stepping:
> Valid values for 'style' are:
> - **SINGLE** - One coil is energized at a time.
> - **DOUBLE** - Two coils are energized at a time for more torque.
> - **INTERLEAVE** - Alternate between single and double to create a half-step in between. This can result in smoother operation, but because of the extra half-step, the speed is reduced by half too.
> - **MICROSTEP** - Adjacent coils are ramped up and down to create a number of 'micro-steps' between each full step. This results in finer resolution and smoother rotation, but with a loss in torque.
_ **Note:** Step is a synchronous command and will not return until all steps have completed. For concurrent motion of two motors, you must handle the step timing for both motors and use the "onestep()" function below._
**Example:**
```
Stepper1.step(100, FORWARD, DOUBLE); // 100 steps forward using double coil stepping
Stepper2.step(100, BACKWARD, MICROSTEP); // 100 steps backward using double microstepping
```
# **setSpeed(_RPMspeed_)**
set the speed of the motor
**Parameters:**
- Speed - the speed in RPM
_ **Note:** The resulting step speed is based on the 'steps' parameter in the constructor. If this does not match the number of steps for your motor, you actual speed will be off as well._
**Example:**
```
Stepper1.setSpeed(10); // Set motor 1 speed to 10 rpm
Stepper2.setSpeed(30); // Set motor 2 speed to 30 rpm
```
# onestep(_direction, stepstyle_)
Single step the motor.
**Parameters:**
- **direction** - the direction of rotation ( **FORWARD** or **BACKWARD** )
- **stepstyle** - the style of stepping:
> Valid values for 'style' are:
> - **SINGLE** - One coil is energized at a time.
> - **DOUBLE** - Two coils are energized at a time for more torque.
> - **INTERLEAVE** - Alternate between single and double to create a half-step in between. This can result in smoother operation, but because of the extra half-step, the speed is reduced by half too.
> - **MICROSTEP** - Adjacent coils are ramped up and down to create a number of 'micro-steps' between each full step. This results in finer resolution and smoother rotation, but with a loss in torque.
**Example:**
```
Stepper1.onestep(FORWARD, DOUBLE); // take one step forward using double coil stepping
```
# release()
Release the holding torque on the motor. This reduces heating and current demand, but the motor will not actively resist rotation.
**Example:**
```
Stepper1.release(); // stop rotation and turn off holding torque.
```
- [Previous Page](https://learn.adafruit.com/afmotor-library-reference/af-dcmotor.md)
## Related Guides
- [Adafruit NeoKey 5x6 Ortho Snap-Apart](https://learn.adafruit.com/adafruit-neokey-5x6-ortho-snap-apart.md)
- [Adafruit Stepper + DC Motor FeatherWing](https://learn.adafruit.com/adafruit-stepper-dc-motor-featherwing.md)
- [Adafruit PCA9685 16-Channel Servo Driver](https://learn.adafruit.com/16-channel-pwm-servo-driver.md)
- [Circuit Playground Sound-Controlled Robot](https://learn.adafruit.com/circuit-playground-sound-controlled-robot.md)
- [Adafruit Pro Trinket LiPoly/LiIon Backpack](https://learn.adafruit.com/adafruit-pro-trinket-lipoly-slash-liion-backpack.md)
- [FTDI Friend](https://learn.adafruit.com/ftdi-friend.md)
- [LOVE Light](https://learn.adafruit.com/love-light.md)
- [MCP3008 - 8-Channel 10-Bit ADC With SPI Interface](https://learn.adafruit.com/mcp3008-spi-adc.md)
- [Adafruit 16-Channel PWM/Servo HAT & Bonnet for Raspberry Pi](https://learn.adafruit.com/adafruit-16-channel-pwm-servo-hat-for-raspberry-pi.md)
- [Adafruit TPS61169 Constant Current Boost Converter for LEDs](https://learn.adafruit.com/adafruit-tps61169-constant-current-boost-converter-for-leds.md)
- [Makey Paper Craft ](https://learn.adafruit.com/makey-paper-craft.md)
- [Adafruit Chainable DS18B20 Extender Breakout](https://learn.adafruit.com/adafruit-chainable-ds18b20-extender-breakout.md)
- [TSL2561 Luminosity Sensor](https://learn.adafruit.com/tsl2561.md)
- [Adafruit PowerBoost 500 Shield](https://learn.adafruit.com/adafruit-powerboost-500-shield-rechargeable-battery-pack.md)
- [Circuit Playground: R is for Robots](https://learn.adafruit.com/circuit-playground-r-is-for-robots.md)
---
# Source: https://learn.adafruit.com/led-bicycle-handlebars/affix-to-handlebars.md
# LED Bicycle Handlebars
## Affix to Handlebars

Secure the center of the LED tape to the center of your handlebars, positioned around your stem. If your handlebars aren't attached to a stem when you do this project, add something to occupy its place, like rolled up cardboard and a velcro tie.

Cut the backing strip near the stem to expose the LED strip's adhesive. Peel away the backing as you affix the strip in position on the handlebars.

1m of LED tape covers these drop bars nicely.

Clip off any extra LED strip with your snippers.

Repeat with the other side.

Wrap handlebars with clear grip tape. I found it on [Amazon](http://www.amazon.com/Cinelli-Jelly-Ribbon-NaturalTransparent/dp/B0016G7MP8) in [two colors](http://www.amazon.com/ACTION-TAPE-CINELLI-JELLY-CLEAR/dp/B0012K8I5Q/ref=pd_sim_sbs_sg_2/185-8334878-4672831) (neither of which gave the LEDs any discernible tint).

Test out the LEDs with a reliable 12V power source. These drop bars were adorned with 1m of LED strip, while the bullhorns below have 2m spiraled around them.

- [Previous Page](https://learn.adafruit.com/led-bicycle-handlebars/solder-led-tape.md)
- [Next Page](https://learn.adafruit.com/led-bicycle-handlebars/battery-pouch.md)
## Featured Products
### LED Bike Handlebar Pack - 1 meter
[LED Bike Handlebar Pack - 1 meter](https://www.adafruit.com/product/933)
This pack contains supplies for making your own LED bicycle handlebars! This project is easily completed in a weekend and requires a small amount of soldering and some sewing, too. Pack includes:
- [Cool white LED strip](http://adafruit.com/products/887)...
No Longer Stocked
[Buy Now](https://www.adafruit.com/product/933)
[Related Guides to the Product](https://learn.adafruit.com/products/933/guides)
### LED Bike Handlebar Pack - 2 meters
[LED Bike Handlebar Pack - 2 meters](https://www.adafruit.com/product/934)
This pack contains supplies for making your own LED bicycle handlebars! This project is easily completed in a weekend and requires a small amount of soldering and some sewing, too. Pack includes:
- [Cool white LED...](http://adafruit.com/products/887)
No Longer Stocked
[Buy Now](https://www.adafruit.com/product/934)
[Related Guides to the Product](https://learn.adafruit.com/products/934/guides)
### Cool White LED Weatherproof Flexi-Strip 60 LED - 5m
[Cool White LED Weatherproof Flexi-Strip 60 LED - 5m](https://www.adafruit.com/product/887)
These LED strips are ultra bright, fun and glowy. There are **60** cool white LEDs per meter, and you can control the entire strip at once with any microcontroller and [a power transistor](http://www.adafruit.com/products/355). The way they are wired, you will need a 9-12VDC...
No Longer Stocked
[Buy Now](https://www.adafruit.com/product/887)
[Related Guides to the Product](https://learn.adafruit.com/products/887/guides)
### Waterproof DC Power Cable Set - 5.5/2.1mm
[Waterproof DC Power Cable Set - 5.5/2.1mm](https://www.adafruit.com/product/743)
Outdoor enthusiasts rejoice! We now have standard 5.5/2.1mm DC power cable sets in a waterproof variety. These cable sets are ideal for projects that must weather the weather: dust, water, rain, snow, tornado (not volcano proof!). They are a little bulkier than normal DC jacks because of the...
In Stock
[Buy Now](https://www.adafruit.com/product/743)
[Related Guides to the Product](https://learn.adafruit.com/products/743/guides)
### 8 x AA battery holder
[8 x AA battery holder](https://www.adafruit.com/product/449)
When you need a portable 12V power pack, this big holder will do the job! The holder will store 8 AA batteries end to end, to give approximately 12VDC output with up to 2 amp peak current draw. We like this configuration in particular because it holds the batteries securely, even if being...
In Stock
[Buy Now](https://www.adafruit.com/product/449)
[Related Guides to the Product](https://learn.adafruit.com/products/449/guides)
### Heat Shrink Pack
[Heat Shrink Pack](https://www.adafruit.com/product/344)
Heat shrink is the duct tape of electronics, it keeps your stuff all safe and kept together. Especially when wiring and soldering, use heat shrink to add mechanical strength to cables. We use this stuff all the time and having a zip-lock bag of all the possible sizes is super...
In Stock
[Buy Now](https://www.adafruit.com/product/344)
[Related Guides to the Product](https://learn.adafruit.com/products/344/guides)
## Related Guides
- [Mystery Box: Crypto Countdown Case](https://learn.adafruit.com/mystery-box-crypto-countdown-case.md)
- [Bedazzler](https://learn.adafruit.com/bedazzler.md)
- [CircuitPython LED Animations](https://learn.adafruit.com/circuitpython-led-animations.md)
- [Blahaj Alarm and Lamp](https://learn.adafruit.com/blahaj-alarm.md)
- [Arduino Lesson 4. Eight LEDs and a Shift Register](https://learn.adafruit.com/adafruit-arduino-lesson-4-eight-leds.md)
- [LED Emerald with Circuit Playground Bluefruit](https://learn.adafruit.com/led-emerald-with-circuit-playground.md)
- [Talking HAL 9000 with RP2040 Prop Maker Feather](https://learn.adafruit.com/hal-9000-rp2040-prop-maker.md)
- [Adafruit NeoPXL8 FeatherWing and Library](https://learn.adafruit.com/adafruit-neopxl8-featherwing-and-library.md)
- [Color Remote with Circuit Playground Bluefruit](https://learn.adafruit.com/color-remote-with-circuit-playground-bluefruit.md)
- [Guardian Shield+ Zelda Breath of the Wild](https://learn.adafruit.com/guardian-shield-zelda-breath-of-the-wild.md)
- [Mad Science Test Tube Rack](https://learn.adafruit.com/mad-science-test-tube-rack.md)
- [Making Wearable Badge Art with Printed Circuit Boards](https://learn.adafruit.com/making-wearable-badge-art-with-printed-circuit-boards.md)
- [Tiny TARDIS Pendant](https://learn.adafruit.com/tiny-tardis-pendant.md)
- [Party Parrot Zoetrope](https://learn.adafruit.com/party-parrot-zoetrope.md)
- [LED Noodle Shop Sign](https://learn.adafruit.com/led-noodle-shop-sign.md)
---
# Source: https://learn.adafruit.com/afmotor-library-reference.md
# AFMotor Library Reference
## AF_DCMotor Class

The AF\_DCMotor class provides speed and direction control for up to four DC motors when used with the Adafruit Motor Shield. To use this in a sketch you must first add the following line at the beginning of your sketch:
```
#include <AFMotor.h>
```
# **AF\_DCMotor _motorname_(_portnum_, _freq_)**
> This is the constructor for a DC motor. Call this constructor once for each motor in your sketch. Each motor instance must have a different name as in the example below.
**Parameters:**
- **port num** - selects which channel (1-4) of the motor controller the motor will be connected to
- **freq** - selects the PWM frequency. If no frequency is specified, 1KHz is used by default.
> > Frequencies for channel 1 & 2 are:
> >
> > - MOTOR12\_64KHZ
> > - MOTOR12\_8KHZ
> > - MOTOR12\_2KHZ
> > - MOTOR12\_1KHZ
> >
> > Frequencies for channel 3 & 4 are:
> >
> > - MOTOR34\_64KHZ
> > - MOTOR34\_8KHZ
> > - MOTOR34\_1KHZ
**Example:**
```
AF_DCMotor motor4(4); // define motor on channel 4 with 1KHz default PWM
AF_DCMotor left_motor(1, MOTOR12_64KHZ); // define motor on channel 1 with 64KHz PWM
```

_ **Note:** Higher frequencies will produce less audible hum in operation, but may result in lower torque with some motors._
# **setSpeed(_speed_)**
> Sets the speed of the motor.
**Parameters:**
- **speed** - Valid values for 'speed' are between 0 and 255 with 0 being off and 255 as full throttle.
**Example:**
```
motor1.setSpeed(255); // Set motor 1 to maximum speed
motor4.setSpeed(127); // Set motor 4 to half speed
```
_ **Note** _ **:** _DC Motor response is not typically linear, and so the actual RPM will not necessarily be proportional to the programmed speed._
# **run(_cmd_)**
> Sets the run-mode of the motor.
**Parameters:**
- **cmd** - the desired run mode for the motor
> Valid values for cmd are:
>
> - **FORWARD** - run forward (actual direction of rotation will depend on motor wiring)
> - **BACKWARD** - run backwards (rotation will be in the opposite direction from FORWARD)
> - **RELEASE** - Stop the motor. This removes power from the motor and is equivalent to setSpeed(0). The motor shield does not implement dynamic breaking, so the motor may take some time to spin down
**Example:** ```
motor.run(FORWARD);
delay(1000); // run forward for 1 second
motor.run(RELEASE);
delay(100); // 'coast' for 1/10 second
motor.run(BACKWARDS); // run in reverse
```
- [Next Page](https://learn.adafruit.com/afmotor-library-reference/af-stepper-class.md)
## Related Guides
- [Adafruit NeoKey 5x6 Ortho Snap-Apart](https://learn.adafruit.com/adafruit-neokey-5x6-ortho-snap-apart.md)
- [Adafruit Stepper + DC Motor FeatherWing](https://learn.adafruit.com/adafruit-stepper-dc-motor-featherwing.md)
- [Adafruit PCA9685 16-Channel Servo Driver](https://learn.adafruit.com/16-channel-pwm-servo-driver.md)
- [Circuit Playground Sound-Controlled Robot](https://learn.adafruit.com/circuit-playground-sound-controlled-robot.md)
- [Adafruit Pro Trinket LiPoly/LiIon Backpack](https://learn.adafruit.com/adafruit-pro-trinket-lipoly-slash-liion-backpack.md)
- [FTDI Friend](https://learn.adafruit.com/ftdi-friend.md)
- [LOVE Light](https://learn.adafruit.com/love-light.md)
- [MCP3008 - 8-Channel 10-Bit ADC With SPI Interface](https://learn.adafruit.com/mcp3008-spi-adc.md)
- [Adafruit 16-Channel PWM/Servo HAT & Bonnet for Raspberry Pi](https://learn.adafruit.com/adafruit-16-channel-pwm-servo-hat-for-raspberry-pi.md)
- [Adafruit TPS61169 Constant Current Boost Converter for LEDs](https://learn.adafruit.com/adafruit-tps61169-constant-current-boost-converter-for-leds.md)
- [Makey Paper Craft ](https://learn.adafruit.com/makey-paper-craft.md)
- [Adafruit Chainable DS18B20 Extender Breakout](https://learn.adafruit.com/adafruit-chainable-ds18b20-extender-breakout.md)
- [TSL2561 Luminosity Sensor](https://learn.adafruit.com/tsl2561.md)
- [Adafruit PowerBoost 500 Shield](https://learn.adafruit.com/adafruit-powerboost-500-shield-rechargeable-battery-pack.md)
- [Circuit Playground: R is for Robots](https://learn.adafruit.com/circuit-playground-r-is-for-robots.md)
---
# Source: https://learn.adafruit.com/adafruit-arduino-lesson-15-dc-motor-reversing/an-experiment.md
# Source: https://learn.adafruit.com/adafruit-arduino-lesson-8-analog-inputs/an-experiment.md
# Arduino Lesson 8. Analog Inputs
## An Experiment
Before we go ahead and use the LEDs, you can try a little experiment using just the variable resistor also known as a **potentiometer** (often called a 'pot' for short) and the Arduino Serial Monitor.
Connect up your breadboard as shown below:

Load the following sketch onto your Arduino.
```
/*
Adafruit Arduino - Lesson 8. Analog Inputs
*/
int potPin = 0;
void setup()
{
Serial.begin(9600);
}
void loop()
{
int reading = analogRead(potPin);
Serial.println(reading);
delay(500);
}
```
Now open the Serial Monitor, and you will see a stream of numbers appearing.

Turn the knob on the variable resistor and you will see the number change between 0 and 1023.
The Serial Monitor is displaying the analog reading value from A0 using the line:
```
int reading = analogRead(potPin);
```
The voltage at A0 is being transformed into a number between 0 and 1023.
- [Previous Page](https://learn.adafruit.com/adafruit-arduino-lesson-8-analog-inputs/parts.md)
- [Next Page](https://learn.adafruit.com/adafruit-arduino-lesson-8-analog-inputs/variable-resistors-pots.md)
## Featured Products
### Breadboard trim potentiometer
[Breadboard trim potentiometer](https://www.adafruit.com/product/356)
These are our favorite trim pots, perfect for breadboarding and prototyping. They have a long grippy adjustment knob and with 0.1" spacing, they plug into breadboards or perfboards with ease.
This is the same pot that comes with our character LCDs and tutorial...
In Stock
[Buy Now](https://www.adafruit.com/product/356)
[Related Guides to the Product](https://learn.adafruit.com/products/356/guides)
### Diffused Red 5mm LED (25 pack)
[Diffused Red 5mm LED (25 pack)](https://www.adafruit.com/product/299)
Need some indicators? We are big fans of these diffused red LEDs, in fact we use them exclusively in our kits. They are fairly bright so they can be seen in daytime, and from any angle. They go easily into a breadboard and will add that extra zing to your project.
- Pack of 25...
In Stock
[Buy Now](https://www.adafruit.com/product/299)
[Related Guides to the Product](https://learn.adafruit.com/products/299/guides)
### 74HC595 Shift Register - 3 pack
[74HC595 Shift Register - 3 pack](https://www.adafruit.com/product/450)
Add lots more outputs to a microcontroller system with chainable shift registers. These chips take a serial input (SPI) of 1 byte (8 bits) and then output those digital bits onto 8 pins. You can chain them together so putting three in a row with the serial output of one plugged into the serial...
In Stock
[Buy Now](https://www.adafruit.com/product/450)
[Related Guides to the Product](https://learn.adafruit.com/products/450/guides)
### Premium Male/Male Jumper Wires - 40 x 6" (150mm)
[Premium Male/Male Jumper Wires - 40 x 6" (150mm)](https://www.adafruit.com/product/758)
Handy for making wire harnesses or jumpering between headers on PCB's. These premium jumper wires are 6" (150mm) long and come in a 'strip' of 40 (4 pieces of each of ten rainbow colors). They have 0.1" male header contacts on either end and fit cleanly next to each other...
In Stock
[Buy Now](https://www.adafruit.com/product/758)
[Related Guides to the Product](https://learn.adafruit.com/products/758/guides)
### Half Sized Premium Breadboard - 400 Tie Points
[Half Sized Premium Breadboard - 400 Tie Points](https://www.adafruit.com/product/64)
This is a cute, half-size breadboard with 400 tie points, good for small projects. It's 3.25" x 2.2" / 8.3cm x 5.5cm with a standard double-strip in the middle and two power rails on both sides. You can pull the power rails off easily to make the breadboard as...
In Stock
[Buy Now](https://www.adafruit.com/product/64)
[Related Guides to the Product](https://learn.adafruit.com/products/64/guides)
### Adafruit METRO 328 Fully Assembled - Arduino IDE compatible
[Adafruit METRO 328 Fully Assembled - Arduino IDE compatible](https://www.adafruit.com/product/50)
We sure love the ATmega328 here at Adafruit, and we use them _a lot_ for our own projects. The processor has plenty of GPIO, Analog inputs, hardware UART SPI and I2C, timers and PWM galore - just enough for most simple projects. When we need to go small, we use a
Out of Stock
[Buy Now](https://www.adafruit.com/product/50)
[Related Guides to the Product](https://learn.adafruit.com/products/50/guides)
## Related Guides
- [74HC595 Shift Register](https://learn.adafruit.com/74hc595.md)
- [8BitBox](https://learn.adafruit.com/8bitbox.md)
- [Adafruit Data Logger Shield](https://learn.adafruit.com/adafruit-data-logger-shield.md)
- [Adafruit Music Maker Shield](https://learn.adafruit.com/adafruit-music-maker-shield-vs1053-mp3-wav-wave-ogg-vorbis-player.md)
- [Adalight Project Pack](https://learn.adafruit.com/adalight-diy-ambient-tv-lighting.md)
- [OLED TRON Clock](https://learn.adafruit.com/oled-tron-clock.md)
- [Arduino "Hunt The Wumpus"](https://learn.adafruit.com/arduino-hunt-the-wumpus.md)
- [Arduino Tips, Tricks, and Techniques](https://learn.adafruit.com/arduino-tips-tricks-and-techniques.md)
- [NeoPixel Painter](https://learn.adafruit.com/neopixel-painter.md)
- [1,500 NeoPixel LED Curtain with Raspberry Pi and Fadecandy](https://learn.adafruit.com/1500-neopixel-led-curtain-with-raspberry-pi-fadecandy.md)
- [Arduin-o-Phone](https://learn.adafruit.com/arduin-o-phone-arduino-powered-diy-cellphone.md)
- [LED Lightbox](https://learn.adafruit.com/led-lightbox.md)
- [Arduino Lesson 3. RGB LEDs](https://learn.adafruit.com/adafruit-arduino-lesson-3-rgb-leds.md)
- [Wave Shield](https://learn.adafruit.com/adafruit-wave-shield-audio-shield-for-arduino.md)
- [Making Adabot: Part 2](https://learn.adafruit.com/making-adabot-part-2.md)
- [RePaper eInk Development Board](https://learn.adafruit.com/repaper-eink-development-board.md)
---
# Source: https://learn.adafruit.com/animating-multiple-led-backpacks.md
# Animating Multiple LED Backpacks
## Overview

Adafruit LED backpacks make it incredibly simple to add small bitmapped displays to a project. Each requires just four wires: power, ground and two communication lines to a microcontroller.
Two common questions we receive:
1. How can I use more than one 8x8 matrix backpack in an Arduino sketch?
2. Can I have two (or more) matrices always showing the same image?
This tutorial demonstrates both.
We’ve had spooky Halloween displays on the brain lately, but the concepts here are equally applicable to more innocent schemes!

http://youtu.be/qztpi-BVkqE
- [Next Page](https://learn.adafruit.com/animating-multiple-led-backpacks/wiring.md)
## Featured Products
### Adafruit Mini 8x8 LED Matrix w/I2C Backpack - Yellow
[Adafruit Mini 8x8 LED Matrix w/I2C Backpack - Yellow](https://www.adafruit.com/product/871)
What's better than a single LED? Lots of LEDs! A fun way to make a small display is to use an [8x8 matrix](https://www.adafruit.com/category/37_88) or a [4-digit 7-segment display](https://www.adafruit.com/category/37_103). Matrices like these are...
In Stock
[Buy Now](https://www.adafruit.com/product/871)
[Related Guides to the Product](https://learn.adafruit.com/products/871/guides)
### Adafruit Mini 0.8" 8x8 LED Matrix w/I2C Backpack - Yellow-Green
[Adafruit Mini 0.8" 8x8 LED Matrix w/I2C Backpack - Yellow-Green](https://www.adafruit.com/product/872)
What's better than a single LED? Lots of LEDs! A fun way to make a small display is to use an [8x8 matrix](https://www.adafruit.com/category/37_88) or a [4-digit 7-segment display](https://www.adafruit.com/category/37_103). Matrices like these are...
In Stock
[Buy Now](https://www.adafruit.com/product/872)
[Related Guides to the Product](https://learn.adafruit.com/products/872/guides)
### Adafruit Mini 8x8 LED Matrix w/I2C Backpack - Blue
[Adafruit Mini 8x8 LED Matrix w/I2C Backpack - Blue](https://www.adafruit.com/product/959)
What's better than a single LED? Lots of LEDs! A fun way to make a small display is to use an [8x8 matrix](https://www.adafruit.com/category/37_88) or a [4-digit 7-segment display](https://www.adafruit.com/category/37_103). Matrices like these are...
In Stock
[Buy Now](https://www.adafruit.com/product/959)
[Related Guides to the Product](https://learn.adafruit.com/products/959/guides)
### Adafruit Small 1.2" 8x8 LED Matrix w/I2C Backpack - Red
[Adafruit Small 1.2" 8x8 LED Matrix w/I2C Backpack - Red](https://www.adafruit.com/product/1049)
What's better than a single LED? Lots of LEDs! A fun way to make a small display is to use an [8x8 matrix](https://www.adafruit.com/category/37_88) or a [4-digit 7-segment display](https://www.adafruit.com/category/37_103). Matrices like these are...
In Stock
[Buy Now](https://www.adafruit.com/product/1049)
[Related Guides to the Product](https://learn.adafruit.com/products/1049/guides)
### Adafruit Small 1.2" 8x8 LED Matrix w/I2C Backpack - Yellow
[Adafruit Small 1.2" 8x8 LED Matrix w/I2C Backpack - Yellow](https://www.adafruit.com/product/1050)
What's better than a single LED? Lots of LEDs! A fun way to make a small display is to use an [8x8 matrix](https://www.adafruit.com/category/37_88) or a [4-digit 7-segment display](https://www.adafruit.com/category/37_103). Matrices like these are...
In Stock
[Buy Now](https://www.adafruit.com/product/1050)
[Related Guides to the Product](https://learn.adafruit.com/products/1050/guides)
### Adafruit Small 1.2" 8x8 LED Matrix w/I2C Backpack - Yellow-Green
[Adafruit Small 1.2" 8x8 LED Matrix w/I2C Backpack - Yellow-Green](https://www.adafruit.com/product/1051)
What's better than a single LED? Lots of LEDs! A fun way to make a small display is to use an [8x8 matrix](https://www.adafruit.com/category/37_88) or a [4-digit 7-segment display](https://www.adafruit.com/category/37_103). Matrices like these are...
In Stock
[Buy Now](https://www.adafruit.com/product/1051)
[Related Guides to the Product](https://learn.adafruit.com/products/1051/guides)
### Adafruit Small 1.2" 8x8 LED Matrix w/I2C Backpack - Blue
[Adafruit Small 1.2" 8x8 LED Matrix w/I2C Backpack - Blue](https://www.adafruit.com/product/1052)
What's better than a single LED? Lots of LEDs! A fun way to make a small display is to use an [8x8 matrix](https://www.adafruit.com/category/37_88) or a [4-digit 7-segment display](https://www.adafruit.com/category/37_103). Matrices like these are...
In Stock
[Buy Now](https://www.adafruit.com/product/1052)
[Related Guides to the Product](https://learn.adafruit.com/products/1052/guides)
### Adafruit Bicolor LED Square Pixel Matrix with I2C Backpack
[Adafruit Bicolor LED Square Pixel Matrix with I2C Backpack](https://www.adafruit.com/product/902)
What's better than a single LED? Lots of LEDs! A fun way to make a small colorful display is to use a [1.2" Bi-color 8x8 LED Matrix](http://www.adafruit.com/products/458). Matrices like these are 'multiplexed' - so to control all the 128 LEDs you need 24 pins....
In Stock
[Buy Now](https://www.adafruit.com/product/902)
[Related Guides to the Product](https://learn.adafruit.com/products/902/guides)
## Related Guides
- [Adafruit LED Backpacks](https://learn.adafruit.com/adafruit-led-backpack.md)
- [Bluefruit LE Connect for iOS and Android](https://learn.adafruit.com/bluefruit-le-connect.md)
- [2.2" TFT Display](https://learn.adafruit.com/2-2-tft-display.md)
- [2.8" TFT Touch Shield](https://learn.adafruit.com/2-8-tft-touch-shield.md)
- [Matrix and 7-Segment LED Backpack with the Raspberry Pi](https://learn.adafruit.com/matrix-7-segment-led-backpack-with-the-raspberry-pi.md)
- [TMP36 Temperature Sensor](https://learn.adafruit.com/tmp36-temperature-sensor.md)
- [Wireless Gardening with Arduino + CC3000 WiFi Modules](https://learn.adafruit.com/wireless-gardening-arduino-cc3000-wifi-modules.md)
- [WiFi Candy Bowl Monitor](https://learn.adafruit.com/wifi-candy-bowl.md)
- [Line Following Zumo Robot Using Simulink](https://learn.adafruit.com/line-following-zumo-robot-programmed-with-simulink.md)
- [Wireless Power Switch with Arduino & the CC3000 WiFi Chip](https://learn.adafruit.com/wireless-power-switch-with-arduino-and-the-cc3000-wifi-chip.md)
- [Trinket / Gemma Space Invader Pendant](https://learn.adafruit.com/trinket-slash-gemma-space-invader-pendant.md)
- [Tiny Arduino Music Visualizer](https://learn.adafruit.com/piccolo.md)
- [LED Matrix Hourglass](https://learn.adafruit.com/led-matrix-hourglass.md)
- [Nokia 5110/3310 Monochrome LCD](https://learn.adafruit.com/nokia-5110-3310-monochrome-lcd.md)
- [Wave Shield Voice Changer](https://learn.adafruit.com/wave-shield-voice-changer.md)
---
# Source: https://learn.adafruit.com/adafruit-arduino-lesson-14-servo-motors/arduino-code-for-knob.md
# Arduino Lesson 14. Servo Motors
## Arduino Code for 'Knob'
The code to make the servo follow the knob's position is simpler than to make it sweep.
```
/*
Adafruit Arduino - Lesson 14. Knob
*/
#include <Servo.h>
int potPin = 0;
int servoPin = 9;
Servo servo;
void setup()
{
servo.attach(servoPin);
}
void loop()
{
int reading = analogRead(potPin); // 0 to 1023
int angle = reading / 6; // 0 to 180-ish
servo.write(angle);
}
```
There is now a second variable called 'potPin'.
To set the position of the servo, we take an analog reading from A0. This gives us a value of between 0 and 1023. Since the servo can only rotate through 180 degrees, we need to scale this down. Dividing it by six will give us an angle between 0 and 170, which will do just fine.
- [Previous Page](https://learn.adafruit.com/adafruit-arduino-lesson-14-servo-motors/the-breadboard-layout-for-knob.md)
- [Next Page](https://learn.adafruit.com/adafruit-arduino-lesson-14-servo-motors/servo-motors.md)
## Featured Products
### Standard servo - TowerPro SG-5010
[Standard servo - TowerPro SG-5010](https://www.adafruit.com/product/155)
This high-torque standard servo can rotate approximately 180 degrees (90 in each direction). You can use any servo code, hardware, or library to control these servos. Good for beginners who want to make stuff move without building a motor controller with feedback & gearbox. Comes with 3...
In Stock
[Buy Now](https://www.adafruit.com/product/155)
[Related Guides to the Product](https://learn.adafruit.com/products/155/guides)
### Premium Male/Male Jumper Wires - 40 x 6" (150mm)
[Premium Male/Male Jumper Wires - 40 x 6" (150mm)](https://www.adafruit.com/product/758)
Handy for making wire harnesses or jumpering between headers on PCB's. These premium jumper wires are 6" (150mm) long and come in a 'strip' of 40 (4 pieces of each of ten rainbow colors). They have 0.1" male header contacts on either end and fit cleanly next to each other...
In Stock
[Buy Now](https://www.adafruit.com/product/758)
[Related Guides to the Product](https://learn.adafruit.com/products/758/guides)
### Half Sized Premium Breadboard - 400 Tie Points
[Half Sized Premium Breadboard - 400 Tie Points](https://www.adafruit.com/product/64)
This is a cute, half-size breadboard with 400 tie points, good for small projects. It's 3.25" x 2.2" / 8.3cm x 5.5cm with a standard double-strip in the middle and two power rails on both sides. You can pull the power rails off easily to make the breadboard as...
In Stock
[Buy Now](https://www.adafruit.com/product/64)
[Related Guides to the Product](https://learn.adafruit.com/products/64/guides)
### Adafruit METRO 328 Fully Assembled - Arduino IDE compatible
[Adafruit METRO 328 Fully Assembled - Arduino IDE compatible](https://www.adafruit.com/product/50)
We sure love the ATmega328 here at Adafruit, and we use them _a lot_ for our own projects. The processor has plenty of GPIO, Analog inputs, hardware UART SPI and I2C, timers and PWM galore - just enough for most simple projects. When we need to go small, we use a
Out of Stock
[Buy Now](https://www.adafruit.com/product/50)
[Related Guides to the Product](https://learn.adafruit.com/products/50/guides)
### Micro servo
[Micro servo](https://www.adafruit.com/product/169)
Tiny little servo can rotate approximately 180 degrees (90 in each direction) and works just like the standard kinds you're used to but _smaller_. You can use any servo code, hardware, or library to control these servos. Good for beginners who want to make stuff move without...
In Stock
[Buy Now](https://www.adafruit.com/product/169)
[Related Guides to the Product](https://learn.adafruit.com/products/169/guides)
### Standard Size - High Torque - Metal Gear Servo
[Standard Size - High Torque - Metal Gear Servo](https://www.adafruit.com/product/1142)
This high-torque standard servo now comes in a metal-gear flavor, for extra-high torque (10 kg\*cm!) and reliability! It can rotate at least 120 degrees (60 in each direction) with a classic 1.5-2.5ms pulse, but if you can extend your pulses it can go up to about 170 degrees - it varies a bit...
In Stock
[Buy Now](https://www.adafruit.com/product/1142)
[Related Guides to the Product](https://learn.adafruit.com/products/1142/guides)
### Micro Servo - MG90D High Torque Metal Gear
[Micro Servo - MG90D High Torque Metal Gear](https://www.adafruit.com/product/1143)
Add more power to your robot with this metal-geared MG90D servo. The tiny little servo can rotate approximately 90 degrees (45 in each direction) and works just like the standard kinds you're used to but _smaller_. You can use any servo code, hardware, or library to control...
Out of Stock
[Buy Now](https://www.adafruit.com/product/1143)
[Related Guides to the Product](https://learn.adafruit.com/products/1143/guides)
## Related Guides
- [Arduino Tips, Tricks, and Techniques](https://learn.adafruit.com/arduino-tips-tricks-and-techniques.md)
- [Light Meter](https://learn.adafruit.com/light-meter.md)
- [Arduino Lesson 4. Eight LEDs and a Shift Register](https://learn.adafruit.com/adafruit-arduino-lesson-4-eight-leds.md)
- [Adafruit Arduino Selection Guide](https://learn.adafruit.com/adafruit-arduino-selection-guide.md)
- [Smart Measuring Cup](https://learn.adafruit.com/smart-measuring-cup.md)
- [Low Power WiFi Datalogger](https://learn.adafruit.com/low-power-wifi-datalogging.md)
- [Electronic Demon Costume](https://learn.adafruit.com/electronic-demon-costume.md)
- [Photocells](https://learn.adafruit.com/photocells.md)
- [Wave Shield Talking Clock](https://learn.adafruit.com/wave-shield-talking-clock.md)
- [WiFi Weather Station](https://learn.adafruit.com/wifi-weather-station-arduino-cc3000.md)
- [Adafruit Data Logger Shield](https://learn.adafruit.com/adafruit-data-logger-shield.md)
- [Ladyada's Learn Arduino - Lesson #1](https://learn.adafruit.com/ladyadas-learn-arduino-lesson-number-1.md)
- [Collin's Lab: MIDI](https://learn.adafruit.com/collins-lab-midi.md)
- [Arduino Lesson 7. Make an RGB LED Fader](https://learn.adafruit.com/adafruit-arduino-lesson-7-make-an-rgb-led-fader.md)
- [Geofencing with the FONA 808 & Adafruit IO](https://learn.adafruit.com/geofencing-with-the-fona-808-and-adafruit-io.md)
---
# Source: https://learn.adafruit.com/adafruit-arduino-lesson-14-servo-motors/arduino-code-for-sweep.md
# Arduino Lesson 14. Servo Motors
## Arduino Code for 'Sweep'
Load up the following sketch onto your Arduino. You should find that the servo immediately begins to turn first in one direction and then back in the other.
The sketch is based on the standard 'sweep' sketch that you can find in the Arduino Examples under the folder 'servo'. You can if you prefer just run that sketch.
```
/*
Adafruit Arduino - Lesson 14. Sweep
*/
#include <Servo.h>
int servoPin = 9;
Servo servo;
int angle = 0; // servo position in degrees
void setup()
{
servo.attach(servoPin);
}
void loop()
{
// scan from 0 to 180 degrees
for(angle = 0; angle < 180; angle++)
{
servo.write(angle);
delay(15);
}
// now scan back from 180 to 0 degrees
for(angle = 180; angle > 0; angle--)
{
servo.write(angle);
delay(15);
}
}
```
Servo motors are controlled by a series of pulses and to make it easy to use them, an Arduino library has been created so that you can just instruct the servo to turn to a particular angle.
The commands for using a servo are like built-in Arduino commands, but because you are not always going to be using a servo in your projects, they are kept in something called a library. If you are going to use commands in the servo library, you need to tell the Arduino IDE that you are using the library with this command:
```
#include <Servo.h>
```
As usual, we then use a variable 'servoPin' to define the pin that is to control the servo.
This line:
```
Servo servo;
```
defines a new variable 'servo' of type 'Servo'. The library has provided us with a new type, like 'int' or 'float' that represents a servo. You can actually define up to eight servos in this way, so if we had two servos, then we could write something like this:
```
Servo servo1;
Servo servo2;
```
In the 'setup' function we need to link the 'servo' variable to the pin that will control the servo using this command:
```
servo.attach(servoPin);
```
The variable 'angle' is used to contain the current angle of the servo in degrees. In the 'loop' function, we use two 'for' loops to first increase the angle in one direction and then back in the other when it gets to 180 degrees.
The command:
```
servo.write(angle);
```
tells the servo to update its position to the angle supplied as a parameter.
- [Previous Page](https://learn.adafruit.com/adafruit-arduino-lesson-14-servo-motors/if-the-servo-misbehaves.md)
- [Next Page](https://learn.adafruit.com/adafruit-arduino-lesson-14-servo-motors/the-breadboard-layout-for-knob.md)
## Featured Products
### Standard servo - TowerPro SG-5010
[Standard servo - TowerPro SG-5010](https://www.adafruit.com/product/155)
This high-torque standard servo can rotate approximately 180 degrees (90 in each direction). You can use any servo code, hardware, or library to control these servos. Good for beginners who want to make stuff move without building a motor controller with feedback & gearbox. Comes with 3...
In Stock
[Buy Now](https://www.adafruit.com/product/155)
[Related Guides to the Product](https://learn.adafruit.com/products/155/guides)
### Premium Male/Male Jumper Wires - 40 x 6" (150mm)
[Premium Male/Male Jumper Wires - 40 x 6" (150mm)](https://www.adafruit.com/product/758)
Handy for making wire harnesses or jumpering between headers on PCB's. These premium jumper wires are 6" (150mm) long and come in a 'strip' of 40 (4 pieces of each of ten rainbow colors). They have 0.1" male header contacts on either end and fit cleanly next to each other...
In Stock
[Buy Now](https://www.adafruit.com/product/758)
[Related Guides to the Product](https://learn.adafruit.com/products/758/guides)
### Half Sized Premium Breadboard - 400 Tie Points
[Half Sized Premium Breadboard - 400 Tie Points](https://www.adafruit.com/product/64)
This is a cute, half-size breadboard with 400 tie points, good for small projects. It's 3.25" x 2.2" / 8.3cm x 5.5cm with a standard double-strip in the middle and two power rails on both sides. You can pull the power rails off easily to make the breadboard as...
In Stock
[Buy Now](https://www.adafruit.com/product/64)
[Related Guides to the Product](https://learn.adafruit.com/products/64/guides)
### Adafruit METRO 328 Fully Assembled - Arduino IDE compatible
[Adafruit METRO 328 Fully Assembled - Arduino IDE compatible](https://www.adafruit.com/product/50)
We sure love the ATmega328 here at Adafruit, and we use them _a lot_ for our own projects. The processor has plenty of GPIO, Analog inputs, hardware UART SPI and I2C, timers and PWM galore - just enough for most simple projects. When we need to go small, we use a
Out of Stock
[Buy Now](https://www.adafruit.com/product/50)
[Related Guides to the Product](https://learn.adafruit.com/products/50/guides)
### Micro servo
[Micro servo](https://www.adafruit.com/product/169)
Tiny little servo can rotate approximately 180 degrees (90 in each direction) and works just like the standard kinds you're used to but _smaller_. You can use any servo code, hardware, or library to control these servos. Good for beginners who want to make stuff move without...
In Stock
[Buy Now](https://www.adafruit.com/product/169)
[Related Guides to the Product](https://learn.adafruit.com/products/169/guides)
### Standard Size - High Torque - Metal Gear Servo
[Standard Size - High Torque - Metal Gear Servo](https://www.adafruit.com/product/1142)
This high-torque standard servo now comes in a metal-gear flavor, for extra-high torque (10 kg\*cm!) and reliability! It can rotate at least 120 degrees (60 in each direction) with a classic 1.5-2.5ms pulse, but if you can extend your pulses it can go up to about 170 degrees - it varies a bit...
In Stock
[Buy Now](https://www.adafruit.com/product/1142)
[Related Guides to the Product](https://learn.adafruit.com/products/1142/guides)
### Micro Servo - MG90D High Torque Metal Gear
[Micro Servo - MG90D High Torque Metal Gear](https://www.adafruit.com/product/1143)
Add more power to your robot with this metal-geared MG90D servo. The tiny little servo can rotate approximately 90 degrees (45 in each direction) and works just like the standard kinds you're used to but _smaller_. You can use any servo code, hardware, or library to control...
Out of Stock
[Buy Now](https://www.adafruit.com/product/1143)
[Related Guides to the Product](https://learn.adafruit.com/products/1143/guides)
## Related Guides
- [Arduino Tips, Tricks, and Techniques](https://learn.adafruit.com/arduino-tips-tricks-and-techniques.md)
- [Light Meter](https://learn.adafruit.com/light-meter.md)
- [Arduino Lesson 4. Eight LEDs and a Shift Register](https://learn.adafruit.com/adafruit-arduino-lesson-4-eight-leds.md)
- [Adafruit Arduino Selection Guide](https://learn.adafruit.com/adafruit-arduino-selection-guide.md)
- [Smart Measuring Cup](https://learn.adafruit.com/smart-measuring-cup.md)
- [Low Power WiFi Datalogger](https://learn.adafruit.com/low-power-wifi-datalogging.md)
- [Electronic Demon Costume](https://learn.adafruit.com/electronic-demon-costume.md)
- [Photocells](https://learn.adafruit.com/photocells.md)
- [Wave Shield Talking Clock](https://learn.adafruit.com/wave-shield-talking-clock.md)
- [WiFi Weather Station](https://learn.adafruit.com/wifi-weather-station-arduino-cc3000.md)
- [Adafruit Data Logger Shield](https://learn.adafruit.com/adafruit-data-logger-shield.md)
- [Ladyada's Learn Arduino - Lesson #1](https://learn.adafruit.com/ladyadas-learn-arduino-lesson-number-1.md)
- [Collin's Lab: MIDI](https://learn.adafruit.com/collins-lab-midi.md)
- [Arduino Lesson 7. Make an RGB LED Fader](https://learn.adafruit.com/adafruit-arduino-lesson-7-make-an-rgb-led-fader.md)
- [Geofencing with the FONA 808 & Adafruit IO](https://learn.adafruit.com/geofencing-with-the-fona-808-and-adafruit-io.md)
---
# Source: https://learn.adafruit.com/12mm-led-pixels/arduino-code.md
# Source: https://learn.adafruit.com/character-lcds/arduino-code.md
# Source: https://learn.adafruit.com/tsl2561/arduino-code.md
# Source: https://learn.adafruit.com/photocells/arduino-code.md
# Source: https://learn.adafruit.com/thermocouple/arduino-code.md
# Source: https://learn.adafruit.com/adafruit-ina219-current-sensor-breakout/arduino-code.md
# Adafruit INA219 Current Sensor Breakout
## Arduino Code
Programming the Adafruit INA219 breakout board in Arduino, using the many boards that have I2C, is simple using our library:
## Install the Library
Open up the Arduino library manager:

Search for the **Adafruit INA219** library and install it

We also have a great tutorial on Arduino library installation at:
[http://learn.adafruit.com/adafruit-all-about-arduino-libraries-install-use](http://learn.adafruit.com/adafruit-all-about-arduino-libraries-install-use "Link: http://learn.adafruit.com/adafruit-all-about-arduino-libraries-install-use")
## Load the Example
- **Select**"_File -\> Examples -\> Adafruit\_INA219 -\> getcurrent_"
- The "getcurrent" example code should open in a new IDE window.

## Run it
- **Click** on the upload button in the IDE. When it is "done uploading"
- **Open** your Serial Monitor and set the speed to 115200 baud.
The output should appear similar to the sample below:

## Customize it
You can adapt, expand or modify the example code to suit your project requirements. For a detailed description of the available library functions, see the **Library Reference** on the next page.
- [Previous Page](https://learn.adafruit.com/adafruit-ina219-current-sensor-breakout/wiring.md)
- [Next Page](https://learn.adafruit.com/adafruit-ina219-current-sensor-breakout/library-reference.md)
## Featured Products
### INA219 High Side DC Current Sensor Breakout - 26V ±3.2A Max
[INA219 High Side DC Current Sensor Breakout - 26V ±3.2A Max](https://www.adafruit.com/product/904)
This breakout board will solve all your power-monitoring problems. Instead of struggling with two multimeters, you can just use the handy INA219 chip on this breakout to both measure both the high side voltage and DC current draw over I2C with ±1% precision.
**Please...**
In Stock
[Buy Now](https://www.adafruit.com/product/904)
[Related Guides to the Product](https://learn.adafruit.com/products/904/guides)
### STEMMA QT / Qwiic JST SH 4-pin Cable - 100mm Long
[STEMMA QT / Qwiic JST SH 4-pin Cable - 100mm Long](https://www.adafruit.com/product/4210)
This 4-wire cable is a little over 100mm / 4" long and fitted with JST-SH female 4-pin connectors on both ends. Compared with the chunkier JST-PH these are 1mm pitch instead of 2mm, but still have a nice latching feel, while being easy to insert and remove.
In Stock
[Buy Now](https://www.adafruit.com/product/4210)
[Related Guides to the Product](https://learn.adafruit.com/products/4210/guides)
### STEMMA QT / Qwiic JST SH 4-pin to Premium Male Headers Cable
[STEMMA QT / Qwiic JST SH 4-pin to Premium Male Headers Cable](https://www.adafruit.com/product/4209)
This 4-wire cable is a little over 150mm / 6" long and fitted with JST-SH female 4-pin connectors on one end and premium Dupont male headers on the other. Compared with the chunkier JST-PH these are 1mm pitch instead of 2mm, but still have a nice latching feel, while being easy to insert...
Out of Stock
[Buy Now](https://www.adafruit.com/product/4209)
[Related Guides to the Product](https://learn.adafruit.com/products/4209/guides)
### Premium Male/Male Jumper Wires - 40 x 6" (150mm)
[Premium Male/Male Jumper Wires - 40 x 6" (150mm)](https://www.adafruit.com/product/758)
Handy for making wire harnesses or jumpering between headers on PCB's. These premium jumper wires are 6" (150mm) long and come in a 'strip' of 40 (4 pieces of each of ten rainbow colors). They have 0.1" male header contacts on either end and fit cleanly next to each other...
Out of Stock
[Buy Now](https://www.adafruit.com/product/758)
[Related Guides to the Product](https://learn.adafruit.com/products/758/guides)
### Full Sized Premium Breadboard - 830 Tie Points
[Full Sized Premium Breadboard - 830 Tie Points](https://www.adafruit.com/product/239)
This is a 'full-size' premium quality breadboard, 830 tie points. Good for small and medium projects. It's 2.2" x 7" (5.5 cm x 17 cm) with a standard double-strip in the middle and two power rails on both sides. You can pull the power rails off easily to make the...
In Stock
[Buy Now](https://www.adafruit.com/product/239)
[Related Guides to the Product](https://learn.adafruit.com/products/239/guides)
### Adafruit INA219 FeatherWing
[Adafruit INA219 FeatherWing](https://www.adafruit.com/product/3650)
The **INA219 FeatherWing** makes power-monitoring problems a thing of the past. Instead of struggling with two multimeters, you can just use the handy INA219 chip on this breakout to measure both the high side voltage and DC current draw over I2C with 1% precision....
In Stock
[Buy Now](https://www.adafruit.com/product/3650)
[Related Guides to the Product](https://learn.adafruit.com/products/3650/guides)
### Adafruit METRO 328 Fully Assembled - Arduino IDE compatible
[Adafruit METRO 328 Fully Assembled - Arduino IDE compatible](https://www.adafruit.com/product/50)
We sure love the ATmega328 here at Adafruit, and we use them _a lot_ for our own projects. The processor has plenty of GPIO, Analog inputs, hardware UART SPI and I2C, timers and PWM galore - just enough for most simple projects. When we need to go small, we use a
Out of Stock
[Buy Now](https://www.adafruit.com/product/50)
[Related Guides to the Product](https://learn.adafruit.com/products/50/guides)
## Related Guides
- [Remote controlled door lock using a fingerprint sensor & Adafruit IO](https://learn.adafruit.com/remote-controlled-door-lock-using-a-fingerprint-sensor-and-adafruit-io.md)
- [WiFi Controlled Mobile Robot](https://learn.adafruit.com/wifi-controlled-mobile-robot.md)
- [Arduino Lesson 14. Servo Motors](https://learn.adafruit.com/adafruit-arduino-lesson-14-servo-motors.md)
- [Geofencing with the FONA 808 & Adafruit IO](https://learn.adafruit.com/geofencing-with-the-fona-808-and-adafruit-io.md)
- [Let’s Put LEDs in Things!](https://learn.adafruit.com/lets-put-leds-in-things.md)
- [Adafruit CC3000 WiFi and Xively](https://learn.adafruit.com/adafruit-cc3000-wifi-and-xively.md)
- [Adafruit AirLift Shield - ESP32 WiFi Co-Processor](https://learn.adafruit.com/adafruit-airlift-shield-esp32-wifi-co-processor.md)
- [Wave Shield Talking Clock](https://learn.adafruit.com/wave-shield-talking-clock.md)
- [Ladyada's Learn Arduino - Lesson #0](https://learn.adafruit.com/ladyadas-learn-arduino-lesson-number-0.md)
- [2.2" TFT Display](https://learn.adafruit.com/2-2-tft-display.md)
- [LED Lightbox](https://learn.adafruit.com/led-lightbox.md)
- [Arduino Prototyping Mounting Plate](https://learn.adafruit.com/arduino-prototyping-mounting-plate.md)
- [How to Choose a Microcontroller](https://learn.adafruit.com/how-to-choose-a-microcontroller.md)
- [Arduino Lesson 16. Stepper Motors](https://learn.adafruit.com/adafruit-arduino-lesson-16-stepper-motors.md)
- [Arduino Lesson 8. Analog Inputs](https://learn.adafruit.com/adafruit-arduino-lesson-8-analog-inputs.md)
---
# Source: https://learn.adafruit.com/adafruit-4-channel-adc-breakouts/arduino-docs.md
# Adafruit 4-Channel ADC Breakouts
## Arduino Docs
- [Previous Page](https://learn.adafruit.com/adafruit-4-channel-adc-breakouts/arduino-code.md)
- [Next Page](https://learn.adafruit.com/adafruit-4-channel-adc-breakouts/downloads.md)
## Featured Products
### ADS1115 16-Bit ADC - 4 Channel with Programmable Gain Amplifier
[ADS1115 16-Bit ADC - 4 Channel with Programmable Gain Amplifier](https://www.adafruit.com/product/1085)
For microcontrollers without an analog-to-digital converter or when you want a higher-precision ADC, the ADS1115 provides 16-bit precision at 860 samples/second over I2C. The chip can be configured as 4 single-ended input channels, or two differential channels. As a nice bonus, it even...
In Stock
[Buy Now](https://www.adafruit.com/product/1085)
[Related Guides to the Product](https://learn.adafruit.com/products/1085/guides)
### ADS1015 12-Bit ADC - 4 Channel with Programmable Gain Amplifier
[ADS1015 12-Bit ADC - 4 Channel with Programmable Gain Amplifier](https://www.adafruit.com/product/1083)
For microcontrollers without an analog-to-digital converter or when you want a higher-precision ADC, the ADS1015 provides 12-bit precision at 3300 samples/second over I2C. The chip can be configured as 4 single-ended input channels or two differential channels. As a nice bonus, it even...
In Stock
[Buy Now](https://www.adafruit.com/product/1083)
[Related Guides to the Product](https://learn.adafruit.com/products/1083/guides)
### STEMMA QT / Qwiic JST SH 4-Pin Cable - 50mm Long
[STEMMA QT / Qwiic JST SH 4-Pin Cable - 50mm Long](https://www.adafruit.com/product/4399)
This 4-wire cable is 50mm / 1.9" long and fitted with JST SH female 4-pin connectors on both ends. Compared with the chunkier JST PH these are 1mm pitch instead of 2mm, but still have a nice latching feel, while being easy to insert and remove.
In Stock
[Buy Now](https://www.adafruit.com/product/4399)
[Related Guides to the Product](https://learn.adafruit.com/products/4399/guides)
### Adafruit Assembled Pi Cobbler Breakout + Cable for Raspberry Pi
[Adafruit Assembled Pi Cobbler Breakout + Cable for Raspberry Pi](https://www.adafruit.com/product/914)
Now that you've finally got your hands on a [Raspberry Pi® Model B](http://www.raspberrypi.org/), you're probably itching to make some fun embedded computer projects with it. What you need is an add on prototyping Pi Cobbler from Adafruit, which can break out all those...
No Longer Stocked
[Buy Now](https://www.adafruit.com/product/914)
[Related Guides to the Product](https://learn.adafruit.com/products/914/guides)
### Adafruit METRO 328 Fully Assembled - Arduino IDE compatible
[Adafruit METRO 328 Fully Assembled - Arduino IDE compatible](https://www.adafruit.com/product/50)
We sure love the ATmega328 here at Adafruit, and we use them _a lot_ for our own projects. The processor has plenty of GPIO, Analog inputs, hardware UART SPI and I2C, timers and PWM galore - just enough for most simple projects. When we need to go small, we use a
Out of Stock
[Buy Now](https://www.adafruit.com/product/50)
[Related Guides to the Product](https://learn.adafruit.com/products/50/guides)
### Full Sized Premium Breadboard - 830 Tie Points
[Full Sized Premium Breadboard - 830 Tie Points](https://www.adafruit.com/product/239)
This is a 'full-size' premium quality breadboard, 830 tie points. Good for small and medium projects. It's 2.2" x 7" (5.5 cm x 17 cm) with a standard double-strip in the middle and two power rails on both sides. You can pull the power rails off easily to make the...
In Stock
[Buy Now](https://www.adafruit.com/product/239)
[Related Guides to the Product](https://learn.adafruit.com/products/239/guides)
## Related Guides
- [Animating Multiple LED Backpacks](https://learn.adafruit.com/animating-multiple-led-backpacks.md)
- [Arduino Lesson 16. Stepper Motors](https://learn.adafruit.com/adafruit-arduino-lesson-16-stepper-motors.md)
- [Bluetooth Temperature & Humidity Sensor](https://learn.adafruit.com/bluetooth-temperature-and-humidity-sensor.md)
- [Light Meter](https://learn.adafruit.com/light-meter.md)
- [Making Adabot: Part 2](https://learn.adafruit.com/making-adabot-part-2.md)
- [Silicone Robo-Tentacle](https://learn.adafruit.com/silicone-robo-tentacle.md)
- [Digital Circuits 7: MCUs... how do they work?](https://learn.adafruit.com/mcus-how-do-they-work.md)
- [Adafruit Motor Shield](https://learn.adafruit.com/adafruit-motor-shield.md)
- [Remote controlled door lock using a fingerprint sensor & Adafruit IO](https://learn.adafruit.com/remote-controlled-door-lock-using-a-fingerprint-sensor-and-adafruit-io.md)
- [Adafruit 16-channel PWM/Servo Shield](https://learn.adafruit.com/adafruit-16-channel-pwm-slash-servo-shield.md)
- [Wireless Gardening with Arduino + CC3000 WiFi Modules](https://learn.adafruit.com/wireless-gardening-arduino-cc3000-wifi-modules.md)
- [Sous-vide controller powered by Arduino - The SousViduino!](https://learn.adafruit.com/sous-vide-powered-by-arduino-the-sous-viduino.md)
- [Arduino GPS Clock](https://learn.adafruit.com/arduino-clock.md)
- [I2C Addresses and Troublesome Chips](https://learn.adafruit.com/i2c-addresses.md)
- [Adafruit INA219 Current Sensor Breakout](https://learn.adafruit.com/adafruit-ina219-current-sensor-breakout.md)
---
# Source: https://learn.adafruit.com/arduino-tips-tricks-and-techniques/arduino-hacks.md
# Arduino Tips, Tricks, and Techniques
## Arduino Hacks
## Bumpers
Having the conductive traces touch your table is not so great, you can protect your Arduino by adding bumpers to the bottom.

You can buy these from McMaster Carr part no. [95495K66](http://www.mcmaster.com/nav/enter.asp?partnum=95495K66&pagenum=3612) (in large quantities) or [Adafruit](http://www.adafruit.com/products/550)
## Free up some RAM
If you're working on a project that needs **a lot** of memory, you can free up 100 more bytes (10% of the RAM on an ATmega168!) by lessening the serial receive buffer. By default its 128 bytes, which is quite a bit!
Open up **hardware/cores/arduino** (or **cores/arduino** ) directory, and edit the file named **wiring\_serial.c** or **HardwareSerial.cpp**
Near the top is a **#define RX\_BUFFER\_SIZE 128** , which means 128 bytes are used for the buffer. You can change this to 32 (or even 16!). If you have almost no serial input, make it as low as you'd like as long as its \> 0.

You can also save another 2 bytes by changing **rx\_buffer\_head** and **rx\_buffer\_tail** from **int** to **uint8\_t**
- [Previous Page](https://learn.adafruit.com/arduino-tips-tricks-and-techniques/3-3v-conversion.md)
- [Next Page](https://learn.adafruit.com/arduino-tips-tricks-and-techniques/arduinoisp.md)
## Featured Products
### Adafruit METRO 328 Fully Assembled - Arduino IDE compatible
[Adafruit METRO 328 Fully Assembled - Arduino IDE compatible](https://www.adafruit.com/product/50)
We sure love the ATmega328 here at Adafruit, and we use them _a lot_ for our own projects. The processor has plenty of GPIO, Analog inputs, hardware UART SPI and I2C, timers and PWM galore - just enough for most simple projects. When we need to go small, we use a
Out of Stock
[Buy Now](https://www.adafruit.com/product/50)
[Related Guides to the Product](https://learn.adafruit.com/products/50/guides)
### Arduino bootloader-programmed chip (Atmega328P)
[Arduino bootloader-programmed chip (Atmega328P)](https://www.adafruit.com/product/123)
This is a preprogrammed Atmega328P chip, useful if you want to make your own Arduino-compatible or repair a damaged chip on an exisiting Arduino UNO, Duemilanove, Diecimila, or NG!
This chip is programmed with 'ADAboot', my version of the bootloader that is...
Out of Stock
[Buy Now](https://www.adafruit.com/product/123)
[Related Guides to the Product](https://learn.adafruit.com/products/123/guides)
## Related Guides
- [NeoPixel Painter](https://learn.adafruit.com/neopixel-painter.md)
- [Adafruit Proto Shield for Arduino](https://learn.adafruit.com/adafruit-proto-shield-arduino.md)
- [Deciphering Strange Arduino Code](https://learn.adafruit.com/deciphering-strange-arduino-code.md)
- [Affordable HAL 9000 Replica](https://learn.adafruit.com/hal-9000-replica.md)
- [WiFi Candy Bowl Monitor](https://learn.adafruit.com/wifi-candy-bowl.md)
- [Arduino Lesson 1. Blink](https://learn.adafruit.com/adafruit-arduino-lesson-1-blink.md)
- [Using NeoPixels and Servos Together](https://learn.adafruit.com/neopixels-and-servos.md)
- [Adafruit 2.8" TFT Touch Shield v2 - Capacitive or Resistive](https://learn.adafruit.com/adafruit-2-8-tft-touch-shield-v2.md)
- [LSM303 Accelerometer + Compass Breakout](https://learn.adafruit.com/lsm303-accelerometer-slash-compass-breakout.md)
- [1,500 NeoPixel LED Curtain with Raspberry Pi and Fadecandy](https://learn.adafruit.com/1500-neopixel-led-curtain-with-raspberry-pi-fadecandy.md)
- [Arduino Lesson 8. Analog Inputs](https://learn.adafruit.com/adafruit-arduino-lesson-8-analog-inputs.md)
- [8BitBox](https://learn.adafruit.com/8bitbox.md)
- [Animating Multiple LED Backpacks](https://learn.adafruit.com/animating-multiple-led-backpacks.md)
- [WiFi Controlled LED Christmahanukwanzaa Tree](https://learn.adafruit.com/wifi-controlled-led-christmahanukwanzaa-tree.md)
- [Reverse Geocache Box](https://learn.adafruit.com/reverse-geocache-engagement-box.md)
---
# Source: https://learn.adafruit.com/arduino-hunt-the-wumpus.md
# Arduino "Hunt The Wumpus"
## Overview & Parts

You can relive the early days of computer gaming on your Arduino with [Hunt the Wumpus](http://en.wikipedia.org/wiki/Hunt_the_Wumpus). This game is a particularly good fit for the RGB LCD shield:
- Different screens can have different backlight colors
- The LCD is large enough for selecting caves to move to or shoot into
- The Wumpus, bat, and pit can all have custom characters
- The D-Pad is well suited to handling menu navigation
You will need:
- [Adafruit RGB LCD Shield](https://www.adafruit.com/products/716)
- [Arduino Uno](https://www.adafruit.com/products/50)

Of course, you do run the risk of taking a wrong turn and being eaten by a Wumpus!

- [Next Page](https://learn.adafruit.com/arduino-hunt-the-wumpus/code.md)
## Featured Products
### Adafruit METRO 328 Fully Assembled - Arduino IDE compatible
[Adafruit METRO 328 Fully Assembled - Arduino IDE compatible](https://www.adafruit.com/product/50)
We sure love the ATmega328 here at Adafruit, and we use them _a lot_ for our own projects. The processor has plenty of GPIO, Analog inputs, hardware UART SPI and I2C, timers and PWM galore - just enough for most simple projects. When we need to go small, we use a
Out of Stock
[Buy Now](https://www.adafruit.com/product/50)
[Related Guides to the Product](https://learn.adafruit.com/products/50/guides)
### RGB LCD Shield Kit w/ 16x2 Character Display - Only 2 pins used!
[RGB LCD Shield Kit w/ 16x2 Character Display - Only 2 pins used!](https://www.adafruit.com/product/716)
This new Adafruit shield makes it easy to use a 16x2 Character LCD. We really like the RGB LCDs we stock in the shop both the [RGB negative](http://www.adafruit.com/products/399) and [RGB positive](http://www.adafruit.com/products/398). Unfortunately, these LCDs do...
In Stock
[Buy Now](https://www.adafruit.com/product/716)
[Related Guides to the Product](https://learn.adafruit.com/products/716/guides)
## Related Guides
- [Cloud Thermometer](https://learn.adafruit.com/cloud-thermometer.md)
- [Adafruit Proto Screw Shield](https://learn.adafruit.com/adafruit-proto-screw-shield.md)
- [36mm LED Pixels](https://learn.adafruit.com/36mm-led-pixels.md)
- [Light Meter](https://learn.adafruit.com/light-meter.md)
- [Sending an SMS with Temboo](https://learn.adafruit.com/sending-an-sms-with-temboo.md)
- [Making Adabot: Part 2](https://learn.adafruit.com/making-adabot-part-2.md)
- [Wireless Gardening with Arduino + CC3000 WiFi Modules](https://learn.adafruit.com/wireless-gardening-arduino-cc3000-wifi-modules.md)
- [RGB LCD Shield](https://learn.adafruit.com/rgb-lcd-shield.md)
- [Sous-vide controller powered by Arduino - The SousViduino!](https://learn.adafruit.com/sous-vide-powered-by-arduino-the-sous-viduino.md)
- [Arduino Lesson 15. DC Motor Reversing](https://learn.adafruit.com/adafruit-arduino-lesson-15-dc-motor-reversing.md)
- [Metal Inlay Capacitive Touch Buttons](https://learn.adafruit.com/metal-inlay-capacitive-touch-buttons.md)
- [Adalight Project Pack](https://learn.adafruit.com/adalight-diy-ambient-tv-lighting.md)
- [FTDI Friend](https://learn.adafruit.com/ftdi-friend.md)
- [8BitBox](https://learn.adafruit.com/8bitbox.md)
- [Arduin-o-Phone](https://learn.adafruit.com/arduin-o-phone-arduino-powered-diy-cellphone.md)
---
# Source: https://learn.adafruit.com/i2c-spi-lcd-backpack/arduino-i2c-use.md
# I2C/SPI LCD Backpack
## Arduino I2C Use
The first option we'll show is how to use the I2C interface on the backpack. We'll be showing how to connect with an Arduino, for other microcontrollers please see our MCP23008 library code for the commands to send to the I2C I/O expander. I2C is nice because it only uses two pins, and you can put multiple I2C devices on the same two pins.
So for example, you could have up to 8 LCD backpacks+LCDs all on two pins! The bad news is that you have to use the 'hardware' I2C pins. You can't change those pins and you can't use them for reading analog data. If you absolutely need those two pins, use SPI (see the next section).
For this, we'll need to connect four wires: GND, 5V, CLK (clock) and DAT (data) via the STEMMA QT connection or the terminal block pins.


## Install Adafruit\_LiquidCrystal
To begin reading sensor data, you will need to download the Adafruit\_LiquidCrystal library from the Arduino library manager.
Open up the Arduino library manager:

Search for the **Adafruit LiquidCrystal ** library and install it

We also have a great tutorial on Arduino library installation at:
[http://learn.adafruit.com/adafruit-all-about-arduino-libraries-install-use](http://learn.adafruit.com/adafruit-all-about-arduino-libraries-install-use "Link: http://learn.adafruit.com/adafruit-all-about-arduino-libraries-install-use")
## Load Demo
Restart the IDE and load up the **Adafruit\_LiquidCrystal-\>HelloWorld\_i2c** demo

Upload the sketch. You should see the backlight turn on when the Arduino resets. If you don't see any characters, adjust the **Contrast** trim potentiometer with a mini-screwdriver until you see the text clearly
The default **HelloWorld** sketch blinks the backlight as well as updating the text.
**If you see the backlight blinking that means your connection to the I2C port is OK but the contrast is too low or too high** , or the LCD data pins are not solidly connected.
Check the contrast first by gently twisting the mini trim potentiometer, if that doesn't help, recheck your soldering and resolder all 16 of the LCD pins!
Once you're done, you can remove the blinking LED backlight code:
> lcd.setBacklight(HIGH);
> delay(500);
> lcd.setBacklight(LOW);
> delay(500);

## Changing the I2C Address
If you want to have more than one LCD backpack device each one needs to have a unique 'address'. You can set the address by jumpering the **A0** **A1** and **A2** solder jumpers. By default, no jumpers are soldered, giving an address of **0x20** (offset **0** ). If you want to have an address of **0x23** (0x20 + offset **3** ) you would solder **A0** (bit 0) and **A1** (bit 1) for an address offset of "011" = 3 in binary.

Then, in the code change:
```
// Connect via i2c, default address #0 (A0-A2 not jumpered)
LiquidCrystal lcd(0);
```
to
```
// Connect via i2c, address #3 (A0&A1 jumpered)
LiquidCrystal lcd(3);
```
- [Previous Page](https://learn.adafruit.com/i2c-spi-lcd-backpack/assembly.md)
- [Next Page](https://learn.adafruit.com/i2c-spi-lcd-backpack/arduino-spi-use.md)
## Primary Products
### i2c / SPI character LCD backpack - STEMMA QT / Qwiic
[i2c / SPI character LCD backpack - STEMMA QT / Qwiic](https://www.adafruit.com/product/292)
Character LCDs are a fun and easy way to have your microcontroller project talk back to you. They are also common, and easy to get, available in tons of colors and sizes. [We've written tutorials on using character LCDs with an Arduino](http://learn.adafruit.com/character-lcds)...
In Stock
[Buy Now](https://www.adafruit.com/product/292)
[Related Guides to the Product](https://learn.adafruit.com/products/292/guides)
## Featured Products
### Standard LCD 20x4 + extras
[Standard LCD 20x4 + extras](https://www.adafruit.com/product/198)
Standard HD44780 LCDs are useful for creating standalone projects.
- 20 characters wide, 4 rows
- White text on blue background
- Connection port is 0.1" pitch, single row for easy breadboarding and wiring
- Single LED backlight with a resistor included, you can...
In Stock
[Buy Now](https://www.adafruit.com/product/198)
[Related Guides to the Product](https://learn.adafruit.com/products/198/guides)
### Standard LCD 16x2 + extras
[Standard LCD 16x2 + extras](https://www.adafruit.com/product/181)
Standard HD44780 LCDs are useful for creating standalone projects.
- 16 characters wide, 2 rows
- White text on blue background
- Connection port is 0.1" pitch, single row for easy breadboarding and wiring
- Pins are documented on the back of the LCD to assist...
In Stock
[Buy Now](https://www.adafruit.com/product/181)
[Related Guides to the Product](https://learn.adafruit.com/products/181/guides)
## Related Guides
- [ Faz-Wrench - Five Nights at Freddy's](https://learn.adafruit.com/faz-wrench.md)
- [Trinket Ultrasonic Rangefinder](https://learn.adafruit.com/trinket-ultrasonic-rangefinder.md)
- [No-Code Indoor Air Quality Monitor with Separate Display](https://learn.adafruit.com/no-code-indoor-air-quality-monitor-with-separate-display.md)
- [Trinket Temperature & Humidity LCD Display](https://learn.adafruit.com/trinket-temperature-humidity-lcd-display.md)
- [Light Meter](https://learn.adafruit.com/light-meter.md)
- [CircuitPython Hardware: ILI9341 TFT & FeatherWing](https://learn.adafruit.com/micropython-hardware-ili9341-tft-and-featherwing.md)
- [Raspberry Pi Thermal Camera](https://learn.adafruit.com/raspberry-pi-thermal-camera.md)
- [Adafruit NeoKey BFF](https://learn.adafruit.com/adafruit-neokey-bff.md)
- [Mini LED Matrix Audio Visualizer](https://learn.adafruit.com/mini-led-matrix-audio-visualizer.md)
- [Adafruit ISO1540 Bidirectional I2C Isolator](https://learn.adafruit.com/adafruit-iso1540-bidirectional-i2c-isolator.md)
- [Raspberry Pi Low-Light Long-Exposure Photography](https://learn.adafruit.com/raspberry-pi-hq-camera-low-light-long-exposure-photography.md)
- [Adafruit Radio Bonnets with OLED Display - RFM69 or RFM9X](https://learn.adafruit.com/adafruit-radio-bonnets.md)
- [PicoDVI Arduino Library: Video Out for RP2040 Boards](https://learn.adafruit.com/picodvi-arduino-library-video-out-for-rp2040-boards.md)
- [reef-pi Guide 5: Light Controller](https://learn.adafruit.com/reef-pi-lighting-controller.md)
- [Adafruit VL53L4CD Time of Flight Distance Sensor](https://learn.adafruit.com/adafruit-vl53l4cd-time-of-flight-distance-sensor.md)
---
# Source: https://learn.adafruit.com/arduino-tips-tricks-and-techniques/arduino-libraries.md
# Arduino Tips, Tricks, and Techniques
## Arduino Libraries
# Need Help Installing a Library?
Check out our super-detailed tutorial for all operating systems here:
[http://learn.adafruit.com/adafruit-all-about-arduino-libraries-install-use](http://learn.adafruit.com/adafruit-all-about-arduino-libraries-install-use "Link: http://learn.adafruit.com/adafruit-all-about-arduino-libraries-install-use")
## What is a library?
Libraries are great places, and not yet illegal in the United States! If you ever need to learn how to do something, like say fix a motorcycle, you can go to your local library and take out a book. Sure you could buy the book but the library is nice because as a resource you can get the book whenever you need it, keeping your house uncluttered.
Software Libraries are very similar. We already studied what a procedure is, in [lesson 3](http://www.ladyada.net/learn/arduino/lesson3.html): a procedure is a list of things to do. A library is a big collection of procedures, where all the procedures are related! If you, say, want to control a motor, you may want to find a Motor Control Library: a collection of procedures that have already been written for you that you can use without having to do the dirty work of learning the nuances of motors.
For example, this is the Serial Library, which allows the Arduino to send data back to the computer:

## Using Libraries
One of the best features of the Arduino project is the ability to add on pre-crafted libraries that add hardware support. There's tons of them, and you can pick and choose which to install. They're only loaded in when the sketch you're working on needs them, so for the most part you can download and stash them for future use.
Sketches will often **depend** on libraries, you can see what they are by looking at the top of the sketch. If you see something like:
```
#include <FatReader.h>
```
That means that you'll need a library called FatReader or a library that contains the file FatReader. If you dont have it installed you'll get an error:
## What's in a library?
A library is a folder with some files in it, the files will end in **.cpp** (C++ code file) and **.h** (C++ header file).

There may also be some **.o** files. The **.o** files are C++ compiled Objects. If you end up working on the library and modifying it, be sure to delete the **.o** files as that will force the Arduino IDE to recompile the modified **.cpp**'s into fresh **.o**'s.
Two optional files you may see are **keywords.txt** (this is a hints file to tell the Arduino IDE how to colorize your sketch and **examples** folder, which may have some handy test-sketches. These will show up under the File→Examples→Library dropdown.

## It's important to remember!
The structure of the library folder is very important! The **.c** and **.h** files must be in the 'lowest level' of folders. For example, you cant have **Arduino/libraries/WaveHC/WaveHC/file.c** or **Arduino/libraries/MyLibraries/WaveHC/file.c** - it must be **Arduino/libraries/WaveHC/file.c**
## How to install libraries
In Arduino v16 and earlier, libraries were stored in the **ArduinoInstallDirectory/hardware/libraries** folder, which also contained all the built-in libraries (like Wire and Serial).
In v17 and up, the user libraries are now stored in the **ArduinoSketchDirectory/libraries** folder. You may need to make the **libraries** sub-folder the first time. However, the good thing about this is you wont have to move & reinstall your libraries every time you upgrade the software.
For example, here is how it looks when NewSoftSerial is installed in Windows (of course your username will be different).
On a Mac, your arduino sketch folder is likely going to be called **Documents/arduino** so create a NEW FOLDER inside that called **libraries** and place the uncompressed library folder inside of that.
Check that the Documents/arduino/libraries/MyNewLibary folder contains the .cpp and .h files.
After you're done, restart the Arduino IDE.
- [Previous Page](https://learn.adafruit.com/arduino-tips-tricks-and-techniques/arduino-uno-faq.md)
- [Next Page](https://learn.adafruit.com/arduino-tips-tricks-and-techniques/bootloader.md)
## Featured Products
### Adafruit METRO 328 Fully Assembled - Arduino IDE compatible
[Adafruit METRO 328 Fully Assembled - Arduino IDE compatible](https://www.adafruit.com/product/50)
We sure love the ATmega328 here at Adafruit, and we use them _a lot_ for our own projects. The processor has plenty of GPIO, Analog inputs, hardware UART SPI and I2C, timers and PWM galore - just enough for most simple projects. When we need to go small, we use a
Out of Stock
[Buy Now](https://www.adafruit.com/product/50)
[Related Guides to the Product](https://learn.adafruit.com/products/50/guides)
### Arduino bootloader-programmed chip (Atmega328P)
[Arduino bootloader-programmed chip (Atmega328P)](https://www.adafruit.com/product/123)
This is a preprogrammed Atmega328P chip, useful if you want to make your own Arduino-compatible or repair a damaged chip on an exisiting Arduino UNO, Duemilanove, Diecimila, or NG!
This chip is programmed with 'ADAboot', my version of the bootloader that is...
Out of Stock
[Buy Now](https://www.adafruit.com/product/123)
[Related Guides to the Product](https://learn.adafruit.com/products/123/guides)
## Related Guides
- [NeoPixel Painter](https://learn.adafruit.com/neopixel-painter.md)
- [Adafruit Proto Shield for Arduino](https://learn.adafruit.com/adafruit-proto-shield-arduino.md)
- [Deciphering Strange Arduino Code](https://learn.adafruit.com/deciphering-strange-arduino-code.md)
- [Affordable HAL 9000 Replica](https://learn.adafruit.com/hal-9000-replica.md)
- [WiFi Candy Bowl Monitor](https://learn.adafruit.com/wifi-candy-bowl.md)
- [Arduino Lesson 1. Blink](https://learn.adafruit.com/adafruit-arduino-lesson-1-blink.md)
- [Using NeoPixels and Servos Together](https://learn.adafruit.com/neopixels-and-servos.md)
- [Adafruit 2.8" TFT Touch Shield v2 - Capacitive or Resistive](https://learn.adafruit.com/adafruit-2-8-tft-touch-shield-v2.md)
- [LSM303 Accelerometer + Compass Breakout](https://learn.adafruit.com/lsm303-accelerometer-slash-compass-breakout.md)
- [1,500 NeoPixel LED Curtain with Raspberry Pi and Fadecandy](https://learn.adafruit.com/1500-neopixel-led-curtain-with-raspberry-pi-fadecandy.md)
- [Arduino Lesson 8. Analog Inputs](https://learn.adafruit.com/adafruit-arduino-lesson-8-analog-inputs.md)
- [8BitBox](https://learn.adafruit.com/8bitbox.md)
- [Animating Multiple LED Backpacks](https://learn.adafruit.com/animating-multiple-led-backpacks.md)
- [WiFi Controlled LED Christmahanukwanzaa Tree](https://learn.adafruit.com/wifi-controlled-led-christmahanukwanzaa-tree.md)
- [Reverse Geocache Box](https://learn.adafruit.com/reverse-geocache-engagement-box.md)
---
# Source: https://learn.adafruit.com/monochrome-oled-breakouts/arduino-library-and-examples.md
# Monochrome OLED Breakouts
## Arduino Library & Examples
For all of the different kinds of small OLED monochrome displays, you'll need to install the Arduino libraries. The code we have is for any kind of Arduino, if you're using a different microcontroller, the code is pretty simple to adapt, the interface we use is basic bit-twiddling SPI or I2C
# Install Arduino Libraries
Using these OLEDs with Arduino sketches requires that two libraries be installed: **Adafruit\_SSD1306** , which handles the low-level communication with the hardware, and **Adafruit\_GFX** , which builds atop this to add graphics functions like lines, circles and text.
In recent versions of the Arduino IDE software (1.6.2 and later), this is most easily done through the Arduino Library Manager.
Open up the Arduino library manager:

Search for the **Adafruit SSD1306** library and install it

Search for the **Adafruit GFX** library and install it

If using an earlier version of the Arduino IDE (prior to 1.8.10), also locate and install **Adafruit\_BusIO** (newer versions will install this dependency automatically).
We also have a great tutorial on Arduino library installation here:
[http://learn.adafruit.com/adafruit-all-about-arduino-libraries-install-use](http://learn.adafruit.com/adafruit-all-about-arduino-libraries-install-use "Link: http://learn.adafruit.com/adafruit-all-about-arduino-libraries-install-use")
# Run Demo!
After installing the **Adafruit\_SSD1306** and **Adafruit\_GFX** library, restart the Arduino IDE. You should now be able to access the sample code by navigating through menus in this order: **File→Examples→**** Adafruit\_SSD1306→SSD1306...**

After you've finished wiring the display as indicated on the following pages, load the example sketch to demonstrate the capabilities of the library and display.
[The OLED SSD1306 driver is based on the Adafruit GFX library which provides all the underlying graphics functions such as drawing pixels, lines, circles, etc. For more details about what you can do with the OLED check out the GFX library tutorial](http://learn.adafruit.com/adafruit-gfx-graphics-library "Link: http://learn.adafruit.com/adafruit-gfx-graphics-library")


## Create Bitmaps with LCD Assistant
You can create bitmaps to display easily with the [LCD assistant software](http://en.radzio.dxp.pl/bitmap_converter/). First make your image using any kind of graphics software such as photoshop or Paint and save as a **Monochrome Bitmap (bmp)**

Select the following options (You might also want to try **Horizontal** if **Vertical** is not coming out right)

and import your monochrome bitmap image. Save the output to a **cpp** file
You can use the output directly with our example code
## Create Bitmaps with image2cpp
image2cpp was created by GitHub user javl and provides a handy way to create bitmaps without installing any additional software. Just visit [https://javl.github.io/image2cpp/,](https://javl.github.io/image2cpp/) upload an image, put in any settings that you would like to use, select a format and generate the code. You can copy the code right into your sketch. If you're interested, you can view the source in their [GitHub repository](https://github.com/javl/image2cpp).
- [Previous Page](https://learn.adafruit.com/monochrome-oled-breakouts/power-requirements.md)
- [Next Page](https://learn.adafruit.com/monochrome-oled-breakouts/wiring-128x64-oleds.md)
## Featured Products
### Monochrome 1.3" 128x64 OLED graphic display - STEMMA QT / Qwiic
[Monochrome 1.3" 128x64 OLED graphic display - STEMMA QT / Qwiic](https://www.adafruit.com/product/938)
These displays are small, only about 1.3" diagonal, but very readable due to the high contrast of an OLED display. This display is made of 128x64 individual white OLED pixels, each one is turned on or off by the controller chip. Because the display makes its own light, no backlight is...
In Stock
[Buy Now](https://www.adafruit.com/product/938)
[Related Guides to the Product](https://learn.adafruit.com/products/938/guides)
### Monochrome 0.96" 128x64 OLED Graphic Display - STEMMA QT
[Monochrome 0.96" 128x64 OLED Graphic Display - STEMMA QT](https://www.adafruit.com/product/326)
These displays are small, only about 1" diagonal, but very readable due to the high contrast of an OLED display. This display is made of 128x64 individual white OLED pixels, each one is turned on or off by the controller chip. Because the display makes its own light, no backlight is...
Out of Stock
[Buy Now](https://www.adafruit.com/product/326)
[Related Guides to the Product](https://learn.adafruit.com/products/326/guides)
### Monochrome 128x32 SPI OLED graphic display
[Monochrome 128x32 SPI OLED graphic display](https://www.adafruit.com/product/661)
These displays are small, only about 1" diagonal, but very readable due to the high contrast of an OLED display. This display is made of 128x32 individual white OLED pixels, each one is turned on or off by the controller chip. Because the display makes its own light, no backlight is...
In Stock
[Buy Now](https://www.adafruit.com/product/661)
[Related Guides to the Product](https://learn.adafruit.com/products/661/guides)
### Monochrome 128x32 I2C OLED graphic display
[Monochrome 128x32 I2C OLED graphic display](https://www.adafruit.com/product/931)
These displays are small, only about 1" diagonal, but very readable due to the high contrast of an OLED display. This display is made of 128x32 individual white OLED pixels, each one is turned on or off by the controller chip. Because the display makes its own light, no backlight is...
No Longer Stocked
[Buy Now](https://www.adafruit.com/product/931)
[Related Guides to the Product](https://learn.adafruit.com/products/931/guides)
### Monochrome 0.91" 128x32 I2C OLED Display - STEMMA QT / Qwiic
[Monochrome 0.91" 128x32 I2C OLED Display - STEMMA QT / Qwiic](https://www.adafruit.com/product/4440)
These displays are small, only about 1" diagonal, but very readable due to the high contrast of an OLED display. This display is made of 128x32 individual white OLED pixels, each one is turned on or off by the controller chip. Because the display makes its own light, no backlight is...
In Stock
[Buy Now](https://www.adafruit.com/product/4440)
[Related Guides to the Product](https://learn.adafruit.com/products/4440/guides)
## Related Guides
- [OLED TRON Clock](https://learn.adafruit.com/oled-tron-clock.md)
- [I2C Addresses and Troublesome Chips](https://learn.adafruit.com/i2c-addresses.md)
- [Monitor Your Greenhouse with a No-Code Environmental Sensor](https://learn.adafruit.com/monitor-your-greenhouse-with-a-no-code-environmental-sensor.md)
- [SSD1306 OLED Displays with Raspberry Pi and BeagleBone Black](https://learn.adafruit.com/ssd1306-oled-displays-with-raspberry-pi-and-beaglebone-black.md)
- [Adafruit FT232H With SPI & I2C Devices](https://learn.adafruit.com/adafruit-ft232h-with-spi-and-i2c-libraries.md)
- [MIDI Melody Maker](https://learn.adafruit.com/midi-melody-maker.md)
- [Steampunk Cameo Necklace with OLED Display](https://learn.adafruit.com/steampunk-cameo-necklace.md)
- [Using QMK on RP2040 Microcontrollers](https://learn.adafruit.com/using-qmk-on-rp2040-microcontrollers.md)
- [CircuitPython OLED and Dual Knob Sketcher](https://learn.adafruit.com/circuitpython-oled-knob-sketcher.md)
- [Gravity Falls Memory Gun](https://learn.adafruit.com/gravity-falls-memory-gun.md)
- [Pico W HTTP Server with CircuitPython](https://learn.adafruit.com/pico-w-http-server-with-circuitpython.md)
- [Adafruit Trinkey QT2040](https://learn.adafruit.com/adafruit-trinkey-qt2040.md)
- [Adafruit Airlift Bitsy Add-On - ESP32 WiFi Co-Processor](https://learn.adafruit.com/adafruit-airlift-bitsy-add-on-esp32-wifi-co-processor.md)
- [Animated Flying Toaster OLED Jewelry](https://learn.adafruit.com/animated-flying-toaster-oled-jewelry.md)
- [Adafruit TCA9548A 1-to-8 I2C Multiplexer Breakout](https://learn.adafruit.com/adafruit-tca9548a-1-to-8-i2c-multiplexer-breakout.md)
---
# Source: https://learn.adafruit.com/digital-led-strip/arduino-library-docs.md
# Source: https://learn.adafruit.com/tsl2561/arduino-library-docs.md
# Source: https://learn.adafruit.com/adafruit-ina219-current-sensor-breakout/arduino-library-docs.md
# Adafruit INA219 Current Sensor Breakout
## Arduino Library Docs
- [Previous Page](https://learn.adafruit.com/adafruit-ina219-current-sensor-breakout/library-reference.md)
- [Next Page](https://learn.adafruit.com/adafruit-ina219-current-sensor-breakout/python-circuitpython.md)
## Featured Products
### INA219 High Side DC Current Sensor Breakout - 26V ±3.2A Max
[INA219 High Side DC Current Sensor Breakout - 26V ±3.2A Max](https://www.adafruit.com/product/904)
This breakout board will solve all your power-monitoring problems. Instead of struggling with two multimeters, you can just use the handy INA219 chip on this breakout to both measure both the high side voltage and DC current draw over I2C with ±1% precision.
**Please...**
In Stock
[Buy Now](https://www.adafruit.com/product/904)
[Related Guides to the Product](https://learn.adafruit.com/products/904/guides)
### STEMMA QT / Qwiic JST SH 4-pin Cable - 100mm Long
[STEMMA QT / Qwiic JST SH 4-pin Cable - 100mm Long](https://www.adafruit.com/product/4210)
This 4-wire cable is a little over 100mm / 4" long and fitted with JST-SH female 4-pin connectors on both ends. Compared with the chunkier JST-PH these are 1mm pitch instead of 2mm, but still have a nice latching feel, while being easy to insert and remove.
In Stock
[Buy Now](https://www.adafruit.com/product/4210)
[Related Guides to the Product](https://learn.adafruit.com/products/4210/guides)
### STEMMA QT / Qwiic JST SH 4-pin to Premium Male Headers Cable
[STEMMA QT / Qwiic JST SH 4-pin to Premium Male Headers Cable](https://www.adafruit.com/product/4209)
This 4-wire cable is a little over 150mm / 6" long and fitted with JST-SH female 4-pin connectors on one end and premium Dupont male headers on the other. Compared with the chunkier JST-PH these are 1mm pitch instead of 2mm, but still have a nice latching feel, while being easy to insert...
Out of Stock
[Buy Now](https://www.adafruit.com/product/4209)
[Related Guides to the Product](https://learn.adafruit.com/products/4209/guides)
### Premium Male/Male Jumper Wires - 40 x 6" (150mm)
[Premium Male/Male Jumper Wires - 40 x 6" (150mm)](https://www.adafruit.com/product/758)
Handy for making wire harnesses or jumpering between headers on PCB's. These premium jumper wires are 6" (150mm) long and come in a 'strip' of 40 (4 pieces of each of ten rainbow colors). They have 0.1" male header contacts on either end and fit cleanly next to each other...
Out of Stock
[Buy Now](https://www.adafruit.com/product/758)
[Related Guides to the Product](https://learn.adafruit.com/products/758/guides)
### Full Sized Premium Breadboard - 830 Tie Points
[Full Sized Premium Breadboard - 830 Tie Points](https://www.adafruit.com/product/239)
This is a 'full-size' premium quality breadboard, 830 tie points. Good for small and medium projects. It's 2.2" x 7" (5.5 cm x 17 cm) with a standard double-strip in the middle and two power rails on both sides. You can pull the power rails off easily to make the...
In Stock
[Buy Now](https://www.adafruit.com/product/239)
[Related Guides to the Product](https://learn.adafruit.com/products/239/guides)
### Adafruit INA219 FeatherWing
[Adafruit INA219 FeatherWing](https://www.adafruit.com/product/3650)
The **INA219 FeatherWing** makes power-monitoring problems a thing of the past. Instead of struggling with two multimeters, you can just use the handy INA219 chip on this breakout to measure both the high side voltage and DC current draw over I2C with 1% precision....
In Stock
[Buy Now](https://www.adafruit.com/product/3650)
[Related Guides to the Product](https://learn.adafruit.com/products/3650/guides)
### Adafruit METRO 328 Fully Assembled - Arduino IDE compatible
[Adafruit METRO 328 Fully Assembled - Arduino IDE compatible](https://www.adafruit.com/product/50)
We sure love the ATmega328 here at Adafruit, and we use them _a lot_ for our own projects. The processor has plenty of GPIO, Analog inputs, hardware UART SPI and I2C, timers and PWM galore - just enough for most simple projects. When we need to go small, we use a
Out of Stock
[Buy Now](https://www.adafruit.com/product/50)
[Related Guides to the Product](https://learn.adafruit.com/products/50/guides)
## Related Guides
- [Remote controlled door lock using a fingerprint sensor & Adafruit IO](https://learn.adafruit.com/remote-controlled-door-lock-using-a-fingerprint-sensor-and-adafruit-io.md)
- [WiFi Controlled Mobile Robot](https://learn.adafruit.com/wifi-controlled-mobile-robot.md)
- [Arduino Lesson 14. Servo Motors](https://learn.adafruit.com/adafruit-arduino-lesson-14-servo-motors.md)
- [Geofencing with the FONA 808 & Adafruit IO](https://learn.adafruit.com/geofencing-with-the-fona-808-and-adafruit-io.md)
- [Let’s Put LEDs in Things!](https://learn.adafruit.com/lets-put-leds-in-things.md)
- [Adafruit CC3000 WiFi and Xively](https://learn.adafruit.com/adafruit-cc3000-wifi-and-xively.md)
- [Adafruit AirLift Shield - ESP32 WiFi Co-Processor](https://learn.adafruit.com/adafruit-airlift-shield-esp32-wifi-co-processor.md)
- [Wave Shield Talking Clock](https://learn.adafruit.com/wave-shield-talking-clock.md)
- [Ladyada's Learn Arduino - Lesson #0](https://learn.adafruit.com/ladyadas-learn-arduino-lesson-number-0.md)
- [2.2" TFT Display](https://learn.adafruit.com/2-2-tft-display.md)
- [LED Lightbox](https://learn.adafruit.com/led-lightbox.md)
- [Arduino Prototyping Mounting Plate](https://learn.adafruit.com/arduino-prototyping-mounting-plate.md)
- [How to Choose a Microcontroller](https://learn.adafruit.com/how-to-choose-a-microcontroller.md)
- [Arduino Lesson 16. Stepper Motors](https://learn.adafruit.com/adafruit-arduino-lesson-16-stepper-motors.md)
- [Arduino Lesson 8. Analog Inputs](https://learn.adafruit.com/adafruit-arduino-lesson-8-analog-inputs.md)
---
# Source: https://learn.adafruit.com/adafruit-pn532-rfid-nfc/arduino-library.md
# Adafruit PN532 RFID/NFC Breakout and Shield
## Arduino Library
## Which Library?
In the past there were two separate Arduino libraries for using the Adafruit NFC boards. One library supported the breakout over a SPI connection, and the other library supported the breakout or shield over an I2C connection. However both of these libraries have been merged into a single Arduino library, [Adafruit-PN532](https://github.com/adafruit/Adafruit-PN532/).
The Adafruit PN532 library has the ability to read MiFare cards, including the hard-coded ID numbers, as well as authenticate and read/write EEPROM chunks. It can work with both the breakout and shield using either a SPI or I2C connection.
## Library Installation
[Download the Adafruit PN532 library from github](https://github.com/adafruit/Adafruit-PN532). Uncompress the folder and rename the folder **Adafruit\_PN532**. Inside the folder you should see the **Adafruit\_PN532.cpp** and **Adafruit\_PN532.h** files. Install the **Adafruit\_PN532** library foler by placing it in your **_arduinosketchfolder_/libraries** folder. You may have to create the **libraries** subfolder if this is your first library. [You can read more about installing libraries in our tutorial](http://learn.adafruit.com/arduino-tips-tricks-and-techniques/arduino-libraries).
Restart the Arduino IDE. You should now be able to select **File \> Examples \> Adafruit\_PN532 \> readMifare** sketch.
**If you're using the NFC breakout with a SPI connection** that uses the wiring shown on previous pages you can immediately upload the sketch to the Arduino and skip down to the [Testing MiFare](../../../../adafruit-pn532-rfid-nfc/arduino-library#testing-mifare) section.
**If you're using the NFC shield, or are using the breakout with an I2C connection ** then you must make a small change to configure the example for I2C. Scroll down to these lines near the top of the sketch:
```
// Uncomment just _one_ line below depending on how your breakout or shield
// is connected to the Arduino:
// Use this line for a breakout with a SPI connection:
Adafruit_PN532 nfc(PN532_SCK, PN532_MISO, PN532_MOSI, PN532_SS);
// Use this line for a breakout with a hardware SPI connection. Note that
// the PN532 SCK, MOSI, and MISO pins need to be connected to the Arduino's
// hardware SPI SCK, MOSI, and MISO pins. On an Arduino Uno these are
// SCK = 13, MOSI = 11, MISO = 12. The SS line can be any digital IO pin.
//Adafruit_PN532 nfc(PN532_SS);
// Or use this line for a breakout or shield with an I2C connection:
//Adafruit_PN532 nfc(PN532_IRQ, PN532_RESET);
```
Change them so the second line is uncommented and the first line is commented. This will configure the sketch to make the library use I2C for communication with the NFC shield or breakout. The modified code should look like:
```
// Uncomment just _one_ line below depending on how your breakout or shield
// is connected to the Arduino:
// Use this line for a breakout with a SPI connection:
//Adafruit_PN532 nfc(PN532_SCK, PN532_MISO, PN532_MOSI, PN532_SS);
// Use this line for a breakout with a hardware SPI connection. Note that
// the PN532 SCK, MOSI, and MISO pins need to be connected to the Arduino's
// hardware SPI SCK, MOSI, and MISO pins. On an Arduino Uno these are
// SCK = 13, MOSI = 11, MISO = 12. The SS line can be any digital IO pin.
//Adafruit_PN532 nfc(PN532_SS);
// Or use this line for a breakout or shield with an I2C connection:
Adafruit_PN532 nfc(PN532_IRQ, PN532_RESET);
```
Then upload the example to the Arduino and continue on. **Note that you need to make a similar change to pick the interface for any other NFC example from the library.**
## Testing MiFare
In the serial monitor, you should see that it found the **PN532** chip. Then you can place your tag nearby and it will display the 4 byte ID code (this one is 0xAE 0x4C 0xF0 0x6C) and then the integer version of all four bytes together. You can use this number to identify each card. Recently NXP made so many cards that they actually ran through all 4 Bytes (2^32) so the number is not guaranteed to be absolutely unique. However, the chances are extremely slim you will have two cards with the same ID so as long as you aren't using these cards for anything terribly important (like money transfer) its fine to use the number as a unique identifier

- [Previous Page](https://learn.adafruit.com/adafruit-pn532-rfid-nfc/shield-wiring.md)
- [Next Page](https://learn.adafruit.com/adafruit-pn532-rfid-nfc/python-circuitpython.md)
## Featured Products
### PN532 NFC/RFID controller breakout board
[PN532 NFC/RFID controller breakout board](https://www.adafruit.com/product/364)
The PN532 is the most popular NFC chip, and is what is embedded in pretty much every phone or device that does NFC. It can pretty much do it all, such as read and write to tags and cards, communicate with phones (say for payment processing), and 'act' like a NFC tag. If you want to do...
Out of Stock
[Buy Now](https://www.adafruit.com/product/364)
[Related Guides to the Product](https://learn.adafruit.com/products/364/guides)
### Adafruit METRO 328 Fully Assembled - Arduino IDE compatible
[Adafruit METRO 328 Fully Assembled - Arduino IDE compatible](https://www.adafruit.com/product/50)
We sure love the ATmega328 here at Adafruit, and we use them _a lot_ for our own projects. The processor has plenty of GPIO, Analog inputs, hardware UART SPI and I2C, timers and PWM galore - just enough for most simple projects. When we need to go small, we use a
Out of Stock
[Buy Now](https://www.adafruit.com/product/50)
[Related Guides to the Product](https://learn.adafruit.com/products/50/guides)
### Breadboarding wire bundle
[Breadboarding wire bundle](https://www.adafruit.com/product/153)
75 flexible stranded core wires with stiff ends molded on in red, orange, yellow, green, blue, brown, black and white. These are a major improvement over the "box of bent wires" that are sometimes sold with breadboards, and faster than stripping your own solid core wires. Makes...
In Stock
[Buy Now](https://www.adafruit.com/product/153)
[Related Guides to the Product](https://learn.adafruit.com/products/153/guides)
### Adafruit PN532 NFC/RFID Controller Shield for Arduino + Extras
[Adafruit PN532 NFC/RFID Controller Shield for Arduino + Extras](https://www.adafruit.com/product/789)
We've taken our popular Adafruit PN532 breakout board and turned it into a shield - the perfect tool for any 13.56MHz RFID or NFC application. The Adafruit NFC shield uses the PN532 chip-set (the most popular NFC chip on the market) and is what is embedded in pretty much every phone or...
In Stock
[Buy Now](https://www.adafruit.com/product/789)
[Related Guides to the Product](https://learn.adafruit.com/products/789/guides)
### 13.56MHz RFID/NFC Card - Classic 1K
[13.56MHz RFID/NFC Card - Classic 1K](https://www.adafruit.com/product/359)
This is a blank 13.56MHz RFID/NFC card - often used for train/bus passes but also found in other systems where a proximity card is desired. The tag contains a small RFID chip and an antenna, and is passively powered by the reader/writer when placed a couple inches away.
These can be...
In Stock
[Buy Now](https://www.adafruit.com/product/359)
[Related Guides to the Product](https://learn.adafruit.com/products/359/guides)
### 13.56MHz RFID/NFC White Tag - Classic 1K
[13.56MHz RFID/NFC White Tag - Classic 1K](https://www.adafruit.com/product/360)
This is a blank 13.56MHz RFID/NFC laundry tag - often used for laundry but also general tagging. The tag contains a small RFID chip and an antenna, and is passively powered by the reader/writer when placed a couple inches away.
These can be read by almost any 13.56MHz RFID/NFC...
In Stock
[Buy Now](https://www.adafruit.com/product/360)
[Related Guides to the Product](https://learn.adafruit.com/products/360/guides)
### 13.56MHz RFID/NFC Clear Tag - Classic 1K
[13.56MHz RFID/NFC Clear Tag - Classic 1K](https://www.adafruit.com/product/361)
This is a blank 13.56MHz Classic 'laundry' tag - often used for laundry or identification but also found in other systems where a small proximity card is desired. This one is clear! The tag contains a small RFID chip and an antenna, and is passively powered by the reader/writer...
In Stock
[Buy Now](https://www.adafruit.com/product/361)
[Related Guides to the Product](https://learn.adafruit.com/products/361/guides)
### 13.56MHz RFID/NFC Sticker - Classic 1K
[13.56MHz RFID/NFC Sticker - Classic 1K](https://www.adafruit.com/product/362)
This is a blank 13.56MHz RFID/NFC sticker - often used for inventory uses but also wherever a sticker is desired. The tag contains a small RFID chip and an antenna, and is passively powered by the reader/writer when placed a couple inches away.
These can be read by almost any...
In Stock
[Buy Now](https://www.adafruit.com/product/362)
[Related Guides to the Product](https://learn.adafruit.com/products/362/guides)
## Related Guides
- [How to Choose a Microcontroller](https://learn.adafruit.com/how-to-choose-a-microcontroller.md)
- [Sous-vide controller powered by Arduino - The SousViduino!](https://learn.adafruit.com/sous-vide-powered-by-arduino-the-sous-viduino.md)
- [Arduino Lesson 13. DC Motors](https://learn.adafruit.com/adafruit-arduino-lesson-13-dc-motors.md)
- [Naughty or Nice Machine](https://learn.adafruit.com/naughty-or-nice-machine.md)
- [Wave Shield Voice Changer](https://learn.adafruit.com/wave-shield-voice-changer.md)
- [Adafruit INA219 Current Sensor Breakout](https://learn.adafruit.com/adafruit-ina219-current-sensor-breakout.md)
- [Low Power Coin Cell Voltage Logger](https://learn.adafruit.com/low-power-coin-cell-voltage-logger.md)
- [Analog Feedback Servos](https://learn.adafruit.com/analog-feedback-servos.md)
- [Tiny Arduino Music Visualizer](https://learn.adafruit.com/piccolo.md)
- [Adafruit Ultimate GPS Logger Shield](https://learn.adafruit.com/adafruit-ultimate-gps-logger-shield.md)
- [Ladyada's Learn Arduino - Lesson #0](https://learn.adafruit.com/ladyadas-learn-arduino-lesson-number-0.md)
- [Mini Thermal Receipt Printers](https://learn.adafruit.com/mini-thermal-receipt-printer.md)
- [Arduino Prototyping Mounting Plate](https://learn.adafruit.com/arduino-prototyping-mounting-plate.md)
- [LED Lightbox](https://learn.adafruit.com/led-lightbox.md)
- [NFC Ring Password Helper](https://learn.adafruit.com/nfc-ring-password-helper.md)
---
# Source: https://learn.adafruit.com/arduino-prototyping-mounting-plate.md
# Arduino Prototyping Mounting Plate
## Assembly
Start by peeling the paper backing off of the plastic plate. Begin at a corner, it should come off easily.
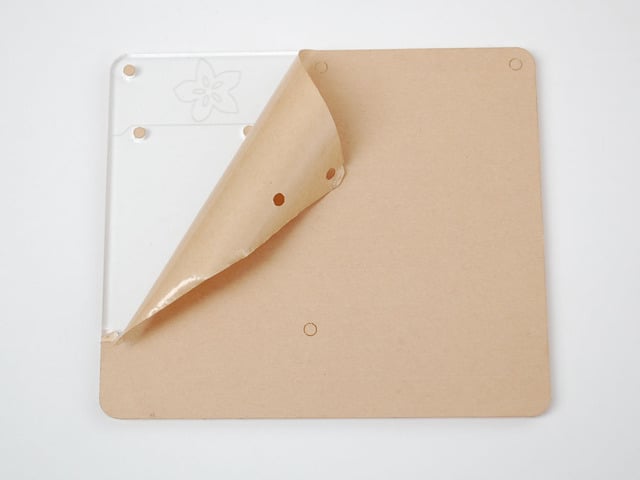
There are little holes and cutouts, you may need to poke them out using a screwdriver or pen

There are outlines showing how the Arduino and breadboard go on, make sure the print is right way up or it'll be confusing!

There are four mounting holes for various Arduinos. Unfortunately, each Arduino revision has slightly different 'preferred' mounting holes. Here we show what we consider the preferred holes for the Uno R3 which is likely what you have. Place the screws into the plate from the bottom of the plate so they stick up. Screw on two hex nuts to keep them in place

Place the Arduino on top, it should slide onto the bolts

Attach the Arduino securely by screwing on the last two hex nuts
The bolts are made of nylon so they will flex a little if necessary. Use pliers to get a grip on the hex nut near the DC power jack


Remove the paper backing from the half size breadboard and stick it on next to the Arduino.
Watch that the bumpy side is not next to the Arduino so it it will flat against it.

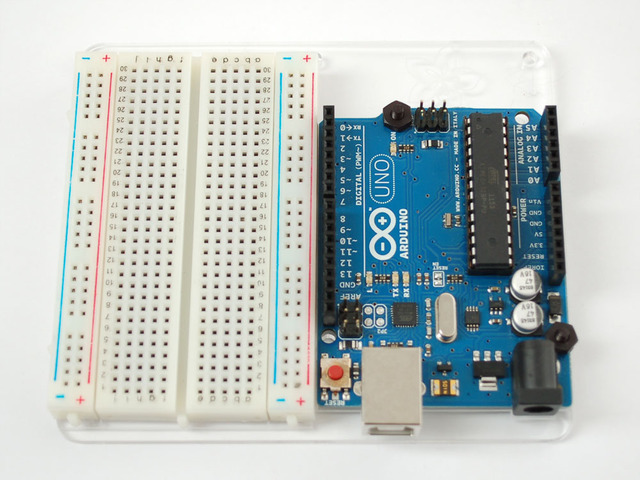
Finally, place four bumpers on the bottom!

## Featured Products
### Adafruit METRO 328 Fully Assembled - Arduino IDE compatible
[Adafruit METRO 328 Fully Assembled - Arduino IDE compatible](https://www.adafruit.com/product/50)
We sure love the ATmega328 here at Adafruit, and we use them _a lot_ for our own projects. The processor has plenty of GPIO, Analog inputs, hardware UART SPI and I2C, timers and PWM galore - just enough for most simple projects. When we need to go small, we use a
Out of Stock
[Buy Now](https://www.adafruit.com/product/50)
[Related Guides to the Product](https://learn.adafruit.com/products/50/guides)
### Half Sized Premium Breadboard - 400 Tie Points
[Half Sized Premium Breadboard - 400 Tie Points](https://www.adafruit.com/product/64)
This is a cute, half-size breadboard with 400 tie points, good for small projects. It's 3.25" x 2.2" / 8.3cm x 5.5cm with a standard double-strip in the middle and two power rails on both sides. You can pull the power rails off easily to make the breadboard as...
In Stock
[Buy Now](https://www.adafruit.com/product/64)
[Related Guides to the Product](https://learn.adafruit.com/products/64/guides)
### Plastic mounting plate for breadboard and Arduino - rubber feet!
[Plastic mounting plate for breadboard and Arduino - rubber feet!](https://www.adafruit.com/product/275)
By popular demand! We now have the plates from the [ARDX](http://www.adafruit.com/products/170) available separately. Acrylic plate is engraved and cut here at the Adafruit factory. There are mounting holes for your [Arduino](http://www.adafruit.com/products/50) and a...
In Stock
[Buy Now](https://www.adafruit.com/product/275)
[Related Guides to the Product](https://learn.adafruit.com/products/275/guides)
### Adafruit MetroX Classic Kit - Experimentation Kit for Metro 328
[Adafruit MetroX Classic Kit - Experimentation Kit for Metro 328](https://www.adafruit.com/product/170)
Interested in making neat stuff with an Arduino-compatible board but not sure where to start? This kit includes all the pieces needed to complete over 20 different circuit and projects. Basically everything you need to be playing within minutes of its arrival. **No soldering required,...**
No Longer Stocked
[Buy Now](https://www.adafruit.com/product/170)
[Related Guides to the Product](https://learn.adafruit.com/products/170/guides)
## Related Guides
- [Tiny Arduino Music Visualizer](https://learn.adafruit.com/piccolo.md)
- [How to Choose a Microcontroller](https://learn.adafruit.com/how-to-choose-a-microcontroller.md)
- [Arduino Lesson 1. Blink](https://learn.adafruit.com/adafruit-arduino-lesson-1-blink.md)
- [Arduino Lesson 3. RGB LEDs](https://learn.adafruit.com/adafruit-arduino-lesson-3-rgb-leds.md)
- [Program an AVR or Arduino Using Raspberry Pi GPIO](https://learn.adafruit.com/program-an-avr-or-arduino-using-raspberry-pi-gpio-pins.md)
- [Remote controlled door lock using a fingerprint sensor & Adafruit IO](https://learn.adafruit.com/remote-controlled-door-lock-using-a-fingerprint-sensor-and-adafruit-io.md)
- [Cloud Thermometer](https://learn.adafruit.com/cloud-thermometer.md)
- [Arduino GPS Clock](https://learn.adafruit.com/arduino-clock.md)
- [Halloween Pumpkin](https://learn.adafruit.com/halloween-pumpkin.md)
- [Line Following Zumo Robot Using Simulink](https://learn.adafruit.com/line-following-zumo-robot-programmed-with-simulink.md)
- [Ladyada's Learn Arduino - Lesson #0](https://learn.adafruit.com/ladyadas-learn-arduino-lesson-number-0.md)
- [Sous-vide controller powered by Arduino - The SousViduino!](https://learn.adafruit.com/sous-vide-powered-by-arduino-the-sous-viduino.md)
- [Adafruit IO Basics: NeoPixel Controller](https://learn.adafruit.com/adafruit-io-basics-neopixel-controller.md)
- [Current Limiting Stepper Driver with DRV8871](https://learn.adafruit.com/current-limiting-stepper-driver-with-drv8871.md)
- [Multi-tasking the Arduino - Part 1](https://learn.adafruit.com/multi-tasking-the-arduino-part-1.md)
---
# Source: https://learn.adafruit.com/how-to-make-a-pogo-pin-test-jig/arduino-shield-jigs.md
# How to Make a Pogo Pin Test Jig
## Arduino Shield Jigs
I will be using [an Arduino to make this jig](http://www.adafruit.com/index.php?main_page=product_info&cPath=17&products_id=50). Arduinos are very standard, easy to power and are a breeze for short projects like this. You'll also want a [proto shield PCB](http://www.adafruit.com/index.php?main_page=product_info&cPath=17_21&products_id=55 "Link: http://www.adafruit.com/index.php?main\_page=product\_info&cPath=17\_21&products\_id=55")
I think I'll put the victim...like this!

Mark and drill the mounting holes - four in this case. Luckily (or on purpose???) I placed the mounting holes on 0.1" boundaries.

Solder wires from each pogo pin to a matching pin on the shield. For this SD card interface I connected the SPI pins to the SPI port. Then the output of the 3.3v regulator goes to an analog pin. I also connected the card detect pin up so I can tell when a board is being tested.
A piezo buzzer is connected to pin #9 (underneath the PCB).
- [Previous Page](https://learn.adafruit.com/how-to-make-a-pogo-pin-test-jig/preparation.md)
- [Next Page](https://learn.adafruit.com/how-to-make-a-pogo-pin-test-jig/the-code.md)
## Featured Products
### Pogo Pin Probe Clip
[Pogo Pin Probe Clip](https://www.adafruit.com/product/1969)
The Pogo Pin Probe Clip is a great way to test and connect with pin-point accuracy without soldering! It's sort of like an [alligator clip](https://www.adafruit.com/product/321) with a built-in springy pogo pin - so you can connect to any PCB pad for 'scoping, analyzing, or...
In Stock
[Buy Now](https://www.adafruit.com/product/1969)
[Related Guides to the Product](https://learn.adafruit.com/products/1969/guides)
### Pogo Pins "Spear Head" (10 pack)
[Pogo Pins "Spear Head" (10 pack)](https://www.adafruit.com/product/394)
Pogo pins are little spring-loaded contacts, very handy for making jigs, or making momentary (but electrically solid) contacts. We use them by the dozen for making programming and testing jigs but they're handy also if say you want to JTAG program a board that you cant solder headers to -...
In Stock
[Buy Now](https://www.adafruit.com/product/394)
[Related Guides to the Product](https://learn.adafruit.com/products/394/guides)
### Pogo Pins "Cupped Head" (10 pack)
[Pogo Pins "Cupped Head" (10 pack)](https://www.adafruit.com/product/2428)
Pogo pins are little spring-loaded contacts, very handy for making jigs, or making momentary (but electrically solid) contacts. We use them by the dozen for making programming and testing jigs but they're handy also if say you want to JTAG program a board that you cant solder headers to -...
In Stock
[Buy Now](https://www.adafruit.com/product/2428)
[Related Guides to the Product](https://learn.adafruit.com/products/2428/guides)
### Pogo Pins "Crown Head" (10 pack)
[Pogo Pins "Crown Head" (10 pack)](https://www.adafruit.com/product/2429)
Pogo pins are little spring-loaded contacts, very handy for making jigs, or making momentary (but electrically solid) contacts. We use them by the dozen for making programming and testing jigs but they're handy also if say you want to JTAG program a board that you cant solder headers to -...
In Stock
[Buy Now](https://www.adafruit.com/product/2429)
[Related Guides to the Product](https://learn.adafruit.com/products/2429/guides)
### Pogo Pins "Needle Head" (10 pack)
[Pogo Pins "Needle Head" (10 pack)](https://www.adafruit.com/product/2430)
Pogo pins are little spring-loaded contacts, very handy for making jigs, or making momentary (but electrically solid) contacts. We use them by the dozen for making programming and testing jigs but they're handy also if say you want to JTAG program a board that you cant solder headers to -...
In Stock
[Buy Now](https://www.adafruit.com/product/2430)
[Related Guides to the Product](https://learn.adafruit.com/products/2430/guides)
### Toggle Clamp - Large Size
[Toggle Clamp - Large Size](https://www.adafruit.com/product/2457)
\*Ka-thunk\* Pin down that PCB with our **Toggle Clamp** , a sturdy and reliable way to quickly press and release with precision! A pogo-pin bed is a great way to connect and test boards without any soldering, but you have to somehow get that PCB aligned right and evenly pressed down...
In Stock
[Buy Now](https://www.adafruit.com/product/2457)
[Related Guides to the Product](https://learn.adafruit.com/products/2457/guides)
### Toggle Clamp - Medium Flip-up Style
[Toggle Clamp - Medium Flip-up Style](https://www.adafruit.com/product/2456)
\*Ka-thunk\* Pin down that little PCB with our **Toggle Clamp** , a sturdy and reliable way to quickly press and release with precision! A pogo-pin bed is a great way to connect and test boards without any soldering, but you have to somehow get that PCB aligned right and evenly...
In Stock
[Buy Now](https://www.adafruit.com/product/2456)
[Related Guides to the Product](https://learn.adafruit.com/products/2456/guides)
### Toggle Clamp - Small Flip-down Style
[Toggle Clamp - Small Flip-down Style](https://www.adafruit.com/product/2459)
\*Ka-thunk\* Pin down that PCB with our **Toggle Clamp** , a sturdy and reliable way to quickly press and release with precision! A pogo-pin bed is a great way to connect and test boards without any soldering, but you have to somehow get that PCB aligned right and evenly pressed...
In Stock
[Buy Now](https://www.adafruit.com/product/2459)
[Related Guides to the Product](https://learn.adafruit.com/products/2459/guides)
## Related Guides
- [DIY 3D Printing Filament](https://learn.adafruit.com/diy-3d-printing-filament.md)
- [Standalone AVR Chip Programmer](https://learn.adafruit.com/standalone-avr-chip-programmer.md)
- [How we designed an injection-molded case](https://learn.adafruit.com/how-we-designed-an-injection-molded-case-for-raspberry-pi.md)
- [Metal Parts from 3D Prints](https://learn.adafruit.com/metal-parts-from-3d-prints.md)
- [KTOWN's Ultimate Creating Parts in Eagle Tutorial](https://learn.adafruit.com/ktowns-ultimate-creating-parts-in-eagle-tutorial.md)
- [Maker Business & Manufacturing Software - Our Tips & Tricks](https://learn.adafruit.com/maker-business-manufacturing-software-our-tips-and-tricks.md)
- [Adafruit Pinguin for EAGLE CAD](https://learn.adafruit.com/adafruit-pinguin-for-eagle-cad.md)
- [Laser-Cut Enclosure Design](https://learn.adafruit.com/laser-cut-enclosure-design.md)
- [How to Sign Windows Drivers & Executables](https://learn.adafruit.com/how-to-sign-windows-drivers-installer.md)
- [SMT Manufacturing](https://learn.adafruit.com/smt-manufacturing.md)
- [All About Laser Cutters](https://learn.adafruit.com/all-about-laser-cutters.md)
- [Shop Tips & Tricks](https://learn.adafruit.com/shop-tips-and-tricks.md)
- [How to convert Eagle PCBs to 3D Models in Fusion 360](https://learn.adafruit.com/how-to-convert-eagle-pcbs-to-3d-models-in-fusion-360.md)
- [Creating Accurate Footprints in Eagle](https://learn.adafruit.com/creating-accurate-footprints-in-eagle.md)
- [Make your own PCB with Eagle, OSH Park, and Adafruit!](https://learn.adafruit.com/making-pcbs-with-oshpark-and-eagle.md)
---
# Source: https://learn.adafruit.com/adafruit-arduino-lesson-3-rgb-leds/arduino-sketch.md
# Arduino Lesson 3. RGB LEDs
## Arduino Sketch
The following test sketch will cycle through the colors red, green, blue, yellow, purple, and aqua. These colors being some of the standard Internet colors.
```
/*
Adafruit Arduino - Lesson 3. RGB LED
*/
int redPin = 11;
int greenPin = 10;
int bluePin = 9;
//uncomment this line if using a Common Anode LED
//#define COMMON_ANODE
void setup()
{
pinMode(redPin, OUTPUT);
pinMode(greenPin, OUTPUT);
pinMode(bluePin, OUTPUT);
}
void loop()
{
setColor(255, 0, 0); // red
delay(1000);
setColor(0, 255, 0); // green
delay(1000);
setColor(0, 0, 255); // blue
delay(1000);
setColor(255, 255, 0); // yellow
delay(1000);
setColor(80, 0, 80); // purple
delay(1000);
setColor(0, 255, 255); // aqua
delay(1000);
}
void setColor(int red, int green, int blue)
{
#ifdef COMMON_ANODE
red = 255 - red;
green = 255 - green;
blue = 255 - blue;
#endif
analogWrite(redPin, red);
analogWrite(greenPin, green);
analogWrite(bluePin, blue);
}
```
Try the sketch out and then we will dissect it in some detail......
The sketch starts by specifying which pins are going to be used for each of the colors:
```
int redPin = 11;
int greenPin = 10;
int bluePin = 9;
```
The next step is to write the 'setup' function. As we have learnt in earlier lessons, the setup function runs just once after the Arduino has reset. In this case, all it has to do is define the three pins we are using as being outputs.
```
void setup()
{
pinMode(redPin, OUTPUT);
pinMode(greenPin, OUTPUT);
pinMode(bluePin, OUTPUT);
}
```
Before we take a look at the 'loop' function, lets look at the last function in the sketch.
```
void setColor(int red, int green, int blue)
{
analogWrite(redPin, red);
analogWrite(greenPin, green);
analogWrite(bluePin, blue);
}
```
This function takes three arguments, one for the brightness of the red, green and blue LEDs. In each case the number will be in the range 0 to 255, where 0 means off and 255 means maximum brightness. The function then calls 'analogWrite' to set the brightness of each LED.
If you look at the 'loop' function you can see that we are setting the amount of red, green and blue light that we want to display and then pausing for a second before moving on to the next color.
```
void loop()
{
setColor(255, 0, 0); // red
delay(1000);
setColor(0, 255, 0); // green
delay(1000);
setColor(0, 0, 255); // blue
delay(1000);
setColor(255, 255, 0);// yellow
delay(1000);
setColor(80, 0, 80); // purple
delay(1000);
setColor(0, 255, 255);// aqua
delay(1000);
}
```
Try adding a few colors of your own to the sketch and watch the effect on your LED.
Info:
- [Previous Page](https://learn.adafruit.com/adafruit-arduino-lesson-3-rgb-leds/colors.md)
- [Next Page](https://learn.adafruit.com/adafruit-arduino-lesson-3-rgb-leds/using-internet-colors.md)
## Featured Products
### Adafruit METRO 328 Fully Assembled - Arduino IDE compatible
[Adafruit METRO 328 Fully Assembled - Arduino IDE compatible](https://www.adafruit.com/product/50)
We sure love the ATmega328 here at Adafruit, and we use them _a lot_ for our own projects. The processor has plenty of GPIO, Analog inputs, hardware UART SPI and I2C, timers and PWM galore - just enough for most simple projects. When we need to go small, we use a
Out of Stock
[Buy Now](https://www.adafruit.com/product/50)
[Related Guides to the Product](https://learn.adafruit.com/products/50/guides)
### Premium Male/Male Jumper Wires - 40 x 6" (150mm)
[Premium Male/Male Jumper Wires - 40 x 6" (150mm)](https://www.adafruit.com/product/758)
Handy for making wire harnesses or jumpering between headers on PCB's. These premium jumper wires are 6" (150mm) long and come in a 'strip' of 40 (4 pieces of each of ten rainbow colors). They have 0.1" male header contacts on either end and fit cleanly next to each other...
In Stock
[Buy Now](https://www.adafruit.com/product/758)
[Related Guides to the Product](https://learn.adafruit.com/products/758/guides)
### Half Sized Premium Breadboard - 400 Tie Points
[Half Sized Premium Breadboard - 400 Tie Points](https://www.adafruit.com/product/64)
This is a cute, half-size breadboard with 400 tie points, good for small projects. It's 3.25" x 2.2" / 8.3cm x 5.5cm with a standard double-strip in the middle and two power rails on both sides. You can pull the power rails off easily to make the breadboard as...
In Stock
[Buy Now](https://www.adafruit.com/product/64)
[Related Guides to the Product](https://learn.adafruit.com/products/64/guides)
### Diffused RGB (tri-color) LED
[Diffused RGB (tri-color) LED](https://www.adafruit.com/product/159)
Diffused 5mm tri-color LED with separate red, green and blue LED chips inside! Nice indicator, and fun to color-swirl. 60 degree viewing angle. We like diffused RGB LEDs because they color mix inside instead of appearing as 3 distinct LEDs.
These are Common-Anode type which means you...
In Stock
[Buy Now](https://www.adafruit.com/product/159)
[Related Guides to the Product](https://learn.adafruit.com/products/159/guides)
## Related Guides
- [Geofencing with the FONA 808 & Adafruit IO](https://learn.adafruit.com/geofencing-with-the-fona-808-and-adafruit-io.md)
- [Adafruit Motor Shield](https://learn.adafruit.com/adafruit-motor-shield.md)
- [Sous-vide controller powered by Arduino - The SousViduino!](https://learn.adafruit.com/sous-vide-powered-by-arduino-the-sous-viduino.md)
- [Wave Shield Voice Changer](https://learn.adafruit.com/wave-shield-voice-changer.md)
- [Arduino Lesson 5. The Serial Monitor](https://learn.adafruit.com/adafruit-arduino-lesson-5-the-serial-monitor.md)
- [Trinket Audio Player](https://learn.adafruit.com/trinket-audio-player.md)
- [Circuit Playground: D is for Diode](https://learn.adafruit.com/circuit-playground-d-is-for-diode.md)
- [Wave Shield](https://learn.adafruit.com/adafruit-wave-shield-audio-shield-for-arduino.md)
- [Arduino Lesson 0. Getting Started](https://learn.adafruit.com/lesson-0-getting-started.md)
- [Current Limiting Stepper Driver with DRV8871](https://learn.adafruit.com/current-limiting-stepper-driver-with-drv8871.md)
- [RePaper eInk Development Board](https://learn.adafruit.com/repaper-eink-development-board.md)
- [Adafruit AirLift Shield - ESP32 WiFi Co-Processor](https://learn.adafruit.com/adafruit-airlift-shield-esp32-wifi-co-processor.md)
- [Low Power WiFi Datalogger](https://learn.adafruit.com/low-power-wifi-datalogging.md)
- [Babel Fish](https://learn.adafruit.com/babel-fish.md)
- [Arduino Lesson 2. LEDs](https://learn.adafruit.com/adafruit-arduino-lesson-2-leds.md)
---
# Source: https://learn.adafruit.com/i2c-spi-lcd-backpack/arduino-spi-use.md
# I2C/SPI LCD Backpack
## Arduino SPI Use
Another option for connecting is to use **SPI** , which is a simpler protocol. The good news about SPI is that its very simple and you can use **any** 3 pins to connect. You can share the **data** and **clock** pins with another device as long as they remain outputs, the **latch** pin should only be used for the backpack. So if you wanted 3 LCDs, for example, they would all have the same **data** and **clock** pins, but the **latch** pin would be different, for 5 pins total
Danger:
The first thing you will need to do is to enable SPI. To do this, solder the **SPI Enable** solder jumper by heating up the pads with a soldering iron and soldering a blob onto both pins:

This will switch the backpack over to SPI mode instead of I2C. If you want to go back to I2C, use wick or a solder sucker to remove the jumper
Next we will connect 5 wires, **5V** , **GND** , **DAT** , **CLK** , and **LAT**.
- To match the example, **CLK** goes to to Digital 2
- **DAT** to Digital 3,
- **LAT** to Digital 4
Once we have the example sketch running you can of course change these to anything you'd like
- Connect **5V** and **GND** to the 5v and Ground Arduino power pins. If you are using a 3.3V Arduino, you still need to power the LCD with 5V power! You can use 3.3V logic just fine

## Install Adafruit\_LiquidCrystal
To begin reading sensor data, you will need to [use the Adafruit\_LiquidCrystal library.](https://github.com/adafruit/LiquidCrystal). You can install the **Adafruit\_LiquidCrystal**** **library for Arduino using the Library Manager in the Arduino IDE.

Click the **Manage Libraries ...** menu item, search for **Adafruit LiquidCrystal** and select the **Adafruit LiquidCrystal** library:

If asked about any dependencies, click "Install All".

## Load Demo
Restart the IDE and load up the **Adafruit\_LiquidCrystal-\>HelloWorld\_SPI** demo

Upload the sketch. You should see the backlight turn on when the Arduino resets. If you don't see any characters, adjust the **Contrast** trim potentiometer with a mini-screwdriver until you see the text clearly
The default HelloWorld sketch blinks the backlight as well as updating the text.
**If you see the backlight blinking that means your connection to the SPI port is OK but the contrast is too low or too high** , or the LCD data pins are not solidly connected.
Check the contrast first by gently twisting the mini trim potentiometer, if that doesn't help, recheck your soldering and resolder all 16 of the LCD pins!

Once you're done, you can remove the blinking LED backlight code:
> lcd.setBacklight(HIGH);
> delay(500);
> lcd.setBacklight(LOW);
> delay(500);
- [Previous Page](https://learn.adafruit.com/i2c-spi-lcd-backpack/arduino-i2c-use.md)
- [Next Page](https://learn.adafruit.com/i2c-spi-lcd-backpack/python-circuitpython.md)
## Primary Products
### i2c / SPI character LCD backpack - STEMMA QT / Qwiic
[i2c / SPI character LCD backpack - STEMMA QT / Qwiic](https://www.adafruit.com/product/292)
Character LCDs are a fun and easy way to have your microcontroller project talk back to you. They are also common, and easy to get, available in tons of colors and sizes. [We've written tutorials on using character LCDs with an Arduino](http://learn.adafruit.com/character-lcds)...
In Stock
[Buy Now](https://www.adafruit.com/product/292)
[Related Guides to the Product](https://learn.adafruit.com/products/292/guides)
## Featured Products
### Standard LCD 20x4 + extras
[Standard LCD 20x4 + extras](https://www.adafruit.com/product/198)
Standard HD44780 LCDs are useful for creating standalone projects.
- 20 characters wide, 4 rows
- White text on blue background
- Connection port is 0.1" pitch, single row for easy breadboarding and wiring
- Single LED backlight with a resistor included, you can...
In Stock
[Buy Now](https://www.adafruit.com/product/198)
[Related Guides to the Product](https://learn.adafruit.com/products/198/guides)
### Standard LCD 16x2 + extras
[Standard LCD 16x2 + extras](https://www.adafruit.com/product/181)
Standard HD44780 LCDs are useful for creating standalone projects.
- 16 characters wide, 2 rows
- White text on blue background
- Connection port is 0.1" pitch, single row for easy breadboarding and wiring
- Pins are documented on the back of the LCD to assist...
In Stock
[Buy Now](https://www.adafruit.com/product/181)
[Related Guides to the Product](https://learn.adafruit.com/products/181/guides)
## Related Guides
- [ Faz-Wrench - Five Nights at Freddy's](https://learn.adafruit.com/faz-wrench.md)
- [Trinket Ultrasonic Rangefinder](https://learn.adafruit.com/trinket-ultrasonic-rangefinder.md)
- [No-Code Indoor Air Quality Monitor with Separate Display](https://learn.adafruit.com/no-code-indoor-air-quality-monitor-with-separate-display.md)
- [Trinket Temperature & Humidity LCD Display](https://learn.adafruit.com/trinket-temperature-humidity-lcd-display.md)
- [Light Meter](https://learn.adafruit.com/light-meter.md)
- [CircuitPython Hardware: ILI9341 TFT & FeatherWing](https://learn.adafruit.com/micropython-hardware-ili9341-tft-and-featherwing.md)
- [Raspberry Pi Thermal Camera](https://learn.adafruit.com/raspberry-pi-thermal-camera.md)
- [Adafruit NeoKey BFF](https://learn.adafruit.com/adafruit-neokey-bff.md)
- [Mini LED Matrix Audio Visualizer](https://learn.adafruit.com/mini-led-matrix-audio-visualizer.md)
- [Adafruit ISO1540 Bidirectional I2C Isolator](https://learn.adafruit.com/adafruit-iso1540-bidirectional-i2c-isolator.md)
- [Raspberry Pi Low-Light Long-Exposure Photography](https://learn.adafruit.com/raspberry-pi-hq-camera-low-light-long-exposure-photography.md)
- [Adafruit Radio Bonnets with OLED Display - RFM69 or RFM9X](https://learn.adafruit.com/adafruit-radio-bonnets.md)
- [PicoDVI Arduino Library: Video Out for RP2040 Boards](https://learn.adafruit.com/picodvi-arduino-library-video-out-for-rp2040-boards.md)
- [reef-pi Guide 5: Light Controller](https://learn.adafruit.com/reef-pi-lighting-controller.md)
- [Adafruit VL53L4CD Time of Flight Distance Sensor](https://learn.adafruit.com/adafruit-vl53l4cd-time-of-flight-distance-sensor.md)
---
# Source: https://learn.adafruit.com/arduino-tips-tricks-and-techniques.md
# Arduino Tips, Tricks, and Techniques
## Arduino UNO FAQ
There's so many Arduino's out there, it may get a little confusing. We wanted to clarify for people some of the changes in the latest version.

**NB** this is just our opinion and interpretation of some of the decisions made by Arduino. We aren't associated with Arduino, and don't speak for them! If you have to get an Official Response to your Arduino question please contact them directly. Thx!
**NB2** Still in progress, we're collecting common questions to answer. If you have more questions, please post them in our [forums](http://forums.adafruit.com/).
http://vimeo.com/15550780
## Arduino Timeline
But first…some history! First there was the serial Arduino (what's the name of it?) with RS232 which was not used outside of the Arduino team & friends.
The first popularly manufactured Arduino was called the NG (New Generation, like Star Trek, yknow?) The NG used the Atmega8 chip running at 16 MHz and an FT232 chip for the USB interface. The bootloader takes up 2KB of space and runs at 19200 baud.
The next version was the Diecimila. The Diecimila updated the chip from the Atmega8 to the Atmega168. The great thing here is double the space and memory (16K instead of 8K). It still ran at 16MHz. The Diecimila also added two extra header pins for 3.3V (from the FTDI chip) and the reset pin which can be handy when a shield is covering up the Reset button. The bootloader takes up 2KB of space and runs at 19200 baud. Auto-resetting was also added which makes life awesomer for everyone.
In 2009, the Duemilanove was released. This one also upgraded the chip again, to the Atmega328. Yet another doubling of space and memory! Another upgrade is now the power is automagically switched between USB and DC-jack which removed the previous jumper. This makes it easier and faster to move from programming to standalone and got rid of some confusion. The bootloader takes up 2KB of space and runs at 57600 baud.
In 2010, we have the Uno! The Uno still uses the 328P chip and the power switcher. It has a smaller bootloader called OptiBoot (more space for users' projects) that runs at 115K. So even though the chip is the same, you get another 1.5K of extra flash space that was previously used by the bootloader. The FTDI chip has also been replaced with a atmega8u2 which allows for different kinds of USB interfaces. Finally, there's an extra 3.3V regulator (LP2985) for a better 3.3V supply. whew! ## New USB Chip
So! All of the older Arduinos (NG, Diecimila and Duemilanove) have used an FTDI chip (the FT232RL) to convert the TTL serial from the Arduino chip (Atmel ATmega). This allows for printable debugging, connecting to software like PureData/Max, Processing, Python, etc. etc. It also allows updating the firmware via the serial bootloader.
The good news about the FT232RL has royalty-free drivers and pretty much just works. The bad news is that it can -only- act as a USB/Serial port. It can't act like a keyboard, mouse, disk drive, MIDI device, etc.

The Uno has changed that by exchanging the FT232RL chip with an atmega8u2 chip. There are a few things that are possible with this new chip but before we discuss that lets make it clear that by default, this chip acts identically to the FTDI chip that it replaces. It's just a USB-serial port!
One improvement in updating the chip is that, previously, Mac users needed to install FTDI drivers. The 8u2 imitates a 'generic' CDC serial device. So now, Mac users do not have to install a driver. Windows users still need to install the .INF file but luckily there are no drivers. This means there will be fewer problems with new versions of windows. There is no way to have a serial USB device that doesn't require an INF file in windows, sadly :(
The big thing that is nice about the 8u2 is that **advanced** users can turn it into a different kind of USB device. For example it can act like a keyboard or mouse. Or a disk driver. Or a MIDI interface, etc. Right now there are no examples of how to do this, but we hope to post some shortly.
And, finally, going with the 8u2 reduced the price of the board which made up for some of the other extras.
###
The Arduino team has indicated they thought about this but preferred that hackability of a DIP chip.
Right now there are a few Arduino's with a 32u4 chip such as the Leonardo, Micro and Esplora
###
The 8u2 can be programmed by soldering a 6-pin ISP header (the R3 has the 6-pin header pre-soldered in) and using a standard AVR programmer. You can also use the bootloader (DFU) in the 8u2. On first generation Unos, you enable this by soldering the 10K resistor right underneath the board. (R2 and R3 versions of the Uno use the 16U2 and do not require the resistor!) Again, we don't have any examples or tutorials but hope to shortly.


The code for the 8u2 is based on LUFA, Dean Cameran's totally awesome USB-AVR library that has great examples and documentation. Its also completely open source.###
The FT232RL had an internal oscillator whereas the 8u2 does not. That means there is a 16mhz crystal next to the 8u2 to allow it to keep up with precise USB timing.
On the other hand, the Atmega328p chip that is the core processor in the Arduino now has a 16mhz ceramic resonator. Ceramic resonators are slightly less precise than crystals but we have been assured that this one was specified and works quite well.


###
The short answer is: yes. The long answer is that most things that people are doing with Arduino do not rely on 20ppm precision timing where 100ppm would fail. For people who want long term precise timekeeping we suggest going with a TCXO (temperature compensation crystal oscillator) - but you would know if you needed that.###
Good question, technically you can. However, in practice the board did not make it through FCC certification with one crystal (long traces with fast squarewaves = lots of noise).###
You can absolutely connect the CLKO out the crystal from the '8u2 to the '328p but you're on your own as we don't think there will be any tutorials about that.###
Arduino is now FCC certified! That means that the board by itself passes FCC certification for electromagnetic emissions. It does **not** mean that your project is FCC certified. The moment you change the Arduino, it's no longer FCC certified (although we'd like some back-up documentation on this).

It is also, still, CE certified for Europeans.###
There's a new bootloader. It works just like the old one - being an STK500-protocol compatible but its a **quarter** of the size! Down from 2K, the new bootloader is a tiny 512b. This gives you more space for your project code! Yay! It's also **faster** - 115K instead of 57.6k so you'll be uploading code in 3 seconds.
The Bad News is that you **must make sure to select Uno in the Boards menu**!!! If you don't things will be confusing because the bootloader speed is wrong, and you won't get that extra 1.5K!
Overall, its a good direction, and the chips can be used in older Arduinos just fine (so you can upgrade your Diecimila or Duemilanove to the Uno by simply replacing the chip).
For more detailed information about the bootloader, such as source code, please visit the [Optiboot](http://code.google.com/p/optiboot/) project page.
###
While it is possible that the 8u2 could act as a full ISP programmer there are a few reasons why its good that it isn't.
1. Giving beginners access to a full ISP programmer will result in bricked chips. There's no risk of messing up the Arduino chip beyond recognition if it's just being bootloaded
2. Having the chip act only as a USB/serial passthrough simplifies the firmware so that the chip has only one function instead of having to have it do double duty as programmer -and- serial interface (think about it, its not easy)
3. Backwards compatibility - the Arduino chips can still be programmed with FTDI breakout boards or cables, making it easy for people to breadboard or make clones.
###
Every USB device needs to have a unique product id and vendor id. Vendor IDs (VID) are sold to companies and Product IDs (PID) are chosen by that company. So for example FTDI owns VID #0403 and they give their chips ID's between #0000 and #FFFF (65,536 different PIDs) Older Ardiuno's used FTDI's VID/PID as that is part of the deal when you purchase their chips. Because the Uno does not use an FTDI chip anymore, the Arduino team had to purchase a USB Vendor ID (VID). Every Arduino product will now have their own PID starting with the Uno (#0001).
If you want to make your own Arduino-compatible board, you have a few choices:
1. Don't use an 8u2, go with an FTDI chip instead that comes with a VID
2. If you're planning to make more than one board for your personal use, you will have to [purchase a VID from USB IF](http://www.usb.org/developers/vendor/ "Link: http://www.usb.org/developers/vendor/") for a one time $2000 fee
3. If you're making a single board for your own experimentation, you can pick a VID/PID that doesn't interfere with any devices on your computer and substitute those in
4. You can purchase licenses for single VID/PID pairs from companies that develop USB devices (we dont have any specific links at the moment)
However, you can't use the Arduino VID when distributing your own Arduino-compatibles! If the cost of a VID is too much for you, simply go with an FTDI chip, K?###
Yep, there is a worldwide shortage of Atmel parts right now. Even the chip used in the Arduino core (Atmega328P) is really hard to get. This happens after recesssions. We hope that these and other Atmel chips will show up again in places like digikey soon. Till then, keep searching on findchips.com!###
Probably not. The Arduino team buys chips in the 10's of thousands, directly from Atmel. They probably get priority over distributors because of this. We're assuming the team bought enough to last for a while.###
While the appearance of a hard-to-get chip coupled with the VID/PID mishegas may seem to be a little annoying, we don't think that means that the Arduino team is being malicious or attempting to make life difficult for people who make derivatives. The move to an '8u2 makes the Arduino more powerful, and easy to use as there are fewer drivers to install. While there is a shortage now, there will eventually be plenty of chips on the market.
Some people in the Arduino forum have thought of forming a group that would purchase a VID for Arduinites to use in personal projects. This is a pretty good idea and its probably the best way to avoid VID/PID conflicts. Between 65,536 projects, that comes to under a nickel per PID.
And of course, because they didn't get rid of the bootloader system, you can **always** just use an FTDI chip.
###
All previous shields should still work perfectly fine as the header spacing is the same, the core chip is the same and the location of parts is the same. In fact, some should work better because the 3V supply has been upgraded (see next point).###
Yup! The Uno is physicially the same size and layout as previous Arduinos. The mounting holes are in the same location. There is an additional mounting hole as well, now.## More 3.3v power!

One sad thing about older boards is that they had a 3.3v power supply but it was really just whatever the FTDI chip's internal 3.3v regulator could give. You -could- get 50mA out of it, maybe. But high power stuff like XBees, SD cards, some fast ADC or DACs could easily drag down the FTDI chip and reset the USB connection. The Uno solves this problem by adding a new 3.3V regulator the LP2985 which can easily provide 150mA.
The LP2985 is a very high quality regulator, and will work great for powering stuff and as a nice solid 1% analog reference.
###
This is a common question. The reason is that the first Arduino used the Atmega8 which could not run faster than 16Mhz. As the chip has been upgraded they wanted to make the boards speed compatible. Arduino is also not really intended for fast-processing (its only 8-bit anyways) so the chips are running at 16MHz.###
Yes! The Uno is still available under a Creative commons license. [You can get the latest schematics and layouts over at the Arduino website.](http://arduino.cc/en/Main/ArduinoBoardUno)## UNO R2 and R3
During fall of 2011, the Arduino team revealed that there will be a new minor revision of the classic Arduino, the "UNO R3" (revision 3). A lot of people have asked us about the R3 so here is everything we know so far.
1. The UNO R3 is not available to resellers until December 1st or so. Really! Nobody has them until then!
2. The UNO R3 is backwards compatible with the UNO - same driver, same uploading, same look
There are a few changes in the UNO, here is what they are:
1. The USB controller chip has moved from an atmega8u2 (8K flash) to an atmega16u2 (16K flash). **This does not mean that you have more flash or RAM for your sketches** this upgrade is for the USB interface chip **only**. In theory this will mean that it will be easier to have low level USB interfaces such as MIDI/Joystick/Keyboard available. **However** these are only theoretical at this time, there is no example code or firmware which will actually do this.
2. There are three more breakout pins on the PCB, next to the AREF pin there is are two I2C pins (SDA/SCL) - this is a **duplication** of the Analog 4 and 5 pins. There is not an extra I2C interface or anything, its just that they made a copy of those pins there for future shields since the I2C pins are in a different place on Mega. There is also an IOREF pin which is next to the Reset pin - this is to let shields know what the running I/O pin voltage is on the board (for the UNO, its 5V). Again, this is a **duplication** of the power pin, it does not add voltage level shifting to the UNO.
3. The RESET button has moved to be next to the USB connector, this makes it easier to press when a shield is on top.
Here is what **didn't** change in the UNO:
1. Processor size and speed - its the same ATMega328P running at 16MHz that we've had since the Duemilanove. Your code will not run faster or better on the R3
2. Same number of pins - no extra pins are added **EVEN THOUGH THERE ARE MORE BREAKOUTS** (see above!)
3. Board size and shape - same size as before
4. Shield compatibility - Every shield that works and plugs into the UNO R1/R2 should be able to work fine with the R3
5. Driver - the driver is the same
6. Upload speed - same upload speed and technique
If you want to [get up an Arduino R3 now, visit the adafruit store](http://www.adafruit.com/products/50) and pick up a board or pack! - [Next Page](https://learn.adafruit.com/arduino-tips-tricks-and-techniques/arduino-libraries.md)
## Featured Products
### Adafruit METRO 328 Fully Assembled - Arduino IDE compatible
[Adafruit METRO 328 Fully Assembled - Arduino IDE compatible](https://www.adafruit.com/product/50)
We sure love the ATmega328 here at Adafruit, and we use them _a lot_ for our own projects. The processor has plenty of GPIO, Analog inputs, hardware UART SPI and I2C, timers and PWM galore - just enough for most simple projects. When we need to go small, we use a
Out of Stock
[Buy Now](https://www.adafruit.com/product/50)
[Related Guides to the Product](https://learn.adafruit.com/products/50/guides)
### Arduino bootloader-programmed chip (Atmega328P)
[Arduino bootloader-programmed chip (Atmega328P)](https://www.adafruit.com/product/123)
This is a preprogrammed Atmega328P chip, useful if you want to make your own Arduino-compatible or repair a damaged chip on an exisiting Arduino UNO, Duemilanove, Diecimila, or NG!
This chip is programmed with 'ADAboot', my version of the bootloader that is...
Out of Stock
[Buy Now](https://www.adafruit.com/product/123)
[Related Guides to the Product](https://learn.adafruit.com/products/123/guides)
## Related Guides
- [NeoPixel Painter](https://learn.adafruit.com/neopixel-painter.md)
- [Adafruit Proto Shield for Arduino](https://learn.adafruit.com/adafruit-proto-shield-arduino.md)
- [Deciphering Strange Arduino Code](https://learn.adafruit.com/deciphering-strange-arduino-code.md)
- [Affordable HAL 9000 Replica](https://learn.adafruit.com/hal-9000-replica.md)
- [WiFi Candy Bowl Monitor](https://learn.adafruit.com/wifi-candy-bowl.md)
- [Arduino Lesson 1. Blink](https://learn.adafruit.com/adafruit-arduino-lesson-1-blink.md)
- [Using NeoPixels and Servos Together](https://learn.adafruit.com/neopixels-and-servos.md)
- [Adafruit 2.8" TFT Touch Shield v2 - Capacitive or Resistive](https://learn.adafruit.com/adafruit-2-8-tft-touch-shield-v2.md)
- [LSM303 Accelerometer + Compass Breakout](https://learn.adafruit.com/lsm303-accelerometer-slash-compass-breakout.md)
- [1,500 NeoPixel LED Curtain with Raspberry Pi and Fadecandy](https://learn.adafruit.com/1500-neopixel-led-curtain-with-raspberry-pi-fadecandy.md)
- [Arduino Lesson 8. Analog Inputs](https://learn.adafruit.com/adafruit-arduino-lesson-8-analog-inputs.md)
- [8BitBox](https://learn.adafruit.com/8bitbox.md)
- [Animating Multiple LED Backpacks](https://learn.adafruit.com/animating-multiple-led-backpacks.md)
- [WiFi Controlled LED Christmahanukwanzaa Tree](https://learn.adafruit.com/wifi-controlled-led-christmahanukwanzaa-tree.md)
- [Reverse Geocache Box](https://learn.adafruit.com/reverse-geocache-engagement-box.md)
---
# Source: https://learn.adafruit.com/arduino-tips-tricks-and-techniques/arduino-uno-faq.md
# Arduino Tips, Tricks, and Techniques
## Arduino UNO FAQ
There's so many Arduino's out there, it may get a little confusing. We wanted to clarify for people some of the changes in the latest version.

**NB** this is just our opinion and interpretation of some of the decisions made by Arduino. We aren't associated with Arduino, and don't speak for them! If you have to get an Official Response to your Arduino question please contact them directly. Thx!
**NB2** Still in progress, we're collecting common questions to answer. If you have more questions, please post them in our [forums](http://forums.adafruit.com/).
http://vimeo.com/15550780
## Arduino Timeline
But first…some history! First there was the serial Arduino (what's the name of it?) with RS232 which was not used outside of the Arduino team & friends.
The first popularly manufactured Arduino was called the NG (New Generation, like Star Trek, yknow?) The NG used the Atmega8 chip running at 16 MHz and an FT232 chip for the USB interface. The bootloader takes up 2KB of space and runs at 19200 baud.
The next version was the Diecimila. The Diecimila updated the chip from the Atmega8 to the Atmega168. The great thing here is double the space and memory (16K instead of 8K). It still ran at 16MHz. The Diecimila also added two extra header pins for 3.3V (from the FTDI chip) and the reset pin which can be handy when a shield is covering up the Reset button. The bootloader takes up 2KB of space and runs at 19200 baud. Auto-resetting was also added which makes life awesomer for everyone.
In 2009, the Duemilanove was released. This one also upgraded the chip again, to the Atmega328. Yet another doubling of space and memory! Another upgrade is now the power is automagically switched between USB and DC-jack which removed the previous jumper. This makes it easier and faster to move from programming to standalone and got rid of some confusion. The bootloader takes up 2KB of space and runs at 57600 baud.
In 2010, we have the Uno! The Uno still uses the 328P chip and the power switcher. It has a smaller bootloader called OptiBoot (more space for users' projects) that runs at 115K. So even though the chip is the same, you get another 1.5K of extra flash space that was previously used by the bootloader. The FTDI chip has also been replaced with a atmega8u2 which allows for different kinds of USB interfaces. Finally, there's an extra 3.3V regulator (LP2985) for a better 3.3V supply. whew! ## New USB Chip
So! All of the older Arduinos (NG, Diecimila and Duemilanove) have used an FTDI chip (the FT232RL) to convert the TTL serial from the Arduino chip (Atmel ATmega). This allows for printable debugging, connecting to software like PureData/Max, Processing, Python, etc. etc. It also allows updating the firmware via the serial bootloader.
The good news about the FT232RL has royalty-free drivers and pretty much just works. The bad news is that it can -only- act as a USB/Serial port. It can't act like a keyboard, mouse, disk drive, MIDI device, etc.

The Uno has changed that by exchanging the FT232RL chip with an atmega8u2 chip. There are a few things that are possible with this new chip but before we discuss that lets make it clear that by default, this chip acts identically to the FTDI chip that it replaces. It's just a USB-serial port!
One improvement in updating the chip is that, previously, Mac users needed to install FTDI drivers. The 8u2 imitates a 'generic' CDC serial device. So now, Mac users do not have to install a driver. Windows users still need to install the .INF file but luckily there are no drivers. This means there will be fewer problems with new versions of windows. There is no way to have a serial USB device that doesn't require an INF file in windows, sadly :(
The big thing that is nice about the 8u2 is that **advanced** users can turn it into a different kind of USB device. For example it can act like a keyboard or mouse. Or a disk driver. Or a MIDI interface, etc. Right now there are no examples of how to do this, but we hope to post some shortly.
And, finally, going with the 8u2 reduced the price of the board which made up for some of the other extras.
###
The Arduino team has indicated they thought about this but preferred that hackability of a DIP chip.
Right now there are a few Arduino's with a 32u4 chip such as the Leonardo, Micro and Esplora
###
The 8u2 can be programmed by soldering a 6-pin ISP header (the R3 has the 6-pin header pre-soldered in) and using a standard AVR programmer. You can also use the bootloader (DFU) in the 8u2. On first generation Unos, you enable this by soldering the 10K resistor right underneath the board. (R2 and R3 versions of the Uno use the 16U2 and do not require the resistor!) Again, we don't have any examples or tutorials but hope to shortly.


The code for the 8u2 is based on LUFA, Dean Cameran's totally awesome USB-AVR library that has great examples and documentation. Its also completely open source.###
The FT232RL had an internal oscillator whereas the 8u2 does not. That means there is a 16mhz crystal next to the 8u2 to allow it to keep up with precise USB timing.
On the other hand, the Atmega328p chip that is the core processor in the Arduino now has a 16mhz ceramic resonator. Ceramic resonators are slightly less precise than crystals but we have been assured that this one was specified and works quite well.


###
The short answer is: yes. The long answer is that most things that people are doing with Arduino do not rely on 20ppm precision timing where 100ppm would fail. For people who want long term precise timekeeping we suggest going with a TCXO (temperature compensation crystal oscillator) - but you would know if you needed that.###
Good question, technically you can. However, in practice the board did not make it through FCC certification with one crystal (long traces with fast squarewaves = lots of noise).###
You can absolutely connect the CLKO out the crystal from the '8u2 to the '328p but you're on your own as we don't think there will be any tutorials about that.###
Arduino is now FCC certified! That means that the board by itself passes FCC certification for electromagnetic emissions. It does **not** mean that your project is FCC certified. The moment you change the Arduino, it's no longer FCC certified (although we'd like some back-up documentation on this).

It is also, still, CE certified for Europeans.###
There's a new bootloader. It works just like the old one - being an STK500-protocol compatible but its a **quarter** of the size! Down from 2K, the new bootloader is a tiny 512b. This gives you more space for your project code! Yay! It's also **faster** - 115K instead of 57.6k so you'll be uploading code in 3 seconds.
The Bad News is that you **must make sure to select Uno in the Boards menu**!!! If you don't things will be confusing because the bootloader speed is wrong, and you won't get that extra 1.5K!
Overall, its a good direction, and the chips can be used in older Arduinos just fine (so you can upgrade your Diecimila or Duemilanove to the Uno by simply replacing the chip).
For more detailed information about the bootloader, such as source code, please visit the [Optiboot](http://code.google.com/p/optiboot/) project page.
###
While it is possible that the 8u2 could act as a full ISP programmer there are a few reasons why its good that it isn't.
1. Giving beginners access to a full ISP programmer will result in bricked chips. There's no risk of messing up the Arduino chip beyond recognition if it's just being bootloaded
2. Having the chip act only as a USB/serial passthrough simplifies the firmware so that the chip has only one function instead of having to have it do double duty as programmer -and- serial interface (think about it, its not easy)
3. Backwards compatibility - the Arduino chips can still be programmed with FTDI breakout boards or cables, making it easy for people to breadboard or make clones.
###
Every USB device needs to have a unique product id and vendor id. Vendor IDs (VID) are sold to companies and Product IDs (PID) are chosen by that company. So for example FTDI owns VID #0403 and they give their chips ID's between #0000 and #FFFF (65,536 different PIDs) Older Ardiuno's used FTDI's VID/PID as that is part of the deal when you purchase their chips. Because the Uno does not use an FTDI chip anymore, the Arduino team had to purchase a USB Vendor ID (VID). Every Arduino product will now have their own PID starting with the Uno (#0001).
If you want to make your own Arduino-compatible board, you have a few choices:
1. Don't use an 8u2, go with an FTDI chip instead that comes with a VID
2. If you're planning to make more than one board for your personal use, you will have to [purchase a VID from USB IF](http://www.usb.org/developers/vendor/ "Link: http://www.usb.org/developers/vendor/") for a one time $2000 fee
3. If you're making a single board for your own experimentation, you can pick a VID/PID that doesn't interfere with any devices on your computer and substitute those in
4. You can purchase licenses for single VID/PID pairs from companies that develop USB devices (we dont have any specific links at the moment)
However, you can't use the Arduino VID when distributing your own Arduino-compatibles! If the cost of a VID is too much for you, simply go with an FTDI chip, K?###
Yep, there is a worldwide shortage of Atmel parts right now. Even the chip used in the Arduino core (Atmega328P) is really hard to get. This happens after recesssions. We hope that these and other Atmel chips will show up again in places like digikey soon. Till then, keep searching on findchips.com!###
Probably not. The Arduino team buys chips in the 10's of thousands, directly from Atmel. They probably get priority over distributors because of this. We're assuming the team bought enough to last for a while.###
While the appearance of a hard-to-get chip coupled with the VID/PID mishegas may seem to be a little annoying, we don't think that means that the Arduino team is being malicious or attempting to make life difficult for people who make derivatives. The move to an '8u2 makes the Arduino more powerful, and easy to use as there are fewer drivers to install. While there is a shortage now, there will eventually be plenty of chips on the market.
Some people in the Arduino forum have thought of forming a group that would purchase a VID for Arduinites to use in personal projects. This is a pretty good idea and its probably the best way to avoid VID/PID conflicts. Between 65,536 projects, that comes to under a nickel per PID.
And of course, because they didn't get rid of the bootloader system, you can **always** just use an FTDI chip.
###
All previous shields should still work perfectly fine as the header spacing is the same, the core chip is the same and the location of parts is the same. In fact, some should work better because the 3V supply has been upgraded (see next point).###
Yup! The Uno is physicially the same size and layout as previous Arduinos. The mounting holes are in the same location. There is an additional mounting hole as well, now.## More 3.3v power!

One sad thing about older boards is that they had a 3.3v power supply but it was really just whatever the FTDI chip's internal 3.3v regulator could give. You -could- get 50mA out of it, maybe. But high power stuff like XBees, SD cards, some fast ADC or DACs could easily drag down the FTDI chip and reset the USB connection. The Uno solves this problem by adding a new 3.3V regulator the LP2985 which can easily provide 150mA.
The LP2985 is a very high quality regulator, and will work great for powering stuff and as a nice solid 1% analog reference.
###
This is a common question. The reason is that the first Arduino used the Atmega8 which could not run faster than 16Mhz. As the chip has been upgraded they wanted to make the boards speed compatible. Arduino is also not really intended for fast-processing (its only 8-bit anyways) so the chips are running at 16MHz.###
Yes! The Uno is still available under a Creative commons license. [You can get the latest schematics and layouts over at the Arduino website.](http://arduino.cc/en/Main/ArduinoBoardUno)## UNO R2 and R3
During fall of 2011, the Arduino team revealed that there will be a new minor revision of the classic Arduino, the "UNO R3" (revision 3). A lot of people have asked us about the R3 so here is everything we know so far.
1. The UNO R3 is not available to resellers until December 1st or so. Really! Nobody has them until then!
2. The UNO R3 is backwards compatible with the UNO - same driver, same uploading, same look
There are a few changes in the UNO, here is what they are:
1. The USB controller chip has moved from an atmega8u2 (8K flash) to an atmega16u2 (16K flash). **This does not mean that you have more flash or RAM for your sketches** this upgrade is for the USB interface chip **only**. In theory this will mean that it will be easier to have low level USB interfaces such as MIDI/Joystick/Keyboard available. **However** these are only theoretical at this time, there is no example code or firmware which will actually do this.
2. There are three more breakout pins on the PCB, next to the AREF pin there is are two I2C pins (SDA/SCL) - this is a **duplication** of the Analog 4 and 5 pins. There is not an extra I2C interface or anything, its just that they made a copy of those pins there for future shields since the I2C pins are in a different place on Mega. There is also an IOREF pin which is next to the Reset pin - this is to let shields know what the running I/O pin voltage is on the board (for the UNO, its 5V). Again, this is a **duplication** of the power pin, it does not add voltage level shifting to the UNO.
3. The RESET button has moved to be next to the USB connector, this makes it easier to press when a shield is on top.
Here is what **didn't** change in the UNO:
1. Processor size and speed - its the same ATMega328P running at 16MHz that we've had since the Duemilanove. Your code will not run faster or better on the R3
2. Same number of pins - no extra pins are added **EVEN THOUGH THERE ARE MORE BREAKOUTS** (see above!)
3. Board size and shape - same size as before
4. Shield compatibility - Every shield that works and plugs into the UNO R1/R2 should be able to work fine with the R3
5. Driver - the driver is the same
6. Upload speed - same upload speed and technique
If you want to [get up an Arduino R3 now, visit the adafruit store](http://www.adafruit.com/products/50) and pick up a board or pack! - [Next Page](https://learn.adafruit.com/arduino-tips-tricks-and-techniques/arduino-libraries.md)
## Featured Products
### Adafruit METRO 328 Fully Assembled - Arduino IDE compatible
[Adafruit METRO 328 Fully Assembled - Arduino IDE compatible](https://www.adafruit.com/product/50)
We sure love the ATmega328 here at Adafruit, and we use them _a lot_ for our own projects. The processor has plenty of GPIO, Analog inputs, hardware UART SPI and I2C, timers and PWM galore - just enough for most simple projects. When we need to go small, we use a
Out of Stock
[Buy Now](https://www.adafruit.com/product/50)
[Related Guides to the Product](https://learn.adafruit.com/products/50/guides)
### Arduino bootloader-programmed chip (Atmega328P)
[Arduino bootloader-programmed chip (Atmega328P)](https://www.adafruit.com/product/123)
This is a preprogrammed Atmega328P chip, useful if you want to make your own Arduino-compatible or repair a damaged chip on an exisiting Arduino UNO, Duemilanove, Diecimila, or NG!
This chip is programmed with 'ADAboot', my version of the bootloader that is...
Out of Stock
[Buy Now](https://www.adafruit.com/product/123)
[Related Guides to the Product](https://learn.adafruit.com/products/123/guides)
## Related Guides
- [NeoPixel Painter](https://learn.adafruit.com/neopixel-painter.md)
- [Adafruit Proto Shield for Arduino](https://learn.adafruit.com/adafruit-proto-shield-arduino.md)
- [Deciphering Strange Arduino Code](https://learn.adafruit.com/deciphering-strange-arduino-code.md)
- [Affordable HAL 9000 Replica](https://learn.adafruit.com/hal-9000-replica.md)
- [WiFi Candy Bowl Monitor](https://learn.adafruit.com/wifi-candy-bowl.md)
- [Arduino Lesson 1. Blink](https://learn.adafruit.com/adafruit-arduino-lesson-1-blink.md)
- [Using NeoPixels and Servos Together](https://learn.adafruit.com/neopixels-and-servos.md)
- [Adafruit 2.8" TFT Touch Shield v2 - Capacitive or Resistive](https://learn.adafruit.com/adafruit-2-8-tft-touch-shield-v2.md)
- [LSM303 Accelerometer + Compass Breakout](https://learn.adafruit.com/lsm303-accelerometer-slash-compass-breakout.md)
- [1,500 NeoPixel LED Curtain with Raspberry Pi and Fadecandy](https://learn.adafruit.com/1500-neopixel-led-curtain-with-raspberry-pi-fadecandy.md)
- [Arduino Lesson 8. Analog Inputs](https://learn.adafruit.com/adafruit-arduino-lesson-8-analog-inputs.md)
- [8BitBox](https://learn.adafruit.com/8bitbox.md)
- [Animating Multiple LED Backpacks](https://learn.adafruit.com/animating-multiple-led-backpacks.md)
- [WiFi Controlled LED Christmahanukwanzaa Tree](https://learn.adafruit.com/wifi-controlled-led-christmahanukwanzaa-tree.md)
- [Reverse Geocache Box](https://learn.adafruit.com/reverse-geocache-engagement-box.md)
---
# Source: https://learn.adafruit.com/ttl-serial-camera/arduino-usage.md
# TTL Serial Camera
## Arduino Usage
Next up, we will wire the camera to our microcontroller (in this case an Arduino). This is pretty similar to the above except we will be using two digital pins and a software serial port to talk to the camera. To save images, you'll need some sort of external storage like our [microSD breakout board](https://www.adafruit.com/products/254).
Connect up the camera like this:

Danger:
We suggest testing the microSD card first. Check out our microSD breakout board tutorial and verify that you can read from the card by listing the files. Once you have verified the microSD card wiring, you can come back here and install the VC0706 camera library.
[Visit the Github repository here.](https://github.com/adafruit/Adafruit-VC0706-Serial-Camera-Library) To download. click the DOWNLOADS button in the top right corner, rename the uncompressed folder Adafruit\_VC0706. Check that the Adafruit\_VC0706 folder contains Adafruit\_VC0706.cpp and Adafruit\_VC0706.h Place the Adafruit\_VC0706 library folder your _arduinosketchfolder_/libraries/ folder. You may need to create the libraries subfolder if its your first library. Restart the IDE.
If you're using Arduino v23 or earlier, you'll also need to install the NewSoftSerial library. [Download it by clicking this link](http://arduiniana.org/NewSoftSerial/NewSoftSerial10c.zip) and install it as you did the Adafruit\_VC0706 library. Arduino 1.0 has this built in now (called SoftwareSerial)
## Taking a Snapshot
OK now you're finally ready to run the snapshot demo. Open up the Arduino IDE and select **File-\> Examples-\> Adafruit\_VC0706-\> Snapshot ** sketch and upload it to the Arduino. Open up the serial monitor and you can see the sketch will take a 640x480 photo and save it to the microSD card. You can then pop the card into your computer to see the JPG file

There are a few things you can change once you get it working. One is changing the pins the camera uses. You can use any two digital pins, change this line:
```
// This is the camera pin connection. Connect the camera TX
// to pin 2, camera RX to pin 3
NewSoftSerial cameraconnection = NewSoftSerial(2, 3);
```
You can also change the snapshot image dimension to 160x120, 320x240 or 640x480 by changing these lines:```
// Set the picture size - you can choose one of 640x480, 320x240 or 160x120
// Remember that bigger pictures take longer to transmit!
cam.setImageSize(VC0706_640x480); // biggest
//cam.setImageSize(VC0706_320x240); // medium
//cam.setImageSize(VC0706_160x120); // small
```
Simply uncomment the size you want, and comment out the others. Bigger pictures will take longer to snap, so you will want to think about how fast you need to grab data and save it to the disk## Detecting Motion
A neat thing that the camera has built in is motion detection. It will look for motion in the video stream and alert the microcontroller (by sending a serial data packet) when motion is detected. IN this way you can save a bit of cash and skip on having a PIR sensor (although a PIR sensor will be better at detecting warm mammalian things).
Load up the **File-\> Examples-\> Adafruit\_VC0706-\> MotionDetect** sketch and upload it to the Arduino. It will take a photo immediately because it just turned on. Then wait a few minutes and wave you hand in front of the camera, it will take another photo.
You can turn motion detection on or off by calling **setMotionDetect()**```
// Motion detection system can alert you when the camera 'sees' motion!
cam.setMotionDetect(true); // turn it on
//cam.setMotionDetect(false); // turn it off (default)
```
You'll need to 'poll' the camera to ask it when motion is detected, by calling **motionDetected()**- it will return true if motion was recently detected, and false otherwise.## Adjusting the Manual Focus
One last thing, the camera modules use a manual focus system - there's no auto focus. This can be good or bad. The camera comes with a far depth of focus which is good for most stuff. If you want to change the focus, we strongly recommend plugging it into a video monitor as shown above so you can see exactly how the camera focus looks. You can then lock the focus with the set screw
The version in the weatherproof housing is a little tougher to adjust but it can be done by unscrewing the housing (it takes a few steps but its all easy to do) and then adjusting the focus before reassembly
- [Previous Page](https://learn.adafruit.com/ttl-serial-camera/using-commtool.md)
- [Next Page](https://learn.adafruit.com/ttl-serial-camera/circuitpython-python-usage.md)
## Featured Products
### TTL Serial JPEG Camera with NTSC Video
[TTL Serial JPEG Camera with NTSC Video](https://www.adafruit.com/product/397)
This camera module can be a pretty neat project addition. It was designed to be used in security systems and does two main things - it outputs NTSC video and can take snapshots of that video (in color) and transmit them over the TTL serial link. You can snap pictures at 640x480, 320x240 or...
In Stock
[Buy Now](https://www.adafruit.com/product/397)
[Related Guides to the Product](https://learn.adafruit.com/products/397/guides)
### Miniature TTL Serial JPEG Camera with NTSC Video
[Miniature TTL Serial JPEG Camera with NTSC Video](https://www.adafruit.com/product/1386)
This tiny little camera module can be a pretty neat project addition, it is just like [our other JPEG cameras (same chipset/software)](http://www.adafruit.com/category/35_68), but much smaller and slimmer. It was designed to be used in security systems and does two main things - it...
In Stock
[Buy Now](https://www.adafruit.com/product/1386)
[Related Guides to the Product](https://learn.adafruit.com/products/1386/guides)
### Adafruit METRO 328 Fully Assembled - Arduino IDE compatible
[Adafruit METRO 328 Fully Assembled - Arduino IDE compatible](https://www.adafruit.com/product/50)
We sure love the ATmega328 here at Adafruit, and we use them _a lot_ for our own projects. The processor has plenty of GPIO, Analog inputs, hardware UART SPI and I2C, timers and PWM galore - just enough for most simple projects. When we need to go small, we use a
Out of Stock
[Buy Now](https://www.adafruit.com/product/50)
[Related Guides to the Product](https://learn.adafruit.com/products/50/guides)
### Weatherproof TTL Serial JPEG Camera with NTSC Video and IR LEDs
[Weatherproof TTL Serial JPEG Camera with NTSC Video and IR LEDs](https://www.adafruit.com/product/613)
This weatherproof camera module is [a classy upgrade to the basic camera module we already stock in the shop](http://www.adafruit.com/products/397). The main differences is that this one comes in a nice metal case with a mounting hinge, a 1 meter long cable with the TTL & NTSC...
In Stock
[Buy Now](https://www.adafruit.com/product/613)
[Related Guides to the Product](https://learn.adafruit.com/products/613/guides)
### MicroSD card breakout board+
[MicroSD card breakout board+](https://www.adafruit.com/product/254)
Not just a simple breakout board, this microSD adapter goes the extra mile - designed for ease of use.
- Onboard 5v-\>3v regulator provides 150mA for power-hungry cards
- 3v level shifting means you can use this with ease on either 3v or 5v systems
- Uses a proper level...
Out of Stock
[Buy Now](https://www.adafruit.com/product/254)
[Related Guides to the Product](https://learn.adafruit.com/products/254/guides)
### Half Sized Premium Breadboard - 400 Tie Points
[Half Sized Premium Breadboard - 400 Tie Points](https://www.adafruit.com/product/64)
This is a cute, half-size breadboard with 400 tie points, good for small projects. It's 3.25" x 2.2" / 8.3cm x 5.5cm with a standard double-strip in the middle and two power rails on both sides. You can pull the power rails off easily to make the breadboard as...
In Stock
[Buy Now](https://www.adafruit.com/product/64)
[Related Guides to the Product](https://learn.adafruit.com/products/64/guides)
### SD/MicroSD Memory Card (8 GB SDHC)
[SD/MicroSD Memory Card (8 GB SDHC)](https://www.adafruit.com/product/1294)
Add mega-storage in a jiffy using this 8 GB class 4 micro-SD card. It comes with a SD adapter so you can use it with any of our shields or adapters. Preformatted to FAT so it works out of the box with our projects. Tested and works great with our
In Stock
[Buy Now](https://www.adafruit.com/product/1294)
[Related Guides to the Product](https://learn.adafruit.com/products/1294/guides)
## Related Guides
- [Making Adabot: Part 2](https://learn.adafruit.com/making-adabot-part-2.md)
- [3D Printed Animatronic Robot Head](https://learn.adafruit.com/3d-printed-animatronic-robot-head.md)
- [Arduino Lesson 14. Servo Motors](https://learn.adafruit.com/adafruit-arduino-lesson-14-servo-motors.md)
- [Arduino Lesson 15. DC Motor Reversing](https://learn.adafruit.com/adafruit-arduino-lesson-15-dc-motor-reversing.md)
- [Programming Arduino with Android and Windows Tablets](https://learn.adafruit.com/programming-arduino-with-android-and-windows-tablets.md)
- [LSM303 Accelerometer + Compass Breakout](https://learn.adafruit.com/lsm303-accelerometer-slash-compass-breakout.md)
- [Adafruit VS1053 MP3/AAC/Ogg/MIDI/WAV Codec Breakout Tutorial](https://learn.adafruit.com/adafruit-vs1053-mp3-aac-ogg-midi-wav-play-and-record-codec-tutorial.md)
- [Naughty or Nice Machine](https://learn.adafruit.com/naughty-or-nice-machine.md)
- [Adafruit Ultimate GPS Logger Shield](https://learn.adafruit.com/adafruit-ultimate-gps-logger-shield.md)
- [Arduino "Hunt The Wumpus"](https://learn.adafruit.com/arduino-hunt-the-wumpus.md)
- [Track Your Treats: Halloween Candy GPS Tracker](https://learn.adafruit.com/track-your-treats-halloween-candy-gps-tracker.md)
- [WiFi Weather Station](https://learn.adafruit.com/wifi-weather-station-arduino-cc3000.md)
- [Bluetooth Controlled Motorized Camera Slider](https://learn.adafruit.com/bluetooth-motorized-camera-slider.md)
- [TMP36 Temperature Sensor](https://learn.adafruit.com/tmp36-temperature-sensor.md)
- [Babel Fish](https://learn.adafruit.com/babel-fish.md)
---
# Source: https://learn.adafruit.com/adafruit-ultimate-gps/arduino-wiring.md
# Adafruit Ultimate GPS
## Breakout Arduino Wiring
Once you've gotten the GPS module tested with direct wiring, we can go forward and wire it up to a microcontroller. We'll be using an Arduino but you can adapt our code to any other microcontroller that can receive TTL serial at 9600 baud.
## Software Serial Boards
For an Arduino compatible, or any board that does not have an extra `HardwareSerial` port, we'll use `SoftwareSerial`. The examples in the **Adafruit\_GPS Arduino** library use pin 8 for Serial RX and pin 7 for Serial TX _on the Arduino-compatible board_. The constructor call in the example sketches is `SoftwareSerial(8, 7);`.
Connect **VIN** to +5V (or whatever the logic level is of your board), **GND** to Ground, **RX** to digital 7 and **TX** to digital 8. Note that the Arduino-compatible **TX** is connected to the GPS **RX** , and the Arduino-compatible **RX** is connected to the GPS **TX**.

## Hardware Serial Boards
If you're using a board with hardware serial support, like this Feather M0, wire up **VIN** to 3.3V (since that is the logic level of the Feather M0), **GND** to ground, and **GPS RX** to Feather TX and **GPS TX** to Feather RX.

Next up, download the Adafruit GPS library. This library does a lot of the 'heavy lifting' required for receiving data from GPS modules, such as reading the streaming data in a background interrupt and auto-magically parsing it. [You can check the code by visiting the GitHub repository](https://github.com/adafruit/Adafruit-GPS-Library "Link: https://github.com/adafruit/Adafruit-GPS-Library")
To install, open the Arduino library manager

Search for **Adafruit GPS** and click **Install**

Library installation is a frequent stumbling block…if you need assistance, our [All About Arduino Libraries](../../../../adafruit-all-about-arduino-libraries-install-use) guide spells it out in detail!
## Arduino UNO or other SoftwareSerial boards
If your microcontrollers _doesn't_ have a Hardware Serial interface available - say you're using an Arduino UNO or compatible, load up the `SoftwareSerial_echotest` example:

## Leonardo/M0/M4/ESP32 and other Hardware Serial Boards
If you have a board with a spare Hardware Serial interface (which many boards other than the original Arduino UNO compatibles have) - we recommend using that since hardware serial will always give less errors and better performance than software serial!
We assume you'll be using `Serial1` - check your board documentation to figure out which pins that is!

## Upload and Check Output
Whichever version you decide to use, upload the sketch to the microcontroller. Then open up the serial monitor. This sketch simply reads data from the software serial or hardware serial port and outputs that to USB.
Open up the Arduino IDE Serial Console and make sure to set the Serial baud rate to **115200**
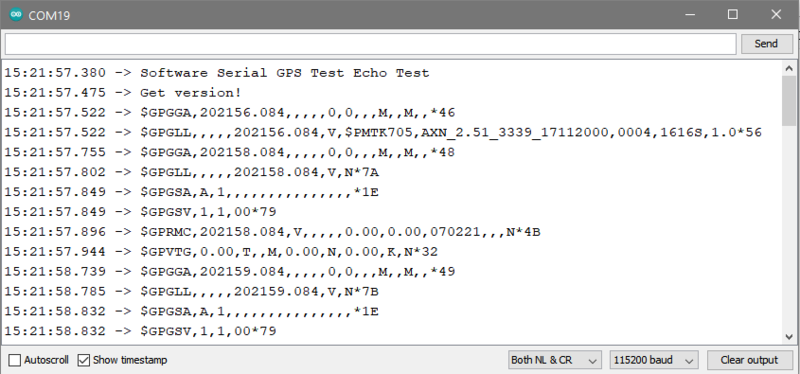
You can configure the GPS output you see by commenting/uncommenting lines in the **setup()** procedure. For example, we can ask the GPS to send different sentences, and change how often it sends data. 10 Hz (10 times a second) is the max speed, and is a lot of data. You may not be able to output "all data" at that speed because the 9600 baud rate is not fast enough.
```
// You can adjust which sentences to have the module emit, below
// uncomment this line to turn on RMC (recommended minimum) and GGA (fix data) including altitude
GPS.sendCommand(PMTK_SET_NMEA_OUTPUT_RMCGGA);
// uncomment this line to turn on only the "minimum recommended" data for high update rates!
//GPS.sendCommand(PMTK_SET_NMEA_OUTPUT_RMCONLY);
// uncomment this line to turn on all the available data - for 9600 baud you'll want 1 Hz rate
//GPS.sendCommand(PMTK_SET_NMEA_OUTPUT_ALLDATA);
// Set the update rate
// 1 Hz update rate
//GPS.sendCommand(PMTK_SET_NMEA_UPDATE_1HZ);
// 5 Hz update rate- for 9600 baud you'll have to set the output to RMC or RMCGGA only (see above)
GPS.sendCommand(PMTK_SET_NMEA_UPDATE_5HZ);
// 10 Hz update rate - for 9600 baud you'll have to set the output to RMC only (see above)
//GPS.sendCommand(PMTK_SET_NMEA_UPDATE_10HZ);
```
In general, we find that most projects only need the RMC and GGA NMEA's so you don't need ALLDATA unless you have some need to know satellite locations.- [Previous Page](https://learn.adafruit.com/adafruit-ultimate-gps/direct-computer-wiring.md)
- [Next Page](https://learn.adafruit.com/adafruit-ultimate-gps/parsed-data-output.md)
## Featured Products
### Adafruit Ultimate GPS Breakout - 66 channel w/10 Hz updates
[Adafruit Ultimate GPS Breakout - 66 channel w/10 Hz updates](https://www.adafruit.com/product/746)
We carry a few different GPS modules here in the Adafruit shop, but none that satisfied our every desire - that's why we designed this little GPS breakout board. We believe this is the **Ultimate** GPS module, so we named it that. It's got everything you want and...
In Stock
[Buy Now](https://www.adafruit.com/product/746)
[Related Guides to the Product](https://learn.adafruit.com/products/746/guides)
### Adafruit Ultimate GPS GNSS with USB - 99 channel w/10 Hz updates
[Adafruit Ultimate GPS GNSS with USB - 99 channel w/10 Hz updates](https://www.adafruit.com/product/4279)
The Ultimate GPS module you know and love has a _glow-up_ to let it be easily used with any computer, not just microcontrollers! With the built-in USB-to-Serial converter, you can now plug-n-play the Ultimate GPS into your computer, laptop, embedded Linux computer, and more. Power and...
In Stock
[Buy Now](https://www.adafruit.com/product/4279)
[Related Guides to the Product](https://learn.adafruit.com/products/4279/guides)
### Adafruit METRO 328 Fully Assembled - Arduino IDE compatible
[Adafruit METRO 328 Fully Assembled - Arduino IDE compatible](https://www.adafruit.com/product/50)
We sure love the ATmega328 here at Adafruit, and we use them _a lot_ for our own projects. The processor has plenty of GPIO, Analog inputs, hardware UART SPI and I2C, timers and PWM galore - just enough for most simple projects. When we need to go small, we use a
Out of Stock
[Buy Now](https://www.adafruit.com/product/50)
[Related Guides to the Product](https://learn.adafruit.com/products/50/guides)
### GPS Antenna - External Active Antenna - 3-5V 28dB 5 Meter SMA
[GPS Antenna - External Active Antenna - 3-5V 28dB 5 Meter SMA](https://www.adafruit.com/product/960)
Give your Ultimate GPS V3 a boost with this external active antenna. This GPS antenna draws about 10mA and will give you an additional 28 dB of gain. It's got a 5 meter long cable so it will easily reach wherever you need it to. The antenna is magnetic so it will stick to the top of a car...
In Stock
[Buy Now](https://www.adafruit.com/product/960)
[Related Guides to the Product](https://learn.adafruit.com/products/960/guides)
### SMA to uFL/u.FL/IPX/IPEX RF Adapter Cable
[SMA to uFL/u.FL/IPX/IPEX RF Adapter Cable](https://www.adafruit.com/product/851)
This RF adapter cable is super handy for anyone doing RF work. Often times, small electronics save space by having a pick-and-placeable u.FL connector (also called uFL, IPEX, IPAX, IPX, MHF, and AM). But most antennas have SMA or RP-SMA connectors on them. This little cable will bridge the...
In Stock
[Buy Now](https://www.adafruit.com/product/851)
[Related Guides to the Product](https://learn.adafruit.com/products/851/guides)
### CR1220 12mm Diameter - 3V Lithium Coin Cell Battery
[CR1220 12mm Diameter - 3V Lithium Coin Cell Battery](https://www.adafruit.com/product/380)
These are the highest quality & capacity batteries, the same as shipped with the iCufflinks, iNecklace, Datalogging and GPS Shields, GPS HAT, etc. One battery per order (you'll want one battery per cufflink or pendant.)
Brand may vary but all battery brands are verified...
Out of Stock
[Buy Now](https://www.adafruit.com/product/380)
[Related Guides to the Product](https://learn.adafruit.com/products/380/guides)
### Breadboarding wire bundle
[Breadboarding wire bundle](https://www.adafruit.com/product/153)
75 flexible stranded core wires with stiff ends molded on in red, orange, yellow, green, blue, brown, black and white. These are a major improvement over the "box of bent wires" that are sometimes sold with breadboards, and faster than stripping your own solid core wires. Makes...
In Stock
[Buy Now](https://www.adafruit.com/product/153)
[Related Guides to the Product](https://learn.adafruit.com/products/153/guides)
### Half Sized Premium Breadboard - 400 Tie Points
[Half Sized Premium Breadboard - 400 Tie Points](https://www.adafruit.com/product/64)
This is a cute, half-size breadboard with 400 tie points, good for small projects. It's 3.25" x 2.2" / 8.3cm x 5.5cm with a standard double-strip in the middle and two power rails on both sides. You can pull the power rails off easily to make the breadboard as...
In Stock
[Buy Now](https://www.adafruit.com/product/64)
[Related Guides to the Product](https://learn.adafruit.com/products/64/guides)
## Related Guides
- [Reverse Geocache Box](https://learn.adafruit.com/reverse-geocache-engagement-box.md)
- [Ladyada's Learn Arduino - Lesson #2](https://learn.adafruit.com/ladyadas-learn-arduino-lesson-number-2.md)
- [Wave Shield Talking Clock](https://learn.adafruit.com/wave-shield-talking-clock.md)
- [Wireless Game Show Poppers for the Classroom!](https://learn.adafruit.com/wireless-game-show-poppers.md)
- [Wireless Gardening with Arduino + CC3000 WiFi Modules](https://learn.adafruit.com/wireless-gardening-arduino-cc3000-wifi-modules.md)
- [CircuitPython Essentials](https://learn.adafruit.com/circuitpython-essentials.md)
- [CircuitPython Libraries on Linux and ODROID C2](https://learn.adafruit.com/circuitpython-libaries-linux-odroid-c2.md)
- [2.2" TFT Display](https://learn.adafruit.com/2-2-tft-display.md)
- [RGB LED Matrix Basics](https://learn.adafruit.com/32x16-32x32-rgb-led-matrix.md)
- [Halloween Pumpkin](https://learn.adafruit.com/halloween-pumpkin.md)
- [Remote controlled door lock using a fingerprint sensor & Adafruit IO](https://learn.adafruit.com/remote-controlled-door-lock-using-a-fingerprint-sensor-and-adafruit-io.md)
- [Automatic Monitor Color Temperature Adjustment](https://learn.adafruit.com/automatic-monitor-color-temperature-adjustment.md)
- [Animating Multiple LED Backpacks](https://learn.adafruit.com/animating-multiple-led-backpacks.md)
- [Skill Badge Requirements: Microcontrollers](https://learn.adafruit.com/skill-badge-requirements-microcontrollers.md)
- [RePaper eInk Development Board](https://learn.adafruit.com/repaper-eink-development-board.md)
---
# Source: https://learn.adafruit.com/adafruit-triple-axis-gyro-breakout/arduino.md
# Adafruit Triple Axis Gyro Breakout
## Arduino
The Adafruit L3GD20 Library for the Arduino implements a convenient device class to handle the the low-level device communication with the Gyro module. The programming interface is described below:
# Install Arduino Libraries
Before you can use the L3GD20, you'l need to install the required libraries using the Arduino Library Manager, which you can open via the menu entry shown below:

You will need to install the **Adafruit Unified Sensor** library ...

... as well as **Adafruit L3GD20 U** :

# **Construction:**
To use the L3GD20 in your sketch, you must first call a constructor to create a device object. There are two forms of the constructor:
- **Adafruit\_L3GD20(void);**
- **Adafruit\_L3GD20(int8\_t cs, int8\_t mosi, int8\_t miso, int8\_t clk); **
The first version takes no parameters and is used for I2C communication. The second version is for SPI communication and requires that you specify the pins to be used.
**I2C Example:** (use with [I2C wiring](http://learn.adafruit.com/adafruit-triple-axis-gyro-breakout/assembly-and-wiring)) ```
// No need to specify pins for I2C
Adafruit_L3GD20 gyro();
```
**SPI Example:** (use with [SPI wiring](http://learn.adafruit.com/adafruit-triple-axis-gyro-breakout/assembly-and-wiring "Link: http://learn.adafruit.com/adafruit-triple-axis-gyro-breakout/assembly-and-wiring")) ```
// Define the pins for SPI
#define GYRO_CS 4 // labeled CS
#define GYRO_DO 5 // labeled SA0
#define GYRO_DI 6 // labeled SDA
#define GYRO_CLK 7 // labeled SCL
Adafruit_L3GD20 gyro(GYRO_CS, GYRO_DO, GYRO_DI, GYRO_CLK);
```
# Initialization:
Before using the device object you constructed, you must initialize it with the sensitivity range you want to use:
- **bool begin(gyroRange\_t rng);**
where " **rng**" can be one of:
- **L3DS20\_RANGE\_250DPS ** - for 250 degrees-per-second range (default)
- **L3DS20\_RANGE\_500DPS ** - for 500 degrees-per-second range
- **L3DS20\_RANGE\_2000DPS**** **- for 2000 degrees-per-second range
**Example:**
```
void setup()
{
Serial.begin(9600);
// Try to initialise and warn if we couldn't detect the chip
if (!gyro.begin(gyro.L3DS20_RANGE_250DPS))
{
Serial.println("Oops ... unable to initialize the L3GD20. Check your wiring!");
while (1);
}
}
```
# Sensing Rotation:
To sense rotation, you must first call the "read()" function to take a reading:
- **void read(void);**
This function takes no parameters. After calling "read()". The raw x, y and z readings can be retrieved from the device object's "data" member.
- **data.x** - x-axis rotation rate in degrees-per-second
- **data.y** - y-axis rotation rate in degrees-per-second
- **data.z** - z-axis rotation rate in degrees-per-second
**Example:** ```
void loop()
{
gyro.read();
Serial.print("X: "); Serial.print((int)gyro.data.x); Serial.print(" ");
Serial.print("Y: "); Serial.print((int)gyro.data.y); Serial.print(" ");
Serial.print("Z: "); Serial.println((int)gyro.data.z); Serial.print(" ");
delay(100);
}
```
# Alternate Units:
The values reported by the read() function are in degrees-per-second (dps) For some calculations, it may be more convenient to work in radians. To convert dps to radians-per-second (rad/s), simply multiply by 0.017453293 as in the following code: ```
#define SENSORS_DPS_TO_RADS (0.017453293F) /**< Degrees/s to rad/s multiplier */
void loop()
{
gyro.read();
Serial.print("X: "); Serial.print((int)gyro.data.x * SENSORS_DPS_TO_RADS); Serial.print(" ");
Serial.print("Y: "); Serial.print((int)gyro.data.y * SENSORS_DPS_TO_RADS); Serial.print(" ");
Serial.print("Z: "); Serial.println((int)gyro.data.z * SENSORS_DPS_TO_RADS); Serial.print(" ");
delay(100);
}
```
# Calibration:
The L3GD20 is calibrated at the factory to close tolerances and will provide sufficient accuracy for most applications.
For critical applications where maximum accuracy is required, the gyro should be calibrated for zero-rate and sensitivity. For detailed information on how to calibrate a MEMS gyro, please refer to section 5.3 of this [technical article](http://www.adafruit.com/datasheets/STMEMS.pdf). Danger:
- [Previous Page](https://learn.adafruit.com/adafruit-triple-axis-gyro-breakout/assembly-and-wiring.md)
- [Next Page](https://learn.adafruit.com/adafruit-triple-axis-gyro-breakout/python-circuitpython.md)
## Featured Products
### L3GD20H Triple-Axis Gyro Breakout Board - L3GD20/L3G4200 Upgrade
[L3GD20H Triple-Axis Gyro Breakout Board - L3GD20/L3G4200 Upgrade](https://www.adafruit.com/product/1032)
A gyroscope is a type of sensor that can sense twisting and turning motions. Often paired with an accelerometer, you can use these to do 3D motion capture and inertial measurement (that is - you can tell how an object is moving!) As these sensors become more popular and easier to manufacture,...
In Stock
[Buy Now](https://www.adafruit.com/product/1032)
[Related Guides to the Product](https://learn.adafruit.com/products/1032/guides)
## Related Guides
- [Adafruit 9-DOF IMU Breakout](https://learn.adafruit.com/adafruit-9-dof-imu-breakout.md)
- [Adafruit 10-DOF IMU Breakout](https://learn.adafruit.com/adafruit-10-dof-imu-breakout-lsm303-l3gd20-bmp180.md)
- [Comparing Gyroscope Datasheets](https://learn.adafruit.com/comparing-gyroscope-datasheets.md)
- [I2C Addresses and Troublesome Chips](https://learn.adafruit.com/i2c-addresses.md)
- [AdaBox 015](https://learn.adafruit.com/adabox015.md)
- [LSM303 Accelerometer + Compass Breakout](https://learn.adafruit.com/lsm303-accelerometer-slash-compass-breakout.md)
- [micro:bit Lesson 1. Using the Built-in Sensors](https://learn.adafruit.com/micro-bit-lesson-1-using-the-built-in-sensors.md)
- [Mystery Box: Shutterglass Chamber](https://learn.adafruit.com/shutterglass-chamber.md)
- [CircuitPython Libraries on Linux and Raspberry Pi](https://learn.adafruit.com/circuitpython-on-raspberrypi-linux.md)
- [Using IFTTT with Adafruit IO to Make an IoT Door Detector](https://learn.adafruit.com/using-ifttt-with-adafruit-io.md)
- [itsaSNAP Apple Health Status Board](https://learn.adafruit.com/itssnap-apple-fitness-status-board.md)
- [IoT Filament Sensor](https://learn.adafruit.com/iot-filament-sensor.md)
- [Adafruit Analog Accelerometer Breakouts](https://learn.adafruit.com/adafruit-analog-accelerometer-breakouts.md)
- [MLX90393 Wide-Range 3-Axis Magnetometer](https://learn.adafruit.com/mlx90393-wide-range-3-axis-magnetometer.md)
- [Raspberry Pi I2C Clock Stretching Fixes](https://learn.adafruit.com/raspberry-pi-i2c-clock-stretching-fixes.md)
---
# Source: https://learn.adafruit.com/arduino-tips-tricks-and-techniques/arduinoisp.md
# Arduino Tips, Tricks, and Techniques
## ArduinoISP
## Introduction
A lot of people start learning about microcontrollers with an Arduino but then want to build their own projects without having to sacrifice their dev board. Or maybe they want to make their own Arduino variant, that is compatible with the IDE. Either way, a common problem is how to burn the bootloader onto the fresh AVR chip. Since AVRs come blank, they need to be set up to be Arduino IDE compatible but to do that you need an AVR programmer (like the USBtinyISP).
[The good news is that you can burn bootloader using your existing Arduino with only a little bit of work. There's even a minitutorial on the arduino.cc site](http://arduino.cc/en/Tutorial/ArduinoISP).
This tutorial is an extention of that tutorial. First we'll show how you can make a permanent bootloader-burner by soldering a [28-pin ZIF socket](https://www.adafruit.com/products/382) to a [proto shield](https://www.adafruit.com/products/51)and use the PWM output line of the Arduino to generate a clock. This will let you 'rescue' many chips that have been set to the wrong type of oscillator, or change ones that are set from external oscillator (most Arduino bootloaders) to internal (such as the lilypad).
## Parts
You will need…
- [An Arduino](http://www.adafruit.com/products/50)
- [A proto shield kit](https://www.adafruit.com/products/51)
- [28-pin ZIF (zero-insertion force) socket](https://www.adafruit.com/products/382 "Link: https://www.adafruit.com/products/382") (you can use a plain socket but ZIF is ideal)
- [Some wire](https://www.adafruit.com/products/289)
- [Blank ATmega328P](http://www.adafruit.com/partfinder/microcontroller?s%5B%5D=atmega328p)
If you bought the kit from Adafruit, you'll have an extra few items such as a Piezo beeper, LEDs, buttons, etc. that you can use for the [Standalone version of this project](http://learn.adafruit.com/standalone-avr-chip-programmer "Link: http://learn.adafruit.com/standalone-avr-chip-programmer"), just ignore them for now!
## Assemble
First up, place the ZIF socket on the proto shield like so:

Solder all 28 pins for a solid connection!
Solder the following wires to the ZIF socket
- Pin 1 to digital 10 - Blue **Don't forget to bend the wire over underneath to connect to the ZIF socket pin when soldering!!!**
- Pin 7 to 5V - Red
- Pin 8 to Ground - Black
- Pin 9 to digital 9 - Gray
- Pin 17 to digital 11 - Brown
- Pin 18 to digital 12 - Orange
- Pin 19 to digital 13 - Yellow
- Pin 20 to +5V - Red
- Pin 22 to Ground - Black

Follow the protoshield tutorial to solder in the Red LED into **LED1** position, Green LED into **LED2** position. Also solder in the two 1.0K resistors next to the LEDs. We'll use the LEDs as indicators. Then solder a wire from the LED2 breakout (white) to analog 0 and a wire from LED1 breakout (white) to digital 8.

Finally, you'll need to solder on the header to allow the shield to be placed on, break the 0.1" male header and place it into the Arduino sockets. Then place the shield above on top to solder it in place.
## Load the Code
Time to load the sketch! [Grab the code from our Github repository and paste it into a new sketch](https://github.com/adafruit/Adafruit_Learning_System_Guides/blob/master/ArduinoISP/ArduinoISP/ArduinoISP.ino). Then upload it to the Arduino.
Danger:
Plug the shield on top, lift the latch, pop in the chip and then lower the latch. Make sure the chip orientation is like so (so with the lever on the left side you can read the text):

With the USB cable still plugged in (and the same Serial port selected as before) Select **Tools→Burn Bootloader→w/Arduino as ISP**

On newer versions of the Arduino IDE, select **Arduino as ISP** from the **Tools→Programmer** menu, then select **Burn Bootloader** from the Tools menu.

The Green LED will be on during the programming, when its done you'll see this message and the LED will turn off.
Thats it! Don't forget, you can burn a few different **kinds** of bootloaders, such as Uno, Duemilanove, Lilypad so depending on your situation you may want to use one over the other.
## Bonus! Using with AVRdude
You can use ArduinoISP from the command line very easily, with AVRdude which is the standard program used to program AVRs by running:
```
avrdude -c arduino -p atmega328 -P COMPORT -b 19200 -U flash:w:filetoburn.hex
```
Instead of **atmega328** you can also program **atmega8** **atmega88** **atmega48** **atmega168,** etc.
- [Previous Page](https://learn.adafruit.com/arduino-tips-tricks-and-techniques/arduino-hacks.md)
## Featured Products
### Adafruit METRO 328 Fully Assembled - Arduino IDE compatible
[Adafruit METRO 328 Fully Assembled - Arduino IDE compatible](https://www.adafruit.com/product/50)
We sure love the ATmega328 here at Adafruit, and we use them _a lot_ for our own projects. The processor has plenty of GPIO, Analog inputs, hardware UART SPI and I2C, timers and PWM galore - just enough for most simple projects. When we need to go small, we use a
Out of Stock
[Buy Now](https://www.adafruit.com/product/50)
[Related Guides to the Product](https://learn.adafruit.com/products/50/guides)
### Arduino bootloader-programmed chip (Atmega328P)
[Arduino bootloader-programmed chip (Atmega328P)](https://www.adafruit.com/product/123)
This is a preprogrammed Atmega328P chip, useful if you want to make your own Arduino-compatible or repair a damaged chip on an exisiting Arduino UNO, Duemilanove, Diecimila, or NG!
This chip is programmed with 'ADAboot', my version of the bootloader that is...
Out of Stock
[Buy Now](https://www.adafruit.com/product/123)
[Related Guides to the Product](https://learn.adafruit.com/products/123/guides)
## Related Guides
- [NeoPixel Painter](https://learn.adafruit.com/neopixel-painter.md)
- [Adafruit Proto Shield for Arduino](https://learn.adafruit.com/adafruit-proto-shield-arduino.md)
- [Deciphering Strange Arduino Code](https://learn.adafruit.com/deciphering-strange-arduino-code.md)
- [Affordable HAL 9000 Replica](https://learn.adafruit.com/hal-9000-replica.md)
- [WiFi Candy Bowl Monitor](https://learn.adafruit.com/wifi-candy-bowl.md)
- [Arduino Lesson 1. Blink](https://learn.adafruit.com/adafruit-arduino-lesson-1-blink.md)
- [Using NeoPixels and Servos Together](https://learn.adafruit.com/neopixels-and-servos.md)
- [Adafruit 2.8" TFT Touch Shield v2 - Capacitive or Resistive](https://learn.adafruit.com/adafruit-2-8-tft-touch-shield-v2.md)
- [LSM303 Accelerometer + Compass Breakout](https://learn.adafruit.com/lsm303-accelerometer-slash-compass-breakout.md)
- [1,500 NeoPixel LED Curtain with Raspberry Pi and Fadecandy](https://learn.adafruit.com/1500-neopixel-led-curtain-with-raspberry-pi-fadecandy.md)
- [Arduino Lesson 8. Analog Inputs](https://learn.adafruit.com/adafruit-arduino-lesson-8-analog-inputs.md)
- [8BitBox](https://learn.adafruit.com/8bitbox.md)
- [Animating Multiple LED Backpacks](https://learn.adafruit.com/animating-multiple-led-backpacks.md)
- [WiFi Controlled LED Christmahanukwanzaa Tree](https://learn.adafruit.com/wifi-controlled-led-christmahanukwanzaa-tree.md)
- [Reverse Geocache Box](https://learn.adafruit.com/reverse-geocache-engagement-box.md)
---
# Source: https://learn.adafruit.com/usb-snes-gamepad/assemble-the-usb-snes-gamepad.md
# USB SNES Gamepad
## Assemble the Gamepad
OK we're basically ready to go. The plan is to solder a single Ground wire to the common ground for all the buttons, then solder a seperate wire to each button (the not-ground side). The ground connects to the Teensy ground, the button wires connect to all the solder pads down the side. Then we'll write the code that listens to the button presses and converts them.
Cut off a strip of ribbon cable, about 4" long. Use diagonal cutters or fingernails to carefully nip and 'rip' the individual wires apart about 1" and then strip the ends and tin them with solder. Do this for both sides.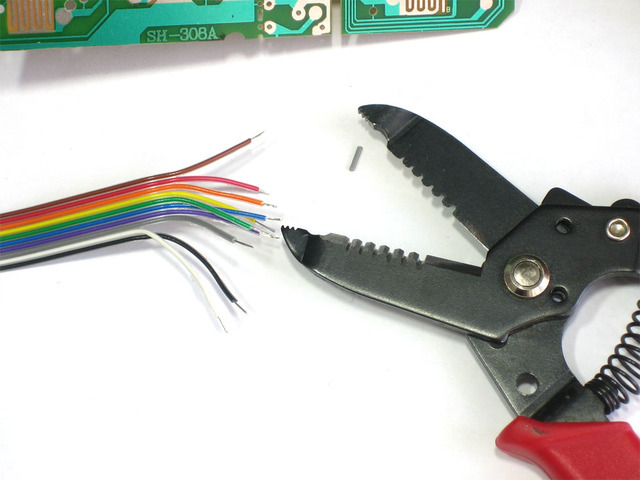
I made this cable about 1" too long initially, but its always easy to make the cable _shorter_!
To connect to ground, we'll expose a little copper in the top left corner, this way we don't have the wire running underneath the elastomer.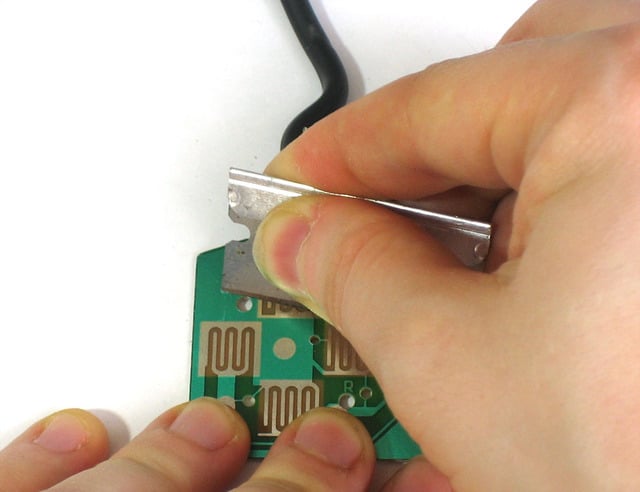

Solder the Black wire to the ground plane, we brought the wire through a hole.

OK lets solder to the first button. The key is to remember to NOT solder to the same common pad but to the _opposite_ pad! Solder the white wire to the 'up' button. There's almost always a hole you can feed the wire through!
Solder the gray wire to the Right pad, the purple wire to the Down pad and the blue wire to the Left pad.
From the back.
Then the orange wire goes to the L1 button, the yellow goes to Start and the green to Select.

I didnt end up using the Red or Brown wires so I tore those off the ribbon. Now cut another piece the same size but with only the white, gray, purple, blue and green wires.
Connect white to B, gray to A, purple to X, blue to Y and green to R1.


If you haven't yet, now is a good time to desolder the SNES connector cable. We wont have space for it so just pull each wire as you heat the solder joint (or just cut them short, either way).
OK! Now all the buttons are wired up, its time to attach them to the Teensy. Place the Teensy in a vise or carefully use a 'third hand' to hold it (grab by the USB connector).
First, solder the black wire to the ground pin.

Next start soldering in all the ribbon cable wires, one after the other, without skipping any holes.
After the first ribbon cable, go to the second piece, starting with the white wire. The last green wire goes next to the blue one on the 'short' side.

Now we are ready to upload code to the Teensy and test out our work!
- [Previous Page](https://learn.adafruit.com/usb-snes-gamepad/introducing-the-teensy-with-hid.md)
- [Next Page](https://learn.adafruit.com/usb-snes-gamepad/programming-the-teensy.md)
## Featured Products
### SNES Controller
[SNES Controller](https://www.adafruit.com/product/131)
A third-party SNES (Super Nintendo/Famicom) controller. Works great with Fuzeboxen as well!
No Longer Stocked
[Buy Now](https://www.adafruit.com/product/131)
[Related Guides to the Product](https://learn.adafruit.com/products/131/guides)
### ADXL335 - 5V ready triple-axis accelerometer (+-3g analog out)
[ADXL335 - 5V ready triple-axis accelerometer (+-3g analog out)](https://www.adafruit.com/product/163)
We've updated our favorite triple-axis accelerometer to now have an on-board 3.3V regulator - making it a perfect choice for interfacing with a 5V microcontroller such as the Arduino. This breakout comes with 3 analog outputs for X, Y and Z axis measurements on a 0.75"x0.75"...
In Stock
[Buy Now](https://www.adafruit.com/product/163)
[Related Guides to the Product](https://learn.adafruit.com/products/163/guides)
### USB cable - A/MiniB
[USB cable - A/MiniB](https://www.adafruit.com/product/260)
This here is your standard A-miniB USB cable, for USB 1.1 or 2.0. Perfect for connecting a PC to your Teensy v2, USB Lipo charger w/Mini B connector, among other things.
Approximately 3 feet / 1 meter long
Color may vary!
No Longer Stocked
[Buy Now](https://www.adafruit.com/product/260)
[Related Guides to the Product](https://learn.adafruit.com/products/260/guides)
### Teensy (ATmega32u4 USB dev board) 2.0
[Teensy (ATmega32u4 USB dev board) 2.0](https://www.adafruit.com/product/199)
Discontinued - **you can grab** [Adafruit ItsyBitsy 32u4 - 5V 16MHz](https://www.adafruit.com/product/3677) **instead!**
The Teensy 2.0 is a complete USB-based microcontoller development system, in a very small footprint! All programming is done via the USB port. No...
No Longer Stocked
[Buy Now](https://www.adafruit.com/product/199)
[Related Guides to the Product](https://learn.adafruit.com/products/199/guides)
### Premium Female/Male 'Extension' Jumper Wires - 20 x 6"
[Premium Female/Male 'Extension' Jumper Wires - 20 x 6"](https://www.adafruit.com/product/1954)
These Female/Male Extension jumper wires are handy for making wire harnesses or jumpering between headers on PCB's. These premium jumper wires are 6" (150mm) long and come in a 'strip' of 20 (2 pieces of each of ten rainbow colors). They have 0.1" male header...
In Stock
[Buy Now](https://www.adafruit.com/product/1954)
[Related Guides to the Product](https://learn.adafruit.com/products/1954/guides)
## Related Guides
- [Adafruit Analog Accelerometer Breakouts](https://learn.adafruit.com/adafruit-analog-accelerometer-breakouts.md)
- [HID Reporter](https://learn.adafruit.com/hid-reporter.md)
- [Gravatars: What they are and how to add or change one](https://learn.adafruit.com/gravatars-what-they-are-and-how-to-add-or-change-one.md)
- [Two Player Game System for PyGamer and RFM69HCW Radio Wing](https://learn.adafruit.com/two-player-game-system-for-pygamer-and-rfm69hcw-radio-wing.md)
- [PyPortal 2FA TOTP Authentication Friend](https://learn.adafruit.com/pyportal-2fa-totp-authentication-friend.md)
- [Dragon Drop: a CircuitPython Game for MacroPad](https://learn.adafruit.com/dragon-drop-a-circuitpython-game-for-macropad.md)
- [NeoTrellis M4 Animated Dice Roller](https://learn.adafruit.com/neotrellis-dice.md)
- [Instagram Photo Frame](https://learn.adafruit.com/instagram-photo-frame.md)
- [BlueLive: Livestream Studio switcher controller](https://learn.adafruit.com/bluelive.md)
- [DIY Turbo Button Controller - HID Remapper](https://learn.adafruit.com/diy-turbo-button-controller-hid-remapper.md)
- [ESP32 PlayStation Controller](https://learn.adafruit.com/esp32-playstation-controller.md)
- [Fruit Jam Chyron](https://learn.adafruit.com/fruit-jam-chyron.md)
- [Custom Color Palettes for MakeCode Arcade Games](https://learn.adafruit.com/custom-color-palettes-for-makecode-arcade-games.md)
- [DIY Welded Bike Stand](https://learn.adafruit.com/diy-welded-bike-stand.md)
- [CircuitPython Stage game library](https://learn.adafruit.com/circuitpython-stage-game-library.md)
---
# Source: https://learn.adafruit.com/papercraft-resistor-helper/assemble.md
# Resistor Helper
## Assembly

Carefully cut out the viewing windows in the holder.
Cut small slits over the red dots on the holder (both sides = 8 cuts). This is where the paper fasteners will anchor each wheel.

Shorten the tabs on four paper fasteners with a pair of clippers. This is optional but we think it looks nicer!


Use a ruler to gently score (but not cut!) the fold line on the holder.
The holder folds easily and neatly after scoring.


Pierce a paper fastener through a tab on one side of the holder and through a wheel.

You can assemble the Resistor Helper with either side as the “front,” but we think you’ll use the 4-band side more often.
Pierce through the opposite side of the holder and flare out the tabs on the fastener to secure. Repeat with the other three wheels.


Once you’ve verified you assembled the wheels in the right order, carefully glue together the corners/edges of the holder.

That’s it! Use and enjoy!
- [Previous Page](https://learn.adafruit.com/papercraft-resistor-helper/cut.md)
## Related Guides
- [Heat Set Insert Rig](https://learn.adafruit.com/heat-set-rig.md)
- [Digital Circuits 2: Some Tools](https://learn.adafruit.com/some-digital-tools.md)
- [Furby 2012 Teardown](https://learn.adafruit.com/furby-2012-teardown.md)
- [Programmable 12v Outdoor Cafe Lights](https://learn.adafruit.com/programmable-12v-outdoor-cafe-lights.md)
- [Icicle Crown with Pebble Pixels & WLED](https://learn.adafruit.com/icicle-crown-with-pebble-pixels-wled.md)
- [USB C CC Resistor Fixer Case](https://learn.adafruit.com/resistor-fixer-case.md)
- [iOS App Development Using Cordova](https://learn.adafruit.com/ios-app-development-using-cordova.md)
- [Understanding USB Type C: Cable Types, Pitfalls and More](https://learn.adafruit.com/understanding-usb-type-c-cable-types-pitfalls-and-more.md)
- [Mass AVR ISP Programmer](https://learn.adafruit.com/mass-avr-isp-programmer.md)
- [Introduction to iOS Development](https://learn.adafruit.com/introduction-to-ios-development.md)
- [Accessing and Using Adafruit PCB Design Files](https://learn.adafruit.com/accessing-and-using-adafruit-pcb-design-files.md)
- [Getting Started with Binho Nova](https://learn.adafruit.com/getting-started-with-binho-nova.md)
- [Adafruit UPDI Friend](https://learn.adafruit.com/adafruit-updi-friend.md)
- [Adafruit CP2104 and CP2102N Friend - USB to Serial Converter](https://learn.adafruit.com/adafruit-cp2102n-cp2104-friend-usb-to-serial-converter.md)
- [DIY Decorative Resin Keycaps](https://learn.adafruit.com/diy-decorative-resin-keycaps.md)
---
# Source: https://learn.adafruit.com/diy-wifi-raspberry-pi-touch-cam/assembling-enclosure.md
# DIY WiFi Raspberry Pi Touchscreen Camera
## Assembling Enclosure
## Mounting Pi Cam
Start by adding a piece of tape to the back of the camera's PCB, to prevent any shorts. Use a short ribbon cable and flip it over to the back of the Pi, covering the ethernet port.
Position the camera with the camera hole in the pitouch-cover.stl part. Align it up so the nubs snap into the left and right mounting holes of the pi cam. Press fit the cover into the **pitouch-top** part.
Position the **pitouch-top** part over the Raspberry Pi and angle it down so the SD card slot slips into the proper opening of the pitouch part.
**Note:** The camera in the photo is plugged into the incorrect port.
## Adding Lenses
Snap the **pitouch-camring** part into the camera hole of the **pitouch-top** part. Insert a 12mm split ring into the **pitouch-camring**. The photojojo lens use magnets for mount and connects to the split ring.


## Mounting the Raspberry Pi and Touch Screen
With the camera and pi mounted to the **pitouch-top** part, flip the the body and place the **pitouch-bottom** part over the touch screen. Press the **pitouch-bottom** part down snapping the parts together.


## Adding Side Bands and Tripod Mount
You can optionally add a tripod mount and grippy bumpers. The Tripod mount can be attached to the bottom of the camera body with 4 small screws. Align up the holes and add screws. Add a standard tripod nut to the bottom of the tripod for attaching to other tripod mounts. 
## Upload, Share and Make
Plug in power to the micro-USB port and photos to your hearts content! If you do make one, please be sure to snap a picture of your creation and click the "[I Made One](http://www.thingiverse.com/thing:244361/add_instance "Link: http://www.thingiverse.com/thing:244361/add\_instance")" button to our [thingiverse](http://www.thingiverse.com/thing:244361/ "Link: http://www.thingiverse.com/thing:244361/") design so we can feature it on our blog!

- [Previous Page](https://learn.adafruit.com/diy-wifi-raspberry-pi-touch-cam/3d-printing-the-enclosure.md)
## Featured Products
### Raspberry Pi DIY Camera Pack
[Raspberry Pi DIY Camera Pack](https://www.adafruit.com/product/3275)
If the holidays promise anything, it’s almost certainly a deluge of photographs. Instead of taking out your smartphones, why not build your own camera?
With one of Adafruit’s best selling screens and an official Raspberry Pi camera, you’ll be ready to set up your very...
Out of Stock
[Buy Now](https://www.adafruit.com/product/3275)
[Related Guides to the Product](https://learn.adafruit.com/products/3275/guides)
### PiTFT Plus Assembled 320x240 2.8" TFT + Resistive Touchscreen
[PiTFT Plus Assembled 320x240 2.8" TFT + Resistive Touchscreen](https://www.adafruit.com/product/2298)
Is this not the cutest little display for the Raspberry Pi? It features a 2.8" display with 320x240 16-bit color pixels and a resistive touch overlay. The plate uses the high speed SPI interface on the Pi and can use the mini display as a console, X window port, displaying images or...
Out of Stock
[Buy Now](https://www.adafruit.com/product/2298)
[Related Guides to the Product](https://learn.adafruit.com/products/2298/guides)
### PiTFT Plus 320x240 3.2" TFT + Resistive Touchscreen
[PiTFT Plus 320x240 3.2" TFT + Resistive Touchscreen](https://www.adafruit.com/product/2616)
Is this not the cutest little display for the Raspberry Pi? It features a 3.2" display with 320x240 16-bit color pixels and a resistive touch overlay. The plate uses the high speed SPI interface on the Pi and can use the mini display as a console, X window port, displaying images or...
Out of Stock
[Buy Now](https://www.adafruit.com/product/2616)
[Related Guides to the Product](https://learn.adafruit.com/products/2616/guides)
### Adafruit PiTFT 2.4" HAT Mini Kit - 320x240 TFT Touchscreen
[Adafruit PiTFT 2.4" HAT Mini Kit - 320x240 TFT Touchscreen](https://www.adafruit.com/product/2455)
Is this not the cutest little display for the Raspberry Pi? It features a 2.4" display with 320x240 16-bit color pixels and a resistive touch overlay. The HAT uses the high speed SPI interface on the Pi and can use the mini display as a console, X window port, displaying images or video...
Out of Stock
[Buy Now](https://www.adafruit.com/product/2455)
[Related Guides to the Product](https://learn.adafruit.com/products/2455/guides)
### Adafruit PiTFT - 320x240 2.8" TFT+Touchscreen for Raspberry Pi
[Adafruit PiTFT - 320x240 2.8" TFT+Touchscreen for Raspberry Pi](https://www.adafruit.com/product/1601)
Is this not the cutest little display for the Raspberry Pi? It features a 2.8" display with 320x240 16-bit color pixels and a resistive touch overlay. The plate uses the high speed SPI interface on the Pi and can use the mini display as a console, X window port, displaying images or video...
Out of Stock
[Buy Now](https://www.adafruit.com/product/1601)
[Related Guides to the Product](https://learn.adafruit.com/products/1601/guides)
### Raspberry Pi 3 - Model B - ARMv8 with 1G RAM
[Raspberry Pi 3 - Model B - ARMv8 with 1G RAM](https://www.adafruit.com/product/3055)
Did you really think the Raspberry Pi would stop getting better? At this point, we sound like a broken record, extolling on the new Pi’s myriad improvements like we’re surprised that the folks at the Raspberry Pi Foundation are continuously making their flagship board better. ...
In Stock
[Buy Now](https://www.adafruit.com/product/3055)
[Related Guides to the Product](https://learn.adafruit.com/products/3055/guides)
### Raspberry Pi 2 - Model B v1.2 - ARM Cortex-A53 with 1G RAM
[Raspberry Pi 2 - Model B v1.2 - ARM Cortex-A53 with 1G RAM](https://www.adafruit.com/product/2358)
Didn't think the Raspberry Pi could get any better? You're in for a big surprise! The Raspberry Pi 2 Model B is out and it's amazing! With an upgraded ARM Cortex-A53 quad-core processor, Dual Core VideoCore IV Multimedia coprocessor, and a full Gigabyte of RAM, this...
No Longer Stocked
[Buy Now](https://www.adafruit.com/product/2358)
[Related Guides to the Product](https://learn.adafruit.com/products/2358/guides)
### Raspberry Pi Model A+ 512MB RAM
[Raspberry Pi Model A+ 512MB RAM](https://www.adafruit.com/product/2266)
**Note:** As of August 10th, 2016 the Raspberry Pi A+ now includes 512 MB of RAM!
The Raspberry Pi Model A+ is the perfect board for the minimalist Pi fan. This low-cost Pi uses the same processor as the model B+, but does away with the Ethernet jack and three of the USB...
No Longer Stocked
[Buy Now](https://www.adafruit.com/product/2266)
[Related Guides to the Product](https://learn.adafruit.com/products/2266/guides)
## Related Guides
- [Kali Linux on the Raspberry Pi with the PiTFT](https://learn.adafruit.com/kali-linux-on-the-raspberry-pi-with-the-pitft.md)
- [PiPhone - A Raspberry Pi based Cellphone](https://learn.adafruit.com/piphone-a-raspberry-pi-based-cellphone.md)
- [Processing on the Raspberry Pi & PiTFT](https://learn.adafruit.com/processing-on-the-raspberry-pi-and-pitft.md)
- [PiGRRL 2](https://learn.adafruit.com/pigrrl-2.md)
- [RasPipe: A Raspberry Pi Pipeline Viewer, Part 2](https://learn.adafruit.com/raspipe-a-raspberry-pi-pipeline-viewer-part-2.md)
- [Monitor PiCam and temperature on a PiTFT via adafruit.io](https://learn.adafruit.com/monitor-picam-and-temperature-on-a-pitft-via-adafruit-dot-io.md)
- [AstroPrint 3D Printing](https://learn.adafruit.com/astroprint-3d-printing.md)
- [Touchscreen Pi Timelapse Controller](https://learn.adafruit.com/touchscreen-pi-timelapse-controller.md)
- [Using the Slamtec RPLIDAR on a Raspberry Pi](https://learn.adafruit.com/slamtec-rplidar-on-pi.md)
- [Adafruit AMG8833 8x8 Thermal Camera Sensor](https://learn.adafruit.com/adafruit-amg8833-8x8-thermal-camera-sensor.md)
- [Pi Hole Ad Detection Display with PiTFT](https://learn.adafruit.com/pi-hole-ad-pitft-tft-detection-display.md)
- [SnapPiCam Raspberry Pi Camera](https://learn.adafruit.com/snappicam-raspberry-pi-camera.md)
- [JOY of Arcada — USB Game Pad for Adafruit PyGamer and PyBadge](https://learn.adafruit.com/joy-of-arcada-usb-game-pad-for-adafruit-pygamer-pybadge.md)
- [Go Fishing with Rotary Encoders](https://learn.adafruit.com/gone-fishing-game.md)
- [Set up and Blink - MATLAB and Simulink with Raspberry Pi](https://learn.adafruit.com/how-to-use-matlab-and-simulink-with-raspberry-pi.md)
---
# Source: https://learn.adafruit.com/1-8-tft-display/assembling-the-shield.md
# 1.8" TFT Display Breakout and Shield
## Assembling the Shield

The shield comes with all surface mount parts pre-soldered. All that remains is to install the headers!
## Cut the Header Sections
Cut the breakaway header strip into sections to fit the holes on the edge of the shield. You will need 2 sections of 6-pins and 2 sections of 8 pins.
You can use wire-cutters as shown or pliers to snap them apart between pins.

## Insert the Headers into an Arduino
To align the header strips for soldering, insert them (long pins down) into the headers of an Arduino.
**Note that for R3 and later Arduinos, there will be an extra 2 unused pins on the end closest the USB and DC power jacks.** 

## Add the Shield
Place the shield over the header strips so that the short pins stick up through the holes.


## And Solder!
Solder each pin to assure good electrical contact.
For tips on soldering see the [Adafruit Guide to Excellent Soldering](http://learn.adafruit.com/adafruit-guide-excellent-soldering "Link: http://learn.adafruit.com/adafruit-guide-excellent-soldering").

- [Previous Page](https://learn.adafruit.com/1-8-tft-display/original-v1-shield.md)
- [Next Page](https://learn.adafruit.com/1-8-tft-display/reading-the-joystick.md)
## Featured Products
### Breadboarding wire bundle
[Breadboarding wire bundle](https://www.adafruit.com/product/153)
75 flexible stranded core wires with stiff ends molded on in red, orange, yellow, green, blue, brown, black and white. These are a major improvement over the "box of bent wires" that are sometimes sold with breadboards, and faster than stripping your own solid core wires. Makes...
In Stock
[Buy Now](https://www.adafruit.com/product/153)
[Related Guides to the Product](https://learn.adafruit.com/products/153/guides)
### Adafruit METRO 328 Fully Assembled - Arduino IDE compatible
[Adafruit METRO 328 Fully Assembled - Arduino IDE compatible](https://www.adafruit.com/product/50)
We sure love the ATmega328 here at Adafruit, and we use them _a lot_ for our own projects. The processor has plenty of GPIO, Analog inputs, hardware UART SPI and I2C, timers and PWM galore - just enough for most simple projects. When we need to go small, we use a
Out of Stock
[Buy Now](https://www.adafruit.com/product/50)
[Related Guides to the Product](https://learn.adafruit.com/products/50/guides)
### Half Sized Premium Breadboard - 400 Tie Points
[Half Sized Premium Breadboard - 400 Tie Points](https://www.adafruit.com/product/64)
This is a cute, half-size breadboard with 400 tie points, good for small projects. It's 3.25" x 2.2" / 8.3cm x 5.5cm with a standard double-strip in the middle and two power rails on both sides. You can pull the power rails off easily to make the breadboard as...
In Stock
[Buy Now](https://www.adafruit.com/product/64)
[Related Guides to the Product](https://learn.adafruit.com/products/64/guides)
### 1.8" Color TFT LCD display with MicroSD Card Breakout
[1.8" Color TFT LCD display with MicroSD Card Breakout](https://www.adafruit.com/product/358)
This lovely little display breakout is the best way to add a small, colorful and bright display to any project. Since the display uses 4-wire SPI to communicate and has its own pixel-addressable frame buffer, it can be used with every kind of microcontroller. Even a very small one with low...
Out of Stock
[Buy Now](https://www.adafruit.com/product/358)
[Related Guides to the Product](https://learn.adafruit.com/products/358/guides)
### Adafruit 1.8" Color TFT Shield w/microSD and Joystick
[Adafruit 1.8" Color TFT Shield w/microSD and Joystick](https://www.adafruit.com/product/802)
This lovely little shield is the best way to add a small, colorful and bright display to any project. We took our popular 1.8" TFT breakout board and remixed it into an Arduino shield complete with microSD card slot and a 5-way joystick navigation switch and three selection buttons! Since...
In Stock
[Buy Now](https://www.adafruit.com/product/802)
[Related Guides to the Product](https://learn.adafruit.com/products/802/guides)
### 1.8" SPI TFT display, 160x128 18-bit color - ST7735R driver
[1.8" SPI TFT display, 160x128 18-bit color - ST7735R driver](https://www.adafruit.com/product/618)
We just love this little 1.8" TFT display, with true TFT color (up to 18-bits per pixel!), fine 160x128 resolution, two white LED backlight that runs on 3.3V and a very easy SPI interface that requires only 4 or 5 digital pins to send pixels to the display.
**Please...**
Out of Stock
[Buy Now](https://www.adafruit.com/product/618)
[Related Guides to the Product](https://learn.adafruit.com/products/618/guides)
## Related Guides
- [Wave Shield](https://learn.adafruit.com/adafruit-wave-shield-audio-shield-for-arduino.md)
- [Adafruit 2.8" TFT Touch Shield v2 - Capacitive or Resistive](https://learn.adafruit.com/adafruit-2-8-tft-touch-shield-v2.md)
- [How to Build a Testing Jig](https://learn.adafruit.com/how-to-build-a-testing-fixture.md)
- [Create an Internet of Things Dashboard with Adafruit IO](https://learn.adafruit.com/create-an-internet-of-things-dashboard-with-adafruit-dot-io.md)
- [Let’s Put LEDs in Things!](https://learn.adafruit.com/lets-put-leds-in-things.md)
- [Tiny Arduino Music Visualizer](https://learn.adafruit.com/piccolo.md)
- [Circuit Playground Sound-Controlled Robot](https://learn.adafruit.com/circuit-playground-sound-controlled-robot.md)
- [Adafruit 1.27" and 1.5" Color OLED Breakout Board](https://learn.adafruit.com/adafruit-1-5-color-oled-breakout-board.md)
- [Arduino Lesson 15. DC Motor Reversing](https://learn.adafruit.com/adafruit-arduino-lesson-15-dc-motor-reversing.md)
- [TTL Serial Camera](https://learn.adafruit.com/ttl-serial-camera.md)
- [Analog Feedback Servos](https://learn.adafruit.com/analog-feedback-servos.md)
- [Geofencing with the FONA 808 & Adafruit IO](https://learn.adafruit.com/geofencing-with-the-fona-808-and-adafruit-io.md)
- [Arduino GPS Clock](https://learn.adafruit.com/arduino-clock.md)
- [Adafruit Data Logger Shield](https://learn.adafruit.com/adafruit-data-logger-shield.md)
- [Making Adabot: Part 2](https://learn.adafruit.com/making-adabot-part-2.md)
---
# Source: https://learn.adafruit.com/adafruit-microphone-amplifier-breakout/assembly-and-wiring.md
# Source: https://learn.adafruit.com/adafruit-triple-axis-gyro-breakout/assembly-and-wiring.md
# Source: https://learn.adafruit.com/adafruit-4-channel-adc-breakouts/assembly-and-wiring.md
# Adafruit 4-Channel ADC Breakouts
## Assembly and Wiring
# Assembly:
The board comes with all surface-mount parts pre-soldered. For breadboard use, the included header-strip should be soldered on:## Prepare the header strip
Cut the supplied header strip to length and insert it long-pins-down in your breadboard to hold it for soldering.
## Position the breakout board
Place the breakout board on the header pins.
## Solder!
Solder each pin for a good electrical connection.

# Wiring:
## Power
First connect VDD and GND. These boards will work with either a 3.3v or a 5v supply. The diagram below shows connection to the Arduino 5v pin.
Danger:

## I2C Connections
I2C requires just 2 pins to communicate. These can be shared with other I2C devices. For R3 and later Arduinos (including MEGA and DUE models), connect SDA-\>SDA and SCL-\>SCL.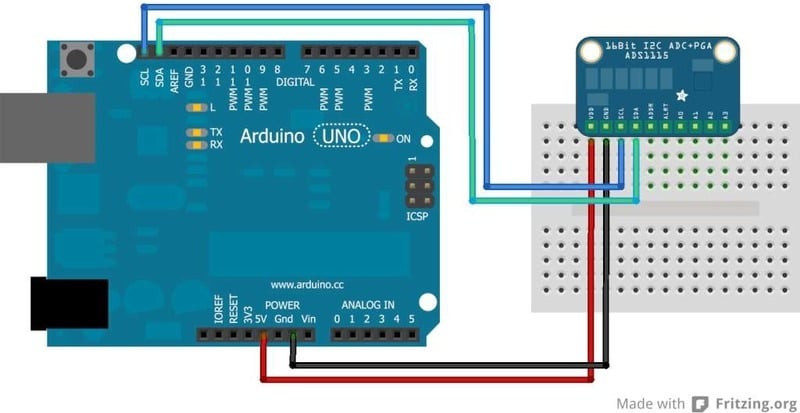
## I2C "Classic"
For older Arduino boards without dedicated SDA and SCL pins, connect as shown below. (For older Arduino Megas, SDA and SCL are on pins 20 and 21)
## I2C Addressing
The ADS11x5 chips have a base 7-bit I2C address of 0x48 (1001000) and a clever addressing scheme that allows four different addresses using just one address pin (named **ADR** for ADdRess). To program the address, connect the address pin as follows:

The following diagram shows one board addressed as 0x48:

## Multiple Boards
By assigning each board a different address, up to 4 boards can be connected as below:
- [Previous Page](https://learn.adafruit.com/adafruit-4-channel-adc-breakouts/pinouts.md)
- [Next Page](https://learn.adafruit.com/adafruit-4-channel-adc-breakouts/signal-connections.md)
## Featured Products
### ADS1115 16-Bit ADC - 4 Channel with Programmable Gain Amplifier
[ADS1115 16-Bit ADC - 4 Channel with Programmable Gain Amplifier](https://www.adafruit.com/product/1085)
For microcontrollers without an analog-to-digital converter or when you want a higher-precision ADC, the ADS1115 provides 16-bit precision at 860 samples/second over I2C. The chip can be configured as 4 single-ended input channels, or two differential channels. As a nice bonus, it even...
In Stock
[Buy Now](https://www.adafruit.com/product/1085)
[Related Guides to the Product](https://learn.adafruit.com/products/1085/guides)
### ADS1015 12-Bit ADC - 4 Channel with Programmable Gain Amplifier
[ADS1015 12-Bit ADC - 4 Channel with Programmable Gain Amplifier](https://www.adafruit.com/product/1083)
For microcontrollers without an analog-to-digital converter or when you want a higher-precision ADC, the ADS1015 provides 12-bit precision at 3300 samples/second over I2C. The chip can be configured as 4 single-ended input channels or two differential channels. As a nice bonus, it even...
In Stock
[Buy Now](https://www.adafruit.com/product/1083)
[Related Guides to the Product](https://learn.adafruit.com/products/1083/guides)
### STEMMA QT / Qwiic JST SH 4-Pin Cable - 50mm Long
[STEMMA QT / Qwiic JST SH 4-Pin Cable - 50mm Long](https://www.adafruit.com/product/4399)
This 4-wire cable is 50mm / 1.9" long and fitted with JST SH female 4-pin connectors on both ends. Compared with the chunkier JST PH these are 1mm pitch instead of 2mm, but still have a nice latching feel, while being easy to insert and remove.
In Stock
[Buy Now](https://www.adafruit.com/product/4399)
[Related Guides to the Product](https://learn.adafruit.com/products/4399/guides)
### Adafruit Assembled Pi Cobbler Breakout + Cable for Raspberry Pi
[Adafruit Assembled Pi Cobbler Breakout + Cable for Raspberry Pi](https://www.adafruit.com/product/914)
Now that you've finally got your hands on a [Raspberry Pi® Model B](http://www.raspberrypi.org/), you're probably itching to make some fun embedded computer projects with it. What you need is an add on prototyping Pi Cobbler from Adafruit, which can break out all those...
No Longer Stocked
[Buy Now](https://www.adafruit.com/product/914)
[Related Guides to the Product](https://learn.adafruit.com/products/914/guides)
### Adafruit METRO 328 Fully Assembled - Arduino IDE compatible
[Adafruit METRO 328 Fully Assembled - Arduino IDE compatible](https://www.adafruit.com/product/50)
We sure love the ATmega328 here at Adafruit, and we use them _a lot_ for our own projects. The processor has plenty of GPIO, Analog inputs, hardware UART SPI and I2C, timers and PWM galore - just enough for most simple projects. When we need to go small, we use a
Out of Stock
[Buy Now](https://www.adafruit.com/product/50)
[Related Guides to the Product](https://learn.adafruit.com/products/50/guides)
### Full Sized Premium Breadboard - 830 Tie Points
[Full Sized Premium Breadboard - 830 Tie Points](https://www.adafruit.com/product/239)
This is a 'full-size' premium quality breadboard, 830 tie points. Good for small and medium projects. It's 2.2" x 7" (5.5 cm x 17 cm) with a standard double-strip in the middle and two power rails on both sides. You can pull the power rails off easily to make the...
In Stock
[Buy Now](https://www.adafruit.com/product/239)
[Related Guides to the Product](https://learn.adafruit.com/products/239/guides)
## Related Guides
- [Animating Multiple LED Backpacks](https://learn.adafruit.com/animating-multiple-led-backpacks.md)
- [Arduino Lesson 16. Stepper Motors](https://learn.adafruit.com/adafruit-arduino-lesson-16-stepper-motors.md)
- [Bluetooth Temperature & Humidity Sensor](https://learn.adafruit.com/bluetooth-temperature-and-humidity-sensor.md)
- [Light Meter](https://learn.adafruit.com/light-meter.md)
- [Making Adabot: Part 2](https://learn.adafruit.com/making-adabot-part-2.md)
- [Silicone Robo-Tentacle](https://learn.adafruit.com/silicone-robo-tentacle.md)
- [Digital Circuits 7: MCUs... how do they work?](https://learn.adafruit.com/mcus-how-do-they-work.md)
- [Adafruit Motor Shield](https://learn.adafruit.com/adafruit-motor-shield.md)
- [Remote controlled door lock using a fingerprint sensor & Adafruit IO](https://learn.adafruit.com/remote-controlled-door-lock-using-a-fingerprint-sensor-and-adafruit-io.md)
- [Adafruit 16-channel PWM/Servo Shield](https://learn.adafruit.com/adafruit-16-channel-pwm-slash-servo-shield.md)
- [Wireless Gardening with Arduino + CC3000 WiFi Modules](https://learn.adafruit.com/wireless-gardening-arduino-cc3000-wifi-modules.md)
- [Sous-vide controller powered by Arduino - The SousViduino!](https://learn.adafruit.com/sous-vide-powered-by-arduino-the-sous-viduino.md)
- [Arduino GPS Clock](https://learn.adafruit.com/arduino-clock.md)
- [I2C Addresses and Troublesome Chips](https://learn.adafruit.com/i2c-addresses.md)
- [Adafruit INA219 Current Sensor Breakout](https://learn.adafruit.com/adafruit-ina219-current-sensor-breakout.md)
---
# Source: https://learn.adafruit.com/biometric-security-box/assembly.md
# Source: https://learn.adafruit.com/rgb-lcd-shield/assembly.md
# Source: https://learn.adafruit.com/internet-of-things-printer/assembly.md
# Source: https://learn.adafruit.com/pi-box/assembly.md
# Source: https://learn.adafruit.com/bone-box/assembly.md
# Source: https://learn.adafruit.com/arduino-prototyping-mounting-plate/assembly.md
# Source: https://learn.adafruit.com/adafruit-ina219-current-sensor-breakout/assembly.md
# Adafruit INA219 Current Sensor Breakout
## Assembly
# Breakout Assembly
The board comes with all surface-mount components pre-soldered. Additional parts are included to help integrate the INA219 breakout board into your project.

Wires can be soldered directly to the holes on the edge of the board. But for breadboard use, you will want to solder on the included 6-pin header.

The load can be connected via the header, or using the included 2-pin screw-terminal.

# FeatherWing Assembly
Solder the headers and the screw terminal to the board in the appropriate locations.
The pin labels are small, so here’s an annotated diagram.


## Addressing the Boards
If more than one INA219 breakout board is used, each board must be assigned a unique address. This is done with the address jumpers on the right edge of the board. The I2C base address for each board is 0x40. The binary address that you program with the address jumpers is added to the base I2C address.
To program the address offset, use a drop of solder to bridge the corresponding address jumper for each binary '1' in the address. 
Up to 4 boards may be connected. Addressing is as follows:
**Board 0** : Address = 0x40 Offset = binary 00000 (no jumpers required)
**Board 1** : Address = 0x41 Offset = binary 00001 (bridge A0 as in the photo above)
**Board 2** : Address = 0x44 Offset = binary 00100 (bridge A1)
**Board 3** : Address = 0x45 Offset = binary 00101 (bridge A0 & A1)
- [Previous Page](https://learn.adafruit.com/adafruit-ina219-current-sensor-breakout/pinouts.md)
- [Next Page](https://learn.adafruit.com/adafruit-ina219-current-sensor-breakout/wiring.md)
## Featured Products
### INA219 High Side DC Current Sensor Breakout - 26V ±3.2A Max
[INA219 High Side DC Current Sensor Breakout - 26V ±3.2A Max](https://www.adafruit.com/product/904)
This breakout board will solve all your power-monitoring problems. Instead of struggling with two multimeters, you can just use the handy INA219 chip on this breakout to both measure both the high side voltage and DC current draw over I2C with ±1% precision.
**Please...**
In Stock
[Buy Now](https://www.adafruit.com/product/904)
[Related Guides to the Product](https://learn.adafruit.com/products/904/guides)
### STEMMA QT / Qwiic JST SH 4-pin Cable - 100mm Long
[STEMMA QT / Qwiic JST SH 4-pin Cable - 100mm Long](https://www.adafruit.com/product/4210)
This 4-wire cable is a little over 100mm / 4" long and fitted with JST-SH female 4-pin connectors on both ends. Compared with the chunkier JST-PH these are 1mm pitch instead of 2mm, but still have a nice latching feel, while being easy to insert and remove.
In Stock
[Buy Now](https://www.adafruit.com/product/4210)
[Related Guides to the Product](https://learn.adafruit.com/products/4210/guides)
### STEMMA QT / Qwiic JST SH 4-pin to Premium Male Headers Cable
[STEMMA QT / Qwiic JST SH 4-pin to Premium Male Headers Cable](https://www.adafruit.com/product/4209)
This 4-wire cable is a little over 150mm / 6" long and fitted with JST-SH female 4-pin connectors on one end and premium Dupont male headers on the other. Compared with the chunkier JST-PH these are 1mm pitch instead of 2mm, but still have a nice latching feel, while being easy to insert...
Out of Stock
[Buy Now](https://www.adafruit.com/product/4209)
[Related Guides to the Product](https://learn.adafruit.com/products/4209/guides)
### Premium Male/Male Jumper Wires - 40 x 6" (150mm)
[Premium Male/Male Jumper Wires - 40 x 6" (150mm)](https://www.adafruit.com/product/758)
Handy for making wire harnesses or jumpering between headers on PCB's. These premium jumper wires are 6" (150mm) long and come in a 'strip' of 40 (4 pieces of each of ten rainbow colors). They have 0.1" male header contacts on either end and fit cleanly next to each other...
Out of Stock
[Buy Now](https://www.adafruit.com/product/758)
[Related Guides to the Product](https://learn.adafruit.com/products/758/guides)
### Full Sized Premium Breadboard - 830 Tie Points
[Full Sized Premium Breadboard - 830 Tie Points](https://www.adafruit.com/product/239)
This is a 'full-size' premium quality breadboard, 830 tie points. Good for small and medium projects. It's 2.2" x 7" (5.5 cm x 17 cm) with a standard double-strip in the middle and two power rails on both sides. You can pull the power rails off easily to make the...
In Stock
[Buy Now](https://www.adafruit.com/product/239)
[Related Guides to the Product](https://learn.adafruit.com/products/239/guides)
### Adafruit INA219 FeatherWing
[Adafruit INA219 FeatherWing](https://www.adafruit.com/product/3650)
The **INA219 FeatherWing** makes power-monitoring problems a thing of the past. Instead of struggling with two multimeters, you can just use the handy INA219 chip on this breakout to measure both the high side voltage and DC current draw over I2C with 1% precision....
In Stock
[Buy Now](https://www.adafruit.com/product/3650)
[Related Guides to the Product](https://learn.adafruit.com/products/3650/guides)
### Adafruit METRO 328 Fully Assembled - Arduino IDE compatible
[Adafruit METRO 328 Fully Assembled - Arduino IDE compatible](https://www.adafruit.com/product/50)
We sure love the ATmega328 here at Adafruit, and we use them _a lot_ for our own projects. The processor has plenty of GPIO, Analog inputs, hardware UART SPI and I2C, timers and PWM galore - just enough for most simple projects. When we need to go small, we use a
Out of Stock
[Buy Now](https://www.adafruit.com/product/50)
[Related Guides to the Product](https://learn.adafruit.com/products/50/guides)
## Related Guides
- [Remote controlled door lock using a fingerprint sensor & Adafruit IO](https://learn.adafruit.com/remote-controlled-door-lock-using-a-fingerprint-sensor-and-adafruit-io.md)
- [WiFi Controlled Mobile Robot](https://learn.adafruit.com/wifi-controlled-mobile-robot.md)
- [Arduino Lesson 14. Servo Motors](https://learn.adafruit.com/adafruit-arduino-lesson-14-servo-motors.md)
- [Geofencing with the FONA 808 & Adafruit IO](https://learn.adafruit.com/geofencing-with-the-fona-808-and-adafruit-io.md)
- [Let’s Put LEDs in Things!](https://learn.adafruit.com/lets-put-leds-in-things.md)
- [Adafruit CC3000 WiFi and Xively](https://learn.adafruit.com/adafruit-cc3000-wifi-and-xively.md)
- [Adafruit AirLift Shield - ESP32 WiFi Co-Processor](https://learn.adafruit.com/adafruit-airlift-shield-esp32-wifi-co-processor.md)
- [Wave Shield Talking Clock](https://learn.adafruit.com/wave-shield-talking-clock.md)
- [Ladyada's Learn Arduino - Lesson #0](https://learn.adafruit.com/ladyadas-learn-arduino-lesson-number-0.md)
- [2.2" TFT Display](https://learn.adafruit.com/2-2-tft-display.md)
- [LED Lightbox](https://learn.adafruit.com/led-lightbox.md)
- [Arduino Prototyping Mounting Plate](https://learn.adafruit.com/arduino-prototyping-mounting-plate.md)
- [How to Choose a Microcontroller](https://learn.adafruit.com/how-to-choose-a-microcontroller.md)
- [Arduino Lesson 16. Stepper Motors](https://learn.adafruit.com/adafruit-arduino-lesson-16-stepper-motors.md)
- [Arduino Lesson 8. Analog Inputs](https://learn.adafruit.com/adafruit-arduino-lesson-8-analog-inputs.md)
---
# Source: https://learn.adafruit.com/chumby-hacker-board/audio.md
# Chumby Hacker Board
## Audio
## Playing Local MP3s
You can play MP3's off of your USB key or if you've copied any to the **/mnt/storage** space with **btplay –start-daemon file.mp3**

MP3's will play in the background. To kill **btplay** run **killall btplay**
Audio will play through the headphone jack at max volume, just plug in your favorite headphones! (Warning: it may be really loud!)
## Playing Remote MP3s
You can also stream music with **btplay** , just stick a URL in there! Of course, you will have to have network capability up and running first

Just as before, just plug into the headphone jack to verify its working. (Warning: it may be really loud!)## Splitting out the A/V
The headphone jack is not actually just audio - its actually Audio and Video. That means that you if you just plug headphones you'll notice some buzzing - thats you listening to the video! Now if you're in a Cronenberg film this is probably OK but for most of us its very annoying! There are two solutions. One is to split out the 3 signals into RCA jacks (with a camcorder cable)

and then recombining with an RCA Y cable (such as [a Y female-RCA to male 3.5mm](http://www.sweetwater.com/store/detail/YRA154/) or [this](http://www.sweetwater.com/store/detail/CMR206/)
**Note** our A/V cables split out the signals as such - **Red** is Video, **White** and **Yellow** are stereo line-level audio which is not what you would expect!
**Note** apparently like every A/V cable is slightly different. If you get one, try different colors to figure out which ones have audio coming out of them and which have video.
## Using the Mixer
If you want to change the volume of the headphones, you'll need to run the audio mixer software **amixer**

You can get and change the HeadPhone volume ( **HP** ) by running **amixer sget HP** and **amixer sset HP**

To set the volume to 1/2 for example, do this **amixer sset HP 64**

## Speaker
The iMX.233 has a built-in mono speaker amplifier that can push up to 2W into a 4 ohm speaker! To use, connect the two speaker inputs into the **Spkr** 0.1" JST connection near the power jack. You can use either pin, they are not polarized as it is a mono output. Don't ground either of the speaker pins, they are "bridge tied" to improve output volume
The chumby is 'switched' by default - if you connect headphones into the jack, the speaker will turn off and vice versa.
If you want the speaker on even with the headphone plugged in, you can use **amixer cset**

For example, the Speaker Playback Switch is off, so we turn it on with **amixer cset numid=4 on** to reactivate
- [Previous Page](https://learn.adafruit.com/chumby-hacker-board/ethernet.md)
- [Next Page](https://learn.adafruit.com/chumby-hacker-board/sd-card.md)
## Featured Products
### USB 2.0 Powered Hub - 7 Ports with 5V 2A Power Supply
[USB 2.0 Powered Hub - 7 Ports with 5V 2A Power Supply](https://www.adafruit.com/product/961)
Add lots more USB capability to your Raspberry Pi or computer using this powered USB 2.0 hub. It adds a full **seven powered ports** , all at USB 2.0 speeds so you can use video cameras and other high speed devices (cheaper hubs are v1.1 and not as fast!)
The extra sauce...
No Longer Stocked
[Buy Now](https://www.adafruit.com/product/961)
[Related Guides to the Product](https://learn.adafruit.com/products/961/guides)
### Miniature WiFi (802.11b/g/n) Module: For Raspberry Pi and more
[Miniature WiFi (802.11b/g/n) Module: For Raspberry Pi and more](https://www.adafruit.com/product/814)
Make your Internet of Things device cable-free by adding WiFi. Take advantage of the Raspberry Pi and Beagle Bone's USB port to add a low cost, but high-reliability wireless link. We tried half a dozen modules to find one that works well with the Pi and Bone without the need of recompiling...
No Longer Stocked
[Buy Now](https://www.adafruit.com/product/814)
[Related Guides to the Product](https://learn.adafruit.com/products/814/guides)
### 5V 2A (2000mA) switching power supply - UL Listed
[5V 2A (2000mA) switching power supply - UL Listed](https://www.adafruit.com/product/276)
This is an FCC/CE certified and UL listed power supply. Need a lot of 5V power? This switching supply gives a clean regulated 5V output at up to 2000mA. 110 or 240 input, so it works in any country. The plugs are "US 2-prong" style so you may need a plug adapter, but you can pick one...
Out of Stock
[Buy Now](https://www.adafruit.com/product/276)
[Related Guides to the Product](https://learn.adafruit.com/products/276/guides)
### 2.1mm to 1.7mm DC jack adapter
[2.1mm to 1.7mm DC jack adapter](https://www.adafruit.com/product/411)
We're carrying this adapter primarily to allow Chumby Hacker Board users to adapt our nice [5V @ 2A power supply](http://www.adafruit.com/products/276) to their CHB. But you can use this adapter for anything else that has a 1.7mm DC jack, such as a PSP.
In Stock
[Buy Now](https://www.adafruit.com/product/411)
[Related Guides to the Product](https://learn.adafruit.com/products/411/guides)
### USB MicroSD Card Reader/Writer - microSD / microSDHC / microSDXC
[USB MicroSD Card Reader/Writer - microSD / microSDHC / microSDXC](https://www.adafruit.com/product/939)
This is the cutest little microSD card reader/writer - but don't be fooled by its adorableness! It's wicked fast and supports up to 64 GB SDXC cards! Simply slide the card into the edge and plug it into your computer. No drivers are required, it shows up as a standard 'Mass...
No Longer Stocked
[Buy Now](https://www.adafruit.com/product/939)
[Related Guides to the Product](https://learn.adafruit.com/products/939/guides)
### Ethernet Cable - 10 ft long
[Ethernet Cable - 10 ft long](https://www.adafruit.com/product/730)
We have so many Internet-connected goodies in the shop, we figured it's time to carry a cable so you can easily connect them up! This cable is 10 feet long, black and has all 8 wires installed. Perfect for use with the [BeagleBone](http://www.adafruit.com/products/513),
No Longer Stocked
[Buy Now](https://www.adafruit.com/product/730)
[Related Guides to the Product](https://learn.adafruit.com/products/730/guides)
### USB to TTL Serial Cable - Debug / Console Cable for Raspberry Pi
[USB to TTL Serial Cable - Debug / Console Cable for Raspberry Pi](https://www.adafruit.com/product/954)
The cable is easiest way ever to connect to your microcontroller/Raspberry Pi/WiFi router serial console port. Inside the big USB plug is a USB\<-\>Serial conversion chip and at the end of the 36" cable are four wire - red power, black ground, white RX into USB port, and green TX out...
In Stock
[Buy Now](https://www.adafruit.com/product/954)
[Related Guides to the Product](https://learn.adafruit.com/products/954/guides)
### FTDI Serial TTL-232 USB Cable
[FTDI Serial TTL-232 USB Cable](https://www.adafruit.com/product/70)
Just about all electronics use TTL serial for debugging, bootloading, programming, serial output, etc. But it's rare for a computer to have a serial port anymore. This is a USB to TTL serial cable, with a FTDI FT232RL usb/serial chip embedded in the head. It has a 6-pin socket at the end...
In Stock
[Buy Now](https://www.adafruit.com/product/70)
[Related Guides to the Product](https://learn.adafruit.com/products/70/guides)
## Related Guides
- [CircuitPython Libraries on MicroPython using the Raspberry Pi Pico](https://learn.adafruit.com/circuitpython-libraries-on-micropython-using-the-raspberry-pi-pico.md)
- [Hallowing Minotaur Maze](https://learn.adafruit.com/hallowing-minotaur-maze.md)
- [Raspberry Pi Azure IoT Hub Dashboard with CircuitPython](https://learn.adafruit.com/raspberry-pi-iot-dashboard-with-azure-and-circuitpython.md)
- [Adafruit 2.9" eInk Display Breakouts and FeatherWings](https://learn.adafruit.com/adafruit-2-9-eink-display-breakouts-and-featherwings.md)
- [Pi SSD Media Server](https://learn.adafruit.com/pi-ssd-media-server.md)
- [Creating Slideshows in CircuitPython](https://learn.adafruit.com/creating-slideshows-in-circuitpython.md)
- [Network Interface Failover using FONA](https://learn.adafruit.com/network-interface-failover-using-fona.md)
- [Matrix Keypad](https://learn.adafruit.com/matrix-keypad.md)
- [Native MP3 decoding on Arduino](https://learn.adafruit.com/native-mp3-decoding-on-arduino.md)
- [Raspberry Pi HQ Camera Case](https://learn.adafruit.com/raspberry-pi-hq-camera-case.md)
- [Articulated Pi Display V2 Mount](https://learn.adafruit.com/pi-wall-mount.md)
- [World's Smallest MAME Arcade Cabinet](https://learn.adafruit.com/worlds-smallest-mame-arcade-cabinet.md)
- [Raspberry Pi E-Ink Weather Station using Python](https://learn.adafruit.com/raspberry-pi-e-ink-weather-station-using-python.md)
- [Getting Started with Raspberry Pi Pico and CircuitPython](https://learn.adafruit.com/getting-started-with-raspberry-pi-pico-circuitpython.md)
- [Adafruit QT Py and NeoPixel LEDs](https://learn.adafruit.com/qt-py-and-neopixel-leds.md)
---
# Source: https://learn.adafruit.com/skill-badge-guide-3d-printing/axis-calibration.md
# Skill Badge Guide: 3D Printing
## Scale calibration

Scale calibration illustrates the process in which you compare the desired dimensions with the actual dimensions your printer produces. The easiest method for accomplishing this is to start by printing a calibration object, like a [Calibration Cube](http://www.thingiverse.com/thing:2064 "Link: http://www.thingiverse.com/thing:2064") or the [Calibration Vector](http://www.thingiverse.com/thing:109114 "Link: http://www.thingiverse.com/thing:109114"). Once complete, use a set of calipers to check the dimensions and record your results.
If the dimensions are not to your liking, there are a few quick tweaks you can implement to improve your results:
1. **Novice:** Simply scale your object before printing. If your calibration object measures 10.5mm, and it should be 10.0mm, scale the object down to 95.24%. (10.0mm x 100%)/10.5mm = 95.24%.
2. **Intermediate:** Edit the firmware to reflect a more accurate steps/mm calculating the required steps/mm vs the actual steps/mm.
3. **Expert:** Change both the feedrate and flowrate as they dictate how much plastic is distributed per mm. These settings can be used to fine tune your printer once you are close in calibration.
- [Previous Page](https://learn.adafruit.com/skill-badge-guide-3d-printing/bed-leveling.md)
- [Next Page](https://learn.adafruit.com/skill-badge-guide-3d-printing/running-the-machine.md)
## Featured Products
### 3D printing - Skill badge, iron-on patch
[3D printing - Skill badge, iron-on patch](https://www.adafruit.com/product/490)
You can 3D print! Adafruit offers a fun and exciting "badges" of achievement for electronics, science and engineering. We believe everyone should be able to be rewarded for learning a useful skill, a badge is just one of the many ways to show and share.
This is the "I...
No Longer Stocked
[Buy Now](https://www.adafruit.com/product/490)
[Related Guides to the Product](https://learn.adafruit.com/products/490/guides)
### 3D printing - Sticker!
[3D printing - Sticker!](https://www.adafruit.com/product/649)
You can 3D print! Adafruit offers a fun and exciting stickers to celebrate achievement for electronics, science and engineering. We believe everyone should be able to be rewarded for learning a useful skill, a sticker is just one of the many ways to show and share.
This is the...
No Longer Stocked
[Buy Now](https://www.adafruit.com/product/649)
[Related Guides to the Product](https://learn.adafruit.com/products/649/guides)
### Flashforge Creator PRO
[Flashforge Creator PRO](https://www.adafruit.com/product/2742)
The **Flashforge Creator Pro** is the latest addition to FlashForge’s Creator family, built upon an open source platform.
Based on proven design of the Creator X chassis, the Pro is now enclosed so you can print ABS better and more efficient than ever. The upgraded...
No Longer Stocked
[Buy Now](https://www.adafruit.com/product/2742)
[Related Guides to the Product](https://learn.adafruit.com/products/2742/guides)
### PrintrBot Simple Metal 3D Printer - Black - Assembled
[PrintrBot Simple Metal 3D Printer - Black - Assembled](https://www.adafruit.com/product/1760)
New from Printrbot, the Metal Simple is a brand new rock solid, all metal, fully-assembled Printrbot Simple! As opposed to the [Printrbot Simple Kit](http://www.adafruit.com/products/1735), all of the laser cut wood parts have been replaced by rock solid metal and assembled. In...
No Longer Stocked
[Buy Now](https://www.adafruit.com/product/1760)
[Related Guides to the Product](https://learn.adafruit.com/products/1760/guides)
### Ultimaker 2+ 3D Printer
[Ultimaker 2+ 3D Printer](https://www.adafruit.com/product/2673)
The **Ultimaker 2+** is one of our favorite 3D printers on the market. It's a well-built open-source compact machine with an excellent UX. Every inch of the Ultimaker 2+ is designed to create the most effortless and reliable 3D printing experience ever!
No Longer Stocked
[Buy Now](https://www.adafruit.com/product/2673)
[Related Guides to the Product](https://learn.adafruit.com/products/2673/guides)
### Micro 3D Printer - Black - Retail Edition
[Micro 3D Printer - Black - Retail Edition](https://www.adafruit.com/product/2933)
The magic of 3D printing is now more affordable and accessible than ever! Meet The **Micro 3D Printer** by [M3D](https://printm3d.com/), the first truly consumer 3D printer. Sporting a compact design, user-friendly software, and replaceable print beds and nozzles,...
No Longer Stocked
[Buy Now](https://www.adafruit.com/product/2933)
[Related Guides to the Product](https://learn.adafruit.com/products/2933/guides)
### Filament for 3D Printers in Various Colors and Types
[Filament for 3D Printers in Various Colors and Types](https://www.adafruit.com/product/2080)
Having a 3D printer without filament is sort of like having a regular printer without paper or ink. And while a lot of printers come with some filament there's a good chance you've been printing up a storm and need something new. That's why we've started carrying a...
Out of Stock
[Buy Now](https://www.adafruit.com/product/2080)
[Related Guides to the Product](https://learn.adafruit.com/products/2080/guides)
## Related Guides
- [Mario Magic Wand](https://learn.adafruit.com/mario-magic-wand.md)
- [Case for HUSB238 Breakout](https://learn.adafruit.com/case-for-husb238.md)
- [3D Printed RFID NFC Rings](https://learn.adafruit.com/3d-printed-rfid-nfc-rings.md)
- [AI 3D Printed Figure](https://learn.adafruit.com/ai-figure.md)
- [Ultrasonic Ruler](https://learn.adafruit.com/ultrasonic-ruler.md)
- [Magnet Bottle Holder](https://learn.adafruit.com/magnet-bottle-holder.md)
- [Printy Boost: Reimagining a Classic Adafruit Kit](https://learn.adafruit.com/printy-boost-reimagining-a-classic-adafruit-kit.md)
- [CYBERDECK Expansion Plate](https://learn.adafruit.com/cyberdeck-plate.md)
- [PyPortal Case](https://learn.adafruit.com/pyportal-case.md)
- [3D Printed LED Buckle](https://learn.adafruit.com/3d-printed-led-buckle.md)
- [CLUE Slim Case](https://learn.adafruit.com/clue-slim-case.md)
- [Adafruit Desktop 3D Printer Buyers Guide](https://learn.adafruit.com/adafruit-desktop-3d-printer-selection-guide.md)
- [3D Printed Animatronic Robot Head](https://learn.adafruit.com/3d-printed-animatronic-robot-head.md)
- [New Years Eve Ball Drop](https://learn.adafruit.com/new-years-eve-ball-drop.md)
- [3D Printed Battery Adapter for Camera-Mount LED Panel](https://learn.adafruit.com/3d-printed-battery-adapter-for-camera-mount-led-panel.md)
---
# Source: https://learn.adafruit.com/babel-fish.md
# Babel Fish
## Overview
https://www.youtube.com/watch?v=l6MIZbZ27ZM
Learn to make a speaking, card-reading toy! The Babel Fish helps you learn to say words and phrases on RFID flash cards by reading the card and playing an associated sound file loaded on an SD card inside. This project is very straightforward and could make a great jumping-off point for your own awesome RFID and Wave Shield project!

For this project you will need
- [Arduino Uno](http://www.adafruit.com/product/50)
- [Adafruit NFC/RFID Shield](http://www.adafruit.com/product/789)
- [Adafruit Wave Shield](http://www.adafruit.com/product/94) (and your own SD card & speaker) or [Wave shield starter kit](http://www.adafruit.com/product/175)
- [MiFare cards (one per flashcard)](http://www.adafruit.com/product/359)
- [Power adapter](http://www.adafruit.com/product/63)
- [Next Page](https://learn.adafruit.com/babel-fish/make-the-nfc-slash-rfid-shield.md)
## Featured Products
### Adafruit METRO 328 Fully Assembled - Arduino IDE compatible
[Adafruit METRO 328 Fully Assembled - Arduino IDE compatible](https://www.adafruit.com/product/50)
We sure love the ATmega328 here at Adafruit, and we use them _a lot_ for our own projects. The processor has plenty of GPIO, Analog inputs, hardware UART SPI and I2C, timers and PWM galore - just enough for most simple projects. When we need to go small, we use a
Out of Stock
[Buy Now](https://www.adafruit.com/product/50)
[Related Guides to the Product](https://learn.adafruit.com/products/50/guides)
### Adafruit PN532 NFC/RFID Controller Shield for Arduino + Extras
[Adafruit PN532 NFC/RFID Controller Shield for Arduino + Extras](https://www.adafruit.com/product/789)
We've taken our popular Adafruit PN532 breakout board and turned it into a shield - the perfect tool for any 13.56MHz RFID or NFC application. The Adafruit NFC shield uses the PN532 chip-set (the most popular NFC chip on the market) and is what is embedded in pretty much every phone or...
In Stock
[Buy Now](https://www.adafruit.com/product/789)
[Related Guides to the Product](https://learn.adafruit.com/products/789/guides)
### Adafruit Wave Shield for Arduino Kit
[Adafruit Wave Shield for Arduino Kit](https://www.adafruit.com/product/94)
Adding quality audio to an electronic project is surprisingly difficult. Here is a shield for Arduino 328's that solves this problem. It can play up to 22KHz 12bit uncompressed audio files of any length. It's low cost, available as an easy-to-make kit. It has an onboard DAC, filter and...
Out of Stock
[Buy Now](https://www.adafruit.com/product/94)
[Related Guides to the Product](https://learn.adafruit.com/products/94/guides)
### Music & sound add-on pack for Arduino
[Music & sound add-on pack for Arduino](https://www.adafruit.com/product/175)
Its a Wave shield party pack! Just add an Arduino to create your own iPod-killer, audio art, sound-effects box...
Comes with:
- Latest [Wave shield kit](http://www.adafruit.com/products/94), works with more SD cards and with older NG Arduinos! Unassembled
- 8 GB...
Out of Stock
[Buy Now](https://www.adafruit.com/product/175)
[Related Guides to the Product](https://learn.adafruit.com/products/175/guides)
### 9 VDC 1000mA regulated switching power adapter - UL listed
[9 VDC 1000mA regulated switching power adapter - UL listed](https://www.adafruit.com/product/63)
This is a really nice power supply. It's a switching DC supply so it's small and light and efficient. It is thin so it fits in power strips without blocking other outlets. The output is regulated so you'll get a steady 9V up to 1000mA (1 Amp) of current draw. 5.5mm/2.1mm barrel...
Out of Stock
[Buy Now](https://www.adafruit.com/product/63)
[Related Guides to the Product](https://learn.adafruit.com/products/63/guides)
### 13.56MHz RFID/NFC Card - Classic 1K
[13.56MHz RFID/NFC Card - Classic 1K](https://www.adafruit.com/product/359)
This is a blank 13.56MHz RFID/NFC card - often used for train/bus passes but also found in other systems where a proximity card is desired. The tag contains a small RFID chip and an antenna, and is passively powered by the reader/writer when placed a couple inches away.
These can be...
In Stock
[Buy Now](https://www.adafruit.com/product/359)
[Related Guides to the Product](https://learn.adafruit.com/products/359/guides)
## Related Guides
- [How to Find Hidden COM Ports](https://learn.adafruit.com/how-to-find-hidden-com-ports.md)
- [Collin's Lab: RFID](https://learn.adafruit.com/collins-lab-rfid.md)
- [Multi-tasking the Arduino - Part 2](https://learn.adafruit.com/multi-tasking-the-arduino-part-2.md)
- [Ladyada's Learn Arduino - Lesson #2](https://learn.adafruit.com/ladyadas-learn-arduino-lesson-number-2.md)
- [Affordable HAL 9000 Replica](https://learn.adafruit.com/hal-9000-replica.md)
- [Adafruit VS1053 MP3/AAC/Ogg/MIDI/WAV Codec Breakout Tutorial](https://learn.adafruit.com/adafruit-vs1053-mp3-aac-ogg-midi-wav-play-and-record-codec-tutorial.md)
- [Arduino Lesson 8. Analog Inputs](https://learn.adafruit.com/adafruit-arduino-lesson-8-analog-inputs.md)
- [Adafruit CC3000 WiFi and Xively](https://learn.adafruit.com/adafruit-cc3000-wifi-and-xively.md)
- [Automatic Monitor Color Temperature Adjustment](https://learn.adafruit.com/automatic-monitor-color-temperature-adjustment.md)
- [RePaper eInk Development Board](https://learn.adafruit.com/repaper-eink-development-board.md)
- [Using NeoPixels and Servos Together](https://learn.adafruit.com/neopixels-and-servos.md)
- [Mini Thermal Receipt Printers](https://learn.adafruit.com/mini-thermal-receipt-printer.md)
- [Line Following Zumo Robot Using Simulink](https://learn.adafruit.com/line-following-zumo-robot-programmed-with-simulink.md)
- [Adafruit 2.8" TFT Touch Shield v2 - Capacitive or Resistive](https://learn.adafruit.com/adafruit-2-8-tft-touch-shield-v2.md)
- [Adafruit INA219 Current Sensor Breakout](https://learn.adafruit.com/adafruit-ina219-current-sensor-breakout.md)
---
# Source: https://learn.adafruit.com/delorean-time-circuit/background.md
# DeLorean Time Circuit
## Background

Getting the big question right out of the way: no, we _won’t_ be selling these. Legally, we _can’t,_ for trademark reasons. But it’s generally okay for anyone to create replica props _for their own personal use_, so we hope this writeup will inspire some cool projects among our customers…

From the moment [these](http://www.adafruit.com/products/878) [LED](http://www.adafruit.com/products/880) [displays](http://www.adafruit.com/products/879) made an appearance on our weekly [Ask an Engineer](http://www.adafruit.com/chat/) show, comparisons were being made to the DeLorean time circuit from the _Back to the Future_ films. It was a moral imperative then to make a demo! If you’re handy with Arduino and some shop tools, you should be able to pull off something similar (better, even), or adapt the ideas to other projects. This was quickly built in fun, so please don’t expect the same level of polish as a finished product tutorial.
- [Next Page](https://learn.adafruit.com/delorean-time-circuit/design-liberties.md)
## Featured Products
### Adafruit 0.56" 4-Digit 7-Segment Display with I2C Backpack - Red
[Adafruit 0.56" 4-Digit 7-Segment Display with I2C Backpack - Red](https://www.adafruit.com/product/878)
What's better than a single LED? Lots of LEDs! A fun way to make a small display is to use an [8x8 matrix](https://www.adafruit.com/category/37_88) or a [4-digit 7-segment display](https://www.adafruit.com/category/37_103). Matrices like these are...
In Stock
[Buy Now](https://www.adafruit.com/product/878)
[Related Guides to the Product](https://learn.adafruit.com/products/878/guides)
### Adafruit 0.56" 4-Digit 7-Segment Display w/ I2C Backpack - Green
[Adafruit 0.56" 4-Digit 7-Segment Display w/ I2C Backpack - Green](https://www.adafruit.com/product/880)
What's better than a single LED? Lots of LEDs! A fun way to make a small display is to use an [8x8 matrix](https://www.adafruit.com/category/37_88) or a [4-digit 7-segment display](https://www.adafruit.com/category/37_103). Matrices like these are...
No Longer Stocked
[Buy Now](https://www.adafruit.com/product/880)
[Related Guides to the Product](https://learn.adafruit.com/products/880/guides)
### Adafruit 0.56" 4-Digit 7-Segment Display w/I2C Backpack - Yellow
[Adafruit 0.56" 4-Digit 7-Segment Display w/I2C Backpack - Yellow](https://www.adafruit.com/product/879)
What's better than a single LED? Lots of LEDs! A fun way to make a small display is to use an [8x8 matrix](https://www.adafruit.com/category/37_88) or a [4-digit 7-segment display](https://www.adafruit.com/category/37_103). Matrices like these are...
In Stock
[Buy Now](https://www.adafruit.com/product/879)
[Related Guides to the Product](https://learn.adafruit.com/products/879/guides)
### ChronoDot - Ultra-precise Real Time Clock
[ChronoDot - Ultra-precise Real Time Clock](https://www.adafruit.com/product/255)
The **ChronoDot V3** is the latest version of macetech’s popular ChronoDot line of products. Designed during the Great Chip Shortage, it uses the newly-released MAX31328 temperature-compensated real-time clock chip. However, it remains pin- and code-compatible with the older...
In Stock
[Buy Now](https://www.adafruit.com/product/255)
[Related Guides to the Product](https://learn.adafruit.com/products/255/guides)
### Teensy (ATmega32u4 USB dev board) 2.0
[Teensy (ATmega32u4 USB dev board) 2.0](https://www.adafruit.com/product/199)
Discontinued - **you can grab** [Adafruit ItsyBitsy 32u4 - 5V 16MHz](https://www.adafruit.com/product/3677) **instead!**
The Teensy 2.0 is a complete USB-based microcontoller development system, in a very small footprint! All programming is done via the USB port. No...
No Longer Stocked
[Buy Now](https://www.adafruit.com/product/199)
[Related Guides to the Product](https://learn.adafruit.com/products/199/guides)
### Diffused Green 5mm LED (25 pack)
[Diffused Green 5mm LED (25 pack)](https://www.adafruit.com/product/298)
Need some indicators? We are big fans of these diffused green LEDs, in fact we use them exclusively in our kits. They are fairly bright so they can be seen in daytime, and from any angle. They go easily into a breadboard and will add that extra zing to your project.
- Pack of 25...
In Stock
[Buy Now](https://www.adafruit.com/product/298)
[Related Guides to the Product](https://learn.adafruit.com/products/298/guides)
### Diffused Red 5mm LED (25 pack)
[Diffused Red 5mm LED (25 pack)](https://www.adafruit.com/product/299)
Need some indicators? We are big fans of these diffused red LEDs, in fact we use them exclusively in our kits. They are fairly bright so they can be seen in daytime, and from any angle. They go easily into a breadboard and will add that extra zing to your project.
- Pack of 25...
In Stock
[Buy Now](https://www.adafruit.com/product/299)
[Related Guides to the Product](https://learn.adafruit.com/products/299/guides)
## Related Guides
- [Adafruit LED Backpacks](https://learn.adafruit.com/adafruit-led-backpack.md)
- [Mindfulness Clock OF DOOM](https://learn.adafruit.com/mindfulness-clock-of-doom.md)
- [Fidget Spinner Tachometer](https://learn.adafruit.com/fidget-spinner-tachometer.md)
- [Arduino GPS Clock](https://learn.adafruit.com/arduino-clock.md)
- [Collin's Lab: Binary & Hex](https://learn.adafruit.com/collins-lab-binary-and-hex.md)
- [Personalized NextBus ESP8266 Transit Clock](https://learn.adafruit.com/personalized-esp8266-transit-clock.md)
- [Trinket React Counter](https://learn.adafruit.com/trinket-react-counter.md)
- [CircuitPython Hardware: LED Backpacks & FeatherWings](https://learn.adafruit.com/micropython-hardware-led-backpacks-and-featherwings.md)
- [Tap Tempo Trinket](https://learn.adafruit.com/tap-tempo-trinket.md)
- [Raspberry Pi Physical Dashboard](https://learn.adafruit.com/raspberry-pi-physical-dashboard.md)
- [LED Backpack Displays on Raspberry Pi and BeagleBone Black](https://learn.adafruit.com/led-backpack-displays-on-raspberry-pi-and-beaglebone-black.md)
- [Cartoon Character Clock](https://learn.adafruit.com/cartoon-character-clock.md)
- [Feather ESP32-S3 TFT CircuitPython Day 2024 Countdown Clock](https://learn.adafruit.com/feather-esp32-s3-tft-circuitpython-day-2024-countdown-clock.md)
- [Moto 360 Teardown](https://learn.adafruit.com/moto-360-smartwatch-teardown.md)
- [Articulating Retina Monitor](https://learn.adafruit.com/articulating-retina-monitor.md)
---
# Source: https://learn.adafruit.com/2-8-tft-touchscreen/backlight-wiring.md
# 2.8" TFT Touchscreen
## Backlight Wiring
Info:
There are three basic 'components' to the LCD.
The backlight is the first. It is made of 4 white LEDs in parallel with a transistor to control them. The LEDs can draw as much as 80mA all together, but you can PWM the backlight to dim it - the transistor makes it easy to connect any kind of microcontroller output. You can also connect the backlight pin directly to a 3 or 5V pin to turn it on all the way.
We'll begin by assuming you'll be using the 1x20 connector and an Arduino. Wiring may be different for your microcontroller.
Start by connecting the first pin **Ground** of the LCD to ground and the second pin **3-5V** to 5V (you can use 3-5V, this pin will power the TFT and backlight so be sure it can supply 100mA). Then skip 5 pins and connect pin #8 **Backlite** to 5V.

Power up your set, and you'll see the 4 white LED backlight. If this isn't working, something is amiss with your power supply. Go back and fix the wiring!
- [Previous Page](https://learn.adafruit.com/2-8-tft-touchscreen/mounting-options.md)
- [Next Page](https://learn.adafruit.com/2-8-tft-touchscreen/tft-wiring.md)
## Featured Products
### Adafruit METRO 328 Fully Assembled - Arduino IDE compatible
[Adafruit METRO 328 Fully Assembled - Arduino IDE compatible](https://www.adafruit.com/product/50)
We sure love the ATmega328 here at Adafruit, and we use them _a lot_ for our own projects. The processor has plenty of GPIO, Analog inputs, hardware UART SPI and I2C, timers and PWM galore - just enough for most simple projects. When we need to go small, we use a
Out of Stock
[Buy Now](https://www.adafruit.com/product/50)
[Related Guides to the Product](https://learn.adafruit.com/products/50/guides)
### Breadboarding wire bundle
[Breadboarding wire bundle](https://www.adafruit.com/product/153)
75 flexible stranded core wires with stiff ends molded on in red, orange, yellow, green, blue, brown, black and white. These are a major improvement over the "box of bent wires" that are sometimes sold with breadboards, and faster than stripping your own solid core wires. Makes...
In Stock
[Buy Now](https://www.adafruit.com/product/153)
[Related Guides to the Product](https://learn.adafruit.com/products/153/guides)
### Half Sized Premium Breadboard - 400 Tie Points
[Half Sized Premium Breadboard - 400 Tie Points](https://www.adafruit.com/product/64)
This is a cute, half-size breadboard with 400 tie points, good for small projects. It's 3.25" x 2.2" / 8.3cm x 5.5cm with a standard double-strip in the middle and two power rails on both sides. You can pull the power rails off easily to make the breadboard as...
In Stock
[Buy Now](https://www.adafruit.com/product/64)
[Related Guides to the Product](https://learn.adafruit.com/products/64/guides)
### MicroSD card breakout board+
[MicroSD card breakout board+](https://www.adafruit.com/product/254)
Not just a simple breakout board, this microSD adapter goes the extra mile - designed for ease of use.
- Onboard 5v-\>3v regulator provides 150mA for power-hungry cards
- 3v level shifting means you can use this with ease on either 3v or 5v systems
- Uses a proper level...
In Stock
[Buy Now](https://www.adafruit.com/product/254)
[Related Guides to the Product](https://learn.adafruit.com/products/254/guides)
## Related Guides
- [Adafruit Motor Shield](https://learn.adafruit.com/adafruit-motor-shield.md)
- [Photocells](https://learn.adafruit.com/photocells.md)
- [Circuit Playground: D is for Diode](https://learn.adafruit.com/circuit-playground-d-is-for-diode.md)
- [Micro SD Card Breakout Board Tutorial](https://learn.adafruit.com/adafruit-micro-sd-breakout-board-card-tutorial.md)
- [0.96" mini Color OLED](https://learn.adafruit.com/096-mini-color-oled.md)
- [Halloween Pumpkin](https://learn.adafruit.com/halloween-pumpkin.md)
- [Multi-tasking the Arduino - Part 1](https://learn.adafruit.com/multi-tasking-the-arduino-part-1.md)
- [Low Power WiFi Datalogger](https://learn.adafruit.com/low-power-wifi-datalogging.md)
- [Arduino Lesson 3. RGB LEDs](https://learn.adafruit.com/adafruit-arduino-lesson-3-rgb-leds.md)
- [Create an Internet of Things Dashboard with Adafruit IO](https://learn.adafruit.com/create-an-internet-of-things-dashboard-with-adafruit-dot-io.md)
- [Adafruit 4-Channel ADC Breakouts](https://learn.adafruit.com/adafruit-4-channel-adc-breakouts.md)
- [Trinket Audio Player](https://learn.adafruit.com/trinket-audio-player.md)
- [TTL Serial Camera](https://learn.adafruit.com/ttl-serial-camera.md)
- [Wave Shield Voice Changer](https://learn.adafruit.com/wave-shield-voice-changer.md)
- [All About Arduino Libraries](https://learn.adafruit.com/adafruit-all-about-arduino-libraries-install-use.md)
---
# Source: https://learn.adafruit.com/electroknit/backup.md
# Electro-knit
## Backup
This step will show how to download the custom patterns from the knitting machine memory to your computer. This is just for the 'custom' patterns, it wont download the 'built in' patterns that are shown in the manual.
**Plug in the cable** into the back of the machine.

There is a 'key' on the plug so you should be able to use it without accidentally putting it backwards. Still, check to make sure you have the right colored wires in the right places now, before plugging it in.

Now back to the computer. Start up the disk drive emulator in the command line by typing in **python PDDemulate-1.0.py img COMPORT** where **COMPORT** is your serial connection. For example on a mac the command might be **python PDDemulate-1.0.py img /dev/tty.usbserial-A7TKMHYD** this will make an 'image' of the knitting memory in a directory called **img**.


Now over on your knitting machine... When "ready" lamp is lit, clear display with **CE** key, then prepare to save pattern data to "disk" by typing **552** , then **STEP**.


Display will go blank and then "ready" and "pattern no" lamps will light up with the "track" number 1 in the display. Press **STEP**.

Machine will beep when finished, and the track data will now be in the **img** folder along with your emulator and other scripts. Ignore the .id files.

The emulator also makes a handy **file-01.dat** file to make it easy to preview the patterns using **dumppattern.py** (see the next step)
We'll need that **file-01.dat** file, so make a backup of it somewhere else for safekeeping! That file contains all your patterns.
- [Previous Page](https://learn.adafruit.com/electroknit/software.md)
- [Next Page](https://learn.adafruit.com/electroknit/view.md)
## Featured Products
### FTDI Serial TTL-232 USB Cable
[FTDI Serial TTL-232 USB Cable](https://www.adafruit.com/product/70)
Just about all electronics use TTL serial for debugging, bootloading, programming, serial output, etc. But it's rare for a computer to have a serial port anymore. This is a USB to TTL serial cable, with a FTDI FT232RL usb/serial chip embedded in the head. It has a 6-pin socket at the end...
In Stock
[Buy Now](https://www.adafruit.com/product/70)
[Related Guides to the Product](https://learn.adafruit.com/products/70/guides)
## Related Guides
- [Open Source Protective Face Shield Designs](https://learn.adafruit.com/open-source-face-shield-designs.md)
- [Pico Bluetooth Keyboard Bridge](https://learn.adafruit.com/pico-bluetooth-keyboard-bridge.md)
- [Dimmable Li-Ion Halogen Bike Light](https://learn.adafruit.com/dimmable-li-ion-halogen-bike-light.md)
- [Installing IronOS on an MHP30 Mini Hot Plate (DEPRECATED)](https://learn.adafruit.com/installing-ironos-on-a-mhp30-mini-hotplate.md)
- [Getting Started with Braille Output for CircuitPython REPL](https://learn.adafruit.com/getting-started-braille-output-circuitpython-repl.md)
- [Meowsic Cat Piano Line Out](https://learn.adafruit.com/meowsic-line-out.md)
- [Instagram Photo Frame](https://learn.adafruit.com/instagram-photo-frame.md)
- [ESP32 PlayStation Controller](https://learn.adafruit.com/esp32-playstation-controller.md)
- [NeoPIO: Drive lots of LEDs with Raspberry Pi Pico](https://learn.adafruit.com/neopio-drive-lots-of-leds-with-raspberry-pi-pico.md)
- [Ikea Vindriktning Hack with QT Py ESP32-S3 and Adafruit IO](https://learn.adafruit.com/ikea-vindriktning-hack-with-qt-py-esp32-s3-and-adafruit-io.md)
- [See N Say Brain Transplant](https://learn.adafruit.com/see-n-say-brain-transplant.md)
- [DIY Welded Bike Stand](https://learn.adafruit.com/diy-welded-bike-stand.md)
- [Setting up an Open Speech Recording Website](https://learn.adafruit.com/setting-up-an-open-speech-recording-website.md)
- [Authoring Playground Books with Bluefruit for iOS ](https://learn.adafruit.com/create-a-swift-playgroundbook-with-bluetooth-le.md)
- [Adafruit Feather RP2040 with USB Type A Host](https://learn.adafruit.com/adafruit-feather-rp2040-with-usb-type-a-host.md)
---
# Source: https://learn.adafruit.com/adafruit-raspberry-pi-lesson-1-preparing-and-sd-card-for-your-raspberry-pi/balena-etcher.md
# Adafruit's Raspberry Pi Lesson 1. Preparing an SD Card for your Raspberry Pi
## Balena Etcher

Balena Etcher is the imager most people used before the Raspberry Pi Imager was written & released. It works very well and we think some people will continue to use it or perhaps already have it installed!
- [Previous Page](https://learn.adafruit.com/adafruit-raspberry-pi-lesson-1-preparing-and-sd-card-for-your-raspberry-pi/raspberry-pi-imager.md)
- [Next Page](https://learn.adafruit.com/adafruit-raspberry-pi-lesson-1-preparing-and-sd-card-for-your-raspberry-pi/downloading-an-image.md)
## Featured Products
### Raspberry Pi 3 - Model B+ - 1.4GHz Cortex-A53 with 1GB RAM
[Raspberry Pi 3 - Model B+ - 1.4GHz Cortex-A53 with 1GB RAM](https://www.adafruit.com/product/3775)
The Raspberry Pi 3 Model B is the most popular Raspberry Pi computer made, and the Pi Foundation knows you can always make a good thing _better_! And what could make the Pi 3 better? How about a _faster_ processor, 5 GHz WiFi, and updated Ethernet chip with PoE capability?...
In Stock
[Buy Now](https://www.adafruit.com/product/3775)
[Related Guides to the Product](https://learn.adafruit.com/products/3775/guides)
### Raspberry Pi 2 Model B Starter Pack - Includes a Raspberry Pi 2
[Raspberry Pi 2 Model B Starter Pack - Includes a Raspberry Pi 2](https://www.adafruit.com/product/2380)
Why not trick out your fresh new board with some accessories? The Pi 2 is a big deal - a big, big deal. It has an upgraded ARMv7 multicore procssor and a full Gigabyte of RAM - meaning you're going to see ~2x the performance on processor-upgrade only and 4x on average for...
No Longer Stocked
[Buy Now](https://www.adafruit.com/product/2380)
[Related Guides to the Product](https://learn.adafruit.com/products/2380/guides)
### Budget Pack for Raspberry Pi 1 Model B (Doesn't include RasPi)
[Budget Pack for Raspberry Pi 1 Model B (Doesn't include RasPi)](https://www.adafruit.com/product/965)
An optimized collection of parts and pieces to experiment with Raspberry Pi at home, school or work. Great for students and those that want to get their feet wet, no soldering required! **THIS PACK DOES NOT INCLUDE A RASPBERRY PI 1 MODEL B and is NOT compatible with Model B+ or Raspberry Pi...**
No Longer Stocked
[Buy Now](https://www.adafruit.com/product/965)
[Related Guides to the Product](https://learn.adafruit.com/products/965/guides)
### USB MicroSD Card Reader/Writer - microSD / microSDHC / microSDXC
[USB MicroSD Card Reader/Writer - microSD / microSDHC / microSDXC](https://www.adafruit.com/product/939)
This is the cutest little microSD card reader/writer - but don't be fooled by its adorableness! It's wicked fast and supports up to 64 GB SDXC cards! Simply slide the card into the edge and plug it into your computer. No drivers are required, it shows up as a standard 'Mass...
No Longer Stocked
[Buy Now](https://www.adafruit.com/product/939)
[Related Guides to the Product](https://learn.adafruit.com/products/939/guides)
### SD/MicroSD Memory Card - 16GB Class 10 - Adapter Included
[SD/MicroSD Memory Card - 16GB Class 10 - Adapter Included](https://www.adafruit.com/product/2693)
Add speedy mega-storage in a jiffy using this 16 GB Class 10 micro-SD card. It comes with a SD adapter so you can use it with any of our shields or adapters! Preformatted to FAT so it works out of the box with our projects. Works great with any device in the Adafruit shop that uses micro-SD...
No Longer Stocked
[Buy Now](https://www.adafruit.com/product/2693)
[Related Guides to the Product](https://learn.adafruit.com/products/2693/guides)
### SD/MicroSD Memory Card (8 GB SDHC)
[SD/MicroSD Memory Card (8 GB SDHC)](https://www.adafruit.com/product/1294)
Add mega-storage in a jiffy using this 8 GB class 4 micro-SD card. It comes with a SD adapter so you can use it with any of our shields or adapters. Preformatted to FAT so it works out of the box with our projects. Tested and works great with our
In Stock
[Buy Now](https://www.adafruit.com/product/1294)
[Related Guides to the Product](https://learn.adafruit.com/products/1294/guides)
### Raspberry Pi 1 Model B Starter Pack - Includes a Raspberry Pi
[Raspberry Pi 1 Model B Starter Pack - Includes a Raspberry Pi](https://www.adafruit.com/product/1014)
You want to get hacking with your Pi fast, right? Get everything you need to start with the Adafruit Starter Pack for Raspberry Pi. It's the perfect accompaniment to your new Pi, everything you need to boot up your Pi Model B and get going. **We pre-assemble the Cobbler for you, no...**
No Longer Stocked
[Buy Now](https://www.adafruit.com/product/1014)
[Related Guides to the Product](https://learn.adafruit.com/products/1014/guides)
### Low-profile microSD card adapter for Raspberry Pi
[Low-profile microSD card adapter for Raspberry Pi](https://www.adafruit.com/product/966)
Make your Pi a little slimmer with this microSD card adapter board. It slides in where the SD card goes but is half the length. Pop in a microSD card for a sleeker machine. The microSD card holder is a push-push type so you can push on the edge that sticks out to remove the card when...
No Longer Stocked
[Buy Now](https://www.adafruit.com/product/966)
[Related Guides to the Product](https://learn.adafruit.com/products/966/guides)
## Related Guides
- [Press Your Button for Raspberry Pi](https://learn.adafruit.com/press-your-button-for-raspberry-pi.md)
- [Adafruit's Raspberry Pi Lesson 5. Using a Console Cable](https://learn.adafruit.com/adafruits-raspberry-pi-lesson-5-using-a-console-cable.md)
- [Adafruit's Raspberry Pi Lesson 2. First Time Configuration](https://learn.adafruit.com/adafruits-raspberry-pi-lesson-2-first-time-configuration.md)
- [Raspberry Pi as an Ad Blocking Access Point](https://learn.adafruit.com/raspberry-pi-as-an-ad-blocking-access-point.md)
- [Set up and Blink - MATLAB and Simulink with Raspberry Pi](https://learn.adafruit.com/how-to-use-matlab-and-simulink-with-raspberry-pi.md)
- [Pi Video Output Using pygame](https://learn.adafruit.com/pi-video-output-using-pygame.md)
- [Drive a 16x2 LCD with the Raspberry Pi](https://learn.adafruit.com/drive-a-16x2-lcd-directly-with-a-raspberry-pi.md)
- [Adafruit's Raspberry Pi Lesson 4. GPIO Setup](https://learn.adafruit.com/adafruits-raspberry-pi-lesson-4-gpio-setup.md)
- [Windows IoT Core Application Management](https://learn.adafruit.com/windows-iot-application-management.md)
- [Read-Only Raspberry Pi](https://learn.adafruit.com/read-only-raspberry-pi.md)
- [Getting Started With Windows IoT Core on Raspberry Pi](https://learn.adafruit.com/getting-started-with-windows-iot-on-raspberry-pi.md)
- [Adafruit NFC/RFID on Raspberry Pi](https://learn.adafruit.com/adafruit-nfc-rfid-on-raspberry-pi.md)
- [Windows IoT Core Application Development: Headless Blinky](https://learn.adafruit.com/windows-iot-application-development-headless-application.md)
- [USB Audio Cards with a Raspberry Pi ](https://learn.adafruit.com/usb-audio-cards-with-a-raspberry-pi.md)
- [Node.js Embedded Development on the Raspberry Pi](https://learn.adafruit.com/node-embedded-development.md)
---
# Source: https://learn.adafruit.com/mini-thermal-receipt-printer/barcode-printing.md
# Mini Thermal Receipt Printers
## Barcode Printing
Thermal printers are really good at printing barcodes! This printer supports 11 different codes - **UPC A, UPC E, EAN13, EAN8, CODE39, I25, CODEBAR, CODE93, CODE128, CODE11** and **MSI**. It only supports linear (1-D) barcodes, and can’t generate 2-D barcodes like QR codes (although there is a hack you can do, see below!) Barcodes are generated “on the fly,” which is nice — you can customize the height and data included quite easily.
You can make a barcode by calling **printBarcode("barcodedata", BARCODETYPE)**, where the first string is the data to encode (e.g. a UPC code) and **BARCODETYPE** can be **UPC\_A, UPC\_E, **** EAN13, EAN8, CODE39, I25, CODEBAR, CODE93, CODE128, CODE11 ** or ** MSI**.
Some barcodes are very restricted — you can only put in 12 numbers, no characters. Others are very flexible and take nearly any character input.[ Please check out the wikipedia list detailing kinds of barcodes ](http://en.wikipedia.org/wiki/Barcodes#Linear_barcodes "Link: http://en.wikipedia.org/wiki/Barcodes#Linear\_barcodes")to pick the right one for your application.
The available range of barcodes varies with the printer firmware revision. Check Adafruit\_Thermal.h for a list of codes.
It’s also possible to print QR codes, if you’re willing to pre-generate them. This might be handy if you want to, let’s say, include a URL on the receipt and the URL doesn’t change. [You can generate QR codes at many sites including this one.](http://qrcode.kaywa.com/ "Link: http://qrcode.kaywa.com/") Use the smallest QR code size. The image will be in PNG format, so if you’re using the Windows LCD Assistant tool you’ll need to convert it to BMP first (Windows Paint works for this). Then you can convert and embed this in your Arduino sketch as previously described.

- [Previous Page](https://learn.adafruit.com/mini-thermal-receipt-printer/bitmap-printing.md)
- [Next Page](https://learn.adafruit.com/mini-thermal-receipt-printer/circuitpython.md)
## Primary Products
### Mini Thermal Receipt Printer
[Mini Thermal Receipt Printer](https://www.adafruit.com/product/597)
Add a mini printer to any microcontroller project with this very cute thermal printer. Thermal printers are also known as receipt printers, they're what you get when you go to the ATM or grocery store. Now you can embed a little printer of your own into an enclosure. This printer is ideal...
No Longer Stocked
[Buy Now](https://www.adafruit.com/product/597)
[Related Guides to the Product](https://learn.adafruit.com/products/597/guides)
### Tiny Thermal Receipt Printer - TTL Serial / USB
[Tiny Thermal Receipt Printer - TTL Serial / USB](https://www.adafruit.com/product/2751)
Add a _really small_ printer to any microcontroller project with this very cute thermal printer. Thermal printers are also known as receipt printers, they're what you get when you go to the ATM or grocery store. Now you can embed a little printer of your own into an enclosure. This...
No Longer Stocked
[Buy Now](https://www.adafruit.com/product/2751)
[Related Guides to the Product](https://learn.adafruit.com/products/2751/guides)
### Nano Thermal Receipt Printer - TTL Serial
[Nano Thermal Receipt Printer - TTL Serial](https://www.adafruit.com/product/2752)
Add a _really really small_ printer to any microcontroller project with this very cute thermal printer. Thermal printers are also known as receipt printers, they're what you get when you go to the ATM or grocery store. Now you can embed a little printer of your own into an...
No Longer Stocked
[Buy Now](https://www.adafruit.com/product/2752)
[Related Guides to the Product](https://learn.adafruit.com/products/2752/guides)
### Thermal Receipt Printer Guts
[Thermal Receipt Printer Guts](https://www.adafruit.com/product/2753)
Add printing capability to any microcontroller project with **just the innards of a thermal printer.** Thermal printers are also known as receipt printers, they're what you get when you go to the ATM or grocery store. Now you can embed a little printer of your own into a...
No Longer Stocked
[Buy Now](https://www.adafruit.com/product/2753)
[Related Guides to the Product](https://learn.adafruit.com/products/2753/guides)
## Featured Products
### Mini Thermal Receipt Printer Starter Pack
[Mini Thermal Receipt Printer Starter Pack](https://www.adafruit.com/product/600)
Hit the ground running (and printing!) with this starter pack that includes a thermal printer and all the extras and save a few dollars while you're at it.
Includes:
- [A mini thermal receipt printer](http://www.adafruit.com/products/597) - with cables and...
No Longer Stocked
[Buy Now](https://www.adafruit.com/product/600)
[Related Guides to the Product](https://learn.adafruit.com/products/600/guides)
### Female DC Power adapter - 2.1mm jack to screw terminal block
[Female DC Power adapter - 2.1mm jack to screw terminal block](https://www.adafruit.com/product/368)
If you need to connect a DC power wall wart to a board that doesn't have a DC jack - this adapter will come in very handy! There is a 2.1mm DC jack on one end, and a screw terminal block on the other. The terminals are labeled with positive/negative assuming a positive-tip configuration...
In Stock
[Buy Now](https://www.adafruit.com/product/368)
[Related Guides to the Product](https://learn.adafruit.com/products/368/guides)
### 5V 2A (2000mA) switching power supply - UL Listed
[5V 2A (2000mA) switching power supply - UL Listed](https://www.adafruit.com/product/276)
This is an FCC/CE certified and UL listed power supply. Need a lot of 5V power? This switching supply gives a clean regulated 5V output at up to 2000mA. 110 or 240 input, so it works in any country. The plugs are "US 2-prong" style so you may need a plug adapter, but you can pick one...
Out of Stock
[Buy Now](https://www.adafruit.com/product/276)
[Related Guides to the Product](https://learn.adafruit.com/products/276/guides)
### Thermal paper roll - 50' long, 2.25" wide
[Thermal paper roll - 50' long, 2.25" wide](https://www.adafruit.com/product/599)
A mini roll of thermal paper, this fits very nicely into our mini thermal printer. 2.25" wide (about 57mm) and 50 feet long (15 meters). BPA-free.
[Perfect for use with our mini thermal printer!](http://www.adafruit.com/products/597)
No Longer Stocked
[Buy Now](https://www.adafruit.com/product/599)
[Related Guides to the Product](https://learn.adafruit.com/products/599/guides)
### Thermal Paper Roll - 33' long, 2.25"
[Thermal Paper Roll - 33' long, 2.25"](https://www.adafruit.com/product/2754)
A little roll of thermal paper! This fits very nicely into our [Tiny Thermal Receipt Printer](https://www.adafruit.com/products/2751). It's ~2.25" wide (about 57mm) and 33 feet long or about 10 meters.
No Longer Stocked
[Buy Now](https://www.adafruit.com/product/2754)
[Related Guides to the Product](https://learn.adafruit.com/products/2754/guides)
### Thermal Paper Roll - 16' long, 2.25"
[Thermal Paper Roll - 16' long, 2.25"](https://www.adafruit.com/product/2755)
A little roll of thermal paper! This fits very nicely into our [Nano Thermal Receipt Printer](https://www.adafruit.com/products/2752). It's ~2.25" wide (about 57mm) and 16 feet long or about 5 meters.
No Longer Stocked
[Buy Now](https://www.adafruit.com/product/2755)
[Related Guides to the Product](https://learn.adafruit.com/products/2755/guides)
### Adafruit METRO 328 Fully Assembled - Arduino IDE compatible
[Adafruit METRO 328 Fully Assembled - Arduino IDE compatible](https://www.adafruit.com/product/50)
We sure love the ATmega328 here at Adafruit, and we use them _a lot_ for our own projects. The processor has plenty of GPIO, Analog inputs, hardware UART SPI and I2C, timers and PWM galore - just enough for most simple projects. When we need to go small, we use a
Out of Stock
[Buy Now](https://www.adafruit.com/product/50)
[Related Guides to the Product](https://learn.adafruit.com/products/50/guides)
### Breadboarding wire bundle
[Breadboarding wire bundle](https://www.adafruit.com/product/153)
75 flexible stranded core wires with stiff ends molded on in red, orange, yellow, green, blue, brown, black and white. These are a major improvement over the "box of bent wires" that are sometimes sold with breadboards, and faster than stripping your own solid core wires. Makes...
In Stock
[Buy Now](https://www.adafruit.com/product/153)
[Related Guides to the Product](https://learn.adafruit.com/products/153/guides)
## Related Guides
- [How to Find Hidden COM Ports](https://learn.adafruit.com/how-to-find-hidden-com-ports.md)
- [Wireless Game Show Poppers for the Classroom!](https://learn.adafruit.com/wireless-game-show-poppers.md)
- [Adafruit Ultimate GPS](https://learn.adafruit.com/adafruit-ultimate-gps.md)
- [RGB LED Matrix Basics](https://learn.adafruit.com/32x16-32x32-rgb-led-matrix.md)
- [Analog Feedback Servos](https://learn.adafruit.com/analog-feedback-servos.md)
- [Arduino GPS Clock](https://learn.adafruit.com/arduino-clock.md)
- [Silicone Robo-Tentacle](https://learn.adafruit.com/silicone-robo-tentacle.md)
- [Ladyada's Bento Box](https://learn.adafruit.com/lady-adas-bento-box.md)
- [Metal Inlay Capacitive Touch Buttons](https://learn.adafruit.com/metal-inlay-capacitive-touch-buttons.md)
- [Adafruit IO Basics: NeoPixel Controller](https://learn.adafruit.com/adafruit-io-basics-neopixel-controller.md)
- [Adafruit PN532 RFID/NFC Breakout and Shield](https://learn.adafruit.com/adafruit-pn532-rfid-nfc.md)
- [Reverse Geocache Box](https://learn.adafruit.com/reverse-geocache-engagement-box.md)
- [Character LCDs](https://learn.adafruit.com/character-lcds.md)
- [Adafruit INA219 Current Sensor Breakout](https://learn.adafruit.com/adafruit-ina219-current-sensor-breakout.md)
- [All About Arduino Libraries](https://learn.adafruit.com/adafruit-all-about-arduino-libraries-install-use.md)
---
# Source: https://learn.adafruit.com/barcode-scanner.md
# Barcode Scanner
## Overview

This mini tutorial will cover how we use barcode scanners. This isn't necessarily an Arduino project, but it is a tool that we use every day when shipping packages - instead of entering in invoice numbers, we use a barcode scanner. That way we don't have to worry about humans making typos!
This kind of scanner connects via USB to a computer and has a laser/sensor with a rotating mirror, the laser constantly scans in front of the opening, so its very easy. There are also less expensive wand types where you have to 'stroke' across the barcode (such as the old cuecat) and more expensive 2D rotating ones such as those at checkout counters where you can have the barcode rotated and it doesnt matter.

So far we've been very happy with this type. The exact model is the Motorola/Symbol LS2208 which will cost somewhere between $50-$150 depending on the extras and whether its new or used. Ebay has tons so if you are willing to take a little risk that can be a good place to pick up one.- [Next Page](https://learn.adafruit.com/barcode-scanner/cable-connection.md)
## Related Guides
- [Digital Shipping Scales](https://learn.adafruit.com/digital-shipping-scales.md)
---
# Source: https://learn.adafruit.com/calipers/basic-measurements.md
# Calipers
## Basic Measurements
For the three basic measurements (inside, outside, depth), we'll be measuring a piece of 20mm extruded aluminum framing.## Outer Measurement
The first measurement is using the 'outer' jaws. Use the flat part if possible, to avoid any skewing. Use the thumb-wheel to get a good tight grip on the material. You'll notice it's not exactly 20mm, that's from the manufacturing tolerances, not the calipers.
## Inner Measurement
The inner jaws are used to make measurements of slots and holes. These are a little tougher, make sure you're holding them so you are not getting an 'angled' measurement that is larger than it should be. I usually take a few measurements and also 'wiggle' the calipers to make sure they are measuring the minimum distance.

## Depth Measurement
The last basic measurement is depth, often used for drilled holes. This measurement uses the gauge at the end of the calipers. You'll want to practice how to hold the calipers to push the tapered end piece down while also keeping the tail flat against the work, its a little counter intuitive!

- [Previous Page](https://learn.adafruit.com/calipers/setting-the-origin.md)
- [Next Page](https://learn.adafruit.com/calipers/step-and-relative-measurements.md)
## Featured Products
### Mitutoyo - Absolute Digimatic Digital Calipers, 6 in.
[Mitutoyo - Absolute Digimatic Digital Calipers, 6 in.](https://www.adafruit.com/product/294)
The most useful tool we've ever laid our hands on. We thought we'd use them just for electronics but then we got our hands on these calipers and had so much fun we started measuring _everything._
They're indestructible - which is good because we don't...
No Longer Stocked
[Buy Now](https://www.adafruit.com/product/294)
[Related Guides to the Product](https://learn.adafruit.com/products/294/guides)
### Premium Digital Stainless Steel Calipers
[Premium Digital Stainless Steel Calipers](https://www.adafruit.com/product/1724)
The most useful tool we've ever laid our hands on. These calipers are really good quality and an excellent choice if you need something better than a cheap 'disposable' pair of digital calipers but you're not quite ready for a set of high-end Mitsutoyo calipers. These digital...
No Longer Stocked
[Buy Now](https://www.adafruit.com/product/1724)
[Related Guides to the Product](https://learn.adafruit.com/products/1724/guides)
### Solar Digital Calipers
[Solar Digital Calipers](https://www.adafruit.com/product/3720)
_Praise the sun!_ You will never have that awkward situation where your caliper battery dies just when you need to take a measurement. Sure, if you have the budget, [we recommend these near-indestructible high-end Mitutoyo...](https://www.adafruit.com/product/294)
In Stock
[Buy Now](https://www.adafruit.com/product/3720)
[Related Guides to the Product](https://learn.adafruit.com/products/3720/guides)
### Messograf Pen Calipers
[Messograf Pen Calipers](https://www.adafruit.com/product/810)
Discontinued - **you can grab [Solar Digital Calipers ](https://www.adafruit.com/product/3720)instead! **
Caliper rule? Tire tread gauge? Ruler? Thread scale? Writing instrument? The Messograf is all of these in one.
It is a...
No Longer Stocked
[Buy Now](https://www.adafruit.com/product/810)
[Related Guides to the Product](https://learn.adafruit.com/products/810/guides)
## Related Guides
- [Secret Hollow Book Intrusion Detector](https://learn.adafruit.com/secret-hollow-book.md)
- [Necomimi Brainwave Cat Ears Teardown](https://learn.adafruit.com/necomimi-brainwave-cat-ears-teardown.md)
- [Ambient Sound Machine](https://learn.adafruit.com/ambient-machine.md)
- [Personal Torch 3000](https://learn.adafruit.com/pt3000-personal-torch.md)
- [Butterfly Bench with Edge Lit Acrylic](https://learn.adafruit.com/butterfly-bench-with-edge-lit-acrylic.md)
- [Bass MIDI Stomp Box](https://learn.adafruit.com/midi-bass-synth-stomp-box.md)
- [Build a Custom Front Panel](https://learn.adafruit.com/build-a-custom-front-panel.md)
- [Collin's Lab: Soldering](https://learn.adafruit.com/collins-lab-soldering.md)
- [3D Printed Custom Keycaps](https://learn.adafruit.com/3dprinted-custom-keycaps.md)
- [Fiddy - the FTDI Clip](https://learn.adafruit.com/fiddy-ftdi-pogo-pin-clip.md)
- [Photo Light Box](https://learn.adafruit.com/photo-light-box.md)
- [DIY On/Off JST Switch Adapter](https://learn.adafruit.com/on-slash-off-switches.md)
- [Making Edge Guards for Hand Tools Using Hand-Moldable Plastic](https://learn.adafruit.com/hand-moldable-edge-guards.md)
- [USB Locket](https://learn.adafruit.com/usb-locket.md)
- [DIY 3D Printing Filament](https://learn.adafruit.com/diy-3d-printing-filament.md)
---
# Source: https://learn.adafruit.com/basic-resistor-sensor-reading-on-raspberry-pi/basic-photocell-reading.md
# Basic Resistor Sensor Reading on Raspberry Pi
## Basic Photocell Reading

We'll start with a basic photocell. This is a resistor that changes resistance based on how bright the light is. [You can read tons more about photocells in our tutorial](http://learn.adafruit.com/photocells/) but basically we'll be able to measure how bright or dark the room is using the photocell. Note that photocells are not precision measurement devices, and this technique is also not very precise so its only good for basic measurements. [For precision sensing, you'd want a digital lux sensor like this one](https://www.adafruit.com/products/439) - we don't have a tutorial on connecting that to the Pi but we do have example code for Arduino.
## Download the Code
The following code can be downloaded to your raspberry pi
https://github.com/adafruit/Adafruit_Learning_System_Guides/blob/main/Basic_Resistor_Sensor_Reading_on_Raspberry_Pi/Basic_Resistor_Sensor_Reading_on_Raspberry_Pi.py
Let's put this file right in your home directory for simplicity. The wget command makes things easy.
```
$ wget https://raw.githubusercontent.com/adafruit/Adafruit_Learning_System_Guides/master/Basic_Resistor_Sensor_Reading_on_Raspberry_Pi/Basic_Resistor_Sensor_Reading_on_Raspberry_Pi.py
```
# Running the Code
With the Pi connected to the Cobbler, run the script and shade your hand over the sensor to test it out!
The following command will start the program and you should see the ADC output on your screen.
```
$ sudo python3 ./Basic_Resistor_Sensor_Reading_on_Raspberry_Pi.py
```
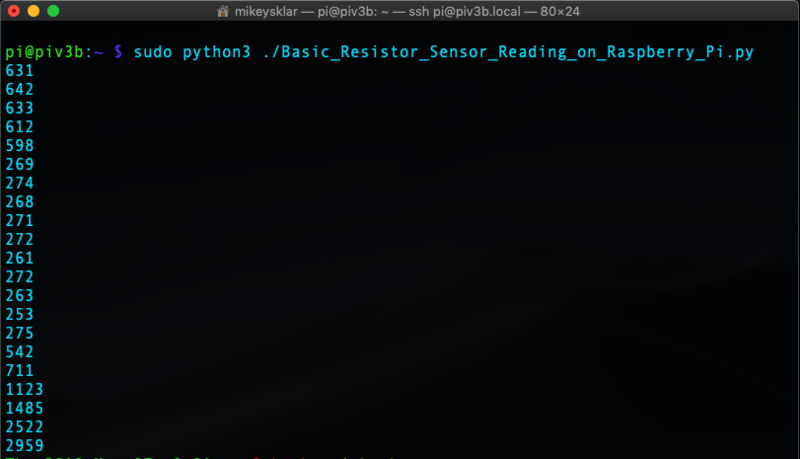
Once you know it works you can change what pin you are using by changing the
**RCpin = board.D18 **
**to**
**RCpin = board.D(**_yourpinnumberhere_**)**
any pin will work.
- [Previous Page](https://learn.adafruit.com/basic-resistor-sensor-reading-on-raspberry-pi/wiring.md)
## Featured Products
### Raspberry Pi 3 - Model B+ - 1.4GHz Cortex-A53 with 1GB RAM
[Raspberry Pi 3 - Model B+ - 1.4GHz Cortex-A53 with 1GB RAM](https://www.adafruit.com/product/3775)
The Raspberry Pi 3 Model B is the most popular Raspberry Pi computer made, and the Pi Foundation knows you can always make a good thing _better_! And what could make the Pi 3 better? How about a _faster_ processor, 5 GHz WiFi, and updated Ethernet chip with PoE capability?...
In Stock
[Buy Now](https://www.adafruit.com/product/3775)
[Related Guides to the Product](https://learn.adafruit.com/products/3775/guides)
### Photo cell (CdS photoresistor)
[Photo cell (CdS photoresistor)](https://www.adafruit.com/product/161)
CdS cells are little light sensors. As the squiggly face is exposed to more light, the resistance goes down. When it's light, the resistance is about ~1KΩ, when dark it goes up to ~10KΩ.
To use, connect one side of the photocell (either one, it's symmetric) to power...
In Stock
[Buy Now](https://www.adafruit.com/product/161)
[Related Guides to the Product](https://learn.adafruit.com/products/161/guides)
### Half Sized Premium Breadboard - 400 Tie Points
[Half Sized Premium Breadboard - 400 Tie Points](https://www.adafruit.com/product/64)
This is a cute, half-size breadboard with 400 tie points, good for small projects. It's 3.25" x 2.2" / 8.3cm x 5.5cm with a standard double-strip in the middle and two power rails on both sides. You can pull the power rails off easily to make the breadboard as...
In Stock
[Buy Now](https://www.adafruit.com/product/64)
[Related Guides to the Product](https://learn.adafruit.com/products/64/guides)
### Assembled Pi Cobbler Plus - Breakout Cable
[Assembled Pi Cobbler Plus - Breakout Cable](https://www.adafruit.com/product/2029)
The Raspberry Pi B+ / Pi 2 / Pi 3 / Pi 4 has landed on the Maker World like a 40-GPIO pinned, quad-USB ported, credit card sized bomb of DIY joy. And while you can use most of our great Model B accessories by hooking up our [downgrade...](https://www.adafruit.com/product/1986)
In Stock
[Buy Now](https://www.adafruit.com/product/2029)
[Related Guides to the Product](https://learn.adafruit.com/products/2029/guides)
### Assembled Pi T-Cobbler Plus - GPIO Breakout
[Assembled Pi T-Cobbler Plus - GPIO Breakout](https://www.adafruit.com/product/2028)
**This is the assembled version of the Pi T-Cobbler Plus. It only works with the Raspberry Pi Model Zero, A+, B+, Pi 2, Pi 3 & Pi 4!** (Any Pi with 2x20 connector)
The Raspberry Pi has landed on the Maker World like a 40-GPIO pinned, quad-USB ported, credit...
In Stock
[Buy Now](https://www.adafruit.com/product/2028)
[Related Guides to the Product](https://learn.adafruit.com/products/2028/guides)
### Adafruit Assembled Pi Cobbler Breakout + Cable for Raspberry Pi
[Adafruit Assembled Pi Cobbler Breakout + Cable for Raspberry Pi](https://www.adafruit.com/product/914)
Now that you've finally got your hands on a [Raspberry Pi® Model B](http://www.raspberrypi.org/), you're probably itching to make some fun embedded computer projects with it. What you need is an add on prototyping Pi Cobbler from Adafruit, which can break out all those...
No Longer Stocked
[Buy Now](https://www.adafruit.com/product/914)
[Related Guides to the Product](https://learn.adafruit.com/products/914/guides)
### Long Flex sensor
[Long Flex sensor](https://www.adafruit.com/product/182)
This sensor can detect flexing or bending in one direction. They were popularized by being used in the Nintendo PowerGlove as a gaming interface.
These sensors are easy to use, they are basically resistors that change value based on how much they're flexed. If they're...
In Stock
[Buy Now](https://www.adafruit.com/product/182)
[Related Guides to the Product](https://learn.adafruit.com/products/182/guides)
### Round Force-Sensitive Resistor (FSR) - 0.3 ~ 10 Newton Force
[Round Force-Sensitive Resistor (FSR) - 0.3 ~ 10 Newton Force](https://www.adafruit.com/product/166)
FSRs are sensors that allow you to detect physical pressure, squeezing and weight. They are simple to use and low cost. This sensor is an Alpha MF01A-N-221-A01 with 1/2 diameter sensing region.
We used to stock the Interlink model 402 FSR - the Alpha version is almost half the price...
In Stock
[Buy Now](https://www.adafruit.com/product/166)
[Related Guides to the Product](https://learn.adafruit.com/products/166/guides)
## Related Guides
- [Circadian Pi Desk Light](https://learn.adafruit.com/circadian-pi-desk-light.md)
- [Raspberry Pi E-mail Notifier Using LEDs](https://learn.adafruit.com/raspberry-pi-e-mail-notifier-using-leds.md)
- [Adafruit's Raspberry Pi Lesson 11. DS18B20 Temperature Sensing](https://learn.adafruit.com/adafruits-raspberry-pi-lesson-11-ds18b20-temperature-sensing.md)
- [LoRa and LoRaWAN Radio for Raspberry Pi](https://learn.adafruit.com/lora-and-lorawan-radio-for-raspberry-pi.md)
- [Adafruit's Raspberry Pi Lesson 4. GPIO Setup](https://learn.adafruit.com/adafruits-raspberry-pi-lesson-4-gpio-setup.md)
- [CircuitPython Libraries on Linux and Google Coral](https://learn.adafruit.com/circuitpython-on-google-coral-linux-blinka.md)
- [Adafruit AMG8833 8x8 Thermal Camera Sensor](https://learn.adafruit.com/adafruit-amg8833-8x8-thermal-camera-sensor.md)
- [Adafruit's Raspberry Pi Lesson 13. Power Control](https://learn.adafruit.com/adafruits-raspberry-pi-lesson-13-power-control.md)
- [Adafruit's Raspberry Pi Lesson 12. Sensing Movement](https://learn.adafruit.com/adafruits-raspberry-pi-lesson-12-sensing-movement.md)
- [Playing sounds and using buttons with Raspberry Pi](https://learn.adafruit.com/playing-sounds-and-using-buttons-with-raspberry-pi.md)
- [Windows IoT Core Application Development: Headless Blinky](https://learn.adafruit.com/windows-iot-application-development-headless-application.md)
- [Adding Basic Audio Ouput to Raspberry Pi Zero](https://learn.adafruit.com/adding-basic-audio-ouput-to-raspberry-pi-zero.md)
- [Drive a 16x2 LCD with the Raspberry Pi](https://learn.adafruit.com/drive-a-16x2-lcd-directly-with-a-raspberry-pi.md)
- [Program an AVR or Arduino Using Raspberry Pi GPIO](https://learn.adafruit.com/program-an-avr-or-arduino-using-raspberry-pi-gpio-pins.md)
- [Diet Raspberry Pi](https://learn.adafruit.com/diet-raspberry-pi.md)
---
# Source: https://learn.adafruit.com/basic-resistor-sensor-reading-on-raspberry-pi.md
# Basic Resistor Sensor Reading on Raspberry Pi
## Overview

We've already covered how to use an Analog-to-Digital Converter chip with a Pi. These chips are the best way to read analog voltages from the Pi. However, there's a way to read many sensors **without** an ADC! By measuring the sensor as a resistor that is used to 'fill up' a capacitor, we can count how long it takes. It's not nearly as precise as an ADC and its a little flakey (since it depends on the Pi timing itself which can vary based on how 'busy' the computer is)
The way we do this is by taking advantage of a basic electronic property of resistors and capacitors. It turns out that if you take a capacitor that is initially storing no voltage, and then connect it to power (like 3.3V) through a resistor, it will charge up to the power voltage slowly. The bigger the resistor, the slower it is.
This technique only works with sensors that act like resistors. however, there are quite a few fun sensors that act this way: [photocells](http://adafruit.com/products/161 "Link: http://adafruit.com/products/161"), [thermistors (temperature sensors)](http://adafruit.com/products/372 "Link: http://adafruit.com/products/372"), [flex sensors](http://adafruit.com/products/182 "Link: http://adafruit.com/products/182"),[force-sensitive resistors](http://adafruit.com/products/166 "Link: http://adafruit.com/products/166"), and many more.
It cannot be used with sensors that have a pure analog output like [IR distance sensors](http://www.adafruit.com/products/164) or [analog accelerometers](http://www.adafruit.com/products/163).
- [Next Page](https://learn.adafruit.com/basic-resistor-sensor-reading-on-raspberry-pi/how-it-works.md)
## Featured Products
### Raspberry Pi 3 - Model B+ - 1.4GHz Cortex-A53 with 1GB RAM
[Raspberry Pi 3 - Model B+ - 1.4GHz Cortex-A53 with 1GB RAM](https://www.adafruit.com/product/3775)
The Raspberry Pi 3 Model B is the most popular Raspberry Pi computer made, and the Pi Foundation knows you can always make a good thing _better_! And what could make the Pi 3 better? How about a _faster_ processor, 5 GHz WiFi, and updated Ethernet chip with PoE capability?...
In Stock
[Buy Now](https://www.adafruit.com/product/3775)
[Related Guides to the Product](https://learn.adafruit.com/products/3775/guides)
### Photo cell (CdS photoresistor)
[Photo cell (CdS photoresistor)](https://www.adafruit.com/product/161)
CdS cells are little light sensors. As the squiggly face is exposed to more light, the resistance goes down. When it's light, the resistance is about ~1KΩ, when dark it goes up to ~10KΩ.
To use, connect one side of the photocell (either one, it's symmetric) to power...
In Stock
[Buy Now](https://www.adafruit.com/product/161)
[Related Guides to the Product](https://learn.adafruit.com/products/161/guides)
### Half Sized Premium Breadboard - 400 Tie Points
[Half Sized Premium Breadboard - 400 Tie Points](https://www.adafruit.com/product/64)
This is a cute, half-size breadboard with 400 tie points, good for small projects. It's 3.25" x 2.2" / 8.3cm x 5.5cm with a standard double-strip in the middle and two power rails on both sides. You can pull the power rails off easily to make the breadboard as...
In Stock
[Buy Now](https://www.adafruit.com/product/64)
[Related Guides to the Product](https://learn.adafruit.com/products/64/guides)
### Assembled Pi Cobbler Plus - Breakout Cable
[Assembled Pi Cobbler Plus - Breakout Cable](https://www.adafruit.com/product/2029)
The Raspberry Pi B+ / Pi 2 / Pi 3 / Pi 4 has landed on the Maker World like a 40-GPIO pinned, quad-USB ported, credit card sized bomb of DIY joy. And while you can use most of our great Model B accessories by hooking up our [downgrade...](https://www.adafruit.com/product/1986)
In Stock
[Buy Now](https://www.adafruit.com/product/2029)
[Related Guides to the Product](https://learn.adafruit.com/products/2029/guides)
### Assembled Pi T-Cobbler Plus - GPIO Breakout
[Assembled Pi T-Cobbler Plus - GPIO Breakout](https://www.adafruit.com/product/2028)
**This is the assembled version of the Pi T-Cobbler Plus. It only works with the Raspberry Pi Model Zero, A+, B+, Pi 2, Pi 3 & Pi 4!** (Any Pi with 2x20 connector)
The Raspberry Pi has landed on the Maker World like a 40-GPIO pinned, quad-USB ported, credit...
In Stock
[Buy Now](https://www.adafruit.com/product/2028)
[Related Guides to the Product](https://learn.adafruit.com/products/2028/guides)
### Adafruit Assembled Pi Cobbler Breakout + Cable for Raspberry Pi
[Adafruit Assembled Pi Cobbler Breakout + Cable for Raspberry Pi](https://www.adafruit.com/product/914)
Now that you've finally got your hands on a [Raspberry Pi® Model B](http://www.raspberrypi.org/), you're probably itching to make some fun embedded computer projects with it. What you need is an add on prototyping Pi Cobbler from Adafruit, which can break out all those...
No Longer Stocked
[Buy Now](https://www.adafruit.com/product/914)
[Related Guides to the Product](https://learn.adafruit.com/products/914/guides)
### Long Flex sensor
[Long Flex sensor](https://www.adafruit.com/product/182)
This sensor can detect flexing or bending in one direction. They were popularized by being used in the Nintendo PowerGlove as a gaming interface.
These sensors are easy to use, they are basically resistors that change value based on how much they're flexed. If they're...
In Stock
[Buy Now](https://www.adafruit.com/product/182)
[Related Guides to the Product](https://learn.adafruit.com/products/182/guides)
### Round Force-Sensitive Resistor (FSR) - 0.3 ~ 10 Newton Force
[Round Force-Sensitive Resistor (FSR) - 0.3 ~ 10 Newton Force](https://www.adafruit.com/product/166)
FSRs are sensors that allow you to detect physical pressure, squeezing and weight. They are simple to use and low cost. This sensor is an Alpha MF01A-N-221-A01 with 1/2 diameter sensing region.
We used to stock the Interlink model 402 FSR - the Alpha version is almost half the price...
In Stock
[Buy Now](https://www.adafruit.com/product/166)
[Related Guides to the Product](https://learn.adafruit.com/products/166/guides)
## Related Guides
- [Circadian Pi Desk Light](https://learn.adafruit.com/circadian-pi-desk-light.md)
- [Raspberry Pi E-mail Notifier Using LEDs](https://learn.adafruit.com/raspberry-pi-e-mail-notifier-using-leds.md)
- [Adafruit's Raspberry Pi Lesson 11. DS18B20 Temperature Sensing](https://learn.adafruit.com/adafruits-raspberry-pi-lesson-11-ds18b20-temperature-sensing.md)
- [LoRa and LoRaWAN Radio for Raspberry Pi](https://learn.adafruit.com/lora-and-lorawan-radio-for-raspberry-pi.md)
- [Adafruit's Raspberry Pi Lesson 4. GPIO Setup](https://learn.adafruit.com/adafruits-raspberry-pi-lesson-4-gpio-setup.md)
- [CircuitPython Libraries on Linux and Google Coral](https://learn.adafruit.com/circuitpython-on-google-coral-linux-blinka.md)
- [Adafruit AMG8833 8x8 Thermal Camera Sensor](https://learn.adafruit.com/adafruit-amg8833-8x8-thermal-camera-sensor.md)
- [Adafruit's Raspberry Pi Lesson 13. Power Control](https://learn.adafruit.com/adafruits-raspberry-pi-lesson-13-power-control.md)
- [Adafruit's Raspberry Pi Lesson 12. Sensing Movement](https://learn.adafruit.com/adafruits-raspberry-pi-lesson-12-sensing-movement.md)
- [Playing sounds and using buttons with Raspberry Pi](https://learn.adafruit.com/playing-sounds-and-using-buttons-with-raspberry-pi.md)
- [Windows IoT Core Application Development: Headless Blinky](https://learn.adafruit.com/windows-iot-application-development-headless-application.md)
- [Adding Basic Audio Ouput to Raspberry Pi Zero](https://learn.adafruit.com/adding-basic-audio-ouput-to-raspberry-pi-zero.md)
- [Drive a 16x2 LCD with the Raspberry Pi](https://learn.adafruit.com/drive-a-16x2-lcd-directly-with-a-raspberry-pi.md)
- [Program an AVR or Arduino Using Raspberry Pi GPIO](https://learn.adafruit.com/program-an-avr-or-arduino-using-raspberry-pi-gpio-pins.md)
- [Diet Raspberry Pi](https://learn.adafruit.com/diet-raspberry-pi.md)
---
# Source: https://learn.adafruit.com/hl1606-led-strip/basic-usage.md
# HL1606 LED Strip
## Basic Usage
The HL1606 is not a common chip for most people, so the best way to explain it is to say its basically a 74HC595 shift register. Like a '595 there is an SPI input and then there is a shift-output so you can chain them. The HL1606 has 6 outputs and they're specifically for driving LEDs. The most basic way to use them is to set each LED on or off. This means you can have up to 8 primary 'colors' on an LED: red, yellow, green, teal, blue, violet, white and black.
There are some pros and cons to driving the strips this way…
**Pro:** Very simple, easy and fast. Use any 3 pins, No interrupts or constant updating required.
**Con: ** Only a handful of colors.
Let's get the strip up and running using this method to start.
**The most important thing to remember is that you need a lot of current (power) to drive these strips, so you will need to arrange a 5V power supply. This test will require about 1 Ampere per meter!**

Note in the image above that the 5V can come from a separate power supply that can provide the power you need. Be sure to tie the grounds together and check the polarity…sticking -5V by accident into the strip could be a sad and expensive mistake. We'll be using an Arduino to demonstrate the strip but the code can easily be ported to your favorite microcontroller.
Note that we have **Latch** connected to digital I/O pin #2, **Clock** connected to #3 and **Data** to #4
To install the required library, first, open up the Arduino library manager:

Search for the **HL1606 ** library and install it

We also have a great tutorial on Arduino library installation at:
[http://learn.adafruit.com/adafruit-all-about-arduino-libraries-install-use](http://learn.adafruit.com/adafruit-all-about-arduino-libraries-install-use "Link: http://learn.adafruit.com/adafruit-all-about-arduino-libraries-install-use")
You should now see a new **example** folder called **HL1606strip** and inside, an example called **basicPatterns**. Upload that sketch to your Arduino. You should see the following:
http://www.flickr.com/photos/adafruit/5387932657/
You can change how long the strip is by adjusting the object creation (instantiation) line:
```
HL1606strip strip = HL1606strip(STRIP_D, STRIP_L, STRIP_C, 32);
```
The last argument "32" is the number of LEDs to address. Count how many are in your strip! The display may be wonky otherwise
The **basicPatterns** sketch has many examples of how to set the color of each pixel by calling
```
strip.setLEDcolor(n, color);
```
where **n ** indicates which LED you want to change and **color** is **RED, YELLOW, GREEN, TEAL, BLUE, VIOLET, WHITE, ** or **BLACK**. After you've set the pixel color, you need to **write** the changes to the strip by calling
```
strip.writeStrip();
```
**writeStrip()** isnt very fast, it will take a few milliseconds to write the changes and it takes longer the more LEDs there are. So change all the LED's you want at once and then write them!
- [Previous Page](https://learn.adafruit.com/hl1606-led-strip/wiring.md)
- [Next Page](https://learn.adafruit.com/hl1606-led-strip/advanced-usage.md)
## Related Guides
- [Pocket Galaxy](https://learn.adafruit.com/pocket-galaxy.md)
- [Mailbox Notification Service](https://learn.adafruit.com/mailbox-notification-service.md)
- [Digital LED Belt](https://learn.adafruit.com/digital-led-belt.md)
- [Bike Wheel POV Display](https://learn.adafruit.com/bike-wheel-pov-display.md)
- [NeoPixel Bracelet](https://learn.adafruit.com/neopixel-bracelet.md)
- [Magic Band Reader](https://learn.adafruit.com/magic-band-reader.md)
- [HalloWing Light Paintstick](https://learn.adafruit.com/hallowing-light-paintstick.md)
- [Stick Person Costume with Neon LED Strips](https://learn.adafruit.com/led-neon-stick-person-costume.md)
- [Light-Up Reactive Ukulele](https://learn.adafruit.com/light-up-reactive-ukulele.md)
- [Gemma 3D Printed Tree Topper](https://learn.adafruit.com/gemma-3d-printed-tree-topper.md)
- [NeoPixel Infinity Mirror Coaster](https://learn.adafruit.com/infinity-mirror-coaster.md)
- [Halloween Skeleton Transformation Illusion Prop](https://learn.adafruit.com/halloween-skeleton-transformation-illusion-prop.md)
- [Magic Mirror with Glowing Secret Messages](https://learn.adafruit.com/magic-mirror-with-glowing-secret-messages.md)
- [Monster Matrix with WLED](https://learn.adafruit.com/monster-matrix-with-wled.md)
- [Mini Neon Sign Prop & n00ds Booster Case](https://learn.adafruit.com/nood-booster-case.md)
---
# Source: https://learn.adafruit.com/adafruit-ultimate-gps/battery-backup.md
# Adafruit Ultimate GPS
## Battery Backup
The GPS has a built in real time clock, which can keep track of time even when it power is lost and it doesn't have a fix yet. It can also help reduce fix times, if you expect to have a flakey power connection (say you're using solar or similar). To use the RTC, we need to attach a battery. There is a spot on the back for a **CR1220** sized battery holder. We provide the holder but the battery is not included. You can use any 12mm coin cell - these are popular and we also carry them in the Adafruit shop.
Normally, if the GPS loses power, it will revert to the factory default for baud rates, configuration, etc. A backup battery will mean that those defaults will not be lost!
The backup real-time-clock circuitry draws 7 uA (0.007 mA) so a CR1220 will last 40mAh / 0.007mA = 5,714 hours = 240 days continuously. The backup battery is only used when there's no main 3V power to the GPS, so as long as it's only used as backup once in a while, it will last years

## If you have a v1 or v2 module ONLY:
Before inserting a battery into the battery holder, first cut the trace between the two solder pads on the back, labeled RTC (this disconnects the VIN pin from the battery input) Use a multimeter with continuity checking to verify the two pads are no longer tied together.
V3 modules do not have a trace to cut, they have a built-in diode!

Remember, the GPS does not know what time zone you are in (even though it knows your location, there is no easy way to determine time zone without a massive lookup table) so all date/time data is in UTC (aka. Greenwich Mean Time) - You will have to write the code that converts that to your local time zone and account for Daylight Savings if required! Since that's pretty complicated, most people just stick to keeping everything in UTC
- [Previous Page](https://learn.adafruit.com/adafruit-ultimate-gps/pinouts.md)
- [Next Page](https://learn.adafruit.com/adafruit-ultimate-gps/external-antenna.md)
## Featured Products
### Adafruit Ultimate GPS Breakout - 66 channel w/10 Hz updates
[Adafruit Ultimate GPS Breakout - 66 channel w/10 Hz updates](https://www.adafruit.com/product/746)
We carry a few different GPS modules here in the Adafruit shop, but none that satisfied our every desire - that's why we designed this little GPS breakout board. We believe this is the **Ultimate** GPS module, so we named it that. It's got everything you want and...
In Stock
[Buy Now](https://www.adafruit.com/product/746)
[Related Guides to the Product](https://learn.adafruit.com/products/746/guides)
### Adafruit Ultimate GPS GNSS with USB - 99 channel w/10 Hz updates
[Adafruit Ultimate GPS GNSS with USB - 99 channel w/10 Hz updates](https://www.adafruit.com/product/4279)
The Ultimate GPS module you know and love has a _glow-up_ to let it be easily used with any computer, not just microcontrollers! With the built-in USB-to-Serial converter, you can now plug-n-play the Ultimate GPS into your computer, laptop, embedded Linux computer, and more. Power and...
In Stock
[Buy Now](https://www.adafruit.com/product/4279)
[Related Guides to the Product](https://learn.adafruit.com/products/4279/guides)
### Adafruit METRO 328 Fully Assembled - Arduino IDE compatible
[Adafruit METRO 328 Fully Assembled - Arduino IDE compatible](https://www.adafruit.com/product/50)
We sure love the ATmega328 here at Adafruit, and we use them _a lot_ for our own projects. The processor has plenty of GPIO, Analog inputs, hardware UART SPI and I2C, timers and PWM galore - just enough for most simple projects. When we need to go small, we use a
Out of Stock
[Buy Now](https://www.adafruit.com/product/50)
[Related Guides to the Product](https://learn.adafruit.com/products/50/guides)
### GPS Antenna - External Active Antenna - 3-5V 28dB 5 Meter SMA
[GPS Antenna - External Active Antenna - 3-5V 28dB 5 Meter SMA](https://www.adafruit.com/product/960)
Give your Ultimate GPS V3 a boost with this external active antenna. This GPS antenna draws about 10mA and will give you an additional 28 dB of gain. It's got a 5 meter long cable so it will easily reach wherever you need it to. The antenna is magnetic so it will stick to the top of a car...
In Stock
[Buy Now](https://www.adafruit.com/product/960)
[Related Guides to the Product](https://learn.adafruit.com/products/960/guides)
### SMA to uFL/u.FL/IPX/IPEX RF Adapter Cable
[SMA to uFL/u.FL/IPX/IPEX RF Adapter Cable](https://www.adafruit.com/product/851)
This RF adapter cable is super handy for anyone doing RF work. Often times, small electronics save space by having a pick-and-placeable u.FL connector (also called uFL, IPEX, IPAX, IPX, MHF, and AM). But most antennas have SMA or RP-SMA connectors on them. This little cable will bridge the...
In Stock
[Buy Now](https://www.adafruit.com/product/851)
[Related Guides to the Product](https://learn.adafruit.com/products/851/guides)
### CR1220 12mm Diameter - 3V Lithium Coin Cell Battery
[CR1220 12mm Diameter - 3V Lithium Coin Cell Battery](https://www.adafruit.com/product/380)
These are the highest quality & capacity batteries, the same as shipped with the iCufflinks, iNecklace, Datalogging and GPS Shields, GPS HAT, etc. One battery per order (you'll want one battery per cufflink or pendant.)
Brand may vary but all battery brands are verified...
Out of Stock
[Buy Now](https://www.adafruit.com/product/380)
[Related Guides to the Product](https://learn.adafruit.com/products/380/guides)
### Breadboarding wire bundle
[Breadboarding wire bundle](https://www.adafruit.com/product/153)
75 flexible stranded core wires with stiff ends molded on in red, orange, yellow, green, blue, brown, black and white. These are a major improvement over the "box of bent wires" that are sometimes sold with breadboards, and faster than stripping your own solid core wires. Makes...
In Stock
[Buy Now](https://www.adafruit.com/product/153)
[Related Guides to the Product](https://learn.adafruit.com/products/153/guides)
### Half Sized Premium Breadboard - 400 Tie Points
[Half Sized Premium Breadboard - 400 Tie Points](https://www.adafruit.com/product/64)
This is a cute, half-size breadboard with 400 tie points, good for small projects. It's 3.25" x 2.2" / 8.3cm x 5.5cm with a standard double-strip in the middle and two power rails on both sides. You can pull the power rails off easily to make the breadboard as...
In Stock
[Buy Now](https://www.adafruit.com/product/64)
[Related Guides to the Product](https://learn.adafruit.com/products/64/guides)
## Related Guides
- [Reverse Geocache Box](https://learn.adafruit.com/reverse-geocache-engagement-box.md)
- [Ladyada's Learn Arduino - Lesson #2](https://learn.adafruit.com/ladyadas-learn-arduino-lesson-number-2.md)
- [Wave Shield Talking Clock](https://learn.adafruit.com/wave-shield-talking-clock.md)
- [Wireless Game Show Poppers for the Classroom!](https://learn.adafruit.com/wireless-game-show-poppers.md)
- [Wireless Gardening with Arduino + CC3000 WiFi Modules](https://learn.adafruit.com/wireless-gardening-arduino-cc3000-wifi-modules.md)
- [CircuitPython Essentials](https://learn.adafruit.com/circuitpython-essentials.md)
- [CircuitPython Libraries on Linux and ODROID C2](https://learn.adafruit.com/circuitpython-libaries-linux-odroid-c2.md)
- [2.2" TFT Display](https://learn.adafruit.com/2-2-tft-display.md)
- [RGB LED Matrix Basics](https://learn.adafruit.com/32x16-32x32-rgb-led-matrix.md)
- [Halloween Pumpkin](https://learn.adafruit.com/halloween-pumpkin.md)
- [Remote controlled door lock using a fingerprint sensor & Adafruit IO](https://learn.adafruit.com/remote-controlled-door-lock-using-a-fingerprint-sensor-and-adafruit-io.md)
- [Automatic Monitor Color Temperature Adjustment](https://learn.adafruit.com/automatic-monitor-color-temperature-adjustment.md)
- [Animating Multiple LED Backpacks](https://learn.adafruit.com/animating-multiple-led-backpacks.md)
- [Skill Badge Requirements: Microcontrollers](https://learn.adafruit.com/skill-badge-requirements-microcontrollers.md)
- [RePaper eInk Development Board](https://learn.adafruit.com/repaper-eink-development-board.md)
---
# Source: https://learn.adafruit.com/calipers/battery-life-and-replacement.md
# Calipers
## Battery Life & Replacement

Digital calipers do require a battery (there are solar ones as well, with an internal backup battery) but good calipers rarely need to have the battery replaced. The pair we have is used many times a day and often isn't even turned off for a few days but has been running without issue for over 5 years. We do suggest turning them off when not in use but many people don't even bother since the battery drain is so low.
To replace the battery, just snap of the top cover, the battery is **LR44/SR44 ** size 1.5V button battery, available in any hardware or grocery store. The Silver Oxide SR44 costs more, but will last longer.
- [Previous Page](https://learn.adafruit.com/calipers/storage.md)
- [Next Page](https://learn.adafruit.com/calipers/setting-the-origin.md)
## Featured Products
### Mitutoyo - Absolute Digimatic Digital Calipers, 6 in.
[Mitutoyo - Absolute Digimatic Digital Calipers, 6 in.](https://www.adafruit.com/product/294)
The most useful tool we've ever laid our hands on. We thought we'd use them just for electronics but then we got our hands on these calipers and had so much fun we started measuring _everything._
They're indestructible - which is good because we don't...
No Longer Stocked
[Buy Now](https://www.adafruit.com/product/294)
[Related Guides to the Product](https://learn.adafruit.com/products/294/guides)
### Premium Digital Stainless Steel Calipers
[Premium Digital Stainless Steel Calipers](https://www.adafruit.com/product/1724)
The most useful tool we've ever laid our hands on. These calipers are really good quality and an excellent choice if you need something better than a cheap 'disposable' pair of digital calipers but you're not quite ready for a set of high-end Mitsutoyo calipers. These digital...
No Longer Stocked
[Buy Now](https://www.adafruit.com/product/1724)
[Related Guides to the Product](https://learn.adafruit.com/products/1724/guides)
### Solar Digital Calipers
[Solar Digital Calipers](https://www.adafruit.com/product/3720)
_Praise the sun!_ You will never have that awkward situation where your caliper battery dies just when you need to take a measurement. Sure, if you have the budget, [we recommend these near-indestructible high-end Mitutoyo...](https://www.adafruit.com/product/294)
In Stock
[Buy Now](https://www.adafruit.com/product/3720)
[Related Guides to the Product](https://learn.adafruit.com/products/3720/guides)
### Messograf Pen Calipers
[Messograf Pen Calipers](https://www.adafruit.com/product/810)
Discontinued - **you can grab [Solar Digital Calipers ](https://www.adafruit.com/product/3720)instead! **
Caliper rule? Tire tread gauge? Ruler? Thread scale? Writing instrument? The Messograf is all of these in one.
It is a...
No Longer Stocked
[Buy Now](https://www.adafruit.com/product/810)
[Related Guides to the Product](https://learn.adafruit.com/products/810/guides)
## Related Guides
- [Secret Hollow Book Intrusion Detector](https://learn.adafruit.com/secret-hollow-book.md)
- [Necomimi Brainwave Cat Ears Teardown](https://learn.adafruit.com/necomimi-brainwave-cat-ears-teardown.md)
- [Ambient Sound Machine](https://learn.adafruit.com/ambient-machine.md)
- [Personal Torch 3000](https://learn.adafruit.com/pt3000-personal-torch.md)
- [Butterfly Bench with Edge Lit Acrylic](https://learn.adafruit.com/butterfly-bench-with-edge-lit-acrylic.md)
- [Bass MIDI Stomp Box](https://learn.adafruit.com/midi-bass-synth-stomp-box.md)
- [Build a Custom Front Panel](https://learn.adafruit.com/build-a-custom-front-panel.md)
- [Collin's Lab: Soldering](https://learn.adafruit.com/collins-lab-soldering.md)
- [3D Printed Custom Keycaps](https://learn.adafruit.com/3dprinted-custom-keycaps.md)
- [Fiddy - the FTDI Clip](https://learn.adafruit.com/fiddy-ftdi-pogo-pin-clip.md)
- [Photo Light Box](https://learn.adafruit.com/photo-light-box.md)
- [DIY On/Off JST Switch Adapter](https://learn.adafruit.com/on-slash-off-switches.md)
- [Making Edge Guards for Hand Tools Using Hand-Moldable Plastic](https://learn.adafruit.com/hand-moldable-edge-guards.md)
- [USB Locket](https://learn.adafruit.com/usb-locket.md)
- [DIY 3D Printing Filament](https://learn.adafruit.com/diy-3d-printing-filament.md)
---
# Source: https://learn.adafruit.com/led-bicycle-handlebars/battery-pouch.md
# LED Bicycle Handlebars
## Battery Pouch
http://www.youtube.com/watch?v=BIwcYmOzLoE&hd=1&t=2m41s
Sew a pouch to house your batteries. I made mine from two rectangles of fabric stitched together along their centers, creating flaps that will wrap around each the battery holder and the bike's top tube. Use vinyl to line the battery compartment for added water resistance. Watch the video above-- it's set to start at the battery pouch segment.

Take your bike out for a nighttime ride!
- [Previous Page](https://learn.adafruit.com/led-bicycle-handlebars/affix-to-handlebars.md)
- [Next Page](https://learn.adafruit.com/led-bicycle-handlebars/frequently-asked-qs.md)
## Featured Products
### LED Bike Handlebar Pack - 1 meter
[LED Bike Handlebar Pack - 1 meter](https://www.adafruit.com/product/933)
This pack contains supplies for making your own LED bicycle handlebars! This project is easily completed in a weekend and requires a small amount of soldering and some sewing, too. Pack includes:
- [Cool white LED strip](http://adafruit.com/products/887)...
No Longer Stocked
[Buy Now](https://www.adafruit.com/product/933)
[Related Guides to the Product](https://learn.adafruit.com/products/933/guides)
### LED Bike Handlebar Pack - 2 meters
[LED Bike Handlebar Pack - 2 meters](https://www.adafruit.com/product/934)
This pack contains supplies for making your own LED bicycle handlebars! This project is easily completed in a weekend and requires a small amount of soldering and some sewing, too. Pack includes:
- [Cool white LED...](http://adafruit.com/products/887)
No Longer Stocked
[Buy Now](https://www.adafruit.com/product/934)
[Related Guides to the Product](https://learn.adafruit.com/products/934/guides)
### Cool White LED Weatherproof Flexi-Strip 60 LED - 5m
[Cool White LED Weatherproof Flexi-Strip 60 LED - 5m](https://www.adafruit.com/product/887)
These LED strips are ultra bright, fun and glowy. There are **60** cool white LEDs per meter, and you can control the entire strip at once with any microcontroller and [a power transistor](http://www.adafruit.com/products/355). The way they are wired, you will need a 9-12VDC...
No Longer Stocked
[Buy Now](https://www.adafruit.com/product/887)
[Related Guides to the Product](https://learn.adafruit.com/products/887/guides)
### Waterproof DC Power Cable Set - 5.5/2.1mm
[Waterproof DC Power Cable Set - 5.5/2.1mm](https://www.adafruit.com/product/743)
Outdoor enthusiasts rejoice! We now have standard 5.5/2.1mm DC power cable sets in a waterproof variety. These cable sets are ideal for projects that must weather the weather: dust, water, rain, snow, tornado (not volcano proof!). They are a little bulkier than normal DC jacks because of the...
In Stock
[Buy Now](https://www.adafruit.com/product/743)
[Related Guides to the Product](https://learn.adafruit.com/products/743/guides)
### 8 x AA battery holder
[8 x AA battery holder](https://www.adafruit.com/product/449)
When you need a portable 12V power pack, this big holder will do the job! The holder will store 8 AA batteries end to end, to give approximately 12VDC output with up to 2 amp peak current draw. We like this configuration in particular because it holds the batteries securely, even if being...
In Stock
[Buy Now](https://www.adafruit.com/product/449)
[Related Guides to the Product](https://learn.adafruit.com/products/449/guides)
### Heat Shrink Pack
[Heat Shrink Pack](https://www.adafruit.com/product/344)
Heat shrink is the duct tape of electronics, it keeps your stuff all safe and kept together. Especially when wiring and soldering, use heat shrink to add mechanical strength to cables. We use this stuff all the time and having a zip-lock bag of all the possible sizes is super...
In Stock
[Buy Now](https://www.adafruit.com/product/344)
[Related Guides to the Product](https://learn.adafruit.com/products/344/guides)
## Related Guides
- [Mystery Box: Crypto Countdown Case](https://learn.adafruit.com/mystery-box-crypto-countdown-case.md)
- [Bedazzler](https://learn.adafruit.com/bedazzler.md)
- [CircuitPython LED Animations](https://learn.adafruit.com/circuitpython-led-animations.md)
- [Blahaj Alarm and Lamp](https://learn.adafruit.com/blahaj-alarm.md)
- [Arduino Lesson 4. Eight LEDs and a Shift Register](https://learn.adafruit.com/adafruit-arduino-lesson-4-eight-leds.md)
- [LED Emerald with Circuit Playground Bluefruit](https://learn.adafruit.com/led-emerald-with-circuit-playground.md)
- [Talking HAL 9000 with RP2040 Prop Maker Feather](https://learn.adafruit.com/hal-9000-rp2040-prop-maker.md)
- [Adafruit NeoPXL8 FeatherWing and Library](https://learn.adafruit.com/adafruit-neopxl8-featherwing-and-library.md)
- [Color Remote with Circuit Playground Bluefruit](https://learn.adafruit.com/color-remote-with-circuit-playground-bluefruit.md)
- [Guardian Shield+ Zelda Breath of the Wild](https://learn.adafruit.com/guardian-shield-zelda-breath-of-the-wild.md)
- [Mad Science Test Tube Rack](https://learn.adafruit.com/mad-science-test-tube-rack.md)
- [Making Wearable Badge Art with Printed Circuit Boards](https://learn.adafruit.com/making-wearable-badge-art-with-printed-circuit-boards.md)
- [Tiny TARDIS Pendant](https://learn.adafruit.com/tiny-tardis-pendant.md)
- [Party Parrot Zoetrope](https://learn.adafruit.com/party-parrot-zoetrope.md)
- [LED Noodle Shop Sign](https://learn.adafruit.com/led-noodle-shop-sign.md)
---
# Source: https://learn.adafruit.com/battery-power-for-led-pixels-and-strips.md
# Battery Power for LED Pixels and Strips
## Overview

Here’s how to use our addressable LED strips and pixels for portable projects — bicycles, costumes and fashion accessories — using readily-available AA cells. This is _much_ easier and less expensive to start with than using fancy lithium-polymer batteries and voltage converters.Our 12mm LED pixels and digital RGB flex strips all operate on 5 Volts. When working at one’s desk or workbench, this is easily supplied with a 5 volt wall adapter, or you might have a bench power supply.
So how do we get our project off the workbench and out into the world?

Info:
The recommended 5 Volts is a “nominal” rating…we actually have a little bit of wiggle room here. About 10% above or below this figure works fine. You can see this by measuring the output of a wall adapter with a voltmeter: due to manufacturing variance, the actual output could be anywhere in this range. So **anything from about 4.5 to 5.5 Volts is safe for these LEDs and 6V is the 'rated absolute maximum'. Any higher and they’ll burn out quickly. Any less and the colors will appear muddy and brown.**
- [Next Page](https://learn.adafruit.com/battery-power-for-led-pixels-and-strips/about-batteries.md)
## Featured Products
### Digital programmable LED belt kit
[Digital programmable LED belt kit](https://www.adafruit.com/product/332)
By popular demand, we now have a project tutorial for how to make your own programmable, ultra-blinky LED belt. Perfect for parties, raves, parades, weddings, funerals, and bar mitzvahs. Wear it with pride, wear it with blinky! Follow our soldering tutorial to build your own heirloom LED belt,...
No Longer Stocked
[Buy Now](https://www.adafruit.com/product/332)
[Related Guides to the Product](https://learn.adafruit.com/products/332/guides)
### Alkaline AAA batteries - 2 pack
[Alkaline AAA batteries - 2 pack](https://www.adafruit.com/product/617)
Battery power for your portable project! These batteries are good quality at a good price, and work fantastic with any of the kits or projects in the shop that use AAA's. This is a pack of **2 AAA batteries**.
These batteries are Alkaline (MnO2) chemistry,...
No Longer Stocked
[Buy Now](https://www.adafruit.com/product/617)
[Related Guides to the Product](https://learn.adafruit.com/products/617/guides)
### 1N4001 Diode - 10 pack
[1N4001 Diode - 10 pack](https://www.adafruit.com/product/755)
This here is a 10 pack of the classic 1N4001 power blocking diode. These are good for reverse polarity protection (put it between your DC power jack and circuitry to avoid a negative-voltage that would zap your delicate electronics), kickback protection (place across your solenoids, relays...
In Stock
[Buy Now](https://www.adafruit.com/product/755)
[Related Guides to the Product](https://learn.adafruit.com/products/755/guides)
### 4 x AA Battery Holder with On/Off Switch
[4 x AA Battery Holder with On/Off Switch](https://www.adafruit.com/product/830)
Make a nice portable power pack with this 4 x AA battery holder. It fits any alkaline or rechargeable AA batteries in series. There's a snap on cover and an on/off switch which can be handy when wiring to something without a switch.
**New**! We now have 0.1" headers...
In Stock
[Buy Now](https://www.adafruit.com/product/830)
[Related Guides to the Product](https://learn.adafruit.com/products/830/guides)
### 12mm Diffused Flat Digital RGB LED Pixels (Strand of 25)
[12mm Diffused Flat Digital RGB LED Pixels (Strand of 25)](https://www.adafruit.com/product/738)
RGB Pixels are digitally-controllable lights you can set to any color, or animate. Each RGB LED and controller chip is molded into a 'dot' of silicone. The dots are weatherproof and rugged. There are four flanges molded in so that you can 'push' them into a 12mm drill hole in...
In Stock
[Buy Now](https://www.adafruit.com/product/738)
[Related Guides to the Product](https://learn.adafruit.com/products/738/guides)
### 12mm Diffused Thin Digital RGB LED Pixels (Strand of 25)
[12mm Diffused Thin Digital RGB LED Pixels (Strand of 25)](https://www.adafruit.com/product/322)
RGB Pixels are digitally-controllable lights you can set to any color, or animate. Each RGB LED and controller chip is molded into a 'dot' of silicone. The dots are weatherproof and rugged. There are four flanges molded in so that you can 'push' them into a 12mm drill hole in...
No Longer Stocked
[Buy Now](https://www.adafruit.com/product/322)
[Related Guides to the Product](https://learn.adafruit.com/products/322/guides)
### Digital RGB LED Weatherproof Strip - LPD8806 32 LED 5m
[Digital RGB LED Weatherproof Strip - LPD8806 32 LED 5m](https://www.adafruit.com/product/306)
These LED strips are fun and glowy. There are 32 RGB LEDs per meter, and you can control each LED individually! Yes, that's right, this is the digitally-addressable type of LED strip. You can set the color of each LED's red, green and blue component with 7-bit PWM precision (so 21-bit...
In Stock
[Buy Now](https://www.adafruit.com/product/306)
[Related Guides to the Product](https://learn.adafruit.com/products/306/guides)
## Related Guides
- [LPD8806 Digital RGB LED Strip](https://learn.adafruit.com/digital-led-strip.md)
- [Meeting Time Keeper Stick](https://learn.adafruit.com/meeting-time-keeper-stick-with-cpx.md)
- [Deluxe 4x4 NeoPixel Keypad](https://learn.adafruit.com/deluxe-4x4-neopixel-neokey-keypad.md)
- [Circuit Playground Express Rocket Lamp](https://learn.adafruit.com/cpx-rocket-lamp.md)
- [Mystery Box: Crypto Countdown Case](https://learn.adafruit.com/mystery-box-crypto-countdown-case.md)
- [MicroBlocks Circuit Playground Express Ornament](https://learn.adafruit.com/microblocks-circuitplayground-express-ornament.md)
- [Adafruit NeoSlider](https://learn.adafruit.com/adafruit-neoslider.md)
- [MIDI Stomping Pads](https://learn.adafruit.com/midi-stomping-pads.md)
- [Tent Lantern](https://learn.adafruit.com/tent-lantern.md)
- [Sword & Wand Prop Effects with Circuit Playground](https://learn.adafruit.com/sword-and-wand-prop-effects-with-circuit-playground.md)
- [Arduino Lesson 6. Digital Inputs](https://learn.adafruit.com/adafruit-arduino-lesson-6-digital-inputs.md)
- [Bedazzler](https://learn.adafruit.com/bedazzler.md)
- [Reindeer Solder Kit by Phyx](https://learn.adafruit.com/reindeer-solder-kit-by-phyx.md)
- [Guardian Shield+ Zelda Breath of the Wild](https://learn.adafruit.com/guardian-shield-zelda-breath-of-the-wild.md)
- [Adafruit TPS61169 Constant Current Boost Converter for LEDs](https://learn.adafruit.com/adafruit-tps61169-constant-current-boost-converter-for-leds.md)
- [reef-pi Guide 5: Light Controller](https://learn.adafruit.com/reef-pi-lighting-controller.md)
---
# Source: https://learn.adafruit.com/digital-led-belt/battery-protection-diode.md
# Digital LED Belt
## Battery Protection Diode
Now we can work on making the battery pack to give us portable power. Grab the remaining parts you'll need, the battery holder, diode, long battery connection cable, and small heatshrink.
Cut the red wire of the battery pack short by about an inch.
Then strip and tin the wire.

Find the diode, this part will protect the board in case you put the batteries in backwards, it also lowers the voltage a little so if you have fresh alkaline batteries, the voltage won't be too high. Diodes are directional so make sure you're working with the right end. Find the end that **doesn't** have a white strip and cut it short. Solder that end to the red wire.

Clip the other side (the side with a white stripe).
Cut off and slide a ~2" piece of black heatshrink onto the red wire past the diode.
Now solder one wire from the battery connection cable onto the other end of the diode, you may need to tin both if you are having trouble getting a good joint. It doesn't matter which wire you choose so just pick one!
Slide the heatshrink back over the diode and solder joints.

Now shrink the tubing to protect the diode, you can use a hair dryer, heat gun, lighter or the edge of your soldering iron.

Now we'll connect the other side of the long power cable to the black wire. Slide a small 1" piece of heat shrink onto the black wire (this image shows a much shorter piece, but its too short so go a little longer).
…and solder together the wires
Then heatshrink like you did before!
- [Previous Page](https://learn.adafruit.com/digital-led-belt/upload-the-test-sketch.md)
- [Next Page](https://learn.adafruit.com/digital-led-belt/power-connection.md)
## Featured Products
### Digital programmable LED belt kit
[Digital programmable LED belt kit](https://www.adafruit.com/product/332)
By popular demand, we now have a project tutorial for how to make your own programmable, ultra-blinky LED belt. Perfect for parties, raves, parades, weddings, funerals, and bar mitzvahs. Wear it with pride, wear it with blinky! Follow our soldering tutorial to build your own heirloom LED belt,...
No Longer Stocked
[Buy Now](https://www.adafruit.com/product/332)
[Related Guides to the Product](https://learn.adafruit.com/products/332/guides)
## Related Guides
- [LED Sequin Bow Tie](https://learn.adafruit.com/led-sequin-bowtie.md)
- [Bluetooth-Controlled NeoPixel Goggles](https://learn.adafruit.com/bluetooth-neopixel-goggles.md)
- [Light Painting with Raspberry Pi](https://learn.adafruit.com/light-painting-with-raspberry-pi.md)
- [Glowing Viking Rune wayFinder](https://learn.adafruit.com/glowing-viking-rune-artifact.md)
- [3D Printing with Bamboo Wood Filament](https://learn.adafruit.com/3d-printing-with-bamboo-wood-filament.md)
- [Jellyfish Umbrella with easy WLED WiFi Control](https://learn.adafruit.com/jellyfish-umbrella-with-easy-wled-wifi-control.md)
- [Bandolier of Light](https://learn.adafruit.com/bandolier-of-light.md)
- [Electron Bow](https://learn.adafruit.com/electron-bow.md)
- [Steven Universe Cosplay Shirt & Gem](https://learn.adafruit.com/steven-universe-cosplay-shirt-gem.md)
- [CLUE Vertical Garden Weather Visualizer](https://learn.adafruit.com/clue-vertical-garden-weather-visualizer.md)
- [Cast a 3d Printed Necklace in Metal](https://learn.adafruit.com/cast-a-3d-printed-necklace-in-metal.md)
- [3D Printed Wearable Video Goggles](https://learn.adafruit.com/3d-printed-wearable-video-goggles.md)
- [Bunny Ears with MakeCode](https://learn.adafruit.com/bunny-ears-with-makecode.md)
- [Roll-up Video Light](https://learn.adafruit.com/roll-up-video-light.md)
- [1,500 NeoPixel LED Curtain with Raspberry Pi and Fadecandy](https://learn.adafruit.com/1500-neopixel-led-curtain-with-raspberry-pi-fadecandy.md)
---
# Source: https://learn.adafruit.com/beaglebone.md
# BeagleBone
## Overview
New from the fine people who have brought us the Beagle Board, we now have a smaller, lighter, but powerful single board linux computer, Beagle Bone! We like this move to a more compact and integrated SBC. For example, there is onboard Ethernet and USB host, as well as a USB client interface (a FTDI chip for shell access). It even comes preloaded with Angstrom Linux on the 4 GB microSD card!

The Beagle Bone is a great step up from **microcontrollers** (such as AVR, PIC, ARM Cortex M3, 8051, Propeller, etc) to **microcomputers**. Unlike a microcontroller, where the FLASH, EEPROM, RAM, etc is all in one chip, a microcomputer has them separated out, like a classic computer such as a desktop or laptop machine. The Beagle Bone has a main processor core running at 700MHz, a chunk of 256M DDR RAM, and permanent storage onto a microSD card. This makes for a powerful machine, that has no problems running Linux, a webserver, Python, FTP clients, SSH, etc.
The Bone also has great accessories built in, such as onboard Ethernet with 10/100M connectivity, mini USB port with TTL serial converter, JTAG debugger for advanced hacking, USB A host port for connecting a hub/WiFi/etc, power management IC that keeps the board safe from a misplugged adapter, and tons of 0.1" spaced breakouts
One of the powerful abilities of the Bone is that it has I2C, SPI, and GPIO at a hobbyist-friendly 3.3V level (instead of the more difficult to interface 1.8V) while also running complex applications such as a webserver. This allows for more complex projects that would tax an Arduino.
- [Next Page](https://learn.adafruit.com/beaglebone/installing-drivers.md)
## Featured Products
### Adafruit Beagle Bone Black Starter Pack
[Adafruit Beagle Bone Black Starter Pack](https://www.adafruit.com/product/703)
If you've heard about the Beagle Bone Black and you want to hit the ground running, this starter pack is for you. We've picked out everything you need to start out, with essential parts and accessories to save on a bundle.
Includes:
-
No Longer Stocked
[Buy Now](https://www.adafruit.com/product/703)
[Related Guides to the Product](https://learn.adafruit.com/products/703/guides)
### Miniature WiFi (802.11b/g/n) Module: For Raspberry Pi and more
[Miniature WiFi (802.11b/g/n) Module: For Raspberry Pi and more](https://www.adafruit.com/product/814)
Make your Internet of Things device cable-free by adding WiFi. Take advantage of the Raspberry Pi and Beagle Bone's USB port to add a low cost, but high-reliability wireless link. We tried half a dozen modules to find one that works well with the Pi and Bone without the need of recompiling...
No Longer Stocked
[Buy Now](https://www.adafruit.com/product/814)
[Related Guides to the Product](https://learn.adafruit.com/products/814/guides)
### Ethernet Cable - 10 ft long
[Ethernet Cable - 10 ft long](https://www.adafruit.com/product/730)
We have so many Internet-connected goodies in the shop, we figured it's time to carry a cable so you can easily connect them up! This cable is 10 feet long, black and has all 8 wires installed. Perfect for use with the [BeagleBone](http://www.adafruit.com/products/513),
No Longer Stocked
[Buy Now](https://www.adafruit.com/product/730)
[Related Guides to the Product](https://learn.adafruit.com/products/730/guides)
### 5V 2A (2000mA) switching power supply - UL Listed
[5V 2A (2000mA) switching power supply - UL Listed](https://www.adafruit.com/product/276)
This is an FCC/CE certified and UL listed power supply. Need a lot of 5V power? This switching supply gives a clean regulated 5V output at up to 2000mA. 110 or 240 input, so it works in any country. The plugs are "US 2-prong" style so you may need a plug adapter, but you can pick one...
In Stock
[Buy Now](https://www.adafruit.com/product/276)
[Related Guides to the Product](https://learn.adafruit.com/products/276/guides)
## Related Guides
- [MPR121 Capacitive Touch Sensor on Raspberry Pi & BeagleBone Black](https://learn.adafruit.com/mpr121-capacitive-touch-sensor-on-raspberry-pi-and-beaglebone-black.md)
- [BNO055 Absolute Orientation Sensor with Raspberry Pi & BeagleBone Black](https://learn.adafruit.com/bno055-absolute-orientation-sensor-with-raspberry-pi-and-beaglebone-black.md)
- [Setting up WiFi with BeagleBone Black](https://learn.adafruit.com/setting-up-wifi-with-beaglebone-black.md)
- [SSD1306 OLED Displays with Raspberry Pi and BeagleBone Black](https://learn.adafruit.com/ssd1306-oled-displays-with-raspberry-pi-and-beaglebone-black.md)
- [Fading a RGB LED on BeagleBone Black](https://learn.adafruit.com/fading-a-rgb-led-on-beaglebone-black.md)
- [DHT Humidity Sensing on Raspberry Pi or Beaglebone Black with GDocs Logging](https://learn.adafruit.com/dht-humidity-sensing-on-raspberry-pi-with-gdocs-logging.md)
- [Running Programs Automatically on Your Tiny Computer](https://learn.adafruit.com/running-programs-automatically-on-your-tiny-computer.md)
- [Blinking an LED with BeagleBone Black](https://learn.adafruit.com/blinking-an-led-with-beaglebone-black.md)
- [MAX31855 Thermocouple Sensor Python Library](https://learn.adafruit.com/max31855-thermocouple-python-library.md)
- [Character LCD with Raspberry Pi or BeagleBone Black](https://learn.adafruit.com/character-lcd-with-raspberry-pi-or-beaglebone-black.md)
- [Connecting a Push Button to BeagleBone Black](https://learn.adafruit.com/connecting-a-push-button-to-beaglebone-black.md)
- [Bone Box](https://learn.adafruit.com/bone-box.md)
- [Nokia 5110/3310 LCD Python Library](https://learn.adafruit.com/nokia-5110-3310-lcd-python-library.md)
- [Controlling a Servo with a BeagleBone Black](https://learn.adafruit.com/controlling-a-servo-with-a-beaglebone-black.md)
- [Bonjour (Zeroconf) Networking for Windows and Linux](https://learn.adafruit.com/bonjour-zeroconf-networking-for-windows-and-linux.md)
---
# Source: https://learn.adafruit.com/skill-badge-guide-3d-printing/bed-leveling.md
# Skill Badge Guide: 3D Printing
## Bed leveling

The build surface needs to be level to ensure the filament properly sticks to the surface and to provide a secure foundation for the print job. The bed can be leveled by either mechanically leveling the bed or using a raft to accommodate for unevenness.
- **Mechanical Leveling** - The easiest way to check this is to command the printer to "zero" the axis and move the extruder to its lowest position. You should be able to insert a sheet of paper between the build platform and the tip of the nozzle. If there is a gap, gently raise that side of the build platform using the adjustment screw or a shim and continue checking the remaining corners of the build area.
- **Extrusion Raft** - If the build platform is warped, or cannot be leveled, try printing your next object with the "raft" feature enabled. This will deposit a thick grid of material onto the bed at the beginning of each print and will eliminate most adhesion problems.
- [Previous Page](https://learn.adafruit.com/skill-badge-guide-3d-printing/setting-up-the-machine.md)
- [Next Page](https://learn.adafruit.com/skill-badge-guide-3d-printing/axis-calibration.md)
## Featured Products
### 3D printing - Skill badge, iron-on patch
[3D printing - Skill badge, iron-on patch](https://www.adafruit.com/product/490)
You can 3D print! Adafruit offers a fun and exciting "badges" of achievement for electronics, science and engineering. We believe everyone should be able to be rewarded for learning a useful skill, a badge is just one of the many ways to show and share.
This is the "I...
No Longer Stocked
[Buy Now](https://www.adafruit.com/product/490)
[Related Guides to the Product](https://learn.adafruit.com/products/490/guides)
### 3D printing - Sticker!
[3D printing - Sticker!](https://www.adafruit.com/product/649)
You can 3D print! Adafruit offers a fun and exciting stickers to celebrate achievement for electronics, science and engineering. We believe everyone should be able to be rewarded for learning a useful skill, a sticker is just one of the many ways to show and share.
This is the...
No Longer Stocked
[Buy Now](https://www.adafruit.com/product/649)
[Related Guides to the Product](https://learn.adafruit.com/products/649/guides)
### Flashforge Creator PRO
[Flashforge Creator PRO](https://www.adafruit.com/product/2742)
The **Flashforge Creator Pro** is the latest addition to FlashForge’s Creator family, built upon an open source platform.
Based on proven design of the Creator X chassis, the Pro is now enclosed so you can print ABS better and more efficient than ever. The upgraded...
No Longer Stocked
[Buy Now](https://www.adafruit.com/product/2742)
[Related Guides to the Product](https://learn.adafruit.com/products/2742/guides)
### PrintrBot Simple Metal 3D Printer - Black - Assembled
[PrintrBot Simple Metal 3D Printer - Black - Assembled](https://www.adafruit.com/product/1760)
New from Printrbot, the Metal Simple is a brand new rock solid, all metal, fully-assembled Printrbot Simple! As opposed to the [Printrbot Simple Kit](http://www.adafruit.com/products/1735), all of the laser cut wood parts have been replaced by rock solid metal and assembled. In...
No Longer Stocked
[Buy Now](https://www.adafruit.com/product/1760)
[Related Guides to the Product](https://learn.adafruit.com/products/1760/guides)
### Ultimaker 2+ 3D Printer
[Ultimaker 2+ 3D Printer](https://www.adafruit.com/product/2673)
The **Ultimaker 2+** is one of our favorite 3D printers on the market. It's a well-built open-source compact machine with an excellent UX. Every inch of the Ultimaker 2+ is designed to create the most effortless and reliable 3D printing experience ever!
No Longer Stocked
[Buy Now](https://www.adafruit.com/product/2673)
[Related Guides to the Product](https://learn.adafruit.com/products/2673/guides)
### Micro 3D Printer - Black - Retail Edition
[Micro 3D Printer - Black - Retail Edition](https://www.adafruit.com/product/2933)
The magic of 3D printing is now more affordable and accessible than ever! Meet The **Micro 3D Printer** by [M3D](https://printm3d.com/), the first truly consumer 3D printer. Sporting a compact design, user-friendly software, and replaceable print beds and nozzles,...
No Longer Stocked
[Buy Now](https://www.adafruit.com/product/2933)
[Related Guides to the Product](https://learn.adafruit.com/products/2933/guides)
### Filament for 3D Printers in Various Colors and Types
[Filament for 3D Printers in Various Colors and Types](https://www.adafruit.com/product/2080)
Having a 3D printer without filament is sort of like having a regular printer without paper or ink. And while a lot of printers come with some filament there's a good chance you've been printing up a storm and need something new. That's why we've started carrying a...
Out of Stock
[Buy Now](https://www.adafruit.com/product/2080)
[Related Guides to the Product](https://learn.adafruit.com/products/2080/guides)
## Related Guides
- [Mario Magic Wand](https://learn.adafruit.com/mario-magic-wand.md)
- [Case for HUSB238 Breakout](https://learn.adafruit.com/case-for-husb238.md)
- [3D Printed RFID NFC Rings](https://learn.adafruit.com/3d-printed-rfid-nfc-rings.md)
- [AI 3D Printed Figure](https://learn.adafruit.com/ai-figure.md)
- [Ultrasonic Ruler](https://learn.adafruit.com/ultrasonic-ruler.md)
- [Magnet Bottle Holder](https://learn.adafruit.com/magnet-bottle-holder.md)
- [Printy Boost: Reimagining a Classic Adafruit Kit](https://learn.adafruit.com/printy-boost-reimagining-a-classic-adafruit-kit.md)
- [CYBERDECK Expansion Plate](https://learn.adafruit.com/cyberdeck-plate.md)
- [PyPortal Case](https://learn.adafruit.com/pyportal-case.md)
- [3D Printed LED Buckle](https://learn.adafruit.com/3d-printed-led-buckle.md)
- [CLUE Slim Case](https://learn.adafruit.com/clue-slim-case.md)
- [Adafruit Desktop 3D Printer Buyers Guide](https://learn.adafruit.com/adafruit-desktop-3d-printer-selection-guide.md)
- [3D Printed Animatronic Robot Head](https://learn.adafruit.com/3d-printed-animatronic-robot-head.md)
- [New Years Eve Ball Drop](https://learn.adafruit.com/new-years-eve-ball-drop.md)
- [3D Printed Battery Adapter for Camera-Mount LED Panel](https://learn.adafruit.com/3d-printed-battery-adapter-for-camera-mount-led-panel.md)
---
# Source: https://learn.adafruit.com/adafruit-led-backpack/bi-color-24-bargraph-assembly.md
# Adafruit LED Backpacks
## Assembly
Danger:
Remove the parts from packaging and place the LED bargraphs over the outlines on the top of the PCB.
**The bargraph must be soldered on the correct orientation or it will not work! Check for the side of the bargraph that has printing on it. Then look for the outline on the PCB that has "Text on this side" marked!**
Do not solder the matrix onto the back of the PCB, it won't work either!


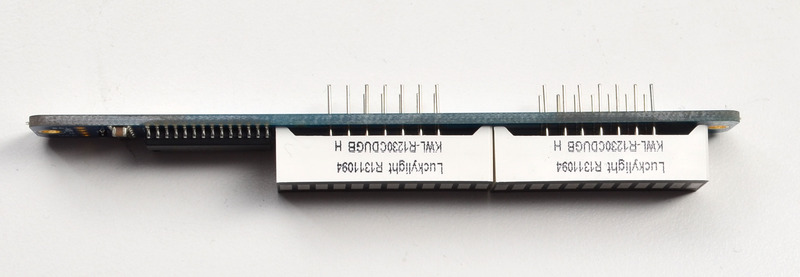
To keep the two bargraphs lined up nicely, you can use a little masking or scotch tape on the bargraph modules, tape them so they are in a straight line. There is a little play during soldering so if you don't do this the two modules may not be in a perfect line.

Turn over the PCB and bend opposite-corner pins of the modules out so that the modules are fixed in place against the PCB. Now is a good time to do a last check that you oriented the modules the right way!
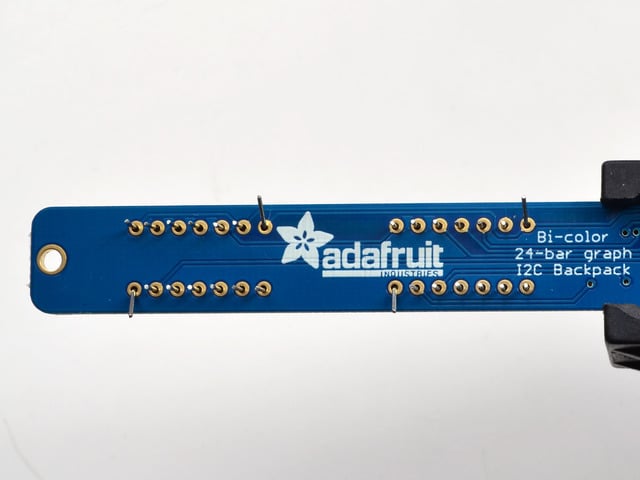
Solder all the module pins in!


OK nice work!

Once soldered, clip each pin. They're quite short and the pins are thicker than usual, so do this over/inside a trash bin so that the pins don't fly off and it you or your pets.

Everything should be neat and clipped, you're done!
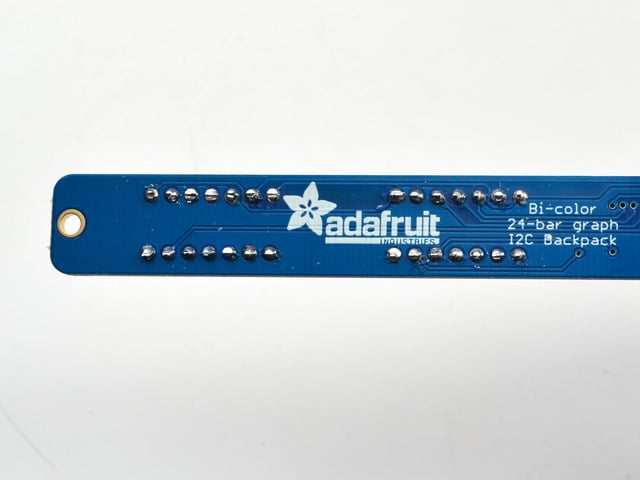
# Soldering on breadboard pins
This is an optional step - you only need to do this step if you're planning on using the bargraph in a breadboard. Chances are you may want to solder wires directly to the pads instead, so you can mount the bargraph elsewhere. Anyhow, skip this step if its not for you!
Break off a piece of male header, 4 pins long. Plug the **long ends** into a solderless breadboard.

Place the PCB on top. you may need to support it a little since its quite long.

Solder these 4 pins too, since you're good at it now this should be easy.


- [Previous Page](https://learn.adafruit.com/adafruit-led-backpack/bi-color-24-bargraph.md)
- [Next Page](https://learn.adafruit.com/adafruit-led-backpack/bi-color-24-bargraph-wiring-and-setup.md)
## Primary Products
### Adafruit Mini 8x8 LED Matrix w/I2C Backpack - Red
[Adafruit Mini 8x8 LED Matrix w/I2C Backpack - Red](https://www.adafruit.com/product/870)
What's better than a single LED? Lots of LEDs! A fun way to make a small display is to use an [8x8 matrix](https://www.adafruit.com/category/37_88) or a [4-digit 7-segment display](https://www.adafruit.com/category/37_103). Matrices like these are...
In Stock
[Buy Now](https://www.adafruit.com/product/870)
[Related Guides to the Product](https://learn.adafruit.com/products/870/guides)
### Adafruit Mini 8x8 LED Matrix w/I2C Backpack - Yellow
[Adafruit Mini 8x8 LED Matrix w/I2C Backpack - Yellow](https://www.adafruit.com/product/871)
What's better than a single LED? Lots of LEDs! A fun way to make a small display is to use an [8x8 matrix](https://www.adafruit.com/category/37_88) or a [4-digit 7-segment display](https://www.adafruit.com/category/37_103). Matrices like these are...
In Stock
[Buy Now](https://www.adafruit.com/product/871)
[Related Guides to the Product](https://learn.adafruit.com/products/871/guides)
### Adafruit Mini 0.8" 8x8 LED Matrix w/I2C Backpack - Yellow-Green
[Adafruit Mini 0.8" 8x8 LED Matrix w/I2C Backpack - Yellow-Green](https://www.adafruit.com/product/872)
What's better than a single LED? Lots of LEDs! A fun way to make a small display is to use an [8x8 matrix](https://www.adafruit.com/category/37_88) or a [4-digit 7-segment display](https://www.adafruit.com/category/37_103). Matrices like these are...
In Stock
[Buy Now](https://www.adafruit.com/product/872)
[Related Guides to the Product](https://learn.adafruit.com/products/872/guides)
### Adafruit 0.56" 4-Digit 7-Segment Display with I2C Backpack - Red
[Adafruit 0.56" 4-Digit 7-Segment Display with I2C Backpack - Red](https://www.adafruit.com/product/878)
What's better than a single LED? Lots of LEDs! A fun way to make a small display is to use an [8x8 matrix](https://www.adafruit.com/category/37_88) or a [4-digit 7-segment display](https://www.adafruit.com/category/37_103). Matrices like these are...
In Stock
[Buy Now](https://www.adafruit.com/product/878)
[Related Guides to the Product](https://learn.adafruit.com/products/878/guides)
### Adafruit 0.56" 4-Digit 7-Segment Display w/I2C Backpack - Yellow
[Adafruit 0.56" 4-Digit 7-Segment Display w/I2C Backpack - Yellow](https://www.adafruit.com/product/879)
What's better than a single LED? Lots of LEDs! A fun way to make a small display is to use an [8x8 matrix](https://www.adafruit.com/category/37_88) or a [4-digit 7-segment display](https://www.adafruit.com/category/37_103). Matrices like these are...
In Stock
[Buy Now](https://www.adafruit.com/product/879)
[Related Guides to the Product](https://learn.adafruit.com/products/879/guides)
### Adafruit 0.56" 4-Digit 7-Segment Display w/ I2C Backpack - Green
[Adafruit 0.56" 4-Digit 7-Segment Display w/ I2C Backpack - Green](https://www.adafruit.com/product/880)
What's better than a single LED? Lots of LEDs! A fun way to make a small display is to use an [8x8 matrix](https://www.adafruit.com/category/37_88) or a [4-digit 7-segment display](https://www.adafruit.com/category/37_103). Matrices like these are...
No Longer Stocked
[Buy Now](https://www.adafruit.com/product/880)
[Related Guides to the Product](https://learn.adafruit.com/products/880/guides)
### Adafruit 0.56" 4-Digit 7-Segment Display w/ I2C Backpack - Blue
[Adafruit 0.56" 4-Digit 7-Segment Display w/ I2C Backpack - Blue](https://www.adafruit.com/product/881)
What's better than a single LED? Lots of LEDs! A fun way to make a small display is to use an [8x8 matrix](https://www.adafruit.com/category/37_88) or a [4-digit 7-segment display](https://www.adafruit.com/category/37_103). Matrices like these are...
In Stock
[Buy Now](https://www.adafruit.com/product/881)
[Related Guides to the Product](https://learn.adafruit.com/products/881/guides)
### Adafruit Bicolor LED Square Pixel Matrix with I2C Backpack
[Adafruit Bicolor LED Square Pixel Matrix with I2C Backpack](https://www.adafruit.com/product/902)
What's better than a single LED? Lots of LEDs! A fun way to make a small colorful display is to use a [1.2" Bi-color 8x8 LED Matrix](http://www.adafruit.com/products/458). Matrices like these are 'multiplexed' - so to control all the 128 LEDs you need 24 pins....
In Stock
[Buy Now](https://www.adafruit.com/product/902)
[Related Guides to the Product](https://learn.adafruit.com/products/902/guides)
### Adafruit Mini 8x8 LED Matrix w/I2C Backpack - Blue
[Adafruit Mini 8x8 LED Matrix w/I2C Backpack - Blue](https://www.adafruit.com/product/959)
What's better than a single LED? Lots of LEDs! A fun way to make a small display is to use an [8x8 matrix](https://www.adafruit.com/category/37_88) or a [4-digit 7-segment display](https://www.adafruit.com/category/37_103). Matrices like these are...
In Stock
[Buy Now](https://www.adafruit.com/product/959)
[Related Guides to the Product](https://learn.adafruit.com/products/959/guides)
### Adafruit 0.56" 4-Digit 7-Segment Display w/I2C Backpack - White
[Adafruit 0.56" 4-Digit 7-Segment Display w/I2C Backpack - White](https://www.adafruit.com/product/1002)
What's better than a single LED? Lots of LEDs! A fun way to make a small display is to use an [8x8 matrix](https://www.adafruit.com/category/37_88) or a [4-digit 7-segment display](https://www.adafruit.com/category/37_103). Matrices like these are...
In Stock
[Buy Now](https://www.adafruit.com/product/1002)
[Related Guides to the Product](https://learn.adafruit.com/products/1002/guides)
### Adafruit 1.2" 8x8 LED Matrix Backpack
[Adafruit 1.2" 8x8 LED Matrix Backpack](https://www.adafruit.com/product/1048)
By popular request, you can now get our 8x8 LED backpacks without the LEDs! These backpacks feature an HT16K33 I2C LED driver, they're simple and easy to use - you can use [our very nice library for the backpacks to...](https://github.com/adafruit/Adafruit-LED-Backpack-Library)
In Stock
[Buy Now](https://www.adafruit.com/product/1048)
[Related Guides to the Product](https://learn.adafruit.com/products/1048/guides)
### Adafruit Small 1.2" 8x8 LED Matrix w/I2C Backpack - Red
[Adafruit Small 1.2" 8x8 LED Matrix w/I2C Backpack - Red](https://www.adafruit.com/product/1049)
What's better than a single LED? Lots of LEDs! A fun way to make a small display is to use an [8x8 matrix](https://www.adafruit.com/category/37_88) or a [4-digit 7-segment display](https://www.adafruit.com/category/37_103). Matrices like these are...
In Stock
[Buy Now](https://www.adafruit.com/product/1049)
[Related Guides to the Product](https://learn.adafruit.com/products/1049/guides)
### Adafruit Small 1.2" 8x8 LED Matrix w/I2C Backpack - Yellow
[Adafruit Small 1.2" 8x8 LED Matrix w/I2C Backpack - Yellow](https://www.adafruit.com/product/1050)
What's better than a single LED? Lots of LEDs! A fun way to make a small display is to use an [8x8 matrix](https://www.adafruit.com/category/37_88) or a [4-digit 7-segment display](https://www.adafruit.com/category/37_103). Matrices like these are...
In Stock
[Buy Now](https://www.adafruit.com/product/1050)
[Related Guides to the Product](https://learn.adafruit.com/products/1050/guides)
### Adafruit Small 1.2" 8x8 LED Matrix w/I2C Backpack - Blue
[Adafruit Small 1.2" 8x8 LED Matrix w/I2C Backpack - Blue](https://www.adafruit.com/product/1052)
What's better than a single LED? Lots of LEDs! A fun way to make a small display is to use an [8x8 matrix](https://www.adafruit.com/category/37_88) or a [4-digit 7-segment display](https://www.adafruit.com/category/37_103). Matrices like these are...
In Stock
[Buy Now](https://www.adafruit.com/product/1052)
[Related Guides to the Product](https://learn.adafruit.com/products/1052/guides)
### Adafruit Mini 8x8 LED Matrix w/I2C Backpack - Ultra Bright White
[Adafruit Mini 8x8 LED Matrix w/I2C Backpack - Ultra Bright White](https://www.adafruit.com/product/1080)
What's better than a single LED? Lots of LEDs! A fun way to make a small display is to use an [8x8 matrix](https://www.adafruit.com/category/37_88) or a [4-digit 7-segment display](https://www.adafruit.com/category/37_103). Matrices like these are...
In Stock
[Buy Now](https://www.adafruit.com/product/1080)
[Related Guides to the Product](https://learn.adafruit.com/products/1080/guides)
### Adafruit 1.2" 4-Digit 7-Segment Display w/I2C Backpack - Green
[Adafruit 1.2" 4-Digit 7-Segment Display w/I2C Backpack - Green](https://www.adafruit.com/product/1268)
What's better than a single LED? Lots of LEDs! A fun way to make a numeric display is to use a [4-digit 7-segment display](https://www.adafruit.com/category/37_103). LED matrices like these are 'multiplexed' - so to control all the seven-segment LEDs you need 14 pins....
No Longer Stocked
[Buy Now](https://www.adafruit.com/product/1268)
[Related Guides to the Product](https://learn.adafruit.com/products/1268/guides)
### Adafruit 1.2" 4-Digit 7-Segment Display w/I2C Backpack - Yellow
[Adafruit 1.2" 4-Digit 7-Segment Display w/I2C Backpack - Yellow](https://www.adafruit.com/product/1269)
What's better than a single LED? Lots of LEDs! A fun way to make a numeric display is to use a [4-digit 7-segment display](https://www.adafruit.com/category/37_103). LED matrices like these are 'multiplexed' - so to control all the seven-segment LEDs you need 14 pins....
In Stock
[Buy Now](https://www.adafruit.com/product/1269)
[Related Guides to the Product](https://learn.adafruit.com/products/1269/guides)
### Adafruit 1.2" 4-Digit 7-Segment Display w/I2C Backpack - Red
[Adafruit 1.2" 4-Digit 7-Segment Display w/I2C Backpack - Red](https://www.adafruit.com/product/1270)
What's better than a single LED? Lots of LEDs! A fun way to make a numeric display is to use a [4-digit 7-segment display](https://www.adafruit.com/category/37_103). LED matrices like these are 'multiplexed' - so to control all the seven-segment LEDs you need 14 pins....
In Stock
[Buy Now](https://www.adafruit.com/product/1270)
[Related Guides to the Product](https://learn.adafruit.com/products/1270/guides)
### Small 1.2" 8x8 Ultra Bright White LED Matrix + Backpack
[Small 1.2" 8x8 Ultra Bright White LED Matrix + Backpack](https://www.adafruit.com/product/1614)
What's better than a single LED? Lots of LEDs! A fun way to make a small display is to use an [8x8 matrix](https://www.adafruit.com/category/37_88) or a [4-digit 7-segment display](https://www.adafruit.com/category/37_103). Matrices like these are...
In Stock
[Buy Now](https://www.adafruit.com/product/1614)
[Related Guides to the Product](https://learn.adafruit.com/products/1614/guides)
### Adafruit Small 1.2" 8x8 LED Matrix w/I2C Backpack - Pure Green
[Adafruit Small 1.2" 8x8 LED Matrix w/I2C Backpack - Pure Green](https://www.adafruit.com/product/1632)
What's better than a single LED? Lots of LEDs! A fun way to make a small display is to use an [8x8 matrix](https://www.adafruit.com/category/37_88) or a [4-digit 7-segment display](https://www.adafruit.com/category/37_103). Matrices like these are...
In Stock
[Buy Now](https://www.adafruit.com/product/1632)
[Related Guides to the Product](https://learn.adafruit.com/products/1632/guides)
### Adafruit Mini 0.8" 8x8 LED Matrix w/I2C Backpack - Pure Green
[Adafruit Mini 0.8" 8x8 LED Matrix w/I2C Backpack - Pure Green](https://www.adafruit.com/product/1633)
What's better than a single LED? Lots of LEDs! A fun way to make a small display is to use an [8x8 matrix](https://www.adafruit.com/category/37_88) or a [4-digit 7-segment display](https://www.adafruit.com/category/37_103). Matrices like these are...
In Stock
[Buy Now](https://www.adafruit.com/product/1633)
[Related Guides to the Product](https://learn.adafruit.com/products/1633/guides)
### Bi-Color (Red/Green) 24-Bar Bargraph w/I2C Backpack Kit
[Bi-Color (Red/Green) 24-Bar Bargraph w/I2C Backpack Kit](https://www.adafruit.com/product/1721)
What's better than a single LED? Lots of LEDs! A fun way to make a small linear display is to use two 12-bar Bi-color bar-graphs. However, this LED bargraph is 'multiplexed' - so to control all the 48 LEDs you need a lot of pins.
Out of Stock
[Buy Now](https://www.adafruit.com/product/1721)
[Related Guides to the Product](https://learn.adafruit.com/products/1721/guides)
### Small 1.2" 8x8 Ultra Bright Square Amber LED Matrix + Backpack
[Small 1.2" 8x8 Ultra Bright Square Amber LED Matrix + Backpack](https://www.adafruit.com/product/1854)
What's better than a single LED? Lots of LEDs! Matrices like these are 'multiplexed' - so to control 64 LEDs you need 16 pins. That's a lot of pins, and there are [driver chips like the MAX7219](//www.adafruit.com/products/453) that can control a matrix for you but...
In Stock
[Buy Now](https://www.adafruit.com/product/1854)
[Related Guides to the Product](https://learn.adafruit.com/products/1854/guides)
### Small 1.2" 8x8 Ultra Bright Square Yellow LED Matrix + Backpack
[Small 1.2" 8x8 Ultra Bright Square Yellow LED Matrix + Backpack](https://www.adafruit.com/product/1855)
What's better than a single LED? Lots of LEDs! Matrices like these are 'multiplexed' - so to control 64 LEDs you need 16 pins. That's a lot of pins, and there are [driver chips like the MAX7219](//www.adafruit.com/products/453) that can control a matrix for you but...
In Stock
[Buy Now](https://www.adafruit.com/product/1855)
[Related Guides to the Product](https://learn.adafruit.com/products/1855/guides)
### Small 1.2" 8x8 Bright Square Pure Green LED Matrix + Backpack
[Small 1.2" 8x8 Bright Square Pure Green LED Matrix + Backpack](https://www.adafruit.com/product/1856)
What's better than a single LED? Lots of LEDs! Matrices like these are 'multiplexed' - so to control 64 LEDs you need 16 pins. That's a lot of pins, and there are [driver chips like the MAX7219](//www.adafruit.com/products/453) that can control a matrix for you but...
In Stock
[Buy Now](https://www.adafruit.com/product/1856)
[Related Guides to the Product](https://learn.adafruit.com/products/1856/guides)
### Small 1.2" 8x8 Ultra Bright Square White LED Matrix + Backpack
[Small 1.2" 8x8 Ultra Bright Square White LED Matrix + Backpack](https://www.adafruit.com/product/1857)
What's better than a single LED? Lots of LEDs! Matrices like these are 'multiplexed' - so to control 64 LEDs you need 16 pins. That's a lot of pins, and there are [driver chips like the MAX7219](//www.adafruit.com/products/453) that can control a matrix for you but...
In Stock
[Buy Now](https://www.adafruit.com/product/1857)
[Related Guides to the Product](https://learn.adafruit.com/products/1857/guides)
### Adafruit 14-segment LED Alphanumeric Backpack - STEMMA QT
[Adafruit 14-segment LED Alphanumeric Backpack - STEMMA QT](https://www.adafruit.com/product/1910)
By popular request, you can now get our 14-segment LED backpacks without the LEDs! These backpacks feature an HT16K33 I2C LED driver, they're simple and easy to use - you can use [our very nice library for the backpacks to...](https://github.com/adafruit/Adafruit-LED-Backpack-Library)
In Stock
[Buy Now](https://www.adafruit.com/product/1910)
[Related Guides to the Product](https://learn.adafruit.com/products/1910/guides)
### Quad Alphanumeric Display - Red 0.54" Digits w/ I2C Backpack
[Quad Alphanumeric Display - Red 0.54" Digits w/ I2C Backpack](https://www.adafruit.com/product/1911)
Display, elegantly, 012345678 or 9! Gaze, hypnotized, at ABCDEFGHIJKLM - well it can display the whole alphabet. You get the point. This is a nice, bright alphanumeric display that shows letters and numbers in a beautiful red hue. It's super bright and designed for viewing from distances...
In Stock
[Buy Now](https://www.adafruit.com/product/1911)
[Related Guides to the Product](https://learn.adafruit.com/products/1911/guides)
### Quad Alphanumeric Display - Blue 0.54" Digits w/ I2C Backpack
[Quad Alphanumeric Display - Blue 0.54" Digits w/ I2C Backpack](https://www.adafruit.com/product/1912)
Display, elegantly, 012345678 or 9! Gaze, hypnotized, at ABCDEFGHIJKLM - well it can display the whole alphabet. You get the point. This is a nice, bright alphanumeric display that shows letters and numbers in a beautiful blue hue. It's super bright and designed for viewing from distances...
In Stock
[Buy Now](https://www.adafruit.com/product/1912)
[Related Guides to the Product](https://learn.adafruit.com/products/1912/guides)
### 16x8 1.2" LED Matrix + Backpack - Ultra Bright Round Green LEDs
[16x8 1.2" LED Matrix + Backpack - Ultra Bright Round Green LEDs](https://www.adafruit.com/product/2035)
What's better than a single LED? Lots of LEDs! And what's better than lots of LEDs? **TWO TIMES AS MANY LEDS!!!**
With the 16x8 LED Matrix Backpack we've doubled your project's matrix capacity by making it super easy to get two separate 8x8 matrices onto...
In Stock
[Buy Now](https://www.adafruit.com/product/2035)
[Related Guides to the Product](https://learn.adafruit.com/products/2035/guides)
### 16x8 1.2" LED Matrix+Backpack UltraBright Round YellowGreen LEDs
[16x8 1.2" LED Matrix+Backpack UltraBright Round YellowGreen LEDs](https://www.adafruit.com/product/2036)
What's better than a single LED? Lots of LEDs! And what's better than lots of LEDs? **TWO TIMES AS MANY LEDS!!!**
With the 16x8 LED Matrix Backpack we've doubled your project's matrix capacity by making it super easy to get two separate 8x8 matrices onto...
In Stock
[Buy Now](https://www.adafruit.com/product/2036)
[Related Guides to the Product](https://learn.adafruit.com/products/2036/guides)
### 16x8 1.2" LED Matrix + Backpack - Ultra Bright Round Red LEDs
[16x8 1.2" LED Matrix + Backpack - Ultra Bright Round Red LEDs](https://www.adafruit.com/product/2037)
What's better than a single LED? Lots of LEDs! And what's better than lots of LEDs? **TWO TIMES AS MANY LEDS!!!**
With the 16x8 LED Matrix Backpack we've doubled your project's matrix capacity by making it super easy to get two separate 8x8 matrices onto...
In Stock
[Buy Now](https://www.adafruit.com/product/2037)
[Related Guides to the Product](https://learn.adafruit.com/products/2037/guides)
### 16x8 1.2" LED Matrix + Backpack - Ultra Bright Round White LEDs
[16x8 1.2" LED Matrix + Backpack - Ultra Bright Round White LEDs](https://www.adafruit.com/product/2038)
What's better than a single LED? Lots of LEDs! And what's better than lots of LEDs? **TWO TIMES AS MANY LEDS!!!**
With the 16x8 LED Matrix Backpack we've doubled your project's matrix capacity by making it super easy to get two separate 8x8 matrices onto...
In Stock
[Buy Now](https://www.adafruit.com/product/2038)
[Related Guides to the Product](https://learn.adafruit.com/products/2038/guides)
### 16x8 1.2" LED Matrix + Backpack - Ultra Bright Round Blue LEDs
[16x8 1.2" LED Matrix + Backpack - Ultra Bright Round Blue LEDs](https://www.adafruit.com/product/2039)
What's better than a single LED? Lots of LEDs! And what's better than lots of LEDs? **TWO TIMES AS MANY LEDS!!!**
With the 16x8 LED Matrix Backpack we've doubled your project's matrix capacity by making it super easy to get two separate 8x8 matrices onto...
In Stock
[Buy Now](https://www.adafruit.com/product/2039)
[Related Guides to the Product](https://learn.adafruit.com/products/2039/guides)
### 16x8 1.2" LED Matrix + Backpack - Ultra Bright Square Blue LEDs
[16x8 1.2" LED Matrix + Backpack - Ultra Bright Square Blue LEDs](https://www.adafruit.com/product/2040)
What's better than a single LED? Lots of LEDs! And what's better than lots of LEDs? **TWO TIMES AS MANY LEDS!!!**
With the 16x8 LED Matrix Backpack we've doubled your project's matrix capacity by making it super easy to get two separate 8x8 matrices onto...
In Stock
[Buy Now](https://www.adafruit.com/product/2040)
[Related Guides to the Product](https://learn.adafruit.com/products/2040/guides)
### 16x8 1.2" LED Matrix + Backpack - Ultra Bright Square Amber LEDs
[16x8 1.2" LED Matrix + Backpack - Ultra Bright Square Amber LEDs](https://www.adafruit.com/product/2041)
What's better than a single LED? Lots of LEDs! And what's better than lots of LEDs? **TWO TIMES AS MANY LEDS!!!**
With the 16x8 LED Matrix Backpack we've doubled your project's matrix capacity by making it super easy to get two separate 8x8 matrices onto...
In Stock
[Buy Now](https://www.adafruit.com/product/2041)
[Related Guides to the Product](https://learn.adafruit.com/products/2041/guides)
### 16x8 1.2" LED Matrix + Backpack - Ultra Bright Square Green LEDs
[16x8 1.2" LED Matrix + Backpack - Ultra Bright Square Green LEDs](https://www.adafruit.com/product/2042)
What's better than a single LED? Lots of LEDs! And what's better than lots of LEDs? **TWO TIMES AS MANY LEDS!!!**
With the 16x8 LED Matrix Backpack we've doubled your project's matrix capacity by making it super easy to get two separate 8x8 matrices onto...
In Stock
[Buy Now](https://www.adafruit.com/product/2042)
[Related Guides to the Product](https://learn.adafruit.com/products/2042/guides)
### 16x8 1.2" LED Matrix + Backpack -Ultra Bright Square Yellow LEDs
[16x8 1.2" LED Matrix + Backpack -Ultra Bright Square Yellow LEDs](https://www.adafruit.com/product/2043)
What's better than a single LED? Lots of LEDs! And what's better than lots of LEDs? **TWO TIMES AS MANY LEDS!!!**
With the 16x8 LED Matrix Backpack we've doubled your project's matrix capacity by making it super easy to get two separate 8x8 matrices onto...
In Stock
[Buy Now](https://www.adafruit.com/product/2043)
[Related Guides to the Product](https://learn.adafruit.com/products/2043/guides)
### 16x8 1.2" LED Matrix + Backpack - Ultra Bright Square White LEDs
[16x8 1.2" LED Matrix + Backpack - Ultra Bright Square White LEDs](https://www.adafruit.com/product/2044)
What's better than a single LED? Lots of LEDs! And what's better than lots of LEDs? **TWO TIMES AS MANY LEDS!!!**
With the 16x8 LED Matrix Backpack we've doubled your project's matrix capacity by making it super easy to get two separate 8x8 matrices onto...
In Stock
[Buy Now](https://www.adafruit.com/product/2044)
[Related Guides to the Product](https://learn.adafruit.com/products/2044/guides)
### 16x8 1.2" LED Matrix + Backpack-Ultra Bright Round Orange LEDs
[16x8 1.2" LED Matrix + Backpack-Ultra Bright Round Orange LEDs](https://www.adafruit.com/product/2052)
What's better than a single LED? Lots of LEDs! And what's better than lots of LEDs? **TWO TIMES AS MANY LEDS!!!**
With the 16x8 LED Matrix Backpack we've doubled your project's matrix capacity by making it super easy to get two separate 8x8 matrices onto...
In Stock
[Buy Now](https://www.adafruit.com/product/2052)
[Related Guides to the Product](https://learn.adafruit.com/products/2052/guides)
### 16x8 1.2" LED Matrices+Backpack Round LEDs in Various Colors
[16x8 1.2" LED Matrices+Backpack Round LEDs in Various Colors](https://www.adafruit.com/product/2054)
What's better than a single LED? Lots of LEDs! And what's better than lots of LEDs? **TWO TIMES AS MANY LEDS!!!**
With the 16x8 LED Matrix Backpack we've doubled your project's matrix capacity by making it super easy to get two separate 8x8 matrices onto...
Out of Stock
[Buy Now](https://www.adafruit.com/product/2054)
[Related Guides to the Product](https://learn.adafruit.com/products/2054/guides)
### Adafruit 8x16 LED Matrix FeatherWing w/o Matrices
[Adafruit 8x16 LED Matrix FeatherWing w/o Matrices](https://www.adafruit.com/product/3090)
You will chirp with delight when you see how easy it is to make your very own 8x16 LED matrix display for any Feather. At 0.8" square, the little [8x8 matrices](https://www.adafruit.com/new/?q=8x8%20miniature%20LED%20matrix&) have everything a big LED matrix has,...
Out of Stock
[Buy Now](https://www.adafruit.com/product/3090)
[Related Guides to the Product](https://learn.adafruit.com/products/3090/guides)
### Adafruit 14-segment LED Alphanumeric backpack (same as P1910)
[Adafruit 14-segment LED Alphanumeric backpack (same as P1910)](https://www.adafruit.com/product/3322)
Just the backpack + 4pin header
No Longer Stocked
[Buy Now](https://www.adafruit.com/product/3322)
[Related Guides to the Product](https://learn.adafruit.com/products/3322/guides)
## Featured Products
### Adafruit Small 1.2" 8x8 LED Matrix w/I2C Backpack - Yellow-Green
[Adafruit Small 1.2" 8x8 LED Matrix w/I2C Backpack - Yellow-Green](https://www.adafruit.com/product/1051)
What's better than a single LED? Lots of LEDs! A fun way to make a small display is to use an [8x8 matrix](https://www.adafruit.com/category/37_88) or a [4-digit 7-segment display](https://www.adafruit.com/category/37_103). Matrices like these are...
In Stock
[Buy Now](https://www.adafruit.com/product/1051)
[Related Guides to the Product](https://learn.adafruit.com/products/1051/guides)
### Small 1.2" 8x8 Ultra Bright Square Blue LED Matrix + Backpack
[Small 1.2" 8x8 Ultra Bright Square Blue LED Matrix + Backpack](https://www.adafruit.com/product/1853)
What's better than a single LED? Lots of LEDs! Matrices like these are 'multiplexed' - so to control 64 LEDs you need 16 pins. That's a lot of pins, and there are [driver chips like the MAX7219](//www.adafruit.com/products/453) that can control a matrix for you but...
In Stock
[Buy Now](https://www.adafruit.com/product/1853)
[Related Guides to the Product](https://learn.adafruit.com/products/1853/guides)
## Related Guides
- [LED Backpack Displays on Raspberry Pi and BeagleBone Black](https://learn.adafruit.com/led-backpack-displays-on-raspberry-pi-and-beaglebone-black.md)
- [Animating Multiple LED Backpacks](https://learn.adafruit.com/animating-multiple-led-backpacks.md)
- [Arduino GPS Clock](https://learn.adafruit.com/arduino-clock.md)
- [Raspberry Pi Physical Dashboard](https://learn.adafruit.com/raspberry-pi-physical-dashboard.md)
- [CircuitPython Hardware: LED Backpacks & FeatherWings](https://learn.adafruit.com/micropython-hardware-led-backpacks-and-featherwings.md)
- [Matrix and 7-Segment LED Backpack with the Raspberry Pi](https://learn.adafruit.com/matrix-7-segment-led-backpack-with-the-raspberry-pi.md)
- [DIY Pocket LED Gamer - Tiny Tetris!](https://learn.adafruit.com/diy-3d-printed-handheld-pocket-game-tiny-tetris-snake.md)
- [RGB LED Matrix Cube with 25,000 LEDs](https://learn.adafruit.com/rgb-led-matrix-cube-for-pi.md)
- [Creating GIFs for SmartMatrix](https://learn.adafruit.com/creating-gifs-for-smartmatrix.md)
- [Adafruit CharliePlex LED Matrix Bonnet](https://learn.adafruit.com/adafruit-charlieplex-bonnet.md)
- [Connecting a 16x32 RGB LED Matrix Panel to a Raspberry Pi](https://learn.adafruit.com/connecting-a-16x32-rgb-led-matrix-panel-to-a-raspberry-pi.md)
- [MicroPython Displays: Drawing Text](https://learn.adafruit.com/micropython-displays-drawing-text.md)
- [Heart Rate Badge](https://learn.adafruit.com/heart-rate-badge.md)
- [16x24 LED Matrix](https://learn.adafruit.com/16x24-led-matrix.md)
- [Adafruit IS31FL3741](https://learn.adafruit.com/adafruit-is31fl3741.md)
---
# Source: https://learn.adafruit.com/adafruit-led-backpack/bi-color-24-bargraph-circuitpython-setup.md
# Adafruit LED Backpacks
## CircuitPython Wiring and Setup
# Wiring
It's easy to use LED Matrices with CircuitPython and the [Adafruit CircuitPython HT16K33](https://github.com/adafruit/Adafruit_CircuitPython_HT16K33) library. This module allows you to easily write CircuitPython code to control the display.
You can use this sensor with any CircuitPython microcontroller board.
We'll cover how to wire the Bargraph to your CircuitPython microcontroller board. First assemble your Bargraph.
Connect the Bargraph to your microcontroller board as shown below.
- **Microcontroller 3V ** to ** Bargraph VIN**
- **Microcontroller GND ** to **Bargraph GND**
- **Microcontroller SCL ** to **Bargraph SCL**
- **Microcontroller SDA ** to **Bargraph SDA**

[Download Fritzing Object](https://cdn-learn.adafruit.com/assets/assets/000/087/062/original/feather-m4-bargraph.fzz?1579283261)
# Library Setup
To use the LED backpack with your [Adafruit CircuitPython](https://learn.adafruit.com/welcome-to-circuitpython/overview) board you'll need to install the [Adafruit\_CircuitPython\_HT16K33](https://github.com/adafruit/Adafruit_CircuitPython_HT16K33) library on your board.
First make sure you are running the [latest version of Adafruit CircuitPython](https://github.com/adafruit/circuitpython/releases) for your board. Next you'll need to install the necessary libraries to use the hardware--read below and carefully follow the referenced steps to find and install these libraries from [Adafruit's CircuitPython library bundle](https://github.com/adafruit/Adafruit_CircuitPython_Bundle).
## Bundle Install
For express boards that have extra flash storage, like the Feather/Metro M0 express and Circuit Playground express, you can easily install the necessary libraries with [Adafruit's CircuitPython bundle](https://github.com/adafruit/Adafruit_CircuitPython_Bundle). This is an all-in-one package that includes the necessary libraries to use the LED backpack display with CircuitPython. For details on installing the bundle, read about [CircuitPython Libraries](https://learn.adafruit.com/welcome-to-circuitpython/circuitpython-libraries).
Remember for non-express boards like the Trinket M0, Gemma M0, and Feather/Metro M0 basic you'll need to [manually install the necessary libraries](https://learn.adafruit.com/welcome-to-circuitpython/circuitpython-libraries#non-express-boards-11-13) from the bundle:
- **adafruit\_ht16k33**
- **adafruit\_bus\_device**
If your board supports USB mass storage, like the M0-based boards, then simply drag the files to the board's file system. **Note on boards without external SPI flash, like a Feather M0 or Trinket/Gemma M0, you might run into issues on Mac OSX with hidden files taking up too much space when drag and drop copying, [see this page for a workaround](../../../../micropython-for-samd21/usb-mass-storage#mac-osx-file-copy-issues).**
Before continuing make sure your board's **lib** folder or root filesystem has at least the **adafruit\_ht16k33** and **adafruit\_bus\_device** folders/modules copied over.

- [Previous Page](https://learn.adafruit.com/adafruit-led-backpack/bi-color-24-bargraph-wiring-and-setup.md)
- [Next Page](https://learn.adafruit.com/adafruit-led-backpack/bi-color-24-bargraph-python-setup.md)
## Primary Products
### Adafruit Mini 8x8 LED Matrix w/I2C Backpack - Red
[Adafruit Mini 8x8 LED Matrix w/I2C Backpack - Red](https://www.adafruit.com/product/870)
What's better than a single LED? Lots of LEDs! A fun way to make a small display is to use an [8x8 matrix](https://www.adafruit.com/category/37_88) or a [4-digit 7-segment display](https://www.adafruit.com/category/37_103). Matrices like these are...
In Stock
[Buy Now](https://www.adafruit.com/product/870)
[Related Guides to the Product](https://learn.adafruit.com/products/870/guides)
### Adafruit Mini 8x8 LED Matrix w/I2C Backpack - Yellow
[Adafruit Mini 8x8 LED Matrix w/I2C Backpack - Yellow](https://www.adafruit.com/product/871)
What's better than a single LED? Lots of LEDs! A fun way to make a small display is to use an [8x8 matrix](https://www.adafruit.com/category/37_88) or a [4-digit 7-segment display](https://www.adafruit.com/category/37_103). Matrices like these are...
In Stock
[Buy Now](https://www.adafruit.com/product/871)
[Related Guides to the Product](https://learn.adafruit.com/products/871/guides)
### Adafruit Mini 0.8" 8x8 LED Matrix w/I2C Backpack - Yellow-Green
[Adafruit Mini 0.8" 8x8 LED Matrix w/I2C Backpack - Yellow-Green](https://www.adafruit.com/product/872)
What's better than a single LED? Lots of LEDs! A fun way to make a small display is to use an [8x8 matrix](https://www.adafruit.com/category/37_88) or a [4-digit 7-segment display](https://www.adafruit.com/category/37_103). Matrices like these are...
In Stock
[Buy Now](https://www.adafruit.com/product/872)
[Related Guides to the Product](https://learn.adafruit.com/products/872/guides)
### Adafruit 0.56" 4-Digit 7-Segment Display with I2C Backpack - Red
[Adafruit 0.56" 4-Digit 7-Segment Display with I2C Backpack - Red](https://www.adafruit.com/product/878)
What's better than a single LED? Lots of LEDs! A fun way to make a small display is to use an [8x8 matrix](https://www.adafruit.com/category/37_88) or a [4-digit 7-segment display](https://www.adafruit.com/category/37_103). Matrices like these are...
In Stock
[Buy Now](https://www.adafruit.com/product/878)
[Related Guides to the Product](https://learn.adafruit.com/products/878/guides)
### Adafruit 0.56" 4-Digit 7-Segment Display w/I2C Backpack - Yellow
[Adafruit 0.56" 4-Digit 7-Segment Display w/I2C Backpack - Yellow](https://www.adafruit.com/product/879)
What's better than a single LED? Lots of LEDs! A fun way to make a small display is to use an [8x8 matrix](https://www.adafruit.com/category/37_88) or a [4-digit 7-segment display](https://www.adafruit.com/category/37_103). Matrices like these are...
In Stock
[Buy Now](https://www.adafruit.com/product/879)
[Related Guides to the Product](https://learn.adafruit.com/products/879/guides)
### Adafruit 0.56" 4-Digit 7-Segment Display w/ I2C Backpack - Green
[Adafruit 0.56" 4-Digit 7-Segment Display w/ I2C Backpack - Green](https://www.adafruit.com/product/880)
What's better than a single LED? Lots of LEDs! A fun way to make a small display is to use an [8x8 matrix](https://www.adafruit.com/category/37_88) or a [4-digit 7-segment display](https://www.adafruit.com/category/37_103). Matrices like these are...
No Longer Stocked
[Buy Now](https://www.adafruit.com/product/880)
[Related Guides to the Product](https://learn.adafruit.com/products/880/guides)
### Adafruit 0.56" 4-Digit 7-Segment Display w/ I2C Backpack - Blue
[Adafruit 0.56" 4-Digit 7-Segment Display w/ I2C Backpack - Blue](https://www.adafruit.com/product/881)
What's better than a single LED? Lots of LEDs! A fun way to make a small display is to use an [8x8 matrix](https://www.adafruit.com/category/37_88) or a [4-digit 7-segment display](https://www.adafruit.com/category/37_103). Matrices like these are...
In Stock
[Buy Now](https://www.adafruit.com/product/881)
[Related Guides to the Product](https://learn.adafruit.com/products/881/guides)
### Adafruit Bicolor LED Square Pixel Matrix with I2C Backpack
[Adafruit Bicolor LED Square Pixel Matrix with I2C Backpack](https://www.adafruit.com/product/902)
What's better than a single LED? Lots of LEDs! A fun way to make a small colorful display is to use a [1.2" Bi-color 8x8 LED Matrix](http://www.adafruit.com/products/458). Matrices like these are 'multiplexed' - so to control all the 128 LEDs you need 24 pins....
In Stock
[Buy Now](https://www.adafruit.com/product/902)
[Related Guides to the Product](https://learn.adafruit.com/products/902/guides)
### Adafruit Mini 8x8 LED Matrix w/I2C Backpack - Blue
[Adafruit Mini 8x8 LED Matrix w/I2C Backpack - Blue](https://www.adafruit.com/product/959)
What's better than a single LED? Lots of LEDs! A fun way to make a small display is to use an [8x8 matrix](https://www.adafruit.com/category/37_88) or a [4-digit 7-segment display](https://www.adafruit.com/category/37_103). Matrices like these are...
In Stock
[Buy Now](https://www.adafruit.com/product/959)
[Related Guides to the Product](https://learn.adafruit.com/products/959/guides)
### Adafruit 0.56" 4-Digit 7-Segment Display w/I2C Backpack - White
[Adafruit 0.56" 4-Digit 7-Segment Display w/I2C Backpack - White](https://www.adafruit.com/product/1002)
What's better than a single LED? Lots of LEDs! A fun way to make a small display is to use an [8x8 matrix](https://www.adafruit.com/category/37_88) or a [4-digit 7-segment display](https://www.adafruit.com/category/37_103). Matrices like these are...
In Stock
[Buy Now](https://www.adafruit.com/product/1002)
[Related Guides to the Product](https://learn.adafruit.com/products/1002/guides)
### Adafruit 1.2" 8x8 LED Matrix Backpack
[Adafruit 1.2" 8x8 LED Matrix Backpack](https://www.adafruit.com/product/1048)
By popular request, you can now get our 8x8 LED backpacks without the LEDs! These backpacks feature an HT16K33 I2C LED driver, they're simple and easy to use - you can use [our very nice library for the backpacks to...](https://github.com/adafruit/Adafruit-LED-Backpack-Library)
In Stock
[Buy Now](https://www.adafruit.com/product/1048)
[Related Guides to the Product](https://learn.adafruit.com/products/1048/guides)
### Adafruit Small 1.2" 8x8 LED Matrix w/I2C Backpack - Red
[Adafruit Small 1.2" 8x8 LED Matrix w/I2C Backpack - Red](https://www.adafruit.com/product/1049)
What's better than a single LED? Lots of LEDs! A fun way to make a small display is to use an [8x8 matrix](https://www.adafruit.com/category/37_88) or a [4-digit 7-segment display](https://www.adafruit.com/category/37_103). Matrices like these are...
In Stock
[Buy Now](https://www.adafruit.com/product/1049)
[Related Guides to the Product](https://learn.adafruit.com/products/1049/guides)
### Adafruit Small 1.2" 8x8 LED Matrix w/I2C Backpack - Yellow
[Adafruit Small 1.2" 8x8 LED Matrix w/I2C Backpack - Yellow](https://www.adafruit.com/product/1050)
What's better than a single LED? Lots of LEDs! A fun way to make a small display is to use an [8x8 matrix](https://www.adafruit.com/category/37_88) or a [4-digit 7-segment display](https://www.adafruit.com/category/37_103). Matrices like these are...
In Stock
[Buy Now](https://www.adafruit.com/product/1050)
[Related Guides to the Product](https://learn.adafruit.com/products/1050/guides)
### Adafruit Small 1.2" 8x8 LED Matrix w/I2C Backpack - Blue
[Adafruit Small 1.2" 8x8 LED Matrix w/I2C Backpack - Blue](https://www.adafruit.com/product/1052)
What's better than a single LED? Lots of LEDs! A fun way to make a small display is to use an [8x8 matrix](https://www.adafruit.com/category/37_88) or a [4-digit 7-segment display](https://www.adafruit.com/category/37_103). Matrices like these are...
In Stock
[Buy Now](https://www.adafruit.com/product/1052)
[Related Guides to the Product](https://learn.adafruit.com/products/1052/guides)
### Adafruit Mini 8x8 LED Matrix w/I2C Backpack - Ultra Bright White
[Adafruit Mini 8x8 LED Matrix w/I2C Backpack - Ultra Bright White](https://www.adafruit.com/product/1080)
What's better than a single LED? Lots of LEDs! A fun way to make a small display is to use an [8x8 matrix](https://www.adafruit.com/category/37_88) or a [4-digit 7-segment display](https://www.adafruit.com/category/37_103). Matrices like these are...
In Stock
[Buy Now](https://www.adafruit.com/product/1080)
[Related Guides to the Product](https://learn.adafruit.com/products/1080/guides)
### Adafruit 1.2" 4-Digit 7-Segment Display w/I2C Backpack - Green
[Adafruit 1.2" 4-Digit 7-Segment Display w/I2C Backpack - Green](https://www.adafruit.com/product/1268)
What's better than a single LED? Lots of LEDs! A fun way to make a numeric display is to use a [4-digit 7-segment display](https://www.adafruit.com/category/37_103). LED matrices like these are 'multiplexed' - so to control all the seven-segment LEDs you need 14 pins....
No Longer Stocked
[Buy Now](https://www.adafruit.com/product/1268)
[Related Guides to the Product](https://learn.adafruit.com/products/1268/guides)
### Adafruit 1.2" 4-Digit 7-Segment Display w/I2C Backpack - Yellow
[Adafruit 1.2" 4-Digit 7-Segment Display w/I2C Backpack - Yellow](https://www.adafruit.com/product/1269)
What's better than a single LED? Lots of LEDs! A fun way to make a numeric display is to use a [4-digit 7-segment display](https://www.adafruit.com/category/37_103). LED matrices like these are 'multiplexed' - so to control all the seven-segment LEDs you need 14 pins....
In Stock
[Buy Now](https://www.adafruit.com/product/1269)
[Related Guides to the Product](https://learn.adafruit.com/products/1269/guides)
### Adafruit 1.2" 4-Digit 7-Segment Display w/I2C Backpack - Red
[Adafruit 1.2" 4-Digit 7-Segment Display w/I2C Backpack - Red](https://www.adafruit.com/product/1270)
What's better than a single LED? Lots of LEDs! A fun way to make a numeric display is to use a [4-digit 7-segment display](https://www.adafruit.com/category/37_103). LED matrices like these are 'multiplexed' - so to control all the seven-segment LEDs you need 14 pins....
In Stock
[Buy Now](https://www.adafruit.com/product/1270)
[Related Guides to the Product](https://learn.adafruit.com/products/1270/guides)
### Small 1.2" 8x8 Ultra Bright White LED Matrix + Backpack
[Small 1.2" 8x8 Ultra Bright White LED Matrix + Backpack](https://www.adafruit.com/product/1614)
What's better than a single LED? Lots of LEDs! A fun way to make a small display is to use an [8x8 matrix](https://www.adafruit.com/category/37_88) or a [4-digit 7-segment display](https://www.adafruit.com/category/37_103). Matrices like these are...
In Stock
[Buy Now](https://www.adafruit.com/product/1614)
[Related Guides to the Product](https://learn.adafruit.com/products/1614/guides)
### Adafruit Small 1.2" 8x8 LED Matrix w/I2C Backpack - Pure Green
[Adafruit Small 1.2" 8x8 LED Matrix w/I2C Backpack - Pure Green](https://www.adafruit.com/product/1632)
What's better than a single LED? Lots of LEDs! A fun way to make a small display is to use an [8x8 matrix](https://www.adafruit.com/category/37_88) or a [4-digit 7-segment display](https://www.adafruit.com/category/37_103). Matrices like these are...
In Stock
[Buy Now](https://www.adafruit.com/product/1632)
[Related Guides to the Product](https://learn.adafruit.com/products/1632/guides)
### Adafruit Mini 0.8" 8x8 LED Matrix w/I2C Backpack - Pure Green
[Adafruit Mini 0.8" 8x8 LED Matrix w/I2C Backpack - Pure Green](https://www.adafruit.com/product/1633)
What's better than a single LED? Lots of LEDs! A fun way to make a small display is to use an [8x8 matrix](https://www.adafruit.com/category/37_88) or a [4-digit 7-segment display](https://www.adafruit.com/category/37_103). Matrices like these are...
In Stock
[Buy Now](https://www.adafruit.com/product/1633)
[Related Guides to the Product](https://learn.adafruit.com/products/1633/guides)
### Bi-Color (Red/Green) 24-Bar Bargraph w/I2C Backpack Kit
[Bi-Color (Red/Green) 24-Bar Bargraph w/I2C Backpack Kit](https://www.adafruit.com/product/1721)
What's better than a single LED? Lots of LEDs! A fun way to make a small linear display is to use two 12-bar Bi-color bar-graphs. However, this LED bargraph is 'multiplexed' - so to control all the 48 LEDs you need a lot of pins.
Out of Stock
[Buy Now](https://www.adafruit.com/product/1721)
[Related Guides to the Product](https://learn.adafruit.com/products/1721/guides)
### Small 1.2" 8x8 Ultra Bright Square Amber LED Matrix + Backpack
[Small 1.2" 8x8 Ultra Bright Square Amber LED Matrix + Backpack](https://www.adafruit.com/product/1854)
What's better than a single LED? Lots of LEDs! Matrices like these are 'multiplexed' - so to control 64 LEDs you need 16 pins. That's a lot of pins, and there are [driver chips like the MAX7219](//www.adafruit.com/products/453) that can control a matrix for you but...
In Stock
[Buy Now](https://www.adafruit.com/product/1854)
[Related Guides to the Product](https://learn.adafruit.com/products/1854/guides)
### Small 1.2" 8x8 Ultra Bright Square Yellow LED Matrix + Backpack
[Small 1.2" 8x8 Ultra Bright Square Yellow LED Matrix + Backpack](https://www.adafruit.com/product/1855)
What's better than a single LED? Lots of LEDs! Matrices like these are 'multiplexed' - so to control 64 LEDs you need 16 pins. That's a lot of pins, and there are [driver chips like the MAX7219](//www.adafruit.com/products/453) that can control a matrix for you but...
In Stock
[Buy Now](https://www.adafruit.com/product/1855)
[Related Guides to the Product](https://learn.adafruit.com/products/1855/guides)
### Small 1.2" 8x8 Bright Square Pure Green LED Matrix + Backpack
[Small 1.2" 8x8 Bright Square Pure Green LED Matrix + Backpack](https://www.adafruit.com/product/1856)
What's better than a single LED? Lots of LEDs! Matrices like these are 'multiplexed' - so to control 64 LEDs you need 16 pins. That's a lot of pins, and there are [driver chips like the MAX7219](//www.adafruit.com/products/453) that can control a matrix for you but...
In Stock
[Buy Now](https://www.adafruit.com/product/1856)
[Related Guides to the Product](https://learn.adafruit.com/products/1856/guides)
### Small 1.2" 8x8 Ultra Bright Square White LED Matrix + Backpack
[Small 1.2" 8x8 Ultra Bright Square White LED Matrix + Backpack](https://www.adafruit.com/product/1857)
What's better than a single LED? Lots of LEDs! Matrices like these are 'multiplexed' - so to control 64 LEDs you need 16 pins. That's a lot of pins, and there are [driver chips like the MAX7219](//www.adafruit.com/products/453) that can control a matrix for you but...
In Stock
[Buy Now](https://www.adafruit.com/product/1857)
[Related Guides to the Product](https://learn.adafruit.com/products/1857/guides)
### Adafruit 14-segment LED Alphanumeric Backpack - STEMMA QT
[Adafruit 14-segment LED Alphanumeric Backpack - STEMMA QT](https://www.adafruit.com/product/1910)
By popular request, you can now get our 14-segment LED backpacks without the LEDs! These backpacks feature an HT16K33 I2C LED driver, they're simple and easy to use - you can use [our very nice library for the backpacks to...](https://github.com/adafruit/Adafruit-LED-Backpack-Library)
In Stock
[Buy Now](https://www.adafruit.com/product/1910)
[Related Guides to the Product](https://learn.adafruit.com/products/1910/guides)
### Quad Alphanumeric Display - Red 0.54" Digits w/ I2C Backpack
[Quad Alphanumeric Display - Red 0.54" Digits w/ I2C Backpack](https://www.adafruit.com/product/1911)
Display, elegantly, 012345678 or 9! Gaze, hypnotized, at ABCDEFGHIJKLM - well it can display the whole alphabet. You get the point. This is a nice, bright alphanumeric display that shows letters and numbers in a beautiful red hue. It's super bright and designed for viewing from distances...
In Stock
[Buy Now](https://www.adafruit.com/product/1911)
[Related Guides to the Product](https://learn.adafruit.com/products/1911/guides)
### Quad Alphanumeric Display - Blue 0.54" Digits w/ I2C Backpack
[Quad Alphanumeric Display - Blue 0.54" Digits w/ I2C Backpack](https://www.adafruit.com/product/1912)
Display, elegantly, 012345678 or 9! Gaze, hypnotized, at ABCDEFGHIJKLM - well it can display the whole alphabet. You get the point. This is a nice, bright alphanumeric display that shows letters and numbers in a beautiful blue hue. It's super bright and designed for viewing from distances...
In Stock
[Buy Now](https://www.adafruit.com/product/1912)
[Related Guides to the Product](https://learn.adafruit.com/products/1912/guides)
### 16x8 1.2" LED Matrix + Backpack - Ultra Bright Round Green LEDs
[16x8 1.2" LED Matrix + Backpack - Ultra Bright Round Green LEDs](https://www.adafruit.com/product/2035)
What's better than a single LED? Lots of LEDs! And what's better than lots of LEDs? **TWO TIMES AS MANY LEDS!!!**
With the 16x8 LED Matrix Backpack we've doubled your project's matrix capacity by making it super easy to get two separate 8x8 matrices onto...
In Stock
[Buy Now](https://www.adafruit.com/product/2035)
[Related Guides to the Product](https://learn.adafruit.com/products/2035/guides)
### 16x8 1.2" LED Matrix+Backpack UltraBright Round YellowGreen LEDs
[16x8 1.2" LED Matrix+Backpack UltraBright Round YellowGreen LEDs](https://www.adafruit.com/product/2036)
What's better than a single LED? Lots of LEDs! And what's better than lots of LEDs? **TWO TIMES AS MANY LEDS!!!**
With the 16x8 LED Matrix Backpack we've doubled your project's matrix capacity by making it super easy to get two separate 8x8 matrices onto...
In Stock
[Buy Now](https://www.adafruit.com/product/2036)
[Related Guides to the Product](https://learn.adafruit.com/products/2036/guides)
### 16x8 1.2" LED Matrix + Backpack - Ultra Bright Round Red LEDs
[16x8 1.2" LED Matrix + Backpack - Ultra Bright Round Red LEDs](https://www.adafruit.com/product/2037)
What's better than a single LED? Lots of LEDs! And what's better than lots of LEDs? **TWO TIMES AS MANY LEDS!!!**
With the 16x8 LED Matrix Backpack we've doubled your project's matrix capacity by making it super easy to get two separate 8x8 matrices onto...
In Stock
[Buy Now](https://www.adafruit.com/product/2037)
[Related Guides to the Product](https://learn.adafruit.com/products/2037/guides)
### 16x8 1.2" LED Matrix + Backpack - Ultra Bright Round White LEDs
[16x8 1.2" LED Matrix + Backpack - Ultra Bright Round White LEDs](https://www.adafruit.com/product/2038)
What's better than a single LED? Lots of LEDs! And what's better than lots of LEDs? **TWO TIMES AS MANY LEDS!!!**
With the 16x8 LED Matrix Backpack we've doubled your project's matrix capacity by making it super easy to get two separate 8x8 matrices onto...
In Stock
[Buy Now](https://www.adafruit.com/product/2038)
[Related Guides to the Product](https://learn.adafruit.com/products/2038/guides)
### 16x8 1.2" LED Matrix + Backpack - Ultra Bright Round Blue LEDs
[16x8 1.2" LED Matrix + Backpack - Ultra Bright Round Blue LEDs](https://www.adafruit.com/product/2039)
What's better than a single LED? Lots of LEDs! And what's better than lots of LEDs? **TWO TIMES AS MANY LEDS!!!**
With the 16x8 LED Matrix Backpack we've doubled your project's matrix capacity by making it super easy to get two separate 8x8 matrices onto...
In Stock
[Buy Now](https://www.adafruit.com/product/2039)
[Related Guides to the Product](https://learn.adafruit.com/products/2039/guides)
### 16x8 1.2" LED Matrix + Backpack - Ultra Bright Square Blue LEDs
[16x8 1.2" LED Matrix + Backpack - Ultra Bright Square Blue LEDs](https://www.adafruit.com/product/2040)
What's better than a single LED? Lots of LEDs! And what's better than lots of LEDs? **TWO TIMES AS MANY LEDS!!!**
With the 16x8 LED Matrix Backpack we've doubled your project's matrix capacity by making it super easy to get two separate 8x8 matrices onto...
In Stock
[Buy Now](https://www.adafruit.com/product/2040)
[Related Guides to the Product](https://learn.adafruit.com/products/2040/guides)
### 16x8 1.2" LED Matrix + Backpack - Ultra Bright Square Amber LEDs
[16x8 1.2" LED Matrix + Backpack - Ultra Bright Square Amber LEDs](https://www.adafruit.com/product/2041)
What's better than a single LED? Lots of LEDs! And what's better than lots of LEDs? **TWO TIMES AS MANY LEDS!!!**
With the 16x8 LED Matrix Backpack we've doubled your project's matrix capacity by making it super easy to get two separate 8x8 matrices onto...
In Stock
[Buy Now](https://www.adafruit.com/product/2041)
[Related Guides to the Product](https://learn.adafruit.com/products/2041/guides)
### 16x8 1.2" LED Matrix + Backpack - Ultra Bright Square Green LEDs
[16x8 1.2" LED Matrix + Backpack - Ultra Bright Square Green LEDs](https://www.adafruit.com/product/2042)
What's better than a single LED? Lots of LEDs! And what's better than lots of LEDs? **TWO TIMES AS MANY LEDS!!!**
With the 16x8 LED Matrix Backpack we've doubled your project's matrix capacity by making it super easy to get two separate 8x8 matrices onto...
In Stock
[Buy Now](https://www.adafruit.com/product/2042)
[Related Guides to the Product](https://learn.adafruit.com/products/2042/guides)
### 16x8 1.2" LED Matrix + Backpack -Ultra Bright Square Yellow LEDs
[16x8 1.2" LED Matrix + Backpack -Ultra Bright Square Yellow LEDs](https://www.adafruit.com/product/2043)
What's better than a single LED? Lots of LEDs! And what's better than lots of LEDs? **TWO TIMES AS MANY LEDS!!!**
With the 16x8 LED Matrix Backpack we've doubled your project's matrix capacity by making it super easy to get two separate 8x8 matrices onto...
In Stock
[Buy Now](https://www.adafruit.com/product/2043)
[Related Guides to the Product](https://learn.adafruit.com/products/2043/guides)
### 16x8 1.2" LED Matrix + Backpack - Ultra Bright Square White LEDs
[16x8 1.2" LED Matrix + Backpack - Ultra Bright Square White LEDs](https://www.adafruit.com/product/2044)
What's better than a single LED? Lots of LEDs! And what's better than lots of LEDs? **TWO TIMES AS MANY LEDS!!!**
With the 16x8 LED Matrix Backpack we've doubled your project's matrix capacity by making it super easy to get two separate 8x8 matrices onto...
In Stock
[Buy Now](https://www.adafruit.com/product/2044)
[Related Guides to the Product](https://learn.adafruit.com/products/2044/guides)
### 16x8 1.2" LED Matrix + Backpack-Ultra Bright Round Orange LEDs
[16x8 1.2" LED Matrix + Backpack-Ultra Bright Round Orange LEDs](https://www.adafruit.com/product/2052)
What's better than a single LED? Lots of LEDs! And what's better than lots of LEDs? **TWO TIMES AS MANY LEDS!!!**
With the 16x8 LED Matrix Backpack we've doubled your project's matrix capacity by making it super easy to get two separate 8x8 matrices onto...
In Stock
[Buy Now](https://www.adafruit.com/product/2052)
[Related Guides to the Product](https://learn.adafruit.com/products/2052/guides)
### 16x8 1.2" LED Matrices+Backpack Round LEDs in Various Colors
[16x8 1.2" LED Matrices+Backpack Round LEDs in Various Colors](https://www.adafruit.com/product/2054)
What's better than a single LED? Lots of LEDs! And what's better than lots of LEDs? **TWO TIMES AS MANY LEDS!!!**
With the 16x8 LED Matrix Backpack we've doubled your project's matrix capacity by making it super easy to get two separate 8x8 matrices onto...
Out of Stock
[Buy Now](https://www.adafruit.com/product/2054)
[Related Guides to the Product](https://learn.adafruit.com/products/2054/guides)
### Adafruit 8x16 LED Matrix FeatherWing w/o Matrices
[Adafruit 8x16 LED Matrix FeatherWing w/o Matrices](https://www.adafruit.com/product/3090)
You will chirp with delight when you see how easy it is to make your very own 8x16 LED matrix display for any Feather. At 0.8" square, the little [8x8 matrices](https://www.adafruit.com/new/?q=8x8%20miniature%20LED%20matrix&) have everything a big LED matrix has,...
Out of Stock
[Buy Now](https://www.adafruit.com/product/3090)
[Related Guides to the Product](https://learn.adafruit.com/products/3090/guides)
### Adafruit 14-segment LED Alphanumeric backpack (same as P1910)
[Adafruit 14-segment LED Alphanumeric backpack (same as P1910)](https://www.adafruit.com/product/3322)
Just the backpack + 4pin header
No Longer Stocked
[Buy Now](https://www.adafruit.com/product/3322)
[Related Guides to the Product](https://learn.adafruit.com/products/3322/guides)
## Featured Products
### Adafruit Small 1.2" 8x8 LED Matrix w/I2C Backpack - Yellow-Green
[Adafruit Small 1.2" 8x8 LED Matrix w/I2C Backpack - Yellow-Green](https://www.adafruit.com/product/1051)
What's better than a single LED? Lots of LEDs! A fun way to make a small display is to use an [8x8 matrix](https://www.adafruit.com/category/37_88) or a [4-digit 7-segment display](https://www.adafruit.com/category/37_103). Matrices like these are...
In Stock
[Buy Now](https://www.adafruit.com/product/1051)
[Related Guides to the Product](https://learn.adafruit.com/products/1051/guides)
### Small 1.2" 8x8 Ultra Bright Square Blue LED Matrix + Backpack
[Small 1.2" 8x8 Ultra Bright Square Blue LED Matrix + Backpack](https://www.adafruit.com/product/1853)
What's better than a single LED? Lots of LEDs! Matrices like these are 'multiplexed' - so to control 64 LEDs you need 16 pins. That's a lot of pins, and there are [driver chips like the MAX7219](//www.adafruit.com/products/453) that can control a matrix for you but...
In Stock
[Buy Now](https://www.adafruit.com/product/1853)
[Related Guides to the Product](https://learn.adafruit.com/products/1853/guides)
## Related Guides
- [LED Backpack Displays on Raspberry Pi and BeagleBone Black](https://learn.adafruit.com/led-backpack-displays-on-raspberry-pi-and-beaglebone-black.md)
- [Animating Multiple LED Backpacks](https://learn.adafruit.com/animating-multiple-led-backpacks.md)
- [Arduino GPS Clock](https://learn.adafruit.com/arduino-clock.md)
- [Raspberry Pi Physical Dashboard](https://learn.adafruit.com/raspberry-pi-physical-dashboard.md)
- [CircuitPython Hardware: LED Backpacks & FeatherWings](https://learn.adafruit.com/micropython-hardware-led-backpacks-and-featherwings.md)
- [Matrix and 7-Segment LED Backpack with the Raspberry Pi](https://learn.adafruit.com/matrix-7-segment-led-backpack-with-the-raspberry-pi.md)
- [DIY Pocket LED Gamer - Tiny Tetris!](https://learn.adafruit.com/diy-3d-printed-handheld-pocket-game-tiny-tetris-snake.md)
- [RGB LED Matrix Cube with 25,000 LEDs](https://learn.adafruit.com/rgb-led-matrix-cube-for-pi.md)
- [Creating GIFs for SmartMatrix](https://learn.adafruit.com/creating-gifs-for-smartmatrix.md)
- [Adafruit CharliePlex LED Matrix Bonnet](https://learn.adafruit.com/adafruit-charlieplex-bonnet.md)
- [Connecting a 16x32 RGB LED Matrix Panel to a Raspberry Pi](https://learn.adafruit.com/connecting-a-16x32-rgb-led-matrix-panel-to-a-raspberry-pi.md)
- [MicroPython Displays: Drawing Text](https://learn.adafruit.com/micropython-displays-drawing-text.md)
- [Heart Rate Badge](https://learn.adafruit.com/heart-rate-badge.md)
- [16x24 LED Matrix](https://learn.adafruit.com/16x24-led-matrix.md)
- [Adafruit IS31FL3741](https://learn.adafruit.com/adafruit-is31fl3741.md)
---
# Source: https://learn.adafruit.com/adafruit-led-backpack/bi-color-24-bargraph-circuitpython-usage.md
# Adafruit LED Backpacks
## CircuitPython and Python Usage
The following section will show how to control the LED backpack from the board's Python prompt / REPL. You'll walk through how to control the LED display and learn how to use the CircuitPython module built for the display.
First [connect to the board's serial REPL ](https://learn.adafruit.com/welcome-to-circuitpython/the-repl)so you are at the CircuitPython **\>\>\>** prompt.
## Initialization
First you'll need to initialize the I2C bus for your board. It's really easy, first import the necessary modules. In this case, we'll use `board` and `BiColor24`.
Then just use `board.I2C()` to create the I2C instance using the default SCL and SDA pins (which will be marked on the boards pins if using a Feather or similar Adafruit board).
Then to initialize the bargraph, you just pass `i2c` in.
Warning: When using the STEMMA QT port, some board may have an alternate I2C such as board.STEMMA_I2C().
```python
import board
from adafruit_ht16k33.bargraph import Bicolor24
i2c = board.I2C()
bc24 = Bicolor24(i2c)
```
If you bridged the address pads on the back of the display, you could pass in the address. The addresses for the HT16K33 can range between 0x70 and 0x77 depending on which pads you have bridged, with 0x70 being used if you haven't bridged any of them. For instance, if you bridge only the **a0** pad, you would use `0x71` like this:
```python
bc24 = Bicolor24(i2c, address=0x71)
```
## Setting the Brightness
You can set the brightness of the display, but changing it will set the brightness of the entire display and not individual segments. If can be adjusted in 1/16 increments **between 0 and 1.0** with 1.0 being the brightest. So to set the display to half brightness, you would use the following:
```python
display.brightness = 0.5
```
## Setting the Blink Rate
You can set the blink rate of the display, but changing it will set the brightness of the entire display and not individual segments. If can be adjusted in 1/4 increments **between 0 and 3** with 3 being the fastest blinking. So to set the display to blink at full speed, you would use the following:
```python
display.blink_rate = 3
```
## Setting Individual Bars
To set individual bars to specific colors, you simply treat the `bc24` object as a list and set it to `bc24.LED_RED`, `bc24.LED_GREEN`, `bc24.LED_YELLOW` or `bc24.LED_OFF`.
```python
bc24[0] = bc24.LED_RED
bc24[1] = bc24.LED_GREEN
bc24[2] = bc24.LED_YELLOW
bc24[3] = bc24.LED_OFF
```
## Filling the Entire Bargraph
To fill the entire bargraph, just use the fill() function and pass in the color you want to set it to. For instance, if you wanted to set everything to green, you would use:
```python
bc24.fill(bc24.LED_GREEN)
```
- [Previous Page](https://learn.adafruit.com/adafruit-led-backpack/bi-color-24-bargraph-python-setup.md)
- [Next Page](https://learn.adafruit.com/adafruit-led-backpack/connecting-multiple-backpacks.md)
## Primary Products
### Adafruit Mini 8x8 LED Matrix w/I2C Backpack - Red
[Adafruit Mini 8x8 LED Matrix w/I2C Backpack - Red](https://www.adafruit.com/product/870)
What's better than a single LED? Lots of LEDs! A fun way to make a small display is to use an [8x8 matrix](https://www.adafruit.com/category/37_88) or a [4-digit 7-segment display](https://www.adafruit.com/category/37_103). Matrices like these are...
In Stock
[Buy Now](https://www.adafruit.com/product/870)
[Related Guides to the Product](https://learn.adafruit.com/products/870/guides)
### Adafruit Mini 8x8 LED Matrix w/I2C Backpack - Yellow
[Adafruit Mini 8x8 LED Matrix w/I2C Backpack - Yellow](https://www.adafruit.com/product/871)
What's better than a single LED? Lots of LEDs! A fun way to make a small display is to use an [8x8 matrix](https://www.adafruit.com/category/37_88) or a [4-digit 7-segment display](https://www.adafruit.com/category/37_103). Matrices like these are...
In Stock
[Buy Now](https://www.adafruit.com/product/871)
[Related Guides to the Product](https://learn.adafruit.com/products/871/guides)
### Adafruit Mini 0.8" 8x8 LED Matrix w/I2C Backpack - Yellow-Green
[Adafruit Mini 0.8" 8x8 LED Matrix w/I2C Backpack - Yellow-Green](https://www.adafruit.com/product/872)
What's better than a single LED? Lots of LEDs! A fun way to make a small display is to use an [8x8 matrix](https://www.adafruit.com/category/37_88) or a [4-digit 7-segment display](https://www.adafruit.com/category/37_103). Matrices like these are...
In Stock
[Buy Now](https://www.adafruit.com/product/872)
[Related Guides to the Product](https://learn.adafruit.com/products/872/guides)
### Adafruit 0.56" 4-Digit 7-Segment Display with I2C Backpack - Red
[Adafruit 0.56" 4-Digit 7-Segment Display with I2C Backpack - Red](https://www.adafruit.com/product/878)
What's better than a single LED? Lots of LEDs! A fun way to make a small display is to use an [8x8 matrix](https://www.adafruit.com/category/37_88) or a [4-digit 7-segment display](https://www.adafruit.com/category/37_103). Matrices like these are...
In Stock
[Buy Now](https://www.adafruit.com/product/878)
[Related Guides to the Product](https://learn.adafruit.com/products/878/guides)
### Adafruit 0.56" 4-Digit 7-Segment Display w/I2C Backpack - Yellow
[Adafruit 0.56" 4-Digit 7-Segment Display w/I2C Backpack - Yellow](https://www.adafruit.com/product/879)
What's better than a single LED? Lots of LEDs! A fun way to make a small display is to use an [8x8 matrix](https://www.adafruit.com/category/37_88) or a [4-digit 7-segment display](https://www.adafruit.com/category/37_103). Matrices like these are...
In Stock
[Buy Now](https://www.adafruit.com/product/879)
[Related Guides to the Product](https://learn.adafruit.com/products/879/guides)
### Adafruit 0.56" 4-Digit 7-Segment Display w/ I2C Backpack - Green
[Adafruit 0.56" 4-Digit 7-Segment Display w/ I2C Backpack - Green](https://www.adafruit.com/product/880)
What's better than a single LED? Lots of LEDs! A fun way to make a small display is to use an [8x8 matrix](https://www.adafruit.com/category/37_88) or a [4-digit 7-segment display](https://www.adafruit.com/category/37_103). Matrices like these are...
No Longer Stocked
[Buy Now](https://www.adafruit.com/product/880)
[Related Guides to the Product](https://learn.adafruit.com/products/880/guides)
### Adafruit 0.56" 4-Digit 7-Segment Display w/ I2C Backpack - Blue
[Adafruit 0.56" 4-Digit 7-Segment Display w/ I2C Backpack - Blue](https://www.adafruit.com/product/881)
What's better than a single LED? Lots of LEDs! A fun way to make a small display is to use an [8x8 matrix](https://www.adafruit.com/category/37_88) or a [4-digit 7-segment display](https://www.adafruit.com/category/37_103). Matrices like these are...
In Stock
[Buy Now](https://www.adafruit.com/product/881)
[Related Guides to the Product](https://learn.adafruit.com/products/881/guides)
### Adafruit Bicolor LED Square Pixel Matrix with I2C Backpack
[Adafruit Bicolor LED Square Pixel Matrix with I2C Backpack](https://www.adafruit.com/product/902)
What's better than a single LED? Lots of LEDs! A fun way to make a small colorful display is to use a [1.2" Bi-color 8x8 LED Matrix](http://www.adafruit.com/products/458). Matrices like these are 'multiplexed' - so to control all the 128 LEDs you need 24 pins....
In Stock
[Buy Now](https://www.adafruit.com/product/902)
[Related Guides to the Product](https://learn.adafruit.com/products/902/guides)
### Adafruit Mini 8x8 LED Matrix w/I2C Backpack - Blue
[Adafruit Mini 8x8 LED Matrix w/I2C Backpack - Blue](https://www.adafruit.com/product/959)
What's better than a single LED? Lots of LEDs! A fun way to make a small display is to use an [8x8 matrix](https://www.adafruit.com/category/37_88) or a [4-digit 7-segment display](https://www.adafruit.com/category/37_103). Matrices like these are...
In Stock
[Buy Now](https://www.adafruit.com/product/959)
[Related Guides to the Product](https://learn.adafruit.com/products/959/guides)
### Adafruit 0.56" 4-Digit 7-Segment Display w/I2C Backpack - White
[Adafruit 0.56" 4-Digit 7-Segment Display w/I2C Backpack - White](https://www.adafruit.com/product/1002)
What's better than a single LED? Lots of LEDs! A fun way to make a small display is to use an [8x8 matrix](https://www.adafruit.com/category/37_88) or a [4-digit 7-segment display](https://www.adafruit.com/category/37_103). Matrices like these are...
In Stock
[Buy Now](https://www.adafruit.com/product/1002)
[Related Guides to the Product](https://learn.adafruit.com/products/1002/guides)
### Adafruit 1.2" 8x8 LED Matrix Backpack
[Adafruit 1.2" 8x8 LED Matrix Backpack](https://www.adafruit.com/product/1048)
By popular request, you can now get our 8x8 LED backpacks without the LEDs! These backpacks feature an HT16K33 I2C LED driver, they're simple and easy to use - you can use [our very nice library for the backpacks to...](https://github.com/adafruit/Adafruit-LED-Backpack-Library)
In Stock
[Buy Now](https://www.adafruit.com/product/1048)
[Related Guides to the Product](https://learn.adafruit.com/products/1048/guides)
### Adafruit Small 1.2" 8x8 LED Matrix w/I2C Backpack - Red
[Adafruit Small 1.2" 8x8 LED Matrix w/I2C Backpack - Red](https://www.adafruit.com/product/1049)
What's better than a single LED? Lots of LEDs! A fun way to make a small display is to use an [8x8 matrix](https://www.adafruit.com/category/37_88) or a [4-digit 7-segment display](https://www.adafruit.com/category/37_103). Matrices like these are...
In Stock
[Buy Now](https://www.adafruit.com/product/1049)
[Related Guides to the Product](https://learn.adafruit.com/products/1049/guides)
### Adafruit Small 1.2" 8x8 LED Matrix w/I2C Backpack - Yellow
[Adafruit Small 1.2" 8x8 LED Matrix w/I2C Backpack - Yellow](https://www.adafruit.com/product/1050)
What's better than a single LED? Lots of LEDs! A fun way to make a small display is to use an [8x8 matrix](https://www.adafruit.com/category/37_88) or a [4-digit 7-segment display](https://www.adafruit.com/category/37_103). Matrices like these are...
In Stock
[Buy Now](https://www.adafruit.com/product/1050)
[Related Guides to the Product](https://learn.adafruit.com/products/1050/guides)
### Adafruit Small 1.2" 8x8 LED Matrix w/I2C Backpack - Blue
[Adafruit Small 1.2" 8x8 LED Matrix w/I2C Backpack - Blue](https://www.adafruit.com/product/1052)
What's better than a single LED? Lots of LEDs! A fun way to make a small display is to use an [8x8 matrix](https://www.adafruit.com/category/37_88) or a [4-digit 7-segment display](https://www.adafruit.com/category/37_103). Matrices like these are...
In Stock
[Buy Now](https://www.adafruit.com/product/1052)
[Related Guides to the Product](https://learn.adafruit.com/products/1052/guides)
### Adafruit Mini 8x8 LED Matrix w/I2C Backpack - Ultra Bright White
[Adafruit Mini 8x8 LED Matrix w/I2C Backpack - Ultra Bright White](https://www.adafruit.com/product/1080)
What's better than a single LED? Lots of LEDs! A fun way to make a small display is to use an [8x8 matrix](https://www.adafruit.com/category/37_88) or a [4-digit 7-segment display](https://www.adafruit.com/category/37_103). Matrices like these are...
In Stock
[Buy Now](https://www.adafruit.com/product/1080)
[Related Guides to the Product](https://learn.adafruit.com/products/1080/guides)
### Adafruit 1.2" 4-Digit 7-Segment Display w/I2C Backpack - Green
[Adafruit 1.2" 4-Digit 7-Segment Display w/I2C Backpack - Green](https://www.adafruit.com/product/1268)
What's better than a single LED? Lots of LEDs! A fun way to make a numeric display is to use a [4-digit 7-segment display](https://www.adafruit.com/category/37_103). LED matrices like these are 'multiplexed' - so to control all the seven-segment LEDs you need 14 pins....
No Longer Stocked
[Buy Now](https://www.adafruit.com/product/1268)
[Related Guides to the Product](https://learn.adafruit.com/products/1268/guides)
### Adafruit 1.2" 4-Digit 7-Segment Display w/I2C Backpack - Yellow
[Adafruit 1.2" 4-Digit 7-Segment Display w/I2C Backpack - Yellow](https://www.adafruit.com/product/1269)
What's better than a single LED? Lots of LEDs! A fun way to make a numeric display is to use a [4-digit 7-segment display](https://www.adafruit.com/category/37_103). LED matrices like these are 'multiplexed' - so to control all the seven-segment LEDs you need 14 pins....
In Stock
[Buy Now](https://www.adafruit.com/product/1269)
[Related Guides to the Product](https://learn.adafruit.com/products/1269/guides)
### Adafruit 1.2" 4-Digit 7-Segment Display w/I2C Backpack - Red
[Adafruit 1.2" 4-Digit 7-Segment Display w/I2C Backpack - Red](https://www.adafruit.com/product/1270)
What's better than a single LED? Lots of LEDs! A fun way to make a numeric display is to use a [4-digit 7-segment display](https://www.adafruit.com/category/37_103). LED matrices like these are 'multiplexed' - so to control all the seven-segment LEDs you need 14 pins....
In Stock
[Buy Now](https://www.adafruit.com/product/1270)
[Related Guides to the Product](https://learn.adafruit.com/products/1270/guides)
### Small 1.2" 8x8 Ultra Bright White LED Matrix + Backpack
[Small 1.2" 8x8 Ultra Bright White LED Matrix + Backpack](https://www.adafruit.com/product/1614)
What's better than a single LED? Lots of LEDs! A fun way to make a small display is to use an [8x8 matrix](https://www.adafruit.com/category/37_88) or a [4-digit 7-segment display](https://www.adafruit.com/category/37_103). Matrices like these are...
In Stock
[Buy Now](https://www.adafruit.com/product/1614)
[Related Guides to the Product](https://learn.adafruit.com/products/1614/guides)
### Adafruit Small 1.2" 8x8 LED Matrix w/I2C Backpack - Pure Green
[Adafruit Small 1.2" 8x8 LED Matrix w/I2C Backpack - Pure Green](https://www.adafruit.com/product/1632)
What's better than a single LED? Lots of LEDs! A fun way to make a small display is to use an [8x8 matrix](https://www.adafruit.com/category/37_88) or a [4-digit 7-segment display](https://www.adafruit.com/category/37_103). Matrices like these are...
In Stock
[Buy Now](https://www.adafruit.com/product/1632)
[Related Guides to the Product](https://learn.adafruit.com/products/1632/guides)
### Adafruit Mini 0.8" 8x8 LED Matrix w/I2C Backpack - Pure Green
[Adafruit Mini 0.8" 8x8 LED Matrix w/I2C Backpack - Pure Green](https://www.adafruit.com/product/1633)
What's better than a single LED? Lots of LEDs! A fun way to make a small display is to use an [8x8 matrix](https://www.adafruit.com/category/37_88) or a [4-digit 7-segment display](https://www.adafruit.com/category/37_103). Matrices like these are...
In Stock
[Buy Now](https://www.adafruit.com/product/1633)
[Related Guides to the Product](https://learn.adafruit.com/products/1633/guides)
### Bi-Color (Red/Green) 24-Bar Bargraph w/I2C Backpack Kit
[Bi-Color (Red/Green) 24-Bar Bargraph w/I2C Backpack Kit](https://www.adafruit.com/product/1721)
What's better than a single LED? Lots of LEDs! A fun way to make a small linear display is to use two 12-bar Bi-color bar-graphs. However, this LED bargraph is 'multiplexed' - so to control all the 48 LEDs you need a lot of pins.
Out of Stock
[Buy Now](https://www.adafruit.com/product/1721)
[Related Guides to the Product](https://learn.adafruit.com/products/1721/guides)
### Small 1.2" 8x8 Ultra Bright Square Amber LED Matrix + Backpack
[Small 1.2" 8x8 Ultra Bright Square Amber LED Matrix + Backpack](https://www.adafruit.com/product/1854)
What's better than a single LED? Lots of LEDs! Matrices like these are 'multiplexed' - so to control 64 LEDs you need 16 pins. That's a lot of pins, and there are [driver chips like the MAX7219](//www.adafruit.com/products/453) that can control a matrix for you but...
In Stock
[Buy Now](https://www.adafruit.com/product/1854)
[Related Guides to the Product](https://learn.adafruit.com/products/1854/guides)
### Small 1.2" 8x8 Ultra Bright Square Yellow LED Matrix + Backpack
[Small 1.2" 8x8 Ultra Bright Square Yellow LED Matrix + Backpack](https://www.adafruit.com/product/1855)
What's better than a single LED? Lots of LEDs! Matrices like these are 'multiplexed' - so to control 64 LEDs you need 16 pins. That's a lot of pins, and there are [driver chips like the MAX7219](//www.adafruit.com/products/453) that can control a matrix for you but...
In Stock
[Buy Now](https://www.adafruit.com/product/1855)
[Related Guides to the Product](https://learn.adafruit.com/products/1855/guides)
### Small 1.2" 8x8 Bright Square Pure Green LED Matrix + Backpack
[Small 1.2" 8x8 Bright Square Pure Green LED Matrix + Backpack](https://www.adafruit.com/product/1856)
What's better than a single LED? Lots of LEDs! Matrices like these are 'multiplexed' - so to control 64 LEDs you need 16 pins. That's a lot of pins, and there are [driver chips like the MAX7219](//www.adafruit.com/products/453) that can control a matrix for you but...
In Stock
[Buy Now](https://www.adafruit.com/product/1856)
[Related Guides to the Product](https://learn.adafruit.com/products/1856/guides)
### Small 1.2" 8x8 Ultra Bright Square White LED Matrix + Backpack
[Small 1.2" 8x8 Ultra Bright Square White LED Matrix + Backpack](https://www.adafruit.com/product/1857)
What's better than a single LED? Lots of LEDs! Matrices like these are 'multiplexed' - so to control 64 LEDs you need 16 pins. That's a lot of pins, and there are [driver chips like the MAX7219](//www.adafruit.com/products/453) that can control a matrix for you but...
In Stock
[Buy Now](https://www.adafruit.com/product/1857)
[Related Guides to the Product](https://learn.adafruit.com/products/1857/guides)
### Adafruit 14-segment LED Alphanumeric Backpack - STEMMA QT
[Adafruit 14-segment LED Alphanumeric Backpack - STEMMA QT](https://www.adafruit.com/product/1910)
By popular request, you can now get our 14-segment LED backpacks without the LEDs! These backpacks feature an HT16K33 I2C LED driver, they're simple and easy to use - you can use [our very nice library for the backpacks to...](https://github.com/adafruit/Adafruit-LED-Backpack-Library)
In Stock
[Buy Now](https://www.adafruit.com/product/1910)
[Related Guides to the Product](https://learn.adafruit.com/products/1910/guides)
### Quad Alphanumeric Display - Red 0.54" Digits w/ I2C Backpack
[Quad Alphanumeric Display - Red 0.54" Digits w/ I2C Backpack](https://www.adafruit.com/product/1911)
Display, elegantly, 012345678 or 9! Gaze, hypnotized, at ABCDEFGHIJKLM - well it can display the whole alphabet. You get the point. This is a nice, bright alphanumeric display that shows letters and numbers in a beautiful red hue. It's super bright and designed for viewing from distances...
In Stock
[Buy Now](https://www.adafruit.com/product/1911)
[Related Guides to the Product](https://learn.adafruit.com/products/1911/guides)
### Quad Alphanumeric Display - Blue 0.54" Digits w/ I2C Backpack
[Quad Alphanumeric Display - Blue 0.54" Digits w/ I2C Backpack](https://www.adafruit.com/product/1912)
Display, elegantly, 012345678 or 9! Gaze, hypnotized, at ABCDEFGHIJKLM - well it can display the whole alphabet. You get the point. This is a nice, bright alphanumeric display that shows letters and numbers in a beautiful blue hue. It's super bright and designed for viewing from distances...
In Stock
[Buy Now](https://www.adafruit.com/product/1912)
[Related Guides to the Product](https://learn.adafruit.com/products/1912/guides)
### 16x8 1.2" LED Matrix + Backpack - Ultra Bright Round Green LEDs
[16x8 1.2" LED Matrix + Backpack - Ultra Bright Round Green LEDs](https://www.adafruit.com/product/2035)
What's better than a single LED? Lots of LEDs! And what's better than lots of LEDs? **TWO TIMES AS MANY LEDS!!!**
With the 16x8 LED Matrix Backpack we've doubled your project's matrix capacity by making it super easy to get two separate 8x8 matrices onto...
In Stock
[Buy Now](https://www.adafruit.com/product/2035)
[Related Guides to the Product](https://learn.adafruit.com/products/2035/guides)
### 16x8 1.2" LED Matrix+Backpack UltraBright Round YellowGreen LEDs
[16x8 1.2" LED Matrix+Backpack UltraBright Round YellowGreen LEDs](https://www.adafruit.com/product/2036)
What's better than a single LED? Lots of LEDs! And what's better than lots of LEDs? **TWO TIMES AS MANY LEDS!!!**
With the 16x8 LED Matrix Backpack we've doubled your project's matrix capacity by making it super easy to get two separate 8x8 matrices onto...
In Stock
[Buy Now](https://www.adafruit.com/product/2036)
[Related Guides to the Product](https://learn.adafruit.com/products/2036/guides)
### 16x8 1.2" LED Matrix + Backpack - Ultra Bright Round Red LEDs
[16x8 1.2" LED Matrix + Backpack - Ultra Bright Round Red LEDs](https://www.adafruit.com/product/2037)
What's better than a single LED? Lots of LEDs! And what's better than lots of LEDs? **TWO TIMES AS MANY LEDS!!!**
With the 16x8 LED Matrix Backpack we've doubled your project's matrix capacity by making it super easy to get two separate 8x8 matrices onto...
In Stock
[Buy Now](https://www.adafruit.com/product/2037)
[Related Guides to the Product](https://learn.adafruit.com/products/2037/guides)
### 16x8 1.2" LED Matrix + Backpack - Ultra Bright Round White LEDs
[16x8 1.2" LED Matrix + Backpack - Ultra Bright Round White LEDs](https://www.adafruit.com/product/2038)
What's better than a single LED? Lots of LEDs! And what's better than lots of LEDs? **TWO TIMES AS MANY LEDS!!!**
With the 16x8 LED Matrix Backpack we've doubled your project's matrix capacity by making it super easy to get two separate 8x8 matrices onto...
In Stock
[Buy Now](https://www.adafruit.com/product/2038)
[Related Guides to the Product](https://learn.adafruit.com/products/2038/guides)
### 16x8 1.2" LED Matrix + Backpack - Ultra Bright Round Blue LEDs
[16x8 1.2" LED Matrix + Backpack - Ultra Bright Round Blue LEDs](https://www.adafruit.com/product/2039)
What's better than a single LED? Lots of LEDs! And what's better than lots of LEDs? **TWO TIMES AS MANY LEDS!!!**
With the 16x8 LED Matrix Backpack we've doubled your project's matrix capacity by making it super easy to get two separate 8x8 matrices onto...
In Stock
[Buy Now](https://www.adafruit.com/product/2039)
[Related Guides to the Product](https://learn.adafruit.com/products/2039/guides)
### 16x8 1.2" LED Matrix + Backpack - Ultra Bright Square Blue LEDs
[16x8 1.2" LED Matrix + Backpack - Ultra Bright Square Blue LEDs](https://www.adafruit.com/product/2040)
What's better than a single LED? Lots of LEDs! And what's better than lots of LEDs? **TWO TIMES AS MANY LEDS!!!**
With the 16x8 LED Matrix Backpack we've doubled your project's matrix capacity by making it super easy to get two separate 8x8 matrices onto...
In Stock
[Buy Now](https://www.adafruit.com/product/2040)
[Related Guides to the Product](https://learn.adafruit.com/products/2040/guides)
### 16x8 1.2" LED Matrix + Backpack - Ultra Bright Square Amber LEDs
[16x8 1.2" LED Matrix + Backpack - Ultra Bright Square Amber LEDs](https://www.adafruit.com/product/2041)
What's better than a single LED? Lots of LEDs! And what's better than lots of LEDs? **TWO TIMES AS MANY LEDS!!!**
With the 16x8 LED Matrix Backpack we've doubled your project's matrix capacity by making it super easy to get two separate 8x8 matrices onto...
In Stock
[Buy Now](https://www.adafruit.com/product/2041)
[Related Guides to the Product](https://learn.adafruit.com/products/2041/guides)
### 16x8 1.2" LED Matrix + Backpack - Ultra Bright Square Green LEDs
[16x8 1.2" LED Matrix + Backpack - Ultra Bright Square Green LEDs](https://www.adafruit.com/product/2042)
What's better than a single LED? Lots of LEDs! And what's better than lots of LEDs? **TWO TIMES AS MANY LEDS!!!**
With the 16x8 LED Matrix Backpack we've doubled your project's matrix capacity by making it super easy to get two separate 8x8 matrices onto...
In Stock
[Buy Now](https://www.adafruit.com/product/2042)
[Related Guides to the Product](https://learn.adafruit.com/products/2042/guides)
### 16x8 1.2" LED Matrix + Backpack -Ultra Bright Square Yellow LEDs
[16x8 1.2" LED Matrix + Backpack -Ultra Bright Square Yellow LEDs](https://www.adafruit.com/product/2043)
What's better than a single LED? Lots of LEDs! And what's better than lots of LEDs? **TWO TIMES AS MANY LEDS!!!**
With the 16x8 LED Matrix Backpack we've doubled your project's matrix capacity by making it super easy to get two separate 8x8 matrices onto...
In Stock
[Buy Now](https://www.adafruit.com/product/2043)
[Related Guides to the Product](https://learn.adafruit.com/products/2043/guides)
### 16x8 1.2" LED Matrix + Backpack - Ultra Bright Square White LEDs
[16x8 1.2" LED Matrix + Backpack - Ultra Bright Square White LEDs](https://www.adafruit.com/product/2044)
What's better than a single LED? Lots of LEDs! And what's better than lots of LEDs? **TWO TIMES AS MANY LEDS!!!**
With the 16x8 LED Matrix Backpack we've doubled your project's matrix capacity by making it super easy to get two separate 8x8 matrices onto...
In Stock
[Buy Now](https://www.adafruit.com/product/2044)
[Related Guides to the Product](https://learn.adafruit.com/products/2044/guides)
### 16x8 1.2" LED Matrix + Backpack-Ultra Bright Round Orange LEDs
[16x8 1.2" LED Matrix + Backpack-Ultra Bright Round Orange LEDs](https://www.adafruit.com/product/2052)
What's better than a single LED? Lots of LEDs! And what's better than lots of LEDs? **TWO TIMES AS MANY LEDS!!!**
With the 16x8 LED Matrix Backpack we've doubled your project's matrix capacity by making it super easy to get two separate 8x8 matrices onto...
In Stock
[Buy Now](https://www.adafruit.com/product/2052)
[Related Guides to the Product](https://learn.adafruit.com/products/2052/guides)
### 16x8 1.2" LED Matrices+Backpack Round LEDs in Various Colors
[16x8 1.2" LED Matrices+Backpack Round LEDs in Various Colors](https://www.adafruit.com/product/2054)
What's better than a single LED? Lots of LEDs! And what's better than lots of LEDs? **TWO TIMES AS MANY LEDS!!!**
With the 16x8 LED Matrix Backpack we've doubled your project's matrix capacity by making it super easy to get two separate 8x8 matrices onto...
Out of Stock
[Buy Now](https://www.adafruit.com/product/2054)
[Related Guides to the Product](https://learn.adafruit.com/products/2054/guides)
### Adafruit 8x16 LED Matrix FeatherWing w/o Matrices
[Adafruit 8x16 LED Matrix FeatherWing w/o Matrices](https://www.adafruit.com/product/3090)
You will chirp with delight when you see how easy it is to make your very own 8x16 LED matrix display for any Feather. At 0.8" square, the little [8x8 matrices](https://www.adafruit.com/new/?q=8x8%20miniature%20LED%20matrix&) have everything a big LED matrix has,...
Out of Stock
[Buy Now](https://www.adafruit.com/product/3090)
[Related Guides to the Product](https://learn.adafruit.com/products/3090/guides)
### Adafruit 14-segment LED Alphanumeric backpack (same as P1910)
[Adafruit 14-segment LED Alphanumeric backpack (same as P1910)](https://www.adafruit.com/product/3322)
Just the backpack + 4pin header
No Longer Stocked
[Buy Now](https://www.adafruit.com/product/3322)
[Related Guides to the Product](https://learn.adafruit.com/products/3322/guides)
## Featured Products
### Adafruit Small 1.2" 8x8 LED Matrix w/I2C Backpack - Yellow-Green
[Adafruit Small 1.2" 8x8 LED Matrix w/I2C Backpack - Yellow-Green](https://www.adafruit.com/product/1051)
What's better than a single LED? Lots of LEDs! A fun way to make a small display is to use an [8x8 matrix](https://www.adafruit.com/category/37_88) or a [4-digit 7-segment display](https://www.adafruit.com/category/37_103). Matrices like these are...
In Stock
[Buy Now](https://www.adafruit.com/product/1051)
[Related Guides to the Product](https://learn.adafruit.com/products/1051/guides)
### Small 1.2" 8x8 Ultra Bright Square Blue LED Matrix + Backpack
[Small 1.2" 8x8 Ultra Bright Square Blue LED Matrix + Backpack](https://www.adafruit.com/product/1853)
What's better than a single LED? Lots of LEDs! Matrices like these are 'multiplexed' - so to control 64 LEDs you need 16 pins. That's a lot of pins, and there are [driver chips like the MAX7219](//www.adafruit.com/products/453) that can control a matrix for you but...
In Stock
[Buy Now](https://www.adafruit.com/product/1853)
[Related Guides to the Product](https://learn.adafruit.com/products/1853/guides)
## Related Guides
- [LED Backpack Displays on Raspberry Pi and BeagleBone Black](https://learn.adafruit.com/led-backpack-displays-on-raspberry-pi-and-beaglebone-black.md)
- [Animating Multiple LED Backpacks](https://learn.adafruit.com/animating-multiple-led-backpacks.md)
- [Arduino GPS Clock](https://learn.adafruit.com/arduino-clock.md)
- [Raspberry Pi Physical Dashboard](https://learn.adafruit.com/raspberry-pi-physical-dashboard.md)
- [CircuitPython Hardware: LED Backpacks & FeatherWings](https://learn.adafruit.com/micropython-hardware-led-backpacks-and-featherwings.md)
- [Matrix and 7-Segment LED Backpack with the Raspberry Pi](https://learn.adafruit.com/matrix-7-segment-led-backpack-with-the-raspberry-pi.md)
- [DIY Pocket LED Gamer - Tiny Tetris!](https://learn.adafruit.com/diy-3d-printed-handheld-pocket-game-tiny-tetris-snake.md)
- [RGB LED Matrix Cube with 25,000 LEDs](https://learn.adafruit.com/rgb-led-matrix-cube-for-pi.md)
- [Creating GIFs for SmartMatrix](https://learn.adafruit.com/creating-gifs-for-smartmatrix.md)
- [Adafruit CharliePlex LED Matrix Bonnet](https://learn.adafruit.com/adafruit-charlieplex-bonnet.md)
- [Connecting a 16x32 RGB LED Matrix Panel to a Raspberry Pi](https://learn.adafruit.com/connecting-a-16x32-rgb-led-matrix-panel-to-a-raspberry-pi.md)
- [MicroPython Displays: Drawing Text](https://learn.adafruit.com/micropython-displays-drawing-text.md)
- [Heart Rate Badge](https://learn.adafruit.com/heart-rate-badge.md)
- [16x24 LED Matrix](https://learn.adafruit.com/16x24-led-matrix.md)
- [Adafruit IS31FL3741](https://learn.adafruit.com/adafruit-is31fl3741.md)
---
# Source: https://learn.adafruit.com/adafruit-led-backpack/bi-color-24-bargraph-python-setup.md
# Adafruit LED Backpacks
## Python Wiring and Setup
# Wiring
It's easy to use LED Matrices with Python and the [Adafruit CircuitPython HT16K33](https://github.com/adafruit/Adafruit_CircuitPython_HT16K33) library. This library allows you to easily write Python code to control the display.
We'll cover how to wire the Bargraph to your Raspberry Pi. First assemble your Bargraph.
Since there's _dozens_ of Linux computers/boards you can use we will show wiring for Raspberry Pi. For other platforms, [please visit the guide for CircuitPython on Linux to see whether your platform is supported](https://learn.adafruit.com/circuitpython-on-raspberrypi-linux).
Connect the Bargraph as shown below to your Raspberry Pi.
- **Raspberry Pi 3.3V ** to ** Bargraph VIN**
- **Raspberry Pi GND ** to **Bargraph GND**
- **Raspberry Pi SCL ** to **Bargraph SCL**
- **Raspberry Pi SDA ** to **Bargraph SDA**

[Download Fritzing Object](https://cdn-learn.adafruit.com/assets/assets/000/087/063/original/raspberry-pi-bargraph.fzz?1579283291)
# Setup
You'll need to install the Adafruit\_Blinka library that provides the CircuitPython support in Python. This may also require enabling I2C on your platform and verifying you are running Python 3. [Since each platform is a little different, and Linux changes often, please visit the CircuitPython on Linux guide to get your computer ready](https://learn.adafruit.com/circuitpython-on-raspberrypi-linux)!
## Python Installation of HT16K33 Library
Once that's done, from your command line run the following command:
- `pip3 install adafruit-circuitpython-ht16k33`
If your default Python is version 3 you may need to run 'pip' instead. Just make sure you aren't trying to use CircuitPython on Python 2.x, it isn't supported!
If that complains about pip3 not being installed, then run this first to install it:
- `sudo apt-get install python3-pip`
That's it. You should be ready to go.
- [Previous Page](https://learn.adafruit.com/adafruit-led-backpack/bi-color-24-bargraph-circuitpython-setup.md)
- [Next Page](https://learn.adafruit.com/adafruit-led-backpack/bi-color-24-bargraph-circuitpython-usage.md)
## Primary Products
### Adafruit Mini 8x8 LED Matrix w/I2C Backpack - Red
[Adafruit Mini 8x8 LED Matrix w/I2C Backpack - Red](https://www.adafruit.com/product/870)
What's better than a single LED? Lots of LEDs! A fun way to make a small display is to use an [8x8 matrix](https://www.adafruit.com/category/37_88) or a [4-digit 7-segment display](https://www.adafruit.com/category/37_103). Matrices like these are...
In Stock
[Buy Now](https://www.adafruit.com/product/870)
[Related Guides to the Product](https://learn.adafruit.com/products/870/guides)
### Adafruit Mini 8x8 LED Matrix w/I2C Backpack - Yellow
[Adafruit Mini 8x8 LED Matrix w/I2C Backpack - Yellow](https://www.adafruit.com/product/871)
What's better than a single LED? Lots of LEDs! A fun way to make a small display is to use an [8x8 matrix](https://www.adafruit.com/category/37_88) or a [4-digit 7-segment display](https://www.adafruit.com/category/37_103). Matrices like these are...
In Stock
[Buy Now](https://www.adafruit.com/product/871)
[Related Guides to the Product](https://learn.adafruit.com/products/871/guides)
### Adafruit Mini 0.8" 8x8 LED Matrix w/I2C Backpack - Yellow-Green
[Adafruit Mini 0.8" 8x8 LED Matrix w/I2C Backpack - Yellow-Green](https://www.adafruit.com/product/872)
What's better than a single LED? Lots of LEDs! A fun way to make a small display is to use an [8x8 matrix](https://www.adafruit.com/category/37_88) or a [4-digit 7-segment display](https://www.adafruit.com/category/37_103). Matrices like these are...
In Stock
[Buy Now](https://www.adafruit.com/product/872)
[Related Guides to the Product](https://learn.adafruit.com/products/872/guides)
### Adafruit 0.56" 4-Digit 7-Segment Display with I2C Backpack - Red
[Adafruit 0.56" 4-Digit 7-Segment Display with I2C Backpack - Red](https://www.adafruit.com/product/878)
What's better than a single LED? Lots of LEDs! A fun way to make a small display is to use an [8x8 matrix](https://www.adafruit.com/category/37_88) or a [4-digit 7-segment display](https://www.adafruit.com/category/37_103). Matrices like these are...
In Stock
[Buy Now](https://www.adafruit.com/product/878)
[Related Guides to the Product](https://learn.adafruit.com/products/878/guides)
### Adafruit 0.56" 4-Digit 7-Segment Display w/I2C Backpack - Yellow
[Adafruit 0.56" 4-Digit 7-Segment Display w/I2C Backpack - Yellow](https://www.adafruit.com/product/879)
What's better than a single LED? Lots of LEDs! A fun way to make a small display is to use an [8x8 matrix](https://www.adafruit.com/category/37_88) or a [4-digit 7-segment display](https://www.adafruit.com/category/37_103). Matrices like these are...
In Stock
[Buy Now](https://www.adafruit.com/product/879)
[Related Guides to the Product](https://learn.adafruit.com/products/879/guides)
### Adafruit 0.56" 4-Digit 7-Segment Display w/ I2C Backpack - Green
[Adafruit 0.56" 4-Digit 7-Segment Display w/ I2C Backpack - Green](https://www.adafruit.com/product/880)
What's better than a single LED? Lots of LEDs! A fun way to make a small display is to use an [8x8 matrix](https://www.adafruit.com/category/37_88) or a [4-digit 7-segment display](https://www.adafruit.com/category/37_103). Matrices like these are...
No Longer Stocked
[Buy Now](https://www.adafruit.com/product/880)
[Related Guides to the Product](https://learn.adafruit.com/products/880/guides)
### Adafruit 0.56" 4-Digit 7-Segment Display w/ I2C Backpack - Blue
[Adafruit 0.56" 4-Digit 7-Segment Display w/ I2C Backpack - Blue](https://www.adafruit.com/product/881)
What's better than a single LED? Lots of LEDs! A fun way to make a small display is to use an [8x8 matrix](https://www.adafruit.com/category/37_88) or a [4-digit 7-segment display](https://www.adafruit.com/category/37_103). Matrices like these are...
In Stock
[Buy Now](https://www.adafruit.com/product/881)
[Related Guides to the Product](https://learn.adafruit.com/products/881/guides)
### Adafruit Bicolor LED Square Pixel Matrix with I2C Backpack
[Adafruit Bicolor LED Square Pixel Matrix with I2C Backpack](https://www.adafruit.com/product/902)
What's better than a single LED? Lots of LEDs! A fun way to make a small colorful display is to use a [1.2" Bi-color 8x8 LED Matrix](http://www.adafruit.com/products/458). Matrices like these are 'multiplexed' - so to control all the 128 LEDs you need 24 pins....
In Stock
[Buy Now](https://www.adafruit.com/product/902)
[Related Guides to the Product](https://learn.adafruit.com/products/902/guides)
### Adafruit Mini 8x8 LED Matrix w/I2C Backpack - Blue
[Adafruit Mini 8x8 LED Matrix w/I2C Backpack - Blue](https://www.adafruit.com/product/959)
What's better than a single LED? Lots of LEDs! A fun way to make a small display is to use an [8x8 matrix](https://www.adafruit.com/category/37_88) or a [4-digit 7-segment display](https://www.adafruit.com/category/37_103). Matrices like these are...
In Stock
[Buy Now](https://www.adafruit.com/product/959)
[Related Guides to the Product](https://learn.adafruit.com/products/959/guides)
### Adafruit 0.56" 4-Digit 7-Segment Display w/I2C Backpack - White
[Adafruit 0.56" 4-Digit 7-Segment Display w/I2C Backpack - White](https://www.adafruit.com/product/1002)
What's better than a single LED? Lots of LEDs! A fun way to make a small display is to use an [8x8 matrix](https://www.adafruit.com/category/37_88) or a [4-digit 7-segment display](https://www.adafruit.com/category/37_103). Matrices like these are...
In Stock
[Buy Now](https://www.adafruit.com/product/1002)
[Related Guides to the Product](https://learn.adafruit.com/products/1002/guides)
### Adafruit 1.2" 8x8 LED Matrix Backpack
[Adafruit 1.2" 8x8 LED Matrix Backpack](https://www.adafruit.com/product/1048)
By popular request, you can now get our 8x8 LED backpacks without the LEDs! These backpacks feature an HT16K33 I2C LED driver, they're simple and easy to use - you can use [our very nice library for the backpacks to...](https://github.com/adafruit/Adafruit-LED-Backpack-Library)
In Stock
[Buy Now](https://www.adafruit.com/product/1048)
[Related Guides to the Product](https://learn.adafruit.com/products/1048/guides)
### Adafruit Small 1.2" 8x8 LED Matrix w/I2C Backpack - Red
[Adafruit Small 1.2" 8x8 LED Matrix w/I2C Backpack - Red](https://www.adafruit.com/product/1049)
What's better than a single LED? Lots of LEDs! A fun way to make a small display is to use an [8x8 matrix](https://www.adafruit.com/category/37_88) or a [4-digit 7-segment display](https://www.adafruit.com/category/37_103). Matrices like these are...
In Stock
[Buy Now](https://www.adafruit.com/product/1049)
[Related Guides to the Product](https://learn.adafruit.com/products/1049/guides)
### Adafruit Small 1.2" 8x8 LED Matrix w/I2C Backpack - Yellow
[Adafruit Small 1.2" 8x8 LED Matrix w/I2C Backpack - Yellow](https://www.adafruit.com/product/1050)
What's better than a single LED? Lots of LEDs! A fun way to make a small display is to use an [8x8 matrix](https://www.adafruit.com/category/37_88) or a [4-digit 7-segment display](https://www.adafruit.com/category/37_103). Matrices like these are...
In Stock
[Buy Now](https://www.adafruit.com/product/1050)
[Related Guides to the Product](https://learn.adafruit.com/products/1050/guides)
### Adafruit Small 1.2" 8x8 LED Matrix w/I2C Backpack - Blue
[Adafruit Small 1.2" 8x8 LED Matrix w/I2C Backpack - Blue](https://www.adafruit.com/product/1052)
What's better than a single LED? Lots of LEDs! A fun way to make a small display is to use an [8x8 matrix](https://www.adafruit.com/category/37_88) or a [4-digit 7-segment display](https://www.adafruit.com/category/37_103). Matrices like these are...
In Stock
[Buy Now](https://www.adafruit.com/product/1052)
[Related Guides to the Product](https://learn.adafruit.com/products/1052/guides)
### Adafruit Mini 8x8 LED Matrix w/I2C Backpack - Ultra Bright White
[Adafruit Mini 8x8 LED Matrix w/I2C Backpack - Ultra Bright White](https://www.adafruit.com/product/1080)
What's better than a single LED? Lots of LEDs! A fun way to make a small display is to use an [8x8 matrix](https://www.adafruit.com/category/37_88) or a [4-digit 7-segment display](https://www.adafruit.com/category/37_103). Matrices like these are...
In Stock
[Buy Now](https://www.adafruit.com/product/1080)
[Related Guides to the Product](https://learn.adafruit.com/products/1080/guides)
### Adafruit 1.2" 4-Digit 7-Segment Display w/I2C Backpack - Green
[Adafruit 1.2" 4-Digit 7-Segment Display w/I2C Backpack - Green](https://www.adafruit.com/product/1268)
What's better than a single LED? Lots of LEDs! A fun way to make a numeric display is to use a [4-digit 7-segment display](https://www.adafruit.com/category/37_103). LED matrices like these are 'multiplexed' - so to control all the seven-segment LEDs you need 14 pins....
No Longer Stocked
[Buy Now](https://www.adafruit.com/product/1268)
[Related Guides to the Product](https://learn.adafruit.com/products/1268/guides)
### Adafruit 1.2" 4-Digit 7-Segment Display w/I2C Backpack - Yellow
[Adafruit 1.2" 4-Digit 7-Segment Display w/I2C Backpack - Yellow](https://www.adafruit.com/product/1269)
What's better than a single LED? Lots of LEDs! A fun way to make a numeric display is to use a [4-digit 7-segment display](https://www.adafruit.com/category/37_103). LED matrices like these are 'multiplexed' - so to control all the seven-segment LEDs you need 14 pins....
In Stock
[Buy Now](https://www.adafruit.com/product/1269)
[Related Guides to the Product](https://learn.adafruit.com/products/1269/guides)
### Adafruit 1.2" 4-Digit 7-Segment Display w/I2C Backpack - Red
[Adafruit 1.2" 4-Digit 7-Segment Display w/I2C Backpack - Red](https://www.adafruit.com/product/1270)
What's better than a single LED? Lots of LEDs! A fun way to make a numeric display is to use a [4-digit 7-segment display](https://www.adafruit.com/category/37_103). LED matrices like these are 'multiplexed' - so to control all the seven-segment LEDs you need 14 pins....
In Stock
[Buy Now](https://www.adafruit.com/product/1270)
[Related Guides to the Product](https://learn.adafruit.com/products/1270/guides)
### Small 1.2" 8x8 Ultra Bright White LED Matrix + Backpack
[Small 1.2" 8x8 Ultra Bright White LED Matrix + Backpack](https://www.adafruit.com/product/1614)
What's better than a single LED? Lots of LEDs! A fun way to make a small display is to use an [8x8 matrix](https://www.adafruit.com/category/37_88) or a [4-digit 7-segment display](https://www.adafruit.com/category/37_103). Matrices like these are...
In Stock
[Buy Now](https://www.adafruit.com/product/1614)
[Related Guides to the Product](https://learn.adafruit.com/products/1614/guides)
### Adafruit Small 1.2" 8x8 LED Matrix w/I2C Backpack - Pure Green
[Adafruit Small 1.2" 8x8 LED Matrix w/I2C Backpack - Pure Green](https://www.adafruit.com/product/1632)
What's better than a single LED? Lots of LEDs! A fun way to make a small display is to use an [8x8 matrix](https://www.adafruit.com/category/37_88) or a [4-digit 7-segment display](https://www.adafruit.com/category/37_103). Matrices like these are...
In Stock
[Buy Now](https://www.adafruit.com/product/1632)
[Related Guides to the Product](https://learn.adafruit.com/products/1632/guides)
### Adafruit Mini 0.8" 8x8 LED Matrix w/I2C Backpack - Pure Green
[Adafruit Mini 0.8" 8x8 LED Matrix w/I2C Backpack - Pure Green](https://www.adafruit.com/product/1633)
What's better than a single LED? Lots of LEDs! A fun way to make a small display is to use an [8x8 matrix](https://www.adafruit.com/category/37_88) or a [4-digit 7-segment display](https://www.adafruit.com/category/37_103). Matrices like these are...
In Stock
[Buy Now](https://www.adafruit.com/product/1633)
[Related Guides to the Product](https://learn.adafruit.com/products/1633/guides)
### Bi-Color (Red/Green) 24-Bar Bargraph w/I2C Backpack Kit
[Bi-Color (Red/Green) 24-Bar Bargraph w/I2C Backpack Kit](https://www.adafruit.com/product/1721)
What's better than a single LED? Lots of LEDs! A fun way to make a small linear display is to use two 12-bar Bi-color bar-graphs. However, this LED bargraph is 'multiplexed' - so to control all the 48 LEDs you need a lot of pins.
Out of Stock
[Buy Now](https://www.adafruit.com/product/1721)
[Related Guides to the Product](https://learn.adafruit.com/products/1721/guides)
### Small 1.2" 8x8 Ultra Bright Square Amber LED Matrix + Backpack
[Small 1.2" 8x8 Ultra Bright Square Amber LED Matrix + Backpack](https://www.adafruit.com/product/1854)
What's better than a single LED? Lots of LEDs! Matrices like these are 'multiplexed' - so to control 64 LEDs you need 16 pins. That's a lot of pins, and there are [driver chips like the MAX7219](//www.adafruit.com/products/453) that can control a matrix for you but...
In Stock
[Buy Now](https://www.adafruit.com/product/1854)
[Related Guides to the Product](https://learn.adafruit.com/products/1854/guides)
### Small 1.2" 8x8 Ultra Bright Square Yellow LED Matrix + Backpack
[Small 1.2" 8x8 Ultra Bright Square Yellow LED Matrix + Backpack](https://www.adafruit.com/product/1855)
What's better than a single LED? Lots of LEDs! Matrices like these are 'multiplexed' - so to control 64 LEDs you need 16 pins. That's a lot of pins, and there are [driver chips like the MAX7219](//www.adafruit.com/products/453) that can control a matrix for you but...
In Stock
[Buy Now](https://www.adafruit.com/product/1855)
[Related Guides to the Product](https://learn.adafruit.com/products/1855/guides)
### Small 1.2" 8x8 Bright Square Pure Green LED Matrix + Backpack
[Small 1.2" 8x8 Bright Square Pure Green LED Matrix + Backpack](https://www.adafruit.com/product/1856)
What's better than a single LED? Lots of LEDs! Matrices like these are 'multiplexed' - so to control 64 LEDs you need 16 pins. That's a lot of pins, and there are [driver chips like the MAX7219](//www.adafruit.com/products/453) that can control a matrix for you but...
In Stock
[Buy Now](https://www.adafruit.com/product/1856)
[Related Guides to the Product](https://learn.adafruit.com/products/1856/guides)
### Small 1.2" 8x8 Ultra Bright Square White LED Matrix + Backpack
[Small 1.2" 8x8 Ultra Bright Square White LED Matrix + Backpack](https://www.adafruit.com/product/1857)
What's better than a single LED? Lots of LEDs! Matrices like these are 'multiplexed' - so to control 64 LEDs you need 16 pins. That's a lot of pins, and there are [driver chips like the MAX7219](//www.adafruit.com/products/453) that can control a matrix for you but...
In Stock
[Buy Now](https://www.adafruit.com/product/1857)
[Related Guides to the Product](https://learn.adafruit.com/products/1857/guides)
### Adafruit 14-segment LED Alphanumeric Backpack - STEMMA QT
[Adafruit 14-segment LED Alphanumeric Backpack - STEMMA QT](https://www.adafruit.com/product/1910)
By popular request, you can now get our 14-segment LED backpacks without the LEDs! These backpacks feature an HT16K33 I2C LED driver, they're simple and easy to use - you can use [our very nice library for the backpacks to...](https://github.com/adafruit/Adafruit-LED-Backpack-Library)
In Stock
[Buy Now](https://www.adafruit.com/product/1910)
[Related Guides to the Product](https://learn.adafruit.com/products/1910/guides)
### Quad Alphanumeric Display - Red 0.54" Digits w/ I2C Backpack
[Quad Alphanumeric Display - Red 0.54" Digits w/ I2C Backpack](https://www.adafruit.com/product/1911)
Display, elegantly, 012345678 or 9! Gaze, hypnotized, at ABCDEFGHIJKLM - well it can display the whole alphabet. You get the point. This is a nice, bright alphanumeric display that shows letters and numbers in a beautiful red hue. It's super bright and designed for viewing from distances...
In Stock
[Buy Now](https://www.adafruit.com/product/1911)
[Related Guides to the Product](https://learn.adafruit.com/products/1911/guides)
### Quad Alphanumeric Display - Blue 0.54" Digits w/ I2C Backpack
[Quad Alphanumeric Display - Blue 0.54" Digits w/ I2C Backpack](https://www.adafruit.com/product/1912)
Display, elegantly, 012345678 or 9! Gaze, hypnotized, at ABCDEFGHIJKLM - well it can display the whole alphabet. You get the point. This is a nice, bright alphanumeric display that shows letters and numbers in a beautiful blue hue. It's super bright and designed for viewing from distances...
In Stock
[Buy Now](https://www.adafruit.com/product/1912)
[Related Guides to the Product](https://learn.adafruit.com/products/1912/guides)
### 16x8 1.2" LED Matrix + Backpack - Ultra Bright Round Green LEDs
[16x8 1.2" LED Matrix + Backpack - Ultra Bright Round Green LEDs](https://www.adafruit.com/product/2035)
What's better than a single LED? Lots of LEDs! And what's better than lots of LEDs? **TWO TIMES AS MANY LEDS!!!**
With the 16x8 LED Matrix Backpack we've doubled your project's matrix capacity by making it super easy to get two separate 8x8 matrices onto...
In Stock
[Buy Now](https://www.adafruit.com/product/2035)
[Related Guides to the Product](https://learn.adafruit.com/products/2035/guides)
### 16x8 1.2" LED Matrix+Backpack UltraBright Round YellowGreen LEDs
[16x8 1.2" LED Matrix+Backpack UltraBright Round YellowGreen LEDs](https://www.adafruit.com/product/2036)
What's better than a single LED? Lots of LEDs! And what's better than lots of LEDs? **TWO TIMES AS MANY LEDS!!!**
With the 16x8 LED Matrix Backpack we've doubled your project's matrix capacity by making it super easy to get two separate 8x8 matrices onto...
In Stock
[Buy Now](https://www.adafruit.com/product/2036)
[Related Guides to the Product](https://learn.adafruit.com/products/2036/guides)
### 16x8 1.2" LED Matrix + Backpack - Ultra Bright Round Red LEDs
[16x8 1.2" LED Matrix + Backpack - Ultra Bright Round Red LEDs](https://www.adafruit.com/product/2037)
What's better than a single LED? Lots of LEDs! And what's better than lots of LEDs? **TWO TIMES AS MANY LEDS!!!**
With the 16x8 LED Matrix Backpack we've doubled your project's matrix capacity by making it super easy to get two separate 8x8 matrices onto...
In Stock
[Buy Now](https://www.adafruit.com/product/2037)
[Related Guides to the Product](https://learn.adafruit.com/products/2037/guides)
### 16x8 1.2" LED Matrix + Backpack - Ultra Bright Round White LEDs
[16x8 1.2" LED Matrix + Backpack - Ultra Bright Round White LEDs](https://www.adafruit.com/product/2038)
What's better than a single LED? Lots of LEDs! And what's better than lots of LEDs? **TWO TIMES AS MANY LEDS!!!**
With the 16x8 LED Matrix Backpack we've doubled your project's matrix capacity by making it super easy to get two separate 8x8 matrices onto...
In Stock
[Buy Now](https://www.adafruit.com/product/2038)
[Related Guides to the Product](https://learn.adafruit.com/products/2038/guides)
### 16x8 1.2" LED Matrix + Backpack - Ultra Bright Round Blue LEDs
[16x8 1.2" LED Matrix + Backpack - Ultra Bright Round Blue LEDs](https://www.adafruit.com/product/2039)
What's better than a single LED? Lots of LEDs! And what's better than lots of LEDs? **TWO TIMES AS MANY LEDS!!!**
With the 16x8 LED Matrix Backpack we've doubled your project's matrix capacity by making it super easy to get two separate 8x8 matrices onto...
In Stock
[Buy Now](https://www.adafruit.com/product/2039)
[Related Guides to the Product](https://learn.adafruit.com/products/2039/guides)
### 16x8 1.2" LED Matrix + Backpack - Ultra Bright Square Blue LEDs
[16x8 1.2" LED Matrix + Backpack - Ultra Bright Square Blue LEDs](https://www.adafruit.com/product/2040)
What's better than a single LED? Lots of LEDs! And what's better than lots of LEDs? **TWO TIMES AS MANY LEDS!!!**
With the 16x8 LED Matrix Backpack we've doubled your project's matrix capacity by making it super easy to get two separate 8x8 matrices onto...
In Stock
[Buy Now](https://www.adafruit.com/product/2040)
[Related Guides to the Product](https://learn.adafruit.com/products/2040/guides)
### 16x8 1.2" LED Matrix + Backpack - Ultra Bright Square Amber LEDs
[16x8 1.2" LED Matrix + Backpack - Ultra Bright Square Amber LEDs](https://www.adafruit.com/product/2041)
What's better than a single LED? Lots of LEDs! And what's better than lots of LEDs? **TWO TIMES AS MANY LEDS!!!**
With the 16x8 LED Matrix Backpack we've doubled your project's matrix capacity by making it super easy to get two separate 8x8 matrices onto...
In Stock
[Buy Now](https://www.adafruit.com/product/2041)
[Related Guides to the Product](https://learn.adafruit.com/products/2041/guides)
### 16x8 1.2" LED Matrix + Backpack - Ultra Bright Square Green LEDs
[16x8 1.2" LED Matrix + Backpack - Ultra Bright Square Green LEDs](https://www.adafruit.com/product/2042)
What's better than a single LED? Lots of LEDs! And what's better than lots of LEDs? **TWO TIMES AS MANY LEDS!!!**
With the 16x8 LED Matrix Backpack we've doubled your project's matrix capacity by making it super easy to get two separate 8x8 matrices onto...
In Stock
[Buy Now](https://www.adafruit.com/product/2042)
[Related Guides to the Product](https://learn.adafruit.com/products/2042/guides)
### 16x8 1.2" LED Matrix + Backpack -Ultra Bright Square Yellow LEDs
[16x8 1.2" LED Matrix + Backpack -Ultra Bright Square Yellow LEDs](https://www.adafruit.com/product/2043)
What's better than a single LED? Lots of LEDs! And what's better than lots of LEDs? **TWO TIMES AS MANY LEDS!!!**
With the 16x8 LED Matrix Backpack we've doubled your project's matrix capacity by making it super easy to get two separate 8x8 matrices onto...
In Stock
[Buy Now](https://www.adafruit.com/product/2043)
[Related Guides to the Product](https://learn.adafruit.com/products/2043/guides)
### 16x8 1.2" LED Matrix + Backpack - Ultra Bright Square White LEDs
[16x8 1.2" LED Matrix + Backpack - Ultra Bright Square White LEDs](https://www.adafruit.com/product/2044)
What's better than a single LED? Lots of LEDs! And what's better than lots of LEDs? **TWO TIMES AS MANY LEDS!!!**
With the 16x8 LED Matrix Backpack we've doubled your project's matrix capacity by making it super easy to get two separate 8x8 matrices onto...
In Stock
[Buy Now](https://www.adafruit.com/product/2044)
[Related Guides to the Product](https://learn.adafruit.com/products/2044/guides)
### 16x8 1.2" LED Matrix + Backpack-Ultra Bright Round Orange LEDs
[16x8 1.2" LED Matrix + Backpack-Ultra Bright Round Orange LEDs](https://www.adafruit.com/product/2052)
What's better than a single LED? Lots of LEDs! And what's better than lots of LEDs? **TWO TIMES AS MANY LEDS!!!**
With the 16x8 LED Matrix Backpack we've doubled your project's matrix capacity by making it super easy to get two separate 8x8 matrices onto...
In Stock
[Buy Now](https://www.adafruit.com/product/2052)
[Related Guides to the Product](https://learn.adafruit.com/products/2052/guides)
### 16x8 1.2" LED Matrices+Backpack Round LEDs in Various Colors
[16x8 1.2" LED Matrices+Backpack Round LEDs in Various Colors](https://www.adafruit.com/product/2054)
What's better than a single LED? Lots of LEDs! And what's better than lots of LEDs? **TWO TIMES AS MANY LEDS!!!**
With the 16x8 LED Matrix Backpack we've doubled your project's matrix capacity by making it super easy to get two separate 8x8 matrices onto...
Out of Stock
[Buy Now](https://www.adafruit.com/product/2054)
[Related Guides to the Product](https://learn.adafruit.com/products/2054/guides)
### Adafruit 8x16 LED Matrix FeatherWing w/o Matrices
[Adafruit 8x16 LED Matrix FeatherWing w/o Matrices](https://www.adafruit.com/product/3090)
You will chirp with delight when you see how easy it is to make your very own 8x16 LED matrix display for any Feather. At 0.8" square, the little [8x8 matrices](https://www.adafruit.com/new/?q=8x8%20miniature%20LED%20matrix&) have everything a big LED matrix has,...
Out of Stock
[Buy Now](https://www.adafruit.com/product/3090)
[Related Guides to the Product](https://learn.adafruit.com/products/3090/guides)
### Adafruit 14-segment LED Alphanumeric backpack (same as P1910)
[Adafruit 14-segment LED Alphanumeric backpack (same as P1910)](https://www.adafruit.com/product/3322)
Just the backpack + 4pin header
No Longer Stocked
[Buy Now](https://www.adafruit.com/product/3322)
[Related Guides to the Product](https://learn.adafruit.com/products/3322/guides)
## Featured Products
### Adafruit Small 1.2" 8x8 LED Matrix w/I2C Backpack - Yellow-Green
[Adafruit Small 1.2" 8x8 LED Matrix w/I2C Backpack - Yellow-Green](https://www.adafruit.com/product/1051)
What's better than a single LED? Lots of LEDs! A fun way to make a small display is to use an [8x8 matrix](https://www.adafruit.com/category/37_88) or a [4-digit 7-segment display](https://www.adafruit.com/category/37_103). Matrices like these are...
In Stock
[Buy Now](https://www.adafruit.com/product/1051)
[Related Guides to the Product](https://learn.adafruit.com/products/1051/guides)
### Small 1.2" 8x8 Ultra Bright Square Blue LED Matrix + Backpack
[Small 1.2" 8x8 Ultra Bright Square Blue LED Matrix + Backpack](https://www.adafruit.com/product/1853)
What's better than a single LED? Lots of LEDs! Matrices like these are 'multiplexed' - so to control 64 LEDs you need 16 pins. That's a lot of pins, and there are [driver chips like the MAX7219](//www.adafruit.com/products/453) that can control a matrix for you but...
In Stock
[Buy Now](https://www.adafruit.com/product/1853)
[Related Guides to the Product](https://learn.adafruit.com/products/1853/guides)
## Related Guides
- [LED Backpack Displays on Raspberry Pi and BeagleBone Black](https://learn.adafruit.com/led-backpack-displays-on-raspberry-pi-and-beaglebone-black.md)
- [Animating Multiple LED Backpacks](https://learn.adafruit.com/animating-multiple-led-backpacks.md)
- [Arduino GPS Clock](https://learn.adafruit.com/arduino-clock.md)
- [Raspberry Pi Physical Dashboard](https://learn.adafruit.com/raspberry-pi-physical-dashboard.md)
- [CircuitPython Hardware: LED Backpacks & FeatherWings](https://learn.adafruit.com/micropython-hardware-led-backpacks-and-featherwings.md)
- [Matrix and 7-Segment LED Backpack with the Raspberry Pi](https://learn.adafruit.com/matrix-7-segment-led-backpack-with-the-raspberry-pi.md)
- [DIY Pocket LED Gamer - Tiny Tetris!](https://learn.adafruit.com/diy-3d-printed-handheld-pocket-game-tiny-tetris-snake.md)
- [RGB LED Matrix Cube with 25,000 LEDs](https://learn.adafruit.com/rgb-led-matrix-cube-for-pi.md)
- [Creating GIFs for SmartMatrix](https://learn.adafruit.com/creating-gifs-for-smartmatrix.md)
- [Adafruit CharliePlex LED Matrix Bonnet](https://learn.adafruit.com/adafruit-charlieplex-bonnet.md)
- [Connecting a 16x32 RGB LED Matrix Panel to a Raspberry Pi](https://learn.adafruit.com/connecting-a-16x32-rgb-led-matrix-panel-to-a-raspberry-pi.md)
- [MicroPython Displays: Drawing Text](https://learn.adafruit.com/micropython-displays-drawing-text.md)
- [Heart Rate Badge](https://learn.adafruit.com/heart-rate-badge.md)
- [16x24 LED Matrix](https://learn.adafruit.com/16x24-led-matrix.md)
- [Adafruit IS31FL3741](https://learn.adafruit.com/adafruit-is31fl3741.md)
---
# Source: https://learn.adafruit.com/adafruit-led-backpack/bi-color-24-bargraph-wiring-and-setup.md
# Adafruit LED Backpacks
## Arduino Wiring and Setup
Primary:
We wrote a basic library to help you work with the bi-color bargraph backpack. The library is written for the Arduino and will work with any Arduino as it just uses the I2C pins. The code is very portable and can be easily adapted to any I2C-capable micro.
Wiring to the bargraph is really easy
- Connect **SCL** to the I2C clock - on Arduino UNO thats Analog #5 (or SCL), on the Leonardo its Digital #3, on the Mega its digital #21
- Connect **SDA** to the I2C data - on Arduino UNO thats Analog #4 (or SDA), on the Leonardo its Digital #2, on the Mega its digital #20
- Connect **GND** to common ground
- Connect **VCC+** to power - 5V is best but 3V also seems to work for 3V microcontrollers.

Next, download the **Adafruit LED Backpack ** library and the **Adafruit GFX ** library from the Arduino library manager.
Open up the Arduino library manager:

Search for the **Adafruit LED Backpack ** library and install it

Search for the **Adafruit GFX ** library and install it

If using an earlier version of the Arduino IDE (prior to 1.8.10), also locate and install **Adafruit\_BusIO** (newer versions will install this dependency automatically).
Once you've restarted you should be able to select the **File→Examples→Adafruit\_LEDBackpack→bargraph24** example sketch. Upload it to your Arduino as usual. You should see a basic test program that tests all the LEDs with different colors.
We also have a great tutorial on Arduino library installation at:
[http://learn.adafruit.com/adafruit-all-about-arduino-libraries-install-use](http://learn.adafruit.com/adafruit-all-about-arduino-libraries-install-use "Link: http://learn.adafruit.com/adafruit-all-about-arduino-libraries-install-use")

Using the library interface is very easy. Start by creating the object with
> **Adafruit\_24bargraph bar = Adafruit\_24bargraph();**
you can name it whatever you want, not just **bar**
Then initialize it with
> **bar.begin(0x70); // pass in the address**
You can init with any address from 0x70 to 0x77, just make sure you solder in the matching solder jumpers!
Finally, write to the bargraph with
> **bar.setBar(**_ **lednumber** _ **,** _ **ledcolor** _**);**
Where _lednumber_ is 0 thru 23. _ledcolor_ can be **LED\_RED, LED\_YELLOW, LED\_GREEN** or **LED\_OFF**
The drawing routines only change the display memory kept by the Arduino. Don't forget to call **bar.writeDisplay()** after drawing to 'save' the memory out to the matrix via I2C.
There are also a few small routines that are special to the matrix:
- **setBrightness(_brightness_)**- will let you change the overall brightness of the entire display. 0 is least bright, 15 is brightest and is what is initialized by the display when you start
- **blinkRate(_rate_)** - You can blink the entire display. 0 is no blinking. 1, 2 or 3 is for display blinking.
- [Previous Page](https://learn.adafruit.com/adafruit-led-backpack/bi-color-24-bargraph-assembly.md)
- [Next Page](https://learn.adafruit.com/adafruit-led-backpack/bi-color-24-bargraph-circuitpython-setup.md)
## Primary Products
### Adafruit Mini 8x8 LED Matrix w/I2C Backpack - Red
[Adafruit Mini 8x8 LED Matrix w/I2C Backpack - Red](https://www.adafruit.com/product/870)
What's better than a single LED? Lots of LEDs! A fun way to make a small display is to use an [8x8 matrix](https://www.adafruit.com/category/37_88) or a [4-digit 7-segment display](https://www.adafruit.com/category/37_103). Matrices like these are...
In Stock
[Buy Now](https://www.adafruit.com/product/870)
[Related Guides to the Product](https://learn.adafruit.com/products/870/guides)
### Adafruit Mini 8x8 LED Matrix w/I2C Backpack - Yellow
[Adafruit Mini 8x8 LED Matrix w/I2C Backpack - Yellow](https://www.adafruit.com/product/871)
What's better than a single LED? Lots of LEDs! A fun way to make a small display is to use an [8x8 matrix](https://www.adafruit.com/category/37_88) or a [4-digit 7-segment display](https://www.adafruit.com/category/37_103). Matrices like these are...
In Stock
[Buy Now](https://www.adafruit.com/product/871)
[Related Guides to the Product](https://learn.adafruit.com/products/871/guides)
### Adafruit Mini 0.8" 8x8 LED Matrix w/I2C Backpack - Yellow-Green
[Adafruit Mini 0.8" 8x8 LED Matrix w/I2C Backpack - Yellow-Green](https://www.adafruit.com/product/872)
What's better than a single LED? Lots of LEDs! A fun way to make a small display is to use an [8x8 matrix](https://www.adafruit.com/category/37_88) or a [4-digit 7-segment display](https://www.adafruit.com/category/37_103). Matrices like these are...
In Stock
[Buy Now](https://www.adafruit.com/product/872)
[Related Guides to the Product](https://learn.adafruit.com/products/872/guides)
### Adafruit 0.56" 4-Digit 7-Segment Display with I2C Backpack - Red
[Adafruit 0.56" 4-Digit 7-Segment Display with I2C Backpack - Red](https://www.adafruit.com/product/878)
What's better than a single LED? Lots of LEDs! A fun way to make a small display is to use an [8x8 matrix](https://www.adafruit.com/category/37_88) or a [4-digit 7-segment display](https://www.adafruit.com/category/37_103). Matrices like these are...
In Stock
[Buy Now](https://www.adafruit.com/product/878)
[Related Guides to the Product](https://learn.adafruit.com/products/878/guides)
### Adafruit 0.56" 4-Digit 7-Segment Display w/I2C Backpack - Yellow
[Adafruit 0.56" 4-Digit 7-Segment Display w/I2C Backpack - Yellow](https://www.adafruit.com/product/879)
What's better than a single LED? Lots of LEDs! A fun way to make a small display is to use an [8x8 matrix](https://www.adafruit.com/category/37_88) or a [4-digit 7-segment display](https://www.adafruit.com/category/37_103). Matrices like these are...
In Stock
[Buy Now](https://www.adafruit.com/product/879)
[Related Guides to the Product](https://learn.adafruit.com/products/879/guides)
### Adafruit 0.56" 4-Digit 7-Segment Display w/ I2C Backpack - Green
[Adafruit 0.56" 4-Digit 7-Segment Display w/ I2C Backpack - Green](https://www.adafruit.com/product/880)
What's better than a single LED? Lots of LEDs! A fun way to make a small display is to use an [8x8 matrix](https://www.adafruit.com/category/37_88) or a [4-digit 7-segment display](https://www.adafruit.com/category/37_103). Matrices like these are...
No Longer Stocked
[Buy Now](https://www.adafruit.com/product/880)
[Related Guides to the Product](https://learn.adafruit.com/products/880/guides)
### Adafruit 0.56" 4-Digit 7-Segment Display w/ I2C Backpack - Blue
[Adafruit 0.56" 4-Digit 7-Segment Display w/ I2C Backpack - Blue](https://www.adafruit.com/product/881)
What's better than a single LED? Lots of LEDs! A fun way to make a small display is to use an [8x8 matrix](https://www.adafruit.com/category/37_88) or a [4-digit 7-segment display](https://www.adafruit.com/category/37_103). Matrices like these are...
In Stock
[Buy Now](https://www.adafruit.com/product/881)
[Related Guides to the Product](https://learn.adafruit.com/products/881/guides)
### Adafruit Bicolor LED Square Pixel Matrix with I2C Backpack
[Adafruit Bicolor LED Square Pixel Matrix with I2C Backpack](https://www.adafruit.com/product/902)
What's better than a single LED? Lots of LEDs! A fun way to make a small colorful display is to use a [1.2" Bi-color 8x8 LED Matrix](http://www.adafruit.com/products/458). Matrices like these are 'multiplexed' - so to control all the 128 LEDs you need 24 pins....
In Stock
[Buy Now](https://www.adafruit.com/product/902)
[Related Guides to the Product](https://learn.adafruit.com/products/902/guides)
### Adafruit Mini 8x8 LED Matrix w/I2C Backpack - Blue
[Adafruit Mini 8x8 LED Matrix w/I2C Backpack - Blue](https://www.adafruit.com/product/959)
What's better than a single LED? Lots of LEDs! A fun way to make a small display is to use an [8x8 matrix](https://www.adafruit.com/category/37_88) or a [4-digit 7-segment display](https://www.adafruit.com/category/37_103). Matrices like these are...
In Stock
[Buy Now](https://www.adafruit.com/product/959)
[Related Guides to the Product](https://learn.adafruit.com/products/959/guides)
### Adafruit 0.56" 4-Digit 7-Segment Display w/I2C Backpack - White
[Adafruit 0.56" 4-Digit 7-Segment Display w/I2C Backpack - White](https://www.adafruit.com/product/1002)
What's better than a single LED? Lots of LEDs! A fun way to make a small display is to use an [8x8 matrix](https://www.adafruit.com/category/37_88) or a [4-digit 7-segment display](https://www.adafruit.com/category/37_103). Matrices like these are...
In Stock
[Buy Now](https://www.adafruit.com/product/1002)
[Related Guides to the Product](https://learn.adafruit.com/products/1002/guides)
### Adafruit 1.2" 8x8 LED Matrix Backpack
[Adafruit 1.2" 8x8 LED Matrix Backpack](https://www.adafruit.com/product/1048)
By popular request, you can now get our 8x8 LED backpacks without the LEDs! These backpacks feature an HT16K33 I2C LED driver, they're simple and easy to use - you can use [our very nice library for the backpacks to...](https://github.com/adafruit/Adafruit-LED-Backpack-Library)
In Stock
[Buy Now](https://www.adafruit.com/product/1048)
[Related Guides to the Product](https://learn.adafruit.com/products/1048/guides)
### Adafruit Small 1.2" 8x8 LED Matrix w/I2C Backpack - Red
[Adafruit Small 1.2" 8x8 LED Matrix w/I2C Backpack - Red](https://www.adafruit.com/product/1049)
What's better than a single LED? Lots of LEDs! A fun way to make a small display is to use an [8x8 matrix](https://www.adafruit.com/category/37_88) or a [4-digit 7-segment display](https://www.adafruit.com/category/37_103). Matrices like these are...
In Stock
[Buy Now](https://www.adafruit.com/product/1049)
[Related Guides to the Product](https://learn.adafruit.com/products/1049/guides)
### Adafruit Small 1.2" 8x8 LED Matrix w/I2C Backpack - Yellow
[Adafruit Small 1.2" 8x8 LED Matrix w/I2C Backpack - Yellow](https://www.adafruit.com/product/1050)
What's better than a single LED? Lots of LEDs! A fun way to make a small display is to use an [8x8 matrix](https://www.adafruit.com/category/37_88) or a [4-digit 7-segment display](https://www.adafruit.com/category/37_103). Matrices like these are...
In Stock
[Buy Now](https://www.adafruit.com/product/1050)
[Related Guides to the Product](https://learn.adafruit.com/products/1050/guides)
### Adafruit Small 1.2" 8x8 LED Matrix w/I2C Backpack - Blue
[Adafruit Small 1.2" 8x8 LED Matrix w/I2C Backpack - Blue](https://www.adafruit.com/product/1052)
What's better than a single LED? Lots of LEDs! A fun way to make a small display is to use an [8x8 matrix](https://www.adafruit.com/category/37_88) or a [4-digit 7-segment display](https://www.adafruit.com/category/37_103). Matrices like these are...
In Stock
[Buy Now](https://www.adafruit.com/product/1052)
[Related Guides to the Product](https://learn.adafruit.com/products/1052/guides)
### Adafruit Mini 8x8 LED Matrix w/I2C Backpack - Ultra Bright White
[Adafruit Mini 8x8 LED Matrix w/I2C Backpack - Ultra Bright White](https://www.adafruit.com/product/1080)
What's better than a single LED? Lots of LEDs! A fun way to make a small display is to use an [8x8 matrix](https://www.adafruit.com/category/37_88) or a [4-digit 7-segment display](https://www.adafruit.com/category/37_103). Matrices like these are...
In Stock
[Buy Now](https://www.adafruit.com/product/1080)
[Related Guides to the Product](https://learn.adafruit.com/products/1080/guides)
### Adafruit 1.2" 4-Digit 7-Segment Display w/I2C Backpack - Green
[Adafruit 1.2" 4-Digit 7-Segment Display w/I2C Backpack - Green](https://www.adafruit.com/product/1268)
What's better than a single LED? Lots of LEDs! A fun way to make a numeric display is to use a [4-digit 7-segment display](https://www.adafruit.com/category/37_103). LED matrices like these are 'multiplexed' - so to control all the seven-segment LEDs you need 14 pins....
No Longer Stocked
[Buy Now](https://www.adafruit.com/product/1268)
[Related Guides to the Product](https://learn.adafruit.com/products/1268/guides)
### Adafruit 1.2" 4-Digit 7-Segment Display w/I2C Backpack - Yellow
[Adafruit 1.2" 4-Digit 7-Segment Display w/I2C Backpack - Yellow](https://www.adafruit.com/product/1269)
What's better than a single LED? Lots of LEDs! A fun way to make a numeric display is to use a [4-digit 7-segment display](https://www.adafruit.com/category/37_103). LED matrices like these are 'multiplexed' - so to control all the seven-segment LEDs you need 14 pins....
In Stock
[Buy Now](https://www.adafruit.com/product/1269)
[Related Guides to the Product](https://learn.adafruit.com/products/1269/guides)
### Adafruit 1.2" 4-Digit 7-Segment Display w/I2C Backpack - Red
[Adafruit 1.2" 4-Digit 7-Segment Display w/I2C Backpack - Red](https://www.adafruit.com/product/1270)
What's better than a single LED? Lots of LEDs! A fun way to make a numeric display is to use a [4-digit 7-segment display](https://www.adafruit.com/category/37_103). LED matrices like these are 'multiplexed' - so to control all the seven-segment LEDs you need 14 pins....
In Stock
[Buy Now](https://www.adafruit.com/product/1270)
[Related Guides to the Product](https://learn.adafruit.com/products/1270/guides)
### Small 1.2" 8x8 Ultra Bright White LED Matrix + Backpack
[Small 1.2" 8x8 Ultra Bright White LED Matrix + Backpack](https://www.adafruit.com/product/1614)
What's better than a single LED? Lots of LEDs! A fun way to make a small display is to use an [8x8 matrix](https://www.adafruit.com/category/37_88) or a [4-digit 7-segment display](https://www.adafruit.com/category/37_103). Matrices like these are...
In Stock
[Buy Now](https://www.adafruit.com/product/1614)
[Related Guides to the Product](https://learn.adafruit.com/products/1614/guides)
### Adafruit Small 1.2" 8x8 LED Matrix w/I2C Backpack - Pure Green
[Adafruit Small 1.2" 8x8 LED Matrix w/I2C Backpack - Pure Green](https://www.adafruit.com/product/1632)
What's better than a single LED? Lots of LEDs! A fun way to make a small display is to use an [8x8 matrix](https://www.adafruit.com/category/37_88) or a [4-digit 7-segment display](https://www.adafruit.com/category/37_103). Matrices like these are...
In Stock
[Buy Now](https://www.adafruit.com/product/1632)
[Related Guides to the Product](https://learn.adafruit.com/products/1632/guides)
### Adafruit Mini 0.8" 8x8 LED Matrix w/I2C Backpack - Pure Green
[Adafruit Mini 0.8" 8x8 LED Matrix w/I2C Backpack - Pure Green](https://www.adafruit.com/product/1633)
What's better than a single LED? Lots of LEDs! A fun way to make a small display is to use an [8x8 matrix](https://www.adafruit.com/category/37_88) or a [4-digit 7-segment display](https://www.adafruit.com/category/37_103). Matrices like these are...
In Stock
[Buy Now](https://www.adafruit.com/product/1633)
[Related Guides to the Product](https://learn.adafruit.com/products/1633/guides)
### Bi-Color (Red/Green) 24-Bar Bargraph w/I2C Backpack Kit
[Bi-Color (Red/Green) 24-Bar Bargraph w/I2C Backpack Kit](https://www.adafruit.com/product/1721)
What's better than a single LED? Lots of LEDs! A fun way to make a small linear display is to use two 12-bar Bi-color bar-graphs. However, this LED bargraph is 'multiplexed' - so to control all the 48 LEDs you need a lot of pins.
Out of Stock
[Buy Now](https://www.adafruit.com/product/1721)
[Related Guides to the Product](https://learn.adafruit.com/products/1721/guides)
### Small 1.2" 8x8 Ultra Bright Square Amber LED Matrix + Backpack
[Small 1.2" 8x8 Ultra Bright Square Amber LED Matrix + Backpack](https://www.adafruit.com/product/1854)
What's better than a single LED? Lots of LEDs! Matrices like these are 'multiplexed' - so to control 64 LEDs you need 16 pins. That's a lot of pins, and there are [driver chips like the MAX7219](//www.adafruit.com/products/453) that can control a matrix for you but...
In Stock
[Buy Now](https://www.adafruit.com/product/1854)
[Related Guides to the Product](https://learn.adafruit.com/products/1854/guides)
### Small 1.2" 8x8 Ultra Bright Square Yellow LED Matrix + Backpack
[Small 1.2" 8x8 Ultra Bright Square Yellow LED Matrix + Backpack](https://www.adafruit.com/product/1855)
What's better than a single LED? Lots of LEDs! Matrices like these are 'multiplexed' - so to control 64 LEDs you need 16 pins. That's a lot of pins, and there are [driver chips like the MAX7219](//www.adafruit.com/products/453) that can control a matrix for you but...
In Stock
[Buy Now](https://www.adafruit.com/product/1855)
[Related Guides to the Product](https://learn.adafruit.com/products/1855/guides)
### Small 1.2" 8x8 Bright Square Pure Green LED Matrix + Backpack
[Small 1.2" 8x8 Bright Square Pure Green LED Matrix + Backpack](https://www.adafruit.com/product/1856)
What's better than a single LED? Lots of LEDs! Matrices like these are 'multiplexed' - so to control 64 LEDs you need 16 pins. That's a lot of pins, and there are [driver chips like the MAX7219](//www.adafruit.com/products/453) that can control a matrix for you but...
In Stock
[Buy Now](https://www.adafruit.com/product/1856)
[Related Guides to the Product](https://learn.adafruit.com/products/1856/guides)
### Small 1.2" 8x8 Ultra Bright Square White LED Matrix + Backpack
[Small 1.2" 8x8 Ultra Bright Square White LED Matrix + Backpack](https://www.adafruit.com/product/1857)
What's better than a single LED? Lots of LEDs! Matrices like these are 'multiplexed' - so to control 64 LEDs you need 16 pins. That's a lot of pins, and there are [driver chips like the MAX7219](//www.adafruit.com/products/453) that can control a matrix for you but...
In Stock
[Buy Now](https://www.adafruit.com/product/1857)
[Related Guides to the Product](https://learn.adafruit.com/products/1857/guides)
### Adafruit 14-segment LED Alphanumeric Backpack - STEMMA QT
[Adafruit 14-segment LED Alphanumeric Backpack - STEMMA QT](https://www.adafruit.com/product/1910)
By popular request, you can now get our 14-segment LED backpacks without the LEDs! These backpacks feature an HT16K33 I2C LED driver, they're simple and easy to use - you can use [our very nice library for the backpacks to...](https://github.com/adafruit/Adafruit-LED-Backpack-Library)
In Stock
[Buy Now](https://www.adafruit.com/product/1910)
[Related Guides to the Product](https://learn.adafruit.com/products/1910/guides)
### Quad Alphanumeric Display - Red 0.54" Digits w/ I2C Backpack
[Quad Alphanumeric Display - Red 0.54" Digits w/ I2C Backpack](https://www.adafruit.com/product/1911)
Display, elegantly, 012345678 or 9! Gaze, hypnotized, at ABCDEFGHIJKLM - well it can display the whole alphabet. You get the point. This is a nice, bright alphanumeric display that shows letters and numbers in a beautiful red hue. It's super bright and designed for viewing from distances...
In Stock
[Buy Now](https://www.adafruit.com/product/1911)
[Related Guides to the Product](https://learn.adafruit.com/products/1911/guides)
### Quad Alphanumeric Display - Blue 0.54" Digits w/ I2C Backpack
[Quad Alphanumeric Display - Blue 0.54" Digits w/ I2C Backpack](https://www.adafruit.com/product/1912)
Display, elegantly, 012345678 or 9! Gaze, hypnotized, at ABCDEFGHIJKLM - well it can display the whole alphabet. You get the point. This is a nice, bright alphanumeric display that shows letters and numbers in a beautiful blue hue. It's super bright and designed for viewing from distances...
In Stock
[Buy Now](https://www.adafruit.com/product/1912)
[Related Guides to the Product](https://learn.adafruit.com/products/1912/guides)
### 16x8 1.2" LED Matrix + Backpack - Ultra Bright Round Green LEDs
[16x8 1.2" LED Matrix + Backpack - Ultra Bright Round Green LEDs](https://www.adafruit.com/product/2035)
What's better than a single LED? Lots of LEDs! And what's better than lots of LEDs? **TWO TIMES AS MANY LEDS!!!**
With the 16x8 LED Matrix Backpack we've doubled your project's matrix capacity by making it super easy to get two separate 8x8 matrices onto...
In Stock
[Buy Now](https://www.adafruit.com/product/2035)
[Related Guides to the Product](https://learn.adafruit.com/products/2035/guides)
### 16x8 1.2" LED Matrix+Backpack UltraBright Round YellowGreen LEDs
[16x8 1.2" LED Matrix+Backpack UltraBright Round YellowGreen LEDs](https://www.adafruit.com/product/2036)
What's better than a single LED? Lots of LEDs! And what's better than lots of LEDs? **TWO TIMES AS MANY LEDS!!!**
With the 16x8 LED Matrix Backpack we've doubled your project's matrix capacity by making it super easy to get two separate 8x8 matrices onto...
In Stock
[Buy Now](https://www.adafruit.com/product/2036)
[Related Guides to the Product](https://learn.adafruit.com/products/2036/guides)
### 16x8 1.2" LED Matrix + Backpack - Ultra Bright Round Red LEDs
[16x8 1.2" LED Matrix + Backpack - Ultra Bright Round Red LEDs](https://www.adafruit.com/product/2037)
What's better than a single LED? Lots of LEDs! And what's better than lots of LEDs? **TWO TIMES AS MANY LEDS!!!**
With the 16x8 LED Matrix Backpack we've doubled your project's matrix capacity by making it super easy to get two separate 8x8 matrices onto...
In Stock
[Buy Now](https://www.adafruit.com/product/2037)
[Related Guides to the Product](https://learn.adafruit.com/products/2037/guides)
### 16x8 1.2" LED Matrix + Backpack - Ultra Bright Round White LEDs
[16x8 1.2" LED Matrix + Backpack - Ultra Bright Round White LEDs](https://www.adafruit.com/product/2038)
What's better than a single LED? Lots of LEDs! And what's better than lots of LEDs? **TWO TIMES AS MANY LEDS!!!**
With the 16x8 LED Matrix Backpack we've doubled your project's matrix capacity by making it super easy to get two separate 8x8 matrices onto...
In Stock
[Buy Now](https://www.adafruit.com/product/2038)
[Related Guides to the Product](https://learn.adafruit.com/products/2038/guides)
### 16x8 1.2" LED Matrix + Backpack - Ultra Bright Round Blue LEDs
[16x8 1.2" LED Matrix + Backpack - Ultra Bright Round Blue LEDs](https://www.adafruit.com/product/2039)
What's better than a single LED? Lots of LEDs! And what's better than lots of LEDs? **TWO TIMES AS MANY LEDS!!!**
With the 16x8 LED Matrix Backpack we've doubled your project's matrix capacity by making it super easy to get two separate 8x8 matrices onto...
In Stock
[Buy Now](https://www.adafruit.com/product/2039)
[Related Guides to the Product](https://learn.adafruit.com/products/2039/guides)
### 16x8 1.2" LED Matrix + Backpack - Ultra Bright Square Blue LEDs
[16x8 1.2" LED Matrix + Backpack - Ultra Bright Square Blue LEDs](https://www.adafruit.com/product/2040)
What's better than a single LED? Lots of LEDs! And what's better than lots of LEDs? **TWO TIMES AS MANY LEDS!!!**
With the 16x8 LED Matrix Backpack we've doubled your project's matrix capacity by making it super easy to get two separate 8x8 matrices onto...
In Stock
[Buy Now](https://www.adafruit.com/product/2040)
[Related Guides to the Product](https://learn.adafruit.com/products/2040/guides)
### 16x8 1.2" LED Matrix + Backpack - Ultra Bright Square Amber LEDs
[16x8 1.2" LED Matrix + Backpack - Ultra Bright Square Amber LEDs](https://www.adafruit.com/product/2041)
What's better than a single LED? Lots of LEDs! And what's better than lots of LEDs? **TWO TIMES AS MANY LEDS!!!**
With the 16x8 LED Matrix Backpack we've doubled your project's matrix capacity by making it super easy to get two separate 8x8 matrices onto...
In Stock
[Buy Now](https://www.adafruit.com/product/2041)
[Related Guides to the Product](https://learn.adafruit.com/products/2041/guides)
### 16x8 1.2" LED Matrix + Backpack - Ultra Bright Square Green LEDs
[16x8 1.2" LED Matrix + Backpack - Ultra Bright Square Green LEDs](https://www.adafruit.com/product/2042)
What's better than a single LED? Lots of LEDs! And what's better than lots of LEDs? **TWO TIMES AS MANY LEDS!!!**
With the 16x8 LED Matrix Backpack we've doubled your project's matrix capacity by making it super easy to get two separate 8x8 matrices onto...
In Stock
[Buy Now](https://www.adafruit.com/product/2042)
[Related Guides to the Product](https://learn.adafruit.com/products/2042/guides)
### 16x8 1.2" LED Matrix + Backpack -Ultra Bright Square Yellow LEDs
[16x8 1.2" LED Matrix + Backpack -Ultra Bright Square Yellow LEDs](https://www.adafruit.com/product/2043)
What's better than a single LED? Lots of LEDs! And what's better than lots of LEDs? **TWO TIMES AS MANY LEDS!!!**
With the 16x8 LED Matrix Backpack we've doubled your project's matrix capacity by making it super easy to get two separate 8x8 matrices onto...
In Stock
[Buy Now](https://www.adafruit.com/product/2043)
[Related Guides to the Product](https://learn.adafruit.com/products/2043/guides)
### 16x8 1.2" LED Matrix + Backpack - Ultra Bright Square White LEDs
[16x8 1.2" LED Matrix + Backpack - Ultra Bright Square White LEDs](https://www.adafruit.com/product/2044)
What's better than a single LED? Lots of LEDs! And what's better than lots of LEDs? **TWO TIMES AS MANY LEDS!!!**
With the 16x8 LED Matrix Backpack we've doubled your project's matrix capacity by making it super easy to get two separate 8x8 matrices onto...
In Stock
[Buy Now](https://www.adafruit.com/product/2044)
[Related Guides to the Product](https://learn.adafruit.com/products/2044/guides)
### 16x8 1.2" LED Matrix + Backpack-Ultra Bright Round Orange LEDs
[16x8 1.2" LED Matrix + Backpack-Ultra Bright Round Orange LEDs](https://www.adafruit.com/product/2052)
What's better than a single LED? Lots of LEDs! And what's better than lots of LEDs? **TWO TIMES AS MANY LEDS!!!**
With the 16x8 LED Matrix Backpack we've doubled your project's matrix capacity by making it super easy to get two separate 8x8 matrices onto...
In Stock
[Buy Now](https://www.adafruit.com/product/2052)
[Related Guides to the Product](https://learn.adafruit.com/products/2052/guides)
### 16x8 1.2" LED Matrices+Backpack Round LEDs in Various Colors
[16x8 1.2" LED Matrices+Backpack Round LEDs in Various Colors](https://www.adafruit.com/product/2054)
What's better than a single LED? Lots of LEDs! And what's better than lots of LEDs? **TWO TIMES AS MANY LEDS!!!**
With the 16x8 LED Matrix Backpack we've doubled your project's matrix capacity by making it super easy to get two separate 8x8 matrices onto...
Out of Stock
[Buy Now](https://www.adafruit.com/product/2054)
[Related Guides to the Product](https://learn.adafruit.com/products/2054/guides)
### Adafruit 8x16 LED Matrix FeatherWing w/o Matrices
[Adafruit 8x16 LED Matrix FeatherWing w/o Matrices](https://www.adafruit.com/product/3090)
You will chirp with delight when you see how easy it is to make your very own 8x16 LED matrix display for any Feather. At 0.8" square, the little [8x8 matrices](https://www.adafruit.com/new/?q=8x8%20miniature%20LED%20matrix&) have everything a big LED matrix has,...
Out of Stock
[Buy Now](https://www.adafruit.com/product/3090)
[Related Guides to the Product](https://learn.adafruit.com/products/3090/guides)
### Adafruit 14-segment LED Alphanumeric backpack (same as P1910)
[Adafruit 14-segment LED Alphanumeric backpack (same as P1910)](https://www.adafruit.com/product/3322)
Just the backpack + 4pin header
No Longer Stocked
[Buy Now](https://www.adafruit.com/product/3322)
[Related Guides to the Product](https://learn.adafruit.com/products/3322/guides)
## Featured Products
### Adafruit Small 1.2" 8x8 LED Matrix w/I2C Backpack - Yellow-Green
[Adafruit Small 1.2" 8x8 LED Matrix w/I2C Backpack - Yellow-Green](https://www.adafruit.com/product/1051)
What's better than a single LED? Lots of LEDs! A fun way to make a small display is to use an [8x8 matrix](https://www.adafruit.com/category/37_88) or a [4-digit 7-segment display](https://www.adafruit.com/category/37_103). Matrices like these are...
In Stock
[Buy Now](https://www.adafruit.com/product/1051)
[Related Guides to the Product](https://learn.adafruit.com/products/1051/guides)
### Small 1.2" 8x8 Ultra Bright Square Blue LED Matrix + Backpack
[Small 1.2" 8x8 Ultra Bright Square Blue LED Matrix + Backpack](https://www.adafruit.com/product/1853)
What's better than a single LED? Lots of LEDs! Matrices like these are 'multiplexed' - so to control 64 LEDs you need 16 pins. That's a lot of pins, and there are [driver chips like the MAX7219](//www.adafruit.com/products/453) that can control a matrix for you but...
In Stock
[Buy Now](https://www.adafruit.com/product/1853)
[Related Guides to the Product](https://learn.adafruit.com/products/1853/guides)
## Related Guides
- [LED Backpack Displays on Raspberry Pi and BeagleBone Black](https://learn.adafruit.com/led-backpack-displays-on-raspberry-pi-and-beaglebone-black.md)
- [Animating Multiple LED Backpacks](https://learn.adafruit.com/animating-multiple-led-backpacks.md)
- [Arduino GPS Clock](https://learn.adafruit.com/arduino-clock.md)
- [Raspberry Pi Physical Dashboard](https://learn.adafruit.com/raspberry-pi-physical-dashboard.md)
- [CircuitPython Hardware: LED Backpacks & FeatherWings](https://learn.adafruit.com/micropython-hardware-led-backpacks-and-featherwings.md)
- [Matrix and 7-Segment LED Backpack with the Raspberry Pi](https://learn.adafruit.com/matrix-7-segment-led-backpack-with-the-raspberry-pi.md)
- [DIY Pocket LED Gamer - Tiny Tetris!](https://learn.adafruit.com/diy-3d-printed-handheld-pocket-game-tiny-tetris-snake.md)
- [RGB LED Matrix Cube with 25,000 LEDs](https://learn.adafruit.com/rgb-led-matrix-cube-for-pi.md)
- [Creating GIFs for SmartMatrix](https://learn.adafruit.com/creating-gifs-for-smartmatrix.md)
- [Adafruit CharliePlex LED Matrix Bonnet](https://learn.adafruit.com/adafruit-charlieplex-bonnet.md)
- [Connecting a 16x32 RGB LED Matrix Panel to a Raspberry Pi](https://learn.adafruit.com/connecting-a-16x32-rgb-led-matrix-panel-to-a-raspberry-pi.md)
- [MicroPython Displays: Drawing Text](https://learn.adafruit.com/micropython-displays-drawing-text.md)
- [Heart Rate Badge](https://learn.adafruit.com/heart-rate-badge.md)
- [16x24 LED Matrix](https://learn.adafruit.com/16x24-led-matrix.md)
- [Adafruit IS31FL3741](https://learn.adafruit.com/adafruit-is31fl3741.md)
---
# Source: https://learn.adafruit.com/adafruit-led-backpack/bi-color-24-bargraph.md
# Adafruit LED Backpacks
## Bi-Color 24 Bargraph
This version of the LED backpack is designed for these bright and colorful bi-color bargraph modules. Each module has 12 red and 12 green LEDs inside, for a total of 24 LEDs controlled as a 1x12 matrix. We put two modules on each backpack for a 24-bar long bargraph (48 total LEDs).
This backpack solves the annoyance of using lots of pins or a bunch of chips by having an I2C constant-current matrix controller sit neatly on the back of the PCB. The controller chip takes care of everything, drawing all 48 LEDs in the background. All you have to do is write data to it using the 2-pin I2C interface. There are three address select pins so you can select one of 8 addresses to control up to 8 of these on a single 2-pin I2C bus (as well as whatever other I2C chips or sensors you like). The driver chip can 'dim' the entire display from 1/16 brightness up to full brightness in 1/16th steps. It cannot dim individual LEDs, only the entire display at once.

- [Previous Page](https://learn.adafruit.com/adafruit-led-backpack/bi-color-8x8-matrix-circuitpython-and-python-usage.md)
- [Next Page](https://learn.adafruit.com/adafruit-led-backpack/bi-color-24-bargraph-assembly.md)
## Primary Products
### Adafruit Mini 8x8 LED Matrix w/I2C Backpack - Red
[Adafruit Mini 8x8 LED Matrix w/I2C Backpack - Red](https://www.adafruit.com/product/870)
What's better than a single LED? Lots of LEDs! A fun way to make a small display is to use an [8x8 matrix](https://www.adafruit.com/category/37_88) or a [4-digit 7-segment display](https://www.adafruit.com/category/37_103). Matrices like these are...
In Stock
[Buy Now](https://www.adafruit.com/product/870)
[Related Guides to the Product](https://learn.adafruit.com/products/870/guides)
### Adafruit Mini 8x8 LED Matrix w/I2C Backpack - Yellow
[Adafruit Mini 8x8 LED Matrix w/I2C Backpack - Yellow](https://www.adafruit.com/product/871)
What's better than a single LED? Lots of LEDs! A fun way to make a small display is to use an [8x8 matrix](https://www.adafruit.com/category/37_88) or a [4-digit 7-segment display](https://www.adafruit.com/category/37_103). Matrices like these are...
In Stock
[Buy Now](https://www.adafruit.com/product/871)
[Related Guides to the Product](https://learn.adafruit.com/products/871/guides)
### Adafruit Mini 0.8" 8x8 LED Matrix w/I2C Backpack - Yellow-Green
[Adafruit Mini 0.8" 8x8 LED Matrix w/I2C Backpack - Yellow-Green](https://www.adafruit.com/product/872)
What's better than a single LED? Lots of LEDs! A fun way to make a small display is to use an [8x8 matrix](https://www.adafruit.com/category/37_88) or a [4-digit 7-segment display](https://www.adafruit.com/category/37_103). Matrices like these are...
In Stock
[Buy Now](https://www.adafruit.com/product/872)
[Related Guides to the Product](https://learn.adafruit.com/products/872/guides)
### Adafruit 0.56" 4-Digit 7-Segment Display with I2C Backpack - Red
[Adafruit 0.56" 4-Digit 7-Segment Display with I2C Backpack - Red](https://www.adafruit.com/product/878)
What's better than a single LED? Lots of LEDs! A fun way to make a small display is to use an [8x8 matrix](https://www.adafruit.com/category/37_88) or a [4-digit 7-segment display](https://www.adafruit.com/category/37_103). Matrices like these are...
In Stock
[Buy Now](https://www.adafruit.com/product/878)
[Related Guides to the Product](https://learn.adafruit.com/products/878/guides)
### Adafruit 0.56" 4-Digit 7-Segment Display w/I2C Backpack - Yellow
[Adafruit 0.56" 4-Digit 7-Segment Display w/I2C Backpack - Yellow](https://www.adafruit.com/product/879)
What's better than a single LED? Lots of LEDs! A fun way to make a small display is to use an [8x8 matrix](https://www.adafruit.com/category/37_88) or a [4-digit 7-segment display](https://www.adafruit.com/category/37_103). Matrices like these are...
In Stock
[Buy Now](https://www.adafruit.com/product/879)
[Related Guides to the Product](https://learn.adafruit.com/products/879/guides)
### Adafruit 0.56" 4-Digit 7-Segment Display w/ I2C Backpack - Green
[Adafruit 0.56" 4-Digit 7-Segment Display w/ I2C Backpack - Green](https://www.adafruit.com/product/880)
What's better than a single LED? Lots of LEDs! A fun way to make a small display is to use an [8x8 matrix](https://www.adafruit.com/category/37_88) or a [4-digit 7-segment display](https://www.adafruit.com/category/37_103). Matrices like these are...
No Longer Stocked
[Buy Now](https://www.adafruit.com/product/880)
[Related Guides to the Product](https://learn.adafruit.com/products/880/guides)
### Adafruit 0.56" 4-Digit 7-Segment Display w/ I2C Backpack - Blue
[Adafruit 0.56" 4-Digit 7-Segment Display w/ I2C Backpack - Blue](https://www.adafruit.com/product/881)
What's better than a single LED? Lots of LEDs! A fun way to make a small display is to use an [8x8 matrix](https://www.adafruit.com/category/37_88) or a [4-digit 7-segment display](https://www.adafruit.com/category/37_103). Matrices like these are...
In Stock
[Buy Now](https://www.adafruit.com/product/881)
[Related Guides to the Product](https://learn.adafruit.com/products/881/guides)
### Adafruit Bicolor LED Square Pixel Matrix with I2C Backpack
[Adafruit Bicolor LED Square Pixel Matrix with I2C Backpack](https://www.adafruit.com/product/902)
What's better than a single LED? Lots of LEDs! A fun way to make a small colorful display is to use a [1.2" Bi-color 8x8 LED Matrix](http://www.adafruit.com/products/458). Matrices like these are 'multiplexed' - so to control all the 128 LEDs you need 24 pins....
In Stock
[Buy Now](https://www.adafruit.com/product/902)
[Related Guides to the Product](https://learn.adafruit.com/products/902/guides)
### Adafruit Mini 8x8 LED Matrix w/I2C Backpack - Blue
[Adafruit Mini 8x8 LED Matrix w/I2C Backpack - Blue](https://www.adafruit.com/product/959)
What's better than a single LED? Lots of LEDs! A fun way to make a small display is to use an [8x8 matrix](https://www.adafruit.com/category/37_88) or a [4-digit 7-segment display](https://www.adafruit.com/category/37_103). Matrices like these are...
In Stock
[Buy Now](https://www.adafruit.com/product/959)
[Related Guides to the Product](https://learn.adafruit.com/products/959/guides)
### Adafruit 0.56" 4-Digit 7-Segment Display w/I2C Backpack - White
[Adafruit 0.56" 4-Digit 7-Segment Display w/I2C Backpack - White](https://www.adafruit.com/product/1002)
What's better than a single LED? Lots of LEDs! A fun way to make a small display is to use an [8x8 matrix](https://www.adafruit.com/category/37_88) or a [4-digit 7-segment display](https://www.adafruit.com/category/37_103). Matrices like these are...
In Stock
[Buy Now](https://www.adafruit.com/product/1002)
[Related Guides to the Product](https://learn.adafruit.com/products/1002/guides)
### Adafruit 1.2" 8x8 LED Matrix Backpack
[Adafruit 1.2" 8x8 LED Matrix Backpack](https://www.adafruit.com/product/1048)
By popular request, you can now get our 8x8 LED backpacks without the LEDs! These backpacks feature an HT16K33 I2C LED driver, they're simple and easy to use - you can use [our very nice library for the backpacks to...](https://github.com/adafruit/Adafruit-LED-Backpack-Library)
In Stock
[Buy Now](https://www.adafruit.com/product/1048)
[Related Guides to the Product](https://learn.adafruit.com/products/1048/guides)
### Adafruit Small 1.2" 8x8 LED Matrix w/I2C Backpack - Red
[Adafruit Small 1.2" 8x8 LED Matrix w/I2C Backpack - Red](https://www.adafruit.com/product/1049)
What's better than a single LED? Lots of LEDs! A fun way to make a small display is to use an [8x8 matrix](https://www.adafruit.com/category/37_88) or a [4-digit 7-segment display](https://www.adafruit.com/category/37_103). Matrices like these are...
In Stock
[Buy Now](https://www.adafruit.com/product/1049)
[Related Guides to the Product](https://learn.adafruit.com/products/1049/guides)
### Adafruit Small 1.2" 8x8 LED Matrix w/I2C Backpack - Yellow
[Adafruit Small 1.2" 8x8 LED Matrix w/I2C Backpack - Yellow](https://www.adafruit.com/product/1050)
What's better than a single LED? Lots of LEDs! A fun way to make a small display is to use an [8x8 matrix](https://www.adafruit.com/category/37_88) or a [4-digit 7-segment display](https://www.adafruit.com/category/37_103). Matrices like these are...
In Stock
[Buy Now](https://www.adafruit.com/product/1050)
[Related Guides to the Product](https://learn.adafruit.com/products/1050/guides)
### Adafruit Small 1.2" 8x8 LED Matrix w/I2C Backpack - Blue
[Adafruit Small 1.2" 8x8 LED Matrix w/I2C Backpack - Blue](https://www.adafruit.com/product/1052)
What's better than a single LED? Lots of LEDs! A fun way to make a small display is to use an [8x8 matrix](https://www.adafruit.com/category/37_88) or a [4-digit 7-segment display](https://www.adafruit.com/category/37_103). Matrices like these are...
In Stock
[Buy Now](https://www.adafruit.com/product/1052)
[Related Guides to the Product](https://learn.adafruit.com/products/1052/guides)
### Adafruit Mini 8x8 LED Matrix w/I2C Backpack - Ultra Bright White
[Adafruit Mini 8x8 LED Matrix w/I2C Backpack - Ultra Bright White](https://www.adafruit.com/product/1080)
What's better than a single LED? Lots of LEDs! A fun way to make a small display is to use an [8x8 matrix](https://www.adafruit.com/category/37_88) or a [4-digit 7-segment display](https://www.adafruit.com/category/37_103). Matrices like these are...
In Stock
[Buy Now](https://www.adafruit.com/product/1080)
[Related Guides to the Product](https://learn.adafruit.com/products/1080/guides)
### Adafruit 1.2" 4-Digit 7-Segment Display w/I2C Backpack - Green
[Adafruit 1.2" 4-Digit 7-Segment Display w/I2C Backpack - Green](https://www.adafruit.com/product/1268)
What's better than a single LED? Lots of LEDs! A fun way to make a numeric display is to use a [4-digit 7-segment display](https://www.adafruit.com/category/37_103). LED matrices like these are 'multiplexed' - so to control all the seven-segment LEDs you need 14 pins....
No Longer Stocked
[Buy Now](https://www.adafruit.com/product/1268)
[Related Guides to the Product](https://learn.adafruit.com/products/1268/guides)
### Adafruit 1.2" 4-Digit 7-Segment Display w/I2C Backpack - Yellow
[Adafruit 1.2" 4-Digit 7-Segment Display w/I2C Backpack - Yellow](https://www.adafruit.com/product/1269)
What's better than a single LED? Lots of LEDs! A fun way to make a numeric display is to use a [4-digit 7-segment display](https://www.adafruit.com/category/37_103). LED matrices like these are 'multiplexed' - so to control all the seven-segment LEDs you need 14 pins....
In Stock
[Buy Now](https://www.adafruit.com/product/1269)
[Related Guides to the Product](https://learn.adafruit.com/products/1269/guides)
### Adafruit 1.2" 4-Digit 7-Segment Display w/I2C Backpack - Red
[Adafruit 1.2" 4-Digit 7-Segment Display w/I2C Backpack - Red](https://www.adafruit.com/product/1270)
What's better than a single LED? Lots of LEDs! A fun way to make a numeric display is to use a [4-digit 7-segment display](https://www.adafruit.com/category/37_103). LED matrices like these are 'multiplexed' - so to control all the seven-segment LEDs you need 14 pins....
In Stock
[Buy Now](https://www.adafruit.com/product/1270)
[Related Guides to the Product](https://learn.adafruit.com/products/1270/guides)
### Small 1.2" 8x8 Ultra Bright White LED Matrix + Backpack
[Small 1.2" 8x8 Ultra Bright White LED Matrix + Backpack](https://www.adafruit.com/product/1614)
What's better than a single LED? Lots of LEDs! A fun way to make a small display is to use an [8x8 matrix](https://www.adafruit.com/category/37_88) or a [4-digit 7-segment display](https://www.adafruit.com/category/37_103). Matrices like these are...
In Stock
[Buy Now](https://www.adafruit.com/product/1614)
[Related Guides to the Product](https://learn.adafruit.com/products/1614/guides)
### Adafruit Small 1.2" 8x8 LED Matrix w/I2C Backpack - Pure Green
[Adafruit Small 1.2" 8x8 LED Matrix w/I2C Backpack - Pure Green](https://www.adafruit.com/product/1632)
What's better than a single LED? Lots of LEDs! A fun way to make a small display is to use an [8x8 matrix](https://www.adafruit.com/category/37_88) or a [4-digit 7-segment display](https://www.adafruit.com/category/37_103). Matrices like these are...
In Stock
[Buy Now](https://www.adafruit.com/product/1632)
[Related Guides to the Product](https://learn.adafruit.com/products/1632/guides)
### Adafruit Mini 0.8" 8x8 LED Matrix w/I2C Backpack - Pure Green
[Adafruit Mini 0.8" 8x8 LED Matrix w/I2C Backpack - Pure Green](https://www.adafruit.com/product/1633)
What's better than a single LED? Lots of LEDs! A fun way to make a small display is to use an [8x8 matrix](https://www.adafruit.com/category/37_88) or a [4-digit 7-segment display](https://www.adafruit.com/category/37_103). Matrices like these are...
In Stock
[Buy Now](https://www.adafruit.com/product/1633)
[Related Guides to the Product](https://learn.adafruit.com/products/1633/guides)
### Bi-Color (Red/Green) 24-Bar Bargraph w/I2C Backpack Kit
[Bi-Color (Red/Green) 24-Bar Bargraph w/I2C Backpack Kit](https://www.adafruit.com/product/1721)
What's better than a single LED? Lots of LEDs! A fun way to make a small linear display is to use two 12-bar Bi-color bar-graphs. However, this LED bargraph is 'multiplexed' - so to control all the 48 LEDs you need a lot of pins.
Out of Stock
[Buy Now](https://www.adafruit.com/product/1721)
[Related Guides to the Product](https://learn.adafruit.com/products/1721/guides)
### Small 1.2" 8x8 Ultra Bright Square Amber LED Matrix + Backpack
[Small 1.2" 8x8 Ultra Bright Square Amber LED Matrix + Backpack](https://www.adafruit.com/product/1854)
What's better than a single LED? Lots of LEDs! Matrices like these are 'multiplexed' - so to control 64 LEDs you need 16 pins. That's a lot of pins, and there are [driver chips like the MAX7219](//www.adafruit.com/products/453) that can control a matrix for you but...
In Stock
[Buy Now](https://www.adafruit.com/product/1854)
[Related Guides to the Product](https://learn.adafruit.com/products/1854/guides)
### Small 1.2" 8x8 Ultra Bright Square Yellow LED Matrix + Backpack
[Small 1.2" 8x8 Ultra Bright Square Yellow LED Matrix + Backpack](https://www.adafruit.com/product/1855)
What's better than a single LED? Lots of LEDs! Matrices like these are 'multiplexed' - so to control 64 LEDs you need 16 pins. That's a lot of pins, and there are [driver chips like the MAX7219](//www.adafruit.com/products/453) that can control a matrix for you but...
In Stock
[Buy Now](https://www.adafruit.com/product/1855)
[Related Guides to the Product](https://learn.adafruit.com/products/1855/guides)
### Small 1.2" 8x8 Bright Square Pure Green LED Matrix + Backpack
[Small 1.2" 8x8 Bright Square Pure Green LED Matrix + Backpack](https://www.adafruit.com/product/1856)
What's better than a single LED? Lots of LEDs! Matrices like these are 'multiplexed' - so to control 64 LEDs you need 16 pins. That's a lot of pins, and there are [driver chips like the MAX7219](//www.adafruit.com/products/453) that can control a matrix for you but...
In Stock
[Buy Now](https://www.adafruit.com/product/1856)
[Related Guides to the Product](https://learn.adafruit.com/products/1856/guides)
### Small 1.2" 8x8 Ultra Bright Square White LED Matrix + Backpack
[Small 1.2" 8x8 Ultra Bright Square White LED Matrix + Backpack](https://www.adafruit.com/product/1857)
What's better than a single LED? Lots of LEDs! Matrices like these are 'multiplexed' - so to control 64 LEDs you need 16 pins. That's a lot of pins, and there are [driver chips like the MAX7219](//www.adafruit.com/products/453) that can control a matrix for you but...
In Stock
[Buy Now](https://www.adafruit.com/product/1857)
[Related Guides to the Product](https://learn.adafruit.com/products/1857/guides)
### Adafruit 14-segment LED Alphanumeric Backpack - STEMMA QT
[Adafruit 14-segment LED Alphanumeric Backpack - STEMMA QT](https://www.adafruit.com/product/1910)
By popular request, you can now get our 14-segment LED backpacks without the LEDs! These backpacks feature an HT16K33 I2C LED driver, they're simple and easy to use - you can use [our very nice library for the backpacks to...](https://github.com/adafruit/Adafruit-LED-Backpack-Library)
In Stock
[Buy Now](https://www.adafruit.com/product/1910)
[Related Guides to the Product](https://learn.adafruit.com/products/1910/guides)
### Quad Alphanumeric Display - Red 0.54" Digits w/ I2C Backpack
[Quad Alphanumeric Display - Red 0.54" Digits w/ I2C Backpack](https://www.adafruit.com/product/1911)
Display, elegantly, 012345678 or 9! Gaze, hypnotized, at ABCDEFGHIJKLM - well it can display the whole alphabet. You get the point. This is a nice, bright alphanumeric display that shows letters and numbers in a beautiful red hue. It's super bright and designed for viewing from distances...
In Stock
[Buy Now](https://www.adafruit.com/product/1911)
[Related Guides to the Product](https://learn.adafruit.com/products/1911/guides)
### Quad Alphanumeric Display - Blue 0.54" Digits w/ I2C Backpack
[Quad Alphanumeric Display - Blue 0.54" Digits w/ I2C Backpack](https://www.adafruit.com/product/1912)
Display, elegantly, 012345678 or 9! Gaze, hypnotized, at ABCDEFGHIJKLM - well it can display the whole alphabet. You get the point. This is a nice, bright alphanumeric display that shows letters and numbers in a beautiful blue hue. It's super bright and designed for viewing from distances...
In Stock
[Buy Now](https://www.adafruit.com/product/1912)
[Related Guides to the Product](https://learn.adafruit.com/products/1912/guides)
### 16x8 1.2" LED Matrix + Backpack - Ultra Bright Round Green LEDs
[16x8 1.2" LED Matrix + Backpack - Ultra Bright Round Green LEDs](https://www.adafruit.com/product/2035)
What's better than a single LED? Lots of LEDs! And what's better than lots of LEDs? **TWO TIMES AS MANY LEDS!!!**
With the 16x8 LED Matrix Backpack we've doubled your project's matrix capacity by making it super easy to get two separate 8x8 matrices onto...
In Stock
[Buy Now](https://www.adafruit.com/product/2035)
[Related Guides to the Product](https://learn.adafruit.com/products/2035/guides)
### 16x8 1.2" LED Matrix+Backpack UltraBright Round YellowGreen LEDs
[16x8 1.2" LED Matrix+Backpack UltraBright Round YellowGreen LEDs](https://www.adafruit.com/product/2036)
What's better than a single LED? Lots of LEDs! And what's better than lots of LEDs? **TWO TIMES AS MANY LEDS!!!**
With the 16x8 LED Matrix Backpack we've doubled your project's matrix capacity by making it super easy to get two separate 8x8 matrices onto...
In Stock
[Buy Now](https://www.adafruit.com/product/2036)
[Related Guides to the Product](https://learn.adafruit.com/products/2036/guides)
### 16x8 1.2" LED Matrix + Backpack - Ultra Bright Round Red LEDs
[16x8 1.2" LED Matrix + Backpack - Ultra Bright Round Red LEDs](https://www.adafruit.com/product/2037)
What's better than a single LED? Lots of LEDs! And what's better than lots of LEDs? **TWO TIMES AS MANY LEDS!!!**
With the 16x8 LED Matrix Backpack we've doubled your project's matrix capacity by making it super easy to get two separate 8x8 matrices onto...
In Stock
[Buy Now](https://www.adafruit.com/product/2037)
[Related Guides to the Product](https://learn.adafruit.com/products/2037/guides)
### 16x8 1.2" LED Matrix + Backpack - Ultra Bright Round White LEDs
[16x8 1.2" LED Matrix + Backpack - Ultra Bright Round White LEDs](https://www.adafruit.com/product/2038)
What's better than a single LED? Lots of LEDs! And what's better than lots of LEDs? **TWO TIMES AS MANY LEDS!!!**
With the 16x8 LED Matrix Backpack we've doubled your project's matrix capacity by making it super easy to get two separate 8x8 matrices onto...
In Stock
[Buy Now](https://www.adafruit.com/product/2038)
[Related Guides to the Product](https://learn.adafruit.com/products/2038/guides)
### 16x8 1.2" LED Matrix + Backpack - Ultra Bright Round Blue LEDs
[16x8 1.2" LED Matrix + Backpack - Ultra Bright Round Blue LEDs](https://www.adafruit.com/product/2039)
What's better than a single LED? Lots of LEDs! And what's better than lots of LEDs? **TWO TIMES AS MANY LEDS!!!**
With the 16x8 LED Matrix Backpack we've doubled your project's matrix capacity by making it super easy to get two separate 8x8 matrices onto...
In Stock
[Buy Now](https://www.adafruit.com/product/2039)
[Related Guides to the Product](https://learn.adafruit.com/products/2039/guides)
### 16x8 1.2" LED Matrix + Backpack - Ultra Bright Square Blue LEDs
[16x8 1.2" LED Matrix + Backpack - Ultra Bright Square Blue LEDs](https://www.adafruit.com/product/2040)
What's better than a single LED? Lots of LEDs! And what's better than lots of LEDs? **TWO TIMES AS MANY LEDS!!!**
With the 16x8 LED Matrix Backpack we've doubled your project's matrix capacity by making it super easy to get two separate 8x8 matrices onto...
In Stock
[Buy Now](https://www.adafruit.com/product/2040)
[Related Guides to the Product](https://learn.adafruit.com/products/2040/guides)
### 16x8 1.2" LED Matrix + Backpack - Ultra Bright Square Amber LEDs
[16x8 1.2" LED Matrix + Backpack - Ultra Bright Square Amber LEDs](https://www.adafruit.com/product/2041)
What's better than a single LED? Lots of LEDs! And what's better than lots of LEDs? **TWO TIMES AS MANY LEDS!!!**
With the 16x8 LED Matrix Backpack we've doubled your project's matrix capacity by making it super easy to get two separate 8x8 matrices onto...
In Stock
[Buy Now](https://www.adafruit.com/product/2041)
[Related Guides to the Product](https://learn.adafruit.com/products/2041/guides)
### 16x8 1.2" LED Matrix + Backpack - Ultra Bright Square Green LEDs
[16x8 1.2" LED Matrix + Backpack - Ultra Bright Square Green LEDs](https://www.adafruit.com/product/2042)
What's better than a single LED? Lots of LEDs! And what's better than lots of LEDs? **TWO TIMES AS MANY LEDS!!!**
With the 16x8 LED Matrix Backpack we've doubled your project's matrix capacity by making it super easy to get two separate 8x8 matrices onto...
In Stock
[Buy Now](https://www.adafruit.com/product/2042)
[Related Guides to the Product](https://learn.adafruit.com/products/2042/guides)
### 16x8 1.2" LED Matrix + Backpack -Ultra Bright Square Yellow LEDs
[16x8 1.2" LED Matrix + Backpack -Ultra Bright Square Yellow LEDs](https://www.adafruit.com/product/2043)
What's better than a single LED? Lots of LEDs! And what's better than lots of LEDs? **TWO TIMES AS MANY LEDS!!!**
With the 16x8 LED Matrix Backpack we've doubled your project's matrix capacity by making it super easy to get two separate 8x8 matrices onto...
In Stock
[Buy Now](https://www.adafruit.com/product/2043)
[Related Guides to the Product](https://learn.adafruit.com/products/2043/guides)
### 16x8 1.2" LED Matrix + Backpack - Ultra Bright Square White LEDs
[16x8 1.2" LED Matrix + Backpack - Ultra Bright Square White LEDs](https://www.adafruit.com/product/2044)
What's better than a single LED? Lots of LEDs! And what's better than lots of LEDs? **TWO TIMES AS MANY LEDS!!!**
With the 16x8 LED Matrix Backpack we've doubled your project's matrix capacity by making it super easy to get two separate 8x8 matrices onto...
In Stock
[Buy Now](https://www.adafruit.com/product/2044)
[Related Guides to the Product](https://learn.adafruit.com/products/2044/guides)
### 16x8 1.2" LED Matrix + Backpack-Ultra Bright Round Orange LEDs
[16x8 1.2" LED Matrix + Backpack-Ultra Bright Round Orange LEDs](https://www.adafruit.com/product/2052)
What's better than a single LED? Lots of LEDs! And what's better than lots of LEDs? **TWO TIMES AS MANY LEDS!!!**
With the 16x8 LED Matrix Backpack we've doubled your project's matrix capacity by making it super easy to get two separate 8x8 matrices onto...
In Stock
[Buy Now](https://www.adafruit.com/product/2052)
[Related Guides to the Product](https://learn.adafruit.com/products/2052/guides)
### 16x8 1.2" LED Matrices+Backpack Round LEDs in Various Colors
[16x8 1.2" LED Matrices+Backpack Round LEDs in Various Colors](https://www.adafruit.com/product/2054)
What's better than a single LED? Lots of LEDs! And what's better than lots of LEDs? **TWO TIMES AS MANY LEDS!!!**
With the 16x8 LED Matrix Backpack we've doubled your project's matrix capacity by making it super easy to get two separate 8x8 matrices onto...
Out of Stock
[Buy Now](https://www.adafruit.com/product/2054)
[Related Guides to the Product](https://learn.adafruit.com/products/2054/guides)
### Adafruit 8x16 LED Matrix FeatherWing w/o Matrices
[Adafruit 8x16 LED Matrix FeatherWing w/o Matrices](https://www.adafruit.com/product/3090)
You will chirp with delight when you see how easy it is to make your very own 8x16 LED matrix display for any Feather. At 0.8" square, the little [8x8 matrices](https://www.adafruit.com/new/?q=8x8%20miniature%20LED%20matrix&) have everything a big LED matrix has,...
Out of Stock
[Buy Now](https://www.adafruit.com/product/3090)
[Related Guides to the Product](https://learn.adafruit.com/products/3090/guides)
### Adafruit 14-segment LED Alphanumeric backpack (same as P1910)
[Adafruit 14-segment LED Alphanumeric backpack (same as P1910)](https://www.adafruit.com/product/3322)
Just the backpack + 4pin header
No Longer Stocked
[Buy Now](https://www.adafruit.com/product/3322)
[Related Guides to the Product](https://learn.adafruit.com/products/3322/guides)
## Featured Products
### Adafruit Small 1.2" 8x8 LED Matrix w/I2C Backpack - Yellow-Green
[Adafruit Small 1.2" 8x8 LED Matrix w/I2C Backpack - Yellow-Green](https://www.adafruit.com/product/1051)
What's better than a single LED? Lots of LEDs! A fun way to make a small display is to use an [8x8 matrix](https://www.adafruit.com/category/37_88) or a [4-digit 7-segment display](https://www.adafruit.com/category/37_103). Matrices like these are...
In Stock
[Buy Now](https://www.adafruit.com/product/1051)
[Related Guides to the Product](https://learn.adafruit.com/products/1051/guides)
### Small 1.2" 8x8 Ultra Bright Square Blue LED Matrix + Backpack
[Small 1.2" 8x8 Ultra Bright Square Blue LED Matrix + Backpack](https://www.adafruit.com/product/1853)
What's better than a single LED? Lots of LEDs! Matrices like these are 'multiplexed' - so to control 64 LEDs you need 16 pins. That's a lot of pins, and there are [driver chips like the MAX7219](//www.adafruit.com/products/453) that can control a matrix for you but...
In Stock
[Buy Now](https://www.adafruit.com/product/1853)
[Related Guides to the Product](https://learn.adafruit.com/products/1853/guides)
## Related Guides
- [LED Backpack Displays on Raspberry Pi and BeagleBone Black](https://learn.adafruit.com/led-backpack-displays-on-raspberry-pi-and-beaglebone-black.md)
- [Animating Multiple LED Backpacks](https://learn.adafruit.com/animating-multiple-led-backpacks.md)
- [Arduino GPS Clock](https://learn.adafruit.com/arduino-clock.md)
- [Raspberry Pi Physical Dashboard](https://learn.adafruit.com/raspberry-pi-physical-dashboard.md)
- [CircuitPython Hardware: LED Backpacks & FeatherWings](https://learn.adafruit.com/micropython-hardware-led-backpacks-and-featherwings.md)
- [Matrix and 7-Segment LED Backpack with the Raspberry Pi](https://learn.adafruit.com/matrix-7-segment-led-backpack-with-the-raspberry-pi.md)
- [DIY Pocket LED Gamer - Tiny Tetris!](https://learn.adafruit.com/diy-3d-printed-handheld-pocket-game-tiny-tetris-snake.md)
- [RGB LED Matrix Cube with 25,000 LEDs](https://learn.adafruit.com/rgb-led-matrix-cube-for-pi.md)
- [Creating GIFs for SmartMatrix](https://learn.adafruit.com/creating-gifs-for-smartmatrix.md)
- [Adafruit CharliePlex LED Matrix Bonnet](https://learn.adafruit.com/adafruit-charlieplex-bonnet.md)
- [Connecting a 16x32 RGB LED Matrix Panel to a Raspberry Pi](https://learn.adafruit.com/connecting-a-16x32-rgb-led-matrix-panel-to-a-raspberry-pi.md)
- [MicroPython Displays: Drawing Text](https://learn.adafruit.com/micropython-displays-drawing-text.md)
- [Heart Rate Badge](https://learn.adafruit.com/heart-rate-badge.md)
- [16x24 LED Matrix](https://learn.adafruit.com/16x24-led-matrix.md)
- [Adafruit IS31FL3741](https://learn.adafruit.com/adafruit-is31fl3741.md)
---
# Source: https://learn.adafruit.com/adafruit-led-backpack/bi-color-8x8-matrix-arduino-setup.md
# Adafruit LED Backpacks
## Arduino Setup
Primary:
We wrote a basic library to help you work with the bi-color 8x8 matrix backpack. The library is written for the Arduino and will work with any Arduino as it just uses the I2C pins. The code is very portable and can be easily adapted to any I2C-capable micro.
Wiring to the matrix is really easy
- Connect **CLK** to the I2C clock - on Arduino UNO thats Analog #5 (or SCL), on the Leonardo its Digital #3, on the Mega its digital #21
- Connect **DAT** to the I2C data - on Arduino UNO thats Analog #4 (or SDA), on the Leonardo its Digital #2, on the Mega its digital #20
- Connect **GND** to common ground
- Connect **VCC+** to power - 5V is best but 3V also seems to work for 3V microcontrollers.
Next, download the **Adafruit LED Backpack ** library and the **Adafruit GFX ** library from the Arduino library manager.
Open up the Arduino library manager:

Search for the **Adafruit LED Backpack ** library and install it

Search for the **Adafruit GFX ** library and install it

If using an earlier version of the Arduino IDE (prior to 1.8.10), also locate and install **Adafruit\_BusIO** (newer versions will install this dependency automatically).
Once you've restarted you should be able to select the **File→Examples→Adafruit\_LEDBackpack→bicolor88** example sketch. Upload it to your Arduino as usual. You should see a basic test program that goes through a bunch of different drawing routines.
We also have a great tutorial on Arduino library installation at:
[http://learn.adafruit.com/adafruit-all-about-arduino-libraries-install-use](http://learn.adafruit.com/adafruit-all-about-arduino-libraries-install-use "Link: http://learn.adafruit.com/adafruit-all-about-arduino-libraries-install-use")

Once you're happy that the matrix works, you can write your own sketches. The 8x8 matrix supports everything the Adafruit GFX library - drawing pixels, lines, rectangles, circles, triangles, roundrects, and small bitmaps. [For more details check out the GFX page which will detail all of the GFX routines](http://learn.adafruit.com/adafruit-gfx-graphics-library).
All the drawing routines only change the display memory kept by the Arduino. Don't forget to call **writeDisplay()** after drawing to 'save' the memory out to the matrix via I2C.
There are also a few small routines that are special to the matrix:
- **setBrightness(_brightness_)**- will let you change the overall brightness of the entire display. 0 is least bright, 15 is brightest and is what is initialized by the display when you start
- **blinkRate(_rate_)** - You can blink the entire display. 0 is no blinking. 1, 2 or 3 is for display blinking.
The default orientation for graphics commands on this display places pixel (0,0) at the top-left when the header is at the left and Adafruit logo at the right. To use the matrix as shown above (header at top, logo at bottom), call matrix.setRotation(3) before issuing graphics commands.

- [Previous Page](https://learn.adafruit.com/adafruit-led-backpack/bi-color-8x8-matrix-assembly.md)
- [Next Page](https://learn.adafruit.com/adafruit-led-backpack/bi-color-8x8-matrix-circuitpython-wiring-and-setup.md)
## Primary Products
### Adafruit Mini 8x8 LED Matrix w/I2C Backpack - Red
[Adafruit Mini 8x8 LED Matrix w/I2C Backpack - Red](https://www.adafruit.com/product/870)
What's better than a single LED? Lots of LEDs! A fun way to make a small display is to use an [8x8 matrix](https://www.adafruit.com/category/37_88) or a [4-digit 7-segment display](https://www.adafruit.com/category/37_103). Matrices like these are...
In Stock
[Buy Now](https://www.adafruit.com/product/870)
[Related Guides to the Product](https://learn.adafruit.com/products/870/guides)
### Adafruit Mini 8x8 LED Matrix w/I2C Backpack - Yellow
[Adafruit Mini 8x8 LED Matrix w/I2C Backpack - Yellow](https://www.adafruit.com/product/871)
What's better than a single LED? Lots of LEDs! A fun way to make a small display is to use an [8x8 matrix](https://www.adafruit.com/category/37_88) or a [4-digit 7-segment display](https://www.adafruit.com/category/37_103). Matrices like these are...
In Stock
[Buy Now](https://www.adafruit.com/product/871)
[Related Guides to the Product](https://learn.adafruit.com/products/871/guides)
### Adafruit Mini 0.8" 8x8 LED Matrix w/I2C Backpack - Yellow-Green
[Adafruit Mini 0.8" 8x8 LED Matrix w/I2C Backpack - Yellow-Green](https://www.adafruit.com/product/872)
What's better than a single LED? Lots of LEDs! A fun way to make a small display is to use an [8x8 matrix](https://www.adafruit.com/category/37_88) or a [4-digit 7-segment display](https://www.adafruit.com/category/37_103). Matrices like these are...
In Stock
[Buy Now](https://www.adafruit.com/product/872)
[Related Guides to the Product](https://learn.adafruit.com/products/872/guides)
### Adafruit 0.56" 4-Digit 7-Segment Display with I2C Backpack - Red
[Adafruit 0.56" 4-Digit 7-Segment Display with I2C Backpack - Red](https://www.adafruit.com/product/878)
What's better than a single LED? Lots of LEDs! A fun way to make a small display is to use an [8x8 matrix](https://www.adafruit.com/category/37_88) or a [4-digit 7-segment display](https://www.adafruit.com/category/37_103). Matrices like these are...
In Stock
[Buy Now](https://www.adafruit.com/product/878)
[Related Guides to the Product](https://learn.adafruit.com/products/878/guides)
### Adafruit 0.56" 4-Digit 7-Segment Display w/I2C Backpack - Yellow
[Adafruit 0.56" 4-Digit 7-Segment Display w/I2C Backpack - Yellow](https://www.adafruit.com/product/879)
What's better than a single LED? Lots of LEDs! A fun way to make a small display is to use an [8x8 matrix](https://www.adafruit.com/category/37_88) or a [4-digit 7-segment display](https://www.adafruit.com/category/37_103). Matrices like these are...
In Stock
[Buy Now](https://www.adafruit.com/product/879)
[Related Guides to the Product](https://learn.adafruit.com/products/879/guides)
### Adafruit 0.56" 4-Digit 7-Segment Display w/ I2C Backpack - Green
[Adafruit 0.56" 4-Digit 7-Segment Display w/ I2C Backpack - Green](https://www.adafruit.com/product/880)
What's better than a single LED? Lots of LEDs! A fun way to make a small display is to use an [8x8 matrix](https://www.adafruit.com/category/37_88) or a [4-digit 7-segment display](https://www.adafruit.com/category/37_103). Matrices like these are...
No Longer Stocked
[Buy Now](https://www.adafruit.com/product/880)
[Related Guides to the Product](https://learn.adafruit.com/products/880/guides)
### Adafruit 0.56" 4-Digit 7-Segment Display w/ I2C Backpack - Blue
[Adafruit 0.56" 4-Digit 7-Segment Display w/ I2C Backpack - Blue](https://www.adafruit.com/product/881)
What's better than a single LED? Lots of LEDs! A fun way to make a small display is to use an [8x8 matrix](https://www.adafruit.com/category/37_88) or a [4-digit 7-segment display](https://www.adafruit.com/category/37_103). Matrices like these are...
In Stock
[Buy Now](https://www.adafruit.com/product/881)
[Related Guides to the Product](https://learn.adafruit.com/products/881/guides)
### Adafruit Bicolor LED Square Pixel Matrix with I2C Backpack
[Adafruit Bicolor LED Square Pixel Matrix with I2C Backpack](https://www.adafruit.com/product/902)
What's better than a single LED? Lots of LEDs! A fun way to make a small colorful display is to use a [1.2" Bi-color 8x8 LED Matrix](http://www.adafruit.com/products/458). Matrices like these are 'multiplexed' - so to control all the 128 LEDs you need 24 pins....
In Stock
[Buy Now](https://www.adafruit.com/product/902)
[Related Guides to the Product](https://learn.adafruit.com/products/902/guides)
### Adafruit Mini 8x8 LED Matrix w/I2C Backpack - Blue
[Adafruit Mini 8x8 LED Matrix w/I2C Backpack - Blue](https://www.adafruit.com/product/959)
What's better than a single LED? Lots of LEDs! A fun way to make a small display is to use an [8x8 matrix](https://www.adafruit.com/category/37_88) or a [4-digit 7-segment display](https://www.adafruit.com/category/37_103). Matrices like these are...
In Stock
[Buy Now](https://www.adafruit.com/product/959)
[Related Guides to the Product](https://learn.adafruit.com/products/959/guides)
### Adafruit 0.56" 4-Digit 7-Segment Display w/I2C Backpack - White
[Adafruit 0.56" 4-Digit 7-Segment Display w/I2C Backpack - White](https://www.adafruit.com/product/1002)
What's better than a single LED? Lots of LEDs! A fun way to make a small display is to use an [8x8 matrix](https://www.adafruit.com/category/37_88) or a [4-digit 7-segment display](https://www.adafruit.com/category/37_103). Matrices like these are...
In Stock
[Buy Now](https://www.adafruit.com/product/1002)
[Related Guides to the Product](https://learn.adafruit.com/products/1002/guides)
### Adafruit 1.2" 8x8 LED Matrix Backpack
[Adafruit 1.2" 8x8 LED Matrix Backpack](https://www.adafruit.com/product/1048)
By popular request, you can now get our 8x8 LED backpacks without the LEDs! These backpacks feature an HT16K33 I2C LED driver, they're simple and easy to use - you can use [our very nice library for the backpacks to...](https://github.com/adafruit/Adafruit-LED-Backpack-Library)
In Stock
[Buy Now](https://www.adafruit.com/product/1048)
[Related Guides to the Product](https://learn.adafruit.com/products/1048/guides)
### Adafruit Small 1.2" 8x8 LED Matrix w/I2C Backpack - Red
[Adafruit Small 1.2" 8x8 LED Matrix w/I2C Backpack - Red](https://www.adafruit.com/product/1049)
What's better than a single LED? Lots of LEDs! A fun way to make a small display is to use an [8x8 matrix](https://www.adafruit.com/category/37_88) or a [4-digit 7-segment display](https://www.adafruit.com/category/37_103). Matrices like these are...
In Stock
[Buy Now](https://www.adafruit.com/product/1049)
[Related Guides to the Product](https://learn.adafruit.com/products/1049/guides)
### Adafruit Small 1.2" 8x8 LED Matrix w/I2C Backpack - Yellow
[Adafruit Small 1.2" 8x8 LED Matrix w/I2C Backpack - Yellow](https://www.adafruit.com/product/1050)
What's better than a single LED? Lots of LEDs! A fun way to make a small display is to use an [8x8 matrix](https://www.adafruit.com/category/37_88) or a [4-digit 7-segment display](https://www.adafruit.com/category/37_103). Matrices like these are...
In Stock
[Buy Now](https://www.adafruit.com/product/1050)
[Related Guides to the Product](https://learn.adafruit.com/products/1050/guides)
### Adafruit Small 1.2" 8x8 LED Matrix w/I2C Backpack - Blue
[Adafruit Small 1.2" 8x8 LED Matrix w/I2C Backpack - Blue](https://www.adafruit.com/product/1052)
What's better than a single LED? Lots of LEDs! A fun way to make a small display is to use an [8x8 matrix](https://www.adafruit.com/category/37_88) or a [4-digit 7-segment display](https://www.adafruit.com/category/37_103). Matrices like these are...
In Stock
[Buy Now](https://www.adafruit.com/product/1052)
[Related Guides to the Product](https://learn.adafruit.com/products/1052/guides)
### Adafruit Mini 8x8 LED Matrix w/I2C Backpack - Ultra Bright White
[Adafruit Mini 8x8 LED Matrix w/I2C Backpack - Ultra Bright White](https://www.adafruit.com/product/1080)
What's better than a single LED? Lots of LEDs! A fun way to make a small display is to use an [8x8 matrix](https://www.adafruit.com/category/37_88) or a [4-digit 7-segment display](https://www.adafruit.com/category/37_103). Matrices like these are...
In Stock
[Buy Now](https://www.adafruit.com/product/1080)
[Related Guides to the Product](https://learn.adafruit.com/products/1080/guides)
### Adafruit 1.2" 4-Digit 7-Segment Display w/I2C Backpack - Green
[Adafruit 1.2" 4-Digit 7-Segment Display w/I2C Backpack - Green](https://www.adafruit.com/product/1268)
What's better than a single LED? Lots of LEDs! A fun way to make a numeric display is to use a [4-digit 7-segment display](https://www.adafruit.com/category/37_103). LED matrices like these are 'multiplexed' - so to control all the seven-segment LEDs you need 14 pins....
No Longer Stocked
[Buy Now](https://www.adafruit.com/product/1268)
[Related Guides to the Product](https://learn.adafruit.com/products/1268/guides)
### Adafruit 1.2" 4-Digit 7-Segment Display w/I2C Backpack - Yellow
[Adafruit 1.2" 4-Digit 7-Segment Display w/I2C Backpack - Yellow](https://www.adafruit.com/product/1269)
What's better than a single LED? Lots of LEDs! A fun way to make a numeric display is to use a [4-digit 7-segment display](https://www.adafruit.com/category/37_103). LED matrices like these are 'multiplexed' - so to control all the seven-segment LEDs you need 14 pins....
In Stock
[Buy Now](https://www.adafruit.com/product/1269)
[Related Guides to the Product](https://learn.adafruit.com/products/1269/guides)
### Adafruit 1.2" 4-Digit 7-Segment Display w/I2C Backpack - Red
[Adafruit 1.2" 4-Digit 7-Segment Display w/I2C Backpack - Red](https://www.adafruit.com/product/1270)
What's better than a single LED? Lots of LEDs! A fun way to make a numeric display is to use a [4-digit 7-segment display](https://www.adafruit.com/category/37_103). LED matrices like these are 'multiplexed' - so to control all the seven-segment LEDs you need 14 pins....
In Stock
[Buy Now](https://www.adafruit.com/product/1270)
[Related Guides to the Product](https://learn.adafruit.com/products/1270/guides)
### Small 1.2" 8x8 Ultra Bright White LED Matrix + Backpack
[Small 1.2" 8x8 Ultra Bright White LED Matrix + Backpack](https://www.adafruit.com/product/1614)
What's better than a single LED? Lots of LEDs! A fun way to make a small display is to use an [8x8 matrix](https://www.adafruit.com/category/37_88) or a [4-digit 7-segment display](https://www.adafruit.com/category/37_103). Matrices like these are...
In Stock
[Buy Now](https://www.adafruit.com/product/1614)
[Related Guides to the Product](https://learn.adafruit.com/products/1614/guides)
### Adafruit Small 1.2" 8x8 LED Matrix w/I2C Backpack - Pure Green
[Adafruit Small 1.2" 8x8 LED Matrix w/I2C Backpack - Pure Green](https://www.adafruit.com/product/1632)
What's better than a single LED? Lots of LEDs! A fun way to make a small display is to use an [8x8 matrix](https://www.adafruit.com/category/37_88) or a [4-digit 7-segment display](https://www.adafruit.com/category/37_103). Matrices like these are...
In Stock
[Buy Now](https://www.adafruit.com/product/1632)
[Related Guides to the Product](https://learn.adafruit.com/products/1632/guides)
### Adafruit Mini 0.8" 8x8 LED Matrix w/I2C Backpack - Pure Green
[Adafruit Mini 0.8" 8x8 LED Matrix w/I2C Backpack - Pure Green](https://www.adafruit.com/product/1633)
What's better than a single LED? Lots of LEDs! A fun way to make a small display is to use an [8x8 matrix](https://www.adafruit.com/category/37_88) or a [4-digit 7-segment display](https://www.adafruit.com/category/37_103). Matrices like these are...
In Stock
[Buy Now](https://www.adafruit.com/product/1633)
[Related Guides to the Product](https://learn.adafruit.com/products/1633/guides)
### Bi-Color (Red/Green) 24-Bar Bargraph w/I2C Backpack Kit
[Bi-Color (Red/Green) 24-Bar Bargraph w/I2C Backpack Kit](https://www.adafruit.com/product/1721)
What's better than a single LED? Lots of LEDs! A fun way to make a small linear display is to use two 12-bar Bi-color bar-graphs. However, this LED bargraph is 'multiplexed' - so to control all the 48 LEDs you need a lot of pins.
Out of Stock
[Buy Now](https://www.adafruit.com/product/1721)
[Related Guides to the Product](https://learn.adafruit.com/products/1721/guides)
### Small 1.2" 8x8 Ultra Bright Square Amber LED Matrix + Backpack
[Small 1.2" 8x8 Ultra Bright Square Amber LED Matrix + Backpack](https://www.adafruit.com/product/1854)
What's better than a single LED? Lots of LEDs! Matrices like these are 'multiplexed' - so to control 64 LEDs you need 16 pins. That's a lot of pins, and there are [driver chips like the MAX7219](//www.adafruit.com/products/453) that can control a matrix for you but...
In Stock
[Buy Now](https://www.adafruit.com/product/1854)
[Related Guides to the Product](https://learn.adafruit.com/products/1854/guides)
### Small 1.2" 8x8 Ultra Bright Square Yellow LED Matrix + Backpack
[Small 1.2" 8x8 Ultra Bright Square Yellow LED Matrix + Backpack](https://www.adafruit.com/product/1855)
What's better than a single LED? Lots of LEDs! Matrices like these are 'multiplexed' - so to control 64 LEDs you need 16 pins. That's a lot of pins, and there are [driver chips like the MAX7219](//www.adafruit.com/products/453) that can control a matrix for you but...
In Stock
[Buy Now](https://www.adafruit.com/product/1855)
[Related Guides to the Product](https://learn.adafruit.com/products/1855/guides)
### Small 1.2" 8x8 Bright Square Pure Green LED Matrix + Backpack
[Small 1.2" 8x8 Bright Square Pure Green LED Matrix + Backpack](https://www.adafruit.com/product/1856)
What's better than a single LED? Lots of LEDs! Matrices like these are 'multiplexed' - so to control 64 LEDs you need 16 pins. That's a lot of pins, and there are [driver chips like the MAX7219](//www.adafruit.com/products/453) that can control a matrix for you but...
In Stock
[Buy Now](https://www.adafruit.com/product/1856)
[Related Guides to the Product](https://learn.adafruit.com/products/1856/guides)
### Small 1.2" 8x8 Ultra Bright Square White LED Matrix + Backpack
[Small 1.2" 8x8 Ultra Bright Square White LED Matrix + Backpack](https://www.adafruit.com/product/1857)
What's better than a single LED? Lots of LEDs! Matrices like these are 'multiplexed' - so to control 64 LEDs you need 16 pins. That's a lot of pins, and there are [driver chips like the MAX7219](//www.adafruit.com/products/453) that can control a matrix for you but...
In Stock
[Buy Now](https://www.adafruit.com/product/1857)
[Related Guides to the Product](https://learn.adafruit.com/products/1857/guides)
### Adafruit 14-segment LED Alphanumeric Backpack - STEMMA QT
[Adafruit 14-segment LED Alphanumeric Backpack - STEMMA QT](https://www.adafruit.com/product/1910)
By popular request, you can now get our 14-segment LED backpacks without the LEDs! These backpacks feature an HT16K33 I2C LED driver, they're simple and easy to use - you can use [our very nice library for the backpacks to...](https://github.com/adafruit/Adafruit-LED-Backpack-Library)
In Stock
[Buy Now](https://www.adafruit.com/product/1910)
[Related Guides to the Product](https://learn.adafruit.com/products/1910/guides)
### Quad Alphanumeric Display - Red 0.54" Digits w/ I2C Backpack
[Quad Alphanumeric Display - Red 0.54" Digits w/ I2C Backpack](https://www.adafruit.com/product/1911)
Display, elegantly, 012345678 or 9! Gaze, hypnotized, at ABCDEFGHIJKLM - well it can display the whole alphabet. You get the point. This is a nice, bright alphanumeric display that shows letters and numbers in a beautiful red hue. It's super bright and designed for viewing from distances...
In Stock
[Buy Now](https://www.adafruit.com/product/1911)
[Related Guides to the Product](https://learn.adafruit.com/products/1911/guides)
### Quad Alphanumeric Display - Blue 0.54" Digits w/ I2C Backpack
[Quad Alphanumeric Display - Blue 0.54" Digits w/ I2C Backpack](https://www.adafruit.com/product/1912)
Display, elegantly, 012345678 or 9! Gaze, hypnotized, at ABCDEFGHIJKLM - well it can display the whole alphabet. You get the point. This is a nice, bright alphanumeric display that shows letters and numbers in a beautiful blue hue. It's super bright and designed for viewing from distances...
In Stock
[Buy Now](https://www.adafruit.com/product/1912)
[Related Guides to the Product](https://learn.adafruit.com/products/1912/guides)
### 16x8 1.2" LED Matrix + Backpack - Ultra Bright Round Green LEDs
[16x8 1.2" LED Matrix + Backpack - Ultra Bright Round Green LEDs](https://www.adafruit.com/product/2035)
What's better than a single LED? Lots of LEDs! And what's better than lots of LEDs? **TWO TIMES AS MANY LEDS!!!**
With the 16x8 LED Matrix Backpack we've doubled your project's matrix capacity by making it super easy to get two separate 8x8 matrices onto...
In Stock
[Buy Now](https://www.adafruit.com/product/2035)
[Related Guides to the Product](https://learn.adafruit.com/products/2035/guides)
### 16x8 1.2" LED Matrix+Backpack UltraBright Round YellowGreen LEDs
[16x8 1.2" LED Matrix+Backpack UltraBright Round YellowGreen LEDs](https://www.adafruit.com/product/2036)
What's better than a single LED? Lots of LEDs! And what's better than lots of LEDs? **TWO TIMES AS MANY LEDS!!!**
With the 16x8 LED Matrix Backpack we've doubled your project's matrix capacity by making it super easy to get two separate 8x8 matrices onto...
In Stock
[Buy Now](https://www.adafruit.com/product/2036)
[Related Guides to the Product](https://learn.adafruit.com/products/2036/guides)
### 16x8 1.2" LED Matrix + Backpack - Ultra Bright Round Red LEDs
[16x8 1.2" LED Matrix + Backpack - Ultra Bright Round Red LEDs](https://www.adafruit.com/product/2037)
What's better than a single LED? Lots of LEDs! And what's better than lots of LEDs? **TWO TIMES AS MANY LEDS!!!**
With the 16x8 LED Matrix Backpack we've doubled your project's matrix capacity by making it super easy to get two separate 8x8 matrices onto...
In Stock
[Buy Now](https://www.adafruit.com/product/2037)
[Related Guides to the Product](https://learn.adafruit.com/products/2037/guides)
### 16x8 1.2" LED Matrix + Backpack - Ultra Bright Round White LEDs
[16x8 1.2" LED Matrix + Backpack - Ultra Bright Round White LEDs](https://www.adafruit.com/product/2038)
What's better than a single LED? Lots of LEDs! And what's better than lots of LEDs? **TWO TIMES AS MANY LEDS!!!**
With the 16x8 LED Matrix Backpack we've doubled your project's matrix capacity by making it super easy to get two separate 8x8 matrices onto...
In Stock
[Buy Now](https://www.adafruit.com/product/2038)
[Related Guides to the Product](https://learn.adafruit.com/products/2038/guides)
### 16x8 1.2" LED Matrix + Backpack - Ultra Bright Round Blue LEDs
[16x8 1.2" LED Matrix + Backpack - Ultra Bright Round Blue LEDs](https://www.adafruit.com/product/2039)
What's better than a single LED? Lots of LEDs! And what's better than lots of LEDs? **TWO TIMES AS MANY LEDS!!!**
With the 16x8 LED Matrix Backpack we've doubled your project's matrix capacity by making it super easy to get two separate 8x8 matrices onto...
In Stock
[Buy Now](https://www.adafruit.com/product/2039)
[Related Guides to the Product](https://learn.adafruit.com/products/2039/guides)
### 16x8 1.2" LED Matrix + Backpack - Ultra Bright Square Blue LEDs
[16x8 1.2" LED Matrix + Backpack - Ultra Bright Square Blue LEDs](https://www.adafruit.com/product/2040)
What's better than a single LED? Lots of LEDs! And what's better than lots of LEDs? **TWO TIMES AS MANY LEDS!!!**
With the 16x8 LED Matrix Backpack we've doubled your project's matrix capacity by making it super easy to get two separate 8x8 matrices onto...
In Stock
[Buy Now](https://www.adafruit.com/product/2040)
[Related Guides to the Product](https://learn.adafruit.com/products/2040/guides)
### 16x8 1.2" LED Matrix + Backpack - Ultra Bright Square Amber LEDs
[16x8 1.2" LED Matrix + Backpack - Ultra Bright Square Amber LEDs](https://www.adafruit.com/product/2041)
What's better than a single LED? Lots of LEDs! And what's better than lots of LEDs? **TWO TIMES AS MANY LEDS!!!**
With the 16x8 LED Matrix Backpack we've doubled your project's matrix capacity by making it super easy to get two separate 8x8 matrices onto...
In Stock
[Buy Now](https://www.adafruit.com/product/2041)
[Related Guides to the Product](https://learn.adafruit.com/products/2041/guides)
### 16x8 1.2" LED Matrix + Backpack - Ultra Bright Square Green LEDs
[16x8 1.2" LED Matrix + Backpack - Ultra Bright Square Green LEDs](https://www.adafruit.com/product/2042)
What's better than a single LED? Lots of LEDs! And what's better than lots of LEDs? **TWO TIMES AS MANY LEDS!!!**
With the 16x8 LED Matrix Backpack we've doubled your project's matrix capacity by making it super easy to get two separate 8x8 matrices onto...
In Stock
[Buy Now](https://www.adafruit.com/product/2042)
[Related Guides to the Product](https://learn.adafruit.com/products/2042/guides)
### 16x8 1.2" LED Matrix + Backpack -Ultra Bright Square Yellow LEDs
[16x8 1.2" LED Matrix + Backpack -Ultra Bright Square Yellow LEDs](https://www.adafruit.com/product/2043)
What's better than a single LED? Lots of LEDs! And what's better than lots of LEDs? **TWO TIMES AS MANY LEDS!!!**
With the 16x8 LED Matrix Backpack we've doubled your project's matrix capacity by making it super easy to get two separate 8x8 matrices onto...
In Stock
[Buy Now](https://www.adafruit.com/product/2043)
[Related Guides to the Product](https://learn.adafruit.com/products/2043/guides)
### 16x8 1.2" LED Matrix + Backpack - Ultra Bright Square White LEDs
[16x8 1.2" LED Matrix + Backpack - Ultra Bright Square White LEDs](https://www.adafruit.com/product/2044)
What's better than a single LED? Lots of LEDs! And what's better than lots of LEDs? **TWO TIMES AS MANY LEDS!!!**
With the 16x8 LED Matrix Backpack we've doubled your project's matrix capacity by making it super easy to get two separate 8x8 matrices onto...
In Stock
[Buy Now](https://www.adafruit.com/product/2044)
[Related Guides to the Product](https://learn.adafruit.com/products/2044/guides)
### 16x8 1.2" LED Matrix + Backpack-Ultra Bright Round Orange LEDs
[16x8 1.2" LED Matrix + Backpack-Ultra Bright Round Orange LEDs](https://www.adafruit.com/product/2052)
What's better than a single LED? Lots of LEDs! And what's better than lots of LEDs? **TWO TIMES AS MANY LEDS!!!**
With the 16x8 LED Matrix Backpack we've doubled your project's matrix capacity by making it super easy to get two separate 8x8 matrices onto...
In Stock
[Buy Now](https://www.adafruit.com/product/2052)
[Related Guides to the Product](https://learn.adafruit.com/products/2052/guides)
### 16x8 1.2" LED Matrices+Backpack Round LEDs in Various Colors
[16x8 1.2" LED Matrices+Backpack Round LEDs in Various Colors](https://www.adafruit.com/product/2054)
What's better than a single LED? Lots of LEDs! And what's better than lots of LEDs? **TWO TIMES AS MANY LEDS!!!**
With the 16x8 LED Matrix Backpack we've doubled your project's matrix capacity by making it super easy to get two separate 8x8 matrices onto...
Out of Stock
[Buy Now](https://www.adafruit.com/product/2054)
[Related Guides to the Product](https://learn.adafruit.com/products/2054/guides)
### Adafruit 8x16 LED Matrix FeatherWing w/o Matrices
[Adafruit 8x16 LED Matrix FeatherWing w/o Matrices](https://www.adafruit.com/product/3090)
You will chirp with delight when you see how easy it is to make your very own 8x16 LED matrix display for any Feather. At 0.8" square, the little [8x8 matrices](https://www.adafruit.com/new/?q=8x8%20miniature%20LED%20matrix&) have everything a big LED matrix has,...
Out of Stock
[Buy Now](https://www.adafruit.com/product/3090)
[Related Guides to the Product](https://learn.adafruit.com/products/3090/guides)
### Adafruit 14-segment LED Alphanumeric backpack (same as P1910)
[Adafruit 14-segment LED Alphanumeric backpack (same as P1910)](https://www.adafruit.com/product/3322)
Just the backpack + 4pin header
No Longer Stocked
[Buy Now](https://www.adafruit.com/product/3322)
[Related Guides to the Product](https://learn.adafruit.com/products/3322/guides)
## Featured Products
### Adafruit Small 1.2" 8x8 LED Matrix w/I2C Backpack - Yellow-Green
[Adafruit Small 1.2" 8x8 LED Matrix w/I2C Backpack - Yellow-Green](https://www.adafruit.com/product/1051)
What's better than a single LED? Lots of LEDs! A fun way to make a small display is to use an [8x8 matrix](https://www.adafruit.com/category/37_88) or a [4-digit 7-segment display](https://www.adafruit.com/category/37_103). Matrices like these are...
In Stock
[Buy Now](https://www.adafruit.com/product/1051)
[Related Guides to the Product](https://learn.adafruit.com/products/1051/guides)
### Small 1.2" 8x8 Ultra Bright Square Blue LED Matrix + Backpack
[Small 1.2" 8x8 Ultra Bright Square Blue LED Matrix + Backpack](https://www.adafruit.com/product/1853)
What's better than a single LED? Lots of LEDs! Matrices like these are 'multiplexed' - so to control 64 LEDs you need 16 pins. That's a lot of pins, and there are [driver chips like the MAX7219](//www.adafruit.com/products/453) that can control a matrix for you but...
In Stock
[Buy Now](https://www.adafruit.com/product/1853)
[Related Guides to the Product](https://learn.adafruit.com/products/1853/guides)
## Related Guides
- [LED Backpack Displays on Raspberry Pi and BeagleBone Black](https://learn.adafruit.com/led-backpack-displays-on-raspberry-pi-and-beaglebone-black.md)
- [Animating Multiple LED Backpacks](https://learn.adafruit.com/animating-multiple-led-backpacks.md)
- [Arduino GPS Clock](https://learn.adafruit.com/arduino-clock.md)
- [Raspberry Pi Physical Dashboard](https://learn.adafruit.com/raspberry-pi-physical-dashboard.md)
- [CircuitPython Hardware: LED Backpacks & FeatherWings](https://learn.adafruit.com/micropython-hardware-led-backpacks-and-featherwings.md)
- [Matrix and 7-Segment LED Backpack with the Raspberry Pi](https://learn.adafruit.com/matrix-7-segment-led-backpack-with-the-raspberry-pi.md)
- [DIY Pocket LED Gamer - Tiny Tetris!](https://learn.adafruit.com/diy-3d-printed-handheld-pocket-game-tiny-tetris-snake.md)
- [RGB LED Matrix Cube with 25,000 LEDs](https://learn.adafruit.com/rgb-led-matrix-cube-for-pi.md)
- [Creating GIFs for SmartMatrix](https://learn.adafruit.com/creating-gifs-for-smartmatrix.md)
- [Adafruit CharliePlex LED Matrix Bonnet](https://learn.adafruit.com/adafruit-charlieplex-bonnet.md)
- [Connecting a 16x32 RGB LED Matrix Panel to a Raspberry Pi](https://learn.adafruit.com/connecting-a-16x32-rgb-led-matrix-panel-to-a-raspberry-pi.md)
- [MicroPython Displays: Drawing Text](https://learn.adafruit.com/micropython-displays-drawing-text.md)
- [Heart Rate Badge](https://learn.adafruit.com/heart-rate-badge.md)
- [16x24 LED Matrix](https://learn.adafruit.com/16x24-led-matrix.md)
- [Adafruit IS31FL3741](https://learn.adafruit.com/adafruit-is31fl3741.md)
---
# Source: https://learn.adafruit.com/adafruit-led-backpack/bi-color-8x8-matrix-assembly.md
# Adafruit LED Backpacks
## Assembly
Danger:
When you buy a pack from Adafruit, it comes with the fully tested and assembled backpack as well as a 8x8 matrix. You'll need to solder the matrix onto the backpack but its an easy task.
Remove the parts from packaging and place the LED matrix OVER the silkscreen side.
**The matrix must be soldered on the correct orientation or it will not work! Check for the side of the matrix that has printing on it. Then look for the front of the PCB that has a circle instead of a square in the corner and line those up as shown on the left**
Do not solder the matrix over the chip on the back of the backpack - it will not work then!
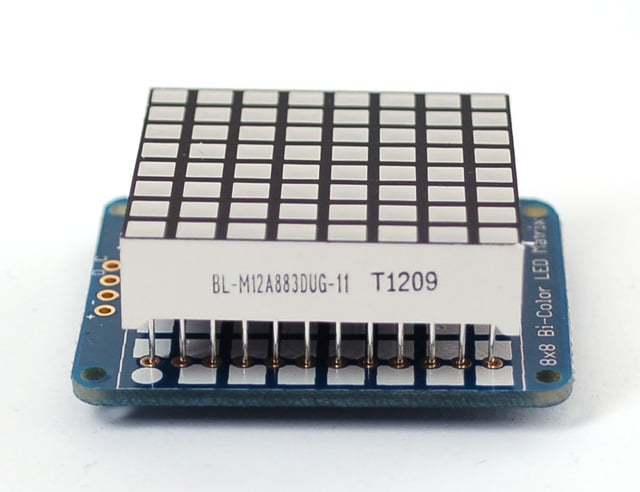
Turn the backpack over so its sitting flat on the matrix.
Solder all 24 pins.
Clip the long pins

Now you're ready to wire it up to a microcontroller. We'll assume you want to use a 4pin header. You can also of course solder wires directly. Place a 4-pin piece of header with the LONG pins down into the breadboard.
Place the soldered backpack on top of the header.
Solder 'em!
- [Previous Page](https://learn.adafruit.com/adafruit-led-backpack/bi-color-8x8-matrix.md)
- [Next Page](https://learn.adafruit.com/adafruit-led-backpack/bi-color-8x8-matrix-arduino-setup.md)
## Primary Products
### Adafruit Mini 8x8 LED Matrix w/I2C Backpack - Red
[Adafruit Mini 8x8 LED Matrix w/I2C Backpack - Red](https://www.adafruit.com/product/870)
What's better than a single LED? Lots of LEDs! A fun way to make a small display is to use an [8x8 matrix](https://www.adafruit.com/category/37_88) or a [4-digit 7-segment display](https://www.adafruit.com/category/37_103). Matrices like these are...
In Stock
[Buy Now](https://www.adafruit.com/product/870)
[Related Guides to the Product](https://learn.adafruit.com/products/870/guides)
### Adafruit Mini 8x8 LED Matrix w/I2C Backpack - Yellow
[Adafruit Mini 8x8 LED Matrix w/I2C Backpack - Yellow](https://www.adafruit.com/product/871)
What's better than a single LED? Lots of LEDs! A fun way to make a small display is to use an [8x8 matrix](https://www.adafruit.com/category/37_88) or a [4-digit 7-segment display](https://www.adafruit.com/category/37_103). Matrices like these are...
In Stock
[Buy Now](https://www.adafruit.com/product/871)
[Related Guides to the Product](https://learn.adafruit.com/products/871/guides)
### Adafruit Mini 0.8" 8x8 LED Matrix w/I2C Backpack - Yellow-Green
[Adafruit Mini 0.8" 8x8 LED Matrix w/I2C Backpack - Yellow-Green](https://www.adafruit.com/product/872)
What's better than a single LED? Lots of LEDs! A fun way to make a small display is to use an [8x8 matrix](https://www.adafruit.com/category/37_88) or a [4-digit 7-segment display](https://www.adafruit.com/category/37_103). Matrices like these are...
In Stock
[Buy Now](https://www.adafruit.com/product/872)
[Related Guides to the Product](https://learn.adafruit.com/products/872/guides)
### Adafruit 0.56" 4-Digit 7-Segment Display with I2C Backpack - Red
[Adafruit 0.56" 4-Digit 7-Segment Display with I2C Backpack - Red](https://www.adafruit.com/product/878)
What's better than a single LED? Lots of LEDs! A fun way to make a small display is to use an [8x8 matrix](https://www.adafruit.com/category/37_88) or a [4-digit 7-segment display](https://www.adafruit.com/category/37_103). Matrices like these are...
In Stock
[Buy Now](https://www.adafruit.com/product/878)
[Related Guides to the Product](https://learn.adafruit.com/products/878/guides)
### Adafruit 0.56" 4-Digit 7-Segment Display w/I2C Backpack - Yellow
[Adafruit 0.56" 4-Digit 7-Segment Display w/I2C Backpack - Yellow](https://www.adafruit.com/product/879)
What's better than a single LED? Lots of LEDs! A fun way to make a small display is to use an [8x8 matrix](https://www.adafruit.com/category/37_88) or a [4-digit 7-segment display](https://www.adafruit.com/category/37_103). Matrices like these are...
In Stock
[Buy Now](https://www.adafruit.com/product/879)
[Related Guides to the Product](https://learn.adafruit.com/products/879/guides)
### Adafruit 0.56" 4-Digit 7-Segment Display w/ I2C Backpack - Green
[Adafruit 0.56" 4-Digit 7-Segment Display w/ I2C Backpack - Green](https://www.adafruit.com/product/880)
What's better than a single LED? Lots of LEDs! A fun way to make a small display is to use an [8x8 matrix](https://www.adafruit.com/category/37_88) or a [4-digit 7-segment display](https://www.adafruit.com/category/37_103). Matrices like these are...
No Longer Stocked
[Buy Now](https://www.adafruit.com/product/880)
[Related Guides to the Product](https://learn.adafruit.com/products/880/guides)
### Adafruit 0.56" 4-Digit 7-Segment Display w/ I2C Backpack - Blue
[Adafruit 0.56" 4-Digit 7-Segment Display w/ I2C Backpack - Blue](https://www.adafruit.com/product/881)
What's better than a single LED? Lots of LEDs! A fun way to make a small display is to use an [8x8 matrix](https://www.adafruit.com/category/37_88) or a [4-digit 7-segment display](https://www.adafruit.com/category/37_103). Matrices like these are...
In Stock
[Buy Now](https://www.adafruit.com/product/881)
[Related Guides to the Product](https://learn.adafruit.com/products/881/guides)
### Adafruit Bicolor LED Square Pixel Matrix with I2C Backpack
[Adafruit Bicolor LED Square Pixel Matrix with I2C Backpack](https://www.adafruit.com/product/902)
What's better than a single LED? Lots of LEDs! A fun way to make a small colorful display is to use a [1.2" Bi-color 8x8 LED Matrix](http://www.adafruit.com/products/458). Matrices like these are 'multiplexed' - so to control all the 128 LEDs you need 24 pins....
In Stock
[Buy Now](https://www.adafruit.com/product/902)
[Related Guides to the Product](https://learn.adafruit.com/products/902/guides)
### Adafruit Mini 8x8 LED Matrix w/I2C Backpack - Blue
[Adafruit Mini 8x8 LED Matrix w/I2C Backpack - Blue](https://www.adafruit.com/product/959)
What's better than a single LED? Lots of LEDs! A fun way to make a small display is to use an [8x8 matrix](https://www.adafruit.com/category/37_88) or a [4-digit 7-segment display](https://www.adafruit.com/category/37_103). Matrices like these are...
In Stock
[Buy Now](https://www.adafruit.com/product/959)
[Related Guides to the Product](https://learn.adafruit.com/products/959/guides)
### Adafruit 0.56" 4-Digit 7-Segment Display w/I2C Backpack - White
[Adafruit 0.56" 4-Digit 7-Segment Display w/I2C Backpack - White](https://www.adafruit.com/product/1002)
What's better than a single LED? Lots of LEDs! A fun way to make a small display is to use an [8x8 matrix](https://www.adafruit.com/category/37_88) or a [4-digit 7-segment display](https://www.adafruit.com/category/37_103). Matrices like these are...
In Stock
[Buy Now](https://www.adafruit.com/product/1002)
[Related Guides to the Product](https://learn.adafruit.com/products/1002/guides)
### Adafruit 1.2" 8x8 LED Matrix Backpack
[Adafruit 1.2" 8x8 LED Matrix Backpack](https://www.adafruit.com/product/1048)
By popular request, you can now get our 8x8 LED backpacks without the LEDs! These backpacks feature an HT16K33 I2C LED driver, they're simple and easy to use - you can use [our very nice library for the backpacks to...](https://github.com/adafruit/Adafruit-LED-Backpack-Library)
In Stock
[Buy Now](https://www.adafruit.com/product/1048)
[Related Guides to the Product](https://learn.adafruit.com/products/1048/guides)
### Adafruit Small 1.2" 8x8 LED Matrix w/I2C Backpack - Red
[Adafruit Small 1.2" 8x8 LED Matrix w/I2C Backpack - Red](https://www.adafruit.com/product/1049)
What's better than a single LED? Lots of LEDs! A fun way to make a small display is to use an [8x8 matrix](https://www.adafruit.com/category/37_88) or a [4-digit 7-segment display](https://www.adafruit.com/category/37_103). Matrices like these are...
In Stock
[Buy Now](https://www.adafruit.com/product/1049)
[Related Guides to the Product](https://learn.adafruit.com/products/1049/guides)
### Adafruit Small 1.2" 8x8 LED Matrix w/I2C Backpack - Yellow
[Adafruit Small 1.2" 8x8 LED Matrix w/I2C Backpack - Yellow](https://www.adafruit.com/product/1050)
What's better than a single LED? Lots of LEDs! A fun way to make a small display is to use an [8x8 matrix](https://www.adafruit.com/category/37_88) or a [4-digit 7-segment display](https://www.adafruit.com/category/37_103). Matrices like these are...
In Stock
[Buy Now](https://www.adafruit.com/product/1050)
[Related Guides to the Product](https://learn.adafruit.com/products/1050/guides)
### Adafruit Small 1.2" 8x8 LED Matrix w/I2C Backpack - Blue
[Adafruit Small 1.2" 8x8 LED Matrix w/I2C Backpack - Blue](https://www.adafruit.com/product/1052)
What's better than a single LED? Lots of LEDs! A fun way to make a small display is to use an [8x8 matrix](https://www.adafruit.com/category/37_88) or a [4-digit 7-segment display](https://www.adafruit.com/category/37_103). Matrices like these are...
In Stock
[Buy Now](https://www.adafruit.com/product/1052)
[Related Guides to the Product](https://learn.adafruit.com/products/1052/guides)
### Adafruit Mini 8x8 LED Matrix w/I2C Backpack - Ultra Bright White
[Adafruit Mini 8x8 LED Matrix w/I2C Backpack - Ultra Bright White](https://www.adafruit.com/product/1080)
What's better than a single LED? Lots of LEDs! A fun way to make a small display is to use an [8x8 matrix](https://www.adafruit.com/category/37_88) or a [4-digit 7-segment display](https://www.adafruit.com/category/37_103). Matrices like these are...
In Stock
[Buy Now](https://www.adafruit.com/product/1080)
[Related Guides to the Product](https://learn.adafruit.com/products/1080/guides)
### Adafruit 1.2" 4-Digit 7-Segment Display w/I2C Backpack - Green
[Adafruit 1.2" 4-Digit 7-Segment Display w/I2C Backpack - Green](https://www.adafruit.com/product/1268)
What's better than a single LED? Lots of LEDs! A fun way to make a numeric display is to use a [4-digit 7-segment display](https://www.adafruit.com/category/37_103). LED matrices like these are 'multiplexed' - so to control all the seven-segment LEDs you need 14 pins....
No Longer Stocked
[Buy Now](https://www.adafruit.com/product/1268)
[Related Guides to the Product](https://learn.adafruit.com/products/1268/guides)
### Adafruit 1.2" 4-Digit 7-Segment Display w/I2C Backpack - Yellow
[Adafruit 1.2" 4-Digit 7-Segment Display w/I2C Backpack - Yellow](https://www.adafruit.com/product/1269)
What's better than a single LED? Lots of LEDs! A fun way to make a numeric display is to use a [4-digit 7-segment display](https://www.adafruit.com/category/37_103). LED matrices like these are 'multiplexed' - so to control all the seven-segment LEDs you need 14 pins....
In Stock
[Buy Now](https://www.adafruit.com/product/1269)
[Related Guides to the Product](https://learn.adafruit.com/products/1269/guides)
### Adafruit 1.2" 4-Digit 7-Segment Display w/I2C Backpack - Red
[Adafruit 1.2" 4-Digit 7-Segment Display w/I2C Backpack - Red](https://www.adafruit.com/product/1270)
What's better than a single LED? Lots of LEDs! A fun way to make a numeric display is to use a [4-digit 7-segment display](https://www.adafruit.com/category/37_103). LED matrices like these are 'multiplexed' - so to control all the seven-segment LEDs you need 14 pins....
In Stock
[Buy Now](https://www.adafruit.com/product/1270)
[Related Guides to the Product](https://learn.adafruit.com/products/1270/guides)
### Small 1.2" 8x8 Ultra Bright White LED Matrix + Backpack
[Small 1.2" 8x8 Ultra Bright White LED Matrix + Backpack](https://www.adafruit.com/product/1614)
What's better than a single LED? Lots of LEDs! A fun way to make a small display is to use an [8x8 matrix](https://www.adafruit.com/category/37_88) or a [4-digit 7-segment display](https://www.adafruit.com/category/37_103). Matrices like these are...
In Stock
[Buy Now](https://www.adafruit.com/product/1614)
[Related Guides to the Product](https://learn.adafruit.com/products/1614/guides)
### Adafruit Small 1.2" 8x8 LED Matrix w/I2C Backpack - Pure Green
[Adafruit Small 1.2" 8x8 LED Matrix w/I2C Backpack - Pure Green](https://www.adafruit.com/product/1632)
What's better than a single LED? Lots of LEDs! A fun way to make a small display is to use an [8x8 matrix](https://www.adafruit.com/category/37_88) or a [4-digit 7-segment display](https://www.adafruit.com/category/37_103). Matrices like these are...
In Stock
[Buy Now](https://www.adafruit.com/product/1632)
[Related Guides to the Product](https://learn.adafruit.com/products/1632/guides)
### Adafruit Mini 0.8" 8x8 LED Matrix w/I2C Backpack - Pure Green
[Adafruit Mini 0.8" 8x8 LED Matrix w/I2C Backpack - Pure Green](https://www.adafruit.com/product/1633)
What's better than a single LED? Lots of LEDs! A fun way to make a small display is to use an [8x8 matrix](https://www.adafruit.com/category/37_88) or a [4-digit 7-segment display](https://www.adafruit.com/category/37_103). Matrices like these are...
In Stock
[Buy Now](https://www.adafruit.com/product/1633)
[Related Guides to the Product](https://learn.adafruit.com/products/1633/guides)
### Bi-Color (Red/Green) 24-Bar Bargraph w/I2C Backpack Kit
[Bi-Color (Red/Green) 24-Bar Bargraph w/I2C Backpack Kit](https://www.adafruit.com/product/1721)
What's better than a single LED? Lots of LEDs! A fun way to make a small linear display is to use two 12-bar Bi-color bar-graphs. However, this LED bargraph is 'multiplexed' - so to control all the 48 LEDs you need a lot of pins.
Out of Stock
[Buy Now](https://www.adafruit.com/product/1721)
[Related Guides to the Product](https://learn.adafruit.com/products/1721/guides)
### Small 1.2" 8x8 Ultra Bright Square Amber LED Matrix + Backpack
[Small 1.2" 8x8 Ultra Bright Square Amber LED Matrix + Backpack](https://www.adafruit.com/product/1854)
What's better than a single LED? Lots of LEDs! Matrices like these are 'multiplexed' - so to control 64 LEDs you need 16 pins. That's a lot of pins, and there are [driver chips like the MAX7219](//www.adafruit.com/products/453) that can control a matrix for you but...
In Stock
[Buy Now](https://www.adafruit.com/product/1854)
[Related Guides to the Product](https://learn.adafruit.com/products/1854/guides)
### Small 1.2" 8x8 Ultra Bright Square Yellow LED Matrix + Backpack
[Small 1.2" 8x8 Ultra Bright Square Yellow LED Matrix + Backpack](https://www.adafruit.com/product/1855)
What's better than a single LED? Lots of LEDs! Matrices like these are 'multiplexed' - so to control 64 LEDs you need 16 pins. That's a lot of pins, and there are [driver chips like the MAX7219](//www.adafruit.com/products/453) that can control a matrix for you but...
In Stock
[Buy Now](https://www.adafruit.com/product/1855)
[Related Guides to the Product](https://learn.adafruit.com/products/1855/guides)
### Small 1.2" 8x8 Bright Square Pure Green LED Matrix + Backpack
[Small 1.2" 8x8 Bright Square Pure Green LED Matrix + Backpack](https://www.adafruit.com/product/1856)
What's better than a single LED? Lots of LEDs! Matrices like these are 'multiplexed' - so to control 64 LEDs you need 16 pins. That's a lot of pins, and there are [driver chips like the MAX7219](//www.adafruit.com/products/453) that can control a matrix for you but...
In Stock
[Buy Now](https://www.adafruit.com/product/1856)
[Related Guides to the Product](https://learn.adafruit.com/products/1856/guides)
### Small 1.2" 8x8 Ultra Bright Square White LED Matrix + Backpack
[Small 1.2" 8x8 Ultra Bright Square White LED Matrix + Backpack](https://www.adafruit.com/product/1857)
What's better than a single LED? Lots of LEDs! Matrices like these are 'multiplexed' - so to control 64 LEDs you need 16 pins. That's a lot of pins, and there are [driver chips like the MAX7219](//www.adafruit.com/products/453) that can control a matrix for you but...
In Stock
[Buy Now](https://www.adafruit.com/product/1857)
[Related Guides to the Product](https://learn.adafruit.com/products/1857/guides)
### Adafruit 14-segment LED Alphanumeric Backpack - STEMMA QT
[Adafruit 14-segment LED Alphanumeric Backpack - STEMMA QT](https://www.adafruit.com/product/1910)
By popular request, you can now get our 14-segment LED backpacks without the LEDs! These backpacks feature an HT16K33 I2C LED driver, they're simple and easy to use - you can use [our very nice library for the backpacks to...](https://github.com/adafruit/Adafruit-LED-Backpack-Library)
In Stock
[Buy Now](https://www.adafruit.com/product/1910)
[Related Guides to the Product](https://learn.adafruit.com/products/1910/guides)
### Quad Alphanumeric Display - Red 0.54" Digits w/ I2C Backpack
[Quad Alphanumeric Display - Red 0.54" Digits w/ I2C Backpack](https://www.adafruit.com/product/1911)
Display, elegantly, 012345678 or 9! Gaze, hypnotized, at ABCDEFGHIJKLM - well it can display the whole alphabet. You get the point. This is a nice, bright alphanumeric display that shows letters and numbers in a beautiful red hue. It's super bright and designed for viewing from distances...
In Stock
[Buy Now](https://www.adafruit.com/product/1911)
[Related Guides to the Product](https://learn.adafruit.com/products/1911/guides)
### Quad Alphanumeric Display - Blue 0.54" Digits w/ I2C Backpack
[Quad Alphanumeric Display - Blue 0.54" Digits w/ I2C Backpack](https://www.adafruit.com/product/1912)
Display, elegantly, 012345678 or 9! Gaze, hypnotized, at ABCDEFGHIJKLM - well it can display the whole alphabet. You get the point. This is a nice, bright alphanumeric display that shows letters and numbers in a beautiful blue hue. It's super bright and designed for viewing from distances...
In Stock
[Buy Now](https://www.adafruit.com/product/1912)
[Related Guides to the Product](https://learn.adafruit.com/products/1912/guides)
### 16x8 1.2" LED Matrix + Backpack - Ultra Bright Round Green LEDs
[16x8 1.2" LED Matrix + Backpack - Ultra Bright Round Green LEDs](https://www.adafruit.com/product/2035)
What's better than a single LED? Lots of LEDs! And what's better than lots of LEDs? **TWO TIMES AS MANY LEDS!!!**
With the 16x8 LED Matrix Backpack we've doubled your project's matrix capacity by making it super easy to get two separate 8x8 matrices onto...
In Stock
[Buy Now](https://www.adafruit.com/product/2035)
[Related Guides to the Product](https://learn.adafruit.com/products/2035/guides)
### 16x8 1.2" LED Matrix+Backpack UltraBright Round YellowGreen LEDs
[16x8 1.2" LED Matrix+Backpack UltraBright Round YellowGreen LEDs](https://www.adafruit.com/product/2036)
What's better than a single LED? Lots of LEDs! And what's better than lots of LEDs? **TWO TIMES AS MANY LEDS!!!**
With the 16x8 LED Matrix Backpack we've doubled your project's matrix capacity by making it super easy to get two separate 8x8 matrices onto...
In Stock
[Buy Now](https://www.adafruit.com/product/2036)
[Related Guides to the Product](https://learn.adafruit.com/products/2036/guides)
### 16x8 1.2" LED Matrix + Backpack - Ultra Bright Round Red LEDs
[16x8 1.2" LED Matrix + Backpack - Ultra Bright Round Red LEDs](https://www.adafruit.com/product/2037)
What's better than a single LED? Lots of LEDs! And what's better than lots of LEDs? **TWO TIMES AS MANY LEDS!!!**
With the 16x8 LED Matrix Backpack we've doubled your project's matrix capacity by making it super easy to get two separate 8x8 matrices onto...
In Stock
[Buy Now](https://www.adafruit.com/product/2037)
[Related Guides to the Product](https://learn.adafruit.com/products/2037/guides)
### 16x8 1.2" LED Matrix + Backpack - Ultra Bright Round White LEDs
[16x8 1.2" LED Matrix + Backpack - Ultra Bright Round White LEDs](https://www.adafruit.com/product/2038)
What's better than a single LED? Lots of LEDs! And what's better than lots of LEDs? **TWO TIMES AS MANY LEDS!!!**
With the 16x8 LED Matrix Backpack we've doubled your project's matrix capacity by making it super easy to get two separate 8x8 matrices onto...
In Stock
[Buy Now](https://www.adafruit.com/product/2038)
[Related Guides to the Product](https://learn.adafruit.com/products/2038/guides)
### 16x8 1.2" LED Matrix + Backpack - Ultra Bright Round Blue LEDs
[16x8 1.2" LED Matrix + Backpack - Ultra Bright Round Blue LEDs](https://www.adafruit.com/product/2039)
What's better than a single LED? Lots of LEDs! And what's better than lots of LEDs? **TWO TIMES AS MANY LEDS!!!**
With the 16x8 LED Matrix Backpack we've doubled your project's matrix capacity by making it super easy to get two separate 8x8 matrices onto...
In Stock
[Buy Now](https://www.adafruit.com/product/2039)
[Related Guides to the Product](https://learn.adafruit.com/products/2039/guides)
### 16x8 1.2" LED Matrix + Backpack - Ultra Bright Square Blue LEDs
[16x8 1.2" LED Matrix + Backpack - Ultra Bright Square Blue LEDs](https://www.adafruit.com/product/2040)
What's better than a single LED? Lots of LEDs! And what's better than lots of LEDs? **TWO TIMES AS MANY LEDS!!!**
With the 16x8 LED Matrix Backpack we've doubled your project's matrix capacity by making it super easy to get two separate 8x8 matrices onto...
In Stock
[Buy Now](https://www.adafruit.com/product/2040)
[Related Guides to the Product](https://learn.adafruit.com/products/2040/guides)
### 16x8 1.2" LED Matrix + Backpack - Ultra Bright Square Amber LEDs
[16x8 1.2" LED Matrix + Backpack - Ultra Bright Square Amber LEDs](https://www.adafruit.com/product/2041)
What's better than a single LED? Lots of LEDs! And what's better than lots of LEDs? **TWO TIMES AS MANY LEDS!!!**
With the 16x8 LED Matrix Backpack we've doubled your project's matrix capacity by making it super easy to get two separate 8x8 matrices onto...
In Stock
[Buy Now](https://www.adafruit.com/product/2041)
[Related Guides to the Product](https://learn.adafruit.com/products/2041/guides)
### 16x8 1.2" LED Matrix + Backpack - Ultra Bright Square Green LEDs
[16x8 1.2" LED Matrix + Backpack - Ultra Bright Square Green LEDs](https://www.adafruit.com/product/2042)
What's better than a single LED? Lots of LEDs! And what's better than lots of LEDs? **TWO TIMES AS MANY LEDS!!!**
With the 16x8 LED Matrix Backpack we've doubled your project's matrix capacity by making it super easy to get two separate 8x8 matrices onto...
In Stock
[Buy Now](https://www.adafruit.com/product/2042)
[Related Guides to the Product](https://learn.adafruit.com/products/2042/guides)
### 16x8 1.2" LED Matrix + Backpack -Ultra Bright Square Yellow LEDs
[16x8 1.2" LED Matrix + Backpack -Ultra Bright Square Yellow LEDs](https://www.adafruit.com/product/2043)
What's better than a single LED? Lots of LEDs! And what's better than lots of LEDs? **TWO TIMES AS MANY LEDS!!!**
With the 16x8 LED Matrix Backpack we've doubled your project's matrix capacity by making it super easy to get two separate 8x8 matrices onto...
In Stock
[Buy Now](https://www.adafruit.com/product/2043)
[Related Guides to the Product](https://learn.adafruit.com/products/2043/guides)
### 16x8 1.2" LED Matrix + Backpack - Ultra Bright Square White LEDs
[16x8 1.2" LED Matrix + Backpack - Ultra Bright Square White LEDs](https://www.adafruit.com/product/2044)
What's better than a single LED? Lots of LEDs! And what's better than lots of LEDs? **TWO TIMES AS MANY LEDS!!!**
With the 16x8 LED Matrix Backpack we've doubled your project's matrix capacity by making it super easy to get two separate 8x8 matrices onto...
In Stock
[Buy Now](https://www.adafruit.com/product/2044)
[Related Guides to the Product](https://learn.adafruit.com/products/2044/guides)
### 16x8 1.2" LED Matrix + Backpack-Ultra Bright Round Orange LEDs
[16x8 1.2" LED Matrix + Backpack-Ultra Bright Round Orange LEDs](https://www.adafruit.com/product/2052)
What's better than a single LED? Lots of LEDs! And what's better than lots of LEDs? **TWO TIMES AS MANY LEDS!!!**
With the 16x8 LED Matrix Backpack we've doubled your project's matrix capacity by making it super easy to get two separate 8x8 matrices onto...
In Stock
[Buy Now](https://www.adafruit.com/product/2052)
[Related Guides to the Product](https://learn.adafruit.com/products/2052/guides)
### 16x8 1.2" LED Matrices+Backpack Round LEDs in Various Colors
[16x8 1.2" LED Matrices+Backpack Round LEDs in Various Colors](https://www.adafruit.com/product/2054)
What's better than a single LED? Lots of LEDs! And what's better than lots of LEDs? **TWO TIMES AS MANY LEDS!!!**
With the 16x8 LED Matrix Backpack we've doubled your project's matrix capacity by making it super easy to get two separate 8x8 matrices onto...
Out of Stock
[Buy Now](https://www.adafruit.com/product/2054)
[Related Guides to the Product](https://learn.adafruit.com/products/2054/guides)
### Adafruit 8x16 LED Matrix FeatherWing w/o Matrices
[Adafruit 8x16 LED Matrix FeatherWing w/o Matrices](https://www.adafruit.com/product/3090)
You will chirp with delight when you see how easy it is to make your very own 8x16 LED matrix display for any Feather. At 0.8" square, the little [8x8 matrices](https://www.adafruit.com/new/?q=8x8%20miniature%20LED%20matrix&) have everything a big LED matrix has,...
Out of Stock
[Buy Now](https://www.adafruit.com/product/3090)
[Related Guides to the Product](https://learn.adafruit.com/products/3090/guides)
### Adafruit 14-segment LED Alphanumeric backpack (same as P1910)
[Adafruit 14-segment LED Alphanumeric backpack (same as P1910)](https://www.adafruit.com/product/3322)
Just the backpack + 4pin header
No Longer Stocked
[Buy Now](https://www.adafruit.com/product/3322)
[Related Guides to the Product](https://learn.adafruit.com/products/3322/guides)
## Featured Products
### Adafruit Small 1.2" 8x8 LED Matrix w/I2C Backpack - Yellow-Green
[Adafruit Small 1.2" 8x8 LED Matrix w/I2C Backpack - Yellow-Green](https://www.adafruit.com/product/1051)
What's better than a single LED? Lots of LEDs! A fun way to make a small display is to use an [8x8 matrix](https://www.adafruit.com/category/37_88) or a [4-digit 7-segment display](https://www.adafruit.com/category/37_103). Matrices like these are...
In Stock
[Buy Now](https://www.adafruit.com/product/1051)
[Related Guides to the Product](https://learn.adafruit.com/products/1051/guides)
### Small 1.2" 8x8 Ultra Bright Square Blue LED Matrix + Backpack
[Small 1.2" 8x8 Ultra Bright Square Blue LED Matrix + Backpack](https://www.adafruit.com/product/1853)
What's better than a single LED? Lots of LEDs! Matrices like these are 'multiplexed' - so to control 64 LEDs you need 16 pins. That's a lot of pins, and there are [driver chips like the MAX7219](//www.adafruit.com/products/453) that can control a matrix for you but...
In Stock
[Buy Now](https://www.adafruit.com/product/1853)
[Related Guides to the Product](https://learn.adafruit.com/products/1853/guides)
## Related Guides
- [LED Backpack Displays on Raspberry Pi and BeagleBone Black](https://learn.adafruit.com/led-backpack-displays-on-raspberry-pi-and-beaglebone-black.md)
- [Animating Multiple LED Backpacks](https://learn.adafruit.com/animating-multiple-led-backpacks.md)
- [Arduino GPS Clock](https://learn.adafruit.com/arduino-clock.md)
- [Raspberry Pi Physical Dashboard](https://learn.adafruit.com/raspberry-pi-physical-dashboard.md)
- [CircuitPython Hardware: LED Backpacks & FeatherWings](https://learn.adafruit.com/micropython-hardware-led-backpacks-and-featherwings.md)
- [Matrix and 7-Segment LED Backpack with the Raspberry Pi](https://learn.adafruit.com/matrix-7-segment-led-backpack-with-the-raspberry-pi.md)
- [DIY Pocket LED Gamer - Tiny Tetris!](https://learn.adafruit.com/diy-3d-printed-handheld-pocket-game-tiny-tetris-snake.md)
- [RGB LED Matrix Cube with 25,000 LEDs](https://learn.adafruit.com/rgb-led-matrix-cube-for-pi.md)
- [Creating GIFs for SmartMatrix](https://learn.adafruit.com/creating-gifs-for-smartmatrix.md)
- [Adafruit CharliePlex LED Matrix Bonnet](https://learn.adafruit.com/adafruit-charlieplex-bonnet.md)
- [Connecting a 16x32 RGB LED Matrix Panel to a Raspberry Pi](https://learn.adafruit.com/connecting-a-16x32-rgb-led-matrix-panel-to-a-raspberry-pi.md)
- [MicroPython Displays: Drawing Text](https://learn.adafruit.com/micropython-displays-drawing-text.md)
- [Heart Rate Badge](https://learn.adafruit.com/heart-rate-badge.md)
- [16x24 LED Matrix](https://learn.adafruit.com/16x24-led-matrix.md)
- [Adafruit IS31FL3741](https://learn.adafruit.com/adafruit-is31fl3741.md)
---
# Source: https://learn.adafruit.com/adafruit-led-backpack/bi-color-8x8-matrix-circuitpython-and-python-usage.md
# Adafruit LED Backpacks
## CircuitPython and Python Usage
The following section will show how to control the LED backpack from the board's Python prompt / REPL. You'll walk through how to control the LED display and learn how to use the CircuitPython module built for the display.
First [connect to the board's serial REPL ](https://learn.adafruit.com/welcome-to-circuitpython/the-repl)so you are at the CircuitPython **\>\>\>** prompt.
## Initialization
First you'll need to initialize the I2C bus for your board. It's really easy, first import the necessary modules. In this case, we'll use `board` and `Matrix8x8x2`.
Then just use `board.I2C()` to create the I2C instance using the default SCL and SDA pins (which will be marked on the boards pins if using a Feather or similar Adafruit board).
Then to initialize the matrix, you just pass `i2c` in.
Warning: When using the STEMMA QT port, some board may have an alternate I2C such as board.STEMMA_I2C().
```python
import board
from adafruit_ht16k33.matrix import Matrix8x8x2
i2c = board.I2C()
matrix = Matrix8x8x2(i2c)
```
If you bridged the address pads on the back of the display, you could pass in the address. The addresses for the HT16K33 can range between 0x70 and 0x77 depending on which pads you have bridged, with 0x70 being used if you haven't bridged any of them. For instance, if you bridge only the **A0** pad, you would use `0x71` like this:
```python
matrix = Matrix8x8x2(i2c, address=0x71)
```
## Setting the Brightness
You can set the brightness of the display, but changing it will set the brightness of the entire display and not individual segments. If can be adjusted in 1/16 increments **between 0 and 1.0** with 1.0 being the brightest. So to set the display to half brightness, you would use the following:
```python
display.brightness = 0.5
```
## Setting the Blink Rate
You can set the blink rate of the display, but changing it will set the brightness of the entire display and not individual pixels. If can be adjusted in 1/4 increments **between 0 and 3** with 3 being the fastest blinking. So to set the display to blink at full speed, you would use the following:
```python
display.blink_rate = 3
```
## Setting Individual Pixels
To set individual pixels to specific colors, you simply treat the `matrix` object as a multidimensional list and set it to` matrix.LED_RED`,` matrix.LED_GREEN`,` matrix.LED_YELLOW` or` matrix.LED_OFF`.
```python
matrix[0, 0] = matrix.LED_RED
matrix[4, 4] = matrix.LED_GREEN
matrix[7, 7] = matrix.LED_YELLOW
matrix[7, 0] = matrix.LED_OFF
```

## Filling the Entire Matrix
To fill the entire matrix, just use the fill() function and pass in the color you want to set it to. For instance, if you wanted to set everything to green, you would use:
```python
matrix.fill(matrix.LED_GREEN)
```
## Shifting the Matrix
To shift the pixels on the matrix, there are 5 functions you can use. The main function, called shift(), is used to shift the pixels, up, down, left, right, or even diagonally. By passing a positive number, it will shift the pixels right/up and passing a negative number will shift them left/down. For instance:
```python
matrix.shift(2, 0) # shift pixels to the right by 2
matrix.shift(-1, 0) # shift pixels to the left by 1
matrix.shift(0, -3) # shift pixels down by 3
matrix.shift(-2, 2) # shift pixels left by 2 and up by 2
```
You can pass `True` as a third parameter to loop all the pixels that get shifted off over to the other side.
```python
matrix.shift(2, 0, True) # loop pixels to the right by 2
matrix.shift(-1, 0, True) # loop pixels to the left by 1
matrix.shift(0, -3, True) # loop pixels down by 3
matrix.shift(-2, 2, True) # loop pixels left by 2 and up by 2
```
Additionally, there are a few convenience functions that will shift the pixels by one. These can also be passed a value of `True` to loop the pixels.
```python
matrix.shift_up() # Shift pixels up
matrix.shift_left() # Shift pixels left
matrix.shift_down() # Shift pixels down
matrix.shift_right() # Shift pixels right
matrix.shift_up(True) # Loop pixels up
matrix.shift_left(True) # Loop pixels left
matrix.shift_down(True) # Loop pixels down
matrix.shift_right(True) # Loop pixels right
```
## Displaying an Image (Pillow Only)
Additionally, when using with the Raspberry Pi, you can use the Pillow library to display an image to the Matrix. The image will need to be the same exact size as the Matrix and should include pure Green, Red, or Yellow. Anything else will be considered to be **off**. In this case, it should be **8x8** pixels. As an example, you can save the image below as **myimage.png**.

[Download Image](https://cdn-learn.adafruit.com/assets/assets/000/087/755/original/led_matrices_squares-color.png?1580237815)
Then if you want to display the image called **myimage.png** , you would use something like this:
```python
import board
from PIL import Image
from adafruit_ht16k33 import matrix
matrix = matrix.Matrix8x8x2(board.I2C())
image = Image.open("myimage.png")
matrix.image(image)
```

- [Previous Page](https://learn.adafruit.com/adafruit-led-backpack/bi-color-8x8-matrix-python-wiring-and-setup.md)
- [Next Page](https://learn.adafruit.com/adafruit-led-backpack/bi-color-24-bargraph.md)
## Primary Products
### Adafruit Mini 8x8 LED Matrix w/I2C Backpack - Red
[Adafruit Mini 8x8 LED Matrix w/I2C Backpack - Red](https://www.adafruit.com/product/870)
What's better than a single LED? Lots of LEDs! A fun way to make a small display is to use an [8x8 matrix](https://www.adafruit.com/category/37_88) or a [4-digit 7-segment display](https://www.adafruit.com/category/37_103). Matrices like these are...
In Stock
[Buy Now](https://www.adafruit.com/product/870)
[Related Guides to the Product](https://learn.adafruit.com/products/870/guides)
### Adafruit Mini 8x8 LED Matrix w/I2C Backpack - Yellow
[Adafruit Mini 8x8 LED Matrix w/I2C Backpack - Yellow](https://www.adafruit.com/product/871)
What's better than a single LED? Lots of LEDs! A fun way to make a small display is to use an [8x8 matrix](https://www.adafruit.com/category/37_88) or a [4-digit 7-segment display](https://www.adafruit.com/category/37_103). Matrices like these are...
In Stock
[Buy Now](https://www.adafruit.com/product/871)
[Related Guides to the Product](https://learn.adafruit.com/products/871/guides)
### Adafruit Mini 0.8" 8x8 LED Matrix w/I2C Backpack - Yellow-Green
[Adafruit Mini 0.8" 8x8 LED Matrix w/I2C Backpack - Yellow-Green](https://www.adafruit.com/product/872)
What's better than a single LED? Lots of LEDs! A fun way to make a small display is to use an [8x8 matrix](https://www.adafruit.com/category/37_88) or a [4-digit 7-segment display](https://www.adafruit.com/category/37_103). Matrices like these are...
In Stock
[Buy Now](https://www.adafruit.com/product/872)
[Related Guides to the Product](https://learn.adafruit.com/products/872/guides)
### Adafruit 0.56" 4-Digit 7-Segment Display with I2C Backpack - Red
[Adafruit 0.56" 4-Digit 7-Segment Display with I2C Backpack - Red](https://www.adafruit.com/product/878)
What's better than a single LED? Lots of LEDs! A fun way to make a small display is to use an [8x8 matrix](https://www.adafruit.com/category/37_88) or a [4-digit 7-segment display](https://www.adafruit.com/category/37_103). Matrices like these are...
In Stock
[Buy Now](https://www.adafruit.com/product/878)
[Related Guides to the Product](https://learn.adafruit.com/products/878/guides)
### Adafruit 0.56" 4-Digit 7-Segment Display w/I2C Backpack - Yellow
[Adafruit 0.56" 4-Digit 7-Segment Display w/I2C Backpack - Yellow](https://www.adafruit.com/product/879)
What's better than a single LED? Lots of LEDs! A fun way to make a small display is to use an [8x8 matrix](https://www.adafruit.com/category/37_88) or a [4-digit 7-segment display](https://www.adafruit.com/category/37_103). Matrices like these are...
In Stock
[Buy Now](https://www.adafruit.com/product/879)
[Related Guides to the Product](https://learn.adafruit.com/products/879/guides)
### Adafruit 0.56" 4-Digit 7-Segment Display w/ I2C Backpack - Green
[Adafruit 0.56" 4-Digit 7-Segment Display w/ I2C Backpack - Green](https://www.adafruit.com/product/880)
What's better than a single LED? Lots of LEDs! A fun way to make a small display is to use an [8x8 matrix](https://www.adafruit.com/category/37_88) or a [4-digit 7-segment display](https://www.adafruit.com/category/37_103). Matrices like these are...
No Longer Stocked
[Buy Now](https://www.adafruit.com/product/880)
[Related Guides to the Product](https://learn.adafruit.com/products/880/guides)
### Adafruit 0.56" 4-Digit 7-Segment Display w/ I2C Backpack - Blue
[Adafruit 0.56" 4-Digit 7-Segment Display w/ I2C Backpack - Blue](https://www.adafruit.com/product/881)
What's better than a single LED? Lots of LEDs! A fun way to make a small display is to use an [8x8 matrix](https://www.adafruit.com/category/37_88) or a [4-digit 7-segment display](https://www.adafruit.com/category/37_103). Matrices like these are...
In Stock
[Buy Now](https://www.adafruit.com/product/881)
[Related Guides to the Product](https://learn.adafruit.com/products/881/guides)
### Adafruit Bicolor LED Square Pixel Matrix with I2C Backpack
[Adafruit Bicolor LED Square Pixel Matrix with I2C Backpack](https://www.adafruit.com/product/902)
What's better than a single LED? Lots of LEDs! A fun way to make a small colorful display is to use a [1.2" Bi-color 8x8 LED Matrix](http://www.adafruit.com/products/458). Matrices like these are 'multiplexed' - so to control all the 128 LEDs you need 24 pins....
In Stock
[Buy Now](https://www.adafruit.com/product/902)
[Related Guides to the Product](https://learn.adafruit.com/products/902/guides)
### Adafruit Mini 8x8 LED Matrix w/I2C Backpack - Blue
[Adafruit Mini 8x8 LED Matrix w/I2C Backpack - Blue](https://www.adafruit.com/product/959)
What's better than a single LED? Lots of LEDs! A fun way to make a small display is to use an [8x8 matrix](https://www.adafruit.com/category/37_88) or a [4-digit 7-segment display](https://www.adafruit.com/category/37_103). Matrices like these are...
In Stock
[Buy Now](https://www.adafruit.com/product/959)
[Related Guides to the Product](https://learn.adafruit.com/products/959/guides)
### Adafruit 0.56" 4-Digit 7-Segment Display w/I2C Backpack - White
[Adafruit 0.56" 4-Digit 7-Segment Display w/I2C Backpack - White](https://www.adafruit.com/product/1002)
What's better than a single LED? Lots of LEDs! A fun way to make a small display is to use an [8x8 matrix](https://www.adafruit.com/category/37_88) or a [4-digit 7-segment display](https://www.adafruit.com/category/37_103). Matrices like these are...
In Stock
[Buy Now](https://www.adafruit.com/product/1002)
[Related Guides to the Product](https://learn.adafruit.com/products/1002/guides)
### Adafruit 1.2" 8x8 LED Matrix Backpack
[Adafruit 1.2" 8x8 LED Matrix Backpack](https://www.adafruit.com/product/1048)
By popular request, you can now get our 8x8 LED backpacks without the LEDs! These backpacks feature an HT16K33 I2C LED driver, they're simple and easy to use - you can use [our very nice library for the backpacks to...](https://github.com/adafruit/Adafruit-LED-Backpack-Library)
In Stock
[Buy Now](https://www.adafruit.com/product/1048)
[Related Guides to the Product](https://learn.adafruit.com/products/1048/guides)
### Adafruit Small 1.2" 8x8 LED Matrix w/I2C Backpack - Red
[Adafruit Small 1.2" 8x8 LED Matrix w/I2C Backpack - Red](https://www.adafruit.com/product/1049)
What's better than a single LED? Lots of LEDs! A fun way to make a small display is to use an [8x8 matrix](https://www.adafruit.com/category/37_88) or a [4-digit 7-segment display](https://www.adafruit.com/category/37_103). Matrices like these are...
In Stock
[Buy Now](https://www.adafruit.com/product/1049)
[Related Guides to the Product](https://learn.adafruit.com/products/1049/guides)
### Adafruit Small 1.2" 8x8 LED Matrix w/I2C Backpack - Yellow
[Adafruit Small 1.2" 8x8 LED Matrix w/I2C Backpack - Yellow](https://www.adafruit.com/product/1050)
What's better than a single LED? Lots of LEDs! A fun way to make a small display is to use an [8x8 matrix](https://www.adafruit.com/category/37_88) or a [4-digit 7-segment display](https://www.adafruit.com/category/37_103). Matrices like these are...
In Stock
[Buy Now](https://www.adafruit.com/product/1050)
[Related Guides to the Product](https://learn.adafruit.com/products/1050/guides)
### Adafruit Small 1.2" 8x8 LED Matrix w/I2C Backpack - Blue
[Adafruit Small 1.2" 8x8 LED Matrix w/I2C Backpack - Blue](https://www.adafruit.com/product/1052)
What's better than a single LED? Lots of LEDs! A fun way to make a small display is to use an [8x8 matrix](https://www.adafruit.com/category/37_88) or a [4-digit 7-segment display](https://www.adafruit.com/category/37_103). Matrices like these are...
In Stock
[Buy Now](https://www.adafruit.com/product/1052)
[Related Guides to the Product](https://learn.adafruit.com/products/1052/guides)
### Adafruit Mini 8x8 LED Matrix w/I2C Backpack - Ultra Bright White
[Adafruit Mini 8x8 LED Matrix w/I2C Backpack - Ultra Bright White](https://www.adafruit.com/product/1080)
What's better than a single LED? Lots of LEDs! A fun way to make a small display is to use an [8x8 matrix](https://www.adafruit.com/category/37_88) or a [4-digit 7-segment display](https://www.adafruit.com/category/37_103). Matrices like these are...
In Stock
[Buy Now](https://www.adafruit.com/product/1080)
[Related Guides to the Product](https://learn.adafruit.com/products/1080/guides)
### Adafruit 1.2" 4-Digit 7-Segment Display w/I2C Backpack - Green
[Adafruit 1.2" 4-Digit 7-Segment Display w/I2C Backpack - Green](https://www.adafruit.com/product/1268)
What's better than a single LED? Lots of LEDs! A fun way to make a numeric display is to use a [4-digit 7-segment display](https://www.adafruit.com/category/37_103). LED matrices like these are 'multiplexed' - so to control all the seven-segment LEDs you need 14 pins....
No Longer Stocked
[Buy Now](https://www.adafruit.com/product/1268)
[Related Guides to the Product](https://learn.adafruit.com/products/1268/guides)
### Adafruit 1.2" 4-Digit 7-Segment Display w/I2C Backpack - Yellow
[Adafruit 1.2" 4-Digit 7-Segment Display w/I2C Backpack - Yellow](https://www.adafruit.com/product/1269)
What's better than a single LED? Lots of LEDs! A fun way to make a numeric display is to use a [4-digit 7-segment display](https://www.adafruit.com/category/37_103). LED matrices like these are 'multiplexed' - so to control all the seven-segment LEDs you need 14 pins....
In Stock
[Buy Now](https://www.adafruit.com/product/1269)
[Related Guides to the Product](https://learn.adafruit.com/products/1269/guides)
### Adafruit 1.2" 4-Digit 7-Segment Display w/I2C Backpack - Red
[Adafruit 1.2" 4-Digit 7-Segment Display w/I2C Backpack - Red](https://www.adafruit.com/product/1270)
What's better than a single LED? Lots of LEDs! A fun way to make a numeric display is to use a [4-digit 7-segment display](https://www.adafruit.com/category/37_103). LED matrices like these are 'multiplexed' - so to control all the seven-segment LEDs you need 14 pins....
In Stock
[Buy Now](https://www.adafruit.com/product/1270)
[Related Guides to the Product](https://learn.adafruit.com/products/1270/guides)
### Small 1.2" 8x8 Ultra Bright White LED Matrix + Backpack
[Small 1.2" 8x8 Ultra Bright White LED Matrix + Backpack](https://www.adafruit.com/product/1614)
What's better than a single LED? Lots of LEDs! A fun way to make a small display is to use an [8x8 matrix](https://www.adafruit.com/category/37_88) or a [4-digit 7-segment display](https://www.adafruit.com/category/37_103). Matrices like these are...
In Stock
[Buy Now](https://www.adafruit.com/product/1614)
[Related Guides to the Product](https://learn.adafruit.com/products/1614/guides)
### Adafruit Small 1.2" 8x8 LED Matrix w/I2C Backpack - Pure Green
[Adafruit Small 1.2" 8x8 LED Matrix w/I2C Backpack - Pure Green](https://www.adafruit.com/product/1632)
What's better than a single LED? Lots of LEDs! A fun way to make a small display is to use an [8x8 matrix](https://www.adafruit.com/category/37_88) or a [4-digit 7-segment display](https://www.adafruit.com/category/37_103). Matrices like these are...
In Stock
[Buy Now](https://www.adafruit.com/product/1632)
[Related Guides to the Product](https://learn.adafruit.com/products/1632/guides)
### Adafruit Mini 0.8" 8x8 LED Matrix w/I2C Backpack - Pure Green
[Adafruit Mini 0.8" 8x8 LED Matrix w/I2C Backpack - Pure Green](https://www.adafruit.com/product/1633)
What's better than a single LED? Lots of LEDs! A fun way to make a small display is to use an [8x8 matrix](https://www.adafruit.com/category/37_88) or a [4-digit 7-segment display](https://www.adafruit.com/category/37_103). Matrices like these are...
In Stock
[Buy Now](https://www.adafruit.com/product/1633)
[Related Guides to the Product](https://learn.adafruit.com/products/1633/guides)
### Bi-Color (Red/Green) 24-Bar Bargraph w/I2C Backpack Kit
[Bi-Color (Red/Green) 24-Bar Bargraph w/I2C Backpack Kit](https://www.adafruit.com/product/1721)
What's better than a single LED? Lots of LEDs! A fun way to make a small linear display is to use two 12-bar Bi-color bar-graphs. However, this LED bargraph is 'multiplexed' - so to control all the 48 LEDs you need a lot of pins.
Out of Stock
[Buy Now](https://www.adafruit.com/product/1721)
[Related Guides to the Product](https://learn.adafruit.com/products/1721/guides)
### Small 1.2" 8x8 Ultra Bright Square Amber LED Matrix + Backpack
[Small 1.2" 8x8 Ultra Bright Square Amber LED Matrix + Backpack](https://www.adafruit.com/product/1854)
What's better than a single LED? Lots of LEDs! Matrices like these are 'multiplexed' - so to control 64 LEDs you need 16 pins. That's a lot of pins, and there are [driver chips like the MAX7219](//www.adafruit.com/products/453) that can control a matrix for you but...
In Stock
[Buy Now](https://www.adafruit.com/product/1854)
[Related Guides to the Product](https://learn.adafruit.com/products/1854/guides)
### Small 1.2" 8x8 Ultra Bright Square Yellow LED Matrix + Backpack
[Small 1.2" 8x8 Ultra Bright Square Yellow LED Matrix + Backpack](https://www.adafruit.com/product/1855)
What's better than a single LED? Lots of LEDs! Matrices like these are 'multiplexed' - so to control 64 LEDs you need 16 pins. That's a lot of pins, and there are [driver chips like the MAX7219](//www.adafruit.com/products/453) that can control a matrix for you but...
In Stock
[Buy Now](https://www.adafruit.com/product/1855)
[Related Guides to the Product](https://learn.adafruit.com/products/1855/guides)
### Small 1.2" 8x8 Bright Square Pure Green LED Matrix + Backpack
[Small 1.2" 8x8 Bright Square Pure Green LED Matrix + Backpack](https://www.adafruit.com/product/1856)
What's better than a single LED? Lots of LEDs! Matrices like these are 'multiplexed' - so to control 64 LEDs you need 16 pins. That's a lot of pins, and there are [driver chips like the MAX7219](//www.adafruit.com/products/453) that can control a matrix for you but...
In Stock
[Buy Now](https://www.adafruit.com/product/1856)
[Related Guides to the Product](https://learn.adafruit.com/products/1856/guides)
### Small 1.2" 8x8 Ultra Bright Square White LED Matrix + Backpack
[Small 1.2" 8x8 Ultra Bright Square White LED Matrix + Backpack](https://www.adafruit.com/product/1857)
What's better than a single LED? Lots of LEDs! Matrices like these are 'multiplexed' - so to control 64 LEDs you need 16 pins. That's a lot of pins, and there are [driver chips like the MAX7219](//www.adafruit.com/products/453) that can control a matrix for you but...
In Stock
[Buy Now](https://www.adafruit.com/product/1857)
[Related Guides to the Product](https://learn.adafruit.com/products/1857/guides)
### Adafruit 14-segment LED Alphanumeric Backpack - STEMMA QT
[Adafruit 14-segment LED Alphanumeric Backpack - STEMMA QT](https://www.adafruit.com/product/1910)
By popular request, you can now get our 14-segment LED backpacks without the LEDs! These backpacks feature an HT16K33 I2C LED driver, they're simple and easy to use - you can use [our very nice library for the backpacks to...](https://github.com/adafruit/Adafruit-LED-Backpack-Library)
In Stock
[Buy Now](https://www.adafruit.com/product/1910)
[Related Guides to the Product](https://learn.adafruit.com/products/1910/guides)
### Quad Alphanumeric Display - Red 0.54" Digits w/ I2C Backpack
[Quad Alphanumeric Display - Red 0.54" Digits w/ I2C Backpack](https://www.adafruit.com/product/1911)
Display, elegantly, 012345678 or 9! Gaze, hypnotized, at ABCDEFGHIJKLM - well it can display the whole alphabet. You get the point. This is a nice, bright alphanumeric display that shows letters and numbers in a beautiful red hue. It's super bright and designed for viewing from distances...
In Stock
[Buy Now](https://www.adafruit.com/product/1911)
[Related Guides to the Product](https://learn.adafruit.com/products/1911/guides)
### Quad Alphanumeric Display - Blue 0.54" Digits w/ I2C Backpack
[Quad Alphanumeric Display - Blue 0.54" Digits w/ I2C Backpack](https://www.adafruit.com/product/1912)
Display, elegantly, 012345678 or 9! Gaze, hypnotized, at ABCDEFGHIJKLM - well it can display the whole alphabet. You get the point. This is a nice, bright alphanumeric display that shows letters and numbers in a beautiful blue hue. It's super bright and designed for viewing from distances...
In Stock
[Buy Now](https://www.adafruit.com/product/1912)
[Related Guides to the Product](https://learn.adafruit.com/products/1912/guides)
### 16x8 1.2" LED Matrix + Backpack - Ultra Bright Round Green LEDs
[16x8 1.2" LED Matrix + Backpack - Ultra Bright Round Green LEDs](https://www.adafruit.com/product/2035)
What's better than a single LED? Lots of LEDs! And what's better than lots of LEDs? **TWO TIMES AS MANY LEDS!!!**
With the 16x8 LED Matrix Backpack we've doubled your project's matrix capacity by making it super easy to get two separate 8x8 matrices onto...
In Stock
[Buy Now](https://www.adafruit.com/product/2035)
[Related Guides to the Product](https://learn.adafruit.com/products/2035/guides)
### 16x8 1.2" LED Matrix+Backpack UltraBright Round YellowGreen LEDs
[16x8 1.2" LED Matrix+Backpack UltraBright Round YellowGreen LEDs](https://www.adafruit.com/product/2036)
What's better than a single LED? Lots of LEDs! And what's better than lots of LEDs? **TWO TIMES AS MANY LEDS!!!**
With the 16x8 LED Matrix Backpack we've doubled your project's matrix capacity by making it super easy to get two separate 8x8 matrices onto...
In Stock
[Buy Now](https://www.adafruit.com/product/2036)
[Related Guides to the Product](https://learn.adafruit.com/products/2036/guides)
### 16x8 1.2" LED Matrix + Backpack - Ultra Bright Round Red LEDs
[16x8 1.2" LED Matrix + Backpack - Ultra Bright Round Red LEDs](https://www.adafruit.com/product/2037)
What's better than a single LED? Lots of LEDs! And what's better than lots of LEDs? **TWO TIMES AS MANY LEDS!!!**
With the 16x8 LED Matrix Backpack we've doubled your project's matrix capacity by making it super easy to get two separate 8x8 matrices onto...
In Stock
[Buy Now](https://www.adafruit.com/product/2037)
[Related Guides to the Product](https://learn.adafruit.com/products/2037/guides)
### 16x8 1.2" LED Matrix + Backpack - Ultra Bright Round White LEDs
[16x8 1.2" LED Matrix + Backpack - Ultra Bright Round White LEDs](https://www.adafruit.com/product/2038)
What's better than a single LED? Lots of LEDs! And what's better than lots of LEDs? **TWO TIMES AS MANY LEDS!!!**
With the 16x8 LED Matrix Backpack we've doubled your project's matrix capacity by making it super easy to get two separate 8x8 matrices onto...
In Stock
[Buy Now](https://www.adafruit.com/product/2038)
[Related Guides to the Product](https://learn.adafruit.com/products/2038/guides)
### 16x8 1.2" LED Matrix + Backpack - Ultra Bright Round Blue LEDs
[16x8 1.2" LED Matrix + Backpack - Ultra Bright Round Blue LEDs](https://www.adafruit.com/product/2039)
What's better than a single LED? Lots of LEDs! And what's better than lots of LEDs? **TWO TIMES AS MANY LEDS!!!**
With the 16x8 LED Matrix Backpack we've doubled your project's matrix capacity by making it super easy to get two separate 8x8 matrices onto...
In Stock
[Buy Now](https://www.adafruit.com/product/2039)
[Related Guides to the Product](https://learn.adafruit.com/products/2039/guides)
### 16x8 1.2" LED Matrix + Backpack - Ultra Bright Square Blue LEDs
[16x8 1.2" LED Matrix + Backpack - Ultra Bright Square Blue LEDs](https://www.adafruit.com/product/2040)
What's better than a single LED? Lots of LEDs! And what's better than lots of LEDs? **TWO TIMES AS MANY LEDS!!!**
With the 16x8 LED Matrix Backpack we've doubled your project's matrix capacity by making it super easy to get two separate 8x8 matrices onto...
In Stock
[Buy Now](https://www.adafruit.com/product/2040)
[Related Guides to the Product](https://learn.adafruit.com/products/2040/guides)
### 16x8 1.2" LED Matrix + Backpack - Ultra Bright Square Amber LEDs
[16x8 1.2" LED Matrix + Backpack - Ultra Bright Square Amber LEDs](https://www.adafruit.com/product/2041)
What's better than a single LED? Lots of LEDs! And what's better than lots of LEDs? **TWO TIMES AS MANY LEDS!!!**
With the 16x8 LED Matrix Backpack we've doubled your project's matrix capacity by making it super easy to get two separate 8x8 matrices onto...
In Stock
[Buy Now](https://www.adafruit.com/product/2041)
[Related Guides to the Product](https://learn.adafruit.com/products/2041/guides)
### 16x8 1.2" LED Matrix + Backpack - Ultra Bright Square Green LEDs
[16x8 1.2" LED Matrix + Backpack - Ultra Bright Square Green LEDs](https://www.adafruit.com/product/2042)
What's better than a single LED? Lots of LEDs! And what's better than lots of LEDs? **TWO TIMES AS MANY LEDS!!!**
With the 16x8 LED Matrix Backpack we've doubled your project's matrix capacity by making it super easy to get two separate 8x8 matrices onto...
In Stock
[Buy Now](https://www.adafruit.com/product/2042)
[Related Guides to the Product](https://learn.adafruit.com/products/2042/guides)
### 16x8 1.2" LED Matrix + Backpack -Ultra Bright Square Yellow LEDs
[16x8 1.2" LED Matrix + Backpack -Ultra Bright Square Yellow LEDs](https://www.adafruit.com/product/2043)
What's better than a single LED? Lots of LEDs! And what's better than lots of LEDs? **TWO TIMES AS MANY LEDS!!!**
With the 16x8 LED Matrix Backpack we've doubled your project's matrix capacity by making it super easy to get two separate 8x8 matrices onto...
In Stock
[Buy Now](https://www.adafruit.com/product/2043)
[Related Guides to the Product](https://learn.adafruit.com/products/2043/guides)
### 16x8 1.2" LED Matrix + Backpack - Ultra Bright Square White LEDs
[16x8 1.2" LED Matrix + Backpack - Ultra Bright Square White LEDs](https://www.adafruit.com/product/2044)
What's better than a single LED? Lots of LEDs! And what's better than lots of LEDs? **TWO TIMES AS MANY LEDS!!!**
With the 16x8 LED Matrix Backpack we've doubled your project's matrix capacity by making it super easy to get two separate 8x8 matrices onto...
In Stock
[Buy Now](https://www.adafruit.com/product/2044)
[Related Guides to the Product](https://learn.adafruit.com/products/2044/guides)
### 16x8 1.2" LED Matrix + Backpack-Ultra Bright Round Orange LEDs
[16x8 1.2" LED Matrix + Backpack-Ultra Bright Round Orange LEDs](https://www.adafruit.com/product/2052)
What's better than a single LED? Lots of LEDs! And what's better than lots of LEDs? **TWO TIMES AS MANY LEDS!!!**
With the 16x8 LED Matrix Backpack we've doubled your project's matrix capacity by making it super easy to get two separate 8x8 matrices onto...
In Stock
[Buy Now](https://www.adafruit.com/product/2052)
[Related Guides to the Product](https://learn.adafruit.com/products/2052/guides)
### 16x8 1.2" LED Matrices+Backpack Round LEDs in Various Colors
[16x8 1.2" LED Matrices+Backpack Round LEDs in Various Colors](https://www.adafruit.com/product/2054)
What's better than a single LED? Lots of LEDs! And what's better than lots of LEDs? **TWO TIMES AS MANY LEDS!!!**
With the 16x8 LED Matrix Backpack we've doubled your project's matrix capacity by making it super easy to get two separate 8x8 matrices onto...
Out of Stock
[Buy Now](https://www.adafruit.com/product/2054)
[Related Guides to the Product](https://learn.adafruit.com/products/2054/guides)
### Adafruit 8x16 LED Matrix FeatherWing w/o Matrices
[Adafruit 8x16 LED Matrix FeatherWing w/o Matrices](https://www.adafruit.com/product/3090)
You will chirp with delight when you see how easy it is to make your very own 8x16 LED matrix display for any Feather. At 0.8" square, the little [8x8 matrices](https://www.adafruit.com/new/?q=8x8%20miniature%20LED%20matrix&) have everything a big LED matrix has,...
Out of Stock
[Buy Now](https://www.adafruit.com/product/3090)
[Related Guides to the Product](https://learn.adafruit.com/products/3090/guides)
### Adafruit 14-segment LED Alphanumeric backpack (same as P1910)
[Adafruit 14-segment LED Alphanumeric backpack (same as P1910)](https://www.adafruit.com/product/3322)
Just the backpack + 4pin header
No Longer Stocked
[Buy Now](https://www.adafruit.com/product/3322)
[Related Guides to the Product](https://learn.adafruit.com/products/3322/guides)
## Featured Products
### Adafruit Small 1.2" 8x8 LED Matrix w/I2C Backpack - Yellow-Green
[Adafruit Small 1.2" 8x8 LED Matrix w/I2C Backpack - Yellow-Green](https://www.adafruit.com/product/1051)
What's better than a single LED? Lots of LEDs! A fun way to make a small display is to use an [8x8 matrix](https://www.adafruit.com/category/37_88) or a [4-digit 7-segment display](https://www.adafruit.com/category/37_103). Matrices like these are...
In Stock
[Buy Now](https://www.adafruit.com/product/1051)
[Related Guides to the Product](https://learn.adafruit.com/products/1051/guides)
### Small 1.2" 8x8 Ultra Bright Square Blue LED Matrix + Backpack
[Small 1.2" 8x8 Ultra Bright Square Blue LED Matrix + Backpack](https://www.adafruit.com/product/1853)
What's better than a single LED? Lots of LEDs! Matrices like these are 'multiplexed' - so to control 64 LEDs you need 16 pins. That's a lot of pins, and there are [driver chips like the MAX7219](//www.adafruit.com/products/453) that can control a matrix for you but...
In Stock
[Buy Now](https://www.adafruit.com/product/1853)
[Related Guides to the Product](https://learn.adafruit.com/products/1853/guides)
## Related Guides
- [LED Backpack Displays on Raspberry Pi and BeagleBone Black](https://learn.adafruit.com/led-backpack-displays-on-raspberry-pi-and-beaglebone-black.md)
- [Animating Multiple LED Backpacks](https://learn.adafruit.com/animating-multiple-led-backpacks.md)
- [Arduino GPS Clock](https://learn.adafruit.com/arduino-clock.md)
- [Raspberry Pi Physical Dashboard](https://learn.adafruit.com/raspberry-pi-physical-dashboard.md)
- [CircuitPython Hardware: LED Backpacks & FeatherWings](https://learn.adafruit.com/micropython-hardware-led-backpacks-and-featherwings.md)
- [Matrix and 7-Segment LED Backpack with the Raspberry Pi](https://learn.adafruit.com/matrix-7-segment-led-backpack-with-the-raspberry-pi.md)
- [DIY Pocket LED Gamer - Tiny Tetris!](https://learn.adafruit.com/diy-3d-printed-handheld-pocket-game-tiny-tetris-snake.md)
- [RGB LED Matrix Cube with 25,000 LEDs](https://learn.adafruit.com/rgb-led-matrix-cube-for-pi.md)
- [Creating GIFs for SmartMatrix](https://learn.adafruit.com/creating-gifs-for-smartmatrix.md)
- [Adafruit CharliePlex LED Matrix Bonnet](https://learn.adafruit.com/adafruit-charlieplex-bonnet.md)
- [Connecting a 16x32 RGB LED Matrix Panel to a Raspberry Pi](https://learn.adafruit.com/connecting-a-16x32-rgb-led-matrix-panel-to-a-raspberry-pi.md)
- [MicroPython Displays: Drawing Text](https://learn.adafruit.com/micropython-displays-drawing-text.md)
- [Heart Rate Badge](https://learn.adafruit.com/heart-rate-badge.md)
- [16x24 LED Matrix](https://learn.adafruit.com/16x24-led-matrix.md)
- [Adafruit IS31FL3741](https://learn.adafruit.com/adafruit-is31fl3741.md)
---
# Source: https://learn.adafruit.com/adafruit-led-backpack/bi-color-8x8-matrix-circuitpython-wiring-and-setup.md
# Adafruit LED Backpacks
## CircuitPython Wiring and Setup
# Wiring
It's easy to use LED Matrices with CircuitPython and the [Adafruit CircuitPython HT16K33](https://github.com/adafruit/Adafruit_CircuitPython_HT16K33) library. This module allows you to easily write CircuitPython code to control the display.
You can use this sensor with any CircuitPython microcontroller board.
We'll cover how to wire the LED Matrix to your CircuitPython microcontroller board. First assemble your LED Matrix.
Connect the LED Matrix to your microcontroller board as shown below.
- **Microcontroller 3V ** to **LED Matrix VIN**
- **Microcontroller GND ** to **LED Matrix GND**
- **Microcontroller SCL ** to **LED Matrix SCL**
- **Microcontroller SDA ** to **LED Matrix SDA**

[Download Fritzing Object](https://cdn-learn.adafruit.com/assets/assets/000/087/076/original/feather-m4-bicolor-8x8.fzz?1579290455)
# Library Setup
To use the LED backpack with your [Adafruit CircuitPython](https://learn.adafruit.com/welcome-to-circuitpython/overview) board you'll need to install the [Adafruit\_CircuitPython\_HT16K33](https://github.com/adafruit/Adafruit_CircuitPython_HT16K33) library on your board.
First make sure you are running the [latest version of Adafruit CircuitPython](https://github.com/adafruit/circuitpython/releases) for your board. Next you'll need to install the necessary libraries to use the hardware--read below and carefully follow the referenced steps to find and install these libraries from [Adafruit's CircuitPython library bundle](https://github.com/adafruit/Adafruit_CircuitPython_Bundle).
## Bundle Install
For express boards that have extra flash storage, like the Feather/Metro M0 express and Circuit Playground express, you can easily install the necessary libraries with [Adafruit's CircuitPython bundle](https://github.com/adafruit/Adafruit_CircuitPython_Bundle). This is an all-in-one package that includes the necessary libraries to use the LED backpack display with CircuitPython. For details on installing the bundle, read about [CircuitPython Libraries](https://learn.adafruit.com/welcome-to-circuitpython/circuitpython-libraries).
Remember for non-express boards like the Trinket M0, Gemma M0, and Feather/Metro M0 basic you'll need to [manually install the necessary libraries](https://learn.adafruit.com/welcome-to-circuitpython/circuitpython-libraries#non-express-boards-11-13) from the bundle:
- **adafruit\_ht16k33**
- **adafruit\_bus\_device**
If your board supports USB mass storage, like the M0-based boards, then simply drag the files to the board's file system. **Note on boards without external SPI flash, like a Feather M0 or Trinket/Gemma M0, you might run into issues on Mac OSX with hidden files taking up too much space when drag and drop copying, [see this page for a workaround](../../../../micropython-for-samd21/usb-mass-storage#mac-osx-file-copy-issues).**
Before continuing make sure your board's **lib** folder or root filesystem has at least the **adafruit\_ht16k33** and **adafruit\_bus\_device** folders/modules copied over.
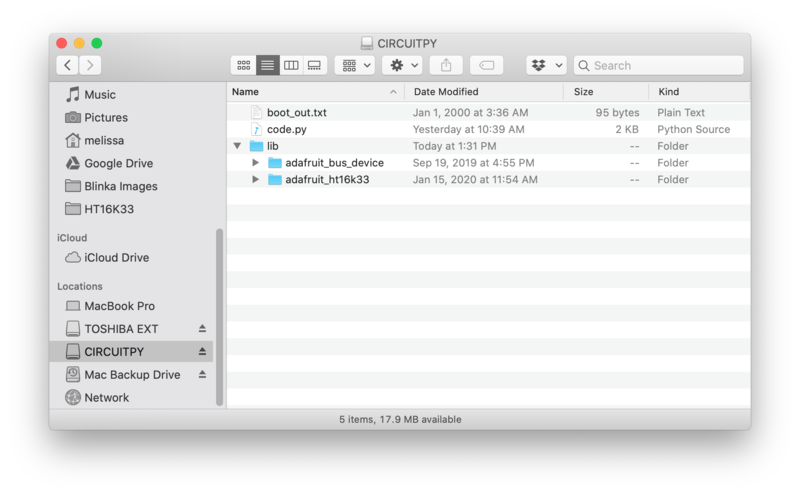
- [Previous Page](https://learn.adafruit.com/adafruit-led-backpack/bi-color-8x8-matrix-arduino-setup.md)
- [Next Page](https://learn.adafruit.com/adafruit-led-backpack/bi-color-8x8-matrix-python-wiring-and-setup.md)
## Primary Products
### Adafruit Mini 8x8 LED Matrix w/I2C Backpack - Red
[Adafruit Mini 8x8 LED Matrix w/I2C Backpack - Red](https://www.adafruit.com/product/870)
What's better than a single LED? Lots of LEDs! A fun way to make a small display is to use an [8x8 matrix](https://www.adafruit.com/category/37_88) or a [4-digit 7-segment display](https://www.adafruit.com/category/37_103). Matrices like these are...
In Stock
[Buy Now](https://www.adafruit.com/product/870)
[Related Guides to the Product](https://learn.adafruit.com/products/870/guides)
### Adafruit Mini 8x8 LED Matrix w/I2C Backpack - Yellow
[Adafruit Mini 8x8 LED Matrix w/I2C Backpack - Yellow](https://www.adafruit.com/product/871)
What's better than a single LED? Lots of LEDs! A fun way to make a small display is to use an [8x8 matrix](https://www.adafruit.com/category/37_88) or a [4-digit 7-segment display](https://www.adafruit.com/category/37_103). Matrices like these are...
In Stock
[Buy Now](https://www.adafruit.com/product/871)
[Related Guides to the Product](https://learn.adafruit.com/products/871/guides)
### Adafruit Mini 0.8" 8x8 LED Matrix w/I2C Backpack - Yellow-Green
[Adafruit Mini 0.8" 8x8 LED Matrix w/I2C Backpack - Yellow-Green](https://www.adafruit.com/product/872)
What's better than a single LED? Lots of LEDs! A fun way to make a small display is to use an [8x8 matrix](https://www.adafruit.com/category/37_88) or a [4-digit 7-segment display](https://www.adafruit.com/category/37_103). Matrices like these are...
In Stock
[Buy Now](https://www.adafruit.com/product/872)
[Related Guides to the Product](https://learn.adafruit.com/products/872/guides)
### Adafruit 0.56" 4-Digit 7-Segment Display with I2C Backpack - Red
[Adafruit 0.56" 4-Digit 7-Segment Display with I2C Backpack - Red](https://www.adafruit.com/product/878)
What's better than a single LED? Lots of LEDs! A fun way to make a small display is to use an [8x8 matrix](https://www.adafruit.com/category/37_88) or a [4-digit 7-segment display](https://www.adafruit.com/category/37_103). Matrices like these are...
In Stock
[Buy Now](https://www.adafruit.com/product/878)
[Related Guides to the Product](https://learn.adafruit.com/products/878/guides)
### Adafruit 0.56" 4-Digit 7-Segment Display w/I2C Backpack - Yellow
[Adafruit 0.56" 4-Digit 7-Segment Display w/I2C Backpack - Yellow](https://www.adafruit.com/product/879)
What's better than a single LED? Lots of LEDs! A fun way to make a small display is to use an [8x8 matrix](https://www.adafruit.com/category/37_88) or a [4-digit 7-segment display](https://www.adafruit.com/category/37_103). Matrices like these are...
In Stock
[Buy Now](https://www.adafruit.com/product/879)
[Related Guides to the Product](https://learn.adafruit.com/products/879/guides)
### Adafruit 0.56" 4-Digit 7-Segment Display w/ I2C Backpack - Green
[Adafruit 0.56" 4-Digit 7-Segment Display w/ I2C Backpack - Green](https://www.adafruit.com/product/880)
What's better than a single LED? Lots of LEDs! A fun way to make a small display is to use an [8x8 matrix](https://www.adafruit.com/category/37_88) or a [4-digit 7-segment display](https://www.adafruit.com/category/37_103). Matrices like these are...
No Longer Stocked
[Buy Now](https://www.adafruit.com/product/880)
[Related Guides to the Product](https://learn.adafruit.com/products/880/guides)
### Adafruit 0.56" 4-Digit 7-Segment Display w/ I2C Backpack - Blue
[Adafruit 0.56" 4-Digit 7-Segment Display w/ I2C Backpack - Blue](https://www.adafruit.com/product/881)
What's better than a single LED? Lots of LEDs! A fun way to make a small display is to use an [8x8 matrix](https://www.adafruit.com/category/37_88) or a [4-digit 7-segment display](https://www.adafruit.com/category/37_103). Matrices like these are...
In Stock
[Buy Now](https://www.adafruit.com/product/881)
[Related Guides to the Product](https://learn.adafruit.com/products/881/guides)
### Adafruit Bicolor LED Square Pixel Matrix with I2C Backpack
[Adafruit Bicolor LED Square Pixel Matrix with I2C Backpack](https://www.adafruit.com/product/902)
What's better than a single LED? Lots of LEDs! A fun way to make a small colorful display is to use a [1.2" Bi-color 8x8 LED Matrix](http://www.adafruit.com/products/458). Matrices like these are 'multiplexed' - so to control all the 128 LEDs you need 24 pins....
In Stock
[Buy Now](https://www.adafruit.com/product/902)
[Related Guides to the Product](https://learn.adafruit.com/products/902/guides)
### Adafruit Mini 8x8 LED Matrix w/I2C Backpack - Blue
[Adafruit Mini 8x8 LED Matrix w/I2C Backpack - Blue](https://www.adafruit.com/product/959)
What's better than a single LED? Lots of LEDs! A fun way to make a small display is to use an [8x8 matrix](https://www.adafruit.com/category/37_88) or a [4-digit 7-segment display](https://www.adafruit.com/category/37_103). Matrices like these are...
In Stock
[Buy Now](https://www.adafruit.com/product/959)
[Related Guides to the Product](https://learn.adafruit.com/products/959/guides)
### Adafruit 0.56" 4-Digit 7-Segment Display w/I2C Backpack - White
[Adafruit 0.56" 4-Digit 7-Segment Display w/I2C Backpack - White](https://www.adafruit.com/product/1002)
What's better than a single LED? Lots of LEDs! A fun way to make a small display is to use an [8x8 matrix](https://www.adafruit.com/category/37_88) or a [4-digit 7-segment display](https://www.adafruit.com/category/37_103). Matrices like these are...
In Stock
[Buy Now](https://www.adafruit.com/product/1002)
[Related Guides to the Product](https://learn.adafruit.com/products/1002/guides)
### Adafruit 1.2" 8x8 LED Matrix Backpack
[Adafruit 1.2" 8x8 LED Matrix Backpack](https://www.adafruit.com/product/1048)
By popular request, you can now get our 8x8 LED backpacks without the LEDs! These backpacks feature an HT16K33 I2C LED driver, they're simple and easy to use - you can use [our very nice library for the backpacks to...](https://github.com/adafruit/Adafruit-LED-Backpack-Library)
In Stock
[Buy Now](https://www.adafruit.com/product/1048)
[Related Guides to the Product](https://learn.adafruit.com/products/1048/guides)
### Adafruit Small 1.2" 8x8 LED Matrix w/I2C Backpack - Red
[Adafruit Small 1.2" 8x8 LED Matrix w/I2C Backpack - Red](https://www.adafruit.com/product/1049)
What's better than a single LED? Lots of LEDs! A fun way to make a small display is to use an [8x8 matrix](https://www.adafruit.com/category/37_88) or a [4-digit 7-segment display](https://www.adafruit.com/category/37_103). Matrices like these are...
In Stock
[Buy Now](https://www.adafruit.com/product/1049)
[Related Guides to the Product](https://learn.adafruit.com/products/1049/guides)
### Adafruit Small 1.2" 8x8 LED Matrix w/I2C Backpack - Yellow
[Adafruit Small 1.2" 8x8 LED Matrix w/I2C Backpack - Yellow](https://www.adafruit.com/product/1050)
What's better than a single LED? Lots of LEDs! A fun way to make a small display is to use an [8x8 matrix](https://www.adafruit.com/category/37_88) or a [4-digit 7-segment display](https://www.adafruit.com/category/37_103). Matrices like these are...
In Stock
[Buy Now](https://www.adafruit.com/product/1050)
[Related Guides to the Product](https://learn.adafruit.com/products/1050/guides)
### Adafruit Small 1.2" 8x8 LED Matrix w/I2C Backpack - Blue
[Adafruit Small 1.2" 8x8 LED Matrix w/I2C Backpack - Blue](https://www.adafruit.com/product/1052)
What's better than a single LED? Lots of LEDs! A fun way to make a small display is to use an [8x8 matrix](https://www.adafruit.com/category/37_88) or a [4-digit 7-segment display](https://www.adafruit.com/category/37_103). Matrices like these are...
In Stock
[Buy Now](https://www.adafruit.com/product/1052)
[Related Guides to the Product](https://learn.adafruit.com/products/1052/guides)
### Adafruit Mini 8x8 LED Matrix w/I2C Backpack - Ultra Bright White
[Adafruit Mini 8x8 LED Matrix w/I2C Backpack - Ultra Bright White](https://www.adafruit.com/product/1080)
What's better than a single LED? Lots of LEDs! A fun way to make a small display is to use an [8x8 matrix](https://www.adafruit.com/category/37_88) or a [4-digit 7-segment display](https://www.adafruit.com/category/37_103). Matrices like these are...
In Stock
[Buy Now](https://www.adafruit.com/product/1080)
[Related Guides to the Product](https://learn.adafruit.com/products/1080/guides)
### Adafruit 1.2" 4-Digit 7-Segment Display w/I2C Backpack - Green
[Adafruit 1.2" 4-Digit 7-Segment Display w/I2C Backpack - Green](https://www.adafruit.com/product/1268)
What's better than a single LED? Lots of LEDs! A fun way to make a numeric display is to use a [4-digit 7-segment display](https://www.adafruit.com/category/37_103). LED matrices like these are 'multiplexed' - so to control all the seven-segment LEDs you need 14 pins....
No Longer Stocked
[Buy Now](https://www.adafruit.com/product/1268)
[Related Guides to the Product](https://learn.adafruit.com/products/1268/guides)
### Adafruit 1.2" 4-Digit 7-Segment Display w/I2C Backpack - Yellow
[Adafruit 1.2" 4-Digit 7-Segment Display w/I2C Backpack - Yellow](https://www.adafruit.com/product/1269)
What's better than a single LED? Lots of LEDs! A fun way to make a numeric display is to use a [4-digit 7-segment display](https://www.adafruit.com/category/37_103). LED matrices like these are 'multiplexed' - so to control all the seven-segment LEDs you need 14 pins....
In Stock
[Buy Now](https://www.adafruit.com/product/1269)
[Related Guides to the Product](https://learn.adafruit.com/products/1269/guides)
### Adafruit 1.2" 4-Digit 7-Segment Display w/I2C Backpack - Red
[Adafruit 1.2" 4-Digit 7-Segment Display w/I2C Backpack - Red](https://www.adafruit.com/product/1270)
What's better than a single LED? Lots of LEDs! A fun way to make a numeric display is to use a [4-digit 7-segment display](https://www.adafruit.com/category/37_103). LED matrices like these are 'multiplexed' - so to control all the seven-segment LEDs you need 14 pins....
In Stock
[Buy Now](https://www.adafruit.com/product/1270)
[Related Guides to the Product](https://learn.adafruit.com/products/1270/guides)
### Small 1.2" 8x8 Ultra Bright White LED Matrix + Backpack
[Small 1.2" 8x8 Ultra Bright White LED Matrix + Backpack](https://www.adafruit.com/product/1614)
What's better than a single LED? Lots of LEDs! A fun way to make a small display is to use an [8x8 matrix](https://www.adafruit.com/category/37_88) or a [4-digit 7-segment display](https://www.adafruit.com/category/37_103). Matrices like these are...
In Stock
[Buy Now](https://www.adafruit.com/product/1614)
[Related Guides to the Product](https://learn.adafruit.com/products/1614/guides)
### Adafruit Small 1.2" 8x8 LED Matrix w/I2C Backpack - Pure Green
[Adafruit Small 1.2" 8x8 LED Matrix w/I2C Backpack - Pure Green](https://www.adafruit.com/product/1632)
What's better than a single LED? Lots of LEDs! A fun way to make a small display is to use an [8x8 matrix](https://www.adafruit.com/category/37_88) or a [4-digit 7-segment display](https://www.adafruit.com/category/37_103). Matrices like these are...
In Stock
[Buy Now](https://www.adafruit.com/product/1632)
[Related Guides to the Product](https://learn.adafruit.com/products/1632/guides)
### Adafruit Mini 0.8" 8x8 LED Matrix w/I2C Backpack - Pure Green
[Adafruit Mini 0.8" 8x8 LED Matrix w/I2C Backpack - Pure Green](https://www.adafruit.com/product/1633)
What's better than a single LED? Lots of LEDs! A fun way to make a small display is to use an [8x8 matrix](https://www.adafruit.com/category/37_88) or a [4-digit 7-segment display](https://www.adafruit.com/category/37_103). Matrices like these are...
In Stock
[Buy Now](https://www.adafruit.com/product/1633)
[Related Guides to the Product](https://learn.adafruit.com/products/1633/guides)
### Bi-Color (Red/Green) 24-Bar Bargraph w/I2C Backpack Kit
[Bi-Color (Red/Green) 24-Bar Bargraph w/I2C Backpack Kit](https://www.adafruit.com/product/1721)
What's better than a single LED? Lots of LEDs! A fun way to make a small linear display is to use two 12-bar Bi-color bar-graphs. However, this LED bargraph is 'multiplexed' - so to control all the 48 LEDs you need a lot of pins.
Out of Stock
[Buy Now](https://www.adafruit.com/product/1721)
[Related Guides to the Product](https://learn.adafruit.com/products/1721/guides)
### Small 1.2" 8x8 Ultra Bright Square Amber LED Matrix + Backpack
[Small 1.2" 8x8 Ultra Bright Square Amber LED Matrix + Backpack](https://www.adafruit.com/product/1854)
What's better than a single LED? Lots of LEDs! Matrices like these are 'multiplexed' - so to control 64 LEDs you need 16 pins. That's a lot of pins, and there are [driver chips like the MAX7219](//www.adafruit.com/products/453) that can control a matrix for you but...
In Stock
[Buy Now](https://www.adafruit.com/product/1854)
[Related Guides to the Product](https://learn.adafruit.com/products/1854/guides)
### Small 1.2" 8x8 Ultra Bright Square Yellow LED Matrix + Backpack
[Small 1.2" 8x8 Ultra Bright Square Yellow LED Matrix + Backpack](https://www.adafruit.com/product/1855)
What's better than a single LED? Lots of LEDs! Matrices like these are 'multiplexed' - so to control 64 LEDs you need 16 pins. That's a lot of pins, and there are [driver chips like the MAX7219](//www.adafruit.com/products/453) that can control a matrix for you but...
In Stock
[Buy Now](https://www.adafruit.com/product/1855)
[Related Guides to the Product](https://learn.adafruit.com/products/1855/guides)
### Small 1.2" 8x8 Bright Square Pure Green LED Matrix + Backpack
[Small 1.2" 8x8 Bright Square Pure Green LED Matrix + Backpack](https://www.adafruit.com/product/1856)
What's better than a single LED? Lots of LEDs! Matrices like these are 'multiplexed' - so to control 64 LEDs you need 16 pins. That's a lot of pins, and there are [driver chips like the MAX7219](//www.adafruit.com/products/453) that can control a matrix for you but...
In Stock
[Buy Now](https://www.adafruit.com/product/1856)
[Related Guides to the Product](https://learn.adafruit.com/products/1856/guides)
### Small 1.2" 8x8 Ultra Bright Square White LED Matrix + Backpack
[Small 1.2" 8x8 Ultra Bright Square White LED Matrix + Backpack](https://www.adafruit.com/product/1857)
What's better than a single LED? Lots of LEDs! Matrices like these are 'multiplexed' - so to control 64 LEDs you need 16 pins. That's a lot of pins, and there are [driver chips like the MAX7219](//www.adafruit.com/products/453) that can control a matrix for you but...
In Stock
[Buy Now](https://www.adafruit.com/product/1857)
[Related Guides to the Product](https://learn.adafruit.com/products/1857/guides)
### Adafruit 14-segment LED Alphanumeric Backpack - STEMMA QT
[Adafruit 14-segment LED Alphanumeric Backpack - STEMMA QT](https://www.adafruit.com/product/1910)
By popular request, you can now get our 14-segment LED backpacks without the LEDs! These backpacks feature an HT16K33 I2C LED driver, they're simple and easy to use - you can use [our very nice library for the backpacks to...](https://github.com/adafruit/Adafruit-LED-Backpack-Library)
In Stock
[Buy Now](https://www.adafruit.com/product/1910)
[Related Guides to the Product](https://learn.adafruit.com/products/1910/guides)
### Quad Alphanumeric Display - Red 0.54" Digits w/ I2C Backpack
[Quad Alphanumeric Display - Red 0.54" Digits w/ I2C Backpack](https://www.adafruit.com/product/1911)
Display, elegantly, 012345678 or 9! Gaze, hypnotized, at ABCDEFGHIJKLM - well it can display the whole alphabet. You get the point. This is a nice, bright alphanumeric display that shows letters and numbers in a beautiful red hue. It's super bright and designed for viewing from distances...
In Stock
[Buy Now](https://www.adafruit.com/product/1911)
[Related Guides to the Product](https://learn.adafruit.com/products/1911/guides)
### Quad Alphanumeric Display - Blue 0.54" Digits w/ I2C Backpack
[Quad Alphanumeric Display - Blue 0.54" Digits w/ I2C Backpack](https://www.adafruit.com/product/1912)
Display, elegantly, 012345678 or 9! Gaze, hypnotized, at ABCDEFGHIJKLM - well it can display the whole alphabet. You get the point. This is a nice, bright alphanumeric display that shows letters and numbers in a beautiful blue hue. It's super bright and designed for viewing from distances...
In Stock
[Buy Now](https://www.adafruit.com/product/1912)
[Related Guides to the Product](https://learn.adafruit.com/products/1912/guides)
### 16x8 1.2" LED Matrix + Backpack - Ultra Bright Round Green LEDs
[16x8 1.2" LED Matrix + Backpack - Ultra Bright Round Green LEDs](https://www.adafruit.com/product/2035)
What's better than a single LED? Lots of LEDs! And what's better than lots of LEDs? **TWO TIMES AS MANY LEDS!!!**
With the 16x8 LED Matrix Backpack we've doubled your project's matrix capacity by making it super easy to get two separate 8x8 matrices onto...
In Stock
[Buy Now](https://www.adafruit.com/product/2035)
[Related Guides to the Product](https://learn.adafruit.com/products/2035/guides)
### 16x8 1.2" LED Matrix+Backpack UltraBright Round YellowGreen LEDs
[16x8 1.2" LED Matrix+Backpack UltraBright Round YellowGreen LEDs](https://www.adafruit.com/product/2036)
What's better than a single LED? Lots of LEDs! And what's better than lots of LEDs? **TWO TIMES AS MANY LEDS!!!**
With the 16x8 LED Matrix Backpack we've doubled your project's matrix capacity by making it super easy to get two separate 8x8 matrices onto...
In Stock
[Buy Now](https://www.adafruit.com/product/2036)
[Related Guides to the Product](https://learn.adafruit.com/products/2036/guides)
### 16x8 1.2" LED Matrix + Backpack - Ultra Bright Round Red LEDs
[16x8 1.2" LED Matrix + Backpack - Ultra Bright Round Red LEDs](https://www.adafruit.com/product/2037)
What's better than a single LED? Lots of LEDs! And what's better than lots of LEDs? **TWO TIMES AS MANY LEDS!!!**
With the 16x8 LED Matrix Backpack we've doubled your project's matrix capacity by making it super easy to get two separate 8x8 matrices onto...
In Stock
[Buy Now](https://www.adafruit.com/product/2037)
[Related Guides to the Product](https://learn.adafruit.com/products/2037/guides)
### 16x8 1.2" LED Matrix + Backpack - Ultra Bright Round White LEDs
[16x8 1.2" LED Matrix + Backpack - Ultra Bright Round White LEDs](https://www.adafruit.com/product/2038)
What's better than a single LED? Lots of LEDs! And what's better than lots of LEDs? **TWO TIMES AS MANY LEDS!!!**
With the 16x8 LED Matrix Backpack we've doubled your project's matrix capacity by making it super easy to get two separate 8x8 matrices onto...
In Stock
[Buy Now](https://www.adafruit.com/product/2038)
[Related Guides to the Product](https://learn.adafruit.com/products/2038/guides)
### 16x8 1.2" LED Matrix + Backpack - Ultra Bright Round Blue LEDs
[16x8 1.2" LED Matrix + Backpack - Ultra Bright Round Blue LEDs](https://www.adafruit.com/product/2039)
What's better than a single LED? Lots of LEDs! And what's better than lots of LEDs? **TWO TIMES AS MANY LEDS!!!**
With the 16x8 LED Matrix Backpack we've doubled your project's matrix capacity by making it super easy to get two separate 8x8 matrices onto...
In Stock
[Buy Now](https://www.adafruit.com/product/2039)
[Related Guides to the Product](https://learn.adafruit.com/products/2039/guides)
### 16x8 1.2" LED Matrix + Backpack - Ultra Bright Square Blue LEDs
[16x8 1.2" LED Matrix + Backpack - Ultra Bright Square Blue LEDs](https://www.adafruit.com/product/2040)
What's better than a single LED? Lots of LEDs! And what's better than lots of LEDs? **TWO TIMES AS MANY LEDS!!!**
With the 16x8 LED Matrix Backpack we've doubled your project's matrix capacity by making it super easy to get two separate 8x8 matrices onto...
In Stock
[Buy Now](https://www.adafruit.com/product/2040)
[Related Guides to the Product](https://learn.adafruit.com/products/2040/guides)
### 16x8 1.2" LED Matrix + Backpack - Ultra Bright Square Amber LEDs
[16x8 1.2" LED Matrix + Backpack - Ultra Bright Square Amber LEDs](https://www.adafruit.com/product/2041)
What's better than a single LED? Lots of LEDs! And what's better than lots of LEDs? **TWO TIMES AS MANY LEDS!!!**
With the 16x8 LED Matrix Backpack we've doubled your project's matrix capacity by making it super easy to get two separate 8x8 matrices onto...
In Stock
[Buy Now](https://www.adafruit.com/product/2041)
[Related Guides to the Product](https://learn.adafruit.com/products/2041/guides)
### 16x8 1.2" LED Matrix + Backpack - Ultra Bright Square Green LEDs
[16x8 1.2" LED Matrix + Backpack - Ultra Bright Square Green LEDs](https://www.adafruit.com/product/2042)
What's better than a single LED? Lots of LEDs! And what's better than lots of LEDs? **TWO TIMES AS MANY LEDS!!!**
With the 16x8 LED Matrix Backpack we've doubled your project's matrix capacity by making it super easy to get two separate 8x8 matrices onto...
In Stock
[Buy Now](https://www.adafruit.com/product/2042)
[Related Guides to the Product](https://learn.adafruit.com/products/2042/guides)
### 16x8 1.2" LED Matrix + Backpack -Ultra Bright Square Yellow LEDs
[16x8 1.2" LED Matrix + Backpack -Ultra Bright Square Yellow LEDs](https://www.adafruit.com/product/2043)
What's better than a single LED? Lots of LEDs! And what's better than lots of LEDs? **TWO TIMES AS MANY LEDS!!!**
With the 16x8 LED Matrix Backpack we've doubled your project's matrix capacity by making it super easy to get two separate 8x8 matrices onto...
In Stock
[Buy Now](https://www.adafruit.com/product/2043)
[Related Guides to the Product](https://learn.adafruit.com/products/2043/guides)
### 16x8 1.2" LED Matrix + Backpack - Ultra Bright Square White LEDs
[16x8 1.2" LED Matrix + Backpack - Ultra Bright Square White LEDs](https://www.adafruit.com/product/2044)
What's better than a single LED? Lots of LEDs! And what's better than lots of LEDs? **TWO TIMES AS MANY LEDS!!!**
With the 16x8 LED Matrix Backpack we've doubled your project's matrix capacity by making it super easy to get two separate 8x8 matrices onto...
In Stock
[Buy Now](https://www.adafruit.com/product/2044)
[Related Guides to the Product](https://learn.adafruit.com/products/2044/guides)
### 16x8 1.2" LED Matrix + Backpack-Ultra Bright Round Orange LEDs
[16x8 1.2" LED Matrix + Backpack-Ultra Bright Round Orange LEDs](https://www.adafruit.com/product/2052)
What's better than a single LED? Lots of LEDs! And what's better than lots of LEDs? **TWO TIMES AS MANY LEDS!!!**
With the 16x8 LED Matrix Backpack we've doubled your project's matrix capacity by making it super easy to get two separate 8x8 matrices onto...
In Stock
[Buy Now](https://www.adafruit.com/product/2052)
[Related Guides to the Product](https://learn.adafruit.com/products/2052/guides)
### 16x8 1.2" LED Matrices+Backpack Round LEDs in Various Colors
[16x8 1.2" LED Matrices+Backpack Round LEDs in Various Colors](https://www.adafruit.com/product/2054)
What's better than a single LED? Lots of LEDs! And what's better than lots of LEDs? **TWO TIMES AS MANY LEDS!!!**
With the 16x8 LED Matrix Backpack we've doubled your project's matrix capacity by making it super easy to get two separate 8x8 matrices onto...
Out of Stock
[Buy Now](https://www.adafruit.com/product/2054)
[Related Guides to the Product](https://learn.adafruit.com/products/2054/guides)
### Adafruit 8x16 LED Matrix FeatherWing w/o Matrices
[Adafruit 8x16 LED Matrix FeatherWing w/o Matrices](https://www.adafruit.com/product/3090)
You will chirp with delight when you see how easy it is to make your very own 8x16 LED matrix display for any Feather. At 0.8" square, the little [8x8 matrices](https://www.adafruit.com/new/?q=8x8%20miniature%20LED%20matrix&) have everything a big LED matrix has,...
Out of Stock
[Buy Now](https://www.adafruit.com/product/3090)
[Related Guides to the Product](https://learn.adafruit.com/products/3090/guides)
### Adafruit 14-segment LED Alphanumeric backpack (same as P1910)
[Adafruit 14-segment LED Alphanumeric backpack (same as P1910)](https://www.adafruit.com/product/3322)
Just the backpack + 4pin header
No Longer Stocked
[Buy Now](https://www.adafruit.com/product/3322)
[Related Guides to the Product](https://learn.adafruit.com/products/3322/guides)
## Featured Products
### Adafruit Small 1.2" 8x8 LED Matrix w/I2C Backpack - Yellow-Green
[Adafruit Small 1.2" 8x8 LED Matrix w/I2C Backpack - Yellow-Green](https://www.adafruit.com/product/1051)
What's better than a single LED? Lots of LEDs! A fun way to make a small display is to use an [8x8 matrix](https://www.adafruit.com/category/37_88) or a [4-digit 7-segment display](https://www.adafruit.com/category/37_103). Matrices like these are...
In Stock
[Buy Now](https://www.adafruit.com/product/1051)
[Related Guides to the Product](https://learn.adafruit.com/products/1051/guides)
### Small 1.2" 8x8 Ultra Bright Square Blue LED Matrix + Backpack
[Small 1.2" 8x8 Ultra Bright Square Blue LED Matrix + Backpack](https://www.adafruit.com/product/1853)
What's better than a single LED? Lots of LEDs! Matrices like these are 'multiplexed' - so to control 64 LEDs you need 16 pins. That's a lot of pins, and there are [driver chips like the MAX7219](//www.adafruit.com/products/453) that can control a matrix for you but...
In Stock
[Buy Now](https://www.adafruit.com/product/1853)
[Related Guides to the Product](https://learn.adafruit.com/products/1853/guides)
## Related Guides
- [LED Backpack Displays on Raspberry Pi and BeagleBone Black](https://learn.adafruit.com/led-backpack-displays-on-raspberry-pi-and-beaglebone-black.md)
- [Animating Multiple LED Backpacks](https://learn.adafruit.com/animating-multiple-led-backpacks.md)
- [Arduino GPS Clock](https://learn.adafruit.com/arduino-clock.md)
- [Raspberry Pi Physical Dashboard](https://learn.adafruit.com/raspberry-pi-physical-dashboard.md)
- [CircuitPython Hardware: LED Backpacks & FeatherWings](https://learn.adafruit.com/micropython-hardware-led-backpacks-and-featherwings.md)
- [Matrix and 7-Segment LED Backpack with the Raspberry Pi](https://learn.adafruit.com/matrix-7-segment-led-backpack-with-the-raspberry-pi.md)
- [DIY Pocket LED Gamer - Tiny Tetris!](https://learn.adafruit.com/diy-3d-printed-handheld-pocket-game-tiny-tetris-snake.md)
- [RGB LED Matrix Cube with 25,000 LEDs](https://learn.adafruit.com/rgb-led-matrix-cube-for-pi.md)
- [Creating GIFs for SmartMatrix](https://learn.adafruit.com/creating-gifs-for-smartmatrix.md)
- [Adafruit CharliePlex LED Matrix Bonnet](https://learn.adafruit.com/adafruit-charlieplex-bonnet.md)
- [Connecting a 16x32 RGB LED Matrix Panel to a Raspberry Pi](https://learn.adafruit.com/connecting-a-16x32-rgb-led-matrix-panel-to-a-raspberry-pi.md)
- [MicroPython Displays: Drawing Text](https://learn.adafruit.com/micropython-displays-drawing-text.md)
- [Heart Rate Badge](https://learn.adafruit.com/heart-rate-badge.md)
- [16x24 LED Matrix](https://learn.adafruit.com/16x24-led-matrix.md)
- [Adafruit IS31FL3741](https://learn.adafruit.com/adafruit-is31fl3741.md)
---
# Source: https://learn.adafruit.com/adafruit-led-backpack/bi-color-8x8-matrix-python-wiring-and-setup.md
# Adafruit LED Backpacks
## Python Wiring and Setup
# Wiring
It's easy to use LED Matrices with Python and the [Adafruit CircuitPython HT16K33](https://github.com/adafruit/Adafruit_CircuitPython_HT16K33) library. This library allows you to easily write Python code to control the display.
We'll cover how to wire the LED Matrix to your Raspberry Pi. First assemble your LED Matrix.
Since there's _dozens_ of Linux computers/boards you can use we will show wiring for Raspberry Pi. For other platforms, [please visit the guide for CircuitPython on Linux to see whether your platform is supported](https://learn.adafruit.com/circuitpython-on-raspberrypi-linux).
Connect the LED Matrix as shown below to your Raspberry Pi.
- **Raspberry Pi 3.3V ** to ** LED Matrix VIN**
- **Raspberry Pi GND ** to **LED Matrix GND**
- **Raspberry Pi SCL ** to **LED Matrix SCL**
- **Raspberry Pi SDA ** to **LED Matrix SDA**

[Download Fritzing Object](https://cdn-learn.adafruit.com/assets/assets/000/087/075/original/raspberry-pi-bicolor-8x8.fzz?1579290427)
# Setup
You'll need to install the Adafruit\_Blinka library that provides the CircuitPython support in Python. This may also require enabling I2C on your platform and verifying you are running Python 3. [Since each platform is a little different, and Linux changes often, please visit the CircuitPython on Linux guide to get your computer ready](https://learn.adafruit.com/circuitpython-on-raspberrypi-linux)!
## Python Installation of HT16K33 Library
Once that's done, from your command line run the following command:
- `pip3 install adafruit-circuitpython-ht16k33`
If your default Python is version 3 you may need to run 'pip' instead. Just make sure you aren't trying to use CircuitPython on Python 2.x, it isn't supported!
If that complains about pip3 not being installed, then run this first to install it:
- `sudo apt-get install python3-pip`
## Pillow Library
We also need PIL, the Python Imaging Library, to allow using text with custom fonts. There are several system libraries that PIL relies on, so installing via a package manager is the easiest way to bring in everything:
- `sudo apt-get install python3-pil`
That's it. You should be ready to go.
- [Previous Page](https://learn.adafruit.com/adafruit-led-backpack/bi-color-8x8-matrix-circuitpython-wiring-and-setup.md)
- [Next Page](https://learn.adafruit.com/adafruit-led-backpack/bi-color-8x8-matrix-circuitpython-and-python-usage.md)
## Primary Products
### Adafruit Mini 8x8 LED Matrix w/I2C Backpack - Red
[Adafruit Mini 8x8 LED Matrix w/I2C Backpack - Red](https://www.adafruit.com/product/870)
What's better than a single LED? Lots of LEDs! A fun way to make a small display is to use an [8x8 matrix](https://www.adafruit.com/category/37_88) or a [4-digit 7-segment display](https://www.adafruit.com/category/37_103). Matrices like these are...
In Stock
[Buy Now](https://www.adafruit.com/product/870)
[Related Guides to the Product](https://learn.adafruit.com/products/870/guides)
### Adafruit Mini 8x8 LED Matrix w/I2C Backpack - Yellow
[Adafruit Mini 8x8 LED Matrix w/I2C Backpack - Yellow](https://www.adafruit.com/product/871)
What's better than a single LED? Lots of LEDs! A fun way to make a small display is to use an [8x8 matrix](https://www.adafruit.com/category/37_88) or a [4-digit 7-segment display](https://www.adafruit.com/category/37_103). Matrices like these are...
In Stock
[Buy Now](https://www.adafruit.com/product/871)
[Related Guides to the Product](https://learn.adafruit.com/products/871/guides)
### Adafruit Mini 0.8" 8x8 LED Matrix w/I2C Backpack - Yellow-Green
[Adafruit Mini 0.8" 8x8 LED Matrix w/I2C Backpack - Yellow-Green](https://www.adafruit.com/product/872)
What's better than a single LED? Lots of LEDs! A fun way to make a small display is to use an [8x8 matrix](https://www.adafruit.com/category/37_88) or a [4-digit 7-segment display](https://www.adafruit.com/category/37_103). Matrices like these are...
In Stock
[Buy Now](https://www.adafruit.com/product/872)
[Related Guides to the Product](https://learn.adafruit.com/products/872/guides)
### Adafruit 0.56" 4-Digit 7-Segment Display with I2C Backpack - Red
[Adafruit 0.56" 4-Digit 7-Segment Display with I2C Backpack - Red](https://www.adafruit.com/product/878)
What's better than a single LED? Lots of LEDs! A fun way to make a small display is to use an [8x8 matrix](https://www.adafruit.com/category/37_88) or a [4-digit 7-segment display](https://www.adafruit.com/category/37_103). Matrices like these are...
In Stock
[Buy Now](https://www.adafruit.com/product/878)
[Related Guides to the Product](https://learn.adafruit.com/products/878/guides)
### Adafruit 0.56" 4-Digit 7-Segment Display w/I2C Backpack - Yellow
[Adafruit 0.56" 4-Digit 7-Segment Display w/I2C Backpack - Yellow](https://www.adafruit.com/product/879)
What's better than a single LED? Lots of LEDs! A fun way to make a small display is to use an [8x8 matrix](https://www.adafruit.com/category/37_88) or a [4-digit 7-segment display](https://www.adafruit.com/category/37_103). Matrices like these are...
In Stock
[Buy Now](https://www.adafruit.com/product/879)
[Related Guides to the Product](https://learn.adafruit.com/products/879/guides)
### Adafruit 0.56" 4-Digit 7-Segment Display w/ I2C Backpack - Green
[Adafruit 0.56" 4-Digit 7-Segment Display w/ I2C Backpack - Green](https://www.adafruit.com/product/880)
What's better than a single LED? Lots of LEDs! A fun way to make a small display is to use an [8x8 matrix](https://www.adafruit.com/category/37_88) or a [4-digit 7-segment display](https://www.adafruit.com/category/37_103). Matrices like these are...
No Longer Stocked
[Buy Now](https://www.adafruit.com/product/880)
[Related Guides to the Product](https://learn.adafruit.com/products/880/guides)
### Adafruit 0.56" 4-Digit 7-Segment Display w/ I2C Backpack - Blue
[Adafruit 0.56" 4-Digit 7-Segment Display w/ I2C Backpack - Blue](https://www.adafruit.com/product/881)
What's better than a single LED? Lots of LEDs! A fun way to make a small display is to use an [8x8 matrix](https://www.adafruit.com/category/37_88) or a [4-digit 7-segment display](https://www.adafruit.com/category/37_103). Matrices like these are...
In Stock
[Buy Now](https://www.adafruit.com/product/881)
[Related Guides to the Product](https://learn.adafruit.com/products/881/guides)
### Adafruit Bicolor LED Square Pixel Matrix with I2C Backpack
[Adafruit Bicolor LED Square Pixel Matrix with I2C Backpack](https://www.adafruit.com/product/902)
What's better than a single LED? Lots of LEDs! A fun way to make a small colorful display is to use a [1.2" Bi-color 8x8 LED Matrix](http://www.adafruit.com/products/458). Matrices like these are 'multiplexed' - so to control all the 128 LEDs you need 24 pins....
In Stock
[Buy Now](https://www.adafruit.com/product/902)
[Related Guides to the Product](https://learn.adafruit.com/products/902/guides)
### Adafruit Mini 8x8 LED Matrix w/I2C Backpack - Blue
[Adafruit Mini 8x8 LED Matrix w/I2C Backpack - Blue](https://www.adafruit.com/product/959)
What's better than a single LED? Lots of LEDs! A fun way to make a small display is to use an [8x8 matrix](https://www.adafruit.com/category/37_88) or a [4-digit 7-segment display](https://www.adafruit.com/category/37_103). Matrices like these are...
In Stock
[Buy Now](https://www.adafruit.com/product/959)
[Related Guides to the Product](https://learn.adafruit.com/products/959/guides)
### Adafruit 0.56" 4-Digit 7-Segment Display w/I2C Backpack - White
[Adafruit 0.56" 4-Digit 7-Segment Display w/I2C Backpack - White](https://www.adafruit.com/product/1002)
What's better than a single LED? Lots of LEDs! A fun way to make a small display is to use an [8x8 matrix](https://www.adafruit.com/category/37_88) or a [4-digit 7-segment display](https://www.adafruit.com/category/37_103). Matrices like these are...
In Stock
[Buy Now](https://www.adafruit.com/product/1002)
[Related Guides to the Product](https://learn.adafruit.com/products/1002/guides)
### Adafruit 1.2" 8x8 LED Matrix Backpack
[Adafruit 1.2" 8x8 LED Matrix Backpack](https://www.adafruit.com/product/1048)
By popular request, you can now get our 8x8 LED backpacks without the LEDs! These backpacks feature an HT16K33 I2C LED driver, they're simple and easy to use - you can use [our very nice library for the backpacks to...](https://github.com/adafruit/Adafruit-LED-Backpack-Library)
In Stock
[Buy Now](https://www.adafruit.com/product/1048)
[Related Guides to the Product](https://learn.adafruit.com/products/1048/guides)
### Adafruit Small 1.2" 8x8 LED Matrix w/I2C Backpack - Red
[Adafruit Small 1.2" 8x8 LED Matrix w/I2C Backpack - Red](https://www.adafruit.com/product/1049)
What's better than a single LED? Lots of LEDs! A fun way to make a small display is to use an [8x8 matrix](https://www.adafruit.com/category/37_88) or a [4-digit 7-segment display](https://www.adafruit.com/category/37_103). Matrices like these are...
In Stock
[Buy Now](https://www.adafruit.com/product/1049)
[Related Guides to the Product](https://learn.adafruit.com/products/1049/guides)
### Adafruit Small 1.2" 8x8 LED Matrix w/I2C Backpack - Yellow
[Adafruit Small 1.2" 8x8 LED Matrix w/I2C Backpack - Yellow](https://www.adafruit.com/product/1050)
What's better than a single LED? Lots of LEDs! A fun way to make a small display is to use an [8x8 matrix](https://www.adafruit.com/category/37_88) or a [4-digit 7-segment display](https://www.adafruit.com/category/37_103). Matrices like these are...
In Stock
[Buy Now](https://www.adafruit.com/product/1050)
[Related Guides to the Product](https://learn.adafruit.com/products/1050/guides)
### Adafruit Small 1.2" 8x8 LED Matrix w/I2C Backpack - Blue
[Adafruit Small 1.2" 8x8 LED Matrix w/I2C Backpack - Blue](https://www.adafruit.com/product/1052)
What's better than a single LED? Lots of LEDs! A fun way to make a small display is to use an [8x8 matrix](https://www.adafruit.com/category/37_88) or a [4-digit 7-segment display](https://www.adafruit.com/category/37_103). Matrices like these are...
In Stock
[Buy Now](https://www.adafruit.com/product/1052)
[Related Guides to the Product](https://learn.adafruit.com/products/1052/guides)
### Adafruit Mini 8x8 LED Matrix w/I2C Backpack - Ultra Bright White
[Adafruit Mini 8x8 LED Matrix w/I2C Backpack - Ultra Bright White](https://www.adafruit.com/product/1080)
What's better than a single LED? Lots of LEDs! A fun way to make a small display is to use an [8x8 matrix](https://www.adafruit.com/category/37_88) or a [4-digit 7-segment display](https://www.adafruit.com/category/37_103). Matrices like these are...
In Stock
[Buy Now](https://www.adafruit.com/product/1080)
[Related Guides to the Product](https://learn.adafruit.com/products/1080/guides)
### Adafruit 1.2" 4-Digit 7-Segment Display w/I2C Backpack - Green
[Adafruit 1.2" 4-Digit 7-Segment Display w/I2C Backpack - Green](https://www.adafruit.com/product/1268)
What's better than a single LED? Lots of LEDs! A fun way to make a numeric display is to use a [4-digit 7-segment display](https://www.adafruit.com/category/37_103). LED matrices like these are 'multiplexed' - so to control all the seven-segment LEDs you need 14 pins....
No Longer Stocked
[Buy Now](https://www.adafruit.com/product/1268)
[Related Guides to the Product](https://learn.adafruit.com/products/1268/guides)
### Adafruit 1.2" 4-Digit 7-Segment Display w/I2C Backpack - Yellow
[Adafruit 1.2" 4-Digit 7-Segment Display w/I2C Backpack - Yellow](https://www.adafruit.com/product/1269)
What's better than a single LED? Lots of LEDs! A fun way to make a numeric display is to use a [4-digit 7-segment display](https://www.adafruit.com/category/37_103). LED matrices like these are 'multiplexed' - so to control all the seven-segment LEDs you need 14 pins....
In Stock
[Buy Now](https://www.adafruit.com/product/1269)
[Related Guides to the Product](https://learn.adafruit.com/products/1269/guides)
### Adafruit 1.2" 4-Digit 7-Segment Display w/I2C Backpack - Red
[Adafruit 1.2" 4-Digit 7-Segment Display w/I2C Backpack - Red](https://www.adafruit.com/product/1270)
What's better than a single LED? Lots of LEDs! A fun way to make a numeric display is to use a [4-digit 7-segment display](https://www.adafruit.com/category/37_103). LED matrices like these are 'multiplexed' - so to control all the seven-segment LEDs you need 14 pins....
In Stock
[Buy Now](https://www.adafruit.com/product/1270)
[Related Guides to the Product](https://learn.adafruit.com/products/1270/guides)
### Small 1.2" 8x8 Ultra Bright White LED Matrix + Backpack
[Small 1.2" 8x8 Ultra Bright White LED Matrix + Backpack](https://www.adafruit.com/product/1614)
What's better than a single LED? Lots of LEDs! A fun way to make a small display is to use an [8x8 matrix](https://www.adafruit.com/category/37_88) or a [4-digit 7-segment display](https://www.adafruit.com/category/37_103). Matrices like these are...
In Stock
[Buy Now](https://www.adafruit.com/product/1614)
[Related Guides to the Product](https://learn.adafruit.com/products/1614/guides)
### Adafruit Small 1.2" 8x8 LED Matrix w/I2C Backpack - Pure Green
[Adafruit Small 1.2" 8x8 LED Matrix w/I2C Backpack - Pure Green](https://www.adafruit.com/product/1632)
What's better than a single LED? Lots of LEDs! A fun way to make a small display is to use an [8x8 matrix](https://www.adafruit.com/category/37_88) or a [4-digit 7-segment display](https://www.adafruit.com/category/37_103). Matrices like these are...
In Stock
[Buy Now](https://www.adafruit.com/product/1632)
[Related Guides to the Product](https://learn.adafruit.com/products/1632/guides)
### Adafruit Mini 0.8" 8x8 LED Matrix w/I2C Backpack - Pure Green
[Adafruit Mini 0.8" 8x8 LED Matrix w/I2C Backpack - Pure Green](https://www.adafruit.com/product/1633)
What's better than a single LED? Lots of LEDs! A fun way to make a small display is to use an [8x8 matrix](https://www.adafruit.com/category/37_88) or a [4-digit 7-segment display](https://www.adafruit.com/category/37_103). Matrices like these are...
In Stock
[Buy Now](https://www.adafruit.com/product/1633)
[Related Guides to the Product](https://learn.adafruit.com/products/1633/guides)
### Bi-Color (Red/Green) 24-Bar Bargraph w/I2C Backpack Kit
[Bi-Color (Red/Green) 24-Bar Bargraph w/I2C Backpack Kit](https://www.adafruit.com/product/1721)
What's better than a single LED? Lots of LEDs! A fun way to make a small linear display is to use two 12-bar Bi-color bar-graphs. However, this LED bargraph is 'multiplexed' - so to control all the 48 LEDs you need a lot of pins.
Out of Stock
[Buy Now](https://www.adafruit.com/product/1721)
[Related Guides to the Product](https://learn.adafruit.com/products/1721/guides)
### Small 1.2" 8x8 Ultra Bright Square Amber LED Matrix + Backpack
[Small 1.2" 8x8 Ultra Bright Square Amber LED Matrix + Backpack](https://www.adafruit.com/product/1854)
What's better than a single LED? Lots of LEDs! Matrices like these are 'multiplexed' - so to control 64 LEDs you need 16 pins. That's a lot of pins, and there are [driver chips like the MAX7219](//www.adafruit.com/products/453) that can control a matrix for you but...
In Stock
[Buy Now](https://www.adafruit.com/product/1854)
[Related Guides to the Product](https://learn.adafruit.com/products/1854/guides)
### Small 1.2" 8x8 Ultra Bright Square Yellow LED Matrix + Backpack
[Small 1.2" 8x8 Ultra Bright Square Yellow LED Matrix + Backpack](https://www.adafruit.com/product/1855)
What's better than a single LED? Lots of LEDs! Matrices like these are 'multiplexed' - so to control 64 LEDs you need 16 pins. That's a lot of pins, and there are [driver chips like the MAX7219](//www.adafruit.com/products/453) that can control a matrix for you but...
In Stock
[Buy Now](https://www.adafruit.com/product/1855)
[Related Guides to the Product](https://learn.adafruit.com/products/1855/guides)
### Small 1.2" 8x8 Bright Square Pure Green LED Matrix + Backpack
[Small 1.2" 8x8 Bright Square Pure Green LED Matrix + Backpack](https://www.adafruit.com/product/1856)
What's better than a single LED? Lots of LEDs! Matrices like these are 'multiplexed' - so to control 64 LEDs you need 16 pins. That's a lot of pins, and there are [driver chips like the MAX7219](//www.adafruit.com/products/453) that can control a matrix for you but...
In Stock
[Buy Now](https://www.adafruit.com/product/1856)
[Related Guides to the Product](https://learn.adafruit.com/products/1856/guides)
### Small 1.2" 8x8 Ultra Bright Square White LED Matrix + Backpack
[Small 1.2" 8x8 Ultra Bright Square White LED Matrix + Backpack](https://www.adafruit.com/product/1857)
What's better than a single LED? Lots of LEDs! Matrices like these are 'multiplexed' - so to control 64 LEDs you need 16 pins. That's a lot of pins, and there are [driver chips like the MAX7219](//www.adafruit.com/products/453) that can control a matrix for you but...
In Stock
[Buy Now](https://www.adafruit.com/product/1857)
[Related Guides to the Product](https://learn.adafruit.com/products/1857/guides)
### Adafruit 14-segment LED Alphanumeric Backpack - STEMMA QT
[Adafruit 14-segment LED Alphanumeric Backpack - STEMMA QT](https://www.adafruit.com/product/1910)
By popular request, you can now get our 14-segment LED backpacks without the LEDs! These backpacks feature an HT16K33 I2C LED driver, they're simple and easy to use - you can use [our very nice library for the backpacks to...](https://github.com/adafruit/Adafruit-LED-Backpack-Library)
In Stock
[Buy Now](https://www.adafruit.com/product/1910)
[Related Guides to the Product](https://learn.adafruit.com/products/1910/guides)
### Quad Alphanumeric Display - Red 0.54" Digits w/ I2C Backpack
[Quad Alphanumeric Display - Red 0.54" Digits w/ I2C Backpack](https://www.adafruit.com/product/1911)
Display, elegantly, 012345678 or 9! Gaze, hypnotized, at ABCDEFGHIJKLM - well it can display the whole alphabet. You get the point. This is a nice, bright alphanumeric display that shows letters and numbers in a beautiful red hue. It's super bright and designed for viewing from distances...
In Stock
[Buy Now](https://www.adafruit.com/product/1911)
[Related Guides to the Product](https://learn.adafruit.com/products/1911/guides)
### Quad Alphanumeric Display - Blue 0.54" Digits w/ I2C Backpack
[Quad Alphanumeric Display - Blue 0.54" Digits w/ I2C Backpack](https://www.adafruit.com/product/1912)
Display, elegantly, 012345678 or 9! Gaze, hypnotized, at ABCDEFGHIJKLM - well it can display the whole alphabet. You get the point. This is a nice, bright alphanumeric display that shows letters and numbers in a beautiful blue hue. It's super bright and designed for viewing from distances...
In Stock
[Buy Now](https://www.adafruit.com/product/1912)
[Related Guides to the Product](https://learn.adafruit.com/products/1912/guides)
### 16x8 1.2" LED Matrix + Backpack - Ultra Bright Round Green LEDs
[16x8 1.2" LED Matrix + Backpack - Ultra Bright Round Green LEDs](https://www.adafruit.com/product/2035)
What's better than a single LED? Lots of LEDs! And what's better than lots of LEDs? **TWO TIMES AS MANY LEDS!!!**
With the 16x8 LED Matrix Backpack we've doubled your project's matrix capacity by making it super easy to get two separate 8x8 matrices onto...
In Stock
[Buy Now](https://www.adafruit.com/product/2035)
[Related Guides to the Product](https://learn.adafruit.com/products/2035/guides)
### 16x8 1.2" LED Matrix+Backpack UltraBright Round YellowGreen LEDs
[16x8 1.2" LED Matrix+Backpack UltraBright Round YellowGreen LEDs](https://www.adafruit.com/product/2036)
What's better than a single LED? Lots of LEDs! And what's better than lots of LEDs? **TWO TIMES AS MANY LEDS!!!**
With the 16x8 LED Matrix Backpack we've doubled your project's matrix capacity by making it super easy to get two separate 8x8 matrices onto...
In Stock
[Buy Now](https://www.adafruit.com/product/2036)
[Related Guides to the Product](https://learn.adafruit.com/products/2036/guides)
### 16x8 1.2" LED Matrix + Backpack - Ultra Bright Round Red LEDs
[16x8 1.2" LED Matrix + Backpack - Ultra Bright Round Red LEDs](https://www.adafruit.com/product/2037)
What's better than a single LED? Lots of LEDs! And what's better than lots of LEDs? **TWO TIMES AS MANY LEDS!!!**
With the 16x8 LED Matrix Backpack we've doubled your project's matrix capacity by making it super easy to get two separate 8x8 matrices onto...
In Stock
[Buy Now](https://www.adafruit.com/product/2037)
[Related Guides to the Product](https://learn.adafruit.com/products/2037/guides)
### 16x8 1.2" LED Matrix + Backpack - Ultra Bright Round White LEDs
[16x8 1.2" LED Matrix + Backpack - Ultra Bright Round White LEDs](https://www.adafruit.com/product/2038)
What's better than a single LED? Lots of LEDs! And what's better than lots of LEDs? **TWO TIMES AS MANY LEDS!!!**
With the 16x8 LED Matrix Backpack we've doubled your project's matrix capacity by making it super easy to get two separate 8x8 matrices onto...
In Stock
[Buy Now](https://www.adafruit.com/product/2038)
[Related Guides to the Product](https://learn.adafruit.com/products/2038/guides)
### 16x8 1.2" LED Matrix + Backpack - Ultra Bright Round Blue LEDs
[16x8 1.2" LED Matrix + Backpack - Ultra Bright Round Blue LEDs](https://www.adafruit.com/product/2039)
What's better than a single LED? Lots of LEDs! And what's better than lots of LEDs? **TWO TIMES AS MANY LEDS!!!**
With the 16x8 LED Matrix Backpack we've doubled your project's matrix capacity by making it super easy to get two separate 8x8 matrices onto...
In Stock
[Buy Now](https://www.adafruit.com/product/2039)
[Related Guides to the Product](https://learn.adafruit.com/products/2039/guides)
### 16x8 1.2" LED Matrix + Backpack - Ultra Bright Square Blue LEDs
[16x8 1.2" LED Matrix + Backpack - Ultra Bright Square Blue LEDs](https://www.adafruit.com/product/2040)
What's better than a single LED? Lots of LEDs! And what's better than lots of LEDs? **TWO TIMES AS MANY LEDS!!!**
With the 16x8 LED Matrix Backpack we've doubled your project's matrix capacity by making it super easy to get two separate 8x8 matrices onto...
In Stock
[Buy Now](https://www.adafruit.com/product/2040)
[Related Guides to the Product](https://learn.adafruit.com/products/2040/guides)
### 16x8 1.2" LED Matrix + Backpack - Ultra Bright Square Amber LEDs
[16x8 1.2" LED Matrix + Backpack - Ultra Bright Square Amber LEDs](https://www.adafruit.com/product/2041)
What's better than a single LED? Lots of LEDs! And what's better than lots of LEDs? **TWO TIMES AS MANY LEDS!!!**
With the 16x8 LED Matrix Backpack we've doubled your project's matrix capacity by making it super easy to get two separate 8x8 matrices onto...
In Stock
[Buy Now](https://www.adafruit.com/product/2041)
[Related Guides to the Product](https://learn.adafruit.com/products/2041/guides)
### 16x8 1.2" LED Matrix + Backpack - Ultra Bright Square Green LEDs
[16x8 1.2" LED Matrix + Backpack - Ultra Bright Square Green LEDs](https://www.adafruit.com/product/2042)
What's better than a single LED? Lots of LEDs! And what's better than lots of LEDs? **TWO TIMES AS MANY LEDS!!!**
With the 16x8 LED Matrix Backpack we've doubled your project's matrix capacity by making it super easy to get two separate 8x8 matrices onto...
In Stock
[Buy Now](https://www.adafruit.com/product/2042)
[Related Guides to the Product](https://learn.adafruit.com/products/2042/guides)
### 16x8 1.2" LED Matrix + Backpack -Ultra Bright Square Yellow LEDs
[16x8 1.2" LED Matrix + Backpack -Ultra Bright Square Yellow LEDs](https://www.adafruit.com/product/2043)
What's better than a single LED? Lots of LEDs! And what's better than lots of LEDs? **TWO TIMES AS MANY LEDS!!!**
With the 16x8 LED Matrix Backpack we've doubled your project's matrix capacity by making it super easy to get two separate 8x8 matrices onto...
In Stock
[Buy Now](https://www.adafruit.com/product/2043)
[Related Guides to the Product](https://learn.adafruit.com/products/2043/guides)
### 16x8 1.2" LED Matrix + Backpack - Ultra Bright Square White LEDs
[16x8 1.2" LED Matrix + Backpack - Ultra Bright Square White LEDs](https://www.adafruit.com/product/2044)
What's better than a single LED? Lots of LEDs! And what's better than lots of LEDs? **TWO TIMES AS MANY LEDS!!!**
With the 16x8 LED Matrix Backpack we've doubled your project's matrix capacity by making it super easy to get two separate 8x8 matrices onto...
In Stock
[Buy Now](https://www.adafruit.com/product/2044)
[Related Guides to the Product](https://learn.adafruit.com/products/2044/guides)
### 16x8 1.2" LED Matrix + Backpack-Ultra Bright Round Orange LEDs
[16x8 1.2" LED Matrix + Backpack-Ultra Bright Round Orange LEDs](https://www.adafruit.com/product/2052)
What's better than a single LED? Lots of LEDs! And what's better than lots of LEDs? **TWO TIMES AS MANY LEDS!!!**
With the 16x8 LED Matrix Backpack we've doubled your project's matrix capacity by making it super easy to get two separate 8x8 matrices onto...
In Stock
[Buy Now](https://www.adafruit.com/product/2052)
[Related Guides to the Product](https://learn.adafruit.com/products/2052/guides)
### 16x8 1.2" LED Matrices+Backpack Round LEDs in Various Colors
[16x8 1.2" LED Matrices+Backpack Round LEDs in Various Colors](https://www.adafruit.com/product/2054)
What's better than a single LED? Lots of LEDs! And what's better than lots of LEDs? **TWO TIMES AS MANY LEDS!!!**
With the 16x8 LED Matrix Backpack we've doubled your project's matrix capacity by making it super easy to get two separate 8x8 matrices onto...
Out of Stock
[Buy Now](https://www.adafruit.com/product/2054)
[Related Guides to the Product](https://learn.adafruit.com/products/2054/guides)
### Adafruit 8x16 LED Matrix FeatherWing w/o Matrices
[Adafruit 8x16 LED Matrix FeatherWing w/o Matrices](https://www.adafruit.com/product/3090)
You will chirp with delight when you see how easy it is to make your very own 8x16 LED matrix display for any Feather. At 0.8" square, the little [8x8 matrices](https://www.adafruit.com/new/?q=8x8%20miniature%20LED%20matrix&) have everything a big LED matrix has,...
Out of Stock
[Buy Now](https://www.adafruit.com/product/3090)
[Related Guides to the Product](https://learn.adafruit.com/products/3090/guides)
### Adafruit 14-segment LED Alphanumeric backpack (same as P1910)
[Adafruit 14-segment LED Alphanumeric backpack (same as P1910)](https://www.adafruit.com/product/3322)
Just the backpack + 4pin header
No Longer Stocked
[Buy Now](https://www.adafruit.com/product/3322)
[Related Guides to the Product](https://learn.adafruit.com/products/3322/guides)
## Featured Products
### Adafruit Small 1.2" 8x8 LED Matrix w/I2C Backpack - Yellow-Green
[Adafruit Small 1.2" 8x8 LED Matrix w/I2C Backpack - Yellow-Green](https://www.adafruit.com/product/1051)
What's better than a single LED? Lots of LEDs! A fun way to make a small display is to use an [8x8 matrix](https://www.adafruit.com/category/37_88) or a [4-digit 7-segment display](https://www.adafruit.com/category/37_103). Matrices like these are...
In Stock
[Buy Now](https://www.adafruit.com/product/1051)
[Related Guides to the Product](https://learn.adafruit.com/products/1051/guides)
### Small 1.2" 8x8 Ultra Bright Square Blue LED Matrix + Backpack
[Small 1.2" 8x8 Ultra Bright Square Blue LED Matrix + Backpack](https://www.adafruit.com/product/1853)
What's better than a single LED? Lots of LEDs! Matrices like these are 'multiplexed' - so to control 64 LEDs you need 16 pins. That's a lot of pins, and there are [driver chips like the MAX7219](//www.adafruit.com/products/453) that can control a matrix for you but...
In Stock
[Buy Now](https://www.adafruit.com/product/1853)
[Related Guides to the Product](https://learn.adafruit.com/products/1853/guides)
## Related Guides
- [LED Backpack Displays on Raspberry Pi and BeagleBone Black](https://learn.adafruit.com/led-backpack-displays-on-raspberry-pi-and-beaglebone-black.md)
- [Animating Multiple LED Backpacks](https://learn.adafruit.com/animating-multiple-led-backpacks.md)
- [Arduino GPS Clock](https://learn.adafruit.com/arduino-clock.md)
- [Raspberry Pi Physical Dashboard](https://learn.adafruit.com/raspberry-pi-physical-dashboard.md)
- [CircuitPython Hardware: LED Backpacks & FeatherWings](https://learn.adafruit.com/micropython-hardware-led-backpacks-and-featherwings.md)
- [Matrix and 7-Segment LED Backpack with the Raspberry Pi](https://learn.adafruit.com/matrix-7-segment-led-backpack-with-the-raspberry-pi.md)
- [DIY Pocket LED Gamer - Tiny Tetris!](https://learn.adafruit.com/diy-3d-printed-handheld-pocket-game-tiny-tetris-snake.md)
- [RGB LED Matrix Cube with 25,000 LEDs](https://learn.adafruit.com/rgb-led-matrix-cube-for-pi.md)
- [Creating GIFs for SmartMatrix](https://learn.adafruit.com/creating-gifs-for-smartmatrix.md)
- [Adafruit CharliePlex LED Matrix Bonnet](https://learn.adafruit.com/adafruit-charlieplex-bonnet.md)
- [Connecting a 16x32 RGB LED Matrix Panel to a Raspberry Pi](https://learn.adafruit.com/connecting-a-16x32-rgb-led-matrix-panel-to-a-raspberry-pi.md)
- [MicroPython Displays: Drawing Text](https://learn.adafruit.com/micropython-displays-drawing-text.md)
- [Heart Rate Badge](https://learn.adafruit.com/heart-rate-badge.md)
- [16x24 LED Matrix](https://learn.adafruit.com/16x24-led-matrix.md)
- [Adafruit IS31FL3741](https://learn.adafruit.com/adafruit-is31fl3741.md)
---
# Source: https://learn.adafruit.com/adafruit-led-backpack/bi-color-8x8-matrix.md
# Adafruit LED Backpacks
## Bi-Color 8x8 Matrix
This version of the LED backpack is designed for these bright and colorful square=pixeled 8x8 matrices. They have 64 red and 64 green LEDs inside, for a total of 128 LEDs controlled as a 8x16 matrix. This backpack solves the annoyance of using 24 pins or a bunch of chips by having an I2C constant-current matrix controller sit neatly on the back of the PCB. The controller chip takes care of everything, drawing all 128 LEDs in the background. All you have to do is write data to it using the 2-pin I2C interface. There are three address select pins so you can select one of 8 addresses to control up to 8 of these on a single 2-pin I2C bus (as well as whatever other I2C chips or sensors you like). The driver chip can 'dim' the entire display from 1/16 brightness up to full brightness in 1/16th steps. It cannot dim individual LEDs, only the entire display at once.

- [Previous Page](https://learn.adafruit.com/adafruit-led-backpack/circuitpython-and-python-usage-197dcbfa-4ccf-4b98-a152-3982411df681.md)
- [Next Page](https://learn.adafruit.com/adafruit-led-backpack/bi-color-8x8-matrix-assembly.md)
## Primary Products
### Adafruit Mini 8x8 LED Matrix w/I2C Backpack - Red
[Adafruit Mini 8x8 LED Matrix w/I2C Backpack - Red](https://www.adafruit.com/product/870)
What's better than a single LED? Lots of LEDs! A fun way to make a small display is to use an [8x8 matrix](https://www.adafruit.com/category/37_88) or a [4-digit 7-segment display](https://www.adafruit.com/category/37_103). Matrices like these are...
In Stock
[Buy Now](https://www.adafruit.com/product/870)
[Related Guides to the Product](https://learn.adafruit.com/products/870/guides)
### Adafruit Mini 8x8 LED Matrix w/I2C Backpack - Yellow
[Adafruit Mini 8x8 LED Matrix w/I2C Backpack - Yellow](https://www.adafruit.com/product/871)
What's better than a single LED? Lots of LEDs! A fun way to make a small display is to use an [8x8 matrix](https://www.adafruit.com/category/37_88) or a [4-digit 7-segment display](https://www.adafruit.com/category/37_103). Matrices like these are...
In Stock
[Buy Now](https://www.adafruit.com/product/871)
[Related Guides to the Product](https://learn.adafruit.com/products/871/guides)
### Adafruit Mini 0.8" 8x8 LED Matrix w/I2C Backpack - Yellow-Green
[Adafruit Mini 0.8" 8x8 LED Matrix w/I2C Backpack - Yellow-Green](https://www.adafruit.com/product/872)
What's better than a single LED? Lots of LEDs! A fun way to make a small display is to use an [8x8 matrix](https://www.adafruit.com/category/37_88) or a [4-digit 7-segment display](https://www.adafruit.com/category/37_103). Matrices like these are...
In Stock
[Buy Now](https://www.adafruit.com/product/872)
[Related Guides to the Product](https://learn.adafruit.com/products/872/guides)
### Adafruit 0.56" 4-Digit 7-Segment Display with I2C Backpack - Red
[Adafruit 0.56" 4-Digit 7-Segment Display with I2C Backpack - Red](https://www.adafruit.com/product/878)
What's better than a single LED? Lots of LEDs! A fun way to make a small display is to use an [8x8 matrix](https://www.adafruit.com/category/37_88) or a [4-digit 7-segment display](https://www.adafruit.com/category/37_103). Matrices like these are...
In Stock
[Buy Now](https://www.adafruit.com/product/878)
[Related Guides to the Product](https://learn.adafruit.com/products/878/guides)
### Adafruit 0.56" 4-Digit 7-Segment Display w/I2C Backpack - Yellow
[Adafruit 0.56" 4-Digit 7-Segment Display w/I2C Backpack - Yellow](https://www.adafruit.com/product/879)
What's better than a single LED? Lots of LEDs! A fun way to make a small display is to use an [8x8 matrix](https://www.adafruit.com/category/37_88) or a [4-digit 7-segment display](https://www.adafruit.com/category/37_103). Matrices like these are...
In Stock
[Buy Now](https://www.adafruit.com/product/879)
[Related Guides to the Product](https://learn.adafruit.com/products/879/guides)
### Adafruit 0.56" 4-Digit 7-Segment Display w/ I2C Backpack - Green
[Adafruit 0.56" 4-Digit 7-Segment Display w/ I2C Backpack - Green](https://www.adafruit.com/product/880)
What's better than a single LED? Lots of LEDs! A fun way to make a small display is to use an [8x8 matrix](https://www.adafruit.com/category/37_88) or a [4-digit 7-segment display](https://www.adafruit.com/category/37_103). Matrices like these are...
No Longer Stocked
[Buy Now](https://www.adafruit.com/product/880)
[Related Guides to the Product](https://learn.adafruit.com/products/880/guides)
### Adafruit 0.56" 4-Digit 7-Segment Display w/ I2C Backpack - Blue
[Adafruit 0.56" 4-Digit 7-Segment Display w/ I2C Backpack - Blue](https://www.adafruit.com/product/881)
What's better than a single LED? Lots of LEDs! A fun way to make a small display is to use an [8x8 matrix](https://www.adafruit.com/category/37_88) or a [4-digit 7-segment display](https://www.adafruit.com/category/37_103). Matrices like these are...
In Stock
[Buy Now](https://www.adafruit.com/product/881)
[Related Guides to the Product](https://learn.adafruit.com/products/881/guides)
### Adafruit Bicolor LED Square Pixel Matrix with I2C Backpack
[Adafruit Bicolor LED Square Pixel Matrix with I2C Backpack](https://www.adafruit.com/product/902)
What's better than a single LED? Lots of LEDs! A fun way to make a small colorful display is to use a [1.2" Bi-color 8x8 LED Matrix](http://www.adafruit.com/products/458). Matrices like these are 'multiplexed' - so to control all the 128 LEDs you need 24 pins....
In Stock
[Buy Now](https://www.adafruit.com/product/902)
[Related Guides to the Product](https://learn.adafruit.com/products/902/guides)
### Adafruit Mini 8x8 LED Matrix w/I2C Backpack - Blue
[Adafruit Mini 8x8 LED Matrix w/I2C Backpack - Blue](https://www.adafruit.com/product/959)
What's better than a single LED? Lots of LEDs! A fun way to make a small display is to use an [8x8 matrix](https://www.adafruit.com/category/37_88) or a [4-digit 7-segment display](https://www.adafruit.com/category/37_103). Matrices like these are...
In Stock
[Buy Now](https://www.adafruit.com/product/959)
[Related Guides to the Product](https://learn.adafruit.com/products/959/guides)
### Adafruit 0.56" 4-Digit 7-Segment Display w/I2C Backpack - White
[Adafruit 0.56" 4-Digit 7-Segment Display w/I2C Backpack - White](https://www.adafruit.com/product/1002)
What's better than a single LED? Lots of LEDs! A fun way to make a small display is to use an [8x8 matrix](https://www.adafruit.com/category/37_88) or a [4-digit 7-segment display](https://www.adafruit.com/category/37_103). Matrices like these are...
In Stock
[Buy Now](https://www.adafruit.com/product/1002)
[Related Guides to the Product](https://learn.adafruit.com/products/1002/guides)
### Adafruit 1.2" 8x8 LED Matrix Backpack
[Adafruit 1.2" 8x8 LED Matrix Backpack](https://www.adafruit.com/product/1048)
By popular request, you can now get our 8x8 LED backpacks without the LEDs! These backpacks feature an HT16K33 I2C LED driver, they're simple and easy to use - you can use [our very nice library for the backpacks to...](https://github.com/adafruit/Adafruit-LED-Backpack-Library)
In Stock
[Buy Now](https://www.adafruit.com/product/1048)
[Related Guides to the Product](https://learn.adafruit.com/products/1048/guides)
### Adafruit Small 1.2" 8x8 LED Matrix w/I2C Backpack - Red
[Adafruit Small 1.2" 8x8 LED Matrix w/I2C Backpack - Red](https://www.adafruit.com/product/1049)
What's better than a single LED? Lots of LEDs! A fun way to make a small display is to use an [8x8 matrix](https://www.adafruit.com/category/37_88) or a [4-digit 7-segment display](https://www.adafruit.com/category/37_103). Matrices like these are...
In Stock
[Buy Now](https://www.adafruit.com/product/1049)
[Related Guides to the Product](https://learn.adafruit.com/products/1049/guides)
### Adafruit Small 1.2" 8x8 LED Matrix w/I2C Backpack - Yellow
[Adafruit Small 1.2" 8x8 LED Matrix w/I2C Backpack - Yellow](https://www.adafruit.com/product/1050)
What's better than a single LED? Lots of LEDs! A fun way to make a small display is to use an [8x8 matrix](https://www.adafruit.com/category/37_88) or a [4-digit 7-segment display](https://www.adafruit.com/category/37_103). Matrices like these are...
In Stock
[Buy Now](https://www.adafruit.com/product/1050)
[Related Guides to the Product](https://learn.adafruit.com/products/1050/guides)
### Adafruit Small 1.2" 8x8 LED Matrix w/I2C Backpack - Blue
[Adafruit Small 1.2" 8x8 LED Matrix w/I2C Backpack - Blue](https://www.adafruit.com/product/1052)
What's better than a single LED? Lots of LEDs! A fun way to make a small display is to use an [8x8 matrix](https://www.adafruit.com/category/37_88) or a [4-digit 7-segment display](https://www.adafruit.com/category/37_103). Matrices like these are...
In Stock
[Buy Now](https://www.adafruit.com/product/1052)
[Related Guides to the Product](https://learn.adafruit.com/products/1052/guides)
### Adafruit Mini 8x8 LED Matrix w/I2C Backpack - Ultra Bright White
[Adafruit Mini 8x8 LED Matrix w/I2C Backpack - Ultra Bright White](https://www.adafruit.com/product/1080)
What's better than a single LED? Lots of LEDs! A fun way to make a small display is to use an [8x8 matrix](https://www.adafruit.com/category/37_88) or a [4-digit 7-segment display](https://www.adafruit.com/category/37_103). Matrices like these are...
In Stock
[Buy Now](https://www.adafruit.com/product/1080)
[Related Guides to the Product](https://learn.adafruit.com/products/1080/guides)
### Adafruit 1.2" 4-Digit 7-Segment Display w/I2C Backpack - Green
[Adafruit 1.2" 4-Digit 7-Segment Display w/I2C Backpack - Green](https://www.adafruit.com/product/1268)
What's better than a single LED? Lots of LEDs! A fun way to make a numeric display is to use a [4-digit 7-segment display](https://www.adafruit.com/category/37_103). LED matrices like these are 'multiplexed' - so to control all the seven-segment LEDs you need 14 pins....
No Longer Stocked
[Buy Now](https://www.adafruit.com/product/1268)
[Related Guides to the Product](https://learn.adafruit.com/products/1268/guides)
### Adafruit 1.2" 4-Digit 7-Segment Display w/I2C Backpack - Yellow
[Adafruit 1.2" 4-Digit 7-Segment Display w/I2C Backpack - Yellow](https://www.adafruit.com/product/1269)
What's better than a single LED? Lots of LEDs! A fun way to make a numeric display is to use a [4-digit 7-segment display](https://www.adafruit.com/category/37_103). LED matrices like these are 'multiplexed' - so to control all the seven-segment LEDs you need 14 pins....
In Stock
[Buy Now](https://www.adafruit.com/product/1269)
[Related Guides to the Product](https://learn.adafruit.com/products/1269/guides)
### Adafruit 1.2" 4-Digit 7-Segment Display w/I2C Backpack - Red
[Adafruit 1.2" 4-Digit 7-Segment Display w/I2C Backpack - Red](https://www.adafruit.com/product/1270)
What's better than a single LED? Lots of LEDs! A fun way to make a numeric display is to use a [4-digit 7-segment display](https://www.adafruit.com/category/37_103). LED matrices like these are 'multiplexed' - so to control all the seven-segment LEDs you need 14 pins....
In Stock
[Buy Now](https://www.adafruit.com/product/1270)
[Related Guides to the Product](https://learn.adafruit.com/products/1270/guides)
### Small 1.2" 8x8 Ultra Bright White LED Matrix + Backpack
[Small 1.2" 8x8 Ultra Bright White LED Matrix + Backpack](https://www.adafruit.com/product/1614)
What's better than a single LED? Lots of LEDs! A fun way to make a small display is to use an [8x8 matrix](https://www.adafruit.com/category/37_88) or a [4-digit 7-segment display](https://www.adafruit.com/category/37_103). Matrices like these are...
In Stock
[Buy Now](https://www.adafruit.com/product/1614)
[Related Guides to the Product](https://learn.adafruit.com/products/1614/guides)
### Adafruit Small 1.2" 8x8 LED Matrix w/I2C Backpack - Pure Green
[Adafruit Small 1.2" 8x8 LED Matrix w/I2C Backpack - Pure Green](https://www.adafruit.com/product/1632)
What's better than a single LED? Lots of LEDs! A fun way to make a small display is to use an [8x8 matrix](https://www.adafruit.com/category/37_88) or a [4-digit 7-segment display](https://www.adafruit.com/category/37_103). Matrices like these are...
In Stock
[Buy Now](https://www.adafruit.com/product/1632)
[Related Guides to the Product](https://learn.adafruit.com/products/1632/guides)
### Adafruit Mini 0.8" 8x8 LED Matrix w/I2C Backpack - Pure Green
[Adafruit Mini 0.8" 8x8 LED Matrix w/I2C Backpack - Pure Green](https://www.adafruit.com/product/1633)
What's better than a single LED? Lots of LEDs! A fun way to make a small display is to use an [8x8 matrix](https://www.adafruit.com/category/37_88) or a [4-digit 7-segment display](https://www.adafruit.com/category/37_103). Matrices like these are...
In Stock
[Buy Now](https://www.adafruit.com/product/1633)
[Related Guides to the Product](https://learn.adafruit.com/products/1633/guides)
### Bi-Color (Red/Green) 24-Bar Bargraph w/I2C Backpack Kit
[Bi-Color (Red/Green) 24-Bar Bargraph w/I2C Backpack Kit](https://www.adafruit.com/product/1721)
What's better than a single LED? Lots of LEDs! A fun way to make a small linear display is to use two 12-bar Bi-color bar-graphs. However, this LED bargraph is 'multiplexed' - so to control all the 48 LEDs you need a lot of pins.
Out of Stock
[Buy Now](https://www.adafruit.com/product/1721)
[Related Guides to the Product](https://learn.adafruit.com/products/1721/guides)
### Small 1.2" 8x8 Ultra Bright Square Amber LED Matrix + Backpack
[Small 1.2" 8x8 Ultra Bright Square Amber LED Matrix + Backpack](https://www.adafruit.com/product/1854)
What's better than a single LED? Lots of LEDs! Matrices like these are 'multiplexed' - so to control 64 LEDs you need 16 pins. That's a lot of pins, and there are [driver chips like the MAX7219](//www.adafruit.com/products/453) that can control a matrix for you but...
In Stock
[Buy Now](https://www.adafruit.com/product/1854)
[Related Guides to the Product](https://learn.adafruit.com/products/1854/guides)
### Small 1.2" 8x8 Ultra Bright Square Yellow LED Matrix + Backpack
[Small 1.2" 8x8 Ultra Bright Square Yellow LED Matrix + Backpack](https://www.adafruit.com/product/1855)
What's better than a single LED? Lots of LEDs! Matrices like these are 'multiplexed' - so to control 64 LEDs you need 16 pins. That's a lot of pins, and there are [driver chips like the MAX7219](//www.adafruit.com/products/453) that can control a matrix for you but...
In Stock
[Buy Now](https://www.adafruit.com/product/1855)
[Related Guides to the Product](https://learn.adafruit.com/products/1855/guides)
### Small 1.2" 8x8 Bright Square Pure Green LED Matrix + Backpack
[Small 1.2" 8x8 Bright Square Pure Green LED Matrix + Backpack](https://www.adafruit.com/product/1856)
What's better than a single LED? Lots of LEDs! Matrices like these are 'multiplexed' - so to control 64 LEDs you need 16 pins. That's a lot of pins, and there are [driver chips like the MAX7219](//www.adafruit.com/products/453) that can control a matrix for you but...
In Stock
[Buy Now](https://www.adafruit.com/product/1856)
[Related Guides to the Product](https://learn.adafruit.com/products/1856/guides)
### Small 1.2" 8x8 Ultra Bright Square White LED Matrix + Backpack
[Small 1.2" 8x8 Ultra Bright Square White LED Matrix + Backpack](https://www.adafruit.com/product/1857)
What's better than a single LED? Lots of LEDs! Matrices like these are 'multiplexed' - so to control 64 LEDs you need 16 pins. That's a lot of pins, and there are [driver chips like the MAX7219](//www.adafruit.com/products/453) that can control a matrix for you but...
In Stock
[Buy Now](https://www.adafruit.com/product/1857)
[Related Guides to the Product](https://learn.adafruit.com/products/1857/guides)
### Adafruit 14-segment LED Alphanumeric Backpack - STEMMA QT
[Adafruit 14-segment LED Alphanumeric Backpack - STEMMA QT](https://www.adafruit.com/product/1910)
By popular request, you can now get our 14-segment LED backpacks without the LEDs! These backpacks feature an HT16K33 I2C LED driver, they're simple and easy to use - you can use [our very nice library for the backpacks to...](https://github.com/adafruit/Adafruit-LED-Backpack-Library)
In Stock
[Buy Now](https://www.adafruit.com/product/1910)
[Related Guides to the Product](https://learn.adafruit.com/products/1910/guides)
### Quad Alphanumeric Display - Red 0.54" Digits w/ I2C Backpack
[Quad Alphanumeric Display - Red 0.54" Digits w/ I2C Backpack](https://www.adafruit.com/product/1911)
Display, elegantly, 012345678 or 9! Gaze, hypnotized, at ABCDEFGHIJKLM - well it can display the whole alphabet. You get the point. This is a nice, bright alphanumeric display that shows letters and numbers in a beautiful red hue. It's super bright and designed for viewing from distances...
In Stock
[Buy Now](https://www.adafruit.com/product/1911)
[Related Guides to the Product](https://learn.adafruit.com/products/1911/guides)
### Quad Alphanumeric Display - Blue 0.54" Digits w/ I2C Backpack
[Quad Alphanumeric Display - Blue 0.54" Digits w/ I2C Backpack](https://www.adafruit.com/product/1912)
Display, elegantly, 012345678 or 9! Gaze, hypnotized, at ABCDEFGHIJKLM - well it can display the whole alphabet. You get the point. This is a nice, bright alphanumeric display that shows letters and numbers in a beautiful blue hue. It's super bright and designed for viewing from distances...
In Stock
[Buy Now](https://www.adafruit.com/product/1912)
[Related Guides to the Product](https://learn.adafruit.com/products/1912/guides)
### 16x8 1.2" LED Matrix + Backpack - Ultra Bright Round Green LEDs
[16x8 1.2" LED Matrix + Backpack - Ultra Bright Round Green LEDs](https://www.adafruit.com/product/2035)
What's better than a single LED? Lots of LEDs! And what's better than lots of LEDs? **TWO TIMES AS MANY LEDS!!!**
With the 16x8 LED Matrix Backpack we've doubled your project's matrix capacity by making it super easy to get two separate 8x8 matrices onto...
In Stock
[Buy Now](https://www.adafruit.com/product/2035)
[Related Guides to the Product](https://learn.adafruit.com/products/2035/guides)
### 16x8 1.2" LED Matrix+Backpack UltraBright Round YellowGreen LEDs
[16x8 1.2" LED Matrix+Backpack UltraBright Round YellowGreen LEDs](https://www.adafruit.com/product/2036)
What's better than a single LED? Lots of LEDs! And what's better than lots of LEDs? **TWO TIMES AS MANY LEDS!!!**
With the 16x8 LED Matrix Backpack we've doubled your project's matrix capacity by making it super easy to get two separate 8x8 matrices onto...
In Stock
[Buy Now](https://www.adafruit.com/product/2036)
[Related Guides to the Product](https://learn.adafruit.com/products/2036/guides)
### 16x8 1.2" LED Matrix + Backpack - Ultra Bright Round Red LEDs
[16x8 1.2" LED Matrix + Backpack - Ultra Bright Round Red LEDs](https://www.adafruit.com/product/2037)
What's better than a single LED? Lots of LEDs! And what's better than lots of LEDs? **TWO TIMES AS MANY LEDS!!!**
With the 16x8 LED Matrix Backpack we've doubled your project's matrix capacity by making it super easy to get two separate 8x8 matrices onto...
In Stock
[Buy Now](https://www.adafruit.com/product/2037)
[Related Guides to the Product](https://learn.adafruit.com/products/2037/guides)
### 16x8 1.2" LED Matrix + Backpack - Ultra Bright Round White LEDs
[16x8 1.2" LED Matrix + Backpack - Ultra Bright Round White LEDs](https://www.adafruit.com/product/2038)
What's better than a single LED? Lots of LEDs! And what's better than lots of LEDs? **TWO TIMES AS MANY LEDS!!!**
With the 16x8 LED Matrix Backpack we've doubled your project's matrix capacity by making it super easy to get two separate 8x8 matrices onto...
In Stock
[Buy Now](https://www.adafruit.com/product/2038)
[Related Guides to the Product](https://learn.adafruit.com/products/2038/guides)
### 16x8 1.2" LED Matrix + Backpack - Ultra Bright Round Blue LEDs
[16x8 1.2" LED Matrix + Backpack - Ultra Bright Round Blue LEDs](https://www.adafruit.com/product/2039)
What's better than a single LED? Lots of LEDs! And what's better than lots of LEDs? **TWO TIMES AS MANY LEDS!!!**
With the 16x8 LED Matrix Backpack we've doubled your project's matrix capacity by making it super easy to get two separate 8x8 matrices onto...
In Stock
[Buy Now](https://www.adafruit.com/product/2039)
[Related Guides to the Product](https://learn.adafruit.com/products/2039/guides)
### 16x8 1.2" LED Matrix + Backpack - Ultra Bright Square Blue LEDs
[16x8 1.2" LED Matrix + Backpack - Ultra Bright Square Blue LEDs](https://www.adafruit.com/product/2040)
What's better than a single LED? Lots of LEDs! And what's better than lots of LEDs? **TWO TIMES AS MANY LEDS!!!**
With the 16x8 LED Matrix Backpack we've doubled your project's matrix capacity by making it super easy to get two separate 8x8 matrices onto...
In Stock
[Buy Now](https://www.adafruit.com/product/2040)
[Related Guides to the Product](https://learn.adafruit.com/products/2040/guides)
### 16x8 1.2" LED Matrix + Backpack - Ultra Bright Square Amber LEDs
[16x8 1.2" LED Matrix + Backpack - Ultra Bright Square Amber LEDs](https://www.adafruit.com/product/2041)
What's better than a single LED? Lots of LEDs! And what's better than lots of LEDs? **TWO TIMES AS MANY LEDS!!!**
With the 16x8 LED Matrix Backpack we've doubled your project's matrix capacity by making it super easy to get two separate 8x8 matrices onto...
In Stock
[Buy Now](https://www.adafruit.com/product/2041)
[Related Guides to the Product](https://learn.adafruit.com/products/2041/guides)
### 16x8 1.2" LED Matrix + Backpack - Ultra Bright Square Green LEDs
[16x8 1.2" LED Matrix + Backpack - Ultra Bright Square Green LEDs](https://www.adafruit.com/product/2042)
What's better than a single LED? Lots of LEDs! And what's better than lots of LEDs? **TWO TIMES AS MANY LEDS!!!**
With the 16x8 LED Matrix Backpack we've doubled your project's matrix capacity by making it super easy to get two separate 8x8 matrices onto...
In Stock
[Buy Now](https://www.adafruit.com/product/2042)
[Related Guides to the Product](https://learn.adafruit.com/products/2042/guides)
### 16x8 1.2" LED Matrix + Backpack -Ultra Bright Square Yellow LEDs
[16x8 1.2" LED Matrix + Backpack -Ultra Bright Square Yellow LEDs](https://www.adafruit.com/product/2043)
What's better than a single LED? Lots of LEDs! And what's better than lots of LEDs? **TWO TIMES AS MANY LEDS!!!**
With the 16x8 LED Matrix Backpack we've doubled your project's matrix capacity by making it super easy to get two separate 8x8 matrices onto...
In Stock
[Buy Now](https://www.adafruit.com/product/2043)
[Related Guides to the Product](https://learn.adafruit.com/products/2043/guides)
### 16x8 1.2" LED Matrix + Backpack - Ultra Bright Square White LEDs
[16x8 1.2" LED Matrix + Backpack - Ultra Bright Square White LEDs](https://www.adafruit.com/product/2044)
What's better than a single LED? Lots of LEDs! And what's better than lots of LEDs? **TWO TIMES AS MANY LEDS!!!**
With the 16x8 LED Matrix Backpack we've doubled your project's matrix capacity by making it super easy to get two separate 8x8 matrices onto...
In Stock
[Buy Now](https://www.adafruit.com/product/2044)
[Related Guides to the Product](https://learn.adafruit.com/products/2044/guides)
### 16x8 1.2" LED Matrix + Backpack-Ultra Bright Round Orange LEDs
[16x8 1.2" LED Matrix + Backpack-Ultra Bright Round Orange LEDs](https://www.adafruit.com/product/2052)
What's better than a single LED? Lots of LEDs! And what's better than lots of LEDs? **TWO TIMES AS MANY LEDS!!!**
With the 16x8 LED Matrix Backpack we've doubled your project's matrix capacity by making it super easy to get two separate 8x8 matrices onto...
In Stock
[Buy Now](https://www.adafruit.com/product/2052)
[Related Guides to the Product](https://learn.adafruit.com/products/2052/guides)
### 16x8 1.2" LED Matrices+Backpack Round LEDs in Various Colors
[16x8 1.2" LED Matrices+Backpack Round LEDs in Various Colors](https://www.adafruit.com/product/2054)
What's better than a single LED? Lots of LEDs! And what's better than lots of LEDs? **TWO TIMES AS MANY LEDS!!!**
With the 16x8 LED Matrix Backpack we've doubled your project's matrix capacity by making it super easy to get two separate 8x8 matrices onto...
Out of Stock
[Buy Now](https://www.adafruit.com/product/2054)
[Related Guides to the Product](https://learn.adafruit.com/products/2054/guides)
### Adafruit 8x16 LED Matrix FeatherWing w/o Matrices
[Adafruit 8x16 LED Matrix FeatherWing w/o Matrices](https://www.adafruit.com/product/3090)
You will chirp with delight when you see how easy it is to make your very own 8x16 LED matrix display for any Feather. At 0.8" square, the little [8x8 matrices](https://www.adafruit.com/new/?q=8x8%20miniature%20LED%20matrix&) have everything a big LED matrix has,...
Out of Stock
[Buy Now](https://www.adafruit.com/product/3090)
[Related Guides to the Product](https://learn.adafruit.com/products/3090/guides)
### Adafruit 14-segment LED Alphanumeric backpack (same as P1910)
[Adafruit 14-segment LED Alphanumeric backpack (same as P1910)](https://www.adafruit.com/product/3322)
Just the backpack + 4pin header
No Longer Stocked
[Buy Now](https://www.adafruit.com/product/3322)
[Related Guides to the Product](https://learn.adafruit.com/products/3322/guides)
## Featured Products
### Adafruit Small 1.2" 8x8 LED Matrix w/I2C Backpack - Yellow-Green
[Adafruit Small 1.2" 8x8 LED Matrix w/I2C Backpack - Yellow-Green](https://www.adafruit.com/product/1051)
What's better than a single LED? Lots of LEDs! A fun way to make a small display is to use an [8x8 matrix](https://www.adafruit.com/category/37_88) or a [4-digit 7-segment display](https://www.adafruit.com/category/37_103). Matrices like these are...
In Stock
[Buy Now](https://www.adafruit.com/product/1051)
[Related Guides to the Product](https://learn.adafruit.com/products/1051/guides)
### Small 1.2" 8x8 Ultra Bright Square Blue LED Matrix + Backpack
[Small 1.2" 8x8 Ultra Bright Square Blue LED Matrix + Backpack](https://www.adafruit.com/product/1853)
What's better than a single LED? Lots of LEDs! Matrices like these are 'multiplexed' - so to control 64 LEDs you need 16 pins. That's a lot of pins, and there are [driver chips like the MAX7219](//www.adafruit.com/products/453) that can control a matrix for you but...
In Stock
[Buy Now](https://www.adafruit.com/product/1853)
[Related Guides to the Product](https://learn.adafruit.com/products/1853/guides)
## Related Guides
- [LED Backpack Displays on Raspberry Pi and BeagleBone Black](https://learn.adafruit.com/led-backpack-displays-on-raspberry-pi-and-beaglebone-black.md)
- [Animating Multiple LED Backpacks](https://learn.adafruit.com/animating-multiple-led-backpacks.md)
- [Arduino GPS Clock](https://learn.adafruit.com/arduino-clock.md)
- [Raspberry Pi Physical Dashboard](https://learn.adafruit.com/raspberry-pi-physical-dashboard.md)
- [CircuitPython Hardware: LED Backpacks & FeatherWings](https://learn.adafruit.com/micropython-hardware-led-backpacks-and-featherwings.md)
- [Matrix and 7-Segment LED Backpack with the Raspberry Pi](https://learn.adafruit.com/matrix-7-segment-led-backpack-with-the-raspberry-pi.md)
- [DIY Pocket LED Gamer - Tiny Tetris!](https://learn.adafruit.com/diy-3d-printed-handheld-pocket-game-tiny-tetris-snake.md)
- [RGB LED Matrix Cube with 25,000 LEDs](https://learn.adafruit.com/rgb-led-matrix-cube-for-pi.md)
- [Creating GIFs for SmartMatrix](https://learn.adafruit.com/creating-gifs-for-smartmatrix.md)
- [Adafruit CharliePlex LED Matrix Bonnet](https://learn.adafruit.com/adafruit-charlieplex-bonnet.md)
- [Connecting a 16x32 RGB LED Matrix Panel to a Raspberry Pi](https://learn.adafruit.com/connecting-a-16x32-rgb-led-matrix-panel-to-a-raspberry-pi.md)
- [MicroPython Displays: Drawing Text](https://learn.adafruit.com/micropython-displays-drawing-text.md)
- [Heart Rate Badge](https://learn.adafruit.com/heart-rate-badge.md)
- [16x24 LED Matrix](https://learn.adafruit.com/16x24-led-matrix.md)
- [Adafruit IS31FL3741](https://learn.adafruit.com/adafruit-is31fl3741.md)
---
# Source: https://learn.adafruit.com/matrix-7-segment-led-backpack-with-the-raspberry-pi/bicolor-bar-graph-24.md
# Matrix and 7-Segment LED Backpack with the Raspberry Pi
## Bicolor Bar Graph 24

## CircuitPython Code
The bicolor bar graph display is demonstrated in the **bicolor24\_test.py ** script. This code will light up 3 bars in different colors and then loop through full color all on and all off modes.
https://github.com/adafruit/Adafruit_Learning_System_Guides/blob/main/Matrix_7-Segment_LED_Backpack_Raspberry_Pi/bicolor24_test/code.py
## Download and Run the Code
We can easily copy this code onto our Pi's home directory using the 'wget' command and then run it using the following commands.
```
cd
wget https://github.com/adafruit/Adafruit_Learning_System_Guides/blob/master/Matrix_7-Segment_LED_Backpack_Raspberry_Pi/bicolor24_test.py
python3 bicolor24_test.py
```
- [Previous Page](https://learn.adafruit.com/matrix-7-segment-led-backpack-with-the-raspberry-pi/7-segment-test.md)
- [Next Page](https://learn.adafruit.com/matrix-7-segment-led-backpack-with-the-raspberry-pi/7-segment-clock.md)
## Featured Products
### Adafruit 0.56" 4-Digit 7-Segment Display w/ I2C Backpack - Blue
[Adafruit 0.56" 4-Digit 7-Segment Display w/ I2C Backpack - Blue](https://www.adafruit.com/product/881)
What's better than a single LED? Lots of LEDs! A fun way to make a small display is to use an [8x8 matrix](https://www.adafruit.com/category/37_88) or a [4-digit 7-segment display](https://www.adafruit.com/category/37_103). Matrices like these are...
In Stock
[Buy Now](https://www.adafruit.com/product/881)
[Related Guides to the Product](https://learn.adafruit.com/products/881/guides)
### Adafruit Mini 0.8" 8x8 LED Matrix w/I2C Backpack - Yellow-Green
[Adafruit Mini 0.8" 8x8 LED Matrix w/I2C Backpack - Yellow-Green](https://www.adafruit.com/product/872)
What's better than a single LED? Lots of LEDs! A fun way to make a small display is to use an [8x8 matrix](https://www.adafruit.com/category/37_88) or a [4-digit 7-segment display](https://www.adafruit.com/category/37_103). Matrices like these are...
In Stock
[Buy Now](https://www.adafruit.com/product/872)
[Related Guides to the Product](https://learn.adafruit.com/products/872/guides)
### Adafruit Bicolor LED Square Pixel Matrix with I2C Backpack
[Adafruit Bicolor LED Square Pixel Matrix with I2C Backpack](https://www.adafruit.com/product/902)
What's better than a single LED? Lots of LEDs! A fun way to make a small colorful display is to use a [1.2" Bi-color 8x8 LED Matrix](http://www.adafruit.com/products/458). Matrices like these are 'multiplexed' - so to control all the 128 LEDs you need 24 pins....
In Stock
[Buy Now](https://www.adafruit.com/product/902)
[Related Guides to the Product](https://learn.adafruit.com/products/902/guides)
### Quad Alphanumeric Display - Blue 0.54" Digits w/ I2C Backpack
[Quad Alphanumeric Display - Blue 0.54" Digits w/ I2C Backpack](https://www.adafruit.com/product/1912)
Display, elegantly, 012345678 or 9! Gaze, hypnotized, at ABCDEFGHIJKLM - well it can display the whole alphabet. You get the point. This is a nice, bright alphanumeric display that shows letters and numbers in a beautiful blue hue. It's super bright and designed for viewing from distances...
In Stock
[Buy Now](https://www.adafruit.com/product/1912)
[Related Guides to the Product](https://learn.adafruit.com/products/1912/guides)
### Bi-Color (Red/Green) 24-Bar Bargraph w/I2C Backpack Kit
[Bi-Color (Red/Green) 24-Bar Bargraph w/I2C Backpack Kit](https://www.adafruit.com/product/1721)
What's better than a single LED? Lots of LEDs! A fun way to make a small linear display is to use two 12-bar Bi-color bar-graphs. However, this LED bargraph is 'multiplexed' - so to control all the 48 LEDs you need a lot of pins.
In Stock
[Buy Now](https://www.adafruit.com/product/1721)
[Related Guides to the Product](https://learn.adafruit.com/products/1721/guides)
### Raspberry Pi 3 - Model B+ - 1.4GHz Cortex-A53 with 1GB RAM
[Raspberry Pi 3 - Model B+ - 1.4GHz Cortex-A53 with 1GB RAM](https://www.adafruit.com/product/3775)
The Raspberry Pi 3 Model B is the most popular Raspberry Pi computer made, and the Pi Foundation knows you can always make a good thing _better_! And what could make the Pi 3 better? How about a _faster_ processor, 5 GHz WiFi, and updated Ethernet chip with PoE capability?...
In Stock
[Buy Now](https://www.adafruit.com/product/3775)
[Related Guides to the Product](https://learn.adafruit.com/products/3775/guides)
### Assembled Pi Cobbler Plus - Breakout Cable
[Assembled Pi Cobbler Plus - Breakout Cable](https://www.adafruit.com/product/2029)
The Raspberry Pi B+ / Pi 2 / Pi 3 / Pi 4 has landed on the Maker World like a 40-GPIO pinned, quad-USB ported, credit card sized bomb of DIY joy. And while you can use most of our great Model B accessories by hooking up our [downgrade...](https://www.adafruit.com/product/1986)
In Stock
[Buy Now](https://www.adafruit.com/product/2029)
[Related Guides to the Product](https://learn.adafruit.com/products/2029/guides)
## Related Guides
- [Adafruit LED Backpacks](https://learn.adafruit.com/adafruit-led-backpack.md)
- [Animating Multiple LED Backpacks](https://learn.adafruit.com/animating-multiple-led-backpacks.md)
- [CircuitPython Hardware: LED Backpacks & FeatherWings](https://learn.adafruit.com/micropython-hardware-led-backpacks-and-featherwings.md)
- [Raspberry Pi Physical Dashboard](https://learn.adafruit.com/raspberry-pi-physical-dashboard.md)
- [Raspberry Pi Analog to Digital Converters](https://learn.adafruit.com/raspberry-pi-analog-to-digital-converters.md)
- [Trinket / Gemma Space Invader Pendant](https://learn.adafruit.com/trinket-slash-gemma-space-invader-pendant.md)
- [Circadian Pi Desk Light](https://learn.adafruit.com/circadian-pi-desk-light.md)
- [LED Backpack Displays on Raspberry Pi and BeagleBone Black](https://learn.adafruit.com/led-backpack-displays-on-raspberry-pi-and-beaglebone-black.md)
- [Speech Synthesis on the Raspberry Pi](https://learn.adafruit.com/speech-synthesis-on-the-raspberry-pi.md)
- [Circle of Fifths Euclidean Synth with synthio and CircuitPython](https://learn.adafruit.com/circle-of-fifths-euclidean-synth-with-synthio-and-circuitpython.md)
- [Tiny Arduino Music Visualizer](https://learn.adafruit.com/piccolo.md)
- [Personalized NextBus ESP8266 Transit Clock](https://learn.adafruit.com/personalized-esp8266-transit-clock.md)
- [Playing sounds and using buttons with Raspberry Pi](https://learn.adafruit.com/playing-sounds-and-using-buttons-with-raspberry-pi.md)
- [Adafruit Microphone Amplifier Breakout](https://learn.adafruit.com/adafruit-microphone-amplifier-breakout.md)
- [RGB Matrix New York Times Title Scroller](https://learn.adafruit.com/rgb-matix-nyt-text-scroller.md)
---
# Source: https://learn.adafruit.com/biometric-security-box.md
# Biometric Lock Box
## Overview

The Biometric Security Box uses the Adafruit Fingerprint Sensor as well as a numeric pass-code and a mechanical key-lock to provide triple-security. This tutorial is based on a 4x6 card file box, but can be easily adapted to larger lock-boxes – or even a full-size door!

- [Next Page](https://learn.adafruit.com/biometric-security-box/parts.md)
## Featured Products
### Panel Mount 2.1mm DC barrel jack
[Panel Mount 2.1mm DC barrel jack](https://www.adafruit.com/product/610)
This power jack is designed to easily attach to a panel up to 8mm thick (0.315" or 5/16") and fit 2.1mm power plugs snugly and securely. Perfect for adding a power connector to your project enclosure. We like this jack in particular for its long body (so you can use it on thicker...
In Stock
[Buy Now](https://www.adafruit.com/product/610)
[Related Guides to the Product](https://learn.adafruit.com/products/610/guides)
### Rugged Metal On/Off Switch with Green LED Ring
[Rugged Metal On/Off Switch with Green LED Ring](https://www.adafruit.com/product/482)
These chrome-plated metal buttons are rugged and look real good while doing it! Simply drill a 16mm hole into any material up to 1/2" thick and you can fit these in place, there's even a rubber gasket to keep water out of the enclosure. On the front of the button is a flat metal...
In Stock
[Buy Now](https://www.adafruit.com/product/482)
[Related Guides to the Product](https://learn.adafruit.com/products/482/guides)
### Adafruit MENTA - Mint Tin Arduino Compatible Kit with Mint Tin
[Adafruit MENTA - Mint Tin Arduino Compatible Kit with Mint Tin](https://www.adafruit.com/product/795)
Introducing the MENTA, a portable minty Arduino-compatible project that fits into a common mint tin. We took our super popular Boarduino series, and wrapped it with a prototyping area into a rounded PCB that slots directly into an Altoids-sized metal tin. We included everything you expect to...
No Longer Stocked
[Buy Now](https://www.adafruit.com/product/795)
[Related Guides to the Product](https://learn.adafruit.com/products/795/guides)
### N-channel power MOSFET
[N-channel power MOSFET](https://www.adafruit.com/product/355)
When you need to switch a lot of power, N-channel MOSFETs are best for the job. These FETs can switch over 60A and 30V and are TO-220 packages so they fit nicely into any breadboard or perfboard. Heat sinking is easy with TO-220's, but because of the very low Rds(on) of down to 0.009 ohms...
In Stock
[Buy Now](https://www.adafruit.com/product/355)
[Related Guides to the Product](https://learn.adafruit.com/products/355/guides)
### Small Push-Pull Solenoid - 12VDC
[Small Push-Pull Solenoid - 12VDC](https://www.adafruit.com/product/412)
Solenoids are basically electromagnets: they are made of a big coil of copper wire with an armature (a slug of metal) in the middle. When the coil is energized, the slug is pulled into the center of the coil. This makes the solenoid able to pull (from one end) or push (from the other)
In Stock
[Buy Now](https://www.adafruit.com/product/412)
[Related Guides to the Product](https://learn.adafruit.com/products/412/guides)
### Membrane 3x4 Matrix Keypad + extras
[Membrane 3x4 Matrix Keypad + extras](https://www.adafruit.com/product/419)
Punch in your secret key into this numeric matrix keypad. This keypad has 12 buttons, arranged in a telephone-line 3x4 grid. It's made of a thin, flexible membrane material with an adhesive backing (just remove the paper) so you can attach it to nearly anything. The keys are connected into...
In Stock
[Buy Now](https://www.adafruit.com/product/419)
[Related Guides to the Product](https://learn.adafruit.com/products/419/guides)
### Fingerprint sensor
[Fingerprint sensor](https://www.adafruit.com/product/751)
Secure your project with biometrics - this all-in-one optical fingerprint sensor will make adding fingerprint detection and verification super simple. These modules are typically used in safes - there's a high powered DSP chip that does the image rendering, calculation, feature-finding and...
No Longer Stocked
[Buy Now](https://www.adafruit.com/product/751)
[Related Guides to the Product](https://learn.adafruit.com/products/751/guides)
## Related Guides
- [LED Breath Stats Mask](https://learn.adafruit.com/led-breath-stats-mask.md)
- [Getting Started with MyoWare Muscle Sensor](https://learn.adafruit.com/getting-started-with-myoware-muscle-sensor.md)
- [Reebok CheckLight Teardown](https://learn.adafruit.com/reebok-checklight-teardown.md)
- [Your Pulse Displayed with NeoPixels](https://learn.adafruit.com/pulse-sensor-displayed-with-neopixels.md)
- [Pulse Room](https://learn.adafruit.com/pulse-room.md)
- [Setting up an Open Speech Recording Website](https://learn.adafruit.com/setting-up-an-open-speech-recording-website.md)
- [Control Electronics with your Brain using NextMind](https://learn.adafruit.com/control-electronics-with-your-brain-using-nextmind.md)
- [Adafruit MPRLS Ported Pressure Sensor Breakout](https://learn.adafruit.com/adafruit-mprls-ported-pressure-sensor-breakout.md)
- [Moto 360 Teardown](https://learn.adafruit.com/moto-360-smartwatch-teardown.md)
- [3D Printed Flexible LED Glove with Conductive Filament](https://learn.adafruit.com/3d-printed-flexible-conductive-filament-led-glove.md)
- [Meditation Trainer](https://learn.adafruit.com/heart-rate-variability-sensor.md)
- [Circuit Playground Bluefruit BLE Heart Rate Pendant with CircuitPython](https://learn.adafruit.com/ble-heart-rate-display-pendant.md)
- [Myo Armband Teardown](https://learn.adafruit.com/myo-armband-teardown.md)
- ['Sup Brows](https://learn.adafruit.com/heybrows.md)
- [Whistle Dog Activity Monitor Teardown](https://learn.adafruit.com/whistle-dog-activity-monitor-teardown.md)
---
# Source: https://learn.adafruit.com/mini-thermal-receipt-printer/bitmap-printing.md
# Mini Thermal Receipt Printers
## Bitmap Printing
This printer can produce bitmaps, which can add a touch of class to a receipt with your logo or similar.
The first step is to get the image prepared. The printer can only do monochrome (1-bit) images, and the maximum width is 384 pixels. We suggest starting with a small bitmap (100 pixels or less on each side) and then experimenting to get the size and look you want.
A few steps are required to prepare an image for printing. For Windows users, there’s a nice graphical user interface for this. For Mac and Linux, different tools are used…not as visually slick, but they do the job well.
Danger:
## Windows
Use an image editing program to save your image as a 1-bit BMP — in Windows, the built-in **Paint** program will suffice.
Download, install and run **[LCD Assistant](http://en.radzio.dxp.pl/bitmap_converter/)**. This program is for Windows only but does a really fantastic job! Load the BMP file you previously generated (in Paint, etc.). The file must be in BMP format — the software won’t read PNG, GIF, etc. Then a couple of settings need to be adjusted…

First, in the “Byte orientation” section of the settings, select “Horizontal” (item A in the image above).
Second (item B above), you may need to change the Width setting. Because this software (and the thermal printer) handle images in horizontal groups of eight pixels, if the image width is not a multiple of 8, it will be truncated (cropped) to the nearest smaller 8-pixel boundary. For example, with the 75 pixel wide image above, the output will be cropped to only 72 pixels wide, losing some data from the right edge. To avoid this, **increase this number to the next multiple of 8** (that would be 80 for the example above), and the output will be padded with blank pixels to cover the gap. Remember the number you use here, you’ll need it later.
The image height does not need to be adjusted this way, only width.
Set the table name to something short but descriptive (e.g. “adalogo” above), then select Save Output from the File menu. Give the file a similarly brief but descriptive name, ending in “.h” (e.g. “adalogo.h”).
To get this file into your Arduino sketch, select “Add File…” from the Sketch menu. This will add a new tab to your code. Your original code is still there under the leftmost tab.
A couple of small changes are now needed in both tabs. First, at the top of the file containing the new table data, change “const unsigned char” to “static const uint8\_t PROGMEM” as shown below:

Next, in the tab containing the main body of your code, add an “include” statement to reference the new file:
```
#include "adalogo.h"
```
Check the **A\_printertest** example sketch if you’re not sure how to include the code properly.
You can now output the image by calling **printBitmap(width, height, tablename)**, where **width** and **height** are the dimensions of the image in pixels (if you changed the image width to a multiple of 8 as previously described, use that number, not the original image size), and **tablename** is the name of the array in the new tab (e.g. “adalogo” above).

Having a graphical user interface is nice, but some of these extra steps can be confusing and error-prone. If you prefer, the technique below for Mac and Linux works in Windows as well.
## Mac and Linux
The conversion tool for Mac and Linux doesn’t include a fancy GUI, but it works well and avoids several steps (and potential mis-steps). The source image doesn’t need to be in BMP format — most image formats can be read natively — and the output can be added to a sketch with no further editing. It works for Windows as well, if you’d rather use this method.
First, if you don’t already have the **Processing** language installed, [download it from processing.org](http://processing.org). Processing looks almost exactly like the Arduino IDE, but it’s for writing code for your normal computer, not a microcontroller. This can be a little confusing to first-timers, so if something doesn’t seem to compile, make sure you’re running code in the right environment: _Arduino_ for for the Arduino board, _Processing_ for your computer.
Danger:
The Adafruit\_Thermal library folder that you previously downloaded contains a sub-folder called **processing**. Inside that is a sketch called **bitmapImageConvert.pde**. Load this into Processing and press RUN (the triangle button).
You’ll be prompted to select an image using the system’s standard file selection dialog. The program runs for just a brief instant, and will create a new file alongside the original image file. For example, if you selected an image called “adalogo.png”, there will be a new file called “adalogo.h” in the same location. This file contains code to add to your Arduino sketch. You shouldn’t need to edit this file unless you want to change the variable names within.
To get this file into your Arduino sketch, select “Add File…” from the Sketch menu. This will add a new tab to your code. Your original code is still there under the leftmost tab.
Next, in the tab containing the main body of your code, add an “include” statement to reference the new file:
```
#include "adalogo.h"
```
Check the **A\_printertest** example sketch if you’re not sure how to include the code properly.
If the source image was called adalogo.png, then the resulting .h file (adalogo.h) will contain three values called adalogo\_width, adalogo\_height and adalogo\_data, which can be passed directly and in-order to the printBitmap() function, like this:
```
printBitmap(adalogo_width, adalogo_height, adalogo_data);
```
- [Previous Page](https://learn.adafruit.com/mini-thermal-receipt-printer/printing-text.md)
- [Next Page](https://learn.adafruit.com/mini-thermal-receipt-printer/barcode-printing.md)
## Primary Products
### Mini Thermal Receipt Printer
[Mini Thermal Receipt Printer](https://www.adafruit.com/product/597)
Add a mini printer to any microcontroller project with this very cute thermal printer. Thermal printers are also known as receipt printers, they're what you get when you go to the ATM or grocery store. Now you can embed a little printer of your own into an enclosure. This printer is ideal...
No Longer Stocked
[Buy Now](https://www.adafruit.com/product/597)
[Related Guides to the Product](https://learn.adafruit.com/products/597/guides)
### Tiny Thermal Receipt Printer - TTL Serial / USB
[Tiny Thermal Receipt Printer - TTL Serial / USB](https://www.adafruit.com/product/2751)
Add a _really small_ printer to any microcontroller project with this very cute thermal printer. Thermal printers are also known as receipt printers, they're what you get when you go to the ATM or grocery store. Now you can embed a little printer of your own into an enclosure. This...
No Longer Stocked
[Buy Now](https://www.adafruit.com/product/2751)
[Related Guides to the Product](https://learn.adafruit.com/products/2751/guides)
### Nano Thermal Receipt Printer - TTL Serial
[Nano Thermal Receipt Printer - TTL Serial](https://www.adafruit.com/product/2752)
Add a _really really small_ printer to any microcontroller project with this very cute thermal printer. Thermal printers are also known as receipt printers, they're what you get when you go to the ATM or grocery store. Now you can embed a little printer of your own into an...
No Longer Stocked
[Buy Now](https://www.adafruit.com/product/2752)
[Related Guides to the Product](https://learn.adafruit.com/products/2752/guides)
### Thermal Receipt Printer Guts
[Thermal Receipt Printer Guts](https://www.adafruit.com/product/2753)
Add printing capability to any microcontroller project with **just the innards of a thermal printer.** Thermal printers are also known as receipt printers, they're what you get when you go to the ATM or grocery store. Now you can embed a little printer of your own into a...
No Longer Stocked
[Buy Now](https://www.adafruit.com/product/2753)
[Related Guides to the Product](https://learn.adafruit.com/products/2753/guides)
## Featured Products
### Mini Thermal Receipt Printer Starter Pack
[Mini Thermal Receipt Printer Starter Pack](https://www.adafruit.com/product/600)
Hit the ground running (and printing!) with this starter pack that includes a thermal printer and all the extras and save a few dollars while you're at it.
Includes:
- [A mini thermal receipt printer](http://www.adafruit.com/products/597) - with cables and...
No Longer Stocked
[Buy Now](https://www.adafruit.com/product/600)
[Related Guides to the Product](https://learn.adafruit.com/products/600/guides)
### Female DC Power adapter - 2.1mm jack to screw terminal block
[Female DC Power adapter - 2.1mm jack to screw terminal block](https://www.adafruit.com/product/368)
If you need to connect a DC power wall wart to a board that doesn't have a DC jack - this adapter will come in very handy! There is a 2.1mm DC jack on one end, and a screw terminal block on the other. The terminals are labeled with positive/negative assuming a positive-tip configuration...
In Stock
[Buy Now](https://www.adafruit.com/product/368)
[Related Guides to the Product](https://learn.adafruit.com/products/368/guides)
### 5V 2A (2000mA) switching power supply - UL Listed
[5V 2A (2000mA) switching power supply - UL Listed](https://www.adafruit.com/product/276)
This is an FCC/CE certified and UL listed power supply. Need a lot of 5V power? This switching supply gives a clean regulated 5V output at up to 2000mA. 110 or 240 input, so it works in any country. The plugs are "US 2-prong" style so you may need a plug adapter, but you can pick one...
Out of Stock
[Buy Now](https://www.adafruit.com/product/276)
[Related Guides to the Product](https://learn.adafruit.com/products/276/guides)
### Thermal paper roll - 50' long, 2.25" wide
[Thermal paper roll - 50' long, 2.25" wide](https://www.adafruit.com/product/599)
A mini roll of thermal paper, this fits very nicely into our mini thermal printer. 2.25" wide (about 57mm) and 50 feet long (15 meters). BPA-free.
[Perfect for use with our mini thermal printer!](http://www.adafruit.com/products/597)
No Longer Stocked
[Buy Now](https://www.adafruit.com/product/599)
[Related Guides to the Product](https://learn.adafruit.com/products/599/guides)
### Thermal Paper Roll - 33' long, 2.25"
[Thermal Paper Roll - 33' long, 2.25"](https://www.adafruit.com/product/2754)
A little roll of thermal paper! This fits very nicely into our [Tiny Thermal Receipt Printer](https://www.adafruit.com/products/2751). It's ~2.25" wide (about 57mm) and 33 feet long or about 10 meters.
No Longer Stocked
[Buy Now](https://www.adafruit.com/product/2754)
[Related Guides to the Product](https://learn.adafruit.com/products/2754/guides)
### Thermal Paper Roll - 16' long, 2.25"
[Thermal Paper Roll - 16' long, 2.25"](https://www.adafruit.com/product/2755)
A little roll of thermal paper! This fits very nicely into our [Nano Thermal Receipt Printer](https://www.adafruit.com/products/2752). It's ~2.25" wide (about 57mm) and 16 feet long or about 5 meters.
No Longer Stocked
[Buy Now](https://www.adafruit.com/product/2755)
[Related Guides to the Product](https://learn.adafruit.com/products/2755/guides)
### Adafruit METRO 328 Fully Assembled - Arduino IDE compatible
[Adafruit METRO 328 Fully Assembled - Arduino IDE compatible](https://www.adafruit.com/product/50)
We sure love the ATmega328 here at Adafruit, and we use them _a lot_ for our own projects. The processor has plenty of GPIO, Analog inputs, hardware UART SPI and I2C, timers and PWM galore - just enough for most simple projects. When we need to go small, we use a
Out of Stock
[Buy Now](https://www.adafruit.com/product/50)
[Related Guides to the Product](https://learn.adafruit.com/products/50/guides)
### Breadboarding wire bundle
[Breadboarding wire bundle](https://www.adafruit.com/product/153)
75 flexible stranded core wires with stiff ends molded on in red, orange, yellow, green, blue, brown, black and white. These are a major improvement over the "box of bent wires" that are sometimes sold with breadboards, and faster than stripping your own solid core wires. Makes...
In Stock
[Buy Now](https://www.adafruit.com/product/153)
[Related Guides to the Product](https://learn.adafruit.com/products/153/guides)
## Related Guides
- [How to Find Hidden COM Ports](https://learn.adafruit.com/how-to-find-hidden-com-ports.md)
- [Wireless Game Show Poppers for the Classroom!](https://learn.adafruit.com/wireless-game-show-poppers.md)
- [Adafruit Ultimate GPS](https://learn.adafruit.com/adafruit-ultimate-gps.md)
- [RGB LED Matrix Basics](https://learn.adafruit.com/32x16-32x32-rgb-led-matrix.md)
- [Analog Feedback Servos](https://learn.adafruit.com/analog-feedback-servos.md)
- [Arduino GPS Clock](https://learn.adafruit.com/arduino-clock.md)
- [Silicone Robo-Tentacle](https://learn.adafruit.com/silicone-robo-tentacle.md)
- [Ladyada's Bento Box](https://learn.adafruit.com/lady-adas-bento-box.md)
- [Metal Inlay Capacitive Touch Buttons](https://learn.adafruit.com/metal-inlay-capacitive-touch-buttons.md)
- [Adafruit IO Basics: NeoPixel Controller](https://learn.adafruit.com/adafruit-io-basics-neopixel-controller.md)
- [Adafruit PN532 RFID/NFC Breakout and Shield](https://learn.adafruit.com/adafruit-pn532-rfid-nfc.md)
- [Reverse Geocache Box](https://learn.adafruit.com/reverse-geocache-engagement-box.md)
- [Character LCDs](https://learn.adafruit.com/character-lcds.md)
- [Adafruit INA219 Current Sensor Breakout](https://learn.adafruit.com/adafruit-ina219-current-sensor-breakout.md)
- [All About Arduino Libraries](https://learn.adafruit.com/adafruit-all-about-arduino-libraries-install-use.md)
---
# Source: https://learn.adafruit.com/2-2-tft-display/bitmaps.md
# 2.2" TFT Display
## Bitmaps
There is a built in microSD card slot into the breakout, and we can use that to load bitmap images! You will need a microSD card formatted **FAT16 or FAT32** (they almost always are by default).

It's really easy to draw bitmaps. We have a library for it, Adafruit\_ImageReader, which can be installed through the Arduino Library Manager (Sketch→Include Library→Manage Libraries…). Enter “imageread” in the search field and the library is easy to spot:

Lets start by downloading this image of pretty flowers (pix by johngineer)

Copy **purple.bmp** into the base directory of a microSD card and insert it into the microSD socket in the breakout.
You'll need to connect up the **SDCS** pin to **Digital 4** on your Arduino, and the **MISO** to **MISO** (or Digital #12 on an Uno) as well. In the below image, those are the extra purple & light blue wires

You may want to try the **SD library** examples before continuing, especially one that lists all the files on the SD card
Now upload the **File→examples→Adafruit ImageReader Library→ShieldILI9341** example to your Arduino + breakout. You will see the flowers appear!

To make new bitmaps, make sure they are less than 240 by 320 pixels and save them in **24-bit BMP format**! They must be in 24-bit format, even if they are not 24-bit color as that is the easiest format for the Arduino. You can rotate images using the **setRotation()** procedure
You can draw as many images as you want - dont forget the names must be less than 8 characters long. Just copy the BMP drawing routines below loop() and call
> **bmpDraw(bmpfilename, x, y);**
For each bitmap. They can be smaller than 320x240 and placed in any location on the screen.

- [Previous Page](https://learn.adafruit.com/2-2-tft-display/adafruit-gfx-library.md)
- [Next Page](https://learn.adafruit.com/2-2-tft-display/circuitpython-displayio-quickstart.md)
## Featured Products
### 2.2" 18-bit color TFT LCD display with microSD card breakout
[2.2" 18-bit color TFT LCD display with microSD card breakout](https://www.adafruit.com/product/1480)
This lovely little display breakout is the best way to add a small, colorful, and bright display to any project. Since the display uses 4-wire SPI to communicate and has its own pixel-addressable frame buffer, it can be used with every kind of microcontroller. Even a very small one with low...
In Stock
[Buy Now](https://www.adafruit.com/product/1480)
[Related Guides to the Product](https://learn.adafruit.com/products/1480/guides)
### Breadboarding wire bundle
[Breadboarding wire bundle](https://www.adafruit.com/product/153)
75 flexible stranded core wires with stiff ends molded on in red, orange, yellow, green, blue, brown, black and white. These are a major improvement over the "box of bent wires" that are sometimes sold with breadboards, and faster than stripping your own solid core wires. Makes...
In Stock
[Buy Now](https://www.adafruit.com/product/153)
[Related Guides to the Product](https://learn.adafruit.com/products/153/guides)
### Adafruit METRO 328 Fully Assembled - Arduino IDE compatible
[Adafruit METRO 328 Fully Assembled - Arduino IDE compatible](https://www.adafruit.com/product/50)
We sure love the ATmega328 here at Adafruit, and we use them _a lot_ for our own projects. The processor has plenty of GPIO, Analog inputs, hardware UART SPI and I2C, timers and PWM galore - just enough for most simple projects. When we need to go small, we use a
Out of Stock
[Buy Now](https://www.adafruit.com/product/50)
[Related Guides to the Product](https://learn.adafruit.com/products/50/guides)
### Half Sized Premium Breadboard - 400 Tie Points
[Half Sized Premium Breadboard - 400 Tie Points](https://www.adafruit.com/product/64)
This is a cute, half-size breadboard with 400 tie points, good for small projects. It's 3.25" x 2.2" / 8.3cm x 5.5cm with a standard double-strip in the middle and two power rails on both sides. You can pull the power rails off easily to make the breadboard as...
In Stock
[Buy Now](https://www.adafruit.com/product/64)
[Related Guides to the Product](https://learn.adafruit.com/products/64/guides)
## Related Guides
- [Affordable HAL 9000 Replica](https://learn.adafruit.com/hal-9000-replica.md)
- [Arduino Lesson 3. RGB LEDs](https://learn.adafruit.com/adafruit-arduino-lesson-3-rgb-leds.md)
- [NeoPixel Painter](https://learn.adafruit.com/neopixel-painter.md)
- [Adafruit 16-channel PWM/Servo Shield](https://learn.adafruit.com/adafruit-16-channel-pwm-slash-servo-shield.md)
- [Adafruit 2.8" TFT Touch Shield v2 - Capacitive or Resistive](https://learn.adafruit.com/adafruit-2-8-tft-touch-shield-v2.md)
- [Bluetooth Temperature & Humidity Sensor](https://learn.adafruit.com/bluetooth-temperature-and-humidity-sensor.md)
- [Arduino Lesson 17. Email Sending Movement Detector](https://learn.adafruit.com/arduino-lesson-17-email-sending-movement-detector.md)
- [TTL Serial Camera](https://learn.adafruit.com/ttl-serial-camera.md)
- [Arduino Lesson 2. LEDs](https://learn.adafruit.com/adafruit-arduino-lesson-2-leds.md)
- [Adafruit 1.27" and 1.5" Color OLED Breakout Board](https://learn.adafruit.com/adafruit-1-5-color-oled-breakout-board.md)
- [Arduino Lesson 5. The Serial Monitor](https://learn.adafruit.com/adafruit-arduino-lesson-5-the-serial-monitor.md)
- [RePaper eInk Development Board](https://learn.adafruit.com/repaper-eink-development-board.md)
- [Wave Shield Voice Changer](https://learn.adafruit.com/wave-shield-voice-changer.md)
- [Adafruit Proto Screw Shield](https://learn.adafruit.com/adafruit-proto-screw-shield.md)
- [Arduino Lesson 6. Digital Inputs](https://learn.adafruit.com/adafruit-arduino-lesson-6-digital-inputs.md)
---
# Source: https://learn.adafruit.com/getting-started-with-flora/blink-onboard-led.md
# Getting Started with FLORA
## Blink onboard LED

Next it's time to load up a program on your FLORA. There is an LED on board, so let's blink it! Plug in the USB cable and paste the following code into the Adafruit Flora IDE:
```
// Pin D7 has an LED connected on FLORA.
// give it a name:
int led = 7;
// the setup routine runs once when you press reset:
void setup() {
// initialize the digital pin as an output.
pinMode(led, OUTPUT);
}
// the loop routine runs over and over again forever:
void loop() {
digitalWrite(led, HIGH); // turn the LED on (HIGH is the voltage level)
delay(1000); // wait for a second
digitalWrite(led, LOW); // turn the LED off by making the voltage LOW
delay(1000); // wait for a second
}
```

From the Tools menu, under "Board," choose "Adafruit Flora"

Also in the Tools menu, under "Serial Port," choose the one that contains the phrase "usbmodem" if you have a Mac.
If you're using a Windows computer, it will be named **COM** something, but not COM1 or COM2 (so it will be whatever comes after those two if they exist, such as COM3 or COM4).

Press the Upload button to transmit the program to the FLORA. It looks like an arrow pointing to the right.

That's it! The on board LED marked "D7" should blink on and off repeatedly, and you've successfully programmed your FLORA!
- [Previous Page](https://learn.adafruit.com/getting-started-with-flora/download-software.md)
- [Next Page](https://learn.adafruit.com/getting-started-with-flora/blink-onboard-neopixel.md)
## Featured Products
### FLORA - Wearable electronic platform: Arduino-compatible
[FLORA - Wearable electronic platform: Arduino-compatible](https://www.adafruit.com/product/659)
FLORA is Adafruit's fully-featured wearable electronics platform. It's a round, sewable, Arduino-compatible microcontroller designed to empower amazing wearables projects.FLORA comes with Adafruit's support, [tutorials and...](http://learn.adafruit.com/category/flora)
In Stock
[Buy Now](https://www.adafruit.com/product/659)
[Related Guides to the Product](https://learn.adafruit.com/products/659/guides)
### 3 x AAA Battery Holder with On/Off Switch and 2-Pin JST
[3 x AAA Battery Holder with On/Off Switch and 2-Pin JST](https://www.adafruit.com/product/727)
This battery holder connects 3 AAA batteries together in series for powering all kinds of projects. We spec'd these out because the box is slim, and 3 AAA's add up to about 3.3-4.5V, a very similar range to Lithium Ion/polymer (Li-Ion) batteries and have an on-off switch. That makes...
In Stock
[Buy Now](https://www.adafruit.com/product/727)
[Related Guides to the Product](https://learn.adafruit.com/products/727/guides)
### USB cable - USB A to Micro-B
[USB cable - USB A to Micro-B](https://www.adafruit.com/product/592)
This here is your standard A to micro-B USB cable, for USB 1.1 or 2.0. Perfect for connecting a PC to your Metro, Feather, Raspberry Pi or other dev-board or microcontroller
Approximately 3 feet / 1 meter long
In Stock
[Buy Now](https://www.adafruit.com/product/592)
[Related Guides to the Product](https://learn.adafruit.com/products/592/guides)
### Getting Started with Adafruit FLORA Book Pack
[Getting Started with Adafruit FLORA Book Pack](https://www.adafruit.com/product/2404)
Pickup a copy of [Getting Started with Adafruit FLORA](https://www.adafruit.com/products/1839) and then hit the ground running with everything that you need to become an [Adafruit FLORA](https://www.adafruit.com/products/659) supreme being!
This pack is...
No Longer Stocked
[Buy Now](https://www.adafruit.com/product/2404)
[Related Guides to the Product](https://learn.adafruit.com/products/2404/guides)
### Getting Started with Adafruit FLORA
[Getting Started with Adafruit FLORA](https://www.adafruit.com/product/1839)
**Making Wearables with an Arduino-Compatible Electronics Platform**
This book introduces readers to building wearable electronics projects using Adafruit's tiny FLORA board: at 4.4 grams, and only 1.75 inches in diameter, and featuring Arduino compatibility, it's the...
No Longer Stocked
[Buy Now](https://www.adafruit.com/product/1839)
[Related Guides to the Product](https://learn.adafruit.com/products/1839/guides)
### FLORA Budget Pack
[FLORA Budget Pack](https://www.adafruit.com/product/1405)
Get started with the fabulous Adafruit Flora platform with this lovely budget kit, just enough to get you started with this fun wearable computer. Included are enough parts to make your first wearable electronic project. There's a Flora motherboard, four ultra-bright chainable RGB pixels,...
Out of Stock
[Buy Now](https://www.adafruit.com/product/1405)
[Related Guides to the Product](https://learn.adafruit.com/products/1405/guides)
### FLORA GPS Starter Pack
[FLORA GPS Starter Pack](https://www.adafruit.com/product/1090)
Get started with the fabulous Adafruit Flora platform with this lovely starter kit. Included are plenty of parts to make a few different fun projects! There's a Flora motherboard, a GPS module that can also perform location datalogging, eight ultra-bright chainable RGB pixels, a battery...
No Longer Stocked
[Buy Now](https://www.adafruit.com/product/1090)
[Related Guides to the Product](https://learn.adafruit.com/products/1090/guides)
### FLORA Sensor Pack
[FLORA Sensor Pack](https://www.adafruit.com/product/1458)
Sense the world around you! The FLORA Sensor Pack includes many types of sensors for your wearable enjoyment. Sense motion, direction, color, light levels, touch, and connections with FLORA sensor breakouts and conductive materials, and a few NeoPixels for experimenting with displaying your...
No Longer Stocked
[Buy Now](https://www.adafruit.com/product/1458)
[Related Guides to the Product](https://learn.adafruit.com/products/1458/guides)
## Related Guides
- [Datalogging Hat with FLORA BLE](https://learn.adafruit.com/datalogging-hat-with-flora-ble.md)
- [Experimenting with NeverWet + Electronics](https://learn.adafruit.com/neverwet-electronics.md)
- [Flora GPS Jacket](https://learn.adafruit.com/flora-gps-jacket.md)
- [SMSsenger Bag](https://learn.adafruit.com/smssenger-bag.md)
- [Conductive Thread](https://learn.adafruit.com/conductive-thread.md)
- [3D Printed Wireless MIDI Controller Guitar](https://learn.adafruit.com/ez-key-wireless-midi-controller-guitar.md)
- [Mailbox Notification Service](https://learn.adafruit.com/mailbox-notification-service.md)
- [GPS Logging Dog Harness](https://learn.adafruit.com/gps-logging-dog-harness.md)
- [NeoPixel Matrix Snowflake Sweater](https://learn.adafruit.com/neopixel-matrix-snowflake-sweater.md)
- [Chameleon Scarf](https://learn.adafruit.com/chameleon-scarf.md)
- [Adafruit Arduino Selection Guide](https://learn.adafruit.com/adafruit-arduino-selection-guide.md)
- [Citi Bike Helmet](https://learn.adafruit.com/citi-bike-helmet.md)
- [FLORA TV-B-Gone](https://learn.adafruit.com/flora-tv-b-gone.md)
- [Flora Wearable GPS](https://learn.adafruit.com/flora-wearable-gps.md)
- [Flora Accelerometer](https://learn.adafruit.com/flora-accelerometer.md)
---
# Source: https://learn.adafruit.com/getting-started-with-flora/blink-onboard-neopixel.md
# Getting Started with FLORA
## Blink onboard NeoPixel
If you have a Flora v2, your Flora comes with an onboard NeoPixel! This lets you have a nice glowy LED using only one pin (Digital 8)
# Install the NeoPixel Library
If you are running Arduino IDE 1.6.1 or higher, you can install the library using the built in library manager, search for and install **Adafruit\_NeoPixel**


Install and close out the Library manager.
[If you're not able to use the library manager or have an older IDE, you can always 'manually' install the library!](../../../../adafruit-neopixel-uberguide)
# Demo Code
Upload the following sketch, note that we consider the 'strip' to be 1 pixel long, and connected to **Digital 8**
```
#include <Adafruit_NeoPixel.h>
#define PIN 8
Adafruit_NeoPixel strip = Adafruit_NeoPixel(1, PIN, NEO_GRB + NEO_KHZ800);
void setup() {
strip.begin();
strip.setBrightness(50);
strip.show(); // Initialize all pixels to 'off'
}
void loop() {
// Some example procedures showing how to display to the pixels:
colorWipe(strip.Color(255, 0, 0), 500); // Red
colorWipe(strip.Color(0, 255, 0), 500); // Green
colorWipe(strip.Color(0, 0, 255), 500); // Blue
rainbowCycle(20);
}
// Fill the dots one after the other with a color
void colorWipe(uint32_t c, uint8_t wait) {
for(uint16_t i=0; i<strip.numPixels(); i++) {
strip.setPixelColor(i, c);
strip.show();
delay(wait);
}
}
// Slightly different, this makes the rainbow equally distributed throughout
void rainbowCycle(uint8_t wait) {
uint16_t i, j;
for(j=0; j<256*5; j++) { // 5 cycles of all colors on wheel
for(i=0; i< strip.numPixels(); i++) {
strip.setPixelColor(i, Wheel(((i * 256 / strip.numPixels()) + j) & 255));
}
strip.show();
delay(wait);
}
}
// Input a value 0 to 255 to get a color value.
// The colours are a transition r - g - b - back to r.
uint32_t Wheel(byte WheelPos) {
WheelPos = 255 - WheelPos;
if(WheelPos < 85) {
return strip.Color(255 - WheelPos * 3, 0, WheelPos * 3);
} else if(WheelPos < 170) {
WheelPos -= 85;
return strip.Color(0, WheelPos * 3, 255 - WheelPos * 3);
} else {
WheelPos -= 170;
return strip.Color(WheelPos * 3, 255 - WheelPos * 3, 0);
}
}
```

- [Previous Page](https://learn.adafruit.com/getting-started-with-flora/blink-onboard-led.md)
- [Next Page](https://learn.adafruit.com/getting-started-with-flora/power-your-flora.md)
## Featured Products
### FLORA - Wearable electronic platform: Arduino-compatible
[FLORA - Wearable electronic platform: Arduino-compatible](https://www.adafruit.com/product/659)
FLORA is Adafruit's fully-featured wearable electronics platform. It's a round, sewable, Arduino-compatible microcontroller designed to empower amazing wearables projects.FLORA comes with Adafruit's support, [tutorials and...](http://learn.adafruit.com/category/flora)
In Stock
[Buy Now](https://www.adafruit.com/product/659)
[Related Guides to the Product](https://learn.adafruit.com/products/659/guides)
### 3 x AAA Battery Holder with On/Off Switch and 2-Pin JST
[3 x AAA Battery Holder with On/Off Switch and 2-Pin JST](https://www.adafruit.com/product/727)
This battery holder connects 3 AAA batteries together in series for powering all kinds of projects. We spec'd these out because the box is slim, and 3 AAA's add up to about 3.3-4.5V, a very similar range to Lithium Ion/polymer (Li-Ion) batteries and have an on-off switch. That makes...
In Stock
[Buy Now](https://www.adafruit.com/product/727)
[Related Guides to the Product](https://learn.adafruit.com/products/727/guides)
### USB cable - USB A to Micro-B
[USB cable - USB A to Micro-B](https://www.adafruit.com/product/592)
This here is your standard A to micro-B USB cable, for USB 1.1 or 2.0. Perfect for connecting a PC to your Metro, Feather, Raspberry Pi or other dev-board or microcontroller
Approximately 3 feet / 1 meter long
In Stock
[Buy Now](https://www.adafruit.com/product/592)
[Related Guides to the Product](https://learn.adafruit.com/products/592/guides)
### Getting Started with Adafruit FLORA Book Pack
[Getting Started with Adafruit FLORA Book Pack](https://www.adafruit.com/product/2404)
Pickup a copy of [Getting Started with Adafruit FLORA](https://www.adafruit.com/products/1839) and then hit the ground running with everything that you need to become an [Adafruit FLORA](https://www.adafruit.com/products/659) supreme being!
This pack is...
No Longer Stocked
[Buy Now](https://www.adafruit.com/product/2404)
[Related Guides to the Product](https://learn.adafruit.com/products/2404/guides)
### Getting Started with Adafruit FLORA
[Getting Started with Adafruit FLORA](https://www.adafruit.com/product/1839)
**Making Wearables with an Arduino-Compatible Electronics Platform**
This book introduces readers to building wearable electronics projects using Adafruit's tiny FLORA board: at 4.4 grams, and only 1.75 inches in diameter, and featuring Arduino compatibility, it's the...
No Longer Stocked
[Buy Now](https://www.adafruit.com/product/1839)
[Related Guides to the Product](https://learn.adafruit.com/products/1839/guides)
### FLORA Budget Pack
[FLORA Budget Pack](https://www.adafruit.com/product/1405)
Get started with the fabulous Adafruit Flora platform with this lovely budget kit, just enough to get you started with this fun wearable computer. Included are enough parts to make your first wearable electronic project. There's a Flora motherboard, four ultra-bright chainable RGB pixels,...
Out of Stock
[Buy Now](https://www.adafruit.com/product/1405)
[Related Guides to the Product](https://learn.adafruit.com/products/1405/guides)
### FLORA GPS Starter Pack
[FLORA GPS Starter Pack](https://www.adafruit.com/product/1090)
Get started with the fabulous Adafruit Flora platform with this lovely starter kit. Included are plenty of parts to make a few different fun projects! There's a Flora motherboard, a GPS module that can also perform location datalogging, eight ultra-bright chainable RGB pixels, a battery...
No Longer Stocked
[Buy Now](https://www.adafruit.com/product/1090)
[Related Guides to the Product](https://learn.adafruit.com/products/1090/guides)
### FLORA Sensor Pack
[FLORA Sensor Pack](https://www.adafruit.com/product/1458)
Sense the world around you! The FLORA Sensor Pack includes many types of sensors for your wearable enjoyment. Sense motion, direction, color, light levels, touch, and connections with FLORA sensor breakouts and conductive materials, and a few NeoPixels for experimenting with displaying your...
No Longer Stocked
[Buy Now](https://www.adafruit.com/product/1458)
[Related Guides to the Product](https://learn.adafruit.com/products/1458/guides)
## Related Guides
- [Datalogging Hat with FLORA BLE](https://learn.adafruit.com/datalogging-hat-with-flora-ble.md)
- [Experimenting with NeverWet + Electronics](https://learn.adafruit.com/neverwet-electronics.md)
- [Flora GPS Jacket](https://learn.adafruit.com/flora-gps-jacket.md)
- [SMSsenger Bag](https://learn.adafruit.com/smssenger-bag.md)
- [Conductive Thread](https://learn.adafruit.com/conductive-thread.md)
- [3D Printed Wireless MIDI Controller Guitar](https://learn.adafruit.com/ez-key-wireless-midi-controller-guitar.md)
- [Mailbox Notification Service](https://learn.adafruit.com/mailbox-notification-service.md)
- [GPS Logging Dog Harness](https://learn.adafruit.com/gps-logging-dog-harness.md)
- [NeoPixel Matrix Snowflake Sweater](https://learn.adafruit.com/neopixel-matrix-snowflake-sweater.md)
- [Chameleon Scarf](https://learn.adafruit.com/chameleon-scarf.md)
- [Adafruit Arduino Selection Guide](https://learn.adafruit.com/adafruit-arduino-selection-guide.md)
- [Citi Bike Helmet](https://learn.adafruit.com/citi-bike-helmet.md)
- [FLORA TV-B-Gone](https://learn.adafruit.com/flora-tv-b-gone.md)
- [Flora Wearable GPS](https://learn.adafruit.com/flora-wearable-gps.md)
- [Flora Accelerometer](https://learn.adafruit.com/flora-accelerometer.md)
---
# Source: https://learn.adafruit.com/adafruit-arduino-lesson-1-blink/blinking-faster.md
# Arduino Lesson 1. Blink
## Blinking Faster
You are now going to make your LED blink faster.As you might have guessed, the key to this lies in changing the parameter in () for the 'delay' command.

This delay period is in milliseconds, and so if you want the LED to blink twice as fast, change the value of 1000 to 500. This would then pause for half a second each delay rather than a whole second.
Upload the sketch again and you should see the LED start to flash more quickly.
- [Previous Page](https://learn.adafruit.com/adafruit-arduino-lesson-1-blink/how-blink-works.md)
- [Next Page](https://learn.adafruit.com/adafruit-arduino-lesson-1-blink/other-things-to-do.md)
## Featured Products
### Adafruit METRO 328 Fully Assembled - Arduino IDE compatible
[Adafruit METRO 328 Fully Assembled - Arduino IDE compatible](https://www.adafruit.com/product/50)
We sure love the ATmega328 here at Adafruit, and we use them _a lot_ for our own projects. The processor has plenty of GPIO, Analog inputs, hardware UART SPI and I2C, timers and PWM galore - just enough for most simple projects. When we need to go small, we use a
Out of Stock
[Buy Now](https://www.adafruit.com/product/50)
[Related Guides to the Product](https://learn.adafruit.com/products/50/guides)
### USB Cable - Standard A-B
[USB Cable - Standard A-B](https://www.adafruit.com/product/62)
This here is your standard A-B USB cable, for USB 1.1 or 2.0. Perfect for connecting a PC to your Arduino, USBtinyISP (among other things).
3 feet / 1 meter long
Color may vary!
In Stock
[Buy Now](https://www.adafruit.com/product/62)
[Related Guides to the Product](https://learn.adafruit.com/products/62/guides)
## Related Guides
- [WiFi Weather Station](https://learn.adafruit.com/wifi-weather-station-arduino-cc3000.md)
- [Naughty or Nice Machine](https://learn.adafruit.com/naughty-or-nice-machine.md)
- [Adafruit VS1053 MP3/AAC/Ogg/MIDI/WAV Codec Breakout Tutorial](https://learn.adafruit.com/adafruit-vs1053-mp3-aac-ogg-midi-wav-play-and-record-codec-tutorial.md)
- [How to program a Zumo Robot with Simulink](https://learn.adafruit.com/zumo-robot-control-with-simulink.md)
- [DIY 8x2 LCD Shield](https://learn.adafruit.com/diy-8x2-lcd-shield.md)
- [3D Printed Animatronic Robot Head](https://learn.adafruit.com/3d-printed-animatronic-robot-head.md)
- [Arduino Lesson 7. Make an RGB LED Fader](https://learn.adafruit.com/adafruit-arduino-lesson-7-make-an-rgb-led-fader.md)
- [WiFi Controlled LED Christmahanukwanzaa Tree](https://learn.adafruit.com/wifi-controlled-led-christmahanukwanzaa-tree.md)
- [Light Meter](https://learn.adafruit.com/light-meter.md)
- [1,500 NeoPixel LED Curtain with Raspberry Pi and Fadecandy](https://learn.adafruit.com/1500-neopixel-led-curtain-with-raspberry-pi-fadecandy.md)
- [Trellis 3D Printed Enclosure](https://learn.adafruit.com/trellis-3d-printed-enclosure.md)
- [Deciphering Strange Arduino Code](https://learn.adafruit.com/deciphering-strange-arduino-code.md)
- [Collin's Lab: MIDI](https://learn.adafruit.com/collins-lab-midi.md)
- [Tiny Arduino Music Visualizer](https://learn.adafruit.com/piccolo.md)
- [Adafruit Music Maker Shield](https://learn.adafruit.com/adafruit-music-maker-shield-vs1053-mp3-wav-wave-ogg-vorbis-player.md)
---
# Source: https://learn.adafruit.com/adafruit-arduino-lesson-2-leds/blinking-the-led.md
# Arduino Lesson 2. LEDs
## Blinking the LED
With a simple modification of the breadboard, we could attach the LED to an output pin of the Arduino. Move the red jumper wire from the Arduino 5V connector to D13, as shown below:
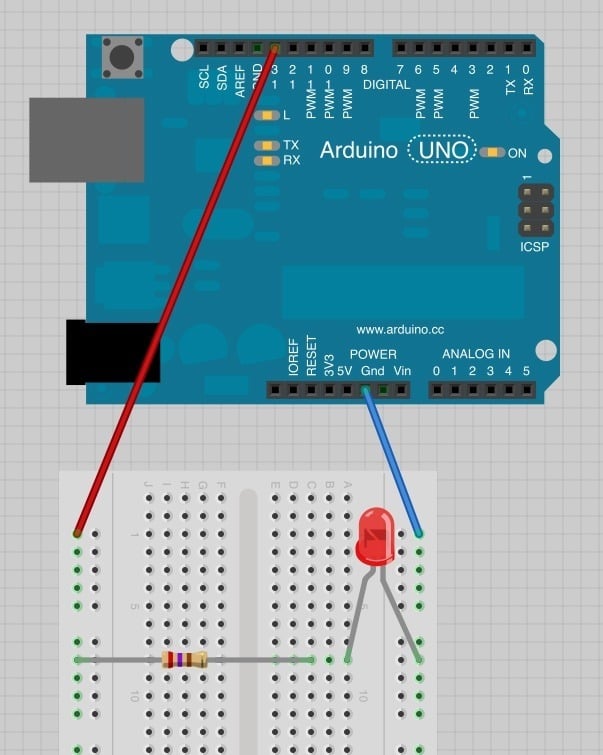
Now load the 'Blink' example sketch from Lesson 1. You will notice that both the built-in 'L' LED and the external LED should now blink.
```
/*
Blink
Turns on an LED on for one second, then off for one second, repeatedly.
This example code is in the public domain.
*/
// Pin 13 has an LED connected on most Arduino boards.
// give it a name:
int led = 13;
// the setup routine runs once when you press reset:
void setup() {
// initialize the digital pin as an output.
pinMode(led, OUTPUT);
}
// the loop routine runs over and over again forever:
void loop() {
digitalWrite(led, HIGH); // turn the LED on (HIGH is the voltage level)
delay(1000); // wait for a second
digitalWrite(led, LOW); // turn the LED off by making the voltage LOW
delay(1000); // wait for a second
}
```
Lets try using a different pin of the Arduino – say D7. Move the red jumper lead from pin D13 to pin D7 and modify the following line near the top of the sketch:
```
int led = 13;
```
so that it reads:
```
int led = 7;
```
Upload the modified sketch to your Arduino board and the LED should still be blinking, but this time using pin D7.
In the next lesson, we will be using LEDs again, this time, the Arduino will be controlling the LED.
[Click Here for the Next Lesson](http://learn.adafruit.com/adafruit-arduino-lesson-3-rgb-leds)
**About the Author**
Simon Monk is author of a number of books relating to Open Source Hardware. The following books written by Simon are available from Adafruit: [Programming Arduino](https://www.adafruit.com/products/1019), [30 Arduino Projects for the Evil Genius](https://www.adafruit.com/products/868) and [Programming the Raspberry Pi](https://www.adafruit.com/index.php?main_page=adasearch&q=programming+raspberry+pi "Link: https://www.adafruit.com/index.php?main\_page=adasearch&q=programming+raspberry+pi"). - [Previous Page](https://learn.adafruit.com/adafruit-arduino-lesson-2-leds/moving-the-resistor.md)
## Featured Products
### Adafruit METRO 328 Fully Assembled - Arduino IDE compatible
[Adafruit METRO 328 Fully Assembled - Arduino IDE compatible](https://www.adafruit.com/product/50)
We sure love the ATmega328 here at Adafruit, and we use them _a lot_ for our own projects. The processor has plenty of GPIO, Analog inputs, hardware UART SPI and I2C, timers and PWM galore - just enough for most simple projects. When we need to go small, we use a
Out of Stock
[Buy Now](https://www.adafruit.com/product/50)
[Related Guides to the Product](https://learn.adafruit.com/products/50/guides)
### Diffused Red 5mm LED (25 pack)
[Diffused Red 5mm LED (25 pack)](https://www.adafruit.com/product/299)
Need some indicators? We are big fans of these diffused red LEDs, in fact we use them exclusively in our kits. They are fairly bright so they can be seen in daytime, and from any angle. They go easily into a breadboard and will add that extra zing to your project.
- Pack of 25...
In Stock
[Buy Now](https://www.adafruit.com/product/299)
[Related Guides to the Product](https://learn.adafruit.com/products/299/guides)
### Half Sized Premium Breadboard - 400 Tie Points
[Half Sized Premium Breadboard - 400 Tie Points](https://www.adafruit.com/product/64)
This is a cute, half-size breadboard with 400 tie points, good for small projects. It's 3.25" x 2.2" / 8.3cm x 5.5cm with a standard double-strip in the middle and two power rails on both sides. You can pull the power rails off easily to make the breadboard as...
In Stock
[Buy Now](https://www.adafruit.com/product/64)
[Related Guides to the Product](https://learn.adafruit.com/products/64/guides)
### Premium Male/Male Jumper Wires - 40 x 6" (150mm)
[Premium Male/Male Jumper Wires - 40 x 6" (150mm)](https://www.adafruit.com/product/758)
Handy for making wire harnesses or jumpering between headers on PCB's. These premium jumper wires are 6" (150mm) long and come in a 'strip' of 40 (4 pieces of each of ten rainbow colors). They have 0.1" male header contacts on either end and fit cleanly next to each other...
In Stock
[Buy Now](https://www.adafruit.com/product/758)
[Related Guides to the Product](https://learn.adafruit.com/products/758/guides)
## Related Guides
- [LSM303 Accelerometer + Compass Breakout](https://learn.adafruit.com/lsm303-accelerometer-slash-compass-breakout.md)
- [Arduino Lesson 6. Digital Inputs](https://learn.adafruit.com/adafruit-arduino-lesson-6-digital-inputs.md)
- [WiFi Candy Bowl Monitor](https://learn.adafruit.com/wifi-candy-bowl.md)
- [Arduino Lesson 12. LCD Displays - Part 2](https://learn.adafruit.com/adafruit-arduino-lesson-12-lcd-displays-part-2.md)
- [Character LCDs](https://learn.adafruit.com/character-lcds.md)
- [Silicone Robo-Tentacle](https://learn.adafruit.com/silicone-robo-tentacle.md)
- [Arduino Ethernet + SD Card](https://learn.adafruit.com/arduino-ethernet-sd-card.md)
- [Arduino Lesson 15. DC Motor Reversing](https://learn.adafruit.com/adafruit-arduino-lesson-15-dc-motor-reversing.md)
- [Arduin-o-Phone](https://learn.adafruit.com/arduin-o-phone-arduino-powered-diy-cellphone.md)
- [Remote controlled door lock using a fingerprint sensor & Adafruit IO](https://learn.adafruit.com/remote-controlled-door-lock-using-a-fingerprint-sensor-and-adafruit-io.md)
- [Adafruit 4-Channel ADC Breakouts](https://learn.adafruit.com/adafruit-4-channel-adc-breakouts.md)
- [Ladyada's Learn Arduino - Lesson #2](https://learn.adafruit.com/ladyadas-learn-arduino-lesson-number-2.md)
- [Adafruit 2.8" TFT Touch Shield v2 - Capacitive or Resistive](https://learn.adafruit.com/adafruit-2-8-tft-touch-shield-v2.md)
- [Arduino Lesson 4. Eight LEDs and a Shift Register](https://learn.adafruit.com/adafruit-arduino-lesson-4-eight-leds.md)
- [2.8" TFT Touch Shield](https://learn.adafruit.com/2-8-tft-touch-shield.md)
---
# Source: https://learn.adafruit.com/bmp085.md
# Bosch BMP085 Breakout Board
## Overview
The BMP085 is a basic sensor that is designed specifically for measuring barometric pressure (it also does temperature measurement on the side to help). It's one of the few sensors that does this measurement, and its fairly low cost so you'll see it used a lot. You may be wondering why someone would want to measure atmospheric pressure, but its actually really useful for two things. One is to measure altitude. As we travel from below sea level to a high mountain, the air pressure _decreases_. That means that if we measure the pressure we can determine our altitude - handy when we don't want the expense or size of a GPS unit. Secondly, atmospheric pressure can be used as a predictor of weather which is why weather-casters often talk about "pressure systems"
Info:

## Specifications
- Pressure sensing range: 300-1100 hPa (9000m to -500m above sea level)
- Up to 0.03hPa / 0.25m resolution
- -40 to +85°C operational range, +-2°C temperature accuracy
- 2-pin i2c interface on chip
- V1 of the breakout uses 3.3V power and logic level only
- V2 of the breakout uses 3.3-5V power and logic level for more flexible usage
- [Datasheet](http://www.adafruit.com/datasheets/BMP085_DataSheet_Rev.1.0_01July2008.pdf)
**[You can pick up a BMP085 breakout board from the Adafruit shop!](http://www.adafruit.com/products/391)**
- [Next Page](https://learn.adafruit.com/bmp085/wiring-the-bmp085.md)
## Featured Products
### BMP180 Barometric Pressure/Temperature/Altitude Sensor- 5V ready
[BMP180 Barometric Pressure/Temperature/Altitude Sensor- 5V ready](https://www.adafruit.com/product/1603)
This precision sensor from Bosch is the best low-cost sensing solution for measuring barometric pressure and temperature. Because pressure changes with altitude you can also use it as an altimeter! The sensor is soldered onto a PCB with a 3.3V regulator, I2C level shifter and pull-up resistors...
No Longer Stocked
[Buy Now](https://www.adafruit.com/product/1603)
[Related Guides to the Product](https://learn.adafruit.com/products/1603/guides)
### BMP085 Barometric Pressure/Temperature/Altitude Sensor- 5V ready
[BMP085 Barometric Pressure/Temperature/Altitude Sensor- 5V ready](https://www.adafruit.com/product/391)
This precision sensor from Bosch is the best low-cost sensing solution for measuring barometric pressure and temperature. Because pressure changes with altitude you can also use it as an altimeter! The sensor is soldered onto a PCB with a 3.3V regulator, I2C level shifter and pull-up resistors...
No Longer Stocked
[Buy Now](https://www.adafruit.com/product/391)
[Related Guides to the Product](https://learn.adafruit.com/products/391/guides)
### Adafruit 10-DOF IMU Breakout - L3GD20H + LSM303 + BMP180
[Adafruit 10-DOF IMU Breakout - L3GD20H + LSM303 + BMP180](https://www.adafruit.com/product/1604)
This inertial-measurement-unit combines 3 of the best quality sensors available on the market to give you 11 axes of data: 3 axes of accelerometer data, 3 axes gyroscopic, 3 axes magnetic (compass), barometric pressure/altitude and temperature. We tested many different 'combination'...
No Longer Stocked
[Buy Now](https://www.adafruit.com/product/1604)
[Related Guides to the Product](https://learn.adafruit.com/products/1604/guides)
## Related Guides
- [Adafruit NeoKey 5x6 Ortho Snap-Apart](https://learn.adafruit.com/adafruit-neokey-5x6-ortho-snap-apart.md)
- [No-Code DS18B20 Temperature Sensor with WipperSnapper](https://learn.adafruit.com/using-ds18b20-temperature-sensor-with-wippersnapper.md)
- [Storage humidity and temperature monitor](https://learn.adafruit.com/storage-humidity-and-temperature-monitor.md)
- [4x4 Rotary Encoder MIDI Messenger](https://learn.adafruit.com/4x4-rotary-encoder-midi-messenger.md)
- [Adafruit STEMMA Soil Sensor - I2C Capacitive Moisture Sensor](https://learn.adafruit.com/adafruit-stemma-soil-sensor-i2c-capacitive-moisture-sensor.md)
- [CircuitPython BLE Multi-Temperature Monitoring](https://learn.adafruit.com/circuitpython-multi-temperature-ble-monitoring.md)
- [Adafruit CAN Pal](https://learn.adafruit.com/adafruit-can-pal.md)
- [Huzzah Weather Display](https://learn.adafruit.com/huzzah-weather-display.md)
- [Adafruit AHT20 Temperature & Humidity Sensor](https://learn.adafruit.com/adafruit-aht20.md)
- [Adafruit LPS33/LPS35 Water Resistant Pressure Sensor](https://learn.adafruit.com/lps35hw-water-resistant-pressure-sensor.md)
- [DHT Humidity Sensing on Raspberry Pi or Beaglebone Black with GDocs Logging](https://learn.adafruit.com/dht-humidity-sensing-on-raspberry-pi-with-gdocs-logging.md)
- [Adafruit STEMMA Non-Latching Mini Relay](https://learn.adafruit.com/adafruit-stemma-non-latching-mini-relay.md)
- [IoT Temperature Logger with Analog Devices ADT7410, Feather and Adafruit IO](https://learn.adafruit.com/iot-temperature-logger-with-arduino-and-adafruit-io.md)
- [Adafruit OV5640 Camera Breakouts](https://learn.adafruit.com/adafruit-ov5640-camera-breakout.md)
- [Adafruit SI1145 Breakout Board - UV index / IR / Visible Sensor](https://learn.adafruit.com/adafruit-si1145-breakout-board-uv-ir-visible-sensor.md)
---
# Source: https://learn.adafruit.com/lesson-0-getting-started/boards-and-ports.md
# Arduino Lesson 0. Getting Started
## Boards and Ports
You are now ready to start the Arduino Software, so whatever platform you are using, open the Arduino folder and open the Arduino application contained within it.

This will start the Arduino IDE, but before you can get programming, you have to tell the Arduino software which type of Arduino board you are using and also select the port it is connecting to.
To tell the Arduino IDE which type of board you are using. From the 'Tools' menu, select Board and then 'Arduino Uno' or 'Leonardo' as appropriate.

Also on the 'Tools' menu, you will find the 'Serial Port' option. Select this option.
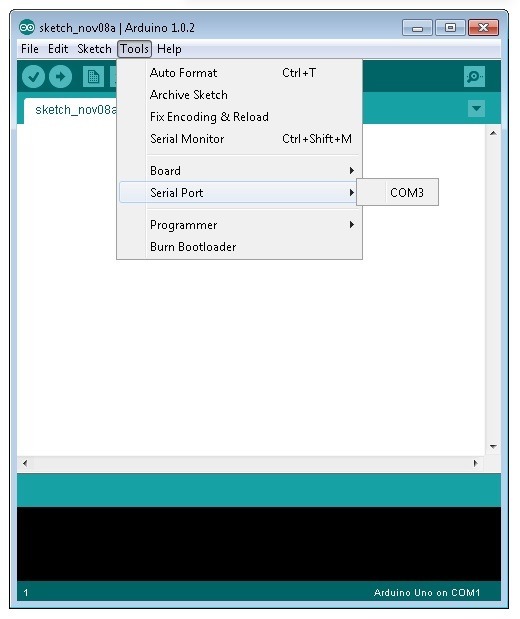
If you are using Windows, there will probably only be one option here and it will either say COM3 or COM4. Even though there is only one option, you will still need to select it.
If you are using a Mac or Linux, there will be more options there, but it will usually be the top option in the list, as this will be the device most recently plugged in. This is useful, as the name of the port may not look like it has anything to do with Arduino. It will probably be called something like **/dev/tty.usbmodemXXXX** or **/dev/ttyUSBn**

In the next lesson, you will start by programming your Arduino board to make its built-in LED blink.
- [Previous Page](https://learn.adafruit.com/lesson-0-getting-started/installing-arduino-mac-and-linux.md)
- [Next Page](https://learn.adafruit.com/lesson-0-getting-started/the-lessons.md)
## Featured Products
### Arduino Leonardo ATmega32u4 with headers
[Arduino Leonardo ATmega32u4 with headers](https://www.adafruit.com/product/849)
**Note:** This product is **discontinued,** but you can purchase the [Seeeduino Lite](https://www.adafruit.com/product/3228), which is an equivalent alternative that can be used instead.
The Arduino Leonardo is a microcontroller board based on...
No Longer Stocked
[Buy Now](https://www.adafruit.com/product/849)
[Related Guides to the Product](https://learn.adafruit.com/products/849/guides)
### Adafruit METRO 328 Fully Assembled - Arduino IDE compatible
[Adafruit METRO 328 Fully Assembled - Arduino IDE compatible](https://www.adafruit.com/product/50)
We sure love the ATmega328 here at Adafruit, and we use them _a lot_ for our own projects. The processor has plenty of GPIO, Analog inputs, hardware UART SPI and I2C, timers and PWM galore - just enough for most simple projects. When we need to go small, we use a
Out of Stock
[Buy Now](https://www.adafruit.com/product/50)
[Related Guides to the Product](https://learn.adafruit.com/products/50/guides)
## Related Guides
- [Bluetooth Temperature & Humidity Sensor](https://learn.adafruit.com/bluetooth-temperature-and-humidity-sensor.md)
- [Bluefruit LE Connect for iOS and Android](https://learn.adafruit.com/bluefruit-le-connect.md)
- [Arduino Lesson 14. Servo Motors](https://learn.adafruit.com/adafruit-arduino-lesson-14-servo-motors.md)
- [20mm LED Pixels](https://learn.adafruit.com/20mm-led-pixels.md)
- [Affordable HAL 9000 Replica](https://learn.adafruit.com/hal-9000-replica.md)
- [Adafruit 1.27" and 1.5" Color OLED Breakout Board](https://learn.adafruit.com/adafruit-1-5-color-oled-breakout-board.md)
- [Mini Thermal Receipt Printers](https://learn.adafruit.com/mini-thermal-receipt-printer.md)
- [Introducing Adafruit Trellis ](https://learn.adafruit.com/adafruit-trellis-diy-open-source-led-keypad.md)
- [Multi-tasking the Arduino - Part 2](https://learn.adafruit.com/multi-tasking-the-arduino-part-2.md)
- [FTDI Friend](https://learn.adafruit.com/ftdi-friend.md)
- [Wave Shield Voice Changer](https://learn.adafruit.com/wave-shield-voice-changer.md)
- [Adafruit 1.14" 240x135 Color TFT Breakout LCD Display](https://learn.adafruit.com/adafruit-1-14-240x135-color-tft-breakout.md)
- [Arduino Ethernet + SD Card](https://learn.adafruit.com/arduino-ethernet-sd-card.md)
- [A REST API for Arduino & the CC3000 WiFi Chip](https://learn.adafruit.com/a-rest-api-for-arduino-and-the-cc3000-wifi-chip.md)
- [WiFi Controlled LED Christmahanukwanzaa Tree](https://learn.adafruit.com/wifi-controlled-led-christmahanukwanzaa-tree.md)
---
# Source: https://learn.adafruit.com/bone-box.md
# Bone Box
## Preparation
Pack up your Beagle Bone in this lovely clear plastic case. We designed this case to be the ideal enclosure, with plenty of elegant details to make it useful to you!
There's plenty of space inside to add on one of our Beagle Bone Proto Capes with components or connectors soldered on. Fits any Beagle Bone version out there - but not BeagleBoards!
# Parts List
The kit includes the following items:
- Six (6) laser-cut acrylic pieces.
- Eight (8) 1/2" #4-40 machine screws.
- Eight (8) #4-40 steel nuts.
- Four (4) 3/16" nylon spacers.

Not included with the kit, you will also need:
- BeagleBone single board computer.
- Small screwdriver.
- Optional: tape.

# Before assembly…
- Peel the backing paper off the acrylic parts.
- Remove Proto Cape, if installed.
- Remove microSD card.
- [Next Page](https://learn.adafruit.com/bone-box/assembly.md)
## Primary Products
### Adafruit Bone Box - Enclosure for Beagle Bone/Beagle Bone Black
[Adafruit Bone Box - Enclosure for Beagle Bone/Beagle Bone Black](https://www.adafruit.com/product/699)
Pack up your [Beagle Bone](http://www.adafruit.com/products/513) or [Beagle Bone Black](http://www.adafruit.com/products/1278) in this lovely clear plastic case. We designed this case to be the ideal enclosure, with plenty of elegant details to make it useful to you!
No Longer Stocked
[Buy Now](https://www.adafruit.com/product/699)
[Related Guides to the Product](https://learn.adafruit.com/products/699/guides)
## Related Guides
- [Measuring Temperature with a BeagleBone Black](https://learn.adafruit.com/measuring-temperature-with-a-beaglebone-black.md)
- [Measuring Light with a BeagleBone Black](https://learn.adafruit.com/measuring-light-with-a-beaglebone-black.md)
- [Adding a Real Time Clock to BeagleBone Black](https://learn.adafruit.com/adding-a-real-time-clock-to-beaglebone-black.md)
- [Setting up IO Python Library on BeagleBone Black](https://learn.adafruit.com/setting-up-io-python-library-on-beaglebone-black.md)
- [Nokia 5110/3310 LCD Python Library](https://learn.adafruit.com/nokia-5110-3310-lcd-python-library.md)
- [BNO055 Absolute Orientation Sensor with Raspberry Pi & BeagleBone Black](https://learn.adafruit.com/bno055-absolute-orientation-sensor-with-raspberry-pi-and-beaglebone-black.md)
- [Adafruit WebIDE](https://learn.adafruit.com/webide.md)
- [MCP9808 Temperature Sensor Python Library](https://learn.adafruit.com/mcp9808-temperature-sensor-python-library.md)
- [FONA Tethering to Raspberry Pi or BeagleBone Black](https://learn.adafruit.com/fona-tethering-to-raspberry-pi-or-beaglebone-black.md)
- [Setting up WiFi with BeagleBone Black](https://learn.adafruit.com/setting-up-wifi-with-beaglebone-black.md)
- [LedGames - a BeagleBone Black 64x64 LED Game](https://learn.adafruit.com/ledgames-beaglebone-black-64x64-led-game.md)
- [TMP006 Temperature Sensor Python Library](https://learn.adafruit.com/tmp006-temperature-sensor-python-library.md)
- [MPR121 Capacitive Touch Sensor on Raspberry Pi & BeagleBone Black](https://learn.adafruit.com/mpr121-capacitive-touch-sensor-on-raspberry-pi-and-beaglebone-black.md)
- [Blinking an LED with BeagleBone Black](https://learn.adafruit.com/blinking-an-led-with-beaglebone-black.md)
- [RePaper eInk Development Board for ARM + GNU/Linux](https://learn.adafruit.com/repaper-eink-development-board-arm-linux-raspberry-pi-beagle-bone-black.md)
---
# Source: https://learn.adafruit.com/hacking-the-kinect/bonus-accelerometer.md
# Hacking the Kinect
## Bonus Accelerometer!
We're going to go back and revisit the mysterious Read command 0x32 that we fuzzed with for a bit. Its also in the logs, be sure to set your filter to show both Host-to-Device and Device-to-Host since its a 'read' not a 'write'
We were pretty close with our commands, it looks like we should be reading only 10 bytes. It also looks like the data doesn't really change much except for a bit further down…
The 7'th byte changes a lot right after we send it that **bRequest** 0x31 (motor movement). That implies that this data read is somehow affected by the motor, possibly a motor feedback byte?
[Checking out a tear-down of the device (from iFixit)](http://www.ifixit.com/Teardown/Microsoft-Kinect-Teardown/4066/2) we see that [there is an 'inclinometer'/accelerometer](http://www.kionix.com/Product%20Sheets/KXSD9%20Product%20Brief.pdf) (Kionix KXSD9). The datasheet indicates it is used for image stabilization, and it has 3 axes (X Y and Z) with 10 bits of data per axis.
Lets continuously read that data
```
import usb.core
import usb.util
import sys
import time
# find our device
dev = usb.core.find(idVendor=0x045e, idProduct=0x02B0)
# was it found?
if dev is None:
raise ValueError('Device not found')
dev.set_configuration()
while True:
# Get data from brequest 0x32
ret = dev.ctrl_transfer(0xC0, 0x32, 0x0, 0x0, 10)
print map(hex, ret)
```
Shaking the Kinect while running the script you'll see clearly that the data changes with movement.
To identify the accelerometer axes, rotate it only one way at a time and note what changes. You can also see how this data is in bytes but the accelerometer data should be a signed word because there are flips from 0xfff7 to 0x0007 which would indicate a negative to positive conversion.

We can cast two bytes to a signed value by 'hand' (in C this is a little easier, we know)```
import usb.core
import usb.util
import sys
import time
# find our device
dev = usb.core.find(idVendor=0x045e, idProduct=0x02B0)
# was it found?
if dev is None:
raise ValueError('Device not found')
dev.set_configuration()
while True:
# Get data from brequest 0x32
ret = dev.ctrl_transfer(0xC0, 0x32, 0x0, 0x0, 10)
#print map(hex, ret)
x = (ret[2] << 8) | ret[3]
x = (x + 2 ** 15) % 2**16 - 2**15 # convert to signed 16b
y = (ret[4] << 8) | ret[5]
y = (y + 2 ** 15) % 2**16 - 2**15 # convert to signed 16b
z = (ret[6] << 8) | ret[7]
z = (z + 2 ** 15) % 2**16 - 2**15 # convert to signed 16b
print x, "\t", y, "\t", z
```
Now when you run the script you'll see the signed data appear properly.
- [Previous Page](https://learn.adafruit.com/hacking-the-kinect/command-number-3-and-4-lets-move.md)
- [Next Page](https://learn.adafruit.com/hacking-the-kinect/more-kinect-information.md)
## Featured Products
### Hacked Kinect - Skill badge, iron-on patch
[Hacked Kinect - Skill badge, iron-on patch](https://www.adafruit.com/product/582)
You can made a cool project using the (hacked) Kinect! Adafruit offers a fun and exciting "badges" of achievement for electronics, science and engineering. We believe everyone should be able to be rewarded for learning a useful skill, a badge is just one of the many ways to show and...
No Longer Stocked
[Buy Now](https://www.adafruit.com/product/582)
[Related Guides to the Product](https://learn.adafruit.com/products/582/guides)
### Beagle USB 12 - Low/Full Speed USB Protocol Analyzer
[Beagle USB 12 - Low/Full Speed USB Protocol Analyzer](https://www.adafruit.com/product/708)
USB complexity got you down? Need a hand with enumeration? Reverse engineering a USB device? You will fall in love with the Beagle 12 USB Analyzer. This hardware analyzer is completely non-intrusive, and is much better than flaky software analyzers. Perfect for when a problem is bad enough it...
No Longer Stocked
[Buy Now](https://www.adafruit.com/product/708)
[Related Guides to the Product](https://learn.adafruit.com/products/708/guides)
### Reverse Engineer - Skill badge, Lenticular printing + pin-on
[Reverse Engineer - Skill badge, Lenticular printing + pin-on](https://www.adafruit.com/product/489)
You can reverse engineer! This is the first lenticular (two-stage image) skill badge that we know of! It says reverse engineer forwards and backwards depending on the angle you view it at!
**Note:** The edges of the badge will appear "white" at an angle,...
No Longer Stocked
[Buy Now](https://www.adafruit.com/product/489)
[Related Guides to the Product](https://learn.adafruit.com/products/489/guides)
### Reverse Engineer - Sticker!
[Reverse Engineer - Sticker!](https://www.adafruit.com/product/673)
You can reverse engineer! Adafruit offers fun and exciting stickers to celebrate achievement for electronics, science and engineering. We believe everyone should be able to be rewarded for learning a useful skill and a sticker is just one of the many ways to show and share.
No Longer Stocked
[Buy Now](https://www.adafruit.com/product/673)
[Related Guides to the Product](https://learn.adafruit.com/products/673/guides)
## Related Guides
- [Guitar Hero MIDI Controller](https://learn.adafruit.com/guitar-hero-midi-controller.md)
- [Commodore 64 - The Most Popular Retro Computer of All Time](https://learn.adafruit.com/commodore-64-retro-guide.md)
- [Use Docker to Compile Linux for ESP32-S3](https://learn.adafruit.com/docker-esp32-s3-linux.md)
- [Feather Guitar Hero Adapter](https://learn.adafruit.com/feather-guitar-hero-adapter.md)
- [BLE Cat Thermal Printer with MEMENTO](https://learn.adafruit.com/ble-cat-thermal-printer-with-memento.md)
- [Fruit Jam Mac Emulator](https://learn.adafruit.com/fruit-jam-mac-emulator.md)
- [How to Make Animated Graphics for Hologram Displays](https://learn.adafruit.com/how-to-make-animated-graphics-for-hologram-displays.md)
- [LED Matrix Wall Arcade for Pico-8](https://learn.adafruit.com/led-matrix-wall-arcade.md)
- [Run an X-Carve CNC Machine Wirelessly with a Raspberry Pi](https://learn.adafruit.com/control-an-xcarve-cnc-machine-wirelessly-with-a-raspberry-pi.md)
- [CircuitPython 2FA TOTP Authentication Friend](https://learn.adafruit.com/circuitpython-totp-otp-2fa-authy-authenticator-friend.md)
- [Flippy Floppy Drive Modification](https://learn.adafruit.com/flippy-floppy-drive-modification.md)
- [Authoring Playground Books with Bluefruit for iOS ](https://learn.adafruit.com/create-a-swift-playgroundbook-with-bluetooth-le.md)
- [SerenityOS - The dream of the '90s is alive!](https://learn.adafruit.com/serenityos-build-and-run-keep-the-90s-dream-alive.md)
- [Stand-alone programming AVRs using CircuitPython](https://learn.adafruit.com/stand-alone-programming-avrs-using-circuitpython.md)
- [Protect Your Online Accounts with Strong Passwords & Password Managers](https://learn.adafruit.com/protect-your-social-media-online-accounts-with-a-strong-password-manager.md)
---
# Source: https://learn.adafruit.com/adafruits-raspberry-pi-lesson-2-first-time-configuration/booting-into-desktop.md
# Adafruit's Raspberry Pi Lesson 2. First Time Configuration
## Booting into Desktop
By default, when the Raspberry Pi boots, you just get a command line. No windows just a terminal where you can login and type commands.
The final configuration that you definitely want to make, unless you don't like windowing environments is to change the boot behaviour so that it automatically starts the windowing system and logs you in.

Select the sensible option and hit Return.

- [Previous Page](https://learn.adafruit.com/adafruits-raspberry-pi-lesson-2-first-time-configuration/changing-timezone.md)
- [Next Page](https://learn.adafruit.com/adafruits-raspberry-pi-lesson-2-first-time-configuration/other-options.md)
## Featured Products
### Raspberry Pi 1 Model B Starter Pack - Includes a Raspberry Pi
[Raspberry Pi 1 Model B Starter Pack - Includes a Raspberry Pi](https://www.adafruit.com/product/1014)
You want to get hacking with your Pi fast, right? Get everything you need to start with the Adafruit Starter Pack for Raspberry Pi. It's the perfect accompaniment to your new Pi, everything you need to boot up your Pi Model B and get going. **We pre-assemble the Cobbler for you, no...**
No Longer Stocked
[Buy Now](https://www.adafruit.com/product/1014)
[Related Guides to the Product](https://learn.adafruit.com/products/1014/guides)
### Programming the Raspberry Pi: Getting Started with Python
[Programming the Raspberry Pi: Getting Started with Python](https://www.adafruit.com/product/1089)
**Program your own Raspberry Pi projects!**
An updated guide to programming your own Raspberry Pi projects. Learn to create inventive programs and fun games on your powerful Raspberry Pi--with no programming experience required. **This practical book has been revised...**
In Stock
[Buy Now](https://www.adafruit.com/product/1089)
[Related Guides to the Product](https://learn.adafruit.com/products/1089/guides)
### Budget Pack for Raspberry Pi 1 Model B (Doesn't include RasPi)
[Budget Pack for Raspberry Pi 1 Model B (Doesn't include RasPi)](https://www.adafruit.com/product/965)
An optimized collection of parts and pieces to experiment with Raspberry Pi at home, school or work. Great for students and those that want to get their feet wet, no soldering required! **THIS PACK DOES NOT INCLUDE A RASPBERRY PI 1 MODEL B and is NOT compatible with Model B+ or Raspberry Pi...**
No Longer Stocked
[Buy Now](https://www.adafruit.com/product/965)
[Related Guides to the Product](https://learn.adafruit.com/products/965/guides)
### Miniature Wireless USB Keyboard with Touchpad
[Miniature Wireless USB Keyboard with Touchpad](https://www.adafruit.com/product/922)
Add a miniature wireless controller to your computer project with this combination keyboard and touchpad. We found the smallest wireless USB keyboard available, a mere 6" x 2.4" x 0.5" (152mm x 59mm x 12.5mm)! It's small but usable to make a great accompaniment to a computer...
In Stock
[Buy Now](https://www.adafruit.com/product/922)
[Related Guides to the Product](https://learn.adafruit.com/products/922/guides)
### NTSC/PAL (Television) TFT Display - 4.3" Diagonal
[NTSC/PAL (Television) TFT Display - 4.3" Diagonal](https://www.adafruit.com/product/946)
Yes, this is an adorable small television! The visible display measures only 4.3" (11cm) diagonal, the TFT comes with a NTSC/PAL driver board, enclosure and stand. The display is very easy to use - simply connect 12VDC to the 2.1mm center-positive DC jack (or use the cable and connect to...
No Longer Stocked
[Buy Now](https://www.adafruit.com/product/946)
[Related Guides to the Product](https://learn.adafruit.com/products/946/guides)
### NTSC/PAL (Television) TFT Display - 7" Diagonal
[NTSC/PAL (Television) TFT Display - 7" Diagonal](https://www.adafruit.com/product/947)
Yes, this is an adorable small television! The visible display measures only 7" (17.8cm) diagonal, the TFT comes with a NTSC/PAL driver board, enclosure and stand. The display is very easy to use - simply connect the included 12VDC adapter to the 2.1mm center-positive DC jack, then...
No Longer Stocked
[Buy Now](https://www.adafruit.com/product/947)
[Related Guides to the Product](https://learn.adafruit.com/products/947/guides)
## Related Guides
- [Adafruit RGB Matrix + Real Time Clock HAT for Raspberry Pi](https://learn.adafruit.com/adafruit-rgb-matrix-plus-real-time-clock-hat-for-raspberry-pi.md)
- [Adafruit PiTFT 3.5" Touch Screen for Raspberry Pi](https://learn.adafruit.com/adafruit-pitft-3-dot-5-touch-screen-for-raspberry-pi.md)
- [Raspberry Pi Hosting Node-Red](https://learn.adafruit.com/raspberry-pi-hosting-node-red.md)
- [Windows IoT Core Application Development: Headed Blinky](https://learn.adafruit.com/windows-iot-application-development-headed-blinky.md)
- [Bonjour (Zeroconf) Networking for Windows and Linux](https://learn.adafruit.com/bonjour-zeroconf-networking-for-windows-and-linux.md)
- [Raspberry Pi Thermal Printer One Time Pads](https://learn.adafruit.com/raspberry-pi-thermal-printer-one-time-pads.md)
- [10" Raspberry Pi Desktop](https://learn.adafruit.com/10-raspberry-pi-desktop.md)
- [What is the Command Line?](https://learn.adafruit.com/what-is-the-command-line.md)
- [Adafruit's Raspberry Pi Lesson 6. Using SSH](https://learn.adafruit.com/adafruits-raspberry-pi-lesson-6-using-ssh.md)
- [Adafruit Prototyping Pi Plate](https://learn.adafruit.com/adafruit-prototyping-pi-plate.md)
- [CircuitPython Libraries on Linux and the 96Boards DragonBoard 410c](https://learn.adafruit.com/circuitpython-libraries-on-linux-and-the-96boards-dragonboard-410c.md)
- [Getting Started With Windows IoT Core on Raspberry Pi](https://learn.adafruit.com/getting-started-with-windows-iot-on-raspberry-pi.md)
- [Raspberry Pi Computer Quick-Start](https://learn.adafruit.com/raspberry-pi-computer-quick-start.md)
- [Adafruit Ultimate GPS with gpsd](https://learn.adafruit.com/adafruit-ultimate-gps-on-the-raspberry-pi.md)
- [Adafruit's Raspberry Pi Lesson 9. Controlling a DC Motor](https://learn.adafruit.com/adafruit-raspberry-pi-lesson-9-controlling-a-dc-motor.md)
---
# Source: https://learn.adafruit.com/arduino-tips-tricks-and-techniques/bootloader.md
# Arduino Tips, Tricks, and Techniques
## Bootloader
Info:
## Bootloader for the Atmega328
[Here is the package for a 'fixed up' ATmega328 bootloader](http://learn.adafruit.com/system/assets/assets/000/010/292/original/Adaboot328.zip). To program it you may need to change the Makefile's ISPTOOL, etc definitions. The commands are **make adaboot328; make TARGET=adaboot328 isp328** (I couldn't get the default 'isp' target to work so I made a new one).
This version has a few fixes: first it integrates the 'no-wait' and 'no-hang' fixes below. It also fixes the annoying "missing signature bytes" bug that freaks out avrdude when programming without the IDE. I also repaired the EEPROM code so that now you can upload and download the EEPROM memory as well as flash. Finally, theres a 'upload feedback' using the LED, for arduino clones that don't have TX/RX leds.
Please note that the fuses are different for this chip because of the extended memory!
## "No-Wait" Bootloader
Here's a bootloader hack that will automatically start the sketch after it has been uploaded and will also only start the bootloader when the reset button is pressed (so when you plug in power it will go straight to the sketch).
Copy the following lines:
```
ch = MCUSR;
MCUSR = 0;
WDTCSR |= _BV(WDCE) | _BV(WDE);
WDTCSR = 0;
// Check if the WDT was used to reset, in which case we dont bootload and skip straight to the code. woot.
if (! (ch & _BV(EXTRF))) // if its a not an external reset...
app_start(); // skip bootloader
```
And paste them as shown:
```
/* main program starts here */
int main(void)
{
uint8_t ch,ch2;
uint16_t w;
ch = MCUSR;
MCUSR = 0;
WDTCSR |= _BV(WDCE) | _BV(WDE);
WDTCSR = 0;
// Check if the WDT was used to reset, in which case we dont bootload and skip straight to the code. woot.
if (! (ch & _BV(EXTRF))) // if its a not an external reset...
app_start(); // skip bootloader
/* set pin direction for bootloader pin and enable pullup */
/* for ATmega128, two pins need to be initialized */
```
Now, in the same way, copy the following code:
```
// autoreset via watchdog (sneaky!)
WDTCSR = _BV(WDE);
while (1); // 16 ms
```
And paste it here:
```
/* Leave programming mode */
else if(ch=='Q') {
nothing_response();
// autoreset via watchdog (sneaky!)
WDTCSR = _BV(WDE);
while (1); // 16 ms
}
/* Erase device, don't care as we will erase one page at a time anyway. */
else if(ch=='R') {
nothing_response();
}
```
You can also just grab the [source code](http://learn.adafruit.com/system/assets/assets/000/010/293/original/ATmegaBOOT_168.c) and [compiled hex file here](http://learn.adafruit.com/system/assets/assets/000/010/294/original/ATmegaBOOT_168_ng.hex.txt).
It will work in NG or Diecimila Arduinos.
## No-Hang Bootloader
If you are using a Diecimila with auto-reset you may be frustrated when your communications program accidentally triggers the bootloader. Here is a quick hack to make the bootloader quit if it doesn't receive a '0' character first (which would indicate the Arduino software is trying to talk to it.
Copy the following line:```
uint8_t firstchar = 0;
```
And paste:
```
/* main program starts here */
int main(void)
{
uint8_t ch,ch2;
uint16_t w;
uint8_t firstchar = 0;
```
Copy:
```
firstchar = 1; // we got an appropriate bootloader instruction
```
Paste:
```
/* Hello is anyone home ? */
if(ch=='0') {
firstchar = 1; // we got an appropriate bootloader instruction
nothing_response();
```
Then paste this below the above code:
```
} else if (firstchar == 0) {
// the first character we got is not '0', lets bail!
// autoreset via watchdog (sneaky!)
WDTCSR = _BV(WDE);
while (1); // 16 ms
}
```
You can also just replace the last two lines with **app\_start()**
## Upload Sketches with AVRDUDE
The bootloader is an 'stk500'-compatible, which means you can use good ol' AVRDUDE to program the arduino.
Just plug in the USB cable, then press the reset just before you start avrdude. [If you need an avrdude tutorial, check out this page](http://ladyada.net/learn/avr/index.html).
- Use **-b 19200** to set the baud rate to 19200
- The device signature reads dont seem to work so you'll want to use **-F**
- The programmer type is **avrisp**
- The device type is **-p m168**
- The port is whatever the FTDI chip shows up as

- [Previous Page](https://learn.adafruit.com/arduino-tips-tricks-and-techniques/arduino-libraries.md)
- [Next Page](https://learn.adafruit.com/arduino-tips-tricks-and-techniques/upgrade.md)
## Featured Products
### Adafruit METRO 328 Fully Assembled - Arduino IDE compatible
[Adafruit METRO 328 Fully Assembled - Arduino IDE compatible](https://www.adafruit.com/product/50)
We sure love the ATmega328 here at Adafruit, and we use them _a lot_ for our own projects. The processor has plenty of GPIO, Analog inputs, hardware UART SPI and I2C, timers and PWM galore - just enough for most simple projects. When we need to go small, we use a
Out of Stock
[Buy Now](https://www.adafruit.com/product/50)
[Related Guides to the Product](https://learn.adafruit.com/products/50/guides)
### Arduino bootloader-programmed chip (Atmega328P)
[Arduino bootloader-programmed chip (Atmega328P)](https://www.adafruit.com/product/123)
This is a preprogrammed Atmega328P chip, useful if you want to make your own Arduino-compatible or repair a damaged chip on an exisiting Arduino UNO, Duemilanove, Diecimila, or NG!
This chip is programmed with 'ADAboot', my version of the bootloader that is...
Out of Stock
[Buy Now](https://www.adafruit.com/product/123)
[Related Guides to the Product](https://learn.adafruit.com/products/123/guides)
## Related Guides
- [NeoPixel Painter](https://learn.adafruit.com/neopixel-painter.md)
- [Adafruit Proto Shield for Arduino](https://learn.adafruit.com/adafruit-proto-shield-arduino.md)
- [Deciphering Strange Arduino Code](https://learn.adafruit.com/deciphering-strange-arduino-code.md)
- [Affordable HAL 9000 Replica](https://learn.adafruit.com/hal-9000-replica.md)
- [WiFi Candy Bowl Monitor](https://learn.adafruit.com/wifi-candy-bowl.md)
- [Arduino Lesson 1. Blink](https://learn.adafruit.com/adafruit-arduino-lesson-1-blink.md)
- [Using NeoPixels and Servos Together](https://learn.adafruit.com/neopixels-and-servos.md)
- [Adafruit 2.8" TFT Touch Shield v2 - Capacitive or Resistive](https://learn.adafruit.com/adafruit-2-8-tft-touch-shield-v2.md)
- [LSM303 Accelerometer + Compass Breakout](https://learn.adafruit.com/lsm303-accelerometer-slash-compass-breakout.md)
- [1,500 NeoPixel LED Curtain with Raspberry Pi and Fadecandy](https://learn.adafruit.com/1500-neopixel-led-curtain-with-raspberry-pi-fadecandy.md)
- [Arduino Lesson 8. Analog Inputs](https://learn.adafruit.com/adafruit-arduino-lesson-8-analog-inputs.md)
- [8BitBox](https://learn.adafruit.com/8bitbox.md)
- [Animating Multiple LED Backpacks](https://learn.adafruit.com/animating-multiple-led-backpacks.md)
- [WiFi Controlled LED Christmahanukwanzaa Tree](https://learn.adafruit.com/wifi-controlled-led-christmahanukwanzaa-tree.md)
- [Reverse Geocache Box](https://learn.adafruit.com/reverse-geocache-engagement-box.md)
---
# Source: https://learn.adafruit.com/playing-sounds-and-using-buttons-with-raspberry-pi/bread-board-setup-for-input-buttons.md
# Playing sounds and using buttons with Raspberry Pi
## Circuit Diagram
All Raspberry Pi versions released to date can use the CircuitPython wiring below. We have used the same GPIO pins 23, 24 and 25 as they are available on Raspberry Pi v1, v2, v3 and Zeros. It does not matter if your cobbler is a 40-pin version or the earlier 26-pin version.
# CircuitPython T-Cobbler

Note that we are not using pull up resistors and do not need to connect to the 3.3v rail. We can do direct pin to button and button to GND connections with CircuitPython configuration.
- [Previous Page](https://learn.adafruit.com/playing-sounds-and-using-buttons-with-raspberry-pi/install-circuitpython-for-raspberry-pi.md)
- [Next Page](https://learn.adafruit.com/playing-sounds-and-using-buttons-with-raspberry-pi/circuitpython-code.md)
## Featured Products
### Raspberry Pi 3 - Model B+ - 1.4GHz Cortex-A53 with 1GB RAM
[Raspberry Pi 3 - Model B+ - 1.4GHz Cortex-A53 with 1GB RAM](https://www.adafruit.com/product/3775)
The Raspberry Pi 3 Model B is the most popular Raspberry Pi computer made, and the Pi Foundation knows you can always make a good thing _better_! And what could make the Pi 3 better? How about a _faster_ processor, 5 GHz WiFi, and updated Ethernet chip with PoE capability?...
In Stock
[Buy Now](https://www.adafruit.com/product/3775)
[Related Guides to the Product](https://learn.adafruit.com/products/3775/guides)
### Half Sized Premium Breadboard - 400 Tie Points
[Half Sized Premium Breadboard - 400 Tie Points](https://www.adafruit.com/product/64)
This is a cute, half-size breadboard with 400 tie points, good for small projects. It's 3.25" x 2.2" / 8.3cm x 5.5cm with a standard double-strip in the middle and two power rails on both sides. You can pull the power rails off easily to make the breadboard as...
In Stock
[Buy Now](https://www.adafruit.com/product/64)
[Related Guides to the Product](https://learn.adafruit.com/products/64/guides)
### Tactile Button switch (6mm) x 20 pack
[Tactile Button switch (6mm) x 20 pack](https://www.adafruit.com/product/367)
Little clicky switches are standard input "buttons" on electronic projects. These work best in a PCB but [can be used on a solderless breadboard as shown in this tutorial](https://learn.adafruit.com/adafruit-arduino-lesson-6-digital-inputs?view=all). The pins are normally...
In Stock
[Buy Now](https://www.adafruit.com/product/367)
[Related Guides to the Product](https://learn.adafruit.com/products/367/guides)
### Adafruit Raspberry Pi B+ / Pi 2 / Pi 3 Case - Smoke Base
[Adafruit Raspberry Pi B+ / Pi 2 / Pi 3 Case - Smoke Base](https://www.adafruit.com/product/2258)
It took awhile to perfect - but that's okay since we can now safely say that the Adafruit case for Raspberry Pi Model B+ / Pi 2 / Pi 3 is The Single Greatest Raspberry Pi Model B+ Case Ever.
This enclosure was designed by Mike Doell - just like our...
In Stock
[Buy Now](https://www.adafruit.com/product/2258)
[Related Guides to the Product](https://learn.adafruit.com/products/2258/guides)
### 5V 2.5A Switching Power Supply with 20AWG MicroUSB Cable
[5V 2.5A Switching Power Supply with 20AWG MicroUSB Cable](https://www.adafruit.com/product/1995)
Our all-in-one 5V 2.5 Amp + MicroUSB cable power adapter is the perfect choice for powering single-board computers like Raspberry Pi, BeagleBone, or anything else that's power-hungry!
This adapter was specifically designed to provide 5.25V, not 5V, but we still call it a 5V USB...
Out of Stock
[Buy Now](https://www.adafruit.com/product/1995)
[Related Guides to the Product](https://learn.adafruit.com/products/1995/guides)
### Assembled Pi T-Cobbler Plus - GPIO Breakout
[Assembled Pi T-Cobbler Plus - GPIO Breakout](https://www.adafruit.com/product/2028)
**This is the assembled version of the Pi T-Cobbler Plus. It only works with the Raspberry Pi Model Zero, A+, B+, Pi 2, Pi 3 & Pi 4!** (Any Pi with 2x20 connector)
The Raspberry Pi has landed on the Maker World like a 40-GPIO pinned, quad-USB ported, credit...
In Stock
[Buy Now](https://www.adafruit.com/product/2028)
[Related Guides to the Product](https://learn.adafruit.com/products/2028/guides)
### Assembled Pi Cobbler Plus - Breakout Cable
[Assembled Pi Cobbler Plus - Breakout Cable](https://www.adafruit.com/product/2029)
The Raspberry Pi B+ / Pi 2 / Pi 3 / Pi 4 has landed on the Maker World like a 40-GPIO pinned, quad-USB ported, credit card sized bomb of DIY joy. And while you can use most of our great Model B accessories by hooking up our [downgrade...](https://www.adafruit.com/product/1986)
In Stock
[Buy Now](https://www.adafruit.com/product/2029)
[Related Guides to the Product](https://learn.adafruit.com/products/2029/guides)
### Adafruit Assembled Pi Cobbler Breakout + Cable for Raspberry Pi
[Adafruit Assembled Pi Cobbler Breakout + Cable for Raspberry Pi](https://www.adafruit.com/product/914)
Now that you've finally got your hands on a [Raspberry Pi® Model B](http://www.raspberrypi.org/), you're probably itching to make some fun embedded computer projects with it. What you need is an add on prototyping Pi Cobbler from Adafruit, which can break out all those...
No Longer Stocked
[Buy Now](https://www.adafruit.com/product/914)
[Related Guides to the Product](https://learn.adafruit.com/products/914/guides)
## Related Guides
- [Capacitive Touch Sensors on the Raspberry Pi](https://learn.adafruit.com/capacitive-touch-sensors-on-the-raspberry-pi.md)
- [LoRa and LoRaWAN Radio for Raspberry Pi](https://learn.adafruit.com/lora-and-lorawan-radio-for-raspberry-pi.md)
- [Adafruit's Raspberry Pi Lesson 13. Power Control](https://learn.adafruit.com/adafruits-raspberry-pi-lesson-13-power-control.md)
- [Adafruit's Raspberry Pi Lesson 4. GPIO Setup](https://learn.adafruit.com/adafruits-raspberry-pi-lesson-4-gpio-setup.md)
- [Adafruit's Raspberry Pi Lesson 11. DS18B20 Temperature Sensing](https://learn.adafruit.com/adafruits-raspberry-pi-lesson-11-ds18b20-temperature-sensing.md)
- [Analog Inputs for Raspberry Pi Using the MCP3008](https://learn.adafruit.com/reading-a-analog-in-and-controlling-audio-volume-with-the-raspberry-pi.md)
- [CircuitPython Libraries on Linux and ODROID C2](https://learn.adafruit.com/circuitpython-libaries-linux-odroid-c2.md)
- [Single Channel LoRaWAN Gateway for Raspberry Pi](https://learn.adafruit.com/raspberry-pi-single-channel-lorawan-gateway.md)
- [Adafruit AMG8833 8x8 Thermal Camera Sensor](https://learn.adafruit.com/adafruit-amg8833-8x8-thermal-camera-sensor.md)
- [Introducing the Raspberry Pi 2 - Model B](https://learn.adafruit.com/introducing-the-raspberry-pi-2-model-b.md)
- [Basic Resistor Sensor Reading on Raspberry Pi](https://learn.adafruit.com/basic-resistor-sensor-reading-on-raspberry-pi.md)
- [Windows IoT Core Application Development: Headed Blinky](https://learn.adafruit.com/windows-iot-application-development-headed-blinky.md)
- [Raspberry Pi WiFi Radio](https://learn.adafruit.com/pi-wifi-radio.md)
- [Program an AVR or Arduino Using Raspberry Pi GPIO](https://learn.adafruit.com/program-an-avr-or-arduino-using-raspberry-pi-gpio-pins.md)
- [USB Rechargeable Cordless Soldering Iron](https://learn.adafruit.com/usb-rechargeable-cordless-soldering-iron.md)
---
# Source: https://learn.adafruit.com/adafruit-arduino-lesson-9-sensing-light/breadboard-layou.md
# Arduino Lesson 9. Sensing Light
## Breadboard Layout
The breadboard layout for this lesson is the same as for lesson 8, except that the pot is replaced by an LDR and a 1 kΩ resistor.
Here is the layout for lesson 8, near the pot.

Simply remove the pot and replace it with the photocell and resistor as shown below:

- [Previous Page](https://learn.adafruit.com/adafruit-arduino-lesson-9-sensing-light/parts.md)
- [Next Page](https://learn.adafruit.com/adafruit-arduino-lesson-9-sensing-light/photocells.md)
## Featured Products
### Photo cell (CdS photoresistor)
[Photo cell (CdS photoresistor)](https://www.adafruit.com/product/161)
CdS cells are little light sensors. As the squiggly face is exposed to more light, the resistance goes down. When it's light, the resistance is about ~1KΩ, when dark it goes up to ~10KΩ.
To use, connect one side of the photocell (either one, it's symmetric) to power...
In Stock
[Buy Now](https://www.adafruit.com/product/161)
[Related Guides to the Product](https://learn.adafruit.com/products/161/guides)
### Diffused Red 5mm LED (25 pack)
[Diffused Red 5mm LED (25 pack)](https://www.adafruit.com/product/299)
Need some indicators? We are big fans of these diffused red LEDs, in fact we use them exclusively in our kits. They are fairly bright so they can be seen in daytime, and from any angle. They go easily into a breadboard and will add that extra zing to your project.
- Pack of 25...
In Stock
[Buy Now](https://www.adafruit.com/product/299)
[Related Guides to the Product](https://learn.adafruit.com/products/299/guides)
### Premium Male/Male Jumper Wires - 40 x 6" (150mm)
[Premium Male/Male Jumper Wires - 40 x 6" (150mm)](https://www.adafruit.com/product/758)
Handy for making wire harnesses or jumpering between headers on PCB's. These premium jumper wires are 6" (150mm) long and come in a 'strip' of 40 (4 pieces of each of ten rainbow colors). They have 0.1" male header contacts on either end and fit cleanly next to each other...
In Stock
[Buy Now](https://www.adafruit.com/product/758)
[Related Guides to the Product](https://learn.adafruit.com/products/758/guides)
### Half Sized Premium Breadboard - 400 Tie Points
[Half Sized Premium Breadboard - 400 Tie Points](https://www.adafruit.com/product/64)
This is a cute, half-size breadboard with 400 tie points, good for small projects. It's 3.25" x 2.2" / 8.3cm x 5.5cm with a standard double-strip in the middle and two power rails on both sides. You can pull the power rails off easily to make the breadboard as...
In Stock
[Buy Now](https://www.adafruit.com/product/64)
[Related Guides to the Product](https://learn.adafruit.com/products/64/guides)
### Adafruit METRO 328 Fully Assembled - Arduino IDE compatible
[Adafruit METRO 328 Fully Assembled - Arduino IDE compatible](https://www.adafruit.com/product/50)
We sure love the ATmega328 here at Adafruit, and we use them _a lot_ for our own projects. The processor has plenty of GPIO, Analog inputs, hardware UART SPI and I2C, timers and PWM galore - just enough for most simple projects. When we need to go small, we use a
Out of Stock
[Buy Now](https://www.adafruit.com/product/50)
[Related Guides to the Product](https://learn.adafruit.com/products/50/guides)
## Related Guides
- [Adafruit Arduino Selection Guide](https://learn.adafruit.com/adafruit-arduino-selection-guide.md)
- [IR Sensor](https://learn.adafruit.com/ir-sensor.md)
- [How to Choose a Microcontroller](https://learn.adafruit.com/how-to-choose-a-microcontroller.md)
- [Adafruit 1.14" 240x135 Color TFT Breakout LCD Display](https://learn.adafruit.com/adafruit-1-14-240x135-color-tft-breakout.md)
- [Adafruit Ultimate GPS](https://learn.adafruit.com/adafruit-ultimate-gps.md)
- [Reverse Geocache Box](https://learn.adafruit.com/reverse-geocache-engagement-box.md)
- [Ladyada's Learn Arduino - Lesson #0](https://learn.adafruit.com/ladyadas-learn-arduino-lesson-number-0.md)
- [How to Find Hidden COM Ports](https://learn.adafruit.com/how-to-find-hidden-com-ports.md)
- [Sending an SMS with Temboo](https://learn.adafruit.com/sending-an-sms-with-temboo.md)
- [Ladyada's Learn Arduino - Lesson #2](https://learn.adafruit.com/ladyadas-learn-arduino-lesson-number-2.md)
- [Arduino Lesson 14. Servo Motors](https://learn.adafruit.com/adafruit-arduino-lesson-14-servo-motors.md)
- [0.96" mini Color OLED](https://learn.adafruit.com/096-mini-color-oled.md)
- [Line Following Zumo Robot Using Simulink](https://learn.adafruit.com/line-following-zumo-robot-programmed-with-simulink.md)
- [Arduino Prototyping Mounting Plate](https://learn.adafruit.com/arduino-prototyping-mounting-plate.md)
- [Babel Fish](https://learn.adafruit.com/babel-fish.md)
---
# Source: https://learn.adafruit.com/adafruit-arduino-lesson-3-rgb-leds/breadboard-layout.md
# Arduino Lesson 3. RGB LEDs
## Breadboard Layout
The RGB LED has four leads. There is one lead going to the positive connection of each of the single LEDs within the package and a single lead that is connected to all three negative sides of the LEDs.

The common negative connection of the LED package is the second pin from the flat side of the LED package. It is also the longest of the four leads. This lead will be connected to ground.
Each LED inside the package requires its own 270Ω resistor to prevent too much current flowing through it. The three positive leads of the LEDs (one red, one green and one blue) are connected to Arduino output pins using these resistors.
Info:

- [Previous Page](https://learn.adafruit.com/adafruit-arduino-lesson-3-rgb-leds/parts.md)
- [Next Page](https://learn.adafruit.com/adafruit-arduino-lesson-3-rgb-leds/colors.md)
## Featured Products
### Adafruit METRO 328 Fully Assembled - Arduino IDE compatible
[Adafruit METRO 328 Fully Assembled - Arduino IDE compatible](https://www.adafruit.com/product/50)
We sure love the ATmega328 here at Adafruit, and we use them _a lot_ for our own projects. The processor has plenty of GPIO, Analog inputs, hardware UART SPI and I2C, timers and PWM galore - just enough for most simple projects. When we need to go small, we use a
Out of Stock
[Buy Now](https://www.adafruit.com/product/50)
[Related Guides to the Product](https://learn.adafruit.com/products/50/guides)
### Premium Male/Male Jumper Wires - 40 x 6" (150mm)
[Premium Male/Male Jumper Wires - 40 x 6" (150mm)](https://www.adafruit.com/product/758)
Handy for making wire harnesses or jumpering between headers on PCB's. These premium jumper wires are 6" (150mm) long and come in a 'strip' of 40 (4 pieces of each of ten rainbow colors). They have 0.1" male header contacts on either end and fit cleanly next to each other...
In Stock
[Buy Now](https://www.adafruit.com/product/758)
[Related Guides to the Product](https://learn.adafruit.com/products/758/guides)
### Half Sized Premium Breadboard - 400 Tie Points
[Half Sized Premium Breadboard - 400 Tie Points](https://www.adafruit.com/product/64)
This is a cute, half-size breadboard with 400 tie points, good for small projects. It's 3.25" x 2.2" / 8.3cm x 5.5cm with a standard double-strip in the middle and two power rails on both sides. You can pull the power rails off easily to make the breadboard as...
In Stock
[Buy Now](https://www.adafruit.com/product/64)
[Related Guides to the Product](https://learn.adafruit.com/products/64/guides)
### Diffused RGB (tri-color) LED
[Diffused RGB (tri-color) LED](https://www.adafruit.com/product/159)
Diffused 5mm tri-color LED with separate red, green and blue LED chips inside! Nice indicator, and fun to color-swirl. 60 degree viewing angle. We like diffused RGB LEDs because they color mix inside instead of appearing as 3 distinct LEDs.
These are Common-Anode type which means you...
In Stock
[Buy Now](https://www.adafruit.com/product/159)
[Related Guides to the Product](https://learn.adafruit.com/products/159/guides)
## Related Guides
- [Geofencing with the FONA 808 & Adafruit IO](https://learn.adafruit.com/geofencing-with-the-fona-808-and-adafruit-io.md)
- [Adafruit Motor Shield](https://learn.adafruit.com/adafruit-motor-shield.md)
- [Sous-vide controller powered by Arduino - The SousViduino!](https://learn.adafruit.com/sous-vide-powered-by-arduino-the-sous-viduino.md)
- [Wave Shield Voice Changer](https://learn.adafruit.com/wave-shield-voice-changer.md)
- [Arduino Lesson 5. The Serial Monitor](https://learn.adafruit.com/adafruit-arduino-lesson-5-the-serial-monitor.md)
- [Trinket Audio Player](https://learn.adafruit.com/trinket-audio-player.md)
- [Circuit Playground: D is for Diode](https://learn.adafruit.com/circuit-playground-d-is-for-diode.md)
- [Wave Shield](https://learn.adafruit.com/adafruit-wave-shield-audio-shield-for-arduino.md)
- [Arduino Lesson 0. Getting Started](https://learn.adafruit.com/lesson-0-getting-started.md)
- [Current Limiting Stepper Driver with DRV8871](https://learn.adafruit.com/current-limiting-stepper-driver-with-drv8871.md)
- [RePaper eInk Development Board](https://learn.adafruit.com/repaper-eink-development-board.md)
- [Adafruit AirLift Shield - ESP32 WiFi Co-Processor](https://learn.adafruit.com/adafruit-airlift-shield-esp32-wifi-co-processor.md)
- [Low Power WiFi Datalogger](https://learn.adafruit.com/low-power-wifi-datalogging.md)
- [Babel Fish](https://learn.adafruit.com/babel-fish.md)
- [Arduino Lesson 2. LEDs](https://learn.adafruit.com/adafruit-arduino-lesson-2-leds.md)
---
# Source: https://learn.adafruit.com/lesson-0-getting-started/breadboard.md
# Arduino Lesson 0. Getting Started
## Breadboard
The projects in this series of lessons all use something called Breadboard, or more accurately, Solderless Breadboard.

Breadboard is a way of constructing electronics without having to use a soldering iron. Components are pushed into the sockets on the breadboard and then extra 'jumper' wires are used to make connections.
If you were to pull the self adhesive backing off the back of your breadboard, it would look something like this.

The middle section of the board has two columns, each with 30 strips of connector, like the one pulled out and to the side of the breadboard. These connect together anything that is pushed through from the front into one of those five holes.
On either edge of the board are much longer sections of clip that join together the columns of holes marked by the blue and red lines on the front of the breadboard. These are generally used for GND (blue) and 5V (red).
This is the breadboard layout used in lesson 2.
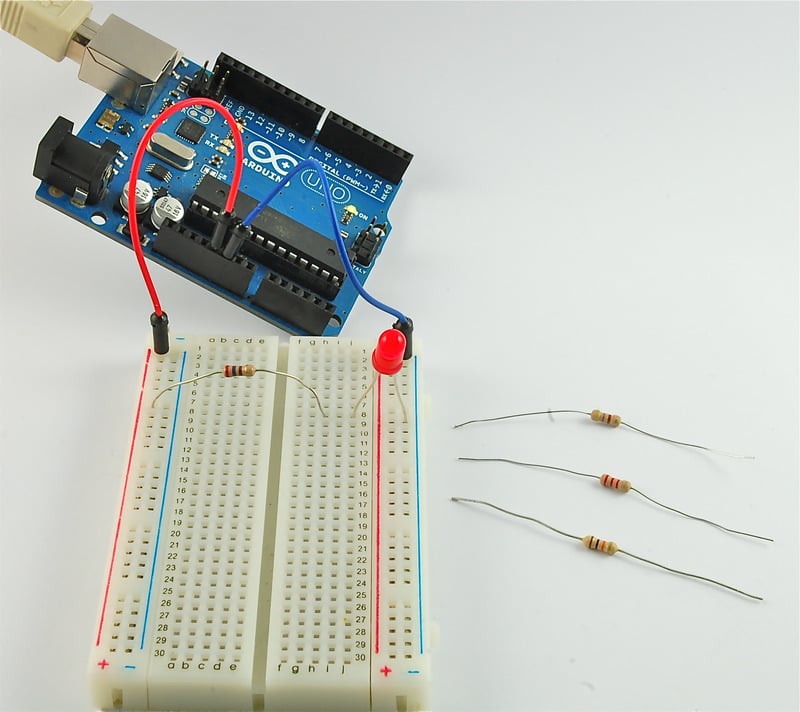
There is a red jumper wire going from the 5V socket on the Arduino to one of the long power connectors on the breadboard. The resistor has one lead pushed into one of the holes on that 5V red column. The resistor's other lead goes to one of the rows on the right hand side of the board in the center of the board.
The LED spans another connector on the same row as the resistor lead (connecting them together) and the blue (GND) long connector on the right of the breadboard. This long blue GND strip is connected near its top to the GND connection of the Arduino.
- [Previous Page](https://learn.adafruit.com/lesson-0-getting-started/parts.md)
- [Next Page](https://learn.adafruit.com/lesson-0-getting-started/installing-arduino-windows.md)
## Featured Products
### Arduino Leonardo ATmega32u4 with headers
[Arduino Leonardo ATmega32u4 with headers](https://www.adafruit.com/product/849)
**Note:** This product is **discontinued,** but you can purchase the [Seeeduino Lite](https://www.adafruit.com/product/3228), which is an equivalent alternative that can be used instead.
The Arduino Leonardo is a microcontroller board based on...
No Longer Stocked
[Buy Now](https://www.adafruit.com/product/849)
[Related Guides to the Product](https://learn.adafruit.com/products/849/guides)
### Adafruit METRO 328 Fully Assembled - Arduino IDE compatible
[Adafruit METRO 328 Fully Assembled - Arduino IDE compatible](https://www.adafruit.com/product/50)
We sure love the ATmega328 here at Adafruit, and we use them _a lot_ for our own projects. The processor has plenty of GPIO, Analog inputs, hardware UART SPI and I2C, timers and PWM galore - just enough for most simple projects. When we need to go small, we use a
Out of Stock
[Buy Now](https://www.adafruit.com/product/50)
[Related Guides to the Product](https://learn.adafruit.com/products/50/guides)
## Related Guides
- [Bluetooth Temperature & Humidity Sensor](https://learn.adafruit.com/bluetooth-temperature-and-humidity-sensor.md)
- [Bluefruit LE Connect for iOS and Android](https://learn.adafruit.com/bluefruit-le-connect.md)
- [Arduino Lesson 14. Servo Motors](https://learn.adafruit.com/adafruit-arduino-lesson-14-servo-motors.md)
- [20mm LED Pixels](https://learn.adafruit.com/20mm-led-pixels.md)
- [Affordable HAL 9000 Replica](https://learn.adafruit.com/hal-9000-replica.md)
- [Adafruit 1.27" and 1.5" Color OLED Breakout Board](https://learn.adafruit.com/adafruit-1-5-color-oled-breakout-board.md)
- [Mini Thermal Receipt Printers](https://learn.adafruit.com/mini-thermal-receipt-printer.md)
- [Introducing Adafruit Trellis ](https://learn.adafruit.com/adafruit-trellis-diy-open-source-led-keypad.md)
- [Multi-tasking the Arduino - Part 2](https://learn.adafruit.com/multi-tasking-the-arduino-part-2.md)
- [FTDI Friend](https://learn.adafruit.com/ftdi-friend.md)
- [Wave Shield Voice Changer](https://learn.adafruit.com/wave-shield-voice-changer.md)
- [Adafruit 1.14" 240x135 Color TFT Breakout LCD Display](https://learn.adafruit.com/adafruit-1-14-240x135-color-tft-breakout.md)
- [Arduino Ethernet + SD Card](https://learn.adafruit.com/arduino-ethernet-sd-card.md)
- [A REST API for Arduino & the CC3000 WiFi Chip](https://learn.adafruit.com/a-rest-api-for-arduino-and-the-cc3000-wifi-chip.md)
- [WiFi Controlled LED Christmahanukwanzaa Tree](https://learn.adafruit.com/wifi-controlled-led-christmahanukwanzaa-tree.md)
---
# Source: https://learn.adafruit.com/1-8-tft-display/breakout-assembly.md
# 1.8" TFT Display Breakout and Shield
## Breakout Assembly

## Prepare the header strip:
Cut the strip to length if necessary. It will be easier to solder if you insert it into a breadboard - **long pins down**

## Add the breakout board:
Place the breakout board over the pins so that the short pins poke through the breakout pads

## And Solder!
Be sure to solder all pins for reliable electrical contact.
_(For tips on soldering, be sure to check out our_ [_Guide to Excellent Soldering_](http://learn.adafruit.com/adafruit-guide-excellent-soldering)_)._


You're done! Check your solder joints visually and continue onto the next steps

- [Previous Page](https://learn.adafruit.com/1-8-tft-display/plugging-in-an-eyespi-cable.md)
- [Next Page](https://learn.adafruit.com/1-8-tft-display/breakout-wiring-and-test.md)
## Featured Products
### Breadboarding wire bundle
[Breadboarding wire bundle](https://www.adafruit.com/product/153)
75 flexible stranded core wires with stiff ends molded on in red, orange, yellow, green, blue, brown, black and white. These are a major improvement over the "box of bent wires" that are sometimes sold with breadboards, and faster than stripping your own solid core wires. Makes...
In Stock
[Buy Now](https://www.adafruit.com/product/153)
[Related Guides to the Product](https://learn.adafruit.com/products/153/guides)
### Adafruit METRO 328 Fully Assembled - Arduino IDE compatible
[Adafruit METRO 328 Fully Assembled - Arduino IDE compatible](https://www.adafruit.com/product/50)
We sure love the ATmega328 here at Adafruit, and we use them _a lot_ for our own projects. The processor has plenty of GPIO, Analog inputs, hardware UART SPI and I2C, timers and PWM galore - just enough for most simple projects. When we need to go small, we use a
Out of Stock
[Buy Now](https://www.adafruit.com/product/50)
[Related Guides to the Product](https://learn.adafruit.com/products/50/guides)
### Half Sized Premium Breadboard - 400 Tie Points
[Half Sized Premium Breadboard - 400 Tie Points](https://www.adafruit.com/product/64)
This is a cute, half-size breadboard with 400 tie points, good for small projects. It's 3.25" x 2.2" / 8.3cm x 5.5cm with a standard double-strip in the middle and two power rails on both sides. You can pull the power rails off easily to make the breadboard as...
In Stock
[Buy Now](https://www.adafruit.com/product/64)
[Related Guides to the Product](https://learn.adafruit.com/products/64/guides)
### 1.8" Color TFT LCD display with MicroSD Card Breakout
[1.8" Color TFT LCD display with MicroSD Card Breakout](https://www.adafruit.com/product/358)
This lovely little display breakout is the best way to add a small, colorful and bright display to any project. Since the display uses 4-wire SPI to communicate and has its own pixel-addressable frame buffer, it can be used with every kind of microcontroller. Even a very small one with low...
Out of Stock
[Buy Now](https://www.adafruit.com/product/358)
[Related Guides to the Product](https://learn.adafruit.com/products/358/guides)
### Adafruit 1.8" Color TFT Shield w/microSD and Joystick
[Adafruit 1.8" Color TFT Shield w/microSD and Joystick](https://www.adafruit.com/product/802)
This lovely little shield is the best way to add a small, colorful and bright display to any project. We took our popular 1.8" TFT breakout board and remixed it into an Arduino shield complete with microSD card slot and a 5-way joystick navigation switch and three selection buttons! Since...
In Stock
[Buy Now](https://www.adafruit.com/product/802)
[Related Guides to the Product](https://learn.adafruit.com/products/802/guides)
### 1.8" SPI TFT display, 160x128 18-bit color - ST7735R driver
[1.8" SPI TFT display, 160x128 18-bit color - ST7735R driver](https://www.adafruit.com/product/618)
We just love this little 1.8" TFT display, with true TFT color (up to 18-bits per pixel!), fine 160x128 resolution, two white LED backlight that runs on 3.3V and a very easy SPI interface that requires only 4 or 5 digital pins to send pixels to the display.
**Please...**
Out of Stock
[Buy Now](https://www.adafruit.com/product/618)
[Related Guides to the Product](https://learn.adafruit.com/products/618/guides)
## Related Guides
- [Wave Shield](https://learn.adafruit.com/adafruit-wave-shield-audio-shield-for-arduino.md)
- [Adafruit 2.8" TFT Touch Shield v2 - Capacitive or Resistive](https://learn.adafruit.com/adafruit-2-8-tft-touch-shield-v2.md)
- [How to Build a Testing Jig](https://learn.adafruit.com/how-to-build-a-testing-fixture.md)
- [Create an Internet of Things Dashboard with Adafruit IO](https://learn.adafruit.com/create-an-internet-of-things-dashboard-with-adafruit-dot-io.md)
- [Let’s Put LEDs in Things!](https://learn.adafruit.com/lets-put-leds-in-things.md)
- [Tiny Arduino Music Visualizer](https://learn.adafruit.com/piccolo.md)
- [Circuit Playground Sound-Controlled Robot](https://learn.adafruit.com/circuit-playground-sound-controlled-robot.md)
- [Adafruit 1.27" and 1.5" Color OLED Breakout Board](https://learn.adafruit.com/adafruit-1-5-color-oled-breakout-board.md)
- [Arduino Lesson 15. DC Motor Reversing](https://learn.adafruit.com/adafruit-arduino-lesson-15-dc-motor-reversing.md)
- [TTL Serial Camera](https://learn.adafruit.com/ttl-serial-camera.md)
- [Analog Feedback Servos](https://learn.adafruit.com/analog-feedback-servos.md)
- [Geofencing with the FONA 808 & Adafruit IO](https://learn.adafruit.com/geofencing-with-the-fona-808-and-adafruit-io.md)
- [Arduino GPS Clock](https://learn.adafruit.com/arduino-clock.md)
- [Adafruit Data Logger Shield](https://learn.adafruit.com/adafruit-data-logger-shield.md)
- [Making Adabot: Part 2](https://learn.adafruit.com/making-adabot-part-2.md)
---
# Source: https://learn.adafruit.com/1-8-tft-display/breakout-pinouts.md
# 1.8" TFT Display Breakout and Shield
## 1.8" TFT Breakout

This lovely little display breakout is the best way to add a small, colorful and bright display to any project. Since the display uses 4-wire SPI to communicate and has its own pixel-addressable frame buffer, it can be used with every kind of microcontroller. Even a very small one with low memory and few pins available!
The 1.8" display has 128x160 color pixels. Unlike the low cost "Nokia 6110" and similar LCD displays, which are CSTN type and thus have poor color and slow refresh, this display is a true TFT! The TFT driver (ST7735R) can display full 18-bit color (262,144 shades!). And the LCD will always come with the same driver chip so there's no worries that your code will not work from one to the other.
The breakout has the TFT display soldered on (it uses a delicate flex-circuit connector) as well as a ultra-low-dropout 3.3V regulator and a 3/5V level shifter so you can use it with 3.3V or 5V power and logic. We also had a little space so we placed a microSD card holder so you can easily load full color bitmaps from a FAT16/FAT32 formatted microSD card. The microSD card is not included, [but you can pick one up here](http://www.adafruit.com/products/102).
This display breakout also features an [18-pin "EYESPI" standard FPC connector](https://www.adafruit.com/?q=eyespi&sort=BestMatch) with flip-top connector. [You can use an 18-pin 0.5mm pitch FPC cable](https://www.adafruit.com/product/5239) to connect to all the GPIO pins for when you want to skip the soldering.
- [Previous Page](https://learn.adafruit.com/1-8-tft-display/overview.md)
- [Next Page](https://learn.adafruit.com/1-8-tft-display/pinouts.md)
## Featured Products
### Breadboarding wire bundle
[Breadboarding wire bundle](https://www.adafruit.com/product/153)
75 flexible stranded core wires with stiff ends molded on in red, orange, yellow, green, blue, brown, black and white. These are a major improvement over the "box of bent wires" that are sometimes sold with breadboards, and faster than stripping your own solid core wires. Makes...
In Stock
[Buy Now](https://www.adafruit.com/product/153)
[Related Guides to the Product](https://learn.adafruit.com/products/153/guides)
### Adafruit METRO 328 Fully Assembled - Arduino IDE compatible
[Adafruit METRO 328 Fully Assembled - Arduino IDE compatible](https://www.adafruit.com/product/50)
We sure love the ATmega328 here at Adafruit, and we use them _a lot_ for our own projects. The processor has plenty of GPIO, Analog inputs, hardware UART SPI and I2C, timers and PWM galore - just enough for most simple projects. When we need to go small, we use a
Out of Stock
[Buy Now](https://www.adafruit.com/product/50)
[Related Guides to the Product](https://learn.adafruit.com/products/50/guides)
### Half Sized Premium Breadboard - 400 Tie Points
[Half Sized Premium Breadboard - 400 Tie Points](https://www.adafruit.com/product/64)
This is a cute, half-size breadboard with 400 tie points, good for small projects. It's 3.25" x 2.2" / 8.3cm x 5.5cm with a standard double-strip in the middle and two power rails on both sides. You can pull the power rails off easily to make the breadboard as...
In Stock
[Buy Now](https://www.adafruit.com/product/64)
[Related Guides to the Product](https://learn.adafruit.com/products/64/guides)
### 1.8" Color TFT LCD display with MicroSD Card Breakout
[1.8" Color TFT LCD display with MicroSD Card Breakout](https://www.adafruit.com/product/358)
This lovely little display breakout is the best way to add a small, colorful and bright display to any project. Since the display uses 4-wire SPI to communicate and has its own pixel-addressable frame buffer, it can be used with every kind of microcontroller. Even a very small one with low...
Out of Stock
[Buy Now](https://www.adafruit.com/product/358)
[Related Guides to the Product](https://learn.adafruit.com/products/358/guides)
### Adafruit 1.8" Color TFT Shield w/microSD and Joystick
[Adafruit 1.8" Color TFT Shield w/microSD and Joystick](https://www.adafruit.com/product/802)
This lovely little shield is the best way to add a small, colorful and bright display to any project. We took our popular 1.8" TFT breakout board and remixed it into an Arduino shield complete with microSD card slot and a 5-way joystick navigation switch and three selection buttons! Since...
In Stock
[Buy Now](https://www.adafruit.com/product/802)
[Related Guides to the Product](https://learn.adafruit.com/products/802/guides)
### 1.8" SPI TFT display, 160x128 18-bit color - ST7735R driver
[1.8" SPI TFT display, 160x128 18-bit color - ST7735R driver](https://www.adafruit.com/product/618)
We just love this little 1.8" TFT display, with true TFT color (up to 18-bits per pixel!), fine 160x128 resolution, two white LED backlight that runs on 3.3V and a very easy SPI interface that requires only 4 or 5 digital pins to send pixels to the display.
**Please...**
Out of Stock
[Buy Now](https://www.adafruit.com/product/618)
[Related Guides to the Product](https://learn.adafruit.com/products/618/guides)
## Related Guides
- [Wave Shield](https://learn.adafruit.com/adafruit-wave-shield-audio-shield-for-arduino.md)
- [Adafruit 2.8" TFT Touch Shield v2 - Capacitive or Resistive](https://learn.adafruit.com/adafruit-2-8-tft-touch-shield-v2.md)
- [How to Build a Testing Jig](https://learn.adafruit.com/how-to-build-a-testing-fixture.md)
- [Create an Internet of Things Dashboard with Adafruit IO](https://learn.adafruit.com/create-an-internet-of-things-dashboard-with-adafruit-dot-io.md)
- [Let’s Put LEDs in Things!](https://learn.adafruit.com/lets-put-leds-in-things.md)
- [Tiny Arduino Music Visualizer](https://learn.adafruit.com/piccolo.md)
- [Circuit Playground Sound-Controlled Robot](https://learn.adafruit.com/circuit-playground-sound-controlled-robot.md)
- [Adafruit 1.27" and 1.5" Color OLED Breakout Board](https://learn.adafruit.com/adafruit-1-5-color-oled-breakout-board.md)
- [Arduino Lesson 15. DC Motor Reversing](https://learn.adafruit.com/adafruit-arduino-lesson-15-dc-motor-reversing.md)
- [TTL Serial Camera](https://learn.adafruit.com/ttl-serial-camera.md)
- [Analog Feedback Servos](https://learn.adafruit.com/analog-feedback-servos.md)
- [Geofencing with the FONA 808 & Adafruit IO](https://learn.adafruit.com/geofencing-with-the-fona-808-and-adafruit-io.md)
- [Arduino GPS Clock](https://learn.adafruit.com/arduino-clock.md)
- [Adafruit Data Logger Shield](https://learn.adafruit.com/adafruit-data-logger-shield.md)
- [Making Adabot: Part 2](https://learn.adafruit.com/making-adabot-part-2.md)
---
# Source: https://learn.adafruit.com/1-8-tft-display/breakout-wiring-and-test.md
# 1.8" TFT Display Breakout and Shield
## Breakout Wiring & Test
There are two ways to wire up these displays - one is a more flexible method (you can use any pins on the Arduino) and the other is much faster (4-8x faster, but you are required to use the hardware SPI pins) We will begin by showing how to use the faster method, you can always change the pins later for flexible 'software SPI'

Wiring up the display in SPI mode is pretty easy as there's not that many pins! We'll be using hardware SPI, but you can also use software SPI (any pins) later. Start by connecting the power pins
- **3-5V Vin** connects to the Arduino **5V** pin - red wires
- **GND** connects to Arduino ground - black wires
- **CLK** connects to SPI clock. On Arduino Uno/Duemilanove/328-based, thats **Digital 13**. On Mega's, its **Digital 52** and on Leonardo/Due its **ICSP-3** ([See SPI Connections for more details](http://arduino.cc/en/Reference/SPI)) - this is the orange wire
- **MOSI** connects to SPI MOSI. On Arduino Uno/Duemilanove/328-based, thats **Digital 11**. On Mega's, its **Digital 51** and on Leonardo/Due its **ICSP-4** ([See SPI Connections for more details](http://arduino.cc/en/Reference/SPI "Link: http://arduino.cc/en/Reference/SPI")) - this is the white wire
- **CS** connects to our SPI Chip Select pin. We'll be using **Digital 10** but you can later change this to any pin - this is the yellow wire
- **RST** connects to our TFT reset pin. We'll be using **Digital 9** but you can later change this pin too - this is the blue wire
- **D/C** connects to our SPI data/command select pin. We'll be using **Digital 8** but you can later change this pin too - this is the green wire
# Install Adafruit ST7735 TFT Library
We have example code ready to go for use with these TFTs. It's written for Arduino, which should be portable to any microcontroller by adapting the C++ source.
_Three_ libraries need to be installed using the **Arduino Library Manager** …this is the preferred and modern way. From the Arduino “Sketch” menu, select “Include Library” then “Manage Libraries…”

Search for and install the Adafruit GFX library:

And the Adafruit ST7735 library:

If using an older version of the Arduino IDE (pre-1.8.10), also locate and install the **Adafruit\_BusIO** library (newer versions do this automatically when using the Arduino Library Manager).
If this is all unfamiliar, we have a [tutorial introducing Arduino library concepts and installation](http://learn.adafruit.com/adafruit-all-about-arduino-libraries-install-use).
Restart the IDE!

After restarting the Arduino software, you should see a new **example** folder called **Adafruit\_ST7735** and inside, an example called **graphicstest**.
Now upload the sketch to your Arduino. You may need to press the Reset button to reset the arduino and TFT. You should see a collection of graphical tests draw out on the TFT.

Once uploaded, the Arduino should perform all the test display procedures! If you're not seeing anything - first check if you have the backlight on, if the backlight is not lit something is wrong with the power/backlight wiring. If the backlight is lit but you see nothing on the display make sure you're using our suggested wiring.
# Changing Pins
Now that you have it working, there's a few things you can do to change around the pins.
If you're using Hardware SPI, the CLOCK and MOSI pins are 'fixed' and cant be changed. But you can change to software SPI, which is a bit slower, and that lets you pick any pins you like. Find these lines:
```
// Option 1 (recommended): must use the hardware SPI pins
// (for UNO thats sclk = 13 and sid = 11) and pin 10 must be
// an output. This is much faster - also required if you want
// to use the microSD card (see the image drawing example)
Adafruit_ST7735 tft = Adafruit_ST7735(TFT_CS, TFT_DC, TFT_RST);
// Option 2: use any pins but a little slower!
#define TFT_SCLK 13 // set these to be whatever pins you like!
#define TFT_MOSI 11 // set these to be whatever pins you like!
//Adafruit_ST7735 tft = Adafruit_ST7735(TFT_CS, TFT_DC, TFT_MOSI, TFT_SCLK, TFT_RST);
```
Comment out option 1, and uncomment option 2. Then you can change the **TFT\_** pins to whatever pins you'd like!
You can also save a pin by setting
`#define TFT_RST 9`
to
`#define TFT_RST -1`
and connecting the RST line to the Arduino Reset pin. That way the Arduino will auto-reset the TFT as well.
- [Previous Page](https://learn.adafruit.com/1-8-tft-display/breakout-assembly.md)
- [Next Page](https://learn.adafruit.com/1-8-tft-display/displaying-bitmaps.md)
## Featured Products
### Breadboarding wire bundle
[Breadboarding wire bundle](https://www.adafruit.com/product/153)
75 flexible stranded core wires with stiff ends molded on in red, orange, yellow, green, blue, brown, black and white. These are a major improvement over the "box of bent wires" that are sometimes sold with breadboards, and faster than stripping your own solid core wires. Makes...
In Stock
[Buy Now](https://www.adafruit.com/product/153)
[Related Guides to the Product](https://learn.adafruit.com/products/153/guides)
### Adafruit METRO 328 Fully Assembled - Arduino IDE compatible
[Adafruit METRO 328 Fully Assembled - Arduino IDE compatible](https://www.adafruit.com/product/50)
We sure love the ATmega328 here at Adafruit, and we use them _a lot_ for our own projects. The processor has plenty of GPIO, Analog inputs, hardware UART SPI and I2C, timers and PWM galore - just enough for most simple projects. When we need to go small, we use a
Out of Stock
[Buy Now](https://www.adafruit.com/product/50)
[Related Guides to the Product](https://learn.adafruit.com/products/50/guides)
### Half Sized Premium Breadboard - 400 Tie Points
[Half Sized Premium Breadboard - 400 Tie Points](https://www.adafruit.com/product/64)
This is a cute, half-size breadboard with 400 tie points, good for small projects. It's 3.25" x 2.2" / 8.3cm x 5.5cm with a standard double-strip in the middle and two power rails on both sides. You can pull the power rails off easily to make the breadboard as...
In Stock
[Buy Now](https://www.adafruit.com/product/64)
[Related Guides to the Product](https://learn.adafruit.com/products/64/guides)
### 1.8" Color TFT LCD display with MicroSD Card Breakout
[1.8" Color TFT LCD display with MicroSD Card Breakout](https://www.adafruit.com/product/358)
This lovely little display breakout is the best way to add a small, colorful and bright display to any project. Since the display uses 4-wire SPI to communicate and has its own pixel-addressable frame buffer, it can be used with every kind of microcontroller. Even a very small one with low...
Out of Stock
[Buy Now](https://www.adafruit.com/product/358)
[Related Guides to the Product](https://learn.adafruit.com/products/358/guides)
### Adafruit 1.8" Color TFT Shield w/microSD and Joystick
[Adafruit 1.8" Color TFT Shield w/microSD and Joystick](https://www.adafruit.com/product/802)
This lovely little shield is the best way to add a small, colorful and bright display to any project. We took our popular 1.8" TFT breakout board and remixed it into an Arduino shield complete with microSD card slot and a 5-way joystick navigation switch and three selection buttons! Since...
In Stock
[Buy Now](https://www.adafruit.com/product/802)
[Related Guides to the Product](https://learn.adafruit.com/products/802/guides)
### 1.8" SPI TFT display, 160x128 18-bit color - ST7735R driver
[1.8" SPI TFT display, 160x128 18-bit color - ST7735R driver](https://www.adafruit.com/product/618)
We just love this little 1.8" TFT display, with true TFT color (up to 18-bits per pixel!), fine 160x128 resolution, two white LED backlight that runs on 3.3V and a very easy SPI interface that requires only 4 or 5 digital pins to send pixels to the display.
**Please...**
Out of Stock
[Buy Now](https://www.adafruit.com/product/618)
[Related Guides to the Product](https://learn.adafruit.com/products/618/guides)
## Related Guides
- [Wave Shield](https://learn.adafruit.com/adafruit-wave-shield-audio-shield-for-arduino.md)
- [Adafruit 2.8" TFT Touch Shield v2 - Capacitive or Resistive](https://learn.adafruit.com/adafruit-2-8-tft-touch-shield-v2.md)
- [How to Build a Testing Jig](https://learn.adafruit.com/how-to-build-a-testing-fixture.md)
- [Create an Internet of Things Dashboard with Adafruit IO](https://learn.adafruit.com/create-an-internet-of-things-dashboard-with-adafruit-dot-io.md)
- [Let’s Put LEDs in Things!](https://learn.adafruit.com/lets-put-leds-in-things.md)
- [Tiny Arduino Music Visualizer](https://learn.adafruit.com/piccolo.md)
- [Circuit Playground Sound-Controlled Robot](https://learn.adafruit.com/circuit-playground-sound-controlled-robot.md)
- [Adafruit 1.27" and 1.5" Color OLED Breakout Board](https://learn.adafruit.com/adafruit-1-5-color-oled-breakout-board.md)
- [Arduino Lesson 15. DC Motor Reversing](https://learn.adafruit.com/adafruit-arduino-lesson-15-dc-motor-reversing.md)
- [TTL Serial Camera](https://learn.adafruit.com/ttl-serial-camera.md)
- [Analog Feedback Servos](https://learn.adafruit.com/analog-feedback-servos.md)
- [Geofencing with the FONA 808 & Adafruit IO](https://learn.adafruit.com/geofencing-with-the-fona-808-and-adafruit-io.md)
- [Arduino GPS Clock](https://learn.adafruit.com/arduino-clock.md)
- [Adafruit Data Logger Shield](https://learn.adafruit.com/adafruit-data-logger-shield.md)
- [Making Adabot: Part 2](https://learn.adafruit.com/making-adabot-part-2.md)
---
# Source: https://learn.adafruit.com/adafruit-pn532-rfid-nfc/breakout-wiring.md
# Adafruit PN532 RFID/NFC Breakout and Shield
## Breakout Wiring
This part of the tutorial is specifically for the Breakout board. We show how to use it with SPI. The breakout also supports TTL serial and I2C but we don't have a tutorial for using it that way as SPI is the most cross-platform method to communicate
If you're using the shield, check the next page

## Wiring the Breakout for SPI
The PN532 chip and breakout is designed to be used by 3.3V systems. To use it with a 5V system such as an Arduino, a level shifter is required to convert the high voltages into 3.3V. If you have a 3.3V embedded system you won't have to use the shifter of course!
To begin, we'll solder in the header to the breakout board. You'll need two small 3-pin pieces of header and one 8-pin piece. You can break these off of a large piece.


Solder the two small pieces to the **SEL0** and **SEL1** pads. These are interface selectors for the chip. Depending on how the jumpers are inserted the chip will talk in TTL serial, i2c or SPI_. _Also solder a strip to the end so you can plug it into a breadboard.
Wire up the 4050 level shifter chip to the Arduino as shown. The notch in the 4050 is at the 'top' in this image.
- Arduino digital pin **2** is connected to 4050 pin **9** (orange wire)
- Arduino digital pin **3** is connected to 4050 pin **11** (yellow wire)
- Arduino digital pin **4** is connected to 4050 pin **14** (green wire)
On the breakout board
- **3.3Vin** is connected to the Arduino **3.3V** pn
- **SCK** is connected to 4050 pin **10** (orange wire)
- **MISO** is connected to Arduino pin **5** (blue wire)
- **MOSI** is connected to 4050 pin **12** (yellow wire)
- **SSEL** is connected to 4050 pin **15&** (green wire)
- **GND** connects to Arduino **ground** (black wire)
Also connect 4050 pin #1 to **3.3V** and pin #8 to **ground**.
Click to see a larger image. The red power wire should be connected to the **3.3v** pin on the Arduino!

Also, we need to select SPI as the interface so on **SEL1** place the jumper in the **ON** position. for **SEL0** place the jumper in the **OFF** position.
That's it! Later on you can change what Arduino pins you are using but for the beginning test we suggest matching our wiring.
Danger:
- [Previous Page](https://learn.adafruit.com/adafruit-pn532-rfid-nfc/overview.md)
- [Next Page](https://learn.adafruit.com/adafruit-pn532-rfid-nfc/shield-wiring.md)
## Featured Products
### PN532 NFC/RFID controller breakout board
[PN532 NFC/RFID controller breakout board](https://www.adafruit.com/product/364)
The PN532 is the most popular NFC chip, and is what is embedded in pretty much every phone or device that does NFC. It can pretty much do it all, such as read and write to tags and cards, communicate with phones (say for payment processing), and 'act' like a NFC tag. If you want to do...
Out of Stock
[Buy Now](https://www.adafruit.com/product/364)
[Related Guides to the Product](https://learn.adafruit.com/products/364/guides)
### Adafruit METRO 328 Fully Assembled - Arduino IDE compatible
[Adafruit METRO 328 Fully Assembled - Arduino IDE compatible](https://www.adafruit.com/product/50)
We sure love the ATmega328 here at Adafruit, and we use them _a lot_ for our own projects. The processor has plenty of GPIO, Analog inputs, hardware UART SPI and I2C, timers and PWM galore - just enough for most simple projects. When we need to go small, we use a
Out of Stock
[Buy Now](https://www.adafruit.com/product/50)
[Related Guides to the Product](https://learn.adafruit.com/products/50/guides)
### Breadboarding wire bundle
[Breadboarding wire bundle](https://www.adafruit.com/product/153)
75 flexible stranded core wires with stiff ends molded on in red, orange, yellow, green, blue, brown, black and white. These are a major improvement over the "box of bent wires" that are sometimes sold with breadboards, and faster than stripping your own solid core wires. Makes...
In Stock
[Buy Now](https://www.adafruit.com/product/153)
[Related Guides to the Product](https://learn.adafruit.com/products/153/guides)
### Adafruit PN532 NFC/RFID Controller Shield for Arduino + Extras
[Adafruit PN532 NFC/RFID Controller Shield for Arduino + Extras](https://www.adafruit.com/product/789)
We've taken our popular Adafruit PN532 breakout board and turned it into a shield - the perfect tool for any 13.56MHz RFID or NFC application. The Adafruit NFC shield uses the PN532 chip-set (the most popular NFC chip on the market) and is what is embedded in pretty much every phone or...
In Stock
[Buy Now](https://www.adafruit.com/product/789)
[Related Guides to the Product](https://learn.adafruit.com/products/789/guides)
### 13.56MHz RFID/NFC Card - Classic 1K
[13.56MHz RFID/NFC Card - Classic 1K](https://www.adafruit.com/product/359)
This is a blank 13.56MHz RFID/NFC card - often used for train/bus passes but also found in other systems where a proximity card is desired. The tag contains a small RFID chip and an antenna, and is passively powered by the reader/writer when placed a couple inches away.
These can be...
In Stock
[Buy Now](https://www.adafruit.com/product/359)
[Related Guides to the Product](https://learn.adafruit.com/products/359/guides)
### 13.56MHz RFID/NFC White Tag - Classic 1K
[13.56MHz RFID/NFC White Tag - Classic 1K](https://www.adafruit.com/product/360)
This is a blank 13.56MHz RFID/NFC laundry tag - often used for laundry but also general tagging. The tag contains a small RFID chip and an antenna, and is passively powered by the reader/writer when placed a couple inches away.
These can be read by almost any 13.56MHz RFID/NFC...
In Stock
[Buy Now](https://www.adafruit.com/product/360)
[Related Guides to the Product](https://learn.adafruit.com/products/360/guides)
### 13.56MHz RFID/NFC Clear Tag - Classic 1K
[13.56MHz RFID/NFC Clear Tag - Classic 1K](https://www.adafruit.com/product/361)
This is a blank 13.56MHz Classic 'laundry' tag - often used for laundry or identification but also found in other systems where a small proximity card is desired. This one is clear! The tag contains a small RFID chip and an antenna, and is passively powered by the reader/writer...
In Stock
[Buy Now](https://www.adafruit.com/product/361)
[Related Guides to the Product](https://learn.adafruit.com/products/361/guides)
### 13.56MHz RFID/NFC Sticker - Classic 1K
[13.56MHz RFID/NFC Sticker - Classic 1K](https://www.adafruit.com/product/362)
This is a blank 13.56MHz RFID/NFC sticker - often used for inventory uses but also wherever a sticker is desired. The tag contains a small RFID chip and an antenna, and is passively powered by the reader/writer when placed a couple inches away.
These can be read by almost any...
In Stock
[Buy Now](https://www.adafruit.com/product/362)
[Related Guides to the Product](https://learn.adafruit.com/products/362/guides)
## Related Guides
- [How to Choose a Microcontroller](https://learn.adafruit.com/how-to-choose-a-microcontroller.md)
- [Sous-vide controller powered by Arduino - The SousViduino!](https://learn.adafruit.com/sous-vide-powered-by-arduino-the-sous-viduino.md)
- [Arduino Lesson 13. DC Motors](https://learn.adafruit.com/adafruit-arduino-lesson-13-dc-motors.md)
- [Naughty or Nice Machine](https://learn.adafruit.com/naughty-or-nice-machine.md)
- [Wave Shield Voice Changer](https://learn.adafruit.com/wave-shield-voice-changer.md)
- [Adafruit INA219 Current Sensor Breakout](https://learn.adafruit.com/adafruit-ina219-current-sensor-breakout.md)
- [Low Power Coin Cell Voltage Logger](https://learn.adafruit.com/low-power-coin-cell-voltage-logger.md)
- [Analog Feedback Servos](https://learn.adafruit.com/analog-feedback-servos.md)
- [Tiny Arduino Music Visualizer](https://learn.adafruit.com/piccolo.md)
- [Adafruit Ultimate GPS Logger Shield](https://learn.adafruit.com/adafruit-ultimate-gps-logger-shield.md)
- [Ladyada's Learn Arduino - Lesson #0](https://learn.adafruit.com/ladyadas-learn-arduino-lesson-number-0.md)
- [Mini Thermal Receipt Printers](https://learn.adafruit.com/mini-thermal-receipt-printer.md)
- [Arduino Prototyping Mounting Plate](https://learn.adafruit.com/arduino-prototyping-mounting-plate.md)
- [LED Lightbox](https://learn.adafruit.com/led-lightbox.md)
- [NFC Ring Password Helper](https://learn.adafruit.com/nfc-ring-password-helper.md)
---
# Source: https://learn.adafruit.com/adafruit-arduino-lesson-4-eight-leds/brightness-control.md
# Arduino Lesson 4. Eight LEDs and a Shift Register
## Brightness Control
One pin of the 74HC595 that I have not mentioned is a pin called 'Output Enable'. This is pin 13 and on the breadboard, it is permanently connected to Ground. This pin acts as a switch, that can enable or disable the outputs - the only thing to watch for is it is 'active low' (connect to ground to enable). So, if it is connected to 5V, all the outputs go off. Whereas if it is connected to Ground, those outputs that are supposed to be on are on and those that should be off are off.
We can use this pin along with the 'analogWrite' function, that we used back in Lesson 3, to control the brightness of the LEDs using PWM (also see Lesson 3).
To do this, all you need to do, is to change the connection to pin 13 of the 74HC595 so that instead of connecting it to Ground, you connect it to pin 3 of the Arduino.
The sketch below, will once all the LEDs have been lit gradually fade them back to off.
```
/*
Adafruit Arduino - Lesson 4. 8 LEDs and a Shift Register - Brightness
*/
int latchPin = 5;
int clockPin = 6;
int dataPin = 4;
int outputEnablePin = 3;
byte leds = 0;
void setup()
{
pinMode(latchPin, OUTPUT);
pinMode(dataPin, OUTPUT);
pinMode(clockPin, OUTPUT);
pinMode(outputEnablePin, OUTPUT);
}
void loop()
{
setBrightness(255);
leds = 0;
updateShiftRegister();
delay(500);
for (int i = 0; i < 8; i++)
{
bitSet(leds, i);
updateShiftRegister();
delay(500);
}
for (byte b = 255; b > 0; b--)
{
setBrightness(b);
delay(50);
}
}
void updateShiftRegister()
{
digitalWrite(latchPin, LOW);
shiftOut(dataPin, clockPin, LSBFIRST, leds);
digitalWrite(latchPin, HIGH);
}
void setBrightness(byte brightness) // 0 to 255
{
analogWrite(outputEnablePin, 255-brightness);
}
```
- [Previous Page](https://learn.adafruit.com/adafruit-arduino-lesson-4-eight-leds/arduino-code.md)
- [Next Page](https://learn.adafruit.com/adafruit-arduino-lesson-4-eight-leds/other-things-to-do.md)
## Featured Products
### Adafruit METRO 328 Fully Assembled - Arduino IDE compatible
[Adafruit METRO 328 Fully Assembled - Arduino IDE compatible](https://www.adafruit.com/product/50)
We sure love the ATmega328 here at Adafruit, and we use them _a lot_ for our own projects. The processor has plenty of GPIO, Analog inputs, hardware UART SPI and I2C, timers and PWM galore - just enough for most simple projects. When we need to go small, we use a
Out of Stock
[Buy Now](https://www.adafruit.com/product/50)
[Related Guides to the Product](https://learn.adafruit.com/products/50/guides)
### 74HC595 Shift Register - 3 pack
[74HC595 Shift Register - 3 pack](https://www.adafruit.com/product/450)
Add lots more outputs to a microcontroller system with chainable shift registers. These chips take a serial input (SPI) of 1 byte (8 bits) and then output those digital bits onto 8 pins. You can chain them together so putting three in a row with the serial output of one plugged into the serial...
In Stock
[Buy Now](https://www.adafruit.com/product/450)
[Related Guides to the Product](https://learn.adafruit.com/products/450/guides)
### Diffused Red 5mm LED (25 pack)
[Diffused Red 5mm LED (25 pack)](https://www.adafruit.com/product/299)
Need some indicators? We are big fans of these diffused red LEDs, in fact we use them exclusively in our kits. They are fairly bright so they can be seen in daytime, and from any angle. They go easily into a breadboard and will add that extra zing to your project.
- Pack of 25...
In Stock
[Buy Now](https://www.adafruit.com/product/299)
[Related Guides to the Product](https://learn.adafruit.com/products/299/guides)
### Premium Male/Male Jumper Wires - 40 x 6" (150mm)
[Premium Male/Male Jumper Wires - 40 x 6" (150mm)](https://www.adafruit.com/product/758)
Handy for making wire harnesses or jumpering between headers on PCB's. These premium jumper wires are 6" (150mm) long and come in a 'strip' of 40 (4 pieces of each of ten rainbow colors). They have 0.1" male header contacts on either end and fit cleanly next to each other...
In Stock
[Buy Now](https://www.adafruit.com/product/758)
[Related Guides to the Product](https://learn.adafruit.com/products/758/guides)
### Half Sized Premium Breadboard - 400 Tie Points
[Half Sized Premium Breadboard - 400 Tie Points](https://www.adafruit.com/product/64)
This is a cute, half-size breadboard with 400 tie points, good for small projects. It's 3.25" x 2.2" / 8.3cm x 5.5cm with a standard double-strip in the middle and two power rails on both sides. You can pull the power rails off easily to make the breadboard as...
In Stock
[Buy Now](https://www.adafruit.com/product/64)
[Related Guides to the Product](https://learn.adafruit.com/products/64/guides)
## Related Guides
- [74HC595 Shift Register](https://learn.adafruit.com/74hc595.md)
- [Adafruit 16-channel PWM/Servo Shield](https://learn.adafruit.com/adafruit-16-channel-pwm-slash-servo-shield.md)
- [Affordable HAL 9000 Replica](https://learn.adafruit.com/hal-9000-replica.md)
- [Mini Thermal Receipt Printers](https://learn.adafruit.com/mini-thermal-receipt-printer.md)
- [Wave Shield Voice Changer](https://learn.adafruit.com/wave-shield-voice-changer.md)
- [Metal Inlay Capacitive Touch Buttons](https://learn.adafruit.com/metal-inlay-capacitive-touch-buttons.md)
- [Adafruit 2.8" TFT Touch Shield v2 - Capacitive or Resistive](https://learn.adafruit.com/adafruit-2-8-tft-touch-shield-v2.md)
- [Arduino Lesson 13. DC Motors](https://learn.adafruit.com/adafruit-arduino-lesson-13-dc-motors.md)
- [Arduino GPS Clock](https://learn.adafruit.com/arduino-clock.md)
- [Line Following Zumo Robot Using Simulink](https://learn.adafruit.com/line-following-zumo-robot-programmed-with-simulink.md)
- [Arduino Lesson 11. LCD Displays - Part 1](https://learn.adafruit.com/adafruit-arduino-lesson-11-lcd-displays-1.md)
- [Adafruit AirLift Shield - ESP32 WiFi Co-Processor](https://learn.adafruit.com/adafruit-airlift-shield-esp32-wifi-co-processor.md)
- [Current Limiting Stepper Driver with DRV8871](https://learn.adafruit.com/current-limiting-stepper-driver-with-drv8871.md)
- [Naughty or Nice Machine](https://learn.adafruit.com/naughty-or-nice-machine.md)
- [Smart Cocktail Shaker](https://learn.adafruit.com/smart-cocktail-shaker.md)
- [Arduino Tips, Tricks, and Techniques](https://learn.adafruit.com/arduino-tips-tricks-and-techniques.md)
---
# Source: https://learn.adafruit.com/flora-gps-jacket/build-it.md
# Flora GPS Jacket
## Build it

Here's a diagram of the jacket's circuit. You'll chain eight pixels together around the collar and attach the GPS to 3.3v, TX, RX, and ground. A 3xAAA battery holder hides in a pocket and extends through a seam to plug into the JST port on the Flora.
Make the connections in your circuit with conductive thread.

http://www.youtube.com/watch?v=XT5ygUt8Cbk
Follow our [guide on conductive thread](http://learn.adafruit.com/conductive-thread) so you can stitch up your circuit like a pro!
Start by stitching the ground bus from GND on Flora to the (-) pads on each pixel.
Next stitch the power bus from VBATT to all of the (+) pads on your pixels.


Then connect up the short data connections between each pixel. Be sure to seal the knots with clear nail polish or Fray Check.

Attach the GPS next! You can sew it directly to your garment or make it snappy with our Flora with Snaps tutorial. Connect 3.3v on the Flora to 3.3v, GND to GND, and RX-\>TX and TX-\>RX.
You can hide the conductive thread traces just under the top layer of fabric, just make sure the stitches aren't so long that they can move and come into contact with each other. You can see that the thread periodically appears on the outside of the garment to anchor the stitched lines.
You can optionally sew a coincell battery holder on the inside of the garment, connecting + to BAT on the GPS and - to GND. This will help the GPS get a fix on your position faster, since it can keep track of its last known position even when the device is off.

The battery holder is hidden in a pocket, with the JST connector poking out through a seam to connect to the Flora. If your pocket is far away from your circuit, Use one of our [handy JST battery extension cables](http://www.adafruit.com/products/1131).
- [Previous Page](https://learn.adafruit.com/flora-gps-jacket/tools-and-supplies.md)
- [Next Page](https://learn.adafruit.com/flora-gps-jacket/the-code.md)
## Featured Products
### FLORA GPS Starter Pack
[FLORA GPS Starter Pack](https://www.adafruit.com/product/1090)
Get started with the fabulous Adafruit Flora platform with this lovely starter kit. Included are plenty of parts to make a few different fun projects! There's a Flora motherboard, a GPS module that can also perform location datalogging, eight ultra-bright chainable RGB pixels, a battery...
No Longer Stocked
[Buy Now](https://www.adafruit.com/product/1090)
[Related Guides to the Product](https://learn.adafruit.com/products/1090/guides)
### FLORA - Wearable electronic platform: Arduino-compatible
[FLORA - Wearable electronic platform: Arduino-compatible](https://www.adafruit.com/product/659)
FLORA is Adafruit's fully-featured wearable electronics platform. It's a round, sewable, Arduino-compatible microcontroller designed to empower amazing wearables projects.FLORA comes with Adafruit's support, [tutorials and...](http://learn.adafruit.com/category/flora)
In Stock
[Buy Now](https://www.adafruit.com/product/659)
[Related Guides to the Product](https://learn.adafruit.com/products/659/guides)
### Flora Wearable Ultimate GPS Module
[Flora Wearable Ultimate GPS Module](https://www.adafruit.com/product/1059)
This module is the best way to add a GPS to your wearable project. It's part of the Adafruit Flora series of wearable electronics, designed specifically for use with the Flora motherboard. Installed on the PCB is the latest of our Ultimate GPS modules, a small, super-thin, low-power GPS...
No Longer Stocked
[Buy Now](https://www.adafruit.com/product/1059)
[Related Guides to the Product](https://learn.adafruit.com/products/1059/guides)
### Small Alligator Clip Test Lead (set of 12)
[Small Alligator Clip Test Lead (set of 12)](https://www.adafruit.com/product/1008)
Connect this to that without soldering using these handy mini alligator clip test leads. 15" cables with alligator clip on each end, color coded. You get 12 pieces in 6 colors. Strong and grippy, these always come in handy! We often use these in conjunction with a multimeter so we...
In Stock
[Buy Now](https://www.adafruit.com/product/1008)
[Related Guides to the Product](https://learn.adafruit.com/products/1008/guides)
### Stainless Medium Conductive Thread - 3 ply - 18 meter/60 ft
[Stainless Medium Conductive Thread - 3 ply - 18 meter/60 ft](https://www.adafruit.com/product/641)
After months of searching, we finally have what we consider to be the ultimate conductive thread. It's thin, strong, smooth, and made completely of 316L stainless steel. Once you start working with this thread you'll quickly agree its optimal for any wearables work!
This...
Out of Stock
[Buy Now](https://www.adafruit.com/product/641)
[Related Guides to the Product](https://learn.adafruit.com/products/641/guides)
### 3 x AAA Battery Holder with On/Off Switch and 2-Pin JST
[3 x AAA Battery Holder with On/Off Switch and 2-Pin JST](https://www.adafruit.com/product/727)
This battery holder connects 3 AAA batteries together in series for powering all kinds of projects. We spec'd these out because the box is slim, and 3 AAA's add up to about 3.3-4.5V, a very similar range to Lithium Ion/polymer (Li-Ion) batteries and have an on-off switch. That makes...
In Stock
[Buy Now](https://www.adafruit.com/product/727)
[Related Guides to the Product](https://learn.adafruit.com/products/727/guides)
### JST-PH Battery Extension Cable - 500mm
[JST-PH Battery Extension Cable - 500mm](https://www.adafruit.com/product/1131)
By popular demand, we now have a handy extension cord for all of our JST PH-terminated battery packs (such as our LiIon/LiPoly and 3xAAA holders). One end has a JST-PH compatible socket, and the other end has a matching plug. Between the two, 500mm of color coded wire. Handy for wearable...
In Stock
[Buy Now](https://www.adafruit.com/product/1131)
[Related Guides to the Product](https://learn.adafruit.com/products/1131/guides)
### Getting Started with Adafruit FLORA
[Getting Started with Adafruit FLORA](https://www.adafruit.com/product/1839)
**Making Wearables with an Arduino-Compatible Electronics Platform**
This book introduces readers to building wearable electronics projects using Adafruit's tiny FLORA board: at 4.4 grams, and only 1.75 inches in diameter, and featuring Arduino compatibility, it's the...
No Longer Stocked
[Buy Now](https://www.adafruit.com/product/1839)
[Related Guides to the Product](https://learn.adafruit.com/products/1839/guides)
## Related Guides
- [FLORA and GEMMA ICSP](https://learn.adafruit.com/flora-and-gemma-isp.md)
- [FLORA Sensors](https://learn.adafruit.com/flora-sensors.md)
- [Adafruit Flora Bluefruit LE](https://learn.adafruit.com/adafruit-flora-bluefruit-le.md)
- [LED Ampli-Tie](https://learn.adafruit.com/led-ampli-tie.md)
- [LED Stego Flex Spike Hoodie](https://learn.adafruit.com/led-stego-flex-spike-hoodie.md)
- [Conductive Thread](https://learn.adafruit.com/conductive-thread.md)
- [Zipper Switch](https://learn.adafruit.com/zipper-switch.md)
- [NeoPixel Ring Clock](https://learn.adafruit.com/neopixel-ring-clock.md)
- [3D Printed Wireless MIDI Controller Guitar](https://learn.adafruit.com/ez-key-wireless-midi-controller-guitar.md)
- [FLORA Pixel Brooch](https://learn.adafruit.com/flora-pixel-brooch.md)
- [FLORA TV-B-Gone](https://learn.adafruit.com/flora-tv-b-gone.md)
- [NeoPixel Matrix Snowflake Sweater](https://learn.adafruit.com/neopixel-matrix-snowflake-sweater.md)
- [Pac Man Pixel Suspenders](https://learn.adafruit.com/pac-man-pixel-suspenders.md)
- [FLORA & Codebender](https://learn.adafruit.com/flora-and-codebender.md)
- [Adafruit SI1145 Breakout Board - UV index / IR / Visible Sensor](https://learn.adafruit.com/adafruit-si1145-breakout-board-uv-ir-visible-sensor.md)
---
# Source: https://learn.adafruit.com/wave-shield-voice-changer/building-it.md
# Wave Shield Voice Changer
## Building It
# Phase 1:
## Follow the original Wave Shield tutorial
We can’t emphasize this one enough: work through the [original Wave Shield tutorial](http://learn.adafruit.com/adafruit-wave-shield-audio-shield-for-arduino "Link: http://learn.adafruit.com/adafruit-wave-shield-audio-shield-for-arduino") before moving on to the voice changer!
This project has many separate parts, and a misstep with any one of them can stop the whole system from working. It would be tricky to debug the point of failure among all the possibilities. Invest a little time now to get the basic Wave Shield examples working — especially the “Pi speak” demo. This lets you know that the shield is properly assembled, the SD card properly formatted and so forth. _Then_ we’ll add the extra features.
Start by [downloading the WaveHC library for Arduino](https://github.com/adafruit/WaveHC "https://github.com/adafruit/WaveHC")…not only for WAV playback, but the voice changer relies on this code too. [We have a tutorial explaining how Arduino libraries are installed](http://learn.adafruit.com/arduino-tips-tricks-and-techniques/arduino-libraries). Download [this ZIP file containing WAV files](http://learn.adafruit.com/system/assets/assets/000/010/145/original/piwav.zip) for the digits of pi. Then proceed through the tutorial until your Wave Shield is speaking them.
# Phase 2:
## Adding voice effects and a sound trigger keypad
With the basic Wave Shield working, now we can add the voice changer and a sound-triggering keypad. You can complete this phase on your workbench using a breadboard…we’ll make it portable later, after confirming that it works.
[Download the Adavoice sketch for Arduino](https://github.com/adafruit/Adafruit_Learning_System_Guides/tree/master/AdaVoice). And you should already have the [WaveHC](http://code.google.com/p/wavehc/) library installed from the prior phase.
[Download the project code and files in Zip](https://github.com/adafruit/Adafruit_Learning_System_Guides/tree/master/AdaVoice)
The GND and 3.3V lines from the Arduino need to connect to several points, so you may want to a breadboard’s power rails for this. 3.3V from the Arduino should connect to the Electret Mic Amp VCC pin, one outside leg of a 10K potentiometer, and the Arduino’s AREF pin. GND from Arduino should connect to GND on the Mic Amp and the opposite outside leg of the potentiometer.
Danger:
The Mic Amp output connects to analog pin 0, and the center leg of the potentiometer connects to analog pin 1.
If you plan to use prerecorded sound effects (some examples are in the “wavs” folder included with the sketch), you’ll need a FAT-formatted SD card with the files placed in the root directory (similar to how the “Pi speak” sketch worked). A 12-button keypad connects to digital pins 6, 7, 8 (columns) and analog pins 2, 3, 4, 5 (rows). But with some changes to the sketch, this can be adapted to use just a few buttons or other triggers. (The keypad is great for haunted house sounds, but too cumbersome for a costume.)
A small speaker can be connected directly to the Wave Shield’s amplifier output. For more volume, we recommend using amplified speakers such as the portable type for iPods and MP3 players, or our Class D Audio Amplifier breakout.

Upload the Adavoice sketch to the Arduino if you haven’t already done this. If everything is wired up and loaded correctly, you should head a startup chime when the sketch starts (if using an SD card with the sample WAVs). If there’s no sound, use the Arduino serial monitor and watch for diagnostic messages.

Once up and running, you can then talk into the microphone and should hear the altered result through the speaker or headphones (keep the mic away from the speaker to avoid feedback). Pressing any of the keypad buttons will stop the voice effect to play the corresponding sound, then resume afterward.
Note that the pitch dial does not work in real time! This is normal and a limitation of the way we’re running the analog-to-digital converter at full speed. To get a new pitch reading, you need to either play back a sound or press the reset button.
# Phase 3:
## Making it battery-powered and portable
To simplify the wiring diagram, we’ll illustrate this next section without the keypad. But you can still include it if you want! The connections are the same as above.
Because breadboard circuits are too delicate for portable use, we’ll join components directly this time.
The Wave Shield can drive a small speaker on its own, but this doesn’t provide a lot of “oomph.” Parties and comic conventions are loud, so you’ll probably want a boost! We’re using our Class D Audio amplifier here with a pair of 4 Ohm speakers. Alternately, there are a lot of ready-to-go battery-powered speakers designed for iPods and other MP3 players that can plug right into the Wave Shield headphone jack. Using our own amp and speakers lets us custom-tailor the placement of all the parts.
It’s best to power the Arduino and audio amplifier separately. During particularly loud moments, the audio amp can draw a lot of current, resulting in a momentary voltage “sag” causing the Arduino to reset. Giving the Arduino it’s own separate power supply prevents this. We’re using a 9 Volt battery connected to the DC barrel jack, or a 6X AA battery pack will last considerably longer. In any case, the ground connection is common between the Arduino and audio power sections, as well as the 3.3V part of the circuit (for the mic amp and trim pot).

Here we’ve mounted all the parts on a sheet of acrylic using double-stick foam tape, then fastened this to a nylon strap so it can be worn over one’s chest. We chose tape for expediency only…give some thought to making your rig more durable, using mounting screws, zip ties, etc.

You can run the microphone connection a couple feet to reach inside a mask or helmet. A [servo extension cable](http://adafruit.com/products/973) provides a very handy 3-conductor separation point, so you can pop your head and set it down! Cut the servo cable in half, soldering one end to the mic amp board and the other side to the Arduino circuit.

- [Previous Page](https://learn.adafruit.com/wave-shield-voice-changer/principles-of-operation.md)
- [Next Page](https://learn.adafruit.com/wave-shield-voice-changer/special-considerations-for-costumes.md)
## Featured Products
### Stereo 3.7W Class D Audio Amplifier - MAX98306
[Stereo 3.7W Class D Audio Amplifier - MAX98306](https://www.adafruit.com/product/987)
This incredibly small stereo amplifier is surprisingly powerful - able to deliver 2 x 3.7W channels into 3 ohm impedance speakers. Inside the miniature chip is a class D controller, able to run from 2.7V-5.5VDC. Since the amp is a class D, its incredibly efficient (over 90% efficient when...
In Stock
[Buy Now](https://www.adafruit.com/product/987)
[Related Guides to the Product](https://learn.adafruit.com/products/987/guides)
### Electret Microphone Amplifier - MAX4466 with Adjustable Gain
[Electret Microphone Amplifier - MAX4466 with Adjustable Gain](https://www.adafruit.com/product/1063)
Add an ear to your project with this well-designed electret microphone amplifier. This fully assembled and tested board comes with a 20-20KHz electret microphone soldered on. For the amplification, we use the Maxim MAX4466, an op-amp specifically designed for this delicate task! The amplifier...
In Stock
[Buy Now](https://www.adafruit.com/product/1063)
[Related Guides to the Product](https://learn.adafruit.com/products/1063/guides)
### Adafruit Wave Shield for Arduino Kit
[Adafruit Wave Shield for Arduino Kit](https://www.adafruit.com/product/94)
Adding quality audio to an electronic project is surprisingly difficult. Here is a shield for Arduino 328's that solves this problem. It can play up to 22KHz 12bit uncompressed audio files of any length. It's low cost, available as an easy-to-make kit. It has an onboard DAC, filter and...
Out of Stock
[Buy Now](https://www.adafruit.com/product/94)
[Related Guides to the Product](https://learn.adafruit.com/products/94/guides)
### Music & sound add-on pack for Arduino
[Music & sound add-on pack for Arduino](https://www.adafruit.com/product/175)
Its a Wave shield party pack! Just add an Arduino to create your own iPod-killer, audio art, sound-effects box...
Comes with:
- Latest [Wave shield kit](http://www.adafruit.com/products/94), works with more SD cards and with older NG Arduinos! Unassembled
- 8 GB...
Out of Stock
[Buy Now](https://www.adafruit.com/product/175)
[Related Guides to the Product](https://learn.adafruit.com/products/175/guides)
### Adafruit Proto Shield for Arduino Kit
[Adafruit Proto Shield for Arduino Kit](https://www.adafruit.com/product/51)
Works with the Uno! This prototyping shield is the best out there (well, we think so, at least). It works with UNO, NG, Diecimila and Duemilanove Arduinos. You can use it with a Leonardo but it will not break out the hardware SPI pins (they're only on the ISP connector underneath) or the...
No Longer Stocked
[Buy Now](https://www.adafruit.com/product/51)
[Related Guides to the Product](https://learn.adafruit.com/products/51/guides)
### Adafruit METRO 328 Fully Assembled - Arduino IDE compatible
[Adafruit METRO 328 Fully Assembled - Arduino IDE compatible](https://www.adafruit.com/product/50)
We sure love the ATmega328 here at Adafruit, and we use them _a lot_ for our own projects. The processor has plenty of GPIO, Analog inputs, hardware UART SPI and I2C, timers and PWM galore - just enough for most simple projects. When we need to go small, we use a
Out of Stock
[Buy Now](https://www.adafruit.com/product/50)
[Related Guides to the Product](https://learn.adafruit.com/products/50/guides)
### Shield stacking headers for Arduino (R3 Compatible)
[Shield stacking headers for Arduino (R3 Compatible)](https://www.adafruit.com/product/85)
_“How could something so simple be so useful?” _
We heard once that in the 4th millennium B.C. some guy asked the person who invented the wheel that question. The person who invented the wheel’s answer, we were told, was...
In Stock
[Buy Now](https://www.adafruit.com/product/85)
[Related Guides to the Product](https://learn.adafruit.com/products/85/guides)
### 6 x AA battery holder with 5.5mm/2.1mm plug
[6 x AA battery holder with 5.5mm/2.1mm plug](https://www.adafruit.com/product/248)
Make a portable power brick with plenty of juice! Use Alkaline AA's for a 9V 3000-4000mAh power supply, or rechargeable NiMH for 2000mAh 7.5V supply. Either one is good for running electronics that have a 5V voltage regulator (thus requiring a 7V+ supply). Will last about 10 times longer...
In Stock
[Buy Now](https://www.adafruit.com/product/248)
[Related Guides to the Product](https://learn.adafruit.com/products/248/guides)
## Related Guides
- [Boombox Beach Bag with Audio Amp and Speakers](https://learn.adafruit.com/boombox-beach-bag-with-audio-amp-and-speakers.md)
- [DIY 8x2 LCD Shield](https://learn.adafruit.com/diy-8x2-lcd-shield.md)
- [3D Printed Animatronic Robot Head](https://learn.adafruit.com/3d-printed-animatronic-robot-head.md)
- [Arduino Lesson 17. Email Sending Movement Detector](https://learn.adafruit.com/arduino-lesson-17-email-sending-movement-detector.md)
- [Arduino Lesson 11. LCD Displays - Part 1](https://learn.adafruit.com/adafruit-arduino-lesson-11-lcd-displays-1.md)
- [Line Following Zumo Robot Using Simulink](https://learn.adafruit.com/line-following-zumo-robot-programmed-with-simulink.md)
- [3D Printed Bone Conduction Transducer Box](https://learn.adafruit.com/3d-printed-bone-conduction-transducer-box.md)
- [Affordable HAL 9000 Replica](https://learn.adafruit.com/hal-9000-replica.md)
- [Electronic Demon Costume](https://learn.adafruit.com/electronic-demon-costume.md)
- [Arduino Lesson 13. DC Motors](https://learn.adafruit.com/adafruit-arduino-lesson-13-dc-motors.md)
- [Naughty or Nice Machine](https://learn.adafruit.com/naughty-or-nice-machine.md)
- [Nokia 5110/3310 Monochrome LCD](https://learn.adafruit.com/nokia-5110-3310-monochrome-lcd.md)
- [Track Your Treats: Halloween Candy GPS Tracker](https://learn.adafruit.com/track-your-treats-halloween-candy-gps-tracker.md)
- [Smart Measuring Cup](https://learn.adafruit.com/smart-measuring-cup.md)
- [Wave Shield](https://learn.adafruit.com/adafruit-wave-shield-audio-shield-for-arduino.md)
---
# Source: https://learn.adafruit.com/adafruit-nfc-rfid-on-raspberry-pi/building-libnfc.md
# Adafruit NFC/RFID on Raspberry Pi
## Building libnfc
# Step One: Prepare for and Download libnfc
Before you can do anything, you will need to get the libnfc library. Make sure you have internet access on your Pi, through Ethernet or WiFi.
If using the full/GUI Raspberry Pi OS, open a terminal window for typing commands.
```xml
cd
sudo apt-get install git autoconf libtool libusb-dev
git clone https://github.com/nfc-tools/libnfc
```
This will create a new directory “libnfc” in your home directory. Answer “Y” when prompted on the apt-get installation.
# Step Two: Set Up libnfc For the Pi
Before libnfc can be built, it needs to be configured for the target system and based on some parameters specific the NFC device you have connected.
libnfc requires a configuration file in a specific location. We’ll start by creating the required folder, then (unrelated) change to the libnfc directory for subsequent steps.
```xml
sudo mkdir -p /etc/nfc/devices.d
cd libnfc
```
Next step varies by target system. This refers to the **machine where the NFC reader will be connected** …occasionally one might set up the OS on one machine, then move the card to a different Pi for use. Follow one or other, not both! If you upgrade or downgrade the Raspberry Pi to a different model later, you _might_ need to recompile everything, depending on which Pi models.
## For Recent Raspberry Pi Models
This step works for Raspberry Pi 400, Pi 4, and Pi 3 models B and B+. It _almost certainly_ works on Compute Module 4 and Pi Zero 2W, but did not have hardware on-hand to confirm (worst case, if later tests fail, you can “make clean” and re-try the alternate instructions below).
Enter this command to install the libnfc serial configuration file for these Pi models:
```auto
sudo cp contrib/libnfc/pn532_uart_on_rpi_3.conf.sample /etc/nfc/devices.d/pn532_uart_on_rpi_3.conf
```
_This should be entered as one continuous long line…it might appear wrapped to two lines in your browser, but enter it as one with a space character in-between. Or use the “Copy Code” button._
## For Earlier Pi Models
This step works for Raspberry Pi 2, Pi 1, and initial Pi Zero models (not Pi Zero 2W). This _may_ work on the wireless Pi Zero W models, but did not have hardware on-hand to confirm (worst case, if later tests fail, you can “make clean” and try the alternate instructions above).
Enter this command to install the libnfc serial configuration file for these systems:
```auto
sudo cp contrib/libnfc/pn532_uart_on_rpi.conf.sample /etc/nfc/devices.d/pn532_uart_on_rpi.conf
```
_This should be entered as one continuous long line…it might appear wrapped to two lines in your browser, but enter it as one with a space character in-between. Or use the “Copy Code” button._
# Step Three: Configure the Library
The next step is to configure the project itself using the 'configure' tool, as follows:
```xml
autoreconf -vis
./configure --with-drivers=pn532_uart --sysconfdir=/etc --prefix=/usr
```
This may take a minute or two to complete, that’s normal. The output will resemble the following:

# Step Four: Build and Install!
Once configured, the following commands then build and install the library:
```auto
make
sudo make install all
```
This may take a few minutes to complete. Some compiler warning messages might be generated along the way…these can be safely ignored.
Once the process is complete, you’re ready to test on actual hardware…
- [Previous Page](https://learn.adafruit.com/adafruit-nfc-rfid-on-raspberry-pi/pi-serial-port.md)
- [Next Page](https://learn.adafruit.com/adafruit-nfc-rfid-on-raspberry-pi/testing-it-out.md)
## Featured Products
### 13.56MHz RFID/NFC tag assortment - Classic 1K
[13.56MHz RFID/NFC tag assortment - Classic 1K](https://www.adafruit.com/product/365)
One of each of our favorite 13.56MHz RFID/NFC Classic 1K tags - 5 in total!
- [Credit card size](http://www.adafruit.com/products/359)
- [1" diameter 'laundry' clear tag](http://www.adafruit.com/products/361)
-
No Longer Stocked
[Buy Now](https://www.adafruit.com/product/365)
[Related Guides to the Product](https://learn.adafruit.com/products/365/guides)
### 13.56MHz RFID/NFC Clear Keychain Fob - Classic 1K
[13.56MHz RFID/NFC Clear Keychain Fob - Classic 1K](https://www.adafruit.com/product/363)
This is a blank 13.56MHz RFID/NFC keychain fob - often used for keys but also an easy way to tag something. The tag contains a small RFID chip and an antenna, and is passively powered by the reader/writer when placed a couple inches away.
These can be read by almost any 13.56MHz...
No Longer Stocked
[Buy Now](https://www.adafruit.com/product/363)
[Related Guides to the Product](https://learn.adafruit.com/products/363/guides)
### 13.56MHz RFID/NFC Bracelet - Classic 1K
[13.56MHz RFID/NFC Bracelet - Classic 1K](https://www.adafruit.com/product/921)
This is a blank 13.56MHz RFID/NFC silicone bracelet. The tag contains a small RFID chip and an antenna, and is passively powered by the reader/writer when placed a couple inches away.
These can be read by almost any 13.56MHz RFID/NFC reader but make sure it can handle ISO/IEC...
In Stock
[Buy Now](https://www.adafruit.com/product/921)
[Related Guides to the Product](https://learn.adafruit.com/products/921/guides)
### 13.56MHz RFID/NFC Charm - Classic 1K
[13.56MHz RFID/NFC Charm - Classic 1K](https://www.adafruit.com/product/884)
This is a blank 13.56MHz RFID/NFC embedded in a phone charm - often used for train/bus passes but also found in other systems where a proximity card is desired. The tag contains a small RFID chip and an antenna, and is passively powered by the reader/writer when placed a couple inches...
No Longer Stocked
[Buy Now](https://www.adafruit.com/product/884)
[Related Guides to the Product](https://learn.adafruit.com/products/884/guides)
### 13.56MHz RFID/NFC Clear Tag - Classic 1K
[13.56MHz RFID/NFC Clear Tag - Classic 1K](https://www.adafruit.com/product/361)
This is a blank 13.56MHz Classic 'laundry' tag - often used for laundry or identification but also found in other systems where a small proximity card is desired. This one is clear! The tag contains a small RFID chip and an antenna, and is passively powered by the reader/writer...
Out of Stock
[Buy Now](https://www.adafruit.com/product/361)
[Related Guides to the Product](https://learn.adafruit.com/products/361/guides)
### 13.56MHz RFID/NFC White Tag - Classic 1K
[13.56MHz RFID/NFC White Tag - Classic 1K](https://www.adafruit.com/product/360)
This is a blank 13.56MHz RFID/NFC laundry tag - often used for laundry but also general tagging. The tag contains a small RFID chip and an antenna, and is passively powered by the reader/writer when placed a couple inches away.
These can be read by almost any 13.56MHz RFID/NFC...
In Stock
[Buy Now](https://www.adafruit.com/product/360)
[Related Guides to the Product](https://learn.adafruit.com/products/360/guides)
### 13.56MHz RFID/NFC Card - Classic 1K
[13.56MHz RFID/NFC Card - Classic 1K](https://www.adafruit.com/product/359)
This is a blank 13.56MHz RFID/NFC card - often used for train/bus passes but also found in other systems where a proximity card is desired. The tag contains a small RFID chip and an antenna, and is passively powered by the reader/writer when placed a couple inches away.
These can be...
In Stock
[Buy Now](https://www.adafruit.com/product/359)
[Related Guides to the Product](https://learn.adafruit.com/products/359/guides)
### Adafruit Assembled Pi Cobbler Breakout + Cable for Raspberry Pi
[Adafruit Assembled Pi Cobbler Breakout + Cable for Raspberry Pi](https://www.adafruit.com/product/914)
Now that you've finally got your hands on a [Raspberry Pi® Model B](http://www.raspberrypi.org/), you're probably itching to make some fun embedded computer projects with it. What you need is an add on prototyping Pi Cobbler from Adafruit, which can break out all those...
No Longer Stocked
[Buy Now](https://www.adafruit.com/product/914)
[Related Guides to the Product](https://learn.adafruit.com/products/914/guides)
## Related Guides
- [I2C Addresses and Troublesome Chips](https://learn.adafruit.com/i2c-addresses.md)
- [Collin's Lab: RFID](https://learn.adafruit.com/collins-lab-rfid.md)
- [Mystery Box: Remote Chess Board Puzzle Lock](https://learn.adafruit.com/mystery-box-remote-chess-board-puzzle-lock.md)
- [Raspberry Pi NFC Minecraft Blocks](https://learn.adafruit.com/raspberry-pi-nfc-minecraft-blocks.md)
- [NFC Raspberry Pi Media Player](https://learn.adafruit.com/nfc-raspberry-pi-media-player.md)
- [Adafruit PN532 RFID/NFC Breakout and Shield](https://learn.adafruit.com/adafruit-pn532-rfid-nfc.md)
- [Adafruit's Raspberry Pi Lesson 9. Controlling a DC Motor](https://learn.adafruit.com/adafruit-raspberry-pi-lesson-9-controlling-a-dc-motor.md)
- [Adafruit's Raspberry Pi Lesson 5. Using a Console Cable](https://learn.adafruit.com/adafruits-raspberry-pi-lesson-5-using-a-console-cable.md)
- [Pi Box](https://learn.adafruit.com/pi-box.md)
- [Piezo Ring Tones with Raspberry Pi](https://learn.adafruit.com/piezo-ring-tones-with-raspberry-pi.md)
- [Cloud Cam: Internet-Connected Security Camera](https://learn.adafruit.com/cloud-cam-connected-raspberry-pi-security-camera.md)
- [Set up and Blink - MATLAB and Simulink with Raspberry Pi](https://learn.adafruit.com/how-to-use-matlab-and-simulink-with-raspberry-pi.md)
- [Battery Powered Raspberry Pi Displays w/RaspiRobot Shield](https://learn.adafruit.com/raspirobot-battery-powered-raspberry-pi-displays.md)
- [Adafruit's Raspberry Pi Lesson 13. Power Control](https://learn.adafruit.com/adafruits-raspberry-pi-lesson-13-power-control.md)
- [Raspberry Pi Thermal Printer One Time Pads](https://learn.adafruit.com/raspberry-pi-thermal-printer-one-time-pads.md)
---
# Source: https://learn.adafruit.com/adafruit-ultimate-gps/built-in-logging.md
# Adafruit Ultimate GPS
## Built In Logging
One of the nice things about the MTK3339 is the built in data-logger. This basic data-logging capability can store date, time, latitude, longitude and altitude data into a 64K flash chip inside. Its not a high resolution logger - it only logs once every 15 seconds when there is a fix - but for 99% of projects that want to track location, this can be a great low power way to log data - no SD card or other EEPROM required! It can store up to 16 hours of data.
The GPS module does require a microcontroller to 'kick start' the logger by requesting it to start. If power is lost it will require another 'kick' to start. If you already have some data in the FLASH, a new trace will be created (so you wont lose old data) and if you run out of space it will simply halt and not overwrite old data. Despite this annoyance, its still a very nice extra and we have some library support to help you use it
For more details check out the [LOCUS (built-in-datalogging system) user guide](http://www.adafruit.com/datasheets/GTop%20LOCUS%20Library%20User%20Manual-v13.pdf)
First, we should try getting the logger to run.Open up the **File→Examples→Adafruit\_GPS→locus\_start** sketch. This will demonstrate how to start the logger (called LOCUS)
The key part is here:
```
Serial.print("STARTING LOGGING....");
if (GPS.LOCUS_StartLogger())
Serial.println(" STARTED!");
else
Serial.println(" no response :(");
delay(1000);
```
You should start the logger and then check the response:
# Logging Status
Once you've seen that the GPS is OK with logging, you can load up the status sketch which will also give you more data. Upload **File→Examples→Adafruit\_GPS→locus\_status** 
This output gives you some more information. the first entry is the Log #. This is how many log traces are in the memory. Every time you start and save data, a new log is made. Full Stop means that once the logger has run out of memory it will stop. Next the output indicates that we are logging only during fix data and at set intervals, with an interval delay of 15 seconds. We are not logging based on distance or speed. The current status is LOGGING (active), there's also the number of records we've stored. Each record is a timestamped location. We log once every 15 seconds, you can see the records increment from 344 to 345 here. Lastly, we can see how much of the internal flash storage is used, only 4% at this point
In real use, you'll probably want to start the loggging and then have your microcontroller go to sleep to reserve power, waking up once in a while to check up on the logging status.
# Downloading Data
Finally, once we're done logging we need to extract the data. To do this we need to first get the raw data out of the FLASH and then decode the sentences. Upload **File→Examples→Adafruit\_GPS→locus\_dump ** to the Arduino and open up the serial monitor
Danger:

Copy and paste all the text after the —-'s (starting with **$PMTKLOX,0,86\*67** and ending with **$PMTK001,622,3\*36** ) [then paste it into the box located on this page](http://learn.adafruit.com/custom/ultimate-gps-parser)
OR
[you can try this python tool that don has kindly donated](https://github.com/don/locus) to the community!
# Using the GPS Tool
If you are having difficulty with the Arduino/javascript tool, you can also try using the GPS tool. The tool runs only under Windows but it is very powerful.
Connect the GPS module to an Arduino [(connected with the Direct Wiring example)](http://learn.adafruit.com/adafruit-ultimate-gps/direct-computer-wiring) , FTDI adapter or other TTL converter and download the [GPS Tool](../../../../adafruit-ultimate-gps/downloads) - connect to the GPS via the COM port of the Arduino/FTDI/TTL cable. You can then query, dump and delete the log memory
- [Previous Page](https://learn.adafruit.com/adafruit-ultimate-gps/circuitpython-datalogging.md)
- [Next Page](https://learn.adafruit.com/adafruit-ultimate-gps/resources.md)
## Featured Products
### Adafruit Ultimate GPS Breakout - 66 channel w/10 Hz updates
[Adafruit Ultimate GPS Breakout - 66 channel w/10 Hz updates](https://www.adafruit.com/product/746)
We carry a few different GPS modules here in the Adafruit shop, but none that satisfied our every desire - that's why we designed this little GPS breakout board. We believe this is the **Ultimate** GPS module, so we named it that. It's got everything you want and...
In Stock
[Buy Now](https://www.adafruit.com/product/746)
[Related Guides to the Product](https://learn.adafruit.com/products/746/guides)
### Adafruit Ultimate GPS GNSS with USB - 99 channel w/10 Hz updates
[Adafruit Ultimate GPS GNSS with USB - 99 channel w/10 Hz updates](https://www.adafruit.com/product/4279)
The Ultimate GPS module you know and love has a _glow-up_ to let it be easily used with any computer, not just microcontrollers! With the built-in USB-to-Serial converter, you can now plug-n-play the Ultimate GPS into your computer, laptop, embedded Linux computer, and more. Power and...
In Stock
[Buy Now](https://www.adafruit.com/product/4279)
[Related Guides to the Product](https://learn.adafruit.com/products/4279/guides)
### Adafruit METRO 328 Fully Assembled - Arduino IDE compatible
[Adafruit METRO 328 Fully Assembled - Arduino IDE compatible](https://www.adafruit.com/product/50)
We sure love the ATmega328 here at Adafruit, and we use them _a lot_ for our own projects. The processor has plenty of GPIO, Analog inputs, hardware UART SPI and I2C, timers and PWM galore - just enough for most simple projects. When we need to go small, we use a
Out of Stock
[Buy Now](https://www.adafruit.com/product/50)
[Related Guides to the Product](https://learn.adafruit.com/products/50/guides)
### GPS Antenna - External Active Antenna - 3-5V 28dB 5 Meter SMA
[GPS Antenna - External Active Antenna - 3-5V 28dB 5 Meter SMA](https://www.adafruit.com/product/960)
Give your Ultimate GPS V3 a boost with this external active antenna. This GPS antenna draws about 10mA and will give you an additional 28 dB of gain. It's got a 5 meter long cable so it will easily reach wherever you need it to. The antenna is magnetic so it will stick to the top of a car...
In Stock
[Buy Now](https://www.adafruit.com/product/960)
[Related Guides to the Product](https://learn.adafruit.com/products/960/guides)
### SMA to uFL/u.FL/IPX/IPEX RF Adapter Cable
[SMA to uFL/u.FL/IPX/IPEX RF Adapter Cable](https://www.adafruit.com/product/851)
This RF adapter cable is super handy for anyone doing RF work. Often times, small electronics save space by having a pick-and-placeable u.FL connector (also called uFL, IPEX, IPAX, IPX, MHF, and AM). But most antennas have SMA or RP-SMA connectors on them. This little cable will bridge the...
In Stock
[Buy Now](https://www.adafruit.com/product/851)
[Related Guides to the Product](https://learn.adafruit.com/products/851/guides)
### CR1220 12mm Diameter - 3V Lithium Coin Cell Battery
[CR1220 12mm Diameter - 3V Lithium Coin Cell Battery](https://www.adafruit.com/product/380)
These are the highest quality & capacity batteries, the same as shipped with the iCufflinks, iNecklace, Datalogging and GPS Shields, GPS HAT, etc. One battery per order (you'll want one battery per cufflink or pendant.)
Brand may vary but all battery brands are verified...
Out of Stock
[Buy Now](https://www.adafruit.com/product/380)
[Related Guides to the Product](https://learn.adafruit.com/products/380/guides)
### Breadboarding wire bundle
[Breadboarding wire bundle](https://www.adafruit.com/product/153)
75 flexible stranded core wires with stiff ends molded on in red, orange, yellow, green, blue, brown, black and white. These are a major improvement over the "box of bent wires" that are sometimes sold with breadboards, and faster than stripping your own solid core wires. Makes...
In Stock
[Buy Now](https://www.adafruit.com/product/153)
[Related Guides to the Product](https://learn.adafruit.com/products/153/guides)
### Half Sized Premium Breadboard - 400 Tie Points
[Half Sized Premium Breadboard - 400 Tie Points](https://www.adafruit.com/product/64)
This is a cute, half-size breadboard with 400 tie points, good for small projects. It's 3.25" x 2.2" / 8.3cm x 5.5cm with a standard double-strip in the middle and two power rails on both sides. You can pull the power rails off easily to make the breadboard as...
In Stock
[Buy Now](https://www.adafruit.com/product/64)
[Related Guides to the Product](https://learn.adafruit.com/products/64/guides)
## Related Guides
- [Reverse Geocache Box](https://learn.adafruit.com/reverse-geocache-engagement-box.md)
- [Ladyada's Learn Arduino - Lesson #2](https://learn.adafruit.com/ladyadas-learn-arduino-lesson-number-2.md)
- [Wave Shield Talking Clock](https://learn.adafruit.com/wave-shield-talking-clock.md)
- [Wireless Game Show Poppers for the Classroom!](https://learn.adafruit.com/wireless-game-show-poppers.md)
- [Wireless Gardening with Arduino + CC3000 WiFi Modules](https://learn.adafruit.com/wireless-gardening-arduino-cc3000-wifi-modules.md)
- [CircuitPython Essentials](https://learn.adafruit.com/circuitpython-essentials.md)
- [CircuitPython Libraries on Linux and ODROID C2](https://learn.adafruit.com/circuitpython-libaries-linux-odroid-c2.md)
- [2.2" TFT Display](https://learn.adafruit.com/2-2-tft-display.md)
- [RGB LED Matrix Basics](https://learn.adafruit.com/32x16-32x32-rgb-led-matrix.md)
- [Halloween Pumpkin](https://learn.adafruit.com/halloween-pumpkin.md)
- [Remote controlled door lock using a fingerprint sensor & Adafruit IO](https://learn.adafruit.com/remote-controlled-door-lock-using-a-fingerprint-sensor-and-adafruit-io.md)
- [Automatic Monitor Color Temperature Adjustment](https://learn.adafruit.com/automatic-monitor-color-temperature-adjustment.md)
- [Animating Multiple LED Backpacks](https://learn.adafruit.com/animating-multiple-led-backpacks.md)
- [Skill Badge Requirements: Microcontrollers](https://learn.adafruit.com/skill-badge-requirements-microcontrollers.md)
- [RePaper eInk Development Board](https://learn.adafruit.com/repaper-eink-development-board.md)
---
# Source: https://learn.adafruit.com/beaglebone/buy-a-beaglebone.md
# BeagleBone
## Buy a BeagleBone
- [Previous Page](https://learn.adafruit.com/beaglebone/wifi.md)
- [Next Page](https://learn.adafruit.com/beaglebone/downloads.md)
## Featured Products
### Adafruit Beagle Bone Black Starter Pack
[Adafruit Beagle Bone Black Starter Pack](https://www.adafruit.com/product/703)
If you've heard about the Beagle Bone Black and you want to hit the ground running, this starter pack is for you. We've picked out everything you need to start out, with essential parts and accessories to save on a bundle.
Includes:
-
No Longer Stocked
[Buy Now](https://www.adafruit.com/product/703)
[Related Guides to the Product](https://learn.adafruit.com/products/703/guides)
### Miniature WiFi (802.11b/g/n) Module: For Raspberry Pi and more
[Miniature WiFi (802.11b/g/n) Module: For Raspberry Pi and more](https://www.adafruit.com/product/814)
Make your Internet of Things device cable-free by adding WiFi. Take advantage of the Raspberry Pi and Beagle Bone's USB port to add a low cost, but high-reliability wireless link. We tried half a dozen modules to find one that works well with the Pi and Bone without the need of recompiling...
No Longer Stocked
[Buy Now](https://www.adafruit.com/product/814)
[Related Guides to the Product](https://learn.adafruit.com/products/814/guides)
### Ethernet Cable - 10 ft long
[Ethernet Cable - 10 ft long](https://www.adafruit.com/product/730)
We have so many Internet-connected goodies in the shop, we figured it's time to carry a cable so you can easily connect them up! This cable is 10 feet long, black and has all 8 wires installed. Perfect for use with the [BeagleBone](http://www.adafruit.com/products/513),
No Longer Stocked
[Buy Now](https://www.adafruit.com/product/730)
[Related Guides to the Product](https://learn.adafruit.com/products/730/guides)
### 5V 2A (2000mA) switching power supply - UL Listed
[5V 2A (2000mA) switching power supply - UL Listed](https://www.adafruit.com/product/276)
This is an FCC/CE certified and UL listed power supply. Need a lot of 5V power? This switching supply gives a clean regulated 5V output at up to 2000mA. 110 or 240 input, so it works in any country. The plugs are "US 2-prong" style so you may need a plug adapter, but you can pick one...
In Stock
[Buy Now](https://www.adafruit.com/product/276)
[Related Guides to the Product](https://learn.adafruit.com/products/276/guides)
## Related Guides
- [MPR121 Capacitive Touch Sensor on Raspberry Pi & BeagleBone Black](https://learn.adafruit.com/mpr121-capacitive-touch-sensor-on-raspberry-pi-and-beaglebone-black.md)
- [BNO055 Absolute Orientation Sensor with Raspberry Pi & BeagleBone Black](https://learn.adafruit.com/bno055-absolute-orientation-sensor-with-raspberry-pi-and-beaglebone-black.md)
- [Setting up WiFi with BeagleBone Black](https://learn.adafruit.com/setting-up-wifi-with-beaglebone-black.md)
- [SSD1306 OLED Displays with Raspberry Pi and BeagleBone Black](https://learn.adafruit.com/ssd1306-oled-displays-with-raspberry-pi-and-beaglebone-black.md)
- [Fading a RGB LED on BeagleBone Black](https://learn.adafruit.com/fading-a-rgb-led-on-beaglebone-black.md)
- [DHT Humidity Sensing on Raspberry Pi or Beaglebone Black with GDocs Logging](https://learn.adafruit.com/dht-humidity-sensing-on-raspberry-pi-with-gdocs-logging.md)
- [Running Programs Automatically on Your Tiny Computer](https://learn.adafruit.com/running-programs-automatically-on-your-tiny-computer.md)
- [Blinking an LED with BeagleBone Black](https://learn.adafruit.com/blinking-an-led-with-beaglebone-black.md)
- [MAX31855 Thermocouple Sensor Python Library](https://learn.adafruit.com/max31855-thermocouple-python-library.md)
- [Character LCD with Raspberry Pi or BeagleBone Black](https://learn.adafruit.com/character-lcd-with-raspberry-pi-or-beaglebone-black.md)
- [Connecting a Push Button to BeagleBone Black](https://learn.adafruit.com/connecting-a-push-button-to-beaglebone-black.md)
- [Bone Box](https://learn.adafruit.com/bone-box.md)
- [Nokia 5110/3310 LCD Python Library](https://learn.adafruit.com/nokia-5110-3310-lcd-python-library.md)
- [Controlling a Servo with a BeagleBone Black](https://learn.adafruit.com/controlling-a-servo-with-a-beaglebone-black.md)
- [Bonjour (Zeroconf) Networking for Windows and Linux](https://learn.adafruit.com/bonjour-zeroconf-networking-for-windows-and-linux.md)
---
# Source: https://learn.adafruit.com/photocells/buy-a-photocell.md
# Photocells
## Buy a Photocell
- [Previous Page](https://learn.adafruit.com/photocells/example-projects.md)
## Featured Products
### Photo cell (CdS photoresistor)
[Photo cell (CdS photoresistor)](https://www.adafruit.com/product/161)
CdS cells are little light sensors. As the squiggly face is exposed to more light, the resistance goes down. When it's light, the resistance is about ~1KΩ, when dark it goes up to ~10KΩ.
To use, connect one side of the photocell (either one, it's symmetric) to power...
In Stock
[Buy Now](https://www.adafruit.com/product/161)
[Related Guides to the Product](https://learn.adafruit.com/products/161/guides)
### Adafruit METRO 328 Fully Assembled - Arduino IDE compatible
[Adafruit METRO 328 Fully Assembled - Arduino IDE compatible](https://www.adafruit.com/product/50)
We sure love the ATmega328 here at Adafruit, and we use them _a lot_ for our own projects. The processor has plenty of GPIO, Analog inputs, hardware UART SPI and I2C, timers and PWM galore - just enough for most simple projects. When we need to go small, we use a
Out of Stock
[Buy Now](https://www.adafruit.com/product/50)
[Related Guides to the Product](https://learn.adafruit.com/products/50/guides)
### Digital Multimeter
[Digital Multimeter](https://www.adafruit.com/product/71)
This is a basic multimeter, I've played with it a bunch and I think its a great addition to a toolbox. It's low cost and simple to use with a big clear display and all the measurements you need:
- AC/DC Voltage measurement
- Current measurement, from 1uA up to...
No Longer Stocked
[Buy Now](https://www.adafruit.com/product/71)
[Related Guides to the Product](https://learn.adafruit.com/products/71/guides)
### Half Sized Premium Breadboard - 400 Tie Points
[Half Sized Premium Breadboard - 400 Tie Points](https://www.adafruit.com/product/64)
This is a cute, half-size breadboard with 400 tie points, good for small projects. It's 3.25" x 2.2" / 8.3cm x 5.5cm with a standard double-strip in the middle and two power rails on both sides. You can pull the power rails off easily to make the breadboard as...
In Stock
[Buy Now](https://www.adafruit.com/product/64)
[Related Guides to the Product](https://learn.adafruit.com/products/64/guides)
## Related Guides
- [Halloween Pumpkin](https://learn.adafruit.com/halloween-pumpkin.md)
- [Adafruit Proto Screw Shield](https://learn.adafruit.com/adafruit-proto-screw-shield.md)
- [Arduino Lesson 11. LCD Displays - Part 1](https://learn.adafruit.com/adafruit-arduino-lesson-11-lcd-displays-1.md)
- [Program an AVR or Arduino Using Raspberry Pi GPIO](https://learn.adafruit.com/program-an-avr-or-arduino-using-raspberry-pi-gpio-pins.md)
- [Arduino Lesson 12. LCD Displays - Part 2](https://learn.adafruit.com/adafruit-arduino-lesson-12-lcd-displays-part-2.md)
- [Silicone Robo-Tentacle](https://learn.adafruit.com/silicone-robo-tentacle.md)
- [Babel Fish](https://learn.adafruit.com/babel-fish.md)
- [Arduino Lesson 10. Making Sounds](https://learn.adafruit.com/adafruit-arduino-lesson-10-making-sounds.md)
- [Arduino Lesson 16. Stepper Motors](https://learn.adafruit.com/adafruit-arduino-lesson-16-stepper-motors.md)
- [Line Following Zumo Robot Using Simulink](https://learn.adafruit.com/line-following-zumo-robot-programmed-with-simulink.md)
- [Bluefruit LE Connect for iOS and Android](https://learn.adafruit.com/bluefruit-le-connect.md)
- [Adafruit 16-channel PWM/Servo Shield](https://learn.adafruit.com/adafruit-16-channel-pwm-slash-servo-shield.md)
- [8BitBox](https://learn.adafruit.com/8bitbox.md)
- [Tiny Arduino Music Visualizer](https://learn.adafruit.com/piccolo.md)
- [Adafruit 1.14" 240x135 Color TFT Breakout LCD Display](https://learn.adafruit.com/adafruit-1-14-240x135-color-tft-breakout.md)
---
# Source: https://learn.adafruit.com/adafruit-pi-cobbler-kit/buy-a-pi-cobbler-kit.md
# Adafruit Pi Cobbler Kit
## Buy a Pi Cobbler Kit!
- [Previous Page](https://learn.adafruit.com/adafruit-pi-cobbler-kit/solder-it.md)
- [Next Page](https://learn.adafruit.com/adafruit-pi-cobbler-kit/downloads.md)
## Featured Products
### Adafruit Assembled Pi Cobbler Breakout + Cable for Raspberry Pi
[Adafruit Assembled Pi Cobbler Breakout + Cable for Raspberry Pi](https://www.adafruit.com/product/914)
Now that you've finally got your hands on a [Raspberry Pi® Model B](http://www.raspberrypi.org/), you're probably itching to make some fun embedded computer projects with it. What you need is an add on prototyping Pi Cobbler from Adafruit, which can break out all those...
No Longer Stocked
[Buy Now](https://www.adafruit.com/product/914)
[Related Guides to the Product](https://learn.adafruit.com/products/914/guides)
### Full Sized Premium Breadboard - 830 Tie Points
[Full Sized Premium Breadboard - 830 Tie Points](https://www.adafruit.com/product/239)
This is a 'full-size' premium quality breadboard, 830 tie points. Good for small and medium projects. It's 2.2" x 7" (5.5 cm x 17 cm) with a standard double-strip in the middle and two power rails on both sides. You can pull the power rails off easily to make the...
In Stock
[Buy Now](https://www.adafruit.com/product/239)
[Related Guides to the Product](https://learn.adafruit.com/products/239/guides)
### Adafruit Pi Unassembled T-Cobbler Breakout Kit for Raspberry Pi
[Adafruit Pi Unassembled T-Cobbler Breakout Kit for Raspberry Pi](https://www.adafruit.com/product/1105)
Now that you've finally got your hands on a [Raspberry Pi®](http://www.raspberrypi.org/), you're probably itching to make some fun embedded computer projects with it. What you need is an add on prototyping Pi T-Cobbler from Adafruit, which can break out all those tasty...
No Longer Stocked
[Buy Now](https://www.adafruit.com/product/1105)
[Related Guides to the Product](https://learn.adafruit.com/products/1105/guides)
## Related Guides
- [Adafruit's Raspberry Pi Lesson 13. Power Control](https://learn.adafruit.com/adafruits-raspberry-pi-lesson-13-power-control.md)
- [Raspberry Pi Pipboy 3000](https://learn.adafruit.com/raspberry-pi-pipboy-3000.md)
- [Raspberry Pi Thermal Printer One Time Pads](https://learn.adafruit.com/raspberry-pi-thermal-printer-one-time-pads.md)
- [Raspberry Pi Zero NPR One Radio](https://learn.adafruit.com/raspberry-pi-zero-npr-one-radio.md)
- [Read-Only Raspberry Pi](https://learn.adafruit.com/read-only-raspberry-pi.md)
- [Networked Thermal Printer using Raspberry Pi and CUPS](https://learn.adafruit.com/networked-thermal-printer-using-cups-and-raspberry-pi.md)
- [Using a Mini PAL/NTSC Display with a Raspberry Pi](https://learn.adafruit.com/using-a-mini-pal-ntsc-display-with-a-raspberry-pi.md)
- [Raspberry Pi Care and Troubleshooting](https://learn.adafruit.com/raspberry-pi-care-and-troubleshooting.md)
- [Set up Home Assistant with a Raspberry Pi](https://learn.adafruit.com/set-up-home-assistant-with-a-raspberry-pi.md)
- [5" Display Kippah Portable Raspberry Pi](https://learn.adafruit.com/portable-kippah-pi.md)
- [piBeacon - DIY Beacon with a Raspberry Pi](https://learn.adafruit.com/pibeacon-ibeacon-with-a-raspberry-pi.md)
- [SSD1306 OLED Displays with Raspberry Pi and BeagleBone Black](https://learn.adafruit.com/ssd1306-oled-displays-with-raspberry-pi-and-beaglebone-black.md)
- [How we designed an injection-molded case](https://learn.adafruit.com/how-we-designed-an-injection-molded-case-for-raspberry-pi.md)
- [7” Portable Multitouch Raspberry Pi Tablet](https://learn.adafruit.com/7-portable-raspberry-pi-multitouch-tablet.md)
- [PiGRRL 2](https://learn.adafruit.com/pigrrl-2.md)
---
# Source: https://learn.adafruit.com/pir-passive-infrared-proximity-motion-sensor/buy-a-pir-motion-sensor.md
# PIR Motion Sensor
## Buy a PIR Motion Sensor
- [Previous Page](https://learn.adafruit.com/pir-passive-infrared-proximity-motion-sensor/example-projects.md)
## Primary Products
### PIR (motion) sensor
[PIR (motion) sensor](https://www.adafruit.com/product/189)
PIR sensors are used to detect motion from pets/humanoids from about 20 feet away (possibly works on zombies, not guaranteed). This one has an adjustable delay before firing (approx 2-4 seconds), adjustable sensitivity **and** we include a 1 foot (30 cm) cable with a socket so you...
In Stock
[Buy Now](https://www.adafruit.com/product/189)
[Related Guides to the Product](https://learn.adafruit.com/products/189/guides)
## Related Guides
- [HalloWing All-Seeing Skull](https://learn.adafruit.com/hallowing-all-seeing-skull.md)
- [Magical Mistletoe](https://learn.adafruit.com/magical-mistletoe.md)
- [Screaming Cauldron](https://learn.adafruit.com/screaming-cauldron.md)
- [IoT Bird Feeder with Camera](https://learn.adafruit.com/iot-window-bird-feeder-with-camera.md)
- [No-Code WipperSnapper Summoning Horn](https://learn.adafruit.com/adafruit-io-wippersnapper-summoning-horn.md)
- [Motion Controlled Matrix Bed Clock](https://learn.adafruit.com/motion-controlled-matrix-bed-clock.md)
- [Adafruit VCNL4020 Proximity and Light Sensor](https://learn.adafruit.com/adafruit-vcnl4020-proximity-and-light-sensor.md)
- [Fog Machine with Motion Sensor and Adafruit IO](https://learn.adafruit.com/fog-machine-remote-trigger.md)
- [Feather Freezer Door Alarm](https://learn.adafruit.com/feather-door-alarm.md)
- [MIDI Laser Harp with Time of Flight Distance Sensors](https://learn.adafruit.com/midi-laser-harp-time-of-flight-sensors.md)
- [Using Adafruit IO Actions to Make an IoT Door Detector](https://learn.adafruit.com/using-adafruit-io-actions-to-make-an-iot-door-detector.md)
- [Quadcopter Spray Can Mod](https://learn.adafruit.com/quadcopter-spray-can-mod.md)
- [Adafruit VCNL4040 Proximity Sensor](https://learn.adafruit.com/adafruit-vcnl4040-proximity-sensor.md)
- [Using ItsaSNAP for HomeKit PIR Motion Detection](https://learn.adafruit.com/itsasnap-homekit-pir-motion-detection.md)
- [No-Code Room Occupancy Status ](https://learn.adafruit.com/no-code-room-occupancy-status.md)
---
# Source: https://learn.adafruit.com/thermistor/buy-a-thermistor.md
# Thermistor
## Buy a Thermistor
- [Previous Page](https://learn.adafruit.com/thermistor/circuitpython.md)
## Featured Products
### 10K Precision Epoxy Thermistor
[10K Precision Epoxy Thermistor](https://www.adafruit.com/product/372)
Need to measure something damp? This epoxy-coated precision 1% 10K thermistor is an inexpensive way to measure temperature in weather or liquids. The resistance in 25 °C is 10K (+- 1%). The resistance goes down as it gets warmer and goes up as it gets cooler.
In Stock
[Buy Now](https://www.adafruit.com/product/372)
[Related Guides to the Product](https://learn.adafruit.com/products/372/guides)
## Related Guides
- [reef-pi Guide 1: Setup and Demonstration](https://learn.adafruit.com/reef-pi-installation-and-configuration.md)
- [Adafruit MCP9600 I2C Thermocouple Amplifier](https://learn.adafruit.com/adafruit-mcp9600-i2c-thermocouple-amplifier.md)
- [Calibrating Sensors](https://learn.adafruit.com/calibrating-sensors.md)
- [EMC2101 Fan Controller and Temperature sensor](https://learn.adafruit.com/emc2101-fan-controller-and-temperature-sensor.md)
- [Arm-based IoT Kit for Cloud IoT Core - Getting Started](https://learn.adafruit.com/raspberry-pi-3-and-sensor-kit-for-google-cloud-iot-core.md)
- [AM2315 - Encased I2C Temperature/Humidity Sensor](https://learn.adafruit.com/am2315-encased-i2c-temperature-humidity-sensor.md)
- [TMP006 Infrared Sensor Breakout](https://learn.adafruit.com/infrared-thermopile-sensor-breakout.md)
- [Adafruit MLX90640 IR Thermal Camera](https://learn.adafruit.com/adafruit-mlx90640-ir-thermal-camera.md)
- [MAX31855 Thermocouple Sensor Python Library](https://learn.adafruit.com/max31855-thermocouple-python-library.md)
- [Storage humidity and temperature monitor](https://learn.adafruit.com/storage-humidity-and-temperature-monitor.md)
- [Kombucha Thermostat with CircuitPython and Feather ](https://learn.adafruit.com/kombucha-thermostat-with-circuitpython-and-feather.md)
- [TMP36 Temperature Sensor](https://learn.adafruit.com/tmp36-temperature-sensor.md)
- [Monitor Your Greenhouse with a No-Code Environmental Sensor](https://learn.adafruit.com/monitor-your-greenhouse-with-a-no-code-environmental-sensor.md)
- [Adafruit TE MS8607 PHT Sensor](https://learn.adafruit.com/adafruit-te-ms8607-pht-sensor.md)
- [Using Melexis MLX90614 Non-Contact Sensors](https://learn.adafruit.com/using-melexis-mlx90614-non-contact-sensors.md)
---
# Source: https://learn.adafruit.com/tilt-sensor/buy-a-tilt-sensor.md
# Tilt Sensor
## Buy a Tilt Sensor
- [Previous Page](https://learn.adafruit.com/tilt-sensor/example-projects.md)
## Featured Products
### Tilt ball switch
[Tilt ball switch](https://www.adafruit.com/product/173)
The "poor man's" accelerometer! Tilt sensors are switches that can detect basic motion/orientation. The metal tube has a little metal ball that rolls around in it, when its tilted upright, the ball rolls onto the contacts sticking out of end and shorts them together.
In Stock
[Buy Now](https://www.adafruit.com/product/173)
[Related Guides to the Product](https://learn.adafruit.com/products/173/guides)
## Related Guides
- [Force Sensitive Resistor (FSR)](https://learn.adafruit.com/force-sensitive-resistor-fsr.md)
- [Basic Resistor Sensor Reading on Raspberry Pi](https://learn.adafruit.com/basic-resistor-sensor-reading-on-raspberry-pi.md)
- [Calibrating Sensors](https://learn.adafruit.com/calibrating-sensors.md)
- [Wireless ESP32-S2 Touch Screen Controller for Pure Data](https://learn.adafruit.com/wireless-esp32-s2-controller-for-pure-data.md)
- [Hang out your washing reminder - Adafruit IO + Vibration switch](https://learn.adafruit.com/hang-out-your-washing-reminder-adafruit-io-vibration-switch.md)
- [Circuit Playground Bike Glove](https://learn.adafruit.com/circuit-playground-bike-glove.md)
- [ICEdot Teardown](https://learn.adafruit.com/icedot-teardown.md)
- [Adafruit VEML6070 UV Sensor Breakout](https://learn.adafruit.com/adafruit-veml6070-uv-light-sensor-breakout.md)
- [NAU7802 Pet Food Scale](https://learn.adafruit.com/nau7802-pet-food-scale.md)
- [Adafruit HX711 24-bit ADC](https://learn.adafruit.com/adafruit-hx711-24-bit-adc.md)
- [Power Glove Wireless MIDI Controller](https://learn.adafruit.com/power-glove-bluetooth-midi-controller.md)
- [Clue Coffee Scale](https://learn.adafruit.com/clue-coffee-scale.md)
- [Adafruit NAU7802 24-Bit ADC - STEMMA QT / Qwiic](https://learn.adafruit.com/adafruit-nau7802-24-bit-adc-stemma-qt-qwiic.md)
- [Flora MIDI Drum Glove](https://learn.adafruit.com/midi-drum-glove.md)
- [Arcade Stick Conversion](https://learn.adafruit.com/arcade-stick-conversion.md)
---
# Source: https://learn.adafruit.com/ttl-serial-camera/buy-a-ttl-serial-camera.md
# TTL Serial Camera
## Buy a TTL Serial Camera
- [Previous Page](https://learn.adafruit.com/ttl-serial-camera/f-a-q.md)
- [Next Page](https://learn.adafruit.com/ttl-serial-camera/downloads.md)
## Featured Products
### TTL Serial JPEG Camera with NTSC Video
[TTL Serial JPEG Camera with NTSC Video](https://www.adafruit.com/product/397)
This camera module can be a pretty neat project addition. It was designed to be used in security systems and does two main things - it outputs NTSC video and can take snapshots of that video (in color) and transmit them over the TTL serial link. You can snap pictures at 640x480, 320x240 or...
In Stock
[Buy Now](https://www.adafruit.com/product/397)
[Related Guides to the Product](https://learn.adafruit.com/products/397/guides)
### Miniature TTL Serial JPEG Camera with NTSC Video
[Miniature TTL Serial JPEG Camera with NTSC Video](https://www.adafruit.com/product/1386)
This tiny little camera module can be a pretty neat project addition, it is just like [our other JPEG cameras (same chipset/software)](http://www.adafruit.com/category/35_68), but much smaller and slimmer. It was designed to be used in security systems and does two main things - it...
In Stock
[Buy Now](https://www.adafruit.com/product/1386)
[Related Guides to the Product](https://learn.adafruit.com/products/1386/guides)
### Adafruit METRO 328 Fully Assembled - Arduino IDE compatible
[Adafruit METRO 328 Fully Assembled - Arduino IDE compatible](https://www.adafruit.com/product/50)
We sure love the ATmega328 here at Adafruit, and we use them _a lot_ for our own projects. The processor has plenty of GPIO, Analog inputs, hardware UART SPI and I2C, timers and PWM galore - just enough for most simple projects. When we need to go small, we use a
Out of Stock
[Buy Now](https://www.adafruit.com/product/50)
[Related Guides to the Product](https://learn.adafruit.com/products/50/guides)
### Weatherproof TTL Serial JPEG Camera with NTSC Video and IR LEDs
[Weatherproof TTL Serial JPEG Camera with NTSC Video and IR LEDs](https://www.adafruit.com/product/613)
This weatherproof camera module is [a classy upgrade to the basic camera module we already stock in the shop](http://www.adafruit.com/products/397). The main differences is that this one comes in a nice metal case with a mounting hinge, a 1 meter long cable with the TTL & NTSC...
In Stock
[Buy Now](https://www.adafruit.com/product/613)
[Related Guides to the Product](https://learn.adafruit.com/products/613/guides)
### MicroSD card breakout board+
[MicroSD card breakout board+](https://www.adafruit.com/product/254)
Not just a simple breakout board, this microSD adapter goes the extra mile - designed for ease of use.
- Onboard 5v-\>3v regulator provides 150mA for power-hungry cards
- 3v level shifting means you can use this with ease on either 3v or 5v systems
- Uses a proper level...
Out of Stock
[Buy Now](https://www.adafruit.com/product/254)
[Related Guides to the Product](https://learn.adafruit.com/products/254/guides)
### Half Sized Premium Breadboard - 400 Tie Points
[Half Sized Premium Breadboard - 400 Tie Points](https://www.adafruit.com/product/64)
This is a cute, half-size breadboard with 400 tie points, good for small projects. It's 3.25" x 2.2" / 8.3cm x 5.5cm with a standard double-strip in the middle and two power rails on both sides. You can pull the power rails off easily to make the breadboard as...
In Stock
[Buy Now](https://www.adafruit.com/product/64)
[Related Guides to the Product](https://learn.adafruit.com/products/64/guides)
### SD/MicroSD Memory Card (8 GB SDHC)
[SD/MicroSD Memory Card (8 GB SDHC)](https://www.adafruit.com/product/1294)
Add mega-storage in a jiffy using this 8 GB class 4 micro-SD card. It comes with a SD adapter so you can use it with any of our shields or adapters. Preformatted to FAT so it works out of the box with our projects. Tested and works great with our
In Stock
[Buy Now](https://www.adafruit.com/product/1294)
[Related Guides to the Product](https://learn.adafruit.com/products/1294/guides)
## Related Guides
- [Making Adabot: Part 2](https://learn.adafruit.com/making-adabot-part-2.md)
- [3D Printed Animatronic Robot Head](https://learn.adafruit.com/3d-printed-animatronic-robot-head.md)
- [Arduino Lesson 14. Servo Motors](https://learn.adafruit.com/adafruit-arduino-lesson-14-servo-motors.md)
- [Arduino Lesson 15. DC Motor Reversing](https://learn.adafruit.com/adafruit-arduino-lesson-15-dc-motor-reversing.md)
- [Programming Arduino with Android and Windows Tablets](https://learn.adafruit.com/programming-arduino-with-android-and-windows-tablets.md)
- [LSM303 Accelerometer + Compass Breakout](https://learn.adafruit.com/lsm303-accelerometer-slash-compass-breakout.md)
- [Adafruit VS1053 MP3/AAC/Ogg/MIDI/WAV Codec Breakout Tutorial](https://learn.adafruit.com/adafruit-vs1053-mp3-aac-ogg-midi-wav-play-and-record-codec-tutorial.md)
- [Naughty or Nice Machine](https://learn.adafruit.com/naughty-or-nice-machine.md)
- [Adafruit Ultimate GPS Logger Shield](https://learn.adafruit.com/adafruit-ultimate-gps-logger-shield.md)
- [Arduino "Hunt The Wumpus"](https://learn.adafruit.com/arduino-hunt-the-wumpus.md)
- [Track Your Treats: Halloween Candy GPS Tracker](https://learn.adafruit.com/track-your-treats-halloween-candy-gps-tracker.md)
- [WiFi Weather Station](https://learn.adafruit.com/wifi-weather-station-arduino-cc3000.md)
- [Bluetooth Controlled Motorized Camera Slider](https://learn.adafruit.com/bluetooth-motorized-camera-slider.md)
- [TMP36 Temperature Sensor](https://learn.adafruit.com/tmp36-temperature-sensor.md)
- [Babel Fish](https://learn.adafruit.com/babel-fish.md)
---
# Source: https://learn.adafruit.com/arduino-prototyping-mounting-plate/buy-adafruit-prototyping-plate.md
# Arduino Prototyping Mounting Plate
## Buy Adafruit Prototyping Plate
- [Previous Page](https://learn.adafruit.com/arduino-prototyping-mounting-plate/assembly.md)
## Featured Products
### Adafruit METRO 328 Fully Assembled - Arduino IDE compatible
[Adafruit METRO 328 Fully Assembled - Arduino IDE compatible](https://www.adafruit.com/product/50)
We sure love the ATmega328 here at Adafruit, and we use them _a lot_ for our own projects. The processor has plenty of GPIO, Analog inputs, hardware UART SPI and I2C, timers and PWM galore - just enough for most simple projects. When we need to go small, we use a
Out of Stock
[Buy Now](https://www.adafruit.com/product/50)
[Related Guides to the Product](https://learn.adafruit.com/products/50/guides)
### Half Sized Premium Breadboard - 400 Tie Points
[Half Sized Premium Breadboard - 400 Tie Points](https://www.adafruit.com/product/64)
This is a cute, half-size breadboard with 400 tie points, good for small projects. It's 3.25" x 2.2" / 8.3cm x 5.5cm with a standard double-strip in the middle and two power rails on both sides. You can pull the power rails off easily to make the breadboard as...
In Stock
[Buy Now](https://www.adafruit.com/product/64)
[Related Guides to the Product](https://learn.adafruit.com/products/64/guides)
### Plastic mounting plate for breadboard and Arduino - rubber feet!
[Plastic mounting plate for breadboard and Arduino - rubber feet!](https://www.adafruit.com/product/275)
By popular demand! We now have the plates from the [ARDX](http://www.adafruit.com/products/170) available separately. Acrylic plate is engraved and cut here at the Adafruit factory. There are mounting holes for your [Arduino](http://www.adafruit.com/products/50) and a...
In Stock
[Buy Now](https://www.adafruit.com/product/275)
[Related Guides to the Product](https://learn.adafruit.com/products/275/guides)
### Adafruit MetroX Classic Kit - Experimentation Kit for Metro 328
[Adafruit MetroX Classic Kit - Experimentation Kit for Metro 328](https://www.adafruit.com/product/170)
Interested in making neat stuff with an Arduino-compatible board but not sure where to start? This kit includes all the pieces needed to complete over 20 different circuit and projects. Basically everything you need to be playing within minutes of its arrival. **No soldering required,...**
No Longer Stocked
[Buy Now](https://www.adafruit.com/product/170)
[Related Guides to the Product](https://learn.adafruit.com/products/170/guides)
## Related Guides
- [Tiny Arduino Music Visualizer](https://learn.adafruit.com/piccolo.md)
- [How to Choose a Microcontroller](https://learn.adafruit.com/how-to-choose-a-microcontroller.md)
- [Arduino Lesson 1. Blink](https://learn.adafruit.com/adafruit-arduino-lesson-1-blink.md)
- [Arduino Lesson 3. RGB LEDs](https://learn.adafruit.com/adafruit-arduino-lesson-3-rgb-leds.md)
- [Program an AVR or Arduino Using Raspberry Pi GPIO](https://learn.adafruit.com/program-an-avr-or-arduino-using-raspberry-pi-gpio-pins.md)
- [Remote controlled door lock using a fingerprint sensor & Adafruit IO](https://learn.adafruit.com/remote-controlled-door-lock-using-a-fingerprint-sensor-and-adafruit-io.md)
- [Cloud Thermometer](https://learn.adafruit.com/cloud-thermometer.md)
- [Arduino GPS Clock](https://learn.adafruit.com/arduino-clock.md)
- [Halloween Pumpkin](https://learn.adafruit.com/halloween-pumpkin.md)
- [Line Following Zumo Robot Using Simulink](https://learn.adafruit.com/line-following-zumo-robot-programmed-with-simulink.md)
- [Ladyada's Learn Arduino - Lesson #0](https://learn.adafruit.com/ladyadas-learn-arduino-lesson-number-0.md)
- [Sous-vide controller powered by Arduino - The SousViduino!](https://learn.adafruit.com/sous-vide-powered-by-arduino-the-sous-viduino.md)
- [Adafruit IO Basics: NeoPixel Controller](https://learn.adafruit.com/adafruit-io-basics-neopixel-controller.md)
- [Current Limiting Stepper Driver with DRV8871](https://learn.adafruit.com/current-limiting-stepper-driver-with-drv8871.md)
- [Multi-tasking the Arduino - Part 1](https://learn.adafruit.com/multi-tasking-the-arduino-part-1.md)
---
# Source: https://learn.adafruit.com/force-sensitive-resistor-fsr/buy-an-fsr.md
# Force Sensitive Resistor (FSR)
## Buy an FSR
- [Previous Page](https://learn.adafruit.com/force-sensitive-resistor-fsr/example-projects.md)
## Featured Products
### Round Force-Sensitive Resistor (FSR) - 0.3 ~ 10 Newton Force
[Round Force-Sensitive Resistor (FSR) - 0.3 ~ 10 Newton Force](https://www.adafruit.com/product/166)
FSRs are sensors that allow you to detect physical pressure, squeezing and weight. They are simple to use and low cost. This sensor is an Alpha MF01A-N-221-A01 with 1/2 diameter sensing region.
We used to stock the Interlink model 402 FSR - the Alpha version is almost half the price...
In Stock
[Buy Now](https://www.adafruit.com/product/166)
[Related Guides to the Product](https://learn.adafruit.com/products/166/guides)
### Square Force-Sensitive Resistor (FSR)
[Square Force-Sensitive Resistor (FSR)](https://www.adafruit.com/product/1075)
FSRs are sensors that allow you to detect physical pressure, squeezing and weight. They are simple to use and low cost. This sensor is an Alpha MF02A-N-221-A01 FSR with a 38mm square sensing region. Note that this sensor can't detect _where_ on the square you pressed (for that,
In Stock
[Buy Now](https://www.adafruit.com/product/1075)
[Related Guides to the Product](https://learn.adafruit.com/products/1075/guides)
### Extra-long force-sensitive resistor (FSR)
[Extra-long force-sensitive resistor (FSR)](https://www.adafruit.com/product/1071)
FSRs are sensors that allow you to detect physical pressure, squeezing and weight. They are simple to use and low cost. This sensor is a Interlink model 408 FSR with a massive 1/4-inch x 24-inch sensing region. You can press anywhere along the strip and the pressure will be recognized. Note...
No Longer Stocked
[Buy Now](https://www.adafruit.com/product/1071)
[Related Guides to the Product](https://learn.adafruit.com/products/1071/guides)
### Terminal Block - 2-pin 3.5mm - pack of 5!
[Terminal Block - 2-pin 3.5mm - pack of 5!](https://www.adafruit.com/product/724)
Nothing makes a project harder to maintain than a lot of loose wiring. That's why we like to use terminal blocks whenever making PCB-to-Wire connections. These particular 3.5mm terminal blocks are our favorite: big enough for a range of wire gauges, easy to adjust with a screwdriver, and...
In Stock
[Buy Now](https://www.adafruit.com/product/724)
[Related Guides to the Product](https://learn.adafruit.com/products/724/guides)
## Related Guides
- [Hang out your washing reminder - Adafruit IO + Vibration switch](https://learn.adafruit.com/hang-out-your-washing-reminder-adafruit-io-vibration-switch.md)
- [ReBoots Animated LED Boot Laces](https://learn.adafruit.com/re-boots-animated-dancing-boot-laces.md)
- [Circuit Playground Bike Glove](https://learn.adafruit.com/circuit-playground-bike-glove.md)
- [CuteCircuit Twirkle Shirt Teardown](https://learn.adafruit.com/cutecircuit-twirkle-shirt-teardown.md)
- [Tilt Sensor](https://learn.adafruit.com/tilt-sensor.md)
- [ICEdot Teardown](https://learn.adafruit.com/icedot-teardown.md)
- [Wireless LED Juggling Balls with ESP-NOW](https://learn.adafruit.com/wireless-juggling-balls-esp-now.md)
- [Adafruit HX711 24-bit ADC](https://learn.adafruit.com/adafruit-hx711-24-bit-adc.md)
- [Arcade Stick Conversion](https://learn.adafruit.com/arcade-stick-conversion.md)
- [Basic Resistor Sensor Reading on Raspberry Pi](https://learn.adafruit.com/basic-resistor-sensor-reading-on-raspberry-pi.md)
- [Adafruit VEML6070 UV Sensor Breakout](https://learn.adafruit.com/adafruit-veml6070-uv-light-sensor-breakout.md)
- [NAU7802 Pet Food Scale](https://learn.adafruit.com/nau7802-pet-food-scale.md)
- [Flora MIDI Drum Glove](https://learn.adafruit.com/midi-drum-glove.md)
- [Adafruit NAU7802 24-Bit ADC - STEMMA QT / Qwiic](https://learn.adafruit.com/adafruit-nau7802-24-bit-adc-stemma-qt-qwiic.md)
- [Clue Coffee Scale](https://learn.adafruit.com/clue-coffee-scale.md)
---
# Source: https://learn.adafruit.com/el-wire/buy-el-components.md
# EL Wire
## Buy EL Components
- [Previous Page](https://learn.adafruit.com/el-wire/el-projects.md)
## Featured Products
### EL Wire 12V Sound Activated Pocket Inverter
[EL Wire 12V Sound Activated Pocket Inverter](https://www.adafruit.com/product/832)
A small, portable inverter for EL wire with an audio input! This inverter has a little microphone and will light the connected EL according to the surrounding audio volume. Makes for an easy reactive project.
This inverter requires **12VDC input** (it works great with our 8xAA...
No Longer Stocked
[Buy Now](https://www.adafruit.com/product/832)
[Related Guides to the Product](https://learn.adafruit.com/products/832/guides)
### EL Wire Sound Activated Pocket Inverter - 5V USB Power
[EL Wire Sound Activated Pocket Inverter - 5V USB Power](https://www.adafruit.com/product/831)
A small, portable inverter for EL wire with an audio input! This inverter has a little microphone and will light the connected EL according to the surrounding audio volume. Makes for an easy reactive project.
This inverter requires 5V input (it works great with any USB power pack) and it...
No Longer Stocked
[Buy Now](https://www.adafruit.com/product/831)
[Related Guides to the Product](https://learn.adafruit.com/products/831/guides)
### EL wire 4xAAA pocket inverter
[EL wire 4xAAA pocket inverter](https://www.adafruit.com/product/564)
A small, portable inverter for EL wire. Powers off of 4 AAA batteries (not included!), it can drive 3-4 meters (10 to 13 feet) of our high-brightness EL wire OR 1 meter (3 feet) of EL tape OR a 10cmx10cm piece of EL panel for about 7 hours.
There is a switch for selecting...
In Stock
[Buy Now](https://www.adafruit.com/product/564)
[Related Guides to the Product](https://learn.adafruit.com/products/564/guides)
### 12V EL wire/tape inverter
[12V EL wire/tape inverter](https://www.adafruit.com/product/448)
This is an inverter for EL wire and tape, similar to our pocket inverters, except it is a brick that takes 12V input instead of 2 AA batteries. This means its good for 'fixed' installations since you can just plug it into a 12V wall adapter. It's also good for portable projects...
In Stock
[Buy Now](https://www.adafruit.com/product/448)
[Related Guides to the Product](https://learn.adafruit.com/products/448/guides)
### EL wire 2xAA pocket inverter
[EL wire 2xAA pocket inverter](https://www.adafruit.com/product/317)
A small, portable inverter for EL wire. Powers off of 2 AA batteries (not included!), it can drive 1 to 8 feet (about 2.5m) of our high-brightness EL wire for 10 hours. There is a button for selecting steady/blink/off modes. There's a removable clip on the back. Comes with a 2.5mm pitch...
Out of Stock
[Buy Now](https://www.adafruit.com/product/317)
[Related Guides to the Product](https://learn.adafruit.com/products/317/guides)
### Heat Shrink Pack
[Heat Shrink Pack](https://www.adafruit.com/product/344)
Heat shrink is the duct tape of electronics, it keeps your stuff all safe and kept together. Especially when wiring and soldering, use heat shrink to add mechanical strength to cables. We use this stuff all the time and having a zip-lock bag of all the possible sizes is super...
In Stock
[Buy Now](https://www.adafruit.com/product/344)
[Related Guides to the Product](https://learn.adafruit.com/products/344/guides)
## Related Guides
- [EL Wire Stocking](https://learn.adafruit.com/el-wire-stocking.md)
- [Light Up your Costume with Noods](https://learn.adafruit.com/light-up-your-costume-with-noods.md)
- [EL Wire Sign](https://learn.adafruit.com/el-wire-sign.md)
- [Glowing Star Chuck Taylor Sneakers](https://learn.adafruit.com/glowing-star-chucks.md)
- [TRON Hoodie](https://learn.adafruit.com/tron-hoodie.md)
- [TRON Bag](https://learn.adafruit.com/tron-bag.md)
- [EL Bowtie](https://learn.adafruit.com/el-bowtie.md)
- [Electron Bow](https://learn.adafruit.com/electron-bow.md)
- [EL Workshop](https://learn.adafruit.com/el-workshop.md)
- [EL Wire Animal Masks](https://learn.adafruit.com/el-wire-animal-masks.md)
- [EL Stick Figure](https://learn.adafruit.com/el-stick-figure.md)
- [Glowing Bean Bags with EL Wire](https://learn.adafruit.com/glowing-bean-bags-with-el-wire.md)
---
# Source: https://learn.adafruit.com/el-workshop/buy-el.md
# Source: https://learn.adafruit.com/tron-bag/buy-el.md
# TRON Bag
## Buy EL!
- [Previous Page](https://learn.adafruit.com/tron-bag/finishing.md)
## Featured Products
### Heat Shrink Pack
[Heat Shrink Pack](https://www.adafruit.com/product/344)
Heat shrink is the duct tape of electronics, it keeps your stuff all safe and kept together. Especially when wiring and soldering, use heat shrink to add mechanical strength to cables. We use this stuff all the time and having a zip-lock bag of all the possible sizes is super...
In Stock
[Buy Now](https://www.adafruit.com/product/344)
[Related Guides to the Product](https://learn.adafruit.com/products/344/guides)
### In-line wire 1-to-4 splitter
[In-line wire 1-to-4 splitter](https://www.adafruit.com/product/402)
If you want to connect multiple EL wires/strips/panels up to one inverter, these splitters are quite useful. There is one male connector (goes to the inverter) and then 4 female connectors (which will connect to each wire/strip/panel. You can even cascade them! Only thing to watch for is make...
In Stock
[Buy Now](https://www.adafruit.com/product/402)
[Related Guides to the Product](https://learn.adafruit.com/products/402/guides)
### EL wire starter pack - Blue 2.5 meter (8.2 ft)
[EL wire starter pack - Blue 2.5 meter (8.2 ft)](https://www.adafruit.com/product/583)
A little bundle to get you started! This project pack contains:
- [2.5 meters (over 8 ft) of high-brightness, long-life EL wire in Blue](http://www.adafruit.com/products/408). 2.5 meters is the maximum amount for the pocket driver - it is cut and soldered so it's ready...
Out of Stock
[Buy Now](https://www.adafruit.com/product/583)
[Related Guides to the Product](https://learn.adafruit.com/products/583/guides)
## Related Guides
- [Battery Powering Wearable Electronics](https://learn.adafruit.com/battery-powering-wearable-electronics.md)
- [3D Printed Daft Punk Helmet with Bluetooth ](https://learn.adafruit.com/3d-printed-daft-punk-helmet-with-bluetooth.md)
- [3D Printed Wearable Video Goggles](https://learn.adafruit.com/3d-printed-wearable-video-goggles.md)
- [Decorative Pointy Elf Ear Bud Holders](https://learn.adafruit.com/elf-ears.md)
- [LED Friendship Bracelet](https://learn.adafruit.com/nautical-led-bracelet.md)
- [Make a Zelda Master Sword with the RP2040 Prop-Maker Feather](https://learn.adafruit.com/master-sword-rp2040.md)
- [USB Locket](https://learn.adafruit.com/usb-locket.md)
- [Light Up your Costume with Noods](https://learn.adafruit.com/light-up-your-costume-with-noods.md)
- [Pac Man Pixel Suspenders](https://learn.adafruit.com/pac-man-pixel-suspenders.md)
- [3D Printed LED Buckle](https://learn.adafruit.com/3d-printed-led-buckle.md)
- [Adafruit Flora Bluefruit LE](https://learn.adafruit.com/adafruit-flora-bluefruit-le.md)
- [Textile Potentiometer Hoodie](https://learn.adafruit.com/textile-potentiometer-hoodie.md)
- [Cynaps Bone Conduction Headset Teardown](https://learn.adafruit.com/cynaps-bone-conduction-headset-teardown.md)
- [Glowing Bean Bags with EL Wire](https://learn.adafruit.com/glowing-bean-bags-with-el-wire.md)
- [3D Printed Gunblade](https://learn.adafruit.com/3d-printed-gunblade.md)
---
# Source: https://learn.adafruit.com/cross-stitch/buy-ohm-sweet-ohm-kit.md
# Cross Stitch
## Buy Ohm Sweet Ohm Kit
- [Previous Page](https://learn.adafruit.com/cross-stitch/instructions.md)
## Featured Products
### Adafruit Ohm Sweet Ohm Cross-Stitch Kit
[Adafruit Ohm Sweet Ohm Cross-Stitch Kit](https://www.adafruit.com/product/855)
A cross-stitch kit that's also a resistor chart! Not only is this kit fun to make (and good for beginner stitchers), when it's all done it functions as a handy resistor reference chart. This Adafruit original kit comes complete with everything you need to get started:
No Longer Stocked
[Buy Now](https://www.adafruit.com/product/855)
[Related Guides to the Product](https://learn.adafruit.com/products/855/guides)
## Related Guides
---
# Source: https://learn.adafruit.com/smt-manufacturing/buy-smt-tools.md
# SMT Manufacturing
## Buy SMT Tools
- [Previous Page](https://learn.adafruit.com/smt-manufacturing/microscope-inspection.md)
## Featured Products
### Fine tip curved tweezers - ESD safe
[Fine tip curved tweezers - ESD safe](https://www.adafruit.com/product/422)
When soldering small surface-mount (SMD/SMT) components, one thing you'll need is a good pair of tweezers. These are a great pair of every-day tweezers. They're anti-static, anti-magnetic and made of hard stainless steel. The tips are fine and pointy to pick up any size component. This...
In Stock
[Buy Now](https://www.adafruit.com/product/422)
[Related Guides to the Product](https://learn.adafruit.com/products/422/guides)
### Fine tip straight tweezers - ESD safe
[Fine tip straight tweezers - ESD safe](https://www.adafruit.com/product/421)
When soldering small surface-mount (SMD/SMT) components, one thing you'll need is a good pair of tweezers. These tweezers are a great pair of every-day tweezers. They're anti-static, anti-magnetic and made of hard stainless steel. The tips are fine and pointy to pick up any size...
In Stock
[Buy Now](https://www.adafruit.com/product/421)
[Related Guides to the Product](https://learn.adafruit.com/products/421/guides)
### USB Microscope - 5MP interpolated 220x magnification / 8 LEDs
[USB Microscope - 5MP interpolated 220x magnification / 8 LEDs](https://www.adafruit.com/product/636)
As electronics get smaller and smaller, you'll need a hand examining PCBs and this little USB microscope is the perfect tool. Its smaller and lighter than a large optical microscope but packs quite a bit of power in its little body. There's a 2 megapixel sensor inside and an optical...
Out of Stock
[Buy Now](https://www.adafruit.com/product/636)
[Related Guides to the Product](https://learn.adafruit.com/products/636/guides)
## Related Guides
- [Reindeer Solder Kit by Phyx](https://learn.adafruit.com/reindeer-solder-kit-by-phyx.md)
- [3D-Printed Solder Paste Dispenser Hand Switch ](https://learn.adafruit.com/3d-printed-solder-paste-dispenser-hand-switch.md)
- [USB Rechargeable Mini Solder Fume Extractor](https://learn.adafruit.com/usb-rechargeable-mini-solder-fume-extractor.md)
- [How to Sign Windows Drivers & Executables](https://learn.adafruit.com/how-to-sign-windows-drivers-installer.md)
- [Desktop Fume Extractor](https://learn.adafruit.com/desktop-fume-extractor.md)
- [Chinese Dragon Puppet with Motion-Reactive Flame Effect](https://learn.adafruit.com/chinese-dragon-puppet-with-motion-reactive-flame-effect.md)
- [16-Step Drum Sequencer](https://learn.adafruit.com/16-step-drum-sequencer.md)
- [Color Sensing Music Player](https://learn.adafruit.com/color-sensing-music-player.md)
- [Light-Up Costumes in Harsh Environments](https://learn.adafruit.com/light-up-costumes-in-harsh-environments.md)
- [Garden Path Lights with WLED and a Sunset Timer](https://learn.adafruit.com/garden-path-lights-with-sunset-timer.md)
- [CNC Rotary Macropad](https://learn.adafruit.com/cnc-rotary-macropad.md)
- [Blinka Says Tabletop Arcade Game](https://learn.adafruit.com/blinka-says-tabletop-arcade-game.md)
- [IoT Moon Phase Guide](https://learn.adafruit.com/moon-phase.md)
- [KTOWN's Ultimate Creating Parts in Eagle Tutorial](https://learn.adafruit.com/ktowns-ultimate-creating-parts-in-eagle-tutorial.md)
- [Shop Tips & Tricks](https://learn.adafruit.com/shop-tips-and-tricks.md)
---
# Source: https://learn.adafruit.com/solderless-rgb-led-clips/buy-solderless-clips.md
# Solderless RGB LED Clips
## Buy Solderless Clips
- [Previous Page](https://learn.adafruit.com/solderless-rgb-led-clips/overview.md)
## Featured Products
### RGB LED Weatherproof flexi-strip 60 LED/m- 5m
[RGB LED Weatherproof flexi-strip 60 LED/m- 5m](https://www.adafruit.com/product/346)
These LED strips are fun and glowy. There are **60** RGB LEDs per meter - twice as many as our other strip, and you can control the entire strip at once with any microcontroller and three transistors. The way they are wired, you will need a 9-12VDC power supply and then ground the R/G/B...
In Stock
[Buy Now](https://www.adafruit.com/product/346)
[Related Guides to the Product](https://learn.adafruit.com/products/346/guides)
### RGB LED weatherproof flexi-strip - 30 LED/m - 5m
[RGB LED weatherproof flexi-strip - 30 LED/m - 5m](https://www.adafruit.com/product/285)
These LED strips are fun and glowy. There are **30** RGB LEDs per meter, and you can control the entire strip at once with any microcontroller and three transistors. The way they are wired, you will need a 9-12VDC power supply and then ground the R/G/B pins to turn on the three colors. Use...
In Stock
[Buy Now](https://www.adafruit.com/product/285)
[Related Guides to the Product](https://learn.adafruit.com/products/285/guides)
## Related Guides
- [RGB LED Strips](https://learn.adafruit.com/rgb-led-strips.md)
- [Color Mixing QT Py Cuff Bracelet](https://learn.adafruit.com/color-mixing-qt-py-cuff.md)
- [Galaxy Pendant](https://learn.adafruit.com/life-proof-led-necklace.md)
- [Halo Energy Sword](https://learn.adafruit.com/halo-energy-sword.md)
- [LIGHTSHIP: LED Animation over WiFi](https://learn.adafruit.com/lightship-led-animation-over-wifi.md)
- [Halloween Neon LED Signs](https://learn.adafruit.com/halloween-neon-led-signs.md)
- [Alohamora Bottle](https://learn.adafruit.com/alohamora-bottle.md)
- [LED Sculpture Lamp](https://learn.adafruit.com/led-sculpture-lamp.md)
- [WiFi Jellyfish Lantern with WLED](https://learn.adafruit.com/wifi-jellyfish-lantern-with-wled.md)
- [Stick Person Costume with Neon LED Strips](https://learn.adafruit.com/led-neon-stick-person-costume.md)
- [Edge-Lit Tavern Sign with WLED - Control with WiFi or IR Remote](https://learn.adafruit.com/edge-lit-tavern-sign-with-wled-control-with-wifi-or-ir-remote.md)
- [No-Solder LED Disco Tie with Bluetooth](https://learn.adafruit.com/no-solder-circuit-playground-bluetooth-disco-tie.md)
- [Gravity Falls Memory Gun](https://learn.adafruit.com/gravity-falls-memory-gun.md)
- [Citi Bike Helmet](https://learn.adafruit.com/citi-bike-helmet.md)
- [NeoPixel Mini VU Meter](https://learn.adafruit.com/neopixel-mini-vu-meter.md)
---
# Source: https://learn.adafruit.com/adafruits-raspberry-pi-lesson-3-network-setup/buying-a-usb-wifi-adapter.md
# Adafruit's Raspberry Pi Lesson 3. Network Setup
## Buying a USB WiFi Adapter
# Built-In WiFi
Beginning in 2016 Raspberry Pi v3 Model B starting shipping with built-in WiFi. Today the A+, B, B+ and Zero W all include built-in WiFi. Earlier versions will require an external adapter to connect over WiFi.
# External Adapters
Look for a WiFi adapter that supports the RTL8192cu chipset the latest Raspbian distributions both have support for this built-in. We have found its much faster than the Ralink chipsets
If you already have a WiFi adapter, just give it a go, even a lot of the very low cost budget adapters will work without any trouble.

WiFi does however use quite a lot of power, so check the power rating of your power supply. Some WiFi adapters require an external power supply to work well. [We suggest the 5V 2A power adapter in our shop if this is the case](https://www.adafruit.com/product/1994 "https://www.adafruit.com/product/1994"). All of the WiFi adapters we have in the Adafruit shop will work just fine this way.
If you have a WiFi adapter plugged taking up a port and drawing power [you may also need a powered USB hub.](http://adafruit.com/products/961 "Link: http://adafruit.com/products/961")
- [Previous Page](https://learn.adafruit.com/adafruits-raspberry-pi-lesson-3-network-setup/using-a-wired-network.md)
- [Next Page](https://learn.adafruit.com/adafruits-raspberry-pi-lesson-3-network-setup/setting-up-wifi-with-raspi-config-easy.md)
## Featured Products
### Raspberry Pi 3 - Model B+ - 1.4GHz Cortex-A53 with 1GB RAM
[Raspberry Pi 3 - Model B+ - 1.4GHz Cortex-A53 with 1GB RAM](https://www.adafruit.com/product/3775)
The Raspberry Pi 3 Model B is the most popular Raspberry Pi computer made, and the Pi Foundation knows you can always make a good thing _better_! And what could make the Pi 3 better? How about a _faster_ processor, 5 GHz WiFi, and updated Ethernet chip with PoE capability?...
In Stock
[Buy Now](https://www.adafruit.com/product/3775)
[Related Guides to the Product](https://learn.adafruit.com/products/3775/guides)
### Budget Pack for Raspberry Pi 1 Model B (Doesn't include RasPi)
[Budget Pack for Raspberry Pi 1 Model B (Doesn't include RasPi)](https://www.adafruit.com/product/965)
An optimized collection of parts and pieces to experiment with Raspberry Pi at home, school or work. Great for students and those that want to get their feet wet, no soldering required! **THIS PACK DOES NOT INCLUDE A RASPBERRY PI 1 MODEL B and is NOT compatible with Model B+ or Raspberry Pi...**
No Longer Stocked
[Buy Now](https://www.adafruit.com/product/965)
[Related Guides to the Product](https://learn.adafruit.com/products/965/guides)
### USB WiFi (802.11b/g/n) Module: For Raspberry Pi and more
[USB WiFi (802.11b/g/n) Module: For Raspberry Pi and more](https://www.adafruit.com/product/1012)
Make your Internet of Things device cable-free by adding WiFi. Take advantage of the Raspberry Pi and Beagle Bone's USB port to add a low cost, but high-reliability wireless link. We tried half a dozen modules to find one that works well with the Pi and Bone without the need of recompiling...
In Stock
[Buy Now](https://www.adafruit.com/product/1012)
[Related Guides to the Product](https://learn.adafruit.com/products/1012/guides)
### USB WiFi (802.11b/g/n) Module with Antenna for Raspberry Pi
[USB WiFi (802.11b/g/n) Module with Antenna for Raspberry Pi](https://www.adafruit.com/product/1030)
Discontinued - [**you can grab** USB WiFi (802.11b/g/n) Module: For Raspberry Pi and more **instead! **](https://www.adafruit.com/product/1012)
Make your Internet of Things device cable-free by adding super WiFi. Take advantage of the Raspberry Pi and Beagle...
No Longer Stocked
[Buy Now](https://www.adafruit.com/product/1030)
[Related Guides to the Product](https://learn.adafruit.com/products/1030/guides)
### Miniature WiFi (802.11b/g/n) Module: For Raspberry Pi and more
[Miniature WiFi (802.11b/g/n) Module: For Raspberry Pi and more](https://www.adafruit.com/product/814)
Make your Internet of Things device cable-free by adding WiFi. Take advantage of the Raspberry Pi and Beagle Bone's USB port to add a low cost, but high-reliability wireless link. We tried half a dozen modules to find one that works well with the Pi and Bone without the need of recompiling...
No Longer Stocked
[Buy Now](https://www.adafruit.com/product/814)
[Related Guides to the Product](https://learn.adafruit.com/products/814/guides)
### Programming the Raspberry Pi: Getting Started with Python
[Programming the Raspberry Pi: Getting Started with Python](https://www.adafruit.com/product/1089)
**Program your own Raspberry Pi projects!**
An updated guide to programming your own Raspberry Pi projects. Learn to create inventive programs and fun games on your powerful Raspberry Pi--with no programming experience required. **This practical book has been revised...**
In Stock
[Buy Now](https://www.adafruit.com/product/1089)
[Related Guides to the Product](https://learn.adafruit.com/products/1089/guides)
### Ethernet Cable - 3 ft long
[Ethernet Cable - 3 ft long](https://www.adafruit.com/product/995)
We have so many Internet-connected goodies in the shop, we figured it's time to carry a cable so you can easily connect them up! This cable is 3 feet long, comes in Adafruit black and has all 8 wires installed. Perfect for use with the
No Longer Stocked
[Buy Now](https://www.adafruit.com/product/995)
[Related Guides to the Product](https://learn.adafruit.com/products/995/guides)
### USB 2.0 Powered Hub - 7 Ports with 5V 2A Power Supply
[USB 2.0 Powered Hub - 7 Ports with 5V 2A Power Supply](https://www.adafruit.com/product/961)
Add lots more USB capability to your Raspberry Pi or computer using this powered USB 2.0 hub. It adds a full **seven powered ports** , all at USB 2.0 speeds so you can use video cameras and other high speed devices (cheaper hubs are v1.1 and not as fast!)
The extra sauce...
No Longer Stocked
[Buy Now](https://www.adafruit.com/product/961)
[Related Guides to the Product](https://learn.adafruit.com/products/961/guides)
## Related Guides
- [Introducing the Raspberry Pi Zero](https://learn.adafruit.com/introducing-the-raspberry-pi-zero.md)
- [Cloud Cam: Internet-Connected Security Camera](https://learn.adafruit.com/cloud-cam-connected-raspberry-pi-security-camera.md)
- [Resizing the Raspberry Pi Boot Partition](https://learn.adafruit.com/resizing-raspberry-pi-boot-partition.md)
- [Raspberry Pi as an Ad Blocking Access Point](https://learn.adafruit.com/raspberry-pi-as-an-ad-blocking-access-point.md)
- [Web Enabled PIXEL on Raspberry Pi](https://learn.adafruit.com/web-enabled-pixel-on-raspberry-pi.md)
- [Adafruit Raspberry Pi Educational Linux Distro](https://learn.adafruit.com/adafruit-raspberry-pi-educational-linux-distro.md)
- [Arm-based IoT Kit for Cloud IoT Core - Getting Started](https://learn.adafruit.com/raspberry-pi-3-and-sensor-kit-for-google-cloud-iot-core.md)
- [Adafruit's Raspberry Pi Lesson 10. Stepper Motors](https://learn.adafruit.com/adafruits-raspberry-pi-lesson-10-stepper-motors.md)
- [A Sillier Mousetrap: Logging Mouse Data to Adafruit IO with the Raspberry Pi](https://learn.adafruit.com/a-sillier-mousetrap-logging-mouse-data-to-adafruit-io-with-the-raspberry-pi.md)
- [Cupcade: the Raspberry Pi Micro Arcade Cabinet](https://learn.adafruit.com/cupcade-raspberry-pi-micro-mini-arcade-game-cabinet.md)
- [Adafruit 128x64 OLED Bonnet for Raspberry Pi](https://learn.adafruit.com/adafruit-128x64-oled-bonnet-for-raspberry-pi.md)
- [Controlling Motors using the Raspberry Pi and RasPiRobot Board V2](https://learn.adafruit.com/controlling-motors-using-the-raspberry-pi-and-raspirobot-board-v2.md)
- [Adafruit PiTFT 3.5" Touch Screen for Raspberry Pi](https://learn.adafruit.com/adafruit-pitft-3-dot-5-touch-screen-for-raspberry-pi.md)
- [Processing on the Raspberry Pi & PiTFT](https://learn.adafruit.com/processing-on-the-raspberry-pi-and-pitft.md)
- [Large Pi-based Thermometer and Clock](https://learn.adafruit.com/large-pi-based-thermometer-and-clock.md)
---
# Source: https://learn.adafruit.com/barcode-scanner/cable-connection.md
# Barcode Scanner
## Cable Connection
Because these scanners are used for so many industries: checkout counters, manufacturing, inventory, shipping, etc. they are designed to be very configurable and flexible. The first thing you will have to pick out is the cable. **The raw scanner doesnt come with a cable** instead there is a 'ethernet' port on the back (its not really ethernet, it just looks like it) where you can have up to 10 wires come out. These wires carry the different interface wires.
The following interefaces are supported:
- **USB** (+5V, ground, D+ and D-)
- **PS/2 keyboard 'wedge' ** (goes between keyboard and computer, inserts keypresses)
- **RS-232** (+-10V serial)
- **IBM 46xx ** (for point of sale computers, rare for other uses)
For our use, we like USB the most because its the most flexible. However, you may want to use these for an embedded project - say where it connects directly to an AVR/PIC/ARM or whatever, you'll probably want to go with the RS232 interface for the ultra simplicity or PS/2 if you don't mind a little extra parsing
You'll need two things to change the interface, one is the proper cable (you can make your own but its a real pain, you'll probably want to just buy it) and a power supply if necessary. RS-232 requires a power supply, but the others do not.
This is the USB cable, for example:

- [Previous Page](https://learn.adafruit.com/barcode-scanner/overview.md)
- [Next Page](https://learn.adafruit.com/barcode-scanner/configure.md)
## Related Guides
- [Digital Shipping Scales](https://learn.adafruit.com/digital-shipping-scales.md)
---
# Source: https://learn.adafruit.com/electroknit/cable.md
# Electro-knit
## Cable
**Make your own cable**
The kh930e is designed to work with a Tandy PDD1 floppy drive. We don't need it! Make your own cable to communicate between your computer and the machine. You will need:
- [FTDI cable](http://www.adafruit.com/index.php?main_page=product_info&cPath=18&products_id=70&zenid=08edecd591934eebcc4993c01b0259d6) - you should be able to use a '3.3v' or '5v' cable.
- 2x4 connector part number [WM8036-ND on Digikey](http://search.digikey.com/scripts/DkSearch/dksus.dll?vendor=0&keywords=WM8036-ND)
You will need to make some minor mods to get the cable talking to your knitting machine. Follow the tutorial to get your knitting cable going.
**Change 'polarity' of the FTDI cable**
FTDI cables have standard 'inverted' TTL (zero is 3-5V and one is 0v) but the KH930E requires the opposite. Luckily its very easy to fix this by reprogramming the software.
You will need a copy of [FTDI MProg](http://www.ftdichip.com/Resources/Utilities.htm "Link: http://www.ftdichip.com/Resources/Utilities.htm") (windows only) and your FTDI cable. Plug in the FTDI cable into your windows computer and [install the driver that matches your computer best](http://www.ftdichip.com/Drivers/VCP.htm "Link: http://www.ftdichip.com/Drivers/VCP.htm")
For Windows users, [http://www.ftdichip.com/Drivers/CDM/CDM%202.08.28%20WHQL%20Certified.zip](http://www.ftdichip.com/Drivers/CDM/CDM%202.08.28%20WHQL%20Certified.zip "Link: http://www.ftdichip.com/Drivers/CDM/CDM%202.08.28%20WHQL%20Certified.zip") is the best choice

[Please read our detailed tutorial on installing the driver here](http://learn.adafruit.com/ftdi-friend) then come back when the driver is installed
Now download [FTDI MProg](http://www.ftdichip.com/Resources/Utilities.htm) (Search for MProg in the page, v3.5 was the latest version last we checked) and run the program

Select **Scan…** from the menu

The message window should say it found a cable.

Now select **Read and Parse** to read in the cable programming.


Click the buttons that say to **Invert TX and RX**.

Here is the wierd thing, you have to **Save as…** the settings so just save it anywhere.

Now you can click the **Program** button (lightening bolt).

The message window will say it programmed.

You're done! Quit Mprog.
**Rewire the connector**
Next we need to rewire the FTDI cable to match the pinout of the knitter. The cable comes with a 1x5 connector, but we need a 2x4 connector. You can also follow [Davi Post's excellent rendition of this cable-rewiring](http://daviworks.com/knitting/cable_tutorial.html "Link: http://daviworks.com/knitting/cable\_tutorial.html") section.

Use tweezers to lift up the black connector tabs.

Then gently pull out the wire.


Repeat for all the wires.
You'll want to cut away a few inches of the black cable sheathing so you have plenty of 'space' to work with the wires. Cut **down** the sheathing without cutting the colored wires, use a fine scissors. Cut 1 or 2" away.
Now grab the 2x8 cable connector you bought from Digikey or whatever. You'll need to insert the wires so that they snap into the connector to match the following diagram. **Do not insert the red or green wires yet!!!** Insert just the orange and yellow wires. Look at the photos below to make sure you have the wires in the right order, they should just snap in. If they don't snap make sure the little lock-tab is facing 'out'
This diagram assumes you're looking at the connector from the end that goes into the machine. Again, check with the photos many times to be sure you get this right!


Pin 1 is black, pin 2 will be red, pin 3 will be green, pin 6 is orange, and pin 7 is yellow.
Next is the one tough part, you'll want to cut the green wire as close as you can to the black sheathing. Use the piece of green wire to branch off from the red wire by stripping a small opening in the red sheathing and soldering the green wire on. This produces one wire with two header inserts - red and green. See the following image:

Wrap it up in electrical tape or heatshrink:

You're done!

**TODO** : We're pretty sure its possible to make this part less difficult by using the RTS (green) wire without splicing it to the 5V (red) wire and using setRTS() in the python code but we already mangled the cable before trying this. If you try and succeed, please post up in the [forums](http://adafruit.com/forums/)!
- [Previous Page](https://learn.adafruit.com/electroknit/overview.md)
- [Next Page](https://learn.adafruit.com/electroknit/software.md)
## Featured Products
### FTDI Serial TTL-232 USB Cable
[FTDI Serial TTL-232 USB Cable](https://www.adafruit.com/product/70)
Just about all electronics use TTL serial for debugging, bootloading, programming, serial output, etc. But it's rare for a computer to have a serial port anymore. This is a USB to TTL serial cable, with a FTDI FT232RL usb/serial chip embedded in the head. It has a 6-pin socket at the end...
In Stock
[Buy Now](https://www.adafruit.com/product/70)
[Related Guides to the Product](https://learn.adafruit.com/products/70/guides)
## Related Guides
- [Open Source Protective Face Shield Designs](https://learn.adafruit.com/open-source-face-shield-designs.md)
- [Pico Bluetooth Keyboard Bridge](https://learn.adafruit.com/pico-bluetooth-keyboard-bridge.md)
- [Dimmable Li-Ion Halogen Bike Light](https://learn.adafruit.com/dimmable-li-ion-halogen-bike-light.md)
- [Installing IronOS on an MHP30 Mini Hot Plate (DEPRECATED)](https://learn.adafruit.com/installing-ironos-on-a-mhp30-mini-hotplate.md)
- [Getting Started with Braille Output for CircuitPython REPL](https://learn.adafruit.com/getting-started-braille-output-circuitpython-repl.md)
- [Meowsic Cat Piano Line Out](https://learn.adafruit.com/meowsic-line-out.md)
- [Instagram Photo Frame](https://learn.adafruit.com/instagram-photo-frame.md)
- [ESP32 PlayStation Controller](https://learn.adafruit.com/esp32-playstation-controller.md)
- [NeoPIO: Drive lots of LEDs with Raspberry Pi Pico](https://learn.adafruit.com/neopio-drive-lots-of-leds-with-raspberry-pi-pico.md)
- [Ikea Vindriktning Hack with QT Py ESP32-S3 and Adafruit IO](https://learn.adafruit.com/ikea-vindriktning-hack-with-qt-py-esp32-s3-and-adafruit-io.md)
- [See N Say Brain Transplant](https://learn.adafruit.com/see-n-say-brain-transplant.md)
- [DIY Welded Bike Stand](https://learn.adafruit.com/diy-welded-bike-stand.md)
- [Setting up an Open Speech Recording Website](https://learn.adafruit.com/setting-up-an-open-speech-recording-website.md)
- [Authoring Playground Books with Bluefruit for iOS ](https://learn.adafruit.com/create-a-swift-playgroundbook-with-bluetooth-le.md)
- [Adafruit Feather RP2040 with USB Type A Host](https://learn.adafruit.com/adafruit-feather-rp2040-with-usb-type-a-host.md)
---
# Source: https://learn.adafruit.com/adafruit-analog-accelerometer-breakouts/calibration-and-programming.md
# Adafruit Analog Accelerometer Breakouts
## Calibration and Programming
# Static Calibration:
As with all sensors, there is some variation in output between samples of these accelerometers. For non-critical applications such as game controllers, or simple motion or tilt sensors, these variations are not important. But for applications requiring precise measurements, calibration to a reliable reference is a good idea.

## Gravity as a Calibration Reference
Acceleration is measured in units of gravitational force or "G", where 1G represents the gravitational pull at the surface of the earth. [Despite what you may have heard](http://www.youtube.com/watch?v=2ORJ7B1bqEY), gravity is a pretty stable force and makes a convenient and reliable calibration reference if you happen to be a surface-dwelling earthling. Danger:
## Calibration Method:
To calibrate the sensor to the gravitational reference, you need to determine the sensor output for each axis when it is precisely aligned with the axis of gravitational pull. Laboratory quality calibration uses precision positioning jigs. The method described here is simple and gives surprisingly good results. 
**Mount the Sensor:**
First mount the sensor to a [small breadboard](http://www.adafruit.com/products/65) like the one on the left. The back and squared edges of the breadboard make a reasonably accurate set of reference planes to orient the sensor for calibration.
**Wire the Sensor:**
Wire the sensor as shown below. This is equivalent to the circuit shown on the previous page, with the addition of a switch.


## Run the Calibration Sketch
- Load the sketch below onto the Arduino and run it.
- Open the Serial Monitor.
- Lay the breadboard with the sensor on a flat surface
- Press and hold the button until you see "Calibrate" in the serial monitor.
- This will calibrate the minimum value for the z axis.
- Stand the breadboard on the front edge and press the button again. to calibrate +y
- Repeat this for the three other edges to calibrate +x, -y and -x.
- Turn the breadboard upside down and press the button again to calibrate +z. (Hint, the underside of a table works well to steady it.)
## Calibration Sketch Output:
Once calibrated, the output will show the calibrated raw range for each axis, followed by the measured "G" forces. The raw ranges can be used as constants in sketches.
Raw Ranges: X: 408-616, Y: 398-610, Z: 422-625
511, 511, 625 :: -0.01G, 0.07G, 1.00G
Raw Ranges: X: 408-616, Y: 398-610, Z: 422-625
511, 511, 625 :: -0.01G, 0.07G, 1.00G
Raw Ranges: X: 408-616, Y: 398-610, Z: 422-625
511, 511, 625 :: -0.01G, 0.07G, 1.00G
Raw Ranges: X: 408-616, Y: 398-610, Z: 422-625
511, 511, 625 :: -0.01G, 0.07G, 1.00G
Raw Ranges: X: 408-616, Y: 398-610, Z: 422-625
# Calibration Sketch
```
const int xInput = A0;
const int yInput = A1;
const int zInput = A2;
const int buttonPin = 2;
// Raw Ranges:
// initialize to mid-range and allow calibration to
// find the minimum and maximum for each axis
int xRawMin = 512;
int xRawMax = 512;
int yRawMin = 512;
int yRawMax = 512;
int zRawMin = 512;
int zRawMax = 512;
// Take multiple samples to reduce noise
const int sampleSize = 10;
void setup()
{
analogReference(EXTERNAL);
Serial.begin(9600);
}
void loop()
{
int xRaw = ReadAxis(xInput);
int yRaw = ReadAxis(yInput);
int zRaw = ReadAxis(zInput);
if (digitalRead(buttonPin) == LOW)
{
AutoCalibrate(xRaw, yRaw, zRaw);
}
else
{
Serial.print("Raw Ranges: X: ");
Serial.print(xRawMin);
Serial.print("-");
Serial.print(xRawMax);
Serial.print(", Y: ");
Serial.print(yRawMin);
Serial.print("-");
Serial.print(yRawMax);
Serial.print(", Z: ");
Serial.print(zRawMin);
Serial.print("-");
Serial.print(zRawMax);
Serial.println();
Serial.print(xRaw);
Serial.print(", ");
Serial.print(yRaw);
Serial.print(", ");
Serial.print(zRaw);
// Convert raw values to 'milli-Gs"
long xScaled = map(xRaw, xRawMin, xRawMax, -1000, 1000);
long yScaled = map(yRaw, yRawMin, yRawMax, -1000, 1000);
long zScaled = map(zRaw, zRawMin, zRawMax, -1000, 1000);
// re-scale to fractional Gs
float xAccel = xScaled / 1000.0;
float yAccel = yScaled / 1000.0;
float zAccel = zScaled / 1000.0;
Serial.print(" :: ");
Serial.print(xAccel);
Serial.print("G, ");
Serial.print(yAccel);
Serial.print("G, ");
Serial.print(zAccel);
Serial.println("G");
delay(500);
}
}
//
// Read "sampleSize" samples and report the average
//
int ReadAxis(int axisPin)
{
long reading = 0;
analogRead(axisPin);
delay(1);
for (int i = 0; i < sampleSize; i++)
{
reading += analogRead(axisPin);
}
return reading/sampleSize;
}
//
// Find the extreme raw readings from each axis
//
void AutoCalibrate(int xRaw, int yRaw, int zRaw)
{
Serial.println("Calibrate");
if (xRaw < xRawMin)
{
xRawMin = xRaw;
}
if (xRaw > xRawMax)
{
xRawMax = xRaw;
}
if (yRaw < yRawMin)
{
yRawMin = yRaw;
}
if (yRaw > yRawMax)
{
yRawMax = yRaw;
}
if (zRaw < zRawMin)
{
zRawMin = zRaw;
}
if (zRaw > zRawMax)
{
zRawMax = zRaw;
}
}
```
- [Previous Page](https://learn.adafruit.com/adafruit-analog-accelerometer-breakouts/arduino-wiring.md)
- [Next Page](https://learn.adafruit.com/adafruit-analog-accelerometer-breakouts/circuitpython-code.md)
## Featured Products
### ADXL335 - 5V ready triple-axis accelerometer (+-3g analog out)
[ADXL335 - 5V ready triple-axis accelerometer (+-3g analog out)](https://www.adafruit.com/product/163)
We've updated our favorite triple-axis accelerometer to now have an on-board 3.3V regulator - making it a perfect choice for interfacing with a 5V microcontroller such as the Arduino. This breakout comes with 3 analog outputs for X, Y and Z axis measurements on a 0.75"x0.75"...
In Stock
[Buy Now](https://www.adafruit.com/product/163)
[Related Guides to the Product](https://learn.adafruit.com/products/163/guides)
### ADXL326 - 5V ready triple-axis accelerometer (+-16g analog out)
[ADXL326 - 5V ready triple-axis accelerometer (+-16g analog out)](https://www.adafruit.com/product/1018)
We've now got a wider range version of favorite triple-axis accelerometer - it even has an on-board 3.3V regulator - making it a perfect choice for interfacing with a 5V microcontroller such as the Arduino. This breakout comes with 3 analog outputs for X, Y and Z axis measurements on a...
In Stock
[Buy Now](https://www.adafruit.com/product/1018)
[Related Guides to the Product](https://learn.adafruit.com/products/1018/guides)
### Adafruit METRO 328 Fully Assembled - Arduino IDE compatible
[Adafruit METRO 328 Fully Assembled - Arduino IDE compatible](https://www.adafruit.com/product/50)
We sure love the ATmega328 here at Adafruit, and we use them _a lot_ for our own projects. The processor has plenty of GPIO, Analog inputs, hardware UART SPI and I2C, timers and PWM galore - just enough for most simple projects. When we need to go small, we use a
Out of Stock
[Buy Now](https://www.adafruit.com/product/50)
[Related Guides to the Product](https://learn.adafruit.com/products/50/guides)
### ADXL377 - High-G Triple-Axis Accelerometer (+-200g Analog Out)
[ADXL377 - High-G Triple-Axis Accelerometer (+-200g Analog Out)](https://www.adafruit.com/product/1413)
**Discontinued -** **you can grab the ** [ADXL375 - High G Accelerometer (+-200g) with I2C and SPI - STEMMA QT / Qwiic](https://www.adafruit.com/product/5374) **instead! **
**Please note: The ADXL377 is "End of Life", **
No Longer Stocked
[Buy Now](https://www.adafruit.com/product/1413)
[Related Guides to the Product](https://learn.adafruit.com/products/1413/guides)
## Related Guides
- [Bluetooth Temperature & Humidity Sensor](https://learn.adafruit.com/bluetooth-temperature-and-humidity-sensor.md)
- [Trinket Audio Player](https://learn.adafruit.com/trinket-audio-player.md)
- [Arduino Prototyping Mounting Plate](https://learn.adafruit.com/arduino-prototyping-mounting-plate.md)
- [Tiny Arduino Music Visualizer](https://learn.adafruit.com/piccolo.md)
- [Wireless Power Switch with Arduino & the CC3000 WiFi Chip](https://learn.adafruit.com/wireless-power-switch-with-arduino-and-the-cc3000-wifi-chip.md)
- [WiFi Controlled LED Christmahanukwanzaa Tree](https://learn.adafruit.com/wifi-controlled-led-christmahanukwanzaa-tree.md)
- [FTDI Friend](https://learn.adafruit.com/ftdi-friend.md)
- [Adafruit 1.14" 240x135 Color TFT Breakout LCD Display](https://learn.adafruit.com/adafruit-1-14-240x135-color-tft-breakout.md)
- [Adafruit AirLift Shield - ESP32 WiFi Co-Processor](https://learn.adafruit.com/adafruit-airlift-shield-esp32-wifi-co-processor.md)
- [How to Build a Testing Jig](https://learn.adafruit.com/how-to-build-a-testing-fixture.md)
- [TMP36 Temperature Sensor](https://learn.adafruit.com/tmp36-temperature-sensor.md)
- [Nokia 5110/3310 Monochrome LCD](https://learn.adafruit.com/nokia-5110-3310-monochrome-lcd.md)
- [Electronic Demon Costume](https://learn.adafruit.com/electronic-demon-costume.md)
- [Ladyada's Bento Box](https://learn.adafruit.com/lady-adas-bento-box.md)
- [Low Power WiFi Datalogger](https://learn.adafruit.com/low-power-wifi-datalogging.md)
---
# Source: https://learn.adafruit.com/calipers.md
# Calipers
## Overview

[This tutorial is for the Mitutoyo digital calipers we carry in the Adafruit shop](http://www.adafruit.com/index.php?main_page=product_info&cPath=8&products_id=294 "Link: http://www.adafruit.com/index.php?main\_page=product\_info&cPath=8&products\_id=294"). They're the best calipers one can get and we're pleased to offer them. We've put together a basic usage guide here to help people get started.- [Next Page](https://learn.adafruit.com/calipers/digital-vs-dial-calipers.md)
## Featured Products
### Mitutoyo - Absolute Digimatic Digital Calipers, 6 in.
[Mitutoyo - Absolute Digimatic Digital Calipers, 6 in.](https://www.adafruit.com/product/294)
The most useful tool we've ever laid our hands on. We thought we'd use them just for electronics but then we got our hands on these calipers and had so much fun we started measuring _everything._
They're indestructible - which is good because we don't...
No Longer Stocked
[Buy Now](https://www.adafruit.com/product/294)
[Related Guides to the Product](https://learn.adafruit.com/products/294/guides)
### Premium Digital Stainless Steel Calipers
[Premium Digital Stainless Steel Calipers](https://www.adafruit.com/product/1724)
The most useful tool we've ever laid our hands on. These calipers are really good quality and an excellent choice if you need something better than a cheap 'disposable' pair of digital calipers but you're not quite ready for a set of high-end Mitsutoyo calipers. These digital...
No Longer Stocked
[Buy Now](https://www.adafruit.com/product/1724)
[Related Guides to the Product](https://learn.adafruit.com/products/1724/guides)
### Solar Digital Calipers
[Solar Digital Calipers](https://www.adafruit.com/product/3720)
_Praise the sun!_ You will never have that awkward situation where your caliper battery dies just when you need to take a measurement. Sure, if you have the budget, [we recommend these near-indestructible high-end Mitutoyo...](https://www.adafruit.com/product/294)
In Stock
[Buy Now](https://www.adafruit.com/product/3720)
[Related Guides to the Product](https://learn.adafruit.com/products/3720/guides)
### Messograf Pen Calipers
[Messograf Pen Calipers](https://www.adafruit.com/product/810)
Discontinued - **you can grab [Solar Digital Calipers ](https://www.adafruit.com/product/3720)instead! **
Caliper rule? Tire tread gauge? Ruler? Thread scale? Writing instrument? The Messograf is all of these in one.
It is a...
No Longer Stocked
[Buy Now](https://www.adafruit.com/product/810)
[Related Guides to the Product](https://learn.adafruit.com/products/810/guides)
## Related Guides
- [Secret Hollow Book Intrusion Detector](https://learn.adafruit.com/secret-hollow-book.md)
- [Necomimi Brainwave Cat Ears Teardown](https://learn.adafruit.com/necomimi-brainwave-cat-ears-teardown.md)
- [Ambient Sound Machine](https://learn.adafruit.com/ambient-machine.md)
- [Personal Torch 3000](https://learn.adafruit.com/pt3000-personal-torch.md)
- [Butterfly Bench with Edge Lit Acrylic](https://learn.adafruit.com/butterfly-bench-with-edge-lit-acrylic.md)
- [Bass MIDI Stomp Box](https://learn.adafruit.com/midi-bass-synth-stomp-box.md)
- [Build a Custom Front Panel](https://learn.adafruit.com/build-a-custom-front-panel.md)
- [Collin's Lab: Soldering](https://learn.adafruit.com/collins-lab-soldering.md)
- [3D Printed Custom Keycaps](https://learn.adafruit.com/3dprinted-custom-keycaps.md)
- [Fiddy - the FTDI Clip](https://learn.adafruit.com/fiddy-ftdi-pogo-pin-clip.md)
- [Photo Light Box](https://learn.adafruit.com/photo-light-box.md)
- [DIY On/Off JST Switch Adapter](https://learn.adafruit.com/on-slash-off-switches.md)
- [Making Edge Guards for Hand Tools Using Hand-Moldable Plastic](https://learn.adafruit.com/hand-moldable-edge-guards.md)
- [USB Locket](https://learn.adafruit.com/usb-locket.md)
- [DIY 3D Printing Filament](https://learn.adafruit.com/diy-3d-printing-filament.md)
---
# Source: https://learn.adafruit.com/pi-thermal-printer/case-1.md
# Internet of Things Printer for Raspberry Pi
## Case Assembly 1 (Pre 2017)
Danger:
The enclosure is comprised of seven (7) laser-cut acrylic pieces. The paper backing should already have been peeled off during the “Preparation” step. If any remains, take care of that now.
Some case pieces are reversible and can be flipped over and installed either way, while others have a specific orientation. You’ve already been acquainted with some of these pieces during the soldering stage. Let’s assign names to the rest of these parts so we can refer to them in these directions:

# Install Raspberry Pi on Bottom Plate
Remove the WiFi adapter and SD card if you haven’t already.
The bottom piece is scored on one side, with an outline showing the placement and orientation of the Raspberry Pi board.

All but the earliest Raspberry Pi boards have two mounting holes. Insert a 1/2" #4-40 screw into each of these holes from the top of the board.

Using your fingertips to keep the screws in place, flip the board over and install a 1/4" nylon spacer over each of the two screws.

Position the bottom plate over the Raspberry Pi (remember, the scored side should face the board) and secure in place with two #4-40 nuts. Tighten the screws from the other side using a small screwdriver and gentle pressure — don’t crank the screws down hard or you’ll crack the case!

If you have an early “rev1” Raspberry Pi board without mounting holes, this can be installed using a set of four [board edge mounts](http://adafruit.com/products/1116 "Link: http://adafruit.com/products/1116") (sold separately, not included in kit).

# Install Thermal Printer
The parts baggie included with the thermal printer contains two triangle-shaped brackets and two long screws. These will hold the printer inside the case.
Note the location of the paper feed button. This should be oriented toward the BACK of the printer.

Being mindful of the wires and other attached components, slide the thermal printer through the large slot on the top case piece, with the feed button toward the BACK (the silver button is toward the front).

Set the printer and top piece face-down and insert the two brackets and screws. Use a small screwdriver to secure these in place. Use gentle pressure! Cranking these down tightly can crack the case.

Connect the power and serial cables from the DC jack and Cobbler, noting the labels on the bottom of the printer. The connectors are identical and it’s easy to get these switched around.

With these three pieces now “tethered” by wires, they should always be lifted and moved around as a single unit. Don’t pull on any of the wires.
- [Previous Page](https://learn.adafruit.com/pi-thermal-printer/case-assembly-1-of-2-pre-2017.md)
- [Next Page](https://learn.adafruit.com/pi-thermal-printer/case-2.md)
## Primary Products
### Adafruit IoT Pi Printer Project Pack
[Adafruit IoT Pi Printer Project Pack](https://www.adafruit.com/product/1289)
Build an "Internet of Things" connected mini printer that will do your bidding! This is a fun weekend project that comes with a beautiful laser cut case. Once assembled, the little printer connects wirelessly to get Internet data for printing onto 2 1/4" wide receipt paper....
No Longer Stocked
[Buy Now](https://www.adafruit.com/product/1289)
[Related Guides to the Product](https://learn.adafruit.com/products/1289/guides)
## Featured Products
### Miniature WiFi (802.11b/g/n) Module: For Raspberry Pi and more
[Miniature WiFi (802.11b/g/n) Module: For Raspberry Pi and more](https://www.adafruit.com/product/814)
Make your Internet of Things device cable-free by adding WiFi. Take advantage of the Raspberry Pi and Beagle Bone's USB port to add a low cost, but high-reliability wireless link. We tried half a dozen modules to find one that works well with the Pi and Bone without the need of recompiling...
No Longer Stocked
[Buy Now](https://www.adafruit.com/product/814)
[Related Guides to the Product](https://learn.adafruit.com/products/814/guides)
### Raspberry Pi - Skill badge, iron-on patch
[Raspberry Pi - Skill badge, iron-on patch](https://www.adafruit.com/product/906)
You are learning to use the small Linux based board, the Raspberry Pi! Adafruit offers a fun and exciting "badges" of achievement for electronics, science and engineering. We believe everyone should be able to be rewarded for learning a useful skill, a badge is just one of the many...
In Stock
[Buy Now](https://www.adafruit.com/product/906)
[Related Guides to the Product](https://learn.adafruit.com/products/906/guides)
### Adafruit Pi Unassembled T-Cobbler Breakout Kit for Raspberry Pi
[Adafruit Pi Unassembled T-Cobbler Breakout Kit for Raspberry Pi](https://www.adafruit.com/product/1105)
Now that you've finally got your hands on a [Raspberry Pi®](http://www.raspberrypi.org/), you're probably itching to make some fun embedded computer projects with it. What you need is an add on prototyping Pi T-Cobbler from Adafruit, which can break out all those tasty...
No Longer Stocked
[Buy Now](https://www.adafruit.com/product/1105)
[Related Guides to the Product](https://learn.adafruit.com/products/1105/guides)
### Mini Thermal Receipt Printer Starter Pack
[Mini Thermal Receipt Printer Starter Pack](https://www.adafruit.com/product/600)
Hit the ground running (and printing!) with this starter pack that includes a thermal printer and all the extras and save a few dollars while you're at it.
Includes:
- [A mini thermal receipt printer](http://www.adafruit.com/products/597) - with cables and...
No Longer Stocked
[Buy Now](https://www.adafruit.com/product/600)
[Related Guides to the Product](https://learn.adafruit.com/products/600/guides)
### Thermal paper roll - 50' long, 2.25" wide
[Thermal paper roll - 50' long, 2.25" wide](https://www.adafruit.com/product/599)
A mini roll of thermal paper, this fits very nicely into our mini thermal printer. 2.25" wide (about 57mm) and 50 feet long (15 meters). BPA-free.
[Perfect for use with our mini thermal printer!](http://www.adafruit.com/products/597)
No Longer Stocked
[Buy Now](https://www.adafruit.com/product/599)
[Related Guides to the Product](https://learn.adafruit.com/products/599/guides)
### Mini Thermal Receipt Printer
[Mini Thermal Receipt Printer](https://www.adafruit.com/product/597)
Add a mini printer to any microcontroller project with this very cute thermal printer. Thermal printers are also known as receipt printers, they're what you get when you go to the ATM or grocery store. Now you can embed a little printer of your own into an enclosure. This printer is ideal...
No Longer Stocked
[Buy Now](https://www.adafruit.com/product/597)
[Related Guides to the Product](https://learn.adafruit.com/products/597/guides)
### Rugged Metal Pushbutton with White LED Ring
[Rugged Metal Pushbutton with White LED Ring](https://www.adafruit.com/product/558)
These chrome-plated metal buttons are rugged and look real good while doing it! Simply drill a 16mm hole into any material up to 1/2" thick and you can fit these in place, there's even a rubber gasket to keep water out of the enclosure. On the front of the button is a flat metal...
In Stock
[Buy Now](https://www.adafruit.com/product/558)
[Related Guides to the Product](https://learn.adafruit.com/products/558/guides)
### 5V 10A switching power supply
[5V 10A switching power supply](https://www.adafruit.com/product/658)
This is a beefy switching supply, for when you need a lot of power! It can supply 5V DC up to 10 Amps, running from 110V or 220V power (the plug it comes with is for US/Canada/Japan but you can use any plug adapter for your country, or just replace the cable with a standard computer/appliance...
In Stock
[Buy Now](https://www.adafruit.com/product/658)
[Related Guides to the Product](https://learn.adafruit.com/products/658/guides)
## Related Guides
- [Skill Badge Requirements: Raspberry Pi](https://learn.adafruit.com/skill-badge-requirements-raspberry-pi.md)
- [Adafruit Prototyping Pi Plate](https://learn.adafruit.com/adafruit-prototyping-pi-plate.md)
- [Adafruit Raspberry Pi Educational Linux Distro](https://learn.adafruit.com/adafruit-raspberry-pi-educational-linux-distro.md)
- [Open Source Protective Face Shield Designs](https://learn.adafruit.com/open-source-face-shield-designs.md)
- [PyPortal IoT Plant Monitor with Google Cloud IoT Core and CircuitPython](https://learn.adafruit.com/pyportal-iot-plant-monitor-with-google-cloud-iot-core-and-circuitpython.md)
- [Adafruit QT Py ESP32-C3 WiFi Dev Board](https://learn.adafruit.com/adafruit-qt-py-esp32-c3-wifi-dev-board.md)
- [AstroPrint 3D Printing](https://learn.adafruit.com/astroprint-3d-printing.md)
- [No-Code Rain Sensing Smart Desktop Umbrella Stand](https://learn.adafruit.com/no-code-rain-sensing-smart-desktop-umbrella-stand.md)
- [MacroPad Remote Procedure Calls over USB to Control Home Assistant](https://learn.adafruit.com/macropad-remote-procedure-calls-over-usb-to-control-home-assistant.md)
- [PiPhone - A Raspberry Pi based Cellphone](https://learn.adafruit.com/piphone-a-raspberry-pi-based-cellphone.md)
- [Adafruit 128x64 OLED Bonnet for Raspberry Pi](https://learn.adafruit.com/adafruit-128x64-oled-bonnet-for-raspberry-pi.md)
- [Set up and Blink - MATLAB and Simulink with Raspberry Pi](https://learn.adafruit.com/how-to-use-matlab-and-simulink-with-raspberry-pi.md)
- [Mini Raspberry Pi Handheld Notebook](https://learn.adafruit.com/mini-raspberry-pi-handheld-notebook-palmtop.md)
- [Adafruit's Raspberry Pi Lesson 2. First Time Configuration](https://learn.adafruit.com/adafruits-raspberry-pi-lesson-2-first-time-configuration.md)
- [Huzzah Weather Display](https://learn.adafruit.com/huzzah-weather-display.md)
---
# Source: https://learn.adafruit.com/pi-thermal-printer/case-2.md
# Internet of Things Printer for Raspberry Pi
## Case Assembly: 2 of 2
Warning:
Here’s the map of case parts again, as you may need to refer back to it some more:

# Using “T-Slots”
The case is assembled using “t-slot” construction, common among laser-cut kits. You’ll notice a couple case parts (back and center support) have t-shaped slots along their edges. These slots hold nuts, while perpendicular case parts have holes for a corresponding machine screw.
Let’s start with the center support piece…that’s the part with four t-slots and a long tab that looks like a nose or something.
**For the 2017 kit:** this piece is asymmetrical…it has a specific right and left. Viewed from the front, the long tab is offset to the **left**.
**For pre-2017 kits:** this piece has no right or left…you can flip it around either way…but it definitely has a top and bottom.
Let’s start with one of the t-slots at the top. Insert a nut into the cross part of the “t” and hold it there between finger and thumb.

If holding the part and the nut simultaneously is a dexterity challenge, you can instead use a bit of tape to provide a temporary hold for the nut. This can be peeled away once the corresponding screw is in place.

We’ll attach this piece to one of the sides. The sides are interchangeable — there is no right or left — but they do have a definite top and bottom, front and back.
Insert the tab from the center support into the corresponding slot on a side piece — this is the off-center slot slightly towards the front. Make sure the tops and bottoms of the two pieces are oriented the same.
When properly aligned, insert a 1/2" #4-40 machine screw into the hole directly over the nut.

Use a screwdriver to turn the nut into place. Just “finger tight” is good for now…in subsequent steps we’ll be loosening certain screws anyway.
Never crank down hard on the case screws or you’ll break the acrylic.

Repeat the above step with the second nut and screw between these two case pieces.
# Connect Back Piece
We’ll repeat some steps similar to the above, this time with the back piece. This is connected by wires to the thermal printer (and Cobbler board, on pre-2017 kits). Be very careful to always move these around as a unit…don’t tug on the wires else your solder joints (or the parts they’re connected to) may break.
Connect the same side piece to the case back, using two nuts and screws as before.
Make sure the tops of the two parts are aligned. In this picture the case is being held at an angle to access the slot…the top of the case faces the bottom-right.

You should now have four nuts and screws installed in one side piece, holding the back and center support.
The parts probably won’t be perfectly square at this stage. That’s perfectly okay…things will become progressively more aligned as the rest of the case goes together.

Stand the partial case up on its side and move the top piece (with button and thermal printer attached) roughly into position. Don’t fit this into the slots yet, just an approximate position.
Route the cables so that the button wires pass through the openings in the center support. For pre-2017 kits, position the T-Cobbler below the printer. You might need to turn some parts around or temporarily disconnect the cables from the printer to achieve a good fit.

# Connect Second Side
This is why the printer isn’t slotted into place yet…it would block some t-slots that we still need access to. We’ll come back to it in a moment…
Scoot the printer out a bit so you can reach theremaining t-slots. Insert a nut into one of the slots, set the second side of the case into position and install a screw.

Repeat with the remaining three nuts and screws. You should now have a box with four sides and eight nuts & screws installed.

Slot one end of the top/printer piece into position. But with both sides in place, the slots at the other end are now blocked. The next few steps take care of all this…

# Insert Case Top
Loosen two of the lower screws about 1/2 turn.
Loosen the corresponding two upper screws so the tip of the screw is flush with the face of the nut (but not so loose that it falls out…if this happens, move the top/printer piece out of the way and repeat the prior steps).
Lift the side of the edge piece. There should be just enough “play” for the tabs from the top piece to fit underneath. Press the printer piece into position.

Lower the side piece into place…slots should fit into corresponding tabs.
Tighten all four screws with a screwdriver. Just “finger tight” is sufficient for now…there’s a few more sequences like this ahead yet…

# Install Front Piece
This sequence is very similar to the above…
Slot one end of the front piece into the side of the case. The “torn receipt” effect should be at the bottom. There’s no front or back to this piece, it can go either way, but Nimbus, our Internet of Things cloud mascot, wears his pompadour to the left.
Loosen the two screws at the back of the case 1/2 turn. Loosen the two front screws so the tip is flush with the nut.

Lift the side piece and pop the front into place.
Pop!

Tighten all four screws using a screwdriver (finger-tight).

# Install Bottom
Nearly done! The anticipation is deadly…
You probably know the routine by now: loosen two top screws by 1/2 turn and two bottom screws so the tip is flush with the nut.
The piece we’re inserting is a little different this time: rather than tabs and slots, there’s a small nubbin at either side that fits into a circular hole on each side of the case. This piece hangs open for now.
Tighten the four screws as before.
**For the 2017-and-later kit, plug in the connections as shown here.**
The end of the data cable with the trimmed plug should connect to the Pi. See how it makes space for the adjacent jumper wire?


**For the pre-2017 kit:** Gently install the Cobbler board on to the Raspberry Pi GPIO header. Support the Pi board from below with the tips of your fingers…this prevents strain on the board and the case.
Make sure all the pins are properly aligned with the header. If it’s off by one pin in any direction, there’s the possibility of damaging the board when the power supply is connected.

Re-insert the SD card and USB WiFi adapter.

Carefully fold all the wires while swinging the bottom shut like a door. The center support piece has just enough flex to act as a latch.
If you need access to the Raspberry Pi board later (to change out the SD card or connect a monitor for troubleshooting), you can unlatch and swing this open later…no need to dismantle the whole case.

Now you can go around the case and tighten each screw. Gently! Just finger pressure plus a fraction of a turn will hold it firmly. If you crank these down too hard you’ll crack the plastic.
# Insert Paper and Connect Power
Pull up the top lever to access the paper compartment. Insert a roll of thermal receipt paper and push the lid closed while feeding the end of the paper through the slot.

Connect the 5V DC power supply to the jack on the back of the case.
Many power supplies look alike. Make absolutely certain you’re connecting the 5 Volt supply included with the kit! Anything more will likely kill the Raspberry Pi board.

Danger:
- [Previous Page](https://learn.adafruit.com/pi-thermal-printer/case-1.md)
- [Next Page](https://learn.adafruit.com/pi-thermal-printer/twitter-setup.md)
## Primary Products
### Adafruit IoT Pi Printer Project Pack
[Adafruit IoT Pi Printer Project Pack](https://www.adafruit.com/product/1289)
Build an "Internet of Things" connected mini printer that will do your bidding! This is a fun weekend project that comes with a beautiful laser cut case. Once assembled, the little printer connects wirelessly to get Internet data for printing onto 2 1/4" wide receipt paper....
No Longer Stocked
[Buy Now](https://www.adafruit.com/product/1289)
[Related Guides to the Product](https://learn.adafruit.com/products/1289/guides)
## Featured Products
### Miniature WiFi (802.11b/g/n) Module: For Raspberry Pi and more
[Miniature WiFi (802.11b/g/n) Module: For Raspberry Pi and more](https://www.adafruit.com/product/814)
Make your Internet of Things device cable-free by adding WiFi. Take advantage of the Raspberry Pi and Beagle Bone's USB port to add a low cost, but high-reliability wireless link. We tried half a dozen modules to find one that works well with the Pi and Bone without the need of recompiling...
No Longer Stocked
[Buy Now](https://www.adafruit.com/product/814)
[Related Guides to the Product](https://learn.adafruit.com/products/814/guides)
### Raspberry Pi - Skill badge, iron-on patch
[Raspberry Pi - Skill badge, iron-on patch](https://www.adafruit.com/product/906)
You are learning to use the small Linux based board, the Raspberry Pi! Adafruit offers a fun and exciting "badges" of achievement for electronics, science and engineering. We believe everyone should be able to be rewarded for learning a useful skill, a badge is just one of the many...
In Stock
[Buy Now](https://www.adafruit.com/product/906)
[Related Guides to the Product](https://learn.adafruit.com/products/906/guides)
### Adafruit Pi Unassembled T-Cobbler Breakout Kit for Raspberry Pi
[Adafruit Pi Unassembled T-Cobbler Breakout Kit for Raspberry Pi](https://www.adafruit.com/product/1105)
Now that you've finally got your hands on a [Raspberry Pi®](http://www.raspberrypi.org/), you're probably itching to make some fun embedded computer projects with it. What you need is an add on prototyping Pi T-Cobbler from Adafruit, which can break out all those tasty...
No Longer Stocked
[Buy Now](https://www.adafruit.com/product/1105)
[Related Guides to the Product](https://learn.adafruit.com/products/1105/guides)
### Mini Thermal Receipt Printer Starter Pack
[Mini Thermal Receipt Printer Starter Pack](https://www.adafruit.com/product/600)
Hit the ground running (and printing!) with this starter pack that includes a thermal printer and all the extras and save a few dollars while you're at it.
Includes:
- [A mini thermal receipt printer](http://www.adafruit.com/products/597) - with cables and...
No Longer Stocked
[Buy Now](https://www.adafruit.com/product/600)
[Related Guides to the Product](https://learn.adafruit.com/products/600/guides)
### Thermal paper roll - 50' long, 2.25" wide
[Thermal paper roll - 50' long, 2.25" wide](https://www.adafruit.com/product/599)
A mini roll of thermal paper, this fits very nicely into our mini thermal printer. 2.25" wide (about 57mm) and 50 feet long (15 meters). BPA-free.
[Perfect for use with our mini thermal printer!](http://www.adafruit.com/products/597)
No Longer Stocked
[Buy Now](https://www.adafruit.com/product/599)
[Related Guides to the Product](https://learn.adafruit.com/products/599/guides)
### Mini Thermal Receipt Printer
[Mini Thermal Receipt Printer](https://www.adafruit.com/product/597)
Add a mini printer to any microcontroller project with this very cute thermal printer. Thermal printers are also known as receipt printers, they're what you get when you go to the ATM or grocery store. Now you can embed a little printer of your own into an enclosure. This printer is ideal...
No Longer Stocked
[Buy Now](https://www.adafruit.com/product/597)
[Related Guides to the Product](https://learn.adafruit.com/products/597/guides)
### Rugged Metal Pushbutton with White LED Ring
[Rugged Metal Pushbutton with White LED Ring](https://www.adafruit.com/product/558)
These chrome-plated metal buttons are rugged and look real good while doing it! Simply drill a 16mm hole into any material up to 1/2" thick and you can fit these in place, there's even a rubber gasket to keep water out of the enclosure. On the front of the button is a flat metal...
In Stock
[Buy Now](https://www.adafruit.com/product/558)
[Related Guides to the Product](https://learn.adafruit.com/products/558/guides)
### 5V 10A switching power supply
[5V 10A switching power supply](https://www.adafruit.com/product/658)
This is a beefy switching supply, for when you need a lot of power! It can supply 5V DC up to 10 Amps, running from 110V or 220V power (the plug it comes with is for US/Canada/Japan but you can use any plug adapter for your country, or just replace the cable with a standard computer/appliance...
In Stock
[Buy Now](https://www.adafruit.com/product/658)
[Related Guides to the Product](https://learn.adafruit.com/products/658/guides)
## Related Guides
- [Skill Badge Requirements: Raspberry Pi](https://learn.adafruit.com/skill-badge-requirements-raspberry-pi.md)
- [Adafruit Prototyping Pi Plate](https://learn.adafruit.com/adafruit-prototyping-pi-plate.md)
- [Adafruit Raspberry Pi Educational Linux Distro](https://learn.adafruit.com/adafruit-raspberry-pi-educational-linux-distro.md)
- [Open Source Protective Face Shield Designs](https://learn.adafruit.com/open-source-face-shield-designs.md)
- [PyPortal IoT Plant Monitor with Google Cloud IoT Core and CircuitPython](https://learn.adafruit.com/pyportal-iot-plant-monitor-with-google-cloud-iot-core-and-circuitpython.md)
- [Adafruit QT Py ESP32-C3 WiFi Dev Board](https://learn.adafruit.com/adafruit-qt-py-esp32-c3-wifi-dev-board.md)
- [AstroPrint 3D Printing](https://learn.adafruit.com/astroprint-3d-printing.md)
- [No-Code Rain Sensing Smart Desktop Umbrella Stand](https://learn.adafruit.com/no-code-rain-sensing-smart-desktop-umbrella-stand.md)
- [MacroPad Remote Procedure Calls over USB to Control Home Assistant](https://learn.adafruit.com/macropad-remote-procedure-calls-over-usb-to-control-home-assistant.md)
- [PiPhone - A Raspberry Pi based Cellphone](https://learn.adafruit.com/piphone-a-raspberry-pi-based-cellphone.md)
- [Adafruit 128x64 OLED Bonnet for Raspberry Pi](https://learn.adafruit.com/adafruit-128x64-oled-bonnet-for-raspberry-pi.md)
- [Set up and Blink - MATLAB and Simulink with Raspberry Pi](https://learn.adafruit.com/how-to-use-matlab-and-simulink-with-raspberry-pi.md)
- [Mini Raspberry Pi Handheld Notebook](https://learn.adafruit.com/mini-raspberry-pi-handheld-notebook-palmtop.md)
- [Adafruit's Raspberry Pi Lesson 2. First Time Configuration](https://learn.adafruit.com/adafruits-raspberry-pi-lesson-2-first-time-configuration.md)
- [Huzzah Weather Display](https://learn.adafruit.com/huzzah-weather-display.md)
---
# Source: https://learn.adafruit.com/pi-thermal-printer/case-assembly-1-of-2-pre-2017.md
# Internet of Things Printer for Raspberry Pi
## Case Assembly: 1 of 2
Danger:
Some case pieces are reversible and can be flipped over and installed either way, while others have a specific orientation. You’ve already been acquainted with a couple of these pieces during the soldering stage. Let’s assign names to the rest of these parts so we can refer to them in these directions:

If you need to replace a broken piece or want to laser-cut your own case in a different color or material, this ZIP file contains all the parts in Adobe Illustrator, PDF and SVG formats:
[IoT_Printer_Case_Files.zip](https://cdn-learn.adafruit.com/assets/assets/000/122/480/original/IoT_Printer_Case_Files.zip?1689101184)
# Install Raspberry Pi on Bottom Plate
Remove the WiFi adapter and SD card if you haven’t already.
The bottom piece is scored on one side, with an outline showing the placement and orientation of the Raspberry Pi board.
Push out the laser cut holes and mount the Raspberry Pi Board to the bottom plate using the included plastic #4-40 screws


# Install Thermal Printer
The parts baggie included with the thermal printer contains two triangle-shaped brackets and two long screws. These will hold the printer inside the case.
Note the location of the paper feed button. This should be oriented toward the BACK of the printer.

Being mindful of the wires and other attached components, slide the thermal printer through the large slot on the top case piece, with the feed button toward the BACK (the silver button is toward the front).

Set the printer and top piece face-down and insert the two brackets and screws. Use a small screwdriver to secure these in place. Use gentle pressure! Cranking these down tightly can crack the case.

Connect the serial cable and power from the DC jack, noting the labels on the bottom of the printer. The connectors are identical and it’s easy to get these switched around.

- [Previous Page](https://learn.adafruit.com/pi-thermal-printer/case-assembly-1-of-3.md)
- [Next Page](https://learn.adafruit.com/pi-thermal-printer/case-1.md)
## Primary Products
### Adafruit IoT Pi Printer Project Pack
[Adafruit IoT Pi Printer Project Pack](https://www.adafruit.com/product/1289)
Build an "Internet of Things" connected mini printer that will do your bidding! This is a fun weekend project that comes with a beautiful laser cut case. Once assembled, the little printer connects wirelessly to get Internet data for printing onto 2 1/4" wide receipt paper....
No Longer Stocked
[Buy Now](https://www.adafruit.com/product/1289)
[Related Guides to the Product](https://learn.adafruit.com/products/1289/guides)
## Featured Products
### Miniature WiFi (802.11b/g/n) Module: For Raspberry Pi and more
[Miniature WiFi (802.11b/g/n) Module: For Raspberry Pi and more](https://www.adafruit.com/product/814)
Make your Internet of Things device cable-free by adding WiFi. Take advantage of the Raspberry Pi and Beagle Bone's USB port to add a low cost, but high-reliability wireless link. We tried half a dozen modules to find one that works well with the Pi and Bone without the need of recompiling...
No Longer Stocked
[Buy Now](https://www.adafruit.com/product/814)
[Related Guides to the Product](https://learn.adafruit.com/products/814/guides)
### Raspberry Pi - Skill badge, iron-on patch
[Raspberry Pi - Skill badge, iron-on patch](https://www.adafruit.com/product/906)
You are learning to use the small Linux based board, the Raspberry Pi! Adafruit offers a fun and exciting "badges" of achievement for electronics, science and engineering. We believe everyone should be able to be rewarded for learning a useful skill, a badge is just one of the many...
In Stock
[Buy Now](https://www.adafruit.com/product/906)
[Related Guides to the Product](https://learn.adafruit.com/products/906/guides)
### Adafruit Pi Unassembled T-Cobbler Breakout Kit for Raspberry Pi
[Adafruit Pi Unassembled T-Cobbler Breakout Kit for Raspberry Pi](https://www.adafruit.com/product/1105)
Now that you've finally got your hands on a [Raspberry Pi®](http://www.raspberrypi.org/), you're probably itching to make some fun embedded computer projects with it. What you need is an add on prototyping Pi T-Cobbler from Adafruit, which can break out all those tasty...
No Longer Stocked
[Buy Now](https://www.adafruit.com/product/1105)
[Related Guides to the Product](https://learn.adafruit.com/products/1105/guides)
### Mini Thermal Receipt Printer Starter Pack
[Mini Thermal Receipt Printer Starter Pack](https://www.adafruit.com/product/600)
Hit the ground running (and printing!) with this starter pack that includes a thermal printer and all the extras and save a few dollars while you're at it.
Includes:
- [A mini thermal receipt printer](http://www.adafruit.com/products/597) - with cables and...
No Longer Stocked
[Buy Now](https://www.adafruit.com/product/600)
[Related Guides to the Product](https://learn.adafruit.com/products/600/guides)
### Thermal paper roll - 50' long, 2.25" wide
[Thermal paper roll - 50' long, 2.25" wide](https://www.adafruit.com/product/599)
A mini roll of thermal paper, this fits very nicely into our mini thermal printer. 2.25" wide (about 57mm) and 50 feet long (15 meters). BPA-free.
[Perfect for use with our mini thermal printer!](http://www.adafruit.com/products/597)
No Longer Stocked
[Buy Now](https://www.adafruit.com/product/599)
[Related Guides to the Product](https://learn.adafruit.com/products/599/guides)
### Mini Thermal Receipt Printer
[Mini Thermal Receipt Printer](https://www.adafruit.com/product/597)
Add a mini printer to any microcontroller project with this very cute thermal printer. Thermal printers are also known as receipt printers, they're what you get when you go to the ATM or grocery store. Now you can embed a little printer of your own into an enclosure. This printer is ideal...
No Longer Stocked
[Buy Now](https://www.adafruit.com/product/597)
[Related Guides to the Product](https://learn.adafruit.com/products/597/guides)
### Rugged Metal Pushbutton with White LED Ring
[Rugged Metal Pushbutton with White LED Ring](https://www.adafruit.com/product/558)
These chrome-plated metal buttons are rugged and look real good while doing it! Simply drill a 16mm hole into any material up to 1/2" thick and you can fit these in place, there's even a rubber gasket to keep water out of the enclosure. On the front of the button is a flat metal...
In Stock
[Buy Now](https://www.adafruit.com/product/558)
[Related Guides to the Product](https://learn.adafruit.com/products/558/guides)
### 5V 10A switching power supply
[5V 10A switching power supply](https://www.adafruit.com/product/658)
This is a beefy switching supply, for when you need a lot of power! It can supply 5V DC up to 10 Amps, running from 110V or 220V power (the plug it comes with is for US/Canada/Japan but you can use any plug adapter for your country, or just replace the cable with a standard computer/appliance...
In Stock
[Buy Now](https://www.adafruit.com/product/658)
[Related Guides to the Product](https://learn.adafruit.com/products/658/guides)
## Related Guides
- [Skill Badge Requirements: Raspberry Pi](https://learn.adafruit.com/skill-badge-requirements-raspberry-pi.md)
- [Adafruit Prototyping Pi Plate](https://learn.adafruit.com/adafruit-prototyping-pi-plate.md)
- [Adafruit Raspberry Pi Educational Linux Distro](https://learn.adafruit.com/adafruit-raspberry-pi-educational-linux-distro.md)
- [Open Source Protective Face Shield Designs](https://learn.adafruit.com/open-source-face-shield-designs.md)
- [PyPortal IoT Plant Monitor with Google Cloud IoT Core and CircuitPython](https://learn.adafruit.com/pyportal-iot-plant-monitor-with-google-cloud-iot-core-and-circuitpython.md)
- [Adafruit QT Py ESP32-C3 WiFi Dev Board](https://learn.adafruit.com/adafruit-qt-py-esp32-c3-wifi-dev-board.md)
- [AstroPrint 3D Printing](https://learn.adafruit.com/astroprint-3d-printing.md)
- [No-Code Rain Sensing Smart Desktop Umbrella Stand](https://learn.adafruit.com/no-code-rain-sensing-smart-desktop-umbrella-stand.md)
- [MacroPad Remote Procedure Calls over USB to Control Home Assistant](https://learn.adafruit.com/macropad-remote-procedure-calls-over-usb-to-control-home-assistant.md)
- [PiPhone - A Raspberry Pi based Cellphone](https://learn.adafruit.com/piphone-a-raspberry-pi-based-cellphone.md)
- [Adafruit 128x64 OLED Bonnet for Raspberry Pi](https://learn.adafruit.com/adafruit-128x64-oled-bonnet-for-raspberry-pi.md)
- [Set up and Blink - MATLAB and Simulink with Raspberry Pi](https://learn.adafruit.com/how-to-use-matlab-and-simulink-with-raspberry-pi.md)
- [Mini Raspberry Pi Handheld Notebook](https://learn.adafruit.com/mini-raspberry-pi-handheld-notebook-palmtop.md)
- [Adafruit's Raspberry Pi Lesson 2. First Time Configuration](https://learn.adafruit.com/adafruits-raspberry-pi-lesson-2-first-time-configuration.md)
- [Huzzah Weather Display](https://learn.adafruit.com/huzzah-weather-display.md)
---
# Source: https://learn.adafruit.com/pi-thermal-printer/case-assembly-1-of-3.md
# Internet of Things Printer for Raspberry Pi
## Case Prep
# Peel and Clean Case Parts
The enclosure is comprised of seven (7) laser-cut acrylic pieces. **Peel** the paper backing from the acrylic case pieces. Some people use a razor blade as a scraper to get this started, but a fingernail at a corner is usually sufficient and won’t gouge the plastic.


After peeling, the parts may have a little bit of paper soot on them from laser cutting. Wiping off may suffice, or they can be **washed** with soap and water…but be absolutely certain that everything is **completely dry** before assembling components in the case!
- [Previous Page](https://learn.adafruit.com/pi-thermal-printer/soldering.md)
- [Next Page](https://learn.adafruit.com/pi-thermal-printer/case-assembly-1-of-2-pre-2017.md)
## Primary Products
### Adafruit IoT Pi Printer Project Pack
[Adafruit IoT Pi Printer Project Pack](https://www.adafruit.com/product/1289)
Build an "Internet of Things" connected mini printer that will do your bidding! This is a fun weekend project that comes with a beautiful laser cut case. Once assembled, the little printer connects wirelessly to get Internet data for printing onto 2 1/4" wide receipt paper....
No Longer Stocked
[Buy Now](https://www.adafruit.com/product/1289)
[Related Guides to the Product](https://learn.adafruit.com/products/1289/guides)
## Featured Products
### Miniature WiFi (802.11b/g/n) Module: For Raspberry Pi and more
[Miniature WiFi (802.11b/g/n) Module: For Raspberry Pi and more](https://www.adafruit.com/product/814)
Make your Internet of Things device cable-free by adding WiFi. Take advantage of the Raspberry Pi and Beagle Bone's USB port to add a low cost, but high-reliability wireless link. We tried half a dozen modules to find one that works well with the Pi and Bone without the need of recompiling...
No Longer Stocked
[Buy Now](https://www.adafruit.com/product/814)
[Related Guides to the Product](https://learn.adafruit.com/products/814/guides)
### Raspberry Pi - Skill badge, iron-on patch
[Raspberry Pi - Skill badge, iron-on patch](https://www.adafruit.com/product/906)
You are learning to use the small Linux based board, the Raspberry Pi! Adafruit offers a fun and exciting "badges" of achievement for electronics, science and engineering. We believe everyone should be able to be rewarded for learning a useful skill, a badge is just one of the many...
In Stock
[Buy Now](https://www.adafruit.com/product/906)
[Related Guides to the Product](https://learn.adafruit.com/products/906/guides)
### Adafruit Pi Unassembled T-Cobbler Breakout Kit for Raspberry Pi
[Adafruit Pi Unassembled T-Cobbler Breakout Kit for Raspberry Pi](https://www.adafruit.com/product/1105)
Now that you've finally got your hands on a [Raspberry Pi®](http://www.raspberrypi.org/), you're probably itching to make some fun embedded computer projects with it. What you need is an add on prototyping Pi T-Cobbler from Adafruit, which can break out all those tasty...
No Longer Stocked
[Buy Now](https://www.adafruit.com/product/1105)
[Related Guides to the Product](https://learn.adafruit.com/products/1105/guides)
### Mini Thermal Receipt Printer Starter Pack
[Mini Thermal Receipt Printer Starter Pack](https://www.adafruit.com/product/600)
Hit the ground running (and printing!) with this starter pack that includes a thermal printer and all the extras and save a few dollars while you're at it.
Includes:
- [A mini thermal receipt printer](http://www.adafruit.com/products/597) - with cables and...
No Longer Stocked
[Buy Now](https://www.adafruit.com/product/600)
[Related Guides to the Product](https://learn.adafruit.com/products/600/guides)
### Thermal paper roll - 50' long, 2.25" wide
[Thermal paper roll - 50' long, 2.25" wide](https://www.adafruit.com/product/599)
A mini roll of thermal paper, this fits very nicely into our mini thermal printer. 2.25" wide (about 57mm) and 50 feet long (15 meters). BPA-free.
[Perfect for use with our mini thermal printer!](http://www.adafruit.com/products/597)
No Longer Stocked
[Buy Now](https://www.adafruit.com/product/599)
[Related Guides to the Product](https://learn.adafruit.com/products/599/guides)
### Mini Thermal Receipt Printer
[Mini Thermal Receipt Printer](https://www.adafruit.com/product/597)
Add a mini printer to any microcontroller project with this very cute thermal printer. Thermal printers are also known as receipt printers, they're what you get when you go to the ATM or grocery store. Now you can embed a little printer of your own into an enclosure. This printer is ideal...
No Longer Stocked
[Buy Now](https://www.adafruit.com/product/597)
[Related Guides to the Product](https://learn.adafruit.com/products/597/guides)
### Rugged Metal Pushbutton with White LED Ring
[Rugged Metal Pushbutton with White LED Ring](https://www.adafruit.com/product/558)
These chrome-plated metal buttons are rugged and look real good while doing it! Simply drill a 16mm hole into any material up to 1/2" thick and you can fit these in place, there's even a rubber gasket to keep water out of the enclosure. On the front of the button is a flat metal...
In Stock
[Buy Now](https://www.adafruit.com/product/558)
[Related Guides to the Product](https://learn.adafruit.com/products/558/guides)
### 5V 10A switching power supply
[5V 10A switching power supply](https://www.adafruit.com/product/658)
This is a beefy switching supply, for when you need a lot of power! It can supply 5V DC up to 10 Amps, running from 110V or 220V power (the plug it comes with is for US/Canada/Japan but you can use any plug adapter for your country, or just replace the cable with a standard computer/appliance...
In Stock
[Buy Now](https://www.adafruit.com/product/658)
[Related Guides to the Product](https://learn.adafruit.com/products/658/guides)
## Related Guides
- [Skill Badge Requirements: Raspberry Pi](https://learn.adafruit.com/skill-badge-requirements-raspberry-pi.md)
- [Adafruit Prototyping Pi Plate](https://learn.adafruit.com/adafruit-prototyping-pi-plate.md)
- [Adafruit Raspberry Pi Educational Linux Distro](https://learn.adafruit.com/adafruit-raspberry-pi-educational-linux-distro.md)
- [Open Source Protective Face Shield Designs](https://learn.adafruit.com/open-source-face-shield-designs.md)
- [PyPortal IoT Plant Monitor with Google Cloud IoT Core and CircuitPython](https://learn.adafruit.com/pyportal-iot-plant-monitor-with-google-cloud-iot-core-and-circuitpython.md)
- [Adafruit QT Py ESP32-C3 WiFi Dev Board](https://learn.adafruit.com/adafruit-qt-py-esp32-c3-wifi-dev-board.md)
- [AstroPrint 3D Printing](https://learn.adafruit.com/astroprint-3d-printing.md)
- [No-Code Rain Sensing Smart Desktop Umbrella Stand](https://learn.adafruit.com/no-code-rain-sensing-smart-desktop-umbrella-stand.md)
- [MacroPad Remote Procedure Calls over USB to Control Home Assistant](https://learn.adafruit.com/macropad-remote-procedure-calls-over-usb-to-control-home-assistant.md)
- [PiPhone - A Raspberry Pi based Cellphone](https://learn.adafruit.com/piphone-a-raspberry-pi-based-cellphone.md)
- [Adafruit 128x64 OLED Bonnet for Raspberry Pi](https://learn.adafruit.com/adafruit-128x64-oled-bonnet-for-raspberry-pi.md)
- [Set up and Blink - MATLAB and Simulink with Raspberry Pi](https://learn.adafruit.com/how-to-use-matlab-and-simulink-with-raspberry-pi.md)
- [Mini Raspberry Pi Handheld Notebook](https://learn.adafruit.com/mini-raspberry-pi-handheld-notebook-palmtop.md)
- [Adafruit's Raspberry Pi Lesson 2. First Time Configuration](https://learn.adafruit.com/adafruits-raspberry-pi-lesson-2-first-time-configuration.md)
- [Huzzah Weather Display](https://learn.adafruit.com/huzzah-weather-display.md)
---
# Source: https://learn.adafruit.com/li-ion-and-lipoly-batteries/cell-phone-and-camcorder-batteries.md
# Li-Ion & LiPoly Batteries
## Cell Phone & Camcorder Batteries

You may end up using camcorder or cell phone batteries. These are removable batteries in a hard case. They tend have protection cells inside the case. This battery for example, is an old project battery from before you could buy lipoly batteries easily.- [Previous Page](https://learn.adafruit.com/li-ion-and-lipoly-batteries/rc-type-batteries.md)
- [Next Page](https://learn.adafruit.com/li-ion-and-lipoly-batteries/multi-battery-packs.md)
## Featured Products
### Adafruit Micro Lipo - USB LiIon/LiPoly charger
[Adafruit Micro Lipo - USB LiIon/LiPoly charger](https://www.adafruit.com/product/1304)
Oh so adorable, this is the tiniest little lipo charger, so handy you can keep it any project box! Its also easy to use. Simply plug in the gold plated contacts into any USB port and a 3.7V/4.2V lithium polymer or lithium ion rechargeable battery into the JST plug on the other end. There are...
In Stock
[Buy Now](https://www.adafruit.com/product/1304)
[Related Guides to the Product](https://learn.adafruit.com/products/1304/guides)
### USB LiIon/LiPoly charger
[USB LiIon/LiPoly charger](https://www.adafruit.com/product/259)
This is a Lithium Ion and Lithium Polymer battery charger based on the [MCP73833](http://www.microchip.com/wwwproducts/Devices.aspx?dDocName=en027785). It uses a USB mini-B for connection to any computer or 'USB wall adapter'. Charging is performed in three stages: first a...
In Stock
[Buy Now](https://www.adafruit.com/product/259)
[Related Guides to the Product](https://learn.adafruit.com/products/259/guides)
### USB/DC Lithium Polymer battery charger 5-12V
[USB/DC Lithium Polymer battery charger 5-12V](https://www.adafruit.com/product/280)
Charge your single-cell lithium ion/polymer battery any which way you like with this board. Have a USB connection? No problem, just plug into the miniUSB connector. Only have a wall adapter? Any standard 2.1mm DC adapter which puts out 5 to 12VDC will work fine. If both are plugged in, the...
No Longer Stocked
[Buy Now](https://www.adafruit.com/product/280)
[Related Guides to the Product](https://learn.adafruit.com/products/280/guides)
### Lithium Ion Battery Pack - 3.7V 6600mAh
[Lithium Ion Battery Pack - 3.7V 6600mAh](https://www.adafruit.com/product/353)
Need a massive battery for your project? This lithium-ion pack is made of 3 balanced 2200mAh cells for a total of 6600mA capacity! The cells are connected in parallel and spot-welded to a protection circuit that provides over-voltage, under-voltage, and over-current protection.
Each cell...
In Stock
[Buy Now](https://www.adafruit.com/product/353)
[Related Guides to the Product](https://learn.adafruit.com/products/353/guides)
### Lithium Ion Battery Pack - 3.7V 4400mAh
[Lithium Ion Battery Pack - 3.7V 4400mAh](https://www.adafruit.com/product/354)
Need a big battery for your project? This lithium-ion pack is made of 2 balanced 2200mAh cells for a total of 4400mA capacity! The cells are connected in parallel and spot-welded to a protection circuit that provides over-voltage, under-voltage, and over-current protection.
Each cell can...
In Stock
[Buy Now](https://www.adafruit.com/product/354)
[Related Guides to the Product](https://learn.adafruit.com/products/354/guides)
### Lithium Ion Polymer Battery - 3.7v 2500mAh
[Lithium Ion Polymer Battery - 3.7v 2500mAh](https://www.adafruit.com/product/328)
Lithium-ion polymer (also known as 'lipo' or 'lipoly') batteries are thin, light, and powerful. The output ranges from 4.2V when completely charged to 3.7V. This battery has a capacity of **2500mAh** for a total of about 10 Wh. If you need a smaller battery,
In Stock
[Buy Now](https://www.adafruit.com/product/328)
[Related Guides to the Product](https://learn.adafruit.com/products/328/guides)
### Lithium Ion Polymer Battery - 3.7v 1200mAh
[Lithium Ion Polymer Battery - 3.7v 1200mAh](https://www.adafruit.com/product/258)
Lithium-ion polymer (also known as 'lipo' or 'lipoly') batteries are thin, light, and powerful. The output ranges from 4.2V when completely charged to 3.7V. This battery has a capacity of 1200mAh for a total of about 4.5 Wh. If you need a larger battery,
In Stock
[Buy Now](https://www.adafruit.com/product/258)
[Related Guides to the Product](https://learn.adafruit.com/products/258/guides)
### Lithium Ion Polymer Battery - 3.7v 500mAh
[Lithium Ion Polymer Battery - 3.7v 500mAh](https://www.adafruit.com/product/1578)
Lithium-ion polymer (also known as 'lipo' or 'lipoly') batteries are thin, light, and powerful. The output ranges from 4.2V when completely charged to 3.7V. This battery has a capacity of 500mAh for a total of about 1.9 Wh. If you need a larger (or smaller!) battery,
In Stock
[Buy Now](https://www.adafruit.com/product/1578)
[Related Guides to the Product](https://learn.adafruit.com/products/1578/guides)
## Related Guides
- [Sound Activated Shark Mask](https://learn.adafruit.com/sound-activated-shark-mask.md)
- [SNES EZ Key Bluefruit Game Pad](https://learn.adafruit.com/snes-ez-key-bluefruit-game-pad.md)
- [Color-sensor Driven NeoPixel Dress](https://learn.adafruit.com/color-sensor-driven-neopixel-dress.md)
- [Adafruit MicroLipo and MiniLipo Battery Chargers](https://learn.adafruit.com/adafruit-microlipo-and-minilipo-battery-chargers.md)
- [Cartoon Network and Make Code - Rose Quartz Shield Umbrella](https://learn.adafruit.com/cartoon-network-and-make-code-rose-quartz-shield-umbrella.md)
- [Ursula's Seashell Necklace](https://learn.adafruit.com/ursulas-seashell-necklace.md)
- [Wireless Control Button for WLED Projects](https://learn.adafruit.com/wireless-control-button-for-wled-projects.md)
- [Bunny Ears with MakeCode](https://learn.adafruit.com/bunny-ears-with-makecode.md)
- [VU Meter Baseball Hat](https://learn.adafruit.com/vu-meter-baseball-hat.md)
- [Glowing Fascinator Hat with Gemma M0 and MakeCode](https://learn.adafruit.com/glowing-fascinator-hat-gemma-m0-makecode.md)
- [LED Masquerade Masks](https://learn.adafruit.com/led-masquerade-masks.md)
- [Han Solo Blaster Cosplay](https://learn.adafruit.com/han-solo-blaster-cosplay.md)
- [Convert your Model M Keyboard to Bluetooth with Bluefruit EZ-Key HID](https://learn.adafruit.com/convert-your-model-m-keyboard-to-bluetooth-with-bluefruit-ez-key-hid.md)
- [Chameleon Scarf](https://learn.adafruit.com/chameleon-scarf.md)
- [Kaleidoscope Eyes (Trinket-Powered NeoPixel LED Ring Goggles)](https://learn.adafruit.com/kaleidoscope-eyes-neopixel-led-goggles-trinket-gemma.md)
---
# Source: https://learn.adafruit.com/skill-badge-requirements-solar/certificate-of-completion.md
# Skill Badge Requirements: Solar
## Certificate of Completion

- [Previous Page](https://learn.adafruit.com/skill-badge-requirements-solar/demonstration.md)
## Featured Products
### Round Solar Panel Skill Badge - 5V / 40mA
[Round Solar Panel Skill Badge - 5V / 40mA](https://www.adafruit.com/product/700)
This skill badge is self-fulfilling! Normally you would get the badge _after_ the project is done, but in this case, the badge can be part of the project! The solar panel is epoxied into a round disc 55mm diameter (about 2.2 inches), its rugged and looks cool besides. We include a...
In Stock
[Buy Now](https://www.adafruit.com/product/700)
[Related Guides to the Product](https://learn.adafruit.com/products/700/guides)
## Related Guides
- [Adafruit FunHouse](https://learn.adafruit.com/adafruit-funhouse.md)
- [Pet Bowl Water Level Sensing](https://learn.adafruit.com/pet-bowl-water-level-sensing-with-the-funhouse-and-home-assistant.md)
- [Wind Blowing Emoji Prop](https://learn.adafruit.com/wind-face-emoji.md)
- [Circuit Playground Express: Piano de Limones](https://learn.adafruit.com/circuit-playground-express-piano-de-limones.md)
- [Smart Measuring Cup](https://learn.adafruit.com/smart-measuring-cup.md)
- [Raspberry Pi Analog to Digital Converters](https://learn.adafruit.com/raspberry-pi-analog-to-digital-converters.md)
- [Face Mask Efficacy Testing with SCIENCE!](https://learn.adafruit.com/raspberry-pi-camera-vision-face-mask-efficacy-testing.md)
- [Remote controlled door lock using a fingerprint sensor & Adafruit IO](https://learn.adafruit.com/remote-controlled-door-lock-using-a-fingerprint-sensor-and-adafruit-io.md)
- [PowerWash Simulator Nozzle Controller](https://learn.adafruit.com/powerwash-simulator-nozzle-controller.md)
- [Send Raspberry Pi Data to COSM](https://learn.adafruit.com/send-raspberry-pi-data-to-cosm.md)
- [Adafruit Analog Accelerometer Breakouts](https://learn.adafruit.com/adafruit-analog-accelerometer-breakouts.md)
- [CircuitPython Libraries on any Computer with FT232H](https://learn.adafruit.com/circuitpython-on-any-computer-with-ft232h.md)
- [Adafruit LSM9DS1 Accelerometer + Gyro + Magnetometer 9-DOF Breakout](https://learn.adafruit.com/adafruit-lsm9ds1-accelerometer-plus-gyro-plus-magnetometer-9-dof-breakout.md)
- [Programmable Wireless BLE Gesture Mouse](https://learn.adafruit.com/ble-wireless-gesture-mouse.md)
- [Adafruit Feather nRF52840 Sense](https://learn.adafruit.com/adafruit-feather-sense.md)
---
# Source: https://learn.adafruit.com/16-channel-pwm-servo-driver/chaining-drivers.md
# Adafruit PCA9685 16-Channel Servo Driver
## Chaining Drivers
Multiple Drivers (up to 62) can be chained to control still more servos. With headers at both ends of the board, the wiring is as simple as connecting a [6-pin parallel cable](https://www.adafruit.com/products/206) from one board to the next.

## Addressing the Boards
Each board in the chain must be assigned a unique address. This is done with the address jumpers on the upper right edge of the board. The I2C base address for each board is 0x40. The binary address that you program with the address jumpers is added to the base I2C address.
To program the address offset, use a drop of solder to bridge the corresponding address jumper for each binary '1' in the address. 
Board 0: Address = 0x40 Offset = binary 00000 (no jumpers required)
Board 1: Address = 0x41 Offset = binary 00001 (bridge A0 as in the photo above)
Board 2: Address = 0x42 Offset = binary 00010 (bridge A1)
Board 3: Address = 0x43 Offset = binary 00011 (bridge A0 & A1)
Board 4: Address = 0x44 Offset = binary 00100 (bridge A2)
etc.
In your sketch, you'll need to declare a separate pobject for each board. Call begin on each object, and control each servo through the object it's attached to. For example:
```
#include <Wire.h>
#include <Adafruit_PWMServoDriver.h>
Adafruit_PWMServoDriver pwm1 = Adafruit_PWMServoDriver(0x40);
Adafruit_PWMServoDriver pwm2 = Adafruit_PWMServoDriver(0x41);
void setup() {
Serial.begin(9600);
Serial.println("16 channel PWM test!");
pwm1.begin();
pwm1.setPWMFreq(1600); // This is the maximum PWM frequency
pwm2.begin();
pwm2.setPWMFreq(1600); // This is the maximum PWM frequency
}
```
- [Previous Page](https://learn.adafruit.com/16-channel-pwm-servo-driver/hooking-it-up.md)
- [Next Page](https://learn.adafruit.com/16-channel-pwm-servo-driver/using-the-adafruit-library.md)
## Featured Products
### Micro servo
[Micro servo](https://www.adafruit.com/product/169)
Tiny little servo can rotate approximately 180 degrees (90 in each direction) and works just like the standard kinds you're used to but _smaller_. You can use any servo code, hardware, or library to control these servos. Good for beginners who want to make stuff move without...
In Stock
[Buy Now](https://www.adafruit.com/product/169)
[Related Guides to the Product](https://learn.adafruit.com/products/169/guides)
### Standard servo - TowerPro SG-5010
[Standard servo - TowerPro SG-5010](https://www.adafruit.com/product/155)
This high-torque standard servo can rotate approximately 180 degrees (90 in each direction). You can use any servo code, hardware, or library to control these servos. Good for beginners who want to make stuff move without building a motor controller with feedback & gearbox. Comes with 3...
In Stock
[Buy Now](https://www.adafruit.com/product/155)
[Related Guides to the Product](https://learn.adafruit.com/products/155/guides)
### Continuous Rotation Servo
[Continuous Rotation Servo](https://www.adafruit.com/product/154)
This servo rotates fully forward or backward instead of moving to a position. You can use any servo code, hardware, or library to control these servos. Good for making simple moving robots. Comes with four different horns, as shown.
To control with an Arduino, we suggest connecting...
In Stock
[Buy Now](https://www.adafruit.com/product/154)
[Related Guides to the Product](https://learn.adafruit.com/products/154/guides)
### Adafruit 16-Channel 12-bit PWM/Servo Driver - I2C interface
[Adafruit 16-Channel 12-bit PWM/Servo Driver - I2C interface](https://www.adafruit.com/product/815)
You want to make a cool robot, maybe a hexapod walker, or maybe just a piece of art with a lot of moving parts. Or maybe you want to drive a lot of LEDs with precise PWM output. Then you realize that your microcontroller has a limited number of PWM outputs! What now? You could give up OR you...
In Stock
[Buy Now](https://www.adafruit.com/product/815)
[Related Guides to the Product](https://learn.adafruit.com/products/815/guides)
### Adafruit METRO 328 Fully Assembled - Arduino IDE compatible
[Adafruit METRO 328 Fully Assembled - Arduino IDE compatible](https://www.adafruit.com/product/50)
We sure love the ATmega328 here at Adafruit, and we use them _a lot_ for our own projects. The processor has plenty of GPIO, Analog inputs, hardware UART SPI and I2C, timers and PWM galore - just enough for most simple projects. When we need to go small, we use a
Out of Stock
[Buy Now](https://www.adafruit.com/product/50)
[Related Guides to the Product](https://learn.adafruit.com/products/50/guides)
## Related Guides
- [LED Tricks: Gamma Correction](https://learn.adafruit.com/led-tricks-gamma-correction.md)
- [MIDI Controlled Robot Lyre with CircuitPython](https://learn.adafruit.com/midi-controlled-robot-lyre-with-circuitpython.md)
- [Photocells](https://learn.adafruit.com/photocells.md)
- [Bluetooth Temperature & Humidity Sensor](https://learn.adafruit.com/bluetooth-temperature-and-humidity-sensor.md)
- [Wave Shield Voice Changer](https://learn.adafruit.com/wave-shield-voice-changer.md)
- [Arduino Lesson 2. LEDs](https://learn.adafruit.com/adafruit-arduino-lesson-2-leds.md)
- [Arduino Lesson 17. Email Sending Movement Detector](https://learn.adafruit.com/arduino-lesson-17-email-sending-movement-detector.md)
- [NeoPixel Painter](https://learn.adafruit.com/neopixel-painter.md)
- [Arduino Lesson 11. LCD Displays - Part 1](https://learn.adafruit.com/adafruit-arduino-lesson-11-lcd-displays-1.md)
- [Adafruit PN532 RFID/NFC Breakout and Shield](https://learn.adafruit.com/adafruit-pn532-rfid-nfc.md)
- [Silicone Robo-Tentacle](https://learn.adafruit.com/silicone-robo-tentacle.md)
- [Sending an SMS with Temboo](https://learn.adafruit.com/sending-an-sms-with-temboo.md)
- [Adafruit Proto Shield for Arduino](https://learn.adafruit.com/adafruit-proto-shield-arduino.md)
- [Programming Arduino with Android and Windows Tablets](https://learn.adafruit.com/programming-arduino-with-android-and-windows-tablets.md)
- [DS1307 Real Time Clock Breakout Board Kit](https://learn.adafruit.com/ds1307-real-time-clock-breakout-board-kit.md)
---
# Source: https://learn.adafruit.com/adafruit-led-backpack/changing-i2c-address.md
# Adafruit LED Backpacks
## Changing I2C Address
The HT16K33 driver chip on these LED backpacks has a default I2C address of **0x70**. Since each device on an I2C bus must have a unique address, its important to avoid collisions or you'll get a lot of strange responses from your electronic devices!
Luckily, the HT16K33 has 2 or 3 address adjust pins, so that the address can be changed! The mini 0.8" 8x8 matrix backpack has 2 address adjust pins. The 1.2" 8x8, bi-color 8x8, bi-color bargraph and 4 x 7-segment backpacks have 3 address adjust pins.
That means that you can set the backpacks to these addresses:
- **Mini 0.8" 8x8:** 0x70, 0x71, 0x72, 0x73
- **Small 1.2" 8x8:** 0x70, 0x71, 0x72, 0x73, 0x74, 0x75, 0x76, 0x77
- **4 x 7-segment:** 0x70, 0x71, 0x72, 0x73, 0x74, 0x75, 0x76, 0x77
- **Bi-color 1.2" 8x8:** 0x70, 0x71, 0x72, 0x73, 0x74, 0x75, 0x76, 0x77
- **Bi-color 24-bargraph:** 0x70, 0x71, 0x72, 0x73, 0x74, 0x75, 0x76, 0x77
You can mix-and-match matrices, as long as each one has a unique address!
## Changing Addresses
You can change the address of a backpack very easily. Look on the back to find the two or three **A0, A1 or A2** solder jumpers. Each one of these is used to hardcode in the address. If a jumper is shorted with solder, that sets the address. **A0** sets the lowest bit with a value of **1** , **A1** sets the middle bit with a value of **2** and **A2** sets the high bit with a value of **4**. The final address is **0x70 + A2 + A1 + A0**. So for example if **A2** is shorted and **A0** is shorted, the address is **0x70 + 4 + 1 = 0x75.** If only A1 is shorted, the address is **0x70 + 2 = 0x72**
**A2** does not appear on the mini 0.8" 8x8 matrix, so you cannot set the address higher than 0x73
Info:


# Changing the address in your code
Once you've adjusted the address on the backpack, you'll also want to adjust the address in the code!
For the Arduino library we wrote, its simple. For example, lets say you want to have two seven-segment matrices. One is set to address 0x70 and the other is set to 0x71. Find this code in the example
```
Adafruit_7segment matrix = Adafruit_7segment();
void setup() {
Serial.begin(9600);
Serial.println("7 Segment Backpack Test");
matrix.begin(0x70);
}
```
And change it to this:
```
Adafruit_7segment matrix1 = Adafruit_7segment();
Adafruit_7segment matrix2 = Adafruit_7segment();
void setup() {
Serial.begin(9600);
Serial.println("Double 7 Segment Backpack Test");
matrix1.begin(0x70);
matrix2.begin(0x71);
}
```
That is, instantiate two matrix objects. Then one is called with **begin(0x70)** and the other is called with **begin(0x71)**. Each one can be used individually. If you need more matrices, just instantiate more objects at the top and **begin()** each one with the unique i2c address.
- [Previous Page](https://learn.adafruit.com/adafruit-led-backpack/connecting-multiple-backpacks.md)
- [Next Page](https://learn.adafruit.com/adafruit-led-backpack/faq.md)
## Primary Products
### Adafruit Mini 8x8 LED Matrix w/I2C Backpack - Red
[Adafruit Mini 8x8 LED Matrix w/I2C Backpack - Red](https://www.adafruit.com/product/870)
What's better than a single LED? Lots of LEDs! A fun way to make a small display is to use an [8x8 matrix](https://www.adafruit.com/category/37_88) or a [4-digit 7-segment display](https://www.adafruit.com/category/37_103). Matrices like these are...
In Stock
[Buy Now](https://www.adafruit.com/product/870)
[Related Guides to the Product](https://learn.adafruit.com/products/870/guides)
### Adafruit Mini 8x8 LED Matrix w/I2C Backpack - Yellow
[Adafruit Mini 8x8 LED Matrix w/I2C Backpack - Yellow](https://www.adafruit.com/product/871)
What's better than a single LED? Lots of LEDs! A fun way to make a small display is to use an [8x8 matrix](https://www.adafruit.com/category/37_88) or a [4-digit 7-segment display](https://www.adafruit.com/category/37_103). Matrices like these are...
In Stock
[Buy Now](https://www.adafruit.com/product/871)
[Related Guides to the Product](https://learn.adafruit.com/products/871/guides)
### Adafruit Mini 0.8" 8x8 LED Matrix w/I2C Backpack - Yellow-Green
[Adafruit Mini 0.8" 8x8 LED Matrix w/I2C Backpack - Yellow-Green](https://www.adafruit.com/product/872)
What's better than a single LED? Lots of LEDs! A fun way to make a small display is to use an [8x8 matrix](https://www.adafruit.com/category/37_88) or a [4-digit 7-segment display](https://www.adafruit.com/category/37_103). Matrices like these are...
In Stock
[Buy Now](https://www.adafruit.com/product/872)
[Related Guides to the Product](https://learn.adafruit.com/products/872/guides)
### Adafruit 0.56" 4-Digit 7-Segment Display with I2C Backpack - Red
[Adafruit 0.56" 4-Digit 7-Segment Display with I2C Backpack - Red](https://www.adafruit.com/product/878)
What's better than a single LED? Lots of LEDs! A fun way to make a small display is to use an [8x8 matrix](https://www.adafruit.com/category/37_88) or a [4-digit 7-segment display](https://www.adafruit.com/category/37_103). Matrices like these are...
In Stock
[Buy Now](https://www.adafruit.com/product/878)
[Related Guides to the Product](https://learn.adafruit.com/products/878/guides)
### Adafruit 0.56" 4-Digit 7-Segment Display w/I2C Backpack - Yellow
[Adafruit 0.56" 4-Digit 7-Segment Display w/I2C Backpack - Yellow](https://www.adafruit.com/product/879)
What's better than a single LED? Lots of LEDs! A fun way to make a small display is to use an [8x8 matrix](https://www.adafruit.com/category/37_88) or a [4-digit 7-segment display](https://www.adafruit.com/category/37_103). Matrices like these are...
In Stock
[Buy Now](https://www.adafruit.com/product/879)
[Related Guides to the Product](https://learn.adafruit.com/products/879/guides)
### Adafruit 0.56" 4-Digit 7-Segment Display w/ I2C Backpack - Green
[Adafruit 0.56" 4-Digit 7-Segment Display w/ I2C Backpack - Green](https://www.adafruit.com/product/880)
What's better than a single LED? Lots of LEDs! A fun way to make a small display is to use an [8x8 matrix](https://www.adafruit.com/category/37_88) or a [4-digit 7-segment display](https://www.adafruit.com/category/37_103). Matrices like these are...
No Longer Stocked
[Buy Now](https://www.adafruit.com/product/880)
[Related Guides to the Product](https://learn.adafruit.com/products/880/guides)
### Adafruit 0.56" 4-Digit 7-Segment Display w/ I2C Backpack - Blue
[Adafruit 0.56" 4-Digit 7-Segment Display w/ I2C Backpack - Blue](https://www.adafruit.com/product/881)
What's better than a single LED? Lots of LEDs! A fun way to make a small display is to use an [8x8 matrix](https://www.adafruit.com/category/37_88) or a [4-digit 7-segment display](https://www.adafruit.com/category/37_103). Matrices like these are...
In Stock
[Buy Now](https://www.adafruit.com/product/881)
[Related Guides to the Product](https://learn.adafruit.com/products/881/guides)
### Adafruit Bicolor LED Square Pixel Matrix with I2C Backpack
[Adafruit Bicolor LED Square Pixel Matrix with I2C Backpack](https://www.adafruit.com/product/902)
What's better than a single LED? Lots of LEDs! A fun way to make a small colorful display is to use a [1.2" Bi-color 8x8 LED Matrix](http://www.adafruit.com/products/458). Matrices like these are 'multiplexed' - so to control all the 128 LEDs you need 24 pins....
In Stock
[Buy Now](https://www.adafruit.com/product/902)
[Related Guides to the Product](https://learn.adafruit.com/products/902/guides)
### Adafruit Mini 8x8 LED Matrix w/I2C Backpack - Blue
[Adafruit Mini 8x8 LED Matrix w/I2C Backpack - Blue](https://www.adafruit.com/product/959)
What's better than a single LED? Lots of LEDs! A fun way to make a small display is to use an [8x8 matrix](https://www.adafruit.com/category/37_88) or a [4-digit 7-segment display](https://www.adafruit.com/category/37_103). Matrices like these are...
In Stock
[Buy Now](https://www.adafruit.com/product/959)
[Related Guides to the Product](https://learn.adafruit.com/products/959/guides)
### Adafruit 0.56" 4-Digit 7-Segment Display w/I2C Backpack - White
[Adafruit 0.56" 4-Digit 7-Segment Display w/I2C Backpack - White](https://www.adafruit.com/product/1002)
What's better than a single LED? Lots of LEDs! A fun way to make a small display is to use an [8x8 matrix](https://www.adafruit.com/category/37_88) or a [4-digit 7-segment display](https://www.adafruit.com/category/37_103). Matrices like these are...
In Stock
[Buy Now](https://www.adafruit.com/product/1002)
[Related Guides to the Product](https://learn.adafruit.com/products/1002/guides)
### Adafruit 1.2" 8x8 LED Matrix Backpack
[Adafruit 1.2" 8x8 LED Matrix Backpack](https://www.adafruit.com/product/1048)
By popular request, you can now get our 8x8 LED backpacks without the LEDs! These backpacks feature an HT16K33 I2C LED driver, they're simple and easy to use - you can use [our very nice library for the backpacks to...](https://github.com/adafruit/Adafruit-LED-Backpack-Library)
In Stock
[Buy Now](https://www.adafruit.com/product/1048)
[Related Guides to the Product](https://learn.adafruit.com/products/1048/guides)
### Adafruit Small 1.2" 8x8 LED Matrix w/I2C Backpack - Red
[Adafruit Small 1.2" 8x8 LED Matrix w/I2C Backpack - Red](https://www.adafruit.com/product/1049)
What's better than a single LED? Lots of LEDs! A fun way to make a small display is to use an [8x8 matrix](https://www.adafruit.com/category/37_88) or a [4-digit 7-segment display](https://www.adafruit.com/category/37_103). Matrices like these are...
In Stock
[Buy Now](https://www.adafruit.com/product/1049)
[Related Guides to the Product](https://learn.adafruit.com/products/1049/guides)
### Adafruit Small 1.2" 8x8 LED Matrix w/I2C Backpack - Yellow
[Adafruit Small 1.2" 8x8 LED Matrix w/I2C Backpack - Yellow](https://www.adafruit.com/product/1050)
What's better than a single LED? Lots of LEDs! A fun way to make a small display is to use an [8x8 matrix](https://www.adafruit.com/category/37_88) or a [4-digit 7-segment display](https://www.adafruit.com/category/37_103). Matrices like these are...
In Stock
[Buy Now](https://www.adafruit.com/product/1050)
[Related Guides to the Product](https://learn.adafruit.com/products/1050/guides)
### Adafruit Small 1.2" 8x8 LED Matrix w/I2C Backpack - Blue
[Adafruit Small 1.2" 8x8 LED Matrix w/I2C Backpack - Blue](https://www.adafruit.com/product/1052)
What's better than a single LED? Lots of LEDs! A fun way to make a small display is to use an [8x8 matrix](https://www.adafruit.com/category/37_88) or a [4-digit 7-segment display](https://www.adafruit.com/category/37_103). Matrices like these are...
In Stock
[Buy Now](https://www.adafruit.com/product/1052)
[Related Guides to the Product](https://learn.adafruit.com/products/1052/guides)
### Adafruit Mini 8x8 LED Matrix w/I2C Backpack - Ultra Bright White
[Adafruit Mini 8x8 LED Matrix w/I2C Backpack - Ultra Bright White](https://www.adafruit.com/product/1080)
What's better than a single LED? Lots of LEDs! A fun way to make a small display is to use an [8x8 matrix](https://www.adafruit.com/category/37_88) or a [4-digit 7-segment display](https://www.adafruit.com/category/37_103). Matrices like these are...
In Stock
[Buy Now](https://www.adafruit.com/product/1080)
[Related Guides to the Product](https://learn.adafruit.com/products/1080/guides)
### Adafruit 1.2" 4-Digit 7-Segment Display w/I2C Backpack - Green
[Adafruit 1.2" 4-Digit 7-Segment Display w/I2C Backpack - Green](https://www.adafruit.com/product/1268)
What's better than a single LED? Lots of LEDs! A fun way to make a numeric display is to use a [4-digit 7-segment display](https://www.adafruit.com/category/37_103). LED matrices like these are 'multiplexed' - so to control all the seven-segment LEDs you need 14 pins....
No Longer Stocked
[Buy Now](https://www.adafruit.com/product/1268)
[Related Guides to the Product](https://learn.adafruit.com/products/1268/guides)
### Adafruit 1.2" 4-Digit 7-Segment Display w/I2C Backpack - Yellow
[Adafruit 1.2" 4-Digit 7-Segment Display w/I2C Backpack - Yellow](https://www.adafruit.com/product/1269)
What's better than a single LED? Lots of LEDs! A fun way to make a numeric display is to use a [4-digit 7-segment display](https://www.adafruit.com/category/37_103). LED matrices like these are 'multiplexed' - so to control all the seven-segment LEDs you need 14 pins....
In Stock
[Buy Now](https://www.adafruit.com/product/1269)
[Related Guides to the Product](https://learn.adafruit.com/products/1269/guides)
### Adafruit 1.2" 4-Digit 7-Segment Display w/I2C Backpack - Red
[Adafruit 1.2" 4-Digit 7-Segment Display w/I2C Backpack - Red](https://www.adafruit.com/product/1270)
What's better than a single LED? Lots of LEDs! A fun way to make a numeric display is to use a [4-digit 7-segment display](https://www.adafruit.com/category/37_103). LED matrices like these are 'multiplexed' - so to control all the seven-segment LEDs you need 14 pins....
In Stock
[Buy Now](https://www.adafruit.com/product/1270)
[Related Guides to the Product](https://learn.adafruit.com/products/1270/guides)
### Small 1.2" 8x8 Ultra Bright White LED Matrix + Backpack
[Small 1.2" 8x8 Ultra Bright White LED Matrix + Backpack](https://www.adafruit.com/product/1614)
What's better than a single LED? Lots of LEDs! A fun way to make a small display is to use an [8x8 matrix](https://www.adafruit.com/category/37_88) or a [4-digit 7-segment display](https://www.adafruit.com/category/37_103). Matrices like these are...
In Stock
[Buy Now](https://www.adafruit.com/product/1614)
[Related Guides to the Product](https://learn.adafruit.com/products/1614/guides)
### Adafruit Small 1.2" 8x8 LED Matrix w/I2C Backpack - Pure Green
[Adafruit Small 1.2" 8x8 LED Matrix w/I2C Backpack - Pure Green](https://www.adafruit.com/product/1632)
What's better than a single LED? Lots of LEDs! A fun way to make a small display is to use an [8x8 matrix](https://www.adafruit.com/category/37_88) or a [4-digit 7-segment display](https://www.adafruit.com/category/37_103). Matrices like these are...
In Stock
[Buy Now](https://www.adafruit.com/product/1632)
[Related Guides to the Product](https://learn.adafruit.com/products/1632/guides)
### Adafruit Mini 0.8" 8x8 LED Matrix w/I2C Backpack - Pure Green
[Adafruit Mini 0.8" 8x8 LED Matrix w/I2C Backpack - Pure Green](https://www.adafruit.com/product/1633)
What's better than a single LED? Lots of LEDs! A fun way to make a small display is to use an [8x8 matrix](https://www.adafruit.com/category/37_88) or a [4-digit 7-segment display](https://www.adafruit.com/category/37_103). Matrices like these are...
In Stock
[Buy Now](https://www.adafruit.com/product/1633)
[Related Guides to the Product](https://learn.adafruit.com/products/1633/guides)
### Bi-Color (Red/Green) 24-Bar Bargraph w/I2C Backpack Kit
[Bi-Color (Red/Green) 24-Bar Bargraph w/I2C Backpack Kit](https://www.adafruit.com/product/1721)
What's better than a single LED? Lots of LEDs! A fun way to make a small linear display is to use two 12-bar Bi-color bar-graphs. However, this LED bargraph is 'multiplexed' - so to control all the 48 LEDs you need a lot of pins.
Out of Stock
[Buy Now](https://www.adafruit.com/product/1721)
[Related Guides to the Product](https://learn.adafruit.com/products/1721/guides)
### Small 1.2" 8x8 Ultra Bright Square Amber LED Matrix + Backpack
[Small 1.2" 8x8 Ultra Bright Square Amber LED Matrix + Backpack](https://www.adafruit.com/product/1854)
What's better than a single LED? Lots of LEDs! Matrices like these are 'multiplexed' - so to control 64 LEDs you need 16 pins. That's a lot of pins, and there are [driver chips like the MAX7219](//www.adafruit.com/products/453) that can control a matrix for you but...
In Stock
[Buy Now](https://www.adafruit.com/product/1854)
[Related Guides to the Product](https://learn.adafruit.com/products/1854/guides)
### Small 1.2" 8x8 Ultra Bright Square Yellow LED Matrix + Backpack
[Small 1.2" 8x8 Ultra Bright Square Yellow LED Matrix + Backpack](https://www.adafruit.com/product/1855)
What's better than a single LED? Lots of LEDs! Matrices like these are 'multiplexed' - so to control 64 LEDs you need 16 pins. That's a lot of pins, and there are [driver chips like the MAX7219](//www.adafruit.com/products/453) that can control a matrix for you but...
In Stock
[Buy Now](https://www.adafruit.com/product/1855)
[Related Guides to the Product](https://learn.adafruit.com/products/1855/guides)
### Small 1.2" 8x8 Bright Square Pure Green LED Matrix + Backpack
[Small 1.2" 8x8 Bright Square Pure Green LED Matrix + Backpack](https://www.adafruit.com/product/1856)
What's better than a single LED? Lots of LEDs! Matrices like these are 'multiplexed' - so to control 64 LEDs you need 16 pins. That's a lot of pins, and there are [driver chips like the MAX7219](//www.adafruit.com/products/453) that can control a matrix for you but...
In Stock
[Buy Now](https://www.adafruit.com/product/1856)
[Related Guides to the Product](https://learn.adafruit.com/products/1856/guides)
### Small 1.2" 8x8 Ultra Bright Square White LED Matrix + Backpack
[Small 1.2" 8x8 Ultra Bright Square White LED Matrix + Backpack](https://www.adafruit.com/product/1857)
What's better than a single LED? Lots of LEDs! Matrices like these are 'multiplexed' - so to control 64 LEDs you need 16 pins. That's a lot of pins, and there are [driver chips like the MAX7219](//www.adafruit.com/products/453) that can control a matrix for you but...
In Stock
[Buy Now](https://www.adafruit.com/product/1857)
[Related Guides to the Product](https://learn.adafruit.com/products/1857/guides)
### Adafruit 14-segment LED Alphanumeric Backpack - STEMMA QT
[Adafruit 14-segment LED Alphanumeric Backpack - STEMMA QT](https://www.adafruit.com/product/1910)
By popular request, you can now get our 14-segment LED backpacks without the LEDs! These backpacks feature an HT16K33 I2C LED driver, they're simple and easy to use - you can use [our very nice library for the backpacks to...](https://github.com/adafruit/Adafruit-LED-Backpack-Library)
In Stock
[Buy Now](https://www.adafruit.com/product/1910)
[Related Guides to the Product](https://learn.adafruit.com/products/1910/guides)
### Quad Alphanumeric Display - Red 0.54" Digits w/ I2C Backpack
[Quad Alphanumeric Display - Red 0.54" Digits w/ I2C Backpack](https://www.adafruit.com/product/1911)
Display, elegantly, 012345678 or 9! Gaze, hypnotized, at ABCDEFGHIJKLM - well it can display the whole alphabet. You get the point. This is a nice, bright alphanumeric display that shows letters and numbers in a beautiful red hue. It's super bright and designed for viewing from distances...
In Stock
[Buy Now](https://www.adafruit.com/product/1911)
[Related Guides to the Product](https://learn.adafruit.com/products/1911/guides)
### Quad Alphanumeric Display - Blue 0.54" Digits w/ I2C Backpack
[Quad Alphanumeric Display - Blue 0.54" Digits w/ I2C Backpack](https://www.adafruit.com/product/1912)
Display, elegantly, 012345678 or 9! Gaze, hypnotized, at ABCDEFGHIJKLM - well it can display the whole alphabet. You get the point. This is a nice, bright alphanumeric display that shows letters and numbers in a beautiful blue hue. It's super bright and designed for viewing from distances...
In Stock
[Buy Now](https://www.adafruit.com/product/1912)
[Related Guides to the Product](https://learn.adafruit.com/products/1912/guides)
### 16x8 1.2" LED Matrix + Backpack - Ultra Bright Round Green LEDs
[16x8 1.2" LED Matrix + Backpack - Ultra Bright Round Green LEDs](https://www.adafruit.com/product/2035)
What's better than a single LED? Lots of LEDs! And what's better than lots of LEDs? **TWO TIMES AS MANY LEDS!!!**
With the 16x8 LED Matrix Backpack we've doubled your project's matrix capacity by making it super easy to get two separate 8x8 matrices onto...
In Stock
[Buy Now](https://www.adafruit.com/product/2035)
[Related Guides to the Product](https://learn.adafruit.com/products/2035/guides)
### 16x8 1.2" LED Matrix+Backpack UltraBright Round YellowGreen LEDs
[16x8 1.2" LED Matrix+Backpack UltraBright Round YellowGreen LEDs](https://www.adafruit.com/product/2036)
What's better than a single LED? Lots of LEDs! And what's better than lots of LEDs? **TWO TIMES AS MANY LEDS!!!**
With the 16x8 LED Matrix Backpack we've doubled your project's matrix capacity by making it super easy to get two separate 8x8 matrices onto...
In Stock
[Buy Now](https://www.adafruit.com/product/2036)
[Related Guides to the Product](https://learn.adafruit.com/products/2036/guides)
### 16x8 1.2" LED Matrix + Backpack - Ultra Bright Round Red LEDs
[16x8 1.2" LED Matrix + Backpack - Ultra Bright Round Red LEDs](https://www.adafruit.com/product/2037)
What's better than a single LED? Lots of LEDs! And what's better than lots of LEDs? **TWO TIMES AS MANY LEDS!!!**
With the 16x8 LED Matrix Backpack we've doubled your project's matrix capacity by making it super easy to get two separate 8x8 matrices onto...
In Stock
[Buy Now](https://www.adafruit.com/product/2037)
[Related Guides to the Product](https://learn.adafruit.com/products/2037/guides)
### 16x8 1.2" LED Matrix + Backpack - Ultra Bright Round White LEDs
[16x8 1.2" LED Matrix + Backpack - Ultra Bright Round White LEDs](https://www.adafruit.com/product/2038)
What's better than a single LED? Lots of LEDs! And what's better than lots of LEDs? **TWO TIMES AS MANY LEDS!!!**
With the 16x8 LED Matrix Backpack we've doubled your project's matrix capacity by making it super easy to get two separate 8x8 matrices onto...
In Stock
[Buy Now](https://www.adafruit.com/product/2038)
[Related Guides to the Product](https://learn.adafruit.com/products/2038/guides)
### 16x8 1.2" LED Matrix + Backpack - Ultra Bright Round Blue LEDs
[16x8 1.2" LED Matrix + Backpack - Ultra Bright Round Blue LEDs](https://www.adafruit.com/product/2039)
What's better than a single LED? Lots of LEDs! And what's better than lots of LEDs? **TWO TIMES AS MANY LEDS!!!**
With the 16x8 LED Matrix Backpack we've doubled your project's matrix capacity by making it super easy to get two separate 8x8 matrices onto...
In Stock
[Buy Now](https://www.adafruit.com/product/2039)
[Related Guides to the Product](https://learn.adafruit.com/products/2039/guides)
### 16x8 1.2" LED Matrix + Backpack - Ultra Bright Square Blue LEDs
[16x8 1.2" LED Matrix + Backpack - Ultra Bright Square Blue LEDs](https://www.adafruit.com/product/2040)
What's better than a single LED? Lots of LEDs! And what's better than lots of LEDs? **TWO TIMES AS MANY LEDS!!!**
With the 16x8 LED Matrix Backpack we've doubled your project's matrix capacity by making it super easy to get two separate 8x8 matrices onto...
In Stock
[Buy Now](https://www.adafruit.com/product/2040)
[Related Guides to the Product](https://learn.adafruit.com/products/2040/guides)
### 16x8 1.2" LED Matrix + Backpack - Ultra Bright Square Amber LEDs
[16x8 1.2" LED Matrix + Backpack - Ultra Bright Square Amber LEDs](https://www.adafruit.com/product/2041)
What's better than a single LED? Lots of LEDs! And what's better than lots of LEDs? **TWO TIMES AS MANY LEDS!!!**
With the 16x8 LED Matrix Backpack we've doubled your project's matrix capacity by making it super easy to get two separate 8x8 matrices onto...
In Stock
[Buy Now](https://www.adafruit.com/product/2041)
[Related Guides to the Product](https://learn.adafruit.com/products/2041/guides)
### 16x8 1.2" LED Matrix + Backpack - Ultra Bright Square Green LEDs
[16x8 1.2" LED Matrix + Backpack - Ultra Bright Square Green LEDs](https://www.adafruit.com/product/2042)
What's better than a single LED? Lots of LEDs! And what's better than lots of LEDs? **TWO TIMES AS MANY LEDS!!!**
With the 16x8 LED Matrix Backpack we've doubled your project's matrix capacity by making it super easy to get two separate 8x8 matrices onto...
In Stock
[Buy Now](https://www.adafruit.com/product/2042)
[Related Guides to the Product](https://learn.adafruit.com/products/2042/guides)
### 16x8 1.2" LED Matrix + Backpack -Ultra Bright Square Yellow LEDs
[16x8 1.2" LED Matrix + Backpack -Ultra Bright Square Yellow LEDs](https://www.adafruit.com/product/2043)
What's better than a single LED? Lots of LEDs! And what's better than lots of LEDs? **TWO TIMES AS MANY LEDS!!!**
With the 16x8 LED Matrix Backpack we've doubled your project's matrix capacity by making it super easy to get two separate 8x8 matrices onto...
In Stock
[Buy Now](https://www.adafruit.com/product/2043)
[Related Guides to the Product](https://learn.adafruit.com/products/2043/guides)
### 16x8 1.2" LED Matrix + Backpack - Ultra Bright Square White LEDs
[16x8 1.2" LED Matrix + Backpack - Ultra Bright Square White LEDs](https://www.adafruit.com/product/2044)
What's better than a single LED? Lots of LEDs! And what's better than lots of LEDs? **TWO TIMES AS MANY LEDS!!!**
With the 16x8 LED Matrix Backpack we've doubled your project's matrix capacity by making it super easy to get two separate 8x8 matrices onto...
In Stock
[Buy Now](https://www.adafruit.com/product/2044)
[Related Guides to the Product](https://learn.adafruit.com/products/2044/guides)
### 16x8 1.2" LED Matrix + Backpack-Ultra Bright Round Orange LEDs
[16x8 1.2" LED Matrix + Backpack-Ultra Bright Round Orange LEDs](https://www.adafruit.com/product/2052)
What's better than a single LED? Lots of LEDs! And what's better than lots of LEDs? **TWO TIMES AS MANY LEDS!!!**
With the 16x8 LED Matrix Backpack we've doubled your project's matrix capacity by making it super easy to get two separate 8x8 matrices onto...
In Stock
[Buy Now](https://www.adafruit.com/product/2052)
[Related Guides to the Product](https://learn.adafruit.com/products/2052/guides)
### 16x8 1.2" LED Matrices+Backpack Round LEDs in Various Colors
[16x8 1.2" LED Matrices+Backpack Round LEDs in Various Colors](https://www.adafruit.com/product/2054)
What's better than a single LED? Lots of LEDs! And what's better than lots of LEDs? **TWO TIMES AS MANY LEDS!!!**
With the 16x8 LED Matrix Backpack we've doubled your project's matrix capacity by making it super easy to get two separate 8x8 matrices onto...
Out of Stock
[Buy Now](https://www.adafruit.com/product/2054)
[Related Guides to the Product](https://learn.adafruit.com/products/2054/guides)
### Adafruit 8x16 LED Matrix FeatherWing w/o Matrices
[Adafruit 8x16 LED Matrix FeatherWing w/o Matrices](https://www.adafruit.com/product/3090)
You will chirp with delight when you see how easy it is to make your very own 8x16 LED matrix display for any Feather. At 0.8" square, the little [8x8 matrices](https://www.adafruit.com/new/?q=8x8%20miniature%20LED%20matrix&) have everything a big LED matrix has,...
Out of Stock
[Buy Now](https://www.adafruit.com/product/3090)
[Related Guides to the Product](https://learn.adafruit.com/products/3090/guides)
### Adafruit 14-segment LED Alphanumeric backpack (same as P1910)
[Adafruit 14-segment LED Alphanumeric backpack (same as P1910)](https://www.adafruit.com/product/3322)
Just the backpack + 4pin header
No Longer Stocked
[Buy Now](https://www.adafruit.com/product/3322)
[Related Guides to the Product](https://learn.adafruit.com/products/3322/guides)
## Featured Products
### Adafruit Small 1.2" 8x8 LED Matrix w/I2C Backpack - Yellow-Green
[Adafruit Small 1.2" 8x8 LED Matrix w/I2C Backpack - Yellow-Green](https://www.adafruit.com/product/1051)
What's better than a single LED? Lots of LEDs! A fun way to make a small display is to use an [8x8 matrix](https://www.adafruit.com/category/37_88) or a [4-digit 7-segment display](https://www.adafruit.com/category/37_103). Matrices like these are...
In Stock
[Buy Now](https://www.adafruit.com/product/1051)
[Related Guides to the Product](https://learn.adafruit.com/products/1051/guides)
### Small 1.2" 8x8 Ultra Bright Square Blue LED Matrix + Backpack
[Small 1.2" 8x8 Ultra Bright Square Blue LED Matrix + Backpack](https://www.adafruit.com/product/1853)
What's better than a single LED? Lots of LEDs! Matrices like these are 'multiplexed' - so to control 64 LEDs you need 16 pins. That's a lot of pins, and there are [driver chips like the MAX7219](//www.adafruit.com/products/453) that can control a matrix for you but...
In Stock
[Buy Now](https://www.adafruit.com/product/1853)
[Related Guides to the Product](https://learn.adafruit.com/products/1853/guides)
## Related Guides
- [LED Backpack Displays on Raspberry Pi and BeagleBone Black](https://learn.adafruit.com/led-backpack-displays-on-raspberry-pi-and-beaglebone-black.md)
- [Animating Multiple LED Backpacks](https://learn.adafruit.com/animating-multiple-led-backpacks.md)
- [Arduino GPS Clock](https://learn.adafruit.com/arduino-clock.md)
- [Raspberry Pi Physical Dashboard](https://learn.adafruit.com/raspberry-pi-physical-dashboard.md)
- [CircuitPython Hardware: LED Backpacks & FeatherWings](https://learn.adafruit.com/micropython-hardware-led-backpacks-and-featherwings.md)
- [Matrix and 7-Segment LED Backpack with the Raspberry Pi](https://learn.adafruit.com/matrix-7-segment-led-backpack-with-the-raspberry-pi.md)
- [DIY Pocket LED Gamer - Tiny Tetris!](https://learn.adafruit.com/diy-3d-printed-handheld-pocket-game-tiny-tetris-snake.md)
- [RGB LED Matrix Cube with 25,000 LEDs](https://learn.adafruit.com/rgb-led-matrix-cube-for-pi.md)
- [Creating GIFs for SmartMatrix](https://learn.adafruit.com/creating-gifs-for-smartmatrix.md)
- [Adafruit CharliePlex LED Matrix Bonnet](https://learn.adafruit.com/adafruit-charlieplex-bonnet.md)
- [Connecting a 16x32 RGB LED Matrix Panel to a Raspberry Pi](https://learn.adafruit.com/connecting-a-16x32-rgb-led-matrix-panel-to-a-raspberry-pi.md)
- [MicroPython Displays: Drawing Text](https://learn.adafruit.com/micropython-displays-drawing-text.md)
- [Heart Rate Badge](https://learn.adafruit.com/heart-rate-badge.md)
- [16x24 LED Matrix](https://learn.adafruit.com/16x24-led-matrix.md)
- [Adafruit IS31FL3741](https://learn.adafruit.com/adafruit-is31fl3741.md)
---
# Source: https://learn.adafruit.com/adafruits-raspberry-pi-lesson-2-first-time-configuration/changing-timezone.md
# Adafruit's Raspberry Pi Lesson 2. First Time Configuration
## Changing Timezone
Skipping past a few options for a moment, the next thing that you almost certainly need to do is (unless you live in the GMT timezone) is to change the timezone.

From the options, first select the Geographic Area, then the Timezone within that area.


- [Previous Page](https://learn.adafruit.com/adafruits-raspberry-pi-lesson-2-first-time-configuration/using-the-whole-screen.md)
- [Next Page](https://learn.adafruit.com/adafruits-raspberry-pi-lesson-2-first-time-configuration/booting-into-desktop.md)
## Featured Products
### Raspberry Pi 1 Model B Starter Pack - Includes a Raspberry Pi
[Raspberry Pi 1 Model B Starter Pack - Includes a Raspberry Pi](https://www.adafruit.com/product/1014)
You want to get hacking with your Pi fast, right? Get everything you need to start with the Adafruit Starter Pack for Raspberry Pi. It's the perfect accompaniment to your new Pi, everything you need to boot up your Pi Model B and get going. **We pre-assemble the Cobbler for you, no...**
No Longer Stocked
[Buy Now](https://www.adafruit.com/product/1014)
[Related Guides to the Product](https://learn.adafruit.com/products/1014/guides)
### Programming the Raspberry Pi: Getting Started with Python
[Programming the Raspberry Pi: Getting Started with Python](https://www.adafruit.com/product/1089)
**Program your own Raspberry Pi projects!**
An updated guide to programming your own Raspberry Pi projects. Learn to create inventive programs and fun games on your powerful Raspberry Pi--with no programming experience required. **This practical book has been revised...**
In Stock
[Buy Now](https://www.adafruit.com/product/1089)
[Related Guides to the Product](https://learn.adafruit.com/products/1089/guides)
### Budget Pack for Raspberry Pi 1 Model B (Doesn't include RasPi)
[Budget Pack for Raspberry Pi 1 Model B (Doesn't include RasPi)](https://www.adafruit.com/product/965)
An optimized collection of parts and pieces to experiment with Raspberry Pi at home, school or work. Great for students and those that want to get their feet wet, no soldering required! **THIS PACK DOES NOT INCLUDE A RASPBERRY PI 1 MODEL B and is NOT compatible with Model B+ or Raspberry Pi...**
No Longer Stocked
[Buy Now](https://www.adafruit.com/product/965)
[Related Guides to the Product](https://learn.adafruit.com/products/965/guides)
### Miniature Wireless USB Keyboard with Touchpad
[Miniature Wireless USB Keyboard with Touchpad](https://www.adafruit.com/product/922)
Add a miniature wireless controller to your computer project with this combination keyboard and touchpad. We found the smallest wireless USB keyboard available, a mere 6" x 2.4" x 0.5" (152mm x 59mm x 12.5mm)! It's small but usable to make a great accompaniment to a computer...
In Stock
[Buy Now](https://www.adafruit.com/product/922)
[Related Guides to the Product](https://learn.adafruit.com/products/922/guides)
### NTSC/PAL (Television) TFT Display - 4.3" Diagonal
[NTSC/PAL (Television) TFT Display - 4.3" Diagonal](https://www.adafruit.com/product/946)
Yes, this is an adorable small television! The visible display measures only 4.3" (11cm) diagonal, the TFT comes with a NTSC/PAL driver board, enclosure and stand. The display is very easy to use - simply connect 12VDC to the 2.1mm center-positive DC jack (or use the cable and connect to...
No Longer Stocked
[Buy Now](https://www.adafruit.com/product/946)
[Related Guides to the Product](https://learn.adafruit.com/products/946/guides)
### NTSC/PAL (Television) TFT Display - 7" Diagonal
[NTSC/PAL (Television) TFT Display - 7" Diagonal](https://www.adafruit.com/product/947)
Yes, this is an adorable small television! The visible display measures only 7" (17.8cm) diagonal, the TFT comes with a NTSC/PAL driver board, enclosure and stand. The display is very easy to use - simply connect the included 12VDC adapter to the 2.1mm center-positive DC jack, then...
No Longer Stocked
[Buy Now](https://www.adafruit.com/product/947)
[Related Guides to the Product](https://learn.adafruit.com/products/947/guides)
## Related Guides
- [Adafruit RGB Matrix + Real Time Clock HAT for Raspberry Pi](https://learn.adafruit.com/adafruit-rgb-matrix-plus-real-time-clock-hat-for-raspberry-pi.md)
- [Adafruit PiTFT 3.5" Touch Screen for Raspberry Pi](https://learn.adafruit.com/adafruit-pitft-3-dot-5-touch-screen-for-raspberry-pi.md)
- [Raspberry Pi Hosting Node-Red](https://learn.adafruit.com/raspberry-pi-hosting-node-red.md)
- [Windows IoT Core Application Development: Headed Blinky](https://learn.adafruit.com/windows-iot-application-development-headed-blinky.md)
- [Bonjour (Zeroconf) Networking for Windows and Linux](https://learn.adafruit.com/bonjour-zeroconf-networking-for-windows-and-linux.md)
- [Raspberry Pi Thermal Printer One Time Pads](https://learn.adafruit.com/raspberry-pi-thermal-printer-one-time-pads.md)
- [10" Raspberry Pi Desktop](https://learn.adafruit.com/10-raspberry-pi-desktop.md)
- [What is the Command Line?](https://learn.adafruit.com/what-is-the-command-line.md)
- [Adafruit's Raspberry Pi Lesson 6. Using SSH](https://learn.adafruit.com/adafruits-raspberry-pi-lesson-6-using-ssh.md)
- [Adafruit Prototyping Pi Plate](https://learn.adafruit.com/adafruit-prototyping-pi-plate.md)
- [CircuitPython Libraries on Linux and the 96Boards DragonBoard 410c](https://learn.adafruit.com/circuitpython-libraries-on-linux-and-the-96boards-dragonboard-410c.md)
- [Getting Started With Windows IoT Core on Raspberry Pi](https://learn.adafruit.com/getting-started-with-windows-iot-on-raspberry-pi.md)
- [Raspberry Pi Computer Quick-Start](https://learn.adafruit.com/raspberry-pi-computer-quick-start.md)
- [Adafruit Ultimate GPS with gpsd](https://learn.adafruit.com/adafruit-ultimate-gps-on-the-raspberry-pi.md)
- [Adafruit's Raspberry Pi Lesson 9. Controlling a DC Motor](https://learn.adafruit.com/adafruit-raspberry-pi-lesson-9-controlling-a-dc-motor.md)
---
# Source: https://learn.adafruit.com/character-lcds.md
# Character LCDs
## Overview
[We sell tons of lovely character LCDs for use with Arduino](http://www.adafruit.com/category/63_96), they are extremely common and a fast way to have your project show status messages. This tutorial will show how you can easily connect a character LCD, either 16x2 or [20x4](http://www.adafruit.com/products/198 "Link: http://www.adafruit.com/products/198").
The LCDs we sell at Adafruit have a low power LED backlight, run on +5v and require only 6 data pins to talk to. You can use **any** data pins you want!
This tutorial will cover character LCDs carried at Adafruit - [such as our "standard" blue&white 16x2, RGB 16x2 LCDs, "standard" blue&white 20x4 and RGB 20x4](https://www.adafruit.com/category/63_96 "Link: https://www.adafruit.com/category/63\_96"). We don't guarantee it will work with any other LCDs. If you need help getting other LCDs to work, please contact the place you purchased it from, they'll be happy to help!
- [Next Page](https://learn.adafruit.com/character-lcds/character-vs-graphical-lcds.md)
## Featured Products
### Standard LCD 16x2 + extras
[Standard LCD 16x2 + extras](https://www.adafruit.com/product/181)
Standard HD44780 LCDs are useful for creating standalone projects.
- 16 characters wide, 2 rows
- White text on blue background
- Connection port is 0.1" pitch, single row for easy breadboarding and wiring
- Pins are documented on the back of the LCD to assist...
In Stock
[Buy Now](https://www.adafruit.com/product/181)
[Related Guides to the Product](https://learn.adafruit.com/products/181/guides)
### Assembled Standard LCD 16x2 + extras - White on Blue
[Assembled Standard LCD 16x2 + extras - White on Blue](https://www.adafruit.com/product/1447)
Standard HD44780 LCDs are useful for creating standalone projects. This product is similar to our [Standard LCD 16x2 display **but comes with the header soldered on!**](https://www.adafruit.com/products/181)
- 16 characters wide, 2 rows
- White text...
In Stock
[Buy Now](https://www.adafruit.com/product/1447)
[Related Guides to the Product](https://learn.adafruit.com/products/1447/guides)
### RGB backlight positive LCD 16x2 + extras
[RGB backlight positive LCD 16x2 + extras](https://www.adafruit.com/product/398)
This is a fancy upgrade to standard 16x2 LCDs, instead of just having blue and white, or red and black, this LCD has black characters on a full color RGB-backlight background! That means you can change the background color to anything you want - red, green, blue, pink, white, purple yellow,...
In Stock
[Buy Now](https://www.adafruit.com/product/398)
[Related Guides to the Product](https://learn.adafruit.com/products/398/guides)
### RGB backlight negative LCD 16x2 + extras
[RGB backlight negative LCD 16x2 + extras](https://www.adafruit.com/product/399)
This is a fancy upgrade to standard 16x2 LCDs, instead of just having blue and white, or red and black, this LCD has full color RGB characters on a dark/black background! That means you can change the character display colors to anything you want - red, green, blue, pink, white, purple yellow,...
In Stock
[Buy Now](https://www.adafruit.com/product/399)
[Related Guides to the Product](https://learn.adafruit.com/products/399/guides)
### Standard LCD 20x4 + extras
[Standard LCD 20x4 + extras](https://www.adafruit.com/product/198)
Standard HD44780 LCDs are useful for creating standalone projects.
- 20 characters wide, 4 rows
- White text on blue background
- Connection port is 0.1" pitch, single row for easy breadboarding and wiring
- Single LED backlight with a resistor included, you can...
In Stock
[Buy Now](https://www.adafruit.com/product/198)
[Related Guides to the Product](https://learn.adafruit.com/products/198/guides)
### RGB backlight positive LCD 20x4 + extras
[RGB backlight positive LCD 20x4 + extras](https://www.adafruit.com/product/499)
This is a fancy upgrade to standard 20x4 LCDs, instead of just having blue and white, or red and black, this LCD has black characters on a full color RGB background! That means you can change the display background color to anything you want - red, green, blue, pink, white, purple yellow,...
In Stock
[Buy Now](https://www.adafruit.com/product/499)
[Related Guides to the Product](https://learn.adafruit.com/products/499/guides)
### RGB backlight negative LCD 20x4 + extras
[RGB backlight negative LCD 20x4 + extras](https://www.adafruit.com/product/498)
This is a fancy upgrade to standard 20x4 LCDs, instead of just having blue and white, or red and black, this LCD has full color RGB characters on a dark/black background! That means you can change the character display colors to anything you want - red, green, blue, pink, white, purple yellow,...
In Stock
[Buy Now](https://www.adafruit.com/product/498)
[Related Guides to the Product](https://learn.adafruit.com/products/498/guides)
### Adafruit METRO 328 Fully Assembled - Arduino IDE compatible
[Adafruit METRO 328 Fully Assembled - Arduino IDE compatible](https://www.adafruit.com/product/50)
We sure love the ATmega328 here at Adafruit, and we use them _a lot_ for our own projects. The processor has plenty of GPIO, Analog inputs, hardware UART SPI and I2C, timers and PWM galore - just enough for most simple projects. When we need to go small, we use a
Out of Stock
[Buy Now](https://www.adafruit.com/product/50)
[Related Guides to the Product](https://learn.adafruit.com/products/50/guides)
## Related Guides
- [Trinket Temperature & Humidity LCD Display](https://learn.adafruit.com/trinket-temperature-humidity-lcd-display.md)
- [Circuit Playground Sound-Controlled Robot](https://learn.adafruit.com/circuit-playground-sound-controlled-robot.md)
- [TTL Serial Camera](https://learn.adafruit.com/ttl-serial-camera.md)
- [Digital Circuits 7: MCUs... how do they work?](https://learn.adafruit.com/mcus-how-do-they-work.md)
- [Adafruit Data Logger Shield](https://learn.adafruit.com/adafruit-data-logger-shield.md)
- [Arduino "Hunt The Wumpus"](https://learn.adafruit.com/arduino-hunt-the-wumpus.md)
- [Arduino Lesson 2. LEDs](https://learn.adafruit.com/adafruit-arduino-lesson-2-leds.md)
- [Mini Thermal Receipt Printers](https://learn.adafruit.com/mini-thermal-receipt-printer.md)
- [Bluetooth Temperature & Humidity Sensor](https://learn.adafruit.com/bluetooth-temperature-and-humidity-sensor.md)
- [Character LCD with Raspberry Pi or BeagleBone Black](https://learn.adafruit.com/character-lcd-with-raspberry-pi-or-beaglebone-black.md)
- [DIY 8x2 LCD Shield](https://learn.adafruit.com/diy-8x2-lcd-shield.md)
- [Arduino Ethernet + SD Card](https://learn.adafruit.com/arduino-ethernet-sd-card.md)
- [Trellis 3D Printed Enclosure](https://learn.adafruit.com/trellis-3d-printed-enclosure.md)
- [Adafruit AirLift Shield - ESP32 WiFi Co-Processor](https://learn.adafruit.com/adafruit-airlift-shield-esp32-wifi-co-processor.md)
- [2.2" TFT Display](https://learn.adafruit.com/2-2-tft-display.md)
---
# Source: https://learn.adafruit.com/character-lcds/character-vs-graphical-lcds.md
# Character LCDs
## Character vs. Graphical LCDs
There are hundreds of different kinds of LCDs, the ones we'll be covering here are **character** LCDs. Character LCDs are ideal for displaying text. They can also be configured to display small icons but the icons must be only 5x7 pixels or so (very small!)
Here is an example of a character LCD, 16 characters by 2 lines:

If you look closely you can see the little rectangles where the characters are displayed. Each rectangle is a grid of pixels. Compare this to a graphical LCD such as the following:
The graphical LCD has one big grid of pixels (in this case 128x64 of them) - It can display text but its best at displaying images. Graphical LCDs tend to be larger, more expensive, difficult to use and need many more pins because of the complexity added.
**This tutorial isn't about graphical LCDs. Its only about text/character LCDs!**
- [Previous Page](https://learn.adafruit.com/character-lcds/overview.md)
- [Next Page](https://learn.adafruit.com/character-lcds/lcd-varieties.md)
## Featured Products
### Standard LCD 16x2 + extras
[Standard LCD 16x2 + extras](https://www.adafruit.com/product/181)
Standard HD44780 LCDs are useful for creating standalone projects.
- 16 characters wide, 2 rows
- White text on blue background
- Connection port is 0.1" pitch, single row for easy breadboarding and wiring
- Pins are documented on the back of the LCD to assist...
In Stock
[Buy Now](https://www.adafruit.com/product/181)
[Related Guides to the Product](https://learn.adafruit.com/products/181/guides)
### Assembled Standard LCD 16x2 + extras - White on Blue
[Assembled Standard LCD 16x2 + extras - White on Blue](https://www.adafruit.com/product/1447)
Standard HD44780 LCDs are useful for creating standalone projects. This product is similar to our [Standard LCD 16x2 display **but comes with the header soldered on!**](https://www.adafruit.com/products/181)
- 16 characters wide, 2 rows
- White text...
In Stock
[Buy Now](https://www.adafruit.com/product/1447)
[Related Guides to the Product](https://learn.adafruit.com/products/1447/guides)
### RGB backlight positive LCD 16x2 + extras
[RGB backlight positive LCD 16x2 + extras](https://www.adafruit.com/product/398)
This is a fancy upgrade to standard 16x2 LCDs, instead of just having blue and white, or red and black, this LCD has black characters on a full color RGB-backlight background! That means you can change the background color to anything you want - red, green, blue, pink, white, purple yellow,...
In Stock
[Buy Now](https://www.adafruit.com/product/398)
[Related Guides to the Product](https://learn.adafruit.com/products/398/guides)
### RGB backlight negative LCD 16x2 + extras
[RGB backlight negative LCD 16x2 + extras](https://www.adafruit.com/product/399)
This is a fancy upgrade to standard 16x2 LCDs, instead of just having blue and white, or red and black, this LCD has full color RGB characters on a dark/black background! That means you can change the character display colors to anything you want - red, green, blue, pink, white, purple yellow,...
In Stock
[Buy Now](https://www.adafruit.com/product/399)
[Related Guides to the Product](https://learn.adafruit.com/products/399/guides)
### Standard LCD 20x4 + extras
[Standard LCD 20x4 + extras](https://www.adafruit.com/product/198)
Standard HD44780 LCDs are useful for creating standalone projects.
- 20 characters wide, 4 rows
- White text on blue background
- Connection port is 0.1" pitch, single row for easy breadboarding and wiring
- Single LED backlight with a resistor included, you can...
In Stock
[Buy Now](https://www.adafruit.com/product/198)
[Related Guides to the Product](https://learn.adafruit.com/products/198/guides)
### RGB backlight positive LCD 20x4 + extras
[RGB backlight positive LCD 20x4 + extras](https://www.adafruit.com/product/499)
This is a fancy upgrade to standard 20x4 LCDs, instead of just having blue and white, or red and black, this LCD has black characters on a full color RGB background! That means you can change the display background color to anything you want - red, green, blue, pink, white, purple yellow,...
In Stock
[Buy Now](https://www.adafruit.com/product/499)
[Related Guides to the Product](https://learn.adafruit.com/products/499/guides)
### RGB backlight negative LCD 20x4 + extras
[RGB backlight negative LCD 20x4 + extras](https://www.adafruit.com/product/498)
This is a fancy upgrade to standard 20x4 LCDs, instead of just having blue and white, or red and black, this LCD has full color RGB characters on a dark/black background! That means you can change the character display colors to anything you want - red, green, blue, pink, white, purple yellow,...
In Stock
[Buy Now](https://www.adafruit.com/product/498)
[Related Guides to the Product](https://learn.adafruit.com/products/498/guides)
### Adafruit METRO 328 Fully Assembled - Arduino IDE compatible
[Adafruit METRO 328 Fully Assembled - Arduino IDE compatible](https://www.adafruit.com/product/50)
We sure love the ATmega328 here at Adafruit, and we use them _a lot_ for our own projects. The processor has plenty of GPIO, Analog inputs, hardware UART SPI and I2C, timers and PWM galore - just enough for most simple projects. When we need to go small, we use a
Out of Stock
[Buy Now](https://www.adafruit.com/product/50)
[Related Guides to the Product](https://learn.adafruit.com/products/50/guides)
## Related Guides
- [Trinket Temperature & Humidity LCD Display](https://learn.adafruit.com/trinket-temperature-humidity-lcd-display.md)
- [Circuit Playground Sound-Controlled Robot](https://learn.adafruit.com/circuit-playground-sound-controlled-robot.md)
- [TTL Serial Camera](https://learn.adafruit.com/ttl-serial-camera.md)
- [Digital Circuits 7: MCUs... how do they work?](https://learn.adafruit.com/mcus-how-do-they-work.md)
- [Adafruit Data Logger Shield](https://learn.adafruit.com/adafruit-data-logger-shield.md)
- [Arduino "Hunt The Wumpus"](https://learn.adafruit.com/arduino-hunt-the-wumpus.md)
- [Arduino Lesson 2. LEDs](https://learn.adafruit.com/adafruit-arduino-lesson-2-leds.md)
- [Mini Thermal Receipt Printers](https://learn.adafruit.com/mini-thermal-receipt-printer.md)
- [Bluetooth Temperature & Humidity Sensor](https://learn.adafruit.com/bluetooth-temperature-and-humidity-sensor.md)
- [Character LCD with Raspberry Pi or BeagleBone Black](https://learn.adafruit.com/character-lcd-with-raspberry-pi-or-beaglebone-black.md)
- [DIY 8x2 LCD Shield](https://learn.adafruit.com/diy-8x2-lcd-shield.md)
- [Arduino Ethernet + SD Card](https://learn.adafruit.com/arduino-ethernet-sd-card.md)
- [Trellis 3D Printed Enclosure](https://learn.adafruit.com/trellis-3d-printed-enclosure.md)
- [Adafruit AirLift Shield - ESP32 WiFi Co-Processor](https://learn.adafruit.com/adafruit-airlift-shield-esp32-wifi-co-processor.md)
- [2.2" TFT Display](https://learn.adafruit.com/2-2-tft-display.md)
---
# Source: https://learn.adafruit.com/diy-8x2-lcd-shield/check-out-the-pins.md
# DIY 8x2 LCD Shield
## Check Out the Pins
The first step is to turn over the LCD and check out the pins. Parallel LCDs almost always have 14 or 16 pins. In this model they are all the way to the left, near the label J1. I soldered 2 7-pin female headers for e-z plugging. Somtimes the pins are along the bottom all in a row.
Look closely at the header for the numbers that show which pins are which. In this model, the first pin is at the top right, the second pin is top left, etc till pin 14 in the bottom left.
When the LCD is flipped over, the pinout will be _mirrored_ **, ** to help me keep track of it, I made a diagram:| **1** | **2** |
| --- | --- |
| **3** | **4** |
| --- | --- |
| **5** | **6** |
| --- | --- |
| **7** | **8** |
| --- | --- |
| **9** | **10** |
| --- | --- |
| **11** | **12** |
| --- | --- |
| **13** | **14** |
| --- | --- |
Whatever your pinout is, make sure you have a diagram written out since you will need to refer to it many times!- [Previous Page](https://learn.adafruit.com/diy-8x2-lcd-shield/overview-and-parts.md)
- [Next Page](https://learn.adafruit.com/diy-8x2-lcd-shield/headers-and-wiring.md)
## Featured Products
### Solid-Core Wire Spool - 25ft - 22AWG - Yellow
[Solid-Core Wire Spool - 25ft - 22AWG - Yellow](https://www.adafruit.com/product/289)
Perfect for bread-boarding, free wiring, etc. This spool of solid-core wire is easy to solder to. When bent it keeps its shape pretty well. We like to have a few spools of this stuff around. We suggest picking up wire strippers to match. Wire gauge is 22 AWG which we've found is the best...
In Stock
[Buy Now](https://www.adafruit.com/product/289)
[Related Guides to the Product](https://learn.adafruit.com/products/289/guides)
### 36-pin 0.1" Female header - pack of 5!
[36-pin 0.1" Female header - pack of 5!](https://www.adafruit.com/product/598)
Female header is like the duct tape of electronics. Its great for connecting things together, soldering to perf-boards, sockets for wires or break-away header, etc. We go through these guys real fast, and thought that given how handy they are, we'd offer them in a pack of five!
In Stock
[Buy Now](https://www.adafruit.com/product/598)
[Related Guides to the Product](https://learn.adafruit.com/products/598/guides)
### Break-away 0.1" 36-pin strip male header - Black - 10 pack
[Break-away 0.1" 36-pin strip male header - Black - 10 pack](https://www.adafruit.com/product/392)
Breakaway header is like the duct tape of electronics. It's great for connecting things together, soldering to perf-boards, fits into any breakout or breadboard, etc. We go through these guys real fast, and thought that given how handy they are, we'd offer them in a pack of ten!
In Stock
[Buy Now](https://www.adafruit.com/product/392)
[Related Guides to the Product](https://learn.adafruit.com/products/392/guides)
### Adafruit Proto Shield for Arduino Kit
[Adafruit Proto Shield for Arduino Kit](https://www.adafruit.com/product/51)
Works with the Uno! This prototyping shield is the best out there (well, we think so, at least). It works with UNO, NG, Diecimila and Duemilanove Arduinos. You can use it with a Leonardo but it will not break out the hardware SPI pins (they're only on the ISP connector underneath) or the...
No Longer Stocked
[Buy Now](https://www.adafruit.com/product/51)
[Related Guides to the Product](https://learn.adafruit.com/products/51/guides)
### Adafruit METRO 328 Fully Assembled - Arduino IDE compatible
[Adafruit METRO 328 Fully Assembled - Arduino IDE compatible](https://www.adafruit.com/product/50)
We sure love the ATmega328 here at Adafruit, and we use them _a lot_ for our own projects. The processor has plenty of GPIO, Analog inputs, hardware UART SPI and I2C, timers and PWM galore - just enough for most simple projects. When we need to go small, we use a
Out of Stock
[Buy Now](https://www.adafruit.com/product/50)
[Related Guides to the Product](https://learn.adafruit.com/products/50/guides)
## Related Guides
- [Geofencing with the FONA 808 & Adafruit IO](https://learn.adafruit.com/geofencing-with-the-fona-808-and-adafruit-io.md)
- [Wireless Game Show Poppers for the Classroom!](https://learn.adafruit.com/wireless-game-show-poppers.md)
- [Adafruit Ultimate GPS](https://learn.adafruit.com/adafruit-ultimate-gps.md)
- [Arduino Lesson 4. Eight LEDs and a Shift Register](https://learn.adafruit.com/adafruit-arduino-lesson-4-eight-leds.md)
- [Adafruit CC3000 WiFi and Xively](https://learn.adafruit.com/adafruit-cc3000-wifi-and-xively.md)
- [FTDI Friend](https://learn.adafruit.com/ftdi-friend.md)
- [A REST API for Arduino & the CC3000 WiFi Chip](https://learn.adafruit.com/a-rest-api-for-arduino-and-the-cc3000-wifi-chip.md)
- [Bluetooth Controlled Motorized Camera Slider](https://learn.adafruit.com/bluetooth-motorized-camera-slider.md)
- [Bluefruit LE Connect for iOS and Android](https://learn.adafruit.com/bluefruit-le-connect.md)
- [Babel Fish](https://learn.adafruit.com/babel-fish.md)
- [Animating Multiple LED Backpacks](https://learn.adafruit.com/animating-multiple-led-backpacks.md)
- [Light Meter](https://learn.adafruit.com/light-meter.md)
- [Adafruit 16-channel PWM/Servo Shield](https://learn.adafruit.com/adafruit-16-channel-pwm-slash-servo-shield.md)
- [Halloween Pumpkin](https://learn.adafruit.com/halloween-pumpkin.md)
- [Naughty or Nice Machine](https://learn.adafruit.com/naughty-or-nice-machine.md)
---
# Source: https://learn.adafruit.com/adalight-diy-ambient-tv-lighting/choosing-leds.md
# Adalight Project Pack
## Mounting LEDs
Info:
Our goal is to install the LEDs behind the screen, projecting light back and outward around the perimeter, illuminating the wall behind.
Every TV and monitor is different, and exactly how and where to best mount the LEDs is more _craft_ than engineering. This is where the “maker ingenuity” comes into play!
While some of our customers have fabricated amazing metal frames and laser-cut acrylic mounting plates, the tools and materials really don’t need to be that advanced. To prove this, our sample setup uses nothing more than cardboard and tape! You can keep it simple or take it as far as your personal skill set allows. It’s not rocket science!
Here we’ve fashioned an LED holder using illustration board from the nearby art supply store. Our template is sized to match the back of the monitor, and a notch has been cut out at the bottom center to accommodate the monitor stand:

Next, calculate the spacing for a ring of 25 LEDs. For this monitor, it worked out nicely as a 9x6 rectangle, roughly 2" spacing, with a one pixel gap at the bottom where the monitor stand protrudes. Perfect!
Notice how the LEDs are spaced along a grid: there’s an equal number along the right and left sides, and (except for the gap for the monitor stand) equal spacing along the top and bottom. As mentioned in a prior page, the software may need to be adjusted for the number of LEDs across and down, if your template is different than this.
Info:
Our monitor has holes for a VESA wall bracket that’s not being used, so holes were punched to match, and the template can be held in place with screws. But it doesn’t need to be that sophisticated — don’t feel bad just using tape or something. In fact, that’s exactly how we held the LEDs in place:

The first LED was attached at the center bottom, just to the left of the monitor stand, and then the rest were positioned in order around the perimeter, ending just to the right of the stand.
Once the LEDs are situated, the Arduino can be placed (double-stick foam tape works nicely) and wired in. Connect a USB cable between the Arduino and computer, and a compatible 5 Volt supply to the LED power connector. The mass of wires and tape may look chaotic from this side, but once the monitor is set up close to a wall, nobody will see it.

(Your wiring will look a little bit different — this is our old prototype, which had different wire colors and no convenient plugs on the ends.)
# Other Mounting Ideas

Cable ties work well with pixels on their side. Holes can be made using an awl, or you can make very clean holes using a leatherworking punch.
LED pixels can be press-fit into holes drilled through metal, wood or plastic. Holes 11 to 12 millimeters in diameter seem about right — experiment on a piece of scrap material first, find a size that gives a firm but not damaging grip.

Forum user “Wackid” made this stunning 100 LED Adalight frame using aluminum U-track with drilled holes carefully spaced around the perimeter. _Extreeeeme!_
- [Previous Page](https://learn.adafruit.com/adalight-diy-ambient-tv-lighting/running-the-software.md)
- [Next Page](https://learn.adafruit.com/adalight-diy-ambient-tv-lighting/troubleshooting.md)
## Featured Products
### Adalight - DIY Ambient Monitor Lighting Project Pack
[Adalight - DIY Ambient Monitor Lighting Project Pack](https://www.adafruit.com/product/461)
Build your own ambient-light addition for a monitor or media PC television with the Adalight project pack! This project pack is for our ["Adalight" project tutorial](http://learn.adafruit.com/adalight-diy-ambient-tv-lighting). By running the Processing code on your...
No Longer Stocked
[Buy Now](https://www.adafruit.com/product/461)
[Related Guides to the Product](https://learn.adafruit.com/products/461/guides)
### 12mm Diffused Thin Digital RGB LED Pixels (Strand of 25)
[12mm Diffused Thin Digital RGB LED Pixels (Strand of 25)](https://www.adafruit.com/product/322)
RGB Pixels are digitally-controllable lights you can set to any color, or animate. Each RGB LED and controller chip is molded into a 'dot' of silicone. The dots are weatherproof and rugged. There are four flanges molded in so that you can 'push' them into a 12mm drill hole in...
No Longer Stocked
[Buy Now](https://www.adafruit.com/product/322)
[Related Guides to the Product](https://learn.adafruit.com/products/322/guides)
### 12mm Diffused Flat Digital RGB LED Pixels (Strand of 25)
[12mm Diffused Flat Digital RGB LED Pixels (Strand of 25)](https://www.adafruit.com/product/738)
RGB Pixels are digitally-controllable lights you can set to any color, or animate. Each RGB LED and controller chip is molded into a 'dot' of silicone. The dots are weatherproof and rugged. There are four flanges molded in so that you can 'push' them into a 12mm drill hole in...
In Stock
[Buy Now](https://www.adafruit.com/product/738)
[Related Guides to the Product](https://learn.adafruit.com/products/738/guides)
### Adafruit METRO 328 Fully Assembled - Arduino IDE compatible
[Adafruit METRO 328 Fully Assembled - Arduino IDE compatible](https://www.adafruit.com/product/50)
We sure love the ATmega328 here at Adafruit, and we use them _a lot_ for our own projects. The processor has plenty of GPIO, Analog inputs, hardware UART SPI and I2C, timers and PWM galore - just enough for most simple projects. When we need to go small, we use a
Out of Stock
[Buy Now](https://www.adafruit.com/product/50)
[Related Guides to the Product](https://learn.adafruit.com/products/50/guides)
### Female DC Power adapter - 2.1mm jack to screw terminal block
[Female DC Power adapter - 2.1mm jack to screw terminal block](https://www.adafruit.com/product/368)
If you need to connect a DC power wall wart to a board that doesn't have a DC jack - this adapter will come in very handy! There is a 2.1mm DC jack on one end, and a screw terminal block on the other. The terminals are labeled with positive/negative assuming a positive-tip configuration...
In Stock
[Buy Now](https://www.adafruit.com/product/368)
[Related Guides to the Product](https://learn.adafruit.com/products/368/guides)
### 5V 2A (2000mA) switching power supply - UL Listed
[5V 2A (2000mA) switching power supply - UL Listed](https://www.adafruit.com/product/276)
This is an FCC/CE certified and UL listed power supply. Need a lot of 5V power? This switching supply gives a clean regulated 5V output at up to 2000mA. 110 or 240 input, so it works in any country. The plugs are "US 2-prong" style so you may need a plug adapter, but you can pick one...
In Stock
[Buy Now](https://www.adafruit.com/product/276)
[Related Guides to the Product](https://learn.adafruit.com/products/276/guides)
### Breadboarding wire bundle
[Breadboarding wire bundle](https://www.adafruit.com/product/153)
75 flexible stranded core wires with stiff ends molded on in red, orange, yellow, green, blue, brown, black and white. These are a major improvement over the "box of bent wires" that are sometimes sold with breadboards, and faster than stripping your own solid core wires. Makes...
In Stock
[Buy Now](https://www.adafruit.com/product/153)
[Related Guides to the Product](https://learn.adafruit.com/products/153/guides)
## Related Guides
- [2.2" TFT Display](https://learn.adafruit.com/2-2-tft-display.md)
- [Arduin-o-Phone](https://learn.adafruit.com/arduin-o-phone-arduino-powered-diy-cellphone.md)
- [Adafruit CC3000 WiFi and Xively](https://learn.adafruit.com/adafruit-cc3000-wifi-and-xively.md)
- [Analog Feedback Servos](https://learn.adafruit.com/analog-feedback-servos.md)
- [Ladyada's Learn Arduino - Lesson #0](https://learn.adafruit.com/ladyadas-learn-arduino-lesson-number-0.md)
- [Adafruit 1.27" and 1.5" Color OLED Breakout Board](https://learn.adafruit.com/adafruit-1-5-color-oled-breakout-board.md)
- [Bluetooth Temperature & Humidity Sensor](https://learn.adafruit.com/bluetooth-temperature-and-humidity-sensor.md)
- [Arduino Lesson 7. Make an RGB LED Fader](https://learn.adafruit.com/adafruit-arduino-lesson-7-make-an-rgb-led-fader.md)
- [Wave Shield](https://learn.adafruit.com/adafruit-wave-shield-audio-shield-for-arduino.md)
- [Adafruit 1.14" 240x135 Color TFT Breakout LCD Display](https://learn.adafruit.com/adafruit-1-14-240x135-color-tft-breakout.md)
- [Adafruit Arduino Selection Guide](https://learn.adafruit.com/adafruit-arduino-selection-guide.md)
- [Arduino Lesson 3. RGB LEDs](https://learn.adafruit.com/adafruit-arduino-lesson-3-rgb-leds.md)
- [Character LCDs](https://learn.adafruit.com/character-lcds.md)
- [Arduino Lesson 11. LCD Displays - Part 1](https://learn.adafruit.com/adafruit-arduino-lesson-11-lcd-displays-1.md)
- [RGB LED Matrix Basics](https://learn.adafruit.com/32x16-32x32-rgb-led-matrix.md)
---
# Source: https://learn.adafruit.com/chumby-hacker-board.md
# Chumby Hacker Board
## Overview
This page is a collection of mini-tutorials on doing stuff with the Chumby Hacker Board (for brevity we will refer to it as the CHB)! The CHB is a cool single board Linux computer that has much of the same hardware as the famous [Chumby One](http://www.chumby.com/). It's great for people who are experienced with Linux and want to have the power of a microcomputer with audio and video output while at the same time getting all the peripherals of a microcontroller such as analog-to-digital conversion, PWM outputs, sensors, bit twiddling, and broken-out GPIOs!
While we believe that the CHB is a fairly easy-to-use Single Board Computer (SBC) having a pre-installed OS on the included uSD card, and ready drivers for the peripherals, its not designed for beginners! The board is best used by those with previous Linux experience: the good news is you don't have to have another Linux computer to set up the CHB but you should have familiarity with shells and shell scripting, gcc, make, dmesg, etc. We also suggest having had some poking around with microcontrollers such as BASIC Stamp, Arduino, AVR, PIC, 8051, etc. So that when we say "i2c" and "not 5v tolerant I/Os" you can follow along.
**The CHB is not in any way officially supported by [Chumby Industries](http://www.chumby.com/)! Chumby has generously offered a [Forum](http://forum.chumby.com/viewforum.php?id=20) and [Wiki](http://wiki.chumby.com/mediawiki/index.php/Chumby_hacker_board) where they will try to share information but there is absolutely no tech support or guarantee that the CHB will meet your project needs. Please do not contact Chumby directly either by email or phone for help with your CHB. If you have questions, please post to their forums to receive help from others and the occasional assistance from a CHB developer.**
Want to pick one up? [We have Chumby Hacker Boards and accessories in stock at the adafruit shop!](http://www.adafruit.com/index.php?main_page=index&cPath=46)
## Hardware Specs
- [Freescale iMX.233 processor](http://www.freescale.com/webapp/sps/site/prod_summary.jsp?code=i.MX233) running at 454 MHz
- 64 MB onboard RAM
- **Comes with 512 MB uSD card with 100 MB Linux installation all ready to go**
- 3.3V I/O pins can talk to most sensors, motor drivers, etc. No struggling with 1.8V levels.
- Low power, fanless ARM926 core draws only 200-300 mA
- Onboard GL850G USB hub draws 100-200mA
- Built-in Lithium Ion/Polymer battery charger and 5V boost converter for portable projects
- **Three** USB port jacks!
- 1.5W mono 4-16 ohm speaker amplifier (0.1" JST onboard connector)
- Microphone input (0.05" JST onboard connector)
- LCD controller with 2mm output port
- 3.5mm A/V output jack with stereo audio and NTSC/PAL composite video
- Back of board has GPIO outputs on 0.1" header spacing, plug in an Arduino proto shield (Beta version only, Final boards don't have this)
- Quadrature encoder connections onboard
- 5-way joystick on-board
- MMA7455 3-axis +-2G to +-8G accelerometer on-board
- 3.3V TTL serial port for easy shell access
- Full GCC toolchain is ready for you to download and get crackin'!
## Mini Tutorials
- [Power supplies](http://learn.adafruit.com/chumby-hacker-board/power "Link: http://learn.adafruit.com/chumby-hacker-board/power") - How to power your Chumby Hacker board!
- [Serial port](http://learn.adafruit.com/chumby-hacker-board/connecting-with-ttl-serial "Link: http://learn.adafruit.com/chumby-hacker-board/connecting-with-ttl-serial") - How to connect to the serial terminal port for shell access
- [Compiler](http://learn.adafruit.com/chumby-hacker-board/compiler "Link: http://learn.adafruit.com/chumby-hacker-board/compiler") - Installing the Falconwing GCC toolchain
- [Accessing i2c](http://learn.adafruit.com/chumby-hacker-board/i2c-sensor "Link: http://learn.adafruit.com/chumby-hacker-board/i2c-sensor") - Connecting to i2c chips including the on-board accelerometer!
- [WiFi networking](http://learn.adafruit.com/chumby-hacker-board/wifi) - Getting to the Internet via wireless 802.11b/g (in progress)
- [Stand-Alone WiFi AP and SSH](http://www.ladyada.net/wiki/stand-alone_wifi_ap_and_ssh "Link: http://www.ladyada.net/wiki/stand-alone\_wifi\_ap\_and\_ssh") - Turn your CHB into a stand-alone DHCP server
- [Ethernet networking](http://learn.adafruit.com/chumby-hacker-board/ethernet) - Getting to the Internet via wired Ethernet
- [Audio](http://learn.adafruit.com/chumby-hacker-board/audio) - Playing audio through the headphone/AV jack and onboard 2W speaker amp
- [microSD](http://learn.adafruit.com/chumby-hacker-board/sd-card) - Cloning, copying and expanding the space on the card (in progress)
- [VGA](http://www.ladyada.net/wiki/chumbyhackerboard/vga) - VGA video out (totally in progress!)
- [EC2 instance for building full, from-scratch images of their own for the hacker board](http://wiki.chumby.com/index.php/Quickstarting_OE "Link: http://wiki.chumby.com/index.php/Quickstarting\_OE") - Thanks Chumby!
More info may be found at the official [Chumby Hacker Board Wiki](http://wiki.chumby.com/mediawiki/index.php/Chumby_hacker_board_beta)
## Pictures!
Click for large photos of the v1.0 PCBs


Click for large photos of the beta PCBs

- [Next Page](https://learn.adafruit.com/chumby-hacker-board/power.md)
## Featured Products
### USB 2.0 Powered Hub - 7 Ports with 5V 2A Power Supply
[USB 2.0 Powered Hub - 7 Ports with 5V 2A Power Supply](https://www.adafruit.com/product/961)
Add lots more USB capability to your Raspberry Pi or computer using this powered USB 2.0 hub. It adds a full **seven powered ports** , all at USB 2.0 speeds so you can use video cameras and other high speed devices (cheaper hubs are v1.1 and not as fast!)
The extra sauce...
No Longer Stocked
[Buy Now](https://www.adafruit.com/product/961)
[Related Guides to the Product](https://learn.adafruit.com/products/961/guides)
### Miniature WiFi (802.11b/g/n) Module: For Raspberry Pi and more
[Miniature WiFi (802.11b/g/n) Module: For Raspberry Pi and more](https://www.adafruit.com/product/814)
Make your Internet of Things device cable-free by adding WiFi. Take advantage of the Raspberry Pi and Beagle Bone's USB port to add a low cost, but high-reliability wireless link. We tried half a dozen modules to find one that works well with the Pi and Bone without the need of recompiling...
No Longer Stocked
[Buy Now](https://www.adafruit.com/product/814)
[Related Guides to the Product](https://learn.adafruit.com/products/814/guides)
### 5V 2A (2000mA) switching power supply - UL Listed
[5V 2A (2000mA) switching power supply - UL Listed](https://www.adafruit.com/product/276)
This is an FCC/CE certified and UL listed power supply. Need a lot of 5V power? This switching supply gives a clean regulated 5V output at up to 2000mA. 110 or 240 input, so it works in any country. The plugs are "US 2-prong" style so you may need a plug adapter, but you can pick one...
Out of Stock
[Buy Now](https://www.adafruit.com/product/276)
[Related Guides to the Product](https://learn.adafruit.com/products/276/guides)
### 2.1mm to 1.7mm DC jack adapter
[2.1mm to 1.7mm DC jack adapter](https://www.adafruit.com/product/411)
We're carrying this adapter primarily to allow Chumby Hacker Board users to adapt our nice [5V @ 2A power supply](http://www.adafruit.com/products/276) to their CHB. But you can use this adapter for anything else that has a 1.7mm DC jack, such as a PSP.
In Stock
[Buy Now](https://www.adafruit.com/product/411)
[Related Guides to the Product](https://learn.adafruit.com/products/411/guides)
### USB MicroSD Card Reader/Writer - microSD / microSDHC / microSDXC
[USB MicroSD Card Reader/Writer - microSD / microSDHC / microSDXC](https://www.adafruit.com/product/939)
This is the cutest little microSD card reader/writer - but don't be fooled by its adorableness! It's wicked fast and supports up to 64 GB SDXC cards! Simply slide the card into the edge and plug it into your computer. No drivers are required, it shows up as a standard 'Mass...
No Longer Stocked
[Buy Now](https://www.adafruit.com/product/939)
[Related Guides to the Product](https://learn.adafruit.com/products/939/guides)
### Ethernet Cable - 10 ft long
[Ethernet Cable - 10 ft long](https://www.adafruit.com/product/730)
We have so many Internet-connected goodies in the shop, we figured it's time to carry a cable so you can easily connect them up! This cable is 10 feet long, black and has all 8 wires installed. Perfect for use with the [BeagleBone](http://www.adafruit.com/products/513),
No Longer Stocked
[Buy Now](https://www.adafruit.com/product/730)
[Related Guides to the Product](https://learn.adafruit.com/products/730/guides)
### USB to TTL Serial Cable - Debug / Console Cable for Raspberry Pi
[USB to TTL Serial Cable - Debug / Console Cable for Raspberry Pi](https://www.adafruit.com/product/954)
The cable is easiest way ever to connect to your microcontroller/Raspberry Pi/WiFi router serial console port. Inside the big USB plug is a USB\<-\>Serial conversion chip and at the end of the 36" cable are four wire - red power, black ground, white RX into USB port, and green TX out...
In Stock
[Buy Now](https://www.adafruit.com/product/954)
[Related Guides to the Product](https://learn.adafruit.com/products/954/guides)
### FTDI Serial TTL-232 USB Cable
[FTDI Serial TTL-232 USB Cable](https://www.adafruit.com/product/70)
Just about all electronics use TTL serial for debugging, bootloading, programming, serial output, etc. But it's rare for a computer to have a serial port anymore. This is a USB to TTL serial cable, with a FTDI FT232RL usb/serial chip embedded in the head. It has a 6-pin socket at the end...
In Stock
[Buy Now](https://www.adafruit.com/product/70)
[Related Guides to the Product](https://learn.adafruit.com/products/70/guides)
## Related Guides
- [CircuitPython Libraries on MicroPython using the Raspberry Pi Pico](https://learn.adafruit.com/circuitpython-libraries-on-micropython-using-the-raspberry-pi-pico.md)
- [Hallowing Minotaur Maze](https://learn.adafruit.com/hallowing-minotaur-maze.md)
- [Raspberry Pi Azure IoT Hub Dashboard with CircuitPython](https://learn.adafruit.com/raspberry-pi-iot-dashboard-with-azure-and-circuitpython.md)
- [Adafruit 2.9" eInk Display Breakouts and FeatherWings](https://learn.adafruit.com/adafruit-2-9-eink-display-breakouts-and-featherwings.md)
- [Pi SSD Media Server](https://learn.adafruit.com/pi-ssd-media-server.md)
- [Creating Slideshows in CircuitPython](https://learn.adafruit.com/creating-slideshows-in-circuitpython.md)
- [Network Interface Failover using FONA](https://learn.adafruit.com/network-interface-failover-using-fona.md)
- [Matrix Keypad](https://learn.adafruit.com/matrix-keypad.md)
- [Native MP3 decoding on Arduino](https://learn.adafruit.com/native-mp3-decoding-on-arduino.md)
- [Raspberry Pi HQ Camera Case](https://learn.adafruit.com/raspberry-pi-hq-camera-case.md)
- [Articulated Pi Display V2 Mount](https://learn.adafruit.com/pi-wall-mount.md)
- [World's Smallest MAME Arcade Cabinet](https://learn.adafruit.com/worlds-smallest-mame-arcade-cabinet.md)
- [Raspberry Pi E-Ink Weather Station using Python](https://learn.adafruit.com/raspberry-pi-e-ink-weather-station-using-python.md)
- [Getting Started with Raspberry Pi Pico and CircuitPython](https://learn.adafruit.com/getting-started-with-raspberry-pi-pico-circuitpython.md)
- [Adafruit QT Py and NeoPixel LEDs](https://learn.adafruit.com/qt-py-and-neopixel-leds.md)
---
# Source: https://learn.adafruit.com/delorean-time-circuit/circuit-trickery.md
# DeLorean Time Circuit
## Circuit Trickery

These 4-digit displays can be assigned one of eight fixed I2C addresses via solder jumpers on the back. But the time circuit needs _nine_ displays. A few possibilities were considered, including driving the one extra display “manually” with shift registers, or use a software I2C library and split the displays among multiple I2C buses. Either would require lots of library code changes and some intense concentration, but I was hit with a massive sinus headache at the time and really didn’t want to think about it.
Instead, exploiting the fact that we need just one way, write-only access to use the displays, I used a simple hardware hack to split the I2C bus to communicate with one row of three displays at a time (and saving some code by repeating the same addresses in each row). The I2C data line fans out to all the displays as normal, but the clock feeds the enable lines of a 74HC138 3-to-8 line decoder, and the microcontroller can then select which output line forwards the clock signal. The data on the other I2C buses is ignored without the corresponding clock.

- [Previous Page](https://learn.adafruit.com/delorean-time-circuit/design-liberties.md)
- [Next Page](https://learn.adafruit.com/delorean-time-circuit/fabrication.md)
## Featured Products
### Adafruit 0.56" 4-Digit 7-Segment Display with I2C Backpack - Red
[Adafruit 0.56" 4-Digit 7-Segment Display with I2C Backpack - Red](https://www.adafruit.com/product/878)
What's better than a single LED? Lots of LEDs! A fun way to make a small display is to use an [8x8 matrix](https://www.adafruit.com/category/37_88) or a [4-digit 7-segment display](https://www.adafruit.com/category/37_103). Matrices like these are...
In Stock
[Buy Now](https://www.adafruit.com/product/878)
[Related Guides to the Product](https://learn.adafruit.com/products/878/guides)
### Adafruit 0.56" 4-Digit 7-Segment Display w/ I2C Backpack - Green
[Adafruit 0.56" 4-Digit 7-Segment Display w/ I2C Backpack - Green](https://www.adafruit.com/product/880)
What's better than a single LED? Lots of LEDs! A fun way to make a small display is to use an [8x8 matrix](https://www.adafruit.com/category/37_88) or a [4-digit 7-segment display](https://www.adafruit.com/category/37_103). Matrices like these are...
No Longer Stocked
[Buy Now](https://www.adafruit.com/product/880)
[Related Guides to the Product](https://learn.adafruit.com/products/880/guides)
### Adafruit 0.56" 4-Digit 7-Segment Display w/I2C Backpack - Yellow
[Adafruit 0.56" 4-Digit 7-Segment Display w/I2C Backpack - Yellow](https://www.adafruit.com/product/879)
What's better than a single LED? Lots of LEDs! A fun way to make a small display is to use an [8x8 matrix](https://www.adafruit.com/category/37_88) or a [4-digit 7-segment display](https://www.adafruit.com/category/37_103). Matrices like these are...
In Stock
[Buy Now](https://www.adafruit.com/product/879)
[Related Guides to the Product](https://learn.adafruit.com/products/879/guides)
### ChronoDot - Ultra-precise Real Time Clock
[ChronoDot - Ultra-precise Real Time Clock](https://www.adafruit.com/product/255)
The **ChronoDot V3** is the latest version of macetech’s popular ChronoDot line of products. Designed during the Great Chip Shortage, it uses the newly-released MAX31328 temperature-compensated real-time clock chip. However, it remains pin- and code-compatible with the older...
In Stock
[Buy Now](https://www.adafruit.com/product/255)
[Related Guides to the Product](https://learn.adafruit.com/products/255/guides)
### Teensy (ATmega32u4 USB dev board) 2.0
[Teensy (ATmega32u4 USB dev board) 2.0](https://www.adafruit.com/product/199)
Discontinued - **you can grab** [Adafruit ItsyBitsy 32u4 - 5V 16MHz](https://www.adafruit.com/product/3677) **instead!**
The Teensy 2.0 is a complete USB-based microcontoller development system, in a very small footprint! All programming is done via the USB port. No...
No Longer Stocked
[Buy Now](https://www.adafruit.com/product/199)
[Related Guides to the Product](https://learn.adafruit.com/products/199/guides)
### Diffused Green 5mm LED (25 pack)
[Diffused Green 5mm LED (25 pack)](https://www.adafruit.com/product/298)
Need some indicators? We are big fans of these diffused green LEDs, in fact we use them exclusively in our kits. They are fairly bright so they can be seen in daytime, and from any angle. They go easily into a breadboard and will add that extra zing to your project.
- Pack of 25...
In Stock
[Buy Now](https://www.adafruit.com/product/298)
[Related Guides to the Product](https://learn.adafruit.com/products/298/guides)
### Diffused Red 5mm LED (25 pack)
[Diffused Red 5mm LED (25 pack)](https://www.adafruit.com/product/299)
Need some indicators? We are big fans of these diffused red LEDs, in fact we use them exclusively in our kits. They are fairly bright so they can be seen in daytime, and from any angle. They go easily into a breadboard and will add that extra zing to your project.
- Pack of 25...
In Stock
[Buy Now](https://www.adafruit.com/product/299)
[Related Guides to the Product](https://learn.adafruit.com/products/299/guides)
## Related Guides
- [Adafruit LED Backpacks](https://learn.adafruit.com/adafruit-led-backpack.md)
- [Mindfulness Clock OF DOOM](https://learn.adafruit.com/mindfulness-clock-of-doom.md)
- [Fidget Spinner Tachometer](https://learn.adafruit.com/fidget-spinner-tachometer.md)
- [Arduino GPS Clock](https://learn.adafruit.com/arduino-clock.md)
- [Collin's Lab: Binary & Hex](https://learn.adafruit.com/collins-lab-binary-and-hex.md)
- [Personalized NextBus ESP8266 Transit Clock](https://learn.adafruit.com/personalized-esp8266-transit-clock.md)
- [Trinket React Counter](https://learn.adafruit.com/trinket-react-counter.md)
- [CircuitPython Hardware: LED Backpacks & FeatherWings](https://learn.adafruit.com/micropython-hardware-led-backpacks-and-featherwings.md)
- [Tap Tempo Trinket](https://learn.adafruit.com/tap-tempo-trinket.md)
- [Raspberry Pi Physical Dashboard](https://learn.adafruit.com/raspberry-pi-physical-dashboard.md)
- [LED Backpack Displays on Raspberry Pi and BeagleBone Black](https://learn.adafruit.com/led-backpack-displays-on-raspberry-pi-and-beaglebone-black.md)
- [Cartoon Character Clock](https://learn.adafruit.com/cartoon-character-clock.md)
- [Feather ESP32-S3 TFT CircuitPython Day 2024 Countdown Clock](https://learn.adafruit.com/feather-esp32-s3-tft-circuitpython-day-2024-countdown-clock.md)
- [Moto 360 Teardown](https://learn.adafruit.com/moto-360-smartwatch-teardown.md)
- [Articulating Retina Monitor](https://learn.adafruit.com/articulating-retina-monitor.md)
---
# Source: https://learn.adafruit.com/adafruit-led-backpack/circuitpython-and-python-usage-197dcbfa-4ccf-4b98-a152-3982411df681.md
# Adafruit LED Backpacks
## CircuitPython and Python Usage
The following section will show how to control the LED backpack from the board's Python prompt / REPL. You'll walk through how to control the LED display and learn how to use the CircuitPython module built for the display.
First [connect to the board's serial REPL ](https://learn.adafruit.com/welcome-to-circuitpython/the-repl)so you are at the CircuitPython **\>\>\>** prompt.
## Initialization
First you'll need to initialize the I2C bus for your board. It's really easy, first import the necessary modules. In this case, we'll use `board` and `BigSeg7x4`.
Then just use `board.I2C()` to create the I2C instance using the default SCL and SDA pins (which will be marked on the boards pins if using a Feather or similar Adafruit board).
Then to initialize the display, you just pass `i2c` in.
Warning: When using the STEMMA QT port, some board may have an alternate I2C such as board.STEMMA_I2C().
```python
import board
from adafruit_ht16k33.segments import BigSeg7x4
i2c = board.I2C()
display = BigSeg7x4(i2c)
```
If you bridged the address pads on the back of the display, you could pass in the address. The addresses for the HT16K33 can range between 0x70 and 0x77 depending on which pads you have bridged, with 0x70 being used if you haven't bridged any of them. For instance, if you bridge only the **A0** pad, you would use `0x71` like this:
```python
display = BigSeg7x4(i2c, address=0x71)
```
## Setting the Brightness
You can set the brightness of the display, but changing it will set the brightness of the entire display and not individual segments. If can be adjusted in 1/16 increments **between 0 and 1.0** with 1.0 being the brightest. So to set the display to half brightness, you would use the following:
```python
display.brightness = 0.5
```
## Setting the Blink Rate
You can set the blink rate of the display, but changing it will set the brightness of the entire display and not individual segments. If can be adjusted in 1/4 increments **between 0 and 3** with 3 being the fastest blinking. So to set the display to blink at full speed, you would use the following:
```python
display.blink_rate = 3
```
## Printing Text
To print text to the display, you just use the print function. For the 7-segment display, valid characters are 0-9, letters A-F, and a hyphen. So if we want to print ABCD, we would use the following:
```python
display.print("ABCD")
```
## Printing Numbers
Printing numbers is done similar to printing text, except without the quotes, though you can still print numbers in a string as well.
```python
display.print(1234)
```
## Printing Hexidecimal Values
To print hexidecimal values, you use the `print_hex` function:
```python
display.print_hex(0x1A2B)
```
## Setting Individual Characters
To set individual characters, you simply treat the `display` object as a list and set it to the value that you would like.
```python
display[0] = '1'
display[1] = '2'
display[2] = 'A'
display[3] = 'B'
```
## Setting Individual Segments
To set individual segments to turn on or off, you would use the set\_digit\_raw function to pass the digit that you want to change and the bitmask. This can be really useful for creating your own characters. The bitmask corresponds to the following diagram. The highest bit is not used, so an X represents that spot to indicate that.

The bitmask is a single 8-bit number that can be passed in as a single Hexidecimal, Decimal, or binary number. This will use a couple different methods to display `8E8E`:
```python
display.set_digit_raw(0, 0xFF)
display.set_digit_raw(1, 0b11111111)
display.set_digit_raw(2, 0x79)
display.set_digit_raw(3, 0b01111001)
```
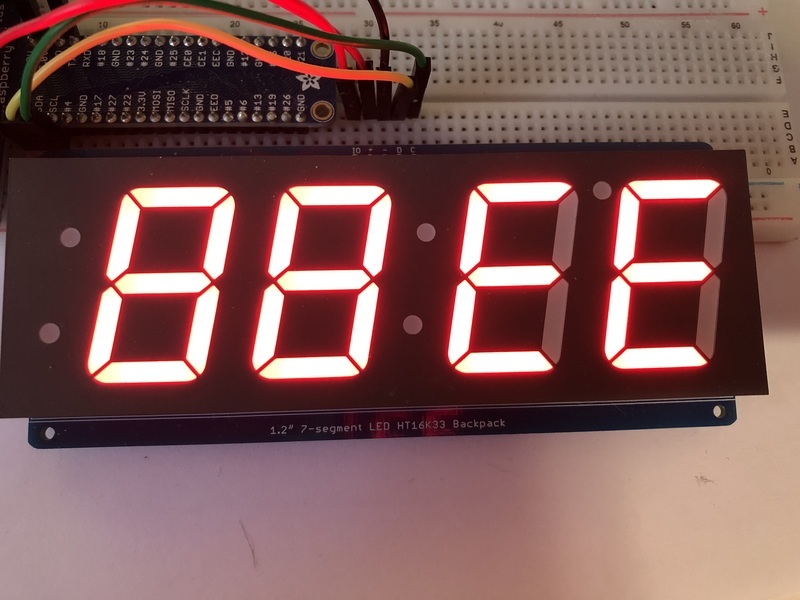
## Filling all Segments
To fill the entire display, just use the fill() function and pass in either 0 or 1 depending on whether you want all segments off or on. For instance, if you wanted to set everything to on, you would use:
```python
display.fill(1)
```
## Scrolling Display Manually
If you want to scroll the displayed data to the left, you can use the `scroll()` function. You can pass in the number of places that you want to scroll. The right-most digit will remain unchanged and you will need to set that manually. After scrolling, you will need to call the show function. For example if you wanted to print an A and then scroll it over to spaces, you would do the following.
```python
display.print("A")
display.scroll(2)
display[3] = " "
display.show()
```
## Displaying the Colon
There are a couple of different ways to display a colon on the 7-segment display. The first and easiest way is to use the print function:
```python
display.print("12:30")
```
The other way to control it is to access the colon with the colons property and set index 0 to `True` or `False`:
```python
display.colons[0] = False
```
## Setting the Left-Side Dots
There are a couple of different ways to set the left-side dots on the large 7-segment display. The first way is to use the colons property like above:
```python
display.colons[1] = False
```
If you would like to set the dots individually, you can do that using the `top_left_dot` and `bottom_left_dot` properties and set them to `True` or `False`:
```python
display.top_left_dot = True
display.bottom_left_dot = True
```
## Setting the AM/PM Indicator
If you would like to set the upper-right dot, you can do this using the `ampm` property:
```python
display.ampm = True
```
## Displaying an Automatic Scrolling Marquee
To make displaying long text easier, we've added a marquee function. You just pass it the full string. Optionally, you can pass it the amount of delay between each character. This may be useful for displaying a phone number, words using only letters A-F, or other numeric data:
```python
display.marquee('Deadbeef ')
```

By default it is 0.25 seconds, but you can change this by providing a second parameter. You can optionally pass `False` for a third parameter if you would not like to have it loop. So if you wanted each character to display for half a second and didn't want it to loop, you would use the following:
```python
display.marquee('Deadbeef', 0.5, False)
```
- [Previous Page](https://learn.adafruit.com/adafruit-led-backpack/python-wiring-and-setup-d74df15e-c55c-487a-acce-a905497ef9db.md)
- [Next Page](https://learn.adafruit.com/adafruit-led-backpack/bi-color-8x8-matrix.md)
## Primary Products
### Adafruit Mini 8x8 LED Matrix w/I2C Backpack - Red
[Adafruit Mini 8x8 LED Matrix w/I2C Backpack - Red](https://www.adafruit.com/product/870)
What's better than a single LED? Lots of LEDs! A fun way to make a small display is to use an [8x8 matrix](https://www.adafruit.com/category/37_88) or a [4-digit 7-segment display](https://www.adafruit.com/category/37_103). Matrices like these are...
In Stock
[Buy Now](https://www.adafruit.com/product/870)
[Related Guides to the Product](https://learn.adafruit.com/products/870/guides)
### Adafruit Mini 8x8 LED Matrix w/I2C Backpack - Yellow
[Adafruit Mini 8x8 LED Matrix w/I2C Backpack - Yellow](https://www.adafruit.com/product/871)
What's better than a single LED? Lots of LEDs! A fun way to make a small display is to use an [8x8 matrix](https://www.adafruit.com/category/37_88) or a [4-digit 7-segment display](https://www.adafruit.com/category/37_103). Matrices like these are...
In Stock
[Buy Now](https://www.adafruit.com/product/871)
[Related Guides to the Product](https://learn.adafruit.com/products/871/guides)
### Adafruit Mini 0.8" 8x8 LED Matrix w/I2C Backpack - Yellow-Green
[Adafruit Mini 0.8" 8x8 LED Matrix w/I2C Backpack - Yellow-Green](https://www.adafruit.com/product/872)
What's better than a single LED? Lots of LEDs! A fun way to make a small display is to use an [8x8 matrix](https://www.adafruit.com/category/37_88) or a [4-digit 7-segment display](https://www.adafruit.com/category/37_103). Matrices like these are...
In Stock
[Buy Now](https://www.adafruit.com/product/872)
[Related Guides to the Product](https://learn.adafruit.com/products/872/guides)
### Adafruit 0.56" 4-Digit 7-Segment Display with I2C Backpack - Red
[Adafruit 0.56" 4-Digit 7-Segment Display with I2C Backpack - Red](https://www.adafruit.com/product/878)
What's better than a single LED? Lots of LEDs! A fun way to make a small display is to use an [8x8 matrix](https://www.adafruit.com/category/37_88) or a [4-digit 7-segment display](https://www.adafruit.com/category/37_103). Matrices like these are...
In Stock
[Buy Now](https://www.adafruit.com/product/878)
[Related Guides to the Product](https://learn.adafruit.com/products/878/guides)
### Adafruit 0.56" 4-Digit 7-Segment Display w/I2C Backpack - Yellow
[Adafruit 0.56" 4-Digit 7-Segment Display w/I2C Backpack - Yellow](https://www.adafruit.com/product/879)
What's better than a single LED? Lots of LEDs! A fun way to make a small display is to use an [8x8 matrix](https://www.adafruit.com/category/37_88) or a [4-digit 7-segment display](https://www.adafruit.com/category/37_103). Matrices like these are...
In Stock
[Buy Now](https://www.adafruit.com/product/879)
[Related Guides to the Product](https://learn.adafruit.com/products/879/guides)
### Adafruit 0.56" 4-Digit 7-Segment Display w/ I2C Backpack - Green
[Adafruit 0.56" 4-Digit 7-Segment Display w/ I2C Backpack - Green](https://www.adafruit.com/product/880)
What's better than a single LED? Lots of LEDs! A fun way to make a small display is to use an [8x8 matrix](https://www.adafruit.com/category/37_88) or a [4-digit 7-segment display](https://www.adafruit.com/category/37_103). Matrices like these are...
No Longer Stocked
[Buy Now](https://www.adafruit.com/product/880)
[Related Guides to the Product](https://learn.adafruit.com/products/880/guides)
### Adafruit 0.56" 4-Digit 7-Segment Display w/ I2C Backpack - Blue
[Adafruit 0.56" 4-Digit 7-Segment Display w/ I2C Backpack - Blue](https://www.adafruit.com/product/881)
What's better than a single LED? Lots of LEDs! A fun way to make a small display is to use an [8x8 matrix](https://www.adafruit.com/category/37_88) or a [4-digit 7-segment display](https://www.adafruit.com/category/37_103). Matrices like these are...
In Stock
[Buy Now](https://www.adafruit.com/product/881)
[Related Guides to the Product](https://learn.adafruit.com/products/881/guides)
### Adafruit Bicolor LED Square Pixel Matrix with I2C Backpack
[Adafruit Bicolor LED Square Pixel Matrix with I2C Backpack](https://www.adafruit.com/product/902)
What's better than a single LED? Lots of LEDs! A fun way to make a small colorful display is to use a [1.2" Bi-color 8x8 LED Matrix](http://www.adafruit.com/products/458). Matrices like these are 'multiplexed' - so to control all the 128 LEDs you need 24 pins....
In Stock
[Buy Now](https://www.adafruit.com/product/902)
[Related Guides to the Product](https://learn.adafruit.com/products/902/guides)
### Adafruit Mini 8x8 LED Matrix w/I2C Backpack - Blue
[Adafruit Mini 8x8 LED Matrix w/I2C Backpack - Blue](https://www.adafruit.com/product/959)
What's better than a single LED? Lots of LEDs! A fun way to make a small display is to use an [8x8 matrix](https://www.adafruit.com/category/37_88) or a [4-digit 7-segment display](https://www.adafruit.com/category/37_103). Matrices like these are...
In Stock
[Buy Now](https://www.adafruit.com/product/959)
[Related Guides to the Product](https://learn.adafruit.com/products/959/guides)
### Adafruit 0.56" 4-Digit 7-Segment Display w/I2C Backpack - White
[Adafruit 0.56" 4-Digit 7-Segment Display w/I2C Backpack - White](https://www.adafruit.com/product/1002)
What's better than a single LED? Lots of LEDs! A fun way to make a small display is to use an [8x8 matrix](https://www.adafruit.com/category/37_88) or a [4-digit 7-segment display](https://www.adafruit.com/category/37_103). Matrices like these are...
In Stock
[Buy Now](https://www.adafruit.com/product/1002)
[Related Guides to the Product](https://learn.adafruit.com/products/1002/guides)
### Adafruit 1.2" 8x8 LED Matrix Backpack
[Adafruit 1.2" 8x8 LED Matrix Backpack](https://www.adafruit.com/product/1048)
By popular request, you can now get our 8x8 LED backpacks without the LEDs! These backpacks feature an HT16K33 I2C LED driver, they're simple and easy to use - you can use [our very nice library for the backpacks to...](https://github.com/adafruit/Adafruit-LED-Backpack-Library)
In Stock
[Buy Now](https://www.adafruit.com/product/1048)
[Related Guides to the Product](https://learn.adafruit.com/products/1048/guides)
### Adafruit Small 1.2" 8x8 LED Matrix w/I2C Backpack - Red
[Adafruit Small 1.2" 8x8 LED Matrix w/I2C Backpack - Red](https://www.adafruit.com/product/1049)
What's better than a single LED? Lots of LEDs! A fun way to make a small display is to use an [8x8 matrix](https://www.adafruit.com/category/37_88) or a [4-digit 7-segment display](https://www.adafruit.com/category/37_103). Matrices like these are...
In Stock
[Buy Now](https://www.adafruit.com/product/1049)
[Related Guides to the Product](https://learn.adafruit.com/products/1049/guides)
### Adafruit Small 1.2" 8x8 LED Matrix w/I2C Backpack - Yellow
[Adafruit Small 1.2" 8x8 LED Matrix w/I2C Backpack - Yellow](https://www.adafruit.com/product/1050)
What's better than a single LED? Lots of LEDs! A fun way to make a small display is to use an [8x8 matrix](https://www.adafruit.com/category/37_88) or a [4-digit 7-segment display](https://www.adafruit.com/category/37_103). Matrices like these are...
In Stock
[Buy Now](https://www.adafruit.com/product/1050)
[Related Guides to the Product](https://learn.adafruit.com/products/1050/guides)
### Adafruit Small 1.2" 8x8 LED Matrix w/I2C Backpack - Blue
[Adafruit Small 1.2" 8x8 LED Matrix w/I2C Backpack - Blue](https://www.adafruit.com/product/1052)
What's better than a single LED? Lots of LEDs! A fun way to make a small display is to use an [8x8 matrix](https://www.adafruit.com/category/37_88) or a [4-digit 7-segment display](https://www.adafruit.com/category/37_103). Matrices like these are...
In Stock
[Buy Now](https://www.adafruit.com/product/1052)
[Related Guides to the Product](https://learn.adafruit.com/products/1052/guides)
### Adafruit Mini 8x8 LED Matrix w/I2C Backpack - Ultra Bright White
[Adafruit Mini 8x8 LED Matrix w/I2C Backpack - Ultra Bright White](https://www.adafruit.com/product/1080)
What's better than a single LED? Lots of LEDs! A fun way to make a small display is to use an [8x8 matrix](https://www.adafruit.com/category/37_88) or a [4-digit 7-segment display](https://www.adafruit.com/category/37_103). Matrices like these are...
In Stock
[Buy Now](https://www.adafruit.com/product/1080)
[Related Guides to the Product](https://learn.adafruit.com/products/1080/guides)
### Adafruit 1.2" 4-Digit 7-Segment Display w/I2C Backpack - Green
[Adafruit 1.2" 4-Digit 7-Segment Display w/I2C Backpack - Green](https://www.adafruit.com/product/1268)
What's better than a single LED? Lots of LEDs! A fun way to make a numeric display is to use a [4-digit 7-segment display](https://www.adafruit.com/category/37_103). LED matrices like these are 'multiplexed' - so to control all the seven-segment LEDs you need 14 pins....
No Longer Stocked
[Buy Now](https://www.adafruit.com/product/1268)
[Related Guides to the Product](https://learn.adafruit.com/products/1268/guides)
### Adafruit 1.2" 4-Digit 7-Segment Display w/I2C Backpack - Yellow
[Adafruit 1.2" 4-Digit 7-Segment Display w/I2C Backpack - Yellow](https://www.adafruit.com/product/1269)
What's better than a single LED? Lots of LEDs! A fun way to make a numeric display is to use a [4-digit 7-segment display](https://www.adafruit.com/category/37_103). LED matrices like these are 'multiplexed' - so to control all the seven-segment LEDs you need 14 pins....
In Stock
[Buy Now](https://www.adafruit.com/product/1269)
[Related Guides to the Product](https://learn.adafruit.com/products/1269/guides)
### Adafruit 1.2" 4-Digit 7-Segment Display w/I2C Backpack - Red
[Adafruit 1.2" 4-Digit 7-Segment Display w/I2C Backpack - Red](https://www.adafruit.com/product/1270)
What's better than a single LED? Lots of LEDs! A fun way to make a numeric display is to use a [4-digit 7-segment display](https://www.adafruit.com/category/37_103). LED matrices like these are 'multiplexed' - so to control all the seven-segment LEDs you need 14 pins....
In Stock
[Buy Now](https://www.adafruit.com/product/1270)
[Related Guides to the Product](https://learn.adafruit.com/products/1270/guides)
### Small 1.2" 8x8 Ultra Bright White LED Matrix + Backpack
[Small 1.2" 8x8 Ultra Bright White LED Matrix + Backpack](https://www.adafruit.com/product/1614)
What's better than a single LED? Lots of LEDs! A fun way to make a small display is to use an [8x8 matrix](https://www.adafruit.com/category/37_88) or a [4-digit 7-segment display](https://www.adafruit.com/category/37_103). Matrices like these are...
In Stock
[Buy Now](https://www.adafruit.com/product/1614)
[Related Guides to the Product](https://learn.adafruit.com/products/1614/guides)
### Adafruit Small 1.2" 8x8 LED Matrix w/I2C Backpack - Pure Green
[Adafruit Small 1.2" 8x8 LED Matrix w/I2C Backpack - Pure Green](https://www.adafruit.com/product/1632)
What's better than a single LED? Lots of LEDs! A fun way to make a small display is to use an [8x8 matrix](https://www.adafruit.com/category/37_88) or a [4-digit 7-segment display](https://www.adafruit.com/category/37_103). Matrices like these are...
In Stock
[Buy Now](https://www.adafruit.com/product/1632)
[Related Guides to the Product](https://learn.adafruit.com/products/1632/guides)
### Adafruit Mini 0.8" 8x8 LED Matrix w/I2C Backpack - Pure Green
[Adafruit Mini 0.8" 8x8 LED Matrix w/I2C Backpack - Pure Green](https://www.adafruit.com/product/1633)
What's better than a single LED? Lots of LEDs! A fun way to make a small display is to use an [8x8 matrix](https://www.adafruit.com/category/37_88) or a [4-digit 7-segment display](https://www.adafruit.com/category/37_103). Matrices like these are...
In Stock
[Buy Now](https://www.adafruit.com/product/1633)
[Related Guides to the Product](https://learn.adafruit.com/products/1633/guides)
### Bi-Color (Red/Green) 24-Bar Bargraph w/I2C Backpack Kit
[Bi-Color (Red/Green) 24-Bar Bargraph w/I2C Backpack Kit](https://www.adafruit.com/product/1721)
What's better than a single LED? Lots of LEDs! A fun way to make a small linear display is to use two 12-bar Bi-color bar-graphs. However, this LED bargraph is 'multiplexed' - so to control all the 48 LEDs you need a lot of pins.
Out of Stock
[Buy Now](https://www.adafruit.com/product/1721)
[Related Guides to the Product](https://learn.adafruit.com/products/1721/guides)
### Small 1.2" 8x8 Ultra Bright Square Amber LED Matrix + Backpack
[Small 1.2" 8x8 Ultra Bright Square Amber LED Matrix + Backpack](https://www.adafruit.com/product/1854)
What's better than a single LED? Lots of LEDs! Matrices like these are 'multiplexed' - so to control 64 LEDs you need 16 pins. That's a lot of pins, and there are [driver chips like the MAX7219](//www.adafruit.com/products/453) that can control a matrix for you but...
In Stock
[Buy Now](https://www.adafruit.com/product/1854)
[Related Guides to the Product](https://learn.adafruit.com/products/1854/guides)
### Small 1.2" 8x8 Ultra Bright Square Yellow LED Matrix + Backpack
[Small 1.2" 8x8 Ultra Bright Square Yellow LED Matrix + Backpack](https://www.adafruit.com/product/1855)
What's better than a single LED? Lots of LEDs! Matrices like these are 'multiplexed' - so to control 64 LEDs you need 16 pins. That's a lot of pins, and there are [driver chips like the MAX7219](//www.adafruit.com/products/453) that can control a matrix for you but...
In Stock
[Buy Now](https://www.adafruit.com/product/1855)
[Related Guides to the Product](https://learn.adafruit.com/products/1855/guides)
### Small 1.2" 8x8 Bright Square Pure Green LED Matrix + Backpack
[Small 1.2" 8x8 Bright Square Pure Green LED Matrix + Backpack](https://www.adafruit.com/product/1856)
What's better than a single LED? Lots of LEDs! Matrices like these are 'multiplexed' - so to control 64 LEDs you need 16 pins. That's a lot of pins, and there are [driver chips like the MAX7219](//www.adafruit.com/products/453) that can control a matrix for you but...
In Stock
[Buy Now](https://www.adafruit.com/product/1856)
[Related Guides to the Product](https://learn.adafruit.com/products/1856/guides)
### Small 1.2" 8x8 Ultra Bright Square White LED Matrix + Backpack
[Small 1.2" 8x8 Ultra Bright Square White LED Matrix + Backpack](https://www.adafruit.com/product/1857)
What's better than a single LED? Lots of LEDs! Matrices like these are 'multiplexed' - so to control 64 LEDs you need 16 pins. That's a lot of pins, and there are [driver chips like the MAX7219](//www.adafruit.com/products/453) that can control a matrix for you but...
In Stock
[Buy Now](https://www.adafruit.com/product/1857)
[Related Guides to the Product](https://learn.adafruit.com/products/1857/guides)
### Adafruit 14-segment LED Alphanumeric Backpack - STEMMA QT
[Adafruit 14-segment LED Alphanumeric Backpack - STEMMA QT](https://www.adafruit.com/product/1910)
By popular request, you can now get our 14-segment LED backpacks without the LEDs! These backpacks feature an HT16K33 I2C LED driver, they're simple and easy to use - you can use [our very nice library for the backpacks to...](https://github.com/adafruit/Adafruit-LED-Backpack-Library)
In Stock
[Buy Now](https://www.adafruit.com/product/1910)
[Related Guides to the Product](https://learn.adafruit.com/products/1910/guides)
### Quad Alphanumeric Display - Red 0.54" Digits w/ I2C Backpack
[Quad Alphanumeric Display - Red 0.54" Digits w/ I2C Backpack](https://www.adafruit.com/product/1911)
Display, elegantly, 012345678 or 9! Gaze, hypnotized, at ABCDEFGHIJKLM - well it can display the whole alphabet. You get the point. This is a nice, bright alphanumeric display that shows letters and numbers in a beautiful red hue. It's super bright and designed for viewing from distances...
In Stock
[Buy Now](https://www.adafruit.com/product/1911)
[Related Guides to the Product](https://learn.adafruit.com/products/1911/guides)
### Quad Alphanumeric Display - Blue 0.54" Digits w/ I2C Backpack
[Quad Alphanumeric Display - Blue 0.54" Digits w/ I2C Backpack](https://www.adafruit.com/product/1912)
Display, elegantly, 012345678 or 9! Gaze, hypnotized, at ABCDEFGHIJKLM - well it can display the whole alphabet. You get the point. This is a nice, bright alphanumeric display that shows letters and numbers in a beautiful blue hue. It's super bright and designed for viewing from distances...
In Stock
[Buy Now](https://www.adafruit.com/product/1912)
[Related Guides to the Product](https://learn.adafruit.com/products/1912/guides)
### 16x8 1.2" LED Matrix + Backpack - Ultra Bright Round Green LEDs
[16x8 1.2" LED Matrix + Backpack - Ultra Bright Round Green LEDs](https://www.adafruit.com/product/2035)
What's better than a single LED? Lots of LEDs! And what's better than lots of LEDs? **TWO TIMES AS MANY LEDS!!!**
With the 16x8 LED Matrix Backpack we've doubled your project's matrix capacity by making it super easy to get two separate 8x8 matrices onto...
In Stock
[Buy Now](https://www.adafruit.com/product/2035)
[Related Guides to the Product](https://learn.adafruit.com/products/2035/guides)
### 16x8 1.2" LED Matrix+Backpack UltraBright Round YellowGreen LEDs
[16x8 1.2" LED Matrix+Backpack UltraBright Round YellowGreen LEDs](https://www.adafruit.com/product/2036)
What's better than a single LED? Lots of LEDs! And what's better than lots of LEDs? **TWO TIMES AS MANY LEDS!!!**
With the 16x8 LED Matrix Backpack we've doubled your project's matrix capacity by making it super easy to get two separate 8x8 matrices onto...
In Stock
[Buy Now](https://www.adafruit.com/product/2036)
[Related Guides to the Product](https://learn.adafruit.com/products/2036/guides)
### 16x8 1.2" LED Matrix + Backpack - Ultra Bright Round Red LEDs
[16x8 1.2" LED Matrix + Backpack - Ultra Bright Round Red LEDs](https://www.adafruit.com/product/2037)
What's better than a single LED? Lots of LEDs! And what's better than lots of LEDs? **TWO TIMES AS MANY LEDS!!!**
With the 16x8 LED Matrix Backpack we've doubled your project's matrix capacity by making it super easy to get two separate 8x8 matrices onto...
In Stock
[Buy Now](https://www.adafruit.com/product/2037)
[Related Guides to the Product](https://learn.adafruit.com/products/2037/guides)
### 16x8 1.2" LED Matrix + Backpack - Ultra Bright Round White LEDs
[16x8 1.2" LED Matrix + Backpack - Ultra Bright Round White LEDs](https://www.adafruit.com/product/2038)
What's better than a single LED? Lots of LEDs! And what's better than lots of LEDs? **TWO TIMES AS MANY LEDS!!!**
With the 16x8 LED Matrix Backpack we've doubled your project's matrix capacity by making it super easy to get two separate 8x8 matrices onto...
In Stock
[Buy Now](https://www.adafruit.com/product/2038)
[Related Guides to the Product](https://learn.adafruit.com/products/2038/guides)
### 16x8 1.2" LED Matrix + Backpack - Ultra Bright Round Blue LEDs
[16x8 1.2" LED Matrix + Backpack - Ultra Bright Round Blue LEDs](https://www.adafruit.com/product/2039)
What's better than a single LED? Lots of LEDs! And what's better than lots of LEDs? **TWO TIMES AS MANY LEDS!!!**
With the 16x8 LED Matrix Backpack we've doubled your project's matrix capacity by making it super easy to get two separate 8x8 matrices onto...
In Stock
[Buy Now](https://www.adafruit.com/product/2039)
[Related Guides to the Product](https://learn.adafruit.com/products/2039/guides)
### 16x8 1.2" LED Matrix + Backpack - Ultra Bright Square Blue LEDs
[16x8 1.2" LED Matrix + Backpack - Ultra Bright Square Blue LEDs](https://www.adafruit.com/product/2040)
What's better than a single LED? Lots of LEDs! And what's better than lots of LEDs? **TWO TIMES AS MANY LEDS!!!**
With the 16x8 LED Matrix Backpack we've doubled your project's matrix capacity by making it super easy to get two separate 8x8 matrices onto...
In Stock
[Buy Now](https://www.adafruit.com/product/2040)
[Related Guides to the Product](https://learn.adafruit.com/products/2040/guides)
### 16x8 1.2" LED Matrix + Backpack - Ultra Bright Square Amber LEDs
[16x8 1.2" LED Matrix + Backpack - Ultra Bright Square Amber LEDs](https://www.adafruit.com/product/2041)
What's better than a single LED? Lots of LEDs! And what's better than lots of LEDs? **TWO TIMES AS MANY LEDS!!!**
With the 16x8 LED Matrix Backpack we've doubled your project's matrix capacity by making it super easy to get two separate 8x8 matrices onto...
In Stock
[Buy Now](https://www.adafruit.com/product/2041)
[Related Guides to the Product](https://learn.adafruit.com/products/2041/guides)
### 16x8 1.2" LED Matrix + Backpack - Ultra Bright Square Green LEDs
[16x8 1.2" LED Matrix + Backpack - Ultra Bright Square Green LEDs](https://www.adafruit.com/product/2042)
What's better than a single LED? Lots of LEDs! And what's better than lots of LEDs? **TWO TIMES AS MANY LEDS!!!**
With the 16x8 LED Matrix Backpack we've doubled your project's matrix capacity by making it super easy to get two separate 8x8 matrices onto...
In Stock
[Buy Now](https://www.adafruit.com/product/2042)
[Related Guides to the Product](https://learn.adafruit.com/products/2042/guides)
### 16x8 1.2" LED Matrix + Backpack -Ultra Bright Square Yellow LEDs
[16x8 1.2" LED Matrix + Backpack -Ultra Bright Square Yellow LEDs](https://www.adafruit.com/product/2043)
What's better than a single LED? Lots of LEDs! And what's better than lots of LEDs? **TWO TIMES AS MANY LEDS!!!**
With the 16x8 LED Matrix Backpack we've doubled your project's matrix capacity by making it super easy to get two separate 8x8 matrices onto...
In Stock
[Buy Now](https://www.adafruit.com/product/2043)
[Related Guides to the Product](https://learn.adafruit.com/products/2043/guides)
### 16x8 1.2" LED Matrix + Backpack - Ultra Bright Square White LEDs
[16x8 1.2" LED Matrix + Backpack - Ultra Bright Square White LEDs](https://www.adafruit.com/product/2044)
What's better than a single LED? Lots of LEDs! And what's better than lots of LEDs? **TWO TIMES AS MANY LEDS!!!**
With the 16x8 LED Matrix Backpack we've doubled your project's matrix capacity by making it super easy to get two separate 8x8 matrices onto...
In Stock
[Buy Now](https://www.adafruit.com/product/2044)
[Related Guides to the Product](https://learn.adafruit.com/products/2044/guides)
### 16x8 1.2" LED Matrix + Backpack-Ultra Bright Round Orange LEDs
[16x8 1.2" LED Matrix + Backpack-Ultra Bright Round Orange LEDs](https://www.adafruit.com/product/2052)
What's better than a single LED? Lots of LEDs! And what's better than lots of LEDs? **TWO TIMES AS MANY LEDS!!!**
With the 16x8 LED Matrix Backpack we've doubled your project's matrix capacity by making it super easy to get two separate 8x8 matrices onto...
In Stock
[Buy Now](https://www.adafruit.com/product/2052)
[Related Guides to the Product](https://learn.adafruit.com/products/2052/guides)
### 16x8 1.2" LED Matrices+Backpack Round LEDs in Various Colors
[16x8 1.2" LED Matrices+Backpack Round LEDs in Various Colors](https://www.adafruit.com/product/2054)
What's better than a single LED? Lots of LEDs! And what's better than lots of LEDs? **TWO TIMES AS MANY LEDS!!!**
With the 16x8 LED Matrix Backpack we've doubled your project's matrix capacity by making it super easy to get two separate 8x8 matrices onto...
Out of Stock
[Buy Now](https://www.adafruit.com/product/2054)
[Related Guides to the Product](https://learn.adafruit.com/products/2054/guides)
### Adafruit 8x16 LED Matrix FeatherWing w/o Matrices
[Adafruit 8x16 LED Matrix FeatherWing w/o Matrices](https://www.adafruit.com/product/3090)
You will chirp with delight when you see how easy it is to make your very own 8x16 LED matrix display for any Feather. At 0.8" square, the little [8x8 matrices](https://www.adafruit.com/new/?q=8x8%20miniature%20LED%20matrix&) have everything a big LED matrix has,...
Out of Stock
[Buy Now](https://www.adafruit.com/product/3090)
[Related Guides to the Product](https://learn.adafruit.com/products/3090/guides)
### Adafruit 14-segment LED Alphanumeric backpack (same as P1910)
[Adafruit 14-segment LED Alphanumeric backpack (same as P1910)](https://www.adafruit.com/product/3322)
Just the backpack + 4pin header
No Longer Stocked
[Buy Now](https://www.adafruit.com/product/3322)
[Related Guides to the Product](https://learn.adafruit.com/products/3322/guides)
## Featured Products
### Adafruit Small 1.2" 8x8 LED Matrix w/I2C Backpack - Yellow-Green
[Adafruit Small 1.2" 8x8 LED Matrix w/I2C Backpack - Yellow-Green](https://www.adafruit.com/product/1051)
What's better than a single LED? Lots of LEDs! A fun way to make a small display is to use an [8x8 matrix](https://www.adafruit.com/category/37_88) or a [4-digit 7-segment display](https://www.adafruit.com/category/37_103). Matrices like these are...
In Stock
[Buy Now](https://www.adafruit.com/product/1051)
[Related Guides to the Product](https://learn.adafruit.com/products/1051/guides)
### Small 1.2" 8x8 Ultra Bright Square Blue LED Matrix + Backpack
[Small 1.2" 8x8 Ultra Bright Square Blue LED Matrix + Backpack](https://www.adafruit.com/product/1853)
What's better than a single LED? Lots of LEDs! Matrices like these are 'multiplexed' - so to control 64 LEDs you need 16 pins. That's a lot of pins, and there are [driver chips like the MAX7219](//www.adafruit.com/products/453) that can control a matrix for you but...
In Stock
[Buy Now](https://www.adafruit.com/product/1853)
[Related Guides to the Product](https://learn.adafruit.com/products/1853/guides)
## Related Guides
- [LED Backpack Displays on Raspberry Pi and BeagleBone Black](https://learn.adafruit.com/led-backpack-displays-on-raspberry-pi-and-beaglebone-black.md)
- [Animating Multiple LED Backpacks](https://learn.adafruit.com/animating-multiple-led-backpacks.md)
- [Arduino GPS Clock](https://learn.adafruit.com/arduino-clock.md)
- [Raspberry Pi Physical Dashboard](https://learn.adafruit.com/raspberry-pi-physical-dashboard.md)
- [CircuitPython Hardware: LED Backpacks & FeatherWings](https://learn.adafruit.com/micropython-hardware-led-backpacks-and-featherwings.md)
- [Matrix and 7-Segment LED Backpack with the Raspberry Pi](https://learn.adafruit.com/matrix-7-segment-led-backpack-with-the-raspberry-pi.md)
- [DIY Pocket LED Gamer - Tiny Tetris!](https://learn.adafruit.com/diy-3d-printed-handheld-pocket-game-tiny-tetris-snake.md)
- [RGB LED Matrix Cube with 25,000 LEDs](https://learn.adafruit.com/rgb-led-matrix-cube-for-pi.md)
- [Creating GIFs for SmartMatrix](https://learn.adafruit.com/creating-gifs-for-smartmatrix.md)
- [Adafruit CharliePlex LED Matrix Bonnet](https://learn.adafruit.com/adafruit-charlieplex-bonnet.md)
- [Connecting a 16x32 RGB LED Matrix Panel to a Raspberry Pi](https://learn.adafruit.com/connecting-a-16x32-rgb-led-matrix-panel-to-a-raspberry-pi.md)
- [MicroPython Displays: Drawing Text](https://learn.adafruit.com/micropython-displays-drawing-text.md)
- [Heart Rate Badge](https://learn.adafruit.com/heart-rate-badge.md)
- [16x24 LED Matrix](https://learn.adafruit.com/16x24-led-matrix.md)
- [Adafruit IS31FL3741](https://learn.adafruit.com/adafruit-is31fl3741.md)
---
# Source: https://learn.adafruit.com/playing-sounds-and-using-buttons-with-raspberry-pi/circuitpython-code.md
# Source: https://learn.adafruit.com/pir-passive-infrared-proximity-motion-sensor/circuitpython-code.md
# PIR Motion Sensor
## CircuitPython Code
It's easy to use a PIR sensor with CircuitPython using simple digital inputs. The PIR sensor looks and acts kind of like a button or switch, i.e. it's only ever a high or low logic level, so you don't need any special libraries or other code to read one from Python. It will help to familiarize yourself with [CircuitPython digital inputs and outputs](../../../../circuitpython-digital-inputs-and-outputs) before continuing though!
First make sure your PIR sensor is wired to your board as shown in the previous page. There's no difference wiring a PIR sensor to an Arduino vs. CircuitPython board. You must connect the power, ground, and sensor output to your board. The sensor output should be connected to any digital I/O line on your board. In this example we'll use pin D2 on a Trinket M0.

[Fritzing Source](https://cdn-learn.adafruit.com/assets/assets/000/047/593/original/trinket_m0_pir.fzz?1508891968)
Next [connect to the board's serial REPL ](../../../../micropython-basics-how-to-load-micropython-on-a-board/serial-terminal)so you are at the CircuitPython **\>\>\>** prompt.
Run the following code to import the **board** and **digitalio** modules which lets you read digital inputs:
```
import board
import digitalio
```
Then create a simple digital input for the PIR. Remember to use the right board pin for how you've wired your sensor to your board. This example is using pin D2 on a Trinket M0:
```
pir = digitalio.DigitalInOut(board.D2)
pir.direction = digitalio.Direction.INPUT
```
At this point you can read the state of the sensor by reading the value property. If the value is at a low logic level, or False, the sensor sees no movement. If it's at a high logic level, or True, the sensor is detecting movement!
Note you'll likely want the sensor's jumper in the H position for retriggering mode as mentioned on the previous page.
For example with no movement in front of the sensor you might see:
```
pir.value
```

Then wave your hand in front of the sensor, and as you wave it run the same command again. Notice you get a True result!
```
pir.value
```

That's all there is to using a PIR sensor with CircuitPython!
Here's a complete example just like from the previous page where movement from the PIR sensor will turn on the board's LED and print a message. This is a direct port of the previous page's Arduino example to CircuitPython. Try saving it as a **main.py** on your board and connecting to the serial terminal to see the output as it runs! (be sure to change the board pin numbers to your sensor and LED wiring!)
```
import board
import digitalio
LED_PIN = board.D13 # Pin number for the board's built in LED.
PIR_PIN = board.D2 # Pin number connected to PIR sensor output wire.
# Setup digital input for PIR sensor:
pir = digitalio.DigitalInOut(PIR_PIN)
pir.direction = digitalio.Direction.INPUT
# Setup digital output for LED:
led = digitalio.DigitalInOut(LED_PIN)
led.direction = digitalio.Direction.OUTPUT
# Main loop that will run forever:
old_value = pir.value
while True:
pir_value = pir.value
if pir_value:
# PIR is detecting movement! Turn on LED.
led.value = True
# Check if this is the first time movement was
# detected and print a message!
if not old_value:
print('Motion detected!')
else:
# PIR is not detecting movement. Turn off LED.
led.value = False
# Again check if this is the first time movement
# stopped and print a message.
if old_value:
print('Motion ended!')
old_value = pir_value
```
- [Previous Page](https://learn.adafruit.com/pir-passive-infrared-proximity-motion-sensor/using-a-pir-w-arduino.md)
- [Next Page](https://learn.adafruit.com/pir-passive-infrared-proximity-motion-sensor/example-projects.md)
## Primary Products
### PIR (motion) sensor
[PIR (motion) sensor](https://www.adafruit.com/product/189)
PIR sensors are used to detect motion from pets/humanoids from about 20 feet away (possibly works on zombies, not guaranteed). This one has an adjustable delay before firing (approx 2-4 seconds), adjustable sensitivity **and** we include a 1 foot (30 cm) cable with a socket so you...
In Stock
[Buy Now](https://www.adafruit.com/product/189)
[Related Guides to the Product](https://learn.adafruit.com/products/189/guides)
## Related Guides
- [HalloWing All-Seeing Skull](https://learn.adafruit.com/hallowing-all-seeing-skull.md)
- [Magical Mistletoe](https://learn.adafruit.com/magical-mistletoe.md)
- [Screaming Cauldron](https://learn.adafruit.com/screaming-cauldron.md)
- [IoT Bird Feeder with Camera](https://learn.adafruit.com/iot-window-bird-feeder-with-camera.md)
- [No-Code WipperSnapper Summoning Horn](https://learn.adafruit.com/adafruit-io-wippersnapper-summoning-horn.md)
- [Motion Controlled Matrix Bed Clock](https://learn.adafruit.com/motion-controlled-matrix-bed-clock.md)
- [Adafruit VCNL4020 Proximity and Light Sensor](https://learn.adafruit.com/adafruit-vcnl4020-proximity-and-light-sensor.md)
- [Fog Machine with Motion Sensor and Adafruit IO](https://learn.adafruit.com/fog-machine-remote-trigger.md)
- [Feather Freezer Door Alarm](https://learn.adafruit.com/feather-door-alarm.md)
- [MIDI Laser Harp with Time of Flight Distance Sensors](https://learn.adafruit.com/midi-laser-harp-time-of-flight-sensors.md)
- [Using Adafruit IO Actions to Make an IoT Door Detector](https://learn.adafruit.com/using-adafruit-io-actions-to-make-an-iot-door-detector.md)
- [Quadcopter Spray Can Mod](https://learn.adafruit.com/quadcopter-spray-can-mod.md)
- [Adafruit VCNL4040 Proximity Sensor](https://learn.adafruit.com/adafruit-vcnl4040-proximity-sensor.md)
- [Using ItsaSNAP for HomeKit PIR Motion Detection](https://learn.adafruit.com/itsasnap-homekit-pir-motion-detection.md)
- [No-Code Room Occupancy Status ](https://learn.adafruit.com/no-code-room-occupancy-status.md)
---
# Source: https://learn.adafruit.com/adafruit-ultimate-gps/circuitpython-datalogging.md
# Adafruit Ultimate GPS
## CircuitPython Datalogging
# Datalogging Example
Another handy task with GPS is logging all the raw output of the GPS module to a file. This is useful if you're importing the GPS data into a tool like Google Earth which can process raw NMEA sentences. You can perform this datalogging very easily with CircuitPython.
To store data you'll need to choose one of two options:
- Wire up a SD card holder to your board's SPI bus, or use a board with SD card holder built-in like the [Feather M0 Adalogger](https://www.adafruit.com/product/2796). **This is the recommended approach** as it gives you a lot of space to store data and you can easily copy the data to your computer from the card.
- Store data in your board's internal filesystem. This requires a little more setup but allows you to save to a file on the internal filesystem of your CircuitPython board, right next to where code and other data files live. This is more limited because depending on your board you might only have a few kilobytes or megabytes of space available and GPS sentences will quickly add up (easily filling multiple megabytes within a few hours of logging).
## Install SD Card Library
If you're storing data on a SD card you must ensure the SD card is wired to your board and you have installed the Adafruit SD card library. Luckily there's [an entire guide to follow to learn about this process of connecting a SD card and installing the necessary library](../../../../micropython-hardware-sd-cards/tdicola-overview). Be sure to carefully follow the guide so the card is connected, library installed, and you can confirm you're able to manually write data to the card from the Python prompt.
## Enable Internal Filesystem Writes
If you're storing data on the internal filesystem you **must** carefully [follow the steps in the CPU temperature logging guide to enable writing to internal storage](../../../../cpu-temperature-logging-with-circuit-python/writing-to-the-filesystem). **If you're writing to a SD card skip these steps and move on to look at the datalogging code below.** Edit the **boot.py** on your board (creating it if it doesn't exist) and add these lines:
```python
import digitalio
import board
import storage
switch = digitalio.DigitalInOut(board.D5)
switch.direction = digitalio.Direction.INPUT
switch.pull = digitalio.Pull.UP
# If the D5 is connected to ground with a wire
# you can edit files over the USB drive again.
storage.remount("/", not switch.value)
```
Remember once you remount("/") **you cannot edit code over the USB drive anymore!** That means you can't edit **boot.py** which is a bit of a conundrum. So we configure the **boot.py** to selectively mount the internal filesystem as writable based on a switch or even just alligator clip connected to ground. Like the [CPU temperature guide shows](../../../../cpu-temperature-logging-with-circuit-python/writing-to-the-filesystem#selectively-setting-readonly-to-false-on-boot) . In this example we're using **D5** but select any available pin.
This code will look at the D5 digital input when the board starts up and if it's connected to ground (use an alligator clip or wire, for example, to connect from D5 to board ground) it will disable internal filesystem writes and allow you to edit code over the USB drive as normal. Remove the alligator clip, reset the board, and the **boot.py** will switch to mounting the internal filesystem as writable so you can log images to it again (but not write any code!).
Remember when you enable USB drive writes (by connecting D5 to ground at startup) you **cannot write files** to the internal filesystem and any code in your **main.py** that attempts to do so (like the example below) will fail. Keep this in mind as you edit code--once you modify code you need to remove the alligator clip, reset the board to re-enable internal filesystem writes, and then watch the output of your program.
Danger:
## Datalogging Example Code
The GPS library examples have a **datalogging.py** file you can edit and save as a **code.py** on your board:
https://github.com/adafruit/Adafruit_CircuitPython_GPS/blob/main/examples/gps_datalogging.py
By default this example expects to log GPS NMEA sentences to a file on the internal storage system at **/gps.txt**. New sentences will be appended to the end of the file every time the example starts running.
If you'd like to instead write to the SD card take note to uncomment the appropriate lines mentioned in the comments:
```
# Path to the file to log GPS data. By default this will be appended to
# which means new lines are added at the end and all old data is kept.
# Change this path to point at internal storage (like '/gps.txt') or SD
# card mounted storage ('/sd/gps.txt') as desired.
#LOG_FILE = '/gps.txt' # Example for writing to internal path /gps.txt
LOG_FILE = '/sd/gps.txt' # Example for writing to SD card path /sd/gps.txt
```
And further below:
Should all be uncommented and look as above. This will configure the code to write GPS NMEA data to the **/sd/gps.txt** file, appending new data to the end of the file.
Once the example is running as a **main.py** on your board open the serial REPL and you should see the raw NMEA sentences printed out:

Check the **gps.txt** file (either under the root or /sd path depending on how you setup the example) in a text editor and you'll see the same raw NMEA sentences:

Awesome! That's all there is to basic datalogging of NMEA sentences with a GPS module and CircuitPython!
- [Previous Page](https://learn.adafruit.com/adafruit-ultimate-gps/circuitpython-python-uart-usage.md)
- [Next Page](https://learn.adafruit.com/adafruit-ultimate-gps/built-in-logging.md)
## Featured Products
### Adafruit Ultimate GPS Breakout - 66 channel w/10 Hz updates
[Adafruit Ultimate GPS Breakout - 66 channel w/10 Hz updates](https://www.adafruit.com/product/746)
We carry a few different GPS modules here in the Adafruit shop, but none that satisfied our every desire - that's why we designed this little GPS breakout board. We believe this is the **Ultimate** GPS module, so we named it that. It's got everything you want and...
In Stock
[Buy Now](https://www.adafruit.com/product/746)
[Related Guides to the Product](https://learn.adafruit.com/products/746/guides)
### Adafruit Ultimate GPS GNSS with USB - 99 channel w/10 Hz updates
[Adafruit Ultimate GPS GNSS with USB - 99 channel w/10 Hz updates](https://www.adafruit.com/product/4279)
The Ultimate GPS module you know and love has a _glow-up_ to let it be easily used with any computer, not just microcontrollers! With the built-in USB-to-Serial converter, you can now plug-n-play the Ultimate GPS into your computer, laptop, embedded Linux computer, and more. Power and...
In Stock
[Buy Now](https://www.adafruit.com/product/4279)
[Related Guides to the Product](https://learn.adafruit.com/products/4279/guides)
### Adafruit METRO 328 Fully Assembled - Arduino IDE compatible
[Adafruit METRO 328 Fully Assembled - Arduino IDE compatible](https://www.adafruit.com/product/50)
We sure love the ATmega328 here at Adafruit, and we use them _a lot_ for our own projects. The processor has plenty of GPIO, Analog inputs, hardware UART SPI and I2C, timers and PWM galore - just enough for most simple projects. When we need to go small, we use a
Out of Stock
[Buy Now](https://www.adafruit.com/product/50)
[Related Guides to the Product](https://learn.adafruit.com/products/50/guides)
### GPS Antenna - External Active Antenna - 3-5V 28dB 5 Meter SMA
[GPS Antenna - External Active Antenna - 3-5V 28dB 5 Meter SMA](https://www.adafruit.com/product/960)
Give your Ultimate GPS V3 a boost with this external active antenna. This GPS antenna draws about 10mA and will give you an additional 28 dB of gain. It's got a 5 meter long cable so it will easily reach wherever you need it to. The antenna is magnetic so it will stick to the top of a car...
In Stock
[Buy Now](https://www.adafruit.com/product/960)
[Related Guides to the Product](https://learn.adafruit.com/products/960/guides)
### SMA to uFL/u.FL/IPX/IPEX RF Adapter Cable
[SMA to uFL/u.FL/IPX/IPEX RF Adapter Cable](https://www.adafruit.com/product/851)
This RF adapter cable is super handy for anyone doing RF work. Often times, small electronics save space by having a pick-and-placeable u.FL connector (also called uFL, IPEX, IPAX, IPX, MHF, and AM). But most antennas have SMA or RP-SMA connectors on them. This little cable will bridge the...
In Stock
[Buy Now](https://www.adafruit.com/product/851)
[Related Guides to the Product](https://learn.adafruit.com/products/851/guides)
### CR1220 12mm Diameter - 3V Lithium Coin Cell Battery
[CR1220 12mm Diameter - 3V Lithium Coin Cell Battery](https://www.adafruit.com/product/380)
These are the highest quality & capacity batteries, the same as shipped with the iCufflinks, iNecklace, Datalogging and GPS Shields, GPS HAT, etc. One battery per order (you'll want one battery per cufflink or pendant.)
Brand may vary but all battery brands are verified...
Out of Stock
[Buy Now](https://www.adafruit.com/product/380)
[Related Guides to the Product](https://learn.adafruit.com/products/380/guides)
### Breadboarding wire bundle
[Breadboarding wire bundle](https://www.adafruit.com/product/153)
75 flexible stranded core wires with stiff ends molded on in red, orange, yellow, green, blue, brown, black and white. These are a major improvement over the "box of bent wires" that are sometimes sold with breadboards, and faster than stripping your own solid core wires. Makes...
In Stock
[Buy Now](https://www.adafruit.com/product/153)
[Related Guides to the Product](https://learn.adafruit.com/products/153/guides)
### Half Sized Premium Breadboard - 400 Tie Points
[Half Sized Premium Breadboard - 400 Tie Points](https://www.adafruit.com/product/64)
This is a cute, half-size breadboard with 400 tie points, good for small projects. It's 3.25" x 2.2" / 8.3cm x 5.5cm with a standard double-strip in the middle and two power rails on both sides. You can pull the power rails off easily to make the breadboard as...
In Stock
[Buy Now](https://www.adafruit.com/product/64)
[Related Guides to the Product](https://learn.adafruit.com/products/64/guides)
## Related Guides
- [Reverse Geocache Box](https://learn.adafruit.com/reverse-geocache-engagement-box.md)
- [Ladyada's Learn Arduino - Lesson #2](https://learn.adafruit.com/ladyadas-learn-arduino-lesson-number-2.md)
- [Wave Shield Talking Clock](https://learn.adafruit.com/wave-shield-talking-clock.md)
- [Wireless Game Show Poppers for the Classroom!](https://learn.adafruit.com/wireless-game-show-poppers.md)
- [Wireless Gardening with Arduino + CC3000 WiFi Modules](https://learn.adafruit.com/wireless-gardening-arduino-cc3000-wifi-modules.md)
- [CircuitPython Essentials](https://learn.adafruit.com/circuitpython-essentials.md)
- [CircuitPython Libraries on Linux and ODROID C2](https://learn.adafruit.com/circuitpython-libaries-linux-odroid-c2.md)
- [2.2" TFT Display](https://learn.adafruit.com/2-2-tft-display.md)
- [RGB LED Matrix Basics](https://learn.adafruit.com/32x16-32x32-rgb-led-matrix.md)
- [Halloween Pumpkin](https://learn.adafruit.com/halloween-pumpkin.md)
- [Remote controlled door lock using a fingerprint sensor & Adafruit IO](https://learn.adafruit.com/remote-controlled-door-lock-using-a-fingerprint-sensor-and-adafruit-io.md)
- [Automatic Monitor Color Temperature Adjustment](https://learn.adafruit.com/automatic-monitor-color-temperature-adjustment.md)
- [Animating Multiple LED Backpacks](https://learn.adafruit.com/animating-multiple-led-backpacks.md)
- [Skill Badge Requirements: Microcontrollers](https://learn.adafruit.com/skill-badge-requirements-microcontrollers.md)
- [RePaper eInk Development Board](https://learn.adafruit.com/repaper-eink-development-board.md)
---
# Source: https://learn.adafruit.com/1-8-tft-display/circuitpython-displayio-quickstart-2.md
# 1.8" TFT Display Breakout and Shield
## CircuitPython Displayio Quickstart
You will need a board capable of running CircuitPython such as the Metro M0 Express or the Metro M4 Express. You can also use boards such as the Feather M0 Express or the Feather M4 Express. We recommend either the Metro M4 or the Feather M4 Express because it's much faster and works better for driving a display. For this guide, we will be using a Feather M4 Express. The steps should be about the same for the Feather M0 Express or either of the Metros. If you haven't already, be sure to check out our [Feather M4 Express](https://learn.adafruit.com/adafruit-feather-m4-express-atsamd51/assembly) guide.
### Adafruit Feather M4 Express - Featuring ATSAMD51
[Adafruit Feather M4 Express - Featuring ATSAMD51](https://www.adafruit.com/product/3857)
It's what you've been waiting for, the Feather M4 Express featuring ATSAMD51. This Feather is fast like a swift, smart like an owl, strong like a ox-bird (it's half ox, half bird, OK?) This feather is powered by our new favorite chip, the **ATSAMD51J19** - with...
In Stock
[Buy Now](https://www.adafruit.com/product/3857)
[Related Guides to the Product](https://learn.adafruit.com/products/3857/guides)

## Preparing the Breakout
Before using the TFT Breakout, you will need to solder the headers or some wires to it. Be sure to check out the [Adafruit Guide To Excellent Soldering](https://learn.adafruit.com/adafruit-guide-excellent-soldering). After that the breakout should be ready to go.
## Wiring the Breakout to the Feather
- **3-5V VCC** connects to the Feather **3V** pin
- **GND** connects toFeather ground
- **SCK** connects to SPI clock. On the Feather that's **SCK**.
- **MISO** connects to SPI MISO. On the Feather that's **MI**
- **MOSI** connects to SPI MOSI. On the Feather that's **MO**
- **TFT\_CS** connects to our SPI Chip Select pin. We'll be using **Digital 5** but you can later change this to any pin
- **D/C** connects to our SPI data/command select pin. We'll be using **Digital 6** but you can later change this pin too.
- **RESET** connects to our reset pin. We'll be using **Digital 9** but you can later change this pin too.
- **LITE** connects to the Feather **3V** pin. This is the only display that this pin is required to be connected or the backlight won't work.

[Download Fritzing Object](https://cdn-learn.adafruit.com/assets/assets/000/116/512/original/160x128-breakout-feather-m4-fritzing.zip?1667860723)
## Required CircuitPython Libraries
To use this display with `displayio`, there is only one required library.
[Adafruit_CircuitPython_ST7735R](https://github.com/adafruit/Adafruit_CircuitPython_ST7735R/releases)
First, make sure you are running the [latest version of Adafruit CircuitPython](https://learn.adafruit.com/welcome-to-circuitpython/installing-circuitpython) for your board.
Next, you'll need to install the necessary libraries to use the hardware--carefully follow the steps to find and install these libraries from [Adafruit's CircuitPython library bundle](https://github.com/adafruit/Adafruit_CircuitPython_Bundle). Our introduction guide has [a great page on how to install the library bundle](https://learn.adafruit.com/welcome-to-circuitpython/circuitpython-libraries) for both express and non-express boards.
Remember for non-express boards, you'll need to manually install the necessary libraries from the bundle:
- **adafruit\_st7735r**
Before continuing make sure your board's lib folder or root filesystem has the **adafruit\_st7735r** file copied over.
## Code Example Additional Libraries
For the Code Example, you will need an additional library. We decided to make use of a library so the code didn't get overly complicated.
[Adafruit_CircuitPython_Display_Text](https://github.com/adafruit/Adafruit_CircuitPython_Display_Text)
Go ahead and install this in the same manner as the driver library by copying the **adafruit\_display\_text** folder over to the **lib** folder on your CircuitPython device.
## CircuitPython Code Example
https://github.com/adafruit/Adafruit_CircuitPython_ST7735R/blob/main/examples/st7735r_128x160_simpletest.py
Let's take a look at the sections of code one by one. We start by importing the board so that we can initialize `SPI`, `displayio`,`terminalio` for the font, a `label`, and the `adafruit_st7735r` driver.
```
import board
import displayio
import terminalio
from adafruit_display_text import label
from adafruit_st7735r import ST7735R
```
Next we release any previously used displays. This is important because if the Feather is reset, the display pins are not automatically released and this makes them available for use again.
```
displayio.release_displays()
```
Next, we set the SPI object to the board's SPI with the easy shortcut function `board.SPI()`. By using this function, it finds the SPI module and initializes using the default SPI parameters.
```
spi = board.SPI()
tft_cs = board.D5
tft_dc = board.D6
```
In the next line, we set the display bus to FourWire which makes use of the SPI bus.
```
display_bus = displayio.FourWire(spi, command=tft_dc, chip_select=tft_cs, reset=board.D9)
```
Finally, we initialize the driver with a width of 160 and a height of 128. If we stopped at this point and ran the code, we would have a terminal that we could type at and have the screen update. Because we want to use the display horizontally and the default orientation is vertical, we rotate it 90 degrees. One other parameter that we provide is `bgr=True` and the reason for this is that the color ordering of certain displays is Blue, Green, Red rather than the usual Red, Green, Blue. It tell displayio the correct color ordering for this particular display.
```
display = ST7735R(display_bus, width=160, height=128, rotation=90, bgr=True)
```

Next we create a background splash image. We do this by creating a group that we can add elements to and adding that group to the display. In this example, we are limiting the maximum number of elements to 10, but this can be increased if you would like. The display will automatically handle updating the group.
```auto
splash = displayio.Group(max_size=10)
display.root_group = splash
```
Next we create a Bitmap which is like a canvas that we can draw on. In this case we are creating the Bitmap to be the same size as the screen, but only have one color. The Bitmaps can currently handle up to 256 different colors. We create a Palette with one color and set that color to 0x00FF00 which happens to be green. Colors are Hexadecimal values in the format of RRGGBB. Even though the Bitmaps can only handle 256 colors at a time, you get to define what those 256 different colors are.
```
color_bitmap = displayio.Bitmap(160, 128, 1)
color_palette = displayio.Palette(1)
color_palette[0] = 0x00FF00 # Bright Green
```
With all those pieces in place, we create a TileGrid by passing the bitmap and palette and draw it at `(0, 0)` which represents the display's upper left.
```
bg_sprite = displayio.TileGrid(color_bitmap,
pixel_shader=color_palette,
x=0, y=0)
splash.append(bg_sprite)
```

Next we will create a smaller purple square. The easiest way to do this is the create a new bitmap that is a little smaller than the full screen with a single color and place it in a specific location. In this case, we will create a bitmap that is 5 pixels smaller on each side. The screen is **160x128** , so we'll want to subtract 10 from each of those numbers.
We'll also want to place it at the position `(5, 5)` so that it ends up centered.
```
inner_bitmap = displayio.Bitmap(150, 118, 1)
inner_palette = displayio.Palette(1)
inner_palette[0] = 0xAA0088 # Purple
inner_sprite = displayio.TileGrid(inner_bitmap,
pixel_shader=inner_palette,
x=5, y=5)
splash.append(inner_sprite)
```
Since we are adding this after the first square, it's automatically drawn on top. Here's what it looks like now.

Next let's add a label that says "Hello World!" on top of that. We're going to use the built-in Terminal Font and scale it up by a factor of two. To scale the label only, we will make use of a subgroup, which we will then add to the main group.
Labels are centered vertically, so we'll place it at 64 for the Y coordinate, and around 11 pixels make it appear to be centered horizontally, but if you want to change the text, change this to whatever looks good to you. Let's go with some yellow text, so we'll pass it a value of `0xFFFF00`.
```
text_group = displayio.Group(max_size=10, scale=2, x=11, y=64)
text = "Hello World!"
text_area = label.Label(terminalio.FONT, text=text, color=0xFFFF00)
text_group.append(text_area) # Subgroup for text scaling
splash.append(text_group)
```
Finally, we place an infinite loop at the end so that the graphics screen remains in place and isn't replaced by a terminal.
```
while True:
pass
```

## Where to go from here
Be sure to check out this excellent [guide to CircuitPython Display Support Using displayio](https://learn.adafruit.com/circuitpython-display-support-using-displayio)
- [Previous Page](https://learn.adafruit.com/1-8-tft-display/displaying-bitmaps.md)
- [Next Page](https://learn.adafruit.com/1-8-tft-display/python-wiring-and-setup.md)
## Featured Products
### Breadboarding wire bundle
[Breadboarding wire bundle](https://www.adafruit.com/product/153)
75 flexible stranded core wires with stiff ends molded on in red, orange, yellow, green, blue, brown, black and white. These are a major improvement over the "box of bent wires" that are sometimes sold with breadboards, and faster than stripping your own solid core wires. Makes...
In Stock
[Buy Now](https://www.adafruit.com/product/153)
[Related Guides to the Product](https://learn.adafruit.com/products/153/guides)
### Adafruit METRO 328 Fully Assembled - Arduino IDE compatible
[Adafruit METRO 328 Fully Assembled - Arduino IDE compatible](https://www.adafruit.com/product/50)
We sure love the ATmega328 here at Adafruit, and we use them _a lot_ for our own projects. The processor has plenty of GPIO, Analog inputs, hardware UART SPI and I2C, timers and PWM galore - just enough for most simple projects. When we need to go small, we use a
Out of Stock
[Buy Now](https://www.adafruit.com/product/50)
[Related Guides to the Product](https://learn.adafruit.com/products/50/guides)
### Half Sized Premium Breadboard - 400 Tie Points
[Half Sized Premium Breadboard - 400 Tie Points](https://www.adafruit.com/product/64)
This is a cute, half-size breadboard with 400 tie points, good for small projects. It's 3.25" x 2.2" / 8.3cm x 5.5cm with a standard double-strip in the middle and two power rails on both sides. You can pull the power rails off easily to make the breadboard as...
In Stock
[Buy Now](https://www.adafruit.com/product/64)
[Related Guides to the Product](https://learn.adafruit.com/products/64/guides)
### 1.8" Color TFT LCD display with MicroSD Card Breakout
[1.8" Color TFT LCD display with MicroSD Card Breakout](https://www.adafruit.com/product/358)
This lovely little display breakout is the best way to add a small, colorful and bright display to any project. Since the display uses 4-wire SPI to communicate and has its own pixel-addressable frame buffer, it can be used with every kind of microcontroller. Even a very small one with low...
Out of Stock
[Buy Now](https://www.adafruit.com/product/358)
[Related Guides to the Product](https://learn.adafruit.com/products/358/guides)
### Adafruit 1.8" Color TFT Shield w/microSD and Joystick
[Adafruit 1.8" Color TFT Shield w/microSD and Joystick](https://www.adafruit.com/product/802)
This lovely little shield is the best way to add a small, colorful and bright display to any project. We took our popular 1.8" TFT breakout board and remixed it into an Arduino shield complete with microSD card slot and a 5-way joystick navigation switch and three selection buttons! Since...
In Stock
[Buy Now](https://www.adafruit.com/product/802)
[Related Guides to the Product](https://learn.adafruit.com/products/802/guides)
### 1.8" SPI TFT display, 160x128 18-bit color - ST7735R driver
[1.8" SPI TFT display, 160x128 18-bit color - ST7735R driver](https://www.adafruit.com/product/618)
We just love this little 1.8" TFT display, with true TFT color (up to 18-bits per pixel!), fine 160x128 resolution, two white LED backlight that runs on 3.3V and a very easy SPI interface that requires only 4 or 5 digital pins to send pixels to the display.
**Please...**
Out of Stock
[Buy Now](https://www.adafruit.com/product/618)
[Related Guides to the Product](https://learn.adafruit.com/products/618/guides)
## Related Guides
- [Wave Shield](https://learn.adafruit.com/adafruit-wave-shield-audio-shield-for-arduino.md)
- [Adafruit 2.8" TFT Touch Shield v2 - Capacitive or Resistive](https://learn.adafruit.com/adafruit-2-8-tft-touch-shield-v2.md)
- [How to Build a Testing Jig](https://learn.adafruit.com/how-to-build-a-testing-fixture.md)
- [Create an Internet of Things Dashboard with Adafruit IO](https://learn.adafruit.com/create-an-internet-of-things-dashboard-with-adafruit-dot-io.md)
- [Let’s Put LEDs in Things!](https://learn.adafruit.com/lets-put-leds-in-things.md)
- [Tiny Arduino Music Visualizer](https://learn.adafruit.com/piccolo.md)
- [Circuit Playground Sound-Controlled Robot](https://learn.adafruit.com/circuit-playground-sound-controlled-robot.md)
- [Adafruit 1.27" and 1.5" Color OLED Breakout Board](https://learn.adafruit.com/adafruit-1-5-color-oled-breakout-board.md)
- [Arduino Lesson 15. DC Motor Reversing](https://learn.adafruit.com/adafruit-arduino-lesson-15-dc-motor-reversing.md)
- [TTL Serial Camera](https://learn.adafruit.com/ttl-serial-camera.md)
- [Analog Feedback Servos](https://learn.adafruit.com/analog-feedback-servos.md)
- [Geofencing with the FONA 808 & Adafruit IO](https://learn.adafruit.com/geofencing-with-the-fona-808-and-adafruit-io.md)
- [Arduino GPS Clock](https://learn.adafruit.com/arduino-clock.md)
- [Adafruit Data Logger Shield](https://learn.adafruit.com/adafruit-data-logger-shield.md)
- [Making Adabot: Part 2](https://learn.adafruit.com/making-adabot-part-2.md)
---
# Source: https://learn.adafruit.com/096-mini-color-oled/circuitpython-displayio-quickstart.md
# 0.96" mini Color OLED
## CircuitPython Displayio Quickstart
You will need a board capable of running CircuitPython such as the Metro M0 Express or the Metro M4 Express. You can also use boards such as the Feather M0 Express or the Feather M4 Express. We recommend either the Metro M4 or the Feather M4 Express because it's much faster and works better for driving a display. For this guide, we will be using a Feather M4 Express. The steps should be about the same for the Feather M0 Express or either of the Metros. If you haven't already, be sure to check out our [Feather M4 Express](https://learn.adafruit.com/adafruit-feather-m4-express-atsamd51/assembly) guide.
### Adafruit Feather M4 Express - Featuring ATSAMD51
[Adafruit Feather M4 Express - Featuring ATSAMD51](https://www.adafruit.com/product/3857)
It's what you've been waiting for, the Feather M4 Express featuring ATSAMD51. This Feather is fast like a swift, smart like an owl, strong like a ox-bird (it's half ox, half bird, OK?) This feather is powered by our new favorite chip, the **ATSAMD51J19** - with...
In Stock
[Buy Now](https://www.adafruit.com/product/3857)
[Related Guides to the Product](https://learn.adafruit.com/products/3857/guides)

## Preparing the Breakout
Before using the TFT Breakout, you will need to solder the headers or some wires to it. Be sure to check out the [Adafruit Guide To Excellent Soldering](https://learn.adafruit.com/adafruit-guide-excellent-soldering). After that the breakout should be ready to go.
## Required CircuitPython Libraries
To use this display with `displayio`, there is only one required library.
[Adafruit_CircuitPython_SSD1331](https://github.com/adafruit/Adafruit_CircuitPython_SSD1331/releases)
First, make sure you are running the [latest version of Adafruit CircuitPython](https://learn.adafruit.com/welcome-to-circuitpython/installing-circuitpython) for your board.
Next, you'll need to install the necessary libraries to use the hardware--carefully follow the steps to find and install these libraries from [Adafruit's CircuitPython library bundle](https://github.com/adafruit/Adafruit_CircuitPython_Bundle). Our introduction guide has [a great page on how to install the library bundle](https://learn.adafruit.com/welcome-to-circuitpython/circuitpython-libraries) for both express and non-express boards.
Remember for non-express boards, you'll need to manually install the necessary libraries from the bundle:
- **adafruit\_ssd1331**
Before continuing make sure your board's lib folder or root filesystem has the **adafruit\_ssd1331** file copied over.
## Code Example Additional Libraries
For the Code Example, you will need an additional library. We decided to make use of a library so the code didn't get overly complicated.
[Adafruit_CircuitPython_Display_Text](https://github.com/adafruit/Adafruit_CircuitPython_Display_Text/releases)
Go ahead and install this in the same manner as the driver library by copying the **adafruit\_display\_text** folder over to the **lib** folder on your CircuitPython device.
## CircuitPython Code Example
https://github.com/adafruit/Adafruit_CircuitPython_SSD1331/blob/main/examples/ssd1331_simpletest.py
Let's take a look at the sections of code one by one. We start by importing the board so that we can initialize `SPI`, `displayio`,`terminalio` for the font, a `label`, and the `adafruit_ssd1331` driver.
```
import board
import displayio
import terminalio
from adafruit_display_text import label
from adafruit_ssd1331 import SSD1331
```
Next we release any previously used displays. This is important because if the Feather is reset, the display pins are not automatically released and this makes them available for use again.
```
displayio.release_displays()
```
Next, we set the SPI object to the board's SPI with the easy shortcut function `board.SPI()`. By using this function, it finds the SPI module and initializes using the default SPI parameters.
```
spi = board.SPI()
tft_cs = board.D5
tft_dc = board.D6
```
In the next line, we set the display bus to FourWire which makes use of the SPI bus.
```
display_bus = displayio.FourWire(spi, command=tft_dc, chip_select=tft_cs, reset=board.D9)
```
Finally, we initialize the driver with a width of 96 and a height of 64. If we stopped at this point and ran the code, we would have a terminal that we could type at and have the screen update.
```
display = SSD1331(display_bus, width=96, height=64)
```

Next we create a background splash image. We do this by creating a group that we can add elements to and adding that group to the display. In this example, we are limiting the maximum number of elements to 10, but this can be increased if you would like. The display will automatically handle updating the group.
```auto
splash = displayio.Group(max_size=10)
display.root_group = splash
```
Next we create a Bitmap which is like a canvas that we can draw on. In this case we are creating the Bitmap to be the same size as the screen, but only have one color. The Bitmaps can currently handle up to 256 different colors. We create a Palette with one color and set that color to 0x00FF00 which happens to be green. Colors are Hexadecimal values in the format of RRGGBB. Even though the Bitmaps can only handle 256 colors at a time, you get to define what those 256 different colors are.
```
color_bitmap = displayio.Bitmap(96, 64, 1)
color_palette = displayio.Palette(1)
color_palette[0] = 0x00FF00 # Bright Green
```
With all those pieces in place, we create a TileGrid by passing the bitmap and palette and draw it at `(0, 0)` which represents the display's upper left.
```
bg_sprite = displayio.TileGrid(color_bitmap,
pixel_shader=color_palette,
x=0, y=0)
splash.append(bg_sprite)
```

Next we will create a smaller purple square. The easiest way to do this is the create a new bitmap that is a little smaller than the full screen with a single color and place it in a specific location. In this case, we will create a bitmap that is 5 pixels smaller on each side. The screen is **96x64** , so we'll want to subtract 10 from each of those numbers.
We'll also want to place it at the position `(5, 5)` so that it ends up centered.
```
inner_bitmap = displayio.Bitmap(86, 54, 1)
inner_palette = displayio.Palette(1)
inner_palette[0] = 0xAA0088 # Purple
inner_sprite = displayio.TileGrid(inner_bitmap,
pixel_shader=inner_palette,
x=5, y=5)
splash.append(inner_sprite)
```
Since we are adding this after the first square, it's automatically drawn on top. Here's what it looks like now.

Next let's add a label that says "Hello World!" on top of that. We're going to use the built-in Terminal Font. In this example, we won't be doing any scaling because of the small resolution, so we'll add the label directly the main group. If we were scaling, we would have used a subgroup.
Labels are centered vertically, so we'll place it at 32 for the Y coordinate, and around 12 pixels make it appear to be centered horizontally, but if you want to change the text, change this to whatever looks good to you. Let's go with some yellow text, so we'll pass it a value of `0xFFFF00`.
```
text = "Hello World!"
text_area = label.Label(terminalio.FONT, text=text, color=0xFFFF00, x=12, y=32)
splash.append(text_area)
```
Finally, we place an infinite loop at the end so that the graphics screen remains in place and isn't replaced by a terminal.
```
while True:
pass
```

## Where to go from here
Be sure to check out this excellent [guide to CircuitPython Display Support Using displayio](https://learn.adafruit.com/circuitpython-display-support-using-displayio)
- [Previous Page](https://learn.adafruit.com/096-mini-color-oled/drawing-bitmaps.md)
- [Next Page](https://learn.adafruit.com/096-mini-color-oled/python-wiring-and-setup.md)
## Featured Products
### OLED Breakout Board - 16-bit Color 0.96" w/microSD holder
[OLED Breakout Board - 16-bit Color 0.96" w/microSD holder](https://www.adafruit.com/product/684)
We love our black and white monochrome displays but we also like to dabble with some color now and then. Our new 0.96" color OLED displays are perfect when you need an ultra-small display with vivid, high-contrast 16-bit color. The visible portion of the OLED measures 0.96" diagonal...
In Stock
[Buy Now](https://www.adafruit.com/product/684)
[Related Guides to the Product](https://learn.adafruit.com/products/684/guides)
### Adafruit METRO 328 Fully Assembled - Arduino IDE compatible
[Adafruit METRO 328 Fully Assembled - Arduino IDE compatible](https://www.adafruit.com/product/50)
We sure love the ATmega328 here at Adafruit, and we use them _a lot_ for our own projects. The processor has plenty of GPIO, Analog inputs, hardware UART SPI and I2C, timers and PWM galore - just enough for most simple projects. When we need to go small, we use a
Out of Stock
[Buy Now](https://www.adafruit.com/product/50)
[Related Guides to the Product](https://learn.adafruit.com/products/50/guides)
### Breadboarding wire bundle
[Breadboarding wire bundle](https://www.adafruit.com/product/153)
75 flexible stranded core wires with stiff ends molded on in red, orange, yellow, green, blue, brown, black and white. These are a major improvement over the "box of bent wires" that are sometimes sold with breadboards, and faster than stripping your own solid core wires. Makes...
In Stock
[Buy Now](https://www.adafruit.com/product/153)
[Related Guides to the Product](https://learn.adafruit.com/products/153/guides)
## Related Guides
- [Tiny Arduino Music Visualizer](https://learn.adafruit.com/piccolo.md)
- [Create an Internet of Things Dashboard with Adafruit IO](https://learn.adafruit.com/create-an-internet-of-things-dashboard-with-adafruit-dot-io.md)
- [Adafruit Ultimate GPS](https://learn.adafruit.com/adafruit-ultimate-gps.md)
- [Ladyada's Learn Arduino - Lesson #0](https://learn.adafruit.com/ladyadas-learn-arduino-lesson-number-0.md)
- [Arduino Lesson 15. DC Motor Reversing](https://learn.adafruit.com/adafruit-arduino-lesson-15-dc-motor-reversing.md)
- [Wireless Gardening with Arduino + CC3000 WiFi Modules](https://learn.adafruit.com/wireless-gardening-arduino-cc3000-wifi-modules.md)
- [Arduino Lesson 9. Sensing Light](https://learn.adafruit.com/adafruit-arduino-lesson-9-sensing-light.md)
- [Low Power Coin Cell Voltage Logger](https://learn.adafruit.com/low-power-coin-cell-voltage-logger.md)
- [LSM303 Accelerometer + Compass Breakout](https://learn.adafruit.com/lsm303-accelerometer-slash-compass-breakout.md)
- [Skill Badge Requirements: Microcontrollers](https://learn.adafruit.com/skill-badge-requirements-microcontrollers.md)
- [WiFi Weather Station](https://learn.adafruit.com/wifi-weather-station-arduino-cc3000.md)
- [Adafruit Proto Shield for Arduino](https://learn.adafruit.com/adafruit-proto-shield-arduino.md)
- [Electronic Demon Costume](https://learn.adafruit.com/electronic-demon-costume.md)
- [DIY 8x2 LCD Shield](https://learn.adafruit.com/diy-8x2-lcd-shield.md)
- [Circuit Playground Sound-Controlled Robot](https://learn.adafruit.com/circuit-playground-sound-controlled-robot.md)
---
# Source: https://learn.adafruit.com/adafruit-ultimate-gps/circuitpython-parsing.md
# Adafruit Ultimate GPS
## CircuitPython & Python Setup
You can easily use a GPS module with Python or CircuitPython code in addition to Arduino. Python code is well suited for parsing and processing the text output from GPS modules, and this [Adafruit CircuitPython GPS](https://github.com/adafruit/Adafruit_CircuitPython_GPS) module handles most of the work for you!
# CircuitPython MicroController Wiring
First make sure to wire up the GPS module to your CircuitPython board so that the hardware UART pins are used. Here's an example with the Metro M0 Express:
- **Board 5V** or **3.3V** to **GPS module VIN**.
- **Board GND** to **GPS module GND**.
- **Board serial TX** to **GPS module RX**.
- **Board serial RX** to **GPS module TX**.

# Python Computer Wiring
Since there's _dozens_ of Linux computers/boards you can use we will show wiring for Raspberry Pi. For other platforms, [please visit the guide for CircuitPython on Linux to see whether your platform is supported](https://learn.adafruit.com/circuitpython-on-raspberrypi-linux).
Here you have two options: An external USB-to-serial converter, or the built-in UART on the Pi's TX/RX pins. Here's an example of wiring up the [USB-to-serial converter](https://www.adafruit.com/product/954):
- **GPS Vin** to **USB** **5V** or **3V** (red wire on USB console cable)
- **GPS Ground** to **USB Ground** (black wire)
- **GPS RX** to **USB TX** (green wire)
- **GPS TX** to **USB RX** (white wire)

Warning:
You can also skip the USB console cable, and just plug a USB C or Micro B cable directly from your computer to the **Ultimate GPS USB**


Here's an example using the Pi's built-in UART:
- **GPS Vin** to **3.**** 3V** (red wire)
- **GPS Ground** to **Ground** (black wire)
- **GPS RX** to **TX** (green wire)
- **GPS TX** to **RX** (white wire)

If you want to use the built-in UART, you'll need to disable the serial console and enable the serial port hardware in **raspi-config**. See [the UART/Serial section of the CircuitPython on Raspberry Pi guide](https://learn.adafruit.com/circuitpython-on-raspberrypi-linux/uart-serial) for detailed instructions on how to do this.
# CircuitPython Installation of GPS Library
Next you'll need to install the [Adafruit CircuitPython GPS](https://github.com/adafruit/Adafruit_CircuitPython_GPS) library on your CircuitPython board. **Remember this module is for Adafruit CircuitPython firmware and not MicroPython.org firmware!**
First make sure you are running the [latest version of Adafruit CircuitPython](https://github.com/adafruit/circuitpython/releases) for your board.
Next you'll need to install the necessary libraries to use the hardware. Carefully follow [the steps to find and install this library](https://learn.adafruit.com/welcome-to-circuitpython/circuitpython-libraries) from [Adafruit's CircuitPython library bundle](https://github.com/adafruit/Adafruit_CircuitPython_Bundle).
- **adafruit\_gps.mpy**
You can also download the **adafruit\_gps.mpy** file from the [Adafruit CircuitPython GPS releases page](https://github.com/adafruit/Adafruit_CircuitPython_GPS/releases).
Before continuing make sure your board's **lib** folder has the **adafruit\_gps.mpy** file copied over.
# Python Installation of GPS Library
You'll need to install the **Adafruit\_Blinka** library that provides the CircuitPython support in Python. This may require verifying you are running Python 3. [Since each platform is a little different, and Linux changes often, please visit the CircuitPython on Linux guide to get your computer ready](https://learn.adafruit.com/circuitpython-on-raspberrypi-linux)!
Once that's done, from your command line run the following command:
```
sudo pip3 install adafruit-circuitpython-gps
```
- [Previous Page](https://learn.adafruit.com/adafruit-ultimate-gps/parsed-data-output.md)
- [Next Page](https://learn.adafruit.com/adafruit-ultimate-gps/circuitpython-python-uart-usage.md)
## Featured Products
### Adafruit Ultimate GPS Breakout - 66 channel w/10 Hz updates
[Adafruit Ultimate GPS Breakout - 66 channel w/10 Hz updates](https://www.adafruit.com/product/746)
We carry a few different GPS modules here in the Adafruit shop, but none that satisfied our every desire - that's why we designed this little GPS breakout board. We believe this is the **Ultimate** GPS module, so we named it that. It's got everything you want and...
In Stock
[Buy Now](https://www.adafruit.com/product/746)
[Related Guides to the Product](https://learn.adafruit.com/products/746/guides)
### Adafruit Ultimate GPS GNSS with USB - 99 channel w/10 Hz updates
[Adafruit Ultimate GPS GNSS with USB - 99 channel w/10 Hz updates](https://www.adafruit.com/product/4279)
The Ultimate GPS module you know and love has a _glow-up_ to let it be easily used with any computer, not just microcontrollers! With the built-in USB-to-Serial converter, you can now plug-n-play the Ultimate GPS into your computer, laptop, embedded Linux computer, and more. Power and...
In Stock
[Buy Now](https://www.adafruit.com/product/4279)
[Related Guides to the Product](https://learn.adafruit.com/products/4279/guides)
### Adafruit METRO 328 Fully Assembled - Arduino IDE compatible
[Adafruit METRO 328 Fully Assembled - Arduino IDE compatible](https://www.adafruit.com/product/50)
We sure love the ATmega328 here at Adafruit, and we use them _a lot_ for our own projects. The processor has plenty of GPIO, Analog inputs, hardware UART SPI and I2C, timers and PWM galore - just enough for most simple projects. When we need to go small, we use a
Out of Stock
[Buy Now](https://www.adafruit.com/product/50)
[Related Guides to the Product](https://learn.adafruit.com/products/50/guides)
### GPS Antenna - External Active Antenna - 3-5V 28dB 5 Meter SMA
[GPS Antenna - External Active Antenna - 3-5V 28dB 5 Meter SMA](https://www.adafruit.com/product/960)
Give your Ultimate GPS V3 a boost with this external active antenna. This GPS antenna draws about 10mA and will give you an additional 28 dB of gain. It's got a 5 meter long cable so it will easily reach wherever you need it to. The antenna is magnetic so it will stick to the top of a car...
In Stock
[Buy Now](https://www.adafruit.com/product/960)
[Related Guides to the Product](https://learn.adafruit.com/products/960/guides)
### SMA to uFL/u.FL/IPX/IPEX RF Adapter Cable
[SMA to uFL/u.FL/IPX/IPEX RF Adapter Cable](https://www.adafruit.com/product/851)
This RF adapter cable is super handy for anyone doing RF work. Often times, small electronics save space by having a pick-and-placeable u.FL connector (also called uFL, IPEX, IPAX, IPX, MHF, and AM). But most antennas have SMA or RP-SMA connectors on them. This little cable will bridge the...
In Stock
[Buy Now](https://www.adafruit.com/product/851)
[Related Guides to the Product](https://learn.adafruit.com/products/851/guides)
### CR1220 12mm Diameter - 3V Lithium Coin Cell Battery
[CR1220 12mm Diameter - 3V Lithium Coin Cell Battery](https://www.adafruit.com/product/380)
These are the highest quality & capacity batteries, the same as shipped with the iCufflinks, iNecklace, Datalogging and GPS Shields, GPS HAT, etc. One battery per order (you'll want one battery per cufflink or pendant.)
Brand may vary but all battery brands are verified...
Out of Stock
[Buy Now](https://www.adafruit.com/product/380)
[Related Guides to the Product](https://learn.adafruit.com/products/380/guides)
### Breadboarding wire bundle
[Breadboarding wire bundle](https://www.adafruit.com/product/153)
75 flexible stranded core wires with stiff ends molded on in red, orange, yellow, green, blue, brown, black and white. These are a major improvement over the "box of bent wires" that are sometimes sold with breadboards, and faster than stripping your own solid core wires. Makes...
In Stock
[Buy Now](https://www.adafruit.com/product/153)
[Related Guides to the Product](https://learn.adafruit.com/products/153/guides)
### Half Sized Premium Breadboard - 400 Tie Points
[Half Sized Premium Breadboard - 400 Tie Points](https://www.adafruit.com/product/64)
This is a cute, half-size breadboard with 400 tie points, good for small projects. It's 3.25" x 2.2" / 8.3cm x 5.5cm with a standard double-strip in the middle and two power rails on both sides. You can pull the power rails off easily to make the breadboard as...
In Stock
[Buy Now](https://www.adafruit.com/product/64)
[Related Guides to the Product](https://learn.adafruit.com/products/64/guides)
## Related Guides
- [Reverse Geocache Box](https://learn.adafruit.com/reverse-geocache-engagement-box.md)
- [Ladyada's Learn Arduino - Lesson #2](https://learn.adafruit.com/ladyadas-learn-arduino-lesson-number-2.md)
- [Wave Shield Talking Clock](https://learn.adafruit.com/wave-shield-talking-clock.md)
- [Wireless Game Show Poppers for the Classroom!](https://learn.adafruit.com/wireless-game-show-poppers.md)
- [Wireless Gardening with Arduino + CC3000 WiFi Modules](https://learn.adafruit.com/wireless-gardening-arduino-cc3000-wifi-modules.md)
- [CircuitPython Essentials](https://learn.adafruit.com/circuitpython-essentials.md)
- [CircuitPython Libraries on Linux and ODROID C2](https://learn.adafruit.com/circuitpython-libaries-linux-odroid-c2.md)
- [2.2" TFT Display](https://learn.adafruit.com/2-2-tft-display.md)
- [RGB LED Matrix Basics](https://learn.adafruit.com/32x16-32x32-rgb-led-matrix.md)
- [Halloween Pumpkin](https://learn.adafruit.com/halloween-pumpkin.md)
- [Remote controlled door lock using a fingerprint sensor & Adafruit IO](https://learn.adafruit.com/remote-controlled-door-lock-using-a-fingerprint-sensor-and-adafruit-io.md)
- [Automatic Monitor Color Temperature Adjustment](https://learn.adafruit.com/automatic-monitor-color-temperature-adjustment.md)
- [Animating Multiple LED Backpacks](https://learn.adafruit.com/animating-multiple-led-backpacks.md)
- [Skill Badge Requirements: Microcontrollers](https://learn.adafruit.com/skill-badge-requirements-microcontrollers.md)
- [RePaper eInk Development Board](https://learn.adafruit.com/repaper-eink-development-board.md)
---
# Source: https://learn.adafruit.com/adafruit-ultimate-gps/circuitpython-python-uart-usage.md
# Adafruit Ultimate GPS
## CircuitPython & Python UART Usage
To demonstrate the usage of the GPS module in CircuitPython using UART, let's look at a complete program example, the **gps\_simpletest.py** file from the module's examples.
### CircuitPython Microcontroller
With a CircuitPython microcontroller, save this file as **code.py** on your board, then open the serial console to see its output.
### Linux/Computer/Raspberry Pi with Python
Warning: If you're running **gps_simpletest.py** on the Raspberry Pi (or any computer), you'll have to make some changes.
On the Raspberry Pi, comment out the `uart = busio(...)` line, and uncomment the `import serial` and `uart = serial.Serial(...)` lines, changing `/dev/ttyUSB0` to the appropriate serial port (the one that shows up when you plug in the GPS via USB). Now you can run the program with the following command:
```
python3 gps_simpletest.py
```
# Example Parsing Code
https://github.com/adafruit/Adafruit_CircuitPython_GPS/blob/main/examples/gps_simpletest.py
When the code runs it will print a message every second, either an update that it's still waiting for a GPS fix:

**Note:** Due to the antenna being built in, the PA1010D Mini GPS module may need a more unobstructed view of the sky than other GPS modules with eternal antennae. With any GPS module, if you are having trouble getting a fix, try moving it to a more ideal location.
Once a fix has been established, it will print details about the current location and other GPS data:

Let's look at the code in a bit more detail to understand how it works. First the example needs to import a few modules like the built-in `busio` and `board` modules that access serial ports and other hardware:
```
import board
import busio
import time
```
Next the GPS module is imported:
```
import adafruit_gps
```
Now a [serial UART](http://circuitpython.readthedocs.io/en/latest/shared-bindings/busio/UART.html) is created and connected to the serial port pins the GPS module will use, this is the low level transport layer to communicate with the GPS module:
```
# Define RX and TX pins for the board's serial port connected to the GPS.
# These are the defaults you should use for the GPS FeatherWing.
# For other boards set RX = GPS module TX, and TX = GPS module RX pins.
RX = board.RX
TX = board.TX
# Create a serial connection for the GPS connection using default speed and
# a slightly higher timeout (GPS modules typically update once a second).
uart = busio.UART(TX, RX, baudrate=9600, timeout=3000)
# for a computer, use the pyserial library for uart access
#import serial
#uart = serial.Serial("/dev/ttyUSB0", baudrate=9600, timeout=3000)
```
Once a `UART` object is available with a connected GPS module you can create an instance of the GPS parsing class. You need to pass this class the `UART` instance and it will internally read new data from the GPS module connected to it:
```
gps = adafruit_gps.GPS(uart)
```
# GPS Example Code Explained
Before reading GPS data the example configures the module by sending some [custom NMEA GPS commands](https://cdn-shop.adafruit.com/datasheets/PMTK_A11.pdf) that adjust the amount and rate of data. Read the comments to see some options for adjust the rate and amount of data, but typically you want the defaults of core location info at a rate of once a second:
```auto
# Initialize the GPS module by changing what data it sends and at what rate.
# These are NMEA extensions for PMTK_314_SET_NMEA_OUTPUT and
# PMTK_220_SET_NMEA_UPDATERATE but you can send anything from here to adjust
# the GPS module behavior:
# https://cdn-shop.adafruit.com/datasheets/PMTK_A11.pdf
# Turn on the basic GGA and RMC info (what you typically want)
gps.send_command(b'PMTK314,0,1,0,1,0,0,0,0,0,0,0,0,0,0,0,0,0,0,0')
# Turn on just minimum info (RMC only, location):
#gps.send_command(b'PMTK314,0,1,0,0,0,0,0,0,0,0,0,0,0,0,0,0,0,0,0')
# Turn off everything:
#gps.send_command(b'PMTK314,0,0,0,0,0,0,0,0,0,0,0,0,0,0,0,0,0,0,0')
# Turn on everything (not all of it is parsed!)
#gps.send_command(b'PMTK314,1,1,1,1,1,1,0,0,0,0,0,0,0,0,0,0,0,0,0')
# Set update rate to once a second (1hz) which is what you typically want.
gps.send_command(b'PMTK220,1000')
# Or decrease to once every two seconds by doubling the millisecond value.
# Be sure to also increase your UART timeout above!
#gps.send_command(b'PMTK220,2000')
# You can also speed up the rate, but don't go too fast or else you can lose
# data during parsing. This would be twice a second (2hz, 500ms delay):
#gps.send_command(b'PMTK220,500')
```
If you want you can send other custom commands to the GPS module with the `send_command` function shown above. You don't need to worry about adding a NMEA checksum to your command either, the function will do this automatically (or not, set `add_checksum=False` as a parameter and it will skip the checksum addition).
Now we can jump into a main loop that continually updates data from the GPS module and prints out status. The most important part of this loop is calling the GPS update function:
```
# Make sure to call gps.update() every loop iteration and at least twice
# as fast as data comes from the GPS unit (usually every second).
# This returns a bool that's true if it parsed new data (you can ignore it
# though if you don't care and instead look at the has_fix property).
gps.update()
```
Like the comments mention, you must call `update` every loop iteration and ideally multiple times a second. Each time you call `update`, it allows the GPS library code to read new data from the GPS module and update its state. Since the GPS module is always sending data you have to be careful to constantly read data or else you might start to lose data as buffers are filled.
You can check the `has_fix` property to see if the module has a GPS location fix, and if so there are a host of attributes to read like `latitude` and `longitude` (available in degrees):
```
if not gps.has_fix:
# Try again if we don't have a fix yet.
print('Waiting for fix...')
continue
# We have a fix! (gps.has_fix is true)
# Print out details about the fix like location, date, etc.
print('=' * 40) # Print a separator line.
print('Fix timestamp: {}/{}/{} {:02}:{:02}:{:02}'.format(
gps.timestamp_utc.tm_mon, # Grab parts of the time from the
gps.timestamp_utc.tm_mday, # struct_time object that holds
gps.timestamp_utc.tm_year, # the fix time. Note you might
gps.timestamp_utc.tm_hour, # not get all data like year, day,
gps.timestamp_utc.tm_min, # month!
gps.timestamp_utc.tm_sec))
print('Latitude: {} degrees'.format(gps.latitude))
print('Longitude: {} degrees'.format(gps.longitude))
print('Fix quality: {}'.format(gps.fix_quality))
# Some attributes beyond latitude, longitude and timestamp are optional
# and might not be present. Check if they're None before trying to use!
if gps.satellites is not None:
print('# satellites: {}'.format(gps.satellites))
if gps.altitude_m is not None:
print('Altitude: {} meters'.format(gps.altitude_m))
if gps.track_angle_deg is not None:
print('Speed: {} knots'.format(gps.speed_knots))
if gps.track_angle_deg is not None:
print('Track angle: {} degrees'.format(gps.track_angle_deg))
if gps.horizontal_dilution is not None:
print('Horizontal dilution: {}'.format(gps.horizontal_dilution))
if gps.height_geoid is not None:
```
Notice some of the attributes like `altitude_m` are checked to be `None` before reading. This is a smart check to put in your code, because those attributes are sometimes not sent by a GPS module. If an attribute isn't sent by the module it will be given a `None`/null value and attempting to print or read it in Python will fail. The core attributes of `latitude`, `longitude`, and `timestamp` are usually always available (if you're using the example as-is) but they might not be if you turn off those outputs with a custom NMEA command!
That's all there is to reading GPS location with CircuitPython code!
- [Previous Page](https://learn.adafruit.com/adafruit-ultimate-gps/circuitpython-parsing.md)
- [Next Page](https://learn.adafruit.com/adafruit-ultimate-gps/circuitpython-datalogging.md)
## Featured Products
### Adafruit Ultimate GPS Breakout - 66 channel w/10 Hz updates
[Adafruit Ultimate GPS Breakout - 66 channel w/10 Hz updates](https://www.adafruit.com/product/746)
We carry a few different GPS modules here in the Adafruit shop, but none that satisfied our every desire - that's why we designed this little GPS breakout board. We believe this is the **Ultimate** GPS module, so we named it that. It's got everything you want and...
In Stock
[Buy Now](https://www.adafruit.com/product/746)
[Related Guides to the Product](https://learn.adafruit.com/products/746/guides)
### Adafruit Ultimate GPS GNSS with USB - 99 channel w/10 Hz updates
[Adafruit Ultimate GPS GNSS with USB - 99 channel w/10 Hz updates](https://www.adafruit.com/product/4279)
The Ultimate GPS module you know and love has a _glow-up_ to let it be easily used with any computer, not just microcontrollers! With the built-in USB-to-Serial converter, you can now plug-n-play the Ultimate GPS into your computer, laptop, embedded Linux computer, and more. Power and...
In Stock
[Buy Now](https://www.adafruit.com/product/4279)
[Related Guides to the Product](https://learn.adafruit.com/products/4279/guides)
### Adafruit METRO 328 Fully Assembled - Arduino IDE compatible
[Adafruit METRO 328 Fully Assembled - Arduino IDE compatible](https://www.adafruit.com/product/50)
We sure love the ATmega328 here at Adafruit, and we use them _a lot_ for our own projects. The processor has plenty of GPIO, Analog inputs, hardware UART SPI and I2C, timers and PWM galore - just enough for most simple projects. When we need to go small, we use a
Out of Stock
[Buy Now](https://www.adafruit.com/product/50)
[Related Guides to the Product](https://learn.adafruit.com/products/50/guides)
### GPS Antenna - External Active Antenna - 3-5V 28dB 5 Meter SMA
[GPS Antenna - External Active Antenna - 3-5V 28dB 5 Meter SMA](https://www.adafruit.com/product/960)
Give your Ultimate GPS V3 a boost with this external active antenna. This GPS antenna draws about 10mA and will give you an additional 28 dB of gain. It's got a 5 meter long cable so it will easily reach wherever you need it to. The antenna is magnetic so it will stick to the top of a car...
In Stock
[Buy Now](https://www.adafruit.com/product/960)
[Related Guides to the Product](https://learn.adafruit.com/products/960/guides)
### SMA to uFL/u.FL/IPX/IPEX RF Adapter Cable
[SMA to uFL/u.FL/IPX/IPEX RF Adapter Cable](https://www.adafruit.com/product/851)
This RF adapter cable is super handy for anyone doing RF work. Often times, small electronics save space by having a pick-and-placeable u.FL connector (also called uFL, IPEX, IPAX, IPX, MHF, and AM). But most antennas have SMA or RP-SMA connectors on them. This little cable will bridge the...
In Stock
[Buy Now](https://www.adafruit.com/product/851)
[Related Guides to the Product](https://learn.adafruit.com/products/851/guides)
### CR1220 12mm Diameter - 3V Lithium Coin Cell Battery
[CR1220 12mm Diameter - 3V Lithium Coin Cell Battery](https://www.adafruit.com/product/380)
These are the highest quality & capacity batteries, the same as shipped with the iCufflinks, iNecklace, Datalogging and GPS Shields, GPS HAT, etc. One battery per order (you'll want one battery per cufflink or pendant.)
Brand may vary but all battery brands are verified...
Out of Stock
[Buy Now](https://www.adafruit.com/product/380)
[Related Guides to the Product](https://learn.adafruit.com/products/380/guides)
### Breadboarding wire bundle
[Breadboarding wire bundle](https://www.adafruit.com/product/153)
75 flexible stranded core wires with stiff ends molded on in red, orange, yellow, green, blue, brown, black and white. These are a major improvement over the "box of bent wires" that are sometimes sold with breadboards, and faster than stripping your own solid core wires. Makes...
In Stock
[Buy Now](https://www.adafruit.com/product/153)
[Related Guides to the Product](https://learn.adafruit.com/products/153/guides)
### Half Sized Premium Breadboard - 400 Tie Points
[Half Sized Premium Breadboard - 400 Tie Points](https://www.adafruit.com/product/64)
This is a cute, half-size breadboard with 400 tie points, good for small projects. It's 3.25" x 2.2" / 8.3cm x 5.5cm with a standard double-strip in the middle and two power rails on both sides. You can pull the power rails off easily to make the breadboard as...
In Stock
[Buy Now](https://www.adafruit.com/product/64)
[Related Guides to the Product](https://learn.adafruit.com/products/64/guides)
## Related Guides
- [Reverse Geocache Box](https://learn.adafruit.com/reverse-geocache-engagement-box.md)
- [Ladyada's Learn Arduino - Lesson #2](https://learn.adafruit.com/ladyadas-learn-arduino-lesson-number-2.md)
- [Wave Shield Talking Clock](https://learn.adafruit.com/wave-shield-talking-clock.md)
- [Wireless Game Show Poppers for the Classroom!](https://learn.adafruit.com/wireless-game-show-poppers.md)
- [Wireless Gardening with Arduino + CC3000 WiFi Modules](https://learn.adafruit.com/wireless-gardening-arduino-cc3000-wifi-modules.md)
- [CircuitPython Essentials](https://learn.adafruit.com/circuitpython-essentials.md)
- [CircuitPython Libraries on Linux and ODROID C2](https://learn.adafruit.com/circuitpython-libaries-linux-odroid-c2.md)
- [2.2" TFT Display](https://learn.adafruit.com/2-2-tft-display.md)
- [RGB LED Matrix Basics](https://learn.adafruit.com/32x16-32x32-rgb-led-matrix.md)
- [Halloween Pumpkin](https://learn.adafruit.com/halloween-pumpkin.md)
- [Remote controlled door lock using a fingerprint sensor & Adafruit IO](https://learn.adafruit.com/remote-controlled-door-lock-using-a-fingerprint-sensor-and-adafruit-io.md)
- [Automatic Monitor Color Temperature Adjustment](https://learn.adafruit.com/automatic-monitor-color-temperature-adjustment.md)
- [Animating Multiple LED Backpacks](https://learn.adafruit.com/animating-multiple-led-backpacks.md)
- [Skill Badge Requirements: Microcontrollers](https://learn.adafruit.com/skill-badge-requirements-microcontrollers.md)
- [RePaper eInk Development Board](https://learn.adafruit.com/repaper-eink-development-board.md)
---
# Source: https://learn.adafruit.com/ttl-serial-camera/circuitpython-python-usage.md
# TTL Serial Camera
## CircuitPython & Python Usage
In addition to taking pictures with the camera in Arduino, you can also use Python and CircuitPython to snap photos and save them to a SD card, computer or Raspberry Pi! The [Adafruit CircuitPython VC0706](https://github.com/adafruit/Adafruit_CircuitPython_VC0706) library is your key to accessing the TTL camera and grabbing images over a serial connection.
You can use this camera with any CircuitPython microcontroller board or with a computer that has GPIO and Python [thanks to Adafruit\_Blinka, our CircuitPython-for-Python compatibility library](https://learn.adafruit.com/circuitpython-on-raspberrypi-linux).
# CircuitPython Microcontroller Wiring
First you'll need to connect the TTL camera and a micro SD card holder to your CircuitPython board. The easiest and recommended option is to use a Feather M0 Adalogger board loaded with CircuitPython. This gives you a micro SD card holder that's pre-wired and ready to go, just connect the camera to the board. Here's an example of connecting the camera to a Feather M0 Adalogger:
Just like connecting the camera to an Arduino you need to connect these wires:
- **Camera 5V** to **board USB or 5V power** (note this means you must have the board plugged into a USB / 5V power supply to properly power the camera).
- **Camera GND** to **board GND**.
- **Camera RX** to **board TX**.
- **Camera TX** to **board RX**.
In addition, please make sure a micro SD card formatted with the FAT32 filesystem (highly recommended to [use the official SD card formatter here](https://www.sdcard.org/downloads/formatter_4/) and not your operating system's formatter!) is inserted in the SD card holder.

# Python Computer Wiring
Since there's _dozens_ of Linux computers/boards you can use, we will show wiring for Raspberry Pi. For other platforms, [please visit the guide for CircuitPython on Linux to see whether your platform is supported](https://learn.adafruit.com/circuitpython-on-raspberrypi-linux).
Here you have two options: An external USB-to-serial converter, or the built-in UART on the Pi's TX/RX pins. Here's an example of wiring up the [USB-to-serial converter](https://www.adafruit.com/product/954):
- **Camera Vin** to **USB** **5V** or **3V** (red wire on USB console cable)
- **Camera Ground** to **USB Ground** (black wire)
- **Camera RX (white wire)** to **USB TX** (green wire)
- **Camera TX (green wire)** to **USB RX** (white wire)

Here's an example using the Pi's built-in UART:
- **Camera 5V (black wire)** to **PI** **3V or 5V**
- **Camera GND (black wire)** to **Pi Ground **
- **Camera RX (white wire)** to **Pi TX**
- **Camera TX (green wire)** to **Pi RX**
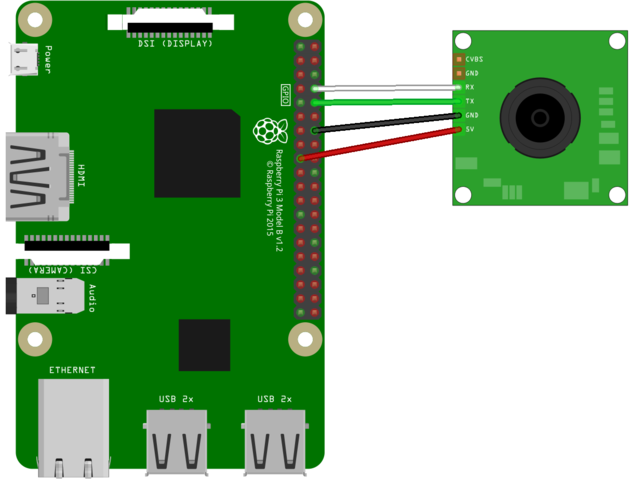
If you want to use the built-in UART, you'll need to disable the serial console and enable the serial port hardware in **raspi-config**. See [the UART/Serial section of the CircuitPython on Raspberry Pi guide](https://learn.adafruit.com/circuitpython-on-raspberrypi-linux/uart-serial) for detailed instructions on how to do this.
Warning:
# CircuitPython Installation of VC0706
As mentioned, you'll also need to install the [Adafruit CircuitPython VC0706](https://github.com/adafruit/Adafruit_CircuitPython_VC0706) library on your CircuitPython board. In addition, the [Adafruit CircuitPython SD](https://github.com/adafruit/Adafruit_CircuitPython_SD) library is used to read and write data to the SD card.
First make sure you are running the [latest version of Adafruit CircuitPython](https://learn.adafruit.com/welcome-to-circuitpython/installing-circuitpython) for your board.
Next you'll need to install the necessary libraries to use the hardware--carefully follow the steps to find and install these libraries from [Adafruit's CircuitPython library bundle](https://circuitpython.org/libraries). The Welcome to CircuitPython guide has [a great page on how to install the library bundle](https://learn.adafruit.com/welcome-to-circuitpython/circuitpython-libraries).
[If your board supports **sdcardio**](https://docs.circuitpython.org/en/latest/shared-bindings/support_matrix.html), then this is the preferred method to do things. **sdcardio ** is a built-in module on boards that support it, so you don't have to copy it over.
After downloading the bundle, copy the necessary libraries from the bundle:
- **adafruit\_vc0706.mpy**
- **adafruit\_sdcard.mpy** (if your board doesn't support sdcardio)
- **adafruit\_bus\_device**
Before continuing, make sure your board's **lib** folder has the **adafruit\_vc0706.mpy, adafruit\_sd.mpy,** and **adafruit\_bus\_device** files and folders copied over.
Next[ connect to the board's serial REPL](https://learn.adafruit.com/welcome-to-circuitpython/the-repl) so you are at the CircuitPython **\>\>\>** prompt.
# Python Installation of VC0706 Library
You'll need to install the **Adafruit\_Blinka** library that provides the CircuitPython support in Python. This may also require enabling UART on your platform and verifying you are running Python 3. [Since each platform is a little different, and Linux changes often, please visit the CircuitPython on Linux guide to get your computer ready](https://learn.adafruit.com/circuitpython-on-raspberrypi-linux)!
Once that's done, from your command line run the following command:
- `sudo pip3 install adafruit-circuitpython-vc0706`
If your default Python is version 3 you may need to run 'pip' instead. Just make sure you aren't trying to use CircuitPython on Python 2.x, it isn't supported!
# Microcontroller CircuitPython Usage (not for Linux/SBC)
To demonstrate the usage of the camera, let's look at an example that will capture an image and save it to the micro SD card as a jpeg file. Load up the example below and save it as **code.py** on your **CIRCUITPY** drive, then open the serial REPL to see the output:
https://github.com/adafruit/Adafruit_CircuitPython_VC0706/blob/main/examples/vc0706_snapshot_simpletest.py
You should see output like the following as the program prints information about the camera and saves an image to the micro SD card:

Be aware saving the image to the card takes some time, as the data is transferred over both a serial connection from the camera and the SPI connection to the micro SD card. A full image capture at 640x480 pixels takes about 30 seconds, but might take longer depending on your board and micro SD card speed.
Once the image capture finishes, you'll see a message printed:

Exit the REPL and power down the board, then remove the SD card and connect it to your computer. You should see an **image.jpg** file saved on it, and inside will be a picture captured from the camera:

Woo hoo, that's all there is to the basics of capturing an image with the serial TTL camera and CircuitPython! Let's look at the code in a tiny bit more detail to understand the usage.
First the example needs to setup the SD card and mount it on the filesystem. This is all boilerplate code from the [CircuitPython SD card guide](../../../../micropython-hardware-sd-cards/) (highly recommended to read it too!):
```auto
# Configuration:
SD_CS_PIN = board.D10 # CS for SD card (SD_CS is for Feather Adalogger)
IMAGE_FILE = "/sd/image.jpg" # Full path to file name to save captured image.
# Will overwrite!
# Setup SPI bus (hardware SPI).
spi = busio.SPI(board.SCK, MOSI=board.MOSI, MISO=board.MISO)
# Setup SD card and mount it in the filesystem.
# Uncomment if your board doesn't support sdcardio
# sd_cs = digitalio.DigitalInOut(SD_CS_PIN)
# sdcard = adafruit_sdcard.SDCard(spi, sd_cs)
sdcard = sdcardio.SDCard(
spi, SD_CS_PIN
) # Comment out if your board doesn't support sdcardio
vfs = storage.VfsFat(sdcard)
storage.mount(vfs, "/sd")
```
Now the VC0706 module is setup and an instance of the VC0706 class is created. Notice we need to create a UART device on whatever pins have hardware support and then this is passed to the camera creator.
```
# Create a serial connection for the VC0706 connection, speed is auto-detected.
uart = busio.UART(board.TX, board.RX, timeout=250)
# Setup VC0706 camera
vc0706 = adafruit_vc0706.VC0706(uart)
```
Once the VC0706 instance is created you can read some interesting properties, like the version string:
```
# Print the version string from the camera.
print('VC0706 version:')
print(vc0706.version)
```
Or even set and get the size of the image (640x480, 320x240, 160x120):
```
# Set the image size.
vc0706.image_size = adafruit_vc0706.IMAGE_SIZE_640x480 # Or set IMAGE_SIZE_320x240 or
# IMAGE_SIZE_160x120
# Note you can also read the property and compare against those values to
# see the current size:
size = vc0706.image_size
if size == adafruit_vc0706.IMAGE_SIZE_640x480:
print('Using 640x480 size image.')
elif size == adafruit_vc0706.IMAGE_SIZE_320x240:
print('Using 320x240 size image.')
elif size == adafruit_vc0706.IMAGE_SIZE_160x120:
print('Using 160x120 size image.')
```
Now the real fun, you can capture an image! This works by first telling the camera to 'freeze' the current image frame in memory with the `take_picture` function. Then you need to make a loop that calls the `read_picture_into` function repeatedly to grab buffers of image data from the camera. Once you have image data it's up to you to do something with it, like write it to a SD card file (although you don't have to do that, you could send it to a web service or do other fun thing!).
The code in this example will capture an image and then save it to a file on the SD card:
```
# Take a picture.
print('Taking a picture in 3 seconds...')
time.sleep(3)
print('SNAP!')
if not vc0706.take_picture():
raise RuntimeError('Failed to take picture!')
# Print size of picture in bytes.
frame_length = vc0706.frame_length
print('Picture size (bytes): {}'.format(frame_length))
# Open a file for writing (overwriting it if necessary).
# This will write 50 bytes at a time using a small buffer.
# You MUST keep the buffer size under 100!
print('Writing image: {}'.format(IMAGE_FILE), end='')
with open(IMAGE_FILE, 'wb') as outfile:
wcount = 0
while frame_length > 0:
# Compute how much data is left to read as the lesser of remaining bytes
# or the copy buffer size (32 bytes at a time). Buffer size MUST be
# a multiple of 4 and under 100. Stick with 32!
to_read = min(frame_length, 32)
copy_buffer = bytearray(to_read)
# Read picture data into the copy buffer.
if vc0706.read_picture_into(copy_buffer) == 0:
raise RuntimeError('Failed to read picture frame data!')
# Write the data to SD card file and decrement remaining bytes.
outfile.write(copy_buffer)
frame_length -= 32
# Print a dot every 2k bytes to show progress.
wcount += 1
if wcount >= 64:
print('.', end='')
wcount = 0
```
One thing to be aware of is that the size of the buffer passed to `read_picture_into` must be a multiple of 4. This is an requirement of the camera hardware itself. In addition, it must be below 100 to fit within an internal buffer. Stick with using a value of 32 like the example here shows!
That's all there is to capturing and saving an image to an SD card using CircuitPython!
# Saving Images to CircuitPython Internal Filesystem
Instead of using the SD card to store images it's also possible with CircuitPython or Python to save images to the internal filesystem where your code and other data files live. This is possible with a few caveats, in particular once you enable writing to the internal storage **you can't set or change your code** over the USB drive connection to your computer. This means you probably want to get your program working first on SD storage or ignoring the file save, and then switch to using internal storage when you know your code is working and ready to write files.
Also be aware internal storage is quite limited on some boards. The non-express boards only have ~64kb or space and a single 640x480 JPEG image from the camera can occupy 50 kilobytes of more of space alone! You likely only want to save images to the internal storage for Express boards that have 2 megabytes of space, however even on those boards take care to not store too many images as they will quickly add up
## Activate Internal storage on Microcontrollers
**This step is not used on Linux / Single Board Computers**
To get started first [follow the steps on the CircuitPython Storage page of the CircuitPython Essentials guide](https://learn.adafruit.com/circuitpython-essentials/circuitpython-storage) to enable writing to internal storage. In particular edit the **boot.py** on your **CIRCUITPY** drive (creating it if it doesn't exist) and add these lines:
```
import digitalio
import board
import storage
switch = digitalio.DigitalInOut(board.D5)
switch.direction = digitalio.Direction.INPUT
switch.pull = digitalio.Pull.UP
# If the D5 is connected to ground with a wire
# you can edit files over the USB drive again.
storage.remount("/", not switch.value)
```
Remember once you remount("/") **you cannot edit code over the USB drive anymore!** That means you can't edit **boot.py** which is a bit of a conundrum. So we configure the **boot.py** to selectively mount the internal filesystem as writable based on a switch or even just alligator clip connected to ground. Like the [CPU temperature guide shows](../../../../cpu-temperature-logging-with-circuit-python/writing-to-the-filesystem#selectively-setting-readonly-to-false-on-boot). In this example we're using **D5** but select any available pin.
This code will look at the **D5** digital input when the board starts up and if it's connected to ground (use an alligator clip or wire, for example, to connect from **D5** to board ground) it will disable internal filesystem writes and allow you to edit code over the USB drive as normal. Remove the alligator clip, reset the board, and the **boot.py** will switch to mounting the internal filesystem as writable so you can log images to it again (but not write any code!).
Remember when you enable USB drive writes (by connecting **D5** to ground at startup) you **cannot write files** to the internal filesystem and any code in your **code.py** that attempts to do so (like the example below) will fail. Keep this in mind as you edit code, once you modify code you need to remove the alligator clip, reset the board to re-enable internal filesystem writes, and then watch the output of your program.
Danger:
## Example Code for saving to internal file system (CircuitPython or Linux / SBC)
Now we can use a slightly modified version of the example that will save to the internal filesystem instead of a SD card. The code is exactly the same as for SD cards except instead of mounting the SD card and opening a file there, we open a file on the internal storage. The exact same VC0706 functions and control loop are used because Python's read and write functions don't care if they're writing to a SD card or internal storage--it's all the same to Python!
https://github.com/adafruit/Adafruit_CircuitPython_VC0706/blob/main/examples/vc0706_snapshot_filesystem.py
## Saving Images to Computer or Raspberry Pi / Linux
Saving images to a Raspberry Pi or other Linux computer is very similar to the CircuitPython internal filesystem. You simply need to comment out a line and uncomment two more depending on what set up you're using.
Info:
Regardless of which set up you're using, you'll need to comment out the following line:
`uart = busio.UART(board.TX, board.RX, baudrate=115200, timeout=0.25)`
## USB to Serial Converter
If using a USB to serial converter, uncomment the following lines:
`# import serial`
` # uart = serial.Serial("/dev/ttyUSB0", baudrate=115200, timeout=0.25)`
## Raspberry Pi / Linux
If using a Raspberry Pi, uncomment the following lines (if you're using a different single board computer, you may need to update the serial port!):
`# import serial`
`# uart = serial.Serial("/dev/ttyS0", baudrate=115200, timeout=0.25)`
The rest of the code works the same way. Smile!
- [Previous Page](https://learn.adafruit.com/ttl-serial-camera/arduino-usage.md)
- [Next Page](https://learn.adafruit.com/ttl-serial-camera/f-a-q.md)
## Featured Products
### TTL Serial JPEG Camera with NTSC Video
[TTL Serial JPEG Camera with NTSC Video](https://www.adafruit.com/product/397)
This camera module can be a pretty neat project addition. It was designed to be used in security systems and does two main things - it outputs NTSC video and can take snapshots of that video (in color) and transmit them over the TTL serial link. You can snap pictures at 640x480, 320x240 or...
In Stock
[Buy Now](https://www.adafruit.com/product/397)
[Related Guides to the Product](https://learn.adafruit.com/products/397/guides)
### Miniature TTL Serial JPEG Camera with NTSC Video
[Miniature TTL Serial JPEG Camera with NTSC Video](https://www.adafruit.com/product/1386)
This tiny little camera module can be a pretty neat project addition, it is just like [our other JPEG cameras (same chipset/software)](http://www.adafruit.com/category/35_68), but much smaller and slimmer. It was designed to be used in security systems and does two main things - it...
In Stock
[Buy Now](https://www.adafruit.com/product/1386)
[Related Guides to the Product](https://learn.adafruit.com/products/1386/guides)
### Adafruit METRO 328 Fully Assembled - Arduino IDE compatible
[Adafruit METRO 328 Fully Assembled - Arduino IDE compatible](https://www.adafruit.com/product/50)
We sure love the ATmega328 here at Adafruit, and we use them _a lot_ for our own projects. The processor has plenty of GPIO, Analog inputs, hardware UART SPI and I2C, timers and PWM galore - just enough for most simple projects. When we need to go small, we use a
Out of Stock
[Buy Now](https://www.adafruit.com/product/50)
[Related Guides to the Product](https://learn.adafruit.com/products/50/guides)
### Weatherproof TTL Serial JPEG Camera with NTSC Video and IR LEDs
[Weatherproof TTL Serial JPEG Camera with NTSC Video and IR LEDs](https://www.adafruit.com/product/613)
This weatherproof camera module is [a classy upgrade to the basic camera module we already stock in the shop](http://www.adafruit.com/products/397). The main differences is that this one comes in a nice metal case with a mounting hinge, a 1 meter long cable with the TTL & NTSC...
In Stock
[Buy Now](https://www.adafruit.com/product/613)
[Related Guides to the Product](https://learn.adafruit.com/products/613/guides)
### MicroSD card breakout board+
[MicroSD card breakout board+](https://www.adafruit.com/product/254)
Not just a simple breakout board, this microSD adapter goes the extra mile - designed for ease of use.
- Onboard 5v-\>3v regulator provides 150mA for power-hungry cards
- 3v level shifting means you can use this with ease on either 3v or 5v systems
- Uses a proper level...
Out of Stock
[Buy Now](https://www.adafruit.com/product/254)
[Related Guides to the Product](https://learn.adafruit.com/products/254/guides)
### Half Sized Premium Breadboard - 400 Tie Points
[Half Sized Premium Breadboard - 400 Tie Points](https://www.adafruit.com/product/64)
This is a cute, half-size breadboard with 400 tie points, good for small projects. It's 3.25" x 2.2" / 8.3cm x 5.5cm with a standard double-strip in the middle and two power rails on both sides. You can pull the power rails off easily to make the breadboard as...
In Stock
[Buy Now](https://www.adafruit.com/product/64)
[Related Guides to the Product](https://learn.adafruit.com/products/64/guides)
### SD/MicroSD Memory Card (8 GB SDHC)
[SD/MicroSD Memory Card (8 GB SDHC)](https://www.adafruit.com/product/1294)
Add mega-storage in a jiffy using this 8 GB class 4 micro-SD card. It comes with a SD adapter so you can use it with any of our shields or adapters. Preformatted to FAT so it works out of the box with our projects. Tested and works great with our
In Stock
[Buy Now](https://www.adafruit.com/product/1294)
[Related Guides to the Product](https://learn.adafruit.com/products/1294/guides)
## Related Guides
- [Making Adabot: Part 2](https://learn.adafruit.com/making-adabot-part-2.md)
- [3D Printed Animatronic Robot Head](https://learn.adafruit.com/3d-printed-animatronic-robot-head.md)
- [Arduino Lesson 14. Servo Motors](https://learn.adafruit.com/adafruit-arduino-lesson-14-servo-motors.md)
- [Arduino Lesson 15. DC Motor Reversing](https://learn.adafruit.com/adafruit-arduino-lesson-15-dc-motor-reversing.md)
- [Programming Arduino with Android and Windows Tablets](https://learn.adafruit.com/programming-arduino-with-android-and-windows-tablets.md)
- [LSM303 Accelerometer + Compass Breakout](https://learn.adafruit.com/lsm303-accelerometer-slash-compass-breakout.md)
- [Adafruit VS1053 MP3/AAC/Ogg/MIDI/WAV Codec Breakout Tutorial](https://learn.adafruit.com/adafruit-vs1053-mp3-aac-ogg-midi-wav-play-and-record-codec-tutorial.md)
- [Naughty or Nice Machine](https://learn.adafruit.com/naughty-or-nice-machine.md)
- [Adafruit Ultimate GPS Logger Shield](https://learn.adafruit.com/adafruit-ultimate-gps-logger-shield.md)
- [Arduino "Hunt The Wumpus"](https://learn.adafruit.com/arduino-hunt-the-wumpus.md)
- [Track Your Treats: Halloween Candy GPS Tracker](https://learn.adafruit.com/track-your-treats-halloween-candy-gps-tracker.md)
- [WiFi Weather Station](https://learn.adafruit.com/wifi-weather-station-arduino-cc3000.md)
- [Bluetooth Controlled Motorized Camera Slider](https://learn.adafruit.com/bluetooth-motorized-camera-slider.md)
- [TMP36 Temperature Sensor](https://learn.adafruit.com/tmp36-temperature-sensor.md)
- [Babel Fish](https://learn.adafruit.com/babel-fish.md)
---
# Source: https://learn.adafruit.com/nokia-5110-3310-monochrome-lcd/circuitpython-quickstart.md
# Nokia 5110/3310 Monochrome LCD
## CircuitPython Wiring
It's easy to use the Nokia 5110/3310 LCD with CircuitPython and the [Adafruit CircuitPython PCD8544](https://github.com/adafruit/Adafruit_CircuitPython_PCD8544) module. This module allows you to easily write Python code to control the display.
You can use this sensor with any CircuitPython microcontroller board or with a computer that has GPIO and Python [thanks to Adafruit\_Blinka, our CircuitPython-for-Python compatibility library](https://learn.adafruit.com/circuitpython-on-raspberrypi-linux).
We'll cover how to wire the Nokia LCD to your CircuitPython microcontroller board. First assemble your LCD.
We're going to show you how to wire it up to a Feather M4 Express. Because the logic levels on a Feather M4 Express are already 3.3v, you don't need a logic level shifter.
Connect the LCD to your microcontroller board as shown below.
- **Microcontroller GND ** to ** LCD Gnd**
- **Microcontroller 3V ** to **LCD Vcc**
- **Microcontroller SCK ** to **LCD Clk**
- **Microcontroller MOSI ** to **LCD Din**
- **Microcontroller D6 ** to **LCD D/C**
- **Microcontroller D5 ** to **LCD CS**
- **Microcontroller D9 ** to **LCD Rst**
- **Microcontroller D10 ** to **LCD Led**

[Download the Fritzing Diagram](https://cdn-learn.adafruit.com/assets/assets/000/083/138/original/circuitpython-wiring.fzz?1572296421)
- [Previous Page](https://learn.adafruit.com/nokia-5110-3310-monochrome-lcd/wiring-fewer-pins.md)
- [Next Page](https://learn.adafruit.com/nokia-5110-3310-monochrome-lcd/circuitpython-setup.md)
## Featured Products
### Nokia 5110/3310 monochrome LCD + extras
[Nokia 5110/3310 monochrome LCD + extras](https://www.adafruit.com/product/338)
These displays were used in old Nokia 5110/3310 cell phones (before the smart-phone fad turned every cell phone into a TV). It's a 84x48 pixel monochrome LCD display. These displays are small, only about 1.5" diagonal, but very readable and come with a white backlight. This...
No Longer Stocked
[Buy Now](https://www.adafruit.com/product/338)
[Related Guides to the Product](https://learn.adafruit.com/products/338/guides)
### Adafruit METRO 328 Fully Assembled - Arduino IDE compatible
[Adafruit METRO 328 Fully Assembled - Arduino IDE compatible](https://www.adafruit.com/product/50)
We sure love the ATmega328 here at Adafruit, and we use them _a lot_ for our own projects. The processor has plenty of GPIO, Analog inputs, hardware UART SPI and I2C, timers and PWM galore - just enough for most simple projects. When we need to go small, we use a
Out of Stock
[Buy Now](https://www.adafruit.com/product/50)
[Related Guides to the Product](https://learn.adafruit.com/products/50/guides)
### Half Sized Premium Breadboard - 400 Tie Points
[Half Sized Premium Breadboard - 400 Tie Points](https://www.adafruit.com/product/64)
This is a cute, half-size breadboard with 400 tie points, good for small projects. It's 3.25" x 2.2" / 8.3cm x 5.5cm with a standard double-strip in the middle and two power rails on both sides. You can pull the power rails off easily to make the breadboard as...
In Stock
[Buy Now](https://www.adafruit.com/product/64)
[Related Guides to the Product](https://learn.adafruit.com/products/64/guides)
### Breadboarding wire bundle
[Breadboarding wire bundle](https://www.adafruit.com/product/153)
75 flexible stranded core wires with stiff ends molded on in red, orange, yellow, green, blue, brown, black and white. These are a major improvement over the "box of bent wires" that are sometimes sold with breadboards, and faster than stripping your own solid core wires. Makes...
In Stock
[Buy Now](https://www.adafruit.com/product/153)
[Related Guides to the Product](https://learn.adafruit.com/products/153/guides)
## Related Guides
- [Babel Fish](https://learn.adafruit.com/babel-fish.md)
- [Adafruit PN532 RFID/NFC Breakout and Shield](https://learn.adafruit.com/adafruit-pn532-rfid-nfc.md)
- [Program an AVR or Arduino Using Raspberry Pi GPIO](https://learn.adafruit.com/program-an-avr-or-arduino-using-raspberry-pi-gpio-pins.md)
- [Deciphering Strange Arduino Code](https://learn.adafruit.com/deciphering-strange-arduino-code.md)
- [Arduino Lesson 1. Blink](https://learn.adafruit.com/adafruit-arduino-lesson-1-blink.md)
- [36mm LED Pixels](https://learn.adafruit.com/36mm-led-pixels.md)
- [Analog Feedback Servos](https://learn.adafruit.com/analog-feedback-servos.md)
- [Using NeoPixels and Servos Together](https://learn.adafruit.com/neopixels-and-servos.md)
- [RePaper eInk Development Board](https://learn.adafruit.com/repaper-eink-development-board.md)
- [Adafruit Proto Shield for Arduino](https://learn.adafruit.com/adafruit-proto-shield-arduino.md)
- [Animating Multiple LED Backpacks](https://learn.adafruit.com/animating-multiple-led-backpacks.md)
- [Create an Internet of Things Dashboard with Adafruit IO](https://learn.adafruit.com/create-an-internet-of-things-dashboard-with-adafruit-dot-io.md)
- [Arduino Lesson 16. Stepper Motors](https://learn.adafruit.com/adafruit-arduino-lesson-16-stepper-motors.md)
- [Metal Inlay Capacitive Touch Buttons](https://learn.adafruit.com/metal-inlay-capacitive-touch-buttons.md)
- [How to Find Hidden COM Ports](https://learn.adafruit.com/how-to-find-hidden-com-ports.md)
---
# Source: https://learn.adafruit.com/12mm-led-pixels/circuitpython-setup.md
# Source: https://learn.adafruit.com/monochrome-oled-breakouts/circuitpython-setup.md
# Monochrome OLED Breakouts
## CircuitPython Setup
# CircuitPython Installation of DisplayIO SSD1306 Library
Warning:
To use the SSD1306 OLED with your Adafruit CircuitPython board you'll need to install the [Adafruit CircuitPython DisplayIO SSD1306](https://github.com/adafruit/Adafruit_CircuitPython_DisplayIO_SSD1306) module on your board.
First make sure you are running the [latest version 5.0 or later of Adafruit CircuitPython](https://learn.adafruit.com/welcome-to-circuitpython/installing-circuitpython) for your board.
Warning:
Next you'll need to install the necessary libraries to use the hardware--carefully follow the steps to find and install these libraries from [Adafruit's CircuitPython library bundle](https://github.com/adafruit/Adafruit_CircuitPython_Bundle/releases). Our CircuitPython starter guide has [a great page on how to install the library bundle](https://learn.adafruit.com/welcome-to-circuitpython/circuitpython-libraries).
If you choose, you can manually install the libraries individually on your board:
- **adafruit\_displayio\_ssd1306**
- **adafruit\_bus\_device**
Before continuing make sure your board's lib folder or root filesystem has the **adafruit\_displayio\_ssd1306****.mpy and ****adafruit\_bus\_device**** **files and folders** **copied over.
Next[ connect to the board's serial REPL](https://learn.adafruit.com/welcome-to-circuitpython/the-repl) so you are at the CircuitPython **\>\>\>** prompt.
## Code Example Additional Libraries
For the Code Example, you will need an additional library. We decided to make use of a library so the code didn't get overly complicated.
[Adafruit_CircuitPython_Display_Text](https://github.com/adafruit/Adafruit_CircuitPython_Display_Text/releases)
Go ahead and install this in the same manner as the driver library by copying the **adafruit\_display\_text** folder over to the **lib** folder on your CircuitPython device.
- [Previous Page](https://learn.adafruit.com/monochrome-oled-breakouts/circuitpython-wiring.md)
- [Next Page](https://learn.adafruit.com/monochrome-oled-breakouts/circuitpython-usage.md)
## Featured Products
### Monochrome 1.3" 128x64 OLED graphic display - STEMMA QT / Qwiic
[Monochrome 1.3" 128x64 OLED graphic display - STEMMA QT / Qwiic](https://www.adafruit.com/product/938)
These displays are small, only about 1.3" diagonal, but very readable due to the high contrast of an OLED display. This display is made of 128x64 individual white OLED pixels, each one is turned on or off by the controller chip. Because the display makes its own light, no backlight is...
In Stock
[Buy Now](https://www.adafruit.com/product/938)
[Related Guides to the Product](https://learn.adafruit.com/products/938/guides)
### Monochrome 0.96" 128x64 OLED Graphic Display - STEMMA QT
[Monochrome 0.96" 128x64 OLED Graphic Display - STEMMA QT](https://www.adafruit.com/product/326)
These displays are small, only about 1" diagonal, but very readable due to the high contrast of an OLED display. This display is made of 128x64 individual white OLED pixels, each one is turned on or off by the controller chip. Because the display makes its own light, no backlight is...
Out of Stock
[Buy Now](https://www.adafruit.com/product/326)
[Related Guides to the Product](https://learn.adafruit.com/products/326/guides)
### Monochrome 128x32 SPI OLED graphic display
[Monochrome 128x32 SPI OLED graphic display](https://www.adafruit.com/product/661)
These displays are small, only about 1" diagonal, but very readable due to the high contrast of an OLED display. This display is made of 128x32 individual white OLED pixels, each one is turned on or off by the controller chip. Because the display makes its own light, no backlight is...
In Stock
[Buy Now](https://www.adafruit.com/product/661)
[Related Guides to the Product](https://learn.adafruit.com/products/661/guides)
### Monochrome 128x32 I2C OLED graphic display
[Monochrome 128x32 I2C OLED graphic display](https://www.adafruit.com/product/931)
These displays are small, only about 1" diagonal, but very readable due to the high contrast of an OLED display. This display is made of 128x32 individual white OLED pixels, each one is turned on or off by the controller chip. Because the display makes its own light, no backlight is...
No Longer Stocked
[Buy Now](https://www.adafruit.com/product/931)
[Related Guides to the Product](https://learn.adafruit.com/products/931/guides)
### Monochrome 0.91" 128x32 I2C OLED Display - STEMMA QT / Qwiic
[Monochrome 0.91" 128x32 I2C OLED Display - STEMMA QT / Qwiic](https://www.adafruit.com/product/4440)
These displays are small, only about 1" diagonal, but very readable due to the high contrast of an OLED display. This display is made of 128x32 individual white OLED pixels, each one is turned on or off by the controller chip. Because the display makes its own light, no backlight is...
In Stock
[Buy Now](https://www.adafruit.com/product/4440)
[Related Guides to the Product](https://learn.adafruit.com/products/4440/guides)
## Related Guides
- [OLED TRON Clock](https://learn.adafruit.com/oled-tron-clock.md)
- [I2C Addresses and Troublesome Chips](https://learn.adafruit.com/i2c-addresses.md)
- [Monitor Your Greenhouse with a No-Code Environmental Sensor](https://learn.adafruit.com/monitor-your-greenhouse-with-a-no-code-environmental-sensor.md)
- [SSD1306 OLED Displays with Raspberry Pi and BeagleBone Black](https://learn.adafruit.com/ssd1306-oled-displays-with-raspberry-pi-and-beaglebone-black.md)
- [Adafruit FT232H With SPI & I2C Devices](https://learn.adafruit.com/adafruit-ft232h-with-spi-and-i2c-libraries.md)
- [MIDI Melody Maker](https://learn.adafruit.com/midi-melody-maker.md)
- [Steampunk Cameo Necklace with OLED Display](https://learn.adafruit.com/steampunk-cameo-necklace.md)
- [Using QMK on RP2040 Microcontrollers](https://learn.adafruit.com/using-qmk-on-rp2040-microcontrollers.md)
- [CircuitPython OLED and Dual Knob Sketcher](https://learn.adafruit.com/circuitpython-oled-knob-sketcher.md)
- [Gravity Falls Memory Gun](https://learn.adafruit.com/gravity-falls-memory-gun.md)
- [Pico W HTTP Server with CircuitPython](https://learn.adafruit.com/pico-w-http-server-with-circuitpython.md)
- [Adafruit Trinkey QT2040](https://learn.adafruit.com/adafruit-trinkey-qt2040.md)
- [Adafruit Airlift Bitsy Add-On - ESP32 WiFi Co-Processor](https://learn.adafruit.com/adafruit-airlift-bitsy-add-on-esp32-wifi-co-processor.md)
- [Animated Flying Toaster OLED Jewelry](https://learn.adafruit.com/animated-flying-toaster-oled-jewelry.md)
- [Adafruit TCA9548A 1-to-8 I2C Multiplexer Breakout](https://learn.adafruit.com/adafruit-tca9548a-1-to-8-i2c-multiplexer-breakout.md)
---
# Source: https://learn.adafruit.com/12mm-led-pixels/circuitpython-usage.md
# Source: https://learn.adafruit.com/monochrome-oled-breakouts/circuitpython-usage.md
# Monochrome OLED Breakouts
## CircuitPython Usage
Warning:
It's easy to use OLEDs with Python and the [Adafruit CircuitPython DisplayIO SSD1306](https://github.com/adafruit/Adafruit_CircuitPython_DisplayIO_SSD1306) module. This module allows you to easily write Python code to control the display.
To demonstrate the usage, we'll initialize the library and use Python code to control the OLED from the board's Python REPL.
# I2C Initialization
If your display is connected to the board using I2C (like if using a Feather and the FeatherWing OLED) you'll first need to initialize the I2C bus. First import the necessary modules:
```
import board
```
Now for either board run this command to create the I2C instance using the default SCL and SDA pins (which will be marked on the boards pins if using a Feather or similar Adafruit board):
```
i2c = board.I2C()
```
After initializing the I2C interface for your firmware as described above, you can create an instance of the `I2CDisplayBus`:
```auto
import displayio
import i2cdisplaybus
import adafruit_displayio_ssd1306
# Release any previously allocated resources
displayio.release_displays()
display_bus = i2cdisplaybus.I2CDisplayBus(i2c, device_address=0x3c)
```
Finally, you can pass the `display_bus` in and create an instance of the SSD1306 I2C driver by running:
```auto
display = adafruit_displayio_ssd1306.SSD1306(display_bus, width=128, height=32)
```
Now you should be seeing an image of the REPL. Note that the last two parameters to the `SSD1306` class initializer are the **width** and **height** of the display in pixels. Be sure to use the right values for the display you're using!
## 128 x 64 size OLEDs (or changing the I2C address)
If you are using a 128x64 display, the I2C address is probably different (`0x3d`), unless you've changed it by soldering some jumpers:
```auto
display_bus = i2cdisplaybus.I2CDisplayBus(i2c, device_address=0x3d)
display = adafruit_displayio_ssd1306.SSD1306(display_bus, width=128, height=64)
```
## Adding hardware reset pin
If you have a `reset` pin (which may be required if your OLED does not have an auto-reset chip like the FeatherWing) also pass in a reset pin like so:
```auto
display_bus = i2cdisplaybus.I2CDisplayBus(i2c, device_address=0x3c, reset=board.D9)
```
At this point the I2C bus and display are initialized. **Skip down to the example code section.**
# SPI Initialization
If your display is connected to the board using SPI you'll first need to initialize the SPI bus.
If you're using a microcontroller board, run the following commands:
```auto
import board
import displayio
import fourwire
import adafruit_displayio_ssd1306
# Release any previously allocated resources
displayio.release_displays()
spi = board.SPI()
tft_cs = board.D5
tft_dc = board.D6
tft_reset = board.D9
display_bus = fourwire.FourWire(spi, command=tft_dc, chip_select=tft_cs,
reset=tft_reset, baudrate=1000000)
display = adafruit_displayio_ssd1306.SSD1306(display_bus, width=128, height=64)
```
The parameters to the FourWire initializer are the pins connected to the display's **DC** , **CS,** and **reset**. Because we are using keyword arguments, they can be in any position. Again make sure to use the right pin names as you have wired up to your board!
Note that the last two parameters to the `SSD1306` class initializer are the **width** and **height** of the display in pixels. Be sure to use the right values for the display you're using!
# Example Code
https://github.com/adafruit/Adafruit_CircuitPython_DisplayIO_SSD1306/blob/main/examples/displayio_ssd1306_simpletest.py
Let's take a look at the sections of code one by one. We start by importing the `board` so that we can initialize SPI, `displayio`,(`FourWire` or `I2CDisplayBus` depending on your display),`terminalio` for the font, a `label`, and the `adafruit_displayio_ssd1306` driver.
```auto
import board
import displayio
# from fourwire import FourWire
import terminalio
from adafruit_display_text import label
from i2cdisplaybus import I2CDisplayBus
import adafruit_displayio_ssd1306
```
Next we release any previously used displays. This is important because if the microprocessor is reset, the display pins are not automatically released and this makes them available for use again.
```
displayio.release_displays()
```
Next we define the reset line, which will be used for either SPI or I2C.
```
oled_reset = board.D9
```
If you're using I2C, you would use this section of code. We set the I2C object to the board's I2C with the easy shortcut function `board.I2C()`. By using this function, it finds the SPI module and initializes using the default SPI parameters. We also set the display bus to `I2CDisplay` which makes use of the I2C bus.
```auto
# Use for I2C
i2c = board.I2C()
display_bus = I2CDisplayBus(i2c, device_address=0x3c, reset=oled_reset)
```
If you're using SPI, you would use this section of code. Don't forget to update the import section accordingly. We set the SPI object to the board's SPI with the easy shortcut function `board.SPI()`. By using this function, it finds the SPI module and initializes using the default SPI parameters. We set the OLED's **CS** (Chip Select), and **DC** (Data/Command) pins. We also set the display bus to FourWire which makes use of the SPI bus. The SSD1306 needs to be slowed down to 1MHz, so we pass in the additional baudrate parameter.
```auto
spi = board.SPI()
oled_cs = board.D5
oled_dc = board.D6
display_bus = FourWire(spi, command=oled_dc, chip_select=oled_cs,
reset=oled_reset, baudrate=1000000)
```
In order to make it easy to change display sizes, we'll define a few variables in one spot here. We have the display width, the display height and the border size, which we will explain a little further below. If your display is something different than these numbers, change them to the correct setting.
```
WIDTH = 128
HEIGHT = 32 # Change to 64 if needed
BORDER = 5
```
Finally, we initialize the driver with a width of the **WIDTH** variable and a height of the **HEIGHT** variable. If we stopped at this point and ran the code, we would have a terminal that we could type at and have the screen update.
```
display = adafruit_displayio_ssd1306.SSD1306(display_bus, width=WIDTH, height=HEIGHT)
```

Next we create a background splash image. We do this by creating a group that we can add elements to and adding that group to the display. In this example, we are limiting the maximum number of elements to 10, but this can be increased if you would like. The display will automatically handle updating the group.
```auto
splash = displayio.Group()
display.root_group = splash
```
Next we create a Bitmap that is the full width and height of the display. The Bitmap is like a canvas that we can draw on. In this case we are creating the Bitmap to be the same size as the screen, but only have one color. Although the Bitmaps can handle up to 256 different colors, the display is monochrome so we only need one. We create a Palette with one color and set that color to `0xFFFFFF` which happens to be white. If were to place a different color here, `displayio` handles color conversion automatically, so it may end up black or white depending on the calculation.
```
color_bitmap = displayio.Bitmap(WIDTH, HEIGHT, 1)
color_palette = displayio.Palette(1)
color_palette[0] = 0xFFFFFF # White
```
With all those pieces in place, we create a TileGrid by passing the bitmap and palette and draw it at `(0, 0)` which represents the display's upper left.
```
bg_sprite = displayio.TileGrid(color_bitmap,
pixel_shader=color_palette,
x=0, y=0)
splash.append(bg_sprite)
```

Next we will create a smaller black rectangle. The easiest way to do this is to create a new bitmap that is a little smaller than the full screen with a single color of `0x000000`, which is **black** , and place it in a specific location. In this case, we will create a bitmap that is 5 pixels smaller on each side. This is where the **BORDER** variable comes into use. It makes calculating the size of the second rectangle much easier. The screen we're using here is **128x64** and we have the BORDER set to **5 ** , so we'll want to subtract 10 from each of those numbers.
We'll also want to place it at the position `(5, 5)` so that it ends up centered.
```
# Draw a smaller inner rectangle
inner_bitmap = displayio.Bitmap(WIDTH-BORDER*2, HEIGHT-BORDER*2, 1)
inner_palette = displayio.Palette(1)
inner_palette[0] = 0x000000 # Black
inner_sprite = displayio.TileGrid(inner_bitmap,
pixel_shader=inner_palette,
x=BORDER, y=BORDER)
splash.append(inner_sprite)
```
Since we are adding this after the first square, it's automatically drawn on top. Here's what it looks like now.

Next add a label that says "Hello World!" on top of that. We're going to use the built-in Terminal Font. In this example, we won't be doing any scaling because of the small resolution, so we'll add the label directly the main group. If we were scaling, we would have used a subgroup.
Labels are centered vertically, so we'll place it at half the HEIGHT for the Y coordinate and subtract one so it looks good. We use the `//` operator to divide because we want a whole number returned and it's an easy way to round it. We'll set the width to around 28 pixels make it appear to be centered horizontally, but if you want to change the text, change this to whatever looks good to you. Let's go with some white text, so we'll pass it a value of `0xFFFFFF`.
```
# Draw a label
text = "Hello World!"
text_area = label.Label(terminalio.FONT, text=text, color=0xFFFFFF, x=28, y=HEIGHT//2-1)
splash.append(text_area)
```
Finally, we place an infinite loop at the end so that the graphics screen remains in place and isn't replaced by a terminal.
```
while True:
pass
```

If you've been following along with a FeatherWing or 128x32 OLED, this is what it should look like:

## Where to go from here
Be sure to check out this excellent [guide to CircuitPython Display Support Using displayio](https://learn.adafruit.com/circuitpython-display-support-using-displayio)
- [Previous Page](https://learn.adafruit.com/monochrome-oled-breakouts/circuitpython-setup.md)
- [Next Page](https://learn.adafruit.com/monochrome-oled-breakouts/python-wiring.md)
## Featured Products
### Monochrome 1.3" 128x64 OLED graphic display - STEMMA QT / Qwiic
[Monochrome 1.3" 128x64 OLED graphic display - STEMMA QT / Qwiic](https://www.adafruit.com/product/938)
These displays are small, only about 1.3" diagonal, but very readable due to the high contrast of an OLED display. This display is made of 128x64 individual white OLED pixels, each one is turned on or off by the controller chip. Because the display makes its own light, no backlight is...
In Stock
[Buy Now](https://www.adafruit.com/product/938)
[Related Guides to the Product](https://learn.adafruit.com/products/938/guides)
### Monochrome 0.96" 128x64 OLED Graphic Display - STEMMA QT
[Monochrome 0.96" 128x64 OLED Graphic Display - STEMMA QT](https://www.adafruit.com/product/326)
These displays are small, only about 1" diagonal, but very readable due to the high contrast of an OLED display. This display is made of 128x64 individual white OLED pixels, each one is turned on or off by the controller chip. Because the display makes its own light, no backlight is...
Out of Stock
[Buy Now](https://www.adafruit.com/product/326)
[Related Guides to the Product](https://learn.adafruit.com/products/326/guides)
### Monochrome 128x32 SPI OLED graphic display
[Monochrome 128x32 SPI OLED graphic display](https://www.adafruit.com/product/661)
These displays are small, only about 1" diagonal, but very readable due to the high contrast of an OLED display. This display is made of 128x32 individual white OLED pixels, each one is turned on or off by the controller chip. Because the display makes its own light, no backlight is...
In Stock
[Buy Now](https://www.adafruit.com/product/661)
[Related Guides to the Product](https://learn.adafruit.com/products/661/guides)
### Monochrome 128x32 I2C OLED graphic display
[Monochrome 128x32 I2C OLED graphic display](https://www.adafruit.com/product/931)
These displays are small, only about 1" diagonal, but very readable due to the high contrast of an OLED display. This display is made of 128x32 individual white OLED pixels, each one is turned on or off by the controller chip. Because the display makes its own light, no backlight is...
No Longer Stocked
[Buy Now](https://www.adafruit.com/product/931)
[Related Guides to the Product](https://learn.adafruit.com/products/931/guides)
### Monochrome 0.91" 128x32 I2C OLED Display - STEMMA QT / Qwiic
[Monochrome 0.91" 128x32 I2C OLED Display - STEMMA QT / Qwiic](https://www.adafruit.com/product/4440)
These displays are small, only about 1" diagonal, but very readable due to the high contrast of an OLED display. This display is made of 128x32 individual white OLED pixels, each one is turned on or off by the controller chip. Because the display makes its own light, no backlight is...
In Stock
[Buy Now](https://www.adafruit.com/product/4440)
[Related Guides to the Product](https://learn.adafruit.com/products/4440/guides)
## Related Guides
- [OLED TRON Clock](https://learn.adafruit.com/oled-tron-clock.md)
- [I2C Addresses and Troublesome Chips](https://learn.adafruit.com/i2c-addresses.md)
- [Monitor Your Greenhouse with a No-Code Environmental Sensor](https://learn.adafruit.com/monitor-your-greenhouse-with-a-no-code-environmental-sensor.md)
- [SSD1306 OLED Displays with Raspberry Pi and BeagleBone Black](https://learn.adafruit.com/ssd1306-oled-displays-with-raspberry-pi-and-beaglebone-black.md)
- [Adafruit FT232H With SPI & I2C Devices](https://learn.adafruit.com/adafruit-ft232h-with-spi-and-i2c-libraries.md)
- [MIDI Melody Maker](https://learn.adafruit.com/midi-melody-maker.md)
- [Steampunk Cameo Necklace with OLED Display](https://learn.adafruit.com/steampunk-cameo-necklace.md)
- [Using QMK on RP2040 Microcontrollers](https://learn.adafruit.com/using-qmk-on-rp2040-microcontrollers.md)
- [CircuitPython OLED and Dual Knob Sketcher](https://learn.adafruit.com/circuitpython-oled-knob-sketcher.md)
- [Gravity Falls Memory Gun](https://learn.adafruit.com/gravity-falls-memory-gun.md)
- [Pico W HTTP Server with CircuitPython](https://learn.adafruit.com/pico-w-http-server-with-circuitpython.md)
- [Adafruit Trinkey QT2040](https://learn.adafruit.com/adafruit-trinkey-qt2040.md)
- [Adafruit Airlift Bitsy Add-On - ESP32 WiFi Co-Processor](https://learn.adafruit.com/adafruit-airlift-bitsy-add-on-esp32-wifi-co-processor.md)
- [Animated Flying Toaster OLED Jewelry](https://learn.adafruit.com/animated-flying-toaster-oled-jewelry.md)
- [Adafruit TCA9548A 1-to-8 I2C Multiplexer Breakout](https://learn.adafruit.com/adafruit-tca9548a-1-to-8-i2c-multiplexer-breakout.md)
---
# Source: https://learn.adafruit.com/adafruit-led-backpack/circuitpython-wiring-and-setup-2666a265-2d8e-4cde-bcb8-dadc29b6b8fa.md
# Adafruit LED Backpacks
## CircuitPython Wiring and Setup
# Wiring
It's easy to use LED 7-Segment Displays with CircuitPython and the [Adafruit CircuitPython HT16K33](https://github.com/adafruit/Adafruit_CircuitPython_HT16K33) library. This module allows you to easily write CircuitPython code to control the display.
You can use this sensor with any CircuitPython microcontroller board.
We'll cover how to wire the 7-Segment Display to your CircuitPython microcontroller board. First assemble your 7-Segment Display.
Connect the 7-Segment Display to your microcontroller board as shown below.
Danger:
Warning:

- **Microcontroller 3.3V ** to **3.3v Bus**
- **3.3v Bus** to **7-Segment Display IO**
- **Microcontroller 5V ** to **7-Segment Display VIN**
- **Microcontroller GND ** to **7-Segment Display GND**
- **Microcontroller SCL ** to **7-Segment Display SCL**
- **Microcontroller SDA ** to **7-Segment Display SDA**
- **1K Resistor** between **3.3v Bus** and **7-Segment Display SCL**
- **1K Resistor** between **3.3v Bus** and **7-Segment Display SDA**
You can also use a STEMMA QT cable to connect any board with a STEMMA QT port to the updated display.

# Library Setup
To use the LED backpack with your [Adafruit CircuitPython](https://learn.adafruit.com/welcome-to-circuitpython/overview) board you'll need to install the [Adafruit\_CircuitPython\_HT16K33](https://github.com/adafruit/Adafruit_CircuitPython_HT16K33) library on your board.
First make sure you are running the [latest version of Adafruit CircuitPython](https://github.com/adafruit/circuitpython/releases) for your board. Next you'll need to install the necessary libraries to use the hardware--read below and carefully follow the referenced steps to find and install these libraries from [Adafruit's CircuitPython library bundle](https://github.com/adafruit/Adafruit_CircuitPython_Bundle).
## Bundle Install
For express boards that have extra flash storage, like the Feather/Metro M0 express and Circuit Playground express, you can easily install the necessary libraries with [Adafruit's CircuitPython bundle](https://github.com/adafruit/Adafruit_CircuitPython_Bundle). This is an all-in-one package that includes the necessary libraries to use the LED backpack display with CircuitPython. For details on installing the bundle, read about [CircuitPython Libraries](https://learn.adafruit.com/welcome-to-circuitpython/circuitpython-libraries).
Remember for non-express boards like the Trinket M0, Gemma M0, and Feather/Metro M0 basic you'll need to [manually install the necessary libraries](https://learn.adafruit.com/welcome-to-circuitpython/circuitpython-libraries#non-express-boards-11-13) from the bundle:
- **adafruit\_ht16k33**
- **adafruit\_bus\_device**
If your board supports USB mass storage, like the M0-based boards, then simply drag the files to the board's file system. **Note on boards without external SPI flash, like a Feather M0 or Trinket/Gemma M0, you might run into issues on Mac OSX with hidden files taking up too much space when drag and drop copying, [see this page for a workaround](../../../../micropython-for-samd21/usb-mass-storage#mac-osx-file-copy-issues).**
Before continuing make sure your board's **lib** folder or root filesystem has at least the **adafruit\_ht16k33** and **adafruit\_bus\_device** folders/modules copied over.

- [Previous Page](https://learn.adafruit.com/adafruit-led-backpack/1-2-inch-7-segment-backpack-arduino-wiring-and-setup.md)
- [Next Page](https://learn.adafruit.com/adafruit-led-backpack/python-wiring-and-setup-d74df15e-c55c-487a-acce-a905497ef9db.md)
## Primary Products
### Adafruit Mini 8x8 LED Matrix w/I2C Backpack - Red
[Adafruit Mini 8x8 LED Matrix w/I2C Backpack - Red](https://www.adafruit.com/product/870)
What's better than a single LED? Lots of LEDs! A fun way to make a small display is to use an [8x8 matrix](https://www.adafruit.com/category/37_88) or a [4-digit 7-segment display](https://www.adafruit.com/category/37_103). Matrices like these are...
In Stock
[Buy Now](https://www.adafruit.com/product/870)
[Related Guides to the Product](https://learn.adafruit.com/products/870/guides)
### Adafruit Mini 8x8 LED Matrix w/I2C Backpack - Yellow
[Adafruit Mini 8x8 LED Matrix w/I2C Backpack - Yellow](https://www.adafruit.com/product/871)
What's better than a single LED? Lots of LEDs! A fun way to make a small display is to use an [8x8 matrix](https://www.adafruit.com/category/37_88) or a [4-digit 7-segment display](https://www.adafruit.com/category/37_103). Matrices like these are...
In Stock
[Buy Now](https://www.adafruit.com/product/871)
[Related Guides to the Product](https://learn.adafruit.com/products/871/guides)
### Adafruit Mini 0.8" 8x8 LED Matrix w/I2C Backpack - Yellow-Green
[Adafruit Mini 0.8" 8x8 LED Matrix w/I2C Backpack - Yellow-Green](https://www.adafruit.com/product/872)
What's better than a single LED? Lots of LEDs! A fun way to make a small display is to use an [8x8 matrix](https://www.adafruit.com/category/37_88) or a [4-digit 7-segment display](https://www.adafruit.com/category/37_103). Matrices like these are...
In Stock
[Buy Now](https://www.adafruit.com/product/872)
[Related Guides to the Product](https://learn.adafruit.com/products/872/guides)
### Adafruit 0.56" 4-Digit 7-Segment Display with I2C Backpack - Red
[Adafruit 0.56" 4-Digit 7-Segment Display with I2C Backpack - Red](https://www.adafruit.com/product/878)
What's better than a single LED? Lots of LEDs! A fun way to make a small display is to use an [8x8 matrix](https://www.adafruit.com/category/37_88) or a [4-digit 7-segment display](https://www.adafruit.com/category/37_103). Matrices like these are...
In Stock
[Buy Now](https://www.adafruit.com/product/878)
[Related Guides to the Product](https://learn.adafruit.com/products/878/guides)
### Adafruit 0.56" 4-Digit 7-Segment Display w/I2C Backpack - Yellow
[Adafruit 0.56" 4-Digit 7-Segment Display w/I2C Backpack - Yellow](https://www.adafruit.com/product/879)
What's better than a single LED? Lots of LEDs! A fun way to make a small display is to use an [8x8 matrix](https://www.adafruit.com/category/37_88) or a [4-digit 7-segment display](https://www.adafruit.com/category/37_103). Matrices like these are...
In Stock
[Buy Now](https://www.adafruit.com/product/879)
[Related Guides to the Product](https://learn.adafruit.com/products/879/guides)
### Adafruit 0.56" 4-Digit 7-Segment Display w/ I2C Backpack - Green
[Adafruit 0.56" 4-Digit 7-Segment Display w/ I2C Backpack - Green](https://www.adafruit.com/product/880)
What's better than a single LED? Lots of LEDs! A fun way to make a small display is to use an [8x8 matrix](https://www.adafruit.com/category/37_88) or a [4-digit 7-segment display](https://www.adafruit.com/category/37_103). Matrices like these are...
No Longer Stocked
[Buy Now](https://www.adafruit.com/product/880)
[Related Guides to the Product](https://learn.adafruit.com/products/880/guides)
### Adafruit 0.56" 4-Digit 7-Segment Display w/ I2C Backpack - Blue
[Adafruit 0.56" 4-Digit 7-Segment Display w/ I2C Backpack - Blue](https://www.adafruit.com/product/881)
What's better than a single LED? Lots of LEDs! A fun way to make a small display is to use an [8x8 matrix](https://www.adafruit.com/category/37_88) or a [4-digit 7-segment display](https://www.adafruit.com/category/37_103). Matrices like these are...
In Stock
[Buy Now](https://www.adafruit.com/product/881)
[Related Guides to the Product](https://learn.adafruit.com/products/881/guides)
### Adafruit Bicolor LED Square Pixel Matrix with I2C Backpack
[Adafruit Bicolor LED Square Pixel Matrix with I2C Backpack](https://www.adafruit.com/product/902)
What's better than a single LED? Lots of LEDs! A fun way to make a small colorful display is to use a [1.2" Bi-color 8x8 LED Matrix](http://www.adafruit.com/products/458). Matrices like these are 'multiplexed' - so to control all the 128 LEDs you need 24 pins....
In Stock
[Buy Now](https://www.adafruit.com/product/902)
[Related Guides to the Product](https://learn.adafruit.com/products/902/guides)
### Adafruit Mini 8x8 LED Matrix w/I2C Backpack - Blue
[Adafruit Mini 8x8 LED Matrix w/I2C Backpack - Blue](https://www.adafruit.com/product/959)
What's better than a single LED? Lots of LEDs! A fun way to make a small display is to use an [8x8 matrix](https://www.adafruit.com/category/37_88) or a [4-digit 7-segment display](https://www.adafruit.com/category/37_103). Matrices like these are...
In Stock
[Buy Now](https://www.adafruit.com/product/959)
[Related Guides to the Product](https://learn.adafruit.com/products/959/guides)
### Adafruit 0.56" 4-Digit 7-Segment Display w/I2C Backpack - White
[Adafruit 0.56" 4-Digit 7-Segment Display w/I2C Backpack - White](https://www.adafruit.com/product/1002)
What's better than a single LED? Lots of LEDs! A fun way to make a small display is to use an [8x8 matrix](https://www.adafruit.com/category/37_88) or a [4-digit 7-segment display](https://www.adafruit.com/category/37_103). Matrices like these are...
In Stock
[Buy Now](https://www.adafruit.com/product/1002)
[Related Guides to the Product](https://learn.adafruit.com/products/1002/guides)
### Adafruit 1.2" 8x8 LED Matrix Backpack
[Adafruit 1.2" 8x8 LED Matrix Backpack](https://www.adafruit.com/product/1048)
By popular request, you can now get our 8x8 LED backpacks without the LEDs! These backpacks feature an HT16K33 I2C LED driver, they're simple and easy to use - you can use [our very nice library for the backpacks to...](https://github.com/adafruit/Adafruit-LED-Backpack-Library)
In Stock
[Buy Now](https://www.adafruit.com/product/1048)
[Related Guides to the Product](https://learn.adafruit.com/products/1048/guides)
### Adafruit Small 1.2" 8x8 LED Matrix w/I2C Backpack - Red
[Adafruit Small 1.2" 8x8 LED Matrix w/I2C Backpack - Red](https://www.adafruit.com/product/1049)
What's better than a single LED? Lots of LEDs! A fun way to make a small display is to use an [8x8 matrix](https://www.adafruit.com/category/37_88) or a [4-digit 7-segment display](https://www.adafruit.com/category/37_103). Matrices like these are...
In Stock
[Buy Now](https://www.adafruit.com/product/1049)
[Related Guides to the Product](https://learn.adafruit.com/products/1049/guides)
### Adafruit Small 1.2" 8x8 LED Matrix w/I2C Backpack - Yellow
[Adafruit Small 1.2" 8x8 LED Matrix w/I2C Backpack - Yellow](https://www.adafruit.com/product/1050)
What's better than a single LED? Lots of LEDs! A fun way to make a small display is to use an [8x8 matrix](https://www.adafruit.com/category/37_88) or a [4-digit 7-segment display](https://www.adafruit.com/category/37_103). Matrices like these are...
In Stock
[Buy Now](https://www.adafruit.com/product/1050)
[Related Guides to the Product](https://learn.adafruit.com/products/1050/guides)
### Adafruit Small 1.2" 8x8 LED Matrix w/I2C Backpack - Blue
[Adafruit Small 1.2" 8x8 LED Matrix w/I2C Backpack - Blue](https://www.adafruit.com/product/1052)
What's better than a single LED? Lots of LEDs! A fun way to make a small display is to use an [8x8 matrix](https://www.adafruit.com/category/37_88) or a [4-digit 7-segment display](https://www.adafruit.com/category/37_103). Matrices like these are...
In Stock
[Buy Now](https://www.adafruit.com/product/1052)
[Related Guides to the Product](https://learn.adafruit.com/products/1052/guides)
### Adafruit Mini 8x8 LED Matrix w/I2C Backpack - Ultra Bright White
[Adafruit Mini 8x8 LED Matrix w/I2C Backpack - Ultra Bright White](https://www.adafruit.com/product/1080)
What's better than a single LED? Lots of LEDs! A fun way to make a small display is to use an [8x8 matrix](https://www.adafruit.com/category/37_88) or a [4-digit 7-segment display](https://www.adafruit.com/category/37_103). Matrices like these are...
In Stock
[Buy Now](https://www.adafruit.com/product/1080)
[Related Guides to the Product](https://learn.adafruit.com/products/1080/guides)
### Adafruit 1.2" 4-Digit 7-Segment Display w/I2C Backpack - Green
[Adafruit 1.2" 4-Digit 7-Segment Display w/I2C Backpack - Green](https://www.adafruit.com/product/1268)
What's better than a single LED? Lots of LEDs! A fun way to make a numeric display is to use a [4-digit 7-segment display](https://www.adafruit.com/category/37_103). LED matrices like these are 'multiplexed' - so to control all the seven-segment LEDs you need 14 pins....
No Longer Stocked
[Buy Now](https://www.adafruit.com/product/1268)
[Related Guides to the Product](https://learn.adafruit.com/products/1268/guides)
### Adafruit 1.2" 4-Digit 7-Segment Display w/I2C Backpack - Yellow
[Adafruit 1.2" 4-Digit 7-Segment Display w/I2C Backpack - Yellow](https://www.adafruit.com/product/1269)
What's better than a single LED? Lots of LEDs! A fun way to make a numeric display is to use a [4-digit 7-segment display](https://www.adafruit.com/category/37_103). LED matrices like these are 'multiplexed' - so to control all the seven-segment LEDs you need 14 pins....
In Stock
[Buy Now](https://www.adafruit.com/product/1269)
[Related Guides to the Product](https://learn.adafruit.com/products/1269/guides)
### Adafruit 1.2" 4-Digit 7-Segment Display w/I2C Backpack - Red
[Adafruit 1.2" 4-Digit 7-Segment Display w/I2C Backpack - Red](https://www.adafruit.com/product/1270)
What's better than a single LED? Lots of LEDs! A fun way to make a numeric display is to use a [4-digit 7-segment display](https://www.adafruit.com/category/37_103). LED matrices like these are 'multiplexed' - so to control all the seven-segment LEDs you need 14 pins....
In Stock
[Buy Now](https://www.adafruit.com/product/1270)
[Related Guides to the Product](https://learn.adafruit.com/products/1270/guides)
### Small 1.2" 8x8 Ultra Bright White LED Matrix + Backpack
[Small 1.2" 8x8 Ultra Bright White LED Matrix + Backpack](https://www.adafruit.com/product/1614)
What's better than a single LED? Lots of LEDs! A fun way to make a small display is to use an [8x8 matrix](https://www.adafruit.com/category/37_88) or a [4-digit 7-segment display](https://www.adafruit.com/category/37_103). Matrices like these are...
In Stock
[Buy Now](https://www.adafruit.com/product/1614)
[Related Guides to the Product](https://learn.adafruit.com/products/1614/guides)
### Adafruit Small 1.2" 8x8 LED Matrix w/I2C Backpack - Pure Green
[Adafruit Small 1.2" 8x8 LED Matrix w/I2C Backpack - Pure Green](https://www.adafruit.com/product/1632)
What's better than a single LED? Lots of LEDs! A fun way to make a small display is to use an [8x8 matrix](https://www.adafruit.com/category/37_88) or a [4-digit 7-segment display](https://www.adafruit.com/category/37_103). Matrices like these are...
In Stock
[Buy Now](https://www.adafruit.com/product/1632)
[Related Guides to the Product](https://learn.adafruit.com/products/1632/guides)
### Adafruit Mini 0.8" 8x8 LED Matrix w/I2C Backpack - Pure Green
[Adafruit Mini 0.8" 8x8 LED Matrix w/I2C Backpack - Pure Green](https://www.adafruit.com/product/1633)
What's better than a single LED? Lots of LEDs! A fun way to make a small display is to use an [8x8 matrix](https://www.adafruit.com/category/37_88) or a [4-digit 7-segment display](https://www.adafruit.com/category/37_103). Matrices like these are...
In Stock
[Buy Now](https://www.adafruit.com/product/1633)
[Related Guides to the Product](https://learn.adafruit.com/products/1633/guides)
### Bi-Color (Red/Green) 24-Bar Bargraph w/I2C Backpack Kit
[Bi-Color (Red/Green) 24-Bar Bargraph w/I2C Backpack Kit](https://www.adafruit.com/product/1721)
What's better than a single LED? Lots of LEDs! A fun way to make a small linear display is to use two 12-bar Bi-color bar-graphs. However, this LED bargraph is 'multiplexed' - so to control all the 48 LEDs you need a lot of pins.
Out of Stock
[Buy Now](https://www.adafruit.com/product/1721)
[Related Guides to the Product](https://learn.adafruit.com/products/1721/guides)
### Small 1.2" 8x8 Ultra Bright Square Amber LED Matrix + Backpack
[Small 1.2" 8x8 Ultra Bright Square Amber LED Matrix + Backpack](https://www.adafruit.com/product/1854)
What's better than a single LED? Lots of LEDs! Matrices like these are 'multiplexed' - so to control 64 LEDs you need 16 pins. That's a lot of pins, and there are [driver chips like the MAX7219](//www.adafruit.com/products/453) that can control a matrix for you but...
In Stock
[Buy Now](https://www.adafruit.com/product/1854)
[Related Guides to the Product](https://learn.adafruit.com/products/1854/guides)
### Small 1.2" 8x8 Ultra Bright Square Yellow LED Matrix + Backpack
[Small 1.2" 8x8 Ultra Bright Square Yellow LED Matrix + Backpack](https://www.adafruit.com/product/1855)
What's better than a single LED? Lots of LEDs! Matrices like these are 'multiplexed' - so to control 64 LEDs you need 16 pins. That's a lot of pins, and there are [driver chips like the MAX7219](//www.adafruit.com/products/453) that can control a matrix for you but...
In Stock
[Buy Now](https://www.adafruit.com/product/1855)
[Related Guides to the Product](https://learn.adafruit.com/products/1855/guides)
### Small 1.2" 8x8 Bright Square Pure Green LED Matrix + Backpack
[Small 1.2" 8x8 Bright Square Pure Green LED Matrix + Backpack](https://www.adafruit.com/product/1856)
What's better than a single LED? Lots of LEDs! Matrices like these are 'multiplexed' - so to control 64 LEDs you need 16 pins. That's a lot of pins, and there are [driver chips like the MAX7219](//www.adafruit.com/products/453) that can control a matrix for you but...
In Stock
[Buy Now](https://www.adafruit.com/product/1856)
[Related Guides to the Product](https://learn.adafruit.com/products/1856/guides)
### Small 1.2" 8x8 Ultra Bright Square White LED Matrix + Backpack
[Small 1.2" 8x8 Ultra Bright Square White LED Matrix + Backpack](https://www.adafruit.com/product/1857)
What's better than a single LED? Lots of LEDs! Matrices like these are 'multiplexed' - so to control 64 LEDs you need 16 pins. That's a lot of pins, and there are [driver chips like the MAX7219](//www.adafruit.com/products/453) that can control a matrix for you but...
In Stock
[Buy Now](https://www.adafruit.com/product/1857)
[Related Guides to the Product](https://learn.adafruit.com/products/1857/guides)
### Adafruit 14-segment LED Alphanumeric Backpack - STEMMA QT
[Adafruit 14-segment LED Alphanumeric Backpack - STEMMA QT](https://www.adafruit.com/product/1910)
By popular request, you can now get our 14-segment LED backpacks without the LEDs! These backpacks feature an HT16K33 I2C LED driver, they're simple and easy to use - you can use [our very nice library for the backpacks to...](https://github.com/adafruit/Adafruit-LED-Backpack-Library)
In Stock
[Buy Now](https://www.adafruit.com/product/1910)
[Related Guides to the Product](https://learn.adafruit.com/products/1910/guides)
### Quad Alphanumeric Display - Red 0.54" Digits w/ I2C Backpack
[Quad Alphanumeric Display - Red 0.54" Digits w/ I2C Backpack](https://www.adafruit.com/product/1911)
Display, elegantly, 012345678 or 9! Gaze, hypnotized, at ABCDEFGHIJKLM - well it can display the whole alphabet. You get the point. This is a nice, bright alphanumeric display that shows letters and numbers in a beautiful red hue. It's super bright and designed for viewing from distances...
In Stock
[Buy Now](https://www.adafruit.com/product/1911)
[Related Guides to the Product](https://learn.adafruit.com/products/1911/guides)
### Quad Alphanumeric Display - Blue 0.54" Digits w/ I2C Backpack
[Quad Alphanumeric Display - Blue 0.54" Digits w/ I2C Backpack](https://www.adafruit.com/product/1912)
Display, elegantly, 012345678 or 9! Gaze, hypnotized, at ABCDEFGHIJKLM - well it can display the whole alphabet. You get the point. This is a nice, bright alphanumeric display that shows letters and numbers in a beautiful blue hue. It's super bright and designed for viewing from distances...
In Stock
[Buy Now](https://www.adafruit.com/product/1912)
[Related Guides to the Product](https://learn.adafruit.com/products/1912/guides)
### 16x8 1.2" LED Matrix + Backpack - Ultra Bright Round Green LEDs
[16x8 1.2" LED Matrix + Backpack - Ultra Bright Round Green LEDs](https://www.adafruit.com/product/2035)
What's better than a single LED? Lots of LEDs! And what's better than lots of LEDs? **TWO TIMES AS MANY LEDS!!!**
With the 16x8 LED Matrix Backpack we've doubled your project's matrix capacity by making it super easy to get two separate 8x8 matrices onto...
In Stock
[Buy Now](https://www.adafruit.com/product/2035)
[Related Guides to the Product](https://learn.adafruit.com/products/2035/guides)
### 16x8 1.2" LED Matrix+Backpack UltraBright Round YellowGreen LEDs
[16x8 1.2" LED Matrix+Backpack UltraBright Round YellowGreen LEDs](https://www.adafruit.com/product/2036)
What's better than a single LED? Lots of LEDs! And what's better than lots of LEDs? **TWO TIMES AS MANY LEDS!!!**
With the 16x8 LED Matrix Backpack we've doubled your project's matrix capacity by making it super easy to get two separate 8x8 matrices onto...
In Stock
[Buy Now](https://www.adafruit.com/product/2036)
[Related Guides to the Product](https://learn.adafruit.com/products/2036/guides)
### 16x8 1.2" LED Matrix + Backpack - Ultra Bright Round Red LEDs
[16x8 1.2" LED Matrix + Backpack - Ultra Bright Round Red LEDs](https://www.adafruit.com/product/2037)
What's better than a single LED? Lots of LEDs! And what's better than lots of LEDs? **TWO TIMES AS MANY LEDS!!!**
With the 16x8 LED Matrix Backpack we've doubled your project's matrix capacity by making it super easy to get two separate 8x8 matrices onto...
In Stock
[Buy Now](https://www.adafruit.com/product/2037)
[Related Guides to the Product](https://learn.adafruit.com/products/2037/guides)
### 16x8 1.2" LED Matrix + Backpack - Ultra Bright Round White LEDs
[16x8 1.2" LED Matrix + Backpack - Ultra Bright Round White LEDs](https://www.adafruit.com/product/2038)
What's better than a single LED? Lots of LEDs! And what's better than lots of LEDs? **TWO TIMES AS MANY LEDS!!!**
With the 16x8 LED Matrix Backpack we've doubled your project's matrix capacity by making it super easy to get two separate 8x8 matrices onto...
In Stock
[Buy Now](https://www.adafruit.com/product/2038)
[Related Guides to the Product](https://learn.adafruit.com/products/2038/guides)
### 16x8 1.2" LED Matrix + Backpack - Ultra Bright Round Blue LEDs
[16x8 1.2" LED Matrix + Backpack - Ultra Bright Round Blue LEDs](https://www.adafruit.com/product/2039)
What's better than a single LED? Lots of LEDs! And what's better than lots of LEDs? **TWO TIMES AS MANY LEDS!!!**
With the 16x8 LED Matrix Backpack we've doubled your project's matrix capacity by making it super easy to get two separate 8x8 matrices onto...
In Stock
[Buy Now](https://www.adafruit.com/product/2039)
[Related Guides to the Product](https://learn.adafruit.com/products/2039/guides)
### 16x8 1.2" LED Matrix + Backpack - Ultra Bright Square Blue LEDs
[16x8 1.2" LED Matrix + Backpack - Ultra Bright Square Blue LEDs](https://www.adafruit.com/product/2040)
What's better than a single LED? Lots of LEDs! And what's better than lots of LEDs? **TWO TIMES AS MANY LEDS!!!**
With the 16x8 LED Matrix Backpack we've doubled your project's matrix capacity by making it super easy to get two separate 8x8 matrices onto...
In Stock
[Buy Now](https://www.adafruit.com/product/2040)
[Related Guides to the Product](https://learn.adafruit.com/products/2040/guides)
### 16x8 1.2" LED Matrix + Backpack - Ultra Bright Square Amber LEDs
[16x8 1.2" LED Matrix + Backpack - Ultra Bright Square Amber LEDs](https://www.adafruit.com/product/2041)
What's better than a single LED? Lots of LEDs! And what's better than lots of LEDs? **TWO TIMES AS MANY LEDS!!!**
With the 16x8 LED Matrix Backpack we've doubled your project's matrix capacity by making it super easy to get two separate 8x8 matrices onto...
In Stock
[Buy Now](https://www.adafruit.com/product/2041)
[Related Guides to the Product](https://learn.adafruit.com/products/2041/guides)
### 16x8 1.2" LED Matrix + Backpack - Ultra Bright Square Green LEDs
[16x8 1.2" LED Matrix + Backpack - Ultra Bright Square Green LEDs](https://www.adafruit.com/product/2042)
What's better than a single LED? Lots of LEDs! And what's better than lots of LEDs? **TWO TIMES AS MANY LEDS!!!**
With the 16x8 LED Matrix Backpack we've doubled your project's matrix capacity by making it super easy to get two separate 8x8 matrices onto...
In Stock
[Buy Now](https://www.adafruit.com/product/2042)
[Related Guides to the Product](https://learn.adafruit.com/products/2042/guides)
### 16x8 1.2" LED Matrix + Backpack -Ultra Bright Square Yellow LEDs
[16x8 1.2" LED Matrix + Backpack -Ultra Bright Square Yellow LEDs](https://www.adafruit.com/product/2043)
What's better than a single LED? Lots of LEDs! And what's better than lots of LEDs? **TWO TIMES AS MANY LEDS!!!**
With the 16x8 LED Matrix Backpack we've doubled your project's matrix capacity by making it super easy to get two separate 8x8 matrices onto...
In Stock
[Buy Now](https://www.adafruit.com/product/2043)
[Related Guides to the Product](https://learn.adafruit.com/products/2043/guides)
### 16x8 1.2" LED Matrix + Backpack - Ultra Bright Square White LEDs
[16x8 1.2" LED Matrix + Backpack - Ultra Bright Square White LEDs](https://www.adafruit.com/product/2044)
What's better than a single LED? Lots of LEDs! And what's better than lots of LEDs? **TWO TIMES AS MANY LEDS!!!**
With the 16x8 LED Matrix Backpack we've doubled your project's matrix capacity by making it super easy to get two separate 8x8 matrices onto...
In Stock
[Buy Now](https://www.adafruit.com/product/2044)
[Related Guides to the Product](https://learn.adafruit.com/products/2044/guides)
### 16x8 1.2" LED Matrix + Backpack-Ultra Bright Round Orange LEDs
[16x8 1.2" LED Matrix + Backpack-Ultra Bright Round Orange LEDs](https://www.adafruit.com/product/2052)
What's better than a single LED? Lots of LEDs! And what's better than lots of LEDs? **TWO TIMES AS MANY LEDS!!!**
With the 16x8 LED Matrix Backpack we've doubled your project's matrix capacity by making it super easy to get two separate 8x8 matrices onto...
In Stock
[Buy Now](https://www.adafruit.com/product/2052)
[Related Guides to the Product](https://learn.adafruit.com/products/2052/guides)
### 16x8 1.2" LED Matrices+Backpack Round LEDs in Various Colors
[16x8 1.2" LED Matrices+Backpack Round LEDs in Various Colors](https://www.adafruit.com/product/2054)
What's better than a single LED? Lots of LEDs! And what's better than lots of LEDs? **TWO TIMES AS MANY LEDS!!!**
With the 16x8 LED Matrix Backpack we've doubled your project's matrix capacity by making it super easy to get two separate 8x8 matrices onto...
Out of Stock
[Buy Now](https://www.adafruit.com/product/2054)
[Related Guides to the Product](https://learn.adafruit.com/products/2054/guides)
### Adafruit 8x16 LED Matrix FeatherWing w/o Matrices
[Adafruit 8x16 LED Matrix FeatherWing w/o Matrices](https://www.adafruit.com/product/3090)
You will chirp with delight when you see how easy it is to make your very own 8x16 LED matrix display for any Feather. At 0.8" square, the little [8x8 matrices](https://www.adafruit.com/new/?q=8x8%20miniature%20LED%20matrix&) have everything a big LED matrix has,...
Out of Stock
[Buy Now](https://www.adafruit.com/product/3090)
[Related Guides to the Product](https://learn.adafruit.com/products/3090/guides)
### Adafruit 14-segment LED Alphanumeric backpack (same as P1910)
[Adafruit 14-segment LED Alphanumeric backpack (same as P1910)](https://www.adafruit.com/product/3322)
Just the backpack + 4pin header
No Longer Stocked
[Buy Now](https://www.adafruit.com/product/3322)
[Related Guides to the Product](https://learn.adafruit.com/products/3322/guides)
## Featured Products
### Adafruit Small 1.2" 8x8 LED Matrix w/I2C Backpack - Yellow-Green
[Adafruit Small 1.2" 8x8 LED Matrix w/I2C Backpack - Yellow-Green](https://www.adafruit.com/product/1051)
What's better than a single LED? Lots of LEDs! A fun way to make a small display is to use an [8x8 matrix](https://www.adafruit.com/category/37_88) or a [4-digit 7-segment display](https://www.adafruit.com/category/37_103). Matrices like these are...
In Stock
[Buy Now](https://www.adafruit.com/product/1051)
[Related Guides to the Product](https://learn.adafruit.com/products/1051/guides)
### Small 1.2" 8x8 Ultra Bright Square Blue LED Matrix + Backpack
[Small 1.2" 8x8 Ultra Bright Square Blue LED Matrix + Backpack](https://www.adafruit.com/product/1853)
What's better than a single LED? Lots of LEDs! Matrices like these are 'multiplexed' - so to control 64 LEDs you need 16 pins. That's a lot of pins, and there are [driver chips like the MAX7219](//www.adafruit.com/products/453) that can control a matrix for you but...
In Stock
[Buy Now](https://www.adafruit.com/product/1853)
[Related Guides to the Product](https://learn.adafruit.com/products/1853/guides)
## Related Guides
- [LED Backpack Displays on Raspberry Pi and BeagleBone Black](https://learn.adafruit.com/led-backpack-displays-on-raspberry-pi-and-beaglebone-black.md)
- [Animating Multiple LED Backpacks](https://learn.adafruit.com/animating-multiple-led-backpacks.md)
- [Arduino GPS Clock](https://learn.adafruit.com/arduino-clock.md)
- [Raspberry Pi Physical Dashboard](https://learn.adafruit.com/raspberry-pi-physical-dashboard.md)
- [CircuitPython Hardware: LED Backpacks & FeatherWings](https://learn.adafruit.com/micropython-hardware-led-backpacks-and-featherwings.md)
- [Matrix and 7-Segment LED Backpack with the Raspberry Pi](https://learn.adafruit.com/matrix-7-segment-led-backpack-with-the-raspberry-pi.md)
- [DIY Pocket LED Gamer - Tiny Tetris!](https://learn.adafruit.com/diy-3d-printed-handheld-pocket-game-tiny-tetris-snake.md)
- [RGB LED Matrix Cube with 25,000 LEDs](https://learn.adafruit.com/rgb-led-matrix-cube-for-pi.md)
- [Creating GIFs for SmartMatrix](https://learn.adafruit.com/creating-gifs-for-smartmatrix.md)
- [Adafruit CharliePlex LED Matrix Bonnet](https://learn.adafruit.com/adafruit-charlieplex-bonnet.md)
- [Connecting a 16x32 RGB LED Matrix Panel to a Raspberry Pi](https://learn.adafruit.com/connecting-a-16x32-rgb-led-matrix-panel-to-a-raspberry-pi.md)
- [MicroPython Displays: Drawing Text](https://learn.adafruit.com/micropython-displays-drawing-text.md)
- [Heart Rate Badge](https://learn.adafruit.com/heart-rate-badge.md)
- [16x24 LED Matrix](https://learn.adafruit.com/16x24-led-matrix.md)
- [Adafruit IS31FL3741](https://learn.adafruit.com/adafruit-is31fl3741.md)
---
# Source: https://learn.adafruit.com/12mm-led-pixels/circuitpython-wiring-and-setup.md
# 12mm LED Pixels
## CircuitPython and Python Wiring
It's easy to use the 12mm LED pixels with CircuitPython and the [Adafruit CircuitPython WS2801](https://github.com/adafruit/Adafruit_CircuitPython_WS2801) module. This module allows you to easily write Python code to control the lights.
You can use these LEDs with any CircuitPython microcontroller board or with a computer that has GPIO.
## CircuitPython Wiring
You can wire up the WS2801 strand for CircuitPython and using any two GPIO pins. One will serve as the clock Pin and one as the Data Pin.
Danger:
- **Microcontroller GND ** to ** Blue Ground line**
- **Microcontroller D6 ** to **Green Serial Clock line**
- **Microcontroller D5 ** to **Yellow Serial Data line**
- **5V Regulated Supply +5V** to **Red +5V Line**
- **5V Regulated Supply Ground** to **Blue Ground line**

[Download Fritzing Diagram](https://cdn-learn.adafruit.com/assets/assets/000/083/361/original/circuitpython-software-wiring.fzz?1572636526)
## Python Wiring
Wiring for Python is pretty simple as well.
- **Microcontroller GND ** to ** Blue Ground line**
- **Microcontroller D6 ** to **Green Serial Clock line**
- **Microcontroller D5 ** to **Yellow Serial Data line**
- **5V Regulated Supply +5V** to **Red +5V Line**
- **5V Regulated Supply Ground** to **Blue Ground line**
[Download Fritzing Diagram](https://cdn-learn.adafruit.com/assets/assets/000/094/852/original/python-software-wiring.fzz?1600464229)
### Hardware SPI Wiring on the Raspberry Pi
The Raspberry Pi seem to be an exception in that Hardware SPI seems to work pretty well on here.
- **Microcontroller GND ** to ** Blue Ground line**
- **Microcontroller SCLK ** to **Green Serial Clock line**
- **Microcontroller MOSI ** to **Yellow Serial Data line**
- **5V Regulated Supply +5V** to **Red +5V Line**
- **5V Regulated Supply Ground** to **Blue Ground line**

[Download Fritzing Diagram](https://cdn-learn.adafruit.com/assets/assets/000/094/853/original/python-hardware-wiring.fzz?1600464247)
- [Previous Page](https://learn.adafruit.com/12mm-led-pixels/arduino-code.md)
- [Next Page](https://learn.adafruit.com/12mm-led-pixels/circuitpython-setup.md)
## Featured Products
### 12mm Diffused Flat Digital RGB LED Pixels (Strand of 25)
[12mm Diffused Flat Digital RGB LED Pixels (Strand of 25)](https://www.adafruit.com/product/738)
RGB Pixels are digitally-controllable lights you can set to any color, or animate. Each RGB LED and controller chip is molded into a 'dot' of silicone. The dots are weatherproof and rugged. There are four flanges molded in so that you can 'push' them into a 12mm drill hole in...
In Stock
[Buy Now](https://www.adafruit.com/product/738)
[Related Guides to the Product](https://learn.adafruit.com/products/738/guides)
### 12mm Diffused Thin Digital RGB LED Pixels (Strand of 25)
[12mm Diffused Thin Digital RGB LED Pixels (Strand of 25)](https://www.adafruit.com/product/322)
RGB Pixels are digitally-controllable lights you can set to any color, or animate. Each RGB LED and controller chip is molded into a 'dot' of silicone. The dots are weatherproof and rugged. There are four flanges molded in so that you can 'push' them into a 12mm drill hole in...
No Longer Stocked
[Buy Now](https://www.adafruit.com/product/322)
[Related Guides to the Product](https://learn.adafruit.com/products/322/guides)
### 5V 10A switching power supply
[5V 10A switching power supply](https://www.adafruit.com/product/658)
This is a beefy switching supply, for when you need a lot of power! It can supply 5V DC up to 10 Amps, running from 110V or 220V power (the plug it comes with is for US/Canada/Japan but you can use any plug adapter for your country, or just replace the cable with a standard computer/appliance...
Out of Stock
[Buy Now](https://www.adafruit.com/product/658)
[Related Guides to the Product](https://learn.adafruit.com/products/658/guides)
### 5V 2A (2000mA) switching power supply - UL Listed
[5V 2A (2000mA) switching power supply - UL Listed](https://www.adafruit.com/product/276)
This is an FCC/CE certified and UL listed power supply. Need a lot of 5V power? This switching supply gives a clean regulated 5V output at up to 2000mA. 110 or 240 input, so it works in any country. The plugs are "US 2-prong" style so you may need a plug adapter, but you can pick one...
In Stock
[Buy Now](https://www.adafruit.com/product/276)
[Related Guides to the Product](https://learn.adafruit.com/products/276/guides)
### Female DC Power adapter - 2.1mm jack to screw terminal block
[Female DC Power adapter - 2.1mm jack to screw terminal block](https://www.adafruit.com/product/368)
If you need to connect a DC power wall wart to a board that doesn't have a DC jack - this adapter will come in very handy! There is a 2.1mm DC jack on one end, and a screw terminal block on the other. The terminals are labeled with positive/negative assuming a positive-tip configuration...
In Stock
[Buy Now](https://www.adafruit.com/product/368)
[Related Guides to the Product](https://learn.adafruit.com/products/368/guides)
### 4-pin JST SM Plug + Receptacle Cable Set
[4-pin JST SM Plug + Receptacle Cable Set](https://www.adafruit.com/product/578)
These 4-wire cables are 15cm long and come as a set, one side has a JST SM type connector plug on the end. The other side has a matching JST SM type receptacle connector. They are good for whenever you have 4 wires you want to be able to plug and unplug. We like the solid and compact nature of...
In Stock
[Buy Now](https://www.adafruit.com/product/578)
[Related Guides to the Product](https://learn.adafruit.com/products/578/guides)
## Related Guides
- [Bluefruit Controlled Macetech RGB LED Shades](https://learn.adafruit.com/ledshades.md)
- [Make it Glow: NeoPixel and LED Diffusion Tips & Tricks](https://learn.adafruit.com/make-it-glow-neopixel-and-led-diffusion-tips-tricks.md)
- [Starduino: 8-Bit Super Mario Tree Topper](https://learn.adafruit.com/starduino-neopixel-8-bit-mario-star-tree-topper.md)
- [NeoPixel Ring Clock](https://learn.adafruit.com/neopixel-ring-clock.md)
- [Star Fragment IoT Lamp](https://learn.adafruit.com/star-fragment-iot-lamp.md)
- [Talking Musical NeoPixel Clock with Infrared, BLE and Touch Controls](https://learn.adafruit.com/talking-musical-neo-pixel-clock-with-infrared-ble-and-touch-controls.md)
- [Perfect Pitch Machine](https://learn.adafruit.com/perfect-pitch-machine.md)
- [CheerLights](https://learn.adafruit.com/cheerlights.md)
- [NeuroDreamer Teardown](https://learn.adafruit.com/neurodreamer-teardown.md)
- [Holiday Lights: Easy DIY Christmas Wreath & Garland with WLED](https://learn.adafruit.com/holiday-garland-decor-app-control-with-no-coding.md)
- [Adafruit IO Home: Security ](https://learn.adafruit.com/adafruit-io-home-security.md)
- [Adafruit NeoPot](https://learn.adafruit.com/adafruit-neopot.md)
- [NeoKey Socket Breakout with NeoPixel for MX and CHOC Key Switches](https://learn.adafruit.com/neokey-breakout.md)
- [NeoPixie Dust Bag](https://learn.adafruit.com/neopixel-pixie-dust-bag.md)
- [Multi-tasking the Arduino - Part 3](https://learn.adafruit.com/multi-tasking-the-arduino-part-3.md)
---
# Source: https://learn.adafruit.com/monochrome-oled-breakouts/circuitpython-wiring.md
# Monochrome OLED Breakouts
## CircuitPython Wiring
It's easy to use OLEDs with CircuitPython and the [Adafruit CircuitPython DisplayIO SSD1306](https://github.com/adafruit/Adafruit_CircuitPython_DisplayIO_SSD1306) module. This module allows you to easily write CircuitPython code to control the display.
You can use this sensor with any CircuitPython microcontroller board.
We'll cover how to wire the OLED to your CircuitPython microcontroller board. First assemble your OLED.
Connect the OLED to your microcontroller board as shown below.
## Adafruit OLED FeatherWing
- **Solder the Feather with female headers on top or stacking headers.**
- **Attach the OLED FeatherWing using the stacking method.**

## Adafruit 128x32 I2C OLED Display
- **Microcontroller 3V** to **OLED VIN**
- **Microcontroller GND** to **OLED GND**
- **Microcontroller SCL** to **OLED SCL**
- **Microcontroller SDA** to **OLED SDA**
- **Microcontroller D9** to **OLED RST**

## Adafruit 128x32 SPI OLED Display
- **Microcontroller 3V** to **OLED VIN**
- **Microcontroller GND** to **OLED GND**
- **Microcontroller SCK** to **OLED CLK**
- **Microcontroller MOSI** to **OLED Data**
- **Microcontroller D5** to **OLED CS**
- **Microcontroller D6** to **OLED D/C**
- **Microcontroller D9** to **OLED RST**

## Adafruit 0.96" 128x64 OLED Display STEMMA QT Version - I2C Wiring
**You do not need to alter the jumpers on the back - I2C is the default configuration on this display!**
- **Microcontroller 3V** to **OLED Vin**
- **Microcontroller GND** to **OLED Gnd**
- **Microcontroller SCL** to **OLED Clk**
- **Microcontroller SDA** to **OLED Data**
Note: Connecting the OLED RST is not necessary as this revision added auto-reset circuitry so the RESET pin is not required.

## Adafruit 0.96" or 1.3" 128x64 OLED Display Original Version - I2C Wiring
Warning:
- **Microcontroller 3V** to **OLED Vin**
- **Microcontroller GND** to **OLED Gnd**
- **Microcontroller SCL** to **OLED Clk**
- **Microcontroller SDA** to **OLED Data**
- **Microcontroller D9** to **OLED Rst**


## Adafruit 0.96" or 1.3" 128x64 OLED Display - SPI Wiring
Warning:
- **Microcontroller 3V** to **OLED Vin**
- **Microcontroller GND** to **OLED Gnd**
- **Microcontroller SCK** to **OLED Clk**
- **Microcontroller MOSI** to **OLED Data**
- **Microcontroller D5** to **OLED CS**
- **Microcontroller D6** to **OLED DC**
- **Microcontroller D9** to **OLED Rst**


- [Previous Page](https://learn.adafruit.com/monochrome-oled-breakouts/wiring-096-128x64-oled-display.md)
- [Next Page](https://learn.adafruit.com/monochrome-oled-breakouts/circuitpython-setup.md)
## Featured Products
### Monochrome 1.3" 128x64 OLED graphic display - STEMMA QT / Qwiic
[Monochrome 1.3" 128x64 OLED graphic display - STEMMA QT / Qwiic](https://www.adafruit.com/product/938)
These displays are small, only about 1.3" diagonal, but very readable due to the high contrast of an OLED display. This display is made of 128x64 individual white OLED pixels, each one is turned on or off by the controller chip. Because the display makes its own light, no backlight is...
In Stock
[Buy Now](https://www.adafruit.com/product/938)
[Related Guides to the Product](https://learn.adafruit.com/products/938/guides)
### Monochrome 0.96" 128x64 OLED Graphic Display - STEMMA QT
[Monochrome 0.96" 128x64 OLED Graphic Display - STEMMA QT](https://www.adafruit.com/product/326)
These displays are small, only about 1" diagonal, but very readable due to the high contrast of an OLED display. This display is made of 128x64 individual white OLED pixels, each one is turned on or off by the controller chip. Because the display makes its own light, no backlight is...
Out of Stock
[Buy Now](https://www.adafruit.com/product/326)
[Related Guides to the Product](https://learn.adafruit.com/products/326/guides)
### Monochrome 128x32 SPI OLED graphic display
[Monochrome 128x32 SPI OLED graphic display](https://www.adafruit.com/product/661)
These displays are small, only about 1" diagonal, but very readable due to the high contrast of an OLED display. This display is made of 128x32 individual white OLED pixels, each one is turned on or off by the controller chip. Because the display makes its own light, no backlight is...
In Stock
[Buy Now](https://www.adafruit.com/product/661)
[Related Guides to the Product](https://learn.adafruit.com/products/661/guides)
### Monochrome 128x32 I2C OLED graphic display
[Monochrome 128x32 I2C OLED graphic display](https://www.adafruit.com/product/931)
These displays are small, only about 1" diagonal, but very readable due to the high contrast of an OLED display. This display is made of 128x32 individual white OLED pixels, each one is turned on or off by the controller chip. Because the display makes its own light, no backlight is...
No Longer Stocked
[Buy Now](https://www.adafruit.com/product/931)
[Related Guides to the Product](https://learn.adafruit.com/products/931/guides)
### Monochrome 0.91" 128x32 I2C OLED Display - STEMMA QT / Qwiic
[Monochrome 0.91" 128x32 I2C OLED Display - STEMMA QT / Qwiic](https://www.adafruit.com/product/4440)
These displays are small, only about 1" diagonal, but very readable due to the high contrast of an OLED display. This display is made of 128x32 individual white OLED pixels, each one is turned on or off by the controller chip. Because the display makes its own light, no backlight is...
In Stock
[Buy Now](https://www.adafruit.com/product/4440)
[Related Guides to the Product](https://learn.adafruit.com/products/4440/guides)
## Related Guides
- [OLED TRON Clock](https://learn.adafruit.com/oled-tron-clock.md)
- [I2C Addresses and Troublesome Chips](https://learn.adafruit.com/i2c-addresses.md)
- [Monitor Your Greenhouse with a No-Code Environmental Sensor](https://learn.adafruit.com/monitor-your-greenhouse-with-a-no-code-environmental-sensor.md)
- [SSD1306 OLED Displays with Raspberry Pi and BeagleBone Black](https://learn.adafruit.com/ssd1306-oled-displays-with-raspberry-pi-and-beaglebone-black.md)
- [Adafruit FT232H With SPI & I2C Devices](https://learn.adafruit.com/adafruit-ft232h-with-spi-and-i2c-libraries.md)
- [MIDI Melody Maker](https://learn.adafruit.com/midi-melody-maker.md)
- [Steampunk Cameo Necklace with OLED Display](https://learn.adafruit.com/steampunk-cameo-necklace.md)
- [Using QMK on RP2040 Microcontrollers](https://learn.adafruit.com/using-qmk-on-rp2040-microcontrollers.md)
- [CircuitPython OLED and Dual Knob Sketcher](https://learn.adafruit.com/circuitpython-oled-knob-sketcher.md)
- [Gravity Falls Memory Gun](https://learn.adafruit.com/gravity-falls-memory-gun.md)
- [Pico W HTTP Server with CircuitPython](https://learn.adafruit.com/pico-w-http-server-with-circuitpython.md)
- [Adafruit Trinkey QT2040](https://learn.adafruit.com/adafruit-trinkey-qt2040.md)
- [Adafruit Airlift Bitsy Add-On - ESP32 WiFi Co-Processor](https://learn.adafruit.com/adafruit-airlift-bitsy-add-on-esp32-wifi-co-processor.md)
- [Animated Flying Toaster OLED Jewelry](https://learn.adafruit.com/animated-flying-toaster-oled-jewelry.md)
- [Adafruit TCA9548A 1-to-8 I2C Multiplexer Breakout](https://learn.adafruit.com/adafruit-tca9548a-1-to-8-i2c-multiplexer-breakout.md)
---
# Source: https://learn.adafruit.com/rgb-lcd-shield/circuitpython.md
# Source: https://learn.adafruit.com/thermistor/circuitpython.md
# Source: https://learn.adafruit.com/ir-sensor/circuitpython.md
# Source: https://learn.adafruit.com/photocells/circuitpython.md
# Photocells
## CircuitPython
It's easy to read how much light a photocell sees with CircuitPython and its [built-in analog input support](../../../../circuitpython-basics-analog-inputs-and-outputs/analog-to-digital-converter-inputs). By wiring the photocell to an analog input of your board you can read the voltage from it and see how it changes as the amount of light hitting the sensor changes too.
First wire up a photocell to your board as shown on the previous page for Arduino. You'll want to setup the same voltage divider with a **10 kilo-ohm resistor** circuit and feed the output into any analog input on your board (note the special method of reading photocells without an analog input is not currently supported by CircuitPython).
Here's an example of wiring a photocell to a Feather M0:

- **Board 3.3V** to **one leg of the photocell** (doesn't matter which leg). Note you want to use the voltage from your board that corresponds to the maximum analog input voltage. For Feather boards this is 3.3V, but for other boards it might be higher or lower--consult your board documentation to be sure.
- **10 kilo-ohm resistor** to the **other leg of the photocell.**
- **Board GND ** to the **other leg of the 10 kilo-ohm resistor**.
- **Board A1** (or any other analog input) to the **junction of the photocell & 10 kilo-ohm resistor**.
Next [connect to the board's serial REPL ](../../../../micropython-basics-how-to-load-micropython-on-a-board/serial-terminal)so you are at the CircuitPython **\>\>\>** prompt.
Now import the **board** and **analogio** modules that allow you to read an analog input. Be sure you've read the [CircuitPython analog I/O guide](../../../../circuitpython-analog-inputs-and-outputs) for more background on using analog inputs too!
```
import board
import analogio
```
Create an analog input for the A1 pin connected to the photocell & resistor junction:
```
photocell = analogio.AnalogIn(board.A1)
```
At this point you can read the value property to get a reading of the light seen by the photocell. Try it:
```
photocell.value
```

Try covering the photocell with your hand to block the light it can see and read the value again:
```
photocell.value
```

Notice the value changed! When the sensor sees less light the value is reduced. The more light the sensor sees, the higher the value.
You might wonder, what's the range of possible values? It turns out for an analog input in CircuitPython the maximum values range from 0 to 65535 (or the maximum 16-bit unsigned integer value). If you shine an extremely bright light on the photocell you might see a value near 65k, and if you completely block the sensor you might see a value down near 0.
If you're curious you can also convert this value into a voltage that's higher or lower depending on how much light is hitting the sensor. Let's make a function to do this:
```
def analog_voltage(adc):
return adc.value / 65535 * adc.reference_voltage
volts = analog_voltage(photocell)
print('Photocell voltage: {0}V'.format(volts))
```

Cool! Notice the voltage increases up to near 3.3 volts as the light hitting the photocell increases. If you cover the photocell up and read the voltage you'll see it falls down near 0 volts.
You can use either the raw value or voltage to check how much light is hitting the photocell. Both will change proportionally to the amount of light hitting the sensor.
Here's a complete program that reads the photocell value and prints both the value and voltage every second. Save this as **main.py** on your board and open the serial output to see the printed values. Try shining light on the sensor or covering it up to see how the value and voltage change!
```
import time
import board
import analogio
# Initialize analog input connected to photocell.
photocell = analogio.AnalogIn(board.A1)
# Make a function to convert from analog value to voltage.
def analog_voltage(adc):
return adc.value / 65535 * adc.reference_voltage
# Main loop reads value and voltage every second and prints them out.
while True:
# Read the value, then the voltage.
val = photocell.value
volts = analog_voltage(photocell)
# Print the values:
print('Photocell value: {0} voltage: {1}V'.format(val, volts))
# Delay for a second and repeat!
time.sleep(1.0)
```
That's all there is to reading a photocell using an analog input with CircuitPython!
- [Previous Page](https://learn.adafruit.com/photocells/arduino-code.md)
- [Next Page](https://learn.adafruit.com/photocells/example-projects.md)
## Featured Products
### Photo cell (CdS photoresistor)
[Photo cell (CdS photoresistor)](https://www.adafruit.com/product/161)
CdS cells are little light sensors. As the squiggly face is exposed to more light, the resistance goes down. When it's light, the resistance is about ~1KΩ, when dark it goes up to ~10KΩ.
To use, connect one side of the photocell (either one, it's symmetric) to power...
In Stock
[Buy Now](https://www.adafruit.com/product/161)
[Related Guides to the Product](https://learn.adafruit.com/products/161/guides)
### Adafruit METRO 328 Fully Assembled - Arduino IDE compatible
[Adafruit METRO 328 Fully Assembled - Arduino IDE compatible](https://www.adafruit.com/product/50)
We sure love the ATmega328 here at Adafruit, and we use them _a lot_ for our own projects. The processor has plenty of GPIO, Analog inputs, hardware UART SPI and I2C, timers and PWM galore - just enough for most simple projects. When we need to go small, we use a
Out of Stock
[Buy Now](https://www.adafruit.com/product/50)
[Related Guides to the Product](https://learn.adafruit.com/products/50/guides)
### Digital Multimeter
[Digital Multimeter](https://www.adafruit.com/product/71)
This is a basic multimeter, I've played with it a bunch and I think its a great addition to a toolbox. It's low cost and simple to use with a big clear display and all the measurements you need:
- AC/DC Voltage measurement
- Current measurement, from 1uA up to...
No Longer Stocked
[Buy Now](https://www.adafruit.com/product/71)
[Related Guides to the Product](https://learn.adafruit.com/products/71/guides)
### Half Sized Premium Breadboard - 400 Tie Points
[Half Sized Premium Breadboard - 400 Tie Points](https://www.adafruit.com/product/64)
This is a cute, half-size breadboard with 400 tie points, good for small projects. It's 3.25" x 2.2" / 8.3cm x 5.5cm with a standard double-strip in the middle and two power rails on both sides. You can pull the power rails off easily to make the breadboard as...
In Stock
[Buy Now](https://www.adafruit.com/product/64)
[Related Guides to the Product](https://learn.adafruit.com/products/64/guides)
## Related Guides
- [Halloween Pumpkin](https://learn.adafruit.com/halloween-pumpkin.md)
- [Adafruit Proto Screw Shield](https://learn.adafruit.com/adafruit-proto-screw-shield.md)
- [Arduino Lesson 11. LCD Displays - Part 1](https://learn.adafruit.com/adafruit-arduino-lesson-11-lcd-displays-1.md)
- [Program an AVR or Arduino Using Raspberry Pi GPIO](https://learn.adafruit.com/program-an-avr-or-arduino-using-raspberry-pi-gpio-pins.md)
- [Arduino Lesson 12. LCD Displays - Part 2](https://learn.adafruit.com/adafruit-arduino-lesson-12-lcd-displays-part-2.md)
- [Silicone Robo-Tentacle](https://learn.adafruit.com/silicone-robo-tentacle.md)
- [Babel Fish](https://learn.adafruit.com/babel-fish.md)
- [Arduino Lesson 10. Making Sounds](https://learn.adafruit.com/adafruit-arduino-lesson-10-making-sounds.md)
- [Arduino Lesson 16. Stepper Motors](https://learn.adafruit.com/adafruit-arduino-lesson-16-stepper-motors.md)
- [Line Following Zumo Robot Using Simulink](https://learn.adafruit.com/line-following-zumo-robot-programmed-with-simulink.md)
- [Bluefruit LE Connect for iOS and Android](https://learn.adafruit.com/bluefruit-le-connect.md)
- [Adafruit 16-channel PWM/Servo Shield](https://learn.adafruit.com/adafruit-16-channel-pwm-slash-servo-shield.md)
- [8BitBox](https://learn.adafruit.com/8bitbox.md)
- [Tiny Arduino Music Visualizer](https://learn.adafruit.com/piccolo.md)
- [Adafruit 1.14" 240x135 Color TFT Breakout LCD Display](https://learn.adafruit.com/adafruit-1-14-240x135-color-tft-breakout.md)
---
# Source: https://learn.adafruit.com/biometric-security-box/circuitry.md
# Biometric Lock Box
## Circuitry
## The Microcontroller
The box in the photographs uses a [Menta](http://www.adafruit.com/products/795) without the mint tin (i.e. a demented Menta). However, the code and circuitry will also work with an [UNO](https://www.adafruit.com/products/50), [Boarduino](http://www.adafruit.com/products/72) or any other Arduino compatible microcontroller. If you are using the Menta or Boarduino, first build it according to the appropriate tutorial.
## The Circuit
Connect the components as shown in the diagram below.
If you are using a Menta, the pin locations are the same as for the UNO in the diagram, you can mount the MOSFET and Diode and a header for the keypad connector in the prototyping area.
If you are using a Boarduino, be aware that the pin locations will be different from the diagram.

- [Previous Page](https://learn.adafruit.com/biometric-security-box/parts.md)
- [Next Page](https://learn.adafruit.com/biometric-security-box/assembly.md)
## Featured Products
### Panel Mount 2.1mm DC barrel jack
[Panel Mount 2.1mm DC barrel jack](https://www.adafruit.com/product/610)
This power jack is designed to easily attach to a panel up to 8mm thick (0.315" or 5/16") and fit 2.1mm power plugs snugly and securely. Perfect for adding a power connector to your project enclosure. We like this jack in particular for its long body (so you can use it on thicker...
In Stock
[Buy Now](https://www.adafruit.com/product/610)
[Related Guides to the Product](https://learn.adafruit.com/products/610/guides)
### Rugged Metal On/Off Switch with Green LED Ring
[Rugged Metal On/Off Switch with Green LED Ring](https://www.adafruit.com/product/482)
These chrome-plated metal buttons are rugged and look real good while doing it! Simply drill a 16mm hole into any material up to 1/2" thick and you can fit these in place, there's even a rubber gasket to keep water out of the enclosure. On the front of the button is a flat metal...
In Stock
[Buy Now](https://www.adafruit.com/product/482)
[Related Guides to the Product](https://learn.adafruit.com/products/482/guides)
### Adafruit MENTA - Mint Tin Arduino Compatible Kit with Mint Tin
[Adafruit MENTA - Mint Tin Arduino Compatible Kit with Mint Tin](https://www.adafruit.com/product/795)
Introducing the MENTA, a portable minty Arduino-compatible project that fits into a common mint tin. We took our super popular Boarduino series, and wrapped it with a prototyping area into a rounded PCB that slots directly into an Altoids-sized metal tin. We included everything you expect to...
No Longer Stocked
[Buy Now](https://www.adafruit.com/product/795)
[Related Guides to the Product](https://learn.adafruit.com/products/795/guides)
### N-channel power MOSFET
[N-channel power MOSFET](https://www.adafruit.com/product/355)
When you need to switch a lot of power, N-channel MOSFETs are best for the job. These FETs can switch over 60A and 30V and are TO-220 packages so they fit nicely into any breadboard or perfboard. Heat sinking is easy with TO-220's, but because of the very low Rds(on) of down to 0.009 ohms...
In Stock
[Buy Now](https://www.adafruit.com/product/355)
[Related Guides to the Product](https://learn.adafruit.com/products/355/guides)
### Small Push-Pull Solenoid - 12VDC
[Small Push-Pull Solenoid - 12VDC](https://www.adafruit.com/product/412)
Solenoids are basically electromagnets: they are made of a big coil of copper wire with an armature (a slug of metal) in the middle. When the coil is energized, the slug is pulled into the center of the coil. This makes the solenoid able to pull (from one end) or push (from the other)
In Stock
[Buy Now](https://www.adafruit.com/product/412)
[Related Guides to the Product](https://learn.adafruit.com/products/412/guides)
### Membrane 3x4 Matrix Keypad + extras
[Membrane 3x4 Matrix Keypad + extras](https://www.adafruit.com/product/419)
Punch in your secret key into this numeric matrix keypad. This keypad has 12 buttons, arranged in a telephone-line 3x4 grid. It's made of a thin, flexible membrane material with an adhesive backing (just remove the paper) so you can attach it to nearly anything. The keys are connected into...
In Stock
[Buy Now](https://www.adafruit.com/product/419)
[Related Guides to the Product](https://learn.adafruit.com/products/419/guides)
### Fingerprint sensor
[Fingerprint sensor](https://www.adafruit.com/product/751)
Secure your project with biometrics - this all-in-one optical fingerprint sensor will make adding fingerprint detection and verification super simple. These modules are typically used in safes - there's a high powered DSP chip that does the image rendering, calculation, feature-finding and...
No Longer Stocked
[Buy Now](https://www.adafruit.com/product/751)
[Related Guides to the Product](https://learn.adafruit.com/products/751/guides)
## Related Guides
- [LED Breath Stats Mask](https://learn.adafruit.com/led-breath-stats-mask.md)
- [Getting Started with MyoWare Muscle Sensor](https://learn.adafruit.com/getting-started-with-myoware-muscle-sensor.md)
- [Reebok CheckLight Teardown](https://learn.adafruit.com/reebok-checklight-teardown.md)
- [Your Pulse Displayed with NeoPixels](https://learn.adafruit.com/pulse-sensor-displayed-with-neopixels.md)
- [Pulse Room](https://learn.adafruit.com/pulse-room.md)
- [Setting up an Open Speech Recording Website](https://learn.adafruit.com/setting-up-an-open-speech-recording-website.md)
- [Control Electronics with your Brain using NextMind](https://learn.adafruit.com/control-electronics-with-your-brain-using-nextmind.md)
- [Adafruit MPRLS Ported Pressure Sensor Breakout](https://learn.adafruit.com/adafruit-mprls-ported-pressure-sensor-breakout.md)
- [Moto 360 Teardown](https://learn.adafruit.com/moto-360-smartwatch-teardown.md)
- [3D Printed Flexible LED Glove with Conductive Filament](https://learn.adafruit.com/3d-printed-flexible-conductive-filament-led-glove.md)
- [Meditation Trainer](https://learn.adafruit.com/heart-rate-variability-sensor.md)
- [Circuit Playground Bluefruit BLE Heart Rate Pendant with CircuitPython](https://learn.adafruit.com/ble-heart-rate-display-pendant.md)
- [Myo Armband Teardown](https://learn.adafruit.com/myo-armband-teardown.md)
- ['Sup Brows](https://learn.adafruit.com/heybrows.md)
- [Whistle Dog Activity Monitor Teardown](https://learn.adafruit.com/whistle-dog-activity-monitor-teardown.md)
---
# Source: https://learn.adafruit.com/el-workshop/class-outline.md
# EL Workshop
## Class Outline
Get acquainted with your students - ask them to introduce themselves and show off the items they brought to adorn with EL wire. Introduce yourself while you're at it.
Introduce the materials and tools - show off the materials in the students' kits and the function of each tool.
Show a smattering of EL projects from around the web to get your students inspired!
If you brought extra EL materials (other types of inverters, EL panel, etc.), show how they work. The sound-activated inverter always induces some "ooo"s from the class.
Describe how the whole circuit will work- what EL wire is made from and how it lights up, the inverter's step up to AC, and the safety precautions to be taken during construction.

Solder demo - show the EL soldering process start-to-finish and explain how to decide when to solder a new branch and when to just mask a section of EL with heat shrink.
Solder practice - have each student make a practice EL solder joint with scrap materials. As they take turns with the soldering iron, the rest of the students can start planning their project design.

Design planning time! Have your students plan out their design using their EL wire and masking tape. Walk around the room helping advise the best way to incorporate it-- your blessing and suggestions will give the students confidence about their designs.

Construction! Advise students to finish all of their design's required soldering before they leave class - they can always finish gluing or sewing at home.
Demonstrate sewing and gluing techniques - either on some sample material or using a students' project as an example.
The rest of the class is spent constructing the projects. Check in with each student multiple times to keep him/her on track. Your students may run into roadblocks along the way - a tangled thread can cause major anxiety for a newbie stitcher! It's your job to reassure your students that they CAN DO IT, there are solutions to each problem they encounter, and that you will help them make it awesome.
- [Previous Page](https://learn.adafruit.com/el-workshop/extra-supplies.md)
- [Next Page](https://learn.adafruit.com/el-workshop/follow-through.md)
## Featured Products
### 2-pin JST SM In-line power wire connector (male)
[2-pin JST SM In-line power wire connector (male)](https://www.adafruit.com/product/319)
If you have a project where you'd like to be able to detach the wiring, this wire will fit the bill. Its a JST 2.5mm 'free hanging' cable assembly that latches strongly. One wire is marked with a white dashed line. You can't plug these in backwards.
This is the...
No Longer Stocked
[Buy Now](https://www.adafruit.com/product/319)
[Related Guides to the Product](https://learn.adafruit.com/products/319/guides)
### In-line wire 1-to-4 splitter
[In-line wire 1-to-4 splitter](https://www.adafruit.com/product/402)
If you want to connect multiple EL wires/strips/panels up to one inverter, these splitters are quite useful. There is one male connector (goes to the inverter) and then 4 female connectors (which will connect to each wire/strip/panel. You can even cascade them! Only thing to watch for is make...
In Stock
[Buy Now](https://www.adafruit.com/product/402)
[Related Guides to the Product](https://learn.adafruit.com/products/402/guides)
### Needle set - 3/9 sizes - 20 needles
[Needle set - 3/9 sizes - 20 needles](https://www.adafruit.com/product/615)
Mighty needles, sew like the wind! This needle set is the only one you'll need for any sort of hand sewing, especially using our conductive thread and wearable electronics parts.
Each pack contains 20 gold-eye sharps, with eye sizes ranging from #3 (1.75" long) to #9...
In Stock
[Buy Now](https://www.adafruit.com/product/615)
[Related Guides to the Product](https://learn.adafruit.com/products/615/guides)
## Related Guides
- [Electron Bow](https://learn.adafruit.com/electron-bow.md)
- [EL Wire Sign](https://learn.adafruit.com/el-wire-sign.md)
- [EL Wire Animal Masks](https://learn.adafruit.com/el-wire-animal-masks.md)
- [EL Bowtie](https://learn.adafruit.com/el-bowtie.md)
- [EL Wire](https://learn.adafruit.com/el-wire.md)
- [TRON Bag](https://learn.adafruit.com/tron-bag.md)
- [Light Up your Costume with Noods](https://learn.adafruit.com/light-up-your-costume-with-noods.md)
- [EL Stick Figure](https://learn.adafruit.com/el-stick-figure.md)
- [TRON Hoodie](https://learn.adafruit.com/tron-hoodie.md)
- [EL Wire Stocking](https://learn.adafruit.com/el-wire-stocking.md)
- [Glowing Bean Bags with EL Wire](https://learn.adafruit.com/glowing-bean-bags-with-el-wire.md)
- [Glowing Star Chuck Taylor Sneakers](https://learn.adafruit.com/glowing-star-chucks.md)
---
# Source: https://learn.adafruit.com/usb-snes-gamepad/closing-it-up.md
# USB SNES Gamepad
## Closing it Up
Now that the mouse and keyboard are working, we can close up the game pad. This is actually the toughest part of the project, as the enclosure has plastic standoffs that are in the way.One thing that will help is 'deribboning' the ribbon cable, so that it is easy to push around the wires.
Use sticky foam tape or hot glue to place the Teensy right at the top.
Likewise, align the acellerometer so that it is as shown (otherwise you may have some flipped axes. You should put it near the middle but we didn't see any difference being in this location.
Finally, twist the USB cable so that it goes through the strain relief posts. If this makes it really tough to close you can probably skip it and just be careful not to yank!
As you close the case, use tweezers to poke the wires around inside so that they do not interfere with the standoffs.
We wanted to make sure we could update the code without going through the disassembly process, so we drilled a hole in the back right over where the button is, then used a paper clip to push the tiny button. You can also just solder two wires to GND and RST and bring these out of the case, when shorted it will start the bootloader.

You're done! Enjoy your new toy, and modify the sketch if you need to change the key commands or mouse movements.

- [Previous Page](https://learn.adafruit.com/usb-snes-gamepad/adding-the-accelerometer.md)
## Featured Products
### SNES Controller
[SNES Controller](https://www.adafruit.com/product/131)
A third-party SNES (Super Nintendo/Famicom) controller. Works great with Fuzeboxen as well!
No Longer Stocked
[Buy Now](https://www.adafruit.com/product/131)
[Related Guides to the Product](https://learn.adafruit.com/products/131/guides)
### ADXL335 - 5V ready triple-axis accelerometer (+-3g analog out)
[ADXL335 - 5V ready triple-axis accelerometer (+-3g analog out)](https://www.adafruit.com/product/163)
We've updated our favorite triple-axis accelerometer to now have an on-board 3.3V regulator - making it a perfect choice for interfacing with a 5V microcontroller such as the Arduino. This breakout comes with 3 analog outputs for X, Y and Z axis measurements on a 0.75"x0.75"...
In Stock
[Buy Now](https://www.adafruit.com/product/163)
[Related Guides to the Product](https://learn.adafruit.com/products/163/guides)
### USB cable - A/MiniB
[USB cable - A/MiniB](https://www.adafruit.com/product/260)
This here is your standard A-miniB USB cable, for USB 1.1 or 2.0. Perfect for connecting a PC to your Teensy v2, USB Lipo charger w/Mini B connector, among other things.
Approximately 3 feet / 1 meter long
Color may vary!
No Longer Stocked
[Buy Now](https://www.adafruit.com/product/260)
[Related Guides to the Product](https://learn.adafruit.com/products/260/guides)
### Teensy (ATmega32u4 USB dev board) 2.0
[Teensy (ATmega32u4 USB dev board) 2.0](https://www.adafruit.com/product/199)
Discontinued - **you can grab** [Adafruit ItsyBitsy 32u4 - 5V 16MHz](https://www.adafruit.com/product/3677) **instead!**
The Teensy 2.0 is a complete USB-based microcontoller development system, in a very small footprint! All programming is done via the USB port. No...
No Longer Stocked
[Buy Now](https://www.adafruit.com/product/199)
[Related Guides to the Product](https://learn.adafruit.com/products/199/guides)
### Premium Female/Male 'Extension' Jumper Wires - 20 x 6"
[Premium Female/Male 'Extension' Jumper Wires - 20 x 6"](https://www.adafruit.com/product/1954)
These Female/Male Extension jumper wires are handy for making wire harnesses or jumpering between headers on PCB's. These premium jumper wires are 6" (150mm) long and come in a 'strip' of 20 (2 pieces of each of ten rainbow colors). They have 0.1" male header...
In Stock
[Buy Now](https://www.adafruit.com/product/1954)
[Related Guides to the Product](https://learn.adafruit.com/products/1954/guides)
## Related Guides
- [Adafruit Analog Accelerometer Breakouts](https://learn.adafruit.com/adafruit-analog-accelerometer-breakouts.md)
- [HID Reporter](https://learn.adafruit.com/hid-reporter.md)
- [Gravatars: What they are and how to add or change one](https://learn.adafruit.com/gravatars-what-they-are-and-how-to-add-or-change-one.md)
- [Two Player Game System for PyGamer and RFM69HCW Radio Wing](https://learn.adafruit.com/two-player-game-system-for-pygamer-and-rfm69hcw-radio-wing.md)
- [PyPortal 2FA TOTP Authentication Friend](https://learn.adafruit.com/pyportal-2fa-totp-authentication-friend.md)
- [Dragon Drop: a CircuitPython Game for MacroPad](https://learn.adafruit.com/dragon-drop-a-circuitpython-game-for-macropad.md)
- [NeoTrellis M4 Animated Dice Roller](https://learn.adafruit.com/neotrellis-dice.md)
- [Instagram Photo Frame](https://learn.adafruit.com/instagram-photo-frame.md)
- [BlueLive: Livestream Studio switcher controller](https://learn.adafruit.com/bluelive.md)
- [DIY Turbo Button Controller - HID Remapper](https://learn.adafruit.com/diy-turbo-button-controller-hid-remapper.md)
- [ESP32 PlayStation Controller](https://learn.adafruit.com/esp32-playstation-controller.md)
- [Fruit Jam Chyron](https://learn.adafruit.com/fruit-jam-chyron.md)
- [Custom Color Palettes for MakeCode Arcade Games](https://learn.adafruit.com/custom-color-palettes-for-makecode-arcade-games.md)
- [DIY Welded Bike Stand](https://learn.adafruit.com/diy-welded-bike-stand.md)
- [CircuitPython Stage game library](https://learn.adafruit.com/circuitpython-stage-game-library.md)
---
# Source: https://learn.adafruit.com/light-meter/code-and-wiring.md
# Light Meter
## Code & Wiring
First up is plugging the light sensor into the breadboard.

The next step is connecting the sensor to the Arduino:
- Sensor **GND pin** - black wire – Arduino **ground** **pin**
- Sensor **VCC pin** - yellow wire – Arduino **3.3v** **pin**
- Sensor **SCL pin** - green wire – Arduino **analog pin 5** (i2c clock line)
- Sensor **SDA pin** - blue wire – Arduino **analog pin 4** (i2c data line)
If you're using only the TSL2561 on your Arduino and no other I2C devices, its fine to connect it directly. If you have other I2C devices that run on 5V connected at the same time [you should use a i2c-compatible level shifter such as this one](http://www.adafruit.com/products/757) to shift both the SCL and SDA data. Connect the **HV** pin to 5V, the **LV** pin to 3.3V, grounds to ground, and connect **A1** and **B1** channels to the TSL SDA/SCL pins and **A2** and **B2** to the matching Arduino I2C pins

The LCD can now be added to the circuit. Since this project uses SPI mode to talk to the LCD, make sure the SPI solder enable jumper has been soldered.
- LCD backpack **GND pin** - black wire – Arduino **ground pin**
- LCD backpack **5V pin** - red wire – Arduino **A5V pin**
- LCD backpack **LAT pin ** - orange wire – Arduino **digital pin 4** (SPI latch pin)
- LCD backpack **DAT pin** - blue wire – Arduino **digital pin 3** (SPI data pin)
- LCD backpack ** CLK pin** - green wire – Arduino ** digital pin 2** (SPI clock pin)

With all components added, the block diagram of the circuit looks like this:
_Arduino Uno image courtesy of Fritzing_For my project, I’m gathering data at reasonably high light levels; so, I went with the following settings:
```
tsl.setGain(TSL2561_GAIN_0X);
tsl.setTiming(TSL2561_INTEGRATIONTIME_13MS);
```
If you are measuring low light levels, you may want to adjust these two lines accordingly:
```
tsl.setGain(TSL2561_GAIN_16X);
tsl.setTiming(TSL2561_INTEGRATIONTIME_402MS);
```
An additional area to highlight is how the sketch is printing the light level values:
```
snprintf_P(output_buffer, 6, PSTR("%5d"), (full_spectrum - ir_spectrum));
```
**snprintf\_P** is a variant of sprintf that adds a couple of nice features. The ‘ **n** ’ indicates that you can specify a maximum number of bytes to write into the buffer; this helps protect against accidental buffer overruns. The ‘ **\_P** ’ indicates that the format string is read from program memory; this helps conserve RAM. In the invocation above, I’m using the companion macro **PSTR()** to keep the format string parameter in program memory.- [Previous Page](https://learn.adafruit.com/light-meter/overview-and-parts.md)
- [Next Page](https://learn.adafruit.com/light-meter/downloads.md)
## Featured Products
### Adafruit TSL2561 Digital Luminosity/Lux/Light Sensor Breakout
[Adafruit TSL2561 Digital Luminosity/Lux/Light Sensor Breakout](https://www.adafruit.com/product/439)
The TSL2561 luminosity sensor is an advanced digital light sensor, ideal for use in a wide range of light situations. Compared to low cost CdS cells, this sensor is more precise, allowing for exact lux calculations and can be configured for different gain/timing ranges to detect light ranges...
No Longer Stocked
[Buy Now](https://www.adafruit.com/product/439)
[Related Guides to the Product](https://learn.adafruit.com/products/439/guides)
### i2c / SPI character LCD backpack - STEMMA QT / Qwiic
[i2c / SPI character LCD backpack - STEMMA QT / Qwiic](https://www.adafruit.com/product/292)
Character LCDs are a fun and easy way to have your microcontroller project talk back to you. They are also common, and easy to get, available in tons of colors and sizes. [We've written tutorials on using character LCDs with an Arduino](http://learn.adafruit.com/character-lcds)...
In Stock
[Buy Now](https://www.adafruit.com/product/292)
[Related Guides to the Product](https://learn.adafruit.com/products/292/guides)
### Standard LCD 16x2 + extras
[Standard LCD 16x2 + extras](https://www.adafruit.com/product/181)
Standard HD44780 LCDs are useful for creating standalone projects.
- 16 characters wide, 2 rows
- White text on blue background
- Connection port is 0.1" pitch, single row for easy breadboarding and wiring
- Pins are documented on the back of the LCD to assist...
In Stock
[Buy Now](https://www.adafruit.com/product/181)
[Related Guides to the Product](https://learn.adafruit.com/products/181/guides)
### 4-channel I2C-safe Bi-directional Logic Level Converter
[4-channel I2C-safe Bi-directional Logic Level Converter](https://www.adafruit.com/product/757)
Because the Arduino (and Basic Stamp) are 5V devices, and most modern sensors, displays, flashcards, and modes are 3.3V-only, many makers find that they need to perform level shifting/conversion to protect the 3.3V device from 5V. Here we've got a ** 4-channel I2C-safe...**
In Stock
[Buy Now](https://www.adafruit.com/product/757)
[Related Guides to the Product](https://learn.adafruit.com/products/757/guides)
### Adafruit METRO 328 Fully Assembled - Arduino IDE compatible
[Adafruit METRO 328 Fully Assembled - Arduino IDE compatible](https://www.adafruit.com/product/50)
We sure love the ATmega328 here at Adafruit, and we use them _a lot_ for our own projects. The processor has plenty of GPIO, Analog inputs, hardware UART SPI and I2C, timers and PWM galore - just enough for most simple projects. When we need to go small, we use a
Out of Stock
[Buy Now](https://www.adafruit.com/product/50)
[Related Guides to the Product](https://learn.adafruit.com/products/50/guides)
## Related Guides
- [I2C/SPI LCD Backpack](https://learn.adafruit.com/i2c-spi-lcd-backpack.md)
- [Smart Measuring Cup](https://learn.adafruit.com/smart-measuring-cup.md)
- [Introducing Adafruit Trellis ](https://learn.adafruit.com/adafruit-trellis-diy-open-source-led-keypad.md)
- [Wireless Game Show Poppers for the Classroom!](https://learn.adafruit.com/wireless-game-show-poppers.md)
- [Adafruit INA219 Current Sensor Breakout](https://learn.adafruit.com/adafruit-ina219-current-sensor-breakout.md)
- [Naughty or Nice Machine](https://learn.adafruit.com/naughty-or-nice-machine.md)
- [Low Power WiFi Datalogger](https://learn.adafruit.com/low-power-wifi-datalogging.md)
- [Adafruit Optical Fingerprint Sensor](https://learn.adafruit.com/adafruit-optical-fingerprint-sensor.md)
- [Nokia 5110/3310 Monochrome LCD](https://learn.adafruit.com/nokia-5110-3310-monochrome-lcd.md)
- [Sending an SMS with Temboo](https://learn.adafruit.com/sending-an-sms-with-temboo.md)
- [Ladyada's Learn Arduino - Lesson #0](https://learn.adafruit.com/ladyadas-learn-arduino-lesson-number-0.md)
- [Arduino "Hunt The Wumpus"](https://learn.adafruit.com/arduino-hunt-the-wumpus.md)
- [Making Adabot: Part 2](https://learn.adafruit.com/making-adabot-part-2.md)
- [CircuitPython Libraries on Linux and the 96Boards DragonBoard 410c](https://learn.adafruit.com/circuitpython-libraries-on-linux-and-the-96boards-dragonboard-410c.md)
- [Wave Shield Talking Clock](https://learn.adafruit.com/wave-shield-talking-clock.md)
- [Program an AVR or Arduino Using Raspberry Pi GPIO](https://learn.adafruit.com/program-an-avr-or-arduino-using-raspberry-pi-gpio-pins.md)
---
# Source: https://learn.adafruit.com/oled-tron-clock/code-wiring.md
# OLED TRON Clock
## Code & Wiring
The overall circuit is set up by following the wiring in the [tutorial on the monochrome 128×64 OLED](http://learn.adafruit.com/monochrome-oled-breakouts/wiring-096-128x64-oled-display "Link: http://learn.adafruit.com/monochrome-oled-breakouts/wiring-096-128x64-oled-display") and plugging the RTC breakout board directly into the Arduino as shown in [the DS1307 tutorial](http://learn.adafruit.com/ds1307-real-time-clock-breakout-board-kit).
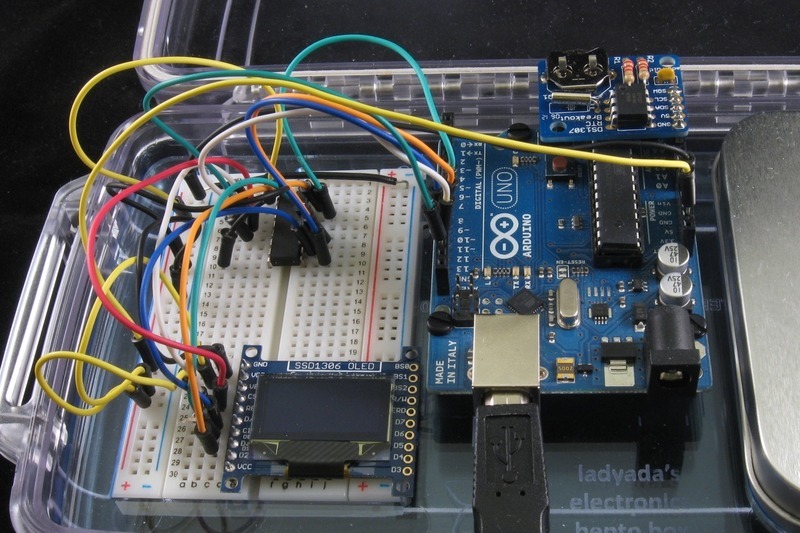
The main sketch file handles reading the current time and drawing the rectangles. A second file contains the coordinates for each rectangle. The rectangles are broken up into three arrays - hour\_rects, minute\_rects, & second\_rects and ordered by the appropriate time value. The advantage of this approach is that modifying the design of the clock is as easy as adjusting the values in the appropriate array entry. The biggest downside was the increase in memory usage; I ended up keeping the arrays in program memory by declaring the arrays with the prog\_uint8\_t type and PROGMEM attribute:
```
prog_uint8_t hour_rects[12][4] PROGMEM = { ... };
```
Also, reading from the arrays required the use of an appropriate function:
```
pgm_read_byte_near(&rectangles[i][0]);
```
- [Previous Page](https://learn.adafruit.com/oled-tron-clock/overview-and-parts.md)
- [Next Page](https://learn.adafruit.com/oled-tron-clock/downloads.md)
## Featured Products
### DS1307 Real Time Clock breakout board kit
[DS1307 Real Time Clock breakout board kit](https://www.adafruit.com/product/264)
**[We've upgraded this RTC breakout and made it even easier to use! Now available as a fully assembled board, it has the same components, chip, size, etc but you don't have to put it together. It's also less expensive! Check out...](https://www.adafruit.com/product/3296)**
No Longer Stocked
[Buy Now](https://www.adafruit.com/product/264)
[Related Guides to the Product](https://learn.adafruit.com/products/264/guides)
### Monochrome 0.96" 128x64 OLED Graphic Display - STEMMA QT
[Monochrome 0.96" 128x64 OLED Graphic Display - STEMMA QT](https://www.adafruit.com/product/326)
These displays are small, only about 1" diagonal, but very readable due to the high contrast of an OLED display. This display is made of 128x64 individual white OLED pixels, each one is turned on or off by the controller chip. Because the display makes its own light, no backlight is...
Out of Stock
[Buy Now](https://www.adafruit.com/product/326)
[Related Guides to the Product](https://learn.adafruit.com/products/326/guides)
### Adafruit METRO 328 Fully Assembled - Arduino IDE compatible
[Adafruit METRO 328 Fully Assembled - Arduino IDE compatible](https://www.adafruit.com/product/50)
We sure love the ATmega328 here at Adafruit, and we use them _a lot_ for our own projects. The processor has plenty of GPIO, Analog inputs, hardware UART SPI and I2C, timers and PWM galore - just enough for most simple projects. When we need to go small, we use a
Out of Stock
[Buy Now](https://www.adafruit.com/product/50)
[Related Guides to the Product](https://learn.adafruit.com/products/50/guides)
### Monochrome 1.3" 128x64 OLED graphic display - STEMMA QT / Qwiic
[Monochrome 1.3" 128x64 OLED graphic display - STEMMA QT / Qwiic](https://www.adafruit.com/product/938)
These displays are small, only about 1.3" diagonal, but very readable due to the high contrast of an OLED display. This display is made of 128x64 individual white OLED pixels, each one is turned on or off by the controller chip. Because the display makes its own light, no backlight is...
In Stock
[Buy Now](https://www.adafruit.com/product/938)
[Related Guides to the Product](https://learn.adafruit.com/products/938/guides)
## Related Guides
- [Animating Multiple LED Backpacks](https://learn.adafruit.com/animating-multiple-led-backpacks.md)
- [Adalight Project Pack](https://learn.adafruit.com/adalight-diy-ambient-tv-lighting.md)
- [Analog Feedback Servos](https://learn.adafruit.com/analog-feedback-servos.md)
- [CircuitPython Hardware: SSD1306 OLED Display](https://learn.adafruit.com/micropython-hardware-ssd1306-oled-display.md)
- [Light Meter](https://learn.adafruit.com/light-meter.md)
- [Wave Shield Talking Clock](https://learn.adafruit.com/wave-shield-talking-clock.md)
- [Remote controlled door lock using a fingerprint sensor & Adafruit IO](https://learn.adafruit.com/remote-controlled-door-lock-using-a-fingerprint-sensor-and-adafruit-io.md)
- [Wireless Game Show Poppers for the Classroom!](https://learn.adafruit.com/wireless-game-show-poppers.md)
- [I2C Addresses and Troublesome Chips](https://learn.adafruit.com/i2c-addresses.md)
- [IR Sensor](https://learn.adafruit.com/ir-sensor.md)
- [Pro Trinket Power Meter](https://learn.adafruit.com/pro-trinket-power-meter.md)
- [Adafruit PN532 RFID/NFC Breakout and Shield](https://learn.adafruit.com/adafruit-pn532-rfid-nfc.md)
- [Adafruit Music Maker Shield](https://learn.adafruit.com/adafruit-music-maker-shield-vs1053-mp3-wav-wave-ogg-vorbis-player.md)
- [How to program a Zumo Robot with Simulink](https://learn.adafruit.com/zumo-robot-control-with-simulink.md)
- [Arduino Lesson 1. Blink](https://learn.adafruit.com/adafruit-arduino-lesson-1-blink.md)
---
# Source: https://learn.adafruit.com/flora-rgb-smart-pixels/code-with-makecode.md
# Sewable NeoPixels
## Code with MakeCode

[MakeCode](http://www.makecode.com) is Microsoft's drag-and-drop code editor, and it's about the easiest way to get your pixels showing color.
Click the appropriate button below to go to the MakeCode **strandtest** project. Click the Download button on that page, and a file called **circuitplayground-strandtest.uf2** (for Circuit Playground Express) or **maker-strandtest.uf2** (for Gemma M0) will download to your computer.
Plug your Circuit Playground Express into your computer via a USB port and double-click the tiny "reset" button in the center of the board. All the onboard lights will turn green, and a drive will appear on your computer called **CPLAYBOOT** or **GEMMABOOT**. Drag the file you just downloaded onto this drive.
The pixel you have connected will light up in a succession of colors followed by a rainbow animation.
[StrandTest for Circuit Playground Express](https://makecode.com/_3TMh7Y417RFK)
[StrandTest for Gemma M0](https://makecode.com/_5bMR1AMxM7ir)
**Note: MakeCode will NOT work on a FLORA or GEMMA v1 board. ** For those older boards you must use the Arduino code method. However, Arduino will work on Circuit Playground Express or Gemma M0 as well as the older boards.
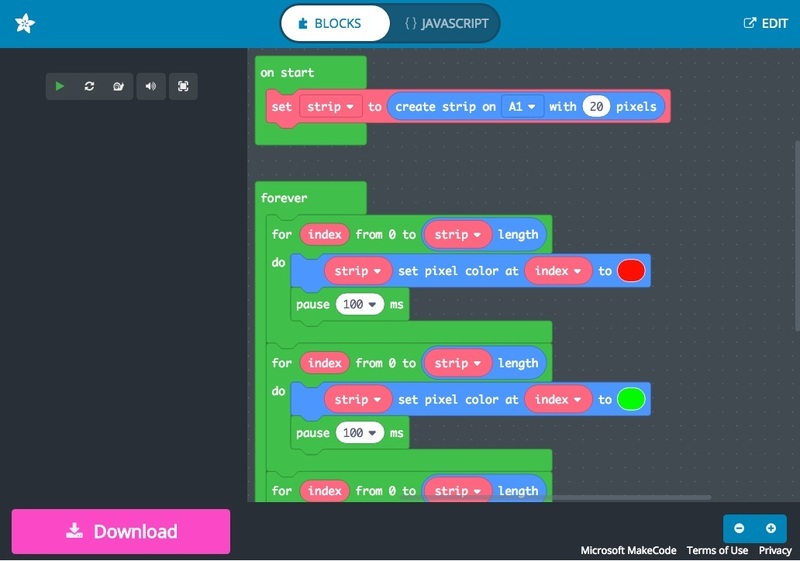
- [Previous Page](https://learn.adafruit.com/flora-rgb-smart-pixels/hook-up-alligator-clips.md)
- [Next Page](https://learn.adafruit.com/flora-rgb-smart-pixels/run-pixel-test-code.md)
## Featured Products
### Flora RGB Smart NeoPixel version 3 - Pack of 4
[Flora RGB Smart NeoPixel version 3 - Pack of 4](https://www.adafruit.com/product/1260)
What's a wearable project without LEDs? Our favorite part of the Flora platform is these tiny smart pixels. Designed specifically for wearables, these updated Flora NeoPixels have ultra-cool technology: these ultra-bright LEDs have a constant-current driver cooked right into the LED...
In Stock
[Buy Now](https://www.adafruit.com/product/1260)
[Related Guides to the Product](https://learn.adafruit.com/products/1260/guides)
### Flora RGB Smart NeoPixel version 3 - Sheet of 20
[Flora RGB Smart NeoPixel version 3 - Sheet of 20](https://www.adafruit.com/product/1559)
So, you want lots and lots of NeoPixels? And you want them for less? Not a problem! Here's a sheet of Flora NeoPixels fresh from the (reflow) oven. Cut them off as you need 'em and save a pretty penny while you're at it.
**Each order comes with 20 pixels on a...**
In Stock
[Buy Now](https://www.adafruit.com/product/1559)
[Related Guides to the Product](https://learn.adafruit.com/products/1559/guides)
### Circuit Playground Express
[Circuit Playground Express](https://www.adafruit.com/product/3333)
**Circuit Playground Express** is the next step towards a perfect introduction to electronics and programming. We've taken the original Circuit Playground Classic and made it even better! Not only did we pack even more sensors in, we also made it even easier to...
In Stock
[Buy Now](https://www.adafruit.com/product/3333)
[Related Guides to the Product](https://learn.adafruit.com/products/3333/guides)
### Adafruit GEMMA M0 - Miniature wearable electronic platform
[Adafruit GEMMA M0 - Miniature wearable electronic platform](https://www.adafruit.com/product/3501)
The **Adafruit Gemma M0** is a super small microcontroller board, with just enough built-in to create many simple projects. It may look small and cute: round, about the size of a quarter, with friendly alligator-clip sew pads. But do not be fooled! The Gemma M0 is incredibly...
In Stock
[Buy Now](https://www.adafruit.com/product/3501)
[Related Guides to the Product](https://learn.adafruit.com/products/3501/guides)
### FLORA - Wearable electronic platform: Arduino-compatible
[FLORA - Wearable electronic platform: Arduino-compatible](https://www.adafruit.com/product/659)
FLORA is Adafruit's fully-featured wearable electronics platform. It's a round, sewable, Arduino-compatible microcontroller designed to empower amazing wearables projects.FLORA comes with Adafruit's support, [tutorials and...](http://learn.adafruit.com/category/flora)
In Stock
[Buy Now](https://www.adafruit.com/product/659)
[Related Guides to the Product](https://learn.adafruit.com/products/659/guides)
### Small Alligator Clip Test Lead (set of 12)
[Small Alligator Clip Test Lead (set of 12)](https://www.adafruit.com/product/1008)
Connect this to that without soldering using these handy mini alligator clip test leads. 15" cables with alligator clip on each end, color coded. You get 12 pieces in 6 colors. Strong and grippy, these always come in handy! We often use these in conjunction with a multimeter so we...
In Stock
[Buy Now](https://www.adafruit.com/product/1008)
[Related Guides to the Product](https://learn.adafruit.com/products/1008/guides)
### Short Wire Alligator Clip Test Lead (set of 12)
[Short Wire Alligator Clip Test Lead (set of 12)](https://www.adafruit.com/product/1592)
Connect this to that without soldering using these handy mini alligator clip test leads. Approximately 4.5" overall cables with alligator clip on each end, color coded. You get 12 pieces in 6 colors. Strong and grippy, these always come in handy! We often use these in conjunction with a...
In Stock
[Buy Now](https://www.adafruit.com/product/1592)
[Related Guides to the Product](https://learn.adafruit.com/products/1592/guides)
### Stainless Thin Conductive Thread - 2 ply - 23 meter/76 ft
[Stainless Thin Conductive Thread - 2 ply - 23 meter/76 ft](https://www.adafruit.com/product/640)
After months of searching, we finally have what we consider to be the ultimate conductive thread. It's thin, strong, smooth, and made completely of 316L stainless steel. Once you start working with this thread you'll quickly agree its optimal for any wearables work!
This...
In Stock
[Buy Now](https://www.adafruit.com/product/640)
[Related Guides to the Product](https://learn.adafruit.com/products/640/guides)
## Related Guides
- [Adafruit Circuit Playground Express](https://learn.adafruit.com/adafruit-circuit-playground-express.md)
- [Plush Game Controller](https://learn.adafruit.com/plush-game-controller.md)
- [Twinkling Neopixel Parasol](https://learn.adafruit.com/twinkling-led-parasol.md)
- [NYE Circuit Playground Drop](https://learn.adafruit.com/nye-circuit-playground-drop.md)
- [Mason Jar Snow Globe](https://learn.adafruit.com/snow-globe-makecode.md)
- [FLORA and GEMMA ICSP](https://learn.adafruit.com/flora-and-gemma-isp.md)
- [Crickit Powered Dancin' Snowman!](https://learn.adafruit.com/crickit-powered-dancin-snowman.md)
- [Circuit Playground Express Spooky Laughing Box](https://learn.adafruit.com/spooky-circuit-playground-express-mystery-box.md)
- [GEMMA Hoop Earrings](https://learn.adafruit.com/gemma-hoop-earrings.md)
- [LEGO Compatible Crickit Rover](https://learn.adafruit.com/lego-compatible-crickit-rover.md)
- [Debugging the SAMD21 with GDB](https://learn.adafruit.com/debugging-the-samd21-with-gdb.md)
- [3D Printed LED Fire Horns](https://learn.adafruit.com/3d-printed-led-fire-horns.md)
- [PianoGlove](https://learn.adafruit.com/pianoglove.md)
- [Circuit Playground Express Serial Communications](https://learn.adafruit.com/circuit-playground-express-serial-communications.md)
- [Motion Gift Box](https://learn.adafruit.com/motion-gift-box.md)
- [Kaleidoscope Eyes (Trinket-Powered NeoPixel LED Ring Goggles)](https://learn.adafruit.com/kaleidoscope-eyes-neopixel-led-goggles-trinket-gemma.md)
---
# Source: https://learn.adafruit.com/digital-led-strip/code.md
# Source: https://learn.adafruit.com/36mm-led-pixels/code.md
# Source: https://learn.adafruit.com/20mm-led-pixels/code.md
# Source: https://learn.adafruit.com/gps-dog-collar/code.md
# GPS Dog Collar
## Code
The following is the code for the project.
https://github.com/adafruit/Adafruit_Learning_System_Guides/blob/main/GPS_Dog_Collar/GPS_Dog_Collar/GPS_Dog_Collar.ino
## Code Walkthrough
If you scroll down a bit in the code, you will see where you enter the total distance you would like your dog to walk in a day. I have set the default to 3 miles.
```
//ENTER YOUR DESIRED DISTANCE GOAL (IN MILES)
//-------------------------------------------------------------------------------
float GOAL = 3; //Distances can include decimal points
//-------------------------------------------------------------------------------
```
I used the [TinyGPS library](http://arduiniana.org/libraries/tinygps/) to do most of the heavy lifting, and pulled a lot of code from my [Coobro Geo](http://www.adafruit.com/products/652) code. The heart of the code is all about taking constant distance measurements. Every time the code loops, it looks at where you were, and where you are.
```
unsigned long calc_dist(float flat1, float flon1, float flat2, float flon2)
{
float dist_calc=0;
float dist_calc2=0;
float diflat=0;
float diflon=0;
diflat=radians(flat2-flat1);
flat1=radians(flat1);
flat2=radians(flat2);
diflon=radians((flon2)-(flon1));
dist_calc = (sin(diflat/2.0)*sin(diflat/2.0));
dist_calc2= cos(flat1);
dist_calc2*=cos(flat2);
dist_calc2*=sin(diflon/2.0);
dist_calc2*=sin(diflon/2.0);
dist_calc +=dist_calc2;
dist_calc=(2*atan2(sqrt(dist_calc),sqrt(1.0-dist_calc)));
dist_calc*=6371000.0; //Converting to meters
return dist_calc;
}
```
When standing still, the GPS coordinates will jump around slightly. I didn't want this to affect the total distance traveled, so I had the code first make sure you were moving. If you are moving, it adds the distance value from the code above to a running total to determine your total distance traveled.
```
if (gps.f_speed_kmph() > 3.9)
{
if (start == 1)
{
start = 0;
lastFlat = flat;
lastFlon = flon;
}
else
{
//totalDistance = gps.distance_between(flat, flon, LONDON_LAT, LONDON_LON);
totalDistance = totalDistance + calc_dist(flat, flon, lastFlat, lastFlon);
lastFlat = flat;
lastFlon = flon;
}
}
```
My favorite part of coding this project was making that tiny OLED display useful information that would be easy to see and understand at a quick glance. I started by creating a neat 'Acquiring Satellites' animation when you first turn on the device. I then created a nice bar graph that shows your progress towards your goal. Above the bar graph is a running mileage counter. All of these numbers can easily be converted to km if needed.
```
display.clearDisplay();
display.setTextSize(1);
display.setTextColor(WHITE);
display.setCursor(0,0);
float fDist = totalDistance;
//convert meters to miles
fDist *= 0.000621371192;
//float fSpeed = gps.f_speed_kmph();
printLCDFloat(fDist, 2);
display.print(" Miles (");
float targetDist = fDist / GOAL;
printLCDFloat(targetDist*100, 0);
display.print("%)");
display.drawLine(0, 12, 0, 31, WHITE);
display.drawLine(63, 28, 63, 31, WHITE);
display.drawLine(127, 12, 127, 31, WHITE);
display.drawLine(31, 28, 31, 31, WHITE);
display.drawLine(95, 28, 95, 31, WHITE);
display.drawLine(0, 28, 127, 28, WHITE);
display.drawLine(0, 12, 127, 12, WHITE);
display.fillRect(2, 14, (124 * targetDist), 13, 1);
if (gps.hdop() > 2000) {
//display.fillRect(2, 14, (124), 13, BLACK);
display.fillRect(0, 0, 128, 32, BLACK);
display.fillCircle(6, 6, 2, WHITE);
display.fillCircle(64, 6, 2, WHITE);
display.fillCircle(122, 6, 2, WHITE);
display.fillCircle(35, 6, 2, WHITE);
display.fillCircle(93, 6, 2, WHITE);
if (i==0){
display.drawCircle(6, 6, 4, WHITE);
}
if (i==1){
display.drawCircle(35, 6, 4, WHITE);
}
if (i==2){
display.drawCircle(64, 6, 4, WHITE);
}
if (i==3){
display.drawCircle(93, 6, 4, WHITE);
}
if (i==4){
display.drawCircle(122, 6, 4, WHITE);
i = 0;
} else {
i++;
}
display.setTextColor(WHITE);
display.setCursor(5,20);
display.print("Acquiring Satellites");
}
display.display();
```
- [Previous Page](https://learn.adafruit.com/gps-dog-collar/wiring.md)
- [Next Page](https://learn.adafruit.com/gps-dog-collar/going-further.md)
## Featured Products
### Adafruit Ultimate GPS Breakout - 66 channel w/10 Hz updates
[Adafruit Ultimate GPS Breakout - 66 channel w/10 Hz updates](https://www.adafruit.com/product/746)
We carry a few different GPS modules here in the Adafruit shop, but none that satisfied our every desire - that's why we designed this little GPS breakout board. We believe this is the **Ultimate** GPS module, so we named it that. It's got everything you want and...
In Stock
[Buy Now](https://www.adafruit.com/product/746)
[Related Guides to the Product](https://learn.adafruit.com/products/746/guides)
### Atmega32u4 Breakout Board
[Atmega32u4 Breakout Board](https://www.adafruit.com/product/296)
Toss out those FTDI cables and go USB-native with the ATmega32u4. After many months of back-orders, we finally received a shipment of these little guys and are excited to offer our breakout board. The little dev board keeps it simple, with just the bare essentials:
- Atmega32u4 - AVR...
No Longer Stocked
[Buy Now](https://www.adafruit.com/product/296)
[Related Guides to the Product](https://learn.adafruit.com/products/296/guides)
### Monochrome 128x32 SPI OLED graphic display
[Monochrome 128x32 SPI OLED graphic display](https://www.adafruit.com/product/661)
These displays are small, only about 1" diagonal, but very readable due to the high contrast of an OLED display. This display is made of 128x32 individual white OLED pixels, each one is turned on or off by the controller chip. Because the display makes its own light, no backlight is...
In Stock
[Buy Now](https://www.adafruit.com/product/661)
[Related Guides to the Product](https://learn.adafruit.com/products/661/guides)
### 3 x AAA Battery Holder with On/Off Switch and 2-Pin JST
[3 x AAA Battery Holder with On/Off Switch and 2-Pin JST](https://www.adafruit.com/product/727)
This battery holder connects 3 AAA batteries together in series for powering all kinds of projects. We spec'd these out because the box is slim, and 3 AAA's add up to about 3.3-4.5V, a very similar range to Lithium Ion/polymer (Li-Ion) batteries and have an on-off switch. That makes...
In Stock
[Buy Now](https://www.adafruit.com/product/727)
[Related Guides to the Product](https://learn.adafruit.com/products/727/guides)
### Adafruit Feather 32u4 Basic Proto
[Adafruit Feather 32u4 Basic Proto](https://www.adafruit.com/product/2771)
**Feather** is the new development board from Adafruit, and like its namesake it is thin, light, and lets you fly! We designed Feather to be a new standard for portable microcontroller cores.
**This is the Feather 32u4 Basic Proto,** it has a bunch of...
In Stock
[Buy Now](https://www.adafruit.com/product/2771)
[Related Guides to the Product](https://learn.adafruit.com/products/2771/guides)
### Adafruit Feather 32u4 Adalogger
[Adafruit Feather 32u4 Adalogger](https://www.adafruit.com/product/2795)
Feather is the new development board from Adafruit, and like its namesake it is thin, light, and lets you fly! We designed Feather to be a new standard for portable microcontroller cores.
This is the **Adafruit Feather 32u4 Adalogger** - our take on an...
In Stock
[Buy Now](https://www.adafruit.com/product/2795)
[Related Guides to the Product](https://learn.adafruit.com/products/2795/guides)
## Related Guides
- [Adafruit Feather 32u4 Basic Proto](https://learn.adafruit.com/adafruit-feather-32u4-basic-proto.md)
- [SSD1306 OLED Displays with Raspberry Pi and BeagleBone Black](https://learn.adafruit.com/ssd1306-oled-displays-with-raspberry-pi-and-beaglebone-black.md)
- [Adding a Single Board Computer to Blinka](https://learn.adafruit.com/adding-a-single-board-computer-to-blinka.md)
- [Superhero Power Gauntlet](https://learn.adafruit.com/superhero-power-gauntlet.md)
- [Arduino Ethernet + SD Card](https://learn.adafruit.com/arduino-ethernet-sd-card.md)
- [CircuitPython Hardware: SSD1306 OLED Display](https://learn.adafruit.com/micropython-hardware-ssd1306-oled-display.md)
- [Adafruit Ultimate GPS with gpsd](https://learn.adafruit.com/adafruit-ultimate-gps-on-the-raspberry-pi.md)
- [Adafruit OLED Displays for Raspberry Pi](https://learn.adafruit.com/adafruit-oled-displays-for-raspberry-pi.md)
- [Adabox 001 Temperature Alarm](https://learn.adafruit.com/adabox-001-temperature-alarm.md)
- [Magic Wand](https://learn.adafruit.com/magic-wand.md)
- [Festive Feather Holiday Lights](https://learn.adafruit.com/festive-feather-holiday-lights.md)
- [Reverse Geocache Box](https://learn.adafruit.com/reverse-geocache-engagement-box.md)
- [3D Printed Case for Adafruit Feather](https://learn.adafruit.com/3d-printed-case-for-adafruit-feather.md)
- [Feather Fingerboard](https://learn.adafruit.com/feather-fingerboard.md)
- [Monochrome OLED Breakouts](https://learn.adafruit.com/monochrome-oled-breakouts.md)
- [Adafruit Feather 32u4 Adalogger](https://learn.adafruit.com/adafruit-feather-32u4-adalogger.md)
---
# Source: https://learn.adafruit.com/adafruit-arduino-lesson-3-rgb-leds/colors.md
# Arduino Lesson 3. RGB LEDs
## Colors
The reason that you can mix any color you like by varying the quantities of red, green and blue light is that your eye has three types of light receptor in it (red, green and blue). Your eye and brain process the amounts of red, green and blue and convert it into a color of the spectrum.
In a way, by using the three LEDs we are playing a trick on the eye. This same idea is used in TVs, where the LCD has red, green and blue color dots next to each other making up each pixel.

If we set the brightness of all three LEDs to be the same, then the overall color of the light will be white. If we turn off the blue LED, so that just the red and green LEDs are the same brightness, then the light will appear yellow.
We can control the brightness of each of the red, green and blue parts of the LED separately, making it possible to mix any color we like.
Black is not so much a color as an absense of light. So the closest we can come to black with our LED is to turn off all three colors.
- [Previous Page](https://learn.adafruit.com/adafruit-arduino-lesson-3-rgb-leds/breadboard-layout.md)
- [Next Page](https://learn.adafruit.com/adafruit-arduino-lesson-3-rgb-leds/arduino-sketch.md)
## Featured Products
### Adafruit METRO 328 Fully Assembled - Arduino IDE compatible
[Adafruit METRO 328 Fully Assembled - Arduino IDE compatible](https://www.adafruit.com/product/50)
We sure love the ATmega328 here at Adafruit, and we use them _a lot_ for our own projects. The processor has plenty of GPIO, Analog inputs, hardware UART SPI and I2C, timers and PWM galore - just enough for most simple projects. When we need to go small, we use a
Out of Stock
[Buy Now](https://www.adafruit.com/product/50)
[Related Guides to the Product](https://learn.adafruit.com/products/50/guides)
### Premium Male/Male Jumper Wires - 40 x 6" (150mm)
[Premium Male/Male Jumper Wires - 40 x 6" (150mm)](https://www.adafruit.com/product/758)
Handy for making wire harnesses or jumpering between headers on PCB's. These premium jumper wires are 6" (150mm) long and come in a 'strip' of 40 (4 pieces of each of ten rainbow colors). They have 0.1" male header contacts on either end and fit cleanly next to each other...
In Stock
[Buy Now](https://www.adafruit.com/product/758)
[Related Guides to the Product](https://learn.adafruit.com/products/758/guides)
### Half Sized Premium Breadboard - 400 Tie Points
[Half Sized Premium Breadboard - 400 Tie Points](https://www.adafruit.com/product/64)
This is a cute, half-size breadboard with 400 tie points, good for small projects. It's 3.25" x 2.2" / 8.3cm x 5.5cm with a standard double-strip in the middle and two power rails on both sides. You can pull the power rails off easily to make the breadboard as...
In Stock
[Buy Now](https://www.adafruit.com/product/64)
[Related Guides to the Product](https://learn.adafruit.com/products/64/guides)
### Diffused RGB (tri-color) LED
[Diffused RGB (tri-color) LED](https://www.adafruit.com/product/159)
Diffused 5mm tri-color LED with separate red, green and blue LED chips inside! Nice indicator, and fun to color-swirl. 60 degree viewing angle. We like diffused RGB LEDs because they color mix inside instead of appearing as 3 distinct LEDs.
These are Common-Anode type which means you...
In Stock
[Buy Now](https://www.adafruit.com/product/159)
[Related Guides to the Product](https://learn.adafruit.com/products/159/guides)
## Related Guides
- [Geofencing with the FONA 808 & Adafruit IO](https://learn.adafruit.com/geofencing-with-the-fona-808-and-adafruit-io.md)
- [Adafruit Motor Shield](https://learn.adafruit.com/adafruit-motor-shield.md)
- [Sous-vide controller powered by Arduino - The SousViduino!](https://learn.adafruit.com/sous-vide-powered-by-arduino-the-sous-viduino.md)
- [Wave Shield Voice Changer](https://learn.adafruit.com/wave-shield-voice-changer.md)
- [Arduino Lesson 5. The Serial Monitor](https://learn.adafruit.com/adafruit-arduino-lesson-5-the-serial-monitor.md)
- [Trinket Audio Player](https://learn.adafruit.com/trinket-audio-player.md)
- [Circuit Playground: D is for Diode](https://learn.adafruit.com/circuit-playground-d-is-for-diode.md)
- [Wave Shield](https://learn.adafruit.com/adafruit-wave-shield-audio-shield-for-arduino.md)
- [Arduino Lesson 0. Getting Started](https://learn.adafruit.com/lesson-0-getting-started.md)
- [Current Limiting Stepper Driver with DRV8871](https://learn.adafruit.com/current-limiting-stepper-driver-with-drv8871.md)
- [RePaper eInk Development Board](https://learn.adafruit.com/repaper-eink-development-board.md)
- [Adafruit AirLift Shield - ESP32 WiFi Co-Processor](https://learn.adafruit.com/adafruit-airlift-shield-esp32-wifi-co-processor.md)
- [Low Power WiFi Datalogger](https://learn.adafruit.com/low-power-wifi-datalogging.md)
- [Babel Fish](https://learn.adafruit.com/babel-fish.md)
- [Arduino Lesson 2. LEDs](https://learn.adafruit.com/adafruit-arduino-lesson-2-leds.md)
---
# Source: https://learn.adafruit.com/hacking-the-kinect/command-number-1-and-2-led-blinky.md
# Hacking the Kinect
## Command #1 & 2 - LED blinky!
We'll edit our python code to just send command #1 and see what happens. From our logs we know that for sending commands from host-to-device, we should use **bRequestType** of 0x40 (verify this by looking at the **bmRequestType** bits of the command packets), **wIndex** and **wLength** of zero
For command #1, set **bRequest** to 0x06 and a **wValue** to 4. The final argument is now an empty array [] to indicate no data is transmitted
```
import usb.core
import usb.util
import sys
# find our device
dev = usb.core.find(idVendor=0x045e, idProduct=0x02B0)
# was it found?
if dev is None:
raise ValueError('Device not found')
# set the active configuration. With no arguments, the first
# configuration will be the active one
dev.set_configuration()
ret = dev.ctrl_transfer(0x40, 0x6, 0x1, 0, [])
print ret
```
We ran our python code and…nothing happened!
OK well maybe that was some initialization command. Lets replace it with the next command #2, set **bRequest** to 0x06 and a **wValue** to 1
**ret = dev.ctrl\_transfer(0x40, 0x6, 0x1, 0, [])**
We ran this command and the motor didn't move but the LED stopped blinking.
For fun we ran the previous command again and the LED started blinking again.
Now we have an idea: maybe this **bRequest** 0x6 controls the LED?
On your own, continue this line of thought by trying different **wValue** s from 0 on up to see what other **wValues** do, keep track of them all in a notebook or project file.
- [Previous Page](https://learn.adafruit.com/hacking-the-kinect/usb-analyzer.md)
- [Next Page](https://learn.adafruit.com/hacking-the-kinect/command-number-3-and-4-lets-move.md)
## Featured Products
### Hacked Kinect - Skill badge, iron-on patch
[Hacked Kinect - Skill badge, iron-on patch](https://www.adafruit.com/product/582)
You can made a cool project using the (hacked) Kinect! Adafruit offers a fun and exciting "badges" of achievement for electronics, science and engineering. We believe everyone should be able to be rewarded for learning a useful skill, a badge is just one of the many ways to show and...
No Longer Stocked
[Buy Now](https://www.adafruit.com/product/582)
[Related Guides to the Product](https://learn.adafruit.com/products/582/guides)
### Beagle USB 12 - Low/Full Speed USB Protocol Analyzer
[Beagle USB 12 - Low/Full Speed USB Protocol Analyzer](https://www.adafruit.com/product/708)
USB complexity got you down? Need a hand with enumeration? Reverse engineering a USB device? You will fall in love with the Beagle 12 USB Analyzer. This hardware analyzer is completely non-intrusive, and is much better than flaky software analyzers. Perfect for when a problem is bad enough it...
No Longer Stocked
[Buy Now](https://www.adafruit.com/product/708)
[Related Guides to the Product](https://learn.adafruit.com/products/708/guides)
### Reverse Engineer - Skill badge, Lenticular printing + pin-on
[Reverse Engineer - Skill badge, Lenticular printing + pin-on](https://www.adafruit.com/product/489)
You can reverse engineer! This is the first lenticular (two-stage image) skill badge that we know of! It says reverse engineer forwards and backwards depending on the angle you view it at!
**Note:** The edges of the badge will appear "white" at an angle,...
No Longer Stocked
[Buy Now](https://www.adafruit.com/product/489)
[Related Guides to the Product](https://learn.adafruit.com/products/489/guides)
### Reverse Engineer - Sticker!
[Reverse Engineer - Sticker!](https://www.adafruit.com/product/673)
You can reverse engineer! Adafruit offers fun and exciting stickers to celebrate achievement for electronics, science and engineering. We believe everyone should be able to be rewarded for learning a useful skill and a sticker is just one of the many ways to show and share.
No Longer Stocked
[Buy Now](https://www.adafruit.com/product/673)
[Related Guides to the Product](https://learn.adafruit.com/products/673/guides)
## Related Guides
- [Guitar Hero MIDI Controller](https://learn.adafruit.com/guitar-hero-midi-controller.md)
- [Commodore 64 - The Most Popular Retro Computer of All Time](https://learn.adafruit.com/commodore-64-retro-guide.md)
- [Use Docker to Compile Linux for ESP32-S3](https://learn.adafruit.com/docker-esp32-s3-linux.md)
- [Feather Guitar Hero Adapter](https://learn.adafruit.com/feather-guitar-hero-adapter.md)
- [BLE Cat Thermal Printer with MEMENTO](https://learn.adafruit.com/ble-cat-thermal-printer-with-memento.md)
- [Fruit Jam Mac Emulator](https://learn.adafruit.com/fruit-jam-mac-emulator.md)
- [How to Make Animated Graphics for Hologram Displays](https://learn.adafruit.com/how-to-make-animated-graphics-for-hologram-displays.md)
- [LED Matrix Wall Arcade for Pico-8](https://learn.adafruit.com/led-matrix-wall-arcade.md)
- [Run an X-Carve CNC Machine Wirelessly with a Raspberry Pi](https://learn.adafruit.com/control-an-xcarve-cnc-machine-wirelessly-with-a-raspberry-pi.md)
- [CircuitPython 2FA TOTP Authentication Friend](https://learn.adafruit.com/circuitpython-totp-otp-2fa-authy-authenticator-friend.md)
- [Flippy Floppy Drive Modification](https://learn.adafruit.com/flippy-floppy-drive-modification.md)
- [Authoring Playground Books with Bluefruit for iOS ](https://learn.adafruit.com/create-a-swift-playgroundbook-with-bluetooth-le.md)
- [SerenityOS - The dream of the '90s is alive!](https://learn.adafruit.com/serenityos-build-and-run-keep-the-90s-dream-alive.md)
- [Stand-alone programming AVRs using CircuitPython](https://learn.adafruit.com/stand-alone-programming-avrs-using-circuitpython.md)
- [Protect Your Online Accounts with Strong Passwords & Password Managers](https://learn.adafruit.com/protect-your-social-media-online-accounts-with-a-strong-password-manager.md)
---
# Source: https://learn.adafruit.com/hacking-the-kinect/command-number-3-and-4-lets-move.md
# Hacking the Kinect
## Command #3 & 4 - Let's move!
Having conquered one of the commands, we'll now tackle the other one. Try to replicate command #3, set **bRequest** to 0x31 and a **wValue** to 0xffd0 (also known as -48 for a 2-byte word)
**ret = dev.ctrl\_transfer(0x40, 0x31, 0xffd0, 0, [])**
Running the python script made the motor move its 'head' down.
Now try command #4, 0xfff0 (also known as -16 for a 2-byte word)
**ret = dev.ctrl\_transfer(0x40, 0x31, 0xfff0, 0, [])**
This makes the head move up. Now we have both the motor and LED under our control! Here is a video we shot a few minutes after getting the motor working, using a python script to move it up and down.
http://www.flickr.com/photos/adafruit/5162806683/
- [Previous Page](https://learn.adafruit.com/hacking-the-kinect/command-number-1-and-2-led-blinky.md)
- [Next Page](https://learn.adafruit.com/hacking-the-kinect/bonus-accelerometer.md)
## Featured Products
### Hacked Kinect - Skill badge, iron-on patch
[Hacked Kinect - Skill badge, iron-on patch](https://www.adafruit.com/product/582)
You can made a cool project using the (hacked) Kinect! Adafruit offers a fun and exciting "badges" of achievement for electronics, science and engineering. We believe everyone should be able to be rewarded for learning a useful skill, a badge is just one of the many ways to show and...
No Longer Stocked
[Buy Now](https://www.adafruit.com/product/582)
[Related Guides to the Product](https://learn.adafruit.com/products/582/guides)
### Beagle USB 12 - Low/Full Speed USB Protocol Analyzer
[Beagle USB 12 - Low/Full Speed USB Protocol Analyzer](https://www.adafruit.com/product/708)
USB complexity got you down? Need a hand with enumeration? Reverse engineering a USB device? You will fall in love with the Beagle 12 USB Analyzer. This hardware analyzer is completely non-intrusive, and is much better than flaky software analyzers. Perfect for when a problem is bad enough it...
No Longer Stocked
[Buy Now](https://www.adafruit.com/product/708)
[Related Guides to the Product](https://learn.adafruit.com/products/708/guides)
### Reverse Engineer - Skill badge, Lenticular printing + pin-on
[Reverse Engineer - Skill badge, Lenticular printing + pin-on](https://www.adafruit.com/product/489)
You can reverse engineer! This is the first lenticular (two-stage image) skill badge that we know of! It says reverse engineer forwards and backwards depending on the angle you view it at!
**Note:** The edges of the badge will appear "white" at an angle,...
No Longer Stocked
[Buy Now](https://www.adafruit.com/product/489)
[Related Guides to the Product](https://learn.adafruit.com/products/489/guides)
### Reverse Engineer - Sticker!
[Reverse Engineer - Sticker!](https://www.adafruit.com/product/673)
You can reverse engineer! Adafruit offers fun and exciting stickers to celebrate achievement for electronics, science and engineering. We believe everyone should be able to be rewarded for learning a useful skill and a sticker is just one of the many ways to show and share.
No Longer Stocked
[Buy Now](https://www.adafruit.com/product/673)
[Related Guides to the Product](https://learn.adafruit.com/products/673/guides)
## Related Guides
- [Guitar Hero MIDI Controller](https://learn.adafruit.com/guitar-hero-midi-controller.md)
- [Commodore 64 - The Most Popular Retro Computer of All Time](https://learn.adafruit.com/commodore-64-retro-guide.md)
- [Use Docker to Compile Linux for ESP32-S3](https://learn.adafruit.com/docker-esp32-s3-linux.md)
- [Feather Guitar Hero Adapter](https://learn.adafruit.com/feather-guitar-hero-adapter.md)
- [BLE Cat Thermal Printer with MEMENTO](https://learn.adafruit.com/ble-cat-thermal-printer-with-memento.md)
- [Fruit Jam Mac Emulator](https://learn.adafruit.com/fruit-jam-mac-emulator.md)
- [How to Make Animated Graphics for Hologram Displays](https://learn.adafruit.com/how-to-make-animated-graphics-for-hologram-displays.md)
- [LED Matrix Wall Arcade for Pico-8](https://learn.adafruit.com/led-matrix-wall-arcade.md)
- [Run an X-Carve CNC Machine Wirelessly with a Raspberry Pi](https://learn.adafruit.com/control-an-xcarve-cnc-machine-wirelessly-with-a-raspberry-pi.md)
- [CircuitPython 2FA TOTP Authentication Friend](https://learn.adafruit.com/circuitpython-totp-otp-2fa-authy-authenticator-friend.md)
- [Flippy Floppy Drive Modification](https://learn.adafruit.com/flippy-floppy-drive-modification.md)
- [Authoring Playground Books with Bluefruit for iOS ](https://learn.adafruit.com/create-a-swift-playgroundbook-with-bluetooth-le.md)
- [SerenityOS - The dream of the '90s is alive!](https://learn.adafruit.com/serenityos-build-and-run-keep-the-90s-dream-alive.md)
- [Stand-alone programming AVRs using CircuitPython](https://learn.adafruit.com/stand-alone-programming-avrs-using-circuitpython.md)
- [Protect Your Online Accounts with Strong Passwords & Password Managers](https://learn.adafruit.com/protect-your-social-media-online-accounts-with-a-strong-password-manager.md)
---
# Source: https://learn.adafruit.com/adafruit-guide-excellent-soldering/common-problems.md
# Adafruit Guide To Excellent Soldering
## Common Soldering Problems

## The Ideal Solder Joint
The ideal solder joint for through-hole components should resemble the diagram below. 
The photos that follow show some common soldering problems, with suggestions for repair and prevention:
## Disturbed Joint
A Disturbed joint is one that has been subjected to movement as the solder was solidifying. The surface of the joint may appear frosted, crystalline or rough.
Often called a 'Cold Joint'. They can look similar to a true cold joint, but the cause is different.
**Repair:** This joint can be repaired by reheating and allowing it to cool undisturbed.
**Prevention:** Proper preparation, including immobilizing the joint and stabilizing the work in a vise can prevent disturbed joints.
## Cold Joint
A 'Cold Joint' is one where the solder did not melt completely. It is often characterized by a rough or lumpy surface. Cold joints are unreliable. The solder bond will be poor and the cracks may develop in the joint over time.
**Repair:** Cold joints can usually be repaired by simply re-heating the joint with a hot iron until the solder flows. Many cold joints (such as the one pictured) also suffer from too much solder. The excess solder can usually be drawn-off with the tip of the iron.
**Prevention:**
A properly pre-heated soldering iron with sufficient power will help prevent cold joints.


## Overheated Joint
At the other extreme, we have the overheated joint. The solder has not yet flowed well and the residue of burnt flux will make fixing this joint difficult.
**Repair** : An overheated joint can usually be repaired after cleaning. Careful scraping with the tip of a knife, or little isopropyl alcohol & a toothbrush will remove the burnt flux.
**Prevention:** A clean, hot soldering iron, proper preparation and cleaning of the joint will help prevent overheated joints.


## Insufficient Wetting (Pad)
These two joints both show signs of insufficient wetting of the solder pad. The solder has wetted the leads nicely, but it has not formed a good bond with the pad. This can be caused by a dirty circuit board, or by failing to apply heat to the pad as well as the pin.
**Repair:** This condition can usually be repaired by placing the tip of the hot iron at the base of the joint until the solder flows to cover the pad.
**Prevention:** Cleaning the board and even heating of both the pad and the pin will prevent this problem.


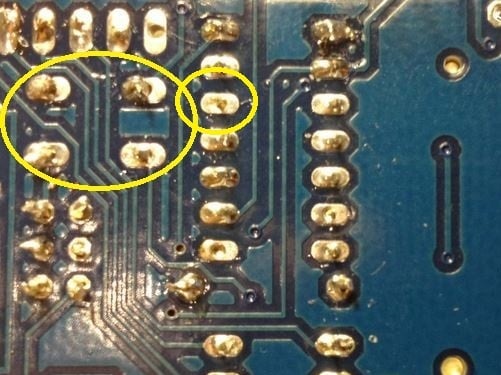


## Insufficient Wetting (Pin)
This solder in this joint has not wetted the pin at all and has only partially wetted the pad. In this case, heat was not applied to the pin and the solder was not given adequate time to flow.
**Repair** : This joint can be repaired by re-heating and applying more solder. Be sure that the tip of the hot iron is touching both the pin and the pad.
**Prevention** : Even heating of both the pin and the pad will prevent this problem.

## Insufficient Wetting
## (Surface Mount)
Here we have three pins of a surface mount component where the solder has not flowed onto the solder pad. This is caused by heating the pin instead of the pad.
**Repair:** This is easily repaired by heating the solder pad with the tip of the iron, then applying solder until it flows and melts together with the solder already on the pin.
**Prevention:** Heat the pad first.

## Solder Starved
A solder starved joint simply does not have enough solder. It may make good electrical contact, but it is hard to verify by inspection. In any case, it is not a strong joint and may develop stress cracks and fail over time.
**Repair:** Re-heat the joint and add more solder to make a good strong joint.
## Too Much Solder
This might be a perfectly good joint, but we can't tell for sure. It is entirely possible that this blob of solder wets neither the pin nor the pad and is not a reliable electrical connection. The best evidence of proper wetting (and good electrical contact) is a nice concave surface as on the joint on the far left.
**Repair:** It is usually possible to draw off some of the excess solder with the tip of a hot iron. In extreme cases, a solder-sucker or some solder wick can be helpful as well.

## Untrimmed Leads
Leads that are too long are potential short circuits. The two joints on the left are an obvious danger of touching. But the one on the right is long enough to be dangerous as well. It would not take much force to bend that lead over to touch an adjacent trace.
**Repair** : Trim all leads just at the top of the solder joint.


## Solder Bridge
The left two solder joints have melted together, forming an unintended connection between the two.
**Repair:** Sometimes the excess solder can be drawn off by dragging the tip of a hot iron between the two solder joints. If there is too much solder, a solder sucker or solder wick can help get rid of the excess.
**Prevention:** Solder bridges most often happen between joints with too much solder to begin with. Use only enough solder to make a good joint.


## Lifted Pad
This photo shows a solder pad that has become detached from the surface of the circuit board. This most often occurs when trying to de-solder components from the board. But it can result simply from overworking the joint to the point where the adhesive bond between copper and the board is destroyed.
Lifted pads are especially common on boards with thin copper layers and/or no through-plating on the holes.
## Repairing a Lifted Pad
It may not be pretty, but a lifted pad can usually be repaired. The simplest repair is to fold the lead over to a still-attached copper trace and solder it as shown to the left. If your board has a solder-mask, you will need to carefully scrape off enough to expose the bare copper.
Other alternatives are to follow the trace to the next via and run a jumper to there. Or, in the worst case, follow the trace to the nearest component and solder your jumper to the leg of that. Not exactly pretty, but functional.

## Stray Solder Spatters
These bits of solder are held to the board only by sticky flux residue. If they work loose, they can easily cause a short circuit on the board.
**Repair:** These are easy to remove with the tip of a knife or tweezers.

## All of the Above!
Don't panic. Take your time. Most joints can be repaired with patience. If the solder refuses to flow the way you want it to:
1. Stop and let the joint cool.
2. Clean and tin your iron.
3. Clean off any burnt flux from the joint.
4. Let the iron come back up to temperature.
5. Then reheat the joint and try again.

- [Previous Page](https://learn.adafruit.com/adafruit-guide-excellent-soldering/surface-mount.md)
- [Next Page](https://learn.adafruit.com/adafruit-guide-excellent-soldering/soldering-faq.md)
## Featured Products
### Panavise Jr.
[Panavise Jr.](https://www.adafruit.com/product/151)
The best mini-vise for working on smaller PCBs (2.875" or less in one dimension)! The jaws are strong plastic that wont damage the PCB and doesn't mind if you hit it with the soldering iron by accident. Made in the USA.
- The easy-to-use single knob controls head movement...
No Longer Stocked
[Buy Now](https://www.adafruit.com/product/151)
[Related Guides to the Product](https://learn.adafruit.com/products/151/guides)
### Hakko Professional Quality 20-30 AWG Wire Strippers
[Hakko Professional Quality 20-30 AWG Wire Strippers](https://www.adafruit.com/product/527)
These are the finest wire strippers we have used, and if you have to do a lot of wiring, you will agree! They have soft rounded grips - very comfortable to use, and precision ground notches that do a perfect job every time. No more yanking or twisting to strip wires cleanly and quickly.
In Stock
[Buy Now](https://www.adafruit.com/product/527)
[Related Guides to the Product](https://learn.adafruit.com/products/527/guides)
### Mini Solder spool - 60/40 lead rosin-core solder 0.3mm diameter
[Mini Solder spool - 60/40 lead rosin-core solder 0.3mm diameter](https://www.adafruit.com/product/145)
If you want to make a kit you'll need some solder. This 100g (about 1/4 lb) spool is just the right amount, not too much (like 1 lb spools) and not too little (like those little 'pocket clip' vials). 0.3mm diameter, 60/40 'no clean' rosin core. Good for all through-hole...
In Stock
[Buy Now](https://www.adafruit.com/product/145)
[Related Guides to the Product](https://learn.adafruit.com/products/145/guides)
### Solder sucker
[Solder sucker](https://www.adafruit.com/product/148)
Strangely enough, that's the technical term for this desoldering vacuum tool. Useful in cleaning up mistakes, every electrical engineer has one of these on their desk.
To use, depress the end to engage the vacuum. Then heat up the to-be-desoldered joint until it is liquid. With your...
In Stock
[Buy Now](https://www.adafruit.com/product/148)
[Related Guides to the Product](https://learn.adafruit.com/products/148/guides)
### Solder wick - 1.5mm wide and 1.5m / 5 feet long
[Solder wick - 1.5mm wide and 1.5m / 5 feet long](https://www.adafruit.com/product/149)
Used along with the solder sucker to clean up soldering messes. Wick really comes in handy when soldering or desoldering surface-mount parts. Even if you don't have the best iron for SMT work, a bit of wick will fix it up.
1.5mm wick, and 1.5m long, so you have plenty to work...
Out of Stock
[Buy Now](https://www.adafruit.com/product/149)
[Related Guides to the Product](https://learn.adafruit.com/products/149/guides)
### Soldering iron stand
[Soldering iron stand](https://www.adafruit.com/product/150)
A real stand with sponge and solidly-built sheet metal holder prevents your iron from 'rolling away' or burning a hole in the table. If you're starting out and have a 'pen type' soldering iron, this is essential for your safety. Comes with a sponge, too!
****
Out of Stock
[Buy Now](https://www.adafruit.com/product/150)
[Related Guides to the Product](https://learn.adafruit.com/products/150/guides)
### Adjustable 30W 110V soldering iron
[Adjustable 30W 110V soldering iron](https://www.adafruit.com/product/180)
This 'pen-style' soldering iron is just about the best entry-level tool I've seen. It's not as powerful as a Weller WES51 but it _is_ self-contained and easy to use. With proper care, it will last for many years. Turn it off when not in use, clean the plated tip with a...
No Longer Stocked
[Buy Now](https://www.adafruit.com/product/180)
[Related Guides to the Product](https://learn.adafruit.com/products/180/guides)
### Learn to solder - Skill badge, iron-on patch
[Learn to solder - Skill badge, iron-on patch](https://www.adafruit.com/product/465)
You can solder! Adafruit offers a fun and exciting "badges" of achievement for electronics, science and engineering. We believe everyone should be able to be rewarded for learning a useful skill, a badge is just one of the many ways to show and share.
This is the "I...
No Longer Stocked
[Buy Now](https://www.adafruit.com/product/465)
[Related Guides to the Product](https://learn.adafruit.com/products/465/guides)
## Related Guides
- [Blinka Says Tabletop Arcade Game](https://learn.adafruit.com/blinka-says-tabletop-arcade-game.md)
- [Water Drip Dress with Oozemaster 3000](https://learn.adafruit.com/water-drip-dress-with-oozemaster-3000.md)
- [Floor Lamp with NeoPixels and WLED Custom Animations](https://learn.adafruit.com/floor-lamp-with-wled.md)
- [Space Shuttle Discovery Solder Kit by Phyx](https://learn.adafruit.com/space-shuttle-discovery-solder-kit.md)
- [USB Rechargeable Mini Solder Fume Extractor](https://learn.adafruit.com/usb-rechargeable-mini-solder-fume-extractor.md)
- [Cartoon Character Clock](https://learn.adafruit.com/cartoon-character-clock.md)
- [Collin's Lab: Soldering](https://learn.adafruit.com/collins-lab-soldering.md)
- [SMT Breadboard Prototyping Using Breakout PCBs](https://learn.adafruit.com/smt-prototyping-using-breakout-pcbs.md)
- [Motion-Activated Solder Fume Extractor With Lamp](https://learn.adafruit.com/motion-activated-solder-fume-extractor-with-lamp.md)
- [Color Balancing Video Camera Light feat. DotStars](https://learn.adafruit.com/color-balancing-light-box-with-dotstar-cool-warm-white-leds.md)
- [Ambient Sound Machine](https://learn.adafruit.com/ambient-machine.md)
- [DIY On/Off JST Switch Adapter](https://learn.adafruit.com/on-slash-off-switches.md)
- [IoT Moon Phase Guide](https://learn.adafruit.com/moon-phase.md)
- [CNC Rotary Macropad](https://learn.adafruit.com/cnc-rotary-macropad.md)
- [Secret Hollow Book Intrusion Detector](https://learn.adafruit.com/secret-hollow-book.md)
---
# Source: https://learn.adafruit.com/chumby-hacker-board/compiler.md
# Chumby Hacker Board
## Compiler
## Toolchain
You can easily install an open source toolchain to get started developing right on the Chumby Hacker board!
Step one is to download the following file [http://files.chumby.com/hacks/falconwing\_toolchain.sh](http://files.chumby.com/hacks/falconwing_toolchain.sh) (20M) and save it onto any USB key. Then insert that USB into one of the CHB's USB ports.

Run **df** to find the name of the USB key
**cp** the file from the USB key onto **/mnt/storage**
Then **cd** into /mnt/storage and run the **./falconwing\_toolchain.sh** script to install the toolchain.

When you are done, you can **rm falconwing\_toolchain.sh** to free up some space.
**Please save a backup of the falconwing\_toolchain.sh file somewhere so you dont end up having to re-download it (Chumby is kindly hosting this file but its very large!)**
- [Previous Page](https://learn.adafruit.com/chumby-hacker-board/connecting-with-ttl-serial.md)
- [Next Page](https://learn.adafruit.com/chumby-hacker-board/i2c-sensor.md)
## Featured Products
### USB 2.0 Powered Hub - 7 Ports with 5V 2A Power Supply
[USB 2.0 Powered Hub - 7 Ports with 5V 2A Power Supply](https://www.adafruit.com/product/961)
Add lots more USB capability to your Raspberry Pi or computer using this powered USB 2.0 hub. It adds a full **seven powered ports** , all at USB 2.0 speeds so you can use video cameras and other high speed devices (cheaper hubs are v1.1 and not as fast!)
The extra sauce...
No Longer Stocked
[Buy Now](https://www.adafruit.com/product/961)
[Related Guides to the Product](https://learn.adafruit.com/products/961/guides)
### Miniature WiFi (802.11b/g/n) Module: For Raspberry Pi and more
[Miniature WiFi (802.11b/g/n) Module: For Raspberry Pi and more](https://www.adafruit.com/product/814)
Make your Internet of Things device cable-free by adding WiFi. Take advantage of the Raspberry Pi and Beagle Bone's USB port to add a low cost, but high-reliability wireless link. We tried half a dozen modules to find one that works well with the Pi and Bone without the need of recompiling...
No Longer Stocked
[Buy Now](https://www.adafruit.com/product/814)
[Related Guides to the Product](https://learn.adafruit.com/products/814/guides)
### 5V 2A (2000mA) switching power supply - UL Listed
[5V 2A (2000mA) switching power supply - UL Listed](https://www.adafruit.com/product/276)
This is an FCC/CE certified and UL listed power supply. Need a lot of 5V power? This switching supply gives a clean regulated 5V output at up to 2000mA. 110 or 240 input, so it works in any country. The plugs are "US 2-prong" style so you may need a plug adapter, but you can pick one...
Out of Stock
[Buy Now](https://www.adafruit.com/product/276)
[Related Guides to the Product](https://learn.adafruit.com/products/276/guides)
### 2.1mm to 1.7mm DC jack adapter
[2.1mm to 1.7mm DC jack adapter](https://www.adafruit.com/product/411)
We're carrying this adapter primarily to allow Chumby Hacker Board users to adapt our nice [5V @ 2A power supply](http://www.adafruit.com/products/276) to their CHB. But you can use this adapter for anything else that has a 1.7mm DC jack, such as a PSP.
In Stock
[Buy Now](https://www.adafruit.com/product/411)
[Related Guides to the Product](https://learn.adafruit.com/products/411/guides)
### USB MicroSD Card Reader/Writer - microSD / microSDHC / microSDXC
[USB MicroSD Card Reader/Writer - microSD / microSDHC / microSDXC](https://www.adafruit.com/product/939)
This is the cutest little microSD card reader/writer - but don't be fooled by its adorableness! It's wicked fast and supports up to 64 GB SDXC cards! Simply slide the card into the edge and plug it into your computer. No drivers are required, it shows up as a standard 'Mass...
No Longer Stocked
[Buy Now](https://www.adafruit.com/product/939)
[Related Guides to the Product](https://learn.adafruit.com/products/939/guides)
### Ethernet Cable - 10 ft long
[Ethernet Cable - 10 ft long](https://www.adafruit.com/product/730)
We have so many Internet-connected goodies in the shop, we figured it's time to carry a cable so you can easily connect them up! This cable is 10 feet long, black and has all 8 wires installed. Perfect for use with the [BeagleBone](http://www.adafruit.com/products/513),
No Longer Stocked
[Buy Now](https://www.adafruit.com/product/730)
[Related Guides to the Product](https://learn.adafruit.com/products/730/guides)
### USB to TTL Serial Cable - Debug / Console Cable for Raspberry Pi
[USB to TTL Serial Cable - Debug / Console Cable for Raspberry Pi](https://www.adafruit.com/product/954)
The cable is easiest way ever to connect to your microcontroller/Raspberry Pi/WiFi router serial console port. Inside the big USB plug is a USB\<-\>Serial conversion chip and at the end of the 36" cable are four wire - red power, black ground, white RX into USB port, and green TX out...
In Stock
[Buy Now](https://www.adafruit.com/product/954)
[Related Guides to the Product](https://learn.adafruit.com/products/954/guides)
### FTDI Serial TTL-232 USB Cable
[FTDI Serial TTL-232 USB Cable](https://www.adafruit.com/product/70)
Just about all electronics use TTL serial for debugging, bootloading, programming, serial output, etc. But it's rare for a computer to have a serial port anymore. This is a USB to TTL serial cable, with a FTDI FT232RL usb/serial chip embedded in the head. It has a 6-pin socket at the end...
In Stock
[Buy Now](https://www.adafruit.com/product/70)
[Related Guides to the Product](https://learn.adafruit.com/products/70/guides)
## Related Guides
- [CircuitPython Libraries on MicroPython using the Raspberry Pi Pico](https://learn.adafruit.com/circuitpython-libraries-on-micropython-using-the-raspberry-pi-pico.md)
- [Hallowing Minotaur Maze](https://learn.adafruit.com/hallowing-minotaur-maze.md)
- [Raspberry Pi Azure IoT Hub Dashboard with CircuitPython](https://learn.adafruit.com/raspberry-pi-iot-dashboard-with-azure-and-circuitpython.md)
- [Adafruit 2.9" eInk Display Breakouts and FeatherWings](https://learn.adafruit.com/adafruit-2-9-eink-display-breakouts-and-featherwings.md)
- [Pi SSD Media Server](https://learn.adafruit.com/pi-ssd-media-server.md)
- [Creating Slideshows in CircuitPython](https://learn.adafruit.com/creating-slideshows-in-circuitpython.md)
- [Network Interface Failover using FONA](https://learn.adafruit.com/network-interface-failover-using-fona.md)
- [Matrix Keypad](https://learn.adafruit.com/matrix-keypad.md)
- [Native MP3 decoding on Arduino](https://learn.adafruit.com/native-mp3-decoding-on-arduino.md)
- [Raspberry Pi HQ Camera Case](https://learn.adafruit.com/raspberry-pi-hq-camera-case.md)
- [Articulated Pi Display V2 Mount](https://learn.adafruit.com/pi-wall-mount.md)
- [World's Smallest MAME Arcade Cabinet](https://learn.adafruit.com/worlds-smallest-mame-arcade-cabinet.md)
- [Raspberry Pi E-Ink Weather Station using Python](https://learn.adafruit.com/raspberry-pi-e-ink-weather-station-using-python.md)
- [Getting Started with Raspberry Pi Pico and CircuitPython](https://learn.adafruit.com/getting-started-with-raspberry-pi-pico-circuitpython.md)
- [Adafruit QT Py and NeoPixel LEDs](https://learn.adafruit.com/qt-py-and-neopixel-leds.md)
---
# Source: https://learn.adafruit.com/skill-badge-requirements-solar/concept-of-operation.md
# Skill Badge Requirements: Solar
## Section 1: Concept of Operation

_The following section focuses on investigating the different concepts that govern the operation of a solar cell._
Do EACH of the following and submit to your instructor:
1. Identify and describe the photoelectric effect.
2. Identify and describe three different types of solar cells, their advantages and disadvantages.
3. Identify and describe the layers that make up a typical cell.
4. Identify and describe the following terminology:
1. Effective surface area (Aeff)
2. Open circuit voltage (Voc)
3. Short circuit current (Isc)
4. Power output (Psa)
5. Input power density (Pin)
6. Efficiency (ɳ)
5. Identify and describe the hardware that makes up a panel.
6. Identify and describe how individual cells are connected to make a panel.
7. Describe why solar technology might be cost prohibitive.
1. What can be done to lower the cost?
8. Identify the equipment and describe the method in which solar panels are connected to the electrical grid.
9. Identify and describe two methods for storing the electrical energy produced by your solar cell.
- [Previous Page](https://learn.adafruit.com/skill-badge-requirements-solar/overview.md)
- [Next Page](https://learn.adafruit.com/skill-badge-requirements-solar/making-measurements.md)
## Featured Products
### Round Solar Panel Skill Badge - 5V / 40mA
[Round Solar Panel Skill Badge - 5V / 40mA](https://www.adafruit.com/product/700)
This skill badge is self-fulfilling! Normally you would get the badge _after_ the project is done, but in this case, the badge can be part of the project! The solar panel is epoxied into a round disc 55mm diameter (about 2.2 inches), its rugged and looks cool besides. We include a...
In Stock
[Buy Now](https://www.adafruit.com/product/700)
[Related Guides to the Product](https://learn.adafruit.com/products/700/guides)
## Related Guides
- [Adafruit FunHouse](https://learn.adafruit.com/adafruit-funhouse.md)
- [Pet Bowl Water Level Sensing](https://learn.adafruit.com/pet-bowl-water-level-sensing-with-the-funhouse-and-home-assistant.md)
- [Wind Blowing Emoji Prop](https://learn.adafruit.com/wind-face-emoji.md)
- [Circuit Playground Express: Piano de Limones](https://learn.adafruit.com/circuit-playground-express-piano-de-limones.md)
- [Smart Measuring Cup](https://learn.adafruit.com/smart-measuring-cup.md)
- [Raspberry Pi Analog to Digital Converters](https://learn.adafruit.com/raspberry-pi-analog-to-digital-converters.md)
- [Face Mask Efficacy Testing with SCIENCE!](https://learn.adafruit.com/raspberry-pi-camera-vision-face-mask-efficacy-testing.md)
- [Remote controlled door lock using a fingerprint sensor & Adafruit IO](https://learn.adafruit.com/remote-controlled-door-lock-using-a-fingerprint-sensor-and-adafruit-io.md)
- [PowerWash Simulator Nozzle Controller](https://learn.adafruit.com/powerwash-simulator-nozzle-controller.md)
- [Send Raspberry Pi Data to COSM](https://learn.adafruit.com/send-raspberry-pi-data-to-cosm.md)
- [Adafruit Analog Accelerometer Breakouts](https://learn.adafruit.com/adafruit-analog-accelerometer-breakouts.md)
- [CircuitPython Libraries on any Computer with FT232H](https://learn.adafruit.com/circuitpython-on-any-computer-with-ft232h.md)
- [Adafruit LSM9DS1 Accelerometer + Gyro + Magnetometer 9-DOF Breakout](https://learn.adafruit.com/adafruit-lsm9ds1-accelerometer-plus-gyro-plus-magnetometer-9-dof-breakout.md)
- [Programmable Wireless BLE Gesture Mouse](https://learn.adafruit.com/ble-wireless-gesture-mouse.md)
- [Adafruit Feather nRF52840 Sense](https://learn.adafruit.com/adafruit-feather-sense.md)
---
# Source: https://learn.adafruit.com/li-ion-and-lipoly-batteries/conclusion.md
# Li-Ion & LiPoly Batteries
## Conclusion
Lithium Ion and Lithium Ion Polymer batteries are a great power source for projects but they require care during use and charging. They can be easy to damage or misuse and can hurt you or your property! All the batteries we sell pass testing and certification but you should still be careful with them. Read the datasheet, follow our suggestions and those in the datasheet as well as common sense!
[The manufacturer of our lithium ion batteries indicates the following warnings and cautions:](http://www.adafruit.com/datasheets/30003-0.pdf)
- Do NOT immerse the battery in water or other liquids. Keep or store the battery in a cool and dry place/environment.
- Do NOT use or store the battery near any source of heat.
- Use a charger that is clearly specified to be compatible for charging the battery and has appropriate charging protection (voltage, current, temperature)
- Do NOT install the battery in reverse polarity.
- Do NOT connect the battery to an electrical outlet or other incompatible power source.
- Do NOT discard the battery in fire.
- Do NOT short circuit the battery. Do NOT connect the positive and negative terminals to each other with metallic object(s) or other conductive material(s).
- Do NOT transport or store the battery together with metal objects, such as hairpins, necklaces, or any other conductive object or material.
- Do NOT strike, crush, puncture, disassemble, or throw the battery.
- Do NOT directly solder the battery or battery terminals.
- Do NOT pierce the battery.
- Lithium batteries should be used only with proper voltage, current, and temperature protection circuitry and protection.
- Do NOT use or leave the battery in a high temperature environment (for example, under direct sunlight or in a vehicle in hot weather). Failure to take this precaution can lead to overheating of battery and/or fire or explosion. Also, performance of battery will degrade and lifetime will be reduced.
- Do NOT use battery in a location where there is high static-electricity or magnetic fields, otherwise safety devices may be damaged which cannot be visible.
- If the battery leaks and the electrolyte get into the eyes, do NOT rub eyes. Instead, rinse and wash eyes with clean water, and immediately seek medical attention.
- It the battery gives off an odor, generates heat, becomes discolored or deformed, or in any way appears abnormal during use, recharging, or storage, immediately remove it from the device or battery charger and stop using it.
- In case the battery terminals are dirty, clean the terminals with a dry cloth before use. Otherwise, poor performance may occur due to the poor connection with the instrument or device.
- Be aware that discarded batteries may cause fire or explosion. Therefore, apply a non-conductive tape to the battery terminals to insulate them before discarding.
**Temp sensor FAQ: ** Most DIY/hobbyist chargers don't come with temperature sensors built in because they are not always right next to your battery and they are intended to be used at low charge rates and indoors where the temperature is around 25 degrees C. If you want to charge your batteries at high rates (above 0.5 **C** ) or outdoors, you should get a temperature-based charging solution.
- [Previous Page](https://learn.adafruit.com/li-ion-and-lipoly-batteries/proper-charging.md)
- [Next Page](https://learn.adafruit.com/li-ion-and-lipoly-batteries/downloads.md)
## Featured Products
### Adafruit Micro Lipo - USB LiIon/LiPoly charger
[Adafruit Micro Lipo - USB LiIon/LiPoly charger](https://www.adafruit.com/product/1304)
Oh so adorable, this is the tiniest little lipo charger, so handy you can keep it any project box! Its also easy to use. Simply plug in the gold plated contacts into any USB port and a 3.7V/4.2V lithium polymer or lithium ion rechargeable battery into the JST plug on the other end. There are...
In Stock
[Buy Now](https://www.adafruit.com/product/1304)
[Related Guides to the Product](https://learn.adafruit.com/products/1304/guides)
### USB LiIon/LiPoly charger
[USB LiIon/LiPoly charger](https://www.adafruit.com/product/259)
This is a Lithium Ion and Lithium Polymer battery charger based on the [MCP73833](http://www.microchip.com/wwwproducts/Devices.aspx?dDocName=en027785). It uses a USB mini-B for connection to any computer or 'USB wall adapter'. Charging is performed in three stages: first a...
In Stock
[Buy Now](https://www.adafruit.com/product/259)
[Related Guides to the Product](https://learn.adafruit.com/products/259/guides)
### USB/DC Lithium Polymer battery charger 5-12V
[USB/DC Lithium Polymer battery charger 5-12V](https://www.adafruit.com/product/280)
Charge your single-cell lithium ion/polymer battery any which way you like with this board. Have a USB connection? No problem, just plug into the miniUSB connector. Only have a wall adapter? Any standard 2.1mm DC adapter which puts out 5 to 12VDC will work fine. If both are plugged in, the...
No Longer Stocked
[Buy Now](https://www.adafruit.com/product/280)
[Related Guides to the Product](https://learn.adafruit.com/products/280/guides)
### Lithium Ion Battery Pack - 3.7V 6600mAh
[Lithium Ion Battery Pack - 3.7V 6600mAh](https://www.adafruit.com/product/353)
Need a massive battery for your project? This lithium-ion pack is made of 3 balanced 2200mAh cells for a total of 6600mA capacity! The cells are connected in parallel and spot-welded to a protection circuit that provides over-voltage, under-voltage, and over-current protection.
Each cell...
In Stock
[Buy Now](https://www.adafruit.com/product/353)
[Related Guides to the Product](https://learn.adafruit.com/products/353/guides)
### Lithium Ion Battery Pack - 3.7V 4400mAh
[Lithium Ion Battery Pack - 3.7V 4400mAh](https://www.adafruit.com/product/354)
Need a big battery for your project? This lithium-ion pack is made of 2 balanced 2200mAh cells for a total of 4400mA capacity! The cells are connected in parallel and spot-welded to a protection circuit that provides over-voltage, under-voltage, and over-current protection.
Each cell can...
In Stock
[Buy Now](https://www.adafruit.com/product/354)
[Related Guides to the Product](https://learn.adafruit.com/products/354/guides)
### Lithium Ion Polymer Battery - 3.7v 2500mAh
[Lithium Ion Polymer Battery - 3.7v 2500mAh](https://www.adafruit.com/product/328)
Lithium-ion polymer (also known as 'lipo' or 'lipoly') batteries are thin, light, and powerful. The output ranges from 4.2V when completely charged to 3.7V. This battery has a capacity of **2500mAh** for a total of about 10 Wh. If you need a smaller battery,
In Stock
[Buy Now](https://www.adafruit.com/product/328)
[Related Guides to the Product](https://learn.adafruit.com/products/328/guides)
### Lithium Ion Polymer Battery - 3.7v 1200mAh
[Lithium Ion Polymer Battery - 3.7v 1200mAh](https://www.adafruit.com/product/258)
Lithium-ion polymer (also known as 'lipo' or 'lipoly') batteries are thin, light, and powerful. The output ranges from 4.2V when completely charged to 3.7V. This battery has a capacity of 1200mAh for a total of about 4.5 Wh. If you need a larger battery,
In Stock
[Buy Now](https://www.adafruit.com/product/258)
[Related Guides to the Product](https://learn.adafruit.com/products/258/guides)
### Lithium Ion Polymer Battery - 3.7v 500mAh
[Lithium Ion Polymer Battery - 3.7v 500mAh](https://www.adafruit.com/product/1578)
Lithium-ion polymer (also known as 'lipo' or 'lipoly') batteries are thin, light, and powerful. The output ranges from 4.2V when completely charged to 3.7V. This battery has a capacity of 500mAh for a total of about 1.9 Wh. If you need a larger (or smaller!) battery,
In Stock
[Buy Now](https://www.adafruit.com/product/1578)
[Related Guides to the Product](https://learn.adafruit.com/products/1578/guides)
## Related Guides
- [Sound Activated Shark Mask](https://learn.adafruit.com/sound-activated-shark-mask.md)
- [SNES EZ Key Bluefruit Game Pad](https://learn.adafruit.com/snes-ez-key-bluefruit-game-pad.md)
- [Color-sensor Driven NeoPixel Dress](https://learn.adafruit.com/color-sensor-driven-neopixel-dress.md)
- [Adafruit MicroLipo and MiniLipo Battery Chargers](https://learn.adafruit.com/adafruit-microlipo-and-minilipo-battery-chargers.md)
- [Cartoon Network and Make Code - Rose Quartz Shield Umbrella](https://learn.adafruit.com/cartoon-network-and-make-code-rose-quartz-shield-umbrella.md)
- [Ursula's Seashell Necklace](https://learn.adafruit.com/ursulas-seashell-necklace.md)
- [Wireless Control Button for WLED Projects](https://learn.adafruit.com/wireless-control-button-for-wled-projects.md)
- [Bunny Ears with MakeCode](https://learn.adafruit.com/bunny-ears-with-makecode.md)
- [VU Meter Baseball Hat](https://learn.adafruit.com/vu-meter-baseball-hat.md)
- [Glowing Fascinator Hat with Gemma M0 and MakeCode](https://learn.adafruit.com/glowing-fascinator-hat-gemma-m0-makecode.md)
- [LED Masquerade Masks](https://learn.adafruit.com/led-masquerade-masks.md)
- [Han Solo Blaster Cosplay](https://learn.adafruit.com/han-solo-blaster-cosplay.md)
- [Convert your Model M Keyboard to Bluetooth with Bluefruit EZ-Key HID](https://learn.adafruit.com/convert-your-model-m-keyboard-to-bluetooth-with-bluefruit-ez-key-hid.md)
- [Chameleon Scarf](https://learn.adafruit.com/chameleon-scarf.md)
- [Kaleidoscope Eyes (Trinket-Powered NeoPixel LED Ring Goggles)](https://learn.adafruit.com/kaleidoscope-eyes-neopixel-led-goggles-trinket-gemma.md)
---
# Source: https://learn.adafruit.com/conductive-thread.md
# Conductive Thread
## Overview
http://youtu.be/XT5ygUt8Cbk
After months of searching, we finally have what we consider to be the ultimate conductive thread. It's thin, strong, smooth, and made completely of 316L stainless steel. Once you start working with this thread you'll quickly agree its optimal for any wearables work!
We carry this thread in 2 and 3 ply. [2 ply](http://adafruit.com/products/640) is a little thicker than every day polyester or cotton thread but still thin enough to be sewn by hand in medium-eye needles or with a sewing machine that can handle 'heavy' thread. Because it is strong and smooth, its ideal for any wearable/e-textile project. It also has fairly low resistivity, 16 ohms per foot so you can use it to drive LEDs and other electronic components that use under ~50mA.
Our [3 ply thread](http://adafruit.com/products/641) has a resistance of 10 ohms per foot for components that use under ~100mA. It is thicker than standard cotton/poly thread and can be used by hand or in industrial sewing machines.
Because it is made of stainless steel fibers, it will not oxidize like silver does: your projects will not 'stop working' because of oxidation after a few months and its safe to wash. However, this thread is a little 'stiff', it feels a little like 'waxed thread' and is not ideal for making iPhone-compatible gloves. [If you want to sew conductive thread into the pads of gloves, check out our thin conductive yarn!](https://www.adafruit.com/products/603 "Link: https://www.adafruit.com/products/603")


2 ply

3 ply
https://www.youtube.com/watch?v=m9O-T8oy7TU
- [Next Page](https://learn.adafruit.com/conductive-thread/tools-and-supplies.md)
## Featured Products
### Stainless Medium Conductive Thread - 3 ply - 18 meter/60 ft
[Stainless Medium Conductive Thread - 3 ply - 18 meter/60 ft](https://www.adafruit.com/product/641)
After months of searching, we finally have what we consider to be the ultimate conductive thread. It's thin, strong, smooth, and made completely of 316L stainless steel. Once you start working with this thread you'll quickly agree its optimal for any wearables work!
This...
Out of Stock
[Buy Now](https://www.adafruit.com/product/641)
[Related Guides to the Product](https://learn.adafruit.com/products/641/guides)
### Stainless Thin Conductive Thread - 2 ply - 23 meter/76 ft
[Stainless Thin Conductive Thread - 2 ply - 23 meter/76 ft](https://www.adafruit.com/product/640)
After months of searching, we finally have what we consider to be the ultimate conductive thread. It's thin, strong, smooth, and made completely of 316L stainless steel. Once you start working with this thread you'll quickly agree its optimal for any wearables work!
This...
In Stock
[Buy Now](https://www.adafruit.com/product/640)
[Related Guides to the Product](https://learn.adafruit.com/products/640/guides)
### Stainless Thin Conductive Yarn / Thick Conductive Thread - 30 ft
[Stainless Thin Conductive Yarn / Thick Conductive Thread - 30 ft](https://www.adafruit.com/product/603)
This 316L stainless steel thread falls somewhere between a thick thread and a thin yarn. Most sewing machines wouldn't be happy with this thread since its thick, and it has the 'furry' soft feel of yarn which makes it poor for most e-textiles/wearables projects. However, the high...
In Stock
[Buy Now](https://www.adafruit.com/product/603)
[Related Guides to the Product](https://learn.adafruit.com/products/603/guides)
### Conductive thread ribbon cable - White - 1 yard
[Conductive thread ribbon cable - White - 1 yard](https://www.adafruit.com/product/1139)
This lightweight, flexible fabric ribbon cable contains four channels of conductive thread, perfect for wiring up wearables where flexibility is key. Use it to connect your conductive fabric gamepad to your microcontroller or computer!
Features:
- Low resistance: ~16...
No Longer Stocked
[Buy Now](https://www.adafruit.com/product/1139)
[Related Guides to the Product](https://learn.adafruit.com/products/1139/guides)
### Needle set - 3/9 sizes - 20 needles
[Needle set - 3/9 sizes - 20 needles](https://www.adafruit.com/product/615)
Mighty needles, sew like the wind! This needle set is the only one you'll need for any sort of hand sewing, especially using our conductive thread and wearable electronics parts.
Each pack contains 20 gold-eye sharps, with eye sizes ranging from #3 (1.75" long) to #9...
Out of Stock
[Buy Now](https://www.adafruit.com/product/615)
[Related Guides to the Product](https://learn.adafruit.com/products/615/guides)
### Small Alligator Clip Test Lead (set of 12)
[Small Alligator Clip Test Lead (set of 12)](https://www.adafruit.com/product/1008)
Connect this to that without soldering using these handy mini alligator clip test leads. 15" cables with alligator clip on each end, color coded. You get 12 pieces in 6 colors. Strong and grippy, these always come in handy! We often use these in conjunction with a multimeter so we...
In Stock
[Buy Now](https://www.adafruit.com/product/1008)
[Related Guides to the Product](https://learn.adafruit.com/products/1008/guides)
### Sewable Snaps - 5mm Diameter - Card of 24
[Sewable Snaps - 5mm Diameter - Card of 24](https://www.adafruit.com/product/1126)
The small 5mm size of these tin-plated brass snaps means they fit perfectly on Flora's pads! Snaps make a great connector for wearables-- solder one side to the board and sew the other to your project with conductive thread! This card comes with 24 complete snaps (socket and stud...
In Stock
[Buy Now](https://www.adafruit.com/product/1126)
[Related Guides to the Product](https://learn.adafruit.com/products/1126/guides)
### FLORA - Wearable electronic platform: Arduino-compatible
[FLORA - Wearable electronic platform: Arduino-compatible](https://www.adafruit.com/product/659)
FLORA is Adafruit's fully-featured wearable electronics platform. It's a round, sewable, Arduino-compatible microcontroller designed to empower amazing wearables projects.FLORA comes with Adafruit's support, [tutorials and...](http://learn.adafruit.com/category/flora)
In Stock
[Buy Now](https://www.adafruit.com/product/659)
[Related Guides to the Product](https://learn.adafruit.com/products/659/guides)
## Related Guides
- [Capacitive Touch with Conductive Fabric & Flora](https://learn.adafruit.com/capacitive-touch-with-conductive-fabric-and-flora.md)
- [Fiber Optic Pixie Skirt](https://learn.adafruit.com/fiber-optic-pixie-princess-skirt.md)
- [Haptic Headband](https://learn.adafruit.com/haptic-headband.md)
- [EEG Costume Cap](https://learn.adafruit.com/eeg-costume-cap.md)
- [Zipper Switch](https://learn.adafruit.com/zipper-switch.md)
- [Adafruit Arduino IDE Setup](https://learn.adafruit.com/adafruit-arduino-ide-setup.md)
- [Sewable NeoPixels](https://learn.adafruit.com/flora-rgb-smart-pixels.md)
- [FLORA TV-B-Gone](https://learn.adafruit.com/flora-tv-b-gone.md)
- [Experimenting with NeverWet + Electronics](https://learn.adafruit.com/neverwet-electronics.md)
- [LED Stego Flex Spike Hoodie](https://learn.adafruit.com/led-stego-flex-spike-hoodie.md)
- [Getting Started with FLORA](https://learn.adafruit.com/getting-started-with-flora.md)
- [Sunscreen Reminder Hat](https://learn.adafruit.com/sunscreen-reminder-hat.md)
- [Mailbox Notification Service](https://learn.adafruit.com/mailbox-notification-service.md)
- [FLORA + FONA](https://learn.adafruit.com/flora-plus-fona.md)
- [Flora TSL2561 Lux Sensor](https://learn.adafruit.com/flora-lux-sensor.md)
---
# Source: https://learn.adafruit.com/barcode-scanner/configure.md
# Barcode Scanner
## Configure
You'll also need to configure the barcode scanner. The way you configure it is very cute, once its powered you scan barcodes from the printed out manual (see Downloads below) to tell it how you are going to use it, what volume the beeper should beep at, etc. etc. If you're using RS-232 you would indicate the baud rate by scanning say the 9600 baud rate in the manual.
- [Previous Page](https://learn.adafruit.com/barcode-scanner/cable-connection.md)
- [Next Page](https://learn.adafruit.com/barcode-scanner/usb-interfacing.md)
## Related Guides
- [Digital Shipping Scales](https://learn.adafruit.com/digital-shipping-scales.md)
---
# Source: https://learn.adafruit.com/adafruits-raspberry-pi-lesson-4-gpio-setup/configuring-i2c.md
# Adafruit's Raspberry Pi Lesson 4. GPIO Setup
## Configuring I2C
I2C is a very commonly used standard designed to allow one chip to talk to another. So, since the Raspberry Pi can talk I2C we can connect it to a variety of I2C capable chips and modules.
The I2C bus allows multiple devices to be connected to your Raspberry Pi, each with a unique address, that can often be set by changing jumper settings on the module. It is very useful to be able to see which devices are connected to your Pi as a way of making sure everything is working.
```auto
sudo apt-get install -y python3-smbus
sudo apt-get install -y i2c-tools
```
# Installing Kernel Support (with Raspi-Config)
Run **sudo raspi-config** and follow the prompts to install i2c support for the ARM core and linux kernel
Go to **Interfacing Options**

On older versions, look under **Advanced**

then **I2C**

Enable!


```
sudo reboot
```
# Testing I2C
Now when you log in you can type the following command to see all the connected devices
```
sudo i2cdetect -y 1
```

This shows that two I2C addresses are in use – 0x40 and 0x70.
These values will be different for you depending on what is currently attached to the I2C pins of your Raspberry Pi
Note that if you are using one of the very first Raspberry Pis (a 256MB Raspberry Pi Model B) then you will need to change the command to:
```
sudo i2cdetect -y 0
```
The Raspberry Pi designers swapped over I2C ports between board releases. Just remember: 512M Pi's use i2c port 1, 256M ones use i2c port 0!
When you are finished in raspi-config reboot for the i2c modules to automatically load into the kernel.
- [Previous Page](https://learn.adafruit.com/adafruits-raspberry-pi-lesson-4-gpio-setup/adafruit-pi-code.md)
- [Next Page](https://learn.adafruit.com/adafruits-raspberry-pi-lesson-4-gpio-setup/configuring-spi.md)
## Featured Products
### Assembled Pi Cobbler Plus - Breakout Cable
[Assembled Pi Cobbler Plus - Breakout Cable](https://www.adafruit.com/product/2029)
The Raspberry Pi B+ / Pi 2 / Pi 3 / Pi 4 has landed on the Maker World like a 40-GPIO pinned, quad-USB ported, credit card sized bomb of DIY joy. And while you can use most of our great Model B accessories by hooking up our [downgrade...](https://www.adafruit.com/product/1986)
In Stock
[Buy Now](https://www.adafruit.com/product/2029)
[Related Guides to the Product](https://learn.adafruit.com/products/2029/guides)
### Assembled Pi T-Cobbler Plus - GPIO Breakout
[Assembled Pi T-Cobbler Plus - GPIO Breakout](https://www.adafruit.com/product/2028)
**This is the assembled version of the Pi T-Cobbler Plus. It only works with the Raspberry Pi Model Zero, A+, B+, Pi 2, Pi 3 & Pi 4!** (Any Pi with 2x20 connector)
The Raspberry Pi has landed on the Maker World like a 40-GPIO pinned, quad-USB ported, credit...
In Stock
[Buy Now](https://www.adafruit.com/product/2028)
[Related Guides to the Product](https://learn.adafruit.com/products/2028/guides)
### Raspberry Pi 3 Model B Starter Pack - Includes a Raspberry Pi 3
[Raspberry Pi 3 Model B Starter Pack - Includes a Raspberry Pi 3](https://www.adafruit.com/product/3058)
Gotta say - this new Pi 3 is fly. All the cool kids are going to have it - but all the coolest kids are also going to have a big pack of super cool accessories.
We've hand chosen these accessories as the perfect accompaniment to your new Raspberry Pi 3 - Model B. It's...
No Longer Stocked
[Buy Now](https://www.adafruit.com/product/3058)
[Related Guides to the Product](https://learn.adafruit.com/products/3058/guides)
### Adafruit Assembled Pi Cobbler Breakout + Cable for Raspberry Pi
[Adafruit Assembled Pi Cobbler Breakout + Cable for Raspberry Pi](https://www.adafruit.com/product/914)
Now that you've finally got your hands on a [Raspberry Pi® Model B](http://www.raspberrypi.org/), you're probably itching to make some fun embedded computer projects with it. What you need is an add on prototyping Pi Cobbler from Adafruit, which can break out all those...
No Longer Stocked
[Buy Now](https://www.adafruit.com/product/914)
[Related Guides to the Product](https://learn.adafruit.com/products/914/guides)
### Budget Pack for Raspberry Pi 1 Model B (Doesn't include RasPi)
[Budget Pack for Raspberry Pi 1 Model B (Doesn't include RasPi)](https://www.adafruit.com/product/965)
An optimized collection of parts and pieces to experiment with Raspberry Pi at home, school or work. Great for students and those that want to get their feet wet, no soldering required! **THIS PACK DOES NOT INCLUDE A RASPBERRY PI 1 MODEL B and is NOT compatible with Model B+ or Raspberry Pi...**
No Longer Stocked
[Buy Now](https://www.adafruit.com/product/965)
[Related Guides to the Product](https://learn.adafruit.com/products/965/guides)
### GPIO Ribbon Cable for Raspberry Pi Model A and B - 26 pin
[GPIO Ribbon Cable for Raspberry Pi Model A and B - 26 pin](https://www.adafruit.com/product/862)
That new Raspberry Pi® Model A or B computer you just got has a row of 2x13 pin headers soldered on - those are the GPIO (general purpose input/output) pins and for those of us who like to hack electronics they are where the real fun is. By programming the Pi, you can twiddle those pins...
In Stock
[Buy Now](https://www.adafruit.com/product/862)
[Related Guides to the Product](https://learn.adafruit.com/products/862/guides)
### Programming the Raspberry Pi: Getting Started with Python
[Programming the Raspberry Pi: Getting Started with Python](https://www.adafruit.com/product/1089)
**Program your own Raspberry Pi projects!**
An updated guide to programming your own Raspberry Pi projects. Learn to create inventive programs and fun games on your powerful Raspberry Pi--with no programming experience required. **This practical book has been revised...**
In Stock
[Buy Now](https://www.adafruit.com/product/1089)
[Related Guides to the Product](https://learn.adafruit.com/products/1089/guides)
## Related Guides
- [Adafruit's Raspberry Pi Lesson 11. DS18B20 Temperature Sensing](https://learn.adafruit.com/adafruits-raspberry-pi-lesson-11-ds18b20-temperature-sensing.md)
- [Drive a 16x2 LCD with the Raspberry Pi](https://learn.adafruit.com/drive-a-16x2-lcd-directly-with-a-raspberry-pi.md)
- [Capacitive Touch Sensors on the Raspberry Pi](https://learn.adafruit.com/capacitive-touch-sensors-on-the-raspberry-pi.md)
- [Circadian Pi Desk Light](https://learn.adafruit.com/circadian-pi-desk-light.md)
- [Windows IoT Core Application Development: Headless Blinky](https://learn.adafruit.com/windows-iot-application-development-headless-application.md)
- [Node.js Embedded Development on the Raspberry Pi](https://learn.adafruit.com/node-embedded-development.md)
- [Single Channel LoRaWAN Gateway for Raspberry Pi](https://learn.adafruit.com/raspberry-pi-single-channel-lorawan-gateway.md)
- [Basic Resistor Sensor Reading on Raspberry Pi](https://learn.adafruit.com/basic-resistor-sensor-reading-on-raspberry-pi.md)
- [Raspberry Pi E-mail Notifier Using LEDs](https://learn.adafruit.com/raspberry-pi-e-mail-notifier-using-leds.md)
- [LoRa and LoRaWAN Radio for Raspberry Pi](https://learn.adafruit.com/lora-and-lorawan-radio-for-raspberry-pi.md)
- [Adafruit's Raspberry Pi Lesson 13. Power Control](https://learn.adafruit.com/adafruits-raspberry-pi-lesson-13-power-control.md)
- [Matrix and 7-Segment LED Backpack with the Raspberry Pi](https://learn.adafruit.com/matrix-7-segment-led-backpack-with-the-raspberry-pi.md)
- [Adafruit's Raspberry Pi Lesson 12. Sensing Movement](https://learn.adafruit.com/adafruits-raspberry-pi-lesson-12-sensing-movement.md)
- [Setting up a Raspberry Pi with NOOBS](https://learn.adafruit.com/setting-up-a-raspberry-pi-with-noobs.md)
- [Processing on the Raspberry Pi & PiTFT](https://learn.adafruit.com/processing-on-the-raspberry-pi-and-pitft.md)
---
# Source: https://learn.adafruit.com/adafruits-raspberry-pi-lesson-4-gpio-setup/configuring-spi.md
# Adafruit's Raspberry Pi Lesson 4. GPIO Setup
## Configuring SPI
# Installing Kernel Support (with Raspi-Config)
Run **sudo raspi-config** and follow the prompts to install i2c support for the ARM core and linux kernel
Go to **Interfacing Options**
Go to **Interfacing Options**

Then select **SPI**

When asked if you want to **enable** select **YES**

That's it!

Info:
Next time you log in you can check that you can see the devices with
**ls -l /dev/spidev\***
you should see two 'devices' one for each SPI bus

Info:
- [Previous Page](https://learn.adafruit.com/adafruits-raspberry-pi-lesson-4-gpio-setup/configuring-i2c.md)
- [Next Page](https://learn.adafruit.com/adafruits-raspberry-pi-lesson-4-gpio-setup/test-and-configure.md)
## Featured Products
### Assembled Pi Cobbler Plus - Breakout Cable
[Assembled Pi Cobbler Plus - Breakout Cable](https://www.adafruit.com/product/2029)
The Raspberry Pi B+ / Pi 2 / Pi 3 / Pi 4 has landed on the Maker World like a 40-GPIO pinned, quad-USB ported, credit card sized bomb of DIY joy. And while you can use most of our great Model B accessories by hooking up our [downgrade...](https://www.adafruit.com/product/1986)
In Stock
[Buy Now](https://www.adafruit.com/product/2029)
[Related Guides to the Product](https://learn.adafruit.com/products/2029/guides)
### Assembled Pi T-Cobbler Plus - GPIO Breakout
[Assembled Pi T-Cobbler Plus - GPIO Breakout](https://www.adafruit.com/product/2028)
**This is the assembled version of the Pi T-Cobbler Plus. It only works with the Raspberry Pi Model Zero, A+, B+, Pi 2, Pi 3 & Pi 4!** (Any Pi with 2x20 connector)
The Raspberry Pi has landed on the Maker World like a 40-GPIO pinned, quad-USB ported, credit...
In Stock
[Buy Now](https://www.adafruit.com/product/2028)
[Related Guides to the Product](https://learn.adafruit.com/products/2028/guides)
### Raspberry Pi 3 Model B Starter Pack - Includes a Raspberry Pi 3
[Raspberry Pi 3 Model B Starter Pack - Includes a Raspberry Pi 3](https://www.adafruit.com/product/3058)
Gotta say - this new Pi 3 is fly. All the cool kids are going to have it - but all the coolest kids are also going to have a big pack of super cool accessories.
We've hand chosen these accessories as the perfect accompaniment to your new Raspberry Pi 3 - Model B. It's...
No Longer Stocked
[Buy Now](https://www.adafruit.com/product/3058)
[Related Guides to the Product](https://learn.adafruit.com/products/3058/guides)
### Adafruit Assembled Pi Cobbler Breakout + Cable for Raspberry Pi
[Adafruit Assembled Pi Cobbler Breakout + Cable for Raspberry Pi](https://www.adafruit.com/product/914)
Now that you've finally got your hands on a [Raspberry Pi® Model B](http://www.raspberrypi.org/), you're probably itching to make some fun embedded computer projects with it. What you need is an add on prototyping Pi Cobbler from Adafruit, which can break out all those...
No Longer Stocked
[Buy Now](https://www.adafruit.com/product/914)
[Related Guides to the Product](https://learn.adafruit.com/products/914/guides)
### Budget Pack for Raspberry Pi 1 Model B (Doesn't include RasPi)
[Budget Pack for Raspberry Pi 1 Model B (Doesn't include RasPi)](https://www.adafruit.com/product/965)
An optimized collection of parts and pieces to experiment with Raspberry Pi at home, school or work. Great for students and those that want to get their feet wet, no soldering required! **THIS PACK DOES NOT INCLUDE A RASPBERRY PI 1 MODEL B and is NOT compatible with Model B+ or Raspberry Pi...**
No Longer Stocked
[Buy Now](https://www.adafruit.com/product/965)
[Related Guides to the Product](https://learn.adafruit.com/products/965/guides)
### GPIO Ribbon Cable for Raspberry Pi Model A and B - 26 pin
[GPIO Ribbon Cable for Raspberry Pi Model A and B - 26 pin](https://www.adafruit.com/product/862)
That new Raspberry Pi® Model A or B computer you just got has a row of 2x13 pin headers soldered on - those are the GPIO (general purpose input/output) pins and for those of us who like to hack electronics they are where the real fun is. By programming the Pi, you can twiddle those pins...
In Stock
[Buy Now](https://www.adafruit.com/product/862)
[Related Guides to the Product](https://learn.adafruit.com/products/862/guides)
### Programming the Raspberry Pi: Getting Started with Python
[Programming the Raspberry Pi: Getting Started with Python](https://www.adafruit.com/product/1089)
**Program your own Raspberry Pi projects!**
An updated guide to programming your own Raspberry Pi projects. Learn to create inventive programs and fun games on your powerful Raspberry Pi--with no programming experience required. **This practical book has been revised...**
In Stock
[Buy Now](https://www.adafruit.com/product/1089)
[Related Guides to the Product](https://learn.adafruit.com/products/1089/guides)
## Related Guides
- [Adafruit's Raspberry Pi Lesson 11. DS18B20 Temperature Sensing](https://learn.adafruit.com/adafruits-raspberry-pi-lesson-11-ds18b20-temperature-sensing.md)
- [Drive a 16x2 LCD with the Raspberry Pi](https://learn.adafruit.com/drive-a-16x2-lcd-directly-with-a-raspberry-pi.md)
- [Capacitive Touch Sensors on the Raspberry Pi](https://learn.adafruit.com/capacitive-touch-sensors-on-the-raspberry-pi.md)
- [Circadian Pi Desk Light](https://learn.adafruit.com/circadian-pi-desk-light.md)
- [Windows IoT Core Application Development: Headless Blinky](https://learn.adafruit.com/windows-iot-application-development-headless-application.md)
- [Node.js Embedded Development on the Raspberry Pi](https://learn.adafruit.com/node-embedded-development.md)
- [Single Channel LoRaWAN Gateway for Raspberry Pi](https://learn.adafruit.com/raspberry-pi-single-channel-lorawan-gateway.md)
- [Basic Resistor Sensor Reading on Raspberry Pi](https://learn.adafruit.com/basic-resistor-sensor-reading-on-raspberry-pi.md)
- [Raspberry Pi E-mail Notifier Using LEDs](https://learn.adafruit.com/raspberry-pi-e-mail-notifier-using-leds.md)
- [LoRa and LoRaWAN Radio for Raspberry Pi](https://learn.adafruit.com/lora-and-lorawan-radio-for-raspberry-pi.md)
- [Adafruit's Raspberry Pi Lesson 13. Power Control](https://learn.adafruit.com/adafruits-raspberry-pi-lesson-13-power-control.md)
- [Matrix and 7-Segment LED Backpack with the Raspberry Pi](https://learn.adafruit.com/matrix-7-segment-led-backpack-with-the-raspberry-pi.md)
- [Adafruit's Raspberry Pi Lesson 12. Sensing Movement](https://learn.adafruit.com/adafruits-raspberry-pi-lesson-12-sensing-movement.md)
- [Setting up a Raspberry Pi with NOOBS](https://learn.adafruit.com/setting-up-a-raspberry-pi-with-noobs.md)
- [Processing on the Raspberry Pi & PiTFT](https://learn.adafruit.com/processing-on-the-raspberry-pi-and-pitft.md)
---
# Source: https://learn.adafruit.com/using-the-bmp085-with-raspberry-pi/configuring-the-pi-for-i2c.md
# Using the BMP085/180 with Raspberry Pi or Beaglebone Black
## Configuring the Pi for I2C
Danger:
**If you're using a Raspberry Pi, follow the steps below to configure it to use the I2C interface. If you're using a Beaglebone Black with its standard Debian distribution, you can skip this page and move on to the next step.**
Before you can get started with I2C on the Pi, you'll need to run through a couple quick steps from the console.
Check out this tutorial for more details and follow it completely
[http://learn.adafruit.com/adafruits-raspberry-pi-lesson-4-gpio-setup/configuring-i2c](http://learn.adafruit.com/adafruits-raspberry-pi-lesson-4-gpio-setup/configuring-i2c)
When you're done, run
```
sudo i2cdetect -y 0 (if you are using a version 1 Raspberry Pi)
sudo i2cdetect -y 1 (if you are using a version 2 Raspberry Pi)
```
This will search /dev/i2c-0 or /dev/i2c-1 for all address, and if an Adafruit BMP085 Breakout is properly connected it should show up at 0x77 as follows:

Once both of these packages have been installed, you have everything you need to get started accessing I2C and SMBus devices in Python.
- [Previous Page](https://learn.adafruit.com/using-the-bmp085-with-raspberry-pi/overview.md)
- [Next Page](https://learn.adafruit.com/using-the-bmp085-with-raspberry-pi/hooking-everything-up.md)
## Featured Products
### BMP180 Barometric Pressure/Temperature/Altitude Sensor- 5V ready
[BMP180 Barometric Pressure/Temperature/Altitude Sensor- 5V ready](https://www.adafruit.com/product/1603)
This precision sensor from Bosch is the best low-cost sensing solution for measuring barometric pressure and temperature. Because pressure changes with altitude you can also use it as an altimeter! The sensor is soldered onto a PCB with a 3.3V regulator, I2C level shifter and pull-up resistors...
No Longer Stocked
[Buy Now](https://www.adafruit.com/product/1603)
[Related Guides to the Product](https://learn.adafruit.com/products/1603/guides)
### Raspberry Pi Model B 512MB RAM
[Raspberry Pi Model B 512MB RAM](https://www.adafruit.com/product/998)
Adafruit ships the **Raspberry Pi Model B 512MB RAM** as of 10/18/2012.
The Raspberry Pi® is a single-board computer developed in the UK by the Raspberry Pi Foundation with the intention of stimulating the teaching of basic computer science in schools. The Raspberry...
No Longer Stocked
[Buy Now](https://www.adafruit.com/product/998)
[Related Guides to the Product](https://learn.adafruit.com/products/998/guides)
### Adafruit Assembled Pi Cobbler Breakout + Cable for Raspberry Pi
[Adafruit Assembled Pi Cobbler Breakout + Cable for Raspberry Pi](https://www.adafruit.com/product/914)
Now that you've finally got your hands on a [Raspberry Pi® Model B](http://www.raspberrypi.org/), you're probably itching to make some fun embedded computer projects with it. What you need is an add on prototyping Pi Cobbler from Adafruit, which can break out all those...
No Longer Stocked
[Buy Now](https://www.adafruit.com/product/914)
[Related Guides to the Product](https://learn.adafruit.com/products/914/guides)
### BeagleBone Black Rev C - 4GB Flash - Pre-installed Debian
[BeagleBone Black Rev C - 4GB Flash - Pre-installed Debian](https://www.adafruit.com/product/1876)
Note: As of May 12, 2014 Adafruit is shipping Rev C. We have discontinued selling Rev B. There are no exchanges or "upgrades" for Rev B to Rev C.
If you liked the BeagleBone Black Rev B, you will love the Rev C! The Rev C still has a blistering 1GHz processor and 512MB...
No Longer Stocked
[Buy Now](https://www.adafruit.com/product/1876)
[Related Guides to the Product](https://learn.adafruit.com/products/1876/guides)
### BeagleBone Black Rev C - 4GB - Pre-installed Debian
[BeagleBone Black Rev C - 4GB - Pre-installed Debian](https://www.adafruit.com/product/1996)
If you liked the BeagleBone Black Rev B, you will love the Rev C! The Rev C has a blistering 1GHz AM3358 processor and 512MB onboard DDR3 RAM, two 46-pin headers, micro HDMI for audio/video output, USB ports, 10/100 Ethernet and other I/O features. The Rev C is an ultra-powered embedded...
Out of Stock
[Buy Now](https://www.adafruit.com/product/1996)
[Related Guides to the Product](https://learn.adafruit.com/products/1996/guides)
## Related Guides
- [Capacitive Touch Sensors on the Raspberry Pi](https://learn.adafruit.com/capacitive-touch-sensors-on-the-raspberry-pi.md)
- [Modern Replacements for DHT11 and DHT22 Sensors](https://learn.adafruit.com/modern-replacements-for-dht11-dht22-sensors.md)
- [Adding a Real Time Clock to Raspberry Pi](https://learn.adafruit.com/adding-a-real-time-clock-to-raspberry-pi.md)
- [Adafruit AHT20 Temperature & Humidity Sensor](https://learn.adafruit.com/adafruit-aht20.md)
- [Wood Case for Raspberry Pi 3](https://learn.adafruit.com/wood-case-for-raspberry-pi-3.md)
- [Adafruit DPI Display Kippah](https://learn.adafruit.com/adafruit-dpi-display-kippah-ttl-tft.md)
- [Adafruit's Raspberry Pi Lesson 6. Using SSH](https://learn.adafruit.com/adafruits-raspberry-pi-lesson-6-using-ssh.md)
- [3.5" PiTFT OctoPrint Rig](https://learn.adafruit.com/3-dot-5-pitft-octoprint-rig.md)
- [Adafruit TMP117 High Accuracy I2C Temperature Monitor](https://learn.adafruit.com/adafruit-tmp117-high-accuracy-i2c-temperature-monitor.md)
- [Instant Camera using Raspberry Pi and Thermal Printer](https://learn.adafruit.com/instant-camera-using-raspberry-pi-and-thermal-printer.md)
- [User-space SPI TFT Python Library - ILI9341](https://learn.adafruit.com/user-space-spi-tft-python-library-ili9341-2-8.md)
- [USB Audio Cards with a Raspberry Pi ](https://learn.adafruit.com/usb-audio-cards-with-a-raspberry-pi.md)
- [micro:bit Lesson 4. Sensing Light](https://learn.adafruit.com/micro-bit-lesson-4-sensing-light-and-temperature.md)
- [No-Code Indoor Grow Monitor with PPFD and VPD Measurements](https://learn.adafruit.com/no-code-indoor-grow-monitor.md)
- [PyBadge Thermal Camera Case](https://learn.adafruit.com/pybadge-thermal-camera-case.md)
---
# Source: https://learn.adafruit.com/adafruit-16-channel-servo-driver-with-raspberry-pi/configuring-your-pi-for-i2c.md
# Adafruit 16 Channel Servo Driver with Raspberry Pi
## Configuring Your Pi for I2C
Before you can get started with I2C on the Pi, you'll need to run through a couple quick steps from the console.
If you are running Rasbian and are familiar with Terminal commands, then the description below will be sufficient.
If not, then to learn more about how to setup I2C with Raspbian, then take a minor diversion to this Adafruit Tutorial: [http://learn.adafruit.com/adafruits-raspberry-pi-lesson-4-gpio-setup/configuring-i2c](http://learn.adafruit.com/adafruits-raspberry-pi-lesson-4-gpio-setup/configuring-i2c)
When you are ready to continue, enter the following commands to add SMBus support (which includes I2C) to Python:
```
sudo apt-get install python-smbus
sudo apt-get install i2c-tools
```
**i2c-tools** isn't strictly required, but it's a useful package since you can use it to scan for any I2C or SMBus devices connected to your board. If you know something is connected, but you don't know it's 7-bit I2C address, this library has a great little tool to help you find it. **python-smbus** is required, it adds the I2C support for python!
If you have an Original Raspberry Pi (Sold before October 2012) - the I2C is port 0:
```
sudo i2cdetect -y 0
```
If you have a second rev Raspberry Pi, the I2C is on port 1:
```
sudo i2cdetect -y 1
```
This will search /dev/i2c-0 or /dev/i2c-1 for all address, and if an Adafruit PWM breakout is properly connected and it's set to it's default address -- meaning none of the 6 address solder jumpers at the top of the board have been soldered shut -- it should show up at 0x40 (binary 1000000) as follows:

Once both of these packages have been installed, you have everything you need to get started accessing I2C and SMBus devices in Python.
- [Previous Page](https://learn.adafruit.com/adafruit-16-channel-servo-driver-with-raspberry-pi/overview.md)
- [Next Page](https://learn.adafruit.com/adafruit-16-channel-servo-driver-with-raspberry-pi/hooking-it-up.md)
## Featured Products
### 5V 2A (2000mA) switching power supply - UL Listed
[5V 2A (2000mA) switching power supply - UL Listed](https://www.adafruit.com/product/276)
This is an FCC/CE certified and UL listed power supply. Need a lot of 5V power? This switching supply gives a clean regulated 5V output at up to 2000mA. 110 or 240 input, so it works in any country. The plugs are "US 2-prong" style so you may need a plug adapter, but you can pick one...
In Stock
[Buy Now](https://www.adafruit.com/product/276)
[Related Guides to the Product](https://learn.adafruit.com/products/276/guides)
### Female DC Power adapter - 2.1mm jack to screw terminal block
[Female DC Power adapter - 2.1mm jack to screw terminal block](https://www.adafruit.com/product/368)
If you need to connect a DC power wall wart to a board that doesn't have a DC jack - this adapter will come in very handy! There is a 2.1mm DC jack on one end, and a screw terminal block on the other. The terminals are labeled with positive/negative assuming a positive-tip configuration...
In Stock
[Buy Now](https://www.adafruit.com/product/368)
[Related Guides to the Product](https://learn.adafruit.com/products/368/guides)
### Standard servo - TowerPro SG-5010
[Standard servo - TowerPro SG-5010](https://www.adafruit.com/product/155)
This high-torque standard servo can rotate approximately 180 degrees (90 in each direction). You can use any servo code, hardware, or library to control these servos. Good for beginners who want to make stuff move without building a motor controller with feedback & gearbox. Comes with 3...
In Stock
[Buy Now](https://www.adafruit.com/product/155)
[Related Guides to the Product](https://learn.adafruit.com/products/155/guides)
### Continuous Rotation Servo
[Continuous Rotation Servo](https://www.adafruit.com/product/154)
This servo rotates fully forward or backward instead of moving to a position. You can use any servo code, hardware, or library to control these servos. Good for making simple moving robots. Comes with four different horns, as shown.
To control with an Arduino, we suggest connecting...
In Stock
[Buy Now](https://www.adafruit.com/product/154)
[Related Guides to the Product](https://learn.adafruit.com/products/154/guides)
### Adafruit 16-Channel 12-bit PWM/Servo Driver - I2C interface
[Adafruit 16-Channel 12-bit PWM/Servo Driver - I2C interface](https://www.adafruit.com/product/815)
You want to make a cool robot, maybe a hexapod walker, or maybe just a piece of art with a lot of moving parts. Or maybe you want to drive a lot of LEDs with precise PWM output. Then you realize that your microcontroller has a limited number of PWM outputs! What now? You could give up OR you...
In Stock
[Buy Now](https://www.adafruit.com/product/815)
[Related Guides to the Product](https://learn.adafruit.com/products/815/guides)
### Half Sized Premium Breadboard - 400 Tie Points
[Half Sized Premium Breadboard - 400 Tie Points](https://www.adafruit.com/product/64)
This is a cute, half-size breadboard with 400 tie points, good for small projects. It's 3.25" x 2.2" / 8.3cm x 5.5cm with a standard double-strip in the middle and two power rails on both sides. You can pull the power rails off easily to make the breadboard as...
In Stock
[Buy Now](https://www.adafruit.com/product/64)
[Related Guides to the Product](https://learn.adafruit.com/products/64/guides)
### Breadboarding wire bundle
[Breadboarding wire bundle](https://www.adafruit.com/product/153)
75 flexible stranded core wires with stiff ends molded on in red, orange, yellow, green, blue, brown, black and white. These are a major improvement over the "box of bent wires" that are sometimes sold with breadboards, and faster than stripping your own solid core wires. Makes...
In Stock
[Buy Now](https://www.adafruit.com/product/153)
[Related Guides to the Product](https://learn.adafruit.com/products/153/guides)
## Related Guides
- [Raspberry Pi Wifi-Controlled Cat Laser Toy](https://learn.adafruit.com/raspberry-pi-wifi-controlled-cat-laser-toy.md)
- [Adafruit PCA9685 16-Channel Servo Driver](https://learn.adafruit.com/16-channel-pwm-servo-driver.md)
- [CircuitPython Hardware: PCA9685 PWM & Servo Driver](https://learn.adafruit.com/micropython-hardware-pca9685-pwm-and-servo-driver.md)
- [LED Tricks: Gamma Correction](https://learn.adafruit.com/led-tricks-gamma-correction.md)
- [Adafruit Motor Selection Guide](https://learn.adafruit.com/adafruit-motor-selection-guide.md)
- [Adafruit IO Basics: Analog Output](https://learn.adafruit.com/adafruit-io-basics-analog-output.md)
- [MIDI Controlled Robot Lyre with CircuitPython](https://learn.adafruit.com/midi-controlled-robot-lyre-with-circuitpython.md)
- [Digital Circuits 4: Sequential Circuits](https://learn.adafruit.com/digital-circuits-4-sequential-circuits.md)
- [MASLOW: an Open WiFi Detector with Adafruit Pro Trinket and CC3000](https://learn.adafruit.com/wifi-hotspot-finder-adafruit-pro-trinket-cc3000.md)
- [Current Limiting Stepper Driver with DRV8871](https://learn.adafruit.com/current-limiting-stepper-driver-with-drv8871.md)
- [CRICKIT Flippy Robot](https://learn.adafruit.com/crickit-flippy-robot.md)
- [Adafruit NFC/RFID on Raspberry Pi](https://learn.adafruit.com/adafruit-nfc-rfid-on-raspberry-pi.md)
- [Stumble-Bot](https://learn.adafruit.com/stumble-bot-with-circuit-playground-and-crickit.md)
- [Adabot Toy Robot Friend](https://learn.adafruit.com/adabot-rp2040.md)
- [Making PCB Jewelry & Art with Gingerbread and KiCad](https://learn.adafruit.com/making-pcb-art-with-gingerbread-and-kicad.md)
---
# Source: https://learn.adafruit.com/flora-pixel-brooch/connect-first-signal-wire.md
# FLORA Pixel Brooch
## Connect first signal wire

Cut a small piece of hookup wire and use wire strippers to remove about 1/2 inch of the plastic coating at one end.

feed the bare wire end through the hole marked D6 on your FLORA.

Wrap the wire around the edge of the board and around itself to secure the wire. Pinch the D6 pad with your pliers to be sure the wire is making good contact to the metal.

Now it's time to decide where you'd like your first pixel. Hold it up to your FLORA to get an idea of how long the wire should be. This wire will connect to the pad on the pixel next to the inward-pointing arrow. **If you're using the newer v2 pixels, they will look slightly different, but the arrow notation is the same!**

Strip off the shielding off the wire at the desired length.

Slide the pixel onto this wire, using the hold next to the inward-pointing arrow.
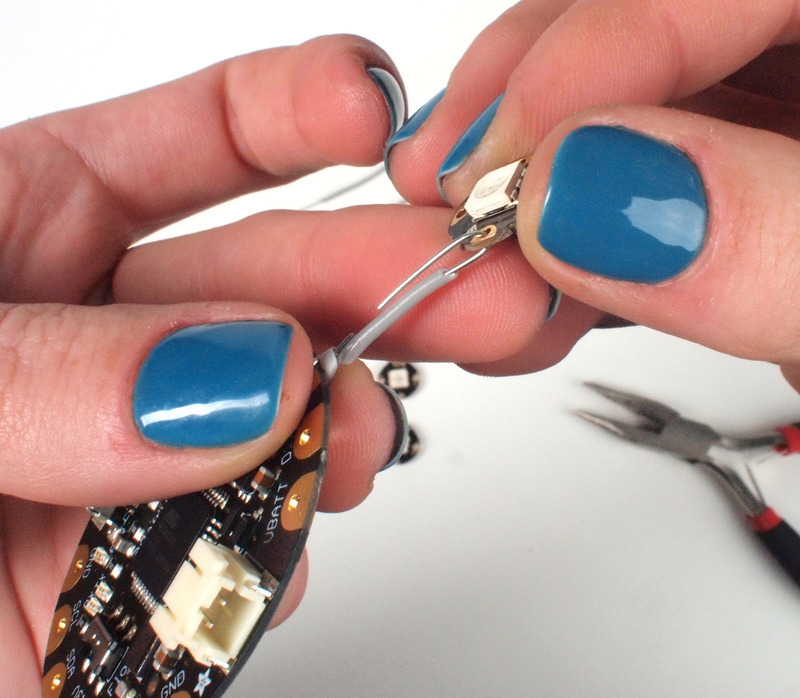
Fold the bare wire around the pixel board.

Like you did earlier, twist the wire around itself and crimp with your pliers to ensure a strong connection. The pixel should not wiggle.

Done! Time to move on to the rest of the wiring...
- [Previous Page](https://learn.adafruit.com/flora-pixel-brooch/overview.md)
- [Next Page](https://learn.adafruit.com/flora-pixel-brooch/connect-power-and-ground-wires.md)
## Featured Products
### FLORA - Wearable electronic platform: Arduino-compatible
[FLORA - Wearable electronic platform: Arduino-compatible](https://www.adafruit.com/product/659)
FLORA is Adafruit's fully-featured wearable electronics platform. It's a round, sewable, Arduino-compatible microcontroller designed to empower amazing wearables projects.FLORA comes with Adafruit's support, [tutorials and...](http://learn.adafruit.com/category/flora)
In Stock
[Buy Now](https://www.adafruit.com/product/659)
[Related Guides to the Product](https://learn.adafruit.com/products/659/guides)
### Flora RGB Smart NeoPixel version 3 - Pack of 4
[Flora RGB Smart NeoPixel version 3 - Pack of 4](https://www.adafruit.com/product/1260)
What's a wearable project without LEDs? Our favorite part of the Flora platform is these tiny smart pixels. Designed specifically for wearables, these updated Flora NeoPixels have ultra-cool technology: these ultra-bright LEDs have a constant-current driver cooked right into the LED...
In Stock
[Buy Now](https://www.adafruit.com/product/1260)
[Related Guides to the Product](https://learn.adafruit.com/products/1260/guides)
### Solid-Core Wire Spool - 25ft - 22AWG - Black
[Solid-Core Wire Spool - 25ft - 22AWG - Black](https://www.adafruit.com/product/290)
Perfect for bread-boarding, free wiring, etc. This spool of solid-core wire is easy to solder to. When bent it keeps its shape pretty well. We like to have a few spools of this stuff around. We suggest picking up wire strippers to match. Wire gauge is 22 AWG which we've found is the best...
In Stock
[Buy Now](https://www.adafruit.com/product/290)
[Related Guides to the Product](https://learn.adafruit.com/products/290/guides)
### Lithium Ion Polymer Battery - 3.7v 150mAh
[Lithium Ion Polymer Battery - 3.7v 150mAh](https://www.adafruit.com/product/1317)
Lithium-ion polymer (also known as 'lipo' or 'lipoly') batteries are thin, light, and powerful. The output ranges from 4.2V when completely charged to 3.7V. This battery has a capacity of 150mAh for a total of about 0.6 Wh. If you need a larger battery,
Out of Stock
[Buy Now](https://www.adafruit.com/product/1317)
[Related Guides to the Product](https://learn.adafruit.com/products/1317/guides)
### Magnetic Pin Back
[Magnetic Pin Back](https://www.adafruit.com/product/1170)
These magnetic pin backs have two pieces: a metal bar with adhesive strip and a plastic piece with two strong rare-earth magnets. Affix the metal bar to your FLORA projects-- it's just the right size! Then attach your FLORA project to any garment without poking holes in your clothes. The...
In Stock
[Buy Now](https://www.adafruit.com/product/1170)
[Related Guides to the Product](https://learn.adafruit.com/products/1170/guides)
### Hakko Professional Quality 20-30 AWG Wire Strippers
[Hakko Professional Quality 20-30 AWG Wire Strippers](https://www.adafruit.com/product/527)
These are the finest wire strippers we have used, and if you have to do a lot of wiring, you will agree! They have soft rounded grips - very comfortable to use, and precision ground notches that do a perfect job every time. No more yanking or twisting to strip wires cleanly and quickly.
In Stock
[Buy Now](https://www.adafruit.com/product/527)
[Related Guides to the Product](https://learn.adafruit.com/products/527/guides)
### Simple pliers
[Simple pliers](https://www.adafruit.com/product/146)
Simple needlenose pliers for twisting, pulling and pliering your project.
In Stock
[Buy Now](https://www.adafruit.com/product/146)
[Related Guides to the Product](https://learn.adafruit.com/products/146/guides)
### Getting Started with Adafruit FLORA
[Getting Started with Adafruit FLORA](https://www.adafruit.com/product/1839)
**Making Wearables with an Arduino-Compatible Electronics Platform**
This book introduces readers to building wearable electronics projects using Adafruit's tiny FLORA board: at 4.4 grams, and only 1.75 inches in diameter, and featuring Arduino compatibility, it's the...
No Longer Stocked
[Buy Now](https://www.adafruit.com/product/1839)
[Related Guides to the Product](https://learn.adafruit.com/products/1839/guides)
## Related Guides
- [Chameleon Scarf](https://learn.adafruit.com/chameleon-scarf.md)
- [Washing Wearable Electronics](https://learn.adafruit.com/washing-wearable-electronics.md)
- [Light-Up Angler Fish Embroidery](https://learn.adafruit.com/light-up-angler-fish-embroidery.md)
- [Flora TSL2561 Lux Sensor](https://learn.adafruit.com/flora-lux-sensor.md)
- [Glowing Skullcandy Headphones Mod](https://learn.adafruit.com/glowing-skullcandy-headphones-mod.md)
- [Flora Snaps](https://learn.adafruit.com/flora-snaps.md)
- [Heart Rate Badge](https://learn.adafruit.com/heart-rate-badge.md)
- [Memories of an Arduino](https://learn.adafruit.com/memories-of-an-arduino.md)
- [VU Meter Baseball Hat](https://learn.adafruit.com/vu-meter-baseball-hat.md)
- [Flora Wearable GPS](https://learn.adafruit.com/flora-wearable-gps.md)
- [Light of Your Life Wedding Bouquet](https://learn.adafruit.com/light-of-your-life-wedding-bouquet.md)
- [Flora Accelerometer](https://learn.adafruit.com/flora-accelerometer.md)
- [Mailbox Notification Service](https://learn.adafruit.com/mailbox-notification-service.md)
- [Pac Man Pixel Suspenders](https://learn.adafruit.com/pac-man-pixel-suspenders.md)
- [Adafruit NeoPot](https://learn.adafruit.com/adafruit-neopot.md)
---
# Source: https://learn.adafruit.com/flora-pixel-brooch/connect-power-and-ground-wires.md
# FLORA Pixel Brooch
## Connect power and ground wires
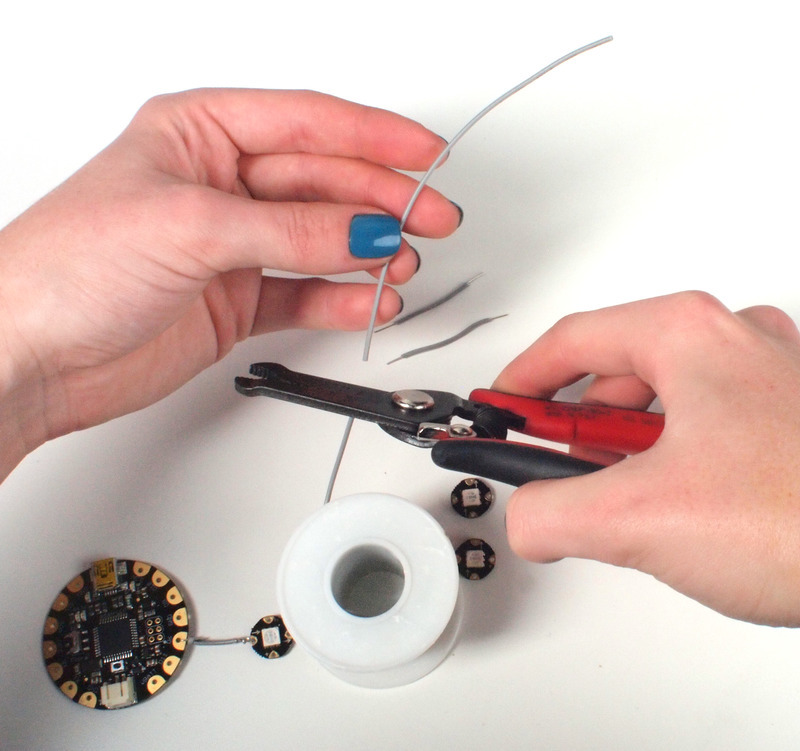
Cut a longer piece of wire-- about 6 inches. Remember: you can always make it shorter, but you can't make it longer!

Strip the end of the wire.

Attach this long wire to the FLORA pad marked VBATT in the same wrap-and-twist manner you used earlier.

See where your power wire will meet up with the pixel pad marked +, and strip the casing off of the wire past this point.

Thread the bare power wire through the pad marked +. Wrap it around the pad and crimp it to make a secure connection but DO NOT CUT the excess wire! You'll use it to chain to the next pixel's power pad.

Repeat the above steps for the ground wire, connected to the FLORA pad marked GND. Remember to keep the excess wire to use for the next pixels! With three points of contact, the angle and direction of your pixel design will start to take shape. I chose to arrange my three pixels in a curve following the contour of the edge of the FLORA board, and so made the first power connection longer than ground. You can arrange your pixels in a straight line or however you like.
- [Previous Page](https://learn.adafruit.com/flora-pixel-brooch/connect-first-signal-wire.md)
- [Next Page](https://learn.adafruit.com/flora-pixel-brooch/add-more-pixels.md)
## Featured Products
### FLORA - Wearable electronic platform: Arduino-compatible
[FLORA - Wearable electronic platform: Arduino-compatible](https://www.adafruit.com/product/659)
FLORA is Adafruit's fully-featured wearable electronics platform. It's a round, sewable, Arduino-compatible microcontroller designed to empower amazing wearables projects.FLORA comes with Adafruit's support, [tutorials and...](http://learn.adafruit.com/category/flora)
In Stock
[Buy Now](https://www.adafruit.com/product/659)
[Related Guides to the Product](https://learn.adafruit.com/products/659/guides)
### Flora RGB Smart NeoPixel version 3 - Pack of 4
[Flora RGB Smart NeoPixel version 3 - Pack of 4](https://www.adafruit.com/product/1260)
What's a wearable project without LEDs? Our favorite part of the Flora platform is these tiny smart pixels. Designed specifically for wearables, these updated Flora NeoPixels have ultra-cool technology: these ultra-bright LEDs have a constant-current driver cooked right into the LED...
In Stock
[Buy Now](https://www.adafruit.com/product/1260)
[Related Guides to the Product](https://learn.adafruit.com/products/1260/guides)
### Solid-Core Wire Spool - 25ft - 22AWG - Black
[Solid-Core Wire Spool - 25ft - 22AWG - Black](https://www.adafruit.com/product/290)
Perfect for bread-boarding, free wiring, etc. This spool of solid-core wire is easy to solder to. When bent it keeps its shape pretty well. We like to have a few spools of this stuff around. We suggest picking up wire strippers to match. Wire gauge is 22 AWG which we've found is the best...
In Stock
[Buy Now](https://www.adafruit.com/product/290)
[Related Guides to the Product](https://learn.adafruit.com/products/290/guides)
### Lithium Ion Polymer Battery - 3.7v 150mAh
[Lithium Ion Polymer Battery - 3.7v 150mAh](https://www.adafruit.com/product/1317)
Lithium-ion polymer (also known as 'lipo' or 'lipoly') batteries are thin, light, and powerful. The output ranges from 4.2V when completely charged to 3.7V. This battery has a capacity of 150mAh for a total of about 0.6 Wh. If you need a larger battery,
Out of Stock
[Buy Now](https://www.adafruit.com/product/1317)
[Related Guides to the Product](https://learn.adafruit.com/products/1317/guides)
### Magnetic Pin Back
[Magnetic Pin Back](https://www.adafruit.com/product/1170)
These magnetic pin backs have two pieces: a metal bar with adhesive strip and a plastic piece with two strong rare-earth magnets. Affix the metal bar to your FLORA projects-- it's just the right size! Then attach your FLORA project to any garment without poking holes in your clothes. The...
In Stock
[Buy Now](https://www.adafruit.com/product/1170)
[Related Guides to the Product](https://learn.adafruit.com/products/1170/guides)
### Hakko Professional Quality 20-30 AWG Wire Strippers
[Hakko Professional Quality 20-30 AWG Wire Strippers](https://www.adafruit.com/product/527)
These are the finest wire strippers we have used, and if you have to do a lot of wiring, you will agree! They have soft rounded grips - very comfortable to use, and precision ground notches that do a perfect job every time. No more yanking or twisting to strip wires cleanly and quickly.
In Stock
[Buy Now](https://www.adafruit.com/product/527)
[Related Guides to the Product](https://learn.adafruit.com/products/527/guides)
### Simple pliers
[Simple pliers](https://www.adafruit.com/product/146)
Simple needlenose pliers for twisting, pulling and pliering your project.
In Stock
[Buy Now](https://www.adafruit.com/product/146)
[Related Guides to the Product](https://learn.adafruit.com/products/146/guides)
### Getting Started with Adafruit FLORA
[Getting Started with Adafruit FLORA](https://www.adafruit.com/product/1839)
**Making Wearables with an Arduino-Compatible Electronics Platform**
This book introduces readers to building wearable electronics projects using Adafruit's tiny FLORA board: at 4.4 grams, and only 1.75 inches in diameter, and featuring Arduino compatibility, it's the...
No Longer Stocked
[Buy Now](https://www.adafruit.com/product/1839)
[Related Guides to the Product](https://learn.adafruit.com/products/1839/guides)
## Related Guides
- [Chameleon Scarf](https://learn.adafruit.com/chameleon-scarf.md)
- [Washing Wearable Electronics](https://learn.adafruit.com/washing-wearable-electronics.md)
- [Light-Up Angler Fish Embroidery](https://learn.adafruit.com/light-up-angler-fish-embroidery.md)
- [Flora TSL2561 Lux Sensor](https://learn.adafruit.com/flora-lux-sensor.md)
- [Glowing Skullcandy Headphones Mod](https://learn.adafruit.com/glowing-skullcandy-headphones-mod.md)
- [Flora Snaps](https://learn.adafruit.com/flora-snaps.md)
- [Heart Rate Badge](https://learn.adafruit.com/heart-rate-badge.md)
- [Memories of an Arduino](https://learn.adafruit.com/memories-of-an-arduino.md)
- [VU Meter Baseball Hat](https://learn.adafruit.com/vu-meter-baseball-hat.md)
- [Flora Wearable GPS](https://learn.adafruit.com/flora-wearable-gps.md)
- [Light of Your Life Wedding Bouquet](https://learn.adafruit.com/light-of-your-life-wedding-bouquet.md)
- [Flora Accelerometer](https://learn.adafruit.com/flora-accelerometer.md)
- [Mailbox Notification Service](https://learn.adafruit.com/mailbox-notification-service.md)
- [Pac Man Pixel Suspenders](https://learn.adafruit.com/pac-man-pixel-suspenders.md)
- [Adafruit NeoPot](https://learn.adafruit.com/adafruit-neopot.md)
---
# Source: https://learn.adafruit.com/adafruits-raspberry-pi-lesson-5-using-a-console-cable/connect-the-lead.md
# Adafruit's Raspberry Pi Lesson 5. Using a Console Cable
## Connect the Lead
The Console lead has four female connections that can be plugged directly onto the GPIO header of the Raspberry Pi.
The Adafruit USB console cable has 3.3V logic, so its safe to use with your Pi.

Attach the leads as shown below:

The connections are to the outside pin connections of the GPIO header. See Lesson 4, for more information about the header: [http://learn.adafruit.com/adafruits-raspberry-pi-lesson-4-gpio-setup/the-gpio-connector](http://learn.adafruit.com/adafruits-raspberry-pi-lesson-4-gpio-setup/the-gpio-connector)
- The red lead should be connected to 5V _if you want to power via the cable, see below for details_
- The black lead to GND (3rd pin down)
- The white lead to TXD on the Pi (4th pin down)
- The green lead to RXD on the pI (5th pin down)
# Powering Via Cable
Here's a photo showing an older Pi and also powering it via USB. Pi 2 or later are not suggested for this technique as they draw over 500mA
The important thing here is to only power it from one source, the USB power adaptor or the Console Lead **BUT NOT BOTH**. Unless you have a Pi A+ or Pi Zero, don't connect the red wire!
If you _do_ decide to power the Pi from the console cable, **DO NOT** attach the Pi's USB power adapter. If you would rather power the Pi from your USB power adapter then leave the Red lead from the Serial lead un attached.

OK now power up your Raspberry Pi!
- [Previous Page](https://learn.adafruit.com/adafruits-raspberry-pi-lesson-5-using-a-console-cable/software-installation-linux.md)
- [Next Page](https://learn.adafruit.com/adafruits-raspberry-pi-lesson-5-using-a-console-cable/test-and-configure.md)
## Featured Products
### Budget Pack for Raspberry Pi 1 Model B (Doesn't include RasPi)
[Budget Pack for Raspberry Pi 1 Model B (Doesn't include RasPi)](https://www.adafruit.com/product/965)
An optimized collection of parts and pieces to experiment with Raspberry Pi at home, school or work. Great for students and those that want to get their feet wet, no soldering required! **THIS PACK DOES NOT INCLUDE A RASPBERRY PI 1 MODEL B and is NOT compatible with Model B+ or Raspberry Pi...**
No Longer Stocked
[Buy Now](https://www.adafruit.com/product/965)
[Related Guides to the Product](https://learn.adafruit.com/products/965/guides)
### USB to TTL Serial Cable - Debug / Console Cable for Raspberry Pi
[USB to TTL Serial Cable - Debug / Console Cable for Raspberry Pi](https://www.adafruit.com/product/954)
The cable is easiest way ever to connect to your microcontroller/Raspberry Pi/WiFi router serial console port. Inside the big USB plug is a USB\<-\>Serial conversion chip and at the end of the 36" cable are four wire - red power, black ground, white RX into USB port, and green TX out...
In Stock
[Buy Now](https://www.adafruit.com/product/954)
[Related Guides to the Product](https://learn.adafruit.com/products/954/guides)
### Programming the Raspberry Pi: Getting Started with Python
[Programming the Raspberry Pi: Getting Started with Python](https://www.adafruit.com/product/1089)
**Program your own Raspberry Pi projects!**
An updated guide to programming your own Raspberry Pi projects. Learn to create inventive programs and fun games on your powerful Raspberry Pi--with no programming experience required. **This practical book has been revised...**
In Stock
[Buy Now](https://www.adafruit.com/product/1089)
[Related Guides to the Product](https://learn.adafruit.com/products/1089/guides)
### Raspberry Pi Model B starter pack Doesn't include Raspberry Pi 1
[Raspberry Pi Model B starter pack Doesn't include Raspberry Pi 1](https://www.adafruit.com/product/955)
You want to get hacking with your Pi fast, right? Get everything you need to start with the Adafruit Starter Pack for Raspberry Pi. It's the perfect accompaniment to your new Pi, everything you need to get a distro image loaded and running. **We even pre-assemble the Cobbler for you,...**
No Longer Stocked
[Buy Now](https://www.adafruit.com/product/955)
[Related Guides to the Product](https://learn.adafruit.com/products/955/guides)
### Raspberry Pi 1 Model B Starter Pack - Includes a Raspberry Pi
[Raspberry Pi 1 Model B Starter Pack - Includes a Raspberry Pi](https://www.adafruit.com/product/1014)
You want to get hacking with your Pi fast, right? Get everything you need to start with the Adafruit Starter Pack for Raspberry Pi. It's the perfect accompaniment to your new Pi, everything you need to boot up your Pi Model B and get going. **We pre-assemble the Cobbler for you, no...**
No Longer Stocked
[Buy Now](https://www.adafruit.com/product/1014)
[Related Guides to the Product](https://learn.adafruit.com/products/1014/guides)
### Raspberry Pi 3 - Model B - ARMv8 with 1G RAM
[Raspberry Pi 3 - Model B - ARMv8 with 1G RAM](https://www.adafruit.com/product/3055)
Did you really think the Raspberry Pi would stop getting better? At this point, we sound like a broken record, extolling on the new Pi’s myriad improvements like we’re surprised that the folks at the Raspberry Pi Foundation are continuously making their flagship board better. ...
In Stock
[Buy Now](https://www.adafruit.com/product/3055)
[Related Guides to the Product](https://learn.adafruit.com/products/3055/guides)
### Raspberry Pi Zero - Version 1.3
[Raspberry Pi Zero - Version 1.3](https://www.adafruit.com/product/2885)
At first glance, the Pi Zero isn't much. It just looks like a slimmed down version of the Raspberry Pi we know and love. But when we started to think of the possibilities - [and what a well-chosen set of accessories could add](https://www.adafruit.com/product/2816) -...
Out of Stock
[Buy Now](https://www.adafruit.com/product/2885)
[Related Guides to the Product](https://learn.adafruit.com/products/2885/guides)
### Raspberry Pi Model A+ 512MB RAM
[Raspberry Pi Model A+ 512MB RAM](https://www.adafruit.com/product/2266)
**Note:** As of August 10th, 2016 the Raspberry Pi A+ now includes 512 MB of RAM!
The Raspberry Pi Model A+ is the perfect board for the minimalist Pi fan. This low-cost Pi uses the same processor as the model B+, but does away with the Ethernet jack and three of the USB...
No Longer Stocked
[Buy Now](https://www.adafruit.com/product/2266)
[Related Guides to the Product](https://learn.adafruit.com/products/2266/guides)
## Related Guides
- [Windows IoT Core Application Development: Headless Blinky](https://learn.adafruit.com/windows-iot-application-development-headless-application.md)
- [Adafruit's Raspberry Pi Lesson 4. GPIO Setup](https://learn.adafruit.com/adafruits-raspberry-pi-lesson-4-gpio-setup.md)
- [Introducing the Raspberry Pi Model B+](https://learn.adafruit.com/introducing-the-raspberry-pi-model-b-plus-plus-differences-vs-model-b.md)
- [Adafruit Raspberry Pi Educational Linux Distro](https://learn.adafruit.com/adafruit-raspberry-pi-educational-linux-distro.md)
- [NeoPixels on Raspberry Pi](https://learn.adafruit.com/neopixels-on-raspberry-pi.md)
- [Controlling Motors using the Raspberry Pi and RasPiRobot Board V2](https://learn.adafruit.com/controlling-motors-using-the-raspberry-pi-and-raspirobot-board-v2.md)
- [Pi Video Output Using pygame](https://learn.adafruit.com/pi-video-output-using-pygame.md)
- [Windows IoT Core Application Development: Headed Blinky](https://learn.adafruit.com/windows-iot-application-development-headed-blinky.md)
- [Capacitive Touch Sensors on the Raspberry Pi](https://learn.adafruit.com/capacitive-touch-sensors-on-the-raspberry-pi.md)
- [Introducing the Raspberry Pi Zero](https://learn.adafruit.com/introducing-the-raspberry-pi-zero.md)
- [Send Raspberry Pi Data to COSM](https://learn.adafruit.com/send-raspberry-pi-data-to-cosm.md)
- [Getting Started With Windows IoT Core on Raspberry Pi](https://learn.adafruit.com/getting-started-with-windows-iot-on-raspberry-pi.md)
- [Node.js Embedded Development on the Raspberry Pi](https://learn.adafruit.com/node-embedded-development.md)
- [Using an External Drive as a Raspberry Pi Root Filesystem](https://learn.adafruit.com/external-drive-as-raspberry-pi-root.md)
- [Debugging with the Raspberry Pi WebIDE](https://learn.adafruit.com/debugging-with-the-raspberry-pi-webide.md)
---
# Source: https://learn.adafruit.com/digital-led-belt/connect-the-led-strip.md
# Digital LED Belt
## Connect the LED Strip
[We have a lot more details on the digital LED strip and how it works here](http://learn.adafruit.com/digital-led-strip) so you may want to also read that stuff.
The most important part is that you'll be soldering to one end of the LED strip, and to make sure you are soldering to tbe **INPUT** end. To determine which is the input, check the writing on the flexible PCB. If it says **CI DI** then thats the (correct) input end. If it says **CO DO** then thats the (wrong) output. You can only connect to the input end so double check.
Tin the pads by carefully melting a little solder onto the pads.


**We'll skip first wire, which is the red-striped one.** Go to the wire next to that (#2), that wire will connect to the **+5V** pad. Carefully solder the tinned pad to the tinned wire.
The next two wires go in line to **CI** and **DI.**

The unused fifth (5th) wire gets skipped as well.
The sixth wire connects to **GND.**

Now you can trim the unused wires (the red one and the skipped 5th one).
You can now reconnect the cable. Click on the image to enlarge it and make sure your wiring matches!
- [Previous Page](https://learn.adafruit.com/digital-led-belt/prepare-cable.md)
- [Next Page](https://learn.adafruit.com/digital-led-belt/upload-the-test-sketch.md)
## Featured Products
### Digital programmable LED belt kit
[Digital programmable LED belt kit](https://www.adafruit.com/product/332)
By popular demand, we now have a project tutorial for how to make your own programmable, ultra-blinky LED belt. Perfect for parties, raves, parades, weddings, funerals, and bar mitzvahs. Wear it with pride, wear it with blinky! Follow our soldering tutorial to build your own heirloom LED belt,...
No Longer Stocked
[Buy Now](https://www.adafruit.com/product/332)
[Related Guides to the Product](https://learn.adafruit.com/products/332/guides)
## Related Guides
- [LED Sequin Bow Tie](https://learn.adafruit.com/led-sequin-bowtie.md)
- [Bluetooth-Controlled NeoPixel Goggles](https://learn.adafruit.com/bluetooth-neopixel-goggles.md)
- [Light Painting with Raspberry Pi](https://learn.adafruit.com/light-painting-with-raspberry-pi.md)
- [Glowing Viking Rune wayFinder](https://learn.adafruit.com/glowing-viking-rune-artifact.md)
- [3D Printing with Bamboo Wood Filament](https://learn.adafruit.com/3d-printing-with-bamboo-wood-filament.md)
- [Jellyfish Umbrella with easy WLED WiFi Control](https://learn.adafruit.com/jellyfish-umbrella-with-easy-wled-wifi-control.md)
- [Bandolier of Light](https://learn.adafruit.com/bandolier-of-light.md)
- [Electron Bow](https://learn.adafruit.com/electron-bow.md)
- [Steven Universe Cosplay Shirt & Gem](https://learn.adafruit.com/steven-universe-cosplay-shirt-gem.md)
- [CLUE Vertical Garden Weather Visualizer](https://learn.adafruit.com/clue-vertical-garden-weather-visualizer.md)
- [Cast a 3d Printed Necklace in Metal](https://learn.adafruit.com/cast-a-3d-printed-necklace-in-metal.md)
- [3D Printed Wearable Video Goggles](https://learn.adafruit.com/3d-printed-wearable-video-goggles.md)
- [Bunny Ears with MakeCode](https://learn.adafruit.com/bunny-ears-with-makecode.md)
- [Roll-up Video Light](https://learn.adafruit.com/roll-up-video-light.md)
- [1,500 NeoPixel LED Curtain with Raspberry Pi and Fadecandy](https://learn.adafruit.com/1500-neopixel-led-curtain-with-raspberry-pi-fadecandy.md)
---
# Source: https://learn.adafruit.com/2-8-tft-touch-shield/connect.md
# 2.8" TFT Touch Shield
## Connect

Because the TFT is exactly the same size as an Arduino, we preassemble the shield in the factory. To use, simply place it onto your Arduino. No wiring, no soldering!
- [Previous Page](https://learn.adafruit.com/2-8-tft-touch-shield/faq.md)
- [Next Page](https://learn.adafruit.com/2-8-tft-touch-shield/lcd-test.md)
## Featured Products
### Adafruit METRO 328 Fully Assembled - Arduino IDE compatible
[Adafruit METRO 328 Fully Assembled - Arduino IDE compatible](https://www.adafruit.com/product/50)
We sure love the ATmega328 here at Adafruit, and we use them _a lot_ for our own projects. The processor has plenty of GPIO, Analog inputs, hardware UART SPI and I2C, timers and PWM galore - just enough for most simple projects. When we need to go small, we use a
Out of Stock
[Buy Now](https://www.adafruit.com/product/50)
[Related Guides to the Product](https://learn.adafruit.com/products/50/guides)
## Related Guides
- [LED Lightbox](https://learn.adafruit.com/led-lightbox.md)
- [Trinket Audio Player](https://learn.adafruit.com/trinket-audio-player.md)
- [Geofencing with the FONA 808 & Adafruit IO](https://learn.adafruit.com/geofencing-with-the-fona-808-and-adafruit-io.md)
- [Adafruit Analog Accelerometer Breakouts](https://learn.adafruit.com/adafruit-analog-accelerometer-breakouts.md)
- [Electronic Demon Costume](https://learn.adafruit.com/electronic-demon-costume.md)
- [Adafruit Ultimate GPS Logger Shield](https://learn.adafruit.com/adafruit-ultimate-gps-logger-shield.md)
- [Mini Thermal Receipt Printers](https://learn.adafruit.com/mini-thermal-receipt-printer.md)
- [Bluefruit LE Connect for iOS and Android](https://learn.adafruit.com/bluefruit-le-connect.md)
- [Introducing Adafruit Trellis ](https://learn.adafruit.com/adafruit-trellis-diy-open-source-led-keypad.md)
- [Arduino Lesson 9. Sensing Light](https://learn.adafruit.com/adafruit-arduino-lesson-9-sensing-light.md)
- [36mm LED Pixels](https://learn.adafruit.com/36mm-led-pixels.md)
- [Adafruit 16-channel PWM/Servo Shield](https://learn.adafruit.com/adafruit-16-channel-pwm-slash-servo-shield.md)
- [Naughty or Nice Machine](https://learn.adafruit.com/naughty-or-nice-machine.md)
- [Wireless Gardening with Arduino + CC3000 WiFi Modules](https://learn.adafruit.com/wireless-gardening-arduino-cc3000-wifi-modules.md)
- [LSM303 Accelerometer + Compass Breakout](https://learn.adafruit.com/lsm303-accelerometer-slash-compass-breakout.md)
---
# Source: https://learn.adafruit.com/photocells/connecting-a-photocell.md
# Photocells
## Connecting a Photocell
Because photocells are basically resistors, they are non-polarized. That means you can connect them up 'either way' and they'll work just fine!
Photocells are pretty hardy, you can easily solder to them, clip the leads, plug them into breadboards, use alligator clips, etc. The only care you should take is to avoid bending the leads right at the epoxied sensor, as they could break off if flexed too often.
- [Previous Page](https://learn.adafruit.com/photocells/testing-a-photocell.md)
- [Next Page](https://learn.adafruit.com/photocells/using-a-photocell.md)
## Featured Products
### Photo cell (CdS photoresistor)
[Photo cell (CdS photoresistor)](https://www.adafruit.com/product/161)
CdS cells are little light sensors. As the squiggly face is exposed to more light, the resistance goes down. When it's light, the resistance is about ~1KΩ, when dark it goes up to ~10KΩ.
To use, connect one side of the photocell (either one, it's symmetric) to power...
In Stock
[Buy Now](https://www.adafruit.com/product/161)
[Related Guides to the Product](https://learn.adafruit.com/products/161/guides)
### Adafruit METRO 328 Fully Assembled - Arduino IDE compatible
[Adafruit METRO 328 Fully Assembled - Arduino IDE compatible](https://www.adafruit.com/product/50)
We sure love the ATmega328 here at Adafruit, and we use them _a lot_ for our own projects. The processor has plenty of GPIO, Analog inputs, hardware UART SPI and I2C, timers and PWM galore - just enough for most simple projects. When we need to go small, we use a
Out of Stock
[Buy Now](https://www.adafruit.com/product/50)
[Related Guides to the Product](https://learn.adafruit.com/products/50/guides)
### Digital Multimeter
[Digital Multimeter](https://www.adafruit.com/product/71)
This is a basic multimeter, I've played with it a bunch and I think its a great addition to a toolbox. It's low cost and simple to use with a big clear display and all the measurements you need:
- AC/DC Voltage measurement
- Current measurement, from 1uA up to...
No Longer Stocked
[Buy Now](https://www.adafruit.com/product/71)
[Related Guides to the Product](https://learn.adafruit.com/products/71/guides)
### Half Sized Premium Breadboard - 400 Tie Points
[Half Sized Premium Breadboard - 400 Tie Points](https://www.adafruit.com/product/64)
This is a cute, half-size breadboard with 400 tie points, good for small projects. It's 3.25" x 2.2" / 8.3cm x 5.5cm with a standard double-strip in the middle and two power rails on both sides. You can pull the power rails off easily to make the breadboard as...
In Stock
[Buy Now](https://www.adafruit.com/product/64)
[Related Guides to the Product](https://learn.adafruit.com/products/64/guides)
## Related Guides
- [Halloween Pumpkin](https://learn.adafruit.com/halloween-pumpkin.md)
- [Adafruit Proto Screw Shield](https://learn.adafruit.com/adafruit-proto-screw-shield.md)
- [Arduino Lesson 11. LCD Displays - Part 1](https://learn.adafruit.com/adafruit-arduino-lesson-11-lcd-displays-1.md)
- [Program an AVR or Arduino Using Raspberry Pi GPIO](https://learn.adafruit.com/program-an-avr-or-arduino-using-raspberry-pi-gpio-pins.md)
- [Arduino Lesson 12. LCD Displays - Part 2](https://learn.adafruit.com/adafruit-arduino-lesson-12-lcd-displays-part-2.md)
- [Silicone Robo-Tentacle](https://learn.adafruit.com/silicone-robo-tentacle.md)
- [Babel Fish](https://learn.adafruit.com/babel-fish.md)
- [Arduino Lesson 10. Making Sounds](https://learn.adafruit.com/adafruit-arduino-lesson-10-making-sounds.md)
- [Arduino Lesson 16. Stepper Motors](https://learn.adafruit.com/adafruit-arduino-lesson-16-stepper-motors.md)
- [Line Following Zumo Robot Using Simulink](https://learn.adafruit.com/line-following-zumo-robot-programmed-with-simulink.md)
- [Bluefruit LE Connect for iOS and Android](https://learn.adafruit.com/bluefruit-le-connect.md)
- [Adafruit 16-channel PWM/Servo Shield](https://learn.adafruit.com/adafruit-16-channel-pwm-slash-servo-shield.md)
- [8BitBox](https://learn.adafruit.com/8bitbox.md)
- [Tiny Arduino Music Visualizer](https://learn.adafruit.com/piccolo.md)
- [Adafruit 1.14" 240x135 Color TFT Breakout LCD Display](https://learn.adafruit.com/adafruit-1-14-240x135-color-tft-breakout.md)
---
# Source: https://learn.adafruit.com/conductive-thread/connecting-components.md
# Conductive Thread
## Connecting components

The thread must travel between components to connect them, while avoiding other paths of conductive thread in the circuit. The thread acts like uninsulated wire or traces on a circuit board, but this circuit board is made out of fabric!

The most straightforward connection is a running stitch. You can also learn many more [hand embroidery stitches](http://www.needlenthread.com/2006/06/basic-embroidery-stitches-line-stitches.html) which can have decorative or functional appeal in your project.

As you stitch along, pause periodically to whip-stitch a chainable pixel's ground pad (-).

Turning 180 degrees

Now that all the pixels are anchored by one pad, clean up any stray threads on the back.
Tie a knot with a sewing needle! Insert the needle under a previous stitch.


Pull the thread almost all the way through, leaving a small loop. Put your needle through this loop and pull the thread through, creating a tight knot.
Don't forget to seal the knot with Fray Check or clear nail polish before trimming the tail closely.


- [Previous Page](https://learn.adafruit.com/conductive-thread/tying-knots.md)
- [Next Page](https://learn.adafruit.com/conductive-thread/preventing-short-circuits.md)
## Featured Products
### Stainless Medium Conductive Thread - 3 ply - 18 meter/60 ft
[Stainless Medium Conductive Thread - 3 ply - 18 meter/60 ft](https://www.adafruit.com/product/641)
After months of searching, we finally have what we consider to be the ultimate conductive thread. It's thin, strong, smooth, and made completely of 316L stainless steel. Once you start working with this thread you'll quickly agree its optimal for any wearables work!
This...
Out of Stock
[Buy Now](https://www.adafruit.com/product/641)
[Related Guides to the Product](https://learn.adafruit.com/products/641/guides)
### Stainless Thin Conductive Thread - 2 ply - 23 meter/76 ft
[Stainless Thin Conductive Thread - 2 ply - 23 meter/76 ft](https://www.adafruit.com/product/640)
After months of searching, we finally have what we consider to be the ultimate conductive thread. It's thin, strong, smooth, and made completely of 316L stainless steel. Once you start working with this thread you'll quickly agree its optimal for any wearables work!
This...
In Stock
[Buy Now](https://www.adafruit.com/product/640)
[Related Guides to the Product](https://learn.adafruit.com/products/640/guides)
### Stainless Thin Conductive Yarn / Thick Conductive Thread - 30 ft
[Stainless Thin Conductive Yarn / Thick Conductive Thread - 30 ft](https://www.adafruit.com/product/603)
This 316L stainless steel thread falls somewhere between a thick thread and a thin yarn. Most sewing machines wouldn't be happy with this thread since its thick, and it has the 'furry' soft feel of yarn which makes it poor for most e-textiles/wearables projects. However, the high...
In Stock
[Buy Now](https://www.adafruit.com/product/603)
[Related Guides to the Product](https://learn.adafruit.com/products/603/guides)
### Conductive thread ribbon cable - White - 1 yard
[Conductive thread ribbon cable - White - 1 yard](https://www.adafruit.com/product/1139)
This lightweight, flexible fabric ribbon cable contains four channels of conductive thread, perfect for wiring up wearables where flexibility is key. Use it to connect your conductive fabric gamepad to your microcontroller or computer!
Features:
- Low resistance: ~16...
No Longer Stocked
[Buy Now](https://www.adafruit.com/product/1139)
[Related Guides to the Product](https://learn.adafruit.com/products/1139/guides)
### Needle set - 3/9 sizes - 20 needles
[Needle set - 3/9 sizes - 20 needles](https://www.adafruit.com/product/615)
Mighty needles, sew like the wind! This needle set is the only one you'll need for any sort of hand sewing, especially using our conductive thread and wearable electronics parts.
Each pack contains 20 gold-eye sharps, with eye sizes ranging from #3 (1.75" long) to #9...
Out of Stock
[Buy Now](https://www.adafruit.com/product/615)
[Related Guides to the Product](https://learn.adafruit.com/products/615/guides)
### Small Alligator Clip Test Lead (set of 12)
[Small Alligator Clip Test Lead (set of 12)](https://www.adafruit.com/product/1008)
Connect this to that without soldering using these handy mini alligator clip test leads. 15" cables with alligator clip on each end, color coded. You get 12 pieces in 6 colors. Strong and grippy, these always come in handy! We often use these in conjunction with a multimeter so we...
In Stock
[Buy Now](https://www.adafruit.com/product/1008)
[Related Guides to the Product](https://learn.adafruit.com/products/1008/guides)
### Sewable Snaps - 5mm Diameter - Card of 24
[Sewable Snaps - 5mm Diameter - Card of 24](https://www.adafruit.com/product/1126)
The small 5mm size of these tin-plated brass snaps means they fit perfectly on Flora's pads! Snaps make a great connector for wearables-- solder one side to the board and sew the other to your project with conductive thread! This card comes with 24 complete snaps (socket and stud...
In Stock
[Buy Now](https://www.adafruit.com/product/1126)
[Related Guides to the Product](https://learn.adafruit.com/products/1126/guides)
### FLORA - Wearable electronic platform: Arduino-compatible
[FLORA - Wearable electronic platform: Arduino-compatible](https://www.adafruit.com/product/659)
FLORA is Adafruit's fully-featured wearable electronics platform. It's a round, sewable, Arduino-compatible microcontroller designed to empower amazing wearables projects.FLORA comes with Adafruit's support, [tutorials and...](http://learn.adafruit.com/category/flora)
In Stock
[Buy Now](https://www.adafruit.com/product/659)
[Related Guides to the Product](https://learn.adafruit.com/products/659/guides)
## Related Guides
- [Capacitive Touch with Conductive Fabric & Flora](https://learn.adafruit.com/capacitive-touch-with-conductive-fabric-and-flora.md)
- [Fiber Optic Pixie Skirt](https://learn.adafruit.com/fiber-optic-pixie-princess-skirt.md)
- [Haptic Headband](https://learn.adafruit.com/haptic-headband.md)
- [EEG Costume Cap](https://learn.adafruit.com/eeg-costume-cap.md)
- [Zipper Switch](https://learn.adafruit.com/zipper-switch.md)
- [Adafruit Arduino IDE Setup](https://learn.adafruit.com/adafruit-arduino-ide-setup.md)
- [Sewable NeoPixels](https://learn.adafruit.com/flora-rgb-smart-pixels.md)
- [FLORA TV-B-Gone](https://learn.adafruit.com/flora-tv-b-gone.md)
- [Experimenting with NeverWet + Electronics](https://learn.adafruit.com/neverwet-electronics.md)
- [LED Stego Flex Spike Hoodie](https://learn.adafruit.com/led-stego-flex-spike-hoodie.md)
- [Getting Started with FLORA](https://learn.adafruit.com/getting-started-with-flora.md)
- [Sunscreen Reminder Hat](https://learn.adafruit.com/sunscreen-reminder-hat.md)
- [Mailbox Notification Service](https://learn.adafruit.com/mailbox-notification-service.md)
- [FLORA + FONA](https://learn.adafruit.com/flora-plus-fona.md)
- [Flora TSL2561 Lux Sensor](https://learn.adafruit.com/flora-lux-sensor.md)
---
# Source: https://learn.adafruit.com/adafruit-led-backpack/connecting-multiple-backpacks.md
# Adafruit LED Backpacks
## Connecting Multiple Backpacks
The coolest part about the I2C backpacks is that you can connect more than one using just the same 2 pins. This opens possibilities for [all kinds of multi-display projects](http://learn.adafruit.com/animating-multiple-led-backpacks/ideas).
[For a project that shows this is practice, check out this page](http://learn.adafruit.com/animating-multiple-led-backpacks) on animating multiple LED backpacks

# Wire it Up
To connect another backpack to your project, just wire it in parallel with the first one as in the diagram below.
Info:

# Configure the Address
For each backpack you add, you need to configure a different I2C address. You can keep adding backpacks in the same way until you run out of addresses. See the next page for how to configure the address on your backpack.- [Previous Page](https://learn.adafruit.com/adafruit-led-backpack/bi-color-24-bargraph-circuitpython-usage.md)
- [Next Page](https://learn.adafruit.com/adafruit-led-backpack/changing-i2c-address.md)
## Primary Products
### Adafruit Mini 8x8 LED Matrix w/I2C Backpack - Red
[Adafruit Mini 8x8 LED Matrix w/I2C Backpack - Red](https://www.adafruit.com/product/870)
What's better than a single LED? Lots of LEDs! A fun way to make a small display is to use an [8x8 matrix](https://www.adafruit.com/category/37_88) or a [4-digit 7-segment display](https://www.adafruit.com/category/37_103). Matrices like these are...
In Stock
[Buy Now](https://www.adafruit.com/product/870)
[Related Guides to the Product](https://learn.adafruit.com/products/870/guides)
### Adafruit Mini 8x8 LED Matrix w/I2C Backpack - Yellow
[Adafruit Mini 8x8 LED Matrix w/I2C Backpack - Yellow](https://www.adafruit.com/product/871)
What's better than a single LED? Lots of LEDs! A fun way to make a small display is to use an [8x8 matrix](https://www.adafruit.com/category/37_88) or a [4-digit 7-segment display](https://www.adafruit.com/category/37_103). Matrices like these are...
In Stock
[Buy Now](https://www.adafruit.com/product/871)
[Related Guides to the Product](https://learn.adafruit.com/products/871/guides)
### Adafruit Mini 0.8" 8x8 LED Matrix w/I2C Backpack - Yellow-Green
[Adafruit Mini 0.8" 8x8 LED Matrix w/I2C Backpack - Yellow-Green](https://www.adafruit.com/product/872)
What's better than a single LED? Lots of LEDs! A fun way to make a small display is to use an [8x8 matrix](https://www.adafruit.com/category/37_88) or a [4-digit 7-segment display](https://www.adafruit.com/category/37_103). Matrices like these are...
In Stock
[Buy Now](https://www.adafruit.com/product/872)
[Related Guides to the Product](https://learn.adafruit.com/products/872/guides)
### Adafruit 0.56" 4-Digit 7-Segment Display with I2C Backpack - Red
[Adafruit 0.56" 4-Digit 7-Segment Display with I2C Backpack - Red](https://www.adafruit.com/product/878)
What's better than a single LED? Lots of LEDs! A fun way to make a small display is to use an [8x8 matrix](https://www.adafruit.com/category/37_88) or a [4-digit 7-segment display](https://www.adafruit.com/category/37_103). Matrices like these are...
In Stock
[Buy Now](https://www.adafruit.com/product/878)
[Related Guides to the Product](https://learn.adafruit.com/products/878/guides)
### Adafruit 0.56" 4-Digit 7-Segment Display w/I2C Backpack - Yellow
[Adafruit 0.56" 4-Digit 7-Segment Display w/I2C Backpack - Yellow](https://www.adafruit.com/product/879)
What's better than a single LED? Lots of LEDs! A fun way to make a small display is to use an [8x8 matrix](https://www.adafruit.com/category/37_88) or a [4-digit 7-segment display](https://www.adafruit.com/category/37_103). Matrices like these are...
In Stock
[Buy Now](https://www.adafruit.com/product/879)
[Related Guides to the Product](https://learn.adafruit.com/products/879/guides)
### Adafruit 0.56" 4-Digit 7-Segment Display w/ I2C Backpack - Green
[Adafruit 0.56" 4-Digit 7-Segment Display w/ I2C Backpack - Green](https://www.adafruit.com/product/880)
What's better than a single LED? Lots of LEDs! A fun way to make a small display is to use an [8x8 matrix](https://www.adafruit.com/category/37_88) or a [4-digit 7-segment display](https://www.adafruit.com/category/37_103). Matrices like these are...
No Longer Stocked
[Buy Now](https://www.adafruit.com/product/880)
[Related Guides to the Product](https://learn.adafruit.com/products/880/guides)
### Adafruit 0.56" 4-Digit 7-Segment Display w/ I2C Backpack - Blue
[Adafruit 0.56" 4-Digit 7-Segment Display w/ I2C Backpack - Blue](https://www.adafruit.com/product/881)
What's better than a single LED? Lots of LEDs! A fun way to make a small display is to use an [8x8 matrix](https://www.adafruit.com/category/37_88) or a [4-digit 7-segment display](https://www.adafruit.com/category/37_103). Matrices like these are...
In Stock
[Buy Now](https://www.adafruit.com/product/881)
[Related Guides to the Product](https://learn.adafruit.com/products/881/guides)
### Adafruit Bicolor LED Square Pixel Matrix with I2C Backpack
[Adafruit Bicolor LED Square Pixel Matrix with I2C Backpack](https://www.adafruit.com/product/902)
What's better than a single LED? Lots of LEDs! A fun way to make a small colorful display is to use a [1.2" Bi-color 8x8 LED Matrix](http://www.adafruit.com/products/458). Matrices like these are 'multiplexed' - so to control all the 128 LEDs you need 24 pins....
In Stock
[Buy Now](https://www.adafruit.com/product/902)
[Related Guides to the Product](https://learn.adafruit.com/products/902/guides)
### Adafruit Mini 8x8 LED Matrix w/I2C Backpack - Blue
[Adafruit Mini 8x8 LED Matrix w/I2C Backpack - Blue](https://www.adafruit.com/product/959)
What's better than a single LED? Lots of LEDs! A fun way to make a small display is to use an [8x8 matrix](https://www.adafruit.com/category/37_88) or a [4-digit 7-segment display](https://www.adafruit.com/category/37_103). Matrices like these are...
In Stock
[Buy Now](https://www.adafruit.com/product/959)
[Related Guides to the Product](https://learn.adafruit.com/products/959/guides)
### Adafruit 0.56" 4-Digit 7-Segment Display w/I2C Backpack - White
[Adafruit 0.56" 4-Digit 7-Segment Display w/I2C Backpack - White](https://www.adafruit.com/product/1002)
What's better than a single LED? Lots of LEDs! A fun way to make a small display is to use an [8x8 matrix](https://www.adafruit.com/category/37_88) or a [4-digit 7-segment display](https://www.adafruit.com/category/37_103). Matrices like these are...
In Stock
[Buy Now](https://www.adafruit.com/product/1002)
[Related Guides to the Product](https://learn.adafruit.com/products/1002/guides)
### Adafruit 1.2" 8x8 LED Matrix Backpack
[Adafruit 1.2" 8x8 LED Matrix Backpack](https://www.adafruit.com/product/1048)
By popular request, you can now get our 8x8 LED backpacks without the LEDs! These backpacks feature an HT16K33 I2C LED driver, they're simple and easy to use - you can use [our very nice library for the backpacks to...](https://github.com/adafruit/Adafruit-LED-Backpack-Library)
In Stock
[Buy Now](https://www.adafruit.com/product/1048)
[Related Guides to the Product](https://learn.adafruit.com/products/1048/guides)
### Adafruit Small 1.2" 8x8 LED Matrix w/I2C Backpack - Red
[Adafruit Small 1.2" 8x8 LED Matrix w/I2C Backpack - Red](https://www.adafruit.com/product/1049)
What's better than a single LED? Lots of LEDs! A fun way to make a small display is to use an [8x8 matrix](https://www.adafruit.com/category/37_88) or a [4-digit 7-segment display](https://www.adafruit.com/category/37_103). Matrices like these are...
In Stock
[Buy Now](https://www.adafruit.com/product/1049)
[Related Guides to the Product](https://learn.adafruit.com/products/1049/guides)
### Adafruit Small 1.2" 8x8 LED Matrix w/I2C Backpack - Yellow
[Adafruit Small 1.2" 8x8 LED Matrix w/I2C Backpack - Yellow](https://www.adafruit.com/product/1050)
What's better than a single LED? Lots of LEDs! A fun way to make a small display is to use an [8x8 matrix](https://www.adafruit.com/category/37_88) or a [4-digit 7-segment display](https://www.adafruit.com/category/37_103). Matrices like these are...
In Stock
[Buy Now](https://www.adafruit.com/product/1050)
[Related Guides to the Product](https://learn.adafruit.com/products/1050/guides)
### Adafruit Small 1.2" 8x8 LED Matrix w/I2C Backpack - Blue
[Adafruit Small 1.2" 8x8 LED Matrix w/I2C Backpack - Blue](https://www.adafruit.com/product/1052)
What's better than a single LED? Lots of LEDs! A fun way to make a small display is to use an [8x8 matrix](https://www.adafruit.com/category/37_88) or a [4-digit 7-segment display](https://www.adafruit.com/category/37_103). Matrices like these are...
In Stock
[Buy Now](https://www.adafruit.com/product/1052)
[Related Guides to the Product](https://learn.adafruit.com/products/1052/guides)
### Adafruit Mini 8x8 LED Matrix w/I2C Backpack - Ultra Bright White
[Adafruit Mini 8x8 LED Matrix w/I2C Backpack - Ultra Bright White](https://www.adafruit.com/product/1080)
What's better than a single LED? Lots of LEDs! A fun way to make a small display is to use an [8x8 matrix](https://www.adafruit.com/category/37_88) or a [4-digit 7-segment display](https://www.adafruit.com/category/37_103). Matrices like these are...
In Stock
[Buy Now](https://www.adafruit.com/product/1080)
[Related Guides to the Product](https://learn.adafruit.com/products/1080/guides)
### Adafruit 1.2" 4-Digit 7-Segment Display w/I2C Backpack - Green
[Adafruit 1.2" 4-Digit 7-Segment Display w/I2C Backpack - Green](https://www.adafruit.com/product/1268)
What's better than a single LED? Lots of LEDs! A fun way to make a numeric display is to use a [4-digit 7-segment display](https://www.adafruit.com/category/37_103). LED matrices like these are 'multiplexed' - so to control all the seven-segment LEDs you need 14 pins....
No Longer Stocked
[Buy Now](https://www.adafruit.com/product/1268)
[Related Guides to the Product](https://learn.adafruit.com/products/1268/guides)
### Adafruit 1.2" 4-Digit 7-Segment Display w/I2C Backpack - Yellow
[Adafruit 1.2" 4-Digit 7-Segment Display w/I2C Backpack - Yellow](https://www.adafruit.com/product/1269)
What's better than a single LED? Lots of LEDs! A fun way to make a numeric display is to use a [4-digit 7-segment display](https://www.adafruit.com/category/37_103). LED matrices like these are 'multiplexed' - so to control all the seven-segment LEDs you need 14 pins....
In Stock
[Buy Now](https://www.adafruit.com/product/1269)
[Related Guides to the Product](https://learn.adafruit.com/products/1269/guides)
### Adafruit 1.2" 4-Digit 7-Segment Display w/I2C Backpack - Red
[Adafruit 1.2" 4-Digit 7-Segment Display w/I2C Backpack - Red](https://www.adafruit.com/product/1270)
What's better than a single LED? Lots of LEDs! A fun way to make a numeric display is to use a [4-digit 7-segment display](https://www.adafruit.com/category/37_103). LED matrices like these are 'multiplexed' - so to control all the seven-segment LEDs you need 14 pins....
In Stock
[Buy Now](https://www.adafruit.com/product/1270)
[Related Guides to the Product](https://learn.adafruit.com/products/1270/guides)
### Small 1.2" 8x8 Ultra Bright White LED Matrix + Backpack
[Small 1.2" 8x8 Ultra Bright White LED Matrix + Backpack](https://www.adafruit.com/product/1614)
What's better than a single LED? Lots of LEDs! A fun way to make a small display is to use an [8x8 matrix](https://www.adafruit.com/category/37_88) or a [4-digit 7-segment display](https://www.adafruit.com/category/37_103). Matrices like these are...
In Stock
[Buy Now](https://www.adafruit.com/product/1614)
[Related Guides to the Product](https://learn.adafruit.com/products/1614/guides)
### Adafruit Small 1.2" 8x8 LED Matrix w/I2C Backpack - Pure Green
[Adafruit Small 1.2" 8x8 LED Matrix w/I2C Backpack - Pure Green](https://www.adafruit.com/product/1632)
What's better than a single LED? Lots of LEDs! A fun way to make a small display is to use an [8x8 matrix](https://www.adafruit.com/category/37_88) or a [4-digit 7-segment display](https://www.adafruit.com/category/37_103). Matrices like these are...
In Stock
[Buy Now](https://www.adafruit.com/product/1632)
[Related Guides to the Product](https://learn.adafruit.com/products/1632/guides)
### Adafruit Mini 0.8" 8x8 LED Matrix w/I2C Backpack - Pure Green
[Adafruit Mini 0.8" 8x8 LED Matrix w/I2C Backpack - Pure Green](https://www.adafruit.com/product/1633)
What's better than a single LED? Lots of LEDs! A fun way to make a small display is to use an [8x8 matrix](https://www.adafruit.com/category/37_88) or a [4-digit 7-segment display](https://www.adafruit.com/category/37_103). Matrices like these are...
In Stock
[Buy Now](https://www.adafruit.com/product/1633)
[Related Guides to the Product](https://learn.adafruit.com/products/1633/guides)
### Bi-Color (Red/Green) 24-Bar Bargraph w/I2C Backpack Kit
[Bi-Color (Red/Green) 24-Bar Bargraph w/I2C Backpack Kit](https://www.adafruit.com/product/1721)
What's better than a single LED? Lots of LEDs! A fun way to make a small linear display is to use two 12-bar Bi-color bar-graphs. However, this LED bargraph is 'multiplexed' - so to control all the 48 LEDs you need a lot of pins.
Out of Stock
[Buy Now](https://www.adafruit.com/product/1721)
[Related Guides to the Product](https://learn.adafruit.com/products/1721/guides)
### Small 1.2" 8x8 Ultra Bright Square Amber LED Matrix + Backpack
[Small 1.2" 8x8 Ultra Bright Square Amber LED Matrix + Backpack](https://www.adafruit.com/product/1854)
What's better than a single LED? Lots of LEDs! Matrices like these are 'multiplexed' - so to control 64 LEDs you need 16 pins. That's a lot of pins, and there are [driver chips like the MAX7219](//www.adafruit.com/products/453) that can control a matrix for you but...
In Stock
[Buy Now](https://www.adafruit.com/product/1854)
[Related Guides to the Product](https://learn.adafruit.com/products/1854/guides)
### Small 1.2" 8x8 Ultra Bright Square Yellow LED Matrix + Backpack
[Small 1.2" 8x8 Ultra Bright Square Yellow LED Matrix + Backpack](https://www.adafruit.com/product/1855)
What's better than a single LED? Lots of LEDs! Matrices like these are 'multiplexed' - so to control 64 LEDs you need 16 pins. That's a lot of pins, and there are [driver chips like the MAX7219](//www.adafruit.com/products/453) that can control a matrix for you but...
In Stock
[Buy Now](https://www.adafruit.com/product/1855)
[Related Guides to the Product](https://learn.adafruit.com/products/1855/guides)
### Small 1.2" 8x8 Bright Square Pure Green LED Matrix + Backpack
[Small 1.2" 8x8 Bright Square Pure Green LED Matrix + Backpack](https://www.adafruit.com/product/1856)
What's better than a single LED? Lots of LEDs! Matrices like these are 'multiplexed' - so to control 64 LEDs you need 16 pins. That's a lot of pins, and there are [driver chips like the MAX7219](//www.adafruit.com/products/453) that can control a matrix for you but...
In Stock
[Buy Now](https://www.adafruit.com/product/1856)
[Related Guides to the Product](https://learn.adafruit.com/products/1856/guides)
### Small 1.2" 8x8 Ultra Bright Square White LED Matrix + Backpack
[Small 1.2" 8x8 Ultra Bright Square White LED Matrix + Backpack](https://www.adafruit.com/product/1857)
What's better than a single LED? Lots of LEDs! Matrices like these are 'multiplexed' - so to control 64 LEDs you need 16 pins. That's a lot of pins, and there are [driver chips like the MAX7219](//www.adafruit.com/products/453) that can control a matrix for you but...
In Stock
[Buy Now](https://www.adafruit.com/product/1857)
[Related Guides to the Product](https://learn.adafruit.com/products/1857/guides)
### Adafruit 14-segment LED Alphanumeric Backpack - STEMMA QT
[Adafruit 14-segment LED Alphanumeric Backpack - STEMMA QT](https://www.adafruit.com/product/1910)
By popular request, you can now get our 14-segment LED backpacks without the LEDs! These backpacks feature an HT16K33 I2C LED driver, they're simple and easy to use - you can use [our very nice library for the backpacks to...](https://github.com/adafruit/Adafruit-LED-Backpack-Library)
In Stock
[Buy Now](https://www.adafruit.com/product/1910)
[Related Guides to the Product](https://learn.adafruit.com/products/1910/guides)
### Quad Alphanumeric Display - Red 0.54" Digits w/ I2C Backpack
[Quad Alphanumeric Display - Red 0.54" Digits w/ I2C Backpack](https://www.adafruit.com/product/1911)
Display, elegantly, 012345678 or 9! Gaze, hypnotized, at ABCDEFGHIJKLM - well it can display the whole alphabet. You get the point. This is a nice, bright alphanumeric display that shows letters and numbers in a beautiful red hue. It's super bright and designed for viewing from distances...
In Stock
[Buy Now](https://www.adafruit.com/product/1911)
[Related Guides to the Product](https://learn.adafruit.com/products/1911/guides)
### Quad Alphanumeric Display - Blue 0.54" Digits w/ I2C Backpack
[Quad Alphanumeric Display - Blue 0.54" Digits w/ I2C Backpack](https://www.adafruit.com/product/1912)
Display, elegantly, 012345678 or 9! Gaze, hypnotized, at ABCDEFGHIJKLM - well it can display the whole alphabet. You get the point. This is a nice, bright alphanumeric display that shows letters and numbers in a beautiful blue hue. It's super bright and designed for viewing from distances...
In Stock
[Buy Now](https://www.adafruit.com/product/1912)
[Related Guides to the Product](https://learn.adafruit.com/products/1912/guides)
### 16x8 1.2" LED Matrix + Backpack - Ultra Bright Round Green LEDs
[16x8 1.2" LED Matrix + Backpack - Ultra Bright Round Green LEDs](https://www.adafruit.com/product/2035)
What's better than a single LED? Lots of LEDs! And what's better than lots of LEDs? **TWO TIMES AS MANY LEDS!!!**
With the 16x8 LED Matrix Backpack we've doubled your project's matrix capacity by making it super easy to get two separate 8x8 matrices onto...
In Stock
[Buy Now](https://www.adafruit.com/product/2035)
[Related Guides to the Product](https://learn.adafruit.com/products/2035/guides)
### 16x8 1.2" LED Matrix+Backpack UltraBright Round YellowGreen LEDs
[16x8 1.2" LED Matrix+Backpack UltraBright Round YellowGreen LEDs](https://www.adafruit.com/product/2036)
What's better than a single LED? Lots of LEDs! And what's better than lots of LEDs? **TWO TIMES AS MANY LEDS!!!**
With the 16x8 LED Matrix Backpack we've doubled your project's matrix capacity by making it super easy to get two separate 8x8 matrices onto...
In Stock
[Buy Now](https://www.adafruit.com/product/2036)
[Related Guides to the Product](https://learn.adafruit.com/products/2036/guides)
### 16x8 1.2" LED Matrix + Backpack - Ultra Bright Round Red LEDs
[16x8 1.2" LED Matrix + Backpack - Ultra Bright Round Red LEDs](https://www.adafruit.com/product/2037)
What's better than a single LED? Lots of LEDs! And what's better than lots of LEDs? **TWO TIMES AS MANY LEDS!!!**
With the 16x8 LED Matrix Backpack we've doubled your project's matrix capacity by making it super easy to get two separate 8x8 matrices onto...
In Stock
[Buy Now](https://www.adafruit.com/product/2037)
[Related Guides to the Product](https://learn.adafruit.com/products/2037/guides)
### 16x8 1.2" LED Matrix + Backpack - Ultra Bright Round White LEDs
[16x8 1.2" LED Matrix + Backpack - Ultra Bright Round White LEDs](https://www.adafruit.com/product/2038)
What's better than a single LED? Lots of LEDs! And what's better than lots of LEDs? **TWO TIMES AS MANY LEDS!!!**
With the 16x8 LED Matrix Backpack we've doubled your project's matrix capacity by making it super easy to get two separate 8x8 matrices onto...
In Stock
[Buy Now](https://www.adafruit.com/product/2038)
[Related Guides to the Product](https://learn.adafruit.com/products/2038/guides)
### 16x8 1.2" LED Matrix + Backpack - Ultra Bright Round Blue LEDs
[16x8 1.2" LED Matrix + Backpack - Ultra Bright Round Blue LEDs](https://www.adafruit.com/product/2039)
What's better than a single LED? Lots of LEDs! And what's better than lots of LEDs? **TWO TIMES AS MANY LEDS!!!**
With the 16x8 LED Matrix Backpack we've doubled your project's matrix capacity by making it super easy to get two separate 8x8 matrices onto...
In Stock
[Buy Now](https://www.adafruit.com/product/2039)
[Related Guides to the Product](https://learn.adafruit.com/products/2039/guides)
### 16x8 1.2" LED Matrix + Backpack - Ultra Bright Square Blue LEDs
[16x8 1.2" LED Matrix + Backpack - Ultra Bright Square Blue LEDs](https://www.adafruit.com/product/2040)
What's better than a single LED? Lots of LEDs! And what's better than lots of LEDs? **TWO TIMES AS MANY LEDS!!!**
With the 16x8 LED Matrix Backpack we've doubled your project's matrix capacity by making it super easy to get two separate 8x8 matrices onto...
In Stock
[Buy Now](https://www.adafruit.com/product/2040)
[Related Guides to the Product](https://learn.adafruit.com/products/2040/guides)
### 16x8 1.2" LED Matrix + Backpack - Ultra Bright Square Amber LEDs
[16x8 1.2" LED Matrix + Backpack - Ultra Bright Square Amber LEDs](https://www.adafruit.com/product/2041)
What's better than a single LED? Lots of LEDs! And what's better than lots of LEDs? **TWO TIMES AS MANY LEDS!!!**
With the 16x8 LED Matrix Backpack we've doubled your project's matrix capacity by making it super easy to get two separate 8x8 matrices onto...
In Stock
[Buy Now](https://www.adafruit.com/product/2041)
[Related Guides to the Product](https://learn.adafruit.com/products/2041/guides)
### 16x8 1.2" LED Matrix + Backpack - Ultra Bright Square Green LEDs
[16x8 1.2" LED Matrix + Backpack - Ultra Bright Square Green LEDs](https://www.adafruit.com/product/2042)
What's better than a single LED? Lots of LEDs! And what's better than lots of LEDs? **TWO TIMES AS MANY LEDS!!!**
With the 16x8 LED Matrix Backpack we've doubled your project's matrix capacity by making it super easy to get two separate 8x8 matrices onto...
In Stock
[Buy Now](https://www.adafruit.com/product/2042)
[Related Guides to the Product](https://learn.adafruit.com/products/2042/guides)
### 16x8 1.2" LED Matrix + Backpack -Ultra Bright Square Yellow LEDs
[16x8 1.2" LED Matrix + Backpack -Ultra Bright Square Yellow LEDs](https://www.adafruit.com/product/2043)
What's better than a single LED? Lots of LEDs! And what's better than lots of LEDs? **TWO TIMES AS MANY LEDS!!!**
With the 16x8 LED Matrix Backpack we've doubled your project's matrix capacity by making it super easy to get two separate 8x8 matrices onto...
In Stock
[Buy Now](https://www.adafruit.com/product/2043)
[Related Guides to the Product](https://learn.adafruit.com/products/2043/guides)
### 16x8 1.2" LED Matrix + Backpack - Ultra Bright Square White LEDs
[16x8 1.2" LED Matrix + Backpack - Ultra Bright Square White LEDs](https://www.adafruit.com/product/2044)
What's better than a single LED? Lots of LEDs! And what's better than lots of LEDs? **TWO TIMES AS MANY LEDS!!!**
With the 16x8 LED Matrix Backpack we've doubled your project's matrix capacity by making it super easy to get two separate 8x8 matrices onto...
In Stock
[Buy Now](https://www.adafruit.com/product/2044)
[Related Guides to the Product](https://learn.adafruit.com/products/2044/guides)
### 16x8 1.2" LED Matrix + Backpack-Ultra Bright Round Orange LEDs
[16x8 1.2" LED Matrix + Backpack-Ultra Bright Round Orange LEDs](https://www.adafruit.com/product/2052)
What's better than a single LED? Lots of LEDs! And what's better than lots of LEDs? **TWO TIMES AS MANY LEDS!!!**
With the 16x8 LED Matrix Backpack we've doubled your project's matrix capacity by making it super easy to get two separate 8x8 matrices onto...
In Stock
[Buy Now](https://www.adafruit.com/product/2052)
[Related Guides to the Product](https://learn.adafruit.com/products/2052/guides)
### 16x8 1.2" LED Matrices+Backpack Round LEDs in Various Colors
[16x8 1.2" LED Matrices+Backpack Round LEDs in Various Colors](https://www.adafruit.com/product/2054)
What's better than a single LED? Lots of LEDs! And what's better than lots of LEDs? **TWO TIMES AS MANY LEDS!!!**
With the 16x8 LED Matrix Backpack we've doubled your project's matrix capacity by making it super easy to get two separate 8x8 matrices onto...
Out of Stock
[Buy Now](https://www.adafruit.com/product/2054)
[Related Guides to the Product](https://learn.adafruit.com/products/2054/guides)
### Adafruit 8x16 LED Matrix FeatherWing w/o Matrices
[Adafruit 8x16 LED Matrix FeatherWing w/o Matrices](https://www.adafruit.com/product/3090)
You will chirp with delight when you see how easy it is to make your very own 8x16 LED matrix display for any Feather. At 0.8" square, the little [8x8 matrices](https://www.adafruit.com/new/?q=8x8%20miniature%20LED%20matrix&) have everything a big LED matrix has,...
Out of Stock
[Buy Now](https://www.adafruit.com/product/3090)
[Related Guides to the Product](https://learn.adafruit.com/products/3090/guides)
### Adafruit 14-segment LED Alphanumeric backpack (same as P1910)
[Adafruit 14-segment LED Alphanumeric backpack (same as P1910)](https://www.adafruit.com/product/3322)
Just the backpack + 4pin header
No Longer Stocked
[Buy Now](https://www.adafruit.com/product/3322)
[Related Guides to the Product](https://learn.adafruit.com/products/3322/guides)
## Featured Products
### Adafruit Small 1.2" 8x8 LED Matrix w/I2C Backpack - Yellow-Green
[Adafruit Small 1.2" 8x8 LED Matrix w/I2C Backpack - Yellow-Green](https://www.adafruit.com/product/1051)
What's better than a single LED? Lots of LEDs! A fun way to make a small display is to use an [8x8 matrix](https://www.adafruit.com/category/37_88) or a [4-digit 7-segment display](https://www.adafruit.com/category/37_103). Matrices like these are...
In Stock
[Buy Now](https://www.adafruit.com/product/1051)
[Related Guides to the Product](https://learn.adafruit.com/products/1051/guides)
### Small 1.2" 8x8 Ultra Bright Square Blue LED Matrix + Backpack
[Small 1.2" 8x8 Ultra Bright Square Blue LED Matrix + Backpack](https://www.adafruit.com/product/1853)
What's better than a single LED? Lots of LEDs! Matrices like these are 'multiplexed' - so to control 64 LEDs you need 16 pins. That's a lot of pins, and there are [driver chips like the MAX7219](//www.adafruit.com/products/453) that can control a matrix for you but...
In Stock
[Buy Now](https://www.adafruit.com/product/1853)
[Related Guides to the Product](https://learn.adafruit.com/products/1853/guides)
## Related Guides
- [LED Backpack Displays on Raspberry Pi and BeagleBone Black](https://learn.adafruit.com/led-backpack-displays-on-raspberry-pi-and-beaglebone-black.md)
- [Animating Multiple LED Backpacks](https://learn.adafruit.com/animating-multiple-led-backpacks.md)
- [Arduino GPS Clock](https://learn.adafruit.com/arduino-clock.md)
- [Raspberry Pi Physical Dashboard](https://learn.adafruit.com/raspberry-pi-physical-dashboard.md)
- [CircuitPython Hardware: LED Backpacks & FeatherWings](https://learn.adafruit.com/micropython-hardware-led-backpacks-and-featherwings.md)
- [Matrix and 7-Segment LED Backpack with the Raspberry Pi](https://learn.adafruit.com/matrix-7-segment-led-backpack-with-the-raspberry-pi.md)
- [DIY Pocket LED Gamer - Tiny Tetris!](https://learn.adafruit.com/diy-3d-printed-handheld-pocket-game-tiny-tetris-snake.md)
- [RGB LED Matrix Cube with 25,000 LEDs](https://learn.adafruit.com/rgb-led-matrix-cube-for-pi.md)
- [Creating GIFs for SmartMatrix](https://learn.adafruit.com/creating-gifs-for-smartmatrix.md)
- [Adafruit CharliePlex LED Matrix Bonnet](https://learn.adafruit.com/adafruit-charlieplex-bonnet.md)
- [Connecting a 16x32 RGB LED Matrix Panel to a Raspberry Pi](https://learn.adafruit.com/connecting-a-16x32-rgb-led-matrix-panel-to-a-raspberry-pi.md)
- [MicroPython Displays: Drawing Text](https://learn.adafruit.com/micropython-displays-drawing-text.md)
- [Heart Rate Badge](https://learn.adafruit.com/heart-rate-badge.md)
- [16x24 LED Matrix](https://learn.adafruit.com/16x24-led-matrix.md)
- [Adafruit IS31FL3741](https://learn.adafruit.com/adafruit-is31fl3741.md)
---
# Source: https://learn.adafruit.com/send-raspberry-pi-data-to-cosm/connecting-the-cobbler-slash-mcp3008-slash-tmp36.md
# Send Raspberry Pi Data to COSM
## Connecting the Cobbler to the MCP3008 and TMP36
Info:
# Why we need an ADC
The Raspberry Pi computer does not have a way to read analog inputs. It's a digital-only computer. Compare this to the Arduino, AVR or PIC microcontrollers that often have 6 or more analog inputs! Analog inputs are handy because many sensors are analog outputs, so we need a way to make the Pi analog-friendly.
We'll do that by wiring up an [MCP3008 chip](https://www.adafruit.com/products/856) to it. The [MCP3008](https://www.adafruit.com/products/856) acts like a 'bridge' between digital and analog. It has 8 analog inputs and the Pi can query it using 4 digital pins. That makes it a perfect addition to the Pi for integrating simple sensors like [photocells](http://learn.adafruit.com/photocells), [FSRs](http://learn.adafruit.com/force-sensitive-resistor-fsr) or potentiometers, [thermistors](http://learn.adafruit.com/thermistor), etc.!
[Lets check the datasheet of the MCP3008 chip.](http://www.adafruit.com/datasheets/MCP3008.pdf) On the first page in the lower right corner there's a pinout diagram showing the names of the pins.
# Wiring Diagram
In order to read analog data we need to use the following pins: **VDD** (power), **DGND** (digital ground) to power the MCP3008 chip. We also need four 'SPI' data pins: **DOUT** (Data Out from MCP3008), **CLK** (Clock pin), **DIN** (Data In from Raspberry Pi), and / **CS** (Chip Select). Finally of course, a source of analog data, we'll be using the TMP36 temperature sensor
The MCP3008 has a few more pins we need to connect: **AGND** (analog ground, used sometimes in precision circuitry, which this is not) connects to **GND** , and **VREF** (analog voltage reference, used for changing the 'scale' - we want the full scale so tie it to **3.3V** )
Below is a wiring diagram. Connect the 3.3V cobbler pin to the left + rail and the GND pin to the right - rail. Connect the following pins for the MCP chip
- MCP3008 VDD -\> 3.3V (red)
- MCP3008 VREF -\> 3.3V (red)
- MCP3008 AGND -\> GND (green)
- MCP3008 CLK -\> #18
- MCP3008 DOUT -\> #23
- MCP3008 DIN -\> #24
- MCP3008 CS -\> #25
- MCP3008 DGND -\> GND (green)
Advanced users may note that the Raspberry Pi does have a hardware SPI interface (the cobbler pins are labeled MISO/MOSI/SCLK/CE0/CE1). The hardware SPI interface is super fast but not included in all distributions. For that reason we are using a bit banged SPI implementation so the SPI pins can be any of the raspberry pi's GPIOs (assuming you update the script). Once you get this project working with the above pinout, feel free to edit the python code to change the pins as you'd like to have them!

# TMP36
Finally the TMP36 has three pins that need to be connected. They are numbered from left to right in ascending order when the text of the sensor is facing you.
- pin1: 3.3v
- pin2: analog out --\> channel0 on mcp3008 (pin1)
- pin3: gnd

- [Previous Page](https://learn.adafruit.com/send-raspberry-pi-data-to-cosm/overview.md)
- [Next Page](https://learn.adafruit.com/send-raspberry-pi-data-to-cosm/necessary-packages.md)
## Featured Products
### MCP3008 - 8-Channel 10-Bit ADC With SPI Interface
[MCP3008 - 8-Channel 10-Bit ADC With SPI Interface](https://www.adafruit.com/product/856)
Need to add analog inputs? This chip will add 8 channels of 10-bit analog input to your microcontroller or microcomputer project. It's super easy to use and uses SPI so only 4 pins are required. We chose this chip as a great accompaniment to the Raspberry Pi computer because it's fun...
In Stock
[Buy Now](https://www.adafruit.com/product/856)
[Related Guides to the Product](https://learn.adafruit.com/products/856/guides)
### TMP36 - Analog Temperature sensor
[TMP36 - Analog Temperature sensor](https://www.adafruit.com/product/165)
Wide range, low power temperature sensor outputs an analog voltage that is proportional to the ambient temperature. To use, connect pin 1 (left) to power (between 2.7 and 5.5V), pin 3 (right) to ground, and pin 2 to analog in on your microcontroller. The voltage out is 0V at -50°C and...
In Stock
[Buy Now](https://www.adafruit.com/product/165)
[Related Guides to the Product](https://learn.adafruit.com/products/165/guides)
### Full Sized Premium Breadboard - 830 Tie Points
[Full Sized Premium Breadboard - 830 Tie Points](https://www.adafruit.com/product/239)
This is a 'full-size' premium quality breadboard, 830 tie points. Good for small and medium projects. It's 2.2" x 7" (5.5 cm x 17 cm) with a standard double-strip in the middle and two power rails on both sides. You can pull the power rails off easily to make the...
In Stock
[Buy Now](https://www.adafruit.com/product/239)
[Related Guides to the Product](https://learn.adafruit.com/products/239/guides)
### Half Sized Premium Breadboard - 400 Tie Points
[Half Sized Premium Breadboard - 400 Tie Points](https://www.adafruit.com/product/64)
This is a cute, half-size breadboard with 400 tie points, good for small projects. It's 3.25" x 2.2" / 8.3cm x 5.5cm with a standard double-strip in the middle and two power rails on both sides. You can pull the power rails off easily to make the breadboard as...
In Stock
[Buy Now](https://www.adafruit.com/product/64)
[Related Guides to the Product](https://learn.adafruit.com/products/64/guides)
### Adafruit Assembled Pi Cobbler Breakout + Cable for Raspberry Pi
[Adafruit Assembled Pi Cobbler Breakout + Cable for Raspberry Pi](https://www.adafruit.com/product/914)
Now that you've finally got your hands on a [Raspberry Pi® Model B](http://www.raspberrypi.org/), you're probably itching to make some fun embedded computer projects with it. What you need is an add on prototyping Pi Cobbler from Adafruit, which can break out all those...
No Longer Stocked
[Buy Now](https://www.adafruit.com/product/914)
[Related Guides to the Product](https://learn.adafruit.com/products/914/guides)
### GPIO Ribbon Cable for Raspberry Pi Model A and B - 26 pin
[GPIO Ribbon Cable for Raspberry Pi Model A and B - 26 pin](https://www.adafruit.com/product/862)
That new Raspberry Pi® Model A or B computer you just got has a row of 2x13 pin headers soldered on - those are the GPIO (general purpose input/output) pins and for those of us who like to hack electronics they are where the real fun is. By programming the Pi, you can twiddle those pins...
In Stock
[Buy Now](https://www.adafruit.com/product/862)
[Related Guides to the Product](https://learn.adafruit.com/products/862/guides)
### Adafruit Pi Box - Enclosure for Raspberry Pi Model A or B
[Adafruit Pi Box - Enclosure for Raspberry Pi Model A or B](https://www.adafruit.com/product/859)
**Discontinued** - you can grab [Adafruit Pi Box Plus - Enclosure for RasPi Model B+/Pi 2/ Pi 3](https://www.adafruit.com/product/1985) instead!
**We're still selling this classic Adafruit case for those who specifically want it but **
No Longer Stocked
[Buy Now](https://www.adafruit.com/product/859)
[Related Guides to the Product](https://learn.adafruit.com/products/859/guides)
## Related Guides
- [MCP3008 - 8-Channel 10-Bit ADC With SPI Interface](https://learn.adafruit.com/mcp3008-spi-adc.md)
- [Adafruit MAX31856 Universal Thermocouple Amplifier](https://learn.adafruit.com/adafruit-max31856-thermocouple-amplifier.md)
- [Adafruit Swirly Aluminum Mounting Grid for 0.1" Spaced PCBs](https://learn.adafruit.com/swirly-grid.md)
- [Capacitive Touch with Conductive Fabric & Flora](https://learn.adafruit.com/capacitive-touch-with-conductive-fabric-and-flora.md)
- [Raspberry Pi Wifi-Controlled Cat Laser Toy](https://learn.adafruit.com/raspberry-pi-wifi-controlled-cat-laser-toy.md)
- [Adafruit's Raspberry Pi Lesson 6. Using SSH](https://learn.adafruit.com/adafruits-raspberry-pi-lesson-6-using-ssh.md)
- [Piezo Ring Tones with Raspberry Pi](https://learn.adafruit.com/piezo-ring-tones-with-raspberry-pi.md)
- [LED Backpack Displays on Raspberry Pi and BeagleBone Black](https://learn.adafruit.com/led-backpack-displays-on-raspberry-pi-and-beaglebone-black.md)
- [Bluetooth LE MIDI Controller](https://learn.adafruit.com/bluetooth-le-midi-controller.md)
- [MCP9808 Temperature Sensor Python Library](https://learn.adafruit.com/mcp9808-temperature-sensor-python-library.md)
- [ulab: Crunch Numbers fast in CircuitPython](https://learn.adafruit.com/ulab-crunch-numbers-fast-with-circuitpython.md)
- [Using MPL3115A2 with CircuitPython](https://learn.adafruit.com/using-mpl3115a2-with-circuitpython.md)
- [Pi-Top Assembly ](https://learn.adafruit.com/pi-top-assembly.md)
- [Goose Game M4SK Controller](https://learn.adafruit.com/goose-game-m4sk-controller.md)
- [Bluefruit Playground App](https://learn.adafruit.com/bluefruit-playground-app.md)
- [Raspberry Pi SelfieBlock](https://learn.adafruit.com/selfieblock.md)
---
# Source: https://learn.adafruit.com/reading-a-analog-in-and-controlling-audio-volume-with-the-raspberry-pi/connecting-the-cobbler-to-a-mcp3008.md
# Analog Inputs for Raspberry Pi Using the MCP3008
## Connecting the Cobbler to a MCP3008
# To follow this tutorial you will need
- [MCP3008 DIP-package ADC converter chip](https://www.adafruit.com/products/856 "Link: https://www.adafruit.com/products/856")
- [10K trimer](https://www.adafruit.com/products/356 "Link: https://www.adafruit.com/products/356") [or panel mount potentiometer](https://www.adafruit.com/products/562)
- [Adafruit T-Cobbler Plus](https://www.adafruit.com/product/2028) or for an older 26-pin Pi an [Adafruit Pi Cobbler](https://www.adafruit.com/products/914 "Link: https://www.adafruit.com/products/914")
- [Full-size breadboard](https://www.adafruit.com/products/239)
- [Breadboarding wires](https://www.adafruit.com/category/82 "Link: https://www.adafruit.com/category/82")
And of course a working Raspberry Pi.
# Why we need an ADC
The Raspberry Pi computer does not have a way to read analog inputs. It's a digital-only computer. Compare this to the Arduino, AVR or PIC microcontrollers that often have 6 or more analog inputs! Analog inputs are handy because many sensors are analog outputs, so we need a way to make the Pi analog-friendly.
We'll do that by wiring up an [MCP3008 chip](https://www.adafruit.com/products/856) to it. The [MCP3008](https://www.adafruit.com/products/856) acts like a "bridge" between digital and analog. It has 8 analog inputs and the Pi can query it using 4 digital pins. That makes it a perfect addition to the Pi for integrating simple sensors like [photocells](http://learn.adafruit.com/photocells), [FSRs](http://learn.adafruit.com/force-sensitive-resistor-fsr) or potentiometers, [thermistors](http://learn.adafruit.com/thermistor), etc.!
[Let's check the datasheet of the MCP3008 chip.](http://www.adafruit.com/datasheets/MCP3008.pdf "Link: http://www.adafruit.com/datasheets/MCP3008.pdf") On the first page in the lower right corner there's a pinout diagram showing the names of the pins:

# Wiring Diagram
In order to read analog data we need to use the following pins:
**VDD** (power) and **DGND ** (digital ground) to power the MCP3008 chip. We also need four "SPI" data pins: **DOUT** (Data Out from MCP3008), **CLK** (Clock pin), **DIN** (Data In from Raspberry Pi), and / **CS** (Chip Select). Finally of course, a source of analog data. We'll be using the basic 10k trim pot.
The MCP3008 has a few more pins we need to connect: **AGND** (analog ground, used sometimes in precision circuitry, which this is not) connects to **GND** , and **VREF** (analog voltage reference, used for changing the "scale" - we want the full scale, so tie it to **3.3V** ).
Below is a wiring diagram. Connect the 3.3V cobbler pin to the left + rail and the GND pin to the right - rail. Connect the following pins for the MCP chip
- MCP3008 VDD -\> 3.3V (red)
- MCP3008 VREF -\> 3.3V (red)
- MCP3008 AGND -\> GND (black)
- MCP3008 CLK -\> SCLK (yellow)
- MCP3008 DOUT -\> MISO (purple)
- MCP3008 DIN -\> MOSI (white)
- MCP3008 CS -\> #22 (green)
- MCP3008 DGND -\> GND (black)
Next connect up the potentiometer.
- Pin #1 (left) goes to 3.3v (red)
- Pin #2 (middle) connects to MCP3008 **CH0** (analog input #0) with a purple wire
- Pin #3 (right) connects to GND (black)
Below we provide to wiring diagrams that will work with all versions of Raspberry Pi released so far (except the compute node which has no header). The first diagram is for the most recent Pi v3 and Pi Zero models which have a 40-pin GPIO header. The second is for the first two generations of Raspberry Pi which had a smaller 26-pin header. In both cases we are using the same GPIOs so the code will not be any different.
## T-Cobbler Plus Wiring 40-Pin Pi (v3, Zero)

## Pi Cobbler Wiring 26-Pin Pi (v1, v2)

- [Previous Page](https://learn.adafruit.com/reading-a-analog-in-and-controlling-audio-volume-with-the-raspberry-pi/overview.md)
- [Next Page](https://learn.adafruit.com/reading-a-analog-in-and-controlling-audio-volume-with-the-raspberry-pi/necessary-packages.md)
## Featured Products
### MCP3008 - 8-Channel 10-Bit ADC With SPI Interface
[MCP3008 - 8-Channel 10-Bit ADC With SPI Interface](https://www.adafruit.com/product/856)
Need to add analog inputs? This chip will add 8 channels of 10-bit analog input to your microcontroller or microcomputer project. It's super easy to use and uses SPI so only 4 pins are required. We chose this chip as a great accompaniment to the Raspberry Pi computer because it's fun...
In Stock
[Buy Now](https://www.adafruit.com/product/856)
[Related Guides to the Product](https://learn.adafruit.com/products/856/guides)
### Breadboard trim potentiometer
[Breadboard trim potentiometer](https://www.adafruit.com/product/356)
These are our favorite trim pots, perfect for breadboarding and prototyping. They have a long grippy adjustment knob and with 0.1" spacing, they plug into breadboards or perfboards with ease.
This is the same pot that comes with our character LCDs and tutorial...
In Stock
[Buy Now](https://www.adafruit.com/product/356)
[Related Guides to the Product](https://learn.adafruit.com/products/356/guides)
### Full Sized Premium Breadboard - 830 Tie Points
[Full Sized Premium Breadboard - 830 Tie Points](https://www.adafruit.com/product/239)
This is a 'full-size' premium quality breadboard, 830 tie points. Good for small and medium projects. It's 2.2" x 7" (5.5 cm x 17 cm) with a standard double-strip in the middle and two power rails on both sides. You can pull the power rails off easily to make the...
In Stock
[Buy Now](https://www.adafruit.com/product/239)
[Related Guides to the Product](https://learn.adafruit.com/products/239/guides)
### Raspberry Pi 3 - Model B+ - 1.4GHz Cortex-A53 with 1GB RAM
[Raspberry Pi 3 - Model B+ - 1.4GHz Cortex-A53 with 1GB RAM](https://www.adafruit.com/product/3775)
The Raspberry Pi 3 Model B is the most popular Raspberry Pi computer made, and the Pi Foundation knows you can always make a good thing _better_! And what could make the Pi 3 better? How about a _faster_ processor, 5 GHz WiFi, and updated Ethernet chip with PoE capability?...
In Stock
[Buy Now](https://www.adafruit.com/product/3775)
[Related Guides to the Product](https://learn.adafruit.com/products/3775/guides)
### Assembled Pi T-Cobbler Plus - GPIO Breakout
[Assembled Pi T-Cobbler Plus - GPIO Breakout](https://www.adafruit.com/product/2028)
**This is the assembled version of the Pi T-Cobbler Plus. It only works with the Raspberry Pi Model Zero, A+, B+, Pi 2, Pi 3 & Pi 4!** (Any Pi with 2x20 connector)
The Raspberry Pi has landed on the Maker World like a 40-GPIO pinned, quad-USB ported, credit...
In Stock
[Buy Now](https://www.adafruit.com/product/2028)
[Related Guides to the Product](https://learn.adafruit.com/products/2028/guides)
## Related Guides
- [MCP3008 - 8-Channel 10-Bit ADC With SPI Interface](https://learn.adafruit.com/mcp3008-spi-adc.md)
- [Raspberry Pi E-mail Notifier Using LEDs](https://learn.adafruit.com/raspberry-pi-e-mail-notifier-using-leds.md)
- [Adafruit AMG8833 8x8 Thermal Camera Sensor](https://learn.adafruit.com/adafruit-amg8833-8x8-thermal-camera-sensor.md)
- [Capacitive Touch Sensors on the Raspberry Pi](https://learn.adafruit.com/capacitive-touch-sensors-on-the-raspberry-pi.md)
- [Windows IoT Core Application Development: Headed Blinky](https://learn.adafruit.com/windows-iot-application-development-headed-blinky.md)
- [Single Channel LoRaWAN Gateway for Raspberry Pi](https://learn.adafruit.com/raspberry-pi-single-channel-lorawan-gateway.md)
- [LoRa and LoRaWAN Radio for Raspberry Pi](https://learn.adafruit.com/lora-and-lorawan-radio-for-raspberry-pi.md)
- [Adafruit's Raspberry Pi Lesson 12. Sensing Movement](https://learn.adafruit.com/adafruits-raspberry-pi-lesson-12-sensing-movement.md)
- [Large Pi-based Thermometer and Clock](https://learn.adafruit.com/large-pi-based-thermometer-and-clock.md)
- [Playing sounds and using buttons with Raspberry Pi](https://learn.adafruit.com/playing-sounds-and-using-buttons-with-raspberry-pi.md)
- [Windows IoT Core Application Development: Headless Blinky](https://learn.adafruit.com/windows-iot-application-development-headless-application.md)
- [Adafruit's Raspberry Pi Lesson 11. DS18B20 Temperature Sensing](https://learn.adafruit.com/adafruits-raspberry-pi-lesson-11-ds18b20-temperature-sensing.md)
- [Node.js Embedded Development on the Raspberry Pi](https://learn.adafruit.com/node-embedded-development.md)
- [Adafruit's Raspberry Pi Lesson 10. Stepper Motors](https://learn.adafruit.com/adafruits-raspberry-pi-lesson-10-stepper-motors.md)
- [CircuitPython Libraries on Linux and ODROID C2](https://learn.adafruit.com/circuitpython-libaries-linux-odroid-c2.md)
- [Adafruit's Raspberry Pi Lesson 4. GPIO Setup](https://learn.adafruit.com/adafruits-raspberry-pi-lesson-4-gpio-setup.md)
---
# Source: https://learn.adafruit.com/dht/connecting-to-a-dhtxx-sensor.md
# DHT11, DHT22 and AM2302 Sensors
## Connecting to a DHTxx Sensor
Luckily it is trivial to connect to these sensors, they have fairly long 0.1"-pitch pins so you can plug them into any breadboard, perfboard or similar.
Likewise, it is fairly easy to connect up to the DHT sensors. They have four pins
1. **VCC** - red wire Connect to 3.3 - 5V power. Sometime 3.3V power isn't enough in which case try 5V power.
2. **Data out -** white or yellow wire
3. Not connected
4. **Ground -** black wire
Simply ignore pin 3, it's not used. You will want to place a 10 Kohm resistor between VCC and the data pin, to act as a medium-strength pull up on the data line. The Arduino has built in pullups you can turn on but they're very weak, about 20-50K
Info:
This diagram shows how we will connect for the testing sketch. Connect data to pin 2, you can change it later to any pin.

If you have an AM2302
- [Previous Page](https://learn.adafruit.com/dht/overview.md)
- [Next Page](https://learn.adafruit.com/dht/using-a-dhtxx-sensor-with-arduino.md)
## Featured Products
### DHT22 temperature-humidity sensor + extras
[DHT22 temperature-humidity sensor + extras](https://www.adafruit.com/product/385)
The DHT22 is a basic, low-cost digital temperature and humidity sensor. It uses a capacitive humidity sensor and a thermistor to measure the surrounding air and spits out a digital signal on the data pin (no analog input pins needed). It's fairly simple to use but requires careful timing...
No Longer Stocked
[Buy Now](https://www.adafruit.com/product/385)
[Related Guides to the Product](https://learn.adafruit.com/products/385/guides)
### DHT11 basic temperature-humidity sensor + extras
[DHT11 basic temperature-humidity sensor + extras](https://www.adafruit.com/product/386)
**Discontinued -** **you can grab the ** [DHT20 - AHT20 Pin Module - I2C Temperature and Humidity Sensor](https://www.adafruit.com/product/5183) **instead! **
The DHT11 is a basic, ultra low-cost digital temperature and humidity sensor. It uses...
No Longer Stocked
[Buy Now](https://www.adafruit.com/product/386)
[Related Guides to the Product](https://learn.adafruit.com/products/386/guides)
### AM2302 (wired DHT22) temperature-humidity sensor
[AM2302 (wired DHT22) temperature-humidity sensor](https://www.adafruit.com/product/393)
Discontinued - [**you can grab** AM2301B - Wired Enclosed AHT20 - Temperature and Humidity Sensor **instead!**](https://www.adafruit.com/product/5181)
The AM2302 is a wired version of the [DHT22](http://www.adafruit.com/products/385), in a large plastic...
No Longer Stocked
[Buy Now](https://www.adafruit.com/product/393)
[Related Guides to the Product](https://learn.adafruit.com/products/393/guides)
## Related Guides
- [Adafruit SGP30 TVOC/eCO2 Gas Sensor](https://learn.adafruit.com/adafruit-sgp30-gas-tvoc-eco2-mox-sensor.md)
- [Adafruit BME680](https://learn.adafruit.com/adafruit-bme680-humidity-temperature-barometic-pressure-voc-gas.md)
- [Using LoraWAN and The Things Network with CircuitPython](https://learn.adafruit.com/using-lorawan-and-the-things-network-with-circuitpython.md)
- [Adafruit BME280 Humidity + Barometric Pressure + Temperature Sensor Breakout](https://learn.adafruit.com/adafruit-bme280-humidity-barometric-pressure-temperature-sensor-breakout.md)
- [Trinket Temperature & Humidity LCD Display](https://learn.adafruit.com/trinket-temperature-humidity-lcd-display.md)
- [PyLeap CLUE Barometer](https://learn.adafruit.com/pyleap-clue-barometer.md)
- [Adafruit CC3000 WiFi and Xively](https://learn.adafruit.com/adafruit-cc3000-wifi-and-xively.md)
- [CLUE Vertical Garden Weather Visualizer](https://learn.adafruit.com/clue-vertical-garden-weather-visualizer.md)
- [Adafruit BMP183 SPI Barometric Pressure & Altitude Sensor](https://learn.adafruit.com/adafruit-bmp183-spi-barometric-pressure-and-altitude-sensor.md)
- [Weather Display Matrix](https://learn.adafruit.com/weather-display-matrix.md)
- [ESP8266 WiFi Weather Station with Color TFT Display](https://learn.adafruit.com/wifi-weather-station-with-tft-display.md)
- [Adafruit VEML6070 UV Sensor Breakout](https://learn.adafruit.com/adafruit-veml6070-uv-light-sensor-breakout.md)
- [Adafruit HTU21D-F Temperature & Humidity Sensor](https://learn.adafruit.com/adafruit-htu21d-f-temperature-humidity-sensor.md)
- [IoT Temperature Logger with Analog Devices ADT7410, Feather and Adafruit IO](https://learn.adafruit.com/iot-temperature-logger-with-arduino-and-adafruit-io.md)
- [Adafruit BMP280 Barometric Pressure + Temperature Sensor Breakout](https://learn.adafruit.com/adafruit-bmp280-barometric-pressure-plus-temperature-sensor-breakout.md)
---
# Source: https://learn.adafruit.com/pir-passive-infrared-proximity-motion-sensor/connecting-to-a-pir.md
# PIR Motion Sensor
## Connecting to a PIR

Most PIR modules have a 3-pin connection at the side or bottom. The pinout may vary between modules so triple-check the pinout! It's often silkscreened on right next to the connection (at least, ours is!) One pin will be ground, another will be signal and the final one will be power. Power is usually 3-5VDC input but may be as high as 12V. Sometimes larger modules don't have direct output and instead just operate a relay in which case there is ground, power and the two switch connections.
The output of some relays may be 'open collector' - that means it requires a pullup resistor. If you're not getting a variable output be sure to try attaching a 10K pullup between the signal and power pins.
An easy way of prototyping with PIR sensors is to connect it to a breadboard since the connection port is 0.1" spacing. Some PIRs come with header on them already, the one's from adafruit have a straight 3-pin header on them for connecting a cable

For our PIR's the red cable is + voltage power, black cable is - ground power and yellow is the signal out. Just make sure you plug the cable in as shown above! If you get it backwards you won't damage the PIR but it won't work.
- [Previous Page](https://learn.adafruit.com/pir-passive-infrared-proximity-motion-sensor/how-pirs-work.md)
- [Next Page](https://learn.adafruit.com/pir-passive-infrared-proximity-motion-sensor/testing-a-pir.md)
## Primary Products
### PIR (motion) sensor
[PIR (motion) sensor](https://www.adafruit.com/product/189)
PIR sensors are used to detect motion from pets/humanoids from about 20 feet away (possibly works on zombies, not guaranteed). This one has an adjustable delay before firing (approx 2-4 seconds), adjustable sensitivity **and** we include a 1 foot (30 cm) cable with a socket so you...
In Stock
[Buy Now](https://www.adafruit.com/product/189)
[Related Guides to the Product](https://learn.adafruit.com/products/189/guides)
## Related Guides
- [HalloWing All-Seeing Skull](https://learn.adafruit.com/hallowing-all-seeing-skull.md)
- [Magical Mistletoe](https://learn.adafruit.com/magical-mistletoe.md)
- [Screaming Cauldron](https://learn.adafruit.com/screaming-cauldron.md)
- [IoT Bird Feeder with Camera](https://learn.adafruit.com/iot-window-bird-feeder-with-camera.md)
- [No-Code WipperSnapper Summoning Horn](https://learn.adafruit.com/adafruit-io-wippersnapper-summoning-horn.md)
- [Motion Controlled Matrix Bed Clock](https://learn.adafruit.com/motion-controlled-matrix-bed-clock.md)
- [Adafruit VCNL4020 Proximity and Light Sensor](https://learn.adafruit.com/adafruit-vcnl4020-proximity-and-light-sensor.md)
- [Fog Machine with Motion Sensor and Adafruit IO](https://learn.adafruit.com/fog-machine-remote-trigger.md)
- [Feather Freezer Door Alarm](https://learn.adafruit.com/feather-door-alarm.md)
- [MIDI Laser Harp with Time of Flight Distance Sensors](https://learn.adafruit.com/midi-laser-harp-time-of-flight-sensors.md)
- [Using Adafruit IO Actions to Make an IoT Door Detector](https://learn.adafruit.com/using-adafruit-io-actions-to-make-an-iot-door-detector.md)
- [Quadcopter Spray Can Mod](https://learn.adafruit.com/quadcopter-spray-can-mod.md)
- [Adafruit VCNL4040 Proximity Sensor](https://learn.adafruit.com/adafruit-vcnl4040-proximity-sensor.md)
- [Using ItsaSNAP for HomeKit PIR Motion Detection](https://learn.adafruit.com/itsasnap-homekit-pir-motion-detection.md)
- [No-Code Room Occupancy Status ](https://learn.adafruit.com/no-code-room-occupancy-status.md)
---
# Source: https://learn.adafruit.com/tilt-sensor/connecting-to-a-tilt-sensor.md
# Tilt Sensor
## Connecting to a Tilt Sensor
Tilt switches are pretty hardy, you can easily solder to them, clip the leads, plug them into breadboards, use alligator clips, etc. The only care you should take is to avoid bending the leads too much as they may break off.

- [Previous Page](https://learn.adafruit.com/tilt-sensor/testing-a-tilt-sensor.md)
- [Next Page](https://learn.adafruit.com/tilt-sensor/using-a-tilt-sensor.md)
## Featured Products
### Tilt ball switch
[Tilt ball switch](https://www.adafruit.com/product/173)
The "poor man's" accelerometer! Tilt sensors are switches that can detect basic motion/orientation. The metal tube has a little metal ball that rolls around in it, when its tilted upright, the ball rolls onto the contacts sticking out of end and shorts them together.
In Stock
[Buy Now](https://www.adafruit.com/product/173)
[Related Guides to the Product](https://learn.adafruit.com/products/173/guides)
## Related Guides
- [Force Sensitive Resistor (FSR)](https://learn.adafruit.com/force-sensitive-resistor-fsr.md)
- [Basic Resistor Sensor Reading on Raspberry Pi](https://learn.adafruit.com/basic-resistor-sensor-reading-on-raspberry-pi.md)
- [Calibrating Sensors](https://learn.adafruit.com/calibrating-sensors.md)
- [Wireless ESP32-S2 Touch Screen Controller for Pure Data](https://learn.adafruit.com/wireless-esp32-s2-controller-for-pure-data.md)
- [Hang out your washing reminder - Adafruit IO + Vibration switch](https://learn.adafruit.com/hang-out-your-washing-reminder-adafruit-io-vibration-switch.md)
- [Circuit Playground Bike Glove](https://learn.adafruit.com/circuit-playground-bike-glove.md)
- [ICEdot Teardown](https://learn.adafruit.com/icedot-teardown.md)
- [Adafruit VEML6070 UV Sensor Breakout](https://learn.adafruit.com/adafruit-veml6070-uv-light-sensor-breakout.md)
- [NAU7802 Pet Food Scale](https://learn.adafruit.com/nau7802-pet-food-scale.md)
- [Adafruit HX711 24-bit ADC](https://learn.adafruit.com/adafruit-hx711-24-bit-adc.md)
- [Power Glove Wireless MIDI Controller](https://learn.adafruit.com/power-glove-bluetooth-midi-controller.md)
- [Clue Coffee Scale](https://learn.adafruit.com/clue-coffee-scale.md)
- [Adafruit NAU7802 24-Bit ADC - STEMMA QT / Qwiic](https://learn.adafruit.com/adafruit-nau7802-24-bit-adc-stemma-qt-qwiic.md)
- [Flora MIDI Drum Glove](https://learn.adafruit.com/midi-drum-glove.md)
- [Arcade Stick Conversion](https://learn.adafruit.com/arcade-stick-conversion.md)
---
# Source: https://learn.adafruit.com/force-sensitive-resistor-fsr/connecting-to-an-fsr.md
# Force Sensitive Resistor (FSR)
## Connecting to an FSR
Because FSRs are basically resistors, they are non-polarized. That means you can connect them up 'either way'a and they'll work just fine!FSRs are often a polymer with conductive material silk-screened on. That means they're plastic and the connection tab is crimped on somewhat delicate material. The best way to connect to these is to simply plug them into a breadboard.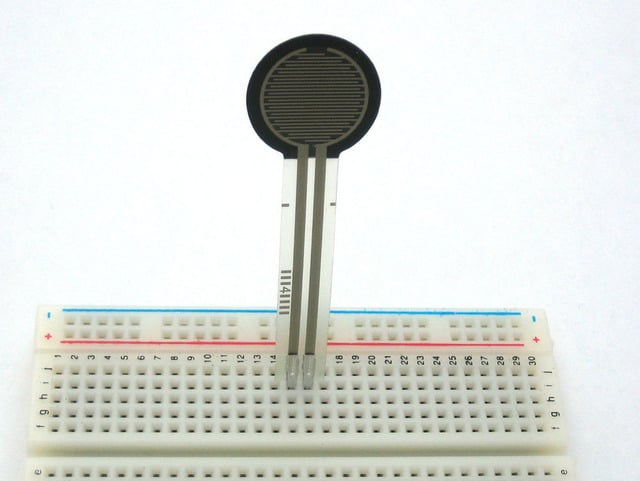
or use a clamp-style connector like alligator clips, or a female header.
or a terminal block such as [Phoenix #1881448](http://mouser.com/Search/ProductDetail.aspx?qs=sGAEpiMZZMvXvCN7QvKasXNwb4IufXV%2fCdHopRH7bbg%3d)
It is possible to solder onto the tabs but _you must be very fast_ because if your iron is not good quality or you dally even a few seconds, you will melt the plastic and ruin the FSR! **Don't attempt to solder directly to your FSR unless you are absolutely sure you have the skills to do so.** - [Previous Page](https://learn.adafruit.com/force-sensitive-resistor-fsr/testing-an-fsr.md)
- [Next Page](https://learn.adafruit.com/force-sensitive-resistor-fsr/using-an-fsr.md)
## Featured Products
### Round Force-Sensitive Resistor (FSR) - 0.3 ~ 10 Newton Force
[Round Force-Sensitive Resistor (FSR) - 0.3 ~ 10 Newton Force](https://www.adafruit.com/product/166)
FSRs are sensors that allow you to detect physical pressure, squeezing and weight. They are simple to use and low cost. This sensor is an Alpha MF01A-N-221-A01 with 1/2 diameter sensing region.
We used to stock the Interlink model 402 FSR - the Alpha version is almost half the price...
In Stock
[Buy Now](https://www.adafruit.com/product/166)
[Related Guides to the Product](https://learn.adafruit.com/products/166/guides)
### Square Force-Sensitive Resistor (FSR)
[Square Force-Sensitive Resistor (FSR)](https://www.adafruit.com/product/1075)
FSRs are sensors that allow you to detect physical pressure, squeezing and weight. They are simple to use and low cost. This sensor is an Alpha MF02A-N-221-A01 FSR with a 38mm square sensing region. Note that this sensor can't detect _where_ on the square you pressed (for that,
In Stock
[Buy Now](https://www.adafruit.com/product/1075)
[Related Guides to the Product](https://learn.adafruit.com/products/1075/guides)
### Extra-long force-sensitive resistor (FSR)
[Extra-long force-sensitive resistor (FSR)](https://www.adafruit.com/product/1071)
FSRs are sensors that allow you to detect physical pressure, squeezing and weight. They are simple to use and low cost. This sensor is a Interlink model 408 FSR with a massive 1/4-inch x 24-inch sensing region. You can press anywhere along the strip and the pressure will be recognized. Note...
No Longer Stocked
[Buy Now](https://www.adafruit.com/product/1071)
[Related Guides to the Product](https://learn.adafruit.com/products/1071/guides)
### Terminal Block - 2-pin 3.5mm - pack of 5!
[Terminal Block - 2-pin 3.5mm - pack of 5!](https://www.adafruit.com/product/724)
Nothing makes a project harder to maintain than a lot of loose wiring. That's why we like to use terminal blocks whenever making PCB-to-Wire connections. These particular 3.5mm terminal blocks are our favorite: big enough for a range of wire gauges, easy to adjust with a screwdriver, and...
In Stock
[Buy Now](https://www.adafruit.com/product/724)
[Related Guides to the Product](https://learn.adafruit.com/products/724/guides)
## Related Guides
- [Hang out your washing reminder - Adafruit IO + Vibration switch](https://learn.adafruit.com/hang-out-your-washing-reminder-adafruit-io-vibration-switch.md)
- [ReBoots Animated LED Boot Laces](https://learn.adafruit.com/re-boots-animated-dancing-boot-laces.md)
- [Circuit Playground Bike Glove](https://learn.adafruit.com/circuit-playground-bike-glove.md)
- [CuteCircuit Twirkle Shirt Teardown](https://learn.adafruit.com/cutecircuit-twirkle-shirt-teardown.md)
- [Tilt Sensor](https://learn.adafruit.com/tilt-sensor.md)
- [ICEdot Teardown](https://learn.adafruit.com/icedot-teardown.md)
- [Wireless LED Juggling Balls with ESP-NOW](https://learn.adafruit.com/wireless-juggling-balls-esp-now.md)
- [Adafruit HX711 24-bit ADC](https://learn.adafruit.com/adafruit-hx711-24-bit-adc.md)
- [Arcade Stick Conversion](https://learn.adafruit.com/arcade-stick-conversion.md)
- [Basic Resistor Sensor Reading on Raspberry Pi](https://learn.adafruit.com/basic-resistor-sensor-reading-on-raspberry-pi.md)
- [Adafruit VEML6070 UV Sensor Breakout](https://learn.adafruit.com/adafruit-veml6070-uv-light-sensor-breakout.md)
- [NAU7802 Pet Food Scale](https://learn.adafruit.com/nau7802-pet-food-scale.md)
- [Flora MIDI Drum Glove](https://learn.adafruit.com/midi-drum-glove.md)
- [Adafruit NAU7802 24-Bit ADC - STEMMA QT / Qwiic](https://learn.adafruit.com/adafruit-nau7802-24-bit-adc-stemma-qt-qwiic.md)
- [Clue Coffee Scale](https://learn.adafruit.com/clue-coffee-scale.md)
---
# Source: https://learn.adafruit.com/dht-humidity-sensing-on-raspberry-pi-with-gdocs-logging/connecting-to-googles-docs-python3.md
# DHT Humidity Sensing on Raspberry Pi or Beaglebone Black with GDocs Logging
## Connecting to Google Docs
Danger:
Danger:
[RE: DHT 22 Temperature and Humidity sensor with adafruit code](https://forums.adafruit.com/viewtopic.php?f=19&t=53299&p=271580#p271310)
# Create and prepare spreadsheet
First up you will need to [sign up for Google Docs](http://sheets.google.com) and create a spreadsheet. We're going to call ours DHT Humidity Logs.
Once you've created it, delete all but one line (since we don't want 1000 empty rows):

Then make the one remaining line a header with row names:

# Get OAuth2 credentials
As of April 2015 Google has deprecated the older simple authentication interface for accessing Google spreadsheet data. You must carefully follow the steps below to enable OAuth2 access to your Google spreadsheet. Unfortunately these steps are somewhat complex, so go through them very carefully to make sure you don't miss a step. If you run into problems try consulting the [gspread python library](https://github.com/burnash/gspread) that this script uses.
To get your OAuth2 credentials follow the steps on this page:
- [gspread - Using OAuth2 for Authorization](http://gspread.readthedocs.org/en/latest/oauth2.html)
After you follow the steps in the document above you should have downloaded a .json file, like `SpreadsheetData-(gibberish).json`. **Place this .json file in the same directory as the `google_spreadsheet.py` example.** If you don't place this file in the same directory then authentication will fail and you will not be able to update your spreadsheet!
One last step that **must be completed** is to share your Google spreadsheet to the email address associated with the OAuth2 credentials. Open the .json file and search for the **"client\_email":** line that looks like this (but with a different email address):
```
"client_email": "149345334675-md0qff5f0kib41meu20f7d1habos3qcu@developer.gserviceaccount.com",
```
Take note of that email address value and go to your Google spreadsheet in a web browser. Using the **File -\> Share...** menu item share the spreadsheet with **read and write access** to the email address found above. **Make sure to share your spreadsheet or you will not be able to update it with the script!**
# Run Python Code
First up we will have to install the **gspread** python library, which will do the heavy lifting of connecting to google docs and updating the spreadsheet! With your board connected and online, run the following:
```
sudo pip3 install gspread oauth2client pyasn1 pyasn1-modules
```
Create a new file called **google\_spreadsheet.py** with **nano** or your favorite text editor and put the following in:
https://github.com/adafruit/Adafruit_Learning_System_Guides/blob/main/DHT_Google_Spreadsheet/google_spreadsheet.py
Next, in the **examples** directory again, edit **google\_spreadsheet.py** and adjust the configuration values towards the top of the file:
```
# Type of sensor, can be adafruit_dht.DHT11 or adafruit_dht.DHT22.
# For the AM2302, use the adafruit_dht.DHT22 class.
DHT_TYPE = adafruit_dht.DHT22
# Example of sensor connected to Raspberry Pi Pin 23
DHT_PIN = board.D4
# Example of sensor connected to Beaglebone Black Pin P8_11
# DHT_PIN = 'P8_11'
# Google Docs OAuth credential JSON file. Note that the process for authenticating
# ...
GDOCS_OAUTH_JSON = 'your SpreadsheetData-*.json file name'
# Google Docs spreadsheet name.
GDOCS_SPREADSHEET_NAME = 'your google docs spreadsheet name'
```
Make sure `DHT_TYPE` is set to the type of sensor you are using (either `adafruit_dht.DHT11`or`adafruit_dht.DHT22`), and `DHT_PIN` is set to the GPIO pin number which is connected to your DHT sensor. If you're using an **AM2302, ** use the `adafruit_dht.DHT22` class.
In the example above a Raspberry Pi GPIO pin #23 is shown, however commented below it is an example of a Beaglebone Black using GPIO pin P8\_11.
Next make sure to set the **`GDOCS_OAUTH_JSON` ** to the name of the `SpreadsheetData-*.json` file in the same directory as the `google_spreadsheet.py` file. If you don't have a `SpreadsheetData-*.json` file then you accidentally missed the steps above. **Go back and carefully follow the [OAuth2 credential steps](../../../../dht-humidity-sensing-on-raspberry-pi-with-gdocs-logging/connecting-to-googles-docs-updated#get-oauth2-credentials) to get an OAuth2 credential .json file before continuing!**
Finally **set** **`GDOCS_SPREADSHEET_NAME` to the name of your spreadsheet** , like '_DHT Humidity Logs_'.
**Save the file** and **execute the Python script by running** :
> **python3 google\_spreadsheet.py**
You should see the program run and after about 30 seconds a humidity and temperature measurement is displayed and written to the spreadsheet. The program will continue to run and log a measurement every 30 seconds until you force it to quit by pressing `Ctrl-C`.
The measurement frequency can be adjusted by changing the `FREQUENCY_SECONDS` configuration in the python code.
Open the spreadsheet on Google's site and you should see measurements added in real time!
https://www.youtube.com/watch?v=Skr2uPZzviM
[You can also see our spreadsheet here, it wont be running live after Aug 24, 2012 but it gives you an idea of the data format](https://docs.google.com/spreadsheet/ccc?key=0AlwXpwqqd84DdFVobHFCWXZLU2l2V212WnFrS3QwdkE#gid=0)- [Previous Page](https://learn.adafruit.com/dht-humidity-sensing-on-raspberry-pi-with-gdocs-logging/python-setup.md)
## Featured Products
### Adafruit Assembled Pi Cobbler Breakout + Cable for Raspberry Pi
[Adafruit Assembled Pi Cobbler Breakout + Cable for Raspberry Pi](https://www.adafruit.com/product/914)
Now that you've finally got your hands on a [Raspberry Pi® Model B](http://www.raspberrypi.org/), you're probably itching to make some fun embedded computer projects with it. What you need is an add on prototyping Pi Cobbler from Adafruit, which can break out all those...
No Longer Stocked
[Buy Now](https://www.adafruit.com/product/914)
[Related Guides to the Product](https://learn.adafruit.com/products/914/guides)
### BeagleBone Black Rev C - 4GB Flash - Pre-installed Debian
[BeagleBone Black Rev C - 4GB Flash - Pre-installed Debian](https://www.adafruit.com/product/1876)
Note: As of May 12, 2014 Adafruit is shipping Rev C. We have discontinued selling Rev B. There are no exchanges or "upgrades" for Rev B to Rev C.
If you liked the BeagleBone Black Rev B, you will love the Rev C! The Rev C still has a blistering 1GHz processor and 512MB onboard DDR3...
No Longer Stocked
[Buy Now](https://www.adafruit.com/product/1876)
[Related Guides to the Product](https://learn.adafruit.com/products/1876/guides)
### BeagleBone Black - Rev B
[BeagleBone Black - Rev B](https://www.adafruit.com/product/1278)
**[Adafruit is no longer shipping the BeagleBone Black Rev B, it has been replaced with the Rev C as of 5/12/14](https://www.adafruit.com/products/1876) - the Rev C now has 4G flash and also comes with Debian, it also costs slightly more. There are no exchanges or...**
No Longer Stocked
[Buy Now](https://www.adafruit.com/product/1278)
[Related Guides to the Product](https://learn.adafruit.com/products/1278/guides)
### Miniature WiFi (802.11b/g/n) Module: For Raspberry Pi and more
[Miniature WiFi (802.11b/g/n) Module: For Raspberry Pi and more](https://www.adafruit.com/product/814)
Make your Internet of Things device cable-free by adding WiFi. Take advantage of the Raspberry Pi and Beagle Bone's USB port to add a low cost, but high-reliability wireless link. We tried half a dozen modules to find one that works well with the Pi and Bone without the need of recompiling...
No Longer Stocked
[Buy Now](https://www.adafruit.com/product/814)
[Related Guides to the Product](https://learn.adafruit.com/products/814/guides)
### AM2302 (wired DHT22) temperature-humidity sensor
[AM2302 (wired DHT22) temperature-humidity sensor](https://www.adafruit.com/product/393)
Discontinued - [**you can grab** AM2301B - Wired Enclosed AHT20 - Temperature and Humidity Sensor **instead!**](https://www.adafruit.com/product/5181)
The AM2302 is a wired version of the [DHT22](http://www.adafruit.com/products/385), in a large plastic...
No Longer Stocked
[Buy Now](https://www.adafruit.com/product/393)
[Related Guides to the Product](https://learn.adafruit.com/products/393/guides)
### DHT11 basic temperature-humidity sensor + extras
[DHT11 basic temperature-humidity sensor + extras](https://www.adafruit.com/product/386)
**Discontinued -** **you can grab the ** [DHT20 - AHT20 Pin Module - I2C Temperature and Humidity Sensor](https://www.adafruit.com/product/5183) **instead! **
The DHT11 is a basic, ultra low-cost digital temperature and humidity sensor. It uses...
No Longer Stocked
[Buy Now](https://www.adafruit.com/product/386)
[Related Guides to the Product](https://learn.adafruit.com/products/386/guides)
### DHT22 temperature-humidity sensor + extras
[DHT22 temperature-humidity sensor + extras](https://www.adafruit.com/product/385)
The DHT22 is a basic, low-cost digital temperature and humidity sensor. It uses a capacitive humidity sensor and a thermistor to measure the surrounding air and spits out a digital signal on the data pin (no analog input pins needed). It's fairly simple to use but requires careful timing...
No Longer Stocked
[Buy Now](https://www.adafruit.com/product/385)
[Related Guides to the Product](https://learn.adafruit.com/products/385/guides)
### BeagleBone Black Rev C - 4GB - Pre-installed Debian
[BeagleBone Black Rev C - 4GB - Pre-installed Debian](https://www.adafruit.com/product/1996)
If you liked the BeagleBone Black Rev B, you will love the Rev C! The Rev C has a blistering 1GHz AM3358 processor and 512MB onboard DDR3 RAM, two 46-pin headers, micro HDMI for audio/video output, USB ports, 10/100 Ethernet and other I/O features. The Rev C is an ultra-powered embedded...
In Stock
[Buy Now](https://www.adafruit.com/product/1996)
[Related Guides to the Product](https://learn.adafruit.com/products/1996/guides)
## Related Guides
- [Freq Show: Raspberry Pi RTL-SDR Scanner](https://learn.adafruit.com/freq-show-raspberry-pi-rtl-sdr-scanner.md)
- [Adding a Real Time Clock to Raspberry Pi](https://learn.adafruit.com/adding-a-real-time-clock-to-raspberry-pi.md)
- [LED Backpack Displays on Raspberry Pi and BeagleBone Black](https://learn.adafruit.com/led-backpack-displays-on-raspberry-pi-and-beaglebone-black.md)
- [Raspberry Pi SelfieBlock](https://learn.adafruit.com/selfieblock.md)
- [How Cold Is It?](https://learn.adafruit.com/how-cold-is-it.md)
- [Bluetooth Temperature & Humidity Sensor](https://learn.adafruit.com/bluetooth-temperature-and-humidity-sensor.md)
- [Introducing the Raspberry Pi 2 - Model B](https://learn.adafruit.com/introducing-the-raspberry-pi-2-model-b.md)
- [Send Raspberry Pi Data to COSM](https://learn.adafruit.com/send-raspberry-pi-data-to-cosm.md)
- [Adafruit HTS221 - Temperature & Humidity Sensor](https://learn.adafruit.com/adafruit-hts221-temperature-humidity-sensor.md)
- [Using Piezo Buzzers with WipperSnapper](https://learn.adafruit.com/using-piezo-buzzers-with-wippersnapper.md)
- [Using Melexis MLX90614 Non-Contact Sensors](https://learn.adafruit.com/using-melexis-mlx90614-non-contact-sensors.md)
- [reef-pi Guide 2: Power Controller](https://learn.adafruit.com/reef-pi-power-controller.md)
- [Adafruit Pi Box Plus](https://learn.adafruit.com/adafruit-pi-box-plus.md)
- [Capacitive Touch Sensors on the Raspberry Pi](https://learn.adafruit.com/capacitive-touch-sensors-on-the-raspberry-pi.md)
- [Adafruit Si7021 Temperature + Humidity Sensor](https://learn.adafruit.com/adafruit-si7021-temperature-plus-humidity-sensor.md)
---
# Source: https://learn.adafruit.com/32x16-32x32-rgb-led-matrix/connecting-using-a-proto-shield.md
# RGB LED Matrix Basics
## Connecting Using a Proto Shield
As mentioned on the “Jumper” page: if you hold a ribbon cable flat — no folds — and with both connectors facing you, keys pointed the same direction — there’s is a 1:1 correlation between the pins. The top-right pin on one plug links to the top-right on the other plug, and so forth. This holds true even if the cable has a doubled-over strain relief. **As long as the keys point the same way and the plugs face the same way, pins are in the same positions at both ends.**

**Either end of the ribbon cable can be plugged into the matrix INPUT socket.**
The free end of the ribbon can point toward the center of the matrix, or hang off the side…the pinout is still the same. Notice below the direction of the “key” doesn’t change.

A dual-row header gets installed on the proto shield, similar to the connector on the matrix. Just like the ribbon cable lying flat, as long as these two headers are _aligned the same way,_ they’ll **match pin-for-pin** ; unlike the jumper wire method from the prior page, mirroring doesn’t happen.
Wires are then soldered from the header to specific Arduino pins on the proto shield. Try to keep wire lengths reasonably short to avoid signal interference.
Using color-coded wires helps a _lot!_ If you don’t have colored wires, that’s okay, just pay close attention where everything goes. Our goal is a proto shield something like this:

It’s not necessary to install all the buttons and lights on the proto shield if you don’t want — just the basic header pins are sufficient.
For **Arduino form-factor boards** , using an [**Adafruit** proto shield](https://www.adafruit.com/product/2077): **if using a shrouded socket (like on the back of the matrix — with the notch so a ribbon cable only fits one way) you’ll need to place this near the “Reset” end of the shield.** The plastic shroud obscures a lot of pins. **Others’ proto shields may be laid out different** …look around for a good location before committing to solder.
For **Arduino Mega** with our [corresponding proto shield](https://www.adafruit.com/products/192): a shrouded socket fits best near the **middle** of the shield.
**Otherwise, you can use a plain 2x8-pin male header, or two 1x8 sections** installed side-by-side (as in the photo above). Since there’s no alignment key with this setup, you might want to indicate it with some tape or a permanent marker.
Depending on the make and model of proto shield, some pins are designed to connect in short rows. Others don’t. For the latter, strip a little extra insulation and bend the wire to wrap around the leg of the socket from behind, then solder.

# Connect Ground Wires
**32x32** and **64x32** matrices require **three ** ground connections. **32x16** matrices have **four**.
Most proto shields have _tons_ of grounding points, so you shouldn’t have trouble finding places to connect these.

# Upper RGB Data
Pins **R1** , **G1** and **B1** (labeled R0, B0 and G0 on some matrices) deliver data to the **top half** of the display.
On the **Arduino Uno** and **Adafruit Metro (328, M0** or **M4) **boards, connect these to digital pins **2** , **3** and **4**.
On **Arduino Mega** , connect to pins **24** , **25** and **26**.

# Lower RGB Data
Pins **R2** , **G2** and **B2** (labeled R1, G1 and B1 on some matrices) deliver data to the **bottom half ** of the display. These connect to the next three Arduino pins…
On **Arduino Uno** and **Adafruit Metros** , that’s pins **5** , **6** and **7**.
On **Arduino Mega** , pins **27** , **28** and **29**.

# Row Select Lines
Pins **A** , **B** , **C** and **D** select which two rows of the display are currently lit. ( **32x16 matrices don’t have a “D” pin** — it’s connected to **ground ** instead.)
These connect to pins **A0** , **A1** , **A2** and (if D pin present) **A3**. This is the **same** for both the **Arduino Uno** and **Mega**.

# LAT Wire
For **32x32** and **64x32** matrices, **LAT** connects to Arduino pin **10**.
This is the same for all boards.
The LAT (latch) signal marks the end of a row of data.

# OE Wire
**OE** connects to Arduino pin **9**. This is the same for all boards.
OE (output enable) switches the LEDs off when transitioning from one row to the next.

# CLK Wire
Last one!
**CLK** connects to…
- **Pin 8** on **Arduino Uno** , **Adafruit Metro 328** or **Metro M0**.
- **Pin A4** on **Adafruit Metro M4**.
- **Pin 11** on **Arduino Mega**.
The CLK (clock) signal marks the arrival of each bit of data.

Here’s that photo again of a completed shield. You can tell this is for a 32x16 matrix, because there are four ground connections (one of the long vertical strips is a ground bus — see the tiny jumpers there?).
The ribbon cable to the matrix would plug into this with the key facing left.
The colors and positions don’t quite match the examples above, but are close. G1 and G2 are yellow wires. LAT is the purple wire and should go to pin 10 now (we changed around some things in the Arduino library).

- [Previous Page](https://learn.adafruit.com/32x16-32x32-rgb-led-matrix/connecting-with-jumper-wires.md)
- [Next Page](https://learn.adafruit.com/32x16-32x32-rgb-led-matrix/test-example-code.md)
## Featured Products
### Medium 16x32 RGB LED matrix panel - 6mm Pitch
[Medium 16x32 RGB LED matrix panel - 6mm Pitch](https://www.adafruit.com/product/420)
Bring a little bit of Times Square into your home with this 16 x 32 RGB LED matrix panel. These panels are normally used to make video walls, here in New York we see them on the sides of busses and bus stops, to display animations or short video clips. We thought they looked really cool so we...
In Stock
[Buy Now](https://www.adafruit.com/product/420)
[Related Guides to the Product](https://learn.adafruit.com/products/420/guides)
### 32x32 RGB LED Matrix Panel - 4mm Pitch
[32x32 RGB LED Matrix Panel - 4mm Pitch](https://www.adafruit.com/product/607)
Bring a little bit of Times Square into your home with this totally adorable 5 inch square 32 x 32 RGB LED matrix panel. These panels are normally used to make video walls, here in New York we see them on the sides of busses and bus stops, to display animations or short video clips. We thought...
In Stock
[Buy Now](https://www.adafruit.com/product/607)
[Related Guides to the Product](https://learn.adafruit.com/products/607/guides)
### 32x32 RGB LED Matrix Panel - 5mm Pitch
[32x32 RGB LED Matrix Panel - 5mm Pitch](https://www.adafruit.com/product/2026)
Bring a little bit of Times Square into your home with this sweet 32 x 32 square RGB LED matrix panel. These panels are normally used to make video walls, here in New York we see them on the sides of busses and bus stops, to display animations or short video clips. We thought they looked...
In Stock
[Buy Now](https://www.adafruit.com/product/2026)
[Related Guides to the Product](https://learn.adafruit.com/products/2026/guides)
### 32x32 RGB LED Matrix Panel - 6mm pitch
[32x32 RGB LED Matrix Panel - 6mm pitch](https://www.adafruit.com/product/1484)
Bring a little bit of Times Square into your home with this sweet 32 x 32 square RGB LED matrix panel. These panels are normally used to make video walls, here in New York we see them on the sides of busses and bus stops, to display animations or short video clips. We thought they looked...
In Stock
[Buy Now](https://www.adafruit.com/product/1484)
[Related Guides to the Product](https://learn.adafruit.com/products/1484/guides)
### 64x32 RGB LED Matrix - 3mm pitch
[64x32 RGB LED Matrix - 3mm pitch](https://www.adafruit.com/product/2279)
Bring a little bit of Times Square into your home with this sweet 64 x 32 square RGB LED matrix panel. These panels are normally used to make video walls, here in New York we see them on the sides of busses and bus stops, to display animations or short video clips. We thought they looked...
In Stock
[Buy Now](https://www.adafruit.com/product/2279)
[Related Guides to the Product](https://learn.adafruit.com/products/2279/guides)
### 64x32 RGB LED Matrix - 4mm pitch
[64x32 RGB LED Matrix - 4mm pitch](https://www.adafruit.com/product/2278)
Bring a little bit of Times Square into your home with this sweet 64 x 32 square RGB LED matrix panel. These panels are normally used to make video walls, here in New York we see them on the sides of busses and bus stops, to display animations or short video clips. We thought they looked...
Out of Stock
[Buy Now](https://www.adafruit.com/product/2278)
[Related Guides to the Product](https://learn.adafruit.com/products/2278/guides)
### 64x32 RGB LED Matrix - 5mm pitch
[64x32 RGB LED Matrix - 5mm pitch](https://www.adafruit.com/product/2277)
Bring a little bit of Times Square into your home with this sweet 64x32 square RGB LED matrix panel. These panels are normally used to make video walls, here in New York we see them on the sides of busses and bus stops, to display animations or short video clips. We thought they looked really...
In Stock
[Buy Now](https://www.adafruit.com/product/2277)
[Related Guides to the Product](https://learn.adafruit.com/products/2277/guides)
### 64x32 RGB LED Matrix - 6mm pitch
[64x32 RGB LED Matrix - 6mm pitch](https://www.adafruit.com/product/2276)
Bring a little bit of Times Square into your home with this sweet 64x32 square RGB LED matrix panel. These panels are normally used to make video walls, here in New York we see them on the sides of busses and bus stops, to display animations or short video clips. We thought they looked really...
In Stock
[Buy Now](https://www.adafruit.com/product/2276)
[Related Guides to the Product](https://learn.adafruit.com/products/2276/guides)
## Related Guides
- [Adafruit Metro M0 Express](https://learn.adafruit.com/adafruit-metro-m0-express.md)
- [Adafruit Metro M4 Express featuring ATSAMD51](https://learn.adafruit.com/adafruit-metro-m4-express-featuring-atsamd51.md)
- [CircuitPython 101: Basic Builtin Data Structures](https://learn.adafruit.com/basic-datastructures-in-circuitpython.md)
- [Adafruit Ultimate GPS](https://learn.adafruit.com/adafruit-ultimate-gps.md)
- [WiFi Controlled LED Christmahanukwanzaa Tree](https://learn.adafruit.com/wifi-controlled-led-christmahanukwanzaa-tree.md)
- [Stream Deck controlled RGB Message Panel using Adafruit IO](https://learn.adafruit.com/stream-deck-controlled-rgb-message-panel-using-adafruit-io.md)
- [Memories of an Arduino](https://learn.adafruit.com/memories-of-an-arduino.md)
- [Matrix Portal Stained Glass with WLED](https://learn.adafruit.com/matrix-portal-stained-glass-with-wled.md)
- [Sous-vide controller powered by Arduino - The SousViduino!](https://learn.adafruit.com/sous-vide-powered-by-arduino-the-sous-viduino.md)
- [LED Matrix Sports Scoreboard](https://learn.adafruit.com/led-matrix-sports-scoreboard.md)
- [Creating MatrixPortal Projects with CircuitPython](https://learn.adafruit.com/creating-projects-with-the-circuitpython-matrixportal-library.md)
- [Introducing Adafruit Trellis ](https://learn.adafruit.com/adafruit-trellis-diy-open-source-led-keypad.md)
- [CircuitPython Hardware: Charlieplex LED Matrix](https://learn.adafruit.com/micropython-hardware-charlieplex-led-matrix.md)
- [CircuitPython Display Support Using displayio](https://learn.adafruit.com/circuitpython-display-support-using-displayio.md)
- [Arduino Lesson 16. Stepper Motors](https://learn.adafruit.com/adafruit-arduino-lesson-16-stepper-motors.md)
- [2.8" TFT Touchscreen](https://learn.adafruit.com/2-8-tft-touchscreen.md)
- [SmartMatrix Animated GIF Player](https://learn.adafruit.com/smartmatrix-animated-gif-player.md)
---
# Source: https://learn.adafruit.com/32x16-32x32-rgb-led-matrix/connecting-using-rgb-matrix-shield.md
# RGB LED Matrix Basics
## Connecting Using RGB Matrix Shield
This is the **preferred** method for pairing these matrices with an Arduino-sized board, as it’s quick and trouble-free.
The **Adafruit RGB Matrix Shield** works with the **Arduino Uno** and **Zero** , and the **Adafruit Metro M0** …and with one or more jumper wires can work with the **Metro M4** (and potentially other boards with this form factor, if a compatible Arduino library is available).
The shield does **_not_** directly work with the Arduino Mega — additional jumper wires are needed to pins off the shield — see the “Jumper Wires” page for pinouts, or consider making your own Mega proto shield for that board.
## Assembling the Partially Assembled Version
The shield comes with the button, terminal block, and the 16-pin header already soldered on. All you need to do is solder the headers!
The included headers should be installed from the underside and soldered from the top.


## Assembling the Original Version
The shield arrives unpopulated and you’ll need to do a little soldering to get it going.
Header pins are installed from the underside and soldered on top. Three components — a button, power terminal and 16-pin header — insert from the top and are soldered underneath.
**The 16-pin (8x2) header must be installed in the correct orientation!** The polarity notch is indicated on the silkscreen, or you can see in the photos above that the notch faces the digital I/O pins. If you install this backwards the matrix will not work!


## Powering the Shield
Power to the LED matrix can be connected to the shield’s screw terminals — red wire to +5Vout, black wire to GND — and the whole circuit is then powered from the Arduino’s DC jack or a USB cable at a safe and regulated 5 Volts.
## Metro M4 Usage
The shield requires a small modification to work with the Adafruit **Metro M4** :
- Use a small file or hobby knife to cut the PCB trace between the two pads indicated here.
- Solder a wire from the adjacent “CLK” pin to the “Analog In 4” pin.

A corresponding change is required in one’s code — look for the “CLK” pin definition in any of the matrix examples…
```
#define CLK 8
```
And change the “8” to “A4”:
```
#define CLK A4
```
Warning:
## Metro RP2350 Usage
Jumper Wires are needed for the four address pins A, B, C and D. The reason for this is those address pins on the shield align to the RP2350 Port 1. However all GPIOs need to be on Port 0 for this chip to work. This means each on the shield pins A0, A1, A2 and A3 need to have a trace cut and a small wire soldered re-routing the connections over to the D1, D11, D22 and D23 pins of the Metro RP2350.
```auto
Address Line Shield Default (Port 1, bad) → Rewired To (Port 0, good)
-----------------------------------------------------------------------------
A A0 (GPIO42) → D1 (GPIO1, TX)
B A1 (GPIO43) → D11 (GPIO11)
C A2 (GPIO44) → D22 (GPIO22)
D A3 (GPIO45) → D23 (GPIO23)
```

## Metro RP2350 CircuitPython Shapes
```auto
import board
import displayio
import rgbmatrix
import framebufferio
from adafruit_display_shapes.circle import Circle
from adafruit_display_shapes.rect import Rect
from adafruit_display_shapes.triangle import Triangle
displayio.release_displays()
# Panel wiring with A→D1, B→D11, C→D22, D→D23
matrix = rgbmatrix.RGBMatrix(
width=64, height=32, bit_depth=4,
rgb_pins=[board.D2, board.D3, board.D4, board.D5, board.D6, board.D7],
addr_pins=[board.D1, board.D11, board.D22, board.D23], # rewired
clock_pin=board.D8,
latch_pin=board.D10,
output_enable_pin=board.D9,
doublebuffer=True
)
display = framebufferio.FramebufferDisplay(matrix, auto_refresh=True)
# Root group
root = displayio.Group()
display.root_group = root
# Background (black rectangle)
root.append(Rect(0, 0, display.width, display.height, fill=0x000000))
# Shapes
root.append(Circle(12, 16, 10, fill=0xFF0000)) # red circle left
root.append(Rect(26, 8, 14, 14, fill=0x00FF00)) # green square center
root.append(Triangle(42, 24, 50, 8, 58, 24, fill=0x0000FF)) # blue triangle right
# Done — shapes are static, nothing else needed
while True:
pass
```
- [Previous Page](https://learn.adafruit.com/32x16-32x32-rgb-led-matrix/new-wiring.md)
- [Next Page](https://learn.adafruit.com/32x16-32x32-rgb-led-matrix/connecting-with-jumper-wires.md)
## Featured Products
### Medium 16x32 RGB LED matrix panel - 6mm Pitch
[Medium 16x32 RGB LED matrix panel - 6mm Pitch](https://www.adafruit.com/product/420)
Bring a little bit of Times Square into your home with this 16 x 32 RGB LED matrix panel. These panels are normally used to make video walls, here in New York we see them on the sides of busses and bus stops, to display animations or short video clips. We thought they looked really cool so we...
In Stock
[Buy Now](https://www.adafruit.com/product/420)
[Related Guides to the Product](https://learn.adafruit.com/products/420/guides)
### 32x32 RGB LED Matrix Panel - 4mm Pitch
[32x32 RGB LED Matrix Panel - 4mm Pitch](https://www.adafruit.com/product/607)
Bring a little bit of Times Square into your home with this totally adorable 5 inch square 32 x 32 RGB LED matrix panel. These panels are normally used to make video walls, here in New York we see them on the sides of busses and bus stops, to display animations or short video clips. We thought...
In Stock
[Buy Now](https://www.adafruit.com/product/607)
[Related Guides to the Product](https://learn.adafruit.com/products/607/guides)
### 32x32 RGB LED Matrix Panel - 5mm Pitch
[32x32 RGB LED Matrix Panel - 5mm Pitch](https://www.adafruit.com/product/2026)
Bring a little bit of Times Square into your home with this sweet 32 x 32 square RGB LED matrix panel. These panels are normally used to make video walls, here in New York we see them on the sides of busses and bus stops, to display animations or short video clips. We thought they looked...
In Stock
[Buy Now](https://www.adafruit.com/product/2026)
[Related Guides to the Product](https://learn.adafruit.com/products/2026/guides)
### 32x32 RGB LED Matrix Panel - 6mm pitch
[32x32 RGB LED Matrix Panel - 6mm pitch](https://www.adafruit.com/product/1484)
Bring a little bit of Times Square into your home with this sweet 32 x 32 square RGB LED matrix panel. These panels are normally used to make video walls, here in New York we see them on the sides of busses and bus stops, to display animations or short video clips. We thought they looked...
In Stock
[Buy Now](https://www.adafruit.com/product/1484)
[Related Guides to the Product](https://learn.adafruit.com/products/1484/guides)
### 64x32 RGB LED Matrix - 3mm pitch
[64x32 RGB LED Matrix - 3mm pitch](https://www.adafruit.com/product/2279)
Bring a little bit of Times Square into your home with this sweet 64 x 32 square RGB LED matrix panel. These panels are normally used to make video walls, here in New York we see them on the sides of busses and bus stops, to display animations or short video clips. We thought they looked...
In Stock
[Buy Now](https://www.adafruit.com/product/2279)
[Related Guides to the Product](https://learn.adafruit.com/products/2279/guides)
### 64x32 RGB LED Matrix - 4mm pitch
[64x32 RGB LED Matrix - 4mm pitch](https://www.adafruit.com/product/2278)
Bring a little bit of Times Square into your home with this sweet 64 x 32 square RGB LED matrix panel. These panels are normally used to make video walls, here in New York we see them on the sides of busses and bus stops, to display animations or short video clips. We thought they looked...
Out of Stock
[Buy Now](https://www.adafruit.com/product/2278)
[Related Guides to the Product](https://learn.adafruit.com/products/2278/guides)
### 64x32 RGB LED Matrix - 5mm pitch
[64x32 RGB LED Matrix - 5mm pitch](https://www.adafruit.com/product/2277)
Bring a little bit of Times Square into your home with this sweet 64x32 square RGB LED matrix panel. These panels are normally used to make video walls, here in New York we see them on the sides of busses and bus stops, to display animations or short video clips. We thought they looked really...
In Stock
[Buy Now](https://www.adafruit.com/product/2277)
[Related Guides to the Product](https://learn.adafruit.com/products/2277/guides)
### 64x32 RGB LED Matrix - 6mm pitch
[64x32 RGB LED Matrix - 6mm pitch](https://www.adafruit.com/product/2276)
Bring a little bit of Times Square into your home with this sweet 64x32 square RGB LED matrix panel. These panels are normally used to make video walls, here in New York we see them on the sides of busses and bus stops, to display animations or short video clips. We thought they looked really...
In Stock
[Buy Now](https://www.adafruit.com/product/2276)
[Related Guides to the Product](https://learn.adafruit.com/products/2276/guides)
## Related Guides
- [Adafruit Metro M0 Express](https://learn.adafruit.com/adafruit-metro-m0-express.md)
- [Adafruit Metro M4 Express featuring ATSAMD51](https://learn.adafruit.com/adafruit-metro-m4-express-featuring-atsamd51.md)
- [CircuitPython 101: Basic Builtin Data Structures](https://learn.adafruit.com/basic-datastructures-in-circuitpython.md)
- [Adafruit Ultimate GPS](https://learn.adafruit.com/adafruit-ultimate-gps.md)
- [WiFi Controlled LED Christmahanukwanzaa Tree](https://learn.adafruit.com/wifi-controlled-led-christmahanukwanzaa-tree.md)
- [Stream Deck controlled RGB Message Panel using Adafruit IO](https://learn.adafruit.com/stream-deck-controlled-rgb-message-panel-using-adafruit-io.md)
- [Memories of an Arduino](https://learn.adafruit.com/memories-of-an-arduino.md)
- [Matrix Portal Stained Glass with WLED](https://learn.adafruit.com/matrix-portal-stained-glass-with-wled.md)
- [Sous-vide controller powered by Arduino - The SousViduino!](https://learn.adafruit.com/sous-vide-powered-by-arduino-the-sous-viduino.md)
- [LED Matrix Sports Scoreboard](https://learn.adafruit.com/led-matrix-sports-scoreboard.md)
- [Creating MatrixPortal Projects with CircuitPython](https://learn.adafruit.com/creating-projects-with-the-circuitpython-matrixportal-library.md)
- [Introducing Adafruit Trellis ](https://learn.adafruit.com/adafruit-trellis-diy-open-source-led-keypad.md)
- [CircuitPython Hardware: Charlieplex LED Matrix](https://learn.adafruit.com/micropython-hardware-charlieplex-led-matrix.md)
- [CircuitPython Display Support Using displayio](https://learn.adafruit.com/circuitpython-display-support-using-displayio.md)
- [Arduino Lesson 16. Stepper Motors](https://learn.adafruit.com/adafruit-arduino-lesson-16-stepper-motors.md)
- [2.8" TFT Touchscreen](https://learn.adafruit.com/2-8-tft-touchscreen.md)
- [SmartMatrix Animated GIF Player](https://learn.adafruit.com/smartmatrix-animated-gif-player.md)
---
# Source: https://learn.adafruit.com/32x16-32x32-rgb-led-matrix/connecting-with-jumper-wires.md
# RGB LED Matrix Basics
## Connecting with Jumper Wires
Danger:
Ribbon cables and their corresponding headers are sometimes a topological puzzle. Here’s a trick to help keep track…
If you hold the ribbon cable flat — no folds — and with both connectors facing you, keys pointed the same direction — now there is a 1:1 correlation between the pins. The top-right pin on one plug links to the top-right on the other plug, and so forth. This holds true even if the cable has a doubled-over strain relief. **As long as the keys point the same way and the plugs face the same way, pins are in the same positions at both ends.**

Plugged into a socket on the LED matrix, one header now faces _away_ from you. If you double the cable back on itself (not a twist, but a fold)…to access a specific pin on the socket, the left and right columns are now mirrored (rows are in the same order — the red stripe provides a point of reference). You’re looking “up” into the plug rather than “down” into the socket.
For example, R1 (the top-left pin on the INPUT socket) appears at the top-_right_ of the exposed plug. You can jam a wire jumper in that hole to a corresponding pin on the Arduino…

So! From the prior page, refer to the socket that’s correct for your matrix type. The labels may be a little different (or none at all), but most are pretty close to what’s shown here.
Then _swap the columns_ to find the correct position for a given signal.


**Either end of the ribbon cable can be plugged into the matrix INPUT socket.** Notice below, the “key” faces the same way regardless.
With the free end of the ribbon toward the center of the matrix, the Arduino can be hidden behind it.
With the free end of the ribbon off the side, it’s easier to see both the front of the matrix and the Arduino simultaneously, for making additional connections or for troubleshooting.

Using color-coded wires helps a _lot!_ If you don’t have colored wires, that’s okay, just pay close attention where everything goes. Our goal is a fully-populated plug like this:

So! Let’s proceed with the wiring, in groups…
# Connect Ground Wires
**32x32** and **64x32** matrices require **three** ground connections. **32x16** matrices have **four**.
Current **Arduino Uno form-factor** boards have **three** ground pins (the third is next to pin 13). If you need additional ground connections — for a 32x16 matrix, or if using an older Arduino board with only 2 ground pins — a solderless breadboard is handy for linking all these pins.
**Arduino Mega** boards have **five** ground pins. Same three as the Arduino Uno, plus two more next to pins 52 & 53.


# Upper RGB Data
Pins **R1** , **G1** and **B1** (labeled R0, B0 and G0 on some matrices) deliver data to the **top half** of the display.
On the **Arduino Uno** and **Adafruit Metro (328, M0** or **M4) **boards, connect these to digital pins **2** , **3** and **4**.
On **Arduino Mega** , connect to pins **24** , **25** and **26**.


# Lower RGB Data
Pins **R2** , **G2** and **B2** (labeled R1, G1 and B1 on some matrices) deliver data to the **bottom half** of the display. These connect to the next three Arduino pins…
On **Arduino Uno** and **Adafruit Metros** , that’s pins **5** , **6** and **7**.
On **Arduino Mega** , pins **27** , **28** and **29**.


# Row Select Lines
Pins **A** , **B** , **C** and **D** select which two rows of the display are currently lit. ( **32x16 matrices don’t have a “D” pin** — it’s connected to **ground** instead.)
These connect to pins **A0** , **A1** , **A2** and (if D pin present) **A3**. This is the **same** for all boards.


# LAT Wire
The **LAT** signal connects to Arduino pin **10**.
This is the same for all boards.
The LAT (latch) signal marks the end of a row of data.


# OE Wire
**OE** connects to Arduino pin **9**. This is the same for all boards.
OE (output enable) switches the LEDs off when transitioning from one row to the next.

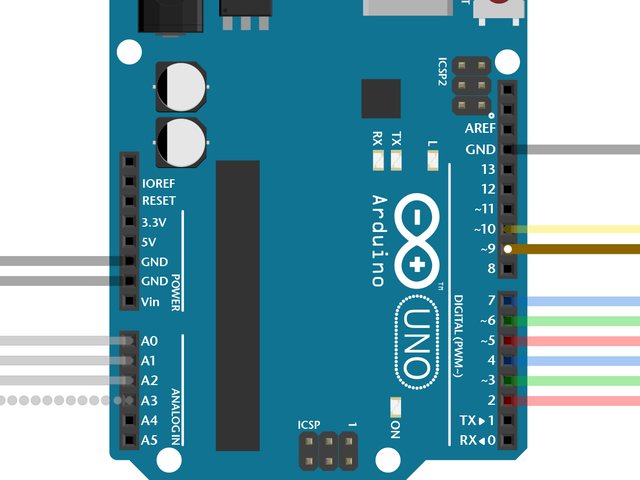
# CLK Wire
Last one!
**CLK** connects to…
- **Pin 8** on **Arduino Uno** , **Adafruit Metro 328** or **Metro M0**.
- **Pin 11** on **Arduino Mega**.
- **Pin A4** on **Adafruit Metro M4** (not shown, but you get the idea).
The CLK (clock) signal marks the arrival of each bit of data.


That’s it. You can skip ahead to the “Test Example Code” page now.
- [Previous Page](https://learn.adafruit.com/32x16-32x32-rgb-led-matrix/connecting-using-rgb-matrix-shield.md)
- [Next Page](https://learn.adafruit.com/32x16-32x32-rgb-led-matrix/connecting-using-a-proto-shield.md)
## Featured Products
### Medium 16x32 RGB LED matrix panel - 6mm Pitch
[Medium 16x32 RGB LED matrix panel - 6mm Pitch](https://www.adafruit.com/product/420)
Bring a little bit of Times Square into your home with this 16 x 32 RGB LED matrix panel. These panels are normally used to make video walls, here in New York we see them on the sides of busses and bus stops, to display animations or short video clips. We thought they looked really cool so we...
In Stock
[Buy Now](https://www.adafruit.com/product/420)
[Related Guides to the Product](https://learn.adafruit.com/products/420/guides)
### 32x32 RGB LED Matrix Panel - 4mm Pitch
[32x32 RGB LED Matrix Panel - 4mm Pitch](https://www.adafruit.com/product/607)
Bring a little bit of Times Square into your home with this totally adorable 5 inch square 32 x 32 RGB LED matrix panel. These panels are normally used to make video walls, here in New York we see them on the sides of busses and bus stops, to display animations or short video clips. We thought...
In Stock
[Buy Now](https://www.adafruit.com/product/607)
[Related Guides to the Product](https://learn.adafruit.com/products/607/guides)
### 32x32 RGB LED Matrix Panel - 5mm Pitch
[32x32 RGB LED Matrix Panel - 5mm Pitch](https://www.adafruit.com/product/2026)
Bring a little bit of Times Square into your home with this sweet 32 x 32 square RGB LED matrix panel. These panels are normally used to make video walls, here in New York we see them on the sides of busses and bus stops, to display animations or short video clips. We thought they looked...
In Stock
[Buy Now](https://www.adafruit.com/product/2026)
[Related Guides to the Product](https://learn.adafruit.com/products/2026/guides)
### 32x32 RGB LED Matrix Panel - 6mm pitch
[32x32 RGB LED Matrix Panel - 6mm pitch](https://www.adafruit.com/product/1484)
Bring a little bit of Times Square into your home with this sweet 32 x 32 square RGB LED matrix panel. These panels are normally used to make video walls, here in New York we see them on the sides of busses and bus stops, to display animations or short video clips. We thought they looked...
In Stock
[Buy Now](https://www.adafruit.com/product/1484)
[Related Guides to the Product](https://learn.adafruit.com/products/1484/guides)
### 64x32 RGB LED Matrix - 3mm pitch
[64x32 RGB LED Matrix - 3mm pitch](https://www.adafruit.com/product/2279)
Bring a little bit of Times Square into your home with this sweet 64 x 32 square RGB LED matrix panel. These panels are normally used to make video walls, here in New York we see them on the sides of busses and bus stops, to display animations or short video clips. We thought they looked...
In Stock
[Buy Now](https://www.adafruit.com/product/2279)
[Related Guides to the Product](https://learn.adafruit.com/products/2279/guides)
### 64x32 RGB LED Matrix - 4mm pitch
[64x32 RGB LED Matrix - 4mm pitch](https://www.adafruit.com/product/2278)
Bring a little bit of Times Square into your home with this sweet 64 x 32 square RGB LED matrix panel. These panels are normally used to make video walls, here in New York we see them on the sides of busses and bus stops, to display animations or short video clips. We thought they looked...
Out of Stock
[Buy Now](https://www.adafruit.com/product/2278)
[Related Guides to the Product](https://learn.adafruit.com/products/2278/guides)
### 64x32 RGB LED Matrix - 5mm pitch
[64x32 RGB LED Matrix - 5mm pitch](https://www.adafruit.com/product/2277)
Bring a little bit of Times Square into your home with this sweet 64x32 square RGB LED matrix panel. These panels are normally used to make video walls, here in New York we see them on the sides of busses and bus stops, to display animations or short video clips. We thought they looked really...
In Stock
[Buy Now](https://www.adafruit.com/product/2277)
[Related Guides to the Product](https://learn.adafruit.com/products/2277/guides)
### 64x32 RGB LED Matrix - 6mm pitch
[64x32 RGB LED Matrix - 6mm pitch](https://www.adafruit.com/product/2276)
Bring a little bit of Times Square into your home with this sweet 64x32 square RGB LED matrix panel. These panels are normally used to make video walls, here in New York we see them on the sides of busses and bus stops, to display animations or short video clips. We thought they looked really...
In Stock
[Buy Now](https://www.adafruit.com/product/2276)
[Related Guides to the Product](https://learn.adafruit.com/products/2276/guides)
## Related Guides
- [Adafruit Metro M0 Express](https://learn.adafruit.com/adafruit-metro-m0-express.md)
- [Adafruit Metro M4 Express featuring ATSAMD51](https://learn.adafruit.com/adafruit-metro-m4-express-featuring-atsamd51.md)
- [CircuitPython 101: Basic Builtin Data Structures](https://learn.adafruit.com/basic-datastructures-in-circuitpython.md)
- [Adafruit Ultimate GPS](https://learn.adafruit.com/adafruit-ultimate-gps.md)
- [WiFi Controlled LED Christmahanukwanzaa Tree](https://learn.adafruit.com/wifi-controlled-led-christmahanukwanzaa-tree.md)
- [Stream Deck controlled RGB Message Panel using Adafruit IO](https://learn.adafruit.com/stream-deck-controlled-rgb-message-panel-using-adafruit-io.md)
- [Memories of an Arduino](https://learn.adafruit.com/memories-of-an-arduino.md)
- [Matrix Portal Stained Glass with WLED](https://learn.adafruit.com/matrix-portal-stained-glass-with-wled.md)
- [Sous-vide controller powered by Arduino - The SousViduino!](https://learn.adafruit.com/sous-vide-powered-by-arduino-the-sous-viduino.md)
- [LED Matrix Sports Scoreboard](https://learn.adafruit.com/led-matrix-sports-scoreboard.md)
- [Creating MatrixPortal Projects with CircuitPython](https://learn.adafruit.com/creating-projects-with-the-circuitpython-matrixportal-library.md)
- [Introducing Adafruit Trellis ](https://learn.adafruit.com/adafruit-trellis-diy-open-source-led-keypad.md)
- [CircuitPython Hardware: Charlieplex LED Matrix](https://learn.adafruit.com/micropython-hardware-charlieplex-led-matrix.md)
- [CircuitPython Display Support Using displayio](https://learn.adafruit.com/circuitpython-display-support-using-displayio.md)
- [Arduino Lesson 16. Stepper Motors](https://learn.adafruit.com/adafruit-arduino-lesson-16-stepper-motors.md)
- [2.8" TFT Touchscreen](https://learn.adafruit.com/2-8-tft-touchscreen.md)
- [SmartMatrix Animated GIF Player](https://learn.adafruit.com/smartmatrix-animated-gif-player.md)
---
# Source: https://learn.adafruit.com/chumby-hacker-board/connecting-with-ttl-serial.md
# Chumby Hacker Board
## Connecting with TTL serial
The chumby has a four-pin, 3v level TTL serial connection port running at **115.2 Kbps**. You **cannot** just connect this to your computer's serial port, parallel port or USB port without a converter. We think the best way to connect is using an [FTDI cable](http://www.adafruit.com/index.php?main_page=product_info&cPath=33&products_id=70 "Link: http://www.adafruit.com/index.php?main\_page=product\_info&cPath=33&products\_id=70") which can be easily modified.
## Make the Cable

You **must** use a 3.3v logic level FTDI cable, look for the letters "3V3" or similar on the cable. We also suggest checking with a multimeter that the voltage on the logic pins (everything but Red) is no higher than 3.3V. 5V logic will damage the chumby board, and it would be a shame if it broke before you got to have some fun!
Also, make sure you have an adapter thats a cable, so that you can move around the pins.

Use tweezers to lift up the black connector tabs.
Then gently pull out the wires
Repeat!
Rearrange the wires as shown, so you have Black (GND) then a space, Orange (TX) and Yellow (RX). You can clip the unused pins or cover them with heatshrink. They wont be used. Just make sure you don't have the conductive pins accidentally touch your Hacker Board!!!

## Connect

Plug in your FTDI cable, and install any drivers. See our instructions for driver installation for [Windows](http://www.ladyada.net/learn/arduino/lesson0-win.html), [Mac](http://www.ladyada.net/learn/arduino/lesson0-mac.html) and [Linux](http://www.ladyada.net/learn/arduino/lesson0-lin.html).
Once the driver is installed, verify the COM or tty port. For example, the COM port for our FTDI cable is COM34 (we have a lot of FTDI cables!). Open up a Serial Terminal program and connect to that COM or tty port at 115.2Kbps without hardware handshaking.

Connect a 5V regulated supply into the chumby and your FTDI cable so that the black wire lines up with the **GND** labeled pin.
You should see the following on your terminal:
Hit return a few times to get the shell!
- [Previous Page](https://learn.adafruit.com/chumby-hacker-board/power.md)
- [Next Page](https://learn.adafruit.com/chumby-hacker-board/compiler.md)
## Featured Products
### USB 2.0 Powered Hub - 7 Ports with 5V 2A Power Supply
[USB 2.0 Powered Hub - 7 Ports with 5V 2A Power Supply](https://www.adafruit.com/product/961)
Add lots more USB capability to your Raspberry Pi or computer using this powered USB 2.0 hub. It adds a full **seven powered ports** , all at USB 2.0 speeds so you can use video cameras and other high speed devices (cheaper hubs are v1.1 and not as fast!)
The extra sauce...
No Longer Stocked
[Buy Now](https://www.adafruit.com/product/961)
[Related Guides to the Product](https://learn.adafruit.com/products/961/guides)
### Miniature WiFi (802.11b/g/n) Module: For Raspberry Pi and more
[Miniature WiFi (802.11b/g/n) Module: For Raspberry Pi and more](https://www.adafruit.com/product/814)
Make your Internet of Things device cable-free by adding WiFi. Take advantage of the Raspberry Pi and Beagle Bone's USB port to add a low cost, but high-reliability wireless link. We tried half a dozen modules to find one that works well with the Pi and Bone without the need of recompiling...
No Longer Stocked
[Buy Now](https://www.adafruit.com/product/814)
[Related Guides to the Product](https://learn.adafruit.com/products/814/guides)
### 5V 2A (2000mA) switching power supply - UL Listed
[5V 2A (2000mA) switching power supply - UL Listed](https://www.adafruit.com/product/276)
This is an FCC/CE certified and UL listed power supply. Need a lot of 5V power? This switching supply gives a clean regulated 5V output at up to 2000mA. 110 or 240 input, so it works in any country. The plugs are "US 2-prong" style so you may need a plug adapter, but you can pick one...
Out of Stock
[Buy Now](https://www.adafruit.com/product/276)
[Related Guides to the Product](https://learn.adafruit.com/products/276/guides)
### 2.1mm to 1.7mm DC jack adapter
[2.1mm to 1.7mm DC jack adapter](https://www.adafruit.com/product/411)
We're carrying this adapter primarily to allow Chumby Hacker Board users to adapt our nice [5V @ 2A power supply](http://www.adafruit.com/products/276) to their CHB. But you can use this adapter for anything else that has a 1.7mm DC jack, such as a PSP.
In Stock
[Buy Now](https://www.adafruit.com/product/411)
[Related Guides to the Product](https://learn.adafruit.com/products/411/guides)
### USB MicroSD Card Reader/Writer - microSD / microSDHC / microSDXC
[USB MicroSD Card Reader/Writer - microSD / microSDHC / microSDXC](https://www.adafruit.com/product/939)
This is the cutest little microSD card reader/writer - but don't be fooled by its adorableness! It's wicked fast and supports up to 64 GB SDXC cards! Simply slide the card into the edge and plug it into your computer. No drivers are required, it shows up as a standard 'Mass...
No Longer Stocked
[Buy Now](https://www.adafruit.com/product/939)
[Related Guides to the Product](https://learn.adafruit.com/products/939/guides)
### Ethernet Cable - 10 ft long
[Ethernet Cable - 10 ft long](https://www.adafruit.com/product/730)
We have so many Internet-connected goodies in the shop, we figured it's time to carry a cable so you can easily connect them up! This cable is 10 feet long, black and has all 8 wires installed. Perfect for use with the [BeagleBone](http://www.adafruit.com/products/513),
No Longer Stocked
[Buy Now](https://www.adafruit.com/product/730)
[Related Guides to the Product](https://learn.adafruit.com/products/730/guides)
### USB to TTL Serial Cable - Debug / Console Cable for Raspberry Pi
[USB to TTL Serial Cable - Debug / Console Cable for Raspberry Pi](https://www.adafruit.com/product/954)
The cable is easiest way ever to connect to your microcontroller/Raspberry Pi/WiFi router serial console port. Inside the big USB plug is a USB\<-\>Serial conversion chip and at the end of the 36" cable are four wire - red power, black ground, white RX into USB port, and green TX out...
In Stock
[Buy Now](https://www.adafruit.com/product/954)
[Related Guides to the Product](https://learn.adafruit.com/products/954/guides)
### FTDI Serial TTL-232 USB Cable
[FTDI Serial TTL-232 USB Cable](https://www.adafruit.com/product/70)
Just about all electronics use TTL serial for debugging, bootloading, programming, serial output, etc. But it's rare for a computer to have a serial port anymore. This is a USB to TTL serial cable, with a FTDI FT232RL usb/serial chip embedded in the head. It has a 6-pin socket at the end...
In Stock
[Buy Now](https://www.adafruit.com/product/70)
[Related Guides to the Product](https://learn.adafruit.com/products/70/guides)
## Related Guides
- [CircuitPython Libraries on MicroPython using the Raspberry Pi Pico](https://learn.adafruit.com/circuitpython-libraries-on-micropython-using-the-raspberry-pi-pico.md)
- [Hallowing Minotaur Maze](https://learn.adafruit.com/hallowing-minotaur-maze.md)
- [Raspberry Pi Azure IoT Hub Dashboard with CircuitPython](https://learn.adafruit.com/raspberry-pi-iot-dashboard-with-azure-and-circuitpython.md)
- [Adafruit 2.9" eInk Display Breakouts and FeatherWings](https://learn.adafruit.com/adafruit-2-9-eink-display-breakouts-and-featherwings.md)
- [Pi SSD Media Server](https://learn.adafruit.com/pi-ssd-media-server.md)
- [Creating Slideshows in CircuitPython](https://learn.adafruit.com/creating-slideshows-in-circuitpython.md)
- [Network Interface Failover using FONA](https://learn.adafruit.com/network-interface-failover-using-fona.md)
- [Matrix Keypad](https://learn.adafruit.com/matrix-keypad.md)
- [Native MP3 decoding on Arduino](https://learn.adafruit.com/native-mp3-decoding-on-arduino.md)
- [Raspberry Pi HQ Camera Case](https://learn.adafruit.com/raspberry-pi-hq-camera-case.md)
- [Articulated Pi Display V2 Mount](https://learn.adafruit.com/pi-wall-mount.md)
- [World's Smallest MAME Arcade Cabinet](https://learn.adafruit.com/worlds-smallest-mame-arcade-cabinet.md)
- [Raspberry Pi E-Ink Weather Station using Python](https://learn.adafruit.com/raspberry-pi-e-ink-weather-station-using-python.md)
- [Getting Started with Raspberry Pi Pico and CircuitPython](https://learn.adafruit.com/getting-started-with-raspberry-pi-pico-circuitpython.md)
- [Adafruit QT Py and NeoPixel LEDs](https://learn.adafruit.com/qt-py-and-neopixel-leds.md)
---
# Source: https://learn.adafruit.com/2-8-tft-touchscreen/connection-options.md
# 2.8" TFT Touchscreen
## Connection Options
Info:
The TFT LCD requires a lot of pins to use with your processor. We have two breakouts available which you can use depending on your application.
The first (right hand side) is a single 1x20 header strip with 0.1" spacing. This is perfect for breadboard use or if you have to do some hand wiring. You can use 'straight' header or 'right angle' header so that it stands up straight (although it may be harder to touch if its soldered this way).
To solder the header, we suggest placing a 20pin strip of header, long pins down into a breadboard.

Place the LCD on top and solder each pin.

The second is a 2x10 dual header strip with 0.1" spacing. This is perfect for use with an IDC cable for remote access. We suggest a 6" cable but you might be able to use a 12" one, it depends on how fast you're writing to the screen (faster means a shorter cable required).
_This cable is a 2x5 not 2x10 but its what the larger cable will look like_
[You can pick up a socket-socket cable from digikey for $2 - they're also available from any other electronics shop](http://search.digikey.com/scripts/DkSearch/dksus.dll?Detail&name=H3AAH-2006G-ND).
- [Previous Page](https://learn.adafruit.com/2-8-tft-touchscreen/overview.md)
- [Next Page](https://learn.adafruit.com/2-8-tft-touchscreen/mounting-options.md)
## Featured Products
### Adafruit METRO 328 Fully Assembled - Arduino IDE compatible
[Adafruit METRO 328 Fully Assembled - Arduino IDE compatible](https://www.adafruit.com/product/50)
We sure love the ATmega328 here at Adafruit, and we use them _a lot_ for our own projects. The processor has plenty of GPIO, Analog inputs, hardware UART SPI and I2C, timers and PWM galore - just enough for most simple projects. When we need to go small, we use a
Out of Stock
[Buy Now](https://www.adafruit.com/product/50)
[Related Guides to the Product](https://learn.adafruit.com/products/50/guides)
### Breadboarding wire bundle
[Breadboarding wire bundle](https://www.adafruit.com/product/153)
75 flexible stranded core wires with stiff ends molded on in red, orange, yellow, green, blue, brown, black and white. These are a major improvement over the "box of bent wires" that are sometimes sold with breadboards, and faster than stripping your own solid core wires. Makes...
In Stock
[Buy Now](https://www.adafruit.com/product/153)
[Related Guides to the Product](https://learn.adafruit.com/products/153/guides)
### Half Sized Premium Breadboard - 400 Tie Points
[Half Sized Premium Breadboard - 400 Tie Points](https://www.adafruit.com/product/64)
This is a cute, half-size breadboard with 400 tie points, good for small projects. It's 3.25" x 2.2" / 8.3cm x 5.5cm with a standard double-strip in the middle and two power rails on both sides. You can pull the power rails off easily to make the breadboard as...
In Stock
[Buy Now](https://www.adafruit.com/product/64)
[Related Guides to the Product](https://learn.adafruit.com/products/64/guides)
### MicroSD card breakout board+
[MicroSD card breakout board+](https://www.adafruit.com/product/254)
Not just a simple breakout board, this microSD adapter goes the extra mile - designed for ease of use.
- Onboard 5v-\>3v regulator provides 150mA for power-hungry cards
- 3v level shifting means you can use this with ease on either 3v or 5v systems
- Uses a proper level...
In Stock
[Buy Now](https://www.adafruit.com/product/254)
[Related Guides to the Product](https://learn.adafruit.com/products/254/guides)
## Related Guides
- [Adafruit Motor Shield](https://learn.adafruit.com/adafruit-motor-shield.md)
- [Photocells](https://learn.adafruit.com/photocells.md)
- [Circuit Playground: D is for Diode](https://learn.adafruit.com/circuit-playground-d-is-for-diode.md)
- [Micro SD Card Breakout Board Tutorial](https://learn.adafruit.com/adafruit-micro-sd-breakout-board-card-tutorial.md)
- [0.96" mini Color OLED](https://learn.adafruit.com/096-mini-color-oled.md)
- [Halloween Pumpkin](https://learn.adafruit.com/halloween-pumpkin.md)
- [Multi-tasking the Arduino - Part 1](https://learn.adafruit.com/multi-tasking-the-arduino-part-1.md)
- [Low Power WiFi Datalogger](https://learn.adafruit.com/low-power-wifi-datalogging.md)
- [Arduino Lesson 3. RGB LEDs](https://learn.adafruit.com/adafruit-arduino-lesson-3-rgb-leds.md)
- [Create an Internet of Things Dashboard with Adafruit IO](https://learn.adafruit.com/create-an-internet-of-things-dashboard-with-adafruit-dot-io.md)
- [Adafruit 4-Channel ADC Breakouts](https://learn.adafruit.com/adafruit-4-channel-adc-breakouts.md)
- [Trinket Audio Player](https://learn.adafruit.com/trinket-audio-player.md)
- [TTL Serial Camera](https://learn.adafruit.com/ttl-serial-camera.md)
- [Wave Shield Voice Changer](https://learn.adafruit.com/wave-shield-voice-changer.md)
- [All About Arduino Libraries](https://learn.adafruit.com/adafruit-all-about-arduino-libraries-install-use.md)
---
# Source: https://learn.adafruit.com/multimeters/continuity.md
# Multimeters
## Continuity
## What is Continuity?
You might be asking, "What is continuity?" But don't worry, it's quite simple! Continuity means, are two things electrically connected. So if two electronic parts are connected with a wire, they are continuous. If they are connected with cotton string, they are not: while they are connected, the cotton string is not conductive.
You can always use a resistance-tester (ohmmeter) to figure out if something is connected because the resistance of wires is very small, less than 100 ohms, usually. However, continuity testers usually have a piezo buzzer which beeps. This makes them very useful when you want to poke at a circuit and need to focus on where the probes are instead of staring at the meter display.
For some basic circuits you can just look to see where the wires go to determine continuity but it's always wise to use a multimeter. Sometimes wires break or you're tired and can't easily follow all the PCB traces. I use continuity check all the time!
## What is it good for?
Continuity is one of the most important tests. Here are some things it is good for
- Determine if your soldering is good. If your solder joint it is a _cold solder connection_ it will appear connected but in actually it is not! This can be really frustrating if you are not experienced in visually detecting cold solder joints
- Determine if a wire is broken in the middle. Power cords and headphone cables are notorious for breaking inside the shielding, it appears as if the cable is fine but inside the wires have been bent so much they eventually broke.
- Making sure something **isn't** connected. Sometimes a solder joint will _short_ two connections. [Or maybe your PCB has mistakes on it and some traces were shorted by accident.](http://s3.amazonaws.com/ladyadanet/make/x0xb0x/shorts_t.jpg "Link: http://s3.amazonaws.com/ladyadanet/make/x0xb0x/shorts\_t.jpg")
- Reverse-engineering or verifying a design back to a schematic
## Remember!
**You can only test continuity when the device you're testing is** **not powered**. Continuity works by poking a little voltage into the circuit and seeing how much current flows, its perfectly safe for your device but if its powered there is already voltage in the circuit, and you will get incorrect readings
**Always** test to make sure your meter is working before starting the test by brushing the two tips together, and verifying you hear the beep. Maybe the battery is low or its not in the right mode.
**Continuity is non-directional** , you can switch probes and it will be the same.
If you are testing two points in a circuit and there is a (big) capacitor between those points **you may hear a quick beep and then quiet**. That's because the voltage the meter is applying to the circuit is charging up the capacitor and during that time the meter 'thinks' its continuous (essentially)
**Small resistors (under 100 ohms or so) and also all inductors will seem like short circuits** to a multimeter because they are very much like wires.
**Likewise, continuity doesn't mean "short"** it just means very very low resistance. For example, if you have a circuit that draws an Amp from a 5V supply, it will appear to be a 5Ω resistor. If you measure that with your meter it will think its a short circuit, but really its just a high-drain circuit.
## Get Into the Mode
## First step is to get your multimeter into the correct mode. Look for the icon that looks sort of like a 'sound wave'
Here are three examples. Note that sometimes the mode is "dual" (or possibly more) usage,


Turn the multimeter knob so that it points to this symbol.## Touch and Go
For a majority of multimeters, you're ready to go, just touch the tips of the probes together so that they make a beeping sound!
Here's a video demonstration:
http://www.youtube.com/watch?v=6BEKj4J2AXw
Here are some examples covering a couple of different multimeters:## Example 1
This meter is very simple. When the probes are not touching, the display shows "1"

When you touch the tips together, the display changes to a three digit mode (it's displaying resistance, which we will cover later) It also emits a beep.
## Example 2
This meter is dual-mode but still very easy to use. Turn the dial to the symbol. When the probes are not touching the display shows "OL" which stands for Open Loop. (Open loop is another way of saying there is no continuity).

When you touch the probes, the soundwave icon shows up in the display (upper right) and it also shows a number. The number is not the resistance, actually…its the voltage (look for the V in the right hand side for Volts). This is because this mode is also a **Diode Test** (which will be discussed later).
## Example 3
This meter is triple-mode and requires an extra step to get to the continuity function. Click on the image to get a closer view of the triple-mode. After you dial to this mode you must press the **Mode** button, the wave icon will then appear in the display.

You can see the wave icon in the top right as expected. This meter also displays OL (I've noticed that nicer meters do this).
Unlike the other meter, this one displays Ohms (see the symbol on the right of the display). The resistance is low (4.7Ohms) but not 0 (the ideal value) because the probes and wires act as resistors. Usually with these sorts of meters they will beep whenever resistance is under 100 ohms or so.
## Probing a PCB
Here is an example of testing a PCB for continuity.The first test shows that the two points are not connected.

The second test shows that these two points are connected.
- [Previous Page](https://learn.adafruit.com/multimeters/overview.md)
- [Next Page](https://learn.adafruit.com/multimeters/resistance.md)
## Featured Products
### Extech EX330 12-function autoranging multimeter
[Extech EX330 12-function autoranging multimeter](https://www.adafruit.com/product/308)
**Discontinued** - [you can grab this Digital Multimeter - Model 9205B+ instead!](https://www.adafruit.com/product/2034)
If you're looking for one of the best multimeters, we're proud to now offer our personal favorite! The Extech EX330 "12...
No Longer Stocked
[Buy Now](https://www.adafruit.com/product/308)
[Related Guides to the Product](https://learn.adafruit.com/products/308/guides)
### Digital Multimeter
[Digital Multimeter](https://www.adafruit.com/product/71)
This is a basic multimeter, I've played with it a bunch and I think its a great addition to a toolbox. It's low cost and simple to use with a big clear display and all the measurements you need:
- AC/DC Voltage measurement
- Current measurement, from 1uA up to...
No Longer Stocked
[Buy Now](https://www.adafruit.com/product/71)
[Related Guides to the Product](https://learn.adafruit.com/products/71/guides)
### Digital Multimeter - Model 9205B+
[Digital Multimeter - Model 9205B+](https://www.adafruit.com/product/2034)
This massive multimeter has everything but the kitchen sink included. It's a great addition to any workbench or toolbox. It's low cost, simple to use, and has a big clear display with all the measurements you need and more!
The multimeter includes:
- AC/DC Voltage...
In Stock
[Buy Now](https://www.adafruit.com/product/2034)
[Related Guides to the Product](https://learn.adafruit.com/products/2034/guides)
### Pocket Autoranging Digital Multimeter
[Pocket Autoranging Digital Multimeter](https://www.adafruit.com/product/850)
When we're on the go, we like to keep a multimeter in our purse and this model is by far the best pocket meter we've found. It's so good you'll end up using it as your main multimeter!
First up, this meter can measure nearly everything: it's got DC and AC...
Out of Stock
[Buy Now](https://www.adafruit.com/product/850)
[Related Guides to the Product](https://learn.adafruit.com/products/850/guides)
### Multi-Meter! - Skill badge, iron-on patch
[Multi-Meter! - Skill badge, iron-on patch](https://www.adafruit.com/product/502)
You can use a multi-meter! Adafruit offers a fun and exciting "badges" of achievement for electronics, science and engineering. We believe everyone should be able to be rewarded for learning a useful skill, a badge is just one of the many ways to show and share.
This is...
No Longer Stocked
[Buy Now](https://www.adafruit.com/product/502)
[Related Guides to the Product](https://learn.adafruit.com/products/502/guides)
### Multi-Meter! - Sticker!
[Multi-Meter! - Sticker!](https://www.adafruit.com/product/646)
You can use a multi-meter! Adafruit offers a fun and exciting stickers to celebrate achievements in electronics, science and engineering. We believe everyone should be able to be rewarded for learning a useful skill, a great sticker is just one of the many ways to show and share.
No Longer Stocked
[Buy Now](https://www.adafruit.com/product/646)
[Related Guides to the Product](https://learn.adafruit.com/products/646/guides)
## Related Guides
- [USB-PD Hacks](https://learn.adafruit.com/usb-pd-hacks.md)
- [Energy Budgets](https://learn.adafruit.com/energy-budgets.md)
- [Ladyada's Toolkit](https://learn.adafruit.com/ladyadas-toolkit.md)
- [Collin's Lab: Multimeters](https://learn.adafruit.com/collins-lab-multimeters.md)
---
# Source: https://learn.adafruit.com/2-8-tft-touch-shield/controlling-the-backlight.md
# 2.8" TFT Touch Shield
## Controlling the Backlight
By default, we assume you'll want the backlight on all the time. However, you may want to PWM control or otherwise turn off the LED backlight to save power. You can do this with a simple hack. On the back, look for the two **backlight** jumpers. Cut the trace between the **VCC** jumper using a sharp knife and then solder the jumper labeled **Pin 3**. Then you can use Digital 3 to control the backlight.

- [Previous Page](https://learn.adafruit.com/2-8-tft-touch-shield/bitmaps.md)
- [Next Page](https://learn.adafruit.com/2-8-tft-touch-shield/downloads.md)
## Featured Products
### Adafruit METRO 328 Fully Assembled - Arduino IDE compatible
[Adafruit METRO 328 Fully Assembled - Arduino IDE compatible](https://www.adafruit.com/product/50)
We sure love the ATmega328 here at Adafruit, and we use them _a lot_ for our own projects. The processor has plenty of GPIO, Analog inputs, hardware UART SPI and I2C, timers and PWM galore - just enough for most simple projects. When we need to go small, we use a
Out of Stock
[Buy Now](https://www.adafruit.com/product/50)
[Related Guides to the Product](https://learn.adafruit.com/products/50/guides)
## Related Guides
- [LED Lightbox](https://learn.adafruit.com/led-lightbox.md)
- [Trinket Audio Player](https://learn.adafruit.com/trinket-audio-player.md)
- [Geofencing with the FONA 808 & Adafruit IO](https://learn.adafruit.com/geofencing-with-the-fona-808-and-adafruit-io.md)
- [Adafruit Analog Accelerometer Breakouts](https://learn.adafruit.com/adafruit-analog-accelerometer-breakouts.md)
- [Electronic Demon Costume](https://learn.adafruit.com/electronic-demon-costume.md)
- [Adafruit Ultimate GPS Logger Shield](https://learn.adafruit.com/adafruit-ultimate-gps-logger-shield.md)
- [Mini Thermal Receipt Printers](https://learn.adafruit.com/mini-thermal-receipt-printer.md)
- [Bluefruit LE Connect for iOS and Android](https://learn.adafruit.com/bluefruit-le-connect.md)
- [Introducing Adafruit Trellis ](https://learn.adafruit.com/adafruit-trellis-diy-open-source-led-keypad.md)
- [Arduino Lesson 9. Sensing Light](https://learn.adafruit.com/adafruit-arduino-lesson-9-sensing-light.md)
- [36mm LED Pixels](https://learn.adafruit.com/36mm-led-pixels.md)
- [Adafruit 16-channel PWM/Servo Shield](https://learn.adafruit.com/adafruit-16-channel-pwm-slash-servo-shield.md)
- [Naughty or Nice Machine](https://learn.adafruit.com/naughty-or-nice-machine.md)
- [Wireless Gardening with Arduino + CC3000 WiFi Modules](https://learn.adafruit.com/wireless-gardening-arduino-cc3000-wifi-modules.md)
- [LSM303 Accelerometer + Compass Breakout](https://learn.adafruit.com/lsm303-accelerometer-slash-compass-breakout.md)
---
# Source: https://learn.adafruit.com/adafruit-gfx-graphics-library/coordinate-system-and-units.md
# Adafruit GFX Graphics Library
## Coordinate System and Units
Pixels — picture elements, the blocks comprising a digital image — are addressed by their horizontal (X) and vertical (Y) coordinates. The coordinate system places the origin (0,0) at the top left corner, with positive X increasing to the right and positive Y increasing downward. This is upside-down relative to the standard Cartesian coordinate system of mathematics, but is established practice in many computer graphics systems (a throwback to the days of raster-scan CRT graphics, which worked top-to-bottom). To use a tall “portrait” layout rather than wide “landscape” format, or if physical constraints dictate the orientation of a display in an enclosure, one of four rotation settings can also be applied, indicating which corner of the display represents the top left.
Also unlike the mathematical Cartesian coordinate system, points here have dimension — they are always one full integer pixel wide and tall.

Coordinates are always expressed in pixel units; there is no implicit scale to a real-world measure like millimeters or inches, and the size of a displayed graphic will be a function of that specific display’s _dot pitch_ or pixel density. If you’re aiming for a real-world dimension, you’ll need to scale your coordinates to suit. Dot pitch can often be found in the device datasheet, or by measuring the screen width and dividing the number of pixels across by this measurement.
The library will safely “clip” any graphics drawn off the edges of the screen. In fact this is done on purpose sometimes, as with scrolling text displays.
For color-capable displays, colors are represented as unsigned 16-bit values. Some displays may physically be capable of more or fewer bits than this, but the library operates with 16-bit values…these are easy for the Arduino to work with while also providing a consistent data type across all the different displays. The primary color components — red, green and blue — are all “packed” into a single 16-bit variable, with the most significant 5 bits conveying red, middle 6 bits conveying green, and least significant 5 bits conveying blue. That extra bit is assigned to green because our eyes are most sensitive to green light. _Science!_

For the most common primary and secondary colors, we have this handy cheat-sheet that you can include in your own code. Of course, you can pick any of 65,536 different colors, but this basic list may be easiest when starting out:
```
// Color definitions
#define BLACK 0x0000
#define BLUE 0x001F
#define RED 0xF800
#define GREEN 0x07E0
#define CYAN 0x07FF
#define MAGENTA 0xF81F
#define YELLOW 0xFFE0
#define WHITE 0xFFFF
```
Elsewhere: [here’s a detailed explanation of 16-bit “RGB565” colors](http://www.barth-dev.de/online/rgb565-color-picker/) that includes an interactive color picker (not compatible with all browsers).
For monochrome (single-color) displays, colors are always specified as simply 1 (set) or 0 (clear). The semantics of set/clear are specific to the type of display: with something like a luminous OLED display, a “set” pixel is lighted, whereas with a reflective LCD display, a “set” pixel is typically dark. There may be exceptions, but generally you can count on 0 (clear) representing the default background state for a freshly-initialized display, whatever that works out to be.
- [Previous Page](https://learn.adafruit.com/adafruit-gfx-graphics-library/overview.md)
- [Next Page](https://learn.adafruit.com/adafruit-gfx-graphics-library/graphics-primitives.md)
## Related Guides
- [AdaBox 019](https://learn.adafruit.com/adabox019.md)
- [Sous-vide controller powered by Arduino - The SousViduino!](https://learn.adafruit.com/sous-vide-powered-by-arduino-the-sous-viduino.md)
- [Adafruit 128x64 OLED Bonnet for Raspberry Pi](https://learn.adafruit.com/adafruit-128x64-oled-bonnet-for-raspberry-pi.md)
- [Adafruit IO IOT Hub with the Adafruit FunHouse](https://learn.adafruit.com/adafruit-io-hub-with-the-adafruit-funhouse.md)
- [HalloWing Flapping Bat](https://learn.adafruit.com/hallowing-flapping-bat.md)
- [CircuitPython OLED and Dual Knob Sketcher](https://learn.adafruit.com/circuitpython-oled-knob-sketcher.md)
- [Monochrome OLED Breakouts](https://learn.adafruit.com/monochrome-oled-breakouts.md)
- [4x4 Rotary Encoder MIDI Messenger](https://learn.adafruit.com/4x4-rotary-encoder-midi-messenger.md)
- [Pico W HTTP Server with CircuitPython](https://learn.adafruit.com/pico-w-http-server-with-circuitpython.md)
- [Capturing Camera Images with CircuitPython](https://learn.adafruit.com/capturing-camera-images-with-circuitpython.md)
- [WiFi OLED Display Badge](https://learn.adafruit.com/digital-display-badge.md)
- [Trinket Ultrasonic Rangefinder](https://learn.adafruit.com/trinket-ultrasonic-rangefinder.md)
- [PyPortal Adafruit Quote Book](https://learn.adafruit.com/pyportal-adafruit-quote-board.md)
- [2.8" TFT Touchscreen](https://learn.adafruit.com/2-8-tft-touchscreen.md)
- [Magic Storybook with ChatGPT](https://learn.adafruit.com/magic-storybook-with-chatgpt.md)
---
# Source: https://learn.adafruit.com/send-raspberry-pi-data-to-cosm/cosm-account-and-feed.md
# Send Raspberry Pi Data to COSM
## COSM Account and Feed
Info:
COSM (used to be Pachube) helps connect little devices like the raspberry pi to the internet. You will need to do the following to use COSM.
- Setup a Account
- Create a Feed
- Save the API\_KEY
- Save the FEED ID
# Setup a Account
You will need to create a COSM account. Click on the blue "Get Started" circle to create a new account. It's your typical e-mail/password followed by password verification. You will need to check your e-mail and click the verification link. 
# Add a Feed
Click the blue plus to add a feed.

Select Arduino

Give your new feed a title and tags.
Title: "Raspberry Pi Temperature" _(or whatever you like)_
Tags: raspberry pi, temperature, adc _(or make up your own)_
Select the "Create" button.

You need to extract the API\_KEY and FEEDID from the code sample that COSM provides. These will go into the python script that we setup on the next page. The API\_KEY lets COSM knows who is connecting and to which feed they want to send data.
In this example the API\_KEY is: 5RNOO3ShYJxYiq2V2sgSRtz3112SAKxFQjNDQmNXc0RScz0g
The FEEDID is: 68872
Do not use those numbers, use your own!

- [Previous Page](https://learn.adafruit.com/send-raspberry-pi-data-to-cosm/necessary-packages.md)
- [Next Page](https://learn.adafruit.com/send-raspberry-pi-data-to-cosm/python-script.md)
## Featured Products
### MCP3008 - 8-Channel 10-Bit ADC With SPI Interface
[MCP3008 - 8-Channel 10-Bit ADC With SPI Interface](https://www.adafruit.com/product/856)
Need to add analog inputs? This chip will add 8 channels of 10-bit analog input to your microcontroller or microcomputer project. It's super easy to use and uses SPI so only 4 pins are required. We chose this chip as a great accompaniment to the Raspberry Pi computer because it's fun...
In Stock
[Buy Now](https://www.adafruit.com/product/856)
[Related Guides to the Product](https://learn.adafruit.com/products/856/guides)
### TMP36 - Analog Temperature sensor
[TMP36 - Analog Temperature sensor](https://www.adafruit.com/product/165)
Wide range, low power temperature sensor outputs an analog voltage that is proportional to the ambient temperature. To use, connect pin 1 (left) to power (between 2.7 and 5.5V), pin 3 (right) to ground, and pin 2 to analog in on your microcontroller. The voltage out is 0V at -50°C and...
In Stock
[Buy Now](https://www.adafruit.com/product/165)
[Related Guides to the Product](https://learn.adafruit.com/products/165/guides)
### Full Sized Premium Breadboard - 830 Tie Points
[Full Sized Premium Breadboard - 830 Tie Points](https://www.adafruit.com/product/239)
This is a 'full-size' premium quality breadboard, 830 tie points. Good for small and medium projects. It's 2.2" x 7" (5.5 cm x 17 cm) with a standard double-strip in the middle and two power rails on both sides. You can pull the power rails off easily to make the...
In Stock
[Buy Now](https://www.adafruit.com/product/239)
[Related Guides to the Product](https://learn.adafruit.com/products/239/guides)
### Half Sized Premium Breadboard - 400 Tie Points
[Half Sized Premium Breadboard - 400 Tie Points](https://www.adafruit.com/product/64)
This is a cute, half-size breadboard with 400 tie points, good for small projects. It's 3.25" x 2.2" / 8.3cm x 5.5cm with a standard double-strip in the middle and two power rails on both sides. You can pull the power rails off easily to make the breadboard as...
In Stock
[Buy Now](https://www.adafruit.com/product/64)
[Related Guides to the Product](https://learn.adafruit.com/products/64/guides)
### Adafruit Assembled Pi Cobbler Breakout + Cable for Raspberry Pi
[Adafruit Assembled Pi Cobbler Breakout + Cable for Raspberry Pi](https://www.adafruit.com/product/914)
Now that you've finally got your hands on a [Raspberry Pi® Model B](http://www.raspberrypi.org/), you're probably itching to make some fun embedded computer projects with it. What you need is an add on prototyping Pi Cobbler from Adafruit, which can break out all those...
No Longer Stocked
[Buy Now](https://www.adafruit.com/product/914)
[Related Guides to the Product](https://learn.adafruit.com/products/914/guides)
### GPIO Ribbon Cable for Raspberry Pi Model A and B - 26 pin
[GPIO Ribbon Cable for Raspberry Pi Model A and B - 26 pin](https://www.adafruit.com/product/862)
That new Raspberry Pi® Model A or B computer you just got has a row of 2x13 pin headers soldered on - those are the GPIO (general purpose input/output) pins and for those of us who like to hack electronics they are where the real fun is. By programming the Pi, you can twiddle those pins...
In Stock
[Buy Now](https://www.adafruit.com/product/862)
[Related Guides to the Product](https://learn.adafruit.com/products/862/guides)
### Adafruit Pi Box - Enclosure for Raspberry Pi Model A or B
[Adafruit Pi Box - Enclosure for Raspberry Pi Model A or B](https://www.adafruit.com/product/859)
**Discontinued** - you can grab [Adafruit Pi Box Plus - Enclosure for RasPi Model B+/Pi 2/ Pi 3](https://www.adafruit.com/product/1985) instead!
**We're still selling this classic Adafruit case for those who specifically want it but **
No Longer Stocked
[Buy Now](https://www.adafruit.com/product/859)
[Related Guides to the Product](https://learn.adafruit.com/products/859/guides)
## Related Guides
- [MCP3008 - 8-Channel 10-Bit ADC With SPI Interface](https://learn.adafruit.com/mcp3008-spi-adc.md)
- [Adafruit MAX31856 Universal Thermocouple Amplifier](https://learn.adafruit.com/adafruit-max31856-thermocouple-amplifier.md)
- [Adafruit Swirly Aluminum Mounting Grid for 0.1" Spaced PCBs](https://learn.adafruit.com/swirly-grid.md)
- [Capacitive Touch with Conductive Fabric & Flora](https://learn.adafruit.com/capacitive-touch-with-conductive-fabric-and-flora.md)
- [Raspberry Pi Wifi-Controlled Cat Laser Toy](https://learn.adafruit.com/raspberry-pi-wifi-controlled-cat-laser-toy.md)
- [Adafruit's Raspberry Pi Lesson 6. Using SSH](https://learn.adafruit.com/adafruits-raspberry-pi-lesson-6-using-ssh.md)
- [Piezo Ring Tones with Raspberry Pi](https://learn.adafruit.com/piezo-ring-tones-with-raspberry-pi.md)
- [LED Backpack Displays on Raspberry Pi and BeagleBone Black](https://learn.adafruit.com/led-backpack-displays-on-raspberry-pi-and-beaglebone-black.md)
- [Bluetooth LE MIDI Controller](https://learn.adafruit.com/bluetooth-le-midi-controller.md)
- [MCP9808 Temperature Sensor Python Library](https://learn.adafruit.com/mcp9808-temperature-sensor-python-library.md)
- [ulab: Crunch Numbers fast in CircuitPython](https://learn.adafruit.com/ulab-crunch-numbers-fast-with-circuitpython.md)
- [Using MPL3115A2 with CircuitPython](https://learn.adafruit.com/using-mpl3115a2-with-circuitpython.md)
- [Pi-Top Assembly ](https://learn.adafruit.com/pi-top-assembly.md)
- [Goose Game M4SK Controller](https://learn.adafruit.com/goose-game-m4sk-controller.md)
- [Bluefruit Playground App](https://learn.adafruit.com/bluefruit-playground-app.md)
- [Raspberry Pi SelfieBlock](https://learn.adafruit.com/selfieblock.md)
---
# Source: https://learn.adafruit.com/send-raspberry-pi-data-to-cosm/cosm-view.md
# Send Raspberry Pi Data to COSM
## COSM Graph View
Info:
This is how COSM [displays the temperature we are sending it](https://cosm.com/feeds/68872). We can see both celsius and fahrenheit temperature graphs. The graphs have independent sliders so it can easily be adjusted from minutes to weeks to months. There are a lot of fun settings for viewing the graph data.
A really cool feature is that you can have triggers go off based on the data values. COSM will alert you via HTTP POST or Twitter so that you can setup alarms if things go bad. If we connected up more sensors the MCP3008 we could easily have more graphs appear.

- [Previous Page](https://learn.adafruit.com/send-raspberry-pi-data-to-cosm/python-script.md)
## Featured Products
### MCP3008 - 8-Channel 10-Bit ADC With SPI Interface
[MCP3008 - 8-Channel 10-Bit ADC With SPI Interface](https://www.adafruit.com/product/856)
Need to add analog inputs? This chip will add 8 channels of 10-bit analog input to your microcontroller or microcomputer project. It's super easy to use and uses SPI so only 4 pins are required. We chose this chip as a great accompaniment to the Raspberry Pi computer because it's fun...
In Stock
[Buy Now](https://www.adafruit.com/product/856)
[Related Guides to the Product](https://learn.adafruit.com/products/856/guides)
### TMP36 - Analog Temperature sensor
[TMP36 - Analog Temperature sensor](https://www.adafruit.com/product/165)
Wide range, low power temperature sensor outputs an analog voltage that is proportional to the ambient temperature. To use, connect pin 1 (left) to power (between 2.7 and 5.5V), pin 3 (right) to ground, and pin 2 to analog in on your microcontroller. The voltage out is 0V at -50°C and...
In Stock
[Buy Now](https://www.adafruit.com/product/165)
[Related Guides to the Product](https://learn.adafruit.com/products/165/guides)
### Full Sized Premium Breadboard - 830 Tie Points
[Full Sized Premium Breadboard - 830 Tie Points](https://www.adafruit.com/product/239)
This is a 'full-size' premium quality breadboard, 830 tie points. Good for small and medium projects. It's 2.2" x 7" (5.5 cm x 17 cm) with a standard double-strip in the middle and two power rails on both sides. You can pull the power rails off easily to make the...
In Stock
[Buy Now](https://www.adafruit.com/product/239)
[Related Guides to the Product](https://learn.adafruit.com/products/239/guides)
### Half Sized Premium Breadboard - 400 Tie Points
[Half Sized Premium Breadboard - 400 Tie Points](https://www.adafruit.com/product/64)
This is a cute, half-size breadboard with 400 tie points, good for small projects. It's 3.25" x 2.2" / 8.3cm x 5.5cm with a standard double-strip in the middle and two power rails on both sides. You can pull the power rails off easily to make the breadboard as...
In Stock
[Buy Now](https://www.adafruit.com/product/64)
[Related Guides to the Product](https://learn.adafruit.com/products/64/guides)
### Adafruit Assembled Pi Cobbler Breakout + Cable for Raspberry Pi
[Adafruit Assembled Pi Cobbler Breakout + Cable for Raspberry Pi](https://www.adafruit.com/product/914)
Now that you've finally got your hands on a [Raspberry Pi® Model B](http://www.raspberrypi.org/), you're probably itching to make some fun embedded computer projects with it. What you need is an add on prototyping Pi Cobbler from Adafruit, which can break out all those...
No Longer Stocked
[Buy Now](https://www.adafruit.com/product/914)
[Related Guides to the Product](https://learn.adafruit.com/products/914/guides)
### GPIO Ribbon Cable for Raspberry Pi Model A and B - 26 pin
[GPIO Ribbon Cable for Raspberry Pi Model A and B - 26 pin](https://www.adafruit.com/product/862)
That new Raspberry Pi® Model A or B computer you just got has a row of 2x13 pin headers soldered on - those are the GPIO (general purpose input/output) pins and for those of us who like to hack electronics they are where the real fun is. By programming the Pi, you can twiddle those pins...
In Stock
[Buy Now](https://www.adafruit.com/product/862)
[Related Guides to the Product](https://learn.adafruit.com/products/862/guides)
### Adafruit Pi Box - Enclosure for Raspberry Pi Model A or B
[Adafruit Pi Box - Enclosure for Raspberry Pi Model A or B](https://www.adafruit.com/product/859)
**Discontinued** - you can grab [Adafruit Pi Box Plus - Enclosure for RasPi Model B+/Pi 2/ Pi 3](https://www.adafruit.com/product/1985) instead!
**We're still selling this classic Adafruit case for those who specifically want it but **
No Longer Stocked
[Buy Now](https://www.adafruit.com/product/859)
[Related Guides to the Product](https://learn.adafruit.com/products/859/guides)
## Related Guides
- [MCP3008 - 8-Channel 10-Bit ADC With SPI Interface](https://learn.adafruit.com/mcp3008-spi-adc.md)
- [Adafruit MAX31856 Universal Thermocouple Amplifier](https://learn.adafruit.com/adafruit-max31856-thermocouple-amplifier.md)
- [Adafruit Swirly Aluminum Mounting Grid for 0.1" Spaced PCBs](https://learn.adafruit.com/swirly-grid.md)
- [Capacitive Touch with Conductive Fabric & Flora](https://learn.adafruit.com/capacitive-touch-with-conductive-fabric-and-flora.md)
- [Raspberry Pi Wifi-Controlled Cat Laser Toy](https://learn.adafruit.com/raspberry-pi-wifi-controlled-cat-laser-toy.md)
- [Adafruit's Raspberry Pi Lesson 6. Using SSH](https://learn.adafruit.com/adafruits-raspberry-pi-lesson-6-using-ssh.md)
- [Piezo Ring Tones with Raspberry Pi](https://learn.adafruit.com/piezo-ring-tones-with-raspberry-pi.md)
- [LED Backpack Displays on Raspberry Pi and BeagleBone Black](https://learn.adafruit.com/led-backpack-displays-on-raspberry-pi-and-beaglebone-black.md)
- [Bluetooth LE MIDI Controller](https://learn.adafruit.com/bluetooth-le-midi-controller.md)
- [MCP9808 Temperature Sensor Python Library](https://learn.adafruit.com/mcp9808-temperature-sensor-python-library.md)
- [ulab: Crunch Numbers fast in CircuitPython](https://learn.adafruit.com/ulab-crunch-numbers-fast-with-circuitpython.md)
- [Using MPL3115A2 with CircuitPython](https://learn.adafruit.com/using-mpl3115a2-with-circuitpython.md)
- [Pi-Top Assembly ](https://learn.adafruit.com/pi-top-assembly.md)
- [Goose Game M4SK Controller](https://learn.adafruit.com/goose-game-m4sk-controller.md)
- [Bluefruit Playground App](https://learn.adafruit.com/bluefruit-playground-app.md)
- [Raspberry Pi SelfieBlock](https://learn.adafruit.com/selfieblock.md)
---
# Source: https://learn.adafruit.com/creating-accurate-footprints-in-eagle/creating-a-scaled-bitmap.md
# Creating Accurate Footprints in Eagle
## Creating a Scaled Bitmap
Once you've located an accurate top view of your part, you need to get a decent-sized copy of the image into your favorite photo editing program. With most PDFs you can just zoom in on the PDF so the image area in question is full screen, take a screenshot and then paste this image into your image editor, removing everything except the top view (you might need to use a white paint-brush for example):
It's important to have measurements in the image at first since we'll need these to create a properly scaled image. In this particular image, the connector is 14mm across the X axis. Using this number, we'll measure the actual width of the image in pixel across the X axis, which turns out to be 643 pixels from one edge to the other.
Info:

Since we now know that the bitmap image is 643 pixels wide for a real-life width of 14mm, it's easy to figure out how to scale the image to a useful size. Simply divide the mechanical part width in mm\*100 by the actual image width of the same segment. In this case (14mm\*100) / 643 pixels = 2.177.
Resize your image using this ratio. The total image above is 1047 pixels wide, so 1047\*2.177 = 2279 pixels wide. Once resized, you need to convert the image to a 1-bit bitmap image and save is somewhere. (As a sanity check before saying, this conversion should give you ~1400 pixels across the 14mm section for 1 pixel = 0.01mm).
Again, the way you do this will change from one image editing program to the next, but any decent image editor should support this. You should end up with a bitmap image like this:

Save this 1-bit Windows bitmap (.bmp) image somewhere memorable, and open up Eagle.
- [Previous Page](https://learn.adafruit.com/creating-accurate-footprints-in-eagle/finding-and-accurate-reference.md)
- [Next Page](https://learn.adafruit.com/creating-accurate-footprints-in-eagle/importing-the-bitmap-into-eagle.md)
## Related Guides
- [How to Sign Windows Drivers & Executables](https://learn.adafruit.com/how-to-sign-windows-drivers-installer.md)
- [Make your own PCB with Eagle, OSH Park, and Adafruit!](https://learn.adafruit.com/making-pcbs-with-oshpark-and-eagle.md)
- [Metal Parts from 3D Prints](https://learn.adafruit.com/metal-parts-from-3d-prints.md)
- [All About Laser Cutters](https://learn.adafruit.com/all-about-laser-cutters.md)
- [Adafruit Pinguin for EAGLE CAD](https://learn.adafruit.com/adafruit-pinguin-for-eagle-cad.md)
- [Maker Business & Manufacturing Software - Our Tips & Tricks](https://learn.adafruit.com/maker-business-manufacturing-software-our-tips-and-tricks.md)
- [SMT Manufacturing](https://learn.adafruit.com/smt-manufacturing.md)
- [How to Make a Pogo Pin Test Jig](https://learn.adafruit.com/how-to-make-a-pogo-pin-test-jig.md)
- [How we designed an injection-molded case](https://learn.adafruit.com/how-we-designed-an-injection-molded-case-for-raspberry-pi.md)
- [How to convert Eagle PCBs to 3D Models in Fusion 360](https://learn.adafruit.com/how-to-convert-eagle-pcbs-to-3d-models-in-fusion-360.md)
- [DIY 3D Printing Filament](https://learn.adafruit.com/diy-3d-printing-filament.md)
- [Laser-Cut Enclosure Design](https://learn.adafruit.com/laser-cut-enclosure-design.md)
- [Shop Tips & Tricks](https://learn.adafruit.com/shop-tips-and-tricks.md)
- [Standalone AVR Chip Programmer](https://learn.adafruit.com/standalone-avr-chip-programmer.md)
- [KTOWN's Ultimate Creating Parts in Eagle Tutorial](https://learn.adafruit.com/ktowns-ultimate-creating-parts-in-eagle-tutorial.md)
---
# Source: https://learn.adafruit.com/creating-accurate-footprints-in-eagle.md
# Creating Accurate Footprints in Eagle
## Overview

While sometimes quick and dirty works fine for footprints, if you ever have to deal with enclosures or particularly dense boards, you'll soon find out that accurate footprints can make your life much easier.
There are some really nice, detailed and accurate footprints in the default Eagle libraries, but there aren't a lot of resources out there on how to create them. This guide will hopefully serve that purpose, highlighting what works for me making connectors and similar types of footprints.## What You'll Need
1. Cadsoft Eagle
2. An accurate mechanical diagram of the part in question
3. A decent image editing program (Gimp, paint.net, Photoshop, etc.)
- [Next Page](https://learn.adafruit.com/creating-accurate-footprints-in-eagle/finding-and-accurate-reference.md)
## Related Guides
- [How to Sign Windows Drivers & Executables](https://learn.adafruit.com/how-to-sign-windows-drivers-installer.md)
- [Make your own PCB with Eagle, OSH Park, and Adafruit!](https://learn.adafruit.com/making-pcbs-with-oshpark-and-eagle.md)
- [Metal Parts from 3D Prints](https://learn.adafruit.com/metal-parts-from-3d-prints.md)
- [All About Laser Cutters](https://learn.adafruit.com/all-about-laser-cutters.md)
- [Adafruit Pinguin for EAGLE CAD](https://learn.adafruit.com/adafruit-pinguin-for-eagle-cad.md)
- [Maker Business & Manufacturing Software - Our Tips & Tricks](https://learn.adafruit.com/maker-business-manufacturing-software-our-tips-and-tricks.md)
- [SMT Manufacturing](https://learn.adafruit.com/smt-manufacturing.md)
- [How to Make a Pogo Pin Test Jig](https://learn.adafruit.com/how-to-make-a-pogo-pin-test-jig.md)
- [How we designed an injection-molded case](https://learn.adafruit.com/how-we-designed-an-injection-molded-case-for-raspberry-pi.md)
- [How to convert Eagle PCBs to 3D Models in Fusion 360](https://learn.adafruit.com/how-to-convert-eagle-pcbs-to-3d-models-in-fusion-360.md)
- [DIY 3D Printing Filament](https://learn.adafruit.com/diy-3d-printing-filament.md)
- [Laser-Cut Enclosure Design](https://learn.adafruit.com/laser-cut-enclosure-design.md)
- [Shop Tips & Tricks](https://learn.adafruit.com/shop-tips-and-tricks.md)
- [Standalone AVR Chip Programmer](https://learn.adafruit.com/standalone-avr-chip-programmer.md)
- [KTOWN's Ultimate Creating Parts in Eagle Tutorial](https://learn.adafruit.com/ktowns-ultimate-creating-parts-in-eagle-tutorial.md)
---
# Source: https://learn.adafruit.com/cross-stitch.md
# Cross Stitch
## Overview
http://www.youtube.com/watch?v=MZHEtXSr-a8
So you want to learn cross stitch! A great first project is our [Adafruit Ohm Sweet Ohm kit](http://adafruit.com/products/855) , which is useful for reading resistors after you're done stitching! You can download the [PDF instructions for this kit](http://adafruit.com/images/ohm-sweet-ohm-printout.pdf) , which includes the Ohm Sweet Ohm pattern, required floss quantities, and specific instructions and tips.
- [Next Page](https://learn.adafruit.com/cross-stitch/instructions.md)
## Featured Products
### Adafruit Ohm Sweet Ohm Cross-Stitch Kit
[Adafruit Ohm Sweet Ohm Cross-Stitch Kit](https://www.adafruit.com/product/855)
A cross-stitch kit that's also a resistor chart! Not only is this kit fun to make (and good for beginner stitchers), when it's all done it functions as a handy resistor reference chart. This Adafruit original kit comes complete with everything you need to get started:
No Longer Stocked
[Buy Now](https://www.adafruit.com/product/855)
[Related Guides to the Product](https://learn.adafruit.com/products/855/guides)
## Related Guides
---
# Source: https://learn.adafruit.com/rgb-led-strips/current-draw.md
# RGB LED Strips
## Current Draw
Because there are three LEDs in series, you cannot drive these LEDs from a 5V supply. The LED strips say "+12V" on them to mark the anode and that's the maximum voltage we suggest. We've found that if you're ok with them being a little dimmer, even 9VDC works very well.
Each segment of 3 LEDs draws **approximately** 20 milliAmperes from a 12V supply, per string of LEDs. So for each segment, there is a maximum 20mA draw from the red LEDs, 20mA draw from the green and 20mA from the blue. If you have the LED strip on full white (all LEDs lit) that would be 60mA per segment.
To find the total maximum current draw per meter, we would multiply **60mA x 10** (ten segments per meter for the 30/LED per meter strip) = **0.6 Amps per meter** OR **60mA x 20** (twenty segments per meter for the 60/LED per meter strip) = **1.2 Amps per meter**. Again, that's assuming you would have all the LEDs on at once and that you are powering it from 12V. If you're going to be PWM-fading between colors, maybe 1/2 of that is what you'll be drawing. Still, you do need to have a fairly decent power supply to run this strip, all those LEDs add up!
- [Previous Page](https://learn.adafruit.com/rgb-led-strips/schematic.md)
- [Next Page](https://learn.adafruit.com/rgb-led-strips/wiring.md)
## Featured Products
### Flexible RGB Neon-like LED Strip 120 LEDs - 1 meter long
[Flexible RGB Neon-like LED Strip 120 LEDs - 1 meter long](https://www.adafruit.com/product/4245)
Here at Adafruit we love discovering new and exotic glowing things. Like moths to the flame, we were intrigued by these fresh **Flexible Silicone Neon-Like LED Strips**! They _look_ a lot like neon, but without the need for expensive transformers, glass tubing or inert...
In Stock
[Buy Now](https://www.adafruit.com/product/4245)
[Related Guides to the Product](https://learn.adafruit.com/products/4245/guides)
### RGB LED weatherproof flexi-strip - 30 LED/m - 5m
[RGB LED weatherproof flexi-strip - 30 LED/m - 5m](https://www.adafruit.com/product/285)
These LED strips are fun and glowy. There are **30** RGB LEDs per meter, and you can control the entire strip at once with any microcontroller and three transistors. The way they are wired, you will need a 9-12VDC power supply and then ground the R/G/B pins to turn on the three colors. Use...
In Stock
[Buy Now](https://www.adafruit.com/product/285)
[Related Guides to the Product](https://learn.adafruit.com/products/285/guides)
### RGB LED Weatherproof flexi-strip 60 LED/m- 5m
[RGB LED Weatherproof flexi-strip 60 LED/m- 5m](https://www.adafruit.com/product/346)
These LED strips are fun and glowy. There are **60** RGB LEDs per meter - twice as many as our other strip, and you can control the entire strip at once with any microcontroller and three transistors. The way they are wired, you will need a 9-12VDC power supply and then ground the R/G/B...
In Stock
[Buy Now](https://www.adafruit.com/product/346)
[Related Guides to the Product](https://learn.adafruit.com/products/346/guides)
### Analog RGBW LED Strip - RGB plus Cool White - 60 LED/m
[Analog RGBW LED Strip - RGB plus Cool White - 60 LED/m](https://www.adafruit.com/product/2440)
_A dream come true...an analog LED strip with both RGB and Cool White LEDs...It's so........bbbeeeaaaaauuuttttiiiifuuulllll!!!_
These LED strips are fun and glowy. There are **60** RGB and Cool White LEDs per meter - you can control the entire strip at once with any...
In Stock
[Buy Now](https://www.adafruit.com/product/2440)
[Related Guides to the Product](https://learn.adafruit.com/products/2440/guides)
### Analog RGBW LED Strip - RGB plus Warm White - 60 LED/m
[Analog RGBW LED Strip - RGB plus Warm White - 60 LED/m](https://www.adafruit.com/product/2439)
_A dream come true...an analog LED strip with both RGB and Warm White LEDs...It's so........bbbeeeaaaaauuuttttiiiifuuulllll!!!_
These LED strips are fun and glowy. There are **60** RGB and Warm White LEDs per meter - you can control the entire strip at once...
In Stock
[Buy Now](https://www.adafruit.com/product/2439)
[Related Guides to the Product](https://learn.adafruit.com/products/2439/guides)
### Solderless DotStar and Analog RGB LED Strip Clip Sampler
[Solderless DotStar and Analog RGB LED Strip Clip Sampler](https://www.adafruit.com/product/1004)
These ingenious little clips make it easier than ever to use our analog RGB LED strips - no need to solder! The clips snap onto the ends of the LED strip and hold securely. They're not waterproof but you could cover them in heat-shrink to make them weatherproof.
You get one...
In Stock
[Buy Now](https://www.adafruit.com/product/1004)
[Related Guides to the Product](https://learn.adafruit.com/products/1004/guides)
### TIP120 Power Darlington Transistors - 3 pack
[TIP120 Power Darlington Transistors - 3 pack](https://www.adafruit.com/product/976)
Transistors are powerful little electronic switches, and when our little NPN transistors aren't power enough for your project, we have been known to use these beefy TIP120 Darlington transistors. Great for whenever you need to control medium to high-power electronics such as motors,...
In Stock
[Buy Now](https://www.adafruit.com/product/976)
[Related Guides to the Product](https://learn.adafruit.com/products/976/guides)
### Breadboarding wire bundle
[Breadboarding wire bundle](https://www.adafruit.com/product/153)
75 flexible stranded core wires with stiff ends molded on in red, orange, yellow, green, blue, brown, black and white. These are a major improvement over the "box of bent wires" that are sometimes sold with breadboards, and faster than stripping your own solid core wires. Makes...
In Stock
[Buy Now](https://www.adafruit.com/product/153)
[Related Guides to the Product](https://learn.adafruit.com/products/153/guides)
## Related Guides
- [Wakanda Forever Game](https://learn.adafruit.com/wakanda-forever-game.md)
- [NeoPixel Cyber Falls Wig](https://learn.adafruit.com/neopixel-cyber-falls.md)
- [Halloween Skeleton Transformation Illusion Prop](https://learn.adafruit.com/halloween-skeleton-transformation-illusion-prop.md)
- [Alohamora Bottle](https://learn.adafruit.com/alohamora-bottle.md)
- [NeoPixel Aquarium with Submersible Lights](https://learn.adafruit.com/neopixel-aquarium-with-submersible-lights.md)
- [Adafruit Sparkle Motion](https://learn.adafruit.com/adafruit-sparkle-motion.md)
- [NeoPixel Painter](https://learn.adafruit.com/neopixel-painter.md)
- [Cosplay Glow Fur Raver Bandolier](https://learn.adafruit.com/cosplay-glow-fur-raver-bandolier.md)
- [Make it Glow: NeoPixel and LED Diffusion Tips & Tricks](https://learn.adafruit.com/make-it-glow-neopixel-and-led-diffusion-tips-tricks.md)
- [LIGHTSHIP: LED Animation over WiFi](https://learn.adafruit.com/lightship-led-animation-over-wifi.md)
- [DRAFT PUNK](https://learn.adafruit.com/draft-punk.md)
- [NeoPixel LED Heart Necklace](https://learn.adafruit.com/neopixel-led-heart-necklace.md)
- [Stick Person Costume with Neon LED Strips](https://learn.adafruit.com/led-neon-stick-person-costume.md)
- [FunHouse Parking Assistant](https://learn.adafruit.com/funhouse-parking-assistant.md)
- [Sparkle Motion Dance Shoes](https://learn.adafruit.com/sparkle-motion-dance-shoes.md)
---
# Source: https://learn.adafruit.com/multimeters/current.md
# Multimeters
## Current
# What is current?
Current is the rate of electricity flow in a circuit. Using the same water analogy as before, higher pressure (voltage) and a bigger pipe (lower resistance) means a greater volume of water per second (current) will flow. This simple relationship is represented by the equation known as "Ohm's Law":
## I = V/R
Where: 'I' is current, 'V' is voltage and 'R' is resistance.
Another important equation is the one for power.
## P = I x V
Where 'P' is power (measured in Watts), 'I' is current and 'V' is voltage.
Watts is a measure of work, or the conversion of electrical energy into some other form such as heat, light or motion. As the equation implies, it takes both voltage and current to do work.
# Why Measure Current?
If there is not enough current, your circuit may not be able to do the work it was designed to do. Logic circuits may not function reliably, displays may be dim, motors may stall.
On the other hand, if there is too much current, things will heat up and components may be damaged. In extreme cases there may even be smoke or flames.
Reasons for measuring current in a circuit include:
- Determining circuit power requirements
- Verifying correct circuit operation
- Testing power supply performance
- Verify that batteries are charging or discharging at a safe rate
- Estimating battery life or recharge time
- Diagnosing circuit problems

# Pick a safe range.
Most meters have several current measuring ranges. Choose one that is good for AT LEAST the maximum current you expect to be measuring. If in doubt, choose the next higher range. There is usually overlap between the ranges and you can always go back to a lower one after you have verified that it is safe to do so.
Info:

This meter has 4 ranges from 200 microamps to 200 milliamps. In addition, the 20 milliamp setting can be used to measure up to 20 amps when used with a special high-current probe jack.

This is an 'auto-ranging' meter and has just 3 very wide range settings. It will automatically adjust the range to give you the best precision measurement within those settings:
- microamps (uA)
- milliamps (mA)
- amps (A)
# Choose the right connections.
Multimeters contain sensitive circuits capable of precision measurements of tiny currents and voltage. These circuits can be damaged or destroyed by high current flow. That is why most meters have a separate jack for high current measurements. This jack is fused for safety. If you are using the high-current setting, be sure to use the right jack.
Info:
Info:

This meter has a separate jack for measuring voltage and resistance. And two jacks for different ranges of current measurement. One current measurement jack is safe for currents up to 200mA. The other can be used to measure currents up to 20 amps.


These two meters use the same jack for all measurements except high current measurements.

Here we are using the 0-200mA jack to make a measurement in the 2mA range.

This is the correct jack and range to use for measurements above 200mA on this meter.

On this meter, the correct jack and range selections for high-current measurement are clearly indicated in yellow.
Also note the warning labels indicating maximum safe levels for each jack.

But with all meters, use care when choosing range and connections to avoid damage to the meter. Most meters have internal fuses to protect the circuitry, but they are not always readily accessible for easy replacement.

# Get in the loop!
To measure the current, you have to make it flow through the meter. To do that you need to make your meter part of the circuit. You need to break the circuit at the point where you want to measure the current and insert your meter in the middle. Before connecting your meter to the circuit, double check your range and make sure you have the leads plugged into the right jacks.
For this example, we are going to measure the battery supply current going into a MintyBoost:
## Breaking the circuit:
First we need to break the circuit so we can insert our meter. In this case we will just unsolder the battery wire from the Mintyboost circuit board

Then we will attach a temporary lead to make it easier to connect the meter.

## Closing the loop
Now we connect the meter between the battery lead and our temporary lead. We'll use some alligator clips to hold it all together.
The positive meter probe is connected to the positive battery lead. The negative probe connects to the temporary lead we soldered to the Mintyboost circuit board. This closes the loop and makes the battery current flow through the meter.
We'll start with the high-current range and probe connection to be safe:

We see that the current is 0.23A (230mA). This is well within the 400mA safe limit for the low-current probe jack, so we set the meter to the milliamp range and use the low current jack for a more precise measurement.

Using the milliamp range, we can see that there is 226.9 mA of current going from the battery to the mintyboost.
- [Previous Page](https://learn.adafruit.com/multimeters/voltage.md)
## Featured Products
### Extech EX330 12-function autoranging multimeter
[Extech EX330 12-function autoranging multimeter](https://www.adafruit.com/product/308)
**Discontinued** - [you can grab this Digital Multimeter - Model 9205B+ instead!](https://www.adafruit.com/product/2034)
If you're looking for one of the best multimeters, we're proud to now offer our personal favorite! The Extech EX330 "12...
No Longer Stocked
[Buy Now](https://www.adafruit.com/product/308)
[Related Guides to the Product](https://learn.adafruit.com/products/308/guides)
### Digital Multimeter
[Digital Multimeter](https://www.adafruit.com/product/71)
This is a basic multimeter, I've played with it a bunch and I think its a great addition to a toolbox. It's low cost and simple to use with a big clear display and all the measurements you need:
- AC/DC Voltage measurement
- Current measurement, from 1uA up to...
No Longer Stocked
[Buy Now](https://www.adafruit.com/product/71)
[Related Guides to the Product](https://learn.adafruit.com/products/71/guides)
### Digital Multimeter - Model 9205B+
[Digital Multimeter - Model 9205B+](https://www.adafruit.com/product/2034)
This massive multimeter has everything but the kitchen sink included. It's a great addition to any workbench or toolbox. It's low cost, simple to use, and has a big clear display with all the measurements you need and more!
The multimeter includes:
- AC/DC Voltage...
In Stock
[Buy Now](https://www.adafruit.com/product/2034)
[Related Guides to the Product](https://learn.adafruit.com/products/2034/guides)
### Pocket Autoranging Digital Multimeter
[Pocket Autoranging Digital Multimeter](https://www.adafruit.com/product/850)
When we're on the go, we like to keep a multimeter in our purse and this model is by far the best pocket meter we've found. It's so good you'll end up using it as your main multimeter!
First up, this meter can measure nearly everything: it's got DC and AC...
Out of Stock
[Buy Now](https://www.adafruit.com/product/850)
[Related Guides to the Product](https://learn.adafruit.com/products/850/guides)
### Multi-Meter! - Skill badge, iron-on patch
[Multi-Meter! - Skill badge, iron-on patch](https://www.adafruit.com/product/502)
You can use a multi-meter! Adafruit offers a fun and exciting "badges" of achievement for electronics, science and engineering. We believe everyone should be able to be rewarded for learning a useful skill, a badge is just one of the many ways to show and share.
This is...
No Longer Stocked
[Buy Now](https://www.adafruit.com/product/502)
[Related Guides to the Product](https://learn.adafruit.com/products/502/guides)
### Multi-Meter! - Sticker!
[Multi-Meter! - Sticker!](https://www.adafruit.com/product/646)
You can use a multi-meter! Adafruit offers a fun and exciting stickers to celebrate achievements in electronics, science and engineering. We believe everyone should be able to be rewarded for learning a useful skill, a great sticker is just one of the many ways to show and share.
No Longer Stocked
[Buy Now](https://www.adafruit.com/product/646)
[Related Guides to the Product](https://learn.adafruit.com/products/646/guides)
## Related Guides
- [USB-PD Hacks](https://learn.adafruit.com/usb-pd-hacks.md)
- [Energy Budgets](https://learn.adafruit.com/energy-budgets.md)
- [Ladyada's Toolkit](https://learn.adafruit.com/ladyadas-toolkit.md)
- [Collin's Lab: Multimeters](https://learn.adafruit.com/collins-lab-multimeters.md)
---
# Source: https://learn.adafruit.com/skill-badge-sash/cut-fabric.md
# Skill Badge Sash
## Cut Fabric

Pin the pattern to your fabric. You want four pieces total, so here I have pinned and cut two layers at a time and I will repeat on a different area of fabric.

If your fabric is big enough, you can cut all four layers at once, or cut four layers with the shoulder seam (marked on the pattern) on the fold.

Get ready to sew at the shoulder seam if you didn't cut it on the fold-- make two stacks of two fabric layers each.
- [Previous Page](https://learn.adafruit.com/skill-badge-sash/download-pattern.md)
- [Next Page](https://learn.adafruit.com/skill-badge-sash/sew-together.md)
## Featured Products
### LEDs - Skill badge, iron-on patch
[LEDs - Skill badge, iron-on patch](https://www.adafruit.com/product/479)
You learned LEDs! (Light-emitting diodes)... Adafruit offers a fun and exciting "badges" of achievement for electronics, science and engineering. We believe everyone should be able to be rewarded for learning a useful skill, a badge is just one of the many ways to show and share.
No Longer Stocked
[Buy Now](https://www.adafruit.com/product/479)
[Related Guides to the Product](https://learn.adafruit.com/products/479/guides)
### Learn to program "Hello world" - Skill badge, iron-on patch
[Learn to program "Hello world" - Skill badge, iron-on patch](https://www.adafruit.com/product/478)
You can write code! Adafruit offers a fun and exciting "badges" of achievement for electronics, science and engineering. We believe everyone should be able to be rewarded for learning a useful skill, a badge is just one of the many ways to show and share.
This is the...
No Longer Stocked
[Buy Now](https://www.adafruit.com/product/478)
[Related Guides to the Product](https://learn.adafruit.com/products/478/guides)
### Learn to solder - Skill badge, iron-on patch
[Learn to solder - Skill badge, iron-on patch](https://www.adafruit.com/product/465)
You can solder! Adafruit offers a fun and exciting "badges" of achievement for electronics, science and engineering. We believe everyone should be able to be rewarded for learning a useful skill, a badge is just one of the many ways to show and share.
This is the "I...
No Longer Stocked
[Buy Now](https://www.adafruit.com/product/465)
[Related Guides to the Product](https://learn.adafruit.com/products/465/guides)
## Related Guides
- [Collin's Lab: Solar](https://learn.adafruit.com/collins-lab-solar.md)
- [Cartoon Network MakeCode: Garnet's Palm Gems from Steven Universe](https://learn.adafruit.com/cartoon-network-makecode-garnet-s-palm-gems-from-steven-universe.md)
- [No-Sew LED Wristband](https://learn.adafruit.com/no-sew-led-wristband.md)
- [MicroCode for micro:bit](https://learn.adafruit.com/microcode-for-microbit.md)
- [Adafruit New York and NYC DOE vendor information ](https://learn.adafruit.com/educational-orders-for-educators-based-in-new-york.md)
- [Getting Started With Steven Universe](https://learn.adafruit.com/getting-started-with-steven-universe.md)
- [Visual Studio Code for Education... and CircuitPython](https://learn.adafruit.com/visual-studio-code-for-education-and-circuitpython.md)
- [Makecode para la Circuit Playground Express](https://learn.adafruit.com/makecode-es.md)
- [Share your work with Adafruit Playground!](https://learn.adafruit.com/adafruit-playground-notes.md)
- [Buttermilk Boat with Circuit Playground Express](https://learn.adafruit.com/boat-with-circuit-playground-express.md)
- [Mouse Painter: Emulate Mice with MakeCode ](https://learn.adafruit.com/mouse-painter-emulate-mice-with-makecode.md)
- [Best Beginner Boards for Teachers](https://learn.adafruit.com/best-beginner-boards-for-teachers.md)
- [Anatomical 3D Printed Beating Heart with MakeCode](https://learn.adafruit.com/anatomical-3d-printed-beating-heart-with-makecode.md)
- [MakeCode for Circuit Playground Express](https://learn.adafruit.com/makecode.md)
- [Trash Panda](https://learn.adafruit.com/trash-panda-circuit-python-crickit.md)
---
# Source: https://learn.adafruit.com/papercraft-resistor-helper/cut.md
# Resistor Helper
## Wheels

Cut out and glue pairs of colored wheels back to back.
Info:


Line up your colored wheels by the letters and numbers – 4a is the first wheel on the 4-band side, for example. Keep track of your pieces because we’re about to cut out the ID numbers!

Now carefully cut out the inner circles on your wheels, placing each one back in line before cutting the next one. Of course you can always refer back to this page if you forget which wheel is which!
- [Previous Page](https://learn.adafruit.com/papercraft-resistor-helper/prep.md)
- [Next Page](https://learn.adafruit.com/papercraft-resistor-helper/assemble.md)
## Related Guides
- [Heat Set Insert Rig](https://learn.adafruit.com/heat-set-rig.md)
- [Digital Circuits 2: Some Tools](https://learn.adafruit.com/some-digital-tools.md)
- [Furby 2012 Teardown](https://learn.adafruit.com/furby-2012-teardown.md)
- [Programmable 12v Outdoor Cafe Lights](https://learn.adafruit.com/programmable-12v-outdoor-cafe-lights.md)
- [Icicle Crown with Pebble Pixels & WLED](https://learn.adafruit.com/icicle-crown-with-pebble-pixels-wled.md)
- [USB C CC Resistor Fixer Case](https://learn.adafruit.com/resistor-fixer-case.md)
- [iOS App Development Using Cordova](https://learn.adafruit.com/ios-app-development-using-cordova.md)
- [Understanding USB Type C: Cable Types, Pitfalls and More](https://learn.adafruit.com/understanding-usb-type-c-cable-types-pitfalls-and-more.md)
- [Mass AVR ISP Programmer](https://learn.adafruit.com/mass-avr-isp-programmer.md)
- [Introduction to iOS Development](https://learn.adafruit.com/introduction-to-ios-development.md)
- [Accessing and Using Adafruit PCB Design Files](https://learn.adafruit.com/accessing-and-using-adafruit-pcb-design-files.md)
- [Getting Started with Binho Nova](https://learn.adafruit.com/getting-started-with-binho-nova.md)
- [Adafruit UPDI Friend](https://learn.adafruit.com/adafruit-updi-friend.md)
- [Adafruit CP2104 and CP2102N Friend - USB to Serial Converter](https://learn.adafruit.com/adafruit-cp2102n-cp2104-friend-usb-to-serial-converter.md)
- [DIY Decorative Resin Keycaps](https://learn.adafruit.com/diy-decorative-resin-keycaps.md)
---
# Source: https://learn.adafruit.com/delorean-time-circuit.md
# DeLorean Time Circuit
## Background

Getting the big question right out of the way: no, we _won’t_ be selling these. Legally, we _can’t,_ for trademark reasons. But it’s generally okay for anyone to create replica props _for their own personal use_, so we hope this writeup will inspire some cool projects among our customers…

From the moment [these](http://www.adafruit.com/products/878) [LED](http://www.adafruit.com/products/880) [displays](http://www.adafruit.com/products/879) made an appearance on our weekly [Ask an Engineer](http://www.adafruit.com/chat/) show, comparisons were being made to the DeLorean time circuit from the _Back to the Future_ films. It was a moral imperative then to make a demo! If you’re handy with Arduino and some shop tools, you should be able to pull off something similar (better, even), or adapt the ideas to other projects. This was quickly built in fun, so please don’t expect the same level of polish as a finished product tutorial.
- [Next Page](https://learn.adafruit.com/delorean-time-circuit/design-liberties.md)
## Featured Products
### Adafruit 0.56" 4-Digit 7-Segment Display with I2C Backpack - Red
[Adafruit 0.56" 4-Digit 7-Segment Display with I2C Backpack - Red](https://www.adafruit.com/product/878)
What's better than a single LED? Lots of LEDs! A fun way to make a small display is to use an [8x8 matrix](https://www.adafruit.com/category/37_88) or a [4-digit 7-segment display](https://www.adafruit.com/category/37_103). Matrices like these are...
In Stock
[Buy Now](https://www.adafruit.com/product/878)
[Related Guides to the Product](https://learn.adafruit.com/products/878/guides)
### Adafruit 0.56" 4-Digit 7-Segment Display w/ I2C Backpack - Green
[Adafruit 0.56" 4-Digit 7-Segment Display w/ I2C Backpack - Green](https://www.adafruit.com/product/880)
What's better than a single LED? Lots of LEDs! A fun way to make a small display is to use an [8x8 matrix](https://www.adafruit.com/category/37_88) or a [4-digit 7-segment display](https://www.adafruit.com/category/37_103). Matrices like these are...
No Longer Stocked
[Buy Now](https://www.adafruit.com/product/880)
[Related Guides to the Product](https://learn.adafruit.com/products/880/guides)
### Adafruit 0.56" 4-Digit 7-Segment Display w/I2C Backpack - Yellow
[Adafruit 0.56" 4-Digit 7-Segment Display w/I2C Backpack - Yellow](https://www.adafruit.com/product/879)
What's better than a single LED? Lots of LEDs! A fun way to make a small display is to use an [8x8 matrix](https://www.adafruit.com/category/37_88) or a [4-digit 7-segment display](https://www.adafruit.com/category/37_103). Matrices like these are...
In Stock
[Buy Now](https://www.adafruit.com/product/879)
[Related Guides to the Product](https://learn.adafruit.com/products/879/guides)
### ChronoDot - Ultra-precise Real Time Clock
[ChronoDot - Ultra-precise Real Time Clock](https://www.adafruit.com/product/255)
The **ChronoDot V3** is the latest version of macetech’s popular ChronoDot line of products. Designed during the Great Chip Shortage, it uses the newly-released MAX31328 temperature-compensated real-time clock chip. However, it remains pin- and code-compatible with the older...
In Stock
[Buy Now](https://www.adafruit.com/product/255)
[Related Guides to the Product](https://learn.adafruit.com/products/255/guides)
### Teensy (ATmega32u4 USB dev board) 2.0
[Teensy (ATmega32u4 USB dev board) 2.0](https://www.adafruit.com/product/199)
Discontinued - **you can grab** [Adafruit ItsyBitsy 32u4 - 5V 16MHz](https://www.adafruit.com/product/3677) **instead!**
The Teensy 2.0 is a complete USB-based microcontoller development system, in a very small footprint! All programming is done via the USB port. No...
No Longer Stocked
[Buy Now](https://www.adafruit.com/product/199)
[Related Guides to the Product](https://learn.adafruit.com/products/199/guides)
### Diffused Green 5mm LED (25 pack)
[Diffused Green 5mm LED (25 pack)](https://www.adafruit.com/product/298)
Need some indicators? We are big fans of these diffused green LEDs, in fact we use them exclusively in our kits. They are fairly bright so they can be seen in daytime, and from any angle. They go easily into a breadboard and will add that extra zing to your project.
- Pack of 25...
In Stock
[Buy Now](https://www.adafruit.com/product/298)
[Related Guides to the Product](https://learn.adafruit.com/products/298/guides)
### Diffused Red 5mm LED (25 pack)
[Diffused Red 5mm LED (25 pack)](https://www.adafruit.com/product/299)
Need some indicators? We are big fans of these diffused red LEDs, in fact we use them exclusively in our kits. They are fairly bright so they can be seen in daytime, and from any angle. They go easily into a breadboard and will add that extra zing to your project.
- Pack of 25...
In Stock
[Buy Now](https://www.adafruit.com/product/299)
[Related Guides to the Product](https://learn.adafruit.com/products/299/guides)
## Related Guides
- [Adafruit LED Backpacks](https://learn.adafruit.com/adafruit-led-backpack.md)
- [Mindfulness Clock OF DOOM](https://learn.adafruit.com/mindfulness-clock-of-doom.md)
- [Fidget Spinner Tachometer](https://learn.adafruit.com/fidget-spinner-tachometer.md)
- [Arduino GPS Clock](https://learn.adafruit.com/arduino-clock.md)
- [Collin's Lab: Binary & Hex](https://learn.adafruit.com/collins-lab-binary-and-hex.md)
- [Personalized NextBus ESP8266 Transit Clock](https://learn.adafruit.com/personalized-esp8266-transit-clock.md)
- [Trinket React Counter](https://learn.adafruit.com/trinket-react-counter.md)
- [CircuitPython Hardware: LED Backpacks & FeatherWings](https://learn.adafruit.com/micropython-hardware-led-backpacks-and-featherwings.md)
- [Tap Tempo Trinket](https://learn.adafruit.com/tap-tempo-trinket.md)
- [Raspberry Pi Physical Dashboard](https://learn.adafruit.com/raspberry-pi-physical-dashboard.md)
- [LED Backpack Displays on Raspberry Pi and BeagleBone Black](https://learn.adafruit.com/led-backpack-displays-on-raspberry-pi-and-beaglebone-black.md)
- [Cartoon Character Clock](https://learn.adafruit.com/cartoon-character-clock.md)
- [Feather ESP32-S3 TFT CircuitPython Day 2024 Countdown Clock](https://learn.adafruit.com/feather-esp32-s3-tft-circuitpython-day-2024-countdown-clock.md)
- [Moto 360 Teardown](https://learn.adafruit.com/moto-360-smartwatch-teardown.md)
- [Articulating Retina Monitor](https://learn.adafruit.com/articulating-retina-monitor.md)
---
# Source: https://learn.adafruit.com/skill-badge-requirements-solar/demonstration.md
# Skill Badge Requirements: Solar
## Section 3: Demonstration

_This section focuses on the demonstration of a device that utilizes solar technology._
Do ONE of the following and submit to your instructor:
1. Design and construct a simple circuit that powers an LED using the electrical energy produced by your solar cell.
2. Design and construct a model car that uses materials provided by your instructor to run on the electrical energy produced by your solar cells.
3. Design and construct a method for tracking the sun, improving your cells power output over time.
- [Previous Page](https://learn.adafruit.com/skill-badge-requirements-solar/making-measurements.md)
- [Next Page](https://learn.adafruit.com/skill-badge-requirements-solar/certificate-of-completion.md)
## Featured Products
### Round Solar Panel Skill Badge - 5V / 40mA
[Round Solar Panel Skill Badge - 5V / 40mA](https://www.adafruit.com/product/700)
This skill badge is self-fulfilling! Normally you would get the badge _after_ the project is done, but in this case, the badge can be part of the project! The solar panel is epoxied into a round disc 55mm diameter (about 2.2 inches), its rugged and looks cool besides. We include a...
In Stock
[Buy Now](https://www.adafruit.com/product/700)
[Related Guides to the Product](https://learn.adafruit.com/products/700/guides)
## Related Guides
- [Adafruit FunHouse](https://learn.adafruit.com/adafruit-funhouse.md)
- [Pet Bowl Water Level Sensing](https://learn.adafruit.com/pet-bowl-water-level-sensing-with-the-funhouse-and-home-assistant.md)
- [Wind Blowing Emoji Prop](https://learn.adafruit.com/wind-face-emoji.md)
- [Circuit Playground Express: Piano de Limones](https://learn.adafruit.com/circuit-playground-express-piano-de-limones.md)
- [Smart Measuring Cup](https://learn.adafruit.com/smart-measuring-cup.md)
- [Raspberry Pi Analog to Digital Converters](https://learn.adafruit.com/raspberry-pi-analog-to-digital-converters.md)
- [Face Mask Efficacy Testing with SCIENCE!](https://learn.adafruit.com/raspberry-pi-camera-vision-face-mask-efficacy-testing.md)
- [Remote controlled door lock using a fingerprint sensor & Adafruit IO](https://learn.adafruit.com/remote-controlled-door-lock-using-a-fingerprint-sensor-and-adafruit-io.md)
- [PowerWash Simulator Nozzle Controller](https://learn.adafruit.com/powerwash-simulator-nozzle-controller.md)
- [Send Raspberry Pi Data to COSM](https://learn.adafruit.com/send-raspberry-pi-data-to-cosm.md)
- [Adafruit Analog Accelerometer Breakouts](https://learn.adafruit.com/adafruit-analog-accelerometer-breakouts.md)
- [CircuitPython Libraries on any Computer with FT232H](https://learn.adafruit.com/circuitpython-on-any-computer-with-ft232h.md)
- [Adafruit LSM9DS1 Accelerometer + Gyro + Magnetometer 9-DOF Breakout](https://learn.adafruit.com/adafruit-lsm9ds1-accelerometer-plus-gyro-plus-magnetometer-9-dof-breakout.md)
- [Programmable Wireless BLE Gesture Mouse](https://learn.adafruit.com/ble-wireless-gesture-mouse.md)
- [Adafruit Feather nRF52840 Sense](https://learn.adafruit.com/adafruit-feather-sense.md)
---
# Source: https://learn.adafruit.com/fpga-rgb-matrix/demos.md
# FPGA RGB Matrix
## Demos
## Running the Virtual JTAG interface server
Open the command script **tcl/run.cmd** in a text editor and ensure that the path to the **quartus\_stp** executable is correct. Then, double click the script to launch the Virtual JTAG interface server ( **tcl/vjtag\_server.tcl** ). This binds to a TCP port to allow programs and scripts to write data to the FPGA through Altera's Tcl API.
This allows you to send video to the FPGA from any device that can communicate over the network! For example, a remote Arduino with a Wi-Fi shield, or an Android cellphone.

## The included Processing demos and code
Two demos written in the [Processing programming language](http://www.processing.org/) (a dialect of Java) are available in the processing folder. You can run either demo by copying its directory to your local sketchbook folder (usually ~/Processing). The first demo, Chaser is a basic test animation. The second demo, Magnify sends a real-time screen capture to the panels through the FPGA.

- [Previous Page](https://learn.adafruit.com/fpga-rgb-matrix/synthesize-and-upload.md)
- [Next Page](https://learn.adafruit.com/fpga-rgb-matrix/more.md)
## Featured Products
### 5V 2A (2000mA) switching power supply - UL Listed
[5V 2A (2000mA) switching power supply - UL Listed](https://www.adafruit.com/product/276)
This is an FCC/CE certified and UL listed power supply. Need a lot of 5V power? This switching supply gives a clean regulated 5V output at up to 2000mA. 110 or 240 input, so it works in any country. The plugs are "US 2-prong" style so you may need a plug adapter, but you can pick one...
In Stock
[Buy Now](https://www.adafruit.com/product/276)
[Related Guides to the Product](https://learn.adafruit.com/products/276/guides)
### Medium 16x32 RGB LED matrix panel - 6mm Pitch
[Medium 16x32 RGB LED matrix panel - 6mm Pitch](https://www.adafruit.com/product/420)
Bring a little bit of Times Square into your home with this 16 x 32 RGB LED matrix panel. These panels are normally used to make video walls, here in New York we see them on the sides of busses and bus stops, to display animations or short video clips. We thought they looked really cool so we...
In Stock
[Buy Now](https://www.adafruit.com/product/420)
[Related Guides to the Product](https://learn.adafruit.com/products/420/guides)
### DE0-Nano - Altera Cyclone IV FPGA starter board
[DE0-Nano - Altera Cyclone IV FPGA starter board](https://www.adafruit.com/product/451)
For every day projects, microcontrollers are low-cost and easy to use. But when you have a project that needs raw power and high speed you may want to check out FPGAs (Field Programmable Gate Arrays). FPGAs are like raw chips that you can design by hand. They run very fast and very...
No Longer Stocked
[Buy Now](https://www.adafruit.com/product/451)
[Related Guides to the Product](https://learn.adafruit.com/products/451/guides)
## Related Guides
- [Smart Bathroom App](https://learn.adafruit.com/smart-bathroom-app.md)
- [NeoTrellis Light Painting](https://learn.adafruit.com/neotrellis-light-painting.md)
- [TIMESQUARE Wordclock](https://learn.adafruit.com/timesquare-wordclock.md)
- [MatrixPortal S3 Flight Proximity Tracker](https://learn.adafruit.com/matrixportal-s3-flight-proximity-tracker.md)
- [MicroPython Displays: Drawing Shapes](https://learn.adafruit.com/micropython-displays-drawing-shapes.md)
- [Adafruit Protomatter RGB Matrix Library](https://learn.adafruit.com/adafruit-protomatter-rgb-matrix-library.md)
- [Adafruit Microphone Amplifier Breakout](https://learn.adafruit.com/adafruit-microphone-amplifier-breakout.md)
- [16x16 NeoPixel Matrix Square Pixel Display](https://learn.adafruit.com/16x16-neopixel-matrix-square-pixel-display.md)
- [Shake Away 2021 with MatrixPortal](https://learn.adafruit.com/matrixportal-shake-away-2020.md)
- [NeoTrellis Feather Case Assembly](https://learn.adafruit.com/neotrellis-feather-case-assembly.md)
- [RGB LED Matrices with CircuitPython](https://learn.adafruit.com/rgb-led-matrices-matrix-panels-with-circuitpython.md)
- [Scroll an SMS Text Message on your RGB Matrix](https://learn.adafruit.com/scroll-an-sms-text-message-on-your-rgb-matrix.md)
- [Adafruit LED Backpacks](https://learn.adafruit.com/adafruit-led-backpack.md)
- [Raspberry Pi LED Matrix Display](https://learn.adafruit.com/raspberry-pi-led-matrix-display.md)
- [Sino:bit with Arduino](https://learn.adafruit.com/sino-bit-with-arduino.md)
---
# Source: https://learn.adafruit.com/delorean-time-circuit/design-liberties.md
# DeLorean Time Circuit
## Design Liberties
When accepting this assignment, I might’ve failed to mention a small detail to the boss folks: I don’t own a car, let alone a DeLorean, for displaying the finished prop. Instead, mostly inspired by [Jeri Ellsworth’s NES purse](http://www.flickr.com/photos/candescence/3908396605/ "Link: http://www.flickr.com/photos/candescence/3908396605/"), I had this goofball idea of a slim, battery-powered device that could be installed and photographed in ironic settings: on a bicycle, on public transit, hung from a [Flavor Flav](http://www.flickr.com/photos/relaxing/6209049368/in/photostream/ "Link: http://www.flickr.com/photos/relaxing/6209049368/in/photostream/") necklace as “bling,” and so forth.
While the general idea could have been accomplished quickly and easily with an iPad running the _[Flux Capacitor™](http://itunes.apple.com/us/app/flux-capacitor/id391862376?mt=8)_ app, I wanted to preserve somewhat the staggered design of the original, and it _had_ to have real 7-segment LED displays…there’s no substitute for seeing the genuine thing. In much the way that [nixie tubes](http://www.adafruit.com/blog/2010/11/11/making-classic-frequency-counters-into-nixie-clocks/) have a certain vintage _coolness_ about them, LED displays too are reaching a nostalgic threshold, iconic of 1980s technology.

Using stock parts required some design compromises. The date and time formats would be changed to fit these 4-digit displays (the film prop used back-painted glass fakes for the month display, with some segment changes being physically impossible, making a 100% match unattainable anyway…iPad wins there). Also took liberties with some LED colors and various spacings, but overall the piece is still highly recognizable.
For the sake of a quick demo, I had to cut this short. Though all the displays are addressable, the destination and last-departed dates are simply fixed values from the first film; there’s no interaction. I may revisit this to add a keypad later, but for now it’s all just a fancy clock (it does show the current time accurately, using a [ChronoDot RTC](https://www.adafruit.com/products/255)). Also, the vector files are not available, because they’re _utter garbage!_ Creating something of finished kit quality [requires many iterations and refinements](http://www.adafruit.com/blog/2012/06/07/22/ "Link: http://www.adafruit.com/blog/2012/06/07/22/")…but with a rushed, one-shot piece like this, course corrections would come in the form of a Dremel tool and epoxy putty. If you plan to build one, give it some time and prepare your blueprint carefully.
- [Previous Page](https://learn.adafruit.com/delorean-time-circuit/background.md)
- [Next Page](https://learn.adafruit.com/delorean-time-circuit/circuit-trickery.md)
## Featured Products
### Adafruit 0.56" 4-Digit 7-Segment Display with I2C Backpack - Red
[Adafruit 0.56" 4-Digit 7-Segment Display with I2C Backpack - Red](https://www.adafruit.com/product/878)
What's better than a single LED? Lots of LEDs! A fun way to make a small display is to use an [8x8 matrix](https://www.adafruit.com/category/37_88) or a [4-digit 7-segment display](https://www.adafruit.com/category/37_103). Matrices like these are...
In Stock
[Buy Now](https://www.adafruit.com/product/878)
[Related Guides to the Product](https://learn.adafruit.com/products/878/guides)
### Adafruit 0.56" 4-Digit 7-Segment Display w/ I2C Backpack - Green
[Adafruit 0.56" 4-Digit 7-Segment Display w/ I2C Backpack - Green](https://www.adafruit.com/product/880)
What's better than a single LED? Lots of LEDs! A fun way to make a small display is to use an [8x8 matrix](https://www.adafruit.com/category/37_88) or a [4-digit 7-segment display](https://www.adafruit.com/category/37_103). Matrices like these are...
No Longer Stocked
[Buy Now](https://www.adafruit.com/product/880)
[Related Guides to the Product](https://learn.adafruit.com/products/880/guides)
### Adafruit 0.56" 4-Digit 7-Segment Display w/I2C Backpack - Yellow
[Adafruit 0.56" 4-Digit 7-Segment Display w/I2C Backpack - Yellow](https://www.adafruit.com/product/879)
What's better than a single LED? Lots of LEDs! A fun way to make a small display is to use an [8x8 matrix](https://www.adafruit.com/category/37_88) or a [4-digit 7-segment display](https://www.adafruit.com/category/37_103). Matrices like these are...
In Stock
[Buy Now](https://www.adafruit.com/product/879)
[Related Guides to the Product](https://learn.adafruit.com/products/879/guides)
### ChronoDot - Ultra-precise Real Time Clock
[ChronoDot - Ultra-precise Real Time Clock](https://www.adafruit.com/product/255)
The **ChronoDot V3** is the latest version of macetech’s popular ChronoDot line of products. Designed during the Great Chip Shortage, it uses the newly-released MAX31328 temperature-compensated real-time clock chip. However, it remains pin- and code-compatible with the older...
In Stock
[Buy Now](https://www.adafruit.com/product/255)
[Related Guides to the Product](https://learn.adafruit.com/products/255/guides)
### Teensy (ATmega32u4 USB dev board) 2.0
[Teensy (ATmega32u4 USB dev board) 2.0](https://www.adafruit.com/product/199)
Discontinued - **you can grab** [Adafruit ItsyBitsy 32u4 - 5V 16MHz](https://www.adafruit.com/product/3677) **instead!**
The Teensy 2.0 is a complete USB-based microcontoller development system, in a very small footprint! All programming is done via the USB port. No...
No Longer Stocked
[Buy Now](https://www.adafruit.com/product/199)
[Related Guides to the Product](https://learn.adafruit.com/products/199/guides)
### Diffused Green 5mm LED (25 pack)
[Diffused Green 5mm LED (25 pack)](https://www.adafruit.com/product/298)
Need some indicators? We are big fans of these diffused green LEDs, in fact we use them exclusively in our kits. They are fairly bright so they can be seen in daytime, and from any angle. They go easily into a breadboard and will add that extra zing to your project.
- Pack of 25...
In Stock
[Buy Now](https://www.adafruit.com/product/298)
[Related Guides to the Product](https://learn.adafruit.com/products/298/guides)
### Diffused Red 5mm LED (25 pack)
[Diffused Red 5mm LED (25 pack)](https://www.adafruit.com/product/299)
Need some indicators? We are big fans of these diffused red LEDs, in fact we use them exclusively in our kits. They are fairly bright so they can be seen in daytime, and from any angle. They go easily into a breadboard and will add that extra zing to your project.
- Pack of 25...
In Stock
[Buy Now](https://www.adafruit.com/product/299)
[Related Guides to the Product](https://learn.adafruit.com/products/299/guides)
## Related Guides
- [Adafruit LED Backpacks](https://learn.adafruit.com/adafruit-led-backpack.md)
- [Mindfulness Clock OF DOOM](https://learn.adafruit.com/mindfulness-clock-of-doom.md)
- [Fidget Spinner Tachometer](https://learn.adafruit.com/fidget-spinner-tachometer.md)
- [Arduino GPS Clock](https://learn.adafruit.com/arduino-clock.md)
- [Collin's Lab: Binary & Hex](https://learn.adafruit.com/collins-lab-binary-and-hex.md)
- [Personalized NextBus ESP8266 Transit Clock](https://learn.adafruit.com/personalized-esp8266-transit-clock.md)
- [Trinket React Counter](https://learn.adafruit.com/trinket-react-counter.md)
- [CircuitPython Hardware: LED Backpacks & FeatherWings](https://learn.adafruit.com/micropython-hardware-led-backpacks-and-featherwings.md)
- [Tap Tempo Trinket](https://learn.adafruit.com/tap-tempo-trinket.md)
- [Raspberry Pi Physical Dashboard](https://learn.adafruit.com/raspberry-pi-physical-dashboard.md)
- [LED Backpack Displays on Raspberry Pi and BeagleBone Black](https://learn.adafruit.com/led-backpack-displays-on-raspberry-pi-and-beaglebone-black.md)
- [Cartoon Character Clock](https://learn.adafruit.com/cartoon-character-clock.md)
- [Feather ESP32-S3 TFT CircuitPython Day 2024 Countdown Clock](https://learn.adafruit.com/feather-esp32-s3-tft-circuitpython-day-2024-countdown-clock.md)
- [Moto 360 Teardown](https://learn.adafruit.com/moto-360-smartwatch-teardown.md)
- [Articulating Retina Monitor](https://learn.adafruit.com/articulating-retina-monitor.md)
---
# Source: https://learn.adafruit.com/usb-dc-and-solar-lipoly-charger/design-notes.md
# USB, DC & Solar Lipoly Charger
## Design Notes
## Is this a Max Power Point Tracker (MPPT)?
This design is not a 'true' MPPT, and we did that for a reason! Max power point trackers work by 'tracking' the voltage and current curve of a solar panel so that the total Power (Voltage \* Current) is maximized. This means that as the light changes, the voltage and current must be carefully tracked. In general, the way controllers perform MPPT is to have a DC/DC converter - that's because to have the best power conversion you'll want DC/DC not linear converters (that lose any excess voltage as heat). For example, say you want to charge a 6V lead acid battery and you have a 12V (approx) panel. The voltage will range between 9V and 14V depending on current draw and visible light. The buck converter will do its best to keep the current draw so that the total power available at the _output_ is maximized.
This [diagram from Linear](https://www.analog.com/media/en/technical-documentation/lt-journal-article/LTJournal_V20N4_Jan11.pdf "Link: https://www.analog.com/media/en/technical-documentation/lt-journal-article/LTJournal\_V20N4\_Jan11.pdf") is really good at describing how it works:

The Green lines show the I-V curve of the panel for a _given_ light condition. As the light increases the voltages stay sort of the same but the _amount of current_ you can draw goes up! If you can keep the DC/DC converter operating on the red line, that's the maximum power.
**However, there are some side effects to using a MPPT design.**
First is that DC/DC converters are expensive, and adding a DC/DC converter to a LiPo charger chip increases the cost by 2x. For small panels, if the MPPT increases the efficiency by 30% but you can double the panel size for the same price increase, it might be easier to just go with a larger panel.
Second is that DC/DC converters are not necessarily more efficient than a linear converter at low voltages and currents. At the voltages we're talking about, a 6V panel charging a 4V battery, the max power point will tend to be around 5V - only a volt above the battery. Considering there's a 0.5V drop with the input diode, the added inefficiency of a DC/DC converter is about equivalent to the extra voltage drop used by the linear charger. For this reason, you tend to see MPPT controllers only for multi-ampere chargers for big lead acid batteries and really big panels.
**So the upshot is...**
If your panel voltage is ~1V above your battery charging voltage, your current draw is under an Ampere, and you control the current draw to keep the voltage steady at around the 'max power voltage' (the red line up above), it's possible to get near-MPPT performance, without the complexity of a DC/DC converter, and without the high price. That's what the design of this charger does.
## Why a special solar charger?
We've had a lot of customers that are interested in making solar powered projects, so we wanted to make a lipo charger board that is specifically designed with Solar & USB charging in mind. We'll explain why...
Most people try to plug a solar panel directly into a lipo charger and while it _sort of _works, the battery takes _forever_ to charge because the efficiency is terrible! That's because most lipo chargers are meant to plug into a USB port or wall, and are very simple in their design. USB ports supply 5V at up to 500mA and they're pretty solid - the voltage doesn't change much even at the max current draw. So when you plug a charger into a computer with a USB port, they just draw 500mA or so and happily chug away. Same goes for wall adapters. The voltage and current limits are kept steady.
Solar panels are a little different, the voltage and current _vary constantly_ depending on sunlight available. They are unstable! That instability confuses battery chargers, which causes them to do one of two things: rapidly turn on and off as they try to draw more current from the panel than possible and/or draw much less current than they can, to keep the voltage from collapsing
Here is a diagram of a **single ** solar cell, in various light conditions (the colored rainbow lines):

We find these diagrams common but a bit confusing. So we'll show how to use them. Pick the top red line (maximum light) and start at the very right of the line where it meets the horizontal scale. This is the current (I) = 0 point. We're drawing _no current_ and the voltage of the cell is 0.5V. 0.5V is the **open circuit voltage**. Keep following the graph up and to the left. As the current draw increases, the voltage drops slightly until we reach the point of drawing 38mA (0.038A). At this point, the voltage is around 0.4V. Next draw a bit more current, moving to the left some more and the voltage starts _collapsing._We can try to draw more current but as you can see, drawing even a tiny bit more than 38mA makes the cell voltage drop to 0V. 38mA is the **short circuit current**
Depending on the light conditions, the amount of maximum current can range, from 38mA (red) to 32 mA (orange) down to 5mA (yellow) or even lower. Solar cells can be made larger (the short circuit current is bigger) but the voltage of the cell is fixed at 0.5V open circuit - it's just part the physics of the cell. However, you can connect a bunch of cells in series to add them up. A 6V **panel** has 12 **cells** (12 \* 0.5V = 6V)
Now you can see what happens if you connect a 6V solar panel to a lipoly charger. As long as the current being drawn by the charger is less than the panel's short circuit current at that light condition, everything is peachy. The moment the light changes even a little, and the current the lipo charger wants is higher than the short circuit current, the charger becomes **unstable: ** it will draw too much current, which will cause the voltage to collapse, which causes the charger to turn off, which reduces the current draw, which makes the panel voltage recover, which turns on the charger again, which then draws too much current, and the cycle repeats.
You can see this happen in the image from my scope below:

The scale is 1V per square, and the 0V point is one square above the bottom of the display (see the 2-\> on the left) The ** open circuit voltage ** of the panel is about 6.5V, the lipo charger draws some current and quickly the panel voltage collapses. After 250 us, the charger tries again, but fails again. The lipo charger may seem to be charging because the **CHRG** light is on but really its doing a poor job of it!
## Solar Optimization!
OK so how do we fix this problem? The issue we have here is that the voltage collapses during high current draw. We need to find a way to keep the lipo charger from drawing too much current, and backing off when the voltage starts to droop. We looked high and low and finally found a chip that has something like this built in. The MCP73871 calls it Voltage Proportional Charge Control (VPCC) and basically, it does precisely what we want. We can set the voltage to a point just above the battery charge voltage point (say 4.5V) and then instruct the charger to draw as much current as possible. It will automatically increase/reduce the charge rate to keep the voltage higher than 4.5V!

In this case, we set the voltage using two resistors, the voltage divider ends up stabilizing it at ~4.5V. Because the voltage collapse of a panel is really sudden, we still end up needing a little more help stabilizing the panel. We do that by adding a BFC (Big Freaking Capacitor).
This schottky diode charges a 4700uF capacitor from the panel - the diode prevents the capacitor from draining back into the panel.- [Previous Page](https://learn.adafruit.com/usb-dc-and-solar-lipoly-charger/using-the-charger.md)
- [Next Page](https://learn.adafruit.com/usb-dc-and-solar-lipoly-charger/downloads.md)
## Featured Products
### Lithium Ion Battery Pack - 3.7V 4400mAh
[Lithium Ion Battery Pack - 3.7V 4400mAh](https://www.adafruit.com/product/354)
Need a big battery for your project? This lithium-ion pack is made of 2 balanced 2200mAh cells for a total of 4400mA capacity! The cells are connected in parallel and spot-welded to a protection circuit that provides over-voltage, under-voltage, and over-current protection.
Each cell can...
In Stock
[Buy Now](https://www.adafruit.com/product/354)
[Related Guides to the Product](https://learn.adafruit.com/products/354/guides)
### USB / DC / Solar Lithium Ion/Polymer charger
[USB / DC / Solar Lithium Ion/Polymer charger](https://www.adafruit.com/product/390)
Make your projects to go green this summer with our specialized USB/Solar Lithium Ion Polymer Battery charger! This charger is a very unique design, perfect for outdoor projects, or DIY iPod chargers. We've spent over a year testing and tinkering with this charger to come up with a plug...
In Stock
[Buy Now](https://www.adafruit.com/product/390)
[Related Guides to the Product](https://learn.adafruit.com/products/390/guides)
### Lithium Ion Polymer Battery - 3.7v 1200mAh
[Lithium Ion Polymer Battery - 3.7v 1200mAh](https://www.adafruit.com/product/258)
Lithium-ion polymer (also known as 'lipo' or 'lipoly') batteries are thin, light, and powerful. The output ranges from 4.2V when completely charged to 3.7V. This battery has a capacity of 1200mAh for a total of about 4.5 Wh. If you need a larger battery,
In Stock
[Buy Now](https://www.adafruit.com/product/258)
[Related Guides to the Product](https://learn.adafruit.com/products/258/guides)
### Male DC Power adapter - 2.1mm plug to screw terminal block
[Male DC Power adapter - 2.1mm plug to screw terminal block](https://www.adafruit.com/product/369)
If you need to connect a battery pack or wired power supply to a board that has a DC jack - this adapter will come in very handy! There is a 2.1mm DC plug on one end, and a screw terminal block on the other. The terminals are labeled with positive/negative assuming a positive-tip configuration...
In Stock
[Buy Now](https://www.adafruit.com/product/369)
[Related Guides to the Product](https://learn.adafruit.com/products/369/guides)
### MintyBoost Kit
[MintyBoost Kit](https://www.adafruit.com/product/14)
The world's first and only open-source hardware charger: The MintyBoost®!
**New version!** Works with the new iPhone 4 & 5 and more! **Please review the [Minty Boost project page(s)](//learn.adafruit.com/minty-boost) before purchase and...**
No Longer Stocked
[Buy Now](https://www.adafruit.com/product/14)
[Related Guides to the Product](https://learn.adafruit.com/products/14/guides)
### 10K Precision Epoxy Thermistor
[10K Precision Epoxy Thermistor](https://www.adafruit.com/product/372)
Need to measure something damp? This epoxy-coated precision 1% 10K thermistor is an inexpensive way to measure temperature in weather or liquids. The resistance in 25 °C is 10K (+- 1%). The resistance goes down as it gets warmer and goes up as it gets cooler.
In Stock
[Buy Now](https://www.adafruit.com/product/372)
[Related Guides to the Product](https://learn.adafruit.com/products/372/guides)
### Large 6V 3.7W Solar Panel
[Large 6V 3.7W Solar Panel](https://www.adafruit.com/product/417)
Harness even more power from the sun with this nice big solar panel. We had these custom made for us when customers let us know they needed more than what our 2W panel could provide. This panel is a 12-cell (6V) assembly mounted onto a fiberglass PCB and covered with PET plastic which protects...
No Longer Stocked
[Buy Now](https://www.adafruit.com/product/417)
[Related Guides to the Product](https://learn.adafruit.com/products/417/guides)
### Large 6V 3.5W Solar panel
[Large 6V 3.5W Solar panel](https://www.adafruit.com/product/500)
These panels come to us from Voltaic Systems, makers of fine solar-powered bags and packs. These are waterproof, scratch resistant, and UV resistant. They use a high efficiency monocrystalline cell. They output 6V at 530 mA via 3.5mm x 1.1mm DC jack connector - a nice upgrade to the 2W panels...
Out of Stock
[Buy Now](https://www.adafruit.com/product/500)
[Related Guides to the Product](https://learn.adafruit.com/products/500/guides)
## Related Guides
- [Collin's Lab: Solar](https://learn.adafruit.com/collins-lab-solar.md)
- [Compost Friend!](https://learn.adafruit.com/compost-optimization-machine.md)
- [Portable Solar Charging Tracker](https://learn.adafruit.com/portable-solar-charging-tracker.md)
- [Mailbox Notification Service](https://learn.adafruit.com/mailbox-notification-service.md)
- [Solar Charging Handbag](https://learn.adafruit.com/solar-charging-handbag.md)
- [Solar Boost Bag](https://learn.adafruit.com/solar-boost-bag.md)
- [Adafruit MCP4728 I2C Quad DAC](https://learn.adafruit.com/adafruit-mcp4728-i2c-quad-dac.md)
- [Adafruit LiIon or LiPoly Charger BFF Add-On for QT Py](https://learn.adafruit.com/adafruit-qt-py-charger-bff.md)
- [Adafruit TPS61169 Constant Current Boost Converter for LEDs](https://learn.adafruit.com/adafruit-tps61169-constant-current-boost-converter-for-leds.md)
- [Adafruit MAX17048 LiPoly / LiIon Fuel Gauge and Battery Monitor](https://learn.adafruit.com/adafruit-max17048-lipoly-liion-fuel-gauge-and-battery-monitor.md)
- [Magical Light-up Dreidel](https://learn.adafruit.com/magical-light-up-dreidel.md)
- [Adafruit USB Type C Power Delivery Switchable Breakout](https://learn.adafruit.com/adafruit-usb-type-c-power-delivery-switchable-breakout.md)
- [Controlling Devices with RFID Wiz](https://learn.adafruit.com/controlling-devices-with-rfid-wiz.md)
- [Adafruit INA23x DC Current Voltage Power Monitor](https://learn.adafruit.com/adafruit-ina237-dc-current-voltage-power-monitor.md)
- [Adafruit TPL5110 Power Timer Breakout](https://learn.adafruit.com/adafruit-tpl5110-power-timer-breakout.md)
---
# Source: https://learn.adafruit.com/tron-bag/design.md
# TRON Bag
## Design
The first step is to plan out your design. We did this on some graph paper. EL wire is stiff and holds its shape but can't be bent many times or it will break (like any stiff wire). For that reason, you'll want to try to try and keep the wires on large flat surfaces or going around edges that don't flex.

The nice thing about most laptop bags is that they have a flap and pockets with strong piping and corners to protect the computer, we'll take advantage of that! We're going to put a design on the large front flap, we'll start by chalking it out.

Think about how you want the EL wire to travel around the bag. EL is hard to solder to, and harder to 'split' so keeping it simple is key! You'll want to have all the ends terminate near a pocket that will hold the inverter.

Since the pocket AA inverters can only drive 2 or 3 meters or wire maximum, its smart to keep the design short and sweet. Keep track of how long the final wire will be, add up all the segments and keep the number under 2.5m for the best look. You can also of course use a larger inverter or two inverters!

A half hour of planning now will make eveything easier later!
- [Previous Page](https://learn.adafruit.com/tron-bag/tools.md)
- [Next Page](https://learn.adafruit.com/tron-bag/soldering.md)
## Featured Products
### Heat Shrink Pack
[Heat Shrink Pack](https://www.adafruit.com/product/344)
Heat shrink is the duct tape of electronics, it keeps your stuff all safe and kept together. Especially when wiring and soldering, use heat shrink to add mechanical strength to cables. We use this stuff all the time and having a zip-lock bag of all the possible sizes is super...
In Stock
[Buy Now](https://www.adafruit.com/product/344)
[Related Guides to the Product](https://learn.adafruit.com/products/344/guides)
### In-line wire 1-to-4 splitter
[In-line wire 1-to-4 splitter](https://www.adafruit.com/product/402)
If you want to connect multiple EL wires/strips/panels up to one inverter, these splitters are quite useful. There is one male connector (goes to the inverter) and then 4 female connectors (which will connect to each wire/strip/panel. You can even cascade them! Only thing to watch for is make...
In Stock
[Buy Now](https://www.adafruit.com/product/402)
[Related Guides to the Product](https://learn.adafruit.com/products/402/guides)
### EL wire starter pack - Blue 2.5 meter (8.2 ft)
[EL wire starter pack - Blue 2.5 meter (8.2 ft)](https://www.adafruit.com/product/583)
A little bundle to get you started! This project pack contains:
- [2.5 meters (over 8 ft) of high-brightness, long-life EL wire in Blue](http://www.adafruit.com/products/408). 2.5 meters is the maximum amount for the pocket driver - it is cut and soldered so it's ready...
Out of Stock
[Buy Now](https://www.adafruit.com/product/583)
[Related Guides to the Product](https://learn.adafruit.com/products/583/guides)
## Related Guides
- [Battery Powering Wearable Electronics](https://learn.adafruit.com/battery-powering-wearable-electronics.md)
- [3D Printed Daft Punk Helmet with Bluetooth ](https://learn.adafruit.com/3d-printed-daft-punk-helmet-with-bluetooth.md)
- [3D Printed Wearable Video Goggles](https://learn.adafruit.com/3d-printed-wearable-video-goggles.md)
- [Decorative Pointy Elf Ear Bud Holders](https://learn.adafruit.com/elf-ears.md)
- [LED Friendship Bracelet](https://learn.adafruit.com/nautical-led-bracelet.md)
- [Make a Zelda Master Sword with the RP2040 Prop-Maker Feather](https://learn.adafruit.com/master-sword-rp2040.md)
- [USB Locket](https://learn.adafruit.com/usb-locket.md)
- [Light Up your Costume with Noods](https://learn.adafruit.com/light-up-your-costume-with-noods.md)
- [Pac Man Pixel Suspenders](https://learn.adafruit.com/pac-man-pixel-suspenders.md)
- [3D Printed LED Buckle](https://learn.adafruit.com/3d-printed-led-buckle.md)
- [Adafruit Flora Bluefruit LE](https://learn.adafruit.com/adafruit-flora-bluefruit-le.md)
- [Textile Potentiometer Hoodie](https://learn.adafruit.com/textile-potentiometer-hoodie.md)
- [Cynaps Bone Conduction Headset Teardown](https://learn.adafruit.com/cynaps-bone-conduction-headset-teardown.md)
- [Glowing Bean Bags with EL Wire](https://learn.adafruit.com/glowing-bean-bags-with-el-wire.md)
- [3D Printed Gunblade](https://learn.adafruit.com/3d-printed-gunblade.md)
---
# Source: https://learn.adafruit.com/tron-bag/detailing.md
# TRON Bag
## Detailing
We wanted to have a 'broken' wire detail in the center of the bag to match the TRON detailing observed in the movie. We did this by slipping some heat shrink over the EL wire to 'black out' the light-- much easier than trying to solder it to a short piece of wire.

- [Previous Page](https://learn.adafruit.com/tron-bag/sewing.md)
- [Next Page](https://learn.adafruit.com/tron-bag/splitting.md)
## Featured Products
### Heat Shrink Pack
[Heat Shrink Pack](https://www.adafruit.com/product/344)
Heat shrink is the duct tape of electronics, it keeps your stuff all safe and kept together. Especially when wiring and soldering, use heat shrink to add mechanical strength to cables. We use this stuff all the time and having a zip-lock bag of all the possible sizes is super...
In Stock
[Buy Now](https://www.adafruit.com/product/344)
[Related Guides to the Product](https://learn.adafruit.com/products/344/guides)
### In-line wire 1-to-4 splitter
[In-line wire 1-to-4 splitter](https://www.adafruit.com/product/402)
If you want to connect multiple EL wires/strips/panels up to one inverter, these splitters are quite useful. There is one male connector (goes to the inverter) and then 4 female connectors (which will connect to each wire/strip/panel. You can even cascade them! Only thing to watch for is make...
In Stock
[Buy Now](https://www.adafruit.com/product/402)
[Related Guides to the Product](https://learn.adafruit.com/products/402/guides)
### EL wire starter pack - Blue 2.5 meter (8.2 ft)
[EL wire starter pack - Blue 2.5 meter (8.2 ft)](https://www.adafruit.com/product/583)
A little bundle to get you started! This project pack contains:
- [2.5 meters (over 8 ft) of high-brightness, long-life EL wire in Blue](http://www.adafruit.com/products/408). 2.5 meters is the maximum amount for the pocket driver - it is cut and soldered so it's ready...
Out of Stock
[Buy Now](https://www.adafruit.com/product/583)
[Related Guides to the Product](https://learn.adafruit.com/products/583/guides)
## Related Guides
- [Battery Powering Wearable Electronics](https://learn.adafruit.com/battery-powering-wearable-electronics.md)
- [3D Printed Daft Punk Helmet with Bluetooth ](https://learn.adafruit.com/3d-printed-daft-punk-helmet-with-bluetooth.md)
- [3D Printed Wearable Video Goggles](https://learn.adafruit.com/3d-printed-wearable-video-goggles.md)
- [Decorative Pointy Elf Ear Bud Holders](https://learn.adafruit.com/elf-ears.md)
- [LED Friendship Bracelet](https://learn.adafruit.com/nautical-led-bracelet.md)
- [Make a Zelda Master Sword with the RP2040 Prop-Maker Feather](https://learn.adafruit.com/master-sword-rp2040.md)
- [USB Locket](https://learn.adafruit.com/usb-locket.md)
- [Light Up your Costume with Noods](https://learn.adafruit.com/light-up-your-costume-with-noods.md)
- [Pac Man Pixel Suspenders](https://learn.adafruit.com/pac-man-pixel-suspenders.md)
- [3D Printed LED Buckle](https://learn.adafruit.com/3d-printed-led-buckle.md)
- [Adafruit Flora Bluefruit LE](https://learn.adafruit.com/adafruit-flora-bluefruit-le.md)
- [Textile Potentiometer Hoodie](https://learn.adafruit.com/textile-potentiometer-hoodie.md)
- [Cynaps Bone Conduction Headset Teardown](https://learn.adafruit.com/cynaps-bone-conduction-headset-teardown.md)
- [Glowing Bean Bags with EL Wire](https://learn.adafruit.com/glowing-bean-bags-with-el-wire.md)
- [3D Printed Gunblade](https://learn.adafruit.com/3d-printed-gunblade.md)
---
# Source: https://learn.adafruit.com/hacking-the-kinect/determine-the-descriptors.md
# Hacking the Kinect
## Determine the Descriptors
The next best thing to do after you've determined the VID/PID is to identify the **descriptor** of the device. A descriptor is a sort of 'menu' of what the device can do and how it likes to transfer data. In general, each device has one descriptor._ Sometimes_ a device has more than one descriptor and you can choose which one you want but its not terribly common so we're just going to ignore it.A fantastic way to get the descriptor without having to write any software is to run **lsusb -vv ** on a linux computer. (Try the "USB Prober" tool from Apple for Mac OS X or [USBView on Windows](https://msdn.microsoft.com/en-us/library/windows/hardware/ff560019%28v=vs.85%29.aspx))
Here is the output of **lsusb** for the NUI Motor
```
Device Descriptor:
bLength 18
bDescriptorType 1
bcdUSB 2.00
bDeviceClass 0 (Defined at Interface level)
bDeviceSubClass 0
bDeviceProtocol 0
bMaxPacketSize0 64
idVendor 0x045e Microsoft Corp.
idProduct 0x02b0
bcdDevice 1.05
iManufacturer 1 Microsoft
iProduct 2 Xbox NUI Motor
iSerial 0
bNumConfigurations 1
Configuration Descriptor:
bLength 9
bDescriptorType 2
wTotalLength 18
bNumInterfaces 1
bConfigurationValue 1
iConfiguration 0
bmAttributes 0xc0
Self Powered
MaxPower 100mA
Interface Descriptor:
bLength 9
bDescriptorType 4
bInterfaceNumber 0
bAlternateSetting 0
bNumEndpoints 0
bInterfaceClass 255 Vendor Specific Class
bInterfaceSubClass 0
bInterfaceProtocol 0
iInterface 0
Device Status: 0x0000
(Bus Powered)
```
Let's see what we've got. You can see the VID and PID up there. Next we'll look at **bNumConfigurations** (how many different descriptors we have) and lucky for us the number is **1. ** Next, look at the **Interface Descriptor** in particular, **bNumEndpoints** which is 0. This means there are no Endpoints.
Endpoints are a type of USB 'data pipe' - there are 4 kinds:
- **Bulk ** Endpoints are for transferring a lot of data, like a disk drive. It's OK if it takes a little longer but we want big packets. This endpoint goes only in one direction (so to read and write you'd want two)
- **Interrupt** Endpoints are for transferring tiny amounts of data very quickly, like for a USB mouse. In this case, the device has to be responsive so we want fast movement. This endpoint goes only in one direction
- **Isochronous** Endpoints are for transferring a fair amount of data where the data must show up at the same time and if it can't it should just be dropped. This is for stuff like Audio and Video where timing is key. This endpoint goes only in one direction (so bidirectional audio for headphone and mic would have two EPs)
- **Control Endpoints** are this weird not-quite-an-Endpoint Endpoint. They are used to transfer small amounts of data to say turn a device on or off. They're very 'cheap' to develop, and every device has one even if its not mentioned.
For example, a serial port may have two Interrupt endpoints for transferring data in and out and then a control endpoint for setting the baud rate.
For more details we really do suggest reading everything at **[janaxelson.com](http://janaxelson.com/)** about USB as it's complex.
This motor device has no Endpoints, but that doesn't mean you can't communicate with it. It just means it only uses a bidirectional Control Endpoint. This isn't surprising, motors are slow and don't require a lot of data to control.
Contrast this to the Video/Camera device:
```
Device Descriptor:
bLength 18
bDescriptorType 1
bcdUSB 2.00
bDeviceClass 0 (Defined at Interface level)
bDeviceSubClass 0
bDeviceProtocol 0
bMaxPacketSize0 64
idVendor 0x045e Microsoft Corp.
idProduct 0x02ae
bcdDevice 1.0b
iManufacturer 2 Microsoft
iProduct 1 Xbox NUI Camera
iSerial 3 A00366A08793039A
bNumConfigurations 1
Configuration Descriptor:
bLength 9
bDescriptorType 2
wTotalLength 32
bNumInterfaces 1
bConfigurationValue 1
iConfiguration 0
bmAttributes 0xc0
Self Powered
MaxPower 16mA
Interface Descriptor:
bLength 9
bDescriptorType 4
bInterfaceNumber 0
bAlternateSetting 0
bNumEndpoints 2
bInterfaceClass 255 Vendor Specific Class
bInterfaceSubClass 255 Vendor Specific Subclass
bInterfaceProtocol 255 Vendor Specific Protocol
iInterface 0
Endpoint Descriptor:
bLength 7
bDescriptorType 5
bEndpointAddress 0x81 EP 1 IN
bmAttributes 1
Transfer Type Isochronous
Synch Type None
Usage Type Data
wMaxPacketSize 0x0bc0 2x 960 bytes
bInterval 1
Endpoint Descriptor:
bLength 7
bDescriptorType 5
bEndpointAddress 0x82 EP 2 IN
bmAttributes 1
Transfer Type Isochronous
Synch Type None
Usage Type Data
wMaxPacketSize 0x0bc0 2x 960 bytes
bInterval 1
Device Qualifier (for other device speed):
bLength 10
bDescriptorType 6
bcdUSB 2.00
bDeviceClass 0 (Defined at Interface level)
bDeviceSubClass 0
bDeviceProtocol 0
bMaxPacketSize0 64
bNumConfigurations 1
Device Status: 0x0001
Self Powered
```
This device has two Isochronous endpoints **both** of which are **IN ** type (data going **IN** to the computer). This makes sense: the Kinect has a IR depth camera and a normal VGA camera. Two cameras, two Endpoints. Of course, there is also a Control endpoint not mentioned here, the Control endpoint could be used to set stuff like aperture, gamma correction, any sort of built-in filter, etc.- [Previous Page](https://learn.adafruit.com/hacking-the-kinect/verify-the-vid-and-pid.md)
- [Next Page](https://learn.adafruit.com/hacking-the-kinect/making-a-driver.md)
## Featured Products
### Hacked Kinect - Skill badge, iron-on patch
[Hacked Kinect - Skill badge, iron-on patch](https://www.adafruit.com/product/582)
You can made a cool project using the (hacked) Kinect! Adafruit offers a fun and exciting "badges" of achievement for electronics, science and engineering. We believe everyone should be able to be rewarded for learning a useful skill, a badge is just one of the many ways to show and...
No Longer Stocked
[Buy Now](https://www.adafruit.com/product/582)
[Related Guides to the Product](https://learn.adafruit.com/products/582/guides)
### Beagle USB 12 - Low/Full Speed USB Protocol Analyzer
[Beagle USB 12 - Low/Full Speed USB Protocol Analyzer](https://www.adafruit.com/product/708)
USB complexity got you down? Need a hand with enumeration? Reverse engineering a USB device? You will fall in love with the Beagle 12 USB Analyzer. This hardware analyzer is completely non-intrusive, and is much better than flaky software analyzers. Perfect for when a problem is bad enough it...
No Longer Stocked
[Buy Now](https://www.adafruit.com/product/708)
[Related Guides to the Product](https://learn.adafruit.com/products/708/guides)
### Reverse Engineer - Skill badge, Lenticular printing + pin-on
[Reverse Engineer - Skill badge, Lenticular printing + pin-on](https://www.adafruit.com/product/489)
You can reverse engineer! This is the first lenticular (two-stage image) skill badge that we know of! It says reverse engineer forwards and backwards depending on the angle you view it at!
**Note:** The edges of the badge will appear "white" at an angle,...
No Longer Stocked
[Buy Now](https://www.adafruit.com/product/489)
[Related Guides to the Product](https://learn.adafruit.com/products/489/guides)
### Reverse Engineer - Sticker!
[Reverse Engineer - Sticker!](https://www.adafruit.com/product/673)
You can reverse engineer! Adafruit offers fun and exciting stickers to celebrate achievement for electronics, science and engineering. We believe everyone should be able to be rewarded for learning a useful skill and a sticker is just one of the many ways to show and share.
No Longer Stocked
[Buy Now](https://www.adafruit.com/product/673)
[Related Guides to the Product](https://learn.adafruit.com/products/673/guides)
## Related Guides
- [Guitar Hero MIDI Controller](https://learn.adafruit.com/guitar-hero-midi-controller.md)
- [Commodore 64 - The Most Popular Retro Computer of All Time](https://learn.adafruit.com/commodore-64-retro-guide.md)
- [Use Docker to Compile Linux for ESP32-S3](https://learn.adafruit.com/docker-esp32-s3-linux.md)
- [Feather Guitar Hero Adapter](https://learn.adafruit.com/feather-guitar-hero-adapter.md)
- [BLE Cat Thermal Printer with MEMENTO](https://learn.adafruit.com/ble-cat-thermal-printer-with-memento.md)
- [Fruit Jam Mac Emulator](https://learn.adafruit.com/fruit-jam-mac-emulator.md)
- [How to Make Animated Graphics for Hologram Displays](https://learn.adafruit.com/how-to-make-animated-graphics-for-hologram-displays.md)
- [LED Matrix Wall Arcade for Pico-8](https://learn.adafruit.com/led-matrix-wall-arcade.md)
- [Run an X-Carve CNC Machine Wirelessly with a Raspberry Pi](https://learn.adafruit.com/control-an-xcarve-cnc-machine-wirelessly-with-a-raspberry-pi.md)
- [CircuitPython 2FA TOTP Authentication Friend](https://learn.adafruit.com/circuitpython-totp-otp-2fa-authy-authenticator-friend.md)
- [Flippy Floppy Drive Modification](https://learn.adafruit.com/flippy-floppy-drive-modification.md)
- [Authoring Playground Books with Bluefruit for iOS ](https://learn.adafruit.com/create-a-swift-playgroundbook-with-bluetooth-le.md)
- [SerenityOS - The dream of the '90s is alive!](https://learn.adafruit.com/serenityos-build-and-run-keep-the-90s-dream-alive.md)
- [Stand-alone programming AVRs using CircuitPython](https://learn.adafruit.com/stand-alone-programming-avrs-using-circuitpython.md)
- [Protect Your Online Accounts with Strong Passwords & Password Managers](https://learn.adafruit.com/protect-your-social-media-online-accounts-with-a-strong-password-manager.md)
---
# Source: https://learn.adafruit.com/dht/dht-circuitpython-code.md
# DHT11, DHT22 and AM2302 Sensors
## DHT CircuitPython Code
Warning:
# Adafruit CircuitPython Module Install
To use the DHT sensor with your Adafruit CircuitPython board you'll need to install the [Adafruit\_CircuitPython\_DHT](https://github.com/adafruit/Adafruit_CircuitPython_DHT) module on your board.
First make sure you are running the [latest version of Adafruit CircuitPython](https://circuitpython.org/downloads) for your board.
Next you'll need to install the necessary libraries to use the hardware--carefully follow the steps to find and install these libraries from [Adafruit's CircuitPython library bundle](https://github.com/adafruit/Adafruit_CircuitPython_Bundle). Our introduction guide has [a great page on how to install the library bundle](../../../../welcome-to-circuitpython/circuitpython-libraries) for both express and non-express boards.
Remember for non-express boards like the, you'll need to manually install the necessary libraries from the bundle:
- **adafruit\_dht.mpy**
You can also download the **adafruit\_dht.mpy** from [its releases page on Github](https://github.com/adafruit/Adafruit_CircuitPython_DHT/releases).
Before continuing make sure your board's lib folder or root filesystem has the **adafruit\_dht.mpy ** module copied over.

# Wiring
DHT wiring is very simple:
- The left-most pin is **power**. We recommend powering from 5V (sometimes 3V is not enough) - this is OK even if you are using 3.3V logic
- The second pin is **data**. Connect a 10K pullup resistor from this pin to 3.3V. If you are using a DHT11 it's required. If you're using a DHT22 or AM2302 you can sometimes leave this off
- Skip the third pin
- The right-most pin is **ground**
Warning:
Here's an example using a Trinket M0 - **you can use any CircuitPython board** , just check that the Data pin is `pulseio`-capable.

In this example we'll use a Feather M0 and DHT22 sensor connected to pin D6

[Fritzing Source](https://cdn-learn.adafruit.com/assets/assets/000/047/595/original/m0_dht.fzz?1508892874)
# Usage
To demonstrate the usage of the DHT sensor module you can connect to your board's serial REPL and run Python code to read the temperature and humidity.
Next [connect to the board's serial REPL ](../../../../welcome-to-circuitpython/the-repl)so you are at the CircuitPython **\>\>\>** prompt.
Next import the **board** and **adafruit\_dht** modules, these are necessary modules to initialize and access the sensor:
```
import board
import adafruit_dht
```
You may also want to try powering the DHT sensor from 5V (we found sometimes it really needs more power) but still having the 10K pull-up resistor to 3.3V volts)
Now create an instance of either the **DHT11** or **DHT22** class, depending on the type of sensor you're using (for the AM2302 sensor use the DHT22 class). You must pass in the pin which is connected to the signal line, for example a DHT22 or AM2302 sensor connected to board pin `D6` would need this code:
```
dht = adafruit_dht.DHT22(board.D6)
```
Note for a DHT11 sensor you'd instead use **adafruit\_dht.DHT11** in place of the **adafruit\_dht.DHT22** code above.
At this point you're all set and ready to start reading the temperature and humidity! You can do this by reading the **temperature** property which returns temperature in degrees Celsius:
```
dht.temperature
```

To read the humidity grab the value of the **humidity** property, it will return the percent humidity as a floating point value from 0 to 100%:
```
dht.humidity
```

In most cases you'll always get back a temperature or humidity value when requested, but sometimes if there's electrical noise or the signal was interrupted in some way you might see an exception thrown to try again. It's normal for these sensors to sometimes be hard to read and you might need to make your code retry a few times if it fails to read. However if you always get errors and can't ever read the sensor then double check your wiring (don't forget the pull-up resistor if needed!) and the power to the device.
# Example Code
Here's a full example sketch which also manages error-retry logic (which will happen once in a while.
**Don't forget to change the logic pin to whatever pin you're using!** Then save this as `main.py` on your CircuitPython board
https://github.com/adafruit/Adafruit_Learning_System_Guides/blob/main/Gemma/Introducing_Gemma_M0/dht22/code.py
If you are using a DHT11, change the code to use a `adafruit_dht.DHT11(board.D2)` object.
Open the REPL to see the output! Breathe on the sensor to see it move temperature and humidity up (unless you are a White Walker in which case the temperature will go down)

- [Previous Page](https://learn.adafruit.com/dht/using-a-dhtxx-sensor-with-arduino.md)
- [Next Page](https://learn.adafruit.com/dht/downloads.md)
## Featured Products
### DHT22 temperature-humidity sensor + extras
[DHT22 temperature-humidity sensor + extras](https://www.adafruit.com/product/385)
The DHT22 is a basic, low-cost digital temperature and humidity sensor. It uses a capacitive humidity sensor and a thermistor to measure the surrounding air and spits out a digital signal on the data pin (no analog input pins needed). It's fairly simple to use but requires careful timing...
No Longer Stocked
[Buy Now](https://www.adafruit.com/product/385)
[Related Guides to the Product](https://learn.adafruit.com/products/385/guides)
### DHT11 basic temperature-humidity sensor + extras
[DHT11 basic temperature-humidity sensor + extras](https://www.adafruit.com/product/386)
**Discontinued -** **you can grab the ** [DHT20 - AHT20 Pin Module - I2C Temperature and Humidity Sensor](https://www.adafruit.com/product/5183) **instead! **
The DHT11 is a basic, ultra low-cost digital temperature and humidity sensor. It uses...
No Longer Stocked
[Buy Now](https://www.adafruit.com/product/386)
[Related Guides to the Product](https://learn.adafruit.com/products/386/guides)
### AM2302 (wired DHT22) temperature-humidity sensor
[AM2302 (wired DHT22) temperature-humidity sensor](https://www.adafruit.com/product/393)
Discontinued - [**you can grab** AM2301B - Wired Enclosed AHT20 - Temperature and Humidity Sensor **instead!**](https://www.adafruit.com/product/5181)
The AM2302 is a wired version of the [DHT22](http://www.adafruit.com/products/385), in a large plastic...
No Longer Stocked
[Buy Now](https://www.adafruit.com/product/393)
[Related Guides to the Product](https://learn.adafruit.com/products/393/guides)
## Related Guides
- [Adafruit SGP30 TVOC/eCO2 Gas Sensor](https://learn.adafruit.com/adafruit-sgp30-gas-tvoc-eco2-mox-sensor.md)
- [Adafruit BME680](https://learn.adafruit.com/adafruit-bme680-humidity-temperature-barometic-pressure-voc-gas.md)
- [Using LoraWAN and The Things Network with CircuitPython](https://learn.adafruit.com/using-lorawan-and-the-things-network-with-circuitpython.md)
- [Adafruit BME280 Humidity + Barometric Pressure + Temperature Sensor Breakout](https://learn.adafruit.com/adafruit-bme280-humidity-barometric-pressure-temperature-sensor-breakout.md)
- [Trinket Temperature & Humidity LCD Display](https://learn.adafruit.com/trinket-temperature-humidity-lcd-display.md)
- [PyLeap CLUE Barometer](https://learn.adafruit.com/pyleap-clue-barometer.md)
- [Adafruit CC3000 WiFi and Xively](https://learn.adafruit.com/adafruit-cc3000-wifi-and-xively.md)
- [CLUE Vertical Garden Weather Visualizer](https://learn.adafruit.com/clue-vertical-garden-weather-visualizer.md)
- [Adafruit BMP183 SPI Barometric Pressure & Altitude Sensor](https://learn.adafruit.com/adafruit-bmp183-spi-barometric-pressure-and-altitude-sensor.md)
- [Weather Display Matrix](https://learn.adafruit.com/weather-display-matrix.md)
- [ESP8266 WiFi Weather Station with Color TFT Display](https://learn.adafruit.com/wifi-weather-station-with-tft-display.md)
- [Adafruit VEML6070 UV Sensor Breakout](https://learn.adafruit.com/adafruit-veml6070-uv-light-sensor-breakout.md)
- [Adafruit HTU21D-F Temperature & Humidity Sensor](https://learn.adafruit.com/adafruit-htu21d-f-temperature-humidity-sensor.md)
- [IoT Temperature Logger with Analog Devices ADT7410, Feather and Adafruit IO](https://learn.adafruit.com/iot-temperature-logger-with-arduino-and-adafruit-io.md)
- [Adafruit BMP280 Barometric Pressure + Temperature Sensor Breakout](https://learn.adafruit.com/adafruit-bmp280-barometric-pressure-plus-temperature-sensor-breakout.md)
---
# Source: https://learn.adafruit.com/dht-humidity-sensing-on-raspberry-pi-with-gdocs-logging.md
# DHT Humidity Sensing on Raspberry Pi or Beaglebone Black with GDocs Logging
## Overview
Info:

Time to start exploring more sensors with the Raspberry Pi and Beaglebone Black! Today we'll be checking out the [DHT11](https://www.adafruit.com/products/386), [DHT22](https://www.adafruit.com/products/385) and [AM2302](https://www.adafruit.com/products/393 "Link: https://www.adafruit.com/products/393") humidity and temperature sensors available from Adafruit
In this tutorial we'll be showing how to install a DHT sensor Python library which utilizes C for high-speed GPIO polling to handle bit-banged sensor output. Many low cost sensors have unusual output formats, and in this case, a "Manchester-esque" output that is not SPI, I2C or 1-Wire compatible must be polled continuously by the Pi to decode. Luckily, the C GPIO libraries are fast enough to decode the output.
Once we have that working, we add the fun of Python to update a google spreadsheet live with the temperature/humidity data. This project would be the great basis for home or garden automation!
[You can check out our spreadsheet here, it wont be updated live after Aug 24 2012 but it will show you the format of data you get](https://docs.google.com/spreadsheet/ccc?key=0AlwXpwqqd84DdFVobHFCWXZLU2l2V212WnFrS3QwdkE#gid=0 "Link: https://docs.google.com/spreadsheet/ccc?key=0AlwXpwqqd84DdFVobHFCWXZLU2l2V212WnFrS3QwdkE#gid=0")
http://youtu.be/Skr2uPZzviM
- [Next Page](https://learn.adafruit.com/dht-humidity-sensing-on-raspberry-pi-with-gdocs-logging/wiring.md)
## Featured Products
### Adafruit Assembled Pi Cobbler Breakout + Cable for Raspberry Pi
[Adafruit Assembled Pi Cobbler Breakout + Cable for Raspberry Pi](https://www.adafruit.com/product/914)
Now that you've finally got your hands on a [Raspberry Pi® Model B](http://www.raspberrypi.org/), you're probably itching to make some fun embedded computer projects with it. What you need is an add on prototyping Pi Cobbler from Adafruit, which can break out all those...
No Longer Stocked
[Buy Now](https://www.adafruit.com/product/914)
[Related Guides to the Product](https://learn.adafruit.com/products/914/guides)
### BeagleBone Black Rev C - 4GB Flash - Pre-installed Debian
[BeagleBone Black Rev C - 4GB Flash - Pre-installed Debian](https://www.adafruit.com/product/1876)
Note: As of May 12, 2014 Adafruit is shipping Rev C. We have discontinued selling Rev B. There are no exchanges or "upgrades" for Rev B to Rev C.
If you liked the BeagleBone Black Rev B, you will love the Rev C! The Rev C still has a blistering 1GHz processor and 512MB onboard DDR3...
No Longer Stocked
[Buy Now](https://www.adafruit.com/product/1876)
[Related Guides to the Product](https://learn.adafruit.com/products/1876/guides)
### BeagleBone Black - Rev B
[BeagleBone Black - Rev B](https://www.adafruit.com/product/1278)
**[Adafruit is no longer shipping the BeagleBone Black Rev B, it has been replaced with the Rev C as of 5/12/14](https://www.adafruit.com/products/1876) - the Rev C now has 4G flash and also comes with Debian, it also costs slightly more. There are no exchanges or...**
No Longer Stocked
[Buy Now](https://www.adafruit.com/product/1278)
[Related Guides to the Product](https://learn.adafruit.com/products/1278/guides)
### Miniature WiFi (802.11b/g/n) Module: For Raspberry Pi and more
[Miniature WiFi (802.11b/g/n) Module: For Raspberry Pi and more](https://www.adafruit.com/product/814)
Make your Internet of Things device cable-free by adding WiFi. Take advantage of the Raspberry Pi and Beagle Bone's USB port to add a low cost, but high-reliability wireless link. We tried half a dozen modules to find one that works well with the Pi and Bone without the need of recompiling...
No Longer Stocked
[Buy Now](https://www.adafruit.com/product/814)
[Related Guides to the Product](https://learn.adafruit.com/products/814/guides)
### AM2302 (wired DHT22) temperature-humidity sensor
[AM2302 (wired DHT22) temperature-humidity sensor](https://www.adafruit.com/product/393)
Discontinued - [**you can grab** AM2301B - Wired Enclosed AHT20 - Temperature and Humidity Sensor **instead!**](https://www.adafruit.com/product/5181)
The AM2302 is a wired version of the [DHT22](http://www.adafruit.com/products/385), in a large plastic...
No Longer Stocked
[Buy Now](https://www.adafruit.com/product/393)
[Related Guides to the Product](https://learn.adafruit.com/products/393/guides)
### DHT11 basic temperature-humidity sensor + extras
[DHT11 basic temperature-humidity sensor + extras](https://www.adafruit.com/product/386)
**Discontinued -** **you can grab the ** [DHT20 - AHT20 Pin Module - I2C Temperature and Humidity Sensor](https://www.adafruit.com/product/5183) **instead! **
The DHT11 is a basic, ultra low-cost digital temperature and humidity sensor. It uses...
No Longer Stocked
[Buy Now](https://www.adafruit.com/product/386)
[Related Guides to the Product](https://learn.adafruit.com/products/386/guides)
### DHT22 temperature-humidity sensor + extras
[DHT22 temperature-humidity sensor + extras](https://www.adafruit.com/product/385)
The DHT22 is a basic, low-cost digital temperature and humidity sensor. It uses a capacitive humidity sensor and a thermistor to measure the surrounding air and spits out a digital signal on the data pin (no analog input pins needed). It's fairly simple to use but requires careful timing...
No Longer Stocked
[Buy Now](https://www.adafruit.com/product/385)
[Related Guides to the Product](https://learn.adafruit.com/products/385/guides)
### BeagleBone Black Rev C - 4GB - Pre-installed Debian
[BeagleBone Black Rev C - 4GB - Pre-installed Debian](https://www.adafruit.com/product/1996)
If you liked the BeagleBone Black Rev B, you will love the Rev C! The Rev C has a blistering 1GHz AM3358 processor and 512MB onboard DDR3 RAM, two 46-pin headers, micro HDMI for audio/video output, USB ports, 10/100 Ethernet and other I/O features. The Rev C is an ultra-powered embedded...
In Stock
[Buy Now](https://www.adafruit.com/product/1996)
[Related Guides to the Product](https://learn.adafruit.com/products/1996/guides)
## Related Guides
- [Freq Show: Raspberry Pi RTL-SDR Scanner](https://learn.adafruit.com/freq-show-raspberry-pi-rtl-sdr-scanner.md)
- [Adding a Real Time Clock to Raspberry Pi](https://learn.adafruit.com/adding-a-real-time-clock-to-raspberry-pi.md)
- [LED Backpack Displays on Raspberry Pi and BeagleBone Black](https://learn.adafruit.com/led-backpack-displays-on-raspberry-pi-and-beaglebone-black.md)
- [Raspberry Pi SelfieBlock](https://learn.adafruit.com/selfieblock.md)
- [How Cold Is It?](https://learn.adafruit.com/how-cold-is-it.md)
- [Bluetooth Temperature & Humidity Sensor](https://learn.adafruit.com/bluetooth-temperature-and-humidity-sensor.md)
- [Introducing the Raspberry Pi 2 - Model B](https://learn.adafruit.com/introducing-the-raspberry-pi-2-model-b.md)
- [Send Raspberry Pi Data to COSM](https://learn.adafruit.com/send-raspberry-pi-data-to-cosm.md)
- [Adafruit HTS221 - Temperature & Humidity Sensor](https://learn.adafruit.com/adafruit-hts221-temperature-humidity-sensor.md)
- [Using Piezo Buzzers with WipperSnapper](https://learn.adafruit.com/using-piezo-buzzers-with-wippersnapper.md)
- [Using Melexis MLX90614 Non-Contact Sensors](https://learn.adafruit.com/using-melexis-mlx90614-non-contact-sensors.md)
- [reef-pi Guide 2: Power Controller](https://learn.adafruit.com/reef-pi-power-controller.md)
- [Adafruit Pi Box Plus](https://learn.adafruit.com/adafruit-pi-box-plus.md)
- [Capacitive Touch Sensors on the Raspberry Pi](https://learn.adafruit.com/capacitive-touch-sensors-on-the-raspberry-pi.md)
- [Adafruit Si7021 Temperature + Humidity Sensor](https://learn.adafruit.com/adafruit-si7021-temperature-plus-humidity-sensor.md)
---
# Source: https://learn.adafruit.com/dht.md
# DHT11, DHT22 and AM2302 Sensors
## Overview
This tutorial covers the low cost [DHT temperature & humidity sensors](http://www.adafruit.com/category/35_66 "Link: http://www.adafruit.com/category/35\_66"). These sensors are very basic and slow, but are great for hobbyists who want to do some basic data logging. The DHT sensors are made of two parts, a capacitive humidity sensor and a [thermistor](http://learn.adafruit.com/thermistor). There is also a very basic chip inside that does some analog to digital conversion and spits out a digital signal with the temperature and humidity. The digital signal is fairly easy to read using any microcontroller.

## DHT11 vs DHT22
We have two versions of the DHT sensor, they look a bit similar and have the same pinout, but have different characteristics. Here are the specs:
**[DHT11](http://www.adafruit.com/products/386 "Link: http://www.adafruit.com/products/386")**
- Ultra low cost
- 3 to 5V power and I/O
- 2.5mA max current use during conversion (while requesting data)
- Good for 20-80% humidity readings with 5% accuracy
- Good for 0-50°C temperature readings ±2°C accuracy
- No more than 1 Hz sampling rate (once every second)
- Body size 15.5mm x 12mm x 5.5mm
- 4 pins with 0.1" spacing
**[DHT22](http://www.adafruit.com/products/385)/ [AM2302](https://www.adafruit.com/product/393) (Wired version)**
- Low cost
- 3 to 5V power and I/O
- 2.5mA max current use during conversion (while requesting data)
- Good for 0-100% humidity readings with 2-5% accuracy
- Good for -40 to 80°C temperature readings ±0.5°C accuracy
- No more than 0.5 Hz sampling rate (once every 2 seconds)
- Body size 15.1mm x 25mm x 7.7mm
- 4 pins with 0.1" spacing
As you can see, the [DHT22](http://www.adafruit.com/products/385) / [AM2302](https://www.adafruit.com/product/393) is a little more accurate and good over a slightly larger range. Both use a single digital pin and are 'sluggish' in that you can't query them more than once every second or two.
**You can pick up both the [DHT11](http://www.adafruit.com/products/386) and [DHT22](http://www.adafruit.com/products/385) or [AM2302](https://www.adafruit.com/product/393) from the adafruit shop!**
- [Next Page](https://learn.adafruit.com/dht/connecting-to-a-dhtxx-sensor.md)
## Featured Products
### DHT22 temperature-humidity sensor + extras
[DHT22 temperature-humidity sensor + extras](https://www.adafruit.com/product/385)
The DHT22 is a basic, low-cost digital temperature and humidity sensor. It uses a capacitive humidity sensor and a thermistor to measure the surrounding air and spits out a digital signal on the data pin (no analog input pins needed). It's fairly simple to use but requires careful timing...
No Longer Stocked
[Buy Now](https://www.adafruit.com/product/385)
[Related Guides to the Product](https://learn.adafruit.com/products/385/guides)
### DHT11 basic temperature-humidity sensor + extras
[DHT11 basic temperature-humidity sensor + extras](https://www.adafruit.com/product/386)
**Discontinued -** **you can grab the ** [DHT20 - AHT20 Pin Module - I2C Temperature and Humidity Sensor](https://www.adafruit.com/product/5183) **instead! **
The DHT11 is a basic, ultra low-cost digital temperature and humidity sensor. It uses...
No Longer Stocked
[Buy Now](https://www.adafruit.com/product/386)
[Related Guides to the Product](https://learn.adafruit.com/products/386/guides)
### AM2302 (wired DHT22) temperature-humidity sensor
[AM2302 (wired DHT22) temperature-humidity sensor](https://www.adafruit.com/product/393)
Discontinued - [**you can grab** AM2301B - Wired Enclosed AHT20 - Temperature and Humidity Sensor **instead!**](https://www.adafruit.com/product/5181)
The AM2302 is a wired version of the [DHT22](http://www.adafruit.com/products/385), in a large plastic...
No Longer Stocked
[Buy Now](https://www.adafruit.com/product/393)
[Related Guides to the Product](https://learn.adafruit.com/products/393/guides)
## Related Guides
- [Adafruit SGP30 TVOC/eCO2 Gas Sensor](https://learn.adafruit.com/adafruit-sgp30-gas-tvoc-eco2-mox-sensor.md)
- [Adafruit BME680](https://learn.adafruit.com/adafruit-bme680-humidity-temperature-barometic-pressure-voc-gas.md)
- [Using LoraWAN and The Things Network with CircuitPython](https://learn.adafruit.com/using-lorawan-and-the-things-network-with-circuitpython.md)
- [Adafruit BME280 Humidity + Barometric Pressure + Temperature Sensor Breakout](https://learn.adafruit.com/adafruit-bme280-humidity-barometric-pressure-temperature-sensor-breakout.md)
- [Trinket Temperature & Humidity LCD Display](https://learn.adafruit.com/trinket-temperature-humidity-lcd-display.md)
- [PyLeap CLUE Barometer](https://learn.adafruit.com/pyleap-clue-barometer.md)
- [Adafruit CC3000 WiFi and Xively](https://learn.adafruit.com/adafruit-cc3000-wifi-and-xively.md)
- [CLUE Vertical Garden Weather Visualizer](https://learn.adafruit.com/clue-vertical-garden-weather-visualizer.md)
- [Adafruit BMP183 SPI Barometric Pressure & Altitude Sensor](https://learn.adafruit.com/adafruit-bmp183-spi-barometric-pressure-and-altitude-sensor.md)
- [Weather Display Matrix](https://learn.adafruit.com/weather-display-matrix.md)
- [ESP8266 WiFi Weather Station with Color TFT Display](https://learn.adafruit.com/wifi-weather-station-with-tft-display.md)
- [Adafruit VEML6070 UV Sensor Breakout](https://learn.adafruit.com/adafruit-veml6070-uv-light-sensor-breakout.md)
- [Adafruit HTU21D-F Temperature & Humidity Sensor](https://learn.adafruit.com/adafruit-htu21d-f-temperature-humidity-sensor.md)
- [IoT Temperature Logger with Analog Devices ADT7410, Feather and Adafruit IO](https://learn.adafruit.com/iot-temperature-logger-with-arduino-and-adafruit-io.md)
- [Adafruit BMP280 Barometric Pressure + Temperature Sensor Breakout](https://learn.adafruit.com/adafruit-bmp280-barometric-pressure-plus-temperature-sensor-breakout.md)
---
# Source: https://learn.adafruit.com/digital-led-belt.md
# Digital LED Belt
## Overview
By popular demand, we now have a project tutorial for how to make your own programmable, ultra-blinky LED belt. Perfect for parties, raves, parades, weddings, funerals, and bar mitzvahs. Wear it with pride, wear it with blinky! Follow this tutorial to build your own heirloom LED belt, and hand it down to your grandkids.
We designed this project to demonstrate how to use the digital LED strip, how to use our Atmega32u4 breakout board with the Arduino IDE and how to make a portable battery powered project that runs off of AAs. This project is not too difficult, and can be finished in a day. Some soldering experience is good since 'free wire' soldering is a little more difficult than soldering to a PCB, but even beginners should be able to manage. We don't include a tutorial on using the Arduino IDE so its good if you've played around with the Arduino already.

http://www.flickr.com/photos/adafruit/5387932657/
## Tools
You'll need some very common electronics tools to make this project
- [A soldering iron](http://www.adafruit.com/index.php?main_page=product_info&cPath=8&products_id=180 "Link: http://www.adafruit.com/index.php?main\_page=product\_info&cPath=8&products\_id=180") and [solder](http://www.adafruit.com/index.php?main_page=product_info&cPath=8&products_id=145)
- [Wire cutters](http://www.adafruit.com/index.php?main_page=product_info&cPath=8&products_id=152 "Link: http://www.adafruit.com/index.php?main\_page=product\_info&cPath=8&products\_id=152") and [wire stripper](http://www.adafruit.com/index.php?main_page=product_info&cPath=8&products_id=147 "Link: http://www.adafruit.com/index.php?main\_page=product\_info&cPath=8&products\_id=147")(or a tool that does both)
- Heat source like a heat gun, hairdryer, or lighter
- [Any kind of pliers](http://www.adafruit.com/index.php?main_page=product_info&cPath=8&products_id=146)
- [A 3rd hand tool](http://www.adafruit.com/index.php?main_page=product_info&cPath=8&products_id=291 "Link: http://www.adafruit.com/index.php?main\_page=product\_info&cPath=8&products\_id=291") or [panavise](http://www.adafruit.com/index.php?main_page=product_info&cPath=8&products_id=151)or some other way to keep your work steady
- [A basic multimeter can be handy](http://www.adafruit.com/index.php?main_page=product_info&cPath=8&products_id=71 "Link: http://www.adafruit.com/index.php?main\_page=product\_info&cPath=8&products\_id=71")
## Parts List
We have this project available as a pack. You can of course, get the parts individually and adapt it for your own nefarious purposes
- [Atmega32u4 breakout board (the brains!)](http://www.adafruit.com/index.php?main_page=product_info&cPath=42&products_id=296)
- [Digital LED strip - 1 meter](http://www.adafruit.com/index.php?main_page=product_info&cPath=37&products_id=306)
- 6-pin IDC cable
- Inline cable pair ([male ](http://www.adafruit.com/index.php?main_page=product_info&cPath=33&products_id=319)and [female](http://www.adafruit.com/index.php?main_page=product_info&cPath=33&products_id=318) )
- [4xAA battery holder with a switch](http://www.adafruit.com/partfinder/powerconn#cylindrical)
- [1N4001 diode](http://www.adafruit.com/partfinder/diodes#power_blocking)
- 3" of 3/32" heatshrink
- 2" of 1" heatshrink
- Zip/cable tie
- [Next Page](https://learn.adafruit.com/digital-led-belt/install-driver.md)
## Featured Products
### Digital programmable LED belt kit
[Digital programmable LED belt kit](https://www.adafruit.com/product/332)
By popular demand, we now have a project tutorial for how to make your own programmable, ultra-blinky LED belt. Perfect for parties, raves, parades, weddings, funerals, and bar mitzvahs. Wear it with pride, wear it with blinky! Follow our soldering tutorial to build your own heirloom LED belt,...
No Longer Stocked
[Buy Now](https://www.adafruit.com/product/332)
[Related Guides to the Product](https://learn.adafruit.com/products/332/guides)
## Related Guides
- [LED Sequin Bow Tie](https://learn.adafruit.com/led-sequin-bowtie.md)
- [Bluetooth-Controlled NeoPixel Goggles](https://learn.adafruit.com/bluetooth-neopixel-goggles.md)
- [Light Painting with Raspberry Pi](https://learn.adafruit.com/light-painting-with-raspberry-pi.md)
- [Glowing Viking Rune wayFinder](https://learn.adafruit.com/glowing-viking-rune-artifact.md)
- [3D Printing with Bamboo Wood Filament](https://learn.adafruit.com/3d-printing-with-bamboo-wood-filament.md)
- [Jellyfish Umbrella with easy WLED WiFi Control](https://learn.adafruit.com/jellyfish-umbrella-with-easy-wled-wifi-control.md)
- [Bandolier of Light](https://learn.adafruit.com/bandolier-of-light.md)
- [Electron Bow](https://learn.adafruit.com/electron-bow.md)
- [Steven Universe Cosplay Shirt & Gem](https://learn.adafruit.com/steven-universe-cosplay-shirt-gem.md)
- [CLUE Vertical Garden Weather Visualizer](https://learn.adafruit.com/clue-vertical-garden-weather-visualizer.md)
- [Cast a 3d Printed Necklace in Metal](https://learn.adafruit.com/cast-a-3d-printed-necklace-in-metal.md)
- [3D Printed Wearable Video Goggles](https://learn.adafruit.com/3d-printed-wearable-video-goggles.md)
- [Bunny Ears with MakeCode](https://learn.adafruit.com/bunny-ears-with-makecode.md)
- [Roll-up Video Light](https://learn.adafruit.com/roll-up-video-light.md)
- [1,500 NeoPixel LED Curtain with Raspberry Pi and Fadecandy](https://learn.adafruit.com/1500-neopixel-led-curtain-with-raspberry-pi-fadecandy.md)
---
# Source: https://learn.adafruit.com/digital-led-strip.md
# LPD8806 Digital RGB LED Strip
## Overview
Primary:

We love some good LED blinking as much as the next person but after years of LED-soldering we need something cooler to get us excited. Sure there are RGB LEDs and those are fun too but what comes after that? Well, we have the answer: **Digital LED Strips**! These are _flexible_ circuit boards with full color LEDs soldered on. They take a lot of LED-wiring-drudgery out of decorating a room, car, bicycle, costume, etc. The ones we carry come with a removable waterproof casing.
There are two basic kinds of LED strips, the "analog" kind and "digital" kind. Analog-type strips have all the LEDs connected in parallel and so it acts like one huge tri-color LED; you can set the **entire** strip to any color you want, but you can't control the individual LED's colors. They are very very easy to use and fairly inexpensive.
The Digital-type strips work in a different way. They have a chip for each LED, to use the strip you have to send digitally coded data to the chips. However, this means you can control each LED individually! Because of the extra complexity of the chip, they are more expensive.

**Technical specs:**
- 32 LEDs per meter (16 segments)
- 2 common-anode RGB LEDs per segment, individually controllable
- Removable IP65 waterproof casing
- Maximum 5V @ 120mA draw per 2.5" strip segment (all LEDs on full brightness) - about 2A per meter
- 16.5mm (0.65") wide (LPD8806), 4.5mm (0.18") thick with casing on, 62.5mm (2.45") long per segment
- LED wavelengths: 630nm/530nm/475nm
- Microcontroller required to control strip
# Know Your LED Strips
Adafruit carries several types of flexible LED strip. Examine your strip closely. If it looks like this:

Then you’re reading the right tutorial. Proceed!
If your strip looks like this:

Then you have the prior generation HL1606 strip. Adafruit no longer sells this model, but our [tutorial is still available for reference](http://learn.adafruit.com/hl1606-led-strip).
If your strip resembles this: 
Then you have one of our “analog” LED strips, a different animal altogether. [Here’s the appropriate tutorial to get you started](http://learn.adafruit.com/rgb-led-strips).- [Next Page](https://learn.adafruit.com/digital-led-strip/project-ideas.md)
## Primary Products
### Digital RGB LED Weatherproof Strip - LPD8806 32 LED 5m
[Digital RGB LED Weatherproof Strip - LPD8806 32 LED 5m](https://www.adafruit.com/product/306)
These LED strips are fun and glowy. There are 32 RGB LEDs per meter, and you can control each LED individually! Yes, that's right, this is the digitally-addressable type of LED strip. You can set the color of each LED's red, green and blue component with 7-bit PWM precision (so 21-bit...
In Stock
[Buy Now](https://www.adafruit.com/product/306)
[Related Guides to the Product](https://learn.adafruit.com/products/306/guides)
## Featured Products
### Female DC Power adapter - 2.1mm jack to screw terminal block
[Female DC Power adapter - 2.1mm jack to screw terminal block](https://www.adafruit.com/product/368)
If you need to connect a DC power wall wart to a board that doesn't have a DC jack - this adapter will come in very handy! There is a 2.1mm DC jack on one end, and a screw terminal block on the other. The terminals are labeled with positive/negative assuming a positive-tip configuration...
In Stock
[Buy Now](https://www.adafruit.com/product/368)
[Related Guides to the Product](https://learn.adafruit.com/products/368/guides)
### 5V 10A switching power supply
[5V 10A switching power supply](https://www.adafruit.com/product/658)
This is a beefy switching supply, for when you need a lot of power! It can supply 5V DC up to 10 Amps, running from 110V or 220V power (the plug it comes with is for US/Canada/Japan but you can use any plug adapter for your country, or just replace the cable with a standard computer/appliance...
Out of Stock
[Buy Now](https://www.adafruit.com/product/658)
[Related Guides to the Product](https://learn.adafruit.com/products/658/guides)
### 5V 4A (4000mA) switching power supply - UL Listed
[5V 4A (4000mA) switching power supply - UL Listed](https://www.adafruit.com/product/1466)
Need a lot of 5V power? This switching supply gives a clean regulated 5V output at up to **4 Amps** (4000mA). 110 or 240 input, so it works in any country. The plugs are "US 2-prong" style so you may need a plug adapter, but you can pick one up at any hardware store for $1 or so,...
In Stock
[Buy Now](https://www.adafruit.com/product/1466)
[Related Guides to the Product](https://learn.adafruit.com/products/1466/guides)
### 5V 2A (2000mA) switching power supply - UL Listed
[5V 2A (2000mA) switching power supply - UL Listed](https://www.adafruit.com/product/276)
This is an FCC/CE certified and UL listed power supply. Need a lot of 5V power? This switching supply gives a clean regulated 5V output at up to 2000mA. 110 or 240 input, so it works in any country. The plugs are "US 2-prong" style so you may need a plug adapter, but you can pick one...
In Stock
[Buy Now](https://www.adafruit.com/product/276)
[Related Guides to the Product](https://learn.adafruit.com/products/276/guides)
### 4-pin JST SM Plug + Receptacle Cable Set
[4-pin JST SM Plug + Receptacle Cable Set](https://www.adafruit.com/product/578)
These 4-wire cables are 15cm long and come as a set, one side has a JST SM type connector plug on the end. The other side has a matching JST SM type receptacle connector. They are good for whenever you have 4 wires you want to be able to plug and unplug. We like the solid and compact nature of...
In Stock
[Buy Now](https://www.adafruit.com/product/578)
[Related Guides to the Product](https://learn.adafruit.com/products/578/guides)
## Related Guides
- [NeoPixel Painter](https://learn.adafruit.com/neopixel-painter.md)
- [The Pixif](https://learn.adafruit.com/the-pixif.md)
- [Genesis Poi: DotStar LED Persistence-of-Vision](https://learn.adafruit.com/genesis-poi-dotstar-led-persistence-of-vision-poi.md)
- [Monster Matrix with WLED](https://learn.adafruit.com/monster-matrix-with-wled.md)
- [Playa Festival Bike](https://learn.adafruit.com/playa-festival-bike.md)
- [Halo Energy Sword](https://learn.adafruit.com/halo-energy-sword.md)
- [Magic Band Reader](https://learn.adafruit.com/magic-band-reader.md)
- [CLUE Vertical Garden Weather Visualizer](https://learn.adafruit.com/clue-vertical-garden-weather-visualizer.md)
- [Gemma Firewalker Lite Sneakers](https://learn.adafruit.com/gemma-led-sneakers.md)
- [NeoPixel Mini VU Meter](https://learn.adafruit.com/neopixel-mini-vu-meter.md)
- [CircuitPython Animated Holiday Wreath Lights](https://learn.adafruit.com/circuitpython-animated-holiday-wreath-lights.md)
- [Remote Controlled LED Tea Light Sconce](https://learn.adafruit.com/remote-controlled-led-candelabra.md)
- [Toddler Timer](https://learn.adafruit.com/toddler-timer.md)
- [Stick Person Costume with Neon LED Strips](https://learn.adafruit.com/led-neon-stick-person-costume.md)
- [The PICsellator](https://learn.adafruit.com/the-picsellator.md)
---
# Source: https://learn.adafruit.com/digital-shipping-scales.md
# Digital Shipping Scales
## Overview
This tutorial will cover digital shipping scales! I know, exciting, right? But really, if you need to sense weights and get them into a computer or microcontroller, these are really easy to find, fairly accurate and easy to use.
We use digital shipping scales for our shipping system (no surprise there!) - we weigh every package to make sure we are purchasing the right amout of postage. For postal, if we dont put the right postage on, the package can get returned or denied which is no good. We could try to approximate the weight from knowing whats in the order but packaging can vary - this way its always perfectly known when we buy the postage!- [Next Page](https://learn.adafruit.com/digital-shipping-scales/smaller-scale-0-10-lb.md)
## Related Guides
- [Barcode Scanner](https://learn.adafruit.com/barcode-scanner.md)
---
# Source: https://learn.adafruit.com/calipers/digital-vs-dial-calipers.md
# Calipers
## Digital vs. Dial Calipers
There are a few different types of caliper you'll come across: digital, dial and vernier. We're going to skip vernier and show the difference between dial and digital.
Dial calipers use a mechanical system consisting of a rack and pinion, there's a gear-set inside as well that moves the dial in increments of one thousandth of an inch (or hundredth of a mm). To read, the 'most significant' value is read from the rule and the fractional value from the dial. The nice thing about dial calipers is that they don't use batteries and although are not waterproof, work well even if damp.
There are some downsides: if they are dropped, the rack and pinion can get out of alignment (especially on cheaper calipers) and it can be difficult to recalibrate. They're a little tougher to read and often are either imperial or metric (but not both).

Digital calipers don't have any rack/pinion/gear system. This makes them more shock-proof which we like (since we're a little clumsy and have dropped the calipers a few times).
Digital calipers can also easily convert from inches to mm and back which we really like since a lot of electronics is mixed-units.


So how does a digital caliper work without gears? it turns out that underneath the plastic 'ruler' overlay is an engraved copper design. The slide part has a circuit board with thin strips that look like a 'comb'. The comb and copper pads form a grid of capacitors,[ two conductive plates separated by the dielectric plastic overlay.](http://en.wikipedia.org/wiki/Capacitor) As the comb slides over the copper pattern, the capacitance between the plates changes. If the patterns are engraved precisely, even very small changes in capacitance can be detected by an analog interface (such as an RC timer or oscillator).

[Photo from PhysicDude](http://www.flickr.com/photos/50241702@N04/5227386500/ "Link: http://www.flickr.com/photos/50241702@N04/5227386500/")
This means that if the dielectric changes it can mess up the readings. For this reason, digital calipers can give jumpy readings if they are dirty or wet.
- [Previous Page](https://learn.adafruit.com/calipers/overview.md)
- [Next Page](https://learn.adafruit.com/calipers/storage.md)
## Featured Products
### Mitutoyo - Absolute Digimatic Digital Calipers, 6 in.
[Mitutoyo - Absolute Digimatic Digital Calipers, 6 in.](https://www.adafruit.com/product/294)
The most useful tool we've ever laid our hands on. We thought we'd use them just for electronics but then we got our hands on these calipers and had so much fun we started measuring _everything._
They're indestructible - which is good because we don't...
No Longer Stocked
[Buy Now](https://www.adafruit.com/product/294)
[Related Guides to the Product](https://learn.adafruit.com/products/294/guides)
### Premium Digital Stainless Steel Calipers
[Premium Digital Stainless Steel Calipers](https://www.adafruit.com/product/1724)
The most useful tool we've ever laid our hands on. These calipers are really good quality and an excellent choice if you need something better than a cheap 'disposable' pair of digital calipers but you're not quite ready for a set of high-end Mitsutoyo calipers. These digital...
No Longer Stocked
[Buy Now](https://www.adafruit.com/product/1724)
[Related Guides to the Product](https://learn.adafruit.com/products/1724/guides)
### Solar Digital Calipers
[Solar Digital Calipers](https://www.adafruit.com/product/3720)
_Praise the sun!_ You will never have that awkward situation where your caliper battery dies just when you need to take a measurement. Sure, if you have the budget, [we recommend these near-indestructible high-end Mitutoyo...](https://www.adafruit.com/product/294)
In Stock
[Buy Now](https://www.adafruit.com/product/3720)
[Related Guides to the Product](https://learn.adafruit.com/products/3720/guides)
### Messograf Pen Calipers
[Messograf Pen Calipers](https://www.adafruit.com/product/810)
Discontinued - **you can grab [Solar Digital Calipers ](https://www.adafruit.com/product/3720)instead! **
Caliper rule? Tire tread gauge? Ruler? Thread scale? Writing instrument? The Messograf is all of these in one.
It is a...
No Longer Stocked
[Buy Now](https://www.adafruit.com/product/810)
[Related Guides to the Product](https://learn.adafruit.com/products/810/guides)
## Related Guides
- [Secret Hollow Book Intrusion Detector](https://learn.adafruit.com/secret-hollow-book.md)
- [Necomimi Brainwave Cat Ears Teardown](https://learn.adafruit.com/necomimi-brainwave-cat-ears-teardown.md)
- [Ambient Sound Machine](https://learn.adafruit.com/ambient-machine.md)
- [Personal Torch 3000](https://learn.adafruit.com/pt3000-personal-torch.md)
- [Butterfly Bench with Edge Lit Acrylic](https://learn.adafruit.com/butterfly-bench-with-edge-lit-acrylic.md)
- [Bass MIDI Stomp Box](https://learn.adafruit.com/midi-bass-synth-stomp-box.md)
- [Build a Custom Front Panel](https://learn.adafruit.com/build-a-custom-front-panel.md)
- [Collin's Lab: Soldering](https://learn.adafruit.com/collins-lab-soldering.md)
- [3D Printed Custom Keycaps](https://learn.adafruit.com/3dprinted-custom-keycaps.md)
- [Fiddy - the FTDI Clip](https://learn.adafruit.com/fiddy-ftdi-pogo-pin-clip.md)
- [Photo Light Box](https://learn.adafruit.com/photo-light-box.md)
- [DIY On/Off JST Switch Adapter](https://learn.adafruit.com/on-slash-off-switches.md)
- [Making Edge Guards for Hand Tools Using Hand-Moldable Plastic](https://learn.adafruit.com/hand-moldable-edge-guards.md)
- [USB Locket](https://learn.adafruit.com/usb-locket.md)
- [DIY 3D Printing Filament](https://learn.adafruit.com/diy-3d-printing-filament.md)
---
# Source: https://learn.adafruit.com/12mm-led-pixels/dimensions.md
# 12mm LED Pixels
## Dimensions
There’s a fair amount of variance between pixels due to the rubbery, waterproof coating. The figures given here are just guidelines, rounded up to the next whole millimeter (except for the mounting hole diameter). Allow yourself some extra “wiggle room” for spacing when planning an installation.
For mounting holes, 11.5 millimeters is a good guideline, or might go as narrow as 11 mm for a really firm grip, though at that size pixels will be hard to remove and the mounting flange may take some abuse in the process.
# “Bullet” Pixels


# “Square” Pixels


- [Previous Page](https://learn.adafruit.com/12mm-led-pixels/troubleshooting.md)
## Featured Products
### 12mm Diffused Flat Digital RGB LED Pixels (Strand of 25)
[12mm Diffused Flat Digital RGB LED Pixels (Strand of 25)](https://www.adafruit.com/product/738)
RGB Pixels are digitally-controllable lights you can set to any color, or animate. Each RGB LED and controller chip is molded into a 'dot' of silicone. The dots are weatherproof and rugged. There are four flanges molded in so that you can 'push' them into a 12mm drill hole in...
In Stock
[Buy Now](https://www.adafruit.com/product/738)
[Related Guides to the Product](https://learn.adafruit.com/products/738/guides)
### 12mm Diffused Thin Digital RGB LED Pixels (Strand of 25)
[12mm Diffused Thin Digital RGB LED Pixels (Strand of 25)](https://www.adafruit.com/product/322)
RGB Pixels are digitally-controllable lights you can set to any color, or animate. Each RGB LED and controller chip is molded into a 'dot' of silicone. The dots are weatherproof and rugged. There are four flanges molded in so that you can 'push' them into a 12mm drill hole in...
No Longer Stocked
[Buy Now](https://www.adafruit.com/product/322)
[Related Guides to the Product](https://learn.adafruit.com/products/322/guides)
### 5V 10A switching power supply
[5V 10A switching power supply](https://www.adafruit.com/product/658)
This is a beefy switching supply, for when you need a lot of power! It can supply 5V DC up to 10 Amps, running from 110V or 220V power (the plug it comes with is for US/Canada/Japan but you can use any plug adapter for your country, or just replace the cable with a standard computer/appliance...
Out of Stock
[Buy Now](https://www.adafruit.com/product/658)
[Related Guides to the Product](https://learn.adafruit.com/products/658/guides)
### 5V 2A (2000mA) switching power supply - UL Listed
[5V 2A (2000mA) switching power supply - UL Listed](https://www.adafruit.com/product/276)
This is an FCC/CE certified and UL listed power supply. Need a lot of 5V power? This switching supply gives a clean regulated 5V output at up to 2000mA. 110 or 240 input, so it works in any country. The plugs are "US 2-prong" style so you may need a plug adapter, but you can pick one...
In Stock
[Buy Now](https://www.adafruit.com/product/276)
[Related Guides to the Product](https://learn.adafruit.com/products/276/guides)
### Female DC Power adapter - 2.1mm jack to screw terminal block
[Female DC Power adapter - 2.1mm jack to screw terminal block](https://www.adafruit.com/product/368)
If you need to connect a DC power wall wart to a board that doesn't have a DC jack - this adapter will come in very handy! There is a 2.1mm DC jack on one end, and a screw terminal block on the other. The terminals are labeled with positive/negative assuming a positive-tip configuration...
In Stock
[Buy Now](https://www.adafruit.com/product/368)
[Related Guides to the Product](https://learn.adafruit.com/products/368/guides)
### 4-pin JST SM Plug + Receptacle Cable Set
[4-pin JST SM Plug + Receptacle Cable Set](https://www.adafruit.com/product/578)
These 4-wire cables are 15cm long and come as a set, one side has a JST SM type connector plug on the end. The other side has a matching JST SM type receptacle connector. They are good for whenever you have 4 wires you want to be able to plug and unplug. We like the solid and compact nature of...
In Stock
[Buy Now](https://www.adafruit.com/product/578)
[Related Guides to the Product](https://learn.adafruit.com/products/578/guides)
## Related Guides
- [Bluefruit Controlled Macetech RGB LED Shades](https://learn.adafruit.com/ledshades.md)
- [Make it Glow: NeoPixel and LED Diffusion Tips & Tricks](https://learn.adafruit.com/make-it-glow-neopixel-and-led-diffusion-tips-tricks.md)
- [Starduino: 8-Bit Super Mario Tree Topper](https://learn.adafruit.com/starduino-neopixel-8-bit-mario-star-tree-topper.md)
- [NeoPixel Ring Clock](https://learn.adafruit.com/neopixel-ring-clock.md)
- [Star Fragment IoT Lamp](https://learn.adafruit.com/star-fragment-iot-lamp.md)
- [Talking Musical NeoPixel Clock with Infrared, BLE and Touch Controls](https://learn.adafruit.com/talking-musical-neo-pixel-clock-with-infrared-ble-and-touch-controls.md)
- [Perfect Pitch Machine](https://learn.adafruit.com/perfect-pitch-machine.md)
- [CheerLights](https://learn.adafruit.com/cheerlights.md)
- [NeuroDreamer Teardown](https://learn.adafruit.com/neurodreamer-teardown.md)
- [Holiday Lights: Easy DIY Christmas Wreath & Garland with WLED](https://learn.adafruit.com/holiday-garland-decor-app-control-with-no-coding.md)
- [Adafruit IO Home: Security ](https://learn.adafruit.com/adafruit-io-home-security.md)
- [Adafruit NeoPot](https://learn.adafruit.com/adafruit-neopot.md)
- [NeoKey Socket Breakout with NeoPixel for MX and CHOC Key Switches](https://learn.adafruit.com/neokey-breakout.md)
- [NeoPixie Dust Bag](https://learn.adafruit.com/neopixel-pixie-dust-bag.md)
- [Multi-tasking the Arduino - Part 3](https://learn.adafruit.com/multi-tasking-the-arduino-part-3.md)
---
# Source: https://learn.adafruit.com/battery-power-for-led-pixels-and-strips/diode.md
# Battery Power for LED Pixels and Strips
## Diode Fix for Alkaline Batteries
> “I don’t know if you wanna trust the safety of our country to some, uh…silicone diode!”
> > — General Beringer, _WarGames_

A single [1N4001 diode](https://www.adafruit.com/products/755) has about a 0.7 Volt drop across its leads. Wired to our 6 Volt battery pack (when using alkaline cells), this yields 5.3 Volts output. That’s within our 5V±10% target window, so this simple component addition is all that’s needed to use the battery pack with the LED strips and pixels.
This same solution can be seen in our [Digital Programmable LED Belt Kit](http://adafruit.com/products/332 "Link: http://adafruit.com/products/332").
Diodes have a specific _polarity,_ passing current in only one direction_…_the silver stripe is the + end. So we want to connect the + terminal from the battery pack to the “dark” end with no stripe.
Danger:
Danger:
Cut the **red** wire of the battery pack short by about an inch.

Strip off about 3/8" insulation from the red wire.
Then “tin” the end of the wire with a bit of solder to keep it from fraying.

Clip the end of the diode (the “dark” end, _without_ a silver stripe) to a similar length, then solder the red wire to this.

Clip the other end of the diode (the side with a silver stripe).

Cut off and slide a 2" piece of heat shrink tube onto the red wire. Keep sliding it all the way past the diode.

Now solder the positive wire from your LED circuit to the “stripe” end of the diode. Or you can add a plug/receptacle pair between the two to make them easier to separate and service later on.

Take the piece of heat shrink you slid over the wire before…

…and slide it back over the diode and the solder joints.

Shrink the tubing to grip the diode and wires. You can use a heat gun, lighter or the edge of your soldering iron.

Taa-daah!
The black wire from the battery holder then connects to the ground wire of the LED circuit (or plug/receptacle, if you’ve installed one). This side is much simpler than the diode-equipped wire:
Slide a small 1" piece of heat shrink onto the black wire (this image shows a much shorter piece…oops…go a little longer than this).

Solder together the ends of the wires. The dreaded _inline splice!_

Then slide and shrink as you did before. Done!

- [Previous Page](https://learn.adafruit.com/battery-power-for-led-pixels-and-strips/about-batteries.md)
- [Next Page](https://learn.adafruit.com/battery-power-for-led-pixels-and-strips/powering-the-microcontroller-too.md)
## Featured Products
### Digital programmable LED belt kit
[Digital programmable LED belt kit](https://www.adafruit.com/product/332)
By popular demand, we now have a project tutorial for how to make your own programmable, ultra-blinky LED belt. Perfect for parties, raves, parades, weddings, funerals, and bar mitzvahs. Wear it with pride, wear it with blinky! Follow our soldering tutorial to build your own heirloom LED belt,...
No Longer Stocked
[Buy Now](https://www.adafruit.com/product/332)
[Related Guides to the Product](https://learn.adafruit.com/products/332/guides)
### Alkaline AAA batteries - 2 pack
[Alkaline AAA batteries - 2 pack](https://www.adafruit.com/product/617)
Battery power for your portable project! These batteries are good quality at a good price, and work fantastic with any of the kits or projects in the shop that use AAA's. This is a pack of **2 AAA batteries**.
These batteries are Alkaline (MnO2) chemistry,...
No Longer Stocked
[Buy Now](https://www.adafruit.com/product/617)
[Related Guides to the Product](https://learn.adafruit.com/products/617/guides)
### 1N4001 Diode - 10 pack
[1N4001 Diode - 10 pack](https://www.adafruit.com/product/755)
This here is a 10 pack of the classic 1N4001 power blocking diode. These are good for reverse polarity protection (put it between your DC power jack and circuitry to avoid a negative-voltage that would zap your delicate electronics), kickback protection (place across your solenoids, relays...
In Stock
[Buy Now](https://www.adafruit.com/product/755)
[Related Guides to the Product](https://learn.adafruit.com/products/755/guides)
### 4 x AA Battery Holder with On/Off Switch
[4 x AA Battery Holder with On/Off Switch](https://www.adafruit.com/product/830)
Make a nice portable power pack with this 4 x AA battery holder. It fits any alkaline or rechargeable AA batteries in series. There's a snap on cover and an on/off switch which can be handy when wiring to something without a switch.
**New**! We now have 0.1" headers...
In Stock
[Buy Now](https://www.adafruit.com/product/830)
[Related Guides to the Product](https://learn.adafruit.com/products/830/guides)
### 12mm Diffused Flat Digital RGB LED Pixels (Strand of 25)
[12mm Diffused Flat Digital RGB LED Pixels (Strand of 25)](https://www.adafruit.com/product/738)
RGB Pixels are digitally-controllable lights you can set to any color, or animate. Each RGB LED and controller chip is molded into a 'dot' of silicone. The dots are weatherproof and rugged. There are four flanges molded in so that you can 'push' them into a 12mm drill hole in...
In Stock
[Buy Now](https://www.adafruit.com/product/738)
[Related Guides to the Product](https://learn.adafruit.com/products/738/guides)
### 12mm Diffused Thin Digital RGB LED Pixels (Strand of 25)
[12mm Diffused Thin Digital RGB LED Pixels (Strand of 25)](https://www.adafruit.com/product/322)
RGB Pixels are digitally-controllable lights you can set to any color, or animate. Each RGB LED and controller chip is molded into a 'dot' of silicone. The dots are weatherproof and rugged. There are four flanges molded in so that you can 'push' them into a 12mm drill hole in...
No Longer Stocked
[Buy Now](https://www.adafruit.com/product/322)
[Related Guides to the Product](https://learn.adafruit.com/products/322/guides)
### Digital RGB LED Weatherproof Strip - LPD8806 32 LED 5m
[Digital RGB LED Weatherproof Strip - LPD8806 32 LED 5m](https://www.adafruit.com/product/306)
These LED strips are fun and glowy. There are 32 RGB LEDs per meter, and you can control each LED individually! Yes, that's right, this is the digitally-addressable type of LED strip. You can set the color of each LED's red, green and blue component with 7-bit PWM precision (so 21-bit...
In Stock
[Buy Now](https://www.adafruit.com/product/306)
[Related Guides to the Product](https://learn.adafruit.com/products/306/guides)
## Related Guides
- [LPD8806 Digital RGB LED Strip](https://learn.adafruit.com/digital-led-strip.md)
- [Meeting Time Keeper Stick](https://learn.adafruit.com/meeting-time-keeper-stick-with-cpx.md)
- [Deluxe 4x4 NeoPixel Keypad](https://learn.adafruit.com/deluxe-4x4-neopixel-neokey-keypad.md)
- [Circuit Playground Express Rocket Lamp](https://learn.adafruit.com/cpx-rocket-lamp.md)
- [Mystery Box: Crypto Countdown Case](https://learn.adafruit.com/mystery-box-crypto-countdown-case.md)
- [MicroBlocks Circuit Playground Express Ornament](https://learn.adafruit.com/microblocks-circuitplayground-express-ornament.md)
- [Adafruit NeoSlider](https://learn.adafruit.com/adafruit-neoslider.md)
- [MIDI Stomping Pads](https://learn.adafruit.com/midi-stomping-pads.md)
- [Tent Lantern](https://learn.adafruit.com/tent-lantern.md)
- [Sword & Wand Prop Effects with Circuit Playground](https://learn.adafruit.com/sword-and-wand-prop-effects-with-circuit-playground.md)
- [Arduino Lesson 6. Digital Inputs](https://learn.adafruit.com/adafruit-arduino-lesson-6-digital-inputs.md)
- [Bedazzler](https://learn.adafruit.com/bedazzler.md)
- [Reindeer Solder Kit by Phyx](https://learn.adafruit.com/reindeer-solder-kit-by-phyx.md)
- [Guardian Shield+ Zelda Breath of the Wild](https://learn.adafruit.com/guardian-shield-zelda-breath-of-the-wild.md)
- [Adafruit TPS61169 Constant Current Boost Converter for LEDs](https://learn.adafruit.com/adafruit-tps61169-constant-current-boost-converter-for-leds.md)
- [reef-pi Guide 5: Light Controller](https://learn.adafruit.com/reef-pi-lighting-controller.md)
---
# Source: https://learn.adafruit.com/adafruit-ultimate-gps/direct-computer-wiring.md
# Adafruit Ultimate GPS
## Direct Computer Wiring
GPS modules are great in that the moment you turn them on, they'll start spitting out data, and trying to get a 'fix' (location verification). Like pretty much every GPS in existence, the Adafruit Ultimate GPS uses TTL serial output to send data so the best way to first test the GPS is to wire it directly to the computer via the TTL serial to USB converter on an Arduino. You can also use an FTDI Friend or other TTL adapter but for this demonstration we'll use a classic Arduino.
Danger: This tutorial step won't work with a chip that has NATIVE USB - it's for an Arduino UNO compatible only. Go on to the next step, [Breakout Arduino Wiring](https://learn.adafruit.com/adafruit-ultimate-gps/arduino-wiring), but refer back here for this discussion of the GPS data!
First, load a "blank" sketch into the Arduino:
```
// this sketch will allow you to bypass the Atmega chip
// and connect the Ultimate GPS directly to the USB/Serial
// chip converter.
// Connect VIN to +5V
// Connect GND to Ground
// Connect GPS RX (data into GPS) to Digital 0
// Connect GPS TX (data out from GPS) to Digital 1
void setup() {}
void loop() {}
```
This is will free up the converter so you can directly wire and bypass the Arduino chip. Once you've uploaded this sketch, wire the GPS as follows. Your module may look slightly different, but as long as you are connecting to the right pin names, they all work identically for this part.
Note that TX on the Arduino is connected to TX on the Ultimate GPS, and similarly for RX. **This is not the usual wiring,** which would have TX\<-\>RX and RX\<-\>TX. It is wired this way because you are using the separate USB-serial converter on the Arduino board directly, by using the "blank" sketch above.
Danger: Use the wiring below **only** for the "blank" sketch above, with an Arduino Uno compatible only. For regular use, use the wiring shown on the [Breakout Arduino Wiring](https://learn.adafruit.com/adafruit-ultimate-gps/arduino-wiring) page.

Now plug in the USB cable, and open up the serial monitor from the Arduino IDE and be sure to select **9600 baud** in the drop down. You should see text like the following:
This is the raw GPS "NMEA sentence" output from the module. There are a few different kinds of NMEA sentences, the most common ones people use are the **$GPRMC** ( **G** lobal **P** ositioning **R** ecommended **M** inimum **C** oordinates or something like that) and the **$GPGGA** sentences. These two provide the time, date, latitude, longitude, altitude, estimated land speed, and fix type. Fix type indicates whether the GPS has locked onto the satellite data and received enough data to determine the location (2D fix) or location+altitude (3D fix).
[For more details about NMEA sentences and what data they contain, check out this site](http://aprs.gids.nl/nmea/)
If you look at the data in the above window, you can see that there are a lot of commas, with no data in between them. That's because this module is on my desk, indoors, and does not have a 'fix'. To get a fix, we need to put the module outside.
Danger:
If you can get a really long USB cord (or attach a GPS antenna to the v3 modules) and stick the GPS out a window, so its pointing at the sky, eventually the GPS will get a fix and the window data will change over to transmit valid data like this:

Look for the line that says **$GPRMC,194509.000,A,4042.6142,N,07400.4168,W,2.03,221.11,160412,,,A\*77**
This line is called the RMC (Recommended Minimum) sentence and has pretty much all of the most useful data. Each chunk of data is separated by a comma.
The first part **194509.000** is the current time **GMT** (Greenwich Mean Time). The first two numbers ** 19 ** indicate the hour (1900h, otherwise known as 7pm) the next two are the minute, the next two are the seconds and finally the milliseconds. So the time when this screenshot was taken is 7:45 pm and 9 seconds. The GPS does not know what time zone you are in, or about "daylight savings" so you will have to do the calculation to turn GMT into your timezone
The second part is the 'status code', if it is a **V** that means the data is **V** oid (invalid). If it is an **A** that means its **A** ctive (the GPS could get a lock/fix)
The next 4 pieces of data are the geolocation data. According to the GPS, my location is ** 4042.6142,N**** **(Latitude 40 degrees, 42.6142 decimal minutes North) & **07400.4168,W**. (Longitude 74 degrees, 0.4168 decimal minutes West) To look at this location in Google maps, type **+40 42.6142', -74 00.4168'** into the [google maps search box](http://maps.google.com/) . Unfortunately gmaps requires you to use +/- instead of NSWE notation. N and E are positive, S and W are negative.
Danger:
The next data is the ground speed in knots. We're going **2.03** knots
After that is the tracking angle, this is meant to approximate what 'compass' direction we're heading at based on our past travel
The one after that is **160412** which is the current date (16th of April, 2012).
Finally there is the **\*XX** data which is used as a data transfer checksum
Once you get a fix using your GPS module, verify your location with google maps (or some other mapping software). Remember that GPS is often only accurate to 5-10 meters and worse if you're indoors or surrounded by tall buildings.
- [Previous Page](https://learn.adafruit.com/adafruit-ultimate-gps/external-antenna.md)
- [Next Page](https://learn.adafruit.com/adafruit-ultimate-gps/arduino-wiring.md)
## Featured Products
### Adafruit Ultimate GPS Breakout - 66 channel w/10 Hz updates
[Adafruit Ultimate GPS Breakout - 66 channel w/10 Hz updates](https://www.adafruit.com/product/746)
We carry a few different GPS modules here in the Adafruit shop, but none that satisfied our every desire - that's why we designed this little GPS breakout board. We believe this is the **Ultimate** GPS module, so we named it that. It's got everything you want and...
In Stock
[Buy Now](https://www.adafruit.com/product/746)
[Related Guides to the Product](https://learn.adafruit.com/products/746/guides)
### Adafruit Ultimate GPS GNSS with USB - 99 channel w/10 Hz updates
[Adafruit Ultimate GPS GNSS with USB - 99 channel w/10 Hz updates](https://www.adafruit.com/product/4279)
The Ultimate GPS module you know and love has a _glow-up_ to let it be easily used with any computer, not just microcontrollers! With the built-in USB-to-Serial converter, you can now plug-n-play the Ultimate GPS into your computer, laptop, embedded Linux computer, and more. Power and...
In Stock
[Buy Now](https://www.adafruit.com/product/4279)
[Related Guides to the Product](https://learn.adafruit.com/products/4279/guides)
### Adafruit METRO 328 Fully Assembled - Arduino IDE compatible
[Adafruit METRO 328 Fully Assembled - Arduino IDE compatible](https://www.adafruit.com/product/50)
We sure love the ATmega328 here at Adafruit, and we use them _a lot_ for our own projects. The processor has plenty of GPIO, Analog inputs, hardware UART SPI and I2C, timers and PWM galore - just enough for most simple projects. When we need to go small, we use a
Out of Stock
[Buy Now](https://www.adafruit.com/product/50)
[Related Guides to the Product](https://learn.adafruit.com/products/50/guides)
### GPS Antenna - External Active Antenna - 3-5V 28dB 5 Meter SMA
[GPS Antenna - External Active Antenna - 3-5V 28dB 5 Meter SMA](https://www.adafruit.com/product/960)
Give your Ultimate GPS V3 a boost with this external active antenna. This GPS antenna draws about 10mA and will give you an additional 28 dB of gain. It's got a 5 meter long cable so it will easily reach wherever you need it to. The antenna is magnetic so it will stick to the top of a car...
In Stock
[Buy Now](https://www.adafruit.com/product/960)
[Related Guides to the Product](https://learn.adafruit.com/products/960/guides)
### SMA to uFL/u.FL/IPX/IPEX RF Adapter Cable
[SMA to uFL/u.FL/IPX/IPEX RF Adapter Cable](https://www.adafruit.com/product/851)
This RF adapter cable is super handy for anyone doing RF work. Often times, small electronics save space by having a pick-and-placeable u.FL connector (also called uFL, IPEX, IPAX, IPX, MHF, and AM). But most antennas have SMA or RP-SMA connectors on them. This little cable will bridge the...
In Stock
[Buy Now](https://www.adafruit.com/product/851)
[Related Guides to the Product](https://learn.adafruit.com/products/851/guides)
### CR1220 12mm Diameter - 3V Lithium Coin Cell Battery
[CR1220 12mm Diameter - 3V Lithium Coin Cell Battery](https://www.adafruit.com/product/380)
These are the highest quality & capacity batteries, the same as shipped with the iCufflinks, iNecklace, Datalogging and GPS Shields, GPS HAT, etc. One battery per order (you'll want one battery per cufflink or pendant.)
Brand may vary but all battery brands are verified...
Out of Stock
[Buy Now](https://www.adafruit.com/product/380)
[Related Guides to the Product](https://learn.adafruit.com/products/380/guides)
### Breadboarding wire bundle
[Breadboarding wire bundle](https://www.adafruit.com/product/153)
75 flexible stranded core wires with stiff ends molded on in red, orange, yellow, green, blue, brown, black and white. These are a major improvement over the "box of bent wires" that are sometimes sold with breadboards, and faster than stripping your own solid core wires. Makes...
In Stock
[Buy Now](https://www.adafruit.com/product/153)
[Related Guides to the Product](https://learn.adafruit.com/products/153/guides)
### Half Sized Premium Breadboard - 400 Tie Points
[Half Sized Premium Breadboard - 400 Tie Points](https://www.adafruit.com/product/64)
This is a cute, half-size breadboard with 400 tie points, good for small projects. It's 3.25" x 2.2" / 8.3cm x 5.5cm with a standard double-strip in the middle and two power rails on both sides. You can pull the power rails off easily to make the breadboard as...
In Stock
[Buy Now](https://www.adafruit.com/product/64)
[Related Guides to the Product](https://learn.adafruit.com/products/64/guides)
## Related Guides
- [Reverse Geocache Box](https://learn.adafruit.com/reverse-geocache-engagement-box.md)
- [Ladyada's Learn Arduino - Lesson #2](https://learn.adafruit.com/ladyadas-learn-arduino-lesson-number-2.md)
- [Wave Shield Talking Clock](https://learn.adafruit.com/wave-shield-talking-clock.md)
- [Wireless Game Show Poppers for the Classroom!](https://learn.adafruit.com/wireless-game-show-poppers.md)
- [Wireless Gardening with Arduino + CC3000 WiFi Modules](https://learn.adafruit.com/wireless-gardening-arduino-cc3000-wifi-modules.md)
- [CircuitPython Essentials](https://learn.adafruit.com/circuitpython-essentials.md)
- [CircuitPython Libraries on Linux and ODROID C2](https://learn.adafruit.com/circuitpython-libaries-linux-odroid-c2.md)
- [2.2" TFT Display](https://learn.adafruit.com/2-2-tft-display.md)
- [RGB LED Matrix Basics](https://learn.adafruit.com/32x16-32x32-rgb-led-matrix.md)
- [Halloween Pumpkin](https://learn.adafruit.com/halloween-pumpkin.md)
- [Remote controlled door lock using a fingerprint sensor & Adafruit IO](https://learn.adafruit.com/remote-controlled-door-lock-using-a-fingerprint-sensor-and-adafruit-io.md)
- [Automatic Monitor Color Temperature Adjustment](https://learn.adafruit.com/automatic-monitor-color-temperature-adjustment.md)
- [Animating Multiple LED Backpacks](https://learn.adafruit.com/animating-multiple-led-backpacks.md)
- [Skill Badge Requirements: Microcontrollers](https://learn.adafruit.com/skill-badge-requirements-microcontrollers.md)
- [RePaper eInk Development Board](https://learn.adafruit.com/repaper-eink-development-board.md)
---
# Source: https://learn.adafruit.com/usb-snes-gamepad/disassemble-the-snes-controller.md
# USB SNES Gamepad
## Disassemble the SNES Controller
We'll begin by disassembling the SNES controller.
There are 5 small phillips screws on the back. Once you lift the back off, you can remove the PCB. Be careful as there are tiny wires for the 'side' buttons so just make sure those pieces come out cleanly.

Each button is made of 3 parts - theres the plastic part that you press, beneath that is the _elastomer_ which is a rubber molded piece with a conductive bit that goes underneath the plastic part, and finally on the PCB there are two interdigitated and exposed traces. When the user presses the plastic button, it pushes down on the elastomer which then pushes the conductive rubber onto both traces, shorting them.
There is also a black blob in the middle. This blob is a chip that takes all the button inputs and then converts it into the way that the SNES wants to hear. Thats all fine, but we dont want to use the blob because we are going to make our own custom chip software. (Note that it would be pretty easy to make the Teensy 'talk' right to the blob using the SNES protocol but then you wouldn't be able to adapt this tutorial to other controllers, for that reason we're going to do it the 'hard way')
The question is now how can we listen to all the buttons?

Well, luckily, almost all game pads are going to use a similar method for arranging the buttons. If you note carefully at the PCB, you'll see that each button is made of two traces, but that all of the buttons _share_ one trace together.

This is the _common_ (ground) trace. If we were to make a schematic, it would look kinda like this:
**Note that this is really just a symbolic schematic, the ground wire doesn't necessarily connect on the side thats indicated, we're just showing how all the buttons have a common ground pin!**
OK now this is straight forward, [if you are not sure how to read buttons with a microcontroller, we have a nice tutorial you might want to check out](http://www.ladyada.net/learn/arduino/lesson5.html) (in fact, we really suggest it as we'll be referring to concepts in that tutorial) Basically each button connects to an input of the microcontroller. We'll need a pull-up resistor, but luckily we can set the microcontroller's _internal_ pullups (so we dont have to solder in 12 10K resistors!) Then the microcontroller can listen on each pin for a button press and when it is received, generate a keypress event.
- [Previous Page](https://learn.adafruit.com/usb-snes-gamepad/overview.md)
- [Next Page](https://learn.adafruit.com/usb-snes-gamepad/introducing-the-teensy-with-hid.md)
## Featured Products
### SNES Controller
[SNES Controller](https://www.adafruit.com/product/131)
A third-party SNES (Super Nintendo/Famicom) controller. Works great with Fuzeboxen as well!
No Longer Stocked
[Buy Now](https://www.adafruit.com/product/131)
[Related Guides to the Product](https://learn.adafruit.com/products/131/guides)
### ADXL335 - 5V ready triple-axis accelerometer (+-3g analog out)
[ADXL335 - 5V ready triple-axis accelerometer (+-3g analog out)](https://www.adafruit.com/product/163)
We've updated our favorite triple-axis accelerometer to now have an on-board 3.3V regulator - making it a perfect choice for interfacing with a 5V microcontroller such as the Arduino. This breakout comes with 3 analog outputs for X, Y and Z axis measurements on a 0.75"x0.75"...
In Stock
[Buy Now](https://www.adafruit.com/product/163)
[Related Guides to the Product](https://learn.adafruit.com/products/163/guides)
### USB cable - A/MiniB
[USB cable - A/MiniB](https://www.adafruit.com/product/260)
This here is your standard A-miniB USB cable, for USB 1.1 or 2.0. Perfect for connecting a PC to your Teensy v2, USB Lipo charger w/Mini B connector, among other things.
Approximately 3 feet / 1 meter long
Color may vary!
No Longer Stocked
[Buy Now](https://www.adafruit.com/product/260)
[Related Guides to the Product](https://learn.adafruit.com/products/260/guides)
### Teensy (ATmega32u4 USB dev board) 2.0
[Teensy (ATmega32u4 USB dev board) 2.0](https://www.adafruit.com/product/199)
Discontinued - **you can grab** [Adafruit ItsyBitsy 32u4 - 5V 16MHz](https://www.adafruit.com/product/3677) **instead!**
The Teensy 2.0 is a complete USB-based microcontoller development system, in a very small footprint! All programming is done via the USB port. No...
No Longer Stocked
[Buy Now](https://www.adafruit.com/product/199)
[Related Guides to the Product](https://learn.adafruit.com/products/199/guides)
### Premium Female/Male 'Extension' Jumper Wires - 20 x 6"
[Premium Female/Male 'Extension' Jumper Wires - 20 x 6"](https://www.adafruit.com/product/1954)
These Female/Male Extension jumper wires are handy for making wire harnesses or jumpering between headers on PCB's. These premium jumper wires are 6" (150mm) long and come in a 'strip' of 20 (2 pieces of each of ten rainbow colors). They have 0.1" male header...
In Stock
[Buy Now](https://www.adafruit.com/product/1954)
[Related Guides to the Product](https://learn.adafruit.com/products/1954/guides)
## Related Guides
- [Adafruit Analog Accelerometer Breakouts](https://learn.adafruit.com/adafruit-analog-accelerometer-breakouts.md)
- [HID Reporter](https://learn.adafruit.com/hid-reporter.md)
- [Gravatars: What they are and how to add or change one](https://learn.adafruit.com/gravatars-what-they-are-and-how-to-add-or-change-one.md)
- [Two Player Game System for PyGamer and RFM69HCW Radio Wing](https://learn.adafruit.com/two-player-game-system-for-pygamer-and-rfm69hcw-radio-wing.md)
- [PyPortal 2FA TOTP Authentication Friend](https://learn.adafruit.com/pyportal-2fa-totp-authentication-friend.md)
- [Dragon Drop: a CircuitPython Game for MacroPad](https://learn.adafruit.com/dragon-drop-a-circuitpython-game-for-macropad.md)
- [NeoTrellis M4 Animated Dice Roller](https://learn.adafruit.com/neotrellis-dice.md)
- [Instagram Photo Frame](https://learn.adafruit.com/instagram-photo-frame.md)
- [BlueLive: Livestream Studio switcher controller](https://learn.adafruit.com/bluelive.md)
- [DIY Turbo Button Controller - HID Remapper](https://learn.adafruit.com/diy-turbo-button-controller-hid-remapper.md)
- [ESP32 PlayStation Controller](https://learn.adafruit.com/esp32-playstation-controller.md)
- [Fruit Jam Chyron](https://learn.adafruit.com/fruit-jam-chyron.md)
- [Custom Color Palettes for MakeCode Arcade Games](https://learn.adafruit.com/custom-color-palettes-for-makecode-arcade-games.md)
- [DIY Welded Bike Stand](https://learn.adafruit.com/diy-welded-bike-stand.md)
- [CircuitPython Stage game library](https://learn.adafruit.com/circuitpython-stage-game-library.md)
---
# Source: https://learn.adafruit.com/1-8-tft-display/displaying-bitmaps.md
# 1.8" TFT Display Breakout and Shield
## Displaying Bitmaps

In this example, we'll show how to display a 128x160 pixel full color bitmap from a microSD card.
We have an example sketch in the library showing how to display full color bitmap images stored on an SD card. You'll need a [microSD card such as this one](http://www.adafruit.com/products/102).
It's really easy to draw bitmaps. We have a library for it, Adafruit\_ImageReader, which can be installed through the Arduino Library Manager (Sketch→Include Library→Manage Libraries…). Enter “imageread” in the search field and the library is easy to spot:

You'll also need an image. We suggest starting with this bitmap of a parrot.
[Download parrot.bmp](http://learn.adafruit.com/system/assets/assets/000/010/143/original/parrot.bmp)
If you want to later use your own image, use an image editing tool and crop your image to no larger than 160 pixels high and 128 pixels wide. Save it as a 24-bit color **BMP** file - it must be 24-bit color format to work, even if it was originally a 16-bit color image - because of the way BMPs are stored and displayed!
Copy the **parrot.bmp** to the microSD card and insert it into the micro SD card holder on your shield or breakout board.

# Breakout Wiring
**Shield users** can skip directly to the " **Example Sketch**" section.
Wire up the TFT as described on the wiring & test page and add the two wires for talking to the SD card. Connect **CARD\_CS** (the unconnected pin in the middle) to digital pin **4** (you can change this later to any pin you want). Connect **MISO** (second from the right) to the Arduino's hardware SPI **MISO** pin. For Classic arduinos, this is pin **12**. For Mega's this is pin **50**. You can't change the **MISO** pin, it's fixed in the chip hardware.

# Example Sketch
If you have the breakout, open the **File→examples→Adafruit ImageReader Library→**** BreakoutST7735 - 160x128 **example.

If you have the shield, open the **File→examples→Adafruit ImageReader Library→**** ShieldST7735 **example.

Now upload the example sketch to the Arduino. It should display the parrot image. If you have any problems, check the serial console for any messages such as not being able to initialize the microSD card or not finding the image.

- [Previous Page](https://learn.adafruit.com/1-8-tft-display/breakout-wiring-and-test.md)
- [Next Page](https://learn.adafruit.com/1-8-tft-display/circuitpython-displayio-quickstart-2.md)
## Featured Products
### Breadboarding wire bundle
[Breadboarding wire bundle](https://www.adafruit.com/product/153)
75 flexible stranded core wires with stiff ends molded on in red, orange, yellow, green, blue, brown, black and white. These are a major improvement over the "box of bent wires" that are sometimes sold with breadboards, and faster than stripping your own solid core wires. Makes...
In Stock
[Buy Now](https://www.adafruit.com/product/153)
[Related Guides to the Product](https://learn.adafruit.com/products/153/guides)
### Adafruit METRO 328 Fully Assembled - Arduino IDE compatible
[Adafruit METRO 328 Fully Assembled - Arduino IDE compatible](https://www.adafruit.com/product/50)
We sure love the ATmega328 here at Adafruit, and we use them _a lot_ for our own projects. The processor has plenty of GPIO, Analog inputs, hardware UART SPI and I2C, timers and PWM galore - just enough for most simple projects. When we need to go small, we use a
Out of Stock
[Buy Now](https://www.adafruit.com/product/50)
[Related Guides to the Product](https://learn.adafruit.com/products/50/guides)
### Half Sized Premium Breadboard - 400 Tie Points
[Half Sized Premium Breadboard - 400 Tie Points](https://www.adafruit.com/product/64)
This is a cute, half-size breadboard with 400 tie points, good for small projects. It's 3.25" x 2.2" / 8.3cm x 5.5cm with a standard double-strip in the middle and two power rails on both sides. You can pull the power rails off easily to make the breadboard as...
In Stock
[Buy Now](https://www.adafruit.com/product/64)
[Related Guides to the Product](https://learn.adafruit.com/products/64/guides)
### 1.8" Color TFT LCD display with MicroSD Card Breakout
[1.8" Color TFT LCD display with MicroSD Card Breakout](https://www.adafruit.com/product/358)
This lovely little display breakout is the best way to add a small, colorful and bright display to any project. Since the display uses 4-wire SPI to communicate and has its own pixel-addressable frame buffer, it can be used with every kind of microcontroller. Even a very small one with low...
Out of Stock
[Buy Now](https://www.adafruit.com/product/358)
[Related Guides to the Product](https://learn.adafruit.com/products/358/guides)
### Adafruit 1.8" Color TFT Shield w/microSD and Joystick
[Adafruit 1.8" Color TFT Shield w/microSD and Joystick](https://www.adafruit.com/product/802)
This lovely little shield is the best way to add a small, colorful and bright display to any project. We took our popular 1.8" TFT breakout board and remixed it into an Arduino shield complete with microSD card slot and a 5-way joystick navigation switch and three selection buttons! Since...
In Stock
[Buy Now](https://www.adafruit.com/product/802)
[Related Guides to the Product](https://learn.adafruit.com/products/802/guides)
### 1.8" SPI TFT display, 160x128 18-bit color - ST7735R driver
[1.8" SPI TFT display, 160x128 18-bit color - ST7735R driver](https://www.adafruit.com/product/618)
We just love this little 1.8" TFT display, with true TFT color (up to 18-bits per pixel!), fine 160x128 resolution, two white LED backlight that runs on 3.3V and a very easy SPI interface that requires only 4 or 5 digital pins to send pixels to the display.
**Please...**
Out of Stock
[Buy Now](https://www.adafruit.com/product/618)
[Related Guides to the Product](https://learn.adafruit.com/products/618/guides)
## Related Guides
- [Wave Shield](https://learn.adafruit.com/adafruit-wave-shield-audio-shield-for-arduino.md)
- [Adafruit 2.8" TFT Touch Shield v2 - Capacitive or Resistive](https://learn.adafruit.com/adafruit-2-8-tft-touch-shield-v2.md)
- [How to Build a Testing Jig](https://learn.adafruit.com/how-to-build-a-testing-fixture.md)
- [Create an Internet of Things Dashboard with Adafruit IO](https://learn.adafruit.com/create-an-internet-of-things-dashboard-with-adafruit-dot-io.md)
- [Let’s Put LEDs in Things!](https://learn.adafruit.com/lets-put-leds-in-things.md)
- [Tiny Arduino Music Visualizer](https://learn.adafruit.com/piccolo.md)
- [Circuit Playground Sound-Controlled Robot](https://learn.adafruit.com/circuit-playground-sound-controlled-robot.md)
- [Adafruit 1.27" and 1.5" Color OLED Breakout Board](https://learn.adafruit.com/adafruit-1-5-color-oled-breakout-board.md)
- [Arduino Lesson 15. DC Motor Reversing](https://learn.adafruit.com/adafruit-arduino-lesson-15-dc-motor-reversing.md)
- [TTL Serial Camera](https://learn.adafruit.com/ttl-serial-camera.md)
- [Analog Feedback Servos](https://learn.adafruit.com/analog-feedback-servos.md)
- [Geofencing with the FONA 808 & Adafruit IO](https://learn.adafruit.com/geofencing-with-the-fona-808-and-adafruit-io.md)
- [Arduino GPS Clock](https://learn.adafruit.com/arduino-clock.md)
- [Adafruit Data Logger Shield](https://learn.adafruit.com/adafruit-data-logger-shield.md)
- [Making Adabot: Part 2](https://learn.adafruit.com/making-adabot-part-2.md)
---
# Source: https://learn.adafruit.com/rfid-iphone/dissolve-the-card.md
# RFID iPhone
## Dissolve the Card

Put your card in a vessel and fill with acetone until the card is completely submerged. Cover the container so the acetone doesn't all evaporate, and wait 15-30 minutes.

Once the plastic has all peeled away, gently poke around in the mess to find the shiny RFID antenna and carefully remove it from the vessel. You can reuse the acetone, just pour it back into the bottle and throw the now-destroyed plastic away.

The antenna is made of enamel-coated wire, and it does not have to remain in this exact shape to still function just fine.
- [Previous Page](https://learn.adafruit.com/rfid-iphone/overview.md)
- [Next Page](https://learn.adafruit.com/rfid-iphone/tape-antenna.md)
## Featured Products
### iPhone 4/4S Bottom Screw Replacement - Pentalobe 2 per pack
[iPhone 4/4S Bottom Screw Replacement - Pentalobe 2 per pack](https://www.adafruit.com/product/892)
These are perfect replacements for the little screws on the bottom of iPhone 4/4S's. We have them in two 'flavors' - this flavor is the classic 0.8mm 5-point star/Pentalobe. You can use these in either a 4 or 4S phone. [We also have the...](http://www.adafruit.com/products/891)
No Longer Stocked
[Buy Now](https://www.adafruit.com/product/892)
[Related Guides to the Product](https://learn.adafruit.com/products/892/guides)
### iPhone 4/4S Bottom Screw Replacement - Phillips #000 2 per pack
[iPhone 4/4S Bottom Screw Replacement - Phillips #000 2 per pack](https://www.adafruit.com/product/891)
These are perfect replacements for the little screws on the bottom of iPhone 4/4S's. We have them in two 'flavors' - this flavor is the slightly easier-to-work with Phillips #000. You can use these in either a 4 or 4S phone. [We also...](http://www.adafruit.com/products/892)
No Longer Stocked
[Buy Now](https://www.adafruit.com/product/891)
[Related Guides to the Product](https://learn.adafruit.com/products/891/guides)
### Aluminum iPhone 4 Phillips #000 / PH000 Screwdriver
[Aluminum iPhone 4 Phillips #000 / PH000 Screwdriver](https://www.adafruit.com/product/890)
We tried half a dozen different precision Phillips #000 screwdriver tools to find the one we liked the most. The body is made from a single piece of aluminum and has nice knurled grips. The end-cap rotates so you can keep the body steady while rotating. The tip is nicely machined and is...
No Longer Stocked
[Buy Now](https://www.adafruit.com/product/890)
[Related Guides to the Product](https://learn.adafruit.com/products/890/guides)
### 13.56MHz RFID/NFC Card - Classic 1K
[13.56MHz RFID/NFC Card - Classic 1K](https://www.adafruit.com/product/359)
This is a blank 13.56MHz RFID/NFC card - often used for train/bus passes but also found in other systems where a proximity card is desired. The tag contains a small RFID chip and an antenna, and is passively powered by the reader/writer when placed a couple inches away.
These can be...
In Stock
[Buy Now](https://www.adafruit.com/product/359)
[Related Guides to the Product](https://learn.adafruit.com/products/359/guides)
### Clear No-Logo iPhone Replacement Back - iPhone 4S
[Clear No-Logo iPhone Replacement Back - iPhone 4S](https://www.adafruit.com/product/930)
Turn your iPhone 4S invisible! OK well maybe not invisible, but with this clear back you can gaze deeply into the inner works of the iPhone - great for when you want a geeky cyber-look or want to place a visible RFID tag inside the phone. This kit comes with a clear plastic back and two basic...
No Longer Stocked
[Buy Now](https://www.adafruit.com/product/930)
[Related Guides to the Product](https://learn.adafruit.com/products/930/guides)
### Aluminum iPhone 4S 0.8mm 5-Point Star/Pentalobe Screwdriver
[Aluminum iPhone 4S 0.8mm 5-Point Star/Pentalobe Screwdriver](https://www.adafruit.com/product/888)
Discontinued - **you can grab** [38 Piece Screwdriver Set](https://www.adafruit.com/product/822)**[i](https://www.adafruit.com/product/822)nstead! **
We tried half a dozen different 5-point star/"pentalobe" screwdriver tools...
No Longer Stocked
[Buy Now](https://www.adafruit.com/product/888)
[Related Guides to the Product](https://learn.adafruit.com/products/888/guides)
### Clear No-Logo iPhone Replacement Back - iPhone 4
[Clear No-Logo iPhone Replacement Back - iPhone 4](https://www.adafruit.com/product/929)
Turn your iPhone 4 invisible! OK well maybe not invisible, but with this clear back you can gaze deeply into the inner works of the iPhone - great for when you want a geeky cyber-look or want to place a visible RFID tag inside the phone. This kit comes with a clear plastic back and two basic...
No Longer Stocked
[Buy Now](https://www.adafruit.com/product/929)
[Related Guides to the Product](https://learn.adafruit.com/products/929/guides)
## Related Guides
- [Magic Band Reader](https://learn.adafruit.com/magic-band-reader.md)
- [Babel Fish](https://learn.adafruit.com/babel-fish.md)
- [Scannable Links with NFC](https://learn.adafruit.com/scannable-links-with-nfc.md)
- [Using Web NFC](https://learn.adafruit.com/using-webnfc.md)
- [Unlock Android Phone with Wearable NFC](https://learn.adafruit.com/unlock-android-with-wearable-nfc.md)
- [Collin's Lab: RFID](https://learn.adafruit.com/collins-lab-rfid.md)
- [Adafruit ST25DV16K I2C RFID EEPROM Breakout](https://learn.adafruit.com/adafruit-st25dv16k-i2c-rfic-eeprom-breakout.md)
- [Raspberry Pi NFC Minecraft Blocks](https://learn.adafruit.com/raspberry-pi-nfc-minecraft-blocks.md)
- [Controlling Devices with RFID Wiz](https://learn.adafruit.com/controlling-devices-with-rfid-wiz.md)
- [NFC Raspberry Pi Media Player](https://learn.adafruit.com/nfc-raspberry-pi-media-player.md)
- [3D Printed RFID NFC Rings](https://learn.adafruit.com/3d-printed-rfid-nfc-rings.md)
- [Adafruit PN532 RFID/NFC Breakout and Shield](https://learn.adafruit.com/adafruit-pn532-rfid-nfc.md)
- [Adafruit NFC/RFID on Raspberry Pi](https://learn.adafruit.com/adafruit-nfc-rfid-on-raspberry-pi.md)
- [Magic Band Teardown](https://learn.adafruit.com/magic-band-teardown.md)
- [Mystery Box: Remote Chess Board Puzzle Lock](https://learn.adafruit.com/mystery-box-remote-chess-board-puzzle-lock.md)
---
# Source: https://learn.adafruit.com/diy-8x2-lcd-shield.md
# DIY 8x2 LCD Shield
## Overview & Parts
This tutorial will show you how to solder together a shield for an LCD with a 8x2 header.
## Parts
Aside from the parts offered available from Adafruit, you will need to source the LCD yourself. Parallel LCDs come in a couple different sizes, from 16 characters, 1 line (16x1) to 24 characters, 4 lines (24x4).
In this tutorial I use the [16x2 Picvue from Jameco](http://www.jameco.com/webapp/wcs/stores/servlet/ProductDisplay?langId=-1&storeId=10001&catalogId=10001&productId=365982) because that’s what I had in my box of stuff, but you can easily adapt it for any other LCD. The wiring may differ a little bit but that will be covered.
- [Next Page](https://learn.adafruit.com/diy-8x2-lcd-shield/check-out-the-pins.md)
## Featured Products
### Solid-Core Wire Spool - 25ft - 22AWG - Yellow
[Solid-Core Wire Spool - 25ft - 22AWG - Yellow](https://www.adafruit.com/product/289)
Perfect for bread-boarding, free wiring, etc. This spool of solid-core wire is easy to solder to. When bent it keeps its shape pretty well. We like to have a few spools of this stuff around. We suggest picking up wire strippers to match. Wire gauge is 22 AWG which we've found is the best...
In Stock
[Buy Now](https://www.adafruit.com/product/289)
[Related Guides to the Product](https://learn.adafruit.com/products/289/guides)
### 36-pin 0.1" Female header - pack of 5!
[36-pin 0.1" Female header - pack of 5!](https://www.adafruit.com/product/598)
Female header is like the duct tape of electronics. Its great for connecting things together, soldering to perf-boards, sockets for wires or break-away header, etc. We go through these guys real fast, and thought that given how handy they are, we'd offer them in a pack of five!
In Stock
[Buy Now](https://www.adafruit.com/product/598)
[Related Guides to the Product](https://learn.adafruit.com/products/598/guides)
### Break-away 0.1" 36-pin strip male header - Black - 10 pack
[Break-away 0.1" 36-pin strip male header - Black - 10 pack](https://www.adafruit.com/product/392)
Breakaway header is like the duct tape of electronics. It's great for connecting things together, soldering to perf-boards, fits into any breakout or breadboard, etc. We go through these guys real fast, and thought that given how handy they are, we'd offer them in a pack of ten!
In Stock
[Buy Now](https://www.adafruit.com/product/392)
[Related Guides to the Product](https://learn.adafruit.com/products/392/guides)
### Adafruit Proto Shield for Arduino Kit
[Adafruit Proto Shield for Arduino Kit](https://www.adafruit.com/product/51)
Works with the Uno! This prototyping shield is the best out there (well, we think so, at least). It works with UNO, NG, Diecimila and Duemilanove Arduinos. You can use it with a Leonardo but it will not break out the hardware SPI pins (they're only on the ISP connector underneath) or the...
No Longer Stocked
[Buy Now](https://www.adafruit.com/product/51)
[Related Guides to the Product](https://learn.adafruit.com/products/51/guides)
### Adafruit METRO 328 Fully Assembled - Arduino IDE compatible
[Adafruit METRO 328 Fully Assembled - Arduino IDE compatible](https://www.adafruit.com/product/50)
We sure love the ATmega328 here at Adafruit, and we use them _a lot_ for our own projects. The processor has plenty of GPIO, Analog inputs, hardware UART SPI and I2C, timers and PWM galore - just enough for most simple projects. When we need to go small, we use a
Out of Stock
[Buy Now](https://www.adafruit.com/product/50)
[Related Guides to the Product](https://learn.adafruit.com/products/50/guides)
## Related Guides
- [Geofencing with the FONA 808 & Adafruit IO](https://learn.adafruit.com/geofencing-with-the-fona-808-and-adafruit-io.md)
- [Wireless Game Show Poppers for the Classroom!](https://learn.adafruit.com/wireless-game-show-poppers.md)
- [Adafruit Ultimate GPS](https://learn.adafruit.com/adafruit-ultimate-gps.md)
- [Arduino Lesson 4. Eight LEDs and a Shift Register](https://learn.adafruit.com/adafruit-arduino-lesson-4-eight-leds.md)
- [Adafruit CC3000 WiFi and Xively](https://learn.adafruit.com/adafruit-cc3000-wifi-and-xively.md)
- [FTDI Friend](https://learn.adafruit.com/ftdi-friend.md)
- [A REST API for Arduino & the CC3000 WiFi Chip](https://learn.adafruit.com/a-rest-api-for-arduino-and-the-cc3000-wifi-chip.md)
- [Bluetooth Controlled Motorized Camera Slider](https://learn.adafruit.com/bluetooth-motorized-camera-slider.md)
- [Bluefruit LE Connect for iOS and Android](https://learn.adafruit.com/bluefruit-le-connect.md)
- [Babel Fish](https://learn.adafruit.com/babel-fish.md)
- [Animating Multiple LED Backpacks](https://learn.adafruit.com/animating-multiple-led-backpacks.md)
- [Light Meter](https://learn.adafruit.com/light-meter.md)
- [Adafruit 16-channel PWM/Servo Shield](https://learn.adafruit.com/adafruit-16-channel-pwm-slash-servo-shield.md)
- [Halloween Pumpkin](https://learn.adafruit.com/halloween-pumpkin.md)
- [Naughty or Nice Machine](https://learn.adafruit.com/naughty-or-nice-machine.md)
---
# Source: https://learn.adafruit.com/diy-wifi-raspberry-pi-touch-cam.md
# DIY WiFi Raspberry Pi Touchscreen Camera
## Overview
http://www.youtube.com/watch?v=MRrELkIHgbU
This project explores the Adafruit PiTFT touchscreen and the Raspberry Pi camera board to create a simple point-and-shoot digital camera. One can optionally use WiFi and Dropbox (a cloud file storage and synchronization service) to automatically transfer photos to another computer for editing.


This isn’t likely to replace your digital camera (or even phone-cam) anytime soon…it’s a learning exercise and not a polished consumer item…but as the code is open source, you or others might _customize it_ into something special that your regular camera can’t do.
## Things You’ll Need:
- **Raspberry Pi computer** , _any_ model will work. This project is not especially demanding, so it’s a great use for an older board if you have one around.
- **PiTFT display w/resistive touch.** Various sizes and models are available — for current Raspberry Pi boards (Pi 3, Pi 2, B+ and A+) you’ll want one of the _PiTFT Plus_ variants. For older Pi boards (original Model B or A), a “non-Plus” PiTFT is needed. See featured product links to the right. It _must_ be a PiTFT (connecting to the GPIO header, **not composite or HDMI** ) with **320x240** resolution (no higher, i.e. 3.5" PiTFT won’t work), _must_ have **resistive touch** , _not_ capacitive.
- **Raspberry Pi Camera Board.** Current “v2” cameras or original v1, any will do. For general work you’ll want the **[regular version](https://www.adafruit.com/products/3099)**. For special projects like security or nighttime nature photography, you can experiment with the **[infrared version](http://www.adafruit.com/products/1567 "https://www.adafruit.com/products/3100").**
- **[MicroSD memory card](https://www.adafruit.com/products/1294),** 4GB or larger.
- **HDMI monitor** and **USB keyboard** are needed temporarily during setup. Once everything is configured and working, these are no longer required.
The following parts are **optional:**
- A **[WiFi adapter](http://www.adafruit.com/products/814 "Link: http://www.adafruit.com/products/814")** allows the camera to upload photos to Dropbox (requires account, free). _The Raspberry Pi **3** has WiFi **built in** , so this part isn’t needed with that board._
- A **[USB battery pack](http://www.adafruit.com/products/1565 "Link: http://www.adafruit.com/products/1565")** makes the whole camera portable. If using WiFi, you’ll want a robust battery pack that can provide 1 Amp (some are limited to 500 mA max).
**Some additional parts, tools and skills are also required:** optional buttons or headers on PiTFT displays sometimes require soldering; some means of holding all the pieces together — could be as simple as a few rubber bands, to a drilled-out plastic electronics enclosure, to an elaborate custom 3D-printed case. This all depends on your available resources. Read through to see what’s involved in the project and come up with ideas along the way.
**Other Raspberry Pi – Point & Shoot Cameras!**
James Wolf made a Raspberry Pi - Point & Shoot Camera all inside the original Pi case (except battery). He made a little board attached to a cut down ribbon cable, just for the pull up resistors and the button - instructions, pictures and a link to the simple Python file are [located on his site](http://contractorwolf.wordpress.com/raspberry-pi-point-shoot-camera/).
http://www.youtube.com/watch?v=Jfca32qkgY8
- [Next Page](https://learn.adafruit.com/diy-wifi-raspberry-pi-touch-cam/pi-setup.md)
## Featured Products
### Raspberry Pi DIY Camera Pack
[Raspberry Pi DIY Camera Pack](https://www.adafruit.com/product/3275)
If the holidays promise anything, it’s almost certainly a deluge of photographs. Instead of taking out your smartphones, why not build your own camera?
With one of Adafruit’s best selling screens and an official Raspberry Pi camera, you’ll be ready to set up your very...
Out of Stock
[Buy Now](https://www.adafruit.com/product/3275)
[Related Guides to the Product](https://learn.adafruit.com/products/3275/guides)
### PiTFT Plus Assembled 320x240 2.8" TFT + Resistive Touchscreen
[PiTFT Plus Assembled 320x240 2.8" TFT + Resistive Touchscreen](https://www.adafruit.com/product/2298)
Is this not the cutest little display for the Raspberry Pi? It features a 2.8" display with 320x240 16-bit color pixels and a resistive touch overlay. The plate uses the high speed SPI interface on the Pi and can use the mini display as a console, X window port, displaying images or...
Out of Stock
[Buy Now](https://www.adafruit.com/product/2298)
[Related Guides to the Product](https://learn.adafruit.com/products/2298/guides)
### PiTFT Plus 320x240 3.2" TFT + Resistive Touchscreen
[PiTFT Plus 320x240 3.2" TFT + Resistive Touchscreen](https://www.adafruit.com/product/2616)
Is this not the cutest little display for the Raspberry Pi? It features a 3.2" display with 320x240 16-bit color pixels and a resistive touch overlay. The plate uses the high speed SPI interface on the Pi and can use the mini display as a console, X window port, displaying images or...
Out of Stock
[Buy Now](https://www.adafruit.com/product/2616)
[Related Guides to the Product](https://learn.adafruit.com/products/2616/guides)
### Adafruit PiTFT 2.4" HAT Mini Kit - 320x240 TFT Touchscreen
[Adafruit PiTFT 2.4" HAT Mini Kit - 320x240 TFT Touchscreen](https://www.adafruit.com/product/2455)
Is this not the cutest little display for the Raspberry Pi? It features a 2.4" display with 320x240 16-bit color pixels and a resistive touch overlay. The HAT uses the high speed SPI interface on the Pi and can use the mini display as a console, X window port, displaying images or video...
Out of Stock
[Buy Now](https://www.adafruit.com/product/2455)
[Related Guides to the Product](https://learn.adafruit.com/products/2455/guides)
### Adafruit PiTFT - 320x240 2.8" TFT+Touchscreen for Raspberry Pi
[Adafruit PiTFT - 320x240 2.8" TFT+Touchscreen for Raspberry Pi](https://www.adafruit.com/product/1601)
Is this not the cutest little display for the Raspberry Pi? It features a 2.8" display with 320x240 16-bit color pixels and a resistive touch overlay. The plate uses the high speed SPI interface on the Pi and can use the mini display as a console, X window port, displaying images or video...
Out of Stock
[Buy Now](https://www.adafruit.com/product/1601)
[Related Guides to the Product](https://learn.adafruit.com/products/1601/guides)
### Raspberry Pi 3 - Model B - ARMv8 with 1G RAM
[Raspberry Pi 3 - Model B - ARMv8 with 1G RAM](https://www.adafruit.com/product/3055)
Did you really think the Raspberry Pi would stop getting better? At this point, we sound like a broken record, extolling on the new Pi’s myriad improvements like we’re surprised that the folks at the Raspberry Pi Foundation are continuously making their flagship board better. ...
In Stock
[Buy Now](https://www.adafruit.com/product/3055)
[Related Guides to the Product](https://learn.adafruit.com/products/3055/guides)
### Raspberry Pi 2 - Model B v1.2 - ARM Cortex-A53 with 1G RAM
[Raspberry Pi 2 - Model B v1.2 - ARM Cortex-A53 with 1G RAM](https://www.adafruit.com/product/2358)
Didn't think the Raspberry Pi could get any better? You're in for a big surprise! The Raspberry Pi 2 Model B is out and it's amazing! With an upgraded ARM Cortex-A53 quad-core processor, Dual Core VideoCore IV Multimedia coprocessor, and a full Gigabyte of RAM, this...
No Longer Stocked
[Buy Now](https://www.adafruit.com/product/2358)
[Related Guides to the Product](https://learn.adafruit.com/products/2358/guides)
### Raspberry Pi Model A+ 512MB RAM
[Raspberry Pi Model A+ 512MB RAM](https://www.adafruit.com/product/2266)
**Note:** As of August 10th, 2016 the Raspberry Pi A+ now includes 512 MB of RAM!
The Raspberry Pi Model A+ is the perfect board for the minimalist Pi fan. This low-cost Pi uses the same processor as the model B+, but does away with the Ethernet jack and three of the USB...
No Longer Stocked
[Buy Now](https://www.adafruit.com/product/2266)
[Related Guides to the Product](https://learn.adafruit.com/products/2266/guides)
## Related Guides
- [Kali Linux on the Raspberry Pi with the PiTFT](https://learn.adafruit.com/kali-linux-on-the-raspberry-pi-with-the-pitft.md)
- [PiPhone - A Raspberry Pi based Cellphone](https://learn.adafruit.com/piphone-a-raspberry-pi-based-cellphone.md)
- [Processing on the Raspberry Pi & PiTFT](https://learn.adafruit.com/processing-on-the-raspberry-pi-and-pitft.md)
- [PiGRRL 2](https://learn.adafruit.com/pigrrl-2.md)
- [RasPipe: A Raspberry Pi Pipeline Viewer, Part 2](https://learn.adafruit.com/raspipe-a-raspberry-pi-pipeline-viewer-part-2.md)
- [Monitor PiCam and temperature on a PiTFT via adafruit.io](https://learn.adafruit.com/monitor-picam-and-temperature-on-a-pitft-via-adafruit-dot-io.md)
- [AstroPrint 3D Printing](https://learn.adafruit.com/astroprint-3d-printing.md)
- [Touchscreen Pi Timelapse Controller](https://learn.adafruit.com/touchscreen-pi-timelapse-controller.md)
- [Using the Slamtec RPLIDAR on a Raspberry Pi](https://learn.adafruit.com/slamtec-rplidar-on-pi.md)
- [Adafruit AMG8833 8x8 Thermal Camera Sensor](https://learn.adafruit.com/adafruit-amg8833-8x8-thermal-camera-sensor.md)
- [Pi Hole Ad Detection Display with PiTFT](https://learn.adafruit.com/pi-hole-ad-pitft-tft-detection-display.md)
- [SnapPiCam Raspberry Pi Camera](https://learn.adafruit.com/snappicam-raspberry-pi-camera.md)
- [JOY of Arcada — USB Game Pad for Adafruit PyGamer and PyBadge](https://learn.adafruit.com/joy-of-arcada-usb-game-pad-for-adafruit-pygamer-pybadge.md)
- [Go Fishing with Rotary Encoders](https://learn.adafruit.com/gone-fishing-game.md)
- [Set up and Blink - MATLAB and Simulink with Raspberry Pi](https://learn.adafruit.com/how-to-use-matlab-and-simulink-with-raspberry-pi.md)
---
# Source: https://learn.adafruit.com/adalight-diy-ambient-tv-lighting/download-and-install.md
# Adalight Project Pack
## Download & Install
We’ll install the software next, because it’s easier to test and troubleshoot the electronics on your desk than behind the telly!
Three packages need to be downloaded:
## Download Arduino IDE
First, download the Arduino IDE (integrated development environment) [from the Arduino web site](http://arduino.cc/en/Main/Software). Select the version of the software for your computer type: Windows, Mac or Linux. Read the [Getting Started page](http://arduino.cc/en/Guide/HomePage) for an explanation of how to install the software on your computer. It’s a little different for each of the three operating systems. ## Download Processing IDE
Next, download the Processing IDE [from the Processing web site](http://processing.org/download/). The first section of the [Getting Started page](http://processing.org/learning/gettingstarted/) explains how to install the software.
Danger:
Warning:
## Download Adalight ZIP
Finally, [visit the Adalight page on Github](https://github.com/adafruit/Adalight) and download the ZIP file. The download button is near the upper left of the page:

After uncompressing the ZIP file, you’ll need to move some files into place.
If you’ve run the Arduino and/or Processing IDEs before, there will be corresponding “Arduino” and “Processing” folders inside your personal “Documents” folder (or “My Documents” in Windows). In that case, move the contents of the Arduino and Processing folders from the Adalight ZIP file into the corresponding document folders.
If the Arduino and Processing folders don’t yet exist on your system, you can just copy these from the Adalight ZIP file to your Documents folder.
The other files and folders in the ZIP file can be ignored. These are for advanced users and aren’t essential to its use.

**DO NOT** use the “LEDstream\_LPD8806” sketch/folder unless you are specifically using LPD8806 LED strips in a custom build. Use just the plain “ **LEDstream** ” folder when building the Adalight Project Pack, or for a DIY setup using similar WS2801 LEDs.
Danger:
## Program the Arduino
The Arduino IDE must be installed before this step.
Connect the Arduino board to your computer with a USB A-to-B cable. When connected for the first time, Windows users will prompted to install a driver. This is explained in the Arduino [Getting Started guide for Windows](http://arduino.cc/en/Guide/Windows). No driver is required for Mac or Linux.
Launch the Arduino IDE. After a moment, you should see a simple blue and white window with some buttons.
From the **File** menu, select **Sketchbook** , which should “roll over” to show **LEDstream**. Select this.
From the **Tools** menu, select **Board** , then **Arduino Uno** (or whatever Arduino board type you’re using).
From the **Tools** menu again, select **Serial Port** , and then the port corresponding to your Arduino board.
Click the **Upload** button near the top-left of the window:
After the code is uploaded, if the LEDs are correctly wired up and the power supply is plugged in, the LEDs should all flash red, green, then blue for about a second each, then off. This is a startup diagnostic that tells you the LEDs and Arduino are working correctly, and are now awaiting data from the computer…
Because the Arduino stores the program in non-volatile memory, you should only need to do this upload process once, not every time you want to use Adalight.
Danger:
- [Previous Page](https://learn.adafruit.com/adalight-diy-ambient-tv-lighting/wiring-1.md)
- [Next Page](https://learn.adafruit.com/adalight-diy-ambient-tv-lighting/running-the-software.md)
## Featured Products
### Adalight - DIY Ambient Monitor Lighting Project Pack
[Adalight - DIY Ambient Monitor Lighting Project Pack](https://www.adafruit.com/product/461)
Build your own ambient-light addition for a monitor or media PC television with the Adalight project pack! This project pack is for our ["Adalight" project tutorial](http://learn.adafruit.com/adalight-diy-ambient-tv-lighting). By running the Processing code on your...
No Longer Stocked
[Buy Now](https://www.adafruit.com/product/461)
[Related Guides to the Product](https://learn.adafruit.com/products/461/guides)
### 12mm Diffused Thin Digital RGB LED Pixels (Strand of 25)
[12mm Diffused Thin Digital RGB LED Pixels (Strand of 25)](https://www.adafruit.com/product/322)
RGB Pixels are digitally-controllable lights you can set to any color, or animate. Each RGB LED and controller chip is molded into a 'dot' of silicone. The dots are weatherproof and rugged. There are four flanges molded in so that you can 'push' them into a 12mm drill hole in...
No Longer Stocked
[Buy Now](https://www.adafruit.com/product/322)
[Related Guides to the Product](https://learn.adafruit.com/products/322/guides)
### 12mm Diffused Flat Digital RGB LED Pixels (Strand of 25)
[12mm Diffused Flat Digital RGB LED Pixels (Strand of 25)](https://www.adafruit.com/product/738)
RGB Pixels are digitally-controllable lights you can set to any color, or animate. Each RGB LED and controller chip is molded into a 'dot' of silicone. The dots are weatherproof and rugged. There are four flanges molded in so that you can 'push' them into a 12mm drill hole in...
In Stock
[Buy Now](https://www.adafruit.com/product/738)
[Related Guides to the Product](https://learn.adafruit.com/products/738/guides)
### Adafruit METRO 328 Fully Assembled - Arduino IDE compatible
[Adafruit METRO 328 Fully Assembled - Arduino IDE compatible](https://www.adafruit.com/product/50)
We sure love the ATmega328 here at Adafruit, and we use them _a lot_ for our own projects. The processor has plenty of GPIO, Analog inputs, hardware UART SPI and I2C, timers and PWM galore - just enough for most simple projects. When we need to go small, we use a
Out of Stock
[Buy Now](https://www.adafruit.com/product/50)
[Related Guides to the Product](https://learn.adafruit.com/products/50/guides)
### Female DC Power adapter - 2.1mm jack to screw terminal block
[Female DC Power adapter - 2.1mm jack to screw terminal block](https://www.adafruit.com/product/368)
If you need to connect a DC power wall wart to a board that doesn't have a DC jack - this adapter will come in very handy! There is a 2.1mm DC jack on one end, and a screw terminal block on the other. The terminals are labeled with positive/negative assuming a positive-tip configuration...
In Stock
[Buy Now](https://www.adafruit.com/product/368)
[Related Guides to the Product](https://learn.adafruit.com/products/368/guides)
### 5V 2A (2000mA) switching power supply - UL Listed
[5V 2A (2000mA) switching power supply - UL Listed](https://www.adafruit.com/product/276)
This is an FCC/CE certified and UL listed power supply. Need a lot of 5V power? This switching supply gives a clean regulated 5V output at up to 2000mA. 110 or 240 input, so it works in any country. The plugs are "US 2-prong" style so you may need a plug adapter, but you can pick one...
In Stock
[Buy Now](https://www.adafruit.com/product/276)
[Related Guides to the Product](https://learn.adafruit.com/products/276/guides)
### Breadboarding wire bundle
[Breadboarding wire bundle](https://www.adafruit.com/product/153)
75 flexible stranded core wires with stiff ends molded on in red, orange, yellow, green, blue, brown, black and white. These are a major improvement over the "box of bent wires" that are sometimes sold with breadboards, and faster than stripping your own solid core wires. Makes...
In Stock
[Buy Now](https://www.adafruit.com/product/153)
[Related Guides to the Product](https://learn.adafruit.com/products/153/guides)
## Related Guides
- [2.2" TFT Display](https://learn.adafruit.com/2-2-tft-display.md)
- [Arduin-o-Phone](https://learn.adafruit.com/arduin-o-phone-arduino-powered-diy-cellphone.md)
- [Adafruit CC3000 WiFi and Xively](https://learn.adafruit.com/adafruit-cc3000-wifi-and-xively.md)
- [Analog Feedback Servos](https://learn.adafruit.com/analog-feedback-servos.md)
- [Ladyada's Learn Arduino - Lesson #0](https://learn.adafruit.com/ladyadas-learn-arduino-lesson-number-0.md)
- [Adafruit 1.27" and 1.5" Color OLED Breakout Board](https://learn.adafruit.com/adafruit-1-5-color-oled-breakout-board.md)
- [Bluetooth Temperature & Humidity Sensor](https://learn.adafruit.com/bluetooth-temperature-and-humidity-sensor.md)
- [Arduino Lesson 7. Make an RGB LED Fader](https://learn.adafruit.com/adafruit-arduino-lesson-7-make-an-rgb-led-fader.md)
- [Wave Shield](https://learn.adafruit.com/adafruit-wave-shield-audio-shield-for-arduino.md)
- [Adafruit 1.14" 240x135 Color TFT Breakout LCD Display](https://learn.adafruit.com/adafruit-1-14-240x135-color-tft-breakout.md)
- [Adafruit Arduino Selection Guide](https://learn.adafruit.com/adafruit-arduino-selection-guide.md)
- [Arduino Lesson 3. RGB LEDs](https://learn.adafruit.com/adafruit-arduino-lesson-3-rgb-leds.md)
- [Character LCDs](https://learn.adafruit.com/character-lcds.md)
- [Arduino Lesson 11. LCD Displays - Part 1](https://learn.adafruit.com/adafruit-arduino-lesson-11-lcd-displays-1.md)
- [RGB LED Matrix Basics](https://learn.adafruit.com/32x16-32x32-rgb-led-matrix.md)
---
# Source: https://learn.adafruit.com/skill-badge-sash/download-pattern.md
# Skill Badge Sash
## Download Pattern

[Download the free PDF](http://www.adafruit.com/datasheets/adafruit-sash.pdf) pattern for this sash and print it out (it's 3 pages- one size fits most kids). It's printed with a bit of overlap on each piece so that you can easily tile the pieces together into one sheet.
Cut off the margin on one overlapping piece of the pattern.

Overlap the newly cut piece and line up the pattern with its corresponding neighbor.

Tape the pattern pieces together. Repeat with the remaining piece of paper.

Cut around the border of the paper pattern.
- [Previous Page](https://learn.adafruit.com/skill-badge-sash/overview.md)
- [Next Page](https://learn.adafruit.com/skill-badge-sash/cut-fabric.md)
## Featured Products
### LEDs - Skill badge, iron-on patch
[LEDs - Skill badge, iron-on patch](https://www.adafruit.com/product/479)
You learned LEDs! (Light-emitting diodes)... Adafruit offers a fun and exciting "badges" of achievement for electronics, science and engineering. We believe everyone should be able to be rewarded for learning a useful skill, a badge is just one of the many ways to show and share.
No Longer Stocked
[Buy Now](https://www.adafruit.com/product/479)
[Related Guides to the Product](https://learn.adafruit.com/products/479/guides)
### Learn to program "Hello world" - Skill badge, iron-on patch
[Learn to program "Hello world" - Skill badge, iron-on patch](https://www.adafruit.com/product/478)
You can write code! Adafruit offers a fun and exciting "badges" of achievement for electronics, science and engineering. We believe everyone should be able to be rewarded for learning a useful skill, a badge is just one of the many ways to show and share.
This is the...
No Longer Stocked
[Buy Now](https://www.adafruit.com/product/478)
[Related Guides to the Product](https://learn.adafruit.com/products/478/guides)
### Learn to solder - Skill badge, iron-on patch
[Learn to solder - Skill badge, iron-on patch](https://www.adafruit.com/product/465)
You can solder! Adafruit offers a fun and exciting "badges" of achievement for electronics, science and engineering. We believe everyone should be able to be rewarded for learning a useful skill, a badge is just one of the many ways to show and share.
This is the "I...
No Longer Stocked
[Buy Now](https://www.adafruit.com/product/465)
[Related Guides to the Product](https://learn.adafruit.com/products/465/guides)
## Related Guides
- [Collin's Lab: Solar](https://learn.adafruit.com/collins-lab-solar.md)
- [Cartoon Network MakeCode: Garnet's Palm Gems from Steven Universe](https://learn.adafruit.com/cartoon-network-makecode-garnet-s-palm-gems-from-steven-universe.md)
- [No-Sew LED Wristband](https://learn.adafruit.com/no-sew-led-wristband.md)
- [MicroCode for micro:bit](https://learn.adafruit.com/microcode-for-microbit.md)
- [Adafruit New York and NYC DOE vendor information ](https://learn.adafruit.com/educational-orders-for-educators-based-in-new-york.md)
- [Getting Started With Steven Universe](https://learn.adafruit.com/getting-started-with-steven-universe.md)
- [Visual Studio Code for Education... and CircuitPython](https://learn.adafruit.com/visual-studio-code-for-education-and-circuitpython.md)
- [Makecode para la Circuit Playground Express](https://learn.adafruit.com/makecode-es.md)
- [Share your work with Adafruit Playground!](https://learn.adafruit.com/adafruit-playground-notes.md)
- [Buttermilk Boat with Circuit Playground Express](https://learn.adafruit.com/boat-with-circuit-playground-express.md)
- [Mouse Painter: Emulate Mice with MakeCode ](https://learn.adafruit.com/mouse-painter-emulate-mice-with-makecode.md)
- [Best Beginner Boards for Teachers](https://learn.adafruit.com/best-beginner-boards-for-teachers.md)
- [Anatomical 3D Printed Beating Heart with MakeCode](https://learn.adafruit.com/anatomical-3d-printed-beating-heart-with-makecode.md)
- [MakeCode for Circuit Playground Express](https://learn.adafruit.com/makecode.md)
- [Trash Panda](https://learn.adafruit.com/trash-panda-circuit-python-crickit.md)
---
# Source: https://learn.adafruit.com/getting-started-with-flora/download-software.md
# Getting Started with FLORA
## Download software
To install the software for programming Flora just follow the steps in the steps in the **[Adafruit Arduino IDE setup guide](../../../../adafruit-arduino-ide-setup/arduino-1-dot-6-x-ide)** to easily install support for Flora into your Arduino IDE 1.6 or higher
When you're finished installing the IDE come back to this page to continue the Flora guide.
### Adafruit Arduino IDE Setup - Arduino 1.6.x IDE
[Adafruit Arduino IDE Setup](https://learn.adafruit.com/adafruit-arduino-ide-setup)
[Arduino 1.6.x IDE](https://learn.adafruit.com/adafruit-arduino-ide-setup/arduino-1-dot-6-x-ide)
Danger:
- [Previous Page](https://learn.adafruit.com/getting-started-with-flora/windows-setup.md)
- [Next Page](https://learn.adafruit.com/getting-started-with-flora/blink-onboard-led.md)
## Featured Products
### FLORA - Wearable electronic platform: Arduino-compatible
[FLORA - Wearable electronic platform: Arduino-compatible](https://www.adafruit.com/product/659)
FLORA is Adafruit's fully-featured wearable electronics platform. It's a round, sewable, Arduino-compatible microcontroller designed to empower amazing wearables projects.FLORA comes with Adafruit's support, [tutorials and...](http://learn.adafruit.com/category/flora)
In Stock
[Buy Now](https://www.adafruit.com/product/659)
[Related Guides to the Product](https://learn.adafruit.com/products/659/guides)
### 3 x AAA Battery Holder with On/Off Switch and 2-Pin JST
[3 x AAA Battery Holder with On/Off Switch and 2-Pin JST](https://www.adafruit.com/product/727)
This battery holder connects 3 AAA batteries together in series for powering all kinds of projects. We spec'd these out because the box is slim, and 3 AAA's add up to about 3.3-4.5V, a very similar range to Lithium Ion/polymer (Li-Ion) batteries and have an on-off switch. That makes...
In Stock
[Buy Now](https://www.adafruit.com/product/727)
[Related Guides to the Product](https://learn.adafruit.com/products/727/guides)
### USB cable - USB A to Micro-B
[USB cable - USB A to Micro-B](https://www.adafruit.com/product/592)
This here is your standard A to micro-B USB cable, for USB 1.1 or 2.0. Perfect for connecting a PC to your Metro, Feather, Raspberry Pi or other dev-board or microcontroller
Approximately 3 feet / 1 meter long
In Stock
[Buy Now](https://www.adafruit.com/product/592)
[Related Guides to the Product](https://learn.adafruit.com/products/592/guides)
### Getting Started with Adafruit FLORA Book Pack
[Getting Started with Adafruit FLORA Book Pack](https://www.adafruit.com/product/2404)
Pickup a copy of [Getting Started with Adafruit FLORA](https://www.adafruit.com/products/1839) and then hit the ground running with everything that you need to become an [Adafruit FLORA](https://www.adafruit.com/products/659) supreme being!
This pack is...
No Longer Stocked
[Buy Now](https://www.adafruit.com/product/2404)
[Related Guides to the Product](https://learn.adafruit.com/products/2404/guides)
### Getting Started with Adafruit FLORA
[Getting Started with Adafruit FLORA](https://www.adafruit.com/product/1839)
**Making Wearables with an Arduino-Compatible Electronics Platform**
This book introduces readers to building wearable electronics projects using Adafruit's tiny FLORA board: at 4.4 grams, and only 1.75 inches in diameter, and featuring Arduino compatibility, it's the...
No Longer Stocked
[Buy Now](https://www.adafruit.com/product/1839)
[Related Guides to the Product](https://learn.adafruit.com/products/1839/guides)
### FLORA Budget Pack
[FLORA Budget Pack](https://www.adafruit.com/product/1405)
Get started with the fabulous Adafruit Flora platform with this lovely budget kit, just enough to get you started with this fun wearable computer. Included are enough parts to make your first wearable electronic project. There's a Flora motherboard, four ultra-bright chainable RGB pixels,...
Out of Stock
[Buy Now](https://www.adafruit.com/product/1405)
[Related Guides to the Product](https://learn.adafruit.com/products/1405/guides)
### FLORA GPS Starter Pack
[FLORA GPS Starter Pack](https://www.adafruit.com/product/1090)
Get started with the fabulous Adafruit Flora platform with this lovely starter kit. Included are plenty of parts to make a few different fun projects! There's a Flora motherboard, a GPS module that can also perform location datalogging, eight ultra-bright chainable RGB pixels, a battery...
No Longer Stocked
[Buy Now](https://www.adafruit.com/product/1090)
[Related Guides to the Product](https://learn.adafruit.com/products/1090/guides)
### FLORA Sensor Pack
[FLORA Sensor Pack](https://www.adafruit.com/product/1458)
Sense the world around you! The FLORA Sensor Pack includes many types of sensors for your wearable enjoyment. Sense motion, direction, color, light levels, touch, and connections with FLORA sensor breakouts and conductive materials, and a few NeoPixels for experimenting with displaying your...
No Longer Stocked
[Buy Now](https://www.adafruit.com/product/1458)
[Related Guides to the Product](https://learn.adafruit.com/products/1458/guides)
## Related Guides
- [Datalogging Hat with FLORA BLE](https://learn.adafruit.com/datalogging-hat-with-flora-ble.md)
- [Experimenting with NeverWet + Electronics](https://learn.adafruit.com/neverwet-electronics.md)
- [Flora GPS Jacket](https://learn.adafruit.com/flora-gps-jacket.md)
- [SMSsenger Bag](https://learn.adafruit.com/smssenger-bag.md)
- [Conductive Thread](https://learn.adafruit.com/conductive-thread.md)
- [3D Printed Wireless MIDI Controller Guitar](https://learn.adafruit.com/ez-key-wireless-midi-controller-guitar.md)
- [Mailbox Notification Service](https://learn.adafruit.com/mailbox-notification-service.md)
- [GPS Logging Dog Harness](https://learn.adafruit.com/gps-logging-dog-harness.md)
- [NeoPixel Matrix Snowflake Sweater](https://learn.adafruit.com/neopixel-matrix-snowflake-sweater.md)
- [Chameleon Scarf](https://learn.adafruit.com/chameleon-scarf.md)
- [Adafruit Arduino Selection Guide](https://learn.adafruit.com/adafruit-arduino-selection-guide.md)
- [Citi Bike Helmet](https://learn.adafruit.com/citi-bike-helmet.md)
- [FLORA TV-B-Gone](https://learn.adafruit.com/flora-tv-b-gone.md)
- [Flora Wearable GPS](https://learn.adafruit.com/flora-wearable-gps.md)
- [Flora Accelerometer](https://learn.adafruit.com/flora-accelerometer.md)
---
# Source: https://learn.adafruit.com/using-the-adafruit-library-with-fritzing/download-the-fritzing-library-from-github.md
# Using the Adafruit Library with Fritzing
## Download the Fritzing Library from GitHub
[Download Adafruit Fritzing Library!](https://github.com/adafruit/Fritzing-Library/archive/master.zip)
The first step is to download the [latest version of the Adafruit Fritzing Library from GitHub](https://github.com/adafruit/Fritzing-Library "Link: https://github.com/adafruit/Fritzing-Library")
The easiest way to do that is to click that big nice button up there, otherwise [you can also go to the GitHub repository](https://github.com/adafruit/Fritzing-Library/ "Link: https://github.com/adafruit/Fritzing-Library/")and manually download or clone.
Next, open the archive and extract the file "AdaFruit.fzbz" to a convenient spot (I use the Desktop). After you import the library to Fritzing and save it, it will copy over all the necessary files to your Fritzing user directory, and you'll be able to delete the FZBZ file from wherever you extracted it.
The next step is to import the library into Fritzing...
- [Next Page](https://learn.adafruit.com/using-the-adafruit-library-with-fritzing/import-the-library-into-fritzing.md)
## Related Guides
- [Adafruit TSSP77038 38KHz Infrared IR Demodulator Breakout](https://learn.adafruit.com/adafruit-tssp77038-38khz-infrared-ir-demodulator-breakout.md)
- [Adafruit INA228 I2C Power Monitor](https://learn.adafruit.com/adafruit-ina228-i2c-power-monitor.md)
- [Adafruit TMC2209 Stepper Motor Driver Breakout Board](https://learn.adafruit.com/adafruit-tmc2209-stepper-motor-driver-breakout-board.md)
- [Adafruit ADXL375](https://learn.adafruit.com/adafruit-adxl375.md)
- [Adafruit 15x7 CharliePlex FeatherWing](https://learn.adafruit.com/adafruit-15x7-7x15-charlieplex-led-matrix-charliewing-featherwing.md)
- [Adafruit Proto Doubler PiCowbell](https://learn.adafruit.com/adafruit-proto-doubler-picowbell.md)
- [Adafruit TSMP96000 IR Receiver Breakout](https://learn.adafruit.com/adafruit-tsmp96000-ir-receiver-breakout.md)
- [Adafruit PCA9546 4-Channel STEMMA QT Multiplexer](https://learn.adafruit.com/adafruit-pca9546-4-channel-stemma-qt-multiplexer.md)
- [AWS IoT and Adafruit WICED Feather](https://learn.adafruit.com/aws-iot-and-adafruit-wiced-feather.md)
- [Adafruit Sensirion SHTC3 - Temperature & Humidity Sensor Breakout](https://learn.adafruit.com/adafruit-sensirion-shtc3-temperature-humidity-sensor.md)
- [Expressive Pixels for Adafruit Matrix Portal](https://learn.adafruit.com/expressive-pixels-for-matrix-portal.md)
- [MCP4725 12-Bit DAC Tutorial](https://learn.adafruit.com/mcp4725-12-bit-dac-tutorial.md)
- [Ladyada's Toolkit](https://learn.adafruit.com/ladyadas-toolkit.md)
- [Adafruit 16-channel PWM/Servo Shield](https://learn.adafruit.com/adafruit-16-channel-pwm-slash-servo-shield.md)
- [Adafruit TE MS8607 PHT Sensor](https://learn.adafruit.com/adafruit-te-ms8607-pht-sensor.md)
---
# Source: https://learn.adafruit.com/internet-of-things-printer/download.md
# Internet of Things Printer
## Download
In addition to the [Arduino IDE software itself](http://arduino.cc/en/Main/Software "Link: http://arduino.cc/en/Main/Software") (if not already installed), three downloads are required:
First, retrieve the thermal printer Arduino library the Arduino library manager.
Open up the Arduino library manager:

Search for the **Adafruit Thermal Printer** library and install it

Second, [download Cryptosuite](https://github.com/adafruit/Cryptosuite "Link: https://github.com/adafruit/Cryptosuite"), another Arduino library. When extracted, rename this folder to **Sha** and confirm the files **sha1.cpp** and **sha1.h** are inside this.
Finally, download the Adafruit "Tweet Receipt" code [from its own repository](https://github.com/adafruit/Adafruit_Learning_System_Guides/tree/master/Adafruit_Tweet_Receipt), extract the archive and then rename the uncompressed folder to **Gutenbird**. Confirm that this folder contains the file **Gutenbird.ino**. This code is reliant on Arduino 1.0 features and will not work with Arduino 0023 or earlier.
Place the **Thermal** and **Sha** folders inside your **Arduino libraries** folder. You may need to create this folder if it does not yet exist. In Windows, this would be (home folder)\My Documents\Arduino\Libraries. For Mac, (home)/Documents/Arduino/Libraries. And for Linux, (home)/sketchbook/libraries. We also have a great tutorial on Arduino library installation at:
[http://learn.adafruit.com/adafruit-all-about-arduino-libraries-install-use](http://learn.adafruit.com/adafruit-all-about-arduino-libraries-install-use "Link: http://learn.adafruit.com/adafruit-all-about-arduino-libraries-install-use")
Place the **Gutenbird** folder inside your **Arduino sketch folder** (one level above the libraries folder).
After installing the libraries and sketch, restart the Arduino IDE. You should now be able to access the Twitter sketch by navigating through the menus: File→Sketchbook→Gutenbird
- [Previous Page](https://learn.adafruit.com/internet-of-things-printer/assembly.md)
- [Next Page](https://learn.adafruit.com/internet-of-things-printer/twitter-setup.md)
## Primary Products
### Adafruit IoT Printer Project Pack "Internet of Things" printer
[Adafruit IoT Printer Project Pack "Internet of Things" printer](https://www.adafruit.com/product/717)
Build an "Internet of Things" connected mini printer that will do your bidding! This is a fun weekend project that comes with a beautiful laser cut case. Once assembled, the little printer connects to Ethernet to get Internet data for printing onto 2 1/4" wide receipt paper. The example sketch...
No Longer Stocked
[Buy Now](https://www.adafruit.com/product/717)
[Related Guides to the Product](https://learn.adafruit.com/products/717/guides)
## Featured Products
### Mini Thermal Receipt Printer
[Mini Thermal Receipt Printer](https://www.adafruit.com/product/597)
Add a mini printer to any microcontroller project with this very cute thermal printer. Thermal printers are also known as receipt printers, they're what you get when you go to the ATM or grocery store. Now you can embed a little printer of your own into an enclosure. This printer is ideal...
No Longer Stocked
[Buy Now](https://www.adafruit.com/product/597)
[Related Guides to the Product](https://learn.adafruit.com/products/597/guides)
### Thermal paper roll - 50' long, 2.25" wide
[Thermal paper roll - 50' long, 2.25" wide](https://www.adafruit.com/product/599)
A mini roll of thermal paper, this fits very nicely into our mini thermal printer. 2.25" wide (about 57mm) and 50 feet long (15 meters). BPA-free.
[Perfect for use with our mini thermal printer!](http://www.adafruit.com/products/597)
No Longer Stocked
[Buy Now](https://www.adafruit.com/product/599)
[Related Guides to the Product](https://learn.adafruit.com/products/599/guides)
### Adafruit METRO 328 - Arduino Compatible - with Headers
[Adafruit METRO 328 - Arduino Compatible - with Headers](https://www.adafruit.com/product/2488)
This is the **Adafruit METRO Arduino-Compatible - with headers. ** It's a fully assembled and tested microcontroller and physical computing board with through-hole headers attached. If you don't want a Metro with the headers attached for...
In Stock
[Buy Now](https://www.adafruit.com/product/2488)
[Related Guides to the Product](https://learn.adafruit.com/products/2488/guides)
### Ethernet Shield for Arduino - W5500 Chipset
[Ethernet Shield for Arduino - W5500 Chipset](https://www.adafruit.com/product/2971)
The W5500 Ethernet Shield for Arduino from Seeed Studio is a great way to set up your projects with internet connectivity with just a single chip. Similar to the[Arduino Ethernet Shield](https://www.adafruit.com/product/201), but with a newer chipset, this ethernet shield...
No Longer Stocked
[Buy Now](https://www.adafruit.com/product/2971)
[Related Guides to the Product](https://learn.adafruit.com/products/2971/guides)
### FTDI Friend with Micro USB Port + extras
[FTDI Friend with Micro USB Port + extras](https://www.adafruit.com/product/284)
Long gone are the days of parallel ports and serial ports. Now the USB port reigns supreme! But USB is hard, and you just want to transfer your every-day serial data from a microcontroller to computer. What now? Enter the FTDI Friend!
The FTDI Friend is a tweaked out FTDI FT232RL chip...
In Stock
[Buy Now](https://www.adafruit.com/product/284)
[Related Guides to the Product](https://learn.adafruit.com/products/284/guides)
### Rugged Metal On/Off Switch with Green LED Ring
[Rugged Metal On/Off Switch with Green LED Ring](https://www.adafruit.com/product/482)
These chrome-plated metal buttons are rugged and look real good while doing it! Simply drill a 16mm hole into any material up to 1/2" thick and you can fit these in place, there's even a rubber gasket to keep water out of the enclosure. On the front of the button is a flat metal...
In Stock
[Buy Now](https://www.adafruit.com/product/482)
[Related Guides to the Product](https://learn.adafruit.com/products/482/guides)
### Arduino Ethernet shield R3 with micro SD connector - Assembled
[Arduino Ethernet shield R3 with micro SD connector - Assembled](https://www.adafruit.com/product/201)
The Arduino Ethernet Shield R3 (assembled) allows an Arduino board to connect to the internet. It is based on the Wiznet W5100 ethernet chip (datasheet). The Wiznet W5100 provides a network (IP) stack capable of both TCP and UDP. It supports up to four simultaneous socket connections. Use the...
No Longer Stocked
[Buy Now](https://www.adafruit.com/product/201)
[Related Guides to the Product](https://learn.adafruit.com/products/201/guides)
### Arduino Uno Ethernet
[Arduino Uno Ethernet](https://www.adafruit.com/product/418)
**As of 9/20/2012 Adafruit is currently shipping R3 of the Arduino Uno Ethernet**
Deep in the Swiss Alps, the top secret Arduino Super-collider has accelerated both an [Arduino UNO](https://www.adafruit.com/products/50) and
No Longer Stocked
[Buy Now](https://www.adafruit.com/product/418)
[Related Guides to the Product](https://learn.adafruit.com/products/418/guides)
## Related Guides
- [Mystery Box: NeoMatrix Mk I](https://learn.adafruit.com/mystery-box-neomatrix-mk-i.md)
- [A Z80 CP/M emulator for the SAMD51](https://learn.adafruit.com/z80-cpm-emulator-for-the-samd51-grand-central.md)
- [Echo 2-XL](https://learn.adafruit.com/echo-2-xl.md)
- [DC & USB Boarduino Kits](https://learn.adafruit.com/boarduino-kits.md)
- [Portable Solar Charging Tracker](https://learn.adafruit.com/portable-solar-charging-tracker.md)
- [Ladyada's Learn Arduino - Lesson #2](https://learn.adafruit.com/ladyadas-learn-arduino-lesson-number-2.md)
- [Motorized Camera Slider MK3 ](https://learn.adafruit.com/motorized-camera-slider-mk3.md)
- [Adafruit VCNL4040 Proximity Sensor](https://learn.adafruit.com/adafruit-vcnl4040-proximity-sensor.md)
- [Ladyada's Learn Arduino - Lesson #1](https://learn.adafruit.com/ladyadas-learn-arduino-lesson-number-1.md)
- [Trinket / Gemma IR Control](https://learn.adafruit.com/trinket-gemma-ir-remote-control.md)
- [Adafruit HUZZAH32 – ESP32 Breakout Board](https://learn.adafruit.com/huzzah32-esp32-breakout-board.md)
- [Adafruit HUZZAH ESP8266 breakout](https://learn.adafruit.com/adafruit-huzzah-esp8266-breakout.md)
- [FTDI Friend](https://learn.adafruit.com/ftdi-friend.md)
- [Ladyada's Learn Arduino - Lesson #0](https://learn.adafruit.com/ladyadas-learn-arduino-lesson-number-0.md)
- [IR Sensor](https://learn.adafruit.com/ir-sensor.md)
---
# Source: https://learn.adafruit.com/adafruit-raspberry-pi-lesson-1-preparing-and-sd-card-for-your-raspberry-pi/downloading-an-image.md
# Adafruit's Raspberry Pi Lesson 1. Preparing an SD Card for your Raspberry Pi
## Downloading an Image
The operating system that will be installed onto the SD card must be downloaded from the Internet. This will usually be a zip file that then extracts to a file of type .img an image file. Whatever image file you download, the actual installation process is the same.
# Choose your Operating System
There are a bewildering number of operating systems that you can install on your Raspberry Pi. If you are a beginner, you'll probably want to stick with one of the Linux distributions.
# Choose your Distribution
Having decided you want to install Linux, that is not the end of the story. You now have to decide which distribution or 'distro' of Linux you want to install. Being an Open Source operating system, anyone can take one of the existing distributions an add things to it or configure it in a certain way before packaging it up as another distribution option for anyone to use. This is how the most common Raspberry Pi distribution, 'Raspbian', came into existence. The existing 'Debian' distribution was configured and kitted out with useful things like IDLE (a python-programming language development editor) and Scratch (a learn-to-program gaming system) to make it suitable for the Pi.
All of the Adafruit tutorials (and nearly every other tutorial online) will work with Raspbian, and nearly every Pi out there runs it.
[Raspbian Download](http://www.raspberrypi.org/downloads/)
Additionally, Adafruit offers a growing set of tools for working with Raspbian installations, such as [the Adafruit Raspberry Pi Finder](../../../../the-adafruit-raspberry-pi-finder/overview), a GUI for configuring your Pi over the network. [The CircuitPython libraries](https://learn.adafruit.com/circuitpython-on-raspberrypi-linux/installing-circuitpython-on-raspberry-pi) can easily be installed on your Pi thanks to the adafruit-blinka package.
Whatever distribution you're installing, you'll probably have a zip file that looks something like one of these:
...open the .zip and extract the .img to your desktop.
- [Previous Page](https://learn.adafruit.com/adafruit-raspberry-pi-lesson-1-preparing-and-sd-card-for-your-raspberry-pi/balena-etcher.md)
- [Next Page](https://learn.adafruit.com/adafruit-raspberry-pi-lesson-1-preparing-and-sd-card-for-your-raspberry-pi/making-an-sd-card-using-a-windows-vista-slash-7.md)
## Featured Products
### Raspberry Pi 3 - Model B+ - 1.4GHz Cortex-A53 with 1GB RAM
[Raspberry Pi 3 - Model B+ - 1.4GHz Cortex-A53 with 1GB RAM](https://www.adafruit.com/product/3775)
The Raspberry Pi 3 Model B is the most popular Raspberry Pi computer made, and the Pi Foundation knows you can always make a good thing _better_! And what could make the Pi 3 better? How about a _faster_ processor, 5 GHz WiFi, and updated Ethernet chip with PoE capability?...
In Stock
[Buy Now](https://www.adafruit.com/product/3775)
[Related Guides to the Product](https://learn.adafruit.com/products/3775/guides)
### Raspberry Pi 2 Model B Starter Pack - Includes a Raspberry Pi 2
[Raspberry Pi 2 Model B Starter Pack - Includes a Raspberry Pi 2](https://www.adafruit.com/product/2380)
Why not trick out your fresh new board with some accessories? The Pi 2 is a big deal - a big, big deal. It has an upgraded ARMv7 multicore procssor and a full Gigabyte of RAM - meaning you're going to see ~2x the performance on processor-upgrade only and 4x on average for...
No Longer Stocked
[Buy Now](https://www.adafruit.com/product/2380)
[Related Guides to the Product](https://learn.adafruit.com/products/2380/guides)
### Budget Pack for Raspberry Pi 1 Model B (Doesn't include RasPi)
[Budget Pack for Raspberry Pi 1 Model B (Doesn't include RasPi)](https://www.adafruit.com/product/965)
An optimized collection of parts and pieces to experiment with Raspberry Pi at home, school or work. Great for students and those that want to get their feet wet, no soldering required! **THIS PACK DOES NOT INCLUDE A RASPBERRY PI 1 MODEL B and is NOT compatible with Model B+ or Raspberry Pi...**
No Longer Stocked
[Buy Now](https://www.adafruit.com/product/965)
[Related Guides to the Product](https://learn.adafruit.com/products/965/guides)
### USB MicroSD Card Reader/Writer - microSD / microSDHC / microSDXC
[USB MicroSD Card Reader/Writer - microSD / microSDHC / microSDXC](https://www.adafruit.com/product/939)
This is the cutest little microSD card reader/writer - but don't be fooled by its adorableness! It's wicked fast and supports up to 64 GB SDXC cards! Simply slide the card into the edge and plug it into your computer. No drivers are required, it shows up as a standard 'Mass...
No Longer Stocked
[Buy Now](https://www.adafruit.com/product/939)
[Related Guides to the Product](https://learn.adafruit.com/products/939/guides)
### SD/MicroSD Memory Card - 16GB Class 10 - Adapter Included
[SD/MicroSD Memory Card - 16GB Class 10 - Adapter Included](https://www.adafruit.com/product/2693)
Add speedy mega-storage in a jiffy using this 16 GB Class 10 micro-SD card. It comes with a SD adapter so you can use it with any of our shields or adapters! Preformatted to FAT so it works out of the box with our projects. Works great with any device in the Adafruit shop that uses micro-SD...
No Longer Stocked
[Buy Now](https://www.adafruit.com/product/2693)
[Related Guides to the Product](https://learn.adafruit.com/products/2693/guides)
### SD/MicroSD Memory Card (8 GB SDHC)
[SD/MicroSD Memory Card (8 GB SDHC)](https://www.adafruit.com/product/1294)
Add mega-storage in a jiffy using this 8 GB class 4 micro-SD card. It comes with a SD adapter so you can use it with any of our shields or adapters. Preformatted to FAT so it works out of the box with our projects. Tested and works great with our
In Stock
[Buy Now](https://www.adafruit.com/product/1294)
[Related Guides to the Product](https://learn.adafruit.com/products/1294/guides)
### Raspberry Pi 1 Model B Starter Pack - Includes a Raspberry Pi
[Raspberry Pi 1 Model B Starter Pack - Includes a Raspberry Pi](https://www.adafruit.com/product/1014)
You want to get hacking with your Pi fast, right? Get everything you need to start with the Adafruit Starter Pack for Raspberry Pi. It's the perfect accompaniment to your new Pi, everything you need to boot up your Pi Model B and get going. **We pre-assemble the Cobbler for you, no...**
No Longer Stocked
[Buy Now](https://www.adafruit.com/product/1014)
[Related Guides to the Product](https://learn.adafruit.com/products/1014/guides)
### Low-profile microSD card adapter for Raspberry Pi
[Low-profile microSD card adapter for Raspberry Pi](https://www.adafruit.com/product/966)
Make your Pi a little slimmer with this microSD card adapter board. It slides in where the SD card goes but is half the length. Pop in a microSD card for a sleeker machine. The microSD card holder is a push-push type so you can push on the edge that sticks out to remove the card when...
No Longer Stocked
[Buy Now](https://www.adafruit.com/product/966)
[Related Guides to the Product](https://learn.adafruit.com/products/966/guides)
## Related Guides
- [Press Your Button for Raspberry Pi](https://learn.adafruit.com/press-your-button-for-raspberry-pi.md)
- [Adafruit's Raspberry Pi Lesson 5. Using a Console Cable](https://learn.adafruit.com/adafruits-raspberry-pi-lesson-5-using-a-console-cable.md)
- [Adafruit's Raspberry Pi Lesson 2. First Time Configuration](https://learn.adafruit.com/adafruits-raspberry-pi-lesson-2-first-time-configuration.md)
- [Raspberry Pi as an Ad Blocking Access Point](https://learn.adafruit.com/raspberry-pi-as-an-ad-blocking-access-point.md)
- [Set up and Blink - MATLAB and Simulink with Raspberry Pi](https://learn.adafruit.com/how-to-use-matlab-and-simulink-with-raspberry-pi.md)
- [Pi Video Output Using pygame](https://learn.adafruit.com/pi-video-output-using-pygame.md)
- [Drive a 16x2 LCD with the Raspberry Pi](https://learn.adafruit.com/drive-a-16x2-lcd-directly-with-a-raspberry-pi.md)
- [Adafruit's Raspberry Pi Lesson 4. GPIO Setup](https://learn.adafruit.com/adafruits-raspberry-pi-lesson-4-gpio-setup.md)
- [Windows IoT Core Application Management](https://learn.adafruit.com/windows-iot-application-management.md)
- [Read-Only Raspberry Pi](https://learn.adafruit.com/read-only-raspberry-pi.md)
- [Getting Started With Windows IoT Core on Raspberry Pi](https://learn.adafruit.com/getting-started-with-windows-iot-on-raspberry-pi.md)
- [Adafruit NFC/RFID on Raspberry Pi](https://learn.adafruit.com/adafruit-nfc-rfid-on-raspberry-pi.md)
- [Windows IoT Core Application Development: Headless Blinky](https://learn.adafruit.com/windows-iot-application-development-headless-application.md)
- [USB Audio Cards with a Raspberry Pi ](https://learn.adafruit.com/usb-audio-cards-with-a-raspberry-pi.md)
- [Node.js Embedded Development on the Raspberry Pi](https://learn.adafruit.com/node-embedded-development.md)
---
# Source: https://learn.adafruit.com/adafruit-motor-shield/downloads.md
# Source: https://learn.adafruit.com/usb-dc-and-solar-lipoly-charger/downloads.md
# Source: https://learn.adafruit.com/rgb-lcd-shield/downloads.md
# Source: https://learn.adafruit.com/adafruit-ultimate-gps/downloads.md
# Source: https://learn.adafruit.com/li-ion-and-lipoly-batteries/downloads.md
# Source: https://learn.adafruit.com/digital-shipping-scales/downloads.md
# Source: https://learn.adafruit.com/barcode-scanner/downloads.md
# Source: https://learn.adafruit.com/096-mini-color-oled/downloads.md
# Source: https://learn.adafruit.com/monochrome-oled-breakouts/downloads.md
# Source: https://learn.adafruit.com/adafruit-prototyping-pi-plate/downloads.md
# Source: https://learn.adafruit.com/adafruit-pi-cobbler-kit/downloads.md
# Source: https://learn.adafruit.com/tsl2561/downloads.md
# Source: https://learn.adafruit.com/dht/downloads.md
# Source: https://learn.adafruit.com/bmp085/downloads.md
# Source: https://learn.adafruit.com/thermocouple/downloads.md
# Source: https://learn.adafruit.com/adafruit-ina219-current-sensor-breakout/downloads.md
# Source: https://learn.adafruit.com/adafruit-led-backpack/downloads.md
# Source: https://learn.adafruit.com/beaglebone/downloads.md
# Source: https://learn.adafruit.com/ttl-serial-camera/downloads.md
# TTL Serial Camera
## Downloads
[VC0706 Comm Tool - Windows control software](http://www.adafruit.com/datasheets/VC0706CommTool(EN)%20Setup%20V1-00.exe) (works in Parallels in MacOSX. We do not have source code for this tool in order to directly port it to Mac/Linux)
[Adafruit VC0706 Arduino library Github repository](https://github.com/adafruit/Adafruit-VC0706-Serial-Camera-Library "Link: https://github.com/adafruit/Adafruit-VC0706-Serial-Camera-Library")
[NewSoftSerial library download](http://arduiniana.org/NewSoftSerial/NewSoftSerial10c.zip)# Unsupported Alternate libraries
[https://github.com/oskarirauta/Adafruit-VC0706-Serial-Camera-Library](https://github.com/oskarirauta/Adafruit-VC0706-Serial-Camera-Library "Link: https://github.com/oskarirauta/Adafruit-VC0706-Serial-Camera-Library") is a version for the Maple - we didn't write this code and don't support it but it might be handy for Maple users!
- [Previous Page](https://learn.adafruit.com/ttl-serial-camera/f-a-q.md)
## Featured Products
### TTL Serial JPEG Camera with NTSC Video
[TTL Serial JPEG Camera with NTSC Video](https://www.adafruit.com/product/397)
This camera module can be a pretty neat project addition. It was designed to be used in security systems and does two main things - it outputs NTSC video and can take snapshots of that video (in color) and transmit them over the TTL serial link. You can snap pictures at 640x480, 320x240 or...
In Stock
[Buy Now](https://www.adafruit.com/product/397)
[Related Guides to the Product](https://learn.adafruit.com/products/397/guides)
### Miniature TTL Serial JPEG Camera with NTSC Video
[Miniature TTL Serial JPEG Camera with NTSC Video](https://www.adafruit.com/product/1386)
This tiny little camera module can be a pretty neat project addition, it is just like [our other JPEG cameras (same chipset/software)](http://www.adafruit.com/category/35_68), but much smaller and slimmer. It was designed to be used in security systems and does two main things - it...
In Stock
[Buy Now](https://www.adafruit.com/product/1386)
[Related Guides to the Product](https://learn.adafruit.com/products/1386/guides)
### Adafruit METRO 328 Fully Assembled - Arduino IDE compatible
[Adafruit METRO 328 Fully Assembled - Arduino IDE compatible](https://www.adafruit.com/product/50)
We sure love the ATmega328 here at Adafruit, and we use them _a lot_ for our own projects. The processor has plenty of GPIO, Analog inputs, hardware UART SPI and I2C, timers and PWM galore - just enough for most simple projects. When we need to go small, we use a
Out of Stock
[Buy Now](https://www.adafruit.com/product/50)
[Related Guides to the Product](https://learn.adafruit.com/products/50/guides)
### Weatherproof TTL Serial JPEG Camera with NTSC Video and IR LEDs
[Weatherproof TTL Serial JPEG Camera with NTSC Video and IR LEDs](https://www.adafruit.com/product/613)
This weatherproof camera module is [a classy upgrade to the basic camera module we already stock in the shop](http://www.adafruit.com/products/397). The main differences is that this one comes in a nice metal case with a mounting hinge, a 1 meter long cable with the TTL & NTSC...
In Stock
[Buy Now](https://www.adafruit.com/product/613)
[Related Guides to the Product](https://learn.adafruit.com/products/613/guides)
### MicroSD card breakout board+
[MicroSD card breakout board+](https://www.adafruit.com/product/254)
Not just a simple breakout board, this microSD adapter goes the extra mile - designed for ease of use.
- Onboard 5v-\>3v regulator provides 150mA for power-hungry cards
- 3v level shifting means you can use this with ease on either 3v or 5v systems
- Uses a proper level...
Out of Stock
[Buy Now](https://www.adafruit.com/product/254)
[Related Guides to the Product](https://learn.adafruit.com/products/254/guides)
### Half Sized Premium Breadboard - 400 Tie Points
[Half Sized Premium Breadboard - 400 Tie Points](https://www.adafruit.com/product/64)
This is a cute, half-size breadboard with 400 tie points, good for small projects. It's 3.25" x 2.2" / 8.3cm x 5.5cm with a standard double-strip in the middle and two power rails on both sides. You can pull the power rails off easily to make the breadboard as...
In Stock
[Buy Now](https://www.adafruit.com/product/64)
[Related Guides to the Product](https://learn.adafruit.com/products/64/guides)
### SD/MicroSD Memory Card (8 GB SDHC)
[SD/MicroSD Memory Card (8 GB SDHC)](https://www.adafruit.com/product/1294)
Add mega-storage in a jiffy using this 8 GB class 4 micro-SD card. It comes with a SD adapter so you can use it with any of our shields or adapters. Preformatted to FAT so it works out of the box with our projects. Tested and works great with our
In Stock
[Buy Now](https://www.adafruit.com/product/1294)
[Related Guides to the Product](https://learn.adafruit.com/products/1294/guides)
## Related Guides
- [Making Adabot: Part 2](https://learn.adafruit.com/making-adabot-part-2.md)
- [3D Printed Animatronic Robot Head](https://learn.adafruit.com/3d-printed-animatronic-robot-head.md)
- [Arduino Lesson 14. Servo Motors](https://learn.adafruit.com/adafruit-arduino-lesson-14-servo-motors.md)
- [Arduino Lesson 15. DC Motor Reversing](https://learn.adafruit.com/adafruit-arduino-lesson-15-dc-motor-reversing.md)
- [Programming Arduino with Android and Windows Tablets](https://learn.adafruit.com/programming-arduino-with-android-and-windows-tablets.md)
- [LSM303 Accelerometer + Compass Breakout](https://learn.adafruit.com/lsm303-accelerometer-slash-compass-breakout.md)
- [Adafruit VS1053 MP3/AAC/Ogg/MIDI/WAV Codec Breakout Tutorial](https://learn.adafruit.com/adafruit-vs1053-mp3-aac-ogg-midi-wav-play-and-record-codec-tutorial.md)
- [Naughty or Nice Machine](https://learn.adafruit.com/naughty-or-nice-machine.md)
- [Adafruit Ultimate GPS Logger Shield](https://learn.adafruit.com/adafruit-ultimate-gps-logger-shield.md)
- [Arduino "Hunt The Wumpus"](https://learn.adafruit.com/arduino-hunt-the-wumpus.md)
- [Track Your Treats: Halloween Candy GPS Tracker](https://learn.adafruit.com/track-your-treats-halloween-candy-gps-tracker.md)
- [WiFi Weather Station](https://learn.adafruit.com/wifi-weather-station-arduino-cc3000.md)
- [Bluetooth Controlled Motorized Camera Slider](https://learn.adafruit.com/bluetooth-motorized-camera-slider.md)
- [TMP36 Temperature Sensor](https://learn.adafruit.com/tmp36-temperature-sensor.md)
- [Babel Fish](https://learn.adafruit.com/babel-fish.md)
---
# Source: https://learn.adafruit.com/pi-video-output-using-pygame/drawing-basics.md
# Pi Video Output Using pygame
## Drawing Basics
# The Screen Object
While the pygame API and documentation is quite clear (see the [pygame.draw](http://www.pygame.org/docs/ref/draw.html "Link: http://www.pygame.org/docs/ref/draw.html") documentation, for example), most of the pygame drawing operations take place on a **screen** , which is rendered on a specific [display](http://www.pygame.org/docs/ref/display.html "Link: http://www.pygame.org/docs/ref/display.html").
The way that the code we entered in the previous page works is it initializes the display in the **\_\_init\_\_** function, and it then allows us to access a field named ' **screen**', where all of the actual drawing and graphics work is done in pygame (you pass a reference to this screen to most drawing functions).
You can see how this works by looking at the 'test' function we added and called:```
# Fill the screen with red (255, 0, 0)
red = (255, 0, 0)
self.screen.fill(red)
# Update the display
pygame.display.update()
```
This code references the 'screen' provided in the class (self.screen since we're referencing it from inside the class), and calls the fill method. Once we are done all of our drawing, we tell pygame to update the entire display to take into account these changes, which is done with:
```
pygame.display.update()
```
This is actually an important point about pygame:
Info:
This is both an intentional and an intelligent choice. By doing all of your drawing code at once,and only updating the screen when the drawing is complete, you can benefit from something called double-buffering, which makes all of your drawing appear instant, rather than seeing controls get rendered one at a time in a sequential, sluggish-feeling way.
# Accessing the Screen
Since we made a wrapper class called pyscope which takes care of the low-level framebuffer initialisation, etc., how do you access the screen object from outside the class? It's easy ... any time you want to do any drawing, you just need to access the screen as follows:```
# Create an instance of the PyScope class
scope = pyscope()
# Fill the screen with yellow
scope.screen.fill((255, 255, 0))
# Update the display
pygame.display.update()
# Wait 10 seconds
time.sleep(10)
```
You can test this out by placing it at the bottom of your file with no indents, and you should see a yellow screen for ten seconds when you run it.
- [Previous Page](https://learn.adafruit.com/pi-video-output-using-pygame/pointing-pygame-to-the-framebuffer.md)
- [Next Page](https://learn.adafruit.com/pi-video-output-using-pygame/pygame-drawing-functions.md)
## Featured Products
### Adafruit Assembled Pi Cobbler Breakout + Cable for Raspberry Pi
[Adafruit Assembled Pi Cobbler Breakout + Cable for Raspberry Pi](https://www.adafruit.com/product/914)
Now that you've finally got your hands on a [Raspberry Pi® Model B](http://www.raspberrypi.org/), you're probably itching to make some fun embedded computer projects with it. What you need is an add on prototyping Pi Cobbler from Adafruit, which can break out all those...
No Longer Stocked
[Buy Now](https://www.adafruit.com/product/914)
[Related Guides to the Product](https://learn.adafruit.com/products/914/guides)
### NTSC/PAL (Television) TFT Display - 3.5" Diagonal
[NTSC/PAL (Television) TFT Display - 3.5" Diagonal](https://www.adafruit.com/product/913)
Yes, this is an adorable small television! The visible display measures only 3.5" (8.9cm) diagonal, the TFT comes with a NTSC/PAL driver board. The display is very easy to use - simply connect 6-12VDC to the red (+) and black (-) wires, then connect a composite video source to the RCA...
In Stock
[Buy Now](https://www.adafruit.com/product/913)
[Related Guides to the Product](https://learn.adafruit.com/products/913/guides)
### NTSC/PAL (Television) TFT Display - 2.0" Diagonal
[NTSC/PAL (Television) TFT Display - 2.0" Diagonal](https://www.adafruit.com/product/911)
Yes, this is an adorable miniature television! The visible display measures only 2" diagonal, the TFT comes with a NTSC/PAL driver board. The display is very easy to use - simply connect 6-12VDC to the red and black wires, then connect a composite video source to the RCA connector. Voila,...
In Stock
[Buy Now](https://www.adafruit.com/product/911)
[Related Guides to the Product](https://learn.adafruit.com/products/911/guides)
### NTSC/PAL (Television) TFT Display - 4.3" Diagonal
[NTSC/PAL (Television) TFT Display - 4.3" Diagonal](https://www.adafruit.com/product/946)
Yes, this is an adorable small television! The visible display measures only 4.3" (11cm) diagonal, the TFT comes with a NTSC/PAL driver board, enclosure and stand. The display is very easy to use - simply connect 12VDC to the 2.1mm center-positive DC jack (or use the cable and connect to...
No Longer Stocked
[Buy Now](https://www.adafruit.com/product/946)
[Related Guides to the Product](https://learn.adafruit.com/products/946/guides)
### NTSC/PAL (Television) TFT Display - 7" Diagonal
[NTSC/PAL (Television) TFT Display - 7" Diagonal](https://www.adafruit.com/product/947)
Yes, this is an adorable small television! The visible display measures only 7" (17.8cm) diagonal, the TFT comes with a NTSC/PAL driver board, enclosure and stand. The display is very easy to use - simply connect the included 12VDC adapter to the 2.1mm center-positive DC jack, then...
No Longer Stocked
[Buy Now](https://www.adafruit.com/product/947)
[Related Guides to the Product](https://learn.adafruit.com/products/947/guides)
### Raspberry Pi 1 Model B Starter Pack - Includes a Raspberry Pi
[Raspberry Pi 1 Model B Starter Pack - Includes a Raspberry Pi](https://www.adafruit.com/product/1014)
You want to get hacking with your Pi fast, right? Get everything you need to start with the Adafruit Starter Pack for Raspberry Pi. It's the perfect accompaniment to your new Pi, everything you need to boot up your Pi Model B and get going. **We pre-assemble the Cobbler for you, no...**
No Longer Stocked
[Buy Now](https://www.adafruit.com/product/1014)
[Related Guides to the Product](https://learn.adafruit.com/products/1014/guides)
### NTSC/PAL (Television) TFT Display - 1.5" Diagonal
[NTSC/PAL (Television) TFT Display - 1.5" Diagonal](https://www.adafruit.com/product/910)
Yes, this is an adorable miniature television! The visible display measures only 1.5" diagonal, the TFT comes with a NTSC/PAL driver board. The display is very easy to use - simply connect 6-12VDC to the red and black wires, then connect a composite video source to the RCA connector....
In Stock
[Buy Now](https://www.adafruit.com/product/910)
[Related Guides to the Product](https://learn.adafruit.com/products/910/guides)
## Related Guides
- [Electronic Animated Eyes for ARM Microcontrollers](https://learn.adafruit.com/animated-electronic-eyes.md)
- [CircuitPython Day 2024 Countdown Clock](https://learn.adafruit.com/circuitpython-day-2024-countdown-clock.md)
- [Adafruit RP2350 22-pin FPC HSTX to DVI Adapter](https://learn.adafruit.com/adafruit-rp2350-22-pin-fpc-hstx-to-dvi-adapter.md)
- [Adafruit 3.5" 320x480 Color TFT Touchscreen Breakout](https://learn.adafruit.com/adafruit-3-5-color-320x480-tft-touchscreen-breakout.md)
- [AdaBox 018](https://learn.adafruit.com/adabox018.md)
- [Adafruit's Raspberry Pi Lesson 5. Using a Console Cable](https://learn.adafruit.com/adafruits-raspberry-pi-lesson-5-using-a-console-cable.md)
- [Press Your Button for Raspberry Pi](https://learn.adafruit.com/press-your-button-for-raspberry-pi.md)
- [MONSTER M4SK Toon Hat](https://learn.adafruit.com/monster-mask-augmented-eyes-toon-hat.md)
- [Windows IoT Core Application Development: Headed Blinky](https://learn.adafruit.com/windows-iot-application-development-headed-blinky.md)
- [Cappy Monster M4sk with Animated Eyes](https://learn.adafruit.com/cappy-monster-m4sk.md)
- [Running TensorFlow Lite Object Recognition on the Raspberry Pi 4 or Pi 5](https://learn.adafruit.com/running-tensorflow-lite-on-the-raspberry-pi-4.md)
- [Pip-Boy 2040 Wrist-Mounted Prop](https://learn.adafruit.com/pip-boy-2040.md)
- [CustomEyesation: DIY Monster M4SK Graphics](https://learn.adafruit.com/customeyesation-diy-monster-m4sk-graphics.md)
- [Getting Started With Windows IoT Core on Raspberry Pi](https://learn.adafruit.com/getting-started-with-windows-iot-on-raspberry-pi.md)
- [Candy Bucket GIF Player Eyes](https://learn.adafruit.com/candy-bucket-gif-eyes.md)
---
# Source: https://learn.adafruit.com/096-mini-color-oled/drawing-bitmaps.md
# 0.96" mini Color OLED
## Drawing Bitmaps
We have an example sketch in the library showing how to display full color bitmap images stored on an SD card. You'll need a microSD card such as this one . This example will only work for Arduino v1.0 and later.
You'll also need an image. We suggest starting with this bitmap of a flower If you want to later use your own image, use an image editing tool and crop your image to no larger than 64 pixels high and 96 pixels wide. Save it as a 24-bit color **BMP** file - it must be 24-bit color format to work, even if it was originally a 16-bit color image - becaue of the way BMPs are stored and displayed!
Copy the **violet.bmp** to the microSD card and insert it into the back of the breakout board.

We'll have to add an extra 2 wires so we can 'select' and 'receive data' from the SD card
# Old Style Board: (two rows of pins)
Connect the third pin **SD ChipSelect** of the OLED (gray wire) to pin #18 of the 74LVC245. Then connect pin #2 of the 74LVC245 to Arduino **Digital #4**. This is the pin to select that we want to talk to the microSD card.
Then connect second-from-the bottom pin of the OLED - **SDOUT** - with a wire directly to **Arduino Digital #12** this is the longer white wire shown - this wire does not need to be level shifted.

# New Style Board: (Single row of pins)
Add the following two connections between the breakout board and the Arduino:
- **SDCS** (SC) - Digital #4.(Gray Wire)
- **MISO** (SO) - Digital #12 (Orange Wire)

# Bitmap Example Sketch
To display bitmaps from the on-board micro SD slot, you will need a [micro SD card](http://www.adafruit.com/products/102) formatted ** FAT16 or FAT32** (they almost always are by default).

There is a built in microSD card slot on the rear of the breakout and we can use that to load bitmap images!
It's really easy to draw bitmaps. We have a library for it, Adafruit\_ImageReader, which can be installed through the Arduino Library Manager (Sketch→Include Library→Manage Libraries…). Enter “imageread” in the search field and the library is easy to spot:

Next you can either download the image here or copy it from the images folder from inside the library files.
[Download daffodil.bmp](https://raw.githubusercontent.com/adafruit/Adafruit_ImageReader/1.1.1/images/daffodil.bmp)
## Insert the card
Insert the micro SD card into the slot on the back of the SSD1331 breakout board.

## Copy the bitmap file
Copy the file **"daffodil.bmp"** from the Adafruit\_ImageReader\_Library\images folder (or wherever you saved it if you downloaded the file) over to the root directory of your micro-SD card.

## Load the bitmap example sketch
Select **"Examples-\>Adafruit\_ImageReader\_Library-\>BreakoutSSD1331"** and upload it to your Arduino.

You should see the daffodil! If you don't see it, check the Serial Monitor for hints on what might have gone wrong (maybe the microSD card had an issue).

- [Previous Page](https://learn.adafruit.com/096-mini-color-oled/wiring.md)
- [Next Page](https://learn.adafruit.com/096-mini-color-oled/circuitpython-displayio-quickstart.md)
## Featured Products
### OLED Breakout Board - 16-bit Color 0.96" w/microSD holder
[OLED Breakout Board - 16-bit Color 0.96" w/microSD holder](https://www.adafruit.com/product/684)
We love our black and white monochrome displays but we also like to dabble with some color now and then. Our new 0.96" color OLED displays are perfect when you need an ultra-small display with vivid, high-contrast 16-bit color. The visible portion of the OLED measures 0.96" diagonal...
In Stock
[Buy Now](https://www.adafruit.com/product/684)
[Related Guides to the Product](https://learn.adafruit.com/products/684/guides)
### Adafruit METRO 328 Fully Assembled - Arduino IDE compatible
[Adafruit METRO 328 Fully Assembled - Arduino IDE compatible](https://www.adafruit.com/product/50)
We sure love the ATmega328 here at Adafruit, and we use them _a lot_ for our own projects. The processor has plenty of GPIO, Analog inputs, hardware UART SPI and I2C, timers and PWM galore - just enough for most simple projects. When we need to go small, we use a
Out of Stock
[Buy Now](https://www.adafruit.com/product/50)
[Related Guides to the Product](https://learn.adafruit.com/products/50/guides)
### Breadboarding wire bundle
[Breadboarding wire bundle](https://www.adafruit.com/product/153)
75 flexible stranded core wires with stiff ends molded on in red, orange, yellow, green, blue, brown, black and white. These are a major improvement over the "box of bent wires" that are sometimes sold with breadboards, and faster than stripping your own solid core wires. Makes...
In Stock
[Buy Now](https://www.adafruit.com/product/153)
[Related Guides to the Product](https://learn.adafruit.com/products/153/guides)
## Related Guides
- [Tiny Arduino Music Visualizer](https://learn.adafruit.com/piccolo.md)
- [Create an Internet of Things Dashboard with Adafruit IO](https://learn.adafruit.com/create-an-internet-of-things-dashboard-with-adafruit-dot-io.md)
- [Adafruit Ultimate GPS](https://learn.adafruit.com/adafruit-ultimate-gps.md)
- [Ladyada's Learn Arduino - Lesson #0](https://learn.adafruit.com/ladyadas-learn-arduino-lesson-number-0.md)
- [Arduino Lesson 15. DC Motor Reversing](https://learn.adafruit.com/adafruit-arduino-lesson-15-dc-motor-reversing.md)
- [Wireless Gardening with Arduino + CC3000 WiFi Modules](https://learn.adafruit.com/wireless-gardening-arduino-cc3000-wifi-modules.md)
- [Arduino Lesson 9. Sensing Light](https://learn.adafruit.com/adafruit-arduino-lesson-9-sensing-light.md)
- [Low Power Coin Cell Voltage Logger](https://learn.adafruit.com/low-power-coin-cell-voltage-logger.md)
- [LSM303 Accelerometer + Compass Breakout](https://learn.adafruit.com/lsm303-accelerometer-slash-compass-breakout.md)
- [Skill Badge Requirements: Microcontrollers](https://learn.adafruit.com/skill-badge-requirements-microcontrollers.md)
- [WiFi Weather Station](https://learn.adafruit.com/wifi-weather-station-arduino-cc3000.md)
- [Adafruit Proto Shield for Arduino](https://learn.adafruit.com/adafruit-proto-shield-arduino.md)
- [Electronic Demon Costume](https://learn.adafruit.com/electronic-demon-costume.md)
- [DIY 8x2 LCD Shield](https://learn.adafruit.com/diy-8x2-lcd-shield.md)
- [Circuit Playground Sound-Controlled Robot](https://learn.adafruit.com/circuit-playground-sound-controlled-robot.md)
---
# Source: https://learn.adafruit.com/drive-a-16x2-lcd-directly-with-a-raspberry-pi.md
# Drive a 16x2 LCD with the Raspberry Pi
## Overview

Adding a LCD to any project immediately kicks it up a notch. This tutorial explains how to connect an inexpensive HDD44780 compatible LCD to the Raspberry Pi using 6 GPIO pins. While there are other ways to connect using I2C or the UART, this is the most direct method that gets right down to the bare metal.
This technique:
- allows for **inexpensive LCDs** to be used
- does not require any **i2c drivers**
- won't steal the only **serial port** on the Pi.
The example Python code sends date, time, and the Pi's IP address to the display. If you are running a Pi in headless mode, being able to determine the IP address at a glance is really handy.

# To Follow This Tutorial You Will Need
- [Standard LCD 16x2 + extras](http://adafruit.com/products/181 "Link: http://adafruit.com/products/181")
- [Pi T-Cobbler Plus,](https://www.adafruit.com/product/2028) [Pi Cobbler Plus for Model B+ / Pi 2](https://www.adafruit.com/products/2029) or the original [Pi Cobbler](https://www.adafruit.com/product/914)
- [(2) Half size breadboards](https://www.adafruit.com/products/64)
- [Hook-up Wire](https://www.adafruit.com/index.php?main_page=adasearch&q=hook-up+wire+spool "Link: https://www.adafruit.com/index.php?main\_page=adasearch&q=hook-up+wire+spool")
- [A Raspberry Pi](https://www.adafruit.com/?q=raspberry%20pi) (compatible with all 26pin and 40pin Pi releases to date)
Info:
- [Next Page](https://learn.adafruit.com/drive-a-16x2-lcd-directly-with-a-raspberry-pi/wiring.md)
## Featured Products
### Standard LCD 16x2 + extras
[Standard LCD 16x2 + extras](https://www.adafruit.com/product/181)
Standard HD44780 LCDs are useful for creating standalone projects.
- 16 characters wide, 2 rows
- White text on blue background
- Connection port is 0.1" pitch, single row for easy breadboarding and wiring
- Pins are documented on the back of the LCD to assist...
In Stock
[Buy Now](https://www.adafruit.com/product/181)
[Related Guides to the Product](https://learn.adafruit.com/products/181/guides)
### Raspberry Pi 3 - Model B - ARMv8 with 1G RAM
[Raspberry Pi 3 - Model B - ARMv8 with 1G RAM](https://www.adafruit.com/product/3055)
Did you really think the Raspberry Pi would stop getting better? At this point, we sound like a broken record, extolling on the new Pi’s myriad improvements like we’re surprised that the folks at the Raspberry Pi Foundation are continuously making their flagship board better. ...
In Stock
[Buy Now](https://www.adafruit.com/product/3055)
[Related Guides to the Product](https://learn.adafruit.com/products/3055/guides)
### Adafruit Assembled Pi T-Cobbler Breakout for Raspberry Pi
[Adafruit Assembled Pi T-Cobbler Breakout for Raspberry Pi](https://www.adafruit.com/product/1754)
Now that you've finally got your hands on a [Raspberry Pi®](http://www.raspberrypi.org/), you're probably itching to make some fun embedded computer projects with it. What you need is an **assembled** add on prototyping Pi T-Cobbler from Adafruit, which can...
No Longer Stocked
[Buy Now](https://www.adafruit.com/product/1754)
[Related Guides to the Product](https://learn.adafruit.com/products/1754/guides)
### Assembled Pi Cobbler Plus - Breakout Cable
[Assembled Pi Cobbler Plus - Breakout Cable](https://www.adafruit.com/product/2029)
The Raspberry Pi B+ / Pi 2 / Pi 3 / Pi 4 has landed on the Maker World like a 40-GPIO pinned, quad-USB ported, credit card sized bomb of DIY joy. And while you can use most of our great Model B accessories by hooking up our [downgrade...](https://www.adafruit.com/product/1986)
In Stock
[Buy Now](https://www.adafruit.com/product/2029)
[Related Guides to the Product](https://learn.adafruit.com/products/2029/guides)
### Half Sized Premium Breadboard - 400 Tie Points
[Half Sized Premium Breadboard - 400 Tie Points](https://www.adafruit.com/product/64)
This is a cute, half-size breadboard with 400 tie points, good for small projects. It's 3.25" x 2.2" / 8.3cm x 5.5cm with a standard double-strip in the middle and two power rails on both sides. You can pull the power rails off easily to make the breadboard as...
In Stock
[Buy Now](https://www.adafruit.com/product/64)
[Related Guides to the Product](https://learn.adafruit.com/products/64/guides)
## Related Guides
- [Program an AVR or Arduino Using Raspberry Pi GPIO](https://learn.adafruit.com/program-an-avr-or-arduino-using-raspberry-pi-gpio-pins.md)
- [Basic Resistor Sensor Reading on Raspberry Pi](https://learn.adafruit.com/basic-resistor-sensor-reading-on-raspberry-pi.md)
- [Circadian Pi Desk Light](https://learn.adafruit.com/circadian-pi-desk-light.md)
- [Speech Synthesis on the Raspberry Pi](https://learn.adafruit.com/speech-synthesis-on-the-raspberry-pi.md)
- [Matrix and 7-Segment LED Backpack with the Raspberry Pi](https://learn.adafruit.com/matrix-7-segment-led-backpack-with-the-raspberry-pi.md)
- [Capacitive Touch Sensors on the Raspberry Pi](https://learn.adafruit.com/capacitive-touch-sensors-on-the-raspberry-pi.md)
- [Adafruit's Raspberry Pi Lesson 4. GPIO Setup](https://learn.adafruit.com/adafruits-raspberry-pi-lesson-4-gpio-setup.md)
- [Adafruit's Raspberry Pi Lesson 12. Sensing Movement](https://learn.adafruit.com/adafruits-raspberry-pi-lesson-12-sensing-movement.md)
- [Playing sounds and using buttons with Raspberry Pi](https://learn.adafruit.com/playing-sounds-and-using-buttons-with-raspberry-pi.md)
- [Adafruit's Raspberry Pi Lesson 10. Stepper Motors](https://learn.adafruit.com/adafruits-raspberry-pi-lesson-10-stepper-motors.md)
- [Raspberry Pi Analog to Digital Converters](https://learn.adafruit.com/raspberry-pi-analog-to-digital-converters.md)
- [Raspberry Pi E-mail Notifier Using LEDs](https://learn.adafruit.com/raspberry-pi-e-mail-notifier-using-leds.md)
- [Adafruit's Raspberry Pi Lesson 11. DS18B20 Temperature Sensing](https://learn.adafruit.com/adafruits-raspberry-pi-lesson-11-ds18b20-temperature-sensing.md)
- [Getting Started With Windows IoT Core on Raspberry Pi](https://learn.adafruit.com/getting-started-with-windows-iot-on-raspberry-pi.md)
- [Trinket Ultrasonic Rangefinder](https://learn.adafruit.com/trinket-ultrasonic-rangefinder.md)
---
# Source: https://learn.adafruit.com/diy-wifi-raspberry-pi-touch-cam/dropbox-setup.md
# DIY WiFi Raspberry Pi Touchscreen Camera
## Dropbox Setup
Dropbox is a “cloud” file storage and syncing service. A basic account is free and offers two gigabytes of storage. We can leverage this as a means of getting photos off the Raspberry Pi onto other devices (desktop computer, etc.) without cables or swapping cards.
This pretty much requires a WiFi connection; trying to work a camera with an Ethernet cable continually attached would get tiresome. It also requires being in range of your wireless access point, with the Raspberry Pi suitably configured for access.
We’ll use **[this guide from RasPi.TV](http://raspi.tv/2013/how-to-use-dropbox-with-raspberry-pi)** (with minor changes as Dropbox has evolved) to get Dropbox and the Raspberry Pi to work together. The steps include:
- Set up Dropbox account if you don’t already have one.
- Locate the Dropbox Uploader software on the Raspberry Pi.
- Create a Dropbox app and get access credentials.
## 1. Create a Dropbox account if you don’t already have one.
A basic account (2GB limit) is free. Sign up at [Dropbox.com](http://www.dropbox.com).
## 2. Locate the Dropbox Uploader software
There should be a folder called “Dropbox-Uploader” in the pi user’s home directory. The camera installer script downloaded and placed it there.
```
cd ~/Dropbox-Uploader
```
## 3. Create a new Dropbox App through the Dropbox developer site
Visit [https://www.dropbox.com/developers/apps](https://www.dropbox.com/developers/apps) and log in with your Dropbox account credentials.
Use the “Create app” button to begin the process…

Select “Dropbox API” and “Full Dropbox,” then assign your app a unique name (e.g. “Bob’s Raspberry Pi Camera”), then click “Create App.”

In the Settings tab for your new app, there’s a section with the heading “OAuth 2.” Look for the button “Generate access token.” This will give a long string of seemingly random letters — a unique identifier for tying your camera to your Dropbox account. (This is different from the “App key” and “App secret” — don’t use those — look for the long _access token!_)

This last step is easiest if you have SSH enabled on the Pi and are logged in through a terminal program, so you can just copy-and-paste rather than having to type in that whole string exactly…
## 4. Set up Dropbox Uploader
You should be inside the Dropbox-Uploader directory at this point (i.e. typing “pwd” should return “/home/pi/Dropbox-Uploader”).
Run the dropbox\_uploader.sh script:
```
./dropbox_uploader.sh
```
You’ll be prompted to enter your access token that was generated in Step 3. This must be _exact,_ which is why ssh and copy-and-paste is so helpful.
If you mess up this process, you can run “./dropbox\_uploader.sh unlink” to clear out Dropbox Uploader’s settings and start over.
Let’s test it!
```
echo 12345 > foo.txt
./dropbox_uploader.sh upload foo.txt /
```
This will create a small text file (foo.txt) containing the string “12345” and will upload it to the root level of your Dropbox drive. If Dropbox is installed on your “main” computer the file should appear there after a moment, else use a web browser to log into your Dropbox account and you should see it there among your files.
**If this works, then next time you run the cam.py script you can go into _Settings_ and select _Dropbox_ for storage. Photos will be saved both in the “Photos” folder and uploaded immediately to Dropbox.**
- [Previous Page](https://learn.adafruit.com/diy-wifi-raspberry-pi-touch-cam/pi-setup.md)
- [Next Page](https://learn.adafruit.com/diy-wifi-raspberry-pi-touch-cam/using-the-camera.md)
## Featured Products
### Raspberry Pi DIY Camera Pack
[Raspberry Pi DIY Camera Pack](https://www.adafruit.com/product/3275)
If the holidays promise anything, it’s almost certainly a deluge of photographs. Instead of taking out your smartphones, why not build your own camera?
With one of Adafruit’s best selling screens and an official Raspberry Pi camera, you’ll be ready to set up your very...
Out of Stock
[Buy Now](https://www.adafruit.com/product/3275)
[Related Guides to the Product](https://learn.adafruit.com/products/3275/guides)
### PiTFT Plus Assembled 320x240 2.8" TFT + Resistive Touchscreen
[PiTFT Plus Assembled 320x240 2.8" TFT + Resistive Touchscreen](https://www.adafruit.com/product/2298)
Is this not the cutest little display for the Raspberry Pi? It features a 2.8" display with 320x240 16-bit color pixels and a resistive touch overlay. The plate uses the high speed SPI interface on the Pi and can use the mini display as a console, X window port, displaying images or...
Out of Stock
[Buy Now](https://www.adafruit.com/product/2298)
[Related Guides to the Product](https://learn.adafruit.com/products/2298/guides)
### PiTFT Plus 320x240 3.2" TFT + Resistive Touchscreen
[PiTFT Plus 320x240 3.2" TFT + Resistive Touchscreen](https://www.adafruit.com/product/2616)
Is this not the cutest little display for the Raspberry Pi? It features a 3.2" display with 320x240 16-bit color pixels and a resistive touch overlay. The plate uses the high speed SPI interface on the Pi and can use the mini display as a console, X window port, displaying images or...
Out of Stock
[Buy Now](https://www.adafruit.com/product/2616)
[Related Guides to the Product](https://learn.adafruit.com/products/2616/guides)
### Adafruit PiTFT 2.4" HAT Mini Kit - 320x240 TFT Touchscreen
[Adafruit PiTFT 2.4" HAT Mini Kit - 320x240 TFT Touchscreen](https://www.adafruit.com/product/2455)
Is this not the cutest little display for the Raspberry Pi? It features a 2.4" display with 320x240 16-bit color pixels and a resistive touch overlay. The HAT uses the high speed SPI interface on the Pi and can use the mini display as a console, X window port, displaying images or video...
Out of Stock
[Buy Now](https://www.adafruit.com/product/2455)
[Related Guides to the Product](https://learn.adafruit.com/products/2455/guides)
### Adafruit PiTFT - 320x240 2.8" TFT+Touchscreen for Raspberry Pi
[Adafruit PiTFT - 320x240 2.8" TFT+Touchscreen for Raspberry Pi](https://www.adafruit.com/product/1601)
Is this not the cutest little display for the Raspberry Pi? It features a 2.8" display with 320x240 16-bit color pixels and a resistive touch overlay. The plate uses the high speed SPI interface on the Pi and can use the mini display as a console, X window port, displaying images or video...
Out of Stock
[Buy Now](https://www.adafruit.com/product/1601)
[Related Guides to the Product](https://learn.adafruit.com/products/1601/guides)
### Raspberry Pi 3 - Model B - ARMv8 with 1G RAM
[Raspberry Pi 3 - Model B - ARMv8 with 1G RAM](https://www.adafruit.com/product/3055)
Did you really think the Raspberry Pi would stop getting better? At this point, we sound like a broken record, extolling on the new Pi’s myriad improvements like we’re surprised that the folks at the Raspberry Pi Foundation are continuously making their flagship board better. ...
In Stock
[Buy Now](https://www.adafruit.com/product/3055)
[Related Guides to the Product](https://learn.adafruit.com/products/3055/guides)
### Raspberry Pi 2 - Model B v1.2 - ARM Cortex-A53 with 1G RAM
[Raspberry Pi 2 - Model B v1.2 - ARM Cortex-A53 with 1G RAM](https://www.adafruit.com/product/2358)
Didn't think the Raspberry Pi could get any better? You're in for a big surprise! The Raspberry Pi 2 Model B is out and it's amazing! With an upgraded ARM Cortex-A53 quad-core processor, Dual Core VideoCore IV Multimedia coprocessor, and a full Gigabyte of RAM, this...
No Longer Stocked
[Buy Now](https://www.adafruit.com/product/2358)
[Related Guides to the Product](https://learn.adafruit.com/products/2358/guides)
### Raspberry Pi Model A+ 512MB RAM
[Raspberry Pi Model A+ 512MB RAM](https://www.adafruit.com/product/2266)
**Note:** As of August 10th, 2016 the Raspberry Pi A+ now includes 512 MB of RAM!
The Raspberry Pi Model A+ is the perfect board for the minimalist Pi fan. This low-cost Pi uses the same processor as the model B+, but does away with the Ethernet jack and three of the USB...
No Longer Stocked
[Buy Now](https://www.adafruit.com/product/2266)
[Related Guides to the Product](https://learn.adafruit.com/products/2266/guides)
## Related Guides
- [Kali Linux on the Raspberry Pi with the PiTFT](https://learn.adafruit.com/kali-linux-on-the-raspberry-pi-with-the-pitft.md)
- [PiPhone - A Raspberry Pi based Cellphone](https://learn.adafruit.com/piphone-a-raspberry-pi-based-cellphone.md)
- [Processing on the Raspberry Pi & PiTFT](https://learn.adafruit.com/processing-on-the-raspberry-pi-and-pitft.md)
- [PiGRRL 2](https://learn.adafruit.com/pigrrl-2.md)
- [RasPipe: A Raspberry Pi Pipeline Viewer, Part 2](https://learn.adafruit.com/raspipe-a-raspberry-pi-pipeline-viewer-part-2.md)
- [Monitor PiCam and temperature on a PiTFT via adafruit.io](https://learn.adafruit.com/monitor-picam-and-temperature-on-a-pitft-via-adafruit-dot-io.md)
- [AstroPrint 3D Printing](https://learn.adafruit.com/astroprint-3d-printing.md)
- [Touchscreen Pi Timelapse Controller](https://learn.adafruit.com/touchscreen-pi-timelapse-controller.md)
- [Using the Slamtec RPLIDAR on a Raspberry Pi](https://learn.adafruit.com/slamtec-rplidar-on-pi.md)
- [Adafruit AMG8833 8x8 Thermal Camera Sensor](https://learn.adafruit.com/adafruit-amg8833-8x8-thermal-camera-sensor.md)
- [Pi Hole Ad Detection Display with PiTFT](https://learn.adafruit.com/pi-hole-ad-pitft-tft-detection-display.md)
- [SnapPiCam Raspberry Pi Camera](https://learn.adafruit.com/snappicam-raspberry-pi-camera.md)
- [JOY of Arcada — USB Game Pad for Adafruit PyGamer and PyBadge](https://learn.adafruit.com/joy-of-arcada-usb-game-pad-for-adafruit-pygamer-pybadge.md)
- [Go Fishing with Rotary Encoders](https://learn.adafruit.com/gone-fishing-game.md)
- [Set up and Blink - MATLAB and Simulink with Raspberry Pi](https://learn.adafruit.com/how-to-use-matlab-and-simulink-with-raspberry-pi.md)
---
# Source: https://learn.adafruit.com/el-wire/el-projects.md
# EL Wire
## EL Projects
[TRON Bag](http://learn.adafruit.com/tron-bag/)
https://www.youtube.com/watch?v=7si_73v31I0
[EL Wire Couch](http://www.adafruit.com/blog/?p=27554)
- [Previous Page](https://learn.adafruit.com/el-wire/using-el-wire.md)
## Featured Products
### EL Wire 12V Sound Activated Pocket Inverter
[EL Wire 12V Sound Activated Pocket Inverter](https://www.adafruit.com/product/832)
A small, portable inverter for EL wire with an audio input! This inverter has a little microphone and will light the connected EL according to the surrounding audio volume. Makes for an easy reactive project.
This inverter requires **12VDC input** (it works great with our 8xAA...
No Longer Stocked
[Buy Now](https://www.adafruit.com/product/832)
[Related Guides to the Product](https://learn.adafruit.com/products/832/guides)
### EL Wire Sound Activated Pocket Inverter - 5V USB Power
[EL Wire Sound Activated Pocket Inverter - 5V USB Power](https://www.adafruit.com/product/831)
A small, portable inverter for EL wire with an audio input! This inverter has a little microphone and will light the connected EL according to the surrounding audio volume. Makes for an easy reactive project.
This inverter requires 5V input (it works great with any USB power pack) and it...
No Longer Stocked
[Buy Now](https://www.adafruit.com/product/831)
[Related Guides to the Product](https://learn.adafruit.com/products/831/guides)
### EL wire 4xAAA pocket inverter
[EL wire 4xAAA pocket inverter](https://www.adafruit.com/product/564)
A small, portable inverter for EL wire. Powers off of 4 AAA batteries (not included!), it can drive 3-4 meters (10 to 13 feet) of our high-brightness EL wire OR 1 meter (3 feet) of EL tape OR a 10cmx10cm piece of EL panel for about 7 hours.
There is a switch for selecting...
In Stock
[Buy Now](https://www.adafruit.com/product/564)
[Related Guides to the Product](https://learn.adafruit.com/products/564/guides)
### 12V EL wire/tape inverter
[12V EL wire/tape inverter](https://www.adafruit.com/product/448)
This is an inverter for EL wire and tape, similar to our pocket inverters, except it is a brick that takes 12V input instead of 2 AA batteries. This means its good for 'fixed' installations since you can just plug it into a 12V wall adapter. It's also good for portable projects...
In Stock
[Buy Now](https://www.adafruit.com/product/448)
[Related Guides to the Product](https://learn.adafruit.com/products/448/guides)
### EL wire 2xAA pocket inverter
[EL wire 2xAA pocket inverter](https://www.adafruit.com/product/317)
A small, portable inverter for EL wire. Powers off of 2 AA batteries (not included!), it can drive 1 to 8 feet (about 2.5m) of our high-brightness EL wire for 10 hours. There is a button for selecting steady/blink/off modes. There's a removable clip on the back. Comes with a 2.5mm pitch...
Out of Stock
[Buy Now](https://www.adafruit.com/product/317)
[Related Guides to the Product](https://learn.adafruit.com/products/317/guides)
### Heat Shrink Pack
[Heat Shrink Pack](https://www.adafruit.com/product/344)
Heat shrink is the duct tape of electronics, it keeps your stuff all safe and kept together. Especially when wiring and soldering, use heat shrink to add mechanical strength to cables. We use this stuff all the time and having a zip-lock bag of all the possible sizes is super...
In Stock
[Buy Now](https://www.adafruit.com/product/344)
[Related Guides to the Product](https://learn.adafruit.com/products/344/guides)
## Related Guides
- [EL Wire Stocking](https://learn.adafruit.com/el-wire-stocking.md)
- [Light Up your Costume with Noods](https://learn.adafruit.com/light-up-your-costume-with-noods.md)
- [EL Wire Sign](https://learn.adafruit.com/el-wire-sign.md)
- [Glowing Star Chuck Taylor Sneakers](https://learn.adafruit.com/glowing-star-chucks.md)
- [TRON Hoodie](https://learn.adafruit.com/tron-hoodie.md)
- [TRON Bag](https://learn.adafruit.com/tron-bag.md)
- [EL Bowtie](https://learn.adafruit.com/el-bowtie.md)
- [Electron Bow](https://learn.adafruit.com/electron-bow.md)
- [EL Workshop](https://learn.adafruit.com/el-workshop.md)
- [EL Wire Animal Masks](https://learn.adafruit.com/el-wire-animal-masks.md)
- [EL Stick Figure](https://learn.adafruit.com/el-stick-figure.md)
- [Glowing Bean Bags with EL Wire](https://learn.adafruit.com/glowing-bean-bags-with-el-wire.md)
---
# Source: https://learn.adafruit.com/el-wire-sign.md
# EL Wire Sign
## Overview
http://youtu.be/JlJG-yDP45o
Looking to liven up an already pretty sweet laser tag arena for your music video? My band was. With help from [Becky Stern](http://learn.adafruit.com/users/6), we had four 3'x4' signs completed in a day's time. After all, everything looks cooler in EL...
For EL basics, check out: [Working with Electroluminescent Wire](http://learn.adafruit.com/el-wire/overview)
http://www.youtube.com/watch?v=vc3JWo2iiGc&feature=youtu.be
- [Next Page](https://learn.adafruit.com/el-wire-sign/tools.md)
## Featured Products
### Needle set - 3/9 sizes - 20 needles
[Needle set - 3/9 sizes - 20 needles](https://www.adafruit.com/product/615)
Mighty needles, sew like the wind! This needle set is the only one you'll need for any sort of hand sewing, especially using our conductive thread and wearable electronics parts.
Each pack contains 20 gold-eye sharps, with eye sizes ranging from #3 (1.75" long) to #9...
Out of Stock
[Buy Now](https://www.adafruit.com/product/615)
[Related Guides to the Product](https://learn.adafruit.com/products/615/guides)
### 12V 5A switching power supply
[12V 5A switching power supply](https://www.adafruit.com/product/352)
This is a beefy switching supply, for when you need a lot of power! It can supply 12V DC up to 5 Amps, running from 110V or 220V power (the plug it comes with is for US/Canada/Japan but you can use any plug adapter for your country, or just replace the cable with a standard 'figure-8'...
Out of Stock
[Buy Now](https://www.adafruit.com/product/352)
[Related Guides to the Product](https://learn.adafruit.com/products/352/guides)
### In-line power cable 1 meter long extension cord (for EL wire)
[In-line power cable 1 meter long extension cord (for EL wire)](https://www.adafruit.com/product/616)
Give yourself some more room with an EL wire cable extender. This cable has a 2-pin JST SM plug on one end and receptacle on the other. Use it to extend the reach of EL wire, panel, tape, etc. The cable is a meter long, you can of course snap more together if necessary, or cut and re-solder it...
In Stock
[Buy Now](https://www.adafruit.com/product/616)
[Related Guides to the Product](https://learn.adafruit.com/products/616/guides)
### In-line wire 1-to-4 splitter
[In-line wire 1-to-4 splitter](https://www.adafruit.com/product/402)
If you want to connect multiple EL wires/strips/panels up to one inverter, these splitters are quite useful. There is one male connector (goes to the inverter) and then 4 female connectors (which will connect to each wire/strip/panel. You can even cascade them! Only thing to watch for is make...
In Stock
[Buy Now](https://www.adafruit.com/product/402)
[Related Guides to the Product](https://learn.adafruit.com/products/402/guides)
### 12V EL wire/tape inverter
[12V EL wire/tape inverter](https://www.adafruit.com/product/448)
This is an inverter for EL wire and tape, similar to our pocket inverters, except it is a brick that takes 12V input instead of 2 AA batteries. This means its good for 'fixed' installations since you can just plug it into a 12V wall adapter. It's also good for portable projects...
In Stock
[Buy Now](https://www.adafruit.com/product/448)
[Related Guides to the Product](https://learn.adafruit.com/products/448/guides)
### Green Electroluminescent (EL) Wire - 2.5 meters
[Green Electroluminescent (EL) Wire - 2.5 meters](https://www.adafruit.com/product/407)
EL Wire, also known as Electroluminescent wire, is a stiff wire core coated with phosphor and then covered with a protective PVC sheath. When an AC signal is applied to it, it glows an aqua (blue green) color. You can make it look different colors by changing the coating, for example this is a...
In Stock
[Buy Now](https://www.adafruit.com/product/407)
[Related Guides to the Product](https://learn.adafruit.com/products/407/guides)
### Pink Electroluminescent (EL) Wire - 2.5 meters
[Pink Electroluminescent (EL) Wire - 2.5 meters](https://www.adafruit.com/product/404)
EL Wire, also known as Electroluminescent wire is a stiff wire core coated with phosphor and then covered with a protective PVC sheath. When an AC signal is applied to it, it glows an aqua (blue green) color. This EL is pink-coated so that it looks white. It looks a little like thin neon. Very...
Out of Stock
[Buy Now](https://www.adafruit.com/product/404)
[Related Guides to the Product](https://learn.adafruit.com/products/404/guides)
### Yellow Electroluminescent (EL) Wire - 2.5 meters
[Yellow Electroluminescent (EL) Wire - 2.5 meters](https://www.adafruit.com/product/406)
EL Wire, also known as Electroluminescent wire is a stiff wire core coated with phosphor and then covered with a protective PVC sheath. When an AC signal is applied to it, it glows an aqua (blue green) color. You can make it look different colors by changing the coating, for example this is a...
In Stock
[Buy Now](https://www.adafruit.com/product/406)
[Related Guides to the Product](https://learn.adafruit.com/products/406/guides)
## Related Guides
- [EL Workshop](https://learn.adafruit.com/el-workshop.md)
- [TRON Bag](https://learn.adafruit.com/tron-bag.md)
- [EL Stick Figure](https://learn.adafruit.com/el-stick-figure.md)
- [EL Wire Animal Masks](https://learn.adafruit.com/el-wire-animal-masks.md)
- [Electron Bow](https://learn.adafruit.com/electron-bow.md)
- [Glowing Bean Bags with EL Wire](https://learn.adafruit.com/glowing-bean-bags-with-el-wire.md)
- [EL Wire](https://learn.adafruit.com/el-wire.md)
- [EL Bowtie](https://learn.adafruit.com/el-bowtie.md)
- [Light Up your Costume with Noods](https://learn.adafruit.com/light-up-your-costume-with-noods.md)
- [Glowing Star Chuck Taylor Sneakers](https://learn.adafruit.com/glowing-star-chucks.md)
- [EL Wire Stocking](https://learn.adafruit.com/el-wire-stocking.md)
- [TRON Hoodie](https://learn.adafruit.com/tron-hoodie.md)
---
# Source: https://learn.adafruit.com/el-wire.md
# EL Wire
## Overview
https://www.youtube.com/watch?v=RJ2xGFfrND0
EL Wire, also known as Electroluminescent wire, is a stiff wire core coated with phosphor and then covered with a protective PVC sheath. When an AC signal is applied to it, it glows an aqua (blue green) color. Sometimes its covered with a colored plastic shell to make it appear another color. It looks a little like thin neon. Very bendable, it keeps its shape and you can curl it around your finger. Its an easy way to add some glow to a project, not as bright as LEDs but uses a lot less power!

It's often used for costuming, decoration, accent lighting, safety vests, bicycle/motorcycle/car/boat/home decoration, signs, etc. It's definitely the most popular wearable electronics we've seen since its so easily to use.
We have two EL project tutorials - the [TRON-inspired bag](http://learn.adafruit.com/tron-bag) and the [EL wire party couch](http://www.adafruit.com/blog/2012/03/19/how-to-el-wire-couch-video/ "Link: http://www.adafruit.com/blog/2012/03/19/how-to-el-wire-couch-video/") !
[You can pick up some high-brightness, long-life EL wire and inverters at the Adafruit shop](http://www.adafruit.com/index.php?main_page=index&cPath=50 "Link: http://www.adafruit.com/index.php?main\_page=index&cPath=50")
## Quickstart FAQ
- EL is 'cold' - the wires generate no heat!
- EL wire requires a driver/inverter that can provide 400-2000 Hz, 60-120VAC (that's RMS not peak-to-peak!)
- Higher frequency/voltage results in a brighter wire
- Running the wire brighter will lead to a reduced lifetime (how many hours it takes until its half-brightness)
- Our high-brightness/long-life EL wire can be driven at 100V/2000Hz for 3000 hours before it is half the original brightness
- EL wire is capacitive, and cannot be PWM'ed or easily dimmed (unless you can adjust the voltage/frequency of the inverter)
- The more wire you connect to an inverter, the more 'loaded' it is and the dimmer it will be
- Our AA pocket driver can drive about 2.5 meters before it starts dimming significantly. 2 meters is a good amount, 3 is OK but wont be as bright.
- If you 'split' and connect more than one piece of EL to an inverter, count the total length of all the pieces
- The AA inverter works best with fresh batteries, but you can use rechargables - it'll just be dimmer because the input voltage is lower.
- The capacitance 'load' of the EL is required to stabilize the inverter so **never run the inverter without at least 1 foot of EL attached!**
Danger:
- [Next Page](https://learn.adafruit.com/el-wire/soldering-to-el-wire.md)
## Featured Products
### EL Wire 12V Sound Activated Pocket Inverter
[EL Wire 12V Sound Activated Pocket Inverter](https://www.adafruit.com/product/832)
A small, portable inverter for EL wire with an audio input! This inverter has a little microphone and will light the connected EL according to the surrounding audio volume. Makes for an easy reactive project.
This inverter requires **12VDC input** (it works great with our 8xAA...
No Longer Stocked
[Buy Now](https://www.adafruit.com/product/832)
[Related Guides to the Product](https://learn.adafruit.com/products/832/guides)
### EL Wire Sound Activated Pocket Inverter - 5V USB Power
[EL Wire Sound Activated Pocket Inverter - 5V USB Power](https://www.adafruit.com/product/831)
A small, portable inverter for EL wire with an audio input! This inverter has a little microphone and will light the connected EL according to the surrounding audio volume. Makes for an easy reactive project.
This inverter requires 5V input (it works great with any USB power pack) and it...
No Longer Stocked
[Buy Now](https://www.adafruit.com/product/831)
[Related Guides to the Product](https://learn.adafruit.com/products/831/guides)
### EL wire 4xAAA pocket inverter
[EL wire 4xAAA pocket inverter](https://www.adafruit.com/product/564)
A small, portable inverter for EL wire. Powers off of 4 AAA batteries (not included!), it can drive 3-4 meters (10 to 13 feet) of our high-brightness EL wire OR 1 meter (3 feet) of EL tape OR a 10cmx10cm piece of EL panel for about 7 hours.
There is a switch for selecting...
In Stock
[Buy Now](https://www.adafruit.com/product/564)
[Related Guides to the Product](https://learn.adafruit.com/products/564/guides)
### 12V EL wire/tape inverter
[12V EL wire/tape inverter](https://www.adafruit.com/product/448)
This is an inverter for EL wire and tape, similar to our pocket inverters, except it is a brick that takes 12V input instead of 2 AA batteries. This means its good for 'fixed' installations since you can just plug it into a 12V wall adapter. It's also good for portable projects...
In Stock
[Buy Now](https://www.adafruit.com/product/448)
[Related Guides to the Product](https://learn.adafruit.com/products/448/guides)
### EL wire 2xAA pocket inverter
[EL wire 2xAA pocket inverter](https://www.adafruit.com/product/317)
A small, portable inverter for EL wire. Powers off of 2 AA batteries (not included!), it can drive 1 to 8 feet (about 2.5m) of our high-brightness EL wire for 10 hours. There is a button for selecting steady/blink/off modes. There's a removable clip on the back. Comes with a 2.5mm pitch...
Out of Stock
[Buy Now](https://www.adafruit.com/product/317)
[Related Guides to the Product](https://learn.adafruit.com/products/317/guides)
### Heat Shrink Pack
[Heat Shrink Pack](https://www.adafruit.com/product/344)
Heat shrink is the duct tape of electronics, it keeps your stuff all safe and kept together. Especially when wiring and soldering, use heat shrink to add mechanical strength to cables. We use this stuff all the time and having a zip-lock bag of all the possible sizes is super...
In Stock
[Buy Now](https://www.adafruit.com/product/344)
[Related Guides to the Product](https://learn.adafruit.com/products/344/guides)
## Related Guides
- [EL Wire Stocking](https://learn.adafruit.com/el-wire-stocking.md)
- [Light Up your Costume with Noods](https://learn.adafruit.com/light-up-your-costume-with-noods.md)
- [EL Wire Sign](https://learn.adafruit.com/el-wire-sign.md)
- [Glowing Star Chuck Taylor Sneakers](https://learn.adafruit.com/glowing-star-chucks.md)
- [TRON Hoodie](https://learn.adafruit.com/tron-hoodie.md)
- [TRON Bag](https://learn.adafruit.com/tron-bag.md)
- [EL Bowtie](https://learn.adafruit.com/el-bowtie.md)
- [Electron Bow](https://learn.adafruit.com/electron-bow.md)
- [EL Workshop](https://learn.adafruit.com/el-workshop.md)
- [EL Wire Animal Masks](https://learn.adafruit.com/el-wire-animal-masks.md)
- [EL Stick Figure](https://learn.adafruit.com/el-stick-figure.md)
- [Glowing Bean Bags with EL Wire](https://learn.adafruit.com/glowing-bean-bags-with-el-wire.md)
---
# Source: https://learn.adafruit.com/el-workshop.md
# EL Workshop
## Overview
**Welcome to class!** Here are my tips, tricks, and links for running a successful EL wire class or workshop. I prefer a class size of ten students or fewer, but with one teacher's assistant (or a few intermediately experienced students in the mix) this guide can easily scale to a room of 20 students.
**Class listings:** Make sure to have a single URL you can point people to containing the title, time & date, location, very descriptive description, picture, and sign-up information for your class/workshop. [Here's an example from an EL class I taught at Madagascar Institute in Brooklyn, NY.](http://www.eventbrite.com/event/2988750433 "Link: http://www.eventbrite.com/event/2988750433") Once your listing is up (on your site, a blog, an event site, or wherever), share the info with folks who might be interested. Ask friends if they're on any big mailing lists and wouldn't mind passing the info along, submit the event to blogs on the relevant topics, post to social networks and don't forget word of mouth. Being big on the internet doesn't mean you're reaching a local audience of potential students.
**Class descriptions:** Express the experience you want your students to have, describe the value of what they're getting for their money (great quality materials, grade A instruction, etc.), reasons why they would want to attend (make a cool project, meet fun people, learn something new, impress a girl), and write down everything students should bring and expect. I ask my EL students to bring an item to adorn, like a hat, jacket, bike, etc., so be clear about any prior planning that is expected. Provide some inspiration if you're expecting creativity.

Tools you should make available to your students:
- **Soldering station** (recommended one for every three students) containing iron, solder, third hand tool, wire cutters, and wire strippers
- **Scissors** (recommended one for every two students)
- **Hot glue gun** (recommended one for every five or six students) - for tacking, touch-ups, and quieting the capacitors inside the inverters so they don't go "squeeee."
- **Pliers** both big and small - students might want to make [coat hanger fairy wings](http://www.youtube.com/watch?v=5z20jIu7XJk).
- **Beverages** - your students will work up a thirst! When I teach adult classes at Madagascar Institute they're BYOB.
- [Next Page](https://learn.adafruit.com/el-workshop/extra-supplies.md)
## Featured Products
### 2-pin JST SM In-line power wire connector (male)
[2-pin JST SM In-line power wire connector (male)](https://www.adafruit.com/product/319)
If you have a project where you'd like to be able to detach the wiring, this wire will fit the bill. Its a JST 2.5mm 'free hanging' cable assembly that latches strongly. One wire is marked with a white dashed line. You can't plug these in backwards.
This is the...
No Longer Stocked
[Buy Now](https://www.adafruit.com/product/319)
[Related Guides to the Product](https://learn.adafruit.com/products/319/guides)
### In-line wire 1-to-4 splitter
[In-line wire 1-to-4 splitter](https://www.adafruit.com/product/402)
If you want to connect multiple EL wires/strips/panels up to one inverter, these splitters are quite useful. There is one male connector (goes to the inverter) and then 4 female connectors (which will connect to each wire/strip/panel. You can even cascade them! Only thing to watch for is make...
In Stock
[Buy Now](https://www.adafruit.com/product/402)
[Related Guides to the Product](https://learn.adafruit.com/products/402/guides)
### Needle set - 3/9 sizes - 20 needles
[Needle set - 3/9 sizes - 20 needles](https://www.adafruit.com/product/615)
Mighty needles, sew like the wind! This needle set is the only one you'll need for any sort of hand sewing, especially using our conductive thread and wearable electronics parts.
Each pack contains 20 gold-eye sharps, with eye sizes ranging from #3 (1.75" long) to #9...
In Stock
[Buy Now](https://www.adafruit.com/product/615)
[Related Guides to the Product](https://learn.adafruit.com/products/615/guides)
## Related Guides
- [Electron Bow](https://learn.adafruit.com/electron-bow.md)
- [EL Wire Sign](https://learn.adafruit.com/el-wire-sign.md)
- [EL Wire Animal Masks](https://learn.adafruit.com/el-wire-animal-masks.md)
- [EL Bowtie](https://learn.adafruit.com/el-bowtie.md)
- [EL Wire](https://learn.adafruit.com/el-wire.md)
- [TRON Bag](https://learn.adafruit.com/tron-bag.md)
- [Light Up your Costume with Noods](https://learn.adafruit.com/light-up-your-costume-with-noods.md)
- [EL Stick Figure](https://learn.adafruit.com/el-stick-figure.md)
- [TRON Hoodie](https://learn.adafruit.com/tron-hoodie.md)
- [EL Wire Stocking](https://learn.adafruit.com/el-wire-stocking.md)
- [Glowing Bean Bags with EL Wire](https://learn.adafruit.com/glowing-bean-bags-with-el-wire.md)
- [Glowing Star Chuck Taylor Sneakers](https://learn.adafruit.com/glowing-star-chucks.md)
---
# Source: https://learn.adafruit.com/electroknit.md
# Electro-knit
## Overview
http://www.youtube.com/watch?v=GhnTSWMMtdU
The video above overviews the process which is detailed in this tutorial. Go from a digital image like this:

To a knitted object like this!

Working with these machines is very difficult. Before you begin, look at your life, and what choices brought you to this point. Are you proficient at using the knitting machine's normal functions? Can you read and run Python scripts? Have you ever done any serial communication between your computer and another device before? If you answered "no" to any of these questions, work on these skills first before attempting to follow this guide.
Adventures in communicating with the Brother KH-930e knitting machine! The order of operations:
- [Make the FTDI interface cable](http://learn.adafruit.com/electroknit/cable)
- [Prepare the computer by downloading the software](http://learn.adafruit.com/electroknit/software)
- [Backup your Brother Knitting Machine's memory to your computer](http://learn.adafruit.com/electroknit/backup "Link: http://learn.adafruit.com/electroknit/backup")
- [View patterns from the machine's memory](http://learn.adafruit.com/electroknit/view)
- [Adding a new pattern from an image](http://learn.adafruit.com/electroknit/insert)
- [Load your new file back to the knitting machine](http://learn.adafruit.com/electroknit/upload "Link: http://learn.adafruit.com/electroknit/upload")
Much of this tutorial is directly adapted from [Steve Conklin's totally awesome knitting machine wiki page](http://www.antitronics.com/wiki/index.php?title=Electroknit_Technical_Information "Link: http://www.antitronics.com/wiki/index.php?title=Electroknit\_Technical\_Information")!
**Troubleshooting**
- If the RAM data has been corrupted, the screen will flash "888" and the machine will seem unresponsive. Hold down INPUT and STEP at the same time, and when the display should change. Perform a memory reset by hitting CE, 888, STEP.
**Outside resources**
- download the [PDF knitting machine manual](http://knittsings.com/knitting-machine-manuals/) (many other knitting machine manuals here as well)
- [Troubleshooting Brother machines](http://www.softbyte.co.uk/brothl1.htm#Troubleshooting%20Uploading%20and%20Downloading%20with%20Brother%20KH940,%20KH950i,%20KH965i,%20KH970) - includes how to do an 888 reset of memory
- [Good forum post](http://www.howtomendit.com/answers.php?id=124420) - includes what to do when all the machine will do is flash "888"
- [Newton's Yarns](http://www.newtons.com/brother_knitking.htm) - in Anaheim, CA, claims to carry Brother machines/accessories incl. KE-100 motor drive
- [Next Page](https://learn.adafruit.com/electroknit/cable.md)
## Featured Products
### FTDI Serial TTL-232 USB Cable
[FTDI Serial TTL-232 USB Cable](https://www.adafruit.com/product/70)
Just about all electronics use TTL serial for debugging, bootloading, programming, serial output, etc. But it's rare for a computer to have a serial port anymore. This is a USB to TTL serial cable, with a FTDI FT232RL usb/serial chip embedded in the head. It has a 6-pin socket at the end...
In Stock
[Buy Now](https://www.adafruit.com/product/70)
[Related Guides to the Product](https://learn.adafruit.com/products/70/guides)
## Related Guides
- [Open Source Protective Face Shield Designs](https://learn.adafruit.com/open-source-face-shield-designs.md)
- [Pico Bluetooth Keyboard Bridge](https://learn.adafruit.com/pico-bluetooth-keyboard-bridge.md)
- [Dimmable Li-Ion Halogen Bike Light](https://learn.adafruit.com/dimmable-li-ion-halogen-bike-light.md)
- [Installing IronOS on an MHP30 Mini Hot Plate (DEPRECATED)](https://learn.adafruit.com/installing-ironos-on-a-mhp30-mini-hotplate.md)
- [Getting Started with Braille Output for CircuitPython REPL](https://learn.adafruit.com/getting-started-braille-output-circuitpython-repl.md)
- [Meowsic Cat Piano Line Out](https://learn.adafruit.com/meowsic-line-out.md)
- [Instagram Photo Frame](https://learn.adafruit.com/instagram-photo-frame.md)
- [ESP32 PlayStation Controller](https://learn.adafruit.com/esp32-playstation-controller.md)
- [NeoPIO: Drive lots of LEDs with Raspberry Pi Pico](https://learn.adafruit.com/neopio-drive-lots-of-leds-with-raspberry-pi-pico.md)
- [Ikea Vindriktning Hack with QT Py ESP32-S3 and Adafruit IO](https://learn.adafruit.com/ikea-vindriktning-hack-with-qt-py-esp32-s3-and-adafruit-io.md)
- [See N Say Brain Transplant](https://learn.adafruit.com/see-n-say-brain-transplant.md)
- [DIY Welded Bike Stand](https://learn.adafruit.com/diy-welded-bike-stand.md)
- [Setting up an Open Speech Recording Website](https://learn.adafruit.com/setting-up-an-open-speech-recording-website.md)
- [Authoring Playground Books with Bluefruit for iOS ](https://learn.adafruit.com/create-a-swift-playgroundbook-with-bluetooth-le.md)
- [Adafruit Feather RP2040 with USB Type A Host](https://learn.adafruit.com/adafruit-feather-rp2040-with-usb-type-a-host.md)
---
# Source: https://learn.adafruit.com/adafruits-raspberry-pi-lesson-5-using-a-console-cable/enabling-serial-console.md
# Adafruit's Raspberry Pi Lesson 5. Using a Console Cable
## Enabling Serial Console
Danger:
You can enable/disable the serial console with either editing **/boot/config.txt** or **raspi-config** (which will edit /boot/config.txt for you)
# Option 1. Enabling in /boot/config.txt
You can pop your SD card into a computer and edit **config.txt** with a text editor like SimpleText, WordPad or whatnot. You can also edit on a pi with `sudo nano /boot/config.txt`
At the bottom, last line, add `enable_uart=1` on it's own line.
Pi OS Bookworm and the Pi 5 have minor changes from earlier Pi OS software and hardware. You will edit the file:
`sudo nano /boot/firmware/config.txt`
add these two lines to the end of the config.txt.
```auto
dtparam=uart0
dtparam=uart0_console
```

# Option 2. Enabling via Raspi-Config
Using a monitor and keyboard, log into the shell and run
**sudo raspi-config**
go down to **Interface Options**

Hit enter and then go down to **Serial Port**

Select **Yes**

It should now be enabled

Hit return then select **Finish**
If it asks you to reboot, go to **Yes** and hit return

OK the serial console is now enabled!
- [Previous Page](https://learn.adafruit.com/adafruits-raspberry-pi-lesson-5-using-a-console-cable/you-will-need.md)
- [Next Page](https://learn.adafruit.com/adafruits-raspberry-pi-lesson-5-using-a-console-cable/software-installation-mac.md)
## Featured Products
### Budget Pack for Raspberry Pi 1 Model B (Doesn't include RasPi)
[Budget Pack for Raspberry Pi 1 Model B (Doesn't include RasPi)](https://www.adafruit.com/product/965)
An optimized collection of parts and pieces to experiment with Raspberry Pi at home, school or work. Great for students and those that want to get their feet wet, no soldering required! **THIS PACK DOES NOT INCLUDE A RASPBERRY PI 1 MODEL B and is NOT compatible with Model B+ or Raspberry Pi...**
No Longer Stocked
[Buy Now](https://www.adafruit.com/product/965)
[Related Guides to the Product](https://learn.adafruit.com/products/965/guides)
### USB to TTL Serial Cable - Debug / Console Cable for Raspberry Pi
[USB to TTL Serial Cable - Debug / Console Cable for Raspberry Pi](https://www.adafruit.com/product/954)
The cable is easiest way ever to connect to your microcontroller/Raspberry Pi/WiFi router serial console port. Inside the big USB plug is a USB\<-\>Serial conversion chip and at the end of the 36" cable are four wire - red power, black ground, white RX into USB port, and green TX out...
In Stock
[Buy Now](https://www.adafruit.com/product/954)
[Related Guides to the Product](https://learn.adafruit.com/products/954/guides)
### Programming the Raspberry Pi: Getting Started with Python
[Programming the Raspberry Pi: Getting Started with Python](https://www.adafruit.com/product/1089)
**Program your own Raspberry Pi projects!**
An updated guide to programming your own Raspberry Pi projects. Learn to create inventive programs and fun games on your powerful Raspberry Pi--with no programming experience required. **This practical book has been revised...**
In Stock
[Buy Now](https://www.adafruit.com/product/1089)
[Related Guides to the Product](https://learn.adafruit.com/products/1089/guides)
### Raspberry Pi Model B starter pack Doesn't include Raspberry Pi 1
[Raspberry Pi Model B starter pack Doesn't include Raspberry Pi 1](https://www.adafruit.com/product/955)
You want to get hacking with your Pi fast, right? Get everything you need to start with the Adafruit Starter Pack for Raspberry Pi. It's the perfect accompaniment to your new Pi, everything you need to get a distro image loaded and running. **We even pre-assemble the Cobbler for you,...**
No Longer Stocked
[Buy Now](https://www.adafruit.com/product/955)
[Related Guides to the Product](https://learn.adafruit.com/products/955/guides)
### Raspberry Pi 1 Model B Starter Pack - Includes a Raspberry Pi
[Raspberry Pi 1 Model B Starter Pack - Includes a Raspberry Pi](https://www.adafruit.com/product/1014)
You want to get hacking with your Pi fast, right? Get everything you need to start with the Adafruit Starter Pack for Raspberry Pi. It's the perfect accompaniment to your new Pi, everything you need to boot up your Pi Model B and get going. **We pre-assemble the Cobbler for you, no...**
No Longer Stocked
[Buy Now](https://www.adafruit.com/product/1014)
[Related Guides to the Product](https://learn.adafruit.com/products/1014/guides)
### Raspberry Pi 3 - Model B - ARMv8 with 1G RAM
[Raspberry Pi 3 - Model B - ARMv8 with 1G RAM](https://www.adafruit.com/product/3055)
Did you really think the Raspberry Pi would stop getting better? At this point, we sound like a broken record, extolling on the new Pi’s myriad improvements like we’re surprised that the folks at the Raspberry Pi Foundation are continuously making their flagship board better. ...
In Stock
[Buy Now](https://www.adafruit.com/product/3055)
[Related Guides to the Product](https://learn.adafruit.com/products/3055/guides)
### Raspberry Pi Zero - Version 1.3
[Raspberry Pi Zero - Version 1.3](https://www.adafruit.com/product/2885)
At first glance, the Pi Zero isn't much. It just looks like a slimmed down version of the Raspberry Pi we know and love. But when we started to think of the possibilities - [and what a well-chosen set of accessories could add](https://www.adafruit.com/product/2816) -...
Out of Stock
[Buy Now](https://www.adafruit.com/product/2885)
[Related Guides to the Product](https://learn.adafruit.com/products/2885/guides)
### Raspberry Pi Model A+ 512MB RAM
[Raspberry Pi Model A+ 512MB RAM](https://www.adafruit.com/product/2266)
**Note:** As of August 10th, 2016 the Raspberry Pi A+ now includes 512 MB of RAM!
The Raspberry Pi Model A+ is the perfect board for the minimalist Pi fan. This low-cost Pi uses the same processor as the model B+, but does away with the Ethernet jack and three of the USB...
No Longer Stocked
[Buy Now](https://www.adafruit.com/product/2266)
[Related Guides to the Product](https://learn.adafruit.com/products/2266/guides)
## Related Guides
- [Windows IoT Core Application Development: Headless Blinky](https://learn.adafruit.com/windows-iot-application-development-headless-application.md)
- [Adafruit's Raspberry Pi Lesson 4. GPIO Setup](https://learn.adafruit.com/adafruits-raspberry-pi-lesson-4-gpio-setup.md)
- [Introducing the Raspberry Pi Model B+](https://learn.adafruit.com/introducing-the-raspberry-pi-model-b-plus-plus-differences-vs-model-b.md)
- [Adafruit Raspberry Pi Educational Linux Distro](https://learn.adafruit.com/adafruit-raspberry-pi-educational-linux-distro.md)
- [NeoPixels on Raspberry Pi](https://learn.adafruit.com/neopixels-on-raspberry-pi.md)
- [Controlling Motors using the Raspberry Pi and RasPiRobot Board V2](https://learn.adafruit.com/controlling-motors-using-the-raspberry-pi-and-raspirobot-board-v2.md)
- [Pi Video Output Using pygame](https://learn.adafruit.com/pi-video-output-using-pygame.md)
- [Windows IoT Core Application Development: Headed Blinky](https://learn.adafruit.com/windows-iot-application-development-headed-blinky.md)
- [Capacitive Touch Sensors on the Raspberry Pi](https://learn.adafruit.com/capacitive-touch-sensors-on-the-raspberry-pi.md)
- [Introducing the Raspberry Pi Zero](https://learn.adafruit.com/introducing-the-raspberry-pi-zero.md)
- [Send Raspberry Pi Data to COSM](https://learn.adafruit.com/send-raspberry-pi-data-to-cosm.md)
- [Getting Started With Windows IoT Core on Raspberry Pi](https://learn.adafruit.com/getting-started-with-windows-iot-on-raspberry-pi.md)
- [Node.js Embedded Development on the Raspberry Pi](https://learn.adafruit.com/node-embedded-development.md)
- [Using an External Drive as a Raspberry Pi Root Filesystem](https://learn.adafruit.com/external-drive-as-raspberry-pi-root.md)
- [Debugging with the Raspberry Pi WebIDE](https://learn.adafruit.com/debugging-with-the-raspberry-pi-webide.md)
---
# Source: https://learn.adafruit.com/adafruits-raspberry-pi-lesson-6-using-ssh/enabling-ssh.md
# Adafruit's Raspberry Pi Lesson 6. Using SSH
## Enabling SSH
Secure Shell (SSH) is a feature of Linux that allows you to effectively open a terminal session on your Raspberry Pi from the command line of your host computer.
**Recent versions of Rasbpian do not enable SSH access by default. ** You can use an empty boot file or **raspi-config** , which you first saw [back in Lesson 2](http://learn.adafruit.com/adafruits-raspberry-pi-lesson-2-first-time-configuration)
# Using a blank boot file
For truly headless setups, if you can't **ssh** into your Pi you can't turn on **ssh**!
It's a bit of conundrum! But you can easily get around it by using a trick in Raspbian. To do so, we simply create a file called **ssh**. _This file does not exist by default and needs to be created_. It can be empty. The system looks for it at boot time and will enable ssh if it is there. It is then deleted. So just create a new file and save it as **ssh** to the **boot** folder. If you plug the SD card into your computer, just put that **ssh** file directly in the SD card director's root directory

# Using Raspi-Config
In order to do this, open LX Terminal on your Pi and enter the following command to start Raspi Config:
```
sudo raspi-config
```

Scroll down to the “ssh” option, it might be under **Interfaces** or **Advanced** (they move it around)

Hit the Enter key and then select “Enable”

A script will run and then you will see the following as confirmation:

You will need to reboot your Pi to make the change permanent
- [Previous Page](https://learn.adafruit.com/adafruits-raspberry-pi-lesson-6-using-ssh/overview.md)
- [Next Page](https://learn.adafruit.com/adafruits-raspberry-pi-lesson-6-using-ssh/using-ssh-on-a-mac-or-linux.md)
## Featured Products
### Budget Pack for Raspberry Pi 1 Model B (Doesn't include RasPi)
[Budget Pack for Raspberry Pi 1 Model B (Doesn't include RasPi)](https://www.adafruit.com/product/965)
An optimized collection of parts and pieces to experiment with Raspberry Pi at home, school or work. Great for students and those that want to get their feet wet, no soldering required! **THIS PACK DOES NOT INCLUDE A RASPBERRY PI 1 MODEL B and is NOT compatible with Model B+ or Raspberry Pi...**
No Longer Stocked
[Buy Now](https://www.adafruit.com/product/965)
[Related Guides to the Product](https://learn.adafruit.com/products/965/guides)
### Programming the Raspberry Pi: Getting Started with Python
[Programming the Raspberry Pi: Getting Started with Python](https://www.adafruit.com/product/1089)
**Program your own Raspberry Pi projects!**
An updated guide to programming your own Raspberry Pi projects. Learn to create inventive programs and fun games on your powerful Raspberry Pi--with no programming experience required. **This practical book has been revised...**
In Stock
[Buy Now](https://www.adafruit.com/product/1089)
[Related Guides to the Product](https://learn.adafruit.com/products/1089/guides)
## Related Guides
- [Raspberry Gear](https://learn.adafruit.com/raspberry-gear.md)
- [Raspberry Pi Thermal Printer One Time Pads](https://learn.adafruit.com/raspberry-pi-thermal-printer-one-time-pads.md)
- [A DigitalOcean droplet in 10 minutes](https://learn.adafruit.com/a-digitalocean-droplet-in-10-minutes.md)
- [Raspberry Pi Kernel-o-Matic](https://learn.adafruit.com/raspberry-pi-kernel-o-matic.md)
- [7" Portable HDMI Monitor](https://learn.adafruit.com/7-hdmi-portable-monitor.md)
- [Using OSC to Communicate with a Raspberry Pi](https://learn.adafruit.com/raspberry-pi-open-sound-control.md)
- [DotStar Pi Painter](https://learn.adafruit.com/dotstar-pi-painter.md)
- [Raspberry Pi Computer Quick-Start](https://learn.adafruit.com/raspberry-pi-computer-quick-start.md)
- [Wood Case for Raspberry Pi 3](https://learn.adafruit.com/wood-case-for-raspberry-pi-3.md)
- [Using an External Drive as a Raspberry Pi Root Filesystem](https://learn.adafruit.com/external-drive-as-raspberry-pi-root.md)
- [Getting Started With Windows IoT Core on Raspberry Pi](https://learn.adafruit.com/getting-started-with-windows-iot-on-raspberry-pi.md)
- [Pi Box](https://learn.adafruit.com/pi-box.md)
- [Kali Linux on the Raspberry Pi with the PiTFT](https://learn.adafruit.com/kali-linux-on-the-raspberry-pi-with-the-pitft.md)
- [Raspberry Pi RGB LED Matrix Webapp](https://learn.adafruit.com/raspberry-pi-rgb-led-matrix-webapp.md)
- [Raspberry Pi Pygame UI basics](https://learn.adafruit.com/raspberry-pi-pygame-ui-basics.md)
---
# Source: https://learn.adafruit.com/reverse-geocache-engagement-box/enclosure.md
# Reverse Geocache Box
## Enclosure
You can use pretty much any box you want for your reverse geocache. Make sure you don’t cover up the GPS antenna with any metal that would block the reception. I made my box out of cherry and cut holes for the LCD and Power Button. I cut matching 45° angles on the back side to allow the box to open 90°.

Next, insert all of your electronics. I cut a square hole in the side of the box with a jigsaw so I can connect to the Uno without taking it out of the box. I connected the circuit up to the power switch and mounted the servo on some standoffs.
I added some foam covered in velvet cloth on the bottom to hold the ring:
I added a latch mechanism to the servo arm that locks the box (not shown).- [Previous Page](https://learn.adafruit.com/reverse-geocache-engagement-box/assembly.md)
- [Next Page](https://learn.adafruit.com/reverse-geocache-engagement-box/software.md)
## Featured Products
### Adafruit Ultimate GPS Breakout - 66 channel w/10 Hz updates
[Adafruit Ultimate GPS Breakout - 66 channel w/10 Hz updates](https://www.adafruit.com/product/746)
We carry a few different GPS modules here in the Adafruit shop, but none that satisfied our every desire - that's why we designed this little GPS breakout board. We believe this is the **Ultimate** GPS module, so we named it that. It's got everything you want and...
In Stock
[Buy Now](https://www.adafruit.com/product/746)
[Related Guides to the Product](https://learn.adafruit.com/products/746/guides)
### Standard LCD 16x2 + extras
[Standard LCD 16x2 + extras](https://www.adafruit.com/product/181)
Standard HD44780 LCDs are useful for creating standalone projects.
- 16 characters wide, 2 rows
- White text on blue background
- Connection port is 0.1" pitch, single row for easy breadboarding and wiring
- Pins are documented on the back of the LCD to assist...
In Stock
[Buy Now](https://www.adafruit.com/product/181)
[Related Guides to the Product](https://learn.adafruit.com/products/181/guides)
### Adafruit METRO 328 Fully Assembled - Arduino IDE compatible
[Adafruit METRO 328 Fully Assembled - Arduino IDE compatible](https://www.adafruit.com/product/50)
We sure love the ATmega328 here at Adafruit, and we use them _a lot_ for our own projects. The processor has plenty of GPIO, Analog inputs, hardware UART SPI and I2C, timers and PWM galore - just enough for most simple projects. When we need to go small, we use a
Out of Stock
[Buy Now](https://www.adafruit.com/product/50)
[Related Guides to the Product](https://learn.adafruit.com/products/50/guides)
### Micro servo
[Micro servo](https://www.adafruit.com/product/169)
Tiny little servo can rotate approximately 180 degrees (90 in each direction) and works just like the standard kinds you're used to but _smaller_. You can use any servo code, hardware, or library to control these servos. Good for beginners who want to make stuff move without...
In Stock
[Buy Now](https://www.adafruit.com/product/169)
[Related Guides to the Product](https://learn.adafruit.com/products/169/guides)
### Adafruit Perma-Proto Half-sized Breadboard PCB - 3 Pack!
[Adafruit Perma-Proto Half-sized Breadboard PCB - 3 Pack!](https://www.adafruit.com/product/571)
Customers have asked us to carry basic perf-board, but we never liked the look of most basic perf: its always crummy quality, with pads that flake off and no labeling. Then we thought about how people **actually** prototype - usually starting with a solderless breadboard and then...
In Stock
[Buy Now](https://www.adafruit.com/product/571)
[Related Guides to the Product](https://learn.adafruit.com/products/571/guides)
### Rugged Metal On/Off Switch with Green LED Ring
[Rugged Metal On/Off Switch with Green LED Ring](https://www.adafruit.com/product/482)
These chrome-plated metal buttons are rugged and look real good while doing it! Simply drill a 16mm hole into any material up to 1/2" thick and you can fit these in place, there's even a rubber gasket to keep water out of the enclosure. On the front of the button is a flat metal...
In Stock
[Buy Now](https://www.adafruit.com/product/482)
[Related Guides to the Product](https://learn.adafruit.com/products/482/guides)
### 9V battery holder with switch & 5.5mm/2.1mm plug
[9V battery holder with switch & 5.5mm/2.1mm plug](https://www.adafruit.com/product/67)
This is a 9V battery pack with on/off switch and a pre-attached 5.5mm/2.1mm center-positive barrel plug. Use this to battery-power your Arduino (or other electronic projects) - it's ready to go out of the box!
Battery & screw not included.
![]()
In Stock
[Buy Now](https://www.adafruit.com/product/67)
[Related Guides to the Product](https://learn.adafruit.com/products/67/guides)
## Related Guides
- [Adafruit Ultimate GPS](https://learn.adafruit.com/adafruit-ultimate-gps.md)
- [Wave Shield](https://learn.adafruit.com/adafruit-wave-shield-audio-shield-for-arduino.md)
- [Skill Badge Requirements: Microcontrollers](https://learn.adafruit.com/skill-badge-requirements-microcontrollers.md)
- [Bluetooth Controlled Motorized Camera Slider](https://learn.adafruit.com/bluetooth-motorized-camera-slider.md)
- [Adafruit Proto Shield for Arduino](https://learn.adafruit.com/adafruit-proto-shield-arduino.md)
- [Arduino Lesson 3. RGB LEDs](https://learn.adafruit.com/adafruit-arduino-lesson-3-rgb-leds.md)
- [Arduino Lesson 5. The Serial Monitor](https://learn.adafruit.com/adafruit-arduino-lesson-5-the-serial-monitor.md)
- [Wireless Game Show Poppers for the Classroom!](https://learn.adafruit.com/wireless-game-show-poppers.md)
- [Affordable HAL 9000 Replica](https://learn.adafruit.com/hal-9000-replica.md)
- [36mm LED Pixels](https://learn.adafruit.com/36mm-led-pixels.md)
- [Sending an SMS with Temboo](https://learn.adafruit.com/sending-an-sms-with-temboo.md)
- [Adafruit Arduino Selection Guide](https://learn.adafruit.com/adafruit-arduino-selection-guide.md)
- [FTDI Friend](https://learn.adafruit.com/ftdi-friend.md)
- [Halloween Pumpkin](https://learn.adafruit.com/halloween-pumpkin.md)
- [CircuitPython Essentials](https://learn.adafruit.com/circuitpython-essentials.md)
---
# Source: https://learn.adafruit.com/adafruit-optical-fingerprint-sensor/enrolling-new-users-with-windows.md
# Adafruit Optical Fingerprint Sensor
## Enrolling New Users with Windows
The easiest way to enroll a new fingerprint is to use the Windows software. The interface/test software is unfortunately windows-only and the fingerprint image preview section only seems to work with these sensors:
### Basic Fingerprint Sensor With Socket Header Cable
[Basic Fingerprint Sensor With Socket Header Cable](https://www.adafruit.com/product/4690)
Secure your project with biometrics - this all-in-one optical fingerprint sensor will make adding fingerprint detection and verification super simple. It's easy to use and more affordable than ever!
These modules are typically used in safes - there's a high powered DSP chip that...
In Stock
[Buy Now](https://www.adafruit.com/product/4690)
[Related Guides to the Product](https://learn.adafruit.com/products/4690/guides)

_but_ you only need to use it once to enroll, to get the fingerprint you want stored in the module.
First up, you'll want to connect the sensor to the computer via a USB-serial converter. The easiest way to do this is to connect it directly to the USB/Serial converter in the Arduino. To do this, you'll need to upload a 'blank sketch' this one works well for "traditional" Arduinos, like the Uno and the Mega:
https://github.com/adafruit/Adafruit-Fingerprint-Sensor-Library/blob/master/examples/blank/blank.ino
Danger:
If you're using a Leonardo, Micro, Yun, Zero, or other native-USB device like ATSAMD21 or ATmega32U4-based controller, use the Leo\_passthru sketch instead of the "blank" sketch.
https://github.com/adafruit/Adafruit-Fingerprint-Sensor-Library/blob/master/examples/Leo_passthru/Leo_passthru.ino
Wire up the sensor as described in the sketch comments **after** uploading the sketch. Since the sensor wires are so thin and short, we stripped the wire a bit and melted some solder on so it made better contact but you may want to solder the wires to header or similar if you're not getting good contact. When you plug in the power, you may see the LED blink to indicate the sensor is working.
[Check the Arduino wiring page for the different wire colors for each kind of sensor](https://learn.adafruit.com/admin/guides/143/editor/767)
You'll connect to the hardware RX / TX pins on the microcontroller:

Start up the SFGDemo software and click **Open Device** from the bottom left corner. Select the **COM port** used by the Arduino.

And press OK when done. You should see the following, with a blue success message and some device statistics in the bottom corner. You can change the baud rate in the bottom left hand corner, as well as the "security level" (how sensitive it is) but we suggest leaving those alone until you have everything running and you want to experiment. They should default to 57600 baud and security level 3 so set them if they're wrong
Info:

Lets enroll a new finger! Click the **Preview** checkbox and press the **Enroll** button next to it ( **Con Enroll** means 'Continuous' enroll, which you may want to do if you have many fingers to enroll). When the box comes up, enter in the ID # you want to use. You can use up to 162 ID numbers.

The software will ask you to press the finger to the sensor
You can then see a preview (if you cliecked the preview checkbox) of the fingerprint.
You will then have to repeat the process, to get a second clean print. Use the same finger!
On success you will get a notice.

If there's a problem such as a bad print or image, you'll have to do it again.- [Previous Page](https://learn.adafruit.com/adafruit-optical-fingerprint-sensor/enrolling-vs-searching.md)
- [Next Page](https://learn.adafruit.com/adafruit-optical-fingerprint-sensor/searching-with-the-software.md)
## Featured Products
### Fingerprint sensor
[Fingerprint sensor](https://www.adafruit.com/product/751)
Secure your project with biometrics - this all-in-one optical fingerprint sensor will make adding fingerprint detection and verification super simple. These modules are typically used in safes - there's a high powered DSP chip that does the image rendering, calculation, feature-finding and...
No Longer Stocked
[Buy Now](https://www.adafruit.com/product/751)
[Related Guides to the Product](https://learn.adafruit.com/products/751/guides)
### Rugged Panel Mount Fingerprint Sensor with Bi-Color LED Ring
[Rugged Panel Mount Fingerprint Sensor with Bi-Color LED Ring](https://www.adafruit.com/product/4651)
Secure your project with biometrics - this all-in-one optical fingerprint sensor will make adding fingerprint detection and verification super simple. It even has an LED ring built around the detection pad, which can be set to red, blue or purple (as well as some fading/blinking effects) for a...
In Stock
[Buy Now](https://www.adafruit.com/product/4651)
[Related Guides to the Product](https://learn.adafruit.com/products/4651/guides)
### Adafruit METRO 328 Fully Assembled - Arduino IDE compatible
[Adafruit METRO 328 Fully Assembled - Arduino IDE compatible](https://www.adafruit.com/product/50)
We sure love the ATmega328 here at Adafruit, and we use them _a lot_ for our own projects. The processor has plenty of GPIO, Analog inputs, hardware UART SPI and I2C, timers and PWM galore - just enough for most simple projects. When we need to go small, we use a
Out of Stock
[Buy Now](https://www.adafruit.com/product/50)
[Related Guides to the Product](https://learn.adafruit.com/products/50/guides)
### Breadboarding wire bundle
[Breadboarding wire bundle](https://www.adafruit.com/product/153)
75 flexible stranded core wires with stiff ends molded on in red, orange, yellow, green, blue, brown, black and white. These are a major improvement over the "box of bent wires" that are sometimes sold with breadboards, and faster than stripping your own solid core wires. Makes...
In Stock
[Buy Now](https://www.adafruit.com/product/153)
[Related Guides to the Product](https://learn.adafruit.com/products/153/guides)
## Related Guides
- [A REST API for Arduino & the CC3000 WiFi Chip](https://learn.adafruit.com/a-rest-api-for-arduino-and-the-cc3000-wifi-chip.md)
- [Analog Feedback Servos](https://learn.adafruit.com/analog-feedback-servos.md)
- [Adafruit 4-Channel ADC Breakouts](https://learn.adafruit.com/adafruit-4-channel-adc-breakouts.md)
- [Collin's Lab: MIDI](https://learn.adafruit.com/collins-lab-midi.md)
- [Adafruit PN532 RFID/NFC Breakout and Shield](https://learn.adafruit.com/adafruit-pn532-rfid-nfc.md)
- [Adafruit AirLift Shield - ESP32 WiFi Co-Processor](https://learn.adafruit.com/adafruit-airlift-shield-esp32-wifi-co-processor.md)
- [8BitBox](https://learn.adafruit.com/8bitbox.md)
- [Geofencing with the FONA 808 & Adafruit IO](https://learn.adafruit.com/geofencing-with-the-fona-808-and-adafruit-io.md)
- [1,500 NeoPixel LED Curtain with Raspberry Pi and Fadecandy](https://learn.adafruit.com/1500-neopixel-led-curtain-with-raspberry-pi-fadecandy.md)
- [Photocells](https://learn.adafruit.com/photocells.md)
- [Automatic Monitor Color Temperature Adjustment](https://learn.adafruit.com/automatic-monitor-color-temperature-adjustment.md)
- [Arduino Lesson 15. DC Motor Reversing](https://learn.adafruit.com/adafruit-arduino-lesson-15-dc-motor-reversing.md)
- [Adafruit 1.14" 240x135 Color TFT Breakout LCD Display](https://learn.adafruit.com/adafruit-1-14-240x135-color-tft-breakout.md)
- [How to Find Hidden COM Ports](https://learn.adafruit.com/how-to-find-hidden-com-ports.md)
- [Low Power Coin Cell Voltage Logger](https://learn.adafruit.com/low-power-coin-cell-voltage-logger.md)
---
# Source: https://learn.adafruit.com/adafruit-optical-fingerprint-sensor/enrolling-vs-searching.md
# Adafruit Optical Fingerprint Sensor
## Enrolling vs. Searching
There are basically two requirements for using the optical fingerprint sensor. First is you'll need to **enroll** fingerprints - that means assigning ID #'s to each print so you can query them later. Once you've enrolled all your prints, you can easily 'search' the sensor, asking it to identify which ID (if any) is currently being photographed.
You can enroll using the Windows software (easiest and neat because it shows you the photograph of the print) or with the Arduino sketch (good for when you don't have a Windows machine handy or for on-the-road enrolling).
- [Previous Page](https://learn.adafruit.com/adafruit-optical-fingerprint-sensor/overview.md)
- [Next Page](https://learn.adafruit.com/adafruit-optical-fingerprint-sensor/enrolling-new-users-with-windows.md)
## Featured Products
### Fingerprint sensor
[Fingerprint sensor](https://www.adafruit.com/product/751)
Secure your project with biometrics - this all-in-one optical fingerprint sensor will make adding fingerprint detection and verification super simple. These modules are typically used in safes - there's a high powered DSP chip that does the image rendering, calculation, feature-finding and...
No Longer Stocked
[Buy Now](https://www.adafruit.com/product/751)
[Related Guides to the Product](https://learn.adafruit.com/products/751/guides)
### Rugged Panel Mount Fingerprint Sensor with Bi-Color LED Ring
[Rugged Panel Mount Fingerprint Sensor with Bi-Color LED Ring](https://www.adafruit.com/product/4651)
Secure your project with biometrics - this all-in-one optical fingerprint sensor will make adding fingerprint detection and verification super simple. It even has an LED ring built around the detection pad, which can be set to red, blue or purple (as well as some fading/blinking effects) for a...
In Stock
[Buy Now](https://www.adafruit.com/product/4651)
[Related Guides to the Product](https://learn.adafruit.com/products/4651/guides)
### Adafruit METRO 328 Fully Assembled - Arduino IDE compatible
[Adafruit METRO 328 Fully Assembled - Arduino IDE compatible](https://www.adafruit.com/product/50)
We sure love the ATmega328 here at Adafruit, and we use them _a lot_ for our own projects. The processor has plenty of GPIO, Analog inputs, hardware UART SPI and I2C, timers and PWM galore - just enough for most simple projects. When we need to go small, we use a
Out of Stock
[Buy Now](https://www.adafruit.com/product/50)
[Related Guides to the Product](https://learn.adafruit.com/products/50/guides)
### Breadboarding wire bundle
[Breadboarding wire bundle](https://www.adafruit.com/product/153)
75 flexible stranded core wires with stiff ends molded on in red, orange, yellow, green, blue, brown, black and white. These are a major improvement over the "box of bent wires" that are sometimes sold with breadboards, and faster than stripping your own solid core wires. Makes...
In Stock
[Buy Now](https://www.adafruit.com/product/153)
[Related Guides to the Product](https://learn.adafruit.com/products/153/guides)
## Related Guides
- [A REST API for Arduino & the CC3000 WiFi Chip](https://learn.adafruit.com/a-rest-api-for-arduino-and-the-cc3000-wifi-chip.md)
- [Analog Feedback Servos](https://learn.adafruit.com/analog-feedback-servos.md)
- [Adafruit 4-Channel ADC Breakouts](https://learn.adafruit.com/adafruit-4-channel-adc-breakouts.md)
- [Collin's Lab: MIDI](https://learn.adafruit.com/collins-lab-midi.md)
- [Adafruit PN532 RFID/NFC Breakout and Shield](https://learn.adafruit.com/adafruit-pn532-rfid-nfc.md)
- [Adafruit AirLift Shield - ESP32 WiFi Co-Processor](https://learn.adafruit.com/adafruit-airlift-shield-esp32-wifi-co-processor.md)
- [8BitBox](https://learn.adafruit.com/8bitbox.md)
- [Geofencing with the FONA 808 & Adafruit IO](https://learn.adafruit.com/geofencing-with-the-fona-808-and-adafruit-io.md)
- [1,500 NeoPixel LED Curtain with Raspberry Pi and Fadecandy](https://learn.adafruit.com/1500-neopixel-led-curtain-with-raspberry-pi-fadecandy.md)
- [Photocells](https://learn.adafruit.com/photocells.md)
- [Automatic Monitor Color Temperature Adjustment](https://learn.adafruit.com/automatic-monitor-color-temperature-adjustment.md)
- [Arduino Lesson 15. DC Motor Reversing](https://learn.adafruit.com/adafruit-arduino-lesson-15-dc-motor-reversing.md)
- [Adafruit 1.14" 240x135 Color TFT Breakout LCD Display](https://learn.adafruit.com/adafruit-1-14-240x135-color-tft-breakout.md)
- [How to Find Hidden COM Ports](https://learn.adafruit.com/how-to-find-hidden-com-ports.md)
- [Low Power Coin Cell Voltage Logger](https://learn.adafruit.com/low-power-coin-cell-voltage-logger.md)
---
# Source: https://learn.adafruit.com/adafruit-optical-fingerprint-sensor/enrolling-with-arduino.md
# Adafruit Optical Fingerprint Sensor
## Enrolling with Arduino
We did put together a simple sketch for enrolling a new finger via Arduino - its not as easy to use as the Windows program but it does work!
Run the **File→Examples→Adafruit\_Fingerprint→enroll** sketch and upload it to the Arduino, use the same wiring as above.
When you open up the serial monitor, it will ask for you to type in the ID to enroll - use the box up top to type in a number and click Send.

Then go through the enrollment process as indicated. When it has successfully enrolled a finger, it will print **Stored!**

Don't forget to do a search test when you're done enrolling to make sure its all good!- [Previous Page](https://learn.adafruit.com/adafruit-optical-fingerprint-sensor/wiring-for-use-with-arduino.md)
- [Next Page](https://learn.adafruit.com/adafruit-optical-fingerprint-sensor/circuitpython.md)
## Featured Products
### Fingerprint sensor
[Fingerprint sensor](https://www.adafruit.com/product/751)
Secure your project with biometrics - this all-in-one optical fingerprint sensor will make adding fingerprint detection and verification super simple. These modules are typically used in safes - there's a high powered DSP chip that does the image rendering, calculation, feature-finding and...
No Longer Stocked
[Buy Now](https://www.adafruit.com/product/751)
[Related Guides to the Product](https://learn.adafruit.com/products/751/guides)
### Rugged Panel Mount Fingerprint Sensor with Bi-Color LED Ring
[Rugged Panel Mount Fingerprint Sensor with Bi-Color LED Ring](https://www.adafruit.com/product/4651)
Secure your project with biometrics - this all-in-one optical fingerprint sensor will make adding fingerprint detection and verification super simple. It even has an LED ring built around the detection pad, which can be set to red, blue or purple (as well as some fading/blinking effects) for a...
In Stock
[Buy Now](https://www.adafruit.com/product/4651)
[Related Guides to the Product](https://learn.adafruit.com/products/4651/guides)
### Adafruit METRO 328 Fully Assembled - Arduino IDE compatible
[Adafruit METRO 328 Fully Assembled - Arduino IDE compatible](https://www.adafruit.com/product/50)
We sure love the ATmega328 here at Adafruit, and we use them _a lot_ for our own projects. The processor has plenty of GPIO, Analog inputs, hardware UART SPI and I2C, timers and PWM galore - just enough for most simple projects. When we need to go small, we use a
Out of Stock
[Buy Now](https://www.adafruit.com/product/50)
[Related Guides to the Product](https://learn.adafruit.com/products/50/guides)
### Breadboarding wire bundle
[Breadboarding wire bundle](https://www.adafruit.com/product/153)
75 flexible stranded core wires with stiff ends molded on in red, orange, yellow, green, blue, brown, black and white. These are a major improvement over the "box of bent wires" that are sometimes sold with breadboards, and faster than stripping your own solid core wires. Makes...
In Stock
[Buy Now](https://www.adafruit.com/product/153)
[Related Guides to the Product](https://learn.adafruit.com/products/153/guides)
## Related Guides
- [A REST API for Arduino & the CC3000 WiFi Chip](https://learn.adafruit.com/a-rest-api-for-arduino-and-the-cc3000-wifi-chip.md)
- [Analog Feedback Servos](https://learn.adafruit.com/analog-feedback-servos.md)
- [Adafruit 4-Channel ADC Breakouts](https://learn.adafruit.com/adafruit-4-channel-adc-breakouts.md)
- [Collin's Lab: MIDI](https://learn.adafruit.com/collins-lab-midi.md)
- [Adafruit PN532 RFID/NFC Breakout and Shield](https://learn.adafruit.com/adafruit-pn532-rfid-nfc.md)
- [Adafruit AirLift Shield - ESP32 WiFi Co-Processor](https://learn.adafruit.com/adafruit-airlift-shield-esp32-wifi-co-processor.md)
- [8BitBox](https://learn.adafruit.com/8bitbox.md)
- [Geofencing with the FONA 808 & Adafruit IO](https://learn.adafruit.com/geofencing-with-the-fona-808-and-adafruit-io.md)
- [1,500 NeoPixel LED Curtain with Raspberry Pi and Fadecandy](https://learn.adafruit.com/1500-neopixel-led-curtain-with-raspberry-pi-fadecandy.md)
- [Photocells](https://learn.adafruit.com/photocells.md)
- [Automatic Monitor Color Temperature Adjustment](https://learn.adafruit.com/automatic-monitor-color-temperature-adjustment.md)
- [Arduino Lesson 15. DC Motor Reversing](https://learn.adafruit.com/adafruit-arduino-lesson-15-dc-motor-reversing.md)
- [Adafruit 1.14" 240x135 Color TFT Breakout LCD Display](https://learn.adafruit.com/adafruit-1-14-240x135-color-tft-breakout.md)
- [How to Find Hidden COM Ports](https://learn.adafruit.com/how-to-find-hidden-com-ports.md)
- [Low Power Coin Cell Voltage Logger](https://learn.adafruit.com/low-power-coin-cell-voltage-logger.md)
---
# Source: https://learn.adafruit.com/battery-power-for-led-pixels-and-strips/estimating-running-time.md
# Battery Power for LED Pixels and Strips
## Estimating Running Time
###
This can be fiendishly difficult to predict! Sometimes the only way to be sure is to plug it in with a fresh set of batteries and check the circuit and a clock periodically, until the LEDs fade or start to act erratically.
###
Digital LEDs seldom run in one fixed state — they’re usually animated. We can estimate the power use for a steady configuration, but animation is constantly in flux.
Also, battery manufacturers often overstate their cells’ capacity, or express it under extremely idealized circumstances.
###
Track down a datasheet for your batteries! You might find it on the manufacturer’s web site, or a vendor site such as Digi-Key. Easiest is just to use a web search engine. In most battery datasheets you’ll see one or more charts like this one:

This chart shows the cell’s output voltage over time, at different discharge rates. You can see that the expected service life is _not_ directly proportional to power drain — halving the latter more than doubles the former. Again, with a fixed configuration, we could plan for this, but our LEDs are in motion, which doesn’t make things any easier. You’ll probably just have to come up with an informed _average._
Elsewhere in the datasheet (or often printed on the cell itself, in the case of rechargeables), you may find a capacity in mAh (milliamp-hours).

LED current use is measured in milliamps (mA). As a rule of thumb, we usually use **20 mA** as a guideline for a single LED at full brightness, and each color “pixel” contains three LEDs (one each for red, green and blue), for a total of **60 mA per pixel** when displaying white at full brightness. If we leave that pixel on in that state for one hour, we’ve used 60 milliamp-hours (60 mA × 1 hour = 60 mAh). If the stated battery capacity is 2100 mAh, we could expect to run that one pixel for about 35 hours continuously before the battery peters out (2100 mAh ÷ 60 mA = 35 hours).

But single pixels are seldom left on at full brightness for hours. Usually there’s some combination of brightness levels being mixed, some number of pixels are off entirely, and these states may change many times per second. **That’s why we just use reasonable estimates** , as in “On average, running this code, I think there’s about ten pixels on at any given time, and the average color mix represents a brightness level of 75%.” Starting with the “60 mA per pixel” rule of thumb: 60 mA × 0.75 = 45 mA average per pixel. 45 mA × 10 pixels = 450 mA. Left to run continuously, with a 2100 mAh battery pack, 2100 mAh ÷ 450 mA = 4.66 hours.
Complicating matters further, the LED driver chips themselves use a tiny bit of current, even when the LEDs themselves are “off.” Each chip needs about 2 mA extra…for a strand of 25, it’s using about 50 mA just in this idle state. You may want to factor this into your estimation. Oh, and we forgot to mention power use for the microcontroller that’s driving all this…about 25 mA or so for an Arduino. So we’ll add about 75 mA to the above estimate: 2100 mAh ÷ 525 mA = 4 hours.
If you have a really nice multimeter with an average current recording mode, it will be your new best friend, because it’s doing this based on actual readings. But this capability is usually present only in high-end meters.
You may also want to add some “engineering overhead” to your estimate. Remember what was said about battery capacity often being idealized. So we’ll de-rate the battery by a bit, let’s assume reality is about 80% of the stated capacity: 2100 mAh × 0.8 = 1680 mAh. 1680 mAh ÷ 525 mA = 3.2 hours.
As you can see, there’s an awful lot of fudging and speculation in this process. This is why we say it’s easiest sometimes just to plug in some batteries and keep an eye on it!
- [Previous Page](https://learn.adafruit.com/battery-power-for-led-pixels-and-strips/powering-the-microcontroller-too.md)
- [Next Page](https://learn.adafruit.com/battery-power-for-led-pixels-and-strips/tips-for-larger-projects.md)
## Featured Products
### Digital programmable LED belt kit
[Digital programmable LED belt kit](https://www.adafruit.com/product/332)
By popular demand, we now have a project tutorial for how to make your own programmable, ultra-blinky LED belt. Perfect for parties, raves, parades, weddings, funerals, and bar mitzvahs. Wear it with pride, wear it with blinky! Follow our soldering tutorial to build your own heirloom LED belt,...
No Longer Stocked
[Buy Now](https://www.adafruit.com/product/332)
[Related Guides to the Product](https://learn.adafruit.com/products/332/guides)
### Alkaline AAA batteries - 2 pack
[Alkaline AAA batteries - 2 pack](https://www.adafruit.com/product/617)
Battery power for your portable project! These batteries are good quality at a good price, and work fantastic with any of the kits or projects in the shop that use AAA's. This is a pack of **2 AAA batteries**.
These batteries are Alkaline (MnO2) chemistry,...
No Longer Stocked
[Buy Now](https://www.adafruit.com/product/617)
[Related Guides to the Product](https://learn.adafruit.com/products/617/guides)
### 1N4001 Diode - 10 pack
[1N4001 Diode - 10 pack](https://www.adafruit.com/product/755)
This here is a 10 pack of the classic 1N4001 power blocking diode. These are good for reverse polarity protection (put it between your DC power jack and circuitry to avoid a negative-voltage that would zap your delicate electronics), kickback protection (place across your solenoids, relays...
In Stock
[Buy Now](https://www.adafruit.com/product/755)
[Related Guides to the Product](https://learn.adafruit.com/products/755/guides)
### 4 x AA Battery Holder with On/Off Switch
[4 x AA Battery Holder with On/Off Switch](https://www.adafruit.com/product/830)
Make a nice portable power pack with this 4 x AA battery holder. It fits any alkaline or rechargeable AA batteries in series. There's a snap on cover and an on/off switch which can be handy when wiring to something without a switch.
**New**! We now have 0.1" headers...
In Stock
[Buy Now](https://www.adafruit.com/product/830)
[Related Guides to the Product](https://learn.adafruit.com/products/830/guides)
### 12mm Diffused Flat Digital RGB LED Pixels (Strand of 25)
[12mm Diffused Flat Digital RGB LED Pixels (Strand of 25)](https://www.adafruit.com/product/738)
RGB Pixels are digitally-controllable lights you can set to any color, or animate. Each RGB LED and controller chip is molded into a 'dot' of silicone. The dots are weatherproof and rugged. There are four flanges molded in so that you can 'push' them into a 12mm drill hole in...
In Stock
[Buy Now](https://www.adafruit.com/product/738)
[Related Guides to the Product](https://learn.adafruit.com/products/738/guides)
### 12mm Diffused Thin Digital RGB LED Pixels (Strand of 25)
[12mm Diffused Thin Digital RGB LED Pixels (Strand of 25)](https://www.adafruit.com/product/322)
RGB Pixels are digitally-controllable lights you can set to any color, or animate. Each RGB LED and controller chip is molded into a 'dot' of silicone. The dots are weatherproof and rugged. There are four flanges molded in so that you can 'push' them into a 12mm drill hole in...
No Longer Stocked
[Buy Now](https://www.adafruit.com/product/322)
[Related Guides to the Product](https://learn.adafruit.com/products/322/guides)
### Digital RGB LED Weatherproof Strip - LPD8806 32 LED 5m
[Digital RGB LED Weatherproof Strip - LPD8806 32 LED 5m](https://www.adafruit.com/product/306)
These LED strips are fun and glowy. There are 32 RGB LEDs per meter, and you can control each LED individually! Yes, that's right, this is the digitally-addressable type of LED strip. You can set the color of each LED's red, green and blue component with 7-bit PWM precision (so 21-bit...
In Stock
[Buy Now](https://www.adafruit.com/product/306)
[Related Guides to the Product](https://learn.adafruit.com/products/306/guides)
## Related Guides
- [LPD8806 Digital RGB LED Strip](https://learn.adafruit.com/digital-led-strip.md)
- [NeoPixel GoPro Lens Light](https://learn.adafruit.com/neopixel-gopro-lens-light.md)
- [FancyLED Library for CircuitPython](https://learn.adafruit.com/fancyled-library-for-circuitpython.md)
- [Infinity Mirror Valentine's Candy Box](https://learn.adafruit.com/infinity-mirror-candy-box.md)
- [Circuit Playground Seashell Pendant](https://learn.adafruit.com/circuit-playground-seashell-pendant.md)
- [NYE Circuit Playground Drop](https://learn.adafruit.com/nye-circuit-playground-drop.md)
- [Feather Scorpio Snap Fit Case](https://learn.adafruit.com/feather-scorpio-snap-fit-case.md)
- [LED Noodle Lantern](https://learn.adafruit.com/led-noodle-lantern.md)
- [GitHub Actions Status Tower Light](https://learn.adafruit.com/github-actions-status-tower-light.md)
- [Raspberry Pi E-mail Notifier Using LEDs](https://learn.adafruit.com/raspberry-pi-e-mail-notifier-using-leds.md)
- [Light Up Prop with Prop-Maker](https://learn.adafruit.com/prop-maker-light-wand.md)
- [ISS Pin](https://learn.adafruit.com/iss-pin.md)
- [Flapping Halloween Vampire Bat](https://learn.adafruit.com/flapping-halloween-vampire-bat.md)
- [PyPortal Philips Hue Lighting Controller](https://learn.adafruit.com/pyportal-philips-hue-lighting-controller.md)
- [Adafruit Sparkle Motion Stick](https://learn.adafruit.com/adafruit-sparkle-motion-stick.md)
- [Computer Perfection Synthesizer](https://learn.adafruit.com/computer-perfection-synthesizer.md)
---
# Source: https://learn.adafruit.com/beaglebone/ethernet.md
# BeagleBone
## Ethernet
This mini tutorial will show you how to connect to the Bone via the serial connection to determine the IP address, test the network connection and DNS. You'll need to know the COM serial port address, see the [Drivers](http://www.ladyada.net///drivers.html) tutorial on how to determine the COM and install drivers.
For this tutorial you will need:
- **[Beagle Bone](http://www.adafruit.com/products/513)**
- **[Ethernet Cable](http://www.adafruit.com/products/730)**
Pick these parts up at the Adafruit shop!
## Terminal Software
To connect via the USB cable, you'll need a terminal program. Built into Windows is Hyperterm. You can google around to find another good terminal program.
Connect to the Bone's COM port at 115200 baud, 8 bit, No parity, 1 stop bit, no flow control.


Hit return a few times, to show the login screen.
Log in with the user name **root ** and no password.
That's it you're logged in!## dmesg
Now we can try out the Ethernet connection. Plug a standard straight-through cable from the Bone to your Ethernet router.
Our favorite tool is **dmesg** - this will tell you all the system messages, such as what hardware was found. Type **dmesg** and hit return at the **root@beaglebone: ~#** prompt.


As you can see the last part of boot up is to bring the ethernet connection **eth0** up.## Ethernet Test
You can verify the ethernet connection by typing in **ifconfig -a**

You can see under **inet addr:** the internet address of the Bone - it uses DHCP to automatically get an IP address and this is what the router gave us back. If you don't see anything, try rebooting the system by typing in **reboot** and hitting return. Make sure your Ethernet cable is well connected to both the Bone and the router.
Now you can test the outgoing connection. Type in **ping 18.70.0.160** and hit return.

If it works, you'll see the above. You can type Control-C to cancel.
Next you can test the DNS system, by pinging [www.google.com](http://www.google.com/) , which should also succeed.

- [Previous Page](https://learn.adafruit.com/beaglebone/installing-drivers.md)
- [Next Page](https://learn.adafruit.com/beaglebone/wifi.md)
## Featured Products
### Adafruit Beagle Bone Black Starter Pack
[Adafruit Beagle Bone Black Starter Pack](https://www.adafruit.com/product/703)
If you've heard about the Beagle Bone Black and you want to hit the ground running, this starter pack is for you. We've picked out everything you need to start out, with essential parts and accessories to save on a bundle.
Includes:
-
No Longer Stocked
[Buy Now](https://www.adafruit.com/product/703)
[Related Guides to the Product](https://learn.adafruit.com/products/703/guides)
### Miniature WiFi (802.11b/g/n) Module: For Raspberry Pi and more
[Miniature WiFi (802.11b/g/n) Module: For Raspberry Pi and more](https://www.adafruit.com/product/814)
Make your Internet of Things device cable-free by adding WiFi. Take advantage of the Raspberry Pi and Beagle Bone's USB port to add a low cost, but high-reliability wireless link. We tried half a dozen modules to find one that works well with the Pi and Bone without the need of recompiling...
No Longer Stocked
[Buy Now](https://www.adafruit.com/product/814)
[Related Guides to the Product](https://learn.adafruit.com/products/814/guides)
### Ethernet Cable - 10 ft long
[Ethernet Cable - 10 ft long](https://www.adafruit.com/product/730)
We have so many Internet-connected goodies in the shop, we figured it's time to carry a cable so you can easily connect them up! This cable is 10 feet long, black and has all 8 wires installed. Perfect for use with the [BeagleBone](http://www.adafruit.com/products/513),
No Longer Stocked
[Buy Now](https://www.adafruit.com/product/730)
[Related Guides to the Product](https://learn.adafruit.com/products/730/guides)
### 5V 2A (2000mA) switching power supply - UL Listed
[5V 2A (2000mA) switching power supply - UL Listed](https://www.adafruit.com/product/276)
This is an FCC/CE certified and UL listed power supply. Need a lot of 5V power? This switching supply gives a clean regulated 5V output at up to 2000mA. 110 or 240 input, so it works in any country. The plugs are "US 2-prong" style so you may need a plug adapter, but you can pick one...
In Stock
[Buy Now](https://www.adafruit.com/product/276)
[Related Guides to the Product](https://learn.adafruit.com/products/276/guides)
## Related Guides
- [MPR121 Capacitive Touch Sensor on Raspberry Pi & BeagleBone Black](https://learn.adafruit.com/mpr121-capacitive-touch-sensor-on-raspberry-pi-and-beaglebone-black.md)
- [BNO055 Absolute Orientation Sensor with Raspberry Pi & BeagleBone Black](https://learn.adafruit.com/bno055-absolute-orientation-sensor-with-raspberry-pi-and-beaglebone-black.md)
- [Setting up WiFi with BeagleBone Black](https://learn.adafruit.com/setting-up-wifi-with-beaglebone-black.md)
- [SSD1306 OLED Displays with Raspberry Pi and BeagleBone Black](https://learn.adafruit.com/ssd1306-oled-displays-with-raspberry-pi-and-beaglebone-black.md)
- [Fading a RGB LED on BeagleBone Black](https://learn.adafruit.com/fading-a-rgb-led-on-beaglebone-black.md)
- [DHT Humidity Sensing on Raspberry Pi or Beaglebone Black with GDocs Logging](https://learn.adafruit.com/dht-humidity-sensing-on-raspberry-pi-with-gdocs-logging.md)
- [Running Programs Automatically on Your Tiny Computer](https://learn.adafruit.com/running-programs-automatically-on-your-tiny-computer.md)
- [Blinking an LED with BeagleBone Black](https://learn.adafruit.com/blinking-an-led-with-beaglebone-black.md)
- [MAX31855 Thermocouple Sensor Python Library](https://learn.adafruit.com/max31855-thermocouple-python-library.md)
- [Character LCD with Raspberry Pi or BeagleBone Black](https://learn.adafruit.com/character-lcd-with-raspberry-pi-or-beaglebone-black.md)
- [Connecting a Push Button to BeagleBone Black](https://learn.adafruit.com/connecting-a-push-button-to-beaglebone-black.md)
- [Bone Box](https://learn.adafruit.com/bone-box.md)
- [Nokia 5110/3310 LCD Python Library](https://learn.adafruit.com/nokia-5110-3310-lcd-python-library.md)
- [Controlling a Servo with a BeagleBone Black](https://learn.adafruit.com/controlling-a-servo-with-a-beaglebone-black.md)
- [Bonjour (Zeroconf) Networking for Windows and Linux](https://learn.adafruit.com/bonjour-zeroconf-networking-for-windows-and-linux.md)
---
# Source: https://learn.adafruit.com/pir-passive-infrared-proximity-motion-sensor/example-projects.md
# Source: https://learn.adafruit.com/tilt-sensor/example-projects.md
# Source: https://learn.adafruit.com/tmp36-temperature-sensor/example-projects.md
# Source: https://learn.adafruit.com/photocells/example-projects.md
# Source: https://learn.adafruit.com/force-sensitive-resistor-fsr/example-projects.md
# Force Sensitive Resistor (FSR)
## Example Projects
Here are just a few examples of projects that use FSRs!http://www.youtube.com/watch?feature=player_embedded&v=6duIGjwv6CM
Control LEDs (its a little dark but he's pressing an FSR).
[FSR thumb-wrestling (example from Stanford U. class)](http://protolab.pbworks.com/TutorialSensors#ForceSensitiveResistorFSRThumbWrestling)http://vimeo.com/1908805
[Tapper, a musical interface that works by having you tap your fingers to the music](http://www.arijoseph.com/blog/2008/10/itppcomp-tapper-proposal/)- [Previous Page](https://learn.adafruit.com/force-sensitive-resistor-fsr/using-an-fsr.md)
## Featured Products
### Round Force-Sensitive Resistor (FSR) - 0.3 ~ 10 Newton Force
[Round Force-Sensitive Resistor (FSR) - 0.3 ~ 10 Newton Force](https://www.adafruit.com/product/166)
FSRs are sensors that allow you to detect physical pressure, squeezing and weight. They are simple to use and low cost. This sensor is an Alpha MF01A-N-221-A01 with 1/2 diameter sensing region.
We used to stock the Interlink model 402 FSR - the Alpha version is almost half the price...
In Stock
[Buy Now](https://www.adafruit.com/product/166)
[Related Guides to the Product](https://learn.adafruit.com/products/166/guides)
### Square Force-Sensitive Resistor (FSR)
[Square Force-Sensitive Resistor (FSR)](https://www.adafruit.com/product/1075)
FSRs are sensors that allow you to detect physical pressure, squeezing and weight. They are simple to use and low cost. This sensor is an Alpha MF02A-N-221-A01 FSR with a 38mm square sensing region. Note that this sensor can't detect _where_ on the square you pressed (for that,
In Stock
[Buy Now](https://www.adafruit.com/product/1075)
[Related Guides to the Product](https://learn.adafruit.com/products/1075/guides)
### Extra-long force-sensitive resistor (FSR)
[Extra-long force-sensitive resistor (FSR)](https://www.adafruit.com/product/1071)
FSRs are sensors that allow you to detect physical pressure, squeezing and weight. They are simple to use and low cost. This sensor is a Interlink model 408 FSR with a massive 1/4-inch x 24-inch sensing region. You can press anywhere along the strip and the pressure will be recognized. Note...
No Longer Stocked
[Buy Now](https://www.adafruit.com/product/1071)
[Related Guides to the Product](https://learn.adafruit.com/products/1071/guides)
### Terminal Block - 2-pin 3.5mm - pack of 5!
[Terminal Block - 2-pin 3.5mm - pack of 5!](https://www.adafruit.com/product/724)
Nothing makes a project harder to maintain than a lot of loose wiring. That's why we like to use terminal blocks whenever making PCB-to-Wire connections. These particular 3.5mm terminal blocks are our favorite: big enough for a range of wire gauges, easy to adjust with a screwdriver, and...
In Stock
[Buy Now](https://www.adafruit.com/product/724)
[Related Guides to the Product](https://learn.adafruit.com/products/724/guides)
## Related Guides
- [Hang out your washing reminder - Adafruit IO + Vibration switch](https://learn.adafruit.com/hang-out-your-washing-reminder-adafruit-io-vibration-switch.md)
- [ReBoots Animated LED Boot Laces](https://learn.adafruit.com/re-boots-animated-dancing-boot-laces.md)
- [Circuit Playground Bike Glove](https://learn.adafruit.com/circuit-playground-bike-glove.md)
- [CuteCircuit Twirkle Shirt Teardown](https://learn.adafruit.com/cutecircuit-twirkle-shirt-teardown.md)
- [Tilt Sensor](https://learn.adafruit.com/tilt-sensor.md)
- [ICEdot Teardown](https://learn.adafruit.com/icedot-teardown.md)
- [Wireless LED Juggling Balls with ESP-NOW](https://learn.adafruit.com/wireless-juggling-balls-esp-now.md)
- [Adafruit HX711 24-bit ADC](https://learn.adafruit.com/adafruit-hx711-24-bit-adc.md)
- [Arcade Stick Conversion](https://learn.adafruit.com/arcade-stick-conversion.md)
- [Basic Resistor Sensor Reading on Raspberry Pi](https://learn.adafruit.com/basic-resistor-sensor-reading-on-raspberry-pi.md)
- [Adafruit VEML6070 UV Sensor Breakout](https://learn.adafruit.com/adafruit-veml6070-uv-light-sensor-breakout.md)
- [NAU7802 Pet Food Scale](https://learn.adafruit.com/nau7802-pet-food-scale.md)
- [Flora MIDI Drum Glove](https://learn.adafruit.com/midi-drum-glove.md)
- [Adafruit NAU7802 24-Bit ADC - STEMMA QT / Qwiic](https://learn.adafruit.com/adafruit-nau7802-24-bit-adc-stemma-qt-qwiic.md)
- [Clue Coffee Scale](https://learn.adafruit.com/clue-coffee-scale.md)
---
# Source: https://learn.adafruit.com/adafruit-ultimate-gps/external-antenna.md
# Adafruit Ultimate GPS
## External Antenna
## New in version 3 of the Ultimate GPS breakout, we now have support for optional external antennas!
This is not available in v1 or v2 so if you do not see the uFL connector, you have an older version of the module which cannot support antennas 
All Ultimate GPS modules have a built in patch antenna - this antenna provides -165 dBm sensitivity and is perfect for many projects. However, if you want to place your project in a box, it might not be possible to have the antenna pointing up, or it might be in a metal shield, or you may need more sensitivity. In these cases, [you may want to use an external active antenna.](https://www.adafruit.com/products/960)
[Active antennas draw current, so they do provide more gain but at a power cost. Check the antenna datasheet for exactly how much current they draw - its usually around 10-20mA.](https://www.adafruit.com/products/960 "Link: https://www.adafruit.com/products/960")
Most GPS antennas use SMA connectors, which are popular and easy to use. However, an SMA connector would be fairly big on the GPS breakout so we went with a uFL connector - which is lightweight, small and easy to manufacture. If you don't need an external antenna it wont add significant weight or space but [its easy to attach a uFL-\>SMA adapter cable](http://www.adafruit.com/products/851). Then connect the GPS antenna to the cable.
Warning:
The Ultimate GPS will automagically detect an external active antenna is attached and 'switch over' - you do not need to send any commands
There is an output sentence that will tell you the status of the antenna. **$PGTOP,11,x** where **x** is the status number. If **x** is **3** that means it is using the external antenna. If **x** is **2** it's using the internal antenna and if **x** is **1** there was an antenna short or problem.
On newer shields & modules, you'll need to tell the firmware you want to have this report output, you can do that by adding a **gps.sendCommand(PGCMD\_ANTENNA)** around the same time you set the update rate/sentence output.

- [Previous Page](https://learn.adafruit.com/adafruit-ultimate-gps/battery-backup.md)
- [Next Page](https://learn.adafruit.com/adafruit-ultimate-gps/direct-computer-wiring.md)
## Featured Products
### Adafruit Ultimate GPS Breakout - 66 channel w/10 Hz updates
[Adafruit Ultimate GPS Breakout - 66 channel w/10 Hz updates](https://www.adafruit.com/product/746)
We carry a few different GPS modules here in the Adafruit shop, but none that satisfied our every desire - that's why we designed this little GPS breakout board. We believe this is the **Ultimate** GPS module, so we named it that. It's got everything you want and...
In Stock
[Buy Now](https://www.adafruit.com/product/746)
[Related Guides to the Product](https://learn.adafruit.com/products/746/guides)
### Adafruit Ultimate GPS GNSS with USB - 99 channel w/10 Hz updates
[Adafruit Ultimate GPS GNSS with USB - 99 channel w/10 Hz updates](https://www.adafruit.com/product/4279)
The Ultimate GPS module you know and love has a _glow-up_ to let it be easily used with any computer, not just microcontrollers! With the built-in USB-to-Serial converter, you can now plug-n-play the Ultimate GPS into your computer, laptop, embedded Linux computer, and more. Power and...
In Stock
[Buy Now](https://www.adafruit.com/product/4279)
[Related Guides to the Product](https://learn.adafruit.com/products/4279/guides)
### Adafruit METRO 328 Fully Assembled - Arduino IDE compatible
[Adafruit METRO 328 Fully Assembled - Arduino IDE compatible](https://www.adafruit.com/product/50)
We sure love the ATmega328 here at Adafruit, and we use them _a lot_ for our own projects. The processor has plenty of GPIO, Analog inputs, hardware UART SPI and I2C, timers and PWM galore - just enough for most simple projects. When we need to go small, we use a
Out of Stock
[Buy Now](https://www.adafruit.com/product/50)
[Related Guides to the Product](https://learn.adafruit.com/products/50/guides)
### GPS Antenna - External Active Antenna - 3-5V 28dB 5 Meter SMA
[GPS Antenna - External Active Antenna - 3-5V 28dB 5 Meter SMA](https://www.adafruit.com/product/960)
Give your Ultimate GPS V3 a boost with this external active antenna. This GPS antenna draws about 10mA and will give you an additional 28 dB of gain. It's got a 5 meter long cable so it will easily reach wherever you need it to. The antenna is magnetic so it will stick to the top of a car...
In Stock
[Buy Now](https://www.adafruit.com/product/960)
[Related Guides to the Product](https://learn.adafruit.com/products/960/guides)
### SMA to uFL/u.FL/IPX/IPEX RF Adapter Cable
[SMA to uFL/u.FL/IPX/IPEX RF Adapter Cable](https://www.adafruit.com/product/851)
This RF adapter cable is super handy for anyone doing RF work. Often times, small electronics save space by having a pick-and-placeable u.FL connector (also called uFL, IPEX, IPAX, IPX, MHF, and AM). But most antennas have SMA or RP-SMA connectors on them. This little cable will bridge the...
In Stock
[Buy Now](https://www.adafruit.com/product/851)
[Related Guides to the Product](https://learn.adafruit.com/products/851/guides)
### CR1220 12mm Diameter - 3V Lithium Coin Cell Battery
[CR1220 12mm Diameter - 3V Lithium Coin Cell Battery](https://www.adafruit.com/product/380)
These are the highest quality & capacity batteries, the same as shipped with the iCufflinks, iNecklace, Datalogging and GPS Shields, GPS HAT, etc. One battery per order (you'll want one battery per cufflink or pendant.)
Brand may vary but all battery brands are verified...
Out of Stock
[Buy Now](https://www.adafruit.com/product/380)
[Related Guides to the Product](https://learn.adafruit.com/products/380/guides)
### Breadboarding wire bundle
[Breadboarding wire bundle](https://www.adafruit.com/product/153)
75 flexible stranded core wires with stiff ends molded on in red, orange, yellow, green, blue, brown, black and white. These are a major improvement over the "box of bent wires" that are sometimes sold with breadboards, and faster than stripping your own solid core wires. Makes...
In Stock
[Buy Now](https://www.adafruit.com/product/153)
[Related Guides to the Product](https://learn.adafruit.com/products/153/guides)
### Half Sized Premium Breadboard - 400 Tie Points
[Half Sized Premium Breadboard - 400 Tie Points](https://www.adafruit.com/product/64)
This is a cute, half-size breadboard with 400 tie points, good for small projects. It's 3.25" x 2.2" / 8.3cm x 5.5cm with a standard double-strip in the middle and two power rails on both sides. You can pull the power rails off easily to make the breadboard as...
In Stock
[Buy Now](https://www.adafruit.com/product/64)
[Related Guides to the Product](https://learn.adafruit.com/products/64/guides)
## Related Guides
- [Reverse Geocache Box](https://learn.adafruit.com/reverse-geocache-engagement-box.md)
- [Ladyada's Learn Arduino - Lesson #2](https://learn.adafruit.com/ladyadas-learn-arduino-lesson-number-2.md)
- [Wave Shield Talking Clock](https://learn.adafruit.com/wave-shield-talking-clock.md)
- [Wireless Game Show Poppers for the Classroom!](https://learn.adafruit.com/wireless-game-show-poppers.md)
- [Wireless Gardening with Arduino + CC3000 WiFi Modules](https://learn.adafruit.com/wireless-gardening-arduino-cc3000-wifi-modules.md)
- [CircuitPython Essentials](https://learn.adafruit.com/circuitpython-essentials.md)
- [CircuitPython Libraries on Linux and ODROID C2](https://learn.adafruit.com/circuitpython-libaries-linux-odroid-c2.md)
- [2.2" TFT Display](https://learn.adafruit.com/2-2-tft-display.md)
- [RGB LED Matrix Basics](https://learn.adafruit.com/32x16-32x32-rgb-led-matrix.md)
- [Halloween Pumpkin](https://learn.adafruit.com/halloween-pumpkin.md)
- [Remote controlled door lock using a fingerprint sensor & Adafruit IO](https://learn.adafruit.com/remote-controlled-door-lock-using-a-fingerprint-sensor-and-adafruit-io.md)
- [Automatic Monitor Color Temperature Adjustment](https://learn.adafruit.com/automatic-monitor-color-temperature-adjustment.md)
- [Animating Multiple LED Backpacks](https://learn.adafruit.com/animating-multiple-led-backpacks.md)
- [Skill Badge Requirements: Microcontrollers](https://learn.adafruit.com/skill-badge-requirements-microcontrollers.md)
- [RePaper eInk Development Board](https://learn.adafruit.com/repaper-eink-development-board.md)
---
# Source: https://learn.adafruit.com/el-workshop/extra-supplies.md
# EL Workshop
## Extra Supplies

In addition to an Adafruit [EL wire starter pack](http://www.adafruit.com/products/320 "Link: http://www.adafruit.com/products/320") (or [EL tape starter pack](http://www.adafruit.com/category/50_79 "Link: http://www.adafruit.com/category/50\_79")), each of my students also gets:
- **Adhesive!** I prefer E6000 because it is super strong and flexible, sticks to almost everything, and it doesn't require mixing-- it's available i[n multipacks of smaller tubes](http://www.amazon.com/dp/B007TBYEXM "Link: http://www.amazon.com/dp/B007TBYEXM"). Some people don't like it because it's kinda stinky. You can also use quickset (5 or 7 minutes) epoxy. Hot glue isn't so great for this.
- **Round toothpicks** - for working with the E6000 - each student gets a small handful in their bag. Pick them up at the grocery store or on [Amazon](http://www.amazon.com/dp/B0036B2SIC).
- **Invisible thread** - like fine fishing line, this polyester filament is strong, flexible, see-thru, and you can sew with it! I get mine from [Stuff4](http://www.stuff4crafts.com/clear-sulky-premium-invisible-thread-440-yards-232-0011.html). Each student gets an entire spool.
- **[Pack needles](https://www.adafruit.com/products/615)**
- **AA batteries**
- **[EL splitter](https://www.adafruit.com/products/402)**
- **2x [In-line power wire (male)](https://www.adafruit.com/products/319)** - this way students can have up to three total lines of EL wire coming from the inverter
- **Extra [heat shrink tubing](https://www.adafruit.com/products/344 "Link: https://www.adafruit.com/products/344")** - useful for masking sections of EL wire to make dotted lines, etc.
- **Tiny lighter** - for shrinking heat shrink
I usually charge students a $35 materials fee - roughly $20 for the EL starter pack (although [hackerspaces](http://www.adafruit.com/hacker_spaces/) and [educators](http://www.adafruit.com/educators) can qualify for special pricing or volume discounts), the rest for the items in the above list plus expendibles like hot glue sticks, the instructor's demo supplies and the like. I also pick up a few sound-activated and 4xAAA inverters in case a student's design requires one-- get enough supplies for everyone to comfortably share and create in a generous environment. They should leave feeling empowered to finish their project or take on a new one- and not like they have to buy a bunch more stuff to do it. You can always use extra supplies for a future class!

You may wish to pick up a few [embroidered "learn to solder" badges](https://www.adafruit.com/products/465) to give to students if it's their first time soldering.
- [Previous Page](https://learn.adafruit.com/el-workshop/overview.md)
- [Next Page](https://learn.adafruit.com/el-workshop/class-outline.md)
## Featured Products
### 2-pin JST SM In-line power wire connector (male)
[2-pin JST SM In-line power wire connector (male)](https://www.adafruit.com/product/319)
If you have a project where you'd like to be able to detach the wiring, this wire will fit the bill. Its a JST 2.5mm 'free hanging' cable assembly that latches strongly. One wire is marked with a white dashed line. You can't plug these in backwards.
This is the...
No Longer Stocked
[Buy Now](https://www.adafruit.com/product/319)
[Related Guides to the Product](https://learn.adafruit.com/products/319/guides)
### In-line wire 1-to-4 splitter
[In-line wire 1-to-4 splitter](https://www.adafruit.com/product/402)
If you want to connect multiple EL wires/strips/panels up to one inverter, these splitters are quite useful. There is one male connector (goes to the inverter) and then 4 female connectors (which will connect to each wire/strip/panel. You can even cascade them! Only thing to watch for is make...
In Stock
[Buy Now](https://www.adafruit.com/product/402)
[Related Guides to the Product](https://learn.adafruit.com/products/402/guides)
### Needle set - 3/9 sizes - 20 needles
[Needle set - 3/9 sizes - 20 needles](https://www.adafruit.com/product/615)
Mighty needles, sew like the wind! This needle set is the only one you'll need for any sort of hand sewing, especially using our conductive thread and wearable electronics parts.
Each pack contains 20 gold-eye sharps, with eye sizes ranging from #3 (1.75" long) to #9...
In Stock
[Buy Now](https://www.adafruit.com/product/615)
[Related Guides to the Product](https://learn.adafruit.com/products/615/guides)
## Related Guides
- [Electron Bow](https://learn.adafruit.com/electron-bow.md)
- [EL Wire Sign](https://learn.adafruit.com/el-wire-sign.md)
- [EL Wire Animal Masks](https://learn.adafruit.com/el-wire-animal-masks.md)
- [EL Bowtie](https://learn.adafruit.com/el-bowtie.md)
- [EL Wire](https://learn.adafruit.com/el-wire.md)
- [TRON Bag](https://learn.adafruit.com/tron-bag.md)
- [Light Up your Costume with Noods](https://learn.adafruit.com/light-up-your-costume-with-noods.md)
- [EL Stick Figure](https://learn.adafruit.com/el-stick-figure.md)
- [TRON Hoodie](https://learn.adafruit.com/tron-hoodie.md)
- [EL Wire Stocking](https://learn.adafruit.com/el-wire-stocking.md)
- [Glowing Bean Bags with EL Wire](https://learn.adafruit.com/glowing-bean-bags-with-el-wire.md)
- [Glowing Star Chuck Taylor Sneakers](https://learn.adafruit.com/glowing-star-chucks.md)
---
# Source: https://learn.adafruit.com/2-2-tft-display/eyespi.md
# Source: https://learn.adafruit.com/1-8-tft-display/eyespi.md
# 1.8" TFT Display Breakout and Shield
## EYESPI
group_elements = page.element_group_for(element).try(:elements) || []
group_elements.each_with_index do |group_element, i|
markdown.partial("elements/#{group_element.element_type}", locals: {
page: page,
element: present(group_element),
elements: group_elements,
i: i,
add_links: true
})
end
group_elements = page.element_group_for(element).try(:elements) || []
group_elements.each_with_index do |group_element, i|
markdown.partial("elements/#{group_element.element_type}", locals: {
page: page,
element: present(group_element),
elements: group_elements,
i: i,
add_links: true
})
end
This display now comes with an **EYESPI connector**. This connector allows you to connect your display without soldering. There are [EYESPI cables](https://www.adafruit.com/?q=eyespi+cable&sort=BestMatch) available in multiple lengths, which means you can find one to fit any project. This is especially useful if your project requires the display to be freestanding, and not tied directly into a breadboard. Inspired by the popularity of STEMMA QT, it provides plug-n-play for displays!
## The EYESPI Connector and Cables
The EYESPI connector is an 18 pin 0.5mm pitch FPC connector with a flip-top tab for locking in the associated flex cable. It is designed to allow you to connect a display, without needing to solder headers or wires to the display.
The EYESPI connector location on this display is indicated below.
group_elements = page.element_group_for(element).try(:elements) || []
group_elements.each_with_index do |group_element, i|
markdown.partial("elements/#{group_element.element_type}", locals: {
page: page,
element: present(group_element),
elements: group_elements,
i: i,
add_links: true
})
end
The EYESPI cables are 18 pin 0.5mm pitch flex cables. They are ~9.6mm wide, and designed to fit perfectly into the EYESPI connector. Adafruit currently offers EYESPI cables in three different lengths: [50mm](https://www.adafruit.com/product/5462), [100mm](https://www.adafruit.com/product/5239), and [200mm](https://www.adafruit.com/product/5240).
Warning:
## Wiring Your EYESPI Display
Wiring your EYESPI display to a microcontroller via the EYESPI connector requires the EYESPI breakout board and an EYESPI cable.
### Adafruit EYESPI Breakout Board - 18 Pin FPC Connector
[Adafruit EYESPI Breakout Board - 18 Pin FPC Connector](https://www.adafruit.com/product/5613)
Our most recent [display breakouts have come with a new feature: an 18-pin "EYE SPI" standard FPC connector with flip-top connector](https://www.adafruit.com/?q=eyespi&sort=BestMatch). This is intended to be a sort-of "
In Stock
[Buy Now](https://www.adafruit.com/product/5613)
[Related Guides to the Product](https://learn.adafruit.com/products/5613/guides)

### EYESPI Cable - 18 Pin 100mm long Flex PCB (FPC) A-B type
[EYESPI Cable - 18 Pin 100mm long Flex PCB (FPC) A-B type](https://www.adafruit.com/product/5239)
Connect this to that when a 18-pin FPC connector is needed. This 25 cm long cable is made of a flexible PCB. It's A-B style which means that pin one on one side will match with pin one on the other side. How handy!
In Stock
[Buy Now](https://www.adafruit.com/product/5239)
[Related Guides to the Product](https://learn.adafruit.com/products/5239/guides)

group_elements = page.element_group_for(element).try(:elements) || []
group_elements.each_with_index do |group_element, i|
markdown.partial("elements/#{group_element.element_type}", locals: {
page: page,
element: present(group_element),
elements: group_elements,
i: i,
add_links: true
})
end
Connect the following Feather pins to the associated EYESPI breakout pins:
group_elements = page.element_group_for(element).try(:elements) || []
group_elements.each_with_index do |group_element, i|
markdown.partial("elements/#{group_element.element_type}", locals: {
page: page,
element: present(group_element),
elements: group_elements,
i: i,
add_links: true
})
end
Finally, connect your **display EYESPI connector** to the **breakout EYESPI connector** using an **EYESPI cable**. For details on using the EYESPI connector properly, visit [Plugging in an EYESPI Cable](https://learn.adafruit.com/adafruit-eyespi-breakout-board/plugging-in-an-eyespi-cable).
## EYESPI Pins
Though there are 18 pins available on the EYESPI connector, many displays do not use all available pins. This display requires the following pins:
group_elements = page.element_group_for(element).try(:elements) || []
group_elements.each_with_index do |group_element, i|
markdown.partial("elements/#{group_element.element_type}", locals: {
page: page,
element: present(group_element),
elements: group_elements,
i: i,
add_links: true
})
end
- [Previous Page](https://learn.adafruit.com/1-8-tft-display/pinouts.md)
- [Next Page](https://learn.adafruit.com/1-8-tft-display/plugging-in-an-eyespi-cable.md)
## Featured Products
### Breadboarding wire bundle
[Breadboarding wire bundle](https://www.adafruit.com/product/153)
75 flexible stranded core wires with stiff ends molded on in red, orange, yellow, green, blue, brown, black and white. These are a major improvement over the "box of bent wires" that are sometimes sold with breadboards, and faster than stripping your own solid core wires. Makes...
In Stock
[Buy Now](https://www.adafruit.com/product/153)
[Related Guides to the Product](https://learn.adafruit.com/products/153/guides)
### Adafruit METRO 328 Fully Assembled - Arduino IDE compatible
[Adafruit METRO 328 Fully Assembled - Arduino IDE compatible](https://www.adafruit.com/product/50)
We sure love the ATmega328 here at Adafruit, and we use them _a lot_ for our own projects. The processor has plenty of GPIO, Analog inputs, hardware UART SPI and I2C, timers and PWM galore - just enough for most simple projects. When we need to go small, we use a
Out of Stock
[Buy Now](https://www.adafruit.com/product/50)
[Related Guides to the Product](https://learn.adafruit.com/products/50/guides)
### Half Sized Premium Breadboard - 400 Tie Points
[Half Sized Premium Breadboard - 400 Tie Points](https://www.adafruit.com/product/64)
This is a cute, half-size breadboard with 400 tie points, good for small projects. It's 3.25" x 2.2" / 8.3cm x 5.5cm with a standard double-strip in the middle and two power rails on both sides. You can pull the power rails off easily to make the breadboard as...
In Stock
[Buy Now](https://www.adafruit.com/product/64)
[Related Guides to the Product](https://learn.adafruit.com/products/64/guides)
### 1.8" Color TFT LCD display with MicroSD Card Breakout
[1.8" Color TFT LCD display with MicroSD Card Breakout](https://www.adafruit.com/product/358)
This lovely little display breakout is the best way to add a small, colorful and bright display to any project. Since the display uses 4-wire SPI to communicate and has its own pixel-addressable frame buffer, it can be used with every kind of microcontroller. Even a very small one with low...
Out of Stock
[Buy Now](https://www.adafruit.com/product/358)
[Related Guides to the Product](https://learn.adafruit.com/products/358/guides)
### Adafruit 1.8" Color TFT Shield w/microSD and Joystick
[Adafruit 1.8" Color TFT Shield w/microSD and Joystick](https://www.adafruit.com/product/802)
This lovely little shield is the best way to add a small, colorful and bright display to any project. We took our popular 1.8" TFT breakout board and remixed it into an Arduino shield complete with microSD card slot and a 5-way joystick navigation switch and three selection buttons! Since...
In Stock
[Buy Now](https://www.adafruit.com/product/802)
[Related Guides to the Product](https://learn.adafruit.com/products/802/guides)
### 1.8" SPI TFT display, 160x128 18-bit color - ST7735R driver
[1.8" SPI TFT display, 160x128 18-bit color - ST7735R driver](https://www.adafruit.com/product/618)
We just love this little 1.8" TFT display, with true TFT color (up to 18-bits per pixel!), fine 160x128 resolution, two white LED backlight that runs on 3.3V and a very easy SPI interface that requires only 4 or 5 digital pins to send pixels to the display.
**Please...**
Out of Stock
[Buy Now](https://www.adafruit.com/product/618)
[Related Guides to the Product](https://learn.adafruit.com/products/618/guides)
## Related Guides
- [Wave Shield](https://learn.adafruit.com/adafruit-wave-shield-audio-shield-for-arduino.md)
- [Adafruit 2.8" TFT Touch Shield v2 - Capacitive or Resistive](https://learn.adafruit.com/adafruit-2-8-tft-touch-shield-v2.md)
- [How to Build a Testing Jig](https://learn.adafruit.com/how-to-build-a-testing-fixture.md)
- [Create an Internet of Things Dashboard with Adafruit IO](https://learn.adafruit.com/create-an-internet-of-things-dashboard-with-adafruit-dot-io.md)
- [Let’s Put LEDs in Things!](https://learn.adafruit.com/lets-put-leds-in-things.md)
- [Tiny Arduino Music Visualizer](https://learn.adafruit.com/piccolo.md)
- [Circuit Playground Sound-Controlled Robot](https://learn.adafruit.com/circuit-playground-sound-controlled-robot.md)
- [Adafruit 1.27" and 1.5" Color OLED Breakout Board](https://learn.adafruit.com/adafruit-1-5-color-oled-breakout-board.md)
- [Arduino Lesson 15. DC Motor Reversing](https://learn.adafruit.com/adafruit-arduino-lesson-15-dc-motor-reversing.md)
- [TTL Serial Camera](https://learn.adafruit.com/ttl-serial-camera.md)
- [Analog Feedback Servos](https://learn.adafruit.com/analog-feedback-servos.md)
- [Geofencing with the FONA 808 & Adafruit IO](https://learn.adafruit.com/geofencing-with-the-fona-808-and-adafruit-io.md)
- [Arduino GPS Clock](https://learn.adafruit.com/arduino-clock.md)
- [Adafruit Data Logger Shield](https://learn.adafruit.com/adafruit-data-logger-shield.md)
- [Making Adabot: Part 2](https://learn.adafruit.com/making-adabot-part-2.md)
---
# Source: https://learn.adafruit.com/adafruit-ultimate-gps/f-a-q.md
# Source: https://learn.adafruit.com/digital-led-strip/f-a-q.md
# Source: https://learn.adafruit.com/thermocouple/f-a-q.md
# Source: https://learn.adafruit.com/ttl-serial-camera/f-a-q.md
# TTL Serial Camera
## F.A.Q.
###
You might notice there seems to be a command for changing the baud rate. By default the baudrate is 38400 baud.
**Despite the software letting you change the baud rate this is a very flaky setting and even if it works, when you power up the camera again it will reset. Some experimenters have accidentally disabled their cameras by trying to change the baud rate. We do not suggest you mess with the baud rate settings. If you do, you may permanently disable your camera and we will not replace it!**
###
This is a pretty slow UART camera, it can take up to 30 seconds to transfer an image! It is meant for snapshots or time-lapse type photography, not for any kind of real-time analysis
###
Because it was designed for surveillance, the sensitivity of the camera extends into the infrared range. This means that objects that reflect or emit infrared rays will appear lighter than the do to the human eye. In some cases the image will appear washed out and almost monochromatic.
A more natural rendering can be achieved using an IR blocking filter such as a [B+W 486](http://www.schneiderkreuznach.com/en/photo-imaging/product-field/b-w-fotofilter/products/filtertypes/special-filters/486-uvir-cut/). (Thanks to forum member azhilyakov for the comparison photos!)

- [Previous Page](https://learn.adafruit.com/ttl-serial-camera/circuitpython-python-usage.md)
- [Next Page](https://learn.adafruit.com/ttl-serial-camera/downloads.md)
## Featured Products
### TTL Serial JPEG Camera with NTSC Video
[TTL Serial JPEG Camera with NTSC Video](https://www.adafruit.com/product/397)
This camera module can be a pretty neat project addition. It was designed to be used in security systems and does two main things - it outputs NTSC video and can take snapshots of that video (in color) and transmit them over the TTL serial link. You can snap pictures at 640x480, 320x240 or...
In Stock
[Buy Now](https://www.adafruit.com/product/397)
[Related Guides to the Product](https://learn.adafruit.com/products/397/guides)
### Miniature TTL Serial JPEG Camera with NTSC Video
[Miniature TTL Serial JPEG Camera with NTSC Video](https://www.adafruit.com/product/1386)
This tiny little camera module can be a pretty neat project addition, it is just like [our other JPEG cameras (same chipset/software)](http://www.adafruit.com/category/35_68), but much smaller and slimmer. It was designed to be used in security systems and does two main things - it...
In Stock
[Buy Now](https://www.adafruit.com/product/1386)
[Related Guides to the Product](https://learn.adafruit.com/products/1386/guides)
### Adafruit METRO 328 Fully Assembled - Arduino IDE compatible
[Adafruit METRO 328 Fully Assembled - Arduino IDE compatible](https://www.adafruit.com/product/50)
We sure love the ATmega328 here at Adafruit, and we use them _a lot_ for our own projects. The processor has plenty of GPIO, Analog inputs, hardware UART SPI and I2C, timers and PWM galore - just enough for most simple projects. When we need to go small, we use a
Out of Stock
[Buy Now](https://www.adafruit.com/product/50)
[Related Guides to the Product](https://learn.adafruit.com/products/50/guides)
### Weatherproof TTL Serial JPEG Camera with NTSC Video and IR LEDs
[Weatherproof TTL Serial JPEG Camera with NTSC Video and IR LEDs](https://www.adafruit.com/product/613)
This weatherproof camera module is [a classy upgrade to the basic camera module we already stock in the shop](http://www.adafruit.com/products/397). The main differences is that this one comes in a nice metal case with a mounting hinge, a 1 meter long cable with the TTL & NTSC...
In Stock
[Buy Now](https://www.adafruit.com/product/613)
[Related Guides to the Product](https://learn.adafruit.com/products/613/guides)
### MicroSD card breakout board+
[MicroSD card breakout board+](https://www.adafruit.com/product/254)
Not just a simple breakout board, this microSD adapter goes the extra mile - designed for ease of use.
- Onboard 5v-\>3v regulator provides 150mA for power-hungry cards
- 3v level shifting means you can use this with ease on either 3v or 5v systems
- Uses a proper level...
Out of Stock
[Buy Now](https://www.adafruit.com/product/254)
[Related Guides to the Product](https://learn.adafruit.com/products/254/guides)
### Half Sized Premium Breadboard - 400 Tie Points
[Half Sized Premium Breadboard - 400 Tie Points](https://www.adafruit.com/product/64)
This is a cute, half-size breadboard with 400 tie points, good for small projects. It's 3.25" x 2.2" / 8.3cm x 5.5cm with a standard double-strip in the middle and two power rails on both sides. You can pull the power rails off easily to make the breadboard as...
In Stock
[Buy Now](https://www.adafruit.com/product/64)
[Related Guides to the Product](https://learn.adafruit.com/products/64/guides)
### SD/MicroSD Memory Card (8 GB SDHC)
[SD/MicroSD Memory Card (8 GB SDHC)](https://www.adafruit.com/product/1294)
Add mega-storage in a jiffy using this 8 GB class 4 micro-SD card. It comes with a SD adapter so you can use it with any of our shields or adapters. Preformatted to FAT so it works out of the box with our projects. Tested and works great with our
In Stock
[Buy Now](https://www.adafruit.com/product/1294)
[Related Guides to the Product](https://learn.adafruit.com/products/1294/guides)
## Related Guides
- [Making Adabot: Part 2](https://learn.adafruit.com/making-adabot-part-2.md)
- [3D Printed Animatronic Robot Head](https://learn.adafruit.com/3d-printed-animatronic-robot-head.md)
- [Arduino Lesson 14. Servo Motors](https://learn.adafruit.com/adafruit-arduino-lesson-14-servo-motors.md)
- [Arduino Lesson 15. DC Motor Reversing](https://learn.adafruit.com/adafruit-arduino-lesson-15-dc-motor-reversing.md)
- [Programming Arduino with Android and Windows Tablets](https://learn.adafruit.com/programming-arduino-with-android-and-windows-tablets.md)
- [LSM303 Accelerometer + Compass Breakout](https://learn.adafruit.com/lsm303-accelerometer-slash-compass-breakout.md)
- [Adafruit VS1053 MP3/AAC/Ogg/MIDI/WAV Codec Breakout Tutorial](https://learn.adafruit.com/adafruit-vs1053-mp3-aac-ogg-midi-wav-play-and-record-codec-tutorial.md)
- [Naughty or Nice Machine](https://learn.adafruit.com/naughty-or-nice-machine.md)
- [Adafruit Ultimate GPS Logger Shield](https://learn.adafruit.com/adafruit-ultimate-gps-logger-shield.md)
- [Arduino "Hunt The Wumpus"](https://learn.adafruit.com/arduino-hunt-the-wumpus.md)
- [Track Your Treats: Halloween Candy GPS Tracker](https://learn.adafruit.com/track-your-treats-halloween-candy-gps-tracker.md)
- [WiFi Weather Station](https://learn.adafruit.com/wifi-weather-station-arduino-cc3000.md)
- [Bluetooth Controlled Motorized Camera Slider](https://learn.adafruit.com/bluetooth-motorized-camera-slider.md)
- [TMP36 Temperature Sensor](https://learn.adafruit.com/tmp36-temperature-sensor.md)
- [Babel Fish](https://learn.adafruit.com/babel-fish.md)
---
# Source: https://learn.adafruit.com/rgb-lcd-shield/f-dot-a-q.md
# RGB LCD Shield
## F.A.Q.
###
The monochrome display only responds to backlight colors with RED in them. Use "ON" and "OFF" instead. See the code snippet under "Using with Monochrome Displays"
### What pins are used? What pins are available?
The shield uses only the **SCL** and **SDA** I2C pins, and 5V power and ground. You can use the I2C pins for other I2C sensors/devices as long as they do not share the same address. If you are using an Arduino UNO, **Analog 4** and **Analog 5** are shared with SCL/SDA so you can't use them. Likewise, Arduino Leonardos share SCL/SDA with **Digital 2** & **Digital 3** so those would not be available.
###
If you're seeing error messages that look like any (or all) of the following, it means that the Arduino IDE is not finding the Adafruit libraries
- error: Adafruit\_MCP23017.h: No such file or directory
- error: Adafruit\_RGBLCDShield.h: No such file or directory
- error: 'Adafruit\_RGBLCDShield' does not name a type
- error: 'lcd' was not declared in this scope
- error: 'BUTTON\_UP' was not declared in this scope
- error: 'BUTTON\_DOWN' was not declared in this scope
- error: 'BUTTON\_LEFT' was not declared in this scope
- error: 'BUTTON\_RIGHT' was not declared in this scope
- error: 'BUTTON\_SELECT' was not declared in this scope
There are three possible causes for this:
> **1. You didn't download the library folder.**
> > Adafruit has written some extra software to make it easy to use your shield. This software is contained in a library folder that you can download here:
>
> > [https://github.com/adafruit/Adafruit-RGB-LCD-Shield-Library](https://github.com/adafruit/Adafruit-RGB-LCD-Shield-Library)
>
> > You download the folder by clicking on the[Downloads](https://github.com/adafruit/Adafruit-RGB-LCD-Shield-Library/downloads) button in the top right. You will have the option of downloading the library in one of two compressed formats: '.zip' or '.tar.gz'. Windows and Mac users will probably want to select .zip, while Linux users may prefer .tar.gz.
> >
> > MacOS will automatically uncompress the downloaded file into a folder, which you should find in the Downloads folder.
> >
> > Windows users can double-click on the downloaded file. This will open an Explorer window which will allow you to extract the compressed library folder.
> > _(Continue to the next paragraph to find out what to do with the uncompressed download)_
> **2. The library folder has the wrong name.**
>
> > After downloading and uncompressing the library folder, you **_must_** change the name of the folder to **_exactly_**"Adafruit\_RGBLCDShield". Don't abbreviate, add any spaces, underscores or other characters. Make sure the capitalization is the same as shown here.
> > _(Continue to the next paragraph to find out where to put the library folder)_
>
> **3. The library folder is in the wrong place.**
>
> > When you installed your Arduino IDE, it created a 'sketch folder' for you (if you don't already know where that sketch folder is, go into the Arduino application's 'Sketch' menu, and select 'Show Sketch Folder').
> >
> > _ **Inside** _ of the sketch folder, there should be another folder called 'libraries'. If not, create a new folder _inside_ of the sketch folder, and name it "libraries" (the name **_must_** be **_exactly_**"libraries" - not "library" or"librarys" - not _even_ "Libraries" with a capital 'L' ! ).
> >
> > Move your new Adafruit\_RGBLCDShield folder into this libraries folder.
Once you've made sure the folder has the right name and is in the right place, you have to close and reopen the Arduino IDE, so that it will recognize the new library.
if you're curious, you can learn more about libraries here:
> [http://learn.adafruit.com/arduino-tips-tricks-and-techniques/arduino-libraries](http://learn.adafruit.com/arduino-tips-tricks-and-techniques/arduino-libraries "Link: http://learn.adafruit.com/arduino-tips-tricks-and-techniques/arduino-libraries")
### Does the shield do the button de-bounce logic internally, or do I need to do that in software when reading the buttons?
The `Adafruit_RGBLCDShield` library handles button debouncing for you, when you use the `readButtons()` function.
### Is this compatible with my Arduino? There are two extra pins on the header that don't plug into anything.
The shield will work fine with older Arduino boards. Extra pins were added to the R3 version of the Uno and Mega. These are duplicates of other header pins and are not required for proper operation of the shield.
###
At this time, it does not! This shield is for Arduinos only!
###
Only the ground pin next to the VIN pin is used. You need to connect your ground wire to this pin.
###
Technically, yes. The pinouts for 20x4 and 16x2 are identical. However, the screen is way bigger, and it covers the buttons up so we don't suggest it.
- [Previous Page](https://learn.adafruit.com/rgb-lcd-shield/circuitpython.md)
- [Next Page](https://learn.adafruit.com/rgb-lcd-shield/downloads.md)
## Primary Products
### Adafruit I2C Controlled + Keypad Shield Kit for 16x2 LCD
[Adafruit I2C Controlled + Keypad Shield Kit for 16x2 LCD](https://www.adafruit.com/product/715)
We really like the range of LCDs we stock in the shop, such as our classic [blue & white](http://www.adafruit.com/products/181) and the fancy [RGB negative](http://www.adafruit.com/products/399) and [RGB positive](http://www.adafruit.com/products/398)....
In Stock
[Buy Now](https://www.adafruit.com/product/715)
[Related Guides to the Product](https://learn.adafruit.com/products/715/guides)
## Featured Products
### RGB backlight negative LCD 16x2 + extras
[RGB backlight negative LCD 16x2 + extras](https://www.adafruit.com/product/399)
This is a fancy upgrade to standard 16x2 LCDs, instead of just having blue and white, or red and black, this LCD has full color RGB characters on a dark/black background! That means you can change the character display colors to anything you want - red, green, blue, pink, white, purple yellow,...
In Stock
[Buy Now](https://www.adafruit.com/product/399)
[Related Guides to the Product](https://learn.adafruit.com/products/399/guides)
### RGB backlight positive LCD 16x2 + extras
[RGB backlight positive LCD 16x2 + extras](https://www.adafruit.com/product/398)
This is a fancy upgrade to standard 16x2 LCDs, instead of just having blue and white, or red and black, this LCD has black characters on a full color RGB-backlight background! That means you can change the background color to anything you want - red, green, blue, pink, white, purple yellow,...
In Stock
[Buy Now](https://www.adafruit.com/product/398)
[Related Guides to the Product](https://learn.adafruit.com/products/398/guides)
### LCD Shield Kit w/ 16x2 Character Display - Only 2 pins used!
[LCD Shield Kit w/ 16x2 Character Display - Only 2 pins used!](https://www.adafruit.com/product/772)
This new Adafruit shield makes it easy to use a 16x2 Character LCD. We really like the [Blue & White 16x2 LCDs we stock in the shop](http://www.adafruit.com/products/181). Unfortunately, these LCDs do require quite a few digital pins, 6 to control the LCD and then another pin to...
In Stock
[Buy Now](https://www.adafruit.com/product/772)
[Related Guides to the Product](https://learn.adafruit.com/products/772/guides)
### RGB LCD Shield Kit w/ 16x2 Character Display - Only 2 pins used!
[RGB LCD Shield Kit w/ 16x2 Character Display - Only 2 pins used!](https://www.adafruit.com/product/716)
This new Adafruit shield makes it easy to use a 16x2 Character LCD. We really like the RGB LCDs we stock in the shop both the [RGB negative](http://www.adafruit.com/products/399) and [RGB positive](http://www.adafruit.com/products/398). Unfortunately, these LCDs do...
Out of Stock
[Buy Now](https://www.adafruit.com/product/716)
[Related Guides to the Product](https://learn.adafruit.com/products/716/guides)
### RGB LCD Shield Kit w/ 16x2 Character Display - Only 2 pins used!
[RGB LCD Shield Kit w/ 16x2 Character Display - Only 2 pins used!](https://www.adafruit.com/product/714)
This new Adafruit shield makes it easy to use a 16x2 Character LCD. We really like the RGB LCDs we stock in the shop both the [RGB negative](http://www.adafruit.com/products/399) and [RGB positive](http://www.adafruit.com/products/398). Unfortunately, these LCDs do...
In Stock
[Buy Now](https://www.adafruit.com/product/714)
[Related Guides to the Product](https://learn.adafruit.com/products/714/guides)
## Related Guides
- [Character LCDs](https://learn.adafruit.com/character-lcds.md)
- [Simple Arduino-based USB VID & PID tester](https://learn.adafruit.com/simple-arduino-based-usb-vid-and-pid-tester.md)
- [Arduino "Hunt The Wumpus"](https://learn.adafruit.com/arduino-hunt-the-wumpus.md)
- [Sous-vide controller powered by Arduino - The SousViduino!](https://learn.adafruit.com/sous-vide-powered-by-arduino-the-sous-viduino.md)
- [Trinket Ultrasonic Rangefinder](https://learn.adafruit.com/trinket-ultrasonic-rangefinder.md)
- [Trinket RGB Shield Clock](https://learn.adafruit.com/trinket-rgb-shield-clock.md)
- [Adafruit Capacitive Touch Sensor Breakouts](https://learn.adafruit.com/adafruit-capacitive-touch-sensor-breakouts.md)
- [Trinket Temperature & Humidity LCD Display](https://learn.adafruit.com/trinket-temperature-humidity-lcd-display.md)
- [Character LCD with Raspberry Pi or BeagleBone Black](https://learn.adafruit.com/character-lcd-with-raspberry-pi-or-beaglebone-black.md)
- [eInk Literature Quotes Clock for MagTag](https://learn.adafruit.com/eink-literary-quotes-clock-for-magtag.md)
- [Adafruit Feather RP2040 with DVI Output Port](https://learn.adafruit.com/adafruit-feather-rp2040-dvi.md)
- [Portable Solar Charging Tracker](https://learn.adafruit.com/portable-solar-charging-tracker.md)
- [Adafruit E-Ink Bonnet for Raspberry Pi](https://learn.adafruit.com/adafruit-e-ink-bonnet-for-raspberry-pi.md)
- [What’s Fresh Today? In-Season Produce Reminder for Adafruit MagTag](https://learn.adafruit.com/seasonal-produce-for-adafruit-magtag.md)
- [No-Solder Visualizer Capacitive Touch Controller](https://learn.adafruit.com/no-solder-visualizer-capacitive-touch-controller.md)
---
# Source: https://learn.adafruit.com/flora-tv-b-gone/fabric-pinwheel.md
# FLORA TV-B-Gone
## Fabric pinwheel
The functional circuit is quite attractive as-is, but it's pretty conspicuous. You can dress it up however you like! Below is just one example.


You can make a fabric yoyo and install it right over the pushbutton in the center of the Flora. There are dozens of [fabric yoyo tutorials](http://kangacreative.blogspot.com/2011/05/easy-peasy-fabric-yoyo-tutorial.html) online!

Apply an adhesive pinback to the front side of the Flora board. Be careful to avoid obscuring the Flora's on/off switch.
- [Previous Page](https://learn.adafruit.com/flora-tv-b-gone/power.md)
- [Next Page](https://learn.adafruit.com/flora-tv-b-gone/wear-it.md)
## Featured Products
### FLORA - Wearable electronic platform: Arduino-compatible
[FLORA - Wearable electronic platform: Arduino-compatible](https://www.adafruit.com/product/659)
FLORA is Adafruit's fully-featured wearable electronics platform. It's a round, sewable, Arduino-compatible microcontroller designed to empower amazing wearables projects.FLORA comes with Adafruit's support, [tutorials and...](http://learn.adafruit.com/category/flora)
In Stock
[Buy Now](https://www.adafruit.com/product/659)
[Related Guides to the Product](https://learn.adafruit.com/products/659/guides)
### Super-bright 5mm IR LED
[Super-bright 5mm IR LED](https://www.adafruit.com/product/387)
Infrared LEDs are used for remote controls (they're the little LED in the part you point at your TV) and 'night-vision' cameras, and these little blue guys are high powered ones! They are 940nm wavelength, which is what nearly all devices listen to. They're 20 degree beamwidth,...
In Stock
[Buy Now](https://www.adafruit.com/product/387)
[Related Guides to the Product](https://learn.adafruit.com/products/387/guides)
### Colorful Round Tactile Button Switch Assortment - 15 pack
[Colorful Round Tactile Button Switch Assortment - 15 pack](https://www.adafruit.com/product/1009)
Little clicky switches are standard input "buttons" on electronic projects. These work best in a PCB but [can be used on a solderless breadboard as shown in this tutorial](http://www.ladyada.net/learn/arduino/lesson5.html). The pins are normally open (disconnected) and...
In Stock
[Buy Now](https://www.adafruit.com/product/1009)
[Related Guides to the Product](https://learn.adafruit.com/products/1009/guides)
### NPN Bipolar Transistors (PN2222) - 10 pack
[NPN Bipolar Transistors (PN2222) - 10 pack](https://www.adafruit.com/product/756)
Transistors are powerful little electronic switches, and we really like these NPN transistors whenever we need to control medium-power electronics such as small motors, solenoids, or IR LEDs. We find them so handy, they come in a pack of 10!
Each transistor is a general-purpose...
In Stock
[Buy Now](https://www.adafruit.com/product/756)
[Related Guides to the Product](https://learn.adafruit.com/products/756/guides)
### Heat Shrink Pack
[Heat Shrink Pack](https://www.adafruit.com/product/344)
Heat shrink is the duct tape of electronics, it keeps your stuff all safe and kept together. Especially when wiring and soldering, use heat shrink to add mechanical strength to cables. We use this stuff all the time and having a zip-lock bag of all the possible sizes is super...
In Stock
[Buy Now](https://www.adafruit.com/product/344)
[Related Guides to the Product](https://learn.adafruit.com/products/344/guides)
### 3 x AAA Battery Holder with On/Off Switch and 2-Pin JST
[3 x AAA Battery Holder with On/Off Switch and 2-Pin JST](https://www.adafruit.com/product/727)
This battery holder connects 3 AAA batteries together in series for powering all kinds of projects. We spec'd these out because the box is slim, and 3 AAA's add up to about 3.3-4.5V, a very similar range to Lithium Ion/polymer (Li-Ion) batteries and have an on-off switch. That makes...
In Stock
[Buy Now](https://www.adafruit.com/product/727)
[Related Guides to the Product](https://learn.adafruit.com/products/727/guides)
### Solid-Core Wire Spool - 25ft - 22AWG - Black
[Solid-Core Wire Spool - 25ft - 22AWG - Black](https://www.adafruit.com/product/290)
Perfect for bread-boarding, free wiring, etc. This spool of solid-core wire is easy to solder to. When bent it keeps its shape pretty well. We like to have a few spools of this stuff around. We suggest picking up wire strippers to match. Wire gauge is 22 AWG which we've found is the best...
In Stock
[Buy Now](https://www.adafruit.com/product/290)
[Related Guides to the Product](https://learn.adafruit.com/products/290/guides)
### Getting Started with Adafruit FLORA
[Getting Started with Adafruit FLORA](https://www.adafruit.com/product/1839)
**Making Wearables with an Arduino-Compatible Electronics Platform**
This book introduces readers to building wearable electronics projects using Adafruit's tiny FLORA board: at 4.4 grams, and only 1.75 inches in diameter, and featuring Arduino compatibility, it's the...
No Longer Stocked
[Buy Now](https://www.adafruit.com/product/1839)
[Related Guides to the Product](https://learn.adafruit.com/products/1839/guides)
## Related Guides
- [Citi Bike Helmet](https://learn.adafruit.com/citi-bike-helmet.md)
- [Datalogging Hat with FLORA BLE](https://learn.adafruit.com/datalogging-hat-with-flora-ble.md)
- [Ursula's Seashell Necklace](https://learn.adafruit.com/ursulas-seashell-necklace.md)
- [LED Stego Flex Spike Hoodie](https://learn.adafruit.com/led-stego-flex-spike-hoodie.md)
- [Flora MIDI Drum Glove](https://learn.adafruit.com/midi-drum-glove.md)
- [FLORA NeoGeo Watch](https://learn.adafruit.com/flora-geo-watch.md)
- [Light-Up Angler Fish Embroidery](https://learn.adafruit.com/light-up-angler-fish-embroidery.md)
- [Flora Snaps](https://learn.adafruit.com/flora-snaps.md)
- [Glowing WhoVille Hat](https://learn.adafruit.com/glowing-whoville-hat.md)
- [Fiber Optic Pixie Skirt](https://learn.adafruit.com/fiber-optic-pixie-princess-skirt.md)
- [Pac Man Pixel Suspenders](https://learn.adafruit.com/pac-man-pixel-suspenders.md)
- [Washing Wearable Electronics](https://learn.adafruit.com/washing-wearable-electronics.md)
- [Flora-Powered TARDIS Costume (for Dogs!)](https://learn.adafruit.com/wearable-flora-powered-tardis-costume-dogs.md)
- [Firewalker LED Sneakers](https://learn.adafruit.com/firewalker-led-sneakers.md)
- [FLORA and GEMMA ICSP](https://learn.adafruit.com/flora-and-gemma-isp.md)
---
# Source: https://learn.adafruit.com/delorean-time-circuit/fabrication.md
# DeLorean Time Circuit
## Fabrication
To keep this ultra slim, a [Teensy](https://www.adafruit.com/products/199) microcontroller board was used — a standard Arduino wouldn’t fit, not even the [headerless Leonardo](https://www.adafruit.com/products/883 "Link: https://www.adafruit.com/products/883"). After prototyping the full circuit on a breadboard, all the parts were soldered point-to-point and “dead bug” style inside the case. Power is provided by three AA cells in series — a bit under the ideal 5 Volts, but still sufficient to run everything. The cells fit in the “chin” below the three dates. I’d mail-ordered a special battery holder for this, and then in my rush to complete the project I went ahead and made all the case parts based on the holder dimensions on a web site. Naturally then, with the case already cut and glued, the part that arrived was slightly larger than the dimensions posted. The fix was to break off the battery contacts from the ends of the holder and epoxy putty them directly into the case. This eliminated just enough girth for everything to fit. The remaining electronics were delicately folded into the case with copious amounts of hot-melt glue, tape and swearing.


The case was fabricated from laser-cut acrylic and sprayed with faux hammered metal paint. A metal enclosure would have been more authentic (and more work), but a corollary to “[Maslow’s hammer](http://en.wikipedia.org/wiki/Law_of_the_instrument)” dictates that when you have a laser cutter, every project appears ideally suited to acrylic.

The labels were inkjet printed and made into stickers with a Xyron applicator, trimmed with an X-Acto knife, then painstakingly touched up with a Sharpie marker to hide the white edges. After the labels were applied, the bezels received a thick spray of acrylic sealer, then attached to the front of the case with epoxy.

A classic Dymo labeler (the plastic punched letter kind) might suffice here. In the film trilogy, most of the instruments (including the Flux Capacitor) were labeled that way. But the Time Circuit, being a close-up “hero prop” that required maximum legibility for the audience, had cleanly-printed labels. Sticklers for accuracy might want to take the extra step.
- [Previous Page](https://learn.adafruit.com/delorean-time-circuit/circuit-trickery.md)
- [Next Page](https://learn.adafruit.com/delorean-time-circuit/wrap-up-and-resources.md)
## Featured Products
### Adafruit 0.56" 4-Digit 7-Segment Display with I2C Backpack - Red
[Adafruit 0.56" 4-Digit 7-Segment Display with I2C Backpack - Red](https://www.adafruit.com/product/878)
What's better than a single LED? Lots of LEDs! A fun way to make a small display is to use an [8x8 matrix](https://www.adafruit.com/category/37_88) or a [4-digit 7-segment display](https://www.adafruit.com/category/37_103). Matrices like these are...
In Stock
[Buy Now](https://www.adafruit.com/product/878)
[Related Guides to the Product](https://learn.adafruit.com/products/878/guides)
### Adafruit 0.56" 4-Digit 7-Segment Display w/ I2C Backpack - Green
[Adafruit 0.56" 4-Digit 7-Segment Display w/ I2C Backpack - Green](https://www.adafruit.com/product/880)
What's better than a single LED? Lots of LEDs! A fun way to make a small display is to use an [8x8 matrix](https://www.adafruit.com/category/37_88) or a [4-digit 7-segment display](https://www.adafruit.com/category/37_103). Matrices like these are...
No Longer Stocked
[Buy Now](https://www.adafruit.com/product/880)
[Related Guides to the Product](https://learn.adafruit.com/products/880/guides)
### Adafruit 0.56" 4-Digit 7-Segment Display w/I2C Backpack - Yellow
[Adafruit 0.56" 4-Digit 7-Segment Display w/I2C Backpack - Yellow](https://www.adafruit.com/product/879)
What's better than a single LED? Lots of LEDs! A fun way to make a small display is to use an [8x8 matrix](https://www.adafruit.com/category/37_88) or a [4-digit 7-segment display](https://www.adafruit.com/category/37_103). Matrices like these are...
In Stock
[Buy Now](https://www.adafruit.com/product/879)
[Related Guides to the Product](https://learn.adafruit.com/products/879/guides)
### ChronoDot - Ultra-precise Real Time Clock
[ChronoDot - Ultra-precise Real Time Clock](https://www.adafruit.com/product/255)
The **ChronoDot V3** is the latest version of macetech’s popular ChronoDot line of products. Designed during the Great Chip Shortage, it uses the newly-released MAX31328 temperature-compensated real-time clock chip. However, it remains pin- and code-compatible with the older...
In Stock
[Buy Now](https://www.adafruit.com/product/255)
[Related Guides to the Product](https://learn.adafruit.com/products/255/guides)
### Teensy (ATmega32u4 USB dev board) 2.0
[Teensy (ATmega32u4 USB dev board) 2.0](https://www.adafruit.com/product/199)
Discontinued - **you can grab** [Adafruit ItsyBitsy 32u4 - 5V 16MHz](https://www.adafruit.com/product/3677) **instead!**
The Teensy 2.0 is a complete USB-based microcontoller development system, in a very small footprint! All programming is done via the USB port. No...
No Longer Stocked
[Buy Now](https://www.adafruit.com/product/199)
[Related Guides to the Product](https://learn.adafruit.com/products/199/guides)
### Diffused Green 5mm LED (25 pack)
[Diffused Green 5mm LED (25 pack)](https://www.adafruit.com/product/298)
Need some indicators? We are big fans of these diffused green LEDs, in fact we use them exclusively in our kits. They are fairly bright so they can be seen in daytime, and from any angle. They go easily into a breadboard and will add that extra zing to your project.
- Pack of 25...
In Stock
[Buy Now](https://www.adafruit.com/product/298)
[Related Guides to the Product](https://learn.adafruit.com/products/298/guides)
### Diffused Red 5mm LED (25 pack)
[Diffused Red 5mm LED (25 pack)](https://www.adafruit.com/product/299)
Need some indicators? We are big fans of these diffused red LEDs, in fact we use them exclusively in our kits. They are fairly bright so they can be seen in daytime, and from any angle. They go easily into a breadboard and will add that extra zing to your project.
- Pack of 25...
In Stock
[Buy Now](https://www.adafruit.com/product/299)
[Related Guides to the Product](https://learn.adafruit.com/products/299/guides)
## Related Guides
- [Adafruit LED Backpacks](https://learn.adafruit.com/adafruit-led-backpack.md)
- [Mindfulness Clock OF DOOM](https://learn.adafruit.com/mindfulness-clock-of-doom.md)
- [Fidget Spinner Tachometer](https://learn.adafruit.com/fidget-spinner-tachometer.md)
- [Arduino GPS Clock](https://learn.adafruit.com/arduino-clock.md)
- [Collin's Lab: Binary & Hex](https://learn.adafruit.com/collins-lab-binary-and-hex.md)
- [Personalized NextBus ESP8266 Transit Clock](https://learn.adafruit.com/personalized-esp8266-transit-clock.md)
- [Trinket React Counter](https://learn.adafruit.com/trinket-react-counter.md)
- [CircuitPython Hardware: LED Backpacks & FeatherWings](https://learn.adafruit.com/micropython-hardware-led-backpacks-and-featherwings.md)
- [Tap Tempo Trinket](https://learn.adafruit.com/tap-tempo-trinket.md)
- [Raspberry Pi Physical Dashboard](https://learn.adafruit.com/raspberry-pi-physical-dashboard.md)
- [LED Backpack Displays on Raspberry Pi and BeagleBone Black](https://learn.adafruit.com/led-backpack-displays-on-raspberry-pi-and-beaglebone-black.md)
- [Cartoon Character Clock](https://learn.adafruit.com/cartoon-character-clock.md)
- [Feather ESP32-S3 TFT CircuitPython Day 2024 Countdown Clock](https://learn.adafruit.com/feather-esp32-s3-tft-circuitpython-day-2024-countdown-clock.md)
- [Moto 360 Teardown](https://learn.adafruit.com/moto-360-smartwatch-teardown.md)
- [Articulating Retina Monitor](https://learn.adafruit.com/articulating-retina-monitor.md)
---
# Source: https://learn.adafruit.com/adafruit-motor-shield/faq.md
# Source: https://learn.adafruit.com/usb-dc-and-solar-lipoly-charger/faq.md
# Source: https://learn.adafruit.com/electroknit/faq.md
# Source: https://learn.adafruit.com/adafruit-led-backpack/faq.md
# Adafruit LED Backpacks
## F.A.Q.
###
The best way to get up and running is to read the HT16K33 driver datasheet available at [http://learn.adafruit.com/adafruit-led-backpack/downloads](http://learn.adafruit.com/adafruit-led-backpack/downloads) - the backpacks all use this chip to do all the LED driving. You can cross-reference this document with the Arduino library code to adapt it to your platform. Any microcontroller that has I2C host support should be able to drive the backpacks but we only provide Arduino example code at this time
###
You're in luck! We have a full tutorial here that covers using the 7-segment and 8x8 matrices on a Pi with Python code -\> [http://learn.adafruit.com/matrix-7-segment-led-backpack-with-the-raspberry-pi](http://learn.adafruit.com/matrix-7-segment-led-backpack-with-the-raspberry-pi)
###
We are not sure why this occurs but there is an address collision even though the address are different! Set the backpacks to address 0x71 or anything other than the default 0x70 to make the issue go away
###
It depends on how many LEDs you have lit at once!
But a rough estimation is 20 milliamps per segment. Note that segments are multiplexed per row so that means
- 8x8 Mono Matrix (8 rows)= 8 x 20mA = 160mA max
- 7-segment backpacks (7 segments + 1 dot) = 8 x 20mA = 160 mA
- Alphanumeric (14 segments) = 14 x 20mA = 280mA
- Bi-color 8x8 and 8x16 matrix (16 rows) = 8 x 16 = 320mA
But again, this is _maximum_ and assumes all digits and all segments are lit up! Your average use may be 1/10 to 1/2 of this amount
- [Previous Page](https://learn.adafruit.com/adafruit-led-backpack/changing-i2c-address.md)
- [Next Page](https://learn.adafruit.com/adafruit-led-backpack/downloads.md)
## Primary Products
### Adafruit Mini 8x8 LED Matrix w/I2C Backpack - Red
[Adafruit Mini 8x8 LED Matrix w/I2C Backpack - Red](https://www.adafruit.com/product/870)
What's better than a single LED? Lots of LEDs! A fun way to make a small display is to use an [8x8 matrix](https://www.adafruit.com/category/37_88) or a [4-digit 7-segment display](https://www.adafruit.com/category/37_103). Matrices like these are...
In Stock
[Buy Now](https://www.adafruit.com/product/870)
[Related Guides to the Product](https://learn.adafruit.com/products/870/guides)
### Adafruit Mini 8x8 LED Matrix w/I2C Backpack - Yellow
[Adafruit Mini 8x8 LED Matrix w/I2C Backpack - Yellow](https://www.adafruit.com/product/871)
What's better than a single LED? Lots of LEDs! A fun way to make a small display is to use an [8x8 matrix](https://www.adafruit.com/category/37_88) or a [4-digit 7-segment display](https://www.adafruit.com/category/37_103). Matrices like these are...
In Stock
[Buy Now](https://www.adafruit.com/product/871)
[Related Guides to the Product](https://learn.adafruit.com/products/871/guides)
### Adafruit Mini 0.8" 8x8 LED Matrix w/I2C Backpack - Yellow-Green
[Adafruit Mini 0.8" 8x8 LED Matrix w/I2C Backpack - Yellow-Green](https://www.adafruit.com/product/872)
What's better than a single LED? Lots of LEDs! A fun way to make a small display is to use an [8x8 matrix](https://www.adafruit.com/category/37_88) or a [4-digit 7-segment display](https://www.adafruit.com/category/37_103). Matrices like these are...
In Stock
[Buy Now](https://www.adafruit.com/product/872)
[Related Guides to the Product](https://learn.adafruit.com/products/872/guides)
### Adafruit 0.56" 4-Digit 7-Segment Display with I2C Backpack - Red
[Adafruit 0.56" 4-Digit 7-Segment Display with I2C Backpack - Red](https://www.adafruit.com/product/878)
What's better than a single LED? Lots of LEDs! A fun way to make a small display is to use an [8x8 matrix](https://www.adafruit.com/category/37_88) or a [4-digit 7-segment display](https://www.adafruit.com/category/37_103). Matrices like these are...
In Stock
[Buy Now](https://www.adafruit.com/product/878)
[Related Guides to the Product](https://learn.adafruit.com/products/878/guides)
### Adafruit 0.56" 4-Digit 7-Segment Display w/I2C Backpack - Yellow
[Adafruit 0.56" 4-Digit 7-Segment Display w/I2C Backpack - Yellow](https://www.adafruit.com/product/879)
What's better than a single LED? Lots of LEDs! A fun way to make a small display is to use an [8x8 matrix](https://www.adafruit.com/category/37_88) or a [4-digit 7-segment display](https://www.adafruit.com/category/37_103). Matrices like these are...
In Stock
[Buy Now](https://www.adafruit.com/product/879)
[Related Guides to the Product](https://learn.adafruit.com/products/879/guides)
### Adafruit 0.56" 4-Digit 7-Segment Display w/ I2C Backpack - Green
[Adafruit 0.56" 4-Digit 7-Segment Display w/ I2C Backpack - Green](https://www.adafruit.com/product/880)
What's better than a single LED? Lots of LEDs! A fun way to make a small display is to use an [8x8 matrix](https://www.adafruit.com/category/37_88) or a [4-digit 7-segment display](https://www.adafruit.com/category/37_103). Matrices like these are...
No Longer Stocked
[Buy Now](https://www.adafruit.com/product/880)
[Related Guides to the Product](https://learn.adafruit.com/products/880/guides)
### Adafruit 0.56" 4-Digit 7-Segment Display w/ I2C Backpack - Blue
[Adafruit 0.56" 4-Digit 7-Segment Display w/ I2C Backpack - Blue](https://www.adafruit.com/product/881)
What's better than a single LED? Lots of LEDs! A fun way to make a small display is to use an [8x8 matrix](https://www.adafruit.com/category/37_88) or a [4-digit 7-segment display](https://www.adafruit.com/category/37_103). Matrices like these are...
In Stock
[Buy Now](https://www.adafruit.com/product/881)
[Related Guides to the Product](https://learn.adafruit.com/products/881/guides)
### Adafruit Bicolor LED Square Pixel Matrix with I2C Backpack
[Adafruit Bicolor LED Square Pixel Matrix with I2C Backpack](https://www.adafruit.com/product/902)
What's better than a single LED? Lots of LEDs! A fun way to make a small colorful display is to use a [1.2" Bi-color 8x8 LED Matrix](http://www.adafruit.com/products/458). Matrices like these are 'multiplexed' - so to control all the 128 LEDs you need 24 pins....
In Stock
[Buy Now](https://www.adafruit.com/product/902)
[Related Guides to the Product](https://learn.adafruit.com/products/902/guides)
### Adafruit Mini 8x8 LED Matrix w/I2C Backpack - Blue
[Adafruit Mini 8x8 LED Matrix w/I2C Backpack - Blue](https://www.adafruit.com/product/959)
What's better than a single LED? Lots of LEDs! A fun way to make a small display is to use an [8x8 matrix](https://www.adafruit.com/category/37_88) or a [4-digit 7-segment display](https://www.adafruit.com/category/37_103). Matrices like these are...
In Stock
[Buy Now](https://www.adafruit.com/product/959)
[Related Guides to the Product](https://learn.adafruit.com/products/959/guides)
### Adafruit 0.56" 4-Digit 7-Segment Display w/I2C Backpack - White
[Adafruit 0.56" 4-Digit 7-Segment Display w/I2C Backpack - White](https://www.adafruit.com/product/1002)
What's better than a single LED? Lots of LEDs! A fun way to make a small display is to use an [8x8 matrix](https://www.adafruit.com/category/37_88) or a [4-digit 7-segment display](https://www.adafruit.com/category/37_103). Matrices like these are...
In Stock
[Buy Now](https://www.adafruit.com/product/1002)
[Related Guides to the Product](https://learn.adafruit.com/products/1002/guides)
### Adafruit 1.2" 8x8 LED Matrix Backpack
[Adafruit 1.2" 8x8 LED Matrix Backpack](https://www.adafruit.com/product/1048)
By popular request, you can now get our 8x8 LED backpacks without the LEDs! These backpacks feature an HT16K33 I2C LED driver, they're simple and easy to use - you can use [our very nice library for the backpacks to...](https://github.com/adafruit/Adafruit-LED-Backpack-Library)
In Stock
[Buy Now](https://www.adafruit.com/product/1048)
[Related Guides to the Product](https://learn.adafruit.com/products/1048/guides)
### Adafruit Small 1.2" 8x8 LED Matrix w/I2C Backpack - Red
[Adafruit Small 1.2" 8x8 LED Matrix w/I2C Backpack - Red](https://www.adafruit.com/product/1049)
What's better than a single LED? Lots of LEDs! A fun way to make a small display is to use an [8x8 matrix](https://www.adafruit.com/category/37_88) or a [4-digit 7-segment display](https://www.adafruit.com/category/37_103). Matrices like these are...
In Stock
[Buy Now](https://www.adafruit.com/product/1049)
[Related Guides to the Product](https://learn.adafruit.com/products/1049/guides)
### Adafruit Small 1.2" 8x8 LED Matrix w/I2C Backpack - Yellow
[Adafruit Small 1.2" 8x8 LED Matrix w/I2C Backpack - Yellow](https://www.adafruit.com/product/1050)
What's better than a single LED? Lots of LEDs! A fun way to make a small display is to use an [8x8 matrix](https://www.adafruit.com/category/37_88) or a [4-digit 7-segment display](https://www.adafruit.com/category/37_103). Matrices like these are...
In Stock
[Buy Now](https://www.adafruit.com/product/1050)
[Related Guides to the Product](https://learn.adafruit.com/products/1050/guides)
### Adafruit Small 1.2" 8x8 LED Matrix w/I2C Backpack - Blue
[Adafruit Small 1.2" 8x8 LED Matrix w/I2C Backpack - Blue](https://www.adafruit.com/product/1052)
What's better than a single LED? Lots of LEDs! A fun way to make a small display is to use an [8x8 matrix](https://www.adafruit.com/category/37_88) or a [4-digit 7-segment display](https://www.adafruit.com/category/37_103). Matrices like these are...
In Stock
[Buy Now](https://www.adafruit.com/product/1052)
[Related Guides to the Product](https://learn.adafruit.com/products/1052/guides)
### Adafruit Mini 8x8 LED Matrix w/I2C Backpack - Ultra Bright White
[Adafruit Mini 8x8 LED Matrix w/I2C Backpack - Ultra Bright White](https://www.adafruit.com/product/1080)
What's better than a single LED? Lots of LEDs! A fun way to make a small display is to use an [8x8 matrix](https://www.adafruit.com/category/37_88) or a [4-digit 7-segment display](https://www.adafruit.com/category/37_103). Matrices like these are...
In Stock
[Buy Now](https://www.adafruit.com/product/1080)
[Related Guides to the Product](https://learn.adafruit.com/products/1080/guides)
### Adafruit 1.2" 4-Digit 7-Segment Display w/I2C Backpack - Green
[Adafruit 1.2" 4-Digit 7-Segment Display w/I2C Backpack - Green](https://www.adafruit.com/product/1268)
What's better than a single LED? Lots of LEDs! A fun way to make a numeric display is to use a [4-digit 7-segment display](https://www.adafruit.com/category/37_103). LED matrices like these are 'multiplexed' - so to control all the seven-segment LEDs you need 14 pins....
No Longer Stocked
[Buy Now](https://www.adafruit.com/product/1268)
[Related Guides to the Product](https://learn.adafruit.com/products/1268/guides)
### Adafruit 1.2" 4-Digit 7-Segment Display w/I2C Backpack - Yellow
[Adafruit 1.2" 4-Digit 7-Segment Display w/I2C Backpack - Yellow](https://www.adafruit.com/product/1269)
What's better than a single LED? Lots of LEDs! A fun way to make a numeric display is to use a [4-digit 7-segment display](https://www.adafruit.com/category/37_103). LED matrices like these are 'multiplexed' - so to control all the seven-segment LEDs you need 14 pins....
In Stock
[Buy Now](https://www.adafruit.com/product/1269)
[Related Guides to the Product](https://learn.adafruit.com/products/1269/guides)
### Adafruit 1.2" 4-Digit 7-Segment Display w/I2C Backpack - Red
[Adafruit 1.2" 4-Digit 7-Segment Display w/I2C Backpack - Red](https://www.adafruit.com/product/1270)
What's better than a single LED? Lots of LEDs! A fun way to make a numeric display is to use a [4-digit 7-segment display](https://www.adafruit.com/category/37_103). LED matrices like these are 'multiplexed' - so to control all the seven-segment LEDs you need 14 pins....
In Stock
[Buy Now](https://www.adafruit.com/product/1270)
[Related Guides to the Product](https://learn.adafruit.com/products/1270/guides)
### Small 1.2" 8x8 Ultra Bright White LED Matrix + Backpack
[Small 1.2" 8x8 Ultra Bright White LED Matrix + Backpack](https://www.adafruit.com/product/1614)
What's better than a single LED? Lots of LEDs! A fun way to make a small display is to use an [8x8 matrix](https://www.adafruit.com/category/37_88) or a [4-digit 7-segment display](https://www.adafruit.com/category/37_103). Matrices like these are...
In Stock
[Buy Now](https://www.adafruit.com/product/1614)
[Related Guides to the Product](https://learn.adafruit.com/products/1614/guides)
### Adafruit Small 1.2" 8x8 LED Matrix w/I2C Backpack - Pure Green
[Adafruit Small 1.2" 8x8 LED Matrix w/I2C Backpack - Pure Green](https://www.adafruit.com/product/1632)
What's better than a single LED? Lots of LEDs! A fun way to make a small display is to use an [8x8 matrix](https://www.adafruit.com/category/37_88) or a [4-digit 7-segment display](https://www.adafruit.com/category/37_103). Matrices like these are...
In Stock
[Buy Now](https://www.adafruit.com/product/1632)
[Related Guides to the Product](https://learn.adafruit.com/products/1632/guides)
### Adafruit Mini 0.8" 8x8 LED Matrix w/I2C Backpack - Pure Green
[Adafruit Mini 0.8" 8x8 LED Matrix w/I2C Backpack - Pure Green](https://www.adafruit.com/product/1633)
What's better than a single LED? Lots of LEDs! A fun way to make a small display is to use an [8x8 matrix](https://www.adafruit.com/category/37_88) or a [4-digit 7-segment display](https://www.adafruit.com/category/37_103). Matrices like these are...
In Stock
[Buy Now](https://www.adafruit.com/product/1633)
[Related Guides to the Product](https://learn.adafruit.com/products/1633/guides)
### Bi-Color (Red/Green) 24-Bar Bargraph w/I2C Backpack Kit
[Bi-Color (Red/Green) 24-Bar Bargraph w/I2C Backpack Kit](https://www.adafruit.com/product/1721)
What's better than a single LED? Lots of LEDs! A fun way to make a small linear display is to use two 12-bar Bi-color bar-graphs. However, this LED bargraph is 'multiplexed' - so to control all the 48 LEDs you need a lot of pins.
Out of Stock
[Buy Now](https://www.adafruit.com/product/1721)
[Related Guides to the Product](https://learn.adafruit.com/products/1721/guides)
### Small 1.2" 8x8 Ultra Bright Square Amber LED Matrix + Backpack
[Small 1.2" 8x8 Ultra Bright Square Amber LED Matrix + Backpack](https://www.adafruit.com/product/1854)
What's better than a single LED? Lots of LEDs! Matrices like these are 'multiplexed' - so to control 64 LEDs you need 16 pins. That's a lot of pins, and there are [driver chips like the MAX7219](//www.adafruit.com/products/453) that can control a matrix for you but...
In Stock
[Buy Now](https://www.adafruit.com/product/1854)
[Related Guides to the Product](https://learn.adafruit.com/products/1854/guides)
### Small 1.2" 8x8 Ultra Bright Square Yellow LED Matrix + Backpack
[Small 1.2" 8x8 Ultra Bright Square Yellow LED Matrix + Backpack](https://www.adafruit.com/product/1855)
What's better than a single LED? Lots of LEDs! Matrices like these are 'multiplexed' - so to control 64 LEDs you need 16 pins. That's a lot of pins, and there are [driver chips like the MAX7219](//www.adafruit.com/products/453) that can control a matrix for you but...
In Stock
[Buy Now](https://www.adafruit.com/product/1855)
[Related Guides to the Product](https://learn.adafruit.com/products/1855/guides)
### Small 1.2" 8x8 Bright Square Pure Green LED Matrix + Backpack
[Small 1.2" 8x8 Bright Square Pure Green LED Matrix + Backpack](https://www.adafruit.com/product/1856)
What's better than a single LED? Lots of LEDs! Matrices like these are 'multiplexed' - so to control 64 LEDs you need 16 pins. That's a lot of pins, and there are [driver chips like the MAX7219](//www.adafruit.com/products/453) that can control a matrix for you but...
In Stock
[Buy Now](https://www.adafruit.com/product/1856)
[Related Guides to the Product](https://learn.adafruit.com/products/1856/guides)
### Small 1.2" 8x8 Ultra Bright Square White LED Matrix + Backpack
[Small 1.2" 8x8 Ultra Bright Square White LED Matrix + Backpack](https://www.adafruit.com/product/1857)
What's better than a single LED? Lots of LEDs! Matrices like these are 'multiplexed' - so to control 64 LEDs you need 16 pins. That's a lot of pins, and there are [driver chips like the MAX7219](//www.adafruit.com/products/453) that can control a matrix for you but...
In Stock
[Buy Now](https://www.adafruit.com/product/1857)
[Related Guides to the Product](https://learn.adafruit.com/products/1857/guides)
### Adafruit 14-segment LED Alphanumeric Backpack - STEMMA QT
[Adafruit 14-segment LED Alphanumeric Backpack - STEMMA QT](https://www.adafruit.com/product/1910)
By popular request, you can now get our 14-segment LED backpacks without the LEDs! These backpacks feature an HT16K33 I2C LED driver, they're simple and easy to use - you can use [our very nice library for the backpacks to...](https://github.com/adafruit/Adafruit-LED-Backpack-Library)
In Stock
[Buy Now](https://www.adafruit.com/product/1910)
[Related Guides to the Product](https://learn.adafruit.com/products/1910/guides)
### Quad Alphanumeric Display - Red 0.54" Digits w/ I2C Backpack
[Quad Alphanumeric Display - Red 0.54" Digits w/ I2C Backpack](https://www.adafruit.com/product/1911)
Display, elegantly, 012345678 or 9! Gaze, hypnotized, at ABCDEFGHIJKLM - well it can display the whole alphabet. You get the point. This is a nice, bright alphanumeric display that shows letters and numbers in a beautiful red hue. It's super bright and designed for viewing from distances...
In Stock
[Buy Now](https://www.adafruit.com/product/1911)
[Related Guides to the Product](https://learn.adafruit.com/products/1911/guides)
### Quad Alphanumeric Display - Blue 0.54" Digits w/ I2C Backpack
[Quad Alphanumeric Display - Blue 0.54" Digits w/ I2C Backpack](https://www.adafruit.com/product/1912)
Display, elegantly, 012345678 or 9! Gaze, hypnotized, at ABCDEFGHIJKLM - well it can display the whole alphabet. You get the point. This is a nice, bright alphanumeric display that shows letters and numbers in a beautiful blue hue. It's super bright and designed for viewing from distances...
In Stock
[Buy Now](https://www.adafruit.com/product/1912)
[Related Guides to the Product](https://learn.adafruit.com/products/1912/guides)
### 16x8 1.2" LED Matrix + Backpack - Ultra Bright Round Green LEDs
[16x8 1.2" LED Matrix + Backpack - Ultra Bright Round Green LEDs](https://www.adafruit.com/product/2035)
What's better than a single LED? Lots of LEDs! And what's better than lots of LEDs? **TWO TIMES AS MANY LEDS!!!**
With the 16x8 LED Matrix Backpack we've doubled your project's matrix capacity by making it super easy to get two separate 8x8 matrices onto...
In Stock
[Buy Now](https://www.adafruit.com/product/2035)
[Related Guides to the Product](https://learn.adafruit.com/products/2035/guides)
### 16x8 1.2" LED Matrix+Backpack UltraBright Round YellowGreen LEDs
[16x8 1.2" LED Matrix+Backpack UltraBright Round YellowGreen LEDs](https://www.adafruit.com/product/2036)
What's better than a single LED? Lots of LEDs! And what's better than lots of LEDs? **TWO TIMES AS MANY LEDS!!!**
With the 16x8 LED Matrix Backpack we've doubled your project's matrix capacity by making it super easy to get two separate 8x8 matrices onto...
In Stock
[Buy Now](https://www.adafruit.com/product/2036)
[Related Guides to the Product](https://learn.adafruit.com/products/2036/guides)
### 16x8 1.2" LED Matrix + Backpack - Ultra Bright Round Red LEDs
[16x8 1.2" LED Matrix + Backpack - Ultra Bright Round Red LEDs](https://www.adafruit.com/product/2037)
What's better than a single LED? Lots of LEDs! And what's better than lots of LEDs? **TWO TIMES AS MANY LEDS!!!**
With the 16x8 LED Matrix Backpack we've doubled your project's matrix capacity by making it super easy to get two separate 8x8 matrices onto...
In Stock
[Buy Now](https://www.adafruit.com/product/2037)
[Related Guides to the Product](https://learn.adafruit.com/products/2037/guides)
### 16x8 1.2" LED Matrix + Backpack - Ultra Bright Round White LEDs
[16x8 1.2" LED Matrix + Backpack - Ultra Bright Round White LEDs](https://www.adafruit.com/product/2038)
What's better than a single LED? Lots of LEDs! And what's better than lots of LEDs? **TWO TIMES AS MANY LEDS!!!**
With the 16x8 LED Matrix Backpack we've doubled your project's matrix capacity by making it super easy to get two separate 8x8 matrices onto...
In Stock
[Buy Now](https://www.adafruit.com/product/2038)
[Related Guides to the Product](https://learn.adafruit.com/products/2038/guides)
### 16x8 1.2" LED Matrix + Backpack - Ultra Bright Round Blue LEDs
[16x8 1.2" LED Matrix + Backpack - Ultra Bright Round Blue LEDs](https://www.adafruit.com/product/2039)
What's better than a single LED? Lots of LEDs! And what's better than lots of LEDs? **TWO TIMES AS MANY LEDS!!!**
With the 16x8 LED Matrix Backpack we've doubled your project's matrix capacity by making it super easy to get two separate 8x8 matrices onto...
In Stock
[Buy Now](https://www.adafruit.com/product/2039)
[Related Guides to the Product](https://learn.adafruit.com/products/2039/guides)
### 16x8 1.2" LED Matrix + Backpack - Ultra Bright Square Blue LEDs
[16x8 1.2" LED Matrix + Backpack - Ultra Bright Square Blue LEDs](https://www.adafruit.com/product/2040)
What's better than a single LED? Lots of LEDs! And what's better than lots of LEDs? **TWO TIMES AS MANY LEDS!!!**
With the 16x8 LED Matrix Backpack we've doubled your project's matrix capacity by making it super easy to get two separate 8x8 matrices onto...
In Stock
[Buy Now](https://www.adafruit.com/product/2040)
[Related Guides to the Product](https://learn.adafruit.com/products/2040/guides)
### 16x8 1.2" LED Matrix + Backpack - Ultra Bright Square Amber LEDs
[16x8 1.2" LED Matrix + Backpack - Ultra Bright Square Amber LEDs](https://www.adafruit.com/product/2041)
What's better than a single LED? Lots of LEDs! And what's better than lots of LEDs? **TWO TIMES AS MANY LEDS!!!**
With the 16x8 LED Matrix Backpack we've doubled your project's matrix capacity by making it super easy to get two separate 8x8 matrices onto...
In Stock
[Buy Now](https://www.adafruit.com/product/2041)
[Related Guides to the Product](https://learn.adafruit.com/products/2041/guides)
### 16x8 1.2" LED Matrix + Backpack - Ultra Bright Square Green LEDs
[16x8 1.2" LED Matrix + Backpack - Ultra Bright Square Green LEDs](https://www.adafruit.com/product/2042)
What's better than a single LED? Lots of LEDs! And what's better than lots of LEDs? **TWO TIMES AS MANY LEDS!!!**
With the 16x8 LED Matrix Backpack we've doubled your project's matrix capacity by making it super easy to get two separate 8x8 matrices onto...
In Stock
[Buy Now](https://www.adafruit.com/product/2042)
[Related Guides to the Product](https://learn.adafruit.com/products/2042/guides)
### 16x8 1.2" LED Matrix + Backpack -Ultra Bright Square Yellow LEDs
[16x8 1.2" LED Matrix + Backpack -Ultra Bright Square Yellow LEDs](https://www.adafruit.com/product/2043)
What's better than a single LED? Lots of LEDs! And what's better than lots of LEDs? **TWO TIMES AS MANY LEDS!!!**
With the 16x8 LED Matrix Backpack we've doubled your project's matrix capacity by making it super easy to get two separate 8x8 matrices onto...
In Stock
[Buy Now](https://www.adafruit.com/product/2043)
[Related Guides to the Product](https://learn.adafruit.com/products/2043/guides)
### 16x8 1.2" LED Matrix + Backpack - Ultra Bright Square White LEDs
[16x8 1.2" LED Matrix + Backpack - Ultra Bright Square White LEDs](https://www.adafruit.com/product/2044)
What's better than a single LED? Lots of LEDs! And what's better than lots of LEDs? **TWO TIMES AS MANY LEDS!!!**
With the 16x8 LED Matrix Backpack we've doubled your project's matrix capacity by making it super easy to get two separate 8x8 matrices onto...
In Stock
[Buy Now](https://www.adafruit.com/product/2044)
[Related Guides to the Product](https://learn.adafruit.com/products/2044/guides)
### 16x8 1.2" LED Matrix + Backpack-Ultra Bright Round Orange LEDs
[16x8 1.2" LED Matrix + Backpack-Ultra Bright Round Orange LEDs](https://www.adafruit.com/product/2052)
What's better than a single LED? Lots of LEDs! And what's better than lots of LEDs? **TWO TIMES AS MANY LEDS!!!**
With the 16x8 LED Matrix Backpack we've doubled your project's matrix capacity by making it super easy to get two separate 8x8 matrices onto...
In Stock
[Buy Now](https://www.adafruit.com/product/2052)
[Related Guides to the Product](https://learn.adafruit.com/products/2052/guides)
### 16x8 1.2" LED Matrices+Backpack Round LEDs in Various Colors
[16x8 1.2" LED Matrices+Backpack Round LEDs in Various Colors](https://www.adafruit.com/product/2054)
What's better than a single LED? Lots of LEDs! And what's better than lots of LEDs? **TWO TIMES AS MANY LEDS!!!**
With the 16x8 LED Matrix Backpack we've doubled your project's matrix capacity by making it super easy to get two separate 8x8 matrices onto...
Out of Stock
[Buy Now](https://www.adafruit.com/product/2054)
[Related Guides to the Product](https://learn.adafruit.com/products/2054/guides)
### Adafruit 8x16 LED Matrix FeatherWing w/o Matrices
[Adafruit 8x16 LED Matrix FeatherWing w/o Matrices](https://www.adafruit.com/product/3090)
You will chirp with delight when you see how easy it is to make your very own 8x16 LED matrix display for any Feather. At 0.8" square, the little [8x8 matrices](https://www.adafruit.com/new/?q=8x8%20miniature%20LED%20matrix&) have everything a big LED matrix has,...
Out of Stock
[Buy Now](https://www.adafruit.com/product/3090)
[Related Guides to the Product](https://learn.adafruit.com/products/3090/guides)
### Adafruit 14-segment LED Alphanumeric backpack (same as P1910)
[Adafruit 14-segment LED Alphanumeric backpack (same as P1910)](https://www.adafruit.com/product/3322)
Just the backpack + 4pin header
No Longer Stocked
[Buy Now](https://www.adafruit.com/product/3322)
[Related Guides to the Product](https://learn.adafruit.com/products/3322/guides)
## Featured Products
### Adafruit Small 1.2" 8x8 LED Matrix w/I2C Backpack - Yellow-Green
[Adafruit Small 1.2" 8x8 LED Matrix w/I2C Backpack - Yellow-Green](https://www.adafruit.com/product/1051)
What's better than a single LED? Lots of LEDs! A fun way to make a small display is to use an [8x8 matrix](https://www.adafruit.com/category/37_88) or a [4-digit 7-segment display](https://www.adafruit.com/category/37_103). Matrices like these are...
In Stock
[Buy Now](https://www.adafruit.com/product/1051)
[Related Guides to the Product](https://learn.adafruit.com/products/1051/guides)
### Small 1.2" 8x8 Ultra Bright Square Blue LED Matrix + Backpack
[Small 1.2" 8x8 Ultra Bright Square Blue LED Matrix + Backpack](https://www.adafruit.com/product/1853)
What's better than a single LED? Lots of LEDs! Matrices like these are 'multiplexed' - so to control 64 LEDs you need 16 pins. That's a lot of pins, and there are [driver chips like the MAX7219](//www.adafruit.com/products/453) that can control a matrix for you but...
In Stock
[Buy Now](https://www.adafruit.com/product/1853)
[Related Guides to the Product](https://learn.adafruit.com/products/1853/guides)
## Related Guides
- [LED Backpack Displays on Raspberry Pi and BeagleBone Black](https://learn.adafruit.com/led-backpack-displays-on-raspberry-pi-and-beaglebone-black.md)
- [Animating Multiple LED Backpacks](https://learn.adafruit.com/animating-multiple-led-backpacks.md)
- [Arduino GPS Clock](https://learn.adafruit.com/arduino-clock.md)
- [Raspberry Pi Physical Dashboard](https://learn.adafruit.com/raspberry-pi-physical-dashboard.md)
- [CircuitPython Hardware: LED Backpacks & FeatherWings](https://learn.adafruit.com/micropython-hardware-led-backpacks-and-featherwings.md)
- [Matrix and 7-Segment LED Backpack with the Raspberry Pi](https://learn.adafruit.com/matrix-7-segment-led-backpack-with-the-raspberry-pi.md)
- [DIY Pocket LED Gamer - Tiny Tetris!](https://learn.adafruit.com/diy-3d-printed-handheld-pocket-game-tiny-tetris-snake.md)
- [RGB LED Matrix Cube with 25,000 LEDs](https://learn.adafruit.com/rgb-led-matrix-cube-for-pi.md)
- [Creating GIFs for SmartMatrix](https://learn.adafruit.com/creating-gifs-for-smartmatrix.md)
- [Adafruit CharliePlex LED Matrix Bonnet](https://learn.adafruit.com/adafruit-charlieplex-bonnet.md)
- [Connecting a 16x32 RGB LED Matrix Panel to a Raspberry Pi](https://learn.adafruit.com/connecting-a-16x32-rgb-led-matrix-panel-to-a-raspberry-pi.md)
- [MicroPython Displays: Drawing Text](https://learn.adafruit.com/micropython-displays-drawing-text.md)
- [Heart Rate Badge](https://learn.adafruit.com/heart-rate-badge.md)
- [16x24 LED Matrix](https://learn.adafruit.com/16x24-led-matrix.md)
- [Adafruit IS31FL3741](https://learn.adafruit.com/adafruit-is31fl3741.md)
---
# Source: https://learn.adafruit.com/using-the-bmp085-with-raspberry-pi/faqs.md
# Using the BMP085/180 with Raspberry Pi or Beaglebone Black
## FAQs
Danger:
# Can I use multiple BMP sensors on the same board?
Because each I2C device on the bus needs to have it's own unique address, you normally can only have one device at address 0x77 (etc.). If you require several I2C devices at the same address, and if the devices have a reset pin (like the BMP085 does), then you CAN use multiple devices at the same address ... but at the expense of one GPIO pin per device. What you can do is hold the other devices in reset by pulling the XCLR (Reset) pin low, and letting XCLR go high on the one device that you do want to read, releasing it from reset and causing it to respond to any request on the I2C bus.
Note that on the Beaglebone Black there are 2 I2C buses, so you can in theory run one sensor on each bus. - [Previous Page](https://learn.adafruit.com/using-the-bmp085-with-raspberry-pi/using-the-adafruit-bmp085-python-library.md)
## Featured Products
### BMP180 Barometric Pressure/Temperature/Altitude Sensor- 5V ready
[BMP180 Barometric Pressure/Temperature/Altitude Sensor- 5V ready](https://www.adafruit.com/product/1603)
This precision sensor from Bosch is the best low-cost sensing solution for measuring barometric pressure and temperature. Because pressure changes with altitude you can also use it as an altimeter! The sensor is soldered onto a PCB with a 3.3V regulator, I2C level shifter and pull-up resistors...
No Longer Stocked
[Buy Now](https://www.adafruit.com/product/1603)
[Related Guides to the Product](https://learn.adafruit.com/products/1603/guides)
### Raspberry Pi Model B 512MB RAM
[Raspberry Pi Model B 512MB RAM](https://www.adafruit.com/product/998)
Adafruit ships the **Raspberry Pi Model B 512MB RAM** as of 10/18/2012.
The Raspberry Pi® is a single-board computer developed in the UK by the Raspberry Pi Foundation with the intention of stimulating the teaching of basic computer science in schools. The Raspberry...
No Longer Stocked
[Buy Now](https://www.adafruit.com/product/998)
[Related Guides to the Product](https://learn.adafruit.com/products/998/guides)
### Adafruit Assembled Pi Cobbler Breakout + Cable for Raspberry Pi
[Adafruit Assembled Pi Cobbler Breakout + Cable for Raspberry Pi](https://www.adafruit.com/product/914)
Now that you've finally got your hands on a [Raspberry Pi® Model B](http://www.raspberrypi.org/), you're probably itching to make some fun embedded computer projects with it. What you need is an add on prototyping Pi Cobbler from Adafruit, which can break out all those...
No Longer Stocked
[Buy Now](https://www.adafruit.com/product/914)
[Related Guides to the Product](https://learn.adafruit.com/products/914/guides)
### BeagleBone Black Rev C - 4GB Flash - Pre-installed Debian
[BeagleBone Black Rev C - 4GB Flash - Pre-installed Debian](https://www.adafruit.com/product/1876)
Note: As of May 12, 2014 Adafruit is shipping Rev C. We have discontinued selling Rev B. There are no exchanges or "upgrades" for Rev B to Rev C.
If you liked the BeagleBone Black Rev B, you will love the Rev C! The Rev C still has a blistering 1GHz processor and 512MB...
No Longer Stocked
[Buy Now](https://www.adafruit.com/product/1876)
[Related Guides to the Product](https://learn.adafruit.com/products/1876/guides)
### BeagleBone Black Rev C - 4GB - Pre-installed Debian
[BeagleBone Black Rev C - 4GB - Pre-installed Debian](https://www.adafruit.com/product/1996)
If you liked the BeagleBone Black Rev B, you will love the Rev C! The Rev C has a blistering 1GHz AM3358 processor and 512MB onboard DDR3 RAM, two 46-pin headers, micro HDMI for audio/video output, USB ports, 10/100 Ethernet and other I/O features. The Rev C is an ultra-powered embedded...
Out of Stock
[Buy Now](https://www.adafruit.com/product/1996)
[Related Guides to the Product](https://learn.adafruit.com/products/1996/guides)
## Related Guides
- [Capacitive Touch Sensors on the Raspberry Pi](https://learn.adafruit.com/capacitive-touch-sensors-on-the-raspberry-pi.md)
- [Modern Replacements for DHT11 and DHT22 Sensors](https://learn.adafruit.com/modern-replacements-for-dht11-dht22-sensors.md)
- [Adding a Real Time Clock to Raspberry Pi](https://learn.adafruit.com/adding-a-real-time-clock-to-raspberry-pi.md)
- [Adafruit AHT20 Temperature & Humidity Sensor](https://learn.adafruit.com/adafruit-aht20.md)
- [Wood Case for Raspberry Pi 3](https://learn.adafruit.com/wood-case-for-raspberry-pi-3.md)
- [Adafruit DPI Display Kippah](https://learn.adafruit.com/adafruit-dpi-display-kippah-ttl-tft.md)
- [Adafruit's Raspberry Pi Lesson 6. Using SSH](https://learn.adafruit.com/adafruits-raspberry-pi-lesson-6-using-ssh.md)
- [3.5" PiTFT OctoPrint Rig](https://learn.adafruit.com/3-dot-5-pitft-octoprint-rig.md)
- [Adafruit TMP117 High Accuracy I2C Temperature Monitor](https://learn.adafruit.com/adafruit-tmp117-high-accuracy-i2c-temperature-monitor.md)
- [Instant Camera using Raspberry Pi and Thermal Printer](https://learn.adafruit.com/instant-camera-using-raspberry-pi-and-thermal-printer.md)
- [User-space SPI TFT Python Library - ILI9341](https://learn.adafruit.com/user-space-spi-tft-python-library-ili9341-2-8.md)
- [USB Audio Cards with a Raspberry Pi ](https://learn.adafruit.com/usb-audio-cards-with-a-raspberry-pi.md)
- [micro:bit Lesson 4. Sensing Light](https://learn.adafruit.com/micro-bit-lesson-4-sensing-light-and-temperature.md)
- [No-Code Indoor Grow Monitor with PPFD and VPD Measurements](https://learn.adafruit.com/no-code-indoor-grow-monitor.md)
- [PyBadge Thermal Camera Case](https://learn.adafruit.com/pybadge-thermal-camera-case.md)
---
# Source: https://learn.adafruit.com/skill-badge-guide-3d-printing/filament-types.md
# Skill Badge Guide: 3D Printing
## Filament types

Although there is a wide range of filament types a 3D printer can handle, ABS and PLA plastics are by far the most popular. These two plastics are readily available in a staggering amount of colors, even glow-in-the-dark!
- **[PLA](https://en.wikipedia.org/wiki/Polylactic_acid)** - Is a thermoplastic derived from natural sources and has excellent print qualities. It flows at a relatively low temperature, starting at ~220°C, and does not require a heated build platform. Objects made out of PLA are rigid and more brittle then ABS. PLA is aslo prefered over ABS when used in areas with poor ventilation due to its relatively non-offensive smell.
- **[ABS](https://en.wikipedia.org/wiki/Abs_plastic)** - Is a synthetic thermoplastic commonly used in the automotive industry and also has excellent print qualities. It flows at a temperatures starting at ~230°C, but can be extruded at higher temperatures then PLA due to its chemical stability, but requires a heated build platform. Objects made out of ABS are rigid and tend to bend before breaking, unlike PLA. Lastly, proper ventilation is a must due to the offensive fumes generated when printing ABS.
- **[PLA/PHA](https://www.adafruit.com/products/2063) **- A compromise between PLA and ABS at an affordable price. Like PLA, PLA/PHA is made from renewable resources and is biodegradable. Polyhydroxyalkanoate (PHA) adds toughness to the PLA, making it more malleable and giving it a feel similar to ABS. The colors are opaque and remain vibrant after printing. However unlike ABS, it is not prone to warping and can be printed easily on an unheated printer bed. It flows at a relatively low temperature, starting at ~220°C.
- **[NinjaFlex](https://www.adafruit.com/products/1690)**- Specially formulated thermoplastic elastomer (TPE) that produces flexible prints with elastic properties. Perfect for wearables, LED Diffusers, Bumpers, Insulation, Grips, Buttons andBuoyancy. It flows at temperatures starting at ~240°C, but can be extruded at higher temperatures.
- **[SemiFlex](https://www.adafruit.com/products/2321)** - boasts half the flexibility, more strength and reliability for your 3D printing projects. It's slightly more rigid with a higher level of detail and with added shock-absorption. It can also handle unsupported vertical printing. Flows at temperatures around ~230°C
- **[BambooFill](https://www.adafruit.com/products/2475)** - Made with actual recycled bamboo! This material can be stained and sanded. Smells and feels like wood! Works well on both heated and non-heated build platforms. Flows at a temperatures starting at ~220°C.
- **[BronzeFill](https://www.adafruit.com/products/1830) **- Print with **actual bronze** at home! Straight from the printer parts look almost laser sintered with a matte finish but with a bit of sanding and polishing the bronze particles will start to shine and shimmer unlike any 3D printing filament you have seen before. The weight of the material is something special, about 3x heavier then regular PLA filament. Prints easily on an unheated printer bed. It flows at a temperatures starting at ~220°C.
- **[CopperFill](https://www.adafruit.com/products/2128)** - Same properties as BronzeFill but with a gold color after polishing!
- **[Magnetic Iron](https://www.adafruit.com/products/2797)** - This filament behaves similarly to iron - even to the point of rusting - making it a great choice for costumes and props. it's actually "ferromagnetic" as opposed to magnetic. This means that magnets will stick to items printed with this filament but 3D Printed items will not behave as magnets. Prints easily on an unheated bed. It flows at temperatures starting at ~220°C.
- **[Conductive PLA](https://www.adafruit.com/products/2703https://www.adafruit.com/products/2703)** - A great way to make something with an LED, touch sensor, or some other electronics through your 3D printer. The filament is great for low-voltage circuitry. A great way to think of it is that anything you can run through a 1K resistor should work witht his filament. Prints easily on an unheated bed. It flows at temperatures starting at ~220°C.
- [**Glow in Dark**](https://www.adafruit.com/products/2338 "Glow in Dark") - Literally make your work glow! During the day it's a beautiful creamy color which prints to a perfect smooth finish. Phosphorescent pigment is matched with PLA/PHA compound to make prints glow in the dark. For a better and longer lasting glow time print your models with 100% infill and charge up your models with UV LEDs or high power lights, or just let them enjoy the sunlight for a bit. Prints easily on an unheated bed. It flows at temperatures starting at ~220°C
- [Previous Page](https://learn.adafruit.com/skill-badge-guide-3d-printing/understanding-the-technology.md)
- [Next Page](https://learn.adafruit.com/skill-badge-guide-3d-printing/producing-a-product.md)
## Featured Products
### 3D printing - Skill badge, iron-on patch
[3D printing - Skill badge, iron-on patch](https://www.adafruit.com/product/490)
You can 3D print! Adafruit offers a fun and exciting "badges" of achievement for electronics, science and engineering. We believe everyone should be able to be rewarded for learning a useful skill, a badge is just one of the many ways to show and share.
This is the "I...
No Longer Stocked
[Buy Now](https://www.adafruit.com/product/490)
[Related Guides to the Product](https://learn.adafruit.com/products/490/guides)
### 3D printing - Sticker!
[3D printing - Sticker!](https://www.adafruit.com/product/649)
You can 3D print! Adafruit offers a fun and exciting stickers to celebrate achievement for electronics, science and engineering. We believe everyone should be able to be rewarded for learning a useful skill, a sticker is just one of the many ways to show and share.
This is the...
No Longer Stocked
[Buy Now](https://www.adafruit.com/product/649)
[Related Guides to the Product](https://learn.adafruit.com/products/649/guides)
### Flashforge Creator PRO
[Flashforge Creator PRO](https://www.adafruit.com/product/2742)
The **Flashforge Creator Pro** is the latest addition to FlashForge’s Creator family, built upon an open source platform.
Based on proven design of the Creator X chassis, the Pro is now enclosed so you can print ABS better and more efficient than ever. The upgraded...
No Longer Stocked
[Buy Now](https://www.adafruit.com/product/2742)
[Related Guides to the Product](https://learn.adafruit.com/products/2742/guides)
### PrintrBot Simple Metal 3D Printer - Black - Assembled
[PrintrBot Simple Metal 3D Printer - Black - Assembled](https://www.adafruit.com/product/1760)
New from Printrbot, the Metal Simple is a brand new rock solid, all metal, fully-assembled Printrbot Simple! As opposed to the [Printrbot Simple Kit](http://www.adafruit.com/products/1735), all of the laser cut wood parts have been replaced by rock solid metal and assembled. In...
No Longer Stocked
[Buy Now](https://www.adafruit.com/product/1760)
[Related Guides to the Product](https://learn.adafruit.com/products/1760/guides)
### Ultimaker 2+ 3D Printer
[Ultimaker 2+ 3D Printer](https://www.adafruit.com/product/2673)
The **Ultimaker 2+** is one of our favorite 3D printers on the market. It's a well-built open-source compact machine with an excellent UX. Every inch of the Ultimaker 2+ is designed to create the most effortless and reliable 3D printing experience ever!
No Longer Stocked
[Buy Now](https://www.adafruit.com/product/2673)
[Related Guides to the Product](https://learn.adafruit.com/products/2673/guides)
### Micro 3D Printer - Black - Retail Edition
[Micro 3D Printer - Black - Retail Edition](https://www.adafruit.com/product/2933)
The magic of 3D printing is now more affordable and accessible than ever! Meet The **Micro 3D Printer** by [M3D](https://printm3d.com/), the first truly consumer 3D printer. Sporting a compact design, user-friendly software, and replaceable print beds and nozzles,...
No Longer Stocked
[Buy Now](https://www.adafruit.com/product/2933)
[Related Guides to the Product](https://learn.adafruit.com/products/2933/guides)
### Filament for 3D Printers in Various Colors and Types
[Filament for 3D Printers in Various Colors and Types](https://www.adafruit.com/product/2080)
Having a 3D printer without filament is sort of like having a regular printer without paper or ink. And while a lot of printers come with some filament there's a good chance you've been printing up a storm and need something new. That's why we've started carrying a...
Out of Stock
[Buy Now](https://www.adafruit.com/product/2080)
[Related Guides to the Product](https://learn.adafruit.com/products/2080/guides)
## Related Guides
- [Mario Magic Wand](https://learn.adafruit.com/mario-magic-wand.md)
- [Case for HUSB238 Breakout](https://learn.adafruit.com/case-for-husb238.md)
- [3D Printed RFID NFC Rings](https://learn.adafruit.com/3d-printed-rfid-nfc-rings.md)
- [AI 3D Printed Figure](https://learn.adafruit.com/ai-figure.md)
- [Ultrasonic Ruler](https://learn.adafruit.com/ultrasonic-ruler.md)
- [Magnet Bottle Holder](https://learn.adafruit.com/magnet-bottle-holder.md)
- [Printy Boost: Reimagining a Classic Adafruit Kit](https://learn.adafruit.com/printy-boost-reimagining-a-classic-adafruit-kit.md)
- [CYBERDECK Expansion Plate](https://learn.adafruit.com/cyberdeck-plate.md)
- [PyPortal Case](https://learn.adafruit.com/pyportal-case.md)
- [3D Printed LED Buckle](https://learn.adafruit.com/3d-printed-led-buckle.md)
- [CLUE Slim Case](https://learn.adafruit.com/clue-slim-case.md)
- [Adafruit Desktop 3D Printer Buyers Guide](https://learn.adafruit.com/adafruit-desktop-3d-printer-selection-guide.md)
- [3D Printed Animatronic Robot Head](https://learn.adafruit.com/3d-printed-animatronic-robot-head.md)
- [New Years Eve Ball Drop](https://learn.adafruit.com/new-years-eve-ball-drop.md)
- [3D Printed Battery Adapter for Camera-Mount LED Panel](https://learn.adafruit.com/3d-printed-battery-adapter-for-camera-mount-led-panel.md)
---
# Source: https://learn.adafruit.com/biometric-security-box/final-assembly.md
# Biometric Lock Box
## Final Assembly
## Make the strike.
Cut a strip of brass about 2.5" (64mm) long.
- Measure the distance from the top of the solenoid shaft to the edge of the box lid - typically about 0.44" (11mm).
- Drill a .31" (8mm) hole in one end for the solenoid shaft. The edge of the hole should be 11mm from the end of the strip.
- Drill 2 more 1/8" (3mm) holes for rivets.
- Bend the strike above the hole as shown below.

## Temporarily install the strike
- Position the strike on the front of the box and align the top with the edge of the box as shown.
- Fasten it temporarily with machine screws. Make sure you can unfasten it from outside the box. We will need to open the box for adjustments if the latch binds.

## Test latch operation
If the latch binds or fails to engage the strike, shim the solenoid and/or adjust the position of the strike as needed.
## Rivet the strike
Once you have verified that everything is positioned for proper latch operation, make it permanent and tamper-proof by replacing the screws with pop-rivets.
- [Previous Page](https://learn.adafruit.com/biometric-security-box/program-and-test.md)
- [Next Page](https://learn.adafruit.com/biometric-security-box/use-it.md)
## Featured Products
### Panel Mount 2.1mm DC barrel jack
[Panel Mount 2.1mm DC barrel jack](https://www.adafruit.com/product/610)
This power jack is designed to easily attach to a panel up to 8mm thick (0.315" or 5/16") and fit 2.1mm power plugs snugly and securely. Perfect for adding a power connector to your project enclosure. We like this jack in particular for its long body (so you can use it on thicker...
In Stock
[Buy Now](https://www.adafruit.com/product/610)
[Related Guides to the Product](https://learn.adafruit.com/products/610/guides)
### Rugged Metal On/Off Switch with Green LED Ring
[Rugged Metal On/Off Switch with Green LED Ring](https://www.adafruit.com/product/482)
These chrome-plated metal buttons are rugged and look real good while doing it! Simply drill a 16mm hole into any material up to 1/2" thick and you can fit these in place, there's even a rubber gasket to keep water out of the enclosure. On the front of the button is a flat metal...
In Stock
[Buy Now](https://www.adafruit.com/product/482)
[Related Guides to the Product](https://learn.adafruit.com/products/482/guides)
### Adafruit MENTA - Mint Tin Arduino Compatible Kit with Mint Tin
[Adafruit MENTA - Mint Tin Arduino Compatible Kit with Mint Tin](https://www.adafruit.com/product/795)
Introducing the MENTA, a portable minty Arduino-compatible project that fits into a common mint tin. We took our super popular Boarduino series, and wrapped it with a prototyping area into a rounded PCB that slots directly into an Altoids-sized metal tin. We included everything you expect to...
No Longer Stocked
[Buy Now](https://www.adafruit.com/product/795)
[Related Guides to the Product](https://learn.adafruit.com/products/795/guides)
### N-channel power MOSFET
[N-channel power MOSFET](https://www.adafruit.com/product/355)
When you need to switch a lot of power, N-channel MOSFETs are best for the job. These FETs can switch over 60A and 30V and are TO-220 packages so they fit nicely into any breadboard or perfboard. Heat sinking is easy with TO-220's, but because of the very low Rds(on) of down to 0.009 ohms...
In Stock
[Buy Now](https://www.adafruit.com/product/355)
[Related Guides to the Product](https://learn.adafruit.com/products/355/guides)
### Small Push-Pull Solenoid - 12VDC
[Small Push-Pull Solenoid - 12VDC](https://www.adafruit.com/product/412)
Solenoids are basically electromagnets: they are made of a big coil of copper wire with an armature (a slug of metal) in the middle. When the coil is energized, the slug is pulled into the center of the coil. This makes the solenoid able to pull (from one end) or push (from the other)
In Stock
[Buy Now](https://www.adafruit.com/product/412)
[Related Guides to the Product](https://learn.adafruit.com/products/412/guides)
### Membrane 3x4 Matrix Keypad + extras
[Membrane 3x4 Matrix Keypad + extras](https://www.adafruit.com/product/419)
Punch in your secret key into this numeric matrix keypad. This keypad has 12 buttons, arranged in a telephone-line 3x4 grid. It's made of a thin, flexible membrane material with an adhesive backing (just remove the paper) so you can attach it to nearly anything. The keys are connected into...
In Stock
[Buy Now](https://www.adafruit.com/product/419)
[Related Guides to the Product](https://learn.adafruit.com/products/419/guides)
### Fingerprint sensor
[Fingerprint sensor](https://www.adafruit.com/product/751)
Secure your project with biometrics - this all-in-one optical fingerprint sensor will make adding fingerprint detection and verification super simple. These modules are typically used in safes - there's a high powered DSP chip that does the image rendering, calculation, feature-finding and...
No Longer Stocked
[Buy Now](https://www.adafruit.com/product/751)
[Related Guides to the Product](https://learn.adafruit.com/products/751/guides)
## Related Guides
- [LED Breath Stats Mask](https://learn.adafruit.com/led-breath-stats-mask.md)
- [Getting Started with MyoWare Muscle Sensor](https://learn.adafruit.com/getting-started-with-myoware-muscle-sensor.md)
- [Reebok CheckLight Teardown](https://learn.adafruit.com/reebok-checklight-teardown.md)
- [Your Pulse Displayed with NeoPixels](https://learn.adafruit.com/pulse-sensor-displayed-with-neopixels.md)
- [Pulse Room](https://learn.adafruit.com/pulse-room.md)
- [Setting up an Open Speech Recording Website](https://learn.adafruit.com/setting-up-an-open-speech-recording-website.md)
- [Control Electronics with your Brain using NextMind](https://learn.adafruit.com/control-electronics-with-your-brain-using-nextmind.md)
- [Adafruit MPRLS Ported Pressure Sensor Breakout](https://learn.adafruit.com/adafruit-mprls-ported-pressure-sensor-breakout.md)
- [Moto 360 Teardown](https://learn.adafruit.com/moto-360-smartwatch-teardown.md)
- [3D Printed Flexible LED Glove with Conductive Filament](https://learn.adafruit.com/3d-printed-flexible-conductive-filament-led-glove.md)
- [Meditation Trainer](https://learn.adafruit.com/heart-rate-variability-sensor.md)
- [Circuit Playground Bluefruit BLE Heart Rate Pendant with CircuitPython](https://learn.adafruit.com/ble-heart-rate-display-pendant.md)
- [Myo Armband Teardown](https://learn.adafruit.com/myo-armband-teardown.md)
- ['Sup Brows](https://learn.adafruit.com/heybrows.md)
- [Whistle Dog Activity Monitor Teardown](https://learn.adafruit.com/whistle-dog-activity-monitor-teardown.md)
---
# Source: https://learn.adafruit.com/creating-accurate-footprints-in-eagle/finding-and-accurate-reference.md
# Creating Accurate Footprints in Eagle
## Finding an Accurate Reference
In order to make an accurate footprint, you need a mechanically accurate reference image. Thankfully, most datasheets contain accurate mechanical drawings for at least the top and side view, which is enough in our case to produce an accurate 2D outline of the part.
As an example, we'll be working with the following image from a datasheet for a surface-mount push-push micro-SD connector:

- [Previous Page](https://learn.adafruit.com/creating-accurate-footprints-in-eagle/overview.md)
- [Next Page](https://learn.adafruit.com/creating-accurate-footprints-in-eagle/creating-a-scaled-bitmap.md)
## Related Guides
- [How to Sign Windows Drivers & Executables](https://learn.adafruit.com/how-to-sign-windows-drivers-installer.md)
- [Make your own PCB with Eagle, OSH Park, and Adafruit!](https://learn.adafruit.com/making-pcbs-with-oshpark-and-eagle.md)
- [Metal Parts from 3D Prints](https://learn.adafruit.com/metal-parts-from-3d-prints.md)
- [All About Laser Cutters](https://learn.adafruit.com/all-about-laser-cutters.md)
- [Adafruit Pinguin for EAGLE CAD](https://learn.adafruit.com/adafruit-pinguin-for-eagle-cad.md)
- [Maker Business & Manufacturing Software - Our Tips & Tricks](https://learn.adafruit.com/maker-business-manufacturing-software-our-tips-and-tricks.md)
- [SMT Manufacturing](https://learn.adafruit.com/smt-manufacturing.md)
- [How to Make a Pogo Pin Test Jig](https://learn.adafruit.com/how-to-make-a-pogo-pin-test-jig.md)
- [How we designed an injection-molded case](https://learn.adafruit.com/how-we-designed-an-injection-molded-case-for-raspberry-pi.md)
- [How to convert Eagle PCBs to 3D Models in Fusion 360](https://learn.adafruit.com/how-to-convert-eagle-pcbs-to-3d-models-in-fusion-360.md)
- [DIY 3D Printing Filament](https://learn.adafruit.com/diy-3d-printing-filament.md)
- [Laser-Cut Enclosure Design](https://learn.adafruit.com/laser-cut-enclosure-design.md)
- [Shop Tips & Tricks](https://learn.adafruit.com/shop-tips-and-tricks.md)
- [Standalone AVR Chip Programmer](https://learn.adafruit.com/standalone-avr-chip-programmer.md)
- [KTOWN's Ultimate Creating Parts in Eagle Tutorial](https://learn.adafruit.com/ktowns-ultimate-creating-parts-in-eagle-tutorial.md)
---
# Source: https://learn.adafruit.com/digital-led-belt/finishing-up.md
# Digital LED Belt
## Finishing Up
Connect the LED strip back to the microcontroller board, and place the batteries back into the pack.
Turn on the pack and wait a few seconds, you should see the LED pattern again!

Now we'll wrap it up by protecting the cable that goes to the end of the strip.
Cut the large piece of heat shrink so you have two ~2" pieces. Slide one piece of the large heatshrink onto the end of the LED strip.

Use a heat gun, hair drier or lighter to shrink it down.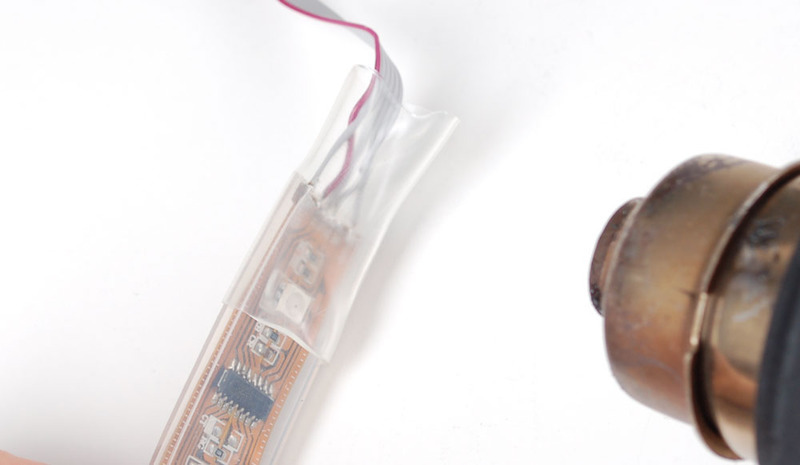
While its warm (but not too hot, be careful!) wrap the cable tie around the end of the heatshrink.
Tighten it over the IDC cable, and cut the end.
You can then use the other piece of heatshrink on the other end of the belt, to protect it.
That's it! Now the project is done. You can keep the battery pack and microcontroller board in your pocket and wrap the belt around you.

- [Previous Page](https://learn.adafruit.com/digital-led-belt/power-connection.md)
## Featured Products
### Digital programmable LED belt kit
[Digital programmable LED belt kit](https://www.adafruit.com/product/332)
By popular demand, we now have a project tutorial for how to make your own programmable, ultra-blinky LED belt. Perfect for parties, raves, parades, weddings, funerals, and bar mitzvahs. Wear it with pride, wear it with blinky! Follow our soldering tutorial to build your own heirloom LED belt,...
No Longer Stocked
[Buy Now](https://www.adafruit.com/product/332)
[Related Guides to the Product](https://learn.adafruit.com/products/332/guides)
## Related Guides
- [LED Sequin Bow Tie](https://learn.adafruit.com/led-sequin-bowtie.md)
- [Bluetooth-Controlled NeoPixel Goggles](https://learn.adafruit.com/bluetooth-neopixel-goggles.md)
- [Light Painting with Raspberry Pi](https://learn.adafruit.com/light-painting-with-raspberry-pi.md)
- [Glowing Viking Rune wayFinder](https://learn.adafruit.com/glowing-viking-rune-artifact.md)
- [3D Printing with Bamboo Wood Filament](https://learn.adafruit.com/3d-printing-with-bamboo-wood-filament.md)
- [Jellyfish Umbrella with easy WLED WiFi Control](https://learn.adafruit.com/jellyfish-umbrella-with-easy-wled-wifi-control.md)
- [Bandolier of Light](https://learn.adafruit.com/bandolier-of-light.md)
- [Electron Bow](https://learn.adafruit.com/electron-bow.md)
- [Steven Universe Cosplay Shirt & Gem](https://learn.adafruit.com/steven-universe-cosplay-shirt-gem.md)
- [CLUE Vertical Garden Weather Visualizer](https://learn.adafruit.com/clue-vertical-garden-weather-visualizer.md)
- [Cast a 3d Printed Necklace in Metal](https://learn.adafruit.com/cast-a-3d-printed-necklace-in-metal.md)
- [3D Printed Wearable Video Goggles](https://learn.adafruit.com/3d-printed-wearable-video-goggles.md)
- [Bunny Ears with MakeCode](https://learn.adafruit.com/bunny-ears-with-makecode.md)
- [Roll-up Video Light](https://learn.adafruit.com/roll-up-video-light.md)
- [1,500 NeoPixel LED Curtain with Raspberry Pi and Fadecandy](https://learn.adafruit.com/1500-neopixel-led-curtain-with-raspberry-pi-fadecandy.md)
---
# Source: https://learn.adafruit.com/skill-badge-sash/finishing.md
# Source: https://learn.adafruit.com/tron-bag/finishing.md
# TRON Bag
## Finishing
Almost done! Once the EL wire is all sewn on make sure to test each strand again to make sure they are still strong and connected. Double check all the heatshrink as well.
You can pass the wires around the bag or, if it is easier, and you're OK with permanent modification, punch a hole and pass the wires through it. This can be a little neater and less obviously modded.

Finally we will connect the strands to the inverter. There are inverters that will 'animate' the strands but we like the 'solid on' look which also matches the TRON movie best. The only problem is we have 4 wires and we want to run them off of one inverter. We'll solve this problem by making a splitter, taking the one output of the inverter and allowing it to drive two EL wires. You can do this for as many strands as you'd like, just add up all the EL lengths.

Solder and heat-shrink the wires. We also carry a pre-soldered four-way splitter for your convenience.

Use the splitter on the inverter (we used two inverters with two splitters here).

Store the inverters in one of the front pockets.

You're done! Enjoy your TRON bag.

- [Previous Page](https://learn.adafruit.com/tron-bag/splitting.md)
## Featured Products
### Heat Shrink Pack
[Heat Shrink Pack](https://www.adafruit.com/product/344)
Heat shrink is the duct tape of electronics, it keeps your stuff all safe and kept together. Especially when wiring and soldering, use heat shrink to add mechanical strength to cables. We use this stuff all the time and having a zip-lock bag of all the possible sizes is super...
In Stock
[Buy Now](https://www.adafruit.com/product/344)
[Related Guides to the Product](https://learn.adafruit.com/products/344/guides)
### In-line wire 1-to-4 splitter
[In-line wire 1-to-4 splitter](https://www.adafruit.com/product/402)
If you want to connect multiple EL wires/strips/panels up to one inverter, these splitters are quite useful. There is one male connector (goes to the inverter) and then 4 female connectors (which will connect to each wire/strip/panel. You can even cascade them! Only thing to watch for is make...
In Stock
[Buy Now](https://www.adafruit.com/product/402)
[Related Guides to the Product](https://learn.adafruit.com/products/402/guides)
### EL wire starter pack - Blue 2.5 meter (8.2 ft)
[EL wire starter pack - Blue 2.5 meter (8.2 ft)](https://www.adafruit.com/product/583)
A little bundle to get you started! This project pack contains:
- [2.5 meters (over 8 ft) of high-brightness, long-life EL wire in Blue](http://www.adafruit.com/products/408). 2.5 meters is the maximum amount for the pocket driver - it is cut and soldered so it's ready...
Out of Stock
[Buy Now](https://www.adafruit.com/product/583)
[Related Guides to the Product](https://learn.adafruit.com/products/583/guides)
## Related Guides
- [Battery Powering Wearable Electronics](https://learn.adafruit.com/battery-powering-wearable-electronics.md)
- [3D Printed Daft Punk Helmet with Bluetooth ](https://learn.adafruit.com/3d-printed-daft-punk-helmet-with-bluetooth.md)
- [3D Printed Wearable Video Goggles](https://learn.adafruit.com/3d-printed-wearable-video-goggles.md)
- [Decorative Pointy Elf Ear Bud Holders](https://learn.adafruit.com/elf-ears.md)
- [LED Friendship Bracelet](https://learn.adafruit.com/nautical-led-bracelet.md)
- [Make a Zelda Master Sword with the RP2040 Prop-Maker Feather](https://learn.adafruit.com/master-sword-rp2040.md)
- [USB Locket](https://learn.adafruit.com/usb-locket.md)
- [Light Up your Costume with Noods](https://learn.adafruit.com/light-up-your-costume-with-noods.md)
- [Pac Man Pixel Suspenders](https://learn.adafruit.com/pac-man-pixel-suspenders.md)
- [3D Printed LED Buckle](https://learn.adafruit.com/3d-printed-led-buckle.md)
- [Adafruit Flora Bluefruit LE](https://learn.adafruit.com/adafruit-flora-bluefruit-le.md)
- [Textile Potentiometer Hoodie](https://learn.adafruit.com/textile-potentiometer-hoodie.md)
- [Cynaps Bone Conduction Headset Teardown](https://learn.adafruit.com/cynaps-bone-conduction-headset-teardown.md)
- [Glowing Bean Bags with EL Wire](https://learn.adafruit.com/glowing-bean-bags-with-el-wire.md)
- [3D Printed Gunblade](https://learn.adafruit.com/3d-printed-gunblade.md)
---
# Source: https://learn.adafruit.com/mini-thermal-receipt-printer/first-test.md
# Mini Thermal Receipt Printers
## First Test
The first test you should do will ensure that paper is loaded and power is wired up correctly and the printer is running.
First up, pull the little plastic tab up top to open up the paper holder. Then insert a roll of 58 millimeter (2 1/4 inch) thermal paper into the bay as shown in the image below.
To reiterate from the first page, the printer models and corresponding roll sizes are:
- **[Mini](https://www.adafruit.com/product/597):** [15m / 50 foot roll](https://www.adafruit.com/product/599)
- **[Tiny](https://www.adafruit.com/product/2751):** [10m / 33'](https://www.adafruit.com/product/2754)
- **[Nano](https://www.adafruit.com/product/2752):** [5m / 15'](https://www.adafruit.com/product/2755)
- **[Guts](https://www.adafruit.com/product/2753):** no paper bay; use any size roll
Make sure that the paper doesn't bind or stick in the bay, it should rotate freely.

As described on prior page, power the printer using a 5V to 9V 2A or higher power supply, such as wiring up a 2.1mm DC power jack:

## Print Test Page
Most of these thermal printers have a test feature providing basic diagnostics. You’ll then know that power is good, paper is correctly loaded, and have some configuration details of the particular unit.
On most **Mini** and **Tiny** printers: **hold down** the button on the top of the printer **while connecting power** to print a test page. In normal use, tapping this button feeds the paper by one line.
On most **Nano** printers and **printer guts** : **connect power first** , then **tap** the button on the control board to print a test page.
_Not all “printer guts” units have a button installed. If needed, you can make a temporary connection across the “J1” pads using a jumper wire or metal tweezers._
Occasional factory production changes occur…if you don’t get a test page using the method above for you model, try the opposite method. A few may even lack a test page feature, but the status LED provides an indication of good power.

Info:
If you don't get a printout, check that the paper is inserted correctly and not binding, that the power is correctly wired, power supply is plugged in, etc. Then try again.
Note the baud rate on the test page. This may be 19200 or 9600. We'll need this number later:

Info:
- [Previous Page](https://learn.adafruit.com/mini-thermal-receipt-printer/power.md)
- [Next Page](https://learn.adafruit.com/mini-thermal-receipt-printer/making-connections.md)
## Primary Products
### Mini Thermal Receipt Printer
[Mini Thermal Receipt Printer](https://www.adafruit.com/product/597)
Add a mini printer to any microcontroller project with this very cute thermal printer. Thermal printers are also known as receipt printers, they're what you get when you go to the ATM or grocery store. Now you can embed a little printer of your own into an enclosure. This printer is ideal...
No Longer Stocked
[Buy Now](https://www.adafruit.com/product/597)
[Related Guides to the Product](https://learn.adafruit.com/products/597/guides)
### Tiny Thermal Receipt Printer - TTL Serial / USB
[Tiny Thermal Receipt Printer - TTL Serial / USB](https://www.adafruit.com/product/2751)
Add a _really small_ printer to any microcontroller project with this very cute thermal printer. Thermal printers are also known as receipt printers, they're what you get when you go to the ATM or grocery store. Now you can embed a little printer of your own into an enclosure. This...
No Longer Stocked
[Buy Now](https://www.adafruit.com/product/2751)
[Related Guides to the Product](https://learn.adafruit.com/products/2751/guides)
### Nano Thermal Receipt Printer - TTL Serial
[Nano Thermal Receipt Printer - TTL Serial](https://www.adafruit.com/product/2752)
Add a _really really small_ printer to any microcontroller project with this very cute thermal printer. Thermal printers are also known as receipt printers, they're what you get when you go to the ATM or grocery store. Now you can embed a little printer of your own into an...
No Longer Stocked
[Buy Now](https://www.adafruit.com/product/2752)
[Related Guides to the Product](https://learn.adafruit.com/products/2752/guides)
### Thermal Receipt Printer Guts
[Thermal Receipt Printer Guts](https://www.adafruit.com/product/2753)
Add printing capability to any microcontroller project with **just the innards of a thermal printer.** Thermal printers are also known as receipt printers, they're what you get when you go to the ATM or grocery store. Now you can embed a little printer of your own into a...
No Longer Stocked
[Buy Now](https://www.adafruit.com/product/2753)
[Related Guides to the Product](https://learn.adafruit.com/products/2753/guides)
## Featured Products
### Mini Thermal Receipt Printer Starter Pack
[Mini Thermal Receipt Printer Starter Pack](https://www.adafruit.com/product/600)
Hit the ground running (and printing!) with this starter pack that includes a thermal printer and all the extras and save a few dollars while you're at it.
Includes:
- [A mini thermal receipt printer](http://www.adafruit.com/products/597) - with cables and...
No Longer Stocked
[Buy Now](https://www.adafruit.com/product/600)
[Related Guides to the Product](https://learn.adafruit.com/products/600/guides)
### Female DC Power adapter - 2.1mm jack to screw terminal block
[Female DC Power adapter - 2.1mm jack to screw terminal block](https://www.adafruit.com/product/368)
If you need to connect a DC power wall wart to a board that doesn't have a DC jack - this adapter will come in very handy! There is a 2.1mm DC jack on one end, and a screw terminal block on the other. The terminals are labeled with positive/negative assuming a positive-tip configuration...
In Stock
[Buy Now](https://www.adafruit.com/product/368)
[Related Guides to the Product](https://learn.adafruit.com/products/368/guides)
### 5V 2A (2000mA) switching power supply - UL Listed
[5V 2A (2000mA) switching power supply - UL Listed](https://www.adafruit.com/product/276)
This is an FCC/CE certified and UL listed power supply. Need a lot of 5V power? This switching supply gives a clean regulated 5V output at up to 2000mA. 110 or 240 input, so it works in any country. The plugs are "US 2-prong" style so you may need a plug adapter, but you can pick one...
Out of Stock
[Buy Now](https://www.adafruit.com/product/276)
[Related Guides to the Product](https://learn.adafruit.com/products/276/guides)
### Thermal paper roll - 50' long, 2.25" wide
[Thermal paper roll - 50' long, 2.25" wide](https://www.adafruit.com/product/599)
A mini roll of thermal paper, this fits very nicely into our mini thermal printer. 2.25" wide (about 57mm) and 50 feet long (15 meters). BPA-free.
[Perfect for use with our mini thermal printer!](http://www.adafruit.com/products/597)
No Longer Stocked
[Buy Now](https://www.adafruit.com/product/599)
[Related Guides to the Product](https://learn.adafruit.com/products/599/guides)
### Thermal Paper Roll - 33' long, 2.25"
[Thermal Paper Roll - 33' long, 2.25"](https://www.adafruit.com/product/2754)
A little roll of thermal paper! This fits very nicely into our [Tiny Thermal Receipt Printer](https://www.adafruit.com/products/2751). It's ~2.25" wide (about 57mm) and 33 feet long or about 10 meters.
No Longer Stocked
[Buy Now](https://www.adafruit.com/product/2754)
[Related Guides to the Product](https://learn.adafruit.com/products/2754/guides)
### Thermal Paper Roll - 16' long, 2.25"
[Thermal Paper Roll - 16' long, 2.25"](https://www.adafruit.com/product/2755)
A little roll of thermal paper! This fits very nicely into our [Nano Thermal Receipt Printer](https://www.adafruit.com/products/2752). It's ~2.25" wide (about 57mm) and 16 feet long or about 5 meters.
No Longer Stocked
[Buy Now](https://www.adafruit.com/product/2755)
[Related Guides to the Product](https://learn.adafruit.com/products/2755/guides)
### Adafruit METRO 328 Fully Assembled - Arduino IDE compatible
[Adafruit METRO 328 Fully Assembled - Arduino IDE compatible](https://www.adafruit.com/product/50)
We sure love the ATmega328 here at Adafruit, and we use them _a lot_ for our own projects. The processor has plenty of GPIO, Analog inputs, hardware UART SPI and I2C, timers and PWM galore - just enough for most simple projects. When we need to go small, we use a
Out of Stock
[Buy Now](https://www.adafruit.com/product/50)
[Related Guides to the Product](https://learn.adafruit.com/products/50/guides)
### Breadboarding wire bundle
[Breadboarding wire bundle](https://www.adafruit.com/product/153)
75 flexible stranded core wires with stiff ends molded on in red, orange, yellow, green, blue, brown, black and white. These are a major improvement over the "box of bent wires" that are sometimes sold with breadboards, and faster than stripping your own solid core wires. Makes...
In Stock
[Buy Now](https://www.adafruit.com/product/153)
[Related Guides to the Product](https://learn.adafruit.com/products/153/guides)
## Related Guides
- [How to Find Hidden COM Ports](https://learn.adafruit.com/how-to-find-hidden-com-ports.md)
- [Wireless Game Show Poppers for the Classroom!](https://learn.adafruit.com/wireless-game-show-poppers.md)
- [Adafruit Ultimate GPS](https://learn.adafruit.com/adafruit-ultimate-gps.md)
- [RGB LED Matrix Basics](https://learn.adafruit.com/32x16-32x32-rgb-led-matrix.md)
- [Analog Feedback Servos](https://learn.adafruit.com/analog-feedback-servos.md)
- [Arduino GPS Clock](https://learn.adafruit.com/arduino-clock.md)
- [Silicone Robo-Tentacle](https://learn.adafruit.com/silicone-robo-tentacle.md)
- [Ladyada's Bento Box](https://learn.adafruit.com/lady-adas-bento-box.md)
- [Metal Inlay Capacitive Touch Buttons](https://learn.adafruit.com/metal-inlay-capacitive-touch-buttons.md)
- [Adafruit IO Basics: NeoPixel Controller](https://learn.adafruit.com/adafruit-io-basics-neopixel-controller.md)
- [Adafruit PN532 RFID/NFC Breakout and Shield](https://learn.adafruit.com/adafruit-pn532-rfid-nfc.md)
- [Reverse Geocache Box](https://learn.adafruit.com/reverse-geocache-engagement-box.md)
- [Character LCDs](https://learn.adafruit.com/character-lcds.md)
- [Adafruit INA219 Current Sensor Breakout](https://learn.adafruit.com/adafruit-ina219-current-sensor-breakout.md)
- [All About Arduino Libraries](https://learn.adafruit.com/adafruit-all-about-arduino-libraries-install-use.md)
---
# Source: https://learn.adafruit.com/babel-fish/fish-box.md
# Babel Fish
## Fish Box
Mark and cut the box with holes for the RFID antenna, speaker, and power cable.

Coat a plain cardboard box in glitter Mod Podge.

The Mod Podge also works as an adhesive! Use it to attach eyes (google image search) and fins (yellow file folder).

Once dry, assemble the box and install the electronics.

Using a stretchy scrap of fabric, stitch the speaker in place with yarn and a yarn needle. This is a good temporary speaker mount you can easily undo later and is recommended over hot glue!
- [Previous Page](https://learn.adafruit.com/babel-fish/programming.md)
- [Next Page](https://learn.adafruit.com/babel-fish/use-it.md)
## Featured Products
### Adafruit METRO 328 Fully Assembled - Arduino IDE compatible
[Adafruit METRO 328 Fully Assembled - Arduino IDE compatible](https://www.adafruit.com/product/50)
We sure love the ATmega328 here at Adafruit, and we use them _a lot_ for our own projects. The processor has plenty of GPIO, Analog inputs, hardware UART SPI and I2C, timers and PWM galore - just enough for most simple projects. When we need to go small, we use a
Out of Stock
[Buy Now](https://www.adafruit.com/product/50)
[Related Guides to the Product](https://learn.adafruit.com/products/50/guides)
### Adafruit PN532 NFC/RFID Controller Shield for Arduino + Extras
[Adafruit PN532 NFC/RFID Controller Shield for Arduino + Extras](https://www.adafruit.com/product/789)
We've taken our popular Adafruit PN532 breakout board and turned it into a shield - the perfect tool for any 13.56MHz RFID or NFC application. The Adafruit NFC shield uses the PN532 chip-set (the most popular NFC chip on the market) and is what is embedded in pretty much every phone or...
In Stock
[Buy Now](https://www.adafruit.com/product/789)
[Related Guides to the Product](https://learn.adafruit.com/products/789/guides)
### Adafruit Wave Shield for Arduino Kit
[Adafruit Wave Shield for Arduino Kit](https://www.adafruit.com/product/94)
Adding quality audio to an electronic project is surprisingly difficult. Here is a shield for Arduino 328's that solves this problem. It can play up to 22KHz 12bit uncompressed audio files of any length. It's low cost, available as an easy-to-make kit. It has an onboard DAC, filter and...
Out of Stock
[Buy Now](https://www.adafruit.com/product/94)
[Related Guides to the Product](https://learn.adafruit.com/products/94/guides)
### Music & sound add-on pack for Arduino
[Music & sound add-on pack for Arduino](https://www.adafruit.com/product/175)
Its a Wave shield party pack! Just add an Arduino to create your own iPod-killer, audio art, sound-effects box...
Comes with:
- Latest [Wave shield kit](http://www.adafruit.com/products/94), works with more SD cards and with older NG Arduinos! Unassembled
- 8 GB...
Out of Stock
[Buy Now](https://www.adafruit.com/product/175)
[Related Guides to the Product](https://learn.adafruit.com/products/175/guides)
### 9 VDC 1000mA regulated switching power adapter - UL listed
[9 VDC 1000mA regulated switching power adapter - UL listed](https://www.adafruit.com/product/63)
This is a really nice power supply. It's a switching DC supply so it's small and light and efficient. It is thin so it fits in power strips without blocking other outlets. The output is regulated so you'll get a steady 9V up to 1000mA (1 Amp) of current draw. 5.5mm/2.1mm barrel...
Out of Stock
[Buy Now](https://www.adafruit.com/product/63)
[Related Guides to the Product](https://learn.adafruit.com/products/63/guides)
### 13.56MHz RFID/NFC Card - Classic 1K
[13.56MHz RFID/NFC Card - Classic 1K](https://www.adafruit.com/product/359)
This is a blank 13.56MHz RFID/NFC card - often used for train/bus passes but also found in other systems where a proximity card is desired. The tag contains a small RFID chip and an antenna, and is passively powered by the reader/writer when placed a couple inches away.
These can be...
In Stock
[Buy Now](https://www.adafruit.com/product/359)
[Related Guides to the Product](https://learn.adafruit.com/products/359/guides)
## Related Guides
- [How to Find Hidden COM Ports](https://learn.adafruit.com/how-to-find-hidden-com-ports.md)
- [Collin's Lab: RFID](https://learn.adafruit.com/collins-lab-rfid.md)
- [Multi-tasking the Arduino - Part 2](https://learn.adafruit.com/multi-tasking-the-arduino-part-2.md)
- [Ladyada's Learn Arduino - Lesson #2](https://learn.adafruit.com/ladyadas-learn-arduino-lesson-number-2.md)
- [Affordable HAL 9000 Replica](https://learn.adafruit.com/hal-9000-replica.md)
- [Adafruit VS1053 MP3/AAC/Ogg/MIDI/WAV Codec Breakout Tutorial](https://learn.adafruit.com/adafruit-vs1053-mp3-aac-ogg-midi-wav-play-and-record-codec-tutorial.md)
- [Arduino Lesson 8. Analog Inputs](https://learn.adafruit.com/adafruit-arduino-lesson-8-analog-inputs.md)
- [Adafruit CC3000 WiFi and Xively](https://learn.adafruit.com/adafruit-cc3000-wifi-and-xively.md)
- [Automatic Monitor Color Temperature Adjustment](https://learn.adafruit.com/automatic-monitor-color-temperature-adjustment.md)
- [RePaper eInk Development Board](https://learn.adafruit.com/repaper-eink-development-board.md)
- [Using NeoPixels and Servos Together](https://learn.adafruit.com/neopixels-and-servos.md)
- [Mini Thermal Receipt Printers](https://learn.adafruit.com/mini-thermal-receipt-printer.md)
- [Line Following Zumo Robot Using Simulink](https://learn.adafruit.com/line-following-zumo-robot-programmed-with-simulink.md)
- [Adafruit 2.8" TFT Touch Shield v2 - Capacitive or Resistive](https://learn.adafruit.com/adafruit-2-8-tft-touch-shield-v2.md)
- [Adafruit INA219 Current Sensor Breakout](https://learn.adafruit.com/adafruit-ina219-current-sensor-breakout.md)
---
# Source: https://learn.adafruit.com/babel-fish/flash-cards.md
# Babel Fish
## Flash cards

You can make flash cards by printing our words and phrases and taping them to RFID cards.

You can also just write on the RFID cards with a dry-erase marker.
- [Previous Page](https://learn.adafruit.com/babel-fish/make-the-wave-shield.md)
- [Next Page](https://learn.adafruit.com/babel-fish/programming.md)
## Featured Products
### Adafruit METRO 328 Fully Assembled - Arduino IDE compatible
[Adafruit METRO 328 Fully Assembled - Arduino IDE compatible](https://www.adafruit.com/product/50)
We sure love the ATmega328 here at Adafruit, and we use them _a lot_ for our own projects. The processor has plenty of GPIO, Analog inputs, hardware UART SPI and I2C, timers and PWM galore - just enough for most simple projects. When we need to go small, we use a
Out of Stock
[Buy Now](https://www.adafruit.com/product/50)
[Related Guides to the Product](https://learn.adafruit.com/products/50/guides)
### Adafruit PN532 NFC/RFID Controller Shield for Arduino + Extras
[Adafruit PN532 NFC/RFID Controller Shield for Arduino + Extras](https://www.adafruit.com/product/789)
We've taken our popular Adafruit PN532 breakout board and turned it into a shield - the perfect tool for any 13.56MHz RFID or NFC application. The Adafruit NFC shield uses the PN532 chip-set (the most popular NFC chip on the market) and is what is embedded in pretty much every phone or...
In Stock
[Buy Now](https://www.adafruit.com/product/789)
[Related Guides to the Product](https://learn.adafruit.com/products/789/guides)
### Adafruit Wave Shield for Arduino Kit
[Adafruit Wave Shield for Arduino Kit](https://www.adafruit.com/product/94)
Adding quality audio to an electronic project is surprisingly difficult. Here is a shield for Arduino 328's that solves this problem. It can play up to 22KHz 12bit uncompressed audio files of any length. It's low cost, available as an easy-to-make kit. It has an onboard DAC, filter and...
Out of Stock
[Buy Now](https://www.adafruit.com/product/94)
[Related Guides to the Product](https://learn.adafruit.com/products/94/guides)
### Music & sound add-on pack for Arduino
[Music & sound add-on pack for Arduino](https://www.adafruit.com/product/175)
Its a Wave shield party pack! Just add an Arduino to create your own iPod-killer, audio art, sound-effects box...
Comes with:
- Latest [Wave shield kit](http://www.adafruit.com/products/94), works with more SD cards and with older NG Arduinos! Unassembled
- 8 GB...
Out of Stock
[Buy Now](https://www.adafruit.com/product/175)
[Related Guides to the Product](https://learn.adafruit.com/products/175/guides)
### 9 VDC 1000mA regulated switching power adapter - UL listed
[9 VDC 1000mA regulated switching power adapter - UL listed](https://www.adafruit.com/product/63)
This is a really nice power supply. It's a switching DC supply so it's small and light and efficient. It is thin so it fits in power strips without blocking other outlets. The output is regulated so you'll get a steady 9V up to 1000mA (1 Amp) of current draw. 5.5mm/2.1mm barrel...
Out of Stock
[Buy Now](https://www.adafruit.com/product/63)
[Related Guides to the Product](https://learn.adafruit.com/products/63/guides)
### 13.56MHz RFID/NFC Card - Classic 1K
[13.56MHz RFID/NFC Card - Classic 1K](https://www.adafruit.com/product/359)
This is a blank 13.56MHz RFID/NFC card - often used for train/bus passes but also found in other systems where a proximity card is desired. The tag contains a small RFID chip and an antenna, and is passively powered by the reader/writer when placed a couple inches away.
These can be...
In Stock
[Buy Now](https://www.adafruit.com/product/359)
[Related Guides to the Product](https://learn.adafruit.com/products/359/guides)
## Related Guides
- [How to Find Hidden COM Ports](https://learn.adafruit.com/how-to-find-hidden-com-ports.md)
- [Collin's Lab: RFID](https://learn.adafruit.com/collins-lab-rfid.md)
- [Multi-tasking the Arduino - Part 2](https://learn.adafruit.com/multi-tasking-the-arduino-part-2.md)
- [Ladyada's Learn Arduino - Lesson #2](https://learn.adafruit.com/ladyadas-learn-arduino-lesson-number-2.md)
- [Affordable HAL 9000 Replica](https://learn.adafruit.com/hal-9000-replica.md)
- [Adafruit VS1053 MP3/AAC/Ogg/MIDI/WAV Codec Breakout Tutorial](https://learn.adafruit.com/adafruit-vs1053-mp3-aac-ogg-midi-wav-play-and-record-codec-tutorial.md)
- [Arduino Lesson 8. Analog Inputs](https://learn.adafruit.com/adafruit-arduino-lesson-8-analog-inputs.md)
- [Adafruit CC3000 WiFi and Xively](https://learn.adafruit.com/adafruit-cc3000-wifi-and-xively.md)
- [Automatic Monitor Color Temperature Adjustment](https://learn.adafruit.com/automatic-monitor-color-temperature-adjustment.md)
- [RePaper eInk Development Board](https://learn.adafruit.com/repaper-eink-development-board.md)
- [Using NeoPixels and Servos Together](https://learn.adafruit.com/neopixels-and-servos.md)
- [Mini Thermal Receipt Printers](https://learn.adafruit.com/mini-thermal-receipt-printer.md)
- [Line Following Zumo Robot Using Simulink](https://learn.adafruit.com/line-following-zumo-robot-programmed-with-simulink.md)
- [Adafruit 2.8" TFT Touch Shield v2 - Capacitive or Resistive](https://learn.adafruit.com/adafruit-2-8-tft-touch-shield-v2.md)
- [Adafruit INA219 Current Sensor Breakout](https://learn.adafruit.com/adafruit-ina219-current-sensor-breakout.md)
---
# Source: https://learn.adafruit.com/flora-gps-jacket.md
# Flora GPS Jacket
## Overview
http://youtu.be/3n9nRSYNg38
Make your coat react to your location with color-changing LEDs! The Flora GPS Jacket tracks your coordinates and then pulses the lights around the collar when you reach your destination. Change the waypoints and range in the provided project code to make your garment light up near your favorite coffee shops or the perfect picnic spot.
Before you begin this project, please freshen up on the following guides containing skills you'll need:
- [Getting started with FLORA](http://learn.adafruit.com/getting-started-with-flora "Link: http://learn.adafruit.com/getting-started-with-flora")
- [Flora RGB Smart Neo Pixels](http://learn.adafruit.com/flora-rgb-smart-pixels "Link: http://learn.adafruit.com/flora-rgb-smart-pixels")
- [Flora Wearable GPS](http://learn.adafruit.com/flora-wearable-gps)
- [Conductive Thread](http://learn.adafruit.com/conductive-thread)
- [Flora with Snaps](http://learn.adafruit.com/flora-snaps "Link: http://learn.adafruit.com/flora-snaps")

- [Next Page](https://learn.adafruit.com/flora-gps-jacket/tools-and-supplies.md)
## Featured Products
### FLORA GPS Starter Pack
[FLORA GPS Starter Pack](https://www.adafruit.com/product/1090)
Get started with the fabulous Adafruit Flora platform with this lovely starter kit. Included are plenty of parts to make a few different fun projects! There's a Flora motherboard, a GPS module that can also perform location datalogging, eight ultra-bright chainable RGB pixels, a battery...
No Longer Stocked
[Buy Now](https://www.adafruit.com/product/1090)
[Related Guides to the Product](https://learn.adafruit.com/products/1090/guides)
### FLORA - Wearable electronic platform: Arduino-compatible
[FLORA - Wearable electronic platform: Arduino-compatible](https://www.adafruit.com/product/659)
FLORA is Adafruit's fully-featured wearable electronics platform. It's a round, sewable, Arduino-compatible microcontroller designed to empower amazing wearables projects.FLORA comes with Adafruit's support, [tutorials and...](http://learn.adafruit.com/category/flora)
In Stock
[Buy Now](https://www.adafruit.com/product/659)
[Related Guides to the Product](https://learn.adafruit.com/products/659/guides)
### Flora Wearable Ultimate GPS Module
[Flora Wearable Ultimate GPS Module](https://www.adafruit.com/product/1059)
This module is the best way to add a GPS to your wearable project. It's part of the Adafruit Flora series of wearable electronics, designed specifically for use with the Flora motherboard. Installed on the PCB is the latest of our Ultimate GPS modules, a small, super-thin, low-power GPS...
No Longer Stocked
[Buy Now](https://www.adafruit.com/product/1059)
[Related Guides to the Product](https://learn.adafruit.com/products/1059/guides)
### Small Alligator Clip Test Lead (set of 12)
[Small Alligator Clip Test Lead (set of 12)](https://www.adafruit.com/product/1008)
Connect this to that without soldering using these handy mini alligator clip test leads. 15" cables with alligator clip on each end, color coded. You get 12 pieces in 6 colors. Strong and grippy, these always come in handy! We often use these in conjunction with a multimeter so we...
In Stock
[Buy Now](https://www.adafruit.com/product/1008)
[Related Guides to the Product](https://learn.adafruit.com/products/1008/guides)
### Stainless Medium Conductive Thread - 3 ply - 18 meter/60 ft
[Stainless Medium Conductive Thread - 3 ply - 18 meter/60 ft](https://www.adafruit.com/product/641)
After months of searching, we finally have what we consider to be the ultimate conductive thread. It's thin, strong, smooth, and made completely of 316L stainless steel. Once you start working with this thread you'll quickly agree its optimal for any wearables work!
This...
Out of Stock
[Buy Now](https://www.adafruit.com/product/641)
[Related Guides to the Product](https://learn.adafruit.com/products/641/guides)
### 3 x AAA Battery Holder with On/Off Switch and 2-Pin JST
[3 x AAA Battery Holder with On/Off Switch and 2-Pin JST](https://www.adafruit.com/product/727)
This battery holder connects 3 AAA batteries together in series for powering all kinds of projects. We spec'd these out because the box is slim, and 3 AAA's add up to about 3.3-4.5V, a very similar range to Lithium Ion/polymer (Li-Ion) batteries and have an on-off switch. That makes...
In Stock
[Buy Now](https://www.adafruit.com/product/727)
[Related Guides to the Product](https://learn.adafruit.com/products/727/guides)
### JST-PH Battery Extension Cable - 500mm
[JST-PH Battery Extension Cable - 500mm](https://www.adafruit.com/product/1131)
By popular demand, we now have a handy extension cord for all of our JST PH-terminated battery packs (such as our LiIon/LiPoly and 3xAAA holders). One end has a JST-PH compatible socket, and the other end has a matching plug. Between the two, 500mm of color coded wire. Handy for wearable...
In Stock
[Buy Now](https://www.adafruit.com/product/1131)
[Related Guides to the Product](https://learn.adafruit.com/products/1131/guides)
### Getting Started with Adafruit FLORA
[Getting Started with Adafruit FLORA](https://www.adafruit.com/product/1839)
**Making Wearables with an Arduino-Compatible Electronics Platform**
This book introduces readers to building wearable electronics projects using Adafruit's tiny FLORA board: at 4.4 grams, and only 1.75 inches in diameter, and featuring Arduino compatibility, it's the...
No Longer Stocked
[Buy Now](https://www.adafruit.com/product/1839)
[Related Guides to the Product](https://learn.adafruit.com/products/1839/guides)
## Related Guides
- [FLORA and GEMMA ICSP](https://learn.adafruit.com/flora-and-gemma-isp.md)
- [FLORA Sensors](https://learn.adafruit.com/flora-sensors.md)
- [Adafruit Flora Bluefruit LE](https://learn.adafruit.com/adafruit-flora-bluefruit-le.md)
- [LED Ampli-Tie](https://learn.adafruit.com/led-ampli-tie.md)
- [LED Stego Flex Spike Hoodie](https://learn.adafruit.com/led-stego-flex-spike-hoodie.md)
- [Conductive Thread](https://learn.adafruit.com/conductive-thread.md)
- [Zipper Switch](https://learn.adafruit.com/zipper-switch.md)
- [NeoPixel Ring Clock](https://learn.adafruit.com/neopixel-ring-clock.md)
- [3D Printed Wireless MIDI Controller Guitar](https://learn.adafruit.com/ez-key-wireless-midi-controller-guitar.md)
- [FLORA Pixel Brooch](https://learn.adafruit.com/flora-pixel-brooch.md)
- [FLORA TV-B-Gone](https://learn.adafruit.com/flora-tv-b-gone.md)
- [NeoPixel Matrix Snowflake Sweater](https://learn.adafruit.com/neopixel-matrix-snowflake-sweater.md)
- [Pac Man Pixel Suspenders](https://learn.adafruit.com/pac-man-pixel-suspenders.md)
- [FLORA & Codebender](https://learn.adafruit.com/flora-and-codebender.md)
- [Adafruit SI1145 Breakout Board - UV index / IR / Visible Sensor](https://learn.adafruit.com/adafruit-si1145-breakout-board-uv-ir-visible-sensor.md)
---
# Source: https://learn.adafruit.com/getting-started-with-flora/flora-modules.md
# Getting Started with FLORA
## FLORA modules
http://youtu.be/qGjOoSYfbkM
[FLORA Accelerometer + Compass](http://learn.adafruit.com/flora-accelerometer)
http://youtu.be/I-bhAN6wqXk
[FLORA Luminosity Sensor](http://learn.adafruit.com/flora-lux-sensor)

[FLORA GPS](http://learn.adafruit.com/flora-wearable-gps)

[Flora RGB Smart NeoPixels](http://learn.adafruit.com/flora-rgb-smart-pixels/)- [Previous Page](https://learn.adafruit.com/getting-started-with-flora/flora-techniques.md)
- [Next Page](https://learn.adafruit.com/getting-started-with-flora/downloads.md)
## Featured Products
### FLORA - Wearable electronic platform: Arduino-compatible
[FLORA - Wearable electronic platform: Arduino-compatible](https://www.adafruit.com/product/659)
FLORA is Adafruit's fully-featured wearable electronics platform. It's a round, sewable, Arduino-compatible microcontroller designed to empower amazing wearables projects.FLORA comes with Adafruit's support, [tutorials and...](http://learn.adafruit.com/category/flora)
In Stock
[Buy Now](https://www.adafruit.com/product/659)
[Related Guides to the Product](https://learn.adafruit.com/products/659/guides)
### 3 x AAA Battery Holder with On/Off Switch and 2-Pin JST
[3 x AAA Battery Holder with On/Off Switch and 2-Pin JST](https://www.adafruit.com/product/727)
This battery holder connects 3 AAA batteries together in series for powering all kinds of projects. We spec'd these out because the box is slim, and 3 AAA's add up to about 3.3-4.5V, a very similar range to Lithium Ion/polymer (Li-Ion) batteries and have an on-off switch. That makes...
In Stock
[Buy Now](https://www.adafruit.com/product/727)
[Related Guides to the Product](https://learn.adafruit.com/products/727/guides)
### USB cable - USB A to Micro-B
[USB cable - USB A to Micro-B](https://www.adafruit.com/product/592)
This here is your standard A to micro-B USB cable, for USB 1.1 or 2.0. Perfect for connecting a PC to your Metro, Feather, Raspberry Pi or other dev-board or microcontroller
Approximately 3 feet / 1 meter long
In Stock
[Buy Now](https://www.adafruit.com/product/592)
[Related Guides to the Product](https://learn.adafruit.com/products/592/guides)
### Getting Started with Adafruit FLORA Book Pack
[Getting Started with Adafruit FLORA Book Pack](https://www.adafruit.com/product/2404)
Pickup a copy of [Getting Started with Adafruit FLORA](https://www.adafruit.com/products/1839) and then hit the ground running with everything that you need to become an [Adafruit FLORA](https://www.adafruit.com/products/659) supreme being!
This pack is...
No Longer Stocked
[Buy Now](https://www.adafruit.com/product/2404)
[Related Guides to the Product](https://learn.adafruit.com/products/2404/guides)
### Getting Started with Adafruit FLORA
[Getting Started with Adafruit FLORA](https://www.adafruit.com/product/1839)
**Making Wearables with an Arduino-Compatible Electronics Platform**
This book introduces readers to building wearable electronics projects using Adafruit's tiny FLORA board: at 4.4 grams, and only 1.75 inches in diameter, and featuring Arduino compatibility, it's the...
No Longer Stocked
[Buy Now](https://www.adafruit.com/product/1839)
[Related Guides to the Product](https://learn.adafruit.com/products/1839/guides)
### FLORA Budget Pack
[FLORA Budget Pack](https://www.adafruit.com/product/1405)
Get started with the fabulous Adafruit Flora platform with this lovely budget kit, just enough to get you started with this fun wearable computer. Included are enough parts to make your first wearable electronic project. There's a Flora motherboard, four ultra-bright chainable RGB pixels,...
Out of Stock
[Buy Now](https://www.adafruit.com/product/1405)
[Related Guides to the Product](https://learn.adafruit.com/products/1405/guides)
### FLORA GPS Starter Pack
[FLORA GPS Starter Pack](https://www.adafruit.com/product/1090)
Get started with the fabulous Adafruit Flora platform with this lovely starter kit. Included are plenty of parts to make a few different fun projects! There's a Flora motherboard, a GPS module that can also perform location datalogging, eight ultra-bright chainable RGB pixels, a battery...
No Longer Stocked
[Buy Now](https://www.adafruit.com/product/1090)
[Related Guides to the Product](https://learn.adafruit.com/products/1090/guides)
### FLORA Sensor Pack
[FLORA Sensor Pack](https://www.adafruit.com/product/1458)
Sense the world around you! The FLORA Sensor Pack includes many types of sensors for your wearable enjoyment. Sense motion, direction, color, light levels, touch, and connections with FLORA sensor breakouts and conductive materials, and a few NeoPixels for experimenting with displaying your...
No Longer Stocked
[Buy Now](https://www.adafruit.com/product/1458)
[Related Guides to the Product](https://learn.adafruit.com/products/1458/guides)
## Related Guides
- [Datalogging Hat with FLORA BLE](https://learn.adafruit.com/datalogging-hat-with-flora-ble.md)
- [Experimenting with NeverWet + Electronics](https://learn.adafruit.com/neverwet-electronics.md)
- [Flora GPS Jacket](https://learn.adafruit.com/flora-gps-jacket.md)
- [SMSsenger Bag](https://learn.adafruit.com/smssenger-bag.md)
- [Conductive Thread](https://learn.adafruit.com/conductive-thread.md)
- [3D Printed Wireless MIDI Controller Guitar](https://learn.adafruit.com/ez-key-wireless-midi-controller-guitar.md)
- [Mailbox Notification Service](https://learn.adafruit.com/mailbox-notification-service.md)
- [GPS Logging Dog Harness](https://learn.adafruit.com/gps-logging-dog-harness.md)
- [NeoPixel Matrix Snowflake Sweater](https://learn.adafruit.com/neopixel-matrix-snowflake-sweater.md)
- [Chameleon Scarf](https://learn.adafruit.com/chameleon-scarf.md)
- [Adafruit Arduino Selection Guide](https://learn.adafruit.com/adafruit-arduino-selection-guide.md)
- [Citi Bike Helmet](https://learn.adafruit.com/citi-bike-helmet.md)
- [FLORA TV-B-Gone](https://learn.adafruit.com/flora-tv-b-gone.md)
- [Flora Wearable GPS](https://learn.adafruit.com/flora-wearable-gps.md)
- [Flora Accelerometer](https://learn.adafruit.com/flora-accelerometer.md)
---
# Source: https://learn.adafruit.com/getting-started-with-flora/flora-pinout-diagram.md
# Getting Started with FLORA
## FLORA pinout diagram

For handy reference, we've created this pinout diagram illustrating all the alternate functions for each of the pins on the Flora.
The most commonly confused part of the Flora is the **VBATT** pad and how power management is handled in the Flora. We designed the flora to be mainly powered via the JST connector. You can power it with a battery pack or lipo battery. That input is polarity protected and also controlled via the on/off switch. The battery output **after** the switch is **VBATT**. You shouldn't use **VBATT** as an input as you might damage your battery if you also plug in the USB connector to a computer! The ideal use of **VBATT** is when you want to power something like NeoPixels or a servo, something that requires more than the 150mA available from the onboard regulator.
## What about SPI?
The Flora also supports hardware SPI. The SPI pins are on the 2x3 header near the center of the Flora. A small white dot indicates pin 1. The SPI header pinout is shown here:

## Some Technical Specs:
- **Battery input (JST)**: 3.5-16V ([the regulator is MIC5225-3.3](http://www.adafruit.com/datasheets/mic5225.pdf)) with reverse polarity protection, 2A max rated connector. We recommend no more than 6VDC so that the 3.3V regulator does not overheat
- **USB input** : 4.5V-5.5V with 500mA fuse
- **3.3V output pad** : we recommend no more than 100mA, as the regulator can supply 150mA and the Flora Mainboard uses 20mA. but you can probably draw up to 250mA in spikes
- **Clock speed:** 8MHz
- **Chipset:** ATmega32u4
- **VBAT output pad:** the higher of the VBAT JST input voltage and USB voltage (two schottkey diode connection)
- **Current Draw:** 8mA quiescent, another 2mA when the pin #D7 LED is on.

- [Previous Page](https://learn.adafruit.com/getting-started-with-flora/overview.md)
- [Next Page](https://learn.adafruit.com/getting-started-with-flora/windows-setup.md)
## Featured Products
### FLORA - Wearable electronic platform: Arduino-compatible
[FLORA - Wearable electronic platform: Arduino-compatible](https://www.adafruit.com/product/659)
FLORA is Adafruit's fully-featured wearable electronics platform. It's a round, sewable, Arduino-compatible microcontroller designed to empower amazing wearables projects.FLORA comes with Adafruit's support, [tutorials and...](http://learn.adafruit.com/category/flora)
In Stock
[Buy Now](https://www.adafruit.com/product/659)
[Related Guides to the Product](https://learn.adafruit.com/products/659/guides)
### 3 x AAA Battery Holder with On/Off Switch and 2-Pin JST
[3 x AAA Battery Holder with On/Off Switch and 2-Pin JST](https://www.adafruit.com/product/727)
This battery holder connects 3 AAA batteries together in series for powering all kinds of projects. We spec'd these out because the box is slim, and 3 AAA's add up to about 3.3-4.5V, a very similar range to Lithium Ion/polymer (Li-Ion) batteries and have an on-off switch. That makes...
In Stock
[Buy Now](https://www.adafruit.com/product/727)
[Related Guides to the Product](https://learn.adafruit.com/products/727/guides)
### USB cable - USB A to Micro-B
[USB cable - USB A to Micro-B](https://www.adafruit.com/product/592)
This here is your standard A to micro-B USB cable, for USB 1.1 or 2.0. Perfect for connecting a PC to your Metro, Feather, Raspberry Pi or other dev-board or microcontroller
Approximately 3 feet / 1 meter long
In Stock
[Buy Now](https://www.adafruit.com/product/592)
[Related Guides to the Product](https://learn.adafruit.com/products/592/guides)
### Getting Started with Adafruit FLORA Book Pack
[Getting Started with Adafruit FLORA Book Pack](https://www.adafruit.com/product/2404)
Pickup a copy of [Getting Started with Adafruit FLORA](https://www.adafruit.com/products/1839) and then hit the ground running with everything that you need to become an [Adafruit FLORA](https://www.adafruit.com/products/659) supreme being!
This pack is...
No Longer Stocked
[Buy Now](https://www.adafruit.com/product/2404)
[Related Guides to the Product](https://learn.adafruit.com/products/2404/guides)
### Getting Started with Adafruit FLORA
[Getting Started with Adafruit FLORA](https://www.adafruit.com/product/1839)
**Making Wearables with an Arduino-Compatible Electronics Platform**
This book introduces readers to building wearable electronics projects using Adafruit's tiny FLORA board: at 4.4 grams, and only 1.75 inches in diameter, and featuring Arduino compatibility, it's the...
No Longer Stocked
[Buy Now](https://www.adafruit.com/product/1839)
[Related Guides to the Product](https://learn.adafruit.com/products/1839/guides)
### FLORA Budget Pack
[FLORA Budget Pack](https://www.adafruit.com/product/1405)
Get started with the fabulous Adafruit Flora platform with this lovely budget kit, just enough to get you started with this fun wearable computer. Included are enough parts to make your first wearable electronic project. There's a Flora motherboard, four ultra-bright chainable RGB pixels,...
Out of Stock
[Buy Now](https://www.adafruit.com/product/1405)
[Related Guides to the Product](https://learn.adafruit.com/products/1405/guides)
### FLORA GPS Starter Pack
[FLORA GPS Starter Pack](https://www.adafruit.com/product/1090)
Get started with the fabulous Adafruit Flora platform with this lovely starter kit. Included are plenty of parts to make a few different fun projects! There's a Flora motherboard, a GPS module that can also perform location datalogging, eight ultra-bright chainable RGB pixels, a battery...
No Longer Stocked
[Buy Now](https://www.adafruit.com/product/1090)
[Related Guides to the Product](https://learn.adafruit.com/products/1090/guides)
### FLORA Sensor Pack
[FLORA Sensor Pack](https://www.adafruit.com/product/1458)
Sense the world around you! The FLORA Sensor Pack includes many types of sensors for your wearable enjoyment. Sense motion, direction, color, light levels, touch, and connections with FLORA sensor breakouts and conductive materials, and a few NeoPixels for experimenting with displaying your...
No Longer Stocked
[Buy Now](https://www.adafruit.com/product/1458)
[Related Guides to the Product](https://learn.adafruit.com/products/1458/guides)
## Related Guides
- [Datalogging Hat with FLORA BLE](https://learn.adafruit.com/datalogging-hat-with-flora-ble.md)
- [Experimenting with NeverWet + Electronics](https://learn.adafruit.com/neverwet-electronics.md)
- [Flora GPS Jacket](https://learn.adafruit.com/flora-gps-jacket.md)
- [SMSsenger Bag](https://learn.adafruit.com/smssenger-bag.md)
- [Conductive Thread](https://learn.adafruit.com/conductive-thread.md)
- [3D Printed Wireless MIDI Controller Guitar](https://learn.adafruit.com/ez-key-wireless-midi-controller-guitar.md)
- [Mailbox Notification Service](https://learn.adafruit.com/mailbox-notification-service.md)
- [GPS Logging Dog Harness](https://learn.adafruit.com/gps-logging-dog-harness.md)
- [NeoPixel Matrix Snowflake Sweater](https://learn.adafruit.com/neopixel-matrix-snowflake-sweater.md)
- [Chameleon Scarf](https://learn.adafruit.com/chameleon-scarf.md)
- [Adafruit Arduino Selection Guide](https://learn.adafruit.com/adafruit-arduino-selection-guide.md)
- [Citi Bike Helmet](https://learn.adafruit.com/citi-bike-helmet.md)
- [FLORA TV-B-Gone](https://learn.adafruit.com/flora-tv-b-gone.md)
- [Flora Wearable GPS](https://learn.adafruit.com/flora-wearable-gps.md)
- [Flora Accelerometer](https://learn.adafruit.com/flora-accelerometer.md)
---
# Source: https://learn.adafruit.com/flora-pixel-brooch.md
# FLORA Pixel Brooch
## Overview
https://www.youtube.com/watch?v=JgF_Cb8p_C0

Make this color-changing LED brooch with FLORA! It's a quick project with no soldering, just free-hand wiring to make the connections. Use our sample code or change it up to display whatever colors or fading effects you like! If you're new to FLORA, check out [the Getting Started guide](http://learn.adafruit.com/getting-started-with-flora) and the FLORA [FLORA RGB NeoPixels guide](http://learn.adafruit.com/flora-rgb-smart-pixels) prior to beginning this project.

Gather materials and tools:
- [FLORA main board](https://www.adafruit.com/products/659 "Link: https://www.adafruit.com/products/659")
- [FLORA RGB NeoPixels](http://www.adafruit.com/products/1260) (any number you like)
- [solid-core hookup wire](https://www.adafruit.com/products/290 "Link: https://www.adafruit.com/products/290")
- [3xAAA battery holder](https://www.adafruit.com/products/727 "Link: https://www.adafruit.com/products/727")or[LiPoly battery](https://www.adafruit.com/products/258 "Link: https://www.adafruit.com/products/258") (requires separate [charger](https://www.adafruit.com/products/259))
- [magnetic pinback](http://www.adafruit.com/products/1170)
- [pliers](https://www.adafruit.com/products/146)
- [wire strippers](https://www.adafruit.com/products/527 "Link: https://www.adafruit.com/products/527")

Here's a Fritzing diagram for the circuit we will build!
- [Next Page](https://learn.adafruit.com/flora-pixel-brooch/connect-first-signal-wire.md)
## Featured Products
### FLORA - Wearable electronic platform: Arduino-compatible
[FLORA - Wearable electronic platform: Arduino-compatible](https://www.adafruit.com/product/659)
FLORA is Adafruit's fully-featured wearable electronics platform. It's a round, sewable, Arduino-compatible microcontroller designed to empower amazing wearables projects.FLORA comes with Adafruit's support, [tutorials and...](http://learn.adafruit.com/category/flora)
In Stock
[Buy Now](https://www.adafruit.com/product/659)
[Related Guides to the Product](https://learn.adafruit.com/products/659/guides)
### Flora RGB Smart NeoPixel version 3 - Pack of 4
[Flora RGB Smart NeoPixel version 3 - Pack of 4](https://www.adafruit.com/product/1260)
What's a wearable project without LEDs? Our favorite part of the Flora platform is these tiny smart pixels. Designed specifically for wearables, these updated Flora NeoPixels have ultra-cool technology: these ultra-bright LEDs have a constant-current driver cooked right into the LED...
In Stock
[Buy Now](https://www.adafruit.com/product/1260)
[Related Guides to the Product](https://learn.adafruit.com/products/1260/guides)
### Solid-Core Wire Spool - 25ft - 22AWG - Black
[Solid-Core Wire Spool - 25ft - 22AWG - Black](https://www.adafruit.com/product/290)
Perfect for bread-boarding, free wiring, etc. This spool of solid-core wire is easy to solder to. When bent it keeps its shape pretty well. We like to have a few spools of this stuff around. We suggest picking up wire strippers to match. Wire gauge is 22 AWG which we've found is the best...
In Stock
[Buy Now](https://www.adafruit.com/product/290)
[Related Guides to the Product](https://learn.adafruit.com/products/290/guides)
### Lithium Ion Polymer Battery - 3.7v 150mAh
[Lithium Ion Polymer Battery - 3.7v 150mAh](https://www.adafruit.com/product/1317)
Lithium-ion polymer (also known as 'lipo' or 'lipoly') batteries are thin, light, and powerful. The output ranges from 4.2V when completely charged to 3.7V. This battery has a capacity of 150mAh for a total of about 0.6 Wh. If you need a larger battery,
Out of Stock
[Buy Now](https://www.adafruit.com/product/1317)
[Related Guides to the Product](https://learn.adafruit.com/products/1317/guides)
### Magnetic Pin Back
[Magnetic Pin Back](https://www.adafruit.com/product/1170)
These magnetic pin backs have two pieces: a metal bar with adhesive strip and a plastic piece with two strong rare-earth magnets. Affix the metal bar to your FLORA projects-- it's just the right size! Then attach your FLORA project to any garment without poking holes in your clothes. The...
In Stock
[Buy Now](https://www.adafruit.com/product/1170)
[Related Guides to the Product](https://learn.adafruit.com/products/1170/guides)
### Hakko Professional Quality 20-30 AWG Wire Strippers
[Hakko Professional Quality 20-30 AWG Wire Strippers](https://www.adafruit.com/product/527)
These are the finest wire strippers we have used, and if you have to do a lot of wiring, you will agree! They have soft rounded grips - very comfortable to use, and precision ground notches that do a perfect job every time. No more yanking or twisting to strip wires cleanly and quickly.
In Stock
[Buy Now](https://www.adafruit.com/product/527)
[Related Guides to the Product](https://learn.adafruit.com/products/527/guides)
### Simple pliers
[Simple pliers](https://www.adafruit.com/product/146)
Simple needlenose pliers for twisting, pulling and pliering your project.
In Stock
[Buy Now](https://www.adafruit.com/product/146)
[Related Guides to the Product](https://learn.adafruit.com/products/146/guides)
### Getting Started with Adafruit FLORA
[Getting Started with Adafruit FLORA](https://www.adafruit.com/product/1839)
**Making Wearables with an Arduino-Compatible Electronics Platform**
This book introduces readers to building wearable electronics projects using Adafruit's tiny FLORA board: at 4.4 grams, and only 1.75 inches in diameter, and featuring Arduino compatibility, it's the...
No Longer Stocked
[Buy Now](https://www.adafruit.com/product/1839)
[Related Guides to the Product](https://learn.adafruit.com/products/1839/guides)
## Related Guides
- [Chameleon Scarf](https://learn.adafruit.com/chameleon-scarf.md)
- [Washing Wearable Electronics](https://learn.adafruit.com/washing-wearable-electronics.md)
- [Light-Up Angler Fish Embroidery](https://learn.adafruit.com/light-up-angler-fish-embroidery.md)
- [Flora TSL2561 Lux Sensor](https://learn.adafruit.com/flora-lux-sensor.md)
- [Glowing Skullcandy Headphones Mod](https://learn.adafruit.com/glowing-skullcandy-headphones-mod.md)
- [Flora Snaps](https://learn.adafruit.com/flora-snaps.md)
- [Heart Rate Badge](https://learn.adafruit.com/heart-rate-badge.md)
- [Memories of an Arduino](https://learn.adafruit.com/memories-of-an-arduino.md)
- [VU Meter Baseball Hat](https://learn.adafruit.com/vu-meter-baseball-hat.md)
- [Flora Wearable GPS](https://learn.adafruit.com/flora-wearable-gps.md)
- [Light of Your Life Wedding Bouquet](https://learn.adafruit.com/light-of-your-life-wedding-bouquet.md)
- [Flora Accelerometer](https://learn.adafruit.com/flora-accelerometer.md)
- [Mailbox Notification Service](https://learn.adafruit.com/mailbox-notification-service.md)
- [Pac Man Pixel Suspenders](https://learn.adafruit.com/pac-man-pixel-suspenders.md)
- [Adafruit NeoPot](https://learn.adafruit.com/adafruit-neopot.md)
---
# Source: https://learn.adafruit.com/getting-started-with-flora/flora-projects.md
# Getting Started with FLORA
## FLORA projects
http://www.youtube.com/watch?v=JgF_Cb8p_C0
[Flora Pixel Brooch](http://learn.adafruit.com/flora-pixel-brooch)

[Flora TV-B-Gone](learn.adafruit.com/flora-tv-b-gone/)
http://www.youtube.com/watch?v=3n9nRSYNg38
[GPS Jacket](http://learn.adafruit.com/flora-gps-jacket)
http://www.youtube.com/watch?v=XcbnPQBJxVs
[Capacitive Touch with Conductive Fabric](http://learn.adafruit.com/capacitive-touch-with-conductive-fabric-and-flora)
http://www.youtube.com/watch?v=K_RT7hYFLB4
[Wearable Piezo Tones](http://learn.adafruit.com/wearable-piezo-tones-with-flora)
https://www.youtube.com/watch?v=7FbK4wA7hjc
[LED Ampli-Tie](http://learn.adafruit.com/led-ampli-tie/)
http://youtu.be/qr3Ke57s3gU
[Plush Game Controller](http://learn.adafruit.com/plush-game-controller)
- [Previous Page](https://learn.adafruit.com/getting-started-with-flora/power-your-flora.md)
- [Next Page](https://learn.adafruit.com/getting-started-with-flora/flora-techniques.md)
## Featured Products
### FLORA - Wearable electronic platform: Arduino-compatible
[FLORA - Wearable electronic platform: Arduino-compatible](https://www.adafruit.com/product/659)
FLORA is Adafruit's fully-featured wearable electronics platform. It's a round, sewable, Arduino-compatible microcontroller designed to empower amazing wearables projects.FLORA comes with Adafruit's support, [tutorials and...](http://learn.adafruit.com/category/flora)
In Stock
[Buy Now](https://www.adafruit.com/product/659)
[Related Guides to the Product](https://learn.adafruit.com/products/659/guides)
### 3 x AAA Battery Holder with On/Off Switch and 2-Pin JST
[3 x AAA Battery Holder with On/Off Switch and 2-Pin JST](https://www.adafruit.com/product/727)
This battery holder connects 3 AAA batteries together in series for powering all kinds of projects. We spec'd these out because the box is slim, and 3 AAA's add up to about 3.3-4.5V, a very similar range to Lithium Ion/polymer (Li-Ion) batteries and have an on-off switch. That makes...
In Stock
[Buy Now](https://www.adafruit.com/product/727)
[Related Guides to the Product](https://learn.adafruit.com/products/727/guides)
### USB cable - USB A to Micro-B
[USB cable - USB A to Micro-B](https://www.adafruit.com/product/592)
This here is your standard A to micro-B USB cable, for USB 1.1 or 2.0. Perfect for connecting a PC to your Metro, Feather, Raspberry Pi or other dev-board or microcontroller
Approximately 3 feet / 1 meter long
In Stock
[Buy Now](https://www.adafruit.com/product/592)
[Related Guides to the Product](https://learn.adafruit.com/products/592/guides)
### Getting Started with Adafruit FLORA Book Pack
[Getting Started with Adafruit FLORA Book Pack](https://www.adafruit.com/product/2404)
Pickup a copy of [Getting Started with Adafruit FLORA](https://www.adafruit.com/products/1839) and then hit the ground running with everything that you need to become an [Adafruit FLORA](https://www.adafruit.com/products/659) supreme being!
This pack is...
No Longer Stocked
[Buy Now](https://www.adafruit.com/product/2404)
[Related Guides to the Product](https://learn.adafruit.com/products/2404/guides)
### Getting Started with Adafruit FLORA
[Getting Started with Adafruit FLORA](https://www.adafruit.com/product/1839)
**Making Wearables with an Arduino-Compatible Electronics Platform**
This book introduces readers to building wearable electronics projects using Adafruit's tiny FLORA board: at 4.4 grams, and only 1.75 inches in diameter, and featuring Arduino compatibility, it's the...
No Longer Stocked
[Buy Now](https://www.adafruit.com/product/1839)
[Related Guides to the Product](https://learn.adafruit.com/products/1839/guides)
### FLORA Budget Pack
[FLORA Budget Pack](https://www.adafruit.com/product/1405)
Get started with the fabulous Adafruit Flora platform with this lovely budget kit, just enough to get you started with this fun wearable computer. Included are enough parts to make your first wearable electronic project. There's a Flora motherboard, four ultra-bright chainable RGB pixels,...
Out of Stock
[Buy Now](https://www.adafruit.com/product/1405)
[Related Guides to the Product](https://learn.adafruit.com/products/1405/guides)
### FLORA GPS Starter Pack
[FLORA GPS Starter Pack](https://www.adafruit.com/product/1090)
Get started with the fabulous Adafruit Flora platform with this lovely starter kit. Included are plenty of parts to make a few different fun projects! There's a Flora motherboard, a GPS module that can also perform location datalogging, eight ultra-bright chainable RGB pixels, a battery...
No Longer Stocked
[Buy Now](https://www.adafruit.com/product/1090)
[Related Guides to the Product](https://learn.adafruit.com/products/1090/guides)
### FLORA Sensor Pack
[FLORA Sensor Pack](https://www.adafruit.com/product/1458)
Sense the world around you! The FLORA Sensor Pack includes many types of sensors for your wearable enjoyment. Sense motion, direction, color, light levels, touch, and connections with FLORA sensor breakouts and conductive materials, and a few NeoPixels for experimenting with displaying your...
No Longer Stocked
[Buy Now](https://www.adafruit.com/product/1458)
[Related Guides to the Product](https://learn.adafruit.com/products/1458/guides)
## Related Guides
- [Datalogging Hat with FLORA BLE](https://learn.adafruit.com/datalogging-hat-with-flora-ble.md)
- [Experimenting with NeverWet + Electronics](https://learn.adafruit.com/neverwet-electronics.md)
- [Flora GPS Jacket](https://learn.adafruit.com/flora-gps-jacket.md)
- [SMSsenger Bag](https://learn.adafruit.com/smssenger-bag.md)
- [Conductive Thread](https://learn.adafruit.com/conductive-thread.md)
- [3D Printed Wireless MIDI Controller Guitar](https://learn.adafruit.com/ez-key-wireless-midi-controller-guitar.md)
- [Mailbox Notification Service](https://learn.adafruit.com/mailbox-notification-service.md)
- [GPS Logging Dog Harness](https://learn.adafruit.com/gps-logging-dog-harness.md)
- [NeoPixel Matrix Snowflake Sweater](https://learn.adafruit.com/neopixel-matrix-snowflake-sweater.md)
- [Chameleon Scarf](https://learn.adafruit.com/chameleon-scarf.md)
- [Adafruit Arduino Selection Guide](https://learn.adafruit.com/adafruit-arduino-selection-guide.md)
- [Citi Bike Helmet](https://learn.adafruit.com/citi-bike-helmet.md)
- [FLORA TV-B-Gone](https://learn.adafruit.com/flora-tv-b-gone.md)
- [Flora Wearable GPS](https://learn.adafruit.com/flora-wearable-gps.md)
- [Flora Accelerometer](https://learn.adafruit.com/flora-accelerometer.md)
---
# Source: https://learn.adafruit.com/flora-rgb-smart-pixels.md
# Sewable NeoPixels
## Overview

What's a wearable project without LEDs? These tiny smart pixels are our favorite thing. Designed specifically for wearables, [we found the brightest RGB LEDs available (an eye-blistering ~3800mcd)](http://adafruit.com/products/1260 "Link: http://adafruit.com/products/619") and paired them with a constant-current driver chip. The contacts are easily sewn with conductive thread. Use this guide to test your first pixel and start on a blinding wearables project with Circuit Playground Express, FLORA or GEMMA!
_Pictured above: [LED Ampli-Tie](../../../led-ampli-tie)_
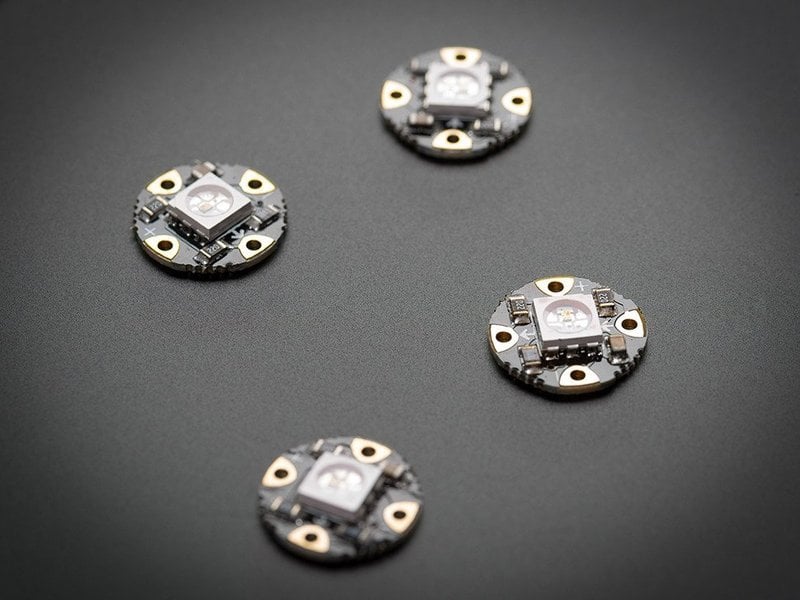
## Prerequisite guides
Before you begin, familiarize yourself with the following tutorials:
- [Adafruit Circuit Playground Express](https://learn.adafruit.com/adafruit-circuit-playground-express)
- [Getting Started with FLORA](../../../../getting-started-with-flora)
- [Introducing GEMMA](../../../../introducing-gemma)
- [NeoPixel Uberguide](../../../../adafruit-neopixel-uberguide)
- [Conductive Thread](../../../../conductive-thread)
## Lots of Pixels?
Each pixel draws as much as 60mA (all three RGB LEDs on for full brightness white). In theory, FLORA can drive up to 500 pixels at 30 FPS (above which it will run out of RAM). Circuit Playground Express can drive more than that. However, above about 20 pixels (and/or if the overall length of conductive thread exceeds ~6 feet/2 meters), the nontrivial resistance of the thread adds up and can affect the power supply. For large quantities of pixels over 20 or if you need to insulate your circuit, you should upgrade to [silicone coated stranded core wire](https://www.adafruit.com/search?q=silicone+cover+wire&b=1), which will provide better conductivity for the pixels - the current draw will add up fast!
Info:

_Pictured above: a FLORA prototype with v1 pixels_
- [Next Page](https://learn.adafruit.com/flora-rgb-smart-pixels/hook-up-alligator-clips.md)
## Featured Products
### Flora RGB Smart NeoPixel version 3 - Pack of 4
[Flora RGB Smart NeoPixel version 3 - Pack of 4](https://www.adafruit.com/product/1260)
What's a wearable project without LEDs? Our favorite part of the Flora platform is these tiny smart pixels. Designed specifically for wearables, these updated Flora NeoPixels have ultra-cool technology: these ultra-bright LEDs have a constant-current driver cooked right into the LED...
In Stock
[Buy Now](https://www.adafruit.com/product/1260)
[Related Guides to the Product](https://learn.adafruit.com/products/1260/guides)
### Flora RGB Smart NeoPixel version 3 - Sheet of 20
[Flora RGB Smart NeoPixel version 3 - Sheet of 20](https://www.adafruit.com/product/1559)
So, you want lots and lots of NeoPixels? And you want them for less? Not a problem! Here's a sheet of Flora NeoPixels fresh from the (reflow) oven. Cut them off as you need 'em and save a pretty penny while you're at it.
**Each order comes with 20 pixels on a...**
In Stock
[Buy Now](https://www.adafruit.com/product/1559)
[Related Guides to the Product](https://learn.adafruit.com/products/1559/guides)
### Circuit Playground Express
[Circuit Playground Express](https://www.adafruit.com/product/3333)
**Circuit Playground Express** is the next step towards a perfect introduction to electronics and programming. We've taken the original Circuit Playground Classic and made it even better! Not only did we pack even more sensors in, we also made it even easier to...
In Stock
[Buy Now](https://www.adafruit.com/product/3333)
[Related Guides to the Product](https://learn.adafruit.com/products/3333/guides)
### Adafruit GEMMA M0 - Miniature wearable electronic platform
[Adafruit GEMMA M0 - Miniature wearable electronic platform](https://www.adafruit.com/product/3501)
The **Adafruit Gemma M0** is a super small microcontroller board, with just enough built-in to create many simple projects. It may look small and cute: round, about the size of a quarter, with friendly alligator-clip sew pads. But do not be fooled! The Gemma M0 is incredibly...
In Stock
[Buy Now](https://www.adafruit.com/product/3501)
[Related Guides to the Product](https://learn.adafruit.com/products/3501/guides)
### FLORA - Wearable electronic platform: Arduino-compatible
[FLORA - Wearable electronic platform: Arduino-compatible](https://www.adafruit.com/product/659)
FLORA is Adafruit's fully-featured wearable electronics platform. It's a round, sewable, Arduino-compatible microcontroller designed to empower amazing wearables projects.FLORA comes with Adafruit's support, [tutorials and...](http://learn.adafruit.com/category/flora)
In Stock
[Buy Now](https://www.adafruit.com/product/659)
[Related Guides to the Product](https://learn.adafruit.com/products/659/guides)
### Small Alligator Clip Test Lead (set of 12)
[Small Alligator Clip Test Lead (set of 12)](https://www.adafruit.com/product/1008)
Connect this to that without soldering using these handy mini alligator clip test leads. 15" cables with alligator clip on each end, color coded. You get 12 pieces in 6 colors. Strong and grippy, these always come in handy! We often use these in conjunction with a multimeter so we...
In Stock
[Buy Now](https://www.adafruit.com/product/1008)
[Related Guides to the Product](https://learn.adafruit.com/products/1008/guides)
### Short Wire Alligator Clip Test Lead (set of 12)
[Short Wire Alligator Clip Test Lead (set of 12)](https://www.adafruit.com/product/1592)
Connect this to that without soldering using these handy mini alligator clip test leads. Approximately 4.5" overall cables with alligator clip on each end, color coded. You get 12 pieces in 6 colors. Strong and grippy, these always come in handy! We often use these in conjunction with a...
In Stock
[Buy Now](https://www.adafruit.com/product/1592)
[Related Guides to the Product](https://learn.adafruit.com/products/1592/guides)
### Stainless Thin Conductive Thread - 2 ply - 23 meter/76 ft
[Stainless Thin Conductive Thread - 2 ply - 23 meter/76 ft](https://www.adafruit.com/product/640)
After months of searching, we finally have what we consider to be the ultimate conductive thread. It's thin, strong, smooth, and made completely of 316L stainless steel. Once you start working with this thread you'll quickly agree its optimal for any wearables work!
This...
In Stock
[Buy Now](https://www.adafruit.com/product/640)
[Related Guides to the Product](https://learn.adafruit.com/products/640/guides)
## Related Guides
- [Adafruit Circuit Playground Express](https://learn.adafruit.com/adafruit-circuit-playground-express.md)
- [Plush Game Controller](https://learn.adafruit.com/plush-game-controller.md)
- [Twinkling Neopixel Parasol](https://learn.adafruit.com/twinkling-led-parasol.md)
- [NYE Circuit Playground Drop](https://learn.adafruit.com/nye-circuit-playground-drop.md)
- [Mason Jar Snow Globe](https://learn.adafruit.com/snow-globe-makecode.md)
- [FLORA and GEMMA ICSP](https://learn.adafruit.com/flora-and-gemma-isp.md)
- [Crickit Powered Dancin' Snowman!](https://learn.adafruit.com/crickit-powered-dancin-snowman.md)
- [Circuit Playground Express Spooky Laughing Box](https://learn.adafruit.com/spooky-circuit-playground-express-mystery-box.md)
- [GEMMA Hoop Earrings](https://learn.adafruit.com/gemma-hoop-earrings.md)
- [LEGO Compatible Crickit Rover](https://learn.adafruit.com/lego-compatible-crickit-rover.md)
- [Debugging the SAMD21 with GDB](https://learn.adafruit.com/debugging-the-samd21-with-gdb.md)
- [3D Printed LED Fire Horns](https://learn.adafruit.com/3d-printed-led-fire-horns.md)
- [PianoGlove](https://learn.adafruit.com/pianoglove.md)
- [Circuit Playground Express Serial Communications](https://learn.adafruit.com/circuit-playground-express-serial-communications.md)
- [Motion Gift Box](https://learn.adafruit.com/motion-gift-box.md)
- [Kaleidoscope Eyes (Trinket-Powered NeoPixel LED Ring Goggles)](https://learn.adafruit.com/kaleidoscope-eyes-neopixel-led-goggles-trinket-gemma.md)
---
# Source: https://learn.adafruit.com/flora-snaps.md
# Flora Snaps
## Overview
http://www.youtube.com/watch?v=dDwmnfpjlno
The small 5mm size of these tin-plated brass snaps means they fit perfectly on Flora's pads! Snaps make a great connector for wearables-- solder one side to the board and sew the other to your project with conductive thread. Easily disconnect your Flora for use in multiple projects, or remove it prior to machine washing.
New to FLORA? Check out these other guides:
- [Getting Started with FLORA](http://learn.adafruit.com/getting-started-with-flora "Link: http://learn.adafruit.com/getting-started-with-flora")
- [Flora RGB Smart Pixels](http://learn.adafruit.com/flora-rgb-smart-pixels "Link: http://learn.adafruit.com/flora-rgb-smart-pixels")
- [Flora Wearable GPS](http://learn.adafruit.com/flora-wearable-gps)
- [Flora Pixel Brooch](http://learn.adafruit.com/flora-pixel-brooch "Link: http://learn.adafruit.com/flora-pixel-brooch")
- [Flora TV-B-Gone](http://learn.adafruit.com/flora-tv-b-gone)
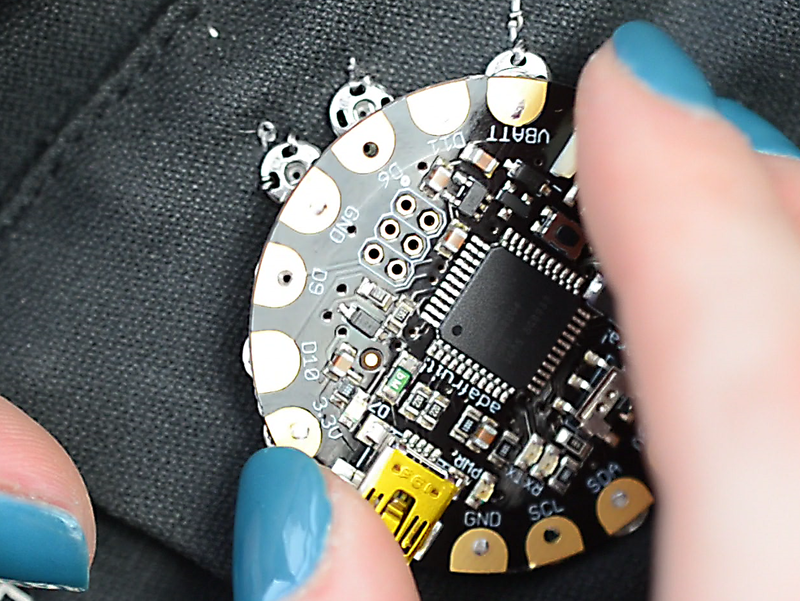
- [Next Page](https://learn.adafruit.com/flora-snaps/tools-and-supplies.md)
## Featured Products
### FLORA - Wearable electronic platform: Arduino-compatible
[FLORA - Wearable electronic platform: Arduino-compatible](https://www.adafruit.com/product/659)
FLORA is Adafruit's fully-featured wearable electronics platform. It's a round, sewable, Arduino-compatible microcontroller designed to empower amazing wearables projects.FLORA comes with Adafruit's support, [tutorials and...](http://learn.adafruit.com/category/flora)
In Stock
[Buy Now](https://www.adafruit.com/product/659)
[Related Guides to the Product](https://learn.adafruit.com/products/659/guides)
### Sewable Snaps - 5mm Diameter - Card of 24
[Sewable Snaps - 5mm Diameter - Card of 24](https://www.adafruit.com/product/1126)
The small 5mm size of these tin-plated brass snaps means they fit perfectly on Flora's pads! Snaps make a great connector for wearables-- solder one side to the board and sew the other to your project with conductive thread! This card comes with 24 complete snaps (socket and stud...
In Stock
[Buy Now](https://www.adafruit.com/product/1126)
[Related Guides to the Product](https://learn.adafruit.com/products/1126/guides)
### Needle set - 3/9 sizes - 20 needles
[Needle set - 3/9 sizes - 20 needles](https://www.adafruit.com/product/615)
Mighty needles, sew like the wind! This needle set is the only one you'll need for any sort of hand sewing, especially using our conductive thread and wearable electronics parts.
Each pack contains 20 gold-eye sharps, with eye sizes ranging from #3 (1.75" long) to #9...
Out of Stock
[Buy Now](https://www.adafruit.com/product/615)
[Related Guides to the Product](https://learn.adafruit.com/products/615/guides)
### Stainless Medium Conductive Thread - 3 ply - 18 meter/60 ft
[Stainless Medium Conductive Thread - 3 ply - 18 meter/60 ft](https://www.adafruit.com/product/641)
After months of searching, we finally have what we consider to be the ultimate conductive thread. It's thin, strong, smooth, and made completely of 316L stainless steel. Once you start working with this thread you'll quickly agree its optimal for any wearables work!
This...
Out of Stock
[Buy Now](https://www.adafruit.com/product/641)
[Related Guides to the Product](https://learn.adafruit.com/products/641/guides)
### Getting Started with Adafruit FLORA
[Getting Started with Adafruit FLORA](https://www.adafruit.com/product/1839)
**Making Wearables with an Arduino-Compatible Electronics Platform**
This book introduces readers to building wearable electronics projects using Adafruit's tiny FLORA board: at 4.4 grams, and only 1.75 inches in diameter, and featuring Arduino compatibility, it's the...
No Longer Stocked
[Buy Now](https://www.adafruit.com/product/1839)
[Related Guides to the Product](https://learn.adafruit.com/products/1839/guides)
### Getting Started with Adafruit FLORA Book Pack
[Getting Started with Adafruit FLORA Book Pack](https://www.adafruit.com/product/2404)
Pickup a copy of [Getting Started with Adafruit FLORA](https://www.adafruit.com/products/1839) and then hit the ground running with everything that you need to become an [Adafruit FLORA](https://www.adafruit.com/products/659) supreme being!
This pack is...
No Longer Stocked
[Buy Now](https://www.adafruit.com/product/2404)
[Related Guides to the Product](https://learn.adafruit.com/products/2404/guides)
### FLORA Sensor Pack
[FLORA Sensor Pack](https://www.adafruit.com/product/1458)
Sense the world around you! The FLORA Sensor Pack includes many types of sensors for your wearable enjoyment. Sense motion, direction, color, light levels, touch, and connections with FLORA sensor breakouts and conductive materials, and a few NeoPixels for experimenting with displaying your...
No Longer Stocked
[Buy Now](https://www.adafruit.com/product/1458)
[Related Guides to the Product](https://learn.adafruit.com/products/1458/guides)
### FLORA GPS Starter Pack
[FLORA GPS Starter Pack](https://www.adafruit.com/product/1090)
Get started with the fabulous Adafruit Flora platform with this lovely starter kit. Included are plenty of parts to make a few different fun projects! There's a Flora motherboard, a GPS module that can also perform location datalogging, eight ultra-bright chainable RGB pixels, a battery...
No Longer Stocked
[Buy Now](https://www.adafruit.com/product/1090)
[Related Guides to the Product](https://learn.adafruit.com/products/1090/guides)
## Related Guides
- [Firewalker LED Sneakers](https://learn.adafruit.com/firewalker-led-sneakers.md)
- [Datalogging Hat with FLORA BLE](https://learn.adafruit.com/datalogging-hat-with-flora-ble.md)
- [Chameleon Scarf](https://learn.adafruit.com/chameleon-scarf.md)
- [Flora TSL2561 Lux Sensor](https://learn.adafruit.com/flora-lux-sensor.md)
- [Adafruit Arduino Selection Guide](https://learn.adafruit.com/adafruit-arduino-selection-guide.md)
- [Flora GPS Jacket](https://learn.adafruit.com/flora-gps-jacket.md)
- [Glowing Skullcandy Headphones Mod](https://learn.adafruit.com/glowing-skullcandy-headphones-mod.md)
- [Flora MIDI Drum Glove](https://learn.adafruit.com/midi-drum-glove.md)
- [How to Find Hidden COM Ports](https://learn.adafruit.com/how-to-find-hidden-com-ports.md)
- [EEG Costume Cap](https://learn.adafruit.com/eeg-costume-cap.md)
- [Getting Started with FLORA](https://learn.adafruit.com/getting-started-with-flora.md)
- [FLORA and GEMMA ICSP](https://learn.adafruit.com/flora-and-gemma-isp.md)
- [NeoPixel Ring Clock](https://learn.adafruit.com/neopixel-ring-clock.md)
- [LED Ampli-Tie](https://learn.adafruit.com/led-ampli-tie.md)
- [Lumo Lift Teardown](https://learn.adafruit.com/lumo-lift-teardown.md)
---
# Source: https://learn.adafruit.com/getting-started-with-flora/flora-techniques.md
# Getting Started with FLORA
## FLORA techniques
https://www.youtube.com/watch?v=dDwmnfpjlno
[Flora snaps](http://learn.adafruit.com/flora-snaps/)
http://www.youtube.com/watch?v=XT5ygUt8Cbk
[Conductive thread](http://learn.adafruit.com/conductive-thread)
http://youtu.be/XcbnPQBJxVs
[Capacitive Touch with Conductive Fabric & Flora](http://learn.adafruit.com/capacitive-touch-with-conductive-fabric-and-flora "Link: http://learn.adafruit.com/capacitive-touch-with-conductive-fabric-and-flora")- [Previous Page](https://learn.adafruit.com/getting-started-with-flora/flora-projects.md)
- [Next Page](https://learn.adafruit.com/getting-started-with-flora/flora-modules.md)
## Featured Products
### FLORA - Wearable electronic platform: Arduino-compatible
[FLORA - Wearable electronic platform: Arduino-compatible](https://www.adafruit.com/product/659)
FLORA is Adafruit's fully-featured wearable electronics platform. It's a round, sewable, Arduino-compatible microcontroller designed to empower amazing wearables projects.FLORA comes with Adafruit's support, [tutorials and...](http://learn.adafruit.com/category/flora)
In Stock
[Buy Now](https://www.adafruit.com/product/659)
[Related Guides to the Product](https://learn.adafruit.com/products/659/guides)
### 3 x AAA Battery Holder with On/Off Switch and 2-Pin JST
[3 x AAA Battery Holder with On/Off Switch and 2-Pin JST](https://www.adafruit.com/product/727)
This battery holder connects 3 AAA batteries together in series for powering all kinds of projects. We spec'd these out because the box is slim, and 3 AAA's add up to about 3.3-4.5V, a very similar range to Lithium Ion/polymer (Li-Ion) batteries and have an on-off switch. That makes...
In Stock
[Buy Now](https://www.adafruit.com/product/727)
[Related Guides to the Product](https://learn.adafruit.com/products/727/guides)
### USB cable - USB A to Micro-B
[USB cable - USB A to Micro-B](https://www.adafruit.com/product/592)
This here is your standard A to micro-B USB cable, for USB 1.1 or 2.0. Perfect for connecting a PC to your Metro, Feather, Raspberry Pi or other dev-board or microcontroller
Approximately 3 feet / 1 meter long
In Stock
[Buy Now](https://www.adafruit.com/product/592)
[Related Guides to the Product](https://learn.adafruit.com/products/592/guides)
### Getting Started with Adafruit FLORA Book Pack
[Getting Started with Adafruit FLORA Book Pack](https://www.adafruit.com/product/2404)
Pickup a copy of [Getting Started with Adafruit FLORA](https://www.adafruit.com/products/1839) and then hit the ground running with everything that you need to become an [Adafruit FLORA](https://www.adafruit.com/products/659) supreme being!
This pack is...
No Longer Stocked
[Buy Now](https://www.adafruit.com/product/2404)
[Related Guides to the Product](https://learn.adafruit.com/products/2404/guides)
### Getting Started with Adafruit FLORA
[Getting Started with Adafruit FLORA](https://www.adafruit.com/product/1839)
**Making Wearables with an Arduino-Compatible Electronics Platform**
This book introduces readers to building wearable electronics projects using Adafruit's tiny FLORA board: at 4.4 grams, and only 1.75 inches in diameter, and featuring Arduino compatibility, it's the...
No Longer Stocked
[Buy Now](https://www.adafruit.com/product/1839)
[Related Guides to the Product](https://learn.adafruit.com/products/1839/guides)
### FLORA Budget Pack
[FLORA Budget Pack](https://www.adafruit.com/product/1405)
Get started with the fabulous Adafruit Flora platform with this lovely budget kit, just enough to get you started with this fun wearable computer. Included are enough parts to make your first wearable electronic project. There's a Flora motherboard, four ultra-bright chainable RGB pixels,...
Out of Stock
[Buy Now](https://www.adafruit.com/product/1405)
[Related Guides to the Product](https://learn.adafruit.com/products/1405/guides)
### FLORA GPS Starter Pack
[FLORA GPS Starter Pack](https://www.adafruit.com/product/1090)
Get started with the fabulous Adafruit Flora platform with this lovely starter kit. Included are plenty of parts to make a few different fun projects! There's a Flora motherboard, a GPS module that can also perform location datalogging, eight ultra-bright chainable RGB pixels, a battery...
No Longer Stocked
[Buy Now](https://www.adafruit.com/product/1090)
[Related Guides to the Product](https://learn.adafruit.com/products/1090/guides)
### FLORA Sensor Pack
[FLORA Sensor Pack](https://www.adafruit.com/product/1458)
Sense the world around you! The FLORA Sensor Pack includes many types of sensors for your wearable enjoyment. Sense motion, direction, color, light levels, touch, and connections with FLORA sensor breakouts and conductive materials, and a few NeoPixels for experimenting with displaying your...
No Longer Stocked
[Buy Now](https://www.adafruit.com/product/1458)
[Related Guides to the Product](https://learn.adafruit.com/products/1458/guides)
## Related Guides
- [Datalogging Hat with FLORA BLE](https://learn.adafruit.com/datalogging-hat-with-flora-ble.md)
- [Experimenting with NeverWet + Electronics](https://learn.adafruit.com/neverwet-electronics.md)
- [Flora GPS Jacket](https://learn.adafruit.com/flora-gps-jacket.md)
- [SMSsenger Bag](https://learn.adafruit.com/smssenger-bag.md)
- [Conductive Thread](https://learn.adafruit.com/conductive-thread.md)
- [3D Printed Wireless MIDI Controller Guitar](https://learn.adafruit.com/ez-key-wireless-midi-controller-guitar.md)
- [Mailbox Notification Service](https://learn.adafruit.com/mailbox-notification-service.md)
- [GPS Logging Dog Harness](https://learn.adafruit.com/gps-logging-dog-harness.md)
- [NeoPixel Matrix Snowflake Sweater](https://learn.adafruit.com/neopixel-matrix-snowflake-sweater.md)
- [Chameleon Scarf](https://learn.adafruit.com/chameleon-scarf.md)
- [Adafruit Arduino Selection Guide](https://learn.adafruit.com/adafruit-arduino-selection-guide.md)
- [Citi Bike Helmet](https://learn.adafruit.com/citi-bike-helmet.md)
- [FLORA TV-B-Gone](https://learn.adafruit.com/flora-tv-b-gone.md)
- [Flora Wearable GPS](https://learn.adafruit.com/flora-wearable-gps.md)
- [Flora Accelerometer](https://learn.adafruit.com/flora-accelerometer.md)
---
# Source: https://learn.adafruit.com/flora-tv-b-gone.md
# FLORA TV-B-Gone
## Overview

http://youtu.be/vRRhMwsqhJQ
Hidden inside this fashion accessory is a stealthy purpose-- it powers down television sets from across the room! This guide will walk you through the steps for creating your own Flora TV-B-Gone, a wearable gadget triggered by the button in the center of its flower design. The infrared LEDs communicate with TVs the same way your remote does (invisibly to the human eye) but the program contains codes to power down just about every TV brand. You can embellish your design however you like to match your outfit or encase it completely in a jacket pocket. The basic design is here, how you make yours is up to you!
New to FLORA? Check out these other guides:
- [Getting Started with FLORA](http://learn.adafruit.com/getting-started-with-flora "Link: http://learn.adafruit.com/getting-started-with-flora")
- [Flora RGB Smart Pixels](http://learn.adafruit.com/flora-rgb-smart-pixels "Link: http://learn.adafruit.com/flora-rgb-smart-pixels")
- [Flora Wearable GPS](http://learn.adafruit.com/flora-wearable-gps)
- [Flora Pixel Brooch](http://learn.adafruit.com/flora-pixel-brooch)
Most photographs in this guide by John De Cristofaro.
Arduino-ported [TV-B-Gone code updated for Flora](https://github.com/adafruit/Flora-TV-B-Gone/ "Link: https://github.com/adafruit/Flora-TV-B-Gone/") by Phillip Burgess.

- [Next Page](https://learn.adafruit.com/flora-tv-b-gone/parts.md)
## Featured Products
### FLORA - Wearable electronic platform: Arduino-compatible
[FLORA - Wearable electronic platform: Arduino-compatible](https://www.adafruit.com/product/659)
FLORA is Adafruit's fully-featured wearable electronics platform. It's a round, sewable, Arduino-compatible microcontroller designed to empower amazing wearables projects.FLORA comes with Adafruit's support, [tutorials and...](http://learn.adafruit.com/category/flora)
In Stock
[Buy Now](https://www.adafruit.com/product/659)
[Related Guides to the Product](https://learn.adafruit.com/products/659/guides)
### Super-bright 5mm IR LED
[Super-bright 5mm IR LED](https://www.adafruit.com/product/387)
Infrared LEDs are used for remote controls (they're the little LED in the part you point at your TV) and 'night-vision' cameras, and these little blue guys are high powered ones! They are 940nm wavelength, which is what nearly all devices listen to. They're 20 degree beamwidth,...
In Stock
[Buy Now](https://www.adafruit.com/product/387)
[Related Guides to the Product](https://learn.adafruit.com/products/387/guides)
### Colorful Round Tactile Button Switch Assortment - 15 pack
[Colorful Round Tactile Button Switch Assortment - 15 pack](https://www.adafruit.com/product/1009)
Little clicky switches are standard input "buttons" on electronic projects. These work best in a PCB but [can be used on a solderless breadboard as shown in this tutorial](http://www.ladyada.net/learn/arduino/lesson5.html). The pins are normally open (disconnected) and...
In Stock
[Buy Now](https://www.adafruit.com/product/1009)
[Related Guides to the Product](https://learn.adafruit.com/products/1009/guides)
### NPN Bipolar Transistors (PN2222) - 10 pack
[NPN Bipolar Transistors (PN2222) - 10 pack](https://www.adafruit.com/product/756)
Transistors are powerful little electronic switches, and we really like these NPN transistors whenever we need to control medium-power electronics such as small motors, solenoids, or IR LEDs. We find them so handy, they come in a pack of 10!
Each transistor is a general-purpose...
In Stock
[Buy Now](https://www.adafruit.com/product/756)
[Related Guides to the Product](https://learn.adafruit.com/products/756/guides)
### Heat Shrink Pack
[Heat Shrink Pack](https://www.adafruit.com/product/344)
Heat shrink is the duct tape of electronics, it keeps your stuff all safe and kept together. Especially when wiring and soldering, use heat shrink to add mechanical strength to cables. We use this stuff all the time and having a zip-lock bag of all the possible sizes is super...
In Stock
[Buy Now](https://www.adafruit.com/product/344)
[Related Guides to the Product](https://learn.adafruit.com/products/344/guides)
### 3 x AAA Battery Holder with On/Off Switch and 2-Pin JST
[3 x AAA Battery Holder with On/Off Switch and 2-Pin JST](https://www.adafruit.com/product/727)
This battery holder connects 3 AAA batteries together in series for powering all kinds of projects. We spec'd these out because the box is slim, and 3 AAA's add up to about 3.3-4.5V, a very similar range to Lithium Ion/polymer (Li-Ion) batteries and have an on-off switch. That makes...
In Stock
[Buy Now](https://www.adafruit.com/product/727)
[Related Guides to the Product](https://learn.adafruit.com/products/727/guides)
### Solid-Core Wire Spool - 25ft - 22AWG - Black
[Solid-Core Wire Spool - 25ft - 22AWG - Black](https://www.adafruit.com/product/290)
Perfect for bread-boarding, free wiring, etc. This spool of solid-core wire is easy to solder to. When bent it keeps its shape pretty well. We like to have a few spools of this stuff around. We suggest picking up wire strippers to match. Wire gauge is 22 AWG which we've found is the best...
In Stock
[Buy Now](https://www.adafruit.com/product/290)
[Related Guides to the Product](https://learn.adafruit.com/products/290/guides)
### Getting Started with Adafruit FLORA
[Getting Started with Adafruit FLORA](https://www.adafruit.com/product/1839)
**Making Wearables with an Arduino-Compatible Electronics Platform**
This book introduces readers to building wearable electronics projects using Adafruit's tiny FLORA board: at 4.4 grams, and only 1.75 inches in diameter, and featuring Arduino compatibility, it's the...
No Longer Stocked
[Buy Now](https://www.adafruit.com/product/1839)
[Related Guides to the Product](https://learn.adafruit.com/products/1839/guides)
## Related Guides
- [Citi Bike Helmet](https://learn.adafruit.com/citi-bike-helmet.md)
- [Datalogging Hat with FLORA BLE](https://learn.adafruit.com/datalogging-hat-with-flora-ble.md)
- [Ursula's Seashell Necklace](https://learn.adafruit.com/ursulas-seashell-necklace.md)
- [LED Stego Flex Spike Hoodie](https://learn.adafruit.com/led-stego-flex-spike-hoodie.md)
- [Flora MIDI Drum Glove](https://learn.adafruit.com/midi-drum-glove.md)
- [FLORA NeoGeo Watch](https://learn.adafruit.com/flora-geo-watch.md)
- [Light-Up Angler Fish Embroidery](https://learn.adafruit.com/light-up-angler-fish-embroidery.md)
- [Flora Snaps](https://learn.adafruit.com/flora-snaps.md)
- [Glowing WhoVille Hat](https://learn.adafruit.com/glowing-whoville-hat.md)
- [Fiber Optic Pixie Skirt](https://learn.adafruit.com/fiber-optic-pixie-princess-skirt.md)
- [Pac Man Pixel Suspenders](https://learn.adafruit.com/pac-man-pixel-suspenders.md)
- [Washing Wearable Electronics](https://learn.adafruit.com/washing-wearable-electronics.md)
- [Flora-Powered TARDIS Costume (for Dogs!)](https://learn.adafruit.com/wearable-flora-powered-tardis-costume-dogs.md)
- [Firewalker LED Sneakers](https://learn.adafruit.com/firewalker-led-sneakers.md)
- [FLORA and GEMMA ICSP](https://learn.adafruit.com/flora-and-gemma-isp.md)
---
# Source: https://learn.adafruit.com/flora-wearable-gps.md
# Flora Wearable GPS
## Overview
http://youtu.be/SE6vut7nl_4

This module is the best way to add a GPS to your wearable project. It's part of the Adafruit Flora series of wearable electronics, designed specifically for use with the Flora motherboard. Installed on the PCB is the latest of our Ultimate GPS modules, a small, super-thin, low power GPS module with built in data-logging capability! This module's easy to use, but extremely powerful:
- -165 dBm sensitivity, 10 Hz updates, 66 channels
- Designed for wearable use with the Flora system
- Only 20mA current draw
- RTC battery-compatible - sew a battery on to create a atomic-precision real time clock
- Built-in datalogging
- \>25Km altitude
- Internal patch antenna + u.FL connector for external active antenna
- Fix status LED
This guide will get you started with the Flora GPS.
- [Next Page](https://learn.adafruit.com/flora-wearable-gps/hook-up-gps.md)
## Featured Products
### FLORA - Wearable electronic platform: Arduino-compatible
[FLORA - Wearable electronic platform: Arduino-compatible](https://www.adafruit.com/product/659)
FLORA is Adafruit's fully-featured wearable electronics platform. It's a round, sewable, Arduino-compatible microcontroller designed to empower amazing wearables projects.FLORA comes with Adafruit's support, [tutorials and...](http://learn.adafruit.com/category/flora)
In Stock
[Buy Now](https://www.adafruit.com/product/659)
[Related Guides to the Product](https://learn.adafruit.com/products/659/guides)
### Flora Wearable Ultimate GPS Module
[Flora Wearable Ultimate GPS Module](https://www.adafruit.com/product/1059)
This module is the best way to add a GPS to your wearable project. It's part of the Adafruit Flora series of wearable electronics, designed specifically for use with the Flora motherboard. Installed on the PCB is the latest of our Ultimate GPS modules, a small, super-thin, low-power GPS...
No Longer Stocked
[Buy Now](https://www.adafruit.com/product/1059)
[Related Guides to the Product](https://learn.adafruit.com/products/1059/guides)
### Small Alligator Clip Test Lead (set of 12)
[Small Alligator Clip Test Lead (set of 12)](https://www.adafruit.com/product/1008)
Connect this to that without soldering using these handy mini alligator clip test leads. 15" cables with alligator clip on each end, color coded. You get 12 pieces in 6 colors. Strong and grippy, these always come in handy! We often use these in conjunction with a multimeter so we...
In Stock
[Buy Now](https://www.adafruit.com/product/1008)
[Related Guides to the Product](https://learn.adafruit.com/products/1008/guides)
### Getting Started with Adafruit FLORA
[Getting Started with Adafruit FLORA](https://www.adafruit.com/product/1839)
**Making Wearables with an Arduino-Compatible Electronics Platform**
This book introduces readers to building wearable electronics projects using Adafruit's tiny FLORA board: at 4.4 grams, and only 1.75 inches in diameter, and featuring Arduino compatibility, it's the...
No Longer Stocked
[Buy Now](https://www.adafruit.com/product/1839)
[Related Guides to the Product](https://learn.adafruit.com/products/1839/guides)
### Getting Started with Adafruit FLORA Book Pack
[Getting Started with Adafruit FLORA Book Pack](https://www.adafruit.com/product/2404)
Pickup a copy of [Getting Started with Adafruit FLORA](https://www.adafruit.com/products/1839) and then hit the ground running with everything that you need to become an [Adafruit FLORA](https://www.adafruit.com/products/659) supreme being!
This pack is...
No Longer Stocked
[Buy Now](https://www.adafruit.com/product/2404)
[Related Guides to the Product](https://learn.adafruit.com/products/2404/guides)
### FLORA GPS Starter Pack
[FLORA GPS Starter Pack](https://www.adafruit.com/product/1090)
Get started with the fabulous Adafruit Flora platform with this lovely starter kit. Included are plenty of parts to make a few different fun projects! There's a Flora motherboard, a GPS module that can also perform location datalogging, eight ultra-bright chainable RGB pixels, a battery...
No Longer Stocked
[Buy Now](https://www.adafruit.com/product/1090)
[Related Guides to the Product](https://learn.adafruit.com/products/1090/guides)
### FLORA Sensor Pack
[FLORA Sensor Pack](https://www.adafruit.com/product/1458)
Sense the world around you! The FLORA Sensor Pack includes many types of sensors for your wearable enjoyment. Sense motion, direction, color, light levels, touch, and connections with FLORA sensor breakouts and conductive materials, and a few NeoPixels for experimenting with displaying your...
No Longer Stocked
[Buy Now](https://www.adafruit.com/product/1458)
[Related Guides to the Product](https://learn.adafruit.com/products/1458/guides)
### FLORA Budget Pack
[FLORA Budget Pack](https://www.adafruit.com/product/1405)
Get started with the fabulous Adafruit Flora platform with this lovely budget kit, just enough to get you started with this fun wearable computer. Included are enough parts to make your first wearable electronic project. There's a Flora motherboard, four ultra-bright chainable RGB pixels,...
Out of Stock
[Buy Now](https://www.adafruit.com/product/1405)
[Related Guides to the Product](https://learn.adafruit.com/products/1405/guides)
## Related Guides
- [FLORA TV-B-Gone](https://learn.adafruit.com/flora-tv-b-gone.md)
- [Zipper Switch](https://learn.adafruit.com/zipper-switch.md)
- [Flora GPS Jacket](https://learn.adafruit.com/flora-gps-jacket.md)
- [Getting Started with FLORA](https://learn.adafruit.com/getting-started-with-flora.md)
- [NeoPixel Ring Clock](https://learn.adafruit.com/neopixel-ring-clock.md)
- [SMSsenger Bag](https://learn.adafruit.com/smssenger-bag.md)
- [VU Meter Baseball Hat](https://learn.adafruit.com/vu-meter-baseball-hat.md)
- [Sparkle Skirt](https://learn.adafruit.com/sparkle-skirt.md)
- [Citi Bike Helmet](https://learn.adafruit.com/citi-bike-helmet.md)
- [Flora MIDI Drum Glove](https://learn.adafruit.com/midi-drum-glove.md)
- [Haptic Headband](https://learn.adafruit.com/haptic-headband.md)
- [Mailbox Notification Service](https://learn.adafruit.com/mailbox-notification-service.md)
- [LED Stego Flex Spike Hoodie](https://learn.adafruit.com/led-stego-flex-spike-hoodie.md)
- [Sunscreen Reminder Hat](https://learn.adafruit.com/sunscreen-reminder-hat.md)
- [Custom Milled PCB Pins](https://learn.adafruit.com/custom-milled-pcb-pins.md)
---
# Source: https://learn.adafruit.com/el-workshop/follow-through.md
# EL Workshop
## Follow-Through

Add a slip of paper to each kit your students take home. It should contain the subject of the class, your name and contact info, the venue information, and any links or resources (like the [Adafruit EL wire tutorial](http://learn.adafruit.com/el-wire)) they might want to look up after class.
Take photos of your students and their works-in-progress. Ask them to email you photos of their finished projects, and any cool projects they work on in the future.
- [Previous Page](https://learn.adafruit.com/el-workshop/class-outline.md)
## Featured Products
### 2-pin JST SM In-line power wire connector (male)
[2-pin JST SM In-line power wire connector (male)](https://www.adafruit.com/product/319)
If you have a project where you'd like to be able to detach the wiring, this wire will fit the bill. Its a JST 2.5mm 'free hanging' cable assembly that latches strongly. One wire is marked with a white dashed line. You can't plug these in backwards.
This is the...
No Longer Stocked
[Buy Now](https://www.adafruit.com/product/319)
[Related Guides to the Product](https://learn.adafruit.com/products/319/guides)
### In-line wire 1-to-4 splitter
[In-line wire 1-to-4 splitter](https://www.adafruit.com/product/402)
If you want to connect multiple EL wires/strips/panels up to one inverter, these splitters are quite useful. There is one male connector (goes to the inverter) and then 4 female connectors (which will connect to each wire/strip/panel. You can even cascade them! Only thing to watch for is make...
In Stock
[Buy Now](https://www.adafruit.com/product/402)
[Related Guides to the Product](https://learn.adafruit.com/products/402/guides)
### Needle set - 3/9 sizes - 20 needles
[Needle set - 3/9 sizes - 20 needles](https://www.adafruit.com/product/615)
Mighty needles, sew like the wind! This needle set is the only one you'll need for any sort of hand sewing, especially using our conductive thread and wearable electronics parts.
Each pack contains 20 gold-eye sharps, with eye sizes ranging from #3 (1.75" long) to #9...
In Stock
[Buy Now](https://www.adafruit.com/product/615)
[Related Guides to the Product](https://learn.adafruit.com/products/615/guides)
## Related Guides
- [Electron Bow](https://learn.adafruit.com/electron-bow.md)
- [EL Wire Sign](https://learn.adafruit.com/el-wire-sign.md)
- [EL Wire Animal Masks](https://learn.adafruit.com/el-wire-animal-masks.md)
- [EL Bowtie](https://learn.adafruit.com/el-bowtie.md)
- [EL Wire](https://learn.adafruit.com/el-wire.md)
- [TRON Bag](https://learn.adafruit.com/tron-bag.md)
- [Light Up your Costume with Noods](https://learn.adafruit.com/light-up-your-costume-with-noods.md)
- [EL Stick Figure](https://learn.adafruit.com/el-stick-figure.md)
- [TRON Hoodie](https://learn.adafruit.com/tron-hoodie.md)
- [EL Wire Stocking](https://learn.adafruit.com/el-wire-stocking.md)
- [Glowing Bean Bags with EL Wire](https://learn.adafruit.com/glowing-bean-bags-with-el-wire.md)
- [Glowing Star Chuck Taylor Sneakers](https://learn.adafruit.com/glowing-star-chucks.md)
---
# Source: https://learn.adafruit.com/force-sensitive-resistor-fsr.md
# Force Sensitive Resistor (FSR)
## Overview
FSRs are sensors that allow you to detect physical pressure, squeezing and weight. They are simple to use and low cost. This is a photo of an FSR, specifically the Interlink 402 model. The 1/2" diameter round part is the sensitive bit.


The FSR is made of 2 layers separated by a spacer. The more one presses, the more of those Active Element dots touch the semiconductor and that makes the resistance go down.

FSRs are basically a resistor that changes its resistive value (in ohms Ω) depending on how much it is pressed. These sensors are fairly low cost, and easy to use but they're rarely accurate. They also vary some from sensor to sensor perhaps 10%. So basically when you use FSRs you should only expect to get _ranges_ of response. While FSRs can detect weight, they're a bad choice for detecting exactly how many pounds of weight are on them.
However, for most touch-sensitive applications like "has this been squeezed or pushed and about how much" they're a good deal for the money!
## Some Basic Stats
## These stats are specifically for the Interlink 402, but nearly all FSRs will be similar. Checking the datasheet will always illuminate any differences
- **Size:** 1/2" (12.5mm) diameter active area by 0.02" thick (Interlink does have some that are as large as 1.5"x1.5")
- **Price** [$7.00 from the Adafruit shop](http://www.adafruit.com/products/166)
- **Resistance range:** Infinite/open circuit (no pressure), 100KΩ (light pressure) to 200Ω (max. pressure)
- **Force range** : 0 to 20 lb. (0 to 100 Newtons) applied evenly over the 0.125 sq in surface area
- **Power supply:** Any! Uses less than 1mA of current (depends on any pullup/down resistors used and supply voltage)
- **[Datasheet](http://learn.adafruit.com/system/assets/assets/000/010/126/original/fsrguide.pdf)** (note there are some mathematical inconsistancies in here)
## How to measure force/pressure with an FSR
As we've said, the FSR's resistance changes as more pressure is applied. When there is no pressure, the sensor looks like an infinite resistor (open circuit), as the pressure increases, the resistance goes down. This graph indicates approximately the resistance of the sensor at different force measurements. (Note that force is not measured in grams and what they really mean is Newtons \* 100!)

It is important to notice that the graph isn't really _linear_ (its a log/log graph) and that at especially low force measurements it quickly goes from infinite to 100KΩ.
- [Next Page](https://learn.adafruit.com/force-sensitive-resistor-fsr/testing-an-fsr.md)
## Featured Products
### Round Force-Sensitive Resistor (FSR) - 0.3 ~ 10 Newton Force
[Round Force-Sensitive Resistor (FSR) - 0.3 ~ 10 Newton Force](https://www.adafruit.com/product/166)
FSRs are sensors that allow you to detect physical pressure, squeezing and weight. They are simple to use and low cost. This sensor is an Alpha MF01A-N-221-A01 with 1/2 diameter sensing region.
We used to stock the Interlink model 402 FSR - the Alpha version is almost half the price...
In Stock
[Buy Now](https://www.adafruit.com/product/166)
[Related Guides to the Product](https://learn.adafruit.com/products/166/guides)
### Square Force-Sensitive Resistor (FSR)
[Square Force-Sensitive Resistor (FSR)](https://www.adafruit.com/product/1075)
FSRs are sensors that allow you to detect physical pressure, squeezing and weight. They are simple to use and low cost. This sensor is an Alpha MF02A-N-221-A01 FSR with a 38mm square sensing region. Note that this sensor can't detect _where_ on the square you pressed (for that,
In Stock
[Buy Now](https://www.adafruit.com/product/1075)
[Related Guides to the Product](https://learn.adafruit.com/products/1075/guides)
### Extra-long force-sensitive resistor (FSR)
[Extra-long force-sensitive resistor (FSR)](https://www.adafruit.com/product/1071)
FSRs are sensors that allow you to detect physical pressure, squeezing and weight. They are simple to use and low cost. This sensor is a Interlink model 408 FSR with a massive 1/4-inch x 24-inch sensing region. You can press anywhere along the strip and the pressure will be recognized. Note...
No Longer Stocked
[Buy Now](https://www.adafruit.com/product/1071)
[Related Guides to the Product](https://learn.adafruit.com/products/1071/guides)
### Terminal Block - 2-pin 3.5mm - pack of 5!
[Terminal Block - 2-pin 3.5mm - pack of 5!](https://www.adafruit.com/product/724)
Nothing makes a project harder to maintain than a lot of loose wiring. That's why we like to use terminal blocks whenever making PCB-to-Wire connections. These particular 3.5mm terminal blocks are our favorite: big enough for a range of wire gauges, easy to adjust with a screwdriver, and...
In Stock
[Buy Now](https://www.adafruit.com/product/724)
[Related Guides to the Product](https://learn.adafruit.com/products/724/guides)
## Related Guides
- [Hang out your washing reminder - Adafruit IO + Vibration switch](https://learn.adafruit.com/hang-out-your-washing-reminder-adafruit-io-vibration-switch.md)
- [ReBoots Animated LED Boot Laces](https://learn.adafruit.com/re-boots-animated-dancing-boot-laces.md)
- [Circuit Playground Bike Glove](https://learn.adafruit.com/circuit-playground-bike-glove.md)
- [CuteCircuit Twirkle Shirt Teardown](https://learn.adafruit.com/cutecircuit-twirkle-shirt-teardown.md)
- [Tilt Sensor](https://learn.adafruit.com/tilt-sensor.md)
- [ICEdot Teardown](https://learn.adafruit.com/icedot-teardown.md)
- [Wireless LED Juggling Balls with ESP-NOW](https://learn.adafruit.com/wireless-juggling-balls-esp-now.md)
- [Adafruit HX711 24-bit ADC](https://learn.adafruit.com/adafruit-hx711-24-bit-adc.md)
- [Arcade Stick Conversion](https://learn.adafruit.com/arcade-stick-conversion.md)
- [Basic Resistor Sensor Reading on Raspberry Pi](https://learn.adafruit.com/basic-resistor-sensor-reading-on-raspberry-pi.md)
- [Adafruit VEML6070 UV Sensor Breakout](https://learn.adafruit.com/adafruit-veml6070-uv-light-sensor-breakout.md)
- [NAU7802 Pet Food Scale](https://learn.adafruit.com/nau7802-pet-food-scale.md)
- [Flora MIDI Drum Glove](https://learn.adafruit.com/midi-drum-glove.md)
- [Adafruit NAU7802 24-Bit ADC - STEMMA QT / Qwiic](https://learn.adafruit.com/adafruit-nau7802-24-bit-adc-stemma-qt-qwiic.md)
- [Clue Coffee Scale](https://learn.adafruit.com/clue-coffee-scale.md)
---
# Source: https://learn.adafruit.com/adafruit-motor-shield/forums.md
# Source: https://learn.adafruit.com/rgb-lcd-shield/forums.md
# Source: https://learn.adafruit.com/tron-bag/forums.md
# TRON Bag
## Forums
- [Previous Page](https://learn.adafruit.com/tron-bag/finishing.md)
## Featured Products
### Heat Shrink Pack
[Heat Shrink Pack](https://www.adafruit.com/product/344)
Heat shrink is the duct tape of electronics, it keeps your stuff all safe and kept together. Especially when wiring and soldering, use heat shrink to add mechanical strength to cables. We use this stuff all the time and having a zip-lock bag of all the possible sizes is super...
In Stock
[Buy Now](https://www.adafruit.com/product/344)
[Related Guides to the Product](https://learn.adafruit.com/products/344/guides)
### In-line wire 1-to-4 splitter
[In-line wire 1-to-4 splitter](https://www.adafruit.com/product/402)
If you want to connect multiple EL wires/strips/panels up to one inverter, these splitters are quite useful. There is one male connector (goes to the inverter) and then 4 female connectors (which will connect to each wire/strip/panel. You can even cascade them! Only thing to watch for is make...
In Stock
[Buy Now](https://www.adafruit.com/product/402)
[Related Guides to the Product](https://learn.adafruit.com/products/402/guides)
### EL wire starter pack - Blue 2.5 meter (8.2 ft)
[EL wire starter pack - Blue 2.5 meter (8.2 ft)](https://www.adafruit.com/product/583)
A little bundle to get you started! This project pack contains:
- [2.5 meters (over 8 ft) of high-brightness, long-life EL wire in Blue](http://www.adafruit.com/products/408). 2.5 meters is the maximum amount for the pocket driver - it is cut and soldered so it's ready...
Out of Stock
[Buy Now](https://www.adafruit.com/product/583)
[Related Guides to the Product](https://learn.adafruit.com/products/583/guides)
## Related Guides
- [Battery Powering Wearable Electronics](https://learn.adafruit.com/battery-powering-wearable-electronics.md)
- [3D Printed Daft Punk Helmet with Bluetooth ](https://learn.adafruit.com/3d-printed-daft-punk-helmet-with-bluetooth.md)
- [3D Printed Wearable Video Goggles](https://learn.adafruit.com/3d-printed-wearable-video-goggles.md)
- [Decorative Pointy Elf Ear Bud Holders](https://learn.adafruit.com/elf-ears.md)
- [LED Friendship Bracelet](https://learn.adafruit.com/nautical-led-bracelet.md)
- [Make a Zelda Master Sword with the RP2040 Prop-Maker Feather](https://learn.adafruit.com/master-sword-rp2040.md)
- [USB Locket](https://learn.adafruit.com/usb-locket.md)
- [Light Up your Costume with Noods](https://learn.adafruit.com/light-up-your-costume-with-noods.md)
- [Pac Man Pixel Suspenders](https://learn.adafruit.com/pac-man-pixel-suspenders.md)
- [3D Printed LED Buckle](https://learn.adafruit.com/3d-printed-led-buckle.md)
- [Adafruit Flora Bluefruit LE](https://learn.adafruit.com/adafruit-flora-bluefruit-le.md)
- [Textile Potentiometer Hoodie](https://learn.adafruit.com/textile-potentiometer-hoodie.md)
- [Cynaps Bone Conduction Headset Teardown](https://learn.adafruit.com/cynaps-bone-conduction-headset-teardown.md)
- [Glowing Bean Bags with EL Wire](https://learn.adafruit.com/glowing-bean-bags-with-el-wire.md)
- [3D Printed Gunblade](https://learn.adafruit.com/3d-printed-gunblade.md)
---
# Source: https://learn.adafruit.com/fpga-rgb-matrix.md
# FPGA RGB Matrix
## Overview

## Controlling the Adafruit 32x16 RGB LED Matrix with a DE0-Nano FPGA Board
Adafruit currently sells a really cool [16x32 RGB LED matrix panel](http://www.adafruit.com/products/420) in their store that is "designed to be driven by an FPGA or other high speed processor." The purpose of this tutorial is to help you get started driving a small handful of these displays with the [DE0-Nano board](http://www.adafruit.com/category/products/451), which contains a mid-range Altera FPGA.
## Prerequisites
This tutorial is for those who are familiar with electronics, microcontrollers, programming IDEs and noodling around on a windows computer with drivers, command prompts, editing text files, etc. Its a good introductory FPGA project but not a good introductory microcontroller/electronics project.
You need to have the Quartus II software installed on your computer. If not, you can download it from [Altera's website](http://www.altera.com/) or install it from the DVD that comes with the DE0-Nano board. You will also need to install the USB-Blaster drivers that enable your computer to communicate with the FPGA (see this short [YouTube video](http://www.youtube.com/watch?v=cezEo9itJBM&t=10s)).
[This tutorial was written by Brian Nez!](http://nezzen.net/)
- [Next Page](https://learn.adafruit.com/fpga-rgb-matrix/new-project.md)
## Featured Products
### 5V 2A (2000mA) switching power supply - UL Listed
[5V 2A (2000mA) switching power supply - UL Listed](https://www.adafruit.com/product/276)
This is an FCC/CE certified and UL listed power supply. Need a lot of 5V power? This switching supply gives a clean regulated 5V output at up to 2000mA. 110 or 240 input, so it works in any country. The plugs are "US 2-prong" style so you may need a plug adapter, but you can pick one...
In Stock
[Buy Now](https://www.adafruit.com/product/276)
[Related Guides to the Product](https://learn.adafruit.com/products/276/guides)
### Medium 16x32 RGB LED matrix panel - 6mm Pitch
[Medium 16x32 RGB LED matrix panel - 6mm Pitch](https://www.adafruit.com/product/420)
Bring a little bit of Times Square into your home with this 16 x 32 RGB LED matrix panel. These panels are normally used to make video walls, here in New York we see them on the sides of busses and bus stops, to display animations or short video clips. We thought they looked really cool so we...
In Stock
[Buy Now](https://www.adafruit.com/product/420)
[Related Guides to the Product](https://learn.adafruit.com/products/420/guides)
### DE0-Nano - Altera Cyclone IV FPGA starter board
[DE0-Nano - Altera Cyclone IV FPGA starter board](https://www.adafruit.com/product/451)
For every day projects, microcontrollers are low-cost and easy to use. But when you have a project that needs raw power and high speed you may want to check out FPGAs (Field Programmable Gate Arrays). FPGAs are like raw chips that you can design by hand. They run very fast and very...
No Longer Stocked
[Buy Now](https://www.adafruit.com/product/451)
[Related Guides to the Product](https://learn.adafruit.com/products/451/guides)
## Related Guides
- [Smart Bathroom App](https://learn.adafruit.com/smart-bathroom-app.md)
- [NeoTrellis Light Painting](https://learn.adafruit.com/neotrellis-light-painting.md)
- [TIMESQUARE Wordclock](https://learn.adafruit.com/timesquare-wordclock.md)
- [MatrixPortal S3 Flight Proximity Tracker](https://learn.adafruit.com/matrixportal-s3-flight-proximity-tracker.md)
- [MicroPython Displays: Drawing Shapes](https://learn.adafruit.com/micropython-displays-drawing-shapes.md)
- [Adafruit Protomatter RGB Matrix Library](https://learn.adafruit.com/adafruit-protomatter-rgb-matrix-library.md)
- [Adafruit Microphone Amplifier Breakout](https://learn.adafruit.com/adafruit-microphone-amplifier-breakout.md)
- [16x16 NeoPixel Matrix Square Pixel Display](https://learn.adafruit.com/16x16-neopixel-matrix-square-pixel-display.md)
- [Shake Away 2021 with MatrixPortal](https://learn.adafruit.com/matrixportal-shake-away-2020.md)
- [NeoTrellis Feather Case Assembly](https://learn.adafruit.com/neotrellis-feather-case-assembly.md)
- [RGB LED Matrices with CircuitPython](https://learn.adafruit.com/rgb-led-matrices-matrix-panels-with-circuitpython.md)
- [Scroll an SMS Text Message on your RGB Matrix](https://learn.adafruit.com/scroll-an-sms-text-message-on-your-rgb-matrix.md)
- [Adafruit LED Backpacks](https://learn.adafruit.com/adafruit-led-backpack.md)
- [Raspberry Pi LED Matrix Display](https://learn.adafruit.com/raspberry-pi-led-matrix-display.md)
- [Sino:bit with Arduino](https://learn.adafruit.com/sino-bit-with-arduino.md)
---
# Source: https://learn.adafruit.com/smt-manufacturing/framed-stencils.md
# SMT Manufacturing
## Framed Stencils
If you want to make a lot of PCBs using SMT technique, its key to use reflowing instead of soldering - so that the entire board is 'soldered' at once. But to do that you'll need to deposit paste precisely on the pads. For starting out, you can use a [DIY stencil such as a laser cut kapton/mylar sheet (low cost)](http://learn.adafruit.com/smt-manufacturing/laser-cut-stencils) or depositing the paste by hand using a syringe.
However, if you ever decide to make a few hundred boards especially those with very fine pitch type parts (say 0.4 or 0.5mm pitch) it may be time to move to a framed stencil!
## Framed v. Unframed
The1 key benefit of framed stencils is that they are 'pre-stretched'. Especially with large PCB panels, having the stencil-board-alignment off by even a mm can cause bridges or opens. With DIY stencils, alignment is a pain and takes care by the operator for each pass.

With a framed stencil, the thin stainless steel sheet is laser cut and then stretched into a solid cast aluminum frame. Its less likely to have misalignment because the sheet cant slide around
If you have the right equipment you can use unframed metal stencils and stretch them into a frame yourself, but unless you're a board fab house its unlikely that this is cost effective.
## In a Machine
Framed stencils are used in a 'screenprinting' PCB stencil machine (we'll have another tutorial about this one). The frame is bolted in place onto a hinge so you can move the stencil up (to replace the PCB) and down (to stencil).
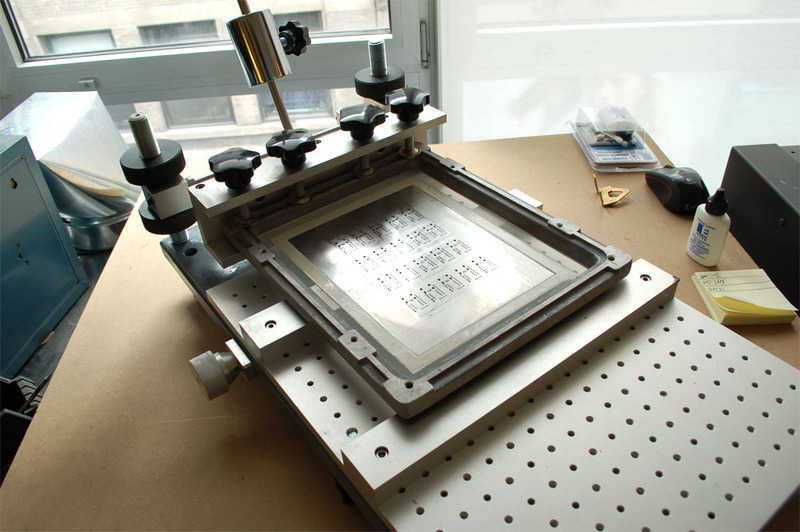
Since the stencil is stretched and flat, as long as it is bolted into the stenciller solidly, you will have minimal adjustment from one PCB to the next. This is what makes it ideal for multi-PCB runs. We do 10-50 PCB panels (of up to 20 pieces per panel) at a time with about 5 seconds between screenprints.## Where to Get Stencils Made
We get our [framed stencils made by stencils unlimited](http://www.stencilsunlimited.com/) . Its pretty easy to make a stencil, just export the Cream Top (or Bottom) layer from your PCB layout software and upload it during your order. They will calculate the best stencil thickness (you want a thicker stencil for large-pitch parts and thinner for fine pitch so an average is taken)\* and ship it the next day.
If you have a board fab house with stencil-making capabilities, you can also ask them to make you the stencil. Don't forget to have a tiled Cream gerber if you are having panels made - so if your design is tiled get them to tile the GBC file for you!

\*[ IPC 7525](http://www.ipc.org/TOC/IPC-7525.pdf) has a long detailed document on calculating stencil thickness. It should be approximately **2.64 + 0.0831 \* pitch-of-component** then averaged.
- [Previous Page](https://learn.adafruit.com/smt-manufacturing/laser-cut-stencils.md)
- [Next Page](https://learn.adafruit.com/smt-manufacturing/stenciling-machines.md)
## Featured Products
### Fine tip curved tweezers - ESD safe
[Fine tip curved tweezers - ESD safe](https://www.adafruit.com/product/422)
When soldering small surface-mount (SMD/SMT) components, one thing you'll need is a good pair of tweezers. These are a great pair of every-day tweezers. They're anti-static, anti-magnetic and made of hard stainless steel. The tips are fine and pointy to pick up any size component. This...
In Stock
[Buy Now](https://www.adafruit.com/product/422)
[Related Guides to the Product](https://learn.adafruit.com/products/422/guides)
### Fine tip straight tweezers - ESD safe
[Fine tip straight tweezers - ESD safe](https://www.adafruit.com/product/421)
When soldering small surface-mount (SMD/SMT) components, one thing you'll need is a good pair of tweezers. These tweezers are a great pair of every-day tweezers. They're anti-static, anti-magnetic and made of hard stainless steel. The tips are fine and pointy to pick up any size...
In Stock
[Buy Now](https://www.adafruit.com/product/421)
[Related Guides to the Product](https://learn.adafruit.com/products/421/guides)
### USB Microscope - 5MP interpolated 220x magnification / 8 LEDs
[USB Microscope - 5MP interpolated 220x magnification / 8 LEDs](https://www.adafruit.com/product/636)
As electronics get smaller and smaller, you'll need a hand examining PCBs and this little USB microscope is the perfect tool. Its smaller and lighter than a large optical microscope but packs quite a bit of power in its little body. There's a 2 megapixel sensor inside and an optical...
Out of Stock
[Buy Now](https://www.adafruit.com/product/636)
[Related Guides to the Product](https://learn.adafruit.com/products/636/guides)
## Related Guides
- [Reindeer Solder Kit by Phyx](https://learn.adafruit.com/reindeer-solder-kit-by-phyx.md)
- [3D-Printed Solder Paste Dispenser Hand Switch ](https://learn.adafruit.com/3d-printed-solder-paste-dispenser-hand-switch.md)
- [USB Rechargeable Mini Solder Fume Extractor](https://learn.adafruit.com/usb-rechargeable-mini-solder-fume-extractor.md)
- [How to Sign Windows Drivers & Executables](https://learn.adafruit.com/how-to-sign-windows-drivers-installer.md)
- [Desktop Fume Extractor](https://learn.adafruit.com/desktop-fume-extractor.md)
- [Chinese Dragon Puppet with Motion-Reactive Flame Effect](https://learn.adafruit.com/chinese-dragon-puppet-with-motion-reactive-flame-effect.md)
- [16-Step Drum Sequencer](https://learn.adafruit.com/16-step-drum-sequencer.md)
- [Color Sensing Music Player](https://learn.adafruit.com/color-sensing-music-player.md)
- [Light-Up Costumes in Harsh Environments](https://learn.adafruit.com/light-up-costumes-in-harsh-environments.md)
- [Garden Path Lights with WLED and a Sunset Timer](https://learn.adafruit.com/garden-path-lights-with-sunset-timer.md)
- [CNC Rotary Macropad](https://learn.adafruit.com/cnc-rotary-macropad.md)
- [Blinka Says Tabletop Arcade Game](https://learn.adafruit.com/blinka-says-tabletop-arcade-game.md)
- [IoT Moon Phase Guide](https://learn.adafruit.com/moon-phase.md)
- [KTOWN's Ultimate Creating Parts in Eagle Tutorial](https://learn.adafruit.com/ktowns-ultimate-creating-parts-in-eagle-tutorial.md)
- [Shop Tips & Tricks](https://learn.adafruit.com/shop-tips-and-tricks.md)
---
# Source: https://learn.adafruit.com/skill-badge-guide-3d-printing/free-3d-cad.md
# Skill Badge Guide: 3D Printing
## Free 3D CAD

There are many FREE CAD suites that make designing for the 3D printer a breeze. Each one has its strengths, so try 'em all and see which works best for you!
- [Blender](http://www.blender.org/ "Link: http://www.blender.org/"): This feature rich software can create everything from solid models for printing to full fledged, cinema quality, video. Although the learning curve is a bit steep, there is a huge amount of support available in their community forum and elsewhere online.
- [Tinkercad](https://tinkercad.com/ "Link: https://tinkercad.com/"): Revived by Autodesk, Tinkercad provides an easy to learn solid modeling environment that links directly to your Thingiverse account.
- [Previous Page](https://learn.adafruit.com/skill-badge-guide-3d-printing/producing-a-product.md)
- [Next Page](https://learn.adafruit.com/skill-badge-guide-3d-printing/setting-up-the-machine.md)
## Featured Products
### 3D printing - Skill badge, iron-on patch
[3D printing - Skill badge, iron-on patch](https://www.adafruit.com/product/490)
You can 3D print! Adafruit offers a fun and exciting "badges" of achievement for electronics, science and engineering. We believe everyone should be able to be rewarded for learning a useful skill, a badge is just one of the many ways to show and share.
This is the "I...
No Longer Stocked
[Buy Now](https://www.adafruit.com/product/490)
[Related Guides to the Product](https://learn.adafruit.com/products/490/guides)
### 3D printing - Sticker!
[3D printing - Sticker!](https://www.adafruit.com/product/649)
You can 3D print! Adafruit offers a fun and exciting stickers to celebrate achievement for electronics, science and engineering. We believe everyone should be able to be rewarded for learning a useful skill, a sticker is just one of the many ways to show and share.
This is the...
No Longer Stocked
[Buy Now](https://www.adafruit.com/product/649)
[Related Guides to the Product](https://learn.adafruit.com/products/649/guides)
### Flashforge Creator PRO
[Flashforge Creator PRO](https://www.adafruit.com/product/2742)
The **Flashforge Creator Pro** is the latest addition to FlashForge’s Creator family, built upon an open source platform.
Based on proven design of the Creator X chassis, the Pro is now enclosed so you can print ABS better and more efficient than ever. The upgraded...
No Longer Stocked
[Buy Now](https://www.adafruit.com/product/2742)
[Related Guides to the Product](https://learn.adafruit.com/products/2742/guides)
### PrintrBot Simple Metal 3D Printer - Black - Assembled
[PrintrBot Simple Metal 3D Printer - Black - Assembled](https://www.adafruit.com/product/1760)
New from Printrbot, the Metal Simple is a brand new rock solid, all metal, fully-assembled Printrbot Simple! As opposed to the [Printrbot Simple Kit](http://www.adafruit.com/products/1735), all of the laser cut wood parts have been replaced by rock solid metal and assembled. In...
No Longer Stocked
[Buy Now](https://www.adafruit.com/product/1760)
[Related Guides to the Product](https://learn.adafruit.com/products/1760/guides)
### Ultimaker 2+ 3D Printer
[Ultimaker 2+ 3D Printer](https://www.adafruit.com/product/2673)
The **Ultimaker 2+** is one of our favorite 3D printers on the market. It's a well-built open-source compact machine with an excellent UX. Every inch of the Ultimaker 2+ is designed to create the most effortless and reliable 3D printing experience ever!
No Longer Stocked
[Buy Now](https://www.adafruit.com/product/2673)
[Related Guides to the Product](https://learn.adafruit.com/products/2673/guides)
### Micro 3D Printer - Black - Retail Edition
[Micro 3D Printer - Black - Retail Edition](https://www.adafruit.com/product/2933)
The magic of 3D printing is now more affordable and accessible than ever! Meet The **Micro 3D Printer** by [M3D](https://printm3d.com/), the first truly consumer 3D printer. Sporting a compact design, user-friendly software, and replaceable print beds and nozzles,...
No Longer Stocked
[Buy Now](https://www.adafruit.com/product/2933)
[Related Guides to the Product](https://learn.adafruit.com/products/2933/guides)
### Filament for 3D Printers in Various Colors and Types
[Filament for 3D Printers in Various Colors and Types](https://www.adafruit.com/product/2080)
Having a 3D printer without filament is sort of like having a regular printer without paper or ink. And while a lot of printers come with some filament there's a good chance you've been printing up a storm and need something new. That's why we've started carrying a...
Out of Stock
[Buy Now](https://www.adafruit.com/product/2080)
[Related Guides to the Product](https://learn.adafruit.com/products/2080/guides)
## Related Guides
- [Mario Magic Wand](https://learn.adafruit.com/mario-magic-wand.md)
- [Case for HUSB238 Breakout](https://learn.adafruit.com/case-for-husb238.md)
- [3D Printed RFID NFC Rings](https://learn.adafruit.com/3d-printed-rfid-nfc-rings.md)
- [AI 3D Printed Figure](https://learn.adafruit.com/ai-figure.md)
- [Ultrasonic Ruler](https://learn.adafruit.com/ultrasonic-ruler.md)
- [Magnet Bottle Holder](https://learn.adafruit.com/magnet-bottle-holder.md)
- [Printy Boost: Reimagining a Classic Adafruit Kit](https://learn.adafruit.com/printy-boost-reimagining-a-classic-adafruit-kit.md)
- [CYBERDECK Expansion Plate](https://learn.adafruit.com/cyberdeck-plate.md)
- [PyPortal Case](https://learn.adafruit.com/pyportal-case.md)
- [3D Printed LED Buckle](https://learn.adafruit.com/3d-printed-led-buckle.md)
- [CLUE Slim Case](https://learn.adafruit.com/clue-slim-case.md)
- [Adafruit Desktop 3D Printer Buyers Guide](https://learn.adafruit.com/adafruit-desktop-3d-printer-selection-guide.md)
- [3D Printed Animatronic Robot Head](https://learn.adafruit.com/3d-printed-animatronic-robot-head.md)
- [New Years Eve Ball Drop](https://learn.adafruit.com/new-years-eve-ball-drop.md)
- [3D Printed Battery Adapter for Camera-Mount LED Panel](https://learn.adafruit.com/3d-printed-battery-adapter-for-camera-mount-led-panel.md)
---
# Source: https://learn.adafruit.com/led-bicycle-handlebars/frequently-asked-qs.md
# LED Bicycle Handlebars
## Frequently Asked Qs
###
Each meter of LED strip draws about 1 Amp - so a one-meter strip will last about 4 hours on 8 AA batteries (3 hours for rechargeables). A two meter strip will be half that.
###
Yes! We suggest using NiMH rechargeables! They'll do a great job at driving the LED strip.
###
The easiest way to make it dimmer is to go with a [6xAA battery holder](http://adafruit.com/products/248) - the lower voltage will still light up the strip but not as much as 8 AA's
###
Use 6 to 8 C or D cells for extra power. A 12V lantern battery will also do a good job, or a 12V lead acid battery.
- [Previous Page](https://learn.adafruit.com/led-bicycle-handlebars/battery-pouch.md)
## Featured Products
### LED Bike Handlebar Pack - 1 meter
[LED Bike Handlebar Pack - 1 meter](https://www.adafruit.com/product/933)
This pack contains supplies for making your own LED bicycle handlebars! This project is easily completed in a weekend and requires a small amount of soldering and some sewing, too. Pack includes:
- [Cool white LED strip](http://adafruit.com/products/887)...
No Longer Stocked
[Buy Now](https://www.adafruit.com/product/933)
[Related Guides to the Product](https://learn.adafruit.com/products/933/guides)
### LED Bike Handlebar Pack - 2 meters
[LED Bike Handlebar Pack - 2 meters](https://www.adafruit.com/product/934)
This pack contains supplies for making your own LED bicycle handlebars! This project is easily completed in a weekend and requires a small amount of soldering and some sewing, too. Pack includes:
- [Cool white LED...](http://adafruit.com/products/887)
No Longer Stocked
[Buy Now](https://www.adafruit.com/product/934)
[Related Guides to the Product](https://learn.adafruit.com/products/934/guides)
### Cool White LED Weatherproof Flexi-Strip 60 LED - 5m
[Cool White LED Weatherproof Flexi-Strip 60 LED - 5m](https://www.adafruit.com/product/887)
These LED strips are ultra bright, fun and glowy. There are **60** cool white LEDs per meter, and you can control the entire strip at once with any microcontroller and [a power transistor](http://www.adafruit.com/products/355). The way they are wired, you will need a 9-12VDC...
No Longer Stocked
[Buy Now](https://www.adafruit.com/product/887)
[Related Guides to the Product](https://learn.adafruit.com/products/887/guides)
### Waterproof DC Power Cable Set - 5.5/2.1mm
[Waterproof DC Power Cable Set - 5.5/2.1mm](https://www.adafruit.com/product/743)
Outdoor enthusiasts rejoice! We now have standard 5.5/2.1mm DC power cable sets in a waterproof variety. These cable sets are ideal for projects that must weather the weather: dust, water, rain, snow, tornado (not volcano proof!). They are a little bulkier than normal DC jacks because of the...
In Stock
[Buy Now](https://www.adafruit.com/product/743)
[Related Guides to the Product](https://learn.adafruit.com/products/743/guides)
### 8 x AA battery holder
[8 x AA battery holder](https://www.adafruit.com/product/449)
When you need a portable 12V power pack, this big holder will do the job! The holder will store 8 AA batteries end to end, to give approximately 12VDC output with up to 2 amp peak current draw. We like this configuration in particular because it holds the batteries securely, even if being...
In Stock
[Buy Now](https://www.adafruit.com/product/449)
[Related Guides to the Product](https://learn.adafruit.com/products/449/guides)
### Heat Shrink Pack
[Heat Shrink Pack](https://www.adafruit.com/product/344)
Heat shrink is the duct tape of electronics, it keeps your stuff all safe and kept together. Especially when wiring and soldering, use heat shrink to add mechanical strength to cables. We use this stuff all the time and having a zip-lock bag of all the possible sizes is super...
In Stock
[Buy Now](https://www.adafruit.com/product/344)
[Related Guides to the Product](https://learn.adafruit.com/products/344/guides)
## Related Guides
- [Mystery Box: Crypto Countdown Case](https://learn.adafruit.com/mystery-box-crypto-countdown-case.md)
- [Bedazzler](https://learn.adafruit.com/bedazzler.md)
- [CircuitPython LED Animations](https://learn.adafruit.com/circuitpython-led-animations.md)
- [Blahaj Alarm and Lamp](https://learn.adafruit.com/blahaj-alarm.md)
- [Arduino Lesson 4. Eight LEDs and a Shift Register](https://learn.adafruit.com/adafruit-arduino-lesson-4-eight-leds.md)
- [LED Emerald with Circuit Playground Bluefruit](https://learn.adafruit.com/led-emerald-with-circuit-playground.md)
- [Talking HAL 9000 with RP2040 Prop Maker Feather](https://learn.adafruit.com/hal-9000-rp2040-prop-maker.md)
- [Adafruit NeoPXL8 FeatherWing and Library](https://learn.adafruit.com/adafruit-neopxl8-featherwing-and-library.md)
- [Color Remote with Circuit Playground Bluefruit](https://learn.adafruit.com/color-remote-with-circuit-playground-bluefruit.md)
- [Guardian Shield+ Zelda Breath of the Wild](https://learn.adafruit.com/guardian-shield-zelda-breath-of-the-wild.md)
- [Mad Science Test Tube Rack](https://learn.adafruit.com/mad-science-test-tube-rack.md)
- [Making Wearable Badge Art with Printed Circuit Boards](https://learn.adafruit.com/making-wearable-badge-art-with-printed-circuit-boards.md)
- [Tiny TARDIS Pendant](https://learn.adafruit.com/tiny-tardis-pendant.md)
- [Party Parrot Zoetrope](https://learn.adafruit.com/party-parrot-zoetrope.md)
- [LED Noodle Shop Sign](https://learn.adafruit.com/led-noodle-shop-sign.md)
---
# Source: https://learn.adafruit.com/furby-2012-teardown.md
# Furby 2012 Teardown
## Overview
http://youtu.be/s3LPDutZK-o

We got one of the new 2012 Furbies, and really wanted to see what was inside! We took it apart as much as possible while still keeping it (semi) functional. We removed the fur while Furby was still on, mostly for dramatic effect in the video above. Before proceeding further, remove Furby's batteries.
- [Next Page](https://learn.adafruit.com/furby-2012-teardown/remove-back-and-face-plates.md)
## Featured Products
### Precision screwdriver set (6 pieces)
[Precision screwdriver set (6 pieces)](https://www.adafruit.com/product/424)
Break seals! Void warranties! With this handy screwdriver set at your hands, all hardware you touch will open up and reveal their secret innards.
This set contains 6 screwdrivers, 3 Phillips (#1, #0 and #00) and 3 flat (2.4mm, 1.8mm and 1.4mm). These sizes will open up pretty much...
In Stock
[Buy Now](https://www.adafruit.com/product/424)
[Related Guides to the Product](https://learn.adafruit.com/products/424/guides)
## Related Guides
- [ScoutMakes Robot Kit](https://learn.adafruit.com/scoutmakes-robot-kit.md)
- [Make it Glow: NeoPixel and LED Diffusion Tips & Tricks](https://learn.adafruit.com/make-it-glow-neopixel-and-led-diffusion-tips-tricks.md)
- [How To Homebrew Game Boy Games](https://learn.adafruit.com/homebrew-game-boy-games.md)
- [PyGamer - Gaming Handheld Crank](https://learn.adafruit.com/gaming-handheld-crank.md)
- [Crayola Scented Candle](https://learn.adafruit.com/crayola-scented-candle.md)
- [Bluefruit Controlled Macetech RGB LED Shades](https://learn.adafruit.com/ledshades.md)
- [Hacking the Kinect](https://learn.adafruit.com/hacking-the-kinect.md)
- [Rotary Phone Dial Keypad](https://learn.adafruit.com/rotary-phone-dial-keypad.md)
- [Computer Perfection Synthesizer](https://learn.adafruit.com/computer-perfection-synthesizer.md)
- [Sideloading Apps on Oculus Quest](https://learn.adafruit.com/sideloading-on-oculus-quest.md)
- [USB-PD Hacks](https://learn.adafruit.com/usb-pd-hacks.md)
- [Adafruit DRV2605L Haptic Controller Breakout](https://learn.adafruit.com/adafruit-drv2605-haptic-controller-breakout.md)
- [RGB Matrix Dreidel Game](https://learn.adafruit.com/rgb-matrix-dreidel-game.md)
- [Darth Faders](https://learn.adafruit.com/darth-faders.md)
- [Making PCB Jewelry & Art with Gingerbread and KiCad](https://learn.adafruit.com/making-pcb-art-with-gingerbread-and-kicad.md)
---
# Source: https://learn.adafruit.com/hacking-the-kinect/fuzzing.md
# Hacking the Kinect
## Fuzzing
Now we can use Python + LibUSB to send Control Endpoint packets with the command
**ctrl\_transfer**** ( bmRequestType, bmRequest, wValue, wIndex, nBytes)**
This command can do both sending and receiving depending on what **bmRequestType ** says (input or output). Still, there is a lot of options here. To send the right command you need to know the **RequestType** and the right **Request** and ther right **Value** as well as the **Index** and how many bytes to read or write.
If we were totally on our own, we would start by trying to read data from the device. This means we have to set the **RequestType** first
| Direction | Type | | | | Recipient |
| --- | --- | --- | --- | --- | --- |
| **D7** | **D6** | **D5** | **D4** | **D3** | **D2** | **D1** | **D0** |
For **bmRequestType** the value passed is very structured so that's not as hard to guess. ([See lvr.com for more information](http://www.beyondlogic.org/usbnutshell/usb6.shtml) )
- Bits 2, 3 and 4 are reserves so set them to 0.
- The direction is set by bit #7, 0 is a 'write' out to the device, 1 is a 'read' from the device
- The 'type' of message is two bits, 0 = Standard, 1 = Class, 2 = Vendor, 3 = Reserved. For many devices that are non-standard, you'll probably want 2 for vendor type. If its a more standard type of device, like a camera or mic, try 0 or 1. 3 Is unused
- The last two bits are usd to determine the recipient for the message 0 = Device, 1 = Interface, 2 = Endpoint, 3 = Other. Go with 0 to start, you can try 2 if there are other endpoints
The safest thing to do is read data (no way to overwrite anything or configure) you can do that by sending packets with **0b11000000** (Read Vendor data from Device) = 0xC0.
If I were to write a fuzzer, I'd start by setting **Index ** to 0 and iterating through all the byte values (255 different values) of **bmRequest** and the first few hundred **wValues**. Its pretty safe to just read random data to a USB device. Start by reading one byte to see if anything shows up, then increase the value
```
import usb.core
import usb.util
import sys
# find our device
dev = usb.core.find(idVendor=0x045e, idProduct=0x02B0)
# was it found?
if dev is None:
raise ValueError('Device not found')
# set the active configuration. With no arguments, the first
# configuration will be the active one
dev.set_configuration()
# Let's fuzz around!
# Lets start by Reading 1 byte from the Device using different Requests
# bRequest is a byte so there are 255 different values
for bRequest in range(255):
try:
ret = dev.ctrl_transfer(0xC0, bRequest, 0, 0, 1)
print "bRequest ",bRequest
print ret
except:
# failed to get data for this request
pass
```

Looks like ** Request ** values 0, 5, 16, 50, 54, 64, 80 and 112 all return some sort of data. The rest had nothing to read
Next we'll try to read more data by changing the last argument to 100 bytes

OK lots of data, but what does it mean? This is where some guessing based on the device itself would come in handy. I'm terribly lazy though and if given an option to avoid a lot of guesswork, I'll take it!- [Previous Page](https://learn.adafruit.com/hacking-the-kinect/installing-python-and-pyusb.md)
- [Next Page](https://learn.adafruit.com/hacking-the-kinect/usb-analyzer.md)
## Featured Products
### Hacked Kinect - Skill badge, iron-on patch
[Hacked Kinect - Skill badge, iron-on patch](https://www.adafruit.com/product/582)
You can made a cool project using the (hacked) Kinect! Adafruit offers a fun and exciting "badges" of achievement for electronics, science and engineering. We believe everyone should be able to be rewarded for learning a useful skill, a badge is just one of the many ways to show and...
No Longer Stocked
[Buy Now](https://www.adafruit.com/product/582)
[Related Guides to the Product](https://learn.adafruit.com/products/582/guides)
### Beagle USB 12 - Low/Full Speed USB Protocol Analyzer
[Beagle USB 12 - Low/Full Speed USB Protocol Analyzer](https://www.adafruit.com/product/708)
USB complexity got you down? Need a hand with enumeration? Reverse engineering a USB device? You will fall in love with the Beagle 12 USB Analyzer. This hardware analyzer is completely non-intrusive, and is much better than flaky software analyzers. Perfect for when a problem is bad enough it...
No Longer Stocked
[Buy Now](https://www.adafruit.com/product/708)
[Related Guides to the Product](https://learn.adafruit.com/products/708/guides)
### Reverse Engineer - Skill badge, Lenticular printing + pin-on
[Reverse Engineer - Skill badge, Lenticular printing + pin-on](https://www.adafruit.com/product/489)
You can reverse engineer! This is the first lenticular (two-stage image) skill badge that we know of! It says reverse engineer forwards and backwards depending on the angle you view it at!
**Note:** The edges of the badge will appear "white" at an angle,...
No Longer Stocked
[Buy Now](https://www.adafruit.com/product/489)
[Related Guides to the Product](https://learn.adafruit.com/products/489/guides)
### Reverse Engineer - Sticker!
[Reverse Engineer - Sticker!](https://www.adafruit.com/product/673)
You can reverse engineer! Adafruit offers fun and exciting stickers to celebrate achievement for electronics, science and engineering. We believe everyone should be able to be rewarded for learning a useful skill and a sticker is just one of the many ways to show and share.
No Longer Stocked
[Buy Now](https://www.adafruit.com/product/673)
[Related Guides to the Product](https://learn.adafruit.com/products/673/guides)
## Related Guides
- [Guitar Hero MIDI Controller](https://learn.adafruit.com/guitar-hero-midi-controller.md)
- [Commodore 64 - The Most Popular Retro Computer of All Time](https://learn.adafruit.com/commodore-64-retro-guide.md)
- [Use Docker to Compile Linux for ESP32-S3](https://learn.adafruit.com/docker-esp32-s3-linux.md)
- [Feather Guitar Hero Adapter](https://learn.adafruit.com/feather-guitar-hero-adapter.md)
- [BLE Cat Thermal Printer with MEMENTO](https://learn.adafruit.com/ble-cat-thermal-printer-with-memento.md)
- [Fruit Jam Mac Emulator](https://learn.adafruit.com/fruit-jam-mac-emulator.md)
- [How to Make Animated Graphics for Hologram Displays](https://learn.adafruit.com/how-to-make-animated-graphics-for-hologram-displays.md)
- [LED Matrix Wall Arcade for Pico-8](https://learn.adafruit.com/led-matrix-wall-arcade.md)
- [Run an X-Carve CNC Machine Wirelessly with a Raspberry Pi](https://learn.adafruit.com/control-an-xcarve-cnc-machine-wirelessly-with-a-raspberry-pi.md)
- [CircuitPython 2FA TOTP Authentication Friend](https://learn.adafruit.com/circuitpython-totp-otp-2fa-authy-authenticator-friend.md)
- [Flippy Floppy Drive Modification](https://learn.adafruit.com/flippy-floppy-drive-modification.md)
- [Authoring Playground Books with Bluefruit for iOS ](https://learn.adafruit.com/create-a-swift-playgroundbook-with-bluetooth-le.md)
- [SerenityOS - The dream of the '90s is alive!](https://learn.adafruit.com/serenityos-build-and-run-keep-the-90s-dream-alive.md)
- [Stand-alone programming AVRs using CircuitPython](https://learn.adafruit.com/stand-alone-programming-avrs-using-circuitpython.md)
- [Protect Your Online Accounts with Strong Passwords & Password Managers](https://learn.adafruit.com/protect-your-social-media-online-accounts-with-a-strong-password-manager.md)
---
# Source: https://learn.adafruit.com/flora-wearable-gps/getting-location-data.md
# Flora Wearable GPS
## Getting location data
## Detailed GPS Test
Now that we know it basically works, we'll try to get 'fix data' from the GPS. For this, you will have to have the GPS outside. It cannot be inside a building, even if its right at the window. The silver antenna must be pointing up with a clear view of the sky!

Wire up the GPS module according to the hookup
[Check your board and serial port settings](http://learn.adafruit.com/getting-started-with-flora/blink-onboard-led) and upload this sketch to your Flora using the Upload button in the IDE.
**Place the GPS module (still connected to the Flora) outside.** Once the GPS has located the satellite data, the red LED on the GPS will stop blinking.
If you see the LED blinking once a second, it does not yet have a fix!
It can take many minutes to get a fix if it doesn't see any satellites immediately.
Once it has a fix, you can check the serial monitor for the GPS data, which includes the current date and time in UTC. It will also give you your latitude, longitude and approximate altitude with the Serial monitor
Danger:

Now we know where we are. According to the GPS, my location is ** 4043.5715 N** (Latitude 40 degrees, 43.5815 minutes North) & **07400.2783 W**. (Longitude 74 degrees, 0.2783 minutes West) To look at this location in Google maps, type **+40°** **43.5715', -74° 00.2783'** into the [google maps search box](http://maps.google.com/) . Unfortunately gmaps requires you to use +/- instead of NSWE notation. N and E are positive, S and W are negative.
Danger:
- [Previous Page](https://learn.adafruit.com/flora-wearable-gps/program-flora.md)
- [Next Page](https://learn.adafruit.com/flora-wearable-gps/downloads.md)
## Featured Products
### FLORA - Wearable electronic platform: Arduino-compatible
[FLORA - Wearable electronic platform: Arduino-compatible](https://www.adafruit.com/product/659)
FLORA is Adafruit's fully-featured wearable electronics platform. It's a round, sewable, Arduino-compatible microcontroller designed to empower amazing wearables projects.FLORA comes with Adafruit's support, [tutorials and...](http://learn.adafruit.com/category/flora)
In Stock
[Buy Now](https://www.adafruit.com/product/659)
[Related Guides to the Product](https://learn.adafruit.com/products/659/guides)
### Flora Wearable Ultimate GPS Module
[Flora Wearable Ultimate GPS Module](https://www.adafruit.com/product/1059)
This module is the best way to add a GPS to your wearable project. It's part of the Adafruit Flora series of wearable electronics, designed specifically for use with the Flora motherboard. Installed on the PCB is the latest of our Ultimate GPS modules, a small, super-thin, low-power GPS...
No Longer Stocked
[Buy Now](https://www.adafruit.com/product/1059)
[Related Guides to the Product](https://learn.adafruit.com/products/1059/guides)
### Small Alligator Clip Test Lead (set of 12)
[Small Alligator Clip Test Lead (set of 12)](https://www.adafruit.com/product/1008)
Connect this to that without soldering using these handy mini alligator clip test leads. 15" cables with alligator clip on each end, color coded. You get 12 pieces in 6 colors. Strong and grippy, these always come in handy! We often use these in conjunction with a multimeter so we...
In Stock
[Buy Now](https://www.adafruit.com/product/1008)
[Related Guides to the Product](https://learn.adafruit.com/products/1008/guides)
### Getting Started with Adafruit FLORA
[Getting Started with Adafruit FLORA](https://www.adafruit.com/product/1839)
**Making Wearables with an Arduino-Compatible Electronics Platform**
This book introduces readers to building wearable electronics projects using Adafruit's tiny FLORA board: at 4.4 grams, and only 1.75 inches in diameter, and featuring Arduino compatibility, it's the...
No Longer Stocked
[Buy Now](https://www.adafruit.com/product/1839)
[Related Guides to the Product](https://learn.adafruit.com/products/1839/guides)
### Getting Started with Adafruit FLORA Book Pack
[Getting Started with Adafruit FLORA Book Pack](https://www.adafruit.com/product/2404)
Pickup a copy of [Getting Started with Adafruit FLORA](https://www.adafruit.com/products/1839) and then hit the ground running with everything that you need to become an [Adafruit FLORA](https://www.adafruit.com/products/659) supreme being!
This pack is...
No Longer Stocked
[Buy Now](https://www.adafruit.com/product/2404)
[Related Guides to the Product](https://learn.adafruit.com/products/2404/guides)
### FLORA GPS Starter Pack
[FLORA GPS Starter Pack](https://www.adafruit.com/product/1090)
Get started with the fabulous Adafruit Flora platform with this lovely starter kit. Included are plenty of parts to make a few different fun projects! There's a Flora motherboard, a GPS module that can also perform location datalogging, eight ultra-bright chainable RGB pixels, a battery...
No Longer Stocked
[Buy Now](https://www.adafruit.com/product/1090)
[Related Guides to the Product](https://learn.adafruit.com/products/1090/guides)
### FLORA Sensor Pack
[FLORA Sensor Pack](https://www.adafruit.com/product/1458)
Sense the world around you! The FLORA Sensor Pack includes many types of sensors for your wearable enjoyment. Sense motion, direction, color, light levels, touch, and connections with FLORA sensor breakouts and conductive materials, and a few NeoPixels for experimenting with displaying your...
No Longer Stocked
[Buy Now](https://www.adafruit.com/product/1458)
[Related Guides to the Product](https://learn.adafruit.com/products/1458/guides)
### FLORA Budget Pack
[FLORA Budget Pack](https://www.adafruit.com/product/1405)
Get started with the fabulous Adafruit Flora platform with this lovely budget kit, just enough to get you started with this fun wearable computer. Included are enough parts to make your first wearable electronic project. There's a Flora motherboard, four ultra-bright chainable RGB pixels,...
Out of Stock
[Buy Now](https://www.adafruit.com/product/1405)
[Related Guides to the Product](https://learn.adafruit.com/products/1405/guides)
## Related Guides
- [FLORA TV-B-Gone](https://learn.adafruit.com/flora-tv-b-gone.md)
- [Zipper Switch](https://learn.adafruit.com/zipper-switch.md)
- [Flora GPS Jacket](https://learn.adafruit.com/flora-gps-jacket.md)
- [Getting Started with FLORA](https://learn.adafruit.com/getting-started-with-flora.md)
- [NeoPixel Ring Clock](https://learn.adafruit.com/neopixel-ring-clock.md)
- [SMSsenger Bag](https://learn.adafruit.com/smssenger-bag.md)
- [VU Meter Baseball Hat](https://learn.adafruit.com/vu-meter-baseball-hat.md)
- [Sparkle Skirt](https://learn.adafruit.com/sparkle-skirt.md)
- [Citi Bike Helmet](https://learn.adafruit.com/citi-bike-helmet.md)
- [Flora MIDI Drum Glove](https://learn.adafruit.com/midi-drum-glove.md)
- [Haptic Headband](https://learn.adafruit.com/haptic-headband.md)
- [Mailbox Notification Service](https://learn.adafruit.com/mailbox-notification-service.md)
- [LED Stego Flex Spike Hoodie](https://learn.adafruit.com/led-stego-flex-spike-hoodie.md)
- [Sunscreen Reminder Hat](https://learn.adafruit.com/sunscreen-reminder-hat.md)
- [Custom Milled PCB Pins](https://learn.adafruit.com/custom-milled-pcb-pins.md)
---
# Source: https://learn.adafruit.com/getting-started-with-flora.md
# Getting Started with FLORA
## Overview


https://www.youtube.com/watch?v=kiBbRU5rwQc
FLORA is Adafruit's wearable electronics platform. We designed it from the ground up to provide the best experience for Adafruit's community of makers, hackers, crafters, artists, designers and engineers. It's built around the Atmega32u4 chip, which has built-in USB support. No pesky special cables or extra parts for programming, just plug it in and get started making the wearables project of your dreams! Works on Windows and Mac.
**New! As of May 12th, 2015, we're now selling the Flora v2! The Flora v2 now comes with a micro-USB port instead of a mini-USB port and a programmable NeoPixel installed** (it's connected to Digital 8, ready for your blinky commands)
The FLORA is extremely beginner-friendly-- it is difficult to destroy the FLORA by connecting a battery backwards due to polarized connector and protection diodes. The onboard regulator means that even connecting a 9V battery will not result in damage or tears.
This guide is the first step in using FLORA, plugging it in and programming it to blink its onboard LED! After that you can move on to our[Flora RGB Smart Pixels tutorial](http://learn.adafruit.com/flora-rgb-smart-pixels) and/or [Flora GPS tutorial](http://learn.adafruit.com/flora-wearable-gps "Link: http://learn.adafruit.com/flora-wearable-gps").

Adafruit created the FLORA from scratch after many months of research and we really think we came up with something that will empower some amazing wearable projects.
The FLORA is small (1.75" diameter). We wanted the smallest possible board for our wearable platform. It's based on our experiences shipping our own, shipping, customer-tested [Atmega32u4](https://www.adafruit.com/products/296)[Breakout Board](https://www.adafruit.com/products/296) with 32K flash, 2.5k RAM running at 16MHz.
FLORA has a small but easy to use onboard reset button to reboot the system. The power supply is designed to be flexible and easy to use. There is an onboard polarized 2 JST battery connector with protection schottky diode for use with external battery packs from 3.5v to 9v DC in (It can run on 3V but 3.5V-5V or higher is ideal). Can be used with LiIon/LiPoly, LiFe, alkaline or rechargeable NiMh/NiCad batteries of any size.
Warning: If you plan to use rechargeable batteries, do consider getting a charging solution separate from the Flora.
The FLORA does **not** have a LiPo charger included by design. This allows safe use with multiple battery types and reduces risk of fire as it is not recommended to charge these batteries on fabric.
### Adafruit Micro Lipo - USB LiIon/LiPoly charger
[Adafruit Micro Lipo - USB LiIon/LiPoly charger](https://www.adafruit.com/product/1304)
Oh so adorable, this is the tiniest little lipo charger, so handy you can keep it any project box! Its also easy to use. Simply plug in the gold plated contacts into any USB port and a 3.7V/4.2V lithium polymer or lithium ion rechargeable battery into the JST plug on the other end. There are...
In Stock
[Buy Now](https://www.adafruit.com/product/1304)
[Related Guides to the Product](https://learn.adafruit.com/products/1304/guides)

FLORA has built-in USB support. Built in USB means you plug it in to program it, it just shows up. No additional purchases are needed! Works with Mac, Windows, Linux, any USB cable works great. Currently the PCB comes with a mini B connector but future versions may change to microUSB.
The FLORA has USB HID support, so it can act like a mouse or keyboard, etc.

- [Next Page](https://learn.adafruit.com/getting-started-with-flora/flora-pinout-diagram.md)
## Featured Products
### FLORA - Wearable electronic platform: Arduino-compatible
[FLORA - Wearable electronic platform: Arduino-compatible](https://www.adafruit.com/product/659)
FLORA is Adafruit's fully-featured wearable electronics platform. It's a round, sewable, Arduino-compatible microcontroller designed to empower amazing wearables projects.FLORA comes with Adafruit's support, [tutorials and...](http://learn.adafruit.com/category/flora)
In Stock
[Buy Now](https://www.adafruit.com/product/659)
[Related Guides to the Product](https://learn.adafruit.com/products/659/guides)
### 3 x AAA Battery Holder with On/Off Switch and 2-Pin JST
[3 x AAA Battery Holder with On/Off Switch and 2-Pin JST](https://www.adafruit.com/product/727)
This battery holder connects 3 AAA batteries together in series for powering all kinds of projects. We spec'd these out because the box is slim, and 3 AAA's add up to about 3.3-4.5V, a very similar range to Lithium Ion/polymer (Li-Ion) batteries and have an on-off switch. That makes...
In Stock
[Buy Now](https://www.adafruit.com/product/727)
[Related Guides to the Product](https://learn.adafruit.com/products/727/guides)
### USB cable - USB A to Micro-B
[USB cable - USB A to Micro-B](https://www.adafruit.com/product/592)
This here is your standard A to micro-B USB cable, for USB 1.1 or 2.0. Perfect for connecting a PC to your Metro, Feather, Raspberry Pi or other dev-board or microcontroller
Approximately 3 feet / 1 meter long
In Stock
[Buy Now](https://www.adafruit.com/product/592)
[Related Guides to the Product](https://learn.adafruit.com/products/592/guides)
### Getting Started with Adafruit FLORA Book Pack
[Getting Started with Adafruit FLORA Book Pack](https://www.adafruit.com/product/2404)
Pickup a copy of [Getting Started with Adafruit FLORA](https://www.adafruit.com/products/1839) and then hit the ground running with everything that you need to become an [Adafruit FLORA](https://www.adafruit.com/products/659) supreme being!
This pack is...
No Longer Stocked
[Buy Now](https://www.adafruit.com/product/2404)
[Related Guides to the Product](https://learn.adafruit.com/products/2404/guides)
### Getting Started with Adafruit FLORA
[Getting Started with Adafruit FLORA](https://www.adafruit.com/product/1839)
**Making Wearables with an Arduino-Compatible Electronics Platform**
This book introduces readers to building wearable electronics projects using Adafruit's tiny FLORA board: at 4.4 grams, and only 1.75 inches in diameter, and featuring Arduino compatibility, it's the...
No Longer Stocked
[Buy Now](https://www.adafruit.com/product/1839)
[Related Guides to the Product](https://learn.adafruit.com/products/1839/guides)
### FLORA Budget Pack
[FLORA Budget Pack](https://www.adafruit.com/product/1405)
Get started with the fabulous Adafruit Flora platform with this lovely budget kit, just enough to get you started with this fun wearable computer. Included are enough parts to make your first wearable electronic project. There's a Flora motherboard, four ultra-bright chainable RGB pixels,...
Out of Stock
[Buy Now](https://www.adafruit.com/product/1405)
[Related Guides to the Product](https://learn.adafruit.com/products/1405/guides)
### FLORA GPS Starter Pack
[FLORA GPS Starter Pack](https://www.adafruit.com/product/1090)
Get started with the fabulous Adafruit Flora platform with this lovely starter kit. Included are plenty of parts to make a few different fun projects! There's a Flora motherboard, a GPS module that can also perform location datalogging, eight ultra-bright chainable RGB pixels, a battery...
No Longer Stocked
[Buy Now](https://www.adafruit.com/product/1090)
[Related Guides to the Product](https://learn.adafruit.com/products/1090/guides)
### FLORA Sensor Pack
[FLORA Sensor Pack](https://www.adafruit.com/product/1458)
Sense the world around you! The FLORA Sensor Pack includes many types of sensors for your wearable enjoyment. Sense motion, direction, color, light levels, touch, and connections with FLORA sensor breakouts and conductive materials, and a few NeoPixels for experimenting with displaying your...
No Longer Stocked
[Buy Now](https://www.adafruit.com/product/1458)
[Related Guides to the Product](https://learn.adafruit.com/products/1458/guides)
## Related Guides
- [Datalogging Hat with FLORA BLE](https://learn.adafruit.com/datalogging-hat-with-flora-ble.md)
- [Experimenting with NeverWet + Electronics](https://learn.adafruit.com/neverwet-electronics.md)
- [Flora GPS Jacket](https://learn.adafruit.com/flora-gps-jacket.md)
- [SMSsenger Bag](https://learn.adafruit.com/smssenger-bag.md)
- [Conductive Thread](https://learn.adafruit.com/conductive-thread.md)
- [3D Printed Wireless MIDI Controller Guitar](https://learn.adafruit.com/ez-key-wireless-midi-controller-guitar.md)
- [Mailbox Notification Service](https://learn.adafruit.com/mailbox-notification-service.md)
- [GPS Logging Dog Harness](https://learn.adafruit.com/gps-logging-dog-harness.md)
- [NeoPixel Matrix Snowflake Sweater](https://learn.adafruit.com/neopixel-matrix-snowflake-sweater.md)
- [Chameleon Scarf](https://learn.adafruit.com/chameleon-scarf.md)
- [Adafruit Arduino Selection Guide](https://learn.adafruit.com/adafruit-arduino-selection-guide.md)
- [Citi Bike Helmet](https://learn.adafruit.com/citi-bike-helmet.md)
- [FLORA TV-B-Gone](https://learn.adafruit.com/flora-tv-b-gone.md)
- [Flora Wearable GPS](https://learn.adafruit.com/flora-wearable-gps.md)
- [Flora Accelerometer](https://learn.adafruit.com/flora-accelerometer.md)
---
# Source: https://learn.adafruit.com/webide/getting-started.md
# Adafruit WebIDE
## Getting Started
Danger:
Setting up your Rapsberry Pi WebIDE will only take a few minutes. Let’s get started.
First up, you will connect to the WebIDE (running on the Pi) using a **different computer** (not the Pi). The client computer must be on the same network.
Open up a web-browser on a computer that shares the same networks as the Pi and browse to either **[http://raspberrypi.l](http://raspberrypi.local)[ocal](http://raspberrypi.local:8080)**[:8080](http://raspberrypi.local:8080) if you are running Raspian/Debian Stretch, or to [**http://xx.xx.xx.xx**](http://xx.xx.xx.xx) where the x's are replaced with your Pi's IP address.
- [Previous Page](https://learn.adafruit.com/webide/installation.md)
- [Next Page](https://learn.adafruit.com/webide/use.md)
## Featured Products
### Raspberry Pi Model B 512MB RAM
[Raspberry Pi Model B 512MB RAM](https://www.adafruit.com/product/998)
Adafruit ships the **Raspberry Pi Model B 512MB RAM** as of 10/18/2012.
The Raspberry Pi® is a single-board computer developed in the UK by the Raspberry Pi Foundation with the intention of stimulating the teaching of basic computer science in schools. The Raspberry...
No Longer Stocked
[Buy Now](https://www.adafruit.com/product/998)
[Related Guides to the Product](https://learn.adafruit.com/products/998/guides)
### BeagleBone Black - Rev B
[BeagleBone Black - Rev B](https://www.adafruit.com/product/1278)
**[Adafruit is no longer shipping the BeagleBone Black Rev B, it has been replaced with the Rev C as of 5/12/14](https://www.adafruit.com/products/1876) - the Rev C now has 4G flash and also comes with Debian, it also costs slightly more. There are no exchanges or...**
No Longer Stocked
[Buy Now](https://www.adafruit.com/product/1278)
[Related Guides to the Product](https://learn.adafruit.com/products/1278/guides)
### Adafruit Pi Box - Enclosure for Raspberry Pi Model A or B
[Adafruit Pi Box - Enclosure for Raspberry Pi Model A or B](https://www.adafruit.com/product/859)
**Discontinued** - you can grab [Adafruit Pi Box Plus - Enclosure for RasPi Model B+/Pi 2/ Pi 3](https://www.adafruit.com/product/1985) instead!
**We're still selling this classic Adafruit case for those who specifically want it but **
No Longer Stocked
[Buy Now](https://www.adafruit.com/product/859)
[Related Guides to the Product](https://learn.adafruit.com/products/859/guides)
### Miniature WiFi (802.11b/g/n) Module: For Raspberry Pi and more
[Miniature WiFi (802.11b/g/n) Module: For Raspberry Pi and more](https://www.adafruit.com/product/814)
Make your Internet of Things device cable-free by adding WiFi. Take advantage of the Raspberry Pi and Beagle Bone's USB port to add a low cost, but high-reliability wireless link. We tried half a dozen modules to find one that works well with the Pi and Bone without the need of recompiling...
No Longer Stocked
[Buy Now](https://www.adafruit.com/product/814)
[Related Guides to the Product](https://learn.adafruit.com/products/814/guides)
## Related Guides
- [Trellis Python Library](https://learn.adafruit.com/trellis-python-library.md)
- [Adafruit DVI Sock for Pico](https://learn.adafruit.com/adafruit-dvi-sock-for-pico.md)
- [Introducing Adafruit ItsyBitsy M4](https://learn.adafruit.com/introducing-adafruit-itsybitsy-m4.md)
- [SMT Breadboard Prototyping Using Breakout PCBs](https://learn.adafruit.com/smt-prototyping-using-breakout-pcbs.md)
- [Getting Started with RTL-SDR and SDR-Sharp and CubicSDR](https://learn.adafruit.com/getting-started-with-rtl-sdr-and-sdr-sharp.md)
- [Adafruit STEMMA Reflective Photo Interrupt Sensor](https://learn.adafruit.com/adafruit-stemma-reflective-photo-interrupt-sensor.md)
- [Adafruit 9-DOF Orientation IMU Fusion Breakout - BNO085](https://learn.adafruit.com/adafruit-9-dof-orientation-imu-fusion-breakout-bno085.md)
- [Adafruit I2C to 8 Channel Solenoid Driver](https://learn.adafruit.com/adafruit-i2c-to-8-channel-solenoid-driver.md)
- [Controlling Motors using the Raspberry Pi and RasPiRobot Board V2](https://learn.adafruit.com/controlling-motors-using-the-raspberry-pi-and-raspirobot-board-v2.md)
- [Adafruit Feather 32u4 FONA](https://learn.adafruit.com/adafruit-feather-32u4-fona.md)
- [Adafruit Pi Stemma QT Breakout](https://learn.adafruit.com/adafruit-pi-stemma-qt-breakout.md)
- [Adafruit's Raspberry Pi Lesson 8. Using a Servo Motor](https://learn.adafruit.com/adafruits-raspberry-pi-lesson-8-using-a-servo-motor.md)
- [IoT Bird Feeder with Camera](https://learn.adafruit.com/iot-window-bird-feeder-with-camera.md)
- [Using the BMP085/180 with Raspberry Pi or Beaglebone Black](https://learn.adafruit.com/using-the-bmp085-with-raspberry-pi.md)
- [AR1100 Resistive Touch Screen Controller Guide](https://learn.adafruit.com/ar1100-resistive-touch-screen-controller-guide.md)
---
# Source: https://learn.adafruit.com/el-wire-sign/glow.md
# EL Wire Sign
## Glow


- [Previous Page](https://learn.adafruit.com/el-wire-sign/power.md)
## Featured Products
### Needle set - 3/9 sizes - 20 needles
[Needle set - 3/9 sizes - 20 needles](https://www.adafruit.com/product/615)
Mighty needles, sew like the wind! This needle set is the only one you'll need for any sort of hand sewing, especially using our conductive thread and wearable electronics parts.
Each pack contains 20 gold-eye sharps, with eye sizes ranging from #3 (1.75" long) to #9...
Out of Stock
[Buy Now](https://www.adafruit.com/product/615)
[Related Guides to the Product](https://learn.adafruit.com/products/615/guides)
### 12V 5A switching power supply
[12V 5A switching power supply](https://www.adafruit.com/product/352)
This is a beefy switching supply, for when you need a lot of power! It can supply 12V DC up to 5 Amps, running from 110V or 220V power (the plug it comes with is for US/Canada/Japan but you can use any plug adapter for your country, or just replace the cable with a standard 'figure-8'...
Out of Stock
[Buy Now](https://www.adafruit.com/product/352)
[Related Guides to the Product](https://learn.adafruit.com/products/352/guides)
### In-line power cable 1 meter long extension cord (for EL wire)
[In-line power cable 1 meter long extension cord (for EL wire)](https://www.adafruit.com/product/616)
Give yourself some more room with an EL wire cable extender. This cable has a 2-pin JST SM plug on one end and receptacle on the other. Use it to extend the reach of EL wire, panel, tape, etc. The cable is a meter long, you can of course snap more together if necessary, or cut and re-solder it...
In Stock
[Buy Now](https://www.adafruit.com/product/616)
[Related Guides to the Product](https://learn.adafruit.com/products/616/guides)
### In-line wire 1-to-4 splitter
[In-line wire 1-to-4 splitter](https://www.adafruit.com/product/402)
If you want to connect multiple EL wires/strips/panels up to one inverter, these splitters are quite useful. There is one male connector (goes to the inverter) and then 4 female connectors (which will connect to each wire/strip/panel. You can even cascade them! Only thing to watch for is make...
In Stock
[Buy Now](https://www.adafruit.com/product/402)
[Related Guides to the Product](https://learn.adafruit.com/products/402/guides)
### 12V EL wire/tape inverter
[12V EL wire/tape inverter](https://www.adafruit.com/product/448)
This is an inverter for EL wire and tape, similar to our pocket inverters, except it is a brick that takes 12V input instead of 2 AA batteries. This means its good for 'fixed' installations since you can just plug it into a 12V wall adapter. It's also good for portable projects...
In Stock
[Buy Now](https://www.adafruit.com/product/448)
[Related Guides to the Product](https://learn.adafruit.com/products/448/guides)
### Green Electroluminescent (EL) Wire - 2.5 meters
[Green Electroluminescent (EL) Wire - 2.5 meters](https://www.adafruit.com/product/407)
EL Wire, also known as Electroluminescent wire, is a stiff wire core coated with phosphor and then covered with a protective PVC sheath. When an AC signal is applied to it, it glows an aqua (blue green) color. You can make it look different colors by changing the coating, for example this is a...
In Stock
[Buy Now](https://www.adafruit.com/product/407)
[Related Guides to the Product](https://learn.adafruit.com/products/407/guides)
### Pink Electroluminescent (EL) Wire - 2.5 meters
[Pink Electroluminescent (EL) Wire - 2.5 meters](https://www.adafruit.com/product/404)
EL Wire, also known as Electroluminescent wire is a stiff wire core coated with phosphor and then covered with a protective PVC sheath. When an AC signal is applied to it, it glows an aqua (blue green) color. This EL is pink-coated so that it looks white. It looks a little like thin neon. Very...
Out of Stock
[Buy Now](https://www.adafruit.com/product/404)
[Related Guides to the Product](https://learn.adafruit.com/products/404/guides)
### Yellow Electroluminescent (EL) Wire - 2.5 meters
[Yellow Electroluminescent (EL) Wire - 2.5 meters](https://www.adafruit.com/product/406)
EL Wire, also known as Electroluminescent wire is a stiff wire core coated with phosphor and then covered with a protective PVC sheath. When an AC signal is applied to it, it glows an aqua (blue green) color. You can make it look different colors by changing the coating, for example this is a...
In Stock
[Buy Now](https://www.adafruit.com/product/406)
[Related Guides to the Product](https://learn.adafruit.com/products/406/guides)
## Related Guides
- [EL Workshop](https://learn.adafruit.com/el-workshop.md)
- [TRON Bag](https://learn.adafruit.com/tron-bag.md)
- [EL Stick Figure](https://learn.adafruit.com/el-stick-figure.md)
- [EL Wire Animal Masks](https://learn.adafruit.com/el-wire-animal-masks.md)
- [Electron Bow](https://learn.adafruit.com/electron-bow.md)
- [Glowing Bean Bags with EL Wire](https://learn.adafruit.com/glowing-bean-bags-with-el-wire.md)
- [EL Wire](https://learn.adafruit.com/el-wire.md)
- [EL Bowtie](https://learn.adafruit.com/el-bowtie.md)
- [Light Up your Costume with Noods](https://learn.adafruit.com/light-up-your-costume-with-noods.md)
- [Glowing Star Chuck Taylor Sneakers](https://learn.adafruit.com/glowing-star-chucks.md)
- [EL Wire Stocking](https://learn.adafruit.com/el-wire-stocking.md)
- [TRON Hoodie](https://learn.adafruit.com/tron-hoodie.md)
---
# Source: https://learn.adafruit.com/gps-dog-collar/going-further.md
# GPS Dog Collar
## Going Further
## The Original Summary
That about sums up the main parts of the code. Your challenge, should you choose to accept, is to improve upon what we have done here. The next logical step would be to use the built in data logger feature of the Ultimate GPS module, and map your dog walks when you get home.
## Going Further
This project was completed in 2012. Advancements in parts are such that this project might be more easily done on a board such as a Feather M0 in CircuitPython.
As far as replicating the original project: Adafruit now carries the original ATmega32u4 processor on the Feather 32u4 Basic and Feather 32u4 Adalogger boards. The latter provides an SD card capability good for data logging. At present we do not have diagrams and code to implement the project with these boards but the changes from the original processor board would be very small. The boards are listed in the Featured Products page.
- [Previous Page](https://learn.adafruit.com/gps-dog-collar/code.md)
## Featured Products
### Adafruit Ultimate GPS Breakout - 66 channel w/10 Hz updates
[Adafruit Ultimate GPS Breakout - 66 channel w/10 Hz updates](https://www.adafruit.com/product/746)
We carry a few different GPS modules here in the Adafruit shop, but none that satisfied our every desire - that's why we designed this little GPS breakout board. We believe this is the **Ultimate** GPS module, so we named it that. It's got everything you want and...
In Stock
[Buy Now](https://www.adafruit.com/product/746)
[Related Guides to the Product](https://learn.adafruit.com/products/746/guides)
### Atmega32u4 Breakout Board
[Atmega32u4 Breakout Board](https://www.adafruit.com/product/296)
Toss out those FTDI cables and go USB-native with the ATmega32u4. After many months of back-orders, we finally received a shipment of these little guys and are excited to offer our breakout board. The little dev board keeps it simple, with just the bare essentials:
- Atmega32u4 - AVR...
No Longer Stocked
[Buy Now](https://www.adafruit.com/product/296)
[Related Guides to the Product](https://learn.adafruit.com/products/296/guides)
### Monochrome 128x32 SPI OLED graphic display
[Monochrome 128x32 SPI OLED graphic display](https://www.adafruit.com/product/661)
These displays are small, only about 1" diagonal, but very readable due to the high contrast of an OLED display. This display is made of 128x32 individual white OLED pixels, each one is turned on or off by the controller chip. Because the display makes its own light, no backlight is...
In Stock
[Buy Now](https://www.adafruit.com/product/661)
[Related Guides to the Product](https://learn.adafruit.com/products/661/guides)
### 3 x AAA Battery Holder with On/Off Switch and 2-Pin JST
[3 x AAA Battery Holder with On/Off Switch and 2-Pin JST](https://www.adafruit.com/product/727)
This battery holder connects 3 AAA batteries together in series for powering all kinds of projects. We spec'd these out because the box is slim, and 3 AAA's add up to about 3.3-4.5V, a very similar range to Lithium Ion/polymer (Li-Ion) batteries and have an on-off switch. That makes...
In Stock
[Buy Now](https://www.adafruit.com/product/727)
[Related Guides to the Product](https://learn.adafruit.com/products/727/guides)
### Adafruit Feather 32u4 Basic Proto
[Adafruit Feather 32u4 Basic Proto](https://www.adafruit.com/product/2771)
**Feather** is the new development board from Adafruit, and like its namesake it is thin, light, and lets you fly! We designed Feather to be a new standard for portable microcontroller cores.
**This is the Feather 32u4 Basic Proto,** it has a bunch of...
In Stock
[Buy Now](https://www.adafruit.com/product/2771)
[Related Guides to the Product](https://learn.adafruit.com/products/2771/guides)
### Adafruit Feather 32u4 Adalogger
[Adafruit Feather 32u4 Adalogger](https://www.adafruit.com/product/2795)
Feather is the new development board from Adafruit, and like its namesake it is thin, light, and lets you fly! We designed Feather to be a new standard for portable microcontroller cores.
This is the **Adafruit Feather 32u4 Adalogger** - our take on an...
In Stock
[Buy Now](https://www.adafruit.com/product/2795)
[Related Guides to the Product](https://learn.adafruit.com/products/2795/guides)
## Related Guides
- [Adafruit Feather 32u4 Basic Proto](https://learn.adafruit.com/adafruit-feather-32u4-basic-proto.md)
- [SSD1306 OLED Displays with Raspberry Pi and BeagleBone Black](https://learn.adafruit.com/ssd1306-oled-displays-with-raspberry-pi-and-beaglebone-black.md)
- [Adding a Single Board Computer to Blinka](https://learn.adafruit.com/adding-a-single-board-computer-to-blinka.md)
- [Superhero Power Gauntlet](https://learn.adafruit.com/superhero-power-gauntlet.md)
- [Arduino Ethernet + SD Card](https://learn.adafruit.com/arduino-ethernet-sd-card.md)
- [CircuitPython Hardware: SSD1306 OLED Display](https://learn.adafruit.com/micropython-hardware-ssd1306-oled-display.md)
- [Adafruit Ultimate GPS with gpsd](https://learn.adafruit.com/adafruit-ultimate-gps-on-the-raspberry-pi.md)
- [Adafruit OLED Displays for Raspberry Pi](https://learn.adafruit.com/adafruit-oled-displays-for-raspberry-pi.md)
- [Adabox 001 Temperature Alarm](https://learn.adafruit.com/adabox-001-temperature-alarm.md)
- [Magic Wand](https://learn.adafruit.com/magic-wand.md)
- [Festive Feather Holiday Lights](https://learn.adafruit.com/festive-feather-holiday-lights.md)
- [Reverse Geocache Box](https://learn.adafruit.com/reverse-geocache-engagement-box.md)
- [3D Printed Case for Adafruit Feather](https://learn.adafruit.com/3d-printed-case-for-adafruit-feather.md)
- [Feather Fingerboard](https://learn.adafruit.com/feather-fingerboard.md)
- [Monochrome OLED Breakouts](https://learn.adafruit.com/monochrome-oled-breakouts.md)
- [Adafruit Feather 32u4 Adalogger](https://learn.adafruit.com/adafruit-feather-32u4-adalogger.md)
---
# Source: https://learn.adafruit.com/gps-dog-collar.md
# GPS Dog Collar
## Overview & Parts
http://www.youtube.com/watch?v=R0u7qhfEVYU
## Wonder if you're giving your dog the exercise she needs? Like electronics? Make your own GPS dog collar!
Parts
- [Adafruit Ultimate GPS Breakout](http://www.adafruit.com/products/746) - 66 channel w/10 Hz updates - MTK3339 chipset
- [Atmega32u4 Breakout Board](http://www.adafruit.com/products/296)
- [Monochrome 128x32 OLED graphic display](http://www.adafruit.com/products/661 "Link: http://www.adafruit.com/products/661")
- [3 x AAA Battery Holder](http://www.adafruit.com/products/727 "Link: http://www.adafruit.com/products/727") and batteries
- stranded hookup wire
- wire-edged ribbon
- scrap of fabric
- electrical tape or dark nail polish (optional)
Tools:
- Soldering iron
- wire strippers
- pliers
- scissors
- needle and thread
- iron
- sewing pins
- sewing machine (optional)


The progress bar fills up as you stroll around the neighborhood. Set your goal ahead of time and watch the miles rack up.
- [Next Page](https://learn.adafruit.com/gps-dog-collar/wiring.md)
## Featured Products
### Adafruit Ultimate GPS Breakout - 66 channel w/10 Hz updates
[Adafruit Ultimate GPS Breakout - 66 channel w/10 Hz updates](https://www.adafruit.com/product/746)
We carry a few different GPS modules here in the Adafruit shop, but none that satisfied our every desire - that's why we designed this little GPS breakout board. We believe this is the **Ultimate** GPS module, so we named it that. It's got everything you want and...
In Stock
[Buy Now](https://www.adafruit.com/product/746)
[Related Guides to the Product](https://learn.adafruit.com/products/746/guides)
### Atmega32u4 Breakout Board
[Atmega32u4 Breakout Board](https://www.adafruit.com/product/296)
Toss out those FTDI cables and go USB-native with the ATmega32u4. After many months of back-orders, we finally received a shipment of these little guys and are excited to offer our breakout board. The little dev board keeps it simple, with just the bare essentials:
- Atmega32u4 - AVR...
No Longer Stocked
[Buy Now](https://www.adafruit.com/product/296)
[Related Guides to the Product](https://learn.adafruit.com/products/296/guides)
### Monochrome 128x32 SPI OLED graphic display
[Monochrome 128x32 SPI OLED graphic display](https://www.adafruit.com/product/661)
These displays are small, only about 1" diagonal, but very readable due to the high contrast of an OLED display. This display is made of 128x32 individual white OLED pixels, each one is turned on or off by the controller chip. Because the display makes its own light, no backlight is...
In Stock
[Buy Now](https://www.adafruit.com/product/661)
[Related Guides to the Product](https://learn.adafruit.com/products/661/guides)
### 3 x AAA Battery Holder with On/Off Switch and 2-Pin JST
[3 x AAA Battery Holder with On/Off Switch and 2-Pin JST](https://www.adafruit.com/product/727)
This battery holder connects 3 AAA batteries together in series for powering all kinds of projects. We spec'd these out because the box is slim, and 3 AAA's add up to about 3.3-4.5V, a very similar range to Lithium Ion/polymer (Li-Ion) batteries and have an on-off switch. That makes...
In Stock
[Buy Now](https://www.adafruit.com/product/727)
[Related Guides to the Product](https://learn.adafruit.com/products/727/guides)
### Adafruit Feather 32u4 Basic Proto
[Adafruit Feather 32u4 Basic Proto](https://www.adafruit.com/product/2771)
**Feather** is the new development board from Adafruit, and like its namesake it is thin, light, and lets you fly! We designed Feather to be a new standard for portable microcontroller cores.
**This is the Feather 32u4 Basic Proto,** it has a bunch of...
In Stock
[Buy Now](https://www.adafruit.com/product/2771)
[Related Guides to the Product](https://learn.adafruit.com/products/2771/guides)
### Adafruit Feather 32u4 Adalogger
[Adafruit Feather 32u4 Adalogger](https://www.adafruit.com/product/2795)
Feather is the new development board from Adafruit, and like its namesake it is thin, light, and lets you fly! We designed Feather to be a new standard for portable microcontroller cores.
This is the **Adafruit Feather 32u4 Adalogger** - our take on an...
In Stock
[Buy Now](https://www.adafruit.com/product/2795)
[Related Guides to the Product](https://learn.adafruit.com/products/2795/guides)
## Related Guides
- [Adafruit Feather 32u4 Basic Proto](https://learn.adafruit.com/adafruit-feather-32u4-basic-proto.md)
- [SSD1306 OLED Displays with Raspberry Pi and BeagleBone Black](https://learn.adafruit.com/ssd1306-oled-displays-with-raspberry-pi-and-beaglebone-black.md)
- [Adding a Single Board Computer to Blinka](https://learn.adafruit.com/adding-a-single-board-computer-to-blinka.md)
- [Superhero Power Gauntlet](https://learn.adafruit.com/superhero-power-gauntlet.md)
- [Arduino Ethernet + SD Card](https://learn.adafruit.com/arduino-ethernet-sd-card.md)
- [CircuitPython Hardware: SSD1306 OLED Display](https://learn.adafruit.com/micropython-hardware-ssd1306-oled-display.md)
- [Adafruit Ultimate GPS with gpsd](https://learn.adafruit.com/adafruit-ultimate-gps-on-the-raspberry-pi.md)
- [Adafruit OLED Displays for Raspberry Pi](https://learn.adafruit.com/adafruit-oled-displays-for-raspberry-pi.md)
- [Adabox 001 Temperature Alarm](https://learn.adafruit.com/adabox-001-temperature-alarm.md)
- [Magic Wand](https://learn.adafruit.com/magic-wand.md)
- [Festive Feather Holiday Lights](https://learn.adafruit.com/festive-feather-holiday-lights.md)
- [Reverse Geocache Box](https://learn.adafruit.com/reverse-geocache-engagement-box.md)
- [3D Printed Case for Adafruit Feather](https://learn.adafruit.com/3d-printed-case-for-adafruit-feather.md)
- [Feather Fingerboard](https://learn.adafruit.com/feather-fingerboard.md)
- [Monochrome OLED Breakouts](https://learn.adafruit.com/monochrome-oled-breakouts.md)
- [Adafruit Feather 32u4 Adalogger](https://learn.adafruit.com/adafruit-feather-32u4-adalogger.md)
---
# Source: https://learn.adafruit.com/1-8-tft-display/graphics-library.md
# 1.8" TFT Display Breakout and Shield
## Graphics Library
We've written a full graphics library specifically for this display which will get you up and running quickly. The code is written in C/C++ for Arduino but is easy to port to any microcontroller by rewritting the low level pin access functions.
The TFT LCD library is based off of the Adafruit GFX graphics core library. GFX has many ready to go functions that should help you start out with your project. It's not exhaustive and we'll try to update it if we find a really useful function. Right now it supports pixels, lines, rectangles, circles, round-rects, triangles and printing text as well as rotation.
Two libraries need to be downloaded and installed: first is the [ST7735 library](https://github.com/adafruit/Adafruit-ST7735-Library) (this contains the low-level code specific to this device), and second is the [Adafruit GFX Library](https://github.com/adafruit/Adafruit-GFX-Library "Link: https://github.com/adafruit/Adafruit-GFX-Library") (which handles graphics operations common to many displays we carry). You can install these with the Arduino library manager.
Open up the Arduino library manager:

Search for the **Adafruit ST7735 ** library and install it

Search for the **Adafruit GFX** library and install it


[Check out the GFX tutorial for detailed information about what is supported and how to use it](http://learn.adafruit.com/adafruit-gfx-graphics-library "Link: http://learn.adafruit.com/adafruit-gfx-graphics-library")! - [Previous Page](https://learn.adafruit.com/1-8-tft-display/reading-the-joystick.md)
- [Next Page](https://learn.adafruit.com/1-8-tft-display/troubleshooting.md)
## Featured Products
### Breadboarding wire bundle
[Breadboarding wire bundle](https://www.adafruit.com/product/153)
75 flexible stranded core wires with stiff ends molded on in red, orange, yellow, green, blue, brown, black and white. These are a major improvement over the "box of bent wires" that are sometimes sold with breadboards, and faster than stripping your own solid core wires. Makes...
In Stock
[Buy Now](https://www.adafruit.com/product/153)
[Related Guides to the Product](https://learn.adafruit.com/products/153/guides)
### Adafruit METRO 328 Fully Assembled - Arduino IDE compatible
[Adafruit METRO 328 Fully Assembled - Arduino IDE compatible](https://www.adafruit.com/product/50)
We sure love the ATmega328 here at Adafruit, and we use them _a lot_ for our own projects. The processor has plenty of GPIO, Analog inputs, hardware UART SPI and I2C, timers and PWM galore - just enough for most simple projects. When we need to go small, we use a
Out of Stock
[Buy Now](https://www.adafruit.com/product/50)
[Related Guides to the Product](https://learn.adafruit.com/products/50/guides)
### Half Sized Premium Breadboard - 400 Tie Points
[Half Sized Premium Breadboard - 400 Tie Points](https://www.adafruit.com/product/64)
This is a cute, half-size breadboard with 400 tie points, good for small projects. It's 3.25" x 2.2" / 8.3cm x 5.5cm with a standard double-strip in the middle and two power rails on both sides. You can pull the power rails off easily to make the breadboard as...
In Stock
[Buy Now](https://www.adafruit.com/product/64)
[Related Guides to the Product](https://learn.adafruit.com/products/64/guides)
### 1.8" Color TFT LCD display with MicroSD Card Breakout
[1.8" Color TFT LCD display with MicroSD Card Breakout](https://www.adafruit.com/product/358)
This lovely little display breakout is the best way to add a small, colorful and bright display to any project. Since the display uses 4-wire SPI to communicate and has its own pixel-addressable frame buffer, it can be used with every kind of microcontroller. Even a very small one with low...
Out of Stock
[Buy Now](https://www.adafruit.com/product/358)
[Related Guides to the Product](https://learn.adafruit.com/products/358/guides)
### Adafruit 1.8" Color TFT Shield w/microSD and Joystick
[Adafruit 1.8" Color TFT Shield w/microSD and Joystick](https://www.adafruit.com/product/802)
This lovely little shield is the best way to add a small, colorful and bright display to any project. We took our popular 1.8" TFT breakout board and remixed it into an Arduino shield complete with microSD card slot and a 5-way joystick navigation switch and three selection buttons! Since...
In Stock
[Buy Now](https://www.adafruit.com/product/802)
[Related Guides to the Product](https://learn.adafruit.com/products/802/guides)
### 1.8" SPI TFT display, 160x128 18-bit color - ST7735R driver
[1.8" SPI TFT display, 160x128 18-bit color - ST7735R driver](https://www.adafruit.com/product/618)
We just love this little 1.8" TFT display, with true TFT color (up to 18-bits per pixel!), fine 160x128 resolution, two white LED backlight that runs on 3.3V and a very easy SPI interface that requires only 4 or 5 digital pins to send pixels to the display.
**Please...**
Out of Stock
[Buy Now](https://www.adafruit.com/product/618)
[Related Guides to the Product](https://learn.adafruit.com/products/618/guides)
## Related Guides
- [Wave Shield](https://learn.adafruit.com/adafruit-wave-shield-audio-shield-for-arduino.md)
- [Adafruit 2.8" TFT Touch Shield v2 - Capacitive or Resistive](https://learn.adafruit.com/adafruit-2-8-tft-touch-shield-v2.md)
- [How to Build a Testing Jig](https://learn.adafruit.com/how-to-build-a-testing-fixture.md)
- [Create an Internet of Things Dashboard with Adafruit IO](https://learn.adafruit.com/create-an-internet-of-things-dashboard-with-adafruit-dot-io.md)
- [Let’s Put LEDs in Things!](https://learn.adafruit.com/lets-put-leds-in-things.md)
- [Tiny Arduino Music Visualizer](https://learn.adafruit.com/piccolo.md)
- [Circuit Playground Sound-Controlled Robot](https://learn.adafruit.com/circuit-playground-sound-controlled-robot.md)
- [Adafruit 1.27" and 1.5" Color OLED Breakout Board](https://learn.adafruit.com/adafruit-1-5-color-oled-breakout-board.md)
- [Arduino Lesson 15. DC Motor Reversing](https://learn.adafruit.com/adafruit-arduino-lesson-15-dc-motor-reversing.md)
- [TTL Serial Camera](https://learn.adafruit.com/ttl-serial-camera.md)
- [Analog Feedback Servos](https://learn.adafruit.com/analog-feedback-servos.md)
- [Geofencing with the FONA 808 & Adafruit IO](https://learn.adafruit.com/geofencing-with-the-fona-808-and-adafruit-io.md)
- [Arduino GPS Clock](https://learn.adafruit.com/arduino-clock.md)
- [Adafruit Data Logger Shield](https://learn.adafruit.com/adafruit-data-logger-shield.md)
- [Making Adabot: Part 2](https://learn.adafruit.com/making-adabot-part-2.md)
---
# Source: https://learn.adafruit.com/adafruit-gfx-graphics-library/graphics-primitives.md
# Adafruit GFX Graphics Library
## Graphics Primitives
Each device-specific display library will have its own constructors and initialization functions. These are documented in the individual tutorials for each display type, or oftentimes are evident in the specific library header file. The remainder of this tutorial covers the common graphics functions that work the same regardless of the display type.
The function descriptions below are merely _prototypes_ — there’s an assumption that a display object is declared and initialized as needed by the device-specific library. Look at the example code with each library to see it in actual use. For example, **where we show print(1234.56), your actual code would place the object name before this, e.g. it might read screen.print(1234.56)** (if you have declared your display object with the name screen).
## Drawing pixels (points)
First up is the most basic pixel pusher. You can call this with X, Y coordinates and a color and it will make a single dot:
```
void drawPixel(uint16_t x, uint16_t y, uint16_t color);
```

## Drawing lines
You can also draw lines, with a starting and end point and color:
```
void drawLine(uint16_t x0, uint16_t y0, uint16_t x1, uint16_t y1, uint16_t color);
```

For horizontal or vertical lines, there are optimized line-drawing functions that avoid the angular calculations:
```
void drawFastVLine(uint16_t x0, uint16_t y0, uint16_t length, uint16_t color);
void drawFastHLine(uint8_t x0, uint8_t y0, uint8_t length, uint16_t color);
```
## Rectangles
Next up, rectangles and squares can be drawn and filled using the following procedures. Each accepts an X, Y pair for the top-left corner of the rectangle, a width and height (in pixels), and a color. drawRect() renders just the frame (outline) of the rectangle — the interior is unaffected — while fillRect() fills the entire area with a given color:
```
void drawRect(uint16_t x0, uint16_t y0, uint16_t w, uint16_t h, uint16_t color);
void fillRect(uint16_t x0, uint16_t y0, uint16_t w, uint16_t h, uint16_t color);
```


To create a solid rectangle with a contrasting outline, use fillRect() first, then drawRect() over it.
## Circles
Likewise, for circles, you can draw and fill. Each function accepts an X, Y pair for the center point, a radius in pixels, and a color:
```
void drawCircle(uint16_t x0, uint16_t y0, uint16_t r, uint16_t color);
void fillCircle(uint16_t x0, uint16_t y0, uint16_t r, uint16_t color);
```


## Rounded rectangles
For rectangles with rounded corners, both draw and fill functions are again available. Each begins with an X, Y, width and height (just like normal rectangles), then there’s a corner radius (in pixels) and finally the color value:
```
void drawRoundRect(uint16_t x0, uint16_t y0, uint16_t w, uint16_t h, uint16_t radius, uint16_t color);
void fillRoundRect(uint16_t x0, uint16_t y0, uint16_t w, uint16_t h, uint16_t radius, uint16_t color);
```

Here’s an added bonus trick: because the circle functions are always drawn relative to a center pixel, the resulting circle diameter will always be an odd number of pixels. If an even-sized circle is required (which would place the center point _between_ pixels), this can be achieved using one of the rounded rectangle functions: pass an identical width and height that are even values, and a corner radius that’s exactly half this value.
## Triangles
With triangles, once again there are the draw and fill functions. Each requires a full seven parameters: the X, Y coordinates for three corner points defining the triangle, followed by a color:
```
void drawTriangle(uint16_t x0, uint16_t y0, uint16_t x1, uint16_t y1, uint16_t x2, uint16_t y2, uint16_t color);
void fillTriangle(uint16_t x0, uint16_t y0, uint16_t x1, uint16_t y1, uint16_t x2, uint16_t y2, uint16_t color);
```

## Characters and text
There are two basic string drawing procedures for adding text. The first is just for a single character. You can place this character at any location and with any color. An optional size parameter can be passed which scales the font by this factor (e.g. size=2 will render the default font at 10x16 pixels per character). It’s a little blocky that way but having just a single font helps keep the program size down.
```
void drawChar(uint16_t x, uint16_t y, char c, uint16_t color, uint16_t bg, uint8_t size);
```

Text is very flexible but operates a bit differently. Instead of one procedure, the text size, color and position are set up in separate functions and then the print() function is used — this makes it easy and provides all of the same string and number formatting capabilities of [Arduino’s familiar Serial.print() and println() functions](https://www.arduino.cc/reference/en/language/functions/communication/serial/print/)! But you precede these with the display object instead of Serial.
```auto
void setCursor(int16_t x0, int16_t y0);
void setTextColor(uint16_t color);
void setTextColor(uint16_t color, uint16_t backgroundcolor);
void setTextSize(uint8_t size);
void setTextWrap(boolean w);
```
Begin with setCursor(x, y), which will place the top left corner of the text wherever you please. Initially this is set to (0,0) (the top-left corner of the screen). Then set the text color with setTextColor(color) — by default this is white. Text is normally drawn “clear” — the open parts of each character show the original background contents, but if you want the text to block out what’s underneath, a background color can be specified as an optional second parameter to setTextColor(). Finally, setTextSize(size) will multiply the scale of the text by a given integer factor. Below you can see scales of 1 (the default), 2 and 3. It appears blocky at larger sizes because we only ship the library with a single simple font, to save space.
Warning: For some OLED displays, 'display.setTextColor(WHITE, BLACK);' seems to work better than specifying 'display.setTextColor(0xFFFFFF, 0x000000);'
Info:

After setting everything up, you can use print() or println() — _just like you do with [Serial printing](https://www.arduino.cc/reference/en/language/functions/communication/serial/print/)!_ For example, to print a string, use print("Hello world") - that’s the first line of the image above. You can also use print() for numbers and variables — the second line above is the output of print(1234.56) and the third line is print(0xDEADBEEF, HEX).
By default, long lines of text are set to automatically “wrap” back to the leftmost column. To override this behavior (so text will run off the right side of the display — useful for scrolling marquee effects), use setTextWrap(false). The normal wrapping behavior is restored with setTextWrap(true).
## Extended Characters, CP437 and a Lurking Bug
The standard built-in font includes a number of symbols and accented characters outside the normal letters and numbers you’d use in print() strings. These can be accessed with drawChar(), passing an 8-bit value (0–255, though commonly expressed in hexadecimal, 0x00–0xFF) for the third argument.
The built-in font is based on the original IBM PC character set, known as [_Code Page 437_ (CP437 for short)](https://en.wikipedia.org/wiki/Code_page_437). Many embedded systems still use this as it’s compact and well established.
Years ago, when originally transcribing CP437 into the GFX library, one symbol was accidentally omitted. Nothing fatal, code runs fine, but _every subsequent symbol was then off by one_ compared to the “real” CP437 character set. By the time this was discovered, _so much code had been written_ — projects shared online but also in fixed media like books and magazines — that fixing the bug would _break every existing project that relied on those extended characters!_
So the error has been left in place, on purpose, but this creates a different issue if one is adapting code from elsewhere that relies on the _correct_ CP437 symbol values.
A compromise solution is a function that enables or disables the “real” CP437 sequence. **By default this is off,** the off-by-one order is used, so that all the old GFX projects in books work without modification. The correct order can be enabled with:
```auto
display.cp437(true);
```
Unless you need to switch back and forth, this typically only needs to be done one time, in the `setup()` function.
Here’s a map of the built-in character set, both the standard erroneous version, and the corrected version used when one calls `cp437(true)`. Notice this only affects the last five rows of symbols; everything prior to character 0xB0 is unaffected:

_The presence of the extended Code Page 437 symbols is only guaranteed in the built-in font. Custom fonts (explained elsewhere) rarely include these._
Extended characters typically can’t be directly printed in code; most editors may support _Unicode_ strings but this _does not directly map to CP437._ Typically one calls the `write()` function with individual character numbers. The GFX library harkens back to an earlier time when Unicode support was not widespread.
Consider the German word _Schön_ (beautiful). One might print this like so:
```cpp
display.cp437(true); // Use correct CP437 character codes
display.print("Scho"); // Print the plain ASCII first part
display.write(0x94); // Print the o-with-umlauts
display.println("n"); // Print the last part
```
Likewise with accessing the math symbols…
```cpp
display.cp437(true); // Use correct CP437 character codes
display.print("Temperature: ");
display.print(number);
display.write(0xF8); // Print the degrees symbol
display.println(); // New line
```
Compiler support for _some_ (not all) 32-bit microcontrollers provides the `printf()` function, which can allow these characters to be placed inline via the `%c` (character) formatting identifier:
```auto
display.cp437(true);
display.printf("Temperature: %d%c\n", number, 0xF8);
display.printf("Sch%cn\n", 0x94);
```
This is nice and compact but _isn’t compatible with all microcontrollers,_ certainly not early Arduino Uno-class devices, so consider how you might be sharing code and use it with care.
**See the “[Using Fonts](../../../../adafruit-gfx-graphics-library/using-fonts)” page for additional text features in the latest GFX library.**
## Bitmaps
You can draw small monochrome (single color) bitmaps, good for sprites and other mini-animations or icons:
```
void drawBitmap(int16_t x, int16_t y, uint8_t *bitmap, int16_t w, int16_t h, uint16_t color);
```
This issues a contiguous block of bits to the display, where each '1' bit sets the corresponding pixel to 'color,' while each '0' bit is skipped. x, y is the top-left corner where the bitmap is drawn, w, h are the width and height in pixels.
The bitmap data _must_ be located in program memory using the PROGMEM directive. This is a somewhat advanced function and beginners are best advised to come back to this later. For an introduction, see the [Arduino tutorial on PROGMEM usage](http://arduino.cc/en/Reference/PROGMEM).
**[Here's a handy webtool for generating bitmap -\> memorymaps](http://javl.github.io/image2cpp/)**
## Clearing or filling the screen
The fillScreen() function will set the entire display to a given color, erasing any existing content:
```
void fillScreen(uint16_t color);
```
## Hardware-Specific functions
Some displays may have unique features like screen invert or hardware-based scrolling. Documentation for those functions can be found in the corresponding display-specific guide. Since these are not common features across all GFX-compatible displays, they are not described here.
- [Previous Page](https://learn.adafruit.com/adafruit-gfx-graphics-library/coordinate-system-and-units.md)
- [Next Page](https://learn.adafruit.com/adafruit-gfx-graphics-library/rotating-the-display.md)
## Related Guides
- [AdaBox 019](https://learn.adafruit.com/adabox019.md)
- [Sous-vide controller powered by Arduino - The SousViduino!](https://learn.adafruit.com/sous-vide-powered-by-arduino-the-sous-viduino.md)
- [Adafruit 128x64 OLED Bonnet for Raspberry Pi](https://learn.adafruit.com/adafruit-128x64-oled-bonnet-for-raspberry-pi.md)
- [Adafruit IO IOT Hub with the Adafruit FunHouse](https://learn.adafruit.com/adafruit-io-hub-with-the-adafruit-funhouse.md)
- [HalloWing Flapping Bat](https://learn.adafruit.com/hallowing-flapping-bat.md)
- [CircuitPython OLED and Dual Knob Sketcher](https://learn.adafruit.com/circuitpython-oled-knob-sketcher.md)
- [Monochrome OLED Breakouts](https://learn.adafruit.com/monochrome-oled-breakouts.md)
- [4x4 Rotary Encoder MIDI Messenger](https://learn.adafruit.com/4x4-rotary-encoder-midi-messenger.md)
- [Pico W HTTP Server with CircuitPython](https://learn.adafruit.com/pico-w-http-server-with-circuitpython.md)
- [Capturing Camera Images with CircuitPython](https://learn.adafruit.com/capturing-camera-images-with-circuitpython.md)
- [WiFi OLED Display Badge](https://learn.adafruit.com/digital-display-badge.md)
- [Trinket Ultrasonic Rangefinder](https://learn.adafruit.com/trinket-ultrasonic-rangefinder.md)
- [PyPortal Adafruit Quote Book](https://learn.adafruit.com/pyportal-adafruit-quote-board.md)
- [2.8" TFT Touchscreen](https://learn.adafruit.com/2-8-tft-touchscreen.md)
- [Magic Storybook with ChatGPT](https://learn.adafruit.com/magic-storybook-with-chatgpt.md)
---
# Source: https://learn.adafruit.com/hacking-the-kinect.md
# Hacking the Kinect
## Overview
Everyone has seen the [Xbox 360 Kinect hacked in a matter of days after our "open source driver" bounty](http://www.adafruit.com/blog/2010/11/10/we-have-a-winner-open-kinect-drivers-released-winner-will-use-3k-for-more-hacking-plus-an-additional-2k-goes-to-the-eff/) - here's how we helped the winner and here's how you can reverse engineer USB devices as well!
USB is a very complex protocol, much more complicated than Serial or Parallel, SPI and even I2C. USB uses only two wires but they are not used as 'receive' and 'transmit' like serial. Rather, data is bidirectional and differential - that is the data sent depends on the _difference _in voltage between the two data lines **D+** and **D-** If you want to do more USB hacking, you'll need to read [Jan Axelson's USB Complete books](http://janaxelson.com/) , they're easy to follow and discuss USB in both depth and breadth.
USB is also very structured. This is good for reverse engineering because it means that at least the format of packets is agreed upon and you won't have to deal with check-sums. The bad news is it means you have to have software assistance to decode the complex packet structure. The good news is that every computer now made has a USB host core, that does a lot of the tough work for you, and there are many software libraries to assist.
Today we're going to be reverse engineering the Xbox Kinect Motor, one part of the Kinect device.

- [Next Page](https://learn.adafruit.com/hacking-the-kinect/verify-the-vid-and-pid.md)
## Featured Products
### Hacked Kinect - Skill badge, iron-on patch
[Hacked Kinect - Skill badge, iron-on patch](https://www.adafruit.com/product/582)
You can made a cool project using the (hacked) Kinect! Adafruit offers a fun and exciting "badges" of achievement for electronics, science and engineering. We believe everyone should be able to be rewarded for learning a useful skill, a badge is just one of the many ways to show and...
No Longer Stocked
[Buy Now](https://www.adafruit.com/product/582)
[Related Guides to the Product](https://learn.adafruit.com/products/582/guides)
### Beagle USB 12 - Low/Full Speed USB Protocol Analyzer
[Beagle USB 12 - Low/Full Speed USB Protocol Analyzer](https://www.adafruit.com/product/708)
USB complexity got you down? Need a hand with enumeration? Reverse engineering a USB device? You will fall in love with the Beagle 12 USB Analyzer. This hardware analyzer is completely non-intrusive, and is much better than flaky software analyzers. Perfect for when a problem is bad enough it...
No Longer Stocked
[Buy Now](https://www.adafruit.com/product/708)
[Related Guides to the Product](https://learn.adafruit.com/products/708/guides)
### Reverse Engineer - Skill badge, Lenticular printing + pin-on
[Reverse Engineer - Skill badge, Lenticular printing + pin-on](https://www.adafruit.com/product/489)
You can reverse engineer! This is the first lenticular (two-stage image) skill badge that we know of! It says reverse engineer forwards and backwards depending on the angle you view it at!
**Note:** The edges of the badge will appear "white" at an angle,...
No Longer Stocked
[Buy Now](https://www.adafruit.com/product/489)
[Related Guides to the Product](https://learn.adafruit.com/products/489/guides)
### Reverse Engineer - Sticker!
[Reverse Engineer - Sticker!](https://www.adafruit.com/product/673)
You can reverse engineer! Adafruit offers fun and exciting stickers to celebrate achievement for electronics, science and engineering. We believe everyone should be able to be rewarded for learning a useful skill and a sticker is just one of the many ways to show and share.
No Longer Stocked
[Buy Now](https://www.adafruit.com/product/673)
[Related Guides to the Product](https://learn.adafruit.com/products/673/guides)
## Related Guides
- [Guitar Hero MIDI Controller](https://learn.adafruit.com/guitar-hero-midi-controller.md)
- [Commodore 64 - The Most Popular Retro Computer of All Time](https://learn.adafruit.com/commodore-64-retro-guide.md)
- [Use Docker to Compile Linux for ESP32-S3](https://learn.adafruit.com/docker-esp32-s3-linux.md)
- [Feather Guitar Hero Adapter](https://learn.adafruit.com/feather-guitar-hero-adapter.md)
- [BLE Cat Thermal Printer with MEMENTO](https://learn.adafruit.com/ble-cat-thermal-printer-with-memento.md)
- [Fruit Jam Mac Emulator](https://learn.adafruit.com/fruit-jam-mac-emulator.md)
- [How to Make Animated Graphics for Hologram Displays](https://learn.adafruit.com/how-to-make-animated-graphics-for-hologram-displays.md)
- [LED Matrix Wall Arcade for Pico-8](https://learn.adafruit.com/led-matrix-wall-arcade.md)
- [Run an X-Carve CNC Machine Wirelessly with a Raspberry Pi](https://learn.adafruit.com/control-an-xcarve-cnc-machine-wirelessly-with-a-raspberry-pi.md)
- [CircuitPython 2FA TOTP Authentication Friend](https://learn.adafruit.com/circuitpython-totp-otp-2fa-authy-authenticator-friend.md)
- [Flippy Floppy Drive Modification](https://learn.adafruit.com/flippy-floppy-drive-modification.md)
- [Authoring Playground Books with Bluefruit for iOS ](https://learn.adafruit.com/create-a-swift-playgroundbook-with-bluetooth-le.md)
- [SerenityOS - The dream of the '90s is alive!](https://learn.adafruit.com/serenityos-build-and-run-keep-the-90s-dream-alive.md)
- [Stand-alone programming AVRs using CircuitPython](https://learn.adafruit.com/stand-alone-programming-avrs-using-circuitpython.md)
- [Protect Your Online Accounts with Strong Passwords & Password Managers](https://learn.adafruit.com/protect-your-social-media-online-accounts-with-a-strong-password-manager.md)
---
# Source: https://learn.adafruit.com/mini-thermal-receipt-printer/hacking.md
# Mini Thermal Receipt Printers
## Hacking!

Look at those huge, razor-sharp image prints! You want some?
The following…
- Is an **undocumented** printer feature and is **NOT guaranteed** to work.
- May require **modifying** your printer — a **warranty-voiding** operation! Continue at your own risk.
You should _only_ attempt this if **_all_** of the following apply:
- Have first confirmed that the **printer works as expected** when operated through **conventional procedures**.
- Have a **genuine performance bottleneck** that cannot be adequately resolved by **adjusting the printer** timing and thermal settings first.
- Are comfortable **opening things** and **soldering**.
Danger:
These printers have a limited serial receive buffer. Push bits to the printer faster than it can physically heat dots and feed paper, and you experience an “overflow” — bitmap images become garbled, text and formatting commands may be skipped.
The thermal printer library tries to throttle data to the printer at just the right rate. Too fast and an overflow occurs. Too slow and it wastes your time; the printer isn’t operating at peak throughput. This is an imperfect process…though we use very conservative timing estimates, the actual speed through the printer is impossible to predict…sometimes overflows _still_ occur.
_Hardware handshaking_ is a means by which a printer or other device can report to the microcontroller that it’s ready to receive more data, virtually eliminating buffer overflows while operating at peak throughput…the paper feed stops only when it physically absolutely must. Optimal performance.
It appears that some varieties of these thermal printers support hardware handshaking (e.g. firmware v2.64, 2.68). This is barely mentioned in the datasheet, and in fact **there isn’t even a physical connection for this on the outside of the printer.** A little surgery is in order…
Primary:
# Parts and Tools Needed
- Small Phillips head screwdriver
- Pliers
- Soldering iron and related paraphernalia
- A bit of wire…but ideally a female jumper wire
# Procedure
Unplug all cables, turn the printer over and remove the two small Phillips screws.

Take the back plate off, then remove the two (or sometimes four) Phillips screws holding the circuit board in place.
These screws are a little smaller than the back-holding ones…don’t get them mixed up!

Carefully, so as not to unseat or unplug the connectors, turn the circuit board over and look for the unpopulated via labeled “DTR.”
There are some other interesting solder points in here, if you’re so inclined. “HV” is the raw 5–9 Volts from the power supply. On the right is a 3.3V pin, though I don’t know the available current. Conceivably one could bring these out to reduce overall cabling in a project…or even install a tiny microcontroller right inside!

Cut an end off a female jumper wire and strip & tin the end.
This will be hanging out of the printer…so a _female_ jumper prevents accidental contact with things if you’re not using the connection. If you only have regular wire, that’s fine, just be careful not to leave a bare end dangling.

Solder the wire to the DTR pad. Top, bottom, doesn’t matter…it’s right up against the serial connection plug, so use whatever path works best for you, there’s ample room for routing the wire around either way.

Language pedants may note that this isn’t technically a DTR pin, but rather CTS. It’s long-standing thing among printer manufacturers…apparently the misnomer was made decades ago but has stuck for consistency.
On the back plate, there’s a small metal “finger” between the serial and power sockets. Using pliers, this can be bent back to provide an exit route for the DTR wire.


Screw the controller board back in place (check that neither of the cables has come unseated), routing the DTR wire around between the two sockets, then screw the back on.
Finished with the hardware!

You can then reconnect the power and serial sockets, and wire those up as before.
Use a jumper wire to connect DTR to any available Arduino pin. In our examples, we’ll use digital pin 4.
The printer electronics operate at 3.3V (but are “5V safe”), so no level shifting is needed with 3.3V boards (Arduino Due, etc.)…this can safely be connected directly.
# Code Changes
Just one line…the Adafruit\_Thermal constructor…needs changing. It can accept an optional parameter, a pin number to use for DTR:
```
Adafruit_Thermal printer(&mySerial, 4);
```
This works just as well with a hardware serial port (e.g. Arduino Mega or Due):
```
Adafruit_Thermal printer(&Serial1, 4);
```
No other changes are necessary. Try this with one of the example sketches…you’ll find the printer is suddenly _lots_ faster! That’s because the software throttle is no longer used…the printer continually reports its actual “ready” state to the microcontroller.
# Printing Huge Images

The printBitmap() function can output images from an open stream or stored in PROGMEM (flash memory)…as explained on the “Printing Bitmaps” page.
Although the Arduino Mega has a whopping 256K flash space, a limitation of the AVR microcontroller is that a single array can’t exceed 32K…that’s about a 384x680 pixel bitmap image. If you try to embed a larger image in your code, the compiler will report an error.
One workaround might be to break really long images into multiple smaller images, and print these out consecutively without a feed() in between.
Another is to use a non-AVR Arduino-compatible board, such as the 32-bit Arduino Due. This has no problem with massive arrays. The Chrysler Building image above is 384x1132 pixels!
# Other Things to Know
This type of printer fares best with light line art and sometimes dithered photographic images as long as the overall dot density is fairly low, like under 50%. Large solid-filled areas exhibit strange streaky artifacts…this isn’t a bug of the library or printer firmware, but just a side-effect of how receipt printers operate, that they can only heat so many dots at a time and have to pull shenanigans to go beyond that, else they jam.
Here are a couple examples from fancy commercial receipt printers.
Notice in the first one that the “solid black” area isn’t _really_ solid black…examining it closely, you can see it’s densely dithered, but not 100% filled.
The second _does_ have solid fills, but limits the total area. On any given row, only so many pixels are set.


If you try to print a “dense” image and the paper jams (image gets squashed vertically), pass a lower density value to printer.begin(). Default value is 120. So for example:
```
printer.begin(80);
```
DTR support is not a panacaea. **Glitches occasionally do still happen** …sometimes overflows, sometimes “framing errors” with serial data. But overall it seems fairly reliable and _buttery smooth!_
- [Previous Page](https://learn.adafruit.com/mini-thermal-receipt-printer/troubleshooting.md)
## Primary Products
### Mini Thermal Receipt Printer
[Mini Thermal Receipt Printer](https://www.adafruit.com/product/597)
Add a mini printer to any microcontroller project with this very cute thermal printer. Thermal printers are also known as receipt printers, they're what you get when you go to the ATM or grocery store. Now you can embed a little printer of your own into an enclosure. This printer is ideal...
No Longer Stocked
[Buy Now](https://www.adafruit.com/product/597)
[Related Guides to the Product](https://learn.adafruit.com/products/597/guides)
### Tiny Thermal Receipt Printer - TTL Serial / USB
[Tiny Thermal Receipt Printer - TTL Serial / USB](https://www.adafruit.com/product/2751)
Add a _really small_ printer to any microcontroller project with this very cute thermal printer. Thermal printers are also known as receipt printers, they're what you get when you go to the ATM or grocery store. Now you can embed a little printer of your own into an enclosure. This...
No Longer Stocked
[Buy Now](https://www.adafruit.com/product/2751)
[Related Guides to the Product](https://learn.adafruit.com/products/2751/guides)
### Nano Thermal Receipt Printer - TTL Serial
[Nano Thermal Receipt Printer - TTL Serial](https://www.adafruit.com/product/2752)
Add a _really really small_ printer to any microcontroller project with this very cute thermal printer. Thermal printers are also known as receipt printers, they're what you get when you go to the ATM or grocery store. Now you can embed a little printer of your own into an...
No Longer Stocked
[Buy Now](https://www.adafruit.com/product/2752)
[Related Guides to the Product](https://learn.adafruit.com/products/2752/guides)
### Thermal Receipt Printer Guts
[Thermal Receipt Printer Guts](https://www.adafruit.com/product/2753)
Add printing capability to any microcontroller project with **just the innards of a thermal printer.** Thermal printers are also known as receipt printers, they're what you get when you go to the ATM or grocery store. Now you can embed a little printer of your own into a...
No Longer Stocked
[Buy Now](https://www.adafruit.com/product/2753)
[Related Guides to the Product](https://learn.adafruit.com/products/2753/guides)
## Featured Products
### Mini Thermal Receipt Printer Starter Pack
[Mini Thermal Receipt Printer Starter Pack](https://www.adafruit.com/product/600)
Hit the ground running (and printing!) with this starter pack that includes a thermal printer and all the extras and save a few dollars while you're at it.
Includes:
- [A mini thermal receipt printer](http://www.adafruit.com/products/597) - with cables and...
No Longer Stocked
[Buy Now](https://www.adafruit.com/product/600)
[Related Guides to the Product](https://learn.adafruit.com/products/600/guides)
### Female DC Power adapter - 2.1mm jack to screw terminal block
[Female DC Power adapter - 2.1mm jack to screw terminal block](https://www.adafruit.com/product/368)
If you need to connect a DC power wall wart to a board that doesn't have a DC jack - this adapter will come in very handy! There is a 2.1mm DC jack on one end, and a screw terminal block on the other. The terminals are labeled with positive/negative assuming a positive-tip configuration...
In Stock
[Buy Now](https://www.adafruit.com/product/368)
[Related Guides to the Product](https://learn.adafruit.com/products/368/guides)
### 5V 2A (2000mA) switching power supply - UL Listed
[5V 2A (2000mA) switching power supply - UL Listed](https://www.adafruit.com/product/276)
This is an FCC/CE certified and UL listed power supply. Need a lot of 5V power? This switching supply gives a clean regulated 5V output at up to 2000mA. 110 or 240 input, so it works in any country. The plugs are "US 2-prong" style so you may need a plug adapter, but you can pick one...
Out of Stock
[Buy Now](https://www.adafruit.com/product/276)
[Related Guides to the Product](https://learn.adafruit.com/products/276/guides)
### Thermal paper roll - 50' long, 2.25" wide
[Thermal paper roll - 50' long, 2.25" wide](https://www.adafruit.com/product/599)
A mini roll of thermal paper, this fits very nicely into our mini thermal printer. 2.25" wide (about 57mm) and 50 feet long (15 meters). BPA-free.
[Perfect for use with our mini thermal printer!](http://www.adafruit.com/products/597)
No Longer Stocked
[Buy Now](https://www.adafruit.com/product/599)
[Related Guides to the Product](https://learn.adafruit.com/products/599/guides)
### Thermal Paper Roll - 33' long, 2.25"
[Thermal Paper Roll - 33' long, 2.25"](https://www.adafruit.com/product/2754)
A little roll of thermal paper! This fits very nicely into our [Tiny Thermal Receipt Printer](https://www.adafruit.com/products/2751). It's ~2.25" wide (about 57mm) and 33 feet long or about 10 meters.
No Longer Stocked
[Buy Now](https://www.adafruit.com/product/2754)
[Related Guides to the Product](https://learn.adafruit.com/products/2754/guides)
### Thermal Paper Roll - 16' long, 2.25"
[Thermal Paper Roll - 16' long, 2.25"](https://www.adafruit.com/product/2755)
A little roll of thermal paper! This fits very nicely into our [Nano Thermal Receipt Printer](https://www.adafruit.com/products/2752). It's ~2.25" wide (about 57mm) and 16 feet long or about 5 meters.
No Longer Stocked
[Buy Now](https://www.adafruit.com/product/2755)
[Related Guides to the Product](https://learn.adafruit.com/products/2755/guides)
### Adafruit METRO 328 Fully Assembled - Arduino IDE compatible
[Adafruit METRO 328 Fully Assembled - Arduino IDE compatible](https://www.adafruit.com/product/50)
We sure love the ATmega328 here at Adafruit, and we use them _a lot_ for our own projects. The processor has plenty of GPIO, Analog inputs, hardware UART SPI and I2C, timers and PWM galore - just enough for most simple projects. When we need to go small, we use a
Out of Stock
[Buy Now](https://www.adafruit.com/product/50)
[Related Guides to the Product](https://learn.adafruit.com/products/50/guides)
### Breadboarding wire bundle
[Breadboarding wire bundle](https://www.adafruit.com/product/153)
75 flexible stranded core wires with stiff ends molded on in red, orange, yellow, green, blue, brown, black and white. These are a major improvement over the "box of bent wires" that are sometimes sold with breadboards, and faster than stripping your own solid core wires. Makes...
In Stock
[Buy Now](https://www.adafruit.com/product/153)
[Related Guides to the Product](https://learn.adafruit.com/products/153/guides)
## Related Guides
- [How to Find Hidden COM Ports](https://learn.adafruit.com/how-to-find-hidden-com-ports.md)
- [Wireless Game Show Poppers for the Classroom!](https://learn.adafruit.com/wireless-game-show-poppers.md)
- [Adafruit Ultimate GPS](https://learn.adafruit.com/adafruit-ultimate-gps.md)
- [RGB LED Matrix Basics](https://learn.adafruit.com/32x16-32x32-rgb-led-matrix.md)
- [Analog Feedback Servos](https://learn.adafruit.com/analog-feedback-servos.md)
- [Arduino GPS Clock](https://learn.adafruit.com/arduino-clock.md)
- [Silicone Robo-Tentacle](https://learn.adafruit.com/silicone-robo-tentacle.md)
- [Ladyada's Bento Box](https://learn.adafruit.com/lady-adas-bento-box.md)
- [Metal Inlay Capacitive Touch Buttons](https://learn.adafruit.com/metal-inlay-capacitive-touch-buttons.md)
- [Adafruit IO Basics: NeoPixel Controller](https://learn.adafruit.com/adafruit-io-basics-neopixel-controller.md)
- [Adafruit PN532 RFID/NFC Breakout and Shield](https://learn.adafruit.com/adafruit-pn532-rfid-nfc.md)
- [Reverse Geocache Box](https://learn.adafruit.com/reverse-geocache-engagement-box.md)
- [Character LCDs](https://learn.adafruit.com/character-lcds.md)
- [Adafruit INA219 Current Sensor Breakout](https://learn.adafruit.com/adafruit-ina219-current-sensor-breakout.md)
- [All About Arduino Libraries](https://learn.adafruit.com/adafruit-all-about-arduino-libraries-install-use.md)
---
# Source: https://learn.adafruit.com/light-painting-with-raspberry-pi/hardware.md
# Light Painting with Raspberry Pi
## Hardware
Interfacing Adafruit’s [Digital Addressable RGB LED](http://learn.adafruit.com/digital-led-strip) strip (aka “LPD8806 strip”) to the Raspberry Pi is super simple, requiring just a few connections between the board, strip and a [DC power jack](http://adafruit.com/products/368).
The board’s MOSI pin connects to the DI pin on the LED strip, and SCLK connects to the CI pin.

Instead of supplying power to the Raspberry Pi’s Micro USB connector, a 5 Volt DC power supply is required because the LED strip draws significantly more current than the USB input can provide. A [2 Amp power supply](http://adafruit.com/products/276) is sufficient for a 1 meter LED strip, while our larger [10 Amp supply](http://adafruit.com/products/658) can power up to 5 meters of LED strip (plus the Raspberry Pi board, in both situations).
+5V and ground from the power supply connect to the 5V and GND pins on both the LED strip and the Raspberry Pi GPIO header.
In the above diagram, we’re directly connecting **3.3V** logic output from the Raspberry Pi to the **5V** logic input of the addressable LED strip. Strictly speaking, this is _not_ Good and Proper. Wildcards like actual power supply voltage (they’re never _precisely_ 5.0000V) or even temperature may contribute to whether this functions reliably. It did very well here, but your mileage may vary. If your LEDs _almost_ work but are glitchy, it’s time for a _logic level shifter_, [explained in this guide](https://learn.adafruit.com/neopixel-levelshifter) (which is about NeoPixels, but the principle is the same — just that we’ve got _two_ wires to level-shift here, rather than NeoPixels’ one).

An initial prototype was assembled using a [Pi Cobbler](http://adafruit.com/products/914) breakout kit. Because the finished project would be moving around a lot, and because breadboards aren’t the most robust thing, a 26-pin IDC cable was sacrificed for science to create a purpose-built cable between the Raspberry Pi GPIO header, LED strip and power supply. This is much more resilient to vibration and careless fingers.

To make connections easy to make/break for setup and take down, we also used two JST 4-pin inline cables ([plug](http://www.adafruit.com/products/578)and [receptacle](http://www.adafruit.com/products/579)) and to attach and detach the LED strip. The connectors are polarized so they can't be plugged backwards!


- [Previous Page](https://learn.adafruit.com/light-painting-with-raspberry-pi/overview.md)
- [Next Page](https://learn.adafruit.com/light-painting-with-raspberry-pi/software.md)
## Featured Products
### Adafruit Assembled Pi Cobbler Breakout + Cable for Raspberry Pi
[Adafruit Assembled Pi Cobbler Breakout + Cable for Raspberry Pi](https://www.adafruit.com/product/914)
Now that you've finally got your hands on a [Raspberry Pi® Model B](http://www.raspberrypi.org/), you're probably itching to make some fun embedded computer projects with it. What you need is an add on prototyping Pi Cobbler from Adafruit, which can break out all those...
No Longer Stocked
[Buy Now](https://www.adafruit.com/product/914)
[Related Guides to the Product](https://learn.adafruit.com/products/914/guides)
### Digital RGB LED Weatherproof Strip - LPD8806 32 LED 5m
[Digital RGB LED Weatherproof Strip - LPD8806 32 LED 5m](https://www.adafruit.com/product/306)
These LED strips are fun and glowy. There are 32 RGB LEDs per meter, and you can control each LED individually! Yes, that's right, this is the digitally-addressable type of LED strip. You can set the color of each LED's red, green and blue component with 7-bit PWM precision (so 21-bit...
In Stock
[Buy Now](https://www.adafruit.com/product/306)
[Related Guides to the Product](https://learn.adafruit.com/products/306/guides)
### 4-pin JST SM Plug + Receptacle Cable Set
[4-pin JST SM Plug + Receptacle Cable Set](https://www.adafruit.com/product/578)
These 4-wire cables are 15cm long and come as a set, one side has a JST SM type connector plug on the end. The other side has a matching JST SM type receptacle connector. They are good for whenever you have 4 wires you want to be able to plug and unplug. We like the solid and compact nature of...
In Stock
[Buy Now](https://www.adafruit.com/product/578)
[Related Guides to the Product](https://learn.adafruit.com/products/578/guides)
### 5V 10A switching power supply
[5V 10A switching power supply](https://www.adafruit.com/product/658)
This is a beefy switching supply, for when you need a lot of power! It can supply 5V DC up to 10 Amps, running from 110V or 220V power (the plug it comes with is for US/Canada/Japan but you can use any plug adapter for your country, or just replace the cable with a standard computer/appliance...
Out of Stock
[Buy Now](https://www.adafruit.com/product/658)
[Related Guides to the Product](https://learn.adafruit.com/products/658/guides)
### 5V 2A (2000mA) switching power supply - UL Listed
[5V 2A (2000mA) switching power supply - UL Listed](https://www.adafruit.com/product/276)
This is an FCC/CE certified and UL listed power supply. Need a lot of 5V power? This switching supply gives a clean regulated 5V output at up to 2000mA. 110 or 240 input, so it works in any country. The plugs are "US 2-prong" style so you may need a plug adapter, but you can pick one...
In Stock
[Buy Now](https://www.adafruit.com/product/276)
[Related Guides to the Product](https://learn.adafruit.com/products/276/guides)
### Female DC Power adapter - 2.1mm jack to screw terminal block
[Female DC Power adapter - 2.1mm jack to screw terminal block](https://www.adafruit.com/product/368)
If you need to connect a DC power wall wart to a board that doesn't have a DC jack - this adapter will come in very handy! There is a 2.1mm DC jack on one end, and a screw terminal block on the other. The terminals are labeled with positive/negative assuming a positive-tip configuration...
In Stock
[Buy Now](https://www.adafruit.com/product/368)
[Related Guides to the Product](https://learn.adafruit.com/products/368/guides)
## Related Guides
- [LPD8806 Digital RGB LED Strip](https://learn.adafruit.com/digital-led-strip.md)
- [Magic Band Reader](https://learn.adafruit.com/magic-band-reader.md)
- [Bubble Table with LED Animations and IR Remote Control](https://learn.adafruit.com/bubble-table-with-led-animations-and-ir-remote-control.md)
- [Mini Neon Sign Prop & n00ds Booster Case](https://learn.adafruit.com/nood-booster-case.md)
- [Gemma 3D Printed Tree Topper](https://learn.adafruit.com/gemma-3d-printed-tree-topper.md)
- [Raspberry Pi SelfieBlock](https://learn.adafruit.com/selfieblock.md)
- [Rumi Sword - KPop Demon Hunters](https://learn.adafruit.com/rumi-sword.md)
- [Setting up a Raspberry Pi as a WiFi Access Point](https://learn.adafruit.com/setting-up-a-raspberry-pi-as-a-wifi-access-point.md)
- [Adafruit's Raspberry Pi Lesson 8. Using a Servo Motor](https://learn.adafruit.com/adafruits-raspberry-pi-lesson-8-using-a-servo-motor.md)
- [Adafruit NFC/RFID on Raspberry Pi](https://learn.adafruit.com/adafruit-nfc-rfid-on-raspberry-pi.md)
- [Set up and Blink - MATLAB and Simulink with Raspberry Pi](https://learn.adafruit.com/how-to-use-matlab-and-simulink-with-raspberry-pi.md)
- [Floor Lamp with NeoPixels and WLED Custom Animations](https://learn.adafruit.com/floor-lamp-with-wled.md)
- [Reverse Engineering a Bluetooth Low Energy Light Bulb](https://learn.adafruit.com/reverse-engineering-a-bluetooth-low-energy-light-bulb.md)
- [Running OpenGL-based Games & Emulators on Adafruit PiTFT Displays](https://learn.adafruit.com/running-opengl-based-games-and-emulators-on-adafruit-pitft-displays.md)
- [CLUE Vertical Garden Weather Visualizer](https://learn.adafruit.com/clue-vertical-garden-weather-visualizer.md)
- [PiPhone - A Raspberry Pi based Cellphone](https://learn.adafruit.com/piphone-a-raspberry-pi-based-cellphone.md)
---
# Source: https://learn.adafruit.com/diy-8x2-lcd-shield/headers-and-wiring.md
# DIY 8x2 LCD Shield
## Headers and Wiring

OK now that we are diagrammed out, I took the protoshield and soldered 2 7-pin headers at one end of the pcb. Note that they are not all the way to the edge, I left one row of holes so I could easily solder some wires. I also soldered a short piece of header (that comes with the shield kit) at the left so that the LCD will be propped up.
You can now do a test fit to verify how it will look. it hangs over a bit but thats OK by me.## Wiring the LCD
Since this is a parallel LCD, data will be sent to it over a _parallel _interface. That is, multiple bits at a time. These LCDs are designed for either a 8-bit or 4-bit interface. Since we'd like to save pins, lets go with the 4-bit interface! The data pins are name **D4** , **D5** , **D6** , and **D7**. Double-check your datasheet but almost all parallel LCDs have these pins numbered 4, 3, 2, and 1 respectively.
| **1 (D7)** | **2 (D6)** |
| --- | --- |
| **3 (D5)** | **4 (D4)** |
| --- | --- |
| **5** | **6** |
| --- | --- |
| **7** | **8** |
| --- | --- |
| **9 (ENABLE)** | **10 (R/W)** |
| --- | --- |
| **11 (RS)** | **12 (CONTRAST)** |
| --- | --- |
| **13 (GND/VSS)** | **14 (+5V/VDD)** |
| --- | --- |
There's a lot of wiring to be done but we're going to go thru it very slowly so it shouldn't be too bad.
Lets connect these to the arduino thusly: D4 -\> Arduino pin #7, D5 -\> Arduino pin #8, D6 -\> Arduino pin #9, D7 -\> Arduino pin #10.

Since I wasnt sure of the wiring, I used the sockets on the protoshield. Once I test and verify they are correct, I'll solder them in!
Next are the two power wires. Parallel LCDs run off of +5V so you can just solder the Vcc wire to 5V and the ground wire to GND.

Next are the 2 control wires, **ENABLE** and **RS** which we connect to pins 12 and 11 respectively.
Theres another control line called **R/W** that you can use to control whether you're reading or writing to the LCD. Since we'll just be writing, that pin can be connected to ground, saving another arduino pin.
The last wire is the contrast control, we need to connect a potentiometer to this to make the display visible. I dont know the specifics of the input current but I used a 10K potentiometer and it worked great.
One pin is connected to +5V, the pin on the other side is connected to ground and the middle pin is connected to the contrast line.

Now place the LCD on top. Looks good!
Make sure you finish up the rest of the shield so you can plug it into an arduino. At least solder in the male headers.- [Previous Page](https://learn.adafruit.com/diy-8x2-lcd-shield/check-out-the-pins.md)
- [Next Page](https://learn.adafruit.com/diy-8x2-lcd-shield/using-the-lcd-shield.md)
## Featured Products
### Solid-Core Wire Spool - 25ft - 22AWG - Yellow
[Solid-Core Wire Spool - 25ft - 22AWG - Yellow](https://www.adafruit.com/product/289)
Perfect for bread-boarding, free wiring, etc. This spool of solid-core wire is easy to solder to. When bent it keeps its shape pretty well. We like to have a few spools of this stuff around. We suggest picking up wire strippers to match. Wire gauge is 22 AWG which we've found is the best...
In Stock
[Buy Now](https://www.adafruit.com/product/289)
[Related Guides to the Product](https://learn.adafruit.com/products/289/guides)
### 36-pin 0.1" Female header - pack of 5!
[36-pin 0.1" Female header - pack of 5!](https://www.adafruit.com/product/598)
Female header is like the duct tape of electronics. Its great for connecting things together, soldering to perf-boards, sockets for wires or break-away header, etc. We go through these guys real fast, and thought that given how handy they are, we'd offer them in a pack of five!
In Stock
[Buy Now](https://www.adafruit.com/product/598)
[Related Guides to the Product](https://learn.adafruit.com/products/598/guides)
### Break-away 0.1" 36-pin strip male header - Black - 10 pack
[Break-away 0.1" 36-pin strip male header - Black - 10 pack](https://www.adafruit.com/product/392)
Breakaway header is like the duct tape of electronics. It's great for connecting things together, soldering to perf-boards, fits into any breakout or breadboard, etc. We go through these guys real fast, and thought that given how handy they are, we'd offer them in a pack of ten!
In Stock
[Buy Now](https://www.adafruit.com/product/392)
[Related Guides to the Product](https://learn.adafruit.com/products/392/guides)
### Adafruit Proto Shield for Arduino Kit
[Adafruit Proto Shield for Arduino Kit](https://www.adafruit.com/product/51)
Works with the Uno! This prototyping shield is the best out there (well, we think so, at least). It works with UNO, NG, Diecimila and Duemilanove Arduinos. You can use it with a Leonardo but it will not break out the hardware SPI pins (they're only on the ISP connector underneath) or the...
No Longer Stocked
[Buy Now](https://www.adafruit.com/product/51)
[Related Guides to the Product](https://learn.adafruit.com/products/51/guides)
### Adafruit METRO 328 Fully Assembled - Arduino IDE compatible
[Adafruit METRO 328 Fully Assembled - Arduino IDE compatible](https://www.adafruit.com/product/50)
We sure love the ATmega328 here at Adafruit, and we use them _a lot_ for our own projects. The processor has plenty of GPIO, Analog inputs, hardware UART SPI and I2C, timers and PWM galore - just enough for most simple projects. When we need to go small, we use a
Out of Stock
[Buy Now](https://www.adafruit.com/product/50)
[Related Guides to the Product](https://learn.adafruit.com/products/50/guides)
## Related Guides
- [Geofencing with the FONA 808 & Adafruit IO](https://learn.adafruit.com/geofencing-with-the-fona-808-and-adafruit-io.md)
- [Wireless Game Show Poppers for the Classroom!](https://learn.adafruit.com/wireless-game-show-poppers.md)
- [Adafruit Ultimate GPS](https://learn.adafruit.com/adafruit-ultimate-gps.md)
- [Arduino Lesson 4. Eight LEDs and a Shift Register](https://learn.adafruit.com/adafruit-arduino-lesson-4-eight-leds.md)
- [Adafruit CC3000 WiFi and Xively](https://learn.adafruit.com/adafruit-cc3000-wifi-and-xively.md)
- [FTDI Friend](https://learn.adafruit.com/ftdi-friend.md)
- [A REST API for Arduino & the CC3000 WiFi Chip](https://learn.adafruit.com/a-rest-api-for-arduino-and-the-cc3000-wifi-chip.md)
- [Bluetooth Controlled Motorized Camera Slider](https://learn.adafruit.com/bluetooth-motorized-camera-slider.md)
- [Bluefruit LE Connect for iOS and Android](https://learn.adafruit.com/bluefruit-le-connect.md)
- [Babel Fish](https://learn.adafruit.com/babel-fish.md)
- [Animating Multiple LED Backpacks](https://learn.adafruit.com/animating-multiple-led-backpacks.md)
- [Light Meter](https://learn.adafruit.com/light-meter.md)
- [Adafruit 16-channel PWM/Servo Shield](https://learn.adafruit.com/adafruit-16-channel-pwm-slash-servo-shield.md)
- [Halloween Pumpkin](https://learn.adafruit.com/halloween-pumpkin.md)
- [Naughty or Nice Machine](https://learn.adafruit.com/naughty-or-nice-machine.md)
---
# Source: https://learn.adafruit.com/bone-box/hello.md
# Bone Box
## Preparation
Pack up your Beagle Bone in this lovely clear plastic case. We designed this case to be the ideal enclosure, with plenty of elegant details to make it useful to you!
There's plenty of space inside to add on one of our Beagle Bone Proto Capes with components or connectors soldered on. Fits any Beagle Bone version out there - but not BeagleBoards!
# Parts List
The kit includes the following items:
- Six (6) laser-cut acrylic pieces.
- Eight (8) 1/2" #4-40 machine screws.
- Eight (8) #4-40 steel nuts.
- Four (4) 3/16" nylon spacers.

Not included with the kit, you will also need:
- BeagleBone single board computer.
- Small screwdriver.
- Optional: tape.

# Before assembly…
- Peel the backing paper off the acrylic parts.
- Remove Proto Cape, if installed.
- Remove microSD card.
- [Next Page](https://learn.adafruit.com/bone-box/assembly.md)
## Primary Products
### Adafruit Bone Box - Enclosure for Beagle Bone/Beagle Bone Black
[Adafruit Bone Box - Enclosure for Beagle Bone/Beagle Bone Black](https://www.adafruit.com/product/699)
Pack up your [Beagle Bone](http://www.adafruit.com/products/513) or [Beagle Bone Black](http://www.adafruit.com/products/1278) in this lovely clear plastic case. We designed this case to be the ideal enclosure, with plenty of elegant details to make it useful to you!
No Longer Stocked
[Buy Now](https://www.adafruit.com/product/699)
[Related Guides to the Product](https://learn.adafruit.com/products/699/guides)
## Related Guides
- [Measuring Temperature with a BeagleBone Black](https://learn.adafruit.com/measuring-temperature-with-a-beaglebone-black.md)
- [Measuring Light with a BeagleBone Black](https://learn.adafruit.com/measuring-light-with-a-beaglebone-black.md)
- [Adding a Real Time Clock to BeagleBone Black](https://learn.adafruit.com/adding-a-real-time-clock-to-beaglebone-black.md)
- [Setting up IO Python Library on BeagleBone Black](https://learn.adafruit.com/setting-up-io-python-library-on-beaglebone-black.md)
- [Nokia 5110/3310 LCD Python Library](https://learn.adafruit.com/nokia-5110-3310-lcd-python-library.md)
- [BNO055 Absolute Orientation Sensor with Raspberry Pi & BeagleBone Black](https://learn.adafruit.com/bno055-absolute-orientation-sensor-with-raspberry-pi-and-beaglebone-black.md)
- [Adafruit WebIDE](https://learn.adafruit.com/webide.md)
- [MCP9808 Temperature Sensor Python Library](https://learn.adafruit.com/mcp9808-temperature-sensor-python-library.md)
- [FONA Tethering to Raspberry Pi or BeagleBone Black](https://learn.adafruit.com/fona-tethering-to-raspberry-pi-or-beaglebone-black.md)
- [Setting up WiFi with BeagleBone Black](https://learn.adafruit.com/setting-up-wifi-with-beaglebone-black.md)
- [LedGames - a BeagleBone Black 64x64 LED Game](https://learn.adafruit.com/ledgames-beaglebone-black-64x64-led-game.md)
- [TMP006 Temperature Sensor Python Library](https://learn.adafruit.com/tmp006-temperature-sensor-python-library.md)
- [MPR121 Capacitive Touch Sensor on Raspberry Pi & BeagleBone Black](https://learn.adafruit.com/mpr121-capacitive-touch-sensor-on-raspberry-pi-and-beaglebone-black.md)
- [Blinking an LED with BeagleBone Black](https://learn.adafruit.com/blinking-an-led-with-beaglebone-black.md)
- [RePaper eInk Development Board for ARM + GNU/Linux](https://learn.adafruit.com/repaper-eink-development-board-arm-linux-raspberry-pi-beagle-bone-black.md)
---
# Source: https://learn.adafruit.com/hl1606-led-strip.md
# HL1606 LED Strip
## Overview
Info:

We love some good LED blinking as much as the next person but after years of LED-soldering we need something cooler to get us excited. Sure there are RGB LEDs and those are fun too but what comes after that? Well, we have the answer: **Digital LED Strips**! These are _flexible_ circuit boards with full color LEDs soldered on. They take a lot of LED-wiring-drudgery out of decorating a room, car, bicycle, costume, etc. The ones we carry come with a removable waterproof casing.
There are two basic kinds of LED strips, the "analog" kind and "digital" kind. Analog-type strips have all the LEDs connected in parallel and so it acts like one huge tri-color LED; you can set the **entire** strip to any color you want, but you can't control the individual LED's colors. They are very very easy to use and fairly inexpensive.
The Digital-type strips work in a different way. They have a chip for each LED, to use the strip you have to send digitally coded data to the chips. However, this means you can control each LED individually! Because of the extra complexity of the chip, they are more expensive.
The strip is made up of 2.5" segments. Each segment is independent and so you can cut the strip down on the segment boundaries, or extend them, or split them up, etc.
**We’ve carried two different types of addressable LED strips. If you ordered before August 2011 then you received the HL1606 type, otherwise you probably have the LPD8806 type. Its not too hard to tell the difference. Look at the segments of the strip and find the 'pads' on the side of each 2.5" segment. The HL1606 strips have six pads on each side. the LPD8806 have four pads on each side.**
This is what the HL1606-based strip segments look like:

If you have the HL1606-based strip, this is your tutorial — read on!
The LPD8806-based strip looks like this (its thinner, and has fewer 'pads' on the side):

If you have the LPD8806-based strip, that type [now has its own separate tutorial](http://learn.adafruit.com/digital-led-strip).
- [Next Page](https://learn.adafruit.com/hl1606-led-strip/wiring.md)
## Related Guides
- [Pocket Galaxy](https://learn.adafruit.com/pocket-galaxy.md)
- [Mailbox Notification Service](https://learn.adafruit.com/mailbox-notification-service.md)
- [Digital LED Belt](https://learn.adafruit.com/digital-led-belt.md)
- [Bike Wheel POV Display](https://learn.adafruit.com/bike-wheel-pov-display.md)
- [NeoPixel Bracelet](https://learn.adafruit.com/neopixel-bracelet.md)
- [Magic Band Reader](https://learn.adafruit.com/magic-band-reader.md)
- [HalloWing Light Paintstick](https://learn.adafruit.com/hallowing-light-paintstick.md)
- [Stick Person Costume with Neon LED Strips](https://learn.adafruit.com/led-neon-stick-person-costume.md)
- [Light-Up Reactive Ukulele](https://learn.adafruit.com/light-up-reactive-ukulele.md)
- [Gemma 3D Printed Tree Topper](https://learn.adafruit.com/gemma-3d-printed-tree-topper.md)
- [NeoPixel Infinity Mirror Coaster](https://learn.adafruit.com/infinity-mirror-coaster.md)
- [Halloween Skeleton Transformation Illusion Prop](https://learn.adafruit.com/halloween-skeleton-transformation-illusion-prop.md)
- [Magic Mirror with Glowing Secret Messages](https://learn.adafruit.com/magic-mirror-with-glowing-secret-messages.md)
- [Monster Matrix with WLED](https://learn.adafruit.com/monster-matrix-with-wled.md)
- [Mini Neon Sign Prop & n00ds Booster Case](https://learn.adafruit.com/nood-booster-case.md)
---
# Source: https://learn.adafruit.com/flora-rgb-smart-pixels/hook-up-alligator-clips.md
# Sewable NeoPixels
## Hook up alligator clips

Hook up three alligator clips to your Circuit Playground Express as shown: one to **VOUT** , one to **A1** , and one to **GND**. I used a red wire for power and a black wire for ground for clarity, but it doesn't matter what color you use.
Hook up the other ends of your alligator clips to a single pixel. **VOUT** (red) connects to the **+** on the pixel, **GND** (black) to the **-** , and **A1** (yellow) to the pad marked with an arrow pointing towards the LED on the tiny board (not away from it).

Wiring on a FLORA is very similar. Just wire to **D6** instead of **A1**. **VBATT** and **VOUT** are more or less the same, for our purposes.

On GEMMA or Gemma M0, the wiring is very similar. Hook up **VOUT** (red in the picture above) to **+** , **GND** to **-** (black above), and **D1** to the inward facing arrow (yellow above).
- [Previous Page](https://learn.adafruit.com/flora-rgb-smart-pixels/overview.md)
- [Next Page](https://learn.adafruit.com/flora-rgb-smart-pixels/code-with-makecode.md)
## Featured Products
### Flora RGB Smart NeoPixel version 3 - Pack of 4
[Flora RGB Smart NeoPixel version 3 - Pack of 4](https://www.adafruit.com/product/1260)
What's a wearable project without LEDs? Our favorite part of the Flora platform is these tiny smart pixels. Designed specifically for wearables, these updated Flora NeoPixels have ultra-cool technology: these ultra-bright LEDs have a constant-current driver cooked right into the LED...
In Stock
[Buy Now](https://www.adafruit.com/product/1260)
[Related Guides to the Product](https://learn.adafruit.com/products/1260/guides)
### Flora RGB Smart NeoPixel version 3 - Sheet of 20
[Flora RGB Smart NeoPixel version 3 - Sheet of 20](https://www.adafruit.com/product/1559)
So, you want lots and lots of NeoPixels? And you want them for less? Not a problem! Here's a sheet of Flora NeoPixels fresh from the (reflow) oven. Cut them off as you need 'em and save a pretty penny while you're at it.
**Each order comes with 20 pixels on a...**
In Stock
[Buy Now](https://www.adafruit.com/product/1559)
[Related Guides to the Product](https://learn.adafruit.com/products/1559/guides)
### Circuit Playground Express
[Circuit Playground Express](https://www.adafruit.com/product/3333)
**Circuit Playground Express** is the next step towards a perfect introduction to electronics and programming. We've taken the original Circuit Playground Classic and made it even better! Not only did we pack even more sensors in, we also made it even easier to...
In Stock
[Buy Now](https://www.adafruit.com/product/3333)
[Related Guides to the Product](https://learn.adafruit.com/products/3333/guides)
### Adafruit GEMMA M0 - Miniature wearable electronic platform
[Adafruit GEMMA M0 - Miniature wearable electronic platform](https://www.adafruit.com/product/3501)
The **Adafruit Gemma M0** is a super small microcontroller board, with just enough built-in to create many simple projects. It may look small and cute: round, about the size of a quarter, with friendly alligator-clip sew pads. But do not be fooled! The Gemma M0 is incredibly...
In Stock
[Buy Now](https://www.adafruit.com/product/3501)
[Related Guides to the Product](https://learn.adafruit.com/products/3501/guides)
### FLORA - Wearable electronic platform: Arduino-compatible
[FLORA - Wearable electronic platform: Arduino-compatible](https://www.adafruit.com/product/659)
FLORA is Adafruit's fully-featured wearable electronics platform. It's a round, sewable, Arduino-compatible microcontroller designed to empower amazing wearables projects.FLORA comes with Adafruit's support, [tutorials and...](http://learn.adafruit.com/category/flora)
In Stock
[Buy Now](https://www.adafruit.com/product/659)
[Related Guides to the Product](https://learn.adafruit.com/products/659/guides)
### Small Alligator Clip Test Lead (set of 12)
[Small Alligator Clip Test Lead (set of 12)](https://www.adafruit.com/product/1008)
Connect this to that without soldering using these handy mini alligator clip test leads. 15" cables with alligator clip on each end, color coded. You get 12 pieces in 6 colors. Strong and grippy, these always come in handy! We often use these in conjunction with a multimeter so we...
In Stock
[Buy Now](https://www.adafruit.com/product/1008)
[Related Guides to the Product](https://learn.adafruit.com/products/1008/guides)
### Short Wire Alligator Clip Test Lead (set of 12)
[Short Wire Alligator Clip Test Lead (set of 12)](https://www.adafruit.com/product/1592)
Connect this to that without soldering using these handy mini alligator clip test leads. Approximately 4.5" overall cables with alligator clip on each end, color coded. You get 12 pieces in 6 colors. Strong and grippy, these always come in handy! We often use these in conjunction with a...
In Stock
[Buy Now](https://www.adafruit.com/product/1592)
[Related Guides to the Product](https://learn.adafruit.com/products/1592/guides)
### Stainless Thin Conductive Thread - 2 ply - 23 meter/76 ft
[Stainless Thin Conductive Thread - 2 ply - 23 meter/76 ft](https://www.adafruit.com/product/640)
After months of searching, we finally have what we consider to be the ultimate conductive thread. It's thin, strong, smooth, and made completely of 316L stainless steel. Once you start working with this thread you'll quickly agree its optimal for any wearables work!
This...
In Stock
[Buy Now](https://www.adafruit.com/product/640)
[Related Guides to the Product](https://learn.adafruit.com/products/640/guides)
## Related Guides
- [Adafruit Circuit Playground Express](https://learn.adafruit.com/adafruit-circuit-playground-express.md)
- [Plush Game Controller](https://learn.adafruit.com/plush-game-controller.md)
- [Twinkling Neopixel Parasol](https://learn.adafruit.com/twinkling-led-parasol.md)
- [NYE Circuit Playground Drop](https://learn.adafruit.com/nye-circuit-playground-drop.md)
- [Mason Jar Snow Globe](https://learn.adafruit.com/snow-globe-makecode.md)
- [FLORA and GEMMA ICSP](https://learn.adafruit.com/flora-and-gemma-isp.md)
- [Crickit Powered Dancin' Snowman!](https://learn.adafruit.com/crickit-powered-dancin-snowman.md)
- [Circuit Playground Express Spooky Laughing Box](https://learn.adafruit.com/spooky-circuit-playground-express-mystery-box.md)
- [GEMMA Hoop Earrings](https://learn.adafruit.com/gemma-hoop-earrings.md)
- [LEGO Compatible Crickit Rover](https://learn.adafruit.com/lego-compatible-crickit-rover.md)
- [Debugging the SAMD21 with GDB](https://learn.adafruit.com/debugging-the-samd21-with-gdb.md)
- [3D Printed LED Fire Horns](https://learn.adafruit.com/3d-printed-led-fire-horns.md)
- [PianoGlove](https://learn.adafruit.com/pianoglove.md)
- [Circuit Playground Express Serial Communications](https://learn.adafruit.com/circuit-playground-express-serial-communications.md)
- [Motion Gift Box](https://learn.adafruit.com/motion-gift-box.md)
- [Kaleidoscope Eyes (Trinket-Powered NeoPixel LED Ring Goggles)](https://learn.adafruit.com/kaleidoscope-eyes-neopixel-led-goggles-trinket-gemma.md)
---
# Source: https://learn.adafruit.com/flora-wearable-gps/hook-up-gps.md
# Flora Wearable GPS
## Hook up GPS

Use alligator clips to connect Flora's 3.3V pad to the 3.3V pad on the GPS. Likewise connect RX to TX and TX to RX, then finally GND to GND.
Unlike the GPS breakout and GPS shield we carry, the Flora GPS is for use with 3.3V power and logic only!

The four connectors are all in a row just to the left of Flora's JST battery connector for easy sewing. But test your project with alligator clips before sewing it in!
- [Previous Page](https://learn.adafruit.com/flora-wearable-gps/overview.md)
- [Next Page](https://learn.adafruit.com/flora-wearable-gps/program-flora.md)
## Featured Products
### FLORA - Wearable electronic platform: Arduino-compatible
[FLORA - Wearable electronic platform: Arduino-compatible](https://www.adafruit.com/product/659)
FLORA is Adafruit's fully-featured wearable electronics platform. It's a round, sewable, Arduino-compatible microcontroller designed to empower amazing wearables projects.FLORA comes with Adafruit's support, [tutorials and...](http://learn.adafruit.com/category/flora)
In Stock
[Buy Now](https://www.adafruit.com/product/659)
[Related Guides to the Product](https://learn.adafruit.com/products/659/guides)
### Flora Wearable Ultimate GPS Module
[Flora Wearable Ultimate GPS Module](https://www.adafruit.com/product/1059)
This module is the best way to add a GPS to your wearable project. It's part of the Adafruit Flora series of wearable electronics, designed specifically for use with the Flora motherboard. Installed on the PCB is the latest of our Ultimate GPS modules, a small, super-thin, low-power GPS...
No Longer Stocked
[Buy Now](https://www.adafruit.com/product/1059)
[Related Guides to the Product](https://learn.adafruit.com/products/1059/guides)
### Small Alligator Clip Test Lead (set of 12)
[Small Alligator Clip Test Lead (set of 12)](https://www.adafruit.com/product/1008)
Connect this to that without soldering using these handy mini alligator clip test leads. 15" cables with alligator clip on each end, color coded. You get 12 pieces in 6 colors. Strong and grippy, these always come in handy! We often use these in conjunction with a multimeter so we...
In Stock
[Buy Now](https://www.adafruit.com/product/1008)
[Related Guides to the Product](https://learn.adafruit.com/products/1008/guides)
### Getting Started with Adafruit FLORA
[Getting Started with Adafruit FLORA](https://www.adafruit.com/product/1839)
**Making Wearables with an Arduino-Compatible Electronics Platform**
This book introduces readers to building wearable electronics projects using Adafruit's tiny FLORA board: at 4.4 grams, and only 1.75 inches in diameter, and featuring Arduino compatibility, it's the...
No Longer Stocked
[Buy Now](https://www.adafruit.com/product/1839)
[Related Guides to the Product](https://learn.adafruit.com/products/1839/guides)
### Getting Started with Adafruit FLORA Book Pack
[Getting Started with Adafruit FLORA Book Pack](https://www.adafruit.com/product/2404)
Pickup a copy of [Getting Started with Adafruit FLORA](https://www.adafruit.com/products/1839) and then hit the ground running with everything that you need to become an [Adafruit FLORA](https://www.adafruit.com/products/659) supreme being!
This pack is...
No Longer Stocked
[Buy Now](https://www.adafruit.com/product/2404)
[Related Guides to the Product](https://learn.adafruit.com/products/2404/guides)
### FLORA GPS Starter Pack
[FLORA GPS Starter Pack](https://www.adafruit.com/product/1090)
Get started with the fabulous Adafruit Flora platform with this lovely starter kit. Included are plenty of parts to make a few different fun projects! There's a Flora motherboard, a GPS module that can also perform location datalogging, eight ultra-bright chainable RGB pixels, a battery...
No Longer Stocked
[Buy Now](https://www.adafruit.com/product/1090)
[Related Guides to the Product](https://learn.adafruit.com/products/1090/guides)
### FLORA Sensor Pack
[FLORA Sensor Pack](https://www.adafruit.com/product/1458)
Sense the world around you! The FLORA Sensor Pack includes many types of sensors for your wearable enjoyment. Sense motion, direction, color, light levels, touch, and connections with FLORA sensor breakouts and conductive materials, and a few NeoPixels for experimenting with displaying your...
No Longer Stocked
[Buy Now](https://www.adafruit.com/product/1458)
[Related Guides to the Product](https://learn.adafruit.com/products/1458/guides)
### FLORA Budget Pack
[FLORA Budget Pack](https://www.adafruit.com/product/1405)
Get started with the fabulous Adafruit Flora platform with this lovely budget kit, just enough to get you started with this fun wearable computer. Included are enough parts to make your first wearable electronic project. There's a Flora motherboard, four ultra-bright chainable RGB pixels,...
Out of Stock
[Buy Now](https://www.adafruit.com/product/1405)
[Related Guides to the Product](https://learn.adafruit.com/products/1405/guides)
## Related Guides
- [FLORA TV-B-Gone](https://learn.adafruit.com/flora-tv-b-gone.md)
- [Zipper Switch](https://learn.adafruit.com/zipper-switch.md)
- [Flora GPS Jacket](https://learn.adafruit.com/flora-gps-jacket.md)
- [Getting Started with FLORA](https://learn.adafruit.com/getting-started-with-flora.md)
- [NeoPixel Ring Clock](https://learn.adafruit.com/neopixel-ring-clock.md)
- [SMSsenger Bag](https://learn.adafruit.com/smssenger-bag.md)
- [VU Meter Baseball Hat](https://learn.adafruit.com/vu-meter-baseball-hat.md)
- [Sparkle Skirt](https://learn.adafruit.com/sparkle-skirt.md)
- [Citi Bike Helmet](https://learn.adafruit.com/citi-bike-helmet.md)
- [Flora MIDI Drum Glove](https://learn.adafruit.com/midi-drum-glove.md)
- [Haptic Headband](https://learn.adafruit.com/haptic-headband.md)
- [Mailbox Notification Service](https://learn.adafruit.com/mailbox-notification-service.md)
- [LED Stego Flex Spike Hoodie](https://learn.adafruit.com/led-stego-flex-spike-hoodie.md)
- [Sunscreen Reminder Hat](https://learn.adafruit.com/sunscreen-reminder-hat.md)
- [Custom Milled PCB Pins](https://learn.adafruit.com/custom-milled-pcb-pins.md)
---
# Source: https://learn.adafruit.com/using-the-bmp085-with-raspberry-pi/hooking-everything-up.md
# Using the BMP085/180 with Raspberry Pi or Beaglebone Black
## Hooking Everything Up
Danger:
# Raspberry Pi
To hook your Adafruit BMP085/BMP180 Breakout up to the Pi, you can use a Pi Cobbler as seen in the following wiring diagram: 
Danger:
# Beaglebone Black
To connect the BMP sensor to a Beaglebone Black you can use [any of the available I2C buses](http://beagleboard.org/Support/bone101 "Link: http://beagleboard.org/Support/bone101"), but the library will default to using I2C bus 1 with pin P9\_19 as SCL and P9\_20 as SDA as shown below: 
Make sure you aren't using any [device tree overlays](https://learn.adafruit.com/introduction-to-the-beaglebone-black-device-tree/overview "Link: https://learn.adafruit.com/introduction-to-the-beaglebone-black-device-tree/overview") which might interfere with the I2C pins. By default the standard device tree setup of the Debian distribution should expose the I2C bus 1 connections above without any extra work required.
Danger:
- [Previous Page](https://learn.adafruit.com/using-the-bmp085-with-raspberry-pi/configuring-the-pi-for-i2c.md)
- [Next Page](https://learn.adafruit.com/using-the-bmp085-with-raspberry-pi/using-the-adafruit-bmp-python-library.md)
## Featured Products
### BMP180 Barometric Pressure/Temperature/Altitude Sensor- 5V ready
[BMP180 Barometric Pressure/Temperature/Altitude Sensor- 5V ready](https://www.adafruit.com/product/1603)
This precision sensor from Bosch is the best low-cost sensing solution for measuring barometric pressure and temperature. Because pressure changes with altitude you can also use it as an altimeter! The sensor is soldered onto a PCB with a 3.3V regulator, I2C level shifter and pull-up resistors...
No Longer Stocked
[Buy Now](https://www.adafruit.com/product/1603)
[Related Guides to the Product](https://learn.adafruit.com/products/1603/guides)
### Raspberry Pi Model B 512MB RAM
[Raspberry Pi Model B 512MB RAM](https://www.adafruit.com/product/998)
Adafruit ships the **Raspberry Pi Model B 512MB RAM** as of 10/18/2012.
The Raspberry Pi® is a single-board computer developed in the UK by the Raspberry Pi Foundation with the intention of stimulating the teaching of basic computer science in schools. The Raspberry...
No Longer Stocked
[Buy Now](https://www.adafruit.com/product/998)
[Related Guides to the Product](https://learn.adafruit.com/products/998/guides)
### Adafruit Assembled Pi Cobbler Breakout + Cable for Raspberry Pi
[Adafruit Assembled Pi Cobbler Breakout + Cable for Raspberry Pi](https://www.adafruit.com/product/914)
Now that you've finally got your hands on a [Raspberry Pi® Model B](http://www.raspberrypi.org/), you're probably itching to make some fun embedded computer projects with it. What you need is an add on prototyping Pi Cobbler from Adafruit, which can break out all those...
No Longer Stocked
[Buy Now](https://www.adafruit.com/product/914)
[Related Guides to the Product](https://learn.adafruit.com/products/914/guides)
### BeagleBone Black Rev C - 4GB Flash - Pre-installed Debian
[BeagleBone Black Rev C - 4GB Flash - Pre-installed Debian](https://www.adafruit.com/product/1876)
Note: As of May 12, 2014 Adafruit is shipping Rev C. We have discontinued selling Rev B. There are no exchanges or "upgrades" for Rev B to Rev C.
If you liked the BeagleBone Black Rev B, you will love the Rev C! The Rev C still has a blistering 1GHz processor and 512MB...
No Longer Stocked
[Buy Now](https://www.adafruit.com/product/1876)
[Related Guides to the Product](https://learn.adafruit.com/products/1876/guides)
### BeagleBone Black Rev C - 4GB - Pre-installed Debian
[BeagleBone Black Rev C - 4GB - Pre-installed Debian](https://www.adafruit.com/product/1996)
If you liked the BeagleBone Black Rev B, you will love the Rev C! The Rev C has a blistering 1GHz AM3358 processor and 512MB onboard DDR3 RAM, two 46-pin headers, micro HDMI for audio/video output, USB ports, 10/100 Ethernet and other I/O features. The Rev C is an ultra-powered embedded...
Out of Stock
[Buy Now](https://www.adafruit.com/product/1996)
[Related Guides to the Product](https://learn.adafruit.com/products/1996/guides)
## Related Guides
- [Capacitive Touch Sensors on the Raspberry Pi](https://learn.adafruit.com/capacitive-touch-sensors-on-the-raspberry-pi.md)
- [Modern Replacements for DHT11 and DHT22 Sensors](https://learn.adafruit.com/modern-replacements-for-dht11-dht22-sensors.md)
- [Adding a Real Time Clock to Raspberry Pi](https://learn.adafruit.com/adding-a-real-time-clock-to-raspberry-pi.md)
- [Adafruit AHT20 Temperature & Humidity Sensor](https://learn.adafruit.com/adafruit-aht20.md)
- [Wood Case for Raspberry Pi 3](https://learn.adafruit.com/wood-case-for-raspberry-pi-3.md)
- [Adafruit DPI Display Kippah](https://learn.adafruit.com/adafruit-dpi-display-kippah-ttl-tft.md)
- [Adafruit's Raspberry Pi Lesson 6. Using SSH](https://learn.adafruit.com/adafruits-raspberry-pi-lesson-6-using-ssh.md)
- [3.5" PiTFT OctoPrint Rig](https://learn.adafruit.com/3-dot-5-pitft-octoprint-rig.md)
- [Adafruit TMP117 High Accuracy I2C Temperature Monitor](https://learn.adafruit.com/adafruit-tmp117-high-accuracy-i2c-temperature-monitor.md)
- [Instant Camera using Raspberry Pi and Thermal Printer](https://learn.adafruit.com/instant-camera-using-raspberry-pi-and-thermal-printer.md)
- [User-space SPI TFT Python Library - ILI9341](https://learn.adafruit.com/user-space-spi-tft-python-library-ili9341-2-8.md)
- [USB Audio Cards with a Raspberry Pi ](https://learn.adafruit.com/usb-audio-cards-with-a-raspberry-pi.md)
- [micro:bit Lesson 4. Sensing Light](https://learn.adafruit.com/micro-bit-lesson-4-sensing-light-and-temperature.md)
- [No-Code Indoor Grow Monitor with PPFD and VPD Measurements](https://learn.adafruit.com/no-code-indoor-grow-monitor.md)
- [PyBadge Thermal Camera Case](https://learn.adafruit.com/pybadge-thermal-camera-case.md)
---
# Source: https://learn.adafruit.com/mcp230xx-gpio-expander-on-the-raspberry-pi/hooking-it-all-up.md
# MCP230xx GPIO Expander on the Raspberry Pi
## Hooking it all up
Danger:

The way that you hook the chip up to your breadboard will depend on the package you use (8-pin MCP23008 or 16-pin MCP23017). The pinouts are quite different between the two chips, so check the datasheet carefully first.
The MCP23017 is shown above with two LEDs connected, on GPA0 and GPA1.
1. The yellow line is SDA
2. The green line is SCL
3. The three black lines on top are the address pins
4. The brown pin is RESET which must be pulled high for normal operation
5. Red is 3.3V
6. Black is GND.
Since these io expander chips use i2c to communiate, you _can_ theoretically power them from 5V while still connecting the i2c data lines to a 3.3V device like the pi. That's because the Pi has two i2c resistors that pull up SDA/SCL to 3.3V. Just make sure not to connect any resistors to SDA/SCL to 5V and you can power the chip from 5V (and have 5V input/output on the MCP chip). Its also fine of course to power the MCP chip from 3.3V but the 5V line on the Pi has more current capability so you might find its better to go that way.
**BUT** if your Pi power supply drifts a little higher than 5V, it might stop being able to register the 3.3V signal. So we recommend starting with 3.3V, and if you need 5V GPIO signalling on the MCP expander, try swapping the red wire to 5.0V
You can compare the two pinouts below to figure out how the 8-pin package should be hooked up depending on the pin names:


You're free to hook anything you want up to the 8 or 16 GPIO pins, but LEDs are used here since most people have one or two laying around and it's an easy way to verify the pin outputs. Be sure to connect a resistor in series to GND, though, to prevent the LED from burning out (if you don't know what value or the details of your LED try something large like 1K to start with).
Here's a quick video of the setup I was using during testing and development. An MCP23017 is used here, running out to a mixed-signal oscilloscope with an 8-channel logic analyzer (ergo the white clip-ons on all the GPIO pins).
http://youtu.be/DfnOYQY4AEI
- [Previous Page](https://learn.adafruit.com/mcp230xx-gpio-expander-on-the-raspberry-pi/overview.md)
- [Next Page](https://learn.adafruit.com/mcp230xx-gpio-expander-on-the-raspberry-pi/using-the-library.md)
## Featured Products
### MCP23017 - i2c 16 input/output port expander
[MCP23017 - i2c 16 input/output port expander](https://www.adafruit.com/product/732)
Add another 16 pins to your microcontroller using an MCP23017 port expander. The MCP23017 uses two i2c pins (these can be shared with other i2c devices), and in exchange gives you 16 general purpose pins. You can set each of 16 pins to be input, output, or input with a pullup. There's even...
In Stock
[Buy Now](https://www.adafruit.com/product/732)
[Related Guides to the Product](https://learn.adafruit.com/products/732/guides)
### MCP23008 - i2c 8 input/output port expander
[MCP23008 - i2c 8 input/output port expander](https://www.adafruit.com/product/593)
Add another 8 pins to your microcontroller using an MCP23008 port expander. The MCP23008 uses two i2c pins (these can be shared with other i2c devices), and in exchange gives you 8 general purpose pins. You can set each of 8 pins to be input, output, or input with a pullup. There's even...
In Stock
[Buy Now](https://www.adafruit.com/product/593)
[Related Guides to the Product](https://learn.adafruit.com/products/593/guides)
### Adafruit Assembled Pi Cobbler Breakout + Cable for Raspberry Pi
[Adafruit Assembled Pi Cobbler Breakout + Cable for Raspberry Pi](https://www.adafruit.com/product/914)
Now that you've finally got your hands on a [Raspberry Pi® Model B](http://www.raspberrypi.org/), you're probably itching to make some fun embedded computer projects with it. What you need is an add on prototyping Pi Cobbler from Adafruit, which can break out all those...
No Longer Stocked
[Buy Now](https://www.adafruit.com/product/914)
[Related Guides to the Product](https://learn.adafruit.com/products/914/guides)
## Related Guides
- [Animated Snake Eyes Bonnet for Raspberry Pi](https://learn.adafruit.com/animated-snake-eyes-bonnet-for-raspberry-pi.md)
- [Bluefruit LE Python Library](https://learn.adafruit.com/bluefruit-le-python-library.md)
- [Running Minecraft on a Raspberry Pi](https://learn.adafruit.com/running-minecraft-on-a-raspberry-pi.md)
- [Basic Resistor Sensor Reading on Raspberry Pi](https://learn.adafruit.com/basic-resistor-sensor-reading-on-raspberry-pi.md)
- [Connecting a 16x32 RGB LED Matrix Panel to a Raspberry Pi](https://learn.adafruit.com/connecting-a-16x32-rgb-led-matrix-panel-to-a-raspberry-pi.md)
- [Battery Powered Raspberry Pi Displays w/RaspiRobot Shield](https://learn.adafruit.com/raspirobot-battery-powered-raspberry-pi-displays.md)
- [Trellis Python Library](https://learn.adafruit.com/trellis-python-library.md)
- [Adafruit Prototyping Pi Plate](https://learn.adafruit.com/adafruit-prototyping-pi-plate.md)
- [A Sillier Mousetrap: Logging Mouse Data to Adafruit IO with the Raspberry Pi](https://learn.adafruit.com/a-sillier-mousetrap-logging-mouse-data-to-adafruit-io-with-the-raspberry-pi.md)
- [Raspberry Pi Pygame UI basics](https://learn.adafruit.com/raspberry-pi-pygame-ui-basics.md)
- [Raspberry Pi E-mail Notifier Using LEDs](https://learn.adafruit.com/raspberry-pi-e-mail-notifier-using-leds.md)
- [Bonjour (Zeroconf) Networking for Windows and Linux](https://learn.adafruit.com/bonjour-zeroconf-networking-for-windows-and-linux.md)
- [Using a Mini PAL/NTSC Display with a Raspberry Pi](https://learn.adafruit.com/using-a-mini-pal-ntsc-display-with-a-raspberry-pi.md)
- [TMP006 Temperature Sensor Python Library](https://learn.adafruit.com/tmp006-temperature-sensor-python-library.md)
- [Controlling Motors using the Raspberry Pi and RasPiRobot Board V2](https://learn.adafruit.com/controlling-motors-using-the-raspberry-pi-and-raspirobot-board-v2.md)
---
# Source: https://learn.adafruit.com/adafruit-16-channel-servo-driver-with-raspberry-pi/hooking-it-up.md
# Adafruit 16 Channel Servo Driver with Raspberry Pi
## Hooking it Up
The easiest way to hook the servo breakout up to your Pi is using a breadboard and connecting it to the Pi using I2C:
- **Pi 3V3** to **breakout VCC**
- **Pi GND** to **breakout GND**
- **Pi SCL** to **breakout SCL**
- **Pi SDA** to **breakout SDA**
- **Servo orange wire** to **breakout PWM on channel 0**
- **Servo red wire** to **breakout V+ on channel 0**
- **Servo brown wire** to **breakout Gnd on channel 0**
**Check your servo's datasheet to verify which wires go to which pin!**

Danger:
Danger:
The PCA9685 (the actual chip that drives the servos) is powered by the 3.3V supply on the Pi (labelled **VCC** on the servo breakout). Because the servos have different power requirements -- typically a 5V supply and as much as a couple hundred mA per servo -- they're powered from a separate power supply, labelled **V+**.
In the example image above with a single servo motor, we are powering the motor from an external 5V power supply connected to the terminal block on the breakout board via a [DC power adapter](http://www.adafruit.com/products/368). Make sure you connect the wires correctly, with +/+ and GND/GND.
## Why not use the +5V supply on the Raspberry Pi?
Switching directions on the servo can cause a lot of noise on the supply, and the servo(s) will cause the voltage to fluctuate significantly, which is a bad situation for the Pi. It's highly recommended to use an external 5V supply with servo motors to avoid problems caused by voltage drops on the Pi's 5V line.
## When to add an optional Capacitor to the driver board
We have a spot on the PCB for soldering in an electrolytic capacitor. Based on your usage, you may or may not need a capacitor. If you are driving a lot of servos from a power supply that dips a lot when the servos move, **n \* 100uF** where **n** is the number of servos is a good place to start - eg **470uF** or more for 5 servos. Since its so dependent on servo current draw, the torque on each motor, and what power supply, there is no "one magic capacitor value" we can suggest which is why we don't include a capacitor in the kit.
- [Previous Page](https://learn.adafruit.com/adafruit-16-channel-servo-driver-with-raspberry-pi/configuring-your-pi-for-i2c.md)
- [Next Page](https://learn.adafruit.com/adafruit-16-channel-servo-driver-with-raspberry-pi/using-the-adafruit-library.md)
## Featured Products
### 5V 2A (2000mA) switching power supply - UL Listed
[5V 2A (2000mA) switching power supply - UL Listed](https://www.adafruit.com/product/276)
This is an FCC/CE certified and UL listed power supply. Need a lot of 5V power? This switching supply gives a clean regulated 5V output at up to 2000mA. 110 or 240 input, so it works in any country. The plugs are "US 2-prong" style so you may need a plug adapter, but you can pick one...
In Stock
[Buy Now](https://www.adafruit.com/product/276)
[Related Guides to the Product](https://learn.adafruit.com/products/276/guides)
### Female DC Power adapter - 2.1mm jack to screw terminal block
[Female DC Power adapter - 2.1mm jack to screw terminal block](https://www.adafruit.com/product/368)
If you need to connect a DC power wall wart to a board that doesn't have a DC jack - this adapter will come in very handy! There is a 2.1mm DC jack on one end, and a screw terminal block on the other. The terminals are labeled with positive/negative assuming a positive-tip configuration...
In Stock
[Buy Now](https://www.adafruit.com/product/368)
[Related Guides to the Product](https://learn.adafruit.com/products/368/guides)
### Standard servo - TowerPro SG-5010
[Standard servo - TowerPro SG-5010](https://www.adafruit.com/product/155)
This high-torque standard servo can rotate approximately 180 degrees (90 in each direction). You can use any servo code, hardware, or library to control these servos. Good for beginners who want to make stuff move without building a motor controller with feedback & gearbox. Comes with 3...
In Stock
[Buy Now](https://www.adafruit.com/product/155)
[Related Guides to the Product](https://learn.adafruit.com/products/155/guides)
### Continuous Rotation Servo
[Continuous Rotation Servo](https://www.adafruit.com/product/154)
This servo rotates fully forward or backward instead of moving to a position. You can use any servo code, hardware, or library to control these servos. Good for making simple moving robots. Comes with four different horns, as shown.
To control with an Arduino, we suggest connecting...
In Stock
[Buy Now](https://www.adafruit.com/product/154)
[Related Guides to the Product](https://learn.adafruit.com/products/154/guides)
### Adafruit 16-Channel 12-bit PWM/Servo Driver - I2C interface
[Adafruit 16-Channel 12-bit PWM/Servo Driver - I2C interface](https://www.adafruit.com/product/815)
You want to make a cool robot, maybe a hexapod walker, or maybe just a piece of art with a lot of moving parts. Or maybe you want to drive a lot of LEDs with precise PWM output. Then you realize that your microcontroller has a limited number of PWM outputs! What now? You could give up OR you...
In Stock
[Buy Now](https://www.adafruit.com/product/815)
[Related Guides to the Product](https://learn.adafruit.com/products/815/guides)
### Half Sized Premium Breadboard - 400 Tie Points
[Half Sized Premium Breadboard - 400 Tie Points](https://www.adafruit.com/product/64)
This is a cute, half-size breadboard with 400 tie points, good for small projects. It's 3.25" x 2.2" / 8.3cm x 5.5cm with a standard double-strip in the middle and two power rails on both sides. You can pull the power rails off easily to make the breadboard as...
In Stock
[Buy Now](https://www.adafruit.com/product/64)
[Related Guides to the Product](https://learn.adafruit.com/products/64/guides)
### Breadboarding wire bundle
[Breadboarding wire bundle](https://www.adafruit.com/product/153)
75 flexible stranded core wires with stiff ends molded on in red, orange, yellow, green, blue, brown, black and white. These are a major improvement over the "box of bent wires" that are sometimes sold with breadboards, and faster than stripping your own solid core wires. Makes...
In Stock
[Buy Now](https://www.adafruit.com/product/153)
[Related Guides to the Product](https://learn.adafruit.com/products/153/guides)
## Related Guides
- [Raspberry Pi Wifi-Controlled Cat Laser Toy](https://learn.adafruit.com/raspberry-pi-wifi-controlled-cat-laser-toy.md)
- [Adafruit PCA9685 16-Channel Servo Driver](https://learn.adafruit.com/16-channel-pwm-servo-driver.md)
- [CircuitPython Hardware: PCA9685 PWM & Servo Driver](https://learn.adafruit.com/micropython-hardware-pca9685-pwm-and-servo-driver.md)
- [LED Tricks: Gamma Correction](https://learn.adafruit.com/led-tricks-gamma-correction.md)
- [Adafruit Motor Selection Guide](https://learn.adafruit.com/adafruit-motor-selection-guide.md)
- [Adafruit IO Basics: Analog Output](https://learn.adafruit.com/adafruit-io-basics-analog-output.md)
- [MIDI Controlled Robot Lyre with CircuitPython](https://learn.adafruit.com/midi-controlled-robot-lyre-with-circuitpython.md)
- [Digital Circuits 4: Sequential Circuits](https://learn.adafruit.com/digital-circuits-4-sequential-circuits.md)
- [MASLOW: an Open WiFi Detector with Adafruit Pro Trinket and CC3000](https://learn.adafruit.com/wifi-hotspot-finder-adafruit-pro-trinket-cc3000.md)
- [Current Limiting Stepper Driver with DRV8871](https://learn.adafruit.com/current-limiting-stepper-driver-with-drv8871.md)
- [CRICKIT Flippy Robot](https://learn.adafruit.com/crickit-flippy-robot.md)
- [Adafruit NFC/RFID on Raspberry Pi](https://learn.adafruit.com/adafruit-nfc-rfid-on-raspberry-pi.md)
- [Stumble-Bot](https://learn.adafruit.com/stumble-bot-with-circuit-playground-and-crickit.md)
- [Adabot Toy Robot Friend](https://learn.adafruit.com/adabot-rp2040.md)
- [Making PCB Jewelry & Art with Gingerbread and KiCad](https://learn.adafruit.com/making-pcb-art-with-gingerbread-and-kicad.md)
---
# Source: https://learn.adafruit.com/smt-manufacturing/hot-air-tools.md
# SMT Manufacturing
## Hot Air Tools
Soldering irons are the primary tool used for soldering, and we use ours all the time for soldering. But for leadless parts, like QFNs, or ultra-tiny components that need rework, hot air can be superior!
The nice thing about hot air is that its just air - this means there's no physical 'tip' nudging the part to heat it up. This is great for delicate components. Another thing is that you can heat up an entire area at once, great when you want to rework a small leadless part because the pads are _underneath_ the chip. The annoying thing is it takes a long time to heat up a board _especially_ if there is a ground plane involved. You can try preheating the board if you have a preheater (basically a small reflow oven works fine).
We decided to go with a Hakko pencil tip hot air station. This station has some things going for it: there's an internal pump, its easy to use and it has a fine tip for small component rework. We picked it up off of ebay for about $150 which is lower than new but worth the risk of it not working out. We recommend getting a non-'chinese clone' air rework station since its common for a poorly made one to work ok at first and then die 6 months later because the pump is low quality, or the heater gets damaged. The old 'black box' Hakko's are discontinued and replaced with the new violet/yellow FX series, so it may be easier to get them off ebay for a discounted price
However, we recently decided its not 'good enough' for us so we bought a Hakko 852 off ebay for $400. We'll post up here when it comes in about whether we like it more.
## In Practice
## We use the Hakko Hot Air station for SMT rework, especially removing small resistors/capacitor or removing/reflowing ultra-small QFN's or UDFNS.
This is a nice video with a lot of details on using hot air reflow. Its slow but it works!
https://www.youtube.com/watch?v=c_Qt5CtUlqY
In this video, we use it to remove some very very small 0402 resistors **without** damaging them so that they can be measured out of circuit:http://vimeo.com/13835359#at=0
If you use our syringe technique to lay down paste, you can even 'reflow' a small board by bathing it in hot air and slowly working from one edge of the PCB to the other. This may not work well with very thick boards with big ground planes but it is probably good enough for making breakouts and such.
- [Previous Page](https://learn.adafruit.com/smt-manufacturing/soldering-irons.md)
- [Next Page](https://learn.adafruit.com/smt-manufacturing/jedec-trays.md)
## Featured Products
### Fine tip curved tweezers - ESD safe
[Fine tip curved tweezers - ESD safe](https://www.adafruit.com/product/422)
When soldering small surface-mount (SMD/SMT) components, one thing you'll need is a good pair of tweezers. These are a great pair of every-day tweezers. They're anti-static, anti-magnetic and made of hard stainless steel. The tips are fine and pointy to pick up any size component. This...
In Stock
[Buy Now](https://www.adafruit.com/product/422)
[Related Guides to the Product](https://learn.adafruit.com/products/422/guides)
### Fine tip straight tweezers - ESD safe
[Fine tip straight tweezers - ESD safe](https://www.adafruit.com/product/421)
When soldering small surface-mount (SMD/SMT) components, one thing you'll need is a good pair of tweezers. These tweezers are a great pair of every-day tweezers. They're anti-static, anti-magnetic and made of hard stainless steel. The tips are fine and pointy to pick up any size...
In Stock
[Buy Now](https://www.adafruit.com/product/421)
[Related Guides to the Product](https://learn.adafruit.com/products/421/guides)
### USB Microscope - 5MP interpolated 220x magnification / 8 LEDs
[USB Microscope - 5MP interpolated 220x magnification / 8 LEDs](https://www.adafruit.com/product/636)
As electronics get smaller and smaller, you'll need a hand examining PCBs and this little USB microscope is the perfect tool. Its smaller and lighter than a large optical microscope but packs quite a bit of power in its little body. There's a 2 megapixel sensor inside and an optical...
Out of Stock
[Buy Now](https://www.adafruit.com/product/636)
[Related Guides to the Product](https://learn.adafruit.com/products/636/guides)
## Related Guides
- [Reindeer Solder Kit by Phyx](https://learn.adafruit.com/reindeer-solder-kit-by-phyx.md)
- [3D-Printed Solder Paste Dispenser Hand Switch ](https://learn.adafruit.com/3d-printed-solder-paste-dispenser-hand-switch.md)
- [USB Rechargeable Mini Solder Fume Extractor](https://learn.adafruit.com/usb-rechargeable-mini-solder-fume-extractor.md)
- [How to Sign Windows Drivers & Executables](https://learn.adafruit.com/how-to-sign-windows-drivers-installer.md)
- [Desktop Fume Extractor](https://learn.adafruit.com/desktop-fume-extractor.md)
- [Chinese Dragon Puppet with Motion-Reactive Flame Effect](https://learn.adafruit.com/chinese-dragon-puppet-with-motion-reactive-flame-effect.md)
- [16-Step Drum Sequencer](https://learn.adafruit.com/16-step-drum-sequencer.md)
- [Color Sensing Music Player](https://learn.adafruit.com/color-sensing-music-player.md)
- [Light-Up Costumes in Harsh Environments](https://learn.adafruit.com/light-up-costumes-in-harsh-environments.md)
- [Garden Path Lights with WLED and a Sunset Timer](https://learn.adafruit.com/garden-path-lights-with-sunset-timer.md)
- [CNC Rotary Macropad](https://learn.adafruit.com/cnc-rotary-macropad.md)
- [Blinka Says Tabletop Arcade Game](https://learn.adafruit.com/blinka-says-tabletop-arcade-game.md)
- [IoT Moon Phase Guide](https://learn.adafruit.com/moon-phase.md)
- [KTOWN's Ultimate Creating Parts in Eagle Tutorial](https://learn.adafruit.com/ktowns-ultimate-creating-parts-in-eagle-tutorial.md)
- [Shop Tips & Tricks](https://learn.adafruit.com/shop-tips-and-tricks.md)
---
# Source: https://learn.adafruit.com/adafruit-arduino-lesson-1-blink/how-blink-works.md
# Arduino Lesson 1. Blink
## How 'Blink' Works
Here is the code for the Blink sketch.
```
/*
Blink
Turns on an LED on for one second, then off for one second, repeatedly.
This example code is in the public domain.
*/
// Pin 13 has an LED connected on most Arduino boards.
// give it a name:
int led = 13;
// the setup routine runs once when you press reset:
void setup() {
// initialize the digital pin as an output.
pinMode(led, OUTPUT);
}
// the loop routine runs over and over again forever:
void loop() {
digitalWrite(led, HIGH); // turn the LED on (HIGH is the voltage level)
delay(1000); // wait for a second
digitalWrite(led, LOW); // turn the LED off by making the voltage LOW
delay(1000); // wait for a second
}
```
The first thing to note is that quite a lot of this sketch is what is called 'comments'. Comments are not actual program instructions, they are just comments about how the program works. They are there for out benefit, so that there is some explanation to accompany the sketch.
Everything between /\* and \*/ at the top of the sketch is a block comment, that explains what the sketch is for.
There are also single line comments that start with // and everything up intil the end of the line counts as being a comment.
The first actual line of code is:
```
int led = 13;
```
As the comment above explains, this is giving a name to the pin that the LED is attached to. This is 13 on most Arduinos, including the Uno and Leonardo.
Next, we have the 'setup' function. Again, as the comment says, this is run when the reset button is pressed. It is also run whenever the board resets for any reason, such as power first being applied to it, or after a sketch has been uploaded.
```
void setup() {
// initialize the digital pin as an output.
pinMode(led, OUTPUT);
}
```
Every Arduino sketch must have a 'setup' function, and the part of it where you might want to add instructions of your own is between the { and the }.
In this case, there is just one command there, which, as the comment states tells the Arduino board that we are going to use the LED pin as an output.
It is also mandatory for a sketch to have a 'loop' function. **Unlike the 'setup' function that only runs once, after a reset, the 'loop' function will, after it has finished running its commands, immediately start again.**
```
void loop() {
digitalWrite(led, HIGH); // turn the LED on (HIGH is the voltage level)
delay(1000); // wait for a second
digitalWrite(led, LOW); // turn the LED off by making the voltage LOW
delay(1000); // wait for a second
}
```
Inside the loop function, the commands first of all turn the LED pin on (HIGH), then 'delay' for 1000 milliseconds (1 second), then turn the LED pin off and pause for another second.
- [Previous Page](https://learn.adafruit.com/adafruit-arduino-lesson-1-blink/uploading-blink-to-the-board.md)
- [Next Page](https://learn.adafruit.com/adafruit-arduino-lesson-1-blink/blinking-faster.md)
## Featured Products
### Adafruit METRO 328 Fully Assembled - Arduino IDE compatible
[Adafruit METRO 328 Fully Assembled - Arduino IDE compatible](https://www.adafruit.com/product/50)
We sure love the ATmega328 here at Adafruit, and we use them _a lot_ for our own projects. The processor has plenty of GPIO, Analog inputs, hardware UART SPI and I2C, timers and PWM galore - just enough for most simple projects. When we need to go small, we use a
Out of Stock
[Buy Now](https://www.adafruit.com/product/50)
[Related Guides to the Product](https://learn.adafruit.com/products/50/guides)
### USB Cable - Standard A-B
[USB Cable - Standard A-B](https://www.adafruit.com/product/62)
This here is your standard A-B USB cable, for USB 1.1 or 2.0. Perfect for connecting a PC to your Arduino, USBtinyISP (among other things).
3 feet / 1 meter long
Color may vary!
In Stock
[Buy Now](https://www.adafruit.com/product/62)
[Related Guides to the Product](https://learn.adafruit.com/products/62/guides)
## Related Guides
- [WiFi Weather Station](https://learn.adafruit.com/wifi-weather-station-arduino-cc3000.md)
- [Naughty or Nice Machine](https://learn.adafruit.com/naughty-or-nice-machine.md)
- [Adafruit VS1053 MP3/AAC/Ogg/MIDI/WAV Codec Breakout Tutorial](https://learn.adafruit.com/adafruit-vs1053-mp3-aac-ogg-midi-wav-play-and-record-codec-tutorial.md)
- [How to program a Zumo Robot with Simulink](https://learn.adafruit.com/zumo-robot-control-with-simulink.md)
- [DIY 8x2 LCD Shield](https://learn.adafruit.com/diy-8x2-lcd-shield.md)
- [3D Printed Animatronic Robot Head](https://learn.adafruit.com/3d-printed-animatronic-robot-head.md)
- [Arduino Lesson 7. Make an RGB LED Fader](https://learn.adafruit.com/adafruit-arduino-lesson-7-make-an-rgb-led-fader.md)
- [WiFi Controlled LED Christmahanukwanzaa Tree](https://learn.adafruit.com/wifi-controlled-led-christmahanukwanzaa-tree.md)
- [Light Meter](https://learn.adafruit.com/light-meter.md)
- [1,500 NeoPixel LED Curtain with Raspberry Pi and Fadecandy](https://learn.adafruit.com/1500-neopixel-led-curtain-with-raspberry-pi-fadecandy.md)
- [Trellis 3D Printed Enclosure](https://learn.adafruit.com/trellis-3d-printed-enclosure.md)
- [Deciphering Strange Arduino Code](https://learn.adafruit.com/deciphering-strange-arduino-code.md)
- [Collin's Lab: MIDI](https://learn.adafruit.com/collins-lab-midi.md)
- [Tiny Arduino Music Visualizer](https://learn.adafruit.com/piccolo.md)
- [Adafruit Music Maker Shield](https://learn.adafruit.com/adafruit-music-maker-shield-vs1053-mp3-wav-wave-ogg-vorbis-player.md)
---
# Source: https://learn.adafruit.com/basic-resistor-sensor-reading-on-raspberry-pi/how-it-works.md
# Basic Resistor Sensor Reading on Raspberry Pi
## How it works

This capture from an oscilloscope shows whats happening on the digital pin (yellow). The blue line indicates when the Pi starts counting and when the counting is complete, about 4.5ms later.
This is because the capacitor acts like a bucket and the resistor is like a thin pipe. To fill a bucket up with a very thin pipe takes enough time that you can figure out how wide the pipe is by timing how long it takes to fill the bucket up halfway
In this case, our 'bucket' is a 1uF ceramic capacitor. You can change the capacitor nearly any way you want but the timing values will also change. 1uF seems to be an OK place to start for most sensors. If you want more range, use a bigger cap - but it will take longer to measure. For faster reads, go with a smaller capacitor
- [Previous Page](https://learn.adafruit.com/basic-resistor-sensor-reading-on-raspberry-pi/overview.md)
- [Next Page](https://learn.adafruit.com/basic-resistor-sensor-reading-on-raspberry-pi/nece.md)
## Featured Products
### Raspberry Pi 3 - Model B+ - 1.4GHz Cortex-A53 with 1GB RAM
[Raspberry Pi 3 - Model B+ - 1.4GHz Cortex-A53 with 1GB RAM](https://www.adafruit.com/product/3775)
The Raspberry Pi 3 Model B is the most popular Raspberry Pi computer made, and the Pi Foundation knows you can always make a good thing _better_! And what could make the Pi 3 better? How about a _faster_ processor, 5 GHz WiFi, and updated Ethernet chip with PoE capability?...
In Stock
[Buy Now](https://www.adafruit.com/product/3775)
[Related Guides to the Product](https://learn.adafruit.com/products/3775/guides)
### Photo cell (CdS photoresistor)
[Photo cell (CdS photoresistor)](https://www.adafruit.com/product/161)
CdS cells are little light sensors. As the squiggly face is exposed to more light, the resistance goes down. When it's light, the resistance is about ~1KΩ, when dark it goes up to ~10KΩ.
To use, connect one side of the photocell (either one, it's symmetric) to power...
In Stock
[Buy Now](https://www.adafruit.com/product/161)
[Related Guides to the Product](https://learn.adafruit.com/products/161/guides)
### Half Sized Premium Breadboard - 400 Tie Points
[Half Sized Premium Breadboard - 400 Tie Points](https://www.adafruit.com/product/64)
This is a cute, half-size breadboard with 400 tie points, good for small projects. It's 3.25" x 2.2" / 8.3cm x 5.5cm with a standard double-strip in the middle and two power rails on both sides. You can pull the power rails off easily to make the breadboard as...
In Stock
[Buy Now](https://www.adafruit.com/product/64)
[Related Guides to the Product](https://learn.adafruit.com/products/64/guides)
### Assembled Pi Cobbler Plus - Breakout Cable
[Assembled Pi Cobbler Plus - Breakout Cable](https://www.adafruit.com/product/2029)
The Raspberry Pi B+ / Pi 2 / Pi 3 / Pi 4 has landed on the Maker World like a 40-GPIO pinned, quad-USB ported, credit card sized bomb of DIY joy. And while you can use most of our great Model B accessories by hooking up our [downgrade...](https://www.adafruit.com/product/1986)
In Stock
[Buy Now](https://www.adafruit.com/product/2029)
[Related Guides to the Product](https://learn.adafruit.com/products/2029/guides)
### Assembled Pi T-Cobbler Plus - GPIO Breakout
[Assembled Pi T-Cobbler Plus - GPIO Breakout](https://www.adafruit.com/product/2028)
**This is the assembled version of the Pi T-Cobbler Plus. It only works with the Raspberry Pi Model Zero, A+, B+, Pi 2, Pi 3 & Pi 4!** (Any Pi with 2x20 connector)
The Raspberry Pi has landed on the Maker World like a 40-GPIO pinned, quad-USB ported, credit...
In Stock
[Buy Now](https://www.adafruit.com/product/2028)
[Related Guides to the Product](https://learn.adafruit.com/products/2028/guides)
### Adafruit Assembled Pi Cobbler Breakout + Cable for Raspberry Pi
[Adafruit Assembled Pi Cobbler Breakout + Cable for Raspberry Pi](https://www.adafruit.com/product/914)
Now that you've finally got your hands on a [Raspberry Pi® Model B](http://www.raspberrypi.org/), you're probably itching to make some fun embedded computer projects with it. What you need is an add on prototyping Pi Cobbler from Adafruit, which can break out all those...
No Longer Stocked
[Buy Now](https://www.adafruit.com/product/914)
[Related Guides to the Product](https://learn.adafruit.com/products/914/guides)
### Long Flex sensor
[Long Flex sensor](https://www.adafruit.com/product/182)
This sensor can detect flexing or bending in one direction. They were popularized by being used in the Nintendo PowerGlove as a gaming interface.
These sensors are easy to use, they are basically resistors that change value based on how much they're flexed. If they're...
In Stock
[Buy Now](https://www.adafruit.com/product/182)
[Related Guides to the Product](https://learn.adafruit.com/products/182/guides)
### Round Force-Sensitive Resistor (FSR) - 0.3 ~ 10 Newton Force
[Round Force-Sensitive Resistor (FSR) - 0.3 ~ 10 Newton Force](https://www.adafruit.com/product/166)
FSRs are sensors that allow you to detect physical pressure, squeezing and weight. They are simple to use and low cost. This sensor is an Alpha MF01A-N-221-A01 with 1/2 diameter sensing region.
We used to stock the Interlink model 402 FSR - the Alpha version is almost half the price...
In Stock
[Buy Now](https://www.adafruit.com/product/166)
[Related Guides to the Product](https://learn.adafruit.com/products/166/guides)
## Related Guides
- [Circadian Pi Desk Light](https://learn.adafruit.com/circadian-pi-desk-light.md)
- [Raspberry Pi E-mail Notifier Using LEDs](https://learn.adafruit.com/raspberry-pi-e-mail-notifier-using-leds.md)
- [Adafruit's Raspberry Pi Lesson 11. DS18B20 Temperature Sensing](https://learn.adafruit.com/adafruits-raspberry-pi-lesson-11-ds18b20-temperature-sensing.md)
- [LoRa and LoRaWAN Radio for Raspberry Pi](https://learn.adafruit.com/lora-and-lorawan-radio-for-raspberry-pi.md)
- [Adafruit's Raspberry Pi Lesson 4. GPIO Setup](https://learn.adafruit.com/adafruits-raspberry-pi-lesson-4-gpio-setup.md)
- [CircuitPython Libraries on Linux and Google Coral](https://learn.adafruit.com/circuitpython-on-google-coral-linux-blinka.md)
- [Adafruit AMG8833 8x8 Thermal Camera Sensor](https://learn.adafruit.com/adafruit-amg8833-8x8-thermal-camera-sensor.md)
- [Adafruit's Raspberry Pi Lesson 13. Power Control](https://learn.adafruit.com/adafruits-raspberry-pi-lesson-13-power-control.md)
- [Adafruit's Raspberry Pi Lesson 12. Sensing Movement](https://learn.adafruit.com/adafruits-raspberry-pi-lesson-12-sensing-movement.md)
- [Playing sounds and using buttons with Raspberry Pi](https://learn.adafruit.com/playing-sounds-and-using-buttons-with-raspberry-pi.md)
- [Windows IoT Core Application Development: Headless Blinky](https://learn.adafruit.com/windows-iot-application-development-headless-application.md)
- [Adding Basic Audio Ouput to Raspberry Pi Zero](https://learn.adafruit.com/adding-basic-audio-ouput-to-raspberry-pi-zero.md)
- [Drive a 16x2 LCD with the Raspberry Pi](https://learn.adafruit.com/drive-a-16x2-lcd-directly-with-a-raspberry-pi.md)
- [Program an AVR or Arduino Using Raspberry Pi GPIO](https://learn.adafruit.com/program-an-avr-or-arduino-using-raspberry-pi-gpio-pins.md)
- [Diet Raspberry Pi](https://learn.adafruit.com/diet-raspberry-pi.md)
---
# Source: https://learn.adafruit.com/pir-passive-infrared-proximity-motion-sensor/how-pirs-work.md
# PIR Motion Sensor
## How PIRs Work
PIR sensors are more complicated than many of the other sensors explained in these tutorials (like photocells, FSRs and tilt switches) because there are multiple variables that affect the sensors input and output. To begin explaining how a basic sensor works, we'll use this rather nice diagram
The passive infrared (PIR) sensor itself has two slots in it, each slot is made of a special material that is sensitive to IR. The lens used here is not really doing much and so we see that the two slots can 'see' out past some distance (basically the sensitivity of the sensor). When the sensor is idle, both slots detect the same amount of IR, the ambient amount radiated from the room or walls or outdoors. When a warm body like a human or animal passes by, it first intercepts one half of the PIR sensor, which causes a_ positive differential_ change between the two halves. When the warm body leaves the sensing area, the reverse happens, whereby the sensor generates a negative differential change. These change pulses are what is detected.
## The PIR Sensor
The IR sensor itself is housed in a hermetically sealed metal can to improve noise/temperature/humidity immunity. There is a window made of IR-transmissive material (typically coated silicon since that is very easy to come by) that protects the sensing element. Behind the window are the two balanced sensors.

_[Left image from Murata datasheet](http://learn.adafruit.com/system/assets/assets/000/010/137/original/pyroelectrics21e.pdf)_

_[Image from RE200B datasheet](http://learn.adafruit.com/system/assets/assets/000/010/134/original/RE200B.pdf)_
You can see above the diagram showing the element window, the two pieces of sensing material

_[Image from RE200B datasheet](http://learn.adafruit.com/system/assets/assets/000/010/134/original/RE200B.pdf)_
This image shows the internal schematic. There is actually a JFET inside (a type of transistor) which is very low-noise and buffers the extremely high impedence of the sensors into something a low-cost chip (like the BIS0001) can sense.
## Lenses
PIR sensors are rather generic and for the most part vary only in price and sensitivity. Most of the real magic happens with the optics. This is a pretty good idea for manufacturing: the PIR sensor and circuitry is fixed and costs a few dollars. The lens costs only a few cents and can change the breadth, range, sensing pattern, very easily.
In the diagram up top, the lens is just a piece of plastic, but that means that the detection area is just two rectangles. Usually we'd like to have a detection area that is much larger. To do that, we use [a simple lens](http://en.wikipedia.org/wiki/Lens_%28optics%29) such as those found in a camera: they condenses a large area (such as a landscape) into a small one (on film or a CCD sensor). For reasons that will be apparent soon, we would like to make the PIR lenses small and thin and moldable from cheap plastic, even though it may add distortion. For this reason the sensors are actually [Fresnel lenses](http://en.wikipedia.org/wiki/Fresnel_lens):

_[Image from Sensors Magazine](http://www.sensorsmag.com/articles/0403/35/main.shtml)_
The Fresnel lens condenses light, providing a larger range of IR to the sensor.

_[Image from BHlens.com](http://www.bhlens.com/linear_fresnel_lens.aspx)_

_[Image from Cypress appnote 2105](http://learn.adafruit.com/system/assets/assets/000/010/138/original/an2105.pdf)_
OK, so now we have a much larger range. However, remember that we actually have two sensors, and more importantly we dont want two really big sensing-area rectangles, but rather a scattering of multiple small areas. So what we do is split up the lens into multiple section, each section of which is a fresnel lens.

_Here you can see the multiple facet-sections_
_This macro shot shows the different Fresnel lenses in each facet!_
The different faceting and sub-lenses create a range of detection areas, interleaved with each other. That's why the lens centers in the facets above are 'inconsistent' - every other one points to a different half of the PIR sensing element


_[Images from NL11NH datasheet](http://learn.adafruit.com/system/assets/assets/000/010/135/original/NL11NH.pdf)_
Here is another image, more qualitative but not as quantitative. (Note that the sensor in the Adafruit shop is 110° not 90°)

_[Image from IR-TEC](http://www.irtec.com/ms-360.htm)_
- [Previous Page](https://learn.adafruit.com/pir-passive-infrared-proximity-motion-sensor/overview.md)
- [Next Page](https://learn.adafruit.com/pir-passive-infrared-proximity-motion-sensor/connecting-to-a-pir.md)
## Primary Products
### PIR (motion) sensor
[PIR (motion) sensor](https://www.adafruit.com/product/189)
PIR sensors are used to detect motion from pets/humanoids from about 20 feet away (possibly works on zombies, not guaranteed). This one has an adjustable delay before firing (approx 2-4 seconds), adjustable sensitivity **and** we include a 1 foot (30 cm) cable with a socket so you...
In Stock
[Buy Now](https://www.adafruit.com/product/189)
[Related Guides to the Product](https://learn.adafruit.com/products/189/guides)
## Related Guides
- [HalloWing All-Seeing Skull](https://learn.adafruit.com/hallowing-all-seeing-skull.md)
- [Magical Mistletoe](https://learn.adafruit.com/magical-mistletoe.md)
- [Screaming Cauldron](https://learn.adafruit.com/screaming-cauldron.md)
- [IoT Bird Feeder with Camera](https://learn.adafruit.com/iot-window-bird-feeder-with-camera.md)
- [No-Code WipperSnapper Summoning Horn](https://learn.adafruit.com/adafruit-io-wippersnapper-summoning-horn.md)
- [Motion Controlled Matrix Bed Clock](https://learn.adafruit.com/motion-controlled-matrix-bed-clock.md)
- [Adafruit VCNL4020 Proximity and Light Sensor](https://learn.adafruit.com/adafruit-vcnl4020-proximity-and-light-sensor.md)
- [Fog Machine with Motion Sensor and Adafruit IO](https://learn.adafruit.com/fog-machine-remote-trigger.md)
- [Feather Freezer Door Alarm](https://learn.adafruit.com/feather-door-alarm.md)
- [MIDI Laser Harp with Time of Flight Distance Sensors](https://learn.adafruit.com/midi-laser-harp-time-of-flight-sensors.md)
- [Using Adafruit IO Actions to Make an IoT Door Detector](https://learn.adafruit.com/using-adafruit-io-actions-to-make-an-iot-door-detector.md)
- [Quadcopter Spray Can Mod](https://learn.adafruit.com/quadcopter-spray-can-mod.md)
- [Adafruit VCNL4040 Proximity Sensor](https://learn.adafruit.com/adafruit-vcnl4040-proximity-sensor.md)
- [Using ItsaSNAP for HomeKit PIR Motion Detection](https://learn.adafruit.com/itsasnap-homekit-pir-motion-detection.md)
- [No-Code Room Occupancy Status ](https://learn.adafruit.com/no-code-room-occupancy-status.md)
---
# Source: https://learn.adafruit.com/32x16-32x32-rgb-led-matrix/how-the-matrix-works.md
# RGB LED Matrix Basics
## How the Matrix Works
There's no “official” documention out there on how these matrices work, and no public datasheets or spec sheets so we are going to try to document how they work.
First thing to notice is that there are 512 RGB LEDs in a 16x32 matrix. Like pretty much every matrix out there, **you can't drive all 512 at once**. One reason is that would require a lot of current, another reason is that it would be really expensive to have so many pins. Instead, the matrix is divided into 8 interleaved sections/strips. The first section is the 1st 'line' and the 9th 'line' (32 x 2 RGB LEDs = 64 RGB LEDs), the second is the 2nd and 10th line, etc until the last section which is the 8th and 16th line. You might be asking, why are the lines paired this way? wouldnt it be nicer to have the first section be the 1st and 2nd line, then 3rd and 4th, until the 15th and 16th? The reason they do it this way is so that the lines are interleaved and look better when refreshed, otherwise we'd see the stripes more clearly.
So, on the PCB are 12 LED driver chips. These are like 74HC595s but they have 16 outputs and they are constant current. 16 outputs \* 12 chips = 192 LEDs that can be controlled at once, and 64 \* 3 (R G and B) = 192. So now the design comes together: You have 192 outputs that can control one line at a time, with each of 192 R, G and B LEDs either on or off. The controller (say an FPGA or microcontroller) selects which section to currently draw (using A, B, and C address pins - 3 bits can have 8 values). Once the address is set, the controller clocks out 192 bits of data (24 bytes) and latches it. Then it increments the address and clocks out another 192 bits, etc until it gets to address #7, then it sets the address back to #0
The only downside of this technique is that despite being very simple and fast, it has **no PWM control** built in! The controller can **only** set the LEDs **on or off**. So what do you do when you want full color? You actually need to draw the entire matrix over and over again at very high speeds to PWM the matrix manually. For that reason, you need to have a very fast controller (50 MHz is a minimum) if you want to do a lot of colors and motion video and have it look good.
How quickly can we feed data to the matrix? Forum users Andrew Silverman and Ryan Brown have been [posting their progress](http://forums.adafruit.com/viewtopic.php?f=47&t=26130&start=0) driving the 16x32 matrix with an FPGA, and the limit appears to be somewhere between 40 and 50 MHz. Ryan writes: “I haven't validated 100% pixel correctness, but 50 MHz seems to work for me […] 67MHz definitely did not work.” He also provided this graph showing current draw relative to clock frequency:

_Image above by rhb.me (CC By-NC-SA)_
“Notice that the LED panel current consumption decreases as clock frequency increases. This suggests that the LED ‘on time’ is decreasing. I’m guessing this is caused by frequency-invariant delays in the LED driver shift registers.”- [Previous Page](https://learn.adafruit.com/32x16-32x32-rgb-led-matrix/library.md)
- [Next Page](https://learn.adafruit.com/32x16-32x32-rgb-led-matrix/faq.md)
## Featured Products
### Medium 16x32 RGB LED matrix panel - 6mm Pitch
[Medium 16x32 RGB LED matrix panel - 6mm Pitch](https://www.adafruit.com/product/420)
Bring a little bit of Times Square into your home with this 16 x 32 RGB LED matrix panel. These panels are normally used to make video walls, here in New York we see them on the sides of busses and bus stops, to display animations or short video clips. We thought they looked really cool so we...
In Stock
[Buy Now](https://www.adafruit.com/product/420)
[Related Guides to the Product](https://learn.adafruit.com/products/420/guides)
### 32x32 RGB LED Matrix Panel - 4mm Pitch
[32x32 RGB LED Matrix Panel - 4mm Pitch](https://www.adafruit.com/product/607)
Bring a little bit of Times Square into your home with this totally adorable 5 inch square 32 x 32 RGB LED matrix panel. These panels are normally used to make video walls, here in New York we see them on the sides of busses and bus stops, to display animations or short video clips. We thought...
In Stock
[Buy Now](https://www.adafruit.com/product/607)
[Related Guides to the Product](https://learn.adafruit.com/products/607/guides)
### 32x32 RGB LED Matrix Panel - 5mm Pitch
[32x32 RGB LED Matrix Panel - 5mm Pitch](https://www.adafruit.com/product/2026)
Bring a little bit of Times Square into your home with this sweet 32 x 32 square RGB LED matrix panel. These panels are normally used to make video walls, here in New York we see them on the sides of busses and bus stops, to display animations or short video clips. We thought they looked...
In Stock
[Buy Now](https://www.adafruit.com/product/2026)
[Related Guides to the Product](https://learn.adafruit.com/products/2026/guides)
### 32x32 RGB LED Matrix Panel - 6mm pitch
[32x32 RGB LED Matrix Panel - 6mm pitch](https://www.adafruit.com/product/1484)
Bring a little bit of Times Square into your home with this sweet 32 x 32 square RGB LED matrix panel. These panels are normally used to make video walls, here in New York we see them on the sides of busses and bus stops, to display animations or short video clips. We thought they looked...
In Stock
[Buy Now](https://www.adafruit.com/product/1484)
[Related Guides to the Product](https://learn.adafruit.com/products/1484/guides)
### 64x32 RGB LED Matrix - 3mm pitch
[64x32 RGB LED Matrix - 3mm pitch](https://www.adafruit.com/product/2279)
Bring a little bit of Times Square into your home with this sweet 64 x 32 square RGB LED matrix panel. These panels are normally used to make video walls, here in New York we see them on the sides of busses and bus stops, to display animations or short video clips. We thought they looked...
In Stock
[Buy Now](https://www.adafruit.com/product/2279)
[Related Guides to the Product](https://learn.adafruit.com/products/2279/guides)
### 64x32 RGB LED Matrix - 4mm pitch
[64x32 RGB LED Matrix - 4mm pitch](https://www.adafruit.com/product/2278)
Bring a little bit of Times Square into your home with this sweet 64 x 32 square RGB LED matrix panel. These panels are normally used to make video walls, here in New York we see them on the sides of busses and bus stops, to display animations or short video clips. We thought they looked...
Out of Stock
[Buy Now](https://www.adafruit.com/product/2278)
[Related Guides to the Product](https://learn.adafruit.com/products/2278/guides)
### 64x32 RGB LED Matrix - 5mm pitch
[64x32 RGB LED Matrix - 5mm pitch](https://www.adafruit.com/product/2277)
Bring a little bit of Times Square into your home with this sweet 64x32 square RGB LED matrix panel. These panels are normally used to make video walls, here in New York we see them on the sides of busses and bus stops, to display animations or short video clips. We thought they looked really...
In Stock
[Buy Now](https://www.adafruit.com/product/2277)
[Related Guides to the Product](https://learn.adafruit.com/products/2277/guides)
### 64x32 RGB LED Matrix - 6mm pitch
[64x32 RGB LED Matrix - 6mm pitch](https://www.adafruit.com/product/2276)
Bring a little bit of Times Square into your home with this sweet 64x32 square RGB LED matrix panel. These panels are normally used to make video walls, here in New York we see them on the sides of busses and bus stops, to display animations or short video clips. We thought they looked really...
In Stock
[Buy Now](https://www.adafruit.com/product/2276)
[Related Guides to the Product](https://learn.adafruit.com/products/2276/guides)
## Related Guides
- [Adafruit Metro M0 Express](https://learn.adafruit.com/adafruit-metro-m0-express.md)
- [Adafruit Metro M4 Express featuring ATSAMD51](https://learn.adafruit.com/adafruit-metro-m4-express-featuring-atsamd51.md)
- [CircuitPython 101: Basic Builtin Data Structures](https://learn.adafruit.com/basic-datastructures-in-circuitpython.md)
- [Adafruit Ultimate GPS](https://learn.adafruit.com/adafruit-ultimate-gps.md)
- [WiFi Controlled LED Christmahanukwanzaa Tree](https://learn.adafruit.com/wifi-controlled-led-christmahanukwanzaa-tree.md)
- [Stream Deck controlled RGB Message Panel using Adafruit IO](https://learn.adafruit.com/stream-deck-controlled-rgb-message-panel-using-adafruit-io.md)
- [Memories of an Arduino](https://learn.adafruit.com/memories-of-an-arduino.md)
- [Matrix Portal Stained Glass with WLED](https://learn.adafruit.com/matrix-portal-stained-glass-with-wled.md)
- [Sous-vide controller powered by Arduino - The SousViduino!](https://learn.adafruit.com/sous-vide-powered-by-arduino-the-sous-viduino.md)
- [LED Matrix Sports Scoreboard](https://learn.adafruit.com/led-matrix-sports-scoreboard.md)
- [Creating MatrixPortal Projects with CircuitPython](https://learn.adafruit.com/creating-projects-with-the-circuitpython-matrixportal-library.md)
- [Introducing Adafruit Trellis ](https://learn.adafruit.com/adafruit-trellis-diy-open-source-led-keypad.md)
- [CircuitPython Hardware: Charlieplex LED Matrix](https://learn.adafruit.com/micropython-hardware-charlieplex-led-matrix.md)
- [CircuitPython Display Support Using displayio](https://learn.adafruit.com/circuitpython-display-support-using-displayio.md)
- [Arduino Lesson 16. Stepper Motors](https://learn.adafruit.com/adafruit-arduino-lesson-16-stepper-motors.md)
- [2.8" TFT Touchscreen](https://learn.adafruit.com/2-8-tft-touchscreen.md)
- [SmartMatrix Animated GIF Player](https://learn.adafruit.com/smartmatrix-animated-gif-player.md)
---
# Source: https://learn.adafruit.com/how-to-make-a-pogo-pin-test-jig.md
# How to Make a Pogo Pin Test Jig
## Overview

If you end up buying a pick and place to assemble PCBs (or even if you're doing it by hand) you'll need to test out your boards! If you have an assembler do it for you, its still probably a good idea to have a jig you can give them. A good jig will tell you whats going right and whats going wrong.
In this tutorial I will show how I designed a very basic jig with a "tested good" audible indicator. The board its testing is very simple but the basic premise can be expanded to large projects with ease.
## More on Pogo Pins
Please familiarize yourself with these Pogo Pin resources:
[The basics of Pogo Pin connectors](https://www.digikey.com/en/articles/the-basics-of-pogo-pin-connectors) - DigiKey
[Video](https://youtu.be/NGZ_vd6qmeQ): Pogo Pins – Collin’s Lab Notes
https://youtu.be/NGZ_vd6qmeQ
- [Next Page](https://learn.adafruit.com/how-to-make-a-pogo-pin-test-jig/preparation.md)
## Featured Products
### Pogo Pin Probe Clip
[Pogo Pin Probe Clip](https://www.adafruit.com/product/1969)
The Pogo Pin Probe Clip is a great way to test and connect with pin-point accuracy without soldering! It's sort of like an [alligator clip](https://www.adafruit.com/product/321) with a built-in springy pogo pin - so you can connect to any PCB pad for 'scoping, analyzing, or...
In Stock
[Buy Now](https://www.adafruit.com/product/1969)
[Related Guides to the Product](https://learn.adafruit.com/products/1969/guides)
### Pogo Pins "Spear Head" (10 pack)
[Pogo Pins "Spear Head" (10 pack)](https://www.adafruit.com/product/394)
Pogo pins are little spring-loaded contacts, very handy for making jigs, or making momentary (but electrically solid) contacts. We use them by the dozen for making programming and testing jigs but they're handy also if say you want to JTAG program a board that you cant solder headers to -...
In Stock
[Buy Now](https://www.adafruit.com/product/394)
[Related Guides to the Product](https://learn.adafruit.com/products/394/guides)
### Pogo Pins "Cupped Head" (10 pack)
[Pogo Pins "Cupped Head" (10 pack)](https://www.adafruit.com/product/2428)
Pogo pins are little spring-loaded contacts, very handy for making jigs, or making momentary (but electrically solid) contacts. We use them by the dozen for making programming and testing jigs but they're handy also if say you want to JTAG program a board that you cant solder headers to -...
In Stock
[Buy Now](https://www.adafruit.com/product/2428)
[Related Guides to the Product](https://learn.adafruit.com/products/2428/guides)
### Pogo Pins "Crown Head" (10 pack)
[Pogo Pins "Crown Head" (10 pack)](https://www.adafruit.com/product/2429)
Pogo pins are little spring-loaded contacts, very handy for making jigs, or making momentary (but electrically solid) contacts. We use them by the dozen for making programming and testing jigs but they're handy also if say you want to JTAG program a board that you cant solder headers to -...
In Stock
[Buy Now](https://www.adafruit.com/product/2429)
[Related Guides to the Product](https://learn.adafruit.com/products/2429/guides)
### Pogo Pins "Needle Head" (10 pack)
[Pogo Pins "Needle Head" (10 pack)](https://www.adafruit.com/product/2430)
Pogo pins are little spring-loaded contacts, very handy for making jigs, or making momentary (but electrically solid) contacts. We use them by the dozen for making programming and testing jigs but they're handy also if say you want to JTAG program a board that you cant solder headers to -...
In Stock
[Buy Now](https://www.adafruit.com/product/2430)
[Related Guides to the Product](https://learn.adafruit.com/products/2430/guides)
### Toggle Clamp - Large Size
[Toggle Clamp - Large Size](https://www.adafruit.com/product/2457)
\*Ka-thunk\* Pin down that PCB with our **Toggle Clamp** , a sturdy and reliable way to quickly press and release with precision! A pogo-pin bed is a great way to connect and test boards without any soldering, but you have to somehow get that PCB aligned right and evenly pressed down...
In Stock
[Buy Now](https://www.adafruit.com/product/2457)
[Related Guides to the Product](https://learn.adafruit.com/products/2457/guides)
### Toggle Clamp - Medium Flip-up Style
[Toggle Clamp - Medium Flip-up Style](https://www.adafruit.com/product/2456)
\*Ka-thunk\* Pin down that little PCB with our **Toggle Clamp** , a sturdy and reliable way to quickly press and release with precision! A pogo-pin bed is a great way to connect and test boards without any soldering, but you have to somehow get that PCB aligned right and evenly...
In Stock
[Buy Now](https://www.adafruit.com/product/2456)
[Related Guides to the Product](https://learn.adafruit.com/products/2456/guides)
### Toggle Clamp - Small Flip-down Style
[Toggle Clamp - Small Flip-down Style](https://www.adafruit.com/product/2459)
\*Ka-thunk\* Pin down that PCB with our **Toggle Clamp** , a sturdy and reliable way to quickly press and release with precision! A pogo-pin bed is a great way to connect and test boards without any soldering, but you have to somehow get that PCB aligned right and evenly pressed...
In Stock
[Buy Now](https://www.adafruit.com/product/2459)
[Related Guides to the Product](https://learn.adafruit.com/products/2459/guides)
## Related Guides
- [DIY 3D Printing Filament](https://learn.adafruit.com/diy-3d-printing-filament.md)
- [Standalone AVR Chip Programmer](https://learn.adafruit.com/standalone-avr-chip-programmer.md)
- [How we designed an injection-molded case](https://learn.adafruit.com/how-we-designed-an-injection-molded-case-for-raspberry-pi.md)
- [Metal Parts from 3D Prints](https://learn.adafruit.com/metal-parts-from-3d-prints.md)
- [KTOWN's Ultimate Creating Parts in Eagle Tutorial](https://learn.adafruit.com/ktowns-ultimate-creating-parts-in-eagle-tutorial.md)
- [Maker Business & Manufacturing Software - Our Tips & Tricks](https://learn.adafruit.com/maker-business-manufacturing-software-our-tips-and-tricks.md)
- [Adafruit Pinguin for EAGLE CAD](https://learn.adafruit.com/adafruit-pinguin-for-eagle-cad.md)
- [Laser-Cut Enclosure Design](https://learn.adafruit.com/laser-cut-enclosure-design.md)
- [How to Sign Windows Drivers & Executables](https://learn.adafruit.com/how-to-sign-windows-drivers-installer.md)
- [SMT Manufacturing](https://learn.adafruit.com/smt-manufacturing.md)
- [All About Laser Cutters](https://learn.adafruit.com/all-about-laser-cutters.md)
- [Shop Tips & Tricks](https://learn.adafruit.com/shop-tips-and-tricks.md)
- [How to convert Eagle PCBs to 3D Models in Fusion 360](https://learn.adafruit.com/how-to-convert-eagle-pcbs-to-3d-models-in-fusion-360.md)
- [Creating Accurate Footprints in Eagle](https://learn.adafruit.com/creating-accurate-footprints-in-eagle.md)
- [Make your own PCB with Eagle, OSH Park, and Adafruit!](https://learn.adafruit.com/making-pcbs-with-oshpark-and-eagle.md)
---
# Source: https://learn.adafruit.com/chumby-hacker-board/i2c-sensor.md
# Chumby Hacker Board
## i2c Sensor
## i2c Twiddler
First, you'll need to have a toolchain installed so make sure you go back and install it!
Sean Cross wrote a great i2c twiddler-tool. This allows you to poke and peek at i2c chips right from the command line. Nice!
Scroll down and copy his i2c C code. Open up your terminal to the CHB and type in **mkdir /mnt/storage/dev** (or whatever place you want to store your code), then **cd /mnt/storage/dev** and finally **cat \> i2c.c** into the terminal and hit return. Then paste in the code and finish by typing **Control-D**

Then compile the code with **gcc** by typing in **gcc -o i2c i2c.c** to create the **i2c** executable. Then run it and make sure you get the response below.

## Reading the MMA7455L accelerometer
There's a Freescale +-2G to +-8G 3-access accelerometer on the CHB for you to play with, lets get some readings. First off, we need to know what the i2c address is. [Open up the datasheet](http://www.freescale.com/files/sensors/doc/data_sheet/MMA7455L.pdf) and look for the section called "i2c Secondary Address".

**$1D** means hexadecimal 0x1D which is the same as decimal 29. Great! Lets read byte #0 from the accelerometer by typing in **./i2c r 29 0** 
?? We got an error that the register was not readable. This means the chip could not be found on the i2c bus. :( But then we rememer that i2c addresses are 7 bits long and are transmitted in the upper bits of an 8-bit byte. So we actually need to shift the address up by 1 bit. That's easy to do, though, just multiply by 2 to get i2c address **58**

Rock! Now we need to figure out what registers we can read, looking at the datasheet we see:
There's a lot of stuff! Lets start with one we know is going to work, like **$0D** (hex 0x0D = dec 13)

It in fact returns the value 0x1D which we know is the i2c address.## Acceleromate!
OK so now we want to get that XYZ data, right? Looking at the register file it seems like the first 6 bytes are used for 10-bit readings, but we can get single 8 bit readings from registers number 6, 7 and 8.
If you're careful you can read those registers while having a friend gently shake the board, you'll see different values returned.

However, wouldn't it be great if you didn't need a friend to shake the board while you pressed Up-arrow & Return? Lets edit Sean's code. To begin we will put **#define**'s in for the address and registers.```
// The 'raw' 7 bit address shifted up
#define MMA7455_I2CADDR (0x1D * 2)
// The registers to read!
#define MMA7455_XOUT8 6
#define MMA7455_YOUT8 7
#define MMA7455_ZOUT8 8
```
Then replace the **main()** function with our own which is shorter and only reads those registers to print out the values.
```
int main(int argc, char **argv) {
int i2c_file;
int8_t x, y, z; // the readings are 8 bits and signed!
// Open a connection to the I2C userspace control file.
if ((i2c_file = open(I2C_FILE_NAME, O_RDWR)) < 0) {
perror("Unable to open i2c control file");
exit(1);
}
// ignore arguments!
while (1) {
// read X and Y and Z from the register
if( get_i2c_register(i2c_file, MMA7455_I2CADDR, MMA7455_XOUT8, &x) ||
get_i2c_register(i2c_file, MMA7455_I2CADDR, MMA7455_YOUT8, &y) ||
get_i2c_register(i2c_file, MMA7455_I2CADDR, MMA7455_ZOUT8, &z) ) {
printf("Unable to read register!\n");
return -1;
}
printf("X = %d\tY = %d\tZ = %d\n", x, y, z);
}
close(i2c_file);
return 0;
}
```
Note the while() loop, and that we read all three registers and stick the results into 8-bit signed variables. Then we printf() 'em all and loop again.
You can grab all of the code below.
Stick the code in a new file called **mma7455.c** by copying and pasting as before. Then compile by running **gcc -o mma7455 mma7455.c** and run with **./mma7455**. Now shake it!

There you go! Now you can talk to the accelerometer to get motion data, and this code is easily adaptable for any i2c chip you may want to use. Enjoy!## Basic i2c twiddler Code
```
/*
This software uses a BSD license.
Copyright (c) 2010, Sean Cross / chumby industries
All rights reserved.
Redistribution and use in source and binary forms, with or without
modification, are permitted provided that the following conditions
are met:
* Redistributions of source code must retain the above copyright
notice, this list of conditions and the following disclaimer.
* Redistributions in binary form must reproduce the above copyright
notice, this list of conditions and the following disclaimer in the
documentation and/or other materials provided with the
distribution.
* Neither the name of Sean Cross / chumby industries nor the names
of its contributors may be used to endorse or promote products
derived from this software without specific prior written
permission.
THIS SOFTWARE IS PROVIDED BY THE COPYRIGHT HOLDERS AND CONTRIBUTORS
"AS IS" AND ANY EXPRESS OR IMPLIED WARRANTIES, INCLUDING, BUT NOT
LIMITED TO, THE IMPLIED WARRANTIES OF MERCHANTABILITY AND FITNESS FOR
A PARTICULAR PURPOSE ARE DISCLAIMED. IN NO EVENT SHALL THE COPYRIGHT
HOLDER OR CONTRIBUTORS BE LIABLE FOR ANY DIRECT, INDIRECT,
INCIDENTAL, SPECIAL, EXEMPLARY, OR CONSEQUENTIAL DAMAGES (INCLUDING,
BUT NOT LIMITED TO, PROCUREMENT OF SUBSTITUTE GOODS OR SERVICES; LOSS
OF USE, DATA, OR PROFITS; OR BUSINESS INTERRUPTION) HOWEVER CAUSED
AND ON ANY THEORY OF LIABILITY, WHETHER IN CONTRACT, STRICT
LIABILITY, OR TORT (INCLUDING NEGLIGENCE OR OTHERWISE) ARISING IN ANY
WAY OUT OF THE USE OF THIS SOFTWARE, EVEN IF ADVISED OF THE
POSSIBILITY OF SUCH DAMAGE.
*/
#include <stdio.h>
#include <linux/i2c.h>
#include <linux/i2c-dev.h>
#include <fcntl.h>
#include <stdlib.h>
#include <unistd.h>
#include <sys/ioctl.h>
#include <string.h>
#define I2C_FILE_NAME "/dev/i2c-0"
#define USAGE_MESSAGE \
"Usage:\n" \
" %s r [addr] [register] " \
"to read value from [register]\n" \
" %s w [addr] [register] [value] " \
"to write a value [value] to register [register]\n" \
""
static int set_i2c_register(int file,
unsigned char addr,
unsigned char reg,
unsigned char value) {
unsigned char outbuf[2];
struct i2c_rdwr_ioctl_data packets;
struct i2c_msg messages[1];
messages[0].addr = addr;
messages[0].flags = 0;
messages[0].len = sizeof(outbuf);
messages[0].buf = outbuf;
/* The first byte indicates which register we'll write */
outbuf[0] = reg;
/*
* The second byte indicates the value to write. Note that for many
* devices, we can write multiple, sequential registers at once by
* simply making outbuf bigger.
*/
outbuf[1] = value;
/* Transfer the i2c packets to the kernel and verify it worked */
packets.msgs = messages;
packets.nmsgs = 1;
if(ioctl(file, I2C_RDWR, &packets) < 0) {
perror("Unable to send data");
return 1;
}
return 0;
}
static int get_i2c_register(int file,
unsigned char addr,
unsigned char reg,
unsigned char *val) {
unsigned char inbuf, outbuf;
struct i2c_rdwr_ioctl_data packets;
struct i2c_msg messages[2];
/*
* In order to read a register, we first do a "dummy write" by writing
* 0 bytes to the register we want to read from. This is similar to
* the packet in set_i2c_register, except it's 1 byte rather than 2.
*/
outbuf = reg;
messages[0].addr = addr;
messages[0].flags = 0;
messages[0].len = sizeof(outbuf);
messages[0].buf = &outbuf;
/* The data will get returned in this structure */
messages[1].addr = addr;
messages[1].flags = I2C_M_RD/* | I2C_M_NOSTART*/;
messages[1].len = sizeof(inbuf);
messages[1].buf = &inbuf;
/* Send the request to the kernel and get the result back */
packets.msgs = messages;
packets.nmsgs = 2;
if(ioctl(file, I2C_RDWR, &packets) < 0) {
perror("Unable to send data");
return 1;
}
*val = inbuf;
return 0;
}
int main(int argc, char **argv) {
int i2c_file;
// Open a connection to the I2C userspace control file.
if ((i2c_file = open(I2C_FILE_NAME, O_RDWR)) < 0) {
perror("Unable to open i2c control file");
exit(1);
}
if(argc > 3 && !strcmp(argv[1], "r")) {
int addr = strtol(argv[2], NULL, 0);
int reg = strtol(argv[3], NULL, 0);
unsigned char value;
if(get_i2c_register(i2c_file, addr, reg, &value)) {
printf("Unable to get register!\n");
}
else {
printf("Register %d: %d (%x)\n", reg, (int)value, (int)value);
}
}
else if(argc > 4 && !strcmp(argv[1], "w")) {
int addr = strtol(argv[2], NULL, 0);
int reg = strtol(argv[3], NULL, 0);
int value = strtol(argv[4], NULL, 0);
if(set_i2c_register(i2c_file, addr, reg, value)) {
printf("Unable to get register!\n");
}
else {
printf("Set register %x: %d (%x)\n", reg, value, value);
}
}
else {
fprintf(stderr, USAGE_MESSAGE, argv[0], argv[0]);
}
close(i2c_file);
return 0;
}
```
## MMA7455L reader
```
/*
This software uses a BSD license.
Copyright (c) 2010, Sean Cross / chumby industries & Limor Fried / adafruit industries (we are both industrious people, eh?)
All rights reserved.
Redistribution and use in source and binary forms, with or without
modification, are permitted provided that the following conditions
are met:
* Redistributions of source code must retain the above copyright
notice, this list of conditions and the following disclaimer.
* Redistributions in binary form must reproduce the above copyright
notice, this list of conditions and the following disclaimer in the
documentation and/or other materials provided with the
distribution.
* Neither the name of Sean Cross / chumby industries nor the names
of its contributors may be used to endorse or promote products
derived from this software without specific prior written
permission.
THIS SOFTWARE IS PROVIDED BY THE COPYRIGHT HOLDERS AND CONTRIBUTORS
"AS IS" AND ANY EXPRESS OR IMPLIED WARRANTIES, INCLUDING, BUT NOT
LIMITED TO, THE IMPLIED WARRANTIES OF MERCHANTABILITY AND FITNESS FOR
A PARTICULAR PURPOSE ARE DISCLAIMED. IN NO EVENT SHALL THE COPYRIGHT
HOLDER OR CONTRIBUTORS BE LIABLE FOR ANY DIRECT, INDIRECT,
INCIDENTAL, SPECIAL, EXEMPLARY, OR CONSEQUENTIAL DAMAGES (INCLUDING,
BUT NOT LIMITED TO, PROCUREMENT OF SUBSTITUTE GOODS OR SERVICES; LOSS
OF USE, DATA, OR PROFITS; OR BUSINESS INTERRUPTION) HOWEVER CAUSED
AND ON ANY THEORY OF LIABILITY, WHETHER IN CONTRACT, STRICT
LIABILITY, OR TORT (INCLUDING NEGLIGENCE OR OTHERWISE) ARISING IN ANY
WAY OUT OF THE USE OF THIS SOFTWARE, EVEN IF ADVISED OF THE
POSSIBILITY OF SUCH DAMAGE.
*/
#include <stdio.h>
#include <linux/i2c.h>
#include <linux/i2c-dev.h>
#include <fcntl.h>
#include <stdlib.h>
#include <unistd.h>
#include <sys/ioctl.h>
#include <string.h>
// The 'raw' 7 bit address shifted up
#define MMA7455_I2CADDR (0x1D * 2)
// The registers to read!
#define MMA7455_XOUT8 6
#define MMA7455_YOUT8 7
#define MMA7455_ZOUT8 8
#define I2C_FILE_NAME "/dev/i2c-0"
static int get_i2c_register(int file,
unsigned char addr,
unsigned char reg,
unsigned char *val) {
unsigned char inbuf, outbuf;
struct i2c_rdwr_ioctl_data packets;
struct i2c_msg messages[2];
/*
* In order to read a register, we first do a "dummy write" by writing
* 0 bytes to the register we want to read from. This is similar to
* the packet in set_i2c_register, except it's 1 byte rather than 2.
*/
outbuf = reg;
messages[0].addr = addr;
messages[0].flags = 0;
messages[0].len = sizeof(outbuf);
messages[0].buf = &outbuf;
/* The data will get returned in this structure */
messages[1].addr = addr;
messages[1].flags = I2C_M_RD/* | I2C_M_NOSTART*/;
messages[1].len = sizeof(inbuf);
messages[1].buf = &inbuf;
/* Send the request to the kernel and get the result back */
packets.msgs = messages;
packets.nmsgs = 2;
if(ioctl(file, I2C_RDWR, &packets) < 0) {
perror("Unable to send data");
return 1;
}
*val = inbuf;
return 0;
}
int main(int argc, char **argv) {
int i2c_file;
int8_t x, y, z; // the readings are 8 bits and signed!
// Open a connection to the I2C userspace control file.
if ((i2c_file = open(I2C_FILE_NAME, O_RDWR)) < 0) {
perror("Unable to open i2c control file");
exit(1);
}
// ignore arguments!
while (1) {
// read X and Y and Z from the register
if( get_i2c_register(i2c_file, MMA7455_I2CADDR, MMA7455_XOUT8, &x) ||
get_i2c_register(i2c_file, MMA7455_I2CADDR, MMA7455_YOUT8, &y) ||
get_i2c_register(i2c_file, MMA7455_I2CADDR, MMA7455_ZOUT8, &z) ) {
printf("Unable to read register!\n");
return -1;
}
printf("X = %d\tY = %d\tZ = %d\n", x, y, z);
}
close(i2c_file);
return 0;
}
```
- [Previous Page](https://learn.adafruit.com/chumby-hacker-board/compiler.md)
- [Next Page](https://learn.adafruit.com/chumby-hacker-board/wifi.md)
## Featured Products
### USB 2.0 Powered Hub - 7 Ports with 5V 2A Power Supply
[USB 2.0 Powered Hub - 7 Ports with 5V 2A Power Supply](https://www.adafruit.com/product/961)
Add lots more USB capability to your Raspberry Pi or computer using this powered USB 2.0 hub. It adds a full **seven powered ports** , all at USB 2.0 speeds so you can use video cameras and other high speed devices (cheaper hubs are v1.1 and not as fast!)
The extra sauce...
No Longer Stocked
[Buy Now](https://www.adafruit.com/product/961)
[Related Guides to the Product](https://learn.adafruit.com/products/961/guides)
### Miniature WiFi (802.11b/g/n) Module: For Raspberry Pi and more
[Miniature WiFi (802.11b/g/n) Module: For Raspberry Pi and more](https://www.adafruit.com/product/814)
Make your Internet of Things device cable-free by adding WiFi. Take advantage of the Raspberry Pi and Beagle Bone's USB port to add a low cost, but high-reliability wireless link. We tried half a dozen modules to find one that works well with the Pi and Bone without the need of recompiling...
No Longer Stocked
[Buy Now](https://www.adafruit.com/product/814)
[Related Guides to the Product](https://learn.adafruit.com/products/814/guides)
### 5V 2A (2000mA) switching power supply - UL Listed
[5V 2A (2000mA) switching power supply - UL Listed](https://www.adafruit.com/product/276)
This is an FCC/CE certified and UL listed power supply. Need a lot of 5V power? This switching supply gives a clean regulated 5V output at up to 2000mA. 110 or 240 input, so it works in any country. The plugs are "US 2-prong" style so you may need a plug adapter, but you can pick one...
Out of Stock
[Buy Now](https://www.adafruit.com/product/276)
[Related Guides to the Product](https://learn.adafruit.com/products/276/guides)
### 2.1mm to 1.7mm DC jack adapter
[2.1mm to 1.7mm DC jack adapter](https://www.adafruit.com/product/411)
We're carrying this adapter primarily to allow Chumby Hacker Board users to adapt our nice [5V @ 2A power supply](http://www.adafruit.com/products/276) to their CHB. But you can use this adapter for anything else that has a 1.7mm DC jack, such as a PSP.
In Stock
[Buy Now](https://www.adafruit.com/product/411)
[Related Guides to the Product](https://learn.adafruit.com/products/411/guides)
### USB MicroSD Card Reader/Writer - microSD / microSDHC / microSDXC
[USB MicroSD Card Reader/Writer - microSD / microSDHC / microSDXC](https://www.adafruit.com/product/939)
This is the cutest little microSD card reader/writer - but don't be fooled by its adorableness! It's wicked fast and supports up to 64 GB SDXC cards! Simply slide the card into the edge and plug it into your computer. No drivers are required, it shows up as a standard 'Mass...
No Longer Stocked
[Buy Now](https://www.adafruit.com/product/939)
[Related Guides to the Product](https://learn.adafruit.com/products/939/guides)
### Ethernet Cable - 10 ft long
[Ethernet Cable - 10 ft long](https://www.adafruit.com/product/730)
We have so many Internet-connected goodies in the shop, we figured it's time to carry a cable so you can easily connect them up! This cable is 10 feet long, black and has all 8 wires installed. Perfect for use with the [BeagleBone](http://www.adafruit.com/products/513),
No Longer Stocked
[Buy Now](https://www.adafruit.com/product/730)
[Related Guides to the Product](https://learn.adafruit.com/products/730/guides)
### USB to TTL Serial Cable - Debug / Console Cable for Raspberry Pi
[USB to TTL Serial Cable - Debug / Console Cable for Raspberry Pi](https://www.adafruit.com/product/954)
The cable is easiest way ever to connect to your microcontroller/Raspberry Pi/WiFi router serial console port. Inside the big USB plug is a USB\<-\>Serial conversion chip and at the end of the 36" cable are four wire - red power, black ground, white RX into USB port, and green TX out...
In Stock
[Buy Now](https://www.adafruit.com/product/954)
[Related Guides to the Product](https://learn.adafruit.com/products/954/guides)
### FTDI Serial TTL-232 USB Cable
[FTDI Serial TTL-232 USB Cable](https://www.adafruit.com/product/70)
Just about all electronics use TTL serial for debugging, bootloading, programming, serial output, etc. But it's rare for a computer to have a serial port anymore. This is a USB to TTL serial cable, with a FTDI FT232RL usb/serial chip embedded in the head. It has a 6-pin socket at the end...
In Stock
[Buy Now](https://www.adafruit.com/product/70)
[Related Guides to the Product](https://learn.adafruit.com/products/70/guides)
## Related Guides
- [CircuitPython Libraries on MicroPython using the Raspberry Pi Pico](https://learn.adafruit.com/circuitpython-libraries-on-micropython-using-the-raspberry-pi-pico.md)
- [Hallowing Minotaur Maze](https://learn.adafruit.com/hallowing-minotaur-maze.md)
- [Raspberry Pi Azure IoT Hub Dashboard with CircuitPython](https://learn.adafruit.com/raspberry-pi-iot-dashboard-with-azure-and-circuitpython.md)
- [Adafruit 2.9" eInk Display Breakouts and FeatherWings](https://learn.adafruit.com/adafruit-2-9-eink-display-breakouts-and-featherwings.md)
- [Pi SSD Media Server](https://learn.adafruit.com/pi-ssd-media-server.md)
- [Creating Slideshows in CircuitPython](https://learn.adafruit.com/creating-slideshows-in-circuitpython.md)
- [Network Interface Failover using FONA](https://learn.adafruit.com/network-interface-failover-using-fona.md)
- [Matrix Keypad](https://learn.adafruit.com/matrix-keypad.md)
- [Native MP3 decoding on Arduino](https://learn.adafruit.com/native-mp3-decoding-on-arduino.md)
- [Raspberry Pi HQ Camera Case](https://learn.adafruit.com/raspberry-pi-hq-camera-case.md)
- [Articulated Pi Display V2 Mount](https://learn.adafruit.com/pi-wall-mount.md)
- [World's Smallest MAME Arcade Cabinet](https://learn.adafruit.com/worlds-smallest-mame-arcade-cabinet.md)
- [Raspberry Pi E-Ink Weather Station using Python](https://learn.adafruit.com/raspberry-pi-e-ink-weather-station-using-python.md)
- [Getting Started with Raspberry Pi Pico and CircuitPython](https://learn.adafruit.com/getting-started-with-raspberry-pi-pico-circuitpython.md)
- [Adafruit QT Py and NeoPixel LEDs](https://learn.adafruit.com/qt-py-and-neopixel-leds.md)
---
# Source: https://learn.adafruit.com/i2c-spi-lcd-backpack.md
# I2C/SPI LCD Backpack
## Overview

Character LCDs are a fun and easy way to have your microcontroller project talk back to you. They are also common, and easy to get, available in tons of colors and sizes. [We've written tutorials on using character LCDs with an Arduino](http://learn.adafruit.com/character-lcds) (or similar microcontroller) but find that the number of pins necessary to control the LCD can be restrictive, especially with ambitious projects. We wanted to make a 'backpack' (add-on circuit) that would reduce the number of pins without a lot of expense.

By using simple I2C and SPI input/output expanders we have reduced the number of pins, while still making it easy to interface with the LCD. Only 2 pins are needed for I2C, 3 for SPI. For Arduino and CircuitPython/Python users, we provide an easy-to-use library that is backwards compatible with projects using the '6 pin' wiring.
This backpack comes with a 2-pin and 3-pin terminal block as shown (you can snap it together to make a 5-pin terminal and then solder it to the backpack for easy wiring).

This backpack will work with any 'standard' character LCD, from 8x1 to 20x4 sizes! As long as they have a 16-pin single-line connection header at the top. [We carry a few LCDs that work great](http://www.adafruit.com/category/63_96). We suggest using our blue white 20x4 or 16x2 LCDs. Note that it does not work with 16x2 OLED displays. You can try to connect our RGB 16x2 or 20x4 LCDs, but this backpack will not control the RGB backlight so you'll have to use the backpack only for the 14 digital IO pins (pins #1-14) and connect the backlight pins (#15-#18) directly to your microcontroller with 4 extra wires for color/PWM control as if they were just an RGB LED.

**NEW! As of February 8, 2023** - This backpack now comes with a big re-spin that makes lots of improvements:
- We've added a 3-5V boost circuit so you can use this backpack to control 5V LCDs even with 3V power and logic.
- The contrast potentiometer is a lot nicer and easier to twist using a small screwdriver
- Added [SparkFun qwiic](https://www.sparkfun.com/qwiic) compatible **[STEMMA QT](https://learn.adafruit.com/introducing-adafruit-stemma-qt)** connectors for the I2C bus **so you don't even need to solder the I2C and power lines.** Just wire up to your favorite micro using a [STEMMA QT adapter cable.](https://www.adafruit.com/?q=stemma%20qt%20cable) [QT Cable is not included, but we have a variety in the shop](https://www.adafruit.com/?q=stemma+qt+cable&sort=BestMatch).
- Functionality and size/shape are the same - mechanically and code-wise it is a drop-in replacement.
- We've also updated this PCB with [Adafruit Pinguin](https://github.com/adafruit/Adafruit_Pinguin) to make a lovely and legible silkscreen.
Info:

- [Next Page](https://learn.adafruit.com/i2c-spi-lcd-backpack/pinouts.md)
## Primary Products
### i2c / SPI character LCD backpack - STEMMA QT / Qwiic
[i2c / SPI character LCD backpack - STEMMA QT / Qwiic](https://www.adafruit.com/product/292)
Character LCDs are a fun and easy way to have your microcontroller project talk back to you. They are also common, and easy to get, available in tons of colors and sizes. [We've written tutorials on using character LCDs with an Arduino](http://learn.adafruit.com/character-lcds)...
In Stock
[Buy Now](https://www.adafruit.com/product/292)
[Related Guides to the Product](https://learn.adafruit.com/products/292/guides)
## Featured Products
### Standard LCD 20x4 + extras
[Standard LCD 20x4 + extras](https://www.adafruit.com/product/198)
Standard HD44780 LCDs are useful for creating standalone projects.
- 20 characters wide, 4 rows
- White text on blue background
- Connection port is 0.1" pitch, single row for easy breadboarding and wiring
- Single LED backlight with a resistor included, you can...
In Stock
[Buy Now](https://www.adafruit.com/product/198)
[Related Guides to the Product](https://learn.adafruit.com/products/198/guides)
### Standard LCD 16x2 + extras
[Standard LCD 16x2 + extras](https://www.adafruit.com/product/181)
Standard HD44780 LCDs are useful for creating standalone projects.
- 16 characters wide, 2 rows
- White text on blue background
- Connection port is 0.1" pitch, single row for easy breadboarding and wiring
- Pins are documented on the back of the LCD to assist...
In Stock
[Buy Now](https://www.adafruit.com/product/181)
[Related Guides to the Product](https://learn.adafruit.com/products/181/guides)
## Related Guides
- [ Faz-Wrench - Five Nights at Freddy's](https://learn.adafruit.com/faz-wrench.md)
- [Trinket Ultrasonic Rangefinder](https://learn.adafruit.com/trinket-ultrasonic-rangefinder.md)
- [No-Code Indoor Air Quality Monitor with Separate Display](https://learn.adafruit.com/no-code-indoor-air-quality-monitor-with-separate-display.md)
- [Trinket Temperature & Humidity LCD Display](https://learn.adafruit.com/trinket-temperature-humidity-lcd-display.md)
- [Light Meter](https://learn.adafruit.com/light-meter.md)
- [CircuitPython Hardware: ILI9341 TFT & FeatherWing](https://learn.adafruit.com/micropython-hardware-ili9341-tft-and-featherwing.md)
- [Raspberry Pi Thermal Camera](https://learn.adafruit.com/raspberry-pi-thermal-camera.md)
- [Adafruit NeoKey BFF](https://learn.adafruit.com/adafruit-neokey-bff.md)
- [Mini LED Matrix Audio Visualizer](https://learn.adafruit.com/mini-led-matrix-audio-visualizer.md)
- [Adafruit ISO1540 Bidirectional I2C Isolator](https://learn.adafruit.com/adafruit-iso1540-bidirectional-i2c-isolator.md)
- [Raspberry Pi Low-Light Long-Exposure Photography](https://learn.adafruit.com/raspberry-pi-hq-camera-low-light-long-exposure-photography.md)
- [Adafruit Radio Bonnets with OLED Display - RFM69 or RFM9X](https://learn.adafruit.com/adafruit-radio-bonnets.md)
- [PicoDVI Arduino Library: Video Out for RP2040 Boards](https://learn.adafruit.com/picodvi-arduino-library-video-out-for-rp2040-boards.md)
- [reef-pi Guide 5: Light Controller](https://learn.adafruit.com/reef-pi-lighting-controller.md)
- [Adafruit VL53L4CD Time of Flight Distance Sensor](https://learn.adafruit.com/adafruit-vl53l4cd-time-of-flight-distance-sensor.md)
---
# Source: https://learn.adafruit.com/piccolo/ideas.md
# Source: https://learn.adafruit.com/animating-multiple-led-backpacks/ideas.md
# Animating Multiple LED Backpacks
## Ideas
Craft stores have these wonderful realistic styrofoam skulls around Halloween time. Here we’re using LED matrices for just the eyes, no mouth (the “roboface” sketch will work all the same). We simply carved out the eye sockets to the back and pushed the LED matrices through. The eyes peer around and blink:

_Level up:_ add a joystick to move the eyes…or if you’re _really_ committed, use a webcam or a Kinect sensor on a PC (connecting to the Arduino through USB) to make the eyes automatically follow victims around the room.
This Jack-o’-lantern (another craft store find made of foam) uses all five matrices (eyes and mouth). Note the 45 degree installation of the eyes. Try to think how you can break free of simple grids and alignment:

This glass head (which originally inspired the project) came from Pier 1 Imports. The addition of a bundled up length of [Flowing Effect EL Wire](http://adafruit.com/products/953) creates an impression of coursing blood or a pulsing brain:

The matrices were held in place with hot-melt glue, which can be cleanly removed later using a Q-Tip dipped in rubbing alcohol.
_Lesson learned:_ at 200 milliamps each, these displays get warm enough to soften the glue. Nothing fell off, but it’s something to keep in mind. If the situation permits, use the matrix backpacks’ mounting holes (obviously this won’t work with the glass head).
Another thought was to glue the displays to a mask, which could be worn under a “morph suit” — the LEDs are extremely bright and will show through the thin fabric:

It’s an interesting concept but still needs some work. Placing the LED backpacks directly over one’s mouth presents a problem: moisture from exhaled breath is conductive enough to confuse the address pads on the backpacks, and they quickly end up all showing the same image! A small blob of hot-melt glue covering the “open” address pads took care of this, but there may still be other issues lurking…the whole thing should probably be potted or enclosed, sealed off from breath and perspiration.
_Level up:_ have the mouth move in sync with the wearer’s own…perhaps a pressure or flex sensor under the chin, or using a microphone based on volume.
http://youtu.be/qztpi-BVkqE
- [Previous Page](https://learn.adafruit.com/animating-multiple-led-backpacks/software.md)
## Featured Products
### Adafruit Mini 8x8 LED Matrix w/I2C Backpack - Yellow
[Adafruit Mini 8x8 LED Matrix w/I2C Backpack - Yellow](https://www.adafruit.com/product/871)
What's better than a single LED? Lots of LEDs! A fun way to make a small display is to use an [8x8 matrix](https://www.adafruit.com/category/37_88) or a [4-digit 7-segment display](https://www.adafruit.com/category/37_103). Matrices like these are...
In Stock
[Buy Now](https://www.adafruit.com/product/871)
[Related Guides to the Product](https://learn.adafruit.com/products/871/guides)
### Adafruit Mini 0.8" 8x8 LED Matrix w/I2C Backpack - Yellow-Green
[Adafruit Mini 0.8" 8x8 LED Matrix w/I2C Backpack - Yellow-Green](https://www.adafruit.com/product/872)
What's better than a single LED? Lots of LEDs! A fun way to make a small display is to use an [8x8 matrix](https://www.adafruit.com/category/37_88) or a [4-digit 7-segment display](https://www.adafruit.com/category/37_103). Matrices like these are...
In Stock
[Buy Now](https://www.adafruit.com/product/872)
[Related Guides to the Product](https://learn.adafruit.com/products/872/guides)
### Adafruit Mini 8x8 LED Matrix w/I2C Backpack - Blue
[Adafruit Mini 8x8 LED Matrix w/I2C Backpack - Blue](https://www.adafruit.com/product/959)
What's better than a single LED? Lots of LEDs! A fun way to make a small display is to use an [8x8 matrix](https://www.adafruit.com/category/37_88) or a [4-digit 7-segment display](https://www.adafruit.com/category/37_103). Matrices like these are...
In Stock
[Buy Now](https://www.adafruit.com/product/959)
[Related Guides to the Product](https://learn.adafruit.com/products/959/guides)
### Adafruit Small 1.2" 8x8 LED Matrix w/I2C Backpack - Red
[Adafruit Small 1.2" 8x8 LED Matrix w/I2C Backpack - Red](https://www.adafruit.com/product/1049)
What's better than a single LED? Lots of LEDs! A fun way to make a small display is to use an [8x8 matrix](https://www.adafruit.com/category/37_88) or a [4-digit 7-segment display](https://www.adafruit.com/category/37_103). Matrices like these are...
In Stock
[Buy Now](https://www.adafruit.com/product/1049)
[Related Guides to the Product](https://learn.adafruit.com/products/1049/guides)
### Adafruit Small 1.2" 8x8 LED Matrix w/I2C Backpack - Yellow
[Adafruit Small 1.2" 8x8 LED Matrix w/I2C Backpack - Yellow](https://www.adafruit.com/product/1050)
What's better than a single LED? Lots of LEDs! A fun way to make a small display is to use an [8x8 matrix](https://www.adafruit.com/category/37_88) or a [4-digit 7-segment display](https://www.adafruit.com/category/37_103). Matrices like these are...
In Stock
[Buy Now](https://www.adafruit.com/product/1050)
[Related Guides to the Product](https://learn.adafruit.com/products/1050/guides)
### Adafruit Small 1.2" 8x8 LED Matrix w/I2C Backpack - Yellow-Green
[Adafruit Small 1.2" 8x8 LED Matrix w/I2C Backpack - Yellow-Green](https://www.adafruit.com/product/1051)
What's better than a single LED? Lots of LEDs! A fun way to make a small display is to use an [8x8 matrix](https://www.adafruit.com/category/37_88) or a [4-digit 7-segment display](https://www.adafruit.com/category/37_103). Matrices like these are...
In Stock
[Buy Now](https://www.adafruit.com/product/1051)
[Related Guides to the Product](https://learn.adafruit.com/products/1051/guides)
### Adafruit Small 1.2" 8x8 LED Matrix w/I2C Backpack - Blue
[Adafruit Small 1.2" 8x8 LED Matrix w/I2C Backpack - Blue](https://www.adafruit.com/product/1052)
What's better than a single LED? Lots of LEDs! A fun way to make a small display is to use an [8x8 matrix](https://www.adafruit.com/category/37_88) or a [4-digit 7-segment display](https://www.adafruit.com/category/37_103). Matrices like these are...
In Stock
[Buy Now](https://www.adafruit.com/product/1052)
[Related Guides to the Product](https://learn.adafruit.com/products/1052/guides)
### Adafruit Bicolor LED Square Pixel Matrix with I2C Backpack
[Adafruit Bicolor LED Square Pixel Matrix with I2C Backpack](https://www.adafruit.com/product/902)
What's better than a single LED? Lots of LEDs! A fun way to make a small colorful display is to use a [1.2" Bi-color 8x8 LED Matrix](http://www.adafruit.com/products/458). Matrices like these are 'multiplexed' - so to control all the 128 LEDs you need 24 pins....
In Stock
[Buy Now](https://www.adafruit.com/product/902)
[Related Guides to the Product](https://learn.adafruit.com/products/902/guides)
## Related Guides
- [Adafruit LED Backpacks](https://learn.adafruit.com/adafruit-led-backpack.md)
- [Bluefruit LE Connect for iOS and Android](https://learn.adafruit.com/bluefruit-le-connect.md)
- [2.2" TFT Display](https://learn.adafruit.com/2-2-tft-display.md)
- [2.8" TFT Touch Shield](https://learn.adafruit.com/2-8-tft-touch-shield.md)
- [Matrix and 7-Segment LED Backpack with the Raspberry Pi](https://learn.adafruit.com/matrix-7-segment-led-backpack-with-the-raspberry-pi.md)
- [TMP36 Temperature Sensor](https://learn.adafruit.com/tmp36-temperature-sensor.md)
- [Wireless Gardening with Arduino + CC3000 WiFi Modules](https://learn.adafruit.com/wireless-gardening-arduino-cc3000-wifi-modules.md)
- [WiFi Candy Bowl Monitor](https://learn.adafruit.com/wifi-candy-bowl.md)
- [Line Following Zumo Robot Using Simulink](https://learn.adafruit.com/line-following-zumo-robot-programmed-with-simulink.md)
- [Wireless Power Switch with Arduino & the CC3000 WiFi Chip](https://learn.adafruit.com/wireless-power-switch-with-arduino-and-the-cc3000-wifi-chip.md)
- [Trinket / Gemma Space Invader Pendant](https://learn.adafruit.com/trinket-slash-gemma-space-invader-pendant.md)
- [Tiny Arduino Music Visualizer](https://learn.adafruit.com/piccolo.md)
- [LED Matrix Hourglass](https://learn.adafruit.com/led-matrix-hourglass.md)
- [Nokia 5110/3310 Monochrome LCD](https://learn.adafruit.com/nokia-5110-3310-monochrome-lcd.md)
- [Wave Shield Voice Changer](https://learn.adafruit.com/wave-shield-voice-changer.md)
---
# Source: https://learn.adafruit.com/adafruit-arduino-lesson-14-servo-motors/if-the-servo-misbehaves.md
# Arduino Lesson 14. Servo Motors
## If the Servo Misbehaves
Your servo may behave erratically, and you may find that this only happens when the Arduino is plugged into certain USB ports. This is because the servo draws quite a lot of power, especially as the motor is starting up, and this sudden high demand can be enough to drop the voltage on the Arduino board, so that it resets itself.
If this happens, then you can usually cure it by adding a high value capacitor (470uF or greater) between GND and 5V on the breadboard.

The capacitor acts as a reservoir of electricity for the motor to use, so that when it starts, it takes charge from the capacitor as well as the Arduino supply.
The longer lead of the capacitor is the positive lead and this should be connected to 5V. The negative lead is also often marked with a '-' symbol.
- [Previous Page](https://learn.adafruit.com/adafruit-arduino-lesson-14-servo-motors/the-breadboard-layout-for-sweep.md)
- [Next Page](https://learn.adafruit.com/adafruit-arduino-lesson-14-servo-motors/arduino-code-for-sweep.md)
## Featured Products
### Standard servo - TowerPro SG-5010
[Standard servo - TowerPro SG-5010](https://www.adafruit.com/product/155)
This high-torque standard servo can rotate approximately 180 degrees (90 in each direction). You can use any servo code, hardware, or library to control these servos. Good for beginners who want to make stuff move without building a motor controller with feedback & gearbox. Comes with 3...
In Stock
[Buy Now](https://www.adafruit.com/product/155)
[Related Guides to the Product](https://learn.adafruit.com/products/155/guides)
### Premium Male/Male Jumper Wires - 40 x 6" (150mm)
[Premium Male/Male Jumper Wires - 40 x 6" (150mm)](https://www.adafruit.com/product/758)
Handy for making wire harnesses or jumpering between headers on PCB's. These premium jumper wires are 6" (150mm) long and come in a 'strip' of 40 (4 pieces of each of ten rainbow colors). They have 0.1" male header contacts on either end and fit cleanly next to each other...
In Stock
[Buy Now](https://www.adafruit.com/product/758)
[Related Guides to the Product](https://learn.adafruit.com/products/758/guides)
### Half Sized Premium Breadboard - 400 Tie Points
[Half Sized Premium Breadboard - 400 Tie Points](https://www.adafruit.com/product/64)
This is a cute, half-size breadboard with 400 tie points, good for small projects. It's 3.25" x 2.2" / 8.3cm x 5.5cm with a standard double-strip in the middle and two power rails on both sides. You can pull the power rails off easily to make the breadboard as...
In Stock
[Buy Now](https://www.adafruit.com/product/64)
[Related Guides to the Product](https://learn.adafruit.com/products/64/guides)
### Adafruit METRO 328 Fully Assembled - Arduino IDE compatible
[Adafruit METRO 328 Fully Assembled - Arduino IDE compatible](https://www.adafruit.com/product/50)
We sure love the ATmega328 here at Adafruit, and we use them _a lot_ for our own projects. The processor has plenty of GPIO, Analog inputs, hardware UART SPI and I2C, timers and PWM galore - just enough for most simple projects. When we need to go small, we use a
Out of Stock
[Buy Now](https://www.adafruit.com/product/50)
[Related Guides to the Product](https://learn.adafruit.com/products/50/guides)
### Micro servo
[Micro servo](https://www.adafruit.com/product/169)
Tiny little servo can rotate approximately 180 degrees (90 in each direction) and works just like the standard kinds you're used to but _smaller_. You can use any servo code, hardware, or library to control these servos. Good for beginners who want to make stuff move without...
In Stock
[Buy Now](https://www.adafruit.com/product/169)
[Related Guides to the Product](https://learn.adafruit.com/products/169/guides)
### Standard Size - High Torque - Metal Gear Servo
[Standard Size - High Torque - Metal Gear Servo](https://www.adafruit.com/product/1142)
This high-torque standard servo now comes in a metal-gear flavor, for extra-high torque (10 kg\*cm!) and reliability! It can rotate at least 120 degrees (60 in each direction) with a classic 1.5-2.5ms pulse, but if you can extend your pulses it can go up to about 170 degrees - it varies a bit...
In Stock
[Buy Now](https://www.adafruit.com/product/1142)
[Related Guides to the Product](https://learn.adafruit.com/products/1142/guides)
### Micro Servo - MG90D High Torque Metal Gear
[Micro Servo - MG90D High Torque Metal Gear](https://www.adafruit.com/product/1143)
Add more power to your robot with this metal-geared MG90D servo. The tiny little servo can rotate approximately 90 degrees (45 in each direction) and works just like the standard kinds you're used to but _smaller_. You can use any servo code, hardware, or library to control...
Out of Stock
[Buy Now](https://www.adafruit.com/product/1143)
[Related Guides to the Product](https://learn.adafruit.com/products/1143/guides)
## Related Guides
- [Arduino Tips, Tricks, and Techniques](https://learn.adafruit.com/arduino-tips-tricks-and-techniques.md)
- [Light Meter](https://learn.adafruit.com/light-meter.md)
- [Arduino Lesson 4. Eight LEDs and a Shift Register](https://learn.adafruit.com/adafruit-arduino-lesson-4-eight-leds.md)
- [Adafruit Arduino Selection Guide](https://learn.adafruit.com/adafruit-arduino-selection-guide.md)
- [Smart Measuring Cup](https://learn.adafruit.com/smart-measuring-cup.md)
- [Low Power WiFi Datalogger](https://learn.adafruit.com/low-power-wifi-datalogging.md)
- [Electronic Demon Costume](https://learn.adafruit.com/electronic-demon-costume.md)
- [Photocells](https://learn.adafruit.com/photocells.md)
- [Wave Shield Talking Clock](https://learn.adafruit.com/wave-shield-talking-clock.md)
- [WiFi Weather Station](https://learn.adafruit.com/wifi-weather-station-arduino-cc3000.md)
- [Adafruit Data Logger Shield](https://learn.adafruit.com/adafruit-data-logger-shield.md)
- [Ladyada's Learn Arduino - Lesson #1](https://learn.adafruit.com/ladyadas-learn-arduino-lesson-number-1.md)
- [Collin's Lab: MIDI](https://learn.adafruit.com/collins-lab-midi.md)
- [Arduino Lesson 7. Make an RGB LED Fader](https://learn.adafruit.com/adafruit-arduino-lesson-7-make-an-rgb-led-fader.md)
- [Geofencing with the FONA 808 & Adafruit IO](https://learn.adafruit.com/geofencing-with-the-fona-808-and-adafruit-io.md)
---
# Source: https://learn.adafruit.com/using-the-adafruit-library-with-fritzing/import-the-library-into-fritzing.md
# Using the Adafruit Library with Fritzing
## Import the Library into Fritzing

Older versions of Fritzing required you to import the library using a particular menu command.
The most current version as of this writing (0.7.5) lets you open it using ("File | Open").
Use "File | Open", navigate to the AdaFruit.fzbz file and open it. The library should import automatically, and you'll see as it populates the parts palette on the right-hand side with all the new Adafruit parts.
The next thing you want to do is save the Adafruit bin (parts libraries in Fritzing are called 'bins'). Do this with the 'Save Bin' command in the parts palette (as shown in the image above). By default, Fritzing will want to save the bin to somewhere in your "/user' directory, which is the best place for it, so approve the suggestion and save the bin.
Restart Fritzing (close it and run it again). **Make sure you've saved the bin before restarting** or it won't show up in the next session.
You may now delete the copy of "AdaFruit.fzbz" from wherever you put it when you extracted it from the GitHub archive.
- [Previous Page](https://learn.adafruit.com/using-the-adafruit-library-with-fritzing/download-the-fritzing-library-from-github.md)
- [Next Page](https://learn.adafruit.com/using-the-adafruit-library-with-fritzing/using-the-adafruit-parts-in-a-fritzing-design.md)
## Related Guides
- [Adafruit TSSP77038 38KHz Infrared IR Demodulator Breakout](https://learn.adafruit.com/adafruit-tssp77038-38khz-infrared-ir-demodulator-breakout.md)
- [Adafruit INA228 I2C Power Monitor](https://learn.adafruit.com/adafruit-ina228-i2c-power-monitor.md)
- [Adafruit TMC2209 Stepper Motor Driver Breakout Board](https://learn.adafruit.com/adafruit-tmc2209-stepper-motor-driver-breakout-board.md)
- [Adafruit ADXL375](https://learn.adafruit.com/adafruit-adxl375.md)
- [Adafruit 15x7 CharliePlex FeatherWing](https://learn.adafruit.com/adafruit-15x7-7x15-charlieplex-led-matrix-charliewing-featherwing.md)
- [Adafruit Proto Doubler PiCowbell](https://learn.adafruit.com/adafruit-proto-doubler-picowbell.md)
- [Adafruit TSMP96000 IR Receiver Breakout](https://learn.adafruit.com/adafruit-tsmp96000-ir-receiver-breakout.md)
- [Adafruit PCA9546 4-Channel STEMMA QT Multiplexer](https://learn.adafruit.com/adafruit-pca9546-4-channel-stemma-qt-multiplexer.md)
- [AWS IoT and Adafruit WICED Feather](https://learn.adafruit.com/aws-iot-and-adafruit-wiced-feather.md)
- [Adafruit Sensirion SHTC3 - Temperature & Humidity Sensor Breakout](https://learn.adafruit.com/adafruit-sensirion-shtc3-temperature-humidity-sensor.md)
- [Expressive Pixels for Adafruit Matrix Portal](https://learn.adafruit.com/expressive-pixels-for-matrix-portal.md)
- [MCP4725 12-Bit DAC Tutorial](https://learn.adafruit.com/mcp4725-12-bit-dac-tutorial.md)
- [Ladyada's Toolkit](https://learn.adafruit.com/ladyadas-toolkit.md)
- [Adafruit 16-channel PWM/Servo Shield](https://learn.adafruit.com/adafruit-16-channel-pwm-slash-servo-shield.md)
- [Adafruit TE MS8607 PHT Sensor](https://learn.adafruit.com/adafruit-te-ms8607-pht-sensor.md)
---
# Source: https://learn.adafruit.com/creating-accurate-footprints-in-eagle/importing-the-bitmap-into-eagle.md
# Creating Accurate Footprints in Eagle
## Importing the Bitmap into Eagle
Once you're inside Eagle, create a new 'Package' and give it an appropriate name (Library \> Package ...). From here, you need to run the 'import-bmp.ulp' user language program. The quickest way is tp simply type the following command anywhere in the package editor:
```
run import-bmp.ulp
```
Once you run the ULP you should be presented with the following dialogue box, which you can click OK on to continue:

You'll be asked to select your source bitmap image, and you need to point to the 1-bit BMP you created earlier:

Next, you'll be presented with a box showing all of the colors available in the image. Select the 'white' pixel box, and click OK:

The most important step is in the following dialogue, where **you need to change two values** :
- Set the ' **Unit**' radio box to ' **mm**'
- Set the ' **Scale**' factor to **0.01mm** , the same scale we used when resizing our bitmap image earlier (remember mm\*100?).

Click the **OK** button, which will present the following screen, and then click the **Run script** button.

This should give you something similar to the results below with the imported bitmap placed on layer 200 (the default value, but it can be changed in the import settings dialogue box above):
With all of the done, we can start making our footprint
- [Previous Page](https://learn.adafruit.com/creating-accurate-footprints-in-eagle/creating-a-scaled-bitmap.md)
- [Next Page](https://learn.adafruit.com/creating-accurate-footprints-in-eagle/tracing-your-footprint.md)
## Related Guides
- [How to Sign Windows Drivers & Executables](https://learn.adafruit.com/how-to-sign-windows-drivers-installer.md)
- [Make your own PCB with Eagle, OSH Park, and Adafruit!](https://learn.adafruit.com/making-pcbs-with-oshpark-and-eagle.md)
- [Metal Parts from 3D Prints](https://learn.adafruit.com/metal-parts-from-3d-prints.md)
- [All About Laser Cutters](https://learn.adafruit.com/all-about-laser-cutters.md)
- [Adafruit Pinguin for EAGLE CAD](https://learn.adafruit.com/adafruit-pinguin-for-eagle-cad.md)
- [Maker Business & Manufacturing Software - Our Tips & Tricks](https://learn.adafruit.com/maker-business-manufacturing-software-our-tips-and-tricks.md)
- [SMT Manufacturing](https://learn.adafruit.com/smt-manufacturing.md)
- [How to Make a Pogo Pin Test Jig](https://learn.adafruit.com/how-to-make-a-pogo-pin-test-jig.md)
- [How we designed an injection-molded case](https://learn.adafruit.com/how-we-designed-an-injection-molded-case-for-raspberry-pi.md)
- [How to convert Eagle PCBs to 3D Models in Fusion 360](https://learn.adafruit.com/how-to-convert-eagle-pcbs-to-3d-models-in-fusion-360.md)
- [DIY 3D Printing Filament](https://learn.adafruit.com/diy-3d-printing-filament.md)
- [Laser-Cut Enclosure Design](https://learn.adafruit.com/laser-cut-enclosure-design.md)
- [Shop Tips & Tricks](https://learn.adafruit.com/shop-tips-and-tricks.md)
- [Standalone AVR Chip Programmer](https://learn.adafruit.com/standalone-avr-chip-programmer.md)
- [KTOWN's Ultimate Creating Parts in Eagle Tutorial](https://learn.adafruit.com/ktowns-ultimate-creating-parts-in-eagle-tutorial.md)
---
# Source: https://learn.adafruit.com/drive-a-16x2-lcd-directly-with-a-raspberry-pi/init-script.md
# Drive a 16x2 LCD with the Raspberry Pi
## Display Time & IP on Every Boot
It's all fine and dandy to have a script which we can manually run, but wouldn't it be nice to have the time and ip address pop up on the display when the Raspberry Pi boots up? This is done using an init script which runs our Python code every time your Raspberry Pi boots up.
## Download the service file
The following command will allow you to download the lcd.service file directly to your Pi.
```auto
wget https://raw.githubusercontent.com/adafruit/Adafruit_Learning_System_Guides/master/Drive_a_16x2_LCD_with_the_Raspberry_Pi/lcd.service
```
https://github.com/adafruit/Adafruit_Learning_System_Guides/blob/main/Drive_a_16x2_LCD_with_the_Raspberry_Pi/lcd.service
## Place the lcd.service file
The lcd.service file needs to be copied into the correct location and the systemctl command can be used to start | stop | enable the service. It is a good idea to test this before enabling as there might be a minor path difference on your system.
```auto
sudo cp lcd.service /etc/systemd/system
```
## Test the lcd.service
```auto
sudo systemctl daemon-reload
sudo systemctl start lcd.service
ps auxww | grep -i 16x2
```

The following commands read the updates to the service file, start the lcd.service and confirm that the process is running. If the script shows up in the 'ps' command output you have done everything correctly and can now enable the service and reboot. The service should activate upon bootup automatically.
## Enable lcd.service
```auto
sudo systemctl enable lcd.service
```
Now on each boot the LCD will automatically show the date/time/ip address on startup. This means you will know when the Pi is reachable and what the ip address is without having to plug a monitor in.
- [Previous Page](https://learn.adafruit.com/drive-a-16x2-lcd-directly-with-a-raspberry-pi/python-code.md)
- [Next Page](https://learn.adafruit.com/drive-a-16x2-lcd-directly-with-a-raspberry-pi/time-zone.md)
## Featured Products
### Standard LCD 16x2 + extras
[Standard LCD 16x2 + extras](https://www.adafruit.com/product/181)
Standard HD44780 LCDs are useful for creating standalone projects.
- 16 characters wide, 2 rows
- White text on blue background
- Connection port is 0.1" pitch, single row for easy breadboarding and wiring
- Pins are documented on the back of the LCD to assist...
In Stock
[Buy Now](https://www.adafruit.com/product/181)
[Related Guides to the Product](https://learn.adafruit.com/products/181/guides)
### Raspberry Pi 3 - Model B - ARMv8 with 1G RAM
[Raspberry Pi 3 - Model B - ARMv8 with 1G RAM](https://www.adafruit.com/product/3055)
Did you really think the Raspberry Pi would stop getting better? At this point, we sound like a broken record, extolling on the new Pi’s myriad improvements like we’re surprised that the folks at the Raspberry Pi Foundation are continuously making their flagship board better. ...
In Stock
[Buy Now](https://www.adafruit.com/product/3055)
[Related Guides to the Product](https://learn.adafruit.com/products/3055/guides)
### Adafruit Assembled Pi T-Cobbler Breakout for Raspberry Pi
[Adafruit Assembled Pi T-Cobbler Breakout for Raspberry Pi](https://www.adafruit.com/product/1754)
Now that you've finally got your hands on a [Raspberry Pi®](http://www.raspberrypi.org/), you're probably itching to make some fun embedded computer projects with it. What you need is an **assembled** add on prototyping Pi T-Cobbler from Adafruit, which can...
No Longer Stocked
[Buy Now](https://www.adafruit.com/product/1754)
[Related Guides to the Product](https://learn.adafruit.com/products/1754/guides)
### Assembled Pi Cobbler Plus - Breakout Cable
[Assembled Pi Cobbler Plus - Breakout Cable](https://www.adafruit.com/product/2029)
The Raspberry Pi B+ / Pi 2 / Pi 3 / Pi 4 has landed on the Maker World like a 40-GPIO pinned, quad-USB ported, credit card sized bomb of DIY joy. And while you can use most of our great Model B accessories by hooking up our [downgrade...](https://www.adafruit.com/product/1986)
In Stock
[Buy Now](https://www.adafruit.com/product/2029)
[Related Guides to the Product](https://learn.adafruit.com/products/2029/guides)
### Half Sized Premium Breadboard - 400 Tie Points
[Half Sized Premium Breadboard - 400 Tie Points](https://www.adafruit.com/product/64)
This is a cute, half-size breadboard with 400 tie points, good for small projects. It's 3.25" x 2.2" / 8.3cm x 5.5cm with a standard double-strip in the middle and two power rails on both sides. You can pull the power rails off easily to make the breadboard as...
In Stock
[Buy Now](https://www.adafruit.com/product/64)
[Related Guides to the Product](https://learn.adafruit.com/products/64/guides)
## Related Guides
- [Program an AVR or Arduino Using Raspberry Pi GPIO](https://learn.adafruit.com/program-an-avr-or-arduino-using-raspberry-pi-gpio-pins.md)
- [Basic Resistor Sensor Reading on Raspberry Pi](https://learn.adafruit.com/basic-resistor-sensor-reading-on-raspberry-pi.md)
- [Circadian Pi Desk Light](https://learn.adafruit.com/circadian-pi-desk-light.md)
- [Speech Synthesis on the Raspberry Pi](https://learn.adafruit.com/speech-synthesis-on-the-raspberry-pi.md)
- [Matrix and 7-Segment LED Backpack with the Raspberry Pi](https://learn.adafruit.com/matrix-7-segment-led-backpack-with-the-raspberry-pi.md)
- [Capacitive Touch Sensors on the Raspberry Pi](https://learn.adafruit.com/capacitive-touch-sensors-on-the-raspberry-pi.md)
- [Adafruit's Raspberry Pi Lesson 4. GPIO Setup](https://learn.adafruit.com/adafruits-raspberry-pi-lesson-4-gpio-setup.md)
- [Adafruit's Raspberry Pi Lesson 12. Sensing Movement](https://learn.adafruit.com/adafruits-raspberry-pi-lesson-12-sensing-movement.md)
- [Playing sounds and using buttons with Raspberry Pi](https://learn.adafruit.com/playing-sounds-and-using-buttons-with-raspberry-pi.md)
- [Adafruit's Raspberry Pi Lesson 10. Stepper Motors](https://learn.adafruit.com/adafruits-raspberry-pi-lesson-10-stepper-motors.md)
- [Raspberry Pi Analog to Digital Converters](https://learn.adafruit.com/raspberry-pi-analog-to-digital-converters.md)
- [Raspberry Pi E-mail Notifier Using LEDs](https://learn.adafruit.com/raspberry-pi-e-mail-notifier-using-leds.md)
- [Adafruit's Raspberry Pi Lesson 11. DS18B20 Temperature Sensing](https://learn.adafruit.com/adafruits-raspberry-pi-lesson-11-ds18b20-temperature-sensing.md)
- [Getting Started With Windows IoT Core on Raspberry Pi](https://learn.adafruit.com/getting-started-with-windows-iot-on-raspberry-pi.md)
- [Trinket Ultrasonic Rangefinder](https://learn.adafruit.com/trinket-ultrasonic-rangefinder.md)
---
# Source: https://learn.adafruit.com/electroknit/insert.md
# Electro-knit
## Insert New Patterns
Now we get to the fun part, showing how you can make an image on your computer and then inserting it into the memory file so that we can easily make new patterns without the tedious entering-by-hand part.
The first thing we'll need to do is make the image. The image **must** be 1-bit/2-color/monochrome/black&white. You need to make sure that whatever image software can save the file in monochrome. A free program on every windows computer that can do this is **MS Paint** - its crummy but it does this stuff kinda well.
A nice thing you can do is zoom in and click pixels. Remember that stitches in knitting are not square, so you may want to squish your graphic horizontally just a bit before lowering its resolution.


Again, make sure that its saved as a monochrome 1-bit Bitmap (BMP) file.

Next you'll need to figure out the pixel dimensions (width and height). You can count the pixels or, at least under windows and some paint programs, they'll report the image size for you.

Write down or otherwise keep track of the pixel dimensions for the next step.
## Creating a container pattern
Our software can't add new patterns to the memory file (we don't understand enough of the format to do so) but it **can** edit existing patterns. So what we'll do is make a blank 'container' pattern on the knitting machine. Then we'll edit the pattern on the computer and re-upload the file.
In this step, you're going to create the blank "container" pattern of the appropriate dimensions using the knitting machine control panel. This pattern is going to be 32x32 and will have pattern ID #901.
Press INPUT

Note the pattern number that appears. User-input patterns get assigned a number in ascending order starting at 901.

Press STEP

Enter your pattern's width (number of stitches), then press STEP

The number of available rows in the machine's memory will appear on the display. Press CE to clear the display.

Enter the pattern's height (number of rows) and press STEP.

Press INPUT once more to exit input mode.
Repeat for as many patterns as you'd like to create (and for which you have space).
## **Inserting the pattern**
Follow the [backup tutorial](http://learn.adafruit.com/electroknit/backup) to transfer the knitting machine memory to your computer
Now you'll run **insertpattern.py** by typing in **python insertpattern.py img/file-01.dat PATTERNNUM BMPFILE myfile.dat** which will insert the **BMPFILE** You made in part 1 into the pattern # location **PATTERNNUM** and when done, save the new data file to **myfile.dat** (so you dont overwrite the old file).

If the pattern size doesn't match the image size it won't continue.

## **Split the file**
Now that we have the **myfile.dat** , we'll need to split the file into tracks. This lets the emulator load the files back like it was a diskette. We've included a simple program to do this, its called **splitfile2trakc.py** and you can run it by typing in **splitfile2track.py myfile.dat** it will create two files, **track0.dat** and **track1.dat**.
Rename the files 00.dat and 01.dat respectively.

And drag them into your **img** folder.

If you're looking for a simple way to accomplish all that file-wrangling, check out Davi Post's img2track software that combines many of the above steps into one handy program.
Lastly, we'll reupload the files to the knitting machine, see the next section!
- [Previous Page](https://learn.adafruit.com/electroknit/view.md)
- [Next Page](https://learn.adafruit.com/electroknit/upload.md)
## Featured Products
### FTDI Serial TTL-232 USB Cable
[FTDI Serial TTL-232 USB Cable](https://www.adafruit.com/product/70)
Just about all electronics use TTL serial for debugging, bootloading, programming, serial output, etc. But it's rare for a computer to have a serial port anymore. This is a USB to TTL serial cable, with a FTDI FT232RL usb/serial chip embedded in the head. It has a 6-pin socket at the end...
In Stock
[Buy Now](https://www.adafruit.com/product/70)
[Related Guides to the Product](https://learn.adafruit.com/products/70/guides)
## Related Guides
- [Open Source Protective Face Shield Designs](https://learn.adafruit.com/open-source-face-shield-designs.md)
- [Pico Bluetooth Keyboard Bridge](https://learn.adafruit.com/pico-bluetooth-keyboard-bridge.md)
- [Dimmable Li-Ion Halogen Bike Light](https://learn.adafruit.com/dimmable-li-ion-halogen-bike-light.md)
- [Installing IronOS on an MHP30 Mini Hot Plate (DEPRECATED)](https://learn.adafruit.com/installing-ironos-on-a-mhp30-mini-hotplate.md)
- [Getting Started with Braille Output for CircuitPython REPL](https://learn.adafruit.com/getting-started-braille-output-circuitpython-repl.md)
- [Meowsic Cat Piano Line Out](https://learn.adafruit.com/meowsic-line-out.md)
- [Instagram Photo Frame](https://learn.adafruit.com/instagram-photo-frame.md)
- [ESP32 PlayStation Controller](https://learn.adafruit.com/esp32-playstation-controller.md)
- [NeoPIO: Drive lots of LEDs with Raspberry Pi Pico](https://learn.adafruit.com/neopio-drive-lots-of-leds-with-raspberry-pi-pico.md)
- [Ikea Vindriktning Hack with QT Py ESP32-S3 and Adafruit IO](https://learn.adafruit.com/ikea-vindriktning-hack-with-qt-py-esp32-s3-and-adafruit-io.md)
- [See N Say Brain Transplant](https://learn.adafruit.com/see-n-say-brain-transplant.md)
- [DIY Welded Bike Stand](https://learn.adafruit.com/diy-welded-bike-stand.md)
- [Setting up an Open Speech Recording Website](https://learn.adafruit.com/setting-up-an-open-speech-recording-website.md)
- [Authoring Playground Books with Bluefruit for iOS ](https://learn.adafruit.com/create-a-swift-playgroundbook-with-bluetooth-le.md)
- [Adafruit Feather RP2040 with USB Type A Host](https://learn.adafruit.com/adafruit-feather-rp2040-with-usb-type-a-host.md)
---
# Source: https://learn.adafruit.com/adafruit-arduino-lesson-14-servo-motors/inside-a-servo.md
# Arduino Lesson 14. Servo Motors
## Inside a Servo
The following short video shows you what is going on inside a servo.
Beware though, if you dismantle your servo like this, there is a good chance that it will not go back together properly.
http://youtu.be/9cvCRnVFpnA
- [Previous Page](https://learn.adafruit.com/adafruit-arduino-lesson-14-servo-motors/servo-motors.md)
- [Next Page](https://learn.adafruit.com/adafruit-arduino-lesson-14-servo-motors/other-things-to-do.md)
## Featured Products
### Standard servo - TowerPro SG-5010
[Standard servo - TowerPro SG-5010](https://www.adafruit.com/product/155)
This high-torque standard servo can rotate approximately 180 degrees (90 in each direction). You can use any servo code, hardware, or library to control these servos. Good for beginners who want to make stuff move without building a motor controller with feedback & gearbox. Comes with 3...
In Stock
[Buy Now](https://www.adafruit.com/product/155)
[Related Guides to the Product](https://learn.adafruit.com/products/155/guides)
### Premium Male/Male Jumper Wires - 40 x 6" (150mm)
[Premium Male/Male Jumper Wires - 40 x 6" (150mm)](https://www.adafruit.com/product/758)
Handy for making wire harnesses or jumpering between headers on PCB's. These premium jumper wires are 6" (150mm) long and come in a 'strip' of 40 (4 pieces of each of ten rainbow colors). They have 0.1" male header contacts on either end and fit cleanly next to each other...
In Stock
[Buy Now](https://www.adafruit.com/product/758)
[Related Guides to the Product](https://learn.adafruit.com/products/758/guides)
### Half Sized Premium Breadboard - 400 Tie Points
[Half Sized Premium Breadboard - 400 Tie Points](https://www.adafruit.com/product/64)
This is a cute, half-size breadboard with 400 tie points, good for small projects. It's 3.25" x 2.2" / 8.3cm x 5.5cm with a standard double-strip in the middle and two power rails on both sides. You can pull the power rails off easily to make the breadboard as...
In Stock
[Buy Now](https://www.adafruit.com/product/64)
[Related Guides to the Product](https://learn.adafruit.com/products/64/guides)
### Adafruit METRO 328 Fully Assembled - Arduino IDE compatible
[Adafruit METRO 328 Fully Assembled - Arduino IDE compatible](https://www.adafruit.com/product/50)
We sure love the ATmega328 here at Adafruit, and we use them _a lot_ for our own projects. The processor has plenty of GPIO, Analog inputs, hardware UART SPI and I2C, timers and PWM galore - just enough for most simple projects. When we need to go small, we use a
Out of Stock
[Buy Now](https://www.adafruit.com/product/50)
[Related Guides to the Product](https://learn.adafruit.com/products/50/guides)
### Micro servo
[Micro servo](https://www.adafruit.com/product/169)
Tiny little servo can rotate approximately 180 degrees (90 in each direction) and works just like the standard kinds you're used to but _smaller_. You can use any servo code, hardware, or library to control these servos. Good for beginners who want to make stuff move without...
In Stock
[Buy Now](https://www.adafruit.com/product/169)
[Related Guides to the Product](https://learn.adafruit.com/products/169/guides)
### Standard Size - High Torque - Metal Gear Servo
[Standard Size - High Torque - Metal Gear Servo](https://www.adafruit.com/product/1142)
This high-torque standard servo now comes in a metal-gear flavor, for extra-high torque (10 kg\*cm!) and reliability! It can rotate at least 120 degrees (60 in each direction) with a classic 1.5-2.5ms pulse, but if you can extend your pulses it can go up to about 170 degrees - it varies a bit...
In Stock
[Buy Now](https://www.adafruit.com/product/1142)
[Related Guides to the Product](https://learn.adafruit.com/products/1142/guides)
### Micro Servo - MG90D High Torque Metal Gear
[Micro Servo - MG90D High Torque Metal Gear](https://www.adafruit.com/product/1143)
Add more power to your robot with this metal-geared MG90D servo. The tiny little servo can rotate approximately 90 degrees (45 in each direction) and works just like the standard kinds you're used to but _smaller_. You can use any servo code, hardware, or library to control...
Out of Stock
[Buy Now](https://www.adafruit.com/product/1143)
[Related Guides to the Product](https://learn.adafruit.com/products/1143/guides)
## Related Guides
- [Arduino Tips, Tricks, and Techniques](https://learn.adafruit.com/arduino-tips-tricks-and-techniques.md)
- [Light Meter](https://learn.adafruit.com/light-meter.md)
- [Arduino Lesson 4. Eight LEDs and a Shift Register](https://learn.adafruit.com/adafruit-arduino-lesson-4-eight-leds.md)
- [Adafruit Arduino Selection Guide](https://learn.adafruit.com/adafruit-arduino-selection-guide.md)
- [Smart Measuring Cup](https://learn.adafruit.com/smart-measuring-cup.md)
- [Low Power WiFi Datalogger](https://learn.adafruit.com/low-power-wifi-datalogging.md)
- [Electronic Demon Costume](https://learn.adafruit.com/electronic-demon-costume.md)
- [Photocells](https://learn.adafruit.com/photocells.md)
- [Wave Shield Talking Clock](https://learn.adafruit.com/wave-shield-talking-clock.md)
- [WiFi Weather Station](https://learn.adafruit.com/wifi-weather-station-arduino-cc3000.md)
- [Adafruit Data Logger Shield](https://learn.adafruit.com/adafruit-data-logger-shield.md)
- [Ladyada's Learn Arduino - Lesson #1](https://learn.adafruit.com/ladyadas-learn-arduino-lesson-number-1.md)
- [Collin's Lab: MIDI](https://learn.adafruit.com/collins-lab-midi.md)
- [Arduino Lesson 7. Make an RGB LED Fader](https://learn.adafruit.com/adafruit-arduino-lesson-7-make-an-rgb-led-fader.md)
- [Geofencing with the FONA 808 & Adafruit IO](https://learn.adafruit.com/geofencing-with-the-fona-808-and-adafruit-io.md)
---
# Source: https://learn.adafruit.com/playing-sounds-and-using-buttons-with-raspberry-pi/install-circuitpython-for-raspberry-pi.md
# Playing sounds and using buttons with Raspberry Pi
## Install CircuitPython for Raspberry Pi
# Install adafruit\_blinka
```
$ sudo pip3 install adafruit-blinka
```
If you have installed adafruit-blinka in the past this would be a good time to see if any upgraded version is available.
```
$ pip3 install --upgrade adafruit_blinka
```
- [Previous Page](https://learn.adafruit.com/playing-sounds-and-using-buttons-with-raspberry-pi/prerequisite-pi-setup.md)
- [Next Page](https://learn.adafruit.com/playing-sounds-and-using-buttons-with-raspberry-pi/bread-board-setup-for-input-buttons.md)
## Featured Products
### Raspberry Pi 3 - Model B+ - 1.4GHz Cortex-A53 with 1GB RAM
[Raspberry Pi 3 - Model B+ - 1.4GHz Cortex-A53 with 1GB RAM](https://www.adafruit.com/product/3775)
The Raspberry Pi 3 Model B is the most popular Raspberry Pi computer made, and the Pi Foundation knows you can always make a good thing _better_! And what could make the Pi 3 better? How about a _faster_ processor, 5 GHz WiFi, and updated Ethernet chip with PoE capability?...
In Stock
[Buy Now](https://www.adafruit.com/product/3775)
[Related Guides to the Product](https://learn.adafruit.com/products/3775/guides)
### Half Sized Premium Breadboard - 400 Tie Points
[Half Sized Premium Breadboard - 400 Tie Points](https://www.adafruit.com/product/64)
This is a cute, half-size breadboard with 400 tie points, good for small projects. It's 3.25" x 2.2" / 8.3cm x 5.5cm with a standard double-strip in the middle and two power rails on both sides. You can pull the power rails off easily to make the breadboard as...
In Stock
[Buy Now](https://www.adafruit.com/product/64)
[Related Guides to the Product](https://learn.adafruit.com/products/64/guides)
### Tactile Button switch (6mm) x 20 pack
[Tactile Button switch (6mm) x 20 pack](https://www.adafruit.com/product/367)
Little clicky switches are standard input "buttons" on electronic projects. These work best in a PCB but [can be used on a solderless breadboard as shown in this tutorial](https://learn.adafruit.com/adafruit-arduino-lesson-6-digital-inputs?view=all). The pins are normally...
In Stock
[Buy Now](https://www.adafruit.com/product/367)
[Related Guides to the Product](https://learn.adafruit.com/products/367/guides)
### Adafruit Raspberry Pi B+ / Pi 2 / Pi 3 Case - Smoke Base
[Adafruit Raspberry Pi B+ / Pi 2 / Pi 3 Case - Smoke Base](https://www.adafruit.com/product/2258)
It took awhile to perfect - but that's okay since we can now safely say that the Adafruit case for Raspberry Pi Model B+ / Pi 2 / Pi 3 is The Single Greatest Raspberry Pi Model B+ Case Ever.
This enclosure was designed by Mike Doell - just like our...
In Stock
[Buy Now](https://www.adafruit.com/product/2258)
[Related Guides to the Product](https://learn.adafruit.com/products/2258/guides)
### 5V 2.5A Switching Power Supply with 20AWG MicroUSB Cable
[5V 2.5A Switching Power Supply with 20AWG MicroUSB Cable](https://www.adafruit.com/product/1995)
Our all-in-one 5V 2.5 Amp + MicroUSB cable power adapter is the perfect choice for powering single-board computers like Raspberry Pi, BeagleBone, or anything else that's power-hungry!
This adapter was specifically designed to provide 5.25V, not 5V, but we still call it a 5V USB...
Out of Stock
[Buy Now](https://www.adafruit.com/product/1995)
[Related Guides to the Product](https://learn.adafruit.com/products/1995/guides)
### Assembled Pi T-Cobbler Plus - GPIO Breakout
[Assembled Pi T-Cobbler Plus - GPIO Breakout](https://www.adafruit.com/product/2028)
**This is the assembled version of the Pi T-Cobbler Plus. It only works with the Raspberry Pi Model Zero, A+, B+, Pi 2, Pi 3 & Pi 4!** (Any Pi with 2x20 connector)
The Raspberry Pi has landed on the Maker World like a 40-GPIO pinned, quad-USB ported, credit...
In Stock
[Buy Now](https://www.adafruit.com/product/2028)
[Related Guides to the Product](https://learn.adafruit.com/products/2028/guides)
### Assembled Pi Cobbler Plus - Breakout Cable
[Assembled Pi Cobbler Plus - Breakout Cable](https://www.adafruit.com/product/2029)
The Raspberry Pi B+ / Pi 2 / Pi 3 / Pi 4 has landed on the Maker World like a 40-GPIO pinned, quad-USB ported, credit card sized bomb of DIY joy. And while you can use most of our great Model B accessories by hooking up our [downgrade...](https://www.adafruit.com/product/1986)
In Stock
[Buy Now](https://www.adafruit.com/product/2029)
[Related Guides to the Product](https://learn.adafruit.com/products/2029/guides)
### Adafruit Assembled Pi Cobbler Breakout + Cable for Raspberry Pi
[Adafruit Assembled Pi Cobbler Breakout + Cable for Raspberry Pi](https://www.adafruit.com/product/914)
Now that you've finally got your hands on a [Raspberry Pi® Model B](http://www.raspberrypi.org/), you're probably itching to make some fun embedded computer projects with it. What you need is an add on prototyping Pi Cobbler from Adafruit, which can break out all those...
No Longer Stocked
[Buy Now](https://www.adafruit.com/product/914)
[Related Guides to the Product](https://learn.adafruit.com/products/914/guides)
## Related Guides
- [Capacitive Touch Sensors on the Raspberry Pi](https://learn.adafruit.com/capacitive-touch-sensors-on-the-raspberry-pi.md)
- [LoRa and LoRaWAN Radio for Raspberry Pi](https://learn.adafruit.com/lora-and-lorawan-radio-for-raspberry-pi.md)
- [Adafruit's Raspberry Pi Lesson 13. Power Control](https://learn.adafruit.com/adafruits-raspberry-pi-lesson-13-power-control.md)
- [Adafruit's Raspberry Pi Lesson 4. GPIO Setup](https://learn.adafruit.com/adafruits-raspberry-pi-lesson-4-gpio-setup.md)
- [Adafruit's Raspberry Pi Lesson 11. DS18B20 Temperature Sensing](https://learn.adafruit.com/adafruits-raspberry-pi-lesson-11-ds18b20-temperature-sensing.md)
- [Analog Inputs for Raspberry Pi Using the MCP3008](https://learn.adafruit.com/reading-a-analog-in-and-controlling-audio-volume-with-the-raspberry-pi.md)
- [CircuitPython Libraries on Linux and ODROID C2](https://learn.adafruit.com/circuitpython-libaries-linux-odroid-c2.md)
- [Single Channel LoRaWAN Gateway for Raspberry Pi](https://learn.adafruit.com/raspberry-pi-single-channel-lorawan-gateway.md)
- [Adafruit AMG8833 8x8 Thermal Camera Sensor](https://learn.adafruit.com/adafruit-amg8833-8x8-thermal-camera-sensor.md)
- [Introducing the Raspberry Pi 2 - Model B](https://learn.adafruit.com/introducing-the-raspberry-pi-2-model-b.md)
- [Basic Resistor Sensor Reading on Raspberry Pi](https://learn.adafruit.com/basic-resistor-sensor-reading-on-raspberry-pi.md)
- [Windows IoT Core Application Development: Headed Blinky](https://learn.adafruit.com/windows-iot-application-development-headed-blinky.md)
- [Raspberry Pi WiFi Radio](https://learn.adafruit.com/pi-wifi-radio.md)
- [Program an AVR or Arduino Using Raspberry Pi GPIO](https://learn.adafruit.com/program-an-avr-or-arduino-using-raspberry-pi-gpio-pins.md)
- [USB Rechargeable Cordless Soldering Iron](https://learn.adafruit.com/usb-rechargeable-cordless-soldering-iron.md)
---
# Source: https://learn.adafruit.com/digital-led-belt/install-driver.md
# Digital LED Belt
## Install Driver
We'll start out easy, by plugging in the atmega32u4 board and installing the driver. For mac and linux users, you can skip this step! If you're using windows, however, you'll need to do this:
[Download the \*\*inf\*\* by right-click saving this file and saving it to the Desktop](http://www.adafruit.com/datasheets/atmega32u4cdc.inf)
Then plug a mini-B cable into the board and you should see the LED light up on it and you'll be asked to install the driver.
Select **No, not this time** :

Select **Install from a list or specific location** :
Browse to the deskop (or where-ever you saved the **inf** )
Click **Continue Anyways** (we didn't pay for Logo testing, but we're using the built in driver so its OK)
Thats it! The USB-serial port should now show up under the device manager. If you press the reset button it will 'disappear' and reappear.
- [Previous Page](https://learn.adafruit.com/digital-led-belt/overview.md)
- [Next Page](https://learn.adafruit.com/digital-led-belt/solder-header.md)
## Featured Products
### Digital programmable LED belt kit
[Digital programmable LED belt kit](https://www.adafruit.com/product/332)
By popular demand, we now have a project tutorial for how to make your own programmable, ultra-blinky LED belt. Perfect for parties, raves, parades, weddings, funerals, and bar mitzvahs. Wear it with pride, wear it with blinky! Follow our soldering tutorial to build your own heirloom LED belt,...
No Longer Stocked
[Buy Now](https://www.adafruit.com/product/332)
[Related Guides to the Product](https://learn.adafruit.com/products/332/guides)
## Related Guides
- [LED Sequin Bow Tie](https://learn.adafruit.com/led-sequin-bowtie.md)
- [Bluetooth-Controlled NeoPixel Goggles](https://learn.adafruit.com/bluetooth-neopixel-goggles.md)
- [Light Painting with Raspberry Pi](https://learn.adafruit.com/light-painting-with-raspberry-pi.md)
- [Glowing Viking Rune wayFinder](https://learn.adafruit.com/glowing-viking-rune-artifact.md)
- [3D Printing with Bamboo Wood Filament](https://learn.adafruit.com/3d-printing-with-bamboo-wood-filament.md)
- [Jellyfish Umbrella with easy WLED WiFi Control](https://learn.adafruit.com/jellyfish-umbrella-with-easy-wled-wifi-control.md)
- [Bandolier of Light](https://learn.adafruit.com/bandolier-of-light.md)
- [Electron Bow](https://learn.adafruit.com/electron-bow.md)
- [Steven Universe Cosplay Shirt & Gem](https://learn.adafruit.com/steven-universe-cosplay-shirt-gem.md)
- [CLUE Vertical Garden Weather Visualizer](https://learn.adafruit.com/clue-vertical-garden-weather-visualizer.md)
- [Cast a 3d Printed Necklace in Metal](https://learn.adafruit.com/cast-a-3d-printed-necklace-in-metal.md)
- [3D Printed Wearable Video Goggles](https://learn.adafruit.com/3d-printed-wearable-video-goggles.md)
- [Bunny Ears with MakeCode](https://learn.adafruit.com/bunny-ears-with-makecode.md)
- [Roll-up Video Light](https://learn.adafruit.com/roll-up-video-light.md)
- [1,500 NeoPixel LED Curtain with Raspberry Pi and Fadecandy](https://learn.adafruit.com/1500-neopixel-led-curtain-with-raspberry-pi-fadecandy.md)
---
# Source: https://learn.adafruit.com/webide/installation.md
# Adafruit WebIDE
## Installation
http://youtu.be/8NoiBBgaKCI
Installation of the editor can be performed in two ways. One is the more trusting, but much easier way, the second is a bit more manual.
## Easy installation:
Log into your Raspberry Pi. If you're on a Mac, you can open Terminal.app to log into the Raspberry Pi over SSH. Linux users can open the default terminal application. If you're using Windows, you'll want to download a good terminal application. My favorite is [PuTTY](http://www.chiark.greenend.org.uk/~sgtatham/putty/download.html "Link: http://www.chiark.greenend.org.uk/~sgtatham/putty/download.html").
Once you have the terminal application open, assuming you're using Occidentalis, type in the following: ```
$ ssh pi@raspberrypi.local
pi@raspberrypi.locals password:
```
Once you type your password in, and get a prompt, you can copy and paste the following command, and hit enter. This command will download an install.sh script from our github repository, and execute it automatically for you.
```
curl https://raw.githubusercontent.com/adafruit/Adafruit-WebIDE/master/scripts/install.sh | sudo sh
```
The editor will be installed into /usr/share/adafruit/webide using the user webide. The script will install node, npm, redis-server, git, and i2c-tools. If you'd like to review the script, it's located in our [repository](https://raw.github.com/adafruit/Adafruit-WebIDE/alpha/scripts/install.sh "Link: https://raw.github.com/adafruit/Adafruit-WebIDE/alpha/scripts/install.sh").
Danger:
After the installation is complete, you'll see the following prompt:
```
**** Starting the server...(please wait) ****
**** The Adafruit WebIDE is installed and running! ****
**** Commands: sudo systemctl {start,stop,restart} adafruit-webide ****
**** Navigate to http://raspberrypi.local:8080 to use the WebIDE
```
The editor is now installed, and you can open a browser to access it from any computer in your network.
Due to our very small development team, and limited resources, the only browsers that are supported are Google Chrome, and Mozilla Firefox at this time. We hope to support more in the future!
## Manual Installation:
You can manually install the editor by following along in the following installer script and choosing the components you'd like to install:
```
https://raw.githubusercontent.com/adafruit/Adafruit-WebIDE/master/scripts/install.sh
```
## Uninstallation:
To uninstall the editor you can run the following script:
```
curl https://raw.githubusercontent.com/adafruit/Adafruit-WebIDE/master/scripts/uninstall.sh | sh
```
You can also manually uninstall by removing the following components:
- Delete the folder the editor exists in.
- Uninstall nodejs npm redis-server git avahi-daemon i2c-tools.
- [Previous Page](https://learn.adafruit.com/webide/overview.md)
- [Next Page](https://learn.adafruit.com/webide/getting-started.md)
## Featured Products
### Raspberry Pi Model B 512MB RAM
[Raspberry Pi Model B 512MB RAM](https://www.adafruit.com/product/998)
Adafruit ships the **Raspberry Pi Model B 512MB RAM** as of 10/18/2012.
The Raspberry Pi® is a single-board computer developed in the UK by the Raspberry Pi Foundation with the intention of stimulating the teaching of basic computer science in schools. The Raspberry...
No Longer Stocked
[Buy Now](https://www.adafruit.com/product/998)
[Related Guides to the Product](https://learn.adafruit.com/products/998/guides)
### BeagleBone Black - Rev B
[BeagleBone Black - Rev B](https://www.adafruit.com/product/1278)
**[Adafruit is no longer shipping the BeagleBone Black Rev B, it has been replaced with the Rev C as of 5/12/14](https://www.adafruit.com/products/1876) - the Rev C now has 4G flash and also comes with Debian, it also costs slightly more. There are no exchanges or...**
No Longer Stocked
[Buy Now](https://www.adafruit.com/product/1278)
[Related Guides to the Product](https://learn.adafruit.com/products/1278/guides)
### Adafruit Pi Box - Enclosure for Raspberry Pi Model A or B
[Adafruit Pi Box - Enclosure for Raspberry Pi Model A or B](https://www.adafruit.com/product/859)
**Discontinued** - you can grab [Adafruit Pi Box Plus - Enclosure for RasPi Model B+/Pi 2/ Pi 3](https://www.adafruit.com/product/1985) instead!
**We're still selling this classic Adafruit case for those who specifically want it but **
No Longer Stocked
[Buy Now](https://www.adafruit.com/product/859)
[Related Guides to the Product](https://learn.adafruit.com/products/859/guides)
### Miniature WiFi (802.11b/g/n) Module: For Raspberry Pi and more
[Miniature WiFi (802.11b/g/n) Module: For Raspberry Pi and more](https://www.adafruit.com/product/814)
Make your Internet of Things device cable-free by adding WiFi. Take advantage of the Raspberry Pi and Beagle Bone's USB port to add a low cost, but high-reliability wireless link. We tried half a dozen modules to find one that works well with the Pi and Bone without the need of recompiling...
No Longer Stocked
[Buy Now](https://www.adafruit.com/product/814)
[Related Guides to the Product](https://learn.adafruit.com/products/814/guides)
## Related Guides
- [Trellis Python Library](https://learn.adafruit.com/trellis-python-library.md)
- [Adafruit DVI Sock for Pico](https://learn.adafruit.com/adafruit-dvi-sock-for-pico.md)
- [Introducing Adafruit ItsyBitsy M4](https://learn.adafruit.com/introducing-adafruit-itsybitsy-m4.md)
- [SMT Breadboard Prototyping Using Breakout PCBs](https://learn.adafruit.com/smt-prototyping-using-breakout-pcbs.md)
- [Getting Started with RTL-SDR and SDR-Sharp and CubicSDR](https://learn.adafruit.com/getting-started-with-rtl-sdr-and-sdr-sharp.md)
- [Adafruit STEMMA Reflective Photo Interrupt Sensor](https://learn.adafruit.com/adafruit-stemma-reflective-photo-interrupt-sensor.md)
- [Adafruit 9-DOF Orientation IMU Fusion Breakout - BNO085](https://learn.adafruit.com/adafruit-9-dof-orientation-imu-fusion-breakout-bno085.md)
- [Adafruit I2C to 8 Channel Solenoid Driver](https://learn.adafruit.com/adafruit-i2c-to-8-channel-solenoid-driver.md)
- [Controlling Motors using the Raspberry Pi and RasPiRobot Board V2](https://learn.adafruit.com/controlling-motors-using-the-raspberry-pi-and-raspirobot-board-v2.md)
- [Adafruit Feather 32u4 FONA](https://learn.adafruit.com/adafruit-feather-32u4-fona.md)
- [Adafruit Pi Stemma QT Breakout](https://learn.adafruit.com/adafruit-pi-stemma-qt-breakout.md)
- [Adafruit's Raspberry Pi Lesson 8. Using a Servo Motor](https://learn.adafruit.com/adafruits-raspberry-pi-lesson-8-using-a-servo-motor.md)
- [IoT Bird Feeder with Camera](https://learn.adafruit.com/iot-window-bird-feeder-with-camera.md)
- [Using the BMP085/180 with Raspberry Pi or Beaglebone Black](https://learn.adafruit.com/using-the-bmp085-with-raspberry-pi.md)
- [AR1100 Resistive Touch Screen Controller Guide](https://learn.adafruit.com/ar1100-resistive-touch-screen-controller-guide.md)
---
# Source: https://learn.adafruit.com/lesson-0-getting-started/installing-arduino-mac-and-linux.md
# Arduino Lesson 0. Getting Started
## Installing Arduino (Mac and Linux)
Get started by visiting the [Arduino.cc](http://arduino.cc/en/Main/Software) website and downloading the matching IDE for your operating system. As of April 2014 we suggest v1.05 as 1.5 is still in beta. If 1.5 is no longer in beta when you read this you can try it out!

Save the install software to your desktop or wherever

The process for installing the Arduino software on the Mac is a lot easier than on the PC. As before, the first step is to download the file. In the case of the Mac, it is a zip file.

Once downloaded, double-click on the zip file, which will extract a single file called ‘Arduino.app’. This is the whole Arduino application, just drag it into your Applications Folder.


You can now find and launch the Arduino software in your Applications folder. As you are going to use it frequently, you may wish to right-click its icon in the dock and set it to Keep In Dock.
There are many different LINUX distributions and the instructions for each distribution are a little different. The Arduino community has done a great job of putting together sets of instructions for each distribution. So follow the link below and select one of the ten or more distributions on offer.
- [Previous Page](https://learn.adafruit.com/lesson-0-getting-started/installing-arduino-windows.md)
- [Next Page](https://learn.adafruit.com/lesson-0-getting-started/boards-and-ports.md)
## Featured Products
### Arduino Leonardo ATmega32u4 with headers
[Arduino Leonardo ATmega32u4 with headers](https://www.adafruit.com/product/849)
**Note:** This product is **discontinued,** but you can purchase the [Seeeduino Lite](https://www.adafruit.com/product/3228), which is an equivalent alternative that can be used instead.
The Arduino Leonardo is a microcontroller board based on...
No Longer Stocked
[Buy Now](https://www.adafruit.com/product/849)
[Related Guides to the Product](https://learn.adafruit.com/products/849/guides)
### Adafruit METRO 328 Fully Assembled - Arduino IDE compatible
[Adafruit METRO 328 Fully Assembled - Arduino IDE compatible](https://www.adafruit.com/product/50)
We sure love the ATmega328 here at Adafruit, and we use them _a lot_ for our own projects. The processor has plenty of GPIO, Analog inputs, hardware UART SPI and I2C, timers and PWM galore - just enough for most simple projects. When we need to go small, we use a
Out of Stock
[Buy Now](https://www.adafruit.com/product/50)
[Related Guides to the Product](https://learn.adafruit.com/products/50/guides)
## Related Guides
- [Bluetooth Temperature & Humidity Sensor](https://learn.adafruit.com/bluetooth-temperature-and-humidity-sensor.md)
- [Bluefruit LE Connect for iOS and Android](https://learn.adafruit.com/bluefruit-le-connect.md)
- [Arduino Lesson 14. Servo Motors](https://learn.adafruit.com/adafruit-arduino-lesson-14-servo-motors.md)
- [20mm LED Pixels](https://learn.adafruit.com/20mm-led-pixels.md)
- [Affordable HAL 9000 Replica](https://learn.adafruit.com/hal-9000-replica.md)
- [Adafruit 1.27" and 1.5" Color OLED Breakout Board](https://learn.adafruit.com/adafruit-1-5-color-oled-breakout-board.md)
- [Mini Thermal Receipt Printers](https://learn.adafruit.com/mini-thermal-receipt-printer.md)
- [Introducing Adafruit Trellis ](https://learn.adafruit.com/adafruit-trellis-diy-open-source-led-keypad.md)
- [Multi-tasking the Arduino - Part 2](https://learn.adafruit.com/multi-tasking-the-arduino-part-2.md)
- [FTDI Friend](https://learn.adafruit.com/ftdi-friend.md)
- [Wave Shield Voice Changer](https://learn.adafruit.com/wave-shield-voice-changer.md)
- [Adafruit 1.14" 240x135 Color TFT Breakout LCD Display](https://learn.adafruit.com/adafruit-1-14-240x135-color-tft-breakout.md)
- [Arduino Ethernet + SD Card](https://learn.adafruit.com/arduino-ethernet-sd-card.md)
- [A REST API for Arduino & the CC3000 WiFi Chip](https://learn.adafruit.com/a-rest-api-for-arduino-and-the-cc3000-wifi-chip.md)
- [WiFi Controlled LED Christmahanukwanzaa Tree](https://learn.adafruit.com/wifi-controlled-led-christmahanukwanzaa-tree.md)
---
# Source: https://learn.adafruit.com/lesson-0-getting-started/installing-arduino-windows.md
# Arduino Lesson 0. Getting Started
## Installing Arduino (Windows)
The Arduino software that you will use to program your Arduino is available for Windows, Mac and Linux. The installation process is different for all three platforms and unfortunately there is a certain amount of manual work to install the software. There is no installer program, but rather you have to unzip a folder which gives you an Arduino folder that contains the Arduino program and a few other items.
In a separate step, you must then install USB drivers, which is the only bit that is a bit fiddly.
Get started by visiting the [Arduino.cc](http://arduino.cc/en/Main/Software) website. As of April 2014 we suggest v1.05 as 1.5 is still in beta. If 1.5 is no longer in beta when you read this you can try it out!
Start by downloading the the zip file for Windows. There is only one version of the software, whether you are using Windows XP through to Windows 7.
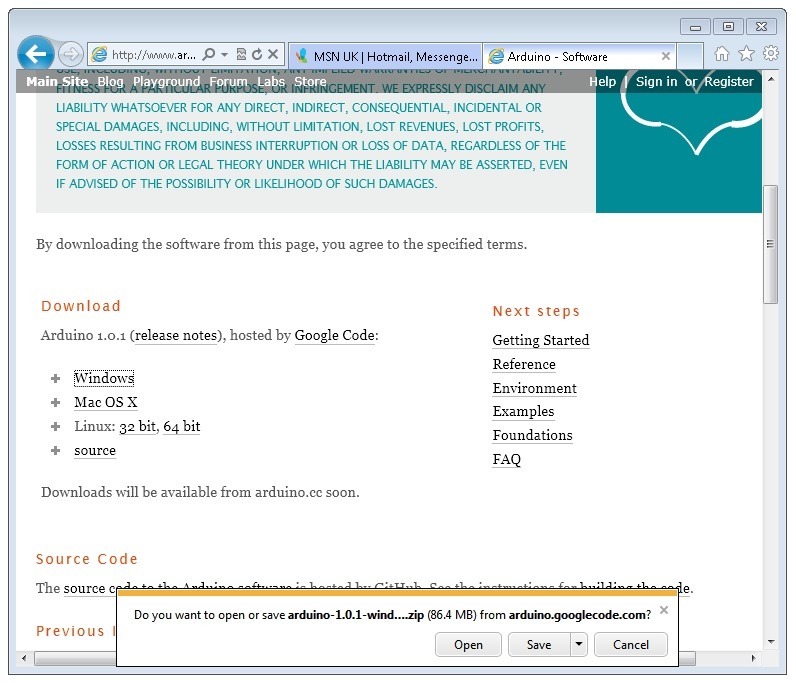
When the zip file has downloaded, extract the contents onto the Desktop, by right-clicking on the file and selecting 'Extract All...' from the pop-up menu.

Next select your Desktop and click 'Extract'. You can move it somewhere else onto your computer later, just by moving the folder, but for now, just keep it on the Desktop.
The Arduino folder contains both the Arduino program itself and also the drivers that allow the Arduino to be connected to your computer by a USB cable. Before we launch the Arduino software, you are going to install the USB drivers.
Plug one end of your USB cable into the Arduino and the other into a USB socket on your computer. The power light on the LED will light up and you may get a 'Found New Hardware' message from Windows. Ignore this message and cancel any attempts that Windows makes to try and install drivers automatically for you.
The most reliable method of installing the USB drivers is to use the Device Manager. This is accessed in different ways depending on your version of Windows. In Windows 7, you first have to open the Control Panel, then select the option to view Icons, and you should find the Device Manager in the list.
Under the section ‘Other Devices’ you should see an icon for ‘unknown device’ with a little yellow warning triangle next to it. This is your Arduino.

Right-click on the device and select the top menu option (Update Driver Software...). You will then be prompted to either ‘Search Automatically for updated driver software’ or ‘Browse my computer for driver software’. Select the option to browse and navigate to the arduino-1.0.2-windows\arduino1.0.2\drivers.

Click 'Next' and you may get a security warning, if so, allow the software to be installed. Once the software has been installed, you will get a confirmation message.

That's it, you are now ready for action, so Skip the next section on installation on Mac and Linux and move straight on to 'Boards and Ports'.
- [Previous Page](https://learn.adafruit.com/lesson-0-getting-started/breadboard.md)
- [Next Page](https://learn.adafruit.com/lesson-0-getting-started/installing-arduino-mac-and-linux.md)
## Featured Products
### Arduino Leonardo ATmega32u4 with headers
[Arduino Leonardo ATmega32u4 with headers](https://www.adafruit.com/product/849)
**Note:** This product is **discontinued,** but you can purchase the [Seeeduino Lite](https://www.adafruit.com/product/3228), which is an equivalent alternative that can be used instead.
The Arduino Leonardo is a microcontroller board based on...
No Longer Stocked
[Buy Now](https://www.adafruit.com/product/849)
[Related Guides to the Product](https://learn.adafruit.com/products/849/guides)
### Adafruit METRO 328 Fully Assembled - Arduino IDE compatible
[Adafruit METRO 328 Fully Assembled - Arduino IDE compatible](https://www.adafruit.com/product/50)
We sure love the ATmega328 here at Adafruit, and we use them _a lot_ for our own projects. The processor has plenty of GPIO, Analog inputs, hardware UART SPI and I2C, timers and PWM galore - just enough for most simple projects. When we need to go small, we use a
Out of Stock
[Buy Now](https://www.adafruit.com/product/50)
[Related Guides to the Product](https://learn.adafruit.com/products/50/guides)
## Related Guides
- [Bluetooth Temperature & Humidity Sensor](https://learn.adafruit.com/bluetooth-temperature-and-humidity-sensor.md)
- [Bluefruit LE Connect for iOS and Android](https://learn.adafruit.com/bluefruit-le-connect.md)
- [Arduino Lesson 14. Servo Motors](https://learn.adafruit.com/adafruit-arduino-lesson-14-servo-motors.md)
- [20mm LED Pixels](https://learn.adafruit.com/20mm-led-pixels.md)
- [Affordable HAL 9000 Replica](https://learn.adafruit.com/hal-9000-replica.md)
- [Adafruit 1.27" and 1.5" Color OLED Breakout Board](https://learn.adafruit.com/adafruit-1-5-color-oled-breakout-board.md)
- [Mini Thermal Receipt Printers](https://learn.adafruit.com/mini-thermal-receipt-printer.md)
- [Introducing Adafruit Trellis ](https://learn.adafruit.com/adafruit-trellis-diy-open-source-led-keypad.md)
- [Multi-tasking the Arduino - Part 2](https://learn.adafruit.com/multi-tasking-the-arduino-part-2.md)
- [FTDI Friend](https://learn.adafruit.com/ftdi-friend.md)
- [Wave Shield Voice Changer](https://learn.adafruit.com/wave-shield-voice-changer.md)
- [Adafruit 1.14" 240x135 Color TFT Breakout LCD Display](https://learn.adafruit.com/adafruit-1-14-240x135-color-tft-breakout.md)
- [Arduino Ethernet + SD Card](https://learn.adafruit.com/arduino-ethernet-sd-card.md)
- [A REST API for Arduino & the CC3000 WiFi Chip](https://learn.adafruit.com/a-rest-api-for-arduino-and-the-cc3000-wifi-chip.md)
- [WiFi Controlled LED Christmahanukwanzaa Tree](https://learn.adafruit.com/wifi-controlled-led-christmahanukwanzaa-tree.md)
---
# Source: https://learn.adafruit.com/beaglebone/installing-drivers.md
# BeagleBone
## Installing Drivers
This section will detail how to install drivers for the USB/Serial connection (and the other USB devices) from the Bone onto your Windows computer. We'll try to have more documentation on using the Bone with a Mac & Linux at some point but since so many people use Windows and its tougher to install the drives on Win than other OS's we'll start here!
For this tutorial you will need:
- **[Beagle Bone](http://www.adafruit.com/products/513)**
Pick these parts up at the Adafruit shop!
## Download & Install
First, we'll install the Windows driver package.[ Download this link to BONE\_DRV.exe](http://beagleboard.org/static/beaglebone/latest/Drivers/Windows/BONE_DRV.exe) and double click it.
When prompted/warned about the software, click **Continue Anyways** - you'll need to do it 3 times - once for each driver.


## Connect!
Start by opening up your Bone packaging, and finding the MiniB USB cable

Plug the miniB side into the Bone, and the A side into your Windows computer. You'll see a popup saying the computer found a USB serial converter.
And then an install popup. Click **Install the software automatically** and **Next.** 
Click **Continue Anyway** when it warns you.
You should finish successfully.
Next you'll go through the same process for the Disk Drive and Beaglebone devices.


Follow the same instructions, installing **Automatically** and clicking **Continue Anyways.**
Finally, you will have the new USB serial port. Go to the Device Manager on your computer to find the name of the COM port. In my case its **COM17.**

That's it, you've installed the drivers! Next up we'll connect via serial and log in.- [Previous Page](https://learn.adafruit.com/beaglebone/overview.md)
- [Next Page](https://learn.adafruit.com/beaglebone/ethernet.md)
## Featured Products
### Adafruit Beagle Bone Black Starter Pack
[Adafruit Beagle Bone Black Starter Pack](https://www.adafruit.com/product/703)
If you've heard about the Beagle Bone Black and you want to hit the ground running, this starter pack is for you. We've picked out everything you need to start out, with essential parts and accessories to save on a bundle.
Includes:
-
No Longer Stocked
[Buy Now](https://www.adafruit.com/product/703)
[Related Guides to the Product](https://learn.adafruit.com/products/703/guides)
### Miniature WiFi (802.11b/g/n) Module: For Raspberry Pi and more
[Miniature WiFi (802.11b/g/n) Module: For Raspberry Pi and more](https://www.adafruit.com/product/814)
Make your Internet of Things device cable-free by adding WiFi. Take advantage of the Raspberry Pi and Beagle Bone's USB port to add a low cost, but high-reliability wireless link. We tried half a dozen modules to find one that works well with the Pi and Bone without the need of recompiling...
No Longer Stocked
[Buy Now](https://www.adafruit.com/product/814)
[Related Guides to the Product](https://learn.adafruit.com/products/814/guides)
### Ethernet Cable - 10 ft long
[Ethernet Cable - 10 ft long](https://www.adafruit.com/product/730)
We have so many Internet-connected goodies in the shop, we figured it's time to carry a cable so you can easily connect them up! This cable is 10 feet long, black and has all 8 wires installed. Perfect for use with the [BeagleBone](http://www.adafruit.com/products/513),
No Longer Stocked
[Buy Now](https://www.adafruit.com/product/730)
[Related Guides to the Product](https://learn.adafruit.com/products/730/guides)
### 5V 2A (2000mA) switching power supply - UL Listed
[5V 2A (2000mA) switching power supply - UL Listed](https://www.adafruit.com/product/276)
This is an FCC/CE certified and UL listed power supply. Need a lot of 5V power? This switching supply gives a clean regulated 5V output at up to 2000mA. 110 or 240 input, so it works in any country. The plugs are "US 2-prong" style so you may need a plug adapter, but you can pick one...
In Stock
[Buy Now](https://www.adafruit.com/product/276)
[Related Guides to the Product](https://learn.adafruit.com/products/276/guides)
## Related Guides
- [MPR121 Capacitive Touch Sensor on Raspberry Pi & BeagleBone Black](https://learn.adafruit.com/mpr121-capacitive-touch-sensor-on-raspberry-pi-and-beaglebone-black.md)
- [BNO055 Absolute Orientation Sensor with Raspberry Pi & BeagleBone Black](https://learn.adafruit.com/bno055-absolute-orientation-sensor-with-raspberry-pi-and-beaglebone-black.md)
- [Setting up WiFi with BeagleBone Black](https://learn.adafruit.com/setting-up-wifi-with-beaglebone-black.md)
- [SSD1306 OLED Displays with Raspberry Pi and BeagleBone Black](https://learn.adafruit.com/ssd1306-oled-displays-with-raspberry-pi-and-beaglebone-black.md)
- [Fading a RGB LED on BeagleBone Black](https://learn.adafruit.com/fading-a-rgb-led-on-beaglebone-black.md)
- [DHT Humidity Sensing on Raspberry Pi or Beaglebone Black with GDocs Logging](https://learn.adafruit.com/dht-humidity-sensing-on-raspberry-pi-with-gdocs-logging.md)
- [Running Programs Automatically on Your Tiny Computer](https://learn.adafruit.com/running-programs-automatically-on-your-tiny-computer.md)
- [Blinking an LED with BeagleBone Black](https://learn.adafruit.com/blinking-an-led-with-beaglebone-black.md)
- [MAX31855 Thermocouple Sensor Python Library](https://learn.adafruit.com/max31855-thermocouple-python-library.md)
- [Character LCD with Raspberry Pi or BeagleBone Black](https://learn.adafruit.com/character-lcd-with-raspberry-pi-or-beaglebone-black.md)
- [Connecting a Push Button to BeagleBone Black](https://learn.adafruit.com/connecting-a-push-button-to-beaglebone-black.md)
- [Bone Box](https://learn.adafruit.com/bone-box.md)
- [Nokia 5110/3310 LCD Python Library](https://learn.adafruit.com/nokia-5110-3310-lcd-python-library.md)
- [Controlling a Servo with a BeagleBone Black](https://learn.adafruit.com/controlling-a-servo-with-a-beaglebone-black.md)
- [Bonjour (Zeroconf) Networking for Windows and Linux](https://learn.adafruit.com/bonjour-zeroconf-networking-for-windows-and-linux.md)
---
# Source: https://learn.adafruit.com/hacking-the-kinect/installing-python-and-pyusb.md
# Hacking the Kinect
## Installing Python & PyUSB
Now we need to start sending commands to this USB device! The fastest and easiest way we know to do this is to use LibUSB with a scripting language such as Python. There are LibUSB bindings for C and C++ and Perl but I happen to like Python so follow along!
[If you don't have python installed, do that now.](http://www.python.org/download/)
Next up, [install PyUSB](http://sourceforge.net/projects/pyusb/) by downloading it and running **python setup.py install** in the expanded directory

- [Previous Page](https://learn.adafruit.com/hacking-the-kinect/making-a-driver.md)
- [Next Page](https://learn.adafruit.com/hacking-the-kinect/fuzzing.md)
## Featured Products
### Hacked Kinect - Skill badge, iron-on patch
[Hacked Kinect - Skill badge, iron-on patch](https://www.adafruit.com/product/582)
You can made a cool project using the (hacked) Kinect! Adafruit offers a fun and exciting "badges" of achievement for electronics, science and engineering. We believe everyone should be able to be rewarded for learning a useful skill, a badge is just one of the many ways to show and...
No Longer Stocked
[Buy Now](https://www.adafruit.com/product/582)
[Related Guides to the Product](https://learn.adafruit.com/products/582/guides)
### Beagle USB 12 - Low/Full Speed USB Protocol Analyzer
[Beagle USB 12 - Low/Full Speed USB Protocol Analyzer](https://www.adafruit.com/product/708)
USB complexity got you down? Need a hand with enumeration? Reverse engineering a USB device? You will fall in love with the Beagle 12 USB Analyzer. This hardware analyzer is completely non-intrusive, and is much better than flaky software analyzers. Perfect for when a problem is bad enough it...
No Longer Stocked
[Buy Now](https://www.adafruit.com/product/708)
[Related Guides to the Product](https://learn.adafruit.com/products/708/guides)
### Reverse Engineer - Skill badge, Lenticular printing + pin-on
[Reverse Engineer - Skill badge, Lenticular printing + pin-on](https://www.adafruit.com/product/489)
You can reverse engineer! This is the first lenticular (two-stage image) skill badge that we know of! It says reverse engineer forwards and backwards depending on the angle you view it at!
**Note:** The edges of the badge will appear "white" at an angle,...
No Longer Stocked
[Buy Now](https://www.adafruit.com/product/489)
[Related Guides to the Product](https://learn.adafruit.com/products/489/guides)
### Reverse Engineer - Sticker!
[Reverse Engineer - Sticker!](https://www.adafruit.com/product/673)
You can reverse engineer! Adafruit offers fun and exciting stickers to celebrate achievement for electronics, science and engineering. We believe everyone should be able to be rewarded for learning a useful skill and a sticker is just one of the many ways to show and share.
No Longer Stocked
[Buy Now](https://www.adafruit.com/product/673)
[Related Guides to the Product](https://learn.adafruit.com/products/673/guides)
## Related Guides
- [Guitar Hero MIDI Controller](https://learn.adafruit.com/guitar-hero-midi-controller.md)
- [Commodore 64 - The Most Popular Retro Computer of All Time](https://learn.adafruit.com/commodore-64-retro-guide.md)
- [Use Docker to Compile Linux for ESP32-S3](https://learn.adafruit.com/docker-esp32-s3-linux.md)
- [Feather Guitar Hero Adapter](https://learn.adafruit.com/feather-guitar-hero-adapter.md)
- [BLE Cat Thermal Printer with MEMENTO](https://learn.adafruit.com/ble-cat-thermal-printer-with-memento.md)
- [Fruit Jam Mac Emulator](https://learn.adafruit.com/fruit-jam-mac-emulator.md)
- [How to Make Animated Graphics for Hologram Displays](https://learn.adafruit.com/how-to-make-animated-graphics-for-hologram-displays.md)
- [LED Matrix Wall Arcade for Pico-8](https://learn.adafruit.com/led-matrix-wall-arcade.md)
- [Run an X-Carve CNC Machine Wirelessly with a Raspberry Pi](https://learn.adafruit.com/control-an-xcarve-cnc-machine-wirelessly-with-a-raspberry-pi.md)
- [CircuitPython 2FA TOTP Authentication Friend](https://learn.adafruit.com/circuitpython-totp-otp-2fa-authy-authenticator-friend.md)
- [Flippy Floppy Drive Modification](https://learn.adafruit.com/flippy-floppy-drive-modification.md)
- [Authoring Playground Books with Bluefruit for iOS ](https://learn.adafruit.com/create-a-swift-playgroundbook-with-bluetooth-le.md)
- [SerenityOS - The dream of the '90s is alive!](https://learn.adafruit.com/serenityos-build-and-run-keep-the-90s-dream-alive.md)
- [Stand-alone programming AVRs using CircuitPython](https://learn.adafruit.com/stand-alone-programming-avrs-using-circuitpython.md)
- [Protect Your Online Accounts with Strong Passwords & Password Managers](https://learn.adafruit.com/protect-your-social-media-online-accounts-with-a-strong-password-manager.md)
---
# Source: https://learn.adafruit.com/adafruit-raspberry-pi-lesson-7-remote-control-with-vnc/installing-vnc.md
# Adafruit's Raspberry Pi Lesson 7. Remote Control with VNC
## Installing VNC
SSH (seehttp://learn.adafruit.com/adafruits-raspberry-pi-lesson-6-using-ssh/overview)is often all you need to control your Raspberry Pi, however sometimes it is useful to be able to remote control your Raspberry Pi using the mouse and seeing just what you would see on the screen of the Raspberry Pi.
VNC (Virtual Network Connection) is a standard for doing just this. To use it, you have to install some software on your Pi. There are a number of VNC server applications, and the one we are going to use is called “tightvnc”.
We can install the VNC server software using the SSH connection that we established earlier.
Enter the following command into your SSH terminal:
```
sudo apt-get update
sudo apt-get install tightvncserver
```

You will be prompted to confirm installation by typing “Y' and finally when installation is complete, you should see the following:

We now need to run the VNC Server, so enter the following command into your SSH window:
```
vncserver :1
```

You will be prompted to enter and confirm a password. It would make sense to use “raspberry” for this, but passwords are limited to 8 characters, so I use “raspberr”. Note that this is the password that you will need to use to connect to the Raspberry Pi remotely.
You will also be asked if you want to create a separate “read-only” password – say no.
From now on, the only command that you need to type within your SSH to start the VNC server will be:
```
vncserver :1
```
The VNC server is now running and so we can attempt to connect to it, but first we must switch to the computer from which we want to control the Pi and setup a VNC client to connect to the Pi.
- [Previous Page](https://learn.adafruit.com/adafruit-raspberry-pi-lesson-7-remote-control-with-vnc/overview.md)
- [Next Page](https://learn.adafruit.com/adafruit-raspberry-pi-lesson-7-remote-control-with-vnc/using-a-vnc-client.md)
## Featured Products
### Budget Pack for Raspberry Pi 1 Model B (Doesn't include RasPi)
[Budget Pack for Raspberry Pi 1 Model B (Doesn't include RasPi)](https://www.adafruit.com/product/965)
An optimized collection of parts and pieces to experiment with Raspberry Pi at home, school or work. Great for students and those that want to get their feet wet, no soldering required! **THIS PACK DOES NOT INCLUDE A RASPBERRY PI 1 MODEL B and is NOT compatible with Model B+ or Raspberry Pi...**
No Longer Stocked
[Buy Now](https://www.adafruit.com/product/965)
[Related Guides to the Product](https://learn.adafruit.com/products/965/guides)
### Programming the Raspberry Pi: Getting Started with Python
[Programming the Raspberry Pi: Getting Started with Python](https://www.adafruit.com/product/1089)
**Program your own Raspberry Pi projects!**
An updated guide to programming your own Raspberry Pi projects. Learn to create inventive programs and fun games on your powerful Raspberry Pi--with no programming experience required. **This practical book has been revised...**
In Stock
[Buy Now](https://www.adafruit.com/product/1089)
[Related Guides to the Product](https://learn.adafruit.com/products/1089/guides)
## Related Guides
- [Using a Mini PAL/NTSC Display with a Raspberry Pi](https://learn.adafruit.com/using-a-mini-pal-ntsc-display-with-a-raspberry-pi.md)
- [Arm-based IoT Kit for Cloud IoT Core - Getting Started](https://learn.adafruit.com/raspberry-pi-3-and-sensor-kit-for-google-cloud-iot-core.md)
- [Windows IoT Core Application Development: Headless Blinky](https://learn.adafruit.com/windows-iot-application-development-headless-application.md)
- [Simple Raspberry Pi Robot](https://learn.adafruit.com/simple-raspberry-pi-robot.md)
- [NeoPixels on Raspberry Pi](https://learn.adafruit.com/neopixels-on-raspberry-pi.md)
- [Portable 5in Monitor with HDMI](https://learn.adafruit.com/portable-5in-monitor-with-hdmi.md)
- [2.2" PiTFT HAT Enclosure](https://learn.adafruit.com/3d-printed-2-2-pitft-raspberry-pi-a-plus-enclosure.md)
- [Bluefruit LE Python Library](https://learn.adafruit.com/bluefruit-le-python-library.md)
- [Adafruit Pi Cobbler Kit](https://learn.adafruit.com/adafruit-pi-cobbler-kit.md)
- [Naughty or Nice Machine](https://learn.adafruit.com/naughty-or-nice-machine.md)
- [DHT Humidity Sensing on Raspberry Pi or Beaglebone Black with GDocs Logging](https://learn.adafruit.com/dht-humidity-sensing-on-raspberry-pi-with-gdocs-logging.md)
- [Adafruit's Raspberry Pi Lesson 1. Preparing an SD Card for your Raspberry Pi](https://learn.adafruit.com/adafruit-raspberry-pi-lesson-1-preparing-and-sd-card-for-your-raspberry-pi.md)
- [Mini Raspberry Pi Handheld Notebook](https://learn.adafruit.com/mini-raspberry-pi-handheld-notebook-palmtop.md)
- [Pi Box](https://learn.adafruit.com/pi-box.md)
- [Running Programs Automatically on Your Tiny Computer](https://learn.adafruit.com/running-programs-automatically-on-your-tiny-computer.md)
---
# Source: https://learn.adafruit.com/cross-stitch/instructions.md
# Cross Stitch
## Instructions
https://www.youtube.com/watch?v=YmndWGVUhvU
This video outlines the whole process, check it out and then see each step below! If you like our videos please [subscribe to our YouTube channel](http://www.youtube.com/subscription_center?add_user=adafruithttp://).

Use Aida cloth for cross stitch– it’s especially woven with openings for your needle between threads. Your needle should not pierce the fabric, but instead pass through these regularly spaced openings. Fold the fabric in half twice to find the center.

To prevent fraying edges on your fabric, secure edges with masking tape or a zigzag stitch.

Keep your fabric taut and square while working with an embroidery hoop– we recommend 6” size for most projects.

The hoop has a special lip to grip the fabric extra tight.
Place the solid round piece of the hoop behind the fabric with the lip facing up.
Seat the outer part of the hoop over the cloth and inner hoop. Loosen the screw at the top of the hoop until the outer hoop fits over the fabric and inner hoop.


Tighten the fabric in the embroidery hoop with the fold marks in the center. This is where you will make your first stitch. Pull the fabric taught in the hoop and tighten the adjustment screw as tightly as you can.

Most embroidery floss is made up of six strands. You will not be using all six strands at once. To separate strands, cut an arm’s length of floss and hold with both hands at the midpoint.

Untwist the midpoint of floss and insert your thumbs between the strands, separating the quantity you will need (usually two or three) according to the pattern. Draw your thumbs apart along the length of floss, allowing floss ends to untwist freely.

Some specialty flosses like this metallic floss are made up of 12 strands.

Thread the needle with the number of strands your pattern calls for.

To start stitching, bring the needle from back to front and pull almost all the way through.

Leave 1” of floss (the “tail") at the back.

Hold this tail in the direction you will stitch.

A single cross stitch is comprised of two half X stitches over a square in the fabric’s weave. Stitch from the upper right to lower left.

Then bring the needle from the back to the front again (from the upper left to the lower right), being sure to wrap around the tail in the back, securing it.

You did it! That's a cross stitch.

You can either make up row of stitches using single cross stitch (completing each stitch before beginning the next one), or you may make a row of bottom stitches, then reverse direction and complete the top stitch of every X. For consistency in appearance, make all first half Xs in one direction (lower left to upper right) and the second half X in the other direction (lower right to upper left). If the floss is tangling or too twisty, let the needle hang freely away from the fabric to let the floss untwist.

Continue to catch the tail on the back as you go.

And that's the basic idea! Continue to follow your pattern to build up your design, changing colors when necessary. The darker pattern grid lines indicate every block of ten stitches so it’s easier to count. You may wish to mark finished rows on the pattern in pencil.
It’s important to wash your hands often while working, as your skin’s natural oils may mark the fabric, especially where it bends over the rim of the hoop. You may wish to fold the excess fabric over the rim while working so your skin is only ever in contact with the back side of the fabric.

Try not to bridge blank spaces in the pattern at the back, especially when working dark colors– they may show through.

Keep the back tidy and knot-free. When 5” of floss are left on your needle, end the strand at the back of the project by sliding the needle under a few stitches.

Carefully clip the strand close to the fabric. To start a new strand of floss, first slide the needle through a few stitches at the back of the fabric to secure the tail.

Move the hoop around the project as necessary to complete all areas of the pattern.

When finished, check the entire project for uncrossed stitches.

Back stitch - Use back stitching for outlines and text. Think to yourself “two steps forward (at the back of the fabric), one stitch back (on the front of the fabric).” These stitches may be parallel to an axis of the grid, or may oppose it at an angle, but do not form Xs like cross stitches.

When complete, take the stitched fabric out of the hoop by loosening the screw and removing both rings. If your fabric does get “hoop marks,” hand wash in warm water with a small amount of color-safe detergent. Rinse first in warm water, then cold.

Even though your floss colors bleed into the water, they will not stain the cloth. Lay on a towel to dry. Because I hold my fabric with the technique above, most of my hoop marks appear on the back of the project.

After washing, iron your project between two towels with low heat and steam.

To mount your finished project, either use sticky foam mat board or cut batting to match a rectangle of cardboard. Tape excess fabric around the back and frame, if desired. The Ohm Sweet Ohm project fits great in an 8x10" frame (not included with kit).

Or make a pillow!
- [Previous Page](https://learn.adafruit.com/cross-stitch/overview.md)
## Featured Products
### Adafruit Ohm Sweet Ohm Cross-Stitch Kit
[Adafruit Ohm Sweet Ohm Cross-Stitch Kit](https://www.adafruit.com/product/855)
A cross-stitch kit that's also a resistor chart! Not only is this kit fun to make (and good for beginner stitchers), when it's all done it functions as a handy resistor reference chart. This Adafruit original kit comes complete with everything you need to get started:
No Longer Stocked
[Buy Now](https://www.adafruit.com/product/855)
[Related Guides to the Product](https://learn.adafruit.com/products/855/guides)
## Related Guides
---
# Source: https://learn.adafruit.com/internet-of-things-printer.md
# Internet of Things Printer
## Introduction
Danger:
In the future, everything will be connected to the internet. And all restaurants will be Taco Bell!

The "Internet of Things" refers to the idea of pervasive, ambient connections between physical objects and the virtual world. If every modest sensor or output device could share information via the internet, what new paradigms will arise? Our little printer is one such experiment. What value can be culled from the internet without a browser interface, or even a computer screen for that matter?

- [Next Page](https://learn.adafruit.com/internet-of-things-printer/parts-list.md)
## Primary Products
### Adafruit IoT Printer Project Pack "Internet of Things" printer
[Adafruit IoT Printer Project Pack "Internet of Things" printer](https://www.adafruit.com/product/717)
Build an "Internet of Things" connected mini printer that will do your bidding! This is a fun weekend project that comes with a beautiful laser cut case. Once assembled, the little printer connects to Ethernet to get Internet data for printing onto 2 1/4" wide receipt paper. The example sketch...
No Longer Stocked
[Buy Now](https://www.adafruit.com/product/717)
[Related Guides to the Product](https://learn.adafruit.com/products/717/guides)
## Featured Products
### Mini Thermal Receipt Printer
[Mini Thermal Receipt Printer](https://www.adafruit.com/product/597)
Add a mini printer to any microcontroller project with this very cute thermal printer. Thermal printers are also known as receipt printers, they're what you get when you go to the ATM or grocery store. Now you can embed a little printer of your own into an enclosure. This printer is ideal...
No Longer Stocked
[Buy Now](https://www.adafruit.com/product/597)
[Related Guides to the Product](https://learn.adafruit.com/products/597/guides)
### Thermal paper roll - 50' long, 2.25" wide
[Thermal paper roll - 50' long, 2.25" wide](https://www.adafruit.com/product/599)
A mini roll of thermal paper, this fits very nicely into our mini thermal printer. 2.25" wide (about 57mm) and 50 feet long (15 meters). BPA-free.
[Perfect for use with our mini thermal printer!](http://www.adafruit.com/products/597)
No Longer Stocked
[Buy Now](https://www.adafruit.com/product/599)
[Related Guides to the Product](https://learn.adafruit.com/products/599/guides)
### Adafruit METRO 328 - Arduino Compatible - with Headers
[Adafruit METRO 328 - Arduino Compatible - with Headers](https://www.adafruit.com/product/2488)
This is the **Adafruit METRO Arduino-Compatible - with headers. ** It's a fully assembled and tested microcontroller and physical computing board with through-hole headers attached. If you don't want a Metro with the headers attached for...
In Stock
[Buy Now](https://www.adafruit.com/product/2488)
[Related Guides to the Product](https://learn.adafruit.com/products/2488/guides)
### Ethernet Shield for Arduino - W5500 Chipset
[Ethernet Shield for Arduino - W5500 Chipset](https://www.adafruit.com/product/2971)
The W5500 Ethernet Shield for Arduino from Seeed Studio is a great way to set up your projects with internet connectivity with just a single chip. Similar to the[Arduino Ethernet Shield](https://www.adafruit.com/product/201), but with a newer chipset, this ethernet shield...
No Longer Stocked
[Buy Now](https://www.adafruit.com/product/2971)
[Related Guides to the Product](https://learn.adafruit.com/products/2971/guides)
### FTDI Friend with Micro USB Port + extras
[FTDI Friend with Micro USB Port + extras](https://www.adafruit.com/product/284)
Long gone are the days of parallel ports and serial ports. Now the USB port reigns supreme! But USB is hard, and you just want to transfer your every-day serial data from a microcontroller to computer. What now? Enter the FTDI Friend!
The FTDI Friend is a tweaked out FTDI FT232RL chip...
In Stock
[Buy Now](https://www.adafruit.com/product/284)
[Related Guides to the Product](https://learn.adafruit.com/products/284/guides)
### Rugged Metal On/Off Switch with Green LED Ring
[Rugged Metal On/Off Switch with Green LED Ring](https://www.adafruit.com/product/482)
These chrome-plated metal buttons are rugged and look real good while doing it! Simply drill a 16mm hole into any material up to 1/2" thick and you can fit these in place, there's even a rubber gasket to keep water out of the enclosure. On the front of the button is a flat metal...
In Stock
[Buy Now](https://www.adafruit.com/product/482)
[Related Guides to the Product](https://learn.adafruit.com/products/482/guides)
### Arduino Ethernet shield R3 with micro SD connector - Assembled
[Arduino Ethernet shield R3 with micro SD connector - Assembled](https://www.adafruit.com/product/201)
The Arduino Ethernet Shield R3 (assembled) allows an Arduino board to connect to the internet. It is based on the Wiznet W5100 ethernet chip (datasheet). The Wiznet W5100 provides a network (IP) stack capable of both TCP and UDP. It supports up to four simultaneous socket connections. Use the...
No Longer Stocked
[Buy Now](https://www.adafruit.com/product/201)
[Related Guides to the Product](https://learn.adafruit.com/products/201/guides)
### Arduino Uno Ethernet
[Arduino Uno Ethernet](https://www.adafruit.com/product/418)
**As of 9/20/2012 Adafruit is currently shipping R3 of the Arduino Uno Ethernet**
Deep in the Swiss Alps, the top secret Arduino Super-collider has accelerated both an [Arduino UNO](https://www.adafruit.com/products/50) and
No Longer Stocked
[Buy Now](https://www.adafruit.com/product/418)
[Related Guides to the Product](https://learn.adafruit.com/products/418/guides)
## Related Guides
- [Mystery Box: NeoMatrix Mk I](https://learn.adafruit.com/mystery-box-neomatrix-mk-i.md)
- [A Z80 CP/M emulator for the SAMD51](https://learn.adafruit.com/z80-cpm-emulator-for-the-samd51-grand-central.md)
- [Echo 2-XL](https://learn.adafruit.com/echo-2-xl.md)
- [DC & USB Boarduino Kits](https://learn.adafruit.com/boarduino-kits.md)
- [Portable Solar Charging Tracker](https://learn.adafruit.com/portable-solar-charging-tracker.md)
- [Ladyada's Learn Arduino - Lesson #2](https://learn.adafruit.com/ladyadas-learn-arduino-lesson-number-2.md)
- [Motorized Camera Slider MK3 ](https://learn.adafruit.com/motorized-camera-slider-mk3.md)
- [Adafruit VCNL4040 Proximity Sensor](https://learn.adafruit.com/adafruit-vcnl4040-proximity-sensor.md)
- [Ladyada's Learn Arduino - Lesson #1](https://learn.adafruit.com/ladyadas-learn-arduino-lesson-number-1.md)
- [Trinket / Gemma IR Control](https://learn.adafruit.com/trinket-gemma-ir-remote-control.md)
- [Adafruit HUZZAH32 – ESP32 Breakout Board](https://learn.adafruit.com/huzzah32-esp32-breakout-board.md)
- [Adafruit HUZZAH ESP8266 breakout](https://learn.adafruit.com/adafruit-huzzah-esp8266-breakout.md)
- [FTDI Friend](https://learn.adafruit.com/ftdi-friend.md)
- [Ladyada's Learn Arduino - Lesson #0](https://learn.adafruit.com/ladyadas-learn-arduino-lesson-number-0.md)
- [IR Sensor](https://learn.adafruit.com/ir-sensor.md)
---
# Source: https://learn.adafruit.com/usb-snes-gamepad/introducing-the-teensy-with-hid.md
# USB SNES Gamepad
## Introducing the Teensy with HID
So you may be wondering "heck, I should just grab an Arduino!" But a 'proper' Arduino can't do what we want, which is to appear as a keyboard. When you plug in an Arduino into your USB port, it shows up as a Serial device, which is fantastic for debugging or for interfacing to Processing. To listen to a Serial device, you need to open up Hyperterm or Zterm or the Arduino IDE's serial monitor. However, it does not act as actual _keyboard _where what it outputs goes to Microsoft Word or a video game.
**The Arduino is a USB serial port - it appears under Ports here, not under Keyboards!**
For that, we need a different kind of chip, a chip that is_ USB native!_ USB native chips can act as USB serial ports, but they can also act as MIDI devices, keyboards, mice, audio devices, joysticks, etc. Nearly anything! A nice chip that does all this is the ATmega32U4 (the U is for usb!) .
The [Teensy](https://www.adafruit.com/product/199) 2.0 is basically this chip, a USB connector, button and some other necessary things. It's very tiny (thus the name) and [has a fantastic programming interface that is basically the Arduino + a helper, it runs under Mac, Linux or Windows](http://pjrc.com/teensy/teensyduino.html "Link: http://pjrc.com/teensy/teensyduino.html").
Since this tutorial was written, a number of other 32U4 microcontroller boards have been developed including the large Arduino Leonardo and the smaller [Adafruit ItsyBitsy 32u4 - 5V 16MHz](https://www.adafruit.com/product/3677), [Adafruit ItsyBitsy 32u4 - 3V 8MHz](https://www.adafruit.com/product/3675), and [Adafruit Feather 32u4 Basic Proto](https://www.adafruit.com/product/2771), which can do similar things.
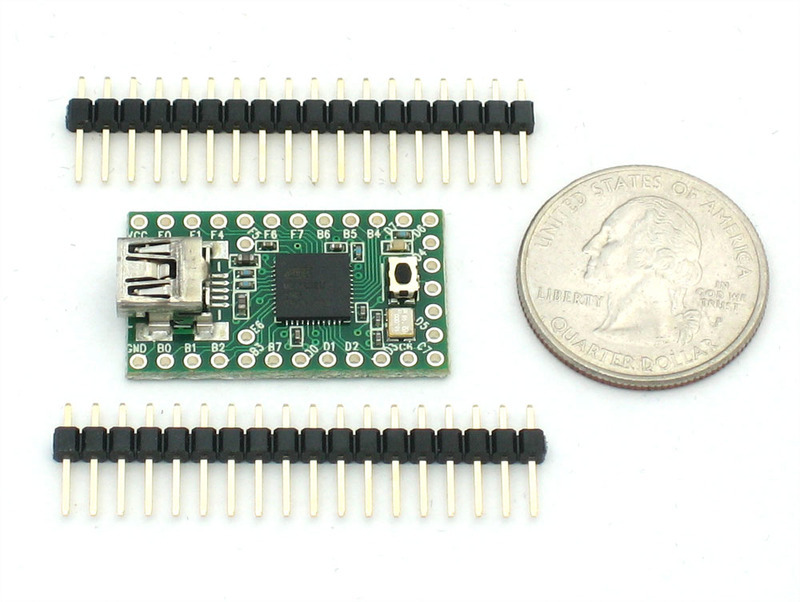
- [Previous Page](https://learn.adafruit.com/usb-snes-gamepad/disassemble-the-snes-controller.md)
- [Next Page](https://learn.adafruit.com/usb-snes-gamepad/assemble-the-usb-snes-gamepad.md)
## Featured Products
### SNES Controller
[SNES Controller](https://www.adafruit.com/product/131)
A third-party SNES (Super Nintendo/Famicom) controller. Works great with Fuzeboxen as well!
No Longer Stocked
[Buy Now](https://www.adafruit.com/product/131)
[Related Guides to the Product](https://learn.adafruit.com/products/131/guides)
### ADXL335 - 5V ready triple-axis accelerometer (+-3g analog out)
[ADXL335 - 5V ready triple-axis accelerometer (+-3g analog out)](https://www.adafruit.com/product/163)
We've updated our favorite triple-axis accelerometer to now have an on-board 3.3V regulator - making it a perfect choice for interfacing with a 5V microcontroller such as the Arduino. This breakout comes with 3 analog outputs for X, Y and Z axis measurements on a 0.75"x0.75"...
In Stock
[Buy Now](https://www.adafruit.com/product/163)
[Related Guides to the Product](https://learn.adafruit.com/products/163/guides)
### USB cable - A/MiniB
[USB cable - A/MiniB](https://www.adafruit.com/product/260)
This here is your standard A-miniB USB cable, for USB 1.1 or 2.0. Perfect for connecting a PC to your Teensy v2, USB Lipo charger w/Mini B connector, among other things.
Approximately 3 feet / 1 meter long
Color may vary!
No Longer Stocked
[Buy Now](https://www.adafruit.com/product/260)
[Related Guides to the Product](https://learn.adafruit.com/products/260/guides)
### Teensy (ATmega32u4 USB dev board) 2.0
[Teensy (ATmega32u4 USB dev board) 2.0](https://www.adafruit.com/product/199)
Discontinued - **you can grab** [Adafruit ItsyBitsy 32u4 - 5V 16MHz](https://www.adafruit.com/product/3677) **instead!**
The Teensy 2.0 is a complete USB-based microcontoller development system, in a very small footprint! All programming is done via the USB port. No...
No Longer Stocked
[Buy Now](https://www.adafruit.com/product/199)
[Related Guides to the Product](https://learn.adafruit.com/products/199/guides)
### Premium Female/Male 'Extension' Jumper Wires - 20 x 6"
[Premium Female/Male 'Extension' Jumper Wires - 20 x 6"](https://www.adafruit.com/product/1954)
These Female/Male Extension jumper wires are handy for making wire harnesses or jumpering between headers on PCB's. These premium jumper wires are 6" (150mm) long and come in a 'strip' of 20 (2 pieces of each of ten rainbow colors). They have 0.1" male header...
In Stock
[Buy Now](https://www.adafruit.com/product/1954)
[Related Guides to the Product](https://learn.adafruit.com/products/1954/guides)
## Related Guides
- [Adafruit Analog Accelerometer Breakouts](https://learn.adafruit.com/adafruit-analog-accelerometer-breakouts.md)
- [HID Reporter](https://learn.adafruit.com/hid-reporter.md)
- [Gravatars: What they are and how to add or change one](https://learn.adafruit.com/gravatars-what-they-are-and-how-to-add-or-change-one.md)
- [Two Player Game System for PyGamer and RFM69HCW Radio Wing](https://learn.adafruit.com/two-player-game-system-for-pygamer-and-rfm69hcw-radio-wing.md)
- [PyPortal 2FA TOTP Authentication Friend](https://learn.adafruit.com/pyportal-2fa-totp-authentication-friend.md)
- [Dragon Drop: a CircuitPython Game for MacroPad](https://learn.adafruit.com/dragon-drop-a-circuitpython-game-for-macropad.md)
- [NeoTrellis M4 Animated Dice Roller](https://learn.adafruit.com/neotrellis-dice.md)
- [Instagram Photo Frame](https://learn.adafruit.com/instagram-photo-frame.md)
- [BlueLive: Livestream Studio switcher controller](https://learn.adafruit.com/bluelive.md)
- [DIY Turbo Button Controller - HID Remapper](https://learn.adafruit.com/diy-turbo-button-controller-hid-remapper.md)
- [ESP32 PlayStation Controller](https://learn.adafruit.com/esp32-playstation-controller.md)
- [Fruit Jam Chyron](https://learn.adafruit.com/fruit-jam-chyron.md)
- [Custom Color Palettes for MakeCode Arcade Games](https://learn.adafruit.com/custom-color-palettes-for-makecode-arcade-games.md)
- [DIY Welded Bike Stand](https://learn.adafruit.com/diy-welded-bike-stand.md)
- [CircuitPython Stage game library](https://learn.adafruit.com/circuitpython-stage-game-library.md)
---
# Source: https://learn.adafruit.com/internet-of-things-printer/introduction.md
# Internet of Things Printer
## Introduction
Danger:
In the future, everything will be connected to the internet. And all restaurants will be Taco Bell!

The "Internet of Things" refers to the idea of pervasive, ambient connections between physical objects and the virtual world. If every modest sensor or output device could share information via the internet, what new paradigms will arise? Our little printer is one such experiment. What value can be culled from the internet without a browser interface, or even a computer screen for that matter?

- [Next Page](https://learn.adafruit.com/internet-of-things-printer/parts-list.md)
## Primary Products
### Adafruit IoT Printer Project Pack "Internet of Things" printer
[Adafruit IoT Printer Project Pack "Internet of Things" printer](https://www.adafruit.com/product/717)
Build an "Internet of Things" connected mini printer that will do your bidding! This is a fun weekend project that comes with a beautiful laser cut case. Once assembled, the little printer connects to Ethernet to get Internet data for printing onto 2 1/4" wide receipt paper. The example sketch...
No Longer Stocked
[Buy Now](https://www.adafruit.com/product/717)
[Related Guides to the Product](https://learn.adafruit.com/products/717/guides)
## Featured Products
### Mini Thermal Receipt Printer
[Mini Thermal Receipt Printer](https://www.adafruit.com/product/597)
Add a mini printer to any microcontroller project with this very cute thermal printer. Thermal printers are also known as receipt printers, they're what you get when you go to the ATM or grocery store. Now you can embed a little printer of your own into an enclosure. This printer is ideal...
No Longer Stocked
[Buy Now](https://www.adafruit.com/product/597)
[Related Guides to the Product](https://learn.adafruit.com/products/597/guides)
### Thermal paper roll - 50' long, 2.25" wide
[Thermal paper roll - 50' long, 2.25" wide](https://www.adafruit.com/product/599)
A mini roll of thermal paper, this fits very nicely into our mini thermal printer. 2.25" wide (about 57mm) and 50 feet long (15 meters). BPA-free.
[Perfect for use with our mini thermal printer!](http://www.adafruit.com/products/597)
No Longer Stocked
[Buy Now](https://www.adafruit.com/product/599)
[Related Guides to the Product](https://learn.adafruit.com/products/599/guides)
### Adafruit METRO 328 - Arduino Compatible - with Headers
[Adafruit METRO 328 - Arduino Compatible - with Headers](https://www.adafruit.com/product/2488)
This is the **Adafruit METRO Arduino-Compatible - with headers. ** It's a fully assembled and tested microcontroller and physical computing board with through-hole headers attached. If you don't want a Metro with the headers attached for...
In Stock
[Buy Now](https://www.adafruit.com/product/2488)
[Related Guides to the Product](https://learn.adafruit.com/products/2488/guides)
### Ethernet Shield for Arduino - W5500 Chipset
[Ethernet Shield for Arduino - W5500 Chipset](https://www.adafruit.com/product/2971)
The W5500 Ethernet Shield for Arduino from Seeed Studio is a great way to set up your projects with internet connectivity with just a single chip. Similar to the[Arduino Ethernet Shield](https://www.adafruit.com/product/201), but with a newer chipset, this ethernet shield...
No Longer Stocked
[Buy Now](https://www.adafruit.com/product/2971)
[Related Guides to the Product](https://learn.adafruit.com/products/2971/guides)
### FTDI Friend with Micro USB Port + extras
[FTDI Friend with Micro USB Port + extras](https://www.adafruit.com/product/284)
Long gone are the days of parallel ports and serial ports. Now the USB port reigns supreme! But USB is hard, and you just want to transfer your every-day serial data from a microcontroller to computer. What now? Enter the FTDI Friend!
The FTDI Friend is a tweaked out FTDI FT232RL chip...
In Stock
[Buy Now](https://www.adafruit.com/product/284)
[Related Guides to the Product](https://learn.adafruit.com/products/284/guides)
### Rugged Metal On/Off Switch with Green LED Ring
[Rugged Metal On/Off Switch with Green LED Ring](https://www.adafruit.com/product/482)
These chrome-plated metal buttons are rugged and look real good while doing it! Simply drill a 16mm hole into any material up to 1/2" thick and you can fit these in place, there's even a rubber gasket to keep water out of the enclosure. On the front of the button is a flat metal...
In Stock
[Buy Now](https://www.adafruit.com/product/482)
[Related Guides to the Product](https://learn.adafruit.com/products/482/guides)
### Arduino Ethernet shield R3 with micro SD connector - Assembled
[Arduino Ethernet shield R3 with micro SD connector - Assembled](https://www.adafruit.com/product/201)
The Arduino Ethernet Shield R3 (assembled) allows an Arduino board to connect to the internet. It is based on the Wiznet W5100 ethernet chip (datasheet). The Wiznet W5100 provides a network (IP) stack capable of both TCP and UDP. It supports up to four simultaneous socket connections. Use the...
No Longer Stocked
[Buy Now](https://www.adafruit.com/product/201)
[Related Guides to the Product](https://learn.adafruit.com/products/201/guides)
### Arduino Uno Ethernet
[Arduino Uno Ethernet](https://www.adafruit.com/product/418)
**As of 9/20/2012 Adafruit is currently shipping R3 of the Arduino Uno Ethernet**
Deep in the Swiss Alps, the top secret Arduino Super-collider has accelerated both an [Arduino UNO](https://www.adafruit.com/products/50) and
No Longer Stocked
[Buy Now](https://www.adafruit.com/product/418)
[Related Guides to the Product](https://learn.adafruit.com/products/418/guides)
## Related Guides
- [Mystery Box: NeoMatrix Mk I](https://learn.adafruit.com/mystery-box-neomatrix-mk-i.md)
- [A Z80 CP/M emulator for the SAMD51](https://learn.adafruit.com/z80-cpm-emulator-for-the-samd51-grand-central.md)
- [Echo 2-XL](https://learn.adafruit.com/echo-2-xl.md)
- [DC & USB Boarduino Kits](https://learn.adafruit.com/boarduino-kits.md)
- [Portable Solar Charging Tracker](https://learn.adafruit.com/portable-solar-charging-tracker.md)
- [Ladyada's Learn Arduino - Lesson #2](https://learn.adafruit.com/ladyadas-learn-arduino-lesson-number-2.md)
- [Motorized Camera Slider MK3 ](https://learn.adafruit.com/motorized-camera-slider-mk3.md)
- [Adafruit VCNL4040 Proximity Sensor](https://learn.adafruit.com/adafruit-vcnl4040-proximity-sensor.md)
- [Ladyada's Learn Arduino - Lesson #1](https://learn.adafruit.com/ladyadas-learn-arduino-lesson-number-1.md)
- [Trinket / Gemma IR Control](https://learn.adafruit.com/trinket-gemma-ir-remote-control.md)
- [Adafruit HUZZAH32 – ESP32 Breakout Board](https://learn.adafruit.com/huzzah32-esp32-breakout-board.md)
- [Adafruit HUZZAH ESP8266 breakout](https://learn.adafruit.com/adafruit-huzzah-esp8266-breakout.md)
- [FTDI Friend](https://learn.adafruit.com/ftdi-friend.md)
- [Ladyada's Learn Arduino - Lesson #0](https://learn.adafruit.com/ladyadas-learn-arduino-lesson-number-0.md)
- [IR Sensor](https://learn.adafruit.com/ir-sensor.md)
---
# Source: https://learn.adafruit.com/ir-sensor/ir-remote-signals.md
# IR Sensor
## IR Remote Signals
Now we know that the sensor works, we want to figure out whats being sent right? But before we do that let's first examine exactly how data is being sent from the IR remote (in your hand) to the IR receiving sensor (on the breadboard)
For this example we will use the Sony power on/off IR code from a Sony TV remote. Its very simple and commonly documented!
Lets pretend we have a Sony remote, and we can look at exactly what light is being blasted out of the IR LED. We'll hookup a basic light sensor (like a basic photocell!) and listen in. We won't use a decoder like a PNA4602 (just yet) because we want to see the undecoded signal. What we see is the following:

Basically we see pulses or IR signal. the yellow 'blocks' are when the IR LED is transmitting and when there is only a line, the IR LED is off. (Note that the voltage being at 3VDC is just because of the way I hooked up the sensor, if I had swapped the pullup for a pulldown it would be at ground.)
The first 'block' is about 2.5ms long (see the cursors and the measurement on the side)
If you zoom into one of those blocks…

You see that they're not really 'blocks' but actually very fast pulses!
If you zoom in all the way…

You can measure the frequency of the IR pulses. As you can tell by the cursors and the measurements on the side, the frequency is about 37.04KHz
OK so now we can understand how IR codes are sent. The IR transmitter LED is quickly pulsed (PWM - pulse width modulated) at a high frequency of 38KHz and then that PWM is likewise pulsed on and off much slower, at times that are about 1-3 ms long.
Why not have the LED just on and off? Why have PWM 'carrier' pulsing? Many reasons!
One reason is that this lets the LED cool off. IR LEDs can take up to 1 Amp (1000 milliamps!) of current. Most LEDs only take 20mA or so. This means IR LEDs are designed for high-power blasting BUT they can only take it for a few microseconds. By PWM'ing it, you let the LED cool off half the time
Another reason is that the TV will only listen to certain frequencies of PWM. So a Sony remote at 37KHz wont be able to work with a JVC DVD player that only wants say 50KHz.
Finally, the most important reason is that by pulsing a carrier wave, you reduce the affects of ambient lighting. The TV only looks for changes in light levels that clock in around 37KHz. Just like its easier for us to tell differences between audio tones than to pin down the precsise pitch of a tone (well, for most people at least)
OK so now we know the carrier frequency. Its 37KHz. Next lets find the pulse widths!
Looking back at the first scope picture

The first pulse is 2.5ms. We can use the cursors to measure the remaining pulses. I'll spare you the 12 images and let you know that the pulses are:| **PWM ON** | **OFF** |
| 2.4 ms | 0.6 ms |
| 1.2 ms | 0.6 ms |
| 0.6 ms | 0.6 ms |
| 1.2 ms | 0.6 ms |
| 0.6 ms | 0.6 ms |
| 1.2 ms | 0.6 ms |
| 0.6 ms | 0.6 ms |
| 0.6 ms | 0.6 ms |
| 1.2 ms | 0.6 ms |
| 0.6 ms | 0.6 ms |
| 0.6 ms | 0.6 ms |
| 0.6 ms | 0.6 ms |
| 0.6 ms | 270 ms |
So lets say you don't have a $1000 oscilloscope, how else can you read these signals? Well the IR decoder such as the PNA4602 does us one favor, it 'filters out' the 38KHz signal so that we only get the big chunks of signal in the milliscond range. This is much easier for a microcontroller to handle. Thats what we'll do in the next section!- [Previous Page](https://learn.adafruit.com/ir-sensor/testing-an-ir-sensor.md)
- [Next Page](https://learn.adafruit.com/ir-sensor/using-an-ir-sensor.md)
## Featured Products
### Adafruit METRO 328 Fully Assembled - Arduino IDE compatible
[Adafruit METRO 328 Fully Assembled - Arduino IDE compatible](https://www.adafruit.com/product/50)
We sure love the ATmega328 here at Adafruit, and we use them _a lot_ for our own projects. The processor has plenty of GPIO, Analog inputs, hardware UART SPI and I2C, timers and PWM galore - just enough for most simple projects. When we need to go small, we use a
Out of Stock
[Buy Now](https://www.adafruit.com/product/50)
[Related Guides to the Product](https://learn.adafruit.com/products/50/guides)
### IR (Infrared) Receiver Sensor
[IR (Infrared) Receiver Sensor](https://www.adafruit.com/product/157)
IR sensor tuned to 38KHz, perfect for receiving commands from a TV remote control. Runs at 3V to 5V so it's great for any microcontroller.
To use, connect pin 3 (all the way to the right) to 5V power, pin 2 (middle) to ground and listen on pin 1. It doesn't do any decoding...
In Stock
[Buy Now](https://www.adafruit.com/product/157)
[Related Guides to the Product](https://learn.adafruit.com/products/157/guides)
### Super-bright 5mm IR LED
[Super-bright 5mm IR LED](https://www.adafruit.com/product/387)
Infrared LEDs are used for remote controls (they're the little LED in the part you point at your TV) and 'night-vision' cameras, and these little blue guys are high powered ones! They are 940nm wavelength, which is what nearly all devices listen to. They're 20 degree beamwidth,...
In Stock
[Buy Now](https://www.adafruit.com/product/387)
[Related Guides to the Product](https://learn.adafruit.com/products/387/guides)
### Mini Remote Control
[Mini Remote Control](https://www.adafruit.com/product/389)
This little remote control would be handy for controlling a robot or other project from across the room. It has 21 buttons and a layout we thought was handy: directional buttons and number entry buttons. The remote uses the NEC encoding type and sends data codes 0 thru 26 (it skips #3, #7,...
In Stock
[Buy Now](https://www.adafruit.com/product/389)
[Related Guides to the Product](https://learn.adafruit.com/products/389/guides)
### Super-bright 5mm IR LED (25 pack)
[Super-bright 5mm IR LED (25 pack)](https://www.adafruit.com/product/388)
Infrared LEDs are used for remote controls (they're the little LED in the part you point at your TV) and 'night-vision' cameras, and these little blue guys are high powered ones! They are 940nm wavelength, which is what nearly all devices listen to. They're 20 degree beamwidth,...
In Stock
[Buy Now](https://www.adafruit.com/product/388)
[Related Guides to the Product](https://learn.adafruit.com/products/388/guides)
### Adafruit METRO 328 - Arduino Compatible - with Headers
[Adafruit METRO 328 - Arduino Compatible - with Headers](https://www.adafruit.com/product/2488)
This is the **Adafruit METRO Arduino-Compatible - with headers. ** It's a fully assembled and tested microcontroller and physical computing board with through-hole headers attached. If you don't want a Metro with the headers attached for...
In Stock
[Buy Now](https://www.adafruit.com/product/2488)
[Related Guides to the Product](https://learn.adafruit.com/products/2488/guides)
## Related Guides
- [RePaper eInk Development Board](https://learn.adafruit.com/repaper-eink-development-board.md)
- [Adafruit MSA301 Triple Axis Accelerometer](https://learn.adafruit.com/msa301-triple-axis-accelerometer.md)
- [Bluetooth Controlled Motorized Camera Slider](https://learn.adafruit.com/bluetooth-motorized-camera-slider.md)
- [Adafruit PCA9685 16-Channel Servo Driver](https://learn.adafruit.com/16-channel-pwm-servo-driver.md)
- [Adalight Project Pack](https://learn.adafruit.com/adalight-diy-ambient-tv-lighting.md)
- [Reverse Geocache Box](https://learn.adafruit.com/reverse-geocache-engagement-box.md)
- [Introducing Adafruit Trellis ](https://learn.adafruit.com/adafruit-trellis-diy-open-source-led-keypad.md)
- [Sending an SMS with Temboo](https://learn.adafruit.com/sending-an-sms-with-temboo.md)
- [20mm LED Pixels](https://learn.adafruit.com/20mm-led-pixels.md)
- [Remote controlled door lock using a fingerprint sensor & Adafruit IO](https://learn.adafruit.com/remote-controlled-door-lock-using-a-fingerprint-sensor-and-adafruit-io.md)
- [Character LCDs](https://learn.adafruit.com/character-lcds.md)
- [Smart Measuring Cup](https://learn.adafruit.com/smart-measuring-cup.md)
- [Memories of an Arduino](https://learn.adafruit.com/memories-of-an-arduino.md)
- [Arduino Lesson 2. LEDs](https://learn.adafruit.com/adafruit-arduino-lesson-2-leds.md)
- [Smart Cocktail Shaker](https://learn.adafruit.com/smart-cocktail-shaker.md)
---
# Source: https://learn.adafruit.com/ir-sensor.md
# IR Sensor
## Overview

IR detectors are little microchips with a photocell that are tuned to listen to infrared light. They are almost always used for remote control detection - every TV and DVD player has one of these in the front to listen for the IR signal from the clicker. Inside the remote control is a matching IR LED, which emits IR pulses to tell the TV to turn on, off or change channels. IR light is not visible to the human eye, which means it takes a little more work to test a setup.
There are a few difference between these and say a [CdS Photocells](http://learn.adafruit.com/photocells):
- IR detectors are specially filtered for Infrared light, they are not good at detecting visible light. On the other hand, photocells are good at detecting yellow/green visible light, not good at IR light
- IR detectors have a **demodulator** inside that looks for modulated IR at 38 KHz. Just shining an IR LED wont be detected, it has to be PWM blinking at 38KHz. Photocells do not have any sort of demodulator and can detect any frequency (including DC) within the response speed of the photocell (which is about 1KHz)
- IR detectors are digital out - either they detect 38KHz IR signal and output low (0V) or they do not detect any and output high (5V). Photocells act like resistors, the resistance changes depending on how much light they are exposed to
In this tutorial we will show how to
- Test your IR sensor to make sure its working
- Read raw IR codes into a microcontroller
- Create a camera intervalometer
- Listen for 'commands' from a remote control on your microcontroller
## Some Stats
These stats are for the[IR detector in the Adafruit shop](http://www.adafruit.com/index.php?main_page=product_info&cPath=35&products_id=157 "Link: http://www.adafruit.com/index.php?main\_page=product\_info&cPath=35&products\_id=157") also known as PNA4602. Nearly all photocells will have slightly different specifications, although they all pretty much work the same. If there's a datasheet, you'll want to refer to it
- **Size:** square, 7mm by 8mm detector area
- **Output:** 0V (low) on detection of 38KHz carrier, 5V (high) otherwise
- **Sensitivity range:** 800nm to 1100nm with peak response at 940nm. Frequency range is 35KHz to 41KHz with peak detection at 38KHz
- **Power supply:** 3-5V DC 3mA
- **[PNA4602 Datasheet](http://learn.adafruit.com/system/assets/assets/000/010/139/original/PNA4602.pdf)** (now discontinued) or **[GP1UX311QS](http://learn.adafruit.com/system/assets/assets/000/010/140/original/GP1UX31QS.pdf)** or **[TSOP38238](http://learn.adafruit.com/system/assets/assets/000/010/141/original/tsop382.pdf)** (pin-compatible replacements)
## What You Can Measure

As you can see from these datasheet graphs, the peak frequency detection is at **38 KHz** and the peak LED color is **940 nm**. You can use from about 35 KHz to 41 KHz but the sensitivity will drop off so that it wont detect as well from afar. Likewise, you can use 850 to 1100 nm LEDs but they wont work as well as 900 to 1000nm so make sure to get matching LEDs! Check the datasheet for your IR LED to verify the wavelength.
Try to get a 940nm - remember that 940nm is not visible light (its Infra Red)!
- [Next Page](https://learn.adafruit.com/ir-sensor/testing-an-ir-sensor.md)
## Featured Products
### Adafruit METRO 328 Fully Assembled - Arduino IDE compatible
[Adafruit METRO 328 Fully Assembled - Arduino IDE compatible](https://www.adafruit.com/product/50)
We sure love the ATmega328 here at Adafruit, and we use them _a lot_ for our own projects. The processor has plenty of GPIO, Analog inputs, hardware UART SPI and I2C, timers and PWM galore - just enough for most simple projects. When we need to go small, we use a
Out of Stock
[Buy Now](https://www.adafruit.com/product/50)
[Related Guides to the Product](https://learn.adafruit.com/products/50/guides)
### IR (Infrared) Receiver Sensor
[IR (Infrared) Receiver Sensor](https://www.adafruit.com/product/157)
IR sensor tuned to 38KHz, perfect for receiving commands from a TV remote control. Runs at 3V to 5V so it's great for any microcontroller.
To use, connect pin 3 (all the way to the right) to 5V power, pin 2 (middle) to ground and listen on pin 1. It doesn't do any decoding...
In Stock
[Buy Now](https://www.adafruit.com/product/157)
[Related Guides to the Product](https://learn.adafruit.com/products/157/guides)
### Super-bright 5mm IR LED
[Super-bright 5mm IR LED](https://www.adafruit.com/product/387)
Infrared LEDs are used for remote controls (they're the little LED in the part you point at your TV) and 'night-vision' cameras, and these little blue guys are high powered ones! They are 940nm wavelength, which is what nearly all devices listen to. They're 20 degree beamwidth,...
In Stock
[Buy Now](https://www.adafruit.com/product/387)
[Related Guides to the Product](https://learn.adafruit.com/products/387/guides)
### Mini Remote Control
[Mini Remote Control](https://www.adafruit.com/product/389)
This little remote control would be handy for controlling a robot or other project from across the room. It has 21 buttons and a layout we thought was handy: directional buttons and number entry buttons. The remote uses the NEC encoding type and sends data codes 0 thru 26 (it skips #3, #7,...
In Stock
[Buy Now](https://www.adafruit.com/product/389)
[Related Guides to the Product](https://learn.adafruit.com/products/389/guides)
### Super-bright 5mm IR LED (25 pack)
[Super-bright 5mm IR LED (25 pack)](https://www.adafruit.com/product/388)
Infrared LEDs are used for remote controls (they're the little LED in the part you point at your TV) and 'night-vision' cameras, and these little blue guys are high powered ones! They are 940nm wavelength, which is what nearly all devices listen to. They're 20 degree beamwidth,...
In Stock
[Buy Now](https://www.adafruit.com/product/388)
[Related Guides to the Product](https://learn.adafruit.com/products/388/guides)
### Adafruit METRO 328 - Arduino Compatible - with Headers
[Adafruit METRO 328 - Arduino Compatible - with Headers](https://www.adafruit.com/product/2488)
This is the **Adafruit METRO Arduino-Compatible - with headers. ** It's a fully assembled and tested microcontroller and physical computing board with through-hole headers attached. If you don't want a Metro with the headers attached for...
In Stock
[Buy Now](https://www.adafruit.com/product/2488)
[Related Guides to the Product](https://learn.adafruit.com/products/2488/guides)
## Related Guides
- [RePaper eInk Development Board](https://learn.adafruit.com/repaper-eink-development-board.md)
- [Adafruit MSA301 Triple Axis Accelerometer](https://learn.adafruit.com/msa301-triple-axis-accelerometer.md)
- [Bluetooth Controlled Motorized Camera Slider](https://learn.adafruit.com/bluetooth-motorized-camera-slider.md)
- [Adafruit PCA9685 16-Channel Servo Driver](https://learn.adafruit.com/16-channel-pwm-servo-driver.md)
- [Adalight Project Pack](https://learn.adafruit.com/adalight-diy-ambient-tv-lighting.md)
- [Reverse Geocache Box](https://learn.adafruit.com/reverse-geocache-engagement-box.md)
- [Introducing Adafruit Trellis ](https://learn.adafruit.com/adafruit-trellis-diy-open-source-led-keypad.md)
- [Sending an SMS with Temboo](https://learn.adafruit.com/sending-an-sms-with-temboo.md)
- [20mm LED Pixels](https://learn.adafruit.com/20mm-led-pixels.md)
- [Remote controlled door lock using a fingerprint sensor & Adafruit IO](https://learn.adafruit.com/remote-controlled-door-lock-using-a-fingerprint-sensor-and-adafruit-io.md)
- [Character LCDs](https://learn.adafruit.com/character-lcds.md)
- [Smart Measuring Cup](https://learn.adafruit.com/smart-measuring-cup.md)
- [Memories of an Arduino](https://learn.adafruit.com/memories-of-an-arduino.md)
- [Arduino Lesson 2. LEDs](https://learn.adafruit.com/adafruit-arduino-lesson-2-leds.md)
- [Smart Cocktail Shaker](https://learn.adafruit.com/smart-cocktail-shaker.md)
---
# Source: https://learn.adafruit.com/smt-manufacturing/jedec-trays.md
# SMT Manufacturing
## JEDEC Trays
This tip is a quicky but very handy! When programming a tray into your pick and place, you will need to know the X&Y dimensions. This sounds simple but measuring them with calipers can be annoying which is when we found this really handy PDF from a JEDEC tray maker that has all the dimensions ready to go!
[You can grab the PDF here](http://learn.adafruit.com/system/assets/assets/000/010/047/original/tray_QFP.pdf), for QFP trays.- [Previous Page](https://learn.adafruit.com/smt-manufacturing/hot-air-tools.md)
- [Next Page](https://learn.adafruit.com/smt-manufacturing/squeegees.md)
## Featured Products
### Fine tip curved tweezers - ESD safe
[Fine tip curved tweezers - ESD safe](https://www.adafruit.com/product/422)
When soldering small surface-mount (SMD/SMT) components, one thing you'll need is a good pair of tweezers. These are a great pair of every-day tweezers. They're anti-static, anti-magnetic and made of hard stainless steel. The tips are fine and pointy to pick up any size component. This...
In Stock
[Buy Now](https://www.adafruit.com/product/422)
[Related Guides to the Product](https://learn.adafruit.com/products/422/guides)
### Fine tip straight tweezers - ESD safe
[Fine tip straight tweezers - ESD safe](https://www.adafruit.com/product/421)
When soldering small surface-mount (SMD/SMT) components, one thing you'll need is a good pair of tweezers. These tweezers are a great pair of every-day tweezers. They're anti-static, anti-magnetic and made of hard stainless steel. The tips are fine and pointy to pick up any size...
In Stock
[Buy Now](https://www.adafruit.com/product/421)
[Related Guides to the Product](https://learn.adafruit.com/products/421/guides)
### USB Microscope - 5MP interpolated 220x magnification / 8 LEDs
[USB Microscope - 5MP interpolated 220x magnification / 8 LEDs](https://www.adafruit.com/product/636)
As electronics get smaller and smaller, you'll need a hand examining PCBs and this little USB microscope is the perfect tool. Its smaller and lighter than a large optical microscope but packs quite a bit of power in its little body. There's a 2 megapixel sensor inside and an optical...
Out of Stock
[Buy Now](https://www.adafruit.com/product/636)
[Related Guides to the Product](https://learn.adafruit.com/products/636/guides)
## Related Guides
- [Reindeer Solder Kit by Phyx](https://learn.adafruit.com/reindeer-solder-kit-by-phyx.md)
- [3D-Printed Solder Paste Dispenser Hand Switch ](https://learn.adafruit.com/3d-printed-solder-paste-dispenser-hand-switch.md)
- [USB Rechargeable Mini Solder Fume Extractor](https://learn.adafruit.com/usb-rechargeable-mini-solder-fume-extractor.md)
- [How to Sign Windows Drivers & Executables](https://learn.adafruit.com/how-to-sign-windows-drivers-installer.md)
- [Desktop Fume Extractor](https://learn.adafruit.com/desktop-fume-extractor.md)
- [Chinese Dragon Puppet with Motion-Reactive Flame Effect](https://learn.adafruit.com/chinese-dragon-puppet-with-motion-reactive-flame-effect.md)
- [16-Step Drum Sequencer](https://learn.adafruit.com/16-step-drum-sequencer.md)
- [Color Sensing Music Player](https://learn.adafruit.com/color-sensing-music-player.md)
- [Light-Up Costumes in Harsh Environments](https://learn.adafruit.com/light-up-costumes-in-harsh-environments.md)
- [Garden Path Lights with WLED and a Sunset Timer](https://learn.adafruit.com/garden-path-lights-with-sunset-timer.md)
- [CNC Rotary Macropad](https://learn.adafruit.com/cnc-rotary-macropad.md)
- [Blinka Says Tabletop Arcade Game](https://learn.adafruit.com/blinka-says-tabletop-arcade-game.md)
- [IoT Moon Phase Guide](https://learn.adafruit.com/moon-phase.md)
- [KTOWN's Ultimate Creating Parts in Eagle Tutorial](https://learn.adafruit.com/ktowns-ultimate-creating-parts-in-eagle-tutorial.md)
- [Shop Tips & Tricks](https://learn.adafruit.com/shop-tips-and-tricks.md)
---
# Source: https://learn.adafruit.com/timesquare-watch-kit/kit-assembly.md
# TIMESQUARE Watch Kit
## Kit Assembly
First up, check that you have all the electronic parts laid out on your table and ready for soldering!

Start by placing the PCB in a vise to keep it steady. We'll be soldering parts on TOP, where the silkscreen shows the component placing. The first part we'll place is the 10K resistor. This resistor is marked **brown black orange gold**. (It's also the only single resistor of that color)
Bend the resistor into a staple and slip the wire leads into the two holes so that the resistor covers the outline labeled **R10** in the bottom right corner shown here

Bend the wire leads out so the resistor sits flat against the PCB. Then you can flip it over and it wont fall out!

With your soldering iron heated up and ready, solder in both leads of the resistor. To do this, heat up the round ring pad and the wire lead at the same time for 2 or 3 seconds, then dip the end of the solder into the heated joint to melt it in.
Then remove the solder and the soldering iron.


Once the soldering is complete, we can clean up by clipping the leads of the resistor. This keeps them from shorting to something else. Use diagonal or flush cutters to clip the wires right above where the solder joint ends.


Next we'll solder in the yellow blobby 0.1uF capacitor. This capacitor is part of the reset circuitry as well, and is used to help reset the chip when we want to reprogram it.
Ceramic capacitors, like resistors, are not directional. So put it in any way it fits, next to the **R10** resistor, so its surrounded by the **C1** outline
Then bend the leads and flip over the board.
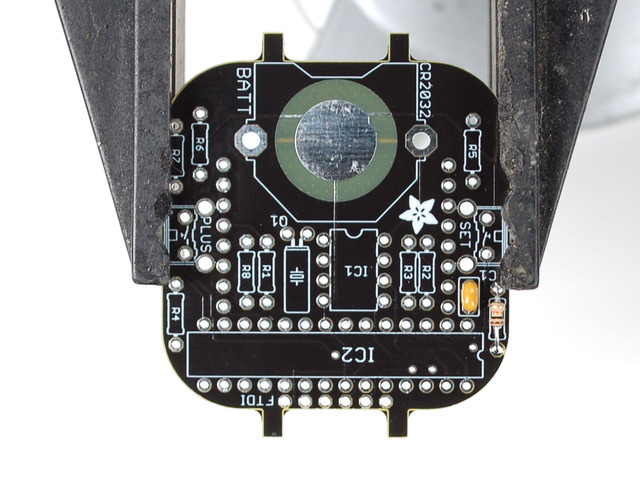

Solder in the capacitor's two legs just like you did with the resistor


You did great with the first two parts, now we will solder in the remaining resistors **R1-R8**. These resistors are the LED 'choke' resistors - they keep the LED matrix's light even and avoids having too much current draw that would kill the battery off!
All the resistors are the same 47 ohm value - **Yellow Violet Black Gold**
Here we placed and soldered all 8 at once but you can go one at a time if you want to take it a little slower!


Solder in all the resistors, either one at a time or all 8 at once! Make sure you don't forget any solder points, though.


Next clip all the leads!


Next up we will put in the first chip. This chip has 8 legs and has the label **DS1337** on top. Make sure you've got the right label on the chip.
This chip is the "real time clock" - the timekeeper. It is a ultra-lo-power circuit, whose only task is to keep track of the time, so its pretty good at it. It's possible to have the main microcontroller chip (the next one we'll do) keep track of the time, but its not as good at it (both in terms of power and precision) so we splurged on having a seperate RTC
The important thing about chips is that they are not like resistors and capacitors in that they **can't** be placed 'either way'. It **must** be placed the right way or the chip wont work. Look for the end of the chip with a notch and a dot. These must match up the silkscreened image on the PCB so make sure the notches line up.


Solder all eight pins of the RTC
No need to clip them after they're done


Next we'll do the big microcontroller chip. This chip is the brains, it does all of the displaying and button handling. Most of the time its 'sleeping' and when you press a button it wakes up and shows the time. It has a lot of pins because the matrix requires 16 pins to draw, and then you need some more pins for buttons, the RTC chip, reprogramming, etc.
The chip is an **ATMEGA328P** that has been pre-programmed at the Adafruit factory to have an Arduino-compatible bootloader and our default watch display code.
To begin, flatten the pins to make them more parallel || shaped intsead of A shaped. Hold the chip in your hand and press all the pins one side at a time against a flat table.
Then when you press it into the holes, make sure each pin has made it into a matching hole, and its sitting flat against the PCB
Like the RTC, this chip **must** be put in the right way. The notch on the chip must go on the left side as in these photos. Check twice to make sure you have the chip in right!


Solder all 28 pins!
No need to clip them after they're done
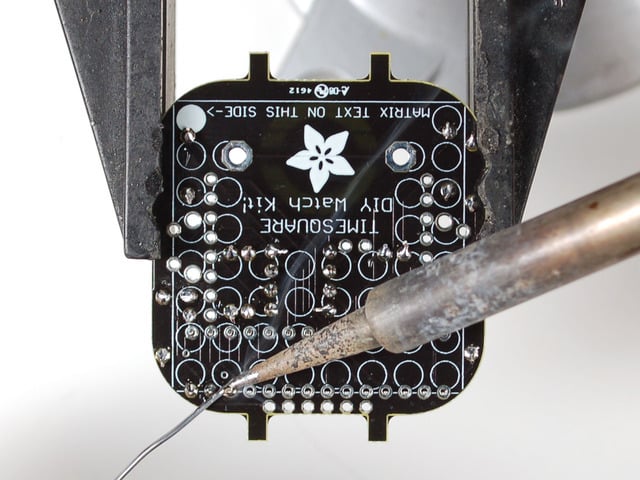


Next we'll place both the battery holder, and the timing crystal. The battery of course is how we power the watch, and this holder keeps it in place. The timing crystal is the "Quartz Crystal" in watches, that keeps time by resonating
The battery holder does have a special way it must go, make sure you can slide the battery in by having the open side facing out
The crystal can go in either way, its symmetric, like the resistors

The battery holder will slip out if you flip over the board, so before flipping the board, solder one leg side from the top. The holder is a great heatsink so it may take a little longer than usual to solder in


Flip it over and solder in the other battery pin, then go back and do the first one.
Also, solder and clip the two crystal pins
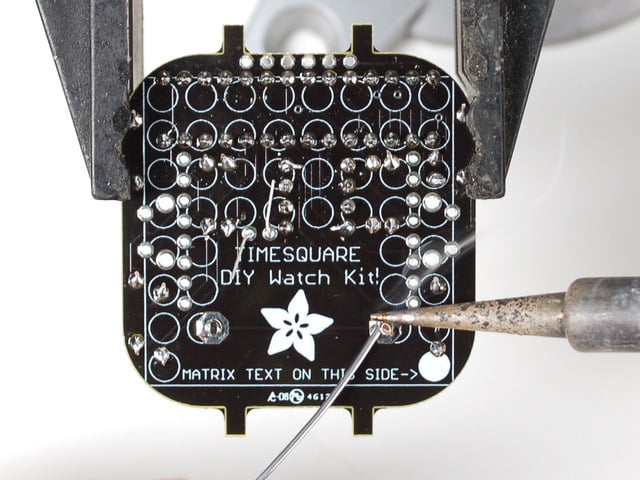


Lastly, place the two interface buttons. You'll use these to set the time, display the time, and change watch faces.
Both go on either side of the board, and they'll snap in.
Then flip the board over and solder in all 4 pins of each
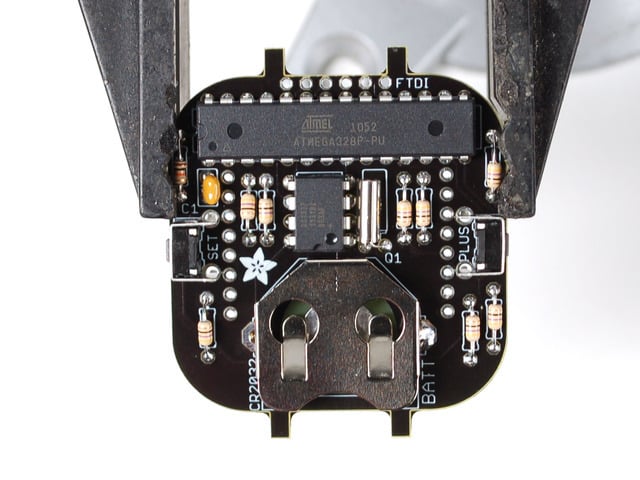
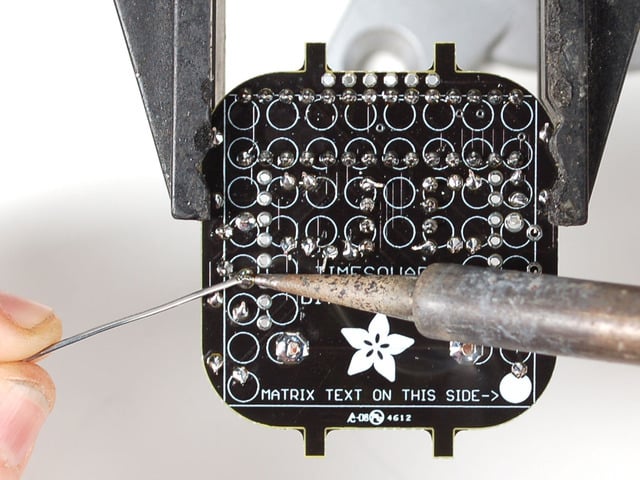

Danger:
Finally, the fun part! The matrix!
The LED matrix is what you'll be looking at - 64 individual LEDs in a plastic case.
The Matrix is not symetric, it **must** go in the right way on the right side.
Look for the writing on the side of the matrix, this side must go on the side of the PCB with a dot as you see here. Also the matrix goes on the OPPOSITE side of the other parts!
Check that the 28-pin microcontroller pins aren't in the way of the matrix, it should sit nice and flat


Now solder in all the pins of the matrix, you may have to angle the iron tip a bit to avoid burning other parts
You can clip the leads but you don't have to (they're less long than the height of all the other parts!


Get the remaining parts out of the kit - a 20mm coin battery, silicone band and optional clear plastic back

Insert a 20mm (CR2032) coin cell battery so that the flat **+** side is facing up and the bumpy side is facing down into the PCB

Place the clear back first into the band so it's at the bottom. Then stretch the band and scootch the assembly in, pulling the rubber to fit around!
When you've got it all in, you may need to pull/press the band around the PCB to have the 'nubs' fit into the notches that are molded into the band


That's it! You can now continue on to set the time and/or adjust your fit


## ADJUSTING FIT
After you've assembled your watch there are a few ways to change the fit of the band around the PCB. First is trimming down the nubs on the PCB. These are there to help keep the board inside the rubber band. However, they may be long depending on your wrist size, and band (all the bands are slightly different)
Simply trim them down a millimeter at a time to help avoid them from sticking out too much


Another easy way to adjust the fit is to remove the plastic back - its not essential and for smaller wrists it may make the watch a little bulkier than desired.

#
## OTHER TWEAKS
_Kapton tape_ is a heat-resistant and electrically insulative tape that's used a lot in electronics. This isn’t included with the watch, but if you’ve been in this hobby for a while there’s a good chance you already have a roll handy. Wonderful stuff.
One or two layers of Kapton tape applied to the watch face make it less prone to washing out under bright light. The tape’s color is similar enough to the red LEDs that they shine through with little difficulty, while most ambient light is blocked.
_Rubylith film_ (from a decent old-school art supply store) would probably work as well, if not better.


- [Previous Page](https://learn.adafruit.com/timesquare-watch-kit/parts-list.md)
- [Next Page](https://learn.adafruit.com/timesquare-watch-kit/setting-the-time.md)
## Featured Products
### TIMESQUARE DIY Watch Kit - Red Display Matrix
[TIMESQUARE DIY Watch Kit - Red Display Matrix](https://www.adafruit.com/product/1106)
Show up stylish AND on time to any event with this awesome looking DIY watch. We have a few watch kits here at Adafruit but we finally have one that looks good and fits well, even for ladies and kids and others with smaller wrists and hands. Its got an 8x8 bit matrix display and a repurposed...
No Longer Stocked
[Buy Now](https://www.adafruit.com/product/1106)
[Related Guides to the Product](https://learn.adafruit.com/products/1106/guides)
### TIMESQUARE DIY Watch Kit - Tangerine Display Matrix
[TIMESQUARE DIY Watch Kit - Tangerine Display Matrix](https://www.adafruit.com/product/1223)
Show up stylish AND on time to any event with this awesome looking DIY watch. We have a few watch kits here at Adafruit but we finally have one that looks good and fits well, even for ladies and kids and others with smaller wrists and hands. Its got an 8x8 bit matrix display and a repurposed...
No Longer Stocked
[Buy Now](https://www.adafruit.com/product/1223)
[Related Guides to the Product](https://learn.adafruit.com/products/1223/guides)
### TIMESQUARE DIY Watch Kit - Lime Display Matrix
[TIMESQUARE DIY Watch Kit - Lime Display Matrix](https://www.adafruit.com/product/1224)
Show up stylish AND on time to any event with this awesome looking DIY watch. We have a few watch kits here at Adafruit but we finally have one that looks good and fits well, even for ladies and kids and others with smaller wrists and hands. Its got an 8x8 bit matrix display and a repurposed...
No Longer Stocked
[Buy Now](https://www.adafruit.com/product/1224)
[Related Guides to the Product](https://learn.adafruit.com/products/1224/guides)
### TIMESQUARE DIY Watch Kit - Blue Display Matrix
[TIMESQUARE DIY Watch Kit - Blue Display Matrix](https://www.adafruit.com/product/1225)
Show up stylish AND on time to any event with this awesome looking DIY watch. We have a few watch kits here at Adafruit but we finally have one that looks good and fits well, even for ladies and kids and others with smaller wrists and hands. Its got an 8x8 bit matrix display and a repurposed...
No Longer Stocked
[Buy Now](https://www.adafruit.com/product/1225)
[Related Guides to the Product](https://learn.adafruit.com/products/1225/guides)
### TIMESQUARE DIY Watch Kit - White Display Matrix
[TIMESQUARE DIY Watch Kit - White Display Matrix](https://www.adafruit.com/product/1226)
Show up stylish AND on time to any event with this awesome looking DIY watch. We have a few watch kits here at Adafruit but we finally have one that looks good and fits well, even for ladies and kids and others with smaller wrists and hands. Its got an 8x8 bit matrix display and a repurposed...
No Longer Stocked
[Buy Now](https://www.adafruit.com/product/1226)
[Related Guides to the Product](https://learn.adafruit.com/products/1226/guides)
### TIMESQUARE silver parts bag
[TIMESQUARE silver parts bag](https://www.adafruit.com/product/1227)
No Longer Stocked
[Buy Now](https://www.adafruit.com/product/1227)
[Related Guides to the Product](https://learn.adafruit.com/products/1227/guides)
## Related Guides
- [MicroLipo v2 Case](https://learn.adafruit.com/microlipo-case.md)
- [Adafruit DotStar FeatherWing](https://learn.adafruit.com/adafruit-dotstar-featherwing-adafruit.md)
- [The Pixif](https://learn.adafruit.com/the-pixif.md)
- [Adafruit VL53L0X Time of Flight Micro-LIDAR Distance Sensor Breakout](https://learn.adafruit.com/adafruit-vl53l0x-micro-lidar-distance-sensor-breakout.md)
- [Adafruit MENTA Kit](https://learn.adafruit.com/adafruit-menta-kit-mint-tin-arduino-compatible.md)
- [Adafruit RGB Matrix Bonnet for Raspberry Pi](https://learn.adafruit.com/adafruit-rgb-matrix-bonnet-for-raspberry-pi.md)
- [Raspberry Pi Care and Troubleshooting](https://learn.adafruit.com/raspberry-pi-care-and-troubleshooting.md)
- [Adafruit FONA 808 Cellular + GPS Shield for Arduino](https://learn.adafruit.com/adafruit-fona-808-cellular-plus-gps-shield-for-arduino.md)
- [Adafruit PCM5122 I2S DAC](https://learn.adafruit.com/adafruit-pcm5122-i2s-dac.md)
- [Use an art canvas to diffuse an RGB matrix](https://learn.adafruit.com/use-an-art-canvas-to-diffuse-rgb-matrix.md)
- [Bluetooth-Controlled Matrix LED Sign using Bluefruit Connect](https://learn.adafruit.com/bluetooth-controlled-matrix-led-sign-using-bluefruit-connect.md)
- [Adafruit AW9523 GPIO Expander and LED Driver](https://learn.adafruit.com/adafruit-aw9523-gpio-expander-and-led-driver.md)
- [Adafruit DPI Display Kippah](https://learn.adafruit.com/adafruit-dpi-display-kippah-ttl-tft.md)
- [DIY Pocket LED Gamer - Tiny Tetris!](https://learn.adafruit.com/diy-3d-printed-handheld-pocket-game-tiny-tetris-snake.md)
- [Adafruit MagTag](https://learn.adafruit.com/adafruit-magtag.md)
---
# Source: https://learn.adafruit.com/lady-adas-bento-box.md
# Ladyada's Bento Box
## Overview

Portage for your projects! [Lady Ada's Bento Box](http://www.adafruit.com/products/765) is a crush-proof, drop-proof & water-proof prototyping kit that combines the ultra-rugged [Otterbox 3000](http://www.adafruit.com/products/339) with a [storage tin](http://www.adafruit.com/products/97) and [half-size (400-point) breadboard](http://www.adafruit.com/products/64) . In the middle is a spot for attaching an Arduino UNO (or any other PCB that has the same shape and mounting holes). There's plenty of clearance for wires (even ones with plastic bits on the end such as our premium jumper wires or wire bundles) and parts on the breadboard, and the box is so sturdy you never have to worry about any delicate parts inside getting damaged. Toss it in your backpack, suitcase, duffel bag and you can be sure to work on it when you get to school, work or home. **The Otterbox we were using has been sadly discontinued but here are the files if you want to mod & hack your own!**
[BentoBox-3000-POWER-V0.5-outlines-AI9.ai](https://cdn-learn.adafruit.com/assets/assets/000/043/905/original/BentoBox-3000-POWER-V0.5-outlines-AI9.ai?1500010840)
[BentoBox-3000-STORAGE-V0.2-outlines-AI9.ai](https://cdn-learn.adafruit.com/assets/assets/000/043/906/original/BentoBox-3000-STORAGE-V0.2-outlines-AI9.ai?1500010847)
- [Next Page](https://learn.adafruit.com/lady-adas-bento-box/parts-list.md)
## Featured Products
### Adafruit METRO 328 Fully Assembled - Arduino IDE compatible
[Adafruit METRO 328 Fully Assembled - Arduino IDE compatible](https://www.adafruit.com/product/50)
We sure love the ATmega328 here at Adafruit, and we use them _a lot_ for our own projects. The processor has plenty of GPIO, Analog inputs, hardware UART SPI and I2C, timers and PWM galore - just enough for most simple projects. When we need to go small, we use a
Out of Stock
[Buy Now](https://www.adafruit.com/product/50)
[Related Guides to the Product](https://learn.adafruit.com/products/50/guides)
### Half Sized Premium Breadboard - 400 Tie Points
[Half Sized Premium Breadboard - 400 Tie Points](https://www.adafruit.com/product/64)
This is a cute, half-size breadboard with 400 tie points, good for small projects. It's 3.25" x 2.2" / 8.3cm x 5.5cm with a standard double-strip in the middle and two power rails on both sides. You can pull the power rails off easily to make the breadboard as...
In Stock
[Buy Now](https://www.adafruit.com/product/64)
[Related Guides to the Product](https://learn.adafruit.com/products/64/guides)
### Altoids mints sized tin
[Altoids mints sized tin](https://www.adafruit.com/product/97)
Useful for larger electronic projects, including the YBox2 kit
In Stock
[Buy Now](https://www.adafruit.com/product/97)
[Related Guides to the Product](https://learn.adafruit.com/products/97/guides)
## Related Guides
- [Wireless Gardening with Arduino + CC3000 WiFi Modules](https://learn.adafruit.com/wireless-gardening-arduino-cc3000-wifi-modules.md)
- [Memories of an Arduino](https://learn.adafruit.com/memories-of-an-arduino.md)
- [Deciphering Strange Arduino Code](https://learn.adafruit.com/deciphering-strange-arduino-code.md)
- [Adafruit 16-channel PWM/Servo Shield](https://learn.adafruit.com/adafruit-16-channel-pwm-slash-servo-shield.md)
- [IR Sensor](https://learn.adafruit.com/ir-sensor.md)
- [Arduino Lesson 8. Analog Inputs](https://learn.adafruit.com/adafruit-arduino-lesson-8-analog-inputs.md)
- [RePaper eInk Development Board](https://learn.adafruit.com/repaper-eink-development-board.md)
- [LED Lightbox](https://learn.adafruit.com/led-lightbox.md)
- [Arduino Tips, Tricks, and Techniques](https://learn.adafruit.com/arduino-tips-tricks-and-techniques.md)
- [Adafruit Music Maker Shield](https://learn.adafruit.com/adafruit-music-maker-shield-vs1053-mp3-wav-wave-ogg-vorbis-player.md)
- [Adafruit 2.8" TFT Touch Shield v2 - Capacitive or Resistive](https://learn.adafruit.com/adafruit-2-8-tft-touch-shield-v2.md)
- [Arduino Lesson 7. Make an RGB LED Fader](https://learn.adafruit.com/adafruit-arduino-lesson-7-make-an-rgb-led-fader.md)
- [0.96" mini Color OLED](https://learn.adafruit.com/096-mini-color-oled.md)
- [Low Power WiFi Datalogger](https://learn.adafruit.com/low-power-wifi-datalogging.md)
- [Electronic Demon Costume](https://learn.adafruit.com/electronic-demon-costume.md)
---
# Source: https://learn.adafruit.com/digital-shipping-scales/larger-scales.md
# Digital Shipping Scales
## Larger Scales
We also sometimes have to ship large packages, especially wholesale orders. In this case we use the larger floor scale. We think these scales are not suitable for shipping small envelopes because they have more error but for big boxes they are great! The scale we have is the **MyWeigh HD-150 ** (about $120) which can do 0-150 lbs or 60 kgs. If you need even more you can get the HD-300 which can weight twice as much but unless you do freight its rare to ship packages over 50 or 75 lbs.
It too comes with a power plug and a RS-232 serial port, you'll need a USB converter if you dont have a COM port on hand. For microcontrollers, a MAX232 or similar will be handy.
- [Previous Page](https://learn.adafruit.com/digital-shipping-scales/using-a-7010sb-scale.md)
- [Next Page](https://learn.adafruit.com/digital-shipping-scales/using-a-hd-150-scale.md)
## Related Guides
- [Barcode Scanner](https://learn.adafruit.com/barcode-scanner.md)
---
# Source: https://learn.adafruit.com/smt-manufacturing/laser-cut-stencils.md
# SMT Manufacturing
## DIY Solder Paste Stencils
If you want to make a lot of PCBs using SMT technique, its key to use reflowing instead of soldering - so that the entire board is 'soldered' at once. But to do that you'll need to deposit paste precisely on the pads. For starting out, you can use a DIY stencil such as a laser cut kapton/mylar sheet. This is a low cost technique you can do yourself or order online!Thanks to [Ryan O'Hara at Ohararp.com](http://ohararp.com/ "Link: http://ohararp.com/") for this information, he provides a stencil cutting service and is recommended!
Supplies you'll need:
1. A laser cutter
2. Kapton film, I like the 2 mil thick 1 ft square sheets from [McMaster-Carr](http://www.mcmaster.com/#2271K2)
3. Solder paste such as [Kester No-Clean](https://www.kester.com/products/product/r276-solder-paste "Link: https://www.kester.com/products/product/r276-solder-paste")
Software you'll need:
1. PCB layout software (well, thats how I do it) - this example will use EagleCAD
2. [Pentalogix ViewMate Gerber viewer software](http://www.pentalogix.com/Download/download.html "Link: http://www.pentalogix.com/Download/download.html")
3. [PDFCreator](http://sourceforge.net/project/showfiles.php?group_id=57796) or some other free PDF printer
## Create Gerber files of cream layer
This is the PCB we'll be making a stencil for. It only has one chip but of course you can use a more complex layout.

Your PCB software should be able to create/export the Cream Layer (solder paste layer) in Gerber RS274x format. In Eagle you can make your own Job for this quite easily.
Also export the Dimension layer (PCB outline) since that will help a lot in registration.## Import Cream Gerber in Viewmate
Start up Viewmate and File\>Import\>Gerber one of the Gerber files generated.


You can zoom in using the Magnifying glass tool.
## Swell Pads
Next we will make minor adjustnents to shrink the pads a little
Select Setup\>D Codes

Which will bring up a list of all the pads used. You will probably just want to select all of them.
Then select Operations \> Swell.
and input somewhere around -0.002 (2 mil) to shrink all the pads by 0.002 inches in each direction.
You'll now see that your pads are thinner. This prevents bridging since the laser is not perfectly precise and tends to 'go over' the boundaries by a few mils.
## Export
Now we'll export to PDF which will allow for easy importing into Corel Draw. The free version of Viewate doesnt seem to permit exporting, but you can print to PDF which is just as good.

## Cut!
Import into Corel Draw and use raster not vector, to burn away the kapton film. For a 35W or 45W epilog, 30% speed and 100% power at 600 dpi made for a nice clean edge. Be sure to gently rub the stencil with water and a paper towel to get rid of the burnt kapton.

I usually use the Dimension layer info to make a jig for silkscreening by cutting out the PCB outline in a 0.062'' (1/16th) clear acrylic sheet
Here is a LFCSP 16 (4mm on each side) cut out of 2 mil kapton as above.

- [Previous Page](https://learn.adafruit.com/smt-manufacturing/solder-paste-storage.md)
- [Next Page](https://learn.adafruit.com/smt-manufacturing/framed-stencils.md)
## Featured Products
### Fine tip curved tweezers - ESD safe
[Fine tip curved tweezers - ESD safe](https://www.adafruit.com/product/422)
When soldering small surface-mount (SMD/SMT) components, one thing you'll need is a good pair of tweezers. These are a great pair of every-day tweezers. They're anti-static, anti-magnetic and made of hard stainless steel. The tips are fine and pointy to pick up any size component. This...
In Stock
[Buy Now](https://www.adafruit.com/product/422)
[Related Guides to the Product](https://learn.adafruit.com/products/422/guides)
### Fine tip straight tweezers - ESD safe
[Fine tip straight tweezers - ESD safe](https://www.adafruit.com/product/421)
When soldering small surface-mount (SMD/SMT) components, one thing you'll need is a good pair of tweezers. These tweezers are a great pair of every-day tweezers. They're anti-static, anti-magnetic and made of hard stainless steel. The tips are fine and pointy to pick up any size...
In Stock
[Buy Now](https://www.adafruit.com/product/421)
[Related Guides to the Product](https://learn.adafruit.com/products/421/guides)
### USB Microscope - 5MP interpolated 220x magnification / 8 LEDs
[USB Microscope - 5MP interpolated 220x magnification / 8 LEDs](https://www.adafruit.com/product/636)
As electronics get smaller and smaller, you'll need a hand examining PCBs and this little USB microscope is the perfect tool. Its smaller and lighter than a large optical microscope but packs quite a bit of power in its little body. There's a 2 megapixel sensor inside and an optical...
Out of Stock
[Buy Now](https://www.adafruit.com/product/636)
[Related Guides to the Product](https://learn.adafruit.com/products/636/guides)
## Related Guides
- [Reindeer Solder Kit by Phyx](https://learn.adafruit.com/reindeer-solder-kit-by-phyx.md)
- [3D-Printed Solder Paste Dispenser Hand Switch ](https://learn.adafruit.com/3d-printed-solder-paste-dispenser-hand-switch.md)
- [USB Rechargeable Mini Solder Fume Extractor](https://learn.adafruit.com/usb-rechargeable-mini-solder-fume-extractor.md)
- [How to Sign Windows Drivers & Executables](https://learn.adafruit.com/how-to-sign-windows-drivers-installer.md)
- [Desktop Fume Extractor](https://learn.adafruit.com/desktop-fume-extractor.md)
- [Chinese Dragon Puppet with Motion-Reactive Flame Effect](https://learn.adafruit.com/chinese-dragon-puppet-with-motion-reactive-flame-effect.md)
- [16-Step Drum Sequencer](https://learn.adafruit.com/16-step-drum-sequencer.md)
- [Color Sensing Music Player](https://learn.adafruit.com/color-sensing-music-player.md)
- [Light-Up Costumes in Harsh Environments](https://learn.adafruit.com/light-up-costumes-in-harsh-environments.md)
- [Garden Path Lights with WLED and a Sunset Timer](https://learn.adafruit.com/garden-path-lights-with-sunset-timer.md)
- [CNC Rotary Macropad](https://learn.adafruit.com/cnc-rotary-macropad.md)
- [Blinka Says Tabletop Arcade Game](https://learn.adafruit.com/blinka-says-tabletop-arcade-game.md)
- [IoT Moon Phase Guide](https://learn.adafruit.com/moon-phase.md)
- [KTOWN's Ultimate Creating Parts in Eagle Tutorial](https://learn.adafruit.com/ktowns-ultimate-creating-parts-in-eagle-tutorial.md)
- [Shop Tips & Tricks](https://learn.adafruit.com/shop-tips-and-tricks.md)
---
# Source: https://learn.adafruit.com/2-8-tft-touchscreen/lcd-test.md
# Source: https://learn.adafruit.com/2-8-tft-touch-shield/lcd-test.md
# 2.8" TFT Touch Shield
## LCD Test
We have a library with example code ready to go for use with these TFTs. The library is not incredibly fast and optimized but its a good start and can easily be ported to other micrcontrollers. However, we'll assume you're using an Arduino.
_Two_ libraries need to be downloaded and installed: the [TFTLCD library](https://github.com/adafruit/TFTLCD-Library) and the [GFX library.](https://github.com/adafruit/Adafruit-GFX-Library) You can install these libraries through the Arduino library manager.
Open up the Arduino library manager:

Search for the **Adafruit GFX ** library and install it:

If using an older Arduino IDE (pre-1.8.10), do the same for **Adafruit\_BusIO** (newer versions do this one automatically).
Then search for the **Adafruit TFTLCD ** library and install it:

We also have a great tutorial on Arduino library installation at:
[http://learn.adafruit.com/adafruit-all-about-arduino-libraries-install-use](http://learn.adafruit.com/adafruit-all-about-arduino-libraries-install-use "Link: http://learn.adafruit.com/adafruit-all-about-arduino-libraries-install-use")
Danger:
```
//comment or uncomment the next line for special pinout!
#define USE_ADAFRUIT_SHIELD_PINOUT
```
Restart the Arduino software. You should see a new **example** folder called **TFTLCD** and inside, an example called **graphicstest**. Upload that sketch to your Arduino. You should see a collection of graphical tests draw out on the TFT.

- [Previous Page](https://learn.adafruit.com/2-8-tft-touch-shield/connect.md)
- [Next Page](https://learn.adafruit.com/2-8-tft-touch-shield/adafruit-gfx-library.md)
## Featured Products
### Adafruit METRO 328 Fully Assembled - Arduino IDE compatible
[Adafruit METRO 328 Fully Assembled - Arduino IDE compatible](https://www.adafruit.com/product/50)
We sure love the ATmega328 here at Adafruit, and we use them _a lot_ for our own projects. The processor has plenty of GPIO, Analog inputs, hardware UART SPI and I2C, timers and PWM galore - just enough for most simple projects. When we need to go small, we use a
Out of Stock
[Buy Now](https://www.adafruit.com/product/50)
[Related Guides to the Product](https://learn.adafruit.com/products/50/guides)
## Related Guides
- [LED Lightbox](https://learn.adafruit.com/led-lightbox.md)
- [Trinket Audio Player](https://learn.adafruit.com/trinket-audio-player.md)
- [Geofencing with the FONA 808 & Adafruit IO](https://learn.adafruit.com/geofencing-with-the-fona-808-and-adafruit-io.md)
- [Adafruit Analog Accelerometer Breakouts](https://learn.adafruit.com/adafruit-analog-accelerometer-breakouts.md)
- [Electronic Demon Costume](https://learn.adafruit.com/electronic-demon-costume.md)
- [Adafruit Ultimate GPS Logger Shield](https://learn.adafruit.com/adafruit-ultimate-gps-logger-shield.md)
- [Mini Thermal Receipt Printers](https://learn.adafruit.com/mini-thermal-receipt-printer.md)
- [Bluefruit LE Connect for iOS and Android](https://learn.adafruit.com/bluefruit-le-connect.md)
- [Introducing Adafruit Trellis ](https://learn.adafruit.com/adafruit-trellis-diy-open-source-led-keypad.md)
- [Arduino Lesson 9. Sensing Light](https://learn.adafruit.com/adafruit-arduino-lesson-9-sensing-light.md)
- [36mm LED Pixels](https://learn.adafruit.com/36mm-led-pixels.md)
- [Adafruit 16-channel PWM/Servo Shield](https://learn.adafruit.com/adafruit-16-channel-pwm-slash-servo-shield.md)
- [Naughty or Nice Machine](https://learn.adafruit.com/naughty-or-nice-machine.md)
- [Wireless Gardening with Arduino + CC3000 WiFi Modules](https://learn.adafruit.com/wireless-gardening-arduino-cc3000-wifi-modules.md)
- [LSM303 Accelerometer + Compass Breakout](https://learn.adafruit.com/lsm303-accelerometer-slash-compass-breakout.md)
---
# Source: https://learn.adafruit.com/character-lcds/lcd-varieties.md
# Character LCDs
## LCD Varieties
OK now that we're clear about what type of LCD we're talking about, its time to also look at the different shapes they come in.
Although they display only text, they do come in many shapes: from top left we have a 20x4 with white text on blue background, a 16x4 with black text on green, 16x2 with white text on blue and a 16x1 with black text on gray.
The good news is that all of these displays are 'swappable' - if you build your project with one you can unplug it and use another size. Your code may have to adjust to the larger size but at least the wiring is the same!

For this part of the tutorial, we'll be using LCDs with a single strip of 16 pins as shown above. There are _also_ some with 2 lines of 8 pins like so:
These are much harder to breadboard. If you want some help in wiring these up, [check out this page](http://learn.adafruit.com/diy-8x2-lcd-shield).
- [Previous Page](https://learn.adafruit.com/character-lcds/character-vs-graphical-lcds.md)
- [Next Page](https://learn.adafruit.com/character-lcds/wiring-a-character-lcd.md)
## Featured Products
### Standard LCD 16x2 + extras
[Standard LCD 16x2 + extras](https://www.adafruit.com/product/181)
Standard HD44780 LCDs are useful for creating standalone projects.
- 16 characters wide, 2 rows
- White text on blue background
- Connection port is 0.1" pitch, single row for easy breadboarding and wiring
- Pins are documented on the back of the LCD to assist...
In Stock
[Buy Now](https://www.adafruit.com/product/181)
[Related Guides to the Product](https://learn.adafruit.com/products/181/guides)
### Assembled Standard LCD 16x2 + extras - White on Blue
[Assembled Standard LCD 16x2 + extras - White on Blue](https://www.adafruit.com/product/1447)
Standard HD44780 LCDs are useful for creating standalone projects. This product is similar to our [Standard LCD 16x2 display **but comes with the header soldered on!**](https://www.adafruit.com/products/181)
- 16 characters wide, 2 rows
- White text...
In Stock
[Buy Now](https://www.adafruit.com/product/1447)
[Related Guides to the Product](https://learn.adafruit.com/products/1447/guides)
### RGB backlight positive LCD 16x2 + extras
[RGB backlight positive LCD 16x2 + extras](https://www.adafruit.com/product/398)
This is a fancy upgrade to standard 16x2 LCDs, instead of just having blue and white, or red and black, this LCD has black characters on a full color RGB-backlight background! That means you can change the background color to anything you want - red, green, blue, pink, white, purple yellow,...
In Stock
[Buy Now](https://www.adafruit.com/product/398)
[Related Guides to the Product](https://learn.adafruit.com/products/398/guides)
### RGB backlight negative LCD 16x2 + extras
[RGB backlight negative LCD 16x2 + extras](https://www.adafruit.com/product/399)
This is a fancy upgrade to standard 16x2 LCDs, instead of just having blue and white, or red and black, this LCD has full color RGB characters on a dark/black background! That means you can change the character display colors to anything you want - red, green, blue, pink, white, purple yellow,...
In Stock
[Buy Now](https://www.adafruit.com/product/399)
[Related Guides to the Product](https://learn.adafruit.com/products/399/guides)
### Standard LCD 20x4 + extras
[Standard LCD 20x4 + extras](https://www.adafruit.com/product/198)
Standard HD44780 LCDs are useful for creating standalone projects.
- 20 characters wide, 4 rows
- White text on blue background
- Connection port is 0.1" pitch, single row for easy breadboarding and wiring
- Single LED backlight with a resistor included, you can...
In Stock
[Buy Now](https://www.adafruit.com/product/198)
[Related Guides to the Product](https://learn.adafruit.com/products/198/guides)
### RGB backlight positive LCD 20x4 + extras
[RGB backlight positive LCD 20x4 + extras](https://www.adafruit.com/product/499)
This is a fancy upgrade to standard 20x4 LCDs, instead of just having blue and white, or red and black, this LCD has black characters on a full color RGB background! That means you can change the display background color to anything you want - red, green, blue, pink, white, purple yellow,...
In Stock
[Buy Now](https://www.adafruit.com/product/499)
[Related Guides to the Product](https://learn.adafruit.com/products/499/guides)
### RGB backlight negative LCD 20x4 + extras
[RGB backlight negative LCD 20x4 + extras](https://www.adafruit.com/product/498)
This is a fancy upgrade to standard 20x4 LCDs, instead of just having blue and white, or red and black, this LCD has full color RGB characters on a dark/black background! That means you can change the character display colors to anything you want - red, green, blue, pink, white, purple yellow,...
In Stock
[Buy Now](https://www.adafruit.com/product/498)
[Related Guides to the Product](https://learn.adafruit.com/products/498/guides)
### Adafruit METRO 328 Fully Assembled - Arduino IDE compatible
[Adafruit METRO 328 Fully Assembled - Arduino IDE compatible](https://www.adafruit.com/product/50)
We sure love the ATmega328 here at Adafruit, and we use them _a lot_ for our own projects. The processor has plenty of GPIO, Analog inputs, hardware UART SPI and I2C, timers and PWM galore - just enough for most simple projects. When we need to go small, we use a
Out of Stock
[Buy Now](https://www.adafruit.com/product/50)
[Related Guides to the Product](https://learn.adafruit.com/products/50/guides)
## Related Guides
- [Trinket Temperature & Humidity LCD Display](https://learn.adafruit.com/trinket-temperature-humidity-lcd-display.md)
- [Circuit Playground Sound-Controlled Robot](https://learn.adafruit.com/circuit-playground-sound-controlled-robot.md)
- [TTL Serial Camera](https://learn.adafruit.com/ttl-serial-camera.md)
- [Digital Circuits 7: MCUs... how do they work?](https://learn.adafruit.com/mcus-how-do-they-work.md)
- [Adafruit Data Logger Shield](https://learn.adafruit.com/adafruit-data-logger-shield.md)
- [Arduino "Hunt The Wumpus"](https://learn.adafruit.com/arduino-hunt-the-wumpus.md)
- [Arduino Lesson 2. LEDs](https://learn.adafruit.com/adafruit-arduino-lesson-2-leds.md)
- [Mini Thermal Receipt Printers](https://learn.adafruit.com/mini-thermal-receipt-printer.md)
- [Bluetooth Temperature & Humidity Sensor](https://learn.adafruit.com/bluetooth-temperature-and-humidity-sensor.md)
- [Character LCD with Raspberry Pi or BeagleBone Black](https://learn.adafruit.com/character-lcd-with-raspberry-pi-or-beaglebone-black.md)
- [DIY 8x2 LCD Shield](https://learn.adafruit.com/diy-8x2-lcd-shield.md)
- [Arduino Ethernet + SD Card](https://learn.adafruit.com/arduino-ethernet-sd-card.md)
- [Trellis 3D Printed Enclosure](https://learn.adafruit.com/trellis-3d-printed-enclosure.md)
- [Adafruit AirLift Shield - ESP32 WiFi Co-Processor](https://learn.adafruit.com/adafruit-airlift-shield-esp32-wifi-co-processor.md)
- [2.2" TFT Display](https://learn.adafruit.com/2-2-tft-display.md)
---
# Source: https://learn.adafruit.com/led-bicycle-handlebars.md
# LED Bicycle Handlebars
## Overview
http://www.youtube.com/watch?v=BIwcYmOzLoE
Light up your ride with some LED handlebars! You will need:
- [Cool white LED strip](http://adafruit.com/products/887) (1m or 2m - available as a [project pack](http://adafruit.com/products/932) in the Adafruit store)
- [Waterproof DC Power Cable Set](http://adafruit.com/products/743)
- [8 x AA battery holder](http://adafruit.com/products/449)
- [Heatshrink tubing](http://adafruit.com/products/344)
- [Clear handlebar tape](http://www.amazon.com/Cinelli-Jelly-Ribbon-NaturalTransparent/dp/B0016G7MP8 "Link: http://www.amazon.com/Cinelli-Jelly-Ribbon-NaturalTransparent/dp/B0016G7MP8")
- Scrap fabric
- Tablecloth vinyl or other waterproof fabric
- Velcro closure tape
- Electrical tape
- Zipties
Tools:
- Soldering iron and solder
- Wire strippers
- Scissors
- Needle and thread
- Sewing machine (optional)
- Measuring tape
- Multimeter
- Lighter (or heat gun-- for shrinking heatshrink tubing)
- Utility or craft knife

This project was inspired by [Mitchell Silva, who created GLOBARS](http://www.coroflot.com/mitchellsilva/GLOBARS) with LEDs inside the handlebars.
- [Next Page](https://learn.adafruit.com/led-bicycle-handlebars/solder-led-tape.md)
## Featured Products
### LED Bike Handlebar Pack - 1 meter
[LED Bike Handlebar Pack - 1 meter](https://www.adafruit.com/product/933)
This pack contains supplies for making your own LED bicycle handlebars! This project is easily completed in a weekend and requires a small amount of soldering and some sewing, too. Pack includes:
- [Cool white LED strip](http://adafruit.com/products/887)...
No Longer Stocked
[Buy Now](https://www.adafruit.com/product/933)
[Related Guides to the Product](https://learn.adafruit.com/products/933/guides)
### LED Bike Handlebar Pack - 2 meters
[LED Bike Handlebar Pack - 2 meters](https://www.adafruit.com/product/934)
This pack contains supplies for making your own LED bicycle handlebars! This project is easily completed in a weekend and requires a small amount of soldering and some sewing, too. Pack includes:
- [Cool white LED...](http://adafruit.com/products/887)
No Longer Stocked
[Buy Now](https://www.adafruit.com/product/934)
[Related Guides to the Product](https://learn.adafruit.com/products/934/guides)
### Cool White LED Weatherproof Flexi-Strip 60 LED - 5m
[Cool White LED Weatherproof Flexi-Strip 60 LED - 5m](https://www.adafruit.com/product/887)
These LED strips are ultra bright, fun and glowy. There are **60** cool white LEDs per meter, and you can control the entire strip at once with any microcontroller and [a power transistor](http://www.adafruit.com/products/355). The way they are wired, you will need a 9-12VDC...
No Longer Stocked
[Buy Now](https://www.adafruit.com/product/887)
[Related Guides to the Product](https://learn.adafruit.com/products/887/guides)
### Waterproof DC Power Cable Set - 5.5/2.1mm
[Waterproof DC Power Cable Set - 5.5/2.1mm](https://www.adafruit.com/product/743)
Outdoor enthusiasts rejoice! We now have standard 5.5/2.1mm DC power cable sets in a waterproof variety. These cable sets are ideal for projects that must weather the weather: dust, water, rain, snow, tornado (not volcano proof!). They are a little bulkier than normal DC jacks because of the...
In Stock
[Buy Now](https://www.adafruit.com/product/743)
[Related Guides to the Product](https://learn.adafruit.com/products/743/guides)
### 8 x AA battery holder
[8 x AA battery holder](https://www.adafruit.com/product/449)
When you need a portable 12V power pack, this big holder will do the job! The holder will store 8 AA batteries end to end, to give approximately 12VDC output with up to 2 amp peak current draw. We like this configuration in particular because it holds the batteries securely, even if being...
In Stock
[Buy Now](https://www.adafruit.com/product/449)
[Related Guides to the Product](https://learn.adafruit.com/products/449/guides)
### Heat Shrink Pack
[Heat Shrink Pack](https://www.adafruit.com/product/344)
Heat shrink is the duct tape of electronics, it keeps your stuff all safe and kept together. Especially when wiring and soldering, use heat shrink to add mechanical strength to cables. We use this stuff all the time and having a zip-lock bag of all the possible sizes is super...
In Stock
[Buy Now](https://www.adafruit.com/product/344)
[Related Guides to the Product](https://learn.adafruit.com/products/344/guides)
## Related Guides
- [Mystery Box: Crypto Countdown Case](https://learn.adafruit.com/mystery-box-crypto-countdown-case.md)
- [Bedazzler](https://learn.adafruit.com/bedazzler.md)
- [CircuitPython LED Animations](https://learn.adafruit.com/circuitpython-led-animations.md)
- [Blahaj Alarm and Lamp](https://learn.adafruit.com/blahaj-alarm.md)
- [Arduino Lesson 4. Eight LEDs and a Shift Register](https://learn.adafruit.com/adafruit-arduino-lesson-4-eight-leds.md)
- [LED Emerald with Circuit Playground Bluefruit](https://learn.adafruit.com/led-emerald-with-circuit-playground.md)
- [Talking HAL 9000 with RP2040 Prop Maker Feather](https://learn.adafruit.com/hal-9000-rp2040-prop-maker.md)
- [Adafruit NeoPXL8 FeatherWing and Library](https://learn.adafruit.com/adafruit-neopxl8-featherwing-and-library.md)
- [Color Remote with Circuit Playground Bluefruit](https://learn.adafruit.com/color-remote-with-circuit-playground-bluefruit.md)
- [Guardian Shield+ Zelda Breath of the Wild](https://learn.adafruit.com/guardian-shield-zelda-breath-of-the-wild.md)
- [Mad Science Test Tube Rack](https://learn.adafruit.com/mad-science-test-tube-rack.md)
- [Making Wearable Badge Art with Printed Circuit Boards](https://learn.adafruit.com/making-wearable-badge-art-with-printed-circuit-boards.md)
- [Tiny TARDIS Pendant](https://learn.adafruit.com/tiny-tardis-pendant.md)
- [Party Parrot Zoetrope](https://learn.adafruit.com/party-parrot-zoetrope.md)
- [LED Noodle Shop Sign](https://learn.adafruit.com/led-noodle-shop-sign.md)
---
# Source: https://learn.adafruit.com/flora-tv-b-gone/leds.md
# Source: https://learn.adafruit.com/adafruit-arduino-lesson-2-leds/leds.md
# Arduino Lesson 2. LEDs
## LEDs
LEDs make great indicator lights. They use very little electricity and they pretty much last forever.
In this lession you will use perhaps the most common of all LEDs a 5mm red LED. 5Mm refers to the diameter of the LED and as well as 5mm, other common sizes are 3mm and the large fun 10mm LEDs.
You cannot directly connect an LED to a battery or voltage source. Firstly, because the LED has a positive and a negative lead and will not light if they are the wrong way around and secondly, an LED must be used with a resistor to limit or 'choke' the amount of current flowing through the LED - otherwise the LED could burn out!

If you do not use a resistor with an LED, then it may well be destroyed almost immediately, as too much current will flow through the LED, heating it and destroying the 'junction' where the light is produced.
There are two ways to tell which is the positive lead of the LED and which the negative.
- Firstly, the positive lead is longer.
- Secondly, where the negative lead enters the body of the LED, there is a flat edge to the case of the LED.
If you happen to have an LED that has a flat side next to the longer lead, you should assume that the longer lead is positive.
- [Previous Page](https://learn.adafruit.com/adafruit-arduino-lesson-2-leds/parts.md)
- [Next Page](https://learn.adafruit.com/adafruit-arduino-lesson-2-leds/resistors.md)
## Featured Products
### Adafruit METRO 328 Fully Assembled - Arduino IDE compatible
[Adafruit METRO 328 Fully Assembled - Arduino IDE compatible](https://www.adafruit.com/product/50)
We sure love the ATmega328 here at Adafruit, and we use them _a lot_ for our own projects. The processor has plenty of GPIO, Analog inputs, hardware UART SPI and I2C, timers and PWM galore - just enough for most simple projects. When we need to go small, we use a
Out of Stock
[Buy Now](https://www.adafruit.com/product/50)
[Related Guides to the Product](https://learn.adafruit.com/products/50/guides)
### Diffused Red 5mm LED (25 pack)
[Diffused Red 5mm LED (25 pack)](https://www.adafruit.com/product/299)
Need some indicators? We are big fans of these diffused red LEDs, in fact we use them exclusively in our kits. They are fairly bright so they can be seen in daytime, and from any angle. They go easily into a breadboard and will add that extra zing to your project.
- Pack of 25...
In Stock
[Buy Now](https://www.adafruit.com/product/299)
[Related Guides to the Product](https://learn.adafruit.com/products/299/guides)
### Half Sized Premium Breadboard - 400 Tie Points
[Half Sized Premium Breadboard - 400 Tie Points](https://www.adafruit.com/product/64)
This is a cute, half-size breadboard with 400 tie points, good for small projects. It's 3.25" x 2.2" / 8.3cm x 5.5cm with a standard double-strip in the middle and two power rails on both sides. You can pull the power rails off easily to make the breadboard as...
In Stock
[Buy Now](https://www.adafruit.com/product/64)
[Related Guides to the Product](https://learn.adafruit.com/products/64/guides)
### Premium Male/Male Jumper Wires - 40 x 6" (150mm)
[Premium Male/Male Jumper Wires - 40 x 6" (150mm)](https://www.adafruit.com/product/758)
Handy for making wire harnesses or jumpering between headers on PCB's. These premium jumper wires are 6" (150mm) long and come in a 'strip' of 40 (4 pieces of each of ten rainbow colors). They have 0.1" male header contacts on either end and fit cleanly next to each other...
In Stock
[Buy Now](https://www.adafruit.com/product/758)
[Related Guides to the Product](https://learn.adafruit.com/products/758/guides)
## Related Guides
- [LSM303 Accelerometer + Compass Breakout](https://learn.adafruit.com/lsm303-accelerometer-slash-compass-breakout.md)
- [Arduino Lesson 6. Digital Inputs](https://learn.adafruit.com/adafruit-arduino-lesson-6-digital-inputs.md)
- [WiFi Candy Bowl Monitor](https://learn.adafruit.com/wifi-candy-bowl.md)
- [Arduino Lesson 12. LCD Displays - Part 2](https://learn.adafruit.com/adafruit-arduino-lesson-12-lcd-displays-part-2.md)
- [Character LCDs](https://learn.adafruit.com/character-lcds.md)
- [Silicone Robo-Tentacle](https://learn.adafruit.com/silicone-robo-tentacle.md)
- [Arduino Ethernet + SD Card](https://learn.adafruit.com/arduino-ethernet-sd-card.md)
- [Arduino Lesson 15. DC Motor Reversing](https://learn.adafruit.com/adafruit-arduino-lesson-15-dc-motor-reversing.md)
- [Arduin-o-Phone](https://learn.adafruit.com/arduin-o-phone-arduino-powered-diy-cellphone.md)
- [Remote controlled door lock using a fingerprint sensor & Adafruit IO](https://learn.adafruit.com/remote-controlled-door-lock-using-a-fingerprint-sensor-and-adafruit-io.md)
- [Adafruit 4-Channel ADC Breakouts](https://learn.adafruit.com/adafruit-4-channel-adc-breakouts.md)
- [Ladyada's Learn Arduino - Lesson #2](https://learn.adafruit.com/ladyadas-learn-arduino-lesson-number-2.md)
- [Adafruit 2.8" TFT Touch Shield v2 - Capacitive or Resistive](https://learn.adafruit.com/adafruit-2-8-tft-touch-shield-v2.md)
- [Arduino Lesson 4. Eight LEDs and a Shift Register](https://learn.adafruit.com/adafruit-arduino-lesson-4-eight-leds.md)
- [2.8" TFT Touch Shield](https://learn.adafruit.com/2-8-tft-touch-shield.md)
---
# Source: https://learn.adafruit.com/lesson-0-getting-started.md
# Arduino Lesson 0. Getting Started
## Overview
In this lesson, you will learn how to setup your computer to use Arduino and how to set about the lessons that follow.

- [Next Page](https://learn.adafruit.com/lesson-0-getting-started/parts.md)
## Featured Products
### Arduino Leonardo ATmega32u4 with headers
[Arduino Leonardo ATmega32u4 with headers](https://www.adafruit.com/product/849)
**Note:** This product is **discontinued,** but you can purchase the [Seeeduino Lite](https://www.adafruit.com/product/3228), which is an equivalent alternative that can be used instead.
The Arduino Leonardo is a microcontroller board based on...
No Longer Stocked
[Buy Now](https://www.adafruit.com/product/849)
[Related Guides to the Product](https://learn.adafruit.com/products/849/guides)
### Adafruit METRO 328 Fully Assembled - Arduino IDE compatible
[Adafruit METRO 328 Fully Assembled - Arduino IDE compatible](https://www.adafruit.com/product/50)
We sure love the ATmega328 here at Adafruit, and we use them _a lot_ for our own projects. The processor has plenty of GPIO, Analog inputs, hardware UART SPI and I2C, timers and PWM galore - just enough for most simple projects. When we need to go small, we use a
Out of Stock
[Buy Now](https://www.adafruit.com/product/50)
[Related Guides to the Product](https://learn.adafruit.com/products/50/guides)
## Related Guides
- [Bluetooth Temperature & Humidity Sensor](https://learn.adafruit.com/bluetooth-temperature-and-humidity-sensor.md)
- [Bluefruit LE Connect for iOS and Android](https://learn.adafruit.com/bluefruit-le-connect.md)
- [Arduino Lesson 14. Servo Motors](https://learn.adafruit.com/adafruit-arduino-lesson-14-servo-motors.md)
- [20mm LED Pixels](https://learn.adafruit.com/20mm-led-pixels.md)
- [Affordable HAL 9000 Replica](https://learn.adafruit.com/hal-9000-replica.md)
- [Adafruit 1.27" and 1.5" Color OLED Breakout Board](https://learn.adafruit.com/adafruit-1-5-color-oled-breakout-board.md)
- [Mini Thermal Receipt Printers](https://learn.adafruit.com/mini-thermal-receipt-printer.md)
- [Introducing Adafruit Trellis ](https://learn.adafruit.com/adafruit-trellis-diy-open-source-led-keypad.md)
- [Multi-tasking the Arduino - Part 2](https://learn.adafruit.com/multi-tasking-the-arduino-part-2.md)
- [FTDI Friend](https://learn.adafruit.com/ftdi-friend.md)
- [Wave Shield Voice Changer](https://learn.adafruit.com/wave-shield-voice-changer.md)
- [Adafruit 1.14" 240x135 Color TFT Breakout LCD Display](https://learn.adafruit.com/adafruit-1-14-240x135-color-tft-breakout.md)
- [Arduino Ethernet + SD Card](https://learn.adafruit.com/arduino-ethernet-sd-card.md)
- [A REST API for Arduino & the CC3000 WiFi Chip](https://learn.adafruit.com/a-rest-api-for-arduino-and-the-cc3000-wifi-chip.md)
- [WiFi Controlled LED Christmahanukwanzaa Tree](https://learn.adafruit.com/wifi-controlled-led-christmahanukwanzaa-tree.md)
---
# Source: https://learn.adafruit.com/li-ion-and-lipoly-batteries.md
# Li-Ion & LiPoly Batteries
## Overview
If you want to take your project portable you'll need a battery pack! For beginners, we suggest alkaline batteries, such as the venerable AA or 9V cell, great for making into larger multi-battery packs, easy to find and carry plenty of charge. If you want to go rechargable to save money and avoid waste, NiMH batteries can often replace alkalines. Eventually, however you may want to upgrade to the shiniest new technology - rechargable lithium ion/polymer batteries.
- [Next Page](https://learn.adafruit.com/li-ion-and-lipoly-batteries/rechargeable-lithiums-names.md)
## Featured Products
### Adafruit Micro Lipo - USB LiIon/LiPoly charger
[Adafruit Micro Lipo - USB LiIon/LiPoly charger](https://www.adafruit.com/product/1304)
Oh so adorable, this is the tiniest little lipo charger, so handy you can keep it any project box! Its also easy to use. Simply plug in the gold plated contacts into any USB port and a 3.7V/4.2V lithium polymer or lithium ion rechargeable battery into the JST plug on the other end. There are...
In Stock
[Buy Now](https://www.adafruit.com/product/1304)
[Related Guides to the Product](https://learn.adafruit.com/products/1304/guides)
### USB LiIon/LiPoly charger
[USB LiIon/LiPoly charger](https://www.adafruit.com/product/259)
This is a Lithium Ion and Lithium Polymer battery charger based on the [MCP73833](http://www.microchip.com/wwwproducts/Devices.aspx?dDocName=en027785). It uses a USB mini-B for connection to any computer or 'USB wall adapter'. Charging is performed in three stages: first a...
In Stock
[Buy Now](https://www.adafruit.com/product/259)
[Related Guides to the Product](https://learn.adafruit.com/products/259/guides)
### USB/DC Lithium Polymer battery charger 5-12V
[USB/DC Lithium Polymer battery charger 5-12V](https://www.adafruit.com/product/280)
Charge your single-cell lithium ion/polymer battery any which way you like with this board. Have a USB connection? No problem, just plug into the miniUSB connector. Only have a wall adapter? Any standard 2.1mm DC adapter which puts out 5 to 12VDC will work fine. If both are plugged in, the...
No Longer Stocked
[Buy Now](https://www.adafruit.com/product/280)
[Related Guides to the Product](https://learn.adafruit.com/products/280/guides)
### Lithium Ion Battery Pack - 3.7V 6600mAh
[Lithium Ion Battery Pack - 3.7V 6600mAh](https://www.adafruit.com/product/353)
Need a massive battery for your project? This lithium-ion pack is made of 3 balanced 2200mAh cells for a total of 6600mA capacity! The cells are connected in parallel and spot-welded to a protection circuit that provides over-voltage, under-voltage, and over-current protection.
Each cell...
In Stock
[Buy Now](https://www.adafruit.com/product/353)
[Related Guides to the Product](https://learn.adafruit.com/products/353/guides)
### Lithium Ion Battery Pack - 3.7V 4400mAh
[Lithium Ion Battery Pack - 3.7V 4400mAh](https://www.adafruit.com/product/354)
Need a big battery for your project? This lithium-ion pack is made of 2 balanced 2200mAh cells for a total of 4400mA capacity! The cells are connected in parallel and spot-welded to a protection circuit that provides over-voltage, under-voltage, and over-current protection.
Each cell can...
In Stock
[Buy Now](https://www.adafruit.com/product/354)
[Related Guides to the Product](https://learn.adafruit.com/products/354/guides)
### Lithium Ion Polymer Battery - 3.7v 2500mAh
[Lithium Ion Polymer Battery - 3.7v 2500mAh](https://www.adafruit.com/product/328)
Lithium-ion polymer (also known as 'lipo' or 'lipoly') batteries are thin, light, and powerful. The output ranges from 4.2V when completely charged to 3.7V. This battery has a capacity of **2500mAh** for a total of about 10 Wh. If you need a smaller battery,
In Stock
[Buy Now](https://www.adafruit.com/product/328)
[Related Guides to the Product](https://learn.adafruit.com/products/328/guides)
### Lithium Ion Polymer Battery - 3.7v 1200mAh
[Lithium Ion Polymer Battery - 3.7v 1200mAh](https://www.adafruit.com/product/258)
Lithium-ion polymer (also known as 'lipo' or 'lipoly') batteries are thin, light, and powerful. The output ranges from 4.2V when completely charged to 3.7V. This battery has a capacity of 1200mAh for a total of about 4.5 Wh. If you need a larger battery,
In Stock
[Buy Now](https://www.adafruit.com/product/258)
[Related Guides to the Product](https://learn.adafruit.com/products/258/guides)
### Lithium Ion Polymer Battery - 3.7v 500mAh
[Lithium Ion Polymer Battery - 3.7v 500mAh](https://www.adafruit.com/product/1578)
Lithium-ion polymer (also known as 'lipo' or 'lipoly') batteries are thin, light, and powerful. The output ranges from 4.2V when completely charged to 3.7V. This battery has a capacity of 500mAh for a total of about 1.9 Wh. If you need a larger (or smaller!) battery,
In Stock
[Buy Now](https://www.adafruit.com/product/1578)
[Related Guides to the Product](https://learn.adafruit.com/products/1578/guides)
## Related Guides
- [Sound Activated Shark Mask](https://learn.adafruit.com/sound-activated-shark-mask.md)
- [SNES EZ Key Bluefruit Game Pad](https://learn.adafruit.com/snes-ez-key-bluefruit-game-pad.md)
- [Color-sensor Driven NeoPixel Dress](https://learn.adafruit.com/color-sensor-driven-neopixel-dress.md)
- [Adafruit MicroLipo and MiniLipo Battery Chargers](https://learn.adafruit.com/adafruit-microlipo-and-minilipo-battery-chargers.md)
- [Cartoon Network and Make Code - Rose Quartz Shield Umbrella](https://learn.adafruit.com/cartoon-network-and-make-code-rose-quartz-shield-umbrella.md)
- [Ursula's Seashell Necklace](https://learn.adafruit.com/ursulas-seashell-necklace.md)
- [Wireless Control Button for WLED Projects](https://learn.adafruit.com/wireless-control-button-for-wled-projects.md)
- [Bunny Ears with MakeCode](https://learn.adafruit.com/bunny-ears-with-makecode.md)
- [VU Meter Baseball Hat](https://learn.adafruit.com/vu-meter-baseball-hat.md)
- [Glowing Fascinator Hat with Gemma M0 and MakeCode](https://learn.adafruit.com/glowing-fascinator-hat-gemma-m0-makecode.md)
- [LED Masquerade Masks](https://learn.adafruit.com/led-masquerade-masks.md)
- [Han Solo Blaster Cosplay](https://learn.adafruit.com/han-solo-blaster-cosplay.md)
- [Convert your Model M Keyboard to Bluetooth with Bluefruit EZ-Key HID](https://learn.adafruit.com/convert-your-model-m-keyboard-to-bluetooth-with-bluefruit-ez-key-hid.md)
- [Chameleon Scarf](https://learn.adafruit.com/chameleon-scarf.md)
- [Kaleidoscope Eyes (Trinket-Powered NeoPixel LED Ring Goggles)](https://learn.adafruit.com/kaleidoscope-eyes-neopixel-led-goggles-trinket-gemma.md)
---
# Source: https://learn.adafruit.com/adafruit-pn532-rfid-nfc/libnfc.md
# Adafruit PN532 RFID/NFC Breakout and Shield
## Using with LibNFC
Warning:
## Using the PN532 Breakout Boards with libnfc
[libnfc](https://github.com/nfc-tools/libnfc) is a mature, cross-platform, open-source NFC library that can be easily configured to work with the PN532 Breakout Board. While Linux is probably the easiest platform to use libnfc with, it can be configured for the Mac and Windows as well, though you may need to dig around on the libnfc Community Forums for some specific details on compiling .dlls for Windows, etc.
If you want to test the PN532 Breakout Board out with libnfc, this simple tutorial should walk you through the absolute basics of compiling and configuring libnfc, and using some of the canned example SW included in the library.
Danger:
# libnfc In Linux (Ubuntu 10.10 used in this example)
## Step One: Download libnfc
Download the latest version of [libnfc from GitHub](https://github.com/nfc-tools/libnfc) (ex. "libnfc-1.4.1.tar.gz") and extract the contents of the file as follows:
```
$ wget http://libnfc.googlecode.com/files/libnfc-x.x.x.tar.gz
$ tar -xvzf libnfc-x.x.x.tar.gz
$ cd libnfc-x.x.x
```
## Step Two: Configure libnfc for PN532 and UART
libnfc currently only supports communication over UART, using any inexpensive USB to UART adapter like the FTDI Friend or a TTL FTDI cable. Before compiling, however, you will need to configure libnfc to include support for UART and the PN532 chipset, which can be done with the following commmand (executing in the folder where the above archive was unzipped):
```
$ ./configure --with-drivers=pn532_uart --enable-serial-autoprobe
```
**Note** : If you also wish to include debug output, you can add the '–enable-serial-autoprobe' flag (minus the single quotes) to the configure options 
## Step Three: Build and install libnfc
You can build and install libnfc with the following three commands, also run from the folder where the original archive was unzipped:
```
$ make clean
$ make
$ make install
```
## Step Four: Check for installed devices
Now that libnfc is (hopefully) built and installed, you can run the 'nfc-list' example to try to detect an attached NFC board. Make sure the board is connected to the FTDI or USB/UART adapter, and that it is connected to your PC, and run the following commands:
```
$ cd examples
$ ./nfc-list
```
This should list the devices that were detected## Step Five: Poll for an ISO14443A (Mifare, etc.) Card
Next, you can use the 'nfc-poll' example to wait 30 seconds for an ISO14443A card or tag and display some basic information about this card. In the examples folder that we changed to above, run the following command:
```
$ ./nfc-poll
```
This should give you some basic information on any card that entered the magnetic field within the specified delay.
# libnfc With Mac OSX Lion
scott-42 was kind of enough to post some tips on getting libnfc working on a Mac using an FTDI adapter. A couple simple changes to the code were required (as of v1.6.0-rc1), with the details [here](http://forums.adafruit.com/viewtopic.php?f=19&t=22085#p115684).
Keeping in mind the code changes mentionned above, the following steps should get libnfc compiling and working via an FTDI type adapter and UART on Lion (using libnfc 1.6.0\_rc1):
## Download and build libnfc and configure if for PN532 UART (making the code changes above before running make):
```
wget http://libnfc.googlecode.com/files/libnfc-1.6.0-rc1.tar.gz
tar -xvzf libnfc-1.6.0-rc1.tar.gz
cd libnfc-1.6.0-rc1
./configure --with-drivers=pn532_uart --enable-serial-autoprobe
sudo make
sudo make install
```
## If everything worked out, switch to the examples folder and see if you can find the PN532 and wait for an appropriate tag:
```
cd examples
Kevins-Mac-mini:examples kevin$ ./nfc-poll
/Users/kevin/libnfc-1.6.0-rc1/examples/.libs/nfc-poll uses libnfc 1.6.0-rc1 (r1326)
NFC reader: pn532_uart:/dev/tty.usbserial-FTE5WWPB - PN532 v1.6 (0x07) opened
NFC device will poll during 30000 ms (20 pollings of 300 ms for 5 modulations)
ISO/IEC 14443A (106 kbps) target:
ATQA (SENS_RES): 00 04
UID (NFCID1): 3e b9 6e 66
SAK (SEL_RES): 08
```
There are some dependencies to get libnfc running, but since it isn't an Adafruit project and we can't really support it directly ourselves, you will probably have better luck looking at the [libnfc forums](http://www.libnfc.org/community/) for Mac support. There are a few active users developping on the Mac.
- [Previous Page](https://learn.adafruit.com/adafruit-pn532-rfid-nfc/ndef.md)
- [Next Page](https://learn.adafruit.com/adafruit-pn532-rfid-nfc/faq.md)
## Featured Products
### PN532 NFC/RFID controller breakout board
[PN532 NFC/RFID controller breakout board](https://www.adafruit.com/product/364)
The PN532 is the most popular NFC chip, and is what is embedded in pretty much every phone or device that does NFC. It can pretty much do it all, such as read and write to tags and cards, communicate with phones (say for payment processing), and 'act' like a NFC tag. If you want to do...
Out of Stock
[Buy Now](https://www.adafruit.com/product/364)
[Related Guides to the Product](https://learn.adafruit.com/products/364/guides)
### Adafruit METRO 328 Fully Assembled - Arduino IDE compatible
[Adafruit METRO 328 Fully Assembled - Arduino IDE compatible](https://www.adafruit.com/product/50)
We sure love the ATmega328 here at Adafruit, and we use them _a lot_ for our own projects. The processor has plenty of GPIO, Analog inputs, hardware UART SPI and I2C, timers and PWM galore - just enough for most simple projects. When we need to go small, we use a
Out of Stock
[Buy Now](https://www.adafruit.com/product/50)
[Related Guides to the Product](https://learn.adafruit.com/products/50/guides)
### Breadboarding wire bundle
[Breadboarding wire bundle](https://www.adafruit.com/product/153)
75 flexible stranded core wires with stiff ends molded on in red, orange, yellow, green, blue, brown, black and white. These are a major improvement over the "box of bent wires" that are sometimes sold with breadboards, and faster than stripping your own solid core wires. Makes...
In Stock
[Buy Now](https://www.adafruit.com/product/153)
[Related Guides to the Product](https://learn.adafruit.com/products/153/guides)
### Adafruit PN532 NFC/RFID Controller Shield for Arduino + Extras
[Adafruit PN532 NFC/RFID Controller Shield for Arduino + Extras](https://www.adafruit.com/product/789)
We've taken our popular Adafruit PN532 breakout board and turned it into a shield - the perfect tool for any 13.56MHz RFID or NFC application. The Adafruit NFC shield uses the PN532 chip-set (the most popular NFC chip on the market) and is what is embedded in pretty much every phone or...
In Stock
[Buy Now](https://www.adafruit.com/product/789)
[Related Guides to the Product](https://learn.adafruit.com/products/789/guides)
### 13.56MHz RFID/NFC Card - Classic 1K
[13.56MHz RFID/NFC Card - Classic 1K](https://www.adafruit.com/product/359)
This is a blank 13.56MHz RFID/NFC card - often used for train/bus passes but also found in other systems where a proximity card is desired. The tag contains a small RFID chip and an antenna, and is passively powered by the reader/writer when placed a couple inches away.
These can be...
In Stock
[Buy Now](https://www.adafruit.com/product/359)
[Related Guides to the Product](https://learn.adafruit.com/products/359/guides)
### 13.56MHz RFID/NFC White Tag - Classic 1K
[13.56MHz RFID/NFC White Tag - Classic 1K](https://www.adafruit.com/product/360)
This is a blank 13.56MHz RFID/NFC laundry tag - often used for laundry but also general tagging. The tag contains a small RFID chip and an antenna, and is passively powered by the reader/writer when placed a couple inches away.
These can be read by almost any 13.56MHz RFID/NFC...
In Stock
[Buy Now](https://www.adafruit.com/product/360)
[Related Guides to the Product](https://learn.adafruit.com/products/360/guides)
### 13.56MHz RFID/NFC Clear Tag - Classic 1K
[13.56MHz RFID/NFC Clear Tag - Classic 1K](https://www.adafruit.com/product/361)
This is a blank 13.56MHz Classic 'laundry' tag - often used for laundry or identification but also found in other systems where a small proximity card is desired. This one is clear! The tag contains a small RFID chip and an antenna, and is passively powered by the reader/writer...
In Stock
[Buy Now](https://www.adafruit.com/product/361)
[Related Guides to the Product](https://learn.adafruit.com/products/361/guides)
### 13.56MHz RFID/NFC Sticker - Classic 1K
[13.56MHz RFID/NFC Sticker - Classic 1K](https://www.adafruit.com/product/362)
This is a blank 13.56MHz RFID/NFC sticker - often used for inventory uses but also wherever a sticker is desired. The tag contains a small RFID chip and an antenna, and is passively powered by the reader/writer when placed a couple inches away.
These can be read by almost any...
In Stock
[Buy Now](https://www.adafruit.com/product/362)
[Related Guides to the Product](https://learn.adafruit.com/products/362/guides)
## Related Guides
- [How to Choose a Microcontroller](https://learn.adafruit.com/how-to-choose-a-microcontroller.md)
- [Sous-vide controller powered by Arduino - The SousViduino!](https://learn.adafruit.com/sous-vide-powered-by-arduino-the-sous-viduino.md)
- [Arduino Lesson 13. DC Motors](https://learn.adafruit.com/adafruit-arduino-lesson-13-dc-motors.md)
- [Naughty or Nice Machine](https://learn.adafruit.com/naughty-or-nice-machine.md)
- [Wave Shield Voice Changer](https://learn.adafruit.com/wave-shield-voice-changer.md)
- [Adafruit INA219 Current Sensor Breakout](https://learn.adafruit.com/adafruit-ina219-current-sensor-breakout.md)
- [Low Power Coin Cell Voltage Logger](https://learn.adafruit.com/low-power-coin-cell-voltage-logger.md)
- [Analog Feedback Servos](https://learn.adafruit.com/analog-feedback-servos.md)
- [Tiny Arduino Music Visualizer](https://learn.adafruit.com/piccolo.md)
- [Adafruit Ultimate GPS Logger Shield](https://learn.adafruit.com/adafruit-ultimate-gps-logger-shield.md)
- [Ladyada's Learn Arduino - Lesson #0](https://learn.adafruit.com/ladyadas-learn-arduino-lesson-number-0.md)
- [Mini Thermal Receipt Printers](https://learn.adafruit.com/mini-thermal-receipt-printer.md)
- [Arduino Prototyping Mounting Plate](https://learn.adafruit.com/arduino-prototyping-mounting-plate.md)
- [LED Lightbox](https://learn.adafruit.com/led-lightbox.md)
- [NFC Ring Password Helper](https://learn.adafruit.com/nfc-ring-password-helper.md)
---
# Source: https://learn.adafruit.com/adafruit-motor-shield/library-install.md
# Adafruit Motor Shield
## Library Install
Warning:
## First Install the Arduino Library
Before you can use the Motor shield, you **must** install the **AF\_Motor** Arduino library - this will instruct the Arduino how to talk to the Adafruit Motor shield, and it isn't optional!
Open up the Arduino library manager:

Search for **Adafruit Motor** library and install it. Make sure it is the library for the V1 motor shield.

We also have a great tutorial on Arduino library installation at:
[http://learn.adafruit.com/adafruit-all-about-arduino-libraries-install-use](http://learn.adafruit.com/adafruit-all-about-arduino-libraries-install-use)
- [Previous Page](https://learn.adafruit.com/adafruit-motor-shield/use-it.md)
- [Next Page](https://learn.adafruit.com/adafruit-motor-shield/power-requirements.md)
## Featured Products
### Adafruit METRO 328 Fully Assembled - Arduino IDE compatible
[Adafruit METRO 328 Fully Assembled - Arduino IDE compatible](https://www.adafruit.com/product/50)
We sure love the ATmega328 here at Adafruit, and we use them _a lot_ for our own projects. The processor has plenty of GPIO, Analog inputs, hardware UART SPI and I2C, timers and PWM galore - just enough for most simple projects. When we need to go small, we use a
Out of Stock
[Buy Now](https://www.adafruit.com/product/50)
[Related Guides to the Product](https://learn.adafruit.com/products/50/guides)
## Related Guides
- [Adafruit Proto Shield for Arduino](https://learn.adafruit.com/adafruit-proto-shield-arduino.md)
- [Analog Feedback Servos](https://learn.adafruit.com/analog-feedback-servos.md)
- [All About Arduino Libraries](https://learn.adafruit.com/adafruit-all-about-arduino-libraries-install-use.md)
- [RePaper eInk Development Board](https://learn.adafruit.com/repaper-eink-development-board.md)
- [Multi-tasking the Arduino - Part 2](https://learn.adafruit.com/multi-tasking-the-arduino-part-2.md)
- [Bluetooth Controlled Motorized Camera Slider](https://learn.adafruit.com/bluetooth-motorized-camera-slider.md)
- [Electronic Demon Costume](https://learn.adafruit.com/electronic-demon-costume.md)
- [Adafruit INA219 Current Sensor Breakout](https://learn.adafruit.com/adafruit-ina219-current-sensor-breakout.md)
- [Ladyada's Learn Arduino - Lesson #2](https://learn.adafruit.com/ladyadas-learn-arduino-lesson-number-2.md)
- [Arduino Lesson 6. Digital Inputs](https://learn.adafruit.com/adafruit-arduino-lesson-6-digital-inputs.md)
- [2.2" TFT Display](https://learn.adafruit.com/2-2-tft-display.md)
- [Arduino Lesson 2. LEDs](https://learn.adafruit.com/adafruit-arduino-lesson-2-leds.md)
- [Collin's Lab: MIDI](https://learn.adafruit.com/collins-lab-midi.md)
- [1,500 NeoPixel LED Curtain with Raspberry Pi and Fadecandy](https://learn.adafruit.com/1500-neopixel-led-curtain-with-raspberry-pi-fadecandy.md)
- [Programming Arduino with Android and Windows Tablets](https://learn.adafruit.com/programming-arduino-with-android-and-windows-tablets.md)
---
# Source: https://learn.adafruit.com/adafruit-ina219-current-sensor-breakout/library-reference.md
# Adafruit INA219 Current Sensor Breakout
## Library Reference
# Construction and Initialization Functions:
`Adafruit_INA219(uint8_t addr = INA219_ADDRESS); `
Constructs an instance of the `Adafruit_INA219`. If no address is specified, the default address (0x40) is used. If more than one INA219 module is connected, it should be addressed as shown on the Assembly page and the configured address passed to the constructor.
`void begin(void); `
Initializes I2C communication with the `Adafruit_INA219` device using the default configuration values.
**Example:**
```
#include <Wire.h>
#include <Adafruit_INA219.h>
Adafruit_INA219 ina219_A;
Adafruit_INA219 ina219_B(0x41);
void setup(void)
{
ina219_A.begin(); // Initialize first board (default address 0x40)
ina219_B.begin(); // Initialize second board with the address 0x41
}
```
Warning: Do not instantiate as ina219.begin(0x41), use the syntax above.
# Sensor Reading Functions:
`float getBusVoltage_V(void); `
Reads the voltage between GND and V-. This is the total voltage seen by the circuit under test. (Supply voltage - shunt voltage).
The return value is in Volts.
`float getShuntVoltage_mV(void); `
Reads the voltage between V- and V+. This is the measured voltage drop across the shunt resistor.
The return value is in Milivolts.
`float getCurrent_mA(void);`
Reads the current, derived via Ohms Law from the measured shunt voltage.
The return value is in Milliamps.
**Example:**
```
float shuntvoltage = 0;
float busvoltage = 0;
float current_mA = 0;
float loadvoltage = 0;
shuntvoltage = ina219.getShuntVoltage_mV();
busvoltage = ina219.getBusVoltage_V();
current_mA = ina219.getCurrent_mA();
loadvoltage = busvoltage + (shuntvoltage / 1000);
Serial.print("Bus Voltage: "); Serial.print(busvoltage); Serial.println(" V");
Serial.print("Shunt Voltage: "); Serial.print(shuntvoltage); Serial.println(" mV");
Serial.print("Load Voltage: "); Serial.print(loadvoltage); Serial.println(" V");
Serial.print("Current: "); Serial.print(current_mA); Serial.println(" mA");
Serial.println("");
```
- [Previous Page](https://learn.adafruit.com/adafruit-ina219-current-sensor-breakout/arduino-code.md)
- [Next Page](https://learn.adafruit.com/adafruit-ina219-current-sensor-breakout/python-circuitpython.md)
## Featured Products
### INA219 High Side DC Current Sensor Breakout - 26V ±3.2A Max
[INA219 High Side DC Current Sensor Breakout - 26V ±3.2A Max](https://www.adafruit.com/product/904)
This breakout board will solve all your power-monitoring problems. Instead of struggling with two multimeters, you can just use the handy INA219 chip on this breakout to both measure both the high side voltage and DC current draw over I2C with ±1% precision.
**Please...**
In Stock
[Buy Now](https://www.adafruit.com/product/904)
[Related Guides to the Product](https://learn.adafruit.com/products/904/guides)
### STEMMA QT / Qwiic JST SH 4-pin Cable - 100mm Long
[STEMMA QT / Qwiic JST SH 4-pin Cable - 100mm Long](https://www.adafruit.com/product/4210)
This 4-wire cable is a little over 100mm / 4" long and fitted with JST-SH female 4-pin connectors on both ends. Compared with the chunkier JST-PH these are 1mm pitch instead of 2mm, but still have a nice latching feel, while being easy to insert and remove.
In Stock
[Buy Now](https://www.adafruit.com/product/4210)
[Related Guides to the Product](https://learn.adafruit.com/products/4210/guides)
### STEMMA QT / Qwiic JST SH 4-pin to Premium Male Headers Cable
[STEMMA QT / Qwiic JST SH 4-pin to Premium Male Headers Cable](https://www.adafruit.com/product/4209)
This 4-wire cable is a little over 150mm / 6" long and fitted with JST-SH female 4-pin connectors on one end and premium Dupont male headers on the other. Compared with the chunkier JST-PH these are 1mm pitch instead of 2mm, but still have a nice latching feel, while being easy to insert...
Out of Stock
[Buy Now](https://www.adafruit.com/product/4209)
[Related Guides to the Product](https://learn.adafruit.com/products/4209/guides)
### Premium Male/Male Jumper Wires - 40 x 6" (150mm)
[Premium Male/Male Jumper Wires - 40 x 6" (150mm)](https://www.adafruit.com/product/758)
Handy for making wire harnesses or jumpering between headers on PCB's. These premium jumper wires are 6" (150mm) long and come in a 'strip' of 40 (4 pieces of each of ten rainbow colors). They have 0.1" male header contacts on either end and fit cleanly next to each other...
Out of Stock
[Buy Now](https://www.adafruit.com/product/758)
[Related Guides to the Product](https://learn.adafruit.com/products/758/guides)
### Full Sized Premium Breadboard - 830 Tie Points
[Full Sized Premium Breadboard - 830 Tie Points](https://www.adafruit.com/product/239)
This is a 'full-size' premium quality breadboard, 830 tie points. Good for small and medium projects. It's 2.2" x 7" (5.5 cm x 17 cm) with a standard double-strip in the middle and two power rails on both sides. You can pull the power rails off easily to make the...
In Stock
[Buy Now](https://www.adafruit.com/product/239)
[Related Guides to the Product](https://learn.adafruit.com/products/239/guides)
### Adafruit INA219 FeatherWing
[Adafruit INA219 FeatherWing](https://www.adafruit.com/product/3650)
The **INA219 FeatherWing** makes power-monitoring problems a thing of the past. Instead of struggling with two multimeters, you can just use the handy INA219 chip on this breakout to measure both the high side voltage and DC current draw over I2C with 1% precision....
In Stock
[Buy Now](https://www.adafruit.com/product/3650)
[Related Guides to the Product](https://learn.adafruit.com/products/3650/guides)
### Adafruit METRO 328 Fully Assembled - Arduino IDE compatible
[Adafruit METRO 328 Fully Assembled - Arduino IDE compatible](https://www.adafruit.com/product/50)
We sure love the ATmega328 here at Adafruit, and we use them _a lot_ for our own projects. The processor has plenty of GPIO, Analog inputs, hardware UART SPI and I2C, timers and PWM galore - just enough for most simple projects. When we need to go small, we use a
Out of Stock
[Buy Now](https://www.adafruit.com/product/50)
[Related Guides to the Product](https://learn.adafruit.com/products/50/guides)
## Related Guides
- [Remote controlled door lock using a fingerprint sensor & Adafruit IO](https://learn.adafruit.com/remote-controlled-door-lock-using-a-fingerprint-sensor-and-adafruit-io.md)
- [WiFi Controlled Mobile Robot](https://learn.adafruit.com/wifi-controlled-mobile-robot.md)
- [Arduino Lesson 14. Servo Motors](https://learn.adafruit.com/adafruit-arduino-lesson-14-servo-motors.md)
- [Geofencing with the FONA 808 & Adafruit IO](https://learn.adafruit.com/geofencing-with-the-fona-808-and-adafruit-io.md)
- [Let’s Put LEDs in Things!](https://learn.adafruit.com/lets-put-leds-in-things.md)
- [Adafruit CC3000 WiFi and Xively](https://learn.adafruit.com/adafruit-cc3000-wifi-and-xively.md)
- [Adafruit AirLift Shield - ESP32 WiFi Co-Processor](https://learn.adafruit.com/adafruit-airlift-shield-esp32-wifi-co-processor.md)
- [Wave Shield Talking Clock](https://learn.adafruit.com/wave-shield-talking-clock.md)
- [Ladyada's Learn Arduino - Lesson #0](https://learn.adafruit.com/ladyadas-learn-arduino-lesson-number-0.md)
- [2.2" TFT Display](https://learn.adafruit.com/2-2-tft-display.md)
- [LED Lightbox](https://learn.adafruit.com/led-lightbox.md)
- [Arduino Prototyping Mounting Plate](https://learn.adafruit.com/arduino-prototyping-mounting-plate.md)
- [How to Choose a Microcontroller](https://learn.adafruit.com/how-to-choose-a-microcontroller.md)
- [Arduino Lesson 16. Stepper Motors](https://learn.adafruit.com/adafruit-arduino-lesson-16-stepper-motors.md)
- [Arduino Lesson 8. Analog Inputs](https://learn.adafruit.com/adafruit-arduino-lesson-8-analog-inputs.md)
---
# Source: https://learn.adafruit.com/32x16-32x32-rgb-led-matrix/library.md
# RGB LED Matrix Basics
## RGBMatrix Library
Next up, load the **testshapes\_16x32** or **testshapes\_32x32** example sketch, which will test every drawing element available (again, you may need to edit the pin numbers for the 32x32 panel).

The most simple thing you may want to do is draw a single pixel, we saw this introduced above.```
// draw a pixel in solid white
matrix.drawPixel(0, 0, matrix.Color333(7, 7, 7));
```
Next we will fill the screen with green by drawing a really large rectangle. The first two arguments are the top left point, then the width in pixels, and the height in pixels, finally the color```
// fix the screen with green
matrix.fillRect(0, 0, 32, 16, matrix.Color333(0, 7, 0));
```
Next we will draw just the outline of a rectangle, in yellow```
// draw a box in yellow
matrix.drawRect(0, 0, 32, 16, matrix.Color333(7, 7, 0));
```
Next you may want to draw lines. The **drawLine** procedure will draw a line in any color you want, we used this to draw a big X
```
// draw an 'X' in red
matrix.drawLine(0, 0, 31, 15, matrix.Color333(7, 0, 0));
matrix.drawLine(31, 0, 0, 15, matrix.Color333(7, 0, 0));
```
The next shapes we draw are circles. You can draw the outline of a circle with **drawCircle** or fill a circle with **fillCircle**. The first two arguments are the center point, the third argument is the radius in pixels, finally the color to use.
```
// draw a blue circle
matrix.drawCircle(7, 7, 7, matrix.Color333(0, 0, 7));
// fill a violet circle
matrix.fillCircle(23, 7, 7, matrix.Color333(7, 0, 7));
```
**fillScreen** allows you to fill the entire screen with a single color:
```
// fill the screen with 'black'
matrix.fillScreen(matrix.Color333(0, 0, 0));
```
Finally, we draw the text that is shown up top as the demonstration image. We can use the **print** function, which you'll be familiar with from **Serial**. You can use **print** to print strings, numbers, variables, etc. However, we need to set up the printing before just going off and doing it! First, we must set the cursor location with **setCursor** which is where the top left pixel of the first character will go, this can be anywhere but note that text characters are 8 pixels high by default. Next **setTextSize** lets you set the size to 1 (8 pixel high) or 2 (16 pixel high for really big text!), you probably want just to stick with 1 for now. Lastly we can set the color of the text with **setTextColor**. Once this is all done, we can just use**print('1')** to print the character "1".
```
// draw some text!
matrix.setCursor(1, 0); // start at top left, with one pixel of spacing
matrix.setTextSize(1); // size 1 == 8 pixels high
// print each letter with a rainbow color
matrix.setTextColor(matrix.Color333(7,0,0));
matrix.print('1');
matrix.setTextColor(matrix.Color333(7,4,0));
matrix.print('6');
matrix.setTextColor(matrix.Color333(7,7,0));
matrix.print('x');
matrix.setTextColor(matrix.Color333(4,7,0));
matrix.print('3');
matrix.setTextColor(matrix.Color333(0,7,0));
matrix.print('2');
matrix.setCursor(1, 9); // next line
matrix.setTextColor(matrix.Color333(0,7,7));
matrix.print('*');
matrix.setTextColor(matrix.Color333(0,4,7));
matrix.print('R');
matrix.setTextColor(matrix.Color333(0,0,7));
matrix.print('G');
matrix.setTextColor(matrix.Color333(4,0,7));
matrix.print("B");
matrix.setTextColor(matrix.Color333(7,0,4));
matrix.print("*");
```

- [Previous Page](https://learn.adafruit.com/32x16-32x32-rgb-led-matrix/test-example-code.md)
- [Next Page](https://learn.adafruit.com/32x16-32x32-rgb-led-matrix/how-the-matrix-works.md)
## Featured Products
### Medium 16x32 RGB LED matrix panel - 6mm Pitch
[Medium 16x32 RGB LED matrix panel - 6mm Pitch](https://www.adafruit.com/product/420)
Bring a little bit of Times Square into your home with this 16 x 32 RGB LED matrix panel. These panels are normally used to make video walls, here in New York we see them on the sides of busses and bus stops, to display animations or short video clips. We thought they looked really cool so we...
In Stock
[Buy Now](https://www.adafruit.com/product/420)
[Related Guides to the Product](https://learn.adafruit.com/products/420/guides)
### 32x32 RGB LED Matrix Panel - 4mm Pitch
[32x32 RGB LED Matrix Panel - 4mm Pitch](https://www.adafruit.com/product/607)
Bring a little bit of Times Square into your home with this totally adorable 5 inch square 32 x 32 RGB LED matrix panel. These panels are normally used to make video walls, here in New York we see them on the sides of busses and bus stops, to display animations or short video clips. We thought...
In Stock
[Buy Now](https://www.adafruit.com/product/607)
[Related Guides to the Product](https://learn.adafruit.com/products/607/guides)
### 32x32 RGB LED Matrix Panel - 5mm Pitch
[32x32 RGB LED Matrix Panel - 5mm Pitch](https://www.adafruit.com/product/2026)
Bring a little bit of Times Square into your home with this sweet 32 x 32 square RGB LED matrix panel. These panels are normally used to make video walls, here in New York we see them on the sides of busses and bus stops, to display animations or short video clips. We thought they looked...
In Stock
[Buy Now](https://www.adafruit.com/product/2026)
[Related Guides to the Product](https://learn.adafruit.com/products/2026/guides)
### 32x32 RGB LED Matrix Panel - 6mm pitch
[32x32 RGB LED Matrix Panel - 6mm pitch](https://www.adafruit.com/product/1484)
Bring a little bit of Times Square into your home with this sweet 32 x 32 square RGB LED matrix panel. These panels are normally used to make video walls, here in New York we see them on the sides of busses and bus stops, to display animations or short video clips. We thought they looked...
In Stock
[Buy Now](https://www.adafruit.com/product/1484)
[Related Guides to the Product](https://learn.adafruit.com/products/1484/guides)
### 64x32 RGB LED Matrix - 3mm pitch
[64x32 RGB LED Matrix - 3mm pitch](https://www.adafruit.com/product/2279)
Bring a little bit of Times Square into your home with this sweet 64 x 32 square RGB LED matrix panel. These panels are normally used to make video walls, here in New York we see them on the sides of busses and bus stops, to display animations or short video clips. We thought they looked...
In Stock
[Buy Now](https://www.adafruit.com/product/2279)
[Related Guides to the Product](https://learn.adafruit.com/products/2279/guides)
### 64x32 RGB LED Matrix - 4mm pitch
[64x32 RGB LED Matrix - 4mm pitch](https://www.adafruit.com/product/2278)
Bring a little bit of Times Square into your home with this sweet 64 x 32 square RGB LED matrix panel. These panels are normally used to make video walls, here in New York we see them on the sides of busses and bus stops, to display animations or short video clips. We thought they looked...
Out of Stock
[Buy Now](https://www.adafruit.com/product/2278)
[Related Guides to the Product](https://learn.adafruit.com/products/2278/guides)
### 64x32 RGB LED Matrix - 5mm pitch
[64x32 RGB LED Matrix - 5mm pitch](https://www.adafruit.com/product/2277)
Bring a little bit of Times Square into your home with this sweet 64x32 square RGB LED matrix panel. These panels are normally used to make video walls, here in New York we see them on the sides of busses and bus stops, to display animations or short video clips. We thought they looked really...
In Stock
[Buy Now](https://www.adafruit.com/product/2277)
[Related Guides to the Product](https://learn.adafruit.com/products/2277/guides)
### 64x32 RGB LED Matrix - 6mm pitch
[64x32 RGB LED Matrix - 6mm pitch](https://www.adafruit.com/product/2276)
Bring a little bit of Times Square into your home with this sweet 64x32 square RGB LED matrix panel. These panels are normally used to make video walls, here in New York we see them on the sides of busses and bus stops, to display animations or short video clips. We thought they looked really...
In Stock
[Buy Now](https://www.adafruit.com/product/2276)
[Related Guides to the Product](https://learn.adafruit.com/products/2276/guides)
## Related Guides
- [Adafruit Metro M0 Express](https://learn.adafruit.com/adafruit-metro-m0-express.md)
- [Adafruit Metro M4 Express featuring ATSAMD51](https://learn.adafruit.com/adafruit-metro-m4-express-featuring-atsamd51.md)
- [CircuitPython 101: Basic Builtin Data Structures](https://learn.adafruit.com/basic-datastructures-in-circuitpython.md)
- [Adafruit Ultimate GPS](https://learn.adafruit.com/adafruit-ultimate-gps.md)
- [WiFi Controlled LED Christmahanukwanzaa Tree](https://learn.adafruit.com/wifi-controlled-led-christmahanukwanzaa-tree.md)
- [Stream Deck controlled RGB Message Panel using Adafruit IO](https://learn.adafruit.com/stream-deck-controlled-rgb-message-panel-using-adafruit-io.md)
- [Memories of an Arduino](https://learn.adafruit.com/memories-of-an-arduino.md)
- [Matrix Portal Stained Glass with WLED](https://learn.adafruit.com/matrix-portal-stained-glass-with-wled.md)
- [Sous-vide controller powered by Arduino - The SousViduino!](https://learn.adafruit.com/sous-vide-powered-by-arduino-the-sous-viduino.md)
- [LED Matrix Sports Scoreboard](https://learn.adafruit.com/led-matrix-sports-scoreboard.md)
- [Creating MatrixPortal Projects with CircuitPython](https://learn.adafruit.com/creating-projects-with-the-circuitpython-matrixportal-library.md)
- [Introducing Adafruit Trellis ](https://learn.adafruit.com/adafruit-trellis-diy-open-source-led-keypad.md)
- [CircuitPython Hardware: Charlieplex LED Matrix](https://learn.adafruit.com/micropython-hardware-charlieplex-led-matrix.md)
- [CircuitPython Display Support Using displayio](https://learn.adafruit.com/circuitpython-display-support-using-displayio.md)
- [Arduino Lesson 16. Stepper Motors](https://learn.adafruit.com/adafruit-arduino-lesson-16-stepper-motors.md)
- [2.8" TFT Touchscreen](https://learn.adafruit.com/2-8-tft-touchscreen.md)
- [SmartMatrix Animated GIF Player](https://learn.adafruit.com/smartmatrix-animated-gif-player.md)
---
# Source: https://learn.adafruit.com/light-meter.md
# Light Meter
## Overview & Parts
http://www.youtube.com/watch?v=1zGL-Ln3BqA
I recently needed to measure how different materials affect light transmission for a gardening project. This seemed like a perfect fit for an Arduino project based around the TSL2561 Light sensor.
It can display the raw "Visible light" count from the sensor and then the calculated Lux.
I used the following parts in this project:
- [Arduino Uno](http://www.adafruit.com/products/50)
- [TSL2561 Digital Light Sensor](http://www.adafruit.com/products/439 "Link: http://www.adafruit.com/products/439")
- [16×2 LCD](http://www.adafruit.com/products/181 "Link: http://www.adafruit.com/products/181")
- [LCD I2C / SPI Backpack](http://www.adafruit.com/products/292 "Link: http://www.adafruit.com/products/292")
Optional (but definitely helps keep everything tidy):
- [Lady Ada’s Bento Box](http://www.adafruit.com/products/765 "Link: http://www.adafruit.com/products/765")
- [Next Page](https://learn.adafruit.com/light-meter/code-and-wiring.md)
## Featured Products
### Adafruit TSL2561 Digital Luminosity/Lux/Light Sensor Breakout
[Adafruit TSL2561 Digital Luminosity/Lux/Light Sensor Breakout](https://www.adafruit.com/product/439)
The TSL2561 luminosity sensor is an advanced digital light sensor, ideal for use in a wide range of light situations. Compared to low cost CdS cells, this sensor is more precise, allowing for exact lux calculations and can be configured for different gain/timing ranges to detect light ranges...
No Longer Stocked
[Buy Now](https://www.adafruit.com/product/439)
[Related Guides to the Product](https://learn.adafruit.com/products/439/guides)
### i2c / SPI character LCD backpack - STEMMA QT / Qwiic
[i2c / SPI character LCD backpack - STEMMA QT / Qwiic](https://www.adafruit.com/product/292)
Character LCDs are a fun and easy way to have your microcontroller project talk back to you. They are also common, and easy to get, available in tons of colors and sizes. [We've written tutorials on using character LCDs with an Arduino](http://learn.adafruit.com/character-lcds)...
In Stock
[Buy Now](https://www.adafruit.com/product/292)
[Related Guides to the Product](https://learn.adafruit.com/products/292/guides)
### Standard LCD 16x2 + extras
[Standard LCD 16x2 + extras](https://www.adafruit.com/product/181)
Standard HD44780 LCDs are useful for creating standalone projects.
- 16 characters wide, 2 rows
- White text on blue background
- Connection port is 0.1" pitch, single row for easy breadboarding and wiring
- Pins are documented on the back of the LCD to assist...
In Stock
[Buy Now](https://www.adafruit.com/product/181)
[Related Guides to the Product](https://learn.adafruit.com/products/181/guides)
### 4-channel I2C-safe Bi-directional Logic Level Converter
[4-channel I2C-safe Bi-directional Logic Level Converter](https://www.adafruit.com/product/757)
Because the Arduino (and Basic Stamp) are 5V devices, and most modern sensors, displays, flashcards, and modes are 3.3V-only, many makers find that they need to perform level shifting/conversion to protect the 3.3V device from 5V. Here we've got a ** 4-channel I2C-safe...**
In Stock
[Buy Now](https://www.adafruit.com/product/757)
[Related Guides to the Product](https://learn.adafruit.com/products/757/guides)
### Adafruit METRO 328 Fully Assembled - Arduino IDE compatible
[Adafruit METRO 328 Fully Assembled - Arduino IDE compatible](https://www.adafruit.com/product/50)
We sure love the ATmega328 here at Adafruit, and we use them _a lot_ for our own projects. The processor has plenty of GPIO, Analog inputs, hardware UART SPI and I2C, timers and PWM galore - just enough for most simple projects. When we need to go small, we use a
Out of Stock
[Buy Now](https://www.adafruit.com/product/50)
[Related Guides to the Product](https://learn.adafruit.com/products/50/guides)
## Related Guides
- [I2C/SPI LCD Backpack](https://learn.adafruit.com/i2c-spi-lcd-backpack.md)
- [Smart Measuring Cup](https://learn.adafruit.com/smart-measuring-cup.md)
- [Introducing Adafruit Trellis ](https://learn.adafruit.com/adafruit-trellis-diy-open-source-led-keypad.md)
- [Wireless Game Show Poppers for the Classroom!](https://learn.adafruit.com/wireless-game-show-poppers.md)
- [Adafruit INA219 Current Sensor Breakout](https://learn.adafruit.com/adafruit-ina219-current-sensor-breakout.md)
- [Naughty or Nice Machine](https://learn.adafruit.com/naughty-or-nice-machine.md)
- [Low Power WiFi Datalogger](https://learn.adafruit.com/low-power-wifi-datalogging.md)
- [Adafruit Optical Fingerprint Sensor](https://learn.adafruit.com/adafruit-optical-fingerprint-sensor.md)
- [Nokia 5110/3310 Monochrome LCD](https://learn.adafruit.com/nokia-5110-3310-monochrome-lcd.md)
- [Sending an SMS with Temboo](https://learn.adafruit.com/sending-an-sms-with-temboo.md)
- [Ladyada's Learn Arduino - Lesson #0](https://learn.adafruit.com/ladyadas-learn-arduino-lesson-number-0.md)
- [Arduino "Hunt The Wumpus"](https://learn.adafruit.com/arduino-hunt-the-wumpus.md)
- [Making Adabot: Part 2](https://learn.adafruit.com/making-adabot-part-2.md)
- [CircuitPython Libraries on Linux and the 96Boards DragonBoard 410c](https://learn.adafruit.com/circuitpython-libraries-on-linux-and-the-96boards-dragonboard-410c.md)
- [Wave Shield Talking Clock](https://learn.adafruit.com/wave-shield-talking-clock.md)
- [Program an AVR or Arduino Using Raspberry Pi GPIO](https://learn.adafruit.com/program-an-avr-or-arduino-using-raspberry-pi-gpio-pins.md)
---
# Source: https://learn.adafruit.com/light-painting-with-raspberry-pi.md
# Light Painting with Raspberry Pi
## Overview
_Light painting_ is an artistic photographic technique combining long exposure times with lights in motion. Traditionally these images have been hand-painted with a penlight…but more recently, affordable microcontrollers and addressable RGB LEDs have brought a new high-tech twist to the idea.
A few such projects have been featured on tech blogs, most notably [the](https://sites.google.com/site/mechatronicsguy/lightscythe)_[LightScythe](https://sites.google.com/site/mechatronicsguy/lightscythe)_[by Gavin “The Mechatronics Guy,”](https://sites.google.com/site/mechatronicsguy/lightscythe) which uses an Arduino and a two meter bar of LEDs. The resulting photos, with their intense colors and mid-air suspended images, have been super popular, and rightfully so.

Large, colorful images require a lot of memory…and that’s one area where we'll need more memory than an Arduino can provide. We had a hunch that the Raspberry Pi could make this process easier. But even we weren’t prepared for what a cakewalk this would be…

- [Next Page](https://learn.adafruit.com/light-painting-with-raspberry-pi/hardware.md)
## Featured Products
### Adafruit Assembled Pi Cobbler Breakout + Cable for Raspberry Pi
[Adafruit Assembled Pi Cobbler Breakout + Cable for Raspberry Pi](https://www.adafruit.com/product/914)
Now that you've finally got your hands on a [Raspberry Pi® Model B](http://www.raspberrypi.org/), you're probably itching to make some fun embedded computer projects with it. What you need is an add on prototyping Pi Cobbler from Adafruit, which can break out all those...
No Longer Stocked
[Buy Now](https://www.adafruit.com/product/914)
[Related Guides to the Product](https://learn.adafruit.com/products/914/guides)
### Digital RGB LED Weatherproof Strip - LPD8806 32 LED 5m
[Digital RGB LED Weatherproof Strip - LPD8806 32 LED 5m](https://www.adafruit.com/product/306)
These LED strips are fun and glowy. There are 32 RGB LEDs per meter, and you can control each LED individually! Yes, that's right, this is the digitally-addressable type of LED strip. You can set the color of each LED's red, green and blue component with 7-bit PWM precision (so 21-bit...
In Stock
[Buy Now](https://www.adafruit.com/product/306)
[Related Guides to the Product](https://learn.adafruit.com/products/306/guides)
### 4-pin JST SM Plug + Receptacle Cable Set
[4-pin JST SM Plug + Receptacle Cable Set](https://www.adafruit.com/product/578)
These 4-wire cables are 15cm long and come as a set, one side has a JST SM type connector plug on the end. The other side has a matching JST SM type receptacle connector. They are good for whenever you have 4 wires you want to be able to plug and unplug. We like the solid and compact nature of...
In Stock
[Buy Now](https://www.adafruit.com/product/578)
[Related Guides to the Product](https://learn.adafruit.com/products/578/guides)
### 5V 10A switching power supply
[5V 10A switching power supply](https://www.adafruit.com/product/658)
This is a beefy switching supply, for when you need a lot of power! It can supply 5V DC up to 10 Amps, running from 110V or 220V power (the plug it comes with is for US/Canada/Japan but you can use any plug adapter for your country, or just replace the cable with a standard computer/appliance...
Out of Stock
[Buy Now](https://www.adafruit.com/product/658)
[Related Guides to the Product](https://learn.adafruit.com/products/658/guides)
### 5V 2A (2000mA) switching power supply - UL Listed
[5V 2A (2000mA) switching power supply - UL Listed](https://www.adafruit.com/product/276)
This is an FCC/CE certified and UL listed power supply. Need a lot of 5V power? This switching supply gives a clean regulated 5V output at up to 2000mA. 110 or 240 input, so it works in any country. The plugs are "US 2-prong" style so you may need a plug adapter, but you can pick one...
In Stock
[Buy Now](https://www.adafruit.com/product/276)
[Related Guides to the Product](https://learn.adafruit.com/products/276/guides)
### Female DC Power adapter - 2.1mm jack to screw terminal block
[Female DC Power adapter - 2.1mm jack to screw terminal block](https://www.adafruit.com/product/368)
If you need to connect a DC power wall wart to a board that doesn't have a DC jack - this adapter will come in very handy! There is a 2.1mm DC jack on one end, and a screw terminal block on the other. The terminals are labeled with positive/negative assuming a positive-tip configuration...
In Stock
[Buy Now](https://www.adafruit.com/product/368)
[Related Guides to the Product](https://learn.adafruit.com/products/368/guides)
## Related Guides
- [LPD8806 Digital RGB LED Strip](https://learn.adafruit.com/digital-led-strip.md)
- [Magic Band Reader](https://learn.adafruit.com/magic-band-reader.md)
- [Bubble Table with LED Animations and IR Remote Control](https://learn.adafruit.com/bubble-table-with-led-animations-and-ir-remote-control.md)
- [Mini Neon Sign Prop & n00ds Booster Case](https://learn.adafruit.com/nood-booster-case.md)
- [Gemma 3D Printed Tree Topper](https://learn.adafruit.com/gemma-3d-printed-tree-topper.md)
- [Raspberry Pi SelfieBlock](https://learn.adafruit.com/selfieblock.md)
- [Rumi Sword - KPop Demon Hunters](https://learn.adafruit.com/rumi-sword.md)
- [Setting up a Raspberry Pi as a WiFi Access Point](https://learn.adafruit.com/setting-up-a-raspberry-pi-as-a-wifi-access-point.md)
- [Adafruit's Raspberry Pi Lesson 8. Using a Servo Motor](https://learn.adafruit.com/adafruits-raspberry-pi-lesson-8-using-a-servo-motor.md)
- [Adafruit NFC/RFID on Raspberry Pi](https://learn.adafruit.com/adafruit-nfc-rfid-on-raspberry-pi.md)
- [Set up and Blink - MATLAB and Simulink with Raspberry Pi](https://learn.adafruit.com/how-to-use-matlab-and-simulink-with-raspberry-pi.md)
- [Floor Lamp with NeoPixels and WLED Custom Animations](https://learn.adafruit.com/floor-lamp-with-wled.md)
- [Reverse Engineering a Bluetooth Low Energy Light Bulb](https://learn.adafruit.com/reverse-engineering-a-bluetooth-low-energy-light-bulb.md)
- [Running OpenGL-based Games & Emulators on Adafruit PiTFT Displays](https://learn.adafruit.com/running-opengl-based-games-and-emulators-on-adafruit-pitft-displays.md)
- [CLUE Vertical Garden Weather Visualizer](https://learn.adafruit.com/clue-vertical-garden-weather-visualizer.md)
- [PiPhone - A Raspberry Pi based Cellphone](https://learn.adafruit.com/piphone-a-raspberry-pi-based-cellphone.md)
---
# Source: https://learn.adafruit.com/adafruit-arduino-lesson-15-dc-motor-reversing/lm293d.md
# Arduino Lesson 15. DC Motor Reversing
## L293D
This is a very useful chip. It can actually control two motors independently. We are just using half the chip in this lesson, most of the pins on the right hand side of the chip are for controlling a second motor.

A second motor would be attached between OUT3 and OUT4. You will also need three more control pins.
- EN2 is connected to a PWM enabled output pin on the Arduino
- IN3 and IN4 are connected to digital outputs on the Arduino
The L293D has two +V pins (8 and 16). The pin '+Vmotor (8) provides the power for the motors, and +V (16) for the chip's logic. We have connected both of these to the Arduino 5V pin. However, if you were using a more powerful motor, or a higher voltage motor, you would provide the motor with a separate power supply using pin 8 connected to the positive power supply and the ground of the second power supply is connected to the ground of the Arduino.
- [Previous Page](https://learn.adafruit.com/adafruit-arduino-lesson-15-dc-motor-reversing/arduino-code.md)
- [Next Page](https://learn.adafruit.com/adafruit-arduino-lesson-15-dc-motor-reversing/other-things-to-do.md)
## Featured Products
### Dual H-Bridge Motor Driver for DC or Steppers - 600mA - L293D
[Dual H-Bridge Motor Driver for DC or Steppers - 600mA - L293D](https://www.adafruit.com/product/807)
Run four solenoids, two DC motors, or one bi-polar or uni-polar stepper with up to 600mA per channel using the L293D. These are perhaps better known as "the drivers in our Adafruit Motorshield". If you accidentally damaged the drivers in a shield, you can use one of these puppies to...
In Stock
[Buy Now](https://www.adafruit.com/product/807)
[Related Guides to the Product](https://learn.adafruit.com/products/807/guides)
### DC Toy / Hobby Motor - 130 Size
[DC Toy / Hobby Motor - 130 Size](https://www.adafruit.com/product/711)
These are standard '130 size' DC hobby motors. They come with a wider operating range than most toy motors: from 4.5 to 9VDC instead of 1.5-4.5V. This range makes them perfect for controlling with an Adafruit Motor Shield, or with an Arduino where you are more likely to have 5 or 9V...
In Stock
[Buy Now](https://www.adafruit.com/product/711)
[Related Guides to the Product](https://learn.adafruit.com/products/711/guides)
### Premium Male/Male Jumper Wires - 40 x 6" (150mm)
[Premium Male/Male Jumper Wires - 40 x 6" (150mm)](https://www.adafruit.com/product/758)
Handy for making wire harnesses or jumpering between headers on PCB's. These premium jumper wires are 6" (150mm) long and come in a 'strip' of 40 (4 pieces of each of ten rainbow colors). They have 0.1" male header contacts on either end and fit cleanly next to each other...
In Stock
[Buy Now](https://www.adafruit.com/product/758)
[Related Guides to the Product](https://learn.adafruit.com/products/758/guides)
### Half Sized Premium Breadboard - 400 Tie Points
[Half Sized Premium Breadboard - 400 Tie Points](https://www.adafruit.com/product/64)
This is a cute, half-size breadboard with 400 tie points, good for small projects. It's 3.25" x 2.2" / 8.3cm x 5.5cm with a standard double-strip in the middle and two power rails on both sides. You can pull the power rails off easily to make the breadboard as...
In Stock
[Buy Now](https://www.adafruit.com/product/64)
[Related Guides to the Product](https://learn.adafruit.com/products/64/guides)
### Adafruit METRO 328 Fully Assembled - Arduino IDE compatible
[Adafruit METRO 328 Fully Assembled - Arduino IDE compatible](https://www.adafruit.com/product/50)
We sure love the ATmega328 here at Adafruit, and we use them _a lot_ for our own projects. The processor has plenty of GPIO, Analog inputs, hardware UART SPI and I2C, timers and PWM galore - just enough for most simple projects. When we need to go small, we use a
Out of Stock
[Buy Now](https://www.adafruit.com/product/50)
[Related Guides to the Product](https://learn.adafruit.com/products/50/guides)
## Related Guides
- [Arduino Lesson 4. Eight LEDs and a Shift Register](https://learn.adafruit.com/adafruit-arduino-lesson-4-eight-leds.md)
- [Wave Shield Voice Changer](https://learn.adafruit.com/wave-shield-voice-changer.md)
- [Adafruit 1.14" 240x135 Color TFT Breakout LCD Display](https://learn.adafruit.com/adafruit-1-14-240x135-color-tft-breakout.md)
- [Wireless Game Show Poppers for the Classroom!](https://learn.adafruit.com/wireless-game-show-poppers.md)
- [Adafruit IO Basics: NeoPixel Controller](https://learn.adafruit.com/adafruit-io-basics-neopixel-controller.md)
- [Track Your Treats: Halloween Candy GPS Tracker](https://learn.adafruit.com/track-your-treats-halloween-candy-gps-tracker.md)
- [20mm LED Pixels](https://learn.adafruit.com/20mm-led-pixels.md)
- [0.96" mini Color OLED](https://learn.adafruit.com/096-mini-color-oled.md)
- [Arduino Lesson 5. The Serial Monitor](https://learn.adafruit.com/adafruit-arduino-lesson-5-the-serial-monitor.md)
- [Halloween Pumpkin](https://learn.adafruit.com/halloween-pumpkin.md)
- [Arduino Lesson 8. Analog Inputs](https://learn.adafruit.com/adafruit-arduino-lesson-8-analog-inputs.md)
- [Arduino Lesson 9. Sensing Light](https://learn.adafruit.com/adafruit-arduino-lesson-9-sensing-light.md)
- [Low Power Coin Cell Voltage Logger](https://learn.adafruit.com/low-power-coin-cell-voltage-logger.md)
- [Line Following Zumo Robot Using Simulink](https://learn.adafruit.com/line-following-zumo-robot-programmed-with-simulink.md)
- [Multi-tasking the Arduino - Part 2](https://learn.adafruit.com/multi-tasking-the-arduino-part-2.md)
---
# Source: https://learn.adafruit.com/adafruit-gfx-graphics-library/loading-images.md
# Adafruit GFX Graphics Library
## Loading Images

Loading .BMP images from an **SD card** (or the **flash memory chip** on Adafruit “Express” boards) is an option for most of our color displays…though it’s not built into Adafruit\_GFX and must be **separately installed**.
The **Adafruit\_ImageReader** library handles this task. It can be installed through the Arduino Library Manager (Sketch→Include Library→Manage Libraries…). Enter “imageread” in the search field and the library is easy to spot:

While you’re there, also look for the **Adafruit\_SPIFlash** library and install it similarly.
There’s one more library required, but it can’t be installed through the Library Manager. The **Adafruit fork** of the **SdFat** library needs to be downloaded as a .ZIP file, uncompressed and [installed the old-school Arduino library way](https://learn.adafruit.com/adafruit-all-about-arduino-libraries-install-use/how-to-install-a-library).
[Download SdFat (Adafruit fork) Arduino library](https://github.com/adafruit/SdFat/archive/master.zip)
# Using the Adafruit\_ImageReader Library
The syntax for using this library (and the separate installation above) are admittedly a bit **peculiar** …it’s a side-effect of the way Arduino handles libraries. We _purposefully_ did not roll this into Adafruit\_GFX because any mere _mention_ of an SD card library will incur _all_ of that library’s considerable memory requirements…_even if one’s sketch doesn’t use an SD card at all! _A majority of graphics projects are self-contained and don’t reference files from a card…not everybody needs this functionality.
There are several **example sketches** in the Adafruit\_ImageReader/examples folder. It’s recommended that you dissect these for ideas how to use the library in your own projects.
They all start with several #includes…
```
#include <Adafruit_GFX.h> // Core graphics library
#include <Adafruit_ILI9341.h> // Hardware-specific library
#include <SdFat.h> // SD card & FAT filesystem library
#include <Adafruit_SPIFlash.h> // SPI / QSPI flash library
#include <Adafruit_ImageReader.h> // Image-reading functions
```
One of these lines may vary from one example to the next, depending which display hardware it’s written to support. Above we see it being used with the Adafruit\_ILI9341 display library required of certain shields, FeatherWings or breakout boards. Others examples reference Adafruit\_HX8357, Adafruit\_ST7735, or other color TFT or OLED display libraries…use the right one for the hardware you have.
Most of the examples can work from either an **SD card** , or the small **flash storage drive** that’s on certain Adafruit “Express” boards. The code to initialize one or the other is a little different, and the examples check whether **USE\_SD\_CARD** is #defined to select one method vs. the other. If you _know for a fact_ that your own project only needs to run on one type or the other, you really only need the corresponding initialization.
For SD card use, these two globals are declared:
```
SdFat SD; // SD card filesystem
Adafruit_ImageReader reader(SD); // Image-reader object, pass in SD filesys
```
For a flash filesystem, there are some special declarations made that help us locate the flash device on different Express boards, then declare three globals:
```
// SPI or QSPI flash filesystem (i.e. CIRCUITPY drive)
#if defined(__SAMD51__) || defined(NRF52840_XXAA)
Adafruit_FlashTransport_QSPI flashTransport(PIN_QSPI_SCK, PIN_QSPI_CS,
PIN_QSPI_IO0, PIN_QSPI_IO1, PIN_QSPI_IO2, PIN_QSPI_IO3);
#else
#if (SPI_INTERFACES_COUNT == 1)
Adafruit_FlashTransport_SPI flashTransport(SS, &SPI);
#else
Adafruit_FlashTransport_SPI flashTransport(SS1, &SPI1);
#endif
#endif
Adafruit_SPIFlash flash(&flashTransport);
FatFileSystem filesys;
Adafruit_ImageReader reader(filesys); // Image-reader, pass in flash filesys
```
The “reader” object will be used to access the image-loading functions later.
Then…we declare a display object (called “tft” in most of the examples) the usual way…for example, with the 2.8 inch TFT touch shield for Arduino, it’s:
```
#define SD_CS 4 // SD card select pin
#define TFT_CS 10 // TFT select pin
#define TFT_DC 9 // TFT display/command pin
Adafruit_ILI9341 tft = Adafruit_ILI9341(TFT_CS, TFT_DC);
```
That all takes place in the global variable section, even before the setup() function.
Now we need to do some work in setup(), and again it’s different for SD cards vs. flash filesystems…
For SD card use, it might look like this:
```
if(!SD.begin(SD_CS, SD_SCK_MHZ(25))) { // ESP32 requires 25 MHz limit
Serial.println(F("SD begin() failed"));
for(;;); // Fatal error, do not continue
}
```
Warning: Some boards such as the Feather M0 prefer a slower clock speed. Reduce the 25 MHz to 12 MHz if you are see seeing a "SD begin() failed." message on a FeatherWing.
This example is providing some very basic error handling…checking the return status of SD.begin() and printing a message to the Serial Monitor if there’s a problem.
Using a flash filesystem instead requires two steps:
```
if(!flash.begin()) {
Serial.println(F("flash begin() failed"));
for(;;);
}
if(!filesys.begin(&flash)) {
Serial.println(F("filesys begin() failed"));
for(;;);
}
```
**All other code is now the same regardless whether using an SD card or flash.** That either/or setup required some extra steps but it’s all smooth sailing now…
After the SD (or flash) and TFT’s `begin()` functions have been called, you can then call `reader.drawBMP()` to load a BMP image from the card to the screen:
```
ImageReturnCode stat;
stat = reader.drawBMP("/purple.bmp", tft, 0, 0);
```
This accepts **four** arguments:
- A filename in “8.3” format (you shouldn’t _need_ to provide an absolute path (the leading “/”), but there are some issues with the SD library on some cutting-edge boards like the ESP32, so go ahead and include this for good measure).
- The display object where the image will be drawn (e.g. “tft”). _This is the weird syntax previously mentioned…rather than tft.drawBMP(), it’s reader.drawBMP(tft), because reasons._
- An X and Y coordinate where the top-left corner of the image is positioned (this doesn’t need to be within screen bounds…the library will clip the image as it’s loaded). 0, 0 will draw the image at the top-left corner…so if the image dimensions match the screen dimensions, it will fill the entire screen.
This function returns a value of type `ImageReturnCode`, which you can either ignore or use it to provide some diagnostic functionality. Possible values are:
- `IMAGE_SUCCESS` — Image loaded successfully (or was clipped fully off screen, still considered “successful” in that there was no error).
- `IMAGE_ERR_FILE_NOT_FOUND` — Could not open the requested file (check spelling, confirm file actually exists on the card, make sure it conforms to “8.3” file naming convention (e.g. “filename.bmp”).
- `IMAGE_ERR_FORMAT` — Not a supported image format. Currently only **uncompressed 24-bit color BMPs** are supported (more will likely be added over time).
- `IMAGE_ERR_MALLOC` — Could not allocate memory for operation (drawBMP() won’t generate this error, but other ImageReader functions might).
Rather than dealing with these values yourself, you can optionally call a function to display a basic diagnostic message to the Serial console:
```
reader.printStatus(stat);
```
If you need to know the **size** of a BMP image _without actually loading it,_ there’s the `bmpDimensions()` function:
```
int32_t width, height;
stat = reader.bmpDimensions("/parrot.bmp", &width, &height);
```
This accepts **three** arguments:
- A filename, same rules as the `drawBMP()` function.
- **Pointers** to two **32-bit integers**. On successful completion, their contents will be set to the image width and height in pixels. On any error these values should be ignored (they’re left uninitialized).
This function returns an `ImageReturnCode` as explained with the `drawBMP()` function above.
# Loading and Using Images in RAM
Depending on image size and other factors, loading an image from SD card to screen may take several seconds. Small images…those that can fit entirely in RAM…can be loaded once and used repeatedly. This can be handy for frequently-used icons or sprites, as it’s usually much easier than converting and embedding an image as an array directly in one’s code…a horrible process.
This introduces another ImageReader function plus a new object type, `Adafruit_Image`:
```
Adafruit_Image img;
stat = reader.loadBMP("/wales.bmp", img);
```
`loadBMP()` accepts **two** arguments:
- A filename, same rules as the previous functions.
- An `Adafruit_Image` object. This is a slightly more flexible type than the bitmaps used by a few drawing functions in the GFX library.
This returns an `ImageReturnCode` as previously described. If an image is too large to fit in available RAM, a value of `IMAGE_ERR_MALLOC` will be returned. Color images require two bytes per pixel…for example, a 100x25 pixel image would need 100\*25\*2 = 5,000 bytes RAM.
On success, the `img` object will contain the image in RAM.
The `loadBMP()` function is useful only on microcontrollers with considerable RAM, like the Adafruit “M0” and “M4” boards, or ESP32. Small devices like the Arduino Uno just can’t cut it. It might be _marginally_ useful on the Arduino Mega with very small images.
After loading, use the `img.draw()` function to display an image on the screen:
```
img.draw(tft, x, y);
```
This accepts **three** arguments:
- A display object (e.g. “tft” in most of the examples), similar to how `drawBMP()` worked.
- An X and Y coordinate for the upper-left corner of the image on the screen, again similar to `drawBMP()`.
We use `img.draw(tft,…)` rather than `tft.drawRGBBitmap(…)` (or other bitmap-drawing functions in the Adafruit\_GFX library) because in the future we plan to add more flexibility with regard to image file formats and types. The `Adafruit_Image` object “understands” a bit about the image that’s been loaded and will call the appropriate bitmap-rendering function automatically, you won’t have to handle each separate case on your own.
If the image failed to load for any reason, `img.draw()` can still be called, it just won’t _do_ anything. But at least the sketch won’t crash.
**There is no BMP-to-flash function.** This is on purpose and by design. We do something similar to that in the [M4\_Eyes](https://learn.adafruit.com/adafruit-monster-m4sk-eyes/compiling-from-source-code) project and you’re welcome to look through that code for insights, but generally speaking this is fraught with peril and not something we recommend. SD to screen or to RAM should cover most cases.
- [Previous Page](https://learn.adafruit.com/adafruit-gfx-graphics-library/using-fonts.md)
- [Next Page](https://learn.adafruit.com/adafruit-gfx-graphics-library/minimizing-redraw-flicker.md)
## Related Guides
- [AdaBox 019](https://learn.adafruit.com/adabox019.md)
- [Sous-vide controller powered by Arduino - The SousViduino!](https://learn.adafruit.com/sous-vide-powered-by-arduino-the-sous-viduino.md)
- [Adafruit 128x64 OLED Bonnet for Raspberry Pi](https://learn.adafruit.com/adafruit-128x64-oled-bonnet-for-raspberry-pi.md)
- [Adafruit IO IOT Hub with the Adafruit FunHouse](https://learn.adafruit.com/adafruit-io-hub-with-the-adafruit-funhouse.md)
- [HalloWing Flapping Bat](https://learn.adafruit.com/hallowing-flapping-bat.md)
- [CircuitPython OLED and Dual Knob Sketcher](https://learn.adafruit.com/circuitpython-oled-knob-sketcher.md)
- [Monochrome OLED Breakouts](https://learn.adafruit.com/monochrome-oled-breakouts.md)
- [4x4 Rotary Encoder MIDI Messenger](https://learn.adafruit.com/4x4-rotary-encoder-midi-messenger.md)
- [Pico W HTTP Server with CircuitPython](https://learn.adafruit.com/pico-w-http-server-with-circuitpython.md)
- [Capturing Camera Images with CircuitPython](https://learn.adafruit.com/capturing-camera-images-with-circuitpython.md)
- [WiFi OLED Display Badge](https://learn.adafruit.com/digital-display-badge.md)
- [Trinket Ultrasonic Rangefinder](https://learn.adafruit.com/trinket-ultrasonic-rangefinder.md)
- [PyPortal Adafruit Quote Book](https://learn.adafruit.com/pyportal-adafruit-quote-board.md)
- [2.8" TFT Touchscreen](https://learn.adafruit.com/2-8-tft-touchscreen.md)
- [Magic Storybook with ChatGPT](https://learn.adafruit.com/magic-storybook-with-chatgpt.md)
---
# Source: https://learn.adafruit.com/adafruit-arduino-lesson-1-blink/loading-the-blink-example.md
# Arduino Lesson 1. Blink
## Loading the 'Blink' Example
You may find that your Arduino board's 'L' LED already blinks when you connect it to a USB plug. This is because Arduino boards are generally shipped with the 'Blink' sketch pre-installed.
In this lesson, we will reprogram the Arduino with our own Blink sketch and then change the rate at which it blinks.
In Lesson 0, you setup your Arduino IDE and made sure that you could find the right serial port for it to connect to your Arduino board. The time has now come to put that connection to the test and program your Arduino board.
The Arduino IDE includes a large collection of example sketches that you can load up and use. This includes an example sketch for making the 'L' LED blink.
Load the 'Blink' sketch that you will find in the IDE's menu system under File → Examples → 01.Basics

When the sketch window opens, enlarge it so that you can see the whole of the sketch in the window.

- [Previous Page](https://learn.adafruit.com/adafruit-arduino-lesson-1-blink/the-l-led.md)
- [Next Page](https://learn.adafruit.com/adafruit-arduino-lesson-1-blink/saving-a-copy-of-blink.md)
## Featured Products
### Adafruit METRO 328 Fully Assembled - Arduino IDE compatible
[Adafruit METRO 328 Fully Assembled - Arduino IDE compatible](https://www.adafruit.com/product/50)
We sure love the ATmega328 here at Adafruit, and we use them _a lot_ for our own projects. The processor has plenty of GPIO, Analog inputs, hardware UART SPI and I2C, timers and PWM galore - just enough for most simple projects. When we need to go small, we use a
Out of Stock
[Buy Now](https://www.adafruit.com/product/50)
[Related Guides to the Product](https://learn.adafruit.com/products/50/guides)
### USB Cable - Standard A-B
[USB Cable - Standard A-B](https://www.adafruit.com/product/62)
This here is your standard A-B USB cable, for USB 1.1 or 2.0. Perfect for connecting a PC to your Arduino, USBtinyISP (among other things).
3 feet / 1 meter long
Color may vary!
In Stock
[Buy Now](https://www.adafruit.com/product/62)
[Related Guides to the Product](https://learn.adafruit.com/products/62/guides)
## Related Guides
- [WiFi Weather Station](https://learn.adafruit.com/wifi-weather-station-arduino-cc3000.md)
- [Naughty or Nice Machine](https://learn.adafruit.com/naughty-or-nice-machine.md)
- [Adafruit VS1053 MP3/AAC/Ogg/MIDI/WAV Codec Breakout Tutorial](https://learn.adafruit.com/adafruit-vs1053-mp3-aac-ogg-midi-wav-play-and-record-codec-tutorial.md)
- [How to program a Zumo Robot with Simulink](https://learn.adafruit.com/zumo-robot-control-with-simulink.md)
- [DIY 8x2 LCD Shield](https://learn.adafruit.com/diy-8x2-lcd-shield.md)
- [3D Printed Animatronic Robot Head](https://learn.adafruit.com/3d-printed-animatronic-robot-head.md)
- [Arduino Lesson 7. Make an RGB LED Fader](https://learn.adafruit.com/adafruit-arduino-lesson-7-make-an-rgb-led-fader.md)
- [WiFi Controlled LED Christmahanukwanzaa Tree](https://learn.adafruit.com/wifi-controlled-led-christmahanukwanzaa-tree.md)
- [Light Meter](https://learn.adafruit.com/light-meter.md)
- [1,500 NeoPixel LED Curtain with Raspberry Pi and Fadecandy](https://learn.adafruit.com/1500-neopixel-led-curtain-with-raspberry-pi-fadecandy.md)
- [Trellis 3D Printed Enclosure](https://learn.adafruit.com/trellis-3d-printed-enclosure.md)
- [Deciphering Strange Arduino Code](https://learn.adafruit.com/deciphering-strange-arduino-code.md)
- [Collin's Lab: MIDI](https://learn.adafruit.com/collins-lab-midi.md)
- [Tiny Arduino Music Visualizer](https://learn.adafruit.com/piccolo.md)
- [Adafruit Music Maker Shield](https://learn.adafruit.com/adafruit-music-maker-shield-vs1053-mp3-wav-wave-ogg-vorbis-player.md)
---
# Source: https://learn.adafruit.com/adafruit-ultimate-gps/locus-parser.md
# Adafruit Ultimate GPS
## LOCUS Parser
- [Previous Page](https://learn.adafruit.com/adafruit-ultimate-gps/built-in-logging.md)
- [Next Page](https://learn.adafruit.com/adafruit-ultimate-gps/resources.md)
## Featured Products
### Adafruit Ultimate GPS Breakout - 66 channel w/10 Hz updates
[Adafruit Ultimate GPS Breakout - 66 channel w/10 Hz updates](https://www.adafruit.com/product/746)
We carry a few different GPS modules here in the Adafruit shop, but none that satisfied our every desire - that's why we designed this little GPS breakout board. We believe this is the **Ultimate** GPS module, so we named it that. It's got everything you want and...
In Stock
[Buy Now](https://www.adafruit.com/product/746)
[Related Guides to the Product](https://learn.adafruit.com/products/746/guides)
### Adafruit Ultimate GPS GNSS with USB - 99 channel w/10 Hz updates
[Adafruit Ultimate GPS GNSS with USB - 99 channel w/10 Hz updates](https://www.adafruit.com/product/4279)
The Ultimate GPS module you know and love has a _glow-up_ to let it be easily used with any computer, not just microcontrollers! With the built-in USB-to-Serial converter, you can now plug-n-play the Ultimate GPS into your computer, laptop, embedded Linux computer, and more. Power and...
In Stock
[Buy Now](https://www.adafruit.com/product/4279)
[Related Guides to the Product](https://learn.adafruit.com/products/4279/guides)
### Adafruit METRO 328 Fully Assembled - Arduino IDE compatible
[Adafruit METRO 328 Fully Assembled - Arduino IDE compatible](https://www.adafruit.com/product/50)
We sure love the ATmega328 here at Adafruit, and we use them _a lot_ for our own projects. The processor has plenty of GPIO, Analog inputs, hardware UART SPI and I2C, timers and PWM galore - just enough for most simple projects. When we need to go small, we use a
Out of Stock
[Buy Now](https://www.adafruit.com/product/50)
[Related Guides to the Product](https://learn.adafruit.com/products/50/guides)
### GPS Antenna - External Active Antenna - 3-5V 28dB 5 Meter SMA
[GPS Antenna - External Active Antenna - 3-5V 28dB 5 Meter SMA](https://www.adafruit.com/product/960)
Give your Ultimate GPS V3 a boost with this external active antenna. This GPS antenna draws about 10mA and will give you an additional 28 dB of gain. It's got a 5 meter long cable so it will easily reach wherever you need it to. The antenna is magnetic so it will stick to the top of a car...
In Stock
[Buy Now](https://www.adafruit.com/product/960)
[Related Guides to the Product](https://learn.adafruit.com/products/960/guides)
### SMA to uFL/u.FL/IPX/IPEX RF Adapter Cable
[SMA to uFL/u.FL/IPX/IPEX RF Adapter Cable](https://www.adafruit.com/product/851)
This RF adapter cable is super handy for anyone doing RF work. Often times, small electronics save space by having a pick-and-placeable u.FL connector (also called uFL, IPEX, IPAX, IPX, MHF, and AM). But most antennas have SMA or RP-SMA connectors on them. This little cable will bridge the...
In Stock
[Buy Now](https://www.adafruit.com/product/851)
[Related Guides to the Product](https://learn.adafruit.com/products/851/guides)
### CR1220 12mm Diameter - 3V Lithium Coin Cell Battery
[CR1220 12mm Diameter - 3V Lithium Coin Cell Battery](https://www.adafruit.com/product/380)
These are the highest quality & capacity batteries, the same as shipped with the iCufflinks, iNecklace, Datalogging and GPS Shields, GPS HAT, etc. One battery per order (you'll want one battery per cufflink or pendant.)
Brand may vary but all battery brands are verified...
Out of Stock
[Buy Now](https://www.adafruit.com/product/380)
[Related Guides to the Product](https://learn.adafruit.com/products/380/guides)
### Breadboarding wire bundle
[Breadboarding wire bundle](https://www.adafruit.com/product/153)
75 flexible stranded core wires with stiff ends molded on in red, orange, yellow, green, blue, brown, black and white. These are a major improvement over the "box of bent wires" that are sometimes sold with breadboards, and faster than stripping your own solid core wires. Makes...
In Stock
[Buy Now](https://www.adafruit.com/product/153)
[Related Guides to the Product](https://learn.adafruit.com/products/153/guides)
### Half Sized Premium Breadboard - 400 Tie Points
[Half Sized Premium Breadboard - 400 Tie Points](https://www.adafruit.com/product/64)
This is a cute, half-size breadboard with 400 tie points, good for small projects. It's 3.25" x 2.2" / 8.3cm x 5.5cm with a standard double-strip in the middle and two power rails on both sides. You can pull the power rails off easily to make the breadboard as...
In Stock
[Buy Now](https://www.adafruit.com/product/64)
[Related Guides to the Product](https://learn.adafruit.com/products/64/guides)
## Related Guides
- [Reverse Geocache Box](https://learn.adafruit.com/reverse-geocache-engagement-box.md)
- [Ladyada's Learn Arduino - Lesson #2](https://learn.adafruit.com/ladyadas-learn-arduino-lesson-number-2.md)
- [Wave Shield Talking Clock](https://learn.adafruit.com/wave-shield-talking-clock.md)
- [Wireless Game Show Poppers for the Classroom!](https://learn.adafruit.com/wireless-game-show-poppers.md)
- [Wireless Gardening with Arduino + CC3000 WiFi Modules](https://learn.adafruit.com/wireless-gardening-arduino-cc3000-wifi-modules.md)
- [CircuitPython Essentials](https://learn.adafruit.com/circuitpython-essentials.md)
- [CircuitPython Libraries on Linux and ODROID C2](https://learn.adafruit.com/circuitpython-libaries-linux-odroid-c2.md)
- [2.2" TFT Display](https://learn.adafruit.com/2-2-tft-display.md)
- [RGB LED Matrix Basics](https://learn.adafruit.com/32x16-32x32-rgb-led-matrix.md)
- [Halloween Pumpkin](https://learn.adafruit.com/halloween-pumpkin.md)
- [Remote controlled door lock using a fingerprint sensor & Adafruit IO](https://learn.adafruit.com/remote-controlled-door-lock-using-a-fingerprint-sensor-and-adafruit-io.md)
- [Automatic Monitor Color Temperature Adjustment](https://learn.adafruit.com/automatic-monitor-color-temperature-adjustment.md)
- [Animating Multiple LED Backpacks](https://learn.adafruit.com/animating-multiple-led-backpacks.md)
- [Skill Badge Requirements: Microcontrollers](https://learn.adafruit.com/skill-badge-requirements-microcontrollers.md)
- [RePaper eInk Development Board](https://learn.adafruit.com/repaper-eink-development-board.md)
---
# Source: https://learn.adafruit.com/low-power-coin-cell-voltage-logger.md
# Low Power Coin Cell Voltage Logger
## Overview

In developing our new [TIMESQUARE watch](http://www.adafruit.com/products/1106 "Link: http://www.adafruit.com/products/1106"), we knew that power use would be a hairy issue. The entire circuit, including an ATmega328P microcontroller and an 8x8 LED matrix, is powered from a single CR2032 lithium coin cell. We obsessed over different LED multiplexing arrangements and processor sleep modes, always trying to trim the power draw just a little bit more.
With the right tools such as the [EEVblog μCurrent](http://adafruit.com/products/882) and a good multimeter, measuring the most minute current changes is a simple task. But translating this into battery longevity isn’t so cut-and-dried…the stated capacity in the battery datasheet assumes a small and constant load, while the watch current can vary greatly. What’s more, the relationship between current draw and battery longevity isn’t necessarily linear. This gets messy. Sometimes you just need to put math and theory aside, plug the thing in and observe the actual outcome.
To that end, we built a test fixture to simulate a consistent use case: activating the watch display once per minute and monitoring the battery voltage as it declines, allowing us to objectively compare different versions of the watch software. The raw data is logged to an SD card for later review and conversion into nice graphs. So this is primarily a tutorial on using the Data Logging Shield for Arduino, but along the way there are some good ancillary tidbits on hardware and software.- [Next Page](https://learn.adafruit.com/low-power-coin-cell-voltage-logger/hardware.md)
## Featured Products
### EEVblog uCurrent - Precision nA Current Measurement Assistant
[EEVblog uCurrent - Precision nA Current Measurement Assistant](https://www.adafruit.com/product/882)
An essential companion when working on a ultra-low-power projects! If you've ever used a portable multimeter (even your $300 Fluke!) to measure sub-uA currents - say for a low power microcontroller or sensor project - you may notice that you're not getting the precision you expect, or...
No Longer Stocked
[Buy Now](https://www.adafruit.com/product/882)
[Related Guides to the Product](https://learn.adafruit.com/products/882/guides)
### Breadboarding wire bundle
[Breadboarding wire bundle](https://www.adafruit.com/product/153)
75 flexible stranded core wires with stiff ends molded on in red, orange, yellow, green, blue, brown, black and white. These are a major improvement over the "box of bent wires" that are sometimes sold with breadboards, and faster than stripping your own solid core wires. Makes...
In Stock
[Buy Now](https://www.adafruit.com/product/153)
[Related Guides to the Product](https://learn.adafruit.com/products/153/guides)
### Shield stacking headers for Arduino (R3 Compatible)
[Shield stacking headers for Arduino (R3 Compatible)](https://www.adafruit.com/product/85)
_“How could something so simple be so useful?” _
We heard once that in the 4th millennium B.C. some guy asked the person who invented the wheel that question. The person who invented the wheel’s answer, we were told, was...
In Stock
[Buy Now](https://www.adafruit.com/product/85)
[Related Guides to the Product](https://learn.adafruit.com/products/85/guides)
### Adafruit METRO 328 Fully Assembled - Arduino IDE compatible
[Adafruit METRO 328 Fully Assembled - Arduino IDE compatible](https://www.adafruit.com/product/50)
We sure love the ATmega328 here at Adafruit, and we use them _a lot_ for our own projects. The processor has plenty of GPIO, Analog inputs, hardware UART SPI and I2C, timers and PWM galore - just enough for most simple projects. When we need to go small, we use a
Out of Stock
[Buy Now](https://www.adafruit.com/product/50)
[Related Guides to the Product](https://learn.adafruit.com/products/50/guides)
### CR2032 Lithium Coin Cell Battery
[CR2032 Lithium Coin Cell Battery](https://www.adafruit.com/product/654)
A perfect match for our [sew-able coin cell holder](http://www.adafruit.com/products/653). This non-rechargeable coin cell is CR2032 sized: 20mm diameter, 3.2mm thick. It has a nominal voltage output of 3V (although it starts a little high at 3.2V and slowly drifts down to 2.5V as...
In Stock
[Buy Now](https://www.adafruit.com/product/654)
[Related Guides to the Product](https://learn.adafruit.com/products/654/guides)
### TIMESQUARE DIY Watch Kit - Red Display Matrix
[TIMESQUARE DIY Watch Kit - Red Display Matrix](https://www.adafruit.com/product/1106)
Show up stylish AND on time to any event with this awesome looking DIY watch. We have a few watch kits here at Adafruit but we finally have one that looks good and fits well, even for ladies and kids and others with smaller wrists and hands. Its got an 8x8 bit matrix display and a repurposed...
No Longer Stocked
[Buy Now](https://www.adafruit.com/product/1106)
[Related Guides to the Product](https://learn.adafruit.com/products/1106/guides)
## Related Guides
- [Bluefruit LE Connect for iOS and Android](https://learn.adafruit.com/bluefruit-le-connect.md)
- [Adafruit 1.27" and 1.5" Color OLED Breakout Board](https://learn.adafruit.com/adafruit-1-5-color-oled-breakout-board.md)
- [How to Choose a Microcontroller](https://learn.adafruit.com/how-to-choose-a-microcontroller.md)
- [Trainable Robotic Arm](https://learn.adafruit.com/trainable-robotic-arm.md)
- [2.8" TFT Touch Shield](https://learn.adafruit.com/2-8-tft-touch-shield.md)
- [LSM303 Accelerometer + Compass Breakout](https://learn.adafruit.com/lsm303-accelerometer-slash-compass-breakout.md)
- [Arduino "Hunt The Wumpus"](https://learn.adafruit.com/arduino-hunt-the-wumpus.md)
- [Making Adabot: Part 2](https://learn.adafruit.com/making-adabot-part-2.md)
- [1,500 NeoPixel LED Curtain with Raspberry Pi and Fadecandy](https://learn.adafruit.com/1500-neopixel-led-curtain-with-raspberry-pi-fadecandy.md)
- [Wave Shield Voice Changer](https://learn.adafruit.com/wave-shield-voice-changer.md)
- [WiFi Controlled LED Christmahanukwanzaa Tree](https://learn.adafruit.com/wifi-controlled-led-christmahanukwanzaa-tree.md)
- [Trellis 3D Printed Enclosure](https://learn.adafruit.com/trellis-3d-printed-enclosure.md)
- [Arduino Ethernet + SD Card](https://learn.adafruit.com/arduino-ethernet-sd-card.md)
- [NeoPixel Painter](https://learn.adafruit.com/neopixel-painter.md)
- [Programming Arduino with Android and Windows Tablets](https://learn.adafruit.com/programming-arduino-with-android-and-windows-tablets.md)
---
# Source: https://learn.adafruit.com/adafruit-raspberry-pi-lesson-7-remote-control-with-vnc/mac-screen-and-file-sharing.md
# Adafruit's Raspberry Pi Lesson 7. Remote Control with VNC
## Mac Screen and File Sharing
If you are a Mac user and have a few Macs on your network, then you will probably be used to seeing other Macs in the network automatically show up in the Finder, so that you can log on to them and browse the file system or even remote control them.

The screen sharing feature of Macs uses VNC, so if you already have TightVNC server installed (as we do) then with a bit of configuration, we can get it to be recognized by other Macs on the network.
The tutorial here:http://4dc5.com/2012/06/12/setting-up-vnc-on-raspberry-pi-for-mac-access/
explains how to do this. It also includes the installation of TightVNC server, which you do not need to repeat as we already have that.
Once its all set up, you will be able to connect to the file system of your raspberry Pi.

Remember to change the user field to pi and as usual the default password is 'raspberry'.

This makes it super-easy to copy files back and forth between your Mac and Pi.
If you click on the Share Screen button, you will get another login prompt.

This time, the password is the password you set up for the VNC server – I suggested 'raspberr'. That is with the 'y' missing from the end.
You should then get a VNC window using the Mac's built-in VNC viewer.

- [Previous Page](https://learn.adafruit.com/adafruit-raspberry-pi-lesson-7-remote-control-with-vnc/running-vncserver-at-startup.md)
- [Next Page](https://learn.adafruit.com/adafruit-raspberry-pi-lesson-7-remote-control-with-vnc/test-and-configure.md)
## Featured Products
### Budget Pack for Raspberry Pi 1 Model B (Doesn't include RasPi)
[Budget Pack for Raspberry Pi 1 Model B (Doesn't include RasPi)](https://www.adafruit.com/product/965)
An optimized collection of parts and pieces to experiment with Raspberry Pi at home, school or work. Great for students and those that want to get their feet wet, no soldering required! **THIS PACK DOES NOT INCLUDE A RASPBERRY PI 1 MODEL B and is NOT compatible with Model B+ or Raspberry Pi...**
No Longer Stocked
[Buy Now](https://www.adafruit.com/product/965)
[Related Guides to the Product](https://learn.adafruit.com/products/965/guides)
### Programming the Raspberry Pi: Getting Started with Python
[Programming the Raspberry Pi: Getting Started with Python](https://www.adafruit.com/product/1089)
**Program your own Raspberry Pi projects!**
An updated guide to programming your own Raspberry Pi projects. Learn to create inventive programs and fun games on your powerful Raspberry Pi--with no programming experience required. **This practical book has been revised...**
In Stock
[Buy Now](https://www.adafruit.com/product/1089)
[Related Guides to the Product](https://learn.adafruit.com/products/1089/guides)
## Related Guides
- [Using a Mini PAL/NTSC Display with a Raspberry Pi](https://learn.adafruit.com/using-a-mini-pal-ntsc-display-with-a-raspberry-pi.md)
- [Arm-based IoT Kit for Cloud IoT Core - Getting Started](https://learn.adafruit.com/raspberry-pi-3-and-sensor-kit-for-google-cloud-iot-core.md)
- [Windows IoT Core Application Development: Headless Blinky](https://learn.adafruit.com/windows-iot-application-development-headless-application.md)
- [Simple Raspberry Pi Robot](https://learn.adafruit.com/simple-raspberry-pi-robot.md)
- [NeoPixels on Raspberry Pi](https://learn.adafruit.com/neopixels-on-raspberry-pi.md)
- [Portable 5in Monitor with HDMI](https://learn.adafruit.com/portable-5in-monitor-with-hdmi.md)
- [2.2" PiTFT HAT Enclosure](https://learn.adafruit.com/3d-printed-2-2-pitft-raspberry-pi-a-plus-enclosure.md)
- [Bluefruit LE Python Library](https://learn.adafruit.com/bluefruit-le-python-library.md)
- [Adafruit Pi Cobbler Kit](https://learn.adafruit.com/adafruit-pi-cobbler-kit.md)
- [Naughty or Nice Machine](https://learn.adafruit.com/naughty-or-nice-machine.md)
- [DHT Humidity Sensing on Raspberry Pi or Beaglebone Black with GDocs Logging](https://learn.adafruit.com/dht-humidity-sensing-on-raspberry-pi-with-gdocs-logging.md)
- [Adafruit's Raspberry Pi Lesson 1. Preparing an SD Card for your Raspberry Pi](https://learn.adafruit.com/adafruit-raspberry-pi-lesson-1-preparing-and-sd-card-for-your-raspberry-pi.md)
- [Mini Raspberry Pi Handheld Notebook](https://learn.adafruit.com/mini-raspberry-pi-handheld-notebook-palmtop.md)
- [Pi Box](https://learn.adafruit.com/pi-box.md)
- [Running Programs Automatically on Your Tiny Computer](https://learn.adafruit.com/running-programs-automatically-on-your-tiny-computer.md)
---
# Source: https://learn.adafruit.com/conductive-thread/machine-sewing.md
# Conductive Thread
## Machine sewing

You can use our 2 ply conductive thread in the bobbin of a sewing machine. Thread the machine's needle with plain thread.
Use a water-disolvable marker to plan out your circuit traces.


You may need to adjust the tension on your machine. Experiment on a scrap piece of fabric and examine the balance between the conductive and regular thread. Adjust the tension and experiment again until you are satisfied.

Machine stitch your circuit.

Leave long tails of conductive thread at the ends of your stitching lines in case you need to pick them up with a hand sewing needle and connect to other components.

Spritz away the markings with water. Be sure to let the fabric completely dry before powering up your circuit.
- [Previous Page](https://learn.adafruit.com/conductive-thread/preventing-short-circuits.md)
- [Next Page](https://learn.adafruit.com/conductive-thread/projects.md)
## Featured Products
### Stainless Medium Conductive Thread - 3 ply - 18 meter/60 ft
[Stainless Medium Conductive Thread - 3 ply - 18 meter/60 ft](https://www.adafruit.com/product/641)
After months of searching, we finally have what we consider to be the ultimate conductive thread. It's thin, strong, smooth, and made completely of 316L stainless steel. Once you start working with this thread you'll quickly agree its optimal for any wearables work!
This...
Out of Stock
[Buy Now](https://www.adafruit.com/product/641)
[Related Guides to the Product](https://learn.adafruit.com/products/641/guides)
### Stainless Thin Conductive Thread - 2 ply - 23 meter/76 ft
[Stainless Thin Conductive Thread - 2 ply - 23 meter/76 ft](https://www.adafruit.com/product/640)
After months of searching, we finally have what we consider to be the ultimate conductive thread. It's thin, strong, smooth, and made completely of 316L stainless steel. Once you start working with this thread you'll quickly agree its optimal for any wearables work!
This...
In Stock
[Buy Now](https://www.adafruit.com/product/640)
[Related Guides to the Product](https://learn.adafruit.com/products/640/guides)
### Stainless Thin Conductive Yarn / Thick Conductive Thread - 30 ft
[Stainless Thin Conductive Yarn / Thick Conductive Thread - 30 ft](https://www.adafruit.com/product/603)
This 316L stainless steel thread falls somewhere between a thick thread and a thin yarn. Most sewing machines wouldn't be happy with this thread since its thick, and it has the 'furry' soft feel of yarn which makes it poor for most e-textiles/wearables projects. However, the high...
In Stock
[Buy Now](https://www.adafruit.com/product/603)
[Related Guides to the Product](https://learn.adafruit.com/products/603/guides)
### Conductive thread ribbon cable - White - 1 yard
[Conductive thread ribbon cable - White - 1 yard](https://www.adafruit.com/product/1139)
This lightweight, flexible fabric ribbon cable contains four channels of conductive thread, perfect for wiring up wearables where flexibility is key. Use it to connect your conductive fabric gamepad to your microcontroller or computer!
Features:
- Low resistance: ~16...
No Longer Stocked
[Buy Now](https://www.adafruit.com/product/1139)
[Related Guides to the Product](https://learn.adafruit.com/products/1139/guides)
### Needle set - 3/9 sizes - 20 needles
[Needle set - 3/9 sizes - 20 needles](https://www.adafruit.com/product/615)
Mighty needles, sew like the wind! This needle set is the only one you'll need for any sort of hand sewing, especially using our conductive thread and wearable electronics parts.
Each pack contains 20 gold-eye sharps, with eye sizes ranging from #3 (1.75" long) to #9...
Out of Stock
[Buy Now](https://www.adafruit.com/product/615)
[Related Guides to the Product](https://learn.adafruit.com/products/615/guides)
### Small Alligator Clip Test Lead (set of 12)
[Small Alligator Clip Test Lead (set of 12)](https://www.adafruit.com/product/1008)
Connect this to that without soldering using these handy mini alligator clip test leads. 15" cables with alligator clip on each end, color coded. You get 12 pieces in 6 colors. Strong and grippy, these always come in handy! We often use these in conjunction with a multimeter so we...
In Stock
[Buy Now](https://www.adafruit.com/product/1008)
[Related Guides to the Product](https://learn.adafruit.com/products/1008/guides)
### Sewable Snaps - 5mm Diameter - Card of 24
[Sewable Snaps - 5mm Diameter - Card of 24](https://www.adafruit.com/product/1126)
The small 5mm size of these tin-plated brass snaps means they fit perfectly on Flora's pads! Snaps make a great connector for wearables-- solder one side to the board and sew the other to your project with conductive thread! This card comes with 24 complete snaps (socket and stud...
In Stock
[Buy Now](https://www.adafruit.com/product/1126)
[Related Guides to the Product](https://learn.adafruit.com/products/1126/guides)
### FLORA - Wearable electronic platform: Arduino-compatible
[FLORA - Wearable electronic platform: Arduino-compatible](https://www.adafruit.com/product/659)
FLORA is Adafruit's fully-featured wearable electronics platform. It's a round, sewable, Arduino-compatible microcontroller designed to empower amazing wearables projects.FLORA comes with Adafruit's support, [tutorials and...](http://learn.adafruit.com/category/flora)
In Stock
[Buy Now](https://www.adafruit.com/product/659)
[Related Guides to the Product](https://learn.adafruit.com/products/659/guides)
## Related Guides
- [Capacitive Touch with Conductive Fabric & Flora](https://learn.adafruit.com/capacitive-touch-with-conductive-fabric-and-flora.md)
- [Fiber Optic Pixie Skirt](https://learn.adafruit.com/fiber-optic-pixie-princess-skirt.md)
- [Haptic Headband](https://learn.adafruit.com/haptic-headband.md)
- [EEG Costume Cap](https://learn.adafruit.com/eeg-costume-cap.md)
- [Zipper Switch](https://learn.adafruit.com/zipper-switch.md)
- [Adafruit Arduino IDE Setup](https://learn.adafruit.com/adafruit-arduino-ide-setup.md)
- [Sewable NeoPixels](https://learn.adafruit.com/flora-rgb-smart-pixels.md)
- [FLORA TV-B-Gone](https://learn.adafruit.com/flora-tv-b-gone.md)
- [Experimenting with NeverWet + Electronics](https://learn.adafruit.com/neverwet-electronics.md)
- [LED Stego Flex Spike Hoodie](https://learn.adafruit.com/led-stego-flex-spike-hoodie.md)
- [Getting Started with FLORA](https://learn.adafruit.com/getting-started-with-flora.md)
- [Sunscreen Reminder Hat](https://learn.adafruit.com/sunscreen-reminder-hat.md)
- [Mailbox Notification Service](https://learn.adafruit.com/mailbox-notification-service.md)
- [FLORA + FONA](https://learn.adafruit.com/flora-plus-fona.md)
- [Flora TSL2561 Lux Sensor](https://learn.adafruit.com/flora-lux-sensor.md)
---
# Source: https://learn.adafruit.com/adafruit-motor-shield/make-it.md
# Adafruit Motor Shield
## Make It!
Warning:
## Lets go!
This is a vey easy kit to make, just go through each of these steps to build the kit
1. [Tools and preparation](http://learn.adafruit.com/adafruit-motor-shield/preparation "Link: http://learn.adafruit.com/adafruit-motor-shield/preparation")
2. [Check the parts list](http://learn.adafruit.com/adafruit-motor-shield/parts-list "Link: http://learn.adafruit.com/adafruit-motor-shield/parts-list")
3. [Solder it](http://learn.adafruit.com/adafruit-motor-shield/solder-it)
- [Previous Page](https://learn.adafruit.com/adafruit-motor-shield/faq.md)
- [Next Page](https://learn.adafruit.com/adafruit-motor-shield/preparation.md)
## Featured Products
### Adafruit METRO 328 Fully Assembled - Arduino IDE compatible
[Adafruit METRO 328 Fully Assembled - Arduino IDE compatible](https://www.adafruit.com/product/50)
We sure love the ATmega328 here at Adafruit, and we use them _a lot_ for our own projects. The processor has plenty of GPIO, Analog inputs, hardware UART SPI and I2C, timers and PWM galore - just enough for most simple projects. When we need to go small, we use a
Out of Stock
[Buy Now](https://www.adafruit.com/product/50)
[Related Guides to the Product](https://learn.adafruit.com/products/50/guides)
## Related Guides
- [Adafruit Proto Shield for Arduino](https://learn.adafruit.com/adafruit-proto-shield-arduino.md)
- [Analog Feedback Servos](https://learn.adafruit.com/analog-feedback-servos.md)
- [All About Arduino Libraries](https://learn.adafruit.com/adafruit-all-about-arduino-libraries-install-use.md)
- [RePaper eInk Development Board](https://learn.adafruit.com/repaper-eink-development-board.md)
- [Multi-tasking the Arduino - Part 2](https://learn.adafruit.com/multi-tasking-the-arduino-part-2.md)
- [Bluetooth Controlled Motorized Camera Slider](https://learn.adafruit.com/bluetooth-motorized-camera-slider.md)
- [Electronic Demon Costume](https://learn.adafruit.com/electronic-demon-costume.md)
- [Adafruit INA219 Current Sensor Breakout](https://learn.adafruit.com/adafruit-ina219-current-sensor-breakout.md)
- [Ladyada's Learn Arduino - Lesson #2](https://learn.adafruit.com/ladyadas-learn-arduino-lesson-number-2.md)
- [Arduino Lesson 6. Digital Inputs](https://learn.adafruit.com/adafruit-arduino-lesson-6-digital-inputs.md)
- [2.2" TFT Display](https://learn.adafruit.com/2-2-tft-display.md)
- [Arduino Lesson 2. LEDs](https://learn.adafruit.com/adafruit-arduino-lesson-2-leds.md)
- [Collin's Lab: MIDI](https://learn.adafruit.com/collins-lab-midi.md)
- [1,500 NeoPixel LED Curtain with Raspberry Pi and Fadecandy](https://learn.adafruit.com/1500-neopixel-led-curtain-with-raspberry-pi-fadecandy.md)
- [Programming Arduino with Android and Windows Tablets](https://learn.adafruit.com/programming-arduino-with-android-and-windows-tablets.md)
---
# Source: https://learn.adafruit.com/babel-fish/make-the-nfc-slash-rfid-shield.md
# Babel Fish
## Make the NFC/RFID Shield
https://www.youtube.com/watch?v=WgLV5X1iWWw
Watch our video about the [NFC/RFID shield for Arduino](http://learn.adafruit.com/adafruit-pn532-rfid-nfc)! We need to modify the shield to work with the Wave Shield.

Use a utility knife to cut the connection between the IRQ pin and header pin neighbor.

Solder a wire from the IRQ pin to digital pin 6.
- [Previous Page](https://learn.adafruit.com/babel-fish/overview.md)
- [Next Page](https://learn.adafruit.com/babel-fish/make-the-wave-shield.md)
## Featured Products
### Adafruit METRO 328 Fully Assembled - Arduino IDE compatible
[Adafruit METRO 328 Fully Assembled - Arduino IDE compatible](https://www.adafruit.com/product/50)
We sure love the ATmega328 here at Adafruit, and we use them _a lot_ for our own projects. The processor has plenty of GPIO, Analog inputs, hardware UART SPI and I2C, timers and PWM galore - just enough for most simple projects. When we need to go small, we use a
Out of Stock
[Buy Now](https://www.adafruit.com/product/50)
[Related Guides to the Product](https://learn.adafruit.com/products/50/guides)
### Adafruit PN532 NFC/RFID Controller Shield for Arduino + Extras
[Adafruit PN532 NFC/RFID Controller Shield for Arduino + Extras](https://www.adafruit.com/product/789)
We've taken our popular Adafruit PN532 breakout board and turned it into a shield - the perfect tool for any 13.56MHz RFID or NFC application. The Adafruit NFC shield uses the PN532 chip-set (the most popular NFC chip on the market) and is what is embedded in pretty much every phone or...
In Stock
[Buy Now](https://www.adafruit.com/product/789)
[Related Guides to the Product](https://learn.adafruit.com/products/789/guides)
### Adafruit Wave Shield for Arduino Kit
[Adafruit Wave Shield for Arduino Kit](https://www.adafruit.com/product/94)
Adding quality audio to an electronic project is surprisingly difficult. Here is a shield for Arduino 328's that solves this problem. It can play up to 22KHz 12bit uncompressed audio files of any length. It's low cost, available as an easy-to-make kit. It has an onboard DAC, filter and...
Out of Stock
[Buy Now](https://www.adafruit.com/product/94)
[Related Guides to the Product](https://learn.adafruit.com/products/94/guides)
### Music & sound add-on pack for Arduino
[Music & sound add-on pack for Arduino](https://www.adafruit.com/product/175)
Its a Wave shield party pack! Just add an Arduino to create your own iPod-killer, audio art, sound-effects box...
Comes with:
- Latest [Wave shield kit](http://www.adafruit.com/products/94), works with more SD cards and with older NG Arduinos! Unassembled
- 8 GB...
Out of Stock
[Buy Now](https://www.adafruit.com/product/175)
[Related Guides to the Product](https://learn.adafruit.com/products/175/guides)
### 9 VDC 1000mA regulated switching power adapter - UL listed
[9 VDC 1000mA regulated switching power adapter - UL listed](https://www.adafruit.com/product/63)
This is a really nice power supply. It's a switching DC supply so it's small and light and efficient. It is thin so it fits in power strips without blocking other outlets. The output is regulated so you'll get a steady 9V up to 1000mA (1 Amp) of current draw. 5.5mm/2.1mm barrel...
Out of Stock
[Buy Now](https://www.adafruit.com/product/63)
[Related Guides to the Product](https://learn.adafruit.com/products/63/guides)
### 13.56MHz RFID/NFC Card - Classic 1K
[13.56MHz RFID/NFC Card - Classic 1K](https://www.adafruit.com/product/359)
This is a blank 13.56MHz RFID/NFC card - often used for train/bus passes but also found in other systems where a proximity card is desired. The tag contains a small RFID chip and an antenna, and is passively powered by the reader/writer when placed a couple inches away.
These can be...
In Stock
[Buy Now](https://www.adafruit.com/product/359)
[Related Guides to the Product](https://learn.adafruit.com/products/359/guides)
## Related Guides
- [How to Find Hidden COM Ports](https://learn.adafruit.com/how-to-find-hidden-com-ports.md)
- [Collin's Lab: RFID](https://learn.adafruit.com/collins-lab-rfid.md)
- [Multi-tasking the Arduino - Part 2](https://learn.adafruit.com/multi-tasking-the-arduino-part-2.md)
- [Ladyada's Learn Arduino - Lesson #2](https://learn.adafruit.com/ladyadas-learn-arduino-lesson-number-2.md)
- [Affordable HAL 9000 Replica](https://learn.adafruit.com/hal-9000-replica.md)
- [Adafruit VS1053 MP3/AAC/Ogg/MIDI/WAV Codec Breakout Tutorial](https://learn.adafruit.com/adafruit-vs1053-mp3-aac-ogg-midi-wav-play-and-record-codec-tutorial.md)
- [Arduino Lesson 8. Analog Inputs](https://learn.adafruit.com/adafruit-arduino-lesson-8-analog-inputs.md)
- [Adafruit CC3000 WiFi and Xively](https://learn.adafruit.com/adafruit-cc3000-wifi-and-xively.md)
- [Automatic Monitor Color Temperature Adjustment](https://learn.adafruit.com/automatic-monitor-color-temperature-adjustment.md)
- [RePaper eInk Development Board](https://learn.adafruit.com/repaper-eink-development-board.md)
- [Using NeoPixels and Servos Together](https://learn.adafruit.com/neopixels-and-servos.md)
- [Mini Thermal Receipt Printers](https://learn.adafruit.com/mini-thermal-receipt-printer.md)
- [Line Following Zumo Robot Using Simulink](https://learn.adafruit.com/line-following-zumo-robot-programmed-with-simulink.md)
- [Adafruit 2.8" TFT Touch Shield v2 - Capacitive or Resistive](https://learn.adafruit.com/adafruit-2-8-tft-touch-shield-v2.md)
- [Adafruit INA219 Current Sensor Breakout](https://learn.adafruit.com/adafruit-ina219-current-sensor-breakout.md)
---
# Source: https://learn.adafruit.com/babel-fish/make-the-wave-shield.md
# Babel Fish
## Make the Wave Shield
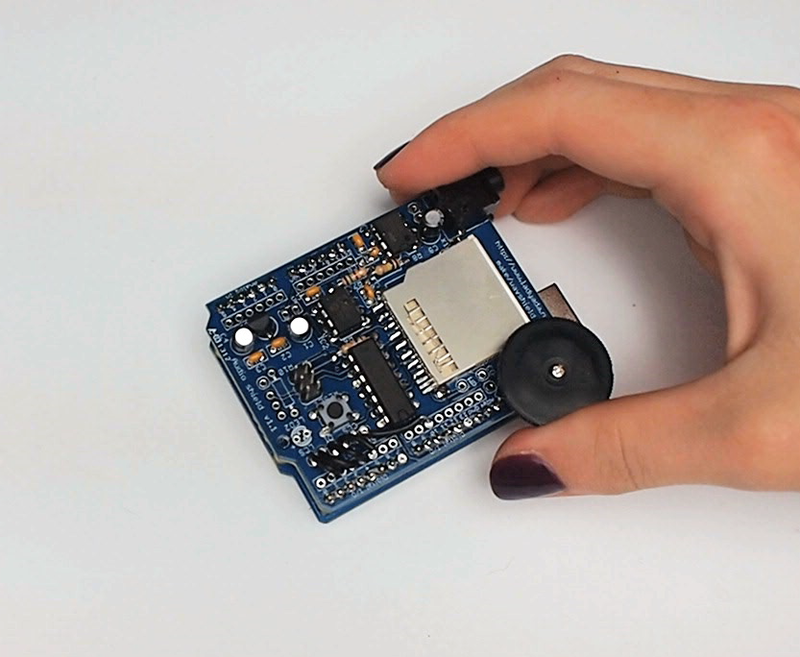
Refer to the [Wave Shield tutorial](http://learn.adafruit.com/adafruit-wave-shield-audio-shield-for-arduino) for complete instructions for assembly. Use the instructed wiring like in the sample. Test the shield to be sure it works before combining with another shield.
- [Previous Page](https://learn.adafruit.com/babel-fish/make-the-nfc-slash-rfid-shield.md)
- [Next Page](https://learn.adafruit.com/babel-fish/flash-cards.md)
## Featured Products
### Adafruit METRO 328 Fully Assembled - Arduino IDE compatible
[Adafruit METRO 328 Fully Assembled - Arduino IDE compatible](https://www.adafruit.com/product/50)
We sure love the ATmega328 here at Adafruit, and we use them _a lot_ for our own projects. The processor has plenty of GPIO, Analog inputs, hardware UART SPI and I2C, timers and PWM galore - just enough for most simple projects. When we need to go small, we use a
Out of Stock
[Buy Now](https://www.adafruit.com/product/50)
[Related Guides to the Product](https://learn.adafruit.com/products/50/guides)
### Adafruit PN532 NFC/RFID Controller Shield for Arduino + Extras
[Adafruit PN532 NFC/RFID Controller Shield for Arduino + Extras](https://www.adafruit.com/product/789)
We've taken our popular Adafruit PN532 breakout board and turned it into a shield - the perfect tool for any 13.56MHz RFID or NFC application. The Adafruit NFC shield uses the PN532 chip-set (the most popular NFC chip on the market) and is what is embedded in pretty much every phone or...
In Stock
[Buy Now](https://www.adafruit.com/product/789)
[Related Guides to the Product](https://learn.adafruit.com/products/789/guides)
### Adafruit Wave Shield for Arduino Kit
[Adafruit Wave Shield for Arduino Kit](https://www.adafruit.com/product/94)
Adding quality audio to an electronic project is surprisingly difficult. Here is a shield for Arduino 328's that solves this problem. It can play up to 22KHz 12bit uncompressed audio files of any length. It's low cost, available as an easy-to-make kit. It has an onboard DAC, filter and...
Out of Stock
[Buy Now](https://www.adafruit.com/product/94)
[Related Guides to the Product](https://learn.adafruit.com/products/94/guides)
### Music & sound add-on pack for Arduino
[Music & sound add-on pack for Arduino](https://www.adafruit.com/product/175)
Its a Wave shield party pack! Just add an Arduino to create your own iPod-killer, audio art, sound-effects box...
Comes with:
- Latest [Wave shield kit](http://www.adafruit.com/products/94), works with more SD cards and with older NG Arduinos! Unassembled
- 8 GB...
Out of Stock
[Buy Now](https://www.adafruit.com/product/175)
[Related Guides to the Product](https://learn.adafruit.com/products/175/guides)
### 9 VDC 1000mA regulated switching power adapter - UL listed
[9 VDC 1000mA regulated switching power adapter - UL listed](https://www.adafruit.com/product/63)
This is a really nice power supply. It's a switching DC supply so it's small and light and efficient. It is thin so it fits in power strips without blocking other outlets. The output is regulated so you'll get a steady 9V up to 1000mA (1 Amp) of current draw. 5.5mm/2.1mm barrel...
Out of Stock
[Buy Now](https://www.adafruit.com/product/63)
[Related Guides to the Product](https://learn.adafruit.com/products/63/guides)
### 13.56MHz RFID/NFC Card - Classic 1K
[13.56MHz RFID/NFC Card - Classic 1K](https://www.adafruit.com/product/359)
This is a blank 13.56MHz RFID/NFC card - often used for train/bus passes but also found in other systems where a proximity card is desired. The tag contains a small RFID chip and an antenna, and is passively powered by the reader/writer when placed a couple inches away.
These can be...
In Stock
[Buy Now](https://www.adafruit.com/product/359)
[Related Guides to the Product](https://learn.adafruit.com/products/359/guides)
## Related Guides
- [How to Find Hidden COM Ports](https://learn.adafruit.com/how-to-find-hidden-com-ports.md)
- [Collin's Lab: RFID](https://learn.adafruit.com/collins-lab-rfid.md)
- [Multi-tasking the Arduino - Part 2](https://learn.adafruit.com/multi-tasking-the-arduino-part-2.md)
- [Ladyada's Learn Arduino - Lesson #2](https://learn.adafruit.com/ladyadas-learn-arduino-lesson-number-2.md)
- [Affordable HAL 9000 Replica](https://learn.adafruit.com/hal-9000-replica.md)
- [Adafruit VS1053 MP3/AAC/Ogg/MIDI/WAV Codec Breakout Tutorial](https://learn.adafruit.com/adafruit-vs1053-mp3-aac-ogg-midi-wav-play-and-record-codec-tutorial.md)
- [Arduino Lesson 8. Analog Inputs](https://learn.adafruit.com/adafruit-arduino-lesson-8-analog-inputs.md)
- [Adafruit CC3000 WiFi and Xively](https://learn.adafruit.com/adafruit-cc3000-wifi-and-xively.md)
- [Automatic Monitor Color Temperature Adjustment](https://learn.adafruit.com/automatic-monitor-color-temperature-adjustment.md)
- [RePaper eInk Development Board](https://learn.adafruit.com/repaper-eink-development-board.md)
- [Using NeoPixels and Servos Together](https://learn.adafruit.com/neopixels-and-servos.md)
- [Mini Thermal Receipt Printers](https://learn.adafruit.com/mini-thermal-receipt-printer.md)
- [Line Following Zumo Robot Using Simulink](https://learn.adafruit.com/line-following-zumo-robot-programmed-with-simulink.md)
- [Adafruit 2.8" TFT Touch Shield v2 - Capacitive or Resistive](https://learn.adafruit.com/adafruit-2-8-tft-touch-shield-v2.md)
- [Adafruit INA219 Current Sensor Breakout](https://learn.adafruit.com/adafruit-ina219-current-sensor-breakout.md)
---
# Source: https://learn.adafruit.com/hacking-the-kinect/making-a-driver.md
# Hacking the Kinect
## Making a Driver
OK so back to our motor. We are ready to start sending data to it via the Control endpoint. For Mac and Linux type computers, a driver isn't necessary to send or receive data directly via USB.
For windows, however, there must be some sort of driver to 'grab' the device for us. Usually drivers are complex and have like, interfaces that plug into the operating system. Like the cameras would show up as a camera device, the microphones as an audio device. We're not quite ready for a detailed driver, what we'll do is make a 'shell driver' which has no operating system capabilities but does let us send commands to it from software.
Again, Mac/Linux people have this built into the OS kernel so skip this part if you don't use windows.
For our shell, we'll use **libusb** a USB library, which is available for windows as **[libusb-win32](http://sourceforge.net/projects/libusb-win32/) **go there and download it.
We'll run the **inf-wizard** (which will make our driver shell)

The important part is entering in the matching VID and PID we found before.

Now when you plug in the Kinect, it will attach itself the the LibUSB-win32 device driver.
We didn't make matching drivers for the audio or camera so those are still driver-less.- [Previous Page](https://learn.adafruit.com/hacking-the-kinect/determine-the-descriptors.md)
- [Next Page](https://learn.adafruit.com/hacking-the-kinect/installing-python-and-pyusb.md)
## Featured Products
### Hacked Kinect - Skill badge, iron-on patch
[Hacked Kinect - Skill badge, iron-on patch](https://www.adafruit.com/product/582)
You can made a cool project using the (hacked) Kinect! Adafruit offers a fun and exciting "badges" of achievement for electronics, science and engineering. We believe everyone should be able to be rewarded for learning a useful skill, a badge is just one of the many ways to show and...
No Longer Stocked
[Buy Now](https://www.adafruit.com/product/582)
[Related Guides to the Product](https://learn.adafruit.com/products/582/guides)
### Beagle USB 12 - Low/Full Speed USB Protocol Analyzer
[Beagle USB 12 - Low/Full Speed USB Protocol Analyzer](https://www.adafruit.com/product/708)
USB complexity got you down? Need a hand with enumeration? Reverse engineering a USB device? You will fall in love with the Beagle 12 USB Analyzer. This hardware analyzer is completely non-intrusive, and is much better than flaky software analyzers. Perfect for when a problem is bad enough it...
No Longer Stocked
[Buy Now](https://www.adafruit.com/product/708)
[Related Guides to the Product](https://learn.adafruit.com/products/708/guides)
### Reverse Engineer - Skill badge, Lenticular printing + pin-on
[Reverse Engineer - Skill badge, Lenticular printing + pin-on](https://www.adafruit.com/product/489)
You can reverse engineer! This is the first lenticular (two-stage image) skill badge that we know of! It says reverse engineer forwards and backwards depending on the angle you view it at!
**Note:** The edges of the badge will appear "white" at an angle,...
No Longer Stocked
[Buy Now](https://www.adafruit.com/product/489)
[Related Guides to the Product](https://learn.adafruit.com/products/489/guides)
### Reverse Engineer - Sticker!
[Reverse Engineer - Sticker!](https://www.adafruit.com/product/673)
You can reverse engineer! Adafruit offers fun and exciting stickers to celebrate achievement for electronics, science and engineering. We believe everyone should be able to be rewarded for learning a useful skill and a sticker is just one of the many ways to show and share.
No Longer Stocked
[Buy Now](https://www.adafruit.com/product/673)
[Related Guides to the Product](https://learn.adafruit.com/products/673/guides)
## Related Guides
- [Guitar Hero MIDI Controller](https://learn.adafruit.com/guitar-hero-midi-controller.md)
- [Commodore 64 - The Most Popular Retro Computer of All Time](https://learn.adafruit.com/commodore-64-retro-guide.md)
- [Use Docker to Compile Linux for ESP32-S3](https://learn.adafruit.com/docker-esp32-s3-linux.md)
- [Feather Guitar Hero Adapter](https://learn.adafruit.com/feather-guitar-hero-adapter.md)
- [BLE Cat Thermal Printer with MEMENTO](https://learn.adafruit.com/ble-cat-thermal-printer-with-memento.md)
- [Fruit Jam Mac Emulator](https://learn.adafruit.com/fruit-jam-mac-emulator.md)
- [How to Make Animated Graphics for Hologram Displays](https://learn.adafruit.com/how-to-make-animated-graphics-for-hologram-displays.md)
- [LED Matrix Wall Arcade for Pico-8](https://learn.adafruit.com/led-matrix-wall-arcade.md)
- [Run an X-Carve CNC Machine Wirelessly with a Raspberry Pi](https://learn.adafruit.com/control-an-xcarve-cnc-machine-wirelessly-with-a-raspberry-pi.md)
- [CircuitPython 2FA TOTP Authentication Friend](https://learn.adafruit.com/circuitpython-totp-otp-2fa-authy-authenticator-friend.md)
- [Flippy Floppy Drive Modification](https://learn.adafruit.com/flippy-floppy-drive-modification.md)
- [Authoring Playground Books with Bluefruit for iOS ](https://learn.adafruit.com/create-a-swift-playgroundbook-with-bluetooth-le.md)
- [SerenityOS - The dream of the '90s is alive!](https://learn.adafruit.com/serenityos-build-and-run-keep-the-90s-dream-alive.md)
- [Stand-alone programming AVRs using CircuitPython](https://learn.adafruit.com/stand-alone-programming-avrs-using-circuitpython.md)
- [Protect Your Online Accounts with Strong Passwords & Password Managers](https://learn.adafruit.com/protect-your-social-media-online-accounts-with-a-strong-password-manager.md)
---
# Source: https://learn.adafruit.com/adafruit-guide-excellent-soldering/making-a-good-solder-joint.md
# Adafruit Guide To Excellent Soldering
## Making a good solder joint

Once you have prepared the your tools and the joint to be soldered, making a good solder joint requires just a few simple steps.
## Heat the joint
Heat the joint with the tip of the iron. Be sure to heat both the solder pad and the component lead or pin. A small drop of solder on the tip will help to transfer the heat to the joint quickly.
## Apply the solder
Touch the end of the solder to the joint so that it contacts both the solder pad and the component lead or pin. It should melt and flow smoothly onto both the pin and the pad. If the solder does not flow, heat the joint for another second or two and try again.

## Let It Flow
Keep heating the solder and allow it to flow into the joint. It should fill the hole and flow smoothly onto both the solder pad and the pin or component lead.
## Let It Cool
Once enough solder has been added to the joint and it has flowed well onto both the component lead and the solder pad, remove the iron from the joint and allow it to cool undisturbed.

## Trim the Lead
Use your diagonal cutters to trim the lead close to the board.
_Note: This step applies only to components with wire leads. It is not necessary to trim the pins on Integrated circuit chips or sockets._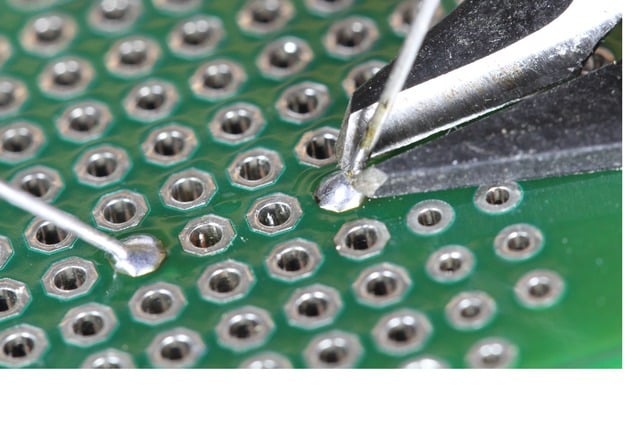

## Congratulations!
Reward yourself with a [Soldering Badge](http://www.adafruit.com/products/465 "Link: http://www.adafruit.com/products/465").
## Problems?
The last page of this guide illustrates a number of common soldering problems with advice on prevention and repair. 
- [Previous Page](https://learn.adafruit.com/adafruit-guide-excellent-soldering/preparation.md)
- [Next Page](https://learn.adafruit.com/adafruit-guide-excellent-soldering/surface-mount.md)
## Featured Products
### Panavise Jr.
[Panavise Jr.](https://www.adafruit.com/product/151)
The best mini-vise for working on smaller PCBs (2.875" or less in one dimension)! The jaws are strong plastic that wont damage the PCB and doesn't mind if you hit it with the soldering iron by accident. Made in the USA.
- The easy-to-use single knob controls head movement...
No Longer Stocked
[Buy Now](https://www.adafruit.com/product/151)
[Related Guides to the Product](https://learn.adafruit.com/products/151/guides)
### Hakko Professional Quality 20-30 AWG Wire Strippers
[Hakko Professional Quality 20-30 AWG Wire Strippers](https://www.adafruit.com/product/527)
These are the finest wire strippers we have used, and if you have to do a lot of wiring, you will agree! They have soft rounded grips - very comfortable to use, and precision ground notches that do a perfect job every time. No more yanking or twisting to strip wires cleanly and quickly.
In Stock
[Buy Now](https://www.adafruit.com/product/527)
[Related Guides to the Product](https://learn.adafruit.com/products/527/guides)
### Mini Solder spool - 60/40 lead rosin-core solder 0.3mm diameter
[Mini Solder spool - 60/40 lead rosin-core solder 0.3mm diameter](https://www.adafruit.com/product/145)
If you want to make a kit you'll need some solder. This 100g (about 1/4 lb) spool is just the right amount, not too much (like 1 lb spools) and not too little (like those little 'pocket clip' vials). 0.3mm diameter, 60/40 'no clean' rosin core. Good for all through-hole...
In Stock
[Buy Now](https://www.adafruit.com/product/145)
[Related Guides to the Product](https://learn.adafruit.com/products/145/guides)
### Solder sucker
[Solder sucker](https://www.adafruit.com/product/148)
Strangely enough, that's the technical term for this desoldering vacuum tool. Useful in cleaning up mistakes, every electrical engineer has one of these on their desk.
To use, depress the end to engage the vacuum. Then heat up the to-be-desoldered joint until it is liquid. With your...
In Stock
[Buy Now](https://www.adafruit.com/product/148)
[Related Guides to the Product](https://learn.adafruit.com/products/148/guides)
### Solder wick - 1.5mm wide and 1.5m / 5 feet long
[Solder wick - 1.5mm wide and 1.5m / 5 feet long](https://www.adafruit.com/product/149)
Used along with the solder sucker to clean up soldering messes. Wick really comes in handy when soldering or desoldering surface-mount parts. Even if you don't have the best iron for SMT work, a bit of wick will fix it up.
1.5mm wick, and 1.5m long, so you have plenty to work...
Out of Stock
[Buy Now](https://www.adafruit.com/product/149)
[Related Guides to the Product](https://learn.adafruit.com/products/149/guides)
### Soldering iron stand
[Soldering iron stand](https://www.adafruit.com/product/150)
A real stand with sponge and solidly-built sheet metal holder prevents your iron from 'rolling away' or burning a hole in the table. If you're starting out and have a 'pen type' soldering iron, this is essential for your safety. Comes with a sponge, too!
****
Out of Stock
[Buy Now](https://www.adafruit.com/product/150)
[Related Guides to the Product](https://learn.adafruit.com/products/150/guides)
### Adjustable 30W 110V soldering iron
[Adjustable 30W 110V soldering iron](https://www.adafruit.com/product/180)
This 'pen-style' soldering iron is just about the best entry-level tool I've seen. It's not as powerful as a Weller WES51 but it _is_ self-contained and easy to use. With proper care, it will last for many years. Turn it off when not in use, clean the plated tip with a...
No Longer Stocked
[Buy Now](https://www.adafruit.com/product/180)
[Related Guides to the Product](https://learn.adafruit.com/products/180/guides)
### Learn to solder - Skill badge, iron-on patch
[Learn to solder - Skill badge, iron-on patch](https://www.adafruit.com/product/465)
You can solder! Adafruit offers a fun and exciting "badges" of achievement for electronics, science and engineering. We believe everyone should be able to be rewarded for learning a useful skill, a badge is just one of the many ways to show and share.
This is the "I...
No Longer Stocked
[Buy Now](https://www.adafruit.com/product/465)
[Related Guides to the Product](https://learn.adafruit.com/products/465/guides)
## Related Guides
- [Blinka Says Tabletop Arcade Game](https://learn.adafruit.com/blinka-says-tabletop-arcade-game.md)
- [Water Drip Dress with Oozemaster 3000](https://learn.adafruit.com/water-drip-dress-with-oozemaster-3000.md)
- [Floor Lamp with NeoPixels and WLED Custom Animations](https://learn.adafruit.com/floor-lamp-with-wled.md)
- [Space Shuttle Discovery Solder Kit by Phyx](https://learn.adafruit.com/space-shuttle-discovery-solder-kit.md)
- [USB Rechargeable Mini Solder Fume Extractor](https://learn.adafruit.com/usb-rechargeable-mini-solder-fume-extractor.md)
- [Cartoon Character Clock](https://learn.adafruit.com/cartoon-character-clock.md)
- [Collin's Lab: Soldering](https://learn.adafruit.com/collins-lab-soldering.md)
- [SMT Breadboard Prototyping Using Breakout PCBs](https://learn.adafruit.com/smt-prototyping-using-breakout-pcbs.md)
- [Motion-Activated Solder Fume Extractor With Lamp](https://learn.adafruit.com/motion-activated-solder-fume-extractor-with-lamp.md)
- [Color Balancing Video Camera Light feat. DotStars](https://learn.adafruit.com/color-balancing-light-box-with-dotstar-cool-warm-white-leds.md)
- [Ambient Sound Machine](https://learn.adafruit.com/ambient-machine.md)
- [DIY On/Off JST Switch Adapter](https://learn.adafruit.com/on-slash-off-switches.md)
- [IoT Moon Phase Guide](https://learn.adafruit.com/moon-phase.md)
- [CNC Rotary Macropad](https://learn.adafruit.com/cnc-rotary-macropad.md)
- [Secret Hollow Book Intrusion Detector](https://learn.adafruit.com/secret-hollow-book.md)
---
# Source: https://learn.adafruit.com/ir-sensor/making-an-intervalometer.md
# IR Sensor
## Making an Intervalometer
OK now that we can read IR codes, lets make a basic project. The first one we will do is to make an intervalometer. An intervalometer is basically a electronic thingy that makes a camera go off every few minutes or so. This can be used for timelapse projects or kite arial photography or other photo projects.
The camera we'll be using has an IR remote you can use to set it off (most higher-end cameras have these).
First we will figure out the codes by reading the signal sent when the button is pressed. Then we'll take that data and make the Arduino spit out that code into an IR LED once a minute
OK step one is easy, point the remote control at the IR sensor and press the button, we got the following for our ML-L3 Nikon remote.

Looks like the data sent is:
| **PWM ON** | **OFF** |
| 2.0 ms | 27 ms |
| 0.4 ms | 1.5 ms |
| 0.5 ms | 3.5 ms |
| 0.5 ms | 62.2 ms |
| 2.0 ms | 27 ms |
| 0.5 ms | 1.5 ms |
| 0.5 ms | 3.5 ms |
| 0.5 ms |
If you look closely you'll see its actually just
| **PWM ON** | **OFF** |
| 2.0 ms | 27 ms |
| 0.4 ms | 1.5 ms |
| 0.5 ms | 3.5 ms |
| 0.5 ms | 62.2 ms |
sent twice. Sending the same signal twice is very common - doubling up to make sure it gets received
Next up we'll need to connect an IR 940nm LED to the output of the Arduino

Then we'll write a sketch which will pulse pin #13 on and off very fast in the proper code sequence.https://github.com/adafruit/Adafruit_Learning_System_Guides/blob/main/IR_Sensor/Arduino/Intervalometer/Intervalometer.ino
`void pulseIR(long microsecs)` is our helper procedure, it will create the PWM IR signal like we saw before. I used my scope to fine-tune it so that the delays added up right. We use the not-often-discussed `cli()`and `sei()`procedures to turn off interrupts. The Arduino does a couple things in the background like looking for serial data to read or write, keeping track of time, etc. Most of the time we can just ignore it but for delicate high speed signals like this we want to keep quiet so that we get a nice clean signal
If you look at `SendNikonCode()` you will see the IR command code that we deduced in the previous project by timing the pulses from the IR sensor.

We wired this up and it worked great, make sure to point the IR LED at the camera properly.
- [Previous Page](https://learn.adafruit.com/ir-sensor/using-an-ir-sensor.md)
- [Next Page](https://learn.adafruit.com/ir-sensor/reading-ir-commands.md)
## Featured Products
### Adafruit METRO 328 Fully Assembled - Arduino IDE compatible
[Adafruit METRO 328 Fully Assembled - Arduino IDE compatible](https://www.adafruit.com/product/50)
We sure love the ATmega328 here at Adafruit, and we use them _a lot_ for our own projects. The processor has plenty of GPIO, Analog inputs, hardware UART SPI and I2C, timers and PWM galore - just enough for most simple projects. When we need to go small, we use a
Out of Stock
[Buy Now](https://www.adafruit.com/product/50)
[Related Guides to the Product](https://learn.adafruit.com/products/50/guides)
### IR (Infrared) Receiver Sensor
[IR (Infrared) Receiver Sensor](https://www.adafruit.com/product/157)
IR sensor tuned to 38KHz, perfect for receiving commands from a TV remote control. Runs at 3V to 5V so it's great for any microcontroller.
To use, connect pin 3 (all the way to the right) to 5V power, pin 2 (middle) to ground and listen on pin 1. It doesn't do any decoding...
In Stock
[Buy Now](https://www.adafruit.com/product/157)
[Related Guides to the Product](https://learn.adafruit.com/products/157/guides)
### Super-bright 5mm IR LED
[Super-bright 5mm IR LED](https://www.adafruit.com/product/387)
Infrared LEDs are used for remote controls (they're the little LED in the part you point at your TV) and 'night-vision' cameras, and these little blue guys are high powered ones! They are 940nm wavelength, which is what nearly all devices listen to. They're 20 degree beamwidth,...
In Stock
[Buy Now](https://www.adafruit.com/product/387)
[Related Guides to the Product](https://learn.adafruit.com/products/387/guides)
### Mini Remote Control
[Mini Remote Control](https://www.adafruit.com/product/389)
This little remote control would be handy for controlling a robot or other project from across the room. It has 21 buttons and a layout we thought was handy: directional buttons and number entry buttons. The remote uses the NEC encoding type and sends data codes 0 thru 26 (it skips #3, #7,...
In Stock
[Buy Now](https://www.adafruit.com/product/389)
[Related Guides to the Product](https://learn.adafruit.com/products/389/guides)
### Super-bright 5mm IR LED (25 pack)
[Super-bright 5mm IR LED (25 pack)](https://www.adafruit.com/product/388)
Infrared LEDs are used for remote controls (they're the little LED in the part you point at your TV) and 'night-vision' cameras, and these little blue guys are high powered ones! They are 940nm wavelength, which is what nearly all devices listen to. They're 20 degree beamwidth,...
In Stock
[Buy Now](https://www.adafruit.com/product/388)
[Related Guides to the Product](https://learn.adafruit.com/products/388/guides)
### Adafruit METRO 328 - Arduino Compatible - with Headers
[Adafruit METRO 328 - Arduino Compatible - with Headers](https://www.adafruit.com/product/2488)
This is the **Adafruit METRO Arduino-Compatible - with headers. ** It's a fully assembled and tested microcontroller and physical computing board with through-hole headers attached. If you don't want a Metro with the headers attached for...
In Stock
[Buy Now](https://www.adafruit.com/product/2488)
[Related Guides to the Product](https://learn.adafruit.com/products/2488/guides)
## Related Guides
- [RePaper eInk Development Board](https://learn.adafruit.com/repaper-eink-development-board.md)
- [Adafruit MSA301 Triple Axis Accelerometer](https://learn.adafruit.com/msa301-triple-axis-accelerometer.md)
- [Bluetooth Controlled Motorized Camera Slider](https://learn.adafruit.com/bluetooth-motorized-camera-slider.md)
- [Adafruit PCA9685 16-Channel Servo Driver](https://learn.adafruit.com/16-channel-pwm-servo-driver.md)
- [Adalight Project Pack](https://learn.adafruit.com/adalight-diy-ambient-tv-lighting.md)
- [Reverse Geocache Box](https://learn.adafruit.com/reverse-geocache-engagement-box.md)
- [Introducing Adafruit Trellis ](https://learn.adafruit.com/adafruit-trellis-diy-open-source-led-keypad.md)
- [Sending an SMS with Temboo](https://learn.adafruit.com/sending-an-sms-with-temboo.md)
- [20mm LED Pixels](https://learn.adafruit.com/20mm-led-pixels.md)
- [Remote controlled door lock using a fingerprint sensor & Adafruit IO](https://learn.adafruit.com/remote-controlled-door-lock-using-a-fingerprint-sensor-and-adafruit-io.md)
- [Character LCDs](https://learn.adafruit.com/character-lcds.md)
- [Smart Measuring Cup](https://learn.adafruit.com/smart-measuring-cup.md)
- [Memories of an Arduino](https://learn.adafruit.com/memories-of-an-arduino.md)
- [Arduino Lesson 2. LEDs](https://learn.adafruit.com/adafruit-arduino-lesson-2-leds.md)
- [Smart Cocktail Shaker](https://learn.adafruit.com/smart-cocktail-shaker.md)
---
# Source: https://learn.adafruit.com/adafruit-raspberry-pi-lesson-1-preparing-and-sd-card-for-your-raspberry-pi/making-an-sd-card-using-a-mac.md
# Adafruit's Raspberry Pi Lesson 1. Preparing an SD Card for your Raspberry Pi
## Making an SD Card – Using a Mac
We really like using balena **Etcher** for burning SD cards. Works great on Mac OS X 10.9 or later, won't over-write your backup disk drive, and can handle compressed images so you do not need to unzip them!
## Mac OS Catalina Issues
If you are having issues running Etcher on the Catalina release of Mac OS, see the links below for more information and some suggested workarounds.
- [Issue 2833](https://github.com/balena-io/etcher/issues/2833)
- [Issue 2911](https://github.com/balena-io/etcher/issues/2911)
- [Balena forum post](https://forums.balena.io/t/balena-and-mac-catalina-not-working/38073)
Most success has been reported by simply running Etcher from the command line using sudo:
```none
sudo /Applications/balenaEtcher.app/Contents/MacOS/balenaEtcher
```
# **Step 1.**
Download Etcher from [https://www.balena.io/etcher/](https://www.balena.io/etcher/)
[Download Etcher](https://www.balena.io/etcher/)
# **Step 2.**
Open the downloaded disk image and drag the balenaEtcher application to the Applications folder. You can then eject the disk image.

# **Step 3.**
Eject any external storage devices such as USB flash drives and backup hard disks. This makes it easier to identify the SD card. Then insert the SD card into the slot on your computer or into the reader.
# **Step 4.**
Run the Etcher application.

The first time you run Etcher you’ll be asked to confirm the download. Click “Open” to continue.

This will launch the Etcher application…

# **Step 5.**
Select the SD card image file by clicking **Select Image.** You can choose a compressed SD image file such as a **.zip ** or **.gz** or an uncompressed **.img** , it’s all good!

# **Step 6.**
Etcher will automatically try to detect the SD drive. If you don’t have an SD card currently inserted, you’ll be prompted to connect one.

Check the disk size to make sure its the right one, that it’s not overwriting your main drive or anything nasty.
Then click **Flash!** _A-ah!_

Etcher will work for a few minutes to “burn” the SD image to the card. You’ll see a progress bar as it works. This is about the time you’ll wish you’d splurged on a high-speed card.
Once the SD card is ready, you will see the following:

The card will be unmounted automatically, so you can pull it out now and use it in your Raspberry Pi.
# **Faster Writes**
If you find yourself burning a lot of SD cards, you can speed things up by clicking the gear icon at the top-right, then turn off the “Validate write” option. I’ve written _hundreds_ of cards and only had _one_ fail validation.

- [Previous Page](https://learn.adafruit.com/adafruit-raspberry-pi-lesson-1-preparing-and-sd-card-for-your-raspberry-pi/making-an-sd-card-using-a-windows-vista-slash-7.md)
- [Next Page](https://learn.adafruit.com/adafruit-raspberry-pi-lesson-1-preparing-and-sd-card-for-your-raspberry-pi/what-next.md)
## Featured Products
### Raspberry Pi 3 - Model B+ - 1.4GHz Cortex-A53 with 1GB RAM
[Raspberry Pi 3 - Model B+ - 1.4GHz Cortex-A53 with 1GB RAM](https://www.adafruit.com/product/3775)
The Raspberry Pi 3 Model B is the most popular Raspberry Pi computer made, and the Pi Foundation knows you can always make a good thing _better_! And what could make the Pi 3 better? How about a _faster_ processor, 5 GHz WiFi, and updated Ethernet chip with PoE capability?...
In Stock
[Buy Now](https://www.adafruit.com/product/3775)
[Related Guides to the Product](https://learn.adafruit.com/products/3775/guides)
### Raspberry Pi 2 Model B Starter Pack - Includes a Raspberry Pi 2
[Raspberry Pi 2 Model B Starter Pack - Includes a Raspberry Pi 2](https://www.adafruit.com/product/2380)
Why not trick out your fresh new board with some accessories? The Pi 2 is a big deal - a big, big deal. It has an upgraded ARMv7 multicore procssor and a full Gigabyte of RAM - meaning you're going to see ~2x the performance on processor-upgrade only and 4x on average for...
No Longer Stocked
[Buy Now](https://www.adafruit.com/product/2380)
[Related Guides to the Product](https://learn.adafruit.com/products/2380/guides)
### Budget Pack for Raspberry Pi 1 Model B (Doesn't include RasPi)
[Budget Pack for Raspberry Pi 1 Model B (Doesn't include RasPi)](https://www.adafruit.com/product/965)
An optimized collection of parts and pieces to experiment with Raspberry Pi at home, school or work. Great for students and those that want to get their feet wet, no soldering required! **THIS PACK DOES NOT INCLUDE A RASPBERRY PI 1 MODEL B and is NOT compatible with Model B+ or Raspberry Pi...**
No Longer Stocked
[Buy Now](https://www.adafruit.com/product/965)
[Related Guides to the Product](https://learn.adafruit.com/products/965/guides)
### USB MicroSD Card Reader/Writer - microSD / microSDHC / microSDXC
[USB MicroSD Card Reader/Writer - microSD / microSDHC / microSDXC](https://www.adafruit.com/product/939)
This is the cutest little microSD card reader/writer - but don't be fooled by its adorableness! It's wicked fast and supports up to 64 GB SDXC cards! Simply slide the card into the edge and plug it into your computer. No drivers are required, it shows up as a standard 'Mass...
No Longer Stocked
[Buy Now](https://www.adafruit.com/product/939)
[Related Guides to the Product](https://learn.adafruit.com/products/939/guides)
### SD/MicroSD Memory Card - 16GB Class 10 - Adapter Included
[SD/MicroSD Memory Card - 16GB Class 10 - Adapter Included](https://www.adafruit.com/product/2693)
Add speedy mega-storage in a jiffy using this 16 GB Class 10 micro-SD card. It comes with a SD adapter so you can use it with any of our shields or adapters! Preformatted to FAT so it works out of the box with our projects. Works great with any device in the Adafruit shop that uses micro-SD...
No Longer Stocked
[Buy Now](https://www.adafruit.com/product/2693)
[Related Guides to the Product](https://learn.adafruit.com/products/2693/guides)
### SD/MicroSD Memory Card (8 GB SDHC)
[SD/MicroSD Memory Card (8 GB SDHC)](https://www.adafruit.com/product/1294)
Add mega-storage in a jiffy using this 8 GB class 4 micro-SD card. It comes with a SD adapter so you can use it with any of our shields or adapters. Preformatted to FAT so it works out of the box with our projects. Tested and works great with our
In Stock
[Buy Now](https://www.adafruit.com/product/1294)
[Related Guides to the Product](https://learn.adafruit.com/products/1294/guides)
### Raspberry Pi 1 Model B Starter Pack - Includes a Raspberry Pi
[Raspberry Pi 1 Model B Starter Pack - Includes a Raspberry Pi](https://www.adafruit.com/product/1014)
You want to get hacking with your Pi fast, right? Get everything you need to start with the Adafruit Starter Pack for Raspberry Pi. It's the perfect accompaniment to your new Pi, everything you need to boot up your Pi Model B and get going. **We pre-assemble the Cobbler for you, no...**
No Longer Stocked
[Buy Now](https://www.adafruit.com/product/1014)
[Related Guides to the Product](https://learn.adafruit.com/products/1014/guides)
### Low-profile microSD card adapter for Raspberry Pi
[Low-profile microSD card adapter for Raspberry Pi](https://www.adafruit.com/product/966)
Make your Pi a little slimmer with this microSD card adapter board. It slides in where the SD card goes but is half the length. Pop in a microSD card for a sleeker machine. The microSD card holder is a push-push type so you can push on the edge that sticks out to remove the card when...
No Longer Stocked
[Buy Now](https://www.adafruit.com/product/966)
[Related Guides to the Product](https://learn.adafruit.com/products/966/guides)
## Related Guides
- [Press Your Button for Raspberry Pi](https://learn.adafruit.com/press-your-button-for-raspberry-pi.md)
- [Adafruit's Raspberry Pi Lesson 5. Using a Console Cable](https://learn.adafruit.com/adafruits-raspberry-pi-lesson-5-using-a-console-cable.md)
- [Adafruit's Raspberry Pi Lesson 2. First Time Configuration](https://learn.adafruit.com/adafruits-raspberry-pi-lesson-2-first-time-configuration.md)
- [Raspberry Pi as an Ad Blocking Access Point](https://learn.adafruit.com/raspberry-pi-as-an-ad-blocking-access-point.md)
- [Set up and Blink - MATLAB and Simulink with Raspberry Pi](https://learn.adafruit.com/how-to-use-matlab-and-simulink-with-raspberry-pi.md)
- [Pi Video Output Using pygame](https://learn.adafruit.com/pi-video-output-using-pygame.md)
- [Drive a 16x2 LCD with the Raspberry Pi](https://learn.adafruit.com/drive-a-16x2-lcd-directly-with-a-raspberry-pi.md)
- [Adafruit's Raspberry Pi Lesson 4. GPIO Setup](https://learn.adafruit.com/adafruits-raspberry-pi-lesson-4-gpio-setup.md)
- [Windows IoT Core Application Management](https://learn.adafruit.com/windows-iot-application-management.md)
- [Read-Only Raspberry Pi](https://learn.adafruit.com/read-only-raspberry-pi.md)
- [Getting Started With Windows IoT Core on Raspberry Pi](https://learn.adafruit.com/getting-started-with-windows-iot-on-raspberry-pi.md)
- [Adafruit NFC/RFID on Raspberry Pi](https://learn.adafruit.com/adafruit-nfc-rfid-on-raspberry-pi.md)
- [Windows IoT Core Application Development: Headless Blinky](https://learn.adafruit.com/windows-iot-application-development-headless-application.md)
- [USB Audio Cards with a Raspberry Pi ](https://learn.adafruit.com/usb-audio-cards-with-a-raspberry-pi.md)
- [Node.js Embedded Development on the Raspberry Pi](https://learn.adafruit.com/node-embedded-development.md)
---
# Source: https://learn.adafruit.com/adafruit-raspberry-pi-lesson-1-preparing-and-sd-card-for-your-raspberry-pi/making-an-sd-card-using-a-windows-vista-slash-7.md
# Adafruit's Raspberry Pi Lesson 1. Preparing an SD Card for your Raspberry Pi
## Making an SD Card – Using Windows
We really like using balenaEtcher for burning SD cards. Works great on any version of Windows, macOS and Linux. It will not over-write your backup disk drive, and can handle compressed images so you do not need to unzip them!
# **Step 1.**
Download Etcher from: [https://www.balena.io/etcher/](https://www.balena.io/etcher/)
[Download balenaEtcher](https://www.balena.io/etcher/)

# **Step 2.**
Run the downloaded app to install!

You can start immediately, doubleclick the Etcher desktop icon, or select it from the Start menu
# **Step 3.**
Eject any external storage devices such as USB flash drives and backup hard disks. This makes it easier to identify the SD card. Then insert the SD card into the slot on your computer or into the reader.
# **Step 4.**
Run the Etcher program

This will launch the following application.

# **Step 5.**
Select the image file by clicking **Select Image** you can select a compressed file such as a **.zip** or **.gz**

# Step 6.
Etcher will automatically try to detect the SD drive, check the size to make sure its the right one
Then click **Flash!**

Check that you have the right device, as it will be reformatted, and then click Install.
It will take a few minutes to install, but once the SD card is ready, you will see the following.
That's all there is to it. Your SD card is ready for use in your Raspberry Pi.
# Faster writes
If you burn a lot of cards, speed it up by turning off **Validate write on success**

- [Previous Page](https://learn.adafruit.com/adafruit-raspberry-pi-lesson-1-preparing-and-sd-card-for-your-raspberry-pi/downloading-an-image.md)
- [Next Page](https://learn.adafruit.com/adafruit-raspberry-pi-lesson-1-preparing-and-sd-card-for-your-raspberry-pi/making-an-sd-card-using-a-mac.md)
## Featured Products
### Raspberry Pi 3 - Model B+ - 1.4GHz Cortex-A53 with 1GB RAM
[Raspberry Pi 3 - Model B+ - 1.4GHz Cortex-A53 with 1GB RAM](https://www.adafruit.com/product/3775)
The Raspberry Pi 3 Model B is the most popular Raspberry Pi computer made, and the Pi Foundation knows you can always make a good thing _better_! And what could make the Pi 3 better? How about a _faster_ processor, 5 GHz WiFi, and updated Ethernet chip with PoE capability?...
In Stock
[Buy Now](https://www.adafruit.com/product/3775)
[Related Guides to the Product](https://learn.adafruit.com/products/3775/guides)
### Raspberry Pi 2 Model B Starter Pack - Includes a Raspberry Pi 2
[Raspberry Pi 2 Model B Starter Pack - Includes a Raspberry Pi 2](https://www.adafruit.com/product/2380)
Why not trick out your fresh new board with some accessories? The Pi 2 is a big deal - a big, big deal. It has an upgraded ARMv7 multicore procssor and a full Gigabyte of RAM - meaning you're going to see ~2x the performance on processor-upgrade only and 4x on average for...
No Longer Stocked
[Buy Now](https://www.adafruit.com/product/2380)
[Related Guides to the Product](https://learn.adafruit.com/products/2380/guides)
### Budget Pack for Raspberry Pi 1 Model B (Doesn't include RasPi)
[Budget Pack for Raspberry Pi 1 Model B (Doesn't include RasPi)](https://www.adafruit.com/product/965)
An optimized collection of parts and pieces to experiment with Raspberry Pi at home, school or work. Great for students and those that want to get their feet wet, no soldering required! **THIS PACK DOES NOT INCLUDE A RASPBERRY PI 1 MODEL B and is NOT compatible with Model B+ or Raspberry Pi...**
No Longer Stocked
[Buy Now](https://www.adafruit.com/product/965)
[Related Guides to the Product](https://learn.adafruit.com/products/965/guides)
### USB MicroSD Card Reader/Writer - microSD / microSDHC / microSDXC
[USB MicroSD Card Reader/Writer - microSD / microSDHC / microSDXC](https://www.adafruit.com/product/939)
This is the cutest little microSD card reader/writer - but don't be fooled by its adorableness! It's wicked fast and supports up to 64 GB SDXC cards! Simply slide the card into the edge and plug it into your computer. No drivers are required, it shows up as a standard 'Mass...
No Longer Stocked
[Buy Now](https://www.adafruit.com/product/939)
[Related Guides to the Product](https://learn.adafruit.com/products/939/guides)
### SD/MicroSD Memory Card - 16GB Class 10 - Adapter Included
[SD/MicroSD Memory Card - 16GB Class 10 - Adapter Included](https://www.adafruit.com/product/2693)
Add speedy mega-storage in a jiffy using this 16 GB Class 10 micro-SD card. It comes with a SD adapter so you can use it with any of our shields or adapters! Preformatted to FAT so it works out of the box with our projects. Works great with any device in the Adafruit shop that uses micro-SD...
No Longer Stocked
[Buy Now](https://www.adafruit.com/product/2693)
[Related Guides to the Product](https://learn.adafruit.com/products/2693/guides)
### SD/MicroSD Memory Card (8 GB SDHC)
[SD/MicroSD Memory Card (8 GB SDHC)](https://www.adafruit.com/product/1294)
Add mega-storage in a jiffy using this 8 GB class 4 micro-SD card. It comes with a SD adapter so you can use it with any of our shields or adapters. Preformatted to FAT so it works out of the box with our projects. Tested and works great with our
In Stock
[Buy Now](https://www.adafruit.com/product/1294)
[Related Guides to the Product](https://learn.adafruit.com/products/1294/guides)
### Raspberry Pi 1 Model B Starter Pack - Includes a Raspberry Pi
[Raspberry Pi 1 Model B Starter Pack - Includes a Raspberry Pi](https://www.adafruit.com/product/1014)
You want to get hacking with your Pi fast, right? Get everything you need to start with the Adafruit Starter Pack for Raspberry Pi. It's the perfect accompaniment to your new Pi, everything you need to boot up your Pi Model B and get going. **We pre-assemble the Cobbler for you, no...**
No Longer Stocked
[Buy Now](https://www.adafruit.com/product/1014)
[Related Guides to the Product](https://learn.adafruit.com/products/1014/guides)
### Low-profile microSD card adapter for Raspberry Pi
[Low-profile microSD card adapter for Raspberry Pi](https://www.adafruit.com/product/966)
Make your Pi a little slimmer with this microSD card adapter board. It slides in where the SD card goes but is half the length. Pop in a microSD card for a sleeker machine. The microSD card holder is a push-push type so you can push on the edge that sticks out to remove the card when...
No Longer Stocked
[Buy Now](https://www.adafruit.com/product/966)
[Related Guides to the Product](https://learn.adafruit.com/products/966/guides)
## Related Guides
- [Press Your Button for Raspberry Pi](https://learn.adafruit.com/press-your-button-for-raspberry-pi.md)
- [Adafruit's Raspberry Pi Lesson 5. Using a Console Cable](https://learn.adafruit.com/adafruits-raspberry-pi-lesson-5-using-a-console-cable.md)
- [Adafruit's Raspberry Pi Lesson 2. First Time Configuration](https://learn.adafruit.com/adafruits-raspberry-pi-lesson-2-first-time-configuration.md)
- [Raspberry Pi as an Ad Blocking Access Point](https://learn.adafruit.com/raspberry-pi-as-an-ad-blocking-access-point.md)
- [Set up and Blink - MATLAB and Simulink with Raspberry Pi](https://learn.adafruit.com/how-to-use-matlab-and-simulink-with-raspberry-pi.md)
- [Pi Video Output Using pygame](https://learn.adafruit.com/pi-video-output-using-pygame.md)
- [Drive a 16x2 LCD with the Raspberry Pi](https://learn.adafruit.com/drive-a-16x2-lcd-directly-with-a-raspberry-pi.md)
- [Adafruit's Raspberry Pi Lesson 4. GPIO Setup](https://learn.adafruit.com/adafruits-raspberry-pi-lesson-4-gpio-setup.md)
- [Windows IoT Core Application Management](https://learn.adafruit.com/windows-iot-application-management.md)
- [Read-Only Raspberry Pi](https://learn.adafruit.com/read-only-raspberry-pi.md)
- [Getting Started With Windows IoT Core on Raspberry Pi](https://learn.adafruit.com/getting-started-with-windows-iot-on-raspberry-pi.md)
- [Adafruit NFC/RFID on Raspberry Pi](https://learn.adafruit.com/adafruit-nfc-rfid-on-raspberry-pi.md)
- [Windows IoT Core Application Development: Headless Blinky](https://learn.adafruit.com/windows-iot-application-development-headless-application.md)
- [USB Audio Cards with a Raspberry Pi ](https://learn.adafruit.com/usb-audio-cards-with-a-raspberry-pi.md)
- [Node.js Embedded Development on the Raspberry Pi](https://learn.adafruit.com/node-embedded-development.md)
---
# Source: https://learn.adafruit.com/mini-thermal-receipt-printer/making-connections.md
# Mini Thermal Receipt Printers
## Making Connections
These printers might see use with **microcontrollers** or with Linux-based computers such as **Raspberry Pi**. The **Tiny** printer has the distinct option of connecting to a Raspberry Pi’s **USB** port, covered later on this page. But to start, let’s talk about _ **TTL serial** _—the non-USB connection present across _all_ of these printers.
## TTL Serial
Most microcontrollers can provide a 3.3V or 5V _TTL serial connection_. It’s not same as the 10V RS232 serial from a computer’s 9-pin serial port — don’t connect the printer directly to a standard PC port or you may damage it. A _USB-to-serial cable_ (such as those made by FTDI, or similar) is an option on Linux PCs, but most will be using it with a microcontroller.
It **makes no difference** if the controller is a **5 Volt** or **3.3 Volt** device. The printer logic is 3.3V, but “5V tolerant,” meaning **no extra level-shifting circuitry is needed** in either direction. Some older documentation may still show a _voltage divider_ (two resistors and some extra wires), but that’s since been found unnecessary. The printer and 5V _or_ 3.3V devices can connect directly.
To start, we’ll connect to the data cable of the printer. Easiest is to simply press breadboard jumper wires into the data plug, then use those to extend the connection to the host: an Arduino or other microcontroller, Raspberry Pi, or USB-to-serial cable.
If the controller is on a **breadboard** or the **socket headers** along the edges of an Arduino Uno-like board, or with most **USB-to-serial** cables: **male/male** jumper wires are suitable.
If the controller is a **Raspberry Pi** : use **female/male** jumper wires to the Pi’s GPIO header.
The **wire color for each pin** is **_not_ the same** across all these printers. Please read the descriptions carefully. It’s _nice_ (but not _mandatory_) to match jumper wire colors to the printer’s data cable, to help keep track of things.

## For Product #597: “Mini”
The **Mini** printer data cable has three wires:
- Black = **GROUND** reference
- Yellow = data **IN** to the printer (RX)
- Green = data **OUT** of the printer (TX)
This is in addition to the separate power cable, described on the prior page.
## For Product #2751: “Tiny”
The **Tiny** printer data cable has **five** wires:
- Red = **GROUND** (yes, red, and yes this totally is the opposite of common electronics conventions)
- Green = data **IN** to the printer (RX)
- Blue = data **OUT** of the printer (TX)
- Yellow (DTR) and black can be left **unconnected**
This is in addition to the separate power cable, described on the prior page.
## For Product #2752: “Nano”
The **Nano** printer cable has **five** wires and _no_ separate power cable.
- Black = power _and_ signal **GROUND**
- Blue = data **IN** to the printer (RX)
- Green = data **OUT** of the printer (TX)
- Red = 5–9V DC power
- Yellow = DTR, can be left unconnected for now
Power and data share a single connector here. Ground must go to _both_ the power supply _and_ the microcontroller, meaning you’ll need a split here, perhaps using a breadboard’s power rail.
## For Product #2753: “Guts”
The **Printer Guts** cable has **five** wires and no separate power cable.
Some printers have a color-coded cable, while others have just have a plain white cable. Unplug this temporarily from the printer and you should find the pin functions **labeled on the PCB** :

The pin order here is **not the same** as the Tiny or Nano printers. And if you have both Guts and Nano printers, be _super careful_ about the wiring, because the plugs are interchangeable but the sequence of wires and colors (if any) _do not_ have the same functions!
- **VH** = 5–9V DC power
- **GND** = power _and_ signal **GROUND**
- **RX** on the PCB = data **IN** to the printer
- **TX** on the PCB = data **OUT** of the printer
- **DTR** on the PCB = can leave unconnected for now
As with the Nano printer, power and data share a single connector. Ground must go to _both_ the power supply _and_ the microcontroller, meaning you’ll need a split here, perhaps using a breadboard’s power rail.
## To Arduino
For a board like the **Arduino Uno** , the other end of the jumper wires can insert into the **board edge sockets**. For smaller devices on a **breadboard** , insert into the corresponding **contact strip**.
**Ground** from the printer always connects to **GND** on the microcontroller board. For the data wires ( **TX** and **RX** ), which pins to connect to can vary by hardware and software, explained further on subsequent pages. Some situations may require specific pins, but you can usually use any two pins. Here’s the printer’s TX line connected to digital pin 5, and RX to digital pin 6:

Warning:
## To Raspberry Pi
Before connecting any **TTL serial** printers to **Raspberry Pi** , it’s _vitally important_ to perform a little **system configuration** first.
The Raspberry Pi board has a TTL serial connection on the GPIO breakout header. By default, it’s configured for a _serial console_ — connected to a terminal, this provides another way to log into the system (along with Ethernet, WiFi or keyboard+monitor). We need to **turn off** the serial console behavior, or a connected printer will just spit out endless gibberish! This only applies to a **TTL serial** connection; **Tiny** printers using **USB** , or others when using a **USB-to-serial** adapter, don’t need this step.
If using a **desktop** OS (mouse and GUI), it’s just a few clicks. From the “Pi” menu at the top left, select **Preferences→Raspberry Pi Configuration…**
Select the **Interfaces** tab.
Turn **Serial Port _ON_** _,_ and **Serial Console _OFF_** _,_ as shown in the image.
Click the “ **OK** ” button, then “ **Yes** ” when asked whether to reboot


If a “ **lite** ” OS (text login), this is done from the command line:
```terminal
sudo raspi-config
```
You’ll find the Serial Port settings under “ **Interface Options**.” Select “ **No** ” for the login shell, and “ **Yes** ” if asked about the serial port hardware (this option might not show up on older Pi models, where it’s always on). Tab over to “ **Finish** ” and reboot when asked.
_Now_ the printer can be connected without making a mess.
The diagram at left shows the Pi’s GPIO header. For orientation reference, the 5V pin at the top right is nearest the corner of the board.
TX and TXD mean the same thing: _transmit_ or _transmit data._ Likewise with RX and RXD. The terms might get used interchangeably.

**TX** and **RX** from the printer go to specific GPIO pins with _opposite_ functions. TX to RX and RX to TX, known as a _crossover_ configuration:

Really you can use _any_ GND shown in the pinout diagram above. The third pin is easy to locate, but that spot’s sometimes occupied by other hardware like small cooling fans.
If you happen to be using the **Mini** printer with the 3-pin data cable, and if the Pi and printer are kept close together, you might not even need jumper wires. Skip the first two 5V pins on the GPIO header, and the data cable can press right on to the next 3 pins in sequence: GND, TX and RX.

## To USB-to-Serial Cable (FTDI, etc.)
The principle here is similar to Raspberry Pi above: create a _crossover_ by connecting the printer’s TX to the adapter cable’s RX pin, RX to TX, and ground to ground.
The diagram here is representative, not literal. Some adapter cables might have this pinout, but others will not. FTDI cables, for example, usually have a 6-pin header with its own color code; only 3 pins are needed here. You’ll find pin functions and colors in the specific cable’s documentation.

Any of these cables will require _device driver_ software. Popular ones (FTDI, Prolific, etc.) might already be present on Linux systems. Check documentation.
Also, _how_ the device manifests when connected to a computer’s USB port will vary among manufacturers and drivers. In Linux it might show as `/dev/tty.USBserial` (followed by a number), but other conventions are sometimes used. Skim through the `/dev` directory and/or try the `lsusb` command to help identify the device.
## “Tiny” Printer: USB to Linux (Raspberry Pi, etc.)
The **Tiny** printer has the lovely option of connecting via USB cable, no jumper wires needed. On Raspberry Pi, there’s _no need_ to change anything with raspi-config…but there _are_ some things to know about the system.
On current Tiny printers, and on earlier ones _when suitably configured,_ the printer appears to the system as **/dev/usb/lp0** and operates through the _USB printing subsystem._ Sometimes there will be a different number at the end, if more printers are attached.
On earlier Tiny printers, the factory configuration instead has it appear as **/dev/ttyUSB0** , which mimics a Prolific _USB-to-serial bridge. _Sometimes there will be a different number at the end, if other USB-to-serial devices are attached.
Any software or commands that want to issue data to the printer should speak to the appropriate device name (try `ls /dev` from the command line to see what’s present, or try `lsusb`). Project code will often have the system device name in a global variable somewhere. Aside from that difference, they should both function the same; open the device, issue data, printer prints it.
If you have an older Tiny printer (defaulting to _USB-to-serial bridge_) and specifically _require_ USB printing subsystem compatibility instead, there’s a way to switch it over:
1. Similar to the self-test, **hold** the **paper feed button** while applying power…but now _ **keep holding it.** _
2. After the QR code, the current USB mode is printed: this will either be **COM** (USB-to-serial mode, the default) or **Printable Port** (USB printing subsystem).
3. **Release** the paper feed button.
4. To **keep** the current setting, **tap** the paper feed button once more.
5. To **change** to to the opposite USB setting (COM or Printable Port), **hold** the feed button for at least **2 seconds**. The printer will confirm the change.

This is present only in older Tiny printers. Current units work strictly in USB printing subsystem mode—it’s considered more modern—and continuing to hold the paper feed button will just eject a lot of paper…so don’t.
- [Previous Page](https://learn.adafruit.com/mini-thermal-receipt-printer/first-test.md)
- [Next Page](https://learn.adafruit.com/mini-thermal-receipt-printer/microcontroller.md)
## Primary Products
### Mini Thermal Receipt Printer
[Mini Thermal Receipt Printer](https://www.adafruit.com/product/597)
Add a mini printer to any microcontroller project with this very cute thermal printer. Thermal printers are also known as receipt printers, they're what you get when you go to the ATM or grocery store. Now you can embed a little printer of your own into an enclosure. This printer is ideal...
No Longer Stocked
[Buy Now](https://www.adafruit.com/product/597)
[Related Guides to the Product](https://learn.adafruit.com/products/597/guides)
### Tiny Thermal Receipt Printer - TTL Serial / USB
[Tiny Thermal Receipt Printer - TTL Serial / USB](https://www.adafruit.com/product/2751)
Add a _really small_ printer to any microcontroller project with this very cute thermal printer. Thermal printers are also known as receipt printers, they're what you get when you go to the ATM or grocery store. Now you can embed a little printer of your own into an enclosure. This...
No Longer Stocked
[Buy Now](https://www.adafruit.com/product/2751)
[Related Guides to the Product](https://learn.adafruit.com/products/2751/guides)
### Nano Thermal Receipt Printer - TTL Serial
[Nano Thermal Receipt Printer - TTL Serial](https://www.adafruit.com/product/2752)
Add a _really really small_ printer to any microcontroller project with this very cute thermal printer. Thermal printers are also known as receipt printers, they're what you get when you go to the ATM or grocery store. Now you can embed a little printer of your own into an...
No Longer Stocked
[Buy Now](https://www.adafruit.com/product/2752)
[Related Guides to the Product](https://learn.adafruit.com/products/2752/guides)
### Thermal Receipt Printer Guts
[Thermal Receipt Printer Guts](https://www.adafruit.com/product/2753)
Add printing capability to any microcontroller project with **just the innards of a thermal printer.** Thermal printers are also known as receipt printers, they're what you get when you go to the ATM or grocery store. Now you can embed a little printer of your own into a...
No Longer Stocked
[Buy Now](https://www.adafruit.com/product/2753)
[Related Guides to the Product](https://learn.adafruit.com/products/2753/guides)
## Featured Products
### Mini Thermal Receipt Printer Starter Pack
[Mini Thermal Receipt Printer Starter Pack](https://www.adafruit.com/product/600)
Hit the ground running (and printing!) with this starter pack that includes a thermal printer and all the extras and save a few dollars while you're at it.
Includes:
- [A mini thermal receipt printer](http://www.adafruit.com/products/597) - with cables and...
No Longer Stocked
[Buy Now](https://www.adafruit.com/product/600)
[Related Guides to the Product](https://learn.adafruit.com/products/600/guides)
### Female DC Power adapter - 2.1mm jack to screw terminal block
[Female DC Power adapter - 2.1mm jack to screw terminal block](https://www.adafruit.com/product/368)
If you need to connect a DC power wall wart to a board that doesn't have a DC jack - this adapter will come in very handy! There is a 2.1mm DC jack on one end, and a screw terminal block on the other. The terminals are labeled with positive/negative assuming a positive-tip configuration...
In Stock
[Buy Now](https://www.adafruit.com/product/368)
[Related Guides to the Product](https://learn.adafruit.com/products/368/guides)
### 5V 2A (2000mA) switching power supply - UL Listed
[5V 2A (2000mA) switching power supply - UL Listed](https://www.adafruit.com/product/276)
This is an FCC/CE certified and UL listed power supply. Need a lot of 5V power? This switching supply gives a clean regulated 5V output at up to 2000mA. 110 or 240 input, so it works in any country. The plugs are "US 2-prong" style so you may need a plug adapter, but you can pick one...
Out of Stock
[Buy Now](https://www.adafruit.com/product/276)
[Related Guides to the Product](https://learn.adafruit.com/products/276/guides)
### Thermal paper roll - 50' long, 2.25" wide
[Thermal paper roll - 50' long, 2.25" wide](https://www.adafruit.com/product/599)
A mini roll of thermal paper, this fits very nicely into our mini thermal printer. 2.25" wide (about 57mm) and 50 feet long (15 meters). BPA-free.
[Perfect for use with our mini thermal printer!](http://www.adafruit.com/products/597)
No Longer Stocked
[Buy Now](https://www.adafruit.com/product/599)
[Related Guides to the Product](https://learn.adafruit.com/products/599/guides)
### Thermal Paper Roll - 33' long, 2.25"
[Thermal Paper Roll - 33' long, 2.25"](https://www.adafruit.com/product/2754)
A little roll of thermal paper! This fits very nicely into our [Tiny Thermal Receipt Printer](https://www.adafruit.com/products/2751). It's ~2.25" wide (about 57mm) and 33 feet long or about 10 meters.
No Longer Stocked
[Buy Now](https://www.adafruit.com/product/2754)
[Related Guides to the Product](https://learn.adafruit.com/products/2754/guides)
### Thermal Paper Roll - 16' long, 2.25"
[Thermal Paper Roll - 16' long, 2.25"](https://www.adafruit.com/product/2755)
A little roll of thermal paper! This fits very nicely into our [Nano Thermal Receipt Printer](https://www.adafruit.com/products/2752). It's ~2.25" wide (about 57mm) and 16 feet long or about 5 meters.
No Longer Stocked
[Buy Now](https://www.adafruit.com/product/2755)
[Related Guides to the Product](https://learn.adafruit.com/products/2755/guides)
### Adafruit METRO 328 Fully Assembled - Arduino IDE compatible
[Adafruit METRO 328 Fully Assembled - Arduino IDE compatible](https://www.adafruit.com/product/50)
We sure love the ATmega328 here at Adafruit, and we use them _a lot_ for our own projects. The processor has plenty of GPIO, Analog inputs, hardware UART SPI and I2C, timers and PWM galore - just enough for most simple projects. When we need to go small, we use a
Out of Stock
[Buy Now](https://www.adafruit.com/product/50)
[Related Guides to the Product](https://learn.adafruit.com/products/50/guides)
### Breadboarding wire bundle
[Breadboarding wire bundle](https://www.adafruit.com/product/153)
75 flexible stranded core wires with stiff ends molded on in red, orange, yellow, green, blue, brown, black and white. These are a major improvement over the "box of bent wires" that are sometimes sold with breadboards, and faster than stripping your own solid core wires. Makes...
In Stock
[Buy Now](https://www.adafruit.com/product/153)
[Related Guides to the Product](https://learn.adafruit.com/products/153/guides)
## Related Guides
- [How to Find Hidden COM Ports](https://learn.adafruit.com/how-to-find-hidden-com-ports.md)
- [Wireless Game Show Poppers for the Classroom!](https://learn.adafruit.com/wireless-game-show-poppers.md)
- [Adafruit Ultimate GPS](https://learn.adafruit.com/adafruit-ultimate-gps.md)
- [RGB LED Matrix Basics](https://learn.adafruit.com/32x16-32x32-rgb-led-matrix.md)
- [Analog Feedback Servos](https://learn.adafruit.com/analog-feedback-servos.md)
- [Arduino GPS Clock](https://learn.adafruit.com/arduino-clock.md)
- [Silicone Robo-Tentacle](https://learn.adafruit.com/silicone-robo-tentacle.md)
- [Ladyada's Bento Box](https://learn.adafruit.com/lady-adas-bento-box.md)
- [Metal Inlay Capacitive Touch Buttons](https://learn.adafruit.com/metal-inlay-capacitive-touch-buttons.md)
- [Adafruit IO Basics: NeoPixel Controller](https://learn.adafruit.com/adafruit-io-basics-neopixel-controller.md)
- [Adafruit PN532 RFID/NFC Breakout and Shield](https://learn.adafruit.com/adafruit-pn532-rfid-nfc.md)
- [Reverse Geocache Box](https://learn.adafruit.com/reverse-geocache-engagement-box.md)
- [Character LCDs](https://learn.adafruit.com/character-lcds.md)
- [Adafruit INA219 Current Sensor Breakout](https://learn.adafruit.com/adafruit-ina219-current-sensor-breakout.md)
- [All About Arduino Libraries](https://learn.adafruit.com/adafruit-all-about-arduino-libraries-install-use.md)
---
# Source: https://learn.adafruit.com/skill-badge-requirements-solar/making-measurements.md
# Skill Badge Requirements: Solar
## Section 2: Making Measurements

_This section focuses measuring the power produced by a solar cell._
Materials Needed:
- Solar cell with terminals exposed
- Ruler or Caliper
- Multimeter
- Notepaper
Do EACH of the following and submit to your instructor:
1. Measure and calculate the surface area (Aeff) of the solar cell supplied by your instructor.
2. Configure and use a multimeter to measure your cell’s Voc in direct sunlight. Record your results.
3. Configure and use a multimeter to measure your cell’s Isc in direct sunlight. Record your results.
4. Calculate your cell’s approximate Psa. Record your results.
5. Calculate your cell’s approximate efficiency based on a Pin of 1000W/m^2.
6. Record your results. ɳ = Psa / (Pin x Aeff)
- [Previous Page](https://learn.adafruit.com/skill-badge-requirements-solar/concept-of-operation.md)
- [Next Page](https://learn.adafruit.com/skill-badge-requirements-solar/demonstration.md)
## Featured Products
### Round Solar Panel Skill Badge - 5V / 40mA
[Round Solar Panel Skill Badge - 5V / 40mA](https://www.adafruit.com/product/700)
This skill badge is self-fulfilling! Normally you would get the badge _after_ the project is done, but in this case, the badge can be part of the project! The solar panel is epoxied into a round disc 55mm diameter (about 2.2 inches), its rugged and looks cool besides. We include a...
In Stock
[Buy Now](https://www.adafruit.com/product/700)
[Related Guides to the Product](https://learn.adafruit.com/products/700/guides)
## Related Guides
- [Adafruit FunHouse](https://learn.adafruit.com/adafruit-funhouse.md)
- [Pet Bowl Water Level Sensing](https://learn.adafruit.com/pet-bowl-water-level-sensing-with-the-funhouse-and-home-assistant.md)
- [Wind Blowing Emoji Prop](https://learn.adafruit.com/wind-face-emoji.md)
- [Circuit Playground Express: Piano de Limones](https://learn.adafruit.com/circuit-playground-express-piano-de-limones.md)
- [Smart Measuring Cup](https://learn.adafruit.com/smart-measuring-cup.md)
- [Raspberry Pi Analog to Digital Converters](https://learn.adafruit.com/raspberry-pi-analog-to-digital-converters.md)
- [Face Mask Efficacy Testing with SCIENCE!](https://learn.adafruit.com/raspberry-pi-camera-vision-face-mask-efficacy-testing.md)
- [Remote controlled door lock using a fingerprint sensor & Adafruit IO](https://learn.adafruit.com/remote-controlled-door-lock-using-a-fingerprint-sensor-and-adafruit-io.md)
- [PowerWash Simulator Nozzle Controller](https://learn.adafruit.com/powerwash-simulator-nozzle-controller.md)
- [Send Raspberry Pi Data to COSM](https://learn.adafruit.com/send-raspberry-pi-data-to-cosm.md)
- [Adafruit Analog Accelerometer Breakouts](https://learn.adafruit.com/adafruit-analog-accelerometer-breakouts.md)
- [CircuitPython Libraries on any Computer with FT232H](https://learn.adafruit.com/circuitpython-on-any-computer-with-ft232h.md)
- [Adafruit LSM9DS1 Accelerometer + Gyro + Magnetometer 9-DOF Breakout](https://learn.adafruit.com/adafruit-lsm9ds1-accelerometer-plus-gyro-plus-magnetometer-9-dof-breakout.md)
- [Programmable Wireless BLE Gesture Mouse](https://learn.adafruit.com/ble-wireless-gesture-mouse.md)
- [Adafruit Feather nRF52840 Sense](https://learn.adafruit.com/adafruit-feather-sense.md)
---
# Source: https://learn.adafruit.com/matrix-7-segment-led-backpack-with-the-raspberry-pi.md
# Matrix and 7-Segment LED Backpack with the Raspberry Pi
## Overview
Info:
LED backpack displays are a great way to add a simple, bright LED display to your project. These displays get their name because of the controller chip attached to the back of them like a 'backpack'. This HT16K33 controller can drive up to 128 multiplexed LEDs in matrix, bar graph, 7-segment numeric, and even 14-segment alpha-numeric configurations. It handles the LEDs with a constant-current driver so the light is bright and consistent even if the power supply varies.
While we already have a [great tutorial](http://learn.adafruit.com/adafruit-led-backpack) and [Arduino library](https://github.com/adafruit/Adafruit-LED-Backpack-Library "Link: https://github.com/adafruit/Adafruit-LED-Backpack-Library") for our handy and easy to use LED backpacks, if you're wondering how you can make use of backpack-enabled LED displays on the Pi, this guide will help you get started!

# What You'll Need
1. A [Raspberry Pi](https://www.adafruit.com/product/3775)
2. A [Pi Cobbler Plus](https://www.adafruit.com/product/2029)
3. One of our many [8x8](https://www.adafruit.com/category/37_88) or [4-Digit 7-Segment](https://www.adafruit.com/category/37_103) backpack-enabled displays
# Related Information
If you're looking for help on how to assemble one of our backpack-enabled LED displays, have a look at our earlier guide, [Adafruit LED Backpacks](http://learn.adafruit.com/adafruit-led-backpack). It contains a lot of complimentary information on these displays, including step by step soldering and assembly instructions.
- [Next Page](https://learn.adafruit.com/matrix-7-segment-led-backpack-with-the-raspberry-pi/hooking-everything-up.md)
## Featured Products
### Adafruit 0.56" 4-Digit 7-Segment Display w/ I2C Backpack - Blue
[Adafruit 0.56" 4-Digit 7-Segment Display w/ I2C Backpack - Blue](https://www.adafruit.com/product/881)
What's better than a single LED? Lots of LEDs! A fun way to make a small display is to use an [8x8 matrix](https://www.adafruit.com/category/37_88) or a [4-digit 7-segment display](https://www.adafruit.com/category/37_103). Matrices like these are...
In Stock
[Buy Now](https://www.adafruit.com/product/881)
[Related Guides to the Product](https://learn.adafruit.com/products/881/guides)
### Adafruit Mini 0.8" 8x8 LED Matrix w/I2C Backpack - Yellow-Green
[Adafruit Mini 0.8" 8x8 LED Matrix w/I2C Backpack - Yellow-Green](https://www.adafruit.com/product/872)
What's better than a single LED? Lots of LEDs! A fun way to make a small display is to use an [8x8 matrix](https://www.adafruit.com/category/37_88) or a [4-digit 7-segment display](https://www.adafruit.com/category/37_103). Matrices like these are...
In Stock
[Buy Now](https://www.adafruit.com/product/872)
[Related Guides to the Product](https://learn.adafruit.com/products/872/guides)
### Adafruit Bicolor LED Square Pixel Matrix with I2C Backpack
[Adafruit Bicolor LED Square Pixel Matrix with I2C Backpack](https://www.adafruit.com/product/902)
What's better than a single LED? Lots of LEDs! A fun way to make a small colorful display is to use a [1.2" Bi-color 8x8 LED Matrix](http://www.adafruit.com/products/458). Matrices like these are 'multiplexed' - so to control all the 128 LEDs you need 24 pins....
In Stock
[Buy Now](https://www.adafruit.com/product/902)
[Related Guides to the Product](https://learn.adafruit.com/products/902/guides)
### Quad Alphanumeric Display - Blue 0.54" Digits w/ I2C Backpack
[Quad Alphanumeric Display - Blue 0.54" Digits w/ I2C Backpack](https://www.adafruit.com/product/1912)
Display, elegantly, 012345678 or 9! Gaze, hypnotized, at ABCDEFGHIJKLM - well it can display the whole alphabet. You get the point. This is a nice, bright alphanumeric display that shows letters and numbers in a beautiful blue hue. It's super bright and designed for viewing from distances...
In Stock
[Buy Now](https://www.adafruit.com/product/1912)
[Related Guides to the Product](https://learn.adafruit.com/products/1912/guides)
### Bi-Color (Red/Green) 24-Bar Bargraph w/I2C Backpack Kit
[Bi-Color (Red/Green) 24-Bar Bargraph w/I2C Backpack Kit](https://www.adafruit.com/product/1721)
What's better than a single LED? Lots of LEDs! A fun way to make a small linear display is to use two 12-bar Bi-color bar-graphs. However, this LED bargraph is 'multiplexed' - so to control all the 48 LEDs you need a lot of pins.
In Stock
[Buy Now](https://www.adafruit.com/product/1721)
[Related Guides to the Product](https://learn.adafruit.com/products/1721/guides)
### Raspberry Pi 3 - Model B+ - 1.4GHz Cortex-A53 with 1GB RAM
[Raspberry Pi 3 - Model B+ - 1.4GHz Cortex-A53 with 1GB RAM](https://www.adafruit.com/product/3775)
The Raspberry Pi 3 Model B is the most popular Raspberry Pi computer made, and the Pi Foundation knows you can always make a good thing _better_! And what could make the Pi 3 better? How about a _faster_ processor, 5 GHz WiFi, and updated Ethernet chip with PoE capability?...
In Stock
[Buy Now](https://www.adafruit.com/product/3775)
[Related Guides to the Product](https://learn.adafruit.com/products/3775/guides)
### Assembled Pi Cobbler Plus - Breakout Cable
[Assembled Pi Cobbler Plus - Breakout Cable](https://www.adafruit.com/product/2029)
The Raspberry Pi B+ / Pi 2 / Pi 3 / Pi 4 has landed on the Maker World like a 40-GPIO pinned, quad-USB ported, credit card sized bomb of DIY joy. And while you can use most of our great Model B accessories by hooking up our [downgrade...](https://www.adafruit.com/product/1986)
In Stock
[Buy Now](https://www.adafruit.com/product/2029)
[Related Guides to the Product](https://learn.adafruit.com/products/2029/guides)
## Related Guides
- [Adafruit LED Backpacks](https://learn.adafruit.com/adafruit-led-backpack.md)
- [Animating Multiple LED Backpacks](https://learn.adafruit.com/animating-multiple-led-backpacks.md)
- [CircuitPython Hardware: LED Backpacks & FeatherWings](https://learn.adafruit.com/micropython-hardware-led-backpacks-and-featherwings.md)
- [Raspberry Pi Physical Dashboard](https://learn.adafruit.com/raspberry-pi-physical-dashboard.md)
- [Raspberry Pi Analog to Digital Converters](https://learn.adafruit.com/raspberry-pi-analog-to-digital-converters.md)
- [Trinket / Gemma Space Invader Pendant](https://learn.adafruit.com/trinket-slash-gemma-space-invader-pendant.md)
- [Circadian Pi Desk Light](https://learn.adafruit.com/circadian-pi-desk-light.md)
- [LED Backpack Displays on Raspberry Pi and BeagleBone Black](https://learn.adafruit.com/led-backpack-displays-on-raspberry-pi-and-beaglebone-black.md)
- [Speech Synthesis on the Raspberry Pi](https://learn.adafruit.com/speech-synthesis-on-the-raspberry-pi.md)
- [Circle of Fifths Euclidean Synth with synthio and CircuitPython](https://learn.adafruit.com/circle-of-fifths-euclidean-synth-with-synthio-and-circuitpython.md)
- [Tiny Arduino Music Visualizer](https://learn.adafruit.com/piccolo.md)
- [Personalized NextBus ESP8266 Transit Clock](https://learn.adafruit.com/personalized-esp8266-transit-clock.md)
- [Playing sounds and using buttons with Raspberry Pi](https://learn.adafruit.com/playing-sounds-and-using-buttons-with-raspberry-pi.md)
- [Adafruit Microphone Amplifier Breakout](https://learn.adafruit.com/adafruit-microphone-amplifier-breakout.md)
- [RGB Matrix New York Times Title Scroller](https://learn.adafruit.com/rgb-matix-nyt-text-scroller.md)
---
# Source: https://learn.adafruit.com/matrix-7-segment-led-backpack-with-the-raspberry-pi/matrix-bicolor-test.md
# Matrix and 7-Segment LED Backpack with the Raspberry Pi
## Matrix Bicolor

The bicolor matrix display is demonstrated in the **matrix\_bicolor\_test.py** example below. This code demonstrates using the **Matrix8x8x2** class in a very similar way to the **Matrix8x8** class. The key difference is that are assigning color value and are not limited to a 1 or 0 value like with the **Matrix8x8** class.
## CircuitPython Code
https://github.com/adafruit/Adafruit_Learning_System_Guides/blob/main/Matrix_7-Segment_LED_Backpack_Raspberry_Pi/matrix_bicolor_test/code.py
## Download and Run the Code
We can easily copy this code onto our Pi's home directory using the 'wget' command and then run it using the following commands.
```
cd
wget https://raw.githubusercontent.com/adafruit/Adafruit_Learning_System_Guides/master/Matrix_7-Segment_LED_Backpack_Raspberry_Pi/matrix_bicolor_test.py
python3 matrix_bicolor_test.py
```
- [Previous Page](https://learn.adafruit.com/matrix-7-segment-led-backpack-with-the-raspberry-pi/using-the-adafruit-library.md)
- [Next Page](https://learn.adafruit.com/matrix-7-segment-led-backpack-with-the-raspberry-pi/7-segment-test.md)
## Featured Products
### Adafruit 0.56" 4-Digit 7-Segment Display w/ I2C Backpack - Blue
[Adafruit 0.56" 4-Digit 7-Segment Display w/ I2C Backpack - Blue](https://www.adafruit.com/product/881)
What's better than a single LED? Lots of LEDs! A fun way to make a small display is to use an [8x8 matrix](https://www.adafruit.com/category/37_88) or a [4-digit 7-segment display](https://www.adafruit.com/category/37_103). Matrices like these are...
In Stock
[Buy Now](https://www.adafruit.com/product/881)
[Related Guides to the Product](https://learn.adafruit.com/products/881/guides)
### Adafruit Mini 0.8" 8x8 LED Matrix w/I2C Backpack - Yellow-Green
[Adafruit Mini 0.8" 8x8 LED Matrix w/I2C Backpack - Yellow-Green](https://www.adafruit.com/product/872)
What's better than a single LED? Lots of LEDs! A fun way to make a small display is to use an [8x8 matrix](https://www.adafruit.com/category/37_88) or a [4-digit 7-segment display](https://www.adafruit.com/category/37_103). Matrices like these are...
In Stock
[Buy Now](https://www.adafruit.com/product/872)
[Related Guides to the Product](https://learn.adafruit.com/products/872/guides)
### Adafruit Bicolor LED Square Pixel Matrix with I2C Backpack
[Adafruit Bicolor LED Square Pixel Matrix with I2C Backpack](https://www.adafruit.com/product/902)
What's better than a single LED? Lots of LEDs! A fun way to make a small colorful display is to use a [1.2" Bi-color 8x8 LED Matrix](http://www.adafruit.com/products/458). Matrices like these are 'multiplexed' - so to control all the 128 LEDs you need 24 pins....
In Stock
[Buy Now](https://www.adafruit.com/product/902)
[Related Guides to the Product](https://learn.adafruit.com/products/902/guides)
### Quad Alphanumeric Display - Blue 0.54" Digits w/ I2C Backpack
[Quad Alphanumeric Display - Blue 0.54" Digits w/ I2C Backpack](https://www.adafruit.com/product/1912)
Display, elegantly, 012345678 or 9! Gaze, hypnotized, at ABCDEFGHIJKLM - well it can display the whole alphabet. You get the point. This is a nice, bright alphanumeric display that shows letters and numbers in a beautiful blue hue. It's super bright and designed for viewing from distances...
In Stock
[Buy Now](https://www.adafruit.com/product/1912)
[Related Guides to the Product](https://learn.adafruit.com/products/1912/guides)
### Bi-Color (Red/Green) 24-Bar Bargraph w/I2C Backpack Kit
[Bi-Color (Red/Green) 24-Bar Bargraph w/I2C Backpack Kit](https://www.adafruit.com/product/1721)
What's better than a single LED? Lots of LEDs! A fun way to make a small linear display is to use two 12-bar Bi-color bar-graphs. However, this LED bargraph is 'multiplexed' - so to control all the 48 LEDs you need a lot of pins.
In Stock
[Buy Now](https://www.adafruit.com/product/1721)
[Related Guides to the Product](https://learn.adafruit.com/products/1721/guides)
### Raspberry Pi 3 - Model B+ - 1.4GHz Cortex-A53 with 1GB RAM
[Raspberry Pi 3 - Model B+ - 1.4GHz Cortex-A53 with 1GB RAM](https://www.adafruit.com/product/3775)
The Raspberry Pi 3 Model B is the most popular Raspberry Pi computer made, and the Pi Foundation knows you can always make a good thing _better_! And what could make the Pi 3 better? How about a _faster_ processor, 5 GHz WiFi, and updated Ethernet chip with PoE capability?...
In Stock
[Buy Now](https://www.adafruit.com/product/3775)
[Related Guides to the Product](https://learn.adafruit.com/products/3775/guides)
### Assembled Pi Cobbler Plus - Breakout Cable
[Assembled Pi Cobbler Plus - Breakout Cable](https://www.adafruit.com/product/2029)
The Raspberry Pi B+ / Pi 2 / Pi 3 / Pi 4 has landed on the Maker World like a 40-GPIO pinned, quad-USB ported, credit card sized bomb of DIY joy. And while you can use most of our great Model B accessories by hooking up our [downgrade...](https://www.adafruit.com/product/1986)
In Stock
[Buy Now](https://www.adafruit.com/product/2029)
[Related Guides to the Product](https://learn.adafruit.com/products/2029/guides)
## Related Guides
- [Adafruit LED Backpacks](https://learn.adafruit.com/adafruit-led-backpack.md)
- [Animating Multiple LED Backpacks](https://learn.adafruit.com/animating-multiple-led-backpacks.md)
- [CircuitPython Hardware: LED Backpacks & FeatherWings](https://learn.adafruit.com/micropython-hardware-led-backpacks-and-featherwings.md)
- [Raspberry Pi Physical Dashboard](https://learn.adafruit.com/raspberry-pi-physical-dashboard.md)
- [Raspberry Pi Analog to Digital Converters](https://learn.adafruit.com/raspberry-pi-analog-to-digital-converters.md)
- [Trinket / Gemma Space Invader Pendant](https://learn.adafruit.com/trinket-slash-gemma-space-invader-pendant.md)
- [Circadian Pi Desk Light](https://learn.adafruit.com/circadian-pi-desk-light.md)
- [LED Backpack Displays on Raspberry Pi and BeagleBone Black](https://learn.adafruit.com/led-backpack-displays-on-raspberry-pi-and-beaglebone-black.md)
- [Speech Synthesis on the Raspberry Pi](https://learn.adafruit.com/speech-synthesis-on-the-raspberry-pi.md)
- [Circle of Fifths Euclidean Synth with synthio and CircuitPython](https://learn.adafruit.com/circle-of-fifths-euclidean-synth-with-synthio-and-circuitpython.md)
- [Tiny Arduino Music Visualizer](https://learn.adafruit.com/piccolo.md)
- [Personalized NextBus ESP8266 Transit Clock](https://learn.adafruit.com/personalized-esp8266-transit-clock.md)
- [Playing sounds and using buttons with Raspberry Pi](https://learn.adafruit.com/playing-sounds-and-using-buttons-with-raspberry-pi.md)
- [Adafruit Microphone Amplifier Breakout](https://learn.adafruit.com/adafruit-microphone-amplifier-breakout.md)
- [RGB Matrix New York Times Title Scroller](https://learn.adafruit.com/rgb-matix-nyt-text-scroller.md)
---
# Source: https://learn.adafruit.com/mcp230xx-gpio-expander-on-the-raspberry-pi.md
# MCP230xx GPIO Expander on the Raspberry Pi
## Overview
Danger:

While the Raspberry Pi packs and awful lot of punch for the price, and it's fairly flexible where HW expandability is concerned, there are situations where you might want a bit more basic digital IO. Thankfully, it's an easy problem to solve with an I2C-enabled device like the MCP23008 (for an extra 8 GPIO pins) or the MCP23017 (for an extra 16 GPIO pins). This tutorial will show you how you can get up and running quickly with either of these chips.
# What You'll Need
- A [Raspberry Pi](http://adafruit.com/products/998) Model B
- A [Pi Cobbler Breakout](http://adafruit.com/products/914)
- An [MCP23017](http://adafruit.com/products/732) or [MCP23008](http://adafruit.com/products/593)
- And LED and a resistor to test with if you don't have a DMM or an oscilloscope
- If you're **not** using [Occidentalis](http://learn.adafruit.com/adafruit-raspberry-pi-educational-linux-distro/occidentalis-v0-dot-2), Adafruit's own Raspberry Pi distro, you'll also need to [make sure your Pi is configured for I2C](http://learn.adafruit.com/adafruits-raspberry-pi-lesson-4-gpio-setup/configuring-i2c) before running through this tutorial. (If you're using Occidentalis, I2C is already enabled, though, and you're ready to go!)
Danger:
- [Next Page](https://learn.adafruit.com/mcp230xx-gpio-expander-on-the-raspberry-pi/hooking-it-all-up.md)
## Featured Products
### MCP23017 - i2c 16 input/output port expander
[MCP23017 - i2c 16 input/output port expander](https://www.adafruit.com/product/732)
Add another 16 pins to your microcontroller using an MCP23017 port expander. The MCP23017 uses two i2c pins (these can be shared with other i2c devices), and in exchange gives you 16 general purpose pins. You can set each of 16 pins to be input, output, or input with a pullup. There's even...
In Stock
[Buy Now](https://www.adafruit.com/product/732)
[Related Guides to the Product](https://learn.adafruit.com/products/732/guides)
### MCP23008 - i2c 8 input/output port expander
[MCP23008 - i2c 8 input/output port expander](https://www.adafruit.com/product/593)
Add another 8 pins to your microcontroller using an MCP23008 port expander. The MCP23008 uses two i2c pins (these can be shared with other i2c devices), and in exchange gives you 8 general purpose pins. You can set each of 8 pins to be input, output, or input with a pullup. There's even...
In Stock
[Buy Now](https://www.adafruit.com/product/593)
[Related Guides to the Product](https://learn.adafruit.com/products/593/guides)
### Adafruit Assembled Pi Cobbler Breakout + Cable for Raspberry Pi
[Adafruit Assembled Pi Cobbler Breakout + Cable for Raspberry Pi](https://www.adafruit.com/product/914)
Now that you've finally got your hands on a [Raspberry Pi® Model B](http://www.raspberrypi.org/), you're probably itching to make some fun embedded computer projects with it. What you need is an add on prototyping Pi Cobbler from Adafruit, which can break out all those...
No Longer Stocked
[Buy Now](https://www.adafruit.com/product/914)
[Related Guides to the Product](https://learn.adafruit.com/products/914/guides)
## Related Guides
- [Animated Snake Eyes Bonnet for Raspberry Pi](https://learn.adafruit.com/animated-snake-eyes-bonnet-for-raspberry-pi.md)
- [Bluefruit LE Python Library](https://learn.adafruit.com/bluefruit-le-python-library.md)
- [Running Minecraft on a Raspberry Pi](https://learn.adafruit.com/running-minecraft-on-a-raspberry-pi.md)
- [Basic Resistor Sensor Reading on Raspberry Pi](https://learn.adafruit.com/basic-resistor-sensor-reading-on-raspberry-pi.md)
- [Connecting a 16x32 RGB LED Matrix Panel to a Raspberry Pi](https://learn.adafruit.com/connecting-a-16x32-rgb-led-matrix-panel-to-a-raspberry-pi.md)
- [Battery Powered Raspberry Pi Displays w/RaspiRobot Shield](https://learn.adafruit.com/raspirobot-battery-powered-raspberry-pi-displays.md)
- [Trellis Python Library](https://learn.adafruit.com/trellis-python-library.md)
- [Adafruit Prototyping Pi Plate](https://learn.adafruit.com/adafruit-prototyping-pi-plate.md)
- [A Sillier Mousetrap: Logging Mouse Data to Adafruit IO with the Raspberry Pi](https://learn.adafruit.com/a-sillier-mousetrap-logging-mouse-data-to-adafruit-io-with-the-raspberry-pi.md)
- [Raspberry Pi Pygame UI basics](https://learn.adafruit.com/raspberry-pi-pygame-ui-basics.md)
- [Raspberry Pi E-mail Notifier Using LEDs](https://learn.adafruit.com/raspberry-pi-e-mail-notifier-using-leds.md)
- [Bonjour (Zeroconf) Networking for Windows and Linux](https://learn.adafruit.com/bonjour-zeroconf-networking-for-windows-and-linux.md)
- [Using a Mini PAL/NTSC Display with a Raspberry Pi](https://learn.adafruit.com/using-a-mini-pal-ntsc-display-with-a-raspberry-pi.md)
- [TMP006 Temperature Sensor Python Library](https://learn.adafruit.com/tmp006-temperature-sensor-python-library.md)
- [Controlling Motors using the Raspberry Pi and RasPiRobot Board V2](https://learn.adafruit.com/controlling-motors-using-the-raspberry-pi-and-raspirobot-board-v2.md)
---
# Source: https://learn.adafruit.com/mcp4725-12-bit-dac-tutorial.md
# MCP4725 12-Bit DAC Tutorial
## Overview

Your microcontroller probably has an ADC (analog -\> digital converter) but does it have a DAC (digital -\> analog converter)??? Now it can! This breakout board features the easy-to-use MCP4725 12-bit DAC. Control it via I2C and send it the value you want it to output, and the VOUT pin will have it. Great for audio / analog projects, such as when you can't use PWM but need a sine wave or adjustable bias point.
We break out the ADDR/A0 pin so you can connect two of these DACs on one I2C bus, just tie that pin of one high (or close the jumper on the back) to keep it from conflicting. Also included is a 6-pin header, for use in a breadboard. Works with both 3.3V or 5V logic.

Some nice extras with this chip: for chips that have 3.4Mbps Fast Mode I2C (Arduino's don't) you can update the Vout at ~200 KHz. There's an EEPROM so if you write the output voltage, you can 'store it' so if the device is power cycled it will restore that voltage. The output voltage is rail-to-rail and proportional to the power pin so if you run it from 3.3V, the output range is 0-3.3V. If you run it from 5V the output range is 0-5V.
[We have an easy-to-use Arduino and CircuitPython/Python library and tutorial with a triangle-wave and sine-wave output example](http://learn.adafruit.com/mcp4725-12-bit-dac-tutorial) that can be used with just about any microcontroller or microcomputer with I2C host.

Comes with a bit of 0.1" standard header in case you want to use it with a breadboard or perfboard. Four mounting holes for easy attachment. There's an _optional_ 3.5mm terminal block spot on the PCB - [we don't include a 3.5mm terminal block but they're both common and stocked in the shop](https://www.adafruit.com/product/724) - that you can solder in place if you like.

To get you going fast, we spun up a custom-made PCB in the[ **STEMMA QT** form factor](https://www.adafruit.com/?q=stemma%20qt%20sensor "STEMMA QT form factor"), making it easy to interface with. The [STEMMA QT connectors](https://learn.adafruit.com/introducing-adafruit-stemma-qt/what-is-stemma-qt) on either side are compatible with the [SparkFun Qwiic](https://www.sparkfun.com/qwiic) I2C connectors. This allows you to make solderless connections between your development board and the MCP4725 or to chain it with a wide range of other sensors and accessories using a [**compatible cable**](https://www.adafruit.com/?q=stemma%20qt%20cable).
[**QT Cable is not included** , but we have a variety in the shop](https://www.adafruit.com/?q=stemma+qt+cable&sort=BestMatch).
Info:

- [Next Page](https://learn.adafruit.com/mcp4725-12-bit-dac-tutorial/pinouts.md)
## Featured Products
### MCP4725 Breakout Board - 12-Bit DAC with I2C Interface
[MCP4725 Breakout Board - 12-Bit DAC with I2C Interface](https://www.adafruit.com/product/935)
Your microcontroller probably has an ADC (analog -\> digital converter) but does it have a DAC (digital -\> analog converter)??? Now it can! This breakout board features the easy-to-use MCP4725 12-bit DAC. Control it via I2C and send it the value you want it to output, and the VOUT pin...
In Stock
[Buy Now](https://www.adafruit.com/product/935)
[Related Guides to the Product](https://learn.adafruit.com/products/935/guides)
## Related Guides
- [I2C Addresses and Troublesome Chips](https://learn.adafruit.com/i2c-addresses.md)
- [MCP4725 12-Bit DAC with Raspberry Pi](https://learn.adafruit.com/mcp4725-12-bit-dac-with-raspberry-pi.md)
- [CircuitPython MIDI to CV Skull](https://learn.adafruit.com/circuitpython-midi-to-cv-skull.md)
- [NeoPixel Manicure](https://learn.adafruit.com/neopixel-manicure.md)
- [Adafruit TPS61169 Constant Current Boost Converter for LEDs](https://learn.adafruit.com/adafruit-tps61169-constant-current-boost-converter-for-leds.md)
- [Adafruit Floppy FeatherWing with 34-Pin IDC Connector](https://learn.adafruit.com/adafruit-floppy-featherwing-with-34-pin-idc-connector.md)
- [Remote Control with the Huzzah + Adafruit.io](https://learn.adafruit.com/remote-control-with-the-huzzah-plus-adafruit-io.md)
- [Adafruit ENS160 MOX Gas Sensor](https://learn.adafruit.com/adafruit-ens160-mox-gas-sensor.md)
- [Hallowing Minotaur Maze](https://learn.adafruit.com/hallowing-minotaur-maze.md)
- [DIY Google's "Physical Web" UriBeacons with the Bluefruit LE Friend](https://learn.adafruit.com/google-physical-web-uribeacon-with-the-bluefruit-le-friend.md)
- [Larsio Paint Music](https://learn.adafruit.com/larsio-paint-music.md)
- [Make It Talk](https://learn.adafruit.com/make-it-talk.md)
- [Introducing Gemma](https://learn.adafruit.com/introducing-gemma.md)
- [3D-Printed Bionic Eye](https://learn.adafruit.com/3d-printed-bionic-eye.md)
- [Adafruit PCF8591 Basic 4 x ADC + DAC Breakout](https://learn.adafruit.com/adafruit-pcf8591-adc-dac.md)
---
# Source: https://learn.adafruit.com/mcp4725-12-bit-dac-with-raspberry-pi.md
# MCP4725 12-Bit DAC with Raspberry Pi
## Overview
Danger:
Already mastered [Analog Inputs with the Pi](http://learn.adafruit.com/reading-a-analog-in-and-controlling-audio-volume-with-the-raspberry-pi), and looking for a new challenge? How about: How can I generate an analog output on the Pi?!
There are several ways you can accomplish this, but one of the easiest and most flexible is to use a dedicated IC called a **Digital to Analog Convertor** (or DAC). A DAC allows you to specify a numeric value (0..255 for an 8-bit DAC, 0..4095 for a 12-bit DAC, etc.), and the IC will output a voltage based on the supply voltage, and relative to that numeric value. For example, using a 12-bit DAC like the [MCP4725](http://www.adafruit.com/products/935) we'll be using here, setting the value to 2048 on a 3.3V system will results in ~1.65V output on the DAC.
This guide will show you everything you need to know to be able to generate precise analog outputs using your Pi and the MCP4725 12-Bit I2C DAC, from connecting everything up, to how to use our easy Python library.
# What You'll Need
The following products are used in this tutorial:
- [Adafruit MCP4725 12-Bit DAC](http://www.adafruit.com/products/935 "Link: http://www.adafruit.com/products/935")
- [Pi Cobbler](https://www.adafruit.com/products/914)
- [Next Page](https://learn.adafruit.com/mcp4725-12-bit-dac-with-raspberry-pi/configuring-your-pi-for-i2c.md)
## Featured Products
### Adafruit Assembled Pi Cobbler Breakout + Cable for Raspberry Pi
[Adafruit Assembled Pi Cobbler Breakout + Cable for Raspberry Pi](https://www.adafruit.com/product/914)
Now that you've finally got your hands on a [Raspberry Pi® Model B](http://www.raspberrypi.org/), you're probably itching to make some fun embedded computer projects with it. What you need is an add on prototyping Pi Cobbler from Adafruit, which can break out all those...
No Longer Stocked
[Buy Now](https://www.adafruit.com/product/914)
[Related Guides to the Product](https://learn.adafruit.com/products/914/guides)
### MCP4725 Breakout Board - 12-Bit DAC with I2C Interface
[MCP4725 Breakout Board - 12-Bit DAC with I2C Interface](https://www.adafruit.com/product/935)
Your microcontroller probably has an ADC (analog -\> digital converter) but does it have a DAC (digital -\> analog converter)??? Now it can! This breakout board features the easy-to-use MCP4725 12-bit DAC. Control it via I2C and send it the value you want it to output, and the VOUT pin...
In Stock
[Buy Now](https://www.adafruit.com/product/935)
[Related Guides to the Product](https://learn.adafruit.com/products/935/guides)
## Related Guides
- [MCP4725 12-Bit DAC Tutorial](https://learn.adafruit.com/mcp4725-12-bit-dac-tutorial.md)
- [CircuitPython MIDI to CV Skull](https://learn.adafruit.com/circuitpython-midi-to-cv-skull.md)
- [I2C Addresses and Troublesome Chips](https://learn.adafruit.com/i2c-addresses.md)
- [Basic Resistor Sensor Reading on Raspberry Pi](https://learn.adafruit.com/basic-resistor-sensor-reading-on-raspberry-pi.md)
- [Read-Only Raspberry Pi](https://learn.adafruit.com/read-only-raspberry-pi.md)
- [Using a 5V Stepper Motor with the RasPiRobot Board V2](https://learn.adafruit.com/using-a-5v-stepper-motor-with-the-raspirobot-board-v2.md)
- [Soundboard Speaker for Bikes & Scooters](https://learn.adafruit.com/soundboard-speaker-for-bikes-scooters.md)
- [Adafruit's Raspberry Pi Lesson 7. Remote Control with VNC](https://learn.adafruit.com/adafruit-raspberry-pi-lesson-7-remote-control-with-vnc.md)
- [Fruit Jam Video Music](https://learn.adafruit.com/fruit-jam-video-music.md)
- [Adafruit's Raspberry Pi Lesson 11. DS18B20 Temperature Sensing](https://learn.adafruit.com/adafruits-raspberry-pi-lesson-11-ds18b20-temperature-sensing.md)
- [Adafruit PiTFT - 2.8" Touchscreen Display for Raspberry Pi](https://learn.adafruit.com/adafruit-pitft-28-inch-resistive-touchscreen-display-raspberry-pi.md)
- [apt.adafruit.com](https://learn.adafruit.com/apt-adafruit-com.md)
- [Raspberry Pi Thermal Printer One Time Pads](https://learn.adafruit.com/raspberry-pi-thermal-printer-one-time-pads.md)
- [CLUE Text Telephone Transmitter](https://learn.adafruit.com/clue-teletype-transmitter.md)
- [Adafruit MAX31865 RTD PT100 or PT1000 Amplifier](https://learn.adafruit.com/adafruit-max31865-rtd-pt100-amplifier.md)
---
# Source: https://learn.adafruit.com/photocells/measuring-light.md
# Photocells
## Measuring Light
As we've said, a photocell's resistance changes as the face is exposed to more light. When its dark, the sensor looks like an large resistor up to 10MΩ, as the light level increases, the resistance goes down. This graph indicates approximately the resistance of the sensor at different light levels. Remember each photocell will be a little different so use this as a guide only!

Note that the graph is not linear, its a log-log graph!
Photocells, particularly the common CdS cells that you're likely to find, are not sensitive to all light. In particular they tend to be sensitive to light between 700nm (red) and 500nm (green) light.

Basically, blue light wont be nearly as effective at triggering the sensor as green/yellow light!## What the Heck is Lux?
Most datasheets use [lux](http://en.wikipedia.org/wiki/Lux) to indicate the resistance at certain light levels. But what is [lux](http://en.wikipedia.org/wiki/Lux) ? Its not a method we tend to use to describe brightness so its tough to gauge. Here is a table [adapted from a Wikipedia article on the topic!](http://en.wikipedia.org/wiki/Lux)| Illuminance | Example |
| --- | --- |
| **0.002 lux** | Moonless clear night sky |
| **0.2 lux** | Design minimum for emergency lighting (AS2293). |
| **0.27 - 1 lux** | Full moon on a clear night |
| **3.4 lux** | Dark limit of civil twilight under a clear sky |
| **50 lux** | Family living room |
| **80 lux** | Hallway/toilet |
| **100 lux** | Very dark overcast day |
| **300 - 500 lux** | Sunrise or sunset on a clear day. Well-lit office area. |
| **1,000 lux** | Overcast day; typical TV studio lighting |
| **10,000 - 25,000 lux** | Full daylight (not direct sun) |
| **32,000 - 130,000 lux** | Direct sunlight |
- [Previous Page](https://learn.adafruit.com/photocells/overview.md)
- [Next Page](https://learn.adafruit.com/photocells/testing-a-photocell.md)
## Featured Products
### Photo cell (CdS photoresistor)
[Photo cell (CdS photoresistor)](https://www.adafruit.com/product/161)
CdS cells are little light sensors. As the squiggly face is exposed to more light, the resistance goes down. When it's light, the resistance is about ~1KΩ, when dark it goes up to ~10KΩ.
To use, connect one side of the photocell (either one, it's symmetric) to power...
In Stock
[Buy Now](https://www.adafruit.com/product/161)
[Related Guides to the Product](https://learn.adafruit.com/products/161/guides)
### Adafruit METRO 328 Fully Assembled - Arduino IDE compatible
[Adafruit METRO 328 Fully Assembled - Arduino IDE compatible](https://www.adafruit.com/product/50)
We sure love the ATmega328 here at Adafruit, and we use them _a lot_ for our own projects. The processor has plenty of GPIO, Analog inputs, hardware UART SPI and I2C, timers and PWM galore - just enough for most simple projects. When we need to go small, we use a
Out of Stock
[Buy Now](https://www.adafruit.com/product/50)
[Related Guides to the Product](https://learn.adafruit.com/products/50/guides)
### Digital Multimeter
[Digital Multimeter](https://www.adafruit.com/product/71)
This is a basic multimeter, I've played with it a bunch and I think its a great addition to a toolbox. It's low cost and simple to use with a big clear display and all the measurements you need:
- AC/DC Voltage measurement
- Current measurement, from 1uA up to...
No Longer Stocked
[Buy Now](https://www.adafruit.com/product/71)
[Related Guides to the Product](https://learn.adafruit.com/products/71/guides)
### Half Sized Premium Breadboard - 400 Tie Points
[Half Sized Premium Breadboard - 400 Tie Points](https://www.adafruit.com/product/64)
This is a cute, half-size breadboard with 400 tie points, good for small projects. It's 3.25" x 2.2" / 8.3cm x 5.5cm with a standard double-strip in the middle and two power rails on both sides. You can pull the power rails off easily to make the breadboard as...
In Stock
[Buy Now](https://www.adafruit.com/product/64)
[Related Guides to the Product](https://learn.adafruit.com/products/64/guides)
## Related Guides
- [Halloween Pumpkin](https://learn.adafruit.com/halloween-pumpkin.md)
- [Adafruit Proto Screw Shield](https://learn.adafruit.com/adafruit-proto-screw-shield.md)
- [Arduino Lesson 11. LCD Displays - Part 1](https://learn.adafruit.com/adafruit-arduino-lesson-11-lcd-displays-1.md)
- [Program an AVR or Arduino Using Raspberry Pi GPIO](https://learn.adafruit.com/program-an-avr-or-arduino-using-raspberry-pi-gpio-pins.md)
- [Arduino Lesson 12. LCD Displays - Part 2](https://learn.adafruit.com/adafruit-arduino-lesson-12-lcd-displays-part-2.md)
- [Silicone Robo-Tentacle](https://learn.adafruit.com/silicone-robo-tentacle.md)
- [Babel Fish](https://learn.adafruit.com/babel-fish.md)
- [Arduino Lesson 10. Making Sounds](https://learn.adafruit.com/adafruit-arduino-lesson-10-making-sounds.md)
- [Arduino Lesson 16. Stepper Motors](https://learn.adafruit.com/adafruit-arduino-lesson-16-stepper-motors.md)
- [Line Following Zumo Robot Using Simulink](https://learn.adafruit.com/line-following-zumo-robot-programmed-with-simulink.md)
- [Bluefruit LE Connect for iOS and Android](https://learn.adafruit.com/bluefruit-le-connect.md)
- [Adafruit 16-channel PWM/Servo Shield](https://learn.adafruit.com/adafruit-16-channel-pwm-slash-servo-shield.md)
- [8BitBox](https://learn.adafruit.com/8bitbox.md)
- [Tiny Arduino Music Visualizer](https://learn.adafruit.com/piccolo.md)
- [Adafruit 1.14" 240x135 Color TFT Breakout LCD Display](https://learn.adafruit.com/adafruit-1-14-240x135-color-tft-breakout.md)
---
# Source: https://learn.adafruit.com/adafruit-microphone-amplifier-breakout/measuring-sound-levels.md
# Adafruit Microphone Amplifier Breakout
## Measuring Sound Levels
The Audio signal from the output of the amplifier is a varying voltage. To measure the sound level, we need to take multiple measurements to find the minimum and maximum extents or "peak to peak amplitude" of the signal.
In the example below, we choose a sample window of 50 milliseconds. That is sufficient to measure sound levels of frequencies as low as 20 Hz - the lower limit of human hearing.
After finding the minimum and maximum samples, we compute the difference and convert it to volts and the output is printed to the serial monitor.
```
/****************************************
Example Sound Level Sketch for the
Adafruit Microphone Amplifier
****************************************/
const int sampleWindow = 50; // Sample window width in mS (50 mS = 20Hz)
unsigned int sample;
void setup()
{
Serial.begin(9600);
}
void loop()
{
unsigned long startMillis= millis(); // Start of sample window
unsigned int peakToPeak = 0; // peak-to-peak level
unsigned int signalMax = 0;
unsigned int signalMin = 1024;
// collect data for 50 mS
while (millis() - startMillis < sampleWindow)
{
sample = analogRead(0);
if (sample < 1024) // toss out spurious readings
{
if (sample > signalMax)
{
signalMax = sample; // save just the max levels
}
else if (sample < signalMin)
{
signalMin = sample; // save just the min levels
}
}
}
peakToPeak = signalMax - signalMin; // max - min = peak-peak amplitude
double volts = (peakToPeak * 5.0) / 1024; // convert to volts
Serial.println(volts);
}
```

OK, so that's not very exciting. What else can you do with it?
# Scrolling Sound Level Meter
So now we will take the peak-to-peak measurement and use it to drive a [Bicolor LED Matrix](http://www.adafruit.com/products/902) to display the sound level. To make it more interesting, we will scroll the display so that the last 8 measurements are graphed in real-time.
To do this you will need to download the [Adafruit GFX Library](https://github.com/adafruit/Adafruit-GFX-Library "Link: https://github.com/adafruit/Adafruit-GFX-Library"), [Adafruit BusIO](https://github.com/adafruit/Adafruit_BusIO) and [LED Backpack Library](https://github.com/adafruit/Adafruit-LED-Backpack-Library). The Wire Library is included in the Arduino IDE installation.
## Assemble the Matrix
Follow the tutorial [here](http://learn.adafruit.com/adafruit-led-backpack/):
## Connect the Matrix
The Matrix backpack has 4 pins, connected as follows:
1. '+' -\> 5v
2. '-' -\> GND
3. D -\> SDA (Analog Pin 4)
4. C -\> SCL (Analog Pin 5)

## Upload the Code
Paste the code below into the Arduino IDE and upload it. Speak in a normal voice about 6-8 inches from the microphone and the sound level meter matrix display should start scrolling.

## Adjust the Gain
Although the amplifier is capable of a rail-to-rail signal (3.3v in this case), the code maps a 1v peak-to-peak signal to the full scale of the display.
This can be changed in the code. Or you can adjust the gain trimmer-pot of the amplifier with a small straight-bladed screwdriver. The amplifier gain is adjustable from 25x to 125x.

Danger:
```
/****************************************
Scrolling Sound Meter Sketch for the
Adafruit Microphone Amplifier
****************************************/
#include <Wire.h>
#include "Adafruit_LEDBackpack.h"
#include "Adafruit_GFX.h"
// Include the Matrix code for display
Adafruit_BicolorMatrix matrix = Adafruit_BicolorMatrix();
const int maxScale = 8;
const int redZone = 5;
const int sampleWindow = 50; // Sample window width in mS (50 mS = 20Hz)
unsigned int sample;
void setup()
{
Serial.begin(9600);
matrix.begin(0x70); // pass in the address
}
void loop()
{
unsigned long startMillis= millis(); // Start of sample window
unsigned int peakToPeak = 0; // peak-to-peak level
unsigned int signalMax = 0;
unsigned int signalMin = 1024;
while (millis() - startMillis < sampleWindow)
{
sample = analogRead(0);
if (sample < 1024) // toss out spurious readings
{
if (sample > signalMax)
{
signalMax = sample; // save just the max levels
}
else if (sample < signalMin)
{
signalMin = sample; // save just the min levels
}
}
}
peakToPeak = signalMax - signalMin;
// map 1v p-p level to the max scale of the display
int displayPeak = map(peakToPeak, 0, 1023, 0, maxScale);
// Update the display:
for (int i = 0; i < 7; i++) // shift the display left
{
matrix.displaybuffer[i] = matrix.displaybuffer[i+1];
}
// draw the new sample
for (int i = 0; i <= maxScale; i++)
{
if (i >= displayPeak) // blank these pixels
{
matrix.drawPixel(i, 7, 0);
}
else if (i < redZone) // draw in green
{
matrix.drawPixel(i, 7, LED_GREEN);
}
else // Red Alert! Red Alert!
{
matrix.drawPixel(i, 7, LED_RED);
}
}
matrix.writeDisplay(); // write the changes we just made to the display
}
```
- [Previous Page](https://learn.adafruit.com/adafruit-microphone-amplifier-breakout/assembly-and-wiring.md)
- [Next Page](https://learn.adafruit.com/adafruit-microphone-amplifier-breakout/more-cool-projects.md)
## Featured Products
### Electret Microphone Amplifier - MAX4466 with Adjustable Gain
[Electret Microphone Amplifier - MAX4466 with Adjustable Gain](https://www.adafruit.com/product/1063)
Add an ear to your project with this well-designed electret microphone amplifier. This fully assembled and tested board comes with a 20-20KHz electret microphone soldered on. For the amplification, we use the Maxim MAX4466, an op-amp specifically designed for this delicate task! The amplifier...
In Stock
[Buy Now](https://www.adafruit.com/product/1063)
[Related Guides to the Product](https://learn.adafruit.com/products/1063/guides)
### Adafruit Bicolor LED Square Pixel Matrix with I2C Backpack
[Adafruit Bicolor LED Square Pixel Matrix with I2C Backpack](https://www.adafruit.com/product/902)
What's better than a single LED? Lots of LEDs! A fun way to make a small colorful display is to use a [1.2" Bi-color 8x8 LED Matrix](http://www.adafruit.com/products/458). Matrices like these are 'multiplexed' - so to control all the 128 LEDs you need 24 pins....
In Stock
[Buy Now](https://www.adafruit.com/product/902)
[Related Guides to the Product](https://learn.adafruit.com/products/902/guides)
### Tiny Premium Breadboard
[Tiny Premium Breadboard](https://www.adafruit.com/product/65)
This is a tiny little breadboard... half the size of a half-size breadboard!
**As of Sep 8, 2022** - This Tiny breadboard has been updated to make plugging and un-plugging boards and headers a buttery-smooth operation. Updated design also includes a metal...
In Stock
[Buy Now](https://www.adafruit.com/product/65)
[Related Guides to the Product](https://learn.adafruit.com/products/65/guides)
## Related Guides
- [Adafruit LED Backpacks](https://learn.adafruit.com/adafruit-led-backpack.md)
- [3D Printed Animatronic Robot Head](https://learn.adafruit.com/3d-printed-animatronic-robot-head.md)
- [Animating Multiple LED Backpacks](https://learn.adafruit.com/animating-multiple-led-backpacks.md)
- [Tiny Arduino Music Visualizer](https://learn.adafruit.com/piccolo.md)
- [LED Ampli-Tie](https://learn.adafruit.com/led-ampli-tie.md)
- [Wave Shield Voice Changer](https://learn.adafruit.com/wave-shield-voice-changer.md)
- [Battery Powered Raspberry Pi Displays w/RaspiRobot Shield](https://learn.adafruit.com/raspirobot-battery-powered-raspberry-pi-displays.md)
- [Trinket Sound-Reactive LED Color Organ](https://learn.adafruit.com/trinket-sound-reactive-led-color-organ.md)
- [Electronic Demon Costume](https://learn.adafruit.com/electronic-demon-costume.md)
- [FFT: Fun with Fourier Transforms](https://learn.adafruit.com/fft-fun-with-fourier-transforms.md)
- [CircuitPython Hardware: LED Backpacks & FeatherWings](https://learn.adafruit.com/micropython-hardware-led-backpacks-and-featherwings.md)
- [3D Printed Wireless MIDI Controller Guitar](https://learn.adafruit.com/ez-key-wireless-midi-controller-guitar.md)
- [Matrix and 7-Segment LED Backpack with the Raspberry Pi](https://learn.adafruit.com/matrix-7-segment-led-backpack-with-the-raspberry-pi.md)
- [Circle of Fifths Euclidean Synth with synthio and CircuitPython](https://learn.adafruit.com/circle-of-fifths-euclidean-synth-with-synthio-and-circuitpython.md)
- [Adafruit STSPIN220 Stepper Motor Driver Breakout Board](https://learn.adafruit.com/adafruit-stspin220-stepper-motor-driver-breakout-board.md)
---
# Source: https://learn.adafruit.com/mini-thermal-receipt-printer/microcontroller.md
# Mini Thermal Receipt Printers
## Arduino Code
Connections are explained on the prior page. For the Arduino example code, we’ll connect the printer’s data out (TX) wire to digital pin 5, and data in (RX) to digital pin 6. Ground can go to any Arduino GND pin. Pins are configurable, but this is what the example uses, so let’s stick with that for now.
On the Arduino side, pin 5 _receives_ (RX) and 6 _transmits_ (TX)…opposite of the printer’s pin functions…called a _crossover_ configuration, something you’ll hear a lot in serial communication and networking.

## Install Library
We made an [Arduino library to assist working with these printers](https://github.com/adafruit/Adafruit-Thermal-Printer-Library).
Go to the _Arduino Library Manager_ under **Sketch→Include…Library→Manage…Libraries…**

Search for and install the **Adafruit Thermal Printer** library:

We also have a great tutorial on Arduino library installation at:
[http://learn.adafruit.com/adafruit-all-about-arduino-libraries-install-use](http://learn.adafruit.com/adafruit-all-about-arduino-libraries-install-use "Link: http://learn.adafruit.com/adafruit-all-about-arduino-libraries-install-use")
You should now be able to access the sample code by navigating through menus in this order: **File→Sketchbook→Libraries→Adafruit\_Thermal→A\_printertest**

**If your printer test page shows 'BAUDRATE: 9600', you'll need to make a small change to the library source code.** Using a text editor (Notepad, etc.) open the file Adafruit\_Thermal.cpp and change this line:
```
#define BAUDRATE 19200
```
to this:
```
#define BAUDRATE 9600
```
Some printers arrive from the factory set for 19200 baud, but a few may be set to 9600. This will _not_ negatively impact the performance of your unit! The speed of the paper through the printer is already much less than this and you will not see any difference…it's strictly a data protocol issue of getting the microcontroller and printer communicating.
OK upload the sketch (with baudrate change if necessary) to the Arduino. You should see the printer print out the example receipt which includes all the capabilities of the library.
If this does not work, first check that the printer and Arduino are both powered, and that the data in, out and ground wires are properly connected to the Arduino.
- [Previous Page](https://learn.adafruit.com/mini-thermal-receipt-printer/making-connections.md)
- [Next Page](https://learn.adafruit.com/mini-thermal-receipt-printer/printing-text.md)
## Primary Products
### Mini Thermal Receipt Printer
[Mini Thermal Receipt Printer](https://www.adafruit.com/product/597)
Add a mini printer to any microcontroller project with this very cute thermal printer. Thermal printers are also known as receipt printers, they're what you get when you go to the ATM or grocery store. Now you can embed a little printer of your own into an enclosure. This printer is ideal...
No Longer Stocked
[Buy Now](https://www.adafruit.com/product/597)
[Related Guides to the Product](https://learn.adafruit.com/products/597/guides)
### Tiny Thermal Receipt Printer - TTL Serial / USB
[Tiny Thermal Receipt Printer - TTL Serial / USB](https://www.adafruit.com/product/2751)
Add a _really small_ printer to any microcontroller project with this very cute thermal printer. Thermal printers are also known as receipt printers, they're what you get when you go to the ATM or grocery store. Now you can embed a little printer of your own into an enclosure. This...
No Longer Stocked
[Buy Now](https://www.adafruit.com/product/2751)
[Related Guides to the Product](https://learn.adafruit.com/products/2751/guides)
### Nano Thermal Receipt Printer - TTL Serial
[Nano Thermal Receipt Printer - TTL Serial](https://www.adafruit.com/product/2752)
Add a _really really small_ printer to any microcontroller project with this very cute thermal printer. Thermal printers are also known as receipt printers, they're what you get when you go to the ATM or grocery store. Now you can embed a little printer of your own into an...
No Longer Stocked
[Buy Now](https://www.adafruit.com/product/2752)
[Related Guides to the Product](https://learn.adafruit.com/products/2752/guides)
### Thermal Receipt Printer Guts
[Thermal Receipt Printer Guts](https://www.adafruit.com/product/2753)
Add printing capability to any microcontroller project with **just the innards of a thermal printer.** Thermal printers are also known as receipt printers, they're what you get when you go to the ATM or grocery store. Now you can embed a little printer of your own into a...
No Longer Stocked
[Buy Now](https://www.adafruit.com/product/2753)
[Related Guides to the Product](https://learn.adafruit.com/products/2753/guides)
## Featured Products
### Mini Thermal Receipt Printer Starter Pack
[Mini Thermal Receipt Printer Starter Pack](https://www.adafruit.com/product/600)
Hit the ground running (and printing!) with this starter pack that includes a thermal printer and all the extras and save a few dollars while you're at it.
Includes:
- [A mini thermal receipt printer](http://www.adafruit.com/products/597) - with cables and...
No Longer Stocked
[Buy Now](https://www.adafruit.com/product/600)
[Related Guides to the Product](https://learn.adafruit.com/products/600/guides)
### Female DC Power adapter - 2.1mm jack to screw terminal block
[Female DC Power adapter - 2.1mm jack to screw terminal block](https://www.adafruit.com/product/368)
If you need to connect a DC power wall wart to a board that doesn't have a DC jack - this adapter will come in very handy! There is a 2.1mm DC jack on one end, and a screw terminal block on the other. The terminals are labeled with positive/negative assuming a positive-tip configuration...
In Stock
[Buy Now](https://www.adafruit.com/product/368)
[Related Guides to the Product](https://learn.adafruit.com/products/368/guides)
### 5V 2A (2000mA) switching power supply - UL Listed
[5V 2A (2000mA) switching power supply - UL Listed](https://www.adafruit.com/product/276)
This is an FCC/CE certified and UL listed power supply. Need a lot of 5V power? This switching supply gives a clean regulated 5V output at up to 2000mA. 110 or 240 input, so it works in any country. The plugs are "US 2-prong" style so you may need a plug adapter, but you can pick one...
Out of Stock
[Buy Now](https://www.adafruit.com/product/276)
[Related Guides to the Product](https://learn.adafruit.com/products/276/guides)
### Thermal paper roll - 50' long, 2.25" wide
[Thermal paper roll - 50' long, 2.25" wide](https://www.adafruit.com/product/599)
A mini roll of thermal paper, this fits very nicely into our mini thermal printer. 2.25" wide (about 57mm) and 50 feet long (15 meters). BPA-free.
[Perfect for use with our mini thermal printer!](http://www.adafruit.com/products/597)
No Longer Stocked
[Buy Now](https://www.adafruit.com/product/599)
[Related Guides to the Product](https://learn.adafruit.com/products/599/guides)
### Thermal Paper Roll - 33' long, 2.25"
[Thermal Paper Roll - 33' long, 2.25"](https://www.adafruit.com/product/2754)
A little roll of thermal paper! This fits very nicely into our [Tiny Thermal Receipt Printer](https://www.adafruit.com/products/2751). It's ~2.25" wide (about 57mm) and 33 feet long or about 10 meters.
No Longer Stocked
[Buy Now](https://www.adafruit.com/product/2754)
[Related Guides to the Product](https://learn.adafruit.com/products/2754/guides)
### Thermal Paper Roll - 16' long, 2.25"
[Thermal Paper Roll - 16' long, 2.25"](https://www.adafruit.com/product/2755)
A little roll of thermal paper! This fits very nicely into our [Nano Thermal Receipt Printer](https://www.adafruit.com/products/2752). It's ~2.25" wide (about 57mm) and 16 feet long or about 5 meters.
No Longer Stocked
[Buy Now](https://www.adafruit.com/product/2755)
[Related Guides to the Product](https://learn.adafruit.com/products/2755/guides)
### Adafruit METRO 328 Fully Assembled - Arduino IDE compatible
[Adafruit METRO 328 Fully Assembled - Arduino IDE compatible](https://www.adafruit.com/product/50)
We sure love the ATmega328 here at Adafruit, and we use them _a lot_ for our own projects. The processor has plenty of GPIO, Analog inputs, hardware UART SPI and I2C, timers and PWM galore - just enough for most simple projects. When we need to go small, we use a
Out of Stock
[Buy Now](https://www.adafruit.com/product/50)
[Related Guides to the Product](https://learn.adafruit.com/products/50/guides)
### Breadboarding wire bundle
[Breadboarding wire bundle](https://www.adafruit.com/product/153)
75 flexible stranded core wires with stiff ends molded on in red, orange, yellow, green, blue, brown, black and white. These are a major improvement over the "box of bent wires" that are sometimes sold with breadboards, and faster than stripping your own solid core wires. Makes...
In Stock
[Buy Now](https://www.adafruit.com/product/153)
[Related Guides to the Product](https://learn.adafruit.com/products/153/guides)
## Related Guides
- [How to Find Hidden COM Ports](https://learn.adafruit.com/how-to-find-hidden-com-ports.md)
- [Wireless Game Show Poppers for the Classroom!](https://learn.adafruit.com/wireless-game-show-poppers.md)
- [Adafruit Ultimate GPS](https://learn.adafruit.com/adafruit-ultimate-gps.md)
- [RGB LED Matrix Basics](https://learn.adafruit.com/32x16-32x32-rgb-led-matrix.md)
- [Analog Feedback Servos](https://learn.adafruit.com/analog-feedback-servos.md)
- [Arduino GPS Clock](https://learn.adafruit.com/arduino-clock.md)
- [Silicone Robo-Tentacle](https://learn.adafruit.com/silicone-robo-tentacle.md)
- [Ladyada's Bento Box](https://learn.adafruit.com/lady-adas-bento-box.md)
- [Metal Inlay Capacitive Touch Buttons](https://learn.adafruit.com/metal-inlay-capacitive-touch-buttons.md)
- [Adafruit IO Basics: NeoPixel Controller](https://learn.adafruit.com/adafruit-io-basics-neopixel-controller.md)
- [Adafruit PN532 RFID/NFC Breakout and Shield](https://learn.adafruit.com/adafruit-pn532-rfid-nfc.md)
- [Reverse Geocache Box](https://learn.adafruit.com/reverse-geocache-engagement-box.md)
- [Character LCDs](https://learn.adafruit.com/character-lcds.md)
- [Adafruit INA219 Current Sensor Breakout](https://learn.adafruit.com/adafruit-ina219-current-sensor-breakout.md)
- [All About Arduino Libraries](https://learn.adafruit.com/adafruit-all-about-arduino-libraries-install-use.md)
---
# Source: https://learn.adafruit.com/smt-manufacturing/microscope-inspection.md
# SMT Manufacturing
## Microscope Inspection
When your parts get small, it can get really tough to see whats going on with them. Especially if your vision is only so-so, having some assistance with inspection is an easily solved problem. When we were at school, the lab had a really sweet stereo-microscope. You could really see quite nicely and solder while looking thru the microscope. It was wonderful but unfortunately a bit too expensive for the common user.
Thankfully, Adafruit now carries a much more affordable alternative.

## USB Microscope
As electronics get smaller and smaller, you'll need a hand examining PCBs and this little USB microscope is the perfect tool. Its smaller and lighter than a large optical microscope but packs quite a bit of power in its little body. There's a 5.0 megapixel sensor inside and an optical magnifier that can adjust from 20x (for basic PCB inspection) to 220x (for detailed inspection). Eight white LEDs are angled right onto whatever you're examining so you get enough lighting to see, and are smoothly adjustable via a dial on the side.
**New!** We've upgraded this microscope to 5.0 Megapixel (from 2.0M) and this one comes with two removable plastic caps to get close ups for a wider focusing range.
If you plug this into any computer, it just shows up as a standard USB camera (we used this for our weekly Ask an Engineer show) and the Windows/Mac software lets you take snapshots using the button on the side of the microscope or direct from the software (so you don't move the camera).
We tried a bunch of different USB microscopes and found this one to be the best combination of optical clarity, usability, and price. It's perfect for electronics hacking, rework, SMT (de)soldering, inspection, and soon you'll find yourself pulling it out to look and photograph all sort of cool small stuff around your lab and home.
[**Pick up our USB Microscope here.**](http://www.adafruit.com/products/636)
We took some snaps of this 'scope while looking at a tiny 0201-populated GPS board at 20x magnification:

and then at a raw die at 200x:

- [Previous Page](https://learn.adafruit.com/smt-manufacturing/tweezers.md)
## Featured Products
### Fine tip curved tweezers - ESD safe
[Fine tip curved tweezers - ESD safe](https://www.adafruit.com/product/422)
When soldering small surface-mount (SMD/SMT) components, one thing you'll need is a good pair of tweezers. These are a great pair of every-day tweezers. They're anti-static, anti-magnetic and made of hard stainless steel. The tips are fine and pointy to pick up any size component. This...
In Stock
[Buy Now](https://www.adafruit.com/product/422)
[Related Guides to the Product](https://learn.adafruit.com/products/422/guides)
### Fine tip straight tweezers - ESD safe
[Fine tip straight tweezers - ESD safe](https://www.adafruit.com/product/421)
When soldering small surface-mount (SMD/SMT) components, one thing you'll need is a good pair of tweezers. These tweezers are a great pair of every-day tweezers. They're anti-static, anti-magnetic and made of hard stainless steel. The tips are fine and pointy to pick up any size...
In Stock
[Buy Now](https://www.adafruit.com/product/421)
[Related Guides to the Product](https://learn.adafruit.com/products/421/guides)
### USB Microscope - 5MP interpolated 220x magnification / 8 LEDs
[USB Microscope - 5MP interpolated 220x magnification / 8 LEDs](https://www.adafruit.com/product/636)
As electronics get smaller and smaller, you'll need a hand examining PCBs and this little USB microscope is the perfect tool. Its smaller and lighter than a large optical microscope but packs quite a bit of power in its little body. There's a 2 megapixel sensor inside and an optical...
Out of Stock
[Buy Now](https://www.adafruit.com/product/636)
[Related Guides to the Product](https://learn.adafruit.com/products/636/guides)
## Related Guides
- [Reindeer Solder Kit by Phyx](https://learn.adafruit.com/reindeer-solder-kit-by-phyx.md)
- [3D-Printed Solder Paste Dispenser Hand Switch ](https://learn.adafruit.com/3d-printed-solder-paste-dispenser-hand-switch.md)
- [USB Rechargeable Mini Solder Fume Extractor](https://learn.adafruit.com/usb-rechargeable-mini-solder-fume-extractor.md)
- [How to Sign Windows Drivers & Executables](https://learn.adafruit.com/how-to-sign-windows-drivers-installer.md)
- [Desktop Fume Extractor](https://learn.adafruit.com/desktop-fume-extractor.md)
- [Chinese Dragon Puppet with Motion-Reactive Flame Effect](https://learn.adafruit.com/chinese-dragon-puppet-with-motion-reactive-flame-effect.md)
- [16-Step Drum Sequencer](https://learn.adafruit.com/16-step-drum-sequencer.md)
- [Color Sensing Music Player](https://learn.adafruit.com/color-sensing-music-player.md)
- [Light-Up Costumes in Harsh Environments](https://learn.adafruit.com/light-up-costumes-in-harsh-environments.md)
- [Garden Path Lights with WLED and a Sunset Timer](https://learn.adafruit.com/garden-path-lights-with-sunset-timer.md)
- [CNC Rotary Macropad](https://learn.adafruit.com/cnc-rotary-macropad.md)
- [Blinka Says Tabletop Arcade Game](https://learn.adafruit.com/blinka-says-tabletop-arcade-game.md)
- [IoT Moon Phase Guide](https://learn.adafruit.com/moon-phase.md)
- [KTOWN's Ultimate Creating Parts in Eagle Tutorial](https://learn.adafruit.com/ktowns-ultimate-creating-parts-in-eagle-tutorial.md)
- [Shop Tips & Tricks](https://learn.adafruit.com/shop-tips-and-tricks.md)
---
# Source: https://learn.adafruit.com/adafruit-pn532-rfid-nfc/mifare.md
# Adafruit PN532 RFID/NFC Breakout and Shield
## MiFare Cards & Tags
MiFare is one of the four 13.56MHz card 'protocols' (FeliCa is another well known one) All of the cards and tags sold at the Adafruit shop use the inexpensive and popular MiFare Classic chipset
## MiFare Classic Cards
MIFARE Classic cards come in 1K and 4K varieties. While several varieties of chips exist, the two main chipsets used are described in the following publicly accessible documents:
- [MF1S503x Mifare Classic 1K data sheet](http://www.nxp.com/documents/data_sheet/MF1S503x.pdf)
- [MF1S70yyX MIFARE Classic 4K data sheet](http://www.nxp.com/documents/data_sheet/MF1S70YYX.pdf "Link: http://www.nxp.com/documents/data\_sheet/MF1S70YYX.pdf")
Mifare Classic cards typically have a **4-byte NUID** that uniquely (within the numeric limits of the value) identifies the card. It's possible to have a 7 byte IDs as well, but the 4 byte models are far more common for Mifare Classic.## EEPROM Memory
Mifare Classic cards have either 1K or 4K of EEPROM memory. Each memory block can be configured with different access conditions, with two seperate authentication keys present in each block.
Mifare Classic cards are divided into section called **sectors** and **blocks**. Each "sector" has individual access rights, and contains a fixed number of "blocks" that are controlled by these access rights. Each block contains 16 bytes, and sectors contains either 4 blocks (1K/4K cards) for a total of 64 bytes per sector, or 16 blocks (4K cards only) for a total of 256 bytes per sector. The card types are organised as follows:
- **1K Cards** - 16 sectors of 4 blocks each (sectors 0..15)
- **4K Cards** - 32 sectors of 4 blocks each (sectors 0..31) and 8 sectors of 16 blocks each (sectors 32..39)
## 4 Block Sectors
1K and 4K cards both use 16 sectors of 4 blocks each, with the bottom 1K of memory on the 4K cards being organised identically to the 1K models for compatability reasons. These individual 4 block sectors (containing 64 byts each) have basic security features are can each be configured with seperate read/write access and two different 6-byte authentication keys (the keys can be different for each sector). Due to these security features (which are stored in the last block, called the **Sector Trailer** ), only the bottom 3 blocks of each sector are actually available for data storage, meaning you have 48 bytes per 64 byte sector available for your own use.
Each 4 block sector is organised as follows, with four rows of 16 bytes each for a total of 64-bytes per sector. The first two sectors of any card are shown:
```
Sector Block Bytes Description
------ ----- ----- -----------
0 1 2 3 4 5 6 7 8 9 10 11 12 13 14 15
```
```
1 3 [-------KEY A-------] [Access Bits] [-------KEY B-------] Sector Trailer
2 [ Data ] Data
1 [ Data ] Data
0 [ Data ] Data
```
```
0 3 [-------KEY A-------] [Access Bits] [-------KEY B-------] Sector Trailer
2 [ Data ] Data
1 [ Data ] Data
0 [ Manufacturer Data ] Manufacturer Block
```
**Sector Trailer (Block 3)**
The sector trailer block contains the two secret keys (Key A and Key B), as well as the access conditions for the four blocks. It has the following structure:
```
Sector Trailer Bytes
--------------------------------------------------------------
0 1 2 3 4 5 6 7 8 9 10 11 12 13 14 15
[ Key A ] [Access Bits] [ Key B ]
```
For more information in using Keys to access the clock contents, see Accessing Data Blocks further below.
**Data Blocks (Blocks 0..2)**
Data blocks are 16 bytes wide and, depending on the permissions set in the access bits, can be read from and written to. You are free to use the 16 data bytes in any way you wish. You can easily store text input, store four 32-bit integer values, a 16 character uri, etc.
**Data Blocks as "Value Blocks"**
An alternative to storing random data in the 16 byte-wide blocks is to configure them as "Value Blocks". Value blocks allow performing electronic purse functions (valid commands are: read, write, increment, decrement, restore, transfer).
Each Value block contains a single signed 32-bit value, and this value is stored 3 times for data integrity and security reasons. It is stored twice non-inverted, and once inverted. The last 4 bytes are used for a 1-byte address, which is stored 4 times (twice non-inverted, and twice inverted).
Data blocks configured as "Value Blocks" have the following structure:```
Value Block Bytes
--------------------------------------------------------------
0 1 2 3 4 5 6 7 8 9 10 11 12 13 14 15
[ Value ] [ ~Value ] [ Value ] [A ~A A ~A]
```
**Manufacturer Block (Sector 0, Block 0)**
Sector 0 is special since it contains the Manufacturer Block. This block contains the manufacturer data, and is read-only. It should be avoided unless you know what you are doing.## 16 Block Sectors
16 block sectors are identical to 4 block sectors, but with more data blocks. The same structure described in the 4 block sectors above applies.
```
Sector Block Bytes Description
------ ----- ----- ----------
0 1 2 3 4 5 6 7 8 9 10 11 12 13 14 15
```
```
32 15 [-------KEY A-------] [Access Bits] [-------KEY B-------] Sector Trailer 32
14 [ Data ] Data
13 [ Data ] Data
...
2 [ Data ] Data
1 [ Data ] Data
0 [ Data ] Data
```
## Accessing EEPROM Memory
To access the EEPROM on the cards, you need to perform the following steps:
1. You must retrieve the 4-byte NUID of the card (this can sometimes be 7-bytes long as well, though rarely for Mifare Classic cards). This is required for the subsequent authentication process.
2. You must authenticate the sector you wish to access according to the access rules defined in the Sector Trailer block for that sector, by passing in the appropriate 6 byte Authentication Key (ex. 0xFF 0xFF 0xFF 0xFF 0xFF 0xFF for new cards).
3. Once authenication has succeeded, and depending on the sector permissions, you can then read/write/increment/decrement the contents of the specific block. Note that you need to re-authenticate for each sector that you access, since each sector can have it's own distinct access keys and rights!
## Note on Authentication
Before you can do access the sector's memory, you first need to "authenticate" according to the security settings stored in the Sector Trailer. By default, any new card will generally be configured to allow full access to every block in the sector using Key A and a value of 0xFF 0xFF 0xFF 0xFF 0xFF 0xFF. Some other common keys that you may wish to try if this doesn't work are:
```
0XFF 0XFF 0XFF 0XFF 0XFF 0XFF
0XD3 0XF7 0XD3 0XF7 0XD3 0XF7
0XA0 0XA1 0XA2 0XA3 0XA4 0XA5
0XB0 0XB1 0XB2 0XB3 0XB4 0XB5
0X4D 0X3A 0X99 0XC3 0X51 0XDD
0X1A 0X98 0X2C 0X7E 0X45 0X9A
0XAA 0XBB 0XCC 0XDD 0XEE 0XFF
0X00 0X00 0X00 0X00 0X00 0X00
0XAB 0XCD 0XEF 0X12 0X34 0X56
```
## Example of a New Mifare Classic 1K Card
The follow memory dump illustrates the structure of a 1K Mifare Classic Card, where the data and Sector Trailer blocks can be clearly seen:
```
[--------------------------Start of Memory Dump--------------------------]
------------------------Sector 0-------------------------
Block 0 8E 02 6F 66 85 08 04 00 62 63 64 65 66 67 68 69 ?.of?...bcdefghi
Block 1 00 00 00 00 00 00 00 00 00 00 00 00 00 00 00 00 ................
Block 2 00 00 00 00 00 00 00 00 00 00 00 00 00 00 00 00 ................
Block 3 00 00 00 00 00 00 FF 07 80 69 FF FF FF FF FF FF ......ÿ.?iÿÿÿÿÿÿ
------------------------Sector 1-------------------------
Block 4 00 00 00 00 00 00 00 00 00 00 00 00 00 00 00 00 ................
Block 5 00 00 00 00 00 00 00 00 00 00 00 00 00 00 00 00 ................
Block 6 00 00 00 00 00 00 00 00 00 00 00 00 00 00 00 00 ................
Block 7 00 00 00 00 00 00 FF 07 80 69 FF FF FF FF FF FF ......ÿ.?iÿÿÿÿÿÿ
------------------------Sector 2-------------------------
Block 8 00 00 00 00 00 00 00 00 00 00 00 00 00 00 00 00 ................
Block 9 00 00 00 00 00 00 00 00 00 00 00 00 00 00 00 00 ................
Block 10 00 00 00 00 00 00 00 00 00 00 00 00 00 00 00 00 ................
Block 11 00 00 00 00 00 00 FF 07 80 69 FF FF FF FF FF FF ......ÿ.?iÿÿÿÿÿÿ
------------------------Sector 3-------------------------
Block 12 00 00 00 00 00 00 00 00 00 00 00 00 00 00 00 00 ................
Block 13 00 00 00 00 00 00 00 00 00 00 00 00 00 00 00 00 ................
Block 14 00 00 00 00 00 00 00 00 00 00 00 00 00 00 00 00 ................
Block 15 00 00 00 00 00 00 FF 07 80 69 FF FF FF FF FF FF ......ÿ.?iÿÿÿÿÿÿ
------------------------Sector 4-------------------------
Block 16 00 00 00 00 00 00 00 00 00 00 00 00 00 00 00 00 ................
Block 17 00 00 00 00 00 00 00 00 00 00 00 00 00 00 00 00 ................
Block 18 00 00 00 00 00 00 00 00 00 00 00 00 00 00 00 00 ................
Block 19 00 00 00 00 00 00 FF 07 80 69 FF FF FF FF FF FF ......ÿ.?iÿÿÿÿÿÿ
------------------------Sector 5-------------------------
Block 20 00 00 00 00 00 00 00 00 00 00 00 00 00 00 00 00 ................
Block 21 00 00 00 00 00 00 00 00 00 00 00 00 00 00 00 00 ................
Block 22 00 00 00 00 00 00 00 00 00 00 00 00 00 00 00 00 ................
Block 23 00 00 00 00 00 00 FF 07 80 69 FF FF FF FF FF FF ......ÿ.?iÿÿÿÿÿÿ
------------------------Sector 6-------------------------
Block 24 00 00 00 00 00 00 00 00 00 00 00 00 00 00 00 00 ................
Block 25 00 00 00 00 00 00 00 00 00 00 00 00 00 00 00 00 ................
Block 26 00 00 00 00 00 00 00 00 00 00 00 00 00 00 00 00 ................
Block 27 00 00 00 00 00 00 FF 07 80 69 FF FF FF FF FF FF ......ÿ.?iÿÿÿÿÿÿ
------------------------Sector 7-------------------------
Block 28 00 00 00 00 00 00 00 00 00 00 00 00 00 00 00 00 ................
Block 29 00 00 00 00 00 00 00 00 00 00 00 00 00 00 00 00 ................
Block 30 00 00 00 00 00 00 00 00 00 00 00 00 00 00 00 00 ................
Block 31 00 00 00 00 00 00 FF 07 80 69 FF FF FF FF FF FF ......ÿ.?iÿÿÿÿÿÿ
------------------------Sector 8-------------------------
Block 32 00 00 00 00 00 00 00 00 00 00 00 00 00 00 00 00 ................
Block 33 00 00 00 00 00 00 00 00 00 00 00 00 00 00 00 00 ................
Block 34 00 00 00 00 00 00 00 00 00 00 00 00 00 00 00 00 ................
Block 35 00 00 00 00 00 00 FF 07 80 69 FF FF FF FF FF FF ......ÿ.?iÿÿÿÿÿÿ
------------------------Sector 9-------------------------
Block 36 00 00 00 00 00 00 00 00 00 00 00 00 00 00 00 00 ................
Block 37 00 00 00 00 00 00 00 00 00 00 00 00 00 00 00 00 ................
Block 38 00 00 00 00 00 00 00 00 00 00 00 00 00 00 00 00 ................
Block 39 00 00 00 00 00 00 FF 07 80 69 FF FF FF FF FF FF ......ÿ.?iÿÿÿÿÿÿ
------------------------Sector 10-------------------------
Block 40 00 00 00 00 00 00 00 00 00 00 00 00 00 00 00 00 ................
Block 41 00 00 00 00 00 00 00 00 00 00 00 00 00 00 00 00 ................
Block 42 00 00 00 00 00 00 00 00 00 00 00 00 00 00 00 00 ................
Block 43 00 00 00 00 00 00 FF 07 80 69 FF FF FF FF FF FF ......ÿ.?iÿÿÿÿÿÿ
------------------------Sector 11-------------------------
Block 44 00 00 00 00 00 00 00 00 00 00 00 00 00 00 00 00 ................
Block 45 00 00 00 00 00 00 00 00 00 00 00 00 00 00 00 00 ................
Block 46 00 00 00 00 00 00 00 00 00 00 00 00 00 00 00 00 ................
Block 47 00 00 00 00 00 00 FF 07 80 69 FF FF FF FF FF FF ......ÿ.?iÿÿÿÿÿÿ
------------------------Sector 12-------------------------
Block 48 00 00 00 00 00 00 00 00 00 00 00 00 00 00 00 00 ................
Block 49 00 00 00 00 00 00 00 00 00 00 00 00 00 00 00 00 ................
Block 50 00 00 00 00 00 00 00 00 00 00 00 00 00 00 00 00 ................
Block 51 00 00 00 00 00 00 FF 07 80 69 FF FF FF FF FF FF ......ÿ.?iÿÿÿÿÿÿ
------------------------Sector 13-------------------------
Block 52 00 00 00 00 00 00 00 00 00 00 00 00 00 00 00 00 ................
Block 53 00 00 00 00 00 00 00 00 00 00 00 00 00 00 00 00 ................
Block 54 00 00 00 00 00 00 00 00 00 00 00 00 00 00 00 00 ................
Block 55 00 00 00 00 00 00 FF 07 80 69 FF FF FF FF FF FF ......ÿ.?iÿÿÿÿÿÿ
------------------------Sector 14-------------------------
Block 56 00 00 00 00 00 00 00 00 00 00 00 00 00 00 00 00 ................
Block 57 00 00 00 00 00 00 00 00 00 00 00 00 00 00 00 00 ................
Block 58 00 00 00 00 00 00 00 00 00 00 00 00 00 00 00 00 ................
Block 59 00 00 00 00 00 00 FF 07 80 69 FF FF FF FF FF FF ......ÿ.?iÿÿÿÿÿÿ
------------------------Sector 15-------------------------
Block 60 00 00 00 00 00 00 00 00 00 00 00 00 00 00 00 00 ................
Block 61 00 00 00 00 00 00 00 00 00 00 00 00 00 00 00 00 ................
Block 62 00 00 00 00 00 00 00 00 00 00 00 00 00 00 00 00 ................
Block 63 00 00 00 00 00 00 FF 07 80 69 FF FF FF FF FF FF ......ÿ.?iÿÿÿÿÿÿ
[---------------------------End of Memory Dump---------------------------]
```
## MiFare Ultralight Cards
MiFare Ultralight cards typically contain 512 bits (64 bytes) of memory, including 4 bytes (32-bits) of OTP (One Time Programmable) memory where the individual bits can be written but not erased.
[MF0ICU1 MiFare Ultralight Functional Specification](http://www.nxp.com/documents/data_sheet/MF0ICU1.pdf "Link: http://www.nxp.com/documents/data\_sheet/MF0ICU1.pdf")
MiFare Ultralight cards have a **7-byte UID** that uniquely identifies the card.
## EEPROM Memory
MiFare Ultralight cards have 512 bits (64 bytes) of EEPROM memory, including 4 byte (32 bits) of OTP memory. Unlike Mifare Classic cards, there is no authentication on a per block level, although the blocks can be set to "read-only" mode using Lock Bytes (described below).
EEPROM memory is organised into 16 pages of four bytes eachs, in the following order:```
Page Description
---- ------------
0 Serial Number (4 bytes)
1 Serial Number (4 bytes)
2 Byte 0: Serial Number
Byte 1: Internal Memory
Byte 2..3: lock bytes
3 One-time programmable memory (4 bytes)
4..15 User memory (4 bytes)
```
Here are the pages and blocks arranged in table format:```
Page Block 0 Block 1 Block 2 Block 3
----- ---------------------------------------
0 [ Serial Number ]
1 [ Serial Number ]
2 [Serial] - [Intern] - [ Lock Bytes ]
3 [ One Time Programmable Memory ]
4 [ User Data ]
5 [ User Data ]
6 [ User Data ]
7 [ User Data ]
8 [ User Data ]
9 [ User Data ]
10 [ User Data ]
11 [ User Data ]
12 [ User Data ]
13 [ User Data ]
14 [ User Data ]
15 [ User Data ]
```
## Lock Bytes (Page 2)
Bytes 2 and 3 of page 2 are referred to as "Lock Bytes". Each page from 0x03 and higher can individually locked by setting the corresponding locking bit to "1" to prevent further write access, effectively making the memory read only.
For more information on the lock byte mechanism, refer to section 8.5.2 of the datasheet (referenced above).## OTP Bytes (Page 3)
Page 3 is the OTP memory, and by default all bits on this page are set to 0. These bits can be bitwise modified using the MiFare WRITE command, and individual bits can be set to 1, but can not be changed back to 0.
## Data Pages (Page 4-15)
Pages 4 to 15 are can be freely read from and written to, provided there is no conflict with the Lock Bytes described above.
After production, the bytes have the following default values:```
Page Byte Values
---- ----------------------
0 1 2 3
4 0xFF 0xFF 0xFF 0xFF
5..15 0x00 0x00 0x00 0x00
```
## Accessing Data Blocks
In order to access the cards, you must following two steps:
1. 'Connect' to a Mifare Ultralight card and retrieve the 7 byte UID of the card.
2. Memory can be read and written directly once a passive mode connection has been made. No authentication is required for Mifare Ultralight cards.
## Read/Write Lengths
For compatability reasons, "Read" requests to a Mifare Ultralight card will retrieve 16 bytes (4 pages) at a time (which corresponds to block size of a Mifare Classic card). For example, if you specify that you want to read page 3, in reality pages 3, 4, 5 and 6 will be read and returned, and you can simply discard the last 12 bytes if they aren't needed. If you select a higher page, the 16 byte read will wrap over to page 0. For example, reading page 14 will actually return page 14, 15, 0 and 1.
"Write" requests occur in pages (4 bytes), so there is no problem with overwriting data on subsequent pages.
- [Previous Page](https://learn.adafruit.com/adafruit-pn532-rfid-nfc/about-nfc.md)
- [Next Page](https://learn.adafruit.com/adafruit-pn532-rfid-nfc/ndef.md)
## Featured Products
### PN532 NFC/RFID controller breakout board
[PN532 NFC/RFID controller breakout board](https://www.adafruit.com/product/364)
The PN532 is the most popular NFC chip, and is what is embedded in pretty much every phone or device that does NFC. It can pretty much do it all, such as read and write to tags and cards, communicate with phones (say for payment processing), and 'act' like a NFC tag. If you want to do...
Out of Stock
[Buy Now](https://www.adafruit.com/product/364)
[Related Guides to the Product](https://learn.adafruit.com/products/364/guides)
### Adafruit METRO 328 Fully Assembled - Arduino IDE compatible
[Adafruit METRO 328 Fully Assembled - Arduino IDE compatible](https://www.adafruit.com/product/50)
We sure love the ATmega328 here at Adafruit, and we use them _a lot_ for our own projects. The processor has plenty of GPIO, Analog inputs, hardware UART SPI and I2C, timers and PWM galore - just enough for most simple projects. When we need to go small, we use a
Out of Stock
[Buy Now](https://www.adafruit.com/product/50)
[Related Guides to the Product](https://learn.adafruit.com/products/50/guides)
### Breadboarding wire bundle
[Breadboarding wire bundle](https://www.adafruit.com/product/153)
75 flexible stranded core wires with stiff ends molded on in red, orange, yellow, green, blue, brown, black and white. These are a major improvement over the "box of bent wires" that are sometimes sold with breadboards, and faster than stripping your own solid core wires. Makes...
In Stock
[Buy Now](https://www.adafruit.com/product/153)
[Related Guides to the Product](https://learn.adafruit.com/products/153/guides)
### Adafruit PN532 NFC/RFID Controller Shield for Arduino + Extras
[Adafruit PN532 NFC/RFID Controller Shield for Arduino + Extras](https://www.adafruit.com/product/789)
We've taken our popular Adafruit PN532 breakout board and turned it into a shield - the perfect tool for any 13.56MHz RFID or NFC application. The Adafruit NFC shield uses the PN532 chip-set (the most popular NFC chip on the market) and is what is embedded in pretty much every phone or...
In Stock
[Buy Now](https://www.adafruit.com/product/789)
[Related Guides to the Product](https://learn.adafruit.com/products/789/guides)
### 13.56MHz RFID/NFC Card - Classic 1K
[13.56MHz RFID/NFC Card - Classic 1K](https://www.adafruit.com/product/359)
This is a blank 13.56MHz RFID/NFC card - often used for train/bus passes but also found in other systems where a proximity card is desired. The tag contains a small RFID chip and an antenna, and is passively powered by the reader/writer when placed a couple inches away.
These can be...
In Stock
[Buy Now](https://www.adafruit.com/product/359)
[Related Guides to the Product](https://learn.adafruit.com/products/359/guides)
### 13.56MHz RFID/NFC White Tag - Classic 1K
[13.56MHz RFID/NFC White Tag - Classic 1K](https://www.adafruit.com/product/360)
This is a blank 13.56MHz RFID/NFC laundry tag - often used for laundry but also general tagging. The tag contains a small RFID chip and an antenna, and is passively powered by the reader/writer when placed a couple inches away.
These can be read by almost any 13.56MHz RFID/NFC...
In Stock
[Buy Now](https://www.adafruit.com/product/360)
[Related Guides to the Product](https://learn.adafruit.com/products/360/guides)
### 13.56MHz RFID/NFC Clear Tag - Classic 1K
[13.56MHz RFID/NFC Clear Tag - Classic 1K](https://www.adafruit.com/product/361)
This is a blank 13.56MHz Classic 'laundry' tag - often used for laundry or identification but also found in other systems where a small proximity card is desired. This one is clear! The tag contains a small RFID chip and an antenna, and is passively powered by the reader/writer...
In Stock
[Buy Now](https://www.adafruit.com/product/361)
[Related Guides to the Product](https://learn.adafruit.com/products/361/guides)
### 13.56MHz RFID/NFC Sticker - Classic 1K
[13.56MHz RFID/NFC Sticker - Classic 1K](https://www.adafruit.com/product/362)
This is a blank 13.56MHz RFID/NFC sticker - often used for inventory uses but also wherever a sticker is desired. The tag contains a small RFID chip and an antenna, and is passively powered by the reader/writer when placed a couple inches away.
These can be read by almost any...
In Stock
[Buy Now](https://www.adafruit.com/product/362)
[Related Guides to the Product](https://learn.adafruit.com/products/362/guides)
## Related Guides
- [How to Choose a Microcontroller](https://learn.adafruit.com/how-to-choose-a-microcontroller.md)
- [Sous-vide controller powered by Arduino - The SousViduino!](https://learn.adafruit.com/sous-vide-powered-by-arduino-the-sous-viduino.md)
- [Arduino Lesson 13. DC Motors](https://learn.adafruit.com/adafruit-arduino-lesson-13-dc-motors.md)
- [Naughty or Nice Machine](https://learn.adafruit.com/naughty-or-nice-machine.md)
- [Wave Shield Voice Changer](https://learn.adafruit.com/wave-shield-voice-changer.md)
- [Adafruit INA219 Current Sensor Breakout](https://learn.adafruit.com/adafruit-ina219-current-sensor-breakout.md)
- [Low Power Coin Cell Voltage Logger](https://learn.adafruit.com/low-power-coin-cell-voltage-logger.md)
- [Analog Feedback Servos](https://learn.adafruit.com/analog-feedback-servos.md)
- [Tiny Arduino Music Visualizer](https://learn.adafruit.com/piccolo.md)
- [Adafruit Ultimate GPS Logger Shield](https://learn.adafruit.com/adafruit-ultimate-gps-logger-shield.md)
- [Ladyada's Learn Arduino - Lesson #0](https://learn.adafruit.com/ladyadas-learn-arduino-lesson-number-0.md)
- [Mini Thermal Receipt Printers](https://learn.adafruit.com/mini-thermal-receipt-printer.md)
- [Arduino Prototyping Mounting Plate](https://learn.adafruit.com/arduino-prototyping-mounting-plate.md)
- [LED Lightbox](https://learn.adafruit.com/led-lightbox.md)
- [NFC Ring Password Helper](https://learn.adafruit.com/nfc-ring-password-helper.md)
---
# Source: https://learn.adafruit.com/mini-thermal-receipt-printer.md
# Mini Thermal Receipt Printers
## Overview

Add printing to any microcontroller project with these very cute thermal printers. Also known as receipt printers, they’re what you see at the ATM or grocery store. Now you can embed a little printer of your own into a project. These printers is ideal for interfacing with a microcontroller, you simply need a 3.3V to 5V TTL serial output from your microcontroller to print text, barcodes, bitmap graphics, even a QR code!
These printers use very common 2.25" (58mm) wide thermal paper, available in the Adafruit shop or most office or stationery supply stores. You will also need a 5 Volt to 9 Volt regulated DC power supply that can provide 2 Amps or more during high-current printing — [our 5V 2A power supply will work very nicely](https://www.adafruit.com/products/276).
**[You can pick up a thermal printer pack including printer, paper, power supply and terminal-block adapter in the Adafruit shop!](http://www.adafruit.com/products/600 "Link: http://www.adafruit.com/products/600")**
Of course, we wouldn't leave you with a datasheet and a “good luck!” — this tutorial and matching Arduino library demonstrate the following:
- Printing with small, medium and large text
- **Bold,** underline and inverted text
- Variable line spacing
- Left, center and right justification
- Barcodes in the following standard formats: **UPC A, UPC E, EAN13, EAN8, CODE39, I25, CODEBAR, CODE93, CODE128, CODE11** and **MSI** - with adjustable barcode height
- Custom monochrome bitmap graphics
- How to print a QR code
## Models
Our _[**Mini Thermal Receipt Printer**](https://www.adafruit.com/product/597)_ is a popular choice as it accommodates a [full-length thermal roll (15m/50')](https://www.adafruit.com/product/599), meaning fewer paper changes. It’s also available in a [**starter pack**](https://www.adafruit.com/product/600) that includes a 5V power supply and DC jack adapter.
This model has a **3-pin serial interface** for connecting to 3.3V or 5V microcontrollers or Raspberry Pi.

The [_ **Tiny Thermal Receipt Printer** _](https://www.adafruit.com/product/2751) is a bit more compact, accommodating shorter [10m/33' rolls](https://www.adafruit.com/product/2754).
What’s interesting and **unique to this model** is that it has _both_ a 5-pin serial header and a **USB port** , which can make for easier interfacing on Raspberry Pi.

For the most compact and portable situations, the [_ **Nano Thermal Receipt Printer** _](https://www.adafruit.com/product/2752) is smaller still, accommodating a [5m/16' paper roll](https://www.adafruit.com/product/2755).
This one has a **5-pin header** for serial data and power.

For the most peculiar situations not covered above, the [_ **Thermal Printer Receipt Guts** _](https://www.adafruit.com/product/2753) is _just the insides_ of a thermal printer. You will need to design and build an enclosure to mount the hardware and hold a paper roll…in principle, _any length_ roll can then work with this.
This unit has a **5-pin header** for serial data and power.

The thermal paper rolls in the Adafruit shop are BPA-free and ready sized to each of the above units. You can also find compatible 2.25" (58mm) wide thermal paper at many office supply stores, though usually in 80–85 foot (25m) lengths that won’t fit as-is in any of these printers. With some patience you can re-roll these onto an empty spool, cutting when the roll reaches a suitable diameter.
**None of these small thermal printers have a cut feature; pull the finished print against the perforated edge.** The _Thermal Printer Guts_ has no perforated edge; you’ll need to design this into your enclosure.
Primary:
- [Next Page](https://learn.adafruit.com/mini-thermal-receipt-printer/power.md)
## Primary Products
### Mini Thermal Receipt Printer
[Mini Thermal Receipt Printer](https://www.adafruit.com/product/597)
Add a mini printer to any microcontroller project with this very cute thermal printer. Thermal printers are also known as receipt printers, they're what you get when you go to the ATM or grocery store. Now you can embed a little printer of your own into an enclosure. This printer is ideal...
No Longer Stocked
[Buy Now](https://www.adafruit.com/product/597)
[Related Guides to the Product](https://learn.adafruit.com/products/597/guides)
### Tiny Thermal Receipt Printer - TTL Serial / USB
[Tiny Thermal Receipt Printer - TTL Serial / USB](https://www.adafruit.com/product/2751)
Add a _really small_ printer to any microcontroller project with this very cute thermal printer. Thermal printers are also known as receipt printers, they're what you get when you go to the ATM or grocery store. Now you can embed a little printer of your own into an enclosure. This...
No Longer Stocked
[Buy Now](https://www.adafruit.com/product/2751)
[Related Guides to the Product](https://learn.adafruit.com/products/2751/guides)
### Nano Thermal Receipt Printer - TTL Serial
[Nano Thermal Receipt Printer - TTL Serial](https://www.adafruit.com/product/2752)
Add a _really really small_ printer to any microcontroller project with this very cute thermal printer. Thermal printers are also known as receipt printers, they're what you get when you go to the ATM or grocery store. Now you can embed a little printer of your own into an...
No Longer Stocked
[Buy Now](https://www.adafruit.com/product/2752)
[Related Guides to the Product](https://learn.adafruit.com/products/2752/guides)
### Thermal Receipt Printer Guts
[Thermal Receipt Printer Guts](https://www.adafruit.com/product/2753)
Add printing capability to any microcontroller project with **just the innards of a thermal printer.** Thermal printers are also known as receipt printers, they're what you get when you go to the ATM or grocery store. Now you can embed a little printer of your own into a...
No Longer Stocked
[Buy Now](https://www.adafruit.com/product/2753)
[Related Guides to the Product](https://learn.adafruit.com/products/2753/guides)
## Featured Products
### Mini Thermal Receipt Printer Starter Pack
[Mini Thermal Receipt Printer Starter Pack](https://www.adafruit.com/product/600)
Hit the ground running (and printing!) with this starter pack that includes a thermal printer and all the extras and save a few dollars while you're at it.
Includes:
- [A mini thermal receipt printer](http://www.adafruit.com/products/597) - with cables and...
No Longer Stocked
[Buy Now](https://www.adafruit.com/product/600)
[Related Guides to the Product](https://learn.adafruit.com/products/600/guides)
### Female DC Power adapter - 2.1mm jack to screw terminal block
[Female DC Power adapter - 2.1mm jack to screw terminal block](https://www.adafruit.com/product/368)
If you need to connect a DC power wall wart to a board that doesn't have a DC jack - this adapter will come in very handy! There is a 2.1mm DC jack on one end, and a screw terminal block on the other. The terminals are labeled with positive/negative assuming a positive-tip configuration...
In Stock
[Buy Now](https://www.adafruit.com/product/368)
[Related Guides to the Product](https://learn.adafruit.com/products/368/guides)
### 5V 2A (2000mA) switching power supply - UL Listed
[5V 2A (2000mA) switching power supply - UL Listed](https://www.adafruit.com/product/276)
This is an FCC/CE certified and UL listed power supply. Need a lot of 5V power? This switching supply gives a clean regulated 5V output at up to 2000mA. 110 or 240 input, so it works in any country. The plugs are "US 2-prong" style so you may need a plug adapter, but you can pick one...
Out of Stock
[Buy Now](https://www.adafruit.com/product/276)
[Related Guides to the Product](https://learn.adafruit.com/products/276/guides)
### Thermal paper roll - 50' long, 2.25" wide
[Thermal paper roll - 50' long, 2.25" wide](https://www.adafruit.com/product/599)
A mini roll of thermal paper, this fits very nicely into our mini thermal printer. 2.25" wide (about 57mm) and 50 feet long (15 meters). BPA-free.
[Perfect for use with our mini thermal printer!](http://www.adafruit.com/products/597)
No Longer Stocked
[Buy Now](https://www.adafruit.com/product/599)
[Related Guides to the Product](https://learn.adafruit.com/products/599/guides)
### Thermal Paper Roll - 33' long, 2.25"
[Thermal Paper Roll - 33' long, 2.25"](https://www.adafruit.com/product/2754)
A little roll of thermal paper! This fits very nicely into our [Tiny Thermal Receipt Printer](https://www.adafruit.com/products/2751). It's ~2.25" wide (about 57mm) and 33 feet long or about 10 meters.
No Longer Stocked
[Buy Now](https://www.adafruit.com/product/2754)
[Related Guides to the Product](https://learn.adafruit.com/products/2754/guides)
### Thermal Paper Roll - 16' long, 2.25"
[Thermal Paper Roll - 16' long, 2.25"](https://www.adafruit.com/product/2755)
A little roll of thermal paper! This fits very nicely into our [Nano Thermal Receipt Printer](https://www.adafruit.com/products/2752). It's ~2.25" wide (about 57mm) and 16 feet long or about 5 meters.
No Longer Stocked
[Buy Now](https://www.adafruit.com/product/2755)
[Related Guides to the Product](https://learn.adafruit.com/products/2755/guides)
### Adafruit METRO 328 Fully Assembled - Arduino IDE compatible
[Adafruit METRO 328 Fully Assembled - Arduino IDE compatible](https://www.adafruit.com/product/50)
We sure love the ATmega328 here at Adafruit, and we use them _a lot_ for our own projects. The processor has plenty of GPIO, Analog inputs, hardware UART SPI and I2C, timers and PWM galore - just enough for most simple projects. When we need to go small, we use a
Out of Stock
[Buy Now](https://www.adafruit.com/product/50)
[Related Guides to the Product](https://learn.adafruit.com/products/50/guides)
### Breadboarding wire bundle
[Breadboarding wire bundle](https://www.adafruit.com/product/153)
75 flexible stranded core wires with stiff ends molded on in red, orange, yellow, green, blue, brown, black and white. These are a major improvement over the "box of bent wires" that are sometimes sold with breadboards, and faster than stripping your own solid core wires. Makes...
In Stock
[Buy Now](https://www.adafruit.com/product/153)
[Related Guides to the Product](https://learn.adafruit.com/products/153/guides)
## Related Guides
- [How to Find Hidden COM Ports](https://learn.adafruit.com/how-to-find-hidden-com-ports.md)
- [Wireless Game Show Poppers for the Classroom!](https://learn.adafruit.com/wireless-game-show-poppers.md)
- [Adafruit Ultimate GPS](https://learn.adafruit.com/adafruit-ultimate-gps.md)
- [RGB LED Matrix Basics](https://learn.adafruit.com/32x16-32x32-rgb-led-matrix.md)
- [Analog Feedback Servos](https://learn.adafruit.com/analog-feedback-servos.md)
- [Arduino GPS Clock](https://learn.adafruit.com/arduino-clock.md)
- [Silicone Robo-Tentacle](https://learn.adafruit.com/silicone-robo-tentacle.md)
- [Ladyada's Bento Box](https://learn.adafruit.com/lady-adas-bento-box.md)
- [Metal Inlay Capacitive Touch Buttons](https://learn.adafruit.com/metal-inlay-capacitive-touch-buttons.md)
- [Adafruit IO Basics: NeoPixel Controller](https://learn.adafruit.com/adafruit-io-basics-neopixel-controller.md)
- [Adafruit PN532 RFID/NFC Breakout and Shield](https://learn.adafruit.com/adafruit-pn532-rfid-nfc.md)
- [Reverse Geocache Box](https://learn.adafruit.com/reverse-geocache-engagement-box.md)
- [Character LCDs](https://learn.adafruit.com/character-lcds.md)
- [Adafruit INA219 Current Sensor Breakout](https://learn.adafruit.com/adafruit-ina219-current-sensor-breakout.md)
- [All About Arduino Libraries](https://learn.adafruit.com/adafruit-all-about-arduino-libraries-install-use.md)
---
# Source: https://learn.adafruit.com/adafruit-gfx-graphics-library/minimizing-redraw-flicker.md
# Adafruit GFX Graphics Library
## Minimizing Redraw Flicker
A common need in microcontroller projects is to **redraw all or part of a screen** , such as when showing **live readings from a sensor**. The least-code approach to this usually is to **erase** all or part of the screen (using `fillScreen()` or `fillRect()`) and **re-draw** everything in the affected area. This does the job, but the off-and-on appearance can be distracting, especially if these redraws occur frequently and it becomes a steady flicker.
This isn’t true of _all_ GFX-compatible devices. Some displays (most LED matrices and some monochrome OLED screens) don’t refresh until there’s specifically a `show()`, `display()` or `update()` call in one’s code (depending on the library), so this flicker is minimized or doesn’t occur. Mostly it’s an issue with color LCD or OLED screens, where graphics are rendered with every function call.
There are a couple of approaches one can use to minimize this effect. The first (and usually easiest) is suited to the **standard fixed-size GFX font** and is best for **Arduino Uno** and other memory-constrained microcontrollers. The other applies to **custom fonts and any other graphics primitives** , and is best for modern 32-bit microcontrollers with **ample RAM** (thought may still work on Uno for very small updates).
## Overwriting Text with the Built-In Font
This first method relies on the fact that the standard built-in font has uniformly-sized characters; it’s sometimes referred to as the “5 by 7” pixel font (though really 6x8 pixels to allow at least 1 pixel between adjacent characters, and for descenders on some lowercase characters like “g” or “p”). Then…
The `setTextColor()` function, which normally accepts a single argument (a color to use for subsequent text printing), can optionally accept a _second_ argument—a “background color” that applies to every pixel in the 6x8 box that’s _not_ part of the character shape. Normally each character box is transparent and only “foreground” pixels are set.
```cpp
display.setTextColor(foreground, background);
```
Here’s how that might be used in an Arduino sketch. Understand that **this is not a complete program** because **every type of display has a distinct setup procedure**. Complete examples for PyPortal are given at the bottom of this page, providing a starting point that can be adapted to other screen types. Look at the “graphicstest” example that accompanies most GFX-compatible libraries for insights.
```cpp
// This is an incomplete Arduino example to minimally show
// the text overwrite approach. A real program would #include
// a display library header and declare a global 'display'.
void setup() {
// Likewise, display initialization would take place here.
// On color LCDs, this is white text on black background:
display.setTextColor(0xFFFF, 0x0000);
// On monochrome OLEDs, these might be 1 and 0 instead.
}
void loop() {
display.setCursor(0, 0); // Position at top-left corner
display.print("Hello"); // Print a message
delay(1000); // Pause 1 second
display.setCursor(0, 0); // Back to top-left corner
display.print("World"); // Print another message, same length
delay(1000); // Pause 1 second
}
```
The sketch alternately prints “Hello” and “World” at the top-left corner of the screen; each pass erases the text that came before, there’s no need to explicitly erase that area. (Try removing the second argument to `setTextColor()` and watch what happens.)
This works because both messages are the same 5-character length (30x7 pixels at the default text size, 60x14 at size 2 and so forth). If the messages are different lengths, it’s necessary to **_pad_** a string with extra spaces to overwrite the old text underneath.
One way to do this is by declaring a **fixed-size character buffer** and then using C’s _formatted output_ via the `sprintf()` function. Let’s suppose a project will need up to 10 characters for each message. We begin by declaring a char array with **11** elements, because C strings _require_ a trailing NUL (0) byte at the end:
```cpp
char buf[11]; // 10 characters + NUL
```
Then we _format_ a string into that buffer using `sprintf()` (string-print-formatted), some examples of which could include:
```cpp
sprintf(buf, "%-10s", "Hello"); // Left-justified message
sprintf(buf, "%10s", "World"); // Right-justified message
sprintf(buf, "%10d", 42); // Right-justified integer
```
And the buffer can then be passed to the normal `print()` or `println()` functions:
```auto
display.setCursor(x, y);
display.print(buf);
```
`sprintf()` has near infinite variety so we can’t give every possible example here. Since it’s a standard part of the C language, just searching around for “C formatted output” or just “sprintf” will turn up plenty of references. It’s quite potent! Note however that the Arduino implementation is somewhat scaled back to fit on a microcontroller; formatting floating-point values this way is not supported, for example.
The counterpoint to using `sprintf()` is one of those _great power, great responsibility_ lessons. String and memory handling in C (and thus C++, and thus the whole Arduino ecosystem) is simplistic, and there’s nothing in place…other than your own self-discipline, you _hope…_to prevent exceeding the length of that `char` array, writing data willy-nilly into other RAM and leading to unexpected behavior or program crashes.
One approach to overwriting floating-point values is to use the normal Arduino `print()` function to the display, which accepts an optional argument specifying the number of digits after the decimal point, so the output is always the same size:
```cpp
float value = 3.14159;
display.print(value, 5); // Will ALWAYS be extended to X.XXXXX, even if 0's
```
Another approach, if numbers or messages to print may **vary in length** , is just to follow up with enough spaces to cover up any change in the number of characters. But this relies on there not being any other _stuff_ toward the right edge of the screen and isn’t suited to every situation:
```cpp
int value = 42;
display.setTextWrap(false); // Allow spaces to go off right edge
display.setCursor(0, 0);
display.print(value);
display.print(" "); // Cover anything previously in this space
```
## Restoring Normal Text Drawing
To turn this off and draw normal “transparent” text, call `setTextColor()` with just the foreground color argument:
```cpp
display.setTextColor(foreground);
```
## Overwriting Text or Graphics Using an _Offscreen Canvas_
The above method has some advantages in that it requires minimal modification to existing programs—something that prints _once_ is easily adapted to print _repeatedly_—and that it fits well within modest microcontrollers like the Arduino Uno.
Where it _doesn’t_ work is with **custom fonts** , or with non-text elements like graphics or indicators. In fact, the optional second argument to `setTextColor()` (the background color) is simply _ignored_ when using custom fonts. This is on purpose and by design! With proportionally-spaced fonts, _strings will occupy different-sized regions,_ even if they contain the same number of characters…the overwrite technique simply can’t be relied on.
The method explained here uses some extra RAM. Most 32-bit microcontrollers have ample capacity for this, but the classic Uno may struggle in all but the simplest cases.
The GFX library can provide an _ **offscreen canvas.** _ It works just like drawing to a screen…except there’s no screen, just a grid of pixels in memory. The canvas can then be passed to another function (explained later), which _does_ draw it to the screen.
Flicker-free redraw then works like this:
- Create a canvas object; usually done just once, at program startup
- Then, each time a screen update is needed:
- Clear the canvas
- Print text or draw shapes to the canvas
- Copy the canvas to the screen
A canvas _doesn’t_ need to match the size of the screen; if you’re just updating a rectangle, it only needs to be that size. That’s important because every pixel takes a little RAM. Also a program can have more than one canvas if needed.
There are different canvas _depths_ for 1, 8 and 16-bit color. We’ll focus on just 1 and 16 here; the 8-bit case is seldom seen.
The 1-bit canvas type—`GFXcanvas1`—provides two colors; _foreground and background,_ or _foreground and transparent,_ much like working with the built-in font and `setTextColor()`. For most single-color things like text, this is what you’d use.
A canvas might be declared in the global part of one’s sketch, before the `setup()` function, like so:
```auto
GFXcanvas1 canvas(width, height);
```
_width_ and _height_ should be the canvas dimensions, in pixels. Each pixel requires 1 bit of RAM…so for instance, 120x30 pixels = 3,600 bits = 450 bytes…plus a couple dozen bytes overhead for the `GFXcanvas1` structure itself. A single small canvas like that can _usually_ work in the modest 1.5K of an Arduino Uno, but complex programs, larger or multiple canvases, or color (explained later) require more capable devices.
Canvases use all the same drawing functions as normally provided by the GFX library. So, where one might use `display.fillScreen(0)` before, one can use `canvas.fillScreen(0)` instead (though the canvas is not a _screen,_ it’s helpful to keep the names uniform across everything). This applies to all the pixel, shape and text-drawing functions. With a `GFXcanvas1` object, drawing colors must be 1 (foreground or “set” pixel) or 0 (background or “clear” pixel).
So the idea here is to just wipe and redraw the _entire contents of the canvas_ each time a redraw is needed. Although GFX provides the `getTextBounds()` function, it just isn’t necessary to go to such fuss to be “optimal”—canvases are already super quick to work with.
As before, this example is incomplete and just highlights the important ideas here. A full working example for PyPortal (and adaptable to other screens) is given at the bottom of the page.
```cpp
// This is an incomplete Arduino example to minimally show
// the canvas drawing approach. A real program would #include
// a display library header and declare a global 'display',
// also including and enabling a custom font.
// Then, in ADDITION to all that, there's...
GFXcanvas1 canvas(120, 30); // 1-bit, 120x30 pixels
void setup() {
// Display init and font select would take place here.
// See later examples for that.
// Text might exceed width of canvas, so disable wrapping:
canvas.setTextWrap(false);
}
void loop() {
canvas.fillScreen(0); // Clear canvas (not display)
canvas.setCursor(0, 24); // Pos. is BASE LINE when using fonts!
canvas.print(millis()); // Print elapsed time in milliseconds
// Copy canvas to screen at upper-left corner. As written here,
// assumes a color LCD, hence the color values of 0xFFFF (white)
// for foreground, 0x0000 (black) for background. Mono OLED can
// use 1 and 0. BOTH colors must be specified to overwrite the
// prior screen contents there.
display.drawBitmap(0, 0, canvas.getBuffer(),
canvas.width(), canvas.height(), 0xFFFF, 0x0000);
}
```
Notice how the fill, cursor and print operations are all performed on the `canvas` object, but the bitmap-drawing operation is done on the `display` object. It’s easy to confuse these; if something like a custom font doesn’t seem to be working, confirm you’ve set that for the canvas, not the display!
Because GFX “clips” graphics drawn to the canvas, this can be used for interesting effects like scrolling text within a rectangle in one section of a screen.
If you have multiple numbers or areas of the screen to update, _and_ these are all the same dimensions, a single canvas can be re-used among them; it’s not always necessary to allocate multiple distinct canvases, unless the size varies.
`drawBitmap()` works with all display types; the same function can be used with a `GFXcanvas1` regardless whether the screen is a 16-bit color TFT display or a black-and-white OLED.
## A Color Canvas
The 16-bit canvas type—`GFXcanvas16`—works much like a 16-bit LCD screen. Instead of foreground and background (or transparent) colors, one has the _whole 64K gamut of colors_ to work with. If you’re _only_ planning to draw text, you probably don’t need this, a `GFXcanvas1` will suffice, and you can specify any single color when copying to the display.
Like the 1-bit variety, this can be declared in the global part of one’s sketch, before the `setup()` function:
```auto
GFXcanvas16 canvas(width, height);
```
Unlike the 1-bit variety, `GFXcanvas16` uses _inordinate_ RAM; 2 bytes per pixel. That 120x30 pixel example from earlier now requires **7,200 bytes** …_way_ beyond the reach of the Arduino Uno’s 1.5K RAM, but practical for more modern microcontrollers to handle.
There are some differences when copying a color canvas to the screen. First, one now uses the `drawRGBBitmap()` function, which accepts mostly the same arguments but omits the foreground and background colors (since the canvas itself is now full color):
```auto
display.drawRGBBitmap(0, 0, canvas.getBuffer(), canvas.width(), canvas.height());
```
Second, `drawRGBBitmap()` _only_ works on color screens, unlike `drawBitmap()` which works across all display types. Color reduction is a subjective process and would incur a _lot_ of extra code, so this capability was omitted. Best to pair monochrome screens with `GFXcanvas1` instead.
## Examples
Here’s the simple “text overwrite” example as written for PyPortal. This could be adapted to other screens by changing the display declaration and initialization; see the “graphicstest” example that accompanies most display libraries.
```auto
// Simple (text overwrite) flicker-free example for PyPortal
#include <Adafruit_GFX.h>
#include <Adafruit_ILI9341.h>
#define TFT_D0 34 // Data bit 0 pin (MUST be on PORT byte boundary)
#define TFT_WR 26 // Write-strobe pin (CCL-inverted timer output)
#define TFT_DC 10 // Data/command pin
#define TFT_CS 11 // Chip-select pin
#define TFT_RST 24 // Reset pin
#define TFT_RD 9 // Read-strobe pin
#define TFT_BACKLIGHT 25
// ILI9341 screen with 8-bit parallel interface:
Adafruit_ILI9341 display(tft8bitbus, TFT_D0, TFT_WR, TFT_DC, TFT_CS, TFT_RST, TFT_RD);
void setup() {
pinMode(TFT_BACKLIGHT, OUTPUT); // PyPortal requires
digitalWrite(TFT_BACKLIGHT, HIGH); // turning on backlight
display.begin(); // Initialize and
display.fillScreen(0x0000); // clear display
display.setTextColor(0xFFFF, 0x0000); // White text, black background
display.setTextSize(2); // 2X size text
}
void loop(void) {
display.setCursor(0, 0); // Position at top-left corner
display.print("Hello"); // Print a message
delay(1000); // Pause 1 second
display.setCursor(0, 0); // Back to top-left corner
display.print("World"); // Print another message, same length
delay(1000); // Pause 1 second
}
```
And here’s a “1-bit canvas” example as written for PyPortal, using a large and friendly font. Again, this could be adapted to other screens by changing the display declaration and initialization; see the “graphicstest” example that accompanies most display libraries.
```auto
// Fancy (offscreen canvas) flicker-free example for PyPortal
#include <Adafruit_GFX.h>
#include <Adafruit_ILI9341.h>
#include <Fonts/FreeSerifBold18pt7b.h>
#define TFT_D0 34 // Data bit 0 pin (MUST be on PORT byte boundary)
#define TFT_WR 26 // Write-strobe pin (CCL-inverted timer output)
#define TFT_DC 10 // Data/command pin
#define TFT_CS 11 // Chip-select pin
#define TFT_RST 24 // Reset pin
#define TFT_RD 9 // Read-strobe pin
#define TFT_BACKLIGHT 25
// ILI9341 screen with 8-bit parallel interface:
Adafruit_ILI9341 display(tft8bitbus, TFT_D0, TFT_WR, TFT_DC, TFT_CS, TFT_RST, TFT_RD);
GFXcanvas1 canvas(120, 30); // 1-bit, 120x30 pixels
void setup() {
pinMode(TFT_BACKLIGHT, OUTPUT); // PyPortal requires
digitalWrite(TFT_BACKLIGHT, HIGH); // turning on backlight
display.begin(); // Initialize and
display.fillScreen(0x0000); // clear display
canvas.setFont(&FreeSerifBold18pt7b); // Use custom font and
canvas.setTextWrap(false); // clip text to canvas
}
void loop(void) {
canvas.fillScreen(0); // Clear canvas (not display)
canvas.setCursor(0, 24); // Pos. is BASE LINE when using fonts!
canvas.print(millis()); // Print elapsed time in milliseconds
// Copy canvas to screen at upper-left corner. As written here,
// assumes a color LCD, hence the color values of 0xFFFF (white)
// for foreground, 0x0000 (black) for background. Mono OLED can
// use 1 and 0. BOTH colors must be specified to overwrite the
// prior screen contents there.
display.drawBitmap(0, 0, canvas.getBuffer(),
canvas.width(), canvas.height(), 0xFFFF, 0x0000);
}
```
Once more, using a 16-bit canvas instead. This example doesn’t make good use of color in the canvas—it’s still just white text on a black background—and is mostly just to show how the drawing syntax is a little different.
```auto
// Fancy (offscreen color canvas) flicker-free example for PyPortal
#include <Adafruit_GFX.h>
#include <Adafruit_ILI9341.h>
#include <Fonts/FreeSerifBold18pt7b.h>
#define TFT_D0 34 // Data bit 0 pin (MUST be on PORT byte boundary)
#define TFT_WR 26 // Write-strobe pin (CCL-inverted timer output)
#define TFT_DC 10 // Data/command pin
#define TFT_CS 11 // Chip-select pin
#define TFT_RST 24 // Reset pin
#define TFT_RD 9 // Read-strobe pin
#define TFT_BACKLIGHT 25
// ILI9341 screen with 8-bit parallel interface:
Adafruit_ILI9341 display(tft8bitbus, TFT_D0, TFT_WR, TFT_DC, TFT_CS, TFT_RST, TFT_RD);
GFXcanvas16 canvas(120, 30); // 16-bit, 120x30 pixels
void setup() {
pinMode(TFT_BACKLIGHT, OUTPUT); // PyPortal requires
digitalWrite(TFT_BACKLIGHT, HIGH); // turning on backlight
display.begin(); // Initialize and
display.fillScreen(0x0000); // clear display
canvas.setFont(&FreeSerifBold18pt7b); // Use custom font
canvas.setTextWrap(false); // Clip text within canvas
}
void loop(void) {
canvas.fillScreen(0x0000); // Clear canvas (not display)
canvas.setCursor(0, 24); // Pos. is BASE LINE when using fonts!
canvas.print(millis()); // Print elapsed time in milliseconds
// Copy canvas to screen at upper-left corner.
display.drawRGBBitmap(0, 0, canvas.getBuffer(), canvas.width(), canvas.height());
}
```
- [Previous Page](https://learn.adafruit.com/adafruit-gfx-graphics-library/loading-images.md)
## Related Guides
- [AdaBox 019](https://learn.adafruit.com/adabox019.md)
- [Sous-vide controller powered by Arduino - The SousViduino!](https://learn.adafruit.com/sous-vide-powered-by-arduino-the-sous-viduino.md)
- [Adafruit 128x64 OLED Bonnet for Raspberry Pi](https://learn.adafruit.com/adafruit-128x64-oled-bonnet-for-raspberry-pi.md)
- [Adafruit IO IOT Hub with the Adafruit FunHouse](https://learn.adafruit.com/adafruit-io-hub-with-the-adafruit-funhouse.md)
- [HalloWing Flapping Bat](https://learn.adafruit.com/hallowing-flapping-bat.md)
- [CircuitPython OLED and Dual Knob Sketcher](https://learn.adafruit.com/circuitpython-oled-knob-sketcher.md)
- [Monochrome OLED Breakouts](https://learn.adafruit.com/monochrome-oled-breakouts.md)
- [4x4 Rotary Encoder MIDI Messenger](https://learn.adafruit.com/4x4-rotary-encoder-midi-messenger.md)
- [Pico W HTTP Server with CircuitPython](https://learn.adafruit.com/pico-w-http-server-with-circuitpython.md)
- [Capturing Camera Images with CircuitPython](https://learn.adafruit.com/capturing-camera-images-with-circuitpython.md)
- [WiFi OLED Display Badge](https://learn.adafruit.com/digital-display-badge.md)
- [Trinket Ultrasonic Rangefinder](https://learn.adafruit.com/trinket-ultrasonic-rangefinder.md)
- [PyPortal Adafruit Quote Book](https://learn.adafruit.com/pyportal-adafruit-quote-board.md)
- [2.8" TFT Touchscreen](https://learn.adafruit.com/2-8-tft-touchscreen.md)
- [Magic Storybook with ChatGPT](https://learn.adafruit.com/magic-storybook-with-chatgpt.md)
---
# Source: https://learn.adafruit.com/monochrome-oled-breakouts.md
# Monochrome OLED Breakouts
## Overview


This is a quick tutorial for our 128x64 and 128x32 pixel monochrome OLED displays. These displays are small, only about 1" diagonal, but very readable due to the high contrast of an OLED display. Each OLED display is made of 128x64 or 128x32 individual white OLEDs, each one is turned on or off by the controller chip. Because the display makes its own light, no backlight is required. This reduces the power required to run the OLED and is why the display has such high contrast; we really like this miniature display for its crispness!

The driver chip, **SSD1306** can communicate in multiple ways including **I2C** , **SPI** and **8-bit parallel**. However, only the 128x64 display has all these interfaces available. For the 128x32 OLED, only SPI is available. Frankly, we prefer SPI since its the most flexible and uses a small number of I/O pins so our example code and wiring diagram will use that.
For the 0.96" STEMMA QT version, **we've updated the design to add auto-reset circuitry** so that the reset pin is optional, since it speaks I2C you can easily connect it up with just two wires (plus power and ground!). We've even included [SparkFun qwiic](https://www.sparkfun.com/qwiic) compatible** [STEMMA QT](https://learn.adafruit.com/introducing-adafruit-stemma-qt)** connectors for the I2C bus so **you don't even need to solder!**

- [Next Page](https://learn.adafruit.com/monochrome-oled-breakouts/power-requirements.md)
## Featured Products
### Monochrome 1.3" 128x64 OLED graphic display - STEMMA QT / Qwiic
[Monochrome 1.3" 128x64 OLED graphic display - STEMMA QT / Qwiic](https://www.adafruit.com/product/938)
These displays are small, only about 1.3" diagonal, but very readable due to the high contrast of an OLED display. This display is made of 128x64 individual white OLED pixels, each one is turned on or off by the controller chip. Because the display makes its own light, no backlight is...
In Stock
[Buy Now](https://www.adafruit.com/product/938)
[Related Guides to the Product](https://learn.adafruit.com/products/938/guides)
### Monochrome 0.96" 128x64 OLED Graphic Display - STEMMA QT
[Monochrome 0.96" 128x64 OLED Graphic Display - STEMMA QT](https://www.adafruit.com/product/326)
These displays are small, only about 1" diagonal, but very readable due to the high contrast of an OLED display. This display is made of 128x64 individual white OLED pixels, each one is turned on or off by the controller chip. Because the display makes its own light, no backlight is...
Out of Stock
[Buy Now](https://www.adafruit.com/product/326)
[Related Guides to the Product](https://learn.adafruit.com/products/326/guides)
### Monochrome 128x32 SPI OLED graphic display
[Monochrome 128x32 SPI OLED graphic display](https://www.adafruit.com/product/661)
These displays are small, only about 1" diagonal, but very readable due to the high contrast of an OLED display. This display is made of 128x32 individual white OLED pixels, each one is turned on or off by the controller chip. Because the display makes its own light, no backlight is...
In Stock
[Buy Now](https://www.adafruit.com/product/661)
[Related Guides to the Product](https://learn.adafruit.com/products/661/guides)
### Monochrome 128x32 I2C OLED graphic display
[Monochrome 128x32 I2C OLED graphic display](https://www.adafruit.com/product/931)
These displays are small, only about 1" diagonal, but very readable due to the high contrast of an OLED display. This display is made of 128x32 individual white OLED pixels, each one is turned on or off by the controller chip. Because the display makes its own light, no backlight is...
No Longer Stocked
[Buy Now](https://www.adafruit.com/product/931)
[Related Guides to the Product](https://learn.adafruit.com/products/931/guides)
### Monochrome 0.91" 128x32 I2C OLED Display - STEMMA QT / Qwiic
[Monochrome 0.91" 128x32 I2C OLED Display - STEMMA QT / Qwiic](https://www.adafruit.com/product/4440)
These displays are small, only about 1" diagonal, but very readable due to the high contrast of an OLED display. This display is made of 128x32 individual white OLED pixels, each one is turned on or off by the controller chip. Because the display makes its own light, no backlight is...
In Stock
[Buy Now](https://www.adafruit.com/product/4440)
[Related Guides to the Product](https://learn.adafruit.com/products/4440/guides)
## Related Guides
- [OLED TRON Clock](https://learn.adafruit.com/oled-tron-clock.md)
- [I2C Addresses and Troublesome Chips](https://learn.adafruit.com/i2c-addresses.md)
- [Monitor Your Greenhouse with a No-Code Environmental Sensor](https://learn.adafruit.com/monitor-your-greenhouse-with-a-no-code-environmental-sensor.md)
- [SSD1306 OLED Displays with Raspberry Pi and BeagleBone Black](https://learn.adafruit.com/ssd1306-oled-displays-with-raspberry-pi-and-beaglebone-black.md)
- [Adafruit FT232H With SPI & I2C Devices](https://learn.adafruit.com/adafruit-ft232h-with-spi-and-i2c-libraries.md)
- [MIDI Melody Maker](https://learn.adafruit.com/midi-melody-maker.md)
- [Steampunk Cameo Necklace with OLED Display](https://learn.adafruit.com/steampunk-cameo-necklace.md)
- [Using QMK on RP2040 Microcontrollers](https://learn.adafruit.com/using-qmk-on-rp2040-microcontrollers.md)
- [CircuitPython OLED and Dual Knob Sketcher](https://learn.adafruit.com/circuitpython-oled-knob-sketcher.md)
- [Gravity Falls Memory Gun](https://learn.adafruit.com/gravity-falls-memory-gun.md)
- [Pico W HTTP Server with CircuitPython](https://learn.adafruit.com/pico-w-http-server-with-circuitpython.md)
- [Adafruit Trinkey QT2040](https://learn.adafruit.com/adafruit-trinkey-qt2040.md)
- [Adafruit Airlift Bitsy Add-On - ESP32 WiFi Co-Processor](https://learn.adafruit.com/adafruit-airlift-bitsy-add-on-esp32-wifi-co-processor.md)
- [Animated Flying Toaster OLED Jewelry](https://learn.adafruit.com/animated-flying-toaster-oled-jewelry.md)
- [Adafruit TCA9548A 1-to-8 I2C Multiplexer Breakout](https://learn.adafruit.com/adafruit-tca9548a-1-to-8-i2c-multiplexer-breakout.md)
---
# Source: https://learn.adafruit.com/adafruit-microphone-amplifier-breakout/more-cool-projects.md
# Adafruit Microphone Amplifier Breakout
## More Cool Projects!
For more fun with the Adafruit Microphone Amplifier, check out the outstanding [Wave Shield Voice Changer](http://learn.adafruit.com/wave-shield-voice-changer) project:
http://youtu.be/eRdSi4gJz98
And the [Tiny Arduino Music Visualizer](http://learn.adafruit.com/piccolo "Link: http://learn.adafruit.com/piccolo")!
http://youtu.be/Tmpl5KA02S4
- [Previous Page](https://learn.adafruit.com/adafruit-microphone-amplifier-breakout/measuring-sound-levels.md)
- [Next Page](https://learn.adafruit.com/adafruit-microphone-amplifier-breakout/downloads.md)
## Featured Products
### Electret Microphone Amplifier - MAX4466 with Adjustable Gain
[Electret Microphone Amplifier - MAX4466 with Adjustable Gain](https://www.adafruit.com/product/1063)
Add an ear to your project with this well-designed electret microphone amplifier. This fully assembled and tested board comes with a 20-20KHz electret microphone soldered on. For the amplification, we use the Maxim MAX4466, an op-amp specifically designed for this delicate task! The amplifier...
In Stock
[Buy Now](https://www.adafruit.com/product/1063)
[Related Guides to the Product](https://learn.adafruit.com/products/1063/guides)
### Adafruit Bicolor LED Square Pixel Matrix with I2C Backpack
[Adafruit Bicolor LED Square Pixel Matrix with I2C Backpack](https://www.adafruit.com/product/902)
What's better than a single LED? Lots of LEDs! A fun way to make a small colorful display is to use a [1.2" Bi-color 8x8 LED Matrix](http://www.adafruit.com/products/458). Matrices like these are 'multiplexed' - so to control all the 128 LEDs you need 24 pins....
In Stock
[Buy Now](https://www.adafruit.com/product/902)
[Related Guides to the Product](https://learn.adafruit.com/products/902/guides)
### Tiny Premium Breadboard
[Tiny Premium Breadboard](https://www.adafruit.com/product/65)
This is a tiny little breadboard... half the size of a half-size breadboard!
**As of Sep 8, 2022** - This Tiny breadboard has been updated to make plugging and un-plugging boards and headers a buttery-smooth operation. Updated design also includes a metal...
In Stock
[Buy Now](https://www.adafruit.com/product/65)
[Related Guides to the Product](https://learn.adafruit.com/products/65/guides)
## Related Guides
- [Adafruit LED Backpacks](https://learn.adafruit.com/adafruit-led-backpack.md)
- [3D Printed Animatronic Robot Head](https://learn.adafruit.com/3d-printed-animatronic-robot-head.md)
- [Animating Multiple LED Backpacks](https://learn.adafruit.com/animating-multiple-led-backpacks.md)
- [Tiny Arduino Music Visualizer](https://learn.adafruit.com/piccolo.md)
- [LED Ampli-Tie](https://learn.adafruit.com/led-ampli-tie.md)
- [Wave Shield Voice Changer](https://learn.adafruit.com/wave-shield-voice-changer.md)
- [Battery Powered Raspberry Pi Displays w/RaspiRobot Shield](https://learn.adafruit.com/raspirobot-battery-powered-raspberry-pi-displays.md)
- [Trinket Sound-Reactive LED Color Organ](https://learn.adafruit.com/trinket-sound-reactive-led-color-organ.md)
- [Electronic Demon Costume](https://learn.adafruit.com/electronic-demon-costume.md)
- [FFT: Fun with Fourier Transforms](https://learn.adafruit.com/fft-fun-with-fourier-transforms.md)
- [CircuitPython Hardware: LED Backpacks & FeatherWings](https://learn.adafruit.com/micropython-hardware-led-backpacks-and-featherwings.md)
- [3D Printed Wireless MIDI Controller Guitar](https://learn.adafruit.com/ez-key-wireless-midi-controller-guitar.md)
- [Matrix and 7-Segment LED Backpack with the Raspberry Pi](https://learn.adafruit.com/matrix-7-segment-led-backpack-with-the-raspberry-pi.md)
- [Circle of Fifths Euclidean Synth with synthio and CircuitPython](https://learn.adafruit.com/circle-of-fifths-euclidean-synth-with-synthio-and-circuitpython.md)
- [Adafruit STSPIN220 Stepper Motor Driver Breakout Board](https://learn.adafruit.com/adafruit-stspin220-stepper-motor-driver-breakout-board.md)
---
# Source: https://learn.adafruit.com/hacking-the-kinect/more-kinect-information.md
# Hacking the Kinect
## More Kinect Information
We hope you enjoyed this reverse-engineering tutorial. For more information about Open Kinect, [please visit the github repository](https://github.com/OpenKinect/libfreenect) and [google group](http://groups.google.com/group/openkinect/).- [Previous Page](https://learn.adafruit.com/hacking-the-kinect/bonus-accelerometer.md)
## Featured Products
### Hacked Kinect - Skill badge, iron-on patch
[Hacked Kinect - Skill badge, iron-on patch](https://www.adafruit.com/product/582)
You can made a cool project using the (hacked) Kinect! Adafruit offers a fun and exciting "badges" of achievement for electronics, science and engineering. We believe everyone should be able to be rewarded for learning a useful skill, a badge is just one of the many ways to show and...
No Longer Stocked
[Buy Now](https://www.adafruit.com/product/582)
[Related Guides to the Product](https://learn.adafruit.com/products/582/guides)
### Beagle USB 12 - Low/Full Speed USB Protocol Analyzer
[Beagle USB 12 - Low/Full Speed USB Protocol Analyzer](https://www.adafruit.com/product/708)
USB complexity got you down? Need a hand with enumeration? Reverse engineering a USB device? You will fall in love with the Beagle 12 USB Analyzer. This hardware analyzer is completely non-intrusive, and is much better than flaky software analyzers. Perfect for when a problem is bad enough it...
No Longer Stocked
[Buy Now](https://www.adafruit.com/product/708)
[Related Guides to the Product](https://learn.adafruit.com/products/708/guides)
### Reverse Engineer - Skill badge, Lenticular printing + pin-on
[Reverse Engineer - Skill badge, Lenticular printing + pin-on](https://www.adafruit.com/product/489)
You can reverse engineer! This is the first lenticular (two-stage image) skill badge that we know of! It says reverse engineer forwards and backwards depending on the angle you view it at!
**Note:** The edges of the badge will appear "white" at an angle,...
No Longer Stocked
[Buy Now](https://www.adafruit.com/product/489)
[Related Guides to the Product](https://learn.adafruit.com/products/489/guides)
### Reverse Engineer - Sticker!
[Reverse Engineer - Sticker!](https://www.adafruit.com/product/673)
You can reverse engineer! Adafruit offers fun and exciting stickers to celebrate achievement for electronics, science and engineering. We believe everyone should be able to be rewarded for learning a useful skill and a sticker is just one of the many ways to show and share.
No Longer Stocked
[Buy Now](https://www.adafruit.com/product/673)
[Related Guides to the Product](https://learn.adafruit.com/products/673/guides)
## Related Guides
- [Guitar Hero MIDI Controller](https://learn.adafruit.com/guitar-hero-midi-controller.md)
- [Commodore 64 - The Most Popular Retro Computer of All Time](https://learn.adafruit.com/commodore-64-retro-guide.md)
- [Use Docker to Compile Linux for ESP32-S3](https://learn.adafruit.com/docker-esp32-s3-linux.md)
- [Feather Guitar Hero Adapter](https://learn.adafruit.com/feather-guitar-hero-adapter.md)
- [BLE Cat Thermal Printer with MEMENTO](https://learn.adafruit.com/ble-cat-thermal-printer-with-memento.md)
- [Fruit Jam Mac Emulator](https://learn.adafruit.com/fruit-jam-mac-emulator.md)
- [How to Make Animated Graphics for Hologram Displays](https://learn.adafruit.com/how-to-make-animated-graphics-for-hologram-displays.md)
- [LED Matrix Wall Arcade for Pico-8](https://learn.adafruit.com/led-matrix-wall-arcade.md)
- [Run an X-Carve CNC Machine Wirelessly with a Raspberry Pi](https://learn.adafruit.com/control-an-xcarve-cnc-machine-wirelessly-with-a-raspberry-pi.md)
- [CircuitPython 2FA TOTP Authentication Friend](https://learn.adafruit.com/circuitpython-totp-otp-2fa-authy-authenticator-friend.md)
- [Flippy Floppy Drive Modification](https://learn.adafruit.com/flippy-floppy-drive-modification.md)
- [Authoring Playground Books with Bluefruit for iOS ](https://learn.adafruit.com/create-a-swift-playgroundbook-with-bluetooth-le.md)
- [SerenityOS - The dream of the '90s is alive!](https://learn.adafruit.com/serenityos-build-and-run-keep-the-90s-dream-alive.md)
- [Stand-alone programming AVRs using CircuitPython](https://learn.adafruit.com/stand-alone-programming-avrs-using-circuitpython.md)
- [Protect Your Online Accounts with Strong Passwords & Password Managers](https://learn.adafruit.com/protect-your-social-media-online-accounts-with-a-strong-password-manager.md)
---
# Source: https://learn.adafruit.com/fpga-rgb-matrix/more.md
# FPGA RGB Matrix
## More!
**Stephen Goadhouse ** wrote in with an update to this project that eliminates the ghosting effect in the original writeup. Check it out by clicking below[LED_Ctrl_Updates.zip](https://learn.adafruit.com/system/assets/assets/000/016/226/original/LED_Ctrl_Updates.zip?1398704832)
- [Previous Page](https://learn.adafruit.com/fpga-rgb-matrix/demos.md)
## Featured Products
### 5V 2A (2000mA) switching power supply - UL Listed
[5V 2A (2000mA) switching power supply - UL Listed](https://www.adafruit.com/product/276)
This is an FCC/CE certified and UL listed power supply. Need a lot of 5V power? This switching supply gives a clean regulated 5V output at up to 2000mA. 110 or 240 input, so it works in any country. The plugs are "US 2-prong" style so you may need a plug adapter, but you can pick one...
In Stock
[Buy Now](https://www.adafruit.com/product/276)
[Related Guides to the Product](https://learn.adafruit.com/products/276/guides)
### Medium 16x32 RGB LED matrix panel - 6mm Pitch
[Medium 16x32 RGB LED matrix panel - 6mm Pitch](https://www.adafruit.com/product/420)
Bring a little bit of Times Square into your home with this 16 x 32 RGB LED matrix panel. These panels are normally used to make video walls, here in New York we see them on the sides of busses and bus stops, to display animations or short video clips. We thought they looked really cool so we...
In Stock
[Buy Now](https://www.adafruit.com/product/420)
[Related Guides to the Product](https://learn.adafruit.com/products/420/guides)
### DE0-Nano - Altera Cyclone IV FPGA starter board
[DE0-Nano - Altera Cyclone IV FPGA starter board](https://www.adafruit.com/product/451)
For every day projects, microcontrollers are low-cost and easy to use. But when you have a project that needs raw power and high speed you may want to check out FPGAs (Field Programmable Gate Arrays). FPGAs are like raw chips that you can design by hand. They run very fast and very...
No Longer Stocked
[Buy Now](https://www.adafruit.com/product/451)
[Related Guides to the Product](https://learn.adafruit.com/products/451/guides)
## Related Guides
- [Smart Bathroom App](https://learn.adafruit.com/smart-bathroom-app.md)
- [NeoTrellis Light Painting](https://learn.adafruit.com/neotrellis-light-painting.md)
- [TIMESQUARE Wordclock](https://learn.adafruit.com/timesquare-wordclock.md)
- [MatrixPortal S3 Flight Proximity Tracker](https://learn.adafruit.com/matrixportal-s3-flight-proximity-tracker.md)
- [MicroPython Displays: Drawing Shapes](https://learn.adafruit.com/micropython-displays-drawing-shapes.md)
- [Adafruit Protomatter RGB Matrix Library](https://learn.adafruit.com/adafruit-protomatter-rgb-matrix-library.md)
- [Adafruit Microphone Amplifier Breakout](https://learn.adafruit.com/adafruit-microphone-amplifier-breakout.md)
- [16x16 NeoPixel Matrix Square Pixel Display](https://learn.adafruit.com/16x16-neopixel-matrix-square-pixel-display.md)
- [Shake Away 2021 with MatrixPortal](https://learn.adafruit.com/matrixportal-shake-away-2020.md)
- [NeoTrellis Feather Case Assembly](https://learn.adafruit.com/neotrellis-feather-case-assembly.md)
- [RGB LED Matrices with CircuitPython](https://learn.adafruit.com/rgb-led-matrices-matrix-panels-with-circuitpython.md)
- [Scroll an SMS Text Message on your RGB Matrix](https://learn.adafruit.com/scroll-an-sms-text-message-on-your-rgb-matrix.md)
- [Adafruit LED Backpacks](https://learn.adafruit.com/adafruit-led-backpack.md)
- [Raspberry Pi LED Matrix Display](https://learn.adafruit.com/raspberry-pi-led-matrix-display.md)
- [Sino:bit with Arduino](https://learn.adafruit.com/sino-bit-with-arduino.md)
---
# Source: https://learn.adafruit.com/light-painting-with-raspberry-pi/motion-rig.md
# Light Painting with Raspberry Pi
## Motion Rig
Handheld, straight LED bars have been _done._ With the code so quickly out of the way, we wanted to take this to the next level. First, the light bar would be replaced with a circle, in order to give the finished pictures an interesting three-dimensional quality. Second, it would be attached to a bicycle to provide smooth motion and to cover much longer distances. Riding this through the darkness during a long-exposure photograph should then create an extruded tube in 3D space. The bicycle “disappears” in the image because it doesn’t sit still long enough for the camera to expose.
A contraption was quickly assembled from PVC pipe and a hula hoop, then spray painted matte black to be stealthy for photos. This rig would attach with zip ties to the rack over the back wheel of the bike.

For power to both the LEDs and computer, a camping battery/inverter was used. The absurdity of this is not lost on us — converting 12V DC to 110V AC back down to 5V DC — but time was of the essence and the portable power unit was already on-hand (and when installed on the bike it looks like a Mr. Fusion…cool!). For something less hack-ish, a DC-to-DC converter would make a lot of sense.
A strip of 96 LEDs was used to go around the hoop
Generous application of zip ties and tape complete the mad science project look. This won’t be surviving a trip to Mars any time soon.

Yes, that’s my bike. Er, trike. What? Why are you looking at me funny?
- [Previous Page](https://learn.adafruit.com/light-painting-with-raspberry-pi/software.md)
- [Next Page](https://learn.adafruit.com/light-painting-with-raspberry-pi/results.md)
## Featured Products
### Adafruit Assembled Pi Cobbler Breakout + Cable for Raspberry Pi
[Adafruit Assembled Pi Cobbler Breakout + Cable for Raspberry Pi](https://www.adafruit.com/product/914)
Now that you've finally got your hands on a [Raspberry Pi® Model B](http://www.raspberrypi.org/), you're probably itching to make some fun embedded computer projects with it. What you need is an add on prototyping Pi Cobbler from Adafruit, which can break out all those...
No Longer Stocked
[Buy Now](https://www.adafruit.com/product/914)
[Related Guides to the Product](https://learn.adafruit.com/products/914/guides)
### Digital RGB LED Weatherproof Strip - LPD8806 32 LED 5m
[Digital RGB LED Weatherproof Strip - LPD8806 32 LED 5m](https://www.adafruit.com/product/306)
These LED strips are fun and glowy. There are 32 RGB LEDs per meter, and you can control each LED individually! Yes, that's right, this is the digitally-addressable type of LED strip. You can set the color of each LED's red, green and blue component with 7-bit PWM precision (so 21-bit...
In Stock
[Buy Now](https://www.adafruit.com/product/306)
[Related Guides to the Product](https://learn.adafruit.com/products/306/guides)
### 4-pin JST SM Plug + Receptacle Cable Set
[4-pin JST SM Plug + Receptacle Cable Set](https://www.adafruit.com/product/578)
These 4-wire cables are 15cm long and come as a set, one side has a JST SM type connector plug on the end. The other side has a matching JST SM type receptacle connector. They are good for whenever you have 4 wires you want to be able to plug and unplug. We like the solid and compact nature of...
In Stock
[Buy Now](https://www.adafruit.com/product/578)
[Related Guides to the Product](https://learn.adafruit.com/products/578/guides)
### 5V 10A switching power supply
[5V 10A switching power supply](https://www.adafruit.com/product/658)
This is a beefy switching supply, for when you need a lot of power! It can supply 5V DC up to 10 Amps, running from 110V or 220V power (the plug it comes with is for US/Canada/Japan but you can use any plug adapter for your country, or just replace the cable with a standard computer/appliance...
Out of Stock
[Buy Now](https://www.adafruit.com/product/658)
[Related Guides to the Product](https://learn.adafruit.com/products/658/guides)
### 5V 2A (2000mA) switching power supply - UL Listed
[5V 2A (2000mA) switching power supply - UL Listed](https://www.adafruit.com/product/276)
This is an FCC/CE certified and UL listed power supply. Need a lot of 5V power? This switching supply gives a clean regulated 5V output at up to 2000mA. 110 or 240 input, so it works in any country. The plugs are "US 2-prong" style so you may need a plug adapter, but you can pick one...
In Stock
[Buy Now](https://www.adafruit.com/product/276)
[Related Guides to the Product](https://learn.adafruit.com/products/276/guides)
### Female DC Power adapter - 2.1mm jack to screw terminal block
[Female DC Power adapter - 2.1mm jack to screw terminal block](https://www.adafruit.com/product/368)
If you need to connect a DC power wall wart to a board that doesn't have a DC jack - this adapter will come in very handy! There is a 2.1mm DC jack on one end, and a screw terminal block on the other. The terminals are labeled with positive/negative assuming a positive-tip configuration...
In Stock
[Buy Now](https://www.adafruit.com/product/368)
[Related Guides to the Product](https://learn.adafruit.com/products/368/guides)
## Related Guides
- [LPD8806 Digital RGB LED Strip](https://learn.adafruit.com/digital-led-strip.md)
- [Magic Band Reader](https://learn.adafruit.com/magic-band-reader.md)
- [Bubble Table with LED Animations and IR Remote Control](https://learn.adafruit.com/bubble-table-with-led-animations-and-ir-remote-control.md)
- [Mini Neon Sign Prop & n00ds Booster Case](https://learn.adafruit.com/nood-booster-case.md)
- [Gemma 3D Printed Tree Topper](https://learn.adafruit.com/gemma-3d-printed-tree-topper.md)
- [Raspberry Pi SelfieBlock](https://learn.adafruit.com/selfieblock.md)
- [Rumi Sword - KPop Demon Hunters](https://learn.adafruit.com/rumi-sword.md)
- [Setting up a Raspberry Pi as a WiFi Access Point](https://learn.adafruit.com/setting-up-a-raspberry-pi-as-a-wifi-access-point.md)
- [Adafruit's Raspberry Pi Lesson 8. Using a Servo Motor](https://learn.adafruit.com/adafruits-raspberry-pi-lesson-8-using-a-servo-motor.md)
- [Adafruit NFC/RFID on Raspberry Pi](https://learn.adafruit.com/adafruit-nfc-rfid-on-raspberry-pi.md)
- [Set up and Blink - MATLAB and Simulink with Raspberry Pi](https://learn.adafruit.com/how-to-use-matlab-and-simulink-with-raspberry-pi.md)
- [Floor Lamp with NeoPixels and WLED Custom Animations](https://learn.adafruit.com/floor-lamp-with-wled.md)
- [Reverse Engineering a Bluetooth Low Energy Light Bulb](https://learn.adafruit.com/reverse-engineering-a-bluetooth-low-energy-light-bulb.md)
- [Running OpenGL-based Games & Emulators on Adafruit PiTFT Displays](https://learn.adafruit.com/running-opengl-based-games-and-emulators-on-adafruit-pitft-displays.md)
- [CLUE Vertical Garden Weather Visualizer](https://learn.adafruit.com/clue-vertical-garden-weather-visualizer.md)
- [PiPhone - A Raspberry Pi based Cellphone](https://learn.adafruit.com/piphone-a-raspberry-pi-based-cellphone.md)
---
# Source: https://learn.adafruit.com/sitcom-sfx-door-trigger/mount-it.md
# Sitcom SFX Door Trigger
## Mount it

Pi, Pi plate, and speaker all stacked together on the VESA mount above the door.

Magnetic door switch contacts have sticky foam, or screws for a more permanent install.

Mounted PIR sensor with some [Sugru](http://www.adafruit.com/products/436)
- [Previous Page](https://learn.adafruit.com/sitcom-sfx-door-trigger/code.md)
- [Next Page](https://learn.adafruit.com/sitcom-sfx-door-trigger/test-it.md)
## Featured Products
### Raspberry Pi 3 - Model B+ - 1.4GHz Cortex-A53 with 1GB RAM
[Raspberry Pi 3 - Model B+ - 1.4GHz Cortex-A53 with 1GB RAM](https://www.adafruit.com/product/3775)
The Raspberry Pi 3 Model B is the most popular Raspberry Pi computer made, and the Pi Foundation knows you can always make a good thing _better_! And what could make the Pi 3 better? How about a _faster_ processor, 5 GHz WiFi, and updated Ethernet chip with PoE capability?...
In Stock
[Buy Now](https://www.adafruit.com/product/3775)
[Related Guides to the Product](https://learn.adafruit.com/products/3775/guides)
### Adafruit Prototyping Pi Plate Kit for Raspberry Pi
[Adafruit Prototyping Pi Plate Kit for Raspberry Pi](https://www.adafruit.com/product/801)
Now that you've finally got your hands on a [Raspberry Pi®](http://www.raspberrypi.org/), you're probably itching to make some fun embedded computer projects with it. What you need is an add on prototyping Pi Plate from Adafruit, which can snap onto the Pi PCB (and is...
No Longer Stocked
[Buy Now](https://www.adafruit.com/product/801)
[Related Guides to the Product](https://learn.adafruit.com/products/801/guides)
### USB Powered Speakers
[USB Powered Speakers](https://www.adafruit.com/product/1363)
Add some extra boom to your audio project with these powered loudspeakers. We sampled half a dozen different models to find ones with a good frequency response, so you'll get quality audio output for music playback. Simply connect the standard 3.5mm stereo plug into your Raspberry Pi model...
In Stock
[Buy Now](https://www.adafruit.com/product/1363)
[Related Guides to the Product](https://learn.adafruit.com/products/1363/guides)
### Magnetic contact switch (door sensor)
[Magnetic contact switch (door sensor)](https://www.adafruit.com/product/375)
This sensor is essentially a reed switch, encased in an ABS plastic shell. Normally the reed is 'open' (no connection between the two wires). The other half is a magnet. When the magnet is less than 13mm (0.5") away, the reed switch closes. They're often used to detect when a...
In Stock
[Buy Now](https://www.adafruit.com/product/375)
[Related Guides to the Product](https://learn.adafruit.com/products/375/guides)
### PIR (motion) sensor
[PIR (motion) sensor](https://www.adafruit.com/product/189)
PIR sensors are used to detect motion from pets/humanoids from about 20 feet away (possibly works on zombies, not guaranteed). This one has an adjustable delay before firing (approx 2-4 seconds), adjustable sensitivity **and** we include a 1 foot (30 cm) cable with a socket so you...
In Stock
[Buy Now](https://www.adafruit.com/product/189)
[Related Guides to the Product](https://learn.adafruit.com/products/189/guides)
### VESA mount for Raspberry Pi Model A and Model B
[VESA mount for Raspberry Pi Model A and Model B](https://www.adafruit.com/product/986)
This basic VESA mount allows you to attach a Raspberry Pi Model A or B computer to the back of most HDMI monitors. It is cut out of clear 3mm acrylic so you can see the LEDs, and has a cut out for the GPIO pins in case you want to connect a GPIO cable or Cobbler to it. The Pi is held in place...
No Longer Stocked
[Buy Now](https://www.adafruit.com/product/986)
[Related Guides to the Product](https://learn.adafruit.com/products/986/guides)
### SD/MicroSD Memory Card (8 GB SDHC)
[SD/MicroSD Memory Card (8 GB SDHC)](https://www.adafruit.com/product/1294)
Add mega-storage in a jiffy using this 8 GB class 4 micro-SD card. It comes with a SD adapter so you can use it with any of our shields or adapters. Preformatted to FAT so it works out of the box with our projects. Tested and works great with our
In Stock
[Buy Now](https://www.adafruit.com/product/1294)
[Related Guides to the Product](https://learn.adafruit.com/products/1294/guides)
### Raspberry Pi 3 Model B+ Starter Pack - Includes a Pi 3 Model B+
[Raspberry Pi 3 Model B+ Starter Pack - Includes a Pi 3 Model B+](https://www.adafruit.com/product/3783)
The Raspberry Pi 3 Model B is the most popular Raspberry Pi computer made, and the Pi Foundation knows you can always make a good thing _better_! And what could make the Pi 3 better? How about a _faster_ processor, 5 GHz WiFi, and updated Ethernet chip with PoE...
Out of Stock
[Buy Now](https://www.adafruit.com/product/3783)
[Related Guides to the Product](https://learn.adafruit.com/products/3783/guides)
## Related Guides
- [PIR Motion Sensor](https://learn.adafruit.com/pir-passive-infrared-proximity-motion-sensor.md)
- [Optical Sensor Drum Track Sequencer](https://learn.adafruit.com/drum-track-sequencer.md)
- [Raspberry Pi Pygame UI basics](https://learn.adafruit.com/raspberry-pi-pygame-ui-basics.md)
- [Raspberry Pi SelfieBlock](https://learn.adafruit.com/selfieblock.md)
- [Ultrasonic Ruler](https://learn.adafruit.com/ultrasonic-ruler.md)
- [ScoutMakes DRV5032 Hall Sensor](https://learn.adafruit.com/scoutmakes-drv5032-hall-sensor.md)
- [Magical Mistletoe](https://learn.adafruit.com/magical-mistletoe.md)
- [Motion Activated Outlet with the Adafruit FunHouse](https://learn.adafruit.com/motion-activated-outlet-with-the-adafruit-funhouse.md)
- [Adafruit VL53L0X Time of Flight Micro-LIDAR Distance Sensor Breakout](https://learn.adafruit.com/adafruit-vl53l0x-micro-lidar-distance-sensor-breakout.md)
- [Adafruit APDS9960 breakout](https://learn.adafruit.com/adafruit-apds9960-breakout.md)
- [Raspberry Pi as a Media Center](https://learn.adafruit.com/raspberry-pi-as-a-media-center.md)
- [Raspberry Pi radio player with touchscreen](https://learn.adafruit.com/raspberry-pi-radio-player-with-touchscreen.md)
- [Arm-based IoT Kit for Cloud IoT Core - Getting Started](https://learn.adafruit.com/raspberry-pi-3-and-sensor-kit-for-google-cloud-iot-core.md)
- [Piezo Ring Tones with Raspberry Pi](https://learn.adafruit.com/piezo-ring-tones-with-raspberry-pi.md)
- [LPC824 NeoPixel IR Distance Sensor](https://learn.adafruit.com/lpc824-neopixel-ir-distance-sensor.md)
- [Track a Turtle with WipperSnapper](https://learn.adafruit.com/track-a-turtle-with-wippersnapper.md)
---
# Source: https://learn.adafruit.com/2-8-tft-touchscreen/mounting-options.md
# 2.8" TFT Touchscreen
## Mounting Options
Info:
We wanted to make sure that you could easily put this display in a box. There are four mounting holes on tabs. If you really don't need the tabs they can be cut off with a hacksaw or tin-snips. The holes are 2.25" apart in the short direction and 2.95" apart in the long direction. The drill holes are 0.125" and will easily take a #4 imperial or M3 (3mm) screw. The PCB is 0.063" thick.- [Previous Page](https://learn.adafruit.com/2-8-tft-touchscreen/connection-options.md)
- [Next Page](https://learn.adafruit.com/2-8-tft-touchscreen/backlight-wiring.md)
## Featured Products
### Adafruit METRO 328 Fully Assembled - Arduino IDE compatible
[Adafruit METRO 328 Fully Assembled - Arduino IDE compatible](https://www.adafruit.com/product/50)
We sure love the ATmega328 here at Adafruit, and we use them _a lot_ for our own projects. The processor has plenty of GPIO, Analog inputs, hardware UART SPI and I2C, timers and PWM galore - just enough for most simple projects. When we need to go small, we use a
Out of Stock
[Buy Now](https://www.adafruit.com/product/50)
[Related Guides to the Product](https://learn.adafruit.com/products/50/guides)
### Breadboarding wire bundle
[Breadboarding wire bundle](https://www.adafruit.com/product/153)
75 flexible stranded core wires with stiff ends molded on in red, orange, yellow, green, blue, brown, black and white. These are a major improvement over the "box of bent wires" that are sometimes sold with breadboards, and faster than stripping your own solid core wires. Makes...
In Stock
[Buy Now](https://www.adafruit.com/product/153)
[Related Guides to the Product](https://learn.adafruit.com/products/153/guides)
### Half Sized Premium Breadboard - 400 Tie Points
[Half Sized Premium Breadboard - 400 Tie Points](https://www.adafruit.com/product/64)
This is a cute, half-size breadboard with 400 tie points, good for small projects. It's 3.25" x 2.2" / 8.3cm x 5.5cm with a standard double-strip in the middle and two power rails on both sides. You can pull the power rails off easily to make the breadboard as...
In Stock
[Buy Now](https://www.adafruit.com/product/64)
[Related Guides to the Product](https://learn.adafruit.com/products/64/guides)
### MicroSD card breakout board+
[MicroSD card breakout board+](https://www.adafruit.com/product/254)
Not just a simple breakout board, this microSD adapter goes the extra mile - designed for ease of use.
- Onboard 5v-\>3v regulator provides 150mA for power-hungry cards
- 3v level shifting means you can use this with ease on either 3v or 5v systems
- Uses a proper level...
In Stock
[Buy Now](https://www.adafruit.com/product/254)
[Related Guides to the Product](https://learn.adafruit.com/products/254/guides)
## Related Guides
- [Adafruit Motor Shield](https://learn.adafruit.com/adafruit-motor-shield.md)
- [Photocells](https://learn.adafruit.com/photocells.md)
- [Circuit Playground: D is for Diode](https://learn.adafruit.com/circuit-playground-d-is-for-diode.md)
- [Micro SD Card Breakout Board Tutorial](https://learn.adafruit.com/adafruit-micro-sd-breakout-board-card-tutorial.md)
- [0.96" mini Color OLED](https://learn.adafruit.com/096-mini-color-oled.md)
- [Halloween Pumpkin](https://learn.adafruit.com/halloween-pumpkin.md)
- [Multi-tasking the Arduino - Part 1](https://learn.adafruit.com/multi-tasking-the-arduino-part-1.md)
- [Low Power WiFi Datalogger](https://learn.adafruit.com/low-power-wifi-datalogging.md)
- [Arduino Lesson 3. RGB LEDs](https://learn.adafruit.com/adafruit-arduino-lesson-3-rgb-leds.md)
- [Create an Internet of Things Dashboard with Adafruit IO](https://learn.adafruit.com/create-an-internet-of-things-dashboard-with-adafruit-dot-io.md)
- [Adafruit 4-Channel ADC Breakouts](https://learn.adafruit.com/adafruit-4-channel-adc-breakouts.md)
- [Trinket Audio Player](https://learn.adafruit.com/trinket-audio-player.md)
- [TTL Serial Camera](https://learn.adafruit.com/ttl-serial-camera.md)
- [Wave Shield Voice Changer](https://learn.adafruit.com/wave-shield-voice-changer.md)
- [All About Arduino Libraries](https://learn.adafruit.com/adafruit-all-about-arduino-libraries-install-use.md)
---
# Source: https://learn.adafruit.com/adafruit-arduino-lesson-2-leds/moving-the-resistor.md
# Arduino Lesson 2. LEDs
## Moving the Resistor
At the moment, you have 5V going to one leg of the resistor, the other leg of the resistor going to the positive side of the LED and the other side of the LED going to GND. However, if we moved the resistor so that it came after the LED, as shown below, the LED will still light.

Note, you will probably want to put the 270Ω resistor back in place.
So, it does not matter which side of the LED we put the resistor, as long as it is there somewhere.
- [Previous Page](https://learn.adafruit.com/adafruit-arduino-lesson-2-leds/breadboard-layout.md)
- [Next Page](https://learn.adafruit.com/adafruit-arduino-lesson-2-leds/blinking-the-led.md)
## Featured Products
### Adafruit METRO 328 Fully Assembled - Arduino IDE compatible
[Adafruit METRO 328 Fully Assembled - Arduino IDE compatible](https://www.adafruit.com/product/50)
We sure love the ATmega328 here at Adafruit, and we use them _a lot_ for our own projects. The processor has plenty of GPIO, Analog inputs, hardware UART SPI and I2C, timers and PWM galore - just enough for most simple projects. When we need to go small, we use a
Out of Stock
[Buy Now](https://www.adafruit.com/product/50)
[Related Guides to the Product](https://learn.adafruit.com/products/50/guides)
### Diffused Red 5mm LED (25 pack)
[Diffused Red 5mm LED (25 pack)](https://www.adafruit.com/product/299)
Need some indicators? We are big fans of these diffused red LEDs, in fact we use them exclusively in our kits. They are fairly bright so they can be seen in daytime, and from any angle. They go easily into a breadboard and will add that extra zing to your project.
- Pack of 25...
In Stock
[Buy Now](https://www.adafruit.com/product/299)
[Related Guides to the Product](https://learn.adafruit.com/products/299/guides)
### Half Sized Premium Breadboard - 400 Tie Points
[Half Sized Premium Breadboard - 400 Tie Points](https://www.adafruit.com/product/64)
This is a cute, half-size breadboard with 400 tie points, good for small projects. It's 3.25" x 2.2" / 8.3cm x 5.5cm with a standard double-strip in the middle and two power rails on both sides. You can pull the power rails off easily to make the breadboard as...
In Stock
[Buy Now](https://www.adafruit.com/product/64)
[Related Guides to the Product](https://learn.adafruit.com/products/64/guides)
### Premium Male/Male Jumper Wires - 40 x 6" (150mm)
[Premium Male/Male Jumper Wires - 40 x 6" (150mm)](https://www.adafruit.com/product/758)
Handy for making wire harnesses or jumpering between headers on PCB's. These premium jumper wires are 6" (150mm) long and come in a 'strip' of 40 (4 pieces of each of ten rainbow colors). They have 0.1" male header contacts on either end and fit cleanly next to each other...
In Stock
[Buy Now](https://www.adafruit.com/product/758)
[Related Guides to the Product](https://learn.adafruit.com/products/758/guides)
## Related Guides
- [LSM303 Accelerometer + Compass Breakout](https://learn.adafruit.com/lsm303-accelerometer-slash-compass-breakout.md)
- [Arduino Lesson 6. Digital Inputs](https://learn.adafruit.com/adafruit-arduino-lesson-6-digital-inputs.md)
- [WiFi Candy Bowl Monitor](https://learn.adafruit.com/wifi-candy-bowl.md)
- [Arduino Lesson 12. LCD Displays - Part 2](https://learn.adafruit.com/adafruit-arduino-lesson-12-lcd-displays-part-2.md)
- [Character LCDs](https://learn.adafruit.com/character-lcds.md)
- [Silicone Robo-Tentacle](https://learn.adafruit.com/silicone-robo-tentacle.md)
- [Arduino Ethernet + SD Card](https://learn.adafruit.com/arduino-ethernet-sd-card.md)
- [Arduino Lesson 15. DC Motor Reversing](https://learn.adafruit.com/adafruit-arduino-lesson-15-dc-motor-reversing.md)
- [Arduin-o-Phone](https://learn.adafruit.com/arduin-o-phone-arduino-powered-diy-cellphone.md)
- [Remote controlled door lock using a fingerprint sensor & Adafruit IO](https://learn.adafruit.com/remote-controlled-door-lock-using-a-fingerprint-sensor-and-adafruit-io.md)
- [Adafruit 4-Channel ADC Breakouts](https://learn.adafruit.com/adafruit-4-channel-adc-breakouts.md)
- [Ladyada's Learn Arduino - Lesson #2](https://learn.adafruit.com/ladyadas-learn-arduino-lesson-number-2.md)
- [Adafruit 2.8" TFT Touch Shield v2 - Capacitive or Resistive](https://learn.adafruit.com/adafruit-2-8-tft-touch-shield-v2.md)
- [Arduino Lesson 4. Eight LEDs and a Shift Register](https://learn.adafruit.com/adafruit-arduino-lesson-4-eight-leds.md)
- [2.8" TFT Touch Shield](https://learn.adafruit.com/2-8-tft-touch-shield.md)
---
# Source: https://learn.adafruit.com/li-ion-and-lipoly-batteries/multi-battery-packs.md
# Li-Ion & LiPoly Batteries
## Multi-battery Packs
You may eventually find yourself needing a big battery, say because your project has twice as many LEDs or you want it to last twice as long. A lot of people think "well I know that if you parallel two batteries that doubles the capacity so I'll do that!"
For example, we could take two 1300mAh batteries, that are 3.7V nominal and connect them together in parallel…

Info:
Not only should you not do this with alkaline batteries, but its especially dangerous with lithium batteries. One battery can discharge into another, damaging it or causing a fire!
If you ever need a larger battery, you should upgrade to a larger battery! Like this one which is twice the size and has twice the capacity.

You may be asking then, **How come adafruit sells battery packs that are paralleled?**
These two packs are clearly two and three batteries. Since they are 3.7V they must be in parallel. Isnt this unsafe?

The answer is that these batteries are assembled by a company that is experienced and certified to test and assemble battery packs. The individual batteries are tested and sorted by machine so that each pack has matching batteries with the same capacity and internal resistance. Individuals do not have this equipment, which is why you should not try to make your own packs.
So the next question is whether you can connect batteries in series to get higher voltages?

This is also discouraged because the battery wont be able to be charged in a balanced manner. You should purchase a lithium ion pack that is preassembled.- [Previous Page](https://learn.adafruit.com/li-ion-and-lipoly-batteries/cell-phone-and-camcorder-batteries.md)
- [Next Page](https://learn.adafruit.com/li-ion-and-lipoly-batteries/proper-charging.md)
## Featured Products
### Adafruit Micro Lipo - USB LiIon/LiPoly charger
[Adafruit Micro Lipo - USB LiIon/LiPoly charger](https://www.adafruit.com/product/1304)
Oh so adorable, this is the tiniest little lipo charger, so handy you can keep it any project box! Its also easy to use. Simply plug in the gold plated contacts into any USB port and a 3.7V/4.2V lithium polymer or lithium ion rechargeable battery into the JST plug on the other end. There are...
In Stock
[Buy Now](https://www.adafruit.com/product/1304)
[Related Guides to the Product](https://learn.adafruit.com/products/1304/guides)
### USB LiIon/LiPoly charger
[USB LiIon/LiPoly charger](https://www.adafruit.com/product/259)
This is a Lithium Ion and Lithium Polymer battery charger based on the [MCP73833](http://www.microchip.com/wwwproducts/Devices.aspx?dDocName=en027785). It uses a USB mini-B for connection to any computer or 'USB wall adapter'. Charging is performed in three stages: first a...
In Stock
[Buy Now](https://www.adafruit.com/product/259)
[Related Guides to the Product](https://learn.adafruit.com/products/259/guides)
### USB/DC Lithium Polymer battery charger 5-12V
[USB/DC Lithium Polymer battery charger 5-12V](https://www.adafruit.com/product/280)
Charge your single-cell lithium ion/polymer battery any which way you like with this board. Have a USB connection? No problem, just plug into the miniUSB connector. Only have a wall adapter? Any standard 2.1mm DC adapter which puts out 5 to 12VDC will work fine. If both are plugged in, the...
No Longer Stocked
[Buy Now](https://www.adafruit.com/product/280)
[Related Guides to the Product](https://learn.adafruit.com/products/280/guides)
### Lithium Ion Battery Pack - 3.7V 6600mAh
[Lithium Ion Battery Pack - 3.7V 6600mAh](https://www.adafruit.com/product/353)
Need a massive battery for your project? This lithium-ion pack is made of 3 balanced 2200mAh cells for a total of 6600mA capacity! The cells are connected in parallel and spot-welded to a protection circuit that provides over-voltage, under-voltage, and over-current protection.
Each cell...
In Stock
[Buy Now](https://www.adafruit.com/product/353)
[Related Guides to the Product](https://learn.adafruit.com/products/353/guides)
### Lithium Ion Battery Pack - 3.7V 4400mAh
[Lithium Ion Battery Pack - 3.7V 4400mAh](https://www.adafruit.com/product/354)
Need a big battery for your project? This lithium-ion pack is made of 2 balanced 2200mAh cells for a total of 4400mA capacity! The cells are connected in parallel and spot-welded to a protection circuit that provides over-voltage, under-voltage, and over-current protection.
Each cell can...
In Stock
[Buy Now](https://www.adafruit.com/product/354)
[Related Guides to the Product](https://learn.adafruit.com/products/354/guides)
### Lithium Ion Polymer Battery - 3.7v 2500mAh
[Lithium Ion Polymer Battery - 3.7v 2500mAh](https://www.adafruit.com/product/328)
Lithium-ion polymer (also known as 'lipo' or 'lipoly') batteries are thin, light, and powerful. The output ranges from 4.2V when completely charged to 3.7V. This battery has a capacity of **2500mAh** for a total of about 10 Wh. If you need a smaller battery,
In Stock
[Buy Now](https://www.adafruit.com/product/328)
[Related Guides to the Product](https://learn.adafruit.com/products/328/guides)
### Lithium Ion Polymer Battery - 3.7v 1200mAh
[Lithium Ion Polymer Battery - 3.7v 1200mAh](https://www.adafruit.com/product/258)
Lithium-ion polymer (also known as 'lipo' or 'lipoly') batteries are thin, light, and powerful. The output ranges from 4.2V when completely charged to 3.7V. This battery has a capacity of 1200mAh for a total of about 4.5 Wh. If you need a larger battery,
In Stock
[Buy Now](https://www.adafruit.com/product/258)
[Related Guides to the Product](https://learn.adafruit.com/products/258/guides)
### Lithium Ion Polymer Battery - 3.7v 500mAh
[Lithium Ion Polymer Battery - 3.7v 500mAh](https://www.adafruit.com/product/1578)
Lithium-ion polymer (also known as 'lipo' or 'lipoly') batteries are thin, light, and powerful. The output ranges from 4.2V when completely charged to 3.7V. This battery has a capacity of 500mAh for a total of about 1.9 Wh. If you need a larger (or smaller!) battery,
In Stock
[Buy Now](https://www.adafruit.com/product/1578)
[Related Guides to the Product](https://learn.adafruit.com/products/1578/guides)
## Related Guides
- [Sound Activated Shark Mask](https://learn.adafruit.com/sound-activated-shark-mask.md)
- [SNES EZ Key Bluefruit Game Pad](https://learn.adafruit.com/snes-ez-key-bluefruit-game-pad.md)
- [Color-sensor Driven NeoPixel Dress](https://learn.adafruit.com/color-sensor-driven-neopixel-dress.md)
- [Adafruit MicroLipo and MiniLipo Battery Chargers](https://learn.adafruit.com/adafruit-microlipo-and-minilipo-battery-chargers.md)
- [Cartoon Network and Make Code - Rose Quartz Shield Umbrella](https://learn.adafruit.com/cartoon-network-and-make-code-rose-quartz-shield-umbrella.md)
- [Ursula's Seashell Necklace](https://learn.adafruit.com/ursulas-seashell-necklace.md)
- [Wireless Control Button for WLED Projects](https://learn.adafruit.com/wireless-control-button-for-wled-projects.md)
- [Bunny Ears with MakeCode](https://learn.adafruit.com/bunny-ears-with-makecode.md)
- [VU Meter Baseball Hat](https://learn.adafruit.com/vu-meter-baseball-hat.md)
- [Glowing Fascinator Hat with Gemma M0 and MakeCode](https://learn.adafruit.com/glowing-fascinator-hat-gemma-m0-makecode.md)
- [LED Masquerade Masks](https://learn.adafruit.com/led-masquerade-masks.md)
- [Han Solo Blaster Cosplay](https://learn.adafruit.com/han-solo-blaster-cosplay.md)
- [Convert your Model M Keyboard to Bluetooth with Bluefruit EZ-Key HID](https://learn.adafruit.com/convert-your-model-m-keyboard-to-bluetooth-with-bluefruit-ez-key-hid.md)
- [Chameleon Scarf](https://learn.adafruit.com/chameleon-scarf.md)
- [Kaleidoscope Eyes (Trinket-Powered NeoPixel LED Ring Goggles)](https://learn.adafruit.com/kaleidoscope-eyes-neopixel-led-goggles-trinket-gemma.md)
---
# Source: https://learn.adafruit.com/multimeters.md
# Multimeters
## Overview
https://www.youtube.com/watch?v=rPGoMbVSUu8
The most important debugging tool in any E.E.'s toolbox is a trusty multimeter. A multimeter can measure continuity, resistance, voltage and sometimes even current, capacitance, temperature, etc. It's a swiss army knife for geeks!## What to look for?
Everyone always asks, " **What multimeter should I get?"**
Well, since they're rather commodified (there are dozens of manufacturers) it is hard to make everyone use the same model, even though it would make things easier.
These are the necessities:
- Continuity testing with piezo buzzer
- Resistance test down to 10 ohm (or lower) and up to 1 Megaohm (or higher)
- DC voltage test down to 100mV (or lower) and up to 50V
- AC voltage test down to 1V and up to 400V (or 200V in the US/Canada/Japan)
- Diode testing
Here are nice things to have in your meter
- Auto-off - to keep from draining the batteries
- AC and DC current test, from 10mA to maybe 200mA and then also a 10A one as well
- Stand - a thing that flips out and keeps it upright on your table
- Auto-ranging - note: some people don't like auto-ranging because its slower and not as precise
- Hold - keep the maximum value on the screen so you can probe without looking at the meter.
- Common battery - such as 9V or AA's, pocket meters use hard-to-replace coin cells
These are things that I rarely (if ever) use, in descending order
- Frequency counter - before I had a scope this was surprisingly useful!
- Capacitance testing - usually to check random SMT caps
- Inductance testing - how often do you really use an inductor?
- Duty cycle - never used this
- Transistor beta meter - people don't really work with transistors anymore
- Temperature probe - I use the "Pease temperature test": a finger
## Other Useful Resources
- [TangentSoft's half-hour video tutorial](http://tangentsoft.net/elec/movies/tt06.html "Link: http://tangentsoft.net/elec/movies/tt06.html")
- [Make Magazine's Bre & Joey Grand on how to use a multimeter](http://www.makezine.com/blog/archive/2007/01/multimeter_tuto.html "Link: http://www.makezine.com/blog/archive/2007/01/multimeter\_tuto.html")
- [Robot Platform tutorial on using digital multimeter](http://www.robotplatform.com/tools/multimeter/multimeter.html "Link: http://www.robotplatform.com/tools/multimeter/multimeter.html")
- [Next Page](https://learn.adafruit.com/multimeters/continuity.md)
## Featured Products
### Extech EX330 12-function autoranging multimeter
[Extech EX330 12-function autoranging multimeter](https://www.adafruit.com/product/308)
**Discontinued** - [you can grab this Digital Multimeter - Model 9205B+ instead!](https://www.adafruit.com/product/2034)
If you're looking for one of the best multimeters, we're proud to now offer our personal favorite! The Extech EX330 "12...
No Longer Stocked
[Buy Now](https://www.adafruit.com/product/308)
[Related Guides to the Product](https://learn.adafruit.com/products/308/guides)
### Digital Multimeter
[Digital Multimeter](https://www.adafruit.com/product/71)
This is a basic multimeter, I've played with it a bunch and I think its a great addition to a toolbox. It's low cost and simple to use with a big clear display and all the measurements you need:
- AC/DC Voltage measurement
- Current measurement, from 1uA up to...
No Longer Stocked
[Buy Now](https://www.adafruit.com/product/71)
[Related Guides to the Product](https://learn.adafruit.com/products/71/guides)
### Digital Multimeter - Model 9205B+
[Digital Multimeter - Model 9205B+](https://www.adafruit.com/product/2034)
This massive multimeter has everything but the kitchen sink included. It's a great addition to any workbench or toolbox. It's low cost, simple to use, and has a big clear display with all the measurements you need and more!
The multimeter includes:
- AC/DC Voltage...
In Stock
[Buy Now](https://www.adafruit.com/product/2034)
[Related Guides to the Product](https://learn.adafruit.com/products/2034/guides)
### Pocket Autoranging Digital Multimeter
[Pocket Autoranging Digital Multimeter](https://www.adafruit.com/product/850)
When we're on the go, we like to keep a multimeter in our purse and this model is by far the best pocket meter we've found. It's so good you'll end up using it as your main multimeter!
First up, this meter can measure nearly everything: it's got DC and AC...
Out of Stock
[Buy Now](https://www.adafruit.com/product/850)
[Related Guides to the Product](https://learn.adafruit.com/products/850/guides)
### Multi-Meter! - Skill badge, iron-on patch
[Multi-Meter! - Skill badge, iron-on patch](https://www.adafruit.com/product/502)
You can use a multi-meter! Adafruit offers a fun and exciting "badges" of achievement for electronics, science and engineering. We believe everyone should be able to be rewarded for learning a useful skill, a badge is just one of the many ways to show and share.
This is...
No Longer Stocked
[Buy Now](https://www.adafruit.com/product/502)
[Related Guides to the Product](https://learn.adafruit.com/products/502/guides)
### Multi-Meter! - Sticker!
[Multi-Meter! - Sticker!](https://www.adafruit.com/product/646)
You can use a multi-meter! Adafruit offers a fun and exciting stickers to celebrate achievements in electronics, science and engineering. We believe everyone should be able to be rewarded for learning a useful skill, a great sticker is just one of the many ways to show and share.
No Longer Stocked
[Buy Now](https://www.adafruit.com/product/646)
[Related Guides to the Product](https://learn.adafruit.com/products/646/guides)
## Related Guides
- [USB-PD Hacks](https://learn.adafruit.com/usb-pd-hacks.md)
- [Energy Budgets](https://learn.adafruit.com/energy-budgets.md)
- [Ladyada's Toolkit](https://learn.adafruit.com/ladyadas-toolkit.md)
- [Collin's Lab: Multimeters](https://learn.adafruit.com/collins-lab-multimeters.md)
---
# Source: https://learn.adafruit.com/adafruit-pn532-rfid-nfc/ndef.md
# Adafruit PN532 RFID/NFC Breakout and Shield
## About the NDEF Format
## NDEF (NFC Data Exchange Format)
The NFC Data Exchange Format (NDEF) is a standardised data format that can be used to exchange information between any compatible NFC device and another NFC device or tag. The data format consists of **NDEF Messages** and **NDEF Records**. The standard is maintained by the NFC Forum and is freely available for consultation but requires accepting a license agreement to [download](http://www.nfc-forum.org/specs/spec_list/).
The NDEF format is used to store and exchange information like URIs, plain text, etc., using a commonly understood format. NFC tags like Mifare Classic cards can be configured as NDEF tags, and data written to them by one NFC device (NDEF Records) can be understood and accessed by any other NDEF compatible device. NDEF messages can also be used to exchange data between two active NFC devices in "peer-to-peer" mode. By adhering to the NDEF data exchange format during communication, devices that would otherwise have no meaningful knowledge of each other or common language are able to share data in an organised, mutually understandable manner.
## NDEF Messages
NDEF Messages are the basic "transportation" mechanism for NDEF records, with each message containing one or more NDEF Records.
## NDEF Records
NDEF Records contain a specific payload, and have the following structure that identifies the contents and size of the record:
```
Bit 7 6 5 4 3 2 1 0
------ ------ ------ ------ ------ ------ ------ ------
[ MB ] [ ME ] [ CF ] [ SR ] [ IL ] [ TNF ]
[ TYPE LENGTH ]
[ PAYLOAD LENGTH ]
[ ID LENGTH ]
[ RECORD TYPE ]
[ ID ]
[ PAYLOAD ]
```
## Record Header (Byte 0)
The record header contains a number of important fields, including a 3-bit field that identifies the type of record that follows (the **Type Name Format** or TNF):
**TNF: Type Name Format Field**
The Type Name Format or **TNF Field** of an NDEF record is a 3-bit value that describes the record type, and sets the expectation for the structure and content of the rest of the record. Possible record type names include: ```
TNF Value Record Type
--------- -----------------------------------------
0x00 Empty Record
Indicates no type, id, or payload is associated with this NDEF Record.
This record type is useful on newly formatted cards since every NDEF tag
must have at least one NDEF Record.
0x01 Well-Known Record
Indicates the type field uses the RTD type name format. This type name is used
to stored any record defined by a Record Type Definition (RTD), such as storing
RTD Text, RTD URIs, etc., and is one of the mostly frequently used and useful
record types.
0x02 MIME Media Record
Indicates the payload is an intermediate or final chunk of a chunked NDEF Record
0x03 Absolute URI Record
Indicates the type field contains a value that follows the absolute-URI BNF
construct defined by RFC 3986
0x04 External Record
Indicates the type field contains a value that follows the RTD external
name specification
0x05 Unknown Record
Indicates the payload type is unknown
0x06 Unchanged Record
Indicates the payload is an intermediate or final chunk of a chunked NDEF Record
```
**IL: ID LENGTH Field**
The IL flag indicates if the ID Length Field is preent or not. If this is set to 0, then the ID Length Field is ommitted in the record.
**SR: Short Record Bit**
The SR flag is set to one if the PAYLOAD LENGTH field is 1 byte (8 bits/0-255) or less. This allows for more compact records.
**CF: Chunk Flag**
The CF flag indicates if this is the first record chunk or a middle record chunk.
**ME: Message End**
The ME flag indicates if this is the last record in the message.
**MB: Message Begin**
The MB flag indicates if this is the start of an NDEF message.
## Type Length
Indicates the length (in bytes) of the Record Type field. This value is always zero for certain types of records defined with the TNF Field described above.
## Payload Length
Indicates the length (in bytes) of the record payload. If the SR field (described above) is set to 1 in the record header, this value will be one byte long (for a payload length from 0-255 bytes). If the SR field is set to 0, this value will be a 32-bit value occupying 4 bytes.
## ID Length
Indicates the length in bytes of the ID field. This field is present only if the IL flag (described above) is set to 1 in the record header.
## Record Type
This value describes the 'type' of record that follows. The values of the type field must corresponse to the value entered in the TNF bits of the record header.
## Record ID
The value of the ID field if an ID is included (the IL bit in the record header is set to 1). If the IL bit is set to 0, this field is ommitted.
## Payload
The record payload, which will be exactly the number of bytes described in the Payload Length field earlier.
## Well-Known Records (TNF Record Type 0x01)
Probably the most useful record type is the **"NFC Forum Well-Known Type"** (TNF Type 0x01). Record types that adhere to the "Well-Defined" type are each described by something called an RTD or **Record Type Definition**. Some of the current Well-Defined RTDs are:
## URI Records (0x55/'U')
The "Well Known Type" for a URI record is 0x55 ('U'), and this record type can be used to store a variety of useful information such as telephone numbers (tel:), website addresses, links to FTP file locations, etc.
URI Records are defined in the document "URI Record Type Definition" from the NFC Forum, and it has the following structure:
```
Name Offset Size Description
---- ------ ---- -----------
Identifier Code 0 1 byte See table below
URI Field 1 N bytes The rest of the URI (depending on byte 0 above)
```
The **URI Identifier Code** is use to shorten the URI length, and can have any of the following values:
```
Value Protocol
----- --------
0x00 No prepending is done ... the entire URI is contained in the URI Field
0x01 http://www.
0x02 https://www.
0x03 http://
0x04 https://
0x05 tel:
0x06 mailto:
0x07 ftp://anonymous:anonymous@
0x08 ftp://ftp.
0x09 ftps://
0x0A sftp://
0x0B smb://
0x0C nfs://
0x0D ftp://
0x0E dav://
0x0F news:
0x10 telnet://
0x11 imap:
0x12 rtsp://
0x13 urn:
0x14 pop:
0x15 sip:
0x16 sips:
0x17 tftp:
0x18 btspp://
0x19 btl2cap://
0x1A btgoep://
0x1B tcpobex://
0x1C irdaobex://
0x1D file://
0x1E urn:epc:id:
0x1F urn:epc:tag:
0x20 urn:epc:pat:
0x21 urn:epc:raw:
0x22 urn:epc:
0x23 urn:nfc:
```
Following the URI Identifier Code is the **URI Field**. This field provides the URI as per RFC 3987 and contains the rest of the URI after the value corresponding to the URI Identifier is prepended (unless the URI ID is 0x00, in which case the complete URI will be contained in the URI Field).
## Test Records
To Do ## Smart Poster Records
To Do ## Example NDEF Records
**Well Known Records**
**URI Record** An example of a URI record is shown in "Memory Dump of a Mifare Classic 1K Card with an NDEF Record" below.
**Text Record**
To Do
**Smartposter Record**
To Do
**Absolute URI Record**
To Do
## Using Mifare Classic Cards as an NDEF Tag
Mifare Classic 1K and 4K cards can be configured as NFC Forum compatible NDEF tags, but they must be organised in a certain manner to do so. The requirements to make a Mifare Classic card "NFC Forum compliant" are described in the following App Note from NXP:
[AN1304 - NFC Type MIFARE Classic Tag Operation](http://www.nxp.com/documents/application_note/AN1304.pdf)
While the App Note above is the authoritative source on the matter, the following notes may also offer a quick overview of the key concepts involved in using Mifare Classic cards as NFC Forum compatible 'NDEF' tags:
## Mifare Application Directory (MAD)
In order to form a relationship between the sector-based memory of a Mifare Classic card and the individual NDEF records, the **Mifare Application Directory** (MAD) structure is used. The MAD indicates which sector(s) contains which NDEF record. The definitive source of information on the Mifare Application Directory is the following application note:
[AN10787 - MIFARE Application Directory (MAD)](http://www.nxp.com/documents/application_note/AN10787.pdf)
For reference sake, the two types of MADs (depending on the size of the card in question) are defined below:
## Mifare Application Directory 1 (MAD1)
**MAD1 can be used in any Mifare Classic card** regardless of the size of the EEPROM, although if it is used with cards larger than 1KB only the first 1KB of memory will be accessible for NDEF records.
The MAD1 is stored in the Manufacturer Sector (Sector 0x00) on the Mifare Classic card.
## Mifare Application Directory 2 (MAD2)
MAD2 can only be used on Mifare Classic cards with **more than 1KB of storage** (Mifare Classic 4K cards, etc.). It is **NOT** compatible with cards containing only 1KB of memory!
The MAD2 is stored in sectors 0x00 (the Manufacturer Sector) and 0x10.
## MAD Sector Access
The sectors containing the MAD1 (0x00) and MAD2 (0x00 and 0x10) are protected with a KEY A and KEY B (if you're not familiar with this concept, consult the Mifare Classic summary elsewhere in the PN532/NFC wiki). To ensure that these sectors can be read by any application, the following common KEY A should always be used:
```
Public KEY A of MAD Sectors
---------------------------------------------------
BYTE 0 BYTE 1 BYTE 2 BYTE 3 BYTE 4 BYTE 5
0xA0 0xA1 0xA2 0xA3 0xA4 0xA5
```
The MAD sector may optionally be write-protected using KEY B if you wish to limit the ability of customers to modify the card contents. The public KEY A will ensure that they can always read the data.## Storing NDEF Messages in Mifare Sectors
NDEF messages/records may be stored in any sector of the Mifare card, other than the sector(s) use by the MAD or sectors beyond the 1K range if a MAD1 table is used.
When a sector is used to store NDEF records, it is referred to as an NFC Sector. As with the MAD Sector(s) described above, these sectors must always be accessible in at least read-only mode, and as such a common public KEY A also exists for NFC Sectors, though it is not the same KEY A used in the MAD sector(s): ```
Public KEY A of NFC Sectors
---------------------------------------------------
BYTE 0 BYTE 1 BYTE 2 BYTE 3 BYTE 4 BYTE 5
0xD3 0xF7 0xD3 0xF7 0xD3 0xF7
```
In order to store an NDEF Message on the Mifare Classic card, the message needs to be wrapped inside something called a **TLV Block**. The basic structure of a TLV Block is described below.
## TLV Blocks
TLV is an abbreviation for three different fields: T for Tag Field, L for Length Field and V for Value Field. A TLV Block consist of one or more bytes, depending on which of these three fields is present. Note that the TLV Block will always be at least one byte since the T Field is mandatory in every case.
**Tag Field**
The Tag Field (or T Field) is the only mandatory field, and uses a single-byte to identify the type of TLV block accordingly to a pre-determined table of values: ```
TLV Block Types
Block Type Value Description
------------- ----- --------------------------------------
NULL 0x00 These blocks should be ignored
NDEF Message 0x03 Block contains an NDEF message
Proprietary 0xFD Block contains proprietary information
Terminator 0xFE Last TLV block in the data area
```
**Length Field**
The Length Field (or L Field) contains the size (in bytes) of the value field. The Length Field can be organised in two different ways, using either one or three bytes.
The one byte format simple contains a single byte value from 0x00..0xFF.
The three byte format consists of the following format:
```
Byte 0: Always 0xFF to indicate that we are using the three byte format
Byte 1..2: Can be a value between 0x00FF and 0xFFFE
```
Both the one byte and three byte format must be supported for NFC Forum and NDEF compatability. **Value Field**
The Value Field (or V Field) is only present if the Length Field (described above) is present and not equal to 0x00. If the Length Field is not equal to 0, the Value Fields will contain N bytes of data in the format indicated by the T Field above.
The value field is where the payload (an **NDEF Message** , for example) is stored.
**Terminator TLV**
The Terminator TLV is the last TLV block in the data area, and consist of a single byte: 0x0FE (see the TLV Block Type table above). This TLV Block in mandatory.
## Memory Dump of a Mifare Classic 1K Card with an NDEF Record
```
[ Start of Memory Dump ]
------------------------Sector 0-------------------------
Block 0 3E 39 AB 7F D3 88 04 00 47 41 16 57 4D 10 34 08 >9«Ó?..GA.WM.4.
Block 1 14 01 03 E1 03 E1 03 E1 03 E1 03 E1 03 E1 03 E1 ...á.á.á.á.á.á.á
Block 2 03 E1 03 E1 03 E1 03 E1 03 E1 03 E1 03 E1 03 E1 .á.á.á.á.á.á.á.á
Block 3 00 00 00 00 00 00 78 77 88 C1 00 00 00 00 00 00 ......xw?Á......
------------------------Sector 1-------------------------
Block 4 00 00 03 11 D1 01 0D 55 01 61 64 61 66 72 75 69 ....Ñ..U.adafrui
Block 5 74 2E 63 6F 6D FE 00 00 00 00 00 00 00 00 00 00 t.comþ..........
Block 6 00 00 00 00 00 00 00 00 00 00 00 00 00 00 00 00 ................
Block 7 00 00 00 00 00 00 7F 07 88 40 00 00 00 00 00 00 .......?@......
------------------------Sector 2-------------------------
Block 8 00 00 00 00 00 00 00 00 00 00 00 00 00 00 00 00 ................
Block 9 00 00 00 00 00 00 00 00 00 00 00 00 00 00 00 00 ................
Block 10 00 00 00 00 00 00 00 00 00 00 00 00 00 00 00 00 ................
Block 11 00 00 00 00 00 00 7F 07 88 40 00 00 00 00 00 00 .......?@......
------------------------Sector 3-------------------------
Block 12 00 00 00 00 00 00 00 00 00 00 00 00 00 00 00 00 ................
Block 13 00 00 00 00 00 00 00 00 00 00 00 00 00 00 00 00 ................
Block 14 00 00 00 00 00 00 00 00 00 00 00 00 00 00 00 00 ................
Block 15 00 00 00 00 00 00 7F 07 88 40 00 00 00 00 00 00 .......?@......
------------------------Sector 4-------------------------
Block 16 00 00 00 00 00 00 00 00 00 00 00 00 00 00 00 00 ................
Block 17 00 00 00 00 00 00 00 00 00 00 00 00 00 00 00 00 ................
Block 18 00 00 00 00 00 00 00 00 00 00 00 00 00 00 00 00 ................
Block 19 00 00 00 00 00 00 7F 07 88 40 00 00 00 00 00 00 .......?@......
------------------------Sector 5-------------------------
Block 20 00 00 00 00 00 00 00 00 00 00 00 00 00 00 00 00 ................
Block 21 00 00 00 00 00 00 00 00 00 00 00 00 00 00 00 00 ................
Block 22 00 00 00 00 00 00 00 00 00 00 00 00 00 00 00 00 ................
Block 23 00 00 00 00 00 00 7F 07 88 40 00 00 00 00 00 00 .......?@......
------------------------Sector 6-------------------------
Block 24 00 00 00 00 00 00 00 00 00 00 00 00 00 00 00 00 ................
Block 25 00 00 00 00 00 00 00 00 00 00 00 00 00 00 00 00 ................
Block 26 00 00 00 00 00 00 00 00 00 00 00 00 00 00 00 00 ................
Block 27 00 00 00 00 00 00 7F 07 88 40 00 00 00 00 00 00 .......?@......
------------------------Sector 7-------------------------
Block 28 00 00 00 00 00 00 00 00 00 00 00 00 00 00 00 00 ................
Block 29 00 00 00 00 00 00 00 00 00 00 00 00 00 00 00 00 ................
Block 30 00 00 00 00 00 00 00 00 00 00 00 00 00 00 00 00 ................
Block 31 00 00 00 00 00 00 7F 07 88 40 00 00 00 00 00 00 .......?@......
------------------------Sector 8-------------------------
Block 32 00 00 00 00 00 00 00 00 00 00 00 00 00 00 00 00 ................
Block 33 00 00 00 00 00 00 00 00 00 00 00 00 00 00 00 00 ................
Block 34 00 00 00 00 00 00 00 00 00 00 00 00 00 00 00 00 ................
Block 35 00 00 00 00 00 00 7F 07 88 40 00 00 00 00 00 00 .......?@......
------------------------Sector 9-------------------------
Block 36 00 00 00 00 00 00 00 00 00 00 00 00 00 00 00 00 ................
Block 37 00 00 00 00 00 00 00 00 00 00 00 00 00 00 00 00 ................
Block 38 00 00 00 00 00 00 00 00 00 00 00 00 00 00 00 00 ................
Block 39 00 00 00 00 00 00 7F 07 88 40 00 00 00 00 00 00 .......?@......
------------------------Sector 10-------------------------
Block 40 00 00 00 00 00 00 00 00 00 00 00 00 00 00 00 00 ................
Block 41 00 00 00 00 00 00 00 00 00 00 00 00 00 00 00 00 ................
Block 42 00 00 00 00 00 00 00 00 00 00 00 00 00 00 00 00 ................
Block 43 00 00 00 00 00 00 7F 07 88 40 00 00 00 00 00 00 .......?@......
------------------------Sector 11-------------------------
Block 44 00 00 00 00 00 00 00 00 00 00 00 00 00 00 00 00 ................
Block 45 00 00 00 00 00 00 00 00 00 00 00 00 00 00 00 00 ................
Block 46 00 00 00 00 00 00 00 00 00 00 00 00 00 00 00 00 ................
Block 47 00 00 00 00 00 00 7F 07 88 40 00 00 00 00 00 00 .......?@......
------------------------Sector 12-------------------------
Block 48 00 00 00 00 00 00 00 00 00 00 00 00 00 00 00 00 ................
Block 49 00 00 00 00 00 00 00 00 00 00 00 00 00 00 00 00 ................
Block 50 00 00 00 00 00 00 00 00 00 00 00 00 00 00 00 00 ................
Block 51 00 00 00 00 00 00 7F 07 88 40 00 00 00 00 00 00 .......?@......
------------------------Sector 13-------------------------
Block 52 00 00 00 00 00 00 00 00 00 00 00 00 00 00 00 00 ................
Block 53 00 00 00 00 00 00 00 00 00 00 00 00 00 00 00 00 ................
Block 54 00 00 00 00 00 00 00 00 00 00 00 00 00 00 00 00 ................
Block 55 00 00 00 00 00 00 7F 07 88 40 00 00 00 00 00 00 .......?@......
------------------------Sector 14-------------------------
Block 56 00 00 00 00 00 00 00 00 00 00 00 00 00 00 00 00 ................
Block 57 00 00 00 00 00 00 00 00 00 00 00 00 00 00 00 00 ................
Block 58 00 00 00 00 00 00 00 00 00 00 00 00 00 00 00 00 ................
Block 59 00 00 00 00 00 00 7F 07 88 40 00 00 00 00 00 00 .......?@......
------------------------Sector 15-------------------------
Block 60 00 00 00 00 00 00 00 00 00 00 00 00 00 00 00 00 ................
Block 61 00 00 00 00 00 00 00 00 00 00 00 00 00 00 00 00 ................
Block 62 00 00 00 00 00 00 00 00 00 00 00 00 00 00 00 00 ................
Block 63 00 00 00 00 00 00 7F 07 88 40 00 00 00 00 00 00 .......?@......
[ End of Memory Dump ]
```
## NDEF Records
The above example contains two records, both located in sector 1 (sector 0 contains the MAD).
**Record 1**
The first record on the card can be identified by looking at the first byte of block 4 in sector 1.
```
Block 00 01 02 03 04 05 06 07 08 09 10 11 12 13 14 15 Char Value
----- ----------------------------------------------- ------------
04 00 00 ..
```
Every record on the Mifare card starts with the **TLV Block** (described above), and the first byte of the TLV Block (the Tag Field) indicates that this is a **NULL Block type (value 0x00)**. The second byte is the Length Field, and is 0. Since there is no payload for this record (Length = 0), the third byte of the TLV block is not present (the Value Field).
This record was likely inserted when the card was first formatted to ensure that at least one record is present.
**Record 2**
The second record on the card starts at byte 0x02 of block 4 and continues into block 5.
```
Block 00 01 02 03 04 05 06 07 08 09 10 11 12 13 14 15 Char Value
----- ----------------------------------------------- ------------
04 03 11 D1 01 0D 55 01 61 64 61 66 72 75 69 Ñ..U.adafrui
05 74 2E 63 6F 6D t.com
```
Starting with the **TLV Block** data in the first two bytes, we can determine the following:
```
Byte(s) Value Description
------- ----- -----------
04:02 0x03 Field Type (0x03 = NDEF Message)
04:03 0x11 Length Field (17 bytes)
```
This indicates to us that the record contains an **NDEF Message** (value 0x03), and that the message is 17 bytes long (0x11 in hexadecimal = 17 in decimal value). This means that our NDEF message is contained in the next 17 bytes (04:04..05:04). The NDEF record can then be analysed as follows:
```
Byte(s) Value Description
------- ----- -----------
04:04 0xD1 This byte is the **NDEF Record Header**, and indicates that this is
an NFC Forum Well Known Record (0x01 in the first 3 bits),
and that this is the first and last record (MB=1, ME=1),
and that this is a short record (SR = 1) meaning the payload
length is less than or equal to 255 chars (len=one byte).
TNF = 0x01 (NFC Forum Well Known Type)
IL = 0 (No ID present, meaning there is no ID Length or ID Field either)
SR = 1 (Short Record)
CF = 0 (Record is not 'chunked')
ME = 1 (End of message)
MB = 1 (Beginning of message)
04:05 0x01 This byte is the **Type Length** for the Record Type Indicator
(see above for more information), which is 1 byte (0x55/'U' below)
04:06 0x0D This is the payload length (13 bytes)
04:07 0x55 Record Type Indicator (0x55 or 'U' = URI Record)
04:08 0x01 This is the **start of the record payload**, which contains the
URI Identifier ("http://www.") since this is a URI Well-Defined
Record Type (see Well-Defined Records above). This will be
prepended to the rest of the URI that follows in the rest of the
message payload
04:09..05:04 ... The remainder of the URI ("adafruit.com"), which combined with the
pre-pended value from byte 04:08 yields: http://www.adafruit.com
```
**TLV Terminator** ```
Block 00 01 02 03 04 05 06 07 08 09 10 11 12 13 14 15 Char Value
----- ----------------------------------------------- ------------
05 FE þ
```
The final byte (block 5, byte 5), with the value 0xFE, is the **TLV Terminator** and indicates that this is the end of the TLV Block.
- [Previous Page](https://learn.adafruit.com/adafruit-pn532-rfid-nfc/mifare.md)
- [Next Page](https://learn.adafruit.com/adafruit-pn532-rfid-nfc/libnfc.md)
## Featured Products
### PN532 NFC/RFID controller breakout board
[PN532 NFC/RFID controller breakout board](https://www.adafruit.com/product/364)
The PN532 is the most popular NFC chip, and is what is embedded in pretty much every phone or device that does NFC. It can pretty much do it all, such as read and write to tags and cards, communicate with phones (say for payment processing), and 'act' like a NFC tag. If you want to do...
Out of Stock
[Buy Now](https://www.adafruit.com/product/364)
[Related Guides to the Product](https://learn.adafruit.com/products/364/guides)
### Adafruit METRO 328 Fully Assembled - Arduino IDE compatible
[Adafruit METRO 328 Fully Assembled - Arduino IDE compatible](https://www.adafruit.com/product/50)
We sure love the ATmega328 here at Adafruit, and we use them _a lot_ for our own projects. The processor has plenty of GPIO, Analog inputs, hardware UART SPI and I2C, timers and PWM galore - just enough for most simple projects. When we need to go small, we use a
Out of Stock
[Buy Now](https://www.adafruit.com/product/50)
[Related Guides to the Product](https://learn.adafruit.com/products/50/guides)
### Breadboarding wire bundle
[Breadboarding wire bundle](https://www.adafruit.com/product/153)
75 flexible stranded core wires with stiff ends molded on in red, orange, yellow, green, blue, brown, black and white. These are a major improvement over the "box of bent wires" that are sometimes sold with breadboards, and faster than stripping your own solid core wires. Makes...
In Stock
[Buy Now](https://www.adafruit.com/product/153)
[Related Guides to the Product](https://learn.adafruit.com/products/153/guides)
### Adafruit PN532 NFC/RFID Controller Shield for Arduino + Extras
[Adafruit PN532 NFC/RFID Controller Shield for Arduino + Extras](https://www.adafruit.com/product/789)
We've taken our popular Adafruit PN532 breakout board and turned it into a shield - the perfect tool for any 13.56MHz RFID or NFC application. The Adafruit NFC shield uses the PN532 chip-set (the most popular NFC chip on the market) and is what is embedded in pretty much every phone or...
In Stock
[Buy Now](https://www.adafruit.com/product/789)
[Related Guides to the Product](https://learn.adafruit.com/products/789/guides)
### 13.56MHz RFID/NFC Card - Classic 1K
[13.56MHz RFID/NFC Card - Classic 1K](https://www.adafruit.com/product/359)
This is a blank 13.56MHz RFID/NFC card - often used for train/bus passes but also found in other systems where a proximity card is desired. The tag contains a small RFID chip and an antenna, and is passively powered by the reader/writer when placed a couple inches away.
These can be...
In Stock
[Buy Now](https://www.adafruit.com/product/359)
[Related Guides to the Product](https://learn.adafruit.com/products/359/guides)
### 13.56MHz RFID/NFC White Tag - Classic 1K
[13.56MHz RFID/NFC White Tag - Classic 1K](https://www.adafruit.com/product/360)
This is a blank 13.56MHz RFID/NFC laundry tag - often used for laundry but also general tagging. The tag contains a small RFID chip and an antenna, and is passively powered by the reader/writer when placed a couple inches away.
These can be read by almost any 13.56MHz RFID/NFC...
In Stock
[Buy Now](https://www.adafruit.com/product/360)
[Related Guides to the Product](https://learn.adafruit.com/products/360/guides)
### 13.56MHz RFID/NFC Clear Tag - Classic 1K
[13.56MHz RFID/NFC Clear Tag - Classic 1K](https://www.adafruit.com/product/361)
This is a blank 13.56MHz Classic 'laundry' tag - often used for laundry or identification but also found in other systems where a small proximity card is desired. This one is clear! The tag contains a small RFID chip and an antenna, and is passively powered by the reader/writer...
In Stock
[Buy Now](https://www.adafruit.com/product/361)
[Related Guides to the Product](https://learn.adafruit.com/products/361/guides)
### 13.56MHz RFID/NFC Sticker - Classic 1K
[13.56MHz RFID/NFC Sticker - Classic 1K](https://www.adafruit.com/product/362)
This is a blank 13.56MHz RFID/NFC sticker - often used for inventory uses but also wherever a sticker is desired. The tag contains a small RFID chip and an antenna, and is passively powered by the reader/writer when placed a couple inches away.
These can be read by almost any...
In Stock
[Buy Now](https://www.adafruit.com/product/362)
[Related Guides to the Product](https://learn.adafruit.com/products/362/guides)
## Related Guides
- [How to Choose a Microcontroller](https://learn.adafruit.com/how-to-choose-a-microcontroller.md)
- [Sous-vide controller powered by Arduino - The SousViduino!](https://learn.adafruit.com/sous-vide-powered-by-arduino-the-sous-viduino.md)
- [Arduino Lesson 13. DC Motors](https://learn.adafruit.com/adafruit-arduino-lesson-13-dc-motors.md)
- [Naughty or Nice Machine](https://learn.adafruit.com/naughty-or-nice-machine.md)
- [Wave Shield Voice Changer](https://learn.adafruit.com/wave-shield-voice-changer.md)
- [Adafruit INA219 Current Sensor Breakout](https://learn.adafruit.com/adafruit-ina219-current-sensor-breakout.md)
- [Low Power Coin Cell Voltage Logger](https://learn.adafruit.com/low-power-coin-cell-voltage-logger.md)
- [Analog Feedback Servos](https://learn.adafruit.com/analog-feedback-servos.md)
- [Tiny Arduino Music Visualizer](https://learn.adafruit.com/piccolo.md)
- [Adafruit Ultimate GPS Logger Shield](https://learn.adafruit.com/adafruit-ultimate-gps-logger-shield.md)
- [Ladyada's Learn Arduino - Lesson #0](https://learn.adafruit.com/ladyadas-learn-arduino-lesson-number-0.md)
- [Mini Thermal Receipt Printers](https://learn.adafruit.com/mini-thermal-receipt-printer.md)
- [Arduino Prototyping Mounting Plate](https://learn.adafruit.com/arduino-prototyping-mounting-plate.md)
- [LED Lightbox](https://learn.adafruit.com/led-lightbox.md)
- [NFC Ring Password Helper](https://learn.adafruit.com/nfc-ring-password-helper.md)
---
# Source: https://learn.adafruit.com/basic-resistor-sensor-reading-on-raspberry-pi/nece.md
# Basic Resistor Sensor Reading on Raspberry Pi
## Necessary Packages
# Update Your Pi to the Latest Raspbian
Your Pi will need to be running the latest version of Raspbian. This tutorial was written using Raspbian Stretch (Nov. 2018). Checkout our guide for [Preparing an SD Card for your Raspberry Pi](https://learn.adafruit.com/adafruit-raspberry-pi-lesson-1-preparing-and-sd-card-for-your-raspberry-pi) if you have not done so already. After the installation is complete be sure and run the following commands to make sure your installation packages and firmware are up to date.
```
$ sudo apt-get update -y
$ sudo apt-get dist-upgrade -y
$ sudo apt-get upgrade -y
$ sudo rpi-update
$ sudo reboot
```
# Install pip3
pip3 is already installed with a full Raspbian installation, but the Raspbian Lite does not include pip3 so it needs to be installed as shown below.
```
$ sudo apt-get install python3-pip
```
# Install adafruit-blinka
The adafruit-blinka package works on all Raspberry Pi boards (except the compute nodes). It makes the CircuitPython libraries available on Raspberry Pi.
```
$ sudo pip3 install adafruit-blinka
```
- [Previous Page](https://learn.adafruit.com/basic-resistor-sensor-reading-on-raspberry-pi/how-it-works.md)
- [Next Page](https://learn.adafruit.com/basic-resistor-sensor-reading-on-raspberry-pi/wiring.md)
## Featured Products
### Raspberry Pi 3 - Model B+ - 1.4GHz Cortex-A53 with 1GB RAM
[Raspberry Pi 3 - Model B+ - 1.4GHz Cortex-A53 with 1GB RAM](https://www.adafruit.com/product/3775)
The Raspberry Pi 3 Model B is the most popular Raspberry Pi computer made, and the Pi Foundation knows you can always make a good thing _better_! And what could make the Pi 3 better? How about a _faster_ processor, 5 GHz WiFi, and updated Ethernet chip with PoE capability?...
In Stock
[Buy Now](https://www.adafruit.com/product/3775)
[Related Guides to the Product](https://learn.adafruit.com/products/3775/guides)
### Photo cell (CdS photoresistor)
[Photo cell (CdS photoresistor)](https://www.adafruit.com/product/161)
CdS cells are little light sensors. As the squiggly face is exposed to more light, the resistance goes down. When it's light, the resistance is about ~1KΩ, when dark it goes up to ~10KΩ.
To use, connect one side of the photocell (either one, it's symmetric) to power...
In Stock
[Buy Now](https://www.adafruit.com/product/161)
[Related Guides to the Product](https://learn.adafruit.com/products/161/guides)
### Half Sized Premium Breadboard - 400 Tie Points
[Half Sized Premium Breadboard - 400 Tie Points](https://www.adafruit.com/product/64)
This is a cute, half-size breadboard with 400 tie points, good for small projects. It's 3.25" x 2.2" / 8.3cm x 5.5cm with a standard double-strip in the middle and two power rails on both sides. You can pull the power rails off easily to make the breadboard as...
In Stock
[Buy Now](https://www.adafruit.com/product/64)
[Related Guides to the Product](https://learn.adafruit.com/products/64/guides)
### Assembled Pi Cobbler Plus - Breakout Cable
[Assembled Pi Cobbler Plus - Breakout Cable](https://www.adafruit.com/product/2029)
The Raspberry Pi B+ / Pi 2 / Pi 3 / Pi 4 has landed on the Maker World like a 40-GPIO pinned, quad-USB ported, credit card sized bomb of DIY joy. And while you can use most of our great Model B accessories by hooking up our [downgrade...](https://www.adafruit.com/product/1986)
In Stock
[Buy Now](https://www.adafruit.com/product/2029)
[Related Guides to the Product](https://learn.adafruit.com/products/2029/guides)
### Assembled Pi T-Cobbler Plus - GPIO Breakout
[Assembled Pi T-Cobbler Plus - GPIO Breakout](https://www.adafruit.com/product/2028)
**This is the assembled version of the Pi T-Cobbler Plus. It only works with the Raspberry Pi Model Zero, A+, B+, Pi 2, Pi 3 & Pi 4!** (Any Pi with 2x20 connector)
The Raspberry Pi has landed on the Maker World like a 40-GPIO pinned, quad-USB ported, credit...
In Stock
[Buy Now](https://www.adafruit.com/product/2028)
[Related Guides to the Product](https://learn.adafruit.com/products/2028/guides)
### Adafruit Assembled Pi Cobbler Breakout + Cable for Raspberry Pi
[Adafruit Assembled Pi Cobbler Breakout + Cable for Raspberry Pi](https://www.adafruit.com/product/914)
Now that you've finally got your hands on a [Raspberry Pi® Model B](http://www.raspberrypi.org/), you're probably itching to make some fun embedded computer projects with it. What you need is an add on prototyping Pi Cobbler from Adafruit, which can break out all those...
No Longer Stocked
[Buy Now](https://www.adafruit.com/product/914)
[Related Guides to the Product](https://learn.adafruit.com/products/914/guides)
### Long Flex sensor
[Long Flex sensor](https://www.adafruit.com/product/182)
This sensor can detect flexing or bending in one direction. They were popularized by being used in the Nintendo PowerGlove as a gaming interface.
These sensors are easy to use, they are basically resistors that change value based on how much they're flexed. If they're...
In Stock
[Buy Now](https://www.adafruit.com/product/182)
[Related Guides to the Product](https://learn.adafruit.com/products/182/guides)
### Round Force-Sensitive Resistor (FSR) - 0.3 ~ 10 Newton Force
[Round Force-Sensitive Resistor (FSR) - 0.3 ~ 10 Newton Force](https://www.adafruit.com/product/166)
FSRs are sensors that allow you to detect physical pressure, squeezing and weight. They are simple to use and low cost. This sensor is an Alpha MF01A-N-221-A01 with 1/2 diameter sensing region.
We used to stock the Interlink model 402 FSR - the Alpha version is almost half the price...
In Stock
[Buy Now](https://www.adafruit.com/product/166)
[Related Guides to the Product](https://learn.adafruit.com/products/166/guides)
## Related Guides
- [Circadian Pi Desk Light](https://learn.adafruit.com/circadian-pi-desk-light.md)
- [Raspberry Pi E-mail Notifier Using LEDs](https://learn.adafruit.com/raspberry-pi-e-mail-notifier-using-leds.md)
- [Adafruit's Raspberry Pi Lesson 11. DS18B20 Temperature Sensing](https://learn.adafruit.com/adafruits-raspberry-pi-lesson-11-ds18b20-temperature-sensing.md)
- [LoRa and LoRaWAN Radio for Raspberry Pi](https://learn.adafruit.com/lora-and-lorawan-radio-for-raspberry-pi.md)
- [Adafruit's Raspberry Pi Lesson 4. GPIO Setup](https://learn.adafruit.com/adafruits-raspberry-pi-lesson-4-gpio-setup.md)
- [CircuitPython Libraries on Linux and Google Coral](https://learn.adafruit.com/circuitpython-on-google-coral-linux-blinka.md)
- [Adafruit AMG8833 8x8 Thermal Camera Sensor](https://learn.adafruit.com/adafruit-amg8833-8x8-thermal-camera-sensor.md)
- [Adafruit's Raspberry Pi Lesson 13. Power Control](https://learn.adafruit.com/adafruits-raspberry-pi-lesson-13-power-control.md)
- [Adafruit's Raspberry Pi Lesson 12. Sensing Movement](https://learn.adafruit.com/adafruits-raspberry-pi-lesson-12-sensing-movement.md)
- [Playing sounds and using buttons with Raspberry Pi](https://learn.adafruit.com/playing-sounds-and-using-buttons-with-raspberry-pi.md)
- [Windows IoT Core Application Development: Headless Blinky](https://learn.adafruit.com/windows-iot-application-development-headless-application.md)
- [Adding Basic Audio Ouput to Raspberry Pi Zero](https://learn.adafruit.com/adding-basic-audio-ouput-to-raspberry-pi-zero.md)
- [Drive a 16x2 LCD with the Raspberry Pi](https://learn.adafruit.com/drive-a-16x2-lcd-directly-with-a-raspberry-pi.md)
- [Program an AVR or Arduino Using Raspberry Pi GPIO](https://learn.adafruit.com/program-an-avr-or-arduino-using-raspberry-pi-gpio-pins.md)
- [Diet Raspberry Pi](https://learn.adafruit.com/diet-raspberry-pi.md)
---
# Source: https://learn.adafruit.com/send-raspberry-pi-data-to-cosm/necessary-packages.md
# Source: https://learn.adafruit.com/reading-a-analog-in-and-controlling-audio-volume-with-the-raspberry-pi/necessary-packages.md
# Source: https://learn.adafruit.com/raspberry-pi-e-mail-notifier-using-leds/necessary-packages.md
# Raspberry Pi E-mail Notifier Using LEDs
## Necessary Packages
# Update Your Pi to the Latest Raspbian
Your Pi will need to be running the latest version of Raspbian. This tutorial was written using Raspbian Stretch (Nov. 2018). Checkout our guide for [Preparing an SD Card for your Raspberry Pi](https://learn.adafruit.com/adafruit-raspberry-pi-lesson-1-preparing-and-sd-card-for-your-raspberry-pi) if you have not done so already. After the installation is complete be sure and run the following commands to make sure your packages are up to date.
```
$ sudo apt-get install update -y
$ sudo apt-get install upgrade -y
```
# Install pip3
pip3 is already installed with a full Raspbian installation, but the Raspbian Lite does not include pip3 so it needs to be installed as shown below.
```
$ sudo apt-get install python3-pip
```
# Install adafruit-blinka
```
$ sudo pip3 install adafruit-blinka
```
# Install imapclient
```
sudo pip3 install imapclient
```
- [Previous Page](https://learn.adafruit.com/raspberry-pi-e-mail-notifier-using-leds/wire-leds.md)
- [Next Page](https://learn.adafruit.com/raspberry-pi-e-mail-notifier-using-leds/python-script.md)
## Featured Products
### Raspberry Pi Starter Pack
[Raspberry Pi Starter Pack](https://www.adafruit.com/product/3049)
You're going to work hard with your Raspberry Pi 2 Model B or Raspberry Pi 1 Model B+. You're going to have to solder, code, and Linux your Maker heart out. That's why we've tried to make it as easy as possible to start...
In Stock
[Buy Now](https://www.adafruit.com/product/3049)
[Related Guides to the Product](https://learn.adafruit.com/products/3049/guides)
### Raspberry Pi 3 - Model B+ - 1.4GHz Cortex-A53 with 1GB RAM
[Raspberry Pi 3 - Model B+ - 1.4GHz Cortex-A53 with 1GB RAM](https://www.adafruit.com/product/3775)
The Raspberry Pi 3 Model B is the most popular Raspberry Pi computer made, and the Pi Foundation knows you can always make a good thing _better_! And what could make the Pi 3 better? How about a _faster_ processor, 5 GHz WiFi, and updated Ethernet chip with PoE capability?...
In Stock
[Buy Now](https://www.adafruit.com/product/3775)
[Related Guides to the Product](https://learn.adafruit.com/products/3775/guides)
### Full Sized Premium Breadboard - 830 Tie Points
[Full Sized Premium Breadboard - 830 Tie Points](https://www.adafruit.com/product/239)
This is a 'full-size' premium quality breadboard, 830 tie points. Good for small and medium projects. It's 2.2" x 7" (5.5 cm x 17 cm) with a standard double-strip in the middle and two power rails on both sides. You can pull the power rails off easily to make the...
In Stock
[Buy Now](https://www.adafruit.com/product/239)
[Related Guides to the Product](https://learn.adafruit.com/products/239/guides)
### 5V 2.5A Switching Power Supply with 20AWG MicroUSB Cable
[5V 2.5A Switching Power Supply with 20AWG MicroUSB Cable](https://www.adafruit.com/product/1995)
Our all-in-one 5V 2.5 Amp + MicroUSB cable power adapter is the perfect choice for powering single-board computers like Raspberry Pi, BeagleBone, or anything else that's power-hungry!
This adapter was specifically designed to provide 5.25V, not 5V, but we still call it a 5V USB...
Out of Stock
[Buy Now](https://www.adafruit.com/product/1995)
[Related Guides to the Product](https://learn.adafruit.com/products/1995/guides)
### Assembled Pi Cobbler Plus - Breakout Cable
[Assembled Pi Cobbler Plus - Breakout Cable](https://www.adafruit.com/product/2029)
The Raspberry Pi B+ / Pi 2 / Pi 3 / Pi 4 has landed on the Maker World like a 40-GPIO pinned, quad-USB ported, credit card sized bomb of DIY joy. And while you can use most of our great Model B accessories by hooking up our [downgrade...](https://www.adafruit.com/product/1986)
In Stock
[Buy Now](https://www.adafruit.com/product/2029)
[Related Guides to the Product](https://learn.adafruit.com/products/2029/guides)
### Assembled Pi T-Cobbler Plus - GPIO Breakout
[Assembled Pi T-Cobbler Plus - GPIO Breakout](https://www.adafruit.com/product/2028)
**This is the assembled version of the Pi T-Cobbler Plus. It only works with the Raspberry Pi Model Zero, A+, B+, Pi 2, Pi 3 & Pi 4!** (Any Pi with 2x20 connector)
The Raspberry Pi has landed on the Maker World like a 40-GPIO pinned, quad-USB ported, credit...
In Stock
[Buy Now](https://www.adafruit.com/product/2028)
[Related Guides to the Product](https://learn.adafruit.com/products/2028/guides)
### Diffused Red 10mm LED (25 pack)
[Diffused Red 10mm LED (25 pack)](https://www.adafruit.com/product/845)
Need some big indicators? We are big fans of these huge diffused red LEDs. They are fairly bright so they can be seen in daytime, and from any angle. They go easily into a breadboard and will add that extra zing to your project.
- Pack of 25 diffused red LEDs
- 10mm...
No Longer Stocked
[Buy Now](https://www.adafruit.com/product/845)
[Related Guides to the Product](https://learn.adafruit.com/products/845/guides)
### Diffused Green 10mm LED (25 pack)
[Diffused Green 10mm LED (25 pack)](https://www.adafruit.com/product/844)
Need some big indicators? We are big fans of these huge 10mm diffused green LEDs. They are fairly bright so they can be seen in daytime, and from any angle. They go easily into a breadboard and will add that extra zing to your project.
- Pack of 25 diffused green LEDs
- 10mm...
No Longer Stocked
[Buy Now](https://www.adafruit.com/product/844)
[Related Guides to the Product](https://learn.adafruit.com/products/844/guides)
## Related Guides
- [Speech Synthesis on the Raspberry Pi](https://learn.adafruit.com/speech-synthesis-on-the-raspberry-pi.md)
- [Circadian Pi Desk Light](https://learn.adafruit.com/circadian-pi-desk-light.md)
- [Adafruit's Raspberry Pi Lesson 11. DS18B20 Temperature Sensing](https://learn.adafruit.com/adafruits-raspberry-pi-lesson-11-ds18b20-temperature-sensing.md)
- [Drive a 16x2 LCD with the Raspberry Pi](https://learn.adafruit.com/drive-a-16x2-lcd-directly-with-a-raspberry-pi.md)
- [Adding Basic Audio Ouput to Raspberry Pi Zero](https://learn.adafruit.com/adding-basic-audio-ouput-to-raspberry-pi-zero.md)
- [Single Channel LoRaWAN Gateway for Raspberry Pi](https://learn.adafruit.com/raspberry-pi-single-channel-lorawan-gateway.md)
- [Playing sounds and using buttons with Raspberry Pi](https://learn.adafruit.com/playing-sounds-and-using-buttons-with-raspberry-pi.md)
- [Program an AVR or Arduino Using Raspberry Pi GPIO](https://learn.adafruit.com/program-an-avr-or-arduino-using-raspberry-pi-gpio-pins.md)
- [IoT Temperature Logger with Analog Devices ADT7410, Raspberry Pi, and Adafruit IO](https://learn.adafruit.com/iot-temperature-logger-with-python-and-adafruit-io.md)
- [Capacitive Touch Sensors on the Raspberry Pi](https://learn.adafruit.com/capacitive-touch-sensors-on-the-raspberry-pi.md)
- [Matrix and 7-Segment LED Backpack with the Raspberry Pi](https://learn.adafruit.com/matrix-7-segment-led-backpack-with-the-raspberry-pi.md)
- [Windows IoT Core Application Development: Headed Blinky](https://learn.adafruit.com/windows-iot-application-development-headed-blinky.md)
- [Basic Resistor Sensor Reading on Raspberry Pi](https://learn.adafruit.com/basic-resistor-sensor-reading-on-raspberry-pi.md)
- [Large Pi-based Thermometer and Clock](https://learn.adafruit.com/large-pi-based-thermometer-and-clock.md)
- [PiPhone - A Raspberry Pi based Cellphone](https://learn.adafruit.com/piphone-a-raspberry-pi-based-cellphone.md)
---
# Source: https://learn.adafruit.com/fpga-rgb-matrix/new-project.md
# FPGA RGB Matrix
## New Project
## User configuration
Once you are all set up and ready to begin, download the necessary files for this project from its [Github repository](https://github.com/adafruit/rgbmatrix-fpga) (click on the "ZIP" icon).
Open the file vhdl/config.vhd in a text editor and change line 32 **(constant NUM\_PANELS...)** to indicate the total number of LED panels you have daisy-chained together in your display. For example, if you are using a 1x2 or 2x1 grid, you will want to change the line to:
> **constant NUM\_PANELS : integer := 2**
You may optionally edit line 33 **(constant PIXEL\_DEPTH...)** in a similar manner to indicate how many bits-per-pixel you want to use. This will affect the level of brightness control available to you later. Finally, save the file!
## Creating the Quartus II project
Start Quartus II and open the "New Project Wizard" from the "File" menu. On the first page, name the project **rgbmatrix-fpga** (or something similar) and name the top-level entity **top\_level**. Click Next.

Now we will add the source code files to the project. Click the "..." button to open the file browser and select the .vhd files in the vhdl folder you downloaded earlier (do not include the testbenches directory). Click "..." again and open the megawizard folder. Set the type drop-down menu to "All Files (\*.\*)" so you can select the .qip, .cmp, and megawizard\_vjtag.vhd files (do not include megawizard\_vjtag\_inst.vhd). Add them to the project and click Next.

The FPGA chip in use on the DE0-Nano is the Cyclone IV EP4CE22F17C6N. You can find it by setting the device family to "Cyclone IV E", package to "FBGA", pin count to 256, and speed grade to 6. Select the chip and click Next.

Set the "Simulation" tool name to "ModelSim-Altera" and the format to "VHDL". Leave everything else as "\" and click Next.

Click Finish to create the project!
- [Previous Page](https://learn.adafruit.com/fpga-rgb-matrix/overview.md)
- [Next Page](https://learn.adafruit.com/fpga-rgb-matrix/pin-settings.md)
## Featured Products
### 5V 2A (2000mA) switching power supply - UL Listed
[5V 2A (2000mA) switching power supply - UL Listed](https://www.adafruit.com/product/276)
This is an FCC/CE certified and UL listed power supply. Need a lot of 5V power? This switching supply gives a clean regulated 5V output at up to 2000mA. 110 or 240 input, so it works in any country. The plugs are "US 2-prong" style so you may need a plug adapter, but you can pick one...
In Stock
[Buy Now](https://www.adafruit.com/product/276)
[Related Guides to the Product](https://learn.adafruit.com/products/276/guides)
### Medium 16x32 RGB LED matrix panel - 6mm Pitch
[Medium 16x32 RGB LED matrix panel - 6mm Pitch](https://www.adafruit.com/product/420)
Bring a little bit of Times Square into your home with this 16 x 32 RGB LED matrix panel. These panels are normally used to make video walls, here in New York we see them on the sides of busses and bus stops, to display animations or short video clips. We thought they looked really cool so we...
In Stock
[Buy Now](https://www.adafruit.com/product/420)
[Related Guides to the Product](https://learn.adafruit.com/products/420/guides)
### DE0-Nano - Altera Cyclone IV FPGA starter board
[DE0-Nano - Altera Cyclone IV FPGA starter board](https://www.adafruit.com/product/451)
For every day projects, microcontrollers are low-cost and easy to use. But when you have a project that needs raw power and high speed you may want to check out FPGAs (Field Programmable Gate Arrays). FPGAs are like raw chips that you can design by hand. They run very fast and very...
No Longer Stocked
[Buy Now](https://www.adafruit.com/product/451)
[Related Guides to the Product](https://learn.adafruit.com/products/451/guides)
## Related Guides
- [Smart Bathroom App](https://learn.adafruit.com/smart-bathroom-app.md)
- [NeoTrellis Light Painting](https://learn.adafruit.com/neotrellis-light-painting.md)
- [TIMESQUARE Wordclock](https://learn.adafruit.com/timesquare-wordclock.md)
- [MatrixPortal S3 Flight Proximity Tracker](https://learn.adafruit.com/matrixportal-s3-flight-proximity-tracker.md)
- [MicroPython Displays: Drawing Shapes](https://learn.adafruit.com/micropython-displays-drawing-shapes.md)
- [Adafruit Protomatter RGB Matrix Library](https://learn.adafruit.com/adafruit-protomatter-rgb-matrix-library.md)
- [Adafruit Microphone Amplifier Breakout](https://learn.adafruit.com/adafruit-microphone-amplifier-breakout.md)
- [16x16 NeoPixel Matrix Square Pixel Display](https://learn.adafruit.com/16x16-neopixel-matrix-square-pixel-display.md)
- [Shake Away 2021 with MatrixPortal](https://learn.adafruit.com/matrixportal-shake-away-2020.md)
- [NeoTrellis Feather Case Assembly](https://learn.adafruit.com/neotrellis-feather-case-assembly.md)
- [RGB LED Matrices with CircuitPython](https://learn.adafruit.com/rgb-led-matrices-matrix-panels-with-circuitpython.md)
- [Scroll an SMS Text Message on your RGB Matrix](https://learn.adafruit.com/scroll-an-sms-text-message-on-your-rgb-matrix.md)
- [Adafruit LED Backpacks](https://learn.adafruit.com/adafruit-led-backpack.md)
- [Raspberry Pi LED Matrix Display](https://learn.adafruit.com/raspberry-pi-led-matrix-display.md)
- [Sino:bit with Arduino](https://learn.adafruit.com/sino-bit-with-arduino.md)
---
# Source: https://learn.adafruit.com/32x16-32x32-rgb-led-matrix/new-wiring.md
# RGB LED Matrix Basics
## Connections
These panels are normally designed for _chaining_ (linking end-to-end into larger displays)…the output of one panel connects to the input of the next, down the line.
With the limited RAM in an Arduino, chaining is seldom practical. Still, **it’s necessary to distinguish the input and output connections** on the panel…it won’t respond if we’re connected to the wrong socket.
Danger: Although the panels support chaining, this is VERY impractical on Arduino-class boards and our library DOES NOT SUPPORT it. A more powerful system like a Raspberry Pi may be a better choice for chained panels!
Flip the matrix over so you’re looking at the back, holding it with the two sockets situated at the **left and right edges** (not top and bottom).
On some panels, if you’re lucky, the sockets are labeled INPUT and OUTPUT (sometimes IN and OUT or similar), so it’s obvious which is the input socket.
If INPUT is not labeled, look for one or more arrows pointing in the **horizontal** direction (ignore any vertical arrows, whether up or down). The horizontal arrows show the direction data moves from INPUT to OUTPUT — then you know which connector is which.
If no such labels are present, a last option is to examine the plastic shroud around the connector pins. The key (notch) on the INPUT connector will face the outer edge of the panel (not the center).

**The arrangement of pins on the INPUT connector varies with matrix size and the batch in which it was produced…**
A **32x16** panel uses this pin arrangement. The labels might be slightly different, or the pins might not be labeled at all…but in either case, use this image for reference.
Notice there are four ground connections. To ensure reliable performance, **_all four_ should be connected to GND** on the Arduino! A solderless breadboard is handy for making this split.

Here’s the layout for **32x32** and **64x32** panels. We’ll call this “ **Variant A**.” Some panels use different labels, but the functions are identical.
The layout is very similar to the 32x16 panel, with pin “D” replacing one ground connection.
**This is the layout we’ll be referencing most often.**
**If you have a 32x32 panel with _no pin labels at all,_ then use this layout.**

Info: On the 64x32 2.5mm panels (product ID [5036](https://www.adafruit.com/product/5036)), the green and blue channels are swapped compared to the standard HUB75 pinout. When using with libraries, simply swap the pin numbers for G1, G2 with B1, B2 in software to flip them back around.
If you are using the CircuitPython `MatrixPortal` library, you do not need to swap pins explicitly. Instead, add this argument to the constructor: `MatrixPortal(..., color_order="RBG", ...)`. The default order is `"RGB"`, and this argument will swap the pins to match the specified `"RBG"` order.
“ **Variant B** ” for **32x32** and **64x32** panels. **The wiring is _identical_ to Variant A above, _only the labels_ are different.**
Ground pins aren’t labeled, but still need to be connected.
LAT (latch) is labeled STB (strobe) here. R1/G1/B1/R2/G2/B2 are changed to R0/G0/B0/R1/G1/B1…but again, no functional difference, it’s just ink.

Our earliest **32x32** panels had a **two-socket** design, let’s call it “ **Variant C**.” All the same pin functions are present but the layout is very different.
R/G/B on the **upper** socket correspond to R1/G1/B1 in Variant A. R/G/B on the **lower** socket correspond to R2/G2/B2.
All the other signals (A/B/C/D/CLK/LAT/OE) need to be connected to **both** sockets — e.g. one pin on the Arduino drives both CLK pins, and so forth.

# Connecting to Arduino
There are two or three methods for connecting a matrix to an Arduino:
1. **Jumper wires** inserted between Arduino headers and a ribbon cable — this works well for testing and prototyping, but is not durable.
2. The **Adafruit RGB Matrix Shield** makes connecting these panels to an Arduino as easy as can be, and is best for permanent installations.
3. One could build a **_proto shield_** to replicate the pinout of option #2. But given the Matrix Shield’s low cost, this might not be worth the effort nowadays.
These panels are normally run by very fast processors or FPGAs, not a 16 MHz Arduino. To achieve reasonable performance in this limited environment, our software is optimized by **tying specific signals to specific Arduino pins**. A _few_ control lines can be reconfigured, but others are very specific… **you can’t wire the whole thing willy-nilly.** The next pages demonstrate compatible wiring…one using the RGB Matrix Shield, the using jumper wires.
- [Previous Page](https://learn.adafruit.com/32x16-32x32-rgb-led-matrix/powering.md)
- [Next Page](https://learn.adafruit.com/32x16-32x32-rgb-led-matrix/connecting-using-rgb-matrix-shield.md)
## Featured Products
### Medium 16x32 RGB LED matrix panel - 6mm Pitch
[Medium 16x32 RGB LED matrix panel - 6mm Pitch](https://www.adafruit.com/product/420)
Bring a little bit of Times Square into your home with this 16 x 32 RGB LED matrix panel. These panels are normally used to make video walls, here in New York we see them on the sides of busses and bus stops, to display animations or short video clips. We thought they looked really cool so we...
In Stock
[Buy Now](https://www.adafruit.com/product/420)
[Related Guides to the Product](https://learn.adafruit.com/products/420/guides)
### 32x32 RGB LED Matrix Panel - 4mm Pitch
[32x32 RGB LED Matrix Panel - 4mm Pitch](https://www.adafruit.com/product/607)
Bring a little bit of Times Square into your home with this totally adorable 5 inch square 32 x 32 RGB LED matrix panel. These panels are normally used to make video walls, here in New York we see them on the sides of busses and bus stops, to display animations or short video clips. We thought...
In Stock
[Buy Now](https://www.adafruit.com/product/607)
[Related Guides to the Product](https://learn.adafruit.com/products/607/guides)
### 32x32 RGB LED Matrix Panel - 5mm Pitch
[32x32 RGB LED Matrix Panel - 5mm Pitch](https://www.adafruit.com/product/2026)
Bring a little bit of Times Square into your home with this sweet 32 x 32 square RGB LED matrix panel. These panels are normally used to make video walls, here in New York we see them on the sides of busses and bus stops, to display animations or short video clips. We thought they looked...
In Stock
[Buy Now](https://www.adafruit.com/product/2026)
[Related Guides to the Product](https://learn.adafruit.com/products/2026/guides)
### 32x32 RGB LED Matrix Panel - 6mm pitch
[32x32 RGB LED Matrix Panel - 6mm pitch](https://www.adafruit.com/product/1484)
Bring a little bit of Times Square into your home with this sweet 32 x 32 square RGB LED matrix panel. These panels are normally used to make video walls, here in New York we see them on the sides of busses and bus stops, to display animations or short video clips. We thought they looked...
In Stock
[Buy Now](https://www.adafruit.com/product/1484)
[Related Guides to the Product](https://learn.adafruit.com/products/1484/guides)
### 64x32 RGB LED Matrix - 3mm pitch
[64x32 RGB LED Matrix - 3mm pitch](https://www.adafruit.com/product/2279)
Bring a little bit of Times Square into your home with this sweet 64 x 32 square RGB LED matrix panel. These panels are normally used to make video walls, here in New York we see them on the sides of busses and bus stops, to display animations or short video clips. We thought they looked...
In Stock
[Buy Now](https://www.adafruit.com/product/2279)
[Related Guides to the Product](https://learn.adafruit.com/products/2279/guides)
### 64x32 RGB LED Matrix - 4mm pitch
[64x32 RGB LED Matrix - 4mm pitch](https://www.adafruit.com/product/2278)
Bring a little bit of Times Square into your home with this sweet 64 x 32 square RGB LED matrix panel. These panels are normally used to make video walls, here in New York we see them on the sides of busses and bus stops, to display animations or short video clips. We thought they looked...
Out of Stock
[Buy Now](https://www.adafruit.com/product/2278)
[Related Guides to the Product](https://learn.adafruit.com/products/2278/guides)
### 64x32 RGB LED Matrix - 5mm pitch
[64x32 RGB LED Matrix - 5mm pitch](https://www.adafruit.com/product/2277)
Bring a little bit of Times Square into your home with this sweet 64x32 square RGB LED matrix panel. These panels are normally used to make video walls, here in New York we see them on the sides of busses and bus stops, to display animations or short video clips. We thought they looked really...
In Stock
[Buy Now](https://www.adafruit.com/product/2277)
[Related Guides to the Product](https://learn.adafruit.com/products/2277/guides)
### 64x32 RGB LED Matrix - 6mm pitch
[64x32 RGB LED Matrix - 6mm pitch](https://www.adafruit.com/product/2276)
Bring a little bit of Times Square into your home with this sweet 64x32 square RGB LED matrix panel. These panels are normally used to make video walls, here in New York we see them on the sides of busses and bus stops, to display animations or short video clips. We thought they looked really...
In Stock
[Buy Now](https://www.adafruit.com/product/2276)
[Related Guides to the Product](https://learn.adafruit.com/products/2276/guides)
## Related Guides
- [Adafruit Metro M0 Express](https://learn.adafruit.com/adafruit-metro-m0-express.md)
- [Adafruit Metro M4 Express featuring ATSAMD51](https://learn.adafruit.com/adafruit-metro-m4-express-featuring-atsamd51.md)
- [CircuitPython 101: Basic Builtin Data Structures](https://learn.adafruit.com/basic-datastructures-in-circuitpython.md)
- [Adafruit Ultimate GPS](https://learn.adafruit.com/adafruit-ultimate-gps.md)
- [WiFi Controlled LED Christmahanukwanzaa Tree](https://learn.adafruit.com/wifi-controlled-led-christmahanukwanzaa-tree.md)
- [Stream Deck controlled RGB Message Panel using Adafruit IO](https://learn.adafruit.com/stream-deck-controlled-rgb-message-panel-using-adafruit-io.md)
- [Memories of an Arduino](https://learn.adafruit.com/memories-of-an-arduino.md)
- [Matrix Portal Stained Glass with WLED](https://learn.adafruit.com/matrix-portal-stained-glass-with-wled.md)
- [Sous-vide controller powered by Arduino - The SousViduino!](https://learn.adafruit.com/sous-vide-powered-by-arduino-the-sous-viduino.md)
- [LED Matrix Sports Scoreboard](https://learn.adafruit.com/led-matrix-sports-scoreboard.md)
- [Creating MatrixPortal Projects with CircuitPython](https://learn.adafruit.com/creating-projects-with-the-circuitpython-matrixportal-library.md)
- [Introducing Adafruit Trellis ](https://learn.adafruit.com/adafruit-trellis-diy-open-source-led-keypad.md)
- [CircuitPython Hardware: Charlieplex LED Matrix](https://learn.adafruit.com/micropython-hardware-charlieplex-led-matrix.md)
- [CircuitPython Display Support Using displayio](https://learn.adafruit.com/circuitpython-display-support-using-displayio.md)
- [Arduino Lesson 16. Stepper Motors](https://learn.adafruit.com/adafruit-arduino-lesson-16-stepper-motors.md)
- [2.8" TFT Touchscreen](https://learn.adafruit.com/2-8-tft-touchscreen.md)
- [SmartMatrix Animated GIF Player](https://learn.adafruit.com/smartmatrix-animated-gif-player.md)
---
# Source: https://learn.adafruit.com/diy-wifi-raspberry-pi-touch-cam/next-steps-dot-dot-dot.md
# DIY WiFi Raspberry Pi Touchscreen Camera
## Next Steps…
This is just a taster. Where you go next is up to you…
- The camera board could be swapped out for the infrared-sensitive [Pi NoIR](http://www.adafruit.com/products/1567) camera.
- The Icon and Button classes in the cam.py script are pretty rudimentary, but might be sufficient for your own touchscreen applications (whether photography-related or otherwise).
- The camera code could be expanded to do new things. There are _lots_ of [camera settings we haven’t even touched](http://picamera.readthedocs.org). Other capabilities like a self-timer, intervalometer or motion detection could be added. Or capturing video.
Look at this embarrassing assemblage of _rubber bands!_ There’s so much more that could be done here for a proper enclosure…perhaps even laser-cut or 3D-printed if you have access to such.

The package could be slimmed down considerably; there’s a _huge_ amount of empty space between the PiTFT and Raspberry Pi (even more with a Model A board). Advanced makers could squeeze a slim LiPo battery and a 5V boost converter in there, connecting to the expansion header at the right edge of the TFT board instead of the side-protruding USB power connector. The result would be similar in size to some consumer point-and-shoot digital cameras.

- [Previous Page](https://learn.adafruit.com/diy-wifi-raspberry-pi-touch-cam/using-the-camera.md)
- [Next Page](https://learn.adafruit.com/diy-wifi-raspberry-pi-touch-cam/3d-printing-the-enclosure.md)
## Featured Products
### Raspberry Pi DIY Camera Pack
[Raspberry Pi DIY Camera Pack](https://www.adafruit.com/product/3275)
If the holidays promise anything, it’s almost certainly a deluge of photographs. Instead of taking out your smartphones, why not build your own camera?
With one of Adafruit’s best selling screens and an official Raspberry Pi camera, you’ll be ready to set up your very...
Out of Stock
[Buy Now](https://www.adafruit.com/product/3275)
[Related Guides to the Product](https://learn.adafruit.com/products/3275/guides)
### PiTFT Plus Assembled 320x240 2.8" TFT + Resistive Touchscreen
[PiTFT Plus Assembled 320x240 2.8" TFT + Resistive Touchscreen](https://www.adafruit.com/product/2298)
Is this not the cutest little display for the Raspberry Pi? It features a 2.8" display with 320x240 16-bit color pixels and a resistive touch overlay. The plate uses the high speed SPI interface on the Pi and can use the mini display as a console, X window port, displaying images or...
Out of Stock
[Buy Now](https://www.adafruit.com/product/2298)
[Related Guides to the Product](https://learn.adafruit.com/products/2298/guides)
### PiTFT Plus 320x240 3.2" TFT + Resistive Touchscreen
[PiTFT Plus 320x240 3.2" TFT + Resistive Touchscreen](https://www.adafruit.com/product/2616)
Is this not the cutest little display for the Raspberry Pi? It features a 3.2" display with 320x240 16-bit color pixels and a resistive touch overlay. The plate uses the high speed SPI interface on the Pi and can use the mini display as a console, X window port, displaying images or...
Out of Stock
[Buy Now](https://www.adafruit.com/product/2616)
[Related Guides to the Product](https://learn.adafruit.com/products/2616/guides)
### Adafruit PiTFT 2.4" HAT Mini Kit - 320x240 TFT Touchscreen
[Adafruit PiTFT 2.4" HAT Mini Kit - 320x240 TFT Touchscreen](https://www.adafruit.com/product/2455)
Is this not the cutest little display for the Raspberry Pi? It features a 2.4" display with 320x240 16-bit color pixels and a resistive touch overlay. The HAT uses the high speed SPI interface on the Pi and can use the mini display as a console, X window port, displaying images or video...
Out of Stock
[Buy Now](https://www.adafruit.com/product/2455)
[Related Guides to the Product](https://learn.adafruit.com/products/2455/guides)
### Adafruit PiTFT - 320x240 2.8" TFT+Touchscreen for Raspberry Pi
[Adafruit PiTFT - 320x240 2.8" TFT+Touchscreen for Raspberry Pi](https://www.adafruit.com/product/1601)
Is this not the cutest little display for the Raspberry Pi? It features a 2.8" display with 320x240 16-bit color pixels and a resistive touch overlay. The plate uses the high speed SPI interface on the Pi and can use the mini display as a console, X window port, displaying images or video...
Out of Stock
[Buy Now](https://www.adafruit.com/product/1601)
[Related Guides to the Product](https://learn.adafruit.com/products/1601/guides)
### Raspberry Pi 3 - Model B - ARMv8 with 1G RAM
[Raspberry Pi 3 - Model B - ARMv8 with 1G RAM](https://www.adafruit.com/product/3055)
Did you really think the Raspberry Pi would stop getting better? At this point, we sound like a broken record, extolling on the new Pi’s myriad improvements like we’re surprised that the folks at the Raspberry Pi Foundation are continuously making their flagship board better. ...
In Stock
[Buy Now](https://www.adafruit.com/product/3055)
[Related Guides to the Product](https://learn.adafruit.com/products/3055/guides)
### Raspberry Pi 2 - Model B v1.2 - ARM Cortex-A53 with 1G RAM
[Raspberry Pi 2 - Model B v1.2 - ARM Cortex-A53 with 1G RAM](https://www.adafruit.com/product/2358)
Didn't think the Raspberry Pi could get any better? You're in for a big surprise! The Raspberry Pi 2 Model B is out and it's amazing! With an upgraded ARM Cortex-A53 quad-core processor, Dual Core VideoCore IV Multimedia coprocessor, and a full Gigabyte of RAM, this...
No Longer Stocked
[Buy Now](https://www.adafruit.com/product/2358)
[Related Guides to the Product](https://learn.adafruit.com/products/2358/guides)
### Raspberry Pi Model A+ 512MB RAM
[Raspberry Pi Model A+ 512MB RAM](https://www.adafruit.com/product/2266)
**Note:** As of August 10th, 2016 the Raspberry Pi A+ now includes 512 MB of RAM!
The Raspberry Pi Model A+ is the perfect board for the minimalist Pi fan. This low-cost Pi uses the same processor as the model B+, but does away with the Ethernet jack and three of the USB...
No Longer Stocked
[Buy Now](https://www.adafruit.com/product/2266)
[Related Guides to the Product](https://learn.adafruit.com/products/2266/guides)
## Related Guides
- [Kali Linux on the Raspberry Pi with the PiTFT](https://learn.adafruit.com/kali-linux-on-the-raspberry-pi-with-the-pitft.md)
- [PiPhone - A Raspberry Pi based Cellphone](https://learn.adafruit.com/piphone-a-raspberry-pi-based-cellphone.md)
- [Processing on the Raspberry Pi & PiTFT](https://learn.adafruit.com/processing-on-the-raspberry-pi-and-pitft.md)
- [PiGRRL 2](https://learn.adafruit.com/pigrrl-2.md)
- [RasPipe: A Raspberry Pi Pipeline Viewer, Part 2](https://learn.adafruit.com/raspipe-a-raspberry-pi-pipeline-viewer-part-2.md)
- [Monitor PiCam and temperature on a PiTFT via adafruit.io](https://learn.adafruit.com/monitor-picam-and-temperature-on-a-pitft-via-adafruit-dot-io.md)
- [AstroPrint 3D Printing](https://learn.adafruit.com/astroprint-3d-printing.md)
- [Touchscreen Pi Timelapse Controller](https://learn.adafruit.com/touchscreen-pi-timelapse-controller.md)
- [Using the Slamtec RPLIDAR on a Raspberry Pi](https://learn.adafruit.com/slamtec-rplidar-on-pi.md)
- [Adafruit AMG8833 8x8 Thermal Camera Sensor](https://learn.adafruit.com/adafruit-amg8833-8x8-thermal-camera-sensor.md)
- [Pi Hole Ad Detection Display with PiTFT](https://learn.adafruit.com/pi-hole-ad-pitft-tft-detection-display.md)
- [SnapPiCam Raspberry Pi Camera](https://learn.adafruit.com/snappicam-raspberry-pi-camera.md)
- [JOY of Arcada — USB Game Pad for Adafruit PyGamer and PyBadge](https://learn.adafruit.com/joy-of-arcada-usb-game-pad-for-adafruit-pygamer-pybadge.md)
- [Go Fishing with Rotary Encoders](https://learn.adafruit.com/gone-fishing-game.md)
- [Set up and Blink - MATLAB and Simulink with Raspberry Pi](https://learn.adafruit.com/how-to-use-matlab-and-simulink-with-raspberry-pi.md)
---
# Source: https://learn.adafruit.com/nokia-5110-3310-monochrome-lcd.md
# Nokia 5110/3310 Monochrome LCD
## Overview


This is a quick tutorial for our 84x48 pixel monochrome LCD display. These displays are small, only about 1.5" diameter, but very readable due and comes with a backlight. This display is made of 84x48 individual pixels, so you can use it for graphics, text or bitmaps. These displays are inexpensive, easy to use, require only a few digital I/O pins and are fairly low power as well.
To drive the display, you will need 3 to 5 digital output pins (depending on whether you want to manually control the chip select and reset lines). Another pin can be used to control (via on/off or PWM) the backlight. **To make things easy for you, we've written a nice graphics library that can print text, pixels, rectangles, circles and lines!** The library is written for the Arduino but can easily be ported to your favorite microcontroller.
**[You can pick up one of these displays at the adafruit shop!](http://www.adafruit.com/index.php?main_page=product_info&cPath=37&products_id=338)**
- [Next Page](https://learn.adafruit.com/nokia-5110-3310-monochrome-lcd/power-requirements.md)
## Featured Products
### Nokia 5110/3310 monochrome LCD + extras
[Nokia 5110/3310 monochrome LCD + extras](https://www.adafruit.com/product/338)
These displays were used in old Nokia 5110/3310 cell phones (before the smart-phone fad turned every cell phone into a TV). It's a 84x48 pixel monochrome LCD display. These displays are small, only about 1.5" diagonal, but very readable and come with a white backlight. This...
No Longer Stocked
[Buy Now](https://www.adafruit.com/product/338)
[Related Guides to the Product](https://learn.adafruit.com/products/338/guides)
### Adafruit METRO 328 Fully Assembled - Arduino IDE compatible
[Adafruit METRO 328 Fully Assembled - Arduino IDE compatible](https://www.adafruit.com/product/50)
We sure love the ATmega328 here at Adafruit, and we use them _a lot_ for our own projects. The processor has plenty of GPIO, Analog inputs, hardware UART SPI and I2C, timers and PWM galore - just enough for most simple projects. When we need to go small, we use a
Out of Stock
[Buy Now](https://www.adafruit.com/product/50)
[Related Guides to the Product](https://learn.adafruit.com/products/50/guides)
### Half Sized Premium Breadboard - 400 Tie Points
[Half Sized Premium Breadboard - 400 Tie Points](https://www.adafruit.com/product/64)
This is a cute, half-size breadboard with 400 tie points, good for small projects. It's 3.25" x 2.2" / 8.3cm x 5.5cm with a standard double-strip in the middle and two power rails on both sides. You can pull the power rails off easily to make the breadboard as...
In Stock
[Buy Now](https://www.adafruit.com/product/64)
[Related Guides to the Product](https://learn.adafruit.com/products/64/guides)
### Breadboarding wire bundle
[Breadboarding wire bundle](https://www.adafruit.com/product/153)
75 flexible stranded core wires with stiff ends molded on in red, orange, yellow, green, blue, brown, black and white. These are a major improvement over the "box of bent wires" that are sometimes sold with breadboards, and faster than stripping your own solid core wires. Makes...
In Stock
[Buy Now](https://www.adafruit.com/product/153)
[Related Guides to the Product](https://learn.adafruit.com/products/153/guides)
## Related Guides
- [Babel Fish](https://learn.adafruit.com/babel-fish.md)
- [Adafruit PN532 RFID/NFC Breakout and Shield](https://learn.adafruit.com/adafruit-pn532-rfid-nfc.md)
- [Program an AVR or Arduino Using Raspberry Pi GPIO](https://learn.adafruit.com/program-an-avr-or-arduino-using-raspberry-pi-gpio-pins.md)
- [Deciphering Strange Arduino Code](https://learn.adafruit.com/deciphering-strange-arduino-code.md)
- [Arduino Lesson 1. Blink](https://learn.adafruit.com/adafruit-arduino-lesson-1-blink.md)
- [36mm LED Pixels](https://learn.adafruit.com/36mm-led-pixels.md)
- [Analog Feedback Servos](https://learn.adafruit.com/analog-feedback-servos.md)
- [Using NeoPixels and Servos Together](https://learn.adafruit.com/neopixels-and-servos.md)
- [RePaper eInk Development Board](https://learn.adafruit.com/repaper-eink-development-board.md)
- [Adafruit Proto Shield for Arduino](https://learn.adafruit.com/adafruit-proto-shield-arduino.md)
- [Animating Multiple LED Backpacks](https://learn.adafruit.com/animating-multiple-led-backpacks.md)
- [Create an Internet of Things Dashboard with Adafruit IO](https://learn.adafruit.com/create-an-internet-of-things-dashboard-with-adafruit-dot-io.md)
- [Arduino Lesson 16. Stepper Motors](https://learn.adafruit.com/adafruit-arduino-lesson-16-stepper-motors.md)
- [Metal Inlay Capacitive Touch Buttons](https://learn.adafruit.com/metal-inlay-capacitive-touch-buttons.md)
- [How to Find Hidden COM Ports](https://learn.adafruit.com/how-to-find-hidden-com-ports.md)
---
# Source: https://learn.adafruit.com/adafruit-raspberry-pi-educational-linux-distro/occidentalis-v0-dot-1.md
# Adafruit Raspberry Pi Educational Linux Distro
## Occidentalis v0.1
Info:

This is our first distro, **Occidentalis v0.1**. **Rubus occidentalis ** is the black raspberry. It is derived from Raspbian Wheezy July 15
We have made a few key changes to make it more hardware-hacker friendly!
- [Updated to Hexxeh firmware](https://raw.github.com/Hexxeh/rpi-update/master/rpi-update)
- 4 Gig SD image (will not fit in 2 G cards!)
- [I2C](http://www.bootc.net/archives/2012/05/19/i2c-and-the-raspberry-pi/ "Link: http://www.bootc.net/archives/2012/05/19/i2c-and-the-raspberry-pi/") and [hardware SPI](http://www.brianhensley.net/2012/07/getting-spi-working-on-raspberry-pi.html) support
- I2C/SPI modules initialized on boot
- sshd on boot
- ssh keygen on first boot
- runs avahi daemon (Bonjour client) and is called **raspberrypi.local**
- [Realtek RTL8188CUS wifi support](http://www.adafruit.com/products/814 "Link: http://www.adafruit.com/products/814")
- [One wire support on GPIO #4 when loaded](https://github.com/FrankBuss/linux-1/commit/71871509238d3e7bce4a74cdf616c3f12542acaa)
Please keep in mind, we are not full time linux distro maintainers - we will try to fix any bugs we find but this distro is not for beginners or people who are new to linux!
Info:
# How to Install!
Click below to download the ZIP file:
- [Adafruit Raspberry Pi Educational Distro - Occidentalis v0.1](http://adafruit-raspberry-pi.s3.amazonaws.com/Occidentalisv01.zip) **!700 Megs! ** (August 2, 2012)
MD5 of the img itself (not the zip): **34b5d3d511fcce0b82186816119d9881**
MD5 of the zip: **cc3559cb6e7cb5f33b0e46118e16b748**
SHA1 of the img: ** e95dbb306bee8a9f77b486c729c7869923b7ee43**
SHA1 of the zip: ** 72eb71d316b8765d5594878b8662f2118dc4320a**
and decompress it. Note that it is 4 GB large! You will need a 4GB card or larger. [We suggest using our 4GB SD card which works great](http://adafruit.com/products/102 "Link: http://adafruit.com/products/102")
You will also need a SD or MicroSD card writer to burn the image on.[ We suggest using our speedy MicroSD card writer that works with any OS.](http://adafruit.com/products/939 "Link: http://adafruit.com/products/939")
[Then follow the directions here](http://elinux.org/RPi_Easy_SD_Card_Setup "Link: http://elinux.org/RPi\_Easy\_SD\_Card\_Setup"), except use the downloaded and uncompressed Occidentalis image instead of Wheezy # I2C Support
I2C support is on SDA and SCL pins. To test, connect any I2C device to power, ground, SDA and SCL. Then run **i2cdetect -y 0** (as root) to detect which addresses are on the bus
[For more ideas, check out this post](http://www.bootc.net/archives/2012/05/19/i2c-and-the-raspberry-pi/ "Link: http://www.bootc.net/archives/2012/05/19/i2c-and-the-raspberry-pi/") (by the most awesome cboot) and others on the Raspberry Pi forums
**Our [BMP085](http://learn.adafruit.com/using-the-bmp085-with-raspberry-pi "Link: http://learn.adafruit.com/using-the-bmp085-with-raspberry-pi"), [MCP4725,](http://learn.adafruit.com/mcp4725-12-bit-dac-with-raspberry-pi "Link: http://learn.adafruit.com/mcp4725-12-bit-dac-with-raspberry-pi") [Servo Driver](http://http://learn.adafruit.com/adafruit-16-channel-servo-driver-with-raspberry-pi), and [7-segment breakout](http://learn.adafruit.com/matrix-7-segment-led-backpack-with-the-raspberry-pi) tutorials cover using I2C via Python on the Pi - so please check those out and read the code examples for I2C interfacing ideas!** # SPI Support
SPI support is on the CLK/MOSI/MISO/CS0/CS1 pins. To test, connect your logic analyser/scope to the pins and run **echo "testtext" \> /dev/spidev0.0** to send some dummy data to the SPI port. You can simply read/write the /dev/spidev files to read/write from SPI
**Our** [**Light Painting**](http://learn.adafruit.com/light-painting-with-raspberry-pi) **tutorial uses the hardware SPI system to write to digital LED strip, ** [**we also have a 'bitbanging' software SPI tutorial here**](http://learn.adafruit.com/reading-a-analog-in-and-controlling-audio-volume-with-the-raspberry-pi "Link: http://learn.adafruit.com/reading-a-analog-in-and-controlling-audio-volume-with-the-raspberry-pi") **if you need such a thing**
# One Wire Support
One wire is most commonly used for DS18B20 temp sensors. The Pi does not have 'hardware' 1-wire support but it can bitbang it with some success. Connect a DS18B20 with VCC to 3V, ground to ground and Data to GPIO #4. Then connect a 4.7K resistor from Data to VCC.
Then run as **root** : **modprobe w1-gpio** and then **modprobe w1-therm** to attach the temperature submodule. Then you can run **cat /sys/bus/w1/devices/28-\*/w1\_slave** to read the temperature data from the bus
The first line has the CRC, if its "NO" then the data is corrupted. If you get a good CRC check, the second line has t=temperature in 1/1000 of a degree Centigrade. For example, below, the temperature is 24.5°C
Since 1-wire is bitbanged, its flakier than SPI or I2C. [We have a short tutorial on using a DS18B20 sensor](http://learn.adafruit.com/adafruits-raspberry-pi-lesson-11-ds18b20-temperature-sensing)

# WiFi support
[We wanted to get our WiFI modules working](http://www.adafruit.com/products/814), so we applied the RTL8192cu-based patches to the kernel. Please note that you almost certianly need a powered USB hub to run a wifi dongle.
Type **ifconfig -a** to verify that **wlanN** (wlan0, wlan1, etc) entry has been created.
You will have to edit **/etc/network/interfaces** with your SSID and password but after that, it should 'just work' - check **iwconfig** and **iwscan** if you're having problems
[We have a tutorial on WiFi setup here](http://learn.adafruit.com/adafruits-raspberry-pi-lesson-3-network-setup/overview)
Info:
# Bonjour Support
Bonjour is what Apple uses to make it easier to find new devices on a LAN. Instead of having to look up the IP address, there's a local name. This distro uses **raspberrypi.local** by default. All Apple machines have Bonjour servers. If you have ever installed iTunes, it comes with it. [Other Windows users can get it from here](http://support.apple.com/kb/DL999)- its called the print server but its what you want
Test by trying to **ping raspberrypi.local** when the Pi is booted and connected to Ethernet (or WiFi once you have configured WiFi) # sshd on Boot
This image has **sshd** on boot - that means you can immediately ssh in using **raspberrypi.local**! The ssh keys are generated on boot but since the user/pass is simply **pi** / **raspberry** you should not put this on an accessible network until you've changed the password # Kernel Source
Want to compile your own modules? Or change the configuration of the kernel?[Advanced users can find our kernel repo here](https://github.com/adafruit/adafruit-raspberrypi-linux)
We do not have any tutorials on how to download, compile or install the linux kernel.
- [Previous Page](https://learn.adafruit.com/adafruit-raspberry-pi-educational-linux-distro/occidentalis-v0-dot-2.md)
## Featured Products
### USB MicroSD Card Reader/Writer - microSD / microSDHC / microSDXC
[USB MicroSD Card Reader/Writer - microSD / microSDHC / microSDXC](https://www.adafruit.com/product/939)
This is the cutest little microSD card reader/writer - but don't be fooled by its adorableness! It's wicked fast and supports up to 64 GB SDXC cards! Simply slide the card into the edge and plug it into your computer. No drivers are required, it shows up as a standard 'Mass...
No Longer Stocked
[Buy Now](https://www.adafruit.com/product/939)
[Related Guides to the Product](https://learn.adafruit.com/products/939/guides)
### Raspberry Pi - Skill badge, iron-on patch
[Raspberry Pi - Skill badge, iron-on patch](https://www.adafruit.com/product/906)
You are learning to use the small Linux based board, the Raspberry Pi! Adafruit offers a fun and exciting "badges" of achievement for electronics, science and engineering. We believe everyone should be able to be rewarded for learning a useful skill, a badge is just one of the many...
In Stock
[Buy Now](https://www.adafruit.com/product/906)
[Related Guides to the Product](https://learn.adafruit.com/products/906/guides)
### SD/MicroSD Memory Card (8 GB SDHC)
[SD/MicroSD Memory Card (8 GB SDHC)](https://www.adafruit.com/product/1294)
Add mega-storage in a jiffy using this 8 GB class 4 micro-SD card. It comes with a SD adapter so you can use it with any of our shields or adapters. Preformatted to FAT so it works out of the box with our projects. Tested and works great with our
In Stock
[Buy Now](https://www.adafruit.com/product/1294)
[Related Guides to the Product](https://learn.adafruit.com/products/1294/guides)
## Related Guides
- [Internet of Things Printer for Raspberry Pi](https://learn.adafruit.com/pi-thermal-printer.md)
- [Skill Badge Requirements: Raspberry Pi](https://learn.adafruit.com/skill-badge-requirements-raspberry-pi.md)
- [Adafruit Prototyping Pi Plate](https://learn.adafruit.com/adafruit-prototyping-pi-plate.md)
- [Adafruit's Raspberry Pi Lesson 2. First Time Configuration](https://learn.adafruit.com/adafruits-raspberry-pi-lesson-2-first-time-configuration.md)
- [Raspberry Pi Kernel-o-Matic](https://learn.adafruit.com/raspberry-pi-kernel-o-matic.md)
- [Raspberry Pi Analog to Digital Converters](https://learn.adafruit.com/raspberry-pi-analog-to-digital-converters.md)
- [Controlling Motors using the Raspberry Pi and RasPiRobot Board V2](https://learn.adafruit.com/controlling-motors-using-the-raspberry-pi-and-raspirobot-board-v2.md)
- [CircuitPython Libraries on Linux and Orange Pi](https://learn.adafruit.com/circuitpython-on-orangepi-linux.md)
- [Raspberry Pi as an Ad Blocking Access Point](https://learn.adafruit.com/raspberry-pi-as-an-ad-blocking-access-point.md)
- [Using an External Drive as a Raspberry Pi Root Filesystem](https://learn.adafruit.com/external-drive-as-raspberry-pi-root.md)
- [Teddy Ruxpin Rebuild](https://learn.adafruit.com/teddy-ruxpin-rebuild.md)
- [RasPipe: A Raspberry Pi Pipeline Viewer, Part 1](https://learn.adafruit.com/raspipe-a-raspberry-pi-pipeline-viewer.md)
- [Running Programs Automatically on Your Tiny Computer](https://learn.adafruit.com/running-programs-automatically-on-your-tiny-computer.md)
- [Speech Synthesis on the Raspberry Pi](https://learn.adafruit.com/speech-synthesis-on-the-raspberry-pi.md)
- [Read-Only Raspberry Pi](https://learn.adafruit.com/read-only-raspberry-pi.md)
---
# Source: https://learn.adafruit.com/adafruit-raspberry-pi-educational-linux-distro/occidentalis-v0-dot-2.md
# Adafruit Raspberry Pi Educational Linux Distro
## Occidentalis v0.2
Info:

This is our second distro, **Occidentalis v0.2**. **Rubus occidentalis** is the black raspberry. It is derived from [Raspbian Wheezy August 16 2012](http://www.raspberrypi.org/downloads "Link: http://www.raspberrypi.org/downloads")
We have made a few key changes to make it more hardware-hacker friendly!
**Version 0.2 updates (new!)**
- Truncated image - only 2.6G now to fit on any 4G card
- raspi-config notice retained on boot
- Removed persistant wlan0 entry
- Password-change reminder on login
- Added **RTC** and **lm-sensors** kernel module
- Included kernel modules for: DS1307, AD525x I2C digipots, HMC6352, BMP085, ADS1015
- **New! Adafruit's PWM/Servo kernel module for easy PWM/Servo control on GPIO#18**
**Version 0.1 updates (still included)**
- [Updated to Hexxeh firmware](https://raw.github.com/Hexxeh/rpi-update/master/rpi-update "Link: https://raw.github.com/Hexxeh/rpi-update/master/rpi-update")
- [I2C](http://www.bootc.net/archives/2012/05/19/i2c-and-the-raspberry-pi/) and [hardware SPI](http://www.brianhensley.net/2012/07/getting-spi-working-on-raspberry-pi.html) support
- I2C/SPI modules initialized on boot
- sshd on boot
- ssh keygen on first boot
- runs avahi daemon (Bonjour client) and is called **raspberrypi.local**
- [Realtek RTL8188CUS wifi support](http://www.adafruit.com/products/814)
- [One wire support on GPIO #4 when loaded](https://github.com/FrankBuss/linux-1/commit/71871509238d3e7bce4a74cdf616c3f12542acaa)
Please keep in mind, we are not full time linux distro maintainers - we will try to fix any bugs we find but this distro is not for beginners or people who are new to linux!
Info:
# How to Install!
Click below to download the ZIP file:
- [Adafruit Raspberry Pi Educational Distro - Occidentalis v0.2](http://adafruit-raspberry-pi.s3.amazonaws.com/Occidentalisv02.zip) **!900 Megs! ** (August 31, 2012)
MD5 of the img itself (not the zip): **4256c0cdad82fa193c5e902143f1ca0e**
MD5 of the zip: **43456900352bb8bd8860902167195d83**
- SHA1 of image: **a609f588bca86694989ab7672badbce423aa89fd**
- SHA1 of zip: **5f33ec07a183f336f973f82634f04108f690f5f3**
and decompress it. Note that it is 2.6 GB large! You will need a 4GB card or larger. [We suggest using our 4GB SD card which works great](http://adafruit.com/products/102 "Link: http://adafruit.com/products/102") After booting, run **sudo raspi-config** to auto-expand the file system to fit the card you've decided on
You will also need a SD or MicroSD card writer to burn the image on.[ We suggest using our speedy MicroSD card writer that works with any OS.](http://adafruit.com/products/939 "Link: http://adafruit.com/products/939")
[Then follow the directions here](http://elinux.org/RPi_Easy_SD_Card_Setup "Link: http://elinux.org/RPi\_Easy\_SD\_Card\_Setup"), except use the downloaded and uncompressed Occidentalis image instead of Wheezy
# Features!
[For details on the I2C, SPI, WiFi, Avahi, and 1-Wire modules please visit the v0.1 page](http://learn.adafruit.com/adafruit-raspberry-pi-educational-linux-distro/occidentalis-v0-dot-1 "Link: http://learn.adafruit.com/adafruit-raspberry-pi-educational-linux-distro/occidentalis-v0-dot-1")
New Features in v0.2!
# New in v0.2, we have some great goodies!
## Smaller Image
First up, we did not expand the filesystem beyond 2.6G, so the image itself is much smaller - only 2.6G instead of 4G. This will make writing the image faster, and it should also work better with a variety of 4G cards. There was no way to fit this in a 2G card, otherwise we would have done it.
## Password and Configuration Reminders
Second, we retained the **raspi-config** notice on startup, just like the stock Wheezy distro. This will help people who wanted a reminder on how to set the timezone, disk size, password, keyboard, etc.
We also added a basic password reminder into ~/.profile - it will just check if the password hasn't been changed from the default. Change your password as soon as you boot, please!
## Hardware RTC Support
The biggest news is we added a bunch of fun goodies to the kernel. We added **RTC** support so you can have an external RTC and use **hwclock** - [we even have a tutorial about it here](http://learn.adafruit.com/adding-a-real-time-clock-to-raspberry-pi).
## Sensors Modules
We poked around the Kernel configuration file and added in module support for a few familiar sensors such as: AD525x Digipots, HMC6352 compass, BMP085 barometric/temp sensor, ADS1015 I2C ADCs, etc.
**Please Note:** we didn't write or support these kernel modules, and we're not even sure if they all work, please experiment and read any kernel documentation about these modules as we do not have any tutorials or support for them at this time!
# PWM and Servo Kernel Module
The most exciting addition is our custom-written kernel module specifically for handling the PWM/Servo capability of the Raspberry Pi's GPIO #18 pin. Unfortunately there is only one PWM pin available on the GPIO header **and** its shared with the Audio system. That means that **you can't use PWM/Servo output and play audio through the 3.5mm jack at the same time.** However, there might be a few situations where you just need a single servo or PWM and audio isn't a requirement.
The module was written by Sean Cross for Adafruit Industries, code is available at our github repository (see below)
This driver can be controlled through its sysfs entries. It will create the directory **/sys/class/rpi-pwm/pwm0/** and populate it with the following files:
- **active** - Reports **1** if PWM is active. In **delayed** mode, write a **1** to this file to activate stored settings. Deactivate by writing a 0 to this file.
- **delayed** - If **0** , any settings made will become active immediately. If **1** , then settings are stored and won't take effect until a **1** is written into **active**.
- **mode** - The PWM mode. One of **servo** , **pwm** , or **audio**.
- **servo** - Moves the servo to this step. Range (0..servo\_max) where **0** is a 0.5ms-long pulse and **servo\_max** is a 2.5ms-long pulse.
- **servo\_max** - The maximum number of servo steps, default of 32
- **duty** - Duty cycle percentage for PWM mode. Range (1..99) where 1 is the shortest positive pulse and 99 is the widest positive
- **frequency** - Desired frequency for PWM mode, write the value to this file
- **real\_frequency** - The actual computed frequency, read the value from this file.
- **mcf** - A maximum common frequency (see _Advanced_ below).
If you attempt to set a frequency or duty cycle that the Raspberry Pi does not support, you will get an error such as:
**write error: Numerical result out of range**
If this happens, the PWM will stop until you set values that are in range.
The **mode** file can be used to switch between **pwm** , **servo** , and **audio** mode:
- **pwm** - Drives a pulse with a frequency specified by the **frequency** file and a duty cycle of **duty**.
- **servo** - A special PWM mode that will drive a servo throughout its range of rotation, starting with 0.5ms wide pulse and ending with 2.5ms, some servos only respond to 1.0-2.0ms and some have a wider range, you will need to experiment to find the full range of your servo. Values are taken from the file **servo** , and range from 0 to **servo\_max** (default 32 which is the max resolution of 62.5us.) The PWM system does not seem to be able to handle a resolution better than 62.5us which is approximately 20 different servo positions or speeds. If you need better resolution, [please check out our 16-channel servo driver tutorial which has 16 channels and 4us resolution](http://learn.adafruit.com/adafruit-16-channel-servo-driver-with-raspberry-pi/overview "Link: http://learn.adafruit.com/adafruit-16-channel-servo-driver-with-raspberry-pi/overview")
- **audio** - Echos the unfiltered contents of the right audio channel out the PWM port. Also enables **delayed** mode so that accidentally modifying PWM parameters won't cause the audio system to lock.
Using the PWM and playing audio at the same time is dicey at best. If you want to mirror audio out the PWM port, write **audio** into the **mode** file and leave it. When audio playback is done, you can switch back into **pwm** or **servo** mode. Then, either write **0** into the **delayed** file to get back into immediate mode, or set your parameters and write a **1** into the **activate** file.
## Advanced settings
##
The default **mcf** is 16000 Hz. This is the frequency at which the PCM audio clock will run. The actual PWM output is derived based on this value, so it should be higher than the desired output frequency. For small duty cycles or for higher frequencies (e.g. above about 8 kHz), you may need to increase this value to get a more accurate **real\_frequency**. Due to rounding, it may not be possible to get your desired output rate. Compare the contents of the **real\_frequency** file with that of the **frequency** file to determine accuracy.
# Kernel Source
Want to compile your own modules? Or change the configuration of the kernel?[Advanced users can find our kernel repo here](https://github.com/adafruit/adafruit-raspberrypi-linux)
[We also have a Kernel+Modules tgz file](http://adafruit-raspberry-pi.s3.amazonaws.com/OccidentalisV02Kernel.tgz), after you've copied this over to your pi, run the following commands
- **tar -zxvf mykernel.tgz**
- **sudo cp tmp/kernel.img /boot/**
- **sudo cp -R tmp/modules/lib/\* /lib/**
- **rm -rf tmp**
We do not have any tutorials on how to download, compile or install the linux kernel.
- [Previous Page](https://learn.adafruit.com/adafruit-raspberry-pi-educational-linux-distro/occidentalis-v0-dot-3.md)
- [Next Page](https://learn.adafruit.com/adafruit-raspberry-pi-educational-linux-distro/occidentalis-v0-dot-1.md)
## Featured Products
### USB MicroSD Card Reader/Writer - microSD / microSDHC / microSDXC
[USB MicroSD Card Reader/Writer - microSD / microSDHC / microSDXC](https://www.adafruit.com/product/939)
This is the cutest little microSD card reader/writer - but don't be fooled by its adorableness! It's wicked fast and supports up to 64 GB SDXC cards! Simply slide the card into the edge and plug it into your computer. No drivers are required, it shows up as a standard 'Mass...
No Longer Stocked
[Buy Now](https://www.adafruit.com/product/939)
[Related Guides to the Product](https://learn.adafruit.com/products/939/guides)
### Raspberry Pi - Skill badge, iron-on patch
[Raspberry Pi - Skill badge, iron-on patch](https://www.adafruit.com/product/906)
You are learning to use the small Linux based board, the Raspberry Pi! Adafruit offers a fun and exciting "badges" of achievement for electronics, science and engineering. We believe everyone should be able to be rewarded for learning a useful skill, a badge is just one of the many...
In Stock
[Buy Now](https://www.adafruit.com/product/906)
[Related Guides to the Product](https://learn.adafruit.com/products/906/guides)
### SD/MicroSD Memory Card (8 GB SDHC)
[SD/MicroSD Memory Card (8 GB SDHC)](https://www.adafruit.com/product/1294)
Add mega-storage in a jiffy using this 8 GB class 4 micro-SD card. It comes with a SD adapter so you can use it with any of our shields or adapters. Preformatted to FAT so it works out of the box with our projects. Tested and works great with our
In Stock
[Buy Now](https://www.adafruit.com/product/1294)
[Related Guides to the Product](https://learn.adafruit.com/products/1294/guides)
## Related Guides
- [Internet of Things Printer for Raspberry Pi](https://learn.adafruit.com/pi-thermal-printer.md)
- [Skill Badge Requirements: Raspberry Pi](https://learn.adafruit.com/skill-badge-requirements-raspberry-pi.md)
- [Adafruit Prototyping Pi Plate](https://learn.adafruit.com/adafruit-prototyping-pi-plate.md)
- [Adafruit's Raspberry Pi Lesson 2. First Time Configuration](https://learn.adafruit.com/adafruits-raspberry-pi-lesson-2-first-time-configuration.md)
- [Raspberry Pi Kernel-o-Matic](https://learn.adafruit.com/raspberry-pi-kernel-o-matic.md)
- [Raspberry Pi Analog to Digital Converters](https://learn.adafruit.com/raspberry-pi-analog-to-digital-converters.md)
- [Controlling Motors using the Raspberry Pi and RasPiRobot Board V2](https://learn.adafruit.com/controlling-motors-using-the-raspberry-pi-and-raspirobot-board-v2.md)
- [CircuitPython Libraries on Linux and Orange Pi](https://learn.adafruit.com/circuitpython-on-orangepi-linux.md)
- [Raspberry Pi as an Ad Blocking Access Point](https://learn.adafruit.com/raspberry-pi-as-an-ad-blocking-access-point.md)
- [Using an External Drive as a Raspberry Pi Root Filesystem](https://learn.adafruit.com/external-drive-as-raspberry-pi-root.md)
- [Teddy Ruxpin Rebuild](https://learn.adafruit.com/teddy-ruxpin-rebuild.md)
- [RasPipe: A Raspberry Pi Pipeline Viewer, Part 1](https://learn.adafruit.com/raspipe-a-raspberry-pi-pipeline-viewer.md)
- [Running Programs Automatically on Your Tiny Computer](https://learn.adafruit.com/running-programs-automatically-on-your-tiny-computer.md)
- [Speech Synthesis on the Raspberry Pi](https://learn.adafruit.com/speech-synthesis-on-the-raspberry-pi.md)
- [Read-Only Raspberry Pi](https://learn.adafruit.com/read-only-raspberry-pi.md)
---
# Source: https://learn.adafruit.com/adafruit-raspberry-pi-educational-linux-distro/occidentalis-v0-dot-3.md
# Adafruit Raspberry Pi Educational Linux Distro
## Occidentalis v0.3
Its been a few years since we released Occidentalis. At the time, the standard Raspbian distribution was still very young and we found a lot of ways to add more hardware support.
However, nowadays Raspbian is quite mature as software goes and has integrated a lot of the modifications!
[So, instead of trying to keep up with continuous Raspbian releases, we created a Pi Bootstrapper, a program that you can run on your computer (or Pi) which will install a lot of our favorite tools and support for you! Check it out here](https://github.com/adafruit/Adafruit-Pi-Finder#adafruit-raspberry-pi-finder)
- [Previous Page](https://learn.adafruit.com/adafruit-raspberry-pi-educational-linux-distro/overview.md)
- [Next Page](https://learn.adafruit.com/adafruit-raspberry-pi-educational-linux-distro/occidentalis-v0-dot-2.md)
## Featured Products
### USB MicroSD Card Reader/Writer - microSD / microSDHC / microSDXC
[USB MicroSD Card Reader/Writer - microSD / microSDHC / microSDXC](https://www.adafruit.com/product/939)
This is the cutest little microSD card reader/writer - but don't be fooled by its adorableness! It's wicked fast and supports up to 64 GB SDXC cards! Simply slide the card into the edge and plug it into your computer. No drivers are required, it shows up as a standard 'Mass...
No Longer Stocked
[Buy Now](https://www.adafruit.com/product/939)
[Related Guides to the Product](https://learn.adafruit.com/products/939/guides)
### Raspberry Pi - Skill badge, iron-on patch
[Raspberry Pi - Skill badge, iron-on patch](https://www.adafruit.com/product/906)
You are learning to use the small Linux based board, the Raspberry Pi! Adafruit offers a fun and exciting "badges" of achievement for electronics, science and engineering. We believe everyone should be able to be rewarded for learning a useful skill, a badge is just one of the many...
In Stock
[Buy Now](https://www.adafruit.com/product/906)
[Related Guides to the Product](https://learn.adafruit.com/products/906/guides)
### SD/MicroSD Memory Card (8 GB SDHC)
[SD/MicroSD Memory Card (8 GB SDHC)](https://www.adafruit.com/product/1294)
Add mega-storage in a jiffy using this 8 GB class 4 micro-SD card. It comes with a SD adapter so you can use it with any of our shields or adapters. Preformatted to FAT so it works out of the box with our projects. Tested and works great with our
In Stock
[Buy Now](https://www.adafruit.com/product/1294)
[Related Guides to the Product](https://learn.adafruit.com/products/1294/guides)
## Related Guides
- [Internet of Things Printer for Raspberry Pi](https://learn.adafruit.com/pi-thermal-printer.md)
- [Skill Badge Requirements: Raspberry Pi](https://learn.adafruit.com/skill-badge-requirements-raspberry-pi.md)
- [Adafruit Prototyping Pi Plate](https://learn.adafruit.com/adafruit-prototyping-pi-plate.md)
- [Adafruit's Raspberry Pi Lesson 2. First Time Configuration](https://learn.adafruit.com/adafruits-raspberry-pi-lesson-2-first-time-configuration.md)
- [Raspberry Pi Kernel-o-Matic](https://learn.adafruit.com/raspberry-pi-kernel-o-matic.md)
- [Raspberry Pi Analog to Digital Converters](https://learn.adafruit.com/raspberry-pi-analog-to-digital-converters.md)
- [Controlling Motors using the Raspberry Pi and RasPiRobot Board V2](https://learn.adafruit.com/controlling-motors-using-the-raspberry-pi-and-raspirobot-board-v2.md)
- [CircuitPython Libraries on Linux and Orange Pi](https://learn.adafruit.com/circuitpython-on-orangepi-linux.md)
- [Raspberry Pi as an Ad Blocking Access Point](https://learn.adafruit.com/raspberry-pi-as-an-ad-blocking-access-point.md)
- [Using an External Drive as a Raspberry Pi Root Filesystem](https://learn.adafruit.com/external-drive-as-raspberry-pi-root.md)
- [Teddy Ruxpin Rebuild](https://learn.adafruit.com/teddy-ruxpin-rebuild.md)
- [RasPipe: A Raspberry Pi Pipeline Viewer, Part 1](https://learn.adafruit.com/raspipe-a-raspberry-pi-pipeline-viewer.md)
- [Running Programs Automatically on Your Tiny Computer](https://learn.adafruit.com/running-programs-automatically-on-your-tiny-computer.md)
- [Speech Synthesis on the Raspberry Pi](https://learn.adafruit.com/speech-synthesis-on-the-raspberry-pi.md)
- [Read-Only Raspberry Pi](https://learn.adafruit.com/read-only-raspberry-pi.md)
---
# Source: https://learn.adafruit.com/oled-tron-clock.md
# OLED TRON Clock
## Overview & Parts
http://www.youtube.com/watch?v=ExEXTzzFYUs
While watching Tron for the umpteenth time, I started thinking about how data could be displayed in abstract, but still readable, ways. The OLED display, with its crispness, seemed like a good fit for what I had in mind. After considering a few different options, I settled on building a stylized clock display.
You will need:
- [Arduino Uno](http://www.adafruit.com/products/50)
- [Monochrome 128×64 OLED graphic display](http://www.adafruit.com/products/326)
- [DS1307 Real Time Clock breakout board kit](http://www.adafruit.com/products/264)

The blocks are drawn so that, from outside to inside, each ring represents hours, minutes, and seconds. The time is read with 0 at the top left corner. The current hour and minute are indicated by the empty block in each ring. The current second is drawn as a solid block (this ends up looking like a square moving around the inside ring). In the above picture, the time can be read as 8:23 and about 38 seconds.
- [Next Page](https://learn.adafruit.com/oled-tron-clock/code-wiring.md)
## Featured Products
### DS1307 Real Time Clock breakout board kit
[DS1307 Real Time Clock breakout board kit](https://www.adafruit.com/product/264)
**[We've upgraded this RTC breakout and made it even easier to use! Now available as a fully assembled board, it has the same components, chip, size, etc but you don't have to put it together. It's also less expensive! Check out...](https://www.adafruit.com/product/3296)**
No Longer Stocked
[Buy Now](https://www.adafruit.com/product/264)
[Related Guides to the Product](https://learn.adafruit.com/products/264/guides)
### Monochrome 0.96" 128x64 OLED Graphic Display - STEMMA QT
[Monochrome 0.96" 128x64 OLED Graphic Display - STEMMA QT](https://www.adafruit.com/product/326)
These displays are small, only about 1" diagonal, but very readable due to the high contrast of an OLED display. This display is made of 128x64 individual white OLED pixels, each one is turned on or off by the controller chip. Because the display makes its own light, no backlight is...
Out of Stock
[Buy Now](https://www.adafruit.com/product/326)
[Related Guides to the Product](https://learn.adafruit.com/products/326/guides)
### Adafruit METRO 328 Fully Assembled - Arduino IDE compatible
[Adafruit METRO 328 Fully Assembled - Arduino IDE compatible](https://www.adafruit.com/product/50)
We sure love the ATmega328 here at Adafruit, and we use them _a lot_ for our own projects. The processor has plenty of GPIO, Analog inputs, hardware UART SPI and I2C, timers and PWM galore - just enough for most simple projects. When we need to go small, we use a
Out of Stock
[Buy Now](https://www.adafruit.com/product/50)
[Related Guides to the Product](https://learn.adafruit.com/products/50/guides)
### Monochrome 1.3" 128x64 OLED graphic display - STEMMA QT / Qwiic
[Monochrome 1.3" 128x64 OLED graphic display - STEMMA QT / Qwiic](https://www.adafruit.com/product/938)
These displays are small, only about 1.3" diagonal, but very readable due to the high contrast of an OLED display. This display is made of 128x64 individual white OLED pixels, each one is turned on or off by the controller chip. Because the display makes its own light, no backlight is...
In Stock
[Buy Now](https://www.adafruit.com/product/938)
[Related Guides to the Product](https://learn.adafruit.com/products/938/guides)
## Related Guides
- [Animating Multiple LED Backpacks](https://learn.adafruit.com/animating-multiple-led-backpacks.md)
- [Adalight Project Pack](https://learn.adafruit.com/adalight-diy-ambient-tv-lighting.md)
- [Analog Feedback Servos](https://learn.adafruit.com/analog-feedback-servos.md)
- [CircuitPython Hardware: SSD1306 OLED Display](https://learn.adafruit.com/micropython-hardware-ssd1306-oled-display.md)
- [Light Meter](https://learn.adafruit.com/light-meter.md)
- [Wave Shield Talking Clock](https://learn.adafruit.com/wave-shield-talking-clock.md)
- [Remote controlled door lock using a fingerprint sensor & Adafruit IO](https://learn.adafruit.com/remote-controlled-door-lock-using-a-fingerprint-sensor-and-adafruit-io.md)
- [Wireless Game Show Poppers for the Classroom!](https://learn.adafruit.com/wireless-game-show-poppers.md)
- [I2C Addresses and Troublesome Chips](https://learn.adafruit.com/i2c-addresses.md)
- [IR Sensor](https://learn.adafruit.com/ir-sensor.md)
- [Pro Trinket Power Meter](https://learn.adafruit.com/pro-trinket-power-meter.md)
- [Adafruit PN532 RFID/NFC Breakout and Shield](https://learn.adafruit.com/adafruit-pn532-rfid-nfc.md)
- [Adafruit Music Maker Shield](https://learn.adafruit.com/adafruit-music-maker-shield-vs1053-mp3-wav-wave-ogg-vorbis-player.md)
- [How to program a Zumo Robot with Simulink](https://learn.adafruit.com/zumo-robot-control-with-simulink.md)
- [Arduino Lesson 1. Blink](https://learn.adafruit.com/adafruit-arduino-lesson-1-blink.md)
---
# Source: https://learn.adafruit.com/1-8-tft-display/original-v1-shield.md
# 1.8" TFT Display Breakout and Shield
## Original V1 Shield
# Original V1.0 Shield
If your shield looks like this, you have the original 1.8" TFT shield which does not have a helper seesaw chip

The shield uses the "Classic Arduino" SPI wiring and will perform best with Atmega 328-based Arduinos such as the Uno. It can work with other Arduinos but not very well.
Load up the **shieldtest** demo

If you are using an Arduino UNO, Duemilanove or compatible with the ATmega328 chipset, you don't have to do anything! If you're using a Mega, Leonardo, Due or other non-ATmega328 chipset, you'll have to make a modification
To use with the shield, modify the example code pin definitions as follows.
Find these lines:
```
// Option 1 (recommended): must use the hardware SPI pins
// (for UNO thats sclk = 13 and sid = 11) and pin 10 must be
// an output. This is much faster - also required if you want
// to use the microSD card (see the image drawing example)
Adafruit_ST7735 tft = Adafruit_ST7735(TFT_CS, TFT_DC, TFT_RST);
// Option 2: use any pins but a little slower!
#define TFT_SCLK 13 // set these to be whatever pins you like!
#define TFT_MOSI 11 // set these to be whatever pins you like!
//Adafruit_ST7735 tft = Adafruit_ST7735(TFT_CS, TFT_DC, TFT_MOSI, TFT_SCLK, TFT_RST);
```
Warning:
The Example code has 2 options for defining the display object. **Uno, Duemilanove** and other Atmega 328-based processors can use the "Option 1" version of the constructor for best performance:
```
Adafruit_ST7735 tft = Adafruit_ST7735(TFT_CS, TFT_DC, TFT_RST);
```
**Mega** and **Leonardo** users should use the "Option 2" version of the constructor for compatibility:
```
Adafruit_ST7735 tft = Adafruit_ST7735(TFT_CS, TFT_DC, TFT_MOSI, TFT_SCLK, TFT_RST);
```
Be sure to select only one option and comment out the other with a pair of //'s.
Now upload the sketch to see the graphical display!
- [Previous Page](https://learn.adafruit.com/1-8-tft-display/circuitpython-displayio-quickstart.md)
- [Next Page](https://learn.adafruit.com/1-8-tft-display/assembling-the-shield.md)
## Featured Products
### Breadboarding wire bundle
[Breadboarding wire bundle](https://www.adafruit.com/product/153)
75 flexible stranded core wires with stiff ends molded on in red, orange, yellow, green, blue, brown, black and white. These are a major improvement over the "box of bent wires" that are sometimes sold with breadboards, and faster than stripping your own solid core wires. Makes...
In Stock
[Buy Now](https://www.adafruit.com/product/153)
[Related Guides to the Product](https://learn.adafruit.com/products/153/guides)
### Adafruit METRO 328 Fully Assembled - Arduino IDE compatible
[Adafruit METRO 328 Fully Assembled - Arduino IDE compatible](https://www.adafruit.com/product/50)
We sure love the ATmega328 here at Adafruit, and we use them _a lot_ for our own projects. The processor has plenty of GPIO, Analog inputs, hardware UART SPI and I2C, timers and PWM galore - just enough for most simple projects. When we need to go small, we use a
Out of Stock
[Buy Now](https://www.adafruit.com/product/50)
[Related Guides to the Product](https://learn.adafruit.com/products/50/guides)
### Half Sized Premium Breadboard - 400 Tie Points
[Half Sized Premium Breadboard - 400 Tie Points](https://www.adafruit.com/product/64)
This is a cute, half-size breadboard with 400 tie points, good for small projects. It's 3.25" x 2.2" / 8.3cm x 5.5cm with a standard double-strip in the middle and two power rails on both sides. You can pull the power rails off easily to make the breadboard as...
In Stock
[Buy Now](https://www.adafruit.com/product/64)
[Related Guides to the Product](https://learn.adafruit.com/products/64/guides)
### 1.8" Color TFT LCD display with MicroSD Card Breakout
[1.8" Color TFT LCD display with MicroSD Card Breakout](https://www.adafruit.com/product/358)
This lovely little display breakout is the best way to add a small, colorful and bright display to any project. Since the display uses 4-wire SPI to communicate and has its own pixel-addressable frame buffer, it can be used with every kind of microcontroller. Even a very small one with low...
Out of Stock
[Buy Now](https://www.adafruit.com/product/358)
[Related Guides to the Product](https://learn.adafruit.com/products/358/guides)
### Adafruit 1.8" Color TFT Shield w/microSD and Joystick
[Adafruit 1.8" Color TFT Shield w/microSD and Joystick](https://www.adafruit.com/product/802)
This lovely little shield is the best way to add a small, colorful and bright display to any project. We took our popular 1.8" TFT breakout board and remixed it into an Arduino shield complete with microSD card slot and a 5-way joystick navigation switch and three selection buttons! Since...
In Stock
[Buy Now](https://www.adafruit.com/product/802)
[Related Guides to the Product](https://learn.adafruit.com/products/802/guides)
### 1.8" SPI TFT display, 160x128 18-bit color - ST7735R driver
[1.8" SPI TFT display, 160x128 18-bit color - ST7735R driver](https://www.adafruit.com/product/618)
We just love this little 1.8" TFT display, with true TFT color (up to 18-bits per pixel!), fine 160x128 resolution, two white LED backlight that runs on 3.3V and a very easy SPI interface that requires only 4 or 5 digital pins to send pixels to the display.
**Please...**
Out of Stock
[Buy Now](https://www.adafruit.com/product/618)
[Related Guides to the Product](https://learn.adafruit.com/products/618/guides)
## Related Guides
- [Wave Shield](https://learn.adafruit.com/adafruit-wave-shield-audio-shield-for-arduino.md)
- [Adafruit 2.8" TFT Touch Shield v2 - Capacitive or Resistive](https://learn.adafruit.com/adafruit-2-8-tft-touch-shield-v2.md)
- [How to Build a Testing Jig](https://learn.adafruit.com/how-to-build-a-testing-fixture.md)
- [Create an Internet of Things Dashboard with Adafruit IO](https://learn.adafruit.com/create-an-internet-of-things-dashboard-with-adafruit-dot-io.md)
- [Let’s Put LEDs in Things!](https://learn.adafruit.com/lets-put-leds-in-things.md)
- [Tiny Arduino Music Visualizer](https://learn.adafruit.com/piccolo.md)
- [Circuit Playground Sound-Controlled Robot](https://learn.adafruit.com/circuit-playground-sound-controlled-robot.md)
- [Adafruit 1.27" and 1.5" Color OLED Breakout Board](https://learn.adafruit.com/adafruit-1-5-color-oled-breakout-board.md)
- [Arduino Lesson 15. DC Motor Reversing](https://learn.adafruit.com/adafruit-arduino-lesson-15-dc-motor-reversing.md)
- [TTL Serial Camera](https://learn.adafruit.com/ttl-serial-camera.md)
- [Analog Feedback Servos](https://learn.adafruit.com/analog-feedback-servos.md)
- [Geofencing with the FONA 808 & Adafruit IO](https://learn.adafruit.com/geofencing-with-the-fona-808-and-adafruit-io.md)
- [Arduino GPS Clock](https://learn.adafruit.com/arduino-clock.md)
- [Adafruit Data Logger Shield](https://learn.adafruit.com/adafruit-data-logger-shield.md)
- [Making Adabot: Part 2](https://learn.adafruit.com/making-adabot-part-2.md)
---
# Source: https://learn.adafruit.com/low-power-coin-cell-voltage-logger/other-lessons.md
# Low Power Coin Cell Voltage Logger
## Other Lessons

The key to making TIMESQUARE practical was to trim the power-down current as much as possible. Certainly, the running current is important too, but the power-down state is where the watch will spend most of its time by far. There may be idle times when it’s left in a drawer for days or weeks…maybe even months, though we hope not…and it has only a single coin cell to draw from. As you can imagine, considerable effort was spent testing and measuring sleep modes and disabling every possible peripheral to reduce the idle current.
One of the more power-hungry peripherals on the ATmega 328P is the _brown-out detect_ circuit, which senses a low voltage condition and calls an interrupt function, the _brown-out reset_ (BOR) handler. This feature is used in products for such things as storing state information in EEPROM before gracefully shutting down. The BOR circuit is enabled by default on the Arduino…and this is very important.
Certain Atmel chips…the 328P among them…can disable the brownout circuit in software (rather than configuration fuses), potentially saving many microamps of current. If you’re programming a “raw” chip via the ISP header, that’s fantastic…if you need to save every last bit of power, and if you don’t need the brownout detection, have at it. But if you’re using a bootloader-based programming system like Arduino, disabling BOR can have disastrous results!
As the supply voltage dips below the brownout threshold, without BOR the chip will start to behave erratically, and may spontaneously jump to any random memory location. And if that code eventually leads into any bootloader function that erases or writes a flash page, the application — or much worse, the bootloader itself — can become corrupted, leaving no easy way to re-flash the watch.
This is NOT the unlikely one-in-a-million change you might think! First, the watch WILL repeatedly brown out any time the battery runs low. Second, keep in mind that it _doesn’t_ have to jump _exactly_ to the start of a block-erasing function, just to any code that may _eventually_ lead there. The odds of this happening during an unprotected brownout seem to be about 1 percent…the phenomenon has been observed in the wild with other projects and even while developing this code…it’s a real thing! So BOR is left enabled to provide a proper safety net. If you’re programming for an Arduino bootloader-based board, you should too.
Really, resist the allure of the nano-amps, DO NOT go blindly adding BOR-disabling code to your project, you'll regret it later. Just don't. Okay? Don't. Thanks.
- [Previous Page](https://learn.adafruit.com/low-power-coin-cell-voltage-logger/results.md)
## Featured Products
### EEVblog uCurrent - Precision nA Current Measurement Assistant
[EEVblog uCurrent - Precision nA Current Measurement Assistant](https://www.adafruit.com/product/882)
An essential companion when working on a ultra-low-power projects! If you've ever used a portable multimeter (even your $300 Fluke!) to measure sub-uA currents - say for a low power microcontroller or sensor project - you may notice that you're not getting the precision you expect, or...
No Longer Stocked
[Buy Now](https://www.adafruit.com/product/882)
[Related Guides to the Product](https://learn.adafruit.com/products/882/guides)
### Breadboarding wire bundle
[Breadboarding wire bundle](https://www.adafruit.com/product/153)
75 flexible stranded core wires with stiff ends molded on in red, orange, yellow, green, blue, brown, black and white. These are a major improvement over the "box of bent wires" that are sometimes sold with breadboards, and faster than stripping your own solid core wires. Makes...
In Stock
[Buy Now](https://www.adafruit.com/product/153)
[Related Guides to the Product](https://learn.adafruit.com/products/153/guides)
### Shield stacking headers for Arduino (R3 Compatible)
[Shield stacking headers for Arduino (R3 Compatible)](https://www.adafruit.com/product/85)
_“How could something so simple be so useful?” _
We heard once that in the 4th millennium B.C. some guy asked the person who invented the wheel that question. The person who invented the wheel’s answer, we were told, was...
In Stock
[Buy Now](https://www.adafruit.com/product/85)
[Related Guides to the Product](https://learn.adafruit.com/products/85/guides)
### Adafruit METRO 328 Fully Assembled - Arduino IDE compatible
[Adafruit METRO 328 Fully Assembled - Arduino IDE compatible](https://www.adafruit.com/product/50)
We sure love the ATmega328 here at Adafruit, and we use them _a lot_ for our own projects. The processor has plenty of GPIO, Analog inputs, hardware UART SPI and I2C, timers and PWM galore - just enough for most simple projects. When we need to go small, we use a
Out of Stock
[Buy Now](https://www.adafruit.com/product/50)
[Related Guides to the Product](https://learn.adafruit.com/products/50/guides)
### CR2032 Lithium Coin Cell Battery
[CR2032 Lithium Coin Cell Battery](https://www.adafruit.com/product/654)
A perfect match for our [sew-able coin cell holder](http://www.adafruit.com/products/653). This non-rechargeable coin cell is CR2032 sized: 20mm diameter, 3.2mm thick. It has a nominal voltage output of 3V (although it starts a little high at 3.2V and slowly drifts down to 2.5V as...
In Stock
[Buy Now](https://www.adafruit.com/product/654)
[Related Guides to the Product](https://learn.adafruit.com/products/654/guides)
### TIMESQUARE DIY Watch Kit - Red Display Matrix
[TIMESQUARE DIY Watch Kit - Red Display Matrix](https://www.adafruit.com/product/1106)
Show up stylish AND on time to any event with this awesome looking DIY watch. We have a few watch kits here at Adafruit but we finally have one that looks good and fits well, even for ladies and kids and others with smaller wrists and hands. Its got an 8x8 bit matrix display and a repurposed...
No Longer Stocked
[Buy Now](https://www.adafruit.com/product/1106)
[Related Guides to the Product](https://learn.adafruit.com/products/1106/guides)
## Related Guides
- [Bluefruit LE Connect for iOS and Android](https://learn.adafruit.com/bluefruit-le-connect.md)
- [Adafruit 1.27" and 1.5" Color OLED Breakout Board](https://learn.adafruit.com/adafruit-1-5-color-oled-breakout-board.md)
- [How to Choose a Microcontroller](https://learn.adafruit.com/how-to-choose-a-microcontroller.md)
- [Trainable Robotic Arm](https://learn.adafruit.com/trainable-robotic-arm.md)
- [2.8" TFT Touch Shield](https://learn.adafruit.com/2-8-tft-touch-shield.md)
- [LSM303 Accelerometer + Compass Breakout](https://learn.adafruit.com/lsm303-accelerometer-slash-compass-breakout.md)
- [Arduino "Hunt The Wumpus"](https://learn.adafruit.com/arduino-hunt-the-wumpus.md)
- [Making Adabot: Part 2](https://learn.adafruit.com/making-adabot-part-2.md)
- [1,500 NeoPixel LED Curtain with Raspberry Pi and Fadecandy](https://learn.adafruit.com/1500-neopixel-led-curtain-with-raspberry-pi-fadecandy.md)
- [Wave Shield Voice Changer](https://learn.adafruit.com/wave-shield-voice-changer.md)
- [WiFi Controlled LED Christmahanukwanzaa Tree](https://learn.adafruit.com/wifi-controlled-led-christmahanukwanzaa-tree.md)
- [Trellis 3D Printed Enclosure](https://learn.adafruit.com/trellis-3d-printed-enclosure.md)
- [Arduino Ethernet + SD Card](https://learn.adafruit.com/arduino-ethernet-sd-card.md)
- [NeoPixel Painter](https://learn.adafruit.com/neopixel-painter.md)
- [Programming Arduino with Android and Windows Tablets](https://learn.adafruit.com/programming-arduino-with-android-and-windows-tablets.md)
---
# Source: https://learn.adafruit.com/calipers/other-measuring-tips.md
# Calipers
## Other Measuring Tips
## Measuring Connector Pitch
We use our calipers to verify component sizes, sometimes these numbers are in the datasheet but once in a while we have a part for which the datasheet is incomplete or we just want to verify. If you're measuring a dense connector, its a good idea to measure over a large number of pins and then average.
For example, on this 37-pin FPC (flex circuit board) I'm measuring between the center points (as far as I can manage) of the two outer pins.
Remember that for a **N ** pin connector, there are **N-1 **'gaps' (a common-enough confusion that it has its own name, the [fencepost-error](http://en.wikipedia.org/wiki/Off-by-one_error) ) so divide **35.68mm ** by **36** = 0.99mm. Since we're eyeballing the center points of the connector, this should be rounded up to a **1mm** pitch. Sometimes the number should be rounded up/down in imperial so if it seems off, check other units.## Measuring Pin-to-Pin Distance
A nice trick you can do with digital calipers is zero'ing out the origin. For example, lets say we have a connector with pins, we want to measure the pin distance. First measure the pin thickness.

Zero it out.
Now you can measure on the outer edges of the pins and it will automatically subtract one pin thickness.
In this case there are 4 pins, so divide **11.92mm ** by 3 to get **3.97mm** , which we'll round up to **4mm** since we know its a metric part.- [Previous Page](https://learn.adafruit.com/calipers/step-and-relative-measurements.md)
## Featured Products
### Mitutoyo - Absolute Digimatic Digital Calipers, 6 in.
[Mitutoyo - Absolute Digimatic Digital Calipers, 6 in.](https://www.adafruit.com/product/294)
The most useful tool we've ever laid our hands on. We thought we'd use them just for electronics but then we got our hands on these calipers and had so much fun we started measuring _everything._
They're indestructible - which is good because we don't...
No Longer Stocked
[Buy Now](https://www.adafruit.com/product/294)
[Related Guides to the Product](https://learn.adafruit.com/products/294/guides)
### Premium Digital Stainless Steel Calipers
[Premium Digital Stainless Steel Calipers](https://www.adafruit.com/product/1724)
The most useful tool we've ever laid our hands on. These calipers are really good quality and an excellent choice if you need something better than a cheap 'disposable' pair of digital calipers but you're not quite ready for a set of high-end Mitsutoyo calipers. These digital...
No Longer Stocked
[Buy Now](https://www.adafruit.com/product/1724)
[Related Guides to the Product](https://learn.adafruit.com/products/1724/guides)
### Solar Digital Calipers
[Solar Digital Calipers](https://www.adafruit.com/product/3720)
_Praise the sun!_ You will never have that awkward situation where your caliper battery dies just when you need to take a measurement. Sure, if you have the budget, [we recommend these near-indestructible high-end Mitutoyo...](https://www.adafruit.com/product/294)
In Stock
[Buy Now](https://www.adafruit.com/product/3720)
[Related Guides to the Product](https://learn.adafruit.com/products/3720/guides)
### Messograf Pen Calipers
[Messograf Pen Calipers](https://www.adafruit.com/product/810)
Discontinued - **you can grab [Solar Digital Calipers ](https://www.adafruit.com/product/3720)instead! **
Caliper rule? Tire tread gauge? Ruler? Thread scale? Writing instrument? The Messograf is all of these in one.
It is a...
No Longer Stocked
[Buy Now](https://www.adafruit.com/product/810)
[Related Guides to the Product](https://learn.adafruit.com/products/810/guides)
## Related Guides
- [Secret Hollow Book Intrusion Detector](https://learn.adafruit.com/secret-hollow-book.md)
- [Necomimi Brainwave Cat Ears Teardown](https://learn.adafruit.com/necomimi-brainwave-cat-ears-teardown.md)
- [Ambient Sound Machine](https://learn.adafruit.com/ambient-machine.md)
- [Personal Torch 3000](https://learn.adafruit.com/pt3000-personal-torch.md)
- [Butterfly Bench with Edge Lit Acrylic](https://learn.adafruit.com/butterfly-bench-with-edge-lit-acrylic.md)
- [Bass MIDI Stomp Box](https://learn.adafruit.com/midi-bass-synth-stomp-box.md)
- [Build a Custom Front Panel](https://learn.adafruit.com/build-a-custom-front-panel.md)
- [Collin's Lab: Soldering](https://learn.adafruit.com/collins-lab-soldering.md)
- [3D Printed Custom Keycaps](https://learn.adafruit.com/3dprinted-custom-keycaps.md)
- [Fiddy - the FTDI Clip](https://learn.adafruit.com/fiddy-ftdi-pogo-pin-clip.md)
- [Photo Light Box](https://learn.adafruit.com/photo-light-box.md)
- [DIY On/Off JST Switch Adapter](https://learn.adafruit.com/on-slash-off-switches.md)
- [Making Edge Guards for Hand Tools Using Hand-Moldable Plastic](https://learn.adafruit.com/hand-moldable-edge-guards.md)
- [USB Locket](https://learn.adafruit.com/usb-locket.md)
- [DIY 3D Printing Filament](https://learn.adafruit.com/diy-3d-printing-filament.md)
---
# Source: https://learn.adafruit.com/adafruits-raspberry-pi-lesson-2-first-time-configuration/other-options.md
# Adafruit's Raspberry Pi Lesson 2. First Time Configuration
## Other Options
The options described above are those which could pretty much be considered essential when running your Raspberry Pi for the first time. There are some other options listed that are worth describing briefly.
- configure\_keyboard – as it implies allows you to chose from a long list of keyboard layouts.
- change\_pass – allows you to change the system password for the user 'pi' the default user on the system. By default, this password is 'raspberry' so those preoccupied with security may wish to change the password.
- change\_locale – For non-English speakers, you can select which locales should be available on the system and which should be the default for the operating system.
- memory\_split – allows you to adjust how much of the shared system memory is available for graphics and how much for the main processor. If you plan to run graphics hungry games, or video playback, then you may decide to alter these settings.
- ssh – in a later tutorial we will look at remote controlling your Pi from another computer using ssh. This option allows you to enable ssh so that you can do that.
- update – this option tries to find a newer version of Raspi\_Config and download it. It is possible that new options will be added to the system in the future, so you may wish to do this.
- [Previous Page](https://learn.adafruit.com/adafruits-raspberry-pi-lesson-2-first-time-configuration/booting-into-desktop.md)
- [Next Page](https://learn.adafruit.com/adafruits-raspberry-pi-lesson-2-first-time-configuration/running-raspi-config-after-booting.md)
## Featured Products
### Raspberry Pi 1 Model B Starter Pack - Includes a Raspberry Pi
[Raspberry Pi 1 Model B Starter Pack - Includes a Raspberry Pi](https://www.adafruit.com/product/1014)
You want to get hacking with your Pi fast, right? Get everything you need to start with the Adafruit Starter Pack for Raspberry Pi. It's the perfect accompaniment to your new Pi, everything you need to boot up your Pi Model B and get going. **We pre-assemble the Cobbler for you, no...**
No Longer Stocked
[Buy Now](https://www.adafruit.com/product/1014)
[Related Guides to the Product](https://learn.adafruit.com/products/1014/guides)
### Programming the Raspberry Pi: Getting Started with Python
[Programming the Raspberry Pi: Getting Started with Python](https://www.adafruit.com/product/1089)
**Program your own Raspberry Pi projects!**
An updated guide to programming your own Raspberry Pi projects. Learn to create inventive programs and fun games on your powerful Raspberry Pi--with no programming experience required. **This practical book has been revised...**
In Stock
[Buy Now](https://www.adafruit.com/product/1089)
[Related Guides to the Product](https://learn.adafruit.com/products/1089/guides)
### Budget Pack for Raspberry Pi 1 Model B (Doesn't include RasPi)
[Budget Pack for Raspberry Pi 1 Model B (Doesn't include RasPi)](https://www.adafruit.com/product/965)
An optimized collection of parts and pieces to experiment with Raspberry Pi at home, school or work. Great for students and those that want to get their feet wet, no soldering required! **THIS PACK DOES NOT INCLUDE A RASPBERRY PI 1 MODEL B and is NOT compatible with Model B+ or Raspberry Pi...**
No Longer Stocked
[Buy Now](https://www.adafruit.com/product/965)
[Related Guides to the Product](https://learn.adafruit.com/products/965/guides)
### Miniature Wireless USB Keyboard with Touchpad
[Miniature Wireless USB Keyboard with Touchpad](https://www.adafruit.com/product/922)
Add a miniature wireless controller to your computer project with this combination keyboard and touchpad. We found the smallest wireless USB keyboard available, a mere 6" x 2.4" x 0.5" (152mm x 59mm x 12.5mm)! It's small but usable to make a great accompaniment to a computer...
In Stock
[Buy Now](https://www.adafruit.com/product/922)
[Related Guides to the Product](https://learn.adafruit.com/products/922/guides)
### NTSC/PAL (Television) TFT Display - 4.3" Diagonal
[NTSC/PAL (Television) TFT Display - 4.3" Diagonal](https://www.adafruit.com/product/946)
Yes, this is an adorable small television! The visible display measures only 4.3" (11cm) diagonal, the TFT comes with a NTSC/PAL driver board, enclosure and stand. The display is very easy to use - simply connect 12VDC to the 2.1mm center-positive DC jack (or use the cable and connect to...
No Longer Stocked
[Buy Now](https://www.adafruit.com/product/946)
[Related Guides to the Product](https://learn.adafruit.com/products/946/guides)
### NTSC/PAL (Television) TFT Display - 7" Diagonal
[NTSC/PAL (Television) TFT Display - 7" Diagonal](https://www.adafruit.com/product/947)
Yes, this is an adorable small television! The visible display measures only 7" (17.8cm) diagonal, the TFT comes with a NTSC/PAL driver board, enclosure and stand. The display is very easy to use - simply connect the included 12VDC adapter to the 2.1mm center-positive DC jack, then...
No Longer Stocked
[Buy Now](https://www.adafruit.com/product/947)
[Related Guides to the Product](https://learn.adafruit.com/products/947/guides)
## Related Guides
- [Adafruit RGB Matrix + Real Time Clock HAT for Raspberry Pi](https://learn.adafruit.com/adafruit-rgb-matrix-plus-real-time-clock-hat-for-raspberry-pi.md)
- [Adafruit PiTFT 3.5" Touch Screen for Raspberry Pi](https://learn.adafruit.com/adafruit-pitft-3-dot-5-touch-screen-for-raspberry-pi.md)
- [Raspberry Pi Hosting Node-Red](https://learn.adafruit.com/raspberry-pi-hosting-node-red.md)
- [Windows IoT Core Application Development: Headed Blinky](https://learn.adafruit.com/windows-iot-application-development-headed-blinky.md)
- [Bonjour (Zeroconf) Networking for Windows and Linux](https://learn.adafruit.com/bonjour-zeroconf-networking-for-windows-and-linux.md)
- [Raspberry Pi Thermal Printer One Time Pads](https://learn.adafruit.com/raspberry-pi-thermal-printer-one-time-pads.md)
- [10" Raspberry Pi Desktop](https://learn.adafruit.com/10-raspberry-pi-desktop.md)
- [What is the Command Line?](https://learn.adafruit.com/what-is-the-command-line.md)
- [Adafruit's Raspberry Pi Lesson 6. Using SSH](https://learn.adafruit.com/adafruits-raspberry-pi-lesson-6-using-ssh.md)
- [Adafruit Prototyping Pi Plate](https://learn.adafruit.com/adafruit-prototyping-pi-plate.md)
- [CircuitPython Libraries on Linux and the 96Boards DragonBoard 410c](https://learn.adafruit.com/circuitpython-libraries-on-linux-and-the-96boards-dragonboard-410c.md)
- [Getting Started With Windows IoT Core on Raspberry Pi](https://learn.adafruit.com/getting-started-with-windows-iot-on-raspberry-pi.md)
- [Raspberry Pi Computer Quick-Start](https://learn.adafruit.com/raspberry-pi-computer-quick-start.md)
- [Adafruit Ultimate GPS with gpsd](https://learn.adafruit.com/adafruit-ultimate-gps-on-the-raspberry-pi.md)
- [Adafruit's Raspberry Pi Lesson 9. Controlling a DC Motor](https://learn.adafruit.com/adafruit-raspberry-pi-lesson-9-controlling-a-dc-motor.md)
---
# Source: https://learn.adafruit.com/adafruit-arduino-lesson-3-rgb-leds/other-things-to-do.md
# Arduino Lesson 3. RGB LEDs
## Other Things to Do
- Try putting a ping-pong ball over the LED
- Try changing the delays to speed up or slow down the color changing
There are lots of things you can do with RGB LEDs. Check out some of the projects on the Internet using RGB LEDs and you will find multi-color persistence of vision devices, as well as all sorts of lighting effects.
[Click Here for the Next Lesson](http://learn.adafruit.com/adafruit-arduino-lesson-4-eight-leds)
**About the Author**
Simon Monk is author of a number of books relating to Open Source Hardware. The following books written by Simon are available from Adafruit: [Programming Arduino](https://www.adafruit.com/products/1019 "Link: https://www.adafruit.com/products/1019"), [30 Arduino Projects for the Evil Genius](https://www.adafruit.com/products/868 "Link: https://www.adafruit.com/products/868") and [Programming the Raspberry Pi](https://www.adafruit.com/index.php?main_page=adasearch&q=programming+raspberry+pi "Link: https://www.adafruit.com/index.php?main\_page=adasearch&q=programming+raspberry+pi").
- [Previous Page](https://learn.adafruit.com/adafruit-arduino-lesson-3-rgb-leds/theory-pwm.md)
## Featured Products
### Adafruit METRO 328 Fully Assembled - Arduino IDE compatible
[Adafruit METRO 328 Fully Assembled - Arduino IDE compatible](https://www.adafruit.com/product/50)
We sure love the ATmega328 here at Adafruit, and we use them _a lot_ for our own projects. The processor has plenty of GPIO, Analog inputs, hardware UART SPI and I2C, timers and PWM galore - just enough for most simple projects. When we need to go small, we use a
Out of Stock
[Buy Now](https://www.adafruit.com/product/50)
[Related Guides to the Product](https://learn.adafruit.com/products/50/guides)
### Premium Male/Male Jumper Wires - 40 x 6" (150mm)
[Premium Male/Male Jumper Wires - 40 x 6" (150mm)](https://www.adafruit.com/product/758)
Handy for making wire harnesses or jumpering between headers on PCB's. These premium jumper wires are 6" (150mm) long and come in a 'strip' of 40 (4 pieces of each of ten rainbow colors). They have 0.1" male header contacts on either end and fit cleanly next to each other...
In Stock
[Buy Now](https://www.adafruit.com/product/758)
[Related Guides to the Product](https://learn.adafruit.com/products/758/guides)
### Half Sized Premium Breadboard - 400 Tie Points
[Half Sized Premium Breadboard - 400 Tie Points](https://www.adafruit.com/product/64)
This is a cute, half-size breadboard with 400 tie points, good for small projects. It's 3.25" x 2.2" / 8.3cm x 5.5cm with a standard double-strip in the middle and two power rails on both sides. You can pull the power rails off easily to make the breadboard as...
In Stock
[Buy Now](https://www.adafruit.com/product/64)
[Related Guides to the Product](https://learn.adafruit.com/products/64/guides)
### Diffused RGB (tri-color) LED
[Diffused RGB (tri-color) LED](https://www.adafruit.com/product/159)
Diffused 5mm tri-color LED with separate red, green and blue LED chips inside! Nice indicator, and fun to color-swirl. 60 degree viewing angle. We like diffused RGB LEDs because they color mix inside instead of appearing as 3 distinct LEDs.
These are Common-Anode type which means you...
In Stock
[Buy Now](https://www.adafruit.com/product/159)
[Related Guides to the Product](https://learn.adafruit.com/products/159/guides)
## Related Guides
- [Geofencing with the FONA 808 & Adafruit IO](https://learn.adafruit.com/geofencing-with-the-fona-808-and-adafruit-io.md)
- [Adafruit Motor Shield](https://learn.adafruit.com/adafruit-motor-shield.md)
- [Sous-vide controller powered by Arduino - The SousViduino!](https://learn.adafruit.com/sous-vide-powered-by-arduino-the-sous-viduino.md)
- [Wave Shield Voice Changer](https://learn.adafruit.com/wave-shield-voice-changer.md)
- [Arduino Lesson 5. The Serial Monitor](https://learn.adafruit.com/adafruit-arduino-lesson-5-the-serial-monitor.md)
- [Trinket Audio Player](https://learn.adafruit.com/trinket-audio-player.md)
- [Circuit Playground: D is for Diode](https://learn.adafruit.com/circuit-playground-d-is-for-diode.md)
- [Wave Shield](https://learn.adafruit.com/adafruit-wave-shield-audio-shield-for-arduino.md)
- [Arduino Lesson 0. Getting Started](https://learn.adafruit.com/lesson-0-getting-started.md)
- [Current Limiting Stepper Driver with DRV8871](https://learn.adafruit.com/current-limiting-stepper-driver-with-drv8871.md)
- [RePaper eInk Development Board](https://learn.adafruit.com/repaper-eink-development-board.md)
- [Adafruit AirLift Shield - ESP32 WiFi Co-Processor](https://learn.adafruit.com/adafruit-airlift-shield-esp32-wifi-co-processor.md)
- [Low Power WiFi Datalogger](https://learn.adafruit.com/low-power-wifi-datalogging.md)
- [Babel Fish](https://learn.adafruit.com/babel-fish.md)
- [Arduino Lesson 2. LEDs](https://learn.adafruit.com/adafruit-arduino-lesson-2-leds.md)
---
# Source: https://learn.adafruit.com/diy-8x2-lcd-shield/overview-and-parts.md
# DIY 8x2 LCD Shield
## Overview & Parts
This tutorial will show you how to solder together a shield for an LCD with a 8x2 header.
## Parts
Aside from the parts offered available from Adafruit, you will need to source the LCD yourself. Parallel LCDs come in a couple different sizes, from 16 characters, 1 line (16x1) to 24 characters, 4 lines (24x4).
In this tutorial I use the [16x2 Picvue from Jameco](http://www.jameco.com/webapp/wcs/stores/servlet/ProductDisplay?langId=-1&storeId=10001&catalogId=10001&productId=365982) because that’s what I had in my box of stuff, but you can easily adapt it for any other LCD. The wiring may differ a little bit but that will be covered.
- [Next Page](https://learn.adafruit.com/diy-8x2-lcd-shield/check-out-the-pins.md)
## Featured Products
### Solid-Core Wire Spool - 25ft - 22AWG - Yellow
[Solid-Core Wire Spool - 25ft - 22AWG - Yellow](https://www.adafruit.com/product/289)
Perfect for bread-boarding, free wiring, etc. This spool of solid-core wire is easy to solder to. When bent it keeps its shape pretty well. We like to have a few spools of this stuff around. We suggest picking up wire strippers to match. Wire gauge is 22 AWG which we've found is the best...
In Stock
[Buy Now](https://www.adafruit.com/product/289)
[Related Guides to the Product](https://learn.adafruit.com/products/289/guides)
### 36-pin 0.1" Female header - pack of 5!
[36-pin 0.1" Female header - pack of 5!](https://www.adafruit.com/product/598)
Female header is like the duct tape of electronics. Its great for connecting things together, soldering to perf-boards, sockets for wires or break-away header, etc. We go through these guys real fast, and thought that given how handy they are, we'd offer them in a pack of five!
In Stock
[Buy Now](https://www.adafruit.com/product/598)
[Related Guides to the Product](https://learn.adafruit.com/products/598/guides)
### Break-away 0.1" 36-pin strip male header - Black - 10 pack
[Break-away 0.1" 36-pin strip male header - Black - 10 pack](https://www.adafruit.com/product/392)
Breakaway header is like the duct tape of electronics. It's great for connecting things together, soldering to perf-boards, fits into any breakout or breadboard, etc. We go through these guys real fast, and thought that given how handy they are, we'd offer them in a pack of ten!
In Stock
[Buy Now](https://www.adafruit.com/product/392)
[Related Guides to the Product](https://learn.adafruit.com/products/392/guides)
### Adafruit Proto Shield for Arduino Kit
[Adafruit Proto Shield for Arduino Kit](https://www.adafruit.com/product/51)
Works with the Uno! This prototyping shield is the best out there (well, we think so, at least). It works with UNO, NG, Diecimila and Duemilanove Arduinos. You can use it with a Leonardo but it will not break out the hardware SPI pins (they're only on the ISP connector underneath) or the...
No Longer Stocked
[Buy Now](https://www.adafruit.com/product/51)
[Related Guides to the Product](https://learn.adafruit.com/products/51/guides)
### Adafruit METRO 328 Fully Assembled - Arduino IDE compatible
[Adafruit METRO 328 Fully Assembled - Arduino IDE compatible](https://www.adafruit.com/product/50)
We sure love the ATmega328 here at Adafruit, and we use them _a lot_ for our own projects. The processor has plenty of GPIO, Analog inputs, hardware UART SPI and I2C, timers and PWM galore - just enough for most simple projects. When we need to go small, we use a
Out of Stock
[Buy Now](https://www.adafruit.com/product/50)
[Related Guides to the Product](https://learn.adafruit.com/products/50/guides)
## Related Guides
- [Geofencing with the FONA 808 & Adafruit IO](https://learn.adafruit.com/geofencing-with-the-fona-808-and-adafruit-io.md)
- [Wireless Game Show Poppers for the Classroom!](https://learn.adafruit.com/wireless-game-show-poppers.md)
- [Adafruit Ultimate GPS](https://learn.adafruit.com/adafruit-ultimate-gps.md)
- [Arduino Lesson 4. Eight LEDs and a Shift Register](https://learn.adafruit.com/adafruit-arduino-lesson-4-eight-leds.md)
- [Adafruit CC3000 WiFi and Xively](https://learn.adafruit.com/adafruit-cc3000-wifi-and-xively.md)
- [FTDI Friend](https://learn.adafruit.com/ftdi-friend.md)
- [A REST API for Arduino & the CC3000 WiFi Chip](https://learn.adafruit.com/a-rest-api-for-arduino-and-the-cc3000-wifi-chip.md)
- [Bluetooth Controlled Motorized Camera Slider](https://learn.adafruit.com/bluetooth-motorized-camera-slider.md)
- [Bluefruit LE Connect for iOS and Android](https://learn.adafruit.com/bluefruit-le-connect.md)
- [Babel Fish](https://learn.adafruit.com/babel-fish.md)
- [Animating Multiple LED Backpacks](https://learn.adafruit.com/animating-multiple-led-backpacks.md)
- [Light Meter](https://learn.adafruit.com/light-meter.md)
- [Adafruit 16-channel PWM/Servo Shield](https://learn.adafruit.com/adafruit-16-channel-pwm-slash-servo-shield.md)
- [Halloween Pumpkin](https://learn.adafruit.com/halloween-pumpkin.md)
- [Naughty or Nice Machine](https://learn.adafruit.com/naughty-or-nice-machine.md)
---
# Source: https://learn.adafruit.com/adafruit-16-channel-servo-driver-with-raspberry-pi/overview.md
# Source: https://learn.adafruit.com/biometric-security-box/overview.md
# Source: https://learn.adafruit.com/adafruit-motor-shield/overview.md
# Source: https://learn.adafruit.com/skill-badge-sash/overview.md
# Source: https://learn.adafruit.com/using-the-bmp085-with-raspberry-pi/overview.md
# Source: https://learn.adafruit.com/light-painting-with-raspberry-pi/overview.md
# Source: https://learn.adafruit.com/adafruit-raspberry-pi-educational-linux-distro/overview.md
# Source: https://learn.adafruit.com/usb-dc-and-solar-lipoly-charger/overview.md
# Source: https://learn.adafruit.com/adafruit-nfc-rfid-on-raspberry-pi/overview.md
# Source: https://learn.adafruit.com/babel-fish/overview.md
# Source: https://learn.adafruit.com/el-workshop/overview.md
# Source: https://learn.adafruit.com/adalight-diy-ambient-tv-lighting/overview.md
# Source: https://learn.adafruit.com/rgb-lcd-shield/overview.md
# Source: https://learn.adafruit.com/adafruit-ultimate-gps/overview.md
# Source: https://learn.adafruit.com/send-raspberry-pi-data-to-cosm/overview.md
# Source: https://learn.adafruit.com/basic-resistor-sensor-reading-on-raspberry-pi/overview.md
# Source: https://learn.adafruit.com/battery-power-for-led-pixels-and-strips/overview.md
# Source: https://learn.adafruit.com/papercraft-resistor-helper/overview.md
# Source: https://learn.adafruit.com/adafruit-gfx-graphics-library/overview.md
# Source: https://learn.adafruit.com/reading-a-analog-in-and-controlling-audio-volume-with-the-raspberry-pi/overview.md
# Source: https://learn.adafruit.com/hl1606-led-strip/overview.md
# Source: https://learn.adafruit.com/digital-led-strip/overview.md
# Source: https://learn.adafruit.com/36mm-led-pixels/overview.md
# Source: https://learn.adafruit.com/led-bicycle-handlebars/overview.md
# Source: https://learn.adafruit.com/20mm-led-pixels/overview.md
# Source: https://learn.adafruit.com/power-supplies/overview.md
# Source: https://learn.adafruit.com/rfid-iphone/overview.md
# Source: https://learn.adafruit.com/multimeters/overview.md
# Source: https://learn.adafruit.com/li-ion-and-lipoly-batteries/overview.md
# Source: https://learn.adafruit.com/12mm-led-pixels/overview.md
# Source: https://learn.adafruit.com/fpga-rgb-matrix/overview.md
# Source: https://learn.adafruit.com/character-lcds/overview.md
# Source: https://learn.adafruit.com/digital-shipping-scales/overview.md
# Source: https://learn.adafruit.com/barcode-scanner/overview.md
# Source: https://learn.adafruit.com/playing-sounds-and-using-buttons-with-raspberry-pi/overview.md
# Source: https://learn.adafruit.com/calipers/overview.md
# Source: https://learn.adafruit.com/096-mini-color-oled/overview.md
# Source: https://learn.adafruit.com/gps-dog-collar/overview.md
# Source: https://learn.adafruit.com/electroknit/overview.md
# Source: https://learn.adafruit.com/tron-bag/overview.md
# Source: https://learn.adafruit.com/raspberry-pi-e-mail-notifier-using-leds/overview.md
# Source: https://learn.adafruit.com/monochrome-oled-breakouts/overview.md
# Source: https://learn.adafruit.com/cross-stitch/overview.md
# Source: https://learn.adafruit.com/adafruit-prototyping-pi-plate/overview.md
# Source: https://learn.adafruit.com/adafruit-pi-cobbler-kit/overview.md
# Source: https://learn.adafruit.com/tsl2561/overview.md
# Source: https://learn.adafruit.com/dht/overview.md
# Source: https://learn.adafruit.com/thermistor/overview.md
# Source: https://learn.adafruit.com/ir-sensor/overview.md
# Source: https://learn.adafruit.com/pir-passive-infrared-proximity-motion-sensor/overview.md
# Source: https://learn.adafruit.com/tilt-sensor/overview.md
# Source: https://learn.adafruit.com/bmp085/overview.md
# Source: https://learn.adafruit.com/tmp36-temperature-sensor/overview.md
# Source: https://learn.adafruit.com/photocells/overview.md
# Source: https://learn.adafruit.com/force-sensitive-resistor-fsr/overview.md
# Source: https://learn.adafruit.com/usb-snes-gamepad/overview.md
# Source: https://learn.adafruit.com/thermocouple/overview.md
# Source: https://learn.adafruit.com/adafruit-ina219-current-sensor-breakout/overview.md
# Source: https://learn.adafruit.com/smt-manufacturing/overview.md
# Source: https://learn.adafruit.com/adafruit-led-backpack/overview.md
# Source: https://learn.adafruit.com/beaglebone/overview.md
# Source: https://learn.adafruit.com/hacking-the-kinect/overview.md
# Source: https://learn.adafruit.com/el-wire/overview.md
# Source: https://learn.adafruit.com/ttl-serial-camera/overview.md
# TTL Serial Camera
## Overview
This tutorial is for our new TTL serial camera module with NTSC video output. These modules are a nice addition to a microcontroller project when you want to take a photo or control a video stream. The modules have a few features built in, such as the ability to change the brightness/saturation/hue of images, auto-contrast and auto-brightness adjustment, and motion detection.

Since it is a little confusing how this is both a snapshot and video camera, we'd like to explain it in detail now. The module was initially designed for surveillance purposes. Its meant to constantly stream TV-resolution video out of the Video pin (this is NTSC monochrome format) and also take commands from the serial port. The serial port commands can request that the module freeze the video and then download a JPEG color image. So for example, normally its just displaying video to a security monitor. When motion is detected, it would take a photo and save it to a disk for later analysis.
The module is admittedly not extremely high resolution - the maximum image size it can take is 640x480 pixels. And it is sensitive to infrared light, which alters the color rendition somewhat. The reason for all this is that it's meant for surveillance, not for nature photography. However, as far as we can tell, this is the best module on the market.
- **Module size:** 32mm x 32mm
- **Image sensor:** CMOS 1/4 inch
- **CMOS Pixels:** 0.3M
- **Pixel size:** 5.6um\*5.6um
- **Output format:** Standard JPEG/M-JPEG
- **White balance:** Automatic
- **Exposure:** Automatic
- **Gain:** Automatic
- **Shutter:** Electronic rolling shutter
- **SNR:** 45DB
- **Dynamic Range:** 60DB
- **Max analog gain:** 16DB
- **Frame speed:** 640\*480 30fps
- **Scan mode:** Progressive scan
- **Viewing angle:** 60 degrees
- **Monitoring distance:** 10 meters, maximum 15meters (adjustable)
- **Image size:** VGA (640\*480), QVGA (320\*240), QQVGA (160\*120)
- **Baud rate:** Default 38400 (the datasheet claims you can change the baud rate with a command but it does not work reliably)
- **Current draw:** 75mA
- **Operating voltage:** DC +5V
- **Communication:** 3.3V TTL (Three wire TX, RX, GND)
## Sample Images
Here are two example images, one of outside during a cloudy day, and one inside on a sunny day.


- [Next Page](https://learn.adafruit.com/ttl-serial-camera/wiring-the-camera.md)
## Featured Products
### TTL Serial JPEG Camera with NTSC Video
[TTL Serial JPEG Camera with NTSC Video](https://www.adafruit.com/product/397)
This camera module can be a pretty neat project addition. It was designed to be used in security systems and does two main things - it outputs NTSC video and can take snapshots of that video (in color) and transmit them over the TTL serial link. You can snap pictures at 640x480, 320x240 or...
In Stock
[Buy Now](https://www.adafruit.com/product/397)
[Related Guides to the Product](https://learn.adafruit.com/products/397/guides)
### Miniature TTL Serial JPEG Camera with NTSC Video
[Miniature TTL Serial JPEG Camera with NTSC Video](https://www.adafruit.com/product/1386)
This tiny little camera module can be a pretty neat project addition, it is just like [our other JPEG cameras (same chipset/software)](http://www.adafruit.com/category/35_68), but much smaller and slimmer. It was designed to be used in security systems and does two main things - it...
In Stock
[Buy Now](https://www.adafruit.com/product/1386)
[Related Guides to the Product](https://learn.adafruit.com/products/1386/guides)
### Adafruit METRO 328 Fully Assembled - Arduino IDE compatible
[Adafruit METRO 328 Fully Assembled - Arduino IDE compatible](https://www.adafruit.com/product/50)
We sure love the ATmega328 here at Adafruit, and we use them _a lot_ for our own projects. The processor has plenty of GPIO, Analog inputs, hardware UART SPI and I2C, timers and PWM galore - just enough for most simple projects. When we need to go small, we use a
Out of Stock
[Buy Now](https://www.adafruit.com/product/50)
[Related Guides to the Product](https://learn.adafruit.com/products/50/guides)
### Weatherproof TTL Serial JPEG Camera with NTSC Video and IR LEDs
[Weatherproof TTL Serial JPEG Camera with NTSC Video and IR LEDs](https://www.adafruit.com/product/613)
This weatherproof camera module is [a classy upgrade to the basic camera module we already stock in the shop](http://www.adafruit.com/products/397). The main differences is that this one comes in a nice metal case with a mounting hinge, a 1 meter long cable with the TTL & NTSC...
In Stock
[Buy Now](https://www.adafruit.com/product/613)
[Related Guides to the Product](https://learn.adafruit.com/products/613/guides)
### MicroSD card breakout board+
[MicroSD card breakout board+](https://www.adafruit.com/product/254)
Not just a simple breakout board, this microSD adapter goes the extra mile - designed for ease of use.
- Onboard 5v-\>3v regulator provides 150mA for power-hungry cards
- 3v level shifting means you can use this with ease on either 3v or 5v systems
- Uses a proper level...
Out of Stock
[Buy Now](https://www.adafruit.com/product/254)
[Related Guides to the Product](https://learn.adafruit.com/products/254/guides)
### Half Sized Premium Breadboard - 400 Tie Points
[Half Sized Premium Breadboard - 400 Tie Points](https://www.adafruit.com/product/64)
This is a cute, half-size breadboard with 400 tie points, good for small projects. It's 3.25" x 2.2" / 8.3cm x 5.5cm with a standard double-strip in the middle and two power rails on both sides. You can pull the power rails off easily to make the breadboard as...
In Stock
[Buy Now](https://www.adafruit.com/product/64)
[Related Guides to the Product](https://learn.adafruit.com/products/64/guides)
### SD/MicroSD Memory Card (8 GB SDHC)
[SD/MicroSD Memory Card (8 GB SDHC)](https://www.adafruit.com/product/1294)
Add mega-storage in a jiffy using this 8 GB class 4 micro-SD card. It comes with a SD adapter so you can use it with any of our shields or adapters. Preformatted to FAT so it works out of the box with our projects. Tested and works great with our
In Stock
[Buy Now](https://www.adafruit.com/product/1294)
[Related Guides to the Product](https://learn.adafruit.com/products/1294/guides)
## Related Guides
- [Making Adabot: Part 2](https://learn.adafruit.com/making-adabot-part-2.md)
- [3D Printed Animatronic Robot Head](https://learn.adafruit.com/3d-printed-animatronic-robot-head.md)
- [Arduino Lesson 14. Servo Motors](https://learn.adafruit.com/adafruit-arduino-lesson-14-servo-motors.md)
- [Arduino Lesson 15. DC Motor Reversing](https://learn.adafruit.com/adafruit-arduino-lesson-15-dc-motor-reversing.md)
- [Programming Arduino with Android and Windows Tablets](https://learn.adafruit.com/programming-arduino-with-android-and-windows-tablets.md)
- [LSM303 Accelerometer + Compass Breakout](https://learn.adafruit.com/lsm303-accelerometer-slash-compass-breakout.md)
- [Adafruit VS1053 MP3/AAC/Ogg/MIDI/WAV Codec Breakout Tutorial](https://learn.adafruit.com/adafruit-vs1053-mp3-aac-ogg-midi-wav-play-and-record-codec-tutorial.md)
- [Naughty or Nice Machine](https://learn.adafruit.com/naughty-or-nice-machine.md)
- [Adafruit Ultimate GPS Logger Shield](https://learn.adafruit.com/adafruit-ultimate-gps-logger-shield.md)
- [Arduino "Hunt The Wumpus"](https://learn.adafruit.com/arduino-hunt-the-wumpus.md)
- [Track Your Treats: Halloween Candy GPS Tracker](https://learn.adafruit.com/track-your-treats-halloween-candy-gps-tracker.md)
- [WiFi Weather Station](https://learn.adafruit.com/wifi-weather-station-arduino-cc3000.md)
- [Bluetooth Controlled Motorized Camera Slider](https://learn.adafruit.com/bluetooth-motorized-camera-slider.md)
- [TMP36 Temperature Sensor](https://learn.adafruit.com/tmp36-temperature-sensor.md)
- [Babel Fish](https://learn.adafruit.com/babel-fish.md)
---
# Source: https://learn.adafruit.com/papercraft-resistor-helper.md
# Resistor Helper
## Overview

Papercrafts at Adafruit! We’re excited to share this Resistor Helper you can download and make yourself. It’s the newest tool in our [Circuit Playground](http://adafruit.com/circuitplayground) family– when you can’t get to your iPhone or iPad, use paper! One side helps you read 4-band types and the other side takes care of 5-band types. The Resistor Helper is on [Thingiverse as a PDF](http://www.thingiverse.com/thing:22070) (with Illustrator editability preserved). Designed by Adafruit with [Matthew Borgatti](http://har.ms/). You can also grab the [PDF on github](https://github.com/adafruit/Adafruit-Resistor-Helper).
Tools/materials:
- Craft knife
- Cutting mat
- Ruler
- Scissors
- Wire cutters/pliers
- Color printer
- Heavy card stock paper
- 4 paper fasteners
- [Next Page](https://learn.adafruit.com/papercraft-resistor-helper/prep.md)
## Related Guides
- [Heat Set Insert Rig](https://learn.adafruit.com/heat-set-rig.md)
- [Digital Circuits 2: Some Tools](https://learn.adafruit.com/some-digital-tools.md)
- [Furby 2012 Teardown](https://learn.adafruit.com/furby-2012-teardown.md)
- [Programmable 12v Outdoor Cafe Lights](https://learn.adafruit.com/programmable-12v-outdoor-cafe-lights.md)
- [Icicle Crown with Pebble Pixels & WLED](https://learn.adafruit.com/icicle-crown-with-pebble-pixels-wled.md)
- [USB C CC Resistor Fixer Case](https://learn.adafruit.com/resistor-fixer-case.md)
- [iOS App Development Using Cordova](https://learn.adafruit.com/ios-app-development-using-cordova.md)
- [Understanding USB Type C: Cable Types, Pitfalls and More](https://learn.adafruit.com/understanding-usb-type-c-cable-types-pitfalls-and-more.md)
- [Mass AVR ISP Programmer](https://learn.adafruit.com/mass-avr-isp-programmer.md)
- [Introduction to iOS Development](https://learn.adafruit.com/introduction-to-ios-development.md)
- [Accessing and Using Adafruit PCB Design Files](https://learn.adafruit.com/accessing-and-using-adafruit-pcb-design-files.md)
- [Getting Started with Binho Nova](https://learn.adafruit.com/getting-started-with-binho-nova.md)
- [Adafruit UPDI Friend](https://learn.adafruit.com/adafruit-updi-friend.md)
- [Adafruit CP2104 and CP2102N Friend - USB to Serial Converter](https://learn.adafruit.com/adafruit-cp2102n-cp2104-friend-usb-to-serial-converter.md)
- [DIY Decorative Resin Keycaps](https://learn.adafruit.com/diy-decorative-resin-keycaps.md)
---
# Source: https://learn.adafruit.com/adafruit-ultimate-gps/parsed-data-output.md
# Adafruit Ultimate GPS
## Breakout Arduino Parsing
Since all GPS's output NMEA sentences and often for our projects we need to extract the actual data from them, we've simplified the task tremendously when using the Adafruit GPS library. By having the library read, store and parse the data in a background interrupt it becomes trivial to query the library and get the latest updated information without any icky parsing work.
Open up the **File→Examples→Adafruit\_GPS→GPS\_HardwareSerial\_Parsing** or **GPS\_SoftwareSerial\_Parsing** sketch and upload it to the microcontroller. Use the same wiring as in the previous page. Then open up the serial monitor.

Info:
In this sketch, we call** GPS.read()** constantly in the main loop (if you can, get this to run once a millisecond in an interrupt). Then in the main loop we can ask if a new chunk of data has been received by calling **GPS.newNMEAreceived()**, if this returns **true** then we can ask the library to parse that data with **GPS.parse(GPS.lastNMEA())**.
We do have to keep querying and parsing in the main loop - its not possible to do this in an interrupt because then we'd be dropping GPS data by accident.
Once data is parsed, we can just ask for data from the library like ** GPS.day** , **GPS.month** and **GPS.year** for the current date. **GPS.fix ** will be 1 if there is a fix, 0 if there is none. If we have a fix then we can ask for **GPS.latitude** , ** GPS.longitude** , **GPS.speed** (in knots, not mph or k/hr!), **GPS.angle** , ** GPS.altitude** (in centimeters) and **GPS.satellites ** (number of satellites)
This should make it much easier to have location-based projects. We suggest keeping the update rate at 1Hz and request that the GPS only output RMC and GGA as the parser does not keep track of other data anyways.
- [Previous Page](https://learn.adafruit.com/adafruit-ultimate-gps/arduino-wiring.md)
- [Next Page](https://learn.adafruit.com/adafruit-ultimate-gps/circuitpython-parsing.md)
## Featured Products
### Adafruit Ultimate GPS Breakout - 66 channel w/10 Hz updates
[Adafruit Ultimate GPS Breakout - 66 channel w/10 Hz updates](https://www.adafruit.com/product/746)
We carry a few different GPS modules here in the Adafruit shop, but none that satisfied our every desire - that's why we designed this little GPS breakout board. We believe this is the **Ultimate** GPS module, so we named it that. It's got everything you want and...
In Stock
[Buy Now](https://www.adafruit.com/product/746)
[Related Guides to the Product](https://learn.adafruit.com/products/746/guides)
### Adafruit Ultimate GPS GNSS with USB - 99 channel w/10 Hz updates
[Adafruit Ultimate GPS GNSS with USB - 99 channel w/10 Hz updates](https://www.adafruit.com/product/4279)
The Ultimate GPS module you know and love has a _glow-up_ to let it be easily used with any computer, not just microcontrollers! With the built-in USB-to-Serial converter, you can now plug-n-play the Ultimate GPS into your computer, laptop, embedded Linux computer, and more. Power and...
In Stock
[Buy Now](https://www.adafruit.com/product/4279)
[Related Guides to the Product](https://learn.adafruit.com/products/4279/guides)
### Adafruit METRO 328 Fully Assembled - Arduino IDE compatible
[Adafruit METRO 328 Fully Assembled - Arduino IDE compatible](https://www.adafruit.com/product/50)
We sure love the ATmega328 here at Adafruit, and we use them _a lot_ for our own projects. The processor has plenty of GPIO, Analog inputs, hardware UART SPI and I2C, timers and PWM galore - just enough for most simple projects. When we need to go small, we use a
Out of Stock
[Buy Now](https://www.adafruit.com/product/50)
[Related Guides to the Product](https://learn.adafruit.com/products/50/guides)
### GPS Antenna - External Active Antenna - 3-5V 28dB 5 Meter SMA
[GPS Antenna - External Active Antenna - 3-5V 28dB 5 Meter SMA](https://www.adafruit.com/product/960)
Give your Ultimate GPS V3 a boost with this external active antenna. This GPS antenna draws about 10mA and will give you an additional 28 dB of gain. It's got a 5 meter long cable so it will easily reach wherever you need it to. The antenna is magnetic so it will stick to the top of a car...
In Stock
[Buy Now](https://www.adafruit.com/product/960)
[Related Guides to the Product](https://learn.adafruit.com/products/960/guides)
### SMA to uFL/u.FL/IPX/IPEX RF Adapter Cable
[SMA to uFL/u.FL/IPX/IPEX RF Adapter Cable](https://www.adafruit.com/product/851)
This RF adapter cable is super handy for anyone doing RF work. Often times, small electronics save space by having a pick-and-placeable u.FL connector (also called uFL, IPEX, IPAX, IPX, MHF, and AM). But most antennas have SMA or RP-SMA connectors on them. This little cable will bridge the...
In Stock
[Buy Now](https://www.adafruit.com/product/851)
[Related Guides to the Product](https://learn.adafruit.com/products/851/guides)
### CR1220 12mm Diameter - 3V Lithium Coin Cell Battery
[CR1220 12mm Diameter - 3V Lithium Coin Cell Battery](https://www.adafruit.com/product/380)
These are the highest quality & capacity batteries, the same as shipped with the iCufflinks, iNecklace, Datalogging and GPS Shields, GPS HAT, etc. One battery per order (you'll want one battery per cufflink or pendant.)
Brand may vary but all battery brands are verified...
Out of Stock
[Buy Now](https://www.adafruit.com/product/380)
[Related Guides to the Product](https://learn.adafruit.com/products/380/guides)
### Breadboarding wire bundle
[Breadboarding wire bundle](https://www.adafruit.com/product/153)
75 flexible stranded core wires with stiff ends molded on in red, orange, yellow, green, blue, brown, black and white. These are a major improvement over the "box of bent wires" that are sometimes sold with breadboards, and faster than stripping your own solid core wires. Makes...
In Stock
[Buy Now](https://www.adafruit.com/product/153)
[Related Guides to the Product](https://learn.adafruit.com/products/153/guides)
### Half Sized Premium Breadboard - 400 Tie Points
[Half Sized Premium Breadboard - 400 Tie Points](https://www.adafruit.com/product/64)
This is a cute, half-size breadboard with 400 tie points, good for small projects. It's 3.25" x 2.2" / 8.3cm x 5.5cm with a standard double-strip in the middle and two power rails on both sides. You can pull the power rails off easily to make the breadboard as...
In Stock
[Buy Now](https://www.adafruit.com/product/64)
[Related Guides to the Product](https://learn.adafruit.com/products/64/guides)
## Related Guides
- [Reverse Geocache Box](https://learn.adafruit.com/reverse-geocache-engagement-box.md)
- [Ladyada's Learn Arduino - Lesson #2](https://learn.adafruit.com/ladyadas-learn-arduino-lesson-number-2.md)
- [Wave Shield Talking Clock](https://learn.adafruit.com/wave-shield-talking-clock.md)
- [Wireless Game Show Poppers for the Classroom!](https://learn.adafruit.com/wireless-game-show-poppers.md)
- [Wireless Gardening with Arduino + CC3000 WiFi Modules](https://learn.adafruit.com/wireless-gardening-arduino-cc3000-wifi-modules.md)
- [CircuitPython Essentials](https://learn.adafruit.com/circuitpython-essentials.md)
- [CircuitPython Libraries on Linux and ODROID C2](https://learn.adafruit.com/circuitpython-libaries-linux-odroid-c2.md)
- [2.2" TFT Display](https://learn.adafruit.com/2-2-tft-display.md)
- [RGB LED Matrix Basics](https://learn.adafruit.com/32x16-32x32-rgb-led-matrix.md)
- [Halloween Pumpkin](https://learn.adafruit.com/halloween-pumpkin.md)
- [Remote controlled door lock using a fingerprint sensor & Adafruit IO](https://learn.adafruit.com/remote-controlled-door-lock-using-a-fingerprint-sensor-and-adafruit-io.md)
- [Automatic Monitor Color Temperature Adjustment](https://learn.adafruit.com/automatic-monitor-color-temperature-adjustment.md)
- [Animating Multiple LED Backpacks](https://learn.adafruit.com/animating-multiple-led-backpacks.md)
- [Skill Badge Requirements: Microcontrollers](https://learn.adafruit.com/skill-badge-requirements-microcontrollers.md)
- [RePaper eInk Development Board](https://learn.adafruit.com/repaper-eink-development-board.md)
---
# Source: https://learn.adafruit.com/reverse-geocache-engagement-box/parts-and-tools.md
# Reverse Geocache Box
## Parts and Tools
To get started with your reverse geocache build, here are the required parts:
[An Arduino UNO](https://www.adafruit.com/products/50) - The brains of the reverse geocache.
[Adafruit Ultimate GPS Module](http://www.adafruit.com/products/746) - This little guy will tell us where we are, and where we need to go.
[A Standard 16x2 LCD](http://www.adafruit.com/products/181) - This will be used to communicate with the person using the reverse geocache box. You can have it help people navigate to the destination, give them a clue, or ask them to marry you. :)
[A Micro Servo](http://www.adafruit.com/products/169) - This little servo will be used to lock and unlock the box with the Arduino.
[Prototyping Board](http://www.adafruit.com/products/571) - Assemble and solder your electronics to this proto-board so it doesn't fall apart in the field.
[A Power Switch](https://www.adafruit.com/products/915) - Kenton prefers the Adafruit Waterproof Metal On/Off Switch (with blue LED ring).
[Hook-Up Wire](https://www.adafruit.com/products/288 "Link: https://www.adafruit.com/products/288") - For connecting all of the electronics together.
[A Battery](https://www.adafruit.com/products/67) - Power the whole thing with this 9V battery holder.
A Box - Something to enclose the project in. Kenton made his out of cherry, but you can use just about anything. Just don't use a metal box, as the metal will block the GPS signals.

Also, you will need a few tools and supplies:
[A Soldering Iron](http://adafruit.com/products/180) - Use this to solder the electronics to the proto-board. If you have never soldered before, [check out our soldering tutorial here](http://learn.adafruit.com/adafruit-guide-excellent-soldering).
[A Spool of Solder](http://adafruit.com/products/145)
[Solder Wick](http://adafruit.com/products/149) - To fix your soldering mistakes the easy way.
[Wire Cutter & Stripper](http://adafruit.com/products/527)
- [Previous Page](https://learn.adafruit.com/reverse-geocache-engagement-box/overview.md)
- [Next Page](https://learn.adafruit.com/reverse-geocache-engagement-box/assembly.md)
## Featured Products
### Adafruit Ultimate GPS Breakout - 66 channel w/10 Hz updates
[Adafruit Ultimate GPS Breakout - 66 channel w/10 Hz updates](https://www.adafruit.com/product/746)
We carry a few different GPS modules here in the Adafruit shop, but none that satisfied our every desire - that's why we designed this little GPS breakout board. We believe this is the **Ultimate** GPS module, so we named it that. It's got everything you want and...
In Stock
[Buy Now](https://www.adafruit.com/product/746)
[Related Guides to the Product](https://learn.adafruit.com/products/746/guides)
### Standard LCD 16x2 + extras
[Standard LCD 16x2 + extras](https://www.adafruit.com/product/181)
Standard HD44780 LCDs are useful for creating standalone projects.
- 16 characters wide, 2 rows
- White text on blue background
- Connection port is 0.1" pitch, single row for easy breadboarding and wiring
- Pins are documented on the back of the LCD to assist...
In Stock
[Buy Now](https://www.adafruit.com/product/181)
[Related Guides to the Product](https://learn.adafruit.com/products/181/guides)
### Adafruit METRO 328 Fully Assembled - Arduino IDE compatible
[Adafruit METRO 328 Fully Assembled - Arduino IDE compatible](https://www.adafruit.com/product/50)
We sure love the ATmega328 here at Adafruit, and we use them _a lot_ for our own projects. The processor has plenty of GPIO, Analog inputs, hardware UART SPI and I2C, timers and PWM galore - just enough for most simple projects. When we need to go small, we use a
Out of Stock
[Buy Now](https://www.adafruit.com/product/50)
[Related Guides to the Product](https://learn.adafruit.com/products/50/guides)
### Micro servo
[Micro servo](https://www.adafruit.com/product/169)
Tiny little servo can rotate approximately 180 degrees (90 in each direction) and works just like the standard kinds you're used to but _smaller_. You can use any servo code, hardware, or library to control these servos. Good for beginners who want to make stuff move without...
In Stock
[Buy Now](https://www.adafruit.com/product/169)
[Related Guides to the Product](https://learn.adafruit.com/products/169/guides)
### Adafruit Perma-Proto Half-sized Breadboard PCB - 3 Pack!
[Adafruit Perma-Proto Half-sized Breadboard PCB - 3 Pack!](https://www.adafruit.com/product/571)
Customers have asked us to carry basic perf-board, but we never liked the look of most basic perf: its always crummy quality, with pads that flake off and no labeling. Then we thought about how people **actually** prototype - usually starting with a solderless breadboard and then...
In Stock
[Buy Now](https://www.adafruit.com/product/571)
[Related Guides to the Product](https://learn.adafruit.com/products/571/guides)
### Rugged Metal On/Off Switch with Green LED Ring
[Rugged Metal On/Off Switch with Green LED Ring](https://www.adafruit.com/product/482)
These chrome-plated metal buttons are rugged and look real good while doing it! Simply drill a 16mm hole into any material up to 1/2" thick and you can fit these in place, there's even a rubber gasket to keep water out of the enclosure. On the front of the button is a flat metal...
In Stock
[Buy Now](https://www.adafruit.com/product/482)
[Related Guides to the Product](https://learn.adafruit.com/products/482/guides)
### 9V battery holder with switch & 5.5mm/2.1mm plug
[9V battery holder with switch & 5.5mm/2.1mm plug](https://www.adafruit.com/product/67)
This is a 9V battery pack with on/off switch and a pre-attached 5.5mm/2.1mm center-positive barrel plug. Use this to battery-power your Arduino (or other electronic projects) - it's ready to go out of the box!
Battery & screw not included.
![]()
In Stock
[Buy Now](https://www.adafruit.com/product/67)
[Related Guides to the Product](https://learn.adafruit.com/products/67/guides)
## Related Guides
- [Adafruit Ultimate GPS](https://learn.adafruit.com/adafruit-ultimate-gps.md)
- [Wave Shield](https://learn.adafruit.com/adafruit-wave-shield-audio-shield-for-arduino.md)
- [Skill Badge Requirements: Microcontrollers](https://learn.adafruit.com/skill-badge-requirements-microcontrollers.md)
- [Bluetooth Controlled Motorized Camera Slider](https://learn.adafruit.com/bluetooth-motorized-camera-slider.md)
- [Adafruit Proto Shield for Arduino](https://learn.adafruit.com/adafruit-proto-shield-arduino.md)
- [Arduino Lesson 3. RGB LEDs](https://learn.adafruit.com/adafruit-arduino-lesson-3-rgb-leds.md)
- [Arduino Lesson 5. The Serial Monitor](https://learn.adafruit.com/adafruit-arduino-lesson-5-the-serial-monitor.md)
- [Wireless Game Show Poppers for the Classroom!](https://learn.adafruit.com/wireless-game-show-poppers.md)
- [Affordable HAL 9000 Replica](https://learn.adafruit.com/hal-9000-replica.md)
- [36mm LED Pixels](https://learn.adafruit.com/36mm-led-pixels.md)
- [Sending an SMS with Temboo](https://learn.adafruit.com/sending-an-sms-with-temboo.md)
- [Adafruit Arduino Selection Guide](https://learn.adafruit.com/adafruit-arduino-selection-guide.md)
- [FTDI Friend](https://learn.adafruit.com/ftdi-friend.md)
- [Halloween Pumpkin](https://learn.adafruit.com/halloween-pumpkin.md)
- [CircuitPython Essentials](https://learn.adafruit.com/circuitpython-essentials.md)
---
# Source: https://learn.adafruit.com/adafruit-motor-shield/parts-list.md
# Source: https://learn.adafruit.com/rgb-lcd-shield/parts-list.md
# Source: https://learn.adafruit.com/internet-of-things-printer/parts-list.md
# Internet of Things Printer
## Parts List
Danger:
The Internet of Things Printer Project Pack includes the following items:
- [Mini Thermal Receipt Printer](https://www.adafruit.com/products/597).
- [50' roll of thermal paper](https://www.adafruit.com/products/599).
- [Metal on/off toggle button with green LED](https://www.adafruit.com/products/482).
- [Panel-mount DC barrel jack](https://www.adafruit.com/products/610).
- [5V 2A DC switching power supply](https://www.adafruit.com/products/276).
- Break-away strip male header (single piece similar to [product ID #400](https://www.adafruit.com/products/400)).
- A short length of [ribbon cable](https://www.adafruit.com/?q=ribbon%20cable).
- Seven (7) laser-cut acrylic pieces - information on these is below.
- Eleven (11) 1/2" #4-40 black nylon machine screws.
- Twelve (12) #4-40 black nylon nuts.
- Not shown: a short length of heat-shrink tube.

## Electronics
Because many users already have Arduino hardware, **the kit does not include microcontroller and/or network boards**. You will need to additionally purchase or bring:
- an Arduino Ethernet board and a USB-to-serial programming adapter such as the [FTDI Friend](https://www.adafruit.com/products/284) or [TTL-232 Cable](https://www.adafruit.com/products/70).
-or-
- an Arduino Uno / [Adafruit Metro 328P board](https://www.adafruit.com/product/2488) and [Ethernet Shield](https://www.adafruit.com/product/2971).
Directions are provided for both. In either case, you will also need:
- Cables for USB programming and Ethernet.

## Acrylic Parts
As the kit of parts is not available at present, the design files for cutting your own acrylic are provided below. You may want to change these depending on your design.
[adafruit_iotp.pdf](https://cdn-learn.adafruit.com/assets/assets/000/074/812/original/adafruit_iotp.pdf?1556042726)
## Tools
The following tools are needed:
- Soldering iron and solder.
- Small screwdriver.
- Optional: tape, pliers.
- Not shown: wire cutters and strippers, lighter or heat gun for heat-shrink.

- [Previous Page](https://learn.adafruit.com/internet-of-things-printer/introduction.md)
- [Next Page](https://learn.adafruit.com/internet-of-things-printer/preparation.md)
## Primary Products
### Adafruit IoT Printer Project Pack "Internet of Things" printer
[Adafruit IoT Printer Project Pack "Internet of Things" printer](https://www.adafruit.com/product/717)
Build an "Internet of Things" connected mini printer that will do your bidding! This is a fun weekend project that comes with a beautiful laser cut case. Once assembled, the little printer connects to Ethernet to get Internet data for printing onto 2 1/4" wide receipt paper. The example sketch...
No Longer Stocked
[Buy Now](https://www.adafruit.com/product/717)
[Related Guides to the Product](https://learn.adafruit.com/products/717/guides)
## Featured Products
### Mini Thermal Receipt Printer
[Mini Thermal Receipt Printer](https://www.adafruit.com/product/597)
Add a mini printer to any microcontroller project with this very cute thermal printer. Thermal printers are also known as receipt printers, they're what you get when you go to the ATM or grocery store. Now you can embed a little printer of your own into an enclosure. This printer is ideal...
No Longer Stocked
[Buy Now](https://www.adafruit.com/product/597)
[Related Guides to the Product](https://learn.adafruit.com/products/597/guides)
### Thermal paper roll - 50' long, 2.25" wide
[Thermal paper roll - 50' long, 2.25" wide](https://www.adafruit.com/product/599)
A mini roll of thermal paper, this fits very nicely into our mini thermal printer. 2.25" wide (about 57mm) and 50 feet long (15 meters). BPA-free.
[Perfect for use with our mini thermal printer!](http://www.adafruit.com/products/597)
No Longer Stocked
[Buy Now](https://www.adafruit.com/product/599)
[Related Guides to the Product](https://learn.adafruit.com/products/599/guides)
### Adafruit METRO 328 - Arduino Compatible - with Headers
[Adafruit METRO 328 - Arduino Compatible - with Headers](https://www.adafruit.com/product/2488)
This is the **Adafruit METRO Arduino-Compatible - with headers. ** It's a fully assembled and tested microcontroller and physical computing board with through-hole headers attached. If you don't want a Metro with the headers attached for...
In Stock
[Buy Now](https://www.adafruit.com/product/2488)
[Related Guides to the Product](https://learn.adafruit.com/products/2488/guides)
### Ethernet Shield for Arduino - W5500 Chipset
[Ethernet Shield for Arduino - W5500 Chipset](https://www.adafruit.com/product/2971)
The W5500 Ethernet Shield for Arduino from Seeed Studio is a great way to set up your projects with internet connectivity with just a single chip. Similar to the[Arduino Ethernet Shield](https://www.adafruit.com/product/201), but with a newer chipset, this ethernet shield...
No Longer Stocked
[Buy Now](https://www.adafruit.com/product/2971)
[Related Guides to the Product](https://learn.adafruit.com/products/2971/guides)
### FTDI Friend with Micro USB Port + extras
[FTDI Friend with Micro USB Port + extras](https://www.adafruit.com/product/284)
Long gone are the days of parallel ports and serial ports. Now the USB port reigns supreme! But USB is hard, and you just want to transfer your every-day serial data from a microcontroller to computer. What now? Enter the FTDI Friend!
The FTDI Friend is a tweaked out FTDI FT232RL chip...
In Stock
[Buy Now](https://www.adafruit.com/product/284)
[Related Guides to the Product](https://learn.adafruit.com/products/284/guides)
### Rugged Metal On/Off Switch with Green LED Ring
[Rugged Metal On/Off Switch with Green LED Ring](https://www.adafruit.com/product/482)
These chrome-plated metal buttons are rugged and look real good while doing it! Simply drill a 16mm hole into any material up to 1/2" thick and you can fit these in place, there's even a rubber gasket to keep water out of the enclosure. On the front of the button is a flat metal...
In Stock
[Buy Now](https://www.adafruit.com/product/482)
[Related Guides to the Product](https://learn.adafruit.com/products/482/guides)
### Arduino Ethernet shield R3 with micro SD connector - Assembled
[Arduino Ethernet shield R3 with micro SD connector - Assembled](https://www.adafruit.com/product/201)
The Arduino Ethernet Shield R3 (assembled) allows an Arduino board to connect to the internet. It is based on the Wiznet W5100 ethernet chip (datasheet). The Wiznet W5100 provides a network (IP) stack capable of both TCP and UDP. It supports up to four simultaneous socket connections. Use the...
No Longer Stocked
[Buy Now](https://www.adafruit.com/product/201)
[Related Guides to the Product](https://learn.adafruit.com/products/201/guides)
### Arduino Uno Ethernet
[Arduino Uno Ethernet](https://www.adafruit.com/product/418)
**As of 9/20/2012 Adafruit is currently shipping R3 of the Arduino Uno Ethernet**
Deep in the Swiss Alps, the top secret Arduino Super-collider has accelerated both an [Arduino UNO](https://www.adafruit.com/products/50) and
No Longer Stocked
[Buy Now](https://www.adafruit.com/product/418)
[Related Guides to the Product](https://learn.adafruit.com/products/418/guides)
## Related Guides
- [Mystery Box: NeoMatrix Mk I](https://learn.adafruit.com/mystery-box-neomatrix-mk-i.md)
- [A Z80 CP/M emulator for the SAMD51](https://learn.adafruit.com/z80-cpm-emulator-for-the-samd51-grand-central.md)
- [Echo 2-XL](https://learn.adafruit.com/echo-2-xl.md)
- [DC & USB Boarduino Kits](https://learn.adafruit.com/boarduino-kits.md)
- [Portable Solar Charging Tracker](https://learn.adafruit.com/portable-solar-charging-tracker.md)
- [Ladyada's Learn Arduino - Lesson #2](https://learn.adafruit.com/ladyadas-learn-arduino-lesson-number-2.md)
- [Motorized Camera Slider MK3 ](https://learn.adafruit.com/motorized-camera-slider-mk3.md)
- [Adafruit VCNL4040 Proximity Sensor](https://learn.adafruit.com/adafruit-vcnl4040-proximity-sensor.md)
- [Ladyada's Learn Arduino - Lesson #1](https://learn.adafruit.com/ladyadas-learn-arduino-lesson-number-1.md)
- [Trinket / Gemma IR Control](https://learn.adafruit.com/trinket-gemma-ir-remote-control.md)
- [Adafruit HUZZAH32 – ESP32 Breakout Board](https://learn.adafruit.com/huzzah32-esp32-breakout-board.md)
- [Adafruit HUZZAH ESP8266 breakout](https://learn.adafruit.com/adafruit-huzzah-esp8266-breakout.md)
- [FTDI Friend](https://learn.adafruit.com/ftdi-friend.md)
- [Ladyada's Learn Arduino - Lesson #0](https://learn.adafruit.com/ladyadas-learn-arduino-lesson-number-0.md)
- [IR Sensor](https://learn.adafruit.com/ir-sensor.md)
---
# Source: https://learn.adafruit.com/biometric-security-box/parts.md
# Biometric Lock Box
## Parts and Preparation
Materials:
- Lock Box - This tutorial uses a "Vaultz" 4x6" card file box. But it can be adapted to fit other sizes or brands.
- [Adafruit Menta](https://www.adafruit.com/products/795) - or other Arduino compatible microcontroller.
- [Fingerprint Sensor](https://www.adafruit.com/products/751)
- [Membrane Keypad](https://www.adafruit.com/products/419)
- [Lighted Switch](https://www.adafruit.com/products/482)
- [12v power adapter](http://www.adafruit.com/products/798)
- [Panel mount power jack](http://www.adafruit.com/products/610 "Link: http://www.adafruit.com/products/610")
- [MOSFET](https://www.adafruit.com/products/355)
- [Diode](https://www.adafruit.com/products/755)
- [Small push-pull solenoid](https://www.adafruit.com/products/412 "Link: https://www.adafruit.com/products/412")
- Brass Strip - 1/2" x .032"
- Pop Rivets - 1/4"
- [Wire](https://www.adafruit.com/index.php?main_page=adasearch&q=hook-up+wire)
- [Header strip](https://www.adafruit.com/products/392)
- [Heat-shrink tubing](https://www.adafruit.com/products/344 "Link: https://www.adafruit.com/products/344")
- Wood
- Cardboard
- Adhesive Felt
- Misc tape, screws, cable ties as needed.
## Remove lining from Lid
Carefully peel the fabric lining from the inside of the box lid. You can discard the lining.

## Lay out components
Arrange the major components in the lid and mark their positions. Be sure to leave room for wiring and spacers to support the false lid.

## Measure and mark cutouts
Mark the cutouts for the fingerprint sensor, power switch and keypad cable on the top of the lid. Also mark the position for the power jack on the back of the box.

## Cut the cable slot
Use an X-Acto or utility knife to cut a rectangular slot for the keypad cable.
## Drill the holes
Drill holes for fingerprint sensor, power switch and power jack.
## Cut a false lid
We will use a false lid to hide the circuitry inside the lid of the box. Cut a piece of 1/8" (3mm) plywood or hardboard to fit the inside of the lid. Also cut some 0.85" (22mm) spacer blocks to go under the false lid.

- [Previous Page](https://learn.adafruit.com/biometric-security-box/overview.md)
- [Next Page](https://learn.adafruit.com/biometric-security-box/circuitry.md)
## Featured Products
### Panel Mount 2.1mm DC barrel jack
[Panel Mount 2.1mm DC barrel jack](https://www.adafruit.com/product/610)
This power jack is designed to easily attach to a panel up to 8mm thick (0.315" or 5/16") and fit 2.1mm power plugs snugly and securely. Perfect for adding a power connector to your project enclosure. We like this jack in particular for its long body (so you can use it on thicker...
In Stock
[Buy Now](https://www.adafruit.com/product/610)
[Related Guides to the Product](https://learn.adafruit.com/products/610/guides)
### Rugged Metal On/Off Switch with Green LED Ring
[Rugged Metal On/Off Switch with Green LED Ring](https://www.adafruit.com/product/482)
These chrome-plated metal buttons are rugged and look real good while doing it! Simply drill a 16mm hole into any material up to 1/2" thick and you can fit these in place, there's even a rubber gasket to keep water out of the enclosure. On the front of the button is a flat metal...
In Stock
[Buy Now](https://www.adafruit.com/product/482)
[Related Guides to the Product](https://learn.adafruit.com/products/482/guides)
### Adafruit MENTA - Mint Tin Arduino Compatible Kit with Mint Tin
[Adafruit MENTA - Mint Tin Arduino Compatible Kit with Mint Tin](https://www.adafruit.com/product/795)
Introducing the MENTA, a portable minty Arduino-compatible project that fits into a common mint tin. We took our super popular Boarduino series, and wrapped it with a prototyping area into a rounded PCB that slots directly into an Altoids-sized metal tin. We included everything you expect to...
No Longer Stocked
[Buy Now](https://www.adafruit.com/product/795)
[Related Guides to the Product](https://learn.adafruit.com/products/795/guides)
### N-channel power MOSFET
[N-channel power MOSFET](https://www.adafruit.com/product/355)
When you need to switch a lot of power, N-channel MOSFETs are best for the job. These FETs can switch over 60A and 30V and are TO-220 packages so they fit nicely into any breadboard or perfboard. Heat sinking is easy with TO-220's, but because of the very low Rds(on) of down to 0.009 ohms...
In Stock
[Buy Now](https://www.adafruit.com/product/355)
[Related Guides to the Product](https://learn.adafruit.com/products/355/guides)
### Small Push-Pull Solenoid - 12VDC
[Small Push-Pull Solenoid - 12VDC](https://www.adafruit.com/product/412)
Solenoids are basically electromagnets: they are made of a big coil of copper wire with an armature (a slug of metal) in the middle. When the coil is energized, the slug is pulled into the center of the coil. This makes the solenoid able to pull (from one end) or push (from the other)
In Stock
[Buy Now](https://www.adafruit.com/product/412)
[Related Guides to the Product](https://learn.adafruit.com/products/412/guides)
### Membrane 3x4 Matrix Keypad + extras
[Membrane 3x4 Matrix Keypad + extras](https://www.adafruit.com/product/419)
Punch in your secret key into this numeric matrix keypad. This keypad has 12 buttons, arranged in a telephone-line 3x4 grid. It's made of a thin, flexible membrane material with an adhesive backing (just remove the paper) so you can attach it to nearly anything. The keys are connected into...
In Stock
[Buy Now](https://www.adafruit.com/product/419)
[Related Guides to the Product](https://learn.adafruit.com/products/419/guides)
### Fingerprint sensor
[Fingerprint sensor](https://www.adafruit.com/product/751)
Secure your project with biometrics - this all-in-one optical fingerprint sensor will make adding fingerprint detection and verification super simple. These modules are typically used in safes - there's a high powered DSP chip that does the image rendering, calculation, feature-finding and...
No Longer Stocked
[Buy Now](https://www.adafruit.com/product/751)
[Related Guides to the Product](https://learn.adafruit.com/products/751/guides)
## Related Guides
- [LED Breath Stats Mask](https://learn.adafruit.com/led-breath-stats-mask.md)
- [Getting Started with MyoWare Muscle Sensor](https://learn.adafruit.com/getting-started-with-myoware-muscle-sensor.md)
- [Reebok CheckLight Teardown](https://learn.adafruit.com/reebok-checklight-teardown.md)
- [Your Pulse Displayed with NeoPixels](https://learn.adafruit.com/pulse-sensor-displayed-with-neopixels.md)
- [Pulse Room](https://learn.adafruit.com/pulse-room.md)
- [Setting up an Open Speech Recording Website](https://learn.adafruit.com/setting-up-an-open-speech-recording-website.md)
- [Control Electronics with your Brain using NextMind](https://learn.adafruit.com/control-electronics-with-your-brain-using-nextmind.md)
- [Adafruit MPRLS Ported Pressure Sensor Breakout](https://learn.adafruit.com/adafruit-mprls-ported-pressure-sensor-breakout.md)
- [Moto 360 Teardown](https://learn.adafruit.com/moto-360-smartwatch-teardown.md)
- [3D Printed Flexible LED Glove with Conductive Filament](https://learn.adafruit.com/3d-printed-flexible-conductive-filament-led-glove.md)
- [Meditation Trainer](https://learn.adafruit.com/heart-rate-variability-sensor.md)
- [Circuit Playground Bluefruit BLE Heart Rate Pendant with CircuitPython](https://learn.adafruit.com/ble-heart-rate-display-pendant.md)
- [Myo Armband Teardown](https://learn.adafruit.com/myo-armband-teardown.md)
- ['Sup Brows](https://learn.adafruit.com/heybrows.md)
- [Whistle Dog Activity Monitor Teardown](https://learn.adafruit.com/whistle-dog-activity-monitor-teardown.md)
---
# Source: https://learn.adafruit.com/photocells.md
# Photocells
## Overview
Photocells are sensors that allow you to detect light. They are small, inexpensive, low-power, easy to use and don't wear out. For that reason they often appear in toys, gadgets and appliances. They are often referred to as CdS cells (they are made of Cadmium-Sulfide), light-dependent resistors (LDR), and photoresistors.
Photocells are basically a resistor that changes its resistive value (in ohms Ω) depending on how much light is shining onto the squiggly face. They are very low cost, easy to get in many sizes and specifications, but are very innacurate. Each photocell sensor will act a little differently than the other, even if they are from the same batch. The variations can be really large, 50% or higher! For this reason, they shouldn't be used to try to determine precise light levels in lux or millicandela. Instead, you can expect to only be able to determine basic light changes.

For most light-sentsitive applications like "is it light or dark out", "is there something in front of the sensor (that would block light)", "is there something interrupting a laser beam" (break-beam sensors), or "which of multiple sensors has the most light hitting it", photocells can be a good choice!
## Some Basic Stats
These stats are for the photocell in the Adafruit shop which is very much like the [PDV-P8001](http://learn.adafruit.com/system/assets/assets/000/010/127/original/PDV-P8001.pdf "Link: http://learn.adafruit.com/system/assets/assets/000/010/127/original/PDV-P8001.pdf") . Nearly all photocells will have slightly different specifications, although they all pretty much work the same. If there's a datasheet, you'll want to refer to it
- **Size:** Round, 5mm (0.2") diameter. (Other photocells can get up to 12mm/0.4" diameter!)
- **Price:** [$1.00 at the Adafruit shop](http://www.adafruit.com/index.php?main_page=product_info&cPath=35&products_id=161 "Link: http://www.adafruit.com/index.php?main\_page=product\_info&cPath=35&products\_id=161")
- **Resistance range:** 200KΩ (dark) to 10KΩ (10 lux brightness)
- **Sensitivity range:** CdS cells respond to light between 400nm (violet) and 600nm (orange) wavelengths, peaking at about 520nm (green).
- **Power supply:** pretty much anything up to 100V, uses less than 1mA of current on average (depends on power supply voltage)
- **[Datasheet](http://learn.adafruit.com/system/assets/assets/000/010/127/original/PDV-P8001.pdf)** and another **[Datasheet](http://learn.adafruit.com/system/assets/assets/000/010/128/original/DTS_A9950_A7060_B9060.pdf)**
- Two **[application notes on using](http://learn.adafruit.com/system/assets/assets/000/010/129/original/APP_PhotocellIntroduction.pdf)** and **[selecting photocells](http://learn.adafruit.com/system/assets/assets/000/010/130/original/gde_photocellselecting.pdf)** where nearly all of these graphs are taken from
## Problems you may encounter with multiple sensors
If, when adding more sensors, you find that the readings are inconsistent, this indicates that the sensors are interfering with each other when switching the analog reading circuit from one pin to the other. You can fix this by doing two delayed readings and tossing out the first one.
[See this post for more information](http://www.adafruit.com/blog/2010/01/29/how-to-multiplex-analog-readings-what-can-go-wrong-with-high-impedance-sensors-and-how-to-fix-it/ "Link: http://www.adafruit.com/blog/2010/01/29/how-to-multiplex-analog-readings-what-can-go-wrong-with-high-impedance-sensors-and-how-to-fix-it/")
- [Next Page](https://learn.adafruit.com/photocells/measuring-light.md)
## Featured Products
### Photo cell (CdS photoresistor)
[Photo cell (CdS photoresistor)](https://www.adafruit.com/product/161)
CdS cells are little light sensors. As the squiggly face is exposed to more light, the resistance goes down. When it's light, the resistance is about ~1KΩ, when dark it goes up to ~10KΩ.
To use, connect one side of the photocell (either one, it's symmetric) to power...
In Stock
[Buy Now](https://www.adafruit.com/product/161)
[Related Guides to the Product](https://learn.adafruit.com/products/161/guides)
### Adafruit METRO 328 Fully Assembled - Arduino IDE compatible
[Adafruit METRO 328 Fully Assembled - Arduino IDE compatible](https://www.adafruit.com/product/50)
We sure love the ATmega328 here at Adafruit, and we use them _a lot_ for our own projects. The processor has plenty of GPIO, Analog inputs, hardware UART SPI and I2C, timers and PWM galore - just enough for most simple projects. When we need to go small, we use a
Out of Stock
[Buy Now](https://www.adafruit.com/product/50)
[Related Guides to the Product](https://learn.adafruit.com/products/50/guides)
### Digital Multimeter
[Digital Multimeter](https://www.adafruit.com/product/71)
This is a basic multimeter, I've played with it a bunch and I think its a great addition to a toolbox. It's low cost and simple to use with a big clear display and all the measurements you need:
- AC/DC Voltage measurement
- Current measurement, from 1uA up to...
No Longer Stocked
[Buy Now](https://www.adafruit.com/product/71)
[Related Guides to the Product](https://learn.adafruit.com/products/71/guides)
### Half Sized Premium Breadboard - 400 Tie Points
[Half Sized Premium Breadboard - 400 Tie Points](https://www.adafruit.com/product/64)
This is a cute, half-size breadboard with 400 tie points, good for small projects. It's 3.25" x 2.2" / 8.3cm x 5.5cm with a standard double-strip in the middle and two power rails on both sides. You can pull the power rails off easily to make the breadboard as...
In Stock
[Buy Now](https://www.adafruit.com/product/64)
[Related Guides to the Product](https://learn.adafruit.com/products/64/guides)
## Related Guides
- [Halloween Pumpkin](https://learn.adafruit.com/halloween-pumpkin.md)
- [Adafruit Proto Screw Shield](https://learn.adafruit.com/adafruit-proto-screw-shield.md)
- [Arduino Lesson 11. LCD Displays - Part 1](https://learn.adafruit.com/adafruit-arduino-lesson-11-lcd-displays-1.md)
- [Program an AVR or Arduino Using Raspberry Pi GPIO](https://learn.adafruit.com/program-an-avr-or-arduino-using-raspberry-pi-gpio-pins.md)
- [Arduino Lesson 12. LCD Displays - Part 2](https://learn.adafruit.com/adafruit-arduino-lesson-12-lcd-displays-part-2.md)
- [Silicone Robo-Tentacle](https://learn.adafruit.com/silicone-robo-tentacle.md)
- [Babel Fish](https://learn.adafruit.com/babel-fish.md)
- [Arduino Lesson 10. Making Sounds](https://learn.adafruit.com/adafruit-arduino-lesson-10-making-sounds.md)
- [Arduino Lesson 16. Stepper Motors](https://learn.adafruit.com/adafruit-arduino-lesson-16-stepper-motors.md)
- [Line Following Zumo Robot Using Simulink](https://learn.adafruit.com/line-following-zumo-robot-programmed-with-simulink.md)
- [Bluefruit LE Connect for iOS and Android](https://learn.adafruit.com/bluefruit-le-connect.md)
- [Adafruit 16-channel PWM/Servo Shield](https://learn.adafruit.com/adafruit-16-channel-pwm-slash-servo-shield.md)
- [8BitBox](https://learn.adafruit.com/8bitbox.md)
- [Tiny Arduino Music Visualizer](https://learn.adafruit.com/piccolo.md)
- [Adafruit 1.14" 240x135 Color TFT Breakout LCD Display](https://learn.adafruit.com/adafruit-1-14-240x135-color-tft-breakout.md)
---
# Source: https://learn.adafruit.com/pi-box.md
# Pi Box
## Assembly
Keep your Raspberry Pi® computer safe and sound in this lovely laser-cut clear 1/8" acrylic enclosure. We designed this case to be beautiful, easy to assemble and perfect for any use (but especially for those who want to tinker!)
# Before you Begin…
The acrylic case clicks together, relying on the slight flexibility of the plastic in place of screws or other hardware. **DO NOT FORCE ANYTHING!** If flexed too hard, acrylic _will_ break. All the pieces should assemble with minimal finger pressure. If a part is uncooperative, something is misaligned…back off and check your progress, _do not_ press harder!
To accommodate manufacturing variance among boards, there’s a tiny bit of “play” in the case dimensions. The finished case will have a slight rattle to it. This is entirely normal, and the case will hold together fine.
# Assembly Procedure:
1. Remove the SD memory card and any cables currently plugged into your Raspberry Pi® board.
2. One of the case ends has cutouts for USB and Ethernet. There’s a small part attached inside the Ethernet cutout — snap this out and set it aside for later. The ring of plastic separating this piece can be discarded.

3. Peel the protective backing from all parts:

With the paper removed, you’ll notice the four sides of the case have I/O ports labeled. This will help later to tell inside from out. Note especially the side with the HDMI port…if you find the case isn’t assembling right, it’s most often because this side is installed upside-down or inside-out.
4. **Optional:** if using a ribbon cable to break out the GPIO pins, install this on the board first. The pin 1 stripe should be positioned nearest the SD card end of the board. The cable should go straight out the side, not double back on itself, and there is no clearance for a strain relief — remove it if present.

5. Position the first side of the case, with the Audio Out and Composite Video Out jacks. If you added a ribbon cable as in the prior step, slot the piece over that first.
6. On the underside of the board, under the Ethernet jack, install the small spacer piece that was snapped out in Step 2.

7. Position the bottom piece over the board, slotting it into the first side. There are no markings on the top or bottom piece — they are interchangeable and work in either orientation.

8. Turn the board over and install the top piece in a similar fashion. Or you can optionally leave the top off for full access to the GPIO and JTAG headers and the ribbon cable connectors.
9. Position the second side of the case (with the HDMI video port), slotting into the tabs on the top and bottom pieces. If this seems wobbly or lopsided, you might have this piece upside-down or inside-out. Check for the “HDMI” label and orient this correctly over the jack.

10. Install the first end of the case: slide the **top of the end piece over the two top hooks first** , then, using **very light pressure** , pivot the end piece downward over the bottom two hooks. It should click into place without difficulty. If you encounter ANY resistance, stop! Do not force this piece or you will break the plastic. Back off, check the alignment of the other pieces (especially the HDMI side), and try again. Gently. And remember, **top to bottom** — the other direction will break.

11. Install the opposite end of the case using the same technique. Top to bottom.

12. Insert the SD memory card, power and signal cables. That’s it, you’re good to go!
# Disassembly:
To dismantle the case, remove the SD card and unplug all cables. Gently pinch the case to release the two lower “claws.” The end piece should pivot upward and can be unhooked at the top. Repeat with the opposite end piece, and the rest of the case then easily dismantles (don’t drop your Pi board in the process!).
# Resources:
- [Product page](http://www.adafruit.com/products/859).
- [Raspberry Pi® web site](http://www.raspberrypi.org/ "Link: http://www.raspberrypi.org/").
- [Adafruit customer support forum](http://forums.adafruit.com/viewforum.php?f=19 "Link: http://forums.adafruit.com/viewforum.php?f=19").
Raspberry Pi® is a trademark of the Raspberry Pi Foundation.
## Primary Products
### Adafruit Pi Box - Enclosure for Raspberry Pi Model A or B
[Adafruit Pi Box - Enclosure for Raspberry Pi Model A or B](https://www.adafruit.com/product/859)
**Discontinued** - you can grab [Adafruit Pi Box Plus - Enclosure for RasPi Model B+/Pi 2/ Pi 3](https://www.adafruit.com/product/1985) instead!
**We're still selling this classic Adafruit case for those who specifically want it but **
No Longer Stocked
[Buy Now](https://www.adafruit.com/product/859)
[Related Guides to the Product](https://learn.adafruit.com/products/859/guides)
## Featured Products
### Adafruit Assembled Pi Cobbler Breakout + Cable for Raspberry Pi
[Adafruit Assembled Pi Cobbler Breakout + Cable for Raspberry Pi](https://www.adafruit.com/product/914)
Now that you've finally got your hands on a [Raspberry Pi® Model B](http://www.raspberrypi.org/), you're probably itching to make some fun embedded computer projects with it. What you need is an add on prototyping Pi Cobbler from Adafruit, which can break out all those...
No Longer Stocked
[Buy Now](https://www.adafruit.com/product/914)
[Related Guides to the Product](https://learn.adafruit.com/products/914/guides)
### GPIO Ribbon Cable for Raspberry Pi Model A and B - 26 pin
[GPIO Ribbon Cable for Raspberry Pi Model A and B - 26 pin](https://www.adafruit.com/product/862)
That new Raspberry Pi® Model A or B computer you just got has a row of 2x13 pin headers soldered on - those are the GPIO (general purpose input/output) pins and for those of us who like to hack electronics they are where the real fun is. By programming the Pi, you can twiddle those pins...
In Stock
[Buy Now](https://www.adafruit.com/product/862)
[Related Guides to the Product](https://learn.adafruit.com/products/862/guides)
## Related Guides
- [Using an IR Remote with a Raspberry Pi Media Center](https://learn.adafruit.com/using-an-ir-remote-with-a-raspberry-pi-media-center.md)
- [Instant Camera using Raspberry Pi and Thermal Printer](https://learn.adafruit.com/instant-camera-using-raspberry-pi-and-thermal-printer.md)
- [Read-Only Raspberry Pi](https://learn.adafruit.com/read-only-raspberry-pi.md)
- [2.2" PiTFT HAT Enclosure](https://learn.adafruit.com/3d-printed-2-2-pitft-raspberry-pi-a-plus-enclosure.md)
- [Speech Synthesis on the Raspberry Pi](https://learn.adafruit.com/speech-synthesis-on-the-raspberry-pi.md)
- [Embedded Linux Board Comparison](https://learn.adafruit.com/embedded-linux-board-comparison.md)
- [BNO055 Absolute Orientation Sensor with Raspberry Pi & BeagleBone Black](https://learn.adafruit.com/bno055-absolute-orientation-sensor-with-raspberry-pi-and-beaglebone-black.md)
- [Adafruit IO Connected Animated GIF Display](https://learn.adafruit.com/adafruit-io-connected-animated-gif-display.md)
- [Pi-Top Assembly ](https://learn.adafruit.com/pi-top-assembly.md)
- [Raspberry Pi LED Matrix Display](https://learn.adafruit.com/raspberry-pi-led-matrix-display.md)
- [Raspberry Pi Thermal Printer One Time Pads](https://learn.adafruit.com/raspberry-pi-thermal-printer-one-time-pads.md)
- [Adafruit Pi Cobbler Kit](https://learn.adafruit.com/adafruit-pi-cobbler-kit.md)
- [7" Portable HDMI Monitor](https://learn.adafruit.com/7-hdmi-portable-monitor.md)
- [Adafruit PiUART - USB Console and Power Add-on for Raspberry Pi](https://learn.adafruit.com/adafruit-piuart-usb-console-and-power-add-on-for-raspberry-pi.md)
- [1,500 NeoPixel LED Curtain with Raspberry Pi and Fadecandy](https://learn.adafruit.com/1500-neopixel-led-curtain-with-raspberry-pi-fadecandy.md)
---
# Source: https://learn.adafruit.com/adafruit-nfc-rfid-on-raspberry-pi/pi-serial-port.md
# Adafruit NFC/RFID on Raspberry Pi
## Pi Serial Port
The easiest way to use libnfc with the Adafruit NFC Breakout is via _serial UART,_ since it's well-supported by libnfc out of the box. Unfortunately the serial UART port on the Pi is already dedicated to other purposes, and needs to be freed up for libnfc…
The following steps (based on a clean Raspberry Pi OS installation) should make the serial UART available to us:
### Using the Desktop/GUI “Full” OS
You’ll find these settings in the Raspberry Pi Configuration tool. From the Raspberry menu at the top-left…
Go to the “Interfaces” tab and you’ll see two options “Serial Port” and “Serial Console.” Toggle _both_ of these away from their default states. Serial Port should be _enabled,_ Serial Console _disabled._ Then click “OK.” Reboot when prompted.
_With each new OS release, it’s normal that some configuration options may move to different menus or positions. If you can’t find it where shown, check under the other top-level menu options…even if moved, the name will likely remain similar._


### Using the “Lite” Command-Line OS
These options can be found in the `raspi-config` tool, which must be run as root:
```auto
sudo raspi-config
```
Navigate down to “Interface Options” and then “Serial Port.” Answer “No” to the login shell question, and “Yes” to the serial port hardware.
Navigate back to the main menu, tab to the “Finish” button and reboot when prompted.
_With each new OS release, it’s normal that some configuration options may move to different menus or positions. If you can’t find it where shown, check under the other top-level menu options…even if moved, the name will likely remain similar._


- [Previous Page](https://learn.adafruit.com/adafruit-nfc-rfid-on-raspberry-pi/overview.md)
- [Next Page](https://learn.adafruit.com/adafruit-nfc-rfid-on-raspberry-pi/building-libnfc.md)
## Featured Products
### 13.56MHz RFID/NFC tag assortment - Classic 1K
[13.56MHz RFID/NFC tag assortment - Classic 1K](https://www.adafruit.com/product/365)
One of each of our favorite 13.56MHz RFID/NFC Classic 1K tags - 5 in total!
- [Credit card size](http://www.adafruit.com/products/359)
- [1" diameter 'laundry' clear tag](http://www.adafruit.com/products/361)
-
No Longer Stocked
[Buy Now](https://www.adafruit.com/product/365)
[Related Guides to the Product](https://learn.adafruit.com/products/365/guides)
### 13.56MHz RFID/NFC Clear Keychain Fob - Classic 1K
[13.56MHz RFID/NFC Clear Keychain Fob - Classic 1K](https://www.adafruit.com/product/363)
This is a blank 13.56MHz RFID/NFC keychain fob - often used for keys but also an easy way to tag something. The tag contains a small RFID chip and an antenna, and is passively powered by the reader/writer when placed a couple inches away.
These can be read by almost any 13.56MHz...
No Longer Stocked
[Buy Now](https://www.adafruit.com/product/363)
[Related Guides to the Product](https://learn.adafruit.com/products/363/guides)
### 13.56MHz RFID/NFC Bracelet - Classic 1K
[13.56MHz RFID/NFC Bracelet - Classic 1K](https://www.adafruit.com/product/921)
This is a blank 13.56MHz RFID/NFC silicone bracelet. The tag contains a small RFID chip and an antenna, and is passively powered by the reader/writer when placed a couple inches away.
These can be read by almost any 13.56MHz RFID/NFC reader but make sure it can handle ISO/IEC...
In Stock
[Buy Now](https://www.adafruit.com/product/921)
[Related Guides to the Product](https://learn.adafruit.com/products/921/guides)
### 13.56MHz RFID/NFC Charm - Classic 1K
[13.56MHz RFID/NFC Charm - Classic 1K](https://www.adafruit.com/product/884)
This is a blank 13.56MHz RFID/NFC embedded in a phone charm - often used for train/bus passes but also found in other systems where a proximity card is desired. The tag contains a small RFID chip and an antenna, and is passively powered by the reader/writer when placed a couple inches...
No Longer Stocked
[Buy Now](https://www.adafruit.com/product/884)
[Related Guides to the Product](https://learn.adafruit.com/products/884/guides)
### 13.56MHz RFID/NFC Clear Tag - Classic 1K
[13.56MHz RFID/NFC Clear Tag - Classic 1K](https://www.adafruit.com/product/361)
This is a blank 13.56MHz Classic 'laundry' tag - often used for laundry or identification but also found in other systems where a small proximity card is desired. This one is clear! The tag contains a small RFID chip and an antenna, and is passively powered by the reader/writer...
Out of Stock
[Buy Now](https://www.adafruit.com/product/361)
[Related Guides to the Product](https://learn.adafruit.com/products/361/guides)
### 13.56MHz RFID/NFC White Tag - Classic 1K
[13.56MHz RFID/NFC White Tag - Classic 1K](https://www.adafruit.com/product/360)
This is a blank 13.56MHz RFID/NFC laundry tag - often used for laundry but also general tagging. The tag contains a small RFID chip and an antenna, and is passively powered by the reader/writer when placed a couple inches away.
These can be read by almost any 13.56MHz RFID/NFC...
In Stock
[Buy Now](https://www.adafruit.com/product/360)
[Related Guides to the Product](https://learn.adafruit.com/products/360/guides)
### 13.56MHz RFID/NFC Card - Classic 1K
[13.56MHz RFID/NFC Card - Classic 1K](https://www.adafruit.com/product/359)
This is a blank 13.56MHz RFID/NFC card - often used for train/bus passes but also found in other systems where a proximity card is desired. The tag contains a small RFID chip and an antenna, and is passively powered by the reader/writer when placed a couple inches away.
These can be...
In Stock
[Buy Now](https://www.adafruit.com/product/359)
[Related Guides to the Product](https://learn.adafruit.com/products/359/guides)
### Adafruit Assembled Pi Cobbler Breakout + Cable for Raspberry Pi
[Adafruit Assembled Pi Cobbler Breakout + Cable for Raspberry Pi](https://www.adafruit.com/product/914)
Now that you've finally got your hands on a [Raspberry Pi® Model B](http://www.raspberrypi.org/), you're probably itching to make some fun embedded computer projects with it. What you need is an add on prototyping Pi Cobbler from Adafruit, which can break out all those...
No Longer Stocked
[Buy Now](https://www.adafruit.com/product/914)
[Related Guides to the Product](https://learn.adafruit.com/products/914/guides)
## Related Guides
- [I2C Addresses and Troublesome Chips](https://learn.adafruit.com/i2c-addresses.md)
- [Collin's Lab: RFID](https://learn.adafruit.com/collins-lab-rfid.md)
- [Mystery Box: Remote Chess Board Puzzle Lock](https://learn.adafruit.com/mystery-box-remote-chess-board-puzzle-lock.md)
- [Raspberry Pi NFC Minecraft Blocks](https://learn.adafruit.com/raspberry-pi-nfc-minecraft-blocks.md)
- [NFC Raspberry Pi Media Player](https://learn.adafruit.com/nfc-raspberry-pi-media-player.md)
- [Adafruit PN532 RFID/NFC Breakout and Shield](https://learn.adafruit.com/adafruit-pn532-rfid-nfc.md)
- [Adafruit's Raspberry Pi Lesson 9. Controlling a DC Motor](https://learn.adafruit.com/adafruit-raspberry-pi-lesson-9-controlling-a-dc-motor.md)
- [Adafruit's Raspberry Pi Lesson 5. Using a Console Cable](https://learn.adafruit.com/adafruits-raspberry-pi-lesson-5-using-a-console-cable.md)
- [Pi Box](https://learn.adafruit.com/pi-box.md)
- [Piezo Ring Tones with Raspberry Pi](https://learn.adafruit.com/piezo-ring-tones-with-raspberry-pi.md)
- [Cloud Cam: Internet-Connected Security Camera](https://learn.adafruit.com/cloud-cam-connected-raspberry-pi-security-camera.md)
- [Set up and Blink - MATLAB and Simulink with Raspberry Pi](https://learn.adafruit.com/how-to-use-matlab-and-simulink-with-raspberry-pi.md)
- [Battery Powered Raspberry Pi Displays w/RaspiRobot Shield](https://learn.adafruit.com/raspirobot-battery-powered-raspberry-pi-displays.md)
- [Adafruit's Raspberry Pi Lesson 13. Power Control](https://learn.adafruit.com/adafruits-raspberry-pi-lesson-13-power-control.md)
- [Raspberry Pi Thermal Printer One Time Pads](https://learn.adafruit.com/raspberry-pi-thermal-printer-one-time-pads.md)
---
# Source: https://learn.adafruit.com/pi-thermal-printer/pi-setup-part-3.md
# Internet of Things Printer for Raspberry Pi
## Raspberry Pi Setup: 3 of 3
# Install Adafruit Code
Connect the power cable to boot the system. Negotiating a wireless connection will take a moment, so wait about a minute before trying to access the system using SSH.
Once logged in, install the Adafruit thermal printer library and example code:
```
git clone https://github.com/adafruit/Python-Thermal-Printer
```
Make sure a roll of paper is installed in the printer and the top is securely latched. Then we’ll test all the basic functionality:
```
cd Python-Thermal-Printer
python printertest.py
```
This should progress through different text sizes, styles and formats, as well as barcodes and images.
If this does not work, the most likely culprits are:
- One of the prerequisite Python libraries is not installed (serial, imaging, unidecode) — explained in Raspberry Pi Setup Part 2 of 3.
- The serial port has not been properly disengaged for application use — also explained in Raspberry Pi Setup Part 2 of 3.
- Wrong connection between printer and Raspberry Pi — explained in Assembly.
The first two will likely give an informative error response. The latter will just produce no results. # Configure the Weather Scripts
Before running the weather scripts, you must create another developer account in order to use the DarkSky weather API.
Go to [https://darksky.net/dev/](https://darksky.net/dev/) and sign up for an account.
Get your API secret key, and go ahead and modify the following line in **forecast.py** and **timetemp.py**
```
API_KEY = "YOUR_API_KEY"
```
Save the changes, then run the script again:
```
python forecast.py
```
This should now print the current weather and the forecast for NYC, the default location. Change the latitude and longitude variables too to reflect the location you'd like to get the weather for. I use[NASA's site](https://mynasadata.larc.nasa.gov/latitudelongitude-finder/)
If this works, also edit the file **timetemp.py** and make the same change there. This is a different script that prints the current time and local weather conditions.
# Configure the Twitter Script
As written, the sketch will search for Tweets originating from Adafruit, but you can change this to any search string supported by the Twitter SearchAPI. FIrst step though is to set up authentication…
```
nano twitter.py
```
Look for this section of code:
```
# Twitter application credentials -- see notes above -- DO NOT SHARE.
consumer_key = 'PUT_YOUR_CONSUMER_KEY_HERE'
consumer_secret = 'PUT_YOUR_CONSUMER_SECRET_HERE'
```
Copy the Consumer key and Consumer secret strings from the Twitter application page into the corresponding spots, keeping the quotes around them.
Just below this is the search term. You can change Adafruit to any other valid Twitter account.
```
queryString = 'from:Adafruit'
```
Different search types are possible, such as by tag. Refer to the SEARCH OPERATORS section of the [Twitter Developers Documentation](https://dev.twitter.com/docs/using-search "Link: https://dev.twitter.com/docs/using-search") for guidance.
Any search string used by the “Gutenbird” sketch for the original Internet of Things Printer can also be used here.
# Test the Main Script
The “main” script starts by printing a greeting image, performs once-daily actions (weather forecast and Sudoku puzzle), then goes into Twitter-monitoring mode.
```
sudo python main.py
```
The “main” script must be run as root (i.e. using “ **sudo** ”) because it directly accesses hardware — the GPIO pins for the button and LED.
**It may take a few minutes to run!**
Each morning at 6:30 am, the once-daily actions are performed again. You can change this time (or the actions) by editing the main.py script.
Press control+C to stop the program. We’ll set it up to run automatically when the printer is turned on…

# Configure Auto-Start
With the software now tested “manually,” let’s make it start automatically upon booting:
```
sudo nano /etc/rc.local
```
Before the final “exit 0” line, add these two lines:
```
cd /home/pi/Python-Thermal-Printer
python main.py &
```
If you downloaded or otherwise placed the printer software in a different location, the first line should be changed accordingly. “sudo” isn’t necessary here because the rc.local script is already run as root.
Reboot the system to test the startup function:
```
sudo reboot
```
After 30 seconds to a minute, you should see the status light come on. After another 30 seconds, the greeting image should be printed, then the “once daily” functions. After that, the printer will go into Twitter-monitoring mode.
# Regular Operation
When the printer is idle, tap the button for the current time and local weather conditions.
Hold the button down to initiate an orderly shutdown. This is always a good idea — you don’t want to just pull the plug on most Linux systems. There may be many files open at any given time, and this gives the system a chance to put things in order.
- [Previous Page](https://learn.adafruit.com/pi-thermal-printer/twitter-setup.md)
- [Next Page](https://learn.adafruit.com/pi-thermal-printer/troubleshooting.md)
## Primary Products
### Adafruit IoT Pi Printer Project Pack
[Adafruit IoT Pi Printer Project Pack](https://www.adafruit.com/product/1289)
Build an "Internet of Things" connected mini printer that will do your bidding! This is a fun weekend project that comes with a beautiful laser cut case. Once assembled, the little printer connects wirelessly to get Internet data for printing onto 2 1/4" wide receipt paper....
No Longer Stocked
[Buy Now](https://www.adafruit.com/product/1289)
[Related Guides to the Product](https://learn.adafruit.com/products/1289/guides)
## Featured Products
### Miniature WiFi (802.11b/g/n) Module: For Raspberry Pi and more
[Miniature WiFi (802.11b/g/n) Module: For Raspberry Pi and more](https://www.adafruit.com/product/814)
Make your Internet of Things device cable-free by adding WiFi. Take advantage of the Raspberry Pi and Beagle Bone's USB port to add a low cost, but high-reliability wireless link. We tried half a dozen modules to find one that works well with the Pi and Bone without the need of recompiling...
No Longer Stocked
[Buy Now](https://www.adafruit.com/product/814)
[Related Guides to the Product](https://learn.adafruit.com/products/814/guides)
### Raspberry Pi - Skill badge, iron-on patch
[Raspberry Pi - Skill badge, iron-on patch](https://www.adafruit.com/product/906)
You are learning to use the small Linux based board, the Raspberry Pi! Adafruit offers a fun and exciting "badges" of achievement for electronics, science and engineering. We believe everyone should be able to be rewarded for learning a useful skill, a badge is just one of the many...
In Stock
[Buy Now](https://www.adafruit.com/product/906)
[Related Guides to the Product](https://learn.adafruit.com/products/906/guides)
### Adafruit Pi Unassembled T-Cobbler Breakout Kit for Raspberry Pi
[Adafruit Pi Unassembled T-Cobbler Breakout Kit for Raspberry Pi](https://www.adafruit.com/product/1105)
Now that you've finally got your hands on a [Raspberry Pi®](http://www.raspberrypi.org/), you're probably itching to make some fun embedded computer projects with it. What you need is an add on prototyping Pi T-Cobbler from Adafruit, which can break out all those tasty...
No Longer Stocked
[Buy Now](https://www.adafruit.com/product/1105)
[Related Guides to the Product](https://learn.adafruit.com/products/1105/guides)
### Mini Thermal Receipt Printer Starter Pack
[Mini Thermal Receipt Printer Starter Pack](https://www.adafruit.com/product/600)
Hit the ground running (and printing!) with this starter pack that includes a thermal printer and all the extras and save a few dollars while you're at it.
Includes:
- [A mini thermal receipt printer](http://www.adafruit.com/products/597) - with cables and...
No Longer Stocked
[Buy Now](https://www.adafruit.com/product/600)
[Related Guides to the Product](https://learn.adafruit.com/products/600/guides)
### Thermal paper roll - 50' long, 2.25" wide
[Thermal paper roll - 50' long, 2.25" wide](https://www.adafruit.com/product/599)
A mini roll of thermal paper, this fits very nicely into our mini thermal printer. 2.25" wide (about 57mm) and 50 feet long (15 meters). BPA-free.
[Perfect for use with our mini thermal printer!](http://www.adafruit.com/products/597)
No Longer Stocked
[Buy Now](https://www.adafruit.com/product/599)
[Related Guides to the Product](https://learn.adafruit.com/products/599/guides)
### Mini Thermal Receipt Printer
[Mini Thermal Receipt Printer](https://www.adafruit.com/product/597)
Add a mini printer to any microcontroller project with this very cute thermal printer. Thermal printers are also known as receipt printers, they're what you get when you go to the ATM or grocery store. Now you can embed a little printer of your own into an enclosure. This printer is ideal...
No Longer Stocked
[Buy Now](https://www.adafruit.com/product/597)
[Related Guides to the Product](https://learn.adafruit.com/products/597/guides)
### Rugged Metal Pushbutton with White LED Ring
[Rugged Metal Pushbutton with White LED Ring](https://www.adafruit.com/product/558)
These chrome-plated metal buttons are rugged and look real good while doing it! Simply drill a 16mm hole into any material up to 1/2" thick and you can fit these in place, there's even a rubber gasket to keep water out of the enclosure. On the front of the button is a flat metal...
In Stock
[Buy Now](https://www.adafruit.com/product/558)
[Related Guides to the Product](https://learn.adafruit.com/products/558/guides)
### 5V 10A switching power supply
[5V 10A switching power supply](https://www.adafruit.com/product/658)
This is a beefy switching supply, for when you need a lot of power! It can supply 5V DC up to 10 Amps, running from 110V or 220V power (the plug it comes with is for US/Canada/Japan but you can use any plug adapter for your country, or just replace the cable with a standard computer/appliance...
In Stock
[Buy Now](https://www.adafruit.com/product/658)
[Related Guides to the Product](https://learn.adafruit.com/products/658/guides)
## Related Guides
- [Skill Badge Requirements: Raspberry Pi](https://learn.adafruit.com/skill-badge-requirements-raspberry-pi.md)
- [Adafruit Prototyping Pi Plate](https://learn.adafruit.com/adafruit-prototyping-pi-plate.md)
- [Adafruit Raspberry Pi Educational Linux Distro](https://learn.adafruit.com/adafruit-raspberry-pi-educational-linux-distro.md)
- [Open Source Protective Face Shield Designs](https://learn.adafruit.com/open-source-face-shield-designs.md)
- [PyPortal IoT Plant Monitor with Google Cloud IoT Core and CircuitPython](https://learn.adafruit.com/pyportal-iot-plant-monitor-with-google-cloud-iot-core-and-circuitpython.md)
- [Adafruit QT Py ESP32-C3 WiFi Dev Board](https://learn.adafruit.com/adafruit-qt-py-esp32-c3-wifi-dev-board.md)
- [AstroPrint 3D Printing](https://learn.adafruit.com/astroprint-3d-printing.md)
- [No-Code Rain Sensing Smart Desktop Umbrella Stand](https://learn.adafruit.com/no-code-rain-sensing-smart-desktop-umbrella-stand.md)
- [MacroPad Remote Procedure Calls over USB to Control Home Assistant](https://learn.adafruit.com/macropad-remote-procedure-calls-over-usb-to-control-home-assistant.md)
- [PiPhone - A Raspberry Pi based Cellphone](https://learn.adafruit.com/piphone-a-raspberry-pi-based-cellphone.md)
- [Adafruit 128x64 OLED Bonnet for Raspberry Pi](https://learn.adafruit.com/adafruit-128x64-oled-bonnet-for-raspberry-pi.md)
- [Set up and Blink - MATLAB and Simulink with Raspberry Pi](https://learn.adafruit.com/how-to-use-matlab-and-simulink-with-raspberry-pi.md)
- [Mini Raspberry Pi Handheld Notebook](https://learn.adafruit.com/mini-raspberry-pi-handheld-notebook-palmtop.md)
- [Adafruit's Raspberry Pi Lesson 2. First Time Configuration](https://learn.adafruit.com/adafruits-raspberry-pi-lesson-2-first-time-configuration.md)
- [Huzzah Weather Display](https://learn.adafruit.com/huzzah-weather-display.md)
---
# Source: https://learn.adafruit.com/diy-wifi-raspberry-pi-touch-cam/pi-setup.md
# DIY WiFi Raspberry Pi Touchscreen Camera
## Pi Setup
The optional tactile buttons on the PiTFT are not required for this project. You can install the buttons for other things if you like, but the camera software is entirely touchscreen-based. (Newer PiTFT variants already have all the buttons installed by default.)
# Load Operating System
To ensure that all the software interdependencies work, it’s best to **start with a clean installation**.
Format a **4GB or larger** SD card and load it up with the Raspbian operating system. [This guide explains how to prepare a card for the Raspberry Pi](http://learn.adafruit.com/adafruit-raspberry-pi-lesson-1-preparing-and-sd-card-for-your-raspberry-pi "Link: http://learn.adafruit.com/adafruit-raspberry-pi-lesson-1-preparing-and-sd-card-for-your-raspberry-pi"). The **Raspbian “Lite”** edition is recommended for this project.
With the Raspberry Pi powered off, install the **Pi camera** with its **ribbon connector** , install the **PiTFT** display atop the GPIO header, connect an **HDMI monitor** and **USB keyboard** and go through the normal first-boot procedure.
After logging in, run **sudo raspi-config** for some basic configuration…
The following settings are useful and **recommended:**
- Under _Internationalization Options,_ change the keyboard layout to match your region. If your keyboard is producing unexpected characters, this is usually the reason why.
- Also in _International,_ if planning to use wireless networking, change the WiFi country setting for your location. Then you can go back to the main menu and _Network Options_ to set up a WiFi connection.
The following are **optional:**
- Under _Interfacing Options,_ enable SSH if you’d prefer to log in remotely and finish the system configuration over a network.
- Other settings can be configured to your liking.
The following should **not** be used:
- _Overclock._ This is a portable, battery-operated project and an overclocked Pi will draw more current. Overclocked systems don’t always play well with the PiTFT and are more likely to corrupt the SD card filesystem. Do not enable this option.
Select “Finish” and then **reboot** when prompted, then more configuration awaits…
Even if you don’t plan to use the Dropbox functionality of this project, it’s **necessary to get the Raspberry Pi on your network** at least temporarily to download additional software. This can be done using the wired **Ethernet** jack (no additional configuration needed), or over **WiFi** using either a USB WiFi adapter or the Pi 3’s built-in wireless networking. If raspi-config doesn’t handle the options you need, **[this guide may be helpful for setting that up](http://learn.adafruit.com/adafruits-raspberry-pi-lesson-3-network-setup).**
Danger:
# Install & Test PiTFT
Our PiTFT installation guide covers the basic setup (see notes below for specific options):
[Visit the PiTFT 2.8" Resistive Display guide to learn how to setup and install the PiTFT](https://learn.adafruit.com/adafruit-pitft-28-inch-resistive-touchscreen-display-raspberry-pi/easy-install-2)
When running the PiTFT installer script, select the #1 configuration option: “PiTFT 2.4", 2.8" or 3.2" resistive (240x320)”. This project can work with any of the **resistive** touch **320x240** PiTFT displays. It **will not work with capacitive displays or the 3.5" PiTFT**.
For rotation, select the #1 option: “90 degrees (landscape)”. This covers most situations, but if you find the screen is oriented 180° from what you need, just re-run the adafruit-pitft.sh script and select the #3 option instead (“270 degrees (landscape)”). You do _not_ need to re-run the camera installer script we’ll show later, just the PiTFT installer.
When asked about having the text console on the PiTFT, answer “y”. Then reboot when prompted.
**Make sure you've got the Raspberry Pi booting with the Text Console mode display on the PiTFT before you continue. You'll need to have that PiTFT stuff all working!**
Once you have it working, log in and then shutdown with **sudo shutdown** at the command line

# Setup Virtual Environment
If you are installing on the Bookworm version of Raspberry Pi OS or later, you will need to install your python modules in a virtual environment. You can find more information in the [Python Virtual Environment Usage on Raspberry Pi](https://learn.adafruit.com/python-virtual-environment-usage-on-raspberry-pi) guide. To Install and activate the virtual environment, use the following commands:
```terminal
sudo apt install python3-venv
python -m venv env --system-site-packages
```
To activate the virtual environment:
```terminal
source env/bin/activate
```
# Easy Install
Our camera software requires a complex set of software dependencies. We’ve written a script that takes care of all the ugly parts. You can download and run with these three lines (this is easiest if you login via _ssh_ and copy-and-paste these lines):
```terminal
cd ~
sudo apt-get update
sudo apt-get install -y git python3-pip
pip3 install --upgrade adafruit-python-shell click
curl https://raw.githubusercontent.com/adafruit/Raspberry-Pi-Installer-Scripts/master/pi-touch-cam.sh > pi-touch-cam.py
sudo -E env PATH=$PATH python3 pi-touch-cam.py
```
The script explains what it’s about to do and prompts for a “Y” before continuing; any other input will cancel.
It may take **10 minutes** or so to run. Afterward, you’ll be prompted to **reboot** the system again. If this all works, **skip ahead** to the “ **Testing** ” section below!
Primary:
# Complex Install From Scratch
If you used the “ **Easy Install** ” directions above, you can **ignore this section** and **skip ahead** to “ **Testing** ” below.
These are the steps taken by the pi-cam-install.sh script, if for some reason you need to perform any or all of these steps manually…
### System Tweaks
The file **/boot/config.txt** is modified to enable the camera (if not already active via raspi-config) and also boost the speed of the PiTFT display (changing the “speed” and “fps” values). These lines are usually at the bottom of the file.
```terminal
dtoverlay=pitft28c,rotate=90,speed=80000000,fps=60
start_x=1
gpu_mem=128
```
### Install Prerequisite Software
Our code relies on a few libraries for handling the camera and screen output. One of these, it’s necessary to intentionally _downgrade,_ in order for the touchscreen to interoperate correctly. It’s complicated. These lines in the script set that up (but don’t actually perform the downgrade yet):
```
# Enable Wheezy package sources
echo "deb http://archive.raspbian.org/raspbian wheezy main
" > /etc/apt/sources.list.d/wheezy.list
# Set stable as default package source (currently jessie)
echo "APT::Default-release \"stable\";
" > /etc/apt/apt.conf.d/10defaultRelease
# Set priority for libsdl from wheezy higher then the jessie package
echo "Package: libsdl1.2debian
Pin: release n=jessie
Pin-Priority: -10
Package: libsdl1.2debian
Pin: release n=wheezy
Pin-Priority: 900
" > /etc/apt/preferences.d/libsdl
```
Update the APT package index files and install Python libraries:
```terminal
sudo apt-get update
sudo apt-get -y --force-yes install python-picamera python-pygame python-imaging
```
_Now_ we perform the actual SDL library downgrade (it has to follow the “apt-get update” above):
```terminal
apt-get -y --force-yes install libsdl1.2debian/wheezy
```
### Download the Camera and Dropbox Scripts
Just a couple more steps to download and uncompress these…
```terminal
cd ~pi
wget https://github.com/andreafabrizi/Dropbox-Uploader/archive/master.zip
unzip master.zip
rm master.zip
mv Dropbox-Uploader-master Dropbox-Uploader
wget https://github.com/adafruit/adafruit-pi-cam/archive/master.zip
unzip master.zip
rm master.zip
```
### Modify /etc/rc.local for auto-start (but don’t enable)
These lines are added to /etc/rc.local — the second is intentionally commented out by default. It’s a good idea to test the camera software manually before throwing the switch. These are inserted just before the final “exit 0” line that’s normally present.
```
# Enable this line to run camera at startup:
# cd /home/pi/adafruit-pi-cam-master ; sudo python cam.py
```
# Testing
Now give it a try. The software must be run as root (using the _sudo_ command) in order to access the TFT display:
```terminal
cd adafruit-pi-cam-master
sudo python cam.py
```
If all goes well, after a few seconds’ initialization you should see a live viewfinder preview on the screen, as well as two onscreen buttons.
If this _doesn’t_ happen, an error message should give some sort of troubleshooting guidance; missing library or driver, etc.
There’s still some work to be done if we want to use Dropbox, so quit the camera program for the time being…tap the gear icon (settings), the left arrow and then the confirmation button. You’ll be back at the command line now.

# Standalone mode
You can have the Pi boot straight into the camera software at startup by editing **/etc/rc.local** (this must be done as root, so “sudo” your text editor of preference):
```terminal
sudo nano /etc/rc.local
```
If you use the Easy Install script, the following line is already present, but commented out. Delete the initial “#” character on the line, save changes and reboot.
Otherwise, if doing this the long way, add the following line just before the final “exit 0”:
```terminal
cd /home/pi/adafruit-pi-cam-master; python cam.py
```
Next time you reboot you should see the text console for a few seconds and then it will start the cam.py software.
- [Previous Page](https://learn.adafruit.com/diy-wifi-raspberry-pi-touch-cam/overview.md)
- [Next Page](https://learn.adafruit.com/diy-wifi-raspberry-pi-touch-cam/dropbox-setup.md)
## Featured Products
### Raspberry Pi DIY Camera Pack
[Raspberry Pi DIY Camera Pack](https://www.adafruit.com/product/3275)
If the holidays promise anything, it’s almost certainly a deluge of photographs. Instead of taking out your smartphones, why not build your own camera?
With one of Adafruit’s best selling screens and an official Raspberry Pi camera, you’ll be ready to set up your very...
Out of Stock
[Buy Now](https://www.adafruit.com/product/3275)
[Related Guides to the Product](https://learn.adafruit.com/products/3275/guides)
### PiTFT Plus Assembled 320x240 2.8" TFT + Resistive Touchscreen
[PiTFT Plus Assembled 320x240 2.8" TFT + Resistive Touchscreen](https://www.adafruit.com/product/2298)
Is this not the cutest little display for the Raspberry Pi? It features a 2.8" display with 320x240 16-bit color pixels and a resistive touch overlay. The plate uses the high speed SPI interface on the Pi and can use the mini display as a console, X window port, displaying images or...
Out of Stock
[Buy Now](https://www.adafruit.com/product/2298)
[Related Guides to the Product](https://learn.adafruit.com/products/2298/guides)
### PiTFT Plus 320x240 3.2" TFT + Resistive Touchscreen
[PiTFT Plus 320x240 3.2" TFT + Resistive Touchscreen](https://www.adafruit.com/product/2616)
Is this not the cutest little display for the Raspberry Pi? It features a 3.2" display with 320x240 16-bit color pixels and a resistive touch overlay. The plate uses the high speed SPI interface on the Pi and can use the mini display as a console, X window port, displaying images or...
Out of Stock
[Buy Now](https://www.adafruit.com/product/2616)
[Related Guides to the Product](https://learn.adafruit.com/products/2616/guides)
### Adafruit PiTFT 2.4" HAT Mini Kit - 320x240 TFT Touchscreen
[Adafruit PiTFT 2.4" HAT Mini Kit - 320x240 TFT Touchscreen](https://www.adafruit.com/product/2455)
Is this not the cutest little display for the Raspberry Pi? It features a 2.4" display with 320x240 16-bit color pixels and a resistive touch overlay. The HAT uses the high speed SPI interface on the Pi and can use the mini display as a console, X window port, displaying images or video...
Out of Stock
[Buy Now](https://www.adafruit.com/product/2455)
[Related Guides to the Product](https://learn.adafruit.com/products/2455/guides)
### Adafruit PiTFT - 320x240 2.8" TFT+Touchscreen for Raspberry Pi
[Adafruit PiTFT - 320x240 2.8" TFT+Touchscreen for Raspberry Pi](https://www.adafruit.com/product/1601)
Is this not the cutest little display for the Raspberry Pi? It features a 2.8" display with 320x240 16-bit color pixels and a resistive touch overlay. The plate uses the high speed SPI interface on the Pi and can use the mini display as a console, X window port, displaying images or video...
Out of Stock
[Buy Now](https://www.adafruit.com/product/1601)
[Related Guides to the Product](https://learn.adafruit.com/products/1601/guides)
### Raspberry Pi 3 - Model B - ARMv8 with 1G RAM
[Raspberry Pi 3 - Model B - ARMv8 with 1G RAM](https://www.adafruit.com/product/3055)
Did you really think the Raspberry Pi would stop getting better? At this point, we sound like a broken record, extolling on the new Pi’s myriad improvements like we’re surprised that the folks at the Raspberry Pi Foundation are continuously making their flagship board better. ...
In Stock
[Buy Now](https://www.adafruit.com/product/3055)
[Related Guides to the Product](https://learn.adafruit.com/products/3055/guides)
### Raspberry Pi 2 - Model B v1.2 - ARM Cortex-A53 with 1G RAM
[Raspberry Pi 2 - Model B v1.2 - ARM Cortex-A53 with 1G RAM](https://www.adafruit.com/product/2358)
Didn't think the Raspberry Pi could get any better? You're in for a big surprise! The Raspberry Pi 2 Model B is out and it's amazing! With an upgraded ARM Cortex-A53 quad-core processor, Dual Core VideoCore IV Multimedia coprocessor, and a full Gigabyte of RAM, this...
No Longer Stocked
[Buy Now](https://www.adafruit.com/product/2358)
[Related Guides to the Product](https://learn.adafruit.com/products/2358/guides)
### Raspberry Pi Model A+ 512MB RAM
[Raspberry Pi Model A+ 512MB RAM](https://www.adafruit.com/product/2266)
**Note:** As of August 10th, 2016 the Raspberry Pi A+ now includes 512 MB of RAM!
The Raspberry Pi Model A+ is the perfect board for the minimalist Pi fan. This low-cost Pi uses the same processor as the model B+, but does away with the Ethernet jack and three of the USB...
No Longer Stocked
[Buy Now](https://www.adafruit.com/product/2266)
[Related Guides to the Product](https://learn.adafruit.com/products/2266/guides)
## Related Guides
- [Kali Linux on the Raspberry Pi with the PiTFT](https://learn.adafruit.com/kali-linux-on-the-raspberry-pi-with-the-pitft.md)
- [PiPhone - A Raspberry Pi based Cellphone](https://learn.adafruit.com/piphone-a-raspberry-pi-based-cellphone.md)
- [Processing on the Raspberry Pi & PiTFT](https://learn.adafruit.com/processing-on-the-raspberry-pi-and-pitft.md)
- [PiGRRL 2](https://learn.adafruit.com/pigrrl-2.md)
- [RasPipe: A Raspberry Pi Pipeline Viewer, Part 2](https://learn.adafruit.com/raspipe-a-raspberry-pi-pipeline-viewer-part-2.md)
- [Monitor PiCam and temperature on a PiTFT via adafruit.io](https://learn.adafruit.com/monitor-picam-and-temperature-on-a-pitft-via-adafruit-dot-io.md)
- [AstroPrint 3D Printing](https://learn.adafruit.com/astroprint-3d-printing.md)
- [Touchscreen Pi Timelapse Controller](https://learn.adafruit.com/touchscreen-pi-timelapse-controller.md)
- [Using the Slamtec RPLIDAR on a Raspberry Pi](https://learn.adafruit.com/slamtec-rplidar-on-pi.md)
- [Adafruit AMG8833 8x8 Thermal Camera Sensor](https://learn.adafruit.com/adafruit-amg8833-8x8-thermal-camera-sensor.md)
- [Pi Hole Ad Detection Display with PiTFT](https://learn.adafruit.com/pi-hole-ad-pitft-tft-detection-display.md)
- [SnapPiCam Raspberry Pi Camera](https://learn.adafruit.com/snappicam-raspberry-pi-camera.md)
- [JOY of Arcada — USB Game Pad for Adafruit PyGamer and PyBadge](https://learn.adafruit.com/joy-of-arcada-usb-game-pad-for-adafruit-pygamer-pybadge.md)
- [Go Fishing with Rotary Encoders](https://learn.adafruit.com/gone-fishing-game.md)
- [Set up and Blink - MATLAB and Simulink with Raspberry Pi](https://learn.adafruit.com/how-to-use-matlab-and-simulink-with-raspberry-pi.md)
---
# Source: https://learn.adafruit.com/pi-thermal-printer.md
# Internet of Things Printer for Raspberry Pi
## Overview
**This guide is marked as** **DISCONTINUED** **— thermal printers and accessories are** **no longer carried** **by Adafruit, and some of the APIs and drivers referenced here are no longer available and/or compatible.** **Code will not be updated and guide feedback will not be reviewed. The information remains online because a few elements may be of use for anyone who still has this hardware, but will still need to DIY their own code.**
In the future, everything will be connected to the internet. And all restaurants will be Taco Bell!

The “Internet of Things” is the idea of pervasive connections between physical objects and the online world. These connected devices don’t just idly sit around waiting for commands or files…they’re active _agents_ that anticipate your needs and can push or pull data from the internet.
Our _Internet of Things Printer_ is a small, internet-connected thermal printer that can have a daily weather forecast ready before you head out in the morning, a puzzle to work on while riding the subway, provide a list of “tweets” relating to your interests…or any other task you can program!
This second version of the printer is built around the Raspberry Pi, a tiny computer that packs a wallop: more processing power, more RAM and the potent Linux operating system. The new kit has an easier time handling graphics and looks super tidy with its wireless networking:

- [Next Page](https://learn.adafruit.com/pi-thermal-printer/parts-list.md)
## Primary Products
### Adafruit IoT Pi Printer Project Pack
[Adafruit IoT Pi Printer Project Pack](https://www.adafruit.com/product/1289)
Build an "Internet of Things" connected mini printer that will do your bidding! This is a fun weekend project that comes with a beautiful laser cut case. Once assembled, the little printer connects wirelessly to get Internet data for printing onto 2 1/4" wide receipt paper....
No Longer Stocked
[Buy Now](https://www.adafruit.com/product/1289)
[Related Guides to the Product](https://learn.adafruit.com/products/1289/guides)
## Featured Products
### Miniature WiFi (802.11b/g/n) Module: For Raspberry Pi and more
[Miniature WiFi (802.11b/g/n) Module: For Raspberry Pi and more](https://www.adafruit.com/product/814)
Make your Internet of Things device cable-free by adding WiFi. Take advantage of the Raspberry Pi and Beagle Bone's USB port to add a low cost, but high-reliability wireless link. We tried half a dozen modules to find one that works well with the Pi and Bone without the need of recompiling...
No Longer Stocked
[Buy Now](https://www.adafruit.com/product/814)
[Related Guides to the Product](https://learn.adafruit.com/products/814/guides)
### Raspberry Pi - Skill badge, iron-on patch
[Raspberry Pi - Skill badge, iron-on patch](https://www.adafruit.com/product/906)
You are learning to use the small Linux based board, the Raspberry Pi! Adafruit offers a fun and exciting "badges" of achievement for electronics, science and engineering. We believe everyone should be able to be rewarded for learning a useful skill, a badge is just one of the many...
In Stock
[Buy Now](https://www.adafruit.com/product/906)
[Related Guides to the Product](https://learn.adafruit.com/products/906/guides)
### Adafruit Pi Unassembled T-Cobbler Breakout Kit for Raspberry Pi
[Adafruit Pi Unassembled T-Cobbler Breakout Kit for Raspberry Pi](https://www.adafruit.com/product/1105)
Now that you've finally got your hands on a [Raspberry Pi®](http://www.raspberrypi.org/), you're probably itching to make some fun embedded computer projects with it. What you need is an add on prototyping Pi T-Cobbler from Adafruit, which can break out all those tasty...
No Longer Stocked
[Buy Now](https://www.adafruit.com/product/1105)
[Related Guides to the Product](https://learn.adafruit.com/products/1105/guides)
### Mini Thermal Receipt Printer Starter Pack
[Mini Thermal Receipt Printer Starter Pack](https://www.adafruit.com/product/600)
Hit the ground running (and printing!) with this starter pack that includes a thermal printer and all the extras and save a few dollars while you're at it.
Includes:
- [A mini thermal receipt printer](http://www.adafruit.com/products/597) - with cables and...
No Longer Stocked
[Buy Now](https://www.adafruit.com/product/600)
[Related Guides to the Product](https://learn.adafruit.com/products/600/guides)
### Thermal paper roll - 50' long, 2.25" wide
[Thermal paper roll - 50' long, 2.25" wide](https://www.adafruit.com/product/599)
A mini roll of thermal paper, this fits very nicely into our mini thermal printer. 2.25" wide (about 57mm) and 50 feet long (15 meters). BPA-free.
[Perfect for use with our mini thermal printer!](http://www.adafruit.com/products/597)
No Longer Stocked
[Buy Now](https://www.adafruit.com/product/599)
[Related Guides to the Product](https://learn.adafruit.com/products/599/guides)
### Mini Thermal Receipt Printer
[Mini Thermal Receipt Printer](https://www.adafruit.com/product/597)
Add a mini printer to any microcontroller project with this very cute thermal printer. Thermal printers are also known as receipt printers, they're what you get when you go to the ATM or grocery store. Now you can embed a little printer of your own into an enclosure. This printer is ideal...
No Longer Stocked
[Buy Now](https://www.adafruit.com/product/597)
[Related Guides to the Product](https://learn.adafruit.com/products/597/guides)
### Rugged Metal Pushbutton with White LED Ring
[Rugged Metal Pushbutton with White LED Ring](https://www.adafruit.com/product/558)
These chrome-plated metal buttons are rugged and look real good while doing it! Simply drill a 16mm hole into any material up to 1/2" thick and you can fit these in place, there's even a rubber gasket to keep water out of the enclosure. On the front of the button is a flat metal...
In Stock
[Buy Now](https://www.adafruit.com/product/558)
[Related Guides to the Product](https://learn.adafruit.com/products/558/guides)
### 5V 10A switching power supply
[5V 10A switching power supply](https://www.adafruit.com/product/658)
This is a beefy switching supply, for when you need a lot of power! It can supply 5V DC up to 10 Amps, running from 110V or 220V power (the plug it comes with is for US/Canada/Japan but you can use any plug adapter for your country, or just replace the cable with a standard computer/appliance...
In Stock
[Buy Now](https://www.adafruit.com/product/658)
[Related Guides to the Product](https://learn.adafruit.com/products/658/guides)
## Related Guides
- [Skill Badge Requirements: Raspberry Pi](https://learn.adafruit.com/skill-badge-requirements-raspberry-pi.md)
- [Adafruit Prototyping Pi Plate](https://learn.adafruit.com/adafruit-prototyping-pi-plate.md)
- [Adafruit Raspberry Pi Educational Linux Distro](https://learn.adafruit.com/adafruit-raspberry-pi-educational-linux-distro.md)
- [Open Source Protective Face Shield Designs](https://learn.adafruit.com/open-source-face-shield-designs.md)
- [PyPortal IoT Plant Monitor with Google Cloud IoT Core and CircuitPython](https://learn.adafruit.com/pyportal-iot-plant-monitor-with-google-cloud-iot-core-and-circuitpython.md)
- [Adafruit QT Py ESP32-C3 WiFi Dev Board](https://learn.adafruit.com/adafruit-qt-py-esp32-c3-wifi-dev-board.md)
- [AstroPrint 3D Printing](https://learn.adafruit.com/astroprint-3d-printing.md)
- [No-Code Rain Sensing Smart Desktop Umbrella Stand](https://learn.adafruit.com/no-code-rain-sensing-smart-desktop-umbrella-stand.md)
- [MacroPad Remote Procedure Calls over USB to Control Home Assistant](https://learn.adafruit.com/macropad-remote-procedure-calls-over-usb-to-control-home-assistant.md)
- [PiPhone - A Raspberry Pi based Cellphone](https://learn.adafruit.com/piphone-a-raspberry-pi-based-cellphone.md)
- [Adafruit 128x64 OLED Bonnet for Raspberry Pi](https://learn.adafruit.com/adafruit-128x64-oled-bonnet-for-raspberry-pi.md)
- [Set up and Blink - MATLAB and Simulink with Raspberry Pi](https://learn.adafruit.com/how-to-use-matlab-and-simulink-with-raspberry-pi.md)
- [Mini Raspberry Pi Handheld Notebook](https://learn.adafruit.com/mini-raspberry-pi-handheld-notebook-palmtop.md)
- [Adafruit's Raspberry Pi Lesson 2. First Time Configuration](https://learn.adafruit.com/adafruits-raspberry-pi-lesson-2-first-time-configuration.md)
- [Huzzah Weather Display](https://learn.adafruit.com/huzzah-weather-display.md)
---
# Source: https://learn.adafruit.com/pi-video-output-using-pygame.md
# Pi Video Output Using pygame
## Overview

http://www.youtube.com/watch?v=Yj0gxhUTqbw&feature=youtu.be
One of the biggest advantages of the Raspberry Pi as a development platform is the easy access you have to a lot of mature, well-designed SW stacks and libraries, making it relatively trivial to perform tasks that would be very complex or time-consuming to implement on deeply embedded mcu-based systems.
One of the areas where this is particularly true is with graphics and user interfaces. The HW requirements are fairly high to be able to work with large displays (larger than say 320x240 pixels), and even if you can meet the timing requirements -- a 7" 800x480 display probably requires ~40MHz for the pixel clock -- there are very few open source or inexpensive graphics frameworks out there to render the kinds of modern UIs people expect today.
The Pi is really stands out here since it's trivial to render complex UIs, taking advantage of modern features like Unicode text and complex scripts, and being able to use different fonts without having to worry about memory and rendering time (it can take a couple hundred KB of SRAM to render a TTF on an embedded system, and the libraries to interpret them are both large and complex), etc. You can also easily display the graphics on any inexpensive composite television or HDMI monitor, which is amazing for a $35 board ... more than the cost of many LCDs!
This tutorial will show you one way to get started drawing graphics on an external display using [pygame](http://www.pygame.org/news.html "Link: http://www.pygame.org/news.html") along with [Adafruit's WebIDE](http://learn.adafruit.com/webide/overview "Link: http://learn.adafruit.com/webide/overview"), and almost any external display ([several are available here](http://www.adafruit.com/category/105 "Link: http://www.adafruit.com/category/105")).
# What You'll Need
- A [Raspberry Pi Model B](http://www.adafruit.com/products/998 "Link: http://www.adafruit.com/products/998")
- [Occidentalis v0.2](http://learn.adafruit.com/adafruit-raspberry-pi-educational-linux-distro/occidentalis-v0-dot-2 "Link: http://learn.adafruit.com/adafruit-raspberry-pi-educational-linux-distro/occidentalis-v0-dot-2") or higher
- Some sort of external display (We're using a [7" NTSC/PAL TFT Display](http://adafruit.com/products/947))
# Development Tools
This tutorial uses Adafruit's [WebIDE](http://learn.adafruit.com/webide/overview). It's an ideal development environment to work with external displays, since you can display your debug output and keep the shell visible while the display contents are changed on the remote display, and easily upload files (images, fonts, etc.) to the Pi.
You could also work via SSH, but as you'll see later in the tutorial this is less convenient since you'll need at least two sessions, it's more cumbersome to transfer files, and you'll probably find the text editor in the WebIDE more natural to use than vi or nano if you aren't already an experiences Linux user.
If you're not already using WebIDE -- have a look at our easy to follow learning guides below:
- [Occidentalis v0.2](http://learn.adafruit.com/adafruit-raspberry-pi-educational-linux-distro/occidentalis-v0-dot-2)
- [Raspberry Pi WebIDE](http://learn.adafruit.com/webide/overview)
- [Next Page](https://learn.adafruit.com/pi-video-output-using-pygame/getting-started.md)
## Featured Products
### Adafruit Assembled Pi Cobbler Breakout + Cable for Raspberry Pi
[Adafruit Assembled Pi Cobbler Breakout + Cable for Raspberry Pi](https://www.adafruit.com/product/914)
Now that you've finally got your hands on a [Raspberry Pi® Model B](http://www.raspberrypi.org/), you're probably itching to make some fun embedded computer projects with it. What you need is an add on prototyping Pi Cobbler from Adafruit, which can break out all those...
No Longer Stocked
[Buy Now](https://www.adafruit.com/product/914)
[Related Guides to the Product](https://learn.adafruit.com/products/914/guides)
### NTSC/PAL (Television) TFT Display - 3.5" Diagonal
[NTSC/PAL (Television) TFT Display - 3.5" Diagonal](https://www.adafruit.com/product/913)
Yes, this is an adorable small television! The visible display measures only 3.5" (8.9cm) diagonal, the TFT comes with a NTSC/PAL driver board. The display is very easy to use - simply connect 6-12VDC to the red (+) and black (-) wires, then connect a composite video source to the RCA...
In Stock
[Buy Now](https://www.adafruit.com/product/913)
[Related Guides to the Product](https://learn.adafruit.com/products/913/guides)
### NTSC/PAL (Television) TFT Display - 2.0" Diagonal
[NTSC/PAL (Television) TFT Display - 2.0" Diagonal](https://www.adafruit.com/product/911)
Yes, this is an adorable miniature television! The visible display measures only 2" diagonal, the TFT comes with a NTSC/PAL driver board. The display is very easy to use - simply connect 6-12VDC to the red and black wires, then connect a composite video source to the RCA connector. Voila,...
In Stock
[Buy Now](https://www.adafruit.com/product/911)
[Related Guides to the Product](https://learn.adafruit.com/products/911/guides)
### NTSC/PAL (Television) TFT Display - 4.3" Diagonal
[NTSC/PAL (Television) TFT Display - 4.3" Diagonal](https://www.adafruit.com/product/946)
Yes, this is an adorable small television! The visible display measures only 4.3" (11cm) diagonal, the TFT comes with a NTSC/PAL driver board, enclosure and stand. The display is very easy to use - simply connect 12VDC to the 2.1mm center-positive DC jack (or use the cable and connect to...
No Longer Stocked
[Buy Now](https://www.adafruit.com/product/946)
[Related Guides to the Product](https://learn.adafruit.com/products/946/guides)
### NTSC/PAL (Television) TFT Display - 7" Diagonal
[NTSC/PAL (Television) TFT Display - 7" Diagonal](https://www.adafruit.com/product/947)
Yes, this is an adorable small television! The visible display measures only 7" (17.8cm) diagonal, the TFT comes with a NTSC/PAL driver board, enclosure and stand. The display is very easy to use - simply connect the included 12VDC adapter to the 2.1mm center-positive DC jack, then...
No Longer Stocked
[Buy Now](https://www.adafruit.com/product/947)
[Related Guides to the Product](https://learn.adafruit.com/products/947/guides)
### Raspberry Pi 1 Model B Starter Pack - Includes a Raspberry Pi
[Raspberry Pi 1 Model B Starter Pack - Includes a Raspberry Pi](https://www.adafruit.com/product/1014)
You want to get hacking with your Pi fast, right? Get everything you need to start with the Adafruit Starter Pack for Raspberry Pi. It's the perfect accompaniment to your new Pi, everything you need to boot up your Pi Model B and get going. **We pre-assemble the Cobbler for you, no...**
No Longer Stocked
[Buy Now](https://www.adafruit.com/product/1014)
[Related Guides to the Product](https://learn.adafruit.com/products/1014/guides)
### NTSC/PAL (Television) TFT Display - 1.5" Diagonal
[NTSC/PAL (Television) TFT Display - 1.5" Diagonal](https://www.adafruit.com/product/910)
Yes, this is an adorable miniature television! The visible display measures only 1.5" diagonal, the TFT comes with a NTSC/PAL driver board. The display is very easy to use - simply connect 6-12VDC to the red and black wires, then connect a composite video source to the RCA connector....
In Stock
[Buy Now](https://www.adafruit.com/product/910)
[Related Guides to the Product](https://learn.adafruit.com/products/910/guides)
## Related Guides
- [Electronic Animated Eyes for ARM Microcontrollers](https://learn.adafruit.com/animated-electronic-eyes.md)
- [CircuitPython Day 2024 Countdown Clock](https://learn.adafruit.com/circuitpython-day-2024-countdown-clock.md)
- [Adafruit RP2350 22-pin FPC HSTX to DVI Adapter](https://learn.adafruit.com/adafruit-rp2350-22-pin-fpc-hstx-to-dvi-adapter.md)
- [Adafruit 3.5" 320x480 Color TFT Touchscreen Breakout](https://learn.adafruit.com/adafruit-3-5-color-320x480-tft-touchscreen-breakout.md)
- [AdaBox 018](https://learn.adafruit.com/adabox018.md)
- [Adafruit's Raspberry Pi Lesson 5. Using a Console Cable](https://learn.adafruit.com/adafruits-raspberry-pi-lesson-5-using-a-console-cable.md)
- [Press Your Button for Raspberry Pi](https://learn.adafruit.com/press-your-button-for-raspberry-pi.md)
- [MONSTER M4SK Toon Hat](https://learn.adafruit.com/monster-mask-augmented-eyes-toon-hat.md)
- [Windows IoT Core Application Development: Headed Blinky](https://learn.adafruit.com/windows-iot-application-development-headed-blinky.md)
- [Cappy Monster M4sk with Animated Eyes](https://learn.adafruit.com/cappy-monster-m4sk.md)
- [Running TensorFlow Lite Object Recognition on the Raspberry Pi 4 or Pi 5](https://learn.adafruit.com/running-tensorflow-lite-on-the-raspberry-pi-4.md)
- [Pip-Boy 2040 Wrist-Mounted Prop](https://learn.adafruit.com/pip-boy-2040.md)
- [CustomEyesation: DIY Monster M4SK Graphics](https://learn.adafruit.com/customeyesation-diy-monster-m4sk-graphics.md)
- [Getting Started With Windows IoT Core on Raspberry Pi](https://learn.adafruit.com/getting-started-with-windows-iot-on-raspberry-pi.md)
- [Candy Bucket GIF Player Eyes](https://learn.adafruit.com/candy-bucket-gif-eyes.md)
---
# Source: https://learn.adafruit.com/pi-wifi-radio.md
# Raspberry Pi WiFi Radio
## Overview
### **PLEASE NOTE:** this guide is now **deprecated** …
- It relied on some _extremely_ finicky software (_pianobar_ and _libav_) which tended to break with each new operating system release…it’s a minor miracle we’ve even managed to patch it this far along!
- It relied on several now-deprecated Python libraries for the display (Adafruit\_CharLCDPlate, Adafruit\_I2C, etc.).
- It’s specific to the _Pandora_ streaming service, which is only available in the United States and a couple other countries.
That being said, if you’re in the US, already have the hardware sitting around and don’t mind sinking 30 minutes into a project that might not pan out, by all means give it a shot. It was pretty nifty when it worked. Please just understand that we will **no longer be providing technical support** for this project **nor any more updates** to this guide. It was last seen working with the 2018-11-13 release of Raspbian Stretch Lite, if that’s any help in recreating the project.
There are other Pi audio guides available in the Adafruit Learning System that might serve you better nowadays:
- [Raspberry Pi Zero NPR One Radio](https://learn.adafruit.com/raspberry-pi-zero-npr-one-radio)
- [Raspberry Pi radio player with touchscreen](https://learn.adafruit.com/raspberry-pi-radio-player-with-touchscreen)
- [_Boomy_ Pi Airplay Boombox](https://learn.adafruit.com/boomy-pi-airplay)

Raspberry Pi, the little _wonder-puter_ that’s taken the world by storm, is so affordable that we can create nifty single-purpose “appliances” around them without shame. Here’s our take on one of the more popular such applications: internet streaming media, the **_Pandora_** music service specifically.
_Pandora is now limited to users in the United States. It is **no longer available in other countries**. This guide is now deprecated and will **not** be updated for alternate services._
http://www.youtube.com/watch?v=uzUruw2Ppyk
With the addition of a small LCD, a few buttons and a USB wireless network adapter, the Raspberry Pi becomes an affordable self-contained music streamer that can be moved to any room of the house…wherever you need your tunes at the moment. Just connect power and speakers or headphones.
- [Next Page](https://learn.adafruit.com/pi-wifi-radio/parts-list.md)
## Featured Products
### Raspberry Pi 3 - Model B+ - 1.4GHz Cortex-A53 with 1GB RAM
[Raspberry Pi 3 - Model B+ - 1.4GHz Cortex-A53 with 1GB RAM](https://www.adafruit.com/product/3775)
The Raspberry Pi 3 Model B is the most popular Raspberry Pi computer made, and the Pi Foundation knows you can always make a good thing _better_! And what could make the Pi 3 better? How about a _faster_ processor, 5 GHz WiFi, and updated Ethernet chip with PoE capability?...
In Stock
[Buy Now](https://www.adafruit.com/product/3775)
[Related Guides to the Product](https://learn.adafruit.com/products/3775/guides)
### SD/MicroSD Memory Card (8 GB SDHC)
[SD/MicroSD Memory Card (8 GB SDHC)](https://www.adafruit.com/product/1294)
Add mega-storage in a jiffy using this 8 GB class 4 micro-SD card. It comes with a SD adapter so you can use it with any of our shields or adapters. Preformatted to FAT so it works out of the box with our projects. Tested and works great with our
In Stock
[Buy Now](https://www.adafruit.com/product/1294)
[Related Guides to the Product](https://learn.adafruit.com/products/1294/guides)
### 5V 2.5A Switching Power Supply with 20AWG MicroUSB Cable
[5V 2.5A Switching Power Supply with 20AWG MicroUSB Cable](https://www.adafruit.com/product/1995)
Our all-in-one 5V 2.5 Amp + MicroUSB cable power adapter is the perfect choice for powering single-board computers like Raspberry Pi, BeagleBone, or anything else that's power-hungry!
This adapter was specifically designed to provide 5.25V, not 5V, but we still call it a 5V USB...
Out of Stock
[Buy Now](https://www.adafruit.com/product/1995)
[Related Guides to the Product](https://learn.adafruit.com/products/1995/guides)
### Adafruit RGB Positive 16x2 LCD+Keypad Kit for Raspberry Pi
[Adafruit RGB Positive 16x2 LCD+Keypad Kit for Raspberry Pi](https://www.adafruit.com/product/1109)
This new Adafruit Pi Plate makes it easy to use an RGB 16x2 Character LCD. We really like the RGB Character LCDs we stock in the shop. (For RGB we have [RGB negative](http://www.adafruit.com/products/399) and [RGB positive](http://www.adafruit.com/products/398).)...
Out of Stock
[Buy Now](https://www.adafruit.com/product/1109)
[Related Guides to the Product](https://learn.adafruit.com/products/1109/guides)
### Adafruit RGB Negative 16x2 LCD+Keypad Kit for Raspberry Pi
[Adafruit RGB Negative 16x2 LCD+Keypad Kit for Raspberry Pi](https://www.adafruit.com/product/1110)
This new Adafruit Pi Plate makes it easy to use an RGB 16x2 Character LCD. We really like the RGB Character LCDs we stock in the shop. (For RGB we have [RGB negative](http://www.adafruit.com/products/399) and [RGB positive](http://www.adafruit.com/products/398).)...
Out of Stock
[Buy Now](https://www.adafruit.com/product/1110)
[Related Guides to the Product](https://learn.adafruit.com/products/1110/guides)
### Adafruit Blue&White 16x2 LCD+Keypad Kit for Raspberry Pi
[Adafruit Blue&White 16x2 LCD+Keypad Kit for Raspberry Pi](https://www.adafruit.com/product/1115)
This new Adafruit Pi Plate makes it easy to use a blue and white 16x2 Character LCD. [We really like the 16x2 Character LCDs we stock in the shop](http://www.adafruit.com/products/181). Unfortunately, these LCDs do require quite a few digital pins, 6 to control the LCD and then...
Out of Stock
[Buy Now](https://www.adafruit.com/product/1115)
[Related Guides to the Product](https://learn.adafruit.com/products/1115/guides)
### Adafruit Raspberry Pi B+ / Pi 2 / Pi 3 Case - Smoke Base
[Adafruit Raspberry Pi B+ / Pi 2 / Pi 3 Case - Smoke Base](https://www.adafruit.com/product/2258)
It took awhile to perfect - but that's okay since we can now safely say that the Adafruit case for Raspberry Pi Model B+ / Pi 2 / Pi 3 is The Single Greatest Raspberry Pi Model B+ Case Ever.
This enclosure was designed by Mike Doell - just like our...
In Stock
[Buy Now](https://www.adafruit.com/product/2258)
[Related Guides to the Product](https://learn.adafruit.com/products/2258/guides)
### Miniature WiFi (802.11b/g/n) Module: For Raspberry Pi and more
[Miniature WiFi (802.11b/g/n) Module: For Raspberry Pi and more](https://www.adafruit.com/product/814)
Make your Internet of Things device cable-free by adding WiFi. Take advantage of the Raspberry Pi and Beagle Bone's USB port to add a low cost, but high-reliability wireless link. We tried half a dozen modules to find one that works well with the Pi and Bone without the need of recompiling...
No Longer Stocked
[Buy Now](https://www.adafruit.com/product/814)
[Related Guides to the Product](https://learn.adafruit.com/products/814/guides)
## Related Guides
- [Adafruit Class Library for Windows IoT Core](https://learn.adafruit.com/adafruit-class-library-for-windows-iot-core.md)
- [Character LCD with Raspberry Pi or BeagleBone Black](https://learn.adafruit.com/character-lcd-with-raspberry-pi-or-beaglebone-black.md)
- [Adafruit 16x2 Character LCD + Keypad for Raspberry Pi](https://learn.adafruit.com/adafruit-16x2-character-lcd-plus-keypad-for-raspberry-pi.md)
- [Onion Pi](https://learn.adafruit.com/onion-pi.md)
- [Monitor Your Home With the Raspberry Pi B+](https://learn.adafruit.com/monitor-your-home-with-the-raspberry-pi-b-plus.md)
- [Pi Hole Ad Detection Display with PiTFT](https://learn.adafruit.com/pi-hole-ad-pitft-tft-detection-display.md)
- [Introducing the Raspberry Pi 2 - Model B](https://learn.adafruit.com/introducing-the-raspberry-pi-2-model-b.md)
- [Setting up a Raspberry Pi as a WiFi Access Point](https://learn.adafruit.com/setting-up-a-raspberry-pi-as-a-wifi-access-point.md)
- [Playing sounds and using buttons with Raspberry Pi](https://learn.adafruit.com/playing-sounds-and-using-buttons-with-raspberry-pi.md)
- [Adafruit RGB Matrix + Real Time Clock HAT for Raspberry Pi](https://learn.adafruit.com/adafruit-rgb-matrix-plus-real-time-clock-hat-for-raspberry-pi.md)
- [Raspberry Pi as an Ad Blocking Access Point](https://learn.adafruit.com/raspberry-pi-as-an-ad-blocking-access-point.md)
- [Internet of Things Printer for Raspberry Pi](https://learn.adafruit.com/pi-thermal-printer.md)
- [Adafruit Prototyping Pi Plate](https://learn.adafruit.com/adafruit-prototyping-pi-plate.md)
- [Node.js Embedded Development on the Raspberry Pi](https://learn.adafruit.com/node-embedded-development.md)
- [Matrix and 7-Segment LED Backpack with the Raspberry Pi](https://learn.adafruit.com/matrix-7-segment-led-backpack-with-the-raspberry-pi.md)
---
# Source: https://learn.adafruit.com/piccolo.md
# Tiny Arduino Music Visualizer
## Overview
**UPDATE: this is an older guide designed for boards like the Arduino Uno and Adafruit METRO 328. It relies on _assembly language_ code that’s specific to 8-bit AVR microcontrollers and will not work with boards based on other chips (ESP32, RP2040, SAMD, etc.).**
http://youtu.be/Tmpl5KA02S4
(Music: _The Owl Named Orion_ by Dan-O at DanoSongs.com)
Here’s an easy-to-build project that really packs a lot of _blinkenlight_ for the effort: a little pocket-size music visualizer we call “Piccolo.”
Set Piccolo next to the telly or some speakers and you’ll see the lights respond to music and sound — lowest notes toward the left end of the graph, highest notes toward the right.
Technically this would be called a “spectrum analyzer,” but as this is not a precision scientific instrument, we’re more comfortable labeling it a “visualizer.” It’s strictly for show.
This intermediate Arduino project shows a clear progression from input to processing and then output in a package that’s appealing and easy for minds to grasp: music and lights. It’s not abstract or “science-y” unless you choose to peel back the layers…
- [Next Page](https://learn.adafruit.com/piccolo/wiring.md)
## Featured Products
### Adafruit Bicolor LED Square Pixel Matrix with I2C Backpack
[Adafruit Bicolor LED Square Pixel Matrix with I2C Backpack](https://www.adafruit.com/product/902)
What's better than a single LED? Lots of LEDs! A fun way to make a small colorful display is to use a [1.2" Bi-color 8x8 LED Matrix](http://www.adafruit.com/products/458). Matrices like these are 'multiplexed' - so to control all the 128 LEDs you need 24 pins....
In Stock
[Buy Now](https://www.adafruit.com/product/902)
[Related Guides to the Product](https://learn.adafruit.com/products/902/guides)
### Electret Microphone Amplifier - MAX4466 with Adjustable Gain
[Electret Microphone Amplifier - MAX4466 with Adjustable Gain](https://www.adafruit.com/product/1063)
Add an ear to your project with this well-designed electret microphone amplifier. This fully assembled and tested board comes with a 20-20KHz electret microphone soldered on. For the amplification, we use the Maxim MAX4466, an op-amp specifically designed for this delicate task! The amplifier...
In Stock
[Buy Now](https://www.adafruit.com/product/1063)
[Related Guides to the Product](https://learn.adafruit.com/products/1063/guides)
### Adafruit METRO 328 Fully Assembled - Arduino IDE compatible
[Adafruit METRO 328 Fully Assembled - Arduino IDE compatible](https://www.adafruit.com/product/50)
We sure love the ATmega328 here at Adafruit, and we use them _a lot_ for our own projects. The processor has plenty of GPIO, Analog inputs, hardware UART SPI and I2C, timers and PWM galore - just enough for most simple projects. When we need to go small, we use a
Out of Stock
[Buy Now](https://www.adafruit.com/product/50)
[Related Guides to the Product](https://learn.adafruit.com/products/50/guides)
### Breadboarding wire bundle
[Breadboarding wire bundle](https://www.adafruit.com/product/153)
75 flexible stranded core wires with stiff ends molded on in red, orange, yellow, green, blue, brown, black and white. These are a major improvement over the "box of bent wires" that are sometimes sold with breadboards, and faster than stripping your own solid core wires. Makes...
In Stock
[Buy Now](https://www.adafruit.com/product/153)
[Related Guides to the Product](https://learn.adafruit.com/products/153/guides)
### Half Sized Premium Breadboard - 400 Tie Points
[Half Sized Premium Breadboard - 400 Tie Points](https://www.adafruit.com/product/64)
This is a cute, half-size breadboard with 400 tie points, good for small projects. It's 3.25" x 2.2" / 8.3cm x 5.5cm with a standard double-strip in the middle and two power rails on both sides. You can pull the power rails off easily to make the breadboard as...
In Stock
[Buy Now](https://www.adafruit.com/product/64)
[Related Guides to the Product](https://learn.adafruit.com/products/64/guides)
## Related Guides
- [Adafruit LED Backpacks](https://learn.adafruit.com/adafruit-led-backpack.md)
- [Digital Circuits 7: MCUs... how do they work?](https://learn.adafruit.com/mcus-how-do-they-work.md)
- [Current Limiting Stepper Driver with DRV8871](https://learn.adafruit.com/current-limiting-stepper-driver-with-drv8871.md)
- [20mm LED Pixels](https://learn.adafruit.com/20mm-led-pixels.md)
- [Reverse Geocache Box](https://learn.adafruit.com/reverse-geocache-engagement-box.md)
- [Trainable Robotic Arm](https://learn.adafruit.com/trainable-robotic-arm.md)
- [Adafruit Microphone Amplifier Breakout](https://learn.adafruit.com/adafruit-microphone-amplifier-breakout.md)
- [Ladyada's Learn Arduino - Lesson #1](https://learn.adafruit.com/ladyadas-learn-arduino-lesson-number-1.md)
- [Silicone Robo-Tentacle](https://learn.adafruit.com/silicone-robo-tentacle.md)
- [Wave Shield Voice Changer](https://learn.adafruit.com/wave-shield-voice-changer.md)
- [IR Sensor](https://learn.adafruit.com/ir-sensor.md)
- [Adafruit Motor Shield](https://learn.adafruit.com/adafruit-motor-shield.md)
- [2.2" TFT Display](https://learn.adafruit.com/2-2-tft-display.md)
- [Arduino Lesson 12. LCD Displays - Part 2](https://learn.adafruit.com/adafruit-arduino-lesson-12-lcd-displays-part-2.md)
- [3D Printed Wireless MIDI Controller Guitar](https://learn.adafruit.com/ez-key-wireless-midi-controller-guitar.md)
- [Mini Thermal Receipt Printers](https://learn.adafruit.com/mini-thermal-receipt-printer.md)
---
# Source: https://learn.adafruit.com/adalight-diy-ambient-tv-lighting/pieces.md
# Adalight Project Pack
## Meet the Pieces
## Digital RGB LED Pixels

Our **Digital RGB LED Pixels** are the ultimate Christmas lights. Under software control, the color and brightness of every single “pixel” can be set and animated.
The 25 pixel strand included in the Project Pack is is suitable for monitors up to 27 inches (70 cm) diagonal.
## Arduino Uno

**Arduino** is the microcontroller development board that’s taken the DIY world by storm. Adalight uses an Arduino Uno connected to a USB port to shuttle data between the host computer and the lights.## Processing

**Processing** is a programming environment designed for multimedia applications and first-time code developers, and it runs equally well on Windows, Mac and Linux computers. If you’ve never programmed before, that’s okay — we provide all the code, you just need to install it and start it running.
## Adalight Project Pack

The **Adalight Project Pack** bundles together one strand of our “bullet” LED Pixels (25 lights), a 5 Volt power supply and a DC jack adapter (so there’s no soldering required). You provide your own Arduino microcontroller — we highly recommend using the Arduino Uno. The project pack a good starter setup, or you can choose to buy all the parts separately if you have plans for a larger or more specialized display.
As explained in the introduction, please read through the complete tutorial for an idea of what other parts and tools you may need: USB cable, wire, tape, etc.
###
Arduino has become so popular among electronics hobbyists that many already own one…or even have spares around. This also allows a choice for technical users who may want to substitute a different microcontroller and not have to pay for an Arduino they won’t be using.
###
Not in this case. The Arduino Mega has more I/O and RAM — it’s great for robots and such — but these provide no benefit for Adalight. So if you’re buying a microcontroller _specifically_ for this project, save some money and get the Uno. Adalight also works 100% with older Arduinos like the Duemilanove and Diecimila (even the earlier “168” version), if you have a retired one sitting around. **Do not use an Arduino Leonardo** …this is a young product and still has some quirks preventing its reliable use with Adalight.
- [Previous Page](https://learn.adafruit.com/adalight-diy-ambient-tv-lighting/overview.md)
- [Next Page](https://learn.adafruit.com/adalight-diy-ambient-tv-lighting/wiring-1.md)
## Featured Products
### Adalight - DIY Ambient Monitor Lighting Project Pack
[Adalight - DIY Ambient Monitor Lighting Project Pack](https://www.adafruit.com/product/461)
Build your own ambient-light addition for a monitor or media PC television with the Adalight project pack! This project pack is for our ["Adalight" project tutorial](http://learn.adafruit.com/adalight-diy-ambient-tv-lighting). By running the Processing code on your...
No Longer Stocked
[Buy Now](https://www.adafruit.com/product/461)
[Related Guides to the Product](https://learn.adafruit.com/products/461/guides)
### 12mm Diffused Thin Digital RGB LED Pixels (Strand of 25)
[12mm Diffused Thin Digital RGB LED Pixels (Strand of 25)](https://www.adafruit.com/product/322)
RGB Pixels are digitally-controllable lights you can set to any color, or animate. Each RGB LED and controller chip is molded into a 'dot' of silicone. The dots are weatherproof and rugged. There are four flanges molded in so that you can 'push' them into a 12mm drill hole in...
No Longer Stocked
[Buy Now](https://www.adafruit.com/product/322)
[Related Guides to the Product](https://learn.adafruit.com/products/322/guides)
### 12mm Diffused Flat Digital RGB LED Pixels (Strand of 25)
[12mm Diffused Flat Digital RGB LED Pixels (Strand of 25)](https://www.adafruit.com/product/738)
RGB Pixels are digitally-controllable lights you can set to any color, or animate. Each RGB LED and controller chip is molded into a 'dot' of silicone. The dots are weatherproof and rugged. There are four flanges molded in so that you can 'push' them into a 12mm drill hole in...
In Stock
[Buy Now](https://www.adafruit.com/product/738)
[Related Guides to the Product](https://learn.adafruit.com/products/738/guides)
### Adafruit METRO 328 Fully Assembled - Arduino IDE compatible
[Adafruit METRO 328 Fully Assembled - Arduino IDE compatible](https://www.adafruit.com/product/50)
We sure love the ATmega328 here at Adafruit, and we use them _a lot_ for our own projects. The processor has plenty of GPIO, Analog inputs, hardware UART SPI and I2C, timers and PWM galore - just enough for most simple projects. When we need to go small, we use a
Out of Stock
[Buy Now](https://www.adafruit.com/product/50)
[Related Guides to the Product](https://learn.adafruit.com/products/50/guides)
### Female DC Power adapter - 2.1mm jack to screw terminal block
[Female DC Power adapter - 2.1mm jack to screw terminal block](https://www.adafruit.com/product/368)
If you need to connect a DC power wall wart to a board that doesn't have a DC jack - this adapter will come in very handy! There is a 2.1mm DC jack on one end, and a screw terminal block on the other. The terminals are labeled with positive/negative assuming a positive-tip configuration...
In Stock
[Buy Now](https://www.adafruit.com/product/368)
[Related Guides to the Product](https://learn.adafruit.com/products/368/guides)
### 5V 2A (2000mA) switching power supply - UL Listed
[5V 2A (2000mA) switching power supply - UL Listed](https://www.adafruit.com/product/276)
This is an FCC/CE certified and UL listed power supply. Need a lot of 5V power? This switching supply gives a clean regulated 5V output at up to 2000mA. 110 or 240 input, so it works in any country. The plugs are "US 2-prong" style so you may need a plug adapter, but you can pick one...
In Stock
[Buy Now](https://www.adafruit.com/product/276)
[Related Guides to the Product](https://learn.adafruit.com/products/276/guides)
### Breadboarding wire bundle
[Breadboarding wire bundle](https://www.adafruit.com/product/153)
75 flexible stranded core wires with stiff ends molded on in red, orange, yellow, green, blue, brown, black and white. These are a major improvement over the "box of bent wires" that are sometimes sold with breadboards, and faster than stripping your own solid core wires. Makes...
In Stock
[Buy Now](https://www.adafruit.com/product/153)
[Related Guides to the Product](https://learn.adafruit.com/products/153/guides)
## Related Guides
- [2.2" TFT Display](https://learn.adafruit.com/2-2-tft-display.md)
- [Arduin-o-Phone](https://learn.adafruit.com/arduin-o-phone-arduino-powered-diy-cellphone.md)
- [Adafruit CC3000 WiFi and Xively](https://learn.adafruit.com/adafruit-cc3000-wifi-and-xively.md)
- [Analog Feedback Servos](https://learn.adafruit.com/analog-feedback-servos.md)
- [Ladyada's Learn Arduino - Lesson #0](https://learn.adafruit.com/ladyadas-learn-arduino-lesson-number-0.md)
- [Adafruit 1.27" and 1.5" Color OLED Breakout Board](https://learn.adafruit.com/adafruit-1-5-color-oled-breakout-board.md)
- [Bluetooth Temperature & Humidity Sensor](https://learn.adafruit.com/bluetooth-temperature-and-humidity-sensor.md)
- [Arduino Lesson 7. Make an RGB LED Fader](https://learn.adafruit.com/adafruit-arduino-lesson-7-make-an-rgb-led-fader.md)
- [Wave Shield](https://learn.adafruit.com/adafruit-wave-shield-audio-shield-for-arduino.md)
- [Adafruit 1.14" 240x135 Color TFT Breakout LCD Display](https://learn.adafruit.com/adafruit-1-14-240x135-color-tft-breakout.md)
- [Adafruit Arduino Selection Guide](https://learn.adafruit.com/adafruit-arduino-selection-guide.md)
- [Arduino Lesson 3. RGB LEDs](https://learn.adafruit.com/adafruit-arduino-lesson-3-rgb-leds.md)
- [Character LCDs](https://learn.adafruit.com/character-lcds.md)
- [Arduino Lesson 11. LCD Displays - Part 1](https://learn.adafruit.com/adafruit-arduino-lesson-11-lcd-displays-1.md)
- [RGB LED Matrix Basics](https://learn.adafruit.com/32x16-32x32-rgb-led-matrix.md)
---
# Source: https://learn.adafruit.com/fpga-rgb-matrix/pin-assignments.md
# FPGA RGB Matrix
## Pin Assignments
## Making pin assignments
Go to the "Assignments" menu and select "Import Assignments...". Import the **de0-nano/rgbmatrix-fpga.qsf** file. After you do this, a message should appear in the "System" console tab at the bottom of Quartus: "Import completed. 14 assignments were written (of of 14 read)."

You can (optionally) customize the pin assignments that were imported by going to the "Assignments" menu and selecting "Assignment Editor". Additional information on the GPIO headers can be found in the [DE0-Nano PDF manual](http://www.terasic.com.tw/cgi-bin/page/archive.pl?Language=English&CategoryNo=139&No=593&PartNo=4) (pages 18-20). A mapping of FPGA pins to GPIO headers can also be found in the de0-nano/DE0\_Nano.qsf file (open it with a text editor).

Save any changes. Now we are ready to connect the pins on the FPGA to the pins on the RGB LED matrix panel!

Please refer to the [Adafruit guide for wiring details](http://learn.adafruit.com/32x16-32x32-rgb-led-matrix/) on the panel side.
[You may want to use female-female jumper wires to make the connections between the IDC pins!](https://www.adafruit.com/products/266)

Info:
- [Previous Page](https://learn.adafruit.com/fpga-rgb-matrix/pin-settings.md)
- [Next Page](https://learn.adafruit.com/fpga-rgb-matrix/synthesize-and-upload.md)
## Featured Products
### 5V 2A (2000mA) switching power supply - UL Listed
[5V 2A (2000mA) switching power supply - UL Listed](https://www.adafruit.com/product/276)
This is an FCC/CE certified and UL listed power supply. Need a lot of 5V power? This switching supply gives a clean regulated 5V output at up to 2000mA. 110 or 240 input, so it works in any country. The plugs are "US 2-prong" style so you may need a plug adapter, but you can pick one...
In Stock
[Buy Now](https://www.adafruit.com/product/276)
[Related Guides to the Product](https://learn.adafruit.com/products/276/guides)
### Medium 16x32 RGB LED matrix panel - 6mm Pitch
[Medium 16x32 RGB LED matrix panel - 6mm Pitch](https://www.adafruit.com/product/420)
Bring a little bit of Times Square into your home with this 16 x 32 RGB LED matrix panel. These panels are normally used to make video walls, here in New York we see them on the sides of busses and bus stops, to display animations or short video clips. We thought they looked really cool so we...
In Stock
[Buy Now](https://www.adafruit.com/product/420)
[Related Guides to the Product](https://learn.adafruit.com/products/420/guides)
### DE0-Nano - Altera Cyclone IV FPGA starter board
[DE0-Nano - Altera Cyclone IV FPGA starter board](https://www.adafruit.com/product/451)
For every day projects, microcontrollers are low-cost and easy to use. But when you have a project that needs raw power and high speed you may want to check out FPGAs (Field Programmable Gate Arrays). FPGAs are like raw chips that you can design by hand. They run very fast and very...
No Longer Stocked
[Buy Now](https://www.adafruit.com/product/451)
[Related Guides to the Product](https://learn.adafruit.com/products/451/guides)
## Related Guides
- [Smart Bathroom App](https://learn.adafruit.com/smart-bathroom-app.md)
- [NeoTrellis Light Painting](https://learn.adafruit.com/neotrellis-light-painting.md)
- [TIMESQUARE Wordclock](https://learn.adafruit.com/timesquare-wordclock.md)
- [MatrixPortal S3 Flight Proximity Tracker](https://learn.adafruit.com/matrixportal-s3-flight-proximity-tracker.md)
- [MicroPython Displays: Drawing Shapes](https://learn.adafruit.com/micropython-displays-drawing-shapes.md)
- [Adafruit Protomatter RGB Matrix Library](https://learn.adafruit.com/adafruit-protomatter-rgb-matrix-library.md)
- [Adafruit Microphone Amplifier Breakout](https://learn.adafruit.com/adafruit-microphone-amplifier-breakout.md)
- [16x16 NeoPixel Matrix Square Pixel Display](https://learn.adafruit.com/16x16-neopixel-matrix-square-pixel-display.md)
- [Shake Away 2021 with MatrixPortal](https://learn.adafruit.com/matrixportal-shake-away-2020.md)
- [NeoTrellis Feather Case Assembly](https://learn.adafruit.com/neotrellis-feather-case-assembly.md)
- [RGB LED Matrices with CircuitPython](https://learn.adafruit.com/rgb-led-matrices-matrix-panels-with-circuitpython.md)
- [Scroll an SMS Text Message on your RGB Matrix](https://learn.adafruit.com/scroll-an-sms-text-message-on-your-rgb-matrix.md)
- [Adafruit LED Backpacks](https://learn.adafruit.com/adafruit-led-backpack.md)
- [Raspberry Pi LED Matrix Display](https://learn.adafruit.com/raspberry-pi-led-matrix-display.md)
- [Sino:bit with Arduino](https://learn.adafruit.com/sino-bit-with-arduino.md)
---
# Source: https://learn.adafruit.com/fpga-rgb-matrix/pin-settings.md
# FPGA RGB Matrix
## Pin settings
## Pin settings
Now that the project has been created, you need to change two more settings before we can move on. Go to the Project Navigator panel in the top left area of Quartus and right click on the device ("Cyclone IV E: ..."). Select "Device" from the menu.
A window will open. Click "Device and Pin Options...". In the left hand side of the new window that comes up, open the "Unused Pins" category. Change the "Reserve all unused pins" settings to "As input tri-stated". This will essentially prevent the unused pins on the FPGA from doing anything unwanted on the DE0-Nano when we program the design.
Now select the "Voltage" category. Change the "Default I/O standard" to "3.3-V LVTTL". This is essential to do because the panels will not recognize a signal below this voltage.

Click OK, then click OK again.
- [Previous Page](https://learn.adafruit.com/fpga-rgb-matrix/new-project.md)
- [Next Page](https://learn.adafruit.com/fpga-rgb-matrix/pin-assignments.md)
## Featured Products
### 5V 2A (2000mA) switching power supply - UL Listed
[5V 2A (2000mA) switching power supply - UL Listed](https://www.adafruit.com/product/276)
This is an FCC/CE certified and UL listed power supply. Need a lot of 5V power? This switching supply gives a clean regulated 5V output at up to 2000mA. 110 or 240 input, so it works in any country. The plugs are "US 2-prong" style so you may need a plug adapter, but you can pick one...
In Stock
[Buy Now](https://www.adafruit.com/product/276)
[Related Guides to the Product](https://learn.adafruit.com/products/276/guides)
### Medium 16x32 RGB LED matrix panel - 6mm Pitch
[Medium 16x32 RGB LED matrix panel - 6mm Pitch](https://www.adafruit.com/product/420)
Bring a little bit of Times Square into your home with this 16 x 32 RGB LED matrix panel. These panels are normally used to make video walls, here in New York we see them on the sides of busses and bus stops, to display animations or short video clips. We thought they looked really cool so we...
In Stock
[Buy Now](https://www.adafruit.com/product/420)
[Related Guides to the Product](https://learn.adafruit.com/products/420/guides)
### DE0-Nano - Altera Cyclone IV FPGA starter board
[DE0-Nano - Altera Cyclone IV FPGA starter board](https://www.adafruit.com/product/451)
For every day projects, microcontrollers are low-cost and easy to use. But when you have a project that needs raw power and high speed you may want to check out FPGAs (Field Programmable Gate Arrays). FPGAs are like raw chips that you can design by hand. They run very fast and very...
No Longer Stocked
[Buy Now](https://www.adafruit.com/product/451)
[Related Guides to the Product](https://learn.adafruit.com/products/451/guides)
## Related Guides
- [Smart Bathroom App](https://learn.adafruit.com/smart-bathroom-app.md)
- [NeoTrellis Light Painting](https://learn.adafruit.com/neotrellis-light-painting.md)
- [TIMESQUARE Wordclock](https://learn.adafruit.com/timesquare-wordclock.md)
- [MatrixPortal S3 Flight Proximity Tracker](https://learn.adafruit.com/matrixportal-s3-flight-proximity-tracker.md)
- [MicroPython Displays: Drawing Shapes](https://learn.adafruit.com/micropython-displays-drawing-shapes.md)
- [Adafruit Protomatter RGB Matrix Library](https://learn.adafruit.com/adafruit-protomatter-rgb-matrix-library.md)
- [Adafruit Microphone Amplifier Breakout](https://learn.adafruit.com/adafruit-microphone-amplifier-breakout.md)
- [16x16 NeoPixel Matrix Square Pixel Display](https://learn.adafruit.com/16x16-neopixel-matrix-square-pixel-display.md)
- [Shake Away 2021 with MatrixPortal](https://learn.adafruit.com/matrixportal-shake-away-2020.md)
- [NeoTrellis Feather Case Assembly](https://learn.adafruit.com/neotrellis-feather-case-assembly.md)
- [RGB LED Matrices with CircuitPython](https://learn.adafruit.com/rgb-led-matrices-matrix-panels-with-circuitpython.md)
- [Scroll an SMS Text Message on your RGB Matrix](https://learn.adafruit.com/scroll-an-sms-text-message-on-your-rgb-matrix.md)
- [Adafruit LED Backpacks](https://learn.adafruit.com/adafruit-led-backpack.md)
- [Raspberry Pi LED Matrix Display](https://learn.adafruit.com/raspberry-pi-led-matrix-display.md)
- [Sino:bit with Arduino](https://learn.adafruit.com/sino-bit-with-arduino.md)
---
# Source: https://learn.adafruit.com/adafruit-ultimate-gps/pinouts.md
# Source: https://learn.adafruit.com/adafruit-ina219-current-sensor-breakout/pinouts.md
# Source: https://learn.adafruit.com/adafruit-led-backpack/pinouts.md
# Adafruit LED Backpacks
## Pinouts


There are a number of features on the 0.54" Alphanumeric Backpack.
# STEMMA QT Revision-Only Features
These features are only available on the STEMMA QT revision.
## STEMMA QT Connectors
The default I2C address is **0x70**.
The [**STEMMA QT connectors**](https://learn.adafruit.com/introducing-adafruit-stemma-qt) provide a solder-free way to connect this backpack to development boards with STEMMA QT connectors, or to other things, with[various associated accessories](https://www.adafruit.com/category/1018).

## On LED and LED Jumper
- **On LED** - On the left side of the back of the board is a little green LED labeled **On**. This LED lights up when the board is successfully powered.
- **LED jumper** - To the right of the On LED is a jumper labeled **LED**. If you wish to disable the On LED, you can cut the trace between the two pads. To enable it again, use solder to reconnect the two pads.

# Original and STEMMA QT Version Features
These features are available on both versions. There is one header pin difference between the two, which is explained in the next section. Everything else is the same.
## Header Pin Through-Hole Pads
If you prefer to use a breadboard, there are through-hole header pin pads along the top of the board in the middle.
The default I2C address is **0x70**.
**On both versions:**
- **VIO/VCC** - This is power for the backpack. It can be 3V-5V. To power the backpack, give it the same power as the logic level of your microcontroller - e.g. for a 5V microcontroller like Arduino, use 5V.
- **GND** - This is common ground for power and logic.
- **SCL** - This is the I2C clock pin. Connect it to your microcontroller I2C clock line. This pin is level shifted so you can use 3-5V logic, and there's a **10K pullup** on this pin.
- **SDA** - This is the I2C data pin. Connect it to your microcontroller I2C data line. This pin is level shifted so you can use 3-5V logic, and there's a **10K pullup** on this pin.


Warning: Wiring VHi to 3v on the Stemma QT version will result in the display not activating.
**On the STEMMA QT revision ONLY:**
- **VHi** - This pin allows you to provide 5V to only the 14-segment displays when using a 3V device to control the backpack. If you're using a 3V device and you want your displays to be brighter, you can maintain the 3V I2C power level, and connect 5V to the VHi pin to make the 14-segment displays have a brighter look.
**On the original version ONLY:**
- **Vi2c** - This is the I2C voltage, which sets the logic level to I2C. Connect this pin to the voltage pin on your device that matches the device's logic level. For example, if you're using a 3.3V microcontroller, connect it to 3.3V.
## Display Pin Through-Hole Pads
These two rows of through-hole pads are for soldering the alphanumeric LED displays onto the backpack. See the [Assembly page](https://learn.adafruit.com/adafruit-led-backpack/0-54-alphanumeric-assembly) for details on attaching the displays properly.


## HT16K33 Matrix Driver
The chip located in the center of the back of the backpack is the HT16K33 matrix driver, which drives the 14-segment LED displays.


## Address Jumper Pins
On the back of the board are **three address jumpers** , labeled **A0** , **A1** , and **A2**. These jumpers allow you to chain up to 8 of these boards on the same pair of I2C clock and data pins. To do so, you solder the jumpers "closed" in various combinations by connecting the two pads.
The default I2C address is **0x70**. The other address options can be calculated by “adding” the **A0/A1/A2** to the base of **0x70**.


**A0** sets the lowest bit with a value of **1** , **A1** sets the next bit with a value of **2** and **A2** sets the next bit with a value of **4.** The final address is **0x7**** 0 + A2 + A1 + A0 **which would be** 0x77**.
So for example if **A2** is soldered closed and **A0** is soldered closed, the address is **0x70 + 4 + 1 = 0x75**.
If only **A0** is soldered closed, the address is **0x70 + 1 = 0x71**
If only **A1** is soldered closed, the address is **0x70 + 2 = 0x72**
If only **A2** is soldered closed, the address is **0x70 + 4 = 0x74**
The table below shows all possible addresses, and whether the pin(s) should be high (closed) or low (open).

- [Previous Page](https://learn.adafruit.com/adafruit-led-backpack/0-54-alphanumeric.md)
- [Next Page](https://learn.adafruit.com/adafruit-led-backpack/0-54-alphanumeric-assembly.md)
## Primary Products
### Adafruit Mini 8x8 LED Matrix w/I2C Backpack - Red
[Adafruit Mini 8x8 LED Matrix w/I2C Backpack - Red](https://www.adafruit.com/product/870)
What's better than a single LED? Lots of LEDs! A fun way to make a small display is to use an [8x8 matrix](https://www.adafruit.com/category/37_88) or a [4-digit 7-segment display](https://www.adafruit.com/category/37_103). Matrices like these are...
In Stock
[Buy Now](https://www.adafruit.com/product/870)
[Related Guides to the Product](https://learn.adafruit.com/products/870/guides)
### Adafruit Mini 8x8 LED Matrix w/I2C Backpack - Yellow
[Adafruit Mini 8x8 LED Matrix w/I2C Backpack - Yellow](https://www.adafruit.com/product/871)
What's better than a single LED? Lots of LEDs! A fun way to make a small display is to use an [8x8 matrix](https://www.adafruit.com/category/37_88) or a [4-digit 7-segment display](https://www.adafruit.com/category/37_103). Matrices like these are...
In Stock
[Buy Now](https://www.adafruit.com/product/871)
[Related Guides to the Product](https://learn.adafruit.com/products/871/guides)
### Adafruit Mini 0.8" 8x8 LED Matrix w/I2C Backpack - Yellow-Green
[Adafruit Mini 0.8" 8x8 LED Matrix w/I2C Backpack - Yellow-Green](https://www.adafruit.com/product/872)
What's better than a single LED? Lots of LEDs! A fun way to make a small display is to use an [8x8 matrix](https://www.adafruit.com/category/37_88) or a [4-digit 7-segment display](https://www.adafruit.com/category/37_103). Matrices like these are...
In Stock
[Buy Now](https://www.adafruit.com/product/872)
[Related Guides to the Product](https://learn.adafruit.com/products/872/guides)
### Adafruit 0.56" 4-Digit 7-Segment Display with I2C Backpack - Red
[Adafruit 0.56" 4-Digit 7-Segment Display with I2C Backpack - Red](https://www.adafruit.com/product/878)
What's better than a single LED? Lots of LEDs! A fun way to make a small display is to use an [8x8 matrix](https://www.adafruit.com/category/37_88) or a [4-digit 7-segment display](https://www.adafruit.com/category/37_103). Matrices like these are...
In Stock
[Buy Now](https://www.adafruit.com/product/878)
[Related Guides to the Product](https://learn.adafruit.com/products/878/guides)
### Adafruit 0.56" 4-Digit 7-Segment Display w/I2C Backpack - Yellow
[Adafruit 0.56" 4-Digit 7-Segment Display w/I2C Backpack - Yellow](https://www.adafruit.com/product/879)
What's better than a single LED? Lots of LEDs! A fun way to make a small display is to use an [8x8 matrix](https://www.adafruit.com/category/37_88) or a [4-digit 7-segment display](https://www.adafruit.com/category/37_103). Matrices like these are...
In Stock
[Buy Now](https://www.adafruit.com/product/879)
[Related Guides to the Product](https://learn.adafruit.com/products/879/guides)
### Adafruit 0.56" 4-Digit 7-Segment Display w/ I2C Backpack - Green
[Adafruit 0.56" 4-Digit 7-Segment Display w/ I2C Backpack - Green](https://www.adafruit.com/product/880)
What's better than a single LED? Lots of LEDs! A fun way to make a small display is to use an [8x8 matrix](https://www.adafruit.com/category/37_88) or a [4-digit 7-segment display](https://www.adafruit.com/category/37_103). Matrices like these are...
No Longer Stocked
[Buy Now](https://www.adafruit.com/product/880)
[Related Guides to the Product](https://learn.adafruit.com/products/880/guides)
### Adafruit 0.56" 4-Digit 7-Segment Display w/ I2C Backpack - Blue
[Adafruit 0.56" 4-Digit 7-Segment Display w/ I2C Backpack - Blue](https://www.adafruit.com/product/881)
What's better than a single LED? Lots of LEDs! A fun way to make a small display is to use an [8x8 matrix](https://www.adafruit.com/category/37_88) or a [4-digit 7-segment display](https://www.adafruit.com/category/37_103). Matrices like these are...
In Stock
[Buy Now](https://www.adafruit.com/product/881)
[Related Guides to the Product](https://learn.adafruit.com/products/881/guides)
### Adafruit Bicolor LED Square Pixel Matrix with I2C Backpack
[Adafruit Bicolor LED Square Pixel Matrix with I2C Backpack](https://www.adafruit.com/product/902)
What's better than a single LED? Lots of LEDs! A fun way to make a small colorful display is to use a [1.2" Bi-color 8x8 LED Matrix](http://www.adafruit.com/products/458). Matrices like these are 'multiplexed' - so to control all the 128 LEDs you need 24 pins....
In Stock
[Buy Now](https://www.adafruit.com/product/902)
[Related Guides to the Product](https://learn.adafruit.com/products/902/guides)
### Adafruit Mini 8x8 LED Matrix w/I2C Backpack - Blue
[Adafruit Mini 8x8 LED Matrix w/I2C Backpack - Blue](https://www.adafruit.com/product/959)
What's better than a single LED? Lots of LEDs! A fun way to make a small display is to use an [8x8 matrix](https://www.adafruit.com/category/37_88) or a [4-digit 7-segment display](https://www.adafruit.com/category/37_103). Matrices like these are...
In Stock
[Buy Now](https://www.adafruit.com/product/959)
[Related Guides to the Product](https://learn.adafruit.com/products/959/guides)
### Adafruit 0.56" 4-Digit 7-Segment Display w/I2C Backpack - White
[Adafruit 0.56" 4-Digit 7-Segment Display w/I2C Backpack - White](https://www.adafruit.com/product/1002)
What's better than a single LED? Lots of LEDs! A fun way to make a small display is to use an [8x8 matrix](https://www.adafruit.com/category/37_88) or a [4-digit 7-segment display](https://www.adafruit.com/category/37_103). Matrices like these are...
In Stock
[Buy Now](https://www.adafruit.com/product/1002)
[Related Guides to the Product](https://learn.adafruit.com/products/1002/guides)
### Adafruit 1.2" 8x8 LED Matrix Backpack
[Adafruit 1.2" 8x8 LED Matrix Backpack](https://www.adafruit.com/product/1048)
By popular request, you can now get our 8x8 LED backpacks without the LEDs! These backpacks feature an HT16K33 I2C LED driver, they're simple and easy to use - you can use [our very nice library for the backpacks to...](https://github.com/adafruit/Adafruit-LED-Backpack-Library)
In Stock
[Buy Now](https://www.adafruit.com/product/1048)
[Related Guides to the Product](https://learn.adafruit.com/products/1048/guides)
### Adafruit Small 1.2" 8x8 LED Matrix w/I2C Backpack - Red
[Adafruit Small 1.2" 8x8 LED Matrix w/I2C Backpack - Red](https://www.adafruit.com/product/1049)
What's better than a single LED? Lots of LEDs! A fun way to make a small display is to use an [8x8 matrix](https://www.adafruit.com/category/37_88) or a [4-digit 7-segment display](https://www.adafruit.com/category/37_103). Matrices like these are...
In Stock
[Buy Now](https://www.adafruit.com/product/1049)
[Related Guides to the Product](https://learn.adafruit.com/products/1049/guides)
### Adafruit Small 1.2" 8x8 LED Matrix w/I2C Backpack - Yellow
[Adafruit Small 1.2" 8x8 LED Matrix w/I2C Backpack - Yellow](https://www.adafruit.com/product/1050)
What's better than a single LED? Lots of LEDs! A fun way to make a small display is to use an [8x8 matrix](https://www.adafruit.com/category/37_88) or a [4-digit 7-segment display](https://www.adafruit.com/category/37_103). Matrices like these are...
In Stock
[Buy Now](https://www.adafruit.com/product/1050)
[Related Guides to the Product](https://learn.adafruit.com/products/1050/guides)
### Adafruit Small 1.2" 8x8 LED Matrix w/I2C Backpack - Blue
[Adafruit Small 1.2" 8x8 LED Matrix w/I2C Backpack - Blue](https://www.adafruit.com/product/1052)
What's better than a single LED? Lots of LEDs! A fun way to make a small display is to use an [8x8 matrix](https://www.adafruit.com/category/37_88) or a [4-digit 7-segment display](https://www.adafruit.com/category/37_103). Matrices like these are...
In Stock
[Buy Now](https://www.adafruit.com/product/1052)
[Related Guides to the Product](https://learn.adafruit.com/products/1052/guides)
### Adafruit Mini 8x8 LED Matrix w/I2C Backpack - Ultra Bright White
[Adafruit Mini 8x8 LED Matrix w/I2C Backpack - Ultra Bright White](https://www.adafruit.com/product/1080)
What's better than a single LED? Lots of LEDs! A fun way to make a small display is to use an [8x8 matrix](https://www.adafruit.com/category/37_88) or a [4-digit 7-segment display](https://www.adafruit.com/category/37_103). Matrices like these are...
In Stock
[Buy Now](https://www.adafruit.com/product/1080)
[Related Guides to the Product](https://learn.adafruit.com/products/1080/guides)
### Adafruit 1.2" 4-Digit 7-Segment Display w/I2C Backpack - Green
[Adafruit 1.2" 4-Digit 7-Segment Display w/I2C Backpack - Green](https://www.adafruit.com/product/1268)
What's better than a single LED? Lots of LEDs! A fun way to make a numeric display is to use a [4-digit 7-segment display](https://www.adafruit.com/category/37_103). LED matrices like these are 'multiplexed' - so to control all the seven-segment LEDs you need 14 pins....
No Longer Stocked
[Buy Now](https://www.adafruit.com/product/1268)
[Related Guides to the Product](https://learn.adafruit.com/products/1268/guides)
### Adafruit 1.2" 4-Digit 7-Segment Display w/I2C Backpack - Yellow
[Adafruit 1.2" 4-Digit 7-Segment Display w/I2C Backpack - Yellow](https://www.adafruit.com/product/1269)
What's better than a single LED? Lots of LEDs! A fun way to make a numeric display is to use a [4-digit 7-segment display](https://www.adafruit.com/category/37_103). LED matrices like these are 'multiplexed' - so to control all the seven-segment LEDs you need 14 pins....
In Stock
[Buy Now](https://www.adafruit.com/product/1269)
[Related Guides to the Product](https://learn.adafruit.com/products/1269/guides)
### Adafruit 1.2" 4-Digit 7-Segment Display w/I2C Backpack - Red
[Adafruit 1.2" 4-Digit 7-Segment Display w/I2C Backpack - Red](https://www.adafruit.com/product/1270)
What's better than a single LED? Lots of LEDs! A fun way to make a numeric display is to use a [4-digit 7-segment display](https://www.adafruit.com/category/37_103). LED matrices like these are 'multiplexed' - so to control all the seven-segment LEDs you need 14 pins....
In Stock
[Buy Now](https://www.adafruit.com/product/1270)
[Related Guides to the Product](https://learn.adafruit.com/products/1270/guides)
### Small 1.2" 8x8 Ultra Bright White LED Matrix + Backpack
[Small 1.2" 8x8 Ultra Bright White LED Matrix + Backpack](https://www.adafruit.com/product/1614)
What's better than a single LED? Lots of LEDs! A fun way to make a small display is to use an [8x8 matrix](https://www.adafruit.com/category/37_88) or a [4-digit 7-segment display](https://www.adafruit.com/category/37_103). Matrices like these are...
In Stock
[Buy Now](https://www.adafruit.com/product/1614)
[Related Guides to the Product](https://learn.adafruit.com/products/1614/guides)
### Adafruit Small 1.2" 8x8 LED Matrix w/I2C Backpack - Pure Green
[Adafruit Small 1.2" 8x8 LED Matrix w/I2C Backpack - Pure Green](https://www.adafruit.com/product/1632)
What's better than a single LED? Lots of LEDs! A fun way to make a small display is to use an [8x8 matrix](https://www.adafruit.com/category/37_88) or a [4-digit 7-segment display](https://www.adafruit.com/category/37_103). Matrices like these are...
In Stock
[Buy Now](https://www.adafruit.com/product/1632)
[Related Guides to the Product](https://learn.adafruit.com/products/1632/guides)
### Adafruit Mini 0.8" 8x8 LED Matrix w/I2C Backpack - Pure Green
[Adafruit Mini 0.8" 8x8 LED Matrix w/I2C Backpack - Pure Green](https://www.adafruit.com/product/1633)
What's better than a single LED? Lots of LEDs! A fun way to make a small display is to use an [8x8 matrix](https://www.adafruit.com/category/37_88) or a [4-digit 7-segment display](https://www.adafruit.com/category/37_103). Matrices like these are...
In Stock
[Buy Now](https://www.adafruit.com/product/1633)
[Related Guides to the Product](https://learn.adafruit.com/products/1633/guides)
### Bi-Color (Red/Green) 24-Bar Bargraph w/I2C Backpack Kit
[Bi-Color (Red/Green) 24-Bar Bargraph w/I2C Backpack Kit](https://www.adafruit.com/product/1721)
What's better than a single LED? Lots of LEDs! A fun way to make a small linear display is to use two 12-bar Bi-color bar-graphs. However, this LED bargraph is 'multiplexed' - so to control all the 48 LEDs you need a lot of pins.
Out of Stock
[Buy Now](https://www.adafruit.com/product/1721)
[Related Guides to the Product](https://learn.adafruit.com/products/1721/guides)
### Small 1.2" 8x8 Ultra Bright Square Amber LED Matrix + Backpack
[Small 1.2" 8x8 Ultra Bright Square Amber LED Matrix + Backpack](https://www.adafruit.com/product/1854)
What's better than a single LED? Lots of LEDs! Matrices like these are 'multiplexed' - so to control 64 LEDs you need 16 pins. That's a lot of pins, and there are [driver chips like the MAX7219](//www.adafruit.com/products/453) that can control a matrix for you but...
In Stock
[Buy Now](https://www.adafruit.com/product/1854)
[Related Guides to the Product](https://learn.adafruit.com/products/1854/guides)
### Small 1.2" 8x8 Ultra Bright Square Yellow LED Matrix + Backpack
[Small 1.2" 8x8 Ultra Bright Square Yellow LED Matrix + Backpack](https://www.adafruit.com/product/1855)
What's better than a single LED? Lots of LEDs! Matrices like these are 'multiplexed' - so to control 64 LEDs you need 16 pins. That's a lot of pins, and there are [driver chips like the MAX7219](//www.adafruit.com/products/453) that can control a matrix for you but...
In Stock
[Buy Now](https://www.adafruit.com/product/1855)
[Related Guides to the Product](https://learn.adafruit.com/products/1855/guides)
### Small 1.2" 8x8 Bright Square Pure Green LED Matrix + Backpack
[Small 1.2" 8x8 Bright Square Pure Green LED Matrix + Backpack](https://www.adafruit.com/product/1856)
What's better than a single LED? Lots of LEDs! Matrices like these are 'multiplexed' - so to control 64 LEDs you need 16 pins. That's a lot of pins, and there are [driver chips like the MAX7219](//www.adafruit.com/products/453) that can control a matrix for you but...
In Stock
[Buy Now](https://www.adafruit.com/product/1856)
[Related Guides to the Product](https://learn.adafruit.com/products/1856/guides)
### Small 1.2" 8x8 Ultra Bright Square White LED Matrix + Backpack
[Small 1.2" 8x8 Ultra Bright Square White LED Matrix + Backpack](https://www.adafruit.com/product/1857)
What's better than a single LED? Lots of LEDs! Matrices like these are 'multiplexed' - so to control 64 LEDs you need 16 pins. That's a lot of pins, and there are [driver chips like the MAX7219](//www.adafruit.com/products/453) that can control a matrix for you but...
In Stock
[Buy Now](https://www.adafruit.com/product/1857)
[Related Guides to the Product](https://learn.adafruit.com/products/1857/guides)
### Adafruit 14-segment LED Alphanumeric Backpack - STEMMA QT
[Adafruit 14-segment LED Alphanumeric Backpack - STEMMA QT](https://www.adafruit.com/product/1910)
By popular request, you can now get our 14-segment LED backpacks without the LEDs! These backpacks feature an HT16K33 I2C LED driver, they're simple and easy to use - you can use [our very nice library for the backpacks to...](https://github.com/adafruit/Adafruit-LED-Backpack-Library)
In Stock
[Buy Now](https://www.adafruit.com/product/1910)
[Related Guides to the Product](https://learn.adafruit.com/products/1910/guides)
### Quad Alphanumeric Display - Red 0.54" Digits w/ I2C Backpack
[Quad Alphanumeric Display - Red 0.54" Digits w/ I2C Backpack](https://www.adafruit.com/product/1911)
Display, elegantly, 012345678 or 9! Gaze, hypnotized, at ABCDEFGHIJKLM - well it can display the whole alphabet. You get the point. This is a nice, bright alphanumeric display that shows letters and numbers in a beautiful red hue. It's super bright and designed for viewing from distances...
In Stock
[Buy Now](https://www.adafruit.com/product/1911)
[Related Guides to the Product](https://learn.adafruit.com/products/1911/guides)
### Quad Alphanumeric Display - Blue 0.54" Digits w/ I2C Backpack
[Quad Alphanumeric Display - Blue 0.54" Digits w/ I2C Backpack](https://www.adafruit.com/product/1912)
Display, elegantly, 012345678 or 9! Gaze, hypnotized, at ABCDEFGHIJKLM - well it can display the whole alphabet. You get the point. This is a nice, bright alphanumeric display that shows letters and numbers in a beautiful blue hue. It's super bright and designed for viewing from distances...
In Stock
[Buy Now](https://www.adafruit.com/product/1912)
[Related Guides to the Product](https://learn.adafruit.com/products/1912/guides)
### 16x8 1.2" LED Matrix + Backpack - Ultra Bright Round Green LEDs
[16x8 1.2" LED Matrix + Backpack - Ultra Bright Round Green LEDs](https://www.adafruit.com/product/2035)
What's better than a single LED? Lots of LEDs! And what's better than lots of LEDs? **TWO TIMES AS MANY LEDS!!!**
With the 16x8 LED Matrix Backpack we've doubled your project's matrix capacity by making it super easy to get two separate 8x8 matrices onto...
In Stock
[Buy Now](https://www.adafruit.com/product/2035)
[Related Guides to the Product](https://learn.adafruit.com/products/2035/guides)
### 16x8 1.2" LED Matrix+Backpack UltraBright Round YellowGreen LEDs
[16x8 1.2" LED Matrix+Backpack UltraBright Round YellowGreen LEDs](https://www.adafruit.com/product/2036)
What's better than a single LED? Lots of LEDs! And what's better than lots of LEDs? **TWO TIMES AS MANY LEDS!!!**
With the 16x8 LED Matrix Backpack we've doubled your project's matrix capacity by making it super easy to get two separate 8x8 matrices onto...
In Stock
[Buy Now](https://www.adafruit.com/product/2036)
[Related Guides to the Product](https://learn.adafruit.com/products/2036/guides)
### 16x8 1.2" LED Matrix + Backpack - Ultra Bright Round Red LEDs
[16x8 1.2" LED Matrix + Backpack - Ultra Bright Round Red LEDs](https://www.adafruit.com/product/2037)
What's better than a single LED? Lots of LEDs! And what's better than lots of LEDs? **TWO TIMES AS MANY LEDS!!!**
With the 16x8 LED Matrix Backpack we've doubled your project's matrix capacity by making it super easy to get two separate 8x8 matrices onto...
In Stock
[Buy Now](https://www.adafruit.com/product/2037)
[Related Guides to the Product](https://learn.adafruit.com/products/2037/guides)
### 16x8 1.2" LED Matrix + Backpack - Ultra Bright Round White LEDs
[16x8 1.2" LED Matrix + Backpack - Ultra Bright Round White LEDs](https://www.adafruit.com/product/2038)
What's better than a single LED? Lots of LEDs! And what's better than lots of LEDs? **TWO TIMES AS MANY LEDS!!!**
With the 16x8 LED Matrix Backpack we've doubled your project's matrix capacity by making it super easy to get two separate 8x8 matrices onto...
In Stock
[Buy Now](https://www.adafruit.com/product/2038)
[Related Guides to the Product](https://learn.adafruit.com/products/2038/guides)
### 16x8 1.2" LED Matrix + Backpack - Ultra Bright Round Blue LEDs
[16x8 1.2" LED Matrix + Backpack - Ultra Bright Round Blue LEDs](https://www.adafruit.com/product/2039)
What's better than a single LED? Lots of LEDs! And what's better than lots of LEDs? **TWO TIMES AS MANY LEDS!!!**
With the 16x8 LED Matrix Backpack we've doubled your project's matrix capacity by making it super easy to get two separate 8x8 matrices onto...
In Stock
[Buy Now](https://www.adafruit.com/product/2039)
[Related Guides to the Product](https://learn.adafruit.com/products/2039/guides)
### 16x8 1.2" LED Matrix + Backpack - Ultra Bright Square Blue LEDs
[16x8 1.2" LED Matrix + Backpack - Ultra Bright Square Blue LEDs](https://www.adafruit.com/product/2040)
What's better than a single LED? Lots of LEDs! And what's better than lots of LEDs? **TWO TIMES AS MANY LEDS!!!**
With the 16x8 LED Matrix Backpack we've doubled your project's matrix capacity by making it super easy to get two separate 8x8 matrices onto...
In Stock
[Buy Now](https://www.adafruit.com/product/2040)
[Related Guides to the Product](https://learn.adafruit.com/products/2040/guides)
### 16x8 1.2" LED Matrix + Backpack - Ultra Bright Square Amber LEDs
[16x8 1.2" LED Matrix + Backpack - Ultra Bright Square Amber LEDs](https://www.adafruit.com/product/2041)
What's better than a single LED? Lots of LEDs! And what's better than lots of LEDs? **TWO TIMES AS MANY LEDS!!!**
With the 16x8 LED Matrix Backpack we've doubled your project's matrix capacity by making it super easy to get two separate 8x8 matrices onto...
In Stock
[Buy Now](https://www.adafruit.com/product/2041)
[Related Guides to the Product](https://learn.adafruit.com/products/2041/guides)
### 16x8 1.2" LED Matrix + Backpack - Ultra Bright Square Green LEDs
[16x8 1.2" LED Matrix + Backpack - Ultra Bright Square Green LEDs](https://www.adafruit.com/product/2042)
What's better than a single LED? Lots of LEDs! And what's better than lots of LEDs? **TWO TIMES AS MANY LEDS!!!**
With the 16x8 LED Matrix Backpack we've doubled your project's matrix capacity by making it super easy to get two separate 8x8 matrices onto...
In Stock
[Buy Now](https://www.adafruit.com/product/2042)
[Related Guides to the Product](https://learn.adafruit.com/products/2042/guides)
### 16x8 1.2" LED Matrix + Backpack -Ultra Bright Square Yellow LEDs
[16x8 1.2" LED Matrix + Backpack -Ultra Bright Square Yellow LEDs](https://www.adafruit.com/product/2043)
What's better than a single LED? Lots of LEDs! And what's better than lots of LEDs? **TWO TIMES AS MANY LEDS!!!**
With the 16x8 LED Matrix Backpack we've doubled your project's matrix capacity by making it super easy to get two separate 8x8 matrices onto...
In Stock
[Buy Now](https://www.adafruit.com/product/2043)
[Related Guides to the Product](https://learn.adafruit.com/products/2043/guides)
### 16x8 1.2" LED Matrix + Backpack - Ultra Bright Square White LEDs
[16x8 1.2" LED Matrix + Backpack - Ultra Bright Square White LEDs](https://www.adafruit.com/product/2044)
What's better than a single LED? Lots of LEDs! And what's better than lots of LEDs? **TWO TIMES AS MANY LEDS!!!**
With the 16x8 LED Matrix Backpack we've doubled your project's matrix capacity by making it super easy to get two separate 8x8 matrices onto...
In Stock
[Buy Now](https://www.adafruit.com/product/2044)
[Related Guides to the Product](https://learn.adafruit.com/products/2044/guides)
### 16x8 1.2" LED Matrix + Backpack-Ultra Bright Round Orange LEDs
[16x8 1.2" LED Matrix + Backpack-Ultra Bright Round Orange LEDs](https://www.adafruit.com/product/2052)
What's better than a single LED? Lots of LEDs! And what's better than lots of LEDs? **TWO TIMES AS MANY LEDS!!!**
With the 16x8 LED Matrix Backpack we've doubled your project's matrix capacity by making it super easy to get two separate 8x8 matrices onto...
In Stock
[Buy Now](https://www.adafruit.com/product/2052)
[Related Guides to the Product](https://learn.adafruit.com/products/2052/guides)
### 16x8 1.2" LED Matrices+Backpack Round LEDs in Various Colors
[16x8 1.2" LED Matrices+Backpack Round LEDs in Various Colors](https://www.adafruit.com/product/2054)
What's better than a single LED? Lots of LEDs! And what's better than lots of LEDs? **TWO TIMES AS MANY LEDS!!!**
With the 16x8 LED Matrix Backpack we've doubled your project's matrix capacity by making it super easy to get two separate 8x8 matrices onto...
Out of Stock
[Buy Now](https://www.adafruit.com/product/2054)
[Related Guides to the Product](https://learn.adafruit.com/products/2054/guides)
### Adafruit 8x16 LED Matrix FeatherWing w/o Matrices
[Adafruit 8x16 LED Matrix FeatherWing w/o Matrices](https://www.adafruit.com/product/3090)
You will chirp with delight when you see how easy it is to make your very own 8x16 LED matrix display for any Feather. At 0.8" square, the little [8x8 matrices](https://www.adafruit.com/new/?q=8x8%20miniature%20LED%20matrix&) have everything a big LED matrix has,...
Out of Stock
[Buy Now](https://www.adafruit.com/product/3090)
[Related Guides to the Product](https://learn.adafruit.com/products/3090/guides)
### Adafruit 14-segment LED Alphanumeric backpack (same as P1910)
[Adafruit 14-segment LED Alphanumeric backpack (same as P1910)](https://www.adafruit.com/product/3322)
Just the backpack + 4pin header
No Longer Stocked
[Buy Now](https://www.adafruit.com/product/3322)
[Related Guides to the Product](https://learn.adafruit.com/products/3322/guides)
## Featured Products
### Adafruit Small 1.2" 8x8 LED Matrix w/I2C Backpack - Yellow-Green
[Adafruit Small 1.2" 8x8 LED Matrix w/I2C Backpack - Yellow-Green](https://www.adafruit.com/product/1051)
What's better than a single LED? Lots of LEDs! A fun way to make a small display is to use an [8x8 matrix](https://www.adafruit.com/category/37_88) or a [4-digit 7-segment display](https://www.adafruit.com/category/37_103). Matrices like these are...
In Stock
[Buy Now](https://www.adafruit.com/product/1051)
[Related Guides to the Product](https://learn.adafruit.com/products/1051/guides)
### Small 1.2" 8x8 Ultra Bright Square Blue LED Matrix + Backpack
[Small 1.2" 8x8 Ultra Bright Square Blue LED Matrix + Backpack](https://www.adafruit.com/product/1853)
What's better than a single LED? Lots of LEDs! Matrices like these are 'multiplexed' - so to control 64 LEDs you need 16 pins. That's a lot of pins, and there are [driver chips like the MAX7219](//www.adafruit.com/products/453) that can control a matrix for you but...
In Stock
[Buy Now](https://www.adafruit.com/product/1853)
[Related Guides to the Product](https://learn.adafruit.com/products/1853/guides)
## Related Guides
- [LED Backpack Displays on Raspberry Pi and BeagleBone Black](https://learn.adafruit.com/led-backpack-displays-on-raspberry-pi-and-beaglebone-black.md)
- [Animating Multiple LED Backpacks](https://learn.adafruit.com/animating-multiple-led-backpacks.md)
- [Arduino GPS Clock](https://learn.adafruit.com/arduino-clock.md)
- [Raspberry Pi Physical Dashboard](https://learn.adafruit.com/raspberry-pi-physical-dashboard.md)
- [CircuitPython Hardware: LED Backpacks & FeatherWings](https://learn.adafruit.com/micropython-hardware-led-backpacks-and-featherwings.md)
- [Matrix and 7-Segment LED Backpack with the Raspberry Pi](https://learn.adafruit.com/matrix-7-segment-led-backpack-with-the-raspberry-pi.md)
- [DIY Pocket LED Gamer - Tiny Tetris!](https://learn.adafruit.com/diy-3d-printed-handheld-pocket-game-tiny-tetris-snake.md)
- [RGB LED Matrix Cube with 25,000 LEDs](https://learn.adafruit.com/rgb-led-matrix-cube-for-pi.md)
- [Creating GIFs for SmartMatrix](https://learn.adafruit.com/creating-gifs-for-smartmatrix.md)
- [Adafruit CharliePlex LED Matrix Bonnet](https://learn.adafruit.com/adafruit-charlieplex-bonnet.md)
- [Connecting a 16x32 RGB LED Matrix Panel to a Raspberry Pi](https://learn.adafruit.com/connecting-a-16x32-rgb-led-matrix-panel-to-a-raspberry-pi.md)
- [MicroPython Displays: Drawing Text](https://learn.adafruit.com/micropython-displays-drawing-text.md)
- [Heart Rate Badge](https://learn.adafruit.com/heart-rate-badge.md)
- [16x24 LED Matrix](https://learn.adafruit.com/16x24-led-matrix.md)
- [Adafruit IS31FL3741](https://learn.adafruit.com/adafruit-is31fl3741.md)
---
# Source: https://learn.adafruit.com/pir-passive-infrared-proximity-motion-sensor.md
# PIR Motion Sensor
## Overview
PIR sensors allow you to sense motion, almost always used to detect whether a human has moved in or out of the sensors range. They are small, inexpensive, low-power, easy to use and don't wear out. For that reason they are commonly found in appliances and gadgets used in homes or businesses. They are often referred to as PIR, "Passive Infrared", "Pyroelectric", or "IR motion" sensors.
PIRs are basically made of a [pyroelectric sensor](http://en.wikipedia.org/wiki/Pyroelectric) (which you can see below as the round metal can with a rectangular crystal in the center), which can detect levels of infrared radiation. Everything emits some low level radiation, and the hotter something is, the more radiation is emitted. The sensor in a motion detector is actually split in two halves. The reason for that is that we are looking to detect motion (change) not average IR levels. The two halves are wired up so that they cancel each other out. If one half sees more or less IR radiation than the other, the output will swing high or low.

Along with the pyroelectic sensor is a bunch of supporting circuitry, resistors and capacitors. It seems that most small hobbyist sensors use the [BISS0001 ("Micro Power PIR Motion Detector IC")](http://learn.adafruit.com/system/assets/assets/000/010/133/original/BISS0001.pdf), undoubtedly a very inexpensive chip. This chip takes the output of the sensor and does some minor processing on it to emit a digital output pulse from the analog sensor.
Our older PIRs looked like this:

Our new PIRs have more adjustable settings and have a header installed in the 3-pin ground/out/power pads

For many basic projects or products that need to detect when a person has left or entered the area, or has approached, PIR sensors are great. They are low power and low cost, pretty rugged, have a wide lens range, and are easy to interface with. Note that PIRs won't tell you how many people are around or how close they are to the sensor, the lens is often fixed to a certain sweep and distance (although it can be hacked somewhere) and they are also sometimes set off by housepets. Experimentation is key!## Some Basic Stats
These stats are for the PIR sensor in the Adafruit shop which is very much [like the Parallax one](http://www.parallax.com/Store/Sensors/ObjectDetection/tabid/176/ProductID/83/List/0/Default.aspx?SortField=ProductName,ProductName) . Nearly all PIRs will have slightly different specifications, although they all pretty much work the same. If there's a datasheet, you'll want to refer to it
- **Size:** Rectangular
- **Price:** [$10.00 at the Adafruit shop](http://www.adafruit.com/index.php?main_page=product_info&cPath=35&products_id=189)
- **Output:** Digital pulse high (3V) when triggered (motion detected) digital low when idle (no motion detected). Pulse lengths are determined by resistors and capacitors on the PCB and differ from sensor to sensor.
- **Sensitivity range:** up to 20 feet (6 meters) 110° x 70° detection range
- **Power supply:** 5V-12V input voltage for most modules (they have a 3.3V regulator), but 5V is ideal in case the regulator has different specs
- **[BIS0001 Datasheet](http://learn.adafruit.com/system/assets/assets/000/010/133/original/BISS0001.pdf)** (the decoder chip used)
- **[RE200B datasheet](http://learn.adafruit.com/system/assets/assets/000/010/134/original/RE200B.pdf)** (most likely the PIR sensing element used)
- **[NL11NH datasheet](http://learn.adafruit.com/system/assets/assets/000/010/135/original/NL11NH.pdf)** (equivalent lens used)
- **[Parallax Datasheet on their version of the sensor](http://learn.adafruit.com/system/assets/assets/000/010/136/original/PIRSensor-V1.2.pdf "Link: http://learn.adafruit.com/system/assets/assets/000/010/136/original/PIRSensor-V1.2.pdf")**
More links!
- [A great page on PIR sensors from GLOLAB \\](http://www.glolab.com/pirparts/infrared.html "Link: http://www.glolab.com/pirparts/infrared.html")
- [Next Page](https://learn.adafruit.com/pir-passive-infrared-proximity-motion-sensor/how-pirs-work.md)
## Primary Products
### PIR (motion) sensor
[PIR (motion) sensor](https://www.adafruit.com/product/189)
PIR sensors are used to detect motion from pets/humanoids from about 20 feet away (possibly works on zombies, not guaranteed). This one has an adjustable delay before firing (approx 2-4 seconds), adjustable sensitivity **and** we include a 1 foot (30 cm) cable with a socket so you...
In Stock
[Buy Now](https://www.adafruit.com/product/189)
[Related Guides to the Product](https://learn.adafruit.com/products/189/guides)
## Related Guides
- [HalloWing All-Seeing Skull](https://learn.adafruit.com/hallowing-all-seeing-skull.md)
- [Magical Mistletoe](https://learn.adafruit.com/magical-mistletoe.md)
- [Screaming Cauldron](https://learn.adafruit.com/screaming-cauldron.md)
- [IoT Bird Feeder with Camera](https://learn.adafruit.com/iot-window-bird-feeder-with-camera.md)
- [No-Code WipperSnapper Summoning Horn](https://learn.adafruit.com/adafruit-io-wippersnapper-summoning-horn.md)
- [Motion Controlled Matrix Bed Clock](https://learn.adafruit.com/motion-controlled-matrix-bed-clock.md)
- [Adafruit VCNL4020 Proximity and Light Sensor](https://learn.adafruit.com/adafruit-vcnl4020-proximity-and-light-sensor.md)
- [Fog Machine with Motion Sensor and Adafruit IO](https://learn.adafruit.com/fog-machine-remote-trigger.md)
- [Feather Freezer Door Alarm](https://learn.adafruit.com/feather-door-alarm.md)
- [MIDI Laser Harp with Time of Flight Distance Sensors](https://learn.adafruit.com/midi-laser-harp-time-of-flight-sensors.md)
- [Using Adafruit IO Actions to Make an IoT Door Detector](https://learn.adafruit.com/using-adafruit-io-actions-to-make-an-iot-door-detector.md)
- [Quadcopter Spray Can Mod](https://learn.adafruit.com/quadcopter-spray-can-mod.md)
- [Adafruit VCNL4040 Proximity Sensor](https://learn.adafruit.com/adafruit-vcnl4040-proximity-sensor.md)
- [Using ItsaSNAP for HomeKit PIR Motion Detection](https://learn.adafruit.com/itsasnap-homekit-pir-motion-detection.md)
- [No-Code Room Occupancy Status ](https://learn.adafruit.com/no-code-room-occupancy-status.md)
---
# Source: https://learn.adafruit.com/adafruit-arduino-lesson-10-making-sounds/playing-a-scale.md
# Arduino Lesson 10. Making Sounds
## Playing a Scale
For the first part of this lesson, the only thing on the breadboard is the Piezo buzzer. One pin of the piezo sounder goes to GND connection and the other to digital pin 12.


Program your Arduino with the following sketch:
```
/*
Adafruit Arduino - Lesson 10. Simple Sounds
*/
int speakerPin = 12;
int numTones = 10;
int tones[] = {261, 277, 294, 311, 330, 349, 370, 392, 415, 440};
// mid C C# D D# E F F# G G# A
void setup()
{
for (int i = 0; i < numTones; i++)
{
tone(speakerPin, tones[i]);
delay(500);
}
noTone(speakerPin);
}
void loop()
{
}
```
To play a note of a particular pitch, you specify the frequency. See the following section on sound. The different frequencies for each note are kept in an array. An array is like a list. So, a scale can be played by playing each of the notes in the list in turn.
The 'for' loop will count from 0 to 9 using the variable 'i'. To get the frequency of the note to play at each step, we use 'tone[i]'. This means, the value in the 'tones' array at position 'i'. So, for example, 'tones[0]' is 261, 'tones[1]' is 277 etc.
The Arduino command 'tone' takes two parameters, the first is the pin to play the tone on and the second is the frequency of the tone to play.
When all the notes have been played, the 'noTone' command stops that pin playing any tone.
We could have put the tone playing code into 'loop' rather than 'setup', but frankly the same scale being played over and over again gets a bit tiresome. So in this case, 'loop' is empty.
To play the tune again, just press the reset button.
- [Previous Page](https://learn.adafruit.com/adafruit-arduino-lesson-10-making-sounds/parts.md)
- [Next Page](https://learn.adafruit.com/adafruit-arduino-lesson-10-making-sounds/sound.md)
## Featured Products
### Piezo Buzzer
[Piezo Buzzer](https://www.adafruit.com/product/160)
Piezo buzzers are used for making beeps, tones and alerts. This one is petite but loud! Drive it with 3-30V peak-to-peak square wave. To use, connect one pin to ground (either one) and the other pin to a square wave out from a timer or microcontroller. For the loudest tones, stay around 4 KHz,...
In Stock
[Buy Now](https://www.adafruit.com/product/160)
[Related Guides to the Product](https://learn.adafruit.com/products/160/guides)
### Photo cell (CdS photoresistor)
[Photo cell (CdS photoresistor)](https://www.adafruit.com/product/161)
CdS cells are little light sensors. As the squiggly face is exposed to more light, the resistance goes down. When it's light, the resistance is about ~1KΩ, when dark it goes up to ~10KΩ.
To use, connect one side of the photocell (either one, it's symmetric) to power...
In Stock
[Buy Now](https://www.adafruit.com/product/161)
[Related Guides to the Product](https://learn.adafruit.com/products/161/guides)
### Premium Male/Male Jumper Wires - 40 x 6" (150mm)
[Premium Male/Male Jumper Wires - 40 x 6" (150mm)](https://www.adafruit.com/product/758)
Handy for making wire harnesses or jumpering between headers on PCB's. These premium jumper wires are 6" (150mm) long and come in a 'strip' of 40 (4 pieces of each of ten rainbow colors). They have 0.1" male header contacts on either end and fit cleanly next to each other...
In Stock
[Buy Now](https://www.adafruit.com/product/758)
[Related Guides to the Product](https://learn.adafruit.com/products/758/guides)
### Half Sized Premium Breadboard - 400 Tie Points
[Half Sized Premium Breadboard - 400 Tie Points](https://www.adafruit.com/product/64)
This is a cute, half-size breadboard with 400 tie points, good for small projects. It's 3.25" x 2.2" / 8.3cm x 5.5cm with a standard double-strip in the middle and two power rails on both sides. You can pull the power rails off easily to make the breadboard as...
In Stock
[Buy Now](https://www.adafruit.com/product/64)
[Related Guides to the Product](https://learn.adafruit.com/products/64/guides)
### Adafruit METRO 328 Fully Assembled - Arduino IDE compatible
[Adafruit METRO 328 Fully Assembled - Arduino IDE compatible](https://www.adafruit.com/product/50)
We sure love the ATmega328 here at Adafruit, and we use them _a lot_ for our own projects. The processor has plenty of GPIO, Analog inputs, hardware UART SPI and I2C, timers and PWM galore - just enough for most simple projects. When we need to go small, we use a
Out of Stock
[Buy Now](https://www.adafruit.com/product/50)
[Related Guides to the Product](https://learn.adafruit.com/products/50/guides)
## Related Guides
- [Multi-tasking the Arduino - Part 2](https://learn.adafruit.com/multi-tasking-the-arduino-part-2.md)
- [Adafruit PCA9685 16-Channel Servo Driver](https://learn.adafruit.com/16-channel-pwm-servo-driver.md)
- [Adafruit CC3000 WiFi and Xively](https://learn.adafruit.com/adafruit-cc3000-wifi-and-xively.md)
- [Trellis 3D Printed Enclosure](https://learn.adafruit.com/trellis-3d-printed-enclosure.md)
- [Remote controlled door lock using a fingerprint sensor & Adafruit IO](https://learn.adafruit.com/remote-controlled-door-lock-using-a-fingerprint-sensor-and-adafruit-io.md)
- [Smart Measuring Cup](https://learn.adafruit.com/smart-measuring-cup.md)
- [0.96" mini Color OLED](https://learn.adafruit.com/096-mini-color-oled.md)
- [Adafruit Analog Accelerometer Breakouts](https://learn.adafruit.com/adafruit-analog-accelerometer-breakouts.md)
- [Circuit Playground: D is for Diode](https://learn.adafruit.com/circuit-playground-d-is-for-diode.md)
- [TMP36 Temperature Sensor](https://learn.adafruit.com/tmp36-temperature-sensor.md)
- [RGB LED Matrix Basics](https://learn.adafruit.com/32x16-32x32-rgb-led-matrix.md)
- [Automatic Monitor Color Temperature Adjustment](https://learn.adafruit.com/automatic-monitor-color-temperature-adjustment.md)
- [Line Following Zumo Robot Using Simulink](https://learn.adafruit.com/line-following-zumo-robot-programmed-with-simulink.md)
- [Wireless Game Show Poppers for the Classroom!](https://learn.adafruit.com/wireless-game-show-poppers.md)
- [Arduino Lesson 4. Eight LEDs and a Shift Register](https://learn.adafruit.com/adafruit-arduino-lesson-4-eight-leds.md)
---
# Source: https://learn.adafruit.com/playing-sounds-and-using-buttons-with-raspberry-pi.md
# Playing sounds and using buttons with Raspberry Pi
## Overview

This guide describes how to use CircuitPython on a Raspberry Pi to trigger audio file playback using tactile button presses. This tutorial works will all versions of Raspberry Pi hardware to date (v1, v2, v3, Zero, etc.) If you have not already used the Raspberry Pi as a input device this guide will show you how to wire up the buttons to the GPIO pins and access their state from a python script.
## To Follow This Tutorial You Will Need
- [A Raspberry Pi](https://www.adafruit.com/?q=raspberry%20pi) (compatible with all 26pin and 40pin Pi releases to date)
- [Pi T-Cobbler Plus,](https://www.adafruit.com/product/2028) [Pi Cobbler Plus for Model B+ / Pi 2](https://www.adafruit.com/products/2029) or the original [Pi Cobbler](https://www.adafruit.com/product/914)
- [(1) Half size breadboard](https://www.adafruit.com/products/64)
- [Hook-up Wire](https://www.adafruit.com/index.php?main_page=adasearch&q=hook-up+wire+spool "Link: https://www.adafruit.com/index.php?main\_page=adasearch&q=hook-up+wire+spool")
- [(3) Tactile Button Switches](https://www.adafruit.com/product/367)
- [(1) 5v 2.5A Switching Power Supply](https://www.adafruit.com/product/1995)
- [Next Page](https://learn.adafruit.com/playing-sounds-and-using-buttons-with-raspberry-pi/prerequisite-pi-setup.md)
## Featured Products
### Raspberry Pi 3 - Model B+ - 1.4GHz Cortex-A53 with 1GB RAM
[Raspberry Pi 3 - Model B+ - 1.4GHz Cortex-A53 with 1GB RAM](https://www.adafruit.com/product/3775)
The Raspberry Pi 3 Model B is the most popular Raspberry Pi computer made, and the Pi Foundation knows you can always make a good thing _better_! And what could make the Pi 3 better? How about a _faster_ processor, 5 GHz WiFi, and updated Ethernet chip with PoE capability?...
In Stock
[Buy Now](https://www.adafruit.com/product/3775)
[Related Guides to the Product](https://learn.adafruit.com/products/3775/guides)
### Half Sized Premium Breadboard - 400 Tie Points
[Half Sized Premium Breadboard - 400 Tie Points](https://www.adafruit.com/product/64)
This is a cute, half-size breadboard with 400 tie points, good for small projects. It's 3.25" x 2.2" / 8.3cm x 5.5cm with a standard double-strip in the middle and two power rails on both sides. You can pull the power rails off easily to make the breadboard as...
In Stock
[Buy Now](https://www.adafruit.com/product/64)
[Related Guides to the Product](https://learn.adafruit.com/products/64/guides)
### Tactile Button switch (6mm) x 20 pack
[Tactile Button switch (6mm) x 20 pack](https://www.adafruit.com/product/367)
Little clicky switches are standard input "buttons" on electronic projects. These work best in a PCB but [can be used on a solderless breadboard as shown in this tutorial](https://learn.adafruit.com/adafruit-arduino-lesson-6-digital-inputs?view=all). The pins are normally...
In Stock
[Buy Now](https://www.adafruit.com/product/367)
[Related Guides to the Product](https://learn.adafruit.com/products/367/guides)
### Adafruit Raspberry Pi B+ / Pi 2 / Pi 3 Case - Smoke Base
[Adafruit Raspberry Pi B+ / Pi 2 / Pi 3 Case - Smoke Base](https://www.adafruit.com/product/2258)
It took awhile to perfect - but that's okay since we can now safely say that the Adafruit case for Raspberry Pi Model B+ / Pi 2 / Pi 3 is The Single Greatest Raspberry Pi Model B+ Case Ever.
This enclosure was designed by Mike Doell - just like our...
In Stock
[Buy Now](https://www.adafruit.com/product/2258)
[Related Guides to the Product](https://learn.adafruit.com/products/2258/guides)
### 5V 2.5A Switching Power Supply with 20AWG MicroUSB Cable
[5V 2.5A Switching Power Supply with 20AWG MicroUSB Cable](https://www.adafruit.com/product/1995)
Our all-in-one 5V 2.5 Amp + MicroUSB cable power adapter is the perfect choice for powering single-board computers like Raspberry Pi, BeagleBone, or anything else that's power-hungry!
This adapter was specifically designed to provide 5.25V, not 5V, but we still call it a 5V USB...
Out of Stock
[Buy Now](https://www.adafruit.com/product/1995)
[Related Guides to the Product](https://learn.adafruit.com/products/1995/guides)
### Assembled Pi T-Cobbler Plus - GPIO Breakout
[Assembled Pi T-Cobbler Plus - GPIO Breakout](https://www.adafruit.com/product/2028)
**This is the assembled version of the Pi T-Cobbler Plus. It only works with the Raspberry Pi Model Zero, A+, B+, Pi 2, Pi 3 & Pi 4!** (Any Pi with 2x20 connector)
The Raspberry Pi has landed on the Maker World like a 40-GPIO pinned, quad-USB ported, credit...
In Stock
[Buy Now](https://www.adafruit.com/product/2028)
[Related Guides to the Product](https://learn.adafruit.com/products/2028/guides)
### Assembled Pi Cobbler Plus - Breakout Cable
[Assembled Pi Cobbler Plus - Breakout Cable](https://www.adafruit.com/product/2029)
The Raspberry Pi B+ / Pi 2 / Pi 3 / Pi 4 has landed on the Maker World like a 40-GPIO pinned, quad-USB ported, credit card sized bomb of DIY joy. And while you can use most of our great Model B accessories by hooking up our [downgrade...](https://www.adafruit.com/product/1986)
In Stock
[Buy Now](https://www.adafruit.com/product/2029)
[Related Guides to the Product](https://learn.adafruit.com/products/2029/guides)
### Adafruit Assembled Pi Cobbler Breakout + Cable for Raspberry Pi
[Adafruit Assembled Pi Cobbler Breakout + Cable for Raspberry Pi](https://www.adafruit.com/product/914)
Now that you've finally got your hands on a [Raspberry Pi® Model B](http://www.raspberrypi.org/), you're probably itching to make some fun embedded computer projects with it. What you need is an add on prototyping Pi Cobbler from Adafruit, which can break out all those...
No Longer Stocked
[Buy Now](https://www.adafruit.com/product/914)
[Related Guides to the Product](https://learn.adafruit.com/products/914/guides)
## Related Guides
- [Capacitive Touch Sensors on the Raspberry Pi](https://learn.adafruit.com/capacitive-touch-sensors-on-the-raspberry-pi.md)
- [LoRa and LoRaWAN Radio for Raspberry Pi](https://learn.adafruit.com/lora-and-lorawan-radio-for-raspberry-pi.md)
- [Adafruit's Raspberry Pi Lesson 13. Power Control](https://learn.adafruit.com/adafruits-raspberry-pi-lesson-13-power-control.md)
- [Adafruit's Raspberry Pi Lesson 4. GPIO Setup](https://learn.adafruit.com/adafruits-raspberry-pi-lesson-4-gpio-setup.md)
- [Adafruit's Raspberry Pi Lesson 11. DS18B20 Temperature Sensing](https://learn.adafruit.com/adafruits-raspberry-pi-lesson-11-ds18b20-temperature-sensing.md)
- [Analog Inputs for Raspberry Pi Using the MCP3008](https://learn.adafruit.com/reading-a-analog-in-and-controlling-audio-volume-with-the-raspberry-pi.md)
- [CircuitPython Libraries on Linux and ODROID C2](https://learn.adafruit.com/circuitpython-libaries-linux-odroid-c2.md)
- [Single Channel LoRaWAN Gateway for Raspberry Pi](https://learn.adafruit.com/raspberry-pi-single-channel-lorawan-gateway.md)
- [Adafruit AMG8833 8x8 Thermal Camera Sensor](https://learn.adafruit.com/adafruit-amg8833-8x8-thermal-camera-sensor.md)
- [Introducing the Raspberry Pi 2 - Model B](https://learn.adafruit.com/introducing-the-raspberry-pi-2-model-b.md)
- [Basic Resistor Sensor Reading on Raspberry Pi](https://learn.adafruit.com/basic-resistor-sensor-reading-on-raspberry-pi.md)
- [Windows IoT Core Application Development: Headed Blinky](https://learn.adafruit.com/windows-iot-application-development-headed-blinky.md)
- [Raspberry Pi WiFi Radio](https://learn.adafruit.com/pi-wifi-radio.md)
- [Program an AVR or Arduino Using Raspberry Pi GPIO](https://learn.adafruit.com/program-an-avr-or-arduino-using-raspberry-pi-gpio-pins.md)
- [USB Rechargeable Cordless Soldering Iron](https://learn.adafruit.com/usb-rechargeable-cordless-soldering-iron.md)
---
# Source: https://learn.adafruit.com/2-2-tft-display/plugging-in-an-eyespi-cable.md
# Source: https://learn.adafruit.com/1-8-tft-display/plugging-in-an-eyespi-cable.md
# 1.8" TFT Display Breakout and Shield
## Plugging in an EYESPI Cable

You can connect an EYESPI compatible display to the EYESPI breakout board using an EYESPI cable. An EYESPI cable is an 18 pin flexible PCB (FPC). The FPC can only be connected properly in one orientation, so be sure to follow the steps below to ensure that your display and breakout are plugged in properly.
Each EYESPI cable has **blue stripes** on either end. On the other side of the cable, underneath the blue stripe, are the connector pins that make contact with the FPC connector pins on the display or breakout.

To begin inserting an EYESPI cable to an FPC connector, gently lift the FPC connector black latch up.

Then, insert the EYESPI cable into the open FPC connector by sliding the cable into the connector. You want to **see the blue stripe facing up towards you**. This inserts the cable pins into the FPC connector.

To secure the cable, lower the FPC connector latch onto the EYESPI cable.

Repeat this process for the FPC connector on your display. Again, ensure that the **blue stripe** on either end of the cable is facing up.

- [Previous Page](https://learn.adafruit.com/1-8-tft-display/eyespi.md)
- [Next Page](https://learn.adafruit.com/1-8-tft-display/breakout-assembly.md)
## Featured Products
### Breadboarding wire bundle
[Breadboarding wire bundle](https://www.adafruit.com/product/153)
75 flexible stranded core wires with stiff ends molded on in red, orange, yellow, green, blue, brown, black and white. These are a major improvement over the "box of bent wires" that are sometimes sold with breadboards, and faster than stripping your own solid core wires. Makes...
In Stock
[Buy Now](https://www.adafruit.com/product/153)
[Related Guides to the Product](https://learn.adafruit.com/products/153/guides)
### Adafruit METRO 328 Fully Assembled - Arduino IDE compatible
[Adafruit METRO 328 Fully Assembled - Arduino IDE compatible](https://www.adafruit.com/product/50)
We sure love the ATmega328 here at Adafruit, and we use them _a lot_ for our own projects. The processor has plenty of GPIO, Analog inputs, hardware UART SPI and I2C, timers and PWM galore - just enough for most simple projects. When we need to go small, we use a
Out of Stock
[Buy Now](https://www.adafruit.com/product/50)
[Related Guides to the Product](https://learn.adafruit.com/products/50/guides)
### Half Sized Premium Breadboard - 400 Tie Points
[Half Sized Premium Breadboard - 400 Tie Points](https://www.adafruit.com/product/64)
This is a cute, half-size breadboard with 400 tie points, good for small projects. It's 3.25" x 2.2" / 8.3cm x 5.5cm with a standard double-strip in the middle and two power rails on both sides. You can pull the power rails off easily to make the breadboard as...
In Stock
[Buy Now](https://www.adafruit.com/product/64)
[Related Guides to the Product](https://learn.adafruit.com/products/64/guides)
### 1.8" Color TFT LCD display with MicroSD Card Breakout
[1.8" Color TFT LCD display with MicroSD Card Breakout](https://www.adafruit.com/product/358)
This lovely little display breakout is the best way to add a small, colorful and bright display to any project. Since the display uses 4-wire SPI to communicate and has its own pixel-addressable frame buffer, it can be used with every kind of microcontroller. Even a very small one with low...
Out of Stock
[Buy Now](https://www.adafruit.com/product/358)
[Related Guides to the Product](https://learn.adafruit.com/products/358/guides)
### Adafruit 1.8" Color TFT Shield w/microSD and Joystick
[Adafruit 1.8" Color TFT Shield w/microSD and Joystick](https://www.adafruit.com/product/802)
This lovely little shield is the best way to add a small, colorful and bright display to any project. We took our popular 1.8" TFT breakout board and remixed it into an Arduino shield complete with microSD card slot and a 5-way joystick navigation switch and three selection buttons! Since...
In Stock
[Buy Now](https://www.adafruit.com/product/802)
[Related Guides to the Product](https://learn.adafruit.com/products/802/guides)
### 1.8" SPI TFT display, 160x128 18-bit color - ST7735R driver
[1.8" SPI TFT display, 160x128 18-bit color - ST7735R driver](https://www.adafruit.com/product/618)
We just love this little 1.8" TFT display, with true TFT color (up to 18-bits per pixel!), fine 160x128 resolution, two white LED backlight that runs on 3.3V and a very easy SPI interface that requires only 4 or 5 digital pins to send pixels to the display.
**Please...**
Out of Stock
[Buy Now](https://www.adafruit.com/product/618)
[Related Guides to the Product](https://learn.adafruit.com/products/618/guides)
## Related Guides
- [Wave Shield](https://learn.adafruit.com/adafruit-wave-shield-audio-shield-for-arduino.md)
- [Adafruit 2.8" TFT Touch Shield v2 - Capacitive or Resistive](https://learn.adafruit.com/adafruit-2-8-tft-touch-shield-v2.md)
- [How to Build a Testing Jig](https://learn.adafruit.com/how-to-build-a-testing-fixture.md)
- [Create an Internet of Things Dashboard with Adafruit IO](https://learn.adafruit.com/create-an-internet-of-things-dashboard-with-adafruit-dot-io.md)
- [Let’s Put LEDs in Things!](https://learn.adafruit.com/lets-put-leds-in-things.md)
- [Tiny Arduino Music Visualizer](https://learn.adafruit.com/piccolo.md)
- [Circuit Playground Sound-Controlled Robot](https://learn.adafruit.com/circuit-playground-sound-controlled-robot.md)
- [Adafruit 1.27" and 1.5" Color OLED Breakout Board](https://learn.adafruit.com/adafruit-1-5-color-oled-breakout-board.md)
- [Arduino Lesson 15. DC Motor Reversing](https://learn.adafruit.com/adafruit-arduino-lesson-15-dc-motor-reversing.md)
- [TTL Serial Camera](https://learn.adafruit.com/ttl-serial-camera.md)
- [Analog Feedback Servos](https://learn.adafruit.com/analog-feedback-servos.md)
- [Geofencing with the FONA 808 & Adafruit IO](https://learn.adafruit.com/geofencing-with-the-fona-808-and-adafruit-io.md)
- [Arduino GPS Clock](https://learn.adafruit.com/arduino-clock.md)
- [Adafruit Data Logger Shield](https://learn.adafruit.com/adafruit-data-logger-shield.md)
- [Making Adabot: Part 2](https://learn.adafruit.com/making-adabot-part-2.md)
---
# Source: https://learn.adafruit.com/pi-video-output-using-pygame/pointing-pygame-to-the-framebuffer.md
# Pi Video Output Using pygame
## Pointing Pygame to the Framebuffer
To render any sort of graphics from the console, we first need to point pygame to the underlying framebuffer used by Linux. This is probably the most error-prone operation, but the following code should handle this gracefully and report any errors if something does go wrong.
Enter the following code into your new project, and save the file via the 'Save' button in the top-menu, or just enter CTRL+S:
```auto
import os
import pygame
import time
class pyscope:
screen = None;
def __init__(self):
"Ininitializes a new pygame screen using the framebuffer"
# Based on "Python GUI in Linux frame buffer"
# http://www.karoltomala.com/blog/?p=679
# Allow running from ssh
os.putenv("DISPLAY", ":0")
disp_no = os.getenv("DISPLAY")
if disp_no:
print("I'm running under X display = {0}".format(disp_no))
# Check which frame buffer drivers are available
# Start with fbcon since directfb hangs with composite output
drivers = ['x11', 'fbcon', 'directfb', 'svgalib']
found = False
for driver in drivers:
# Make sure that SDL_VIDEODRIVER is set
if not os.getenv('SDL_VIDEODRIVER'):
os.putenv('SDL_VIDEODRIVER', driver)
try:
pygame.display.init()
except pygame.error:
print("Driver: {0} failed.".format(driver))
continue
found = True
break
if not found:
raise Exception('No suitable video driver found!')
size = (pygame.display.Info().current_w, pygame.display.Info().current_h)
print("Framebuffer size: %d x %d" % (size[0], size[1]))
self.screen = pygame.display.set_mode(size, pygame.FULLSCREEN)
# Clear the screen to start
self.screen.fill((0, 0, 0))
# Initialise font support
pygame.font.init()
# Render the screen
pygame.display.update()
def __del__(self):
"Destructor to make sure pygame shuts down, etc."
def test(self):
# Fill the screen with red (255, 0, 0)
red = (255, 0, 0)
self.screen.fill(red)
# Update the display
pygame.display.update()
# Create an instance of the PyScope class
scope = pyscope()
scope.test()
time.sleep(10)
```
# Huh ... What is all this?
Don't worry if you don't understand every little bit of the code above. We've provided the code in a way that you simply need to create a new instance of the 'pyscope' class, and the low-level framebuffer implementation should be taken care of. How do you know it works? Let's try it out!
There are three lines of code at the bottom that are important:```
# Create an instance of the PyScope class
scope = pyscope()
scope.test()
time.sleep(10)
```
The first line (after the comment) instantiates a new pyscope object named scope. As soon as this line is executed, the framebuffer will be configured, or any eventual error messages will be displayed if there were any problems.
The second line simply calls a function named 'test' that is in the example code we entered earlier. This will simply fill the screen with the color red.
The third line causes the program to sleep for 10 seconds before exiting. This is provided simply to give us a brief delay before the display returns to the shell, restoring whatever was displayed before this program was run.
# How Do I Run It?
If you've already run off and clicked the 'Run' button, you might have noticed the following error:
You get this error because the application tries to access the framebuffer using first fbcon, then directfb if that fails and finally svgalib. They all fail for one important reason:
Warning: You may need root access to modify the framebuffer!
Future versions of the WebIDE will add the ability to run as root, but if you're running an older version that doesn't already include this functionality, there's an easy workaround. To give your program access to the framebuffer, simple click the Terminal icon at the top of the text editor, and from the shell that pops up enter:
```
sudo python pyscope.py
```
If all goes well, you should see something like the following in your terminal window:

And during 10 seconds, your display should look something like this:

- [Previous Page](https://learn.adafruit.com/pi-video-output-using-pygame/getting-started.md)
- [Next Page](https://learn.adafruit.com/pi-video-output-using-pygame/drawing-basics.md)
## Featured Products
### Adafruit Assembled Pi Cobbler Breakout + Cable for Raspberry Pi
[Adafruit Assembled Pi Cobbler Breakout + Cable for Raspberry Pi](https://www.adafruit.com/product/914)
Now that you've finally got your hands on a [Raspberry Pi® Model B](http://www.raspberrypi.org/), you're probably itching to make some fun embedded computer projects with it. What you need is an add on prototyping Pi Cobbler from Adafruit, which can break out all those...
No Longer Stocked
[Buy Now](https://www.adafruit.com/product/914)
[Related Guides to the Product](https://learn.adafruit.com/products/914/guides)
### NTSC/PAL (Television) TFT Display - 3.5" Diagonal
[NTSC/PAL (Television) TFT Display - 3.5" Diagonal](https://www.adafruit.com/product/913)
Yes, this is an adorable small television! The visible display measures only 3.5" (8.9cm) diagonal, the TFT comes with a NTSC/PAL driver board. The display is very easy to use - simply connect 6-12VDC to the red (+) and black (-) wires, then connect a composite video source to the RCA...
In Stock
[Buy Now](https://www.adafruit.com/product/913)
[Related Guides to the Product](https://learn.adafruit.com/products/913/guides)
### NTSC/PAL (Television) TFT Display - 2.0" Diagonal
[NTSC/PAL (Television) TFT Display - 2.0" Diagonal](https://www.adafruit.com/product/911)
Yes, this is an adorable miniature television! The visible display measures only 2" diagonal, the TFT comes with a NTSC/PAL driver board. The display is very easy to use - simply connect 6-12VDC to the red and black wires, then connect a composite video source to the RCA connector. Voila,...
In Stock
[Buy Now](https://www.adafruit.com/product/911)
[Related Guides to the Product](https://learn.adafruit.com/products/911/guides)
### NTSC/PAL (Television) TFT Display - 4.3" Diagonal
[NTSC/PAL (Television) TFT Display - 4.3" Diagonal](https://www.adafruit.com/product/946)
Yes, this is an adorable small television! The visible display measures only 4.3" (11cm) diagonal, the TFT comes with a NTSC/PAL driver board, enclosure and stand. The display is very easy to use - simply connect 12VDC to the 2.1mm center-positive DC jack (or use the cable and connect to...
No Longer Stocked
[Buy Now](https://www.adafruit.com/product/946)
[Related Guides to the Product](https://learn.adafruit.com/products/946/guides)
### NTSC/PAL (Television) TFT Display - 7" Diagonal
[NTSC/PAL (Television) TFT Display - 7" Diagonal](https://www.adafruit.com/product/947)
Yes, this is an adorable small television! The visible display measures only 7" (17.8cm) diagonal, the TFT comes with a NTSC/PAL driver board, enclosure and stand. The display is very easy to use - simply connect the included 12VDC adapter to the 2.1mm center-positive DC jack, then...
No Longer Stocked
[Buy Now](https://www.adafruit.com/product/947)
[Related Guides to the Product](https://learn.adafruit.com/products/947/guides)
### Raspberry Pi 1 Model B Starter Pack - Includes a Raspberry Pi
[Raspberry Pi 1 Model B Starter Pack - Includes a Raspberry Pi](https://www.adafruit.com/product/1014)
You want to get hacking with your Pi fast, right? Get everything you need to start with the Adafruit Starter Pack for Raspberry Pi. It's the perfect accompaniment to your new Pi, everything you need to boot up your Pi Model B and get going. **We pre-assemble the Cobbler for you, no...**
No Longer Stocked
[Buy Now](https://www.adafruit.com/product/1014)
[Related Guides to the Product](https://learn.adafruit.com/products/1014/guides)
### NTSC/PAL (Television) TFT Display - 1.5" Diagonal
[NTSC/PAL (Television) TFT Display - 1.5" Diagonal](https://www.adafruit.com/product/910)
Yes, this is an adorable miniature television! The visible display measures only 1.5" diagonal, the TFT comes with a NTSC/PAL driver board. The display is very easy to use - simply connect 6-12VDC to the red and black wires, then connect a composite video source to the RCA connector....
In Stock
[Buy Now](https://www.adafruit.com/product/910)
[Related Guides to the Product](https://learn.adafruit.com/products/910/guides)
## Related Guides
- [Electronic Animated Eyes for ARM Microcontrollers](https://learn.adafruit.com/animated-electronic-eyes.md)
- [CircuitPython Day 2024 Countdown Clock](https://learn.adafruit.com/circuitpython-day-2024-countdown-clock.md)
- [Adafruit RP2350 22-pin FPC HSTX to DVI Adapter](https://learn.adafruit.com/adafruit-rp2350-22-pin-fpc-hstx-to-dvi-adapter.md)
- [Adafruit 3.5" 320x480 Color TFT Touchscreen Breakout](https://learn.adafruit.com/adafruit-3-5-color-320x480-tft-touchscreen-breakout.md)
- [AdaBox 018](https://learn.adafruit.com/adabox018.md)
- [Adafruit's Raspberry Pi Lesson 5. Using a Console Cable](https://learn.adafruit.com/adafruits-raspberry-pi-lesson-5-using-a-console-cable.md)
- [Press Your Button for Raspberry Pi](https://learn.adafruit.com/press-your-button-for-raspberry-pi.md)
- [MONSTER M4SK Toon Hat](https://learn.adafruit.com/monster-mask-augmented-eyes-toon-hat.md)
- [Windows IoT Core Application Development: Headed Blinky](https://learn.adafruit.com/windows-iot-application-development-headed-blinky.md)
- [Cappy Monster M4sk with Animated Eyes](https://learn.adafruit.com/cappy-monster-m4sk.md)
- [Running TensorFlow Lite Object Recognition on the Raspberry Pi 4 or Pi 5](https://learn.adafruit.com/running-tensorflow-lite-on-the-raspberry-pi-4.md)
- [Pip-Boy 2040 Wrist-Mounted Prop](https://learn.adafruit.com/pip-boy-2040.md)
- [CustomEyesation: DIY Monster M4SK Graphics](https://learn.adafruit.com/customeyesation-diy-monster-m4sk-graphics.md)
- [Getting Started With Windows IoT Core on Raspberry Pi](https://learn.adafruit.com/getting-started-with-windows-iot-on-raspberry-pi.md)
- [Candy Bucket GIF Player Eyes](https://learn.adafruit.com/candy-bucket-gif-eyes.md)
---
# Source: https://learn.adafruit.com/digital-led-belt/power-connection.md
# Digital LED Belt
## Power Connection
Now we will do the other half of the power connection, the side that connects to the board.
Plug the matching shorter power cable into the longer one so they snap together (they can only go one way).
Now you'll want to trace the **red** power wire back through the connectors. We suggest using a multimeter to be sure. Put 4 AA's in the holder and turn it on. Then use a multimeter to measure the voltage between the cable wires. One way will be about -5V and the other will be +5V. When it's reading +5V the red handle is touching the positive wire. In this example, its the one on the right:

Turn off the power pack (or remove the batteries).
Cut the positive wire short by about 1"

Strip and tin the wire.
Thread the shorter positive wire into the top left hole and knot it. The longer negative wire goes through the opposite (bottom left) hole.
Pull the wires through so that you can push the negative wire into the **GND** pad all the way to the right.
The positive wire goes to the first **5V** pad right next to the hole, all the way to the top left in the image above.
Turn the board over, and solder the ground wire.

…and the +5V wire.
Check your work before we finish up!
- [Previous Page](https://learn.adafruit.com/digital-led-belt/battery-protection-diode.md)
- [Next Page](https://learn.adafruit.com/digital-led-belt/finishing-up.md)
## Featured Products
### Digital programmable LED belt kit
[Digital programmable LED belt kit](https://www.adafruit.com/product/332)
By popular demand, we now have a project tutorial for how to make your own programmable, ultra-blinky LED belt. Perfect for parties, raves, parades, weddings, funerals, and bar mitzvahs. Wear it with pride, wear it with blinky! Follow our soldering tutorial to build your own heirloom LED belt,...
No Longer Stocked
[Buy Now](https://www.adafruit.com/product/332)
[Related Guides to the Product](https://learn.adafruit.com/products/332/guides)
## Related Guides
- [LED Sequin Bow Tie](https://learn.adafruit.com/led-sequin-bowtie.md)
- [Bluetooth-Controlled NeoPixel Goggles](https://learn.adafruit.com/bluetooth-neopixel-goggles.md)
- [Light Painting with Raspberry Pi](https://learn.adafruit.com/light-painting-with-raspberry-pi.md)
- [Glowing Viking Rune wayFinder](https://learn.adafruit.com/glowing-viking-rune-artifact.md)
- [3D Printing with Bamboo Wood Filament](https://learn.adafruit.com/3d-printing-with-bamboo-wood-filament.md)
- [Jellyfish Umbrella with easy WLED WiFi Control](https://learn.adafruit.com/jellyfish-umbrella-with-easy-wled-wifi-control.md)
- [Bandolier of Light](https://learn.adafruit.com/bandolier-of-light.md)
- [Electron Bow](https://learn.adafruit.com/electron-bow.md)
- [Steven Universe Cosplay Shirt & Gem](https://learn.adafruit.com/steven-universe-cosplay-shirt-gem.md)
- [CLUE Vertical Garden Weather Visualizer](https://learn.adafruit.com/clue-vertical-garden-weather-visualizer.md)
- [Cast a 3d Printed Necklace in Metal](https://learn.adafruit.com/cast-a-3d-printed-necklace-in-metal.md)
- [3D Printed Wearable Video Goggles](https://learn.adafruit.com/3d-printed-wearable-video-goggles.md)
- [Bunny Ears with MakeCode](https://learn.adafruit.com/bunny-ears-with-makecode.md)
- [Roll-up Video Light](https://learn.adafruit.com/roll-up-video-light.md)
- [1,500 NeoPixel LED Curtain with Raspberry Pi and Fadecandy](https://learn.adafruit.com/1500-neopixel-led-curtain-with-raspberry-pi-fadecandy.md)
---
# Source: https://learn.adafruit.com/flora-pixel-brooch/power-it-up.md
# FLORA Pixel Brooch
## Power it up

The easiest and safest way to power your FLORA brooch is with a 3xAAA battery holder.

You can also power your FLORA project with a rechargeable lithium polymer battery which is slimmer and can be taped to the back of the FLORA.

The new bootloader instantly runs your program when battery power is supplies, but earlier versions takes about eight seconds for the FLORA to "boot." You'll see the red onboard LED pulse during this time, then your pixels should light up. Oohh, blinky! If your pixels don't all light up, crimp your wire connections again to ensure they are making good contact.
- [Previous Page](https://learn.adafruit.com/flora-pixel-brooch/program.md)
- [Next Page](https://learn.adafruit.com/flora-pixel-brooch/wear-your-pixel-brooch.md)
## Featured Products
### FLORA - Wearable electronic platform: Arduino-compatible
[FLORA - Wearable electronic platform: Arduino-compatible](https://www.adafruit.com/product/659)
FLORA is Adafruit's fully-featured wearable electronics platform. It's a round, sewable, Arduino-compatible microcontroller designed to empower amazing wearables projects.FLORA comes with Adafruit's support, [tutorials and...](http://learn.adafruit.com/category/flora)
In Stock
[Buy Now](https://www.adafruit.com/product/659)
[Related Guides to the Product](https://learn.adafruit.com/products/659/guides)
### Flora RGB Smart NeoPixel version 3 - Pack of 4
[Flora RGB Smart NeoPixel version 3 - Pack of 4](https://www.adafruit.com/product/1260)
What's a wearable project without LEDs? Our favorite part of the Flora platform is these tiny smart pixels. Designed specifically for wearables, these updated Flora NeoPixels have ultra-cool technology: these ultra-bright LEDs have a constant-current driver cooked right into the LED...
In Stock
[Buy Now](https://www.adafruit.com/product/1260)
[Related Guides to the Product](https://learn.adafruit.com/products/1260/guides)
### Solid-Core Wire Spool - 25ft - 22AWG - Black
[Solid-Core Wire Spool - 25ft - 22AWG - Black](https://www.adafruit.com/product/290)
Perfect for bread-boarding, free wiring, etc. This spool of solid-core wire is easy to solder to. When bent it keeps its shape pretty well. We like to have a few spools of this stuff around. We suggest picking up wire strippers to match. Wire gauge is 22 AWG which we've found is the best...
In Stock
[Buy Now](https://www.adafruit.com/product/290)
[Related Guides to the Product](https://learn.adafruit.com/products/290/guides)
### Lithium Ion Polymer Battery - 3.7v 150mAh
[Lithium Ion Polymer Battery - 3.7v 150mAh](https://www.adafruit.com/product/1317)
Lithium-ion polymer (also known as 'lipo' or 'lipoly') batteries are thin, light, and powerful. The output ranges from 4.2V when completely charged to 3.7V. This battery has a capacity of 150mAh for a total of about 0.6 Wh. If you need a larger battery,
Out of Stock
[Buy Now](https://www.adafruit.com/product/1317)
[Related Guides to the Product](https://learn.adafruit.com/products/1317/guides)
### Magnetic Pin Back
[Magnetic Pin Back](https://www.adafruit.com/product/1170)
These magnetic pin backs have two pieces: a metal bar with adhesive strip and a plastic piece with two strong rare-earth magnets. Affix the metal bar to your FLORA projects-- it's just the right size! Then attach your FLORA project to any garment without poking holes in your clothes. The...
In Stock
[Buy Now](https://www.adafruit.com/product/1170)
[Related Guides to the Product](https://learn.adafruit.com/products/1170/guides)
### Hakko Professional Quality 20-30 AWG Wire Strippers
[Hakko Professional Quality 20-30 AWG Wire Strippers](https://www.adafruit.com/product/527)
These are the finest wire strippers we have used, and if you have to do a lot of wiring, you will agree! They have soft rounded grips - very comfortable to use, and precision ground notches that do a perfect job every time. No more yanking or twisting to strip wires cleanly and quickly.
In Stock
[Buy Now](https://www.adafruit.com/product/527)
[Related Guides to the Product](https://learn.adafruit.com/products/527/guides)
### Simple pliers
[Simple pliers](https://www.adafruit.com/product/146)
Simple needlenose pliers for twisting, pulling and pliering your project.
In Stock
[Buy Now](https://www.adafruit.com/product/146)
[Related Guides to the Product](https://learn.adafruit.com/products/146/guides)
### Getting Started with Adafruit FLORA
[Getting Started with Adafruit FLORA](https://www.adafruit.com/product/1839)
**Making Wearables with an Arduino-Compatible Electronics Platform**
This book introduces readers to building wearable electronics projects using Adafruit's tiny FLORA board: at 4.4 grams, and only 1.75 inches in diameter, and featuring Arduino compatibility, it's the...
No Longer Stocked
[Buy Now](https://www.adafruit.com/product/1839)
[Related Guides to the Product](https://learn.adafruit.com/products/1839/guides)
## Related Guides
- [Chameleon Scarf](https://learn.adafruit.com/chameleon-scarf.md)
- [Washing Wearable Electronics](https://learn.adafruit.com/washing-wearable-electronics.md)
- [Light-Up Angler Fish Embroidery](https://learn.adafruit.com/light-up-angler-fish-embroidery.md)
- [Flora TSL2561 Lux Sensor](https://learn.adafruit.com/flora-lux-sensor.md)
- [Glowing Skullcandy Headphones Mod](https://learn.adafruit.com/glowing-skullcandy-headphones-mod.md)
- [Flora Snaps](https://learn.adafruit.com/flora-snaps.md)
- [Heart Rate Badge](https://learn.adafruit.com/heart-rate-badge.md)
- [Memories of an Arduino](https://learn.adafruit.com/memories-of-an-arduino.md)
- [VU Meter Baseball Hat](https://learn.adafruit.com/vu-meter-baseball-hat.md)
- [Flora Wearable GPS](https://learn.adafruit.com/flora-wearable-gps.md)
- [Light of Your Life Wedding Bouquet](https://learn.adafruit.com/light-of-your-life-wedding-bouquet.md)
- [Flora Accelerometer](https://learn.adafruit.com/flora-accelerometer.md)
- [Mailbox Notification Service](https://learn.adafruit.com/mailbox-notification-service.md)
- [Pac Man Pixel Suspenders](https://learn.adafruit.com/pac-man-pixel-suspenders.md)
- [Adafruit NeoPot](https://learn.adafruit.com/adafruit-neopot.md)
---
# Source: https://learn.adafruit.com/adafruit-motor-shield/power-requirements.md
# Source: https://learn.adafruit.com/monochrome-oled-breakouts/power-requirements.md
# Monochrome OLED Breakouts
## Power Requirements
## OLED Power Requirements
The OLED and driver require a 3.3V power supply and 3.3V logic levels for communication. The power requirements depend a little on how much of the display is lit but on average the display uses about 20mA from the 3.3V supply. Built into the OLED driver is a simple switch-cap charge pump that turns 3.3v-5v into a high voltage drive for the OLEDs. You can run the entire display off of one 3.3V supply or use 3.3V for the chip power and up to 4.5V for the OLED charge pump or 3.3V for the chip power and a 7-9V supply directly into the OLED high voltage pin.## 5V- ready 128x64 and 128x32 OLEDs
Unless you have the older v1 128x64 OLED, you can rest assured that your OLED is 5V ready. All 1.3" 128x64 and the small 128x32 SPI and I2C are 5V ready, if you have a v2 0.96" 128x64 OLED with the 5V ready mark on the front, it's also 5V safe. If you have an older 0.96" OLED (see below) you'll need to take extra care when wiring it to a 5V micontroller. The OLED is designed to be 5V compatible so you can power it with 3-5V and the onboard regulator will take care of the rest.
All OLEDs are safe to use with 3.3V logic and power.
Simply connect **GND** to ground, and **Vin** to a 3 to 5V power supply. There will be a 3.3V output on the **3Vo** pin in case you want a regulated 3.3V supply for something else.
## 0.96" 128x64 OLED
The older 0.96" 128x64 OLED is a little more complex to get running as it is not 5V compatible by default, so you have to provide it with 3.3V power.
- **VDD** is the 3.3V logic power. This must be 3 or 3.3V
- **VBAT** is the input to the charge pump. If you use the charge pump, this must be 3.3V to 4.2V
- **VCC ** is the high voltage OLED pin. If you're using the internal charge pump, this must be left unconnected. If you're not using the charge pump, connect this to a 7-9V DC power supply.
For most users, we suggest connecting **VDD** and ** VBAT** together to 3.3V and then leaving **VCC** unconnected.
- [Previous Page](https://learn.adafruit.com/monochrome-oled-breakouts/overview.md)
- [Next Page](https://learn.adafruit.com/monochrome-oled-breakouts/arduino-library-and-examples.md)
## Featured Products
### Monochrome 1.3" 128x64 OLED graphic display - STEMMA QT / Qwiic
[Monochrome 1.3" 128x64 OLED graphic display - STEMMA QT / Qwiic](https://www.adafruit.com/product/938)
These displays are small, only about 1.3" diagonal, but very readable due to the high contrast of an OLED display. This display is made of 128x64 individual white OLED pixels, each one is turned on or off by the controller chip. Because the display makes its own light, no backlight is...
In Stock
[Buy Now](https://www.adafruit.com/product/938)
[Related Guides to the Product](https://learn.adafruit.com/products/938/guides)
### Monochrome 0.96" 128x64 OLED Graphic Display - STEMMA QT
[Monochrome 0.96" 128x64 OLED Graphic Display - STEMMA QT](https://www.adafruit.com/product/326)
These displays are small, only about 1" diagonal, but very readable due to the high contrast of an OLED display. This display is made of 128x64 individual white OLED pixels, each one is turned on or off by the controller chip. Because the display makes its own light, no backlight is...
Out of Stock
[Buy Now](https://www.adafruit.com/product/326)
[Related Guides to the Product](https://learn.adafruit.com/products/326/guides)
### Monochrome 128x32 SPI OLED graphic display
[Monochrome 128x32 SPI OLED graphic display](https://www.adafruit.com/product/661)
These displays are small, only about 1" diagonal, but very readable due to the high contrast of an OLED display. This display is made of 128x32 individual white OLED pixels, each one is turned on or off by the controller chip. Because the display makes its own light, no backlight is...
In Stock
[Buy Now](https://www.adafruit.com/product/661)
[Related Guides to the Product](https://learn.adafruit.com/products/661/guides)
### Monochrome 128x32 I2C OLED graphic display
[Monochrome 128x32 I2C OLED graphic display](https://www.adafruit.com/product/931)
These displays are small, only about 1" diagonal, but very readable due to the high contrast of an OLED display. This display is made of 128x32 individual white OLED pixels, each one is turned on or off by the controller chip. Because the display makes its own light, no backlight is...
No Longer Stocked
[Buy Now](https://www.adafruit.com/product/931)
[Related Guides to the Product](https://learn.adafruit.com/products/931/guides)
### Monochrome 0.91" 128x32 I2C OLED Display - STEMMA QT / Qwiic
[Monochrome 0.91" 128x32 I2C OLED Display - STEMMA QT / Qwiic](https://www.adafruit.com/product/4440)
These displays are small, only about 1" diagonal, but very readable due to the high contrast of an OLED display. This display is made of 128x32 individual white OLED pixels, each one is turned on or off by the controller chip. Because the display makes its own light, no backlight is...
In Stock
[Buy Now](https://www.adafruit.com/product/4440)
[Related Guides to the Product](https://learn.adafruit.com/products/4440/guides)
## Related Guides
- [OLED TRON Clock](https://learn.adafruit.com/oled-tron-clock.md)
- [I2C Addresses and Troublesome Chips](https://learn.adafruit.com/i2c-addresses.md)
- [Monitor Your Greenhouse with a No-Code Environmental Sensor](https://learn.adafruit.com/monitor-your-greenhouse-with-a-no-code-environmental-sensor.md)
- [SSD1306 OLED Displays with Raspberry Pi and BeagleBone Black](https://learn.adafruit.com/ssd1306-oled-displays-with-raspberry-pi-and-beaglebone-black.md)
- [Adafruit FT232H With SPI & I2C Devices](https://learn.adafruit.com/adafruit-ft232h-with-spi-and-i2c-libraries.md)
- [MIDI Melody Maker](https://learn.adafruit.com/midi-melody-maker.md)
- [Steampunk Cameo Necklace with OLED Display](https://learn.adafruit.com/steampunk-cameo-necklace.md)
- [Using QMK on RP2040 Microcontrollers](https://learn.adafruit.com/using-qmk-on-rp2040-microcontrollers.md)
- [CircuitPython OLED and Dual Knob Sketcher](https://learn.adafruit.com/circuitpython-oled-knob-sketcher.md)
- [Gravity Falls Memory Gun](https://learn.adafruit.com/gravity-falls-memory-gun.md)
- [Pico W HTTP Server with CircuitPython](https://learn.adafruit.com/pico-w-http-server-with-circuitpython.md)
- [Adafruit Trinkey QT2040](https://learn.adafruit.com/adafruit-trinkey-qt2040.md)
- [Adafruit Airlift Bitsy Add-On - ESP32 WiFi Co-Processor](https://learn.adafruit.com/adafruit-airlift-bitsy-add-on-esp32-wifi-co-processor.md)
- [Animated Flying Toaster OLED Jewelry](https://learn.adafruit.com/animated-flying-toaster-oled-jewelry.md)
- [Adafruit TCA9548A 1-to-8 I2C Multiplexer Breakout](https://learn.adafruit.com/adafruit-tca9548a-1-to-8-i2c-multiplexer-breakout.md)
---
# Source: https://learn.adafruit.com/power-supplies.md
# Power Supplies
## Overview
## What is a power supply?
A power supply is a device that **supplies power to another device, at a specific voltage level, voltage type and current level**. For example, when we talk about a **9VDC @ 500mA** power supply can provide **as much as 500mA of current** and the voltage will be at least **9V DC** up to that maximum current level. While it sounds simple, power supplies have a lot of little hang-ups that can be very tricky for the uninitiated. For example, unregulated supplies say they can provide 9V but really may be outputting 15V! The very common 7805 regulator datasheet claims it can regulate up to 1000 mA of current, but when you put a 15V supply on one side, it overheats and shuts down! This tutorial will try to help explain all about power supplies.
## Why a power supply?
When you start out with electronics, you'll hear a lot about **power supplies** - they're in every electronics project and they are the backbone of everything! A good power supply will make your project hum along nicely. A bad power supply will make life frustrating: stuff will work sometimes but not others, inconsistent results, motors not working, sensor data always off. Understanding power supplies (boring though they may be) is **key** to making your project work!
A lot of people don't pay much attention to power supplies until problems show up. We think you should always think about your power supply from day one - How are you going to power it? How long will the batteries last? Will it overheat? Can it get damaged by accidentally plugging in the wrong thing?
## Power supplies are all around you!
Unless you live in a shack in the woods, you probably have a dozen power supplies in your home or office.
Here is the power supply that is used in many apple products:

Here is a classic 'wall wart' that comes with many consumer electronics:
This is a massive power supply that's in a PC, usually you dont see this unless you open up the PC and look inside for the big metal box:
All these power supplies have one thing in common - they take high voltage 120V or 220V AC power and **regulate** or **convert** it down to say 12V or 5V DC. This is important because the electronics inside of a computer, or cell phone, or video game console dont run at 120V and they don't run on AC power!
So, to generalize, here is what the power supplies for electronics do:
1. They convert AC (alternating current) power to DC (direct current)
2. They regulate the high voltage (120-220V) down to around 5V (the common voltages range from 3.3V to 15V)
3. They may have fuses or other overcurrent/overheat protection
**Hey, so if electronics can't run on AC, why doesn't wall power come in DC?**
You may be wondering - "I have 20 wall adapters, this seems silly! Why not just have DC power come out of the wall at 5V?" Essentially, because modern electronics are very recent. for many many decades wall power was used to power light bulbs, big motors (like fridges, vacuum cleaners, washing machines, air conditioners), and heaters. All of these use AC power more efficiently than DC power. Also, different electronics need different voltages. So far its worked out better to have a custom power supply for each device although it is a little irritating sometimes!
## AC/DC

## So the power coming out of your wall is high voltage AC but microcontrollers and servos and sensors all want low voltage DC. How shall we make it work? Converting between AC power and DC power requires different techniques depending on what the input and output is. We'll refer to this table:
| Power type in | Power type out | Technique | Pros | Cons | Commonly seen… |
| --- | --- | --- | --- | --- | --- |
| High Voltage AC (eg. 120V-220VAC) | Low voltage AC (eg. 12VAC) | Transformer | Really cheap, electrically isolated | Really big & heavy! | Small motors, in cheaper power supplies before the regulator |
| Low Voltage AC (eg. 20VAC) | High voltage AC (eg ~120VAC) | Transformer | Same as above, but the transformer is flipped around | Really big & heavy! | Some kinds of inverters, EL wire or flash bulb drivers |
| High Voltage AC (eg. 120V-220VAC) | High voltage DC (eg. 170VDC) | Half or full wave rectifier | Very inexpensive (just a diode or two) | Not isolated | We've seen these in tube amps |
| Low Voltage AC (eg. 20VAC) | Low voltage DC (eg 5VDC) | Half or full wave rectifier | Very inexpensive (just a diode or two) | Not isolated | Practically all consumer electronics that have transformer-based supplies |
| High Voltage AC (eg. 120V-220VAC) | Low voltage DC (eg 5VDC) | Transformer & rectifier
Combination of High→Low AC & Low AC→Low DC | Fairly inexpensive | Kinda heavy, output is not precise, efficiency is so-so | Every chunky wall-wart contains this |
| High Voltage AC (eg. 120V-220VAC) | Low voltage DC (eg 5VDC) | Switching supply | Light-weight, output is often precise | Expensive! | Every slimmer wall-wart contains this |
Basically, to convert from AC to AC we tend to use a transformer. To convert from AC to DC we use a transformer + diodes (rectifier) or a switching supply. The former is inexpensive (but not very precise) and the later is expensive (but precise). Guess which one you're more likely to find in a cheaply-made device? :)
We left a few types out of this table because they're a little more esoteric or complex, such as the AC voltage doubler. These are still used but you're a little less likely to see them and they don't get used in power supplies you're likely to encounter.
- [Next Page](https://learn.adafruit.com/power-supplies/transformer-based-ac-dc-converters.md)
## Featured Products
### 12V 5A switching power supply
[12V 5A switching power supply](https://www.adafruit.com/product/352)
This is a beefy switching supply, for when you need a lot of power! It can supply 12V DC up to 5 Amps, running from 110V or 220V power (the plug it comes with is for US/Canada/Japan but you can use any plug adapter for your country, or just replace the cable with a standard 'figure-8'...
In Stock
[Buy Now](https://www.adafruit.com/product/352)
[Related Guides to the Product](https://learn.adafruit.com/products/352/guides)
### 5V 10A switching power supply
[5V 10A switching power supply](https://www.adafruit.com/product/658)
This is a beefy switching supply, for when you need a lot of power! It can supply 5V DC up to 10 Amps, running from 110V or 220V power (the plug it comes with is for US/Canada/Japan but you can use any plug adapter for your country, or just replace the cable with a standard computer/appliance...
Out of Stock
[Buy Now](https://www.adafruit.com/product/658)
[Related Guides to the Product](https://learn.adafruit.com/products/658/guides)
### 5V 1A (1000mA) USB port power supply - UL Listed
[5V 1A (1000mA) USB port power supply - UL Listed](https://www.adafruit.com/product/501)
Need a USB jack for charging or powering a project, but don't want to lug around a computer? This switching supply gives a clean regulated output at up to 1000mA! 110 or 240 input, so it works in any country. The plugs are "US 2-prong" style so you may need a plug adapter, but...
In Stock
[Buy Now](https://www.adafruit.com/product/501)
[Related Guides to the Product](https://learn.adafruit.com/products/501/guides)
### 5V 2A (2000mA) switching power supply - UL Listed
[5V 2A (2000mA) switching power supply - UL Listed](https://www.adafruit.com/product/276)
This is an FCC/CE certified and UL listed power supply. Need a lot of 5V power? This switching supply gives a clean regulated 5V output at up to 2000mA. 110 or 240 input, so it works in any country. The plugs are "US 2-prong" style so you may need a plug adapter, but you can pick one...
In Stock
[Buy Now](https://www.adafruit.com/product/276)
[Related Guides to the Product](https://learn.adafruit.com/products/276/guides)
### 9 VDC 1000mA regulated switching power adapter - UL listed
[9 VDC 1000mA regulated switching power adapter - UL listed](https://www.adafruit.com/product/63)
This is a really nice power supply. It's a switching DC supply so it's small and light and efficient. It is thin so it fits in power strips without blocking other outlets. The output is regulated so you'll get a steady 9V up to 1000mA (1 Amp) of current draw. 5.5mm/2.1mm barrel...
Out of Stock
[Buy Now](https://www.adafruit.com/product/63)
[Related Guides to the Product](https://learn.adafruit.com/products/63/guides)
## Related Guides
- [Adafruit CH334F Mini USB Hub Breakouts](https://learn.adafruit.com/adafruit-ch334f-mini-4-port-usb-hub-breakout.md)
- [Arduino Lesson 3. RGB LEDs](https://learn.adafruit.com/adafruit-arduino-lesson-3-rgb-leds.md)
- [Debug Header for the Feather [M0]](https://learn.adafruit.com/make-a-simple-debugging-featherwing-for-the-m0.md)
- [Adafruit SPI FRAM Breakouts](https://learn.adafruit.com/adafruit-spi-fram-breakout.md)
- [Circuit Playground Analog Input](https://learn.adafruit.com/circuit-playground-analog-input.md)
- [Press Your Button for Raspberry Pi](https://learn.adafruit.com/press-your-button-for-raspberry-pi.md)
- [Step Switch Party](https://learn.adafruit.com/step-switch-party.md)
- [Boomy Pi Airplay Boombox](https://learn.adafruit.com/boomy-pi-airplay.md)
- [Pro Trinket Tachometer](https://learn.adafruit.com/pro-trinket-tachometer.md)
- [Arduino Lesson 4. Eight LEDs and a Shift Register](https://learn.adafruit.com/adafruit-arduino-lesson-4-eight-leds.md)
- [Conductive Thread](https://learn.adafruit.com/conductive-thread.md)
- [Adafruit UPDI Friend](https://learn.adafruit.com/adafruit-updi-friend.md)
- [Arduino Yun Temboo Twitter Tracker](https://learn.adafruit.com/arduino-yun-temboo-twitter-tracker.md)
- [Arduino Lesson 8. Analog Inputs](https://learn.adafruit.com/adafruit-arduino-lesson-8-analog-inputs.md)
- [USB to Eurorack Power Supply](https://learn.adafruit.com/usb-to-eurorack-power-supply.md)
---
# Source: https://learn.adafruit.com/getting-started-with-flora/power-your-flora.md
# Getting Started with FLORA
## Power your FLORA
The Flora runs at 3.3V with an onboard regulator to keep the voltage steady. You'll need to power the board with a 3.6V or greater battery. For that reason, we find 3 x AA or AAA or a lithium-polymer battery to be ideal. You can only power FLORA through its onboard JST port.

After loading your program onto the FLORA, you'll want to unplug the USB cable and go portable with battery power! USB will always power the board, but battery power (through the JST connector) can be turned on and off with Flora's onboard switch (near the "ON" text on the board). We recommend our [3xAAA holder](http://www.adafruit.com/products/727) for beginners, which conveniently plugs into FLORAs JST port.

More advanced users may wish to use a rechargeable [lithium polymer battery](http://www.adafruit.com/products/258 "Link: http://www.adafruit.com/products/258") for their smaller size and longer duration. These batteries pose added risk if abused, shorted, bent, crushed, or punctured. FLORA does not have onboard charging, so you would also need a separate [LiPoly charger](http://www.adafruit.com/products/259 "Link: http://www.adafruit.com/products/259").
# The VBATT Pad
The most commonly confused part of the Flora is the **VBATT** pad and how power management is handled in the Flora. We designed the flora to be mainly powered via the JST connector. You can power it with a battery pack or lipo battery. That input is polarity protected and also controlled via the on/off switch. The battery output **after** the switch is **VBATT**. You shouldn't use **VBATT** as an input as you might damage your battery if you also plug in the USB connector to a computer! The ideal use of **VBATT** is when you want to power something like NeoPixels or a servo, something that requires more than the 150mA available from the onboard regulator.- [Previous Page](https://learn.adafruit.com/getting-started-with-flora/blink-onboard-neopixel.md)
- [Next Page](https://learn.adafruit.com/getting-started-with-flora/flora-projects.md)
## Featured Products
### FLORA - Wearable electronic platform: Arduino-compatible
[FLORA - Wearable electronic platform: Arduino-compatible](https://www.adafruit.com/product/659)
FLORA is Adafruit's fully-featured wearable electronics platform. It's a round, sewable, Arduino-compatible microcontroller designed to empower amazing wearables projects.FLORA comes with Adafruit's support, [tutorials and...](http://learn.adafruit.com/category/flora)
In Stock
[Buy Now](https://www.adafruit.com/product/659)
[Related Guides to the Product](https://learn.adafruit.com/products/659/guides)
### 3 x AAA Battery Holder with On/Off Switch and 2-Pin JST
[3 x AAA Battery Holder with On/Off Switch and 2-Pin JST](https://www.adafruit.com/product/727)
This battery holder connects 3 AAA batteries together in series for powering all kinds of projects. We spec'd these out because the box is slim, and 3 AAA's add up to about 3.3-4.5V, a very similar range to Lithium Ion/polymer (Li-Ion) batteries and have an on-off switch. That makes...
In Stock
[Buy Now](https://www.adafruit.com/product/727)
[Related Guides to the Product](https://learn.adafruit.com/products/727/guides)
### USB cable - USB A to Micro-B
[USB cable - USB A to Micro-B](https://www.adafruit.com/product/592)
This here is your standard A to micro-B USB cable, for USB 1.1 or 2.0. Perfect for connecting a PC to your Metro, Feather, Raspberry Pi or other dev-board or microcontroller
Approximately 3 feet / 1 meter long
In Stock
[Buy Now](https://www.adafruit.com/product/592)
[Related Guides to the Product](https://learn.adafruit.com/products/592/guides)
### Getting Started with Adafruit FLORA Book Pack
[Getting Started with Adafruit FLORA Book Pack](https://www.adafruit.com/product/2404)
Pickup a copy of [Getting Started with Adafruit FLORA](https://www.adafruit.com/products/1839) and then hit the ground running with everything that you need to become an [Adafruit FLORA](https://www.adafruit.com/products/659) supreme being!
This pack is...
No Longer Stocked
[Buy Now](https://www.adafruit.com/product/2404)
[Related Guides to the Product](https://learn.adafruit.com/products/2404/guides)
### Getting Started with Adafruit FLORA
[Getting Started with Adafruit FLORA](https://www.adafruit.com/product/1839)
**Making Wearables with an Arduino-Compatible Electronics Platform**
This book introduces readers to building wearable electronics projects using Adafruit's tiny FLORA board: at 4.4 grams, and only 1.75 inches in diameter, and featuring Arduino compatibility, it's the...
No Longer Stocked
[Buy Now](https://www.adafruit.com/product/1839)
[Related Guides to the Product](https://learn.adafruit.com/products/1839/guides)
### FLORA Budget Pack
[FLORA Budget Pack](https://www.adafruit.com/product/1405)
Get started with the fabulous Adafruit Flora platform with this lovely budget kit, just enough to get you started with this fun wearable computer. Included are enough parts to make your first wearable electronic project. There's a Flora motherboard, four ultra-bright chainable RGB pixels,...
Out of Stock
[Buy Now](https://www.adafruit.com/product/1405)
[Related Guides to the Product](https://learn.adafruit.com/products/1405/guides)
### FLORA GPS Starter Pack
[FLORA GPS Starter Pack](https://www.adafruit.com/product/1090)
Get started with the fabulous Adafruit Flora platform with this lovely starter kit. Included are plenty of parts to make a few different fun projects! There's a Flora motherboard, a GPS module that can also perform location datalogging, eight ultra-bright chainable RGB pixels, a battery...
No Longer Stocked
[Buy Now](https://www.adafruit.com/product/1090)
[Related Guides to the Product](https://learn.adafruit.com/products/1090/guides)
### FLORA Sensor Pack
[FLORA Sensor Pack](https://www.adafruit.com/product/1458)
Sense the world around you! The FLORA Sensor Pack includes many types of sensors for your wearable enjoyment. Sense motion, direction, color, light levels, touch, and connections with FLORA sensor breakouts and conductive materials, and a few NeoPixels for experimenting with displaying your...
No Longer Stocked
[Buy Now](https://www.adafruit.com/product/1458)
[Related Guides to the Product](https://learn.adafruit.com/products/1458/guides)
## Related Guides
- [Datalogging Hat with FLORA BLE](https://learn.adafruit.com/datalogging-hat-with-flora-ble.md)
- [Experimenting with NeverWet + Electronics](https://learn.adafruit.com/neverwet-electronics.md)
- [Flora GPS Jacket](https://learn.adafruit.com/flora-gps-jacket.md)
- [SMSsenger Bag](https://learn.adafruit.com/smssenger-bag.md)
- [Conductive Thread](https://learn.adafruit.com/conductive-thread.md)
- [3D Printed Wireless MIDI Controller Guitar](https://learn.adafruit.com/ez-key-wireless-midi-controller-guitar.md)
- [Mailbox Notification Service](https://learn.adafruit.com/mailbox-notification-service.md)
- [GPS Logging Dog Harness](https://learn.adafruit.com/gps-logging-dog-harness.md)
- [NeoPixel Matrix Snowflake Sweater](https://learn.adafruit.com/neopixel-matrix-snowflake-sweater.md)
- [Chameleon Scarf](https://learn.adafruit.com/chameleon-scarf.md)
- [Adafruit Arduino Selection Guide](https://learn.adafruit.com/adafruit-arduino-selection-guide.md)
- [Citi Bike Helmet](https://learn.adafruit.com/citi-bike-helmet.md)
- [FLORA TV-B-Gone](https://learn.adafruit.com/flora-tv-b-gone.md)
- [Flora Wearable GPS](https://learn.adafruit.com/flora-wearable-gps.md)
- [Flora Accelerometer](https://learn.adafruit.com/flora-accelerometer.md)
---
# Source: https://learn.adafruit.com/digital-led-strip/power.md
# Source: https://learn.adafruit.com/12mm-led-pixels/power.md
# Source: https://learn.adafruit.com/096-mini-color-oled/power.md
# 0.96" mini Color OLED
## Power
OLEDs tend to be fairly low power since they don't have a backlight, but they do require high voltage to drive the OLED segments. For this reason there is a boost converter on the back of the OLED. There's also a 3.3V regulator. However, we've found that it can be very sensitive to noisy 5V supplies such as that on an Arduino so try to run it off the 3.3V line which is filtered and cleaner. The power usage will vary with how many pixels are lit, the maximum is around 25mA.
Of course, the microSD card is another matter - and may draw up to 150mA or more during writes (check the OEM document for the card to understand current usage!)
- [Previous Page](https://learn.adafruit.com/096-mini-color-oled/overview.md)
- [Next Page](https://learn.adafruit.com/096-mini-color-oled/wiring.md)
## Featured Products
### OLED Breakout Board - 16-bit Color 0.96" w/microSD holder
[OLED Breakout Board - 16-bit Color 0.96" w/microSD holder](https://www.adafruit.com/product/684)
We love our black and white monochrome displays but we also like to dabble with some color now and then. Our new 0.96" color OLED displays are perfect when you need an ultra-small display with vivid, high-contrast 16-bit color. The visible portion of the OLED measures 0.96" diagonal...
In Stock
[Buy Now](https://www.adafruit.com/product/684)
[Related Guides to the Product](https://learn.adafruit.com/products/684/guides)
### Adafruit METRO 328 Fully Assembled - Arduino IDE compatible
[Adafruit METRO 328 Fully Assembled - Arduino IDE compatible](https://www.adafruit.com/product/50)
We sure love the ATmega328 here at Adafruit, and we use them _a lot_ for our own projects. The processor has plenty of GPIO, Analog inputs, hardware UART SPI and I2C, timers and PWM galore - just enough for most simple projects. When we need to go small, we use a
Out of Stock
[Buy Now](https://www.adafruit.com/product/50)
[Related Guides to the Product](https://learn.adafruit.com/products/50/guides)
### Breadboarding wire bundle
[Breadboarding wire bundle](https://www.adafruit.com/product/153)
75 flexible stranded core wires with stiff ends molded on in red, orange, yellow, green, blue, brown, black and white. These are a major improvement over the "box of bent wires" that are sometimes sold with breadboards, and faster than stripping your own solid core wires. Makes...
In Stock
[Buy Now](https://www.adafruit.com/product/153)
[Related Guides to the Product](https://learn.adafruit.com/products/153/guides)
## Related Guides
- [Tiny Arduino Music Visualizer](https://learn.adafruit.com/piccolo.md)
- [Create an Internet of Things Dashboard with Adafruit IO](https://learn.adafruit.com/create-an-internet-of-things-dashboard-with-adafruit-dot-io.md)
- [Adafruit Ultimate GPS](https://learn.adafruit.com/adafruit-ultimate-gps.md)
- [Ladyada's Learn Arduino - Lesson #0](https://learn.adafruit.com/ladyadas-learn-arduino-lesson-number-0.md)
- [Arduino Lesson 15. DC Motor Reversing](https://learn.adafruit.com/adafruit-arduino-lesson-15-dc-motor-reversing.md)
- [Wireless Gardening with Arduino + CC3000 WiFi Modules](https://learn.adafruit.com/wireless-gardening-arduino-cc3000-wifi-modules.md)
- [Arduino Lesson 9. Sensing Light](https://learn.adafruit.com/adafruit-arduino-lesson-9-sensing-light.md)
- [Low Power Coin Cell Voltage Logger](https://learn.adafruit.com/low-power-coin-cell-voltage-logger.md)
- [LSM303 Accelerometer + Compass Breakout](https://learn.adafruit.com/lsm303-accelerometer-slash-compass-breakout.md)
- [Skill Badge Requirements: Microcontrollers](https://learn.adafruit.com/skill-badge-requirements-microcontrollers.md)
- [WiFi Weather Station](https://learn.adafruit.com/wifi-weather-station-arduino-cc3000.md)
- [Adafruit Proto Shield for Arduino](https://learn.adafruit.com/adafruit-proto-shield-arduino.md)
- [Electronic Demon Costume](https://learn.adafruit.com/electronic-demon-costume.md)
- [DIY 8x2 LCD Shield](https://learn.adafruit.com/diy-8x2-lcd-shield.md)
- [Circuit Playground Sound-Controlled Robot](https://learn.adafruit.com/circuit-playground-sound-controlled-robot.md)
---
# Source: https://learn.adafruit.com/battery-power-for-led-pixels-and-strips/powering-the-microcontroller-too.md
# Battery Power for LED Pixels and Strips
## Powering the Microcontroller
The Arduino (or other 5 Volt microcontroller) can be powered off the same supply as the LED strip, by splitting the power leads (_after_ the diode, if used) and connecting to the Arduino’s 5V pin (_not_ Vin) and GND.

LED strips aren’t picky about which side they receive power from, only data. In a pinch, if the situation really calls for it, you can connect the battery pack (with diode, if used) to the OUT end of the strip, then power the Arduino from the + and – connections on the IN end (along with the serial data and clock signals). This isn’t recommended though, because voltage drops slightly along the length of the strip, and the Arduino (which is supposed to be running everything) will give out sooner as the batteries approach depletion. Powering the Arduino close to the batteries ensures a healthy voltage, to stay in control for as long as possible.
- [Previous Page](https://learn.adafruit.com/battery-power-for-led-pixels-and-strips/diode.md)
- [Next Page](https://learn.adafruit.com/battery-power-for-led-pixels-and-strips/estimating-running-time.md)
## Featured Products
### Digital programmable LED belt kit
[Digital programmable LED belt kit](https://www.adafruit.com/product/332)
By popular demand, we now have a project tutorial for how to make your own programmable, ultra-blinky LED belt. Perfect for parties, raves, parades, weddings, funerals, and bar mitzvahs. Wear it with pride, wear it with blinky! Follow our soldering tutorial to build your own heirloom LED belt,...
No Longer Stocked
[Buy Now](https://www.adafruit.com/product/332)
[Related Guides to the Product](https://learn.adafruit.com/products/332/guides)
### Alkaline AAA batteries - 2 pack
[Alkaline AAA batteries - 2 pack](https://www.adafruit.com/product/617)
Battery power for your portable project! These batteries are good quality at a good price, and work fantastic with any of the kits or projects in the shop that use AAA's. This is a pack of **2 AAA batteries**.
These batteries are Alkaline (MnO2) chemistry,...
No Longer Stocked
[Buy Now](https://www.adafruit.com/product/617)
[Related Guides to the Product](https://learn.adafruit.com/products/617/guides)
### 1N4001 Diode - 10 pack
[1N4001 Diode - 10 pack](https://www.adafruit.com/product/755)
This here is a 10 pack of the classic 1N4001 power blocking diode. These are good for reverse polarity protection (put it between your DC power jack and circuitry to avoid a negative-voltage that would zap your delicate electronics), kickback protection (place across your solenoids, relays...
In Stock
[Buy Now](https://www.adafruit.com/product/755)
[Related Guides to the Product](https://learn.adafruit.com/products/755/guides)
### 4 x AA Battery Holder with On/Off Switch
[4 x AA Battery Holder with On/Off Switch](https://www.adafruit.com/product/830)
Make a nice portable power pack with this 4 x AA battery holder. It fits any alkaline or rechargeable AA batteries in series. There's a snap on cover and an on/off switch which can be handy when wiring to something without a switch.
**New**! We now have 0.1" headers...
In Stock
[Buy Now](https://www.adafruit.com/product/830)
[Related Guides to the Product](https://learn.adafruit.com/products/830/guides)
### 12mm Diffused Flat Digital RGB LED Pixels (Strand of 25)
[12mm Diffused Flat Digital RGB LED Pixels (Strand of 25)](https://www.adafruit.com/product/738)
RGB Pixels are digitally-controllable lights you can set to any color, or animate. Each RGB LED and controller chip is molded into a 'dot' of silicone. The dots are weatherproof and rugged. There are four flanges molded in so that you can 'push' them into a 12mm drill hole in...
In Stock
[Buy Now](https://www.adafruit.com/product/738)
[Related Guides to the Product](https://learn.adafruit.com/products/738/guides)
### 12mm Diffused Thin Digital RGB LED Pixels (Strand of 25)
[12mm Diffused Thin Digital RGB LED Pixels (Strand of 25)](https://www.adafruit.com/product/322)
RGB Pixels are digitally-controllable lights you can set to any color, or animate. Each RGB LED and controller chip is molded into a 'dot' of silicone. The dots are weatherproof and rugged. There are four flanges molded in so that you can 'push' them into a 12mm drill hole in...
No Longer Stocked
[Buy Now](https://www.adafruit.com/product/322)
[Related Guides to the Product](https://learn.adafruit.com/products/322/guides)
### Digital RGB LED Weatherproof Strip - LPD8806 32 LED 5m
[Digital RGB LED Weatherproof Strip - LPD8806 32 LED 5m](https://www.adafruit.com/product/306)
These LED strips are fun and glowy. There are 32 RGB LEDs per meter, and you can control each LED individually! Yes, that's right, this is the digitally-addressable type of LED strip. You can set the color of each LED's red, green and blue component with 7-bit PWM precision (so 21-bit...
In Stock
[Buy Now](https://www.adafruit.com/product/306)
[Related Guides to the Product](https://learn.adafruit.com/products/306/guides)
## Related Guides
- [LPD8806 Digital RGB LED Strip](https://learn.adafruit.com/digital-led-strip.md)
- [NeoPixel GoPro Lens Light](https://learn.adafruit.com/neopixel-gopro-lens-light.md)
- [FancyLED Library for CircuitPython](https://learn.adafruit.com/fancyled-library-for-circuitpython.md)
- [Infinity Mirror Valentine's Candy Box](https://learn.adafruit.com/infinity-mirror-candy-box.md)
- [Circuit Playground Seashell Pendant](https://learn.adafruit.com/circuit-playground-seashell-pendant.md)
- [NYE Circuit Playground Drop](https://learn.adafruit.com/nye-circuit-playground-drop.md)
- [Feather Scorpio Snap Fit Case](https://learn.adafruit.com/feather-scorpio-snap-fit-case.md)
- [LED Noodle Lantern](https://learn.adafruit.com/led-noodle-lantern.md)
- [GitHub Actions Status Tower Light](https://learn.adafruit.com/github-actions-status-tower-light.md)
- [Raspberry Pi E-mail Notifier Using LEDs](https://learn.adafruit.com/raspberry-pi-e-mail-notifier-using-leds.md)
- [Light Up Prop with Prop-Maker](https://learn.adafruit.com/prop-maker-light-wand.md)
- [ISS Pin](https://learn.adafruit.com/iss-pin.md)
- [Flapping Halloween Vampire Bat](https://learn.adafruit.com/flapping-halloween-vampire-bat.md)
- [PyPortal Philips Hue Lighting Controller](https://learn.adafruit.com/pyportal-philips-hue-lighting-controller.md)
- [Adafruit Sparkle Motion Stick](https://learn.adafruit.com/adafruit-sparkle-motion-stick.md)
- [Computer Perfection Synthesizer](https://learn.adafruit.com/computer-perfection-synthesizer.md)
---
# Source: https://learn.adafruit.com/36mm-led-pixels/powering.md
# Source: https://learn.adafruit.com/20mm-led-pixels/powering.md
# 20mm LED Pixels
## Powering
When running a lot of LEDs, it’s important to keep track of power usage. Individual LEDs don't get very hot or use tons of power, but they add up fast!
Each single 20mm RGB LED pixel can draw up to 60mA from a 5V supply. That means a strand of 20 can use up to 1.2 Amps. That’s a peak rate, which assumes that all the LEDs are on at full brightness. If most of the LEDs are kept dim or off (as when animating patterns), the average power usage can be 1/3 this or less.
Info:
Connect ground to both your power supply and microcontroller. Then connect the 5V line from the power supply to the red wire on the LED strand. A large capacitor (1000uF or so) between 5V and ground is a nice addition to keep ripple down.
We suggest a nice switching supply for driving LED pixels:
Our [5 Volt, 2 Amp power supply](http://adafruit.com/products/276) is ideal for one strand of pixels.
For larger projects using multiple strands of pixels, our [5 Volt 10 Amp power supply](http://adafruit.com/products/658) is good for up to 8 strands (160 pixels total).
The [female DC power adapter](http://adafruit.com/products/368) mates with either of the above power supplies. Screw terminals clamp down on the power leads at the end of a strand, reducing the amount of soldering required.
Note the embossed polarity markings. Connect the **red wire** to the **+** terminal and the **blue wire** to the **-** terminal.

# Tips for powering pixel strands:
- When linking multiple strands together, power should be split and applied to _each_ strand. If you try to power too many LEDs from just one end of the strand, they’ll start to “brown out” the further they are from the power supply.
- Strands can be powered from _either_ end — “input” and “output” doesn’t apply to power, only the data signals from the microcontroller.
- If the 10 Amp power supply isn’t large enough for your project, a [slightly modified ATX computer power supply](http://www.instructables.com/pages/search/search.jsp?ie=ISO-8859-1&q=ATX) can provide 30 Amps to power upwards of 500 pixels!
- Generally speaking, you should not try to power an LED strand from the Arduino’s 5V line. This is okay if just a few pixels are lit, but is not adequate for driving a full strand.
- For a standalone application (not USB connected to a computer), you can power the Arduino from the same regulated 5V supply as the LEDs — connect to the 5V pin on the Arduino, _not_ Vin, and don’t use the DC jack on the Arduino.
- Remember to insulate or trim any unused, exposed power wires!
- [Previous Page](https://learn.adafruit.com/20mm-led-pixels/wiring.md)
- [Next Page](https://learn.adafruit.com/20mm-led-pixels/code.md)
## Featured Products
### Adafruit METRO 328 Fully Assembled - Arduino IDE compatible
[Adafruit METRO 328 Fully Assembled - Arduino IDE compatible](https://www.adafruit.com/product/50)
We sure love the ATmega328 here at Adafruit, and we use them _a lot_ for our own projects. The processor has plenty of GPIO, Analog inputs, hardware UART SPI and I2C, timers and PWM galore - just enough for most simple projects. When we need to go small, we use a
Out of Stock
[Buy Now](https://www.adafruit.com/product/50)
[Related Guides to the Product](https://learn.adafruit.com/products/50/guides)
### Female DC Power adapter - 2.1mm jack to screw terminal block
[Female DC Power adapter - 2.1mm jack to screw terminal block](https://www.adafruit.com/product/368)
If you need to connect a DC power wall wart to a board that doesn't have a DC jack - this adapter will come in very handy! There is a 2.1mm DC jack on one end, and a screw terminal block on the other. The terminals are labeled with positive/negative assuming a positive-tip configuration...
In Stock
[Buy Now](https://www.adafruit.com/product/368)
[Related Guides to the Product](https://learn.adafruit.com/products/368/guides)
### 5V 10A switching power supply
[5V 10A switching power supply](https://www.adafruit.com/product/658)
This is a beefy switching supply, for when you need a lot of power! It can supply 5V DC up to 10 Amps, running from 110V or 220V power (the plug it comes with is for US/Canada/Japan but you can use any plug adapter for your country, or just replace the cable with a standard computer/appliance...
Out of Stock
[Buy Now](https://www.adafruit.com/product/658)
[Related Guides to the Product](https://learn.adafruit.com/products/658/guides)
### 5V 2A (2000mA) switching power supply - UL Listed
[5V 2A (2000mA) switching power supply - UL Listed](https://www.adafruit.com/product/276)
This is an FCC/CE certified and UL listed power supply. Need a lot of 5V power? This switching supply gives a clean regulated 5V output at up to 2000mA. 110 or 240 input, so it works in any country. The plugs are "US 2-prong" style so you may need a plug adapter, but you can pick one...
In Stock
[Buy Now](https://www.adafruit.com/product/276)
[Related Guides to the Product](https://learn.adafruit.com/products/276/guides)
## Related Guides
- [Animating Multiple LED Backpacks](https://learn.adafruit.com/animating-multiple-led-backpacks.md)
- [How to Choose a Microcontroller](https://learn.adafruit.com/how-to-choose-a-microcontroller.md)
- [Circuit Playground: D is for Diode](https://learn.adafruit.com/circuit-playground-d-is-for-diode.md)
- [Reverse Geocache Box](https://learn.adafruit.com/reverse-geocache-engagement-box.md)
- [Sending an SMS with Temboo](https://learn.adafruit.com/sending-an-sms-with-temboo.md)
- [Arduino "Hunt The Wumpus"](https://learn.adafruit.com/arduino-hunt-the-wumpus.md)
- [Arduino Lesson 13. DC Motors](https://learn.adafruit.com/adafruit-arduino-lesson-13-dc-motors.md)
- [2.8" TFT Touch Shield](https://learn.adafruit.com/2-8-tft-touch-shield.md)
- [Wave Shield Voice Changer](https://learn.adafruit.com/wave-shield-voice-changer.md)
- [Using NeoPixels and Servos Together](https://learn.adafruit.com/neopixels-and-servos.md)
- [Arduino Lesson 15. DC Motor Reversing](https://learn.adafruit.com/adafruit-arduino-lesson-15-dc-motor-reversing.md)
- [Arduino Lesson 6. Digital Inputs](https://learn.adafruit.com/adafruit-arduino-lesson-6-digital-inputs.md)
- [Skill Badge Requirements: Microcontrollers](https://learn.adafruit.com/skill-badge-requirements-microcontrollers.md)
- [Arduino Lesson 8. Analog Inputs](https://learn.adafruit.com/adafruit-arduino-lesson-8-analog-inputs.md)
- [8BitBox](https://learn.adafruit.com/8bitbox.md)
---
# Source: https://learn.adafruit.com/el-wire-sign/prep-the-design.md
# EL Wire Sign
## Prep the Design

Start by projecting your design onto the black poster board. Once you get it lined up, tape it in place and trace the design by poking holes every inch or so... We used an awl but even a ballpoint pen would work. Don't worry if you poke too many or mess up- you won't be able to see these when it's all done.


- [Previous Page](https://learn.adafruit.com/el-wire-sign/tools.md)
- [Next Page](https://learn.adafruit.com/el-wire-sign/sew.md)
## Featured Products
### Needle set - 3/9 sizes - 20 needles
[Needle set - 3/9 sizes - 20 needles](https://www.adafruit.com/product/615)
Mighty needles, sew like the wind! This needle set is the only one you'll need for any sort of hand sewing, especially using our conductive thread and wearable electronics parts.
Each pack contains 20 gold-eye sharps, with eye sizes ranging from #3 (1.75" long) to #9...
Out of Stock
[Buy Now](https://www.adafruit.com/product/615)
[Related Guides to the Product](https://learn.adafruit.com/products/615/guides)
### 12V 5A switching power supply
[12V 5A switching power supply](https://www.adafruit.com/product/352)
This is a beefy switching supply, for when you need a lot of power! It can supply 12V DC up to 5 Amps, running from 110V or 220V power (the plug it comes with is for US/Canada/Japan but you can use any plug adapter for your country, or just replace the cable with a standard 'figure-8'...
Out of Stock
[Buy Now](https://www.adafruit.com/product/352)
[Related Guides to the Product](https://learn.adafruit.com/products/352/guides)
### In-line power cable 1 meter long extension cord (for EL wire)
[In-line power cable 1 meter long extension cord (for EL wire)](https://www.adafruit.com/product/616)
Give yourself some more room with an EL wire cable extender. This cable has a 2-pin JST SM plug on one end and receptacle on the other. Use it to extend the reach of EL wire, panel, tape, etc. The cable is a meter long, you can of course snap more together if necessary, or cut and re-solder it...
In Stock
[Buy Now](https://www.adafruit.com/product/616)
[Related Guides to the Product](https://learn.adafruit.com/products/616/guides)
### In-line wire 1-to-4 splitter
[In-line wire 1-to-4 splitter](https://www.adafruit.com/product/402)
If you want to connect multiple EL wires/strips/panels up to one inverter, these splitters are quite useful. There is one male connector (goes to the inverter) and then 4 female connectors (which will connect to each wire/strip/panel. You can even cascade them! Only thing to watch for is make...
In Stock
[Buy Now](https://www.adafruit.com/product/402)
[Related Guides to the Product](https://learn.adafruit.com/products/402/guides)
### 12V EL wire/tape inverter
[12V EL wire/tape inverter](https://www.adafruit.com/product/448)
This is an inverter for EL wire and tape, similar to our pocket inverters, except it is a brick that takes 12V input instead of 2 AA batteries. This means its good for 'fixed' installations since you can just plug it into a 12V wall adapter. It's also good for portable projects...
In Stock
[Buy Now](https://www.adafruit.com/product/448)
[Related Guides to the Product](https://learn.adafruit.com/products/448/guides)
### Green Electroluminescent (EL) Wire - 2.5 meters
[Green Electroluminescent (EL) Wire - 2.5 meters](https://www.adafruit.com/product/407)
EL Wire, also known as Electroluminescent wire, is a stiff wire core coated with phosphor and then covered with a protective PVC sheath. When an AC signal is applied to it, it glows an aqua (blue green) color. You can make it look different colors by changing the coating, for example this is a...
In Stock
[Buy Now](https://www.adafruit.com/product/407)
[Related Guides to the Product](https://learn.adafruit.com/products/407/guides)
### Pink Electroluminescent (EL) Wire - 2.5 meters
[Pink Electroluminescent (EL) Wire - 2.5 meters](https://www.adafruit.com/product/404)
EL Wire, also known as Electroluminescent wire is a stiff wire core coated with phosphor and then covered with a protective PVC sheath. When an AC signal is applied to it, it glows an aqua (blue green) color. This EL is pink-coated so that it looks white. It looks a little like thin neon. Very...
Out of Stock
[Buy Now](https://www.adafruit.com/product/404)
[Related Guides to the Product](https://learn.adafruit.com/products/404/guides)
### Yellow Electroluminescent (EL) Wire - 2.5 meters
[Yellow Electroluminescent (EL) Wire - 2.5 meters](https://www.adafruit.com/product/406)
EL Wire, also known as Electroluminescent wire is a stiff wire core coated with phosphor and then covered with a protective PVC sheath. When an AC signal is applied to it, it glows an aqua (blue green) color. You can make it look different colors by changing the coating, for example this is a...
In Stock
[Buy Now](https://www.adafruit.com/product/406)
[Related Guides to the Product](https://learn.adafruit.com/products/406/guides)
## Related Guides
- [EL Workshop](https://learn.adafruit.com/el-workshop.md)
- [TRON Bag](https://learn.adafruit.com/tron-bag.md)
- [EL Stick Figure](https://learn.adafruit.com/el-stick-figure.md)
- [EL Wire Animal Masks](https://learn.adafruit.com/el-wire-animal-masks.md)
- [Electron Bow](https://learn.adafruit.com/electron-bow.md)
- [Glowing Bean Bags with EL Wire](https://learn.adafruit.com/glowing-bean-bags-with-el-wire.md)
- [EL Wire](https://learn.adafruit.com/el-wire.md)
- [EL Bowtie](https://learn.adafruit.com/el-bowtie.md)
- [Light Up your Costume with Noods](https://learn.adafruit.com/light-up-your-costume-with-noods.md)
- [Glowing Star Chuck Taylor Sneakers](https://learn.adafruit.com/glowing-star-chucks.md)
- [EL Wire Stocking](https://learn.adafruit.com/el-wire-stocking.md)
- [TRON Hoodie](https://learn.adafruit.com/tron-hoodie.md)
---
# Source: https://learn.adafruit.com/conductive-thread/prep-thread-and-fabric.md
# Conductive Thread
## Prep thread and fabric

Cut a length of thread roughly the length of one arm. Much longer and the thread will start to be unwieldy and twisted.

Thread a medium size needle with the conductive thread. You may need to moisten the thread end to help it stay pointy for threading.

Place your fabric in an embroidery hoop. Beginners will find this helps a TON when learning. For more information on using an embroidery hoop correctly, check out our [Cross Stitch tutorial](http://learn.adafruit.com/cross-stitch/instructions). More advanced folks may wish to stitch directly to a stiff garment.
- [Previous Page](https://learn.adafruit.com/conductive-thread/tools-and-supplies.md)
- [Next Page](https://learn.adafruit.com/conductive-thread/stitching-around-circuit-boards.md)
## Featured Products
### Stainless Medium Conductive Thread - 3 ply - 18 meter/60 ft
[Stainless Medium Conductive Thread - 3 ply - 18 meter/60 ft](https://www.adafruit.com/product/641)
After months of searching, we finally have what we consider to be the ultimate conductive thread. It's thin, strong, smooth, and made completely of 316L stainless steel. Once you start working with this thread you'll quickly agree its optimal for any wearables work!
This...
Out of Stock
[Buy Now](https://www.adafruit.com/product/641)
[Related Guides to the Product](https://learn.adafruit.com/products/641/guides)
### Stainless Thin Conductive Thread - 2 ply - 23 meter/76 ft
[Stainless Thin Conductive Thread - 2 ply - 23 meter/76 ft](https://www.adafruit.com/product/640)
After months of searching, we finally have what we consider to be the ultimate conductive thread. It's thin, strong, smooth, and made completely of 316L stainless steel. Once you start working with this thread you'll quickly agree its optimal for any wearables work!
This...
In Stock
[Buy Now](https://www.adafruit.com/product/640)
[Related Guides to the Product](https://learn.adafruit.com/products/640/guides)
### Stainless Thin Conductive Yarn / Thick Conductive Thread - 30 ft
[Stainless Thin Conductive Yarn / Thick Conductive Thread - 30 ft](https://www.adafruit.com/product/603)
This 316L stainless steel thread falls somewhere between a thick thread and a thin yarn. Most sewing machines wouldn't be happy with this thread since its thick, and it has the 'furry' soft feel of yarn which makes it poor for most e-textiles/wearables projects. However, the high...
In Stock
[Buy Now](https://www.adafruit.com/product/603)
[Related Guides to the Product](https://learn.adafruit.com/products/603/guides)
### Conductive thread ribbon cable - White - 1 yard
[Conductive thread ribbon cable - White - 1 yard](https://www.adafruit.com/product/1139)
This lightweight, flexible fabric ribbon cable contains four channels of conductive thread, perfect for wiring up wearables where flexibility is key. Use it to connect your conductive fabric gamepad to your microcontroller or computer!
Features:
- Low resistance: ~16...
No Longer Stocked
[Buy Now](https://www.adafruit.com/product/1139)
[Related Guides to the Product](https://learn.adafruit.com/products/1139/guides)
### Needle set - 3/9 sizes - 20 needles
[Needle set - 3/9 sizes - 20 needles](https://www.adafruit.com/product/615)
Mighty needles, sew like the wind! This needle set is the only one you'll need for any sort of hand sewing, especially using our conductive thread and wearable electronics parts.
Each pack contains 20 gold-eye sharps, with eye sizes ranging from #3 (1.75" long) to #9...
Out of Stock
[Buy Now](https://www.adafruit.com/product/615)
[Related Guides to the Product](https://learn.adafruit.com/products/615/guides)
### Small Alligator Clip Test Lead (set of 12)
[Small Alligator Clip Test Lead (set of 12)](https://www.adafruit.com/product/1008)
Connect this to that without soldering using these handy mini alligator clip test leads. 15" cables with alligator clip on each end, color coded. You get 12 pieces in 6 colors. Strong and grippy, these always come in handy! We often use these in conjunction with a multimeter so we...
In Stock
[Buy Now](https://www.adafruit.com/product/1008)
[Related Guides to the Product](https://learn.adafruit.com/products/1008/guides)
### Sewable Snaps - 5mm Diameter - Card of 24
[Sewable Snaps - 5mm Diameter - Card of 24](https://www.adafruit.com/product/1126)
The small 5mm size of these tin-plated brass snaps means they fit perfectly on Flora's pads! Snaps make a great connector for wearables-- solder one side to the board and sew the other to your project with conductive thread! This card comes with 24 complete snaps (socket and stud...
In Stock
[Buy Now](https://www.adafruit.com/product/1126)
[Related Guides to the Product](https://learn.adafruit.com/products/1126/guides)
### FLORA - Wearable electronic platform: Arduino-compatible
[FLORA - Wearable electronic platform: Arduino-compatible](https://www.adafruit.com/product/659)
FLORA is Adafruit's fully-featured wearable electronics platform. It's a round, sewable, Arduino-compatible microcontroller designed to empower amazing wearables projects.FLORA comes with Adafruit's support, [tutorials and...](http://learn.adafruit.com/category/flora)
In Stock
[Buy Now](https://www.adafruit.com/product/659)
[Related Guides to the Product](https://learn.adafruit.com/products/659/guides)
## Related Guides
- [Capacitive Touch with Conductive Fabric & Flora](https://learn.adafruit.com/capacitive-touch-with-conductive-fabric-and-flora.md)
- [Fiber Optic Pixie Skirt](https://learn.adafruit.com/fiber-optic-pixie-princess-skirt.md)
- [Haptic Headband](https://learn.adafruit.com/haptic-headband.md)
- [EEG Costume Cap](https://learn.adafruit.com/eeg-costume-cap.md)
- [Zipper Switch](https://learn.adafruit.com/zipper-switch.md)
- [Adafruit Arduino IDE Setup](https://learn.adafruit.com/adafruit-arduino-ide-setup.md)
- [Sewable NeoPixels](https://learn.adafruit.com/flora-rgb-smart-pixels.md)
- [FLORA TV-B-Gone](https://learn.adafruit.com/flora-tv-b-gone.md)
- [Experimenting with NeverWet + Electronics](https://learn.adafruit.com/neverwet-electronics.md)
- [LED Stego Flex Spike Hoodie](https://learn.adafruit.com/led-stego-flex-spike-hoodie.md)
- [Getting Started with FLORA](https://learn.adafruit.com/getting-started-with-flora.md)
- [Sunscreen Reminder Hat](https://learn.adafruit.com/sunscreen-reminder-hat.md)
- [Mailbox Notification Service](https://learn.adafruit.com/mailbox-notification-service.md)
- [FLORA + FONA](https://learn.adafruit.com/flora-plus-fona.md)
- [Flora TSL2561 Lux Sensor](https://learn.adafruit.com/flora-lux-sensor.md)
---
# Source: https://learn.adafruit.com/papercraft-resistor-helper/prep.md
# Resistor Helper
## Prep

Download and print out your Resistor Helper in color. It’s sized to fit on one 8.5″ x 11″ sheet. You can get the file from either [Thingiverse](http://www.thingiverse.com/thing:22070) or [Github](https://github.com/adafruit/Adafruit-Resistor-Helper).

The wheels are paired with small arrows. Cut around the holder and separate your wheel pairs from each other.
- [Previous Page](https://learn.adafruit.com/papercraft-resistor-helper/overview.md)
- [Next Page](https://learn.adafruit.com/papercraft-resistor-helper/cut.md)
## Related Guides
- [Heat Set Insert Rig](https://learn.adafruit.com/heat-set-rig.md)
- [Digital Circuits 2: Some Tools](https://learn.adafruit.com/some-digital-tools.md)
- [Furby 2012 Teardown](https://learn.adafruit.com/furby-2012-teardown.md)
- [Programmable 12v Outdoor Cafe Lights](https://learn.adafruit.com/programmable-12v-outdoor-cafe-lights.md)
- [Icicle Crown with Pebble Pixels & WLED](https://learn.adafruit.com/icicle-crown-with-pebble-pixels-wled.md)
- [USB C CC Resistor Fixer Case](https://learn.adafruit.com/resistor-fixer-case.md)
- [iOS App Development Using Cordova](https://learn.adafruit.com/ios-app-development-using-cordova.md)
- [Understanding USB Type C: Cable Types, Pitfalls and More](https://learn.adafruit.com/understanding-usb-type-c-cable-types-pitfalls-and-more.md)
- [Mass AVR ISP Programmer](https://learn.adafruit.com/mass-avr-isp-programmer.md)
- [Introduction to iOS Development](https://learn.adafruit.com/introduction-to-ios-development.md)
- [Accessing and Using Adafruit PCB Design Files](https://learn.adafruit.com/accessing-and-using-adafruit-pcb-design-files.md)
- [Getting Started with Binho Nova](https://learn.adafruit.com/getting-started-with-binho-nova.md)
- [Adafruit UPDI Friend](https://learn.adafruit.com/adafruit-updi-friend.md)
- [Adafruit CP2104 and CP2102N Friend - USB to Serial Converter](https://learn.adafruit.com/adafruit-cp2102n-cp2104-friend-usb-to-serial-converter.md)
- [DIY Decorative Resin Keycaps](https://learn.adafruit.com/diy-decorative-resin-keycaps.md)
---
# Source: https://learn.adafruit.com/pi-thermal-printer/preparation-pre-2017.md
# Internet of Things Printer for Raspberry Pi
## Software Prep
We’ll deal with **software** first, then get into soldering and case assembly later.
The software for this project is built upon the **Raspbian Lite** operating system, a pared-down version of Linux for the Raspberry Pi.
The current kit comes with a card loaded with **NOOBS**. This can be used to download and install Raspbian Lite, but we recommend you overwrite the card so you have the most minimal setup (less things can go wrong!)
# Installing From the NOOBS Card
NOOBS has a **graphical interface** and requires temporarily setting up the Pi like a desktop computer. You’ll need a **monitor** connected, along with a **USB keyboard** and **mouse** (this may also require a **USB hub** ). Insert the card in the Raspberry Pi, then connect a USB micro-B cable from the board’s power connector to a USB power source — a phone charger, hub, or just a USB port on your “main” computer.
When booting the NOOBS card, you’ll briefly see the “rainbow screen” — normally bad news, but **it’s okay** in this case — the Pi will then reboot and launch the NOOBS installer menu:

First order of business is to connect NOOBS to a **wireless network** so software can be downloaded. Use the “ **WiFi networks** ” icon (top center) to set this up. It’s a fairly straightforward WiFi configurator…select a network from the available list and enter a network password if required.
Danger:
Danger:
With an internet connection now made, select “ **Raspbian Lite** ” from the list of available operating systems. **Do NOT** select “Raspbian with PIXEL” — this contains a whole lot of software we do not need or want!
Click the “Install” icon. This will download Raspbian Lite (about 300 megabytes), install it on the SD card and (after prompting) will reboot into the newly-installed operating system. You can then skip ahead to the “Setup” page.
More information on NOOBS is available [in this guide](../../../../setting-up-a-raspberry-pi-with-noobs/overview) if needed.
# Overwriting NOOBS with Raspbian Lite
If you have some prior experience with Raspberry Pi and Linux, you might find this approach simpler…
[Start by downloading the latest version of **Raspbian Lite** from the Raspberry Pi web site](https://www.raspberrypi.org/downloads/raspbian/).
**Do NOT** use “Raspbian with Desktop PIXEL” — this contains a whole lot of software we do not need or want! Also, if you’ve previously downloaded Raspbian Lite for other projects, check if a **newer version** is available. This project relies on some recent features!
[Here’s a tutorial explaining how to install the Raspbian software on the SD card](http://learn.adafruit.com/adafruit-raspberry-pi-lesson-1-preparing-and-sd-card-for-your-raspberry-pi/overview "Link: http://learn.adafruit.com/adafruit-raspberry-pi-lesson-1-preparing-and-sd-card-for-your-raspberry-pi/overview") (replacing NOOBS), with links to nice GUI apps for Windows and Mac. The first couple of pages can be skipped, as we’re already downloading the right software for this project.
If you ever need to restore the NOOBS card to its original state, [this guide](../../../../setting-up-a-raspberry-pi-with-noobs/overview) explains the whole process.
- [Previous Page](https://learn.adafruit.com/pi-thermal-printer/parts.md)
- [Next Page](https://learn.adafruit.com/pi-thermal-printer/raspberry-pi-os-setup.md)
## Primary Products
### Adafruit IoT Pi Printer Project Pack
[Adafruit IoT Pi Printer Project Pack](https://www.adafruit.com/product/1289)
Build an "Internet of Things" connected mini printer that will do your bidding! This is a fun weekend project that comes with a beautiful laser cut case. Once assembled, the little printer connects wirelessly to get Internet data for printing onto 2 1/4" wide receipt paper....
No Longer Stocked
[Buy Now](https://www.adafruit.com/product/1289)
[Related Guides to the Product](https://learn.adafruit.com/products/1289/guides)
## Featured Products
### Miniature WiFi (802.11b/g/n) Module: For Raspberry Pi and more
[Miniature WiFi (802.11b/g/n) Module: For Raspberry Pi and more](https://www.adafruit.com/product/814)
Make your Internet of Things device cable-free by adding WiFi. Take advantage of the Raspberry Pi and Beagle Bone's USB port to add a low cost, but high-reliability wireless link. We tried half a dozen modules to find one that works well with the Pi and Bone without the need of recompiling...
No Longer Stocked
[Buy Now](https://www.adafruit.com/product/814)
[Related Guides to the Product](https://learn.adafruit.com/products/814/guides)
### Raspberry Pi - Skill badge, iron-on patch
[Raspberry Pi - Skill badge, iron-on patch](https://www.adafruit.com/product/906)
You are learning to use the small Linux based board, the Raspberry Pi! Adafruit offers a fun and exciting "badges" of achievement for electronics, science and engineering. We believe everyone should be able to be rewarded for learning a useful skill, a badge is just one of the many...
In Stock
[Buy Now](https://www.adafruit.com/product/906)
[Related Guides to the Product](https://learn.adafruit.com/products/906/guides)
### Adafruit Pi Unassembled T-Cobbler Breakout Kit for Raspberry Pi
[Adafruit Pi Unassembled T-Cobbler Breakout Kit for Raspberry Pi](https://www.adafruit.com/product/1105)
Now that you've finally got your hands on a [Raspberry Pi®](http://www.raspberrypi.org/), you're probably itching to make some fun embedded computer projects with it. What you need is an add on prototyping Pi T-Cobbler from Adafruit, which can break out all those tasty...
No Longer Stocked
[Buy Now](https://www.adafruit.com/product/1105)
[Related Guides to the Product](https://learn.adafruit.com/products/1105/guides)
### Mini Thermal Receipt Printer Starter Pack
[Mini Thermal Receipt Printer Starter Pack](https://www.adafruit.com/product/600)
Hit the ground running (and printing!) with this starter pack that includes a thermal printer and all the extras and save a few dollars while you're at it.
Includes:
- [A mini thermal receipt printer](http://www.adafruit.com/products/597) - with cables and...
No Longer Stocked
[Buy Now](https://www.adafruit.com/product/600)
[Related Guides to the Product](https://learn.adafruit.com/products/600/guides)
### Thermal paper roll - 50' long, 2.25" wide
[Thermal paper roll - 50' long, 2.25" wide](https://www.adafruit.com/product/599)
A mini roll of thermal paper, this fits very nicely into our mini thermal printer. 2.25" wide (about 57mm) and 50 feet long (15 meters). BPA-free.
[Perfect for use with our mini thermal printer!](http://www.adafruit.com/products/597)
No Longer Stocked
[Buy Now](https://www.adafruit.com/product/599)
[Related Guides to the Product](https://learn.adafruit.com/products/599/guides)
### Mini Thermal Receipt Printer
[Mini Thermal Receipt Printer](https://www.adafruit.com/product/597)
Add a mini printer to any microcontroller project with this very cute thermal printer. Thermal printers are also known as receipt printers, they're what you get when you go to the ATM or grocery store. Now you can embed a little printer of your own into an enclosure. This printer is ideal...
No Longer Stocked
[Buy Now](https://www.adafruit.com/product/597)
[Related Guides to the Product](https://learn.adafruit.com/products/597/guides)
### Rugged Metal Pushbutton with White LED Ring
[Rugged Metal Pushbutton with White LED Ring](https://www.adafruit.com/product/558)
These chrome-plated metal buttons are rugged and look real good while doing it! Simply drill a 16mm hole into any material up to 1/2" thick and you can fit these in place, there's even a rubber gasket to keep water out of the enclosure. On the front of the button is a flat metal...
In Stock
[Buy Now](https://www.adafruit.com/product/558)
[Related Guides to the Product](https://learn.adafruit.com/products/558/guides)
### 5V 10A switching power supply
[5V 10A switching power supply](https://www.adafruit.com/product/658)
This is a beefy switching supply, for when you need a lot of power! It can supply 5V DC up to 10 Amps, running from 110V or 220V power (the plug it comes with is for US/Canada/Japan but you can use any plug adapter for your country, or just replace the cable with a standard computer/appliance...
In Stock
[Buy Now](https://www.adafruit.com/product/658)
[Related Guides to the Product](https://learn.adafruit.com/products/658/guides)
## Related Guides
- [Skill Badge Requirements: Raspberry Pi](https://learn.adafruit.com/skill-badge-requirements-raspberry-pi.md)
- [Adafruit Prototyping Pi Plate](https://learn.adafruit.com/adafruit-prototyping-pi-plate.md)
- [Adafruit Raspberry Pi Educational Linux Distro](https://learn.adafruit.com/adafruit-raspberry-pi-educational-linux-distro.md)
- [Open Source Protective Face Shield Designs](https://learn.adafruit.com/open-source-face-shield-designs.md)
- [PyPortal IoT Plant Monitor with Google Cloud IoT Core and CircuitPython](https://learn.adafruit.com/pyportal-iot-plant-monitor-with-google-cloud-iot-core-and-circuitpython.md)
- [Adafruit QT Py ESP32-C3 WiFi Dev Board](https://learn.adafruit.com/adafruit-qt-py-esp32-c3-wifi-dev-board.md)
- [AstroPrint 3D Printing](https://learn.adafruit.com/astroprint-3d-printing.md)
- [No-Code Rain Sensing Smart Desktop Umbrella Stand](https://learn.adafruit.com/no-code-rain-sensing-smart-desktop-umbrella-stand.md)
- [MacroPad Remote Procedure Calls over USB to Control Home Assistant](https://learn.adafruit.com/macropad-remote-procedure-calls-over-usb-to-control-home-assistant.md)
- [PiPhone - A Raspberry Pi based Cellphone](https://learn.adafruit.com/piphone-a-raspberry-pi-based-cellphone.md)
- [Adafruit 128x64 OLED Bonnet for Raspberry Pi](https://learn.adafruit.com/adafruit-128x64-oled-bonnet-for-raspberry-pi.md)
- [Set up and Blink - MATLAB and Simulink with Raspberry Pi](https://learn.adafruit.com/how-to-use-matlab-and-simulink-with-raspberry-pi.md)
- [Mini Raspberry Pi Handheld Notebook](https://learn.adafruit.com/mini-raspberry-pi-handheld-notebook-palmtop.md)
- [Adafruit's Raspberry Pi Lesson 2. First Time Configuration](https://learn.adafruit.com/adafruits-raspberry-pi-lesson-2-first-time-configuration.md)
- [Huzzah Weather Display](https://learn.adafruit.com/huzzah-weather-display.md)
---
# Source: https://learn.adafruit.com/adafruit-motor-shield/preparation.md
# Source: https://learn.adafruit.com/internet-of-things-printer/preparation.md
# Internet of Things Printer
## Preparation
- If using the Arduino Ethernet (board, not shield), gently remove the 6-pin 90-degree male programming header from its socket.
- If using the Arduino Uno + Ethernet Shield, remove the Ethernet Shield if it's currently installed.
- Peel the backing paper off the acrylic parts. This may create a static charge, so building the kit with a grounding mat or wrist strap is recommended.
- If using Ethernet Shield, there's an extra cutout on the back piece of the acrylic case that can be snapped off using finger pressure or pliers. If sharp points remain, trim with wire cutters or a file. If using the Arduino Ethernet, leave this cutout in place.

- Note the unique Ethernet MAC address on the board — usually a white sticker on the bottom. You will need this later, so write it down or snap a photo.

Info:
- [Previous Page](https://learn.adafruit.com/internet-of-things-printer/parts-list.md)
- [Next Page](https://learn.adafruit.com/internet-of-things-printer/assembly.md)
## Primary Products
### Adafruit IoT Printer Project Pack "Internet of Things" printer
[Adafruit IoT Printer Project Pack "Internet of Things" printer](https://www.adafruit.com/product/717)
Build an "Internet of Things" connected mini printer that will do your bidding! This is a fun weekend project that comes with a beautiful laser cut case. Once assembled, the little printer connects to Ethernet to get Internet data for printing onto 2 1/4" wide receipt paper. The example sketch...
No Longer Stocked
[Buy Now](https://www.adafruit.com/product/717)
[Related Guides to the Product](https://learn.adafruit.com/products/717/guides)
## Featured Products
### Mini Thermal Receipt Printer
[Mini Thermal Receipt Printer](https://www.adafruit.com/product/597)
Add a mini printer to any microcontroller project with this very cute thermal printer. Thermal printers are also known as receipt printers, they're what you get when you go to the ATM or grocery store. Now you can embed a little printer of your own into an enclosure. This printer is ideal...
No Longer Stocked
[Buy Now](https://www.adafruit.com/product/597)
[Related Guides to the Product](https://learn.adafruit.com/products/597/guides)
### Thermal paper roll - 50' long, 2.25" wide
[Thermal paper roll - 50' long, 2.25" wide](https://www.adafruit.com/product/599)
A mini roll of thermal paper, this fits very nicely into our mini thermal printer. 2.25" wide (about 57mm) and 50 feet long (15 meters). BPA-free.
[Perfect for use with our mini thermal printer!](http://www.adafruit.com/products/597)
No Longer Stocked
[Buy Now](https://www.adafruit.com/product/599)
[Related Guides to the Product](https://learn.adafruit.com/products/599/guides)
### Adafruit METRO 328 - Arduino Compatible - with Headers
[Adafruit METRO 328 - Arduino Compatible - with Headers](https://www.adafruit.com/product/2488)
This is the **Adafruit METRO Arduino-Compatible - with headers. ** It's a fully assembled and tested microcontroller and physical computing board with through-hole headers attached. If you don't want a Metro with the headers attached for...
In Stock
[Buy Now](https://www.adafruit.com/product/2488)
[Related Guides to the Product](https://learn.adafruit.com/products/2488/guides)
### Ethernet Shield for Arduino - W5500 Chipset
[Ethernet Shield for Arduino - W5500 Chipset](https://www.adafruit.com/product/2971)
The W5500 Ethernet Shield for Arduino from Seeed Studio is a great way to set up your projects with internet connectivity with just a single chip. Similar to the[Arduino Ethernet Shield](https://www.adafruit.com/product/201), but with a newer chipset, this ethernet shield...
No Longer Stocked
[Buy Now](https://www.adafruit.com/product/2971)
[Related Guides to the Product](https://learn.adafruit.com/products/2971/guides)
### FTDI Friend with Micro USB Port + extras
[FTDI Friend with Micro USB Port + extras](https://www.adafruit.com/product/284)
Long gone are the days of parallel ports and serial ports. Now the USB port reigns supreme! But USB is hard, and you just want to transfer your every-day serial data from a microcontroller to computer. What now? Enter the FTDI Friend!
The FTDI Friend is a tweaked out FTDI FT232RL chip...
In Stock
[Buy Now](https://www.adafruit.com/product/284)
[Related Guides to the Product](https://learn.adafruit.com/products/284/guides)
### Rugged Metal On/Off Switch with Green LED Ring
[Rugged Metal On/Off Switch with Green LED Ring](https://www.adafruit.com/product/482)
These chrome-plated metal buttons are rugged and look real good while doing it! Simply drill a 16mm hole into any material up to 1/2" thick and you can fit these in place, there's even a rubber gasket to keep water out of the enclosure. On the front of the button is a flat metal...
In Stock
[Buy Now](https://www.adafruit.com/product/482)
[Related Guides to the Product](https://learn.adafruit.com/products/482/guides)
### Arduino Ethernet shield R3 with micro SD connector - Assembled
[Arduino Ethernet shield R3 with micro SD connector - Assembled](https://www.adafruit.com/product/201)
The Arduino Ethernet Shield R3 (assembled) allows an Arduino board to connect to the internet. It is based on the Wiznet W5100 ethernet chip (datasheet). The Wiznet W5100 provides a network (IP) stack capable of both TCP and UDP. It supports up to four simultaneous socket connections. Use the...
No Longer Stocked
[Buy Now](https://www.adafruit.com/product/201)
[Related Guides to the Product](https://learn.adafruit.com/products/201/guides)
### Arduino Uno Ethernet
[Arduino Uno Ethernet](https://www.adafruit.com/product/418)
**As of 9/20/2012 Adafruit is currently shipping R3 of the Arduino Uno Ethernet**
Deep in the Swiss Alps, the top secret Arduino Super-collider has accelerated both an [Arduino UNO](https://www.adafruit.com/products/50) and
No Longer Stocked
[Buy Now](https://www.adafruit.com/product/418)
[Related Guides to the Product](https://learn.adafruit.com/products/418/guides)
## Related Guides
- [Mystery Box: NeoMatrix Mk I](https://learn.adafruit.com/mystery-box-neomatrix-mk-i.md)
- [A Z80 CP/M emulator for the SAMD51](https://learn.adafruit.com/z80-cpm-emulator-for-the-samd51-grand-central.md)
- [Echo 2-XL](https://learn.adafruit.com/echo-2-xl.md)
- [DC & USB Boarduino Kits](https://learn.adafruit.com/boarduino-kits.md)
- [Portable Solar Charging Tracker](https://learn.adafruit.com/portable-solar-charging-tracker.md)
- [Ladyada's Learn Arduino - Lesson #2](https://learn.adafruit.com/ladyadas-learn-arduino-lesson-number-2.md)
- [Motorized Camera Slider MK3 ](https://learn.adafruit.com/motorized-camera-slider-mk3.md)
- [Adafruit VCNL4040 Proximity Sensor](https://learn.adafruit.com/adafruit-vcnl4040-proximity-sensor.md)
- [Ladyada's Learn Arduino - Lesson #1](https://learn.adafruit.com/ladyadas-learn-arduino-lesson-number-1.md)
- [Trinket / Gemma IR Control](https://learn.adafruit.com/trinket-gemma-ir-remote-control.md)
- [Adafruit HUZZAH32 – ESP32 Breakout Board](https://learn.adafruit.com/huzzah32-esp32-breakout-board.md)
- [Adafruit HUZZAH ESP8266 breakout](https://learn.adafruit.com/adafruit-huzzah-esp8266-breakout.md)
- [FTDI Friend](https://learn.adafruit.com/ftdi-friend.md)
- [Ladyada's Learn Arduino - Lesson #0](https://learn.adafruit.com/ladyadas-learn-arduino-lesson-number-0.md)
- [IR Sensor](https://learn.adafruit.com/ir-sensor.md)
---
# Source: https://learn.adafruit.com/digital-led-belt/prepare-cable.md
# Digital LED Belt
## Prepare Cable
Find the 6-pin IDC cable and plug one end in. it should look like the following. with the cable coming out onto the right side and the red wire up top.
Now cut the other end just before the connector (I'm cutting it about 1" away but don't cut any more off than that!
Disconnect the cable from the board (now that its cut)
Separate the wires of the cable, you can use fingernails to start, or use the tips of the diagonal cutters to nip into the edges and then pull. Pull them so they are about 1" separated.

Strip the ends of each of the wires to remove the plastic coating.

Place the cable in a vise or holder like this third hand tool, and 'tin' the ends by melting solder into the wires while heating with the tip of your soldering iron until they are coated with solder.
- [Previous Page](https://learn.adafruit.com/digital-led-belt/solder-header.md)
- [Next Page](https://learn.adafruit.com/digital-led-belt/connect-the-led-strip.md)
## Featured Products
### Digital programmable LED belt kit
[Digital programmable LED belt kit](https://www.adafruit.com/product/332)
By popular demand, we now have a project tutorial for how to make your own programmable, ultra-blinky LED belt. Perfect for parties, raves, parades, weddings, funerals, and bar mitzvahs. Wear it with pride, wear it with blinky! Follow our soldering tutorial to build your own heirloom LED belt,...
No Longer Stocked
[Buy Now](https://www.adafruit.com/product/332)
[Related Guides to the Product](https://learn.adafruit.com/products/332/guides)
## Related Guides
- [LED Sequin Bow Tie](https://learn.adafruit.com/led-sequin-bowtie.md)
- [Bluetooth-Controlled NeoPixel Goggles](https://learn.adafruit.com/bluetooth-neopixel-goggles.md)
- [Light Painting with Raspberry Pi](https://learn.adafruit.com/light-painting-with-raspberry-pi.md)
- [Glowing Viking Rune wayFinder](https://learn.adafruit.com/glowing-viking-rune-artifact.md)
- [3D Printing with Bamboo Wood Filament](https://learn.adafruit.com/3d-printing-with-bamboo-wood-filament.md)
- [Jellyfish Umbrella with easy WLED WiFi Control](https://learn.adafruit.com/jellyfish-umbrella-with-easy-wled-wifi-control.md)
- [Bandolier of Light](https://learn.adafruit.com/bandolier-of-light.md)
- [Electron Bow](https://learn.adafruit.com/electron-bow.md)
- [Steven Universe Cosplay Shirt & Gem](https://learn.adafruit.com/steven-universe-cosplay-shirt-gem.md)
- [CLUE Vertical Garden Weather Visualizer](https://learn.adafruit.com/clue-vertical-garden-weather-visualizer.md)
- [Cast a 3d Printed Necklace in Metal](https://learn.adafruit.com/cast-a-3d-printed-necklace-in-metal.md)
- [3D Printed Wearable Video Goggles](https://learn.adafruit.com/3d-printed-wearable-video-goggles.md)
- [Bunny Ears with MakeCode](https://learn.adafruit.com/bunny-ears-with-makecode.md)
- [Roll-up Video Light](https://learn.adafruit.com/roll-up-video-light.md)
- [1,500 NeoPixel LED Curtain with Raspberry Pi and Fadecandy](https://learn.adafruit.com/1500-neopixel-led-curtain-with-raspberry-pi-fadecandy.md)
---
# Source: https://learn.adafruit.com/raspberry-pi-e-mail-notifier-using-leds/prepare-python.md
# Raspberry Pi E-mail Notifier Using LEDs
## Prepare Python
In order for our Python code to work, we'll want to make sure a few libraries are installed.
First, from either the keyboard/monitor or SSH console type in:
```
sudo apt-get install python-pip
```

...you'll be asked if you want to continue. Type "Y" for yes, and hit enter.

This part will probably take a little while.
Then you can install the [IMAPClient](http://imapclient.readthedocs.org/en/latest/) Python library, which lets Python talk to most e-mail services:
```
sudo pip install imapclient
```

Danger:
The current version of the script should actually work with any e-mail provider that provides [IMAP](https://en.wikipedia.org/wiki/Internet_Message_Access_Protocol) access. A few useful links:
- [Yahoo! Mail IMAP Settings](https://help.yahoo.com/kb/mobile/imap%C2%A0settings-yahoo-mail-sln4075.html)
- [Hotmail / Outlook.com IMAP Settings](http://www.howto-outlook.com/howto/accountsettings.htm#outlookcom-imap)
- [iCloud: Mail server settings for email clients](https://support.apple.com/en-us/HT202304)
I **f you have two-factor authentication enabled on your GMail account** , you'll need to generate an application-specific password to use IMAP. I[followed Google's detailed instructions](https://support.google.com/mail/answer/1173270?hl=en) and was up and running in no time.
Not sure if you have two-factor auth enabled? That probably means you don't, so don't worry about it for now.
- [Previous Page](https://learn.adafruit.com/raspberry-pi-e-mail-notifier-using-leds/remote-ssh.md)
## Featured Products
### Raspberry Pi Starter Pack
[Raspberry Pi Starter Pack](https://www.adafruit.com/product/3049)
You're going to work hard with your Raspberry Pi 2 Model B or Raspberry Pi 1 Model B+. You're going to have to solder, code, and Linux your Maker heart out. That's why we've tried to make it as easy as possible to start...
In Stock
[Buy Now](https://www.adafruit.com/product/3049)
[Related Guides to the Product](https://learn.adafruit.com/products/3049/guides)
### Raspberry Pi 3 - Model B+ - 1.4GHz Cortex-A53 with 1GB RAM
[Raspberry Pi 3 - Model B+ - 1.4GHz Cortex-A53 with 1GB RAM](https://www.adafruit.com/product/3775)
The Raspberry Pi 3 Model B is the most popular Raspberry Pi computer made, and the Pi Foundation knows you can always make a good thing _better_! And what could make the Pi 3 better? How about a _faster_ processor, 5 GHz WiFi, and updated Ethernet chip with PoE capability?...
In Stock
[Buy Now](https://www.adafruit.com/product/3775)
[Related Guides to the Product](https://learn.adafruit.com/products/3775/guides)
### Full Sized Premium Breadboard - 830 Tie Points
[Full Sized Premium Breadboard - 830 Tie Points](https://www.adafruit.com/product/239)
This is a 'full-size' premium quality breadboard, 830 tie points. Good for small and medium projects. It's 2.2" x 7" (5.5 cm x 17 cm) with a standard double-strip in the middle and two power rails on both sides. You can pull the power rails off easily to make the...
In Stock
[Buy Now](https://www.adafruit.com/product/239)
[Related Guides to the Product](https://learn.adafruit.com/products/239/guides)
### 5V 2.5A Switching Power Supply with 20AWG MicroUSB Cable
[5V 2.5A Switching Power Supply with 20AWG MicroUSB Cable](https://www.adafruit.com/product/1995)
Our all-in-one 5V 2.5 Amp + MicroUSB cable power adapter is the perfect choice for powering single-board computers like Raspberry Pi, BeagleBone, or anything else that's power-hungry!
This adapter was specifically designed to provide 5.25V, not 5V, but we still call it a 5V USB...
Out of Stock
[Buy Now](https://www.adafruit.com/product/1995)
[Related Guides to the Product](https://learn.adafruit.com/products/1995/guides)
### Assembled Pi Cobbler Plus - Breakout Cable
[Assembled Pi Cobbler Plus - Breakout Cable](https://www.adafruit.com/product/2029)
The Raspberry Pi B+ / Pi 2 / Pi 3 / Pi 4 has landed on the Maker World like a 40-GPIO pinned, quad-USB ported, credit card sized bomb of DIY joy. And while you can use most of our great Model B accessories by hooking up our [downgrade...](https://www.adafruit.com/product/1986)
In Stock
[Buy Now](https://www.adafruit.com/product/2029)
[Related Guides to the Product](https://learn.adafruit.com/products/2029/guides)
### Assembled Pi T-Cobbler Plus - GPIO Breakout
[Assembled Pi T-Cobbler Plus - GPIO Breakout](https://www.adafruit.com/product/2028)
**This is the assembled version of the Pi T-Cobbler Plus. It only works with the Raspberry Pi Model Zero, A+, B+, Pi 2, Pi 3 & Pi 4!** (Any Pi with 2x20 connector)
The Raspberry Pi has landed on the Maker World like a 40-GPIO pinned, quad-USB ported, credit...
In Stock
[Buy Now](https://www.adafruit.com/product/2028)
[Related Guides to the Product](https://learn.adafruit.com/products/2028/guides)
### Diffused Red 10mm LED (25 pack)
[Diffused Red 10mm LED (25 pack)](https://www.adafruit.com/product/845)
Need some big indicators? We are big fans of these huge diffused red LEDs. They are fairly bright so they can be seen in daytime, and from any angle. They go easily into a breadboard and will add that extra zing to your project.
- Pack of 25 diffused red LEDs
- 10mm...
No Longer Stocked
[Buy Now](https://www.adafruit.com/product/845)
[Related Guides to the Product](https://learn.adafruit.com/products/845/guides)
### Diffused Green 10mm LED (25 pack)
[Diffused Green 10mm LED (25 pack)](https://www.adafruit.com/product/844)
Need some big indicators? We are big fans of these huge 10mm diffused green LEDs. They are fairly bright so they can be seen in daytime, and from any angle. They go easily into a breadboard and will add that extra zing to your project.
- Pack of 25 diffused green LEDs
- 10mm...
No Longer Stocked
[Buy Now](https://www.adafruit.com/product/844)
[Related Guides to the Product](https://learn.adafruit.com/products/844/guides)
## Related Guides
- [Speech Synthesis on the Raspberry Pi](https://learn.adafruit.com/speech-synthesis-on-the-raspberry-pi.md)
- [Circadian Pi Desk Light](https://learn.adafruit.com/circadian-pi-desk-light.md)
- [Adafruit's Raspberry Pi Lesson 11. DS18B20 Temperature Sensing](https://learn.adafruit.com/adafruits-raspberry-pi-lesson-11-ds18b20-temperature-sensing.md)
- [Drive a 16x2 LCD with the Raspberry Pi](https://learn.adafruit.com/drive-a-16x2-lcd-directly-with-a-raspberry-pi.md)
- [Adding Basic Audio Ouput to Raspberry Pi Zero](https://learn.adafruit.com/adding-basic-audio-ouput-to-raspberry-pi-zero.md)
- [Single Channel LoRaWAN Gateway for Raspberry Pi](https://learn.adafruit.com/raspberry-pi-single-channel-lorawan-gateway.md)
- [Playing sounds and using buttons with Raspberry Pi](https://learn.adafruit.com/playing-sounds-and-using-buttons-with-raspberry-pi.md)
- [Program an AVR or Arduino Using Raspberry Pi GPIO](https://learn.adafruit.com/program-an-avr-or-arduino-using-raspberry-pi-gpio-pins.md)
- [IoT Temperature Logger with Analog Devices ADT7410, Raspberry Pi, and Adafruit IO](https://learn.adafruit.com/iot-temperature-logger-with-python-and-adafruit-io.md)
- [Capacitive Touch Sensors on the Raspberry Pi](https://learn.adafruit.com/capacitive-touch-sensors-on-the-raspberry-pi.md)
- [Matrix and 7-Segment LED Backpack with the Raspberry Pi](https://learn.adafruit.com/matrix-7-segment-led-backpack-with-the-raspberry-pi.md)
- [Windows IoT Core Application Development: Headed Blinky](https://learn.adafruit.com/windows-iot-application-development-headed-blinky.md)
- [Basic Resistor Sensor Reading on Raspberry Pi](https://learn.adafruit.com/basic-resistor-sensor-reading-on-raspberry-pi.md)
- [Large Pi-based Thermometer and Clock](https://learn.adafruit.com/large-pi-based-thermometer-and-clock.md)
- [PiPhone - A Raspberry Pi based Cellphone](https://learn.adafruit.com/piphone-a-raspberry-pi-based-cellphone.md)
---
# Source: https://learn.adafruit.com/playing-sounds-and-using-buttons-with-raspberry-pi/prerequisite-pi-setup.md
# Playing sounds and using buttons with Raspberry Pi
## Pi Prep
# Update Your Pi to the Latest Raspbian
Your Pi will need to be running the latest version of Raspbian. This tutorial was written using Raspbian Stretch (Nov. 2018). Checkout our guide for [Preparing an SD Card for your Raspberry Pi](https://learn.adafruit.com/adafruit-raspberry-pi-lesson-1-preparing-and-sd-card-for-your-raspberry-pi) if you have not done so already. After the installation is complete be sure and run the following commands to make sure your installation packages are up to date.
```
$ sudo apt-get update -y
$ sudo apt-get upgrade -y
```
# Install pip3
pip3 is already installed with a full Raspbian installation, but the Raspbian Lite does not include pip3 so it needs to be installed as shown below.
```
$ sudo apt-get install python3-pip
```
# Install adafruit-blinka
```
$ sudo pip3 install adafruit-blinka
```
- [Previous Page](https://learn.adafruit.com/playing-sounds-and-using-buttons-with-raspberry-pi/overview.md)
- [Next Page](https://learn.adafruit.com/playing-sounds-and-using-buttons-with-raspberry-pi/install-circuitpython-for-raspberry-pi.md)
## Featured Products
### Raspberry Pi 3 - Model B+ - 1.4GHz Cortex-A53 with 1GB RAM
[Raspberry Pi 3 - Model B+ - 1.4GHz Cortex-A53 with 1GB RAM](https://www.adafruit.com/product/3775)
The Raspberry Pi 3 Model B is the most popular Raspberry Pi computer made, and the Pi Foundation knows you can always make a good thing _better_! And what could make the Pi 3 better? How about a _faster_ processor, 5 GHz WiFi, and updated Ethernet chip with PoE capability?...
In Stock
[Buy Now](https://www.adafruit.com/product/3775)
[Related Guides to the Product](https://learn.adafruit.com/products/3775/guides)
### Half Sized Premium Breadboard - 400 Tie Points
[Half Sized Premium Breadboard - 400 Tie Points](https://www.adafruit.com/product/64)
This is a cute, half-size breadboard with 400 tie points, good for small projects. It's 3.25" x 2.2" / 8.3cm x 5.5cm with a standard double-strip in the middle and two power rails on both sides. You can pull the power rails off easily to make the breadboard as...
In Stock
[Buy Now](https://www.adafruit.com/product/64)
[Related Guides to the Product](https://learn.adafruit.com/products/64/guides)
### Tactile Button switch (6mm) x 20 pack
[Tactile Button switch (6mm) x 20 pack](https://www.adafruit.com/product/367)
Little clicky switches are standard input "buttons" on electronic projects. These work best in a PCB but [can be used on a solderless breadboard as shown in this tutorial](https://learn.adafruit.com/adafruit-arduino-lesson-6-digital-inputs?view=all). The pins are normally...
In Stock
[Buy Now](https://www.adafruit.com/product/367)
[Related Guides to the Product](https://learn.adafruit.com/products/367/guides)
### Adafruit Raspberry Pi B+ / Pi 2 / Pi 3 Case - Smoke Base
[Adafruit Raspberry Pi B+ / Pi 2 / Pi 3 Case - Smoke Base](https://www.adafruit.com/product/2258)
It took awhile to perfect - but that's okay since we can now safely say that the Adafruit case for Raspberry Pi Model B+ / Pi 2 / Pi 3 is The Single Greatest Raspberry Pi Model B+ Case Ever.
This enclosure was designed by Mike Doell - just like our...
In Stock
[Buy Now](https://www.adafruit.com/product/2258)
[Related Guides to the Product](https://learn.adafruit.com/products/2258/guides)
### 5V 2.5A Switching Power Supply with 20AWG MicroUSB Cable
[5V 2.5A Switching Power Supply with 20AWG MicroUSB Cable](https://www.adafruit.com/product/1995)
Our all-in-one 5V 2.5 Amp + MicroUSB cable power adapter is the perfect choice for powering single-board computers like Raspberry Pi, BeagleBone, or anything else that's power-hungry!
This adapter was specifically designed to provide 5.25V, not 5V, but we still call it a 5V USB...
Out of Stock
[Buy Now](https://www.adafruit.com/product/1995)
[Related Guides to the Product](https://learn.adafruit.com/products/1995/guides)
### Assembled Pi T-Cobbler Plus - GPIO Breakout
[Assembled Pi T-Cobbler Plus - GPIO Breakout](https://www.adafruit.com/product/2028)
**This is the assembled version of the Pi T-Cobbler Plus. It only works with the Raspberry Pi Model Zero, A+, B+, Pi 2, Pi 3 & Pi 4!** (Any Pi with 2x20 connector)
The Raspberry Pi has landed on the Maker World like a 40-GPIO pinned, quad-USB ported, credit...
In Stock
[Buy Now](https://www.adafruit.com/product/2028)
[Related Guides to the Product](https://learn.adafruit.com/products/2028/guides)
### Assembled Pi Cobbler Plus - Breakout Cable
[Assembled Pi Cobbler Plus - Breakout Cable](https://www.adafruit.com/product/2029)
The Raspberry Pi B+ / Pi 2 / Pi 3 / Pi 4 has landed on the Maker World like a 40-GPIO pinned, quad-USB ported, credit card sized bomb of DIY joy. And while you can use most of our great Model B accessories by hooking up our [downgrade...](https://www.adafruit.com/product/1986)
In Stock
[Buy Now](https://www.adafruit.com/product/2029)
[Related Guides to the Product](https://learn.adafruit.com/products/2029/guides)
### Adafruit Assembled Pi Cobbler Breakout + Cable for Raspberry Pi
[Adafruit Assembled Pi Cobbler Breakout + Cable for Raspberry Pi](https://www.adafruit.com/product/914)
Now that you've finally got your hands on a [Raspberry Pi® Model B](http://www.raspberrypi.org/), you're probably itching to make some fun embedded computer projects with it. What you need is an add on prototyping Pi Cobbler from Adafruit, which can break out all those...
No Longer Stocked
[Buy Now](https://www.adafruit.com/product/914)
[Related Guides to the Product](https://learn.adafruit.com/products/914/guides)
## Related Guides
- [Capacitive Touch Sensors on the Raspberry Pi](https://learn.adafruit.com/capacitive-touch-sensors-on-the-raspberry-pi.md)
- [LoRa and LoRaWAN Radio for Raspberry Pi](https://learn.adafruit.com/lora-and-lorawan-radio-for-raspberry-pi.md)
- [Adafruit's Raspberry Pi Lesson 13. Power Control](https://learn.adafruit.com/adafruits-raspberry-pi-lesson-13-power-control.md)
- [Adafruit's Raspberry Pi Lesson 4. GPIO Setup](https://learn.adafruit.com/adafruits-raspberry-pi-lesson-4-gpio-setup.md)
- [Adafruit's Raspberry Pi Lesson 11. DS18B20 Temperature Sensing](https://learn.adafruit.com/adafruits-raspberry-pi-lesson-11-ds18b20-temperature-sensing.md)
- [Analog Inputs for Raspberry Pi Using the MCP3008](https://learn.adafruit.com/reading-a-analog-in-and-controlling-audio-volume-with-the-raspberry-pi.md)
- [CircuitPython Libraries on Linux and ODROID C2](https://learn.adafruit.com/circuitpython-libaries-linux-odroid-c2.md)
- [Single Channel LoRaWAN Gateway for Raspberry Pi](https://learn.adafruit.com/raspberry-pi-single-channel-lorawan-gateway.md)
- [Adafruit AMG8833 8x8 Thermal Camera Sensor](https://learn.adafruit.com/adafruit-amg8833-8x8-thermal-camera-sensor.md)
- [Introducing the Raspberry Pi 2 - Model B](https://learn.adafruit.com/introducing-the-raspberry-pi-2-model-b.md)
- [Basic Resistor Sensor Reading on Raspberry Pi](https://learn.adafruit.com/basic-resistor-sensor-reading-on-raspberry-pi.md)
- [Windows IoT Core Application Development: Headed Blinky](https://learn.adafruit.com/windows-iot-application-development-headed-blinky.md)
- [Raspberry Pi WiFi Radio](https://learn.adafruit.com/pi-wifi-radio.md)
- [Program an AVR or Arduino Using Raspberry Pi GPIO](https://learn.adafruit.com/program-an-avr-or-arduino-using-raspberry-pi-gpio-pins.md)
- [USB Rechargeable Cordless Soldering Iron](https://learn.adafruit.com/usb-rechargeable-cordless-soldering-iron.md)
---
# Source: https://learn.adafruit.com/conductive-thread/preventing-short-circuits.md
# Conductive Thread
## Preventing short circuits

Keep your stitches small and snug throughout your circuit. An embroidery hoop comes in handy to keep the fabric flat.

Keep power and ground lines far apart from each other. A short between power and ground will prevent your project from working and may even cause your battery to heat up.

Use a multimeter's continuity tester to check your circuit for shorts. The meter will beep any time the two probes are electrically connected.

Put one probe on power and one probe on ground. There should be no beep!

Check your circuit for shorts after finishing each path in your circuit. This way if you do discover a problem, you will know the likely location of the stray thread/short circuit.
- [Previous Page](https://learn.adafruit.com/conductive-thread/connecting-components.md)
- [Next Page](https://learn.adafruit.com/conductive-thread/machine-sewing.md)
## Featured Products
### Stainless Medium Conductive Thread - 3 ply - 18 meter/60 ft
[Stainless Medium Conductive Thread - 3 ply - 18 meter/60 ft](https://www.adafruit.com/product/641)
After months of searching, we finally have what we consider to be the ultimate conductive thread. It's thin, strong, smooth, and made completely of 316L stainless steel. Once you start working with this thread you'll quickly agree its optimal for any wearables work!
This...
Out of Stock
[Buy Now](https://www.adafruit.com/product/641)
[Related Guides to the Product](https://learn.adafruit.com/products/641/guides)
### Stainless Thin Conductive Thread - 2 ply - 23 meter/76 ft
[Stainless Thin Conductive Thread - 2 ply - 23 meter/76 ft](https://www.adafruit.com/product/640)
After months of searching, we finally have what we consider to be the ultimate conductive thread. It's thin, strong, smooth, and made completely of 316L stainless steel. Once you start working with this thread you'll quickly agree its optimal for any wearables work!
This...
In Stock
[Buy Now](https://www.adafruit.com/product/640)
[Related Guides to the Product](https://learn.adafruit.com/products/640/guides)
### Stainless Thin Conductive Yarn / Thick Conductive Thread - 30 ft
[Stainless Thin Conductive Yarn / Thick Conductive Thread - 30 ft](https://www.adafruit.com/product/603)
This 316L stainless steel thread falls somewhere between a thick thread and a thin yarn. Most sewing machines wouldn't be happy with this thread since its thick, and it has the 'furry' soft feel of yarn which makes it poor for most e-textiles/wearables projects. However, the high...
In Stock
[Buy Now](https://www.adafruit.com/product/603)
[Related Guides to the Product](https://learn.adafruit.com/products/603/guides)
### Conductive thread ribbon cable - White - 1 yard
[Conductive thread ribbon cable - White - 1 yard](https://www.adafruit.com/product/1139)
This lightweight, flexible fabric ribbon cable contains four channels of conductive thread, perfect for wiring up wearables where flexibility is key. Use it to connect your conductive fabric gamepad to your microcontroller or computer!
Features:
- Low resistance: ~16...
No Longer Stocked
[Buy Now](https://www.adafruit.com/product/1139)
[Related Guides to the Product](https://learn.adafruit.com/products/1139/guides)
### Needle set - 3/9 sizes - 20 needles
[Needle set - 3/9 sizes - 20 needles](https://www.adafruit.com/product/615)
Mighty needles, sew like the wind! This needle set is the only one you'll need for any sort of hand sewing, especially using our conductive thread and wearable electronics parts.
Each pack contains 20 gold-eye sharps, with eye sizes ranging from #3 (1.75" long) to #9...
Out of Stock
[Buy Now](https://www.adafruit.com/product/615)
[Related Guides to the Product](https://learn.adafruit.com/products/615/guides)
### Small Alligator Clip Test Lead (set of 12)
[Small Alligator Clip Test Lead (set of 12)](https://www.adafruit.com/product/1008)
Connect this to that without soldering using these handy mini alligator clip test leads. 15" cables with alligator clip on each end, color coded. You get 12 pieces in 6 colors. Strong and grippy, these always come in handy! We often use these in conjunction with a multimeter so we...
In Stock
[Buy Now](https://www.adafruit.com/product/1008)
[Related Guides to the Product](https://learn.adafruit.com/products/1008/guides)
### Sewable Snaps - 5mm Diameter - Card of 24
[Sewable Snaps - 5mm Diameter - Card of 24](https://www.adafruit.com/product/1126)
The small 5mm size of these tin-plated brass snaps means they fit perfectly on Flora's pads! Snaps make a great connector for wearables-- solder one side to the board and sew the other to your project with conductive thread! This card comes with 24 complete snaps (socket and stud...
In Stock
[Buy Now](https://www.adafruit.com/product/1126)
[Related Guides to the Product](https://learn.adafruit.com/products/1126/guides)
### FLORA - Wearable electronic platform: Arduino-compatible
[FLORA - Wearable electronic platform: Arduino-compatible](https://www.adafruit.com/product/659)
FLORA is Adafruit's fully-featured wearable electronics platform. It's a round, sewable, Arduino-compatible microcontroller designed to empower amazing wearables projects.FLORA comes with Adafruit's support, [tutorials and...](http://learn.adafruit.com/category/flora)
In Stock
[Buy Now](https://www.adafruit.com/product/659)
[Related Guides to the Product](https://learn.adafruit.com/products/659/guides)
## Related Guides
- [Capacitive Touch with Conductive Fabric & Flora](https://learn.adafruit.com/capacitive-touch-with-conductive-fabric-and-flora.md)
- [Fiber Optic Pixie Skirt](https://learn.adafruit.com/fiber-optic-pixie-princess-skirt.md)
- [Haptic Headband](https://learn.adafruit.com/haptic-headband.md)
- [EEG Costume Cap](https://learn.adafruit.com/eeg-costume-cap.md)
- [Zipper Switch](https://learn.adafruit.com/zipper-switch.md)
- [Adafruit Arduino IDE Setup](https://learn.adafruit.com/adafruit-arduino-ide-setup.md)
- [Sewable NeoPixels](https://learn.adafruit.com/flora-rgb-smart-pixels.md)
- [FLORA TV-B-Gone](https://learn.adafruit.com/flora-tv-b-gone.md)
- [Experimenting with NeverWet + Electronics](https://learn.adafruit.com/neverwet-electronics.md)
- [LED Stego Flex Spike Hoodie](https://learn.adafruit.com/led-stego-flex-spike-hoodie.md)
- [Getting Started with FLORA](https://learn.adafruit.com/getting-started-with-flora.md)
- [Sunscreen Reminder Hat](https://learn.adafruit.com/sunscreen-reminder-hat.md)
- [Mailbox Notification Service](https://learn.adafruit.com/mailbox-notification-service.md)
- [FLORA + FONA](https://learn.adafruit.com/flora-plus-fona.md)
- [Flora TSL2561 Lux Sensor](https://learn.adafruit.com/flora-lux-sensor.md)
---
# Source: https://learn.adafruit.com/wave-shield-voice-changer/principles-of-operation.md
# Wave Shield Voice Changer
## Principles of Operation
Here we explain some of the geeky background theory stuff. If you just want to get into building the thing, you can skip ahead to the next page.
# Graaains…
Regardless whether you’re old enough to have played with Dad’s LP turntable, or have dabbled in digital audio programs on the newest modern PC, you’ve likely experienced some version of this phenomenon: take an audio recording that’s normally played back at one specific speed…and then change that speed, either compressing or expanding time…and the pitch of the audio changes along with it. Compress time and the pitch rises. Expand time and the pitch drops. _Frequency is inversely proportional to wavelength._

That’s easy with recordings…but with live audio, we don’t really have that luxury. Realtime is _realtime_…we can’t compress or expand it…it’s happening as it happens. What’s a would-be voice-changer to do?
There’s a complex technique called a _Fourier transform_ that converts a function (or, say, a stream of audio samples) into its frequency spectrum. The resulting frequency values can be altered and an _inverse transform_ applied to turn this back into audio. This is all mathematically good and proper…but it’s a very demanding process and way beyond what our little Arduino can handle. A fairly potent CPU or DSP is usually required. We’ll need a shortcut or some hack…
In digital music circles, _granular synthesis_ is a technique of joining and layering lots of very short audio samples (or “grains”) — on the order of one to a few milliseconds — to build up more complex sounds or instruments. Now picture just a single “grain,” 10 milliseconds or so…and we continually refresh this one grain from a live microphone. By time-compressing or -stretching this one tiny loop, repeating or dropping short segments to keep up with realtime, we have the basis for a realtime pitch shifter. It really seems like this shouldn’t work…but it does! Speech waveforms tend to repeat over the very short term, and we can drop or repeat some of those waves with only minor degradation in legibility.

This approach is totally suited to the Arduino’s limited processing power and RAM. The result isn’t going to be Hollywood quality, but it’s still vastly better than the majority of voice-changing toys and masks on store shelves. And you get to make it yourself…how cool is that?
# Sampling Audio
The frequency range of human voice covers about 300 Hz to 3,500 Hz (and harmonics may extend above this). The [Nyquist sampling theorem](http://en.wikipedia.org/wiki/Nyquist%E2%80%93Shannon_sampling_theorem) states that a minimum 2X sample rate is needed to faithfully reconstruct a signal. For human voice, that means 7 KHz sampling…but a little more wouldn’t hurt.
Repeatedly calling the Arduino’s standard analogRead() function in a loop is way, WAY too slow for this. We need to get deeper into the works of the Arduino’s analog-to-digital converter, fiddling directly with special registers and modes. A capability called _free-run mode_ collects analog samples at a fast, fixed interval without repeated polling in our code. An interrupt handler is automatically called each time a new sample is ready, which happens like clockwork. Running full tilt, a 16 MHz Arduino can capture 9,615 10-bit samples per second. More than enough for sampling voice!
The audio samples are stored in a _circular buffer,_ which is really just big fancy computer science words for “when you reach the end of the buffer, roll back around to the beginning and write over it.” But conceptually, it helps to think of it as a literal circle:

The frequency of recorded sound will seldom match the buffer length exactly, and audio samples are stored and read at different rates. This can produce a sharp discontinuity — a popping noise — each time the “in” and “out” points cross. A small extra buffer is used to store some of the prior audio samples, and the code cross-fades the audio over this boundary to reduce the “pop.”
Because our audio “grain” is relatively short (about 10 milliseconds), the RAM requirements should be fairly modest, a few hundred bytes. Problem is, we’d also like to continue doing those things that the Wave Shield was designed for — namely, playing back WAV files. That requires reading files from an SD card, and that in turn consumes lots of RAM. Fortunately the design of the WAV-playing code lets us gain access that library’s memory and recycle it for our own needs.
The technical details are all well-commented in the source code. So if you’re curious about the specifics of this implementation…use the source, Luke!
# Limitations
When introducing new users to Arduino, I often describe it as “just enough computer to do any one thing really well.” Walking while chewing gum is a challenge. And so it goes with this project as well. Keep the following limitations in mind:
- It can process the voice effect or play back WAVs (and can do both within the same sketch), but you can’t do both simultaneously.
- You can’t read other analog inputs when the voice effect is running (case in point, you can’t alter the pitch continually with a potentiometer). If using analog sensors as sound triggers (e.g. force-sensing resistor pads in shoes), consider work-arounds such as using a carefully-trimmed voltage divider to a digital input, or a second MCU to process analog inputs, forwarding triggers over a serial or I2C connection.
- Although this can change the _pitch_ of one’s voice, it can’t change _timbre._ It won’t, for instance, make things more metallic or robotic-sounding.
- [Previous Page](https://learn.adafruit.com/wave-shield-voice-changer/overview.md)
- [Next Page](https://learn.adafruit.com/wave-shield-voice-changer/building-it.md)
## Featured Products
### Stereo 3.7W Class D Audio Amplifier - MAX98306
[Stereo 3.7W Class D Audio Amplifier - MAX98306](https://www.adafruit.com/product/987)
This incredibly small stereo amplifier is surprisingly powerful - able to deliver 2 x 3.7W channels into 3 ohm impedance speakers. Inside the miniature chip is a class D controller, able to run from 2.7V-5.5VDC. Since the amp is a class D, its incredibly efficient (over 90% efficient when...
In Stock
[Buy Now](https://www.adafruit.com/product/987)
[Related Guides to the Product](https://learn.adafruit.com/products/987/guides)
### Electret Microphone Amplifier - MAX4466 with Adjustable Gain
[Electret Microphone Amplifier - MAX4466 with Adjustable Gain](https://www.adafruit.com/product/1063)
Add an ear to your project with this well-designed electret microphone amplifier. This fully assembled and tested board comes with a 20-20KHz electret microphone soldered on. For the amplification, we use the Maxim MAX4466, an op-amp specifically designed for this delicate task! The amplifier...
In Stock
[Buy Now](https://www.adafruit.com/product/1063)
[Related Guides to the Product](https://learn.adafruit.com/products/1063/guides)
### Adafruit Wave Shield for Arduino Kit
[Adafruit Wave Shield for Arduino Kit](https://www.adafruit.com/product/94)
Adding quality audio to an electronic project is surprisingly difficult. Here is a shield for Arduino 328's that solves this problem. It can play up to 22KHz 12bit uncompressed audio files of any length. It's low cost, available as an easy-to-make kit. It has an onboard DAC, filter and...
Out of Stock
[Buy Now](https://www.adafruit.com/product/94)
[Related Guides to the Product](https://learn.adafruit.com/products/94/guides)
### Music & sound add-on pack for Arduino
[Music & sound add-on pack for Arduino](https://www.adafruit.com/product/175)
Its a Wave shield party pack! Just add an Arduino to create your own iPod-killer, audio art, sound-effects box...
Comes with:
- Latest [Wave shield kit](http://www.adafruit.com/products/94), works with more SD cards and with older NG Arduinos! Unassembled
- 8 GB...
Out of Stock
[Buy Now](https://www.adafruit.com/product/175)
[Related Guides to the Product](https://learn.adafruit.com/products/175/guides)
### Adafruit Proto Shield for Arduino Kit
[Adafruit Proto Shield for Arduino Kit](https://www.adafruit.com/product/51)
Works with the Uno! This prototyping shield is the best out there (well, we think so, at least). It works with UNO, NG, Diecimila and Duemilanove Arduinos. You can use it with a Leonardo but it will not break out the hardware SPI pins (they're only on the ISP connector underneath) or the...
No Longer Stocked
[Buy Now](https://www.adafruit.com/product/51)
[Related Guides to the Product](https://learn.adafruit.com/products/51/guides)
### Adafruit METRO 328 Fully Assembled - Arduino IDE compatible
[Adafruit METRO 328 Fully Assembled - Arduino IDE compatible](https://www.adafruit.com/product/50)
We sure love the ATmega328 here at Adafruit, and we use them _a lot_ for our own projects. The processor has plenty of GPIO, Analog inputs, hardware UART SPI and I2C, timers and PWM galore - just enough for most simple projects. When we need to go small, we use a
Out of Stock
[Buy Now](https://www.adafruit.com/product/50)
[Related Guides to the Product](https://learn.adafruit.com/products/50/guides)
### Shield stacking headers for Arduino (R3 Compatible)
[Shield stacking headers for Arduino (R3 Compatible)](https://www.adafruit.com/product/85)
_“How could something so simple be so useful?” _
We heard once that in the 4th millennium B.C. some guy asked the person who invented the wheel that question. The person who invented the wheel’s answer, we were told, was...
In Stock
[Buy Now](https://www.adafruit.com/product/85)
[Related Guides to the Product](https://learn.adafruit.com/products/85/guides)
### 6 x AA battery holder with 5.5mm/2.1mm plug
[6 x AA battery holder with 5.5mm/2.1mm plug](https://www.adafruit.com/product/248)
Make a portable power brick with plenty of juice! Use Alkaline AA's for a 9V 3000-4000mAh power supply, or rechargeable NiMH for 2000mAh 7.5V supply. Either one is good for running electronics that have a 5V voltage regulator (thus requiring a 7V+ supply). Will last about 10 times longer...
In Stock
[Buy Now](https://www.adafruit.com/product/248)
[Related Guides to the Product](https://learn.adafruit.com/products/248/guides)
## Related Guides
- [Boombox Beach Bag with Audio Amp and Speakers](https://learn.adafruit.com/boombox-beach-bag-with-audio-amp-and-speakers.md)
- [DIY 8x2 LCD Shield](https://learn.adafruit.com/diy-8x2-lcd-shield.md)
- [3D Printed Animatronic Robot Head](https://learn.adafruit.com/3d-printed-animatronic-robot-head.md)
- [Arduino Lesson 17. Email Sending Movement Detector](https://learn.adafruit.com/arduino-lesson-17-email-sending-movement-detector.md)
- [Arduino Lesson 11. LCD Displays - Part 1](https://learn.adafruit.com/adafruit-arduino-lesson-11-lcd-displays-1.md)
- [Line Following Zumo Robot Using Simulink](https://learn.adafruit.com/line-following-zumo-robot-programmed-with-simulink.md)
- [3D Printed Bone Conduction Transducer Box](https://learn.adafruit.com/3d-printed-bone-conduction-transducer-box.md)
- [Affordable HAL 9000 Replica](https://learn.adafruit.com/hal-9000-replica.md)
- [Electronic Demon Costume](https://learn.adafruit.com/electronic-demon-costume.md)
- [Arduino Lesson 13. DC Motors](https://learn.adafruit.com/adafruit-arduino-lesson-13-dc-motors.md)
- [Naughty or Nice Machine](https://learn.adafruit.com/naughty-or-nice-machine.md)
- [Nokia 5110/3310 Monochrome LCD](https://learn.adafruit.com/nokia-5110-3310-monochrome-lcd.md)
- [Track Your Treats: Halloween Candy GPS Tracker](https://learn.adafruit.com/track-your-treats-halloween-candy-gps-tracker.md)
- [Smart Measuring Cup](https://learn.adafruit.com/smart-measuring-cup.md)
- [Wave Shield](https://learn.adafruit.com/adafruit-wave-shield-audio-shield-for-arduino.md)
---
# Source: https://learn.adafruit.com/mini-thermal-receipt-printer/printing-text.md
# Mini Thermal Receipt Printers
## Printing Text

The thermal printer has a few handy things it can do, most of which are in the **A\_printertest** sketch. These are shown in the image above. In order, starting from the top:
- Inverted text: this is invoked by calling **inverseOn()** — you will get text that’s white-on-black instead of black-on-white. **inverseOff() **turns this off.
- Double height: this makes text thats extra tall, call **doubleHeightOn()** — likewise, turn off with **doubleHeightOff()**
- Left/Center/Right justified: this aligns text to the left or right edge of the page, or centered. You can set the alignment by calling **justify('R') **(for right-justified), **justify('C') **(for centered) or **justify('L') **(for left-justified). Left-justified is the default state.
- **Bold** text: makes it stand out a bit more, enable with **boldOn()** and turn off with **boldOff()**
- Underlined text: makes it stand out a bit more, enable with **underlineOn()** and turn off with **underlineOff()**
- Large/Medium/Small text: by default we use small, medium is twice as tall, large is twice as wide/tall. Set the size with **setSize('L')**, **setSize('M')** or **setSize('S')**
- Line spacing: you can change the space _between _lines of text by calling **setLineHeight()** where **numpix** is the number of pixels. The minimum is 24 (no extra space between lines), the default spacing is 32, and double-spaced text would be 64.
Look through the source of the A\_printertest sketch to see these used in context.
- [Previous Page](https://learn.adafruit.com/mini-thermal-receipt-printer/microcontroller.md)
- [Next Page](https://learn.adafruit.com/mini-thermal-receipt-printer/bitmap-printing.md)
## Primary Products
### Mini Thermal Receipt Printer
[Mini Thermal Receipt Printer](https://www.adafruit.com/product/597)
Add a mini printer to any microcontroller project with this very cute thermal printer. Thermal printers are also known as receipt printers, they're what you get when you go to the ATM or grocery store. Now you can embed a little printer of your own into an enclosure. This printer is ideal...
No Longer Stocked
[Buy Now](https://www.adafruit.com/product/597)
[Related Guides to the Product](https://learn.adafruit.com/products/597/guides)
### Tiny Thermal Receipt Printer - TTL Serial / USB
[Tiny Thermal Receipt Printer - TTL Serial / USB](https://www.adafruit.com/product/2751)
Add a _really small_ printer to any microcontroller project with this very cute thermal printer. Thermal printers are also known as receipt printers, they're what you get when you go to the ATM or grocery store. Now you can embed a little printer of your own into an enclosure. This...
No Longer Stocked
[Buy Now](https://www.adafruit.com/product/2751)
[Related Guides to the Product](https://learn.adafruit.com/products/2751/guides)
### Nano Thermal Receipt Printer - TTL Serial
[Nano Thermal Receipt Printer - TTL Serial](https://www.adafruit.com/product/2752)
Add a _really really small_ printer to any microcontroller project with this very cute thermal printer. Thermal printers are also known as receipt printers, they're what you get when you go to the ATM or grocery store. Now you can embed a little printer of your own into an...
No Longer Stocked
[Buy Now](https://www.adafruit.com/product/2752)
[Related Guides to the Product](https://learn.adafruit.com/products/2752/guides)
### Thermal Receipt Printer Guts
[Thermal Receipt Printer Guts](https://www.adafruit.com/product/2753)
Add printing capability to any microcontroller project with **just the innards of a thermal printer.** Thermal printers are also known as receipt printers, they're what you get when you go to the ATM or grocery store. Now you can embed a little printer of your own into a...
No Longer Stocked
[Buy Now](https://www.adafruit.com/product/2753)
[Related Guides to the Product](https://learn.adafruit.com/products/2753/guides)
## Featured Products
### Mini Thermal Receipt Printer Starter Pack
[Mini Thermal Receipt Printer Starter Pack](https://www.adafruit.com/product/600)
Hit the ground running (and printing!) with this starter pack that includes a thermal printer and all the extras and save a few dollars while you're at it.
Includes:
- [A mini thermal receipt printer](http://www.adafruit.com/products/597) - with cables and...
No Longer Stocked
[Buy Now](https://www.adafruit.com/product/600)
[Related Guides to the Product](https://learn.adafruit.com/products/600/guides)
### Female DC Power adapter - 2.1mm jack to screw terminal block
[Female DC Power adapter - 2.1mm jack to screw terminal block](https://www.adafruit.com/product/368)
If you need to connect a DC power wall wart to a board that doesn't have a DC jack - this adapter will come in very handy! There is a 2.1mm DC jack on one end, and a screw terminal block on the other. The terminals are labeled with positive/negative assuming a positive-tip configuration...
In Stock
[Buy Now](https://www.adafruit.com/product/368)
[Related Guides to the Product](https://learn.adafruit.com/products/368/guides)
### 5V 2A (2000mA) switching power supply - UL Listed
[5V 2A (2000mA) switching power supply - UL Listed](https://www.adafruit.com/product/276)
This is an FCC/CE certified and UL listed power supply. Need a lot of 5V power? This switching supply gives a clean regulated 5V output at up to 2000mA. 110 or 240 input, so it works in any country. The plugs are "US 2-prong" style so you may need a plug adapter, but you can pick one...
Out of Stock
[Buy Now](https://www.adafruit.com/product/276)
[Related Guides to the Product](https://learn.adafruit.com/products/276/guides)
### Thermal paper roll - 50' long, 2.25" wide
[Thermal paper roll - 50' long, 2.25" wide](https://www.adafruit.com/product/599)
A mini roll of thermal paper, this fits very nicely into our mini thermal printer. 2.25" wide (about 57mm) and 50 feet long (15 meters). BPA-free.
[Perfect for use with our mini thermal printer!](http://www.adafruit.com/products/597)
No Longer Stocked
[Buy Now](https://www.adafruit.com/product/599)
[Related Guides to the Product](https://learn.adafruit.com/products/599/guides)
### Thermal Paper Roll - 33' long, 2.25"
[Thermal Paper Roll - 33' long, 2.25"](https://www.adafruit.com/product/2754)
A little roll of thermal paper! This fits very nicely into our [Tiny Thermal Receipt Printer](https://www.adafruit.com/products/2751). It's ~2.25" wide (about 57mm) and 33 feet long or about 10 meters.
No Longer Stocked
[Buy Now](https://www.adafruit.com/product/2754)
[Related Guides to the Product](https://learn.adafruit.com/products/2754/guides)
### Thermal Paper Roll - 16' long, 2.25"
[Thermal Paper Roll - 16' long, 2.25"](https://www.adafruit.com/product/2755)
A little roll of thermal paper! This fits very nicely into our [Nano Thermal Receipt Printer](https://www.adafruit.com/products/2752). It's ~2.25" wide (about 57mm) and 16 feet long or about 5 meters.
No Longer Stocked
[Buy Now](https://www.adafruit.com/product/2755)
[Related Guides to the Product](https://learn.adafruit.com/products/2755/guides)
### Adafruit METRO 328 Fully Assembled - Arduino IDE compatible
[Adafruit METRO 328 Fully Assembled - Arduino IDE compatible](https://www.adafruit.com/product/50)
We sure love the ATmega328 here at Adafruit, and we use them _a lot_ for our own projects. The processor has plenty of GPIO, Analog inputs, hardware UART SPI and I2C, timers and PWM galore - just enough for most simple projects. When we need to go small, we use a
Out of Stock
[Buy Now](https://www.adafruit.com/product/50)
[Related Guides to the Product](https://learn.adafruit.com/products/50/guides)
### Breadboarding wire bundle
[Breadboarding wire bundle](https://www.adafruit.com/product/153)
75 flexible stranded core wires with stiff ends molded on in red, orange, yellow, green, blue, brown, black and white. These are a major improvement over the "box of bent wires" that are sometimes sold with breadboards, and faster than stripping your own solid core wires. Makes...
In Stock
[Buy Now](https://www.adafruit.com/product/153)
[Related Guides to the Product](https://learn.adafruit.com/products/153/guides)
## Related Guides
- [How to Find Hidden COM Ports](https://learn.adafruit.com/how-to-find-hidden-com-ports.md)
- [Wireless Game Show Poppers for the Classroom!](https://learn.adafruit.com/wireless-game-show-poppers.md)
- [Adafruit Ultimate GPS](https://learn.adafruit.com/adafruit-ultimate-gps.md)
- [RGB LED Matrix Basics](https://learn.adafruit.com/32x16-32x32-rgb-led-matrix.md)
- [Analog Feedback Servos](https://learn.adafruit.com/analog-feedback-servos.md)
- [Arduino GPS Clock](https://learn.adafruit.com/arduino-clock.md)
- [Silicone Robo-Tentacle](https://learn.adafruit.com/silicone-robo-tentacle.md)
- [Ladyada's Bento Box](https://learn.adafruit.com/lady-adas-bento-box.md)
- [Metal Inlay Capacitive Touch Buttons](https://learn.adafruit.com/metal-inlay-capacitive-touch-buttons.md)
- [Adafruit IO Basics: NeoPixel Controller](https://learn.adafruit.com/adafruit-io-basics-neopixel-controller.md)
- [Adafruit PN532 RFID/NFC Breakout and Shield](https://learn.adafruit.com/adafruit-pn532-rfid-nfc.md)
- [Reverse Geocache Box](https://learn.adafruit.com/reverse-geocache-engagement-box.md)
- [Character LCDs](https://learn.adafruit.com/character-lcds.md)
- [Adafruit INA219 Current Sensor Breakout](https://learn.adafruit.com/adafruit-ina219-current-sensor-breakout.md)
- [All About Arduino Libraries](https://learn.adafruit.com/adafruit-all-about-arduino-libraries-install-use.md)
---
# Source: https://learn.adafruit.com/skill-badge-guide-3d-printing/producing-a-product.md
# Skill Badge Guide: 3D Printing
## Designing for the printer

In order to produce 3D printer compatible objects, it is important to understand its limits. I like to think of a 3D printer as a spaghetti machine. It carefully stacks noodles on top of each other, and if there isn't enough noodle to stack on, it droops. The following three design elements can be implemented to help prevent drooping and will allow you to successfully print overhangs.
1. **The 45° Rule:** In general, 3D printers are restricted to overhangs that are under 45°. This allows for enough material to be present under the new extrusion and helps to prevent drooping.
2. **Peaked circles:** If you need to create a circular feature that is perpendicular to the build platform, taper the top of the circle with two tangential lines so that the 45° rule is not broken.
3. **Support structure:** Many slicing engines will detect overhangs and can generate a brittle support structure that provides support for overhangs over 45°. This is a nice feature to use, especially when overhangs are unavoidable, but usually uses a ton of filament in the process.
Check out [Makerbot Thingiverse](http://www.thingiverse.com/) for models and design ideas for your next project. Their friendly community has a ton of 3D printer compatible models to share.- [Previous Page](https://learn.adafruit.com/skill-badge-guide-3d-printing/filament-types.md)
- [Next Page](https://learn.adafruit.com/skill-badge-guide-3d-printing/free-3d-cad.md)
## Featured Products
### 3D printing - Skill badge, iron-on patch
[3D printing - Skill badge, iron-on patch](https://www.adafruit.com/product/490)
You can 3D print! Adafruit offers a fun and exciting "badges" of achievement for electronics, science and engineering. We believe everyone should be able to be rewarded for learning a useful skill, a badge is just one of the many ways to show and share.
This is the "I...
No Longer Stocked
[Buy Now](https://www.adafruit.com/product/490)
[Related Guides to the Product](https://learn.adafruit.com/products/490/guides)
### 3D printing - Sticker!
[3D printing - Sticker!](https://www.adafruit.com/product/649)
You can 3D print! Adafruit offers a fun and exciting stickers to celebrate achievement for electronics, science and engineering. We believe everyone should be able to be rewarded for learning a useful skill, a sticker is just one of the many ways to show and share.
This is the...
No Longer Stocked
[Buy Now](https://www.adafruit.com/product/649)
[Related Guides to the Product](https://learn.adafruit.com/products/649/guides)
### Flashforge Creator PRO
[Flashforge Creator PRO](https://www.adafruit.com/product/2742)
The **Flashforge Creator Pro** is the latest addition to FlashForge’s Creator family, built upon an open source platform.
Based on proven design of the Creator X chassis, the Pro is now enclosed so you can print ABS better and more efficient than ever. The upgraded...
No Longer Stocked
[Buy Now](https://www.adafruit.com/product/2742)
[Related Guides to the Product](https://learn.adafruit.com/products/2742/guides)
### PrintrBot Simple Metal 3D Printer - Black - Assembled
[PrintrBot Simple Metal 3D Printer - Black - Assembled](https://www.adafruit.com/product/1760)
New from Printrbot, the Metal Simple is a brand new rock solid, all metal, fully-assembled Printrbot Simple! As opposed to the [Printrbot Simple Kit](http://www.adafruit.com/products/1735), all of the laser cut wood parts have been replaced by rock solid metal and assembled. In...
No Longer Stocked
[Buy Now](https://www.adafruit.com/product/1760)
[Related Guides to the Product](https://learn.adafruit.com/products/1760/guides)
### Ultimaker 2+ 3D Printer
[Ultimaker 2+ 3D Printer](https://www.adafruit.com/product/2673)
The **Ultimaker 2+** is one of our favorite 3D printers on the market. It's a well-built open-source compact machine with an excellent UX. Every inch of the Ultimaker 2+ is designed to create the most effortless and reliable 3D printing experience ever!
No Longer Stocked
[Buy Now](https://www.adafruit.com/product/2673)
[Related Guides to the Product](https://learn.adafruit.com/products/2673/guides)
### Micro 3D Printer - Black - Retail Edition
[Micro 3D Printer - Black - Retail Edition](https://www.adafruit.com/product/2933)
The magic of 3D printing is now more affordable and accessible than ever! Meet The **Micro 3D Printer** by [M3D](https://printm3d.com/), the first truly consumer 3D printer. Sporting a compact design, user-friendly software, and replaceable print beds and nozzles,...
No Longer Stocked
[Buy Now](https://www.adafruit.com/product/2933)
[Related Guides to the Product](https://learn.adafruit.com/products/2933/guides)
### Filament for 3D Printers in Various Colors and Types
[Filament for 3D Printers in Various Colors and Types](https://www.adafruit.com/product/2080)
Having a 3D printer without filament is sort of like having a regular printer without paper or ink. And while a lot of printers come with some filament there's a good chance you've been printing up a storm and need something new. That's why we've started carrying a...
Out of Stock
[Buy Now](https://www.adafruit.com/product/2080)
[Related Guides to the Product](https://learn.adafruit.com/products/2080/guides)
## Related Guides
- [Mario Magic Wand](https://learn.adafruit.com/mario-magic-wand.md)
- [Case for HUSB238 Breakout](https://learn.adafruit.com/case-for-husb238.md)
- [3D Printed RFID NFC Rings](https://learn.adafruit.com/3d-printed-rfid-nfc-rings.md)
- [AI 3D Printed Figure](https://learn.adafruit.com/ai-figure.md)
- [Ultrasonic Ruler](https://learn.adafruit.com/ultrasonic-ruler.md)
- [Magnet Bottle Holder](https://learn.adafruit.com/magnet-bottle-holder.md)
- [Printy Boost: Reimagining a Classic Adafruit Kit](https://learn.adafruit.com/printy-boost-reimagining-a-classic-adafruit-kit.md)
- [CYBERDECK Expansion Plate](https://learn.adafruit.com/cyberdeck-plate.md)
- [PyPortal Case](https://learn.adafruit.com/pyportal-case.md)
- [3D Printed LED Buckle](https://learn.adafruit.com/3d-printed-led-buckle.md)
- [CLUE Slim Case](https://learn.adafruit.com/clue-slim-case.md)
- [Adafruit Desktop 3D Printer Buyers Guide](https://learn.adafruit.com/adafruit-desktop-3d-printer-selection-guide.md)
- [3D Printed Animatronic Robot Head](https://learn.adafruit.com/3d-printed-animatronic-robot-head.md)
- [New Years Eve Ball Drop](https://learn.adafruit.com/new-years-eve-ball-drop.md)
- [3D Printed Battery Adapter for Camera-Mount LED Panel](https://learn.adafruit.com/3d-printed-battery-adapter-for-camera-mount-led-panel.md)
---
# Source: https://learn.adafruit.com/biometric-security-box/program-and-test.md
# Biometric Lock Box
## Program and Test
## Download Fingerprint and Keypad Libraries
- Download the [Adafruit Fingerprint Sensor Library](https://github.com/adafruit/Adafruit-Fingerprint-Sensor-Library) and install it according to the instructions in readme.txt.
- Download the Keypad Library and install according to the instructions [here](http://playground.arduino.cc/Code/Keypad).
## Enroll Fingers
- Load the "enroll" example into the Arduino IDE.
- Change the mySerial pin definitions to: "SoftwareSerial mySerial(13, 12);"
- Follow the [tutorial for enrolling fingerprints](http://learn.adafruit.com/adafruit-optical-fingerprint-sensor/enrolling-with-arduino "Link: http://learn.adafruit.com/adafruit-optical-fingerprint-sensor/enrolling-with-arduino").
## Load code
- Load the Biometric Box sketch at the bottom of this page.
- Edit the "secretCode" string to define your passcode.
- Compile and upload the sketch.
## Test the Latch Operation
- Power on the box - the led on the power switch should flash a few times, then start to 'breathe'.
- Enter your passcode - the fingerprint sensor should turn on and glow red.
- Place your finger on the sensor and you should hear the solenoid click.
```
/***************************************************
Biometric Box Sketch for the optical Fingerprint sensor
This sketch implements a two-level security scheme requiring the
user to enter a passcode via the keypad before scanning a fingerprint
for access.
Adafruit invests time and resources providing this open source code,
please support Adafruit and open-source hardware by purchasing
products from Adafruit!
Written by Bill Earl for Adafruit Industries.
BSD license, all text above must be included in any redistribution
****************************************************/
#include <Keypad.h>
#include <Adafruit_Fingerprint.h>
#include <SoftwareSerial.h>
// Define the states for the lock state machine
#define LOCKED 2
#define PASSWORD_OK 1
#define UNLOCKED 0
// State Variables: Initialize to the locked state
int LockState = LOCKED;
long StartTime = 0;
int position = 0;
// Define your password key sequence here
char* secretCode = "1423";
// Keypad key matrix:
const byte rows = 4;
const byte cols = 3;
char keys[rows][cols] =
{
{'1','2','3'},
{'4','5','6'},
{'7','8','9'},
{'*','0','#'}
};
// Keypad pin definitions
byte rowPins[rows] = {2, 3, 4, 5};
byte colPins[cols] = {6, 7, 8};
// Instantiate the keypad
Keypad keypad = Keypad(makeKeymap(keys), rowPins, colPins, rows, cols);
// More pin definitions:
int LedPin = 10;
int SolenoidPin = 11;
// Define a Fingerprint sensor on pins 12 & 13
int getFingerprintIDez();
SoftwareSerial mySerial(13, 12);
Adafruit_Fingerprint finger = Adafruit_Fingerprint(&mySerial);
void setup()
{
pinMode(LedPin, OUTPUT);
pinMode(SolenoidPin, OUTPUT);
// Flash hello
for (int i = 0; i < 3; i++)
{
digitalWrite(LedPin, HIGH);
delay(100);
digitalWrite(LedPin, LOW);
delay(100);
}
// Initialize state and communicatins
setLockState(LOCKED);
Serial.begin(9600);
finger.begin(57600);
// Connect to the sensor
if (finger.verifyPassword())
{
Serial.println("Found fingerprint sensor!");
}
else
{
Serial.println("Did not find fingerprint sensor :(");
while (1);
}
}
void loop()
{
// Run the state machine:
// Locked State - Monitor keypad for valid Password code entry
if (LockState == LOCKED)
{
char key = keypad.getKey();
if (key == '*' || key == '#')
{
position = 0;
setLockState(LOCKED);
}
if (key != 0)
{
if (key == secretCode[position]) // Valid key in Password sequence
{
Serial.print("Matched ");
Serial.print(key);
Serial.print("-at-");
Serial.println(position);
position ++;
}
else // Invalid key - start all over again
{
Serial.println("Invalid Code!");
position = 0;
}
}
// Let the LED 'breathe' while we wait
analogWrite(LedPin, sin((millis() % 3142) / 1000.0) * 255);
if (position == 4) // Password successfully entered - advance state
{
setLockState(PASSWORD_OK);
position = 0;
}
delay(100);
}
// PASSWORD_OK state - Now wait for a valid fingerprint reading
else if (LockState == PASSWORD_OK)
{
if (getFingerprintIDez() != -1)
{
setLockState(UNLOCKED); // Valid fingerprint - advance state to UNLOCKED
}
if (millis () - StartTime > 5000)
{
setLockState (LOCKED); // Time-out - go back to the LOCKED state
}
}
// UNLOCKED state - hold the solenoid open for a limited time
else if (LockState == UNLOCKED)
{
for (int i = 0; i < 30; i++)
{
// Flash the led to indicate the lock is open
digitalWrite(LedPin, LOW);
delay(50);
digitalWrite(LedPin, HIGH);
delay(50);
}
setLockState (LOCKED); // Time-out - go back to the locked state.
}
}
// returns -1 if failed, otherwise returns ID #
int getFingerprintIDez()
{
uint8_t p = finger.getImage();
if (p != FINGERPRINT_OK) return -1;
p = finger.image2Tz();
if (p != FINGERPRINT_OK) return -1;
p = finger.fingerFastSearch();
if (p != FINGERPRINT_OK) return -1;
// found a match!
Serial.print("Found ID #"); Serial.print(finger.fingerID);
Serial.print(" with confidence of "); Serial.println(finger.confidence);
return finger.fingerID;
}
// Set the state and the time of the state change
void setLockState(int state)
{
LockState = state;
StartTime = millis ();
if (state == LOCKED)
{
Serial.println("Locked!");
digitalWrite(LedPin, HIGH);
digitalWrite(SolenoidPin, LOW);
}
else if (state == PASSWORD_OK)
{
Serial.println("PASSWORD_OK!");
digitalWrite(LedPin, LOW);
}
else if (state == UNLOCKED)
{
Serial.println("Unlocked!");
digitalWrite(LedPin, LOW);
digitalWrite(SolenoidPin, HIGH);
}
}
```
- [Previous Page](https://learn.adafruit.com/biometric-security-box/assembly.md)
- [Next Page](https://learn.adafruit.com/biometric-security-box/final-assembly.md)
## Featured Products
### Panel Mount 2.1mm DC barrel jack
[Panel Mount 2.1mm DC barrel jack](https://www.adafruit.com/product/610)
This power jack is designed to easily attach to a panel up to 8mm thick (0.315" or 5/16") and fit 2.1mm power plugs snugly and securely. Perfect for adding a power connector to your project enclosure. We like this jack in particular for its long body (so you can use it on thicker...
In Stock
[Buy Now](https://www.adafruit.com/product/610)
[Related Guides to the Product](https://learn.adafruit.com/products/610/guides)
### Rugged Metal On/Off Switch with Green LED Ring
[Rugged Metal On/Off Switch with Green LED Ring](https://www.adafruit.com/product/482)
These chrome-plated metal buttons are rugged and look real good while doing it! Simply drill a 16mm hole into any material up to 1/2" thick and you can fit these in place, there's even a rubber gasket to keep water out of the enclosure. On the front of the button is a flat metal...
In Stock
[Buy Now](https://www.adafruit.com/product/482)
[Related Guides to the Product](https://learn.adafruit.com/products/482/guides)
### Adafruit MENTA - Mint Tin Arduino Compatible Kit with Mint Tin
[Adafruit MENTA - Mint Tin Arduino Compatible Kit with Mint Tin](https://www.adafruit.com/product/795)
Introducing the MENTA, a portable minty Arduino-compatible project that fits into a common mint tin. We took our super popular Boarduino series, and wrapped it with a prototyping area into a rounded PCB that slots directly into an Altoids-sized metal tin. We included everything you expect to...
No Longer Stocked
[Buy Now](https://www.adafruit.com/product/795)
[Related Guides to the Product](https://learn.adafruit.com/products/795/guides)
### N-channel power MOSFET
[N-channel power MOSFET](https://www.adafruit.com/product/355)
When you need to switch a lot of power, N-channel MOSFETs are best for the job. These FETs can switch over 60A and 30V and are TO-220 packages so they fit nicely into any breadboard or perfboard. Heat sinking is easy with TO-220's, but because of the very low Rds(on) of down to 0.009 ohms...
In Stock
[Buy Now](https://www.adafruit.com/product/355)
[Related Guides to the Product](https://learn.adafruit.com/products/355/guides)
### Small Push-Pull Solenoid - 12VDC
[Small Push-Pull Solenoid - 12VDC](https://www.adafruit.com/product/412)
Solenoids are basically electromagnets: they are made of a big coil of copper wire with an armature (a slug of metal) in the middle. When the coil is energized, the slug is pulled into the center of the coil. This makes the solenoid able to pull (from one end) or push (from the other)
In Stock
[Buy Now](https://www.adafruit.com/product/412)
[Related Guides to the Product](https://learn.adafruit.com/products/412/guides)
### Membrane 3x4 Matrix Keypad + extras
[Membrane 3x4 Matrix Keypad + extras](https://www.adafruit.com/product/419)
Punch in your secret key into this numeric matrix keypad. This keypad has 12 buttons, arranged in a telephone-line 3x4 grid. It's made of a thin, flexible membrane material with an adhesive backing (just remove the paper) so you can attach it to nearly anything. The keys are connected into...
In Stock
[Buy Now](https://www.adafruit.com/product/419)
[Related Guides to the Product](https://learn.adafruit.com/products/419/guides)
### Fingerprint sensor
[Fingerprint sensor](https://www.adafruit.com/product/751)
Secure your project with biometrics - this all-in-one optical fingerprint sensor will make adding fingerprint detection and verification super simple. These modules are typically used in safes - there's a high powered DSP chip that does the image rendering, calculation, feature-finding and...
No Longer Stocked
[Buy Now](https://www.adafruit.com/product/751)
[Related Guides to the Product](https://learn.adafruit.com/products/751/guides)
## Related Guides
- [LED Breath Stats Mask](https://learn.adafruit.com/led-breath-stats-mask.md)
- [Getting Started with MyoWare Muscle Sensor](https://learn.adafruit.com/getting-started-with-myoware-muscle-sensor.md)
- [Reebok CheckLight Teardown](https://learn.adafruit.com/reebok-checklight-teardown.md)
- [Your Pulse Displayed with NeoPixels](https://learn.adafruit.com/pulse-sensor-displayed-with-neopixels.md)
- [Pulse Room](https://learn.adafruit.com/pulse-room.md)
- [Setting up an Open Speech Recording Website](https://learn.adafruit.com/setting-up-an-open-speech-recording-website.md)
- [Control Electronics with your Brain using NextMind](https://learn.adafruit.com/control-electronics-with-your-brain-using-nextmind.md)
- [Adafruit MPRLS Ported Pressure Sensor Breakout](https://learn.adafruit.com/adafruit-mprls-ported-pressure-sensor-breakout.md)
- [Moto 360 Teardown](https://learn.adafruit.com/moto-360-smartwatch-teardown.md)
- [3D Printed Flexible LED Glove with Conductive Filament](https://learn.adafruit.com/3d-printed-flexible-conductive-filament-led-glove.md)
- [Meditation Trainer](https://learn.adafruit.com/heart-rate-variability-sensor.md)
- [Circuit Playground Bluefruit BLE Heart Rate Pendant with CircuitPython](https://learn.adafruit.com/ble-heart-rate-display-pendant.md)
- [Myo Armband Teardown](https://learn.adafruit.com/myo-armband-teardown.md)
- ['Sup Brows](https://learn.adafruit.com/heybrows.md)
- [Whistle Dog Activity Monitor Teardown](https://learn.adafruit.com/whistle-dog-activity-monitor-teardown.md)
---
# Source: https://learn.adafruit.com/internet-of-things-printer/program-arduino.md
# Internet of Things Printer
## Program Arduino
Danger:
Gutenbird is a big program, nearly filling the Arduino’s entire program space. We’ve gone to great lengths to help it fit, but if you add a lot of new functionality of your own it may run into an issue…
If the code compiles but fails to upload on an R1 or R2 Arduino Uno, you’re seeing an obscure bug in the board’s bootloader when dealing with very large programs. There are a couple of workarounds for this:
- **FIX 1:** If you build a lot of projects and have an Arduino Uno R3 handy, swap it out. Dedicate the R3 board for Gutenbird and use the R2 for the majority of Arduino projects that aren’t quite so demanding. This is the easiest option, if you have the spare board.
- **FIX 2:** Update the bootloader on the older Uno using directions on Arduino.cc. A second Arduino is required during the upgrade, and there’s a small risk of “bricking” your R1/R2 board, so this option is best left to advanced users.
# Edit Code…
- You'll now need to edit the Gutenbird sketch to match all your particular settings. First, copy and paste the four authentication strings from your Twitter application page to the corresponding spots in the software, keeping the quotes around them. **The order of these strings in the code does not match the order on the Twitter form — be sure to copy each to the correct position!**

- As written, the sketch will search for Tweets originating from Adafruit, but you can change this to any search string supported by the Twitter Search API. Refer to the SEARCH OPERATORS section of the [Twitter Developers Documentation](https://developer.twitter.com/ "Link: https://dev.twitter.com/docs/using-search") for guidance.
- Edit the Ethernet MAC address to match the value you previously wrote down from the sticker on your Arduino Ethernet board or shield.
- The code uses DHCP (which dynamically assigns an IP address) by default. If your network doesn't use DHCP, or if you just want to provide a fallback address in case of a problem, edit the IP Address value in the code.
- If using the Arduino Ethernet board, flip up the front face of the enclosure and connect an FTDI Friend or other USB-to-serial adapter to the programming header on the board. If using an Arduino Uno, use the USB port on the back of the box.

- Select your board type and serial port from the Arduino IDE _Tools_ menu, build the sketch and upload to the board. USB can now be disconnected; the box will operate standalone.
- [Previous Page](https://learn.adafruit.com/internet-of-things-printer/twitter-setup.md)
- [Next Page](https://learn.adafruit.com/internet-of-things-printer/use-it.md)
## Primary Products
### Adafruit IoT Printer Project Pack "Internet of Things" printer
[Adafruit IoT Printer Project Pack "Internet of Things" printer](https://www.adafruit.com/product/717)
Build an "Internet of Things" connected mini printer that will do your bidding! This is a fun weekend project that comes with a beautiful laser cut case. Once assembled, the little printer connects to Ethernet to get Internet data for printing onto 2 1/4" wide receipt paper. The example sketch...
No Longer Stocked
[Buy Now](https://www.adafruit.com/product/717)
[Related Guides to the Product](https://learn.adafruit.com/products/717/guides)
## Featured Products
### Mini Thermal Receipt Printer
[Mini Thermal Receipt Printer](https://www.adafruit.com/product/597)
Add a mini printer to any microcontroller project with this very cute thermal printer. Thermal printers are also known as receipt printers, they're what you get when you go to the ATM or grocery store. Now you can embed a little printer of your own into an enclosure. This printer is ideal...
No Longer Stocked
[Buy Now](https://www.adafruit.com/product/597)
[Related Guides to the Product](https://learn.adafruit.com/products/597/guides)
### Thermal paper roll - 50' long, 2.25" wide
[Thermal paper roll - 50' long, 2.25" wide](https://www.adafruit.com/product/599)
A mini roll of thermal paper, this fits very nicely into our mini thermal printer. 2.25" wide (about 57mm) and 50 feet long (15 meters). BPA-free.
[Perfect for use with our mini thermal printer!](http://www.adafruit.com/products/597)
No Longer Stocked
[Buy Now](https://www.adafruit.com/product/599)
[Related Guides to the Product](https://learn.adafruit.com/products/599/guides)
### Adafruit METRO 328 - Arduino Compatible - with Headers
[Adafruit METRO 328 - Arduino Compatible - with Headers](https://www.adafruit.com/product/2488)
This is the **Adafruit METRO Arduino-Compatible - with headers. ** It's a fully assembled and tested microcontroller and physical computing board with through-hole headers attached. If you don't want a Metro with the headers attached for...
In Stock
[Buy Now](https://www.adafruit.com/product/2488)
[Related Guides to the Product](https://learn.adafruit.com/products/2488/guides)
### Ethernet Shield for Arduino - W5500 Chipset
[Ethernet Shield for Arduino - W5500 Chipset](https://www.adafruit.com/product/2971)
The W5500 Ethernet Shield for Arduino from Seeed Studio is a great way to set up your projects with internet connectivity with just a single chip. Similar to the[Arduino Ethernet Shield](https://www.adafruit.com/product/201), but with a newer chipset, this ethernet shield...
No Longer Stocked
[Buy Now](https://www.adafruit.com/product/2971)
[Related Guides to the Product](https://learn.adafruit.com/products/2971/guides)
### FTDI Friend with Micro USB Port + extras
[FTDI Friend with Micro USB Port + extras](https://www.adafruit.com/product/284)
Long gone are the days of parallel ports and serial ports. Now the USB port reigns supreme! But USB is hard, and you just want to transfer your every-day serial data from a microcontroller to computer. What now? Enter the FTDI Friend!
The FTDI Friend is a tweaked out FTDI FT232RL chip...
In Stock
[Buy Now](https://www.adafruit.com/product/284)
[Related Guides to the Product](https://learn.adafruit.com/products/284/guides)
### Rugged Metal On/Off Switch with Green LED Ring
[Rugged Metal On/Off Switch with Green LED Ring](https://www.adafruit.com/product/482)
These chrome-plated metal buttons are rugged and look real good while doing it! Simply drill a 16mm hole into any material up to 1/2" thick and you can fit these in place, there's even a rubber gasket to keep water out of the enclosure. On the front of the button is a flat metal...
In Stock
[Buy Now](https://www.adafruit.com/product/482)
[Related Guides to the Product](https://learn.adafruit.com/products/482/guides)
### Arduino Ethernet shield R3 with micro SD connector - Assembled
[Arduino Ethernet shield R3 with micro SD connector - Assembled](https://www.adafruit.com/product/201)
The Arduino Ethernet Shield R3 (assembled) allows an Arduino board to connect to the internet. It is based on the Wiznet W5100 ethernet chip (datasheet). The Wiznet W5100 provides a network (IP) stack capable of both TCP and UDP. It supports up to four simultaneous socket connections. Use the...
No Longer Stocked
[Buy Now](https://www.adafruit.com/product/201)
[Related Guides to the Product](https://learn.adafruit.com/products/201/guides)
### Arduino Uno Ethernet
[Arduino Uno Ethernet](https://www.adafruit.com/product/418)
**As of 9/20/2012 Adafruit is currently shipping R3 of the Arduino Uno Ethernet**
Deep in the Swiss Alps, the top secret Arduino Super-collider has accelerated both an [Arduino UNO](https://www.adafruit.com/products/50) and
No Longer Stocked
[Buy Now](https://www.adafruit.com/product/418)
[Related Guides to the Product](https://learn.adafruit.com/products/418/guides)
## Related Guides
- [Mystery Box: NeoMatrix Mk I](https://learn.adafruit.com/mystery-box-neomatrix-mk-i.md)
- [A Z80 CP/M emulator for the SAMD51](https://learn.adafruit.com/z80-cpm-emulator-for-the-samd51-grand-central.md)
- [Echo 2-XL](https://learn.adafruit.com/echo-2-xl.md)
- [DC & USB Boarduino Kits](https://learn.adafruit.com/boarduino-kits.md)
- [Portable Solar Charging Tracker](https://learn.adafruit.com/portable-solar-charging-tracker.md)
- [Ladyada's Learn Arduino - Lesson #2](https://learn.adafruit.com/ladyadas-learn-arduino-lesson-number-2.md)
- [Motorized Camera Slider MK3 ](https://learn.adafruit.com/motorized-camera-slider-mk3.md)
- [Adafruit VCNL4040 Proximity Sensor](https://learn.adafruit.com/adafruit-vcnl4040-proximity-sensor.md)
- [Ladyada's Learn Arduino - Lesson #1](https://learn.adafruit.com/ladyadas-learn-arduino-lesson-number-1.md)
- [Trinket / Gemma IR Control](https://learn.adafruit.com/trinket-gemma-ir-remote-control.md)
- [Adafruit HUZZAH32 – ESP32 Breakout Board](https://learn.adafruit.com/huzzah32-esp32-breakout-board.md)
- [Adafruit HUZZAH ESP8266 breakout](https://learn.adafruit.com/adafruit-huzzah-esp8266-breakout.md)
- [FTDI Friend](https://learn.adafruit.com/ftdi-friend.md)
- [Ladyada's Learn Arduino - Lesson #0](https://learn.adafruit.com/ladyadas-learn-arduino-lesson-number-0.md)
- [IR Sensor](https://learn.adafruit.com/ir-sensor.md)
---
# Source: https://learn.adafruit.com/flora-wearable-gps/program-flora.md
# Flora Wearable GPS
## Program FLORA

Make sure the USB cable is connecting your computer and Flora.
## Basic Echo Test
We'll start with the most basic test, where we listen to the raw GPS data, to make sure it shows up! Copy and paste this code into a new sketch window and upload it to your Flora
# Install Adafruit GPS Library
Our helper library will make using the GPS easy since we have working code already. [The library is available on GitHub](https://github.com/adafruit/Adafruit_GPS)
You can download the most recent version from the Arduino library manager.
First, open up the Arduino library manager

Search for the **Adafruit GPS** library and install it

We also have a great tutorial on Arduino library installation at:
http://learn.adafruit.com/adafruit-all-about-arduino-libraries-install-use
# Load Echo Demo
We'll begin by loading up the HardwareSerial echo test example available in the Adafruit\_GPS library

Wire up the GPS module according to the hookup. [Check your board and serial port settings](http://learn.adafruit.com/getting-started-with-flora/blink-onboard-led) and upload this sketch to your Flora using the Upload button in the IDE. Open up the **Serial Monitor.**
You should see something like the following from the serial monitor. You may not have as many numbers, but there should be sentences that start with **$GPRMC** and **$GPGGA** , etc. If you see text like that it means your GPS and connection are working fine.

- [Previous Page](https://learn.adafruit.com/flora-wearable-gps/hook-up-gps.md)
- [Next Page](https://learn.adafruit.com/flora-wearable-gps/getting-location-data.md)
## Featured Products
### FLORA - Wearable electronic platform: Arduino-compatible
[FLORA - Wearable electronic platform: Arduino-compatible](https://www.adafruit.com/product/659)
FLORA is Adafruit's fully-featured wearable electronics platform. It's a round, sewable, Arduino-compatible microcontroller designed to empower amazing wearables projects.FLORA comes with Adafruit's support, [tutorials and...](http://learn.adafruit.com/category/flora)
In Stock
[Buy Now](https://www.adafruit.com/product/659)
[Related Guides to the Product](https://learn.adafruit.com/products/659/guides)
### Flora Wearable Ultimate GPS Module
[Flora Wearable Ultimate GPS Module](https://www.adafruit.com/product/1059)
This module is the best way to add a GPS to your wearable project. It's part of the Adafruit Flora series of wearable electronics, designed specifically for use with the Flora motherboard. Installed on the PCB is the latest of our Ultimate GPS modules, a small, super-thin, low-power GPS...
No Longer Stocked
[Buy Now](https://www.adafruit.com/product/1059)
[Related Guides to the Product](https://learn.adafruit.com/products/1059/guides)
### Small Alligator Clip Test Lead (set of 12)
[Small Alligator Clip Test Lead (set of 12)](https://www.adafruit.com/product/1008)
Connect this to that without soldering using these handy mini alligator clip test leads. 15" cables with alligator clip on each end, color coded. You get 12 pieces in 6 colors. Strong and grippy, these always come in handy! We often use these in conjunction with a multimeter so we...
In Stock
[Buy Now](https://www.adafruit.com/product/1008)
[Related Guides to the Product](https://learn.adafruit.com/products/1008/guides)
### Getting Started with Adafruit FLORA
[Getting Started with Adafruit FLORA](https://www.adafruit.com/product/1839)
**Making Wearables with an Arduino-Compatible Electronics Platform**
This book introduces readers to building wearable electronics projects using Adafruit's tiny FLORA board: at 4.4 grams, and only 1.75 inches in diameter, and featuring Arduino compatibility, it's the...
No Longer Stocked
[Buy Now](https://www.adafruit.com/product/1839)
[Related Guides to the Product](https://learn.adafruit.com/products/1839/guides)
### Getting Started with Adafruit FLORA Book Pack
[Getting Started with Adafruit FLORA Book Pack](https://www.adafruit.com/product/2404)
Pickup a copy of [Getting Started with Adafruit FLORA](https://www.adafruit.com/products/1839) and then hit the ground running with everything that you need to become an [Adafruit FLORA](https://www.adafruit.com/products/659) supreme being!
This pack is...
No Longer Stocked
[Buy Now](https://www.adafruit.com/product/2404)
[Related Guides to the Product](https://learn.adafruit.com/products/2404/guides)
### FLORA GPS Starter Pack
[FLORA GPS Starter Pack](https://www.adafruit.com/product/1090)
Get started with the fabulous Adafruit Flora platform with this lovely starter kit. Included are plenty of parts to make a few different fun projects! There's a Flora motherboard, a GPS module that can also perform location datalogging, eight ultra-bright chainable RGB pixels, a battery...
No Longer Stocked
[Buy Now](https://www.adafruit.com/product/1090)
[Related Guides to the Product](https://learn.adafruit.com/products/1090/guides)
### FLORA Sensor Pack
[FLORA Sensor Pack](https://www.adafruit.com/product/1458)
Sense the world around you! The FLORA Sensor Pack includes many types of sensors for your wearable enjoyment. Sense motion, direction, color, light levels, touch, and connections with FLORA sensor breakouts and conductive materials, and a few NeoPixels for experimenting with displaying your...
No Longer Stocked
[Buy Now](https://www.adafruit.com/product/1458)
[Related Guides to the Product](https://learn.adafruit.com/products/1458/guides)
### FLORA Budget Pack
[FLORA Budget Pack](https://www.adafruit.com/product/1405)
Get started with the fabulous Adafruit Flora platform with this lovely budget kit, just enough to get you started with this fun wearable computer. Included are enough parts to make your first wearable electronic project. There's a Flora motherboard, four ultra-bright chainable RGB pixels,...
Out of Stock
[Buy Now](https://www.adafruit.com/product/1405)
[Related Guides to the Product](https://learn.adafruit.com/products/1405/guides)
## Related Guides
- [FLORA TV-B-Gone](https://learn.adafruit.com/flora-tv-b-gone.md)
- [Zipper Switch](https://learn.adafruit.com/zipper-switch.md)
- [Flora GPS Jacket](https://learn.adafruit.com/flora-gps-jacket.md)
- [Getting Started with FLORA](https://learn.adafruit.com/getting-started-with-flora.md)
- [NeoPixel Ring Clock](https://learn.adafruit.com/neopixel-ring-clock.md)
- [SMSsenger Bag](https://learn.adafruit.com/smssenger-bag.md)
- [VU Meter Baseball Hat](https://learn.adafruit.com/vu-meter-baseball-hat.md)
- [Sparkle Skirt](https://learn.adafruit.com/sparkle-skirt.md)
- [Citi Bike Helmet](https://learn.adafruit.com/citi-bike-helmet.md)
- [Flora MIDI Drum Glove](https://learn.adafruit.com/midi-drum-glove.md)
- [Haptic Headband](https://learn.adafruit.com/haptic-headband.md)
- [Mailbox Notification Service](https://learn.adafruit.com/mailbox-notification-service.md)
- [LED Stego Flex Spike Hoodie](https://learn.adafruit.com/led-stego-flex-spike-hoodie.md)
- [Sunscreen Reminder Hat](https://learn.adafruit.com/sunscreen-reminder-hat.md)
- [Custom Milled PCB Pins](https://learn.adafruit.com/custom-milled-pcb-pins.md)
---
# Source: https://learn.adafruit.com/flora-tv-b-gone/program-it.md
# FLORA TV-B-Gone
## Program it
Connect your Flora to your computer with a mini USB cable. Be sure your battery is either unplugged or that the Flora's onboard power switch is set to off.

[Flora TV-B-Gone Arduino code from GitHub](https://github.com/adafruit/Adafruit_Learning_System_Guides/tree/main/Flora/Flora_TV_B_Gone)
To download the [Flora TV-B-Gone software from Github](https://github.com/adafruit/Adafruit_Learning_System_Guides/blob/main/Flora/Flora_TV_B_Gone/Flora_TV_B_Gone.ino), click the blue button above.

Extract the zip file and rename the resulting folder " **Flora\_TV\_B\_Gone**"
Move the folder into your Arduino sketches folder, which is located in your Documents folder by default on OS X. This is where your Arduino software looks for programs to edit and upload.

Open the Arduino IDE (don't have it? check out our [Getting Started with Flora guide](http://learn.adafruit.com/getting-started-with-flora)), and navigate to File--\>Sketchbook--\>FloraTVB. This will open the program so you can load it onto your Flora.

In Tools--\>Board, you should have "Adafruit Flora" selected.

Also under Tools, be sure you have selected the correct serial port. Flora appears similar to the image above.

Click the Upload button (shown in yellow above) to program your Flora to execute the TV-B-Gone code.

The yellow lights on the Flora board should flash as the program uploads.

After the program is done uploading, you can press the pushbutton to test the circuit. The red LED connected to D7 should flash, and so should your IR LEDs. Since the human eye can't see infrared light unaided, you can use a digital camera to see if the LEDs are lighting up. The sensors in digital cameras are sensitive to IR and display it as a sort of purple. If everything's working properly, you can now disconnect your USB cable.
- [Previous Page](https://learn.adafruit.com/flora-tv-b-gone/pushbutton.md)
- [Next Page](https://learn.adafruit.com/flora-tv-b-gone/power.md)
## Featured Products
### FLORA - Wearable electronic platform: Arduino-compatible
[FLORA - Wearable electronic platform: Arduino-compatible](https://www.adafruit.com/product/659)
FLORA is Adafruit's fully-featured wearable electronics platform. It's a round, sewable, Arduino-compatible microcontroller designed to empower amazing wearables projects.FLORA comes with Adafruit's support, [tutorials and...](http://learn.adafruit.com/category/flora)
In Stock
[Buy Now](https://www.adafruit.com/product/659)
[Related Guides to the Product](https://learn.adafruit.com/products/659/guides)
### Super-bright 5mm IR LED
[Super-bright 5mm IR LED](https://www.adafruit.com/product/387)
Infrared LEDs are used for remote controls (they're the little LED in the part you point at your TV) and 'night-vision' cameras, and these little blue guys are high powered ones! They are 940nm wavelength, which is what nearly all devices listen to. They're 20 degree beamwidth,...
In Stock
[Buy Now](https://www.adafruit.com/product/387)
[Related Guides to the Product](https://learn.adafruit.com/products/387/guides)
### Colorful Round Tactile Button Switch Assortment - 15 pack
[Colorful Round Tactile Button Switch Assortment - 15 pack](https://www.adafruit.com/product/1009)
Little clicky switches are standard input "buttons" on electronic projects. These work best in a PCB but [can be used on a solderless breadboard as shown in this tutorial](http://www.ladyada.net/learn/arduino/lesson5.html). The pins are normally open (disconnected) and...
In Stock
[Buy Now](https://www.adafruit.com/product/1009)
[Related Guides to the Product](https://learn.adafruit.com/products/1009/guides)
### NPN Bipolar Transistors (PN2222) - 10 pack
[NPN Bipolar Transistors (PN2222) - 10 pack](https://www.adafruit.com/product/756)
Transistors are powerful little electronic switches, and we really like these NPN transistors whenever we need to control medium-power electronics such as small motors, solenoids, or IR LEDs. We find them so handy, they come in a pack of 10!
Each transistor is a general-purpose...
In Stock
[Buy Now](https://www.adafruit.com/product/756)
[Related Guides to the Product](https://learn.adafruit.com/products/756/guides)
### Heat Shrink Pack
[Heat Shrink Pack](https://www.adafruit.com/product/344)
Heat shrink is the duct tape of electronics, it keeps your stuff all safe and kept together. Especially when wiring and soldering, use heat shrink to add mechanical strength to cables. We use this stuff all the time and having a zip-lock bag of all the possible sizes is super...
In Stock
[Buy Now](https://www.adafruit.com/product/344)
[Related Guides to the Product](https://learn.adafruit.com/products/344/guides)
### 3 x AAA Battery Holder with On/Off Switch and 2-Pin JST
[3 x AAA Battery Holder with On/Off Switch and 2-Pin JST](https://www.adafruit.com/product/727)
This battery holder connects 3 AAA batteries together in series for powering all kinds of projects. We spec'd these out because the box is slim, and 3 AAA's add up to about 3.3-4.5V, a very similar range to Lithium Ion/polymer (Li-Ion) batteries and have an on-off switch. That makes...
In Stock
[Buy Now](https://www.adafruit.com/product/727)
[Related Guides to the Product](https://learn.adafruit.com/products/727/guides)
### Solid-Core Wire Spool - 25ft - 22AWG - Black
[Solid-Core Wire Spool - 25ft - 22AWG - Black](https://www.adafruit.com/product/290)
Perfect for bread-boarding, free wiring, etc. This spool of solid-core wire is easy to solder to. When bent it keeps its shape pretty well. We like to have a few spools of this stuff around. We suggest picking up wire strippers to match. Wire gauge is 22 AWG which we've found is the best...
In Stock
[Buy Now](https://www.adafruit.com/product/290)
[Related Guides to the Product](https://learn.adafruit.com/products/290/guides)
### Getting Started with Adafruit FLORA
[Getting Started with Adafruit FLORA](https://www.adafruit.com/product/1839)
**Making Wearables with an Arduino-Compatible Electronics Platform**
This book introduces readers to building wearable electronics projects using Adafruit's tiny FLORA board: at 4.4 grams, and only 1.75 inches in diameter, and featuring Arduino compatibility, it's the...
No Longer Stocked
[Buy Now](https://www.adafruit.com/product/1839)
[Related Guides to the Product](https://learn.adafruit.com/products/1839/guides)
## Related Guides
- [Citi Bike Helmet](https://learn.adafruit.com/citi-bike-helmet.md)
- [Datalogging Hat with FLORA BLE](https://learn.adafruit.com/datalogging-hat-with-flora-ble.md)
- [Ursula's Seashell Necklace](https://learn.adafruit.com/ursulas-seashell-necklace.md)
- [LED Stego Flex Spike Hoodie](https://learn.adafruit.com/led-stego-flex-spike-hoodie.md)
- [Flora MIDI Drum Glove](https://learn.adafruit.com/midi-drum-glove.md)
- [FLORA NeoGeo Watch](https://learn.adafruit.com/flora-geo-watch.md)
- [Light-Up Angler Fish Embroidery](https://learn.adafruit.com/light-up-angler-fish-embroidery.md)
- [Flora Snaps](https://learn.adafruit.com/flora-snaps.md)
- [Glowing WhoVille Hat](https://learn.adafruit.com/glowing-whoville-hat.md)
- [Fiber Optic Pixie Skirt](https://learn.adafruit.com/fiber-optic-pixie-princess-skirt.md)
- [Pac Man Pixel Suspenders](https://learn.adafruit.com/pac-man-pixel-suspenders.md)
- [Washing Wearable Electronics](https://learn.adafruit.com/washing-wearable-electronics.md)
- [Flora-Powered TARDIS Costume (for Dogs!)](https://learn.adafruit.com/wearable-flora-powered-tardis-costume-dogs.md)
- [Firewalker LED Sneakers](https://learn.adafruit.com/firewalker-led-sneakers.md)
- [FLORA and GEMMA ICSP](https://learn.adafruit.com/flora-and-gemma-isp.md)
---
# Source: https://learn.adafruit.com/flora-pixel-brooch/program.md
# FLORA Pixel Brooch
## Program
Connect the FLORA to your computer with a USB cable.
# For version 2 pixels:
Install the [NeoPixel library](https://github.com/adafruit/Adafruit_NeoPixel) and go to File--\>Examples--\>Adafruit\_NeoPixel--\>strandtest.

The example sketch is set for 60 pixels, so you can change "Adafruit\_NeoPixel(60...);" to "Adafruit\_NeoPixel(3...);" if you like, but it will still work just fine with the defaults. This sketch will animate through all colors and is a good test. Be sure this sketch lights up your pixels before making any modifications to the code.
# For version 1 pixels:
In the Adafruit IDE, open up the Smart Pixels sample code-- go to File--\>Examples--\>Adafruit\_FloraPixel--\>floratest. Check out our "[Getting Started with Flora](http://learn.adafruit.com/getting-started-with-flora/overview)" tutorial for more info on the software.


The example sketch is set for eight pixels, so you can change "Adafruit\_FloraPixel(8);" to "Adafruit\_FloraPixel(3);" if you like, but it will still work just fine with the defaults. This sketch will animate through all colors and is a good test. Be sure this sketch lights up your pixels before making any modifications to the code.
- [Previous Page](https://learn.adafruit.com/flora-pixel-brooch/add-more-pixels.md)
- [Next Page](https://learn.adafruit.com/flora-pixel-brooch/power-it-up.md)
## Featured Products
### FLORA - Wearable electronic platform: Arduino-compatible
[FLORA - Wearable electronic platform: Arduino-compatible](https://www.adafruit.com/product/659)
FLORA is Adafruit's fully-featured wearable electronics platform. It's a round, sewable, Arduino-compatible microcontroller designed to empower amazing wearables projects.FLORA comes with Adafruit's support, [tutorials and...](http://learn.adafruit.com/category/flora)
In Stock
[Buy Now](https://www.adafruit.com/product/659)
[Related Guides to the Product](https://learn.adafruit.com/products/659/guides)
### Flora RGB Smart NeoPixel version 3 - Pack of 4
[Flora RGB Smart NeoPixel version 3 - Pack of 4](https://www.adafruit.com/product/1260)
What's a wearable project without LEDs? Our favorite part of the Flora platform is these tiny smart pixels. Designed specifically for wearables, these updated Flora NeoPixels have ultra-cool technology: these ultra-bright LEDs have a constant-current driver cooked right into the LED...
In Stock
[Buy Now](https://www.adafruit.com/product/1260)
[Related Guides to the Product](https://learn.adafruit.com/products/1260/guides)
### Solid-Core Wire Spool - 25ft - 22AWG - Black
[Solid-Core Wire Spool - 25ft - 22AWG - Black](https://www.adafruit.com/product/290)
Perfect for bread-boarding, free wiring, etc. This spool of solid-core wire is easy to solder to. When bent it keeps its shape pretty well. We like to have a few spools of this stuff around. We suggest picking up wire strippers to match. Wire gauge is 22 AWG which we've found is the best...
In Stock
[Buy Now](https://www.adafruit.com/product/290)
[Related Guides to the Product](https://learn.adafruit.com/products/290/guides)
### Lithium Ion Polymer Battery - 3.7v 150mAh
[Lithium Ion Polymer Battery - 3.7v 150mAh](https://www.adafruit.com/product/1317)
Lithium-ion polymer (also known as 'lipo' or 'lipoly') batteries are thin, light, and powerful. The output ranges from 4.2V when completely charged to 3.7V. This battery has a capacity of 150mAh for a total of about 0.6 Wh. If you need a larger battery,
Out of Stock
[Buy Now](https://www.adafruit.com/product/1317)
[Related Guides to the Product](https://learn.adafruit.com/products/1317/guides)
### Magnetic Pin Back
[Magnetic Pin Back](https://www.adafruit.com/product/1170)
These magnetic pin backs have two pieces: a metal bar with adhesive strip and a plastic piece with two strong rare-earth magnets. Affix the metal bar to your FLORA projects-- it's just the right size! Then attach your FLORA project to any garment without poking holes in your clothes. The...
In Stock
[Buy Now](https://www.adafruit.com/product/1170)
[Related Guides to the Product](https://learn.adafruit.com/products/1170/guides)
### Hakko Professional Quality 20-30 AWG Wire Strippers
[Hakko Professional Quality 20-30 AWG Wire Strippers](https://www.adafruit.com/product/527)
These are the finest wire strippers we have used, and if you have to do a lot of wiring, you will agree! They have soft rounded grips - very comfortable to use, and precision ground notches that do a perfect job every time. No more yanking or twisting to strip wires cleanly and quickly.
In Stock
[Buy Now](https://www.adafruit.com/product/527)
[Related Guides to the Product](https://learn.adafruit.com/products/527/guides)
### Simple pliers
[Simple pliers](https://www.adafruit.com/product/146)
Simple needlenose pliers for twisting, pulling and pliering your project.
In Stock
[Buy Now](https://www.adafruit.com/product/146)
[Related Guides to the Product](https://learn.adafruit.com/products/146/guides)
### Getting Started with Adafruit FLORA
[Getting Started with Adafruit FLORA](https://www.adafruit.com/product/1839)
**Making Wearables with an Arduino-Compatible Electronics Platform**
This book introduces readers to building wearable electronics projects using Adafruit's tiny FLORA board: at 4.4 grams, and only 1.75 inches in diameter, and featuring Arduino compatibility, it's the...
No Longer Stocked
[Buy Now](https://www.adafruit.com/product/1839)
[Related Guides to the Product](https://learn.adafruit.com/products/1839/guides)
## Related Guides
- [Chameleon Scarf](https://learn.adafruit.com/chameleon-scarf.md)
- [Washing Wearable Electronics](https://learn.adafruit.com/washing-wearable-electronics.md)
- [Light-Up Angler Fish Embroidery](https://learn.adafruit.com/light-up-angler-fish-embroidery.md)
- [Flora TSL2561 Lux Sensor](https://learn.adafruit.com/flora-lux-sensor.md)
- [Glowing Skullcandy Headphones Mod](https://learn.adafruit.com/glowing-skullcandy-headphones-mod.md)
- [Flora Snaps](https://learn.adafruit.com/flora-snaps.md)
- [Heart Rate Badge](https://learn.adafruit.com/heart-rate-badge.md)
- [Memories of an Arduino](https://learn.adafruit.com/memories-of-an-arduino.md)
- [VU Meter Baseball Hat](https://learn.adafruit.com/vu-meter-baseball-hat.md)
- [Flora Wearable GPS](https://learn.adafruit.com/flora-wearable-gps.md)
- [Light of Your Life Wedding Bouquet](https://learn.adafruit.com/light-of-your-life-wedding-bouquet.md)
- [Flora Accelerometer](https://learn.adafruit.com/flora-accelerometer.md)
- [Mailbox Notification Service](https://learn.adafruit.com/mailbox-notification-service.md)
- [Pac Man Pixel Suspenders](https://learn.adafruit.com/pac-man-pixel-suspenders.md)
- [Adafruit NeoPot](https://learn.adafruit.com/adafruit-neopot.md)
---
# Source: https://learn.adafruit.com/usb-snes-gamepad/programming-the-teensy.md
# USB SNES Gamepad
## Programming the Teensy
The Teensy uses the USB connection for programing, so we don't need a seperate AVR programmer. We will use the Teensyduino IDE, which is a patch to the Arduino IDE.
If you don't have it yet, [download & install the Arduino IDE software](http://www.arduino.cc/)
Next, [download the Teensyduino installer for your OS and run it, patching the Arduino IDE](http://pjrc.com/teensy/td_download.html "Link: http://pjrc.com/teensy/td\_download.html")
Finally, be sure to also grab[ Teensyloader](http://pjrc.com/teensy/loader.html) which is a helper that talks to the Teensy for you.
## One Button Test
We'll start with the 'one button test' sketch, which will only listen for the 'Up' D-Pad button and output the letter 'u'
Understanding this code now will make it a lot easier to understand the later sketches that are much more complex!
[You can also grab this code (which may be updated!) at GitHub](https://github.com/adafruit/Adafruit_Learning_System_Guides/blob/master/USB_SNES_Gamepad/teensySNES_onebutton/teensySNES_onebutton.ino)
https://github.com/adafruit/Adafruit_Learning_System_Guides/blob/main/USB_SNES_Gamepad/teensySNES_onebutton/teensySNES_onebutton.ino
Now we'll upload this sketch to the Teensy. Make a new sketch and copy the code in. Select the **Teensy 2.0 (USB Keyboard/Mouse)** item from the Board menu.
Make sure the Loader is running, if you see this:
Press the tiny button to start the bootloader, so that it looks like this:
Upload the sketch! You should see it sucessfully program the Teensy, and reboot. The OS will then alert you that it found an HID device.

And the device manager will now have an extra Keyboard and Mouse called **"HID Keyboard Device"** and **"HID-compliant mouse"** 
You should now be able to open up a text editor and carefully push the 'up' D-pad to generate 'u's!## All Button Test
Next we can upload the sketch that uses _all _the buttons so you can test each connection. It is much longer. [Download it from GitHub](https://github.com/adafruit/Adafruit_Learning_System_Guides/blob/master/USB_SNES_Gamepad/teensySNES_test1/teensySNES_test1.ino).
https://github.com/adafruit/Adafruit_Learning_System_Guides/blob/main/USB_SNES_Gamepad/teensySNES_test1/teensySNES_test1.ino

You should test all the buttons, to make sure they all output characters.
This code is more involved since it has to listen to 12 buttons. You can see at the top where we define an array of all the buttons, and then the keys that correspond to the presses. In this case, we're using a simple one-to-one correspondence for keypresses, such as Up being 'u'. To adapt this code to allow for things like "Alt-F3" would be a little more complex.
The code supports up to 6 simultaneous keypresses.
- [Previous Page](https://learn.adafruit.com/usb-snes-gamepad/assemble-the-usb-snes-gamepad.md)
- [Next Page](https://learn.adafruit.com/usb-snes-gamepad/adding-the-accelerometer.md)
## Featured Products
### SNES Controller
[SNES Controller](https://www.adafruit.com/product/131)
A third-party SNES (Super Nintendo/Famicom) controller. Works great with Fuzeboxen as well!
No Longer Stocked
[Buy Now](https://www.adafruit.com/product/131)
[Related Guides to the Product](https://learn.adafruit.com/products/131/guides)
### ADXL335 - 5V ready triple-axis accelerometer (+-3g analog out)
[ADXL335 - 5V ready triple-axis accelerometer (+-3g analog out)](https://www.adafruit.com/product/163)
We've updated our favorite triple-axis accelerometer to now have an on-board 3.3V regulator - making it a perfect choice for interfacing with a 5V microcontroller such as the Arduino. This breakout comes with 3 analog outputs for X, Y and Z axis measurements on a 0.75"x0.75"...
In Stock
[Buy Now](https://www.adafruit.com/product/163)
[Related Guides to the Product](https://learn.adafruit.com/products/163/guides)
### USB cable - A/MiniB
[USB cable - A/MiniB](https://www.adafruit.com/product/260)
This here is your standard A-miniB USB cable, for USB 1.1 or 2.0. Perfect for connecting a PC to your Teensy v2, USB Lipo charger w/Mini B connector, among other things.
Approximately 3 feet / 1 meter long
Color may vary!
No Longer Stocked
[Buy Now](https://www.adafruit.com/product/260)
[Related Guides to the Product](https://learn.adafruit.com/products/260/guides)
### Teensy (ATmega32u4 USB dev board) 2.0
[Teensy (ATmega32u4 USB dev board) 2.0](https://www.adafruit.com/product/199)
Discontinued - **you can grab** [Adafruit ItsyBitsy 32u4 - 5V 16MHz](https://www.adafruit.com/product/3677) **instead!**
The Teensy 2.0 is a complete USB-based microcontoller development system, in a very small footprint! All programming is done via the USB port. No...
No Longer Stocked
[Buy Now](https://www.adafruit.com/product/199)
[Related Guides to the Product](https://learn.adafruit.com/products/199/guides)
### Premium Female/Male 'Extension' Jumper Wires - 20 x 6"
[Premium Female/Male 'Extension' Jumper Wires - 20 x 6"](https://www.adafruit.com/product/1954)
These Female/Male Extension jumper wires are handy for making wire harnesses or jumpering between headers on PCB's. These premium jumper wires are 6" (150mm) long and come in a 'strip' of 20 (2 pieces of each of ten rainbow colors). They have 0.1" male header...
In Stock
[Buy Now](https://www.adafruit.com/product/1954)
[Related Guides to the Product](https://learn.adafruit.com/products/1954/guides)
## Related Guides
- [Adafruit Analog Accelerometer Breakouts](https://learn.adafruit.com/adafruit-analog-accelerometer-breakouts.md)
- [HID Reporter](https://learn.adafruit.com/hid-reporter.md)
- [Gravatars: What they are and how to add or change one](https://learn.adafruit.com/gravatars-what-they-are-and-how-to-add-or-change-one.md)
- [Two Player Game System for PyGamer and RFM69HCW Radio Wing](https://learn.adafruit.com/two-player-game-system-for-pygamer-and-rfm69hcw-radio-wing.md)
- [PyPortal 2FA TOTP Authentication Friend](https://learn.adafruit.com/pyportal-2fa-totp-authentication-friend.md)
- [Dragon Drop: a CircuitPython Game for MacroPad](https://learn.adafruit.com/dragon-drop-a-circuitpython-game-for-macropad.md)
- [NeoTrellis M4 Animated Dice Roller](https://learn.adafruit.com/neotrellis-dice.md)
- [Instagram Photo Frame](https://learn.adafruit.com/instagram-photo-frame.md)
- [BlueLive: Livestream Studio switcher controller](https://learn.adafruit.com/bluelive.md)
- [DIY Turbo Button Controller - HID Remapper](https://learn.adafruit.com/diy-turbo-button-controller-hid-remapper.md)
- [ESP32 PlayStation Controller](https://learn.adafruit.com/esp32-playstation-controller.md)
- [Fruit Jam Chyron](https://learn.adafruit.com/fruit-jam-chyron.md)
- [Custom Color Palettes for MakeCode Arcade Games](https://learn.adafruit.com/custom-color-palettes-for-makecode-arcade-games.md)
- [DIY Welded Bike Stand](https://learn.adafruit.com/diy-welded-bike-stand.md)
- [CircuitPython Stage game library](https://learn.adafruit.com/circuitpython-stage-game-library.md)
---
# Source: https://learn.adafruit.com/babel-fish/programming.md
# Babel Fish
## Programming
Program your Arduino with the following sketch and open the serial monitor.
Dont forget you'll need to have the Waveshield WaveHC library, and NFCshield library installed first. Visit the Wave and NFC shield product pages and test both of them before continuing onto this code!
```
#include <WaveHC.h>
#include <WaveUtil.h>
#include <Wire.h>
#include <Adafruit_NFCShield_I2C.h>
#define IRQ 6 // this trace must be cut and rewired!
#define RESET 8
Adafruit_NFCShield_I2C nfc(IRQ, RESET);
SdReader card; // This object holds the information for the card
FatVolume vol; // This holds the information for the partition on the card
FatReader root; // This holds the information for the volumes root directory
FatReader file; // This object represent the WAV file for a pi digit or period
WaveHC wave; // This is the only wave (audio) object, since we will only play one at a time
/*
* Define macro to put error messages in flash memory
*/
#define error(msg) error_P(PSTR(msg))
//////////////////////////////////// SETUP
void setup() {
// set up Serial library at 9600 bps
Serial.begin(9600);
PgmPrintln("Pi speaker");
if (!card.init()) {
error("Card init. failed!");
}
if (!vol.init(card)) {
error("No partition!");
}
if (!root.openRoot(vol)) {
error("Couldn't open dir");
}
PgmPrintln("Files found:");
root.ls();
// find Adafruit RFID/NFC shield
nfc.begin();
uint32_t versiondata = nfc.getFirmwareVersion();
if (! versiondata) {
Serial.print("Didn't find PN53x board");
while (1); // halt
}
// Got ok data, print it out!
Serial.print("Found chip PN5"); Serial.println((versiondata>>24) & 0xFF, HEX);
Serial.print("Firmware ver. "); Serial.print((versiondata>>16) & 0xFF, DEC);
Serial.print('.'); Serial.println((versiondata>>8) & 0xFF, DEC);
// configure board to read RFID tags
nfc.SAMConfig();
}
/////////////////////////////////// LOOP
unsigned digit = 0;
void loop() {
uint8_t success;
uint8_t uid[] = { 0, 0, 0, 0, 0, 0, 0 }; // Buffer to store the returned UID
uint8_t uidLength; // Length of the UID (4 or 7 bytes depending on ISO14443A card type)
// wait for RFID card to show up!
Serial.println("Waiting for an ISO14443A Card ...");
// Wait for an ISO14443A type cards (Mifare, etc.). When one is found
// 'uid' will be populated with the UID, and uidLength will indicate
// if the uid is 4 bytes (Mifare Classic) or 7 bytes (Mifare Ultralight)
success = nfc.readPassiveTargetID(PN532_MIFARE_ISO14443A, uid, &uidLength);
uint32_t cardidentifier = 0;
if (success) {
// Found a card!
Serial.print("Card detected #");
// turn the four byte UID of a mifare classic into a single variable #
cardidentifier = uid[3];
cardidentifier <<= 8; cardidentifier |= uid[2];
cardidentifier <<= 8; cardidentifier |= uid[1];
cardidentifier <<= 8; cardidentifier |= uid[0];
Serial.println(cardidentifier);
// repeat this for loop as many times as you have RFID cards
if (cardidentifier == 2588581390) { // this is the card's unique identifier
playcomplete("1.WAV"); // these are file names for the sample audio files - change them to your own file names
}
if (cardidentifier == 2146122274) {
playcomplete("2.WAV");
}
}
}
/////////////////////////////////// HELPERS
/*
* print error message and halt
*/
void error_P(const char *str) {
PgmPrint("Error: ");
SerialPrint_P(str);
sdErrorCheck();
while(1);
}
/*
* print error message and halt if SD I/O error
*/
void sdErrorCheck(void) {
if (!card.errorCode()) return;
PgmPrint("\r\nSD I/O error: ");
Serial.print(card.errorCode(), HEX);
PgmPrint(", ");
Serial.println(card.errorData(), HEX);
while(1);
}
/*
* Play a file and wait for it to complete
*/
void playcomplete(char *name) {
playfile(name);
while (wave.isplaying);
// see if an error occurred while playing
sdErrorCheck();
}
/*
* Open and start playing a WAV file
*/
void playfile(char *name) {
if (wave.isplaying) {// already playing something, so stop it!
wave.stop(); // stop it
}
if (!file.open(root, name)) {
PgmPrint("Couldn't open file ");
Serial.print(name);
return;
}
if (!wave.create(file)) {
PgmPrintln("Not a valid WAV");
return;
}
// ok time to play!
wave.play();
}
```
Replace the long number in the following for loop with your RFID card's ID. Replace the sound file name with the filename for your chosen sound samples.
```
if (cardidentifier == 2146122274) {
playcomplete("2.WAV");
}
```
- [Previous Page](https://learn.adafruit.com/babel-fish/flash-cards.md)
- [Next Page](https://learn.adafruit.com/babel-fish/fish-box.md)
## Featured Products
### Adafruit METRO 328 Fully Assembled - Arduino IDE compatible
[Adafruit METRO 328 Fully Assembled - Arduino IDE compatible](https://www.adafruit.com/product/50)
We sure love the ATmega328 here at Adafruit, and we use them _a lot_ for our own projects. The processor has plenty of GPIO, Analog inputs, hardware UART SPI and I2C, timers and PWM galore - just enough for most simple projects. When we need to go small, we use a
Out of Stock
[Buy Now](https://www.adafruit.com/product/50)
[Related Guides to the Product](https://learn.adafruit.com/products/50/guides)
### Adafruit PN532 NFC/RFID Controller Shield for Arduino + Extras
[Adafruit PN532 NFC/RFID Controller Shield for Arduino + Extras](https://www.adafruit.com/product/789)
We've taken our popular Adafruit PN532 breakout board and turned it into a shield - the perfect tool for any 13.56MHz RFID or NFC application. The Adafruit NFC shield uses the PN532 chip-set (the most popular NFC chip on the market) and is what is embedded in pretty much every phone or...
In Stock
[Buy Now](https://www.adafruit.com/product/789)
[Related Guides to the Product](https://learn.adafruit.com/products/789/guides)
### Adafruit Wave Shield for Arduino Kit
[Adafruit Wave Shield for Arduino Kit](https://www.adafruit.com/product/94)
Adding quality audio to an electronic project is surprisingly difficult. Here is a shield for Arduino 328's that solves this problem. It can play up to 22KHz 12bit uncompressed audio files of any length. It's low cost, available as an easy-to-make kit. It has an onboard DAC, filter and...
Out of Stock
[Buy Now](https://www.adafruit.com/product/94)
[Related Guides to the Product](https://learn.adafruit.com/products/94/guides)
### Music & sound add-on pack for Arduino
[Music & sound add-on pack for Arduino](https://www.adafruit.com/product/175)
Its a Wave shield party pack! Just add an Arduino to create your own iPod-killer, audio art, sound-effects box...
Comes with:
- Latest [Wave shield kit](http://www.adafruit.com/products/94), works with more SD cards and with older NG Arduinos! Unassembled
- 8 GB...
Out of Stock
[Buy Now](https://www.adafruit.com/product/175)
[Related Guides to the Product](https://learn.adafruit.com/products/175/guides)
### 9 VDC 1000mA regulated switching power adapter - UL listed
[9 VDC 1000mA regulated switching power adapter - UL listed](https://www.adafruit.com/product/63)
This is a really nice power supply. It's a switching DC supply so it's small and light and efficient. It is thin so it fits in power strips without blocking other outlets. The output is regulated so you'll get a steady 9V up to 1000mA (1 Amp) of current draw. 5.5mm/2.1mm barrel...
Out of Stock
[Buy Now](https://www.adafruit.com/product/63)
[Related Guides to the Product](https://learn.adafruit.com/products/63/guides)
### 13.56MHz RFID/NFC Card - Classic 1K
[13.56MHz RFID/NFC Card - Classic 1K](https://www.adafruit.com/product/359)
This is a blank 13.56MHz RFID/NFC card - often used for train/bus passes but also found in other systems where a proximity card is desired. The tag contains a small RFID chip and an antenna, and is passively powered by the reader/writer when placed a couple inches away.
These can be...
In Stock
[Buy Now](https://www.adafruit.com/product/359)
[Related Guides to the Product](https://learn.adafruit.com/products/359/guides)
## Related Guides
- [How to Find Hidden COM Ports](https://learn.adafruit.com/how-to-find-hidden-com-ports.md)
- [Collin's Lab: RFID](https://learn.adafruit.com/collins-lab-rfid.md)
- [Multi-tasking the Arduino - Part 2](https://learn.adafruit.com/multi-tasking-the-arduino-part-2.md)
- [Ladyada's Learn Arduino - Lesson #2](https://learn.adafruit.com/ladyadas-learn-arduino-lesson-number-2.md)
- [Affordable HAL 9000 Replica](https://learn.adafruit.com/hal-9000-replica.md)
- [Adafruit VS1053 MP3/AAC/Ogg/MIDI/WAV Codec Breakout Tutorial](https://learn.adafruit.com/adafruit-vs1053-mp3-aac-ogg-midi-wav-play-and-record-codec-tutorial.md)
- [Arduino Lesson 8. Analog Inputs](https://learn.adafruit.com/adafruit-arduino-lesson-8-analog-inputs.md)
- [Adafruit CC3000 WiFi and Xively](https://learn.adafruit.com/adafruit-cc3000-wifi-and-xively.md)
- [Automatic Monitor Color Temperature Adjustment](https://learn.adafruit.com/automatic-monitor-color-temperature-adjustment.md)
- [RePaper eInk Development Board](https://learn.adafruit.com/repaper-eink-development-board.md)
- [Using NeoPixels and Servos Together](https://learn.adafruit.com/neopixels-and-servos.md)
- [Mini Thermal Receipt Printers](https://learn.adafruit.com/mini-thermal-receipt-printer.md)
- [Line Following Zumo Robot Using Simulink](https://learn.adafruit.com/line-following-zumo-robot-programmed-with-simulink.md)
- [Adafruit 2.8" TFT Touch Shield v2 - Capacitive or Resistive](https://learn.adafruit.com/adafruit-2-8-tft-touch-shield-v2.md)
- [Adafruit INA219 Current Sensor Breakout](https://learn.adafruit.com/adafruit-ina219-current-sensor-breakout.md)
---
# Source: https://learn.adafruit.com/thermocouple/project-examples.md
# MAX31855 Thermocouple
## Project Examples
Need ideas? Check out these projects!
[Jeelabs has a detailed walkthrough for a reflow controller (uses an AD595-type chip)](http://news.jeelabs.org/tag/reflow/)https://www.youtube.com/watch?v=Sb1nvKYYTdc

[Terran's PI conntrolled coffee roaster](http://www.consistent.org/terran/2009/coffeeroaster.shtml "Link: http://www.consistent.org/terran/2009/coffeeroaster.shtml")
[RocketNumberNine's reflow toaster project](http://www.rocketnumbernine.com/2009/06/03/smt-table-top-reflow-oven-part-1/ "Link: http://www.rocketnumbernine.com/2009/06/03/smt-table-top-reflow-oven-part-1/")- [Previous Page](https://learn.adafruit.com/thermocouple/f-a-q.md)
- [Next Page](https://learn.adafruit.com/thermocouple/downloads.md)
## Primary Products
### Adafruit Universal Thermocouple Amplifier MAX31856 Breakout
[Adafruit Universal Thermocouple Amplifier MAX31856 Breakout](https://www.adafruit.com/product/3263)
Thermocouples are very sensitive, requiring a good amplifier with a cold-compensation reference, as well as calculations to handle any non-linearities. For a long time we've [suggested our MAX31855K breakout, which works great but is only for...](https://www.adafruit.com/products/269)
Out of Stock
[Buy Now](https://www.adafruit.com/product/3263)
[Related Guides to the Product](https://learn.adafruit.com/products/3263/guides)
## Featured Products
### Thermocouple Amplifier MAX31855 breakout board (MAX6675 upgrade)
[Thermocouple Amplifier MAX31855 breakout board (MAX6675 upgrade)](https://www.adafruit.com/product/269)
Thermocouples are very sensitive, requiring a good amplifier with a cold-compensation reference. The MAX31855K does everything for you, and can be easily interfaced with any microcontroller, even one without an analog input. This breakout board has the chip itself, a 3.3V regulator with 10uF...
In Stock
[Buy Now](https://www.adafruit.com/product/269)
[Related Guides to the Product](https://learn.adafruit.com/products/269/guides)
### Thermocouple Type-K Glass Braid Insulated
[Thermocouple Type-K Glass Braid Insulated](https://www.adafruit.com/product/270)
Thermocouples are best used for measuring temperatures that can go above 100 °C. This is a bare wires bead-probe which can measure air or surface temperatures. Most inexpensive thermocouples have a vinyl covering which can melt at around 200 °C, this one uses a fiberglass braid so it...
Out of Stock
[Buy Now](https://www.adafruit.com/product/270)
[Related Guides to the Product](https://learn.adafruit.com/products/270/guides)
### Thermocouple Type-K Glass Braid Insulated Stainless Steel Tip
[Thermocouple Type-K Glass Braid Insulated Stainless Steel Tip](https://www.adafruit.com/product/3245)
Thermocouples are best used for measuring temperatures that can go above 100°C. This is a bare wires stainless-steel tip probe which can measure air or surface temperatures. Most inexpensive thermocouples have a vinyl covering which can melt at around 200°C, this one uses a fiberglass...
In Stock
[Buy Now](https://www.adafruit.com/product/3245)
[Related Guides to the Product](https://learn.adafruit.com/products/3245/guides)
## Related Guides
- [Adafruit FT232H With SPI & I2C Devices](https://learn.adafruit.com/adafruit-ft232h-with-spi-and-i2c-libraries.md)
- [MicroPython Hardware: SPI Devices](https://learn.adafruit.com/micropython-hardware-spi-devices.md)
- [Connecting the MAX31855 Thermocouple Amplifier breakout to an Electric Imp](https://learn.adafruit.com/connecting-the-max31855-thermocouple-amplifier-breakout-to-an-electric-imp.md)
- [Google Docs Sensor Logging From Your PC](https://learn.adafruit.com/gdocs-sensor-logging-from-your-pc.md)
- [CircuitPython Libraries on Linux and the 96Boards DragonBoard 410c](https://learn.adafruit.com/circuitpython-libraries-on-linux-and-the-96boards-dragonboard-410c.md)
- [MAX31855 Thermocouple Sensor Python Library](https://learn.adafruit.com/max31855-thermocouple-python-library.md)
- [Adding a Single Board Computer to Blinka](https://learn.adafruit.com/adding-a-single-board-computer-to-blinka.md)
- [CircuitPython I2C and SPI Under the Hood](https://learn.adafruit.com/circuitpython-basics-i2c-and-spi.md)
- [ Analog IC Insights On-the-Go by Maxim Integrated](https://learn.adafruit.com/maxim-app.md)
- [Adafruit 1-Wire Thermocouple Amplifier - MAX31850K](https://learn.adafruit.com/adafruit-1-wire-thermocouple-amplifier-max31850k.md)
- [Calibrating Sensors](https://learn.adafruit.com/calibrating-sensors.md)
- [Adafruit TE MS8607 PHT Sensor](https://learn.adafruit.com/adafruit-te-ms8607-pht-sensor.md)
- [Adafruit Sensirion SHT40, SHT41 & SHT45 Temperature & Humidity Sensors](https://learn.adafruit.com/adafruit-sht40-temperature-humidity-sensor.md)
- [Adafruit SHT4x Trinkey](https://learn.adafruit.com/adafruit-sht4x-trinkey.md)
- [Adafruit's Raspberry Pi Lesson 11. DS18B20 Temperature Sensing](https://learn.adafruit.com/adafruits-raspberry-pi-lesson-11-ds18b20-temperature-sensing.md)
---
# Source: https://learn.adafruit.com/digital-led-strip/project-ideas.md
# Source: https://learn.adafruit.com/36mm-led-pixels/project-ideas.md
# Source: https://learn.adafruit.com/12mm-led-pixels/project-ideas.md
# 12mm LED Pixels
## Project Ideas
These pixels could be used for stuff like…
An LED coffee table (this one was “hand made” some time ago…now you could simply use a long strand of our LED pixels and skip the complicated wiring and driver parts):
http://www.youtube.com/watch?v=Tj1j1-dIX6k&feature=player_embedded
A trippy “light bar”:http://player.vimeo.com/video/16297109
Signs and displays:http://www.youtube.com/watch?v=EkrZbBEqcjo&feature=player_embedded
A ball of LEDs:http://player.vimeo.com/video/16303734
- [Previous Page](https://learn.adafruit.com/12mm-led-pixels/overview.md)
- [Next Page](https://learn.adafruit.com/12mm-led-pixels/power.md)
## Featured Products
### 12mm Diffused Flat Digital RGB LED Pixels (Strand of 25)
[12mm Diffused Flat Digital RGB LED Pixels (Strand of 25)](https://www.adafruit.com/product/738)
RGB Pixels are digitally-controllable lights you can set to any color, or animate. Each RGB LED and controller chip is molded into a 'dot' of silicone. The dots are weatherproof and rugged. There are four flanges molded in so that you can 'push' them into a 12mm drill hole in...
In Stock
[Buy Now](https://www.adafruit.com/product/738)
[Related Guides to the Product](https://learn.adafruit.com/products/738/guides)
### 12mm Diffused Thin Digital RGB LED Pixels (Strand of 25)
[12mm Diffused Thin Digital RGB LED Pixels (Strand of 25)](https://www.adafruit.com/product/322)
RGB Pixels are digitally-controllable lights you can set to any color, or animate. Each RGB LED and controller chip is molded into a 'dot' of silicone. The dots are weatherproof and rugged. There are four flanges molded in so that you can 'push' them into a 12mm drill hole in...
No Longer Stocked
[Buy Now](https://www.adafruit.com/product/322)
[Related Guides to the Product](https://learn.adafruit.com/products/322/guides)
### 5V 10A switching power supply
[5V 10A switching power supply](https://www.adafruit.com/product/658)
This is a beefy switching supply, for when you need a lot of power! It can supply 5V DC up to 10 Amps, running from 110V or 220V power (the plug it comes with is for US/Canada/Japan but you can use any plug adapter for your country, or just replace the cable with a standard computer/appliance...
Out of Stock
[Buy Now](https://www.adafruit.com/product/658)
[Related Guides to the Product](https://learn.adafruit.com/products/658/guides)
### 5V 2A (2000mA) switching power supply - UL Listed
[5V 2A (2000mA) switching power supply - UL Listed](https://www.adafruit.com/product/276)
This is an FCC/CE certified and UL listed power supply. Need a lot of 5V power? This switching supply gives a clean regulated 5V output at up to 2000mA. 110 or 240 input, so it works in any country. The plugs are "US 2-prong" style so you may need a plug adapter, but you can pick one...
In Stock
[Buy Now](https://www.adafruit.com/product/276)
[Related Guides to the Product](https://learn.adafruit.com/products/276/guides)
### Female DC Power adapter - 2.1mm jack to screw terminal block
[Female DC Power adapter - 2.1mm jack to screw terminal block](https://www.adafruit.com/product/368)
If you need to connect a DC power wall wart to a board that doesn't have a DC jack - this adapter will come in very handy! There is a 2.1mm DC jack on one end, and a screw terminal block on the other. The terminals are labeled with positive/negative assuming a positive-tip configuration...
In Stock
[Buy Now](https://www.adafruit.com/product/368)
[Related Guides to the Product](https://learn.adafruit.com/products/368/guides)
### 4-pin JST SM Plug + Receptacle Cable Set
[4-pin JST SM Plug + Receptacle Cable Set](https://www.adafruit.com/product/578)
These 4-wire cables are 15cm long and come as a set, one side has a JST SM type connector plug on the end. The other side has a matching JST SM type receptacle connector. They are good for whenever you have 4 wires you want to be able to plug and unplug. We like the solid and compact nature of...
In Stock
[Buy Now](https://www.adafruit.com/product/578)
[Related Guides to the Product](https://learn.adafruit.com/products/578/guides)
## Related Guides
- [Bluefruit Controlled Macetech RGB LED Shades](https://learn.adafruit.com/ledshades.md)
- [Make it Glow: NeoPixel and LED Diffusion Tips & Tricks](https://learn.adafruit.com/make-it-glow-neopixel-and-led-diffusion-tips-tricks.md)
- [Starduino: 8-Bit Super Mario Tree Topper](https://learn.adafruit.com/starduino-neopixel-8-bit-mario-star-tree-topper.md)
- [NeoPixel Ring Clock](https://learn.adafruit.com/neopixel-ring-clock.md)
- [Star Fragment IoT Lamp](https://learn.adafruit.com/star-fragment-iot-lamp.md)
- [Talking Musical NeoPixel Clock with Infrared, BLE and Touch Controls](https://learn.adafruit.com/talking-musical-neo-pixel-clock-with-infrared-ble-and-touch-controls.md)
- [Perfect Pitch Machine](https://learn.adafruit.com/perfect-pitch-machine.md)
- [CheerLights](https://learn.adafruit.com/cheerlights.md)
- [NeuroDreamer Teardown](https://learn.adafruit.com/neurodreamer-teardown.md)
- [Holiday Lights: Easy DIY Christmas Wreath & Garland with WLED](https://learn.adafruit.com/holiday-garland-decor-app-control-with-no-coding.md)
- [Adafruit IO Home: Security ](https://learn.adafruit.com/adafruit-io-home-security.md)
- [Adafruit NeoPot](https://learn.adafruit.com/adafruit-neopot.md)
- [NeoKey Socket Breakout with NeoPixel for MX and CHOC Key Switches](https://learn.adafruit.com/neokey-breakout.md)
- [NeoPixie Dust Bag](https://learn.adafruit.com/neopixel-pixie-dust-bag.md)
- [Multi-tasking the Arduino - Part 3](https://learn.adafruit.com/multi-tasking-the-arduino-part-3.md)
---
# Source: https://learn.adafruit.com/led-bicycle-handlebars/project-pack.md
# LED Bicycle Handlebars
## Project Pack
- [Previous Page](https://learn.adafruit.com/led-bicycle-handlebars/frequently-asked-qs.md)
## Featured Products
### LED Bike Handlebar Pack - 1 meter
[LED Bike Handlebar Pack - 1 meter](https://www.adafruit.com/product/933)
This pack contains supplies for making your own LED bicycle handlebars! This project is easily completed in a weekend and requires a small amount of soldering and some sewing, too. Pack includes:
- [Cool white LED strip](http://adafruit.com/products/887)...
No Longer Stocked
[Buy Now](https://www.adafruit.com/product/933)
[Related Guides to the Product](https://learn.adafruit.com/products/933/guides)
### LED Bike Handlebar Pack - 2 meters
[LED Bike Handlebar Pack - 2 meters](https://www.adafruit.com/product/934)
This pack contains supplies for making your own LED bicycle handlebars! This project is easily completed in a weekend and requires a small amount of soldering and some sewing, too. Pack includes:
- [Cool white LED...](http://adafruit.com/products/887)
No Longer Stocked
[Buy Now](https://www.adafruit.com/product/934)
[Related Guides to the Product](https://learn.adafruit.com/products/934/guides)
### Cool White LED Weatherproof Flexi-Strip 60 LED - 5m
[Cool White LED Weatherproof Flexi-Strip 60 LED - 5m](https://www.adafruit.com/product/887)
These LED strips are ultra bright, fun and glowy. There are **60** cool white LEDs per meter, and you can control the entire strip at once with any microcontroller and [a power transistor](http://www.adafruit.com/products/355). The way they are wired, you will need a 9-12VDC...
No Longer Stocked
[Buy Now](https://www.adafruit.com/product/887)
[Related Guides to the Product](https://learn.adafruit.com/products/887/guides)
### Waterproof DC Power Cable Set - 5.5/2.1mm
[Waterproof DC Power Cable Set - 5.5/2.1mm](https://www.adafruit.com/product/743)
Outdoor enthusiasts rejoice! We now have standard 5.5/2.1mm DC power cable sets in a waterproof variety. These cable sets are ideal for projects that must weather the weather: dust, water, rain, snow, tornado (not volcano proof!). They are a little bulkier than normal DC jacks because of the...
In Stock
[Buy Now](https://www.adafruit.com/product/743)
[Related Guides to the Product](https://learn.adafruit.com/products/743/guides)
### 8 x AA battery holder
[8 x AA battery holder](https://www.adafruit.com/product/449)
When you need a portable 12V power pack, this big holder will do the job! The holder will store 8 AA batteries end to end, to give approximately 12VDC output with up to 2 amp peak current draw. We like this configuration in particular because it holds the batteries securely, even if being...
In Stock
[Buy Now](https://www.adafruit.com/product/449)
[Related Guides to the Product](https://learn.adafruit.com/products/449/guides)
### Heat Shrink Pack
[Heat Shrink Pack](https://www.adafruit.com/product/344)
Heat shrink is the duct tape of electronics, it keeps your stuff all safe and kept together. Especially when wiring and soldering, use heat shrink to add mechanical strength to cables. We use this stuff all the time and having a zip-lock bag of all the possible sizes is super...
In Stock
[Buy Now](https://www.adafruit.com/product/344)
[Related Guides to the Product](https://learn.adafruit.com/products/344/guides)
## Related Guides
- [Mystery Box: Crypto Countdown Case](https://learn.adafruit.com/mystery-box-crypto-countdown-case.md)
- [Bedazzler](https://learn.adafruit.com/bedazzler.md)
- [CircuitPython LED Animations](https://learn.adafruit.com/circuitpython-led-animations.md)
- [Blahaj Alarm and Lamp](https://learn.adafruit.com/blahaj-alarm.md)
- [Arduino Lesson 4. Eight LEDs and a Shift Register](https://learn.adafruit.com/adafruit-arduino-lesson-4-eight-leds.md)
- [LED Emerald with Circuit Playground Bluefruit](https://learn.adafruit.com/led-emerald-with-circuit-playground.md)
- [Talking HAL 9000 with RP2040 Prop Maker Feather](https://learn.adafruit.com/hal-9000-rp2040-prop-maker.md)
- [Adafruit NeoPXL8 FeatherWing and Library](https://learn.adafruit.com/adafruit-neopxl8-featherwing-and-library.md)
- [Color Remote with Circuit Playground Bluefruit](https://learn.adafruit.com/color-remote-with-circuit-playground-bluefruit.md)
- [Guardian Shield+ Zelda Breath of the Wild](https://learn.adafruit.com/guardian-shield-zelda-breath-of-the-wild.md)
- [Mad Science Test Tube Rack](https://learn.adafruit.com/mad-science-test-tube-rack.md)
- [Making Wearable Badge Art with Printed Circuit Boards](https://learn.adafruit.com/making-wearable-badge-art-with-printed-circuit-boards.md)
- [Tiny TARDIS Pendant](https://learn.adafruit.com/tiny-tardis-pendant.md)
- [Party Parrot Zoetrope](https://learn.adafruit.com/party-parrot-zoetrope.md)
- [LED Noodle Shop Sign](https://learn.adafruit.com/led-noodle-shop-sign.md)
---
# Source: https://learn.adafruit.com/conductive-thread/projects.md
# Conductive Thread
## Projects
http://youtu.be/XpwL71IiPXM
## [Sewable LED Sequins](http://www.adafruit.com/blog/2012/05/17/sewable-led-sequins-video/) (2 or 3 ply)
http://youtu.be/dDwmnfpjlno
## [Flora Snaps
](http://learn.adafruit.com/flora-snaps)
http://youtu.be/ljN1vObUa5E
## [iPhone Gloves](http://makeprojects.com/Project/iPhone-Gloves/1633/1#.UN-A4ra5KgY) (conductive yarn)
http://youtu.be/vVJDlxabv0w
## [TV-B-Gone Jacket](http://youtu.be/vVJDlxabv0w)
- [Previous Page](https://learn.adafruit.com/conductive-thread/machine-sewing.md)
## Featured Products
### Stainless Medium Conductive Thread - 3 ply - 18 meter/60 ft
[Stainless Medium Conductive Thread - 3 ply - 18 meter/60 ft](https://www.adafruit.com/product/641)
After months of searching, we finally have what we consider to be the ultimate conductive thread. It's thin, strong, smooth, and made completely of 316L stainless steel. Once you start working with this thread you'll quickly agree its optimal for any wearables work!
This...
Out of Stock
[Buy Now](https://www.adafruit.com/product/641)
[Related Guides to the Product](https://learn.adafruit.com/products/641/guides)
### Stainless Thin Conductive Thread - 2 ply - 23 meter/76 ft
[Stainless Thin Conductive Thread - 2 ply - 23 meter/76 ft](https://www.adafruit.com/product/640)
After months of searching, we finally have what we consider to be the ultimate conductive thread. It's thin, strong, smooth, and made completely of 316L stainless steel. Once you start working with this thread you'll quickly agree its optimal for any wearables work!
This...
In Stock
[Buy Now](https://www.adafruit.com/product/640)
[Related Guides to the Product](https://learn.adafruit.com/products/640/guides)
### Stainless Thin Conductive Yarn / Thick Conductive Thread - 30 ft
[Stainless Thin Conductive Yarn / Thick Conductive Thread - 30 ft](https://www.adafruit.com/product/603)
This 316L stainless steel thread falls somewhere between a thick thread and a thin yarn. Most sewing machines wouldn't be happy with this thread since its thick, and it has the 'furry' soft feel of yarn which makes it poor for most e-textiles/wearables projects. However, the high...
In Stock
[Buy Now](https://www.adafruit.com/product/603)
[Related Guides to the Product](https://learn.adafruit.com/products/603/guides)
### Conductive thread ribbon cable - White - 1 yard
[Conductive thread ribbon cable - White - 1 yard](https://www.adafruit.com/product/1139)
This lightweight, flexible fabric ribbon cable contains four channels of conductive thread, perfect for wiring up wearables where flexibility is key. Use it to connect your conductive fabric gamepad to your microcontroller or computer!
Features:
- Low resistance: ~16...
No Longer Stocked
[Buy Now](https://www.adafruit.com/product/1139)
[Related Guides to the Product](https://learn.adafruit.com/products/1139/guides)
### Needle set - 3/9 sizes - 20 needles
[Needle set - 3/9 sizes - 20 needles](https://www.adafruit.com/product/615)
Mighty needles, sew like the wind! This needle set is the only one you'll need for any sort of hand sewing, especially using our conductive thread and wearable electronics parts.
Each pack contains 20 gold-eye sharps, with eye sizes ranging from #3 (1.75" long) to #9...
Out of Stock
[Buy Now](https://www.adafruit.com/product/615)
[Related Guides to the Product](https://learn.adafruit.com/products/615/guides)
### Small Alligator Clip Test Lead (set of 12)
[Small Alligator Clip Test Lead (set of 12)](https://www.adafruit.com/product/1008)
Connect this to that without soldering using these handy mini alligator clip test leads. 15" cables with alligator clip on each end, color coded. You get 12 pieces in 6 colors. Strong and grippy, these always come in handy! We often use these in conjunction with a multimeter so we...
In Stock
[Buy Now](https://www.adafruit.com/product/1008)
[Related Guides to the Product](https://learn.adafruit.com/products/1008/guides)
### Sewable Snaps - 5mm Diameter - Card of 24
[Sewable Snaps - 5mm Diameter - Card of 24](https://www.adafruit.com/product/1126)
The small 5mm size of these tin-plated brass snaps means they fit perfectly on Flora's pads! Snaps make a great connector for wearables-- solder one side to the board and sew the other to your project with conductive thread! This card comes with 24 complete snaps (socket and stud...
In Stock
[Buy Now](https://www.adafruit.com/product/1126)
[Related Guides to the Product](https://learn.adafruit.com/products/1126/guides)
### FLORA - Wearable electronic platform: Arduino-compatible
[FLORA - Wearable electronic platform: Arduino-compatible](https://www.adafruit.com/product/659)
FLORA is Adafruit's fully-featured wearable electronics platform. It's a round, sewable, Arduino-compatible microcontroller designed to empower amazing wearables projects.FLORA comes with Adafruit's support, [tutorials and...](http://learn.adafruit.com/category/flora)
In Stock
[Buy Now](https://www.adafruit.com/product/659)
[Related Guides to the Product](https://learn.adafruit.com/products/659/guides)
## Related Guides
- [Capacitive Touch with Conductive Fabric & Flora](https://learn.adafruit.com/capacitive-touch-with-conductive-fabric-and-flora.md)
- [Fiber Optic Pixie Skirt](https://learn.adafruit.com/fiber-optic-pixie-princess-skirt.md)
- [Haptic Headband](https://learn.adafruit.com/haptic-headband.md)
- [EEG Costume Cap](https://learn.adafruit.com/eeg-costume-cap.md)
- [Zipper Switch](https://learn.adafruit.com/zipper-switch.md)
- [Adafruit Arduino IDE Setup](https://learn.adafruit.com/adafruit-arduino-ide-setup.md)
- [Sewable NeoPixels](https://learn.adafruit.com/flora-rgb-smart-pixels.md)
- [FLORA TV-B-Gone](https://learn.adafruit.com/flora-tv-b-gone.md)
- [Experimenting with NeverWet + Electronics](https://learn.adafruit.com/neverwet-electronics.md)
- [LED Stego Flex Spike Hoodie](https://learn.adafruit.com/led-stego-flex-spike-hoodie.md)
- [Getting Started with FLORA](https://learn.adafruit.com/getting-started-with-flora.md)
- [Sunscreen Reminder Hat](https://learn.adafruit.com/sunscreen-reminder-hat.md)
- [Mailbox Notification Service](https://learn.adafruit.com/mailbox-notification-service.md)
- [FLORA + FONA](https://learn.adafruit.com/flora-plus-fona.md)
- [Flora TSL2561 Lux Sensor](https://learn.adafruit.com/flora-lux-sensor.md)
---
# Source: https://learn.adafruit.com/li-ion-and-lipoly-batteries/proper-charging.md
# Li-Ion & LiPoly Batteries
## Proper Charging
Now that you know how best to use your lithium ion/polymer battery, we'll finish up by making sure you know how to charge the battery. We'll have a longer tutorial for our chargers at some point but we want to get people started with how to best use our chargers!
As we mentioned before, **you must use a proper lithium ion/polymer ** battery charger. The good news is that nearly all batteries you will encounter are going to be 4.2V. And you can use a 4.2V charger for both lithium ion and lithium ion polymer. If you ever encounter a 4.35V battery, you can always use a 4.2V charger: it'll charge it up to 4.2V which is perfectly safe.

We carry two chargers in our store (at this time). A USB charger and a USB/DC charger. The USB charger is meant for charging single cells from a USB port that can provide 500mA or so. The USB/DC charger is meant for charging batteries from a USB port **or** a DC power supply up to 12V. The latter is more flexible, but more expensive because of the added circuitry.
You'll note that both have battery ports on the bottom (Labeled Battery In and Out) and charging ports at the top (USB on the left and USB + DC on the right)
To connect the battery, simply plug it into the **BATTERY IN** slot.

If you want to use the battery while also having it connected to the charger (less plugging and unplugging that way) you can simply use the **BATTERY OUT** connecion on the right. The **IN ** and **OUT** ports are connected together on the circuit board so it acts as a _pass-through_
To charge, connect a power supply to the top of the board.

The **PWR** red LED on either board will light up to let you know its powered properly. While charging, an LED will also be lit. For the USB only charger, a green done LED will light when the battery is full. For the USB/DC charger, the charging LED will blink slowly (once every few seconds).
You can change the charge rate of each charger by soldering a resistor into slot **R4** (for the USB charger) or **RPROG** (the USB/DC charger).
**The max charge rate of the USB charger is about 1000 mA**. To acheive this charge rate, you can either solder a **2.0K** resistor on top of **R4** (default 2K) - this will make the total parallel restance 1.0K or you can remove **R4** by desoldering it or cutting the trace to it and solder a 1.0K resistor in its place.
**The max charge rate of the USB/DC charger is about 1200 mA**. To acheive this charge rate, you should solder a wire (short) on top of **RPROG** (default 4.7K). You can also change the rate to a different value by either soldering a resistor on top of **RPROG** (and calculating the parallel resistance) or removing the resistor and soldering a different one in its place. [See the schematic for what values result in what charge rates](http://www.adafruit.com/datasheets/mcp73861.png).
[For other values, use a parallel resistor calculator such as this one.](http://www.sengpielaudio.com/calculator-paralresist.htm "Link: http://www.sengpielaudio.com/calculator-paralresist.htm") Put the desired resistance in **Rtotal** and the current resistance on the board into **R1** and then solder **R2** on top.
Info:
- [Previous Page](https://learn.adafruit.com/li-ion-and-lipoly-batteries/multi-battery-packs.md)
- [Next Page](https://learn.adafruit.com/li-ion-and-lipoly-batteries/conclusion.md)
## Featured Products
### Adafruit Micro Lipo - USB LiIon/LiPoly charger
[Adafruit Micro Lipo - USB LiIon/LiPoly charger](https://www.adafruit.com/product/1304)
Oh so adorable, this is the tiniest little lipo charger, so handy you can keep it any project box! Its also easy to use. Simply plug in the gold plated contacts into any USB port and a 3.7V/4.2V lithium polymer or lithium ion rechargeable battery into the JST plug on the other end. There are...
In Stock
[Buy Now](https://www.adafruit.com/product/1304)
[Related Guides to the Product](https://learn.adafruit.com/products/1304/guides)
### USB LiIon/LiPoly charger
[USB LiIon/LiPoly charger](https://www.adafruit.com/product/259)
This is a Lithium Ion and Lithium Polymer battery charger based on the [MCP73833](http://www.microchip.com/wwwproducts/Devices.aspx?dDocName=en027785). It uses a USB mini-B for connection to any computer or 'USB wall adapter'. Charging is performed in three stages: first a...
In Stock
[Buy Now](https://www.adafruit.com/product/259)
[Related Guides to the Product](https://learn.adafruit.com/products/259/guides)
### USB/DC Lithium Polymer battery charger 5-12V
[USB/DC Lithium Polymer battery charger 5-12V](https://www.adafruit.com/product/280)
Charge your single-cell lithium ion/polymer battery any which way you like with this board. Have a USB connection? No problem, just plug into the miniUSB connector. Only have a wall adapter? Any standard 2.1mm DC adapter which puts out 5 to 12VDC will work fine. If both are plugged in, the...
No Longer Stocked
[Buy Now](https://www.adafruit.com/product/280)
[Related Guides to the Product](https://learn.adafruit.com/products/280/guides)
### Lithium Ion Battery Pack - 3.7V 6600mAh
[Lithium Ion Battery Pack - 3.7V 6600mAh](https://www.adafruit.com/product/353)
Need a massive battery for your project? This lithium-ion pack is made of 3 balanced 2200mAh cells for a total of 6600mA capacity! The cells are connected in parallel and spot-welded to a protection circuit that provides over-voltage, under-voltage, and over-current protection.
Each cell...
In Stock
[Buy Now](https://www.adafruit.com/product/353)
[Related Guides to the Product](https://learn.adafruit.com/products/353/guides)
### Lithium Ion Battery Pack - 3.7V 4400mAh
[Lithium Ion Battery Pack - 3.7V 4400mAh](https://www.adafruit.com/product/354)
Need a big battery for your project? This lithium-ion pack is made of 2 balanced 2200mAh cells for a total of 4400mA capacity! The cells are connected in parallel and spot-welded to a protection circuit that provides over-voltage, under-voltage, and over-current protection.
Each cell can...
In Stock
[Buy Now](https://www.adafruit.com/product/354)
[Related Guides to the Product](https://learn.adafruit.com/products/354/guides)
### Lithium Ion Polymer Battery - 3.7v 2500mAh
[Lithium Ion Polymer Battery - 3.7v 2500mAh](https://www.adafruit.com/product/328)
Lithium-ion polymer (also known as 'lipo' or 'lipoly') batteries are thin, light, and powerful. The output ranges from 4.2V when completely charged to 3.7V. This battery has a capacity of **2500mAh** for a total of about 10 Wh. If you need a smaller battery,
In Stock
[Buy Now](https://www.adafruit.com/product/328)
[Related Guides to the Product](https://learn.adafruit.com/products/328/guides)
### Lithium Ion Polymer Battery - 3.7v 1200mAh
[Lithium Ion Polymer Battery - 3.7v 1200mAh](https://www.adafruit.com/product/258)
Lithium-ion polymer (also known as 'lipo' or 'lipoly') batteries are thin, light, and powerful. The output ranges from 4.2V when completely charged to 3.7V. This battery has a capacity of 1200mAh for a total of about 4.5 Wh. If you need a larger battery,
In Stock
[Buy Now](https://www.adafruit.com/product/258)
[Related Guides to the Product](https://learn.adafruit.com/products/258/guides)
### Lithium Ion Polymer Battery - 3.7v 500mAh
[Lithium Ion Polymer Battery - 3.7v 500mAh](https://www.adafruit.com/product/1578)
Lithium-ion polymer (also known as 'lipo' or 'lipoly') batteries are thin, light, and powerful. The output ranges from 4.2V when completely charged to 3.7V. This battery has a capacity of 500mAh for a total of about 1.9 Wh. If you need a larger (or smaller!) battery,
In Stock
[Buy Now](https://www.adafruit.com/product/1578)
[Related Guides to the Product](https://learn.adafruit.com/products/1578/guides)
## Related Guides
- [Sound Activated Shark Mask](https://learn.adafruit.com/sound-activated-shark-mask.md)
- [SNES EZ Key Bluefruit Game Pad](https://learn.adafruit.com/snes-ez-key-bluefruit-game-pad.md)
- [Color-sensor Driven NeoPixel Dress](https://learn.adafruit.com/color-sensor-driven-neopixel-dress.md)
- [Adafruit MicroLipo and MiniLipo Battery Chargers](https://learn.adafruit.com/adafruit-microlipo-and-minilipo-battery-chargers.md)
- [Cartoon Network and Make Code - Rose Quartz Shield Umbrella](https://learn.adafruit.com/cartoon-network-and-make-code-rose-quartz-shield-umbrella.md)
- [Ursula's Seashell Necklace](https://learn.adafruit.com/ursulas-seashell-necklace.md)
- [Wireless Control Button for WLED Projects](https://learn.adafruit.com/wireless-control-button-for-wled-projects.md)
- [Bunny Ears with MakeCode](https://learn.adafruit.com/bunny-ears-with-makecode.md)
- [VU Meter Baseball Hat](https://learn.adafruit.com/vu-meter-baseball-hat.md)
- [Glowing Fascinator Hat with Gemma M0 and MakeCode](https://learn.adafruit.com/glowing-fascinator-hat-gemma-m0-makecode.md)
- [LED Masquerade Masks](https://learn.adafruit.com/led-masquerade-masks.md)
- [Han Solo Blaster Cosplay](https://learn.adafruit.com/han-solo-blaster-cosplay.md)
- [Convert your Model M Keyboard to Bluetooth with Bluefruit EZ-Key HID](https://learn.adafruit.com/convert-your-model-m-keyboard-to-bluetooth-with-bluefruit-ez-key-hid.md)
- [Chameleon Scarf](https://learn.adafruit.com/chameleon-scarf.md)
- [Kaleidoscope Eyes (Trinket-Powered NeoPixel LED Ring Goggles)](https://learn.adafruit.com/kaleidoscope-eyes-neopixel-led-goggles-trinket-gemma.md)
---
# Source: https://learn.adafruit.com/li-ion-and-lipoly-batteries/protection-circuitry.md
# Li-Ion & LiPoly Batteries
## Protection Circuitry
Lithium ion/polymer batteries are extremely power dense. This makes them great for reducing size and weight of projects. However, they are not 'safe' batteries and require extra care. Charging or using the batteries incorrectly can cause explosion or fire (as shown by this and many other youtube videos).
http://www.youtube.com/watch?v=YCWdnjLqVWw&feature=player_embedded
There are five main things to watch for when charging and using batteries:
- Do not charge them **above** their maximum safe voltage (say 4.2V) - usually taken care of by any on-cell protection circuit
- Do not discharge them **below** their minimum safe voltage (say 3.0V) - usually taken care of by any on-cell protection circuit
- Do not **draw more current** than the battery can provide (say about 1-2 **C** ) - usually taken care of by any on-cell protection circuit
- Do not **charge them with more current** than the battery can take (say about 1 **C** ) - usually taken care of by any on-cell protection circuit but also set with the charger by adjusting the charge rate
- Do not charge the batteries **above or below** certain temperatures (usually about 0-50 degrees C) - sometimes handled by the charger, but often not an issue as long as the charge rate is reasonable.
For specifics on each battery you must look at the datasheet to know what the safe voltages, currents and temperatures are - they can vary from cell to cell.
For the first 3 items, a circuit board attached to the battery can monitor the battery voltage and the current going out. These are often referred to simply as **protection circuits**. They are very common on standard batteries but **you must check the datasheet** **or product image** to verify that a protection circuit is attached
On the batteries we sell, the protection circuit is soldered onto the battery and then taped into the little cavity at the top of the battery. This is very common for lipoly cells.

If you don't see any taped circuit board, the cell may be 'raw' - these raw cells **are not** protected!
Danger:
- [Previous Page](https://learn.adafruit.com/li-ion-and-lipoly-batteries/voltages.md)
- [Next Page](https://learn.adafruit.com/li-ion-and-lipoly-batteries/rc-type-batteries.md)
## Featured Products
### Adafruit Micro Lipo - USB LiIon/LiPoly charger
[Adafruit Micro Lipo - USB LiIon/LiPoly charger](https://www.adafruit.com/product/1304)
Oh so adorable, this is the tiniest little lipo charger, so handy you can keep it any project box! Its also easy to use. Simply plug in the gold plated contacts into any USB port and a 3.7V/4.2V lithium polymer or lithium ion rechargeable battery into the JST plug on the other end. There are...
In Stock
[Buy Now](https://www.adafruit.com/product/1304)
[Related Guides to the Product](https://learn.adafruit.com/products/1304/guides)
### USB LiIon/LiPoly charger
[USB LiIon/LiPoly charger](https://www.adafruit.com/product/259)
This is a Lithium Ion and Lithium Polymer battery charger based on the [MCP73833](http://www.microchip.com/wwwproducts/Devices.aspx?dDocName=en027785). It uses a USB mini-B for connection to any computer or 'USB wall adapter'. Charging is performed in three stages: first a...
In Stock
[Buy Now](https://www.adafruit.com/product/259)
[Related Guides to the Product](https://learn.adafruit.com/products/259/guides)
### USB/DC Lithium Polymer battery charger 5-12V
[USB/DC Lithium Polymer battery charger 5-12V](https://www.adafruit.com/product/280)
Charge your single-cell lithium ion/polymer battery any which way you like with this board. Have a USB connection? No problem, just plug into the miniUSB connector. Only have a wall adapter? Any standard 2.1mm DC adapter which puts out 5 to 12VDC will work fine. If both are plugged in, the...
No Longer Stocked
[Buy Now](https://www.adafruit.com/product/280)
[Related Guides to the Product](https://learn.adafruit.com/products/280/guides)
### Lithium Ion Battery Pack - 3.7V 6600mAh
[Lithium Ion Battery Pack - 3.7V 6600mAh](https://www.adafruit.com/product/353)
Need a massive battery for your project? This lithium-ion pack is made of 3 balanced 2200mAh cells for a total of 6600mA capacity! The cells are connected in parallel and spot-welded to a protection circuit that provides over-voltage, under-voltage, and over-current protection.
Each cell...
In Stock
[Buy Now](https://www.adafruit.com/product/353)
[Related Guides to the Product](https://learn.adafruit.com/products/353/guides)
### Lithium Ion Battery Pack - 3.7V 4400mAh
[Lithium Ion Battery Pack - 3.7V 4400mAh](https://www.adafruit.com/product/354)
Need a big battery for your project? This lithium-ion pack is made of 2 balanced 2200mAh cells for a total of 4400mA capacity! The cells are connected in parallel and spot-welded to a protection circuit that provides over-voltage, under-voltage, and over-current protection.
Each cell can...
In Stock
[Buy Now](https://www.adafruit.com/product/354)
[Related Guides to the Product](https://learn.adafruit.com/products/354/guides)
### Lithium Ion Polymer Battery - 3.7v 2500mAh
[Lithium Ion Polymer Battery - 3.7v 2500mAh](https://www.adafruit.com/product/328)
Lithium-ion polymer (also known as 'lipo' or 'lipoly') batteries are thin, light, and powerful. The output ranges from 4.2V when completely charged to 3.7V. This battery has a capacity of **2500mAh** for a total of about 10 Wh. If you need a smaller battery,
In Stock
[Buy Now](https://www.adafruit.com/product/328)
[Related Guides to the Product](https://learn.adafruit.com/products/328/guides)
### Lithium Ion Polymer Battery - 3.7v 1200mAh
[Lithium Ion Polymer Battery - 3.7v 1200mAh](https://www.adafruit.com/product/258)
Lithium-ion polymer (also known as 'lipo' or 'lipoly') batteries are thin, light, and powerful. The output ranges from 4.2V when completely charged to 3.7V. This battery has a capacity of 1200mAh for a total of about 4.5 Wh. If you need a larger battery,
In Stock
[Buy Now](https://www.adafruit.com/product/258)
[Related Guides to the Product](https://learn.adafruit.com/products/258/guides)
### Lithium Ion Polymer Battery - 3.7v 500mAh
[Lithium Ion Polymer Battery - 3.7v 500mAh](https://www.adafruit.com/product/1578)
Lithium-ion polymer (also known as 'lipo' or 'lipoly') batteries are thin, light, and powerful. The output ranges from 4.2V when completely charged to 3.7V. This battery has a capacity of 500mAh for a total of about 1.9 Wh. If you need a larger (or smaller!) battery,
In Stock
[Buy Now](https://www.adafruit.com/product/1578)
[Related Guides to the Product](https://learn.adafruit.com/products/1578/guides)
## Related Guides
- [Sound Activated Shark Mask](https://learn.adafruit.com/sound-activated-shark-mask.md)
- [SNES EZ Key Bluefruit Game Pad](https://learn.adafruit.com/snes-ez-key-bluefruit-game-pad.md)
- [Color-sensor Driven NeoPixel Dress](https://learn.adafruit.com/color-sensor-driven-neopixel-dress.md)
- [Adafruit MicroLipo and MiniLipo Battery Chargers](https://learn.adafruit.com/adafruit-microlipo-and-minilipo-battery-chargers.md)
- [Cartoon Network and Make Code - Rose Quartz Shield Umbrella](https://learn.adafruit.com/cartoon-network-and-make-code-rose-quartz-shield-umbrella.md)
- [Ursula's Seashell Necklace](https://learn.adafruit.com/ursulas-seashell-necklace.md)
- [Wireless Control Button for WLED Projects](https://learn.adafruit.com/wireless-control-button-for-wled-projects.md)
- [Bunny Ears with MakeCode](https://learn.adafruit.com/bunny-ears-with-makecode.md)
- [VU Meter Baseball Hat](https://learn.adafruit.com/vu-meter-baseball-hat.md)
- [Glowing Fascinator Hat with Gemma M0 and MakeCode](https://learn.adafruit.com/glowing-fascinator-hat-gemma-m0-makecode.md)
- [LED Masquerade Masks](https://learn.adafruit.com/led-masquerade-masks.md)
- [Han Solo Blaster Cosplay](https://learn.adafruit.com/han-solo-blaster-cosplay.md)
- [Convert your Model M Keyboard to Bluetooth with Bluefruit EZ-Key HID](https://learn.adafruit.com/convert-your-model-m-keyboard-to-bluetooth-with-bluefruit-ez-key-hid.md)
- [Chameleon Scarf](https://learn.adafruit.com/chameleon-scarf.md)
- [Kaleidoscope Eyes (Trinket-Powered NeoPixel LED Ring Goggles)](https://learn.adafruit.com/kaleidoscope-eyes-neopixel-led-goggles-trinket-gemma.md)
---
# Source: https://learn.adafruit.com/adafruit-arduino-lesson-10-making-sounds/pseudo-theramin.md
# Arduino Lesson 10. Making Sounds
## Pseudo-Theremin
The Theramin ([http://en.wikipedia.org/wiki/Theremin](http://en.wikipedia.org/wiki/Theremin)) is a musical instrument that makes spooky synthesized sounds as you wave your hands in front of it. It was used in the theme music for the original Star Trek series.
We are going to make a similar instrument, albeit a lot less musical, but it will change the pitch of the note as you wave your hand in front of it.
We can leave the piezo sounder where it is, attached directly to the Arduino, but we will need the breadboard for the photocell and resistor that are going to control the pitch.

- [Previous Page](https://learn.adafruit.com/adafruit-arduino-lesson-10-making-sounds/sound.md)
- [Next Page](https://learn.adafruit.com/adafruit-arduino-lesson-10-making-sounds/arduino-code.md)
## Featured Products
### Piezo Buzzer
[Piezo Buzzer](https://www.adafruit.com/product/160)
Piezo buzzers are used for making beeps, tones and alerts. This one is petite but loud! Drive it with 3-30V peak-to-peak square wave. To use, connect one pin to ground (either one) and the other pin to a square wave out from a timer or microcontroller. For the loudest tones, stay around 4 KHz,...
In Stock
[Buy Now](https://www.adafruit.com/product/160)
[Related Guides to the Product](https://learn.adafruit.com/products/160/guides)
### Photo cell (CdS photoresistor)
[Photo cell (CdS photoresistor)](https://www.adafruit.com/product/161)
CdS cells are little light sensors. As the squiggly face is exposed to more light, the resistance goes down. When it's light, the resistance is about ~1KΩ, when dark it goes up to ~10KΩ.
To use, connect one side of the photocell (either one, it's symmetric) to power...
In Stock
[Buy Now](https://www.adafruit.com/product/161)
[Related Guides to the Product](https://learn.adafruit.com/products/161/guides)
### Premium Male/Male Jumper Wires - 40 x 6" (150mm)
[Premium Male/Male Jumper Wires - 40 x 6" (150mm)](https://www.adafruit.com/product/758)
Handy for making wire harnesses or jumpering between headers on PCB's. These premium jumper wires are 6" (150mm) long and come in a 'strip' of 40 (4 pieces of each of ten rainbow colors). They have 0.1" male header contacts on either end and fit cleanly next to each other...
In Stock
[Buy Now](https://www.adafruit.com/product/758)
[Related Guides to the Product](https://learn.adafruit.com/products/758/guides)
### Half Sized Premium Breadboard - 400 Tie Points
[Half Sized Premium Breadboard - 400 Tie Points](https://www.adafruit.com/product/64)
This is a cute, half-size breadboard with 400 tie points, good for small projects. It's 3.25" x 2.2" / 8.3cm x 5.5cm with a standard double-strip in the middle and two power rails on both sides. You can pull the power rails off easily to make the breadboard as...
In Stock
[Buy Now](https://www.adafruit.com/product/64)
[Related Guides to the Product](https://learn.adafruit.com/products/64/guides)
### Adafruit METRO 328 Fully Assembled - Arduino IDE compatible
[Adafruit METRO 328 Fully Assembled - Arduino IDE compatible](https://www.adafruit.com/product/50)
We sure love the ATmega328 here at Adafruit, and we use them _a lot_ for our own projects. The processor has plenty of GPIO, Analog inputs, hardware UART SPI and I2C, timers and PWM galore - just enough for most simple projects. When we need to go small, we use a
Out of Stock
[Buy Now](https://www.adafruit.com/product/50)
[Related Guides to the Product](https://learn.adafruit.com/products/50/guides)
## Related Guides
- [Multi-tasking the Arduino - Part 2](https://learn.adafruit.com/multi-tasking-the-arduino-part-2.md)
- [Adafruit PCA9685 16-Channel Servo Driver](https://learn.adafruit.com/16-channel-pwm-servo-driver.md)
- [Adafruit CC3000 WiFi and Xively](https://learn.adafruit.com/adafruit-cc3000-wifi-and-xively.md)
- [Trellis 3D Printed Enclosure](https://learn.adafruit.com/trellis-3d-printed-enclosure.md)
- [Remote controlled door lock using a fingerprint sensor & Adafruit IO](https://learn.adafruit.com/remote-controlled-door-lock-using-a-fingerprint-sensor-and-adafruit-io.md)
- [Smart Measuring Cup](https://learn.adafruit.com/smart-measuring-cup.md)
- [0.96" mini Color OLED](https://learn.adafruit.com/096-mini-color-oled.md)
- [Adafruit Analog Accelerometer Breakouts](https://learn.adafruit.com/adafruit-analog-accelerometer-breakouts.md)
- [Circuit Playground: D is for Diode](https://learn.adafruit.com/circuit-playground-d-is-for-diode.md)
- [TMP36 Temperature Sensor](https://learn.adafruit.com/tmp36-temperature-sensor.md)
- [RGB LED Matrix Basics](https://learn.adafruit.com/32x16-32x32-rgb-led-matrix.md)
- [Automatic Monitor Color Temperature Adjustment](https://learn.adafruit.com/automatic-monitor-color-temperature-adjustment.md)
- [Line Following Zumo Robot Using Simulink](https://learn.adafruit.com/line-following-zumo-robot-programmed-with-simulink.md)
- [Wireless Game Show Poppers for the Classroom!](https://learn.adafruit.com/wireless-game-show-poppers.md)
- [Arduino Lesson 4. Eight LEDs and a Shift Register](https://learn.adafruit.com/adafruit-arduino-lesson-4-eight-leds.md)
---
# Source: https://learn.adafruit.com/adafruit-arduino-lesson-6-digital-inputs/push-switches.md
# Arduino Lesson 6. Digital Inputs
## Push Switches
Switches are really simple components. When you press a button or flip a lever, they connect two contacts together so that electricity can flow through them.
The little tactile switches that are used in this lesson have four connections, which can be a little confusing.

Actually, there are only really two electrical connections, as inside the switch package pins B and C are connected together, as are A and D.
- [Previous Page](https://learn.adafruit.com/adafruit-arduino-lesson-6-digital-inputs/arduino-code.md)
- [Next Page](https://learn.adafruit.com/adafruit-arduino-lesson-6-digital-inputs/other-things-to-do.md)
## Featured Products
### Tactile Button switch (6mm) x 20 pack
[Tactile Button switch (6mm) x 20 pack](https://www.adafruit.com/product/367)
Little clicky switches are standard input "buttons" on electronic projects. These work best in a PCB but [can be used on a solderless breadboard as shown in this tutorial](https://learn.adafruit.com/adafruit-arduino-lesson-6-digital-inputs?view=all). The pins are normally...
In Stock
[Buy Now](https://www.adafruit.com/product/367)
[Related Guides to the Product](https://learn.adafruit.com/products/367/guides)
### USB Cable - Standard A-B
[USB Cable - Standard A-B](https://www.adafruit.com/product/62)
This here is your standard A-B USB cable, for USB 1.1 or 2.0. Perfect for connecting a PC to your Arduino, USBtinyISP (among other things).
3 feet / 1 meter long
Color may vary!
In Stock
[Buy Now](https://www.adafruit.com/product/62)
[Related Guides to the Product](https://learn.adafruit.com/products/62/guides)
### Diffused Red 5mm LED (25 pack)
[Diffused Red 5mm LED (25 pack)](https://www.adafruit.com/product/299)
Need some indicators? We are big fans of these diffused red LEDs, in fact we use them exclusively in our kits. They are fairly bright so they can be seen in daytime, and from any angle. They go easily into a breadboard and will add that extra zing to your project.
- Pack of 25...
In Stock
[Buy Now](https://www.adafruit.com/product/299)
[Related Guides to the Product](https://learn.adafruit.com/products/299/guides)
### Premium Male/Male Jumper Wires - 40 x 6" (150mm)
[Premium Male/Male Jumper Wires - 40 x 6" (150mm)](https://www.adafruit.com/product/758)
Handy for making wire harnesses or jumpering between headers on PCB's. These premium jumper wires are 6" (150mm) long and come in a 'strip' of 40 (4 pieces of each of ten rainbow colors). They have 0.1" male header contacts on either end and fit cleanly next to each other...
In Stock
[Buy Now](https://www.adafruit.com/product/758)
[Related Guides to the Product](https://learn.adafruit.com/products/758/guides)
### Half Sized Premium Breadboard - 400 Tie Points
[Half Sized Premium Breadboard - 400 Tie Points](https://www.adafruit.com/product/64)
This is a cute, half-size breadboard with 400 tie points, good for small projects. It's 3.25" x 2.2" / 8.3cm x 5.5cm with a standard double-strip in the middle and two power rails on both sides. You can pull the power rails off easily to make the breadboard as...
In Stock
[Buy Now](https://www.adafruit.com/product/64)
[Related Guides to the Product](https://learn.adafruit.com/products/64/guides)
### Adafruit METRO 328 Fully Assembled - Arduino IDE compatible
[Adafruit METRO 328 Fully Assembled - Arduino IDE compatible](https://www.adafruit.com/product/50)
We sure love the ATmega328 here at Adafruit, and we use them _a lot_ for our own projects. The processor has plenty of GPIO, Analog inputs, hardware UART SPI and I2C, timers and PWM galore - just enough for most simple projects. When we need to go small, we use a
Out of Stock
[Buy Now](https://www.adafruit.com/product/50)
[Related Guides to the Product](https://learn.adafruit.com/products/50/guides)
## Related Guides
- [Ladyada's Learn Arduino - Lesson #0](https://learn.adafruit.com/ladyadas-learn-arduino-lesson-number-0.md)
- [0.96" mini Color OLED](https://learn.adafruit.com/096-mini-color-oled.md)
- [Bluefruit LE Connect for iOS and Android](https://learn.adafruit.com/bluefruit-le-connect.md)
- [TMP36 Temperature Sensor](https://learn.adafruit.com/tmp36-temperature-sensor.md)
- [Circuit Playground: D is for Diode](https://learn.adafruit.com/circuit-playground-d-is-for-diode.md)
- [Babel Fish](https://learn.adafruit.com/babel-fish.md)
- [Adafruit 1.27" and 1.5" Color OLED Breakout Board](https://learn.adafruit.com/adafruit-1-5-color-oled-breakout-board.md)
- [Adafruit VS1053 MP3/AAC/Ogg/MIDI/WAV Codec Breakout Tutorial](https://learn.adafruit.com/adafruit-vs1053-mp3-aac-ogg-midi-wav-play-and-record-codec-tutorial.md)
- [Electronic Demon Costume](https://learn.adafruit.com/electronic-demon-costume.md)
- [Introducing Adafruit Trellis ](https://learn.adafruit.com/adafruit-trellis-diy-open-source-led-keypad.md)
- [Adafruit Analog Accelerometer Breakouts](https://learn.adafruit.com/adafruit-analog-accelerometer-breakouts.md)
- [8BitBox](https://learn.adafruit.com/8bitbox.md)
- [DIY 8x2 LCD Shield](https://learn.adafruit.com/diy-8x2-lcd-shield.md)
- [Skill Badge Requirements: Microcontrollers](https://learn.adafruit.com/skill-badge-requirements-microcontrollers.md)
- [Arduino Ethernet + SD Card](https://learn.adafruit.com/arduino-ethernet-sd-card.md)
---
# Source: https://learn.adafruit.com/flora-tv-b-gone/pushbutton.md
# FLORA TV-B-Gone
## Pushbutton
Use a colorful pushbutton to activate your TV-B-Gone! This yellow switch makes a nice center in a flower motif brooch. Use pliers to flatten the legs of the button.

The base of the button should sit flat as shown.

Next we'll connect some wire leads to the pushbutton. Use wire strippers to remove the insulation from the end of some hookup wire. Apply a small amount of solder to this wire end-- this is called "tinning" the wire.

Also tin one of the legs on the pushbutton.
Since both the wire and pushbutton leg now already have solder on them, you can hold them together and reheat the solder. Apply the soldering iron until solder flows between the two, then remove the iron and allow the joint to cool.

Affix another wire (using the method above) to a diagonally opposite leg on the pushbutton.

Clip off the unused legs from the pushbutton.


Congrats, your pushbutton is prepped! Now it's time to attach it to the Flora.
Place the button in the center of the back of the Flora, with the wire leads pointing straight out. Trim the wire leads so that they only stick out past the edge of the Flora board by about 1/4 inch.


Use wire strippers to remove the insulation from the ends of the button leads. Now you'll be able to connect the button two opposite holes on the Flora.

Insert one button wire into the hole D9 on the Flora, and the other button wire into the hole marked GND. There are multiple grounds on Flora, so pick the one that is most opposite D9, so that the two wires can better hold the pushbutton in place.


You can solder these wires from either side of the board.
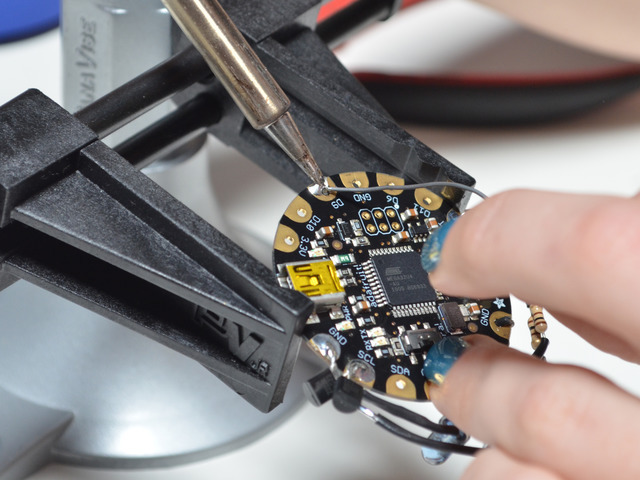

Congrats, you're done with the wiring! Next we'll program and power it up!
- [Previous Page](https://learn.adafruit.com/flora-tv-b-gone/leds.md)
- [Next Page](https://learn.adafruit.com/flora-tv-b-gone/program-it.md)
## Featured Products
### FLORA - Wearable electronic platform: Arduino-compatible
[FLORA - Wearable electronic platform: Arduino-compatible](https://www.adafruit.com/product/659)
FLORA is Adafruit's fully-featured wearable electronics platform. It's a round, sewable, Arduino-compatible microcontroller designed to empower amazing wearables projects.FLORA comes with Adafruit's support, [tutorials and...](http://learn.adafruit.com/category/flora)
In Stock
[Buy Now](https://www.adafruit.com/product/659)
[Related Guides to the Product](https://learn.adafruit.com/products/659/guides)
### Super-bright 5mm IR LED
[Super-bright 5mm IR LED](https://www.adafruit.com/product/387)
Infrared LEDs are used for remote controls (they're the little LED in the part you point at your TV) and 'night-vision' cameras, and these little blue guys are high powered ones! They are 940nm wavelength, which is what nearly all devices listen to. They're 20 degree beamwidth,...
In Stock
[Buy Now](https://www.adafruit.com/product/387)
[Related Guides to the Product](https://learn.adafruit.com/products/387/guides)
### Colorful Round Tactile Button Switch Assortment - 15 pack
[Colorful Round Tactile Button Switch Assortment - 15 pack](https://www.adafruit.com/product/1009)
Little clicky switches are standard input "buttons" on electronic projects. These work best in a PCB but [can be used on a solderless breadboard as shown in this tutorial](http://www.ladyada.net/learn/arduino/lesson5.html). The pins are normally open (disconnected) and...
In Stock
[Buy Now](https://www.adafruit.com/product/1009)
[Related Guides to the Product](https://learn.adafruit.com/products/1009/guides)
### NPN Bipolar Transistors (PN2222) - 10 pack
[NPN Bipolar Transistors (PN2222) - 10 pack](https://www.adafruit.com/product/756)
Transistors are powerful little electronic switches, and we really like these NPN transistors whenever we need to control medium-power electronics such as small motors, solenoids, or IR LEDs. We find them so handy, they come in a pack of 10!
Each transistor is a general-purpose...
In Stock
[Buy Now](https://www.adafruit.com/product/756)
[Related Guides to the Product](https://learn.adafruit.com/products/756/guides)
### Heat Shrink Pack
[Heat Shrink Pack](https://www.adafruit.com/product/344)
Heat shrink is the duct tape of electronics, it keeps your stuff all safe and kept together. Especially when wiring and soldering, use heat shrink to add mechanical strength to cables. We use this stuff all the time and having a zip-lock bag of all the possible sizes is super...
In Stock
[Buy Now](https://www.adafruit.com/product/344)
[Related Guides to the Product](https://learn.adafruit.com/products/344/guides)
### 3 x AAA Battery Holder with On/Off Switch and 2-Pin JST
[3 x AAA Battery Holder with On/Off Switch and 2-Pin JST](https://www.adafruit.com/product/727)
This battery holder connects 3 AAA batteries together in series for powering all kinds of projects. We spec'd these out because the box is slim, and 3 AAA's add up to about 3.3-4.5V, a very similar range to Lithium Ion/polymer (Li-Ion) batteries and have an on-off switch. That makes...
In Stock
[Buy Now](https://www.adafruit.com/product/727)
[Related Guides to the Product](https://learn.adafruit.com/products/727/guides)
### Solid-Core Wire Spool - 25ft - 22AWG - Black
[Solid-Core Wire Spool - 25ft - 22AWG - Black](https://www.adafruit.com/product/290)
Perfect for bread-boarding, free wiring, etc. This spool of solid-core wire is easy to solder to. When bent it keeps its shape pretty well. We like to have a few spools of this stuff around. We suggest picking up wire strippers to match. Wire gauge is 22 AWG which we've found is the best...
In Stock
[Buy Now](https://www.adafruit.com/product/290)
[Related Guides to the Product](https://learn.adafruit.com/products/290/guides)
### Getting Started with Adafruit FLORA
[Getting Started with Adafruit FLORA](https://www.adafruit.com/product/1839)
**Making Wearables with an Arduino-Compatible Electronics Platform**
This book introduces readers to building wearable electronics projects using Adafruit's tiny FLORA board: at 4.4 grams, and only 1.75 inches in diameter, and featuring Arduino compatibility, it's the...
No Longer Stocked
[Buy Now](https://www.adafruit.com/product/1839)
[Related Guides to the Product](https://learn.adafruit.com/products/1839/guides)
## Related Guides
- [Citi Bike Helmet](https://learn.adafruit.com/citi-bike-helmet.md)
- [Datalogging Hat with FLORA BLE](https://learn.adafruit.com/datalogging-hat-with-flora-ble.md)
- [Ursula's Seashell Necklace](https://learn.adafruit.com/ursulas-seashell-necklace.md)
- [LED Stego Flex Spike Hoodie](https://learn.adafruit.com/led-stego-flex-spike-hoodie.md)
- [Flora MIDI Drum Glove](https://learn.adafruit.com/midi-drum-glove.md)
- [FLORA NeoGeo Watch](https://learn.adafruit.com/flora-geo-watch.md)
- [Light-Up Angler Fish Embroidery](https://learn.adafruit.com/light-up-angler-fish-embroidery.md)
- [Flora Snaps](https://learn.adafruit.com/flora-snaps.md)
- [Glowing WhoVille Hat](https://learn.adafruit.com/glowing-whoville-hat.md)
- [Fiber Optic Pixie Skirt](https://learn.adafruit.com/fiber-optic-pixie-princess-skirt.md)
- [Pac Man Pixel Suspenders](https://learn.adafruit.com/pac-man-pixel-suspenders.md)
- [Washing Wearable Electronics](https://learn.adafruit.com/washing-wearable-electronics.md)
- [Flora-Powered TARDIS Costume (for Dogs!)](https://learn.adafruit.com/wearable-flora-powered-tardis-costume-dogs.md)
- [Firewalker LED Sneakers](https://learn.adafruit.com/firewalker-led-sneakers.md)
- [FLORA and GEMMA ICSP](https://learn.adafruit.com/flora-and-gemma-isp.md)
---
# Source: https://learn.adafruit.com/36mm-led-pixels/pwiring.md
# 36mm LED Pixels
## Wiring
The “magic” of these pixels is that they're digitally controlled…even though there are only two control lines, you can have as many pixels as you’d like in a single long strand, yet each remains independently controllable.
Though it looks like the 4-conductor ribbon cable is continuous, _it isn't!_ The pixels have a distinct “in” and “out” side. Data from the microcontroller arrives on the input side, where it’s received by the driver chip. The output side then connects to the input of the next pixel, all the way down the line.
When connecting these pixels to a microcontroller, make sure you're connecting to the strand's **input** pins! On these large pixels, it's easy to spot: examine the circuit board, looking for the "IN" label and an arrow indicating the direction of data flow. If connecting multiple strands together, make sure the output of one strand goes to the input of the next.
The pixel strands include plugs for joining multiple strands, plus two wires for connecting power:

Wiring is pretty easy since there are only 4 wires. The only important thing is that you should not try to power the LED strand from the Arduino's 5V line — these LEDs require a dedicated 12V source separate from the microcontroller.
Use this diagram with the red wire going to +12V from the power supply, green (serial clock) to Arduino digital pin 3, yellow (serial data) to digital pin 2, and black to both the ground connection on the power supply and any available GND pin on the Arduino.

Our Arduino library can use any two pins, but the examples are written to use pins 2 and 3 as above.
- [Previous Page](https://learn.adafruit.com/36mm-led-pixels/project-ideas.md)
- [Next Page](https://learn.adafruit.com/36mm-led-pixels/powering.md)
## Featured Products
### Adafruit METRO 328 Fully Assembled - Arduino IDE compatible
[Adafruit METRO 328 Fully Assembled - Arduino IDE compatible](https://www.adafruit.com/product/50)
We sure love the ATmega328 here at Adafruit, and we use them _a lot_ for our own projects. The processor has plenty of GPIO, Analog inputs, hardware UART SPI and I2C, timers and PWM galore - just enough for most simple projects. When we need to go small, we use a
Out of Stock
[Buy Now](https://www.adafruit.com/product/50)
[Related Guides to the Product](https://learn.adafruit.com/products/50/guides)
### Female DC Power adapter - 2.1mm jack to screw terminal block
[Female DC Power adapter - 2.1mm jack to screw terminal block](https://www.adafruit.com/product/368)
If you need to connect a DC power wall wart to a board that doesn't have a DC jack - this adapter will come in very handy! There is a 2.1mm DC jack on one end, and a screw terminal block on the other. The terminals are labeled with positive/negative assuming a positive-tip configuration...
In Stock
[Buy Now](https://www.adafruit.com/product/368)
[Related Guides to the Product](https://learn.adafruit.com/products/368/guides)
### 12V 5A switching power supply
[12V 5A switching power supply](https://www.adafruit.com/product/352)
This is a beefy switching supply, for when you need a lot of power! It can supply 12V DC up to 5 Amps, running from 110V or 220V power (the plug it comes with is for US/Canada/Japan but you can use any plug adapter for your country, or just replace the cable with a standard 'figure-8'...
In Stock
[Buy Now](https://www.adafruit.com/product/352)
[Related Guides to the Product](https://learn.adafruit.com/products/352/guides)
### 36mm Square 12V Digital RGB LED Pixels (Strand of 20)
[36mm Square 12V Digital RGB LED Pixels (Strand of 20)](https://www.adafruit.com/product/683)
RGB Pixels are digitally-controllable lights you can set to any color, or animate. Each metal 'pixel square' contains 4 RGB LEDs and a controller chip soldered to a PCB. The pixel is then 'flooded' with epoxy to make it water resistant, however we cannot say 100% waterproof you...
No Longer Stocked
[Buy Now](https://www.adafruit.com/product/683)
[Related Guides to the Product](https://learn.adafruit.com/products/683/guides)
## Related Guides
- [Adafruit Data Logger Shield](https://learn.adafruit.com/adafruit-data-logger-shield.md)
- [Track Your Treats: Halloween Candy GPS Tracker](https://learn.adafruit.com/track-your-treats-halloween-candy-gps-tracker.md)
- [Adafruit 1.27" and 1.5" Color OLED Breakout Board](https://learn.adafruit.com/adafruit-1-5-color-oled-breakout-board.md)
- [Adafruit Proto Shield for Arduino](https://learn.adafruit.com/adafruit-proto-shield-arduino.md)
- [Adafruit 16-channel PWM/Servo Shield](https://learn.adafruit.com/adafruit-16-channel-pwm-slash-servo-shield.md)
- [Light Meter](https://learn.adafruit.com/light-meter.md)
- [Cloud Thermometer](https://learn.adafruit.com/cloud-thermometer.md)
- [Character LCDs](https://learn.adafruit.com/character-lcds.md)
- [Ladyada's Learn Arduino - Lesson #0](https://learn.adafruit.com/ladyadas-learn-arduino-lesson-number-0.md)
- [Program an AVR or Arduino Using Raspberry Pi GPIO](https://learn.adafruit.com/program-an-avr-or-arduino-using-raspberry-pi-gpio-pins.md)
- [Arduino Lesson 17. Email Sending Movement Detector](https://learn.adafruit.com/arduino-lesson-17-email-sending-movement-detector.md)
- [Arduino Prototyping Mounting Plate](https://learn.adafruit.com/arduino-prototyping-mounting-plate.md)
- [Analog Feedback Servos](https://learn.adafruit.com/analog-feedback-servos.md)
- [All About Arduino Libraries](https://learn.adafruit.com/adafruit-all-about-arduino-libraries-install-use.md)
- [Trainable Robotic Arm](https://learn.adafruit.com/trainable-robotic-arm.md)
---
# Source: https://learn.adafruit.com/pi-video-output-using-pygame/pygame-drawing-functions.md
# Pi Video Output Using pygame
## Pygame Drawing Functions
Pygame includes a fairly rich collection of drawing objects and functions, making it easy to draw basic shapes, render text, display images, etc. The best way to learn the API is to start exploring it, look at examples on the web, and [read the documentation](http://www.pygame.org/docs/ "Link: http://www.pygame.org/docs/"), but the following sets of functions are probably the most useful if you're just getting started:
- [pygame.draw](http://www.pygame.org/docs/ref/draw.html "Link: http://www.pygame.org/docs/ref/draw.html") (basic drawing primitives)
- [pygame.font](http://www.pygame.org/docs/ref/font.html "Link: http://www.pygame.org/docs/ref/font.html") (text rendering)
- [pygame.image](http://www.pygame.org/docs/ref/image.html) (load and display .gifs, .jpgs, .pngs, etc.)
# Drawing a Graticule
As an example, we'll use some basic drawing primitives to render something resembling a graticule on an oscilloscope. Add the following function to your pyscope class (with proper indentation to align with the rest of the class):```
def drawGraticule(self):
"Renders an empty graticule"
# The graticule is divided into 10 columns x 8 rows
# Each cell is 50x40 pixels large, with 5 subdivisions per
# cell, meaning 10x8 pixels each. Subdivision lines are
# displayed on the central X and Y axis
# Active area = 10,30 to 510,350 (500x320 pixels)
borderColor = (255, 255, 255)
lineColor = (64, 64, 64)
subDividerColor = (128, 128, 128)
# Outer border: 2 pixels wide
pygame.draw.rect(self.screen, borderColor, (8,28,504,324), 2)
# Horizontal lines (40 pixels apart)
for i in range(0, 7):
y = 70+i*40
pygame.draw.line(self.screen, lineColor, (10, y), (510, y))
# Vertical lines (50 pixels apart)
for i in range(0, 9):
x = 60+i*50
pygame.draw.line(self.screen, lineColor, (x, 30), (x, 350))
# Vertical sub-divisions (8 pixels apart)
for i in range(1, 40):
y = 30+i*8
pygame.draw.line(self.screen, subDividerColor, (258, y), (262, y))
# Horizontal sub-divisions (10 pixels apart)
for i in range(1, 50):
x = 10+i*10
pygame.draw.line(self.screen, subDividerColor, (x, 188), (x, 192))
```
This will draw a 500x320 pixel graticule, with an outer 2 pixel border, and divisions for 10 columns, and 8 rows. You can render the graticule with the following code at the bottom of your class:
```
# Create an instance of the PyScope class
scope = pyscope()
# Add the graticule
scope.drawGraticule()
# Update the display
pygame.display.update()
# Wait 10 seconds
time.sleep(10)
```
That you give you something similar to the following (you may need to tweek the colors, etc., depending on the display you are using):

# Adding Text
Adding text is relatively straight-forward using the [pygame.font](http://www.pygame.org/docs/ref/font.html) functions/objects. If you wish to load specific fonts (you can load fonts from files, etc.) you should consult the documentation, but as a basic example of using the default system font you simply need to entering something similar to the following code:```
# Create an instance of the PyScope class
scope = pyscope()
# Get a refernce to the system font, size 30
font = pygame.font.Font(None, 30)
# Render some white text (pyScope 0.1) onto text_surface
text_surface = font.render('pyScope (%s)' % "0.1",
True, (255, 255, 255)) # White text
# Blit the text at 10, 0
scope.screen.blit(text_surface, (10, 0))
# Update the display
pygame.display.update()
# Wait 10 seconds
time.sleep(10)
```
Info:
# Adding Images
It's just as easy to add images using the [pygame.image](http://www.pygame.org/docs/ref/image.html "Link: http://www.pygame.org/docs/ref/image.html") functions/objects.
To test this out, upload an image via the WebIDE using the ' **Upload File**' button on the left-hand menu, and upload the following image:
Select the appropriate image with the popup file dialogue ...

... and the image should show up in your file explorer with whatever name you gave it:

Now you simply need to reference the local file name with the following code:
```
# Create an instance of the PyScope class
scope = pyscope()
# Render the Adafruit logo at 10,360
logo = pygame.image.load('adafruit_logo.gif').convert()
scope.screen.blit(logo, (10, 10))
pygame.display.update()
# Wait 10 seconds
time.sleep(10)
```
# Wrapping it all Up + Animation
If you need to animate anything, the secret is simply to call 'pygame.display.update()' at the appropriate moment.
An example using all of the above techniques can be seen in the following complete class that you can simply copy and paste into your pyscope.py file:```auto
import os
import pygame
import time
import random
class pyscope:
screen = None;
def __init__(self):
"Ininitializes a new pygame screen using the framebuffer"
# Based on "Python GUI in Linux frame buffer"
# http://www.karoltomala.com/blog/?p=679
# Allow running from ssh
os.putenv("DISPLAY", ":0")
disp_no = os.getenv("DISPLAY")
if disp_no:
print("I'm running under X display = {0}".format(disp_no))
# Check which frame buffer drivers are available
# Start with fbcon since directfb hangs with composite output
drivers = ['x11', 'fbcon', 'directfb', 'svgalib']
found = False
for driver in drivers:
# Make sure that SDL_VIDEODRIVER is set
if not os.getenv('SDL_VIDEODRIVER'):
os.putenv('SDL_VIDEODRIVER', driver)
try:
pygame.display.init()
except pygame.error:
print('Driver: {0} failed.'.format(driver))
continue
found = True
break
if not found:
raise Exception('No suitable video driver found!')
size = (pygame.display.Info().current_w, pygame.display.Info().current_h)
print("Framebuffer size: %d x %d" % (size[0], size[1]))
self.screen = pygame.display.set_mode(size, pygame.FULLSCREEN)
# Clear the screen to start
self.screen.fill((0, 0, 0))
# Initialise font support
pygame.font.init()
# Render the screen
pygame.display.update()
def __del__(self):
"Destructor to make sure pygame shuts down, etc."
def drawGraticule(self):
"Renders an empty graticule"
# The graticule is divided into 10 columns x 8 rows
# Each cell is 50x40 pixels large, with 5 subdivisions per
# cell, meaning 10x8 pixels each. Subdivision lines are
# displayed on the central X and Y axis
# Active area = 10,30 to 510,350 (500x320 pixels)
borderColor = (255, 255, 255)
lineColor = (64, 64, 64)
subDividerColor = (128, 128, 128)
# Outer border: 2 pixels wide
pygame.draw.rect(self.screen, borderColor, (8,28,504,324), 2)
# Horizontal lines (40 pixels apart)
for i in range(0, 7):
y = 70+i*40
pygame.draw.line(self.screen, lineColor, (10, y), (510, y))
# Vertical lines (50 pixels apart)
for i in range(0, 9):
x = 60+i*50
pygame.draw.line(self.screen, lineColor, (x, 30), (x, 350))
# Vertical sub-divisions (8 pixels apart)
for i in range(1, 40):
y = 30+i*8
pygame.draw.line(self.screen, subDividerColor, (258, y), (262, y))
# Horizontal sub-divisions (10 pixels apart)
for i in range(1, 50):
x = 10+i*10
pygame.draw.line(self.screen, subDividerColor, (x, 188), (x, 192))
def test(self):
"Test method to make sure the display is configured correctly"
adcColor = (255, 255, 0) # Yellow
self.drawGraticule()
# Render the Adafruit logo at 10,360
logo = pygame.image.load('adafruit_logo.gif').convert()
self.screen.blit(logo, (10, 335))
# Get a font and use it render some text on a Surface.
font = pygame.font.Font(None, 30)
text_surface = font.render('pyScope (%s)' % "0.1",
True, (255, 255, 255)) # White text
# Blit the text at 10, 0
self.screen.blit(text_surface, (10, 0))
# Render some text with a background color
text_surface = font.render('Channel 0',
True, (0, 0, 0), (255, 255, 0)) # Black text with yellow BG
# Blit the text
self.screen.blit(text_surface, (540, 30))
# Update the display
pygame.display.update()
# Random adc data
yLast = 260
for x in range(10, 509):
y = random.randrange(30, 350, 2) # Even number from 30 to 350
pygame.draw.line(self.screen, adcColor, (x, yLast), (x+1, y))
yLast = y
pygame.display.update()
# Create an instance of the PyScope class
scope = pyscope()
scope.test()
# Wait 10 seconds
time.sleep(10)
```
This should give you something similar to the following (depending on your display):
http://www.youtube.com/watch?v=Yj0gxhUTqbw&feature=youtu.be
- [Previous Page](https://learn.adafruit.com/pi-video-output-using-pygame/drawing-basics.md)
## Featured Products
### Adafruit Assembled Pi Cobbler Breakout + Cable for Raspberry Pi
[Adafruit Assembled Pi Cobbler Breakout + Cable for Raspberry Pi](https://www.adafruit.com/product/914)
Now that you've finally got your hands on a [Raspberry Pi® Model B](http://www.raspberrypi.org/), you're probably itching to make some fun embedded computer projects with it. What you need is an add on prototyping Pi Cobbler from Adafruit, which can break out all those...
No Longer Stocked
[Buy Now](https://www.adafruit.com/product/914)
[Related Guides to the Product](https://learn.adafruit.com/products/914/guides)
### NTSC/PAL (Television) TFT Display - 3.5" Diagonal
[NTSC/PAL (Television) TFT Display - 3.5" Diagonal](https://www.adafruit.com/product/913)
Yes, this is an adorable small television! The visible display measures only 3.5" (8.9cm) diagonal, the TFT comes with a NTSC/PAL driver board. The display is very easy to use - simply connect 6-12VDC to the red (+) and black (-) wires, then connect a composite video source to the RCA...
In Stock
[Buy Now](https://www.adafruit.com/product/913)
[Related Guides to the Product](https://learn.adafruit.com/products/913/guides)
### NTSC/PAL (Television) TFT Display - 2.0" Diagonal
[NTSC/PAL (Television) TFT Display - 2.0" Diagonal](https://www.adafruit.com/product/911)
Yes, this is an adorable miniature television! The visible display measures only 2" diagonal, the TFT comes with a NTSC/PAL driver board. The display is very easy to use - simply connect 6-12VDC to the red and black wires, then connect a composite video source to the RCA connector. Voila,...
In Stock
[Buy Now](https://www.adafruit.com/product/911)
[Related Guides to the Product](https://learn.adafruit.com/products/911/guides)
### NTSC/PAL (Television) TFT Display - 4.3" Diagonal
[NTSC/PAL (Television) TFT Display - 4.3" Diagonal](https://www.adafruit.com/product/946)
Yes, this is an adorable small television! The visible display measures only 4.3" (11cm) diagonal, the TFT comes with a NTSC/PAL driver board, enclosure and stand. The display is very easy to use - simply connect 12VDC to the 2.1mm center-positive DC jack (or use the cable and connect to...
No Longer Stocked
[Buy Now](https://www.adafruit.com/product/946)
[Related Guides to the Product](https://learn.adafruit.com/products/946/guides)
### NTSC/PAL (Television) TFT Display - 7" Diagonal
[NTSC/PAL (Television) TFT Display - 7" Diagonal](https://www.adafruit.com/product/947)
Yes, this is an adorable small television! The visible display measures only 7" (17.8cm) diagonal, the TFT comes with a NTSC/PAL driver board, enclosure and stand. The display is very easy to use - simply connect the included 12VDC adapter to the 2.1mm center-positive DC jack, then...
No Longer Stocked
[Buy Now](https://www.adafruit.com/product/947)
[Related Guides to the Product](https://learn.adafruit.com/products/947/guides)
### Raspberry Pi 1 Model B Starter Pack - Includes a Raspberry Pi
[Raspberry Pi 1 Model B Starter Pack - Includes a Raspberry Pi](https://www.adafruit.com/product/1014)
You want to get hacking with your Pi fast, right? Get everything you need to start with the Adafruit Starter Pack for Raspberry Pi. It's the perfect accompaniment to your new Pi, everything you need to boot up your Pi Model B and get going. **We pre-assemble the Cobbler for you, no...**
No Longer Stocked
[Buy Now](https://www.adafruit.com/product/1014)
[Related Guides to the Product](https://learn.adafruit.com/products/1014/guides)
### NTSC/PAL (Television) TFT Display - 1.5" Diagonal
[NTSC/PAL (Television) TFT Display - 1.5" Diagonal](https://www.adafruit.com/product/910)
Yes, this is an adorable miniature television! The visible display measures only 1.5" diagonal, the TFT comes with a NTSC/PAL driver board. The display is very easy to use - simply connect 6-12VDC to the red and black wires, then connect a composite video source to the RCA connector....
In Stock
[Buy Now](https://www.adafruit.com/product/910)
[Related Guides to the Product](https://learn.adafruit.com/products/910/guides)
## Related Guides
- [Electronic Animated Eyes for ARM Microcontrollers](https://learn.adafruit.com/animated-electronic-eyes.md)
- [CircuitPython Day 2024 Countdown Clock](https://learn.adafruit.com/circuitpython-day-2024-countdown-clock.md)
- [Adafruit RP2350 22-pin FPC HSTX to DVI Adapter](https://learn.adafruit.com/adafruit-rp2350-22-pin-fpc-hstx-to-dvi-adapter.md)
- [Adafruit 3.5" 320x480 Color TFT Touchscreen Breakout](https://learn.adafruit.com/adafruit-3-5-color-320x480-tft-touchscreen-breakout.md)
- [AdaBox 018](https://learn.adafruit.com/adabox018.md)
- [Adafruit's Raspberry Pi Lesson 5. Using a Console Cable](https://learn.adafruit.com/adafruits-raspberry-pi-lesson-5-using-a-console-cable.md)
- [Press Your Button for Raspberry Pi](https://learn.adafruit.com/press-your-button-for-raspberry-pi.md)
- [MONSTER M4SK Toon Hat](https://learn.adafruit.com/monster-mask-augmented-eyes-toon-hat.md)
- [Windows IoT Core Application Development: Headed Blinky](https://learn.adafruit.com/windows-iot-application-development-headed-blinky.md)
- [Cappy Monster M4sk with Animated Eyes](https://learn.adafruit.com/cappy-monster-m4sk.md)
- [Running TensorFlow Lite Object Recognition on the Raspberry Pi 4 or Pi 5](https://learn.adafruit.com/running-tensorflow-lite-on-the-raspberry-pi-4.md)
- [Pip-Boy 2040 Wrist-Mounted Prop](https://learn.adafruit.com/pip-boy-2040.md)
- [CustomEyesation: DIY Monster M4SK Graphics](https://learn.adafruit.com/customeyesation-diy-monster-m4sk-graphics.md)
- [Getting Started With Windows IoT Core on Raspberry Pi](https://learn.adafruit.com/getting-started-with-windows-iot-on-raspberry-pi.md)
- [Candy Bucket GIF Player Eyes](https://learn.adafruit.com/candy-bucket-gif-eyes.md)
---
# Source: https://learn.adafruit.com/character-lcds/python-circuitpython.md
# Source: https://learn.adafruit.com/tsl2561/python-circuitpython.md
# Source: https://learn.adafruit.com/thermocouple/python-circuitpython.md
# Source: https://learn.adafruit.com/adafruit-ina219-current-sensor-breakout/python-circuitpython.md
# Adafruit INA219 Current Sensor Breakout
## Python & CircuitPython
It's easy to use the INA219 sensor with Python and CircuitPython, and the [Adafruit CircuitPython INA219](https://github.com/adafruit/Adafruit_CircuitPython_INA219) module. This module allows you to easily write Python code that reads the current and more from the sensor.
You can use this sensor with any CircuitPython microcontroller board or with a computer that has GPIO and Python [thanks to Adafruit\_Blinka, our CircuitPython-for-Python compatibility library](https://learn.adafruit.com/circuitpython-on-raspberrypi-linux).
# CircuitPython Microcontroller Wiring
First wire up a INA219 to your board exactly as shown on the previous pages for Arduino using an I2C interface. In addition connect some load to measure the current from in series to the sensor's **Vin-** and **Vin+** pins as [mentioned on the wiring page](../../../../adafruit-ina219-current-sensor-breakout/wiring#connect-to-the-circuit).
Here is an example of the STEMMA QT version connected to a Feather M4:
- **Board 3V** to **sensor VIN (red wire)**
- **Board GND** to **sensor GND (black wire)**
- **Board SCL** to **sensor SCL (yellow wire)**
- **Board SDA** to **sensor SDA (blue wire)**
- Connect **Vin+** to the **positive terminal of the power supply for the circuit under test**
- Connect **Vin-** to the **positive terminal or lead of the load**


Here's an example of the original version of the sensor wired up to a Feather M0:
- **Board 3V** to **sensor Vcc**
- **Board GND** to **sensor GND**
- **Board SCL** to **sensor SCL**
- **Board SDA** to **sensor SDA**

# Python Computer Wiring
Since there's _dozens_ of Linux computers/boards you can use we will show wiring for Raspberry Pi. For other platforms, [please visit the guide for CircuitPython on Linux to see whether your platform is supported](https://learn.adafruit.com/circuitpython-on-raspberrypi-linux).
In addition connect some load to measure the current from in series to the sensor's **Vin-** and **Vin+** pins as [mentioned on the wiring page](../../../../adafruit-ina219-current-sensor-breakout/wiring#connect-to-the-circuit).
Here's the Raspberry Pi wired to the STEMMA QT version of the sensor:
- **Pi 3V** to **sensor VIN (red wire)**
- **Pi GND** to **sensor GND (black wire)**
- **Pi SCL** to **sensor SCL (yellow wire)**
- **Pi SDA** to **sensor SDA (blue wire)**
- Connect **Vin+** to the **positive terminal of the power supply for the circuit under test**
- Connect **Vin-** to the **positive terminal or lead of the load**


Here's the Raspberry Pi wired to the original version of the sensor with I2C:
- **Pi 3V3** to **sensor Vcc**
- **Pi GND** to **sensor Gnd**
- **Pi SCL** to **sensor Scl**
- **Pi SDA** to **sensor Sda**

# CircuitPython Installation of INA219 Library
Next you'll need to install the [Adafruit CircuitPython INA219](https://github.com/adafruit/Adafruit_CircuitPython_INA219) library on your CircuitPython board.
First make sure you are running the [latest version of Adafruit CircuitPython](https://github.com/adafruit/circuitpython/releases) for your board.
Next you'll need to install the necessary libraries to use the hardware--carefully follow the steps to find and install these libraries from [Adafruit's CircuitPython library bundle](https://github.com/adafruit/Adafruit_CircuitPython_Bundle). For example the Circuit Playground Express guide has [a great page on how to install the library bundle](https://learn.adafruit.com/welcome-to-circuitpython/circuitpython-libraries) for both express and non-express boards.
Remember for non-express boards like the Trinket M0, Gemma M0, and Feather/Metro M0 basic you'll need to manually install the necessary libraries from the bundle:
- **adafruit\_ina219.mpy**
- **adafruit\_bus\_device**
Before continuing make sure your board's **lib** folder or root filesystem has the **adafruit\_ina219.mpy, ** and ** adafruit\_bus\_device**** **files and folders** **copied over.
Warning: Before continuing make sure your board's lib folder has the adafruit\_ina219.mpy, and adafruit\_bus_device files and folders copied over.
Next[ connect to the board's serial REPL](https://learn.adafruit.com/welcome-to-circuitpython/the-repl) so you are at the CircuitPython **\>\>\>** prompt.
# Python Installation of INA219 Library
You'll need to install the Adafruit\_Blinka library that provides the CircuitPython support in Python. This may also require enabling I2C on your platform and verifying you are running Python 3. [Since each platform is a little different, and Linux changes often, please visit the CircuitPython on Linux guide to get your computer ready](https://learn.adafruit.com/circuitpython-on-raspberrypi-linux)!
Once that's done, from your command line run the following command:
- `sudo pip3 install adafruit-circuitpython-ina219`
If your default Python is version 3 you may need to run 'pip' instead. Just make sure you aren't trying to use CircuitPython on Python 2.x, it isn't supported!
# CircuitPython & Python Usage
To demonstrate the usage of the sensor we'll initialize it and read the current and more from the board's Python REPL. Run the following code to import the necessary modules and initialize the I2C connection with the sensor:
```
import board
import busio
import adafruit_ina219
i2c = busio.I2C(board.SCL, board.SDA)
sensor = adafruit_ina219.INA219(i2c)
```
Now you're ready to read values from the sensor using any of these functions:
- **shunt\_voltage** - The shunt voltage in volts.
- **bus\_voltage** - The bus voltage in volts.
- **current** - The current in milliamps.
```
print("Bus Voltage: {} V".format(ina219.bus_voltage))
print("Shunt Voltage: {} mV".format(ina219.shunt_voltage / 1000))
print("Current: {} mA".format(ina219.current))
```
That's all there is to using the INA219 with CircuitPython!
Here's a full example to print the voltage and current every second. Save this as **code.py** on your board's filesystem and check the output from the serial REPL.
# Full Example Code
https://github.com/adafruit/Adafruit_CircuitPython_INA219/blob/main/examples/ina219_simpletest.py
If you have more than one sensor at different I2C addresses (adjusted per the Addressing page), use the following syntax, using the addresses you chose:
```python
ina219a = INA219(i2c_bus, 0x40)
ina219b = INA219(i2c_bus, 0x41)
```
- [Previous Page](https://learn.adafruit.com/adafruit-ina219-current-sensor-breakout/library-reference.md)
- [Next Page](https://learn.adafruit.com/adafruit-ina219-current-sensor-breakout/wippersnapper.md)
## Featured Products
### INA219 High Side DC Current Sensor Breakout - 26V ±3.2A Max
[INA219 High Side DC Current Sensor Breakout - 26V ±3.2A Max](https://www.adafruit.com/product/904)
This breakout board will solve all your power-monitoring problems. Instead of struggling with two multimeters, you can just use the handy INA219 chip on this breakout to both measure both the high side voltage and DC current draw over I2C with ±1% precision.
**Please...**
In Stock
[Buy Now](https://www.adafruit.com/product/904)
[Related Guides to the Product](https://learn.adafruit.com/products/904/guides)
### STEMMA QT / Qwiic JST SH 4-pin Cable - 100mm Long
[STEMMA QT / Qwiic JST SH 4-pin Cable - 100mm Long](https://www.adafruit.com/product/4210)
This 4-wire cable is a little over 100mm / 4" long and fitted with JST-SH female 4-pin connectors on both ends. Compared with the chunkier JST-PH these are 1mm pitch instead of 2mm, but still have a nice latching feel, while being easy to insert and remove.
In Stock
[Buy Now](https://www.adafruit.com/product/4210)
[Related Guides to the Product](https://learn.adafruit.com/products/4210/guides)
### STEMMA QT / Qwiic JST SH 4-pin to Premium Male Headers Cable
[STEMMA QT / Qwiic JST SH 4-pin to Premium Male Headers Cable](https://www.adafruit.com/product/4209)
This 4-wire cable is a little over 150mm / 6" long and fitted with JST-SH female 4-pin connectors on one end and premium Dupont male headers on the other. Compared with the chunkier JST-PH these are 1mm pitch instead of 2mm, but still have a nice latching feel, while being easy to insert...
Out of Stock
[Buy Now](https://www.adafruit.com/product/4209)
[Related Guides to the Product](https://learn.adafruit.com/products/4209/guides)
### Premium Male/Male Jumper Wires - 40 x 6" (150mm)
[Premium Male/Male Jumper Wires - 40 x 6" (150mm)](https://www.adafruit.com/product/758)
Handy for making wire harnesses or jumpering between headers on PCB's. These premium jumper wires are 6" (150mm) long and come in a 'strip' of 40 (4 pieces of each of ten rainbow colors). They have 0.1" male header contacts on either end and fit cleanly next to each other...
Out of Stock
[Buy Now](https://www.adafruit.com/product/758)
[Related Guides to the Product](https://learn.adafruit.com/products/758/guides)
### Full Sized Premium Breadboard - 830 Tie Points
[Full Sized Premium Breadboard - 830 Tie Points](https://www.adafruit.com/product/239)
This is a 'full-size' premium quality breadboard, 830 tie points. Good for small and medium projects. It's 2.2" x 7" (5.5 cm x 17 cm) with a standard double-strip in the middle and two power rails on both sides. You can pull the power rails off easily to make the...
In Stock
[Buy Now](https://www.adafruit.com/product/239)
[Related Guides to the Product](https://learn.adafruit.com/products/239/guides)
### Adafruit INA219 FeatherWing
[Adafruit INA219 FeatherWing](https://www.adafruit.com/product/3650)
The **INA219 FeatherWing** makes power-monitoring problems a thing of the past. Instead of struggling with two multimeters, you can just use the handy INA219 chip on this breakout to measure both the high side voltage and DC current draw over I2C with 1% precision....
In Stock
[Buy Now](https://www.adafruit.com/product/3650)
[Related Guides to the Product](https://learn.adafruit.com/products/3650/guides)
### Adafruit METRO 328 Fully Assembled - Arduino IDE compatible
[Adafruit METRO 328 Fully Assembled - Arduino IDE compatible](https://www.adafruit.com/product/50)
We sure love the ATmega328 here at Adafruit, and we use them _a lot_ for our own projects. The processor has plenty of GPIO, Analog inputs, hardware UART SPI and I2C, timers and PWM galore - just enough for most simple projects. When we need to go small, we use a
Out of Stock
[Buy Now](https://www.adafruit.com/product/50)
[Related Guides to the Product](https://learn.adafruit.com/products/50/guides)
## Related Guides
- [Remote controlled door lock using a fingerprint sensor & Adafruit IO](https://learn.adafruit.com/remote-controlled-door-lock-using-a-fingerprint-sensor-and-adafruit-io.md)
- [WiFi Controlled Mobile Robot](https://learn.adafruit.com/wifi-controlled-mobile-robot.md)
- [Arduino Lesson 14. Servo Motors](https://learn.adafruit.com/adafruit-arduino-lesson-14-servo-motors.md)
- [Geofencing with the FONA 808 & Adafruit IO](https://learn.adafruit.com/geofencing-with-the-fona-808-and-adafruit-io.md)
- [Let’s Put LEDs in Things!](https://learn.adafruit.com/lets-put-leds-in-things.md)
- [Adafruit CC3000 WiFi and Xively](https://learn.adafruit.com/adafruit-cc3000-wifi-and-xively.md)
- [Adafruit AirLift Shield - ESP32 WiFi Co-Processor](https://learn.adafruit.com/adafruit-airlift-shield-esp32-wifi-co-processor.md)
- [Wave Shield Talking Clock](https://learn.adafruit.com/wave-shield-talking-clock.md)
- [Ladyada's Learn Arduino - Lesson #0](https://learn.adafruit.com/ladyadas-learn-arduino-lesson-number-0.md)
- [2.2" TFT Display](https://learn.adafruit.com/2-2-tft-display.md)
- [LED Lightbox](https://learn.adafruit.com/led-lightbox.md)
- [Arduino Prototyping Mounting Plate](https://learn.adafruit.com/arduino-prototyping-mounting-plate.md)
- [How to Choose a Microcontroller](https://learn.adafruit.com/how-to-choose-a-microcontroller.md)
- [Arduino Lesson 16. Stepper Motors](https://learn.adafruit.com/adafruit-arduino-lesson-16-stepper-motors.md)
- [Arduino Lesson 8. Analog Inputs](https://learn.adafruit.com/adafruit-arduino-lesson-8-analog-inputs.md)
---
# Source: https://learn.adafruit.com/drive-a-16x2-lcd-directly-with-a-raspberry-pi/python-code.md
# Drive a 16x2 LCD with the Raspberry Pi
## Python Script

The following code can be downloaded to your raspberry pi and run to get the date, time and IP address of your machine on the LCD display.
# The Code
https://github.com/adafruit/Adafruit_Learning_System_Guides/blob/main/Drive_a_16x2_LCD_with_the_Raspberry_Pi/Drive_a_16x2_LCD_with_the_Raspberry_Pi.py
## Download the Code
Let's put this file right in your home directory for simplicity. The wget command makes things easy.
```auto
wget https://raw.githubusercontent.com/adafruit/Adafruit_Learning_System_Guides/master/Drive_a_16x2_LCD_with_the_Raspberry_Pi/Drive_a_16x2_LCD_with_the_Raspberry_Pi.py
```
# Running the Code
The following command will start the program and you should see the LCD display come to life with date, time and IP address.
```auto
sudo python3 ./Drive_a_16x2_LCD_with_the_Raspberry_Pi.py
```
- [Previous Page](https://learn.adafruit.com/drive-a-16x2-lcd-directly-with-a-raspberry-pi/necessary-packages.md)
- [Next Page](https://learn.adafruit.com/drive-a-16x2-lcd-directly-with-a-raspberry-pi/init-script.md)
## Featured Products
### Standard LCD 16x2 + extras
[Standard LCD 16x2 + extras](https://www.adafruit.com/product/181)
Standard HD44780 LCDs are useful for creating standalone projects.
- 16 characters wide, 2 rows
- White text on blue background
- Connection port is 0.1" pitch, single row for easy breadboarding and wiring
- Pins are documented on the back of the LCD to assist...
In Stock
[Buy Now](https://www.adafruit.com/product/181)
[Related Guides to the Product](https://learn.adafruit.com/products/181/guides)
### Raspberry Pi 3 - Model B - ARMv8 with 1G RAM
[Raspberry Pi 3 - Model B - ARMv8 with 1G RAM](https://www.adafruit.com/product/3055)
Did you really think the Raspberry Pi would stop getting better? At this point, we sound like a broken record, extolling on the new Pi’s myriad improvements like we’re surprised that the folks at the Raspberry Pi Foundation are continuously making their flagship board better. ...
In Stock
[Buy Now](https://www.adafruit.com/product/3055)
[Related Guides to the Product](https://learn.adafruit.com/products/3055/guides)
### Adafruit Assembled Pi T-Cobbler Breakout for Raspberry Pi
[Adafruit Assembled Pi T-Cobbler Breakout for Raspberry Pi](https://www.adafruit.com/product/1754)
Now that you've finally got your hands on a [Raspberry Pi®](http://www.raspberrypi.org/), you're probably itching to make some fun embedded computer projects with it. What you need is an **assembled** add on prototyping Pi T-Cobbler from Adafruit, which can...
No Longer Stocked
[Buy Now](https://www.adafruit.com/product/1754)
[Related Guides to the Product](https://learn.adafruit.com/products/1754/guides)
### Assembled Pi Cobbler Plus - Breakout Cable
[Assembled Pi Cobbler Plus - Breakout Cable](https://www.adafruit.com/product/2029)
The Raspberry Pi B+ / Pi 2 / Pi 3 / Pi 4 has landed on the Maker World like a 40-GPIO pinned, quad-USB ported, credit card sized bomb of DIY joy. And while you can use most of our great Model B accessories by hooking up our [downgrade...](https://www.adafruit.com/product/1986)
In Stock
[Buy Now](https://www.adafruit.com/product/2029)
[Related Guides to the Product](https://learn.adafruit.com/products/2029/guides)
### Half Sized Premium Breadboard - 400 Tie Points
[Half Sized Premium Breadboard - 400 Tie Points](https://www.adafruit.com/product/64)
This is a cute, half-size breadboard with 400 tie points, good for small projects. It's 3.25" x 2.2" / 8.3cm x 5.5cm with a standard double-strip in the middle and two power rails on both sides. You can pull the power rails off easily to make the breadboard as...
In Stock
[Buy Now](https://www.adafruit.com/product/64)
[Related Guides to the Product](https://learn.adafruit.com/products/64/guides)
## Related Guides
- [Program an AVR or Arduino Using Raspberry Pi GPIO](https://learn.adafruit.com/program-an-avr-or-arduino-using-raspberry-pi-gpio-pins.md)
- [Basic Resistor Sensor Reading on Raspberry Pi](https://learn.adafruit.com/basic-resistor-sensor-reading-on-raspberry-pi.md)
- [Circadian Pi Desk Light](https://learn.adafruit.com/circadian-pi-desk-light.md)
- [Speech Synthesis on the Raspberry Pi](https://learn.adafruit.com/speech-synthesis-on-the-raspberry-pi.md)
- [Matrix and 7-Segment LED Backpack with the Raspberry Pi](https://learn.adafruit.com/matrix-7-segment-led-backpack-with-the-raspberry-pi.md)
- [Capacitive Touch Sensors on the Raspberry Pi](https://learn.adafruit.com/capacitive-touch-sensors-on-the-raspberry-pi.md)
- [Adafruit's Raspberry Pi Lesson 4. GPIO Setup](https://learn.adafruit.com/adafruits-raspberry-pi-lesson-4-gpio-setup.md)
- [Adafruit's Raspberry Pi Lesson 12. Sensing Movement](https://learn.adafruit.com/adafruits-raspberry-pi-lesson-12-sensing-movement.md)
- [Playing sounds and using buttons with Raspberry Pi](https://learn.adafruit.com/playing-sounds-and-using-buttons-with-raspberry-pi.md)
- [Adafruit's Raspberry Pi Lesson 10. Stepper Motors](https://learn.adafruit.com/adafruits-raspberry-pi-lesson-10-stepper-motors.md)
- [Raspberry Pi Analog to Digital Converters](https://learn.adafruit.com/raspberry-pi-analog-to-digital-converters.md)
- [Raspberry Pi E-mail Notifier Using LEDs](https://learn.adafruit.com/raspberry-pi-e-mail-notifier-using-leds.md)
- [Adafruit's Raspberry Pi Lesson 11. DS18B20 Temperature Sensing](https://learn.adafruit.com/adafruits-raspberry-pi-lesson-11-ds18b20-temperature-sensing.md)
- [Getting Started With Windows IoT Core on Raspberry Pi](https://learn.adafruit.com/getting-started-with-windows-iot-on-raspberry-pi.md)
- [Trinket Ultrasonic Rangefinder](https://learn.adafruit.com/trinket-ultrasonic-rangefinder.md)
---
# Source: https://learn.adafruit.com/16-channel-pwm-servo-driver/python-docs-servokit.md
# Adafruit PCA9685 16-Channel Servo Driver
## Python Docs: ServoKit
- [Previous Page](https://learn.adafruit.com/16-channel-pwm-servo-driver/python-circuitpython.md)
- [Next Page](https://learn.adafruit.com/16-channel-pwm-servo-driver/downloads.md)
## Featured Products
### Micro servo
[Micro servo](https://www.adafruit.com/product/169)
Tiny little servo can rotate approximately 180 degrees (90 in each direction) and works just like the standard kinds you're used to but _smaller_. You can use any servo code, hardware, or library to control these servos. Good for beginners who want to make stuff move without...
In Stock
[Buy Now](https://www.adafruit.com/product/169)
[Related Guides to the Product](https://learn.adafruit.com/products/169/guides)
### Standard servo - TowerPro SG-5010
[Standard servo - TowerPro SG-5010](https://www.adafruit.com/product/155)
This high-torque standard servo can rotate approximately 180 degrees (90 in each direction). You can use any servo code, hardware, or library to control these servos. Good for beginners who want to make stuff move without building a motor controller with feedback & gearbox. Comes with 3...
In Stock
[Buy Now](https://www.adafruit.com/product/155)
[Related Guides to the Product](https://learn.adafruit.com/products/155/guides)
### Continuous Rotation Servo
[Continuous Rotation Servo](https://www.adafruit.com/product/154)
This servo rotates fully forward or backward instead of moving to a position. You can use any servo code, hardware, or library to control these servos. Good for making simple moving robots. Comes with four different horns, as shown.
To control with an Arduino, we suggest connecting...
In Stock
[Buy Now](https://www.adafruit.com/product/154)
[Related Guides to the Product](https://learn.adafruit.com/products/154/guides)
### Adafruit 16-Channel 12-bit PWM/Servo Driver - I2C interface
[Adafruit 16-Channel 12-bit PWM/Servo Driver - I2C interface](https://www.adafruit.com/product/815)
You want to make a cool robot, maybe a hexapod walker, or maybe just a piece of art with a lot of moving parts. Or maybe you want to drive a lot of LEDs with precise PWM output. Then you realize that your microcontroller has a limited number of PWM outputs! What now? You could give up OR you...
In Stock
[Buy Now](https://www.adafruit.com/product/815)
[Related Guides to the Product](https://learn.adafruit.com/products/815/guides)
### Adafruit METRO 328 Fully Assembled - Arduino IDE compatible
[Adafruit METRO 328 Fully Assembled - Arduino IDE compatible](https://www.adafruit.com/product/50)
We sure love the ATmega328 here at Adafruit, and we use them _a lot_ for our own projects. The processor has plenty of GPIO, Analog inputs, hardware UART SPI and I2C, timers and PWM galore - just enough for most simple projects. When we need to go small, we use a
Out of Stock
[Buy Now](https://www.adafruit.com/product/50)
[Related Guides to the Product](https://learn.adafruit.com/products/50/guides)
## Related Guides
- [LED Tricks: Gamma Correction](https://learn.adafruit.com/led-tricks-gamma-correction.md)
- [MIDI Controlled Robot Lyre with CircuitPython](https://learn.adafruit.com/midi-controlled-robot-lyre-with-circuitpython.md)
- [Photocells](https://learn.adafruit.com/photocells.md)
- [Bluetooth Temperature & Humidity Sensor](https://learn.adafruit.com/bluetooth-temperature-and-humidity-sensor.md)
- [Wave Shield Voice Changer](https://learn.adafruit.com/wave-shield-voice-changer.md)
- [Arduino Lesson 2. LEDs](https://learn.adafruit.com/adafruit-arduino-lesson-2-leds.md)
- [Arduino Lesson 17. Email Sending Movement Detector](https://learn.adafruit.com/arduino-lesson-17-email-sending-movement-detector.md)
- [NeoPixel Painter](https://learn.adafruit.com/neopixel-painter.md)
- [Arduino Lesson 11. LCD Displays - Part 1](https://learn.adafruit.com/adafruit-arduino-lesson-11-lcd-displays-1.md)
- [Adafruit PN532 RFID/NFC Breakout and Shield](https://learn.adafruit.com/adafruit-pn532-rfid-nfc.md)
- [Silicone Robo-Tentacle](https://learn.adafruit.com/silicone-robo-tentacle.md)
- [Sending an SMS with Temboo](https://learn.adafruit.com/sending-an-sms-with-temboo.md)
- [Adafruit Proto Shield for Arduino](https://learn.adafruit.com/adafruit-proto-shield-arduino.md)
- [Programming Arduino with Android and Windows Tablets](https://learn.adafruit.com/programming-arduino-with-android-and-windows-tablets.md)
- [DS1307 Real Time Clock Breakout Board Kit](https://learn.adafruit.com/ds1307-real-time-clock-breakout-board-kit.md)
---
# Source: https://learn.adafruit.com/rgb-lcd-shield/python-docs.md
# Source: https://learn.adafruit.com/adafruit-ultimate-gps/python-docs.md
# Source: https://learn.adafruit.com/character-lcds/python-docs.md
# Source: https://learn.adafruit.com/tsl2561/python-docs.md
# Source: https://learn.adafruit.com/dht/python-docs.md
# Source: https://learn.adafruit.com/thermistor/python-docs.md
# Source: https://learn.adafruit.com/ir-sensor/python-docs.md
# Source: https://learn.adafruit.com/thermocouple/python-docs.md
# Source: https://learn.adafruit.com/adafruit-ina219-current-sensor-breakout/python-docs.md
# Source: https://learn.adafruit.com/ttl-serial-camera/python-docs.md
# TTL Serial Camera
## Python Docs
- [Previous Page](https://learn.adafruit.com/ttl-serial-camera/circuitpython-python-usage.md)
- [Next Page](https://learn.adafruit.com/ttl-serial-camera/f-a-q.md)
## Featured Products
### TTL Serial JPEG Camera with NTSC Video
[TTL Serial JPEG Camera with NTSC Video](https://www.adafruit.com/product/397)
This camera module can be a pretty neat project addition. It was designed to be used in security systems and does two main things - it outputs NTSC video and can take snapshots of that video (in color) and transmit them over the TTL serial link. You can snap pictures at 640x480, 320x240 or...
In Stock
[Buy Now](https://www.adafruit.com/product/397)
[Related Guides to the Product](https://learn.adafruit.com/products/397/guides)
### Miniature TTL Serial JPEG Camera with NTSC Video
[Miniature TTL Serial JPEG Camera with NTSC Video](https://www.adafruit.com/product/1386)
This tiny little camera module can be a pretty neat project addition, it is just like [our other JPEG cameras (same chipset/software)](http://www.adafruit.com/category/35_68), but much smaller and slimmer. It was designed to be used in security systems and does two main things - it...
In Stock
[Buy Now](https://www.adafruit.com/product/1386)
[Related Guides to the Product](https://learn.adafruit.com/products/1386/guides)
### Adafruit METRO 328 Fully Assembled - Arduino IDE compatible
[Adafruit METRO 328 Fully Assembled - Arduino IDE compatible](https://www.adafruit.com/product/50)
We sure love the ATmega328 here at Adafruit, and we use them _a lot_ for our own projects. The processor has plenty of GPIO, Analog inputs, hardware UART SPI and I2C, timers and PWM galore - just enough for most simple projects. When we need to go small, we use a
Out of Stock
[Buy Now](https://www.adafruit.com/product/50)
[Related Guides to the Product](https://learn.adafruit.com/products/50/guides)
### Weatherproof TTL Serial JPEG Camera with NTSC Video and IR LEDs
[Weatherproof TTL Serial JPEG Camera with NTSC Video and IR LEDs](https://www.adafruit.com/product/613)
This weatherproof camera module is [a classy upgrade to the basic camera module we already stock in the shop](http://www.adafruit.com/products/397). The main differences is that this one comes in a nice metal case with a mounting hinge, a 1 meter long cable with the TTL & NTSC...
In Stock
[Buy Now](https://www.adafruit.com/product/613)
[Related Guides to the Product](https://learn.adafruit.com/products/613/guides)
### MicroSD card breakout board+
[MicroSD card breakout board+](https://www.adafruit.com/product/254)
Not just a simple breakout board, this microSD adapter goes the extra mile - designed for ease of use.
- Onboard 5v-\>3v regulator provides 150mA for power-hungry cards
- 3v level shifting means you can use this with ease on either 3v or 5v systems
- Uses a proper level...
Out of Stock
[Buy Now](https://www.adafruit.com/product/254)
[Related Guides to the Product](https://learn.adafruit.com/products/254/guides)
### Half Sized Premium Breadboard - 400 Tie Points
[Half Sized Premium Breadboard - 400 Tie Points](https://www.adafruit.com/product/64)
This is a cute, half-size breadboard with 400 tie points, good for small projects. It's 3.25" x 2.2" / 8.3cm x 5.5cm with a standard double-strip in the middle and two power rails on both sides. You can pull the power rails off easily to make the breadboard as...
In Stock
[Buy Now](https://www.adafruit.com/product/64)
[Related Guides to the Product](https://learn.adafruit.com/products/64/guides)
### SD/MicroSD Memory Card (8 GB SDHC)
[SD/MicroSD Memory Card (8 GB SDHC)](https://www.adafruit.com/product/1294)
Add mega-storage in a jiffy using this 8 GB class 4 micro-SD card. It comes with a SD adapter so you can use it with any of our shields or adapters. Preformatted to FAT so it works out of the box with our projects. Tested and works great with our
In Stock
[Buy Now](https://www.adafruit.com/product/1294)
[Related Guides to the Product](https://learn.adafruit.com/products/1294/guides)
## Related Guides
- [Making Adabot: Part 2](https://learn.adafruit.com/making-adabot-part-2.md)
- [3D Printed Animatronic Robot Head](https://learn.adafruit.com/3d-printed-animatronic-robot-head.md)
- [Arduino Lesson 14. Servo Motors](https://learn.adafruit.com/adafruit-arduino-lesson-14-servo-motors.md)
- [Arduino Lesson 15. DC Motor Reversing](https://learn.adafruit.com/adafruit-arduino-lesson-15-dc-motor-reversing.md)
- [Programming Arduino with Android and Windows Tablets](https://learn.adafruit.com/programming-arduino-with-android-and-windows-tablets.md)
- [LSM303 Accelerometer + Compass Breakout](https://learn.adafruit.com/lsm303-accelerometer-slash-compass-breakout.md)
- [Adafruit VS1053 MP3/AAC/Ogg/MIDI/WAV Codec Breakout Tutorial](https://learn.adafruit.com/adafruit-vs1053-mp3-aac-ogg-midi-wav-play-and-record-codec-tutorial.md)
- [Naughty or Nice Machine](https://learn.adafruit.com/naughty-or-nice-machine.md)
- [Adafruit Ultimate GPS Logger Shield](https://learn.adafruit.com/adafruit-ultimate-gps-logger-shield.md)
- [Arduino "Hunt The Wumpus"](https://learn.adafruit.com/arduino-hunt-the-wumpus.md)
- [Track Your Treats: Halloween Candy GPS Tracker](https://learn.adafruit.com/track-your-treats-halloween-candy-gps-tracker.md)
- [WiFi Weather Station](https://learn.adafruit.com/wifi-weather-station-arduino-cc3000.md)
- [Bluetooth Controlled Motorized Camera Slider](https://learn.adafruit.com/bluetooth-motorized-camera-slider.md)
- [TMP36 Temperature Sensor](https://learn.adafruit.com/tmp36-temperature-sensor.md)
- [Babel Fish](https://learn.adafruit.com/babel-fish.md)
---
# Source: https://learn.adafruit.com/send-raspberry-pi-data-to-cosm/python-script.md
# Source: https://learn.adafruit.com/raspberry-pi-e-mail-notifier-using-leds/python-script.md
# Raspberry Pi E-mail Notifier Using LEDs
## Python Script

Now you're ready to download some Python code and check your Gmail account. The following python script can be downloaded directly onto your raspberry pi, customized with your email settings and executed to illuminate the LEDs.
https://github.com/adafruit/Adafruit_Learning_System_Guides/blob/main/Raspberry_Pi_E-mail_Notifier_Using_LEDs/Raspberry_Pi_E-mail_Notifier_Using_LEDs.py
# Download the Code
Let's put this file right in your home directory for simplicity. The wget command makes this easy.
```
$ cd
$ wget https://raw.githubusercontent.com/adafruit/Adafruit_Learning_System_Guides/master/Raspberry_Pi_E-mail_Notifier_Using_LEDs/Raspberry_Pi_E-mail_Notifier_Using_LEDs.py
```
# Customize Mail Variables
Don't forget to set the `USERNAME` and `PASSWORD` to match your GMail account. (Remember, if you're using two-factor authentication under GMail, you'll need to generate an [application-specific password](https://support.google.com/mail/answer/1173270?hl=en) for this. If you're using a different e-mail provider, you may need to check their documentation for what `HOSTNAME` to use. It's usually something like `imap.youremailproviderhere.com`.)
Finally, my INBOX never goes to zero unread messages. We have a variable called `NEWMAIL_OFFSET` which you can customize to whatever your current unread message count is. When running this python script there will be a number output to the console showing the current number of unseen messages.
# Running the Code
```
$ python3 ./Raspberry_Pi_E-mail_Notifier_Using_LEDs.py
```
Send yourself some emails to see the green LED light up!
You can stop the script at any time by pressing **Ctrl-C**.
- [Previous Page](https://learn.adafruit.com/raspberry-pi-e-mail-notifier-using-leds/necessary-packages.md)
- [Next Page](https://learn.adafruit.com/raspberry-pi-e-mail-notifier-using-leds/remote-ssh.md)
## Featured Products
### Raspberry Pi Starter Pack
[Raspberry Pi Starter Pack](https://www.adafruit.com/product/3049)
You're going to work hard with your Raspberry Pi 2 Model B or Raspberry Pi 1 Model B+. You're going to have to solder, code, and Linux your Maker heart out. That's why we've tried to make it as easy as possible to start...
In Stock
[Buy Now](https://www.adafruit.com/product/3049)
[Related Guides to the Product](https://learn.adafruit.com/products/3049/guides)
### Raspberry Pi 3 - Model B+ - 1.4GHz Cortex-A53 with 1GB RAM
[Raspberry Pi 3 - Model B+ - 1.4GHz Cortex-A53 with 1GB RAM](https://www.adafruit.com/product/3775)
The Raspberry Pi 3 Model B is the most popular Raspberry Pi computer made, and the Pi Foundation knows you can always make a good thing _better_! And what could make the Pi 3 better? How about a _faster_ processor, 5 GHz WiFi, and updated Ethernet chip with PoE capability?...
In Stock
[Buy Now](https://www.adafruit.com/product/3775)
[Related Guides to the Product](https://learn.adafruit.com/products/3775/guides)
### Full Sized Premium Breadboard - 830 Tie Points
[Full Sized Premium Breadboard - 830 Tie Points](https://www.adafruit.com/product/239)
This is a 'full-size' premium quality breadboard, 830 tie points. Good for small and medium projects. It's 2.2" x 7" (5.5 cm x 17 cm) with a standard double-strip in the middle and two power rails on both sides. You can pull the power rails off easily to make the...
In Stock
[Buy Now](https://www.adafruit.com/product/239)
[Related Guides to the Product](https://learn.adafruit.com/products/239/guides)
### 5V 2.5A Switching Power Supply with 20AWG MicroUSB Cable
[5V 2.5A Switching Power Supply with 20AWG MicroUSB Cable](https://www.adafruit.com/product/1995)
Our all-in-one 5V 2.5 Amp + MicroUSB cable power adapter is the perfect choice for powering single-board computers like Raspberry Pi, BeagleBone, or anything else that's power-hungry!
This adapter was specifically designed to provide 5.25V, not 5V, but we still call it a 5V USB...
Out of Stock
[Buy Now](https://www.adafruit.com/product/1995)
[Related Guides to the Product](https://learn.adafruit.com/products/1995/guides)
### Assembled Pi Cobbler Plus - Breakout Cable
[Assembled Pi Cobbler Plus - Breakout Cable](https://www.adafruit.com/product/2029)
The Raspberry Pi B+ / Pi 2 / Pi 3 / Pi 4 has landed on the Maker World like a 40-GPIO pinned, quad-USB ported, credit card sized bomb of DIY joy. And while you can use most of our great Model B accessories by hooking up our [downgrade...](https://www.adafruit.com/product/1986)
In Stock
[Buy Now](https://www.adafruit.com/product/2029)
[Related Guides to the Product](https://learn.adafruit.com/products/2029/guides)
### Assembled Pi T-Cobbler Plus - GPIO Breakout
[Assembled Pi T-Cobbler Plus - GPIO Breakout](https://www.adafruit.com/product/2028)
**This is the assembled version of the Pi T-Cobbler Plus. It only works with the Raspberry Pi Model Zero, A+, B+, Pi 2, Pi 3 & Pi 4!** (Any Pi with 2x20 connector)
The Raspberry Pi has landed on the Maker World like a 40-GPIO pinned, quad-USB ported, credit...
In Stock
[Buy Now](https://www.adafruit.com/product/2028)
[Related Guides to the Product](https://learn.adafruit.com/products/2028/guides)
### Diffused Red 10mm LED (25 pack)
[Diffused Red 10mm LED (25 pack)](https://www.adafruit.com/product/845)
Need some big indicators? We are big fans of these huge diffused red LEDs. They are fairly bright so they can be seen in daytime, and from any angle. They go easily into a breadboard and will add that extra zing to your project.
- Pack of 25 diffused red LEDs
- 10mm...
No Longer Stocked
[Buy Now](https://www.adafruit.com/product/845)
[Related Guides to the Product](https://learn.adafruit.com/products/845/guides)
### Diffused Green 10mm LED (25 pack)
[Diffused Green 10mm LED (25 pack)](https://www.adafruit.com/product/844)
Need some big indicators? We are big fans of these huge 10mm diffused green LEDs. They are fairly bright so they can be seen in daytime, and from any angle. They go easily into a breadboard and will add that extra zing to your project.
- Pack of 25 diffused green LEDs
- 10mm...
No Longer Stocked
[Buy Now](https://www.adafruit.com/product/844)
[Related Guides to the Product](https://learn.adafruit.com/products/844/guides)
## Related Guides
- [Speech Synthesis on the Raspberry Pi](https://learn.adafruit.com/speech-synthesis-on-the-raspberry-pi.md)
- [Circadian Pi Desk Light](https://learn.adafruit.com/circadian-pi-desk-light.md)
- [Adafruit's Raspberry Pi Lesson 11. DS18B20 Temperature Sensing](https://learn.adafruit.com/adafruits-raspberry-pi-lesson-11-ds18b20-temperature-sensing.md)
- [Drive a 16x2 LCD with the Raspberry Pi](https://learn.adafruit.com/drive-a-16x2-lcd-directly-with-a-raspberry-pi.md)
- [Adding Basic Audio Ouput to Raspberry Pi Zero](https://learn.adafruit.com/adding-basic-audio-ouput-to-raspberry-pi-zero.md)
- [Single Channel LoRaWAN Gateway for Raspberry Pi](https://learn.adafruit.com/raspberry-pi-single-channel-lorawan-gateway.md)
- [Playing sounds and using buttons with Raspberry Pi](https://learn.adafruit.com/playing-sounds-and-using-buttons-with-raspberry-pi.md)
- [Program an AVR or Arduino Using Raspberry Pi GPIO](https://learn.adafruit.com/program-an-avr-or-arduino-using-raspberry-pi-gpio-pins.md)
- [IoT Temperature Logger with Analog Devices ADT7410, Raspberry Pi, and Adafruit IO](https://learn.adafruit.com/iot-temperature-logger-with-python-and-adafruit-io.md)
- [Capacitive Touch Sensors on the Raspberry Pi](https://learn.adafruit.com/capacitive-touch-sensors-on-the-raspberry-pi.md)
- [Matrix and 7-Segment LED Backpack with the Raspberry Pi](https://learn.adafruit.com/matrix-7-segment-led-backpack-with-the-raspberry-pi.md)
- [Windows IoT Core Application Development: Headed Blinky](https://learn.adafruit.com/windows-iot-application-development-headed-blinky.md)
- [Basic Resistor Sensor Reading on Raspberry Pi](https://learn.adafruit.com/basic-resistor-sensor-reading-on-raspberry-pi.md)
- [Large Pi-based Thermometer and Clock](https://learn.adafruit.com/large-pi-based-thermometer-and-clock.md)
- [PiPhone - A Raspberry Pi based Cellphone](https://learn.adafruit.com/piphone-a-raspberry-pi-based-cellphone.md)
---
# Source: https://learn.adafruit.com/monochrome-oled-breakouts/python-setup.md
# Monochrome OLED Breakouts
## Python Setup
You'll need to install the Adafruit\_Blinka library that provides the CircuitPython support in Python. This may also require enabling I2C on your platform and verifying you are running Python 3. [Since each platform is a little different, and Linux changes often, please visit the CircuitPython on Linux guide to get your computer ready](https://learn.adafruit.com/circuitpython-on-raspberrypi-linux)!
## Python Installation of SSD1306 Library
Once that's done, from your command line run the following command:
```terminal
pip3 install adafruit-circuitpython-ssd1306
```
If your default Python is version 3 you may need to run 'pip' instead. Just make sure you aren't trying to use CircuitPython on Python 2.x, it isn't supported!
If that complains about pip3 not being installed, then run this first to install it:
```terminal
sudo apt-get install python3-pip
```
## Pillow Library
We also need PIL, the Python Imaging Library, to allow using text with custom fonts. There are several system libraries that PIL relies on, so installing via a package manager is the easiest way to bring in everything:
```terminal
sudo apt-get install python3-pil
```
## NumPy Library
NumPy is needed for the **circuitpython\_typing** library. This can be installed with the following command:
```terminal
sudo apt-get install python3-numpy
```
That's it. You should be ready to go.
## Speeding up the Display on Raspberry Pi
For the best performance, especially if you are doing fast animations, you'll want to tweak the I2C core to run at 1MHz. By default it may be 100KHz or 400KHz
To do this edit the config with `sudo nano /boot/firmware/config.txt`
and add to the end of the file
`dtparam=i2c_baudrate=1000000`

reboot to 'set' the change.
- [Previous Page](https://learn.adafruit.com/monochrome-oled-breakouts/python-wiring.md)
- [Next Page](https://learn.adafruit.com/monochrome-oled-breakouts/python-usage-2.md)
## Featured Products
### Monochrome 1.3" 128x64 OLED graphic display - STEMMA QT / Qwiic
[Monochrome 1.3" 128x64 OLED graphic display - STEMMA QT / Qwiic](https://www.adafruit.com/product/938)
These displays are small, only about 1.3" diagonal, but very readable due to the high contrast of an OLED display. This display is made of 128x64 individual white OLED pixels, each one is turned on or off by the controller chip. Because the display makes its own light, no backlight is...
In Stock
[Buy Now](https://www.adafruit.com/product/938)
[Related Guides to the Product](https://learn.adafruit.com/products/938/guides)
### Monochrome 0.96" 128x64 OLED Graphic Display - STEMMA QT
[Monochrome 0.96" 128x64 OLED Graphic Display - STEMMA QT](https://www.adafruit.com/product/326)
These displays are small, only about 1" diagonal, but very readable due to the high contrast of an OLED display. This display is made of 128x64 individual white OLED pixels, each one is turned on or off by the controller chip. Because the display makes its own light, no backlight is...
Out of Stock
[Buy Now](https://www.adafruit.com/product/326)
[Related Guides to the Product](https://learn.adafruit.com/products/326/guides)
### Monochrome 128x32 SPI OLED graphic display
[Monochrome 128x32 SPI OLED graphic display](https://www.adafruit.com/product/661)
These displays are small, only about 1" diagonal, but very readable due to the high contrast of an OLED display. This display is made of 128x32 individual white OLED pixels, each one is turned on or off by the controller chip. Because the display makes its own light, no backlight is...
In Stock
[Buy Now](https://www.adafruit.com/product/661)
[Related Guides to the Product](https://learn.adafruit.com/products/661/guides)
### Monochrome 128x32 I2C OLED graphic display
[Monochrome 128x32 I2C OLED graphic display](https://www.adafruit.com/product/931)
These displays are small, only about 1" diagonal, but very readable due to the high contrast of an OLED display. This display is made of 128x32 individual white OLED pixels, each one is turned on or off by the controller chip. Because the display makes its own light, no backlight is...
No Longer Stocked
[Buy Now](https://www.adafruit.com/product/931)
[Related Guides to the Product](https://learn.adafruit.com/products/931/guides)
### Monochrome 0.91" 128x32 I2C OLED Display - STEMMA QT / Qwiic
[Monochrome 0.91" 128x32 I2C OLED Display - STEMMA QT / Qwiic](https://www.adafruit.com/product/4440)
These displays are small, only about 1" diagonal, but very readable due to the high contrast of an OLED display. This display is made of 128x32 individual white OLED pixels, each one is turned on or off by the controller chip. Because the display makes its own light, no backlight is...
In Stock
[Buy Now](https://www.adafruit.com/product/4440)
[Related Guides to the Product](https://learn.adafruit.com/products/4440/guides)
## Related Guides
- [OLED TRON Clock](https://learn.adafruit.com/oled-tron-clock.md)
- [I2C Addresses and Troublesome Chips](https://learn.adafruit.com/i2c-addresses.md)
- [Monitor Your Greenhouse with a No-Code Environmental Sensor](https://learn.adafruit.com/monitor-your-greenhouse-with-a-no-code-environmental-sensor.md)
- [SSD1306 OLED Displays with Raspberry Pi and BeagleBone Black](https://learn.adafruit.com/ssd1306-oled-displays-with-raspberry-pi-and-beaglebone-black.md)
- [Adafruit FT232H With SPI & I2C Devices](https://learn.adafruit.com/adafruit-ft232h-with-spi-and-i2c-libraries.md)
- [MIDI Melody Maker](https://learn.adafruit.com/midi-melody-maker.md)
- [Steampunk Cameo Necklace with OLED Display](https://learn.adafruit.com/steampunk-cameo-necklace.md)
- [Using QMK on RP2040 Microcontrollers](https://learn.adafruit.com/using-qmk-on-rp2040-microcontrollers.md)
- [CircuitPython OLED and Dual Knob Sketcher](https://learn.adafruit.com/circuitpython-oled-knob-sketcher.md)
- [Gravity Falls Memory Gun](https://learn.adafruit.com/gravity-falls-memory-gun.md)
- [Pico W HTTP Server with CircuitPython](https://learn.adafruit.com/pico-w-http-server-with-circuitpython.md)
- [Adafruit Trinkey QT2040](https://learn.adafruit.com/adafruit-trinkey-qt2040.md)
- [Adafruit Airlift Bitsy Add-On - ESP32 WiFi Co-Processor](https://learn.adafruit.com/adafruit-airlift-bitsy-add-on-esp32-wifi-co-processor.md)
- [Animated Flying Toaster OLED Jewelry](https://learn.adafruit.com/animated-flying-toaster-oled-jewelry.md)
- [Adafruit TCA9548A 1-to-8 I2C Multiplexer Breakout](https://learn.adafruit.com/adafruit-tca9548a-1-to-8-i2c-multiplexer-breakout.md)
---
# Source: https://learn.adafruit.com/monochrome-oled-breakouts/python-usage-2.md
# Monochrome OLED Breakouts
## Python Usage
It's easy to use OLEDs with Python and the [Adafruit CircuitPython SSD1306](https://github.com/adafruit/Adafruit_CircuitPython_SSD1306) module. This module allows you to easily write Python code to control the display.
You can use this sensor with any computer that has GPIO and Python [thanks to Adafruit\_Blinka, our CircuitPython-for-Python compatibility library](https://learn.adafruit.com/circuitpython-on-raspberrypi-linux).
To demonstrate the usage, we'll initialize the library and use Python code to control the OLED from the board's Python REPL.
Since we are running full CPython on our Linux/computer, we can take advantage of the powerful Pillow image drawing library to handle text, shapes, graphics, etc. [Pillow is a gold standard in image and graphics handling, you can read about all it can do here](https://pillow.readthedocs.io/en/stable/).
# I2C Initialization
If your display is connected to the board using I2C (like if using a PiOLED or Bonnet) you'll first need to initialize the I2C bus. First import the necessary modules:
```
import board
import busio
```
Now for either board run this command to create the I2C instance using the default SCL and SDA pins of your I2C host:
```
i2c = busio.I2C(board.SCL, board.SDA)
```
After initializing the I2C interface for your firmware as described above you can create an instance of the SSD1306 I2C driver by running:
```
import adafruit_ssd1306
oled = adafruit_ssd1306.SSD1306_I2C(128, 32, i2c)
```
Note that the first two parameters to the `SSD1306_I2C` class initializer are the **width** and **height** of the display in pixels. Be sure to use the right values for the display you're using!
## 128 x 64 size OLEDs (or changing the I2C address)
If you are using a 128x64 display, the I2C address is probably different (`0x3d`), unless you've changed it by soldering some jumpers:
```
oled = adafruit_ssd1306.SSD1306_I2C(128, 64, i2c, addr=0x3d)
```
## Adding hardware reset pin
If you have a reset pin (which may be required if your OLED does not have an auto-reset chip like the FeatherWing) also pass in a reset pin like so:
```
import digitalio
reset_pin = digitalio.DigitalInOut(board.D4) # any pin!
oled = adafruit_ssd1306.SSD1306_I2C(128, 32, i2c, reset=reset_pin)
```
At this point the I2C bus and display are initialized. **Skip down to the example code section.**
# SPI Initialization
If your display is connected to the board using SPI you'll first need to initialize the SPI bus:
```
import adafruit_ssd1306
import board
import busio
import digitalio
spi = busio.SPI(board.SCK, MOSI=board.MOSI)
reset_pin = digitalio.DigitalInOut(board.D4) # any pin!
cs_pin = digitalio.DigitalInOut(board.D5) # any pin!
dc_pin = digitalio.DigitalInOut(board.D6) # any pin!
oled = adafruit_ssd1306.SSD1306_SPI(128, 32, spi, dc_pin, reset_pin, cs_pin)
```
Note the first two parameters to the `SSD1306_SPI` class initializer are the **width** and **height** of the display in pixels. Be sure to use the right values for the display you're using!
The next parameters to the initializer are the pins connected to the display's **DC** , **reset** , and **CS** lines in that order. Again make sure to use the right pin names as you have wired up to your board!
# Example Code
https://github.com/adafruit/Adafruit_CircuitPython_SSD1306/blob/main/examples/ssd1306_pillow_demo.py
Let's take a look at the sections of code one by one. We start by importing the `board` so that we can initialize SPI, `digitalio`, several `PIL` modules for Image Drawing, and the `adafruit_ssd1306` driver.
```
import board
import digitalio
from PIL import Image, ImageDraw, ImageFont
import adafruit_ssd1306
```
Next we define the reset line, which will be used for either SPI or I2C. If your OLED has auto-reset circuitry, you can set the `oled_reset` line to **None**
```
oled_reset = digitalio.DigitalInOut(board.D4)
```
In order to make it easy to change display sizes, we'll define a few variables in one spot here. We have the display width, the display height and the border size, which we will explain a little further below. If your display is something different than these numbers, change them to the correct setting.
```
WIDTH = 128
HEIGHT = 32 # Change to 64 if needed
BORDER = 5
```
If you're using I2C, you would use this section of code. We set the I2C object to the board's I2C with the easy shortcut function `board.I2C()`. By using this function, it finds the I2C module and initializes using the default I2C parameters. We also set up the oled with SSD1306\_I2C which makes use of the I2C bus.
```
# Use for I2C.
i2c = board.I2C()
oled = adafruit_ssd1306.SSD1306_I2C(WIDTH, HEIGHT, i2c, addr=0x3c, reset=oled_reset)
```
If you're using SPI, you would use this section of code. We set the SPI object to the board's SPI with the easy shortcut function `board.SPI()`. By using this function, it finds the SPI module and initializes using the default SPI parameters. We set the OLED's **CS** (Chip Select), and **DC** (Data/Command) pins. We also set up the OLED with SSD1306\_SPI which makes use of the SPI bus.
```
# Use for SPI
spi = board.SPI()
oled_cs = digitalio.DigitalInOut(board.D5)
oled_dc = digitalio.DigitalInOut(board.D6)
oled = adafruit_ssd1306.SSD1306_SPI(WIDTH, HEIGHT, spi, oled_dc, oled_reset, oled_cs)
```
Next we clear the display in case it was initialized with any random artifact data.
```
# Clear display.
oled.fill(0)
oled.show()
```
Next, we need to initialize PIL to create a blank image to draw on. Think of it as a virtual canvas. Since this is a monochrome display, we set it up for 1-bit color, meaning a pixel is either white or black. We can make use of the OLED's width and height properties as well. Optionally, we could have used our **WIDTH** and **HEIGHT** variables.
```
# Create blank image for drawing.
# Make sure to create image with mode '1' for 1-bit color.
image = Image.new('1', (oled.width, oled.height))
# Get drawing object to draw on image.
draw = ImageDraw.Draw(image)
```
Now we start the actual drawing. Here we are telling it we want to draw a rectangle from `(0,0)`, which is the upper left, to the full width and height of the display. We want it both filled in and having an outline of white, so we pass 255 for both numbers.
```
# Draw a white background
draw.rectangle((0, 0, oled.width, oled.height), outline=255, fill=255)
```
If we ran the code now, it would still show a blank display because we haven't told python to use our virtual canvas yet. You can skip to the end if you would like to see how to do that. This is what our canvas currently looks like in memory.
Next we will create a smaller black rectangle. The easiest way to do this is to draw another rectangle a little smaller than the full screen with no fill or outline and place it in a specific location. In this case, we will create a rectangle that is 5 pixels smaller on each side. This is where the **BORDER** variable comes into use. It makes calculating the size of the second rectangle much easier. We want the starting coordinate, which consists of the first two parameters, to be our BORDER value. Then for the next two parameters, which are our ending coordinates, we want to subtract our border value from the width and height. Also, because this is a zero-based coordinate system, we also need to subtract 1 from each number.
```
# Draw a smaller inner rectangle
draw.rectangle((BORDER, BORDER, oled.width - BORDER - 1, oled.height - BORDER - 1),
outline=0, fill=0)
```
Here's what our virtual canvas looks like in memory.

Now drawing text with PIL is pretty straightforward. First we start by setting the font to the default system text. After that we define our text and get the size of the text. We're grabbing the size that it would render at so that we can calculate the center position. Finally, we take the font size and screen size to calculate the position we want to draw the text at and it appears in the center of the screen.
```
# Load default font.
font = ImageFont.load_default()
# Draw Some Text
text = "Hello World!"
(font_width, font_height) = font.getsize(text)
draw.text((oled.width//2 - font_width//2, oled.height//2 - font_height//2),
text, font=font, fill=255)
```
Finally, we need to display our virtual canvas to the OLED and we do that with 2 commands. First we set the image to the screen, then we tell it to show the image.
```
# Display image
oled.image(image)
oled.show()
```
Warning:
Here's what the final output should look like.

- [Previous Page](https://learn.adafruit.com/monochrome-oled-breakouts/python-setup.md)
- [Next Page](https://learn.adafruit.com/monochrome-oled-breakouts/troubleshooting-2.md)
## Featured Products
### Monochrome 1.3" 128x64 OLED graphic display - STEMMA QT / Qwiic
[Monochrome 1.3" 128x64 OLED graphic display - STEMMA QT / Qwiic](https://www.adafruit.com/product/938)
These displays are small, only about 1.3" diagonal, but very readable due to the high contrast of an OLED display. This display is made of 128x64 individual white OLED pixels, each one is turned on or off by the controller chip. Because the display makes its own light, no backlight is...
In Stock
[Buy Now](https://www.adafruit.com/product/938)
[Related Guides to the Product](https://learn.adafruit.com/products/938/guides)
### Monochrome 0.96" 128x64 OLED Graphic Display - STEMMA QT
[Monochrome 0.96" 128x64 OLED Graphic Display - STEMMA QT](https://www.adafruit.com/product/326)
These displays are small, only about 1" diagonal, but very readable due to the high contrast of an OLED display. This display is made of 128x64 individual white OLED pixels, each one is turned on or off by the controller chip. Because the display makes its own light, no backlight is...
Out of Stock
[Buy Now](https://www.adafruit.com/product/326)
[Related Guides to the Product](https://learn.adafruit.com/products/326/guides)
### Monochrome 128x32 SPI OLED graphic display
[Monochrome 128x32 SPI OLED graphic display](https://www.adafruit.com/product/661)
These displays are small, only about 1" diagonal, but very readable due to the high contrast of an OLED display. This display is made of 128x32 individual white OLED pixels, each one is turned on or off by the controller chip. Because the display makes its own light, no backlight is...
In Stock
[Buy Now](https://www.adafruit.com/product/661)
[Related Guides to the Product](https://learn.adafruit.com/products/661/guides)
### Monochrome 128x32 I2C OLED graphic display
[Monochrome 128x32 I2C OLED graphic display](https://www.adafruit.com/product/931)
These displays are small, only about 1" diagonal, but very readable due to the high contrast of an OLED display. This display is made of 128x32 individual white OLED pixels, each one is turned on or off by the controller chip. Because the display makes its own light, no backlight is...
No Longer Stocked
[Buy Now](https://www.adafruit.com/product/931)
[Related Guides to the Product](https://learn.adafruit.com/products/931/guides)
### Monochrome 0.91" 128x32 I2C OLED Display - STEMMA QT / Qwiic
[Monochrome 0.91" 128x32 I2C OLED Display - STEMMA QT / Qwiic](https://www.adafruit.com/product/4440)
These displays are small, only about 1" diagonal, but very readable due to the high contrast of an OLED display. This display is made of 128x32 individual white OLED pixels, each one is turned on or off by the controller chip. Because the display makes its own light, no backlight is...
In Stock
[Buy Now](https://www.adafruit.com/product/4440)
[Related Guides to the Product](https://learn.adafruit.com/products/4440/guides)
## Related Guides
- [OLED TRON Clock](https://learn.adafruit.com/oled-tron-clock.md)
- [I2C Addresses and Troublesome Chips](https://learn.adafruit.com/i2c-addresses.md)
- [Monitor Your Greenhouse with a No-Code Environmental Sensor](https://learn.adafruit.com/monitor-your-greenhouse-with-a-no-code-environmental-sensor.md)
- [SSD1306 OLED Displays with Raspberry Pi and BeagleBone Black](https://learn.adafruit.com/ssd1306-oled-displays-with-raspberry-pi-and-beaglebone-black.md)
- [Adafruit FT232H With SPI & I2C Devices](https://learn.adafruit.com/adafruit-ft232h-with-spi-and-i2c-libraries.md)
- [MIDI Melody Maker](https://learn.adafruit.com/midi-melody-maker.md)
- [Steampunk Cameo Necklace with OLED Display](https://learn.adafruit.com/steampunk-cameo-necklace.md)
- [Using QMK on RP2040 Microcontrollers](https://learn.adafruit.com/using-qmk-on-rp2040-microcontrollers.md)
- [CircuitPython OLED and Dual Knob Sketcher](https://learn.adafruit.com/circuitpython-oled-knob-sketcher.md)
- [Gravity Falls Memory Gun](https://learn.adafruit.com/gravity-falls-memory-gun.md)
- [Pico W HTTP Server with CircuitPython](https://learn.adafruit.com/pico-w-http-server-with-circuitpython.md)
- [Adafruit Trinkey QT2040](https://learn.adafruit.com/adafruit-trinkey-qt2040.md)
- [Adafruit Airlift Bitsy Add-On - ESP32 WiFi Co-Processor](https://learn.adafruit.com/adafruit-airlift-bitsy-add-on-esp32-wifi-co-processor.md)
- [Animated Flying Toaster OLED Jewelry](https://learn.adafruit.com/animated-flying-toaster-oled-jewelry.md)
- [Adafruit TCA9548A 1-to-8 I2C Multiplexer Breakout](https://learn.adafruit.com/adafruit-tca9548a-1-to-8-i2c-multiplexer-breakout.md)
---
# Source: https://learn.adafruit.com/096-mini-color-oled/python-usage.md
# 0.96" mini Color OLED
## Python Usage
Warning:
Now that you have everything setup, we're going to look over three different examples. For the first, we'll take a look at automatically scaling and cropping an image and then centering it on the display.
## Turning on the Backlight
On some displays, the backlight is controlled by a separate pin such as the 1.3" TFT Bonnet with Joystick. On such displays, running the below code will likely result in the display remaining black. To turn on the backlight, you will need to add a small snippet of code. If your backlight pin number differs, be sure to change it in the code:
```python
# Turn on the Backlight
backlight = DigitalInOut(board.D26)
backlight.switch_to_output()
backlight.value = True
```
## Displaying an Image
Here's the full code to the example. We will go through it section by section to help you better understand what is going on. Let's start by downloading an image of Blinka. This image has enough border to allow resizing and cropping with a variety of display sizes and rations to still look good.

Make sure you save it as **blinka.jpg** and place it in the same folder as your script. Here's the code we'll be loading onto the Raspberry Pi. We'll go over the interesting parts.
https://github.com/adafruit/Adafruit_CircuitPython_RGB_Display/blob/main/examples/rgb_display_pillow_image.py
So we start with our usual imports including a couple of Pillow modules and the display drivers. That is followed by defining a few pins here. The reason we chose these is because they allow you to use the same code with the PiTFT if you chose to do so.
```python
import digitalio
import board
from PIL import Image, ImageDraw
import adafruit_rgb_display.ili9341 as ili9341
import adafruit_rgb_display.st7789 as st7789
import adafruit_rgb_display.hx8357 as hx8357
import adafruit_rgb_display.st7735 as st7735
import adafruit_rgb_display.ssd1351 as ssd1351
import adafruit_rgb_display.ssd1331 as ssd1331
# Configuration for CS and DC pins
cs_pin = digitalio.DigitalInOut(board.CE0)
dc_pin = digitalio.DigitalInOut(board.D25)
reset_pin = digitalio.DigitalInOut(board.D24)
```
Next we'll set the baud rate from the default 24 MHz so that it works on a variety of displays. The exception to this is the SSD1351 driver, which will automatically limit it to 16MHz even if you pass 24MHz. We'll set up out SPI bus and then initialize the display.
We wanted to make these examples work on as many displays as possible with very few changes. The ILI9341 display is selected by default. For other displays, go ahead and comment out these lines:
```python
disp = ili9341.ILI9341(
spi,
rotation=90, # 2.2", 2.4", 2.8", 3.2" ILI9341
```
and uncomment the line appropriate for your display and possibly the line below in the case of longer initialization sequences. The displays have a rotation property so that it can be set in just one place.
```python
#disp = st7789.ST7789(spi, rotation=90, # 2.0" ST7789
#disp = st7789.ST7789(spi, height=240, y_offset=80, rotation=180, # 1.3", 1.54" ST7789
#disp = st7789.ST7789(spi, rotation=90, width=135, height=240, x_offset=53, y_offset=40, # 1.14" ST7789
#disp = hx8357.HX8357(spi, rotation=180, # 3.5" HX8357
#disp = st7735.ST7735R(spi, rotation=90, # 1.8" ST7735R
#disp = st7735.ST7735R(spi, rotation=270, height=128, x_offset=2, y_offset=3, # 1.44" ST7735R
#disp = st7735.ST7735R(spi, rotation=90, bgr=True, width=80, # 0.96" MiniTFT Rev A ST7735R
#disp = st7735.ST7735R(spi, rotation=90, invert=True, width=80, # 0.96" MiniTFT Rev B ST7735R
#x_offset=26, y_offset=1,#disp = ssd1351.SSD1351(spi, rotation=180, # 1.5" SSD1351
#disp = ssd1351.SSD1351(spi, height=96, y_offset=32, rotation=180, # 1.27" SSD1351
#disp = ssd1331.SSD1331(spi, rotation=180, # 0.96" SSD1331
disp = ili9341.ILI9341(
spi,
rotation=90, # 2.2", 2.4", 2.8", 3.2" ILI9341
cs=cs_pin,
dc=dc_pin,
rst=reset_pin,
baudrate=BAUDRATE
)
```
Next we read the current rotation setting of the display and if it is 90 or 270 degrees, we need to swap the width and height for our calculations, otherwise we just grab the width and height. We will create an `image` with our dimensions and use that to create a `draw` object. The `draw` object will have all of our drawing functions.
```python
# Create blank image for drawing.
# Make sure to create image with mode 'RGB' for full color.
if disp.rotation % 180 == 90:
height = disp.width # we swap height/width to rotate it to landscape!
width = disp.height
else:
width = disp.width # we swap height/width to rotate it to landscape!
height = disp.height
image = Image.new('RGB', (width, height))
# Get drawing object to draw on image.
draw = ImageDraw.Draw(image)
```
Next we clear whatever is on the screen by drawing a black rectangle. This isn't strictly necessary since it will be overwritten by the image, but it kind of sets the stage.
```python
# Draw a black filled box to clear the image.
draw.rectangle((0, 0, width, height), outline=0, fill=(0, 0, 0))
disp.image(image)
```
Next we open the Blinka image, which we've named **blinka.jpg** , which assumes it is in the same directory that you are running the script from. Feel free to change it if it doesn't match your configuration.
```python
image = Image.open("blinka.jpg")
```
Here's where it starts to get interesting. We want to scale the image so that it matches either the width or height of the display, depending on which is smaller, so that we have some of the image to chop off when we crop it. So we start by calculating the width to height ration of both the display and the image. If the height is the closer of the dimensions, we want to match the image height to the display height and let it be a bit wider than the display. Otherwise, we want to do the opposite.
Once we've figured out how we're going to scale it, we pass in the new dimensions and using a **Bicubic** rescaling method, we reassign the newly rescaled image back to `image`. Pillow has quite a few different methods to choose from, but Bicubic does a great job and is reasonably fast.
```python
# Scale the image to the smaller screen dimension
image_ratio = image.width / image.height
screen_ratio = width / height
if screen_ratio < image_ratio:
scaled_width = image.width * height // image.height
scaled_height = height
else:
scaled_width = width
scaled_height = image.height * width // image.width
image = image.resize((scaled_width, scaled_height), Image.BICUBIC)
```
Next we want to figure the starting x and y points of the image where we want to begin cropping it so that it ends up centered. We do that by using a standard centering function, which is basically requesting the difference of the center of the display and the center of the image. Just like with scaling, we replace the `image` variable with the newly cropped image.
```python
# Crop and center the image
x = scaled_width // 2 - width // 2
y = scaled_height // 2 - height // 2
image = image.crop((x, y, x + width, y + height))
```
Finally, we take our image and display it. At this point, the image should have the exact same dimensions at the display and fill it completely.
```python
disp.image(image)
```

## Drawing Shapes and Text
In the next example, we'll take a look at drawing shapes and text. This is very similar to the displayio example, but it uses Pillow instead. Here's the code for that.
https://github.com/adafruit/Adafruit_CircuitPython_RGB_Display/blob/main/examples/rgb_display_pillow_demo.py
Just like in the last example, we'll do our imports, but this time we're including the `ImageFont` Pillow module because we'll be drawing some text this time.
```python
import digitalio
import board
from PIL import Image, ImageDraw, ImageFont
import adafruit_rgb_display.ili9341 as ili9341
```
Next we'll define some parameters that we can tweak for various displays. The `BORDER` will be the size in pixels of the green border between the edge of the display and the inner purple rectangle. The `FONTSIZE` will be the size of the font in points so that we can adjust it easily for different displays.
```python
BORDER = 20
FONTSIZE = 24
```
Next, just like in the previous example, we will set up the display, setup the rotation, and create a draw object. **If you have are using a different display than the ILI9341, go ahead and adjust your initializer as explained in the previous example.** After that, we will setup the background with a green rectangle that takes up the full screen. To get green, we pass in a tuple that has our **Red** , **Green** , and **Blue** color values in it in that order which can be any integer from `0` to `255`.
```python
draw.rectangle((0, 0, width, height), fill=(0, 255, 0))
disp.image(image)
```
Next we will draw an inner purple rectangle. This is the same color value as our example in displayio quickstart, except the hexadecimal values have been converted to decimal. We use the `BORDER` parameter to calculate the size and position that we want to draw the rectangle.
```python
draw.rectangle((BORDER, BORDER, width - BORDER - 1, height - BORDER - 1),
fill=(170, 0, 136))
```
Next we'll load a TTF font. The `DejaVuSans.ttf` font should come preloaded on your Pi in the location in the code. We also make use of the `FONTSIZE` parameter that we discussed earlier.
```python
# Load a TTF Font
font = ImageFont.truetype('/usr/share/fonts/truetype/dejavu/DejaVuSans.ttf', FONTSIZE)
```
Now we draw the text Hello World onto the center of the display. You may recognize the centering calculation was the same one we used to center crop the image in the previous example. In this example though, we get the font size values using the `getsize()` function of the font object.
```python
# Draw Some Text
text = "Hello World!"
(font_width, font_height) = font.getsize(text)
draw.text((width//2 - font_width//2, height//2 - font_height//2),
text, font=font, fill=(255, 255, 0))
```
Finally, just like before, we display the image.
```python
disp.image(image)
```
## Displaying System Information
In this last example we'll take a look at getting the system information and displaying it. This can be very handy for system monitoring. Here's the code for that example:
https://github.com/adafruit/Adafruit_CircuitPython_RGB_Display/blob/main/examples/rgb_display_pillow_stats.py
Just like the last example, we'll start by importing everything we imported, but we're adding two more imports. The first one is `time` so that we can add a small delay and the other is `subprocess` so we can gather some system information.
```python
import time
import subprocess
import digitalio
import board
from PIL import Image, ImageDraw, ImageFont
import adafruit_rgb_display.ili9341 as ili9341
```
Next, just like in the first two examples, we will set up the display, setup the rotation, and create a draw object. **If you have are using a different display than the ILI9341, go ahead and adjust your initializer as explained in the previous example.**
Just like in the first example, we're going to draw a black rectangle to fill up the screen. After that, we're going to set up a couple of constants to help with positioning text. The first is the `padding` and that will be the Y-position of the top-most text and the other is `x` which is the X-Position and represents the left side of the text.
```python
# First define some constants to allow easy positioning of text.
padding = -2
x = 0
```
Next, we load a font just like in the second example.
```python
font = ImageFont.truetype('/usr/share/fonts/truetype/dejavu/DejaVuSans.ttf', 24)
```
Now we get to the main loop and by using `while True:`, it will loop until **Control+C** is pressed on the keyboard. The first item inside here, we clear the screen, but notice that instead of giving it a tuple like before, we can just pass `0` and it will draw black.
```python
draw.rectangle((0, 0, width, height), outline=0, fill=0)
```
Next, we run a few scripts using the `subprocess` function that get called to the Operating System to get information. The in each command is passed through awk in order to be formatted better for the display. By having the OS do the work, we don't have to. These little scripts came from `https://unix.stackexchange.com/questions/119126/command-to-display-memory-usage-disk-usage-and-cpu-load`
```python
cmd = "hostname -I | cut -d\' \' -f1"
IP = "IP: "+subprocess.check_output(cmd, shell=True).decode("utf-8")
cmd = "top -bn1 | grep load | awk '{printf \"CPU Load: %.2f\", $(NF-2)}'"
CPU = subprocess.check_output(cmd, shell=True).decode("utf-8")
cmd = "free -m | awk 'NR==2{printf \"Mem: %s/%s MB %.2f%%\", $3,$2,$3*100/$2 }'"
MemUsage = subprocess.check_output(cmd, shell=True).decode("utf-8")
cmd = "df -h | awk '$NF==\"/\"{printf \"Disk: %d/%d GB %s\", $3,$2,$5}'"
Disk = subprocess.check_output(cmd, shell=True).decode("utf-8")
cmd = "cat /sys/class/thermal/thermal_zone0/temp | awk \'{printf \"CPU Temp: %.1f C\", $(NF-0) / 1000}\'" # pylint: disable=line-too-long
Temp = subprocess.check_output(cmd, shell=True).decode("utf-8")
```
Now we display the information for the user. Here we use yet another way to pass color information. We can pass it as a color string using the pound symbol, just like we would with HTML. With each line, we take the height of the line using `getsize()` and move the pointer down by that much.
```python
y = padding
draw.text((x, y), IP, font=font, fill="#FFFFFF")
y += font.getsize(IP)[1]
draw.text((x, y), CPU, font=font, fill="#FFFF00")
y += font.getsize(CPU)[1]
draw.text((x, y), MemUsage, font=font, fill="#00FF00")
y += font.getsize(MemUsage)[1]
draw.text((x, y), Disk, font=font, fill="#0000FF")
y += font.getsize(Disk)[1]
draw.text((x, y), Temp, font=font, fill="#FF00FF")
```
Finally, we write all the information out to the display using `disp.image()`. Since we are looping, we tell Python to sleep for `0.1` seconds so that the CPU never gets too busy.
```python
disp.image(image)
time.sleep(.1)
```

- [Previous Page](https://learn.adafruit.com/096-mini-color-oled/python-wiring-and-setup.md)
- [Next Page](https://learn.adafruit.com/096-mini-color-oled/downloads.md)
## Featured Products
### OLED Breakout Board - 16-bit Color 0.96" w/microSD holder
[OLED Breakout Board - 16-bit Color 0.96" w/microSD holder](https://www.adafruit.com/product/684)
We love our black and white monochrome displays but we also like to dabble with some color now and then. Our new 0.96" color OLED displays are perfect when you need an ultra-small display with vivid, high-contrast 16-bit color. The visible portion of the OLED measures 0.96" diagonal...
In Stock
[Buy Now](https://www.adafruit.com/product/684)
[Related Guides to the Product](https://learn.adafruit.com/products/684/guides)
### Adafruit METRO 328 Fully Assembled - Arduino IDE compatible
[Adafruit METRO 328 Fully Assembled - Arduino IDE compatible](https://www.adafruit.com/product/50)
We sure love the ATmega328 here at Adafruit, and we use them _a lot_ for our own projects. The processor has plenty of GPIO, Analog inputs, hardware UART SPI and I2C, timers and PWM galore - just enough for most simple projects. When we need to go small, we use a
Out of Stock
[Buy Now](https://www.adafruit.com/product/50)
[Related Guides to the Product](https://learn.adafruit.com/products/50/guides)
### Breadboarding wire bundle
[Breadboarding wire bundle](https://www.adafruit.com/product/153)
75 flexible stranded core wires with stiff ends molded on in red, orange, yellow, green, blue, brown, black and white. These are a major improvement over the "box of bent wires" that are sometimes sold with breadboards, and faster than stripping your own solid core wires. Makes...
In Stock
[Buy Now](https://www.adafruit.com/product/153)
[Related Guides to the Product](https://learn.adafruit.com/products/153/guides)
## Related Guides
- [Tiny Arduino Music Visualizer](https://learn.adafruit.com/piccolo.md)
- [Create an Internet of Things Dashboard with Adafruit IO](https://learn.adafruit.com/create-an-internet-of-things-dashboard-with-adafruit-dot-io.md)
- [Adafruit Ultimate GPS](https://learn.adafruit.com/adafruit-ultimate-gps.md)
- [Ladyada's Learn Arduino - Lesson #0](https://learn.adafruit.com/ladyadas-learn-arduino-lesson-number-0.md)
- [Arduino Lesson 15. DC Motor Reversing](https://learn.adafruit.com/adafruit-arduino-lesson-15-dc-motor-reversing.md)
- [Wireless Gardening with Arduino + CC3000 WiFi Modules](https://learn.adafruit.com/wireless-gardening-arduino-cc3000-wifi-modules.md)
- [Arduino Lesson 9. Sensing Light](https://learn.adafruit.com/adafruit-arduino-lesson-9-sensing-light.md)
- [Low Power Coin Cell Voltage Logger](https://learn.adafruit.com/low-power-coin-cell-voltage-logger.md)
- [LSM303 Accelerometer + Compass Breakout](https://learn.adafruit.com/lsm303-accelerometer-slash-compass-breakout.md)
- [Skill Badge Requirements: Microcontrollers](https://learn.adafruit.com/skill-badge-requirements-microcontrollers.md)
- [WiFi Weather Station](https://learn.adafruit.com/wifi-weather-station-arduino-cc3000.md)
- [Adafruit Proto Shield for Arduino](https://learn.adafruit.com/adafruit-proto-shield-arduino.md)
- [Electronic Demon Costume](https://learn.adafruit.com/electronic-demon-costume.md)
- [DIY 8x2 LCD Shield](https://learn.adafruit.com/diy-8x2-lcd-shield.md)
- [Circuit Playground Sound-Controlled Robot](https://learn.adafruit.com/circuit-playground-sound-controlled-robot.md)
---
# Source: https://learn.adafruit.com/adafruit-led-backpack/python-wiring-and-setup-d74df15e-c55c-487a-acce-a905497ef9db.md
# Adafruit LED Backpacks
## Python Wiring and Setup
# Wiring
It's easy to use 7-Segment Displays with Python and the [Adafruit CircuitPython HT16K33](https://github.com/adafruit/Adafruit_CircuitPython_HT16K33) library. This library allows you to easily write Python code to control the display.
We'll cover how to wire the 7-Segment Display to your Raspberry Pi. First assemble your 7-Segment Display.
Since there's _dozens_ of Linux computers/boards you can use we will show wiring for Raspberry Pi. For other platforms, [please visit the guide for CircuitPython on Linux to see whether your platform is supported](https://learn.adafruit.com/circuitpython-on-raspberrypi-linux).
Using wires, connect the 7-Segment Display as shown below to your Raspberry Pi.
- **Raspberry Pi 3.3V ** to **7-Segment Display IO**
- **Raspberry Pi 5V ** to **7-Segment Display VIN**
- **Raspberry Pi GND ** to **7-Segment Display GND**
- **Raspberry Pi SCL ** to **7-Segment Display SCL**
- **Raspberry Pi SDA ** to **7-Segment Display SDA**

To wire up the display using the STEMMA QT port, if you have a board with STEMMA QT connected to the 40-pin header, you can just use a STEMMA QT cable. If you want to connect the display directly to the header pins, you can just use a cable such as:
### STEMMA QT / Qwiic JST SH 4-pin Cable with Premium Female Sockets
[STEMMA QT / Qwiic JST SH 4-pin Cable with Premium Female Sockets](https://www.adafruit.com/product/4397)
This 4-wire cable is a little over 150mm / 6" long and fitted with JST-SH female 4-pin connectors on one end and premium female headers on the other. Compared with the chunkier JST-PH these are 1mm pitch instead of 2mm, but still have a nice latching feel, while being easy to insert and...
Out of Stock
[Buy Now](https://www.adafruit.com/product/4397)
[Related Guides to the Product](https://learn.adafruit.com/products/4397/guides)

Then connect the 7-Segment Display as shown below to your Raspberry Pi:
- **Raspberry Pi 3.3V ** to STEMMA QT **red wire**
- **Raspberry Pi GND ** to STEMMA QT **black wire**
- **Raspberry Pi SCL ** to STEMMA QT **yellow wire**
- **Raspberry Pi SDA ** to STEMMA QT **blue wire**

# Setup
You'll need to install the Adafruit\_Blinka library that provides the CircuitPython support in Python. This may also require enabling I2C on your platform and verifying you are running Python 3. [Since each platform is a little different, and Linux changes often, please visit the CircuitPython on Linux guide to get your computer ready](https://learn.adafruit.com/circuitpython-on-raspberrypi-linux)!
## Python Installation of HT16K33 Library
Once that's done, from your command line run the following command:
- `pip3 install adafruit-circuitpython-ht16k33`
If your default Python is version 3 you may need to run 'pip' instead. Just make sure you aren't trying to use CircuitPython on Python 2.x, it isn't supported!
If that complains about pip3 not being installed, then run this first to install it:
- `sudo apt-get install python3-pip`
## Pillow Library
If you are using one of the matrix displays, you also need PIL, the Python Imaging Library, to allow using text with custom fonts. There are several system libraries that PIL relies on, so installing via a package manager is the easiest way to bring in everything:
- `sudo apt-get install python3-pil`
That's it. You should be ready to go.
- [Previous Page](https://learn.adafruit.com/adafruit-led-backpack/circuitpython-wiring-and-setup-2666a265-2d8e-4cde-bcb8-dadc29b6b8fa.md)
- [Next Page](https://learn.adafruit.com/adafruit-led-backpack/circuitpython-and-python-usage-197dcbfa-4ccf-4b98-a152-3982411df681.md)
## Primary Products
### Adafruit Mini 8x8 LED Matrix w/I2C Backpack - Red
[Adafruit Mini 8x8 LED Matrix w/I2C Backpack - Red](https://www.adafruit.com/product/870)
What's better than a single LED? Lots of LEDs! A fun way to make a small display is to use an [8x8 matrix](https://www.adafruit.com/category/37_88) or a [4-digit 7-segment display](https://www.adafruit.com/category/37_103). Matrices like these are...
In Stock
[Buy Now](https://www.adafruit.com/product/870)
[Related Guides to the Product](https://learn.adafruit.com/products/870/guides)
### Adafruit Mini 8x8 LED Matrix w/I2C Backpack - Yellow
[Adafruit Mini 8x8 LED Matrix w/I2C Backpack - Yellow](https://www.adafruit.com/product/871)
What's better than a single LED? Lots of LEDs! A fun way to make a small display is to use an [8x8 matrix](https://www.adafruit.com/category/37_88) or a [4-digit 7-segment display](https://www.adafruit.com/category/37_103). Matrices like these are...
In Stock
[Buy Now](https://www.adafruit.com/product/871)
[Related Guides to the Product](https://learn.adafruit.com/products/871/guides)
### Adafruit Mini 0.8" 8x8 LED Matrix w/I2C Backpack - Yellow-Green
[Adafruit Mini 0.8" 8x8 LED Matrix w/I2C Backpack - Yellow-Green](https://www.adafruit.com/product/872)
What's better than a single LED? Lots of LEDs! A fun way to make a small display is to use an [8x8 matrix](https://www.adafruit.com/category/37_88) or a [4-digit 7-segment display](https://www.adafruit.com/category/37_103). Matrices like these are...
In Stock
[Buy Now](https://www.adafruit.com/product/872)
[Related Guides to the Product](https://learn.adafruit.com/products/872/guides)
### Adafruit 0.56" 4-Digit 7-Segment Display with I2C Backpack - Red
[Adafruit 0.56" 4-Digit 7-Segment Display with I2C Backpack - Red](https://www.adafruit.com/product/878)
What's better than a single LED? Lots of LEDs! A fun way to make a small display is to use an [8x8 matrix](https://www.adafruit.com/category/37_88) or a [4-digit 7-segment display](https://www.adafruit.com/category/37_103). Matrices like these are...
In Stock
[Buy Now](https://www.adafruit.com/product/878)
[Related Guides to the Product](https://learn.adafruit.com/products/878/guides)
### Adafruit 0.56" 4-Digit 7-Segment Display w/I2C Backpack - Yellow
[Adafruit 0.56" 4-Digit 7-Segment Display w/I2C Backpack - Yellow](https://www.adafruit.com/product/879)
What's better than a single LED? Lots of LEDs! A fun way to make a small display is to use an [8x8 matrix](https://www.adafruit.com/category/37_88) or a [4-digit 7-segment display](https://www.adafruit.com/category/37_103). Matrices like these are...
In Stock
[Buy Now](https://www.adafruit.com/product/879)
[Related Guides to the Product](https://learn.adafruit.com/products/879/guides)
### Adafruit 0.56" 4-Digit 7-Segment Display w/ I2C Backpack - Green
[Adafruit 0.56" 4-Digit 7-Segment Display w/ I2C Backpack - Green](https://www.adafruit.com/product/880)
What's better than a single LED? Lots of LEDs! A fun way to make a small display is to use an [8x8 matrix](https://www.adafruit.com/category/37_88) or a [4-digit 7-segment display](https://www.adafruit.com/category/37_103). Matrices like these are...
No Longer Stocked
[Buy Now](https://www.adafruit.com/product/880)
[Related Guides to the Product](https://learn.adafruit.com/products/880/guides)
### Adafruit 0.56" 4-Digit 7-Segment Display w/ I2C Backpack - Blue
[Adafruit 0.56" 4-Digit 7-Segment Display w/ I2C Backpack - Blue](https://www.adafruit.com/product/881)
What's better than a single LED? Lots of LEDs! A fun way to make a small display is to use an [8x8 matrix](https://www.adafruit.com/category/37_88) or a [4-digit 7-segment display](https://www.adafruit.com/category/37_103). Matrices like these are...
In Stock
[Buy Now](https://www.adafruit.com/product/881)
[Related Guides to the Product](https://learn.adafruit.com/products/881/guides)
### Adafruit Bicolor LED Square Pixel Matrix with I2C Backpack
[Adafruit Bicolor LED Square Pixel Matrix with I2C Backpack](https://www.adafruit.com/product/902)
What's better than a single LED? Lots of LEDs! A fun way to make a small colorful display is to use a [1.2" Bi-color 8x8 LED Matrix](http://www.adafruit.com/products/458). Matrices like these are 'multiplexed' - so to control all the 128 LEDs you need 24 pins....
In Stock
[Buy Now](https://www.adafruit.com/product/902)
[Related Guides to the Product](https://learn.adafruit.com/products/902/guides)
### Adafruit Mini 8x8 LED Matrix w/I2C Backpack - Blue
[Adafruit Mini 8x8 LED Matrix w/I2C Backpack - Blue](https://www.adafruit.com/product/959)
What's better than a single LED? Lots of LEDs! A fun way to make a small display is to use an [8x8 matrix](https://www.adafruit.com/category/37_88) or a [4-digit 7-segment display](https://www.adafruit.com/category/37_103). Matrices like these are...
In Stock
[Buy Now](https://www.adafruit.com/product/959)
[Related Guides to the Product](https://learn.adafruit.com/products/959/guides)
### Adafruit 0.56" 4-Digit 7-Segment Display w/I2C Backpack - White
[Adafruit 0.56" 4-Digit 7-Segment Display w/I2C Backpack - White](https://www.adafruit.com/product/1002)
What's better than a single LED? Lots of LEDs! A fun way to make a small display is to use an [8x8 matrix](https://www.adafruit.com/category/37_88) or a [4-digit 7-segment display](https://www.adafruit.com/category/37_103). Matrices like these are...
In Stock
[Buy Now](https://www.adafruit.com/product/1002)
[Related Guides to the Product](https://learn.adafruit.com/products/1002/guides)
### Adafruit 1.2" 8x8 LED Matrix Backpack
[Adafruit 1.2" 8x8 LED Matrix Backpack](https://www.adafruit.com/product/1048)
By popular request, you can now get our 8x8 LED backpacks without the LEDs! These backpacks feature an HT16K33 I2C LED driver, they're simple and easy to use - you can use [our very nice library for the backpacks to...](https://github.com/adafruit/Adafruit-LED-Backpack-Library)
In Stock
[Buy Now](https://www.adafruit.com/product/1048)
[Related Guides to the Product](https://learn.adafruit.com/products/1048/guides)
### Adafruit Small 1.2" 8x8 LED Matrix w/I2C Backpack - Red
[Adafruit Small 1.2" 8x8 LED Matrix w/I2C Backpack - Red](https://www.adafruit.com/product/1049)
What's better than a single LED? Lots of LEDs! A fun way to make a small display is to use an [8x8 matrix](https://www.adafruit.com/category/37_88) or a [4-digit 7-segment display](https://www.adafruit.com/category/37_103). Matrices like these are...
In Stock
[Buy Now](https://www.adafruit.com/product/1049)
[Related Guides to the Product](https://learn.adafruit.com/products/1049/guides)
### Adafruit Small 1.2" 8x8 LED Matrix w/I2C Backpack - Yellow
[Adafruit Small 1.2" 8x8 LED Matrix w/I2C Backpack - Yellow](https://www.adafruit.com/product/1050)
What's better than a single LED? Lots of LEDs! A fun way to make a small display is to use an [8x8 matrix](https://www.adafruit.com/category/37_88) or a [4-digit 7-segment display](https://www.adafruit.com/category/37_103). Matrices like these are...
In Stock
[Buy Now](https://www.adafruit.com/product/1050)
[Related Guides to the Product](https://learn.adafruit.com/products/1050/guides)
### Adafruit Small 1.2" 8x8 LED Matrix w/I2C Backpack - Blue
[Adafruit Small 1.2" 8x8 LED Matrix w/I2C Backpack - Blue](https://www.adafruit.com/product/1052)
What's better than a single LED? Lots of LEDs! A fun way to make a small display is to use an [8x8 matrix](https://www.adafruit.com/category/37_88) or a [4-digit 7-segment display](https://www.adafruit.com/category/37_103). Matrices like these are...
In Stock
[Buy Now](https://www.adafruit.com/product/1052)
[Related Guides to the Product](https://learn.adafruit.com/products/1052/guides)
### Adafruit Mini 8x8 LED Matrix w/I2C Backpack - Ultra Bright White
[Adafruit Mini 8x8 LED Matrix w/I2C Backpack - Ultra Bright White](https://www.adafruit.com/product/1080)
What's better than a single LED? Lots of LEDs! A fun way to make a small display is to use an [8x8 matrix](https://www.adafruit.com/category/37_88) or a [4-digit 7-segment display](https://www.adafruit.com/category/37_103). Matrices like these are...
In Stock
[Buy Now](https://www.adafruit.com/product/1080)
[Related Guides to the Product](https://learn.adafruit.com/products/1080/guides)
### Adafruit 1.2" 4-Digit 7-Segment Display w/I2C Backpack - Green
[Adafruit 1.2" 4-Digit 7-Segment Display w/I2C Backpack - Green](https://www.adafruit.com/product/1268)
What's better than a single LED? Lots of LEDs! A fun way to make a numeric display is to use a [4-digit 7-segment display](https://www.adafruit.com/category/37_103). LED matrices like these are 'multiplexed' - so to control all the seven-segment LEDs you need 14 pins....
No Longer Stocked
[Buy Now](https://www.adafruit.com/product/1268)
[Related Guides to the Product](https://learn.adafruit.com/products/1268/guides)
### Adafruit 1.2" 4-Digit 7-Segment Display w/I2C Backpack - Yellow
[Adafruit 1.2" 4-Digit 7-Segment Display w/I2C Backpack - Yellow](https://www.adafruit.com/product/1269)
What's better than a single LED? Lots of LEDs! A fun way to make a numeric display is to use a [4-digit 7-segment display](https://www.adafruit.com/category/37_103). LED matrices like these are 'multiplexed' - so to control all the seven-segment LEDs you need 14 pins....
In Stock
[Buy Now](https://www.adafruit.com/product/1269)
[Related Guides to the Product](https://learn.adafruit.com/products/1269/guides)
### Adafruit 1.2" 4-Digit 7-Segment Display w/I2C Backpack - Red
[Adafruit 1.2" 4-Digit 7-Segment Display w/I2C Backpack - Red](https://www.adafruit.com/product/1270)
What's better than a single LED? Lots of LEDs! A fun way to make a numeric display is to use a [4-digit 7-segment display](https://www.adafruit.com/category/37_103). LED matrices like these are 'multiplexed' - so to control all the seven-segment LEDs you need 14 pins....
In Stock
[Buy Now](https://www.adafruit.com/product/1270)
[Related Guides to the Product](https://learn.adafruit.com/products/1270/guides)
### Small 1.2" 8x8 Ultra Bright White LED Matrix + Backpack
[Small 1.2" 8x8 Ultra Bright White LED Matrix + Backpack](https://www.adafruit.com/product/1614)
What's better than a single LED? Lots of LEDs! A fun way to make a small display is to use an [8x8 matrix](https://www.adafruit.com/category/37_88) or a [4-digit 7-segment display](https://www.adafruit.com/category/37_103). Matrices like these are...
In Stock
[Buy Now](https://www.adafruit.com/product/1614)
[Related Guides to the Product](https://learn.adafruit.com/products/1614/guides)
### Adafruit Small 1.2" 8x8 LED Matrix w/I2C Backpack - Pure Green
[Adafruit Small 1.2" 8x8 LED Matrix w/I2C Backpack - Pure Green](https://www.adafruit.com/product/1632)
What's better than a single LED? Lots of LEDs! A fun way to make a small display is to use an [8x8 matrix](https://www.adafruit.com/category/37_88) or a [4-digit 7-segment display](https://www.adafruit.com/category/37_103). Matrices like these are...
In Stock
[Buy Now](https://www.adafruit.com/product/1632)
[Related Guides to the Product](https://learn.adafruit.com/products/1632/guides)
### Adafruit Mini 0.8" 8x8 LED Matrix w/I2C Backpack - Pure Green
[Adafruit Mini 0.8" 8x8 LED Matrix w/I2C Backpack - Pure Green](https://www.adafruit.com/product/1633)
What's better than a single LED? Lots of LEDs! A fun way to make a small display is to use an [8x8 matrix](https://www.adafruit.com/category/37_88) or a [4-digit 7-segment display](https://www.adafruit.com/category/37_103). Matrices like these are...
In Stock
[Buy Now](https://www.adafruit.com/product/1633)
[Related Guides to the Product](https://learn.adafruit.com/products/1633/guides)
### Bi-Color (Red/Green) 24-Bar Bargraph w/I2C Backpack Kit
[Bi-Color (Red/Green) 24-Bar Bargraph w/I2C Backpack Kit](https://www.adafruit.com/product/1721)
What's better than a single LED? Lots of LEDs! A fun way to make a small linear display is to use two 12-bar Bi-color bar-graphs. However, this LED bargraph is 'multiplexed' - so to control all the 48 LEDs you need a lot of pins.
Out of Stock
[Buy Now](https://www.adafruit.com/product/1721)
[Related Guides to the Product](https://learn.adafruit.com/products/1721/guides)
### Small 1.2" 8x8 Ultra Bright Square Amber LED Matrix + Backpack
[Small 1.2" 8x8 Ultra Bright Square Amber LED Matrix + Backpack](https://www.adafruit.com/product/1854)
What's better than a single LED? Lots of LEDs! Matrices like these are 'multiplexed' - so to control 64 LEDs you need 16 pins. That's a lot of pins, and there are [driver chips like the MAX7219](//www.adafruit.com/products/453) that can control a matrix for you but...
In Stock
[Buy Now](https://www.adafruit.com/product/1854)
[Related Guides to the Product](https://learn.adafruit.com/products/1854/guides)
### Small 1.2" 8x8 Ultra Bright Square Yellow LED Matrix + Backpack
[Small 1.2" 8x8 Ultra Bright Square Yellow LED Matrix + Backpack](https://www.adafruit.com/product/1855)
What's better than a single LED? Lots of LEDs! Matrices like these are 'multiplexed' - so to control 64 LEDs you need 16 pins. That's a lot of pins, and there are [driver chips like the MAX7219](//www.adafruit.com/products/453) that can control a matrix for you but...
In Stock
[Buy Now](https://www.adafruit.com/product/1855)
[Related Guides to the Product](https://learn.adafruit.com/products/1855/guides)
### Small 1.2" 8x8 Bright Square Pure Green LED Matrix + Backpack
[Small 1.2" 8x8 Bright Square Pure Green LED Matrix + Backpack](https://www.adafruit.com/product/1856)
What's better than a single LED? Lots of LEDs! Matrices like these are 'multiplexed' - so to control 64 LEDs you need 16 pins. That's a lot of pins, and there are [driver chips like the MAX7219](//www.adafruit.com/products/453) that can control a matrix for you but...
In Stock
[Buy Now](https://www.adafruit.com/product/1856)
[Related Guides to the Product](https://learn.adafruit.com/products/1856/guides)
### Small 1.2" 8x8 Ultra Bright Square White LED Matrix + Backpack
[Small 1.2" 8x8 Ultra Bright Square White LED Matrix + Backpack](https://www.adafruit.com/product/1857)
What's better than a single LED? Lots of LEDs! Matrices like these are 'multiplexed' - so to control 64 LEDs you need 16 pins. That's a lot of pins, and there are [driver chips like the MAX7219](//www.adafruit.com/products/453) that can control a matrix for you but...
In Stock
[Buy Now](https://www.adafruit.com/product/1857)
[Related Guides to the Product](https://learn.adafruit.com/products/1857/guides)
### Adafruit 14-segment LED Alphanumeric Backpack - STEMMA QT
[Adafruit 14-segment LED Alphanumeric Backpack - STEMMA QT](https://www.adafruit.com/product/1910)
By popular request, you can now get our 14-segment LED backpacks without the LEDs! These backpacks feature an HT16K33 I2C LED driver, they're simple and easy to use - you can use [our very nice library for the backpacks to...](https://github.com/adafruit/Adafruit-LED-Backpack-Library)
In Stock
[Buy Now](https://www.adafruit.com/product/1910)
[Related Guides to the Product](https://learn.adafruit.com/products/1910/guides)
### Quad Alphanumeric Display - Red 0.54" Digits w/ I2C Backpack
[Quad Alphanumeric Display - Red 0.54" Digits w/ I2C Backpack](https://www.adafruit.com/product/1911)
Display, elegantly, 012345678 or 9! Gaze, hypnotized, at ABCDEFGHIJKLM - well it can display the whole alphabet. You get the point. This is a nice, bright alphanumeric display that shows letters and numbers in a beautiful red hue. It's super bright and designed for viewing from distances...
In Stock
[Buy Now](https://www.adafruit.com/product/1911)
[Related Guides to the Product](https://learn.adafruit.com/products/1911/guides)
### Quad Alphanumeric Display - Blue 0.54" Digits w/ I2C Backpack
[Quad Alphanumeric Display - Blue 0.54" Digits w/ I2C Backpack](https://www.adafruit.com/product/1912)
Display, elegantly, 012345678 or 9! Gaze, hypnotized, at ABCDEFGHIJKLM - well it can display the whole alphabet. You get the point. This is a nice, bright alphanumeric display that shows letters and numbers in a beautiful blue hue. It's super bright and designed for viewing from distances...
In Stock
[Buy Now](https://www.adafruit.com/product/1912)
[Related Guides to the Product](https://learn.adafruit.com/products/1912/guides)
### 16x8 1.2" LED Matrix + Backpack - Ultra Bright Round Green LEDs
[16x8 1.2" LED Matrix + Backpack - Ultra Bright Round Green LEDs](https://www.adafruit.com/product/2035)
What's better than a single LED? Lots of LEDs! And what's better than lots of LEDs? **TWO TIMES AS MANY LEDS!!!**
With the 16x8 LED Matrix Backpack we've doubled your project's matrix capacity by making it super easy to get two separate 8x8 matrices onto...
In Stock
[Buy Now](https://www.adafruit.com/product/2035)
[Related Guides to the Product](https://learn.adafruit.com/products/2035/guides)
### 16x8 1.2" LED Matrix+Backpack UltraBright Round YellowGreen LEDs
[16x8 1.2" LED Matrix+Backpack UltraBright Round YellowGreen LEDs](https://www.adafruit.com/product/2036)
What's better than a single LED? Lots of LEDs! And what's better than lots of LEDs? **TWO TIMES AS MANY LEDS!!!**
With the 16x8 LED Matrix Backpack we've doubled your project's matrix capacity by making it super easy to get two separate 8x8 matrices onto...
In Stock
[Buy Now](https://www.adafruit.com/product/2036)
[Related Guides to the Product](https://learn.adafruit.com/products/2036/guides)
### 16x8 1.2" LED Matrix + Backpack - Ultra Bright Round Red LEDs
[16x8 1.2" LED Matrix + Backpack - Ultra Bright Round Red LEDs](https://www.adafruit.com/product/2037)
What's better than a single LED? Lots of LEDs! And what's better than lots of LEDs? **TWO TIMES AS MANY LEDS!!!**
With the 16x8 LED Matrix Backpack we've doubled your project's matrix capacity by making it super easy to get two separate 8x8 matrices onto...
In Stock
[Buy Now](https://www.adafruit.com/product/2037)
[Related Guides to the Product](https://learn.adafruit.com/products/2037/guides)
### 16x8 1.2" LED Matrix + Backpack - Ultra Bright Round White LEDs
[16x8 1.2" LED Matrix + Backpack - Ultra Bright Round White LEDs](https://www.adafruit.com/product/2038)
What's better than a single LED? Lots of LEDs! And what's better than lots of LEDs? **TWO TIMES AS MANY LEDS!!!**
With the 16x8 LED Matrix Backpack we've doubled your project's matrix capacity by making it super easy to get two separate 8x8 matrices onto...
In Stock
[Buy Now](https://www.adafruit.com/product/2038)
[Related Guides to the Product](https://learn.adafruit.com/products/2038/guides)
### 16x8 1.2" LED Matrix + Backpack - Ultra Bright Round Blue LEDs
[16x8 1.2" LED Matrix + Backpack - Ultra Bright Round Blue LEDs](https://www.adafruit.com/product/2039)
What's better than a single LED? Lots of LEDs! And what's better than lots of LEDs? **TWO TIMES AS MANY LEDS!!!**
With the 16x8 LED Matrix Backpack we've doubled your project's matrix capacity by making it super easy to get two separate 8x8 matrices onto...
In Stock
[Buy Now](https://www.adafruit.com/product/2039)
[Related Guides to the Product](https://learn.adafruit.com/products/2039/guides)
### 16x8 1.2" LED Matrix + Backpack - Ultra Bright Square Blue LEDs
[16x8 1.2" LED Matrix + Backpack - Ultra Bright Square Blue LEDs](https://www.adafruit.com/product/2040)
What's better than a single LED? Lots of LEDs! And what's better than lots of LEDs? **TWO TIMES AS MANY LEDS!!!**
With the 16x8 LED Matrix Backpack we've doubled your project's matrix capacity by making it super easy to get two separate 8x8 matrices onto...
In Stock
[Buy Now](https://www.adafruit.com/product/2040)
[Related Guides to the Product](https://learn.adafruit.com/products/2040/guides)
### 16x8 1.2" LED Matrix + Backpack - Ultra Bright Square Amber LEDs
[16x8 1.2" LED Matrix + Backpack - Ultra Bright Square Amber LEDs](https://www.adafruit.com/product/2041)
What's better than a single LED? Lots of LEDs! And what's better than lots of LEDs? **TWO TIMES AS MANY LEDS!!!**
With the 16x8 LED Matrix Backpack we've doubled your project's matrix capacity by making it super easy to get two separate 8x8 matrices onto...
In Stock
[Buy Now](https://www.adafruit.com/product/2041)
[Related Guides to the Product](https://learn.adafruit.com/products/2041/guides)
### 16x8 1.2" LED Matrix + Backpack - Ultra Bright Square Green LEDs
[16x8 1.2" LED Matrix + Backpack - Ultra Bright Square Green LEDs](https://www.adafruit.com/product/2042)
What's better than a single LED? Lots of LEDs! And what's better than lots of LEDs? **TWO TIMES AS MANY LEDS!!!**
With the 16x8 LED Matrix Backpack we've doubled your project's matrix capacity by making it super easy to get two separate 8x8 matrices onto...
In Stock
[Buy Now](https://www.adafruit.com/product/2042)
[Related Guides to the Product](https://learn.adafruit.com/products/2042/guides)
### 16x8 1.2" LED Matrix + Backpack -Ultra Bright Square Yellow LEDs
[16x8 1.2" LED Matrix + Backpack -Ultra Bright Square Yellow LEDs](https://www.adafruit.com/product/2043)
What's better than a single LED? Lots of LEDs! And what's better than lots of LEDs? **TWO TIMES AS MANY LEDS!!!**
With the 16x8 LED Matrix Backpack we've doubled your project's matrix capacity by making it super easy to get two separate 8x8 matrices onto...
In Stock
[Buy Now](https://www.adafruit.com/product/2043)
[Related Guides to the Product](https://learn.adafruit.com/products/2043/guides)
### 16x8 1.2" LED Matrix + Backpack - Ultra Bright Square White LEDs
[16x8 1.2" LED Matrix + Backpack - Ultra Bright Square White LEDs](https://www.adafruit.com/product/2044)
What's better than a single LED? Lots of LEDs! And what's better than lots of LEDs? **TWO TIMES AS MANY LEDS!!!**
With the 16x8 LED Matrix Backpack we've doubled your project's matrix capacity by making it super easy to get two separate 8x8 matrices onto...
In Stock
[Buy Now](https://www.adafruit.com/product/2044)
[Related Guides to the Product](https://learn.adafruit.com/products/2044/guides)
### 16x8 1.2" LED Matrix + Backpack-Ultra Bright Round Orange LEDs
[16x8 1.2" LED Matrix + Backpack-Ultra Bright Round Orange LEDs](https://www.adafruit.com/product/2052)
What's better than a single LED? Lots of LEDs! And what's better than lots of LEDs? **TWO TIMES AS MANY LEDS!!!**
With the 16x8 LED Matrix Backpack we've doubled your project's matrix capacity by making it super easy to get two separate 8x8 matrices onto...
In Stock
[Buy Now](https://www.adafruit.com/product/2052)
[Related Guides to the Product](https://learn.adafruit.com/products/2052/guides)
### 16x8 1.2" LED Matrices+Backpack Round LEDs in Various Colors
[16x8 1.2" LED Matrices+Backpack Round LEDs in Various Colors](https://www.adafruit.com/product/2054)
What's better than a single LED? Lots of LEDs! And what's better than lots of LEDs? **TWO TIMES AS MANY LEDS!!!**
With the 16x8 LED Matrix Backpack we've doubled your project's matrix capacity by making it super easy to get two separate 8x8 matrices onto...
Out of Stock
[Buy Now](https://www.adafruit.com/product/2054)
[Related Guides to the Product](https://learn.adafruit.com/products/2054/guides)
### Adafruit 8x16 LED Matrix FeatherWing w/o Matrices
[Adafruit 8x16 LED Matrix FeatherWing w/o Matrices](https://www.adafruit.com/product/3090)
You will chirp with delight when you see how easy it is to make your very own 8x16 LED matrix display for any Feather. At 0.8" square, the little [8x8 matrices](https://www.adafruit.com/new/?q=8x8%20miniature%20LED%20matrix&) have everything a big LED matrix has,...
Out of Stock
[Buy Now](https://www.adafruit.com/product/3090)
[Related Guides to the Product](https://learn.adafruit.com/products/3090/guides)
### Adafruit 14-segment LED Alphanumeric backpack (same as P1910)
[Adafruit 14-segment LED Alphanumeric backpack (same as P1910)](https://www.adafruit.com/product/3322)
Just the backpack + 4pin header
No Longer Stocked
[Buy Now](https://www.adafruit.com/product/3322)
[Related Guides to the Product](https://learn.adafruit.com/products/3322/guides)
## Featured Products
### Adafruit Small 1.2" 8x8 LED Matrix w/I2C Backpack - Yellow-Green
[Adafruit Small 1.2" 8x8 LED Matrix w/I2C Backpack - Yellow-Green](https://www.adafruit.com/product/1051)
What's better than a single LED? Lots of LEDs! A fun way to make a small display is to use an [8x8 matrix](https://www.adafruit.com/category/37_88) or a [4-digit 7-segment display](https://www.adafruit.com/category/37_103). Matrices like these are...
In Stock
[Buy Now](https://www.adafruit.com/product/1051)
[Related Guides to the Product](https://learn.adafruit.com/products/1051/guides)
### Small 1.2" 8x8 Ultra Bright Square Blue LED Matrix + Backpack
[Small 1.2" 8x8 Ultra Bright Square Blue LED Matrix + Backpack](https://www.adafruit.com/product/1853)
What's better than a single LED? Lots of LEDs! Matrices like these are 'multiplexed' - so to control 64 LEDs you need 16 pins. That's a lot of pins, and there are [driver chips like the MAX7219](//www.adafruit.com/products/453) that can control a matrix for you but...
In Stock
[Buy Now](https://www.adafruit.com/product/1853)
[Related Guides to the Product](https://learn.adafruit.com/products/1853/guides)
## Related Guides
- [LED Backpack Displays on Raspberry Pi and BeagleBone Black](https://learn.adafruit.com/led-backpack-displays-on-raspberry-pi-and-beaglebone-black.md)
- [Animating Multiple LED Backpacks](https://learn.adafruit.com/animating-multiple-led-backpacks.md)
- [Arduino GPS Clock](https://learn.adafruit.com/arduino-clock.md)
- [Raspberry Pi Physical Dashboard](https://learn.adafruit.com/raspberry-pi-physical-dashboard.md)
- [CircuitPython Hardware: LED Backpacks & FeatherWings](https://learn.adafruit.com/micropython-hardware-led-backpacks-and-featherwings.md)
- [Matrix and 7-Segment LED Backpack with the Raspberry Pi](https://learn.adafruit.com/matrix-7-segment-led-backpack-with-the-raspberry-pi.md)
- [DIY Pocket LED Gamer - Tiny Tetris!](https://learn.adafruit.com/diy-3d-printed-handheld-pocket-game-tiny-tetris-snake.md)
- [RGB LED Matrix Cube with 25,000 LEDs](https://learn.adafruit.com/rgb-led-matrix-cube-for-pi.md)
- [Creating GIFs for SmartMatrix](https://learn.adafruit.com/creating-gifs-for-smartmatrix.md)
- [Adafruit CharliePlex LED Matrix Bonnet](https://learn.adafruit.com/adafruit-charlieplex-bonnet.md)
- [Connecting a 16x32 RGB LED Matrix Panel to a Raspberry Pi](https://learn.adafruit.com/connecting-a-16x32-rgb-led-matrix-panel-to-a-raspberry-pi.md)
- [MicroPython Displays: Drawing Text](https://learn.adafruit.com/micropython-displays-drawing-text.md)
- [Heart Rate Badge](https://learn.adafruit.com/heart-rate-badge.md)
- [16x24 LED Matrix](https://learn.adafruit.com/16x24-led-matrix.md)
- [Adafruit IS31FL3741](https://learn.adafruit.com/adafruit-is31fl3741.md)
---
# Source: https://learn.adafruit.com/096-mini-color-oled/python-wiring-and-setup.md
# 0.96" mini Color OLED
## Python Wiring and Setup
# Wiring
It's easy to use display breakouts with Python and the [Adafruit CircuitPython RGB Display](https://github.com/adafruit/Adafruit_CircuitPython_RGB_Display) module. This module allows you to easily write Python code to control the display.
We'll cover how to wire the display to your Raspberry Pi. First assemble your display.
Since there's _dozens_ of Linux computers/boards you can use we will show wiring for Raspberry Pi. For other platforms, [please visit the guide for CircuitPython on Linux to see whether your platform is supported](https://learn.adafruit.com/circuitpython-on-raspberrypi-linux).
Connect the display as shown below to your Raspberry Pi.
Info:
Warning:
## ILI9341 and HX-8357-based Displays
### 2.2" Display
- **CLK** connects to SPI clock. On the Raspberry Pi, that's **SCLK**
- **MOSI** connects to SPI MOSI. On the Raspberry Pi, that's also **MOSI**
- **CS** connects to our SPI Chip Select pin. We'll be using **CE0**
- **D/C** connects to our SPI Chip Select pin. We'll be using **GPIO 25** , but this can be changed later.
- **RST** connects to our Reset pin. We'll be using **GPIO 24** but this can be changed later as well.
- **Vin** connects to the Raspberry Pi's **3V** pin
- **GND** connects to the Raspberry Pi's **ground**

[Download the Fritzing Diagram](https://cdn-learn.adafruit.com/assets/assets/000/084/669/original/2.2_TFT.fzz?1574277335)
### 2.4", 2.8", 3.2", and 3.5" Displays
These displays are set up to use the 8-bit data lines by default. We want to use them for SPI. To do that, you'll need to either solder bridge some pads on the back or connect the appropriate IM lines to 3.3V with jumper wires. Check the back of your display for the correct solder pads or IM lines to put it in SPI mode.
- **Vin** connects to the Raspberry Pi's **3V** pin
- **GND** connects to the Raspberry Pi's **ground**
- **CLK** connects to SPI clock. On the Raspberry Pi, thats **SLCK**
- **MOSI** connects to SPI MOSI. On the Raspberry Pi, thats also **MOSI**
- **CS** connects to our SPI Chip Select pin. We'll be using **CE0**
- **D/C** connects to our SPI Chip Select pin. We'll be using **GPIO 25** , but this can be changed later.
- **RST** connects to our Reset pin. We'll be using **GPIO 24** but this can be changed later as well.
Warning:

[Download the Fritzing Diagram](https://cdn-learn.adafruit.com/assets/assets/000/084/670/original/2.8_TFT.fzz?1574277361)
## ST7789 and ST7735-based Displays
### 1.3", 1.54", and 2.0" IPS TFT Display
- **Vin** connects to the Raspberry Pi's **3V** pin
- **GND** connects to the Raspberry Pi's **ground**
- **CLK** connects to SPI clock. On the Raspberry Pi, thats **SLCK**
- **MOSI** connects to SPI MOSI. On the Raspberry Pi, thats also **MOSI**
- **CS** connects to our SPI Chip Select pin. We'll be using **CE0**
- **RST** connects to our Reset pin. We'll be using **GPIO 24** but this can be changed later.
- **D/C** connects to our SPI Chip Select pin. We'll be using **GPIO 25** , but this can be changed later as well.

[Download the Fritzing Diagram](https://cdn-learn.adafruit.com/assets/assets/000/084/671/original/2.0_TFT.fzz?1574277392)
### 0.96", 1.14", and 1.44" Displays
- **Vin** connects to the Raspberry Pi's **3V** pin
- **GND** connects to the Raspberry Pi's **ground**
- **CLK** connects to SPI clock. On the Raspberry Pi, thats **SLCK**
- **MOSI** connects to SPI MOSI. On the Raspberry Pi, thats also **MOSI**
- **CS** connects to our SPI Chip Select pin. We'll be using **CE0**
- **RST** connects to our Reset pin. We'll be using **GPIO 24** but this can be changed later.
- **D/C** connects to our SPI Chip Select pin. We'll be using **GPIO 25** , but this can be changed later as well.

[Download the Fritzing Diagram](https://cdn-learn.adafruit.com/assets/assets/000/084/672/original/1.44_TFT.fzz?1574277409)
### 1.8" Display
- **GND** connects to the Raspberry Pi's **ground**
- **Vin** connects to the Raspberry Pi's **3V** pin
- **RST** connects to our Reset pin. We'll be using **GPIO 24** but this can be changed later.
- **D/C** connects to our SPI Chip Select pin. We'll be using **GPIO 25** , but this can be changed later as well.
- **CS** connects to our SPI Chip Select pin. We'll be using **CE0**
- **MOSI** connects to SPI MOSI. On the Raspberry Pi, thats also **MOSI**
- **CLK** connects to SPI clock. On the Raspberry Pi, thats **SLCK**
- **LITE** connects to the Raspberry Pi's **3V** pin. This can be used to separately control the backlight.

[Download the Fritzing Diagram](https://cdn-learn.adafruit.com/assets/assets/000/084/673/original/1.8_TFT.fzz?1574277427)
## SSD1351-based Displays
### 1.27" and 1.5" OLED Displays
- **GND** connects to the Raspberry Pi's **ground**
- **Vin** connects to the Raspberry Pi's **3V** pin
- **CLK** connects to SPI clock. On the Raspberry Pi, thats **SLCK**
- **MOSI** connects to SPI MOSI. On the Raspberry Pi, thats also **MOSI**
- **CS** connects to our SPI Chip Select pin. We'll be using **CE0**
- **RST** connects to our Reset pin. We'll be using **GPIO 24** but this can be changed later.
- **D/C** connects to our SPI Chip Select pin. We'll be using **GPIO 25** , but this can be changed later as well.

[Download the Fritzing Diagram](https://cdn-learn.adafruit.com/assets/assets/000/084/674/original/1.5_OLED.fzz?1574277454)
## SSD1331-based Display
### 0.96" OLED Display
- **MOSI** connects to SPI MOSI. On the Raspberry Pi, thats also **MOSI**
- **CLK** connects to SPI clock. On the Raspberry Pi, thats **SLCK**
- **D/C** connects to our SPI Chip Select pin. We'll be using **GPIO 25** , but this can be changed later.
- **RST** connects to our Reset pin. We'll be using **GPIO 24** but this can be changed later as well.
- **CS** connects to our SPI Chip Select pin. We'll be using **CE0**
- **Vin** connects to the Raspberry Pi's **3V** pin
- **GND** connects to the Raspberry Pi's **ground**

[Download the Fritzing Diagram](https://cdn-learn.adafruit.com/assets/assets/000/096/092/original/0.96_OLED.fzz?1603118637)
# Setup
You'll need to install the Adafruit\_Blinka library that provides the CircuitPython support in Python. This may also require enabling SPI on your platform and verifying you are running Python 3. [Since each platform is a little different, and Linux changes often, please visit the CircuitPython on Linux guide to get your computer ready](https://learn.adafruit.com/circuitpython-on-raspberrypi-linux)!
Warning:
## Python Installation of RGB Display Library
Once that's done, from your command line run the following command:
- `pip3 install adafruit-circuitpython-rgb-display`
If your default Python is version 3 you may need to run 'pip' instead. Just make sure you aren't trying to use CircuitPython on Python 2.x, it isn't supported!
If that complains about pip3 not being installed, then run this first to install it:
- `sudo apt-get install python3-pip`
## DejaVu TTF Font
Raspberry Pi usually comes with the DejaVu font already installed, but in case it didn't, you can run the following to install it:
- `sudo apt-get install fonts-dejavu`
This package was previously calls **ttf-dejavu** , so if you are running an older version of Raspberry Pi OS, it may be called that.
## Pillow Library
We also need PIL, the Python Imaging Library, to allow graphics and using text with custom fonts. There are several system libraries that PIL relies on, so installing via a package manager is the easiest way to bring in everything:
- `sudo apt-get install python3-pil`
If you installed the PIL through PIP, you may need to install some additional libraries:
- `sudo apt-get install libopenjp2-7 libtiff5 libatlas-base-dev`
That's it. You should be ready to go.
- [Previous Page](https://learn.adafruit.com/096-mini-color-oled/circuitpython-displayio-quickstart.md)
- [Next Page](https://learn.adafruit.com/096-mini-color-oled/python-usage.md)
## Featured Products
### OLED Breakout Board - 16-bit Color 0.96" w/microSD holder
[OLED Breakout Board - 16-bit Color 0.96" w/microSD holder](https://www.adafruit.com/product/684)
We love our black and white monochrome displays but we also like to dabble with some color now and then. Our new 0.96" color OLED displays are perfect when you need an ultra-small display with vivid, high-contrast 16-bit color. The visible portion of the OLED measures 0.96" diagonal...
In Stock
[Buy Now](https://www.adafruit.com/product/684)
[Related Guides to the Product](https://learn.adafruit.com/products/684/guides)
### Adafruit METRO 328 Fully Assembled - Arduino IDE compatible
[Adafruit METRO 328 Fully Assembled - Arduino IDE compatible](https://www.adafruit.com/product/50)
We sure love the ATmega328 here at Adafruit, and we use them _a lot_ for our own projects. The processor has plenty of GPIO, Analog inputs, hardware UART SPI and I2C, timers and PWM galore - just enough for most simple projects. When we need to go small, we use a
Out of Stock
[Buy Now](https://www.adafruit.com/product/50)
[Related Guides to the Product](https://learn.adafruit.com/products/50/guides)
### Breadboarding wire bundle
[Breadboarding wire bundle](https://www.adafruit.com/product/153)
75 flexible stranded core wires with stiff ends molded on in red, orange, yellow, green, blue, brown, black and white. These are a major improvement over the "box of bent wires" that are sometimes sold with breadboards, and faster than stripping your own solid core wires. Makes...
In Stock
[Buy Now](https://www.adafruit.com/product/153)
[Related Guides to the Product](https://learn.adafruit.com/products/153/guides)
## Related Guides
- [Tiny Arduino Music Visualizer](https://learn.adafruit.com/piccolo.md)
- [Create an Internet of Things Dashboard with Adafruit IO](https://learn.adafruit.com/create-an-internet-of-things-dashboard-with-adafruit-dot-io.md)
- [Adafruit Ultimate GPS](https://learn.adafruit.com/adafruit-ultimate-gps.md)
- [Ladyada's Learn Arduino - Lesson #0](https://learn.adafruit.com/ladyadas-learn-arduino-lesson-number-0.md)
- [Arduino Lesson 15. DC Motor Reversing](https://learn.adafruit.com/adafruit-arduino-lesson-15-dc-motor-reversing.md)
- [Wireless Gardening with Arduino + CC3000 WiFi Modules](https://learn.adafruit.com/wireless-gardening-arduino-cc3000-wifi-modules.md)
- [Arduino Lesson 9. Sensing Light](https://learn.adafruit.com/adafruit-arduino-lesson-9-sensing-light.md)
- [Low Power Coin Cell Voltage Logger](https://learn.adafruit.com/low-power-coin-cell-voltage-logger.md)
- [LSM303 Accelerometer + Compass Breakout](https://learn.adafruit.com/lsm303-accelerometer-slash-compass-breakout.md)
- [Skill Badge Requirements: Microcontrollers](https://learn.adafruit.com/skill-badge-requirements-microcontrollers.md)
- [WiFi Weather Station](https://learn.adafruit.com/wifi-weather-station-arduino-cc3000.md)
- [Adafruit Proto Shield for Arduino](https://learn.adafruit.com/adafruit-proto-shield-arduino.md)
- [Electronic Demon Costume](https://learn.adafruit.com/electronic-demon-costume.md)
- [DIY 8x2 LCD Shield](https://learn.adafruit.com/diy-8x2-lcd-shield.md)
- [Circuit Playground Sound-Controlled Robot](https://learn.adafruit.com/circuit-playground-sound-controlled-robot.md)
---
# Source: https://learn.adafruit.com/monochrome-oled-breakouts/python-wiring.md
# Monochrome OLED Breakouts
## Python Wiring
It's easy to use OLEDs with Python and the [Adafruit CircuitPython SSD1306](https://github.com/adafruit/Adafruit_CircuitPython_SSD1306) module. This module allows you to easily write Python code to control the display.
We'll cover how to wire the OLED to your Raspberry Pi. First assemble your OLED.
Since there's _dozens_ of Linux computers/boards you can use we will show wiring for Raspberry Pi. For other platforms, [please visit the guide for CircuitPython on Linux to see whether your platform is supported](https://learn.adafruit.com/circuitpython-on-raspberrypi-linux).
Connect the OLED as shown below to your Raspberry Pi.
## Adafruit PIOLED
- **The PiOLED comes fully assembled. Simply plug into any Raspberry Pi as shown.**

## Adafruit 128x64 OLED Bonnet for Raspberry Pi
- **The OLED Bonnet comes fully assembled. Simply plug into the Raspberry Pi as shown.**

## Adafruit 128x32 I2C OLED Display
- **Pi 3.3V** to **OLED VIN**
- **Pi GND** to **OLED GND**
- **Pi SCL** to **OLED SCL**
- **Pi SDA** to **OLED SDA**
- **Pi GPIO4** to **OLED RST** (or any available GPIO pin)

## Adafruit 0.96" 128x64 OLED Display STEMMA QT Version - I2C Wiring
**You do not need to alter the jumpers on the back - I2C is the default configuration on this display!**
- **Pi 3.3V** to **OLED Vin (red wire)**
- **Pi GND** to **OLED Gnd (black wire)**
- **Pi SCL** to **OLED Clk (yellow wire)**
- **Pi SDA** to **OLED Data (blue wire)**
Note: Connecting the OLED RST is not necessary as this revision added auto-reset circuitry so the RESET pin is not required.

## Adafruit 0.96" or 1.3" 128x64 OLED Display Original Version - I2C Wiring
**You must solder two jumpers closed on the back of the display to use with I2C!**
- **Pi 3.3V** to **OLED Vin**
- **Pi GND** to **OLED Gnd**
- **Pi SCL** to **OLED Clk**
- **Pi SDA** to **OLED Data**
- **Pi GPIO4** to **OLED Rst** (or any available GPIO pin)


## Adafruit 128x32 SPI OLED Display
- **Pi 3.3V** to **OLED VIN**
- **Pi GND** to **OLED GND**
- **Pi MOSI ** to **OLED DATA**
- **Pi SCLK ** to **OLED CLK**
- **Pi GPIO4** to **OLED RST** (or any available GPIO pin)
- **Pi GPIO5 ** to **OLED CS ** (or any available GPIO pin)
- **Pi GPIO6** to **OLED DC ** (or any available GPIO pin)

## Adafruit 0.96" or 1.3" 128x64 OLED Display - SPI Wiring
- **Pi 3.3V** to **OLED VIN**
- **Pi GND** to **OLED GND**
- **Pi MOSI ** to **OLED DATA**
- **Pi SCLK ** to **OLED CLK**
- **Pi GPIO4** to **OLED RST** (or any available GPIO pin)
- **Pi GPIO5 ** to **OLED CS ** (or any available GPIO pin)
- **Pi GPIO6** to **OLED DC ** (or any available GPIO pin)

- [Previous Page](https://learn.adafruit.com/monochrome-oled-breakouts/circuitpython-usage.md)
- [Next Page](https://learn.adafruit.com/monochrome-oled-breakouts/python-setup.md)
## Featured Products
### Monochrome 1.3" 128x64 OLED graphic display - STEMMA QT / Qwiic
[Monochrome 1.3" 128x64 OLED graphic display - STEMMA QT / Qwiic](https://www.adafruit.com/product/938)
These displays are small, only about 1.3" diagonal, but very readable due to the high contrast of an OLED display. This display is made of 128x64 individual white OLED pixels, each one is turned on or off by the controller chip. Because the display makes its own light, no backlight is...
In Stock
[Buy Now](https://www.adafruit.com/product/938)
[Related Guides to the Product](https://learn.adafruit.com/products/938/guides)
### Monochrome 0.96" 128x64 OLED Graphic Display - STEMMA QT
[Monochrome 0.96" 128x64 OLED Graphic Display - STEMMA QT](https://www.adafruit.com/product/326)
These displays are small, only about 1" diagonal, but very readable due to the high contrast of an OLED display. This display is made of 128x64 individual white OLED pixels, each one is turned on or off by the controller chip. Because the display makes its own light, no backlight is...
Out of Stock
[Buy Now](https://www.adafruit.com/product/326)
[Related Guides to the Product](https://learn.adafruit.com/products/326/guides)
### Monochrome 128x32 SPI OLED graphic display
[Monochrome 128x32 SPI OLED graphic display](https://www.adafruit.com/product/661)
These displays are small, only about 1" diagonal, but very readable due to the high contrast of an OLED display. This display is made of 128x32 individual white OLED pixels, each one is turned on or off by the controller chip. Because the display makes its own light, no backlight is...
In Stock
[Buy Now](https://www.adafruit.com/product/661)
[Related Guides to the Product](https://learn.adafruit.com/products/661/guides)
### Monochrome 128x32 I2C OLED graphic display
[Monochrome 128x32 I2C OLED graphic display](https://www.adafruit.com/product/931)
These displays are small, only about 1" diagonal, but very readable due to the high contrast of an OLED display. This display is made of 128x32 individual white OLED pixels, each one is turned on or off by the controller chip. Because the display makes its own light, no backlight is...
No Longer Stocked
[Buy Now](https://www.adafruit.com/product/931)
[Related Guides to the Product](https://learn.adafruit.com/products/931/guides)
### Monochrome 0.91" 128x32 I2C OLED Display - STEMMA QT / Qwiic
[Monochrome 0.91" 128x32 I2C OLED Display - STEMMA QT / Qwiic](https://www.adafruit.com/product/4440)
These displays are small, only about 1" diagonal, but very readable due to the high contrast of an OLED display. This display is made of 128x32 individual white OLED pixels, each one is turned on or off by the controller chip. Because the display makes its own light, no backlight is...
In Stock
[Buy Now](https://www.adafruit.com/product/4440)
[Related Guides to the Product](https://learn.adafruit.com/products/4440/guides)
## Related Guides
- [OLED TRON Clock](https://learn.adafruit.com/oled-tron-clock.md)
- [I2C Addresses and Troublesome Chips](https://learn.adafruit.com/i2c-addresses.md)
- [Monitor Your Greenhouse with a No-Code Environmental Sensor](https://learn.adafruit.com/monitor-your-greenhouse-with-a-no-code-environmental-sensor.md)
- [SSD1306 OLED Displays with Raspberry Pi and BeagleBone Black](https://learn.adafruit.com/ssd1306-oled-displays-with-raspberry-pi-and-beaglebone-black.md)
- [Adafruit FT232H With SPI & I2C Devices](https://learn.adafruit.com/adafruit-ft232h-with-spi-and-i2c-libraries.md)
- [MIDI Melody Maker](https://learn.adafruit.com/midi-melody-maker.md)
- [Steampunk Cameo Necklace with OLED Display](https://learn.adafruit.com/steampunk-cameo-necklace.md)
- [Using QMK on RP2040 Microcontrollers](https://learn.adafruit.com/using-qmk-on-rp2040-microcontrollers.md)
- [CircuitPython OLED and Dual Knob Sketcher](https://learn.adafruit.com/circuitpython-oled-knob-sketcher.md)
- [Gravity Falls Memory Gun](https://learn.adafruit.com/gravity-falls-memory-gun.md)
- [Pico W HTTP Server with CircuitPython](https://learn.adafruit.com/pico-w-http-server-with-circuitpython.md)
- [Adafruit Trinkey QT2040](https://learn.adafruit.com/adafruit-trinkey-qt2040.md)
- [Adafruit Airlift Bitsy Add-On - ESP32 WiFi Co-Processor](https://learn.adafruit.com/adafruit-airlift-bitsy-add-on-esp32-wifi-co-processor.md)
- [Animated Flying Toaster OLED Jewelry](https://learn.adafruit.com/animated-flying-toaster-oled-jewelry.md)
- [Adafruit TCA9548A 1-to-8 I2C Multiplexer Breakout](https://learn.adafruit.com/adafruit-tca9548a-1-to-8-i2c-multiplexer-breakout.md)
---
# Source: https://learn.adafruit.com/raspberry-pi-e-mail-notifier-using-leds.md
# Raspberry Pi E-mail Notifier Using LEDs
## Overview

# Overview
Raspberry Pi’s popularity makes things so easy that it is almost scary. I set forth on a simple starter project of having the Raspberry Pi show me when new Gmail messages arrive. After some searching, it seems that lots of people are already talking about how to do this and there are some great examples. [Michael over at MitchTech](http://mitchtech.net/raspberry-pi-physical-gmail-notifier/ "Link: http://mitchtech.net/raspberry-pi-physical-gmail-notifier/") had the most ready to go code which I pilfered from.
This project uses two LEDs one green and one red. When a new mail message has arrived the green LED will illuminate. When there are no unread messages the red LED will illuminate.
# To Follow This Tutorial You Will Need
- [Pi T-Cobbler Plus,](https://www.adafruit.com/product/2028) [Pi Cobbler Plus for Model B+ / Pi 2](https://www.adafruit.com/products/2029) or the original [Pi Cobbler](https://www.adafruit.com/product/914)
- [(1) Full sized breadboard](https://www.adafruit.com/product/239)
- [Hook-up Wire](https://www.adafruit.com/index.php?main_page=adasearch&q=hook-up+wire+spool "Link: https://www.adafruit.com/index.php?main\_page=adasearch&q=hook-up+wire+spool")
- [A Raspberry Pi](https://www.adafruit.com/?q=raspberry%20pi) (compatible with all 26pin and 40pin Pi releases to date)
HINT: We suggest purchasing the [Raspberry Pi 3 Model B Starter Pack](https://www.adafruit.com/product/3334) along with a [Raspberry Pi](https://www.adafruit.com/product/3775) which includes all the necessary materials for this tutorial.
- [Next Page](https://learn.adafruit.com/raspberry-pi-e-mail-notifier-using-leds/wire-leds.md)
## Featured Products
### Raspberry Pi Starter Pack
[Raspberry Pi Starter Pack](https://www.adafruit.com/product/3049)
You're going to work hard with your Raspberry Pi 2 Model B or Raspberry Pi 1 Model B+. You're going to have to solder, code, and Linux your Maker heart out. That's why we've tried to make it as easy as possible to start...
In Stock
[Buy Now](https://www.adafruit.com/product/3049)
[Related Guides to the Product](https://learn.adafruit.com/products/3049/guides)
### Raspberry Pi 3 - Model B+ - 1.4GHz Cortex-A53 with 1GB RAM
[Raspberry Pi 3 - Model B+ - 1.4GHz Cortex-A53 with 1GB RAM](https://www.adafruit.com/product/3775)
The Raspberry Pi 3 Model B is the most popular Raspberry Pi computer made, and the Pi Foundation knows you can always make a good thing _better_! And what could make the Pi 3 better? How about a _faster_ processor, 5 GHz WiFi, and updated Ethernet chip with PoE capability?...
In Stock
[Buy Now](https://www.adafruit.com/product/3775)
[Related Guides to the Product](https://learn.adafruit.com/products/3775/guides)
### Full Sized Premium Breadboard - 830 Tie Points
[Full Sized Premium Breadboard - 830 Tie Points](https://www.adafruit.com/product/239)
This is a 'full-size' premium quality breadboard, 830 tie points. Good for small and medium projects. It's 2.2" x 7" (5.5 cm x 17 cm) with a standard double-strip in the middle and two power rails on both sides. You can pull the power rails off easily to make the...
In Stock
[Buy Now](https://www.adafruit.com/product/239)
[Related Guides to the Product](https://learn.adafruit.com/products/239/guides)
### 5V 2.5A Switching Power Supply with 20AWG MicroUSB Cable
[5V 2.5A Switching Power Supply with 20AWG MicroUSB Cable](https://www.adafruit.com/product/1995)
Our all-in-one 5V 2.5 Amp + MicroUSB cable power adapter is the perfect choice for powering single-board computers like Raspberry Pi, BeagleBone, or anything else that's power-hungry!
This adapter was specifically designed to provide 5.25V, not 5V, but we still call it a 5V USB...
Out of Stock
[Buy Now](https://www.adafruit.com/product/1995)
[Related Guides to the Product](https://learn.adafruit.com/products/1995/guides)
### Assembled Pi Cobbler Plus - Breakout Cable
[Assembled Pi Cobbler Plus - Breakout Cable](https://www.adafruit.com/product/2029)
The Raspberry Pi B+ / Pi 2 / Pi 3 / Pi 4 has landed on the Maker World like a 40-GPIO pinned, quad-USB ported, credit card sized bomb of DIY joy. And while you can use most of our great Model B accessories by hooking up our [downgrade...](https://www.adafruit.com/product/1986)
In Stock
[Buy Now](https://www.adafruit.com/product/2029)
[Related Guides to the Product](https://learn.adafruit.com/products/2029/guides)
### Assembled Pi T-Cobbler Plus - GPIO Breakout
[Assembled Pi T-Cobbler Plus - GPIO Breakout](https://www.adafruit.com/product/2028)
**This is the assembled version of the Pi T-Cobbler Plus. It only works with the Raspberry Pi Model Zero, A+, B+, Pi 2, Pi 3 & Pi 4!** (Any Pi with 2x20 connector)
The Raspberry Pi has landed on the Maker World like a 40-GPIO pinned, quad-USB ported, credit...
In Stock
[Buy Now](https://www.adafruit.com/product/2028)
[Related Guides to the Product](https://learn.adafruit.com/products/2028/guides)
### Diffused Red 10mm LED (25 pack)
[Diffused Red 10mm LED (25 pack)](https://www.adafruit.com/product/845)
Need some big indicators? We are big fans of these huge diffused red LEDs. They are fairly bright so they can be seen in daytime, and from any angle. They go easily into a breadboard and will add that extra zing to your project.
- Pack of 25 diffused red LEDs
- 10mm...
No Longer Stocked
[Buy Now](https://www.adafruit.com/product/845)
[Related Guides to the Product](https://learn.adafruit.com/products/845/guides)
### Diffused Green 10mm LED (25 pack)
[Diffused Green 10mm LED (25 pack)](https://www.adafruit.com/product/844)
Need some big indicators? We are big fans of these huge 10mm diffused green LEDs. They are fairly bright so they can be seen in daytime, and from any angle. They go easily into a breadboard and will add that extra zing to your project.
- Pack of 25 diffused green LEDs
- 10mm...
No Longer Stocked
[Buy Now](https://www.adafruit.com/product/844)
[Related Guides to the Product](https://learn.adafruit.com/products/844/guides)
## Related Guides
- [Speech Synthesis on the Raspberry Pi](https://learn.adafruit.com/speech-synthesis-on-the-raspberry-pi.md)
- [Circadian Pi Desk Light](https://learn.adafruit.com/circadian-pi-desk-light.md)
- [Adafruit's Raspberry Pi Lesson 11. DS18B20 Temperature Sensing](https://learn.adafruit.com/adafruits-raspberry-pi-lesson-11-ds18b20-temperature-sensing.md)
- [Drive a 16x2 LCD with the Raspberry Pi](https://learn.adafruit.com/drive-a-16x2-lcd-directly-with-a-raspberry-pi.md)
- [Adding Basic Audio Ouput to Raspberry Pi Zero](https://learn.adafruit.com/adding-basic-audio-ouput-to-raspberry-pi-zero.md)
- [Single Channel LoRaWAN Gateway for Raspberry Pi](https://learn.adafruit.com/raspberry-pi-single-channel-lorawan-gateway.md)
- [Playing sounds and using buttons with Raspberry Pi](https://learn.adafruit.com/playing-sounds-and-using-buttons-with-raspberry-pi.md)
- [Program an AVR or Arduino Using Raspberry Pi GPIO](https://learn.adafruit.com/program-an-avr-or-arduino-using-raspberry-pi-gpio-pins.md)
- [IoT Temperature Logger with Analog Devices ADT7410, Raspberry Pi, and Adafruit IO](https://learn.adafruit.com/iot-temperature-logger-with-python-and-adafruit-io.md)
- [Capacitive Touch Sensors on the Raspberry Pi](https://learn.adafruit.com/capacitive-touch-sensors-on-the-raspberry-pi.md)
- [Matrix and 7-Segment LED Backpack with the Raspberry Pi](https://learn.adafruit.com/matrix-7-segment-led-backpack-with-the-raspberry-pi.md)
- [Windows IoT Core Application Development: Headed Blinky](https://learn.adafruit.com/windows-iot-application-development-headed-blinky.md)
- [Basic Resistor Sensor Reading on Raspberry Pi](https://learn.adafruit.com/basic-resistor-sensor-reading-on-raspberry-pi.md)
- [Large Pi-based Thermometer and Clock](https://learn.adafruit.com/large-pi-based-thermometer-and-clock.md)
- [PiPhone - A Raspberry Pi based Cellphone](https://learn.adafruit.com/piphone-a-raspberry-pi-based-cellphone.md)
---
# Source: https://learn.adafruit.com/adafruit-raspberry-pi-lesson-1-preparing-and-sd-card-for-your-raspberry-pi/raspberry-pi-imager.md
# Adafruit's Raspberry Pi Lesson 1. Preparing an SD Card for your Raspberry Pi
## Raspberry Pi Imager
## What is Raspberry Pi Imager?
Once you have your Pi and SD card, the next step is to install an operating system onto the SD card. Previously this was a bit difficult, especially for beginners, because of varying main operating systems (macOS, Windows, Ubuntu, etc.) and their different methods of accessing the SD card.
[Now there's a new tool called Raspberry Pi Imager that does all the heavy lifting for you.](https://www.raspberrypi.org/blog/raspberry-pi-imager-imaging-utility/)
It's as simple as choosing the desired operating system, selecting the SD card, and hitting WRITE.
https://www.youtube.com/watch?v=J024soVgEeM
## Download Raspberry Pi Imager
Head [here](https://www.raspberrypi.org/downloads/), then download the application for your operating system by clicking the corresponding link.
Raspberry Pi Imager is supported by macOS, Windows and Ubuntu.

## Using the software
Choose your OS and place on SD card
Once the software is downloaded, open up the application.
First, choose which operating system you'd like to put on the SD card. Most will go with Raspberry Pi OS but you have quite a bit of options here. For more on this topic, see **Choose your operating system** below.
Next, insert your SD card into your computer and select it inside the application.
_ **Power user trick:** press Control+Shift+X (Windows) or ⌘+Shift+X (Mac) to bring up the Advanced Options dialog, where you can configure essentials like WiFi_ before the card is even written, _rather than having to change all this on the Pi later._
When you have your software and sd card selected, go ahead and hit "WRITE". This will place the selected OS onto the SD card.


Depending on the size of the operating system you choose, this may take some time (10-15 min)
Finished!

## Choose your operating system
There are a bewildering number of operating systems that you can install on your Raspberry Pi. If you are a beginner, you'll probably want to stick with one of the Linux distributions.
## Choose your distribution
Having decided you want to install Linux, that is not the end of the story. You now have to decide which distribution or 'distro' of Linux you want to install. Being an Open Source operating system, anyone can take one of the existing distributions an add things to it or configure it in a certain way before packaging it up as another distribution option for anyone to use. This is how the most common Raspberry Pi distribution, 'Raspbian', came into existence. The existing 'Debian' distribution was configured and kitted out with useful things like IDLE (a python-programming language development editor) and Scratch (a learn-to-program gaming system) to make it suitable for the Pi.
All of the Adafruit tutorials (and nearly every other tutorial online) will work with Raspbian, and nearly every Pi out there runs it.
## Erasing an SD card
In addition to uploading a number of pre-configured OSes, with Imager, you can also ERASE an SD card.
Just select ERASE from the operating system list, the SD card you'd like to erase and hit WRITE.


- [Previous Page](https://learn.adafruit.com/adafruit-raspberry-pi-lesson-1-preparing-and-sd-card-for-your-raspberry-pi/you-will-need.md)
- [Next Page](https://learn.adafruit.com/adafruit-raspberry-pi-lesson-1-preparing-and-sd-card-for-your-raspberry-pi/balena-etcher.md)
## Featured Products
### Raspberry Pi 3 - Model B+ - 1.4GHz Cortex-A53 with 1GB RAM
[Raspberry Pi 3 - Model B+ - 1.4GHz Cortex-A53 with 1GB RAM](https://www.adafruit.com/product/3775)
The Raspberry Pi 3 Model B is the most popular Raspberry Pi computer made, and the Pi Foundation knows you can always make a good thing _better_! And what could make the Pi 3 better? How about a _faster_ processor, 5 GHz WiFi, and updated Ethernet chip with PoE capability?...
In Stock
[Buy Now](https://www.adafruit.com/product/3775)
[Related Guides to the Product](https://learn.adafruit.com/products/3775/guides)
### Raspberry Pi 2 Model B Starter Pack - Includes a Raspberry Pi 2
[Raspberry Pi 2 Model B Starter Pack - Includes a Raspberry Pi 2](https://www.adafruit.com/product/2380)
Why not trick out your fresh new board with some accessories? The Pi 2 is a big deal - a big, big deal. It has an upgraded ARMv7 multicore procssor and a full Gigabyte of RAM - meaning you're going to see ~2x the performance on processor-upgrade only and 4x on average for...
No Longer Stocked
[Buy Now](https://www.adafruit.com/product/2380)
[Related Guides to the Product](https://learn.adafruit.com/products/2380/guides)
### Budget Pack for Raspberry Pi 1 Model B (Doesn't include RasPi)
[Budget Pack for Raspberry Pi 1 Model B (Doesn't include RasPi)](https://www.adafruit.com/product/965)
An optimized collection of parts and pieces to experiment with Raspberry Pi at home, school or work. Great for students and those that want to get their feet wet, no soldering required! **THIS PACK DOES NOT INCLUDE A RASPBERRY PI 1 MODEL B and is NOT compatible with Model B+ or Raspberry Pi...**
No Longer Stocked
[Buy Now](https://www.adafruit.com/product/965)
[Related Guides to the Product](https://learn.adafruit.com/products/965/guides)
### USB MicroSD Card Reader/Writer - microSD / microSDHC / microSDXC
[USB MicroSD Card Reader/Writer - microSD / microSDHC / microSDXC](https://www.adafruit.com/product/939)
This is the cutest little microSD card reader/writer - but don't be fooled by its adorableness! It's wicked fast and supports up to 64 GB SDXC cards! Simply slide the card into the edge and plug it into your computer. No drivers are required, it shows up as a standard 'Mass...
No Longer Stocked
[Buy Now](https://www.adafruit.com/product/939)
[Related Guides to the Product](https://learn.adafruit.com/products/939/guides)
### SD/MicroSD Memory Card - 16GB Class 10 - Adapter Included
[SD/MicroSD Memory Card - 16GB Class 10 - Adapter Included](https://www.adafruit.com/product/2693)
Add speedy mega-storage in a jiffy using this 16 GB Class 10 micro-SD card. It comes with a SD adapter so you can use it with any of our shields or adapters! Preformatted to FAT so it works out of the box with our projects. Works great with any device in the Adafruit shop that uses micro-SD...
No Longer Stocked
[Buy Now](https://www.adafruit.com/product/2693)
[Related Guides to the Product](https://learn.adafruit.com/products/2693/guides)
### SD/MicroSD Memory Card (8 GB SDHC)
[SD/MicroSD Memory Card (8 GB SDHC)](https://www.adafruit.com/product/1294)
Add mega-storage in a jiffy using this 8 GB class 4 micro-SD card. It comes with a SD adapter so you can use it with any of our shields or adapters. Preformatted to FAT so it works out of the box with our projects. Tested and works great with our
In Stock
[Buy Now](https://www.adafruit.com/product/1294)
[Related Guides to the Product](https://learn.adafruit.com/products/1294/guides)
### Raspberry Pi 1 Model B Starter Pack - Includes a Raspberry Pi
[Raspberry Pi 1 Model B Starter Pack - Includes a Raspberry Pi](https://www.adafruit.com/product/1014)
You want to get hacking with your Pi fast, right? Get everything you need to start with the Adafruit Starter Pack for Raspberry Pi. It's the perfect accompaniment to your new Pi, everything you need to boot up your Pi Model B and get going. **We pre-assemble the Cobbler for you, no...**
No Longer Stocked
[Buy Now](https://www.adafruit.com/product/1014)
[Related Guides to the Product](https://learn.adafruit.com/products/1014/guides)
### Low-profile microSD card adapter for Raspberry Pi
[Low-profile microSD card adapter for Raspberry Pi](https://www.adafruit.com/product/966)
Make your Pi a little slimmer with this microSD card adapter board. It slides in where the SD card goes but is half the length. Pop in a microSD card for a sleeker machine. The microSD card holder is a push-push type so you can push on the edge that sticks out to remove the card when...
No Longer Stocked
[Buy Now](https://www.adafruit.com/product/966)
[Related Guides to the Product](https://learn.adafruit.com/products/966/guides)
## Related Guides
- [Press Your Button for Raspberry Pi](https://learn.adafruit.com/press-your-button-for-raspberry-pi.md)
- [Adafruit's Raspberry Pi Lesson 5. Using a Console Cable](https://learn.adafruit.com/adafruits-raspberry-pi-lesson-5-using-a-console-cable.md)
- [Adafruit's Raspberry Pi Lesson 2. First Time Configuration](https://learn.adafruit.com/adafruits-raspberry-pi-lesson-2-first-time-configuration.md)
- [Raspberry Pi as an Ad Blocking Access Point](https://learn.adafruit.com/raspberry-pi-as-an-ad-blocking-access-point.md)
- [Set up and Blink - MATLAB and Simulink with Raspberry Pi](https://learn.adafruit.com/how-to-use-matlab-and-simulink-with-raspberry-pi.md)
- [Pi Video Output Using pygame](https://learn.adafruit.com/pi-video-output-using-pygame.md)
- [Drive a 16x2 LCD with the Raspberry Pi](https://learn.adafruit.com/drive-a-16x2-lcd-directly-with-a-raspberry-pi.md)
- [Adafruit's Raspberry Pi Lesson 4. GPIO Setup](https://learn.adafruit.com/adafruits-raspberry-pi-lesson-4-gpio-setup.md)
- [Windows IoT Core Application Management](https://learn.adafruit.com/windows-iot-application-management.md)
- [Read-Only Raspberry Pi](https://learn.adafruit.com/read-only-raspberry-pi.md)
- [Getting Started With Windows IoT Core on Raspberry Pi](https://learn.adafruit.com/getting-started-with-windows-iot-on-raspberry-pi.md)
- [Adafruit NFC/RFID on Raspberry Pi](https://learn.adafruit.com/adafruit-nfc-rfid-on-raspberry-pi.md)
- [Windows IoT Core Application Development: Headless Blinky](https://learn.adafruit.com/windows-iot-application-development-headless-application.md)
- [USB Audio Cards with a Raspberry Pi ](https://learn.adafruit.com/usb-audio-cards-with-a-raspberry-pi.md)
- [Node.js Embedded Development on the Raspberry Pi](https://learn.adafruit.com/node-embedded-development.md)
---
# Source: https://learn.adafruit.com/pi-thermal-printer/raspberry-pi-os-setup.md
# Internet of Things Printer for Raspberry Pi
## Raspberry Pi OS Setup
# OS Install and First-Time Configuration
At this point it is assumed you have a bootable SD card containing the Raspbian Lite software. If not, follow the directions on the “Preparation” page.
Warning:
1. Connect a **monitor** and a **USB keyboard** to the Raspberry Pi (a mouse is _not_ required).
2. Insert the SD card containing the **Raspbian Lite** software.
3. Connect a micro-B USB cable to the power connector on the Raspberry Pi.
4. Plug the other end of the USB cable into a power source: a mobile phone charger, a powered USB hub, or simply a USB port on your computer.
The Raspberry Pi should now boot, and you’ll see the monitor fill with lots of “Unix stuff.” On first boot, the system may automatically reboot once as part of the setup process. This is normal.
Primary:
Within a minute or so you should get a login prompt. Log in as user “ **pi** ” and password “ **raspberry** ”. Then enter the following command for essential system setup:
```
sudo raspi-config
```
Use the up/down arrow keys, tab and return/enter to navigate the config menu:

The following selections are **required:**
- Under “ **Interfacing Options** ,” select “ **Serial**.” Turn **OFF** the ** login shell** over serial **,** and **ENABLE** the hardware **serial port**. **NO** and **YES** , respectively. This is vital!
- Under “ **Interfacing Options** ,” **enable SSH**. This permits network access to the Raspberry Pi without a monitor or keyboard attached later.
- Under “ **Localisation Options** ,” select “ **Change Timezone** ” and set this up for your location (a correct time zone is required for the time display and other examples to work).
The following are **optional but recommended:**
- “ **Change User Password** ,” because everybody knows the default (“raspberry”).
- “ **Hostname** ” to distinguish this system from other Raspberry Pis on the network (default is “raspberrypi,” consider changing to “iotp” or “piprinter” or any descriptive name).
- Under “ **Localisation Options** ,” configure the other options for **language** , **WiFi channels** and **keyboard**. _If your keyboard is generating unexpected characters, this is why!_
- Under “ **Advanced Options** ,” you can optionally **disable overscan compensation** if using an HDMI monitor. Though our ultimate goal is to use the Raspberry Pi “headless,” without a monitor, the extra space is welcome during the configuration steps.
**Do NOT** touch “Overclock” or other esoteric settings. Overclocking can wreak havoc with the serial port we’ll be relying on! **Do not overclock.**
Tab to "Finish" and press enter, but **DO NOT REBOOT YET.** We still need to set up the wireless networking. Select “No” when prompted to reboot. Raspi-config will exit to the command line.
Info:
# Configure Wireless Networking
If you have a WiFi network that broadcasts its SSID (the wireless network name), this is fairly straightforward:
```
sudo nano /etc/wpa_supplicant/wpa_supplicant.conf
```
Delete _everything_ in the file, then enter the below text in instead. Check your spelling, everything’s got to be spot-on! Then edit the SSID and password lines to reflect your actual network name and password (keeping the double quotes on both):
```
country=US
ctrl_interface=DIR=/var/run/wpa_supplicant GROUP=netdev
update_config=1
network={
ssid="SSID"
psk="YOUR_PASSWORD"
scan_ssid=1
}
```
[A more in-depth networking tutorial is available here](http://learn.adafruit.com/adafruits-raspberry-pi-lesson-3-network-setup/overview). Skip ahead to the “Reboot” section below. This next section pertains only to hidden wireless networks.
# Hidden Networks
Hidden WiFi networks are an ongoing point of contention…the following directions may or may not work for your particular network. If this doesn’t seem to work, consider changing your WiFi config to broadcast the SSID; it’s been shown that hidden networks aren’t actually any more secure than visible ones!
The network configuration in this case is a fair bit more complicated. And the slightest typo here, even one character, can prevent the system from joining the network! Again, we **strongly recommend using a “broadcast” network** , it’s far easier and less error-prone. But if you _must…_
```
sudo nano /etc/wpa_supplicant/wpa_supplicant.conf
```
Delete _everything_ in the file, then enter the below text in instead. Check your spelling, everything’s got to be spot-on! Indent the 'network' section using tabs, not spaces. Then edit the ssid and psk (password) lines to reflect your actual network name and password (keeping the double quotes on both):
```
ctrl_interface=/var/run/wpa_supplicant
update_config=1
ap_scan=2
eapol_version=1
network={
ssid="my-network-ssid"
scan_ssid=1
mode=0
proto=WPA2
auth_alg=OPEN
pairwise=CCMP
group=CCMP
key_mgmt=WPA-PSK
psk="my-network-password"
}
```
# Reboot
Finally, shut down the system:
```
sudo shutdown -h now
```
Wait for the system to report that it’s **halted** before disconnecting power. It should take about 30 seconds.
Following shutdown, remove the keyboard (if using a Model A board), insert the WiFi adapter and re-connect power (keep the monitor attached for now). With a Model B board, you can keep both the keyboard and WiFi adapter attached until you know the networking is properly configured.
What's nice is Raspbian now comes with Bonjour so you do not need to memorize IP addresses.
If you have Mac, you don't have to do anything
If you have Windows, [go here and install the Bonjour support (via Apple print support)](../../../../bonjour-zeroconf-networking-for-windows-and-linux/)
Your Pi's name will be **raspberrypi.local** unless you changed the hostname in **raspi-config** in whichcase it will be _ **hostname** _ **.local**
If the wireless connection doesn’t work, unplug the WiFi adapter and connect the keyboard and double-check the network setup steps above. It might simply be a typo. Correct any mistakes and reboot.
Once WiFi is working, the keyboard and monitor are no longer required. All further configuration can be done remotely via SSH, if you’ve enabled it in raspi-config.
- [Previous Page](https://learn.adafruit.com/pi-thermal-printer/preparation-pre-2017.md)
- [Next Page](https://learn.adafruit.com/pi-thermal-printer/raspberry-pi-software-setup.md)
## Primary Products
### Adafruit IoT Pi Printer Project Pack
[Adafruit IoT Pi Printer Project Pack](https://www.adafruit.com/product/1289)
Build an "Internet of Things" connected mini printer that will do your bidding! This is a fun weekend project that comes with a beautiful laser cut case. Once assembled, the little printer connects wirelessly to get Internet data for printing onto 2 1/4" wide receipt paper....
No Longer Stocked
[Buy Now](https://www.adafruit.com/product/1289)
[Related Guides to the Product](https://learn.adafruit.com/products/1289/guides)
## Featured Products
### Miniature WiFi (802.11b/g/n) Module: For Raspberry Pi and more
[Miniature WiFi (802.11b/g/n) Module: For Raspberry Pi and more](https://www.adafruit.com/product/814)
Make your Internet of Things device cable-free by adding WiFi. Take advantage of the Raspberry Pi and Beagle Bone's USB port to add a low cost, but high-reliability wireless link. We tried half a dozen modules to find one that works well with the Pi and Bone without the need of recompiling...
No Longer Stocked
[Buy Now](https://www.adafruit.com/product/814)
[Related Guides to the Product](https://learn.adafruit.com/products/814/guides)
### Raspberry Pi - Skill badge, iron-on patch
[Raspberry Pi - Skill badge, iron-on patch](https://www.adafruit.com/product/906)
You are learning to use the small Linux based board, the Raspberry Pi! Adafruit offers a fun and exciting "badges" of achievement for electronics, science and engineering. We believe everyone should be able to be rewarded for learning a useful skill, a badge is just one of the many...
In Stock
[Buy Now](https://www.adafruit.com/product/906)
[Related Guides to the Product](https://learn.adafruit.com/products/906/guides)
### Adafruit Pi Unassembled T-Cobbler Breakout Kit for Raspberry Pi
[Adafruit Pi Unassembled T-Cobbler Breakout Kit for Raspberry Pi](https://www.adafruit.com/product/1105)
Now that you've finally got your hands on a [Raspberry Pi®](http://www.raspberrypi.org/), you're probably itching to make some fun embedded computer projects with it. What you need is an add on prototyping Pi T-Cobbler from Adafruit, which can break out all those tasty...
No Longer Stocked
[Buy Now](https://www.adafruit.com/product/1105)
[Related Guides to the Product](https://learn.adafruit.com/products/1105/guides)
### Mini Thermal Receipt Printer Starter Pack
[Mini Thermal Receipt Printer Starter Pack](https://www.adafruit.com/product/600)
Hit the ground running (and printing!) with this starter pack that includes a thermal printer and all the extras and save a few dollars while you're at it.
Includes:
- [A mini thermal receipt printer](http://www.adafruit.com/products/597) - with cables and...
No Longer Stocked
[Buy Now](https://www.adafruit.com/product/600)
[Related Guides to the Product](https://learn.adafruit.com/products/600/guides)
### Thermal paper roll - 50' long, 2.25" wide
[Thermal paper roll - 50' long, 2.25" wide](https://www.adafruit.com/product/599)
A mini roll of thermal paper, this fits very nicely into our mini thermal printer. 2.25" wide (about 57mm) and 50 feet long (15 meters). BPA-free.
[Perfect for use with our mini thermal printer!](http://www.adafruit.com/products/597)
No Longer Stocked
[Buy Now](https://www.adafruit.com/product/599)
[Related Guides to the Product](https://learn.adafruit.com/products/599/guides)
### Mini Thermal Receipt Printer
[Mini Thermal Receipt Printer](https://www.adafruit.com/product/597)
Add a mini printer to any microcontroller project with this very cute thermal printer. Thermal printers are also known as receipt printers, they're what you get when you go to the ATM or grocery store. Now you can embed a little printer of your own into an enclosure. This printer is ideal...
No Longer Stocked
[Buy Now](https://www.adafruit.com/product/597)
[Related Guides to the Product](https://learn.adafruit.com/products/597/guides)
### Rugged Metal Pushbutton with White LED Ring
[Rugged Metal Pushbutton with White LED Ring](https://www.adafruit.com/product/558)
These chrome-plated metal buttons are rugged and look real good while doing it! Simply drill a 16mm hole into any material up to 1/2" thick and you can fit these in place, there's even a rubber gasket to keep water out of the enclosure. On the front of the button is a flat metal...
In Stock
[Buy Now](https://www.adafruit.com/product/558)
[Related Guides to the Product](https://learn.adafruit.com/products/558/guides)
### 5V 10A switching power supply
[5V 10A switching power supply](https://www.adafruit.com/product/658)
This is a beefy switching supply, for when you need a lot of power! It can supply 5V DC up to 10 Amps, running from 110V or 220V power (the plug it comes with is for US/Canada/Japan but you can use any plug adapter for your country, or just replace the cable with a standard computer/appliance...
In Stock
[Buy Now](https://www.adafruit.com/product/658)
[Related Guides to the Product](https://learn.adafruit.com/products/658/guides)
## Related Guides
- [Skill Badge Requirements: Raspberry Pi](https://learn.adafruit.com/skill-badge-requirements-raspberry-pi.md)
- [Adafruit Prototyping Pi Plate](https://learn.adafruit.com/adafruit-prototyping-pi-plate.md)
- [Adafruit Raspberry Pi Educational Linux Distro](https://learn.adafruit.com/adafruit-raspberry-pi-educational-linux-distro.md)
- [Open Source Protective Face Shield Designs](https://learn.adafruit.com/open-source-face-shield-designs.md)
- [PyPortal IoT Plant Monitor with Google Cloud IoT Core and CircuitPython](https://learn.adafruit.com/pyportal-iot-plant-monitor-with-google-cloud-iot-core-and-circuitpython.md)
- [Adafruit QT Py ESP32-C3 WiFi Dev Board](https://learn.adafruit.com/adafruit-qt-py-esp32-c3-wifi-dev-board.md)
- [AstroPrint 3D Printing](https://learn.adafruit.com/astroprint-3d-printing.md)
- [No-Code Rain Sensing Smart Desktop Umbrella Stand](https://learn.adafruit.com/no-code-rain-sensing-smart-desktop-umbrella-stand.md)
- [MacroPad Remote Procedure Calls over USB to Control Home Assistant](https://learn.adafruit.com/macropad-remote-procedure-calls-over-usb-to-control-home-assistant.md)
- [PiPhone - A Raspberry Pi based Cellphone](https://learn.adafruit.com/piphone-a-raspberry-pi-based-cellphone.md)
- [Adafruit 128x64 OLED Bonnet for Raspberry Pi](https://learn.adafruit.com/adafruit-128x64-oled-bonnet-for-raspberry-pi.md)
- [Set up and Blink - MATLAB and Simulink with Raspberry Pi](https://learn.adafruit.com/how-to-use-matlab-and-simulink-with-raspberry-pi.md)
- [Mini Raspberry Pi Handheld Notebook](https://learn.adafruit.com/mini-raspberry-pi-handheld-notebook-palmtop.md)
- [Adafruit's Raspberry Pi Lesson 2. First Time Configuration](https://learn.adafruit.com/adafruits-raspberry-pi-lesson-2-first-time-configuration.md)
- [Huzzah Weather Display](https://learn.adafruit.com/huzzah-weather-display.md)
---
# Source: https://learn.adafruit.com/pi-wifi-radio/raspberry-pi-setup-1-of-3.md
# Raspberry Pi WiFi Radio
## Initial System Configuration
This project works well with the Raspbian “Lite” operating system; it fits easily on a 2 GB card with room to spare. _Do not_ use the “desktop” images, they’re enormous and contain a ton of things we don’t need for this.
## **[Raspberry Pi Downloads Page](https://www.raspberrypi.org/downloads/raspbian/)**
While that’s downloading, you can work on **[assembling the LCD kit](../../../../adafruit-16x2-character-lcd-plus-keypad-for-raspberry-pi/assembly)**.
If you’re new to Raspberry Pi and Linux, we strongly suggest working through the first few guides in the [**Learn Raspberry Pi**](../../../../category/learn-raspberry-pi) tutorial series…know how to “burn” an SD image, perform a first-time setup and get the Raspberry Pi connected to a network. Some familiarity with one of the text editors (such as the simple _nano_ or the more daunting _vi_ or _emacs_) is also recommended.
Install the Raspbian Lite OS on a **2GB or larger** card. You’ll need to connect a **monitor** and **USB keyboard** for basic system configuration, but this is only temporary…we’ll set it up to run “headless” later. For networking, connect either an Ethernet cable or use WiFi (built-in on some Pi models, else use a USB WiFi adapter).
**At this point you should have an SD card containing the Raspbian Lite software, and an assembled LCD “Pi Plate.”**

You don’t need to install the LCD Plate atop the Pi yet, we’ll do that later. Let’s just get the basics set up.
1. Connect a monitor and keyboard to the Raspberry Pi.
2. Insert the SD card containing the Raspbian OS.
3. Connect a “Micro B” USB cable to the power connector on the Raspberry Pi.
4. Plug the other end of the USB cable into a power source: a mobile phone charger, a powered USB hub, or simply a USB port on your computer.
The Raspberry Pi should now boot, and you’ll see the monitor fill with lots of “Unix stuff.”
Danger:
On first boot, you’ll get a login prompt. Log in as user “pi,” password “raspberry”.
Once you’re logged in successfully and have a command-line prompt, run the system configuration utility:
```
sudo raspi-config
```
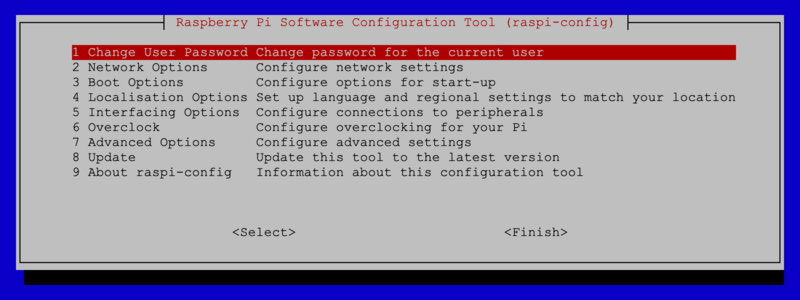
The following selections are **required** :
- Under “Interfacing Options,” enable **I2C**.
- If you’ll be using **WiFi** , under “Localisation Options,” select “Change Wi-fi Country.” Then, under “Network Options,” select “Wi-fi” to enter the SSID/password for your wireless network.
The following are **optional** , but **strongly recommended** :
- Change User Password (because everybody knows the default).
- Under “Localisation Options,” select “Change Locale,” “Change Timezone” and “Change Keyboard Layout” to suit your location. If your keyboard isn’t producing the expected symbols, this is why.
- Network Options→Change Hostname. I named mine “ **pandora** ” to distinguish it from other Raspberry Pi systems on the network.
- Interfacing Options→Enable SSH. This allows remote login from another system on the network, for performing administration tasks without a display attached.
- You can disable Overscan (under “Advanced Options”) if you like — we’ll reboot a few times during the setup process, and this provides a little extra screen real estate on HDMI monitors.
Tab over to the “Finish” button, press Return and confirm you’d like to reboot the system when prompted. You’ll need to log in again, using the password you established above.
Danger:
If using a **USB WiFi adapter** based on the popular **Realtek 8192CU** chipset, disabling WiFi power management seems to help with reliability. Once you’re logged in, type (or copy and paste) this at the command prompt:
```
echo "options 8192cu rtw_power_mgnt=0 rtw_enusbss=0" | sudo tee --append /etc/modprobe.d/8192cu.conf
```
## Enable I2C Support for the LCD
The LCD doesn’t need to be attached yet, but we can get some setup started…
```
sudo nano /etc/modules
```
Add one or both of these lines if not already present:
```
i2c-bcm2708
i2c-dev
```
## Optional: Enable USB Audio
If you plan to use this with a USB Audio Adapter, [this guide explains the process](http://learn.adafruit.com/usb-audio-cards-with-a-raspberry-pi). It’s pretty straightforward, a matter of editing one line in a file.
## Reboot
Finally, shut down the system:
```
sudo shutdown -h now
```
Wait for the system to report that it’s halted before disconnecting power. It should take about 20 seconds.
Following shutdown, insert the USB WiFi adapter (if using one) and re-connect power (keep the monitor attached for now).
**Is using a Model A board:** you’ll need to remove the keyboard to plug in WiFi, or use a powered USB hub temporarily during setup. Without a hub, **ssh** is now the only way into the system…so if WiFi isn’t working, you’ll need to unplug the adapter, connect a keyboard and check the WiFi configuration.
**For all other boards:** keyboard can stay attached until you know the networking is properly configured. Log in again and you should be able to access the outside world now:
```
sudo ping adafruit.com
```
Do not proceed until internet access is working. If WiFi refuses to cooperate, make sure every step above has been followed carefully. If you’re trying to use a hidden network and it just won’t play nice, change the router configuration to broadcast the network name.
Raspbian Lite includes the “avahi” package by default, so the system appears on the network as “pandora.local” (or whatever hostname you configured) instead of a numeric IP address. You can easily access the Raspberry Pi remotely using an ssh client from another system on the network. For example, using the Terminal application in Mac OS X, one would type:
```
ssh pi@pandora.local
```
You should get a password prompt. Once logged in, you can perform all administration duties remotely (including the steps that follow), and the monitor and keyboard are no longer needed on the Raspberry Pi. It’s easier this way because you can cut-and-paste all the commands with their weird syntaxes.
- [Previous Page](https://learn.adafruit.com/pi-wifi-radio/parts-list.md)
- [Next Page](https://learn.adafruit.com/pi-wifi-radio/raspberry-pi-setup-2-of-3.md)
## Featured Products
### Raspberry Pi 3 - Model B+ - 1.4GHz Cortex-A53 with 1GB RAM
[Raspberry Pi 3 - Model B+ - 1.4GHz Cortex-A53 with 1GB RAM](https://www.adafruit.com/product/3775)
The Raspberry Pi 3 Model B is the most popular Raspberry Pi computer made, and the Pi Foundation knows you can always make a good thing _better_! And what could make the Pi 3 better? How about a _faster_ processor, 5 GHz WiFi, and updated Ethernet chip with PoE capability?...
In Stock
[Buy Now](https://www.adafruit.com/product/3775)
[Related Guides to the Product](https://learn.adafruit.com/products/3775/guides)
### SD/MicroSD Memory Card (8 GB SDHC)
[SD/MicroSD Memory Card (8 GB SDHC)](https://www.adafruit.com/product/1294)
Add mega-storage in a jiffy using this 8 GB class 4 micro-SD card. It comes with a SD adapter so you can use it with any of our shields or adapters. Preformatted to FAT so it works out of the box with our projects. Tested and works great with our
In Stock
[Buy Now](https://www.adafruit.com/product/1294)
[Related Guides to the Product](https://learn.adafruit.com/products/1294/guides)
### 5V 2.5A Switching Power Supply with 20AWG MicroUSB Cable
[5V 2.5A Switching Power Supply with 20AWG MicroUSB Cable](https://www.adafruit.com/product/1995)
Our all-in-one 5V 2.5 Amp + MicroUSB cable power adapter is the perfect choice for powering single-board computers like Raspberry Pi, BeagleBone, or anything else that's power-hungry!
This adapter was specifically designed to provide 5.25V, not 5V, but we still call it a 5V USB...
Out of Stock
[Buy Now](https://www.adafruit.com/product/1995)
[Related Guides to the Product](https://learn.adafruit.com/products/1995/guides)
### Adafruit RGB Positive 16x2 LCD+Keypad Kit for Raspberry Pi
[Adafruit RGB Positive 16x2 LCD+Keypad Kit for Raspberry Pi](https://www.adafruit.com/product/1109)
This new Adafruit Pi Plate makes it easy to use an RGB 16x2 Character LCD. We really like the RGB Character LCDs we stock in the shop. (For RGB we have [RGB negative](http://www.adafruit.com/products/399) and [RGB positive](http://www.adafruit.com/products/398).)...
Out of Stock
[Buy Now](https://www.adafruit.com/product/1109)
[Related Guides to the Product](https://learn.adafruit.com/products/1109/guides)
### Adafruit RGB Negative 16x2 LCD+Keypad Kit for Raspberry Pi
[Adafruit RGB Negative 16x2 LCD+Keypad Kit for Raspberry Pi](https://www.adafruit.com/product/1110)
This new Adafruit Pi Plate makes it easy to use an RGB 16x2 Character LCD. We really like the RGB Character LCDs we stock in the shop. (For RGB we have [RGB negative](http://www.adafruit.com/products/399) and [RGB positive](http://www.adafruit.com/products/398).)...
Out of Stock
[Buy Now](https://www.adafruit.com/product/1110)
[Related Guides to the Product](https://learn.adafruit.com/products/1110/guides)
### Adafruit Blue&White 16x2 LCD+Keypad Kit for Raspberry Pi
[Adafruit Blue&White 16x2 LCD+Keypad Kit for Raspberry Pi](https://www.adafruit.com/product/1115)
This new Adafruit Pi Plate makes it easy to use a blue and white 16x2 Character LCD. [We really like the 16x2 Character LCDs we stock in the shop](http://www.adafruit.com/products/181). Unfortunately, these LCDs do require quite a few digital pins, 6 to control the LCD and then...
Out of Stock
[Buy Now](https://www.adafruit.com/product/1115)
[Related Guides to the Product](https://learn.adafruit.com/products/1115/guides)
### Adafruit Raspberry Pi B+ / Pi 2 / Pi 3 Case - Smoke Base
[Adafruit Raspberry Pi B+ / Pi 2 / Pi 3 Case - Smoke Base](https://www.adafruit.com/product/2258)
It took awhile to perfect - but that's okay since we can now safely say that the Adafruit case for Raspberry Pi Model B+ / Pi 2 / Pi 3 is The Single Greatest Raspberry Pi Model B+ Case Ever.
This enclosure was designed by Mike Doell - just like our...
In Stock
[Buy Now](https://www.adafruit.com/product/2258)
[Related Guides to the Product](https://learn.adafruit.com/products/2258/guides)
### Miniature WiFi (802.11b/g/n) Module: For Raspberry Pi and more
[Miniature WiFi (802.11b/g/n) Module: For Raspberry Pi and more](https://www.adafruit.com/product/814)
Make your Internet of Things device cable-free by adding WiFi. Take advantage of the Raspberry Pi and Beagle Bone's USB port to add a low cost, but high-reliability wireless link. We tried half a dozen modules to find one that works well with the Pi and Bone without the need of recompiling...
No Longer Stocked
[Buy Now](https://www.adafruit.com/product/814)
[Related Guides to the Product](https://learn.adafruit.com/products/814/guides)
## Related Guides
- [Adafruit Class Library for Windows IoT Core](https://learn.adafruit.com/adafruit-class-library-for-windows-iot-core.md)
- [Character LCD with Raspberry Pi or BeagleBone Black](https://learn.adafruit.com/character-lcd-with-raspberry-pi-or-beaglebone-black.md)
- [Adafruit 16x2 Character LCD + Keypad for Raspberry Pi](https://learn.adafruit.com/adafruit-16x2-character-lcd-plus-keypad-for-raspberry-pi.md)
- [Onion Pi](https://learn.adafruit.com/onion-pi.md)
- [Monitor Your Home With the Raspberry Pi B+](https://learn.adafruit.com/monitor-your-home-with-the-raspberry-pi-b-plus.md)
- [Pi Hole Ad Detection Display with PiTFT](https://learn.adafruit.com/pi-hole-ad-pitft-tft-detection-display.md)
- [Introducing the Raspberry Pi 2 - Model B](https://learn.adafruit.com/introducing-the-raspberry-pi-2-model-b.md)
- [Setting up a Raspberry Pi as a WiFi Access Point](https://learn.adafruit.com/setting-up-a-raspberry-pi-as-a-wifi-access-point.md)
- [Playing sounds and using buttons with Raspberry Pi](https://learn.adafruit.com/playing-sounds-and-using-buttons-with-raspberry-pi.md)
- [Adafruit RGB Matrix + Real Time Clock HAT for Raspberry Pi](https://learn.adafruit.com/adafruit-rgb-matrix-plus-real-time-clock-hat-for-raspberry-pi.md)
- [Raspberry Pi as an Ad Blocking Access Point](https://learn.adafruit.com/raspberry-pi-as-an-ad-blocking-access-point.md)
- [Internet of Things Printer for Raspberry Pi](https://learn.adafruit.com/pi-thermal-printer.md)
- [Adafruit Prototyping Pi Plate](https://learn.adafruit.com/adafruit-prototyping-pi-plate.md)
- [Node.js Embedded Development on the Raspberry Pi](https://learn.adafruit.com/node-embedded-development.md)
- [Matrix and 7-Segment LED Backpack with the Raspberry Pi](https://learn.adafruit.com/matrix-7-segment-led-backpack-with-the-raspberry-pi.md)
---
# Source: https://learn.adafruit.com/pi-wifi-radio/raspberry-pi-setup-2-of-3.md
# Raspberry Pi WiFi Radio
## Install Software Packages
Danger:
Further configuration of the Raspberry Pi will take place over the network using SSH, not the keyboard and mouse.
- The SSH server should already be enabled on the Raspberry Pi — this was done during the initial raspi-config setup.
- On Mac or Linux systems, you can use a Terminal or xterm window.
- For Windows systems, you can [download PuTTY](http://www.putty.org).
The terminal command to access the system would be:
**ssh pi@pandora.local** (or whatever hostname was configured) if using Netatalk
or:
**ssh pi@192.168.0.42** (or whatever the system’s actual numeric IP address is)
You’ll be prompted for a password — use the password that you set up in raspi-config, or “raspberry” if you left the default. Additionally, the first time connecting you may be prompted regarding a host key for security…enter Y (or click Yes) when prompted.
## Update Installed Software
Once logged in, type the following at the command prompt:
```
sudo apt-get update
```
This updates the list of available software packages, and takes a couple of minutes (just do the “update,” _not_ “upgrade” — the latter can sometimes take _hours!_)
## Install Prerequisite Software
Several prerequisite software packages need to be installed, using different techniques.
First is a collection of code libraries, using the apt-get package manager:
```
sudo apt-get install git i2c-tools python-pexpect python-smbus libavfilter-dev libavformat-dev libcurl4-gnutls-dev libgcrypt-dev libjson-c-dev libao-dev
```
This takes a little while; there’s about 100 megabytes of stuff to download and install.
Now use _git_ and _wget_ to install the rest. There’s our LCD radio UI, then a collection of Adafruit libraries for Raspberry Pi, and finally **pianobar** , a terminal-based Pandora client for Raspberry Pi. _Do not_ use the apt-get version of this, it’s out of date!
```
cd
git clone -b legacy https://github.com/adafruit/Adafruit-Raspberry-Pi-Python-Code
git clone https://github.com/adafruit/Python-WiFi-Radio
wget https://github.com/PromyLOPh/pianobar/archive/e945578ab22912049f1e547ce7b25b01089f7590.zip
unzip e945578ab22912049f1e547ce7b25b01089f7590.zip
```
**Note the “-b legacy” on the first “git clone” line.** It’s required there. But _not_ on anything else.
Now some configuration…
First, link some of the Adafruit libraries into the radio software directory:
```
cd Python-WiFi-Radio
ln -s ../Adafruit-Raspberry-Pi-Python-Code/Adafruit_CharLCDPlate/*.py .
```
(Note: there’s a space before the last period above. Don’t miss it. Copy and paste this exact line, if possible.)
Next, we’ll compile pianobar from source code:
```
cd ../pianobar-e945578ab22912049f1e547ce7b25b01089f7590
make
```
You might get a long list of compiler warnings. That’s fine, as long as the build _finishes._ Compiler _errors,_ on the other hand, will stop the build process. You might be missing a library from the apt-get sequence above, or something in the software may have changed since these instructions were written, in which case post in the [Adafruit Forums](https://forums.adafruit.com) for assistance.
Once compiled, install using:
```
sudo cp pianobar /usr/local/bin
```
Don’t worry about configuring this software yet; we’ll proceed there later. Just use the steps above to get it installed for now.
- [Previous Page](https://learn.adafruit.com/pi-wifi-radio/raspberry-pi-setup-1-of-3.md)
- [Next Page](https://learn.adafruit.com/pi-wifi-radio/raspberry-pi-setup-3-of-3.md)
## Featured Products
### Raspberry Pi 3 - Model B+ - 1.4GHz Cortex-A53 with 1GB RAM
[Raspberry Pi 3 - Model B+ - 1.4GHz Cortex-A53 with 1GB RAM](https://www.adafruit.com/product/3775)
The Raspberry Pi 3 Model B is the most popular Raspberry Pi computer made, and the Pi Foundation knows you can always make a good thing _better_! And what could make the Pi 3 better? How about a _faster_ processor, 5 GHz WiFi, and updated Ethernet chip with PoE capability?...
In Stock
[Buy Now](https://www.adafruit.com/product/3775)
[Related Guides to the Product](https://learn.adafruit.com/products/3775/guides)
### SD/MicroSD Memory Card (8 GB SDHC)
[SD/MicroSD Memory Card (8 GB SDHC)](https://www.adafruit.com/product/1294)
Add mega-storage in a jiffy using this 8 GB class 4 micro-SD card. It comes with a SD adapter so you can use it with any of our shields or adapters. Preformatted to FAT so it works out of the box with our projects. Tested and works great with our
In Stock
[Buy Now](https://www.adafruit.com/product/1294)
[Related Guides to the Product](https://learn.adafruit.com/products/1294/guides)
### 5V 2.5A Switching Power Supply with 20AWG MicroUSB Cable
[5V 2.5A Switching Power Supply with 20AWG MicroUSB Cable](https://www.adafruit.com/product/1995)
Our all-in-one 5V 2.5 Amp + MicroUSB cable power adapter is the perfect choice for powering single-board computers like Raspberry Pi, BeagleBone, or anything else that's power-hungry!
This adapter was specifically designed to provide 5.25V, not 5V, but we still call it a 5V USB...
Out of Stock
[Buy Now](https://www.adafruit.com/product/1995)
[Related Guides to the Product](https://learn.adafruit.com/products/1995/guides)
### Adafruit RGB Positive 16x2 LCD+Keypad Kit for Raspberry Pi
[Adafruit RGB Positive 16x2 LCD+Keypad Kit for Raspberry Pi](https://www.adafruit.com/product/1109)
This new Adafruit Pi Plate makes it easy to use an RGB 16x2 Character LCD. We really like the RGB Character LCDs we stock in the shop. (For RGB we have [RGB negative](http://www.adafruit.com/products/399) and [RGB positive](http://www.adafruit.com/products/398).)...
Out of Stock
[Buy Now](https://www.adafruit.com/product/1109)
[Related Guides to the Product](https://learn.adafruit.com/products/1109/guides)
### Adafruit RGB Negative 16x2 LCD+Keypad Kit for Raspberry Pi
[Adafruit RGB Negative 16x2 LCD+Keypad Kit for Raspberry Pi](https://www.adafruit.com/product/1110)
This new Adafruit Pi Plate makes it easy to use an RGB 16x2 Character LCD. We really like the RGB Character LCDs we stock in the shop. (For RGB we have [RGB negative](http://www.adafruit.com/products/399) and [RGB positive](http://www.adafruit.com/products/398).)...
Out of Stock
[Buy Now](https://www.adafruit.com/product/1110)
[Related Guides to the Product](https://learn.adafruit.com/products/1110/guides)
### Adafruit Blue&White 16x2 LCD+Keypad Kit for Raspberry Pi
[Adafruit Blue&White 16x2 LCD+Keypad Kit for Raspberry Pi](https://www.adafruit.com/product/1115)
This new Adafruit Pi Plate makes it easy to use a blue and white 16x2 Character LCD. [We really like the 16x2 Character LCDs we stock in the shop](http://www.adafruit.com/products/181). Unfortunately, these LCDs do require quite a few digital pins, 6 to control the LCD and then...
Out of Stock
[Buy Now](https://www.adafruit.com/product/1115)
[Related Guides to the Product](https://learn.adafruit.com/products/1115/guides)
### Adafruit Raspberry Pi B+ / Pi 2 / Pi 3 Case - Smoke Base
[Adafruit Raspberry Pi B+ / Pi 2 / Pi 3 Case - Smoke Base](https://www.adafruit.com/product/2258)
It took awhile to perfect - but that's okay since we can now safely say that the Adafruit case for Raspberry Pi Model B+ / Pi 2 / Pi 3 is The Single Greatest Raspberry Pi Model B+ Case Ever.
This enclosure was designed by Mike Doell - just like our...
In Stock
[Buy Now](https://www.adafruit.com/product/2258)
[Related Guides to the Product](https://learn.adafruit.com/products/2258/guides)
### Miniature WiFi (802.11b/g/n) Module: For Raspberry Pi and more
[Miniature WiFi (802.11b/g/n) Module: For Raspberry Pi and more](https://www.adafruit.com/product/814)
Make your Internet of Things device cable-free by adding WiFi. Take advantage of the Raspberry Pi and Beagle Bone's USB port to add a low cost, but high-reliability wireless link. We tried half a dozen modules to find one that works well with the Pi and Bone without the need of recompiling...
No Longer Stocked
[Buy Now](https://www.adafruit.com/product/814)
[Related Guides to the Product](https://learn.adafruit.com/products/814/guides)
## Related Guides
- [Adafruit Class Library for Windows IoT Core](https://learn.adafruit.com/adafruit-class-library-for-windows-iot-core.md)
- [Character LCD with Raspberry Pi or BeagleBone Black](https://learn.adafruit.com/character-lcd-with-raspberry-pi-or-beaglebone-black.md)
- [Adafruit 16x2 Character LCD + Keypad for Raspberry Pi](https://learn.adafruit.com/adafruit-16x2-character-lcd-plus-keypad-for-raspberry-pi.md)
- [Onion Pi](https://learn.adafruit.com/onion-pi.md)
- [Monitor Your Home With the Raspberry Pi B+](https://learn.adafruit.com/monitor-your-home-with-the-raspberry-pi-b-plus.md)
- [Pi Hole Ad Detection Display with PiTFT](https://learn.adafruit.com/pi-hole-ad-pitft-tft-detection-display.md)
- [Introducing the Raspberry Pi 2 - Model B](https://learn.adafruit.com/introducing-the-raspberry-pi-2-model-b.md)
- [Setting up a Raspberry Pi as a WiFi Access Point](https://learn.adafruit.com/setting-up-a-raspberry-pi-as-a-wifi-access-point.md)
- [Playing sounds and using buttons with Raspberry Pi](https://learn.adafruit.com/playing-sounds-and-using-buttons-with-raspberry-pi.md)
- [Adafruit RGB Matrix + Real Time Clock HAT for Raspberry Pi](https://learn.adafruit.com/adafruit-rgb-matrix-plus-real-time-clock-hat-for-raspberry-pi.md)
- [Raspberry Pi as an Ad Blocking Access Point](https://learn.adafruit.com/raspberry-pi-as-an-ad-blocking-access-point.md)
- [Internet of Things Printer for Raspberry Pi](https://learn.adafruit.com/pi-thermal-printer.md)
- [Adafruit Prototyping Pi Plate](https://learn.adafruit.com/adafruit-prototyping-pi-plate.md)
- [Node.js Embedded Development on the Raspberry Pi](https://learn.adafruit.com/node-embedded-development.md)
- [Matrix and 7-Segment LED Backpack with the Raspberry Pi](https://learn.adafruit.com/matrix-7-segment-led-backpack-with-the-raspberry-pi.md)
---
# Source: https://learn.adafruit.com/pi-wifi-radio/raspberry-pi-setup-3-of-3.md
# Raspberry Pi WiFi Radio
## Configure Software Packages
Create a directory for the pianobar configuration:
```
cd
mkdir -p .config/pianobar
```
Then link to the configuration file included with the radio software:
```
cd .config/pianobar
ln -s ../../Python-WiFi-Radio/config .
```
(Note: there’s a space before the final period above. Copy and paste this exact line if possible.)
Danger:
Edit the pianobar configuration file with your Pandora account name and password:
```
nano config
```
The login credentials are near the top of the file:
```
user = YOUR_EMAIL_ADDRESS
password = YOUR_PASSWORD
```
Replace these with **the email address and password that you use for accessing your Pandora account** , _not_ the account on the Raspberry Pi system! Save the changes to the file and exit from the editor.
Finally, enter the following command to make sure audio is routed to the headphone jack rather than the HDMI port **(you can skip this step if [using a USB audio device](http://learn.adafruit.com/usb-audio-cards-with-a-raspberry-pi))**:
```
sudo amixer cset numid=3 1
```
And with that all said and done, you should now be able to run pianobar from the command line:
```
pianobar
```
If that runs as expected, connect headphones or speakers. The initial volume level will be very low. Type right parenthesis several times to increase the volume:
**))))))))**
If that all works, press “q” to exit pianobar, then shut down the system in preparation for installing the final hardware:
```
sudo shutdown -h now
```
If you were remotely logged in via SSH, your connection will be closed and you won’t see a “halt” message. Allow about 20 seconds before disconnecting power.
- [Previous Page](https://learn.adafruit.com/pi-wifi-radio/raspberry-pi-setup-2-of-3.md)
- [Next Page](https://learn.adafruit.com/pi-wifi-radio/add-lcd-plate.md)
## Featured Products
### Raspberry Pi 3 - Model B+ - 1.4GHz Cortex-A53 with 1GB RAM
[Raspberry Pi 3 - Model B+ - 1.4GHz Cortex-A53 with 1GB RAM](https://www.adafruit.com/product/3775)
The Raspberry Pi 3 Model B is the most popular Raspberry Pi computer made, and the Pi Foundation knows you can always make a good thing _better_! And what could make the Pi 3 better? How about a _faster_ processor, 5 GHz WiFi, and updated Ethernet chip with PoE capability?...
In Stock
[Buy Now](https://www.adafruit.com/product/3775)
[Related Guides to the Product](https://learn.adafruit.com/products/3775/guides)
### SD/MicroSD Memory Card (8 GB SDHC)
[SD/MicroSD Memory Card (8 GB SDHC)](https://www.adafruit.com/product/1294)
Add mega-storage in a jiffy using this 8 GB class 4 micro-SD card. It comes with a SD adapter so you can use it with any of our shields or adapters. Preformatted to FAT so it works out of the box with our projects. Tested and works great with our
In Stock
[Buy Now](https://www.adafruit.com/product/1294)
[Related Guides to the Product](https://learn.adafruit.com/products/1294/guides)
### 5V 2.5A Switching Power Supply with 20AWG MicroUSB Cable
[5V 2.5A Switching Power Supply with 20AWG MicroUSB Cable](https://www.adafruit.com/product/1995)
Our all-in-one 5V 2.5 Amp + MicroUSB cable power adapter is the perfect choice for powering single-board computers like Raspberry Pi, BeagleBone, or anything else that's power-hungry!
This adapter was specifically designed to provide 5.25V, not 5V, but we still call it a 5V USB...
Out of Stock
[Buy Now](https://www.adafruit.com/product/1995)
[Related Guides to the Product](https://learn.adafruit.com/products/1995/guides)
### Adafruit RGB Positive 16x2 LCD+Keypad Kit for Raspberry Pi
[Adafruit RGB Positive 16x2 LCD+Keypad Kit for Raspberry Pi](https://www.adafruit.com/product/1109)
This new Adafruit Pi Plate makes it easy to use an RGB 16x2 Character LCD. We really like the RGB Character LCDs we stock in the shop. (For RGB we have [RGB negative](http://www.adafruit.com/products/399) and [RGB positive](http://www.adafruit.com/products/398).)...
Out of Stock
[Buy Now](https://www.adafruit.com/product/1109)
[Related Guides to the Product](https://learn.adafruit.com/products/1109/guides)
### Adafruit RGB Negative 16x2 LCD+Keypad Kit for Raspberry Pi
[Adafruit RGB Negative 16x2 LCD+Keypad Kit for Raspberry Pi](https://www.adafruit.com/product/1110)
This new Adafruit Pi Plate makes it easy to use an RGB 16x2 Character LCD. We really like the RGB Character LCDs we stock in the shop. (For RGB we have [RGB negative](http://www.adafruit.com/products/399) and [RGB positive](http://www.adafruit.com/products/398).)...
Out of Stock
[Buy Now](https://www.adafruit.com/product/1110)
[Related Guides to the Product](https://learn.adafruit.com/products/1110/guides)
### Adafruit Blue&White 16x2 LCD+Keypad Kit for Raspberry Pi
[Adafruit Blue&White 16x2 LCD+Keypad Kit for Raspberry Pi](https://www.adafruit.com/product/1115)
This new Adafruit Pi Plate makes it easy to use a blue and white 16x2 Character LCD. [We really like the 16x2 Character LCDs we stock in the shop](http://www.adafruit.com/products/181). Unfortunately, these LCDs do require quite a few digital pins, 6 to control the LCD and then...
Out of Stock
[Buy Now](https://www.adafruit.com/product/1115)
[Related Guides to the Product](https://learn.adafruit.com/products/1115/guides)
### Adafruit Raspberry Pi B+ / Pi 2 / Pi 3 Case - Smoke Base
[Adafruit Raspberry Pi B+ / Pi 2 / Pi 3 Case - Smoke Base](https://www.adafruit.com/product/2258)
It took awhile to perfect - but that's okay since we can now safely say that the Adafruit case for Raspberry Pi Model B+ / Pi 2 / Pi 3 is The Single Greatest Raspberry Pi Model B+ Case Ever.
This enclosure was designed by Mike Doell - just like our...
In Stock
[Buy Now](https://www.adafruit.com/product/2258)
[Related Guides to the Product](https://learn.adafruit.com/products/2258/guides)
### Miniature WiFi (802.11b/g/n) Module: For Raspberry Pi and more
[Miniature WiFi (802.11b/g/n) Module: For Raspberry Pi and more](https://www.adafruit.com/product/814)
Make your Internet of Things device cable-free by adding WiFi. Take advantage of the Raspberry Pi and Beagle Bone's USB port to add a low cost, but high-reliability wireless link. We tried half a dozen modules to find one that works well with the Pi and Bone without the need of recompiling...
No Longer Stocked
[Buy Now](https://www.adafruit.com/product/814)
[Related Guides to the Product](https://learn.adafruit.com/products/814/guides)
## Related Guides
- [Adafruit Class Library for Windows IoT Core](https://learn.adafruit.com/adafruit-class-library-for-windows-iot-core.md)
- [Character LCD with Raspberry Pi or BeagleBone Black](https://learn.adafruit.com/character-lcd-with-raspberry-pi-or-beaglebone-black.md)
- [Adafruit 16x2 Character LCD + Keypad for Raspberry Pi](https://learn.adafruit.com/adafruit-16x2-character-lcd-plus-keypad-for-raspberry-pi.md)
- [Onion Pi](https://learn.adafruit.com/onion-pi.md)
- [Monitor Your Home With the Raspberry Pi B+](https://learn.adafruit.com/monitor-your-home-with-the-raspberry-pi-b-plus.md)
- [Pi Hole Ad Detection Display with PiTFT](https://learn.adafruit.com/pi-hole-ad-pitft-tft-detection-display.md)
- [Introducing the Raspberry Pi 2 - Model B](https://learn.adafruit.com/introducing-the-raspberry-pi-2-model-b.md)
- [Setting up a Raspberry Pi as a WiFi Access Point](https://learn.adafruit.com/setting-up-a-raspberry-pi-as-a-wifi-access-point.md)
- [Playing sounds and using buttons with Raspberry Pi](https://learn.adafruit.com/playing-sounds-and-using-buttons-with-raspberry-pi.md)
- [Adafruit RGB Matrix + Real Time Clock HAT for Raspberry Pi](https://learn.adafruit.com/adafruit-rgb-matrix-plus-real-time-clock-hat-for-raspberry-pi.md)
- [Raspberry Pi as an Ad Blocking Access Point](https://learn.adafruit.com/raspberry-pi-as-an-ad-blocking-access-point.md)
- [Internet of Things Printer for Raspberry Pi](https://learn.adafruit.com/pi-thermal-printer.md)
- [Adafruit Prototyping Pi Plate](https://learn.adafruit.com/adafruit-prototyping-pi-plate.md)
- [Node.js Embedded Development on the Raspberry Pi](https://learn.adafruit.com/node-embedded-development.md)
- [Matrix and 7-Segment LED Backpack with the Raspberry Pi](https://learn.adafruit.com/matrix-7-segment-led-backpack-with-the-raspberry-pi.md)
---
# Source: https://learn.adafruit.com/pi-thermal-printer/raspberry-pi-software-setup.md
# Internet of Things Printer for Raspberry Pi
## Raspberry Pi Software Setup
Danger:
Further configuration of the Raspberry Pi will take place over the network using **SSH** , not the keyboard and mouse. You also don't have access to the serial console so you can only use ssh or logging in over HDMI + Keyboard.
[As you can probably figure by now, we have an in-depth SSH tutorial](http://learn.adafruit.com/adafruits-raspberry-pi-lesson-6-using-ssh). In summary:
- The **SSH server** should already be **enabled** on the Raspberry Pi — this was done during the initial raspi-config setup.
- On Mac or Linux systems, you can use a Terminal or xterm window.
- For Windows systems, you can [download PuTTY](http://www.putty.org).
The terminal command to access the system would be either:
```
ssh pi@raspberrypi.local
```
(If you changed the hostname in raspi-config, use that instead, e.g. **iotp.local** )
Or — if your computer can’t resolve the “.local” address — try the numeric IP address that you can get from your pi by typing in **hostname -I**

```
ssh pi@10.0.1.10
```
(Substitute the numeric IP address actually reported by the system during boot.)
You’ll be prompted for a password — either use the password that you set up from raspi-config, or “raspberry” if you left the default. Additionally, the first time connecting you may be prompted regarding a host key for security…enter Y (or click Yes) when prompted.
# Update Packages, Install Libraries and Printer Essentials
Once logged in, type the following at the command prompt (if logged in through **ssh** , you can **copy-and-paste** from this browser window to the terminal):
```
sudo apt-get update
sudo apt-get install git cups wiringpi build-essential libcups2-dev libcupsimage2-dev python-serial python-pil python-unidecode
```
The “update” step refreshes the list of available software packages and takes a couple of minutes.
The “install” step downloads and installs a number of packages…this may take 20 minutes or so.
# Install Printer Driver
**The printer does not need to be connected yet.** We can prepare the system the same regardless.
```
cd ~
git clone https://github.com/adafruit/zj-58
cd zj-58
make
sudo ./install
```

Your thermal printer may have arrived with a **test page** in the box or the paper bay. If not, or if you threw that away, you can generate a new one by installing a roll of paper and holding the feed button while connecting power.
Look for the **baud rate** that’s printed near the bottom of the page. This is typically either **9600** or **19200** baud. This is important…you’ll need to know the correct value for your printer.
You can recreate the test page by holding down the feed button and then powering the printer.

To set up this printer as the system default, we’ll be typing two lines similar to the following (but not necessarily identical…read on)…
```
sudo lpadmin -p ZJ-58 -E -v serial:/dev/serial0?baud=19200 -m zjiang/ZJ-58.ppd
sudo lpoptions -d ZJ-58
```
On the first line, change the “ **baud** ” value to **9600** or **19200** as required for your printer. The rest of the line should be typed _exactly_ as it appears above. Likewise for the second line, which needs no changes.

# Finish Up
Shut down the system. We'll work on the case and wiring next, then return to the final software configuration later.
```
sudo shutdown -h now
```
After about 30 seconds, you can disconnect the USB power cable.
Remove the SD card and WiFi adapter, and get your soldering iron ready…
- [Previous Page](https://learn.adafruit.com/pi-thermal-printer/raspberry-pi-os-setup.md)
- [Next Page](https://learn.adafruit.com/pi-thermal-printer/soldering-pre-2017.md)
## Primary Products
### Adafruit IoT Pi Printer Project Pack
[Adafruit IoT Pi Printer Project Pack](https://www.adafruit.com/product/1289)
Build an "Internet of Things" connected mini printer that will do your bidding! This is a fun weekend project that comes with a beautiful laser cut case. Once assembled, the little printer connects wirelessly to get Internet data for printing onto 2 1/4" wide receipt paper....
No Longer Stocked
[Buy Now](https://www.adafruit.com/product/1289)
[Related Guides to the Product](https://learn.adafruit.com/products/1289/guides)
## Featured Products
### Miniature WiFi (802.11b/g/n) Module: For Raspberry Pi and more
[Miniature WiFi (802.11b/g/n) Module: For Raspberry Pi and more](https://www.adafruit.com/product/814)
Make your Internet of Things device cable-free by adding WiFi. Take advantage of the Raspberry Pi and Beagle Bone's USB port to add a low cost, but high-reliability wireless link. We tried half a dozen modules to find one that works well with the Pi and Bone without the need of recompiling...
No Longer Stocked
[Buy Now](https://www.adafruit.com/product/814)
[Related Guides to the Product](https://learn.adafruit.com/products/814/guides)
### Raspberry Pi - Skill badge, iron-on patch
[Raspberry Pi - Skill badge, iron-on patch](https://www.adafruit.com/product/906)
You are learning to use the small Linux based board, the Raspberry Pi! Adafruit offers a fun and exciting "badges" of achievement for electronics, science and engineering. We believe everyone should be able to be rewarded for learning a useful skill, a badge is just one of the many...
In Stock
[Buy Now](https://www.adafruit.com/product/906)
[Related Guides to the Product](https://learn.adafruit.com/products/906/guides)
### Adafruit Pi Unassembled T-Cobbler Breakout Kit for Raspberry Pi
[Adafruit Pi Unassembled T-Cobbler Breakout Kit for Raspberry Pi](https://www.adafruit.com/product/1105)
Now that you've finally got your hands on a [Raspberry Pi®](http://www.raspberrypi.org/), you're probably itching to make some fun embedded computer projects with it. What you need is an add on prototyping Pi T-Cobbler from Adafruit, which can break out all those tasty...
No Longer Stocked
[Buy Now](https://www.adafruit.com/product/1105)
[Related Guides to the Product](https://learn.adafruit.com/products/1105/guides)
### Mini Thermal Receipt Printer Starter Pack
[Mini Thermal Receipt Printer Starter Pack](https://www.adafruit.com/product/600)
Hit the ground running (and printing!) with this starter pack that includes a thermal printer and all the extras and save a few dollars while you're at it.
Includes:
- [A mini thermal receipt printer](http://www.adafruit.com/products/597) - with cables and...
No Longer Stocked
[Buy Now](https://www.adafruit.com/product/600)
[Related Guides to the Product](https://learn.adafruit.com/products/600/guides)
### Thermal paper roll - 50' long, 2.25" wide
[Thermal paper roll - 50' long, 2.25" wide](https://www.adafruit.com/product/599)
A mini roll of thermal paper, this fits very nicely into our mini thermal printer. 2.25" wide (about 57mm) and 50 feet long (15 meters). BPA-free.
[Perfect for use with our mini thermal printer!](http://www.adafruit.com/products/597)
No Longer Stocked
[Buy Now](https://www.adafruit.com/product/599)
[Related Guides to the Product](https://learn.adafruit.com/products/599/guides)
### Mini Thermal Receipt Printer
[Mini Thermal Receipt Printer](https://www.adafruit.com/product/597)
Add a mini printer to any microcontroller project with this very cute thermal printer. Thermal printers are also known as receipt printers, they're what you get when you go to the ATM or grocery store. Now you can embed a little printer of your own into an enclosure. This printer is ideal...
No Longer Stocked
[Buy Now](https://www.adafruit.com/product/597)
[Related Guides to the Product](https://learn.adafruit.com/products/597/guides)
### Rugged Metal Pushbutton with White LED Ring
[Rugged Metal Pushbutton with White LED Ring](https://www.adafruit.com/product/558)
These chrome-plated metal buttons are rugged and look real good while doing it! Simply drill a 16mm hole into any material up to 1/2" thick and you can fit these in place, there's even a rubber gasket to keep water out of the enclosure. On the front of the button is a flat metal...
In Stock
[Buy Now](https://www.adafruit.com/product/558)
[Related Guides to the Product](https://learn.adafruit.com/products/558/guides)
### 5V 10A switching power supply
[5V 10A switching power supply](https://www.adafruit.com/product/658)
This is a beefy switching supply, for when you need a lot of power! It can supply 5V DC up to 10 Amps, running from 110V or 220V power (the plug it comes with is for US/Canada/Japan but you can use any plug adapter for your country, or just replace the cable with a standard computer/appliance...
In Stock
[Buy Now](https://www.adafruit.com/product/658)
[Related Guides to the Product](https://learn.adafruit.com/products/658/guides)
## Related Guides
- [Skill Badge Requirements: Raspberry Pi](https://learn.adafruit.com/skill-badge-requirements-raspberry-pi.md)
- [Adafruit Prototyping Pi Plate](https://learn.adafruit.com/adafruit-prototyping-pi-plate.md)
- [Adafruit Raspberry Pi Educational Linux Distro](https://learn.adafruit.com/adafruit-raspberry-pi-educational-linux-distro.md)
- [Open Source Protective Face Shield Designs](https://learn.adafruit.com/open-source-face-shield-designs.md)
- [PyPortal IoT Plant Monitor with Google Cloud IoT Core and CircuitPython](https://learn.adafruit.com/pyportal-iot-plant-monitor-with-google-cloud-iot-core-and-circuitpython.md)
- [Adafruit QT Py ESP32-C3 WiFi Dev Board](https://learn.adafruit.com/adafruit-qt-py-esp32-c3-wifi-dev-board.md)
- [AstroPrint 3D Printing](https://learn.adafruit.com/astroprint-3d-printing.md)
- [No-Code Rain Sensing Smart Desktop Umbrella Stand](https://learn.adafruit.com/no-code-rain-sensing-smart-desktop-umbrella-stand.md)
- [MacroPad Remote Procedure Calls over USB to Control Home Assistant](https://learn.adafruit.com/macropad-remote-procedure-calls-over-usb-to-control-home-assistant.md)
- [PiPhone - A Raspberry Pi based Cellphone](https://learn.adafruit.com/piphone-a-raspberry-pi-based-cellphone.md)
- [Adafruit 128x64 OLED Bonnet for Raspberry Pi](https://learn.adafruit.com/adafruit-128x64-oled-bonnet-for-raspberry-pi.md)
- [Set up and Blink - MATLAB and Simulink with Raspberry Pi](https://learn.adafruit.com/how-to-use-matlab-and-simulink-with-raspberry-pi.md)
- [Mini Raspberry Pi Handheld Notebook](https://learn.adafruit.com/mini-raspberry-pi-handheld-notebook-palmtop.md)
- [Adafruit's Raspberry Pi Lesson 2. First Time Configuration](https://learn.adafruit.com/adafruits-raspberry-pi-lesson-2-first-time-configuration.md)
- [Huzzah Weather Display](https://learn.adafruit.com/huzzah-weather-display.md)
---
# Source: https://learn.adafruit.com/li-ion-and-lipoly-batteries/rc-type-batteries.md
# Li-Ion & LiPoly Batteries
## "RC" Type Batteries
When purchasing batteries, its good to be aware there are two families of batteries: **Regular/Normal** and **RC** (radio control)
**Regular/normal** lithium ion batteries are what you find in your ipod, camcorder, phone etc. They are meant to last for over 500 charges, stay safe, and provide a **C** or two of current ([For more details about \*\*C\*\* please read our basic battery tutorial](http://learn.adafruit.com/all-about-batteries))
**RC** lithium ion batteries are meant for radio controlled cars, planes, UAVs, quad copters, etc. They are meant to give a lot of power at once, up to 20C and are designed to never 'cut off' so that the battery will be damaged instead of having the plane fall out of the sky.
**RC** batteries are often raw cells, as seen here: There are two tabs coming out of the top and you see its labeled **20C** for high current output capacity. They are often less expensive because there is no protection circuitry.

Info:
- [Previous Page](https://learn.adafruit.com/li-ion-and-lipoly-batteries/protection-circuitry.md)
- [Next Page](https://learn.adafruit.com/li-ion-and-lipoly-batteries/cell-phone-and-camcorder-batteries.md)
## Featured Products
### Adafruit Micro Lipo - USB LiIon/LiPoly charger
[Adafruit Micro Lipo - USB LiIon/LiPoly charger](https://www.adafruit.com/product/1304)
Oh so adorable, this is the tiniest little lipo charger, so handy you can keep it any project box! Its also easy to use. Simply plug in the gold plated contacts into any USB port and a 3.7V/4.2V lithium polymer or lithium ion rechargeable battery into the JST plug on the other end. There are...
In Stock
[Buy Now](https://www.adafruit.com/product/1304)
[Related Guides to the Product](https://learn.adafruit.com/products/1304/guides)
### USB LiIon/LiPoly charger
[USB LiIon/LiPoly charger](https://www.adafruit.com/product/259)
This is a Lithium Ion and Lithium Polymer battery charger based on the [MCP73833](http://www.microchip.com/wwwproducts/Devices.aspx?dDocName=en027785). It uses a USB mini-B for connection to any computer or 'USB wall adapter'. Charging is performed in three stages: first a...
In Stock
[Buy Now](https://www.adafruit.com/product/259)
[Related Guides to the Product](https://learn.adafruit.com/products/259/guides)
### USB/DC Lithium Polymer battery charger 5-12V
[USB/DC Lithium Polymer battery charger 5-12V](https://www.adafruit.com/product/280)
Charge your single-cell lithium ion/polymer battery any which way you like with this board. Have a USB connection? No problem, just plug into the miniUSB connector. Only have a wall adapter? Any standard 2.1mm DC adapter which puts out 5 to 12VDC will work fine. If both are plugged in, the...
No Longer Stocked
[Buy Now](https://www.adafruit.com/product/280)
[Related Guides to the Product](https://learn.adafruit.com/products/280/guides)
### Lithium Ion Battery Pack - 3.7V 6600mAh
[Lithium Ion Battery Pack - 3.7V 6600mAh](https://www.adafruit.com/product/353)
Need a massive battery for your project? This lithium-ion pack is made of 3 balanced 2200mAh cells for a total of 6600mA capacity! The cells are connected in parallel and spot-welded to a protection circuit that provides over-voltage, under-voltage, and over-current protection.
Each cell...
In Stock
[Buy Now](https://www.adafruit.com/product/353)
[Related Guides to the Product](https://learn.adafruit.com/products/353/guides)
### Lithium Ion Battery Pack - 3.7V 4400mAh
[Lithium Ion Battery Pack - 3.7V 4400mAh](https://www.adafruit.com/product/354)
Need a big battery for your project? This lithium-ion pack is made of 2 balanced 2200mAh cells for a total of 4400mA capacity! The cells are connected in parallel and spot-welded to a protection circuit that provides over-voltage, under-voltage, and over-current protection.
Each cell can...
In Stock
[Buy Now](https://www.adafruit.com/product/354)
[Related Guides to the Product](https://learn.adafruit.com/products/354/guides)
### Lithium Ion Polymer Battery - 3.7v 2500mAh
[Lithium Ion Polymer Battery - 3.7v 2500mAh](https://www.adafruit.com/product/328)
Lithium-ion polymer (also known as 'lipo' or 'lipoly') batteries are thin, light, and powerful. The output ranges from 4.2V when completely charged to 3.7V. This battery has a capacity of **2500mAh** for a total of about 10 Wh. If you need a smaller battery,
In Stock
[Buy Now](https://www.adafruit.com/product/328)
[Related Guides to the Product](https://learn.adafruit.com/products/328/guides)
### Lithium Ion Polymer Battery - 3.7v 1200mAh
[Lithium Ion Polymer Battery - 3.7v 1200mAh](https://www.adafruit.com/product/258)
Lithium-ion polymer (also known as 'lipo' or 'lipoly') batteries are thin, light, and powerful. The output ranges from 4.2V when completely charged to 3.7V. This battery has a capacity of 1200mAh for a total of about 4.5 Wh. If you need a larger battery,
In Stock
[Buy Now](https://www.adafruit.com/product/258)
[Related Guides to the Product](https://learn.adafruit.com/products/258/guides)
### Lithium Ion Polymer Battery - 3.7v 500mAh
[Lithium Ion Polymer Battery - 3.7v 500mAh](https://www.adafruit.com/product/1578)
Lithium-ion polymer (also known as 'lipo' or 'lipoly') batteries are thin, light, and powerful. The output ranges from 4.2V when completely charged to 3.7V. This battery has a capacity of 500mAh for a total of about 1.9 Wh. If you need a larger (or smaller!) battery,
In Stock
[Buy Now](https://www.adafruit.com/product/1578)
[Related Guides to the Product](https://learn.adafruit.com/products/1578/guides)
## Related Guides
- [Sound Activated Shark Mask](https://learn.adafruit.com/sound-activated-shark-mask.md)
- [SNES EZ Key Bluefruit Game Pad](https://learn.adafruit.com/snes-ez-key-bluefruit-game-pad.md)
- [Color-sensor Driven NeoPixel Dress](https://learn.adafruit.com/color-sensor-driven-neopixel-dress.md)
- [Adafruit MicroLipo and MiniLipo Battery Chargers](https://learn.adafruit.com/adafruit-microlipo-and-minilipo-battery-chargers.md)
- [Cartoon Network and Make Code - Rose Quartz Shield Umbrella](https://learn.adafruit.com/cartoon-network-and-make-code-rose-quartz-shield-umbrella.md)
- [Ursula's Seashell Necklace](https://learn.adafruit.com/ursulas-seashell-necklace.md)
- [Wireless Control Button for WLED Projects](https://learn.adafruit.com/wireless-control-button-for-wled-projects.md)
- [Bunny Ears with MakeCode](https://learn.adafruit.com/bunny-ears-with-makecode.md)
- [VU Meter Baseball Hat](https://learn.adafruit.com/vu-meter-baseball-hat.md)
- [Glowing Fascinator Hat with Gemma M0 and MakeCode](https://learn.adafruit.com/glowing-fascinator-hat-gemma-m0-makecode.md)
- [LED Masquerade Masks](https://learn.adafruit.com/led-masquerade-masks.md)
- [Han Solo Blaster Cosplay](https://learn.adafruit.com/han-solo-blaster-cosplay.md)
- [Convert your Model M Keyboard to Bluetooth with Bluefruit EZ-Key HID](https://learn.adafruit.com/convert-your-model-m-keyboard-to-bluetooth-with-bluefruit-ez-key-hid.md)
- [Chameleon Scarf](https://learn.adafruit.com/chameleon-scarf.md)
- [Kaleidoscope Eyes (Trinket-Powered NeoPixel LED Ring Goggles)](https://learn.adafruit.com/kaleidoscope-eyes-neopixel-led-goggles-trinket-gemma.md)
---
# Source: https://learn.adafruit.com/reading-a-analog-in-and-controlling-audio-volume-with-the-raspberry-pi.md
# Analog Inputs for Raspberry Pi Using the MCP3008
## Overview

Teaching the Raspberry Pi how to read analog inputs is easier than you think! The Pi does not include a hardware [analog-to-digital converter](https://en.wikipedia.org/wiki/Analog-to-digital_converter), but an external ADC (such as the [MCP3008](https://www.adafruit.com/products/856)) can be used, along with some SPI code in Python to read external analog devices.
Here is a short list of some analog inputs that could be used with this setup:
- [potentiometer](http://www.adafruit.com/products/356)
- [photocell](http://www.adafruit.com/products/161)
- [force sensitive resistor (FSR)](http://www.adafruit.com/products/166)
- [temperature sensor](http://www.adafruit.com/products/165)
- [2-axis joystick](http://www.adafruit.com/products/512)
This guide uses a potentiometer to control the volume of an audio tone, but the code can be used as the basis for any kind of analog-input project.
- [Next Page](https://learn.adafruit.com/reading-a-analog-in-and-controlling-audio-volume-with-the-raspberry-pi/connecting-the-cobbler-to-a-mcp3008.md)
## Featured Products
### MCP3008 - 8-Channel 10-Bit ADC With SPI Interface
[MCP3008 - 8-Channel 10-Bit ADC With SPI Interface](https://www.adafruit.com/product/856)
Need to add analog inputs? This chip will add 8 channels of 10-bit analog input to your microcontroller or microcomputer project. It's super easy to use and uses SPI so only 4 pins are required. We chose this chip as a great accompaniment to the Raspberry Pi computer because it's fun...
In Stock
[Buy Now](https://www.adafruit.com/product/856)
[Related Guides to the Product](https://learn.adafruit.com/products/856/guides)
### Breadboard trim potentiometer
[Breadboard trim potentiometer](https://www.adafruit.com/product/356)
These are our favorite trim pots, perfect for breadboarding and prototyping. They have a long grippy adjustment knob and with 0.1" spacing, they plug into breadboards or perfboards with ease.
This is the same pot that comes with our character LCDs and tutorial...
In Stock
[Buy Now](https://www.adafruit.com/product/356)
[Related Guides to the Product](https://learn.adafruit.com/products/356/guides)
### Full Sized Premium Breadboard - 830 Tie Points
[Full Sized Premium Breadboard - 830 Tie Points](https://www.adafruit.com/product/239)
This is a 'full-size' premium quality breadboard, 830 tie points. Good for small and medium projects. It's 2.2" x 7" (5.5 cm x 17 cm) with a standard double-strip in the middle and two power rails on both sides. You can pull the power rails off easily to make the...
In Stock
[Buy Now](https://www.adafruit.com/product/239)
[Related Guides to the Product](https://learn.adafruit.com/products/239/guides)
### Raspberry Pi 3 - Model B+ - 1.4GHz Cortex-A53 with 1GB RAM
[Raspberry Pi 3 - Model B+ - 1.4GHz Cortex-A53 with 1GB RAM](https://www.adafruit.com/product/3775)
The Raspberry Pi 3 Model B is the most popular Raspberry Pi computer made, and the Pi Foundation knows you can always make a good thing _better_! And what could make the Pi 3 better? How about a _faster_ processor, 5 GHz WiFi, and updated Ethernet chip with PoE capability?...
In Stock
[Buy Now](https://www.adafruit.com/product/3775)
[Related Guides to the Product](https://learn.adafruit.com/products/3775/guides)
### Assembled Pi T-Cobbler Plus - GPIO Breakout
[Assembled Pi T-Cobbler Plus - GPIO Breakout](https://www.adafruit.com/product/2028)
**This is the assembled version of the Pi T-Cobbler Plus. It only works with the Raspberry Pi Model Zero, A+, B+, Pi 2, Pi 3 & Pi 4!** (Any Pi with 2x20 connector)
The Raspberry Pi has landed on the Maker World like a 40-GPIO pinned, quad-USB ported, credit...
In Stock
[Buy Now](https://www.adafruit.com/product/2028)
[Related Guides to the Product](https://learn.adafruit.com/products/2028/guides)
## Related Guides
- [MCP3008 - 8-Channel 10-Bit ADC With SPI Interface](https://learn.adafruit.com/mcp3008-spi-adc.md)
- [Raspberry Pi E-mail Notifier Using LEDs](https://learn.adafruit.com/raspberry-pi-e-mail-notifier-using-leds.md)
- [Adafruit AMG8833 8x8 Thermal Camera Sensor](https://learn.adafruit.com/adafruit-amg8833-8x8-thermal-camera-sensor.md)
- [Capacitive Touch Sensors on the Raspberry Pi](https://learn.adafruit.com/capacitive-touch-sensors-on-the-raspberry-pi.md)
- [Windows IoT Core Application Development: Headed Blinky](https://learn.adafruit.com/windows-iot-application-development-headed-blinky.md)
- [Single Channel LoRaWAN Gateway for Raspberry Pi](https://learn.adafruit.com/raspberry-pi-single-channel-lorawan-gateway.md)
- [LoRa and LoRaWAN Radio for Raspberry Pi](https://learn.adafruit.com/lora-and-lorawan-radio-for-raspberry-pi.md)
- [Adafruit's Raspberry Pi Lesson 12. Sensing Movement](https://learn.adafruit.com/adafruits-raspberry-pi-lesson-12-sensing-movement.md)
- [Large Pi-based Thermometer and Clock](https://learn.adafruit.com/large-pi-based-thermometer-and-clock.md)
- [Playing sounds and using buttons with Raspberry Pi](https://learn.adafruit.com/playing-sounds-and-using-buttons-with-raspberry-pi.md)
- [Windows IoT Core Application Development: Headless Blinky](https://learn.adafruit.com/windows-iot-application-development-headless-application.md)
- [Adafruit's Raspberry Pi Lesson 11. DS18B20 Temperature Sensing](https://learn.adafruit.com/adafruits-raspberry-pi-lesson-11-ds18b20-temperature-sensing.md)
- [Node.js Embedded Development on the Raspberry Pi](https://learn.adafruit.com/node-embedded-development.md)
- [Adafruit's Raspberry Pi Lesson 10. Stepper Motors](https://learn.adafruit.com/adafruits-raspberry-pi-lesson-10-stepper-motors.md)
- [CircuitPython Libraries on Linux and ODROID C2](https://learn.adafruit.com/circuitpython-libaries-linux-odroid-c2.md)
- [Adafruit's Raspberry Pi Lesson 4. GPIO Setup](https://learn.adafruit.com/adafruits-raspberry-pi-lesson-4-gpio-setup.md)
---
# Source: https://learn.adafruit.com/ir-sensor/reading-ir-commands.md
# IR Sensor
## Reading IR Commands
For our final project, we will use a remote control to send messages to a microcontroller. For example, this might be useful for a robot that can be directed with an IR remote. It can also be good for projects that you want to control from far away, without wires.
For a remote in this example we'll be using an Apple clicker remote. You can use any kind of remote you wish, or you can steal one of these from an unsuspecting hipster.

We'll use the code from our previous sketch for raw IR reading but this time we'll edit our printer-outer to have it give us the pulses in a C array, this will make it easier for us to use for pattern matching.```
void printpulses(void) {
Serial.println("\n\r\n\rReceived: \n\rOFF \tON");
for (uint8_t i = 0; i < currentpulse; i++) {
Serial.print(pulses[i][0] * RESOLUTION, DEC);
Serial.print(" usec, ");
Serial.print(pulses[i][1] * RESOLUTION, DEC);
Serial.println(" usec");
}
// print it in a 'array' format
Serial.println("int IRsignal[] = {");
Serial.println("// ON, OFF (in 10's of microseconds)");
for (uint8_t i = 0; i < currentpulse-1; i++) {
Serial.print("\t"); // tab
Serial.print(pulses[i][1] * RESOLUTION / 10, DEC);
Serial.print(", ");
Serial.print(pulses[i+1][0] * RESOLUTION / 10, DEC);
Serial.println(",");
}
Serial.print("\t"); // tab
Serial.print(pulses[currentpulse-1][1] * RESOLUTION / 10, DEC);
Serial.print(", 0};");
}
```
I uploaded the new sketch and pressed the **Play** button on the Apple remote and got the following:
```
int IRsignal[] = { // ON, OFF (in 10's of microseconds)
912, 438,
68, 48,
68, 158,
68, 158,
68, 158,
68, 48,
68, 158,
68, 158,
68, 158,
70, 156,
70, 158,
68, 158,
68, 48,
68, 46,
70, 46,
68, 46,
68, 160,
68, 158,
70, 46,
68, 158,
68, 46,
70, 46,
68, 48,
68, 46,
68, 48,
66, 48,
68, 48,
66, 160,
66, 50,
66, 160,
66, 52,
64, 160,
66, 48,
66, 3950,
908, 214,
66, 3012,
908, 212,
68, 0};
```
We'll try to detect that code.
Let's start a new sketch called **IR Commander (you can download the final code from GitHub at the green button below or click Download Project Zip in the complete code listing). **
[Open the GitHub repo for the code on this page](https://github.com/adafruit/Adafruit_Learning_System_Guides/blob/master/IR_Sensor/Arduino/IR_Commander/ircommander.ino)
https://github.com/adafruit/Adafruit_Learning_System_Guides/blob/main/IR_Sensor/Arduino/IR_Commander/IR_Commander.ino
https://github.com/adafruit/Adafruit_Learning_System_Guides/blob/main/IR_Sensor/Arduino/IR_Commander/ircommander.h
This code uses parts of our previous sketch. The first part we'll do is to create a function that just listens for an IR code an puts the pulse timings into the **pulses[]** array. It will return the number of pulses it heard as a return-value.
```
int listenForIR(void) {
currentpulse = 0;
while (1) {
uint16_t highpulse, lowpulse; // temporary storage timing
highpulse = lowpulse = 0; // start out with no pulse length
// while (digitalRead(IRpin)) { // this is too slow!
while (IRpin_PIN & (1 << IRpin)) {
// pin is still HIGH
// count off another few microseconds
highpulse++;
delayMicroseconds(RESOLUTION);
// If the pulse is too long, we 'timed out' - either nothing
// was received or the code is finished, so print what
// we've grabbed so far, and then reset
if ((highpulse >= MAXPULSE) && (currentpulse != 0)) {
return currentpulse;
}
}
// we didn't time out so lets stash the reading
pulses[currentpulse][0] = highpulse;
// same as above
while (! (IRpin_PIN & _BV(IRpin))) {
// pin is still LOW
lowpulse++;
delayMicroseconds(RESOLUTION);
if ((lowpulse >= MAXPULSE) && (currentpulse != 0)) {
return currentpulse;
}
}
pulses[currentpulse][1] = lowpulse;
// we read one high-low pulse successfully, continue!
currentpulse++;
}
}
```
Our new **loop()** will start out just listening for pulses
```
void loop(void) {
int numberpulses;
numberpulses = listenForIR();
Serial.print("Heard ");
Serial.print(numberpulses);
Serial.println("-pulse long IR signal");
}
```
When we run this it will print out something like...
OK time to make the sketch compare what we received to what we have in our stored array:
As you can see, there is some variation. So when we do our comparison we can't look for preciesely the same values, we have to be a little 'fuzzy'. We'll say that the values can vary by 20% - that should be good enough.```
// What percent we will allow in variation to match the same code \\ #define FUZZINESS 20
void loop(void) {
int numberpulses;
numberpulses = listenForIR();
Serial.print("Heard ");
Serial.print(numberpulses);
Serial.println("-pulse long IR signal");
for (int i=0; i< numberpulses-1; i++) {
int oncode = pulses[i][1] * RESOLUTION / 10;
int offcode = pulses[i+1][0] * RESOLUTION / 10;
Serial.print(oncode); // the ON signal we heard
Serial.print(" - ");
Serial.print(ApplePlaySignal[i*2 + 0]); // the ON signal we want
// check to make sure the error is less than FUZZINESS percent
if ( abs(oncode - ApplePlaySignal[i*2 + 0]) <= (oncode * FUZZINESS / 100)) {
Serial.print(" (ok)");
} else {
Serial.print(" (x)");
}
Serial.print(" \t"); // tab
Serial.print(offcode); // the OFF signal we heard
Serial.print(" - ");
Serial.print(ApplePlaySignal[i*2 + 1]); // the OFF signal we want
if ( abs(offcode - ApplePlaySignal[i*2 + 1]) <= (offcode * FUZZINESS / 100)) {
Serial.print(" (ok)");
} else {
Serial.print(" (x)");
}
Serial.println();
}
}
```

This loop, as it goes through each pulse, does a little math. It compares the absolute (**abs()**) difference between the code we heard and the code we're trying to match abs(oncode - ApplePlaySignal[i\*2 + 0]) and then makes sure that the error is less than FUZZINESS percent of the code length (oncode \* FUZZINESS / 100)
We found we had to tweak the stored values a little to make them match up 100% each time. IR is not a precision-timed protocol so having to make the FUZZINESS 20% or more is not a bad thing
Finally, we can turn the **loop()** into its own function which will return **true** or **false** depending on whether it matched the code we ask it to. We also commented out the printing functions
```
boolean IRcompare(int numpulses, int Signal[]) {
for (int i=0; i< numpulses-1; i++) {
int oncode = pulses[i][1] * RESOLUTION / 10;
int offcode = pulses[i+1][0] * RESOLUTION / 10;
/*
Serial.print(oncode); // the ON signal we heard
Serial.print(" - ");
Serial.print(Signal[i*2 + 0]); // the ON signal we want
*/
// check to make sure the error is less than FUZZINESS percent
if ( abs(oncode - Signal[i*2 + 0]) <= (Signal[i*2 + 0] * FUZZINESS / 100)) {
//Serial.print(" (ok)");
} else {
//Serial.print(" (x)");
// we didn't match perfectly, return a false match
return false;
}
/*
Serial.print(" \t"); // tab
Serial.print(offcode); // the OFF signal we heard
Serial.print(" - ");
Serial.print(Signal[i*2 + 1]); // the OFF signal we want
*/
if ( abs(offcode - Signal[i*2 + 1]) <= (Signal[i*2 + 1] * FUZZINESS / 100)) {
//Serial.print(" (ok)");
} else {
//Serial.print(" (x)");
// we didn't match perfectly, return a false match
return false;
}
//Serial.println();
}
// Everything matched!
return true;
}
```
We then took more IR command data for the 'rewind' and 'fastforward' buttons and put all the code array data into **ircodes.h ** to keep the main sketch from being too long and unreadable [(you can get all the code from github)](http://github.com/adafruit/IR-Commander)
Finally, the main loop looks like this:
```
void loop(void) {
int numberpulses;
numberpulses = listenForIR();
Serial.print("Heard ");
Serial.print(numberpulses);
Serial.println("-pulse long IR signal");
if (IRcompare(numberpulses, ApplePlaySignal)) {
Serial.println("PLAY");
}
if (IRcompare(numberpulses, AppleRewindSignal)) {
Serial.println("REWIND");
}
if (IRcompare(numberpulses, AppleForwardSignal)) {
Serial.println("FORWARD");
}
}
```
We check against all the codes we know about and print out whenever we get a match. You could now take this code and turn it into something else, like a robot that moves depending on what button is pressed.
After testing, success!

- [Previous Page](https://learn.adafruit.com/ir-sensor/making-an-intervalometer.md)
- [Next Page](https://learn.adafruit.com/ir-sensor/circuitpython.md)
## Featured Products
### Adafruit METRO 328 Fully Assembled - Arduino IDE compatible
[Adafruit METRO 328 Fully Assembled - Arduino IDE compatible](https://www.adafruit.com/product/50)
We sure love the ATmega328 here at Adafruit, and we use them _a lot_ for our own projects. The processor has plenty of GPIO, Analog inputs, hardware UART SPI and I2C, timers and PWM galore - just enough for most simple projects. When we need to go small, we use a
Out of Stock
[Buy Now](https://www.adafruit.com/product/50)
[Related Guides to the Product](https://learn.adafruit.com/products/50/guides)
### IR (Infrared) Receiver Sensor
[IR (Infrared) Receiver Sensor](https://www.adafruit.com/product/157)
IR sensor tuned to 38KHz, perfect for receiving commands from a TV remote control. Runs at 3V to 5V so it's great for any microcontroller.
To use, connect pin 3 (all the way to the right) to 5V power, pin 2 (middle) to ground and listen on pin 1. It doesn't do any decoding...
In Stock
[Buy Now](https://www.adafruit.com/product/157)
[Related Guides to the Product](https://learn.adafruit.com/products/157/guides)
### Super-bright 5mm IR LED
[Super-bright 5mm IR LED](https://www.adafruit.com/product/387)
Infrared LEDs are used for remote controls (they're the little LED in the part you point at your TV) and 'night-vision' cameras, and these little blue guys are high powered ones! They are 940nm wavelength, which is what nearly all devices listen to. They're 20 degree beamwidth,...
In Stock
[Buy Now](https://www.adafruit.com/product/387)
[Related Guides to the Product](https://learn.adafruit.com/products/387/guides)
### Mini Remote Control
[Mini Remote Control](https://www.adafruit.com/product/389)
This little remote control would be handy for controlling a robot or other project from across the room. It has 21 buttons and a layout we thought was handy: directional buttons and number entry buttons. The remote uses the NEC encoding type and sends data codes 0 thru 26 (it skips #3, #7,...
In Stock
[Buy Now](https://www.adafruit.com/product/389)
[Related Guides to the Product](https://learn.adafruit.com/products/389/guides)
### Super-bright 5mm IR LED (25 pack)
[Super-bright 5mm IR LED (25 pack)](https://www.adafruit.com/product/388)
Infrared LEDs are used for remote controls (they're the little LED in the part you point at your TV) and 'night-vision' cameras, and these little blue guys are high powered ones! They are 940nm wavelength, which is what nearly all devices listen to. They're 20 degree beamwidth,...
In Stock
[Buy Now](https://www.adafruit.com/product/388)
[Related Guides to the Product](https://learn.adafruit.com/products/388/guides)
### Adafruit METRO 328 - Arduino Compatible - with Headers
[Adafruit METRO 328 - Arduino Compatible - with Headers](https://www.adafruit.com/product/2488)
This is the **Adafruit METRO Arduino-Compatible - with headers. ** It's a fully assembled and tested microcontroller and physical computing board with through-hole headers attached. If you don't want a Metro with the headers attached for...
In Stock
[Buy Now](https://www.adafruit.com/product/2488)
[Related Guides to the Product](https://learn.adafruit.com/products/2488/guides)
## Related Guides
- [RePaper eInk Development Board](https://learn.adafruit.com/repaper-eink-development-board.md)
- [Adafruit MSA301 Triple Axis Accelerometer](https://learn.adafruit.com/msa301-triple-axis-accelerometer.md)
- [Bluetooth Controlled Motorized Camera Slider](https://learn.adafruit.com/bluetooth-motorized-camera-slider.md)
- [Adafruit PCA9685 16-Channel Servo Driver](https://learn.adafruit.com/16-channel-pwm-servo-driver.md)
- [Adalight Project Pack](https://learn.adafruit.com/adalight-diy-ambient-tv-lighting.md)
- [Reverse Geocache Box](https://learn.adafruit.com/reverse-geocache-engagement-box.md)
- [Introducing Adafruit Trellis ](https://learn.adafruit.com/adafruit-trellis-diy-open-source-led-keypad.md)
- [Sending an SMS with Temboo](https://learn.adafruit.com/sending-an-sms-with-temboo.md)
- [20mm LED Pixels](https://learn.adafruit.com/20mm-led-pixels.md)
- [Remote controlled door lock using a fingerprint sensor & Adafruit IO](https://learn.adafruit.com/remote-controlled-door-lock-using-a-fingerprint-sensor-and-adafruit-io.md)
- [Character LCDs](https://learn.adafruit.com/character-lcds.md)
- [Smart Measuring Cup](https://learn.adafruit.com/smart-measuring-cup.md)
- [Memories of an Arduino](https://learn.adafruit.com/memories-of-an-arduino.md)
- [Arduino Lesson 2. LEDs](https://learn.adafruit.com/adafruit-arduino-lesson-2-leds.md)
- [Smart Cocktail Shaker](https://learn.adafruit.com/smart-cocktail-shaker.md)
---
# Source: https://learn.adafruit.com/1-8-tft-display/reading-the-joystick.md
# 1.8" TFT Display Breakout and Shield
## Reading the Joystick

The 5-way joystick on the shield is great for implementing menu navigation or even for use as a tiny game controller. To minimize the number of pins required, the joystick uses a different resistor on each leg of the control to create a variable voltage divider that can be monitored with a single analog pin. Each movement of the joystick control connects a different resistor and results in a different voltage reading.

In the code example below, the CheckJoystick() function reads the analog pin and compares the result with 5 different ranges to determine which (if any) direction the stick has been moved. If you upload this to your Arduino and open the Serial Monitor, you will see the current joystick state printed to the screen.
You can use this code as the input method for your menu system or game:
```
void setup()
{
// initialize serial communication at 9600 bits per second:
Serial.begin(9600);
}
#define Neutral 0
#define Press 1
#define Up 2
#define Down 3
#define Right 4
#define Left 5
// Check the joystick position
int CheckJoystick()
{
int joystickState = analogRead(3);
if (joystickState < 50) return Left;
if (joystickState < 150) return Down;
if (joystickState < 250) return Press;
if (joystickState < 500) return Right;
if (joystickState < 650) return Up;
return Neutral;
}
void loop()
{
int joy = CheckJoystick();
switch (joy)
{
case Left:
Serial.println("Left");
break;
case Right:
Serial.println("Right");
break;
case Up:
Serial.println("Up");
break;
case Down:
Serial.println("Down");
break;
case Press:
Serial.println("Press");
break;
}
}
```
- [Previous Page](https://learn.adafruit.com/1-8-tft-display/assembling-the-shield.md)
- [Next Page](https://learn.adafruit.com/1-8-tft-display/graphics-library.md)
## Featured Products
### Breadboarding wire bundle
[Breadboarding wire bundle](https://www.adafruit.com/product/153)
75 flexible stranded core wires with stiff ends molded on in red, orange, yellow, green, blue, brown, black and white. These are a major improvement over the "box of bent wires" that are sometimes sold with breadboards, and faster than stripping your own solid core wires. Makes...
In Stock
[Buy Now](https://www.adafruit.com/product/153)
[Related Guides to the Product](https://learn.adafruit.com/products/153/guides)
### Adafruit METRO 328 Fully Assembled - Arduino IDE compatible
[Adafruit METRO 328 Fully Assembled - Arduino IDE compatible](https://www.adafruit.com/product/50)
We sure love the ATmega328 here at Adafruit, and we use them _a lot_ for our own projects. The processor has plenty of GPIO, Analog inputs, hardware UART SPI and I2C, timers and PWM galore - just enough for most simple projects. When we need to go small, we use a
Out of Stock
[Buy Now](https://www.adafruit.com/product/50)
[Related Guides to the Product](https://learn.adafruit.com/products/50/guides)
### Half Sized Premium Breadboard - 400 Tie Points
[Half Sized Premium Breadboard - 400 Tie Points](https://www.adafruit.com/product/64)
This is a cute, half-size breadboard with 400 tie points, good for small projects. It's 3.25" x 2.2" / 8.3cm x 5.5cm with a standard double-strip in the middle and two power rails on both sides. You can pull the power rails off easily to make the breadboard as...
In Stock
[Buy Now](https://www.adafruit.com/product/64)
[Related Guides to the Product](https://learn.adafruit.com/products/64/guides)
### 1.8" Color TFT LCD display with MicroSD Card Breakout
[1.8" Color TFT LCD display with MicroSD Card Breakout](https://www.adafruit.com/product/358)
This lovely little display breakout is the best way to add a small, colorful and bright display to any project. Since the display uses 4-wire SPI to communicate and has its own pixel-addressable frame buffer, it can be used with every kind of microcontroller. Even a very small one with low...
Out of Stock
[Buy Now](https://www.adafruit.com/product/358)
[Related Guides to the Product](https://learn.adafruit.com/products/358/guides)
### Adafruit 1.8" Color TFT Shield w/microSD and Joystick
[Adafruit 1.8" Color TFT Shield w/microSD and Joystick](https://www.adafruit.com/product/802)
This lovely little shield is the best way to add a small, colorful and bright display to any project. We took our popular 1.8" TFT breakout board and remixed it into an Arduino shield complete with microSD card slot and a 5-way joystick navigation switch and three selection buttons! Since...
In Stock
[Buy Now](https://www.adafruit.com/product/802)
[Related Guides to the Product](https://learn.adafruit.com/products/802/guides)
### 1.8" SPI TFT display, 160x128 18-bit color - ST7735R driver
[1.8" SPI TFT display, 160x128 18-bit color - ST7735R driver](https://www.adafruit.com/product/618)
We just love this little 1.8" TFT display, with true TFT color (up to 18-bits per pixel!), fine 160x128 resolution, two white LED backlight that runs on 3.3V and a very easy SPI interface that requires only 4 or 5 digital pins to send pixels to the display.
**Please...**
Out of Stock
[Buy Now](https://www.adafruit.com/product/618)
[Related Guides to the Product](https://learn.adafruit.com/products/618/guides)
## Related Guides
- [Wave Shield](https://learn.adafruit.com/adafruit-wave-shield-audio-shield-for-arduino.md)
- [Adafruit 2.8" TFT Touch Shield v2 - Capacitive or Resistive](https://learn.adafruit.com/adafruit-2-8-tft-touch-shield-v2.md)
- [How to Build a Testing Jig](https://learn.adafruit.com/how-to-build-a-testing-fixture.md)
- [Create an Internet of Things Dashboard with Adafruit IO](https://learn.adafruit.com/create-an-internet-of-things-dashboard-with-adafruit-dot-io.md)
- [Let’s Put LEDs in Things!](https://learn.adafruit.com/lets-put-leds-in-things.md)
- [Tiny Arduino Music Visualizer](https://learn.adafruit.com/piccolo.md)
- [Circuit Playground Sound-Controlled Robot](https://learn.adafruit.com/circuit-playground-sound-controlled-robot.md)
- [Adafruit 1.27" and 1.5" Color OLED Breakout Board](https://learn.adafruit.com/adafruit-1-5-color-oled-breakout-board.md)
- [Arduino Lesson 15. DC Motor Reversing](https://learn.adafruit.com/adafruit-arduino-lesson-15-dc-motor-reversing.md)
- [TTL Serial Camera](https://learn.adafruit.com/ttl-serial-camera.md)
- [Analog Feedback Servos](https://learn.adafruit.com/analog-feedback-servos.md)
- [Geofencing with the FONA 808 & Adafruit IO](https://learn.adafruit.com/geofencing-with-the-fona-808-and-adafruit-io.md)
- [Arduino GPS Clock](https://learn.adafruit.com/arduino-clock.md)
- [Adafruit Data Logger Shield](https://learn.adafruit.com/adafruit-data-logger-shield.md)
- [Making Adabot: Part 2](https://learn.adafruit.com/making-adabot-part-2.md)
---
# Source: https://learn.adafruit.com/li-ion-and-lipoly-batteries/rechargeable-lithiums-names.md
# Li-Ion & LiPoly Batteries
## Rechargeable Lithium Names
There are nearly a dozen different chemistries of rechargable lithium ion batteries but we will be specifically talking about Lithium Ion and Lithium Ion Polymer as a group.
On the left you can see two Lithium Ion Polymer cells. On the right, two packs made of cylindrical Lithium Ion batteries
Lithium Ion cells tend to be either rectangular or cylindrial. They are hard-shelled with a strong casing. They often weigh a little more and come in larger capacity but they are also more sturdy and are hard to puncture. They're often used for laptop batteries and other big packs. These are often called:
- Lithium Ion
- Li-Ion
- LiIon
- LiCo (lithium cobalt, the anode chemistry)
Lithium Ion Polymer cells tend to be thin rectangles in a silvery bag. They are soft-shelled and have an easy to damage casing. They often weigh a little less and come in smaller capacity. You can fit them into smaller devices such as tiny iPods. These are often called:
- Lithium Ion Polymer
- Li-Poly
- LiPoly
- LiPo
Despite the structural differences, you should treat them similarly and consider them two versions ('gentle and light' 'tough and strong') of the same kind of battery.
- [Previous Page](https://learn.adafruit.com/li-ion-and-lipoly-batteries/overview.md)
- [Next Page](https://learn.adafruit.com/li-ion-and-lipoly-batteries/voltages.md)
## Featured Products
### Adafruit Micro Lipo - USB LiIon/LiPoly charger
[Adafruit Micro Lipo - USB LiIon/LiPoly charger](https://www.adafruit.com/product/1304)
Oh so adorable, this is the tiniest little lipo charger, so handy you can keep it any project box! Its also easy to use. Simply plug in the gold plated contacts into any USB port and a 3.7V/4.2V lithium polymer or lithium ion rechargeable battery into the JST plug on the other end. There are...
In Stock
[Buy Now](https://www.adafruit.com/product/1304)
[Related Guides to the Product](https://learn.adafruit.com/products/1304/guides)
### USB LiIon/LiPoly charger
[USB LiIon/LiPoly charger](https://www.adafruit.com/product/259)
This is a Lithium Ion and Lithium Polymer battery charger based on the [MCP73833](http://www.microchip.com/wwwproducts/Devices.aspx?dDocName=en027785). It uses a USB mini-B for connection to any computer or 'USB wall adapter'. Charging is performed in three stages: first a...
In Stock
[Buy Now](https://www.adafruit.com/product/259)
[Related Guides to the Product](https://learn.adafruit.com/products/259/guides)
### USB/DC Lithium Polymer battery charger 5-12V
[USB/DC Lithium Polymer battery charger 5-12V](https://www.adafruit.com/product/280)
Charge your single-cell lithium ion/polymer battery any which way you like with this board. Have a USB connection? No problem, just plug into the miniUSB connector. Only have a wall adapter? Any standard 2.1mm DC adapter which puts out 5 to 12VDC will work fine. If both are plugged in, the...
No Longer Stocked
[Buy Now](https://www.adafruit.com/product/280)
[Related Guides to the Product](https://learn.adafruit.com/products/280/guides)
### Lithium Ion Battery Pack - 3.7V 6600mAh
[Lithium Ion Battery Pack - 3.7V 6600mAh](https://www.adafruit.com/product/353)
Need a massive battery for your project? This lithium-ion pack is made of 3 balanced 2200mAh cells for a total of 6600mA capacity! The cells are connected in parallel and spot-welded to a protection circuit that provides over-voltage, under-voltage, and over-current protection.
Each cell...
In Stock
[Buy Now](https://www.adafruit.com/product/353)
[Related Guides to the Product](https://learn.adafruit.com/products/353/guides)
### Lithium Ion Battery Pack - 3.7V 4400mAh
[Lithium Ion Battery Pack - 3.7V 4400mAh](https://www.adafruit.com/product/354)
Need a big battery for your project? This lithium-ion pack is made of 2 balanced 2200mAh cells for a total of 4400mA capacity! The cells are connected in parallel and spot-welded to a protection circuit that provides over-voltage, under-voltage, and over-current protection.
Each cell can...
In Stock
[Buy Now](https://www.adafruit.com/product/354)
[Related Guides to the Product](https://learn.adafruit.com/products/354/guides)
### Lithium Ion Polymer Battery - 3.7v 2500mAh
[Lithium Ion Polymer Battery - 3.7v 2500mAh](https://www.adafruit.com/product/328)
Lithium-ion polymer (also known as 'lipo' or 'lipoly') batteries are thin, light, and powerful. The output ranges from 4.2V when completely charged to 3.7V. This battery has a capacity of **2500mAh** for a total of about 10 Wh. If you need a smaller battery,
In Stock
[Buy Now](https://www.adafruit.com/product/328)
[Related Guides to the Product](https://learn.adafruit.com/products/328/guides)
### Lithium Ion Polymer Battery - 3.7v 1200mAh
[Lithium Ion Polymer Battery - 3.7v 1200mAh](https://www.adafruit.com/product/258)
Lithium-ion polymer (also known as 'lipo' or 'lipoly') batteries are thin, light, and powerful. The output ranges from 4.2V when completely charged to 3.7V. This battery has a capacity of 1200mAh for a total of about 4.5 Wh. If you need a larger battery,
In Stock
[Buy Now](https://www.adafruit.com/product/258)
[Related Guides to the Product](https://learn.adafruit.com/products/258/guides)
### Lithium Ion Polymer Battery - 3.7v 500mAh
[Lithium Ion Polymer Battery - 3.7v 500mAh](https://www.adafruit.com/product/1578)
Lithium-ion polymer (also known as 'lipo' or 'lipoly') batteries are thin, light, and powerful. The output ranges from 4.2V when completely charged to 3.7V. This battery has a capacity of 500mAh for a total of about 1.9 Wh. If you need a larger (or smaller!) battery,
In Stock
[Buy Now](https://www.adafruit.com/product/1578)
[Related Guides to the Product](https://learn.adafruit.com/products/1578/guides)
## Related Guides
- [Sound Activated Shark Mask](https://learn.adafruit.com/sound-activated-shark-mask.md)
- [SNES EZ Key Bluefruit Game Pad](https://learn.adafruit.com/snes-ez-key-bluefruit-game-pad.md)
- [Color-sensor Driven NeoPixel Dress](https://learn.adafruit.com/color-sensor-driven-neopixel-dress.md)
- [Adafruit MicroLipo and MiniLipo Battery Chargers](https://learn.adafruit.com/adafruit-microlipo-and-minilipo-battery-chargers.md)
- [Cartoon Network and Make Code - Rose Quartz Shield Umbrella](https://learn.adafruit.com/cartoon-network-and-make-code-rose-quartz-shield-umbrella.md)
- [Ursula's Seashell Necklace](https://learn.adafruit.com/ursulas-seashell-necklace.md)
- [Wireless Control Button for WLED Projects](https://learn.adafruit.com/wireless-control-button-for-wled-projects.md)
- [Bunny Ears with MakeCode](https://learn.adafruit.com/bunny-ears-with-makecode.md)
- [VU Meter Baseball Hat](https://learn.adafruit.com/vu-meter-baseball-hat.md)
- [Glowing Fascinator Hat with Gemma M0 and MakeCode](https://learn.adafruit.com/glowing-fascinator-hat-gemma-m0-makecode.md)
- [LED Masquerade Masks](https://learn.adafruit.com/led-masquerade-masks.md)
- [Han Solo Blaster Cosplay](https://learn.adafruit.com/han-solo-blaster-cosplay.md)
- [Convert your Model M Keyboard to Bluetooth with Bluefruit EZ-Key HID](https://learn.adafruit.com/convert-your-model-m-keyboard-to-bluetooth-with-bluefruit-ez-key-hid.md)
- [Chameleon Scarf](https://learn.adafruit.com/chameleon-scarf.md)
- [Kaleidoscope Eyes (Trinket-Powered NeoPixel LED Ring Goggles)](https://learn.adafruit.com/kaleidoscope-eyes-neopixel-led-goggles-trinket-gemma.md)
---
# Source: https://learn.adafruit.com/raspberry-pi-e-mail-notifier-using-leds/remote-ssh.md
# Raspberry Pi E-mail Notifier Using LEDs
## Remote SSH
As a first step, you'll want a terminal on your Pi. There are a variety of options, explored in more detail in the [Getting a Terminal on Your Raspberry Pi](../../../../what-is-the-command-line/getting-a-terminal-on-your-raspberry-pi) section of our [introduction to the command line](../../../../what-is-the-command-line/overview):
1. Plug in an HDMI monitor and keyboard
2. [Use a console cable](../../../../adafruits-raspberry-pi-lesson-5-using-a-console-cable/overview)
3. [Log in via **S** ecure **SH** ell (SSH)](../../../../adafruits-raspberry-pi-lesson-6-using-ssh)
Since this project uses the GPIO pins for its own purposes, you'll want to choose between working directly on the Pi (this is fine if you're already set up!) or connecting via SSH (a good idea if you don't have an extra monitor / input devices laying around, and want to work from the comfort of your desktop or laptop).
Examples here will assume a working Raspbian installation with an SSH connection. Not sure how to get started?
For installating Raspbian, check out our [guide to preparing an SD card for the Pi](../../../../adafruit-raspberry-pi-lesson-1-preparing-and-sd-card-for-your-raspberry-pi/overview). If you need help finding the Pi on your network and connecting to it, check out our Pi Finder utility.
[Adafruit Pi Finder](https://github.com/adafruit/Adafruit-Pi-Finder)
...and here's our [guide to using SSH](../../../../adafruits-raspberry-pi-lesson-6-using-ssh).
- [Previous Page](https://learn.adafruit.com/raspberry-pi-e-mail-notifier-using-leds/python-script.md)
- [Next Page](https://learn.adafruit.com/raspberry-pi-e-mail-notifier-using-leds/prepare-python.md)
## Featured Products
### Raspberry Pi Starter Pack
[Raspberry Pi Starter Pack](https://www.adafruit.com/product/3049)
You're going to work hard with your Raspberry Pi 2 Model B or Raspberry Pi 1 Model B+. You're going to have to solder, code, and Linux your Maker heart out. That's why we've tried to make it as easy as possible to start...
In Stock
[Buy Now](https://www.adafruit.com/product/3049)
[Related Guides to the Product](https://learn.adafruit.com/products/3049/guides)
### Raspberry Pi 3 - Model B+ - 1.4GHz Cortex-A53 with 1GB RAM
[Raspberry Pi 3 - Model B+ - 1.4GHz Cortex-A53 with 1GB RAM](https://www.adafruit.com/product/3775)
The Raspberry Pi 3 Model B is the most popular Raspberry Pi computer made, and the Pi Foundation knows you can always make a good thing _better_! And what could make the Pi 3 better? How about a _faster_ processor, 5 GHz WiFi, and updated Ethernet chip with PoE capability?...
In Stock
[Buy Now](https://www.adafruit.com/product/3775)
[Related Guides to the Product](https://learn.adafruit.com/products/3775/guides)
### Full Sized Premium Breadboard - 830 Tie Points
[Full Sized Premium Breadboard - 830 Tie Points](https://www.adafruit.com/product/239)
This is a 'full-size' premium quality breadboard, 830 tie points. Good for small and medium projects. It's 2.2" x 7" (5.5 cm x 17 cm) with a standard double-strip in the middle and two power rails on both sides. You can pull the power rails off easily to make the...
In Stock
[Buy Now](https://www.adafruit.com/product/239)
[Related Guides to the Product](https://learn.adafruit.com/products/239/guides)
### 5V 2.5A Switching Power Supply with 20AWG MicroUSB Cable
[5V 2.5A Switching Power Supply with 20AWG MicroUSB Cable](https://www.adafruit.com/product/1995)
Our all-in-one 5V 2.5 Amp + MicroUSB cable power adapter is the perfect choice for powering single-board computers like Raspberry Pi, BeagleBone, or anything else that's power-hungry!
This adapter was specifically designed to provide 5.25V, not 5V, but we still call it a 5V USB...
Out of Stock
[Buy Now](https://www.adafruit.com/product/1995)
[Related Guides to the Product](https://learn.adafruit.com/products/1995/guides)
### Assembled Pi Cobbler Plus - Breakout Cable
[Assembled Pi Cobbler Plus - Breakout Cable](https://www.adafruit.com/product/2029)
The Raspberry Pi B+ / Pi 2 / Pi 3 / Pi 4 has landed on the Maker World like a 40-GPIO pinned, quad-USB ported, credit card sized bomb of DIY joy. And while you can use most of our great Model B accessories by hooking up our [downgrade...](https://www.adafruit.com/product/1986)
In Stock
[Buy Now](https://www.adafruit.com/product/2029)
[Related Guides to the Product](https://learn.adafruit.com/products/2029/guides)
### Assembled Pi T-Cobbler Plus - GPIO Breakout
[Assembled Pi T-Cobbler Plus - GPIO Breakout](https://www.adafruit.com/product/2028)
**This is the assembled version of the Pi T-Cobbler Plus. It only works with the Raspberry Pi Model Zero, A+, B+, Pi 2, Pi 3 & Pi 4!** (Any Pi with 2x20 connector)
The Raspberry Pi has landed on the Maker World like a 40-GPIO pinned, quad-USB ported, credit...
In Stock
[Buy Now](https://www.adafruit.com/product/2028)
[Related Guides to the Product](https://learn.adafruit.com/products/2028/guides)
### Diffused Red 10mm LED (25 pack)
[Diffused Red 10mm LED (25 pack)](https://www.adafruit.com/product/845)
Need some big indicators? We are big fans of these huge diffused red LEDs. They are fairly bright so they can be seen in daytime, and from any angle. They go easily into a breadboard and will add that extra zing to your project.
- Pack of 25 diffused red LEDs
- 10mm...
No Longer Stocked
[Buy Now](https://www.adafruit.com/product/845)
[Related Guides to the Product](https://learn.adafruit.com/products/845/guides)
### Diffused Green 10mm LED (25 pack)
[Diffused Green 10mm LED (25 pack)](https://www.adafruit.com/product/844)
Need some big indicators? We are big fans of these huge 10mm diffused green LEDs. They are fairly bright so they can be seen in daytime, and from any angle. They go easily into a breadboard and will add that extra zing to your project.
- Pack of 25 diffused green LEDs
- 10mm...
No Longer Stocked
[Buy Now](https://www.adafruit.com/product/844)
[Related Guides to the Product](https://learn.adafruit.com/products/844/guides)
## Related Guides
- [Speech Synthesis on the Raspberry Pi](https://learn.adafruit.com/speech-synthesis-on-the-raspberry-pi.md)
- [Circadian Pi Desk Light](https://learn.adafruit.com/circadian-pi-desk-light.md)
- [Adafruit's Raspberry Pi Lesson 11. DS18B20 Temperature Sensing](https://learn.adafruit.com/adafruits-raspberry-pi-lesson-11-ds18b20-temperature-sensing.md)
- [Drive a 16x2 LCD with the Raspberry Pi](https://learn.adafruit.com/drive-a-16x2-lcd-directly-with-a-raspberry-pi.md)
- [Adding Basic Audio Ouput to Raspberry Pi Zero](https://learn.adafruit.com/adding-basic-audio-ouput-to-raspberry-pi-zero.md)
- [Single Channel LoRaWAN Gateway for Raspberry Pi](https://learn.adafruit.com/raspberry-pi-single-channel-lorawan-gateway.md)
- [Playing sounds and using buttons with Raspberry Pi](https://learn.adafruit.com/playing-sounds-and-using-buttons-with-raspberry-pi.md)
- [Program an AVR or Arduino Using Raspberry Pi GPIO](https://learn.adafruit.com/program-an-avr-or-arduino-using-raspberry-pi-gpio-pins.md)
- [IoT Temperature Logger with Analog Devices ADT7410, Raspberry Pi, and Adafruit IO](https://learn.adafruit.com/iot-temperature-logger-with-python-and-adafruit-io.md)
- [Capacitive Touch Sensors on the Raspberry Pi](https://learn.adafruit.com/capacitive-touch-sensors-on-the-raspberry-pi.md)
- [Matrix and 7-Segment LED Backpack with the Raspberry Pi](https://learn.adafruit.com/matrix-7-segment-led-backpack-with-the-raspberry-pi.md)
- [Windows IoT Core Application Development: Headed Blinky](https://learn.adafruit.com/windows-iot-application-development-headed-blinky.md)
- [Basic Resistor Sensor Reading on Raspberry Pi](https://learn.adafruit.com/basic-resistor-sensor-reading-on-raspberry-pi.md)
- [Large Pi-based Thermometer and Clock](https://learn.adafruit.com/large-pi-based-thermometer-and-clock.md)
- [PiPhone - A Raspberry Pi based Cellphone](https://learn.adafruit.com/piphone-a-raspberry-pi-based-cellphone.md)
---
# Source: https://learn.adafruit.com/furby-2012-teardown/remove-back-and-face-plates.md
# Furby 2012 Teardown
## Remove Back and Fuzzy Parts

Remove the screws from Furby's face.

Peel off the capacitive touch sensors. There's one along the back and one on the top of Furby's head.


Remove the screws from the back panel.


You will need to cut the "fur brackets" at the ears to allow the back panel to release from Furby's body.


Both sides need to be free before the back panel will release.


Cut the tabs holding on the face "fur bracket."

After cutting the tabs, the fur bracket on the face will come off.
- [Previous Page](https://learn.adafruit.com/furby-2012-teardown/overview.md)
- [Next Page](https://learn.adafruit.com/furby-2012-teardown/unhook-sensors.md)
## Featured Products
### Precision screwdriver set (6 pieces)
[Precision screwdriver set (6 pieces)](https://www.adafruit.com/product/424)
Break seals! Void warranties! With this handy screwdriver set at your hands, all hardware you touch will open up and reveal their secret innards.
This set contains 6 screwdrivers, 3 Phillips (#1, #0 and #00) and 3 flat (2.4mm, 1.8mm and 1.4mm). These sizes will open up pretty much...
In Stock
[Buy Now](https://www.adafruit.com/product/424)
[Related Guides to the Product](https://learn.adafruit.com/products/424/guides)
## Related Guides
- [ScoutMakes Robot Kit](https://learn.adafruit.com/scoutmakes-robot-kit.md)
- [Make it Glow: NeoPixel and LED Diffusion Tips & Tricks](https://learn.adafruit.com/make-it-glow-neopixel-and-led-diffusion-tips-tricks.md)
- [How To Homebrew Game Boy Games](https://learn.adafruit.com/homebrew-game-boy-games.md)
- [PyGamer - Gaming Handheld Crank](https://learn.adafruit.com/gaming-handheld-crank.md)
- [Crayola Scented Candle](https://learn.adafruit.com/crayola-scented-candle.md)
- [Bluefruit Controlled Macetech RGB LED Shades](https://learn.adafruit.com/ledshades.md)
- [Hacking the Kinect](https://learn.adafruit.com/hacking-the-kinect.md)
- [Rotary Phone Dial Keypad](https://learn.adafruit.com/rotary-phone-dial-keypad.md)
- [Computer Perfection Synthesizer](https://learn.adafruit.com/computer-perfection-synthesizer.md)
- [Sideloading Apps on Oculus Quest](https://learn.adafruit.com/sideloading-on-oculus-quest.md)
- [USB-PD Hacks](https://learn.adafruit.com/usb-pd-hacks.md)
- [Adafruit DRV2605L Haptic Controller Breakout](https://learn.adafruit.com/adafruit-drv2605-haptic-controller-breakout.md)
- [RGB Matrix Dreidel Game](https://learn.adafruit.com/rgb-matrix-dreidel-game.md)
- [Darth Faders](https://learn.adafruit.com/darth-faders.md)
- [Making PCB Jewelry & Art with Gingerbread and KiCad](https://learn.adafruit.com/making-pcb-art-with-gingerbread-and-kicad.md)
---
# Source: https://learn.adafruit.com/furby-2012-teardown/remove-face-plate.md
# Furby 2012 Teardown
## Remove Face Plate

We couldn't figure out a way to get Furby's inner face plate off cleanly, so we made one cut with shears, after which it released easily.

Remove the piezo sensor (orange wires) from this inner faceplate.

This is as far as we took Furby apart! Here's a video of how functional it still is, although we managed to bust part of one of Furby's LCD eyes.
https://www.youtube.com/watch?v=qX0_YwA1KTc
- [Previous Page](https://learn.adafruit.com/furby-2012-teardown/unhook-sensors.md)
## Featured Products
### Precision screwdriver set (6 pieces)
[Precision screwdriver set (6 pieces)](https://www.adafruit.com/product/424)
Break seals! Void warranties! With this handy screwdriver set at your hands, all hardware you touch will open up and reveal their secret innards.
This set contains 6 screwdrivers, 3 Phillips (#1, #0 and #00) and 3 flat (2.4mm, 1.8mm and 1.4mm). These sizes will open up pretty much...
In Stock
[Buy Now](https://www.adafruit.com/product/424)
[Related Guides to the Product](https://learn.adafruit.com/products/424/guides)
## Related Guides
- [ScoutMakes Robot Kit](https://learn.adafruit.com/scoutmakes-robot-kit.md)
- [Make it Glow: NeoPixel and LED Diffusion Tips & Tricks](https://learn.adafruit.com/make-it-glow-neopixel-and-led-diffusion-tips-tricks.md)
- [How To Homebrew Game Boy Games](https://learn.adafruit.com/homebrew-game-boy-games.md)
- [PyGamer - Gaming Handheld Crank](https://learn.adafruit.com/gaming-handheld-crank.md)
- [Crayola Scented Candle](https://learn.adafruit.com/crayola-scented-candle.md)
- [Bluefruit Controlled Macetech RGB LED Shades](https://learn.adafruit.com/ledshades.md)
- [Hacking the Kinect](https://learn.adafruit.com/hacking-the-kinect.md)
- [Rotary Phone Dial Keypad](https://learn.adafruit.com/rotary-phone-dial-keypad.md)
- [Computer Perfection Synthesizer](https://learn.adafruit.com/computer-perfection-synthesizer.md)
- [Sideloading Apps on Oculus Quest](https://learn.adafruit.com/sideloading-on-oculus-quest.md)
- [USB-PD Hacks](https://learn.adafruit.com/usb-pd-hacks.md)
- [Adafruit DRV2605L Haptic Controller Breakout](https://learn.adafruit.com/adafruit-drv2605-haptic-controller-breakout.md)
- [RGB Matrix Dreidel Game](https://learn.adafruit.com/rgb-matrix-dreidel-game.md)
- [Darth Faders](https://learn.adafruit.com/darth-faders.md)
- [Making PCB Jewelry & Art with Gingerbread and KiCad](https://learn.adafruit.com/making-pcb-art-with-gingerbread-and-kicad.md)
---
# Source: https://learn.adafruit.com/usb-next-keyboard-with-arduino-micro/research.md
# USB NeXT Keyboard with an Arduino Micro
## Research
The first thing to note is that the USB part (acting like a USB keyboard) is the easiest part of the project - there's already plenty of example code for how to do that with an Arduino Leonardo or Micro. The really tough part is figuring out how to read from the keyboard as it's not in any known or well documented protocol. The good news is whenever you're working with a really old technology, the computers back then were really slow and things weren't too complicated. Chances are whatever they did, it was meant to be simple and lightweight. Contrast this with a USB or Bluetooth or WiFi stack!
Our first stop is over at the awesome [http://www.kbdbabel.org/conn/index.html](http://www.kbdbabel.org/conn/index.html "Link: http://www.kbdbabel.org/conn/index.html") ([http://archive.is/yqzKJ)](http://archive.is/yqzKJ)) where the nice author has documented the pinout of the keyboard. This is great because we won't accidentally smash the electronics with the wrong voltage. Also, it gives us a hint of how to talk to it. Power and ground at 5V are nice, easy to work with voltages. There's an RX and TX pin so at least we don't have to deal with a bi-directional or differential signal (whew).

Ok so now we can power it up. I applied +5V to VCC and ground to GND. I did see 5V on the "from KDB" pin, but unfortunately no actual data when keys were pressed. This means that the keyboard isnt 'dumb' - it expects some sort of clock or reset signal on the "to KBD" pin. While one could try to figure it out cold, its a lot of effort.
Ideally, we'd have a NeXT that we could plug the keyboard into and 'sniff' the traffic, that is the easiest way to do it. Unfortunately, we don't have one. We were in crisis! But then we kept searching and looking around (btw, searching for "next keyboard" is not a very efficient way to locate this brand of keyboard!) and we lucked out when we found a Japanese website of serious keyboard enthusiast [http://m0115.web.fc2.com/](http://m0115.web.fc2.com/ "Link: http://m0115.web.fc2.com/") It is using frames so we weren't too optimistic we'd find a GitHub repo, but after a lot of clicking we found the holy grail of NeXT timing information:

Yes! This is exactly what we need, not only does he include the timing diagram, but also the timeline for resetting and querying. 50 microsecond timing is well within the abilities of a 16 MHz microcontroller. Now we're ready to write code. (see the next section for the code listing)
The only thing remaining was the scancode table. By this point I, was 5 hours into this project and getting a little tired, when I realized that any operating system written for NeXT would have this all written up for me. In fact, there was an NetBSD port to NeXT and all the keyboard mapping data was there for me! Link to: [NetBSD driver source](http://web.archive.org/web/20221212183955/http://cvsweb.netbsd.org/bsdweb.cgi/src/sys/arch/next68k/dev/nextkbd.c?rev=1.13&content-type=text/x-cvsweb-markup&only_with_tag=netbsd-6-base), [scancode table](http://web.archive.org/web/20221212184207/http://cvsweb.netbsd.org/bsdweb.cgi/src/sys/arch/next68k/dev/wskbdmap_next.c?rev=1.5&content-type=text/x-cvsweb-markup&only_with_tag=netbsd-6-base) via wayback machine.
- [Previous Page](https://learn.adafruit.com/usb-next-keyboard-with-arduino-micro/parts.md)
- [Next Page](https://learn.adafruit.com/usb-next-keyboard-with-arduino-micro/wiring-case.md)
## Featured Products
### Arduino Micro without Headers - 5V 16MHz ATmega32u4 - Assembled
[Arduino Micro without Headers - 5V 16MHz ATmega32u4 - Assembled](https://www.adafruit.com/product/1315)
Squee! It's the cutest, tiniest little Arduino yet! The Arduino Micro packs all of the power of the Arduino Leonardo in a 1.9" x 0.7" (48mm x 18mm) size. Although it may look like a stick of gum, its actually a USB-native 8-bit microcontroller, with 32K of flash, and 2.5K of RAM....
No Longer Stocked
[Buy Now](https://www.adafruit.com/product/1315)
[Related Guides to the Product](https://learn.adafruit.com/products/1315/guides)
### Arduino Micro with Headers - 5V 16MHz - (ATmega32u4 - assembled)
[Arduino Micro with Headers - 5V 16MHz - (ATmega32u4 - assembled)](https://www.adafruit.com/product/1086)
_Squee_! It's the cutest, tiniest little Arduino yet! The Arduino Micro packs all of the power of the Arduino Leonardo in a 1.9" x 0.7" (48mm x 18mm) size. Although it may look like a stick of gum, its actually a USB-native 8-bit microcontroller, with 32K of flash, and...
No Longer Stocked
[Buy Now](https://www.adafruit.com/product/1086)
[Related Guides to the Product](https://learn.adafruit.com/products/1086/guides)
### Altoids Gum sized tin
[Altoids Gum sized tin](https://www.adafruit.com/product/16)
Ever since Altoids discontinued the Gum version, its been hard to get tins. So we went and got a whole mess of them custom made! These tins are exactly the same shape and size as the old Altoids gum tins but they are blank and we got the bottom flattened instead of rounded (so it fits things...
In Stock
[Buy Now](https://www.adafruit.com/product/16)
[Related Guides to the Product](https://learn.adafruit.com/products/16/guides)
### USB cable - USB A to Micro-B
[USB cable - USB A to Micro-B](https://www.adafruit.com/product/592)
This here is your standard A to micro-B USB cable, for USB 1.1 or 2.0. Perfect for connecting a PC to your Metro, Feather, Raspberry Pi or other dev-board or microcontroller
Approximately 3 feet / 1 meter long
In Stock
[Buy Now](https://www.adafruit.com/product/592)
[Related Guides to the Product](https://learn.adafruit.com/products/592/guides)
## Related Guides
- [Adafruit PCA9546 4-Channel I2C Multiplexer](https://learn.adafruit.com/adafruit-pca9546-4-channel-i2c-multiplexer.md)
- [Blinking an LED with the Zephyr RTOS](https://learn.adafruit.com/blinking-led-with-zephyr-rtos.md)
- [Qualia S3 Fireplace](https://learn.adafruit.com/qualia-s3-fireplace.md)
- [Arduino GPS Clock](https://learn.adafruit.com/arduino-clock.md)
- [Adafruit 4-Channel ADC Breakouts](https://learn.adafruit.com/adafruit-4-channel-adc-breakouts.md)
- [Reverse Geocache Box](https://learn.adafruit.com/reverse-geocache-engagement-box.md)
- [ESPHole Ad Blocker](https://learn.adafruit.com/esphole-ad-blocker.md)
- [Adafruit QT Py and NeoPixel LEDs](https://learn.adafruit.com/qt-py-and-neopixel-leds.md)
- [The Pixif](https://learn.adafruit.com/the-pixif.md)
- [Quickstart IoT - Raspberry Pi Pico RP2040 with WiFi ](https://learn.adafruit.com/quickstart-rp2040-pico-with-wifi-and-circuitpython.md)
- [Atmega32u4 Breakout](https://learn.adafruit.com/atmega32u4-breakout.md)
- [Introducing Adafruit ItsyBitsy M4](https://learn.adafruit.com/introducing-adafruit-itsybitsy-m4.md)
- [Adafruit Metro M7 with microSD](https://learn.adafruit.com/adafruit-metro-m7-microsd.md)
- [Adafruit Infrared IR Remote Receiver](https://learn.adafruit.com/adafruit-infrared-ir-remote-receiver.md)
- [Adafruit Feather M4 CAN Express](https://learn.adafruit.com/adafruit-feather-m4-can-express.md)
---
# Source: https://learn.adafruit.com/multimeters/resistance.md
# Multimeters
## Resistance
## What is Resistance?
Resistance is just what it sounds like, its the characteristic that makes a component fight current flow. The bigger the resistance value (in **ohms** **Ω** ) the more it fights. Most [resistors](http://en.wikipedia.org/wiki/Resistor) you'll see range between 1 ohm and 1 megaohm (1.0 MΩ) they often have 5% tolerance but you can buy 1% or even 0.1% accuracy resistors.
In general, resistence testing is best for measuring resistors, but you may find yourself measuring the resistance of other things, such as sensors and speakers.
## Resistor Coding
Resistors are color coded, at first it seems like a bad way to print the values but with a little time it becomes faster because you dont have to read any numbers and the stripes are visible no matter how it is rotated. [You can use this calculator to play around with resistor color codes](http://www.dannyg.com/examples/res2/resistor.htm "Link: http://www.dannyg.com/examples/res2/resistor.htm").

_Resistor color code chart courtesy of [Make Magazine](http://www.makezine.com/ "Link: http://www.makezine.com/")_
_Resistor image courtesy of_ _[Digikey](http://www.digikey.com/product-detail/en/CFR-25JR-52-1K/1.0KQTR-ND/11974)_
This image shows a 1.0 kΩ 5% resistor (brown black red gold).
## What is resistance testing good for?
Resistance-testing is very useful
- If you don't have a continuity tester, it can double as one
- Check resistors whose values are not clear, if you aren't good at [reading color codes](http://en.wikipedia.org/wiki/Electronic_color_code) or if the marking has come off
- Measure input and output resistance of circuits
- Test and characterize [sensors](http://learn.adafruit.com/multimeters/) and [potentiometers](http://learn.adafruit.com/multimeters/) (see below)
## Remember!
**You can only test resistance when the device you're testing is** **not powered**. Resistance testing works by poking a little voltage into the circuit and seeing how much current flows, its perfectly safe for any component but if its powered there is already voltage in the circuit, and you will get incorrect readings
**You can only test a resistor before it has been soldered/inserted into a circuit**. If you measure it in the circuit you will also be measuring everything connected to it. In some instances this is OK but I would say that in the vast majority it is not. If you try, you will get incorrect readings and that's worse than no reading at all.
**You can make sure your meter is working well by having a '**** reference resistor' **to test against. A 1% 1KΩ or 10KΩ resistor is perfect! Low batteries can make your multimeter wonky.
**Resistance is non-directional** , you can switch probes and the reading will be the same.
**If you have a ranging meter** (as most inexpensive ones are), you'll need to keep track of what range you are in. Otherwise, you will get strange readings, like **OL** or similar, or you may think you're in KΩ when really you're in MΩ. This is a big problem for beginners so be careful!
## Get into the mode.
Look for an ohm (Ω) symbol, if its a ranging meter there will be a bunch of subdivided modes. If its auto-ranging there will be only one.

This meter has the Ω symbol and then 7 submodes, ranging from 200Ω to 2000MΩ (wow!)
This meter has the Ω symbol and then 5 submodes, ranging from 200Ω to 2MΩ
This meter has a multi-mode (you need to press a seperate MODE button to change between capacitor sense, diode test, resistor test and continuity!) It does not, however, have any numbered submodes, as it is auto-ranging.## Ranging vs. Auto-Ranging
As long as it works, it doesn't matter which type you have. But auto-ranging meters are a little slower.
Compare these two videos as I measure a 1KΩ resistor with an autoranging meter:
http://www.youtube.com/watch?v=LKjBX1oxcgk
Which takes about 4 seconds to settle on a final value, and a 10KΩ resistor with a ranging meter:http://www.youtube.com/watch?v=AbFhshdswF4
Which gets the first significant digit instantly, the second digit after 1 second and the final digit after 2.
Expensive autoranging meters, like Fluke 73s, will be super fast so it's not a big deal, but if you have a $200 meter you're probably not reading this tutorial.
Ranges will almost always be something like 200Ω, 2KΩ, 20KΩ, 200KΩ, 2MΩ, etc. Why the 2s instead of 100, 1K, 10K etc.? Well, here's my guess.
Because the vast majority of resistors are 5%, the resistor values are 5% apart (or so). For example, the "standard" 5% values between 1K and 10K are:
1.0K, 1.1K, 1.2K, 1.3K, 1.5K, 1.6K, 1.8K, 2.0K, 2.2K, 2.4K, 2.7K, 3.0K, 3.3K, 3.6K, 3.9K, 4.3K, 4.7K, 5.1K, 5.6K, 6.2K, 6.8K, 7.5K, 8.2K, 9.1K
There are way more values between 1KΩ and 2KΩ than between 2KΩ and 3KΩ, etc. By picking 2KΩ as your max range, you get the best precision for the most probable values.
## Example 1: Testing a Resistor
With an auto-ranging meter, its easy, just put the two probes across the resistor and read the number. For example, this 1KΩ 5% resistor is actually 0.988 Kohm.

And this 10KΩ is really 9.80KΩ. Note that the numbers look similar but the decimal point has moved.
This ranged meter requires that you dial in the range. We'll guess that this resistor is under 2KΩ then measure it. We get 0.992 which means its 0.992 KΩ (or, a 1KΩ resistor).
Now testing a different resistor, we will again guess its under 2KΩ. However, this time we get a strange response, a **1.** which means out of range. Some meters will display an **OL** which you may remember from the continuity secion as meaning "open loop" here it means "the measurement is higher than the range".
We try again, changing the range to 20KΩ
Aha! It is a 9.82 KΩ resistor (10KΩ)
Its a little clumsier than auto-ranging but if you are pretty sure you know about how big the resistance you are expecting is, its very speedy.
## Example 2: Testing a Potentiometer
You can test the max-value of a potentiometer by measuring across the two 'ends' as shown here with a rotational 10KΩ pot. To find the 'range' look at the dial.

You can also use a multimeter to tell whether the potentiometer is a linear or logarithmic (audio) pot. When the pot is centered, if the resistance between the wiper and one end is half of the total value, its linear. (I used clips instead of probles to make it easier to take these photos).
This is a 10KΩ linear potentiometer.
The minimum resistance of the pot, 0Ω (a short) as expected.
Potentiometer centered, about 5KΩ
Maximum value is 9.5KΩ (it should be around 10KΩ)
This video shows the resistance of a 10KΩ linear pot as it is adjusted. At the end it is set to approximately the midd, which is measured at 4.7KΩ, pretty close to the 'ideal' of 5KΩ.http://www.youtube.com/watch?v=Yxk6o0RPbsI
Here are photos of a 50KΩ audio potentiometer:Minimum is 0Ω as expected
Middle is 8KΩ
Maximum is 54.2KΩ, close to the ideal 50KΩ
If, when centered, the resistance is more like 85% or 15% of the total resistance, then its a log pot. This is a 50KΩ analog potentiometer. When centered, the resistance is about 8KΩ.http://www.youtube.com/watch?v=ys8EAn0fi48
## Example 3: Testing a Sensor
Potentiometers are resistors that change value when they are moved. A [Light Dependent Resistor (LDR)](http://www.google.com/url?q=http://en.wikipedia.org/wiki/Photocell&revid=245081890&sa=X&oi=revisions_inline&resnum=0&ct=result&cd=1&usg=AFQjCNGRbRFTVwSDdfCPr_9dkdrh-80kjQ) is a resistor that changes value with the amount of light it receives. This one has a range of about 20K max.
First, set the range, in this case 20KΩ seems pretty good. In bright light, it measures about 610 Ω

Slightly shaded it's 5.84KΩ (remember this is still a well-lit photo)
After setting the range, I experiment with shading it on video:http://www.youtube.com/watch?v=G8cabfHlpxs
- [Previous Page](https://learn.adafruit.com/multimeters/continuity.md)
- [Next Page](https://learn.adafruit.com/multimeters/voltage.md)
## Featured Products
### Extech EX330 12-function autoranging multimeter
[Extech EX330 12-function autoranging multimeter](https://www.adafruit.com/product/308)
**Discontinued** - [you can grab this Digital Multimeter - Model 9205B+ instead!](https://www.adafruit.com/product/2034)
If you're looking for one of the best multimeters, we're proud to now offer our personal favorite! The Extech EX330 "12...
No Longer Stocked
[Buy Now](https://www.adafruit.com/product/308)
[Related Guides to the Product](https://learn.adafruit.com/products/308/guides)
### Digital Multimeter
[Digital Multimeter](https://www.adafruit.com/product/71)
This is a basic multimeter, I've played with it a bunch and I think its a great addition to a toolbox. It's low cost and simple to use with a big clear display and all the measurements you need:
- AC/DC Voltage measurement
- Current measurement, from 1uA up to...
No Longer Stocked
[Buy Now](https://www.adafruit.com/product/71)
[Related Guides to the Product](https://learn.adafruit.com/products/71/guides)
### Digital Multimeter - Model 9205B+
[Digital Multimeter - Model 9205B+](https://www.adafruit.com/product/2034)
This massive multimeter has everything but the kitchen sink included. It's a great addition to any workbench or toolbox. It's low cost, simple to use, and has a big clear display with all the measurements you need and more!
The multimeter includes:
- AC/DC Voltage...
In Stock
[Buy Now](https://www.adafruit.com/product/2034)
[Related Guides to the Product](https://learn.adafruit.com/products/2034/guides)
### Pocket Autoranging Digital Multimeter
[Pocket Autoranging Digital Multimeter](https://www.adafruit.com/product/850)
When we're on the go, we like to keep a multimeter in our purse and this model is by far the best pocket meter we've found. It's so good you'll end up using it as your main multimeter!
First up, this meter can measure nearly everything: it's got DC and AC...
Out of Stock
[Buy Now](https://www.adafruit.com/product/850)
[Related Guides to the Product](https://learn.adafruit.com/products/850/guides)
### Multi-Meter! - Skill badge, iron-on patch
[Multi-Meter! - Skill badge, iron-on patch](https://www.adafruit.com/product/502)
You can use a multi-meter! Adafruit offers a fun and exciting "badges" of achievement for electronics, science and engineering. We believe everyone should be able to be rewarded for learning a useful skill, a badge is just one of the many ways to show and share.
This is...
No Longer Stocked
[Buy Now](https://www.adafruit.com/product/502)
[Related Guides to the Product](https://learn.adafruit.com/products/502/guides)
### Multi-Meter! - Sticker!
[Multi-Meter! - Sticker!](https://www.adafruit.com/product/646)
You can use a multi-meter! Adafruit offers a fun and exciting stickers to celebrate achievements in electronics, science and engineering. We believe everyone should be able to be rewarded for learning a useful skill, a great sticker is just one of the many ways to show and share.
No Longer Stocked
[Buy Now](https://www.adafruit.com/product/646)
[Related Guides to the Product](https://learn.adafruit.com/products/646/guides)
## Related Guides
- [USB-PD Hacks](https://learn.adafruit.com/usb-pd-hacks.md)
- [Energy Budgets](https://learn.adafruit.com/energy-budgets.md)
- [Ladyada's Toolkit](https://learn.adafruit.com/ladyadas-toolkit.md)
- [Collin's Lab: Multimeters](https://learn.adafruit.com/collins-lab-multimeters.md)
---
# Source: https://learn.adafruit.com/smt-manufacturing/resistor-packs.md
# SMT Manufacturing
## Resistor Packs
For prototyping, modding, hacking and reworking, its good to have a range of resistors in your favorite package size. We like the digikey box packs of resistors, and have a set of the 5% in 0603, 0805 and 1206. Sometimes we wish there were more values so we may get the 0805 in 1% for a few values
Either way, having a resistor set is essential!

Pick your poison:
**[1206 5% resistor pack (50 of each value)](http://search.digikey.com/scripts/DkSearch/dksus.dll?Detail&name=PHE2A-KIT-ND)**
**[0805 5% resistor pack (50 of each value)](http://search.digikey.com/scripts/DkSearch/dksus.dll?Detail&name=PHA1A-KIT-ND)**
**[0603 5% resistor pack (50 of each value)](http://search.digikey.com/scripts/DkSearch/dksus.dll?Detail&name=PHG2A-KIT-ND)**
For the 1%, they come in boxes of ranges, pick them up as necessary
**0805 1% Resistors (50 of each value): **
1.0-9.76: PHC1A-KIT-ND
10.0-97.6: PHC2A-KIT-ND
100-976: PHC3A-KIT-ND
1.00K-9.76K: PHC4A-KIT-ND
10.0K-97.6K: PHC5A-KIT-ND
100K-1.0M: PHC6A-KIT-ND
**0603 1% Resistors (50 of each value)**
1.0-7.5: PHH1-KIT-ND
10.0-97.6: PHH2-KIT-ND
100-976: PHH3-KIT-ND
1.00K-9.76K: PHH4-KIT-ND
10.0K-97.6K: PHH5-KIT-ND
100K-1M: PHH6-KIT-ND
- [Previous Page](https://learn.adafruit.com/smt-manufacturing/smt-wipes.md)
- [Next Page](https://learn.adafruit.com/smt-manufacturing/tweezers.md)
## Featured Products
### Fine tip curved tweezers - ESD safe
[Fine tip curved tweezers - ESD safe](https://www.adafruit.com/product/422)
When soldering small surface-mount (SMD/SMT) components, one thing you'll need is a good pair of tweezers. These are a great pair of every-day tweezers. They're anti-static, anti-magnetic and made of hard stainless steel. The tips are fine and pointy to pick up any size component. This...
In Stock
[Buy Now](https://www.adafruit.com/product/422)
[Related Guides to the Product](https://learn.adafruit.com/products/422/guides)
### Fine tip straight tweezers - ESD safe
[Fine tip straight tweezers - ESD safe](https://www.adafruit.com/product/421)
When soldering small surface-mount (SMD/SMT) components, one thing you'll need is a good pair of tweezers. These tweezers are a great pair of every-day tweezers. They're anti-static, anti-magnetic and made of hard stainless steel. The tips are fine and pointy to pick up any size...
In Stock
[Buy Now](https://www.adafruit.com/product/421)
[Related Guides to the Product](https://learn.adafruit.com/products/421/guides)
### USB Microscope - 5MP interpolated 220x magnification / 8 LEDs
[USB Microscope - 5MP interpolated 220x magnification / 8 LEDs](https://www.adafruit.com/product/636)
As electronics get smaller and smaller, you'll need a hand examining PCBs and this little USB microscope is the perfect tool. Its smaller and lighter than a large optical microscope but packs quite a bit of power in its little body. There's a 2 megapixel sensor inside and an optical...
Out of Stock
[Buy Now](https://www.adafruit.com/product/636)
[Related Guides to the Product](https://learn.adafruit.com/products/636/guides)
## Related Guides
- [Reindeer Solder Kit by Phyx](https://learn.adafruit.com/reindeer-solder-kit-by-phyx.md)
- [3D-Printed Solder Paste Dispenser Hand Switch ](https://learn.adafruit.com/3d-printed-solder-paste-dispenser-hand-switch.md)
- [USB Rechargeable Mini Solder Fume Extractor](https://learn.adafruit.com/usb-rechargeable-mini-solder-fume-extractor.md)
- [How to Sign Windows Drivers & Executables](https://learn.adafruit.com/how-to-sign-windows-drivers-installer.md)
- [Desktop Fume Extractor](https://learn.adafruit.com/desktop-fume-extractor.md)
- [Chinese Dragon Puppet with Motion-Reactive Flame Effect](https://learn.adafruit.com/chinese-dragon-puppet-with-motion-reactive-flame-effect.md)
- [16-Step Drum Sequencer](https://learn.adafruit.com/16-step-drum-sequencer.md)
- [Color Sensing Music Player](https://learn.adafruit.com/color-sensing-music-player.md)
- [Light-Up Costumes in Harsh Environments](https://learn.adafruit.com/light-up-costumes-in-harsh-environments.md)
- [Garden Path Lights with WLED and a Sunset Timer](https://learn.adafruit.com/garden-path-lights-with-sunset-timer.md)
- [CNC Rotary Macropad](https://learn.adafruit.com/cnc-rotary-macropad.md)
- [Blinka Says Tabletop Arcade Game](https://learn.adafruit.com/blinka-says-tabletop-arcade-game.md)
- [IoT Moon Phase Guide](https://learn.adafruit.com/moon-phase.md)
- [KTOWN's Ultimate Creating Parts in Eagle Tutorial](https://learn.adafruit.com/ktowns-ultimate-creating-parts-in-eagle-tutorial.md)
- [Shop Tips & Tricks](https://learn.adafruit.com/shop-tips-and-tricks.md)
---
# Source: https://learn.adafruit.com/flora-tv-b-gone/resistors.md
# Source: https://learn.adafruit.com/adafruit-arduino-lesson-2-leds/resistors.md
# Arduino Lesson 2. LEDs
## Resistors
As the name suggests, resistors resist the flow of electricity and the higher the value of the resistor, the more it resists and the less electrical current will flow through it. We are going to use this to control how much electricity flows through the LED and therefore how brightly it shines.

But first, a bit more about resistors.
The unit of resistance is called the Ohm, which is usually shortened to Ω the Greek letter Omega. Because an Ohm is a low value of resistance (it doesn't resist much at all), we also give the values of resistors in kΩ (1000 Ω) and MΩ (1000,000 Ω). These are called kilo-ohms and mega-ohms.
In this lesson, we are going to use four different values of resistor, 270Ω, 470Ω, 2.2kΩ and 10kΩ. These resistors all look the same, except that they have different colored stripes on them. These stripes tell you the value of the resistor.
The resistor color code works like this, for resistors like this with three colored stripes and then a gold stripe at one end.
Each color has a number, as follows:
- Black 0
- Brown 1
- Red 2
- Orange 3
- Yellow 4
- Green 5
- Blue 6
- Purple 7
- Gray 8
- White 9
The first two striped are the first two digits of the value, so red, purple means 2, 7. The next stripe is the number of zeros that need to come after the first two digits, so if the third stripe is brown, as it is in the photograph above, then there will be one zero and so the resistor is 270Ω.
A resistor with stripes brown, black, orange is 10 and three zeros so 10,000 Ω in other words 10 kΩ.
Unlike LEDs, resistors do not have a positive and negative lead. They can be connected either way around.- [Previous Page](https://learn.adafruit.com/adafruit-arduino-lesson-2-leds/leds.md)
- [Next Page](https://learn.adafruit.com/adafruit-arduino-lesson-2-leds/breadboard-layout.md)
## Featured Products
### Adafruit METRO 328 Fully Assembled - Arduino IDE compatible
[Adafruit METRO 328 Fully Assembled - Arduino IDE compatible](https://www.adafruit.com/product/50)
We sure love the ATmega328 here at Adafruit, and we use them _a lot_ for our own projects. The processor has plenty of GPIO, Analog inputs, hardware UART SPI and I2C, timers and PWM galore - just enough for most simple projects. When we need to go small, we use a
Out of Stock
[Buy Now](https://www.adafruit.com/product/50)
[Related Guides to the Product](https://learn.adafruit.com/products/50/guides)
### Diffused Red 5mm LED (25 pack)
[Diffused Red 5mm LED (25 pack)](https://www.adafruit.com/product/299)
Need some indicators? We are big fans of these diffused red LEDs, in fact we use them exclusively in our kits. They are fairly bright so they can be seen in daytime, and from any angle. They go easily into a breadboard and will add that extra zing to your project.
- Pack of 25...
In Stock
[Buy Now](https://www.adafruit.com/product/299)
[Related Guides to the Product](https://learn.adafruit.com/products/299/guides)
### Half Sized Premium Breadboard - 400 Tie Points
[Half Sized Premium Breadboard - 400 Tie Points](https://www.adafruit.com/product/64)
This is a cute, half-size breadboard with 400 tie points, good for small projects. It's 3.25" x 2.2" / 8.3cm x 5.5cm with a standard double-strip in the middle and two power rails on both sides. You can pull the power rails off easily to make the breadboard as...
In Stock
[Buy Now](https://www.adafruit.com/product/64)
[Related Guides to the Product](https://learn.adafruit.com/products/64/guides)
### Premium Male/Male Jumper Wires - 40 x 6" (150mm)
[Premium Male/Male Jumper Wires - 40 x 6" (150mm)](https://www.adafruit.com/product/758)
Handy for making wire harnesses or jumpering between headers on PCB's. These premium jumper wires are 6" (150mm) long and come in a 'strip' of 40 (4 pieces of each of ten rainbow colors). They have 0.1" male header contacts on either end and fit cleanly next to each other...
In Stock
[Buy Now](https://www.adafruit.com/product/758)
[Related Guides to the Product](https://learn.adafruit.com/products/758/guides)
## Related Guides
- [LSM303 Accelerometer + Compass Breakout](https://learn.adafruit.com/lsm303-accelerometer-slash-compass-breakout.md)
- [Arduino Lesson 6. Digital Inputs](https://learn.adafruit.com/adafruit-arduino-lesson-6-digital-inputs.md)
- [WiFi Candy Bowl Monitor](https://learn.adafruit.com/wifi-candy-bowl.md)
- [Arduino Lesson 12. LCD Displays - Part 2](https://learn.adafruit.com/adafruit-arduino-lesson-12-lcd-displays-part-2.md)
- [Character LCDs](https://learn.adafruit.com/character-lcds.md)
- [Silicone Robo-Tentacle](https://learn.adafruit.com/silicone-robo-tentacle.md)
- [Arduino Ethernet + SD Card](https://learn.adafruit.com/arduino-ethernet-sd-card.md)
- [Arduino Lesson 15. DC Motor Reversing](https://learn.adafruit.com/adafruit-arduino-lesson-15-dc-motor-reversing.md)
- [Arduin-o-Phone](https://learn.adafruit.com/arduin-o-phone-arduino-powered-diy-cellphone.md)
- [Remote controlled door lock using a fingerprint sensor & Adafruit IO](https://learn.adafruit.com/remote-controlled-door-lock-using-a-fingerprint-sensor-and-adafruit-io.md)
- [Adafruit 4-Channel ADC Breakouts](https://learn.adafruit.com/adafruit-4-channel-adc-breakouts.md)
- [Ladyada's Learn Arduino - Lesson #2](https://learn.adafruit.com/ladyadas-learn-arduino-lesson-number-2.md)
- [Adafruit 2.8" TFT Touch Shield v2 - Capacitive or Resistive](https://learn.adafruit.com/adafruit-2-8-tft-touch-shield-v2.md)
- [Arduino Lesson 4. Eight LEDs and a Shift Register](https://learn.adafruit.com/adafruit-arduino-lesson-4-eight-leds.md)
- [2.8" TFT Touch Shield](https://learn.adafruit.com/2-8-tft-touch-shield.md)
---
# Source: https://learn.adafruit.com/adafruit-motor-shield/resources.md
# Source: https://learn.adafruit.com/adafruit-ultimate-gps/resources.md
# Adafruit Ultimate GPS
## Resources
# Datasheets
- [MTK3329/MTK3339 command set sheet](http://www.adafruit.com/datasheets/PMTK_A11.pdf) for changing the fix data rate, baud rate, sentence outputs, etc!
- [PMTK 'complete' data](http://www.adafruit.com/datasheets/PMTK%20command%20packet-Complete-C39-A01.pdf)sheet (like the above but with even more commands)
- [Datasheet for the PA6B (MTK3329) GPS module itself](http://www.adafruit.com/datasheets/PA6B-Datasheet-A07.pdf)
- [Datasheet for the PA6C (MTK3339) GPS module itself](http://www.adafruit.com/datasheets/GlobalTop-FGPMMOPA6C-Datasheet-V0A-Preliminary.pdf)
- [Datasheet for the PA6H (MTK3339) GPS module itself](http://www.adafruit.com/datasheets/GlobalTop-FGPMMOPA6H-Datasheet-V0A.pdf)
- [MT3339 GPS PC Tool (windows only)](http://www.adafruit.com/datasheets/GlobalTop%20MT3339%20PC%20Tool%20v1.3%20without%20F2.0&I3.1.rar) and the [PC Tool manual](http://www.adafruit.com/datasheets/GlobalTop%20MT3339%20PC%20Tool%20Operation%20Manual%20v1.1.pdf)
- [Sample code and spec sheet for the LOCUS built-in logger](http://www.adafruit.com/datasheets/Locus_Sample_Code.zip)
- [LOCUS (built-in-datalogging system) user guide](http://www.adafruit.com/datasheets/GTop%20LOCUS%20Library%20User%20Manual-v13.pdf)
- [Mini GPS tool (windows only)](http://www.adafruit.com/datasheets/MiniGPS_Tool_1.7.1.zip)
# More reading:
- [Trimble's GPS tutorial](http://www.trimble.com/gps_tutorial/)
- [Garmin's GPS tutorial](http://www8.garmin.com/aboutGPS/)
# Adafruit GPS Library for Arduino
[https://github.com/adafruit/Adafruit-GPS-Library/](https://github.com/adafruit/Adafruit-GPS-Library/)
# EPO files for AGPS use
[Data format for EPO files](http://www.adafruit.com/datasheets/GTop%20EPO%20Format%20and%20Protocol-v14.pdf)
[MTK_EPO_Nov_12_2014.zip](https://learn.adafruit.com/system/assets/assets/000/021/226/original/MTK_EPO_Nov_12_2014.zip?1415819755)
- [Previous Page](https://learn.adafruit.com/adafruit-ultimate-gps/built-in-logging.md)
- [Next Page](https://learn.adafruit.com/adafruit-ultimate-gps/f-a-q.md)
## Featured Products
### Adafruit Ultimate GPS Breakout - 66 channel w/10 Hz updates
[Adafruit Ultimate GPS Breakout - 66 channel w/10 Hz updates](https://www.adafruit.com/product/746)
We carry a few different GPS modules here in the Adafruit shop, but none that satisfied our every desire - that's why we designed this little GPS breakout board. We believe this is the **Ultimate** GPS module, so we named it that. It's got everything you want and...
In Stock
[Buy Now](https://www.adafruit.com/product/746)
[Related Guides to the Product](https://learn.adafruit.com/products/746/guides)
### Adafruit Ultimate GPS GNSS with USB - 99 channel w/10 Hz updates
[Adafruit Ultimate GPS GNSS with USB - 99 channel w/10 Hz updates](https://www.adafruit.com/product/4279)
The Ultimate GPS module you know and love has a _glow-up_ to let it be easily used with any computer, not just microcontrollers! With the built-in USB-to-Serial converter, you can now plug-n-play the Ultimate GPS into your computer, laptop, embedded Linux computer, and more. Power and...
In Stock
[Buy Now](https://www.adafruit.com/product/4279)
[Related Guides to the Product](https://learn.adafruit.com/products/4279/guides)
### Adafruit METRO 328 Fully Assembled - Arduino IDE compatible
[Adafruit METRO 328 Fully Assembled - Arduino IDE compatible](https://www.adafruit.com/product/50)
We sure love the ATmega328 here at Adafruit, and we use them _a lot_ for our own projects. The processor has plenty of GPIO, Analog inputs, hardware UART SPI and I2C, timers and PWM galore - just enough for most simple projects. When we need to go small, we use a
Out of Stock
[Buy Now](https://www.adafruit.com/product/50)
[Related Guides to the Product](https://learn.adafruit.com/products/50/guides)
### GPS Antenna - External Active Antenna - 3-5V 28dB 5 Meter SMA
[GPS Antenna - External Active Antenna - 3-5V 28dB 5 Meter SMA](https://www.adafruit.com/product/960)
Give your Ultimate GPS V3 a boost with this external active antenna. This GPS antenna draws about 10mA and will give you an additional 28 dB of gain. It's got a 5 meter long cable so it will easily reach wherever you need it to. The antenna is magnetic so it will stick to the top of a car...
In Stock
[Buy Now](https://www.adafruit.com/product/960)
[Related Guides to the Product](https://learn.adafruit.com/products/960/guides)
### SMA to uFL/u.FL/IPX/IPEX RF Adapter Cable
[SMA to uFL/u.FL/IPX/IPEX RF Adapter Cable](https://www.adafruit.com/product/851)
This RF adapter cable is super handy for anyone doing RF work. Often times, small electronics save space by having a pick-and-placeable u.FL connector (also called uFL, IPEX, IPAX, IPX, MHF, and AM). But most antennas have SMA or RP-SMA connectors on them. This little cable will bridge the...
In Stock
[Buy Now](https://www.adafruit.com/product/851)
[Related Guides to the Product](https://learn.adafruit.com/products/851/guides)
### CR1220 12mm Diameter - 3V Lithium Coin Cell Battery
[CR1220 12mm Diameter - 3V Lithium Coin Cell Battery](https://www.adafruit.com/product/380)
These are the highest quality & capacity batteries, the same as shipped with the iCufflinks, iNecklace, Datalogging and GPS Shields, GPS HAT, etc. One battery per order (you'll want one battery per cufflink or pendant.)
Brand may vary but all battery brands are verified...
Out of Stock
[Buy Now](https://www.adafruit.com/product/380)
[Related Guides to the Product](https://learn.adafruit.com/products/380/guides)
### Breadboarding wire bundle
[Breadboarding wire bundle](https://www.adafruit.com/product/153)
75 flexible stranded core wires with stiff ends molded on in red, orange, yellow, green, blue, brown, black and white. These are a major improvement over the "box of bent wires" that are sometimes sold with breadboards, and faster than stripping your own solid core wires. Makes...
In Stock
[Buy Now](https://www.adafruit.com/product/153)
[Related Guides to the Product](https://learn.adafruit.com/products/153/guides)
### Half Sized Premium Breadboard - 400 Tie Points
[Half Sized Premium Breadboard - 400 Tie Points](https://www.adafruit.com/product/64)
This is a cute, half-size breadboard with 400 tie points, good for small projects. It's 3.25" x 2.2" / 8.3cm x 5.5cm with a standard double-strip in the middle and two power rails on both sides. You can pull the power rails off easily to make the breadboard as...
In Stock
[Buy Now](https://www.adafruit.com/product/64)
[Related Guides to the Product](https://learn.adafruit.com/products/64/guides)
## Related Guides
- [Reverse Geocache Box](https://learn.adafruit.com/reverse-geocache-engagement-box.md)
- [Ladyada's Learn Arduino - Lesson #2](https://learn.adafruit.com/ladyadas-learn-arduino-lesson-number-2.md)
- [Wave Shield Talking Clock](https://learn.adafruit.com/wave-shield-talking-clock.md)
- [Wireless Game Show Poppers for the Classroom!](https://learn.adafruit.com/wireless-game-show-poppers.md)
- [Wireless Gardening with Arduino + CC3000 WiFi Modules](https://learn.adafruit.com/wireless-gardening-arduino-cc3000-wifi-modules.md)
- [CircuitPython Essentials](https://learn.adafruit.com/circuitpython-essentials.md)
- [CircuitPython Libraries on Linux and ODROID C2](https://learn.adafruit.com/circuitpython-libaries-linux-odroid-c2.md)
- [2.2" TFT Display](https://learn.adafruit.com/2-2-tft-display.md)
- [RGB LED Matrix Basics](https://learn.adafruit.com/32x16-32x32-rgb-led-matrix.md)
- [Halloween Pumpkin](https://learn.adafruit.com/halloween-pumpkin.md)
- [Remote controlled door lock using a fingerprint sensor & Adafruit IO](https://learn.adafruit.com/remote-controlled-door-lock-using-a-fingerprint-sensor-and-adafruit-io.md)
- [Automatic Monitor Color Temperature Adjustment](https://learn.adafruit.com/automatic-monitor-color-temperature-adjustment.md)
- [Animating Multiple LED Backpacks](https://learn.adafruit.com/animating-multiple-led-backpacks.md)
- [Skill Badge Requirements: Microcontrollers](https://learn.adafruit.com/skill-badge-requirements-microcontrollers.md)
- [RePaper eInk Development Board](https://learn.adafruit.com/repaper-eink-development-board.md)
---
# Source: https://learn.adafruit.com/light-painting-with-raspberry-pi/results.md
# Light Painting with Raspberry Pi
## Results
These first images were cobbled together pretty quickly, and we didn’t go out of our way for a good, dark location. With some planning and refinement the results can potentially be _much_ nicer than this.
These are all 10- to 15-second exposures.
The ring of fire:

Cola wars:
Big snake. Ostensibly a python:

_Tron Legacy_ light cycle:
Total project time, starting from zero Python experience to having a working demo, photographs and a tutorial, was about two days. Great things are afoot!

Update: Here's a quick test Ladyada did in Adafruit warehouse last night, shot with a phone!
- [Previous Page](https://learn.adafruit.com/light-painting-with-raspberry-pi/motion-rig.md)
## Featured Products
### Adafruit Assembled Pi Cobbler Breakout + Cable for Raspberry Pi
[Adafruit Assembled Pi Cobbler Breakout + Cable for Raspberry Pi](https://www.adafruit.com/product/914)
Now that you've finally got your hands on a [Raspberry Pi® Model B](http://www.raspberrypi.org/), you're probably itching to make some fun embedded computer projects with it. What you need is an add on prototyping Pi Cobbler from Adafruit, which can break out all those...
No Longer Stocked
[Buy Now](https://www.adafruit.com/product/914)
[Related Guides to the Product](https://learn.adafruit.com/products/914/guides)
### Digital RGB LED Weatherproof Strip - LPD8806 32 LED 5m
[Digital RGB LED Weatherproof Strip - LPD8806 32 LED 5m](https://www.adafruit.com/product/306)
These LED strips are fun and glowy. There are 32 RGB LEDs per meter, and you can control each LED individually! Yes, that's right, this is the digitally-addressable type of LED strip. You can set the color of each LED's red, green and blue component with 7-bit PWM precision (so 21-bit...
In Stock
[Buy Now](https://www.adafruit.com/product/306)
[Related Guides to the Product](https://learn.adafruit.com/products/306/guides)
### 4-pin JST SM Plug + Receptacle Cable Set
[4-pin JST SM Plug + Receptacle Cable Set](https://www.adafruit.com/product/578)
These 4-wire cables are 15cm long and come as a set, one side has a JST SM type connector plug on the end. The other side has a matching JST SM type receptacle connector. They are good for whenever you have 4 wires you want to be able to plug and unplug. We like the solid and compact nature of...
In Stock
[Buy Now](https://www.adafruit.com/product/578)
[Related Guides to the Product](https://learn.adafruit.com/products/578/guides)
### 5V 10A switching power supply
[5V 10A switching power supply](https://www.adafruit.com/product/658)
This is a beefy switching supply, for when you need a lot of power! It can supply 5V DC up to 10 Amps, running from 110V or 220V power (the plug it comes with is for US/Canada/Japan but you can use any plug adapter for your country, or just replace the cable with a standard computer/appliance...
Out of Stock
[Buy Now](https://www.adafruit.com/product/658)
[Related Guides to the Product](https://learn.adafruit.com/products/658/guides)
### 5V 2A (2000mA) switching power supply - UL Listed
[5V 2A (2000mA) switching power supply - UL Listed](https://www.adafruit.com/product/276)
This is an FCC/CE certified and UL listed power supply. Need a lot of 5V power? This switching supply gives a clean regulated 5V output at up to 2000mA. 110 or 240 input, so it works in any country. The plugs are "US 2-prong" style so you may need a plug adapter, but you can pick one...
In Stock
[Buy Now](https://www.adafruit.com/product/276)
[Related Guides to the Product](https://learn.adafruit.com/products/276/guides)
### Female DC Power adapter - 2.1mm jack to screw terminal block
[Female DC Power adapter - 2.1mm jack to screw terminal block](https://www.adafruit.com/product/368)
If you need to connect a DC power wall wart to a board that doesn't have a DC jack - this adapter will come in very handy! There is a 2.1mm DC jack on one end, and a screw terminal block on the other. The terminals are labeled with positive/negative assuming a positive-tip configuration...
In Stock
[Buy Now](https://www.adafruit.com/product/368)
[Related Guides to the Product](https://learn.adafruit.com/products/368/guides)
## Related Guides
- [LPD8806 Digital RGB LED Strip](https://learn.adafruit.com/digital-led-strip.md)
- [Magic Band Reader](https://learn.adafruit.com/magic-band-reader.md)
- [Bubble Table with LED Animations and IR Remote Control](https://learn.adafruit.com/bubble-table-with-led-animations-and-ir-remote-control.md)
- [Mini Neon Sign Prop & n00ds Booster Case](https://learn.adafruit.com/nood-booster-case.md)
- [Gemma 3D Printed Tree Topper](https://learn.adafruit.com/gemma-3d-printed-tree-topper.md)
- [Raspberry Pi SelfieBlock](https://learn.adafruit.com/selfieblock.md)
- [Rumi Sword - KPop Demon Hunters](https://learn.adafruit.com/rumi-sword.md)
- [Setting up a Raspberry Pi as a WiFi Access Point](https://learn.adafruit.com/setting-up-a-raspberry-pi-as-a-wifi-access-point.md)
- [Adafruit's Raspberry Pi Lesson 8. Using a Servo Motor](https://learn.adafruit.com/adafruits-raspberry-pi-lesson-8-using-a-servo-motor.md)
- [Adafruit NFC/RFID on Raspberry Pi](https://learn.adafruit.com/adafruit-nfc-rfid-on-raspberry-pi.md)
- [Set up and Blink - MATLAB and Simulink with Raspberry Pi](https://learn.adafruit.com/how-to-use-matlab-and-simulink-with-raspberry-pi.md)
- [Floor Lamp with NeoPixels and WLED Custom Animations](https://learn.adafruit.com/floor-lamp-with-wled.md)
- [Reverse Engineering a Bluetooth Low Energy Light Bulb](https://learn.adafruit.com/reverse-engineering-a-bluetooth-low-energy-light-bulb.md)
- [Running OpenGL-based Games & Emulators on Adafruit PiTFT Displays](https://learn.adafruit.com/running-opengl-based-games-and-emulators-on-adafruit-pitft-displays.md)
- [CLUE Vertical Garden Weather Visualizer](https://learn.adafruit.com/clue-vertical-garden-weather-visualizer.md)
- [PiPhone - A Raspberry Pi based Cellphone](https://learn.adafruit.com/piphone-a-raspberry-pi-based-cellphone.md)
---
# Source: https://learn.adafruit.com/reverse-geocache-engagement-box.md
# Reverse Geocache Box
## Overview
Adafruit customer Kenton Harris used a reverse geocaching box to propose to his girlfriend (she said yes). After the project build and successful proposal, he shared how he built the reverse geocache with us. We thought others may be interested in building a similar box for their own proposals, or for fun!
A reverse geocaching box works similar to other geocaching devices. It will guide you to certain coordinates on earth and instead of finding a geocache located at those coordinates, you carry the box with you, and it opens for you at a predetermined destination. This is also a great way to do a scavenger hunt (making someone go to multiple locations before the box opens).
- [Next Page](https://learn.adafruit.com/reverse-geocache-engagement-box/parts-and-tools.md)
## Featured Products
### Adafruit Ultimate GPS Breakout - 66 channel w/10 Hz updates
[Adafruit Ultimate GPS Breakout - 66 channel w/10 Hz updates](https://www.adafruit.com/product/746)
We carry a few different GPS modules here in the Adafruit shop, but none that satisfied our every desire - that's why we designed this little GPS breakout board. We believe this is the **Ultimate** GPS module, so we named it that. It's got everything you want and...
In Stock
[Buy Now](https://www.adafruit.com/product/746)
[Related Guides to the Product](https://learn.adafruit.com/products/746/guides)
### Standard LCD 16x2 + extras
[Standard LCD 16x2 + extras](https://www.adafruit.com/product/181)
Standard HD44780 LCDs are useful for creating standalone projects.
- 16 characters wide, 2 rows
- White text on blue background
- Connection port is 0.1" pitch, single row for easy breadboarding and wiring
- Pins are documented on the back of the LCD to assist...
In Stock
[Buy Now](https://www.adafruit.com/product/181)
[Related Guides to the Product](https://learn.adafruit.com/products/181/guides)
### Adafruit METRO 328 Fully Assembled - Arduino IDE compatible
[Adafruit METRO 328 Fully Assembled - Arduino IDE compatible](https://www.adafruit.com/product/50)
We sure love the ATmega328 here at Adafruit, and we use them _a lot_ for our own projects. The processor has plenty of GPIO, Analog inputs, hardware UART SPI and I2C, timers and PWM galore - just enough for most simple projects. When we need to go small, we use a
Out of Stock
[Buy Now](https://www.adafruit.com/product/50)
[Related Guides to the Product](https://learn.adafruit.com/products/50/guides)
### Micro servo
[Micro servo](https://www.adafruit.com/product/169)
Tiny little servo can rotate approximately 180 degrees (90 in each direction) and works just like the standard kinds you're used to but _smaller_. You can use any servo code, hardware, or library to control these servos. Good for beginners who want to make stuff move without...
In Stock
[Buy Now](https://www.adafruit.com/product/169)
[Related Guides to the Product](https://learn.adafruit.com/products/169/guides)
### Adafruit Perma-Proto Half-sized Breadboard PCB - 3 Pack!
[Adafruit Perma-Proto Half-sized Breadboard PCB - 3 Pack!](https://www.adafruit.com/product/571)
Customers have asked us to carry basic perf-board, but we never liked the look of most basic perf: its always crummy quality, with pads that flake off and no labeling. Then we thought about how people **actually** prototype - usually starting with a solderless breadboard and then...
In Stock
[Buy Now](https://www.adafruit.com/product/571)
[Related Guides to the Product](https://learn.adafruit.com/products/571/guides)
### Rugged Metal On/Off Switch with Green LED Ring
[Rugged Metal On/Off Switch with Green LED Ring](https://www.adafruit.com/product/482)
These chrome-plated metal buttons are rugged and look real good while doing it! Simply drill a 16mm hole into any material up to 1/2" thick and you can fit these in place, there's even a rubber gasket to keep water out of the enclosure. On the front of the button is a flat metal...
In Stock
[Buy Now](https://www.adafruit.com/product/482)
[Related Guides to the Product](https://learn.adafruit.com/products/482/guides)
### 9V battery holder with switch & 5.5mm/2.1mm plug
[9V battery holder with switch & 5.5mm/2.1mm plug](https://www.adafruit.com/product/67)
This is a 9V battery pack with on/off switch and a pre-attached 5.5mm/2.1mm center-positive barrel plug. Use this to battery-power your Arduino (or other electronic projects) - it's ready to go out of the box!
Battery & screw not included.
![]()
In Stock
[Buy Now](https://www.adafruit.com/product/67)
[Related Guides to the Product](https://learn.adafruit.com/products/67/guides)
## Related Guides
- [Adafruit Ultimate GPS](https://learn.adafruit.com/adafruit-ultimate-gps.md)
- [Wave Shield](https://learn.adafruit.com/adafruit-wave-shield-audio-shield-for-arduino.md)
- [Skill Badge Requirements: Microcontrollers](https://learn.adafruit.com/skill-badge-requirements-microcontrollers.md)
- [Bluetooth Controlled Motorized Camera Slider](https://learn.adafruit.com/bluetooth-motorized-camera-slider.md)
- [Adafruit Proto Shield for Arduino](https://learn.adafruit.com/adafruit-proto-shield-arduino.md)
- [Arduino Lesson 3. RGB LEDs](https://learn.adafruit.com/adafruit-arduino-lesson-3-rgb-leds.md)
- [Arduino Lesson 5. The Serial Monitor](https://learn.adafruit.com/adafruit-arduino-lesson-5-the-serial-monitor.md)
- [Wireless Game Show Poppers for the Classroom!](https://learn.adafruit.com/wireless-game-show-poppers.md)
- [Affordable HAL 9000 Replica](https://learn.adafruit.com/hal-9000-replica.md)
- [36mm LED Pixels](https://learn.adafruit.com/36mm-led-pixels.md)
- [Sending an SMS with Temboo](https://learn.adafruit.com/sending-an-sms-with-temboo.md)
- [Adafruit Arduino Selection Guide](https://learn.adafruit.com/adafruit-arduino-selection-guide.md)
- [FTDI Friend](https://learn.adafruit.com/ftdi-friend.md)
- [Halloween Pumpkin](https://learn.adafruit.com/halloween-pumpkin.md)
- [CircuitPython Essentials](https://learn.adafruit.com/circuitpython-essentials.md)
---
# Source: https://learn.adafruit.com/rfid-iphone.md
# RFID iPhone
## Overview
http://www.youtube.com/watch?v=Xau0r7GkMMg#t=58s
After seeing [Dhani Sutanto](http://www.ds72.com/latest-works/oyster-ring) mod his Oyster Card (London transit pass) into a ring, I got excited to try something similar with an CharlieCard (Boston's RFID transit pass). You can dissolve the card in acetone and then remove the RFID antenna and chip inside.
- [Next Page](https://learn.adafruit.com/rfid-iphone/dissolve-the-card.md)
## Featured Products
### iPhone 4/4S Bottom Screw Replacement - Pentalobe 2 per pack
[iPhone 4/4S Bottom Screw Replacement - Pentalobe 2 per pack](https://www.adafruit.com/product/892)
These are perfect replacements for the little screws on the bottom of iPhone 4/4S's. We have them in two 'flavors' - this flavor is the classic 0.8mm 5-point star/Pentalobe. You can use these in either a 4 or 4S phone. [We also have the...](http://www.adafruit.com/products/891)
No Longer Stocked
[Buy Now](https://www.adafruit.com/product/892)
[Related Guides to the Product](https://learn.adafruit.com/products/892/guides)
### iPhone 4/4S Bottom Screw Replacement - Phillips #000 2 per pack
[iPhone 4/4S Bottom Screw Replacement - Phillips #000 2 per pack](https://www.adafruit.com/product/891)
These are perfect replacements for the little screws on the bottom of iPhone 4/4S's. We have them in two 'flavors' - this flavor is the slightly easier-to-work with Phillips #000. You can use these in either a 4 or 4S phone. [We also...](http://www.adafruit.com/products/892)
No Longer Stocked
[Buy Now](https://www.adafruit.com/product/891)
[Related Guides to the Product](https://learn.adafruit.com/products/891/guides)
### Aluminum iPhone 4 Phillips #000 / PH000 Screwdriver
[Aluminum iPhone 4 Phillips #000 / PH000 Screwdriver](https://www.adafruit.com/product/890)
We tried half a dozen different precision Phillips #000 screwdriver tools to find the one we liked the most. The body is made from a single piece of aluminum and has nice knurled grips. The end-cap rotates so you can keep the body steady while rotating. The tip is nicely machined and is...
No Longer Stocked
[Buy Now](https://www.adafruit.com/product/890)
[Related Guides to the Product](https://learn.adafruit.com/products/890/guides)
### 13.56MHz RFID/NFC Card - Classic 1K
[13.56MHz RFID/NFC Card - Classic 1K](https://www.adafruit.com/product/359)
This is a blank 13.56MHz RFID/NFC card - often used for train/bus passes but also found in other systems where a proximity card is desired. The tag contains a small RFID chip and an antenna, and is passively powered by the reader/writer when placed a couple inches away.
These can be...
In Stock
[Buy Now](https://www.adafruit.com/product/359)
[Related Guides to the Product](https://learn.adafruit.com/products/359/guides)
### Clear No-Logo iPhone Replacement Back - iPhone 4S
[Clear No-Logo iPhone Replacement Back - iPhone 4S](https://www.adafruit.com/product/930)
Turn your iPhone 4S invisible! OK well maybe not invisible, but with this clear back you can gaze deeply into the inner works of the iPhone - great for when you want a geeky cyber-look or want to place a visible RFID tag inside the phone. This kit comes with a clear plastic back and two basic...
No Longer Stocked
[Buy Now](https://www.adafruit.com/product/930)
[Related Guides to the Product](https://learn.adafruit.com/products/930/guides)
### Aluminum iPhone 4S 0.8mm 5-Point Star/Pentalobe Screwdriver
[Aluminum iPhone 4S 0.8mm 5-Point Star/Pentalobe Screwdriver](https://www.adafruit.com/product/888)
Discontinued - **you can grab** [38 Piece Screwdriver Set](https://www.adafruit.com/product/822)**[i](https://www.adafruit.com/product/822)nstead! **
We tried half a dozen different 5-point star/"pentalobe" screwdriver tools...
No Longer Stocked
[Buy Now](https://www.adafruit.com/product/888)
[Related Guides to the Product](https://learn.adafruit.com/products/888/guides)
### Clear No-Logo iPhone Replacement Back - iPhone 4
[Clear No-Logo iPhone Replacement Back - iPhone 4](https://www.adafruit.com/product/929)
Turn your iPhone 4 invisible! OK well maybe not invisible, but with this clear back you can gaze deeply into the inner works of the iPhone - great for when you want a geeky cyber-look or want to place a visible RFID tag inside the phone. This kit comes with a clear plastic back and two basic...
No Longer Stocked
[Buy Now](https://www.adafruit.com/product/929)
[Related Guides to the Product](https://learn.adafruit.com/products/929/guides)
## Related Guides
- [Magic Band Reader](https://learn.adafruit.com/magic-band-reader.md)
- [Babel Fish](https://learn.adafruit.com/babel-fish.md)
- [Scannable Links with NFC](https://learn.adafruit.com/scannable-links-with-nfc.md)
- [Using Web NFC](https://learn.adafruit.com/using-webnfc.md)
- [Unlock Android Phone with Wearable NFC](https://learn.adafruit.com/unlock-android-with-wearable-nfc.md)
- [Collin's Lab: RFID](https://learn.adafruit.com/collins-lab-rfid.md)
- [Adafruit ST25DV16K I2C RFID EEPROM Breakout](https://learn.adafruit.com/adafruit-st25dv16k-i2c-rfic-eeprom-breakout.md)
- [Raspberry Pi NFC Minecraft Blocks](https://learn.adafruit.com/raspberry-pi-nfc-minecraft-blocks.md)
- [Controlling Devices with RFID Wiz](https://learn.adafruit.com/controlling-devices-with-rfid-wiz.md)
- [NFC Raspberry Pi Media Player](https://learn.adafruit.com/nfc-raspberry-pi-media-player.md)
- [3D Printed RFID NFC Rings](https://learn.adafruit.com/3d-printed-rfid-nfc-rings.md)
- [Adafruit PN532 RFID/NFC Breakout and Shield](https://learn.adafruit.com/adafruit-pn532-rfid-nfc.md)
- [Adafruit NFC/RFID on Raspberry Pi](https://learn.adafruit.com/adafruit-nfc-rfid-on-raspberry-pi.md)
- [Magic Band Teardown](https://learn.adafruit.com/magic-band-teardown.md)
- [Mystery Box: Remote Chess Board Puzzle Lock](https://learn.adafruit.com/mystery-box-remote-chess-board-puzzle-lock.md)
---
# Source: https://learn.adafruit.com/character-lcds/rgb-backlit-lcds.md
# Character LCDs
## RGB Backlit LCDs
[We now stock a few different RGB backlight LCDs](http://www.adafruit.com/category/63) . These LCDs work just like the normal character type, but the backlight has three LEDS (red/green/blue) so you can generate any color you'd like. Very handy when you want to have some ambient information conveyed.
After you've wired up the LCD and tested it as above, you can connect the LEDs to the PWM analog out pins of the Arduino to precisely set the color. The PWM pins are fixed in hardware and there's 6 of them but three are already used so we'll use the remaining three PWM pins. Connect the red LED (pin 16 of the LCD) to Digital 3, the green LED pin (pin 17 of the LCD) to digital 5 and the blue LED pin (pin 18 of the LCD) to digital 6. You do not need any resistors between the LED pins and the arduino pins because resistors are already soldered onto the character LCD for you!

Now upload this code to your Arduino to see the LCD background light swirl! ([Click here to see what it looks like in action](http://www.flickr.com/photos/adafruit/6002862732/ "Link: http://www.flickr.com/photos/adafruit/6002862732/")).
http://www.youtube.com/watch?v=M460s1A_vlQ
```
// include the library code:
#include <LiquidCrystal.h>
#include <Wire.h>
#define REDLITE 3
#define GREENLITE 5
#define BLUELITE 6
// initialize the library with the numbers of the interface pins
LiquidCrystal lcd(7, 8, 9, 10, 11, 12);
// you can change the overall brightness by range 0 -> 255
int brightness = 255;
void setup() {
// set up the LCD's number of rows and columns:
lcd.begin(16, 2);
// Print a message to the LCD.
lcd.print("RGB 16x2 Display ");
lcd.setCursor(0,1);
lcd.print(" Multicolor LCD ");
pinMode(REDLITE, OUTPUT);
pinMode(GREENLITE, OUTPUT);
pinMode(BLUELITE, OUTPUT);
brightness = 100;
}
void loop() {
for (int i = 0; i < 255; i++) {
setBacklight(i, 0, 255-i);
delay(5);
}
for (int i = 0; i < 255; i++) {
setBacklight(255-i, i, 0);
delay(5);
}
for (int i = 0; i < 255; i++) {
setBacklight(0, 255-i, i);
delay(5);
}
}
void setBacklight(uint8_t r, uint8_t g, uint8_t b) {
// normalize the red LED - its brighter than the rest!
r = map(r, 0, 255, 0, 100);
g = map(g, 0, 255, 0, 150);
r = map(r, 0, 255, 0, brightness);
g = map(g, 0, 255, 0, brightness);
b = map(b, 0, 255, 0, brightness);
// common anode so invert!
r = map(r, 0, 255, 255, 0);
g = map(g, 0, 255, 255, 0);
b = map(b, 0, 255, 255, 0);
Serial.print("R = "); Serial.print(r, DEC);
Serial.print(" G = "); Serial.print(g, DEC);
Serial.print(" B = "); Serial.println(b, DEC);
analogWrite(REDLITE, r);
analogWrite(GREENLITE, g);
analogWrite(BLUELITE, b);
}
```
- [Previous Page](https://learn.adafruit.com/character-lcds/arduino-code.md)
- [Next Page](https://learn.adafruit.com/character-lcds/python-circuitpython.md)
## Featured Products
### Standard LCD 16x2 + extras
[Standard LCD 16x2 + extras](https://www.adafruit.com/product/181)
Standard HD44780 LCDs are useful for creating standalone projects.
- 16 characters wide, 2 rows
- White text on blue background
- Connection port is 0.1" pitch, single row for easy breadboarding and wiring
- Pins are documented on the back of the LCD to assist...
In Stock
[Buy Now](https://www.adafruit.com/product/181)
[Related Guides to the Product](https://learn.adafruit.com/products/181/guides)
### Assembled Standard LCD 16x2 + extras - White on Blue
[Assembled Standard LCD 16x2 + extras - White on Blue](https://www.adafruit.com/product/1447)
Standard HD44780 LCDs are useful for creating standalone projects. This product is similar to our [Standard LCD 16x2 display **but comes with the header soldered on!**](https://www.adafruit.com/products/181)
- 16 characters wide, 2 rows
- White text...
In Stock
[Buy Now](https://www.adafruit.com/product/1447)
[Related Guides to the Product](https://learn.adafruit.com/products/1447/guides)
### RGB backlight positive LCD 16x2 + extras
[RGB backlight positive LCD 16x2 + extras](https://www.adafruit.com/product/398)
This is a fancy upgrade to standard 16x2 LCDs, instead of just having blue and white, or red and black, this LCD has black characters on a full color RGB-backlight background! That means you can change the background color to anything you want - red, green, blue, pink, white, purple yellow,...
In Stock
[Buy Now](https://www.adafruit.com/product/398)
[Related Guides to the Product](https://learn.adafruit.com/products/398/guides)
### RGB backlight negative LCD 16x2 + extras
[RGB backlight negative LCD 16x2 + extras](https://www.adafruit.com/product/399)
This is a fancy upgrade to standard 16x2 LCDs, instead of just having blue and white, or red and black, this LCD has full color RGB characters on a dark/black background! That means you can change the character display colors to anything you want - red, green, blue, pink, white, purple yellow,...
In Stock
[Buy Now](https://www.adafruit.com/product/399)
[Related Guides to the Product](https://learn.adafruit.com/products/399/guides)
### Standard LCD 20x4 + extras
[Standard LCD 20x4 + extras](https://www.adafruit.com/product/198)
Standard HD44780 LCDs are useful for creating standalone projects.
- 20 characters wide, 4 rows
- White text on blue background
- Connection port is 0.1" pitch, single row for easy breadboarding and wiring
- Single LED backlight with a resistor included, you can...
In Stock
[Buy Now](https://www.adafruit.com/product/198)
[Related Guides to the Product](https://learn.adafruit.com/products/198/guides)
### RGB backlight positive LCD 20x4 + extras
[RGB backlight positive LCD 20x4 + extras](https://www.adafruit.com/product/499)
This is a fancy upgrade to standard 20x4 LCDs, instead of just having blue and white, or red and black, this LCD has black characters on a full color RGB background! That means you can change the display background color to anything you want - red, green, blue, pink, white, purple yellow,...
In Stock
[Buy Now](https://www.adafruit.com/product/499)
[Related Guides to the Product](https://learn.adafruit.com/products/499/guides)
### RGB backlight negative LCD 20x4 + extras
[RGB backlight negative LCD 20x4 + extras](https://www.adafruit.com/product/498)
This is a fancy upgrade to standard 20x4 LCDs, instead of just having blue and white, or red and black, this LCD has full color RGB characters on a dark/black background! That means you can change the character display colors to anything you want - red, green, blue, pink, white, purple yellow,...
In Stock
[Buy Now](https://www.adafruit.com/product/498)
[Related Guides to the Product](https://learn.adafruit.com/products/498/guides)
### Adafruit METRO 328 Fully Assembled - Arduino IDE compatible
[Adafruit METRO 328 Fully Assembled - Arduino IDE compatible](https://www.adafruit.com/product/50)
We sure love the ATmega328 here at Adafruit, and we use them _a lot_ for our own projects. The processor has plenty of GPIO, Analog inputs, hardware UART SPI and I2C, timers and PWM galore - just enough for most simple projects. When we need to go small, we use a
Out of Stock
[Buy Now](https://www.adafruit.com/product/50)
[Related Guides to the Product](https://learn.adafruit.com/products/50/guides)
## Related Guides
- [Trinket Temperature & Humidity LCD Display](https://learn.adafruit.com/trinket-temperature-humidity-lcd-display.md)
- [Circuit Playground Sound-Controlled Robot](https://learn.adafruit.com/circuit-playground-sound-controlled-robot.md)
- [TTL Serial Camera](https://learn.adafruit.com/ttl-serial-camera.md)
- [Digital Circuits 7: MCUs... how do they work?](https://learn.adafruit.com/mcus-how-do-they-work.md)
- [Adafruit Data Logger Shield](https://learn.adafruit.com/adafruit-data-logger-shield.md)
- [Arduino "Hunt The Wumpus"](https://learn.adafruit.com/arduino-hunt-the-wumpus.md)
- [Arduino Lesson 2. LEDs](https://learn.adafruit.com/adafruit-arduino-lesson-2-leds.md)
- [Mini Thermal Receipt Printers](https://learn.adafruit.com/mini-thermal-receipt-printer.md)
- [Bluetooth Temperature & Humidity Sensor](https://learn.adafruit.com/bluetooth-temperature-and-humidity-sensor.md)
- [Character LCD with Raspberry Pi or BeagleBone Black](https://learn.adafruit.com/character-lcd-with-raspberry-pi-or-beaglebone-black.md)
- [DIY 8x2 LCD Shield](https://learn.adafruit.com/diy-8x2-lcd-shield.md)
- [Arduino Ethernet + SD Card](https://learn.adafruit.com/arduino-ethernet-sd-card.md)
- [Trellis 3D Printed Enclosure](https://learn.adafruit.com/trellis-3d-printed-enclosure.md)
- [Adafruit AirLift Shield - ESP32 WiFi Co-Processor](https://learn.adafruit.com/adafruit-airlift-shield-esp32-wifi-co-processor.md)
- [2.2" TFT Display](https://learn.adafruit.com/2-2-tft-display.md)
---
# Source: https://learn.adafruit.com/rgb-lcd-shield.md
# RGB LCD Shield
## Overview

This new Adafruit shield makes it easy to use a 16x2 Character LCD. We really like the range of LCDs we stock in the shop, such as our classic [blue & white](http://www.adafruit.com/products/181) as well as the fancy [RGB negative](http://www.adafruit.com/products/399) and [RGB positive](http://www.adafruit.com/products/398).
Unfortunately, these LCDs do require quite a few digital pins, 6 to control the LCD and then perhaps another 3 to control the RGB backlight for a total of 9 pins. That's half of the pins available on a classic Arduino!

With this in mind, we wanted to make it easier for people to get these LCD into their projects. So we devised a shield that lets you control **a 16x2 Character LCD, up to 3 backlight pins AND 5 keypad pins using only the two I2C pins on the Arduino!** The best part is you don't really lose those two pins either, since you can use I2C-based sensors, real-time clocks, etc. and have them share the I2C bus. This is a super slick way to add a display without all the wiring hassle.

This shield is perfect for when you want to build a stand-alone project with its own user interface. The 4 directional buttons plus select button allows basic control without having to attach a bulky computer.

The shield is designed for 'classic' Arduino-shaped boards such as the Uno, Metro, etc. But it will also fit "Mega" sized boards because the I2C pins are labeled SCL/SDA.
This used to come as a kit but now comes as an assembled SMT design, so much less soldering is required.

**Revision History:**
- **As of May 29, 2024 –** The PCB's design has been updated. Now it comes with the buttons, chips and other components already soldered into place. You will still need to solder on the shield headers and the LCD, but it's a lot easier.
- [Next Page](https://learn.adafruit.com/rgb-lcd-shield/parts-list.md)
## Primary Products
### Adafruit I2C Controlled + Keypad Shield Kit for 16x2 LCD
[Adafruit I2C Controlled + Keypad Shield Kit for 16x2 LCD](https://www.adafruit.com/product/715)
We really like the range of LCDs we stock in the shop, such as our classic [blue & white](http://www.adafruit.com/products/181) and the fancy [RGB negative](http://www.adafruit.com/products/399) and [RGB positive](http://www.adafruit.com/products/398)....
In Stock
[Buy Now](https://www.adafruit.com/product/715)
[Related Guides to the Product](https://learn.adafruit.com/products/715/guides)
## Featured Products
### RGB backlight negative LCD 16x2 + extras
[RGB backlight negative LCD 16x2 + extras](https://www.adafruit.com/product/399)
This is a fancy upgrade to standard 16x2 LCDs, instead of just having blue and white, or red and black, this LCD has full color RGB characters on a dark/black background! That means you can change the character display colors to anything you want - red, green, blue, pink, white, purple yellow,...
In Stock
[Buy Now](https://www.adafruit.com/product/399)
[Related Guides to the Product](https://learn.adafruit.com/products/399/guides)
### RGB backlight positive LCD 16x2 + extras
[RGB backlight positive LCD 16x2 + extras](https://www.adafruit.com/product/398)
This is a fancy upgrade to standard 16x2 LCDs, instead of just having blue and white, or red and black, this LCD has black characters on a full color RGB-backlight background! That means you can change the background color to anything you want - red, green, blue, pink, white, purple yellow,...
In Stock
[Buy Now](https://www.adafruit.com/product/398)
[Related Guides to the Product](https://learn.adafruit.com/products/398/guides)
### LCD Shield Kit w/ 16x2 Character Display - Only 2 pins used!
[LCD Shield Kit w/ 16x2 Character Display - Only 2 pins used!](https://www.adafruit.com/product/772)
This new Adafruit shield makes it easy to use a 16x2 Character LCD. We really like the [Blue & White 16x2 LCDs we stock in the shop](http://www.adafruit.com/products/181). Unfortunately, these LCDs do require quite a few digital pins, 6 to control the LCD and then another pin to...
In Stock
[Buy Now](https://www.adafruit.com/product/772)
[Related Guides to the Product](https://learn.adafruit.com/products/772/guides)
### RGB LCD Shield Kit w/ 16x2 Character Display - Only 2 pins used!
[RGB LCD Shield Kit w/ 16x2 Character Display - Only 2 pins used!](https://www.adafruit.com/product/716)
This new Adafruit shield makes it easy to use a 16x2 Character LCD. We really like the RGB LCDs we stock in the shop both the [RGB negative](http://www.adafruit.com/products/399) and [RGB positive](http://www.adafruit.com/products/398). Unfortunately, these LCDs do...
Out of Stock
[Buy Now](https://www.adafruit.com/product/716)
[Related Guides to the Product](https://learn.adafruit.com/products/716/guides)
### RGB LCD Shield Kit w/ 16x2 Character Display - Only 2 pins used!
[RGB LCD Shield Kit w/ 16x2 Character Display - Only 2 pins used!](https://www.adafruit.com/product/714)
This new Adafruit shield makes it easy to use a 16x2 Character LCD. We really like the RGB LCDs we stock in the shop both the [RGB negative](http://www.adafruit.com/products/399) and [RGB positive](http://www.adafruit.com/products/398). Unfortunately, these LCDs do...
In Stock
[Buy Now](https://www.adafruit.com/product/714)
[Related Guides to the Product](https://learn.adafruit.com/products/714/guides)
## Related Guides
- [Character LCDs](https://learn.adafruit.com/character-lcds.md)
- [Simple Arduino-based USB VID & PID tester](https://learn.adafruit.com/simple-arduino-based-usb-vid-and-pid-tester.md)
- [Arduino "Hunt The Wumpus"](https://learn.adafruit.com/arduino-hunt-the-wumpus.md)
- [Sous-vide controller powered by Arduino - The SousViduino!](https://learn.adafruit.com/sous-vide-powered-by-arduino-the-sous-viduino.md)
- [Trinket Ultrasonic Rangefinder](https://learn.adafruit.com/trinket-ultrasonic-rangefinder.md)
- [Trinket RGB Shield Clock](https://learn.adafruit.com/trinket-rgb-shield-clock.md)
- [Adafruit Capacitive Touch Sensor Breakouts](https://learn.adafruit.com/adafruit-capacitive-touch-sensor-breakouts.md)
- [Trinket Temperature & Humidity LCD Display](https://learn.adafruit.com/trinket-temperature-humidity-lcd-display.md)
- [Character LCD with Raspberry Pi or BeagleBone Black](https://learn.adafruit.com/character-lcd-with-raspberry-pi-or-beaglebone-black.md)
- [eInk Literature Quotes Clock for MagTag](https://learn.adafruit.com/eink-literary-quotes-clock-for-magtag.md)
- [Adafruit Feather RP2040 with DVI Output Port](https://learn.adafruit.com/adafruit-feather-rp2040-dvi.md)
- [Portable Solar Charging Tracker](https://learn.adafruit.com/portable-solar-charging-tracker.md)
- [Adafruit E-Ink Bonnet for Raspberry Pi](https://learn.adafruit.com/adafruit-e-ink-bonnet-for-raspberry-pi.md)
- [What’s Fresh Today? In-Season Produce Reminder for Adafruit MagTag](https://learn.adafruit.com/seasonal-produce-for-adafruit-magtag.md)
- [No-Solder Visualizer Capacitive Touch Controller](https://learn.adafruit.com/no-solder-visualizer-capacitive-touch-controller.md)
---
# Source: https://learn.adafruit.com/rgb-led-strips.md
# RGB LED Strips
## Overview
http://www.flickr.com/photos/adafruit/5162826878/
We love some good LED blinking as much as the next person but after years of LED-soldering we need something cooler to get us excited. Sure there are RGB LEDs and those are fun too but what comes after that? Well, we have the answer: **LED Strips**! These are _flexible_ circuit boards with full color LEDs soldered on. They take a lot of LED-wiring-drudgery out of decorating a room, car, bicycle, costume, etc. The ones we carry are also waterproof (although not all are).
There are two basic kinds of LED strips, the "analog" kind and "digital" kind. Analog-type strips have all the LEDs connected in parallel and so it acts like one huge tri-color LED; you can set the **entire** strip to any color you want, but you can't control the individual LED's colors. They are very very easy to use and fairly inexpensive.
The Digital-type strips work in a different way. They have a chip for each LED, to use the strip you have to send digitally coded data to the chips. However, this means you can control each LED individually! Because of the extra complexity of the chip, they are more expensive.
**[You can buy waterproof analog-type RGB LED strips by the meter at the Adafruit shop!](http://www.adafruit.com/index.php?main_page=product_info&cPath=37&products_id=285 "Link: http://www.adafruit.com/index.php?main\_page=product\_info&cPath=37&products\_id=285")**
Danger:
Technical specs:
- 10.5mm (0.41") wide, 3mm (0.12") thick, 100mm (3.95") long per segment
- Clear waterproof molded
- 3M adhesive strip on back
- Maximum 12V @ 60mA draw per strip segment
- 3 common-anode RGB LEDs per segment
- LED wavelengths: 630nm/530nm/475nm
- No microcontroller or chip controller ('analog' only!)
- (We're working on getting an English datasheet from the manufacturer!)

- [Next Page](https://learn.adafruit.com/rgb-led-strips/schematic.md)
## Featured Products
### Flexible RGB Neon-like LED Strip 120 LEDs - 1 meter long
[Flexible RGB Neon-like LED Strip 120 LEDs - 1 meter long](https://www.adafruit.com/product/4245)
Here at Adafruit we love discovering new and exotic glowing things. Like moths to the flame, we were intrigued by these fresh **Flexible Silicone Neon-Like LED Strips**! They _look_ a lot like neon, but without the need for expensive transformers, glass tubing or inert...
In Stock
[Buy Now](https://www.adafruit.com/product/4245)
[Related Guides to the Product](https://learn.adafruit.com/products/4245/guides)
### RGB LED weatherproof flexi-strip - 30 LED/m - 5m
[RGB LED weatherproof flexi-strip - 30 LED/m - 5m](https://www.adafruit.com/product/285)
These LED strips are fun and glowy. There are **30** RGB LEDs per meter, and you can control the entire strip at once with any microcontroller and three transistors. The way they are wired, you will need a 9-12VDC power supply and then ground the R/G/B pins to turn on the three colors. Use...
In Stock
[Buy Now](https://www.adafruit.com/product/285)
[Related Guides to the Product](https://learn.adafruit.com/products/285/guides)
### RGB LED Weatherproof flexi-strip 60 LED/m- 5m
[RGB LED Weatherproof flexi-strip 60 LED/m- 5m](https://www.adafruit.com/product/346)
These LED strips are fun and glowy. There are **60** RGB LEDs per meter - twice as many as our other strip, and you can control the entire strip at once with any microcontroller and three transistors. The way they are wired, you will need a 9-12VDC power supply and then ground the R/G/B...
In Stock
[Buy Now](https://www.adafruit.com/product/346)
[Related Guides to the Product](https://learn.adafruit.com/products/346/guides)
### Analog RGBW LED Strip - RGB plus Cool White - 60 LED/m
[Analog RGBW LED Strip - RGB plus Cool White - 60 LED/m](https://www.adafruit.com/product/2440)
_A dream come true...an analog LED strip with both RGB and Cool White LEDs...It's so........bbbeeeaaaaauuuttttiiiifuuulllll!!!_
These LED strips are fun and glowy. There are **60** RGB and Cool White LEDs per meter - you can control the entire strip at once with any...
In Stock
[Buy Now](https://www.adafruit.com/product/2440)
[Related Guides to the Product](https://learn.adafruit.com/products/2440/guides)
### Analog RGBW LED Strip - RGB plus Warm White - 60 LED/m
[Analog RGBW LED Strip - RGB plus Warm White - 60 LED/m](https://www.adafruit.com/product/2439)
_A dream come true...an analog LED strip with both RGB and Warm White LEDs...It's so........bbbeeeaaaaauuuttttiiiifuuulllll!!!_
These LED strips are fun and glowy. There are **60** RGB and Warm White LEDs per meter - you can control the entire strip at once...
In Stock
[Buy Now](https://www.adafruit.com/product/2439)
[Related Guides to the Product](https://learn.adafruit.com/products/2439/guides)
### Solderless DotStar and Analog RGB LED Strip Clip Sampler
[Solderless DotStar and Analog RGB LED Strip Clip Sampler](https://www.adafruit.com/product/1004)
These ingenious little clips make it easier than ever to use our analog RGB LED strips - no need to solder! The clips snap onto the ends of the LED strip and hold securely. They're not waterproof but you could cover them in heat-shrink to make them weatherproof.
You get one...
In Stock
[Buy Now](https://www.adafruit.com/product/1004)
[Related Guides to the Product](https://learn.adafruit.com/products/1004/guides)
### TIP120 Power Darlington Transistors - 3 pack
[TIP120 Power Darlington Transistors - 3 pack](https://www.adafruit.com/product/976)
Transistors are powerful little electronic switches, and when our little NPN transistors aren't power enough for your project, we have been known to use these beefy TIP120 Darlington transistors. Great for whenever you need to control medium to high-power electronics such as motors,...
In Stock
[Buy Now](https://www.adafruit.com/product/976)
[Related Guides to the Product](https://learn.adafruit.com/products/976/guides)
### Breadboarding wire bundle
[Breadboarding wire bundle](https://www.adafruit.com/product/153)
75 flexible stranded core wires with stiff ends molded on in red, orange, yellow, green, blue, brown, black and white. These are a major improvement over the "box of bent wires" that are sometimes sold with breadboards, and faster than stripping your own solid core wires. Makes...
In Stock
[Buy Now](https://www.adafruit.com/product/153)
[Related Guides to the Product](https://learn.adafruit.com/products/153/guides)
## Related Guides
- [Wakanda Forever Game](https://learn.adafruit.com/wakanda-forever-game.md)
- [NeoPixel Cyber Falls Wig](https://learn.adafruit.com/neopixel-cyber-falls.md)
- [Halloween Skeleton Transformation Illusion Prop](https://learn.adafruit.com/halloween-skeleton-transformation-illusion-prop.md)
- [Alohamora Bottle](https://learn.adafruit.com/alohamora-bottle.md)
- [NeoPixel Aquarium with Submersible Lights](https://learn.adafruit.com/neopixel-aquarium-with-submersible-lights.md)
- [Adafruit Sparkle Motion](https://learn.adafruit.com/adafruit-sparkle-motion.md)
- [NeoPixel Painter](https://learn.adafruit.com/neopixel-painter.md)
- [Cosplay Glow Fur Raver Bandolier](https://learn.adafruit.com/cosplay-glow-fur-raver-bandolier.md)
- [Make it Glow: NeoPixel and LED Diffusion Tips & Tricks](https://learn.adafruit.com/make-it-glow-neopixel-and-led-diffusion-tips-tricks.md)
- [LIGHTSHIP: LED Animation over WiFi](https://learn.adafruit.com/lightship-led-animation-over-wifi.md)
- [DRAFT PUNK](https://learn.adafruit.com/draft-punk.md)
- [NeoPixel LED Heart Necklace](https://learn.adafruit.com/neopixel-led-heart-necklace.md)
- [Stick Person Costume with Neon LED Strips](https://learn.adafruit.com/led-neon-stick-person-costume.md)
- [FunHouse Parking Assistant](https://learn.adafruit.com/funhouse-parking-assistant.md)
- [Sparkle Motion Dance Shoes](https://learn.adafruit.com/sparkle-motion-dance-shoes.md)
---
# Source: https://learn.adafruit.com/adafruit-gfx-graphics-library/rotating-the-display.md
# Adafruit GFX Graphics Library
## Rotating the Display
You can also rotate your drawing. Note that this will _not_ rotate what you already drew, but it will change the coordinate system for any new drawing. This can be really handy if you had to turn your board or display sideways or upside down to fit in a particular enclosure. In most cases this only needs to be done once, inside setup().
We can only rotate 0, 90, 180 or 270 degrees - anything else is not possible in hardware and is too taxing for an Arduino to calculate in software

```
void setRotation(uint8_t rotation);
```
The **rotation** parameter can be **0** , **1** , **2** or **3**. For displays that are part of an Arduino shield, rotation value 0 sets the display to a _portrait_ (tall) mode, with the USB jack at the top right. Rotation value 2 is also a portrait mode, with the USB jack at the bottom left. Rotation 1 is _landscape_ (wide) mode, with the USB jack at the bottom right, while rotation 3 is also landscape, but with the USB jack at the top left.
For other displays, please try all 4 rotations to figure out how they end up rotating as the alignment will vary depending on each display, in general the rotations move counter-clockwise
When rotating, the origin point (0,0) changes — the idea is that it should be arranged at the top-left of the display for the other graphics functions to make consistent sense (and match all the function descriptions above).
If you need to reference the size of the screen (which will change between portrait and landscape modes), use width() and height().
```
uint16_t width();
uint16_t height();
```
Each returns the dimension (in pixels) of the corresponding axis, adjusted for the display’s current rotation setting.
- [Previous Page](https://learn.adafruit.com/adafruit-gfx-graphics-library/graphics-primitives.md)
- [Next Page](https://learn.adafruit.com/adafruit-gfx-graphics-library/using-fonts.md)
## Related Guides
- [AdaBox 019](https://learn.adafruit.com/adabox019.md)
- [Sous-vide controller powered by Arduino - The SousViduino!](https://learn.adafruit.com/sous-vide-powered-by-arduino-the-sous-viduino.md)
- [Adafruit 128x64 OLED Bonnet for Raspberry Pi](https://learn.adafruit.com/adafruit-128x64-oled-bonnet-for-raspberry-pi.md)
- [Adafruit IO IOT Hub with the Adafruit FunHouse](https://learn.adafruit.com/adafruit-io-hub-with-the-adafruit-funhouse.md)
- [HalloWing Flapping Bat](https://learn.adafruit.com/hallowing-flapping-bat.md)
- [CircuitPython OLED and Dual Knob Sketcher](https://learn.adafruit.com/circuitpython-oled-knob-sketcher.md)
- [Monochrome OLED Breakouts](https://learn.adafruit.com/monochrome-oled-breakouts.md)
- [4x4 Rotary Encoder MIDI Messenger](https://learn.adafruit.com/4x4-rotary-encoder-midi-messenger.md)
- [Pico W HTTP Server with CircuitPython](https://learn.adafruit.com/pico-w-http-server-with-circuitpython.md)
- [Capturing Camera Images with CircuitPython](https://learn.adafruit.com/capturing-camera-images-with-circuitpython.md)
- [WiFi OLED Display Badge](https://learn.adafruit.com/digital-display-badge.md)
- [Trinket Ultrasonic Rangefinder](https://learn.adafruit.com/trinket-ultrasonic-rangefinder.md)
- [PyPortal Adafruit Quote Book](https://learn.adafruit.com/pyportal-adafruit-quote-board.md)
- [2.8" TFT Touchscreen](https://learn.adafruit.com/2-8-tft-touchscreen.md)
- [Magic Storybook with ChatGPT](https://learn.adafruit.com/magic-storybook-with-chatgpt.md)
---
# Source: https://learn.adafruit.com/reading-a-analog-in-and-controlling-audio-volume-with-the-raspberry-pi/run-it.md
# Analog Inputs for Raspberry Pi Using the MCP3008
## Run It
# Running the Code
The following command will start our volume control script. Adjusting the trimpot will printout the OS volume level on the screen.
```auto
$ sudo python3 ./code.py
```
## Testing the Volume Control
Opening a second terminal on your Raspberry Pi we can run the "speaker-test" command and listen to the volume change as we turn the trimpot.
```
$ speaker-test -t sine -f 440
```
## Controlling MP3 Volume
The mpg123 command can be used to play MP3 files on your Raspberry Pi. We can open an additional terminal and play MP3 files and adjust the volume with the trimpot we have wired up.
```
$ mpg123 <MP3 filename>
```
- [Previous Page](https://learn.adafruit.com/reading-a-analog-in-and-controlling-audio-volume-with-the-raspberry-pi/script.md)
## Featured Products
### MCP3008 - 8-Channel 10-Bit ADC With SPI Interface
[MCP3008 - 8-Channel 10-Bit ADC With SPI Interface](https://www.adafruit.com/product/856)
Need to add analog inputs? This chip will add 8 channels of 10-bit analog input to your microcontroller or microcomputer project. It's super easy to use and uses SPI so only 4 pins are required. We chose this chip as a great accompaniment to the Raspberry Pi computer because it's fun...
In Stock
[Buy Now](https://www.adafruit.com/product/856)
[Related Guides to the Product](https://learn.adafruit.com/products/856/guides)
### Breadboard trim potentiometer
[Breadboard trim potentiometer](https://www.adafruit.com/product/356)
These are our favorite trim pots, perfect for breadboarding and prototyping. They have a long grippy adjustment knob and with 0.1" spacing, they plug into breadboards or perfboards with ease.
This is the same pot that comes with our character LCDs and tutorial...
In Stock
[Buy Now](https://www.adafruit.com/product/356)
[Related Guides to the Product](https://learn.adafruit.com/products/356/guides)
### Full Sized Premium Breadboard - 830 Tie Points
[Full Sized Premium Breadboard - 830 Tie Points](https://www.adafruit.com/product/239)
This is a 'full-size' premium quality breadboard, 830 tie points. Good for small and medium projects. It's 2.2" x 7" (5.5 cm x 17 cm) with a standard double-strip in the middle and two power rails on both sides. You can pull the power rails off easily to make the...
In Stock
[Buy Now](https://www.adafruit.com/product/239)
[Related Guides to the Product](https://learn.adafruit.com/products/239/guides)
### Raspberry Pi 3 - Model B+ - 1.4GHz Cortex-A53 with 1GB RAM
[Raspberry Pi 3 - Model B+ - 1.4GHz Cortex-A53 with 1GB RAM](https://www.adafruit.com/product/3775)
The Raspberry Pi 3 Model B is the most popular Raspberry Pi computer made, and the Pi Foundation knows you can always make a good thing _better_! And what could make the Pi 3 better? How about a _faster_ processor, 5 GHz WiFi, and updated Ethernet chip with PoE capability?...
In Stock
[Buy Now](https://www.adafruit.com/product/3775)
[Related Guides to the Product](https://learn.adafruit.com/products/3775/guides)
### Assembled Pi T-Cobbler Plus - GPIO Breakout
[Assembled Pi T-Cobbler Plus - GPIO Breakout](https://www.adafruit.com/product/2028)
**This is the assembled version of the Pi T-Cobbler Plus. It only works with the Raspberry Pi Model Zero, A+, B+, Pi 2, Pi 3 & Pi 4!** (Any Pi with 2x20 connector)
The Raspberry Pi has landed on the Maker World like a 40-GPIO pinned, quad-USB ported, credit...
In Stock
[Buy Now](https://www.adafruit.com/product/2028)
[Related Guides to the Product](https://learn.adafruit.com/products/2028/guides)
## Related Guides
- [MCP3008 - 8-Channel 10-Bit ADC With SPI Interface](https://learn.adafruit.com/mcp3008-spi-adc.md)
- [Raspberry Pi E-mail Notifier Using LEDs](https://learn.adafruit.com/raspberry-pi-e-mail-notifier-using-leds.md)
- [Adafruit AMG8833 8x8 Thermal Camera Sensor](https://learn.adafruit.com/adafruit-amg8833-8x8-thermal-camera-sensor.md)
- [Capacitive Touch Sensors on the Raspberry Pi](https://learn.adafruit.com/capacitive-touch-sensors-on-the-raspberry-pi.md)
- [Windows IoT Core Application Development: Headed Blinky](https://learn.adafruit.com/windows-iot-application-development-headed-blinky.md)
- [Single Channel LoRaWAN Gateway for Raspberry Pi](https://learn.adafruit.com/raspberry-pi-single-channel-lorawan-gateway.md)
- [LoRa and LoRaWAN Radio for Raspberry Pi](https://learn.adafruit.com/lora-and-lorawan-radio-for-raspberry-pi.md)
- [Adafruit's Raspberry Pi Lesson 12. Sensing Movement](https://learn.adafruit.com/adafruits-raspberry-pi-lesson-12-sensing-movement.md)
- [Large Pi-based Thermometer and Clock](https://learn.adafruit.com/large-pi-based-thermometer-and-clock.md)
- [Playing sounds and using buttons with Raspberry Pi](https://learn.adafruit.com/playing-sounds-and-using-buttons-with-raspberry-pi.md)
- [Windows IoT Core Application Development: Headless Blinky](https://learn.adafruit.com/windows-iot-application-development-headless-application.md)
- [Adafruit's Raspberry Pi Lesson 11. DS18B20 Temperature Sensing](https://learn.adafruit.com/adafruits-raspberry-pi-lesson-11-ds18b20-temperature-sensing.md)
- [Node.js Embedded Development on the Raspberry Pi](https://learn.adafruit.com/node-embedded-development.md)
- [Adafruit's Raspberry Pi Lesson 10. Stepper Motors](https://learn.adafruit.com/adafruits-raspberry-pi-lesson-10-stepper-motors.md)
- [CircuitPython Libraries on Linux and ODROID C2](https://learn.adafruit.com/circuitpython-libaries-linux-odroid-c2.md)
- [Adafruit's Raspberry Pi Lesson 4. GPIO Setup](https://learn.adafruit.com/adafruits-raspberry-pi-lesson-4-gpio-setup.md)
---
# Source: https://learn.adafruit.com/flora-rgb-smart-pixels/run-pixel-test-code.md
# Sewable NeoPixels
## Code with Arduino
## Install the NeoPixel Arduino library
Open up the Arduino library manager:

Search for the **Adafruit Neopixel ** library and install it

We also have a great tutorial on Arduino library installation at:
[http://learn.adafruit.com/adafruit-all-about-arduino-libraries-install-use](http://learn.adafruit.com/adafruit-all-about-arduino-libraries-install-use "Link: http://learn.adafruit.com/adafruit-all-about-arduino-libraries-install-use")

Connect your FLORA and computer with a USB cable.
## Now upload!
Install the [NeoPixel library](https://github.com/adafruit/Adafruit_NeoPixel) and go to **File --\> Examples --\> Adafruit\_NeoPixel --\> strandtest.**

If you cannot find that file in the dropdown menu go back up and reinstall the library.
This will launch a window containing the sample sketch. Upload it to your FLORA or GEMMA with the Upload button.

Once successfully uploaded to your FLORA or GEMMA, the pixel will flash and fade different colors. Congrats, you've tested your pixel!
**We do test each pixel in the factory, but you should use this method to test that all three colors (red, green, blue) work on each of your pixels before sewing them into your project!**

For GEMMA, you'll need to change the pin number in the Arduino sketch before uploading. Change "6" to "1":

Then upload the sample code to GEMMA by pressing the reset button (the red LED should start pulsing) and clicking the "upload" button in the Arduino software.
- [Previous Page](https://learn.adafruit.com/flora-rgb-smart-pixels/code-with-makecode.md)
- [Next Page](https://learn.adafruit.com/flora-rgb-smart-pixels/add-more-pixels.md)
## Featured Products
### Flora RGB Smart NeoPixel version 3 - Pack of 4
[Flora RGB Smart NeoPixel version 3 - Pack of 4](https://www.adafruit.com/product/1260)
What's a wearable project without LEDs? Our favorite part of the Flora platform is these tiny smart pixels. Designed specifically for wearables, these updated Flora NeoPixels have ultra-cool technology: these ultra-bright LEDs have a constant-current driver cooked right into the LED...
In Stock
[Buy Now](https://www.adafruit.com/product/1260)
[Related Guides to the Product](https://learn.adafruit.com/products/1260/guides)
### Flora RGB Smart NeoPixel version 3 - Sheet of 20
[Flora RGB Smart NeoPixel version 3 - Sheet of 20](https://www.adafruit.com/product/1559)
So, you want lots and lots of NeoPixels? And you want them for less? Not a problem! Here's a sheet of Flora NeoPixels fresh from the (reflow) oven. Cut them off as you need 'em and save a pretty penny while you're at it.
**Each order comes with 20 pixels on a...**
In Stock
[Buy Now](https://www.adafruit.com/product/1559)
[Related Guides to the Product](https://learn.adafruit.com/products/1559/guides)
### Circuit Playground Express
[Circuit Playground Express](https://www.adafruit.com/product/3333)
**Circuit Playground Express** is the next step towards a perfect introduction to electronics and programming. We've taken the original Circuit Playground Classic and made it even better! Not only did we pack even more sensors in, we also made it even easier to...
In Stock
[Buy Now](https://www.adafruit.com/product/3333)
[Related Guides to the Product](https://learn.adafruit.com/products/3333/guides)
### Adafruit GEMMA M0 - Miniature wearable electronic platform
[Adafruit GEMMA M0 - Miniature wearable electronic platform](https://www.adafruit.com/product/3501)
The **Adafruit Gemma M0** is a super small microcontroller board, with just enough built-in to create many simple projects. It may look small and cute: round, about the size of a quarter, with friendly alligator-clip sew pads. But do not be fooled! The Gemma M0 is incredibly...
In Stock
[Buy Now](https://www.adafruit.com/product/3501)
[Related Guides to the Product](https://learn.adafruit.com/products/3501/guides)
### FLORA - Wearable electronic platform: Arduino-compatible
[FLORA - Wearable electronic platform: Arduino-compatible](https://www.adafruit.com/product/659)
FLORA is Adafruit's fully-featured wearable electronics platform. It's a round, sewable, Arduino-compatible microcontroller designed to empower amazing wearables projects.FLORA comes with Adafruit's support, [tutorials and...](http://learn.adafruit.com/category/flora)
In Stock
[Buy Now](https://www.adafruit.com/product/659)
[Related Guides to the Product](https://learn.adafruit.com/products/659/guides)
### Small Alligator Clip Test Lead (set of 12)
[Small Alligator Clip Test Lead (set of 12)](https://www.adafruit.com/product/1008)
Connect this to that without soldering using these handy mini alligator clip test leads. 15" cables with alligator clip on each end, color coded. You get 12 pieces in 6 colors. Strong and grippy, these always come in handy! We often use these in conjunction with a multimeter so we...
In Stock
[Buy Now](https://www.adafruit.com/product/1008)
[Related Guides to the Product](https://learn.adafruit.com/products/1008/guides)
### Short Wire Alligator Clip Test Lead (set of 12)
[Short Wire Alligator Clip Test Lead (set of 12)](https://www.adafruit.com/product/1592)
Connect this to that without soldering using these handy mini alligator clip test leads. Approximately 4.5" overall cables with alligator clip on each end, color coded. You get 12 pieces in 6 colors. Strong and grippy, these always come in handy! We often use these in conjunction with a...
In Stock
[Buy Now](https://www.adafruit.com/product/1592)
[Related Guides to the Product](https://learn.adafruit.com/products/1592/guides)
### Stainless Thin Conductive Thread - 2 ply - 23 meter/76 ft
[Stainless Thin Conductive Thread - 2 ply - 23 meter/76 ft](https://www.adafruit.com/product/640)
After months of searching, we finally have what we consider to be the ultimate conductive thread. It's thin, strong, smooth, and made completely of 316L stainless steel. Once you start working with this thread you'll quickly agree its optimal for any wearables work!
This...
In Stock
[Buy Now](https://www.adafruit.com/product/640)
[Related Guides to the Product](https://learn.adafruit.com/products/640/guides)
## Related Guides
- [Adafruit Circuit Playground Express](https://learn.adafruit.com/adafruit-circuit-playground-express.md)
- [Plush Game Controller](https://learn.adafruit.com/plush-game-controller.md)
- [Twinkling Neopixel Parasol](https://learn.adafruit.com/twinkling-led-parasol.md)
- [NYE Circuit Playground Drop](https://learn.adafruit.com/nye-circuit-playground-drop.md)
- [Mason Jar Snow Globe](https://learn.adafruit.com/snow-globe-makecode.md)
- [FLORA and GEMMA ICSP](https://learn.adafruit.com/flora-and-gemma-isp.md)
- [Crickit Powered Dancin' Snowman!](https://learn.adafruit.com/crickit-powered-dancin-snowman.md)
- [Circuit Playground Express Spooky Laughing Box](https://learn.adafruit.com/spooky-circuit-playground-express-mystery-box.md)
- [GEMMA Hoop Earrings](https://learn.adafruit.com/gemma-hoop-earrings.md)
- [LEGO Compatible Crickit Rover](https://learn.adafruit.com/lego-compatible-crickit-rover.md)
- [Debugging the SAMD21 with GDB](https://learn.adafruit.com/debugging-the-samd21-with-gdb.md)
- [3D Printed LED Fire Horns](https://learn.adafruit.com/3d-printed-led-fire-horns.md)
- [PianoGlove](https://learn.adafruit.com/pianoglove.md)
- [Circuit Playground Express Serial Communications](https://learn.adafruit.com/circuit-playground-express-serial-communications.md)
- [Motion Gift Box](https://learn.adafruit.com/motion-gift-box.md)
- [Kaleidoscope Eyes (Trinket-Powered NeoPixel LED Ring Goggles)](https://learn.adafruit.com/kaleidoscope-eyes-neopixel-led-goggles-trinket-gemma.md)
---
# Source: https://learn.adafruit.com/adafruits-raspberry-pi-lesson-2-first-time-configuration/running-raspi-config-after-booting.md
# Adafruit's Raspberry Pi Lesson 2. First Time Configuration
## Running raspi-config After Booting
You can run **raspi-config** any time you like, if you find that there are some settings that you need to make.
Click on the desktop icon 'LXTerminal' to open a terminal session.

Then enter the following command and hit return:
```
sudo raspi-config
```
- [Previous Page](https://learn.adafruit.com/adafruits-raspberry-pi-lesson-2-first-time-configuration/other-options.md)
- [Next Page](https://learn.adafruit.com/adafruits-raspberry-pi-lesson-2-first-time-configuration/test-and-configure.md)
## Featured Products
### Raspberry Pi 1 Model B Starter Pack - Includes a Raspberry Pi
[Raspberry Pi 1 Model B Starter Pack - Includes a Raspberry Pi](https://www.adafruit.com/product/1014)
You want to get hacking with your Pi fast, right? Get everything you need to start with the Adafruit Starter Pack for Raspberry Pi. It's the perfect accompaniment to your new Pi, everything you need to boot up your Pi Model B and get going. **We pre-assemble the Cobbler for you, no...**
No Longer Stocked
[Buy Now](https://www.adafruit.com/product/1014)
[Related Guides to the Product](https://learn.adafruit.com/products/1014/guides)
### Programming the Raspberry Pi: Getting Started with Python
[Programming the Raspberry Pi: Getting Started with Python](https://www.adafruit.com/product/1089)
**Program your own Raspberry Pi projects!**
An updated guide to programming your own Raspberry Pi projects. Learn to create inventive programs and fun games on your powerful Raspberry Pi--with no programming experience required. **This practical book has been revised...**
In Stock
[Buy Now](https://www.adafruit.com/product/1089)
[Related Guides to the Product](https://learn.adafruit.com/products/1089/guides)
### Budget Pack for Raspberry Pi 1 Model B (Doesn't include RasPi)
[Budget Pack for Raspberry Pi 1 Model B (Doesn't include RasPi)](https://www.adafruit.com/product/965)
An optimized collection of parts and pieces to experiment with Raspberry Pi at home, school or work. Great for students and those that want to get their feet wet, no soldering required! **THIS PACK DOES NOT INCLUDE A RASPBERRY PI 1 MODEL B and is NOT compatible with Model B+ or Raspberry Pi...**
No Longer Stocked
[Buy Now](https://www.adafruit.com/product/965)
[Related Guides to the Product](https://learn.adafruit.com/products/965/guides)
### Miniature Wireless USB Keyboard with Touchpad
[Miniature Wireless USB Keyboard with Touchpad](https://www.adafruit.com/product/922)
Add a miniature wireless controller to your computer project with this combination keyboard and touchpad. We found the smallest wireless USB keyboard available, a mere 6" x 2.4" x 0.5" (152mm x 59mm x 12.5mm)! It's small but usable to make a great accompaniment to a computer...
In Stock
[Buy Now](https://www.adafruit.com/product/922)
[Related Guides to the Product](https://learn.adafruit.com/products/922/guides)
### NTSC/PAL (Television) TFT Display - 4.3" Diagonal
[NTSC/PAL (Television) TFT Display - 4.3" Diagonal](https://www.adafruit.com/product/946)
Yes, this is an adorable small television! The visible display measures only 4.3" (11cm) diagonal, the TFT comes with a NTSC/PAL driver board, enclosure and stand. The display is very easy to use - simply connect 12VDC to the 2.1mm center-positive DC jack (or use the cable and connect to...
No Longer Stocked
[Buy Now](https://www.adafruit.com/product/946)
[Related Guides to the Product](https://learn.adafruit.com/products/946/guides)
### NTSC/PAL (Television) TFT Display - 7" Diagonal
[NTSC/PAL (Television) TFT Display - 7" Diagonal](https://www.adafruit.com/product/947)
Yes, this is an adorable small television! The visible display measures only 7" (17.8cm) diagonal, the TFT comes with a NTSC/PAL driver board, enclosure and stand. The display is very easy to use - simply connect the included 12VDC adapter to the 2.1mm center-positive DC jack, then...
No Longer Stocked
[Buy Now](https://www.adafruit.com/product/947)
[Related Guides to the Product](https://learn.adafruit.com/products/947/guides)
## Related Guides
- [Adafruit RGB Matrix + Real Time Clock HAT for Raspberry Pi](https://learn.adafruit.com/adafruit-rgb-matrix-plus-real-time-clock-hat-for-raspberry-pi.md)
- [Adafruit PiTFT 3.5" Touch Screen for Raspberry Pi](https://learn.adafruit.com/adafruit-pitft-3-dot-5-touch-screen-for-raspberry-pi.md)
- [Raspberry Pi Hosting Node-Red](https://learn.adafruit.com/raspberry-pi-hosting-node-red.md)
- [Windows IoT Core Application Development: Headed Blinky](https://learn.adafruit.com/windows-iot-application-development-headed-blinky.md)
- [Bonjour (Zeroconf) Networking for Windows and Linux](https://learn.adafruit.com/bonjour-zeroconf-networking-for-windows-and-linux.md)
- [Raspberry Pi Thermal Printer One Time Pads](https://learn.adafruit.com/raspberry-pi-thermal-printer-one-time-pads.md)
- [10" Raspberry Pi Desktop](https://learn.adafruit.com/10-raspberry-pi-desktop.md)
- [What is the Command Line?](https://learn.adafruit.com/what-is-the-command-line.md)
- [Adafruit's Raspberry Pi Lesson 6. Using SSH](https://learn.adafruit.com/adafruits-raspberry-pi-lesson-6-using-ssh.md)
- [Adafruit Prototyping Pi Plate](https://learn.adafruit.com/adafruit-prototyping-pi-plate.md)
- [CircuitPython Libraries on Linux and the 96Boards DragonBoard 410c](https://learn.adafruit.com/circuitpython-libraries-on-linux-and-the-96boards-dragonboard-410c.md)
- [Getting Started With Windows IoT Core on Raspberry Pi](https://learn.adafruit.com/getting-started-with-windows-iot-on-raspberry-pi.md)
- [Raspberry Pi Computer Quick-Start](https://learn.adafruit.com/raspberry-pi-computer-quick-start.md)
- [Adafruit Ultimate GPS with gpsd](https://learn.adafruit.com/adafruit-ultimate-gps-on-the-raspberry-pi.md)
- [Adafruit's Raspberry Pi Lesson 9. Controlling a DC Motor](https://learn.adafruit.com/adafruit-raspberry-pi-lesson-9-controlling-a-dc-motor.md)
---
# Source: https://learn.adafruit.com/skill-badge-guide-3d-printing/running-the-machine.md
# Skill Badge Guide: 3D Printing
## Running the machine

After you have completed your quick mechanical check, turn on the printer and open your control software (ReplicatorG, Makerware, etc.). Import your model into the virtual build area and preheat the extruder (and platform if a heated platform is used) since this usually takes a good bit of time. Depending on the software you used to create your model, it might be oriented improperly with respect to the build platform. Simply drag the model so that it is positioned within the printer's build area and have the software place it onto the platform. This will ensure that the first layer adheres correctly and that the object is level. Follow your printers directions regarding sending the job to the printer, select your desired resolution and fill density, press print and watch the magic happen.

Like any machine, 3D printers should not be left unattended while they are printing. This is especially important with large print jobs as the heat generated by the printing process can cause mechanical failure that, if left unchecked, can cause a fire. Make sure you are familiar with your machine's emergency stop procedure. Most machines feature an emergency stop button (sometimes in the software) to immediately halt the machine. If all else fails, pull the plug!
When the print job is complete, let your model cool or you might unintentionally mush it while prying it off the platform. If you model is stuck, use a plastic putty knife to carefully work around the perimeter of the object until it pops off. Clean up any excess material and you are good to go!
- [Previous Page](https://learn.adafruit.com/skill-badge-guide-3d-printing/axis-calibration.md)
## Featured Products
### 3D printing - Skill badge, iron-on patch
[3D printing - Skill badge, iron-on patch](https://www.adafruit.com/product/490)
You can 3D print! Adafruit offers a fun and exciting "badges" of achievement for electronics, science and engineering. We believe everyone should be able to be rewarded for learning a useful skill, a badge is just one of the many ways to show and share.
This is the "I...
No Longer Stocked
[Buy Now](https://www.adafruit.com/product/490)
[Related Guides to the Product](https://learn.adafruit.com/products/490/guides)
### 3D printing - Sticker!
[3D printing - Sticker!](https://www.adafruit.com/product/649)
You can 3D print! Adafruit offers a fun and exciting stickers to celebrate achievement for electronics, science and engineering. We believe everyone should be able to be rewarded for learning a useful skill, a sticker is just one of the many ways to show and share.
This is the...
No Longer Stocked
[Buy Now](https://www.adafruit.com/product/649)
[Related Guides to the Product](https://learn.adafruit.com/products/649/guides)
### Flashforge Creator PRO
[Flashforge Creator PRO](https://www.adafruit.com/product/2742)
The **Flashforge Creator Pro** is the latest addition to FlashForge’s Creator family, built upon an open source platform.
Based on proven design of the Creator X chassis, the Pro is now enclosed so you can print ABS better and more efficient than ever. The upgraded...
No Longer Stocked
[Buy Now](https://www.adafruit.com/product/2742)
[Related Guides to the Product](https://learn.adafruit.com/products/2742/guides)
### PrintrBot Simple Metal 3D Printer - Black - Assembled
[PrintrBot Simple Metal 3D Printer - Black - Assembled](https://www.adafruit.com/product/1760)
New from Printrbot, the Metal Simple is a brand new rock solid, all metal, fully-assembled Printrbot Simple! As opposed to the [Printrbot Simple Kit](http://www.adafruit.com/products/1735), all of the laser cut wood parts have been replaced by rock solid metal and assembled. In...
No Longer Stocked
[Buy Now](https://www.adafruit.com/product/1760)
[Related Guides to the Product](https://learn.adafruit.com/products/1760/guides)
### Ultimaker 2+ 3D Printer
[Ultimaker 2+ 3D Printer](https://www.adafruit.com/product/2673)
The **Ultimaker 2+** is one of our favorite 3D printers on the market. It's a well-built open-source compact machine with an excellent UX. Every inch of the Ultimaker 2+ is designed to create the most effortless and reliable 3D printing experience ever!
No Longer Stocked
[Buy Now](https://www.adafruit.com/product/2673)
[Related Guides to the Product](https://learn.adafruit.com/products/2673/guides)
### Micro 3D Printer - Black - Retail Edition
[Micro 3D Printer - Black - Retail Edition](https://www.adafruit.com/product/2933)
The magic of 3D printing is now more affordable and accessible than ever! Meet The **Micro 3D Printer** by [M3D](https://printm3d.com/), the first truly consumer 3D printer. Sporting a compact design, user-friendly software, and replaceable print beds and nozzles,...
No Longer Stocked
[Buy Now](https://www.adafruit.com/product/2933)
[Related Guides to the Product](https://learn.adafruit.com/products/2933/guides)
### Filament for 3D Printers in Various Colors and Types
[Filament for 3D Printers in Various Colors and Types](https://www.adafruit.com/product/2080)
Having a 3D printer without filament is sort of like having a regular printer without paper or ink. And while a lot of printers come with some filament there's a good chance you've been printing up a storm and need something new. That's why we've started carrying a...
Out of Stock
[Buy Now](https://www.adafruit.com/product/2080)
[Related Guides to the Product](https://learn.adafruit.com/products/2080/guides)
## Related Guides
- [Mario Magic Wand](https://learn.adafruit.com/mario-magic-wand.md)
- [Case for HUSB238 Breakout](https://learn.adafruit.com/case-for-husb238.md)
- [3D Printed RFID NFC Rings](https://learn.adafruit.com/3d-printed-rfid-nfc-rings.md)
- [AI 3D Printed Figure](https://learn.adafruit.com/ai-figure.md)
- [Ultrasonic Ruler](https://learn.adafruit.com/ultrasonic-ruler.md)
- [Magnet Bottle Holder](https://learn.adafruit.com/magnet-bottle-holder.md)
- [Printy Boost: Reimagining a Classic Adafruit Kit](https://learn.adafruit.com/printy-boost-reimagining-a-classic-adafruit-kit.md)
- [CYBERDECK Expansion Plate](https://learn.adafruit.com/cyberdeck-plate.md)
- [PyPortal Case](https://learn.adafruit.com/pyportal-case.md)
- [3D Printed LED Buckle](https://learn.adafruit.com/3d-printed-led-buckle.md)
- [CLUE Slim Case](https://learn.adafruit.com/clue-slim-case.md)
- [Adafruit Desktop 3D Printer Buyers Guide](https://learn.adafruit.com/adafruit-desktop-3d-printer-selection-guide.md)
- [3D Printed Animatronic Robot Head](https://learn.adafruit.com/3d-printed-animatronic-robot-head.md)
- [New Years Eve Ball Drop](https://learn.adafruit.com/new-years-eve-ball-drop.md)
- [3D Printed Battery Adapter for Camera-Mount LED Panel](https://learn.adafruit.com/3d-printed-battery-adapter-for-camera-mount-led-panel.md)
---
# Source: https://learn.adafruit.com/adalight-diy-ambient-tv-lighting/running-the-software.md
# Adalight Project Pack
## Running the Software
Info:
Launch the Processing IDE. After a moment, you should see a simple gray and white window that looks _very_ similar to the Arduino IDE.
From the **File** menu, select **Sketchbook** , which should “roll over” to show **Adalight** and **Colorswirl**. Select the latter first: **Colorswirl**.
Click the **Run** button near the top-left of the window:

If the Arduino is the first or only serial device on the system, this should start a colorful rainbow of animation on the LEDs.
If this is _not_ what happens, then you’ll need to edit some code. Around line 26, look for this statement:
** myPort = new Serial(this, Serial.list()[0], 115200);**
We need to change how the code opens the serial connection to the Arduino. One route is just through trial and error: try **Serial.list()[1]**, then ** **** Serial.list()[2]**, and so forth, re-starting the program each time to see if it works. For a more scientific approach, add one new line of code before running the sketch:
** println(Serial.list());**
When run, this displays a list of all serial ports or devices. If you know which device or COM port corresponds to the Arduino, you can then change the original line to include this data. For example, it might now read:
** myPort = new Serial(this, "COM6", 115200);**
This will be different on every system, so we can’t just tell you what to put there.
Another way to locate the port name: in the Arduino IDE, this is the port you selected in the Tools→Serial Port menu before programming the chip.
Once you have Colorswirl working, make note of the change (if any), because the same change will need to be made in the Adalight code.

Moving ahead…
From the **File** menu, select **Sketchbook** , then **Adalight**. If you changed the Colorswirl sketch to find the serial port, make that same change to the Adalight code. Now click the **Run** button.
Though they’re in a jumbled mess on your desk right now, the LEDs should light up in colors resembling the perimeter of your screen. Move some windows around the edge — you should see the LEDs react to this.
As it runs, the software performs a continual series of screen captures, averaging the pixels in blocks around the perimeter of the screen and issuing the resulting color data to the LEDs. You can hide the preview window and let the sketch continue working in the background. Being capture-based, it’s not tied to any one specific media player, and most anything you can put on your display — MPEG movies, YouTube, games and so forth — can benefit from the effect. It seems to work especially well with the outer space sequences in _Cosmos_…a bit ironic in that Carl Sagan’s “Spaceship of the Imagination” from this series featured a giant flat screen and mood lighting decades before Philips turned it into a commercial product!

If you plan to arrange the LEDs similarly to our examples — 25 pixels in a ring, 1 pixel gap at the bottom, with the first pixel starting just left of the gap — then nothing more needs to be changed in the software. If using a different layout, you’ll need to make adjustments in the code. You'll find extensive notes in the source code for making this (and other) changes.
Once all the hardware and software is working, it’s time to get crafty and mount the LEDs on the telly…
- [Previous Page](https://learn.adafruit.com/adalight-diy-ambient-tv-lighting/download-and-install.md)
- [Next Page](https://learn.adafruit.com/adalight-diy-ambient-tv-lighting/choosing-leds.md)
## Featured Products
### Adalight - DIY Ambient Monitor Lighting Project Pack
[Adalight - DIY Ambient Monitor Lighting Project Pack](https://www.adafruit.com/product/461)
Build your own ambient-light addition for a monitor or media PC television with the Adalight project pack! This project pack is for our ["Adalight" project tutorial](http://learn.adafruit.com/adalight-diy-ambient-tv-lighting). By running the Processing code on your...
No Longer Stocked
[Buy Now](https://www.adafruit.com/product/461)
[Related Guides to the Product](https://learn.adafruit.com/products/461/guides)
### 12mm Diffused Thin Digital RGB LED Pixels (Strand of 25)
[12mm Diffused Thin Digital RGB LED Pixels (Strand of 25)](https://www.adafruit.com/product/322)
RGB Pixels are digitally-controllable lights you can set to any color, or animate. Each RGB LED and controller chip is molded into a 'dot' of silicone. The dots are weatherproof and rugged. There are four flanges molded in so that you can 'push' them into a 12mm drill hole in...
No Longer Stocked
[Buy Now](https://www.adafruit.com/product/322)
[Related Guides to the Product](https://learn.adafruit.com/products/322/guides)
### 12mm Diffused Flat Digital RGB LED Pixels (Strand of 25)
[12mm Diffused Flat Digital RGB LED Pixels (Strand of 25)](https://www.adafruit.com/product/738)
RGB Pixels are digitally-controllable lights you can set to any color, or animate. Each RGB LED and controller chip is molded into a 'dot' of silicone. The dots are weatherproof and rugged. There are four flanges molded in so that you can 'push' them into a 12mm drill hole in...
In Stock
[Buy Now](https://www.adafruit.com/product/738)
[Related Guides to the Product](https://learn.adafruit.com/products/738/guides)
### Adafruit METRO 328 Fully Assembled - Arduino IDE compatible
[Adafruit METRO 328 Fully Assembled - Arduino IDE compatible](https://www.adafruit.com/product/50)
We sure love the ATmega328 here at Adafruit, and we use them _a lot_ for our own projects. The processor has plenty of GPIO, Analog inputs, hardware UART SPI and I2C, timers and PWM galore - just enough for most simple projects. When we need to go small, we use a
Out of Stock
[Buy Now](https://www.adafruit.com/product/50)
[Related Guides to the Product](https://learn.adafruit.com/products/50/guides)
### Female DC Power adapter - 2.1mm jack to screw terminal block
[Female DC Power adapter - 2.1mm jack to screw terminal block](https://www.adafruit.com/product/368)
If you need to connect a DC power wall wart to a board that doesn't have a DC jack - this adapter will come in very handy! There is a 2.1mm DC jack on one end, and a screw terminal block on the other. The terminals are labeled with positive/negative assuming a positive-tip configuration...
In Stock
[Buy Now](https://www.adafruit.com/product/368)
[Related Guides to the Product](https://learn.adafruit.com/products/368/guides)
### 5V 2A (2000mA) switching power supply - UL Listed
[5V 2A (2000mA) switching power supply - UL Listed](https://www.adafruit.com/product/276)
This is an FCC/CE certified and UL listed power supply. Need a lot of 5V power? This switching supply gives a clean regulated 5V output at up to 2000mA. 110 or 240 input, so it works in any country. The plugs are "US 2-prong" style so you may need a plug adapter, but you can pick one...
In Stock
[Buy Now](https://www.adafruit.com/product/276)
[Related Guides to the Product](https://learn.adafruit.com/products/276/guides)
### Breadboarding wire bundle
[Breadboarding wire bundle](https://www.adafruit.com/product/153)
75 flexible stranded core wires with stiff ends molded on in red, orange, yellow, green, blue, brown, black and white. These are a major improvement over the "box of bent wires" that are sometimes sold with breadboards, and faster than stripping your own solid core wires. Makes...
In Stock
[Buy Now](https://www.adafruit.com/product/153)
[Related Guides to the Product](https://learn.adafruit.com/products/153/guides)
## Related Guides
- [2.2" TFT Display](https://learn.adafruit.com/2-2-tft-display.md)
- [Arduin-o-Phone](https://learn.adafruit.com/arduin-o-phone-arduino-powered-diy-cellphone.md)
- [Adafruit CC3000 WiFi and Xively](https://learn.adafruit.com/adafruit-cc3000-wifi-and-xively.md)
- [Analog Feedback Servos](https://learn.adafruit.com/analog-feedback-servos.md)
- [Ladyada's Learn Arduino - Lesson #0](https://learn.adafruit.com/ladyadas-learn-arduino-lesson-number-0.md)
- [Adafruit 1.27" and 1.5" Color OLED Breakout Board](https://learn.adafruit.com/adafruit-1-5-color-oled-breakout-board.md)
- [Bluetooth Temperature & Humidity Sensor](https://learn.adafruit.com/bluetooth-temperature-and-humidity-sensor.md)
- [Arduino Lesson 7. Make an RGB LED Fader](https://learn.adafruit.com/adafruit-arduino-lesson-7-make-an-rgb-led-fader.md)
- [Wave Shield](https://learn.adafruit.com/adafruit-wave-shield-audio-shield-for-arduino.md)
- [Adafruit 1.14" 240x135 Color TFT Breakout LCD Display](https://learn.adafruit.com/adafruit-1-14-240x135-color-tft-breakout.md)
- [Adafruit Arduino Selection Guide](https://learn.adafruit.com/adafruit-arduino-selection-guide.md)
- [Arduino Lesson 3. RGB LEDs](https://learn.adafruit.com/adafruit-arduino-lesson-3-rgb-leds.md)
- [Character LCDs](https://learn.adafruit.com/character-lcds.md)
- [Arduino Lesson 11. LCD Displays - Part 1](https://learn.adafruit.com/adafruit-arduino-lesson-11-lcd-displays-1.md)
- [RGB LED Matrix Basics](https://learn.adafruit.com/32x16-32x32-rgb-led-matrix.md)
---
# Source: https://learn.adafruit.com/adafruit-raspberry-pi-lesson-7-remote-control-with-vnc/running-vncserver-at-startup.md
# Adafruit's Raspberry Pi Lesson 7. Remote Control with VNC
## Running VNCServer at Startup
Info:
Connecting to your Raspberry Pi remotely with VNC is fine as long as your Pi does not reboot. If it does, then you either have to connect with SSH and restart the VNC Server or arrange for the VNC Server to run automatically after the Raspberry Pi reboots.
There are several different methods of arranging for some code to be run as the Pi starts. The method described below is probably the easiest to use. You can adapt it to run other commands instead of starting the VNC server.
**Step 1.**
Open a Terminal session on the Pi, or connect using SSH. A new terminal or SSH session will automatically start you off in your home directory of /home/pi. If you are not in this directory, change to it by typing:
```
$ cd /home/pi
```
Then cd to the .config directory by typing:
```
$ cd .config
```
Note the '.' at the start of the folder name. This makes it a hidden folder that will not show up when you type 'ls'.
**Step 2.**
Issue the command below to create a new directory inside .config called 'autostart'.
```
$ mkdir autostart
```
cd into that new directory by typing:
```
$ cd autostart
```

**Step 3.**
All that remains is to edit a new configuration file. So type the following command to open the nano editor on the new file:
```
$ nano tightvnc.desktop
```
Edit the contents of the file with the following text.
```
[Desktop Entry]
Type=Application
Name=TightVNC
Exec=vncserver :1
StartupNotify=false
```

Type ctrl-X and then Y to save the changes to the file.
Thats all there is to it. The next time you reboot the VNC server will restart automatically.
- [Previous Page](https://learn.adafruit.com/adafruit-raspberry-pi-lesson-7-remote-control-with-vnc/using-a-vnc-client.md)
- [Next Page](https://learn.adafruit.com/adafruit-raspberry-pi-lesson-7-remote-control-with-vnc/mac-screen-and-file-sharing.md)
## Featured Products
### Budget Pack for Raspberry Pi 1 Model B (Doesn't include RasPi)
[Budget Pack for Raspberry Pi 1 Model B (Doesn't include RasPi)](https://www.adafruit.com/product/965)
An optimized collection of parts and pieces to experiment with Raspberry Pi at home, school or work. Great for students and those that want to get their feet wet, no soldering required! **THIS PACK DOES NOT INCLUDE A RASPBERRY PI 1 MODEL B and is NOT compatible with Model B+ or Raspberry Pi...**
No Longer Stocked
[Buy Now](https://www.adafruit.com/product/965)
[Related Guides to the Product](https://learn.adafruit.com/products/965/guides)
### Programming the Raspberry Pi: Getting Started with Python
[Programming the Raspberry Pi: Getting Started with Python](https://www.adafruit.com/product/1089)
**Program your own Raspberry Pi projects!**
An updated guide to programming your own Raspberry Pi projects. Learn to create inventive programs and fun games on your powerful Raspberry Pi--with no programming experience required. **This practical book has been revised...**
In Stock
[Buy Now](https://www.adafruit.com/product/1089)
[Related Guides to the Product](https://learn.adafruit.com/products/1089/guides)
## Related Guides
- [Using a Mini PAL/NTSC Display with a Raspberry Pi](https://learn.adafruit.com/using-a-mini-pal-ntsc-display-with-a-raspberry-pi.md)
- [Arm-based IoT Kit for Cloud IoT Core - Getting Started](https://learn.adafruit.com/raspberry-pi-3-and-sensor-kit-for-google-cloud-iot-core.md)
- [Windows IoT Core Application Development: Headless Blinky](https://learn.adafruit.com/windows-iot-application-development-headless-application.md)
- [Simple Raspberry Pi Robot](https://learn.adafruit.com/simple-raspberry-pi-robot.md)
- [NeoPixels on Raspberry Pi](https://learn.adafruit.com/neopixels-on-raspberry-pi.md)
- [Portable 5in Monitor with HDMI](https://learn.adafruit.com/portable-5in-monitor-with-hdmi.md)
- [2.2" PiTFT HAT Enclosure](https://learn.adafruit.com/3d-printed-2-2-pitft-raspberry-pi-a-plus-enclosure.md)
- [Bluefruit LE Python Library](https://learn.adafruit.com/bluefruit-le-python-library.md)
- [Adafruit Pi Cobbler Kit](https://learn.adafruit.com/adafruit-pi-cobbler-kit.md)
- [Naughty or Nice Machine](https://learn.adafruit.com/naughty-or-nice-machine.md)
- [DHT Humidity Sensing on Raspberry Pi or Beaglebone Black with GDocs Logging](https://learn.adafruit.com/dht-humidity-sensing-on-raspberry-pi-with-gdocs-logging.md)
- [Adafruit's Raspberry Pi Lesson 1. Preparing an SD Card for your Raspberry Pi](https://learn.adafruit.com/adafruit-raspberry-pi-lesson-1-preparing-and-sd-card-for-your-raspberry-pi.md)
- [Mini Raspberry Pi Handheld Notebook](https://learn.adafruit.com/mini-raspberry-pi-handheld-notebook-palmtop.md)
- [Pi Box](https://learn.adafruit.com/pi-box.md)
- [Running Programs Automatically on Your Tiny Computer](https://learn.adafruit.com/running-programs-automatically-on-your-tiny-computer.md)
---
# Source: https://learn.adafruit.com/adafruit-arduino-lesson-1-blink/saving-a-copy-of-blink.md
# Arduino Lesson 1. Blink
## Saving a Copy of 'Blink'
The example sketches included with the Arduino IDE are 'read-only'. That is, you can upload them to an Arduino board, but if you change them, you cannot save them as the same file.
We are going to change this sketch, so, the first thing you need to do is save your own copy that you can change however you like.
From the File menu on the Arduino IDE select the option 'Save As..' and then save the sketch with the name 'MyBlink'.

You have saved your copy of 'Blink' in your sketchbook. This means that if you ever want to find it again, you can just open it using the File → Sketchbook menu option.

- [Previous Page](https://learn.adafruit.com/adafruit-arduino-lesson-1-blink/loading-the-blink-example.md)
- [Next Page](https://learn.adafruit.com/adafruit-arduino-lesson-1-blink/uploading-blink-to-the-board.md)
## Featured Products
### Adafruit METRO 328 Fully Assembled - Arduino IDE compatible
[Adafruit METRO 328 Fully Assembled - Arduino IDE compatible](https://www.adafruit.com/product/50)
We sure love the ATmega328 here at Adafruit, and we use them _a lot_ for our own projects. The processor has plenty of GPIO, Analog inputs, hardware UART SPI and I2C, timers and PWM galore - just enough for most simple projects. When we need to go small, we use a
Out of Stock
[Buy Now](https://www.adafruit.com/product/50)
[Related Guides to the Product](https://learn.adafruit.com/products/50/guides)
### USB Cable - Standard A-B
[USB Cable - Standard A-B](https://www.adafruit.com/product/62)
This here is your standard A-B USB cable, for USB 1.1 or 2.0. Perfect for connecting a PC to your Arduino, USBtinyISP (among other things).
3 feet / 1 meter long
Color may vary!
In Stock
[Buy Now](https://www.adafruit.com/product/62)
[Related Guides to the Product](https://learn.adafruit.com/products/62/guides)
## Related Guides
- [WiFi Weather Station](https://learn.adafruit.com/wifi-weather-station-arduino-cc3000.md)
- [Naughty or Nice Machine](https://learn.adafruit.com/naughty-or-nice-machine.md)
- [Adafruit VS1053 MP3/AAC/Ogg/MIDI/WAV Codec Breakout Tutorial](https://learn.adafruit.com/adafruit-vs1053-mp3-aac-ogg-midi-wav-play-and-record-codec-tutorial.md)
- [How to program a Zumo Robot with Simulink](https://learn.adafruit.com/zumo-robot-control-with-simulink.md)
- [DIY 8x2 LCD Shield](https://learn.adafruit.com/diy-8x2-lcd-shield.md)
- [3D Printed Animatronic Robot Head](https://learn.adafruit.com/3d-printed-animatronic-robot-head.md)
- [Arduino Lesson 7. Make an RGB LED Fader](https://learn.adafruit.com/adafruit-arduino-lesson-7-make-an-rgb-led-fader.md)
- [WiFi Controlled LED Christmahanukwanzaa Tree](https://learn.adafruit.com/wifi-controlled-led-christmahanukwanzaa-tree.md)
- [Light Meter](https://learn.adafruit.com/light-meter.md)
- [1,500 NeoPixel LED Curtain with Raspberry Pi and Fadecandy](https://learn.adafruit.com/1500-neopixel-led-curtain-with-raspberry-pi-fadecandy.md)
- [Trellis 3D Printed Enclosure](https://learn.adafruit.com/trellis-3d-printed-enclosure.md)
- [Deciphering Strange Arduino Code](https://learn.adafruit.com/deciphering-strange-arduino-code.md)
- [Collin's Lab: MIDI](https://learn.adafruit.com/collins-lab-midi.md)
- [Tiny Arduino Music Visualizer](https://learn.adafruit.com/piccolo.md)
- [Adafruit Music Maker Shield](https://learn.adafruit.com/adafruit-music-maker-shield-vs1053-mp3-wav-wave-ogg-vorbis-player.md)
---
# Source: https://learn.adafruit.com/rgb-led-strips/schematic.md
# RGB LED Strips
## Schematic
Analog type RGB LED strips come on a reel, and are made of 3-LED sections that are 10 cm long. They are easy to cut at the boundary of each section, theres a little cut mark area and some copper tabs you can solder to. Each LED in a section is a '5050' tri-color type, containing a red, green and blue LED. That means that every section really has 9 total LEDs - three red, three green and three blue. The LEDs are arranged in series as shown in the following schematic:

- [Previous Page](https://learn.adafruit.com/rgb-led-strips/overview.md)
- [Next Page](https://learn.adafruit.com/rgb-led-strips/current-draw.md)
## Featured Products
### Flexible RGB Neon-like LED Strip 120 LEDs - 1 meter long
[Flexible RGB Neon-like LED Strip 120 LEDs - 1 meter long](https://www.adafruit.com/product/4245)
Here at Adafruit we love discovering new and exotic glowing things. Like moths to the flame, we were intrigued by these fresh **Flexible Silicone Neon-Like LED Strips**! They _look_ a lot like neon, but without the need for expensive transformers, glass tubing or inert...
In Stock
[Buy Now](https://www.adafruit.com/product/4245)
[Related Guides to the Product](https://learn.adafruit.com/products/4245/guides)
### RGB LED weatherproof flexi-strip - 30 LED/m - 5m
[RGB LED weatherproof flexi-strip - 30 LED/m - 5m](https://www.adafruit.com/product/285)
These LED strips are fun and glowy. There are **30** RGB LEDs per meter, and you can control the entire strip at once with any microcontroller and three transistors. The way they are wired, you will need a 9-12VDC power supply and then ground the R/G/B pins to turn on the three colors. Use...
In Stock
[Buy Now](https://www.adafruit.com/product/285)
[Related Guides to the Product](https://learn.adafruit.com/products/285/guides)
### RGB LED Weatherproof flexi-strip 60 LED/m- 5m
[RGB LED Weatherproof flexi-strip 60 LED/m- 5m](https://www.adafruit.com/product/346)
These LED strips are fun and glowy. There are **60** RGB LEDs per meter - twice as many as our other strip, and you can control the entire strip at once with any microcontroller and three transistors. The way they are wired, you will need a 9-12VDC power supply and then ground the R/G/B...
In Stock
[Buy Now](https://www.adafruit.com/product/346)
[Related Guides to the Product](https://learn.adafruit.com/products/346/guides)
### Analog RGBW LED Strip - RGB plus Cool White - 60 LED/m
[Analog RGBW LED Strip - RGB plus Cool White - 60 LED/m](https://www.adafruit.com/product/2440)
_A dream come true...an analog LED strip with both RGB and Cool White LEDs...It's so........bbbeeeaaaaauuuttttiiiifuuulllll!!!_
These LED strips are fun and glowy. There are **60** RGB and Cool White LEDs per meter - you can control the entire strip at once with any...
In Stock
[Buy Now](https://www.adafruit.com/product/2440)
[Related Guides to the Product](https://learn.adafruit.com/products/2440/guides)
### Analog RGBW LED Strip - RGB plus Warm White - 60 LED/m
[Analog RGBW LED Strip - RGB plus Warm White - 60 LED/m](https://www.adafruit.com/product/2439)
_A dream come true...an analog LED strip with both RGB and Warm White LEDs...It's so........bbbeeeaaaaauuuttttiiiifuuulllll!!!_
These LED strips are fun and glowy. There are **60** RGB and Warm White LEDs per meter - you can control the entire strip at once...
In Stock
[Buy Now](https://www.adafruit.com/product/2439)
[Related Guides to the Product](https://learn.adafruit.com/products/2439/guides)
### Solderless DotStar and Analog RGB LED Strip Clip Sampler
[Solderless DotStar and Analog RGB LED Strip Clip Sampler](https://www.adafruit.com/product/1004)
These ingenious little clips make it easier than ever to use our analog RGB LED strips - no need to solder! The clips snap onto the ends of the LED strip and hold securely. They're not waterproof but you could cover them in heat-shrink to make them weatherproof.
You get one...
In Stock
[Buy Now](https://www.adafruit.com/product/1004)
[Related Guides to the Product](https://learn.adafruit.com/products/1004/guides)
### TIP120 Power Darlington Transistors - 3 pack
[TIP120 Power Darlington Transistors - 3 pack](https://www.adafruit.com/product/976)
Transistors are powerful little electronic switches, and when our little NPN transistors aren't power enough for your project, we have been known to use these beefy TIP120 Darlington transistors. Great for whenever you need to control medium to high-power electronics such as motors,...
In Stock
[Buy Now](https://www.adafruit.com/product/976)
[Related Guides to the Product](https://learn.adafruit.com/products/976/guides)
### Breadboarding wire bundle
[Breadboarding wire bundle](https://www.adafruit.com/product/153)
75 flexible stranded core wires with stiff ends molded on in red, orange, yellow, green, blue, brown, black and white. These are a major improvement over the "box of bent wires" that are sometimes sold with breadboards, and faster than stripping your own solid core wires. Makes...
In Stock
[Buy Now](https://www.adafruit.com/product/153)
[Related Guides to the Product](https://learn.adafruit.com/products/153/guides)
## Related Guides
- [Wakanda Forever Game](https://learn.adafruit.com/wakanda-forever-game.md)
- [NeoPixel Cyber Falls Wig](https://learn.adafruit.com/neopixel-cyber-falls.md)
- [Halloween Skeleton Transformation Illusion Prop](https://learn.adafruit.com/halloween-skeleton-transformation-illusion-prop.md)
- [Alohamora Bottle](https://learn.adafruit.com/alohamora-bottle.md)
- [NeoPixel Aquarium with Submersible Lights](https://learn.adafruit.com/neopixel-aquarium-with-submersible-lights.md)
- [Adafruit Sparkle Motion](https://learn.adafruit.com/adafruit-sparkle-motion.md)
- [NeoPixel Painter](https://learn.adafruit.com/neopixel-painter.md)
- [Cosplay Glow Fur Raver Bandolier](https://learn.adafruit.com/cosplay-glow-fur-raver-bandolier.md)
- [Make it Glow: NeoPixel and LED Diffusion Tips & Tricks](https://learn.adafruit.com/make-it-glow-neopixel-and-led-diffusion-tips-tricks.md)
- [LIGHTSHIP: LED Animation over WiFi](https://learn.adafruit.com/lightship-led-animation-over-wifi.md)
- [DRAFT PUNK](https://learn.adafruit.com/draft-punk.md)
- [NeoPixel LED Heart Necklace](https://learn.adafruit.com/neopixel-led-heart-necklace.md)
- [Stick Person Costume with Neon LED Strips](https://learn.adafruit.com/led-neon-stick-person-costume.md)
- [FunHouse Parking Assistant](https://learn.adafruit.com/funhouse-parking-assistant.md)
- [Sparkle Motion Dance Shoes](https://learn.adafruit.com/sparkle-motion-dance-shoes.md)
---
# Source: https://learn.adafruit.com/reading-a-analog-in-and-controlling-audio-volume-with-the-raspberry-pi/script.md
# Analog Inputs for Raspberry Pi Using the MCP3008
## Python Script
The following code can be downloaded directly to your Raspberry Pi. It will read the trimpot value, translate the reading to a volume range and modify the OS output volume level on your Raspberry Pi.
The remap\_range() method is being used to convert the 16-bit analog in range 0 - 65,535 to volume 0-100%.
# The Code
https://github.com/adafruit/Adafruit_Learning_System_Guides/blob/main/Analog_Inputs_for_Raspberry_Pi_Using_the_MCP3008/code.py
## Download the Code
Let's put this file right in your home directory for simplicity. The wget command makes things easy.
```auto
$ wget https://raw.githubusercontent.com/adafruit/Adafruit_Learning_System_Guides/master/Analog_Inputs_for_Raspberry_Pi_Using_the_MCP3008/code.py
```
- [Previous Page](https://learn.adafruit.com/reading-a-analog-in-and-controlling-audio-volume-with-the-raspberry-pi/necessary-packages.md)
- [Next Page](https://learn.adafruit.com/reading-a-analog-in-and-controlling-audio-volume-with-the-raspberry-pi/run-it.md)
## Featured Products
### MCP3008 - 8-Channel 10-Bit ADC With SPI Interface
[MCP3008 - 8-Channel 10-Bit ADC With SPI Interface](https://www.adafruit.com/product/856)
Need to add analog inputs? This chip will add 8 channels of 10-bit analog input to your microcontroller or microcomputer project. It's super easy to use and uses SPI so only 4 pins are required. We chose this chip as a great accompaniment to the Raspberry Pi computer because it's fun...
In Stock
[Buy Now](https://www.adafruit.com/product/856)
[Related Guides to the Product](https://learn.adafruit.com/products/856/guides)
### Breadboard trim potentiometer
[Breadboard trim potentiometer](https://www.adafruit.com/product/356)
These are our favorite trim pots, perfect for breadboarding and prototyping. They have a long grippy adjustment knob and with 0.1" spacing, they plug into breadboards or perfboards with ease.
This is the same pot that comes with our character LCDs and tutorial...
In Stock
[Buy Now](https://www.adafruit.com/product/356)
[Related Guides to the Product](https://learn.adafruit.com/products/356/guides)
### Full Sized Premium Breadboard - 830 Tie Points
[Full Sized Premium Breadboard - 830 Tie Points](https://www.adafruit.com/product/239)
This is a 'full-size' premium quality breadboard, 830 tie points. Good for small and medium projects. It's 2.2" x 7" (5.5 cm x 17 cm) with a standard double-strip in the middle and two power rails on both sides. You can pull the power rails off easily to make the...
In Stock
[Buy Now](https://www.adafruit.com/product/239)
[Related Guides to the Product](https://learn.adafruit.com/products/239/guides)
### Raspberry Pi 3 - Model B+ - 1.4GHz Cortex-A53 with 1GB RAM
[Raspberry Pi 3 - Model B+ - 1.4GHz Cortex-A53 with 1GB RAM](https://www.adafruit.com/product/3775)
The Raspberry Pi 3 Model B is the most popular Raspberry Pi computer made, and the Pi Foundation knows you can always make a good thing _better_! And what could make the Pi 3 better? How about a _faster_ processor, 5 GHz WiFi, and updated Ethernet chip with PoE capability?...
In Stock
[Buy Now](https://www.adafruit.com/product/3775)
[Related Guides to the Product](https://learn.adafruit.com/products/3775/guides)
### Assembled Pi T-Cobbler Plus - GPIO Breakout
[Assembled Pi T-Cobbler Plus - GPIO Breakout](https://www.adafruit.com/product/2028)
**This is the assembled version of the Pi T-Cobbler Plus. It only works with the Raspberry Pi Model Zero, A+, B+, Pi 2, Pi 3 & Pi 4!** (Any Pi with 2x20 connector)
The Raspberry Pi has landed on the Maker World like a 40-GPIO pinned, quad-USB ported, credit...
In Stock
[Buy Now](https://www.adafruit.com/product/2028)
[Related Guides to the Product](https://learn.adafruit.com/products/2028/guides)
## Related Guides
- [MCP3008 - 8-Channel 10-Bit ADC With SPI Interface](https://learn.adafruit.com/mcp3008-spi-adc.md)
- [Raspberry Pi E-mail Notifier Using LEDs](https://learn.adafruit.com/raspberry-pi-e-mail-notifier-using-leds.md)
- [Adafruit AMG8833 8x8 Thermal Camera Sensor](https://learn.adafruit.com/adafruit-amg8833-8x8-thermal-camera-sensor.md)
- [Capacitive Touch Sensors on the Raspberry Pi](https://learn.adafruit.com/capacitive-touch-sensors-on-the-raspberry-pi.md)
- [Windows IoT Core Application Development: Headed Blinky](https://learn.adafruit.com/windows-iot-application-development-headed-blinky.md)
- [Single Channel LoRaWAN Gateway for Raspberry Pi](https://learn.adafruit.com/raspberry-pi-single-channel-lorawan-gateway.md)
- [LoRa and LoRaWAN Radio for Raspberry Pi](https://learn.adafruit.com/lora-and-lorawan-radio-for-raspberry-pi.md)
- [Adafruit's Raspberry Pi Lesson 12. Sensing Movement](https://learn.adafruit.com/adafruits-raspberry-pi-lesson-12-sensing-movement.md)
- [Large Pi-based Thermometer and Clock](https://learn.adafruit.com/large-pi-based-thermometer-and-clock.md)
- [Playing sounds and using buttons with Raspberry Pi](https://learn.adafruit.com/playing-sounds-and-using-buttons-with-raspberry-pi.md)
- [Windows IoT Core Application Development: Headless Blinky](https://learn.adafruit.com/windows-iot-application-development-headless-application.md)
- [Adafruit's Raspberry Pi Lesson 11. DS18B20 Temperature Sensing](https://learn.adafruit.com/adafruits-raspberry-pi-lesson-11-ds18b20-temperature-sensing.md)
- [Node.js Embedded Development on the Raspberry Pi](https://learn.adafruit.com/node-embedded-development.md)
- [Adafruit's Raspberry Pi Lesson 10. Stepper Motors](https://learn.adafruit.com/adafruits-raspberry-pi-lesson-10-stepper-motors.md)
- [CircuitPython Libraries on Linux and ODROID C2](https://learn.adafruit.com/circuitpython-libaries-linux-odroid-c2.md)
- [Adafruit's Raspberry Pi Lesson 4. GPIO Setup](https://learn.adafruit.com/adafruits-raspberry-pi-lesson-4-gpio-setup.md)
---
# Source: https://learn.adafruit.com/chumby-hacker-board/sd-card.md
# Chumby Hacker Board
## SD Card
The easiest way to do things for now is to use a linux machine or a bootable linux CD/DVD, or even a virtual machine running under Windows. Macintosh has most of these commands available too in a root window. Some things can be done on the Chumby hackerboard itself since dd (and fdisk) might be available.
## Cloning/Copying
The original image is available from a link off the forum:
[http://forum.chumby.com/viewtopic.php?pid=31177#p31177](http://forum.chumby.com/viewtopic.php?pid=31177#p31177)
An earlier message references windiskimager:
[https://launchpad.net/win32-image-writer/+download](https://launchpad.net/win32-image-writer/+download)
The image in the .zip file has the partition table overlap problem, but it should be the original boot image.
You can clone the 1G original microSD card if you have made modifications or otherwise don't want to use the image file. It can be written to any same or larger card. The standard way is to use "dd". Google "dd windows" for a version that works there, but basically you need to do a byte-for-byte image copy from the original device to the new one. You probably also want to make a backup of the card as well.
Cloning can be done on the hackerboard itself if you have a USB to microSD adapter. This will be something like:
```
dd if=/dev/mmcblk0 of=/dev/sda bs=64M
```
Since the board uses mmcblk0 for internal flash.
NOTE: DD IS DANGEROUS SINCE IT ACCESSES THE HARDWARE DIRECTLY - YOU CAN END UP OVERWRITING YOUR WINDOWS DRIVE IF YOU AREN'T CAREFUL. Make sure everything is backed up or you know exactly what you are doing.
```
dd if=/dev/sdX of=/dev/sdY bs=64M
```
Windows will have something different for the /dev entries. /dev/sdX is the original card. Under linux, if you do "cat /proc/partitions" you will find a list - /dev/sda is typically your system drive. You can do this before inserting the original card, then look what appears after about 10 seconds - the new partitions will be from the new drive, which should be the chumby hacker image. You can also do it directly on the Chumby - in this case the values should be if=/dev/mmcblk0, and of=/dev/sda but I would still check /proc/partitions to see what was there.
If you can access your main hard drive, I would first back things up (if you have 1G of free space) by using dd, "dd if=/dev/sdX of=/media/c-drive/chb.img bs=64M". /media/cdrive is wherever the hard drive shows up under linux, or something like "C:\chb.img" under windows. This will create an image file of the uSD so it can be restored if anything goes wrong. The "bs=64M" copies 64 megabyte chunks which will be a lot faster as it normally copies bytes. Then you can remove the chumby SD and insert the clone target and just reverse "if" and "of": "dd if=/media/c-drive/chb.img of=/dev/sdX bs=64M". Then test the clone.
You can also do so with the rom image:
```
dd if=rom-falconwing.img of=/dev/sdX bs=64M
```
## Fixing the partition table
Before you can change the partition sizes you need to fix the partition table.
The limited fdisk on the Chumby hacker board can't be used for this - you will need to boot into linux.
(note, it is probably easier to patch a few bytes with a hex editor, especially the original - I need to compare the original with the fixed MBR table and document the changed bytes in the first partition entry).
Reinsert the clone after the copy (remove and reinsert to get the updated disk structure). Run "fdisk /dev/sdX". This is a basic partition editor. It will complain because the structure is broken. Type "p" to print. You will see the first partition overlaps the next two. do "d" then "1" to delete the partition from the table (it isn't reformatted or anything), then "n", "p", it will default to partiton 1, then use the defaults for first and last. Do "t" then "1" then "53(return)" to reset the type, type "p" to see the changes (no overlaps!), then "w" to write it to the disk.
## Resizing the partitions
I use gparted, available on some bootable fixit CDs or almost every bootable linux CD or USB stick.
Partition 4 is the extended container, and within, partition 6 is the "storage" partion". You will first need to move and/or resize partition 4 to make partition 6 larger. I would suggest also moving it on larger cards so you can make the other (root) partitions larger too.
Run gparted from the menu or "sudo gparted /dev/sdX" from the command line. Click on partition 4 and do move/resize, and slide it to give free space before if you want to expand the other partitions, but make sure it ends at the end of the disk. Then select the storage partition within and stretch it to the end of the new space. Tell it to apply changes.
I have a 16Gb image with plenty of room for everything.
(Note from BBotany on a different route to expanding the filesystem.) If you are working on a system that does not contain gparted, it is possible to use cfdisk to expand the final partition. Simply select the partition, and apply the "maximize" option. This will also extend the extended partition container (aka "partition 4") automatically. However, you will need to resize the filesystem that is on the partition separately; it is easy to use "resize2fs" to do this. If this is not on the machine you changed partition sizes on (or you forgot to expand the filesytem before reinserting the SD card in the hackerboard), it is present on the hackerboard by default. After the partition table has been modified, simply run resize2fs on the partition. If you are on your own linux host, you presumably know where this is. If you are on the hackerboard itself, then the commands are as follows: unmount the partition with "umount /mnt/storage/", run the resize as: "resize2fs /dev/mmcblk0p6", and then remount it with "mount /mnt/storage/". When I upgraded to an 8GB SD card, this gave me a /mnt/storage of 6.4GB.
- [Previous Page](https://learn.adafruit.com/chumby-hacker-board/audio.md)
## Featured Products
### USB 2.0 Powered Hub - 7 Ports with 5V 2A Power Supply
[USB 2.0 Powered Hub - 7 Ports with 5V 2A Power Supply](https://www.adafruit.com/product/961)
Add lots more USB capability to your Raspberry Pi or computer using this powered USB 2.0 hub. It adds a full **seven powered ports** , all at USB 2.0 speeds so you can use video cameras and other high speed devices (cheaper hubs are v1.1 and not as fast!)
The extra sauce...
No Longer Stocked
[Buy Now](https://www.adafruit.com/product/961)
[Related Guides to the Product](https://learn.adafruit.com/products/961/guides)
### Miniature WiFi (802.11b/g/n) Module: For Raspberry Pi and more
[Miniature WiFi (802.11b/g/n) Module: For Raspberry Pi and more](https://www.adafruit.com/product/814)
Make your Internet of Things device cable-free by adding WiFi. Take advantage of the Raspberry Pi and Beagle Bone's USB port to add a low cost, but high-reliability wireless link. We tried half a dozen modules to find one that works well with the Pi and Bone without the need of recompiling...
No Longer Stocked
[Buy Now](https://www.adafruit.com/product/814)
[Related Guides to the Product](https://learn.adafruit.com/products/814/guides)
### 5V 2A (2000mA) switching power supply - UL Listed
[5V 2A (2000mA) switching power supply - UL Listed](https://www.adafruit.com/product/276)
This is an FCC/CE certified and UL listed power supply. Need a lot of 5V power? This switching supply gives a clean regulated 5V output at up to 2000mA. 110 or 240 input, so it works in any country. The plugs are "US 2-prong" style so you may need a plug adapter, but you can pick one...
Out of Stock
[Buy Now](https://www.adafruit.com/product/276)
[Related Guides to the Product](https://learn.adafruit.com/products/276/guides)
### 2.1mm to 1.7mm DC jack adapter
[2.1mm to 1.7mm DC jack adapter](https://www.adafruit.com/product/411)
We're carrying this adapter primarily to allow Chumby Hacker Board users to adapt our nice [5V @ 2A power supply](http://www.adafruit.com/products/276) to their CHB. But you can use this adapter for anything else that has a 1.7mm DC jack, such as a PSP.
In Stock
[Buy Now](https://www.adafruit.com/product/411)
[Related Guides to the Product](https://learn.adafruit.com/products/411/guides)
### USB MicroSD Card Reader/Writer - microSD / microSDHC / microSDXC
[USB MicroSD Card Reader/Writer - microSD / microSDHC / microSDXC](https://www.adafruit.com/product/939)
This is the cutest little microSD card reader/writer - but don't be fooled by its adorableness! It's wicked fast and supports up to 64 GB SDXC cards! Simply slide the card into the edge and plug it into your computer. No drivers are required, it shows up as a standard 'Mass...
No Longer Stocked
[Buy Now](https://www.adafruit.com/product/939)
[Related Guides to the Product](https://learn.adafruit.com/products/939/guides)
### Ethernet Cable - 10 ft long
[Ethernet Cable - 10 ft long](https://www.adafruit.com/product/730)
We have so many Internet-connected goodies in the shop, we figured it's time to carry a cable so you can easily connect them up! This cable is 10 feet long, black and has all 8 wires installed. Perfect for use with the [BeagleBone](http://www.adafruit.com/products/513),
No Longer Stocked
[Buy Now](https://www.adafruit.com/product/730)
[Related Guides to the Product](https://learn.adafruit.com/products/730/guides)
### USB to TTL Serial Cable - Debug / Console Cable for Raspberry Pi
[USB to TTL Serial Cable - Debug / Console Cable for Raspberry Pi](https://www.adafruit.com/product/954)
The cable is easiest way ever to connect to your microcontroller/Raspberry Pi/WiFi router serial console port. Inside the big USB plug is a USB\<-\>Serial conversion chip and at the end of the 36" cable are four wire - red power, black ground, white RX into USB port, and green TX out...
In Stock
[Buy Now](https://www.adafruit.com/product/954)
[Related Guides to the Product](https://learn.adafruit.com/products/954/guides)
### FTDI Serial TTL-232 USB Cable
[FTDI Serial TTL-232 USB Cable](https://www.adafruit.com/product/70)
Just about all electronics use TTL serial for debugging, bootloading, programming, serial output, etc. But it's rare for a computer to have a serial port anymore. This is a USB to TTL serial cable, with a FTDI FT232RL usb/serial chip embedded in the head. It has a 6-pin socket at the end...
In Stock
[Buy Now](https://www.adafruit.com/product/70)
[Related Guides to the Product](https://learn.adafruit.com/products/70/guides)
## Related Guides
- [CircuitPython Libraries on MicroPython using the Raspberry Pi Pico](https://learn.adafruit.com/circuitpython-libraries-on-micropython-using-the-raspberry-pi-pico.md)
- [Hallowing Minotaur Maze](https://learn.adafruit.com/hallowing-minotaur-maze.md)
- [Raspberry Pi Azure IoT Hub Dashboard with CircuitPython](https://learn.adafruit.com/raspberry-pi-iot-dashboard-with-azure-and-circuitpython.md)
- [Adafruit 2.9" eInk Display Breakouts and FeatherWings](https://learn.adafruit.com/adafruit-2-9-eink-display-breakouts-and-featherwings.md)
- [Pi SSD Media Server](https://learn.adafruit.com/pi-ssd-media-server.md)
- [Creating Slideshows in CircuitPython](https://learn.adafruit.com/creating-slideshows-in-circuitpython.md)
- [Network Interface Failover using FONA](https://learn.adafruit.com/network-interface-failover-using-fona.md)
- [Matrix Keypad](https://learn.adafruit.com/matrix-keypad.md)
- [Native MP3 decoding on Arduino](https://learn.adafruit.com/native-mp3-decoding-on-arduino.md)
- [Raspberry Pi HQ Camera Case](https://learn.adafruit.com/raspberry-pi-hq-camera-case.md)
- [Articulated Pi Display V2 Mount](https://learn.adafruit.com/pi-wall-mount.md)
- [World's Smallest MAME Arcade Cabinet](https://learn.adafruit.com/worlds-smallest-mame-arcade-cabinet.md)
- [Raspberry Pi E-Ink Weather Station using Python](https://learn.adafruit.com/raspberry-pi-e-ink-weather-station-using-python.md)
- [Getting Started with Raspberry Pi Pico and CircuitPython](https://learn.adafruit.com/getting-started-with-raspberry-pi-pico-circuitpython.md)
- [Adafruit QT Py and NeoPixel LEDs](https://learn.adafruit.com/qt-py-and-neopixel-leds.md)
---
# Source: https://learn.adafruit.com/adafruit-optical-fingerprint-sensor/searching-with-the-software.md
# Adafruit Optical Fingerprint Sensor
## Searching with the Software
Once you have the finger enrolled, it's a good idea to do a quick test to make sure it can be found in the database. Click on the **Search** button on the right hand side.
When prompted, press a different/same finger to the sensor.
If it is the same finger, you should get a match with the ID #

If it is not a finger in the database, you will get a failure notice.
- [Previous Page](https://learn.adafruit.com/adafruit-optical-fingerprint-sensor/enrolling-new-users-with-windows.md)
- [Next Page](https://learn.adafruit.com/adafruit-optical-fingerprint-sensor/wiring-for-use-with-arduino.md)
## Featured Products
### Fingerprint sensor
[Fingerprint sensor](https://www.adafruit.com/product/751)
Secure your project with biometrics - this all-in-one optical fingerprint sensor will make adding fingerprint detection and verification super simple. These modules are typically used in safes - there's a high powered DSP chip that does the image rendering, calculation, feature-finding and...
No Longer Stocked
[Buy Now](https://www.adafruit.com/product/751)
[Related Guides to the Product](https://learn.adafruit.com/products/751/guides)
### Rugged Panel Mount Fingerprint Sensor with Bi-Color LED Ring
[Rugged Panel Mount Fingerprint Sensor with Bi-Color LED Ring](https://www.adafruit.com/product/4651)
Secure your project with biometrics - this all-in-one optical fingerprint sensor will make adding fingerprint detection and verification super simple. It even has an LED ring built around the detection pad, which can be set to red, blue or purple (as well as some fading/blinking effects) for a...
In Stock
[Buy Now](https://www.adafruit.com/product/4651)
[Related Guides to the Product](https://learn.adafruit.com/products/4651/guides)
### Adafruit METRO 328 Fully Assembled - Arduino IDE compatible
[Adafruit METRO 328 Fully Assembled - Arduino IDE compatible](https://www.adafruit.com/product/50)
We sure love the ATmega328 here at Adafruit, and we use them _a lot_ for our own projects. The processor has plenty of GPIO, Analog inputs, hardware UART SPI and I2C, timers and PWM galore - just enough for most simple projects. When we need to go small, we use a
Out of Stock
[Buy Now](https://www.adafruit.com/product/50)
[Related Guides to the Product](https://learn.adafruit.com/products/50/guides)
### Breadboarding wire bundle
[Breadboarding wire bundle](https://www.adafruit.com/product/153)
75 flexible stranded core wires with stiff ends molded on in red, orange, yellow, green, blue, brown, black and white. These are a major improvement over the "box of bent wires" that are sometimes sold with breadboards, and faster than stripping your own solid core wires. Makes...
In Stock
[Buy Now](https://www.adafruit.com/product/153)
[Related Guides to the Product](https://learn.adafruit.com/products/153/guides)
## Related Guides
- [A REST API for Arduino & the CC3000 WiFi Chip](https://learn.adafruit.com/a-rest-api-for-arduino-and-the-cc3000-wifi-chip.md)
- [Analog Feedback Servos](https://learn.adafruit.com/analog-feedback-servos.md)
- [Adafruit 4-Channel ADC Breakouts](https://learn.adafruit.com/adafruit-4-channel-adc-breakouts.md)
- [Collin's Lab: MIDI](https://learn.adafruit.com/collins-lab-midi.md)
- [Adafruit PN532 RFID/NFC Breakout and Shield](https://learn.adafruit.com/adafruit-pn532-rfid-nfc.md)
- [Adafruit AirLift Shield - ESP32 WiFi Co-Processor](https://learn.adafruit.com/adafruit-airlift-shield-esp32-wifi-co-processor.md)
- [8BitBox](https://learn.adafruit.com/8bitbox.md)
- [Geofencing with the FONA 808 & Adafruit IO](https://learn.adafruit.com/geofencing-with-the-fona-808-and-adafruit-io.md)
- [1,500 NeoPixel LED Curtain with Raspberry Pi and Fadecandy](https://learn.adafruit.com/1500-neopixel-led-curtain-with-raspberry-pi-fadecandy.md)
- [Photocells](https://learn.adafruit.com/photocells.md)
- [Automatic Monitor Color Temperature Adjustment](https://learn.adafruit.com/automatic-monitor-color-temperature-adjustment.md)
- [Arduino Lesson 15. DC Motor Reversing](https://learn.adafruit.com/adafruit-arduino-lesson-15-dc-motor-reversing.md)
- [Adafruit 1.14" 240x135 Color TFT Breakout LCD Display](https://learn.adafruit.com/adafruit-1-14-240x135-color-tft-breakout.md)
- [How to Find Hidden COM Ports](https://learn.adafruit.com/how-to-find-hidden-com-ports.md)
- [Low Power Coin Cell Voltage Logger](https://learn.adafruit.com/low-power-coin-cell-voltage-logger.md)
---
# Source: https://learn.adafruit.com/skill-badge-requirements-raspberry-pi/section-1-configuration.md
# Skill Badge Requirements: Raspberry Pi
## Section 1: Configuration
_This section focuses on developing an understanding of the history and philosophy behind the design of the Raspberry Pi_
Do EACH of the following and submit to your instructor:
1. Identify and describe FIVE possible applications for the Pi in a K-12 school setting
2. Compare and contrast the potential use of the Pi and the OLPC (One Laptop Per Child) as an educational computer system for third world countries
3. Inform at least three other people about the benefits and philosophy behind using the Raspberry Pi as an educational tool
- [Previous Page](https://learn.adafruit.com/skill-badge-requirements-raspberry-pi/overview.md)
- [Next Page](https://learn.adafruit.com/skill-badge-requirements-raspberry-pi/section-2-understanding-the-hardware.md)
## Featured Products
### Raspberry Pi - Skill badge, iron-on patch
[Raspberry Pi - Skill badge, iron-on patch](https://www.adafruit.com/product/906)
You are learning to use the small Linux based board, the Raspberry Pi! Adafruit offers a fun and exciting "badges" of achievement for electronics, science and engineering. We believe everyone should be able to be rewarded for learning a useful skill, a badge is just one of the many...
In Stock
[Buy Now](https://www.adafruit.com/product/906)
[Related Guides to the Product](https://learn.adafruit.com/products/906/guides)
## Related Guides
- [Adafruit Prototyping Pi Plate](https://learn.adafruit.com/adafruit-prototyping-pi-plate.md)
- [Adafruit Raspberry Pi Educational Linux Distro](https://learn.adafruit.com/adafruit-raspberry-pi-educational-linux-distro.md)
- [Internet of Things Printer for Raspberry Pi](https://learn.adafruit.com/pi-thermal-printer.md)
- [Adafruit's Raspberry Pi Lesson 11. DS18B20 Temperature Sensing](https://learn.adafruit.com/adafruits-raspberry-pi-lesson-11-ds18b20-temperature-sensing.md)
- [Introducing the Raspberry Pi Model B+](https://learn.adafruit.com/introducing-the-raspberry-pi-model-b-plus-plus-differences-vs-model-b.md)
- [Adafruit's Raspberry Pi Lesson 7. Remote Control with VNC](https://learn.adafruit.com/adafruit-raspberry-pi-lesson-7-remote-control-with-vnc.md)
- [Raspberry Pi Thermal Printer One Time Pads](https://learn.adafruit.com/raspberry-pi-thermal-printer-one-time-pads.md)
- [Press Your Button for Raspberry Pi](https://learn.adafruit.com/press-your-button-for-raspberry-pi.md)
- [Windows IoT Core Application Management](https://learn.adafruit.com/windows-iot-application-management.md)
- [Windows IoT Core Application Development: Headed Blinky](https://learn.adafruit.com/windows-iot-application-development-headed-blinky.md)
- [Adafruit's Raspberry Pi Lesson 5. Using a Console Cable](https://learn.adafruit.com/adafruits-raspberry-pi-lesson-5-using-a-console-cable.md)
- [Raspberry Pi Analog to Digital Converters](https://learn.adafruit.com/raspberry-pi-analog-to-digital-converters.md)
- [Debugging with the Raspberry Pi WebIDE](https://learn.adafruit.com/debugging-with-the-raspberry-pi-webide.md)
- [Adafruit's Raspberry Pi Lesson 3. Network Setup](https://learn.adafruit.com/adafruits-raspberry-pi-lesson-3-network-setup.md)
- [Using an External Drive as a Raspberry Pi Root Filesystem](https://learn.adafruit.com/external-drive-as-raspberry-pi-root.md)
---
# Source: https://learn.adafruit.com/skill-badge-requirements-digi-xbee/section-1-xbee-hardware.md
# Skill Badge Requirements: Digi XBee
## Section 1: XBee Hardware

_This section focuses on establishing an understanding of the types of XBee modules and their hardware_
Do EACH of the following and submit to your instructor:
1. Describe the general idea behind producing a wireless data connection between two devices
2. Identify and describe the differences between the series 1 & 2 XBee modules
3. Identify and describe the differences between the low-power and PRO modules
4. Identify and describe the available antenna options and their individual benefits
5. Identify and describe the methods for configuring a module
1. Be sure to include the use of X-CTU and an explanation of the AT command set
Do EACH of the following and submit to your instructor:
1. Identify and describe XBee's operating voltage
1. Describe why this voltage is important to know when interfacing with devices, such as Arduino
2. Identify and describe a method for interfacing an XBee with a microcontroller, such as Arduino
2. Identify and describe the issues concerning sharing serial TX/RX lines between your microcontroller and other devices (i.e. the problem with Arduino sharing TX/RX lines with the USB to Serial converter and an XBee)
- [Previous Page](https://learn.adafruit.com/skill-badge-requirements-digi-xbee/overview.md)
- [Next Page](https://learn.adafruit.com/skill-badge-requirements-digi-xbee/section-2-the-wireless-data-connection.md)
## Featured Products
### Digi XBee - Skill badge, iron-on patch
[Digi XBee - Skill badge, iron-on patch](https://www.adafruit.com/product/595)
You are learning how to use XBee wireless modules for your projects! Adafruit offers a fun and exciting "badges" of achievement for electronics, science and engineering. We believe everyone should be able to be rewarded for learning a useful skill, a badge is just one of the many...
No Longer Stocked
[Buy Now](https://www.adafruit.com/product/595)
[Related Guides to the Product](https://learn.adafruit.com/products/595/guides)
## Related Guides
- [Introducing the Adafruit WICED Feather WiFi](https://learn.adafruit.com/introducing-the-adafruit-wiced-feather-wifi.md)
- [MicroPython Smart Holiday Lights](https://learn.adafruit.com/micropython-smart-holiday-lights.md)
- [Wireless NeoPixel Controller](https://learn.adafruit.com/neotrellis-neopixel-controller.md)
- [Remote Effects Trigger Box](https://learn.adafruit.com/remote-effects-trigger.md)
- [Matrix Portal Stained Glass with WLED](https://learn.adafruit.com/matrix-portal-stained-glass-with-wled.md)
- [MagTag 3D Printed Stand Case](https://learn.adafruit.com/magtag-3d-printed-stand-case.md)
- [Adafruit ATWINC1500 WiFi Breakout](https://learn.adafruit.com/adafruit-atwinc1500-wifi-module-breakout.md)
- [Holiday Lights: Easy DIY Christmas Wreath & Garland with WLED](https://learn.adafruit.com/holiday-garland-decor-app-control-with-no-coding.md)
- [Adafruit ItsyBitsy ESP32](https://learn.adafruit.com/adafruit-itsybitsy-esp32.md)
- [Theme Park Wait Time Display](https://learn.adafruit.com/park-wait-time.md)
- [Upgrading AirLift ESP32 Firmware](https://learn.adafruit.com/upgrading-esp32-firmware.md)
- [Floor Lamp with NeoPixels and WLED Custom Animations](https://learn.adafruit.com/floor-lamp-with-wled.md)
- [File Glider](https://learn.adafruit.com/file-glider.md)
- [Adafruit Feather M0 Radio with RFM69 Packet Radio](https://learn.adafruit.com/adafruit-feather-m0-radio-with-rfm69-packet-radio.md)
- [Garden Path Lights with WLED and a Sunset Timer](https://learn.adafruit.com/garden-path-lights-with-sunset-timer.md)
---
# Source: https://learn.adafruit.com/skill-badge-requirements-digi-xbee/section-2-the-wireless-data-connection.md
# Skill Badge Requirements: Digi XBee
## Section 2: The Wireless Data Connection

_This section focuses on the different methods of producing a wireless data connection_
Do EACH of the following and submit to your instructor:
1. Identify and describe XBee's three primary network topologies
1. Provide instances where these topologies could be used
2. Identify and describe the format in which data is sent between XBee modules
1. How might you optimize your data packets to reduce size and simplify interpretation
3. Identify and describe the supported baud rates
1. Provide advantages of using a lower rate over a higher
2. Provide advantages of using a higher rate over a lower
4. Identify and describe the different "Function Sets" the XBee can be configured for
1. How do these differ between the series 1 & 2 modules
Do ONE of the following and submit to your instructor:
1. Using a pair of XBee series 1 modules, produce a point to point network and demonstrate successful bi-directional communication
1. Complete a range test inside of a building and record your results
2. Complete a range test outside with a clear line of sight and record your results
3. Detail the factors, both hardware and structural, that affect the range of your connection
2. Using a pair of XBee series 2 modules, produce a point to point network and demonstrate successful bi-directional communication
1. Complete a range test inside of a building and record your results
2. Complete a range test outside with a clear line of sight and record your results
3. Detail the factors, both hardware and structural, that affects the range of your connection
Do ONE of the following and submit to your instructor:
1. Using a pair of XBee series 1 modules, reconfigure the modules to a higher baud-rate, produce a point to point network, and successfully transfer data
1. Replicate the previous range test inside of a building and record your results
2. Replicate the previous range test outside with a clear line of sight and record your results
3. Detail the effect of baud-rate on range
2. Using a pair of XBee series 2 modules, reconfigure the modules to a higher baud-rate, produce a point to point network, and successfully transfer data
1. Replicate the previous range test inside of a building and record your results
2. Replicate the previous range test outside with a clear line of sight and record your results
3. Detail the effect of baud-rate on range
- [Previous Page](https://learn.adafruit.com/skill-badge-requirements-digi-xbee/section-1-xbee-hardware.md)
- [Next Page](https://learn.adafruit.com/skill-badge-requirements-digi-xbee/section-3-power-options.md)
## Featured Products
### Digi XBee - Skill badge, iron-on patch
[Digi XBee - Skill badge, iron-on patch](https://www.adafruit.com/product/595)
You are learning how to use XBee wireless modules for your projects! Adafruit offers a fun and exciting "badges" of achievement for electronics, science and engineering. We believe everyone should be able to be rewarded for learning a useful skill, a badge is just one of the many...
No Longer Stocked
[Buy Now](https://www.adafruit.com/product/595)
[Related Guides to the Product](https://learn.adafruit.com/products/595/guides)
## Related Guides
- [Introducing the Adafruit WICED Feather WiFi](https://learn.adafruit.com/introducing-the-adafruit-wiced-feather-wifi.md)
- [MicroPython Smart Holiday Lights](https://learn.adafruit.com/micropython-smart-holiday-lights.md)
- [Wireless NeoPixel Controller](https://learn.adafruit.com/neotrellis-neopixel-controller.md)
- [Remote Effects Trigger Box](https://learn.adafruit.com/remote-effects-trigger.md)
- [Matrix Portal Stained Glass with WLED](https://learn.adafruit.com/matrix-portal-stained-glass-with-wled.md)
- [MagTag 3D Printed Stand Case](https://learn.adafruit.com/magtag-3d-printed-stand-case.md)
- [Adafruit ATWINC1500 WiFi Breakout](https://learn.adafruit.com/adafruit-atwinc1500-wifi-module-breakout.md)
- [Holiday Lights: Easy DIY Christmas Wreath & Garland with WLED](https://learn.adafruit.com/holiday-garland-decor-app-control-with-no-coding.md)
- [Adafruit ItsyBitsy ESP32](https://learn.adafruit.com/adafruit-itsybitsy-esp32.md)
- [Theme Park Wait Time Display](https://learn.adafruit.com/park-wait-time.md)
- [Upgrading AirLift ESP32 Firmware](https://learn.adafruit.com/upgrading-esp32-firmware.md)
- [Floor Lamp with NeoPixels and WLED Custom Animations](https://learn.adafruit.com/floor-lamp-with-wled.md)
- [File Glider](https://learn.adafruit.com/file-glider.md)
- [Adafruit Feather M0 Radio with RFM69 Packet Radio](https://learn.adafruit.com/adafruit-feather-m0-radio-with-rfm69-packet-radio.md)
- [Garden Path Lights with WLED and a Sunset Timer](https://learn.adafruit.com/garden-path-lights-with-sunset-timer.md)
---
# Source: https://learn.adafruit.com/skill-badge-requirements-raspberry-pi/section-2-understanding-the-hardware.md
# Skill Badge Requirements: Raspberry Pi
## Section 2: Understanding the Hardware

_This section focuses on the Pi's configuration and use_
Do EACH of the following and submit to your instructor:
1. Identify and describe the peripherals necessary for operating the Pi
2. Identify and describe the necessity of a good quality 5V power supply
3. Identify and describe potential symptoms of a poor quality 5V power supply
4. Describe the procedure for connecting the peripherals and starting up the system
Do EACH of the following and submit to your instructor:
1. Identify and describe the primary supported operating systems
2. Identify and describe the benefits of each aforementioned operating system
3. Identify and describe the procedure for configuring a SD card for your chosen operating system
4. Identify and describe the methods used to update an already configured system
5. Identify and describe the use of the config.txt file
6. Identify and describe the use the raspi-config application
7. Identify and describe the Internet connectivity options
- [Previous Page](https://learn.adafruit.com/skill-badge-requirements-raspberry-pi/section-1-configuration.md)
- [Next Page](https://learn.adafruit.com/skill-badge-requirements-raspberry-pi/section-3-demonstration.md)
## Featured Products
### Raspberry Pi - Skill badge, iron-on patch
[Raspberry Pi - Skill badge, iron-on patch](https://www.adafruit.com/product/906)
You are learning to use the small Linux based board, the Raspberry Pi! Adafruit offers a fun and exciting "badges" of achievement for electronics, science and engineering. We believe everyone should be able to be rewarded for learning a useful skill, a badge is just one of the many...
In Stock
[Buy Now](https://www.adafruit.com/product/906)
[Related Guides to the Product](https://learn.adafruit.com/products/906/guides)
## Related Guides
- [Adafruit Prototyping Pi Plate](https://learn.adafruit.com/adafruit-prototyping-pi-plate.md)
- [Adafruit Raspberry Pi Educational Linux Distro](https://learn.adafruit.com/adafruit-raspberry-pi-educational-linux-distro.md)
- [Internet of Things Printer for Raspberry Pi](https://learn.adafruit.com/pi-thermal-printer.md)
- [Adafruit's Raspberry Pi Lesson 11. DS18B20 Temperature Sensing](https://learn.adafruit.com/adafruits-raspberry-pi-lesson-11-ds18b20-temperature-sensing.md)
- [Introducing the Raspberry Pi Model B+](https://learn.adafruit.com/introducing-the-raspberry-pi-model-b-plus-plus-differences-vs-model-b.md)
- [Adafruit's Raspberry Pi Lesson 7. Remote Control with VNC](https://learn.adafruit.com/adafruit-raspberry-pi-lesson-7-remote-control-with-vnc.md)
- [Raspberry Pi Thermal Printer One Time Pads](https://learn.adafruit.com/raspberry-pi-thermal-printer-one-time-pads.md)
- [Press Your Button for Raspberry Pi](https://learn.adafruit.com/press-your-button-for-raspberry-pi.md)
- [Windows IoT Core Application Management](https://learn.adafruit.com/windows-iot-application-management.md)
- [Windows IoT Core Application Development: Headed Blinky](https://learn.adafruit.com/windows-iot-application-development-headed-blinky.md)
- [Adafruit's Raspberry Pi Lesson 5. Using a Console Cable](https://learn.adafruit.com/adafruits-raspberry-pi-lesson-5-using-a-console-cable.md)
- [Raspberry Pi Analog to Digital Converters](https://learn.adafruit.com/raspberry-pi-analog-to-digital-converters.md)
- [Debugging with the Raspberry Pi WebIDE](https://learn.adafruit.com/debugging-with-the-raspberry-pi-webide.md)
- [Adafruit's Raspberry Pi Lesson 3. Network Setup](https://learn.adafruit.com/adafruits-raspberry-pi-lesson-3-network-setup.md)
- [Using an External Drive as a Raspberry Pi Root Filesystem](https://learn.adafruit.com/external-drive-as-raspberry-pi-root.md)
---
# Source: https://learn.adafruit.com/skill-badge-requirements-raspberry-pi/section-3-demonstration.md
# Skill Badge Requirements: Raspberry Pi
## Section 3: Demonstration

_This section focuses on using the Raspberry Pi as the basis for an software/electronics project_
Do the following and submit to your instructor:
1. Propose THREE potential projects in which the Raspberry Pi would be more appropriate then a standalone microcontroller (like the Arduino)
Do ONE of the following and submit to your instructor:
1. Using an operating system and programming language of your choice, produce a piece of software that allows for control of the Pi's IO or file system via the Internet
2. Using an operating system and programming language of your choice, complete a predetermined project that utilizes the onboard GPIO
3. Using an operating system and programming language of your choice, construct a unique project that utilizes the onboard GPIO to complete a simple task
4. Using an operating system and programming language of your choice, interface with and control an external hardware device.
_Need some ideas? Check out_ [_http://learn.adafruit.com/category/raspberry-pi_](http://learn.adafruit.com/category/raspberry-pi "Link: http://learn.adafruit.com/category/raspberry-pi") _!_
- [Previous Page](https://learn.adafruit.com/skill-badge-requirements-raspberry-pi/section-2-understanding-the-hardware.md)
- [Next Page](https://learn.adafruit.com/skill-badge-requirements-raspberry-pi/certificate-of-completion.md)
## Featured Products
### Raspberry Pi - Skill badge, iron-on patch
[Raspberry Pi - Skill badge, iron-on patch](https://www.adafruit.com/product/906)
You are learning to use the small Linux based board, the Raspberry Pi! Adafruit offers a fun and exciting "badges" of achievement for electronics, science and engineering. We believe everyone should be able to be rewarded for learning a useful skill, a badge is just one of the many...
In Stock
[Buy Now](https://www.adafruit.com/product/906)
[Related Guides to the Product](https://learn.adafruit.com/products/906/guides)
## Related Guides
- [Adafruit Prototyping Pi Plate](https://learn.adafruit.com/adafruit-prototyping-pi-plate.md)
- [Adafruit Raspberry Pi Educational Linux Distro](https://learn.adafruit.com/adafruit-raspberry-pi-educational-linux-distro.md)
- [Internet of Things Printer for Raspberry Pi](https://learn.adafruit.com/pi-thermal-printer.md)
- [Adafruit's Raspberry Pi Lesson 11. DS18B20 Temperature Sensing](https://learn.adafruit.com/adafruits-raspberry-pi-lesson-11-ds18b20-temperature-sensing.md)
- [Introducing the Raspberry Pi Model B+](https://learn.adafruit.com/introducing-the-raspberry-pi-model-b-plus-plus-differences-vs-model-b.md)
- [Adafruit's Raspberry Pi Lesson 7. Remote Control with VNC](https://learn.adafruit.com/adafruit-raspberry-pi-lesson-7-remote-control-with-vnc.md)
- [Raspberry Pi Thermal Printer One Time Pads](https://learn.adafruit.com/raspberry-pi-thermal-printer-one-time-pads.md)
- [Press Your Button for Raspberry Pi](https://learn.adafruit.com/press-your-button-for-raspberry-pi.md)
- [Windows IoT Core Application Management](https://learn.adafruit.com/windows-iot-application-management.md)
- [Windows IoT Core Application Development: Headed Blinky](https://learn.adafruit.com/windows-iot-application-development-headed-blinky.md)
- [Adafruit's Raspberry Pi Lesson 5. Using a Console Cable](https://learn.adafruit.com/adafruits-raspberry-pi-lesson-5-using-a-console-cable.md)
- [Raspberry Pi Analog to Digital Converters](https://learn.adafruit.com/raspberry-pi-analog-to-digital-converters.md)
- [Debugging with the Raspberry Pi WebIDE](https://learn.adafruit.com/debugging-with-the-raspberry-pi-webide.md)
- [Adafruit's Raspberry Pi Lesson 3. Network Setup](https://learn.adafruit.com/adafruits-raspberry-pi-lesson-3-network-setup.md)
- [Using an External Drive as a Raspberry Pi Root Filesystem](https://learn.adafruit.com/external-drive-as-raspberry-pi-root.md)
---
# Source: https://learn.adafruit.com/skill-badge-requirements-digi-xbee/section-3-power-options.md
# Skill Badge Requirements: Digi XBee
## Section 3: Power Options

_This section focuses on the production of a simple wireless sensor network_
Do EACH of the following and submit to your instructor:
1. Identify and describe the different sleep options for the series 1 & 2 modules
2. Identify and describe the difference between hardware controlled and software controlled sleep
3. Use a multimeter to measure and describe the power consumption of a sleeping XBee
1. Explain and describe the discrepancy between your measured number and the number provided by Digi
- [Previous Page](https://learn.adafruit.com/skill-badge-requirements-digi-xbee/section-2-the-wireless-data-connection.md)
- [Next Page](https://learn.adafruit.com/skill-badge-requirements-digi-xbee/section-4-establishing-a-network.md)
## Featured Products
### Digi XBee - Skill badge, iron-on patch
[Digi XBee - Skill badge, iron-on patch](https://www.adafruit.com/product/595)
You are learning how to use XBee wireless modules for your projects! Adafruit offers a fun and exciting "badges" of achievement for electronics, science and engineering. We believe everyone should be able to be rewarded for learning a useful skill, a badge is just one of the many...
No Longer Stocked
[Buy Now](https://www.adafruit.com/product/595)
[Related Guides to the Product](https://learn.adafruit.com/products/595/guides)
## Related Guides
- [Introducing the Adafruit WICED Feather WiFi](https://learn.adafruit.com/introducing-the-adafruit-wiced-feather-wifi.md)
- [MicroPython Smart Holiday Lights](https://learn.adafruit.com/micropython-smart-holiday-lights.md)
- [Wireless NeoPixel Controller](https://learn.adafruit.com/neotrellis-neopixel-controller.md)
- [Remote Effects Trigger Box](https://learn.adafruit.com/remote-effects-trigger.md)
- [Matrix Portal Stained Glass with WLED](https://learn.adafruit.com/matrix-portal-stained-glass-with-wled.md)
- [MagTag 3D Printed Stand Case](https://learn.adafruit.com/magtag-3d-printed-stand-case.md)
- [Adafruit ATWINC1500 WiFi Breakout](https://learn.adafruit.com/adafruit-atwinc1500-wifi-module-breakout.md)
- [Holiday Lights: Easy DIY Christmas Wreath & Garland with WLED](https://learn.adafruit.com/holiday-garland-decor-app-control-with-no-coding.md)
- [Adafruit ItsyBitsy ESP32](https://learn.adafruit.com/adafruit-itsybitsy-esp32.md)
- [Theme Park Wait Time Display](https://learn.adafruit.com/park-wait-time.md)
- [Upgrading AirLift ESP32 Firmware](https://learn.adafruit.com/upgrading-esp32-firmware.md)
- [Floor Lamp with NeoPixels and WLED Custom Animations](https://learn.adafruit.com/floor-lamp-with-wled.md)
- [File Glider](https://learn.adafruit.com/file-glider.md)
- [Adafruit Feather M0 Radio with RFM69 Packet Radio](https://learn.adafruit.com/adafruit-feather-m0-radio-with-rfm69-packet-radio.md)
- [Garden Path Lights with WLED and a Sunset Timer](https://learn.adafruit.com/garden-path-lights-with-sunset-timer.md)
---
# Source: https://learn.adafruit.com/skill-badge-requirements-digi-xbee/section-4-establishing-a-network.md
# Skill Badge Requirements: Digi XBee
## Section 4: Establishing a Network

_This section focuses on the production of a simple wireless sensor network_
Do EACH of the following and submit to your instructor:
1. Identify and describe a method for passing and interpreting a data stream between a remote device and the host
2. Identify and describe the benefits of data integrity checking and when it should be used
- [Previous Page](https://learn.adafruit.com/skill-badge-requirements-digi-xbee/section-3-power-options.md)
- [Next Page](https://learn.adafruit.com/skill-badge-requirements-digi-xbee/section-5-demonstration.md)
## Featured Products
### Digi XBee - Skill badge, iron-on patch
[Digi XBee - Skill badge, iron-on patch](https://www.adafruit.com/product/595)
You are learning how to use XBee wireless modules for your projects! Adafruit offers a fun and exciting "badges" of achievement for electronics, science and engineering. We believe everyone should be able to be rewarded for learning a useful skill, a badge is just one of the many...
No Longer Stocked
[Buy Now](https://www.adafruit.com/product/595)
[Related Guides to the Product](https://learn.adafruit.com/products/595/guides)
## Related Guides
- [Introducing the Adafruit WICED Feather WiFi](https://learn.adafruit.com/introducing-the-adafruit-wiced-feather-wifi.md)
- [MicroPython Smart Holiday Lights](https://learn.adafruit.com/micropython-smart-holiday-lights.md)
- [Wireless NeoPixel Controller](https://learn.adafruit.com/neotrellis-neopixel-controller.md)
- [Remote Effects Trigger Box](https://learn.adafruit.com/remote-effects-trigger.md)
- [Matrix Portal Stained Glass with WLED](https://learn.adafruit.com/matrix-portal-stained-glass-with-wled.md)
- [MagTag 3D Printed Stand Case](https://learn.adafruit.com/magtag-3d-printed-stand-case.md)
- [Adafruit ATWINC1500 WiFi Breakout](https://learn.adafruit.com/adafruit-atwinc1500-wifi-module-breakout.md)
- [Holiday Lights: Easy DIY Christmas Wreath & Garland with WLED](https://learn.adafruit.com/holiday-garland-decor-app-control-with-no-coding.md)
- [Adafruit ItsyBitsy ESP32](https://learn.adafruit.com/adafruit-itsybitsy-esp32.md)
- [Theme Park Wait Time Display](https://learn.adafruit.com/park-wait-time.md)
- [Upgrading AirLift ESP32 Firmware](https://learn.adafruit.com/upgrading-esp32-firmware.md)
- [Floor Lamp with NeoPixels and WLED Custom Animations](https://learn.adafruit.com/floor-lamp-with-wled.md)
- [File Glider](https://learn.adafruit.com/file-glider.md)
- [Adafruit Feather M0 Radio with RFM69 Packet Radio](https://learn.adafruit.com/adafruit-feather-m0-radio-with-rfm69-packet-radio.md)
- [Garden Path Lights with WLED and a Sunset Timer](https://learn.adafruit.com/garden-path-lights-with-sunset-timer.md)
---
# Source: https://learn.adafruit.com/skill-badge-requirements-digi-xbee/section-5-demonstration.md
# Skill Badge Requirements: Digi XBee
## Section 5: Demonstration

_This section focuses on the demonstration of a properly configured XBee network and its interface to a microcontroller of your choice._
Do ONE of the following and submit to your instructor:
1. Using a microcontroller of your choice, produce a peer to peer XBee network that samples a remote temperature sensor when requested by the operator
1. Describe the method for passing your request
2. Describe the method for interpreting the data
2. Using a microcontroller of your choice, construct a remotely controlled device (i.e. model car, quadcopter, robot) that demonstrated bi-directional communication
1. Describe the method for passing your control values
2. Describe the method for interpreting the data being transmitted from your remote device
- [Previous Page](https://learn.adafruit.com/skill-badge-requirements-digi-xbee/section-4-establishing-a-network.md)
- [Next Page](https://learn.adafruit.com/skill-badge-requirements-digi-xbee/certificate-of-completion.md)
## Featured Products
### Digi XBee - Skill badge, iron-on patch
[Digi XBee - Skill badge, iron-on patch](https://www.adafruit.com/product/595)
You are learning how to use XBee wireless modules for your projects! Adafruit offers a fun and exciting "badges" of achievement for electronics, science and engineering. We believe everyone should be able to be rewarded for learning a useful skill, a badge is just one of the many...
No Longer Stocked
[Buy Now](https://www.adafruit.com/product/595)
[Related Guides to the Product](https://learn.adafruit.com/products/595/guides)
## Related Guides
- [Introducing the Adafruit WICED Feather WiFi](https://learn.adafruit.com/introducing-the-adafruit-wiced-feather-wifi.md)
- [MicroPython Smart Holiday Lights](https://learn.adafruit.com/micropython-smart-holiday-lights.md)
- [Wireless NeoPixel Controller](https://learn.adafruit.com/neotrellis-neopixel-controller.md)
- [Remote Effects Trigger Box](https://learn.adafruit.com/remote-effects-trigger.md)
- [Matrix Portal Stained Glass with WLED](https://learn.adafruit.com/matrix-portal-stained-glass-with-wled.md)
- [MagTag 3D Printed Stand Case](https://learn.adafruit.com/magtag-3d-printed-stand-case.md)
- [Adafruit ATWINC1500 WiFi Breakout](https://learn.adafruit.com/adafruit-atwinc1500-wifi-module-breakout.md)
- [Holiday Lights: Easy DIY Christmas Wreath & Garland with WLED](https://learn.adafruit.com/holiday-garland-decor-app-control-with-no-coding.md)
- [Adafruit ItsyBitsy ESP32](https://learn.adafruit.com/adafruit-itsybitsy-esp32.md)
- [Theme Park Wait Time Display](https://learn.adafruit.com/park-wait-time.md)
- [Upgrading AirLift ESP32 Firmware](https://learn.adafruit.com/upgrading-esp32-firmware.md)
- [Floor Lamp with NeoPixels and WLED Custom Animations](https://learn.adafruit.com/floor-lamp-with-wled.md)
- [File Glider](https://learn.adafruit.com/file-glider.md)
- [Adafruit Feather M0 Radio with RFM69 Packet Radio](https://learn.adafruit.com/adafruit-feather-m0-radio-with-rfm69-packet-radio.md)
- [Garden Path Lights with WLED and a Sunset Timer](https://learn.adafruit.com/garden-path-lights-with-sunset-timer.md)
---
# Source: https://learn.adafruit.com/send-raspberry-pi-data-to-cosm.md
# Send Raspberry Pi Data to COSM
## Overview
Info:

The combination of connecting a Raspberry Pi to COSM makes creating a internet of things much easier than it has been in the past. The Pi with it's easy access to ethernet / WiFi and COSM's drop dead simple usability will graph all sensor data you send to it.
This tutorial explains how to connect a analog temperature sensor to the Pi and use a small python script to upload that data for storage and graphing on COSM.
# To follow this tutorial you will need
- [MCP3008 DIP-package ADC converter chip](https://www.adafruit.com/products/856 "Link: https://www.adafruit.com/products/856")
- [Analog Temperature Sensor TMP-36](http://www.adafruit.com/products/165 "Link: http://www.adafruit.com/products/165")
- [Adafruit Pi Cobbler](https://www.adafruit.com/products/914 "Link: https://www.adafruit.com/products/914") - follow the tutorial to assemble it
- [Half](https://www.adafruit.com/products/64 "Link: https://www.adafruit.com/products/64") or [Full-size breadboard](https://www.adafruit.com/products/239 "Link: https://www.adafruit.com/products/239")
- [Breadboarding wires](https://www.adafruit.com/category/82 "Link: https://www.adafruit.com/category/82")
- Raspberry Pi with a internet connection
_Hey, that photo up there has the GPIO cable in backwards - so when you wire it up don't follow that pic!_
- [Next Page](https://learn.adafruit.com/send-raspberry-pi-data-to-cosm/connecting-the-cobbler-slash-mcp3008-slash-tmp36.md)
## Featured Products
### MCP3008 - 8-Channel 10-Bit ADC With SPI Interface
[MCP3008 - 8-Channel 10-Bit ADC With SPI Interface](https://www.adafruit.com/product/856)
Need to add analog inputs? This chip will add 8 channels of 10-bit analog input to your microcontroller or microcomputer project. It's super easy to use and uses SPI so only 4 pins are required. We chose this chip as a great accompaniment to the Raspberry Pi computer because it's fun...
In Stock
[Buy Now](https://www.adafruit.com/product/856)
[Related Guides to the Product](https://learn.adafruit.com/products/856/guides)
### TMP36 - Analog Temperature sensor
[TMP36 - Analog Temperature sensor](https://www.adafruit.com/product/165)
Wide range, low power temperature sensor outputs an analog voltage that is proportional to the ambient temperature. To use, connect pin 1 (left) to power (between 2.7 and 5.5V), pin 3 (right) to ground, and pin 2 to analog in on your microcontroller. The voltage out is 0V at -50°C and...
In Stock
[Buy Now](https://www.adafruit.com/product/165)
[Related Guides to the Product](https://learn.adafruit.com/products/165/guides)
### Full Sized Premium Breadboard - 830 Tie Points
[Full Sized Premium Breadboard - 830 Tie Points](https://www.adafruit.com/product/239)
This is a 'full-size' premium quality breadboard, 830 tie points. Good for small and medium projects. It's 2.2" x 7" (5.5 cm x 17 cm) with a standard double-strip in the middle and two power rails on both sides. You can pull the power rails off easily to make the...
In Stock
[Buy Now](https://www.adafruit.com/product/239)
[Related Guides to the Product](https://learn.adafruit.com/products/239/guides)
### Half Sized Premium Breadboard - 400 Tie Points
[Half Sized Premium Breadboard - 400 Tie Points](https://www.adafruit.com/product/64)
This is a cute, half-size breadboard with 400 tie points, good for small projects. It's 3.25" x 2.2" / 8.3cm x 5.5cm with a standard double-strip in the middle and two power rails on both sides. You can pull the power rails off easily to make the breadboard as...
In Stock
[Buy Now](https://www.adafruit.com/product/64)
[Related Guides to the Product](https://learn.adafruit.com/products/64/guides)
### Adafruit Assembled Pi Cobbler Breakout + Cable for Raspberry Pi
[Adafruit Assembled Pi Cobbler Breakout + Cable for Raspberry Pi](https://www.adafruit.com/product/914)
Now that you've finally got your hands on a [Raspberry Pi® Model B](http://www.raspberrypi.org/), you're probably itching to make some fun embedded computer projects with it. What you need is an add on prototyping Pi Cobbler from Adafruit, which can break out all those...
No Longer Stocked
[Buy Now](https://www.adafruit.com/product/914)
[Related Guides to the Product](https://learn.adafruit.com/products/914/guides)
### GPIO Ribbon Cable for Raspberry Pi Model A and B - 26 pin
[GPIO Ribbon Cable for Raspberry Pi Model A and B - 26 pin](https://www.adafruit.com/product/862)
That new Raspberry Pi® Model A or B computer you just got has a row of 2x13 pin headers soldered on - those are the GPIO (general purpose input/output) pins and for those of us who like to hack electronics they are where the real fun is. By programming the Pi, you can twiddle those pins...
In Stock
[Buy Now](https://www.adafruit.com/product/862)
[Related Guides to the Product](https://learn.adafruit.com/products/862/guides)
### Adafruit Pi Box - Enclosure for Raspberry Pi Model A or B
[Adafruit Pi Box - Enclosure for Raspberry Pi Model A or B](https://www.adafruit.com/product/859)
**Discontinued** - you can grab [Adafruit Pi Box Plus - Enclosure for RasPi Model B+/Pi 2/ Pi 3](https://www.adafruit.com/product/1985) instead!
**We're still selling this classic Adafruit case for those who specifically want it but **
No Longer Stocked
[Buy Now](https://www.adafruit.com/product/859)
[Related Guides to the Product](https://learn.adafruit.com/products/859/guides)
## Related Guides
- [MCP3008 - 8-Channel 10-Bit ADC With SPI Interface](https://learn.adafruit.com/mcp3008-spi-adc.md)
- [Adafruit MAX31856 Universal Thermocouple Amplifier](https://learn.adafruit.com/adafruit-max31856-thermocouple-amplifier.md)
- [Adafruit Swirly Aluminum Mounting Grid for 0.1" Spaced PCBs](https://learn.adafruit.com/swirly-grid.md)
- [Capacitive Touch with Conductive Fabric & Flora](https://learn.adafruit.com/capacitive-touch-with-conductive-fabric-and-flora.md)
- [Raspberry Pi Wifi-Controlled Cat Laser Toy](https://learn.adafruit.com/raspberry-pi-wifi-controlled-cat-laser-toy.md)
- [Adafruit's Raspberry Pi Lesson 6. Using SSH](https://learn.adafruit.com/adafruits-raspberry-pi-lesson-6-using-ssh.md)
- [Piezo Ring Tones with Raspberry Pi](https://learn.adafruit.com/piezo-ring-tones-with-raspberry-pi.md)
- [LED Backpack Displays on Raspberry Pi and BeagleBone Black](https://learn.adafruit.com/led-backpack-displays-on-raspberry-pi-and-beaglebone-black.md)
- [Bluetooth LE MIDI Controller](https://learn.adafruit.com/bluetooth-le-midi-controller.md)
- [MCP9808 Temperature Sensor Python Library](https://learn.adafruit.com/mcp9808-temperature-sensor-python-library.md)
- [ulab: Crunch Numbers fast in CircuitPython](https://learn.adafruit.com/ulab-crunch-numbers-fast-with-circuitpython.md)
- [Using MPL3115A2 with CircuitPython](https://learn.adafruit.com/using-mpl3115a2-with-circuitpython.md)
- [Pi-Top Assembly ](https://learn.adafruit.com/pi-top-assembly.md)
- [Goose Game M4SK Controller](https://learn.adafruit.com/goose-game-m4sk-controller.md)
- [Bluefruit Playground App](https://learn.adafruit.com/bluefruit-playground-app.md)
- [Raspberry Pi SelfieBlock](https://learn.adafruit.com/selfieblock.md)
---
# Source: https://learn.adafruit.com/adafruit-arduino-lesson-14-servo-motors/servo-motors.md
# Arduino Lesson 14. Servo Motors
## Servo Motors
The position of the servo motor is set by the length of a pulse. The servo expects to receive a pulse roughly every 20 milliseconds. If that pulse is high for 1 millisecond, then the servo angle will be zero, if it is 1.5 milliseconds, then it will be at its centre position and if it is 2 milliseconds it will be at 180 degrees.

The end points of the servo can vary and many servos only turn through about 170 degrees. You can also buy 'continuous' servos that can rotate through the full 360 degrees.
- [Previous Page](https://learn.adafruit.com/adafruit-arduino-lesson-14-servo-motors/arduino-code-for-knob.md)
- [Next Page](https://learn.adafruit.com/adafruit-arduino-lesson-14-servo-motors/inside-a-servo.md)
## Featured Products
### Standard servo - TowerPro SG-5010
[Standard servo - TowerPro SG-5010](https://www.adafruit.com/product/155)
This high-torque standard servo can rotate approximately 180 degrees (90 in each direction). You can use any servo code, hardware, or library to control these servos. Good for beginners who want to make stuff move without building a motor controller with feedback & gearbox. Comes with 3...
In Stock
[Buy Now](https://www.adafruit.com/product/155)
[Related Guides to the Product](https://learn.adafruit.com/products/155/guides)
### Premium Male/Male Jumper Wires - 40 x 6" (150mm)
[Premium Male/Male Jumper Wires - 40 x 6" (150mm)](https://www.adafruit.com/product/758)
Handy for making wire harnesses or jumpering between headers on PCB's. These premium jumper wires are 6" (150mm) long and come in a 'strip' of 40 (4 pieces of each of ten rainbow colors). They have 0.1" male header contacts on either end and fit cleanly next to each other...
In Stock
[Buy Now](https://www.adafruit.com/product/758)
[Related Guides to the Product](https://learn.adafruit.com/products/758/guides)
### Half Sized Premium Breadboard - 400 Tie Points
[Half Sized Premium Breadboard - 400 Tie Points](https://www.adafruit.com/product/64)
This is a cute, half-size breadboard with 400 tie points, good for small projects. It's 3.25" x 2.2" / 8.3cm x 5.5cm with a standard double-strip in the middle and two power rails on both sides. You can pull the power rails off easily to make the breadboard as...
In Stock
[Buy Now](https://www.adafruit.com/product/64)
[Related Guides to the Product](https://learn.adafruit.com/products/64/guides)
### Adafruit METRO 328 Fully Assembled - Arduino IDE compatible
[Adafruit METRO 328 Fully Assembled - Arduino IDE compatible](https://www.adafruit.com/product/50)
We sure love the ATmega328 here at Adafruit, and we use them _a lot_ for our own projects. The processor has plenty of GPIO, Analog inputs, hardware UART SPI and I2C, timers and PWM galore - just enough for most simple projects. When we need to go small, we use a
Out of Stock
[Buy Now](https://www.adafruit.com/product/50)
[Related Guides to the Product](https://learn.adafruit.com/products/50/guides)
### Micro servo
[Micro servo](https://www.adafruit.com/product/169)
Tiny little servo can rotate approximately 180 degrees (90 in each direction) and works just like the standard kinds you're used to but _smaller_. You can use any servo code, hardware, or library to control these servos. Good for beginners who want to make stuff move without...
In Stock
[Buy Now](https://www.adafruit.com/product/169)
[Related Guides to the Product](https://learn.adafruit.com/products/169/guides)
### Standard Size - High Torque - Metal Gear Servo
[Standard Size - High Torque - Metal Gear Servo](https://www.adafruit.com/product/1142)
This high-torque standard servo now comes in a metal-gear flavor, for extra-high torque (10 kg\*cm!) and reliability! It can rotate at least 120 degrees (60 in each direction) with a classic 1.5-2.5ms pulse, but if you can extend your pulses it can go up to about 170 degrees - it varies a bit...
In Stock
[Buy Now](https://www.adafruit.com/product/1142)
[Related Guides to the Product](https://learn.adafruit.com/products/1142/guides)
### Micro Servo - MG90D High Torque Metal Gear
[Micro Servo - MG90D High Torque Metal Gear](https://www.adafruit.com/product/1143)
Add more power to your robot with this metal-geared MG90D servo. The tiny little servo can rotate approximately 90 degrees (45 in each direction) and works just like the standard kinds you're used to but _smaller_. You can use any servo code, hardware, or library to control...
Out of Stock
[Buy Now](https://www.adafruit.com/product/1143)
[Related Guides to the Product](https://learn.adafruit.com/products/1143/guides)
## Related Guides
- [Arduino Tips, Tricks, and Techniques](https://learn.adafruit.com/arduino-tips-tricks-and-techniques.md)
- [Light Meter](https://learn.adafruit.com/light-meter.md)
- [Arduino Lesson 4. Eight LEDs and a Shift Register](https://learn.adafruit.com/adafruit-arduino-lesson-4-eight-leds.md)
- [Adafruit Arduino Selection Guide](https://learn.adafruit.com/adafruit-arduino-selection-guide.md)
- [Smart Measuring Cup](https://learn.adafruit.com/smart-measuring-cup.md)
- [Low Power WiFi Datalogger](https://learn.adafruit.com/low-power-wifi-datalogging.md)
- [Electronic Demon Costume](https://learn.adafruit.com/electronic-demon-costume.md)
- [Photocells](https://learn.adafruit.com/photocells.md)
- [Wave Shield Talking Clock](https://learn.adafruit.com/wave-shield-talking-clock.md)
- [WiFi Weather Station](https://learn.adafruit.com/wifi-weather-station-arduino-cc3000.md)
- [Adafruit Data Logger Shield](https://learn.adafruit.com/adafruit-data-logger-shield.md)
- [Ladyada's Learn Arduino - Lesson #1](https://learn.adafruit.com/ladyadas-learn-arduino-lesson-number-1.md)
- [Collin's Lab: MIDI](https://learn.adafruit.com/collins-lab-midi.md)
- [Arduino Lesson 7. Make an RGB LED Fader](https://learn.adafruit.com/adafruit-arduino-lesson-7-make-an-rgb-led-fader.md)
- [Geofencing with the FONA 808 & Adafruit IO](https://learn.adafruit.com/geofencing-with-the-fona-808-and-adafruit-io.md)
---
# Source: https://learn.adafruit.com/adding-a-real-time-clock-to-raspberry-pi/set-rtc-time.md
# Adding a Real Time Clock to Raspberry Pi
## Set RTC Time
Now that we have the module wired up and verified that you can see the module with i2cdetect, we can set up the module.
Warning:
# Raspberry Pi OS's with systemd
This should be the case for any current release. For much older releases without systemd, skip to the next section.
_[Thanks to ad8g for the hints!](https://ad8g.net/2015/10/29/adding-a-real-time-clock-on-raspbian-jessie/)_
You can add support for the RTC by adding a device tree overlay. Run
**sudo nano /boot/config.txt**
to edit the pi configuration and add whichever matches your RTC chip:
`dtoverlay=i2c-rtc,ds1307`
or
`dtoverlay=i2c-rtc,pcf8523`
or
`dtoverlay=i2c-rtc,ds3231`
to the end of the file

Save it and run `sudo reboot` to start again. Log in and run `sudo i2cdetect -y 1` to see the UU show up where 0x68 should be

Disable the "fake hwclock" which interferes with the 'real' hwclock
```terminal
sudo apt-get -y remove fake-hwclock
sudo update-rc.d -f fake-hwclock remove
sudo systemctl disable fake-hwclock
```

Now with the fake-hw clock off, you can start the original 'hardware clock' script.
Run **sudo nano /lib/udev/hwclock-set** and comment out these three lines **:**
**#if [-e /run/systemd/system] ; then
# exit 0
#fi**

Also comment out the two lines
` /sbin/hwclock --rtc=$dev --systz --badyear`
and
`/sbin/hwclock --rtc=$dev --systz`

## Sync time from Pi to RTC
When you first plug in the RTC module, it's going to have the wrong time because it has to be set once. You can always read the time directly from the RTC with `sudo hwclock -r`
(ignore use of deprecated -D parameter in the screenshot)

You can see, the date at first is invalid! You can set the correct time easily. First run `date` to verify the time is correct. Plug in Ethernet or WiFi to let the Pi sync the right time from the Internet. Once that's done, run `sudo hwclock -w` to **w** rite the time, and another `sudo hwclock -r` to **r** ead the time

Once the time is set, make sure the coin cell battery is inserted so that the time is saved. You only have to set the time _once_
That's it! Next time you boot the time will automatically be synced from the RTC module
To only ready time from the RTC and not the internet, you can disable the timesync service with:
```terminal
sudo systemctl disable systemd-timesyncd.service
```
###
If you are getting an error message like this when trying to read/write to the RTC, make sure you have a good coin cell battery installed.
# Raspbian Wheezy or other pre-systemd Linux
First, load up the RTC module by running
`sudo modprobe i2c-bcm2708 sudo modprobe i2c-dev sudo modprobe rtc-ds1307`
Then, as root (type in **sudo bash** ) run
`echo ds1307 0x68 > /sys/class/i2c-adapter/i2c-1/new_device`
If you happen to have an old Rev 1 Pi, type in
`echo ds1307 0x68 > /sys/class/i2c-adapter/i2c-0/new_device`
You can then type in **exit** to drop out of the root shell.
Then check the time with **sudo hwclock -r** which will read the time from the DS1307 module. If this is the first time the module has been used, it will report back Jan 1 2000, and you'll need to set the time

First you'll need to get the right time set on the Pi, the easiest way is to connect it up to Ethernet or Wifi - it will automatically set the time from the network. Once the time is correct (check with the **date** command), run **sudo hwclock -w** to write the system time to the RTC
You can then verify it with **sudo hwclock -r**

Next, you'll want to add the RTC kernel module to the /etc/modules list, so its loaded when the machine boots. Run **sudo nano /etc/modules** and add **rtc-ds1307** at the end of the file (the image below says rtc-1307 but its a typo)

Older pre-Jessie raspbian is a little different. First up, you'll want to create the DS1307 device creation at boot, edit /etc/rc.local by running
`sudo nano /etc/rc.local`
and add:
> `echo ds1307 0x68 > /sys/class/i2c-adapter/i2c-0/new_device` _(for v1 raspberry pi)_
> `echo ds1307 0x68 > /sys/class/i2c-adapter/i2c-1/new_device` _(for v2 raspberry pi)_
> `sudo hwclock -s` _(both versions)_
before `exit 0` (we forgot the hwclock -s part in the screenshot below)

That's it! Next time you boot the time will automatically be synced from the RTC module
- [Previous Page](https://learn.adafruit.com/adding-a-real-time-clock-to-raspberry-pi/set-up-and-test-i2c.md)
## Featured Products
### Adafruit PiRTC - PCF8523 Real Time Clock for Raspberry Pi
[Adafruit PiRTC - PCF8523 Real Time Clock for Raspberry Pi](https://www.adafruit.com/product/3386)
This is a great battery-backed real time clock (RTC) that allows your Raspberry Pi project to keep track of time if the power is lost. Perfect for data-logging, clock-building, time-stamping, timers and alarms, etc. Equipped with **PCF8523** RTC, it works great with the...
In Stock
[Buy Now](https://www.adafruit.com/product/3386)
[Related Guides to the Product](https://learn.adafruit.com/products/3386/guides)
### Adafruit PiRTC - Precise DS3231 Real Time Clock for Raspberry Pi
[Adafruit PiRTC - Precise DS3231 Real Time Clock for Raspberry Pi](https://www.adafruit.com/product/4282)
This is the best battery-backed real time clock (RTC) you can get that allows your Raspberry Pi project to keep track of time if the power is lost. Perfect for data-logging, clock-building, NTP servers, time-stamping, timers and alarms, etc. Equipped with **a genuine DS3231** RTC,...
In Stock
[Buy Now](https://www.adafruit.com/product/4282)
[Related Guides to the Product](https://learn.adafruit.com/products/4282/guides)
### Adafruit PCF8523 Real Time Clock Assembled Breakout Board
[Adafruit PCF8523 Real Time Clock Assembled Breakout Board](https://www.adafruit.com/product/3295)
This is a great battery-backed real time clock (RTC) that allows your microcontroller project to keep track of time even if it is reprogrammed, or if the power is lost. Perfect for datalogging, clock-building, time stamping, timers and alarms, etc. Equipped...
In Stock
[Buy Now](https://www.adafruit.com/product/3295)
[Related Guides to the Product](https://learn.adafruit.com/products/3295/guides)
### Adafruit DS1307 Real Time Clock Assembled Breakout Board
[Adafruit DS1307 Real Time Clock Assembled Breakout Board](https://www.adafruit.com/product/3296)
This is a great battery-backed real time clock (RTC) that allows your microcontroller project to keep track of time even if it is reprogrammed, or if the power is lost. Perfect for datalogging, clock-building, time stamping, timers and alarms, etc. The **DS1307** is the most...
In Stock
[Buy Now](https://www.adafruit.com/product/3296)
[Related Guides to the Product](https://learn.adafruit.com/products/3296/guides)
### ChronoDot - Ultra-precise Real Time Clock
[ChronoDot - Ultra-precise Real Time Clock](https://www.adafruit.com/product/255)
The **ChronoDot V3** is the latest version of macetech’s popular ChronoDot line of products. Designed during the Great Chip Shortage, it uses the newly-released MAX31328 temperature-compensated real-time clock chip. However, it remains pin- and code-compatible with the older...
In Stock
[Buy Now](https://www.adafruit.com/product/255)
[Related Guides to the Product](https://learn.adafruit.com/products/255/guides)
### Adafruit DS3231 Precision RTC Breakout
[Adafruit DS3231 Precision RTC Breakout](https://www.adafruit.com/product/3013)
The datasheet for the **DS3231** explains that this part is an "Extremely Accurate I²C-Integrated RTC/TCXO/Crystal". And, hey, it does exactly what it says on the tin! This **Real Time Clock (RTC)** is the most precise you can get in a small, low power...
In Stock
[Buy Now](https://www.adafruit.com/product/3013)
[Related Guides to the Product](https://learn.adafruit.com/products/3013/guides)
### CR1220 12mm Diameter - 3V Lithium Coin Cell Battery
[CR1220 12mm Diameter - 3V Lithium Coin Cell Battery](https://www.adafruit.com/product/380)
These are the highest quality & capacity batteries, the same as shipped with the iCufflinks, iNecklace, Datalogging and GPS Shields, GPS HAT, etc. One battery per order (you'll want one battery per cufflink or pendant.)
Brand may vary but all battery brands are verified...
In Stock
[Buy Now](https://www.adafruit.com/product/380)
[Related Guides to the Product](https://learn.adafruit.com/products/380/guides)
### DS1307 Real Time Clock breakout board kit
[DS1307 Real Time Clock breakout board kit](https://www.adafruit.com/product/264)
**[We've upgraded this RTC breakout and made it even easier to use! Now available as a fully assembled board, it has the same components, chip, size, etc but you don't have to put it together. It's also less expensive! Check out...](https://www.adafruit.com/product/3296)**
No Longer Stocked
[Buy Now](https://www.adafruit.com/product/264)
[Related Guides to the Product](https://learn.adafruit.com/products/264/guides)
## Related Guides
- [I2C Addresses and Troublesome Chips](https://learn.adafruit.com/i2c-addresses.md)
- [DS1307 Real Time Clock Breakout Board Kit](https://learn.adafruit.com/ds1307-real-time-clock-breakout-board-kit.md)
- [NeoPixel 60 Ring Wall Clock](https://learn.adafruit.com/neopixel-60-ring-clock.md)
- [NeoMatrix 8x8 Word Clock](https://learn.adafruit.com/neomatrix-8x8-word-clock.md)
- [Adafruit DS3231 Precision RTC Breakout](https://learn.adafruit.com/adafruit-ds3231-precision-rtc-breakout.md)
- [MacroPad 2FA TOTP Authentication Friend](https://learn.adafruit.com/macropad-2fa-totp-authentication-friend.md)
- [Plotting Offline Data - JSONL to CSV files, filters and graphs](https://learn.adafruit.com/plotting-offline-data-jsonl-to-csv-files-filters-and-graphs.md)
- [Large Pi-based Thermometer and Clock](https://learn.adafruit.com/large-pi-based-thermometer-and-clock.md)
- [Blahaj Alarm and Lamp](https://learn.adafruit.com/blahaj-alarm.md)
- [Prop-Maker Feather Talking Adabot Clock](https://learn.adafruit.com/prop-maker-feather-talking-adabot-clock.md)
- [Playing sounds and using buttons with Raspberry Pi](https://learn.adafruit.com/playing-sounds-and-using-buttons-with-raspberry-pi.md)
- [Monitor PiCam and temperature on a PiTFT via adafruit.io](https://learn.adafruit.com/monitor-picam-and-temperature-on-a-pitft-via-adafruit-dot-io.md)
- [DotStar Pi Painter](https://learn.adafruit.com/dotstar-pi-painter.md)
- [NextBus transit clock for Raspberry Pi](https://learn.adafruit.com/nextbus-transit-clock-for-raspberry-pi.md)
- [Wood Case for Raspberry Pi 3](https://learn.adafruit.com/wood-case-for-raspberry-pi-3.md)
---
# Source: https://learn.adafruit.com/adding-a-real-time-clock-to-raspberry-pi/set-up-and-test-i2c.md
# Adding a Real Time Clock to Raspberry Pi
## Set Up & Test I2C
# Set up I2C on your Pi
You'll also need to set up i2c on your Pi, to do so, run **sudo raspi-config** and under **Interface Options ** select I2C and turn it on.
For more details, check out our tutorial on Raspberry Pi i2c setup and testing at [http://learn.adafruit.com/adafruits-raspberry-pi-lesson-4-gpio-setup/configuring-i2c](http://learn.adafruit.com/adafruits-raspberry-pi-lesson-4-gpio-setup/configuring-i2c)
You may need to reboot once you've done that with **sudo reboot**
# Verify Wiring (I2C scan)
Verify your wiring by running
```terminal
sudo apt-get install python3-smbus i2c-tools
```
to install the helper software and then `sudo i2cdetect -y 1 `at the command line, you should see ID #68 show up - that's the address of the DS1307, PCF8523 or DS3231!
If you have a much older Pi 1, you will have to run `sudo i2cdetect -y 0 `as the I2C bus address changed from 0 to 1

Warning:
- [Previous Page](https://learn.adafruit.com/adding-a-real-time-clock-to-raspberry-pi/wiring-the-rtc.md)
- [Next Page](https://learn.adafruit.com/adding-a-real-time-clock-to-raspberry-pi/set-rtc-time.md)
## Featured Products
### Adafruit PiRTC - PCF8523 Real Time Clock for Raspberry Pi
[Adafruit PiRTC - PCF8523 Real Time Clock for Raspberry Pi](https://www.adafruit.com/product/3386)
This is a great battery-backed real time clock (RTC) that allows your Raspberry Pi project to keep track of time if the power is lost. Perfect for data-logging, clock-building, time-stamping, timers and alarms, etc. Equipped with **PCF8523** RTC, it works great with the...
In Stock
[Buy Now](https://www.adafruit.com/product/3386)
[Related Guides to the Product](https://learn.adafruit.com/products/3386/guides)
### Adafruit PiRTC - Precise DS3231 Real Time Clock for Raspberry Pi
[Adafruit PiRTC - Precise DS3231 Real Time Clock for Raspberry Pi](https://www.adafruit.com/product/4282)
This is the best battery-backed real time clock (RTC) you can get that allows your Raspberry Pi project to keep track of time if the power is lost. Perfect for data-logging, clock-building, NTP servers, time-stamping, timers and alarms, etc. Equipped with **a genuine DS3231** RTC,...
In Stock
[Buy Now](https://www.adafruit.com/product/4282)
[Related Guides to the Product](https://learn.adafruit.com/products/4282/guides)
### Adafruit PCF8523 Real Time Clock Assembled Breakout Board
[Adafruit PCF8523 Real Time Clock Assembled Breakout Board](https://www.adafruit.com/product/3295)
This is a great battery-backed real time clock (RTC) that allows your microcontroller project to keep track of time even if it is reprogrammed, or if the power is lost. Perfect for datalogging, clock-building, time stamping, timers and alarms, etc. Equipped...
In Stock
[Buy Now](https://www.adafruit.com/product/3295)
[Related Guides to the Product](https://learn.adafruit.com/products/3295/guides)
### Adafruit DS1307 Real Time Clock Assembled Breakout Board
[Adafruit DS1307 Real Time Clock Assembled Breakout Board](https://www.adafruit.com/product/3296)
This is a great battery-backed real time clock (RTC) that allows your microcontroller project to keep track of time even if it is reprogrammed, or if the power is lost. Perfect for datalogging, clock-building, time stamping, timers and alarms, etc. The **DS1307** is the most...
In Stock
[Buy Now](https://www.adafruit.com/product/3296)
[Related Guides to the Product](https://learn.adafruit.com/products/3296/guides)
### ChronoDot - Ultra-precise Real Time Clock
[ChronoDot - Ultra-precise Real Time Clock](https://www.adafruit.com/product/255)
The **ChronoDot V3** is the latest version of macetech’s popular ChronoDot line of products. Designed during the Great Chip Shortage, it uses the newly-released MAX31328 temperature-compensated real-time clock chip. However, it remains pin- and code-compatible with the older...
In Stock
[Buy Now](https://www.adafruit.com/product/255)
[Related Guides to the Product](https://learn.adafruit.com/products/255/guides)
### Adafruit DS3231 Precision RTC Breakout
[Adafruit DS3231 Precision RTC Breakout](https://www.adafruit.com/product/3013)
The datasheet for the **DS3231** explains that this part is an "Extremely Accurate I²C-Integrated RTC/TCXO/Crystal". And, hey, it does exactly what it says on the tin! This **Real Time Clock (RTC)** is the most precise you can get in a small, low power...
In Stock
[Buy Now](https://www.adafruit.com/product/3013)
[Related Guides to the Product](https://learn.adafruit.com/products/3013/guides)
### CR1220 12mm Diameter - 3V Lithium Coin Cell Battery
[CR1220 12mm Diameter - 3V Lithium Coin Cell Battery](https://www.adafruit.com/product/380)
These are the highest quality & capacity batteries, the same as shipped with the iCufflinks, iNecklace, Datalogging and GPS Shields, GPS HAT, etc. One battery per order (you'll want one battery per cufflink or pendant.)
Brand may vary but all battery brands are verified...
In Stock
[Buy Now](https://www.adafruit.com/product/380)
[Related Guides to the Product](https://learn.adafruit.com/products/380/guides)
### DS1307 Real Time Clock breakout board kit
[DS1307 Real Time Clock breakout board kit](https://www.adafruit.com/product/264)
**[We've upgraded this RTC breakout and made it even easier to use! Now available as a fully assembled board, it has the same components, chip, size, etc but you don't have to put it together. It's also less expensive! Check out...](https://www.adafruit.com/product/3296)**
No Longer Stocked
[Buy Now](https://www.adafruit.com/product/264)
[Related Guides to the Product](https://learn.adafruit.com/products/264/guides)
## Related Guides
- [I2C Addresses and Troublesome Chips](https://learn.adafruit.com/i2c-addresses.md)
- [DS1307 Real Time Clock Breakout Board Kit](https://learn.adafruit.com/ds1307-real-time-clock-breakout-board-kit.md)
- [NeoPixel 60 Ring Wall Clock](https://learn.adafruit.com/neopixel-60-ring-clock.md)
- [NeoMatrix 8x8 Word Clock](https://learn.adafruit.com/neomatrix-8x8-word-clock.md)
- [Adafruit DS3231 Precision RTC Breakout](https://learn.adafruit.com/adafruit-ds3231-precision-rtc-breakout.md)
- [MacroPad 2FA TOTP Authentication Friend](https://learn.adafruit.com/macropad-2fa-totp-authentication-friend.md)
- [Plotting Offline Data - JSONL to CSV files, filters and graphs](https://learn.adafruit.com/plotting-offline-data-jsonl-to-csv-files-filters-and-graphs.md)
- [Large Pi-based Thermometer and Clock](https://learn.adafruit.com/large-pi-based-thermometer-and-clock.md)
- [Blahaj Alarm and Lamp](https://learn.adafruit.com/blahaj-alarm.md)
- [Prop-Maker Feather Talking Adabot Clock](https://learn.adafruit.com/prop-maker-feather-talking-adabot-clock.md)
- [Playing sounds and using buttons with Raspberry Pi](https://learn.adafruit.com/playing-sounds-and-using-buttons-with-raspberry-pi.md)
- [Monitor PiCam and temperature on a PiTFT via adafruit.io](https://learn.adafruit.com/monitor-picam-and-temperature-on-a-pitft-via-adafruit-dot-io.md)
- [DotStar Pi Painter](https://learn.adafruit.com/dotstar-pi-painter.md)
- [NextBus transit clock for Raspberry Pi](https://learn.adafruit.com/nextbus-transit-clock-for-raspberry-pi.md)
- [Wood Case for Raspberry Pi 3](https://learn.adafruit.com/wood-case-for-raspberry-pi-3.md)
---
# Source: https://learn.adafruit.com/calipers/setting-the-origin.md
# Calipers
## Setting the Origin

Before using your calipers, check that the origin is correct, clean the blades with a cloth to make sure there's no dust or dirt that would give the wrong measurement and close the jaws. You should read 0.0mm, if not, check that they're clean and if so, press the **origin** button. We've never had to do this since they are pre-origin'd at the factory but hey, you never know.- [Previous Page](https://learn.adafruit.com/calipers/battery-life-and-replacement.md)
- [Next Page](https://learn.adafruit.com/calipers/basic-measurements.md)
## Featured Products
### Mitutoyo - Absolute Digimatic Digital Calipers, 6 in.
[Mitutoyo - Absolute Digimatic Digital Calipers, 6 in.](https://www.adafruit.com/product/294)
The most useful tool we've ever laid our hands on. We thought we'd use them just for electronics but then we got our hands on these calipers and had so much fun we started measuring _everything._
They're indestructible - which is good because we don't...
No Longer Stocked
[Buy Now](https://www.adafruit.com/product/294)
[Related Guides to the Product](https://learn.adafruit.com/products/294/guides)
### Premium Digital Stainless Steel Calipers
[Premium Digital Stainless Steel Calipers](https://www.adafruit.com/product/1724)
The most useful tool we've ever laid our hands on. These calipers are really good quality and an excellent choice if you need something better than a cheap 'disposable' pair of digital calipers but you're not quite ready for a set of high-end Mitsutoyo calipers. These digital...
No Longer Stocked
[Buy Now](https://www.adafruit.com/product/1724)
[Related Guides to the Product](https://learn.adafruit.com/products/1724/guides)
### Solar Digital Calipers
[Solar Digital Calipers](https://www.adafruit.com/product/3720)
_Praise the sun!_ You will never have that awkward situation where your caliper battery dies just when you need to take a measurement. Sure, if you have the budget, [we recommend these near-indestructible high-end Mitutoyo...](https://www.adafruit.com/product/294)
In Stock
[Buy Now](https://www.adafruit.com/product/3720)
[Related Guides to the Product](https://learn.adafruit.com/products/3720/guides)
### Messograf Pen Calipers
[Messograf Pen Calipers](https://www.adafruit.com/product/810)
Discontinued - **you can grab [Solar Digital Calipers ](https://www.adafruit.com/product/3720)instead! **
Caliper rule? Tire tread gauge? Ruler? Thread scale? Writing instrument? The Messograf is all of these in one.
It is a...
No Longer Stocked
[Buy Now](https://www.adafruit.com/product/810)
[Related Guides to the Product](https://learn.adafruit.com/products/810/guides)
## Related Guides
- [Secret Hollow Book Intrusion Detector](https://learn.adafruit.com/secret-hollow-book.md)
- [Necomimi Brainwave Cat Ears Teardown](https://learn.adafruit.com/necomimi-brainwave-cat-ears-teardown.md)
- [Ambient Sound Machine](https://learn.adafruit.com/ambient-machine.md)
- [Personal Torch 3000](https://learn.adafruit.com/pt3000-personal-torch.md)
- [Butterfly Bench with Edge Lit Acrylic](https://learn.adafruit.com/butterfly-bench-with-edge-lit-acrylic.md)
- [Bass MIDI Stomp Box](https://learn.adafruit.com/midi-bass-synth-stomp-box.md)
- [Build a Custom Front Panel](https://learn.adafruit.com/build-a-custom-front-panel.md)
- [Collin's Lab: Soldering](https://learn.adafruit.com/collins-lab-soldering.md)
- [3D Printed Custom Keycaps](https://learn.adafruit.com/3dprinted-custom-keycaps.md)
- [Fiddy - the FTDI Clip](https://learn.adafruit.com/fiddy-ftdi-pogo-pin-clip.md)
- [Photo Light Box](https://learn.adafruit.com/photo-light-box.md)
- [DIY On/Off JST Switch Adapter](https://learn.adafruit.com/on-slash-off-switches.md)
- [Making Edge Guards for Hand Tools Using Hand-Moldable Plastic](https://learn.adafruit.com/hand-moldable-edge-guards.md)
- [USB Locket](https://learn.adafruit.com/usb-locket.md)
- [DIY 3D Printing Filament](https://learn.adafruit.com/diy-3d-printing-filament.md)
---
# Source: https://learn.adafruit.com/timesquare-watch-kit/setting-the-time.md
# TIMESQUARE Watch Kit
## Setting the Time

First wake the watch by **tapping** either side button. With the time display active, you can enter time-setting mode by **holding** down **both** side buttons for about two seconds. If using the watch for the first time, or after swapping batteries, it may wake in time-setting mode automatically.
## Tap →⌚ or ⌚← tap
## Hold
→⌚←
2 sec

Date and time are set by cycling through each digit. The currently-active digit is shown with a blinking underline cursor. **Tap** the **left** button to advance to the next digit, or **tap** the **right** button to increment the current digit (it will “roll over” to 0 or 1 as needed).

## **Tap **** →⌚ = Next digit**
**⌚← Tap = Current digit +1**
There are two digits each for the year, month, day, hour and minute, and the watch will briefly display the symbols **Y** , **M** , **D** , etc. when moving from one pair of digits to the next. The high and low digits are set individually…this is different from most digital clocks, we find it faster and less troublesome. The range for each digit varies, and the watch will keep the values in check.
There is no seconds adjustment. Seconds will be reset to zero when exiting time-setting mode.
The last “digit” is a 12- or 24-hour display mode selection. 12/24 currently only affects the marquee mode; the binary display is limited to 12-hour time. Advancing past the 12/24 item will scroll back to the first digit of the year. So if you overshoot a digit you wanted to set, just repeatedly tap the left button until you roll around to it again.
## Tap →⌚ = Y→Y→M→M→D→D→H→H→M→M→12/24↩
To exit time-setting mode and return to the last time display mode, **hold** down **both** buttons for two seconds again.
## Hold
→⌚←
2 sec
- [Previous Page](https://learn.adafruit.com/timesquare-watch-kit/kit-assembly.md)
- [Next Page](https://learn.adafruit.com/timesquare-watch-kit/time-display-modes.md)
## Featured Products
### TIMESQUARE DIY Watch Kit - Red Display Matrix
[TIMESQUARE DIY Watch Kit - Red Display Matrix](https://www.adafruit.com/product/1106)
Show up stylish AND on time to any event with this awesome looking DIY watch. We have a few watch kits here at Adafruit but we finally have one that looks good and fits well, even for ladies and kids and others with smaller wrists and hands. Its got an 8x8 bit matrix display and a repurposed...
No Longer Stocked
[Buy Now](https://www.adafruit.com/product/1106)
[Related Guides to the Product](https://learn.adafruit.com/products/1106/guides)
### TIMESQUARE DIY Watch Kit - Tangerine Display Matrix
[TIMESQUARE DIY Watch Kit - Tangerine Display Matrix](https://www.adafruit.com/product/1223)
Show up stylish AND on time to any event with this awesome looking DIY watch. We have a few watch kits here at Adafruit but we finally have one that looks good and fits well, even for ladies and kids and others with smaller wrists and hands. Its got an 8x8 bit matrix display and a repurposed...
No Longer Stocked
[Buy Now](https://www.adafruit.com/product/1223)
[Related Guides to the Product](https://learn.adafruit.com/products/1223/guides)
### TIMESQUARE DIY Watch Kit - Lime Display Matrix
[TIMESQUARE DIY Watch Kit - Lime Display Matrix](https://www.adafruit.com/product/1224)
Show up stylish AND on time to any event with this awesome looking DIY watch. We have a few watch kits here at Adafruit but we finally have one that looks good and fits well, even for ladies and kids and others with smaller wrists and hands. Its got an 8x8 bit matrix display and a repurposed...
No Longer Stocked
[Buy Now](https://www.adafruit.com/product/1224)
[Related Guides to the Product](https://learn.adafruit.com/products/1224/guides)
### TIMESQUARE DIY Watch Kit - Blue Display Matrix
[TIMESQUARE DIY Watch Kit - Blue Display Matrix](https://www.adafruit.com/product/1225)
Show up stylish AND on time to any event with this awesome looking DIY watch. We have a few watch kits here at Adafruit but we finally have one that looks good and fits well, even for ladies and kids and others with smaller wrists and hands. Its got an 8x8 bit matrix display and a repurposed...
No Longer Stocked
[Buy Now](https://www.adafruit.com/product/1225)
[Related Guides to the Product](https://learn.adafruit.com/products/1225/guides)
### TIMESQUARE DIY Watch Kit - White Display Matrix
[TIMESQUARE DIY Watch Kit - White Display Matrix](https://www.adafruit.com/product/1226)
Show up stylish AND on time to any event with this awesome looking DIY watch. We have a few watch kits here at Adafruit but we finally have one that looks good and fits well, even for ladies and kids and others with smaller wrists and hands. Its got an 8x8 bit matrix display and a repurposed...
No Longer Stocked
[Buy Now](https://www.adafruit.com/product/1226)
[Related Guides to the Product](https://learn.adafruit.com/products/1226/guides)
### TIMESQUARE silver parts bag
[TIMESQUARE silver parts bag](https://www.adafruit.com/product/1227)
No Longer Stocked
[Buy Now](https://www.adafruit.com/product/1227)
[Related Guides to the Product](https://learn.adafruit.com/products/1227/guides)
## Related Guides
- [MicroLipo v2 Case](https://learn.adafruit.com/microlipo-case.md)
- [Adafruit DotStar FeatherWing](https://learn.adafruit.com/adafruit-dotstar-featherwing-adafruit.md)
- [The Pixif](https://learn.adafruit.com/the-pixif.md)
- [Adafruit VL53L0X Time of Flight Micro-LIDAR Distance Sensor Breakout](https://learn.adafruit.com/adafruit-vl53l0x-micro-lidar-distance-sensor-breakout.md)
- [Adafruit MENTA Kit](https://learn.adafruit.com/adafruit-menta-kit-mint-tin-arduino-compatible.md)
- [Adafruit RGB Matrix Bonnet for Raspberry Pi](https://learn.adafruit.com/adafruit-rgb-matrix-bonnet-for-raspberry-pi.md)
- [Raspberry Pi Care and Troubleshooting](https://learn.adafruit.com/raspberry-pi-care-and-troubleshooting.md)
- [Adafruit FONA 808 Cellular + GPS Shield for Arduino](https://learn.adafruit.com/adafruit-fona-808-cellular-plus-gps-shield-for-arduino.md)
- [Adafruit PCM5122 I2S DAC](https://learn.adafruit.com/adafruit-pcm5122-i2s-dac.md)
- [Use an art canvas to diffuse an RGB matrix](https://learn.adafruit.com/use-an-art-canvas-to-diffuse-rgb-matrix.md)
- [Bluetooth-Controlled Matrix LED Sign using Bluefruit Connect](https://learn.adafruit.com/bluetooth-controlled-matrix-led-sign-using-bluefruit-connect.md)
- [Adafruit AW9523 GPIO Expander and LED Driver](https://learn.adafruit.com/adafruit-aw9523-gpio-expander-and-led-driver.md)
- [Adafruit DPI Display Kippah](https://learn.adafruit.com/adafruit-dpi-display-kippah-ttl-tft.md)
- [DIY Pocket LED Gamer - Tiny Tetris!](https://learn.adafruit.com/diy-3d-printed-handheld-pocket-game-tiny-tetris-snake.md)
- [Adafruit MagTag](https://learn.adafruit.com/adafruit-magtag.md)
---
# Source: https://learn.adafruit.com/skill-badge-guide-3d-printing/setting-up-the-machine.md
# Skill Badge Guide: 3D Printing
## Setting up the machine

Before you operate your machine, check the following to ensure its proper operation:
1. Make sure the filament spool is installed properly and turns freely.
2. Gently move each axis and ensure they move smoothly.
3. Check that the build platform is level.
These three checks will help to eliminate many of the problems that inhibit a good print job. If the spool sticks while it unravels it will pull up on the extruder and may prevent it from extruding. If the axis don't move freely, they may need to be greased or realigned. This will help prevent the stepper from skipping a step, resulting in a shifted print job. Finally, if the build platform is not level the first layer will most likely not stick evenly and will cause distortion or warping of the printed model.
- [Previous Page](https://learn.adafruit.com/skill-badge-guide-3d-printing/free-3d-cad.md)
- [Next Page](https://learn.adafruit.com/skill-badge-guide-3d-printing/bed-leveling.md)
## Featured Products
### 3D printing - Skill badge, iron-on patch
[3D printing - Skill badge, iron-on patch](https://www.adafruit.com/product/490)
You can 3D print! Adafruit offers a fun and exciting "badges" of achievement for electronics, science and engineering. We believe everyone should be able to be rewarded for learning a useful skill, a badge is just one of the many ways to show and share.
This is the "I...
No Longer Stocked
[Buy Now](https://www.adafruit.com/product/490)
[Related Guides to the Product](https://learn.adafruit.com/products/490/guides)
### 3D printing - Sticker!
[3D printing - Sticker!](https://www.adafruit.com/product/649)
You can 3D print! Adafruit offers a fun and exciting stickers to celebrate achievement for electronics, science and engineering. We believe everyone should be able to be rewarded for learning a useful skill, a sticker is just one of the many ways to show and share.
This is the...
No Longer Stocked
[Buy Now](https://www.adafruit.com/product/649)
[Related Guides to the Product](https://learn.adafruit.com/products/649/guides)
### Flashforge Creator PRO
[Flashforge Creator PRO](https://www.adafruit.com/product/2742)
The **Flashforge Creator Pro** is the latest addition to FlashForge’s Creator family, built upon an open source platform.
Based on proven design of the Creator X chassis, the Pro is now enclosed so you can print ABS better and more efficient than ever. The upgraded...
No Longer Stocked
[Buy Now](https://www.adafruit.com/product/2742)
[Related Guides to the Product](https://learn.adafruit.com/products/2742/guides)
### PrintrBot Simple Metal 3D Printer - Black - Assembled
[PrintrBot Simple Metal 3D Printer - Black - Assembled](https://www.adafruit.com/product/1760)
New from Printrbot, the Metal Simple is a brand new rock solid, all metal, fully-assembled Printrbot Simple! As opposed to the [Printrbot Simple Kit](http://www.adafruit.com/products/1735), all of the laser cut wood parts have been replaced by rock solid metal and assembled. In...
No Longer Stocked
[Buy Now](https://www.adafruit.com/product/1760)
[Related Guides to the Product](https://learn.adafruit.com/products/1760/guides)
### Ultimaker 2+ 3D Printer
[Ultimaker 2+ 3D Printer](https://www.adafruit.com/product/2673)
The **Ultimaker 2+** is one of our favorite 3D printers on the market. It's a well-built open-source compact machine with an excellent UX. Every inch of the Ultimaker 2+ is designed to create the most effortless and reliable 3D printing experience ever!
No Longer Stocked
[Buy Now](https://www.adafruit.com/product/2673)
[Related Guides to the Product](https://learn.adafruit.com/products/2673/guides)
### Micro 3D Printer - Black - Retail Edition
[Micro 3D Printer - Black - Retail Edition](https://www.adafruit.com/product/2933)
The magic of 3D printing is now more affordable and accessible than ever! Meet The **Micro 3D Printer** by [M3D](https://printm3d.com/), the first truly consumer 3D printer. Sporting a compact design, user-friendly software, and replaceable print beds and nozzles,...
No Longer Stocked
[Buy Now](https://www.adafruit.com/product/2933)
[Related Guides to the Product](https://learn.adafruit.com/products/2933/guides)
### Filament for 3D Printers in Various Colors and Types
[Filament for 3D Printers in Various Colors and Types](https://www.adafruit.com/product/2080)
Having a 3D printer without filament is sort of like having a regular printer without paper or ink. And while a lot of printers come with some filament there's a good chance you've been printing up a storm and need something new. That's why we've started carrying a...
Out of Stock
[Buy Now](https://www.adafruit.com/product/2080)
[Related Guides to the Product](https://learn.adafruit.com/products/2080/guides)
## Related Guides
- [Mario Magic Wand](https://learn.adafruit.com/mario-magic-wand.md)
- [Case for HUSB238 Breakout](https://learn.adafruit.com/case-for-husb238.md)
- [3D Printed RFID NFC Rings](https://learn.adafruit.com/3d-printed-rfid-nfc-rings.md)
- [AI 3D Printed Figure](https://learn.adafruit.com/ai-figure.md)
- [Ultrasonic Ruler](https://learn.adafruit.com/ultrasonic-ruler.md)
- [Magnet Bottle Holder](https://learn.adafruit.com/magnet-bottle-holder.md)
- [Printy Boost: Reimagining a Classic Adafruit Kit](https://learn.adafruit.com/printy-boost-reimagining-a-classic-adafruit-kit.md)
- [CYBERDECK Expansion Plate](https://learn.adafruit.com/cyberdeck-plate.md)
- [PyPortal Case](https://learn.adafruit.com/pyportal-case.md)
- [3D Printed LED Buckle](https://learn.adafruit.com/3d-printed-led-buckle.md)
- [CLUE Slim Case](https://learn.adafruit.com/clue-slim-case.md)
- [Adafruit Desktop 3D Printer Buyers Guide](https://learn.adafruit.com/adafruit-desktop-3d-printer-selection-guide.md)
- [3D Printed Animatronic Robot Head](https://learn.adafruit.com/3d-printed-animatronic-robot-head.md)
- [New Years Eve Ball Drop](https://learn.adafruit.com/new-years-eve-ball-drop.md)
- [3D Printed Battery Adapter for Camera-Mount LED Panel](https://learn.adafruit.com/3d-printed-battery-adapter-for-camera-mount-led-panel.md)
---
# Source: https://learn.adafruit.com/adafruits-raspberry-pi-lesson-3-network-setup/setting-up-wifi-with-occidentalis.md
# Adafruit's Raspberry Pi Lesson 3. Network Setup
## Setting up Wifi by Hand (Advanced)
Info:
To configure Wifi you will need to edit the file **/etc/wpa\_supplicant/wpa\_supplicant.conf**. There are two ways to do this as described below. Use whichever is most convenient for your setup and situation.
With either approach, you'll want the contents of the file to be what is shown below. Replace **YOURSSID** and **YOURPASSWORD** with whatever is used for your network setup.
```
ctrl_interface=DIR=/var/run/wpa_supplicant GROUP=netdev
update_config=1
country=US
network={
ssid="YOURSSID"
psk="YOURPASSWORD"
scan_ssid=1
}
```
Info:
[Click here for a list of country codes.](https://en.wikipedia.org/wiki/ISO_3166-1_alpha-2)
## Create the file in /boot
This approach will allow you to configure Wifi by creating and editing the file directly on the SD card in another PC. The **/boot** partition is FAT formatted which is readable by most PC's. So you can simply insert the SD card in a USB reader and a **boot** folder should show up.
If you create a **wpa\_supplicant.conf** file in **/boot** , it will be copied to the main partition's **/etc/wpa\_supplicant** location at boot time,replacing whatever is there. It will then be deleted from **/boot** , so you won't see it there if you go looking.
So just use whatever text editor (not word processor) you want on your PC to create the file in **/boot** , like this:

Save the file and safely remove the SD card from your PC. Put it in the Raspberry Pi and power it up. If all goes well, it should copy the file over and connect to your Wifi.
## Edit the file in /etc/wpa\_supplicant
This is the more direct approach - you edit the file directly on the Raspberry Pi. This approach works good if you are already connected to the Raspberry Pi via a console cable or monitor.
Since this file requires elevated privileges to access, you'll need to open it with **sudo**.

Then add the contents. Don't forget to actually change **YOURSSID** and **YOURPASSWORD**.

Press CTRL-X and then Y to save and and exit. Then run the following command to have the file read and try to connect to your Wifi.
```
sudo wpa_cli -i wlan0 reconfigure
```

- [Previous Page](https://learn.adafruit.com/adafruits-raspberry-pi-lesson-3-network-setup/setting-up-wifi-with-raspi-config-easy.md)
- [Next Page](https://learn.adafruit.com/adafruits-raspberry-pi-lesson-3-network-setup/test-and-configure.md)
## Featured Products
### Raspberry Pi 3 - Model B+ - 1.4GHz Cortex-A53 with 1GB RAM
[Raspberry Pi 3 - Model B+ - 1.4GHz Cortex-A53 with 1GB RAM](https://www.adafruit.com/product/3775)
The Raspberry Pi 3 Model B is the most popular Raspberry Pi computer made, and the Pi Foundation knows you can always make a good thing _better_! And what could make the Pi 3 better? How about a _faster_ processor, 5 GHz WiFi, and updated Ethernet chip with PoE capability?...
In Stock
[Buy Now](https://www.adafruit.com/product/3775)
[Related Guides to the Product](https://learn.adafruit.com/products/3775/guides)
### Budget Pack for Raspberry Pi 1 Model B (Doesn't include RasPi)
[Budget Pack for Raspberry Pi 1 Model B (Doesn't include RasPi)](https://www.adafruit.com/product/965)
An optimized collection of parts and pieces to experiment with Raspberry Pi at home, school or work. Great for students and those that want to get their feet wet, no soldering required! **THIS PACK DOES NOT INCLUDE A RASPBERRY PI 1 MODEL B and is NOT compatible with Model B+ or Raspberry Pi...**
No Longer Stocked
[Buy Now](https://www.adafruit.com/product/965)
[Related Guides to the Product](https://learn.adafruit.com/products/965/guides)
### USB WiFi (802.11b/g/n) Module: For Raspberry Pi and more
[USB WiFi (802.11b/g/n) Module: For Raspberry Pi and more](https://www.adafruit.com/product/1012)
Make your Internet of Things device cable-free by adding WiFi. Take advantage of the Raspberry Pi and Beagle Bone's USB port to add a low cost, but high-reliability wireless link. We tried half a dozen modules to find one that works well with the Pi and Bone without the need of recompiling...
In Stock
[Buy Now](https://www.adafruit.com/product/1012)
[Related Guides to the Product](https://learn.adafruit.com/products/1012/guides)
### USB WiFi (802.11b/g/n) Module with Antenna for Raspberry Pi
[USB WiFi (802.11b/g/n) Module with Antenna for Raspberry Pi](https://www.adafruit.com/product/1030)
Discontinued - [**you can grab** USB WiFi (802.11b/g/n) Module: For Raspberry Pi and more **instead! **](https://www.adafruit.com/product/1012)
Make your Internet of Things device cable-free by adding super WiFi. Take advantage of the Raspberry Pi and Beagle...
No Longer Stocked
[Buy Now](https://www.adafruit.com/product/1030)
[Related Guides to the Product](https://learn.adafruit.com/products/1030/guides)
### Miniature WiFi (802.11b/g/n) Module: For Raspberry Pi and more
[Miniature WiFi (802.11b/g/n) Module: For Raspberry Pi and more](https://www.adafruit.com/product/814)
Make your Internet of Things device cable-free by adding WiFi. Take advantage of the Raspberry Pi and Beagle Bone's USB port to add a low cost, but high-reliability wireless link. We tried half a dozen modules to find one that works well with the Pi and Bone without the need of recompiling...
No Longer Stocked
[Buy Now](https://www.adafruit.com/product/814)
[Related Guides to the Product](https://learn.adafruit.com/products/814/guides)
### Programming the Raspberry Pi: Getting Started with Python
[Programming the Raspberry Pi: Getting Started with Python](https://www.adafruit.com/product/1089)
**Program your own Raspberry Pi projects!**
An updated guide to programming your own Raspberry Pi projects. Learn to create inventive programs and fun games on your powerful Raspberry Pi--with no programming experience required. **This practical book has been revised...**
In Stock
[Buy Now](https://www.adafruit.com/product/1089)
[Related Guides to the Product](https://learn.adafruit.com/products/1089/guides)
### Ethernet Cable - 3 ft long
[Ethernet Cable - 3 ft long](https://www.adafruit.com/product/995)
We have so many Internet-connected goodies in the shop, we figured it's time to carry a cable so you can easily connect them up! This cable is 3 feet long, comes in Adafruit black and has all 8 wires installed. Perfect for use with the
No Longer Stocked
[Buy Now](https://www.adafruit.com/product/995)
[Related Guides to the Product](https://learn.adafruit.com/products/995/guides)
### USB 2.0 Powered Hub - 7 Ports with 5V 2A Power Supply
[USB 2.0 Powered Hub - 7 Ports with 5V 2A Power Supply](https://www.adafruit.com/product/961)
Add lots more USB capability to your Raspberry Pi or computer using this powered USB 2.0 hub. It adds a full **seven powered ports** , all at USB 2.0 speeds so you can use video cameras and other high speed devices (cheaper hubs are v1.1 and not as fast!)
The extra sauce...
No Longer Stocked
[Buy Now](https://www.adafruit.com/product/961)
[Related Guides to the Product](https://learn.adafruit.com/products/961/guides)
## Related Guides
- [Introducing the Raspberry Pi Zero](https://learn.adafruit.com/introducing-the-raspberry-pi-zero.md)
- [Cloud Cam: Internet-Connected Security Camera](https://learn.adafruit.com/cloud-cam-connected-raspberry-pi-security-camera.md)
- [Resizing the Raspberry Pi Boot Partition](https://learn.adafruit.com/resizing-raspberry-pi-boot-partition.md)
- [Raspberry Pi as an Ad Blocking Access Point](https://learn.adafruit.com/raspberry-pi-as-an-ad-blocking-access-point.md)
- [Web Enabled PIXEL on Raspberry Pi](https://learn.adafruit.com/web-enabled-pixel-on-raspberry-pi.md)
- [Adafruit Raspberry Pi Educational Linux Distro](https://learn.adafruit.com/adafruit-raspberry-pi-educational-linux-distro.md)
- [Arm-based IoT Kit for Cloud IoT Core - Getting Started](https://learn.adafruit.com/raspberry-pi-3-and-sensor-kit-for-google-cloud-iot-core.md)
- [Adafruit's Raspberry Pi Lesson 10. Stepper Motors](https://learn.adafruit.com/adafruits-raspberry-pi-lesson-10-stepper-motors.md)
- [A Sillier Mousetrap: Logging Mouse Data to Adafruit IO with the Raspberry Pi](https://learn.adafruit.com/a-sillier-mousetrap-logging-mouse-data-to-adafruit-io-with-the-raspberry-pi.md)
- [Cupcade: the Raspberry Pi Micro Arcade Cabinet](https://learn.adafruit.com/cupcade-raspberry-pi-micro-mini-arcade-game-cabinet.md)
- [Adafruit 128x64 OLED Bonnet for Raspberry Pi](https://learn.adafruit.com/adafruit-128x64-oled-bonnet-for-raspberry-pi.md)
- [Controlling Motors using the Raspberry Pi and RasPiRobot Board V2](https://learn.adafruit.com/controlling-motors-using-the-raspberry-pi-and-raspirobot-board-v2.md)
- [Adafruit PiTFT 3.5" Touch Screen for Raspberry Pi](https://learn.adafruit.com/adafruit-pitft-3-dot-5-touch-screen-for-raspberry-pi.md)
- [Processing on the Raspberry Pi & PiTFT](https://learn.adafruit.com/processing-on-the-raspberry-pi-and-pitft.md)
- [Large Pi-based Thermometer and Clock](https://learn.adafruit.com/large-pi-based-thermometer-and-clock.md)
---
# Source: https://learn.adafruit.com/adafruits-raspberry-pi-lesson-3-network-setup/setting-up-wifi-with-raspi-config-easy.md
# Adafruit's Raspberry Pi Lesson 3. Network Setup
## Setting up Wifi
# raspi-config
raspi-config is the Raspberry Pi configuration tool that makes network configuration, remote access (eg. ssh / vnc), location settings and boot options a snap. This tool can be run from the command line and provides a simple interface that is easy to navigate with arrow keys. We highly recommend using this method over the GUI or manual command line file editing due to the flexibility of being able to run it remotely or in a console.
# Launching raspi-config
When you first boot your newly configured Pi it will either drop you into a console or into a graphical environment. In either case we will run the following command. The GUI boot up will require us to launch a terminal.

```
sudo raspi-config
```
## Select Network Options

## Select Wi-Fi

## Enter WiFi Name (SSID)

## Enter WiFi Password

## Select Finish

## Bring Up the WiFi Adapter
We could just reboot and see if the WiFi automatically comes up. The following wpa\_cli command will bring up the WiFi interface on-line without requiring a reboot.
If you have a modern Raspberry Pi and are using an external adapter it is likely that your WiFi device will be named wlan1.
```
sudo wpa_cli -i wlan0 reconfigure
```

## Verify IP Address
If everything worked properly we will see the IP address of our device after the "inet " argument. We are now on-line. If this does not work try repeating the steps above in raspi-config and entering the WiFi access point name (SSID) and password again.
```
ifconfig wlan0
```
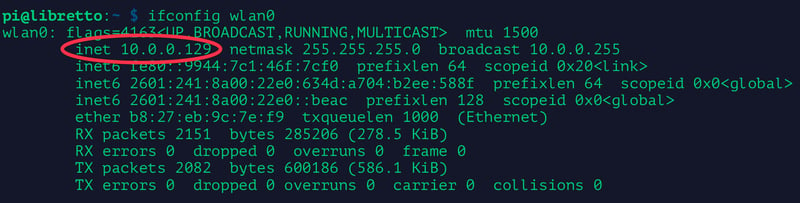
- [Previous Page](https://learn.adafruit.com/adafruits-raspberry-pi-lesson-3-network-setup/buying-a-usb-wifi-adapter.md)
- [Next Page](https://learn.adafruit.com/adafruits-raspberry-pi-lesson-3-network-setup/setting-up-wifi-with-occidentalis.md)
## Featured Products
### Raspberry Pi 3 - Model B+ - 1.4GHz Cortex-A53 with 1GB RAM
[Raspberry Pi 3 - Model B+ - 1.4GHz Cortex-A53 with 1GB RAM](https://www.adafruit.com/product/3775)
The Raspberry Pi 3 Model B is the most popular Raspberry Pi computer made, and the Pi Foundation knows you can always make a good thing _better_! And what could make the Pi 3 better? How about a _faster_ processor, 5 GHz WiFi, and updated Ethernet chip with PoE capability?...
In Stock
[Buy Now](https://www.adafruit.com/product/3775)
[Related Guides to the Product](https://learn.adafruit.com/products/3775/guides)
### Budget Pack for Raspberry Pi 1 Model B (Doesn't include RasPi)
[Budget Pack for Raspberry Pi 1 Model B (Doesn't include RasPi)](https://www.adafruit.com/product/965)
An optimized collection of parts and pieces to experiment with Raspberry Pi at home, school or work. Great for students and those that want to get their feet wet, no soldering required! **THIS PACK DOES NOT INCLUDE A RASPBERRY PI 1 MODEL B and is NOT compatible with Model B+ or Raspberry Pi...**
No Longer Stocked
[Buy Now](https://www.adafruit.com/product/965)
[Related Guides to the Product](https://learn.adafruit.com/products/965/guides)
### USB WiFi (802.11b/g/n) Module: For Raspberry Pi and more
[USB WiFi (802.11b/g/n) Module: For Raspberry Pi and more](https://www.adafruit.com/product/1012)
Make your Internet of Things device cable-free by adding WiFi. Take advantage of the Raspberry Pi and Beagle Bone's USB port to add a low cost, but high-reliability wireless link. We tried half a dozen modules to find one that works well with the Pi and Bone without the need of recompiling...
In Stock
[Buy Now](https://www.adafruit.com/product/1012)
[Related Guides to the Product](https://learn.adafruit.com/products/1012/guides)
### USB WiFi (802.11b/g/n) Module with Antenna for Raspberry Pi
[USB WiFi (802.11b/g/n) Module with Antenna for Raspberry Pi](https://www.adafruit.com/product/1030)
Discontinued - [**you can grab** USB WiFi (802.11b/g/n) Module: For Raspberry Pi and more **instead! **](https://www.adafruit.com/product/1012)
Make your Internet of Things device cable-free by adding super WiFi. Take advantage of the Raspberry Pi and Beagle...
No Longer Stocked
[Buy Now](https://www.adafruit.com/product/1030)
[Related Guides to the Product](https://learn.adafruit.com/products/1030/guides)
### Miniature WiFi (802.11b/g/n) Module: For Raspberry Pi and more
[Miniature WiFi (802.11b/g/n) Module: For Raspberry Pi and more](https://www.adafruit.com/product/814)
Make your Internet of Things device cable-free by adding WiFi. Take advantage of the Raspberry Pi and Beagle Bone's USB port to add a low cost, but high-reliability wireless link. We tried half a dozen modules to find one that works well with the Pi and Bone without the need of recompiling...
No Longer Stocked
[Buy Now](https://www.adafruit.com/product/814)
[Related Guides to the Product](https://learn.adafruit.com/products/814/guides)
### Programming the Raspberry Pi: Getting Started with Python
[Programming the Raspberry Pi: Getting Started with Python](https://www.adafruit.com/product/1089)
**Program your own Raspberry Pi projects!**
An updated guide to programming your own Raspberry Pi projects. Learn to create inventive programs and fun games on your powerful Raspberry Pi--with no programming experience required. **This practical book has been revised...**
In Stock
[Buy Now](https://www.adafruit.com/product/1089)
[Related Guides to the Product](https://learn.adafruit.com/products/1089/guides)
### Ethernet Cable - 3 ft long
[Ethernet Cable - 3 ft long](https://www.adafruit.com/product/995)
We have so many Internet-connected goodies in the shop, we figured it's time to carry a cable so you can easily connect them up! This cable is 3 feet long, comes in Adafruit black and has all 8 wires installed. Perfect for use with the
No Longer Stocked
[Buy Now](https://www.adafruit.com/product/995)
[Related Guides to the Product](https://learn.adafruit.com/products/995/guides)
### USB 2.0 Powered Hub - 7 Ports with 5V 2A Power Supply
[USB 2.0 Powered Hub - 7 Ports with 5V 2A Power Supply](https://www.adafruit.com/product/961)
Add lots more USB capability to your Raspberry Pi or computer using this powered USB 2.0 hub. It adds a full **seven powered ports** , all at USB 2.0 speeds so you can use video cameras and other high speed devices (cheaper hubs are v1.1 and not as fast!)
The extra sauce...
No Longer Stocked
[Buy Now](https://www.adafruit.com/product/961)
[Related Guides to the Product](https://learn.adafruit.com/products/961/guides)
## Related Guides
- [Introducing the Raspberry Pi Zero](https://learn.adafruit.com/introducing-the-raspberry-pi-zero.md)
- [Cloud Cam: Internet-Connected Security Camera](https://learn.adafruit.com/cloud-cam-connected-raspberry-pi-security-camera.md)
- [Resizing the Raspberry Pi Boot Partition](https://learn.adafruit.com/resizing-raspberry-pi-boot-partition.md)
- [Raspberry Pi as an Ad Blocking Access Point](https://learn.adafruit.com/raspberry-pi-as-an-ad-blocking-access-point.md)
- [Web Enabled PIXEL on Raspberry Pi](https://learn.adafruit.com/web-enabled-pixel-on-raspberry-pi.md)
- [Adafruit Raspberry Pi Educational Linux Distro](https://learn.adafruit.com/adafruit-raspberry-pi-educational-linux-distro.md)
- [Arm-based IoT Kit for Cloud IoT Core - Getting Started](https://learn.adafruit.com/raspberry-pi-3-and-sensor-kit-for-google-cloud-iot-core.md)
- [Adafruit's Raspberry Pi Lesson 10. Stepper Motors](https://learn.adafruit.com/adafruits-raspberry-pi-lesson-10-stepper-motors.md)
- [A Sillier Mousetrap: Logging Mouse Data to Adafruit IO with the Raspberry Pi](https://learn.adafruit.com/a-sillier-mousetrap-logging-mouse-data-to-adafruit-io-with-the-raspberry-pi.md)
- [Cupcade: the Raspberry Pi Micro Arcade Cabinet](https://learn.adafruit.com/cupcade-raspberry-pi-micro-mini-arcade-game-cabinet.md)
- [Adafruit 128x64 OLED Bonnet for Raspberry Pi](https://learn.adafruit.com/adafruit-128x64-oled-bonnet-for-raspberry-pi.md)
- [Controlling Motors using the Raspberry Pi and RasPiRobot Board V2](https://learn.adafruit.com/controlling-motors-using-the-raspberry-pi-and-raspirobot-board-v2.md)
- [Adafruit PiTFT 3.5" Touch Screen for Raspberry Pi](https://learn.adafruit.com/adafruit-pitft-3-dot-5-touch-screen-for-raspberry-pi.md)
- [Processing on the Raspberry Pi & PiTFT](https://learn.adafruit.com/processing-on-the-raspberry-pi-and-pitft.md)
- [Large Pi-based Thermometer and Clock](https://learn.adafruit.com/large-pi-based-thermometer-and-clock.md)
---
# Source: https://learn.adafruit.com/flora-snaps/sew-on-sockets.md
# Flora Snaps
## Sew on sockets

Press your snappy Flora against the garment firmly and wiggle the board so the studs make small impressions on the fabric.

These markings show where to sew the corresponding sockets.

Sew the sockets onto the garment with conductive thread. Stitch the threads to their corresponding components of the circuit. Use nail polish or fray check to seal the knots before trimming the loose end very close-- stray threads cause shorts!

The Flora will be connected most securely if it has supporting sockets at various spots around the circular board. If your circuit doesn't use pads on all sides of the Flora, you can sew sockets with plain thread in strategic spots, as seen in the upper right of this photo.

Snap your Flora into position! Try connecting and disconnecting it a few times to test the solder joints again.
- [Previous Page](https://learn.adafruit.com/flora-snaps/testing-and-troubleshooting.md)
- [Next Page](https://learn.adafruit.com/flora-snaps/use-it.md)
## Featured Products
### FLORA - Wearable electronic platform: Arduino-compatible
[FLORA - Wearable electronic platform: Arduino-compatible](https://www.adafruit.com/product/659)
FLORA is Adafruit's fully-featured wearable electronics platform. It's a round, sewable, Arduino-compatible microcontroller designed to empower amazing wearables projects.FLORA comes with Adafruit's support, [tutorials and...](http://learn.adafruit.com/category/flora)
In Stock
[Buy Now](https://www.adafruit.com/product/659)
[Related Guides to the Product](https://learn.adafruit.com/products/659/guides)
### Sewable Snaps - 5mm Diameter - Card of 24
[Sewable Snaps - 5mm Diameter - Card of 24](https://www.adafruit.com/product/1126)
The small 5mm size of these tin-plated brass snaps means they fit perfectly on Flora's pads! Snaps make a great connector for wearables-- solder one side to the board and sew the other to your project with conductive thread! This card comes with 24 complete snaps (socket and stud...
In Stock
[Buy Now](https://www.adafruit.com/product/1126)
[Related Guides to the Product](https://learn.adafruit.com/products/1126/guides)
### Needle set - 3/9 sizes - 20 needles
[Needle set - 3/9 sizes - 20 needles](https://www.adafruit.com/product/615)
Mighty needles, sew like the wind! This needle set is the only one you'll need for any sort of hand sewing, especially using our conductive thread and wearable electronics parts.
Each pack contains 20 gold-eye sharps, with eye sizes ranging from #3 (1.75" long) to #9...
Out of Stock
[Buy Now](https://www.adafruit.com/product/615)
[Related Guides to the Product](https://learn.adafruit.com/products/615/guides)
### Stainless Medium Conductive Thread - 3 ply - 18 meter/60 ft
[Stainless Medium Conductive Thread - 3 ply - 18 meter/60 ft](https://www.adafruit.com/product/641)
After months of searching, we finally have what we consider to be the ultimate conductive thread. It's thin, strong, smooth, and made completely of 316L stainless steel. Once you start working with this thread you'll quickly agree its optimal for any wearables work!
This...
Out of Stock
[Buy Now](https://www.adafruit.com/product/641)
[Related Guides to the Product](https://learn.adafruit.com/products/641/guides)
### Getting Started with Adafruit FLORA
[Getting Started with Adafruit FLORA](https://www.adafruit.com/product/1839)
**Making Wearables with an Arduino-Compatible Electronics Platform**
This book introduces readers to building wearable electronics projects using Adafruit's tiny FLORA board: at 4.4 grams, and only 1.75 inches in diameter, and featuring Arduino compatibility, it's the...
No Longer Stocked
[Buy Now](https://www.adafruit.com/product/1839)
[Related Guides to the Product](https://learn.adafruit.com/products/1839/guides)
### Getting Started with Adafruit FLORA Book Pack
[Getting Started with Adafruit FLORA Book Pack](https://www.adafruit.com/product/2404)
Pickup a copy of [Getting Started with Adafruit FLORA](https://www.adafruit.com/products/1839) and then hit the ground running with everything that you need to become an [Adafruit FLORA](https://www.adafruit.com/products/659) supreme being!
This pack is...
No Longer Stocked
[Buy Now](https://www.adafruit.com/product/2404)
[Related Guides to the Product](https://learn.adafruit.com/products/2404/guides)
### FLORA Sensor Pack
[FLORA Sensor Pack](https://www.adafruit.com/product/1458)
Sense the world around you! The FLORA Sensor Pack includes many types of sensors for your wearable enjoyment. Sense motion, direction, color, light levels, touch, and connections with FLORA sensor breakouts and conductive materials, and a few NeoPixels for experimenting with displaying your...
No Longer Stocked
[Buy Now](https://www.adafruit.com/product/1458)
[Related Guides to the Product](https://learn.adafruit.com/products/1458/guides)
### FLORA GPS Starter Pack
[FLORA GPS Starter Pack](https://www.adafruit.com/product/1090)
Get started with the fabulous Adafruit Flora platform with this lovely starter kit. Included are plenty of parts to make a few different fun projects! There's a Flora motherboard, a GPS module that can also perform location datalogging, eight ultra-bright chainable RGB pixels, a battery...
No Longer Stocked
[Buy Now](https://www.adafruit.com/product/1090)
[Related Guides to the Product](https://learn.adafruit.com/products/1090/guides)
## Related Guides
- [Firewalker LED Sneakers](https://learn.adafruit.com/firewalker-led-sneakers.md)
- [Datalogging Hat with FLORA BLE](https://learn.adafruit.com/datalogging-hat-with-flora-ble.md)
- [Chameleon Scarf](https://learn.adafruit.com/chameleon-scarf.md)
- [Flora TSL2561 Lux Sensor](https://learn.adafruit.com/flora-lux-sensor.md)
- [Adafruit Arduino Selection Guide](https://learn.adafruit.com/adafruit-arduino-selection-guide.md)
- [Flora GPS Jacket](https://learn.adafruit.com/flora-gps-jacket.md)
- [Glowing Skullcandy Headphones Mod](https://learn.adafruit.com/glowing-skullcandy-headphones-mod.md)
- [Flora MIDI Drum Glove](https://learn.adafruit.com/midi-drum-glove.md)
- [How to Find Hidden COM Ports](https://learn.adafruit.com/how-to-find-hidden-com-ports.md)
- [EEG Costume Cap](https://learn.adafruit.com/eeg-costume-cap.md)
- [Getting Started with FLORA](https://learn.adafruit.com/getting-started-with-flora.md)
- [FLORA and GEMMA ICSP](https://learn.adafruit.com/flora-and-gemma-isp.md)
- [NeoPixel Ring Clock](https://learn.adafruit.com/neopixel-ring-clock.md)
- [LED Ampli-Tie](https://learn.adafruit.com/led-ampli-tie.md)
- [Lumo Lift Teardown](https://learn.adafruit.com/lumo-lift-teardown.md)
---
# Source: https://learn.adafruit.com/skill-badge-sash/sew-together.md
# Skill Badge Sash
## Sew Together

Stitch a seam all the way across one shoulder, and at either end of the other shoulder seam, leaving a space for turning it right side out later. Check out the illustration above.

Line up the right sides of your sash-length pieces.

Pin all around the edges, and pin the shoulder seam allowances open.

Stitch around the pinned perimeter.

- [Previous Page](https://learn.adafruit.com/skill-badge-sash/cut-fabric.md)
- [Next Page](https://learn.adafruit.com/skill-badge-sash/finishing.md)
## Featured Products
### LEDs - Skill badge, iron-on patch
[LEDs - Skill badge, iron-on patch](https://www.adafruit.com/product/479)
You learned LEDs! (Light-emitting diodes)... Adafruit offers a fun and exciting "badges" of achievement for electronics, science and engineering. We believe everyone should be able to be rewarded for learning a useful skill, a badge is just one of the many ways to show and share.
No Longer Stocked
[Buy Now](https://www.adafruit.com/product/479)
[Related Guides to the Product](https://learn.adafruit.com/products/479/guides)
### Learn to program "Hello world" - Skill badge, iron-on patch
[Learn to program "Hello world" - Skill badge, iron-on patch](https://www.adafruit.com/product/478)
You can write code! Adafruit offers a fun and exciting "badges" of achievement for electronics, science and engineering. We believe everyone should be able to be rewarded for learning a useful skill, a badge is just one of the many ways to show and share.
This is the...
No Longer Stocked
[Buy Now](https://www.adafruit.com/product/478)
[Related Guides to the Product](https://learn.adafruit.com/products/478/guides)
### Learn to solder - Skill badge, iron-on patch
[Learn to solder - Skill badge, iron-on patch](https://www.adafruit.com/product/465)
You can solder! Adafruit offers a fun and exciting "badges" of achievement for electronics, science and engineering. We believe everyone should be able to be rewarded for learning a useful skill, a badge is just one of the many ways to show and share.
This is the "I...
No Longer Stocked
[Buy Now](https://www.adafruit.com/product/465)
[Related Guides to the Product](https://learn.adafruit.com/products/465/guides)
## Related Guides
- [Collin's Lab: Solar](https://learn.adafruit.com/collins-lab-solar.md)
- [Cartoon Network MakeCode: Garnet's Palm Gems from Steven Universe](https://learn.adafruit.com/cartoon-network-makecode-garnet-s-palm-gems-from-steven-universe.md)
- [No-Sew LED Wristband](https://learn.adafruit.com/no-sew-led-wristband.md)
- [MicroCode for micro:bit](https://learn.adafruit.com/microcode-for-microbit.md)
- [Adafruit New York and NYC DOE vendor information ](https://learn.adafruit.com/educational-orders-for-educators-based-in-new-york.md)
- [Getting Started With Steven Universe](https://learn.adafruit.com/getting-started-with-steven-universe.md)
- [Visual Studio Code for Education... and CircuitPython](https://learn.adafruit.com/visual-studio-code-for-education-and-circuitpython.md)
- [Makecode para la Circuit Playground Express](https://learn.adafruit.com/makecode-es.md)
- [Share your work with Adafruit Playground!](https://learn.adafruit.com/adafruit-playground-notes.md)
- [Buttermilk Boat with Circuit Playground Express](https://learn.adafruit.com/boat-with-circuit-playground-express.md)
- [Mouse Painter: Emulate Mice with MakeCode ](https://learn.adafruit.com/mouse-painter-emulate-mice-with-makecode.md)
- [Best Beginner Boards for Teachers](https://learn.adafruit.com/best-beginner-boards-for-teachers.md)
- [Anatomical 3D Printed Beating Heart with MakeCode](https://learn.adafruit.com/anatomical-3d-printed-beating-heart-with-makecode.md)
- [MakeCode for Circuit Playground Express](https://learn.adafruit.com/makecode.md)
- [Trash Panda](https://learn.adafruit.com/trash-panda-circuit-python-crickit.md)
---
# Source: https://learn.adafruit.com/el-wire-sign/sew.md
# EL Wire Sign
## Sew

Thread the EL wire from the back, widening the hole with your awl so that the whole wire fits through. Keep in mind the starting hole's location matters in more intricate designs- you want to minimize the amount of wire 'lost' when threading it back behind the board. Pull the wire all the way through, leaving just the tail connector behind. Double up the clear thread on your needle so that you're essentially tying a big loop of thread around it. This will make it much easier to start and end each length of thread and strand of EL.

Sew loops around the wire every inch or as needed around tight turns so that you're tacking it down. The tighter you pull the EL wire and the thread, the more clean and smooth your designs will look. Create short stitches that are perpendicular to the EL wire, then run longer stitches across the back of the poster board over to the next stitch location.

Create tight corners by bending the EL wire around the needle, but be careful not to break the interior corona wires.

When you've reached the end, tie it off!

We didn't have to, but if you want to salvage as much EL as possible, you can [cut and solder](http://learn.adafruit.com/el-wire/soldering-to-el-wire) on a [male in-line power connector](http://adafruit.com/products/319).
- [Previous Page](https://learn.adafruit.com/el-wire-sign/prep-the-design.md)
- [Next Page](https://learn.adafruit.com/el-wire-sign/power.md)
## Featured Products
### Needle set - 3/9 sizes - 20 needles
[Needle set - 3/9 sizes - 20 needles](https://www.adafruit.com/product/615)
Mighty needles, sew like the wind! This needle set is the only one you'll need for any sort of hand sewing, especially using our conductive thread and wearable electronics parts.
Each pack contains 20 gold-eye sharps, with eye sizes ranging from #3 (1.75" long) to #9...
Out of Stock
[Buy Now](https://www.adafruit.com/product/615)
[Related Guides to the Product](https://learn.adafruit.com/products/615/guides)
### 12V 5A switching power supply
[12V 5A switching power supply](https://www.adafruit.com/product/352)
This is a beefy switching supply, for when you need a lot of power! It can supply 12V DC up to 5 Amps, running from 110V or 220V power (the plug it comes with is for US/Canada/Japan but you can use any plug adapter for your country, or just replace the cable with a standard 'figure-8'...
Out of Stock
[Buy Now](https://www.adafruit.com/product/352)
[Related Guides to the Product](https://learn.adafruit.com/products/352/guides)
### In-line power cable 1 meter long extension cord (for EL wire)
[In-line power cable 1 meter long extension cord (for EL wire)](https://www.adafruit.com/product/616)
Give yourself some more room with an EL wire cable extender. This cable has a 2-pin JST SM plug on one end and receptacle on the other. Use it to extend the reach of EL wire, panel, tape, etc. The cable is a meter long, you can of course snap more together if necessary, or cut and re-solder it...
In Stock
[Buy Now](https://www.adafruit.com/product/616)
[Related Guides to the Product](https://learn.adafruit.com/products/616/guides)
### In-line wire 1-to-4 splitter
[In-line wire 1-to-4 splitter](https://www.adafruit.com/product/402)
If you want to connect multiple EL wires/strips/panels up to one inverter, these splitters are quite useful. There is one male connector (goes to the inverter) and then 4 female connectors (which will connect to each wire/strip/panel. You can even cascade them! Only thing to watch for is make...
In Stock
[Buy Now](https://www.adafruit.com/product/402)
[Related Guides to the Product](https://learn.adafruit.com/products/402/guides)
### 12V EL wire/tape inverter
[12V EL wire/tape inverter](https://www.adafruit.com/product/448)
This is an inverter for EL wire and tape, similar to our pocket inverters, except it is a brick that takes 12V input instead of 2 AA batteries. This means its good for 'fixed' installations since you can just plug it into a 12V wall adapter. It's also good for portable projects...
In Stock
[Buy Now](https://www.adafruit.com/product/448)
[Related Guides to the Product](https://learn.adafruit.com/products/448/guides)
### Green Electroluminescent (EL) Wire - 2.5 meters
[Green Electroluminescent (EL) Wire - 2.5 meters](https://www.adafruit.com/product/407)
EL Wire, also known as Electroluminescent wire, is a stiff wire core coated with phosphor and then covered with a protective PVC sheath. When an AC signal is applied to it, it glows an aqua (blue green) color. You can make it look different colors by changing the coating, for example this is a...
In Stock
[Buy Now](https://www.adafruit.com/product/407)
[Related Guides to the Product](https://learn.adafruit.com/products/407/guides)
### Pink Electroluminescent (EL) Wire - 2.5 meters
[Pink Electroluminescent (EL) Wire - 2.5 meters](https://www.adafruit.com/product/404)
EL Wire, also known as Electroluminescent wire is a stiff wire core coated with phosphor and then covered with a protective PVC sheath. When an AC signal is applied to it, it glows an aqua (blue green) color. This EL is pink-coated so that it looks white. It looks a little like thin neon. Very...
Out of Stock
[Buy Now](https://www.adafruit.com/product/404)
[Related Guides to the Product](https://learn.adafruit.com/products/404/guides)
### Yellow Electroluminescent (EL) Wire - 2.5 meters
[Yellow Electroluminescent (EL) Wire - 2.5 meters](https://www.adafruit.com/product/406)
EL Wire, also known as Electroluminescent wire is a stiff wire core coated with phosphor and then covered with a protective PVC sheath. When an AC signal is applied to it, it glows an aqua (blue green) color. You can make it look different colors by changing the coating, for example this is a...
In Stock
[Buy Now](https://www.adafruit.com/product/406)
[Related Guides to the Product](https://learn.adafruit.com/products/406/guides)
## Related Guides
- [EL Workshop](https://learn.adafruit.com/el-workshop.md)
- [TRON Bag](https://learn.adafruit.com/tron-bag.md)
- [EL Stick Figure](https://learn.adafruit.com/el-stick-figure.md)
- [EL Wire Animal Masks](https://learn.adafruit.com/el-wire-animal-masks.md)
- [Electron Bow](https://learn.adafruit.com/electron-bow.md)
- [Glowing Bean Bags with EL Wire](https://learn.adafruit.com/glowing-bean-bags-with-el-wire.md)
- [EL Wire](https://learn.adafruit.com/el-wire.md)
- [EL Bowtie](https://learn.adafruit.com/el-bowtie.md)
- [Light Up your Costume with Noods](https://learn.adafruit.com/light-up-your-costume-with-noods.md)
- [Glowing Star Chuck Taylor Sneakers](https://learn.adafruit.com/glowing-star-chucks.md)
- [EL Wire Stocking](https://learn.adafruit.com/el-wire-stocking.md)
- [TRON Hoodie](https://learn.adafruit.com/tron-hoodie.md)
---
# Source: https://learn.adafruit.com/tron-bag/sewing.md
# TRON Bag
## Sewing
Now we'll start sewing the EL onto the bag. We suggest using 'invisible' thread - also known as nylon thread, its strong and clear so that it wont distract from your EL.
Place the inverter connected to the EL in the pocket you think is best, this will let you best judge how much wire you need - be sure to try opening and closing the bag so you don't make any mistakes. **Its easy to cut EL wire down but impossible to make it longer so measure twice and cut once!**
Lay the EL wire so it traces the chalk outline (or piping) - in this photo the EL is lit but we don't necessarily suggest that you sew it lit unless it helps you visualize the design. Use masking tape to keep the EL wire in place.

Start at the "inverter" end.

Use the needle and thread to wrap around the EL wire and tack it down, a stitch every cm is fine for long runs. We suggest grabbing plenty of material to provide a strong grip.

Once you have traced the pattern, **then** you should cut the ends with wirecutters! (again don't cut while its on)
You can cap the EL wire for protection with a piece of small heatshrink, while its still warm, squeeze it with pliers to seal it.

Continue with all the pieces, taping them down and sewing them, making sure that all the connector ends wind up in the same pocket. You can see here how it all goes to the top left corner.

- [Previous Page](https://learn.adafruit.com/tron-bag/soldering.md)
- [Next Page](https://learn.adafruit.com/tron-bag/detailing.md)
## Featured Products
### Heat Shrink Pack
[Heat Shrink Pack](https://www.adafruit.com/product/344)
Heat shrink is the duct tape of electronics, it keeps your stuff all safe and kept together. Especially when wiring and soldering, use heat shrink to add mechanical strength to cables. We use this stuff all the time and having a zip-lock bag of all the possible sizes is super...
In Stock
[Buy Now](https://www.adafruit.com/product/344)
[Related Guides to the Product](https://learn.adafruit.com/products/344/guides)
### In-line wire 1-to-4 splitter
[In-line wire 1-to-4 splitter](https://www.adafruit.com/product/402)
If you want to connect multiple EL wires/strips/panels up to one inverter, these splitters are quite useful. There is one male connector (goes to the inverter) and then 4 female connectors (which will connect to each wire/strip/panel. You can even cascade them! Only thing to watch for is make...
In Stock
[Buy Now](https://www.adafruit.com/product/402)
[Related Guides to the Product](https://learn.adafruit.com/products/402/guides)
### EL wire starter pack - Blue 2.5 meter (8.2 ft)
[EL wire starter pack - Blue 2.5 meter (8.2 ft)](https://www.adafruit.com/product/583)
A little bundle to get you started! This project pack contains:
- [2.5 meters (over 8 ft) of high-brightness, long-life EL wire in Blue](http://www.adafruit.com/products/408). 2.5 meters is the maximum amount for the pocket driver - it is cut and soldered so it's ready...
Out of Stock
[Buy Now](https://www.adafruit.com/product/583)
[Related Guides to the Product](https://learn.adafruit.com/products/583/guides)
## Related Guides
- [Battery Powering Wearable Electronics](https://learn.adafruit.com/battery-powering-wearable-electronics.md)
- [3D Printed Daft Punk Helmet with Bluetooth ](https://learn.adafruit.com/3d-printed-daft-punk-helmet-with-bluetooth.md)
- [3D Printed Wearable Video Goggles](https://learn.adafruit.com/3d-printed-wearable-video-goggles.md)
- [Decorative Pointy Elf Ear Bud Holders](https://learn.adafruit.com/elf-ears.md)
- [LED Friendship Bracelet](https://learn.adafruit.com/nautical-led-bracelet.md)
- [Make a Zelda Master Sword with the RP2040 Prop-Maker Feather](https://learn.adafruit.com/master-sword-rp2040.md)
- [USB Locket](https://learn.adafruit.com/usb-locket.md)
- [Light Up your Costume with Noods](https://learn.adafruit.com/light-up-your-costume-with-noods.md)
- [Pac Man Pixel Suspenders](https://learn.adafruit.com/pac-man-pixel-suspenders.md)
- [3D Printed LED Buckle](https://learn.adafruit.com/3d-printed-led-buckle.md)
- [Adafruit Flora Bluefruit LE](https://learn.adafruit.com/adafruit-flora-bluefruit-le.md)
- [Textile Potentiometer Hoodie](https://learn.adafruit.com/textile-potentiometer-hoodie.md)
- [Cynaps Bone Conduction Headset Teardown](https://learn.adafruit.com/cynaps-bone-conduction-headset-teardown.md)
- [Glowing Bean Bags with EL Wire](https://learn.adafruit.com/glowing-bean-bags-with-el-wire.md)
- [3D Printed Gunblade](https://learn.adafruit.com/3d-printed-gunblade.md)
---
# Source: https://learn.adafruit.com/adafruit-pn532-rfid-nfc/shield-wiring.md
# Adafruit PN532 RFID/NFC Breakout and Shield
## Shield Wiring
## Solder the Headers
The first step is to solder the headers to the shield. Cut the header strip to length and insert the sections (long pins down) into an Arduino. Then place the shield on top and solder each pin.


## Using the Adafruit NFC Shield with I2C
The Adafruit NFC shield is designed to be used using the I2C by default. I2C only uses two pins (Analog 4 and 5 which are fixed in hardware and cannot be changed) to communicate and one pin as an 'interrupt' pin (Digital 2 - can be changed however). What is nice about I2C is that it is a 'shared' bus - unlike SPI and TTL serial - so you can put as many sensors as you'd like all on the same two pins, as long as their addresses don't collide/conflict. The Interrupt pin is handy because instead of constantly asking the NFC shield "is there a card in view yet? what about now?" constantly, the chip will alert us when a NFC target comes into the antenna range.
The shield is drop-in compatible with any Classic Arduino (UNO, Duemilanove, Diecimilla, etc using the ATmega168 or '328) as well as any Mega R3 or later.
[Mega R2 Arduinos work as well but you need to solder a wire from the](http://arduino.cc/en/Main/ArduinoBoardMega "Link: http://arduino.cc/en/Main/ArduinoBoardMega")**[SDA](http://arduino.cc/en/Main/ArduinoBoardMega)**[and ](http://arduino.cc/en/Main/ArduinoBoardMega)**[SCL](http://arduino.cc/en/Main/ArduinoBoardMega)**[pin holes to the Mega's I2C pins on Digital #20 and #21](http://arduino.cc/en/Main/ArduinoBoardMega "Link: http://arduino.cc/en/Main/ArduinoBoardMega")
# Using with the Arduino Leonardo and Yun
Info:
Here are some photos of setting the IRQ pin to digital 6. First, use a sharp hobby knife to cut the trace from IRQ to 2

Solder a wire from IRQ to #6

- [Previous Page](https://learn.adafruit.com/adafruit-pn532-rfid-nfc/breakout-wiring.md)
- [Next Page](https://learn.adafruit.com/adafruit-pn532-rfid-nfc/arduino-library.md)
## Featured Products
### PN532 NFC/RFID controller breakout board
[PN532 NFC/RFID controller breakout board](https://www.adafruit.com/product/364)
The PN532 is the most popular NFC chip, and is what is embedded in pretty much every phone or device that does NFC. It can pretty much do it all, such as read and write to tags and cards, communicate with phones (say for payment processing), and 'act' like a NFC tag. If you want to do...
Out of Stock
[Buy Now](https://www.adafruit.com/product/364)
[Related Guides to the Product](https://learn.adafruit.com/products/364/guides)
### Adafruit METRO 328 Fully Assembled - Arduino IDE compatible
[Adafruit METRO 328 Fully Assembled - Arduino IDE compatible](https://www.adafruit.com/product/50)
We sure love the ATmega328 here at Adafruit, and we use them _a lot_ for our own projects. The processor has plenty of GPIO, Analog inputs, hardware UART SPI and I2C, timers and PWM galore - just enough for most simple projects. When we need to go small, we use a
Out of Stock
[Buy Now](https://www.adafruit.com/product/50)
[Related Guides to the Product](https://learn.adafruit.com/products/50/guides)
### Breadboarding wire bundle
[Breadboarding wire bundle](https://www.adafruit.com/product/153)
75 flexible stranded core wires with stiff ends molded on in red, orange, yellow, green, blue, brown, black and white. These are a major improvement over the "box of bent wires" that are sometimes sold with breadboards, and faster than stripping your own solid core wires. Makes...
In Stock
[Buy Now](https://www.adafruit.com/product/153)
[Related Guides to the Product](https://learn.adafruit.com/products/153/guides)
### Adafruit PN532 NFC/RFID Controller Shield for Arduino + Extras
[Adafruit PN532 NFC/RFID Controller Shield for Arduino + Extras](https://www.adafruit.com/product/789)
We've taken our popular Adafruit PN532 breakout board and turned it into a shield - the perfect tool for any 13.56MHz RFID or NFC application. The Adafruit NFC shield uses the PN532 chip-set (the most popular NFC chip on the market) and is what is embedded in pretty much every phone or...
In Stock
[Buy Now](https://www.adafruit.com/product/789)
[Related Guides to the Product](https://learn.adafruit.com/products/789/guides)
### 13.56MHz RFID/NFC Card - Classic 1K
[13.56MHz RFID/NFC Card - Classic 1K](https://www.adafruit.com/product/359)
This is a blank 13.56MHz RFID/NFC card - often used for train/bus passes but also found in other systems where a proximity card is desired. The tag contains a small RFID chip and an antenna, and is passively powered by the reader/writer when placed a couple inches away.
These can be...
In Stock
[Buy Now](https://www.adafruit.com/product/359)
[Related Guides to the Product](https://learn.adafruit.com/products/359/guides)
### 13.56MHz RFID/NFC White Tag - Classic 1K
[13.56MHz RFID/NFC White Tag - Classic 1K](https://www.adafruit.com/product/360)
This is a blank 13.56MHz RFID/NFC laundry tag - often used for laundry but also general tagging. The tag contains a small RFID chip and an antenna, and is passively powered by the reader/writer when placed a couple inches away.
These can be read by almost any 13.56MHz RFID/NFC...
In Stock
[Buy Now](https://www.adafruit.com/product/360)
[Related Guides to the Product](https://learn.adafruit.com/products/360/guides)
### 13.56MHz RFID/NFC Clear Tag - Classic 1K
[13.56MHz RFID/NFC Clear Tag - Classic 1K](https://www.adafruit.com/product/361)
This is a blank 13.56MHz Classic 'laundry' tag - often used for laundry or identification but also found in other systems where a small proximity card is desired. This one is clear! The tag contains a small RFID chip and an antenna, and is passively powered by the reader/writer...
In Stock
[Buy Now](https://www.adafruit.com/product/361)
[Related Guides to the Product](https://learn.adafruit.com/products/361/guides)
### 13.56MHz RFID/NFC Sticker - Classic 1K
[13.56MHz RFID/NFC Sticker - Classic 1K](https://www.adafruit.com/product/362)
This is a blank 13.56MHz RFID/NFC sticker - often used for inventory uses but also wherever a sticker is desired. The tag contains a small RFID chip and an antenna, and is passively powered by the reader/writer when placed a couple inches away.
These can be read by almost any...
In Stock
[Buy Now](https://www.adafruit.com/product/362)
[Related Guides to the Product](https://learn.adafruit.com/products/362/guides)
## Related Guides
- [How to Choose a Microcontroller](https://learn.adafruit.com/how-to-choose-a-microcontroller.md)
- [Sous-vide controller powered by Arduino - The SousViduino!](https://learn.adafruit.com/sous-vide-powered-by-arduino-the-sous-viduino.md)
- [Arduino Lesson 13. DC Motors](https://learn.adafruit.com/adafruit-arduino-lesson-13-dc-motors.md)
- [Naughty or Nice Machine](https://learn.adafruit.com/naughty-or-nice-machine.md)
- [Wave Shield Voice Changer](https://learn.adafruit.com/wave-shield-voice-changer.md)
- [Adafruit INA219 Current Sensor Breakout](https://learn.adafruit.com/adafruit-ina219-current-sensor-breakout.md)
- [Low Power Coin Cell Voltage Logger](https://learn.adafruit.com/low-power-coin-cell-voltage-logger.md)
- [Analog Feedback Servos](https://learn.adafruit.com/analog-feedback-servos.md)
- [Tiny Arduino Music Visualizer](https://learn.adafruit.com/piccolo.md)
- [Adafruit Ultimate GPS Logger Shield](https://learn.adafruit.com/adafruit-ultimate-gps-logger-shield.md)
- [Ladyada's Learn Arduino - Lesson #0](https://learn.adafruit.com/ladyadas-learn-arduino-lesson-number-0.md)
- [Mini Thermal Receipt Printers](https://learn.adafruit.com/mini-thermal-receipt-printer.md)
- [Arduino Prototyping Mounting Plate](https://learn.adafruit.com/arduino-prototyping-mounting-plate.md)
- [LED Lightbox](https://learn.adafruit.com/led-lightbox.md)
- [NFC Ring Password Helper](https://learn.adafruit.com/nfc-ring-password-helper.md)
---
# Source: https://learn.adafruit.com/adafruit-4-channel-adc-breakouts/signal-connections.md
# Adafruit 4-Channel ADC Breakouts
## Signal Connections

## Single Ended vs. Differential Inputs:
The ADS1x15 breakouts support up to 4 SIngle Ended or 2 Differential inputs.
**Single Ended** inputs measure the voltage between the analog input channel (A0-A3) and analog ground (GND).
**Differential** inputs measure the voltage between two analog input channels. (A0&A1 or A2&A3).
## Which should I use?
Single ended inputs give you twice as many inputs. So why would you want to use differential inputs?
Single ended inputs can, by definition, only measure positive voltages. Without the sign bit, you only get an effective 15 bit resolution.
In addition to providing the full 16 bits of resolution and the ability to measure negative voltages, Differential measurements offer more immunity from electromagnetic noise. This is useful when using long signal wires or operating in an electrically noisy environment. This is also desirable when dealing with small signals requiring high gain, since the gain will amplify the noise as well as the signal.
## Single Ended Connections:
Connect the signal wire to one of the analog input channels (A0 - A3). Connect the ground wire to GND. This diagram shows how to connect an ADXL335 to for measurement of the X, Y and Z axis on analog channels A0, A1 and A2. 
## Differential Connections:
Differential measurements use a pair of input pins, either A0&A1 or A2&A3. The following diagram shows connections for differential measurement of the battery voltage on a LiPo charger board.

Danger:
- [Previous Page](https://learn.adafruit.com/adafruit-4-channel-adc-breakouts/assembly-and-wiring.md)
- [Next Page](https://learn.adafruit.com/adafruit-4-channel-adc-breakouts/python-circuitpython.md)
## Featured Products
### ADS1115 16-Bit ADC - 4 Channel with Programmable Gain Amplifier
[ADS1115 16-Bit ADC - 4 Channel with Programmable Gain Amplifier](https://www.adafruit.com/product/1085)
For microcontrollers without an analog-to-digital converter or when you want a higher-precision ADC, the ADS1115 provides 16-bit precision at 860 samples/second over I2C. The chip can be configured as 4 single-ended input channels, or two differential channels. As a nice bonus, it even...
In Stock
[Buy Now](https://www.adafruit.com/product/1085)
[Related Guides to the Product](https://learn.adafruit.com/products/1085/guides)
### ADS1015 12-Bit ADC - 4 Channel with Programmable Gain Amplifier
[ADS1015 12-Bit ADC - 4 Channel with Programmable Gain Amplifier](https://www.adafruit.com/product/1083)
For microcontrollers without an analog-to-digital converter or when you want a higher-precision ADC, the ADS1015 provides 12-bit precision at 3300 samples/second over I2C. The chip can be configured as 4 single-ended input channels or two differential channels. As a nice bonus, it even...
In Stock
[Buy Now](https://www.adafruit.com/product/1083)
[Related Guides to the Product](https://learn.adafruit.com/products/1083/guides)
### STEMMA QT / Qwiic JST SH 4-Pin Cable - 50mm Long
[STEMMA QT / Qwiic JST SH 4-Pin Cable - 50mm Long](https://www.adafruit.com/product/4399)
This 4-wire cable is 50mm / 1.9" long and fitted with JST SH female 4-pin connectors on both ends. Compared with the chunkier JST PH these are 1mm pitch instead of 2mm, but still have a nice latching feel, while being easy to insert and remove.
In Stock
[Buy Now](https://www.adafruit.com/product/4399)
[Related Guides to the Product](https://learn.adafruit.com/products/4399/guides)
### Adafruit Assembled Pi Cobbler Breakout + Cable for Raspberry Pi
[Adafruit Assembled Pi Cobbler Breakout + Cable for Raspberry Pi](https://www.adafruit.com/product/914)
Now that you've finally got your hands on a [Raspberry Pi® Model B](http://www.raspberrypi.org/), you're probably itching to make some fun embedded computer projects with it. What you need is an add on prototyping Pi Cobbler from Adafruit, which can break out all those...
No Longer Stocked
[Buy Now](https://www.adafruit.com/product/914)
[Related Guides to the Product](https://learn.adafruit.com/products/914/guides)
### Adafruit METRO 328 Fully Assembled - Arduino IDE compatible
[Adafruit METRO 328 Fully Assembled - Arduino IDE compatible](https://www.adafruit.com/product/50)
We sure love the ATmega328 here at Adafruit, and we use them _a lot_ for our own projects. The processor has plenty of GPIO, Analog inputs, hardware UART SPI and I2C, timers and PWM galore - just enough for most simple projects. When we need to go small, we use a
Out of Stock
[Buy Now](https://www.adafruit.com/product/50)
[Related Guides to the Product](https://learn.adafruit.com/products/50/guides)
### Full Sized Premium Breadboard - 830 Tie Points
[Full Sized Premium Breadboard - 830 Tie Points](https://www.adafruit.com/product/239)
This is a 'full-size' premium quality breadboard, 830 tie points. Good for small and medium projects. It's 2.2" x 7" (5.5 cm x 17 cm) with a standard double-strip in the middle and two power rails on both sides. You can pull the power rails off easily to make the...
In Stock
[Buy Now](https://www.adafruit.com/product/239)
[Related Guides to the Product](https://learn.adafruit.com/products/239/guides)
## Related Guides
- [Animating Multiple LED Backpacks](https://learn.adafruit.com/animating-multiple-led-backpacks.md)
- [Arduino Lesson 16. Stepper Motors](https://learn.adafruit.com/adafruit-arduino-lesson-16-stepper-motors.md)
- [Bluetooth Temperature & Humidity Sensor](https://learn.adafruit.com/bluetooth-temperature-and-humidity-sensor.md)
- [Light Meter](https://learn.adafruit.com/light-meter.md)
- [Making Adabot: Part 2](https://learn.adafruit.com/making-adabot-part-2.md)
- [Silicone Robo-Tentacle](https://learn.adafruit.com/silicone-robo-tentacle.md)
- [Digital Circuits 7: MCUs... how do they work?](https://learn.adafruit.com/mcus-how-do-they-work.md)
- [Adafruit Motor Shield](https://learn.adafruit.com/adafruit-motor-shield.md)
- [Remote controlled door lock using a fingerprint sensor & Adafruit IO](https://learn.adafruit.com/remote-controlled-door-lock-using-a-fingerprint-sensor-and-adafruit-io.md)
- [Adafruit 16-channel PWM/Servo Shield](https://learn.adafruit.com/adafruit-16-channel-pwm-slash-servo-shield.md)
- [Wireless Gardening with Arduino + CC3000 WiFi Modules](https://learn.adafruit.com/wireless-gardening-arduino-cc3000-wifi-modules.md)
- [Sous-vide controller powered by Arduino - The SousViduino!](https://learn.adafruit.com/sous-vide-powered-by-arduino-the-sous-viduino.md)
- [Arduino GPS Clock](https://learn.adafruit.com/arduino-clock.md)
- [I2C Addresses and Troublesome Chips](https://learn.adafruit.com/i2c-addresses.md)
- [Adafruit INA219 Current Sensor Breakout](https://learn.adafruit.com/adafruit-ina219-current-sensor-breakout.md)
---
# Source: https://learn.adafruit.com/sitcom-sfx-door-trigger.md
# Sitcom SFX Door Trigger
## Overview
http://vimeo.com/55041635
This guide is for people that wish they had a soundtrack to their life. Using a PIR sensor and magnetic door switch with a Raspberry Pi, you'll be able to play a sound file every time you open a door. More specifically, it will play a pre-recorded sound file based on whether you are entering (applause!) or leaving (booooo!).
This guide works with all 20-pin and 40-pin versions of the Raspberry Pi.
This project was conceived and executed along with [George Michael Brower](http://www.staggeringbeauty.com).

- [Next Page](https://learn.adafruit.com/sitcom-sfx-door-trigger/getting-started.md)
## Featured Products
### Raspberry Pi 3 - Model B+ - 1.4GHz Cortex-A53 with 1GB RAM
[Raspberry Pi 3 - Model B+ - 1.4GHz Cortex-A53 with 1GB RAM](https://www.adafruit.com/product/3775)
The Raspberry Pi 3 Model B is the most popular Raspberry Pi computer made, and the Pi Foundation knows you can always make a good thing _better_! And what could make the Pi 3 better? How about a _faster_ processor, 5 GHz WiFi, and updated Ethernet chip with PoE capability?...
In Stock
[Buy Now](https://www.adafruit.com/product/3775)
[Related Guides to the Product](https://learn.adafruit.com/products/3775/guides)
### Adafruit Prototyping Pi Plate Kit for Raspberry Pi
[Adafruit Prototyping Pi Plate Kit for Raspberry Pi](https://www.adafruit.com/product/801)
Now that you've finally got your hands on a [Raspberry Pi®](http://www.raspberrypi.org/), you're probably itching to make some fun embedded computer projects with it. What you need is an add on prototyping Pi Plate from Adafruit, which can snap onto the Pi PCB (and is...
No Longer Stocked
[Buy Now](https://www.adafruit.com/product/801)
[Related Guides to the Product](https://learn.adafruit.com/products/801/guides)
### USB Powered Speakers
[USB Powered Speakers](https://www.adafruit.com/product/1363)
Add some extra boom to your audio project with these powered loudspeakers. We sampled half a dozen different models to find ones with a good frequency response, so you'll get quality audio output for music playback. Simply connect the standard 3.5mm stereo plug into your Raspberry Pi model...
In Stock
[Buy Now](https://www.adafruit.com/product/1363)
[Related Guides to the Product](https://learn.adafruit.com/products/1363/guides)
### Magnetic contact switch (door sensor)
[Magnetic contact switch (door sensor)](https://www.adafruit.com/product/375)
This sensor is essentially a reed switch, encased in an ABS plastic shell. Normally the reed is 'open' (no connection between the two wires). The other half is a magnet. When the magnet is less than 13mm (0.5") away, the reed switch closes. They're often used to detect when a...
In Stock
[Buy Now](https://www.adafruit.com/product/375)
[Related Guides to the Product](https://learn.adafruit.com/products/375/guides)
### PIR (motion) sensor
[PIR (motion) sensor](https://www.adafruit.com/product/189)
PIR sensors are used to detect motion from pets/humanoids from about 20 feet away (possibly works on zombies, not guaranteed). This one has an adjustable delay before firing (approx 2-4 seconds), adjustable sensitivity **and** we include a 1 foot (30 cm) cable with a socket so you...
In Stock
[Buy Now](https://www.adafruit.com/product/189)
[Related Guides to the Product](https://learn.adafruit.com/products/189/guides)
### VESA mount for Raspberry Pi Model A and Model B
[VESA mount for Raspberry Pi Model A and Model B](https://www.adafruit.com/product/986)
This basic VESA mount allows you to attach a Raspberry Pi Model A or B computer to the back of most HDMI monitors. It is cut out of clear 3mm acrylic so you can see the LEDs, and has a cut out for the GPIO pins in case you want to connect a GPIO cable or Cobbler to it. The Pi is held in place...
No Longer Stocked
[Buy Now](https://www.adafruit.com/product/986)
[Related Guides to the Product](https://learn.adafruit.com/products/986/guides)
### SD/MicroSD Memory Card (8 GB SDHC)
[SD/MicroSD Memory Card (8 GB SDHC)](https://www.adafruit.com/product/1294)
Add mega-storage in a jiffy using this 8 GB class 4 micro-SD card. It comes with a SD adapter so you can use it with any of our shields or adapters. Preformatted to FAT so it works out of the box with our projects. Tested and works great with our
In Stock
[Buy Now](https://www.adafruit.com/product/1294)
[Related Guides to the Product](https://learn.adafruit.com/products/1294/guides)
### Raspberry Pi 3 Model B+ Starter Pack - Includes a Pi 3 Model B+
[Raspberry Pi 3 Model B+ Starter Pack - Includes a Pi 3 Model B+](https://www.adafruit.com/product/3783)
The Raspberry Pi 3 Model B is the most popular Raspberry Pi computer made, and the Pi Foundation knows you can always make a good thing _better_! And what could make the Pi 3 better? How about a _faster_ processor, 5 GHz WiFi, and updated Ethernet chip with PoE...
Out of Stock
[Buy Now](https://www.adafruit.com/product/3783)
[Related Guides to the Product](https://learn.adafruit.com/products/3783/guides)
## Related Guides
- [PIR Motion Sensor](https://learn.adafruit.com/pir-passive-infrared-proximity-motion-sensor.md)
- [Optical Sensor Drum Track Sequencer](https://learn.adafruit.com/drum-track-sequencer.md)
- [Raspberry Pi Pygame UI basics](https://learn.adafruit.com/raspberry-pi-pygame-ui-basics.md)
- [Raspberry Pi SelfieBlock](https://learn.adafruit.com/selfieblock.md)
- [Ultrasonic Ruler](https://learn.adafruit.com/ultrasonic-ruler.md)
- [ScoutMakes DRV5032 Hall Sensor](https://learn.adafruit.com/scoutmakes-drv5032-hall-sensor.md)
- [Magical Mistletoe](https://learn.adafruit.com/magical-mistletoe.md)
- [Motion Activated Outlet with the Adafruit FunHouse](https://learn.adafruit.com/motion-activated-outlet-with-the-adafruit-funhouse.md)
- [Adafruit VL53L0X Time of Flight Micro-LIDAR Distance Sensor Breakout](https://learn.adafruit.com/adafruit-vl53l0x-micro-lidar-distance-sensor-breakout.md)
- [Adafruit APDS9960 breakout](https://learn.adafruit.com/adafruit-apds9960-breakout.md)
- [Raspberry Pi as a Media Center](https://learn.adafruit.com/raspberry-pi-as-a-media-center.md)
- [Raspberry Pi radio player with touchscreen](https://learn.adafruit.com/raspberry-pi-radio-player-with-touchscreen.md)
- [Arm-based IoT Kit for Cloud IoT Core - Getting Started](https://learn.adafruit.com/raspberry-pi-3-and-sensor-kit-for-google-cloud-iot-core.md)
- [Piezo Ring Tones with Raspberry Pi](https://learn.adafruit.com/piezo-ring-tones-with-raspberry-pi.md)
- [LPC824 NeoPixel IR Distance Sensor](https://learn.adafruit.com/lpc824-neopixel-ir-distance-sensor.md)
- [Track a Turtle with WipperSnapper](https://learn.adafruit.com/track-a-turtle-with-wippersnapper.md)
---
# Source: https://learn.adafruit.com/skill-badge-guide-3d-printing.md
# Skill Badge Guide: 3D Printing
## 3D Printing Overview

The 3D printer uses a process called _fused deposition modeling_ to construct a solid object from a virtual model. This process involves the controlled deposition of a molten feed stock, typically ABS or PLA plastic, onto a build surface where layer-by-layer the model emerges. Each 3D printer features a series of motors to move the three axis and the extruder, and a controller to move the motors and manage the build process.
- [Next Page](https://learn.adafruit.com/skill-badge-guide-3d-printing/understanding-the-technology.md)
## Featured Products
### 3D printing - Skill badge, iron-on patch
[3D printing - Skill badge, iron-on patch](https://www.adafruit.com/product/490)
You can 3D print! Adafruit offers a fun and exciting "badges" of achievement for electronics, science and engineering. We believe everyone should be able to be rewarded for learning a useful skill, a badge is just one of the many ways to show and share.
This is the "I...
No Longer Stocked
[Buy Now](https://www.adafruit.com/product/490)
[Related Guides to the Product](https://learn.adafruit.com/products/490/guides)
### 3D printing - Sticker!
[3D printing - Sticker!](https://www.adafruit.com/product/649)
You can 3D print! Adafruit offers a fun and exciting stickers to celebrate achievement for electronics, science and engineering. We believe everyone should be able to be rewarded for learning a useful skill, a sticker is just one of the many ways to show and share.
This is the...
No Longer Stocked
[Buy Now](https://www.adafruit.com/product/649)
[Related Guides to the Product](https://learn.adafruit.com/products/649/guides)
### Flashforge Creator PRO
[Flashforge Creator PRO](https://www.adafruit.com/product/2742)
The **Flashforge Creator Pro** is the latest addition to FlashForge’s Creator family, built upon an open source platform.
Based on proven design of the Creator X chassis, the Pro is now enclosed so you can print ABS better and more efficient than ever. The upgraded...
No Longer Stocked
[Buy Now](https://www.adafruit.com/product/2742)
[Related Guides to the Product](https://learn.adafruit.com/products/2742/guides)
### PrintrBot Simple Metal 3D Printer - Black - Assembled
[PrintrBot Simple Metal 3D Printer - Black - Assembled](https://www.adafruit.com/product/1760)
New from Printrbot, the Metal Simple is a brand new rock solid, all metal, fully-assembled Printrbot Simple! As opposed to the [Printrbot Simple Kit](http://www.adafruit.com/products/1735), all of the laser cut wood parts have been replaced by rock solid metal and assembled. In...
No Longer Stocked
[Buy Now](https://www.adafruit.com/product/1760)
[Related Guides to the Product](https://learn.adafruit.com/products/1760/guides)
### Ultimaker 2+ 3D Printer
[Ultimaker 2+ 3D Printer](https://www.adafruit.com/product/2673)
The **Ultimaker 2+** is one of our favorite 3D printers on the market. It's a well-built open-source compact machine with an excellent UX. Every inch of the Ultimaker 2+ is designed to create the most effortless and reliable 3D printing experience ever!
No Longer Stocked
[Buy Now](https://www.adafruit.com/product/2673)
[Related Guides to the Product](https://learn.adafruit.com/products/2673/guides)
### Micro 3D Printer - Black - Retail Edition
[Micro 3D Printer - Black - Retail Edition](https://www.adafruit.com/product/2933)
The magic of 3D printing is now more affordable and accessible than ever! Meet The **Micro 3D Printer** by [M3D](https://printm3d.com/), the first truly consumer 3D printer. Sporting a compact design, user-friendly software, and replaceable print beds and nozzles,...
No Longer Stocked
[Buy Now](https://www.adafruit.com/product/2933)
[Related Guides to the Product](https://learn.adafruit.com/products/2933/guides)
### Filament for 3D Printers in Various Colors and Types
[Filament for 3D Printers in Various Colors and Types](https://www.adafruit.com/product/2080)
Having a 3D printer without filament is sort of like having a regular printer without paper or ink. And while a lot of printers come with some filament there's a good chance you've been printing up a storm and need something new. That's why we've started carrying a...
Out of Stock
[Buy Now](https://www.adafruit.com/product/2080)
[Related Guides to the Product](https://learn.adafruit.com/products/2080/guides)
## Related Guides
- [Mario Magic Wand](https://learn.adafruit.com/mario-magic-wand.md)
- [Case for HUSB238 Breakout](https://learn.adafruit.com/case-for-husb238.md)
- [3D Printed RFID NFC Rings](https://learn.adafruit.com/3d-printed-rfid-nfc-rings.md)
- [AI 3D Printed Figure](https://learn.adafruit.com/ai-figure.md)
- [Ultrasonic Ruler](https://learn.adafruit.com/ultrasonic-ruler.md)
- [Magnet Bottle Holder](https://learn.adafruit.com/magnet-bottle-holder.md)
- [Printy Boost: Reimagining a Classic Adafruit Kit](https://learn.adafruit.com/printy-boost-reimagining-a-classic-adafruit-kit.md)
- [CYBERDECK Expansion Plate](https://learn.adafruit.com/cyberdeck-plate.md)
- [PyPortal Case](https://learn.adafruit.com/pyportal-case.md)
- [3D Printed LED Buckle](https://learn.adafruit.com/3d-printed-led-buckle.md)
- [CLUE Slim Case](https://learn.adafruit.com/clue-slim-case.md)
- [Adafruit Desktop 3D Printer Buyers Guide](https://learn.adafruit.com/adafruit-desktop-3d-printer-selection-guide.md)
- [3D Printed Animatronic Robot Head](https://learn.adafruit.com/3d-printed-animatronic-robot-head.md)
- [New Years Eve Ball Drop](https://learn.adafruit.com/new-years-eve-ball-drop.md)
- [3D Printed Battery Adapter for Camera-Mount LED Panel](https://learn.adafruit.com/3d-printed-battery-adapter-for-camera-mount-led-panel.md)
---
# Source: https://learn.adafruit.com/skill-badge-requirements-digi-xbee.md
# Skill Badge Requirements: Digi XBee
## Overview
For years, Digi's XBee line has provided the Maker World with an easy to use wireless serial/IO bridge. Each XBee shares a common footprint (with exception to the XBee SMT) between series 1 & 2 while offering a wide range of power and antenna options. The user also has the ability to configure the network type to meet the needs of almost any project.
_Instructions for completion:_
Record the section, item number and requirement before each response on your notepaper. This will assist your instructor when evaluating the completion of the requirements.
**Example** (from Solar Requirements) **:**
2.1 Measure and calculate the surface area (Aeff) of the solar cell supplied by your instructor.
- I calculated the surface area (Aeff) of my solar cell to be 2 square inches, with the dimensions of 2in x 1in.
- [Next Page](https://learn.adafruit.com/skill-badge-requirements-digi-xbee/section-1-xbee-hardware.md)
## Featured Products
### Digi XBee - Skill badge, iron-on patch
[Digi XBee - Skill badge, iron-on patch](https://www.adafruit.com/product/595)
You are learning how to use XBee wireless modules for your projects! Adafruit offers a fun and exciting "badges" of achievement for electronics, science and engineering. We believe everyone should be able to be rewarded for learning a useful skill, a badge is just one of the many...
No Longer Stocked
[Buy Now](https://www.adafruit.com/product/595)
[Related Guides to the Product](https://learn.adafruit.com/products/595/guides)
## Related Guides
- [Introducing the Adafruit WICED Feather WiFi](https://learn.adafruit.com/introducing-the-adafruit-wiced-feather-wifi.md)
- [MicroPython Smart Holiday Lights](https://learn.adafruit.com/micropython-smart-holiday-lights.md)
- [Wireless NeoPixel Controller](https://learn.adafruit.com/neotrellis-neopixel-controller.md)
- [Remote Effects Trigger Box](https://learn.adafruit.com/remote-effects-trigger.md)
- [Matrix Portal Stained Glass with WLED](https://learn.adafruit.com/matrix-portal-stained-glass-with-wled.md)
- [MagTag 3D Printed Stand Case](https://learn.adafruit.com/magtag-3d-printed-stand-case.md)
- [Adafruit ATWINC1500 WiFi Breakout](https://learn.adafruit.com/adafruit-atwinc1500-wifi-module-breakout.md)
- [Holiday Lights: Easy DIY Christmas Wreath & Garland with WLED](https://learn.adafruit.com/holiday-garland-decor-app-control-with-no-coding.md)
- [Adafruit ItsyBitsy ESP32](https://learn.adafruit.com/adafruit-itsybitsy-esp32.md)
- [Theme Park Wait Time Display](https://learn.adafruit.com/park-wait-time.md)
- [Upgrading AirLift ESP32 Firmware](https://learn.adafruit.com/upgrading-esp32-firmware.md)
- [Floor Lamp with NeoPixels and WLED Custom Animations](https://learn.adafruit.com/floor-lamp-with-wled.md)
- [File Glider](https://learn.adafruit.com/file-glider.md)
- [Adafruit Feather M0 Radio with RFM69 Packet Radio](https://learn.adafruit.com/adafruit-feather-m0-radio-with-rfm69-packet-radio.md)
- [Garden Path Lights with WLED and a Sunset Timer](https://learn.adafruit.com/garden-path-lights-with-sunset-timer.md)
---
# Source: https://learn.adafruit.com/skill-badge-requirements-raspberry-pi.md
# Skill Badge Requirements: Raspberry Pi
## Overview
Originating in Cambridge University’s Computer Laboratory, the Raspberry Pi is a super-affordable educational computing system that has taken the Maker-world by storm. This inexpensive system-on-chip (SOC) breakout for Broadcom's BCM2385 boasts a 700 Mhz ARM with 256MB of RAM, TV, HDMI, stereo audio, USB, SD memory slot, Ethernet and 17 GPIO for general purpose hackery. Each device is capable of running a wide range of operating systems that allow the Pi to function as anything from a media center to the primary control system for a high altitude balloon. In fact, this requirements sheet was written on a Raspberry Pi Model B using a Motorola Lapdock, Raspbian and Leafpad.

_Instructions for completion:_
Record the section, item number and requirement before each response on your notepaper. This will assist your instructor when evaluating the completion of the requirements.
**Example:**
2.1 Measure and calculate the surface area (Aeff) of the solar cell supplied by your instructor.
- I calculated the surface area (Aeff) of my solar cell to be 2 square inches, with the dimensions of 2in x 1in.
- [Next Page](https://learn.adafruit.com/skill-badge-requirements-raspberry-pi/section-1-configuration.md)
## Featured Products
### Raspberry Pi - Skill badge, iron-on patch
[Raspberry Pi - Skill badge, iron-on patch](https://www.adafruit.com/product/906)
You are learning to use the small Linux based board, the Raspberry Pi! Adafruit offers a fun and exciting "badges" of achievement for electronics, science and engineering. We believe everyone should be able to be rewarded for learning a useful skill, a badge is just one of the many...
In Stock
[Buy Now](https://www.adafruit.com/product/906)
[Related Guides to the Product](https://learn.adafruit.com/products/906/guides)
## Related Guides
- [Adafruit Prototyping Pi Plate](https://learn.adafruit.com/adafruit-prototyping-pi-plate.md)
- [Adafruit Raspberry Pi Educational Linux Distro](https://learn.adafruit.com/adafruit-raspberry-pi-educational-linux-distro.md)
- [Internet of Things Printer for Raspberry Pi](https://learn.adafruit.com/pi-thermal-printer.md)
- [Adafruit's Raspberry Pi Lesson 11. DS18B20 Temperature Sensing](https://learn.adafruit.com/adafruits-raspberry-pi-lesson-11-ds18b20-temperature-sensing.md)
- [Introducing the Raspberry Pi Model B+](https://learn.adafruit.com/introducing-the-raspberry-pi-model-b-plus-plus-differences-vs-model-b.md)
- [Adafruit's Raspberry Pi Lesson 7. Remote Control with VNC](https://learn.adafruit.com/adafruit-raspberry-pi-lesson-7-remote-control-with-vnc.md)
- [Raspberry Pi Thermal Printer One Time Pads](https://learn.adafruit.com/raspberry-pi-thermal-printer-one-time-pads.md)
- [Press Your Button for Raspberry Pi](https://learn.adafruit.com/press-your-button-for-raspberry-pi.md)
- [Windows IoT Core Application Management](https://learn.adafruit.com/windows-iot-application-management.md)
- [Windows IoT Core Application Development: Headed Blinky](https://learn.adafruit.com/windows-iot-application-development-headed-blinky.md)
- [Adafruit's Raspberry Pi Lesson 5. Using a Console Cable](https://learn.adafruit.com/adafruits-raspberry-pi-lesson-5-using-a-console-cable.md)
- [Raspberry Pi Analog to Digital Converters](https://learn.adafruit.com/raspberry-pi-analog-to-digital-converters.md)
- [Debugging with the Raspberry Pi WebIDE](https://learn.adafruit.com/debugging-with-the-raspberry-pi-webide.md)
- [Adafruit's Raspberry Pi Lesson 3. Network Setup](https://learn.adafruit.com/adafruits-raspberry-pi-lesson-3-network-setup.md)
- [Using an External Drive as a Raspberry Pi Root Filesystem](https://learn.adafruit.com/external-drive-as-raspberry-pi-root.md)
---
# Source: https://learn.adafruit.com/skill-badge-requirements-solar.md
# Skill Badge Requirements: Solar
## Overview
Solar cells, or photovoltaics, are made out of photosensitive semiconductors that convert light energy into electricity in a process known as the photoelectric effect. This process describes the interaction between light energy and the materials that make up the individual cell. Depending on how the cell is configured, conversion efficiencies can exceed 30%!

_Instructions for completion:_
Record the section, item number and requirement before each response on your notepaper. This will assist your instructor when evaluating the completion of the requirements.
**Example:**
2.1 Measure and calculate the surface area (Aeff) of the solar cell supplied by your instructor.
- I calculated the surface area (Aeff) of my solar cell to be 2 square inches, with the dimensions of 2in x 1in.
- [Next Page](https://learn.adafruit.com/skill-badge-requirements-solar/concept-of-operation.md)
## Featured Products
### Round Solar Panel Skill Badge - 5V / 40mA
[Round Solar Panel Skill Badge - 5V / 40mA](https://www.adafruit.com/product/700)
This skill badge is self-fulfilling! Normally you would get the badge _after_ the project is done, but in this case, the badge can be part of the project! The solar panel is epoxied into a round disc 55mm diameter (about 2.2 inches), its rugged and looks cool besides. We include a...
In Stock
[Buy Now](https://www.adafruit.com/product/700)
[Related Guides to the Product](https://learn.adafruit.com/products/700/guides)
## Related Guides
- [Adafruit FunHouse](https://learn.adafruit.com/adafruit-funhouse.md)
- [Pet Bowl Water Level Sensing](https://learn.adafruit.com/pet-bowl-water-level-sensing-with-the-funhouse-and-home-assistant.md)
- [Wind Blowing Emoji Prop](https://learn.adafruit.com/wind-face-emoji.md)
- [Circuit Playground Express: Piano de Limones](https://learn.adafruit.com/circuit-playground-express-piano-de-limones.md)
- [Smart Measuring Cup](https://learn.adafruit.com/smart-measuring-cup.md)
- [Raspberry Pi Analog to Digital Converters](https://learn.adafruit.com/raspberry-pi-analog-to-digital-converters.md)
- [Face Mask Efficacy Testing with SCIENCE!](https://learn.adafruit.com/raspberry-pi-camera-vision-face-mask-efficacy-testing.md)
- [Remote controlled door lock using a fingerprint sensor & Adafruit IO](https://learn.adafruit.com/remote-controlled-door-lock-using-a-fingerprint-sensor-and-adafruit-io.md)
- [PowerWash Simulator Nozzle Controller](https://learn.adafruit.com/powerwash-simulator-nozzle-controller.md)
- [Send Raspberry Pi Data to COSM](https://learn.adafruit.com/send-raspberry-pi-data-to-cosm.md)
- [Adafruit Analog Accelerometer Breakouts](https://learn.adafruit.com/adafruit-analog-accelerometer-breakouts.md)
- [CircuitPython Libraries on any Computer with FT232H](https://learn.adafruit.com/circuitpython-on-any-computer-with-ft232h.md)
- [Adafruit LSM9DS1 Accelerometer + Gyro + Magnetometer 9-DOF Breakout](https://learn.adafruit.com/adafruit-lsm9ds1-accelerometer-plus-gyro-plus-magnetometer-9-dof-breakout.md)
- [Programmable Wireless BLE Gesture Mouse](https://learn.adafruit.com/ble-wireless-gesture-mouse.md)
- [Adafruit Feather nRF52840 Sense](https://learn.adafruit.com/adafruit-feather-sense.md)
---
# Source: https://learn.adafruit.com/skill-badge-sash.md
# Skill Badge Sash
## Overview

Collecting maker skill badges is fun, but you need a place to display them! Sure, you could put them on your backpack, but we'd like to show you how to make this easy sash to celebrate all the skills you've earned.
- [Next Page](https://learn.adafruit.com/skill-badge-sash/download-pattern.md)
## Featured Products
### LEDs - Skill badge, iron-on patch
[LEDs - Skill badge, iron-on patch](https://www.adafruit.com/product/479)
You learned LEDs! (Light-emitting diodes)... Adafruit offers a fun and exciting "badges" of achievement for electronics, science and engineering. We believe everyone should be able to be rewarded for learning a useful skill, a badge is just one of the many ways to show and share.
No Longer Stocked
[Buy Now](https://www.adafruit.com/product/479)
[Related Guides to the Product](https://learn.adafruit.com/products/479/guides)
### Learn to program "Hello world" - Skill badge, iron-on patch
[Learn to program "Hello world" - Skill badge, iron-on patch](https://www.adafruit.com/product/478)
You can write code! Adafruit offers a fun and exciting "badges" of achievement for electronics, science and engineering. We believe everyone should be able to be rewarded for learning a useful skill, a badge is just one of the many ways to show and share.
This is the...
No Longer Stocked
[Buy Now](https://www.adafruit.com/product/478)
[Related Guides to the Product](https://learn.adafruit.com/products/478/guides)
### Learn to solder - Skill badge, iron-on patch
[Learn to solder - Skill badge, iron-on patch](https://www.adafruit.com/product/465)
You can solder! Adafruit offers a fun and exciting "badges" of achievement for electronics, science and engineering. We believe everyone should be able to be rewarded for learning a useful skill, a badge is just one of the many ways to show and share.
This is the "I...
No Longer Stocked
[Buy Now](https://www.adafruit.com/product/465)
[Related Guides to the Product](https://learn.adafruit.com/products/465/guides)
## Related Guides
- [Collin's Lab: Solar](https://learn.adafruit.com/collins-lab-solar.md)
- [Cartoon Network MakeCode: Garnet's Palm Gems from Steven Universe](https://learn.adafruit.com/cartoon-network-makecode-garnet-s-palm-gems-from-steven-universe.md)
- [No-Sew LED Wristband](https://learn.adafruit.com/no-sew-led-wristband.md)
- [MicroCode for micro:bit](https://learn.adafruit.com/microcode-for-microbit.md)
- [Adafruit New York and NYC DOE vendor information ](https://learn.adafruit.com/educational-orders-for-educators-based-in-new-york.md)
- [Getting Started With Steven Universe](https://learn.adafruit.com/getting-started-with-steven-universe.md)
- [Visual Studio Code for Education... and CircuitPython](https://learn.adafruit.com/visual-studio-code-for-education-and-circuitpython.md)
- [Makecode para la Circuit Playground Express](https://learn.adafruit.com/makecode-es.md)
- [Share your work with Adafruit Playground!](https://learn.adafruit.com/adafruit-playground-notes.md)
- [Buttermilk Boat with Circuit Playground Express](https://learn.adafruit.com/boat-with-circuit-playground-express.md)
- [Mouse Painter: Emulate Mice with MakeCode ](https://learn.adafruit.com/mouse-painter-emulate-mice-with-makecode.md)
- [Best Beginner Boards for Teachers](https://learn.adafruit.com/best-beginner-boards-for-teachers.md)
- [Anatomical 3D Printed Beating Heart with MakeCode](https://learn.adafruit.com/anatomical-3d-printed-beating-heart-with-makecode.md)
- [MakeCode for Circuit Playground Express](https://learn.adafruit.com/makecode.md)
- [Trash Panda](https://learn.adafruit.com/trash-panda-circuit-python-crickit.md)
---
# Source: https://learn.adafruit.com/digital-shipping-scales/smaller-scale-0-10-lb.md
# Digital Shipping Scales
## Smaller Scale (0-10 lb)
For 99% of our packages, the weight of the box is under 10lb. So far we've found the **Salter Brecknell 7010SB** is a small, fairly well made scale. You can pick up the whole package for about $60-$70. This is actually a fair price, the accuracy ranges from 0.1 oz (for under 5lb packages) to 0.5 oz (for 5-10 lb packages). This is totally acceptable for shipping where under a few lbs, the postage is done by the oz and over 5 lb postage tends to be done by the lb.
The scale comes with a wall plug and a serial cable. The plug has a 3.5mm 'audio' plug and the serial cable has only two conductors - ground and TX - connected to a 2.5mm audio plug. To use, simply power it up and plug the serial port to your computer. [We buy computers with COM ports built into them so that the COM port is fixed in hardware](http://wiki.ladyada.net/adacomputer) , but [you can also use any USB to serial converter cable that will give you a USB plug](http://www.adafruit.com/index.php?main_page=product_info&cPath=33&products_id=18).
If you are trying to connect to a microcontroller/microcomputer, you can use a male DB-9 and then use a MAX232 or similar to convert from the +-10V inverted serial that comes out of the cable and convert it to plain 3.3-5V TTL serial
The bottom has two removable plates. One reveals a 9V battery (you can turn this into a portable scale but we think the 9V plug works best) and the other reveals some THM PCB. Not really sure what that's for but perhaps during test they use it?

- [Previous Page](https://learn.adafruit.com/digital-shipping-scales/overview.md)
- [Next Page](https://learn.adafruit.com/digital-shipping-scales/using-a-7010sb-scale.md)
## Related Guides
- [Barcode Scanner](https://learn.adafruit.com/barcode-scanner.md)
---
# Source: https://learn.adafruit.com/smt-manufacturing/smt-forum.md
# SMT Manufacturing
## Adafruit SMT Forum
- [Previous Page](https://learn.adafruit.com/smt-manufacturing/microscope-inspection.md)
## Featured Products
### Fine tip curved tweezers - ESD safe
[Fine tip curved tweezers - ESD safe](https://www.adafruit.com/product/422)
When soldering small surface-mount (SMD/SMT) components, one thing you'll need is a good pair of tweezers. These are a great pair of every-day tweezers. They're anti-static, anti-magnetic and made of hard stainless steel. The tips are fine and pointy to pick up any size component. This...
In Stock
[Buy Now](https://www.adafruit.com/product/422)
[Related Guides to the Product](https://learn.adafruit.com/products/422/guides)
### Fine tip straight tweezers - ESD safe
[Fine tip straight tweezers - ESD safe](https://www.adafruit.com/product/421)
When soldering small surface-mount (SMD/SMT) components, one thing you'll need is a good pair of tweezers. These tweezers are a great pair of every-day tweezers. They're anti-static, anti-magnetic and made of hard stainless steel. The tips are fine and pointy to pick up any size...
In Stock
[Buy Now](https://www.adafruit.com/product/421)
[Related Guides to the Product](https://learn.adafruit.com/products/421/guides)
### USB Microscope - 5MP interpolated 220x magnification / 8 LEDs
[USB Microscope - 5MP interpolated 220x magnification / 8 LEDs](https://www.adafruit.com/product/636)
As electronics get smaller and smaller, you'll need a hand examining PCBs and this little USB microscope is the perfect tool. Its smaller and lighter than a large optical microscope but packs quite a bit of power in its little body. There's a 2 megapixel sensor inside and an optical...
Out of Stock
[Buy Now](https://www.adafruit.com/product/636)
[Related Guides to the Product](https://learn.adafruit.com/products/636/guides)
## Related Guides
- [Reindeer Solder Kit by Phyx](https://learn.adafruit.com/reindeer-solder-kit-by-phyx.md)
- [3D-Printed Solder Paste Dispenser Hand Switch ](https://learn.adafruit.com/3d-printed-solder-paste-dispenser-hand-switch.md)
- [USB Rechargeable Mini Solder Fume Extractor](https://learn.adafruit.com/usb-rechargeable-mini-solder-fume-extractor.md)
- [How to Sign Windows Drivers & Executables](https://learn.adafruit.com/how-to-sign-windows-drivers-installer.md)
- [Desktop Fume Extractor](https://learn.adafruit.com/desktop-fume-extractor.md)
- [Chinese Dragon Puppet with Motion-Reactive Flame Effect](https://learn.adafruit.com/chinese-dragon-puppet-with-motion-reactive-flame-effect.md)
- [16-Step Drum Sequencer](https://learn.adafruit.com/16-step-drum-sequencer.md)
- [Color Sensing Music Player](https://learn.adafruit.com/color-sensing-music-player.md)
- [Light-Up Costumes in Harsh Environments](https://learn.adafruit.com/light-up-costumes-in-harsh-environments.md)
- [Garden Path Lights with WLED and a Sunset Timer](https://learn.adafruit.com/garden-path-lights-with-sunset-timer.md)
- [CNC Rotary Macropad](https://learn.adafruit.com/cnc-rotary-macropad.md)
- [Blinka Says Tabletop Arcade Game](https://learn.adafruit.com/blinka-says-tabletop-arcade-game.md)
- [IoT Moon Phase Guide](https://learn.adafruit.com/moon-phase.md)
- [KTOWN's Ultimate Creating Parts in Eagle Tutorial](https://learn.adafruit.com/ktowns-ultimate-creating-parts-in-eagle-tutorial.md)
- [Shop Tips & Tricks](https://learn.adafruit.com/shop-tips-and-tricks.md)
---
# Source: https://learn.adafruit.com/smt-manufacturing.md
# SMT Manufacturing
## Overview
Here are a bunch of tutorials for manufacturing small to medium scale (10 - 10,000) piece surface mount electronics.
- [Next Page](https://learn.adafruit.com/smt-manufacturing/solder-paste-storage.md)
## Featured Products
### Fine tip curved tweezers - ESD safe
[Fine tip curved tweezers - ESD safe](https://www.adafruit.com/product/422)
When soldering small surface-mount (SMD/SMT) components, one thing you'll need is a good pair of tweezers. These are a great pair of every-day tweezers. They're anti-static, anti-magnetic and made of hard stainless steel. The tips are fine and pointy to pick up any size component. This...
In Stock
[Buy Now](https://www.adafruit.com/product/422)
[Related Guides to the Product](https://learn.adafruit.com/products/422/guides)
### Fine tip straight tweezers - ESD safe
[Fine tip straight tweezers - ESD safe](https://www.adafruit.com/product/421)
When soldering small surface-mount (SMD/SMT) components, one thing you'll need is a good pair of tweezers. These tweezers are a great pair of every-day tweezers. They're anti-static, anti-magnetic and made of hard stainless steel. The tips are fine and pointy to pick up any size...
In Stock
[Buy Now](https://www.adafruit.com/product/421)
[Related Guides to the Product](https://learn.adafruit.com/products/421/guides)
### USB Microscope - 5MP interpolated 220x magnification / 8 LEDs
[USB Microscope - 5MP interpolated 220x magnification / 8 LEDs](https://www.adafruit.com/product/636)
As electronics get smaller and smaller, you'll need a hand examining PCBs and this little USB microscope is the perfect tool. Its smaller and lighter than a large optical microscope but packs quite a bit of power in its little body. There's a 2 megapixel sensor inside and an optical...
Out of Stock
[Buy Now](https://www.adafruit.com/product/636)
[Related Guides to the Product](https://learn.adafruit.com/products/636/guides)
## Related Guides
- [Reindeer Solder Kit by Phyx](https://learn.adafruit.com/reindeer-solder-kit-by-phyx.md)
- [3D-Printed Solder Paste Dispenser Hand Switch ](https://learn.adafruit.com/3d-printed-solder-paste-dispenser-hand-switch.md)
- [USB Rechargeable Mini Solder Fume Extractor](https://learn.adafruit.com/usb-rechargeable-mini-solder-fume-extractor.md)
- [How to Sign Windows Drivers & Executables](https://learn.adafruit.com/how-to-sign-windows-drivers-installer.md)
- [Desktop Fume Extractor](https://learn.adafruit.com/desktop-fume-extractor.md)
- [Chinese Dragon Puppet with Motion-Reactive Flame Effect](https://learn.adafruit.com/chinese-dragon-puppet-with-motion-reactive-flame-effect.md)
- [16-Step Drum Sequencer](https://learn.adafruit.com/16-step-drum-sequencer.md)
- [Color Sensing Music Player](https://learn.adafruit.com/color-sensing-music-player.md)
- [Light-Up Costumes in Harsh Environments](https://learn.adafruit.com/light-up-costumes-in-harsh-environments.md)
- [Garden Path Lights with WLED and a Sunset Timer](https://learn.adafruit.com/garden-path-lights-with-sunset-timer.md)
- [CNC Rotary Macropad](https://learn.adafruit.com/cnc-rotary-macropad.md)
- [Blinka Says Tabletop Arcade Game](https://learn.adafruit.com/blinka-says-tabletop-arcade-game.md)
- [IoT Moon Phase Guide](https://learn.adafruit.com/moon-phase.md)
- [KTOWN's Ultimate Creating Parts in Eagle Tutorial](https://learn.adafruit.com/ktowns-ultimate-creating-parts-in-eagle-tutorial.md)
- [Shop Tips & Tricks](https://learn.adafruit.com/shop-tips-and-tricks.md)
---
# Source: https://learn.adafruit.com/smt-manufacturing/smt-wipes.md
# SMT Manufacturing
## SMT Wipes
Now that you've finished stenciling, you'll want to clean up! Paste can get everywhere, especially when doing a lot of boards and the paste is liquidy. We recycle our paste (putting it back into the pot) even though its suggested not to do that. (If we ever go thru a pot a day maybe we wont have to but paste is pretty expensive!) Then we wipe down the scrapers, stencil and area using SMT stencil wipes which are totally awesome and make clean up really easy. They're also good for cleaning off a board if/when you have a messy stencil paste deposit and want to redo it.
- [Previous Page](https://learn.adafruit.com/smt-manufacturing/squeegees.md)
- [Next Page](https://learn.adafruit.com/smt-manufacturing/resistor-packs.md)
## Featured Products
### Fine tip curved tweezers - ESD safe
[Fine tip curved tweezers - ESD safe](https://www.adafruit.com/product/422)
When soldering small surface-mount (SMD/SMT) components, one thing you'll need is a good pair of tweezers. These are a great pair of every-day tweezers. They're anti-static, anti-magnetic and made of hard stainless steel. The tips are fine and pointy to pick up any size component. This...
In Stock
[Buy Now](https://www.adafruit.com/product/422)
[Related Guides to the Product](https://learn.adafruit.com/products/422/guides)
### Fine tip straight tweezers - ESD safe
[Fine tip straight tweezers - ESD safe](https://www.adafruit.com/product/421)
When soldering small surface-mount (SMD/SMT) components, one thing you'll need is a good pair of tweezers. These tweezers are a great pair of every-day tweezers. They're anti-static, anti-magnetic and made of hard stainless steel. The tips are fine and pointy to pick up any size...
In Stock
[Buy Now](https://www.adafruit.com/product/421)
[Related Guides to the Product](https://learn.adafruit.com/products/421/guides)
### USB Microscope - 5MP interpolated 220x magnification / 8 LEDs
[USB Microscope - 5MP interpolated 220x magnification / 8 LEDs](https://www.adafruit.com/product/636)
As electronics get smaller and smaller, you'll need a hand examining PCBs and this little USB microscope is the perfect tool. Its smaller and lighter than a large optical microscope but packs quite a bit of power in its little body. There's a 2 megapixel sensor inside and an optical...
Out of Stock
[Buy Now](https://www.adafruit.com/product/636)
[Related Guides to the Product](https://learn.adafruit.com/products/636/guides)
## Related Guides
- [Reindeer Solder Kit by Phyx](https://learn.adafruit.com/reindeer-solder-kit-by-phyx.md)
- [3D-Printed Solder Paste Dispenser Hand Switch ](https://learn.adafruit.com/3d-printed-solder-paste-dispenser-hand-switch.md)
- [USB Rechargeable Mini Solder Fume Extractor](https://learn.adafruit.com/usb-rechargeable-mini-solder-fume-extractor.md)
- [How to Sign Windows Drivers & Executables](https://learn.adafruit.com/how-to-sign-windows-drivers-installer.md)
- [Desktop Fume Extractor](https://learn.adafruit.com/desktop-fume-extractor.md)
- [Chinese Dragon Puppet with Motion-Reactive Flame Effect](https://learn.adafruit.com/chinese-dragon-puppet-with-motion-reactive-flame-effect.md)
- [16-Step Drum Sequencer](https://learn.adafruit.com/16-step-drum-sequencer.md)
- [Color Sensing Music Player](https://learn.adafruit.com/color-sensing-music-player.md)
- [Light-Up Costumes in Harsh Environments](https://learn.adafruit.com/light-up-costumes-in-harsh-environments.md)
- [Garden Path Lights with WLED and a Sunset Timer](https://learn.adafruit.com/garden-path-lights-with-sunset-timer.md)
- [CNC Rotary Macropad](https://learn.adafruit.com/cnc-rotary-macropad.md)
- [Blinka Says Tabletop Arcade Game](https://learn.adafruit.com/blinka-says-tabletop-arcade-game.md)
- [IoT Moon Phase Guide](https://learn.adafruit.com/moon-phase.md)
- [KTOWN's Ultimate Creating Parts in Eagle Tutorial](https://learn.adafruit.com/ktowns-ultimate-creating-parts-in-eagle-tutorial.md)
- [Shop Tips & Tricks](https://learn.adafruit.com/shop-tips-and-tricks.md)
---
# Source: https://learn.adafruit.com/adafruits-raspberry-pi-lesson-5-using-a-console-cable/software-installation-linux.md
# Adafruit's Raspberry Pi Lesson 5. Using a Console Cable
## Software Installation (Linux)
Linux Kernels 2.4.31 and above already have the PL2303 and CP210X USB driver for the Console Lead built-in, so you should not need to install that.
Some distributions such as Ubuntu 12.10 do not include the "screen" command. Try running the command "screen" and if you get an error message, you can install it by typing the following command:
```
sudo apt-get install screen
```
- [Previous Page](https://learn.adafruit.com/adafruits-raspberry-pi-lesson-5-using-a-console-cable/software-installation-windows.md)
- [Next Page](https://learn.adafruit.com/adafruits-raspberry-pi-lesson-5-using-a-console-cable/connect-the-lead.md)
## Featured Products
### Budget Pack for Raspberry Pi 1 Model B (Doesn't include RasPi)
[Budget Pack for Raspberry Pi 1 Model B (Doesn't include RasPi)](https://www.adafruit.com/product/965)
An optimized collection of parts and pieces to experiment with Raspberry Pi at home, school or work. Great for students and those that want to get their feet wet, no soldering required! **THIS PACK DOES NOT INCLUDE A RASPBERRY PI 1 MODEL B and is NOT compatible with Model B+ or Raspberry Pi...**
No Longer Stocked
[Buy Now](https://www.adafruit.com/product/965)
[Related Guides to the Product](https://learn.adafruit.com/products/965/guides)
### USB to TTL Serial Cable - Debug / Console Cable for Raspberry Pi
[USB to TTL Serial Cable - Debug / Console Cable for Raspberry Pi](https://www.adafruit.com/product/954)
The cable is easiest way ever to connect to your microcontroller/Raspberry Pi/WiFi router serial console port. Inside the big USB plug is a USB\<-\>Serial conversion chip and at the end of the 36" cable are four wire - red power, black ground, white RX into USB port, and green TX out...
In Stock
[Buy Now](https://www.adafruit.com/product/954)
[Related Guides to the Product](https://learn.adafruit.com/products/954/guides)
### Programming the Raspberry Pi: Getting Started with Python
[Programming the Raspberry Pi: Getting Started with Python](https://www.adafruit.com/product/1089)
**Program your own Raspberry Pi projects!**
An updated guide to programming your own Raspberry Pi projects. Learn to create inventive programs and fun games on your powerful Raspberry Pi--with no programming experience required. **This practical book has been revised...**
In Stock
[Buy Now](https://www.adafruit.com/product/1089)
[Related Guides to the Product](https://learn.adafruit.com/products/1089/guides)
### Raspberry Pi Model B starter pack Doesn't include Raspberry Pi 1
[Raspberry Pi Model B starter pack Doesn't include Raspberry Pi 1](https://www.adafruit.com/product/955)
You want to get hacking with your Pi fast, right? Get everything you need to start with the Adafruit Starter Pack for Raspberry Pi. It's the perfect accompaniment to your new Pi, everything you need to get a distro image loaded and running. **We even pre-assemble the Cobbler for you,...**
No Longer Stocked
[Buy Now](https://www.adafruit.com/product/955)
[Related Guides to the Product](https://learn.adafruit.com/products/955/guides)
### Raspberry Pi 1 Model B Starter Pack - Includes a Raspberry Pi
[Raspberry Pi 1 Model B Starter Pack - Includes a Raspberry Pi](https://www.adafruit.com/product/1014)
You want to get hacking with your Pi fast, right? Get everything you need to start with the Adafruit Starter Pack for Raspberry Pi. It's the perfect accompaniment to your new Pi, everything you need to boot up your Pi Model B and get going. **We pre-assemble the Cobbler for you, no...**
No Longer Stocked
[Buy Now](https://www.adafruit.com/product/1014)
[Related Guides to the Product](https://learn.adafruit.com/products/1014/guides)
### Raspberry Pi 3 - Model B - ARMv8 with 1G RAM
[Raspberry Pi 3 - Model B - ARMv8 with 1G RAM](https://www.adafruit.com/product/3055)
Did you really think the Raspberry Pi would stop getting better? At this point, we sound like a broken record, extolling on the new Pi’s myriad improvements like we’re surprised that the folks at the Raspberry Pi Foundation are continuously making their flagship board better. ...
In Stock
[Buy Now](https://www.adafruit.com/product/3055)
[Related Guides to the Product](https://learn.adafruit.com/products/3055/guides)
### Raspberry Pi Zero - Version 1.3
[Raspberry Pi Zero - Version 1.3](https://www.adafruit.com/product/2885)
At first glance, the Pi Zero isn't much. It just looks like a slimmed down version of the Raspberry Pi we know and love. But when we started to think of the possibilities - [and what a well-chosen set of accessories could add](https://www.adafruit.com/product/2816) -...
Out of Stock
[Buy Now](https://www.adafruit.com/product/2885)
[Related Guides to the Product](https://learn.adafruit.com/products/2885/guides)
### Raspberry Pi Model A+ 512MB RAM
[Raspberry Pi Model A+ 512MB RAM](https://www.adafruit.com/product/2266)
**Note:** As of August 10th, 2016 the Raspberry Pi A+ now includes 512 MB of RAM!
The Raspberry Pi Model A+ is the perfect board for the minimalist Pi fan. This low-cost Pi uses the same processor as the model B+, but does away with the Ethernet jack and three of the USB...
No Longer Stocked
[Buy Now](https://www.adafruit.com/product/2266)
[Related Guides to the Product](https://learn.adafruit.com/products/2266/guides)
## Related Guides
- [Windows IoT Core Application Development: Headless Blinky](https://learn.adafruit.com/windows-iot-application-development-headless-application.md)
- [Adafruit's Raspberry Pi Lesson 4. GPIO Setup](https://learn.adafruit.com/adafruits-raspberry-pi-lesson-4-gpio-setup.md)
- [Introducing the Raspberry Pi Model B+](https://learn.adafruit.com/introducing-the-raspberry-pi-model-b-plus-plus-differences-vs-model-b.md)
- [Adafruit Raspberry Pi Educational Linux Distro](https://learn.adafruit.com/adafruit-raspberry-pi-educational-linux-distro.md)
- [NeoPixels on Raspberry Pi](https://learn.adafruit.com/neopixels-on-raspberry-pi.md)
- [Controlling Motors using the Raspberry Pi and RasPiRobot Board V2](https://learn.adafruit.com/controlling-motors-using-the-raspberry-pi-and-raspirobot-board-v2.md)
- [Pi Video Output Using pygame](https://learn.adafruit.com/pi-video-output-using-pygame.md)
- [Windows IoT Core Application Development: Headed Blinky](https://learn.adafruit.com/windows-iot-application-development-headed-blinky.md)
- [Capacitive Touch Sensors on the Raspberry Pi](https://learn.adafruit.com/capacitive-touch-sensors-on-the-raspberry-pi.md)
- [Introducing the Raspberry Pi Zero](https://learn.adafruit.com/introducing-the-raspberry-pi-zero.md)
- [Send Raspberry Pi Data to COSM](https://learn.adafruit.com/send-raspberry-pi-data-to-cosm.md)
- [Getting Started With Windows IoT Core on Raspberry Pi](https://learn.adafruit.com/getting-started-with-windows-iot-on-raspberry-pi.md)
- [Node.js Embedded Development on the Raspberry Pi](https://learn.adafruit.com/node-embedded-development.md)
- [Using an External Drive as a Raspberry Pi Root Filesystem](https://learn.adafruit.com/external-drive-as-raspberry-pi-root.md)
- [Debugging with the Raspberry Pi WebIDE](https://learn.adafruit.com/debugging-with-the-raspberry-pi-webide.md)
---
# Source: https://learn.adafruit.com/adafruits-raspberry-pi-lesson-5-using-a-console-cable/software-installation-mac.md
# Adafruit's Raspberry Pi Lesson 5. Using a Console Cable
## Software Installation (Mac)
OSX includes terminal emulation software that you can use from the command line, so we only need to install the USB drivers for the cable.
# Install Drivers
Next, install the latest drivers for the cable chipset.
There's _two_ possible chipsets. The older cables use Prolific brand, the newer cables (as of 2017) use SiLabs brand. **If you're not sure which you have, just install both drivers! There's no risk and the cable will work no matter what**
## Prolific Chipset
For the "Prolific Chipset" cable, grab the drivers from here
[You can grab the latest drivers from Prolific!](http://www.prolific.com.tw/US/ShowProduct.aspx?p_id=229&pcid=41)
[Here is a mirror of PL2303_Mac_OSX_Drv_V1_6_2_20190723.rar in case Prolific is down](https://cdn-learn.adafruit.com/assets/assets/000/081/284/original/PL2303_Mac_OSX_Drv_V1_6_2_20190723.rar?1569118464)
And if you're using an [older version of Mac OS X (10.8-10.6) then try this Prolific driver version 1.5.1](https://www.adafruit.com/images/product-files/954/md_PL2303_MacOSX_10_6-10_10_v1_5_1.zip).
## SiLabs CP210X Drivers
If you are running [**Mac OS X , please use the SiLabs drivers**](https://www.silabs.com/products/development-tools/software/usb-to-uart-bridge-vcp-drivers) here
Warning:
[Download LEGACY Mac CP210X Driver](http://community.silabs.com/t5/Interface-Knowledge-Base/Legacy-OS-Software-and-Driver-Packages/ta-p/182585)
# Install!
Both downloads are standard Mac installers. Accept all defaults when prompted.

- [Previous Page](https://learn.adafruit.com/adafruits-raspberry-pi-lesson-5-using-a-console-cable/enabling-serial-console.md)
- [Next Page](https://learn.adafruit.com/adafruits-raspberry-pi-lesson-5-using-a-console-cable/software-installation-windows.md)
## Featured Products
### Budget Pack for Raspberry Pi 1 Model B (Doesn't include RasPi)
[Budget Pack for Raspberry Pi 1 Model B (Doesn't include RasPi)](https://www.adafruit.com/product/965)
An optimized collection of parts and pieces to experiment with Raspberry Pi at home, school or work. Great for students and those that want to get their feet wet, no soldering required! **THIS PACK DOES NOT INCLUDE A RASPBERRY PI 1 MODEL B and is NOT compatible with Model B+ or Raspberry Pi...**
No Longer Stocked
[Buy Now](https://www.adafruit.com/product/965)
[Related Guides to the Product](https://learn.adafruit.com/products/965/guides)
### USB to TTL Serial Cable - Debug / Console Cable for Raspberry Pi
[USB to TTL Serial Cable - Debug / Console Cable for Raspberry Pi](https://www.adafruit.com/product/954)
The cable is easiest way ever to connect to your microcontroller/Raspberry Pi/WiFi router serial console port. Inside the big USB plug is a USB\<-\>Serial conversion chip and at the end of the 36" cable are four wire - red power, black ground, white RX into USB port, and green TX out...
In Stock
[Buy Now](https://www.adafruit.com/product/954)
[Related Guides to the Product](https://learn.adafruit.com/products/954/guides)
### Programming the Raspberry Pi: Getting Started with Python
[Programming the Raspberry Pi: Getting Started with Python](https://www.adafruit.com/product/1089)
**Program your own Raspberry Pi projects!**
An updated guide to programming your own Raspberry Pi projects. Learn to create inventive programs and fun games on your powerful Raspberry Pi--with no programming experience required. **This practical book has been revised...**
In Stock
[Buy Now](https://www.adafruit.com/product/1089)
[Related Guides to the Product](https://learn.adafruit.com/products/1089/guides)
### Raspberry Pi Model B starter pack Doesn't include Raspberry Pi 1
[Raspberry Pi Model B starter pack Doesn't include Raspberry Pi 1](https://www.adafruit.com/product/955)
You want to get hacking with your Pi fast, right? Get everything you need to start with the Adafruit Starter Pack for Raspberry Pi. It's the perfect accompaniment to your new Pi, everything you need to get a distro image loaded and running. **We even pre-assemble the Cobbler for you,...**
No Longer Stocked
[Buy Now](https://www.adafruit.com/product/955)
[Related Guides to the Product](https://learn.adafruit.com/products/955/guides)
### Raspberry Pi 1 Model B Starter Pack - Includes a Raspberry Pi
[Raspberry Pi 1 Model B Starter Pack - Includes a Raspberry Pi](https://www.adafruit.com/product/1014)
You want to get hacking with your Pi fast, right? Get everything you need to start with the Adafruit Starter Pack for Raspberry Pi. It's the perfect accompaniment to your new Pi, everything you need to boot up your Pi Model B and get going. **We pre-assemble the Cobbler for you, no...**
No Longer Stocked
[Buy Now](https://www.adafruit.com/product/1014)
[Related Guides to the Product](https://learn.adafruit.com/products/1014/guides)
### Raspberry Pi 3 - Model B - ARMv8 with 1G RAM
[Raspberry Pi 3 - Model B - ARMv8 with 1G RAM](https://www.adafruit.com/product/3055)
Did you really think the Raspberry Pi would stop getting better? At this point, we sound like a broken record, extolling on the new Pi’s myriad improvements like we’re surprised that the folks at the Raspberry Pi Foundation are continuously making their flagship board better. ...
In Stock
[Buy Now](https://www.adafruit.com/product/3055)
[Related Guides to the Product](https://learn.adafruit.com/products/3055/guides)
### Raspberry Pi Zero - Version 1.3
[Raspberry Pi Zero - Version 1.3](https://www.adafruit.com/product/2885)
At first glance, the Pi Zero isn't much. It just looks like a slimmed down version of the Raspberry Pi we know and love. But when we started to think of the possibilities - [and what a well-chosen set of accessories could add](https://www.adafruit.com/product/2816) -...
Out of Stock
[Buy Now](https://www.adafruit.com/product/2885)
[Related Guides to the Product](https://learn.adafruit.com/products/2885/guides)
### Raspberry Pi Model A+ 512MB RAM
[Raspberry Pi Model A+ 512MB RAM](https://www.adafruit.com/product/2266)
**Note:** As of August 10th, 2016 the Raspberry Pi A+ now includes 512 MB of RAM!
The Raspberry Pi Model A+ is the perfect board for the minimalist Pi fan. This low-cost Pi uses the same processor as the model B+, but does away with the Ethernet jack and three of the USB...
No Longer Stocked
[Buy Now](https://www.adafruit.com/product/2266)
[Related Guides to the Product](https://learn.adafruit.com/products/2266/guides)
## Related Guides
- [Windows IoT Core Application Development: Headless Blinky](https://learn.adafruit.com/windows-iot-application-development-headless-application.md)
- [Adafruit's Raspberry Pi Lesson 4. GPIO Setup](https://learn.adafruit.com/adafruits-raspberry-pi-lesson-4-gpio-setup.md)
- [Introducing the Raspberry Pi Model B+](https://learn.adafruit.com/introducing-the-raspberry-pi-model-b-plus-plus-differences-vs-model-b.md)
- [Adafruit Raspberry Pi Educational Linux Distro](https://learn.adafruit.com/adafruit-raspberry-pi-educational-linux-distro.md)
- [NeoPixels on Raspberry Pi](https://learn.adafruit.com/neopixels-on-raspberry-pi.md)
- [Controlling Motors using the Raspberry Pi and RasPiRobot Board V2](https://learn.adafruit.com/controlling-motors-using-the-raspberry-pi-and-raspirobot-board-v2.md)
- [Pi Video Output Using pygame](https://learn.adafruit.com/pi-video-output-using-pygame.md)
- [Windows IoT Core Application Development: Headed Blinky](https://learn.adafruit.com/windows-iot-application-development-headed-blinky.md)
- [Capacitive Touch Sensors on the Raspberry Pi](https://learn.adafruit.com/capacitive-touch-sensors-on-the-raspberry-pi.md)
- [Introducing the Raspberry Pi Zero](https://learn.adafruit.com/introducing-the-raspberry-pi-zero.md)
- [Send Raspberry Pi Data to COSM](https://learn.adafruit.com/send-raspberry-pi-data-to-cosm.md)
- [Getting Started With Windows IoT Core on Raspberry Pi](https://learn.adafruit.com/getting-started-with-windows-iot-on-raspberry-pi.md)
- [Node.js Embedded Development on the Raspberry Pi](https://learn.adafruit.com/node-embedded-development.md)
- [Using an External Drive as a Raspberry Pi Root Filesystem](https://learn.adafruit.com/external-drive-as-raspberry-pi-root.md)
- [Debugging with the Raspberry Pi WebIDE](https://learn.adafruit.com/debugging-with-the-raspberry-pi-webide.md)
---
# Source: https://learn.adafruit.com/adafruits-raspberry-pi-lesson-5-using-a-console-cable/software-installation-windows.md
# Adafruit's Raspberry Pi Lesson 5. Using a Console Cable
## Software Installation (Windows)
Download and install Putty from here: [http://www.putty.org/](http://www.putty.org/)
From the list of downloads select the binary called just **putty.exe** from the section **For Windows on Intel x86**. This will prompt you to save the file. Save it onto the **Desktop** for now.
Warning:
# Install Drivers
Next, install the latest drivers for the cable chipset.
There's _two_ possible chipsets. The older cables use Prolific brand, the newer cables (as of 2017) use SiLabs brand. **If you're not sure which you have, just install both drivers! There's no risk and the cable will work no matter what**
## Prolific Chipset
For the "Prolific Chipset" cable, grab the drivers from here
[Download the latest PL2303 drivers from Prolific here!](http://www.prolific.com.tw/US/ShowProduct.aspx?p_id=225&pcid=41)
This will save a zip file called **PL2303\_Prolific\_DriverInstaller\_v1\_7\_0.zip** (or similar). Unzip this onto the desktop and within the folder run the installer called **PL2303\_Prolific\_DriverInstaller\_v1.7.0.exe**

If you're having issues, [you can also try this older PL2303 driver (v1.0.13)](http://www.adafruit.com/datasheets/PL2303%201.0.13.zip)
## SiLabs Chipset
For the "SiLabs Chipset" cable, grab the drivers from here
[Download Windows CP210X Drivers](https://www.silabs.com/developers/usb-to-uart-bridge-vcp-drivers)
This will save a zip file called **CP210x\_Windows\_Drivers.zip** (or similar). Unzip this onto the desktop and within the folder run the installer called **CP210xVCPInstaller\_x64.exe**
(or **CP210xVCPInstaller\_x86.exe** if the x64.exe doesn't run)

# Complete Installation
Click through the entire driver installation process to completion
You may need to reboot!

The driver is installed in such a way that when you later plug in the USB console lead, it will still launch the “Found New Hardware” wizard. If you allow the Wizard to search the Internet and install it should work.

When it has finished installing the driver, you should get this message:

- [Previous Page](https://learn.adafruit.com/adafruits-raspberry-pi-lesson-5-using-a-console-cable/software-installation-mac.md)
- [Next Page](https://learn.adafruit.com/adafruits-raspberry-pi-lesson-5-using-a-console-cable/software-installation-linux.md)
## Featured Products
### Budget Pack for Raspberry Pi 1 Model B (Doesn't include RasPi)
[Budget Pack for Raspberry Pi 1 Model B (Doesn't include RasPi)](https://www.adafruit.com/product/965)
An optimized collection of parts and pieces to experiment with Raspberry Pi at home, school or work. Great for students and those that want to get their feet wet, no soldering required! **THIS PACK DOES NOT INCLUDE A RASPBERRY PI 1 MODEL B and is NOT compatible with Model B+ or Raspberry Pi...**
No Longer Stocked
[Buy Now](https://www.adafruit.com/product/965)
[Related Guides to the Product](https://learn.adafruit.com/products/965/guides)
### USB to TTL Serial Cable - Debug / Console Cable for Raspberry Pi
[USB to TTL Serial Cable - Debug / Console Cable for Raspberry Pi](https://www.adafruit.com/product/954)
The cable is easiest way ever to connect to your microcontroller/Raspberry Pi/WiFi router serial console port. Inside the big USB plug is a USB\<-\>Serial conversion chip and at the end of the 36" cable are four wire - red power, black ground, white RX into USB port, and green TX out...
In Stock
[Buy Now](https://www.adafruit.com/product/954)
[Related Guides to the Product](https://learn.adafruit.com/products/954/guides)
### Programming the Raspberry Pi: Getting Started with Python
[Programming the Raspberry Pi: Getting Started with Python](https://www.adafruit.com/product/1089)
**Program your own Raspberry Pi projects!**
An updated guide to programming your own Raspberry Pi projects. Learn to create inventive programs and fun games on your powerful Raspberry Pi--with no programming experience required. **This practical book has been revised...**
In Stock
[Buy Now](https://www.adafruit.com/product/1089)
[Related Guides to the Product](https://learn.adafruit.com/products/1089/guides)
### Raspberry Pi Model B starter pack Doesn't include Raspberry Pi 1
[Raspberry Pi Model B starter pack Doesn't include Raspberry Pi 1](https://www.adafruit.com/product/955)
You want to get hacking with your Pi fast, right? Get everything you need to start with the Adafruit Starter Pack for Raspberry Pi. It's the perfect accompaniment to your new Pi, everything you need to get a distro image loaded and running. **We even pre-assemble the Cobbler for you,...**
No Longer Stocked
[Buy Now](https://www.adafruit.com/product/955)
[Related Guides to the Product](https://learn.adafruit.com/products/955/guides)
### Raspberry Pi 1 Model B Starter Pack - Includes a Raspberry Pi
[Raspberry Pi 1 Model B Starter Pack - Includes a Raspberry Pi](https://www.adafruit.com/product/1014)
You want to get hacking with your Pi fast, right? Get everything you need to start with the Adafruit Starter Pack for Raspberry Pi. It's the perfect accompaniment to your new Pi, everything you need to boot up your Pi Model B and get going. **We pre-assemble the Cobbler for you, no...**
No Longer Stocked
[Buy Now](https://www.adafruit.com/product/1014)
[Related Guides to the Product](https://learn.adafruit.com/products/1014/guides)
### Raspberry Pi 3 - Model B - ARMv8 with 1G RAM
[Raspberry Pi 3 - Model B - ARMv8 with 1G RAM](https://www.adafruit.com/product/3055)
Did you really think the Raspberry Pi would stop getting better? At this point, we sound like a broken record, extolling on the new Pi’s myriad improvements like we’re surprised that the folks at the Raspberry Pi Foundation are continuously making their flagship board better. ...
In Stock
[Buy Now](https://www.adafruit.com/product/3055)
[Related Guides to the Product](https://learn.adafruit.com/products/3055/guides)
### Raspberry Pi Zero - Version 1.3
[Raspberry Pi Zero - Version 1.3](https://www.adafruit.com/product/2885)
At first glance, the Pi Zero isn't much. It just looks like a slimmed down version of the Raspberry Pi we know and love. But when we started to think of the possibilities - [and what a well-chosen set of accessories could add](https://www.adafruit.com/product/2816) -...
Out of Stock
[Buy Now](https://www.adafruit.com/product/2885)
[Related Guides to the Product](https://learn.adafruit.com/products/2885/guides)
### Raspberry Pi Model A+ 512MB RAM
[Raspberry Pi Model A+ 512MB RAM](https://www.adafruit.com/product/2266)
**Note:** As of August 10th, 2016 the Raspberry Pi A+ now includes 512 MB of RAM!
The Raspberry Pi Model A+ is the perfect board for the minimalist Pi fan. This low-cost Pi uses the same processor as the model B+, but does away with the Ethernet jack and three of the USB...
No Longer Stocked
[Buy Now](https://www.adafruit.com/product/2266)
[Related Guides to the Product](https://learn.adafruit.com/products/2266/guides)
## Related Guides
- [Windows IoT Core Application Development: Headless Blinky](https://learn.adafruit.com/windows-iot-application-development-headless-application.md)
- [Adafruit's Raspberry Pi Lesson 4. GPIO Setup](https://learn.adafruit.com/adafruits-raspberry-pi-lesson-4-gpio-setup.md)
- [Introducing the Raspberry Pi Model B+](https://learn.adafruit.com/introducing-the-raspberry-pi-model-b-plus-plus-differences-vs-model-b.md)
- [Adafruit Raspberry Pi Educational Linux Distro](https://learn.adafruit.com/adafruit-raspberry-pi-educational-linux-distro.md)
- [NeoPixels on Raspberry Pi](https://learn.adafruit.com/neopixels-on-raspberry-pi.md)
- [Controlling Motors using the Raspberry Pi and RasPiRobot Board V2](https://learn.adafruit.com/controlling-motors-using-the-raspberry-pi-and-raspirobot-board-v2.md)
- [Pi Video Output Using pygame](https://learn.adafruit.com/pi-video-output-using-pygame.md)
- [Windows IoT Core Application Development: Headed Blinky](https://learn.adafruit.com/windows-iot-application-development-headed-blinky.md)
- [Capacitive Touch Sensors on the Raspberry Pi](https://learn.adafruit.com/capacitive-touch-sensors-on-the-raspberry-pi.md)
- [Introducing the Raspberry Pi Zero](https://learn.adafruit.com/introducing-the-raspberry-pi-zero.md)
- [Send Raspberry Pi Data to COSM](https://learn.adafruit.com/send-raspberry-pi-data-to-cosm.md)
- [Getting Started With Windows IoT Core on Raspberry Pi](https://learn.adafruit.com/getting-started-with-windows-iot-on-raspberry-pi.md)
- [Node.js Embedded Development on the Raspberry Pi](https://learn.adafruit.com/node-embedded-development.md)
- [Using an External Drive as a Raspberry Pi Root Filesystem](https://learn.adafruit.com/external-drive-as-raspberry-pi-root.md)
- [Debugging with the Raspberry Pi WebIDE](https://learn.adafruit.com/debugging-with-the-raspberry-pi-webide.md)
---
# Source: https://learn.adafruit.com/light-painting-with-raspberry-pi/software.md
# Source: https://learn.adafruit.com/electroknit/software.md
# Electro-knit
## Software
In this section we will download and install the software that emulates a disk drive to the knitting machine.
**Python code**
Now that you have the cable running, its time to download the software. Visit the Adafruit [github](http://github.com/adafruit/knitting_machine) repository and click on **Download** to download the source code.
_This code is based on [Steve Conklin's knitting machine code](http://www.antitronics.com/wiki/index.php?title=Electroknit_Technical_Information) which is totally awesome but doesn't support pattern insertion. Still, check out his site for a lot of detailed information._
Download the file and unzip it into a directory that is easy for you to get to. For windows, we're going to stick the folder in **My Documents** in a folder called **brother** but if you are comfortable with command lines put it where-ever you'd like!

We've had good luck running this software on Linux and Mac (OS X) systems, but it supposedly works on Windows now too, thanks to Steve's PDDEmulate.py bug fix. Try it and let us know!
You will need Python installed to run the code. To see if you have Python installed, open up a command line and type in **python**. If you're running Windows you probably don't have it, so download it from [the official Python site](http://www.python.org/download/) . You'll also need [PySerial (serial interface for python) from http://sourceforge.net/projects/pyserial/](http://sourceforge.net/projects/pyserial/)
Open up a command line (windows) or Terminal (mac) or xterm (linux) and **cd** to the **brother** directory and then type in **ls** (or **dir** if **ls** doesnt work) to list all the files.

**Determining the serial port**
Now we need to figure out what the name of the FTDI cable is. This process differs a little for Mac, Linux and Windows people.
Under Mac, in the Terminal window, type in **ls /dev/cu.\*** which should give the following responses or so.

The name we are looking for is **/dev/cu.usbserial-XXXX** where the X's are going to be unique for each cable. Copy and paste the name into a text file so you'll remember it for later.
For Linux/Unix type **ls /dev/ttyUSB** \* into a terminal window, you should see a device file called something like **ttyUSB0**.

If you are using Windows, go to the **Device Manager** (From the **Start Menu** , select **Settings→Control Panel**. Double click on **System** and select the **Hardware** tab. Then click on the **Device Manager** button).

- [Previous Page](https://learn.adafruit.com/electroknit/cable.md)
- [Next Page](https://learn.adafruit.com/electroknit/backup.md)
## Featured Products
### FTDI Serial TTL-232 USB Cable
[FTDI Serial TTL-232 USB Cable](https://www.adafruit.com/product/70)
Just about all electronics use TTL serial for debugging, bootloading, programming, serial output, etc. But it's rare for a computer to have a serial port anymore. This is a USB to TTL serial cable, with a FTDI FT232RL usb/serial chip embedded in the head. It has a 6-pin socket at the end...
In Stock
[Buy Now](https://www.adafruit.com/product/70)
[Related Guides to the Product](https://learn.adafruit.com/products/70/guides)
## Related Guides
- [Open Source Protective Face Shield Designs](https://learn.adafruit.com/open-source-face-shield-designs.md)
- [Pico Bluetooth Keyboard Bridge](https://learn.adafruit.com/pico-bluetooth-keyboard-bridge.md)
- [Dimmable Li-Ion Halogen Bike Light](https://learn.adafruit.com/dimmable-li-ion-halogen-bike-light.md)
- [Installing IronOS on an MHP30 Mini Hot Plate (DEPRECATED)](https://learn.adafruit.com/installing-ironos-on-a-mhp30-mini-hotplate.md)
- [Getting Started with Braille Output for CircuitPython REPL](https://learn.adafruit.com/getting-started-braille-output-circuitpython-repl.md)
- [Meowsic Cat Piano Line Out](https://learn.adafruit.com/meowsic-line-out.md)
- [Instagram Photo Frame](https://learn.adafruit.com/instagram-photo-frame.md)
- [ESP32 PlayStation Controller](https://learn.adafruit.com/esp32-playstation-controller.md)
- [NeoPIO: Drive lots of LEDs with Raspberry Pi Pico](https://learn.adafruit.com/neopio-drive-lots-of-leds-with-raspberry-pi-pico.md)
- [Ikea Vindriktning Hack with QT Py ESP32-S3 and Adafruit IO](https://learn.adafruit.com/ikea-vindriktning-hack-with-qt-py-esp32-s3-and-adafruit-io.md)
- [See N Say Brain Transplant](https://learn.adafruit.com/see-n-say-brain-transplant.md)
- [DIY Welded Bike Stand](https://learn.adafruit.com/diy-welded-bike-stand.md)
- [Setting up an Open Speech Recording Website](https://learn.adafruit.com/setting-up-an-open-speech-recording-website.md)
- [Authoring Playground Books with Bluefruit for iOS ](https://learn.adafruit.com/create-a-swift-playgroundbook-with-bluetooth-le.md)
- [Adafruit Feather RP2040 with USB Type A Host](https://learn.adafruit.com/adafruit-feather-rp2040-with-usb-type-a-host.md)
---
# Source: https://learn.adafruit.com/usb-dc-and-solar-lipoly-charger/solar-charger-preparation.md
# USB, DC & Solar Lipoly Charger
## Solar Charger Preparation
## Installing the Capacitor
The first thing to do before starting to charge with a solar panel is to install the large filtering capacitor. This capacitor is necessary to stabilize the panel a little, and since we're going to charge with a lot of current, the capacitor needs to be pretty big. There is a spot on the PCB for the capacitor, you can of course install it directly there by soldering the wires of the capacitor into the pads.
Danger:

If you're low on space, you can solder wires to the capacitor and then install it a little farther away. Just remember to use heatshrink to keep the capacitor legs from shorting. If you want you can bend the capacitor over a bit as well, but dont have it touch the hot charging chip (the black square in the middle of the PCB)!
Next you will have to connect up your solar panel. Panels sometimes come 'bare' (no wires), with just wires, or with a connector of some sort. You may need to splice a connector onto the panel to match the 5.5/2.1mm (or 4mm on older charger) DC jack on the adapter.
- [Previous Page](https://learn.adafruit.com/usb-dc-and-solar-lipoly-charger/faq.md)
- [Next Page](https://learn.adafruit.com/usb-dc-and-solar-lipoly-charger/solar-panel-preparation.md)
## Featured Products
### Lithium Ion Battery Pack - 3.7V 4400mAh
[Lithium Ion Battery Pack - 3.7V 4400mAh](https://www.adafruit.com/product/354)
Need a big battery for your project? This lithium-ion pack is made of 2 balanced 2200mAh cells for a total of 4400mA capacity! The cells are connected in parallel and spot-welded to a protection circuit that provides over-voltage, under-voltage, and over-current protection.
Each cell can...
In Stock
[Buy Now](https://www.adafruit.com/product/354)
[Related Guides to the Product](https://learn.adafruit.com/products/354/guides)
### USB / DC / Solar Lithium Ion/Polymer charger
[USB / DC / Solar Lithium Ion/Polymer charger](https://www.adafruit.com/product/390)
Make your projects to go green this summer with our specialized USB/Solar Lithium Ion Polymer Battery charger! This charger is a very unique design, perfect for outdoor projects, or DIY iPod chargers. We've spent over a year testing and tinkering with this charger to come up with a plug...
In Stock
[Buy Now](https://www.adafruit.com/product/390)
[Related Guides to the Product](https://learn.adafruit.com/products/390/guides)
### Lithium Ion Polymer Battery - 3.7v 1200mAh
[Lithium Ion Polymer Battery - 3.7v 1200mAh](https://www.adafruit.com/product/258)
Lithium-ion polymer (also known as 'lipo' or 'lipoly') batteries are thin, light, and powerful. The output ranges from 4.2V when completely charged to 3.7V. This battery has a capacity of 1200mAh for a total of about 4.5 Wh. If you need a larger battery,
In Stock
[Buy Now](https://www.adafruit.com/product/258)
[Related Guides to the Product](https://learn.adafruit.com/products/258/guides)
### Male DC Power adapter - 2.1mm plug to screw terminal block
[Male DC Power adapter - 2.1mm plug to screw terminal block](https://www.adafruit.com/product/369)
If you need to connect a battery pack or wired power supply to a board that has a DC jack - this adapter will come in very handy! There is a 2.1mm DC plug on one end, and a screw terminal block on the other. The terminals are labeled with positive/negative assuming a positive-tip configuration...
In Stock
[Buy Now](https://www.adafruit.com/product/369)
[Related Guides to the Product](https://learn.adafruit.com/products/369/guides)
### MintyBoost Kit
[MintyBoost Kit](https://www.adafruit.com/product/14)
The world's first and only open-source hardware charger: The MintyBoost®!
**New version!** Works with the new iPhone 4 & 5 and more! **Please review the [Minty Boost project page(s)](//learn.adafruit.com/minty-boost) before purchase and...**
No Longer Stocked
[Buy Now](https://www.adafruit.com/product/14)
[Related Guides to the Product](https://learn.adafruit.com/products/14/guides)
### 10K Precision Epoxy Thermistor
[10K Precision Epoxy Thermistor](https://www.adafruit.com/product/372)
Need to measure something damp? This epoxy-coated precision 1% 10K thermistor is an inexpensive way to measure temperature in weather or liquids. The resistance in 25 °C is 10K (+- 1%). The resistance goes down as it gets warmer and goes up as it gets cooler.
In Stock
[Buy Now](https://www.adafruit.com/product/372)
[Related Guides to the Product](https://learn.adafruit.com/products/372/guides)
### Large 6V 3.7W Solar Panel
[Large 6V 3.7W Solar Panel](https://www.adafruit.com/product/417)
Harness even more power from the sun with this nice big solar panel. We had these custom made for us when customers let us know they needed more than what our 2W panel could provide. This panel is a 12-cell (6V) assembly mounted onto a fiberglass PCB and covered with PET plastic which protects...
No Longer Stocked
[Buy Now](https://www.adafruit.com/product/417)
[Related Guides to the Product](https://learn.adafruit.com/products/417/guides)
### Large 6V 3.5W Solar panel
[Large 6V 3.5W Solar panel](https://www.adafruit.com/product/500)
These panels come to us from Voltaic Systems, makers of fine solar-powered bags and packs. These are waterproof, scratch resistant, and UV resistant. They use a high efficiency monocrystalline cell. They output 6V at 530 mA via 3.5mm x 1.1mm DC jack connector - a nice upgrade to the 2W panels...
Out of Stock
[Buy Now](https://www.adafruit.com/product/500)
[Related Guides to the Product](https://learn.adafruit.com/products/500/guides)
## Related Guides
- [Collin's Lab: Solar](https://learn.adafruit.com/collins-lab-solar.md)
- [Compost Friend!](https://learn.adafruit.com/compost-optimization-machine.md)
- [Portable Solar Charging Tracker](https://learn.adafruit.com/portable-solar-charging-tracker.md)
- [Mailbox Notification Service](https://learn.adafruit.com/mailbox-notification-service.md)
- [Solar Charging Handbag](https://learn.adafruit.com/solar-charging-handbag.md)
- [Solar Boost Bag](https://learn.adafruit.com/solar-boost-bag.md)
- [Adafruit MCP4728 I2C Quad DAC](https://learn.adafruit.com/adafruit-mcp4728-i2c-quad-dac.md)
- [Adafruit LiIon or LiPoly Charger BFF Add-On for QT Py](https://learn.adafruit.com/adafruit-qt-py-charger-bff.md)
- [Adafruit TPS61169 Constant Current Boost Converter for LEDs](https://learn.adafruit.com/adafruit-tps61169-constant-current-boost-converter-for-leds.md)
- [Adafruit MAX17048 LiPoly / LiIon Fuel Gauge and Battery Monitor](https://learn.adafruit.com/adafruit-max17048-lipoly-liion-fuel-gauge-and-battery-monitor.md)
- [Magical Light-up Dreidel](https://learn.adafruit.com/magical-light-up-dreidel.md)
- [Adafruit USB Type C Power Delivery Switchable Breakout](https://learn.adafruit.com/adafruit-usb-type-c-power-delivery-switchable-breakout.md)
- [Controlling Devices with RFID Wiz](https://learn.adafruit.com/controlling-devices-with-rfid-wiz.md)
- [Adafruit INA23x DC Current Voltage Power Monitor](https://learn.adafruit.com/adafruit-ina237-dc-current-voltage-power-monitor.md)
- [Adafruit TPL5110 Power Timer Breakout](https://learn.adafruit.com/adafruit-tpl5110-power-timer-breakout.md)
---
# Source: https://learn.adafruit.com/usb-dc-and-solar-lipoly-charger/solar-panel-preparation.md
# USB, DC & Solar Lipoly Charger
## Solar Panel Preparation
## Splice or Adapt?
The first verison of the solar charger came with a 4mm DC barrel jack on it. On older versions (4mm) it would come with a converter cable.
- If you have a newer v2 charger (June 2013+), connect a [2.1mm Terminal Block Adapter](http://www.adafruit.com/products/369 "Link: http://www.adafruit.com/products/369") onto the panel using basic wires, or a [1.3mm to 2.1mm adapter cable](https://www.adafruit.com/products/2788) then plug that into the 2.1mm adapter. This is the fastest method
- If you have an older v1 charger, you can use the terminal block method above OR cut the adapter cable in half and splice the 4mm connector onto the panel. The panel will plug right into the board but its more work.
# Voltaic Panels with 1.3mm Connectors
[Grab one of our adapter cables, it will let you plug in the solar panel directly](https://www.adafruit.com/products/2788)

# Other 6V Solar Panels
If you have a panel with something other than 2.1mm or 1.3mm connector, you'll need to remove any existing connector. Cut off whatever connector is on

Gently remove the outer casing without nipping the inner wires.

Strip and tin the inner wires.

## Method 1
For this you'll need a [2.1mm Terminal Block Adapter](http://www.adafruit.com/products/369) but its really simple. Just open up the screw terminals, slide the red wire into the + hole and the black wire into the - hole and retighten! Now you can just plug it directly into the charger (or adapter cable).

# If You Have a Pre-2013 Solar Charger
This method is a little tougher, but results in a nicer cable. You'll need some heatshrink as well as some item with a 2.1mm DC barrel plug (like the 2.1mm adapter)
Cut off anything on the opposite end.

And carefully strip off the outer sheath.
You'll want some longer wires on this side, maybe 1.5" (3-4 cm).
Strip just the ends of the wires and tin them.
Place a big piece of heatshrink onto the cable, and then two shorter and smaller pieces on each of the wires.
Solder red to red and black to black, keep the heatshrink away from your soldering iron since it may shrink too fast!

After the solder cools off, pull the smaller shrink onto the wires and heatshrink them!
Then pull the big piece over everything!
And heatshrink it (with a hot air gun if you have one, or carefully with a lighter if you don't).
That's it! Check with a multimeter, in the sun, to verify that you have a open circuit voltage on the plug.
- [Previous Page](https://learn.adafruit.com/usb-dc-and-solar-lipoly-charger/solar-charger-preparation.md)
- [Next Page](https://learn.adafruit.com/usb-dc-and-solar-lipoly-charger/using-the-charger.md)
## Featured Products
### Lithium Ion Battery Pack - 3.7V 4400mAh
[Lithium Ion Battery Pack - 3.7V 4400mAh](https://www.adafruit.com/product/354)
Need a big battery for your project? This lithium-ion pack is made of 2 balanced 2200mAh cells for a total of 4400mA capacity! The cells are connected in parallel and spot-welded to a protection circuit that provides over-voltage, under-voltage, and over-current protection.
Each cell can...
In Stock
[Buy Now](https://www.adafruit.com/product/354)
[Related Guides to the Product](https://learn.adafruit.com/products/354/guides)
### USB / DC / Solar Lithium Ion/Polymer charger
[USB / DC / Solar Lithium Ion/Polymer charger](https://www.adafruit.com/product/390)
Make your projects to go green this summer with our specialized USB/Solar Lithium Ion Polymer Battery charger! This charger is a very unique design, perfect for outdoor projects, or DIY iPod chargers. We've spent over a year testing and tinkering with this charger to come up with a plug...
In Stock
[Buy Now](https://www.adafruit.com/product/390)
[Related Guides to the Product](https://learn.adafruit.com/products/390/guides)
### Lithium Ion Polymer Battery - 3.7v 1200mAh
[Lithium Ion Polymer Battery - 3.7v 1200mAh](https://www.adafruit.com/product/258)
Lithium-ion polymer (also known as 'lipo' or 'lipoly') batteries are thin, light, and powerful. The output ranges from 4.2V when completely charged to 3.7V. This battery has a capacity of 1200mAh for a total of about 4.5 Wh. If you need a larger battery,
In Stock
[Buy Now](https://www.adafruit.com/product/258)
[Related Guides to the Product](https://learn.adafruit.com/products/258/guides)
### Male DC Power adapter - 2.1mm plug to screw terminal block
[Male DC Power adapter - 2.1mm plug to screw terminal block](https://www.adafruit.com/product/369)
If you need to connect a battery pack or wired power supply to a board that has a DC jack - this adapter will come in very handy! There is a 2.1mm DC plug on one end, and a screw terminal block on the other. The terminals are labeled with positive/negative assuming a positive-tip configuration...
In Stock
[Buy Now](https://www.adafruit.com/product/369)
[Related Guides to the Product](https://learn.adafruit.com/products/369/guides)
### MintyBoost Kit
[MintyBoost Kit](https://www.adafruit.com/product/14)
The world's first and only open-source hardware charger: The MintyBoost®!
**New version!** Works with the new iPhone 4 & 5 and more! **Please review the [Minty Boost project page(s)](//learn.adafruit.com/minty-boost) before purchase and...**
No Longer Stocked
[Buy Now](https://www.adafruit.com/product/14)
[Related Guides to the Product](https://learn.adafruit.com/products/14/guides)
### 10K Precision Epoxy Thermistor
[10K Precision Epoxy Thermistor](https://www.adafruit.com/product/372)
Need to measure something damp? This epoxy-coated precision 1% 10K thermistor is an inexpensive way to measure temperature in weather or liquids. The resistance in 25 °C is 10K (+- 1%). The resistance goes down as it gets warmer and goes up as it gets cooler.
In Stock
[Buy Now](https://www.adafruit.com/product/372)
[Related Guides to the Product](https://learn.adafruit.com/products/372/guides)
### Large 6V 3.7W Solar Panel
[Large 6V 3.7W Solar Panel](https://www.adafruit.com/product/417)
Harness even more power from the sun with this nice big solar panel. We had these custom made for us when customers let us know they needed more than what our 2W panel could provide. This panel is a 12-cell (6V) assembly mounted onto a fiberglass PCB and covered with PET plastic which protects...
No Longer Stocked
[Buy Now](https://www.adafruit.com/product/417)
[Related Guides to the Product](https://learn.adafruit.com/products/417/guides)
### Large 6V 3.5W Solar panel
[Large 6V 3.5W Solar panel](https://www.adafruit.com/product/500)
These panels come to us from Voltaic Systems, makers of fine solar-powered bags and packs. These are waterproof, scratch resistant, and UV resistant. They use a high efficiency monocrystalline cell. They output 6V at 530 mA via 3.5mm x 1.1mm DC jack connector - a nice upgrade to the 2W panels...
Out of Stock
[Buy Now](https://www.adafruit.com/product/500)
[Related Guides to the Product](https://learn.adafruit.com/products/500/guides)
## Related Guides
- [Collin's Lab: Solar](https://learn.adafruit.com/collins-lab-solar.md)
- [Compost Friend!](https://learn.adafruit.com/compost-optimization-machine.md)
- [Portable Solar Charging Tracker](https://learn.adafruit.com/portable-solar-charging-tracker.md)
- [Mailbox Notification Service](https://learn.adafruit.com/mailbox-notification-service.md)
- [Solar Charging Handbag](https://learn.adafruit.com/solar-charging-handbag.md)
- [Solar Boost Bag](https://learn.adafruit.com/solar-boost-bag.md)
- [Adafruit MCP4728 I2C Quad DAC](https://learn.adafruit.com/adafruit-mcp4728-i2c-quad-dac.md)
- [Adafruit LiIon or LiPoly Charger BFF Add-On for QT Py](https://learn.adafruit.com/adafruit-qt-py-charger-bff.md)
- [Adafruit TPS61169 Constant Current Boost Converter for LEDs](https://learn.adafruit.com/adafruit-tps61169-constant-current-boost-converter-for-leds.md)
- [Adafruit MAX17048 LiPoly / LiIon Fuel Gauge and Battery Monitor](https://learn.adafruit.com/adafruit-max17048-lipoly-liion-fuel-gauge-and-battery-monitor.md)
- [Magical Light-up Dreidel](https://learn.adafruit.com/magical-light-up-dreidel.md)
- [Adafruit USB Type C Power Delivery Switchable Breakout](https://learn.adafruit.com/adafruit-usb-type-c-power-delivery-switchable-breakout.md)
- [Controlling Devices with RFID Wiz](https://learn.adafruit.com/controlling-devices-with-rfid-wiz.md)
- [Adafruit INA23x DC Current Voltage Power Monitor](https://learn.adafruit.com/adafruit-ina237-dc-current-voltage-power-monitor.md)
- [Adafruit TPL5110 Power Timer Breakout](https://learn.adafruit.com/adafruit-tpl5110-power-timer-breakout.md)
---
# Source: https://learn.adafruit.com/digital-led-belt/solder-header.md
# Digital LED Belt
## Solder Header
This step is pretty easy, find the small header piece in the package and solder it into the spot at the end of the Atmega32u4 breakout board. Make sure the short pins are going into the PCB and the long pins are facing up.
You may need to use a piece of tape to keep the header in place while soldering it. Solder all 6 pins.

- [Previous Page](https://learn.adafruit.com/digital-led-belt/install-driver.md)
- [Next Page](https://learn.adafruit.com/digital-led-belt/prepare-cable.md)
## Featured Products
### Digital programmable LED belt kit
[Digital programmable LED belt kit](https://www.adafruit.com/product/332)
By popular demand, we now have a project tutorial for how to make your own programmable, ultra-blinky LED belt. Perfect for parties, raves, parades, weddings, funerals, and bar mitzvahs. Wear it with pride, wear it with blinky! Follow our soldering tutorial to build your own heirloom LED belt,...
No Longer Stocked
[Buy Now](https://www.adafruit.com/product/332)
[Related Guides to the Product](https://learn.adafruit.com/products/332/guides)
## Related Guides
- [LED Sequin Bow Tie](https://learn.adafruit.com/led-sequin-bowtie.md)
- [Bluetooth-Controlled NeoPixel Goggles](https://learn.adafruit.com/bluetooth-neopixel-goggles.md)
- [Light Painting with Raspberry Pi](https://learn.adafruit.com/light-painting-with-raspberry-pi.md)
- [Glowing Viking Rune wayFinder](https://learn.adafruit.com/glowing-viking-rune-artifact.md)
- [3D Printing with Bamboo Wood Filament](https://learn.adafruit.com/3d-printing-with-bamboo-wood-filament.md)
- [Jellyfish Umbrella with easy WLED WiFi Control](https://learn.adafruit.com/jellyfish-umbrella-with-easy-wled-wifi-control.md)
- [Bandolier of Light](https://learn.adafruit.com/bandolier-of-light.md)
- [Electron Bow](https://learn.adafruit.com/electron-bow.md)
- [Steven Universe Cosplay Shirt & Gem](https://learn.adafruit.com/steven-universe-cosplay-shirt-gem.md)
- [CLUE Vertical Garden Weather Visualizer](https://learn.adafruit.com/clue-vertical-garden-weather-visualizer.md)
- [Cast a 3d Printed Necklace in Metal](https://learn.adafruit.com/cast-a-3d-printed-necklace-in-metal.md)
- [3D Printed Wearable Video Goggles](https://learn.adafruit.com/3d-printed-wearable-video-goggles.md)
- [Bunny Ears with MakeCode](https://learn.adafruit.com/bunny-ears-with-makecode.md)
- [Roll-up Video Light](https://learn.adafruit.com/roll-up-video-light.md)
- [1,500 NeoPixel LED Curtain with Raspberry Pi and Fadecandy](https://learn.adafruit.com/1500-neopixel-led-curtain-with-raspberry-pi-fadecandy.md)
---
# Source: https://learn.adafruit.com/adafruit-motor-shield/solder-it.md
# Source: https://learn.adafruit.com/adafruit-prototyping-pi-plate/solder-it.md
# Source: https://learn.adafruit.com/adafruit-pi-cobbler-kit/solder-it.md
# Adafruit Pi Cobbler Kit
## Solder it!
First up, open up your kit and verify you have the components - gray cable, blue PCB, black connector and a stick of male header. The header is breakaway, so it might be one long piece instead of two shorter


Start by putting the PCB in front of you with the text as shown on the left. Then place the header on top.
**For the classic cobbler: THERE IS A NOTCH IN THE HEADER MAKE SURE ITS RIGHT NEXT TO THE PIN LABELED #21! **
**For the T-cobbler: THERE IS A NOTCH IN THE HEADER MAKE SURE ITS RIGHT NEXT TO TWO HOLES AT THE T JUNCTION
** Its really important to line up the header right, because otherwise the pins will be reversed, making the cobbler useless


Flip over the two pieces so they are resting on the black header.


With your soldering iron heated up to 700 degrees F, and some solder, heat up each ring/pin pair for 2 seconds, then poke the end of the solder in to melt it in and make a strong electrical and mechanical connection. Then pull the solder away. Finally remove the iron.
Repeat for all 26 pins!


Next break the long piece of header into two 13 pin pieces. You can do this with diagonal cutters, pliers or your fingers


The easiest way to align the pins is to plug them into a solder-less breadboard as shown, with the LONG ends down into the breadboard.
Then place the cobbler PCB on top so that the short ends of the header stick through the 26 pads on either side of the connector. If the PCB doesn't slip right on, check that you have the pins aligned and spaced right. It doesn't matter which way the PCB is oriented on the breadboard.


Solder each of the 26 pads just like you did with the connector before.


That's it! Now you can turn off the soldering iron and plug the IDC cable. Note that one wire of the cable has a red stripe. That's pin #1. Because the cobbler connector has that notch, you can only put it in the right way (whew!)
However, it is possible to put the cable in upside down on the Raspberry Pi! Check the images on the left to verify that the stripe is on the edge closest to the SD card!
_Note that the stripe may be red (gray cable) or white (black cable)_


- [Previous Page](https://learn.adafruit.com/adafruit-pi-cobbler-kit/overview.md)
- [Next Page](https://learn.adafruit.com/adafruit-pi-cobbler-kit/downloads.md)
## Featured Products
### Adafruit Assembled Pi Cobbler Breakout + Cable for Raspberry Pi
[Adafruit Assembled Pi Cobbler Breakout + Cable for Raspberry Pi](https://www.adafruit.com/product/914)
Now that you've finally got your hands on a [Raspberry Pi® Model B](http://www.raspberrypi.org/), you're probably itching to make some fun embedded computer projects with it. What you need is an add on prototyping Pi Cobbler from Adafruit, which can break out all those...
No Longer Stocked
[Buy Now](https://www.adafruit.com/product/914)
[Related Guides to the Product](https://learn.adafruit.com/products/914/guides)
### Full Sized Premium Breadboard - 830 Tie Points
[Full Sized Premium Breadboard - 830 Tie Points](https://www.adafruit.com/product/239)
This is a 'full-size' premium quality breadboard, 830 tie points. Good for small and medium projects. It's 2.2" x 7" (5.5 cm x 17 cm) with a standard double-strip in the middle and two power rails on both sides. You can pull the power rails off easily to make the...
In Stock
[Buy Now](https://www.adafruit.com/product/239)
[Related Guides to the Product](https://learn.adafruit.com/products/239/guides)
### Adafruit Pi Unassembled T-Cobbler Breakout Kit for Raspberry Pi
[Adafruit Pi Unassembled T-Cobbler Breakout Kit for Raspberry Pi](https://www.adafruit.com/product/1105)
Now that you've finally got your hands on a [Raspberry Pi®](http://www.raspberrypi.org/), you're probably itching to make some fun embedded computer projects with it. What you need is an add on prototyping Pi T-Cobbler from Adafruit, which can break out all those tasty...
No Longer Stocked
[Buy Now](https://www.adafruit.com/product/1105)
[Related Guides to the Product](https://learn.adafruit.com/products/1105/guides)
## Related Guides
- [Adafruit's Raspberry Pi Lesson 13. Power Control](https://learn.adafruit.com/adafruits-raspberry-pi-lesson-13-power-control.md)
- [Raspberry Pi Pipboy 3000](https://learn.adafruit.com/raspberry-pi-pipboy-3000.md)
- [Raspberry Pi Thermal Printer One Time Pads](https://learn.adafruit.com/raspberry-pi-thermal-printer-one-time-pads.md)
- [Raspberry Pi Zero NPR One Radio](https://learn.adafruit.com/raspberry-pi-zero-npr-one-radio.md)
- [Read-Only Raspberry Pi](https://learn.adafruit.com/read-only-raspberry-pi.md)
- [Networked Thermal Printer using Raspberry Pi and CUPS](https://learn.adafruit.com/networked-thermal-printer-using-cups-and-raspberry-pi.md)
- [Using a Mini PAL/NTSC Display with a Raspberry Pi](https://learn.adafruit.com/using-a-mini-pal-ntsc-display-with-a-raspberry-pi.md)
- [Raspberry Pi Care and Troubleshooting](https://learn.adafruit.com/raspberry-pi-care-and-troubleshooting.md)
- [Set up Home Assistant with a Raspberry Pi](https://learn.adafruit.com/set-up-home-assistant-with-a-raspberry-pi.md)
- [5" Display Kippah Portable Raspberry Pi](https://learn.adafruit.com/portable-kippah-pi.md)
- [piBeacon - DIY Beacon with a Raspberry Pi](https://learn.adafruit.com/pibeacon-ibeacon-with-a-raspberry-pi.md)
- [SSD1306 OLED Displays with Raspberry Pi and BeagleBone Black](https://learn.adafruit.com/ssd1306-oled-displays-with-raspberry-pi-and-beaglebone-black.md)
- [How we designed an injection-molded case](https://learn.adafruit.com/how-we-designed-an-injection-molded-case-for-raspberry-pi.md)
- [7” Portable Multitouch Raspberry Pi Tablet](https://learn.adafruit.com/7-portable-raspberry-pi-multitouch-tablet.md)
- [PiGRRL 2](https://learn.adafruit.com/pigrrl-2.md)
---
# Source: https://learn.adafruit.com/led-bicycle-handlebars/solder-led-tape.md
# LED Bicycle Handlebars
## Solder LED Tape

Scrape away the plastic coating over two solder pads at the center of your LED strip.

Grab the jack side of the waterproof power connector and solder the red wire to the positive (+) pad on the LED strip, and the black wire to the negative (-) pad. Slide a large piece of heatshrink tubing over the LED strip and the newly formed junctions.

Add a ziptie, some epoxy, or both to provide strain relief and added waterproofing at this delicate spot.
- [Previous Page](https://learn.adafruit.com/led-bicycle-handlebars/overview.md)
- [Next Page](https://learn.adafruit.com/led-bicycle-handlebars/affix-to-handlebars.md)
## Featured Products
### LED Bike Handlebar Pack - 1 meter
[LED Bike Handlebar Pack - 1 meter](https://www.adafruit.com/product/933)
This pack contains supplies for making your own LED bicycle handlebars! This project is easily completed in a weekend and requires a small amount of soldering and some sewing, too. Pack includes:
- [Cool white LED strip](http://adafruit.com/products/887)...
No Longer Stocked
[Buy Now](https://www.adafruit.com/product/933)
[Related Guides to the Product](https://learn.adafruit.com/products/933/guides)
### LED Bike Handlebar Pack - 2 meters
[LED Bike Handlebar Pack - 2 meters](https://www.adafruit.com/product/934)
This pack contains supplies for making your own LED bicycle handlebars! This project is easily completed in a weekend and requires a small amount of soldering and some sewing, too. Pack includes:
- [Cool white LED...](http://adafruit.com/products/887)
No Longer Stocked
[Buy Now](https://www.adafruit.com/product/934)
[Related Guides to the Product](https://learn.adafruit.com/products/934/guides)
### Cool White LED Weatherproof Flexi-Strip 60 LED - 5m
[Cool White LED Weatherproof Flexi-Strip 60 LED - 5m](https://www.adafruit.com/product/887)
These LED strips are ultra bright, fun and glowy. There are **60** cool white LEDs per meter, and you can control the entire strip at once with any microcontroller and [a power transistor](http://www.adafruit.com/products/355). The way they are wired, you will need a 9-12VDC...
No Longer Stocked
[Buy Now](https://www.adafruit.com/product/887)
[Related Guides to the Product](https://learn.adafruit.com/products/887/guides)
### Waterproof DC Power Cable Set - 5.5/2.1mm
[Waterproof DC Power Cable Set - 5.5/2.1mm](https://www.adafruit.com/product/743)
Outdoor enthusiasts rejoice! We now have standard 5.5/2.1mm DC power cable sets in a waterproof variety. These cable sets are ideal for projects that must weather the weather: dust, water, rain, snow, tornado (not volcano proof!). They are a little bulkier than normal DC jacks because of the...
In Stock
[Buy Now](https://www.adafruit.com/product/743)
[Related Guides to the Product](https://learn.adafruit.com/products/743/guides)
### 8 x AA battery holder
[8 x AA battery holder](https://www.adafruit.com/product/449)
When you need a portable 12V power pack, this big holder will do the job! The holder will store 8 AA batteries end to end, to give approximately 12VDC output with up to 2 amp peak current draw. We like this configuration in particular because it holds the batteries securely, even if being...
In Stock
[Buy Now](https://www.adafruit.com/product/449)
[Related Guides to the Product](https://learn.adafruit.com/products/449/guides)
### Heat Shrink Pack
[Heat Shrink Pack](https://www.adafruit.com/product/344)
Heat shrink is the duct tape of electronics, it keeps your stuff all safe and kept together. Especially when wiring and soldering, use heat shrink to add mechanical strength to cables. We use this stuff all the time and having a zip-lock bag of all the possible sizes is super...
In Stock
[Buy Now](https://www.adafruit.com/product/344)
[Related Guides to the Product](https://learn.adafruit.com/products/344/guides)
## Related Guides
- [Mystery Box: Crypto Countdown Case](https://learn.adafruit.com/mystery-box-crypto-countdown-case.md)
- [Bedazzler](https://learn.adafruit.com/bedazzler.md)
- [CircuitPython LED Animations](https://learn.adafruit.com/circuitpython-led-animations.md)
- [Blahaj Alarm and Lamp](https://learn.adafruit.com/blahaj-alarm.md)
- [Arduino Lesson 4. Eight LEDs and a Shift Register](https://learn.adafruit.com/adafruit-arduino-lesson-4-eight-leds.md)
- [LED Emerald with Circuit Playground Bluefruit](https://learn.adafruit.com/led-emerald-with-circuit-playground.md)
- [Talking HAL 9000 with RP2040 Prop Maker Feather](https://learn.adafruit.com/hal-9000-rp2040-prop-maker.md)
- [Adafruit NeoPXL8 FeatherWing and Library](https://learn.adafruit.com/adafruit-neopxl8-featherwing-and-library.md)
- [Color Remote with Circuit Playground Bluefruit](https://learn.adafruit.com/color-remote-with-circuit-playground-bluefruit.md)
- [Guardian Shield+ Zelda Breath of the Wild](https://learn.adafruit.com/guardian-shield-zelda-breath-of-the-wild.md)
- [Mad Science Test Tube Rack](https://learn.adafruit.com/mad-science-test-tube-rack.md)
- [Making Wearable Badge Art with Printed Circuit Boards](https://learn.adafruit.com/making-wearable-badge-art-with-printed-circuit-boards.md)
- [Tiny TARDIS Pendant](https://learn.adafruit.com/tiny-tardis-pendant.md)
- [Party Parrot Zoetrope](https://learn.adafruit.com/party-parrot-zoetrope.md)
- [LED Noodle Shop Sign](https://learn.adafruit.com/led-noodle-shop-sign.md)
---
# Source: https://learn.adafruit.com/smt-manufacturing/solder-paste-storage.md
# SMT Manufacturing
## Solder Paste Storage
If you want to do precise, fast, and fine pitch SMT assembly, you'll have to switch from 'wire' solder to 'paste' solder
Wire solder is what most people start with, it comes on a roll:

Inside the wire is a bit of flux (thats the smoke that comes off of the iron when soldering). The flux is often rosin type, no-wash type.
When doing SMT work, you can use thin wire but often times even that isn't good enough, you need to use paste! Paste comes in tubs of 1/2 - 1 lb or so. The paste has consistancy of smooth peanut butter and is made of ball of solder suspended in flux. As the paste is heated in an oven the solder melts and the flux burns away leaving a solid solder joint.
We may have a future tutorial with more details about choosing paste and solder but for now we will move on to what this tutorial is about which is how to store solder paste.
The problem with paste is that the flux can evaporate off, leaving the paste 'old' and 'dry'. It won't screenprint as well - you'll have difficulty with bridges and getting clean deposits. Paste should be kept cold, but not freezing. [Kester suggests 0-10 degrees C (32-50 degrees F)](http://www.adafruit.com/datasheets/kesterpaste.pdf "Link: http://www.adafruit.com/datasheets/kesterpaste.pdf").
If you can get your hands on a cube fridge, we suggest using that - make sure that no food is stored in there as paste is toxic and it gets everywhere. If you don't have space for a cube fridge (like us) here are two solutions we found.
## Mini Can Fridge
If you have a single tub of paste, you can use $20 "desktop coke can" coolers. Also mini insulin coolers might be an alternative.

There is a peltier inside, which can cool down to about 40-50 degrees F. it works best with something that has full contact with the peltier, like a big tub of paste (not a syringe).
The only annoying thing is that they have a USB port and you may not have a computer to plug it into nearby. Also, although it is USB it draws much more than the 500mA max you're supposed to pull from a port. So we suggest using an external power supply. We had a 5V 1000mA power supply kicking around so we just cut the USB cable off and [soldered a female 2.1mm jack on](http://www.adafruit.com/index.php?main_page=product_info&cPath=44&products_id=327) . You can also just [use one of these 5V @2A supplies and splice it directly on](http://www.adafruit.com/index.php?main_page=product_info&cPath=44&products_id=276). 
That's it! Pretty easy to use and kept our 1 lb tub cooler. We also wrapped the tub in a piece of foam to add more insulation.
## Camp Fridge
Once we started having more than one tub, and also syringes for touch-up/dispensing we had to upgrade from the mini-can fridge. Usually people get a mini cube fridge but we don't have a lot of space, and also we determined that the power usage of a larger peltier-based fridge was less than the smallest cube fridge.

You can find 12V camping fridges at most appliance stores. It draws about 60W and has a temp display on the front. It tends to keep stuff inside at 45 degrees F or so which is perfect for us.
One thing to watch for with these is that they condense water during the summer months so you may want to keep a rag on the bottom to soak up water and wring it out once in a while.
- [Previous Page](https://learn.adafruit.com/smt-manufacturing/overview.md)
- [Next Page](https://learn.adafruit.com/smt-manufacturing/laser-cut-stencils.md)
## Featured Products
### Fine tip curved tweezers - ESD safe
[Fine tip curved tweezers - ESD safe](https://www.adafruit.com/product/422)
When soldering small surface-mount (SMD/SMT) components, one thing you'll need is a good pair of tweezers. These are a great pair of every-day tweezers. They're anti-static, anti-magnetic and made of hard stainless steel. The tips are fine and pointy to pick up any size component. This...
In Stock
[Buy Now](https://www.adafruit.com/product/422)
[Related Guides to the Product](https://learn.adafruit.com/products/422/guides)
### Fine tip straight tweezers - ESD safe
[Fine tip straight tweezers - ESD safe](https://www.adafruit.com/product/421)
When soldering small surface-mount (SMD/SMT) components, one thing you'll need is a good pair of tweezers. These tweezers are a great pair of every-day tweezers. They're anti-static, anti-magnetic and made of hard stainless steel. The tips are fine and pointy to pick up any size...
In Stock
[Buy Now](https://www.adafruit.com/product/421)
[Related Guides to the Product](https://learn.adafruit.com/products/421/guides)
### USB Microscope - 5MP interpolated 220x magnification / 8 LEDs
[USB Microscope - 5MP interpolated 220x magnification / 8 LEDs](https://www.adafruit.com/product/636)
As electronics get smaller and smaller, you'll need a hand examining PCBs and this little USB microscope is the perfect tool. Its smaller and lighter than a large optical microscope but packs quite a bit of power in its little body. There's a 2 megapixel sensor inside and an optical...
Out of Stock
[Buy Now](https://www.adafruit.com/product/636)
[Related Guides to the Product](https://learn.adafruit.com/products/636/guides)
## Related Guides
- [Reindeer Solder Kit by Phyx](https://learn.adafruit.com/reindeer-solder-kit-by-phyx.md)
- [3D-Printed Solder Paste Dispenser Hand Switch ](https://learn.adafruit.com/3d-printed-solder-paste-dispenser-hand-switch.md)
- [USB Rechargeable Mini Solder Fume Extractor](https://learn.adafruit.com/usb-rechargeable-mini-solder-fume-extractor.md)
- [How to Sign Windows Drivers & Executables](https://learn.adafruit.com/how-to-sign-windows-drivers-installer.md)
- [Desktop Fume Extractor](https://learn.adafruit.com/desktop-fume-extractor.md)
- [Chinese Dragon Puppet with Motion-Reactive Flame Effect](https://learn.adafruit.com/chinese-dragon-puppet-with-motion-reactive-flame-effect.md)
- [16-Step Drum Sequencer](https://learn.adafruit.com/16-step-drum-sequencer.md)
- [Color Sensing Music Player](https://learn.adafruit.com/color-sensing-music-player.md)
- [Light-Up Costumes in Harsh Environments](https://learn.adafruit.com/light-up-costumes-in-harsh-environments.md)
- [Garden Path Lights with WLED and a Sunset Timer](https://learn.adafruit.com/garden-path-lights-with-sunset-timer.md)
- [CNC Rotary Macropad](https://learn.adafruit.com/cnc-rotary-macropad.md)
- [Blinka Says Tabletop Arcade Game](https://learn.adafruit.com/blinka-says-tabletop-arcade-game.md)
- [IoT Moon Phase Guide](https://learn.adafruit.com/moon-phase.md)
- [KTOWN's Ultimate Creating Parts in Eagle Tutorial](https://learn.adafruit.com/ktowns-ultimate-creating-parts-in-eagle-tutorial.md)
- [Shop Tips & Tricks](https://learn.adafruit.com/shop-tips-and-tricks.md)
---
# Source: https://learn.adafruit.com/smt-manufacturing/solder-paste-syringes.md
# SMT Manufacturing
## Solder Paste Syringes
If you want to do small scale prototype SMT manufacture, it may be faster to just deposit paste by hand onto the PCB instead of getting a stencil made and shipped. We use this for our prototypes and its very fast once you get the hang of it. Instead of stenciling paste on, a small syringe of paste is squeezed onto each pad, sort of like a cake decorator (but with toxic metal).
After the paste is deposited on the pads, each component is handplaced with tweezers. Then the entire board is reflowed. you can use hot air but a plate or oven works best (we'll have a tutorial about that some day)
This technique works for both lead and lead-free PCB/parts/paste but of course leaded solder is easier to work with.
## Tips and Plunger
We use LF-4300 from Amtech for our in-house lead free paste. Its not necessarily the best, just what we use so if you have a favorite brand go with that!
You'll also need a plunger and tips. [You can get a huge assortment of different tips from McMaster](http://www.mcmaster.com/#luer-lock-needles/=caftwf) . For every day use we like using the 20ga pink plastic tip from the shop above - best for larger parts like SOIC, passives and some larger pitch TQFP.
[https://www.google.com/search?channel=nus5&client=firefox-b-1-d&q=amtech+LF-4300](http://www.solderandmore.com/servlet/the-Water-Washable-NC-Solder-Paste-4300-%26-LF-dsh-4300/Categories)

For finer pitch parts, and leadless parts, we go with a luer-lock 24 gauge. Its a bit tough to push on but gives a nice fine bead.
For the plunger,[we suggest shelling out for the nice plunger we have shown here, its $25 but makes hand-dispensing trivial](http://www.zeph.com/plungers.htm) and you can just reuse it when the syringe is empty.
# 0.4mm Pitch TDFN
When hand assembling fine pitch or leadless parts, the syringe dispener makes an impossible job easy!
For this board we'll be placing a 0.4mm TDFN leadless part. Virtually impossible to do by hand! Using the fine needle, place a blog on each pad and lay a small bead on the TDFN pads. You can also place a small dot in the center of the TDFN pad - sometimes this helps with placement but its a bit of a toss up so try both ways and see which you prefer

Place the large parts first (so you dont bump the tiny parts as you place them).
Carefully place the fine pitch parts in the correct orientation. Be careful about placement so that the pads line up, a difficult task as you get to smaller pitches.

After you reflow, there will be tiny bridges, you can fix those with a very fine tip soldering iron and some wick.
- [Previous Page](https://learn.adafruit.com/smt-manufacturing/stenciling-machines.md)
- [Next Page](https://learn.adafruit.com/smt-manufacturing/soldering-irons.md)
## Featured Products
### Fine tip curved tweezers - ESD safe
[Fine tip curved tweezers - ESD safe](https://www.adafruit.com/product/422)
When soldering small surface-mount (SMD/SMT) components, one thing you'll need is a good pair of tweezers. These are a great pair of every-day tweezers. They're anti-static, anti-magnetic and made of hard stainless steel. The tips are fine and pointy to pick up any size component. This...
In Stock
[Buy Now](https://www.adafruit.com/product/422)
[Related Guides to the Product](https://learn.adafruit.com/products/422/guides)
### Fine tip straight tweezers - ESD safe
[Fine tip straight tweezers - ESD safe](https://www.adafruit.com/product/421)
When soldering small surface-mount (SMD/SMT) components, one thing you'll need is a good pair of tweezers. These tweezers are a great pair of every-day tweezers. They're anti-static, anti-magnetic and made of hard stainless steel. The tips are fine and pointy to pick up any size...
In Stock
[Buy Now](https://www.adafruit.com/product/421)
[Related Guides to the Product](https://learn.adafruit.com/products/421/guides)
### USB Microscope - 5MP interpolated 220x magnification / 8 LEDs
[USB Microscope - 5MP interpolated 220x magnification / 8 LEDs](https://www.adafruit.com/product/636)
As electronics get smaller and smaller, you'll need a hand examining PCBs and this little USB microscope is the perfect tool. Its smaller and lighter than a large optical microscope but packs quite a bit of power in its little body. There's a 2 megapixel sensor inside and an optical...
Out of Stock
[Buy Now](https://www.adafruit.com/product/636)
[Related Guides to the Product](https://learn.adafruit.com/products/636/guides)
## Related Guides
- [Reindeer Solder Kit by Phyx](https://learn.adafruit.com/reindeer-solder-kit-by-phyx.md)
- [3D-Printed Solder Paste Dispenser Hand Switch ](https://learn.adafruit.com/3d-printed-solder-paste-dispenser-hand-switch.md)
- [USB Rechargeable Mini Solder Fume Extractor](https://learn.adafruit.com/usb-rechargeable-mini-solder-fume-extractor.md)
- [How to Sign Windows Drivers & Executables](https://learn.adafruit.com/how-to-sign-windows-drivers-installer.md)
- [Desktop Fume Extractor](https://learn.adafruit.com/desktop-fume-extractor.md)
- [Chinese Dragon Puppet with Motion-Reactive Flame Effect](https://learn.adafruit.com/chinese-dragon-puppet-with-motion-reactive-flame-effect.md)
- [16-Step Drum Sequencer](https://learn.adafruit.com/16-step-drum-sequencer.md)
- [Color Sensing Music Player](https://learn.adafruit.com/color-sensing-music-player.md)
- [Light-Up Costumes in Harsh Environments](https://learn.adafruit.com/light-up-costumes-in-harsh-environments.md)
- [Garden Path Lights with WLED and a Sunset Timer](https://learn.adafruit.com/garden-path-lights-with-sunset-timer.md)
- [CNC Rotary Macropad](https://learn.adafruit.com/cnc-rotary-macropad.md)
- [Blinka Says Tabletop Arcade Game](https://learn.adafruit.com/blinka-says-tabletop-arcade-game.md)
- [IoT Moon Phase Guide](https://learn.adafruit.com/moon-phase.md)
- [KTOWN's Ultimate Creating Parts in Eagle Tutorial](https://learn.adafruit.com/ktowns-ultimate-creating-parts-in-eagle-tutorial.md)
- [Shop Tips & Tricks](https://learn.adafruit.com/shop-tips-and-tricks.md)
---
# Source: https://learn.adafruit.com/flora-snaps/solder-snap-stem.md
# Flora Snaps
## Solder snap stud

The stem-like half of the snap is called the stud. The flat metal surface on this part makes it ideal for soldering to a flat pad on a circuit board. Align one stud to the pad you just tinned, and heat the post through until the pad's solder becomes molten again.
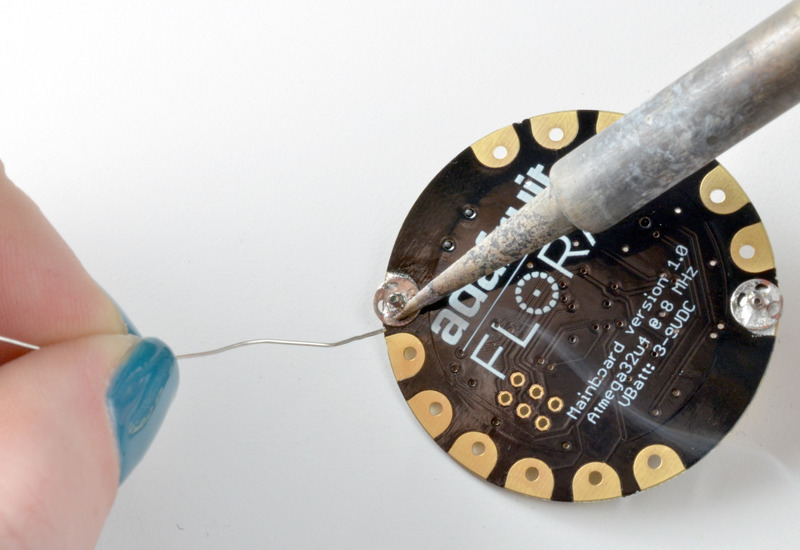
While the solder is molten, apply another small amount of solder. It should stick to the stud and wick into/around one or more of its needle holes.

You may need to shift the stud around with your soldering iron to get it into position before allowing the joint to cool. Now the solder is mechanically connecting the stud to the board as well as electrically connecting the corresponding pin on the Flora.
Some discoloration may occur as the snap's tin plating shifts with the application of heat and solder. It may reveal its brassy core!
- [Previous Page](https://learn.adafruit.com/flora-snaps/tin-the-pads.md)
- [Next Page](https://learn.adafruit.com/flora-snaps/add-more-snaps.md)
## Featured Products
### FLORA - Wearable electronic platform: Arduino-compatible
[FLORA - Wearable electronic platform: Arduino-compatible](https://www.adafruit.com/product/659)
FLORA is Adafruit's fully-featured wearable electronics platform. It's a round, sewable, Arduino-compatible microcontroller designed to empower amazing wearables projects.FLORA comes with Adafruit's support, [tutorials and...](http://learn.adafruit.com/category/flora)
In Stock
[Buy Now](https://www.adafruit.com/product/659)
[Related Guides to the Product](https://learn.adafruit.com/products/659/guides)
### Sewable Snaps - 5mm Diameter - Card of 24
[Sewable Snaps - 5mm Diameter - Card of 24](https://www.adafruit.com/product/1126)
The small 5mm size of these tin-plated brass snaps means they fit perfectly on Flora's pads! Snaps make a great connector for wearables-- solder one side to the board and sew the other to your project with conductive thread! This card comes with 24 complete snaps (socket and stud...
In Stock
[Buy Now](https://www.adafruit.com/product/1126)
[Related Guides to the Product](https://learn.adafruit.com/products/1126/guides)
### Needle set - 3/9 sizes - 20 needles
[Needle set - 3/9 sizes - 20 needles](https://www.adafruit.com/product/615)
Mighty needles, sew like the wind! This needle set is the only one you'll need for any sort of hand sewing, especially using our conductive thread and wearable electronics parts.
Each pack contains 20 gold-eye sharps, with eye sizes ranging from #3 (1.75" long) to #9...
Out of Stock
[Buy Now](https://www.adafruit.com/product/615)
[Related Guides to the Product](https://learn.adafruit.com/products/615/guides)
### Stainless Medium Conductive Thread - 3 ply - 18 meter/60 ft
[Stainless Medium Conductive Thread - 3 ply - 18 meter/60 ft](https://www.adafruit.com/product/641)
After months of searching, we finally have what we consider to be the ultimate conductive thread. It's thin, strong, smooth, and made completely of 316L stainless steel. Once you start working with this thread you'll quickly agree its optimal for any wearables work!
This...
Out of Stock
[Buy Now](https://www.adafruit.com/product/641)
[Related Guides to the Product](https://learn.adafruit.com/products/641/guides)
### Getting Started with Adafruit FLORA
[Getting Started with Adafruit FLORA](https://www.adafruit.com/product/1839)
**Making Wearables with an Arduino-Compatible Electronics Platform**
This book introduces readers to building wearable electronics projects using Adafruit's tiny FLORA board: at 4.4 grams, and only 1.75 inches in diameter, and featuring Arduino compatibility, it's the...
No Longer Stocked
[Buy Now](https://www.adafruit.com/product/1839)
[Related Guides to the Product](https://learn.adafruit.com/products/1839/guides)
### Getting Started with Adafruit FLORA Book Pack
[Getting Started with Adafruit FLORA Book Pack](https://www.adafruit.com/product/2404)
Pickup a copy of [Getting Started with Adafruit FLORA](https://www.adafruit.com/products/1839) and then hit the ground running with everything that you need to become an [Adafruit FLORA](https://www.adafruit.com/products/659) supreme being!
This pack is...
No Longer Stocked
[Buy Now](https://www.adafruit.com/product/2404)
[Related Guides to the Product](https://learn.adafruit.com/products/2404/guides)
### FLORA Sensor Pack
[FLORA Sensor Pack](https://www.adafruit.com/product/1458)
Sense the world around you! The FLORA Sensor Pack includes many types of sensors for your wearable enjoyment. Sense motion, direction, color, light levels, touch, and connections with FLORA sensor breakouts and conductive materials, and a few NeoPixels for experimenting with displaying your...
No Longer Stocked
[Buy Now](https://www.adafruit.com/product/1458)
[Related Guides to the Product](https://learn.adafruit.com/products/1458/guides)
### FLORA GPS Starter Pack
[FLORA GPS Starter Pack](https://www.adafruit.com/product/1090)
Get started with the fabulous Adafruit Flora platform with this lovely starter kit. Included are plenty of parts to make a few different fun projects! There's a Flora motherboard, a GPS module that can also perform location datalogging, eight ultra-bright chainable RGB pixels, a battery...
No Longer Stocked
[Buy Now](https://www.adafruit.com/product/1090)
[Related Guides to the Product](https://learn.adafruit.com/products/1090/guides)
## Related Guides
- [Firewalker LED Sneakers](https://learn.adafruit.com/firewalker-led-sneakers.md)
- [Datalogging Hat with FLORA BLE](https://learn.adafruit.com/datalogging-hat-with-flora-ble.md)
- [Chameleon Scarf](https://learn.adafruit.com/chameleon-scarf.md)
- [Flora TSL2561 Lux Sensor](https://learn.adafruit.com/flora-lux-sensor.md)
- [Adafruit Arduino Selection Guide](https://learn.adafruit.com/adafruit-arduino-selection-guide.md)
- [Flora GPS Jacket](https://learn.adafruit.com/flora-gps-jacket.md)
- [Glowing Skullcandy Headphones Mod](https://learn.adafruit.com/glowing-skullcandy-headphones-mod.md)
- [Flora MIDI Drum Glove](https://learn.adafruit.com/midi-drum-glove.md)
- [How to Find Hidden COM Ports](https://learn.adafruit.com/how-to-find-hidden-com-ports.md)
- [EEG Costume Cap](https://learn.adafruit.com/eeg-costume-cap.md)
- [Getting Started with FLORA](https://learn.adafruit.com/getting-started-with-flora.md)
- [FLORA and GEMMA ICSP](https://learn.adafruit.com/flora-and-gemma-isp.md)
- [NeoPixel Ring Clock](https://learn.adafruit.com/neopixel-ring-clock.md)
- [LED Ampli-Tie](https://learn.adafruit.com/led-ampli-tie.md)
- [Lumo Lift Teardown](https://learn.adafruit.com/lumo-lift-teardown.md)
---
# Source: https://learn.adafruit.com/adafruit-guide-excellent-soldering/soldering-faq.md
# Adafruit Guide To Excellent Soldering
## Soldering FAQ
###
Yes. The header pins do not make reliable contact with the solder holes unless they are soldered.
###
That does not assure reliable electrical contact. For that you need solder.
###
You might be lucky enough to get contact on a few pins. But reliable operation requires solid electrical contact on ALL power, ground and signal pins. This can only be achieved by good soldering.
###
Bad or marginal connections often appear good when you test them this way. The pressure of the probe tends to compress the joint together and make it more conductive. But as soon as you remove the probe, it will go back to being a bad or marginal connection.
###
If we determine that a product has been properly connected and programmed and still does not work, we will be happy to replace it within our 30 day warranty period. For many products, proper connections require soldering.
If we see that the device has not been properly connected or has soldering problems, we will request that you correct those problems and re-test the device.
The overwhelming majority of problems we see go away once the device is properly connected.
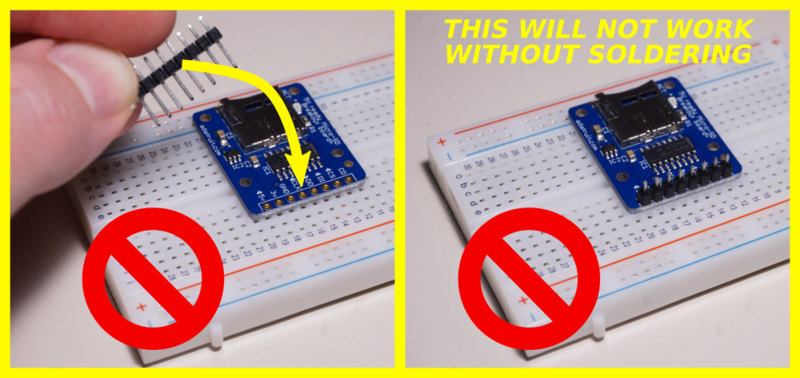

- [Previous Page](https://learn.adafruit.com/adafruit-guide-excellent-soldering/common-problems.md)
## Featured Products
### Panavise Jr.
[Panavise Jr.](https://www.adafruit.com/product/151)
The best mini-vise for working on smaller PCBs (2.875" or less in one dimension)! The jaws are strong plastic that wont damage the PCB and doesn't mind if you hit it with the soldering iron by accident. Made in the USA.
- The easy-to-use single knob controls head movement...
No Longer Stocked
[Buy Now](https://www.adafruit.com/product/151)
[Related Guides to the Product](https://learn.adafruit.com/products/151/guides)
### Hakko Professional Quality 20-30 AWG Wire Strippers
[Hakko Professional Quality 20-30 AWG Wire Strippers](https://www.adafruit.com/product/527)
These are the finest wire strippers we have used, and if you have to do a lot of wiring, you will agree! They have soft rounded grips - very comfortable to use, and precision ground notches that do a perfect job every time. No more yanking or twisting to strip wires cleanly and quickly.
In Stock
[Buy Now](https://www.adafruit.com/product/527)
[Related Guides to the Product](https://learn.adafruit.com/products/527/guides)
### Mini Solder spool - 60/40 lead rosin-core solder 0.3mm diameter
[Mini Solder spool - 60/40 lead rosin-core solder 0.3mm diameter](https://www.adafruit.com/product/145)
If you want to make a kit you'll need some solder. This 100g (about 1/4 lb) spool is just the right amount, not too much (like 1 lb spools) and not too little (like those little 'pocket clip' vials). 0.3mm diameter, 60/40 'no clean' rosin core. Good for all through-hole...
In Stock
[Buy Now](https://www.adafruit.com/product/145)
[Related Guides to the Product](https://learn.adafruit.com/products/145/guides)
### Solder sucker
[Solder sucker](https://www.adafruit.com/product/148)
Strangely enough, that's the technical term for this desoldering vacuum tool. Useful in cleaning up mistakes, every electrical engineer has one of these on their desk.
To use, depress the end to engage the vacuum. Then heat up the to-be-desoldered joint until it is liquid. With your...
In Stock
[Buy Now](https://www.adafruit.com/product/148)
[Related Guides to the Product](https://learn.adafruit.com/products/148/guides)
### Solder wick - 1.5mm wide and 1.5m / 5 feet long
[Solder wick - 1.5mm wide and 1.5m / 5 feet long](https://www.adafruit.com/product/149)
Used along with the solder sucker to clean up soldering messes. Wick really comes in handy when soldering or desoldering surface-mount parts. Even if you don't have the best iron for SMT work, a bit of wick will fix it up.
1.5mm wick, and 1.5m long, so you have plenty to work...
Out of Stock
[Buy Now](https://www.adafruit.com/product/149)
[Related Guides to the Product](https://learn.adafruit.com/products/149/guides)
### Soldering iron stand
[Soldering iron stand](https://www.adafruit.com/product/150)
A real stand with sponge and solidly-built sheet metal holder prevents your iron from 'rolling away' or burning a hole in the table. If you're starting out and have a 'pen type' soldering iron, this is essential for your safety. Comes with a sponge, too!
****
Out of Stock
[Buy Now](https://www.adafruit.com/product/150)
[Related Guides to the Product](https://learn.adafruit.com/products/150/guides)
### Adjustable 30W 110V soldering iron
[Adjustable 30W 110V soldering iron](https://www.adafruit.com/product/180)
This 'pen-style' soldering iron is just about the best entry-level tool I've seen. It's not as powerful as a Weller WES51 but it _is_ self-contained and easy to use. With proper care, it will last for many years. Turn it off when not in use, clean the plated tip with a...
No Longer Stocked
[Buy Now](https://www.adafruit.com/product/180)
[Related Guides to the Product](https://learn.adafruit.com/products/180/guides)
### Learn to solder - Skill badge, iron-on patch
[Learn to solder - Skill badge, iron-on patch](https://www.adafruit.com/product/465)
You can solder! Adafruit offers a fun and exciting "badges" of achievement for electronics, science and engineering. We believe everyone should be able to be rewarded for learning a useful skill, a badge is just one of the many ways to show and share.
This is the "I...
No Longer Stocked
[Buy Now](https://www.adafruit.com/product/465)
[Related Guides to the Product](https://learn.adafruit.com/products/465/guides)
## Related Guides
- [Blinka Says Tabletop Arcade Game](https://learn.adafruit.com/blinka-says-tabletop-arcade-game.md)
- [Water Drip Dress with Oozemaster 3000](https://learn.adafruit.com/water-drip-dress-with-oozemaster-3000.md)
- [Floor Lamp with NeoPixels and WLED Custom Animations](https://learn.adafruit.com/floor-lamp-with-wled.md)
- [Space Shuttle Discovery Solder Kit by Phyx](https://learn.adafruit.com/space-shuttle-discovery-solder-kit.md)
- [USB Rechargeable Mini Solder Fume Extractor](https://learn.adafruit.com/usb-rechargeable-mini-solder-fume-extractor.md)
- [Cartoon Character Clock](https://learn.adafruit.com/cartoon-character-clock.md)
- [Collin's Lab: Soldering](https://learn.adafruit.com/collins-lab-soldering.md)
- [SMT Breadboard Prototyping Using Breakout PCBs](https://learn.adafruit.com/smt-prototyping-using-breakout-pcbs.md)
- [Motion-Activated Solder Fume Extractor With Lamp](https://learn.adafruit.com/motion-activated-solder-fume-extractor-with-lamp.md)
- [Color Balancing Video Camera Light feat. DotStars](https://learn.adafruit.com/color-balancing-light-box-with-dotstar-cool-warm-white-leds.md)
- [Ambient Sound Machine](https://learn.adafruit.com/ambient-machine.md)
- [DIY On/Off JST Switch Adapter](https://learn.adafruit.com/on-slash-off-switches.md)
- [IoT Moon Phase Guide](https://learn.adafruit.com/moon-phase.md)
- [CNC Rotary Macropad](https://learn.adafruit.com/cnc-rotary-macropad.md)
- [Secret Hollow Book Intrusion Detector](https://learn.adafruit.com/secret-hollow-book.md)
---
# Source: https://learn.adafruit.com/smt-manufacturing/soldering-irons.md
# SMT Manufacturing
## Soldering Irons
One thing is certain, if you're doing SMT, you're doing rework. So having the right rework tools will save you tons of time, frustration and money. We try to aim for about 90% yield off the pick and place (or better) and repair the rest for a total aim of 95% or better. The first tool you'll want to invest in is a really good soldering iron.## What We Use
We originally were big fans of Weller irons and used them in school but when it came time to stock the Adafruit lab we decided to go with a **Metcal MX-500 ** on the recommendation of a friend. It was a good recommendation! Metcals are really heavy, durable and heat up ultra fast.
They're easy to switch tips, and can power two different soldering stations (we use a hot tweezer on the 'alternate' station). The wand is light and easy to grip.
The only weird thing to watch for is that the temperature is set by the tip, not the station. The station only has an on-off switch. This can be good when you're using only one type of solder, say leadfree (700 degree F tips) or lead (600 degree F tips) but can be annoying if you use both - although we suppose you can just go with the hottest tips.
Metcals are a little pricey but you can pick one up used on ebay for around $200 (thats what we did).
## Soldering Tips
The nicest thing about the metcal is the wide assortment of tips available. They're a snap to swap - takes only a few second of pulling the old tip out and pushing in a new one.

For general thru-hole we like the screwdriver tip **STTC-137P** (shown on the wand)
For soldering FPCs or reworking a long row of pins, the **SMTC-061** (all the way on the right) is very handy
For fine pitch rework we use the **STTC-122** (second from the right)
We also like the two long 'hard to reach areas' tips ** STTC-107** and **STTC-140**. Great for getting underneath microSD holders and miniUSB connectors.
We also got a hoof tip **SMTC-1147** (second from the left) but haven't used it yet since we don't do drag soldering so much.
- [Previous Page](https://learn.adafruit.com/smt-manufacturing/solder-paste-syringes.md)
- [Next Page](https://learn.adafruit.com/smt-manufacturing/hot-air-tools.md)
## Featured Products
### Fine tip curved tweezers - ESD safe
[Fine tip curved tweezers - ESD safe](https://www.adafruit.com/product/422)
When soldering small surface-mount (SMD/SMT) components, one thing you'll need is a good pair of tweezers. These are a great pair of every-day tweezers. They're anti-static, anti-magnetic and made of hard stainless steel. The tips are fine and pointy to pick up any size component. This...
In Stock
[Buy Now](https://www.adafruit.com/product/422)
[Related Guides to the Product](https://learn.adafruit.com/products/422/guides)
### Fine tip straight tweezers - ESD safe
[Fine tip straight tweezers - ESD safe](https://www.adafruit.com/product/421)
When soldering small surface-mount (SMD/SMT) components, one thing you'll need is a good pair of tweezers. These tweezers are a great pair of every-day tweezers. They're anti-static, anti-magnetic and made of hard stainless steel. The tips are fine and pointy to pick up any size...
In Stock
[Buy Now](https://www.adafruit.com/product/421)
[Related Guides to the Product](https://learn.adafruit.com/products/421/guides)
### USB Microscope - 5MP interpolated 220x magnification / 8 LEDs
[USB Microscope - 5MP interpolated 220x magnification / 8 LEDs](https://www.adafruit.com/product/636)
As electronics get smaller and smaller, you'll need a hand examining PCBs and this little USB microscope is the perfect tool. Its smaller and lighter than a large optical microscope but packs quite a bit of power in its little body. There's a 2 megapixel sensor inside and an optical...
Out of Stock
[Buy Now](https://www.adafruit.com/product/636)
[Related Guides to the Product](https://learn.adafruit.com/products/636/guides)
## Related Guides
- [Reindeer Solder Kit by Phyx](https://learn.adafruit.com/reindeer-solder-kit-by-phyx.md)
- [3D-Printed Solder Paste Dispenser Hand Switch ](https://learn.adafruit.com/3d-printed-solder-paste-dispenser-hand-switch.md)
- [USB Rechargeable Mini Solder Fume Extractor](https://learn.adafruit.com/usb-rechargeable-mini-solder-fume-extractor.md)
- [How to Sign Windows Drivers & Executables](https://learn.adafruit.com/how-to-sign-windows-drivers-installer.md)
- [Desktop Fume Extractor](https://learn.adafruit.com/desktop-fume-extractor.md)
- [Chinese Dragon Puppet with Motion-Reactive Flame Effect](https://learn.adafruit.com/chinese-dragon-puppet-with-motion-reactive-flame-effect.md)
- [16-Step Drum Sequencer](https://learn.adafruit.com/16-step-drum-sequencer.md)
- [Color Sensing Music Player](https://learn.adafruit.com/color-sensing-music-player.md)
- [Light-Up Costumes in Harsh Environments](https://learn.adafruit.com/light-up-costumes-in-harsh-environments.md)
- [Garden Path Lights with WLED and a Sunset Timer](https://learn.adafruit.com/garden-path-lights-with-sunset-timer.md)
- [CNC Rotary Macropad](https://learn.adafruit.com/cnc-rotary-macropad.md)
- [Blinka Says Tabletop Arcade Game](https://learn.adafruit.com/blinka-says-tabletop-arcade-game.md)
- [IoT Moon Phase Guide](https://learn.adafruit.com/moon-phase.md)
- [KTOWN's Ultimate Creating Parts in Eagle Tutorial](https://learn.adafruit.com/ktowns-ultimate-creating-parts-in-eagle-tutorial.md)
- [Shop Tips & Tricks](https://learn.adafruit.com/shop-tips-and-tricks.md)
---
# Source: https://learn.adafruit.com/adafruit-arduino-lesson-11-lcd-displays-1/soldering-pins-to-the-display.md
# Arduino Lesson 11. LCD Displays - Part 1
## Soldering Pins to the Display
The display needs 16 pins, so if your header strip is longer than that then break it off to the right length.

Then put the length of 16 header pins into the solder tabs on the display and starting at one end, solder each of the pins in place. It can be easier to put the long end of the pins into the breadboard so that the header pins are held straight.
If you do not do this, then solder one pin in first and then get the pins in straight, melting the solder on the pin before making any adjustment.

- [Previous Page](https://learn.adafruit.com/adafruit-arduino-lesson-11-lcd-displays-1/breadboard-layout.md)
- [Next Page](https://learn.adafruit.com/adafruit-arduino-lesson-11-lcd-displays-1/arduino-code.md)
## Featured Products
### Standard LCD 16x2 + extras
[Standard LCD 16x2 + extras](https://www.adafruit.com/product/181)
Standard HD44780 LCDs are useful for creating standalone projects.
- 16 characters wide, 2 rows
- White text on blue background
- Connection port is 0.1" pitch, single row for easy breadboarding and wiring
- Pins are documented on the back of the LCD to assist...
In Stock
[Buy Now](https://www.adafruit.com/product/181)
[Related Guides to the Product](https://learn.adafruit.com/products/181/guides)
### Premium Male/Male Jumper Wires - 40 x 6" (150mm)
[Premium Male/Male Jumper Wires - 40 x 6" (150mm)](https://www.adafruit.com/product/758)
Handy for making wire harnesses or jumpering between headers on PCB's. These premium jumper wires are 6" (150mm) long and come in a 'strip' of 40 (4 pieces of each of ten rainbow colors). They have 0.1" male header contacts on either end and fit cleanly next to each other...
In Stock
[Buy Now](https://www.adafruit.com/product/758)
[Related Guides to the Product](https://learn.adafruit.com/products/758/guides)
### Half Sized Premium Breadboard - 400 Tie Points
[Half Sized Premium Breadboard - 400 Tie Points](https://www.adafruit.com/product/64)
This is a cute, half-size breadboard with 400 tie points, good for small projects. It's 3.25" x 2.2" / 8.3cm x 5.5cm with a standard double-strip in the middle and two power rails on both sides. You can pull the power rails off easily to make the breadboard as...
In Stock
[Buy Now](https://www.adafruit.com/product/64)
[Related Guides to the Product](https://learn.adafruit.com/products/64/guides)
### Adafruit METRO 328 Fully Assembled - Arduino IDE compatible
[Adafruit METRO 328 Fully Assembled - Arduino IDE compatible](https://www.adafruit.com/product/50)
We sure love the ATmega328 here at Adafruit, and we use them _a lot_ for our own projects. The processor has plenty of GPIO, Analog inputs, hardware UART SPI and I2C, timers and PWM galore - just enough for most simple projects. When we need to go small, we use a
Out of Stock
[Buy Now](https://www.adafruit.com/product/50)
[Related Guides to the Product](https://learn.adafruit.com/products/50/guides)
## Related Guides
- [2.2" TFT Display](https://learn.adafruit.com/2-2-tft-display.md)
- [Bluetooth Temperature & Humidity Sensor](https://learn.adafruit.com/bluetooth-temperature-and-humidity-sensor.md)
- [Wave Shield Voice Changer](https://learn.adafruit.com/wave-shield-voice-changer.md)
- [Adafruit Music Maker Shield](https://learn.adafruit.com/adafruit-music-maker-shield-vs1053-mp3-wav-wave-ogg-vorbis-player.md)
- [Introducing Adafruit Trellis ](https://learn.adafruit.com/adafruit-trellis-diy-open-source-led-keypad.md)
- [Arduino Lesson 13. DC Motors](https://learn.adafruit.com/adafruit-arduino-lesson-13-dc-motors.md)
- [RePaper eInk Development Board](https://learn.adafruit.com/repaper-eink-development-board.md)
- [Bluefruit LE Connect for iOS and Android](https://learn.adafruit.com/bluefruit-le-connect.md)
- [Memories of an Arduino](https://learn.adafruit.com/memories-of-an-arduino.md)
- [Wireless Power Switch with Arduino & the CC3000 WiFi Chip](https://learn.adafruit.com/wireless-power-switch-with-arduino-and-the-cc3000-wifi-chip.md)
- [Adafruit Analog Accelerometer Breakouts](https://learn.adafruit.com/adafruit-analog-accelerometer-breakouts.md)
- [Smart Measuring Cup](https://learn.adafruit.com/smart-measuring-cup.md)
- [Programming Arduino with Android and Windows Tablets](https://learn.adafruit.com/programming-arduino-with-android-and-windows-tablets.md)
- [Ladyada's Learn Arduino - Lesson #1](https://learn.adafruit.com/ladyadas-learn-arduino-lesson-number-1.md)
- [SMS Texting Pet Food Dish](https://learn.adafruit.com/sms-texting-pet-food-dish.md)
---
# Source: https://learn.adafruit.com/pi-thermal-printer/soldering-pre-2017.md
# Internet of Things Printer for Raspberry Pi
## Soldering
Danger:
Some soldering steps take place close to pieces of the case. Be very careful where you set your soldering iron so as not to damage the plastic parts! Also watch out for flux spatter.
During the soldering and assembly process, certain parts will become “tethered” together by wires…always pick up and move these parts together, don’t let pieces hang by the wires…this could damage parts or solder joints.
# Prepare Wires
In the plastic baggie accompanying the thermal printer should be two cables, a bit over a foot long. The **power cable** has **two** conductors: red and black. The **data cable** has **three** conductors: green, yellow and black.

**Cut** the **red/black power cable** in **half**. This cable has a different plug at each end. We want to **keep the wider of the two plugs** for the printer; the other can be discarded or tossed in your spare bits drawer.
**The data cable (green/yellow/black) is NOT cut**, only the power cable!

Use wire cutters to clip the side “wings” off the plug at one end of the data cable.
**Do not** cut any of these wires! Just trim the plastic.


Next, grab the female/female jumper wires and cut off the connector at **one end** of each of the following colors:
- 2 Black
- 1 Red
- 1 Yellow
- 1 Green

###
You might have the older (pre-2017) version of this kit. Skip to the next page for wiring directions.
After cutting, you should have:
- A **three-conductor** (green/yellow/black) data cable with plugs at **both ends** , about 14 inches long.
- A **two-conductor** (red/black) power cable with a **wide** plug at **one end** , about 7" long.
- **Five jumper wires** about 6" long, each with a **female** connector at **one end**.
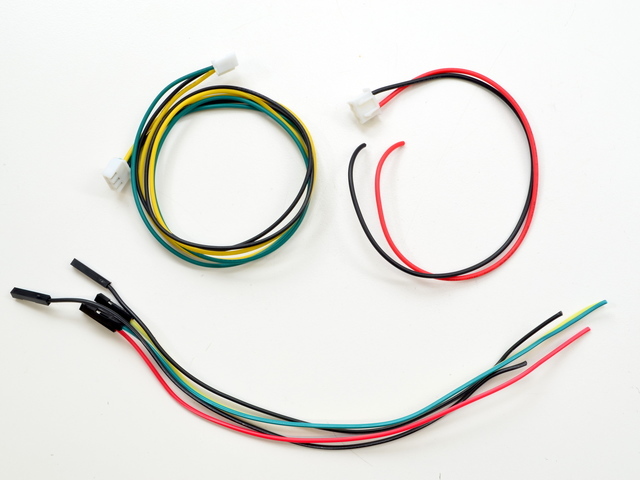
# Prepare Button
Don’t be confused by the colors here. This sequence is three of the **jumper wires** , not the serial data cable!
Looking at the back of the button, with the pins arranged in a “smile,” the functions from left to right are:
- **LED +**
- **NC** (Normally Closed)
- **NO** (Normally Open)
- **COMMON**
- **LED –**

Using finger pressure or small pliers (gently!), smoosh the last two pins ( **COMMON** and **LED –** ) close together. We need to loop a single wire through both of them…

Strip about 3/8" of insulation from the end of three of the jumper wires: **BLACK** , **YELLOW** and **GREEN**. Twist the ends a bit to keep the strands from fraying.
**Do not** do this with the serial data cable! Use the one-sided **jumper wires**.

Loop the **BLACK** wire through the **LED –** and **COMMON** pins, bend it back on itself and solder.
This is a tight squeeze for the wire, like threading a needle. It may help to turn the wire a bit while passing it through, to keep the strands from fraying. It may take a few tries…you can remove the wire, re-twist it, and try again.

Repeat with the **GREEN** wire on the **LED +** pin and the **YELLOW** wire on the **NO** (Normally Open) pin.
The **NC** (Normally Closed) pin is **NOT CONNECTED.**

Fish the three wires through the button hole on the top case piece, press the button into place and secure with the included nut.
There is no front or back side for the top piece…you can insert the button either way.

# Prepare DC Jack
There are three “legs” on the DC jack, but we’ll just be using two of them.
The large center leg corresponds to the power supply tip, which will be +5V.
The “outer” of the two small legs is the power supply ring (ground).
The “inner” small leg is not connected.

Strip about 1/4" insulation from the red and black wires on the power cable and the one-sided jumper wires.
Twist the wires a bit to prevent the strands from fraying.
Twist the two red wires together, feed through the large center leg (+) and solder in place.

Repeat with the two black wires through the “outer” small leg (–).
Remember, the “inner” small leg is not connected.

Fish the connector and wires through the DC hole on the back piece of the case (this the part with the etched Adafruit logo) and press the jack into place.
Secure the DC jack from the other side with the included nut. You’ll need to fish the wires through this to get it into place.
Once the jack is in place, solder the 4700uF capacitor to the + and - terminals. This will help keep the voltage stable when the thermal printer is operating.


Danger:
That’s it for soldering! You can unplug your iron now.
- [Previous Page](https://learn.adafruit.com/pi-thermal-printer/raspberry-pi-software-setup.md)
- [Next Page](https://learn.adafruit.com/pi-thermal-printer/soldering.md)
## Primary Products
### Adafruit IoT Pi Printer Project Pack
[Adafruit IoT Pi Printer Project Pack](https://www.adafruit.com/product/1289)
Build an "Internet of Things" connected mini printer that will do your bidding! This is a fun weekend project that comes with a beautiful laser cut case. Once assembled, the little printer connects wirelessly to get Internet data for printing onto 2 1/4" wide receipt paper....
No Longer Stocked
[Buy Now](https://www.adafruit.com/product/1289)
[Related Guides to the Product](https://learn.adafruit.com/products/1289/guides)
## Featured Products
### Miniature WiFi (802.11b/g/n) Module: For Raspberry Pi and more
[Miniature WiFi (802.11b/g/n) Module: For Raspberry Pi and more](https://www.adafruit.com/product/814)
Make your Internet of Things device cable-free by adding WiFi. Take advantage of the Raspberry Pi and Beagle Bone's USB port to add a low cost, but high-reliability wireless link. We tried half a dozen modules to find one that works well with the Pi and Bone without the need of recompiling...
No Longer Stocked
[Buy Now](https://www.adafruit.com/product/814)
[Related Guides to the Product](https://learn.adafruit.com/products/814/guides)
### Raspberry Pi - Skill badge, iron-on patch
[Raspberry Pi - Skill badge, iron-on patch](https://www.adafruit.com/product/906)
You are learning to use the small Linux based board, the Raspberry Pi! Adafruit offers a fun and exciting "badges" of achievement for electronics, science and engineering. We believe everyone should be able to be rewarded for learning a useful skill, a badge is just one of the many...
In Stock
[Buy Now](https://www.adafruit.com/product/906)
[Related Guides to the Product](https://learn.adafruit.com/products/906/guides)
### Adafruit Pi Unassembled T-Cobbler Breakout Kit for Raspberry Pi
[Adafruit Pi Unassembled T-Cobbler Breakout Kit for Raspberry Pi](https://www.adafruit.com/product/1105)
Now that you've finally got your hands on a [Raspberry Pi®](http://www.raspberrypi.org/), you're probably itching to make some fun embedded computer projects with it. What you need is an add on prototyping Pi T-Cobbler from Adafruit, which can break out all those tasty...
No Longer Stocked
[Buy Now](https://www.adafruit.com/product/1105)
[Related Guides to the Product](https://learn.adafruit.com/products/1105/guides)
### Mini Thermal Receipt Printer Starter Pack
[Mini Thermal Receipt Printer Starter Pack](https://www.adafruit.com/product/600)
Hit the ground running (and printing!) with this starter pack that includes a thermal printer and all the extras and save a few dollars while you're at it.
Includes:
- [A mini thermal receipt printer](http://www.adafruit.com/products/597) - with cables and...
No Longer Stocked
[Buy Now](https://www.adafruit.com/product/600)
[Related Guides to the Product](https://learn.adafruit.com/products/600/guides)
### Thermal paper roll - 50' long, 2.25" wide
[Thermal paper roll - 50' long, 2.25" wide](https://www.adafruit.com/product/599)
A mini roll of thermal paper, this fits very nicely into our mini thermal printer. 2.25" wide (about 57mm) and 50 feet long (15 meters). BPA-free.
[Perfect for use with our mini thermal printer!](http://www.adafruit.com/products/597)
No Longer Stocked
[Buy Now](https://www.adafruit.com/product/599)
[Related Guides to the Product](https://learn.adafruit.com/products/599/guides)
### Mini Thermal Receipt Printer
[Mini Thermal Receipt Printer](https://www.adafruit.com/product/597)
Add a mini printer to any microcontroller project with this very cute thermal printer. Thermal printers are also known as receipt printers, they're what you get when you go to the ATM or grocery store. Now you can embed a little printer of your own into an enclosure. This printer is ideal...
No Longer Stocked
[Buy Now](https://www.adafruit.com/product/597)
[Related Guides to the Product](https://learn.adafruit.com/products/597/guides)
### Rugged Metal Pushbutton with White LED Ring
[Rugged Metal Pushbutton with White LED Ring](https://www.adafruit.com/product/558)
These chrome-plated metal buttons are rugged and look real good while doing it! Simply drill a 16mm hole into any material up to 1/2" thick and you can fit these in place, there's even a rubber gasket to keep water out of the enclosure. On the front of the button is a flat metal...
In Stock
[Buy Now](https://www.adafruit.com/product/558)
[Related Guides to the Product](https://learn.adafruit.com/products/558/guides)
### 5V 10A switching power supply
[5V 10A switching power supply](https://www.adafruit.com/product/658)
This is a beefy switching supply, for when you need a lot of power! It can supply 5V DC up to 10 Amps, running from 110V or 220V power (the plug it comes with is for US/Canada/Japan but you can use any plug adapter for your country, or just replace the cable with a standard computer/appliance...
In Stock
[Buy Now](https://www.adafruit.com/product/658)
[Related Guides to the Product](https://learn.adafruit.com/products/658/guides)
## Related Guides
- [Skill Badge Requirements: Raspberry Pi](https://learn.adafruit.com/skill-badge-requirements-raspberry-pi.md)
- [Adafruit Prototyping Pi Plate](https://learn.adafruit.com/adafruit-prototyping-pi-plate.md)
- [Adafruit Raspberry Pi Educational Linux Distro](https://learn.adafruit.com/adafruit-raspberry-pi-educational-linux-distro.md)
- [Open Source Protective Face Shield Designs](https://learn.adafruit.com/open-source-face-shield-designs.md)
- [PyPortal IoT Plant Monitor with Google Cloud IoT Core and CircuitPython](https://learn.adafruit.com/pyportal-iot-plant-monitor-with-google-cloud-iot-core-and-circuitpython.md)
- [Adafruit QT Py ESP32-C3 WiFi Dev Board](https://learn.adafruit.com/adafruit-qt-py-esp32-c3-wifi-dev-board.md)
- [AstroPrint 3D Printing](https://learn.adafruit.com/astroprint-3d-printing.md)
- [No-Code Rain Sensing Smart Desktop Umbrella Stand](https://learn.adafruit.com/no-code-rain-sensing-smart-desktop-umbrella-stand.md)
- [MacroPad Remote Procedure Calls over USB to Control Home Assistant](https://learn.adafruit.com/macropad-remote-procedure-calls-over-usb-to-control-home-assistant.md)
- [PiPhone - A Raspberry Pi based Cellphone](https://learn.adafruit.com/piphone-a-raspberry-pi-based-cellphone.md)
- [Adafruit 128x64 OLED Bonnet for Raspberry Pi](https://learn.adafruit.com/adafruit-128x64-oled-bonnet-for-raspberry-pi.md)
- [Set up and Blink - MATLAB and Simulink with Raspberry Pi](https://learn.adafruit.com/how-to-use-matlab-and-simulink-with-raspberry-pi.md)
- [Mini Raspberry Pi Handheld Notebook](https://learn.adafruit.com/mini-raspberry-pi-handheld-notebook-palmtop.md)
- [Adafruit's Raspberry Pi Lesson 2. First Time Configuration](https://learn.adafruit.com/adafruits-raspberry-pi-lesson-2-first-time-configuration.md)
- [Huzzah Weather Display](https://learn.adafruit.com/huzzah-weather-display.md)
---
# Source: https://learn.adafruit.com/el-wire/soldering-to-el-wire.md
# EL Wire
## Soldering to EL Wire
EL wire is a little tricky to work with. It is made of three wires, one large middle wire and two very thin 'corona' wires. In the closeup above, you can see the two thin wires wrapped around the core. These two sets of wires are the leads we must solder to. But first, we have to get to them!
You'll need the following tools and items:
- [Wire strippers with a 20 AWG or 18 AWG slot](http://www.adafruit.com/index.php?main_page=product_info&cPath=8&products_id=147 "Link: http://www.adafruit.com/index.php?main\_page=product\_info&cPath=8&products\_id=147")
- [Wire cutters (these can be part of the wire strippers)](http://www.adafruit.com/index.php?main_page=product_info&cPath=8&products_id=147 "Link: http://www.adafruit.com/index.php?main\_page=product\_info&cPath=8&products\_id=147")
- [Soldering iron](http://www.adafruit.com/index.php?main_page=product_info&cPath=8&products_id=180 "Link: http://www.adafruit.com/index.php?main\_page=product\_info&cPath=8&products\_id=180")
- [Solder](http://www.adafruit.com/index.php?main_page=product_info&cPath=8&products_id=145)
- [Third hand tool](http://www.adafruit.com/index.php?main_page=product_info&cPath=8&products_id=291 "Link: http://www.adafruit.com/index.php?main\_page=product\_info&cPath=8&products\_id=291")
- Copper tape
- [Heat shrink in 1/4" and 1/8" diameter, 1:2 or 1:3](http://www.adafruit.com/products/344)
- [Wire to solder the EL to](http://www.adafruit.com/index.php?main_page=product_info&cPath=50&products_id=318 "Link: http://www.adafruit.com/index.php?main\_page=product\_info&cPath=50&products\_id=318")
- Heat shrinker, Heat gun, hair dryer, lighter, you can also just use the edge of your soldering iron
- Utility knife, hobby knife (x-acto), box-cutter, razor blade, etc
That's it! You're now ready to plug the El wire strand into an inverter.Start by cutting the wire to be as long as you want, and add an inch (or if you're starting out, a few inches) for the wire connection. Remember, its very easy to make the wire shorter but hard to make it longer!
Next, we'll need to remove the outer coating. This is the hardest part of the process so don't be disappointed if it takes a few tries to get it right! Use the 20 AWG or 18 AWG slot and strip off the PVC coating about 1/2" (1 cm) away from the end.
You may find heating the end of the EL wire with a heat gun makes the sheath soft allows it to pull off easily, leaving the corona wires intact. (Tip from a customer!)

If you accidentally cut off one of the corona wires (or both) cut the core and try again.
If you arent succeeding at getting the PVC off without damaging the wires, you can try not-quite-closing the cutters all the way (the image below is an exaggeration of how much to close it) and giving it a good yank.
Upon success you should have three wires sticking out.
Make sure you really didnt damage the corona wires by giving each one a gentle tug.
OK place the end of the wire in your third 'helping' hand tool, essential for all kinds of wire soldering.
Next, cut a 1" or so piece of 1/4" copper tape. Dont use scissors to cut copper tape, use wire cutters!
Unwrap a few mm of tape from the backing and stick it right next to the edge of the stripped EL wire. Fold the two thin wires on **top.**

Heat up your soldering iron to 650 degrees F and make sure its hot by melting solder onto the tip, it should melt easily. Now press the tip of the iron to the two wires and copper tape and quickly dab some solder in. Then remove the iron. This should not take more than a second or two or the EL wire casing will melt.

Check that the wires are soldered to the tape.
Now wrap the remaining tape around so that it covers and protects the solder joint.
Cut it so that it wraps around once, you dont want it too bulky.
Now that the corona wires are tucked away safely, we can work on soldering to the middle wire. First we must remove the phosphor, by scraping it off. Some people use a lighter to burn it off but we like to just scrape it with a razor. Either way, remove some of it.
You don't have to remove all of it, just half of the wire is fine.
Now tin the wire by heating it up with the soldering iron tip and melting solder onto the wire, this will coat it with solder - makes it easier later to solder on the wire.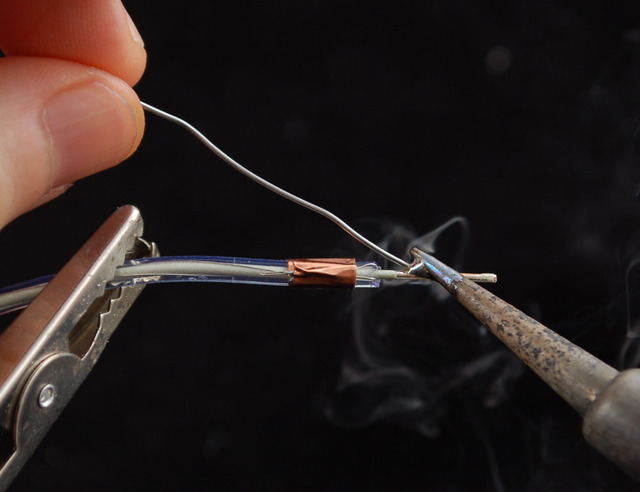
Next get your wire ready, ours come precut and tinned. If not, cut so that one side is about 1/2" longer than the other tin the ends. EL is AC-powered so you dont have to worry about 'polarity'.
**Before** you solder it on, get a piece of 1/8" heat shrink and cut it so its as long as the middle wire piece (1/2" or so).
Pull the wire apart so that you can slip the heat shrink on and have 1/4" or more of clearance from the end of the wire, otherwise the soldering iron will prematurely shrink it. Solder the wire to the middle conductor.
If you're having problems, go back and tip both wires with plenty of solder so you can just heat them up while touching!
After 15 seconds check that the solder connection has cooled, then slide the 1/8" shrink over the middle joint.
Now you have to heat up the heatshrink to get it to shrink. You can use a heat gun, hair dryer, hold it above a lighter (carefully!) or you can try 'rubbing' the non-solder part of your iron gently against the shrink.
When done correctly the middle wire will be completely protected.
Now we can revisit the corona wires. Using the tip of the soldering iron, heat up the copper tape and melt a little solder on.
Then solder the other wire to the copper tape.

Slide a 1" piece of 1/4" heatshrink from the other end of the EL wire.
Use your heat gun again to shrink the heatshrink over the whole assembly, to protect it.
- [Previous Page](https://learn.adafruit.com/el-wire/overview.md)
- [Next Page](https://learn.adafruit.com/el-wire/using-el-wire.md)
## Featured Products
### EL Wire 12V Sound Activated Pocket Inverter
[EL Wire 12V Sound Activated Pocket Inverter](https://www.adafruit.com/product/832)
A small, portable inverter for EL wire with an audio input! This inverter has a little microphone and will light the connected EL according to the surrounding audio volume. Makes for an easy reactive project.
This inverter requires **12VDC input** (it works great with our 8xAA...
No Longer Stocked
[Buy Now](https://www.adafruit.com/product/832)
[Related Guides to the Product](https://learn.adafruit.com/products/832/guides)
### EL Wire Sound Activated Pocket Inverter - 5V USB Power
[EL Wire Sound Activated Pocket Inverter - 5V USB Power](https://www.adafruit.com/product/831)
A small, portable inverter for EL wire with an audio input! This inverter has a little microphone and will light the connected EL according to the surrounding audio volume. Makes for an easy reactive project.
This inverter requires 5V input (it works great with any USB power pack) and it...
No Longer Stocked
[Buy Now](https://www.adafruit.com/product/831)
[Related Guides to the Product](https://learn.adafruit.com/products/831/guides)
### EL wire 4xAAA pocket inverter
[EL wire 4xAAA pocket inverter](https://www.adafruit.com/product/564)
A small, portable inverter for EL wire. Powers off of 4 AAA batteries (not included!), it can drive 3-4 meters (10 to 13 feet) of our high-brightness EL wire OR 1 meter (3 feet) of EL tape OR a 10cmx10cm piece of EL panel for about 7 hours.
There is a switch for selecting...
In Stock
[Buy Now](https://www.adafruit.com/product/564)
[Related Guides to the Product](https://learn.adafruit.com/products/564/guides)
### 12V EL wire/tape inverter
[12V EL wire/tape inverter](https://www.adafruit.com/product/448)
This is an inverter for EL wire and tape, similar to our pocket inverters, except it is a brick that takes 12V input instead of 2 AA batteries. This means its good for 'fixed' installations since you can just plug it into a 12V wall adapter. It's also good for portable projects...
In Stock
[Buy Now](https://www.adafruit.com/product/448)
[Related Guides to the Product](https://learn.adafruit.com/products/448/guides)
### EL wire 2xAA pocket inverter
[EL wire 2xAA pocket inverter](https://www.adafruit.com/product/317)
A small, portable inverter for EL wire. Powers off of 2 AA batteries (not included!), it can drive 1 to 8 feet (about 2.5m) of our high-brightness EL wire for 10 hours. There is a button for selecting steady/blink/off modes. There's a removable clip on the back. Comes with a 2.5mm pitch...
Out of Stock
[Buy Now](https://www.adafruit.com/product/317)
[Related Guides to the Product](https://learn.adafruit.com/products/317/guides)
### Heat Shrink Pack
[Heat Shrink Pack](https://www.adafruit.com/product/344)
Heat shrink is the duct tape of electronics, it keeps your stuff all safe and kept together. Especially when wiring and soldering, use heat shrink to add mechanical strength to cables. We use this stuff all the time and having a zip-lock bag of all the possible sizes is super...
In Stock
[Buy Now](https://www.adafruit.com/product/344)
[Related Guides to the Product](https://learn.adafruit.com/products/344/guides)
## Related Guides
- [EL Wire Stocking](https://learn.adafruit.com/el-wire-stocking.md)
- [Light Up your Costume with Noods](https://learn.adafruit.com/light-up-your-costume-with-noods.md)
- [EL Wire Sign](https://learn.adafruit.com/el-wire-sign.md)
- [Glowing Star Chuck Taylor Sneakers](https://learn.adafruit.com/glowing-star-chucks.md)
- [TRON Hoodie](https://learn.adafruit.com/tron-hoodie.md)
- [TRON Bag](https://learn.adafruit.com/tron-bag.md)
- [EL Bowtie](https://learn.adafruit.com/el-bowtie.md)
- [Electron Bow](https://learn.adafruit.com/electron-bow.md)
- [EL Workshop](https://learn.adafruit.com/el-workshop.md)
- [EL Wire Animal Masks](https://learn.adafruit.com/el-wire-animal-masks.md)
- [EL Stick Figure](https://learn.adafruit.com/el-stick-figure.md)
- [Glowing Bean Bags with EL Wire](https://learn.adafruit.com/glowing-bean-bags-with-el-wire.md)
---
# Source: https://learn.adafruit.com/tron-bag/soldering.md
# TRON Bag
## Soldering
Now that you have your pattern, its time to start working with the EL wire. If you've used EL before, it might be easier for you to cut EL pieces to match the traced out pattern.

Info:
**[Go over to our detailed EL wire tutorial (you'll want to keep it up on your web browser as solder all the pieces, and attach a connector so that you can connect it to the EL inverter.](http://learn.adafruit.com/el-wire)**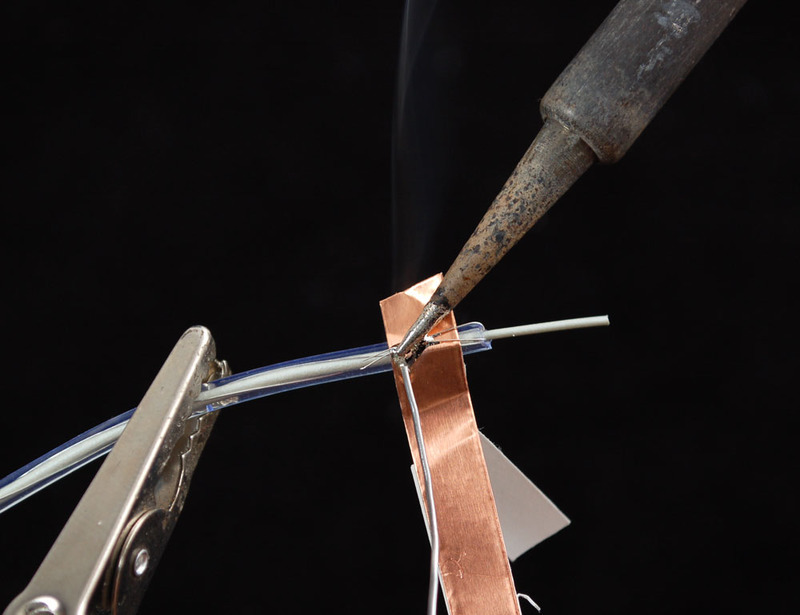
Once you've soldered your connector on, attach it to the inverter and test it, make sure the EL is glowing.

Now disconnect the wire from the inverter - **never cut EL wire while its lit!**
And don't cut it yet, we'll do that in a later step!
- [Previous Page](https://learn.adafruit.com/tron-bag/design.md)
- [Next Page](https://learn.adafruit.com/tron-bag/sewing.md)
## Featured Products
### Heat Shrink Pack
[Heat Shrink Pack](https://www.adafruit.com/product/344)
Heat shrink is the duct tape of electronics, it keeps your stuff all safe and kept together. Especially when wiring and soldering, use heat shrink to add mechanical strength to cables. We use this stuff all the time and having a zip-lock bag of all the possible sizes is super...
In Stock
[Buy Now](https://www.adafruit.com/product/344)
[Related Guides to the Product](https://learn.adafruit.com/products/344/guides)
### In-line wire 1-to-4 splitter
[In-line wire 1-to-4 splitter](https://www.adafruit.com/product/402)
If you want to connect multiple EL wires/strips/panels up to one inverter, these splitters are quite useful. There is one male connector (goes to the inverter) and then 4 female connectors (which will connect to each wire/strip/panel. You can even cascade them! Only thing to watch for is make...
In Stock
[Buy Now](https://www.adafruit.com/product/402)
[Related Guides to the Product](https://learn.adafruit.com/products/402/guides)
### EL wire starter pack - Blue 2.5 meter (8.2 ft)
[EL wire starter pack - Blue 2.5 meter (8.2 ft)](https://www.adafruit.com/product/583)
A little bundle to get you started! This project pack contains:
- [2.5 meters (over 8 ft) of high-brightness, long-life EL wire in Blue](http://www.adafruit.com/products/408). 2.5 meters is the maximum amount for the pocket driver - it is cut and soldered so it's ready...
Out of Stock
[Buy Now](https://www.adafruit.com/product/583)
[Related Guides to the Product](https://learn.adafruit.com/products/583/guides)
## Related Guides
- [Battery Powering Wearable Electronics](https://learn.adafruit.com/battery-powering-wearable-electronics.md)
- [3D Printed Daft Punk Helmet with Bluetooth ](https://learn.adafruit.com/3d-printed-daft-punk-helmet-with-bluetooth.md)
- [3D Printed Wearable Video Goggles](https://learn.adafruit.com/3d-printed-wearable-video-goggles.md)
- [Decorative Pointy Elf Ear Bud Holders](https://learn.adafruit.com/elf-ears.md)
- [LED Friendship Bracelet](https://learn.adafruit.com/nautical-led-bracelet.md)
- [Make a Zelda Master Sword with the RP2040 Prop-Maker Feather](https://learn.adafruit.com/master-sword-rp2040.md)
- [USB Locket](https://learn.adafruit.com/usb-locket.md)
- [Light Up your Costume with Noods](https://learn.adafruit.com/light-up-your-costume-with-noods.md)
- [Pac Man Pixel Suspenders](https://learn.adafruit.com/pac-man-pixel-suspenders.md)
- [3D Printed LED Buckle](https://learn.adafruit.com/3d-printed-led-buckle.md)
- [Adafruit Flora Bluefruit LE](https://learn.adafruit.com/adafruit-flora-bluefruit-le.md)
- [Textile Potentiometer Hoodie](https://learn.adafruit.com/textile-potentiometer-hoodie.md)
- [Cynaps Bone Conduction Headset Teardown](https://learn.adafruit.com/cynaps-bone-conduction-headset-teardown.md)
- [Glowing Bean Bags with EL Wire](https://learn.adafruit.com/glowing-bean-bags-with-el-wire.md)
- [3D Printed Gunblade](https://learn.adafruit.com/3d-printed-gunblade.md)
---
# Source: https://learn.adafruit.com/solderless-rgb-led-clips.md
# Solderless RGB LED Clips
## Overview

Hook up RGB LED strip easily and without soldering! These clips make it super simple to affix two strips together, either with an extension or a coupler, and third option allows easy connection to a power supply and controller.
Info:

Use a utility knife or other sharp blade to carefully remove the plastic coating on the end of your RGB LED strip. You will need to make one cut perpendicular to the strip (like slicing a loaf of bread), being careful to only cut through the clear rubbery plastic and not the actual circuit, and then another cut along the surface of the circuit, with the blade oriented as shown above. This will expose the copper pads and make a skinny tab we can slide inside the solderless clip.


Open the plastic cover on the clip and slide the freshly sliced end of RGB LED strip under the metal tabs inside the connector.

This little coupler clip makes it easy to join two pieces of strip together without a disruption in the spacing of the LEDs.

Close the plastic covers and you're done! Pictured here is the extender cable with strips attached on either end.

Use and enjoy!
## Featured Products
### RGB LED Weatherproof flexi-strip 60 LED/m- 5m
[RGB LED Weatherproof flexi-strip 60 LED/m- 5m](https://www.adafruit.com/product/346)
These LED strips are fun and glowy. There are **60** RGB LEDs per meter - twice as many as our other strip, and you can control the entire strip at once with any microcontroller and three transistors. The way they are wired, you will need a 9-12VDC power supply and then ground the R/G/B...
In Stock
[Buy Now](https://www.adafruit.com/product/346)
[Related Guides to the Product](https://learn.adafruit.com/products/346/guides)
### RGB LED weatherproof flexi-strip - 30 LED/m - 5m
[RGB LED weatherproof flexi-strip - 30 LED/m - 5m](https://www.adafruit.com/product/285)
These LED strips are fun and glowy. There are **30** RGB LEDs per meter, and you can control the entire strip at once with any microcontroller and three transistors. The way they are wired, you will need a 9-12VDC power supply and then ground the R/G/B pins to turn on the three colors. Use...
In Stock
[Buy Now](https://www.adafruit.com/product/285)
[Related Guides to the Product](https://learn.adafruit.com/products/285/guides)
## Related Guides
- [RGB LED Strips](https://learn.adafruit.com/rgb-led-strips.md)
- [Color Mixing QT Py Cuff Bracelet](https://learn.adafruit.com/color-mixing-qt-py-cuff.md)
- [Galaxy Pendant](https://learn.adafruit.com/life-proof-led-necklace.md)
- [Halo Energy Sword](https://learn.adafruit.com/halo-energy-sword.md)
- [LIGHTSHIP: LED Animation over WiFi](https://learn.adafruit.com/lightship-led-animation-over-wifi.md)
- [Halloween Neon LED Signs](https://learn.adafruit.com/halloween-neon-led-signs.md)
- [Alohamora Bottle](https://learn.adafruit.com/alohamora-bottle.md)
- [LED Sculpture Lamp](https://learn.adafruit.com/led-sculpture-lamp.md)
- [WiFi Jellyfish Lantern with WLED](https://learn.adafruit.com/wifi-jellyfish-lantern-with-wled.md)
- [Stick Person Costume with Neon LED Strips](https://learn.adafruit.com/led-neon-stick-person-costume.md)
- [Edge-Lit Tavern Sign with WLED - Control with WiFi or IR Remote](https://learn.adafruit.com/edge-lit-tavern-sign-with-wled-control-with-wifi-or-ir-remote.md)
- [No-Solder LED Disco Tie with Bluetooth](https://learn.adafruit.com/no-solder-circuit-playground-bluetooth-disco-tie.md)
- [Gravity Falls Memory Gun](https://learn.adafruit.com/gravity-falls-memory-gun.md)
- [Citi Bike Helmet](https://learn.adafruit.com/citi-bike-helmet.md)
- [NeoPixel Mini VU Meter](https://learn.adafruit.com/neopixel-mini-vu-meter.md)
---
# Source: https://learn.adafruit.com/adafruit-arduino-lesson-10-making-sounds/sound.md
# Arduino Lesson 10. Making Sounds
## Sound
Sound waves are vibrations in the air pressure. The speed of the vibrations (cycles per second or Hertz) is what makes the pitch of the sound. The higher the frequency of the vibration, the higher the pitch.

Middle C is usually defined as a frequency of 261 Hz. If you turn a digital output on and off again 261 times every second then that output will be middle C.
To hear the output, we need to attach something that will convert the electrical signal into sound waves. This can be done with a loudspeaker or as we have used here a piezo sounder.
Piezo sounders use a special crystal that expands and contracts as an electrical signal passes through it. This will generate a tone that we can hear.
- [Previous Page](https://learn.adafruit.com/adafruit-arduino-lesson-10-making-sounds/playing-a-scale.md)
- [Next Page](https://learn.adafruit.com/adafruit-arduino-lesson-10-making-sounds/pseudo-theramin.md)
## Featured Products
### Piezo Buzzer
[Piezo Buzzer](https://www.adafruit.com/product/160)
Piezo buzzers are used for making beeps, tones and alerts. This one is petite but loud! Drive it with 3-30V peak-to-peak square wave. To use, connect one pin to ground (either one) and the other pin to a square wave out from a timer or microcontroller. For the loudest tones, stay around 4 KHz,...
In Stock
[Buy Now](https://www.adafruit.com/product/160)
[Related Guides to the Product](https://learn.adafruit.com/products/160/guides)
### Photo cell (CdS photoresistor)
[Photo cell (CdS photoresistor)](https://www.adafruit.com/product/161)
CdS cells are little light sensors. As the squiggly face is exposed to more light, the resistance goes down. When it's light, the resistance is about ~1KΩ, when dark it goes up to ~10KΩ.
To use, connect one side of the photocell (either one, it's symmetric) to power...
In Stock
[Buy Now](https://www.adafruit.com/product/161)
[Related Guides to the Product](https://learn.adafruit.com/products/161/guides)
### Premium Male/Male Jumper Wires - 40 x 6" (150mm)
[Premium Male/Male Jumper Wires - 40 x 6" (150mm)](https://www.adafruit.com/product/758)
Handy for making wire harnesses or jumpering between headers on PCB's. These premium jumper wires are 6" (150mm) long and come in a 'strip' of 40 (4 pieces of each of ten rainbow colors). They have 0.1" male header contacts on either end and fit cleanly next to each other...
In Stock
[Buy Now](https://www.adafruit.com/product/758)
[Related Guides to the Product](https://learn.adafruit.com/products/758/guides)
### Half Sized Premium Breadboard - 400 Tie Points
[Half Sized Premium Breadboard - 400 Tie Points](https://www.adafruit.com/product/64)
This is a cute, half-size breadboard with 400 tie points, good for small projects. It's 3.25" x 2.2" / 8.3cm x 5.5cm with a standard double-strip in the middle and two power rails on both sides. You can pull the power rails off easily to make the breadboard as...
In Stock
[Buy Now](https://www.adafruit.com/product/64)
[Related Guides to the Product](https://learn.adafruit.com/products/64/guides)
### Adafruit METRO 328 Fully Assembled - Arduino IDE compatible
[Adafruit METRO 328 Fully Assembled - Arduino IDE compatible](https://www.adafruit.com/product/50)
We sure love the ATmega328 here at Adafruit, and we use them _a lot_ for our own projects. The processor has plenty of GPIO, Analog inputs, hardware UART SPI and I2C, timers and PWM galore - just enough for most simple projects. When we need to go small, we use a
Out of Stock
[Buy Now](https://www.adafruit.com/product/50)
[Related Guides to the Product](https://learn.adafruit.com/products/50/guides)
## Related Guides
- [Multi-tasking the Arduino - Part 2](https://learn.adafruit.com/multi-tasking-the-arduino-part-2.md)
- [Adafruit PCA9685 16-Channel Servo Driver](https://learn.adafruit.com/16-channel-pwm-servo-driver.md)
- [Adafruit CC3000 WiFi and Xively](https://learn.adafruit.com/adafruit-cc3000-wifi-and-xively.md)
- [Trellis 3D Printed Enclosure](https://learn.adafruit.com/trellis-3d-printed-enclosure.md)
- [Remote controlled door lock using a fingerprint sensor & Adafruit IO](https://learn.adafruit.com/remote-controlled-door-lock-using-a-fingerprint-sensor-and-adafruit-io.md)
- [Smart Measuring Cup](https://learn.adafruit.com/smart-measuring-cup.md)
- [0.96" mini Color OLED](https://learn.adafruit.com/096-mini-color-oled.md)
- [Adafruit Analog Accelerometer Breakouts](https://learn.adafruit.com/adafruit-analog-accelerometer-breakouts.md)
- [Circuit Playground: D is for Diode](https://learn.adafruit.com/circuit-playground-d-is-for-diode.md)
- [TMP36 Temperature Sensor](https://learn.adafruit.com/tmp36-temperature-sensor.md)
- [RGB LED Matrix Basics](https://learn.adafruit.com/32x16-32x32-rgb-led-matrix.md)
- [Automatic Monitor Color Temperature Adjustment](https://learn.adafruit.com/automatic-monitor-color-temperature-adjustment.md)
- [Line Following Zumo Robot Using Simulink](https://learn.adafruit.com/line-following-zumo-robot-programmed-with-simulink.md)
- [Wireless Game Show Poppers for the Classroom!](https://learn.adafruit.com/wireless-game-show-poppers.md)
- [Arduino Lesson 4. Eight LEDs and a Shift Register](https://learn.adafruit.com/adafruit-arduino-lesson-4-eight-leds.md)
---
# Source: https://learn.adafruit.com/wave-shield-voice-changer/special-considerations-for-costumes.md
# Wave Shield Voice Changer
## Tips for Use in Costumes
- Give your project a complete dry run well ahead of time…don’t dash right off to the party! Know how long batteries will last. Check that wires aren’t pulled and connections aren’t strained. Make sure no components get uncomfortably or dangerously hot. Fine-tune audio levels and reduce feedback.
- Build it extra rugged and motion-proof. Stranded wire flexes much better than solid-core wire. Use beefy, [NASA-style inline splices](http://blog.makezine.com/2012/02/28/how-to-splice-wire-to-nasa-standards/). Implement strain reliefs to avoid cracked solder connections. Breadboards are fine for prototyping, but [solder up your rig for deployment](http://adafruit.com/products/591 "Link: http://adafruit.com/products/591").
- Don’t shout — speak softly and let the amplifier boost your voice. You want people to hear the “bent” sound, not your natural voice.
- Point speakers away from the microphone to avoid feedback. Even a few degrees can make a big difference.
- Sweat is horribly corrosive stuff! It’s mostly salt water — and look what that does to ships at sea. Even worse, it’s conductive! Seal _everything._ Heat-shrink all wire connections, and use plastic enclosures or epoxy for any electronics that are fully inside a costume. If using a microphone inside a mask (which may have both sweat _and_ condensation from breath, ewww!), borrow an old audio pro trick and wrap the mic inside a balloon.
- Pack spare batteries and, space permitting, a minimal repair kit of safety pins, a few zip ties and a length of duct tape.
- Never let technical wizardry get in the way of a good performance! The example sketch uses a membrane keypad with many tiny buttons…that’s fine for a tabletop “sound board” instrument, but a poor choice for a Godzilla suit (who really should be continually thrashing about leveling Tokyo, not standing still to hunt around for a specific button). More isn’t always better…one or two buttons hidden in a glove may suffice. Practice until your performance is natural and your technology is discreet.
- [Previous Page](https://learn.adafruit.com/wave-shield-voice-changer/building-it.md)
## Featured Products
### Stereo 3.7W Class D Audio Amplifier - MAX98306
[Stereo 3.7W Class D Audio Amplifier - MAX98306](https://www.adafruit.com/product/987)
This incredibly small stereo amplifier is surprisingly powerful - able to deliver 2 x 3.7W channels into 3 ohm impedance speakers. Inside the miniature chip is a class D controller, able to run from 2.7V-5.5VDC. Since the amp is a class D, its incredibly efficient (over 90% efficient when...
In Stock
[Buy Now](https://www.adafruit.com/product/987)
[Related Guides to the Product](https://learn.adafruit.com/products/987/guides)
### Electret Microphone Amplifier - MAX4466 with Adjustable Gain
[Electret Microphone Amplifier - MAX4466 with Adjustable Gain](https://www.adafruit.com/product/1063)
Add an ear to your project with this well-designed electret microphone amplifier. This fully assembled and tested board comes with a 20-20KHz electret microphone soldered on. For the amplification, we use the Maxim MAX4466, an op-amp specifically designed for this delicate task! The amplifier...
In Stock
[Buy Now](https://www.adafruit.com/product/1063)
[Related Guides to the Product](https://learn.adafruit.com/products/1063/guides)
### Adafruit Wave Shield for Arduino Kit
[Adafruit Wave Shield for Arduino Kit](https://www.adafruit.com/product/94)
Adding quality audio to an electronic project is surprisingly difficult. Here is a shield for Arduino 328's that solves this problem. It can play up to 22KHz 12bit uncompressed audio files of any length. It's low cost, available as an easy-to-make kit. It has an onboard DAC, filter and...
Out of Stock
[Buy Now](https://www.adafruit.com/product/94)
[Related Guides to the Product](https://learn.adafruit.com/products/94/guides)
### Music & sound add-on pack for Arduino
[Music & sound add-on pack for Arduino](https://www.adafruit.com/product/175)
Its a Wave shield party pack! Just add an Arduino to create your own iPod-killer, audio art, sound-effects box...
Comes with:
- Latest [Wave shield kit](http://www.adafruit.com/products/94), works with more SD cards and with older NG Arduinos! Unassembled
- 8 GB...
Out of Stock
[Buy Now](https://www.adafruit.com/product/175)
[Related Guides to the Product](https://learn.adafruit.com/products/175/guides)
### Adafruit Proto Shield for Arduino Kit
[Adafruit Proto Shield for Arduino Kit](https://www.adafruit.com/product/51)
Works with the Uno! This prototyping shield is the best out there (well, we think so, at least). It works with UNO, NG, Diecimila and Duemilanove Arduinos. You can use it with a Leonardo but it will not break out the hardware SPI pins (they're only on the ISP connector underneath) or the...
No Longer Stocked
[Buy Now](https://www.adafruit.com/product/51)
[Related Guides to the Product](https://learn.adafruit.com/products/51/guides)
### Adafruit METRO 328 Fully Assembled - Arduino IDE compatible
[Adafruit METRO 328 Fully Assembled - Arduino IDE compatible](https://www.adafruit.com/product/50)
We sure love the ATmega328 here at Adafruit, and we use them _a lot_ for our own projects. The processor has plenty of GPIO, Analog inputs, hardware UART SPI and I2C, timers and PWM galore - just enough for most simple projects. When we need to go small, we use a
Out of Stock
[Buy Now](https://www.adafruit.com/product/50)
[Related Guides to the Product](https://learn.adafruit.com/products/50/guides)
### Shield stacking headers for Arduino (R3 Compatible)
[Shield stacking headers for Arduino (R3 Compatible)](https://www.adafruit.com/product/85)
_“How could something so simple be so useful?” _
We heard once that in the 4th millennium B.C. some guy asked the person who invented the wheel that question. The person who invented the wheel’s answer, we were told, was...
In Stock
[Buy Now](https://www.adafruit.com/product/85)
[Related Guides to the Product](https://learn.adafruit.com/products/85/guides)
### 6 x AA battery holder with 5.5mm/2.1mm plug
[6 x AA battery holder with 5.5mm/2.1mm plug](https://www.adafruit.com/product/248)
Make a portable power brick with plenty of juice! Use Alkaline AA's for a 9V 3000-4000mAh power supply, or rechargeable NiMH for 2000mAh 7.5V supply. Either one is good for running electronics that have a 5V voltage regulator (thus requiring a 7V+ supply). Will last about 10 times longer...
In Stock
[Buy Now](https://www.adafruit.com/product/248)
[Related Guides to the Product](https://learn.adafruit.com/products/248/guides)
## Related Guides
- [Boombox Beach Bag with Audio Amp and Speakers](https://learn.adafruit.com/boombox-beach-bag-with-audio-amp-and-speakers.md)
- [DIY 8x2 LCD Shield](https://learn.adafruit.com/diy-8x2-lcd-shield.md)
- [3D Printed Animatronic Robot Head](https://learn.adafruit.com/3d-printed-animatronic-robot-head.md)
- [Arduino Lesson 17. Email Sending Movement Detector](https://learn.adafruit.com/arduino-lesson-17-email-sending-movement-detector.md)
- [Arduino Lesson 11. LCD Displays - Part 1](https://learn.adafruit.com/adafruit-arduino-lesson-11-lcd-displays-1.md)
- [Line Following Zumo Robot Using Simulink](https://learn.adafruit.com/line-following-zumo-robot-programmed-with-simulink.md)
- [3D Printed Bone Conduction Transducer Box](https://learn.adafruit.com/3d-printed-bone-conduction-transducer-box.md)
- [Affordable HAL 9000 Replica](https://learn.adafruit.com/hal-9000-replica.md)
- [Electronic Demon Costume](https://learn.adafruit.com/electronic-demon-costume.md)
- [Arduino Lesson 13. DC Motors](https://learn.adafruit.com/adafruit-arduino-lesson-13-dc-motors.md)
- [Naughty or Nice Machine](https://learn.adafruit.com/naughty-or-nice-machine.md)
- [Nokia 5110/3310 Monochrome LCD](https://learn.adafruit.com/nokia-5110-3310-monochrome-lcd.md)
- [Track Your Treats: Halloween Candy GPS Tracker](https://learn.adafruit.com/track-your-treats-halloween-candy-gps-tracker.md)
- [Smart Measuring Cup](https://learn.adafruit.com/smart-measuring-cup.md)
- [Wave Shield](https://learn.adafruit.com/adafruit-wave-shield-audio-shield-for-arduino.md)
---
# Source: https://learn.adafruit.com/tron-bag/splitting.md
# TRON Bag
## Splitting
For the pocket detail, we wanted to have a piece of EL that split in two, this is possible but a little trickier than just a single piece. Make sure you're comfortable with soldering to EL wire since you'll need to solder to two ends, thus doubling the difficulty
You'll want to cut the first piece a little long, again, and then solder **two** pieces of ribbon or other thin stranded wire to both the core and corona wires. Each one can go to another EL piece.

This time, start sewing from the junction, so that its centered.


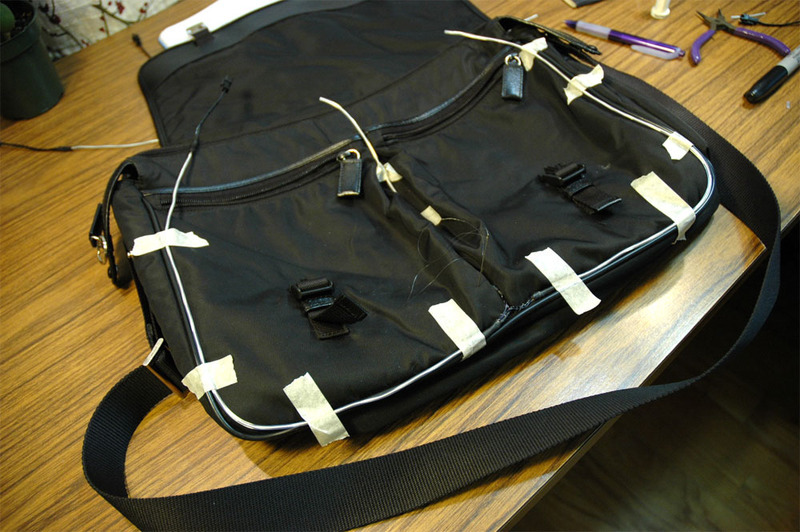
- [Previous Page](https://learn.adafruit.com/tron-bag/detailing.md)
- [Next Page](https://learn.adafruit.com/tron-bag/finishing.md)
## Featured Products
### Heat Shrink Pack
[Heat Shrink Pack](https://www.adafruit.com/product/344)
Heat shrink is the duct tape of electronics, it keeps your stuff all safe and kept together. Especially when wiring and soldering, use heat shrink to add mechanical strength to cables. We use this stuff all the time and having a zip-lock bag of all the possible sizes is super...
In Stock
[Buy Now](https://www.adafruit.com/product/344)
[Related Guides to the Product](https://learn.adafruit.com/products/344/guides)
### In-line wire 1-to-4 splitter
[In-line wire 1-to-4 splitter](https://www.adafruit.com/product/402)
If you want to connect multiple EL wires/strips/panels up to one inverter, these splitters are quite useful. There is one male connector (goes to the inverter) and then 4 female connectors (which will connect to each wire/strip/panel. You can even cascade them! Only thing to watch for is make...
In Stock
[Buy Now](https://www.adafruit.com/product/402)
[Related Guides to the Product](https://learn.adafruit.com/products/402/guides)
### EL wire starter pack - Blue 2.5 meter (8.2 ft)
[EL wire starter pack - Blue 2.5 meter (8.2 ft)](https://www.adafruit.com/product/583)
A little bundle to get you started! This project pack contains:
- [2.5 meters (over 8 ft) of high-brightness, long-life EL wire in Blue](http://www.adafruit.com/products/408). 2.5 meters is the maximum amount for the pocket driver - it is cut and soldered so it's ready...
Out of Stock
[Buy Now](https://www.adafruit.com/product/583)
[Related Guides to the Product](https://learn.adafruit.com/products/583/guides)
## Related Guides
- [Battery Powering Wearable Electronics](https://learn.adafruit.com/battery-powering-wearable-electronics.md)
- [3D Printed Daft Punk Helmet with Bluetooth ](https://learn.adafruit.com/3d-printed-daft-punk-helmet-with-bluetooth.md)
- [3D Printed Wearable Video Goggles](https://learn.adafruit.com/3d-printed-wearable-video-goggles.md)
- [Decorative Pointy Elf Ear Bud Holders](https://learn.adafruit.com/elf-ears.md)
- [LED Friendship Bracelet](https://learn.adafruit.com/nautical-led-bracelet.md)
- [Make a Zelda Master Sword with the RP2040 Prop-Maker Feather](https://learn.adafruit.com/master-sword-rp2040.md)
- [USB Locket](https://learn.adafruit.com/usb-locket.md)
- [Light Up your Costume with Noods](https://learn.adafruit.com/light-up-your-costume-with-noods.md)
- [Pac Man Pixel Suspenders](https://learn.adafruit.com/pac-man-pixel-suspenders.md)
- [3D Printed LED Buckle](https://learn.adafruit.com/3d-printed-led-buckle.md)
- [Adafruit Flora Bluefruit LE](https://learn.adafruit.com/adafruit-flora-bluefruit-le.md)
- [Textile Potentiometer Hoodie](https://learn.adafruit.com/textile-potentiometer-hoodie.md)
- [Cynaps Bone Conduction Headset Teardown](https://learn.adafruit.com/cynaps-bone-conduction-headset-teardown.md)
- [Glowing Bean Bags with EL Wire](https://learn.adafruit.com/glowing-bean-bags-with-el-wire.md)
- [3D Printed Gunblade](https://learn.adafruit.com/3d-printed-gunblade.md)
---
# Source: https://learn.adafruit.com/smt-manufacturing/squeegees.md
# SMT Manufacturing
## Squeegees
So you have your PCBs, cooled paste, your stencils and your stenciling machine. Only thing you need now is to apply it! This is the final tutorial in the SMT stencil series!## $5 Squeegees
We do manual paste deposition. We tried a whole bunch of different, expensive squeegees, but in the end we really just liked the nice rubber-gripped paint scrapers at the hardware store down the street.

We have two: one 4" and one 1" wide. We like a 1" one for mixing up paste after its taken from the fridge. This gets it warmed up and easier to work with.

We then use the paste spooned out to apply it to the larger spatula.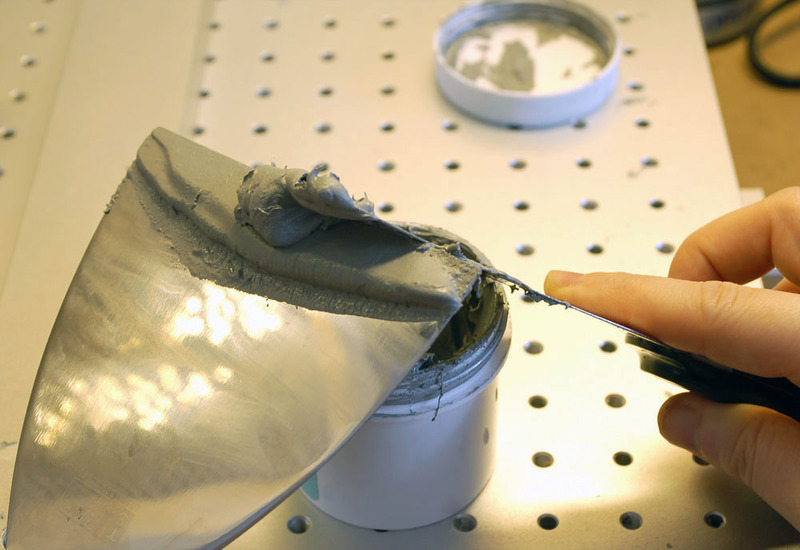
Pull the spatula against the stencil. Getting this right takes a lot of practice, you need to get angle, pressure, and amount of paste correct.
Sometimes we have a big stencil so we only do one side at a time.
We have a technique we use, we usually do two wipes. One is at a more acute angle, where we push the paste thru the stencil.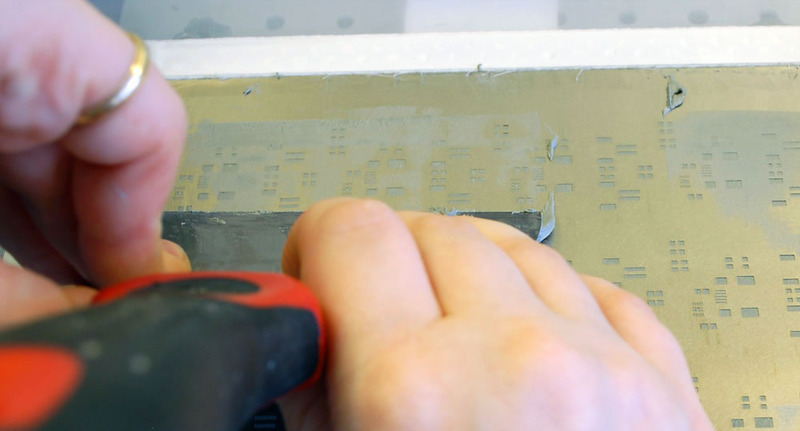
Then we go at a wider angle, to scrape the paste off.
That's it! It does take practice. We had to do 50 boards before we really got the hang of it.
- [Previous Page](https://learn.adafruit.com/smt-manufacturing/jedec-trays.md)
- [Next Page](https://learn.adafruit.com/smt-manufacturing/smt-wipes.md)
## Featured Products
### Fine tip curved tweezers - ESD safe
[Fine tip curved tweezers - ESD safe](https://www.adafruit.com/product/422)
When soldering small surface-mount (SMD/SMT) components, one thing you'll need is a good pair of tweezers. These are a great pair of every-day tweezers. They're anti-static, anti-magnetic and made of hard stainless steel. The tips are fine and pointy to pick up any size component. This...
In Stock
[Buy Now](https://www.adafruit.com/product/422)
[Related Guides to the Product](https://learn.adafruit.com/products/422/guides)
### Fine tip straight tweezers - ESD safe
[Fine tip straight tweezers - ESD safe](https://www.adafruit.com/product/421)
When soldering small surface-mount (SMD/SMT) components, one thing you'll need is a good pair of tweezers. These tweezers are a great pair of every-day tweezers. They're anti-static, anti-magnetic and made of hard stainless steel. The tips are fine and pointy to pick up any size...
In Stock
[Buy Now](https://www.adafruit.com/product/421)
[Related Guides to the Product](https://learn.adafruit.com/products/421/guides)
### USB Microscope - 5MP interpolated 220x magnification / 8 LEDs
[USB Microscope - 5MP interpolated 220x magnification / 8 LEDs](https://www.adafruit.com/product/636)
As electronics get smaller and smaller, you'll need a hand examining PCBs and this little USB microscope is the perfect tool. Its smaller and lighter than a large optical microscope but packs quite a bit of power in its little body. There's a 2 megapixel sensor inside and an optical...
Out of Stock
[Buy Now](https://www.adafruit.com/product/636)
[Related Guides to the Product](https://learn.adafruit.com/products/636/guides)
## Related Guides
- [Reindeer Solder Kit by Phyx](https://learn.adafruit.com/reindeer-solder-kit-by-phyx.md)
- [3D-Printed Solder Paste Dispenser Hand Switch ](https://learn.adafruit.com/3d-printed-solder-paste-dispenser-hand-switch.md)
- [USB Rechargeable Mini Solder Fume Extractor](https://learn.adafruit.com/usb-rechargeable-mini-solder-fume-extractor.md)
- [How to Sign Windows Drivers & Executables](https://learn.adafruit.com/how-to-sign-windows-drivers-installer.md)
- [Desktop Fume Extractor](https://learn.adafruit.com/desktop-fume-extractor.md)
- [Chinese Dragon Puppet with Motion-Reactive Flame Effect](https://learn.adafruit.com/chinese-dragon-puppet-with-motion-reactive-flame-effect.md)
- [16-Step Drum Sequencer](https://learn.adafruit.com/16-step-drum-sequencer.md)
- [Color Sensing Music Player](https://learn.adafruit.com/color-sensing-music-player.md)
- [Light-Up Costumes in Harsh Environments](https://learn.adafruit.com/light-up-costumes-in-harsh-environments.md)
- [Garden Path Lights with WLED and a Sunset Timer](https://learn.adafruit.com/garden-path-lights-with-sunset-timer.md)
- [CNC Rotary Macropad](https://learn.adafruit.com/cnc-rotary-macropad.md)
- [Blinka Says Tabletop Arcade Game](https://learn.adafruit.com/blinka-says-tabletop-arcade-game.md)
- [IoT Moon Phase Guide](https://learn.adafruit.com/moon-phase.md)
- [KTOWN's Ultimate Creating Parts in Eagle Tutorial](https://learn.adafruit.com/ktowns-ultimate-creating-parts-in-eagle-tutorial.md)
- [Shop Tips & Tricks](https://learn.adafruit.com/shop-tips-and-tricks.md)
---
# Source: https://learn.adafruit.com/adafruits-raspberry-pi-lesson-6-using-ssh/ssh-under-windows.md
# Adafruit's Raspberry Pi Lesson 6. Using SSH
## SSH under Windows
If you use windows, then you will need to download a free program called “PuTTY” from here: [http://www.putty.org/](http://www.putty.org/).
Having downloaded and installed PuTTY (it's a single file called putty.exe), run the program.

Enter the IP address that you found earlier and click “Open”. This will give you a warning (the first time) and then prompt you for the user (“pi”) and password (“raspberry”).

The ssh window will then be ready for use.

For a good example of how to use ssh to remotely configure a raspberry Pi, take a look at this tutorial:
**[http://learn.adafruit.com/raspberry-pi-e-mail-notifier-using-leds/overview](http://learn.adafruit.com/raspberry-pi-e-mail-notifier-using-leds/overview)**
- [Previous Page](https://learn.adafruit.com/adafruits-raspberry-pi-lesson-6-using-ssh/using-ssh-on-a-mac-or-linux.md)
- [Next Page](https://learn.adafruit.com/adafruits-raspberry-pi-lesson-6-using-ssh/test-and-configure.md)
## Featured Products
### Budget Pack for Raspberry Pi 1 Model B (Doesn't include RasPi)
[Budget Pack for Raspberry Pi 1 Model B (Doesn't include RasPi)](https://www.adafruit.com/product/965)
An optimized collection of parts and pieces to experiment with Raspberry Pi at home, school or work. Great for students and those that want to get their feet wet, no soldering required! **THIS PACK DOES NOT INCLUDE A RASPBERRY PI 1 MODEL B and is NOT compatible with Model B+ or Raspberry Pi...**
No Longer Stocked
[Buy Now](https://www.adafruit.com/product/965)
[Related Guides to the Product](https://learn.adafruit.com/products/965/guides)
### Programming the Raspberry Pi: Getting Started with Python
[Programming the Raspberry Pi: Getting Started with Python](https://www.adafruit.com/product/1089)
**Program your own Raspberry Pi projects!**
An updated guide to programming your own Raspberry Pi projects. Learn to create inventive programs and fun games on your powerful Raspberry Pi--with no programming experience required. **This practical book has been revised...**
In Stock
[Buy Now](https://www.adafruit.com/product/1089)
[Related Guides to the Product](https://learn.adafruit.com/products/1089/guides)
## Related Guides
- [Raspberry Gear](https://learn.adafruit.com/raspberry-gear.md)
- [Raspberry Pi Thermal Printer One Time Pads](https://learn.adafruit.com/raspberry-pi-thermal-printer-one-time-pads.md)
- [A DigitalOcean droplet in 10 minutes](https://learn.adafruit.com/a-digitalocean-droplet-in-10-minutes.md)
- [Raspberry Pi Kernel-o-Matic](https://learn.adafruit.com/raspberry-pi-kernel-o-matic.md)
- [7" Portable HDMI Monitor](https://learn.adafruit.com/7-hdmi-portable-monitor.md)
- [Using OSC to Communicate with a Raspberry Pi](https://learn.adafruit.com/raspberry-pi-open-sound-control.md)
- [DotStar Pi Painter](https://learn.adafruit.com/dotstar-pi-painter.md)
- [Raspberry Pi Computer Quick-Start](https://learn.adafruit.com/raspberry-pi-computer-quick-start.md)
- [Wood Case for Raspberry Pi 3](https://learn.adafruit.com/wood-case-for-raspberry-pi-3.md)
- [Using an External Drive as a Raspberry Pi Root Filesystem](https://learn.adafruit.com/external-drive-as-raspberry-pi-root.md)
- [Getting Started With Windows IoT Core on Raspberry Pi](https://learn.adafruit.com/getting-started-with-windows-iot-on-raspberry-pi.md)
- [Pi Box](https://learn.adafruit.com/pi-box.md)
- [Kali Linux on the Raspberry Pi with the PiTFT](https://learn.adafruit.com/kali-linux-on-the-raspberry-pi-with-the-pitft.md)
- [Raspberry Pi RGB LED Matrix Webapp](https://learn.adafruit.com/raspberry-pi-rgb-led-matrix-webapp.md)
- [Raspberry Pi Pygame UI basics](https://learn.adafruit.com/raspberry-pi-pygame-ui-basics.md)
---
# Source: https://learn.adafruit.com/barcode-scanner/stand.md
# Barcode Scanner
## Stand
If you are scanning at a desk, it may be convenient to have the scanner in a stand, this way you dont have to press the trigger every time to scan a sheet of paper. We use the stand and then just slide invoices with barcodes underneath the scanner. There's a little magnet in the stand and the scanner detects it to know when it should stay on. There are also powersaving modes if you want, check the manual for the config barcodes
- [Previous Page](https://learn.adafruit.com/barcode-scanner/usb-interfacing.md)
- [Next Page](https://learn.adafruit.com/barcode-scanner/downloads.md)
## Related Guides
- [Digital Shipping Scales](https://learn.adafruit.com/digital-shipping-scales.md)
---
# Source: https://learn.adafruit.com/smt-manufacturing/stenciling-machines.md
# SMT Manufacturing
## Stenciling Machines
You can always start out your SMT designs with [DIY laser-cut stencils](http://learn.adafruit.com/smt-manufacturing/laser-cut-stencils) but eventually you'll want to upgrade to a stenciling machine. Stencil machines hold the metal-cut stencil flat and taut so that you dont have any shifting or curling while you try to lay paste down. The good ones have a fixture so you can always get the same alignement every time - speeding up your stenciling time down to under a minute per PCB. They're a little expensive, but if you ever plan to do over 100 of a PCB they are essential!

## Get the Right Stencil
First thing to note is that most machines are to be used with a certain type of stencil. Some require framed stencils. Others use foil (unframed) type. Framed stencils are bulky, and more expensive, but they are fast because you dont have to spend time stretching or loading them. If you have a lot of stencils already, of course look for a machine that matches what you've got. At ~$200 each its a shame to reorder them!

## The Machine!
The stencil machine we opted for is called an [STP-350](http://www.madelltech.com/stp350.html) , we picked it up from Madell (most everything else there is not suggested but this machine is fairly well made and we think worth the price) For about $1350 US.

The nice thing about this machine is that it takes framed stencils, is about $1500 after shipping and has a good fixturing area. We liked that it uses 3mm holes for alignment. Many low cost stencilers require the PCB to be flat against the bed which means you can't (easily) do double-sided boards.
We get our PCB house to place 4 x 3mm holes in each corner of our PCB panel. The first time you set it up for a PCB run, you'll need to align it by loosening the 3mm studs and placing the PCB on the fixture bed. Then you can use the knobs on the side to help align it.
It takes 5-10 minutes to set up per board but once it is set up and aligned, you can just lift the stencil, place a new one so that the corner holes snap into the fixture studs and print! We've found that the corner holes almost always line up perfectly.
- [Previous Page](https://learn.adafruit.com/smt-manufacturing/framed-stencils.md)
- [Next Page](https://learn.adafruit.com/smt-manufacturing/solder-paste-syringes.md)
## Featured Products
### Fine tip curved tweezers - ESD safe
[Fine tip curved tweezers - ESD safe](https://www.adafruit.com/product/422)
When soldering small surface-mount (SMD/SMT) components, one thing you'll need is a good pair of tweezers. These are a great pair of every-day tweezers. They're anti-static, anti-magnetic and made of hard stainless steel. The tips are fine and pointy to pick up any size component. This...
In Stock
[Buy Now](https://www.adafruit.com/product/422)
[Related Guides to the Product](https://learn.adafruit.com/products/422/guides)
### Fine tip straight tweezers - ESD safe
[Fine tip straight tweezers - ESD safe](https://www.adafruit.com/product/421)
When soldering small surface-mount (SMD/SMT) components, one thing you'll need is a good pair of tweezers. These tweezers are a great pair of every-day tweezers. They're anti-static, anti-magnetic and made of hard stainless steel. The tips are fine and pointy to pick up any size...
In Stock
[Buy Now](https://www.adafruit.com/product/421)
[Related Guides to the Product](https://learn.adafruit.com/products/421/guides)
### USB Microscope - 5MP interpolated 220x magnification / 8 LEDs
[USB Microscope - 5MP interpolated 220x magnification / 8 LEDs](https://www.adafruit.com/product/636)
As electronics get smaller and smaller, you'll need a hand examining PCBs and this little USB microscope is the perfect tool. Its smaller and lighter than a large optical microscope but packs quite a bit of power in its little body. There's a 2 megapixel sensor inside and an optical...
Out of Stock
[Buy Now](https://www.adafruit.com/product/636)
[Related Guides to the Product](https://learn.adafruit.com/products/636/guides)
## Related Guides
- [Reindeer Solder Kit by Phyx](https://learn.adafruit.com/reindeer-solder-kit-by-phyx.md)
- [3D-Printed Solder Paste Dispenser Hand Switch ](https://learn.adafruit.com/3d-printed-solder-paste-dispenser-hand-switch.md)
- [USB Rechargeable Mini Solder Fume Extractor](https://learn.adafruit.com/usb-rechargeable-mini-solder-fume-extractor.md)
- [How to Sign Windows Drivers & Executables](https://learn.adafruit.com/how-to-sign-windows-drivers-installer.md)
- [Desktop Fume Extractor](https://learn.adafruit.com/desktop-fume-extractor.md)
- [Chinese Dragon Puppet with Motion-Reactive Flame Effect](https://learn.adafruit.com/chinese-dragon-puppet-with-motion-reactive-flame-effect.md)
- [16-Step Drum Sequencer](https://learn.adafruit.com/16-step-drum-sequencer.md)
- [Color Sensing Music Player](https://learn.adafruit.com/color-sensing-music-player.md)
- [Light-Up Costumes in Harsh Environments](https://learn.adafruit.com/light-up-costumes-in-harsh-environments.md)
- [Garden Path Lights with WLED and a Sunset Timer](https://learn.adafruit.com/garden-path-lights-with-sunset-timer.md)
- [CNC Rotary Macropad](https://learn.adafruit.com/cnc-rotary-macropad.md)
- [Blinka Says Tabletop Arcade Game](https://learn.adafruit.com/blinka-says-tabletop-arcade-game.md)
- [IoT Moon Phase Guide](https://learn.adafruit.com/moon-phase.md)
- [KTOWN's Ultimate Creating Parts in Eagle Tutorial](https://learn.adafruit.com/ktowns-ultimate-creating-parts-in-eagle-tutorial.md)
- [Shop Tips & Tricks](https://learn.adafruit.com/shop-tips-and-tricks.md)
---
# Source: https://learn.adafruit.com/calipers/step-and-relative-measurements.md
# Calipers
## Step & Relative Measurements
Say we have a mint tin that we're measuring. We want to know the thickness of the metal, but because of the rolled edges, there's no easy way for us get a good measurement with the outer-pincers. However, we can use two measurements and subtract them! This is what digital calipers are good at.
Step measurements are taken by pressing the 'head' against the bottom of the tin and then lining up the offset movable side so that it presses against the top of the edge.

Now zero out the measurement.
And measure the overall thickness. The difference is the thickness of the bottom metal.
This measurement came out to 33.5 mils. [The closest standard sheet gauge](http://www.engineersedge.com/gauge.htm) to 0.0335 is 20 gauge. Variations in the metal thickness may be due to additional thickness from the plating process or the rounded edges interfering with the depth measurement. Taking multiple measurements is always a good idea!- [Previous Page](https://learn.adafruit.com/calipers/basic-measurements.md)
- [Next Page](https://learn.adafruit.com/calipers/other-measuring-tips.md)
## Featured Products
### Mitutoyo - Absolute Digimatic Digital Calipers, 6 in.
[Mitutoyo - Absolute Digimatic Digital Calipers, 6 in.](https://www.adafruit.com/product/294)
The most useful tool we've ever laid our hands on. We thought we'd use them just for electronics but then we got our hands on these calipers and had so much fun we started measuring _everything._
They're indestructible - which is good because we don't...
No Longer Stocked
[Buy Now](https://www.adafruit.com/product/294)
[Related Guides to the Product](https://learn.adafruit.com/products/294/guides)
### Premium Digital Stainless Steel Calipers
[Premium Digital Stainless Steel Calipers](https://www.adafruit.com/product/1724)
The most useful tool we've ever laid our hands on. These calipers are really good quality and an excellent choice if you need something better than a cheap 'disposable' pair of digital calipers but you're not quite ready for a set of high-end Mitsutoyo calipers. These digital...
No Longer Stocked
[Buy Now](https://www.adafruit.com/product/1724)
[Related Guides to the Product](https://learn.adafruit.com/products/1724/guides)
### Solar Digital Calipers
[Solar Digital Calipers](https://www.adafruit.com/product/3720)
_Praise the sun!_ You will never have that awkward situation where your caliper battery dies just when you need to take a measurement. Sure, if you have the budget, [we recommend these near-indestructible high-end Mitutoyo...](https://www.adafruit.com/product/294)
In Stock
[Buy Now](https://www.adafruit.com/product/3720)
[Related Guides to the Product](https://learn.adafruit.com/products/3720/guides)
### Messograf Pen Calipers
[Messograf Pen Calipers](https://www.adafruit.com/product/810)
Discontinued - **you can grab [Solar Digital Calipers ](https://www.adafruit.com/product/3720)instead! **
Caliper rule? Tire tread gauge? Ruler? Thread scale? Writing instrument? The Messograf is all of these in one.
It is a...
No Longer Stocked
[Buy Now](https://www.adafruit.com/product/810)
[Related Guides to the Product](https://learn.adafruit.com/products/810/guides)
## Related Guides
- [Secret Hollow Book Intrusion Detector](https://learn.adafruit.com/secret-hollow-book.md)
- [Necomimi Brainwave Cat Ears Teardown](https://learn.adafruit.com/necomimi-brainwave-cat-ears-teardown.md)
- [Ambient Sound Machine](https://learn.adafruit.com/ambient-machine.md)
- [Personal Torch 3000](https://learn.adafruit.com/pt3000-personal-torch.md)
- [Butterfly Bench with Edge Lit Acrylic](https://learn.adafruit.com/butterfly-bench-with-edge-lit-acrylic.md)
- [Bass MIDI Stomp Box](https://learn.adafruit.com/midi-bass-synth-stomp-box.md)
- [Build a Custom Front Panel](https://learn.adafruit.com/build-a-custom-front-panel.md)
- [Collin's Lab: Soldering](https://learn.adafruit.com/collins-lab-soldering.md)
- [3D Printed Custom Keycaps](https://learn.adafruit.com/3dprinted-custom-keycaps.md)
- [Fiddy - the FTDI Clip](https://learn.adafruit.com/fiddy-ftdi-pogo-pin-clip.md)
- [Photo Light Box](https://learn.adafruit.com/photo-light-box.md)
- [DIY On/Off JST Switch Adapter](https://learn.adafruit.com/on-slash-off-switches.md)
- [Making Edge Guards for Hand Tools Using Hand-Moldable Plastic](https://learn.adafruit.com/hand-moldable-edge-guards.md)
- [USB Locket](https://learn.adafruit.com/usb-locket.md)
- [DIY 3D Printing Filament](https://learn.adafruit.com/diy-3d-printing-filament.md)
---
# Source: https://learn.adafruit.com/adafruit-arduino-lesson-16-stepper-motors/stepper-motors.md
# Arduino Lesson 16. Stepper Motors
## Stepper Motors
Stepper motors use a cogged wheel and electro magnets to nudge the wheel round a 'step' at a time.

By energizing the coils in the right order, the motor is driven round. The number of steps that the stepper motor has in a 360 degree rotation is actually the number of teeth on the cog.
The motor we are using has 48 steps, but then the motor also incorporates a reduction gearbox of 1:16 that means that it needs 16 x 48 = 768 steps.
In this lesson, we do not use the common Red connection. This connection is only provided if you are using a different type of drive circuit that does not allow the current in each coil to be reversed. Having a center connection to each coil means that you can either energise the left or right side of the coil, and get the effect of reversing the current flow without having to use a circuit that can reverse the current.
Since we are using a L293D that is very good at reversing the current, we do not need this common connection, we can supply current in either direction to the whole of each of the coils.
- [Previous Page](https://learn.adafruit.com/adafruit-arduino-lesson-16-stepper-motors/arduino-code.md)
- [Next Page](https://learn.adafruit.com/adafruit-arduino-lesson-16-stepper-motors/other-things-to-do.md)
## Featured Products
### Small Reduction Stepper Motor - 5VDC 32-Step 1/16 Gearing
[Small Reduction Stepper Motor - 5VDC 32-Step 1/16 Gearing](https://www.adafruit.com/product/858)
This is a great first stepper motor, good for small projects and experimenting with steppers. This uni-polar motor has a built-in mounting plate with two mounting holes. There are only 32 steps (11.25 degree) per revolution, and inside is a 1/16 reduction gear set. (Actually it's...
In Stock
[Buy Now](https://www.adafruit.com/product/858)
[Related Guides to the Product](https://learn.adafruit.com/products/858/guides)
### Dual H-Bridge Motor Driver for DC or Steppers - 600mA - L293D
[Dual H-Bridge Motor Driver for DC or Steppers - 600mA - L293D](https://www.adafruit.com/product/807)
Run four solenoids, two DC motors, or one bi-polar or uni-polar stepper with up to 600mA per channel using the L293D. These are perhaps better known as "the drivers in our Adafruit Motorshield". If you accidentally damaged the drivers in a shield, you can use one of these puppies to...
In Stock
[Buy Now](https://www.adafruit.com/product/807)
[Related Guides to the Product](https://learn.adafruit.com/products/807/guides)
### Premium Male/Male Jumper Wires - 40 x 6" (150mm)
[Premium Male/Male Jumper Wires - 40 x 6" (150mm)](https://www.adafruit.com/product/758)
Handy for making wire harnesses or jumpering between headers on PCB's. These premium jumper wires are 6" (150mm) long and come in a 'strip' of 40 (4 pieces of each of ten rainbow colors). They have 0.1" male header contacts on either end and fit cleanly next to each other...
In Stock
[Buy Now](https://www.adafruit.com/product/758)
[Related Guides to the Product](https://learn.adafruit.com/products/758/guides)
### Half Sized Premium Breadboard - 400 Tie Points
[Half Sized Premium Breadboard - 400 Tie Points](https://www.adafruit.com/product/64)
This is a cute, half-size breadboard with 400 tie points, good for small projects. It's 3.25" x 2.2" / 8.3cm x 5.5cm with a standard double-strip in the middle and two power rails on both sides. You can pull the power rails off easily to make the breadboard as...
In Stock
[Buy Now](https://www.adafruit.com/product/64)
[Related Guides to the Product](https://learn.adafruit.com/products/64/guides)
### Adafruit METRO 328 Fully Assembled - Arduino IDE compatible
[Adafruit METRO 328 Fully Assembled - Arduino IDE compatible](https://www.adafruit.com/product/50)
We sure love the ATmega328 here at Adafruit, and we use them _a lot_ for our own projects. The processor has plenty of GPIO, Analog inputs, hardware UART SPI and I2C, timers and PWM galore - just enough for most simple projects. When we need to go small, we use a
Out of Stock
[Buy Now](https://www.adafruit.com/product/50)
[Related Guides to the Product](https://learn.adafruit.com/products/50/guides)
## Related Guides
- [Silicone Robo-Tentacle](https://learn.adafruit.com/silicone-robo-tentacle.md)
- [Arduino Lesson 13. DC Motors](https://learn.adafruit.com/adafruit-arduino-lesson-13-dc-motors.md)
- [Adafruit AirLift Shield - ESP32 WiFi Co-Processor](https://learn.adafruit.com/adafruit-airlift-shield-esp32-wifi-co-processor.md)
- [RePaper eInk Development Board](https://learn.adafruit.com/repaper-eink-development-board.md)
- [Memories of an Arduino](https://learn.adafruit.com/memories-of-an-arduino.md)
- [Adafruit Proto Screw Shield](https://learn.adafruit.com/adafruit-proto-screw-shield.md)
- [Circuit Playground Sound-Controlled Robot](https://learn.adafruit.com/circuit-playground-sound-controlled-robot.md)
- [Arduino Lesson 8. Analog Inputs](https://learn.adafruit.com/adafruit-arduino-lesson-8-analog-inputs.md)
- [Arduino GPS Clock](https://learn.adafruit.com/arduino-clock.md)
- [Current Limiting Stepper Driver with DRV8871](https://learn.adafruit.com/current-limiting-stepper-driver-with-drv8871.md)
- [Adafruit IO Basics: NeoPixel Controller](https://learn.adafruit.com/adafruit-io-basics-neopixel-controller.md)
- [Tiny Arduino Music Visualizer](https://learn.adafruit.com/piccolo.md)
- [WiFi Weather Station](https://learn.adafruit.com/wifi-weather-station-arduino-cc3000.md)
- [How to Find Hidden COM Ports](https://learn.adafruit.com/how-to-find-hidden-com-ports.md)
- [Collin's Lab: MIDI](https://learn.adafruit.com/collins-lab-midi.md)
---
# Source: https://learn.adafruit.com/conductive-thread/stitching-around-circuit-boards.md
# Conductive Thread
## Stitching around circuit boards

Get an idea of where your circuit will go. You may wish to mark traces with tailor's chalk or a water-soluable embroidery marker, or just freehand it! Get your circuit board onto your taut fabric and pick up your threaded needle.

Bring the needle through the fabric from back to front, right next to the circuit board.

Pull the needle all the way through and continue pulling the thread tail until only 6 inches remains at the back of the fabric.

Leave this tail dangling for now-- we'll tie it in a knot later.

Bring your needle from front to back through the hole in the circuit board. Pull the needle and slack thread all the way through until the thread snugly hugs the conductive pad ad the edge of the board.

Repeat with a few more stitches to make a secure mechanical and electrical connection.

End with both ends at the back of the fabric and get ready to tie a knot.
- [Previous Page](https://learn.adafruit.com/conductive-thread/prep-thread-and-fabric.md)
- [Next Page](https://learn.adafruit.com/conductive-thread/tying-knots.md)
## Featured Products
### Stainless Medium Conductive Thread - 3 ply - 18 meter/60 ft
[Stainless Medium Conductive Thread - 3 ply - 18 meter/60 ft](https://www.adafruit.com/product/641)
After months of searching, we finally have what we consider to be the ultimate conductive thread. It's thin, strong, smooth, and made completely of 316L stainless steel. Once you start working with this thread you'll quickly agree its optimal for any wearables work!
This...
Out of Stock
[Buy Now](https://www.adafruit.com/product/641)
[Related Guides to the Product](https://learn.adafruit.com/products/641/guides)
### Stainless Thin Conductive Thread - 2 ply - 23 meter/76 ft
[Stainless Thin Conductive Thread - 2 ply - 23 meter/76 ft](https://www.adafruit.com/product/640)
After months of searching, we finally have what we consider to be the ultimate conductive thread. It's thin, strong, smooth, and made completely of 316L stainless steel. Once you start working with this thread you'll quickly agree its optimal for any wearables work!
This...
In Stock
[Buy Now](https://www.adafruit.com/product/640)
[Related Guides to the Product](https://learn.adafruit.com/products/640/guides)
### Stainless Thin Conductive Yarn / Thick Conductive Thread - 30 ft
[Stainless Thin Conductive Yarn / Thick Conductive Thread - 30 ft](https://www.adafruit.com/product/603)
This 316L stainless steel thread falls somewhere between a thick thread and a thin yarn. Most sewing machines wouldn't be happy with this thread since its thick, and it has the 'furry' soft feel of yarn which makes it poor for most e-textiles/wearables projects. However, the high...
In Stock
[Buy Now](https://www.adafruit.com/product/603)
[Related Guides to the Product](https://learn.adafruit.com/products/603/guides)
### Conductive thread ribbon cable - White - 1 yard
[Conductive thread ribbon cable - White - 1 yard](https://www.adafruit.com/product/1139)
This lightweight, flexible fabric ribbon cable contains four channels of conductive thread, perfect for wiring up wearables where flexibility is key. Use it to connect your conductive fabric gamepad to your microcontroller or computer!
Features:
- Low resistance: ~16...
No Longer Stocked
[Buy Now](https://www.adafruit.com/product/1139)
[Related Guides to the Product](https://learn.adafruit.com/products/1139/guides)
### Needle set - 3/9 sizes - 20 needles
[Needle set - 3/9 sizes - 20 needles](https://www.adafruit.com/product/615)
Mighty needles, sew like the wind! This needle set is the only one you'll need for any sort of hand sewing, especially using our conductive thread and wearable electronics parts.
Each pack contains 20 gold-eye sharps, with eye sizes ranging from #3 (1.75" long) to #9...
Out of Stock
[Buy Now](https://www.adafruit.com/product/615)
[Related Guides to the Product](https://learn.adafruit.com/products/615/guides)
### Small Alligator Clip Test Lead (set of 12)
[Small Alligator Clip Test Lead (set of 12)](https://www.adafruit.com/product/1008)
Connect this to that without soldering using these handy mini alligator clip test leads. 15" cables with alligator clip on each end, color coded. You get 12 pieces in 6 colors. Strong and grippy, these always come in handy! We often use these in conjunction with a multimeter so we...
In Stock
[Buy Now](https://www.adafruit.com/product/1008)
[Related Guides to the Product](https://learn.adafruit.com/products/1008/guides)
### Sewable Snaps - 5mm Diameter - Card of 24
[Sewable Snaps - 5mm Diameter - Card of 24](https://www.adafruit.com/product/1126)
The small 5mm size of these tin-plated brass snaps means they fit perfectly on Flora's pads! Snaps make a great connector for wearables-- solder one side to the board and sew the other to your project with conductive thread! This card comes with 24 complete snaps (socket and stud...
In Stock
[Buy Now](https://www.adafruit.com/product/1126)
[Related Guides to the Product](https://learn.adafruit.com/products/1126/guides)
### FLORA - Wearable electronic platform: Arduino-compatible
[FLORA - Wearable electronic platform: Arduino-compatible](https://www.adafruit.com/product/659)
FLORA is Adafruit's fully-featured wearable electronics platform. It's a round, sewable, Arduino-compatible microcontroller designed to empower amazing wearables projects.FLORA comes with Adafruit's support, [tutorials and...](http://learn.adafruit.com/category/flora)
In Stock
[Buy Now](https://www.adafruit.com/product/659)
[Related Guides to the Product](https://learn.adafruit.com/products/659/guides)
## Related Guides
- [Capacitive Touch with Conductive Fabric & Flora](https://learn.adafruit.com/capacitive-touch-with-conductive-fabric-and-flora.md)
- [Fiber Optic Pixie Skirt](https://learn.adafruit.com/fiber-optic-pixie-princess-skirt.md)
- [Haptic Headband](https://learn.adafruit.com/haptic-headband.md)
- [EEG Costume Cap](https://learn.adafruit.com/eeg-costume-cap.md)
- [Zipper Switch](https://learn.adafruit.com/zipper-switch.md)
- [Adafruit Arduino IDE Setup](https://learn.adafruit.com/adafruit-arduino-ide-setup.md)
- [Sewable NeoPixels](https://learn.adafruit.com/flora-rgb-smart-pixels.md)
- [FLORA TV-B-Gone](https://learn.adafruit.com/flora-tv-b-gone.md)
- [Experimenting with NeverWet + Electronics](https://learn.adafruit.com/neverwet-electronics.md)
- [LED Stego Flex Spike Hoodie](https://learn.adafruit.com/led-stego-flex-spike-hoodie.md)
- [Getting Started with FLORA](https://learn.adafruit.com/getting-started-with-flora.md)
- [Sunscreen Reminder Hat](https://learn.adafruit.com/sunscreen-reminder-hat.md)
- [Mailbox Notification Service](https://learn.adafruit.com/mailbox-notification-service.md)
- [FLORA + FONA](https://learn.adafruit.com/flora-plus-fona.md)
- [Flora TSL2561 Lux Sensor](https://learn.adafruit.com/flora-lux-sensor.md)
---
# Source: https://learn.adafruit.com/calipers/storage.md
# Calipers
## Storage
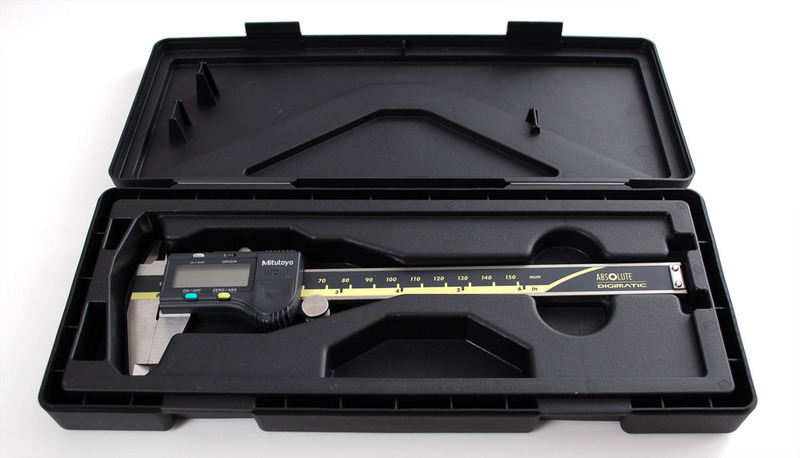
Keep your calipers happy and safe in their box. Even though digital calipers are in many ways more durable than mechanical/dial types, especially with respect to shock, when traveling or storing, keep 'em in the case!- [Previous Page](https://learn.adafruit.com/calipers/digital-vs-dial-calipers.md)
- [Next Page](https://learn.adafruit.com/calipers/battery-life-and-replacement.md)
## Featured Products
### Mitutoyo - Absolute Digimatic Digital Calipers, 6 in.
[Mitutoyo - Absolute Digimatic Digital Calipers, 6 in.](https://www.adafruit.com/product/294)
The most useful tool we've ever laid our hands on. We thought we'd use them just for electronics but then we got our hands on these calipers and had so much fun we started measuring _everything._
They're indestructible - which is good because we don't...
No Longer Stocked
[Buy Now](https://www.adafruit.com/product/294)
[Related Guides to the Product](https://learn.adafruit.com/products/294/guides)
### Premium Digital Stainless Steel Calipers
[Premium Digital Stainless Steel Calipers](https://www.adafruit.com/product/1724)
The most useful tool we've ever laid our hands on. These calipers are really good quality and an excellent choice if you need something better than a cheap 'disposable' pair of digital calipers but you're not quite ready for a set of high-end Mitsutoyo calipers. These digital...
No Longer Stocked
[Buy Now](https://www.adafruit.com/product/1724)
[Related Guides to the Product](https://learn.adafruit.com/products/1724/guides)
### Solar Digital Calipers
[Solar Digital Calipers](https://www.adafruit.com/product/3720)
_Praise the sun!_ You will never have that awkward situation where your caliper battery dies just when you need to take a measurement. Sure, if you have the budget, [we recommend these near-indestructible high-end Mitutoyo...](https://www.adafruit.com/product/294)
In Stock
[Buy Now](https://www.adafruit.com/product/3720)
[Related Guides to the Product](https://learn.adafruit.com/products/3720/guides)
### Messograf Pen Calipers
[Messograf Pen Calipers](https://www.adafruit.com/product/810)
Discontinued - **you can grab [Solar Digital Calipers ](https://www.adafruit.com/product/3720)instead! **
Caliper rule? Tire tread gauge? Ruler? Thread scale? Writing instrument? The Messograf is all of these in one.
It is a...
No Longer Stocked
[Buy Now](https://www.adafruit.com/product/810)
[Related Guides to the Product](https://learn.adafruit.com/products/810/guides)
## Related Guides
- [Secret Hollow Book Intrusion Detector](https://learn.adafruit.com/secret-hollow-book.md)
- [Necomimi Brainwave Cat Ears Teardown](https://learn.adafruit.com/necomimi-brainwave-cat-ears-teardown.md)
- [Ambient Sound Machine](https://learn.adafruit.com/ambient-machine.md)
- [Personal Torch 3000](https://learn.adafruit.com/pt3000-personal-torch.md)
- [Butterfly Bench with Edge Lit Acrylic](https://learn.adafruit.com/butterfly-bench-with-edge-lit-acrylic.md)
- [Bass MIDI Stomp Box](https://learn.adafruit.com/midi-bass-synth-stomp-box.md)
- [Build a Custom Front Panel](https://learn.adafruit.com/build-a-custom-front-panel.md)
- [Collin's Lab: Soldering](https://learn.adafruit.com/collins-lab-soldering.md)
- [3D Printed Custom Keycaps](https://learn.adafruit.com/3dprinted-custom-keycaps.md)
- [Fiddy - the FTDI Clip](https://learn.adafruit.com/fiddy-ftdi-pogo-pin-clip.md)
- [Photo Light Box](https://learn.adafruit.com/photo-light-box.md)
- [DIY On/Off JST Switch Adapter](https://learn.adafruit.com/on-slash-off-switches.md)
- [Making Edge Guards for Hand Tools Using Hand-Moldable Plastic](https://learn.adafruit.com/hand-moldable-edge-guards.md)
- [USB Locket](https://learn.adafruit.com/usb-locket.md)
- [DIY 3D Printing Filament](https://learn.adafruit.com/diy-3d-printing-filament.md)
---
# Source: https://learn.adafruit.com/webide/submit-a-bug.md
# Adafruit WebIDE
## Submit a Bug
- [Previous Page](https://learn.adafruit.com/webide/faq.md)
## Featured Products
### Raspberry Pi Model B 512MB RAM
[Raspberry Pi Model B 512MB RAM](https://www.adafruit.com/product/998)
Adafruit ships the **Raspberry Pi Model B 512MB RAM** as of 10/18/2012.
The Raspberry Pi® is a single-board computer developed in the UK by the Raspberry Pi Foundation with the intention of stimulating the teaching of basic computer science in schools. The Raspberry...
No Longer Stocked
[Buy Now](https://www.adafruit.com/product/998)
[Related Guides to the Product](https://learn.adafruit.com/products/998/guides)
### BeagleBone Black - Rev B
[BeagleBone Black - Rev B](https://www.adafruit.com/product/1278)
**[Adafruit is no longer shipping the BeagleBone Black Rev B, it has been replaced with the Rev C as of 5/12/14](https://www.adafruit.com/products/1876) - the Rev C now has 4G flash and also comes with Debian, it also costs slightly more. There are no exchanges or...**
No Longer Stocked
[Buy Now](https://www.adafruit.com/product/1278)
[Related Guides to the Product](https://learn.adafruit.com/products/1278/guides)
### Adafruit Pi Box - Enclosure for Raspberry Pi Model A or B
[Adafruit Pi Box - Enclosure for Raspberry Pi Model A or B](https://www.adafruit.com/product/859)
**Discontinued** - you can grab [Adafruit Pi Box Plus - Enclosure for RasPi Model B+/Pi 2/ Pi 3](https://www.adafruit.com/product/1985) instead!
**We're still selling this classic Adafruit case for those who specifically want it but **
No Longer Stocked
[Buy Now](https://www.adafruit.com/product/859)
[Related Guides to the Product](https://learn.adafruit.com/products/859/guides)
### Miniature WiFi (802.11b/g/n) Module: For Raspberry Pi and more
[Miniature WiFi (802.11b/g/n) Module: For Raspberry Pi and more](https://www.adafruit.com/product/814)
Make your Internet of Things device cable-free by adding WiFi. Take advantage of the Raspberry Pi and Beagle Bone's USB port to add a low cost, but high-reliability wireless link. We tried half a dozen modules to find one that works well with the Pi and Bone without the need of recompiling...
No Longer Stocked
[Buy Now](https://www.adafruit.com/product/814)
[Related Guides to the Product](https://learn.adafruit.com/products/814/guides)
## Related Guides
- [Trellis Python Library](https://learn.adafruit.com/trellis-python-library.md)
- [Adafruit DVI Sock for Pico](https://learn.adafruit.com/adafruit-dvi-sock-for-pico.md)
- [Introducing Adafruit ItsyBitsy M4](https://learn.adafruit.com/introducing-adafruit-itsybitsy-m4.md)
- [SMT Breadboard Prototyping Using Breakout PCBs](https://learn.adafruit.com/smt-prototyping-using-breakout-pcbs.md)
- [Getting Started with RTL-SDR and SDR-Sharp and CubicSDR](https://learn.adafruit.com/getting-started-with-rtl-sdr-and-sdr-sharp.md)
- [Adafruit STEMMA Reflective Photo Interrupt Sensor](https://learn.adafruit.com/adafruit-stemma-reflective-photo-interrupt-sensor.md)
- [Adafruit 9-DOF Orientation IMU Fusion Breakout - BNO085](https://learn.adafruit.com/adafruit-9-dof-orientation-imu-fusion-breakout-bno085.md)
- [Adafruit I2C to 8 Channel Solenoid Driver](https://learn.adafruit.com/adafruit-i2c-to-8-channel-solenoid-driver.md)
- [Controlling Motors using the Raspberry Pi and RasPiRobot Board V2](https://learn.adafruit.com/controlling-motors-using-the-raspberry-pi-and-raspirobot-board-v2.md)
- [Adafruit Feather 32u4 FONA](https://learn.adafruit.com/adafruit-feather-32u4-fona.md)
- [Adafruit Pi Stemma QT Breakout](https://learn.adafruit.com/adafruit-pi-stemma-qt-breakout.md)
- [Adafruit's Raspberry Pi Lesson 8. Using a Servo Motor](https://learn.adafruit.com/adafruits-raspberry-pi-lesson-8-using-a-servo-motor.md)
- [IoT Bird Feeder with Camera](https://learn.adafruit.com/iot-window-bird-feeder-with-camera.md)
- [Using the BMP085/180 with Raspberry Pi or Beaglebone Black](https://learn.adafruit.com/using-the-bmp085-with-raspberry-pi.md)
- [AR1100 Resistive Touch Screen Controller Guide](https://learn.adafruit.com/ar1100-resistive-touch-screen-controller-guide.md)
---
# Source: https://learn.adafruit.com/arduino-tips-tricks-and-techniques/support-forums.md
# Source: https://learn.adafruit.com/2-8-tft-touchscreen/support-forums.md
# Source: https://learn.adafruit.com/reverse-geocache-engagement-box/support-forums.md
# Source: https://learn.adafruit.com/2-8-tft-touch-shield/support-forums.md
# Source: https://learn.adafruit.com/how-to-make-a-pogo-pin-test-jig/support-forums.md
# Source: https://learn.adafruit.com/chumby-hacker-board/support-forums.md
# Chumby Hacker Board
## Support Forums
- [Previous Page](https://learn.adafruit.com/chumby-hacker-board/sd-card.md)
## Featured Products
### USB 2.0 Powered Hub - 7 Ports with 5V 2A Power Supply
[USB 2.0 Powered Hub - 7 Ports with 5V 2A Power Supply](https://www.adafruit.com/product/961)
Add lots more USB capability to your Raspberry Pi or computer using this powered USB 2.0 hub. It adds a full **seven powered ports** , all at USB 2.0 speeds so you can use video cameras and other high speed devices (cheaper hubs are v1.1 and not as fast!)
The extra sauce...
No Longer Stocked
[Buy Now](https://www.adafruit.com/product/961)
[Related Guides to the Product](https://learn.adafruit.com/products/961/guides)
### Miniature WiFi (802.11b/g/n) Module: For Raspberry Pi and more
[Miniature WiFi (802.11b/g/n) Module: For Raspberry Pi and more](https://www.adafruit.com/product/814)
Make your Internet of Things device cable-free by adding WiFi. Take advantage of the Raspberry Pi and Beagle Bone's USB port to add a low cost, but high-reliability wireless link. We tried half a dozen modules to find one that works well with the Pi and Bone without the need of recompiling...
No Longer Stocked
[Buy Now](https://www.adafruit.com/product/814)
[Related Guides to the Product](https://learn.adafruit.com/products/814/guides)
### 5V 2A (2000mA) switching power supply - UL Listed
[5V 2A (2000mA) switching power supply - UL Listed](https://www.adafruit.com/product/276)
This is an FCC/CE certified and UL listed power supply. Need a lot of 5V power? This switching supply gives a clean regulated 5V output at up to 2000mA. 110 or 240 input, so it works in any country. The plugs are "US 2-prong" style so you may need a plug adapter, but you can pick one...
Out of Stock
[Buy Now](https://www.adafruit.com/product/276)
[Related Guides to the Product](https://learn.adafruit.com/products/276/guides)
### 2.1mm to 1.7mm DC jack adapter
[2.1mm to 1.7mm DC jack adapter](https://www.adafruit.com/product/411)
We're carrying this adapter primarily to allow Chumby Hacker Board users to adapt our nice [5V @ 2A power supply](http://www.adafruit.com/products/276) to their CHB. But you can use this adapter for anything else that has a 1.7mm DC jack, such as a PSP.
In Stock
[Buy Now](https://www.adafruit.com/product/411)
[Related Guides to the Product](https://learn.adafruit.com/products/411/guides)
### USB MicroSD Card Reader/Writer - microSD / microSDHC / microSDXC
[USB MicroSD Card Reader/Writer - microSD / microSDHC / microSDXC](https://www.adafruit.com/product/939)
This is the cutest little microSD card reader/writer - but don't be fooled by its adorableness! It's wicked fast and supports up to 64 GB SDXC cards! Simply slide the card into the edge and plug it into your computer. No drivers are required, it shows up as a standard 'Mass...
No Longer Stocked
[Buy Now](https://www.adafruit.com/product/939)
[Related Guides to the Product](https://learn.adafruit.com/products/939/guides)
### Ethernet Cable - 10 ft long
[Ethernet Cable - 10 ft long](https://www.adafruit.com/product/730)
We have so many Internet-connected goodies in the shop, we figured it's time to carry a cable so you can easily connect them up! This cable is 10 feet long, black and has all 8 wires installed. Perfect for use with the [BeagleBone](http://www.adafruit.com/products/513),
No Longer Stocked
[Buy Now](https://www.adafruit.com/product/730)
[Related Guides to the Product](https://learn.adafruit.com/products/730/guides)
### USB to TTL Serial Cable - Debug / Console Cable for Raspberry Pi
[USB to TTL Serial Cable - Debug / Console Cable for Raspberry Pi](https://www.adafruit.com/product/954)
The cable is easiest way ever to connect to your microcontroller/Raspberry Pi/WiFi router serial console port. Inside the big USB plug is a USB\<-\>Serial conversion chip and at the end of the 36" cable are four wire - red power, black ground, white RX into USB port, and green TX out...
In Stock
[Buy Now](https://www.adafruit.com/product/954)
[Related Guides to the Product](https://learn.adafruit.com/products/954/guides)
### FTDI Serial TTL-232 USB Cable
[FTDI Serial TTL-232 USB Cable](https://www.adafruit.com/product/70)
Just about all electronics use TTL serial for debugging, bootloading, programming, serial output, etc. But it's rare for a computer to have a serial port anymore. This is a USB to TTL serial cable, with a FTDI FT232RL usb/serial chip embedded in the head. It has a 6-pin socket at the end...
In Stock
[Buy Now](https://www.adafruit.com/product/70)
[Related Guides to the Product](https://learn.adafruit.com/products/70/guides)
## Related Guides
- [CircuitPython Libraries on MicroPython using the Raspberry Pi Pico](https://learn.adafruit.com/circuitpython-libraries-on-micropython-using-the-raspberry-pi-pico.md)
- [Hallowing Minotaur Maze](https://learn.adafruit.com/hallowing-minotaur-maze.md)
- [Raspberry Pi Azure IoT Hub Dashboard with CircuitPython](https://learn.adafruit.com/raspberry-pi-iot-dashboard-with-azure-and-circuitpython.md)
- [Adafruit 2.9" eInk Display Breakouts and FeatherWings](https://learn.adafruit.com/adafruit-2-9-eink-display-breakouts-and-featherwings.md)
- [Pi SSD Media Server](https://learn.adafruit.com/pi-ssd-media-server.md)
- [Creating Slideshows in CircuitPython](https://learn.adafruit.com/creating-slideshows-in-circuitpython.md)
- [Network Interface Failover using FONA](https://learn.adafruit.com/network-interface-failover-using-fona.md)
- [Matrix Keypad](https://learn.adafruit.com/matrix-keypad.md)
- [Native MP3 decoding on Arduino](https://learn.adafruit.com/native-mp3-decoding-on-arduino.md)
- [Raspberry Pi HQ Camera Case](https://learn.adafruit.com/raspberry-pi-hq-camera-case.md)
- [Articulated Pi Display V2 Mount](https://learn.adafruit.com/pi-wall-mount.md)
- [World's Smallest MAME Arcade Cabinet](https://learn.adafruit.com/worlds-smallest-mame-arcade-cabinet.md)
- [Raspberry Pi E-Ink Weather Station using Python](https://learn.adafruit.com/raspberry-pi-e-ink-weather-station-using-python.md)
- [Getting Started with Raspberry Pi Pico and CircuitPython](https://learn.adafruit.com/getting-started-with-raspberry-pi-pico-circuitpython.md)
- [Adafruit QT Py and NeoPixel LEDs](https://learn.adafruit.com/qt-py-and-neopixel-leds.md)
---
# Source: https://learn.adafruit.com/adafruit-guide-excellent-soldering/surface-mount.md
# Adafruit Guide To Excellent Soldering
## Surface Mount Components
The previous page showed how to make a good through-hole joint. But more and more components are only available in surface mount form these days. Not all surface mount packages are easily worked by hand, but there are plenty that can be managed with the same basic tools used for through-hole soldering.
Let's start with a surface-mount part common to several Adafruit kits: The SD Card Holder:
## Immobilize the Joint
Unlike many surface mount components, immobilizing the SD card holder is relatively easy. There are small pegs on the back that fit into positioning holes in the board. Once it is in place, solder the four small corner tabs to make it permanent.

## Heat the Joint
Start by putting the tip of the hot iron on the solder pad adjacent to the pin. The pad will take longer to heat, so we apply most of the heat to the pad to start.
## Apply the Solder
When the joint is hot, apply solder to the side opposite the iron. The solder should melt and start to flow into the joint.
## Let it Flow
Apply just enough solder to ensure a good joint, then keep the heat on while the solder wicks up between the pin and the pad to make a good electrical bond.
## Let it Cool
Remove the iron and allow the joint to cool undisturbed.
## Problems?
The last page of this guide illustrates a number of common soldering problems with advice on prevention and repair. - [Previous Page](https://learn.adafruit.com/adafruit-guide-excellent-soldering/making-a-good-solder-joint.md)
- [Next Page](https://learn.adafruit.com/adafruit-guide-excellent-soldering/common-problems.md)
## Featured Products
### Panavise Jr.
[Panavise Jr.](https://www.adafruit.com/product/151)
The best mini-vise for working on smaller PCBs (2.875" or less in one dimension)! The jaws are strong plastic that wont damage the PCB and doesn't mind if you hit it with the soldering iron by accident. Made in the USA.
- The easy-to-use single knob controls head movement...
No Longer Stocked
[Buy Now](https://www.adafruit.com/product/151)
[Related Guides to the Product](https://learn.adafruit.com/products/151/guides)
### Hakko Professional Quality 20-30 AWG Wire Strippers
[Hakko Professional Quality 20-30 AWG Wire Strippers](https://www.adafruit.com/product/527)
These are the finest wire strippers we have used, and if you have to do a lot of wiring, you will agree! They have soft rounded grips - very comfortable to use, and precision ground notches that do a perfect job every time. No more yanking or twisting to strip wires cleanly and quickly.
In Stock
[Buy Now](https://www.adafruit.com/product/527)
[Related Guides to the Product](https://learn.adafruit.com/products/527/guides)
### Mini Solder spool - 60/40 lead rosin-core solder 0.3mm diameter
[Mini Solder spool - 60/40 lead rosin-core solder 0.3mm diameter](https://www.adafruit.com/product/145)
If you want to make a kit you'll need some solder. This 100g (about 1/4 lb) spool is just the right amount, not too much (like 1 lb spools) and not too little (like those little 'pocket clip' vials). 0.3mm diameter, 60/40 'no clean' rosin core. Good for all through-hole...
In Stock
[Buy Now](https://www.adafruit.com/product/145)
[Related Guides to the Product](https://learn.adafruit.com/products/145/guides)
### Solder sucker
[Solder sucker](https://www.adafruit.com/product/148)
Strangely enough, that's the technical term for this desoldering vacuum tool. Useful in cleaning up mistakes, every electrical engineer has one of these on their desk.
To use, depress the end to engage the vacuum. Then heat up the to-be-desoldered joint until it is liquid. With your...
In Stock
[Buy Now](https://www.adafruit.com/product/148)
[Related Guides to the Product](https://learn.adafruit.com/products/148/guides)
### Solder wick - 1.5mm wide and 1.5m / 5 feet long
[Solder wick - 1.5mm wide and 1.5m / 5 feet long](https://www.adafruit.com/product/149)
Used along with the solder sucker to clean up soldering messes. Wick really comes in handy when soldering or desoldering surface-mount parts. Even if you don't have the best iron for SMT work, a bit of wick will fix it up.
1.5mm wick, and 1.5m long, so you have plenty to work...
Out of Stock
[Buy Now](https://www.adafruit.com/product/149)
[Related Guides to the Product](https://learn.adafruit.com/products/149/guides)
### Soldering iron stand
[Soldering iron stand](https://www.adafruit.com/product/150)
A real stand with sponge and solidly-built sheet metal holder prevents your iron from 'rolling away' or burning a hole in the table. If you're starting out and have a 'pen type' soldering iron, this is essential for your safety. Comes with a sponge, too!
****
Out of Stock
[Buy Now](https://www.adafruit.com/product/150)
[Related Guides to the Product](https://learn.adafruit.com/products/150/guides)
### Adjustable 30W 110V soldering iron
[Adjustable 30W 110V soldering iron](https://www.adafruit.com/product/180)
This 'pen-style' soldering iron is just about the best entry-level tool I've seen. It's not as powerful as a Weller WES51 but it _is_ self-contained and easy to use. With proper care, it will last for many years. Turn it off when not in use, clean the plated tip with a...
No Longer Stocked
[Buy Now](https://www.adafruit.com/product/180)
[Related Guides to the Product](https://learn.adafruit.com/products/180/guides)
### Learn to solder - Skill badge, iron-on patch
[Learn to solder - Skill badge, iron-on patch](https://www.adafruit.com/product/465)
You can solder! Adafruit offers a fun and exciting "badges" of achievement for electronics, science and engineering. We believe everyone should be able to be rewarded for learning a useful skill, a badge is just one of the many ways to show and share.
This is the "I...
No Longer Stocked
[Buy Now](https://www.adafruit.com/product/465)
[Related Guides to the Product](https://learn.adafruit.com/products/465/guides)
## Related Guides
- [Blinka Says Tabletop Arcade Game](https://learn.adafruit.com/blinka-says-tabletop-arcade-game.md)
- [Water Drip Dress with Oozemaster 3000](https://learn.adafruit.com/water-drip-dress-with-oozemaster-3000.md)
- [Floor Lamp with NeoPixels and WLED Custom Animations](https://learn.adafruit.com/floor-lamp-with-wled.md)
- [Space Shuttle Discovery Solder Kit by Phyx](https://learn.adafruit.com/space-shuttle-discovery-solder-kit.md)
- [USB Rechargeable Mini Solder Fume Extractor](https://learn.adafruit.com/usb-rechargeable-mini-solder-fume-extractor.md)
- [Cartoon Character Clock](https://learn.adafruit.com/cartoon-character-clock.md)
- [Collin's Lab: Soldering](https://learn.adafruit.com/collins-lab-soldering.md)
- [SMT Breadboard Prototyping Using Breakout PCBs](https://learn.adafruit.com/smt-prototyping-using-breakout-pcbs.md)
- [Motion-Activated Solder Fume Extractor With Lamp](https://learn.adafruit.com/motion-activated-solder-fume-extractor-with-lamp.md)
- [Color Balancing Video Camera Light feat. DotStars](https://learn.adafruit.com/color-balancing-light-box-with-dotstar-cool-warm-white-leds.md)
- [Ambient Sound Machine](https://learn.adafruit.com/ambient-machine.md)
- [DIY On/Off JST Switch Adapter](https://learn.adafruit.com/on-slash-off-switches.md)
- [IoT Moon Phase Guide](https://learn.adafruit.com/moon-phase.md)
- [CNC Rotary Macropad](https://learn.adafruit.com/cnc-rotary-macropad.md)
- [Secret Hollow Book Intrusion Detector](https://learn.adafruit.com/secret-hollow-book.md)
---
# Source: https://learn.adafruit.com/fpga-rgb-matrix/synthesize-and-upload.md
# FPGA RGB Matrix
## Synthesize and Upload
## Synthesizing the design
To synthesize the design, go to the "Processing" menu and select "Start Compilation", or click on the purple arrow icon in the toolbar. Synthesis should be quite fast since the design is small. After compilation is successful, you should have a new .sof file in your Quartus project directory. It should be 703,642 bytes long.
## Uploading the bitfile
Plug in your DE0-Nano board via the USB connector. Now, go to the "Tools" menu and select "Programmer".

In the top left of the window that appears, you should see "USB-Blaster [USB-0]". If instead you see "No Hardware", click on "Hardware Setup..." and (re-)select your device.

Now, select the **.sof** file in the list, ensure "Program/Verify" is checked, and click "Start"! This should take about a second.

The FPGA is now programmed with your design! (This only programmed the SRAM though, not the onboard EEPROM — so the design is only stored until power is turned off.)
Note: In the future, you can use the command script **de0-nano/program.cmd** to quickly program the FPGA's SRAM with your **.sof** file (it uses the Quartus command line programming utility).
- [Previous Page](https://learn.adafruit.com/fpga-rgb-matrix/pin-assignments.md)
- [Next Page](https://learn.adafruit.com/fpga-rgb-matrix/demos.md)
## Featured Products
### 5V 2A (2000mA) switching power supply - UL Listed
[5V 2A (2000mA) switching power supply - UL Listed](https://www.adafruit.com/product/276)
This is an FCC/CE certified and UL listed power supply. Need a lot of 5V power? This switching supply gives a clean regulated 5V output at up to 2000mA. 110 or 240 input, so it works in any country. The plugs are "US 2-prong" style so you may need a plug adapter, but you can pick one...
In Stock
[Buy Now](https://www.adafruit.com/product/276)
[Related Guides to the Product](https://learn.adafruit.com/products/276/guides)
### Medium 16x32 RGB LED matrix panel - 6mm Pitch
[Medium 16x32 RGB LED matrix panel - 6mm Pitch](https://www.adafruit.com/product/420)
Bring a little bit of Times Square into your home with this 16 x 32 RGB LED matrix panel. These panels are normally used to make video walls, here in New York we see them on the sides of busses and bus stops, to display animations or short video clips. We thought they looked really cool so we...
In Stock
[Buy Now](https://www.adafruit.com/product/420)
[Related Guides to the Product](https://learn.adafruit.com/products/420/guides)
### DE0-Nano - Altera Cyclone IV FPGA starter board
[DE0-Nano - Altera Cyclone IV FPGA starter board](https://www.adafruit.com/product/451)
For every day projects, microcontrollers are low-cost and easy to use. But when you have a project that needs raw power and high speed you may want to check out FPGAs (Field Programmable Gate Arrays). FPGAs are like raw chips that you can design by hand. They run very fast and very...
No Longer Stocked
[Buy Now](https://www.adafruit.com/product/451)
[Related Guides to the Product](https://learn.adafruit.com/products/451/guides)
## Related Guides
- [Smart Bathroom App](https://learn.adafruit.com/smart-bathroom-app.md)
- [NeoTrellis Light Painting](https://learn.adafruit.com/neotrellis-light-painting.md)
- [TIMESQUARE Wordclock](https://learn.adafruit.com/timesquare-wordclock.md)
- [MatrixPortal S3 Flight Proximity Tracker](https://learn.adafruit.com/matrixportal-s3-flight-proximity-tracker.md)
- [MicroPython Displays: Drawing Shapes](https://learn.adafruit.com/micropython-displays-drawing-shapes.md)
- [Adafruit Protomatter RGB Matrix Library](https://learn.adafruit.com/adafruit-protomatter-rgb-matrix-library.md)
- [Adafruit Microphone Amplifier Breakout](https://learn.adafruit.com/adafruit-microphone-amplifier-breakout.md)
- [16x16 NeoPixel Matrix Square Pixel Display](https://learn.adafruit.com/16x16-neopixel-matrix-square-pixel-display.md)
- [Shake Away 2021 with MatrixPortal](https://learn.adafruit.com/matrixportal-shake-away-2020.md)
- [NeoTrellis Feather Case Assembly](https://learn.adafruit.com/neotrellis-feather-case-assembly.md)
- [RGB LED Matrices with CircuitPython](https://learn.adafruit.com/rgb-led-matrices-matrix-panels-with-circuitpython.md)
- [Scroll an SMS Text Message on your RGB Matrix](https://learn.adafruit.com/scroll-an-sms-text-message-on-your-rgb-matrix.md)
- [Adafruit LED Backpacks](https://learn.adafruit.com/adafruit-led-backpack.md)
- [Raspberry Pi LED Matrix Display](https://learn.adafruit.com/raspberry-pi-led-matrix-display.md)
- [Sino:bit with Arduino](https://learn.adafruit.com/sino-bit-with-arduino.md)
---
# Source: https://learn.adafruit.com/rfid-iphone/tape-antenna.md
# RFID iPhone
## Tape Tag and Finish

At first we tried putting the antenna under the back plate of the phone just the way it was, all floppy-like. It didn't scan. For the reader to induce power flow through the antenna, there can't be a bit metal object right next to it, there needs to be a bit of air space.
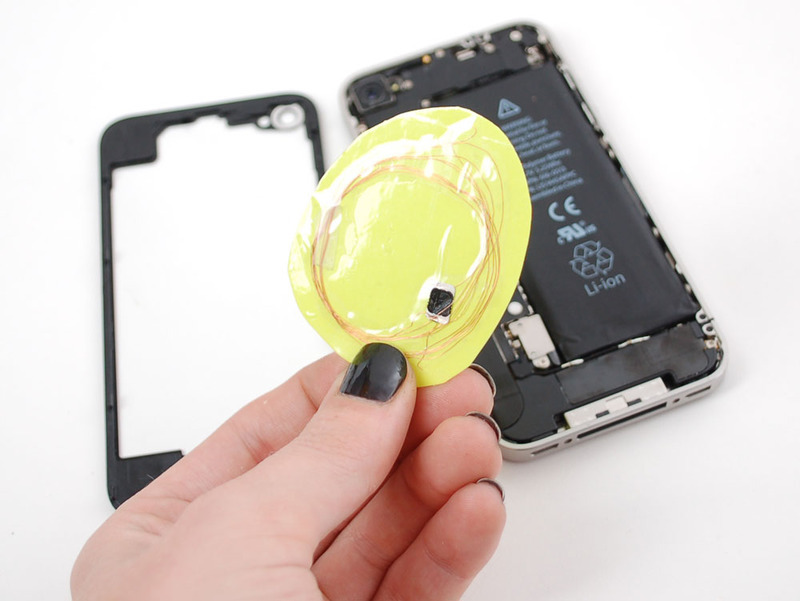
We achieved this by taping the chip/antenna to a piece of paper, then building up several layers of packing tape until we could reliably scan the tag from inside the phone. The positioning within the phone can affect scanability too.

Replace the back plate of your phone and enjoy!
- [Previous Page](https://learn.adafruit.com/rfid-iphone/dissolve-the-card.md)
## Featured Products
### iPhone 4/4S Bottom Screw Replacement - Pentalobe 2 per pack
[iPhone 4/4S Bottom Screw Replacement - Pentalobe 2 per pack](https://www.adafruit.com/product/892)
These are perfect replacements for the little screws on the bottom of iPhone 4/4S's. We have them in two 'flavors' - this flavor is the classic 0.8mm 5-point star/Pentalobe. You can use these in either a 4 or 4S phone. [We also have the...](http://www.adafruit.com/products/891)
No Longer Stocked
[Buy Now](https://www.adafruit.com/product/892)
[Related Guides to the Product](https://learn.adafruit.com/products/892/guides)
### iPhone 4/4S Bottom Screw Replacement - Phillips #000 2 per pack
[iPhone 4/4S Bottom Screw Replacement - Phillips #000 2 per pack](https://www.adafruit.com/product/891)
These are perfect replacements for the little screws on the bottom of iPhone 4/4S's. We have them in two 'flavors' - this flavor is the slightly easier-to-work with Phillips #000. You can use these in either a 4 or 4S phone. [We also...](http://www.adafruit.com/products/892)
No Longer Stocked
[Buy Now](https://www.adafruit.com/product/891)
[Related Guides to the Product](https://learn.adafruit.com/products/891/guides)
### Aluminum iPhone 4 Phillips #000 / PH000 Screwdriver
[Aluminum iPhone 4 Phillips #000 / PH000 Screwdriver](https://www.adafruit.com/product/890)
We tried half a dozen different precision Phillips #000 screwdriver tools to find the one we liked the most. The body is made from a single piece of aluminum and has nice knurled grips. The end-cap rotates so you can keep the body steady while rotating. The tip is nicely machined and is...
No Longer Stocked
[Buy Now](https://www.adafruit.com/product/890)
[Related Guides to the Product](https://learn.adafruit.com/products/890/guides)
### 13.56MHz RFID/NFC Card - Classic 1K
[13.56MHz RFID/NFC Card - Classic 1K](https://www.adafruit.com/product/359)
This is a blank 13.56MHz RFID/NFC card - often used for train/bus passes but also found in other systems where a proximity card is desired. The tag contains a small RFID chip and an antenna, and is passively powered by the reader/writer when placed a couple inches away.
These can be...
In Stock
[Buy Now](https://www.adafruit.com/product/359)
[Related Guides to the Product](https://learn.adafruit.com/products/359/guides)
### Clear No-Logo iPhone Replacement Back - iPhone 4S
[Clear No-Logo iPhone Replacement Back - iPhone 4S](https://www.adafruit.com/product/930)
Turn your iPhone 4S invisible! OK well maybe not invisible, but with this clear back you can gaze deeply into the inner works of the iPhone - great for when you want a geeky cyber-look or want to place a visible RFID tag inside the phone. This kit comes with a clear plastic back and two basic...
No Longer Stocked
[Buy Now](https://www.adafruit.com/product/930)
[Related Guides to the Product](https://learn.adafruit.com/products/930/guides)
### Aluminum iPhone 4S 0.8mm 5-Point Star/Pentalobe Screwdriver
[Aluminum iPhone 4S 0.8mm 5-Point Star/Pentalobe Screwdriver](https://www.adafruit.com/product/888)
Discontinued - **you can grab** [38 Piece Screwdriver Set](https://www.adafruit.com/product/822)**[i](https://www.adafruit.com/product/822)nstead! **
We tried half a dozen different 5-point star/"pentalobe" screwdriver tools...
No Longer Stocked
[Buy Now](https://www.adafruit.com/product/888)
[Related Guides to the Product](https://learn.adafruit.com/products/888/guides)
### Clear No-Logo iPhone Replacement Back - iPhone 4
[Clear No-Logo iPhone Replacement Back - iPhone 4](https://www.adafruit.com/product/929)
Turn your iPhone 4 invisible! OK well maybe not invisible, but with this clear back you can gaze deeply into the inner works of the iPhone - great for when you want a geeky cyber-look or want to place a visible RFID tag inside the phone. This kit comes with a clear plastic back and two basic...
No Longer Stocked
[Buy Now](https://www.adafruit.com/product/929)
[Related Guides to the Product](https://learn.adafruit.com/products/929/guides)
## Related Guides
- [Magic Band Reader](https://learn.adafruit.com/magic-band-reader.md)
- [Babel Fish](https://learn.adafruit.com/babel-fish.md)
- [Scannable Links with NFC](https://learn.adafruit.com/scannable-links-with-nfc.md)
- [Using Web NFC](https://learn.adafruit.com/using-webnfc.md)
- [Unlock Android Phone with Wearable NFC](https://learn.adafruit.com/unlock-android-with-wearable-nfc.md)
- [Collin's Lab: RFID](https://learn.adafruit.com/collins-lab-rfid.md)
- [Adafruit ST25DV16K I2C RFID EEPROM Breakout](https://learn.adafruit.com/adafruit-st25dv16k-i2c-rfic-eeprom-breakout.md)
- [Raspberry Pi NFC Minecraft Blocks](https://learn.adafruit.com/raspberry-pi-nfc-minecraft-blocks.md)
- [Controlling Devices with RFID Wiz](https://learn.adafruit.com/controlling-devices-with-rfid-wiz.md)
- [NFC Raspberry Pi Media Player](https://learn.adafruit.com/nfc-raspberry-pi-media-player.md)
- [3D Printed RFID NFC Rings](https://learn.adafruit.com/3d-printed-rfid-nfc-rings.md)
- [Adafruit PN532 RFID/NFC Breakout and Shield](https://learn.adafruit.com/adafruit-pn532-rfid-nfc.md)
- [Adafruit NFC/RFID on Raspberry Pi](https://learn.adafruit.com/adafruit-nfc-rfid-on-raspberry-pi.md)
- [Magic Band Teardown](https://learn.adafruit.com/magic-band-teardown.md)
- [Mystery Box: Remote Chess Board Puzzle Lock](https://learn.adafruit.com/mystery-box-remote-chess-board-puzzle-lock.md)
---
# Source: https://learn.adafruit.com/adafruit-raspberry-pi-lesson-7-remote-control-with-vnc/test-and-configure.md
# Source: https://learn.adafruit.com/adafruits-raspberry-pi-lesson-6-using-ssh/test-and-configure.md
# Source: https://learn.adafruit.com/adafruits-raspberry-pi-lesson-5-using-a-console-cable/test-and-configure.md
# Source: https://learn.adafruit.com/adafruits-raspberry-pi-lesson-4-gpio-setup/test-and-configure.md
# Source: https://learn.adafruit.com/adafruits-raspberry-pi-lesson-3-network-setup/test-and-configure.md
# Source: https://learn.adafruit.com/adafruits-raspberry-pi-lesson-2-first-time-configuration/test-and-configure.md
# Adafruit's Raspberry Pi Lesson 2. First Time Configuration
## Test & Configure

Reboot your Pi – click the icon bottom right – and this time you should boot straight up into the windowing environment.
In the next tutorial, we will look at configuring WiFi and finding the IP address of your Pi.
[Click Here for the Next Lesson](http://learn.adafruit.com/adafruits-raspberry-pi-lesson-3-network-setup)
- [Previous Page](https://learn.adafruit.com/adafruits-raspberry-pi-lesson-2-first-time-configuration/running-raspi-config-after-booting.md)
## Featured Products
### Raspberry Pi 1 Model B Starter Pack - Includes a Raspberry Pi
[Raspberry Pi 1 Model B Starter Pack - Includes a Raspberry Pi](https://www.adafruit.com/product/1014)
You want to get hacking with your Pi fast, right? Get everything you need to start with the Adafruit Starter Pack for Raspberry Pi. It's the perfect accompaniment to your new Pi, everything you need to boot up your Pi Model B and get going. **We pre-assemble the Cobbler for you, no...**
No Longer Stocked
[Buy Now](https://www.adafruit.com/product/1014)
[Related Guides to the Product](https://learn.adafruit.com/products/1014/guides)
### Programming the Raspberry Pi: Getting Started with Python
[Programming the Raspberry Pi: Getting Started with Python](https://www.adafruit.com/product/1089)
**Program your own Raspberry Pi projects!**
An updated guide to programming your own Raspberry Pi projects. Learn to create inventive programs and fun games on your powerful Raspberry Pi--with no programming experience required. **This practical book has been revised...**
In Stock
[Buy Now](https://www.adafruit.com/product/1089)
[Related Guides to the Product](https://learn.adafruit.com/products/1089/guides)
### Budget Pack for Raspberry Pi 1 Model B (Doesn't include RasPi)
[Budget Pack for Raspberry Pi 1 Model B (Doesn't include RasPi)](https://www.adafruit.com/product/965)
An optimized collection of parts and pieces to experiment with Raspberry Pi at home, school or work. Great for students and those that want to get their feet wet, no soldering required! **THIS PACK DOES NOT INCLUDE A RASPBERRY PI 1 MODEL B and is NOT compatible with Model B+ or Raspberry Pi...**
No Longer Stocked
[Buy Now](https://www.adafruit.com/product/965)
[Related Guides to the Product](https://learn.adafruit.com/products/965/guides)
### Miniature Wireless USB Keyboard with Touchpad
[Miniature Wireless USB Keyboard with Touchpad](https://www.adafruit.com/product/922)
Add a miniature wireless controller to your computer project with this combination keyboard and touchpad. We found the smallest wireless USB keyboard available, a mere 6" x 2.4" x 0.5" (152mm x 59mm x 12.5mm)! It's small but usable to make a great accompaniment to a computer...
In Stock
[Buy Now](https://www.adafruit.com/product/922)
[Related Guides to the Product](https://learn.adafruit.com/products/922/guides)
### NTSC/PAL (Television) TFT Display - 4.3" Diagonal
[NTSC/PAL (Television) TFT Display - 4.3" Diagonal](https://www.adafruit.com/product/946)
Yes, this is an adorable small television! The visible display measures only 4.3" (11cm) diagonal, the TFT comes with a NTSC/PAL driver board, enclosure and stand. The display is very easy to use - simply connect 12VDC to the 2.1mm center-positive DC jack (or use the cable and connect to...
No Longer Stocked
[Buy Now](https://www.adafruit.com/product/946)
[Related Guides to the Product](https://learn.adafruit.com/products/946/guides)
### NTSC/PAL (Television) TFT Display - 7" Diagonal
[NTSC/PAL (Television) TFT Display - 7" Diagonal](https://www.adafruit.com/product/947)
Yes, this is an adorable small television! The visible display measures only 7" (17.8cm) diagonal, the TFT comes with a NTSC/PAL driver board, enclosure and stand. The display is very easy to use - simply connect the included 12VDC adapter to the 2.1mm center-positive DC jack, then...
No Longer Stocked
[Buy Now](https://www.adafruit.com/product/947)
[Related Guides to the Product](https://learn.adafruit.com/products/947/guides)
## Related Guides
- [Adafruit RGB Matrix + Real Time Clock HAT for Raspberry Pi](https://learn.adafruit.com/adafruit-rgb-matrix-plus-real-time-clock-hat-for-raspberry-pi.md)
- [Adafruit PiTFT 3.5" Touch Screen for Raspberry Pi](https://learn.adafruit.com/adafruit-pitft-3-dot-5-touch-screen-for-raspberry-pi.md)
- [Raspberry Pi Hosting Node-Red](https://learn.adafruit.com/raspberry-pi-hosting-node-red.md)
- [Windows IoT Core Application Development: Headed Blinky](https://learn.adafruit.com/windows-iot-application-development-headed-blinky.md)
- [Bonjour (Zeroconf) Networking for Windows and Linux](https://learn.adafruit.com/bonjour-zeroconf-networking-for-windows-and-linux.md)
- [Raspberry Pi Thermal Printer One Time Pads](https://learn.adafruit.com/raspberry-pi-thermal-printer-one-time-pads.md)
- [10" Raspberry Pi Desktop](https://learn.adafruit.com/10-raspberry-pi-desktop.md)
- [What is the Command Line?](https://learn.adafruit.com/what-is-the-command-line.md)
- [Adafruit's Raspberry Pi Lesson 6. Using SSH](https://learn.adafruit.com/adafruits-raspberry-pi-lesson-6-using-ssh.md)
- [Adafruit Prototyping Pi Plate](https://learn.adafruit.com/adafruit-prototyping-pi-plate.md)
- [CircuitPython Libraries on Linux and the 96Boards DragonBoard 410c](https://learn.adafruit.com/circuitpython-libraries-on-linux-and-the-96boards-dragonboard-410c.md)
- [Getting Started With Windows IoT Core on Raspberry Pi](https://learn.adafruit.com/getting-started-with-windows-iot-on-raspberry-pi.md)
- [Raspberry Pi Computer Quick-Start](https://learn.adafruit.com/raspberry-pi-computer-quick-start.md)
- [Adafruit Ultimate GPS with gpsd](https://learn.adafruit.com/adafruit-ultimate-gps-on-the-raspberry-pi.md)
- [Adafruit's Raspberry Pi Lesson 9. Controlling a DC Motor](https://learn.adafruit.com/adafruit-raspberry-pi-lesson-9-controlling-a-dc-motor.md)
---
# Source: https://learn.adafruit.com/32x16-32x32-rgb-led-matrix/test-example-code.md
# RGB LED Matrix Basics
## Test Example Code
We have example code ready to go for these displays. It does not work with every board out there. **See the “Compatible Hardware” lists on the opening page for guidance.**
Danger:
Danger:
**Support for 32-bit microcontrollers — M4, RP2040, ESP32, etc. — is documented in** [a different library called _Protomatter,_ documented here](https://learn.adafruit.com/adafruit-protomatter-rgb-matrix-library) **.**
**Arduino Uno support is limited to the 32x16 matrix, and only “single-buffered”** (i.e. no smooth animation), _despite_ any comments in the examples that might suggest otherwise.
_Over time, RAM required by the core Arduino code and the matrix-driving graphics libraries has increased…a few bytes here and there as bugs are fixed and features are added. Early on, 32x32 (or double-buffered 32x16)_ just barely _fit in the Arduino Uno’s RAM, with a few dozen bytes to spare for user code. This is no longer the case. But you might still see references to this in older code._
Some libraries need to be downloaded and installed: first is the [RGB Matrix Panel library](https://github.com/adafruit/RGB-matrix-Panel) (this contains the low-level code specific to this device), then the [Adafruit GFX Library](https://github.com/adafruit/Adafruit-GFX-Library) (which handles graphics operations common to many displays we carry) and [Adafruit BusIO](https://github.com/adafruit/Adafruit_BusIO).
Both libraries can be found and installed using the Arduino Library Manager ( **Sketch→Include Library→Manage Libraries…** ). Search for “gfx” and “rgb matrix panel” and install the corresponding Adafruit libraries.


Now you are ready to test! Open up the IDE and load **File→Examples→RGBmatrixPanel→testcolors\_16x32** (for the 16x32 panel) or **File→Examples→RGBmatrixPanel→colorwheel\_32x32** (for the 32x32 panel). There’s also a **testshapes\_32x64** example for boards with sufficient RAM.
**If using an Arduino Mega 2560,** in addition to wiring changes previously mentioned, you'll need to make a small change to each of the example sketches. This line:
```
#define CLK 8 // MUST be on PORTB! (Use pin 11 on Mega)
```
Should be changed to:
```
#define CLK 11
```
_(Any of digital pins 10-13 and 50-53 can be used for this function on the Mega, with the corresponding wiring change. The examples all reference pin 11.)_
If using an **Adafruit Metro M4** (_not_ M0 or 328), the CLK change would instead be:
```
#define CLK A4
```
After uploading, with the 16x32 panel you should see the following:

This is a test pattern that shows 512 colors (out of 4096) on the 512 pixels. Since there's no really elegant way to show a 3-dimensional color space (R/G/B) in two dimensions, there's just repeating grids of red/green with increasing blue. Anyways, this shows you the range of colors you can achieve!
or, with the 32x32 panel:

Now that you've got it working here are a few things to look for:
The most useful line to look at is:
```
matrix.drawPixel(x, y, matrix.Color333(r, g, b));
```
which is where we actually draw to the display. This code only draws one pixel at a time. The **x** and **y** coordinates are the individual pixels of the display. **(0,0)** is in the top left corner, **(31, 15)** is in the bottom right (remember that we start counting at 0 here!). To create a color, you will want to use the helper funciton **Color333** which will take three 3-bit numbers and combine them into a single packed integer. So for example, the first argument, **r** can range from 0 to 7. Likewise for **g** and **b**. To make a pixel that is pure red, **r** would be 7 and **g, b** would be 0. To make a white pixel, set all to 7. To make a black (off) pixel, set the colors to 0. A similar function, **Color444** , accepts three 4-bit numbers for up to 4096 colors.
Now we can open up the next example, which shows the rest of the library capabilities.
- [Previous Page](https://learn.adafruit.com/32x16-32x32-rgb-led-matrix/connecting-using-a-proto-shield.md)
- [Next Page](https://learn.adafruit.com/32x16-32x32-rgb-led-matrix/library.md)
## Featured Products
### Medium 16x32 RGB LED matrix panel - 6mm Pitch
[Medium 16x32 RGB LED matrix panel - 6mm Pitch](https://www.adafruit.com/product/420)
Bring a little bit of Times Square into your home with this 16 x 32 RGB LED matrix panel. These panels are normally used to make video walls, here in New York we see them on the sides of busses and bus stops, to display animations or short video clips. We thought they looked really cool so we...
In Stock
[Buy Now](https://www.adafruit.com/product/420)
[Related Guides to the Product](https://learn.adafruit.com/products/420/guides)
### 32x32 RGB LED Matrix Panel - 4mm Pitch
[32x32 RGB LED Matrix Panel - 4mm Pitch](https://www.adafruit.com/product/607)
Bring a little bit of Times Square into your home with this totally adorable 5 inch square 32 x 32 RGB LED matrix panel. These panels are normally used to make video walls, here in New York we see them on the sides of busses and bus stops, to display animations or short video clips. We thought...
In Stock
[Buy Now](https://www.adafruit.com/product/607)
[Related Guides to the Product](https://learn.adafruit.com/products/607/guides)
### 32x32 RGB LED Matrix Panel - 5mm Pitch
[32x32 RGB LED Matrix Panel - 5mm Pitch](https://www.adafruit.com/product/2026)
Bring a little bit of Times Square into your home with this sweet 32 x 32 square RGB LED matrix panel. These panels are normally used to make video walls, here in New York we see them on the sides of busses and bus stops, to display animations or short video clips. We thought they looked...
In Stock
[Buy Now](https://www.adafruit.com/product/2026)
[Related Guides to the Product](https://learn.adafruit.com/products/2026/guides)
### 32x32 RGB LED Matrix Panel - 6mm pitch
[32x32 RGB LED Matrix Panel - 6mm pitch](https://www.adafruit.com/product/1484)
Bring a little bit of Times Square into your home with this sweet 32 x 32 square RGB LED matrix panel. These panels are normally used to make video walls, here in New York we see them on the sides of busses and bus stops, to display animations or short video clips. We thought they looked...
In Stock
[Buy Now](https://www.adafruit.com/product/1484)
[Related Guides to the Product](https://learn.adafruit.com/products/1484/guides)
### 64x32 RGB LED Matrix - 3mm pitch
[64x32 RGB LED Matrix - 3mm pitch](https://www.adafruit.com/product/2279)
Bring a little bit of Times Square into your home with this sweet 64 x 32 square RGB LED matrix panel. These panels are normally used to make video walls, here in New York we see them on the sides of busses and bus stops, to display animations or short video clips. We thought they looked...
In Stock
[Buy Now](https://www.adafruit.com/product/2279)
[Related Guides to the Product](https://learn.adafruit.com/products/2279/guides)
### 64x32 RGB LED Matrix - 4mm pitch
[64x32 RGB LED Matrix - 4mm pitch](https://www.adafruit.com/product/2278)
Bring a little bit of Times Square into your home with this sweet 64 x 32 square RGB LED matrix panel. These panels are normally used to make video walls, here in New York we see them on the sides of busses and bus stops, to display animations or short video clips. We thought they looked...
Out of Stock
[Buy Now](https://www.adafruit.com/product/2278)
[Related Guides to the Product](https://learn.adafruit.com/products/2278/guides)
### 64x32 RGB LED Matrix - 5mm pitch
[64x32 RGB LED Matrix - 5mm pitch](https://www.adafruit.com/product/2277)
Bring a little bit of Times Square into your home with this sweet 64x32 square RGB LED matrix panel. These panels are normally used to make video walls, here in New York we see them on the sides of busses and bus stops, to display animations or short video clips. We thought they looked really...
In Stock
[Buy Now](https://www.adafruit.com/product/2277)
[Related Guides to the Product](https://learn.adafruit.com/products/2277/guides)
### 64x32 RGB LED Matrix - 6mm pitch
[64x32 RGB LED Matrix - 6mm pitch](https://www.adafruit.com/product/2276)
Bring a little bit of Times Square into your home with this sweet 64x32 square RGB LED matrix panel. These panels are normally used to make video walls, here in New York we see them on the sides of busses and bus stops, to display animations or short video clips. We thought they looked really...
In Stock
[Buy Now](https://www.adafruit.com/product/2276)
[Related Guides to the Product](https://learn.adafruit.com/products/2276/guides)
## Related Guides
- [Adafruit Metro M0 Express](https://learn.adafruit.com/adafruit-metro-m0-express.md)
- [Adafruit Metro M4 Express featuring ATSAMD51](https://learn.adafruit.com/adafruit-metro-m4-express-featuring-atsamd51.md)
- [CircuitPython 101: Basic Builtin Data Structures](https://learn.adafruit.com/basic-datastructures-in-circuitpython.md)
- [Adafruit Ultimate GPS](https://learn.adafruit.com/adafruit-ultimate-gps.md)
- [WiFi Controlled LED Christmahanukwanzaa Tree](https://learn.adafruit.com/wifi-controlled-led-christmahanukwanzaa-tree.md)
- [Stream Deck controlled RGB Message Panel using Adafruit IO](https://learn.adafruit.com/stream-deck-controlled-rgb-message-panel-using-adafruit-io.md)
- [Memories of an Arduino](https://learn.adafruit.com/memories-of-an-arduino.md)
- [Matrix Portal Stained Glass with WLED](https://learn.adafruit.com/matrix-portal-stained-glass-with-wled.md)
- [Sous-vide controller powered by Arduino - The SousViduino!](https://learn.adafruit.com/sous-vide-powered-by-arduino-the-sous-viduino.md)
- [LED Matrix Sports Scoreboard](https://learn.adafruit.com/led-matrix-sports-scoreboard.md)
- [Creating MatrixPortal Projects with CircuitPython](https://learn.adafruit.com/creating-projects-with-the-circuitpython-matrixportal-library.md)
- [Introducing Adafruit Trellis ](https://learn.adafruit.com/adafruit-trellis-diy-open-source-led-keypad.md)
- [CircuitPython Hardware: Charlieplex LED Matrix](https://learn.adafruit.com/micropython-hardware-charlieplex-led-matrix.md)
- [CircuitPython Display Support Using displayio](https://learn.adafruit.com/circuitpython-display-support-using-displayio.md)
- [Arduino Lesson 16. Stepper Motors](https://learn.adafruit.com/adafruit-arduino-lesson-16-stepper-motors.md)
- [2.8" TFT Touchscreen](https://learn.adafruit.com/2-8-tft-touchscreen.md)
- [SmartMatrix Animated GIF Player](https://learn.adafruit.com/smartmatrix-animated-gif-player.md)
---
# Source: https://learn.adafruit.com/sitcom-sfx-door-trigger/test-it.md
# Sitcom SFX Door Trigger
## Test it
Now its testing time. The Pi looks for the two sensor inputs: the first one is the magnetic door switch, when that opens it knows that someone is entering or leaving. The PIR sensor is used to tell what side of the door they're on - that's what determines which WAV to play.
Here's a little video of my roommate trying out both entering and leaving:
https://vimeo.com/56001329
- [Previous Page](https://learn.adafruit.com/sitcom-sfx-door-trigger/mount-it.md)
## Featured Products
### Raspberry Pi 3 - Model B+ - 1.4GHz Cortex-A53 with 1GB RAM
[Raspberry Pi 3 - Model B+ - 1.4GHz Cortex-A53 with 1GB RAM](https://www.adafruit.com/product/3775)
The Raspberry Pi 3 Model B is the most popular Raspberry Pi computer made, and the Pi Foundation knows you can always make a good thing _better_! And what could make the Pi 3 better? How about a _faster_ processor, 5 GHz WiFi, and updated Ethernet chip with PoE capability?...
In Stock
[Buy Now](https://www.adafruit.com/product/3775)
[Related Guides to the Product](https://learn.adafruit.com/products/3775/guides)
### Adafruit Prototyping Pi Plate Kit for Raspberry Pi
[Adafruit Prototyping Pi Plate Kit for Raspberry Pi](https://www.adafruit.com/product/801)
Now that you've finally got your hands on a [Raspberry Pi®](http://www.raspberrypi.org/), you're probably itching to make some fun embedded computer projects with it. What you need is an add on prototyping Pi Plate from Adafruit, which can snap onto the Pi PCB (and is...
No Longer Stocked
[Buy Now](https://www.adafruit.com/product/801)
[Related Guides to the Product](https://learn.adafruit.com/products/801/guides)
### USB Powered Speakers
[USB Powered Speakers](https://www.adafruit.com/product/1363)
Add some extra boom to your audio project with these powered loudspeakers. We sampled half a dozen different models to find ones with a good frequency response, so you'll get quality audio output for music playback. Simply connect the standard 3.5mm stereo plug into your Raspberry Pi model...
In Stock
[Buy Now](https://www.adafruit.com/product/1363)
[Related Guides to the Product](https://learn.adafruit.com/products/1363/guides)
### Magnetic contact switch (door sensor)
[Magnetic contact switch (door sensor)](https://www.adafruit.com/product/375)
This sensor is essentially a reed switch, encased in an ABS plastic shell. Normally the reed is 'open' (no connection between the two wires). The other half is a magnet. When the magnet is less than 13mm (0.5") away, the reed switch closes. They're often used to detect when a...
In Stock
[Buy Now](https://www.adafruit.com/product/375)
[Related Guides to the Product](https://learn.adafruit.com/products/375/guides)
### PIR (motion) sensor
[PIR (motion) sensor](https://www.adafruit.com/product/189)
PIR sensors are used to detect motion from pets/humanoids from about 20 feet away (possibly works on zombies, not guaranteed). This one has an adjustable delay before firing (approx 2-4 seconds), adjustable sensitivity **and** we include a 1 foot (30 cm) cable with a socket so you...
In Stock
[Buy Now](https://www.adafruit.com/product/189)
[Related Guides to the Product](https://learn.adafruit.com/products/189/guides)
### VESA mount for Raspberry Pi Model A and Model B
[VESA mount for Raspberry Pi Model A and Model B](https://www.adafruit.com/product/986)
This basic VESA mount allows you to attach a Raspberry Pi Model A or B computer to the back of most HDMI monitors. It is cut out of clear 3mm acrylic so you can see the LEDs, and has a cut out for the GPIO pins in case you want to connect a GPIO cable or Cobbler to it. The Pi is held in place...
No Longer Stocked
[Buy Now](https://www.adafruit.com/product/986)
[Related Guides to the Product](https://learn.adafruit.com/products/986/guides)
### SD/MicroSD Memory Card (8 GB SDHC)
[SD/MicroSD Memory Card (8 GB SDHC)](https://www.adafruit.com/product/1294)
Add mega-storage in a jiffy using this 8 GB class 4 micro-SD card. It comes with a SD adapter so you can use it with any of our shields or adapters. Preformatted to FAT so it works out of the box with our projects. Tested and works great with our
In Stock
[Buy Now](https://www.adafruit.com/product/1294)
[Related Guides to the Product](https://learn.adafruit.com/products/1294/guides)
### Raspberry Pi 3 Model B+ Starter Pack - Includes a Pi 3 Model B+
[Raspberry Pi 3 Model B+ Starter Pack - Includes a Pi 3 Model B+](https://www.adafruit.com/product/3783)
The Raspberry Pi 3 Model B is the most popular Raspberry Pi computer made, and the Pi Foundation knows you can always make a good thing _better_! And what could make the Pi 3 better? How about a _faster_ processor, 5 GHz WiFi, and updated Ethernet chip with PoE...
Out of Stock
[Buy Now](https://www.adafruit.com/product/3783)
[Related Guides to the Product](https://learn.adafruit.com/products/3783/guides)
## Related Guides
- [PIR Motion Sensor](https://learn.adafruit.com/pir-passive-infrared-proximity-motion-sensor.md)
- [Optical Sensor Drum Track Sequencer](https://learn.adafruit.com/drum-track-sequencer.md)
- [Raspberry Pi Pygame UI basics](https://learn.adafruit.com/raspberry-pi-pygame-ui-basics.md)
- [Raspberry Pi SelfieBlock](https://learn.adafruit.com/selfieblock.md)
- [Ultrasonic Ruler](https://learn.adafruit.com/ultrasonic-ruler.md)
- [ScoutMakes DRV5032 Hall Sensor](https://learn.adafruit.com/scoutmakes-drv5032-hall-sensor.md)
- [Magical Mistletoe](https://learn.adafruit.com/magical-mistletoe.md)
- [Motion Activated Outlet with the Adafruit FunHouse](https://learn.adafruit.com/motion-activated-outlet-with-the-adafruit-funhouse.md)
- [Adafruit VL53L0X Time of Flight Micro-LIDAR Distance Sensor Breakout](https://learn.adafruit.com/adafruit-vl53l0x-micro-lidar-distance-sensor-breakout.md)
- [Adafruit APDS9960 breakout](https://learn.adafruit.com/adafruit-apds9960-breakout.md)
- [Raspberry Pi as a Media Center](https://learn.adafruit.com/raspberry-pi-as-a-media-center.md)
- [Raspberry Pi radio player with touchscreen](https://learn.adafruit.com/raspberry-pi-radio-player-with-touchscreen.md)
- [Arm-based IoT Kit for Cloud IoT Core - Getting Started](https://learn.adafruit.com/raspberry-pi-3-and-sensor-kit-for-google-cloud-iot-core.md)
- [Piezo Ring Tones with Raspberry Pi](https://learn.adafruit.com/piezo-ring-tones-with-raspberry-pi.md)
- [LPC824 NeoPixel IR Distance Sensor](https://learn.adafruit.com/lpc824-neopixel-ir-distance-sensor.md)
- [Track a Turtle with WipperSnapper](https://learn.adafruit.com/track-a-turtle-with-wippersnapper.md)
---
# Source: https://learn.adafruit.com/photocells/testing-a-photocell.md
# Photocells
## Testing a Photocell
The easiest way to determine how your photocell works is to [connect a multimeter in resistance-measurement mode](http://learn.adafruit.com/multimeters/ "Link: http://learn.adafruit.com/multimeters/") to the two leads and see how the resistance changes when shading the sensor with your hand, turning off lights, etc. Because the resistance changes a lot, an auto-ranging meter works well here. Otherwise, just make sure you try different ranges, between 1MΩ and 1KΩ before 'giving up'.


- [Previous Page](https://learn.adafruit.com/photocells/measuring-light.md)
- [Next Page](https://learn.adafruit.com/photocells/connecting-a-photocell.md)
## Featured Products
### Photo cell (CdS photoresistor)
[Photo cell (CdS photoresistor)](https://www.adafruit.com/product/161)
CdS cells are little light sensors. As the squiggly face is exposed to more light, the resistance goes down. When it's light, the resistance is about ~1KΩ, when dark it goes up to ~10KΩ.
To use, connect one side of the photocell (either one, it's symmetric) to power...
In Stock
[Buy Now](https://www.adafruit.com/product/161)
[Related Guides to the Product](https://learn.adafruit.com/products/161/guides)
### Adafruit METRO 328 Fully Assembled - Arduino IDE compatible
[Adafruit METRO 328 Fully Assembled - Arduino IDE compatible](https://www.adafruit.com/product/50)
We sure love the ATmega328 here at Adafruit, and we use them _a lot_ for our own projects. The processor has plenty of GPIO, Analog inputs, hardware UART SPI and I2C, timers and PWM galore - just enough for most simple projects. When we need to go small, we use a
Out of Stock
[Buy Now](https://www.adafruit.com/product/50)
[Related Guides to the Product](https://learn.adafruit.com/products/50/guides)
### Digital Multimeter
[Digital Multimeter](https://www.adafruit.com/product/71)
This is a basic multimeter, I've played with it a bunch and I think its a great addition to a toolbox. It's low cost and simple to use with a big clear display and all the measurements you need:
- AC/DC Voltage measurement
- Current measurement, from 1uA up to...
No Longer Stocked
[Buy Now](https://www.adafruit.com/product/71)
[Related Guides to the Product](https://learn.adafruit.com/products/71/guides)
### Half Sized Premium Breadboard - 400 Tie Points
[Half Sized Premium Breadboard - 400 Tie Points](https://www.adafruit.com/product/64)
This is a cute, half-size breadboard with 400 tie points, good for small projects. It's 3.25" x 2.2" / 8.3cm x 5.5cm with a standard double-strip in the middle and two power rails on both sides. You can pull the power rails off easily to make the breadboard as...
In Stock
[Buy Now](https://www.adafruit.com/product/64)
[Related Guides to the Product](https://learn.adafruit.com/products/64/guides)
## Related Guides
- [Halloween Pumpkin](https://learn.adafruit.com/halloween-pumpkin.md)
- [Adafruit Proto Screw Shield](https://learn.adafruit.com/adafruit-proto-screw-shield.md)
- [Arduino Lesson 11. LCD Displays - Part 1](https://learn.adafruit.com/adafruit-arduino-lesson-11-lcd-displays-1.md)
- [Program an AVR or Arduino Using Raspberry Pi GPIO](https://learn.adafruit.com/program-an-avr-or-arduino-using-raspberry-pi-gpio-pins.md)
- [Arduino Lesson 12. LCD Displays - Part 2](https://learn.adafruit.com/adafruit-arduino-lesson-12-lcd-displays-part-2.md)
- [Silicone Robo-Tentacle](https://learn.adafruit.com/silicone-robo-tentacle.md)
- [Babel Fish](https://learn.adafruit.com/babel-fish.md)
- [Arduino Lesson 10. Making Sounds](https://learn.adafruit.com/adafruit-arduino-lesson-10-making-sounds.md)
- [Arduino Lesson 16. Stepper Motors](https://learn.adafruit.com/adafruit-arduino-lesson-16-stepper-motors.md)
- [Line Following Zumo Robot Using Simulink](https://learn.adafruit.com/line-following-zumo-robot-programmed-with-simulink.md)
- [Bluefruit LE Connect for iOS and Android](https://learn.adafruit.com/bluefruit-le-connect.md)
- [Adafruit 16-channel PWM/Servo Shield](https://learn.adafruit.com/adafruit-16-channel-pwm-slash-servo-shield.md)
- [8BitBox](https://learn.adafruit.com/8bitbox.md)
- [Tiny Arduino Music Visualizer](https://learn.adafruit.com/piccolo.md)
- [Adafruit 1.14" 240x135 Color TFT Breakout LCD Display](https://learn.adafruit.com/adafruit-1-14-240x135-color-tft-breakout.md)
---
# Source: https://learn.adafruit.com/pir-passive-infrared-proximity-motion-sensor/testing-a-pir.md
# PIR Motion Sensor
## Testing a PIR


Now when the PIR detects motion, the output pin will go "high" to 3.3V and light up the LED!
Once you have the breadboard wired up, insert batteries and wait 30-60 seconds for the PIR to 'stabilize'. During that time the LED may blink a little. Wait until the LED is off and then move around in front of it, waving a hand, etc, to see the LED light up!
# Retriggering
There's a couple options you may have with your PIR. First up we'll explore the 'Retriggering' option.
Once you have the LED blinking, look on the back of the PIR sensor and make sure that the jumper is placed in the **L** position as shown below.


Now set up the testing board again. You may notice that when connecting up the PIR sensor as above, the LED does not stay on when moving in front of it but actually turns on and off every second or so. That is called "non-retriggering".
Now change the jumper so that it is in the ** H ** position. If you set up the test, you will notice that now the LED _does_ stay on the entire time that something is moving. That is called "retriggering".

(The graphs above are from the BISS0001 datasheet, they kinda suck)
For most applications, "retriggering" (jumper in H position as shown below) mode is a little nicer.
If you need to connect the sensor to something edge-triggered, you'll want to set it to "non-retriggering" (jumper in L position).
# Changing sensitivity
The Adafruit PIR has a trimpot on the back for adjusting sensitivity. You can adjust this if your PIR is too sensitive or not sensitive enough - clockwise makes it more sensitive.

# Changing Pulse Time and Timeout Length
There are two 'timeouts' associated with the PIR sensor. One is the " **Tx**" timeout: how long the LED is lit after it detects movement - this is easy to adjust on Adafruit PIR's because there's a potentiometer.
The second is the " **Ti**" timeout which is how long the LED is guaranteed to be off when there is no movement. This one is not _easily_ changed but if you're handy with a soldering iron it is within reason.
First, lets take a look at the BISS datasheet again

On Adafruit PIR sensors, there's a little trim potentiometer labeled **TIME.** This is a 1 Megaohm adjustable resistor which is added to a 10K series resistor. And **C6** is 0.01uF so
> **Tx = 24576 x (10K + Rtime) x 0.01uF**
If the Rtime potentiometer is turned all the way down counter-clockwise (to 0 ohms) then
> **Tx = 24576 x (10K) x 0.01uF = 2.5** seconds (approx)
If the Rtime potentiometer is turned all the way up clockwise to 1 Megaohm then
> **Tx = 24576 x (1010K) x 0.01uF = 250** seconds (approx)
If RTime is in the middle, that'd be about 120 seconds (two minutes) so you can tweak it as necessary. For example if you want motion from someone to turn on a fan for a minimum of 1 minute, set the Rtime potentiometer to about 1/4 the way around.
# For older/other PIR sensors
If you have a PIR sensor from somewhere else that does not have a potentiometer adjust, you can trace out the adjustment resistors this way:

Determining R10 and R9 isnt too tough. Unfortunately this PIR sensor is mislabeled (it looks like they swapped R9 R17). You can trace the pins by looking at the BISS001 datasheet and figuring out what pins they are - R10 connects to pin 3 and R9 connects to pin 7. the capacitors are a little tougher to determine, but you can 'reverse engineer' them from timing the sensor and solving!
For example:
> **Tx is = 24576 \* R10 \* C6 = ~1.2 seconds**
> **R10** = 4.7K and **C6** = 10nF
Likewise,
> **Ti = 24 \* R9 \* C7 = ~1.2 seconds**
> **R9** = 470K and **C7** = 0.1uF
You can change the timing by swapping different resistors or capacitors. For a nice tutorial on this, see [Keith's PIR hacking page](http://www.neufeld.newton.ks.us/electronics/?p=208 "Link: http://www.neufeld.newton.ks.us/electronics/?p=208").
- [Previous Page](https://learn.adafruit.com/pir-passive-infrared-proximity-motion-sensor/connecting-to-a-pir.md)
- [Next Page](https://learn.adafruit.com/pir-passive-infrared-proximity-motion-sensor/using-a-pir-w-arduino.md)
## Primary Products
### PIR (motion) sensor
[PIR (motion) sensor](https://www.adafruit.com/product/189)
PIR sensors are used to detect motion from pets/humanoids from about 20 feet away (possibly works on zombies, not guaranteed). This one has an adjustable delay before firing (approx 2-4 seconds), adjustable sensitivity **and** we include a 1 foot (30 cm) cable with a socket so you...
In Stock
[Buy Now](https://www.adafruit.com/product/189)
[Related Guides to the Product](https://learn.adafruit.com/products/189/guides)
## Related Guides
- [HalloWing All-Seeing Skull](https://learn.adafruit.com/hallowing-all-seeing-skull.md)
- [Magical Mistletoe](https://learn.adafruit.com/magical-mistletoe.md)
- [Screaming Cauldron](https://learn.adafruit.com/screaming-cauldron.md)
- [IoT Bird Feeder with Camera](https://learn.adafruit.com/iot-window-bird-feeder-with-camera.md)
- [No-Code WipperSnapper Summoning Horn](https://learn.adafruit.com/adafruit-io-wippersnapper-summoning-horn.md)
- [Motion Controlled Matrix Bed Clock](https://learn.adafruit.com/motion-controlled-matrix-bed-clock.md)
- [Adafruit VCNL4020 Proximity and Light Sensor](https://learn.adafruit.com/adafruit-vcnl4020-proximity-and-light-sensor.md)
- [Fog Machine with Motion Sensor and Adafruit IO](https://learn.adafruit.com/fog-machine-remote-trigger.md)
- [Feather Freezer Door Alarm](https://learn.adafruit.com/feather-door-alarm.md)
- [MIDI Laser Harp with Time of Flight Distance Sensors](https://learn.adafruit.com/midi-laser-harp-time-of-flight-sensors.md)
- [Using Adafruit IO Actions to Make an IoT Door Detector](https://learn.adafruit.com/using-adafruit-io-actions-to-make-an-iot-door-detector.md)
- [Quadcopter Spray Can Mod](https://learn.adafruit.com/quadcopter-spray-can-mod.md)
- [Adafruit VCNL4040 Proximity Sensor](https://learn.adafruit.com/adafruit-vcnl4040-proximity-sensor.md)
- [Using ItsaSNAP for HomeKit PIR Motion Detection](https://learn.adafruit.com/itsasnap-homekit-pir-motion-detection.md)
- [No-Code Room Occupancy Status ](https://learn.adafruit.com/no-code-room-occupancy-status.md)
---
# Source: https://learn.adafruit.com/tmp36-temperature-sensor/testing-a-temp-sensor.md
# TMP36 Temperature Sensor
## Testing a Temp Sensor
Testing these sensors is pretty easy but you'll need a battery pack or power supply.
Connect a 2.7-5.5V power supply (2-4 AA batteries work fantastic) so that ground is connected to pin 3 (right pin), and power is connected to pin 1 (left pin)
Then connect your multimeter in DC voltage mode to ground and the remaining pin 2 (middle). If you've got a TMP36 and its about room temperature (25°C), the voltage should be about 0.75V. Note that if you're using a LM35, the voltage will be 0.25V

_The sensor is indicating that the temperature is 26.3°C also known as 79.3°F_
You can change the voltage range by pressing the plastic case of the sensor with your fingers, you will see the temperature/voltage rise.

_With my fingers on the sensor, heating it up a little, the temperature reading is now 29.7°C / 85.5°F_
Or you can touch the sensor with an ice cube, perferrably in a plastic bag so it doesn't get water on your circuit, and see the temperature/voltage drop.

_I pressed an ice-cube against the sensor, to bring the temperature down to 18.6°C / 65.5°F_- [Previous Page](https://learn.adafruit.com/tmp36-temperature-sensor/overview.md)
- [Next Page](https://learn.adafruit.com/tmp36-temperature-sensor/using-a-temp-sensor.md)
## Featured Products
### Adafruit METRO 328 Fully Assembled - Arduino IDE compatible
[Adafruit METRO 328 Fully Assembled - Arduino IDE compatible](https://www.adafruit.com/product/50)
We sure love the ATmega328 here at Adafruit, and we use them _a lot_ for our own projects. The processor has plenty of GPIO, Analog inputs, hardware UART SPI and I2C, timers and PWM galore - just enough for most simple projects. When we need to go small, we use a
Out of Stock
[Buy Now](https://www.adafruit.com/product/50)
[Related Guides to the Product](https://learn.adafruit.com/products/50/guides)
### Half Sized Premium Breadboard - 400 Tie Points
[Half Sized Premium Breadboard - 400 Tie Points](https://www.adafruit.com/product/64)
This is a cute, half-size breadboard with 400 tie points, good for small projects. It's 3.25" x 2.2" / 8.3cm x 5.5cm with a standard double-strip in the middle and two power rails on both sides. You can pull the power rails off easily to make the breadboard as...
In Stock
[Buy Now](https://www.adafruit.com/product/64)
[Related Guides to the Product](https://learn.adafruit.com/products/64/guides)
### TMP36 - Analog Temperature sensor
[TMP36 - Analog Temperature sensor](https://www.adafruit.com/product/165)
Wide range, low power temperature sensor outputs an analog voltage that is proportional to the ambient temperature. To use, connect pin 1 (left) to power (between 2.7 and 5.5V), pin 3 (right) to ground, and pin 2 to analog in on your microcontroller. The voltage out is 0V at -50°C and...
In Stock
[Buy Now](https://www.adafruit.com/product/165)
[Related Guides to the Product](https://learn.adafruit.com/products/165/guides)
## Related Guides
- [Circuit Playground Sound-Controlled Robot](https://learn.adafruit.com/circuit-playground-sound-controlled-robot.md)
- [Multi-tasking the Arduino - Part 1](https://learn.adafruit.com/multi-tasking-the-arduino-part-1.md)
- [NeoPixel Painter](https://learn.adafruit.com/neopixel-painter.md)
- [Ladyada's Bento Box](https://learn.adafruit.com/lady-adas-bento-box.md)
- [WiFi Controlled LED Christmahanukwanzaa Tree](https://learn.adafruit.com/wifi-controlled-led-christmahanukwanzaa-tree.md)
- [Adafruit 2.8" TFT Touch Shield v2 - Capacitive or Resistive](https://learn.adafruit.com/adafruit-2-8-tft-touch-shield-v2.md)
- [SMS Texting Pet Food Dish](https://learn.adafruit.com/sms-texting-pet-food-dish.md)
- [Ladyada's Learn Arduino - Lesson #1](https://learn.adafruit.com/ladyadas-learn-arduino-lesson-number-1.md)
- [Arduino Lesson 17. Email Sending Movement Detector](https://learn.adafruit.com/arduino-lesson-17-email-sending-movement-detector.md)
- [Nokia 5110/3310 Monochrome LCD](https://learn.adafruit.com/nokia-5110-3310-monochrome-lcd.md)
- [Arduino Lesson 8. Analog Inputs](https://learn.adafruit.com/adafruit-arduino-lesson-8-analog-inputs.md)
- [Wave Shield Voice Changer](https://learn.adafruit.com/wave-shield-voice-changer.md)
- [Arduino Lesson 13. DC Motors](https://learn.adafruit.com/adafruit-arduino-lesson-13-dc-motors.md)
- [Low Power WiFi Datalogger](https://learn.adafruit.com/low-power-wifi-datalogging.md)
- [DS1307 Real Time Clock Breakout Board Kit](https://learn.adafruit.com/ds1307-real-time-clock-breakout-board-kit.md)
---
# Source: https://learn.adafruit.com/thermistor/testing-a-thermistor.md
# Thermistor
## Testing a Thermistor
Because thermistors are simply resistors, its easy to test it out. Simply measure the resistance using a multimeter:
You should read about 10Kohm assuming its room temperature where you're sitting. The resistance of course may be higher or lower depending on the room temperature. Also, your hands may end up touching the contacts so your body-resistance will lower the value a bit too. But you should still get about 10 Kohm
For example, its warm here in an un-airconditioned room in the middle of the summer, so we read 8Kohm (30°C - 86°F!)
- [Previous Page](https://learn.adafruit.com/thermistor/overview.md)
- [Next Page](https://learn.adafruit.com/thermistor/using-a-thermistor.md)
## Featured Products
### 10K Precision Epoxy Thermistor
[10K Precision Epoxy Thermistor](https://www.adafruit.com/product/372)
Need to measure something damp? This epoxy-coated precision 1% 10K thermistor is an inexpensive way to measure temperature in weather or liquids. The resistance in 25 °C is 10K (+- 1%). The resistance goes down as it gets warmer and goes up as it gets cooler.
In Stock
[Buy Now](https://www.adafruit.com/product/372)
[Related Guides to the Product](https://learn.adafruit.com/products/372/guides)
## Related Guides
- [reef-pi Guide 1: Setup and Demonstration](https://learn.adafruit.com/reef-pi-installation-and-configuration.md)
- [Adafruit MCP9600 I2C Thermocouple Amplifier](https://learn.adafruit.com/adafruit-mcp9600-i2c-thermocouple-amplifier.md)
- [Calibrating Sensors](https://learn.adafruit.com/calibrating-sensors.md)
- [EMC2101 Fan Controller and Temperature sensor](https://learn.adafruit.com/emc2101-fan-controller-and-temperature-sensor.md)
- [Arm-based IoT Kit for Cloud IoT Core - Getting Started](https://learn.adafruit.com/raspberry-pi-3-and-sensor-kit-for-google-cloud-iot-core.md)
- [AM2315 - Encased I2C Temperature/Humidity Sensor](https://learn.adafruit.com/am2315-encased-i2c-temperature-humidity-sensor.md)
- [TMP006 Infrared Sensor Breakout](https://learn.adafruit.com/infrared-thermopile-sensor-breakout.md)
- [Adafruit MLX90640 IR Thermal Camera](https://learn.adafruit.com/adafruit-mlx90640-ir-thermal-camera.md)
- [MAX31855 Thermocouple Sensor Python Library](https://learn.adafruit.com/max31855-thermocouple-python-library.md)
- [Storage humidity and temperature monitor](https://learn.adafruit.com/storage-humidity-and-temperature-monitor.md)
- [Kombucha Thermostat with CircuitPython and Feather ](https://learn.adafruit.com/kombucha-thermostat-with-circuitpython-and-feather.md)
- [TMP36 Temperature Sensor](https://learn.adafruit.com/tmp36-temperature-sensor.md)
- [Monitor Your Greenhouse with a No-Code Environmental Sensor](https://learn.adafruit.com/monitor-your-greenhouse-with-a-no-code-environmental-sensor.md)
- [Adafruit TE MS8607 PHT Sensor](https://learn.adafruit.com/adafruit-te-ms8607-pht-sensor.md)
- [Using Melexis MLX90614 Non-Contact Sensors](https://learn.adafruit.com/using-melexis-mlx90614-non-contact-sensors.md)
---
# Source: https://learn.adafruit.com/tilt-sensor/testing-a-tilt-sensor.md
# Tilt Sensor
## Testing a Tilt Sensor
Testing your sensor is simple. Put your multimeter into continuity-test mode and touch the probes to the two leads. Then tilt to determine the angle at which the switch opens and closes.
_When pointing down, the switch is Open Loop (no continuity)._
_When pointing up, the switch is closed (low resistance / continuous)._- [Previous Page](https://learn.adafruit.com/tilt-sensor/overview.md)
- [Next Page](https://learn.adafruit.com/tilt-sensor/connecting-to-a-tilt-sensor.md)
## Featured Products
### Tilt ball switch
[Tilt ball switch](https://www.adafruit.com/product/173)
The "poor man's" accelerometer! Tilt sensors are switches that can detect basic motion/orientation. The metal tube has a little metal ball that rolls around in it, when its tilted upright, the ball rolls onto the contacts sticking out of end and shorts them together.
In Stock
[Buy Now](https://www.adafruit.com/product/173)
[Related Guides to the Product](https://learn.adafruit.com/products/173/guides)
## Related Guides
- [Force Sensitive Resistor (FSR)](https://learn.adafruit.com/force-sensitive-resistor-fsr.md)
- [Basic Resistor Sensor Reading on Raspberry Pi](https://learn.adafruit.com/basic-resistor-sensor-reading-on-raspberry-pi.md)
- [Calibrating Sensors](https://learn.adafruit.com/calibrating-sensors.md)
- [Wireless ESP32-S2 Touch Screen Controller for Pure Data](https://learn.adafruit.com/wireless-esp32-s2-controller-for-pure-data.md)
- [Hang out your washing reminder - Adafruit IO + Vibration switch](https://learn.adafruit.com/hang-out-your-washing-reminder-adafruit-io-vibration-switch.md)
- [Circuit Playground Bike Glove](https://learn.adafruit.com/circuit-playground-bike-glove.md)
- [ICEdot Teardown](https://learn.adafruit.com/icedot-teardown.md)
- [Adafruit VEML6070 UV Sensor Breakout](https://learn.adafruit.com/adafruit-veml6070-uv-light-sensor-breakout.md)
- [NAU7802 Pet Food Scale](https://learn.adafruit.com/nau7802-pet-food-scale.md)
- [Adafruit HX711 24-bit ADC](https://learn.adafruit.com/adafruit-hx711-24-bit-adc.md)
- [Power Glove Wireless MIDI Controller](https://learn.adafruit.com/power-glove-bluetooth-midi-controller.md)
- [Clue Coffee Scale](https://learn.adafruit.com/clue-coffee-scale.md)
- [Adafruit NAU7802 24-Bit ADC - STEMMA QT / Qwiic](https://learn.adafruit.com/adafruit-nau7802-24-bit-adc-stemma-qt-qwiic.md)
- [Flora MIDI Drum Glove](https://learn.adafruit.com/midi-drum-glove.md)
- [Arcade Stick Conversion](https://learn.adafruit.com/arcade-stick-conversion.md)
---
# Source: https://learn.adafruit.com/force-sensitive-resistor-fsr/testing-an-fsr.md
# Force Sensitive Resistor (FSR)
## Testing an FSR
The easiest way to determine how your FSR works is to [connect a multimeter in resistance-measurement mode](http://learn.adafruit.com/multimeters/) to the two tabs on your sensor and see how the resistance changes. Because the resistance changes a lot, a auto-ranging meter works well here. Otherwise, just make sure you try different ranges, between 1 Mohm and 100 ohm before 'giving up'.

- [Previous Page](https://learn.adafruit.com/force-sensitive-resistor-fsr/overview.md)
- [Next Page](https://learn.adafruit.com/force-sensitive-resistor-fsr/connecting-to-an-fsr.md)
## Featured Products
### Round Force-Sensitive Resistor (FSR) - 0.3 ~ 10 Newton Force
[Round Force-Sensitive Resistor (FSR) - 0.3 ~ 10 Newton Force](https://www.adafruit.com/product/166)
FSRs are sensors that allow you to detect physical pressure, squeezing and weight. They are simple to use and low cost. This sensor is an Alpha MF01A-N-221-A01 with 1/2 diameter sensing region.
We used to stock the Interlink model 402 FSR - the Alpha version is almost half the price...
In Stock
[Buy Now](https://www.adafruit.com/product/166)
[Related Guides to the Product](https://learn.adafruit.com/products/166/guides)
### Square Force-Sensitive Resistor (FSR)
[Square Force-Sensitive Resistor (FSR)](https://www.adafruit.com/product/1075)
FSRs are sensors that allow you to detect physical pressure, squeezing and weight. They are simple to use and low cost. This sensor is an Alpha MF02A-N-221-A01 FSR with a 38mm square sensing region. Note that this sensor can't detect _where_ on the square you pressed (for that,
In Stock
[Buy Now](https://www.adafruit.com/product/1075)
[Related Guides to the Product](https://learn.adafruit.com/products/1075/guides)
### Extra-long force-sensitive resistor (FSR)
[Extra-long force-sensitive resistor (FSR)](https://www.adafruit.com/product/1071)
FSRs are sensors that allow you to detect physical pressure, squeezing and weight. They are simple to use and low cost. This sensor is a Interlink model 408 FSR with a massive 1/4-inch x 24-inch sensing region. You can press anywhere along the strip and the pressure will be recognized. Note...
No Longer Stocked
[Buy Now](https://www.adafruit.com/product/1071)
[Related Guides to the Product](https://learn.adafruit.com/products/1071/guides)
### Terminal Block - 2-pin 3.5mm - pack of 5!
[Terminal Block - 2-pin 3.5mm - pack of 5!](https://www.adafruit.com/product/724)
Nothing makes a project harder to maintain than a lot of loose wiring. That's why we like to use terminal blocks whenever making PCB-to-Wire connections. These particular 3.5mm terminal blocks are our favorite: big enough for a range of wire gauges, easy to adjust with a screwdriver, and...
In Stock
[Buy Now](https://www.adafruit.com/product/724)
[Related Guides to the Product](https://learn.adafruit.com/products/724/guides)
## Related Guides
- [Hang out your washing reminder - Adafruit IO + Vibration switch](https://learn.adafruit.com/hang-out-your-washing-reminder-adafruit-io-vibration-switch.md)
- [ReBoots Animated LED Boot Laces](https://learn.adafruit.com/re-boots-animated-dancing-boot-laces.md)
- [Circuit Playground Bike Glove](https://learn.adafruit.com/circuit-playground-bike-glove.md)
- [CuteCircuit Twirkle Shirt Teardown](https://learn.adafruit.com/cutecircuit-twirkle-shirt-teardown.md)
- [Tilt Sensor](https://learn.adafruit.com/tilt-sensor.md)
- [ICEdot Teardown](https://learn.adafruit.com/icedot-teardown.md)
- [Wireless LED Juggling Balls with ESP-NOW](https://learn.adafruit.com/wireless-juggling-balls-esp-now.md)
- [Adafruit HX711 24-bit ADC](https://learn.adafruit.com/adafruit-hx711-24-bit-adc.md)
- [Arcade Stick Conversion](https://learn.adafruit.com/arcade-stick-conversion.md)
- [Basic Resistor Sensor Reading on Raspberry Pi](https://learn.adafruit.com/basic-resistor-sensor-reading-on-raspberry-pi.md)
- [Adafruit VEML6070 UV Sensor Breakout](https://learn.adafruit.com/adafruit-veml6070-uv-light-sensor-breakout.md)
- [NAU7802 Pet Food Scale](https://learn.adafruit.com/nau7802-pet-food-scale.md)
- [Flora MIDI Drum Glove](https://learn.adafruit.com/midi-drum-glove.md)
- [Adafruit NAU7802 24-Bit ADC - STEMMA QT / Qwiic](https://learn.adafruit.com/adafruit-nau7802-24-bit-adc-stemma-qt-qwiic.md)
- [Clue Coffee Scale](https://learn.adafruit.com/clue-coffee-scale.md)
---
# Source: https://learn.adafruit.com/ir-sensor/testing-an-ir-sensor.md
# IR Sensor
## Testing an IR Sensor
Because there is a semiconductor/chip inside the sensor, it must be powered with 3 - 5V to function. Contrast this to photocells and FSRs where they act like resistors and thus can be simply tested with a multimeter.

Here we will connect the detector as such:
- Pin 1 is the output so we wire this to a visible LED and resistor
- Pin 2 is ground
- Pin 3 is VCC, connect to 3-5V
When the detector sees IR signal, it will pull the output low, turning on the LED - since the LED is red its much easier for us to see than IR!

We will use 4xAA 1.3V batteries (I use NiMH) so that the voltage powering the sensor is about 4V.
2 batteries (3V) may be too little. 3 Batteries should be fine if you have a triple-AA holder
You can also get 5V from a microcontroller like an Arduino if you have one around. Ground goes to the middle pin.
The positive (longer) head of the Red LED connects to the +6V pin and the negative (shorter lead) connects through a 200 to 1000 ohm resistor to the first pin on the IR sensor.
Now grab any remote control like for a TV, DVD, computer, etc. and point it at the detector while pressing some buttons, you should see the LED blink a couple times whenever the remote is pressed.
- [Previous Page](https://learn.adafruit.com/ir-sensor/overview.md)
- [Next Page](https://learn.adafruit.com/ir-sensor/ir-remote-signals.md)
## Featured Products
### Adafruit METRO 328 Fully Assembled - Arduino IDE compatible
[Adafruit METRO 328 Fully Assembled - Arduino IDE compatible](https://www.adafruit.com/product/50)
We sure love the ATmega328 here at Adafruit, and we use them _a lot_ for our own projects. The processor has plenty of GPIO, Analog inputs, hardware UART SPI and I2C, timers and PWM galore - just enough for most simple projects. When we need to go small, we use a
Out of Stock
[Buy Now](https://www.adafruit.com/product/50)
[Related Guides to the Product](https://learn.adafruit.com/products/50/guides)
### IR (Infrared) Receiver Sensor
[IR (Infrared) Receiver Sensor](https://www.adafruit.com/product/157)
IR sensor tuned to 38KHz, perfect for receiving commands from a TV remote control. Runs at 3V to 5V so it's great for any microcontroller.
To use, connect pin 3 (all the way to the right) to 5V power, pin 2 (middle) to ground and listen on pin 1. It doesn't do any decoding...
In Stock
[Buy Now](https://www.adafruit.com/product/157)
[Related Guides to the Product](https://learn.adafruit.com/products/157/guides)
### Super-bright 5mm IR LED
[Super-bright 5mm IR LED](https://www.adafruit.com/product/387)
Infrared LEDs are used for remote controls (they're the little LED in the part you point at your TV) and 'night-vision' cameras, and these little blue guys are high powered ones! They are 940nm wavelength, which is what nearly all devices listen to. They're 20 degree beamwidth,...
In Stock
[Buy Now](https://www.adafruit.com/product/387)
[Related Guides to the Product](https://learn.adafruit.com/products/387/guides)
### Mini Remote Control
[Mini Remote Control](https://www.adafruit.com/product/389)
This little remote control would be handy for controlling a robot or other project from across the room. It has 21 buttons and a layout we thought was handy: directional buttons and number entry buttons. The remote uses the NEC encoding type and sends data codes 0 thru 26 (it skips #3, #7,...
In Stock
[Buy Now](https://www.adafruit.com/product/389)
[Related Guides to the Product](https://learn.adafruit.com/products/389/guides)
### Super-bright 5mm IR LED (25 pack)
[Super-bright 5mm IR LED (25 pack)](https://www.adafruit.com/product/388)
Infrared LEDs are used for remote controls (they're the little LED in the part you point at your TV) and 'night-vision' cameras, and these little blue guys are high powered ones! They are 940nm wavelength, which is what nearly all devices listen to. They're 20 degree beamwidth,...
In Stock
[Buy Now](https://www.adafruit.com/product/388)
[Related Guides to the Product](https://learn.adafruit.com/products/388/guides)
### Adafruit METRO 328 - Arduino Compatible - with Headers
[Adafruit METRO 328 - Arduino Compatible - with Headers](https://www.adafruit.com/product/2488)
This is the **Adafruit METRO Arduino-Compatible - with headers. ** It's a fully assembled and tested microcontroller and physical computing board with through-hole headers attached. If you don't want a Metro with the headers attached for...
In Stock
[Buy Now](https://www.adafruit.com/product/2488)
[Related Guides to the Product](https://learn.adafruit.com/products/2488/guides)
## Related Guides
- [RePaper eInk Development Board](https://learn.adafruit.com/repaper-eink-development-board.md)
- [Adafruit MSA301 Triple Axis Accelerometer](https://learn.adafruit.com/msa301-triple-axis-accelerometer.md)
- [Bluetooth Controlled Motorized Camera Slider](https://learn.adafruit.com/bluetooth-motorized-camera-slider.md)
- [Adafruit PCA9685 16-Channel Servo Driver](https://learn.adafruit.com/16-channel-pwm-servo-driver.md)
- [Adalight Project Pack](https://learn.adafruit.com/adalight-diy-ambient-tv-lighting.md)
- [Reverse Geocache Box](https://learn.adafruit.com/reverse-geocache-engagement-box.md)
- [Introducing Adafruit Trellis ](https://learn.adafruit.com/adafruit-trellis-diy-open-source-led-keypad.md)
- [Sending an SMS with Temboo](https://learn.adafruit.com/sending-an-sms-with-temboo.md)
- [20mm LED Pixels](https://learn.adafruit.com/20mm-led-pixels.md)
- [Remote controlled door lock using a fingerprint sensor & Adafruit IO](https://learn.adafruit.com/remote-controlled-door-lock-using-a-fingerprint-sensor-and-adafruit-io.md)
- [Character LCDs](https://learn.adafruit.com/character-lcds.md)
- [Smart Measuring Cup](https://learn.adafruit.com/smart-measuring-cup.md)
- [Memories of an Arduino](https://learn.adafruit.com/memories-of-an-arduino.md)
- [Arduino Lesson 2. LEDs](https://learn.adafruit.com/adafruit-arduino-lesson-2-leds.md)
- [Smart Cocktail Shaker](https://learn.adafruit.com/smart-cocktail-shaker.md)
---
# Source: https://learn.adafruit.com/flora-snaps/testing-and-troubleshooting.md
# Flora Snaps
## Snap adjustments

When cool, snap on the socket sides of the snap to check your spacing. If any of the snaps touch each other, you'll need to heat them up again for realignment to prevent a short circuit.

Do all the sockets sit flat? A few in this photo are crooked because solder is clogging the works. If this happens to you, just reheat the solder on the post and try to get it to flow towards the board, into the crevices and away from the stem. If there's just too much solder on the snap, try wicking some away with copper braid.

Test the strength of the solder joints by popping the sockets on and off. Once you are satisfied with the placement and strength of the snaps, remove the sockets for placement on your textile.
- [Previous Page](https://learn.adafruit.com/flora-snaps/add-more-snaps.md)
- [Next Page](https://learn.adafruit.com/flora-snaps/sew-on-sockets.md)
## Featured Products
### FLORA - Wearable electronic platform: Arduino-compatible
[FLORA - Wearable electronic platform: Arduino-compatible](https://www.adafruit.com/product/659)
FLORA is Adafruit's fully-featured wearable electronics platform. It's a round, sewable, Arduino-compatible microcontroller designed to empower amazing wearables projects.FLORA comes with Adafruit's support, [tutorials and...](http://learn.adafruit.com/category/flora)
In Stock
[Buy Now](https://www.adafruit.com/product/659)
[Related Guides to the Product](https://learn.adafruit.com/products/659/guides)
### Sewable Snaps - 5mm Diameter - Card of 24
[Sewable Snaps - 5mm Diameter - Card of 24](https://www.adafruit.com/product/1126)
The small 5mm size of these tin-plated brass snaps means they fit perfectly on Flora's pads! Snaps make a great connector for wearables-- solder one side to the board and sew the other to your project with conductive thread! This card comes with 24 complete snaps (socket and stud...
In Stock
[Buy Now](https://www.adafruit.com/product/1126)
[Related Guides to the Product](https://learn.adafruit.com/products/1126/guides)
### Needle set - 3/9 sizes - 20 needles
[Needle set - 3/9 sizes - 20 needles](https://www.adafruit.com/product/615)
Mighty needles, sew like the wind! This needle set is the only one you'll need for any sort of hand sewing, especially using our conductive thread and wearable electronics parts.
Each pack contains 20 gold-eye sharps, with eye sizes ranging from #3 (1.75" long) to #9...
Out of Stock
[Buy Now](https://www.adafruit.com/product/615)
[Related Guides to the Product](https://learn.adafruit.com/products/615/guides)
### Stainless Medium Conductive Thread - 3 ply - 18 meter/60 ft
[Stainless Medium Conductive Thread - 3 ply - 18 meter/60 ft](https://www.adafruit.com/product/641)
After months of searching, we finally have what we consider to be the ultimate conductive thread. It's thin, strong, smooth, and made completely of 316L stainless steel. Once you start working with this thread you'll quickly agree its optimal for any wearables work!
This...
Out of Stock
[Buy Now](https://www.adafruit.com/product/641)
[Related Guides to the Product](https://learn.adafruit.com/products/641/guides)
### Getting Started with Adafruit FLORA
[Getting Started with Adafruit FLORA](https://www.adafruit.com/product/1839)
**Making Wearables with an Arduino-Compatible Electronics Platform**
This book introduces readers to building wearable electronics projects using Adafruit's tiny FLORA board: at 4.4 grams, and only 1.75 inches in diameter, and featuring Arduino compatibility, it's the...
No Longer Stocked
[Buy Now](https://www.adafruit.com/product/1839)
[Related Guides to the Product](https://learn.adafruit.com/products/1839/guides)
### Getting Started with Adafruit FLORA Book Pack
[Getting Started with Adafruit FLORA Book Pack](https://www.adafruit.com/product/2404)
Pickup a copy of [Getting Started with Adafruit FLORA](https://www.adafruit.com/products/1839) and then hit the ground running with everything that you need to become an [Adafruit FLORA](https://www.adafruit.com/products/659) supreme being!
This pack is...
No Longer Stocked
[Buy Now](https://www.adafruit.com/product/2404)
[Related Guides to the Product](https://learn.adafruit.com/products/2404/guides)
### FLORA Sensor Pack
[FLORA Sensor Pack](https://www.adafruit.com/product/1458)
Sense the world around you! The FLORA Sensor Pack includes many types of sensors for your wearable enjoyment. Sense motion, direction, color, light levels, touch, and connections with FLORA sensor breakouts and conductive materials, and a few NeoPixels for experimenting with displaying your...
No Longer Stocked
[Buy Now](https://www.adafruit.com/product/1458)
[Related Guides to the Product](https://learn.adafruit.com/products/1458/guides)
### FLORA GPS Starter Pack
[FLORA GPS Starter Pack](https://www.adafruit.com/product/1090)
Get started with the fabulous Adafruit Flora platform with this lovely starter kit. Included are plenty of parts to make a few different fun projects! There's a Flora motherboard, a GPS module that can also perform location datalogging, eight ultra-bright chainable RGB pixels, a battery...
No Longer Stocked
[Buy Now](https://www.adafruit.com/product/1090)
[Related Guides to the Product](https://learn.adafruit.com/products/1090/guides)
## Related Guides
- [Firewalker LED Sneakers](https://learn.adafruit.com/firewalker-led-sneakers.md)
- [Datalogging Hat with FLORA BLE](https://learn.adafruit.com/datalogging-hat-with-flora-ble.md)
- [Chameleon Scarf](https://learn.adafruit.com/chameleon-scarf.md)
- [Flora TSL2561 Lux Sensor](https://learn.adafruit.com/flora-lux-sensor.md)
- [Adafruit Arduino Selection Guide](https://learn.adafruit.com/adafruit-arduino-selection-guide.md)
- [Flora GPS Jacket](https://learn.adafruit.com/flora-gps-jacket.md)
- [Glowing Skullcandy Headphones Mod](https://learn.adafruit.com/glowing-skullcandy-headphones-mod.md)
- [Flora MIDI Drum Glove](https://learn.adafruit.com/midi-drum-glove.md)
- [How to Find Hidden COM Ports](https://learn.adafruit.com/how-to-find-hidden-com-ports.md)
- [EEG Costume Cap](https://learn.adafruit.com/eeg-costume-cap.md)
- [Getting Started with FLORA](https://learn.adafruit.com/getting-started-with-flora.md)
- [FLORA and GEMMA ICSP](https://learn.adafruit.com/flora-and-gemma-isp.md)
- [NeoPixel Ring Clock](https://learn.adafruit.com/neopixel-ring-clock.md)
- [LED Ampli-Tie](https://learn.adafruit.com/led-ampli-tie.md)
- [Lumo Lift Teardown](https://learn.adafruit.com/lumo-lift-teardown.md)
---
# Source: https://learn.adafruit.com/adafruit-nfc-rfid-on-raspberry-pi/testing-it-out.md
# Adafruit NFC/RFID on Raspberry Pi
## Testing it Out
# Hooking Everything Up
The Adafruit [NFC Breakout](https://www.adafruit.com/products/364) board is much more appropriate with the Pi than the [NFC Shield](https://www.adafruit.com/products/789 "Link: https://www.adafruit.com/products/789"), since the breakout doesn't have 5V level shifting (which means you won't accidentally damage your Pi!), and you have easier access to the bus select pins, etc.
If it isn't already hooked up, you can connect your breakout now using a convenient [Pi Cobbler](http://adafruit.com/products/914), following the image below: There are two places to do this: either the board end header (fits more nicely in a breadboard), or the FTDI header along one side (shown in photo below):

**Note:** Make sure that the **SEL0** and **SEL1** jumpers on the NFC breakout are set to **OFF** , which will cause the PN532 to boot into UART mode (rather than SPI and I2C, which aren't currently supported by libnfc). You will need to reset the breakout after changing these pins, which you can do by cycling the power pin.
Use a 5V supply pin from the Pi, and the 5V input on either the FTDI header or board end header, rather than the Pi’s 3.3V supply, since the 3.3V supply is used by the core on the Raspberry Pi and you don't want to pull sharp, heavy loads from it, like when you first enable and charge the near field.
# Read an ISO14443-A (Mifare, etc.) Card with nfc-poll
With libnfc configured, built and installed, you can go back to the command-line, place a card on the reader, and run the following command to get the tags unique ID:
```auto
nfc-poll
```
_nfc-poll should be able to run this way thanks to the “make install” step on the prior page, which puts it in the /user/bin directory. If it doesn’t run, check if you did the install step, or you can find the executable program in __~/libnfc/examples_
A successful run will yield the following:

That's it! From here, you can explore some of the other examples in the 'examples' folder, and figure out how to get started writing your own applications based on libnfc! Be sure to have a look at the [libnfc project page](https://github.com/nfc-tools/libnfc "Link: http://www.libnfc.org/documentation/introduction").
## Common Issues
If nfc-poll returns this message:
**pn53x\_check\_communication error**
The culprit is usually one of two things:
- Try swapping the RX and TX wires.
- The particular model of Pi might be an exception to the “Recent” vs “Earlier” rules on the previous page. If the wire swap didn’t fix the issue, try using the opposite library setup steps…do a “make clean” first so that everything’s rebuilt.
- [Previous Page](https://learn.adafruit.com/adafruit-nfc-rfid-on-raspberry-pi/building-libnfc.md)
## Featured Products
### 13.56MHz RFID/NFC tag assortment - Classic 1K
[13.56MHz RFID/NFC tag assortment - Classic 1K](https://www.adafruit.com/product/365)
One of each of our favorite 13.56MHz RFID/NFC Classic 1K tags - 5 in total!
- [Credit card size](http://www.adafruit.com/products/359)
- [1" diameter 'laundry' clear tag](http://www.adafruit.com/products/361)
-
No Longer Stocked
[Buy Now](https://www.adafruit.com/product/365)
[Related Guides to the Product](https://learn.adafruit.com/products/365/guides)
### 13.56MHz RFID/NFC Clear Keychain Fob - Classic 1K
[13.56MHz RFID/NFC Clear Keychain Fob - Classic 1K](https://www.adafruit.com/product/363)
This is a blank 13.56MHz RFID/NFC keychain fob - often used for keys but also an easy way to tag something. The tag contains a small RFID chip and an antenna, and is passively powered by the reader/writer when placed a couple inches away.
These can be read by almost any 13.56MHz...
No Longer Stocked
[Buy Now](https://www.adafruit.com/product/363)
[Related Guides to the Product](https://learn.adafruit.com/products/363/guides)
### 13.56MHz RFID/NFC Bracelet - Classic 1K
[13.56MHz RFID/NFC Bracelet - Classic 1K](https://www.adafruit.com/product/921)
This is a blank 13.56MHz RFID/NFC silicone bracelet. The tag contains a small RFID chip and an antenna, and is passively powered by the reader/writer when placed a couple inches away.
These can be read by almost any 13.56MHz RFID/NFC reader but make sure it can handle ISO/IEC...
In Stock
[Buy Now](https://www.adafruit.com/product/921)
[Related Guides to the Product](https://learn.adafruit.com/products/921/guides)
### 13.56MHz RFID/NFC Charm - Classic 1K
[13.56MHz RFID/NFC Charm - Classic 1K](https://www.adafruit.com/product/884)
This is a blank 13.56MHz RFID/NFC embedded in a phone charm - often used for train/bus passes but also found in other systems where a proximity card is desired. The tag contains a small RFID chip and an antenna, and is passively powered by the reader/writer when placed a couple inches...
No Longer Stocked
[Buy Now](https://www.adafruit.com/product/884)
[Related Guides to the Product](https://learn.adafruit.com/products/884/guides)
### 13.56MHz RFID/NFC Clear Tag - Classic 1K
[13.56MHz RFID/NFC Clear Tag - Classic 1K](https://www.adafruit.com/product/361)
This is a blank 13.56MHz Classic 'laundry' tag - often used for laundry or identification but also found in other systems where a small proximity card is desired. This one is clear! The tag contains a small RFID chip and an antenna, and is passively powered by the reader/writer...
Out of Stock
[Buy Now](https://www.adafruit.com/product/361)
[Related Guides to the Product](https://learn.adafruit.com/products/361/guides)
### 13.56MHz RFID/NFC White Tag - Classic 1K
[13.56MHz RFID/NFC White Tag - Classic 1K](https://www.adafruit.com/product/360)
This is a blank 13.56MHz RFID/NFC laundry tag - often used for laundry but also general tagging. The tag contains a small RFID chip and an antenna, and is passively powered by the reader/writer when placed a couple inches away.
These can be read by almost any 13.56MHz RFID/NFC...
In Stock
[Buy Now](https://www.adafruit.com/product/360)
[Related Guides to the Product](https://learn.adafruit.com/products/360/guides)
### 13.56MHz RFID/NFC Card - Classic 1K
[13.56MHz RFID/NFC Card - Classic 1K](https://www.adafruit.com/product/359)
This is a blank 13.56MHz RFID/NFC card - often used for train/bus passes but also found in other systems where a proximity card is desired. The tag contains a small RFID chip and an antenna, and is passively powered by the reader/writer when placed a couple inches away.
These can be...
In Stock
[Buy Now](https://www.adafruit.com/product/359)
[Related Guides to the Product](https://learn.adafruit.com/products/359/guides)
### Adafruit Assembled Pi Cobbler Breakout + Cable for Raspberry Pi
[Adafruit Assembled Pi Cobbler Breakout + Cable for Raspberry Pi](https://www.adafruit.com/product/914)
Now that you've finally got your hands on a [Raspberry Pi® Model B](http://www.raspberrypi.org/), you're probably itching to make some fun embedded computer projects with it. What you need is an add on prototyping Pi Cobbler from Adafruit, which can break out all those...
No Longer Stocked
[Buy Now](https://www.adafruit.com/product/914)
[Related Guides to the Product](https://learn.adafruit.com/products/914/guides)
## Related Guides
- [I2C Addresses and Troublesome Chips](https://learn.adafruit.com/i2c-addresses.md)
- [Collin's Lab: RFID](https://learn.adafruit.com/collins-lab-rfid.md)
- [Mystery Box: Remote Chess Board Puzzle Lock](https://learn.adafruit.com/mystery-box-remote-chess-board-puzzle-lock.md)
- [Raspberry Pi NFC Minecraft Blocks](https://learn.adafruit.com/raspberry-pi-nfc-minecraft-blocks.md)
- [NFC Raspberry Pi Media Player](https://learn.adafruit.com/nfc-raspberry-pi-media-player.md)
- [Adafruit PN532 RFID/NFC Breakout and Shield](https://learn.adafruit.com/adafruit-pn532-rfid-nfc.md)
- [Adafruit's Raspberry Pi Lesson 9. Controlling a DC Motor](https://learn.adafruit.com/adafruit-raspberry-pi-lesson-9-controlling-a-dc-motor.md)
- [Adafruit's Raspberry Pi Lesson 5. Using a Console Cable](https://learn.adafruit.com/adafruits-raspberry-pi-lesson-5-using-a-console-cable.md)
- [Pi Box](https://learn.adafruit.com/pi-box.md)
- [Piezo Ring Tones with Raspberry Pi](https://learn.adafruit.com/piezo-ring-tones-with-raspberry-pi.md)
- [Cloud Cam: Internet-Connected Security Camera](https://learn.adafruit.com/cloud-cam-connected-raspberry-pi-security-camera.md)
- [Set up and Blink - MATLAB and Simulink with Raspberry Pi](https://learn.adafruit.com/how-to-use-matlab-and-simulink-with-raspberry-pi.md)
- [Battery Powered Raspberry Pi Displays w/RaspiRobot Shield](https://learn.adafruit.com/raspirobot-battery-powered-raspberry-pi-displays.md)
- [Adafruit's Raspberry Pi Lesson 13. Power Control](https://learn.adafruit.com/adafruits-raspberry-pi-lesson-13-power-control.md)
- [Raspberry Pi Thermal Printer One Time Pads](https://learn.adafruit.com/raspberry-pi-thermal-printer-one-time-pads.md)
---
# Source: https://learn.adafruit.com/ttl-serial-camera/testing-the-camera.md
# TTL Serial Camera
## Testing the Camera
The quickest way to test out the modules is to use the NTSC video out connection. That way, when you adjust the view & focus you can immediately see the results. Paired with the next section (using the Comm Tool), its the ideal method of introducing yourself to the module.
Most TV's and monitors require an RCA jack or plug input. We just soldered a spare RCA jack to the camera, with black being the case ground and yellow signal. You can get RCA cables and accessories in any hobby/electronics shop like Radio Shack.
**Unfortunately, it is not possible to change the camera from NTSC to PAL** - its hardcoded by a pin soldered to the board and there's no easy way to extract it and change it (we tried!)
Plug in the NTSC cable to your monitor, and connect the red and black power wires to +5V supply - you should get monochrome video output on the monitor immediately!
[We have some NTSC television modules in the Adafruit shop you can use to test with](https://www.adafruit.com/index.php?main_page=adasearch&q=NTSC+Television "Link: https://www.adafruit.com/index.php?main\_page=adasearch&q=NTSC+Television")


- [Previous Page](https://learn.adafruit.com/ttl-serial-camera/wiring-the-camera.md)
- [Next Page](https://learn.adafruit.com/ttl-serial-camera/using-commtool.md)
## Featured Products
### TTL Serial JPEG Camera with NTSC Video
[TTL Serial JPEG Camera with NTSC Video](https://www.adafruit.com/product/397)
This camera module can be a pretty neat project addition. It was designed to be used in security systems and does two main things - it outputs NTSC video and can take snapshots of that video (in color) and transmit them over the TTL serial link. You can snap pictures at 640x480, 320x240 or...
In Stock
[Buy Now](https://www.adafruit.com/product/397)
[Related Guides to the Product](https://learn.adafruit.com/products/397/guides)
### Miniature TTL Serial JPEG Camera with NTSC Video
[Miniature TTL Serial JPEG Camera with NTSC Video](https://www.adafruit.com/product/1386)
This tiny little camera module can be a pretty neat project addition, it is just like [our other JPEG cameras (same chipset/software)](http://www.adafruit.com/category/35_68), but much smaller and slimmer. It was designed to be used in security systems and does two main things - it...
In Stock
[Buy Now](https://www.adafruit.com/product/1386)
[Related Guides to the Product](https://learn.adafruit.com/products/1386/guides)
### Adafruit METRO 328 Fully Assembled - Arduino IDE compatible
[Adafruit METRO 328 Fully Assembled - Arduino IDE compatible](https://www.adafruit.com/product/50)
We sure love the ATmega328 here at Adafruit, and we use them _a lot_ for our own projects. The processor has plenty of GPIO, Analog inputs, hardware UART SPI and I2C, timers and PWM galore - just enough for most simple projects. When we need to go small, we use a
Out of Stock
[Buy Now](https://www.adafruit.com/product/50)
[Related Guides to the Product](https://learn.adafruit.com/products/50/guides)
### Weatherproof TTL Serial JPEG Camera with NTSC Video and IR LEDs
[Weatherproof TTL Serial JPEG Camera with NTSC Video and IR LEDs](https://www.adafruit.com/product/613)
This weatherproof camera module is [a classy upgrade to the basic camera module we already stock in the shop](http://www.adafruit.com/products/397). The main differences is that this one comes in a nice metal case with a mounting hinge, a 1 meter long cable with the TTL & NTSC...
In Stock
[Buy Now](https://www.adafruit.com/product/613)
[Related Guides to the Product](https://learn.adafruit.com/products/613/guides)
### MicroSD card breakout board+
[MicroSD card breakout board+](https://www.adafruit.com/product/254)
Not just a simple breakout board, this microSD adapter goes the extra mile - designed for ease of use.
- Onboard 5v-\>3v regulator provides 150mA for power-hungry cards
- 3v level shifting means you can use this with ease on either 3v or 5v systems
- Uses a proper level...
Out of Stock
[Buy Now](https://www.adafruit.com/product/254)
[Related Guides to the Product](https://learn.adafruit.com/products/254/guides)
### Half Sized Premium Breadboard - 400 Tie Points
[Half Sized Premium Breadboard - 400 Tie Points](https://www.adafruit.com/product/64)
This is a cute, half-size breadboard with 400 tie points, good for small projects. It's 3.25" x 2.2" / 8.3cm x 5.5cm with a standard double-strip in the middle and two power rails on both sides. You can pull the power rails off easily to make the breadboard as...
In Stock
[Buy Now](https://www.adafruit.com/product/64)
[Related Guides to the Product](https://learn.adafruit.com/products/64/guides)
### SD/MicroSD Memory Card (8 GB SDHC)
[SD/MicroSD Memory Card (8 GB SDHC)](https://www.adafruit.com/product/1294)
Add mega-storage in a jiffy using this 8 GB class 4 micro-SD card. It comes with a SD adapter so you can use it with any of our shields or adapters. Preformatted to FAT so it works out of the box with our projects. Tested and works great with our
In Stock
[Buy Now](https://www.adafruit.com/product/1294)
[Related Guides to the Product](https://learn.adafruit.com/products/1294/guides)
## Related Guides
- [Making Adabot: Part 2](https://learn.adafruit.com/making-adabot-part-2.md)
- [3D Printed Animatronic Robot Head](https://learn.adafruit.com/3d-printed-animatronic-robot-head.md)
- [Arduino Lesson 14. Servo Motors](https://learn.adafruit.com/adafruit-arduino-lesson-14-servo-motors.md)
- [Arduino Lesson 15. DC Motor Reversing](https://learn.adafruit.com/adafruit-arduino-lesson-15-dc-motor-reversing.md)
- [Programming Arduino with Android and Windows Tablets](https://learn.adafruit.com/programming-arduino-with-android-and-windows-tablets.md)
- [LSM303 Accelerometer + Compass Breakout](https://learn.adafruit.com/lsm303-accelerometer-slash-compass-breakout.md)
- [Adafruit VS1053 MP3/AAC/Ogg/MIDI/WAV Codec Breakout Tutorial](https://learn.adafruit.com/adafruit-vs1053-mp3-aac-ogg-midi-wav-play-and-record-codec-tutorial.md)
- [Naughty or Nice Machine](https://learn.adafruit.com/naughty-or-nice-machine.md)
- [Adafruit Ultimate GPS Logger Shield](https://learn.adafruit.com/adafruit-ultimate-gps-logger-shield.md)
- [Arduino "Hunt The Wumpus"](https://learn.adafruit.com/arduino-hunt-the-wumpus.md)
- [Track Your Treats: Halloween Candy GPS Tracker](https://learn.adafruit.com/track-your-treats-halloween-candy-gps-tracker.md)
- [WiFi Weather Station](https://learn.adafruit.com/wifi-weather-station-arduino-cc3000.md)
- [Bluetooth Controlled Motorized Camera Slider](https://learn.adafruit.com/bluetooth-motorized-camera-slider.md)
- [TMP36 Temperature Sensor](https://learn.adafruit.com/tmp36-temperature-sensor.md)
- [Babel Fish](https://learn.adafruit.com/babel-fish.md)
---
# Source: https://learn.adafruit.com/1-8-tft-display/testing-the-shield.md
# 1.8" TFT Display Breakout and Shield
## Testing the Shield
You can test your assembled shield using the example code from the library.
Start by installing a bunch of libraries!
## Open the Arduino Library manager

Install the **Adafruit GFX Library**

If using an older version of the Arduino IDE (pre-1.8.10), also locate and install the **Adafruit\_BusIO** library (newer versions do this automatically when using the Arduino Library Manager).
**Adafruit ST7735 Library**

**Adafruit seesaw Library**

[You can read more about installing libraries in our tutorial](http://learn.adafruit.com/arduino-tips-tricks-and-techniques/arduino-libraries).
Restart the Arduino IDE.
# 1.8" Shield with seesaw
If your shield looks like this, you have the 1.8" seesaw version (the most recent) which will work with just about any/all boards. For this version load up the **seesaw\_shield18\_test example**


Upload to your microcontroller, and open the serial port watcher at **9600** baud:
The sketch waits until the serial port is opened (you can make it auto-start once you know things are working by removing the `while (!Serial);` line
Check that the seesaw chip is detected, you should see text display on the TFT after a quick draw test.
If you don't have an SD card inserted, it will fail to init the SD card, that's ok you can continue with the test

Once you've gotten this far try pressing all the buttons on the board (except for RESET) to activate the invert-blinking loop.
Info:

[For more details about seesaw, check out our guide](https://learn.adafruit.com/adafruit-seesaw-atsamd09-breakout) - we made a nice wrapper for the 1.8" TFT to control the backlight and read buttons but it still might be useful to know the underlying protocol
## Displaying a Bitmap
If you have [parrot.bmp](http://learn.adafruit.com/system/assets/assets/000/010/143/original/parrot.bmp) stored on the SD card you will get a nice parrot display once the buttons have all been pressed

- [Previous Page](https://learn.adafruit.com/1-8-tft-display/1-8-tft-shield.md)
- [Next Page](https://learn.adafruit.com/1-8-tft-display/circuitpython-displayio-quickstart.md)
## Featured Products
### Breadboarding wire bundle
[Breadboarding wire bundle](https://www.adafruit.com/product/153)
75 flexible stranded core wires with stiff ends molded on in red, orange, yellow, green, blue, brown, black and white. These are a major improvement over the "box of bent wires" that are sometimes sold with breadboards, and faster than stripping your own solid core wires. Makes...
In Stock
[Buy Now](https://www.adafruit.com/product/153)
[Related Guides to the Product](https://learn.adafruit.com/products/153/guides)
### Adafruit METRO 328 Fully Assembled - Arduino IDE compatible
[Adafruit METRO 328 Fully Assembled - Arduino IDE compatible](https://www.adafruit.com/product/50)
We sure love the ATmega328 here at Adafruit, and we use them _a lot_ for our own projects. The processor has plenty of GPIO, Analog inputs, hardware UART SPI and I2C, timers and PWM galore - just enough for most simple projects. When we need to go small, we use a
Out of Stock
[Buy Now](https://www.adafruit.com/product/50)
[Related Guides to the Product](https://learn.adafruit.com/products/50/guides)
### Half Sized Premium Breadboard - 400 Tie Points
[Half Sized Premium Breadboard - 400 Tie Points](https://www.adafruit.com/product/64)
This is a cute, half-size breadboard with 400 tie points, good for small projects. It's 3.25" x 2.2" / 8.3cm x 5.5cm with a standard double-strip in the middle and two power rails on both sides. You can pull the power rails off easily to make the breadboard as...
In Stock
[Buy Now](https://www.adafruit.com/product/64)
[Related Guides to the Product](https://learn.adafruit.com/products/64/guides)
### 1.8" Color TFT LCD display with MicroSD Card Breakout
[1.8" Color TFT LCD display with MicroSD Card Breakout](https://www.adafruit.com/product/358)
This lovely little display breakout is the best way to add a small, colorful and bright display to any project. Since the display uses 4-wire SPI to communicate and has its own pixel-addressable frame buffer, it can be used with every kind of microcontroller. Even a very small one with low...
Out of Stock
[Buy Now](https://www.adafruit.com/product/358)
[Related Guides to the Product](https://learn.adafruit.com/products/358/guides)
### Adafruit 1.8" Color TFT Shield w/microSD and Joystick
[Adafruit 1.8" Color TFT Shield w/microSD and Joystick](https://www.adafruit.com/product/802)
This lovely little shield is the best way to add a small, colorful and bright display to any project. We took our popular 1.8" TFT breakout board and remixed it into an Arduino shield complete with microSD card slot and a 5-way joystick navigation switch and three selection buttons! Since...
In Stock
[Buy Now](https://www.adafruit.com/product/802)
[Related Guides to the Product](https://learn.adafruit.com/products/802/guides)
### 1.8" SPI TFT display, 160x128 18-bit color - ST7735R driver
[1.8" SPI TFT display, 160x128 18-bit color - ST7735R driver](https://www.adafruit.com/product/618)
We just love this little 1.8" TFT display, with true TFT color (up to 18-bits per pixel!), fine 160x128 resolution, two white LED backlight that runs on 3.3V and a very easy SPI interface that requires only 4 or 5 digital pins to send pixels to the display.
**Please...**
Out of Stock
[Buy Now](https://www.adafruit.com/product/618)
[Related Guides to the Product](https://learn.adafruit.com/products/618/guides)
## Related Guides
- [Wave Shield](https://learn.adafruit.com/adafruit-wave-shield-audio-shield-for-arduino.md)
- [Adafruit 2.8" TFT Touch Shield v2 - Capacitive or Resistive](https://learn.adafruit.com/adafruit-2-8-tft-touch-shield-v2.md)
- [How to Build a Testing Jig](https://learn.adafruit.com/how-to-build-a-testing-fixture.md)
- [Create an Internet of Things Dashboard with Adafruit IO](https://learn.adafruit.com/create-an-internet-of-things-dashboard-with-adafruit-dot-io.md)
- [Let’s Put LEDs in Things!](https://learn.adafruit.com/lets-put-leds-in-things.md)
- [Tiny Arduino Music Visualizer](https://learn.adafruit.com/piccolo.md)
- [Circuit Playground Sound-Controlled Robot](https://learn.adafruit.com/circuit-playground-sound-controlled-robot.md)
- [Adafruit 1.27" and 1.5" Color OLED Breakout Board](https://learn.adafruit.com/adafruit-1-5-color-oled-breakout-board.md)
- [Arduino Lesson 15. DC Motor Reversing](https://learn.adafruit.com/adafruit-arduino-lesson-15-dc-motor-reversing.md)
- [TTL Serial Camera](https://learn.adafruit.com/ttl-serial-camera.md)
- [Analog Feedback Servos](https://learn.adafruit.com/analog-feedback-servos.md)
- [Geofencing with the FONA 808 & Adafruit IO](https://learn.adafruit.com/geofencing-with-the-fona-808-and-adafruit-io.md)
- [Arduino GPS Clock](https://learn.adafruit.com/arduino-clock.md)
- [Adafruit Data Logger Shield](https://learn.adafruit.com/adafruit-data-logger-shield.md)
- [Making Adabot: Part 2](https://learn.adafruit.com/making-adabot-part-2.md)
---
# Source: https://learn.adafruit.com/nokia-5110-3310-monochrome-lcd/testing.md
# Source: https://learn.adafruit.com/how-to-make-a-pogo-pin-test-jig/testing.md
# How to Make a Pogo Pin Test Jig
## Testing
Now the fun part! When a board is ready to test, insert a uSD card, and simply slip it into the orienting 'registration' standoffs and press down to make contact with the pogo pins. The Arduino will automatically detect when the CD pin is shorted to ground (good) and begin the test procedure. If all is good, it will beep!

Beep!
- [Previous Page](https://learn.adafruit.com/how-to-make-a-pogo-pin-test-jig/the-code.md)
- [Next Page](https://learn.adafruit.com/how-to-make-a-pogo-pin-test-jig/advanced-pogo-jigs.md)
## Featured Products
### Pogo Pin Probe Clip
[Pogo Pin Probe Clip](https://www.adafruit.com/product/1969)
The Pogo Pin Probe Clip is a great way to test and connect with pin-point accuracy without soldering! It's sort of like an [alligator clip](https://www.adafruit.com/product/321) with a built-in springy pogo pin - so you can connect to any PCB pad for 'scoping, analyzing, or...
In Stock
[Buy Now](https://www.adafruit.com/product/1969)
[Related Guides to the Product](https://learn.adafruit.com/products/1969/guides)
### Pogo Pins "Spear Head" (10 pack)
[Pogo Pins "Spear Head" (10 pack)](https://www.adafruit.com/product/394)
Pogo pins are little spring-loaded contacts, very handy for making jigs, or making momentary (but electrically solid) contacts. We use them by the dozen for making programming and testing jigs but they're handy also if say you want to JTAG program a board that you cant solder headers to -...
In Stock
[Buy Now](https://www.adafruit.com/product/394)
[Related Guides to the Product](https://learn.adafruit.com/products/394/guides)
### Pogo Pins "Cupped Head" (10 pack)
[Pogo Pins "Cupped Head" (10 pack)](https://www.adafruit.com/product/2428)
Pogo pins are little spring-loaded contacts, very handy for making jigs, or making momentary (but electrically solid) contacts. We use them by the dozen for making programming and testing jigs but they're handy also if say you want to JTAG program a board that you cant solder headers to -...
In Stock
[Buy Now](https://www.adafruit.com/product/2428)
[Related Guides to the Product](https://learn.adafruit.com/products/2428/guides)
### Pogo Pins "Crown Head" (10 pack)
[Pogo Pins "Crown Head" (10 pack)](https://www.adafruit.com/product/2429)
Pogo pins are little spring-loaded contacts, very handy for making jigs, or making momentary (but electrically solid) contacts. We use them by the dozen for making programming and testing jigs but they're handy also if say you want to JTAG program a board that you cant solder headers to -...
In Stock
[Buy Now](https://www.adafruit.com/product/2429)
[Related Guides to the Product](https://learn.adafruit.com/products/2429/guides)
### Pogo Pins "Needle Head" (10 pack)
[Pogo Pins "Needle Head" (10 pack)](https://www.adafruit.com/product/2430)
Pogo pins are little spring-loaded contacts, very handy for making jigs, or making momentary (but electrically solid) contacts. We use them by the dozen for making programming and testing jigs but they're handy also if say you want to JTAG program a board that you cant solder headers to -...
In Stock
[Buy Now](https://www.adafruit.com/product/2430)
[Related Guides to the Product](https://learn.adafruit.com/products/2430/guides)
### Toggle Clamp - Large Size
[Toggle Clamp - Large Size](https://www.adafruit.com/product/2457)
\*Ka-thunk\* Pin down that PCB with our **Toggle Clamp** , a sturdy and reliable way to quickly press and release with precision! A pogo-pin bed is a great way to connect and test boards without any soldering, but you have to somehow get that PCB aligned right and evenly pressed down...
In Stock
[Buy Now](https://www.adafruit.com/product/2457)
[Related Guides to the Product](https://learn.adafruit.com/products/2457/guides)
### Toggle Clamp - Medium Flip-up Style
[Toggle Clamp - Medium Flip-up Style](https://www.adafruit.com/product/2456)
\*Ka-thunk\* Pin down that little PCB with our **Toggle Clamp** , a sturdy and reliable way to quickly press and release with precision! A pogo-pin bed is a great way to connect and test boards without any soldering, but you have to somehow get that PCB aligned right and evenly...
In Stock
[Buy Now](https://www.adafruit.com/product/2456)
[Related Guides to the Product](https://learn.adafruit.com/products/2456/guides)
### Toggle Clamp - Small Flip-down Style
[Toggle Clamp - Small Flip-down Style](https://www.adafruit.com/product/2459)
\*Ka-thunk\* Pin down that PCB with our **Toggle Clamp** , a sturdy and reliable way to quickly press and release with precision! A pogo-pin bed is a great way to connect and test boards without any soldering, but you have to somehow get that PCB aligned right and evenly pressed...
In Stock
[Buy Now](https://www.adafruit.com/product/2459)
[Related Guides to the Product](https://learn.adafruit.com/products/2459/guides)
## Related Guides
- [DIY 3D Printing Filament](https://learn.adafruit.com/diy-3d-printing-filament.md)
- [Standalone AVR Chip Programmer](https://learn.adafruit.com/standalone-avr-chip-programmer.md)
- [How we designed an injection-molded case](https://learn.adafruit.com/how-we-designed-an-injection-molded-case-for-raspberry-pi.md)
- [Metal Parts from 3D Prints](https://learn.adafruit.com/metal-parts-from-3d-prints.md)
- [KTOWN's Ultimate Creating Parts in Eagle Tutorial](https://learn.adafruit.com/ktowns-ultimate-creating-parts-in-eagle-tutorial.md)
- [Maker Business & Manufacturing Software - Our Tips & Tricks](https://learn.adafruit.com/maker-business-manufacturing-software-our-tips-and-tricks.md)
- [Adafruit Pinguin for EAGLE CAD](https://learn.adafruit.com/adafruit-pinguin-for-eagle-cad.md)
- [Laser-Cut Enclosure Design](https://learn.adafruit.com/laser-cut-enclosure-design.md)
- [How to Sign Windows Drivers & Executables](https://learn.adafruit.com/how-to-sign-windows-drivers-installer.md)
- [SMT Manufacturing](https://learn.adafruit.com/smt-manufacturing.md)
- [All About Laser Cutters](https://learn.adafruit.com/all-about-laser-cutters.md)
- [Shop Tips & Tricks](https://learn.adafruit.com/shop-tips-and-tricks.md)
- [How to convert Eagle PCBs to 3D Models in Fusion 360](https://learn.adafruit.com/how-to-convert-eagle-pcbs-to-3d-models-in-fusion-360.md)
- [Creating Accurate Footprints in Eagle](https://learn.adafruit.com/creating-accurate-footprints-in-eagle.md)
- [Make your own PCB with Eagle, OSH Park, and Adafruit!](https://learn.adafruit.com/making-pcbs-with-oshpark-and-eagle.md)
---
# Source: https://learn.adafruit.com/2-8-tft-touchscreen/tft-wiring.md
# 2.8" TFT Touchscreen
## TFT Wiring
Info:
Now that the backlight is working, we can get the TFT LCD working. There are many pins required, and to keep the code running fairly fast, we have 'hardcoded' Arduino digital pins #2-#9 for the 8 data lines.
Start at the end of the TFT (other side than the power pins) and in order connect the pins to digital 7 thru 2. If you're using a mega, connect the TFT Data Pins #0-7 to Mega pins #22-29, in that order. Those Mega pins are on the 'double' header.

Then connect the next two pins to digital 9 and 8.
If you're using a mega, connect the TFT Data Pins #0-7 to Mega pins #22-29, in that order. Those Mega pins are on the 'double' header.

In addition to the 8 data lines, you'll also need 4 or 5 control lines.
- Connect the third pin **CS** ( **Chip Select** ) to Analog 3
- Connect the fourth pin **C/D** ( **Command/Data** ) to Analog 2
- Connect the fifth pin **WR** ( **Write** ) to Analog 1
- Connect the sixth pin **RD** ( **Read** ) to Analog 0
- Connect the seventh pin **RST** ( **Reset** ) to the Arduino Reset line. This will reset the panel when the Arduino is Reset. You can also use a digital pin for the LCD reset but this will save us a pin.

Now we can run some code!- [Previous Page](https://learn.adafruit.com/2-8-tft-touchscreen/backlight-wiring.md)
- [Next Page](https://learn.adafruit.com/2-8-tft-touchscreen/lcd-test.md)
## Featured Products
### Adafruit METRO 328 Fully Assembled - Arduino IDE compatible
[Adafruit METRO 328 Fully Assembled - Arduino IDE compatible](https://www.adafruit.com/product/50)
We sure love the ATmega328 here at Adafruit, and we use them _a lot_ for our own projects. The processor has plenty of GPIO, Analog inputs, hardware UART SPI and I2C, timers and PWM galore - just enough for most simple projects. When we need to go small, we use a
Out of Stock
[Buy Now](https://www.adafruit.com/product/50)
[Related Guides to the Product](https://learn.adafruit.com/products/50/guides)
### Breadboarding wire bundle
[Breadboarding wire bundle](https://www.adafruit.com/product/153)
75 flexible stranded core wires with stiff ends molded on in red, orange, yellow, green, blue, brown, black and white. These are a major improvement over the "box of bent wires" that are sometimes sold with breadboards, and faster than stripping your own solid core wires. Makes...
In Stock
[Buy Now](https://www.adafruit.com/product/153)
[Related Guides to the Product](https://learn.adafruit.com/products/153/guides)
### Half Sized Premium Breadboard - 400 Tie Points
[Half Sized Premium Breadboard - 400 Tie Points](https://www.adafruit.com/product/64)
This is a cute, half-size breadboard with 400 tie points, good for small projects. It's 3.25" x 2.2" / 8.3cm x 5.5cm with a standard double-strip in the middle and two power rails on both sides. You can pull the power rails off easily to make the breadboard as...
In Stock
[Buy Now](https://www.adafruit.com/product/64)
[Related Guides to the Product](https://learn.adafruit.com/products/64/guides)
### MicroSD card breakout board+
[MicroSD card breakout board+](https://www.adafruit.com/product/254)
Not just a simple breakout board, this microSD adapter goes the extra mile - designed for ease of use.
- Onboard 5v-\>3v regulator provides 150mA for power-hungry cards
- 3v level shifting means you can use this with ease on either 3v or 5v systems
- Uses a proper level...
In Stock
[Buy Now](https://www.adafruit.com/product/254)
[Related Guides to the Product](https://learn.adafruit.com/products/254/guides)
## Related Guides
- [Adafruit Motor Shield](https://learn.adafruit.com/adafruit-motor-shield.md)
- [Photocells](https://learn.adafruit.com/photocells.md)
- [Circuit Playground: D is for Diode](https://learn.adafruit.com/circuit-playground-d-is-for-diode.md)
- [Micro SD Card Breakout Board Tutorial](https://learn.adafruit.com/adafruit-micro-sd-breakout-board-card-tutorial.md)
- [0.96" mini Color OLED](https://learn.adafruit.com/096-mini-color-oled.md)
- [Halloween Pumpkin](https://learn.adafruit.com/halloween-pumpkin.md)
- [Multi-tasking the Arduino - Part 1](https://learn.adafruit.com/multi-tasking-the-arduino-part-1.md)
- [Low Power WiFi Datalogger](https://learn.adafruit.com/low-power-wifi-datalogging.md)
- [Arduino Lesson 3. RGB LEDs](https://learn.adafruit.com/adafruit-arduino-lesson-3-rgb-leds.md)
- [Create an Internet of Things Dashboard with Adafruit IO](https://learn.adafruit.com/create-an-internet-of-things-dashboard-with-adafruit-dot-io.md)
- [Adafruit 4-Channel ADC Breakouts](https://learn.adafruit.com/adafruit-4-channel-adc-breakouts.md)
- [Trinket Audio Player](https://learn.adafruit.com/trinket-audio-player.md)
- [TTL Serial Camera](https://learn.adafruit.com/ttl-serial-camera.md)
- [Wave Shield Voice Changer](https://learn.adafruit.com/wave-shield-voice-changer.md)
- [All About Arduino Libraries](https://learn.adafruit.com/adafruit-all-about-arduino-libraries-install-use.md)
---
# Source: https://learn.adafruit.com/adafruit-arduino-lesson-4-eight-leds/the-74hc595-shift-register.md
# Arduino Lesson 4. Eight LEDs and a Shift Register
## The 74HC595 Shift Register
Before I go through the code, let's have a quick look at what the chip is doing, so that we can understand what the code has to do.
The chip is of a type called a shift register.

The shift register holds what can be thought of as eight memory locations, each of which can be a 1 or a 0.
To set each of these values on or off, we feed in the data using the 'Data' and 'Clock' pins of the chip.
The clock pin needs to receive eight pulses. At the time of each pulse, if the data pin is high, then a 1 gets pushed into the shift register. Otherwise, it is a 0. When all eight pulses have been received, then enabling the 'Latch' pin copies those eight values to the latch register. This is necessary, otherwise the wrong LEDs would flicker as the data was being loaded into the shift register.
The chip also has an OE (output enable) pin, this is used to enable or disable the outputs all at once. You could attach this to a PWM capable Arduino pin and use 'analogWrite' to control the brightness of the LEDs. This pin is active low, so we tie it to GND.
- [Previous Page](https://learn.adafruit.com/adafruit-arduino-lesson-4-eight-leds/breadboard-layout.md)
- [Next Page](https://learn.adafruit.com/adafruit-arduino-lesson-4-eight-leds/arduino-code.md)
## Featured Products
### Adafruit METRO 328 Fully Assembled - Arduino IDE compatible
[Adafruit METRO 328 Fully Assembled - Arduino IDE compatible](https://www.adafruit.com/product/50)
We sure love the ATmega328 here at Adafruit, and we use them _a lot_ for our own projects. The processor has plenty of GPIO, Analog inputs, hardware UART SPI and I2C, timers and PWM galore - just enough for most simple projects. When we need to go small, we use a
Out of Stock
[Buy Now](https://www.adafruit.com/product/50)
[Related Guides to the Product](https://learn.adafruit.com/products/50/guides)
### 74HC595 Shift Register - 3 pack
[74HC595 Shift Register - 3 pack](https://www.adafruit.com/product/450)
Add lots more outputs to a microcontroller system with chainable shift registers. These chips take a serial input (SPI) of 1 byte (8 bits) and then output those digital bits onto 8 pins. You can chain them together so putting three in a row with the serial output of one plugged into the serial...
In Stock
[Buy Now](https://www.adafruit.com/product/450)
[Related Guides to the Product](https://learn.adafruit.com/products/450/guides)
### Diffused Red 5mm LED (25 pack)
[Diffused Red 5mm LED (25 pack)](https://www.adafruit.com/product/299)
Need some indicators? We are big fans of these diffused red LEDs, in fact we use them exclusively in our kits. They are fairly bright so they can be seen in daytime, and from any angle. They go easily into a breadboard and will add that extra zing to your project.
- Pack of 25...
In Stock
[Buy Now](https://www.adafruit.com/product/299)
[Related Guides to the Product](https://learn.adafruit.com/products/299/guides)
### Premium Male/Male Jumper Wires - 40 x 6" (150mm)
[Premium Male/Male Jumper Wires - 40 x 6" (150mm)](https://www.adafruit.com/product/758)
Handy for making wire harnesses or jumpering between headers on PCB's. These premium jumper wires are 6" (150mm) long and come in a 'strip' of 40 (4 pieces of each of ten rainbow colors). They have 0.1" male header contacts on either end and fit cleanly next to each other...
In Stock
[Buy Now](https://www.adafruit.com/product/758)
[Related Guides to the Product](https://learn.adafruit.com/products/758/guides)
### Half Sized Premium Breadboard - 400 Tie Points
[Half Sized Premium Breadboard - 400 Tie Points](https://www.adafruit.com/product/64)
This is a cute, half-size breadboard with 400 tie points, good for small projects. It's 3.25" x 2.2" / 8.3cm x 5.5cm with a standard double-strip in the middle and two power rails on both sides. You can pull the power rails off easily to make the breadboard as...
In Stock
[Buy Now](https://www.adafruit.com/product/64)
[Related Guides to the Product](https://learn.adafruit.com/products/64/guides)
## Related Guides
- [74HC595 Shift Register](https://learn.adafruit.com/74hc595.md)
- [Adafruit 16-channel PWM/Servo Shield](https://learn.adafruit.com/adafruit-16-channel-pwm-slash-servo-shield.md)
- [Affordable HAL 9000 Replica](https://learn.adafruit.com/hal-9000-replica.md)
- [Mini Thermal Receipt Printers](https://learn.adafruit.com/mini-thermal-receipt-printer.md)
- [Wave Shield Voice Changer](https://learn.adafruit.com/wave-shield-voice-changer.md)
- [Metal Inlay Capacitive Touch Buttons](https://learn.adafruit.com/metal-inlay-capacitive-touch-buttons.md)
- [Adafruit 2.8" TFT Touch Shield v2 - Capacitive or Resistive](https://learn.adafruit.com/adafruit-2-8-tft-touch-shield-v2.md)
- [Arduino Lesson 13. DC Motors](https://learn.adafruit.com/adafruit-arduino-lesson-13-dc-motors.md)
- [Arduino GPS Clock](https://learn.adafruit.com/arduino-clock.md)
- [Line Following Zumo Robot Using Simulink](https://learn.adafruit.com/line-following-zumo-robot-programmed-with-simulink.md)
- [Arduino Lesson 11. LCD Displays - Part 1](https://learn.adafruit.com/adafruit-arduino-lesson-11-lcd-displays-1.md)
- [Adafruit AirLift Shield - ESP32 WiFi Co-Processor](https://learn.adafruit.com/adafruit-airlift-shield-esp32-wifi-co-processor.md)
- [Current Limiting Stepper Driver with DRV8871](https://learn.adafruit.com/current-limiting-stepper-driver-with-drv8871.md)
- [Naughty or Nice Machine](https://learn.adafruit.com/naughty-or-nice-machine.md)
- [Smart Cocktail Shaker](https://learn.adafruit.com/smart-cocktail-shaker.md)
- [Arduino Tips, Tricks, and Techniques](https://learn.adafruit.com/arduino-tips-tricks-and-techniques.md)
---
# Source: https://learn.adafruit.com/adafruit-arduino-lesson-14-servo-motors/the-breadboard-layout-for-knob.md
# Arduino Lesson 14. Servo Motors
## The Breadboard Layout for 'Knob'
Our next step is to add a pot so that we can control the position of the servo by turning the knob.
You just need to add the pot and a lead from its slider to A0 on the Arduino.

- [Previous Page](https://learn.adafruit.com/adafruit-arduino-lesson-14-servo-motors/arduino-code-for-sweep.md)
- [Next Page](https://learn.adafruit.com/adafruit-arduino-lesson-14-servo-motors/arduino-code-for-knob.md)
## Featured Products
### Standard servo - TowerPro SG-5010
[Standard servo - TowerPro SG-5010](https://www.adafruit.com/product/155)
This high-torque standard servo can rotate approximately 180 degrees (90 in each direction). You can use any servo code, hardware, or library to control these servos. Good for beginners who want to make stuff move without building a motor controller with feedback & gearbox. Comes with 3...
In Stock
[Buy Now](https://www.adafruit.com/product/155)
[Related Guides to the Product](https://learn.adafruit.com/products/155/guides)
### Premium Male/Male Jumper Wires - 40 x 6" (150mm)
[Premium Male/Male Jumper Wires - 40 x 6" (150mm)](https://www.adafruit.com/product/758)
Handy for making wire harnesses or jumpering between headers on PCB's. These premium jumper wires are 6" (150mm) long and come in a 'strip' of 40 (4 pieces of each of ten rainbow colors). They have 0.1" male header contacts on either end and fit cleanly next to each other...
In Stock
[Buy Now](https://www.adafruit.com/product/758)
[Related Guides to the Product](https://learn.adafruit.com/products/758/guides)
### Half Sized Premium Breadboard - 400 Tie Points
[Half Sized Premium Breadboard - 400 Tie Points](https://www.adafruit.com/product/64)
This is a cute, half-size breadboard with 400 tie points, good for small projects. It's 3.25" x 2.2" / 8.3cm x 5.5cm with a standard double-strip in the middle and two power rails on both sides. You can pull the power rails off easily to make the breadboard as...
In Stock
[Buy Now](https://www.adafruit.com/product/64)
[Related Guides to the Product](https://learn.adafruit.com/products/64/guides)
### Adafruit METRO 328 Fully Assembled - Arduino IDE compatible
[Adafruit METRO 328 Fully Assembled - Arduino IDE compatible](https://www.adafruit.com/product/50)
We sure love the ATmega328 here at Adafruit, and we use them _a lot_ for our own projects. The processor has plenty of GPIO, Analog inputs, hardware UART SPI and I2C, timers and PWM galore - just enough for most simple projects. When we need to go small, we use a
Out of Stock
[Buy Now](https://www.adafruit.com/product/50)
[Related Guides to the Product](https://learn.adafruit.com/products/50/guides)
### Micro servo
[Micro servo](https://www.adafruit.com/product/169)
Tiny little servo can rotate approximately 180 degrees (90 in each direction) and works just like the standard kinds you're used to but _smaller_. You can use any servo code, hardware, or library to control these servos. Good for beginners who want to make stuff move without...
In Stock
[Buy Now](https://www.adafruit.com/product/169)
[Related Guides to the Product](https://learn.adafruit.com/products/169/guides)
### Standard Size - High Torque - Metal Gear Servo
[Standard Size - High Torque - Metal Gear Servo](https://www.adafruit.com/product/1142)
This high-torque standard servo now comes in a metal-gear flavor, for extra-high torque (10 kg\*cm!) and reliability! It can rotate at least 120 degrees (60 in each direction) with a classic 1.5-2.5ms pulse, but if you can extend your pulses it can go up to about 170 degrees - it varies a bit...
In Stock
[Buy Now](https://www.adafruit.com/product/1142)
[Related Guides to the Product](https://learn.adafruit.com/products/1142/guides)
### Micro Servo - MG90D High Torque Metal Gear
[Micro Servo - MG90D High Torque Metal Gear](https://www.adafruit.com/product/1143)
Add more power to your robot with this metal-geared MG90D servo. The tiny little servo can rotate approximately 90 degrees (45 in each direction) and works just like the standard kinds you're used to but _smaller_. You can use any servo code, hardware, or library to control...
Out of Stock
[Buy Now](https://www.adafruit.com/product/1143)
[Related Guides to the Product](https://learn.adafruit.com/products/1143/guides)
## Related Guides
- [Arduino Tips, Tricks, and Techniques](https://learn.adafruit.com/arduino-tips-tricks-and-techniques.md)
- [Light Meter](https://learn.adafruit.com/light-meter.md)
- [Arduino Lesson 4. Eight LEDs and a Shift Register](https://learn.adafruit.com/adafruit-arduino-lesson-4-eight-leds.md)
- [Adafruit Arduino Selection Guide](https://learn.adafruit.com/adafruit-arduino-selection-guide.md)
- [Smart Measuring Cup](https://learn.adafruit.com/smart-measuring-cup.md)
- [Low Power WiFi Datalogger](https://learn.adafruit.com/low-power-wifi-datalogging.md)
- [Electronic Demon Costume](https://learn.adafruit.com/electronic-demon-costume.md)
- [Photocells](https://learn.adafruit.com/photocells.md)
- [Wave Shield Talking Clock](https://learn.adafruit.com/wave-shield-talking-clock.md)
- [WiFi Weather Station](https://learn.adafruit.com/wifi-weather-station-arduino-cc3000.md)
- [Adafruit Data Logger Shield](https://learn.adafruit.com/adafruit-data-logger-shield.md)
- [Ladyada's Learn Arduino - Lesson #1](https://learn.adafruit.com/ladyadas-learn-arduino-lesson-number-1.md)
- [Collin's Lab: MIDI](https://learn.adafruit.com/collins-lab-midi.md)
- [Arduino Lesson 7. Make an RGB LED Fader](https://learn.adafruit.com/adafruit-arduino-lesson-7-make-an-rgb-led-fader.md)
- [Geofencing with the FONA 808 & Adafruit IO](https://learn.adafruit.com/geofencing-with-the-fona-808-and-adafruit-io.md)
---
# Source: https://learn.adafruit.com/adafruit-arduino-lesson-14-servo-motors/the-breadboard-layout-for-sweep.md
# Arduino Lesson 14. Servo Motors
## The Breadboard Layout for 'Sweep'
For this experiment, the only thing connected to the Arduino is the servo motor.

The servo motor has three leads. The color of the leads varies between servo motors, but the red lead is always 5V and GND will either be black or brown. The other lead is the control lead and this is usually orange or yellow. This control lead is connected to digital pin 9.
The servo is conveniently terminated in a socket into which we can push jumper wires, to link it to the breadboard and then to the Arduino.

- [Previous Page](https://learn.adafruit.com/adafruit-arduino-lesson-14-servo-motors/parts.md)
- [Next Page](https://learn.adafruit.com/adafruit-arduino-lesson-14-servo-motors/if-the-servo-misbehaves.md)
## Featured Products
### Standard servo - TowerPro SG-5010
[Standard servo - TowerPro SG-5010](https://www.adafruit.com/product/155)
This high-torque standard servo can rotate approximately 180 degrees (90 in each direction). You can use any servo code, hardware, or library to control these servos. Good for beginners who want to make stuff move without building a motor controller with feedback & gearbox. Comes with 3...
In Stock
[Buy Now](https://www.adafruit.com/product/155)
[Related Guides to the Product](https://learn.adafruit.com/products/155/guides)
### Premium Male/Male Jumper Wires - 40 x 6" (150mm)
[Premium Male/Male Jumper Wires - 40 x 6" (150mm)](https://www.adafruit.com/product/758)
Handy for making wire harnesses or jumpering between headers on PCB's. These premium jumper wires are 6" (150mm) long and come in a 'strip' of 40 (4 pieces of each of ten rainbow colors). They have 0.1" male header contacts on either end and fit cleanly next to each other...
In Stock
[Buy Now](https://www.adafruit.com/product/758)
[Related Guides to the Product](https://learn.adafruit.com/products/758/guides)
### Half Sized Premium Breadboard - 400 Tie Points
[Half Sized Premium Breadboard - 400 Tie Points](https://www.adafruit.com/product/64)
This is a cute, half-size breadboard with 400 tie points, good for small projects. It's 3.25" x 2.2" / 8.3cm x 5.5cm with a standard double-strip in the middle and two power rails on both sides. You can pull the power rails off easily to make the breadboard as...
In Stock
[Buy Now](https://www.adafruit.com/product/64)
[Related Guides to the Product](https://learn.adafruit.com/products/64/guides)
### Adafruit METRO 328 Fully Assembled - Arduino IDE compatible
[Adafruit METRO 328 Fully Assembled - Arduino IDE compatible](https://www.adafruit.com/product/50)
We sure love the ATmega328 here at Adafruit, and we use them _a lot_ for our own projects. The processor has plenty of GPIO, Analog inputs, hardware UART SPI and I2C, timers and PWM galore - just enough for most simple projects. When we need to go small, we use a
Out of Stock
[Buy Now](https://www.adafruit.com/product/50)
[Related Guides to the Product](https://learn.adafruit.com/products/50/guides)
### Micro servo
[Micro servo](https://www.adafruit.com/product/169)
Tiny little servo can rotate approximately 180 degrees (90 in each direction) and works just like the standard kinds you're used to but _smaller_. You can use any servo code, hardware, or library to control these servos. Good for beginners who want to make stuff move without...
In Stock
[Buy Now](https://www.adafruit.com/product/169)
[Related Guides to the Product](https://learn.adafruit.com/products/169/guides)
### Standard Size - High Torque - Metal Gear Servo
[Standard Size - High Torque - Metal Gear Servo](https://www.adafruit.com/product/1142)
This high-torque standard servo now comes in a metal-gear flavor, for extra-high torque (10 kg\*cm!) and reliability! It can rotate at least 120 degrees (60 in each direction) with a classic 1.5-2.5ms pulse, but if you can extend your pulses it can go up to about 170 degrees - it varies a bit...
In Stock
[Buy Now](https://www.adafruit.com/product/1142)
[Related Guides to the Product](https://learn.adafruit.com/products/1142/guides)
### Micro Servo - MG90D High Torque Metal Gear
[Micro Servo - MG90D High Torque Metal Gear](https://www.adafruit.com/product/1143)
Add more power to your robot with this metal-geared MG90D servo. The tiny little servo can rotate approximately 90 degrees (45 in each direction) and works just like the standard kinds you're used to but _smaller_. You can use any servo code, hardware, or library to control...
Out of Stock
[Buy Now](https://www.adafruit.com/product/1143)
[Related Guides to the Product](https://learn.adafruit.com/products/1143/guides)
## Related Guides
- [Arduino Tips, Tricks, and Techniques](https://learn.adafruit.com/arduino-tips-tricks-and-techniques.md)
- [Light Meter](https://learn.adafruit.com/light-meter.md)
- [Arduino Lesson 4. Eight LEDs and a Shift Register](https://learn.adafruit.com/adafruit-arduino-lesson-4-eight-leds.md)
- [Adafruit Arduino Selection Guide](https://learn.adafruit.com/adafruit-arduino-selection-guide.md)
- [Smart Measuring Cup](https://learn.adafruit.com/smart-measuring-cup.md)
- [Low Power WiFi Datalogger](https://learn.adafruit.com/low-power-wifi-datalogging.md)
- [Electronic Demon Costume](https://learn.adafruit.com/electronic-demon-costume.md)
- [Photocells](https://learn.adafruit.com/photocells.md)
- [Wave Shield Talking Clock](https://learn.adafruit.com/wave-shield-talking-clock.md)
- [WiFi Weather Station](https://learn.adafruit.com/wifi-weather-station-arduino-cc3000.md)
- [Adafruit Data Logger Shield](https://learn.adafruit.com/adafruit-data-logger-shield.md)
- [Ladyada's Learn Arduino - Lesson #1](https://learn.adafruit.com/ladyadas-learn-arduino-lesson-number-1.md)
- [Collin's Lab: MIDI](https://learn.adafruit.com/collins-lab-midi.md)
- [Arduino Lesson 7. Make an RGB LED Fader](https://learn.adafruit.com/adafruit-arduino-lesson-7-make-an-rgb-led-fader.md)
- [Geofencing with the FONA 808 & Adafruit IO](https://learn.adafruit.com/geofencing-with-the-fona-808-and-adafruit-io.md)
---
# Source: https://learn.adafruit.com/flora-gps-jacket/the-code.md
# Source: https://learn.adafruit.com/how-to-make-a-pogo-pin-test-jig/the-code.md
# How to Make a Pogo Pin Test Jig
## The Code
The code for the project is below and available on GitHub.
[See the files for this project on GitHub](https://github.com/adafruit/Adafruit_Learning_System_Guides/tree/master/SD_Card_Testing_Jig)
https://github.com/adafruit/Adafruit_Learning_System_Guides/blob/main/SD_Card_Testing_Jig/sdcardtest/sdcardtest.ino
- [Previous Page](https://learn.adafruit.com/how-to-make-a-pogo-pin-test-jig/arduino-shield-jigs.md)
- [Next Page](https://learn.adafruit.com/how-to-make-a-pogo-pin-test-jig/testing.md)
## Featured Products
### Pogo Pin Probe Clip
[Pogo Pin Probe Clip](https://www.adafruit.com/product/1969)
The Pogo Pin Probe Clip is a great way to test and connect with pin-point accuracy without soldering! It's sort of like an [alligator clip](https://www.adafruit.com/product/321) with a built-in springy pogo pin - so you can connect to any PCB pad for 'scoping, analyzing, or...
In Stock
[Buy Now](https://www.adafruit.com/product/1969)
[Related Guides to the Product](https://learn.adafruit.com/products/1969/guides)
### Pogo Pins "Spear Head" (10 pack)
[Pogo Pins "Spear Head" (10 pack)](https://www.adafruit.com/product/394)
Pogo pins are little spring-loaded contacts, very handy for making jigs, or making momentary (but electrically solid) contacts. We use them by the dozen for making programming and testing jigs but they're handy also if say you want to JTAG program a board that you cant solder headers to -...
In Stock
[Buy Now](https://www.adafruit.com/product/394)
[Related Guides to the Product](https://learn.adafruit.com/products/394/guides)
### Pogo Pins "Cupped Head" (10 pack)
[Pogo Pins "Cupped Head" (10 pack)](https://www.adafruit.com/product/2428)
Pogo pins are little spring-loaded contacts, very handy for making jigs, or making momentary (but electrically solid) contacts. We use them by the dozen for making programming and testing jigs but they're handy also if say you want to JTAG program a board that you cant solder headers to -...
In Stock
[Buy Now](https://www.adafruit.com/product/2428)
[Related Guides to the Product](https://learn.adafruit.com/products/2428/guides)
### Pogo Pins "Crown Head" (10 pack)
[Pogo Pins "Crown Head" (10 pack)](https://www.adafruit.com/product/2429)
Pogo pins are little spring-loaded contacts, very handy for making jigs, or making momentary (but electrically solid) contacts. We use them by the dozen for making programming and testing jigs but they're handy also if say you want to JTAG program a board that you cant solder headers to -...
In Stock
[Buy Now](https://www.adafruit.com/product/2429)
[Related Guides to the Product](https://learn.adafruit.com/products/2429/guides)
### Pogo Pins "Needle Head" (10 pack)
[Pogo Pins "Needle Head" (10 pack)](https://www.adafruit.com/product/2430)
Pogo pins are little spring-loaded contacts, very handy for making jigs, or making momentary (but electrically solid) contacts. We use them by the dozen for making programming and testing jigs but they're handy also if say you want to JTAG program a board that you cant solder headers to -...
In Stock
[Buy Now](https://www.adafruit.com/product/2430)
[Related Guides to the Product](https://learn.adafruit.com/products/2430/guides)
### Toggle Clamp - Large Size
[Toggle Clamp - Large Size](https://www.adafruit.com/product/2457)
\*Ka-thunk\* Pin down that PCB with our **Toggle Clamp** , a sturdy and reliable way to quickly press and release with precision! A pogo-pin bed is a great way to connect and test boards without any soldering, but you have to somehow get that PCB aligned right and evenly pressed down...
In Stock
[Buy Now](https://www.adafruit.com/product/2457)
[Related Guides to the Product](https://learn.adafruit.com/products/2457/guides)
### Toggle Clamp - Medium Flip-up Style
[Toggle Clamp - Medium Flip-up Style](https://www.adafruit.com/product/2456)
\*Ka-thunk\* Pin down that little PCB with our **Toggle Clamp** , a sturdy and reliable way to quickly press and release with precision! A pogo-pin bed is a great way to connect and test boards without any soldering, but you have to somehow get that PCB aligned right and evenly...
In Stock
[Buy Now](https://www.adafruit.com/product/2456)
[Related Guides to the Product](https://learn.adafruit.com/products/2456/guides)
### Toggle Clamp - Small Flip-down Style
[Toggle Clamp - Small Flip-down Style](https://www.adafruit.com/product/2459)
\*Ka-thunk\* Pin down that PCB with our **Toggle Clamp** , a sturdy and reliable way to quickly press and release with precision! A pogo-pin bed is a great way to connect and test boards without any soldering, but you have to somehow get that PCB aligned right and evenly pressed...
In Stock
[Buy Now](https://www.adafruit.com/product/2459)
[Related Guides to the Product](https://learn.adafruit.com/products/2459/guides)
## Related Guides
- [DIY 3D Printing Filament](https://learn.adafruit.com/diy-3d-printing-filament.md)
- [Standalone AVR Chip Programmer](https://learn.adafruit.com/standalone-avr-chip-programmer.md)
- [How we designed an injection-molded case](https://learn.adafruit.com/how-we-designed-an-injection-molded-case-for-raspberry-pi.md)
- [Metal Parts from 3D Prints](https://learn.adafruit.com/metal-parts-from-3d-prints.md)
- [KTOWN's Ultimate Creating Parts in Eagle Tutorial](https://learn.adafruit.com/ktowns-ultimate-creating-parts-in-eagle-tutorial.md)
- [Maker Business & Manufacturing Software - Our Tips & Tricks](https://learn.adafruit.com/maker-business-manufacturing-software-our-tips-and-tricks.md)
- [Adafruit Pinguin for EAGLE CAD](https://learn.adafruit.com/adafruit-pinguin-for-eagle-cad.md)
- [Laser-Cut Enclosure Design](https://learn.adafruit.com/laser-cut-enclosure-design.md)
- [How to Sign Windows Drivers & Executables](https://learn.adafruit.com/how-to-sign-windows-drivers-installer.md)
- [SMT Manufacturing](https://learn.adafruit.com/smt-manufacturing.md)
- [All About Laser Cutters](https://learn.adafruit.com/all-about-laser-cutters.md)
- [Shop Tips & Tricks](https://learn.adafruit.com/shop-tips-and-tricks.md)
- [How to convert Eagle PCBs to 3D Models in Fusion 360](https://learn.adafruit.com/how-to-convert-eagle-pcbs-to-3d-models-in-fusion-360.md)
- [Creating Accurate Footprints in Eagle](https://learn.adafruit.com/creating-accurate-footprints-in-eagle.md)
- [Make your own PCB with Eagle, OSH Park, and Adafruit!](https://learn.adafruit.com/making-pcbs-with-oshpark-and-eagle.md)
---
# Source: https://learn.adafruit.com/character-lcds/the-createchar-command.md
# Character LCDs
## The createChar Command
You may want to have special characters, for example in this temperature sensor, we created a 'degree' symbol (°)
You can do that with the **createChar** command, and to help you out [we're going to point you to this really great website that does the hard work for you!](http://www.quinapalus.com/hd44780udg.html)- [Previous Page](https://learn.adafruit.com/character-lcds/python-circuitpython.md)
## Featured Products
### Standard LCD 16x2 + extras
[Standard LCD 16x2 + extras](https://www.adafruit.com/product/181)
Standard HD44780 LCDs are useful for creating standalone projects.
- 16 characters wide, 2 rows
- White text on blue background
- Connection port is 0.1" pitch, single row for easy breadboarding and wiring
- Pins are documented on the back of the LCD to assist...
In Stock
[Buy Now](https://www.adafruit.com/product/181)
[Related Guides to the Product](https://learn.adafruit.com/products/181/guides)
### Assembled Standard LCD 16x2 + extras - White on Blue
[Assembled Standard LCD 16x2 + extras - White on Blue](https://www.adafruit.com/product/1447)
Standard HD44780 LCDs are useful for creating standalone projects. This product is similar to our [Standard LCD 16x2 display **but comes with the header soldered on!**](https://www.adafruit.com/products/181)
- 16 characters wide, 2 rows
- White text...
In Stock
[Buy Now](https://www.adafruit.com/product/1447)
[Related Guides to the Product](https://learn.adafruit.com/products/1447/guides)
### RGB backlight positive LCD 16x2 + extras
[RGB backlight positive LCD 16x2 + extras](https://www.adafruit.com/product/398)
This is a fancy upgrade to standard 16x2 LCDs, instead of just having blue and white, or red and black, this LCD has black characters on a full color RGB-backlight background! That means you can change the background color to anything you want - red, green, blue, pink, white, purple yellow,...
In Stock
[Buy Now](https://www.adafruit.com/product/398)
[Related Guides to the Product](https://learn.adafruit.com/products/398/guides)
### RGB backlight negative LCD 16x2 + extras
[RGB backlight negative LCD 16x2 + extras](https://www.adafruit.com/product/399)
This is a fancy upgrade to standard 16x2 LCDs, instead of just having blue and white, or red and black, this LCD has full color RGB characters on a dark/black background! That means you can change the character display colors to anything you want - red, green, blue, pink, white, purple yellow,...
In Stock
[Buy Now](https://www.adafruit.com/product/399)
[Related Guides to the Product](https://learn.adafruit.com/products/399/guides)
### Standard LCD 20x4 + extras
[Standard LCD 20x4 + extras](https://www.adafruit.com/product/198)
Standard HD44780 LCDs are useful for creating standalone projects.
- 20 characters wide, 4 rows
- White text on blue background
- Connection port is 0.1" pitch, single row for easy breadboarding and wiring
- Single LED backlight with a resistor included, you can...
In Stock
[Buy Now](https://www.adafruit.com/product/198)
[Related Guides to the Product](https://learn.adafruit.com/products/198/guides)
### RGB backlight positive LCD 20x4 + extras
[RGB backlight positive LCD 20x4 + extras](https://www.adafruit.com/product/499)
This is a fancy upgrade to standard 20x4 LCDs, instead of just having blue and white, or red and black, this LCD has black characters on a full color RGB background! That means you can change the display background color to anything you want - red, green, blue, pink, white, purple yellow,...
In Stock
[Buy Now](https://www.adafruit.com/product/499)
[Related Guides to the Product](https://learn.adafruit.com/products/499/guides)
### RGB backlight negative LCD 20x4 + extras
[RGB backlight negative LCD 20x4 + extras](https://www.adafruit.com/product/498)
This is a fancy upgrade to standard 20x4 LCDs, instead of just having blue and white, or red and black, this LCD has full color RGB characters on a dark/black background! That means you can change the character display colors to anything you want - red, green, blue, pink, white, purple yellow,...
In Stock
[Buy Now](https://www.adafruit.com/product/498)
[Related Guides to the Product](https://learn.adafruit.com/products/498/guides)
### Adafruit METRO 328 Fully Assembled - Arduino IDE compatible
[Adafruit METRO 328 Fully Assembled - Arduino IDE compatible](https://www.adafruit.com/product/50)
We sure love the ATmega328 here at Adafruit, and we use them _a lot_ for our own projects. The processor has plenty of GPIO, Analog inputs, hardware UART SPI and I2C, timers and PWM galore - just enough for most simple projects. When we need to go small, we use a
Out of Stock
[Buy Now](https://www.adafruit.com/product/50)
[Related Guides to the Product](https://learn.adafruit.com/products/50/guides)
## Related Guides
- [Trinket Temperature & Humidity LCD Display](https://learn.adafruit.com/trinket-temperature-humidity-lcd-display.md)
- [Circuit Playground Sound-Controlled Robot](https://learn.adafruit.com/circuit-playground-sound-controlled-robot.md)
- [TTL Serial Camera](https://learn.adafruit.com/ttl-serial-camera.md)
- [Digital Circuits 7: MCUs... how do they work?](https://learn.adafruit.com/mcus-how-do-they-work.md)
- [Adafruit Data Logger Shield](https://learn.adafruit.com/adafruit-data-logger-shield.md)
- [Arduino "Hunt The Wumpus"](https://learn.adafruit.com/arduino-hunt-the-wumpus.md)
- [Arduino Lesson 2. LEDs](https://learn.adafruit.com/adafruit-arduino-lesson-2-leds.md)
- [Mini Thermal Receipt Printers](https://learn.adafruit.com/mini-thermal-receipt-printer.md)
- [Bluetooth Temperature & Humidity Sensor](https://learn.adafruit.com/bluetooth-temperature-and-humidity-sensor.md)
- [Character LCD with Raspberry Pi or BeagleBone Black](https://learn.adafruit.com/character-lcd-with-raspberry-pi-or-beaglebone-black.md)
- [DIY 8x2 LCD Shield](https://learn.adafruit.com/diy-8x2-lcd-shield.md)
- [Arduino Ethernet + SD Card](https://learn.adafruit.com/arduino-ethernet-sd-card.md)
- [Trellis 3D Printed Enclosure](https://learn.adafruit.com/trellis-3d-printed-enclosure.md)
- [Adafruit AirLift Shield - ESP32 WiFi Co-Processor](https://learn.adafruit.com/adafruit-airlift-shield-esp32-wifi-co-processor.md)
- [2.2" TFT Display](https://learn.adafruit.com/2-2-tft-display.md)
---
# Source: https://learn.adafruit.com/adafruits-raspberry-pi-lesson-4-gpio-setup/the-gpio-connector.md
# Adafruit's Raspberry Pi Lesson 4. GPIO Setup
## The GPIO Connector
The diagram below show GPIO pinouts used on different models of the Raspberry Pi. The earlier revisions of the Raspberry Pi were 26-pin based while the newer models are 40-pin.

As well as supplying power (GND, 3.3V and 5V) all the GPIO pins can be used as either digital inputs or outputs. The pins labelled SCL and SDA can be used for I2C. The pins labelled MOSI, MISO and SCKL can be used to connect to high speed SPI devices.
All the pins have 3.3V logic levels and are not 5V-safe so the output levels are 0-3.3V and the inputs should not be higher than 3.3V. If you want to connect a 5V output to a Pi input, [use a level shifter](https://www.adafruit.com/index.php?main_page=adasearch&q=level+shifter)
A popular way to actually make the connections to the Raspberry Pi is to use a [Pi Cobbler Plus ](https://www.adafruit.com/product/2029)or a [Pi T-Cobbler Breakout](https://www.adafruit.com/product/1754) for older 26-pin versions.
This uses a ribbon cable to connect the GPIO connector to solderless breadboard, where you can add your own components.

Danger:
- [Previous Page](https://learn.adafruit.com/adafruits-raspberry-pi-lesson-4-gpio-setup/overview.md)
- [Next Page](https://learn.adafruit.com/adafruits-raspberry-pi-lesson-4-gpio-setup/adafruit-pi-code.md)
## Featured Products
### Assembled Pi Cobbler Plus - Breakout Cable
[Assembled Pi Cobbler Plus - Breakout Cable](https://www.adafruit.com/product/2029)
The Raspberry Pi B+ / Pi 2 / Pi 3 / Pi 4 has landed on the Maker World like a 40-GPIO pinned, quad-USB ported, credit card sized bomb of DIY joy. And while you can use most of our great Model B accessories by hooking up our [downgrade...](https://www.adafruit.com/product/1986)
In Stock
[Buy Now](https://www.adafruit.com/product/2029)
[Related Guides to the Product](https://learn.adafruit.com/products/2029/guides)
### Assembled Pi T-Cobbler Plus - GPIO Breakout
[Assembled Pi T-Cobbler Plus - GPIO Breakout](https://www.adafruit.com/product/2028)
**This is the assembled version of the Pi T-Cobbler Plus. It only works with the Raspberry Pi Model Zero, A+, B+, Pi 2, Pi 3 & Pi 4!** (Any Pi with 2x20 connector)
The Raspberry Pi has landed on the Maker World like a 40-GPIO pinned, quad-USB ported, credit...
In Stock
[Buy Now](https://www.adafruit.com/product/2028)
[Related Guides to the Product](https://learn.adafruit.com/products/2028/guides)
### Raspberry Pi 3 Model B Starter Pack - Includes a Raspberry Pi 3
[Raspberry Pi 3 Model B Starter Pack - Includes a Raspberry Pi 3](https://www.adafruit.com/product/3058)
Gotta say - this new Pi 3 is fly. All the cool kids are going to have it - but all the coolest kids are also going to have a big pack of super cool accessories.
We've hand chosen these accessories as the perfect accompaniment to your new Raspberry Pi 3 - Model B. It's...
No Longer Stocked
[Buy Now](https://www.adafruit.com/product/3058)
[Related Guides to the Product](https://learn.adafruit.com/products/3058/guides)
### Adafruit Assembled Pi Cobbler Breakout + Cable for Raspberry Pi
[Adafruit Assembled Pi Cobbler Breakout + Cable for Raspberry Pi](https://www.adafruit.com/product/914)
Now that you've finally got your hands on a [Raspberry Pi® Model B](http://www.raspberrypi.org/), you're probably itching to make some fun embedded computer projects with it. What you need is an add on prototyping Pi Cobbler from Adafruit, which can break out all those...
No Longer Stocked
[Buy Now](https://www.adafruit.com/product/914)
[Related Guides to the Product](https://learn.adafruit.com/products/914/guides)
### Budget Pack for Raspberry Pi 1 Model B (Doesn't include RasPi)
[Budget Pack for Raspberry Pi 1 Model B (Doesn't include RasPi)](https://www.adafruit.com/product/965)
An optimized collection of parts and pieces to experiment with Raspberry Pi at home, school or work. Great for students and those that want to get their feet wet, no soldering required! **THIS PACK DOES NOT INCLUDE A RASPBERRY PI 1 MODEL B and is NOT compatible with Model B+ or Raspberry Pi...**
No Longer Stocked
[Buy Now](https://www.adafruit.com/product/965)
[Related Guides to the Product](https://learn.adafruit.com/products/965/guides)
### GPIO Ribbon Cable for Raspberry Pi Model A and B - 26 pin
[GPIO Ribbon Cable for Raspberry Pi Model A and B - 26 pin](https://www.adafruit.com/product/862)
That new Raspberry Pi® Model A or B computer you just got has a row of 2x13 pin headers soldered on - those are the GPIO (general purpose input/output) pins and for those of us who like to hack electronics they are where the real fun is. By programming the Pi, you can twiddle those pins...
In Stock
[Buy Now](https://www.adafruit.com/product/862)
[Related Guides to the Product](https://learn.adafruit.com/products/862/guides)
### Programming the Raspberry Pi: Getting Started with Python
[Programming the Raspberry Pi: Getting Started with Python](https://www.adafruit.com/product/1089)
**Program your own Raspberry Pi projects!**
An updated guide to programming your own Raspberry Pi projects. Learn to create inventive programs and fun games on your powerful Raspberry Pi--with no programming experience required. **This practical book has been revised...**
In Stock
[Buy Now](https://www.adafruit.com/product/1089)
[Related Guides to the Product](https://learn.adafruit.com/products/1089/guides)
## Related Guides
- [Adafruit's Raspberry Pi Lesson 11. DS18B20 Temperature Sensing](https://learn.adafruit.com/adafruits-raspberry-pi-lesson-11-ds18b20-temperature-sensing.md)
- [Drive a 16x2 LCD with the Raspberry Pi](https://learn.adafruit.com/drive-a-16x2-lcd-directly-with-a-raspberry-pi.md)
- [Capacitive Touch Sensors on the Raspberry Pi](https://learn.adafruit.com/capacitive-touch-sensors-on-the-raspberry-pi.md)
- [Circadian Pi Desk Light](https://learn.adafruit.com/circadian-pi-desk-light.md)
- [Windows IoT Core Application Development: Headless Blinky](https://learn.adafruit.com/windows-iot-application-development-headless-application.md)
- [Node.js Embedded Development on the Raspberry Pi](https://learn.adafruit.com/node-embedded-development.md)
- [Single Channel LoRaWAN Gateway for Raspberry Pi](https://learn.adafruit.com/raspberry-pi-single-channel-lorawan-gateway.md)
- [Basic Resistor Sensor Reading on Raspberry Pi](https://learn.adafruit.com/basic-resistor-sensor-reading-on-raspberry-pi.md)
- [Raspberry Pi E-mail Notifier Using LEDs](https://learn.adafruit.com/raspberry-pi-e-mail-notifier-using-leds.md)
- [LoRa and LoRaWAN Radio for Raspberry Pi](https://learn.adafruit.com/lora-and-lorawan-radio-for-raspberry-pi.md)
- [Adafruit's Raspberry Pi Lesson 13. Power Control](https://learn.adafruit.com/adafruits-raspberry-pi-lesson-13-power-control.md)
- [Matrix and 7-Segment LED Backpack with the Raspberry Pi](https://learn.adafruit.com/matrix-7-segment-led-backpack-with-the-raspberry-pi.md)
- [Adafruit's Raspberry Pi Lesson 12. Sensing Movement](https://learn.adafruit.com/adafruits-raspberry-pi-lesson-12-sensing-movement.md)
- [Setting up a Raspberry Pi with NOOBS](https://learn.adafruit.com/setting-up-a-raspberry-pi-with-noobs.md)
- [Processing on the Raspberry Pi & PiTFT](https://learn.adafruit.com/processing-on-the-raspberry-pi-and-pitft.md)
---
# Source: https://learn.adafruit.com/adafruit-arduino-lesson-1-blink/the-l-led.md
# Arduino Lesson 1. Blink
## The 'L' LED
The Arduino has rows of connectors along both sides that are used to connect to electronic devices and plug-in 'shields' that allow the Arduino to do more.
However, the Arduino also has a single LED that you can control from your sketches. This LED is built onto the Arduino board and is often referred to as the 'L' LED as this is how it is labelled on the board.
The position of this LED is circled in red on the pictures of the Arduino Uno and Leonardo below.


- [Previous Page](https://learn.adafruit.com/adafruit-arduino-lesson-1-blink/parts.md)
- [Next Page](https://learn.adafruit.com/adafruit-arduino-lesson-1-blink/loading-the-blink-example.md)
## Featured Products
### Adafruit METRO 328 Fully Assembled - Arduino IDE compatible
[Adafruit METRO 328 Fully Assembled - Arduino IDE compatible](https://www.adafruit.com/product/50)
We sure love the ATmega328 here at Adafruit, and we use them _a lot_ for our own projects. The processor has plenty of GPIO, Analog inputs, hardware UART SPI and I2C, timers and PWM galore - just enough for most simple projects. When we need to go small, we use a
Out of Stock
[Buy Now](https://www.adafruit.com/product/50)
[Related Guides to the Product](https://learn.adafruit.com/products/50/guides)
### USB Cable - Standard A-B
[USB Cable - Standard A-B](https://www.adafruit.com/product/62)
This here is your standard A-B USB cable, for USB 1.1 or 2.0. Perfect for connecting a PC to your Arduino, USBtinyISP (among other things).
3 feet / 1 meter long
Color may vary!
In Stock
[Buy Now](https://www.adafruit.com/product/62)
[Related Guides to the Product](https://learn.adafruit.com/products/62/guides)
## Related Guides
- [WiFi Weather Station](https://learn.adafruit.com/wifi-weather-station-arduino-cc3000.md)
- [Naughty or Nice Machine](https://learn.adafruit.com/naughty-or-nice-machine.md)
- [Adafruit VS1053 MP3/AAC/Ogg/MIDI/WAV Codec Breakout Tutorial](https://learn.adafruit.com/adafruit-vs1053-mp3-aac-ogg-midi-wav-play-and-record-codec-tutorial.md)
- [How to program a Zumo Robot with Simulink](https://learn.adafruit.com/zumo-robot-control-with-simulink.md)
- [DIY 8x2 LCD Shield](https://learn.adafruit.com/diy-8x2-lcd-shield.md)
- [3D Printed Animatronic Robot Head](https://learn.adafruit.com/3d-printed-animatronic-robot-head.md)
- [Arduino Lesson 7. Make an RGB LED Fader](https://learn.adafruit.com/adafruit-arduino-lesson-7-make-an-rgb-led-fader.md)
- [WiFi Controlled LED Christmahanukwanzaa Tree](https://learn.adafruit.com/wifi-controlled-led-christmahanukwanzaa-tree.md)
- [Light Meter](https://learn.adafruit.com/light-meter.md)
- [1,500 NeoPixel LED Curtain with Raspberry Pi and Fadecandy](https://learn.adafruit.com/1500-neopixel-led-curtain-with-raspberry-pi-fadecandy.md)
- [Trellis 3D Printed Enclosure](https://learn.adafruit.com/trellis-3d-printed-enclosure.md)
- [Deciphering Strange Arduino Code](https://learn.adafruit.com/deciphering-strange-arduino-code.md)
- [Collin's Lab: MIDI](https://learn.adafruit.com/collins-lab-midi.md)
- [Tiny Arduino Music Visualizer](https://learn.adafruit.com/piccolo.md)
- [Adafruit Music Maker Shield](https://learn.adafruit.com/adafruit-music-maker-shield-vs1053-mp3-wav-wave-ogg-vorbis-player.md)
---
# Source: https://learn.adafruit.com/lesson-0-getting-started/the-lessons.md
# Arduino Lesson 0. Getting Started
## The Lessons
The remainder of the lessons in this series are designed to lead you through various aspects of both electronics and programming the Arduino.
They follow in a logical order, with each lesson building on the lessons that have come before.
- [Lesson 1. Blink](http://learn.adafruit.com/adafruit-arduino-lesson-1-blink "Link: http://learn.adafruit.com/adafruit-arduino-lesson-1-blink")
- [Lesson 2. LEDs](http://learn.adafruit.com/adafruit-arduino-lesson-2-leds "Link: http://learn.adafruit.com/adafruit-arduino-lesson-2-leds")
- [Lesson 3. RGB LEDs](http://learn.adafruit.com/adafruit-arduino-lesson-3-rgb-leds "Link: http://learn.adafruit.com/adafruit-arduino-lesson-3-rgb-leds")
- [Lesson 4. Eight LEDs and a Shift Register](http://learn.adafruit.com/adafruit-arduino-lesson-4-eight-leds "Link: http://learn.adafruit.com/adafruit-arduino-lesson-4-eight-leds")
- [Lesson 5. The Serial Monitor](http://learn.adafruit.com/adafruit-arduino-lesson-5-the-serial-monitor "Link: http://learn.adafruit.com/adafruit-arduino-lesson-5-the-serial-monitor")
- [Lesson 6. Digital Inputs](http://learn.adafruit.com/adafruit-arduino-lesson-6-digital-inputs "Link: http://learn.adafruit.com/adafruit-arduino-lesson-6-digital-inputs")
- [Lesson 7. Make an RGB LED Fader](http://learn.adafruit.com/adafruit-arduino-lesson-7-make-an-rgb-led-fader "Link: http://learn.adafruit.com/adafruit-arduino-lesson-7-make-an-rgb-led-fader")
- [Lesson 8. Analog Inputs](http://learn.adafruit.com/adafruit-arduino-lesson-8-analog-inputs "Link: http://learn.adafruit.com/adafruit-arduino-lesson-8-analog-inputs")
- [Lesson 9. Sensing Light](http://learn.adafruit.com/adafruit-arduino-lesson-9-sensing-light "Link: http://learn.adafruit.com/adafruit-arduino-lesson-9-sensing-light")
- [Lesson 10. Making Sounds](http://learn.adafruit.com/adafruit-arduino-lesson-10-making-sounds "Link: http://learn.adafruit.com/adafruit-arduino-lesson-10-making-sounds")
- [Lesson 11. LCD Displays - Part 1](http://learn.adafruit.com/adafruit-arduino-lesson-11-lcd-displays-1 "Link: http://learn.adafruit.com/adafruit-arduino-lesson-11-lcd-displays-1")
- [Lesson 12. LCD Displays - Part 2](http://learn.adafruit.com/adafruit-arduino-lesson-12-lcd-displays-part-2 "Link: http://learn.adafruit.com/adafruit-arduino-lesson-12-lcd-displays-part-2")
- [Lesson 13. DC Motors](http://learn.adafruit.com/adafruit-arduino-lesson-13-dc-motors "Link: http://learn.adafruit.com/adafruit-arduino-lesson-13-dc-motors")
- [Lesson 14. Servo Motors](http://learn.adafruit.com/adafruit-arduino-lesson-14-servo-motors "Link: http://learn.adafruit.com/adafruit-arduino-lesson-14-servo-motors")
- [Lesson 15. DC Motor Reversing](http://learn.adafruit.com/adafruit-arduino-lesson-15-dc-motor-reversing "Link: http://learn.adafruit.com/adafruit-arduino-lesson-15-dc-motor-reversing")
- [Lesson 16. Stepper Motors](http://learn.adafruit.com/adafruit-arduino-lesson-16-stepper-motors "Link: http://learn.adafruit.com/adafruit-arduino-lesson-16-stepper-motors")
**About the Author.**
Simon Monk is author of a number of books relating to Open Source Hardware. The following books written by Simon are available from Adafruit: [Programming Arduino](https://www.adafruit.com/products/1019), [30 Arduino Projects for the Evil Genius](https://www.adafruit.com/products/868) and [Programming the Raspberry Pi](https://www.adafruit.com/index.php?main_page=adasearch&q=programming+raspberry+pi).
- [Previous Page](https://learn.adafruit.com/lesson-0-getting-started/boards-and-ports.md)
## Featured Products
### Arduino Leonardo ATmega32u4 with headers
[Arduino Leonardo ATmega32u4 with headers](https://www.adafruit.com/product/849)
**Note:** This product is **discontinued,** but you can purchase the [Seeeduino Lite](https://www.adafruit.com/product/3228), which is an equivalent alternative that can be used instead.
The Arduino Leonardo is a microcontroller board based on...
No Longer Stocked
[Buy Now](https://www.adafruit.com/product/849)
[Related Guides to the Product](https://learn.adafruit.com/products/849/guides)
### Adafruit METRO 328 Fully Assembled - Arduino IDE compatible
[Adafruit METRO 328 Fully Assembled - Arduino IDE compatible](https://www.adafruit.com/product/50)
We sure love the ATmega328 here at Adafruit, and we use them _a lot_ for our own projects. The processor has plenty of GPIO, Analog inputs, hardware UART SPI and I2C, timers and PWM galore - just enough for most simple projects. When we need to go small, we use a
Out of Stock
[Buy Now](https://www.adafruit.com/product/50)
[Related Guides to the Product](https://learn.adafruit.com/products/50/guides)
## Related Guides
- [Bluetooth Temperature & Humidity Sensor](https://learn.adafruit.com/bluetooth-temperature-and-humidity-sensor.md)
- [Bluefruit LE Connect for iOS and Android](https://learn.adafruit.com/bluefruit-le-connect.md)
- [Arduino Lesson 14. Servo Motors](https://learn.adafruit.com/adafruit-arduino-lesson-14-servo-motors.md)
- [20mm LED Pixels](https://learn.adafruit.com/20mm-led-pixels.md)
- [Affordable HAL 9000 Replica](https://learn.adafruit.com/hal-9000-replica.md)
- [Adafruit 1.27" and 1.5" Color OLED Breakout Board](https://learn.adafruit.com/adafruit-1-5-color-oled-breakout-board.md)
- [Mini Thermal Receipt Printers](https://learn.adafruit.com/mini-thermal-receipt-printer.md)
- [Introducing Adafruit Trellis ](https://learn.adafruit.com/adafruit-trellis-diy-open-source-led-keypad.md)
- [Multi-tasking the Arduino - Part 2](https://learn.adafruit.com/multi-tasking-the-arduino-part-2.md)
- [FTDI Friend](https://learn.adafruit.com/ftdi-friend.md)
- [Wave Shield Voice Changer](https://learn.adafruit.com/wave-shield-voice-changer.md)
- [Adafruit 1.14" 240x135 Color TFT Breakout LCD Display](https://learn.adafruit.com/adafruit-1-14-240x135-color-tft-breakout.md)
- [Arduino Ethernet + SD Card](https://learn.adafruit.com/arduino-ethernet-sd-card.md)
- [A REST API for Arduino & the CC3000 WiFi Chip](https://learn.adafruit.com/a-rest-api-for-arduino-and-the-cc3000-wifi-chip.md)
- [WiFi Controlled LED Christmahanukwanzaa Tree](https://learn.adafruit.com/wifi-controlled-led-christmahanukwanzaa-tree.md)
---
# Source: https://learn.adafruit.com/adafruit-arduino-lesson-5-the-serial-monitor/the-serial-monitor.md
# Arduino Lesson 5. The Serial Monitor
## The Serial Monitor
Upload the following sketch to your Arduino. Later on, we will see exactly how it works.
```
/*
Adafruit Arduino - Lesson 5. Serial Monitor
*/
int latchPin = 5;
int clockPin = 6;
int dataPin = 4;
byte leds = 0;
void setup()
{
pinMode(latchPin, OUTPUT);
pinMode(dataPin, OUTPUT);
pinMode(clockPin, OUTPUT);
updateShiftRegister();
Serial.begin(9600);
while (! Serial); // Wait untilSerial is ready - Leonardo
Serial.println("Enter LED Number 0 to 7 or 'x' to clear");
}
void loop()
{
if (Serial.available())
{
char ch = Serial.read();
if (ch >= '0' && ch <= '7')
{
int led = ch - '0';
bitSet(leds, led);
updateShiftRegister();
Serial.print("Turned on LED ");
Serial.println(led);
}
if (ch == 'x')
{
leds = 0;
updateShiftRegister();
Serial.println("Cleared");
}
}
}
void updateShiftRegister()
{
digitalWrite(latchPin, LOW);
shiftOut(dataPin, clockPin, LSBFIRST, leds);
digitalWrite(latchPin, HIGH);
}
```
After you have uploaded this sketch onto your Arduino, click on the right-most button on the toolbar in the Arduino IDE. The button is circled below.

The following window will open.

This window is called the Serial Monitor and it is part of the Arduino IDE software. Its job is to allow you to both send messages from your computer to an Arduino board (over USB) and also to receive messages from the Arduino.
The message “Enter LED Number 0 to 9 or 'x' to clear” has been sent by the Arduino, and it is telling us what commands we can send to the Arduino which is either to send the 'x' (to turn all the LEDs off) or the number of the LED you want to turn on (where 0 is the bottom LED, 1 is the next one up right up to 7 for the top LED).
Try typing the following commands, into the top area of the Serial Monitor that is level with the 'Send' button. Press 'Send', after typing each of these characters: x 0 3 5
Typing x, will have no effect, if the LEDs are already all off, but as you enter each number, the corresponding LED should light and you will get a confirmation message from the Arduino board, so that the Serial Monitor will appear as shown below.

You can see that I am about to press send after entering 'x' again. Do this and all the LEDs will turn off.
- [Previous Page](https://learn.adafruit.com/adafruit-arduino-lesson-5-the-serial-monitor/overview.md)
- [Next Page](https://learn.adafruit.com/adafruit-arduino-lesson-5-the-serial-monitor/arduino-code.md)
## Featured Products
### USB Cable - Standard A-B
[USB Cable - Standard A-B](https://www.adafruit.com/product/62)
This here is your standard A-B USB cable, for USB 1.1 or 2.0. Perfect for connecting a PC to your Arduino, USBtinyISP (among other things).
3 feet / 1 meter long
Color may vary!
In Stock
[Buy Now](https://www.adafruit.com/product/62)
[Related Guides to the Product](https://learn.adafruit.com/products/62/guides)
### Diffused Red 5mm LED (25 pack)
[Diffused Red 5mm LED (25 pack)](https://www.adafruit.com/product/299)
Need some indicators? We are big fans of these diffused red LEDs, in fact we use them exclusively in our kits. They are fairly bright so they can be seen in daytime, and from any angle. They go easily into a breadboard and will add that extra zing to your project.
- Pack of 25...
In Stock
[Buy Now](https://www.adafruit.com/product/299)
[Related Guides to the Product](https://learn.adafruit.com/products/299/guides)
### 74HC595 Shift Register - 3 pack
[74HC595 Shift Register - 3 pack](https://www.adafruit.com/product/450)
Add lots more outputs to a microcontroller system with chainable shift registers. These chips take a serial input (SPI) of 1 byte (8 bits) and then output those digital bits onto 8 pins. You can chain them together so putting three in a row with the serial output of one plugged into the serial...
In Stock
[Buy Now](https://www.adafruit.com/product/450)
[Related Guides to the Product](https://learn.adafruit.com/products/450/guides)
### Premium Male/Male Jumper Wires - 40 x 6" (150mm)
[Premium Male/Male Jumper Wires - 40 x 6" (150mm)](https://www.adafruit.com/product/758)
Handy for making wire harnesses or jumpering between headers on PCB's. These premium jumper wires are 6" (150mm) long and come in a 'strip' of 40 (4 pieces of each of ten rainbow colors). They have 0.1" male header contacts on either end and fit cleanly next to each other...
In Stock
[Buy Now](https://www.adafruit.com/product/758)
[Related Guides to the Product](https://learn.adafruit.com/products/758/guides)
### Half Sized Premium Breadboard - 400 Tie Points
[Half Sized Premium Breadboard - 400 Tie Points](https://www.adafruit.com/product/64)
This is a cute, half-size breadboard with 400 tie points, good for small projects. It's 3.25" x 2.2" / 8.3cm x 5.5cm with a standard double-strip in the middle and two power rails on both sides. You can pull the power rails off easily to make the breadboard as...
In Stock
[Buy Now](https://www.adafruit.com/product/64)
[Related Guides to the Product](https://learn.adafruit.com/products/64/guides)
### Adafruit METRO 328 Fully Assembled - Arduino IDE compatible
[Adafruit METRO 328 Fully Assembled - Arduino IDE compatible](https://www.adafruit.com/product/50)
We sure love the ATmega328 here at Adafruit, and we use them _a lot_ for our own projects. The processor has plenty of GPIO, Analog inputs, hardware UART SPI and I2C, timers and PWM galore - just enough for most simple projects. When we need to go small, we use a
Out of Stock
[Buy Now](https://www.adafruit.com/product/50)
[Related Guides to the Product](https://learn.adafruit.com/products/50/guides)
## Related Guides
- [74HC595 Shift Register](https://learn.adafruit.com/74hc595.md)
- [Adafruit Music Maker Shield](https://learn.adafruit.com/adafruit-music-maker-shield-vs1053-mp3-wav-wave-ogg-vorbis-player.md)
- [Wave Shield Talking Clock](https://learn.adafruit.com/wave-shield-talking-clock.md)
- [Arduino Lesson 4. Eight LEDs and a Shift Register](https://learn.adafruit.com/adafruit-arduino-lesson-4-eight-leds.md)
- [Character LCDs](https://learn.adafruit.com/character-lcds.md)
- [Arduino Lesson 10. Making Sounds](https://learn.adafruit.com/adafruit-arduino-lesson-10-making-sounds.md)
- [WiFi Weather Station](https://learn.adafruit.com/wifi-weather-station-arduino-cc3000.md)
- [Reverse Geocache Box](https://learn.adafruit.com/reverse-geocache-engagement-box.md)
- [36mm LED Pixels](https://learn.adafruit.com/36mm-led-pixels.md)
- [Ladyada's Learn Arduino - Lesson #2](https://learn.adafruit.com/ladyadas-learn-arduino-lesson-number-2.md)
- [Automatic Monitor Color Temperature Adjustment](https://learn.adafruit.com/automatic-monitor-color-temperature-adjustment.md)
- [Low Power WiFi Datalogger](https://learn.adafruit.com/low-power-wifi-datalogging.md)
- [LED Lightbox](https://learn.adafruit.com/led-lightbox.md)
- [Arduino Lesson 11. LCD Displays - Part 1](https://learn.adafruit.com/adafruit-arduino-lesson-11-lcd-displays-1.md)
- [Adafruit Data Logger Shield](https://learn.adafruit.com/adafruit-data-logger-shield.md)
- [Bluefruit LE Connect for iOS and Android](https://learn.adafruit.com/bluefruit-le-connect.md)
---
# Source: https://learn.adafruit.com/adafruit-arduino-lesson-3-rgb-leds/theory-pwm.md
# Arduino Lesson 3. RGB LEDs
## Theory (PWM)
Pulse Width Modulation (or PWM) is a technique for controlling power. We also use it here to control the brightness of each of the LEDs.
The diagram below shows the signal from one of the PWM pins on the Arduino.

Roughly every 1/500 of a second, the PWM output will produce a pulse. The length of this pulse is controlled by the 'analogWrite' function. So 'analogWrite(0)' will not produce any pulse at all and 'analogWrite(255)' will produce a pulse that lasts all the way until the next pulse is due, so that the output is actually on all the time.
If we specify a value in the analogWrite that is somewhere in between 0 and 255 then we will produce a pulse. If the output pulse is only high for 5% of the time then whatever we are driving will only receive 5% of full power.
If however the output is at 5V for 90% of the time then the load will get 90% of the power delivered to it. We cannot see the LEDs turning on and off at that speed, so to us, it just looks like the brightness is changing.
- [Previous Page](https://learn.adafruit.com/adafruit-arduino-lesson-3-rgb-leds/using-internet-colors.md)
- [Next Page](https://learn.adafruit.com/adafruit-arduino-lesson-3-rgb-leds/other-things-to-do.md)
## Featured Products
### Adafruit METRO 328 Fully Assembled - Arduino IDE compatible
[Adafruit METRO 328 Fully Assembled - Arduino IDE compatible](https://www.adafruit.com/product/50)
We sure love the ATmega328 here at Adafruit, and we use them _a lot_ for our own projects. The processor has plenty of GPIO, Analog inputs, hardware UART SPI and I2C, timers and PWM galore - just enough for most simple projects. When we need to go small, we use a
Out of Stock
[Buy Now](https://www.adafruit.com/product/50)
[Related Guides to the Product](https://learn.adafruit.com/products/50/guides)
### Premium Male/Male Jumper Wires - 40 x 6" (150mm)
[Premium Male/Male Jumper Wires - 40 x 6" (150mm)](https://www.adafruit.com/product/758)
Handy for making wire harnesses or jumpering between headers on PCB's. These premium jumper wires are 6" (150mm) long and come in a 'strip' of 40 (4 pieces of each of ten rainbow colors). They have 0.1" male header contacts on either end and fit cleanly next to each other...
In Stock
[Buy Now](https://www.adafruit.com/product/758)
[Related Guides to the Product](https://learn.adafruit.com/products/758/guides)
### Half Sized Premium Breadboard - 400 Tie Points
[Half Sized Premium Breadboard - 400 Tie Points](https://www.adafruit.com/product/64)
This is a cute, half-size breadboard with 400 tie points, good for small projects. It's 3.25" x 2.2" / 8.3cm x 5.5cm with a standard double-strip in the middle and two power rails on both sides. You can pull the power rails off easily to make the breadboard as...
In Stock
[Buy Now](https://www.adafruit.com/product/64)
[Related Guides to the Product](https://learn.adafruit.com/products/64/guides)
### Diffused RGB (tri-color) LED
[Diffused RGB (tri-color) LED](https://www.adafruit.com/product/159)
Diffused 5mm tri-color LED with separate red, green and blue LED chips inside! Nice indicator, and fun to color-swirl. 60 degree viewing angle. We like diffused RGB LEDs because they color mix inside instead of appearing as 3 distinct LEDs.
These are Common-Anode type which means you...
In Stock
[Buy Now](https://www.adafruit.com/product/159)
[Related Guides to the Product](https://learn.adafruit.com/products/159/guides)
## Related Guides
- [Geofencing with the FONA 808 & Adafruit IO](https://learn.adafruit.com/geofencing-with-the-fona-808-and-adafruit-io.md)
- [Adafruit Motor Shield](https://learn.adafruit.com/adafruit-motor-shield.md)
- [Sous-vide controller powered by Arduino - The SousViduino!](https://learn.adafruit.com/sous-vide-powered-by-arduino-the-sous-viduino.md)
- [Wave Shield Voice Changer](https://learn.adafruit.com/wave-shield-voice-changer.md)
- [Arduino Lesson 5. The Serial Monitor](https://learn.adafruit.com/adafruit-arduino-lesson-5-the-serial-monitor.md)
- [Trinket Audio Player](https://learn.adafruit.com/trinket-audio-player.md)
- [Circuit Playground: D is for Diode](https://learn.adafruit.com/circuit-playground-d-is-for-diode.md)
- [Wave Shield](https://learn.adafruit.com/adafruit-wave-shield-audio-shield-for-arduino.md)
- [Arduino Lesson 0. Getting Started](https://learn.adafruit.com/lesson-0-getting-started.md)
- [Current Limiting Stepper Driver with DRV8871](https://learn.adafruit.com/current-limiting-stepper-driver-with-drv8871.md)
- [RePaper eInk Development Board](https://learn.adafruit.com/repaper-eink-development-board.md)
- [Adafruit AirLift Shield - ESP32 WiFi Co-Processor](https://learn.adafruit.com/adafruit-airlift-shield-esp32-wifi-co-processor.md)
- [Low Power WiFi Datalogger](https://learn.adafruit.com/low-power-wifi-datalogging.md)
- [Babel Fish](https://learn.adafruit.com/babel-fish.md)
- [Arduino Lesson 2. LEDs](https://learn.adafruit.com/adafruit-arduino-lesson-2-leds.md)
---
# Source: https://learn.adafruit.com/thermistor.md
# Thermistor
## Overview
A thermistor is a **thermal resistor** - a resistor that changes its resistance with temperature. Technically, all resistors are thermistors - their resistance changes slightly with temperature - but the change is usually very very small and difficult to measure. Thermistors are made so that the resistance changes drastically with temperature so that it can be 100 ohms or more of change per degree!
There are two kinds of of thermistors, NTC (negative temperature coefficient) and PTC (positive temperature coefficient). In general, you will see NTC sensors used for temperature measurement. PTC's are often used as resettable fuses - an increase in temperature increases the resistance which means that as more current passes through them, they heat up and 'choke back' the current, quite handy for protecting circuits!
Thermistors have some benefits over other kinds of temperature sensors such as analog output chips ([LM35/TMP36](http://www.ladyada.net/learn/sensors/temp36.html) ) or digital temperature sensor chips (DS18B20) or [thermocouples](http://learn.adafruit.com/thermocouple/).
- First off, they are much much cheaper than all the above! A bare 5% thermistor is only 10 cents in bulk.
- They are also much easier to waterproof since its just a resistor.
- They work at any voltage (digital sensors require 3 or 5V logic).
- Compared to a thermocouple, they don't require an amplifier to read the minute voltages - you can use any microcontroller to read a thermistor.
- They can also be incredibly accurate for the price. For example, the 10K 1% thermistor in the shop is good for measuring with ±0.25°C accuracy! (Assuming you have an accurate enough analog converter)
- They are difficult to break or damage - they are much simpler and more reliable
On the other hand, they require a little more work to interpret readings, and they dont work at very high temperatures like thermocouples. Without a digital-to-analog converter on board, you might be better off with a digital temperature sensor.
Their simplicity makes them incredibly popular for basic temperature feedback control. For example, lets say you wanted to have a fan that turns on when the temperature gets high. You could use a microcontroller, a digital sensor, and have that control the relay. Or you could use the thermistor to feed the base of a transistor, as the temperature rises, the resistance goes down, feeding more current into the transistor until it turns on. (This is a rough idea, you would need a few more components to make it work)
Even if you do use a microcontroller or complex system, for the price you can't beat 'em!
**[You can pick up a 10K 1% waterproof thermistor in the Adafruit shop](http://www.adafruit.com/products/372)**
## Some Stats
[Here are technical details for the thermistor in our shop](http://www.adafruit.com/products/372 "Link: http://www.adafruit.com/products/372")
- **Resistance at 25°C:** 10K ±1%
- **B25/50:** 3950 ±1%
- **Thermal time constant** ? 15 seconds
- **Thermistor temperature range** -55°C to 125°C
- **Wire temperature range** -55°C to 105°C
- **28 AWG PVC Wire**
- **Diameter: 3.5mm/0.13in**
- **Length: 18in/45cm**
- [Resistance/Temperature table](http://www.adafruit.com/datasheets/103_3950_lookuptable.pdf)
Note that even though the thermistor can go up to 125°C the cable itself maxes out at 105°C so this thermistor is not good for measuring very very hot liquids
- [Next Page](https://learn.adafruit.com/thermistor/testing-a-thermistor.md)
## Featured Products
### 10K Precision Epoxy Thermistor
[10K Precision Epoxy Thermistor](https://www.adafruit.com/product/372)
Need to measure something damp? This epoxy-coated precision 1% 10K thermistor is an inexpensive way to measure temperature in weather or liquids. The resistance in 25 °C is 10K (+- 1%). The resistance goes down as it gets warmer and goes up as it gets cooler.
In Stock
[Buy Now](https://www.adafruit.com/product/372)
[Related Guides to the Product](https://learn.adafruit.com/products/372/guides)
## Related Guides
- [reef-pi Guide 1: Setup and Demonstration](https://learn.adafruit.com/reef-pi-installation-and-configuration.md)
- [Adafruit MCP9600 I2C Thermocouple Amplifier](https://learn.adafruit.com/adafruit-mcp9600-i2c-thermocouple-amplifier.md)
- [Calibrating Sensors](https://learn.adafruit.com/calibrating-sensors.md)
- [EMC2101 Fan Controller and Temperature sensor](https://learn.adafruit.com/emc2101-fan-controller-and-temperature-sensor.md)
- [Arm-based IoT Kit for Cloud IoT Core - Getting Started](https://learn.adafruit.com/raspberry-pi-3-and-sensor-kit-for-google-cloud-iot-core.md)
- [AM2315 - Encased I2C Temperature/Humidity Sensor](https://learn.adafruit.com/am2315-encased-i2c-temperature-humidity-sensor.md)
- [TMP006 Infrared Sensor Breakout](https://learn.adafruit.com/infrared-thermopile-sensor-breakout.md)
- [Adafruit MLX90640 IR Thermal Camera](https://learn.adafruit.com/adafruit-mlx90640-ir-thermal-camera.md)
- [MAX31855 Thermocouple Sensor Python Library](https://learn.adafruit.com/max31855-thermocouple-python-library.md)
- [Storage humidity and temperature monitor](https://learn.adafruit.com/storage-humidity-and-temperature-monitor.md)
- [Kombucha Thermostat with CircuitPython and Feather ](https://learn.adafruit.com/kombucha-thermostat-with-circuitpython-and-feather.md)
- [TMP36 Temperature Sensor](https://learn.adafruit.com/tmp36-temperature-sensor.md)
- [Monitor Your Greenhouse with a No-Code Environmental Sensor](https://learn.adafruit.com/monitor-your-greenhouse-with-a-no-code-environmental-sensor.md)
- [Adafruit TE MS8607 PHT Sensor](https://learn.adafruit.com/adafruit-te-ms8607-pht-sensor.md)
- [Using Melexis MLX90614 Non-Contact Sensors](https://learn.adafruit.com/using-melexis-mlx90614-non-contact-sensors.md)
---
# Source: https://learn.adafruit.com/thermocouple.md
# MAX31855 Thermocouple
## Overview
A thermocouple is a kind of temperature sensor.
Unlike [semiconductor temperature sensors such as the TMP36](http://learn.adafruit.com/tmp36-temperature-sensor) , thermocouples have no electronics inside them, they are simply made by welding together two metal wires. Because of a physical effect of two joined metals, there is a slight but measurable voltage across the wires that increases with temperature. The type of metals used affect the voltage range, cost and sensitivity, which is why we have a few different kinds of thermocouples. The main improvement of using a thermocouple over a semiconductor sensor or thermistor is that the temperature range is very much increased. For example, the TMP36 can go from -50 to 150°C, after that the chip itself can be damaged. Common thermocouples on the other hand, can go from -200°C to 1350°C (K type) and there are ones that can go above 2300°C!

Thermocouples are often used in HVAC systems, heaters and boilers, kilns, etc. There are a few different kinds but this tutorial will discuss K type, which are very common and easier to interface with.
One difficulty in using them is that the voltage to be measured is very small, with changes of about 50 uV per °C (a uV is 1/1000000 Volts). While it is possible to read these voltages using a clean power supply and nice op-amps, there are other complications such as a non-linear response (its not always 50uV/°C) and cold-temperature compensation (the effect measured is only a differential and there must be a reference, just as ground is a reference for voltage). For that reason, we suggest only using an interface chip that will do the heavy lifting for you, allow you to easily integrate the sensor without as much pain. In this tutorial we will use a MAX6675 K-thermocouple interface chip which doesn't even require an ADC, spitting out a nice digital data signal of the temperature.
## Some Basic Stats
## This is for a K-type thermocouple with glass overbraiding
- **Size:** 24 gauge, 1 meter long (you can cut it down if desired)
- **Price: ** [$10 at the adafruit store](http://www.adafruit.com/index.php?main_page=product_info&cPath=35&products_id=270)
- **Temperature range:** -100°C to 500°C / -150 to 900°F (After this the glass overbraiding may be damaged)
- **Output range: ** -6 to +20mV
- **Precision:** +-2°C
- **[Requires an amplifier such as MAX31855](http://www.adafruit.com/products/269 "Link: http://www.adafruit.com/products/269")**
- **Interface** : [MAX6675](https://www.analog.com/en/products/max6675.html) (discontinued), [MAX31855](http://www.adafruit.com/products/269), or [AD595](http://www.analog.com/en/sensors/analog-temperature-sensors/ad595/products/product.html) (analog)
- **[K Thermocouple Datasheet](https://sea.omega.com/temperature/Z/pdf/z204-206.pdf)**
- **[MAX6675 Datasheet](http://www.adafruit.com/datasheets/MAX6675.pdf)**
- **[MAX31855 Datasheet](http://www.adafruit.com/datasheets/MAX31855.pdf)**
- [Next Page](https://learn.adafruit.com/thermocouple/wiring-a-thermocouple.md)
## Primary Products
### Adafruit Universal Thermocouple Amplifier MAX31856 Breakout
[Adafruit Universal Thermocouple Amplifier MAX31856 Breakout](https://www.adafruit.com/product/3263)
Thermocouples are very sensitive, requiring a good amplifier with a cold-compensation reference, as well as calculations to handle any non-linearities. For a long time we've [suggested our MAX31855K breakout, which works great but is only for...](https://www.adafruit.com/products/269)
Out of Stock
[Buy Now](https://www.adafruit.com/product/3263)
[Related Guides to the Product](https://learn.adafruit.com/products/3263/guides)
## Featured Products
### Thermocouple Amplifier MAX31855 breakout board (MAX6675 upgrade)
[Thermocouple Amplifier MAX31855 breakout board (MAX6675 upgrade)](https://www.adafruit.com/product/269)
Thermocouples are very sensitive, requiring a good amplifier with a cold-compensation reference. The MAX31855K does everything for you, and can be easily interfaced with any microcontroller, even one without an analog input. This breakout board has the chip itself, a 3.3V regulator with 10uF...
In Stock
[Buy Now](https://www.adafruit.com/product/269)
[Related Guides to the Product](https://learn.adafruit.com/products/269/guides)
### Thermocouple Type-K Glass Braid Insulated
[Thermocouple Type-K Glass Braid Insulated](https://www.adafruit.com/product/270)
Thermocouples are best used for measuring temperatures that can go above 100 °C. This is a bare wires bead-probe which can measure air or surface temperatures. Most inexpensive thermocouples have a vinyl covering which can melt at around 200 °C, this one uses a fiberglass braid so it...
Out of Stock
[Buy Now](https://www.adafruit.com/product/270)
[Related Guides to the Product](https://learn.adafruit.com/products/270/guides)
### Thermocouple Type-K Glass Braid Insulated Stainless Steel Tip
[Thermocouple Type-K Glass Braid Insulated Stainless Steel Tip](https://www.adafruit.com/product/3245)
Thermocouples are best used for measuring temperatures that can go above 100°C. This is a bare wires stainless-steel tip probe which can measure air or surface temperatures. Most inexpensive thermocouples have a vinyl covering which can melt at around 200°C, this one uses a fiberglass...
In Stock
[Buy Now](https://www.adafruit.com/product/3245)
[Related Guides to the Product](https://learn.adafruit.com/products/3245/guides)
## Related Guides
- [Adafruit FT232H With SPI & I2C Devices](https://learn.adafruit.com/adafruit-ft232h-with-spi-and-i2c-libraries.md)
- [MicroPython Hardware: SPI Devices](https://learn.adafruit.com/micropython-hardware-spi-devices.md)
- [Connecting the MAX31855 Thermocouple Amplifier breakout to an Electric Imp](https://learn.adafruit.com/connecting-the-max31855-thermocouple-amplifier-breakout-to-an-electric-imp.md)
- [Google Docs Sensor Logging From Your PC](https://learn.adafruit.com/gdocs-sensor-logging-from-your-pc.md)
- [CircuitPython Libraries on Linux and the 96Boards DragonBoard 410c](https://learn.adafruit.com/circuitpython-libraries-on-linux-and-the-96boards-dragonboard-410c.md)
- [MAX31855 Thermocouple Sensor Python Library](https://learn.adafruit.com/max31855-thermocouple-python-library.md)
- [Adding a Single Board Computer to Blinka](https://learn.adafruit.com/adding-a-single-board-computer-to-blinka.md)
- [CircuitPython I2C and SPI Under the Hood](https://learn.adafruit.com/circuitpython-basics-i2c-and-spi.md)
- [ Analog IC Insights On-the-Go by Maxim Integrated](https://learn.adafruit.com/maxim-app.md)
- [Adafruit 1-Wire Thermocouple Amplifier - MAX31850K](https://learn.adafruit.com/adafruit-1-wire-thermocouple-amplifier-max31850k.md)
- [Calibrating Sensors](https://learn.adafruit.com/calibrating-sensors.md)
- [Adafruit TE MS8607 PHT Sensor](https://learn.adafruit.com/adafruit-te-ms8607-pht-sensor.md)
- [Adafruit Sensirion SHT40, SHT41 & SHT45 Temperature & Humidity Sensors](https://learn.adafruit.com/adafruit-sht40-temperature-humidity-sensor.md)
- [Adafruit SHT4x Trinkey](https://learn.adafruit.com/adafruit-sht4x-trinkey.md)
- [Adafruit's Raspberry Pi Lesson 11. DS18B20 Temperature Sensing](https://learn.adafruit.com/adafruits-raspberry-pi-lesson-11-ds18b20-temperature-sensing.md)
---
# Source: https://learn.adafruit.com/tilt-sensor.md
# Tilt Sensor
## Overview
Tilt sensors allow you to detect orientation or inclination. They are small, inexpensive, low-power and easy-to-use. If used properly, they will not wear out. Their simplicitiy makes them popular for toys, gadgets and appliances. Sometimes they are referred to as "mercury switches", "tilt switches" or "rolling ball sensors" for obvious reasons.
They are usually made by a cavity of some sort (cylindrical is popular, although not always) and a conductive free mass inside, such as a blob of mercury or rolling ball. One end of the cavity has two conductive elements (poles). When the sensor is oriented so that that end is downwards, the mass rolls onto the poles and shorts them, acting as a switch throw.

Tilt switches used to be made exclusively of mercury, but are rarer now since they are recognized as being extremely toxic. The benefits of mercury is that the blob is dense enough that it doesnt bounce and so the switch isnt susceptible to vibrations. On the other hand, ball-type sensors are easy to make, wont shatter, and pose no risk of pollution.

While not as precise or flexible as a full accelerometer, tilt switches can detect motion or orientation simply. Another benefit to them is that the big ones can switch power on their own. Accelerometers, on the other hand, output digital or analog voltage that must then be analyzed with extra circuitry.## Basic Stats
These stats are for the tilt sensor in the Adafruit shop which is very much like the [107-2006-EV](http://learn.adafruit.com/system/assets/assets/000/010/132/original/MS-100906.pdf) . Nearly all will have slightly different sizes & specifications, although they all pretty much work the same. If there's a datasheet, you'll want to refer to it
- **Size:** Cylindrical, 4mm (0.16") diameter & 12mm (0.45") long.
- **Price:** [$2.00 at the Adafruit shop](http://www.adafruit.com/products/173)
- **Sensitivity range:** \> +-15 degrees
- **Lifetime** : 50,000+ cycles (switches)
- **Power supply:** Up to 24V, switching less than 5mA
- **[Datasheet](http://learn.adafruit.com/system/assets/assets/000/010/132/original/MS-100906.pdf)**
- [Next Page](https://learn.adafruit.com/tilt-sensor/testing-a-tilt-sensor.md)
## Featured Products
### Tilt ball switch
[Tilt ball switch](https://www.adafruit.com/product/173)
The "poor man's" accelerometer! Tilt sensors are switches that can detect basic motion/orientation. The metal tube has a little metal ball that rolls around in it, when its tilted upright, the ball rolls onto the contacts sticking out of end and shorts them together.
In Stock
[Buy Now](https://www.adafruit.com/product/173)
[Related Guides to the Product](https://learn.adafruit.com/products/173/guides)
## Related Guides
- [Force Sensitive Resistor (FSR)](https://learn.adafruit.com/force-sensitive-resistor-fsr.md)
- [Basic Resistor Sensor Reading on Raspberry Pi](https://learn.adafruit.com/basic-resistor-sensor-reading-on-raspberry-pi.md)
- [Calibrating Sensors](https://learn.adafruit.com/calibrating-sensors.md)
- [Wireless ESP32-S2 Touch Screen Controller for Pure Data](https://learn.adafruit.com/wireless-esp32-s2-controller-for-pure-data.md)
- [Hang out your washing reminder - Adafruit IO + Vibration switch](https://learn.adafruit.com/hang-out-your-washing-reminder-adafruit-io-vibration-switch.md)
- [Circuit Playground Bike Glove](https://learn.adafruit.com/circuit-playground-bike-glove.md)
- [ICEdot Teardown](https://learn.adafruit.com/icedot-teardown.md)
- [Adafruit VEML6070 UV Sensor Breakout](https://learn.adafruit.com/adafruit-veml6070-uv-light-sensor-breakout.md)
- [NAU7802 Pet Food Scale](https://learn.adafruit.com/nau7802-pet-food-scale.md)
- [Adafruit HX711 24-bit ADC](https://learn.adafruit.com/adafruit-hx711-24-bit-adc.md)
- [Power Glove Wireless MIDI Controller](https://learn.adafruit.com/power-glove-bluetooth-midi-controller.md)
- [Clue Coffee Scale](https://learn.adafruit.com/clue-coffee-scale.md)
- [Adafruit NAU7802 24-Bit ADC - STEMMA QT / Qwiic](https://learn.adafruit.com/adafruit-nau7802-24-bit-adc-stemma-qt-qwiic.md)
- [Flora MIDI Drum Glove](https://learn.adafruit.com/midi-drum-glove.md)
- [Arcade Stick Conversion](https://learn.adafruit.com/arcade-stick-conversion.md)
---
# Source: https://learn.adafruit.com/timesquare-watch-kit/time-display-modes.md
# TIMESQUARE Watch Kit
## Time Display Modes
**Tap** the right or left side buttons to wake the watch and show the time in the current display mode.
## Tap →⌚ or ⌚← tap
**Hold** the left **or** right buttons (not both) for 2 seconds to move back or forward through modes.
## Hold →⌚ 2 sec or ⌚← hold 2 sec
The sequence of modes is:
## ↪Marquee↔Binary↔Moon Phase↔Battery Gauge↩

## Marquee mode
Inspired by the famous Dow Jones news ticker, this scrolls the current time from right to left.
Tap either side button while active to switch the display from time to date. Tap again to show the time.
## Binary mode
Bright dots represent a binary “1,” dimmer dots are “0.” “Off” dots separate the digits.
The hour (1 to 12) is shown as four 2x2 pixel blocks across the top.
Minutes and seconds are 1-pixel blocks, with the high and low digits separated for easier reading (3 bits and 4 bits, respectively).
The display at left shows 4:09 and 12 seconds.

## Moon Phase mode
Displays the current phase of the moon.
The resolution is limited somewhat by the screen. It’s generally accurate, but this is not a medical device — do not rely on this data if you are prone to lycanthropy.
## Battery Gauge
This displays the _approximate_ battery level.
Frequent button presses may temporarily lower the battery voltage more than this display indicates. After assembling your watch, you might run through the first battery pretty quickly in your enthusiasm to show everyone. If it seems to have suffered a premature demise, allow the watch to rest for a few hours, or try a fresh battery.
**Sometimes the watch display may appear dim or flickery, regardless of the display mode. This happens when the battery voltage runs low. It’s normal behavior, an attempt by the watch to preserve battery life. Allow it to rest or replace the battery soon.**
- [Previous Page](https://learn.adafruit.com/timesquare-watch-kit/setting-the-time.md)
- [Next Page](https://learn.adafruit.com/timesquare-watch-kit/uploading-new-firmware.md)
## Featured Products
### TIMESQUARE DIY Watch Kit - Red Display Matrix
[TIMESQUARE DIY Watch Kit - Red Display Matrix](https://www.adafruit.com/product/1106)
Show up stylish AND on time to any event with this awesome looking DIY watch. We have a few watch kits here at Adafruit but we finally have one that looks good and fits well, even for ladies and kids and others with smaller wrists and hands. Its got an 8x8 bit matrix display and a repurposed...
No Longer Stocked
[Buy Now](https://www.adafruit.com/product/1106)
[Related Guides to the Product](https://learn.adafruit.com/products/1106/guides)
### TIMESQUARE DIY Watch Kit - Tangerine Display Matrix
[TIMESQUARE DIY Watch Kit - Tangerine Display Matrix](https://www.adafruit.com/product/1223)
Show up stylish AND on time to any event with this awesome looking DIY watch. We have a few watch kits here at Adafruit but we finally have one that looks good and fits well, even for ladies and kids and others with smaller wrists and hands. Its got an 8x8 bit matrix display and a repurposed...
No Longer Stocked
[Buy Now](https://www.adafruit.com/product/1223)
[Related Guides to the Product](https://learn.adafruit.com/products/1223/guides)
### TIMESQUARE DIY Watch Kit - Lime Display Matrix
[TIMESQUARE DIY Watch Kit - Lime Display Matrix](https://www.adafruit.com/product/1224)
Show up stylish AND on time to any event with this awesome looking DIY watch. We have a few watch kits here at Adafruit but we finally have one that looks good and fits well, even for ladies and kids and others with smaller wrists and hands. Its got an 8x8 bit matrix display and a repurposed...
No Longer Stocked
[Buy Now](https://www.adafruit.com/product/1224)
[Related Guides to the Product](https://learn.adafruit.com/products/1224/guides)
### TIMESQUARE DIY Watch Kit - Blue Display Matrix
[TIMESQUARE DIY Watch Kit - Blue Display Matrix](https://www.adafruit.com/product/1225)
Show up stylish AND on time to any event with this awesome looking DIY watch. We have a few watch kits here at Adafruit but we finally have one that looks good and fits well, even for ladies and kids and others with smaller wrists and hands. Its got an 8x8 bit matrix display and a repurposed...
No Longer Stocked
[Buy Now](https://www.adafruit.com/product/1225)
[Related Guides to the Product](https://learn.adafruit.com/products/1225/guides)
### TIMESQUARE DIY Watch Kit - White Display Matrix
[TIMESQUARE DIY Watch Kit - White Display Matrix](https://www.adafruit.com/product/1226)
Show up stylish AND on time to any event with this awesome looking DIY watch. We have a few watch kits here at Adafruit but we finally have one that looks good and fits well, even for ladies and kids and others with smaller wrists and hands. Its got an 8x8 bit matrix display and a repurposed...
No Longer Stocked
[Buy Now](https://www.adafruit.com/product/1226)
[Related Guides to the Product](https://learn.adafruit.com/products/1226/guides)
### TIMESQUARE silver parts bag
[TIMESQUARE silver parts bag](https://www.adafruit.com/product/1227)
No Longer Stocked
[Buy Now](https://www.adafruit.com/product/1227)
[Related Guides to the Product](https://learn.adafruit.com/products/1227/guides)
## Related Guides
- [MicroLipo v2 Case](https://learn.adafruit.com/microlipo-case.md)
- [Adafruit DotStar FeatherWing](https://learn.adafruit.com/adafruit-dotstar-featherwing-adafruit.md)
- [The Pixif](https://learn.adafruit.com/the-pixif.md)
- [Adafruit VL53L0X Time of Flight Micro-LIDAR Distance Sensor Breakout](https://learn.adafruit.com/adafruit-vl53l0x-micro-lidar-distance-sensor-breakout.md)
- [Adafruit MENTA Kit](https://learn.adafruit.com/adafruit-menta-kit-mint-tin-arduino-compatible.md)
- [Adafruit RGB Matrix Bonnet for Raspberry Pi](https://learn.adafruit.com/adafruit-rgb-matrix-bonnet-for-raspberry-pi.md)
- [Raspberry Pi Care and Troubleshooting](https://learn.adafruit.com/raspberry-pi-care-and-troubleshooting.md)
- [Adafruit FONA 808 Cellular + GPS Shield for Arduino](https://learn.adafruit.com/adafruit-fona-808-cellular-plus-gps-shield-for-arduino.md)
- [Adafruit PCM5122 I2S DAC](https://learn.adafruit.com/adafruit-pcm5122-i2s-dac.md)
- [Use an art canvas to diffuse an RGB matrix](https://learn.adafruit.com/use-an-art-canvas-to-diffuse-rgb-matrix.md)
- [Bluetooth-Controlled Matrix LED Sign using Bluefruit Connect](https://learn.adafruit.com/bluetooth-controlled-matrix-led-sign-using-bluefruit-connect.md)
- [Adafruit AW9523 GPIO Expander and LED Driver](https://learn.adafruit.com/adafruit-aw9523-gpio-expander-and-led-driver.md)
- [Adafruit DPI Display Kippah](https://learn.adafruit.com/adafruit-dpi-display-kippah-ttl-tft.md)
- [DIY Pocket LED Gamer - Tiny Tetris!](https://learn.adafruit.com/diy-3d-printed-handheld-pocket-game-tiny-tetris-snake.md)
- [Adafruit MagTag](https://learn.adafruit.com/adafruit-magtag.md)
---
# Source: https://learn.adafruit.com/drive-a-16x2-lcd-directly-with-a-raspberry-pi/time-zone.md
# Drive a 16x2 LCD with the Raspberry Pi
## Time Zone
Last, but not least: My Pi came configured with UT (Universal Time). I prefer to see time based on my time zone, which is Mountain. Here is how to configure time on the Pi for any location. This is a one time configuration setting that will survive between reboots.
We can use raspi-config to easy set our timezone. Choose the following:
- Localisation Options
- Change Timezone
- Continent / Country
- Time zone
## Run raspi-config
```auto
sudo raspi-config
```


- [Previous Page](https://learn.adafruit.com/drive-a-16x2-lcd-directly-with-a-raspberry-pi/init-script.md)
## Featured Products
### Standard LCD 16x2 + extras
[Standard LCD 16x2 + extras](https://www.adafruit.com/product/181)
Standard HD44780 LCDs are useful for creating standalone projects.
- 16 characters wide, 2 rows
- White text on blue background
- Connection port is 0.1" pitch, single row for easy breadboarding and wiring
- Pins are documented on the back of the LCD to assist...
In Stock
[Buy Now](https://www.adafruit.com/product/181)
[Related Guides to the Product](https://learn.adafruit.com/products/181/guides)
### Raspberry Pi 3 - Model B - ARMv8 with 1G RAM
[Raspberry Pi 3 - Model B - ARMv8 with 1G RAM](https://www.adafruit.com/product/3055)
Did you really think the Raspberry Pi would stop getting better? At this point, we sound like a broken record, extolling on the new Pi’s myriad improvements like we’re surprised that the folks at the Raspberry Pi Foundation are continuously making their flagship board better. ...
In Stock
[Buy Now](https://www.adafruit.com/product/3055)
[Related Guides to the Product](https://learn.adafruit.com/products/3055/guides)
### Adafruit Assembled Pi T-Cobbler Breakout for Raspberry Pi
[Adafruit Assembled Pi T-Cobbler Breakout for Raspberry Pi](https://www.adafruit.com/product/1754)
Now that you've finally got your hands on a [Raspberry Pi®](http://www.raspberrypi.org/), you're probably itching to make some fun embedded computer projects with it. What you need is an **assembled** add on prototyping Pi T-Cobbler from Adafruit, which can...
No Longer Stocked
[Buy Now](https://www.adafruit.com/product/1754)
[Related Guides to the Product](https://learn.adafruit.com/products/1754/guides)
### Assembled Pi Cobbler Plus - Breakout Cable
[Assembled Pi Cobbler Plus - Breakout Cable](https://www.adafruit.com/product/2029)
The Raspberry Pi B+ / Pi 2 / Pi 3 / Pi 4 has landed on the Maker World like a 40-GPIO pinned, quad-USB ported, credit card sized bomb of DIY joy. And while you can use most of our great Model B accessories by hooking up our [downgrade...](https://www.adafruit.com/product/1986)
In Stock
[Buy Now](https://www.adafruit.com/product/2029)
[Related Guides to the Product](https://learn.adafruit.com/products/2029/guides)
### Half Sized Premium Breadboard - 400 Tie Points
[Half Sized Premium Breadboard - 400 Tie Points](https://www.adafruit.com/product/64)
This is a cute, half-size breadboard with 400 tie points, good for small projects. It's 3.25" x 2.2" / 8.3cm x 5.5cm with a standard double-strip in the middle and two power rails on both sides. You can pull the power rails off easily to make the breadboard as...
In Stock
[Buy Now](https://www.adafruit.com/product/64)
[Related Guides to the Product](https://learn.adafruit.com/products/64/guides)
## Related Guides
- [Program an AVR or Arduino Using Raspberry Pi GPIO](https://learn.adafruit.com/program-an-avr-or-arduino-using-raspberry-pi-gpio-pins.md)
- [Basic Resistor Sensor Reading on Raspberry Pi](https://learn.adafruit.com/basic-resistor-sensor-reading-on-raspberry-pi.md)
- [Circadian Pi Desk Light](https://learn.adafruit.com/circadian-pi-desk-light.md)
- [Speech Synthesis on the Raspberry Pi](https://learn.adafruit.com/speech-synthesis-on-the-raspberry-pi.md)
- [Matrix and 7-Segment LED Backpack with the Raspberry Pi](https://learn.adafruit.com/matrix-7-segment-led-backpack-with-the-raspberry-pi.md)
- [Capacitive Touch Sensors on the Raspberry Pi](https://learn.adafruit.com/capacitive-touch-sensors-on-the-raspberry-pi.md)
- [Adafruit's Raspberry Pi Lesson 4. GPIO Setup](https://learn.adafruit.com/adafruits-raspberry-pi-lesson-4-gpio-setup.md)
- [Adafruit's Raspberry Pi Lesson 12. Sensing Movement](https://learn.adafruit.com/adafruits-raspberry-pi-lesson-12-sensing-movement.md)
- [Playing sounds and using buttons with Raspberry Pi](https://learn.adafruit.com/playing-sounds-and-using-buttons-with-raspberry-pi.md)
- [Adafruit's Raspberry Pi Lesson 10. Stepper Motors](https://learn.adafruit.com/adafruits-raspberry-pi-lesson-10-stepper-motors.md)
- [Raspberry Pi Analog to Digital Converters](https://learn.adafruit.com/raspberry-pi-analog-to-digital-converters.md)
- [Raspberry Pi E-mail Notifier Using LEDs](https://learn.adafruit.com/raspberry-pi-e-mail-notifier-using-leds.md)
- [Adafruit's Raspberry Pi Lesson 11. DS18B20 Temperature Sensing](https://learn.adafruit.com/adafruits-raspberry-pi-lesson-11-ds18b20-temperature-sensing.md)
- [Getting Started With Windows IoT Core on Raspberry Pi](https://learn.adafruit.com/getting-started-with-windows-iot-on-raspberry-pi.md)
- [Trinket Ultrasonic Rangefinder](https://learn.adafruit.com/trinket-ultrasonic-rangefinder.md)
---
# Source: https://learn.adafruit.com/timesquare-watch-kit.md
# TIMESQUARE Watch Kit
## Overview

Show up stylish AND on time to any event with this awesome looking DIY watch. We have a few watch kits here at Adafruit but we finally have one that looks good and fits well, even for ladies and kids and others with smaller wrists and hands. Its got a 8x8 bit matrix display and a repurposed silicone watch band for a professional look.

64 LEDs light up to tell you the time in a variety of ways. Built into the kit are 3 different watch 'faces' - a scrolling marquee with time and date, a binary watch display (for geeks, robots and binary fans), and a moon phase display (for beach-combers, werewolves). There's also a built in battery meter so you can check your battery life. [Want to make your own watch? Easy! The microcontroller is an Arduino-compatible, all you need is an FTDI Friend and the Arduino IDE and you can design your own watch faces and upload them to the TIMESQUARE.](http://learn.adafruit.com/timesquare-watch-kit/uploading-new-firmware)

Engineered for greatness by PaintYourDragon, this watch squeezes over 1000 full time displays out of a coin battery, and a 1+ year 'resting' lifetime, so you can use this as a day-to-day time keeper.

This watch comes with a ultra bright red LED matrix and a black silicone watch band that fits all wrists from children to adult.

This is a DIY kit, and requires some basic soldering/assembly to put together. It is a beginner kit, so this is a fine project to use in learning how to solder. Tools are not included, you'll need a soldering iron, solder and diagonal cutters as a minimum. [Check the tutorial page for details on what tools and steps are required to assemble.](http://learn.adafruit.com/timesquare-watch-kit) Take about 1-2 hours to put together. Build it in the afternoon and you'll be done in time to hit the clubs in the evening.
- [Next Page](https://learn.adafruit.com/timesquare-watch-kit/tools-list.md)
## Featured Products
### TIMESQUARE DIY Watch Kit - Red Display Matrix
[TIMESQUARE DIY Watch Kit - Red Display Matrix](https://www.adafruit.com/product/1106)
Show up stylish AND on time to any event with this awesome looking DIY watch. We have a few watch kits here at Adafruit but we finally have one that looks good and fits well, even for ladies and kids and others with smaller wrists and hands. Its got an 8x8 bit matrix display and a repurposed...
No Longer Stocked
[Buy Now](https://www.adafruit.com/product/1106)
[Related Guides to the Product](https://learn.adafruit.com/products/1106/guides)
### TIMESQUARE DIY Watch Kit - Tangerine Display Matrix
[TIMESQUARE DIY Watch Kit - Tangerine Display Matrix](https://www.adafruit.com/product/1223)
Show up stylish AND on time to any event with this awesome looking DIY watch. We have a few watch kits here at Adafruit but we finally have one that looks good and fits well, even for ladies and kids and others with smaller wrists and hands. Its got an 8x8 bit matrix display and a repurposed...
No Longer Stocked
[Buy Now](https://www.adafruit.com/product/1223)
[Related Guides to the Product](https://learn.adafruit.com/products/1223/guides)
### TIMESQUARE DIY Watch Kit - Lime Display Matrix
[TIMESQUARE DIY Watch Kit - Lime Display Matrix](https://www.adafruit.com/product/1224)
Show up stylish AND on time to any event with this awesome looking DIY watch. We have a few watch kits here at Adafruit but we finally have one that looks good and fits well, even for ladies and kids and others with smaller wrists and hands. Its got an 8x8 bit matrix display and a repurposed...
No Longer Stocked
[Buy Now](https://www.adafruit.com/product/1224)
[Related Guides to the Product](https://learn.adafruit.com/products/1224/guides)
### TIMESQUARE DIY Watch Kit - Blue Display Matrix
[TIMESQUARE DIY Watch Kit - Blue Display Matrix](https://www.adafruit.com/product/1225)
Show up stylish AND on time to any event with this awesome looking DIY watch. We have a few watch kits here at Adafruit but we finally have one that looks good and fits well, even for ladies and kids and others with smaller wrists and hands. Its got an 8x8 bit matrix display and a repurposed...
No Longer Stocked
[Buy Now](https://www.adafruit.com/product/1225)
[Related Guides to the Product](https://learn.adafruit.com/products/1225/guides)
### TIMESQUARE DIY Watch Kit - White Display Matrix
[TIMESQUARE DIY Watch Kit - White Display Matrix](https://www.adafruit.com/product/1226)
Show up stylish AND on time to any event with this awesome looking DIY watch. We have a few watch kits here at Adafruit but we finally have one that looks good and fits well, even for ladies and kids and others with smaller wrists and hands. Its got an 8x8 bit matrix display and a repurposed...
No Longer Stocked
[Buy Now](https://www.adafruit.com/product/1226)
[Related Guides to the Product](https://learn.adafruit.com/products/1226/guides)
### TIMESQUARE silver parts bag
[TIMESQUARE silver parts bag](https://www.adafruit.com/product/1227)
No Longer Stocked
[Buy Now](https://www.adafruit.com/product/1227)
[Related Guides to the Product](https://learn.adafruit.com/products/1227/guides)
## Related Guides
- [MicroLipo v2 Case](https://learn.adafruit.com/microlipo-case.md)
- [Adafruit DotStar FeatherWing](https://learn.adafruit.com/adafruit-dotstar-featherwing-adafruit.md)
- [The Pixif](https://learn.adafruit.com/the-pixif.md)
- [Adafruit VL53L0X Time of Flight Micro-LIDAR Distance Sensor Breakout](https://learn.adafruit.com/adafruit-vl53l0x-micro-lidar-distance-sensor-breakout.md)
- [Adafruit MENTA Kit](https://learn.adafruit.com/adafruit-menta-kit-mint-tin-arduino-compatible.md)
- [Adafruit RGB Matrix Bonnet for Raspberry Pi](https://learn.adafruit.com/adafruit-rgb-matrix-bonnet-for-raspberry-pi.md)
- [Raspberry Pi Care and Troubleshooting](https://learn.adafruit.com/raspberry-pi-care-and-troubleshooting.md)
- [Adafruit FONA 808 Cellular + GPS Shield for Arduino](https://learn.adafruit.com/adafruit-fona-808-cellular-plus-gps-shield-for-arduino.md)
- [Adafruit PCM5122 I2S DAC](https://learn.adafruit.com/adafruit-pcm5122-i2s-dac.md)
- [Use an art canvas to diffuse an RGB matrix](https://learn.adafruit.com/use-an-art-canvas-to-diffuse-rgb-matrix.md)
- [Bluetooth-Controlled Matrix LED Sign using Bluefruit Connect](https://learn.adafruit.com/bluetooth-controlled-matrix-led-sign-using-bluefruit-connect.md)
- [Adafruit AW9523 GPIO Expander and LED Driver](https://learn.adafruit.com/adafruit-aw9523-gpio-expander-and-led-driver.md)
- [Adafruit DPI Display Kippah](https://learn.adafruit.com/adafruit-dpi-display-kippah-ttl-tft.md)
- [DIY Pocket LED Gamer - Tiny Tetris!](https://learn.adafruit.com/diy-3d-printed-handheld-pocket-game-tiny-tetris-snake.md)
- [Adafruit MagTag](https://learn.adafruit.com/adafruit-magtag.md)
---
# Source: https://learn.adafruit.com/flora-snaps/tin-the-pads.md
# Flora Snaps
## Tin the pads

Use your hot soldering iron to heat up one of the metal pads on the back of the Flora. Apply a small amount of solder to the pad. This is called tinning.

Spread the solder around the metal pad with the tip of your soldering iron. The solder will form the connection between the Flora and the snap.
- [Previous Page](https://learn.adafruit.com/flora-snaps/tools-and-supplies.md)
- [Next Page](https://learn.adafruit.com/flora-snaps/solder-snap-stem.md)
## Featured Products
### FLORA - Wearable electronic platform: Arduino-compatible
[FLORA - Wearable electronic platform: Arduino-compatible](https://www.adafruit.com/product/659)
FLORA is Adafruit's fully-featured wearable electronics platform. It's a round, sewable, Arduino-compatible microcontroller designed to empower amazing wearables projects.FLORA comes with Adafruit's support, [tutorials and...](http://learn.adafruit.com/category/flora)
In Stock
[Buy Now](https://www.adafruit.com/product/659)
[Related Guides to the Product](https://learn.adafruit.com/products/659/guides)
### Sewable Snaps - 5mm Diameter - Card of 24
[Sewable Snaps - 5mm Diameter - Card of 24](https://www.adafruit.com/product/1126)
The small 5mm size of these tin-plated brass snaps means they fit perfectly on Flora's pads! Snaps make a great connector for wearables-- solder one side to the board and sew the other to your project with conductive thread! This card comes with 24 complete snaps (socket and stud...
In Stock
[Buy Now](https://www.adafruit.com/product/1126)
[Related Guides to the Product](https://learn.adafruit.com/products/1126/guides)
### Needle set - 3/9 sizes - 20 needles
[Needle set - 3/9 sizes - 20 needles](https://www.adafruit.com/product/615)
Mighty needles, sew like the wind! This needle set is the only one you'll need for any sort of hand sewing, especially using our conductive thread and wearable electronics parts.
Each pack contains 20 gold-eye sharps, with eye sizes ranging from #3 (1.75" long) to #9...
Out of Stock
[Buy Now](https://www.adafruit.com/product/615)
[Related Guides to the Product](https://learn.adafruit.com/products/615/guides)
### Stainless Medium Conductive Thread - 3 ply - 18 meter/60 ft
[Stainless Medium Conductive Thread - 3 ply - 18 meter/60 ft](https://www.adafruit.com/product/641)
After months of searching, we finally have what we consider to be the ultimate conductive thread. It's thin, strong, smooth, and made completely of 316L stainless steel. Once you start working with this thread you'll quickly agree its optimal for any wearables work!
This...
Out of Stock
[Buy Now](https://www.adafruit.com/product/641)
[Related Guides to the Product](https://learn.adafruit.com/products/641/guides)
### Getting Started with Adafruit FLORA
[Getting Started with Adafruit FLORA](https://www.adafruit.com/product/1839)
**Making Wearables with an Arduino-Compatible Electronics Platform**
This book introduces readers to building wearable electronics projects using Adafruit's tiny FLORA board: at 4.4 grams, and only 1.75 inches in diameter, and featuring Arduino compatibility, it's the...
No Longer Stocked
[Buy Now](https://www.adafruit.com/product/1839)
[Related Guides to the Product](https://learn.adafruit.com/products/1839/guides)
### Getting Started with Adafruit FLORA Book Pack
[Getting Started with Adafruit FLORA Book Pack](https://www.adafruit.com/product/2404)
Pickup a copy of [Getting Started with Adafruit FLORA](https://www.adafruit.com/products/1839) and then hit the ground running with everything that you need to become an [Adafruit FLORA](https://www.adafruit.com/products/659) supreme being!
This pack is...
No Longer Stocked
[Buy Now](https://www.adafruit.com/product/2404)
[Related Guides to the Product](https://learn.adafruit.com/products/2404/guides)
### FLORA Sensor Pack
[FLORA Sensor Pack](https://www.adafruit.com/product/1458)
Sense the world around you! The FLORA Sensor Pack includes many types of sensors for your wearable enjoyment. Sense motion, direction, color, light levels, touch, and connections with FLORA sensor breakouts and conductive materials, and a few NeoPixels for experimenting with displaying your...
No Longer Stocked
[Buy Now](https://www.adafruit.com/product/1458)
[Related Guides to the Product](https://learn.adafruit.com/products/1458/guides)
### FLORA GPS Starter Pack
[FLORA GPS Starter Pack](https://www.adafruit.com/product/1090)
Get started with the fabulous Adafruit Flora platform with this lovely starter kit. Included are plenty of parts to make a few different fun projects! There's a Flora motherboard, a GPS module that can also perform location datalogging, eight ultra-bright chainable RGB pixels, a battery...
No Longer Stocked
[Buy Now](https://www.adafruit.com/product/1090)
[Related Guides to the Product](https://learn.adafruit.com/products/1090/guides)
## Related Guides
- [Firewalker LED Sneakers](https://learn.adafruit.com/firewalker-led-sneakers.md)
- [Datalogging Hat with FLORA BLE](https://learn.adafruit.com/datalogging-hat-with-flora-ble.md)
- [Chameleon Scarf](https://learn.adafruit.com/chameleon-scarf.md)
- [Flora TSL2561 Lux Sensor](https://learn.adafruit.com/flora-lux-sensor.md)
- [Adafruit Arduino Selection Guide](https://learn.adafruit.com/adafruit-arduino-selection-guide.md)
- [Flora GPS Jacket](https://learn.adafruit.com/flora-gps-jacket.md)
- [Glowing Skullcandy Headphones Mod](https://learn.adafruit.com/glowing-skullcandy-headphones-mod.md)
- [Flora MIDI Drum Glove](https://learn.adafruit.com/midi-drum-glove.md)
- [How to Find Hidden COM Ports](https://learn.adafruit.com/how-to-find-hidden-com-ports.md)
- [EEG Costume Cap](https://learn.adafruit.com/eeg-costume-cap.md)
- [Getting Started with FLORA](https://learn.adafruit.com/getting-started-with-flora.md)
- [FLORA and GEMMA ICSP](https://learn.adafruit.com/flora-and-gemma-isp.md)
- [NeoPixel Ring Clock](https://learn.adafruit.com/neopixel-ring-clock.md)
- [LED Ampli-Tie](https://learn.adafruit.com/led-ampli-tie.md)
- [Lumo Lift Teardown](https://learn.adafruit.com/lumo-lift-teardown.md)
---
# Source: https://learn.adafruit.com/battery-power-for-led-pixels-and-strips/tips-for-larger-projects.md
# Battery Power for LED Pixels and Strips
## Tips for Larger Projects

AA batteries are surprisingly potent little things, and a set of four can comfortably run about a meter of LPD8806 LED strip or one strand of 25 12mm pixels for a couple hours or more. You can go beyond this to create larger projects, with some forethought…
- A fully-lit 1 meter strip can demand close to 2 Amps, but the batteries and diode are only rated for a continuous output of about 1 Amp. You can push beyond this for brief intervals, but it can’t be sustained. Design your software so that the LEDs seldom or never exceed this level, using the 60 mA rule of thumb.
- Voltage diminishes slightly along the length of a strand. And when voltage drops too far, the LEDs will show dim and muddy colors. When using long runs of LEDs, we recommend adding an extra power tap every meter or 25 pixels to reduce this voltage drop.
- Remember that “off” pixels still need a tiny bit of current for the driver chips…about 50 mA per strand or meter…and another 25 mA for the microcontroller. Factor this into your battery calculations and software design. Large setups may be using hundreds of milliamps that are never seen, but continuously pass through that diode with its 1 Amp ceiling.
- C or D cells have more capacity for extra run time (up to 12,000 mAh with top-of-the-line NiMH D cells). We don't stock battery holders for these, but suitable ones can be found at Radio Shack and elsewhere. The 1N4001 diode is still rated for 1 Amp continuous output though…so for a larger project with many LEDs simultaneously lit, you might need to swap this out for a beefier diode such as a 1N5400, good for up to 3 Amps. This may get hot, so don’t leave it exposed to curious fingers.
- [Previous Page](https://learn.adafruit.com/battery-power-for-led-pixels-and-strips/estimating-running-time.md)
## Featured Products
### Digital programmable LED belt kit
[Digital programmable LED belt kit](https://www.adafruit.com/product/332)
By popular demand, we now have a project tutorial for how to make your own programmable, ultra-blinky LED belt. Perfect for parties, raves, parades, weddings, funerals, and bar mitzvahs. Wear it with pride, wear it with blinky! Follow our soldering tutorial to build your own heirloom LED belt,...
No Longer Stocked
[Buy Now](https://www.adafruit.com/product/332)
[Related Guides to the Product](https://learn.adafruit.com/products/332/guides)
### Alkaline AAA batteries - 2 pack
[Alkaline AAA batteries - 2 pack](https://www.adafruit.com/product/617)
Battery power for your portable project! These batteries are good quality at a good price, and work fantastic with any of the kits or projects in the shop that use AAA's. This is a pack of **2 AAA batteries**.
These batteries are Alkaline (MnO2) chemistry,...
No Longer Stocked
[Buy Now](https://www.adafruit.com/product/617)
[Related Guides to the Product](https://learn.adafruit.com/products/617/guides)
### 1N4001 Diode - 10 pack
[1N4001 Diode - 10 pack](https://www.adafruit.com/product/755)
This here is a 10 pack of the classic 1N4001 power blocking diode. These are good for reverse polarity protection (put it between your DC power jack and circuitry to avoid a negative-voltage that would zap your delicate electronics), kickback protection (place across your solenoids, relays...
In Stock
[Buy Now](https://www.adafruit.com/product/755)
[Related Guides to the Product](https://learn.adafruit.com/products/755/guides)
### 4 x AA Battery Holder with On/Off Switch
[4 x AA Battery Holder with On/Off Switch](https://www.adafruit.com/product/830)
Make a nice portable power pack with this 4 x AA battery holder. It fits any alkaline or rechargeable AA batteries in series. There's a snap on cover and an on/off switch which can be handy when wiring to something without a switch.
**New**! We now have 0.1" headers...
In Stock
[Buy Now](https://www.adafruit.com/product/830)
[Related Guides to the Product](https://learn.adafruit.com/products/830/guides)
### 12mm Diffused Flat Digital RGB LED Pixels (Strand of 25)
[12mm Diffused Flat Digital RGB LED Pixels (Strand of 25)](https://www.adafruit.com/product/738)
RGB Pixels are digitally-controllable lights you can set to any color, or animate. Each RGB LED and controller chip is molded into a 'dot' of silicone. The dots are weatherproof and rugged. There are four flanges molded in so that you can 'push' them into a 12mm drill hole in...
In Stock
[Buy Now](https://www.adafruit.com/product/738)
[Related Guides to the Product](https://learn.adafruit.com/products/738/guides)
### 12mm Diffused Thin Digital RGB LED Pixels (Strand of 25)
[12mm Diffused Thin Digital RGB LED Pixels (Strand of 25)](https://www.adafruit.com/product/322)
RGB Pixels are digitally-controllable lights you can set to any color, or animate. Each RGB LED and controller chip is molded into a 'dot' of silicone. The dots are weatherproof and rugged. There are four flanges molded in so that you can 'push' them into a 12mm drill hole in...
No Longer Stocked
[Buy Now](https://www.adafruit.com/product/322)
[Related Guides to the Product](https://learn.adafruit.com/products/322/guides)
### Digital RGB LED Weatherproof Strip - LPD8806 32 LED 5m
[Digital RGB LED Weatherproof Strip - LPD8806 32 LED 5m](https://www.adafruit.com/product/306)
These LED strips are fun and glowy. There are 32 RGB LEDs per meter, and you can control each LED individually! Yes, that's right, this is the digitally-addressable type of LED strip. You can set the color of each LED's red, green and blue component with 7-bit PWM precision (so 21-bit...
In Stock
[Buy Now](https://www.adafruit.com/product/306)
[Related Guides to the Product](https://learn.adafruit.com/products/306/guides)
## Related Guides
- [LPD8806 Digital RGB LED Strip](https://learn.adafruit.com/digital-led-strip.md)
- [NeoPixel GoPro Lens Light](https://learn.adafruit.com/neopixel-gopro-lens-light.md)
- [FancyLED Library for CircuitPython](https://learn.adafruit.com/fancyled-library-for-circuitpython.md)
- [Infinity Mirror Valentine's Candy Box](https://learn.adafruit.com/infinity-mirror-candy-box.md)
- [Circuit Playground Seashell Pendant](https://learn.adafruit.com/circuit-playground-seashell-pendant.md)
- [NYE Circuit Playground Drop](https://learn.adafruit.com/nye-circuit-playground-drop.md)
- [Feather Scorpio Snap Fit Case](https://learn.adafruit.com/feather-scorpio-snap-fit-case.md)
- [LED Noodle Lantern](https://learn.adafruit.com/led-noodle-lantern.md)
- [GitHub Actions Status Tower Light](https://learn.adafruit.com/github-actions-status-tower-light.md)
- [Raspberry Pi E-mail Notifier Using LEDs](https://learn.adafruit.com/raspberry-pi-e-mail-notifier-using-leds.md)
- [Light Up Prop with Prop-Maker](https://learn.adafruit.com/prop-maker-light-wand.md)
- [ISS Pin](https://learn.adafruit.com/iss-pin.md)
- [Flapping Halloween Vampire Bat](https://learn.adafruit.com/flapping-halloween-vampire-bat.md)
- [PyPortal Philips Hue Lighting Controller](https://learn.adafruit.com/pyportal-philips-hue-lighting-controller.md)
- [Adafruit Sparkle Motion Stick](https://learn.adafruit.com/adafruit-sparkle-motion-stick.md)
- [Computer Perfection Synthesizer](https://learn.adafruit.com/computer-perfection-synthesizer.md)
---
# Source: https://learn.adafruit.com/tmp36-temperature-sensor.md
# TMP36 Temperature Sensor
## Overview
An analog temperature sensor is pretty easy to explain, its a chip that tells you what the ambient temperature is!
These sensors use a solid-state technique to determine the temperature. That is to say, they don't use mercury (like old thermometers), [bimetalic strips](http://en.wikipedia.org/wiki/Bimetallic_strip) (like in some home thermometers or stoves), nor do they use [thermistors ](http://en.wikipedia.org/wiki/Thermistor)(temperature sensitive resistors). Instead, they use the fact as temperature increases, the voltage across a diode increases at a known rate. (Technically, this is actually the voltage drop between the base and emitter - the Vbe - of a transistor.) By precisely amplifying the voltage change, it is easy to generate an analog signal that is directly proportional to temperature. There have been some improvements on the technique but, essentially that is how temperature is measured.
The good news is all that complex calculation is done _inside_ the chip - it just spits out the temperature, ready for you to use!

Because these sensors have no moving parts, they are precise, never wear out, don't need calibration, work under many environmental conditions, and are consistant between sensors and readings. Moreover they are very inexpensive and quite easy to use.
## Some Basic Stats
These stats are for the temperature sensor in the Adafruit shop, the [Analog Devices TMP36](http://learn.adafruit.com/system/assets/assets/000/010/131/original/TMP35_36_37.pdf) (-40 to 150C).
It's very similar to the LM35/TMP35 (Celsius output, min 4v power) and LM34/TMP34 (Fahrenheit output). The reason we went with the '36 instead of the '35 or '34 is that this sensor has a very wide range and doesn't require a negative voltage to read sub-zero temperatures. Otherwise, the functionality is basically the same.
- **Size:** TO-92 package (about 0.2" x 0.2" x 0.2") with three leads
- **Price:** [$1.50 at the Adafruit shop](http://www.adafruit.com/index.php?main_page=product_info&cPath=35&products_id=165)
- **Temperature range:** -40°C to 150°C / -40°F to 302°F
- **Output range:** 0.1V (-40°C) to 2.0V (150°C) but accuracy decreases after 125°C
- **Power supply:** 2.7V to 5.5V only, 0.05 mA current draw
- **[Datasheet](http://learn.adafruit.com/system/assets/assets/000/010/131/original/TMP35_36_37.pdf)**
## How to Measure Temperature
Using the TMP36 is easy, simply connect the left pin to power (2.7-5.5V) and the right pin to ground. Then the middle pin will have an analog voltage that is directly proportional (linear) to the temperature. The analog voltage is independent of the power supply.

To convert the voltage to temperature, simply use the basic formula:
**Temp in °C = [(Vout in mV) - 500**] ** / 10**
So for example, if the voltage out is 1V that means that the temperature is **((1000 mV - 500) / 10) = 50 °C**
If you're using a LM35 or similar, use line 'a' in the image above and the formula: **Temp in °C = (Vout in mV)**** / 10**
## Problems you may encounter with multiple sensors:
If, when adding more sensors, you find that the temperature is inconsistant, this indicates that the sensors are interfering with each other when switching the analog reading circuit from one pin to the other. You can fix this by doing two delayed readings and tossing out the first one
[See this post for more information](http://www.adafruit.com/blog/2010/01/29/how-to-multiplex-analog-readings-what-can-go-wrong-with-high-impedance-sensors-and-how-to-fix-it/)
- [Next Page](https://learn.adafruit.com/tmp36-temperature-sensor/testing-a-temp-sensor.md)
## Featured Products
### Adafruit METRO 328 Fully Assembled - Arduino IDE compatible
[Adafruit METRO 328 Fully Assembled - Arduino IDE compatible](https://www.adafruit.com/product/50)
We sure love the ATmega328 here at Adafruit, and we use them _a lot_ for our own projects. The processor has plenty of GPIO, Analog inputs, hardware UART SPI and I2C, timers and PWM galore - just enough for most simple projects. When we need to go small, we use a
Out of Stock
[Buy Now](https://www.adafruit.com/product/50)
[Related Guides to the Product](https://learn.adafruit.com/products/50/guides)
### Half Sized Premium Breadboard - 400 Tie Points
[Half Sized Premium Breadboard - 400 Tie Points](https://www.adafruit.com/product/64)
This is a cute, half-size breadboard with 400 tie points, good for small projects. It's 3.25" x 2.2" / 8.3cm x 5.5cm with a standard double-strip in the middle and two power rails on both sides. You can pull the power rails off easily to make the breadboard as...
In Stock
[Buy Now](https://www.adafruit.com/product/64)
[Related Guides to the Product](https://learn.adafruit.com/products/64/guides)
### TMP36 - Analog Temperature sensor
[TMP36 - Analog Temperature sensor](https://www.adafruit.com/product/165)
Wide range, low power temperature sensor outputs an analog voltage that is proportional to the ambient temperature. To use, connect pin 1 (left) to power (between 2.7 and 5.5V), pin 3 (right) to ground, and pin 2 to analog in on your microcontroller. The voltage out is 0V at -50°C and...
In Stock
[Buy Now](https://www.adafruit.com/product/165)
[Related Guides to the Product](https://learn.adafruit.com/products/165/guides)
## Related Guides
- [Circuit Playground Sound-Controlled Robot](https://learn.adafruit.com/circuit-playground-sound-controlled-robot.md)
- [Multi-tasking the Arduino - Part 1](https://learn.adafruit.com/multi-tasking-the-arduino-part-1.md)
- [NeoPixel Painter](https://learn.adafruit.com/neopixel-painter.md)
- [Ladyada's Bento Box](https://learn.adafruit.com/lady-adas-bento-box.md)
- [WiFi Controlled LED Christmahanukwanzaa Tree](https://learn.adafruit.com/wifi-controlled-led-christmahanukwanzaa-tree.md)
- [Adafruit 2.8" TFT Touch Shield v2 - Capacitive or Resistive](https://learn.adafruit.com/adafruit-2-8-tft-touch-shield-v2.md)
- [SMS Texting Pet Food Dish](https://learn.adafruit.com/sms-texting-pet-food-dish.md)
- [Ladyada's Learn Arduino - Lesson #1](https://learn.adafruit.com/ladyadas-learn-arduino-lesson-number-1.md)
- [Arduino Lesson 17. Email Sending Movement Detector](https://learn.adafruit.com/arduino-lesson-17-email-sending-movement-detector.md)
- [Nokia 5110/3310 Monochrome LCD](https://learn.adafruit.com/nokia-5110-3310-monochrome-lcd.md)
- [Arduino Lesson 8. Analog Inputs](https://learn.adafruit.com/adafruit-arduino-lesson-8-analog-inputs.md)
- [Wave Shield Voice Changer](https://learn.adafruit.com/wave-shield-voice-changer.md)
- [Arduino Lesson 13. DC Motors](https://learn.adafruit.com/adafruit-arduino-lesson-13-dc-motors.md)
- [Low Power WiFi Datalogger](https://learn.adafruit.com/low-power-wifi-datalogging.md)
- [DS1307 Real Time Clock Breakout Board Kit](https://learn.adafruit.com/ds1307-real-time-clock-breakout-board-kit.md)
---
# Source: https://learn.adafruit.com/tmp36-temperature-sensor/tmp36-with-circuitpython.md
# TMP36 Temperature Sensor
## TMP36 with CircuitPython
With CircuitPython it's easy to read the TMP36 sensor using the [analog I/O module](../../../../circuitpython-basics-analog-inputs-and-outputs) and analog to digital converter built-in to your board. You can easily turn the TMP36 output voltage into a precise temperature reading with just a few lines of Python code.
To follow this page make sure to wire up the TMP36 sensor to your CircuitPython board as shown on the previous page. The A0 analog input will be used as the input from the TMP36's temperature output. Here's an example of a Feather M0 wired to the TMP36 on the A0 analog input:
**Note:** The simple circuit just connecting the sensor to a board was found to give incorrect readings with CircuitPython because of the speed at which CircuitPython reads the analog value.
To fix this problem, add a 0.01uF or 0.1uF capacitor and a 47k resistor across the output and ground pins of the TMP36, shown below.

First [connect to the board's serial REPL ](../../../../micropython-basics-how-to-load-micropython-on-a-board/serial-terminal)so you are at the CircuitPython **\>\>\>** prompt.
Next import the necessary **board** and **analogio** modules:
```
import board
import analogio
```
Now create an analog input for the A0 pin on the board:
```
tmp36 = analogio.AnalogIn(board.A0)
```
At this point you can read the raw ADC value of the TMP36 sensor output. Like the analog I/O guide mentions this value will range from 0 to 65535 proportional to the voltage output by the sensor (from 0 to the analog reference voltage of your board, typically 3.3V to 5V).
For example try reading the raw ADC value:
```
tmp36.value
```

You can convert this value into a voltage (in millivolts) using a similar formula mentioned on the previous page. However there's one small change to increase the range of values from 1023 to 65535--this is necessary because CircuitPython uses a wider range of values for ADC inputs. In addition with CircuitPython you can directly access the board's analog reference voltage so one simple equation will work for both 3.3V and 5V references:
```
tmp36.value * (tmp36.reference_voltage * 1000 / 65535)
```

Once you have the analog voltage value output by the TMP36 you can turn it into a temperature in degrees Celsius just like the previous page shows:
```
millivolts = tmp36.value * (tmp36.reference_voltage * 1000 / 65535)
(millivolts - 500) / 10
```

Let's make a function to perform this math for us and return the temperature in degrees Celsius:
```
def tmp36_temperature_C(analogin):
millivolts = analogin.value * (analogin.reference_voltage * 1000 / 65535)
return (millivolts - 500) / 10
tmp36_temperature_C(tmp36)
```


You can turn this into a complete program that reads and prints the temperature every second too. Save this as a **code.py** on your board and check the serial output:
```
import board
import analogio
import time
TMP36_PIN = board.A0 # Analog input connected to TMP36 output.
# Function to simplify the math of reading the temperature.
def tmp36_temperature_C(analogin):
millivolts = analogin.value * (analogin.reference_voltage * 1000 / 65535)
return (millivolts - 500) / 10
# Create TMP36 analog input.
tmp36 = analogio.AnalogIn(TMP36_PIN)
# Loop forever.
while True:
# Read the temperature in Celsius.
temp_C = tmp36_temperature_C(tmp36)
# Convert to Fahrenheit.
temp_F = (temp_C * 9/5) + 32
# Print out the value and delay a second before looping again.
print("Temperature: {}C {}F".format(temp_C, temp_F))
time.sleep(1.0)
```
- [Previous Page](https://learn.adafruit.com/tmp36-temperature-sensor/using-a-temp-sensor.md)
- [Next Page](https://learn.adafruit.com/tmp36-temperature-sensor/example-projects.md)
## Featured Products
### Adafruit METRO 328 Fully Assembled - Arduino IDE compatible
[Adafruit METRO 328 Fully Assembled - Arduino IDE compatible](https://www.adafruit.com/product/50)
We sure love the ATmega328 here at Adafruit, and we use them _a lot_ for our own projects. The processor has plenty of GPIO, Analog inputs, hardware UART SPI and I2C, timers and PWM galore - just enough for most simple projects. When we need to go small, we use a
Out of Stock
[Buy Now](https://www.adafruit.com/product/50)
[Related Guides to the Product](https://learn.adafruit.com/products/50/guides)
### Half Sized Premium Breadboard - 400 Tie Points
[Half Sized Premium Breadboard - 400 Tie Points](https://www.adafruit.com/product/64)
This is a cute, half-size breadboard with 400 tie points, good for small projects. It's 3.25" x 2.2" / 8.3cm x 5.5cm with a standard double-strip in the middle and two power rails on both sides. You can pull the power rails off easily to make the breadboard as...
In Stock
[Buy Now](https://www.adafruit.com/product/64)
[Related Guides to the Product](https://learn.adafruit.com/products/64/guides)
### TMP36 - Analog Temperature sensor
[TMP36 - Analog Temperature sensor](https://www.adafruit.com/product/165)
Wide range, low power temperature sensor outputs an analog voltage that is proportional to the ambient temperature. To use, connect pin 1 (left) to power (between 2.7 and 5.5V), pin 3 (right) to ground, and pin 2 to analog in on your microcontroller. The voltage out is 0V at -50°C and...
In Stock
[Buy Now](https://www.adafruit.com/product/165)
[Related Guides to the Product](https://learn.adafruit.com/products/165/guides)
## Related Guides
- [Circuit Playground Sound-Controlled Robot](https://learn.adafruit.com/circuit-playground-sound-controlled-robot.md)
- [Multi-tasking the Arduino - Part 1](https://learn.adafruit.com/multi-tasking-the-arduino-part-1.md)
- [NeoPixel Painter](https://learn.adafruit.com/neopixel-painter.md)
- [Ladyada's Bento Box](https://learn.adafruit.com/lady-adas-bento-box.md)
- [WiFi Controlled LED Christmahanukwanzaa Tree](https://learn.adafruit.com/wifi-controlled-led-christmahanukwanzaa-tree.md)
- [Adafruit 2.8" TFT Touch Shield v2 - Capacitive or Resistive](https://learn.adafruit.com/adafruit-2-8-tft-touch-shield-v2.md)
- [SMS Texting Pet Food Dish](https://learn.adafruit.com/sms-texting-pet-food-dish.md)
- [Ladyada's Learn Arduino - Lesson #1](https://learn.adafruit.com/ladyadas-learn-arduino-lesson-number-1.md)
- [Arduino Lesson 17. Email Sending Movement Detector](https://learn.adafruit.com/arduino-lesson-17-email-sending-movement-detector.md)
- [Nokia 5110/3310 Monochrome LCD](https://learn.adafruit.com/nokia-5110-3310-monochrome-lcd.md)
- [Arduino Lesson 8. Analog Inputs](https://learn.adafruit.com/adafruit-arduino-lesson-8-analog-inputs.md)
- [Wave Shield Voice Changer](https://learn.adafruit.com/wave-shield-voice-changer.md)
- [Arduino Lesson 13. DC Motors](https://learn.adafruit.com/adafruit-arduino-lesson-13-dc-motors.md)
- [Low Power WiFi Datalogger](https://learn.adafruit.com/low-power-wifi-datalogging.md)
- [DS1307 Real Time Clock Breakout Board Kit](https://learn.adafruit.com/ds1307-real-time-clock-breakout-board-kit.md)
---
# Source: https://learn.adafruit.com/flora-gps-jacket/tools-and-supplies.md
# Source: https://learn.adafruit.com/conductive-thread/tools-and-supplies.md
# Source: https://learn.adafruit.com/flora-snaps/tools-and-supplies.md
# Flora Snaps
## Tools & supplies
First gather your tools and supplies! You will need [teeny tiny 5mm snaps](http://www.adafruit.com/products/1126), a [Flora main board](http://www.adafruit.com/products/659), [conductive thread](http://www.adafruit.com/products/641), and a [needle](http://www.adafruit.com/products/615).
You'll also need some clear nail polish or fray check.


**Soldering iron**
Any entry level 'all-in-one' soldering iron that you might find at your local hardware store should work. As with most things in life, you get what you pay for.
Upgrading to a higher end soldering iron setup, like the [Hakko FX-888 that we stock in our store](http://adafruit.com/products/180 "Link: http://adafruit.com/products/180"), will make soldering fun and easy.
Do not use a "ColdHeat" soldering iron! They are not suitable for delicate electronics work and can damage the Flora ([see here](http://www.epemag.wimborne.co.uk/cold-soldering2.htm)).
[Click here to buy our entry level adjustable 30W 110V soldering iron.](http://adafruit.com/products/180 "Link: http://adafruit.com/products/180")
[Click here to upgrade to a Genuine Hakko FX-888 adjustable temperature soldering iron.](http://adafruit.com/products/303 "Link: http://adafruit.com/products/303")
[Learn how to solder with tons of tutorials!](http://learn.adafruit.com/adafruit-guide-excellent-soldering "Link: http://learn.adafruit.com/adafruit-guide-excellent-soldering") [
](http://www.ladyada.net/learn/soldering/index.html)


**Solder**
You will want rosin core, 60/40 solder. Good solder is a good thing. Bad solder leads to bridging and cold solder joints which can be tough to find.
[Click here to buy a spool of leaded solder (recommended for beginners).](http://adafruit.com/products/145 "Link: http://adafruit.com/products/145")
[Click here to buy a spool of lead-free solder.](http://adafruit.com/products/734 "Link: http://adafruit.com/products/734")

**Multimeter**
You will need a good quality basic multimeter that can measure voltage and continuity.
[Click here to buy a basic multimeter.](http://adafruit.com/products/71)
[Click here to buy a top of the line multimeter.](http://adafruit.com/products/308)
[Click here to buy a pocket multimeter.](http://adafruit.com/products/850)
[Don't forget to learn how to use your multimeter too!](http://learn.adafruit.com/multimeters)


Solder wick will help correct any mistakes and adjust the fit of your snaps.
[Click here to buy some.](http://adafruit.com/products/149)

A [Panavise](http://adafruit.com/products/151) is useful, but not strictly necessary.

- [Previous Page](https://learn.adafruit.com/flora-snaps/overview.md)
- [Next Page](https://learn.adafruit.com/flora-snaps/tin-the-pads.md)
## Featured Products
### FLORA - Wearable electronic platform: Arduino-compatible
[FLORA - Wearable electronic platform: Arduino-compatible](https://www.adafruit.com/product/659)
FLORA is Adafruit's fully-featured wearable electronics platform. It's a round, sewable, Arduino-compatible microcontroller designed to empower amazing wearables projects.FLORA comes with Adafruit's support, [tutorials and...](http://learn.adafruit.com/category/flora)
In Stock
[Buy Now](https://www.adafruit.com/product/659)
[Related Guides to the Product](https://learn.adafruit.com/products/659/guides)
### Sewable Snaps - 5mm Diameter - Card of 24
[Sewable Snaps - 5mm Diameter - Card of 24](https://www.adafruit.com/product/1126)
The small 5mm size of these tin-plated brass snaps means they fit perfectly on Flora's pads! Snaps make a great connector for wearables-- solder one side to the board and sew the other to your project with conductive thread! This card comes with 24 complete snaps (socket and stud...
In Stock
[Buy Now](https://www.adafruit.com/product/1126)
[Related Guides to the Product](https://learn.adafruit.com/products/1126/guides)
### Needle set - 3/9 sizes - 20 needles
[Needle set - 3/9 sizes - 20 needles](https://www.adafruit.com/product/615)
Mighty needles, sew like the wind! This needle set is the only one you'll need for any sort of hand sewing, especially using our conductive thread and wearable electronics parts.
Each pack contains 20 gold-eye sharps, with eye sizes ranging from #3 (1.75" long) to #9...
Out of Stock
[Buy Now](https://www.adafruit.com/product/615)
[Related Guides to the Product](https://learn.adafruit.com/products/615/guides)
### Stainless Medium Conductive Thread - 3 ply - 18 meter/60 ft
[Stainless Medium Conductive Thread - 3 ply - 18 meter/60 ft](https://www.adafruit.com/product/641)
After months of searching, we finally have what we consider to be the ultimate conductive thread. It's thin, strong, smooth, and made completely of 316L stainless steel. Once you start working with this thread you'll quickly agree its optimal for any wearables work!
This...
Out of Stock
[Buy Now](https://www.adafruit.com/product/641)
[Related Guides to the Product](https://learn.adafruit.com/products/641/guides)
### Getting Started with Adafruit FLORA
[Getting Started with Adafruit FLORA](https://www.adafruit.com/product/1839)
**Making Wearables with an Arduino-Compatible Electronics Platform**
This book introduces readers to building wearable electronics projects using Adafruit's tiny FLORA board: at 4.4 grams, and only 1.75 inches in diameter, and featuring Arduino compatibility, it's the...
No Longer Stocked
[Buy Now](https://www.adafruit.com/product/1839)
[Related Guides to the Product](https://learn.adafruit.com/products/1839/guides)
### Getting Started with Adafruit FLORA Book Pack
[Getting Started with Adafruit FLORA Book Pack](https://www.adafruit.com/product/2404)
Pickup a copy of [Getting Started with Adafruit FLORA](https://www.adafruit.com/products/1839) and then hit the ground running with everything that you need to become an [Adafruit FLORA](https://www.adafruit.com/products/659) supreme being!
This pack is...
No Longer Stocked
[Buy Now](https://www.adafruit.com/product/2404)
[Related Guides to the Product](https://learn.adafruit.com/products/2404/guides)
### FLORA Sensor Pack
[FLORA Sensor Pack](https://www.adafruit.com/product/1458)
Sense the world around you! The FLORA Sensor Pack includes many types of sensors for your wearable enjoyment. Sense motion, direction, color, light levels, touch, and connections with FLORA sensor breakouts and conductive materials, and a few NeoPixels for experimenting with displaying your...
No Longer Stocked
[Buy Now](https://www.adafruit.com/product/1458)
[Related Guides to the Product](https://learn.adafruit.com/products/1458/guides)
### FLORA GPS Starter Pack
[FLORA GPS Starter Pack](https://www.adafruit.com/product/1090)
Get started with the fabulous Adafruit Flora platform with this lovely starter kit. Included are plenty of parts to make a few different fun projects! There's a Flora motherboard, a GPS module that can also perform location datalogging, eight ultra-bright chainable RGB pixels, a battery...
No Longer Stocked
[Buy Now](https://www.adafruit.com/product/1090)
[Related Guides to the Product](https://learn.adafruit.com/products/1090/guides)
## Related Guides
- [Firewalker LED Sneakers](https://learn.adafruit.com/firewalker-led-sneakers.md)
- [Datalogging Hat with FLORA BLE](https://learn.adafruit.com/datalogging-hat-with-flora-ble.md)
- [Chameleon Scarf](https://learn.adafruit.com/chameleon-scarf.md)
- [Flora TSL2561 Lux Sensor](https://learn.adafruit.com/flora-lux-sensor.md)
- [Adafruit Arduino Selection Guide](https://learn.adafruit.com/adafruit-arduino-selection-guide.md)
- [Flora GPS Jacket](https://learn.adafruit.com/flora-gps-jacket.md)
- [Glowing Skullcandy Headphones Mod](https://learn.adafruit.com/glowing-skullcandy-headphones-mod.md)
- [Flora MIDI Drum Glove](https://learn.adafruit.com/midi-drum-glove.md)
- [How to Find Hidden COM Ports](https://learn.adafruit.com/how-to-find-hidden-com-ports.md)
- [EEG Costume Cap](https://learn.adafruit.com/eeg-costume-cap.md)
- [Getting Started with FLORA](https://learn.adafruit.com/getting-started-with-flora.md)
- [FLORA and GEMMA ICSP](https://learn.adafruit.com/flora-and-gemma-isp.md)
- [NeoPixel Ring Clock](https://learn.adafruit.com/neopixel-ring-clock.md)
- [LED Ampli-Tie](https://learn.adafruit.com/led-ampli-tie.md)
- [Lumo Lift Teardown](https://learn.adafruit.com/lumo-lift-teardown.md)
---
# Source: https://learn.adafruit.com/timesquare-watch-kit/tools-list.md
# TIMESQUARE Watch Kit
## Tools List
## Tutorials
- [Learn how to solder with tons of tutorials!](http://learn.adafruit.com/adafruit-guide-excellent-soldering) [
](http://www.ladyada.net/learn/soldering/index.html)
- [Don't forget to learn how to use your multimeter too!](http://learn.adafruit.com/multimeters)
## Tools
There are a few tools that are required for assembly. None of these tools are included. If you don't have them, now would be a good time to borrow or purchase them. They are very very handy whenever assembling/fixing/modifying electronic devices! I provide links to buy them, but of course, you should get them where ever is most convenient/inexpensive. Many of these parts are available in a place like Radio Shack or other (higher quality) DIY electronics stores.
**Soldering iron**
Any entry level 'all-in-one' soldering iron that you might find at your local hardware store should work. As with most things in life, you get what you pay for.
Upgrading to a higher end soldering iron setup, like the [Hakko FX-888 that we stock in our store](http://adafruit.com/products/180 "Link: http://adafruit.com/products/180"), will make soldering fun and easy.
Do not use a "ColdHeat" soldering iron! They are not suitable for delicate electronics work and can damage the kit ([see here](http://www.epemag.wimborne.co.uk/cold-soldering2.htm)).
[Click here to buy our entry level adjustable 30W 110V soldering iron.](http://adafruit.com/products/180)
[Click here to upgrade to a Genuine Hakko FX-888 adjustable temperature soldering iron.](http://adafruit.com/products/303)


**Solder**
You will want rosin core, 60/40 solder. Good solder is a good thing. Bad solder leads to bridging and cold solder joints which can be tough to find.
[Click here to buy a spool of leaded solder (recommended for beginners).](http://adafruit.com/products/145 "Link: http://adafruit.com/products/145")
[Click here to buy a spool of lead-free solder.](http://adafruit.com/products/734 "Link: http://adafruit.com/products/734")

**Multimeter**
You will need a good quality basic multimeter that can measure voltage and continuity.
[Click here to buy a basic multimeter.](http://adafruit.com/products/71)
[Click here to buy a top of the line multimeter.](http://adafruit.com/products/308)
[Click here to buy a pocket multimeter.](http://adafruit.com/products/850 "Link: http://adafruit.com/products/850")


**Flush Diagonal Cutters**
You will need flush diagonal cutters to trim the wires and leads off of components once you have soldered them in place.
[Click here to buy our favorite cutters.](http://adafruit.com/products/152 "Link: http://adafruit.com/products/152")

**Solder Sucker**
Strangely enough, that's the technical term for this desoldering vacuum tool. Useful in cleaning up mistakes, every electrical engineer has one of these on their desk.
[Click here to buy a one.](http://adafruit.com/products/148 "Link: http://adafruit.com/products/148")

**Helping Third Hand With Magnifier**
Not _absolutely _necessary but will make things go much much faster, and it will make soldering much easier.
[Pick one up here.](http://adafruit.com/products/291 "Link: http://adafruit.com/products/291")

- [Previous Page](https://learn.adafruit.com/timesquare-watch-kit/overview.md)
- [Next Page](https://learn.adafruit.com/timesquare-watch-kit/parts-list.md)
## Featured Products
### TIMESQUARE DIY Watch Kit - Red Display Matrix
[TIMESQUARE DIY Watch Kit - Red Display Matrix](https://www.adafruit.com/product/1106)
Show up stylish AND on time to any event with this awesome looking DIY watch. We have a few watch kits here at Adafruit but we finally have one that looks good and fits well, even for ladies and kids and others with smaller wrists and hands. Its got an 8x8 bit matrix display and a repurposed...
No Longer Stocked
[Buy Now](https://www.adafruit.com/product/1106)
[Related Guides to the Product](https://learn.adafruit.com/products/1106/guides)
### TIMESQUARE DIY Watch Kit - Tangerine Display Matrix
[TIMESQUARE DIY Watch Kit - Tangerine Display Matrix](https://www.adafruit.com/product/1223)
Show up stylish AND on time to any event with this awesome looking DIY watch. We have a few watch kits here at Adafruit but we finally have one that looks good and fits well, even for ladies and kids and others with smaller wrists and hands. Its got an 8x8 bit matrix display and a repurposed...
No Longer Stocked
[Buy Now](https://www.adafruit.com/product/1223)
[Related Guides to the Product](https://learn.adafruit.com/products/1223/guides)
### TIMESQUARE DIY Watch Kit - Lime Display Matrix
[TIMESQUARE DIY Watch Kit - Lime Display Matrix](https://www.adafruit.com/product/1224)
Show up stylish AND on time to any event with this awesome looking DIY watch. We have a few watch kits here at Adafruit but we finally have one that looks good and fits well, even for ladies and kids and others with smaller wrists and hands. Its got an 8x8 bit matrix display and a repurposed...
No Longer Stocked
[Buy Now](https://www.adafruit.com/product/1224)
[Related Guides to the Product](https://learn.adafruit.com/products/1224/guides)
### TIMESQUARE DIY Watch Kit - Blue Display Matrix
[TIMESQUARE DIY Watch Kit - Blue Display Matrix](https://www.adafruit.com/product/1225)
Show up stylish AND on time to any event with this awesome looking DIY watch. We have a few watch kits here at Adafruit but we finally have one that looks good and fits well, even for ladies and kids and others with smaller wrists and hands. Its got an 8x8 bit matrix display and a repurposed...
No Longer Stocked
[Buy Now](https://www.adafruit.com/product/1225)
[Related Guides to the Product](https://learn.adafruit.com/products/1225/guides)
### TIMESQUARE DIY Watch Kit - White Display Matrix
[TIMESQUARE DIY Watch Kit - White Display Matrix](https://www.adafruit.com/product/1226)
Show up stylish AND on time to any event with this awesome looking DIY watch. We have a few watch kits here at Adafruit but we finally have one that looks good and fits well, even for ladies and kids and others with smaller wrists and hands. Its got an 8x8 bit matrix display and a repurposed...
No Longer Stocked
[Buy Now](https://www.adafruit.com/product/1226)
[Related Guides to the Product](https://learn.adafruit.com/products/1226/guides)
### TIMESQUARE silver parts bag
[TIMESQUARE silver parts bag](https://www.adafruit.com/product/1227)
No Longer Stocked
[Buy Now](https://www.adafruit.com/product/1227)
[Related Guides to the Product](https://learn.adafruit.com/products/1227/guides)
## Related Guides
- [MicroLipo v2 Case](https://learn.adafruit.com/microlipo-case.md)
- [Adafruit DotStar FeatherWing](https://learn.adafruit.com/adafruit-dotstar-featherwing-adafruit.md)
- [The Pixif](https://learn.adafruit.com/the-pixif.md)
- [Adafruit VL53L0X Time of Flight Micro-LIDAR Distance Sensor Breakout](https://learn.adafruit.com/adafruit-vl53l0x-micro-lidar-distance-sensor-breakout.md)
- [Adafruit MENTA Kit](https://learn.adafruit.com/adafruit-menta-kit-mint-tin-arduino-compatible.md)
- [Adafruit RGB Matrix Bonnet for Raspberry Pi](https://learn.adafruit.com/adafruit-rgb-matrix-bonnet-for-raspberry-pi.md)
- [Raspberry Pi Care and Troubleshooting](https://learn.adafruit.com/raspberry-pi-care-and-troubleshooting.md)
- [Adafruit FONA 808 Cellular + GPS Shield for Arduino](https://learn.adafruit.com/adafruit-fona-808-cellular-plus-gps-shield-for-arduino.md)
- [Adafruit PCM5122 I2S DAC](https://learn.adafruit.com/adafruit-pcm5122-i2s-dac.md)
- [Use an art canvas to diffuse an RGB matrix](https://learn.adafruit.com/use-an-art-canvas-to-diffuse-rgb-matrix.md)
- [Bluetooth-Controlled Matrix LED Sign using Bluefruit Connect](https://learn.adafruit.com/bluetooth-controlled-matrix-led-sign-using-bluefruit-connect.md)
- [Adafruit AW9523 GPIO Expander and LED Driver](https://learn.adafruit.com/adafruit-aw9523-gpio-expander-and-led-driver.md)
- [Adafruit DPI Display Kippah](https://learn.adafruit.com/adafruit-dpi-display-kippah-ttl-tft.md)
- [DIY Pocket LED Gamer - Tiny Tetris!](https://learn.adafruit.com/diy-3d-printed-handheld-pocket-game-tiny-tetris-snake.md)
- [Adafruit MagTag](https://learn.adafruit.com/adafruit-magtag.md)
---
# Source: https://learn.adafruit.com/tron-bag/tools.md
# TRON Bag
## Tools

- **[EL (electro luminescent) wire](http://www.adafruit.com/index.php?main_page=index&cPath=50)** - you can get this stuff online or sometimes in auto shops (its used for decoration). [We suggest getting Aqua 2.3-2.6mm](http://www.adafruit.com/index.php?main_page=product_info&cPath=50&products_id=316) diameter which will appear white and is the brightest kind of EL
- **[EL Inverter](http://www.adafruit.com/index.php?main_page=product_info&cPath=50&products_id=317)** - we really dig the 2 x AA inverters, they're easy to use and power and can run a few meters. You'll also need 2 AA batteries of course.
- **[Connectors for the Inverter](http://www.adafruit.com/index.php?main_page=product_info&cPath=50&products_id=318)** - usually sold next to the inverter.
- **[Soldering iron](http://www.adafruit.com/index.php?main_page=product_info&cPath=8&products_id=180)** **and [Solder](http://www.adafruit.com/index.php?main_page=product_info&cPath=8&products_id=145)**- to attach the EL wire. Available in any electronics shop, hardware store, or radio shack, etc.
- **[Copper tape](http://www.adafruit.com/partfinder/misc)** - you can get this at craft stores in the glassworking area
- **[Wire strippers](http://www.adafruit.com/index.php?main_page=product_info&cPath=8&products_id=147)**with a 18 or 20 AWG notch to strip the EL wire. Available in any electronics shop, hardware store, or radio shack, etc.
- **[Wire cutters](http://www.adafruit.com/index.php?main_page=product_info&cPath=8&products_id=152)** - For cutting the copper tape and EL wire. Available in any electronics shop, hardware store, or radio shack, etc.
- **Heat shrink** - in 1/4" and 1/8" diameter, to protect the EL wire. Available in any electronics shop, hardware store, or radio shack, etc.
- **Ribbon or other thin stranded wire** - for extending the inverter, as necessary.Available in any electronics shop, hardware store, or radio shack, etc.
- **Lighter** / Heat gun / Hair drier - to shrink the heatshrink.
- **Scissors** - for cutting thread.
- **"Invisible" thread** - made of nylon this stuff is strong, waterproof and clear! All sewing and craft stores will have this
- **Heavy needle** - make sure its large enough to thread the invisible thread, but thin and sharp enough that you can pass it through the fabric of the bag. All sewing and craft stores will have this
**[We have a starter pack at the adafruit shop with some EL wire, inverter and connector and other small bits you need.](http://www.adafruit.com/index.php?main_page=product_info&cPath=50&products_id=320 "Link: http://www.adafruit.com/index.php?main\_page=product\_info&cPath=50&products\_id=320")**
- [Previous Page](https://learn.adafruit.com/tron-bag/overview.md)
- [Next Page](https://learn.adafruit.com/tron-bag/design.md)
## Featured Products
### Heat Shrink Pack
[Heat Shrink Pack](https://www.adafruit.com/product/344)
Heat shrink is the duct tape of electronics, it keeps your stuff all safe and kept together. Especially when wiring and soldering, use heat shrink to add mechanical strength to cables. We use this stuff all the time and having a zip-lock bag of all the possible sizes is super...
In Stock
[Buy Now](https://www.adafruit.com/product/344)
[Related Guides to the Product](https://learn.adafruit.com/products/344/guides)
### In-line wire 1-to-4 splitter
[In-line wire 1-to-4 splitter](https://www.adafruit.com/product/402)
If you want to connect multiple EL wires/strips/panels up to one inverter, these splitters are quite useful. There is one male connector (goes to the inverter) and then 4 female connectors (which will connect to each wire/strip/panel. You can even cascade them! Only thing to watch for is make...
In Stock
[Buy Now](https://www.adafruit.com/product/402)
[Related Guides to the Product](https://learn.adafruit.com/products/402/guides)
### EL wire starter pack - Blue 2.5 meter (8.2 ft)
[EL wire starter pack - Blue 2.5 meter (8.2 ft)](https://www.adafruit.com/product/583)
A little bundle to get you started! This project pack contains:
- [2.5 meters (over 8 ft) of high-brightness, long-life EL wire in Blue](http://www.adafruit.com/products/408). 2.5 meters is the maximum amount for the pocket driver - it is cut and soldered so it's ready...
Out of Stock
[Buy Now](https://www.adafruit.com/product/583)
[Related Guides to the Product](https://learn.adafruit.com/products/583/guides)
## Related Guides
- [Battery Powering Wearable Electronics](https://learn.adafruit.com/battery-powering-wearable-electronics.md)
- [3D Printed Daft Punk Helmet with Bluetooth ](https://learn.adafruit.com/3d-printed-daft-punk-helmet-with-bluetooth.md)
- [3D Printed Wearable Video Goggles](https://learn.adafruit.com/3d-printed-wearable-video-goggles.md)
- [Decorative Pointy Elf Ear Bud Holders](https://learn.adafruit.com/elf-ears.md)
- [LED Friendship Bracelet](https://learn.adafruit.com/nautical-led-bracelet.md)
- [Make a Zelda Master Sword with the RP2040 Prop-Maker Feather](https://learn.adafruit.com/master-sword-rp2040.md)
- [USB Locket](https://learn.adafruit.com/usb-locket.md)
- [Light Up your Costume with Noods](https://learn.adafruit.com/light-up-your-costume-with-noods.md)
- [Pac Man Pixel Suspenders](https://learn.adafruit.com/pac-man-pixel-suspenders.md)
- [3D Printed LED Buckle](https://learn.adafruit.com/3d-printed-led-buckle.md)
- [Adafruit Flora Bluefruit LE](https://learn.adafruit.com/adafruit-flora-bluefruit-le.md)
- [Textile Potentiometer Hoodie](https://learn.adafruit.com/textile-potentiometer-hoodie.md)
- [Cynaps Bone Conduction Headset Teardown](https://learn.adafruit.com/cynaps-bone-conduction-headset-teardown.md)
- [Glowing Bean Bags with EL Wire](https://learn.adafruit.com/glowing-bean-bags-with-el-wire.md)
- [3D Printed Gunblade](https://learn.adafruit.com/3d-printed-gunblade.md)
---
# Source: https://learn.adafruit.com/2-8-tft-touch-shield/touchscreen-paint-example.md
# 2.8" TFT Touch Shield
## Touchscreen Paint Example
The LCD has a 2.8" 4-wire resistive touch screen glued onto it. You can use this for detecing finger-presses, stylus', etc. You'll need 4 pins to talk to the touch panel **but** we **reuse** some of the pins for the TFT LCD! This is because the resistance of the panel is high enough that it doesn't interfere with the digital input/output and we can query the panel in between TFT accesses, when the pins are not being used.
This tutorial requires the installation of the **Adafruit Touchscreen ** library. This library is available for installation on the Arduino library manager.
Open up the Arduino library manager:

Search for the **Adafruit Touchscreen ** library and install it

We also have a great tutorial on Arduino library installation at:
[http://learn.adafruit.com/adafruit-all-about-arduino-libraries-install-use](http://learn.adafruit.com/adafruit-all-about-arduino-libraries-install-use "Link: http://learn.adafruit.com/adafruit-all-about-arduino-libraries-install-use")
# Example
We connect the 4 pins as follows:
- Y+ is connected to Analog 1
- Y- is connected to Digital 7
- X+ is connected to Digital 6
- X- is connected to Analog 2
Now start up the **tftpaint\_shield** example in the TFTLCD library. The right hand side will have 'color boxes' you can press to select which color you want to draw with. If you press the area to the **left** where the screen ends, it will erase the screen.
Danger:

- [Previous Page](https://learn.adafruit.com/2-8-tft-touch-shield/adafruit-gfx-library.md)
- [Next Page](https://learn.adafruit.com/2-8-tft-touch-shield/bitmaps.md)
## Featured Products
### Adafruit METRO 328 Fully Assembled - Arduino IDE compatible
[Adafruit METRO 328 Fully Assembled - Arduino IDE compatible](https://www.adafruit.com/product/50)
We sure love the ATmega328 here at Adafruit, and we use them _a lot_ for our own projects. The processor has plenty of GPIO, Analog inputs, hardware UART SPI and I2C, timers and PWM galore - just enough for most simple projects. When we need to go small, we use a
Out of Stock
[Buy Now](https://www.adafruit.com/product/50)
[Related Guides to the Product](https://learn.adafruit.com/products/50/guides)
## Related Guides
- [LED Lightbox](https://learn.adafruit.com/led-lightbox.md)
- [Trinket Audio Player](https://learn.adafruit.com/trinket-audio-player.md)
- [Geofencing with the FONA 808 & Adafruit IO](https://learn.adafruit.com/geofencing-with-the-fona-808-and-adafruit-io.md)
- [Adafruit Analog Accelerometer Breakouts](https://learn.adafruit.com/adafruit-analog-accelerometer-breakouts.md)
- [Electronic Demon Costume](https://learn.adafruit.com/electronic-demon-costume.md)
- [Adafruit Ultimate GPS Logger Shield](https://learn.adafruit.com/adafruit-ultimate-gps-logger-shield.md)
- [Mini Thermal Receipt Printers](https://learn.adafruit.com/mini-thermal-receipt-printer.md)
- [Bluefruit LE Connect for iOS and Android](https://learn.adafruit.com/bluefruit-le-connect.md)
- [Introducing Adafruit Trellis ](https://learn.adafruit.com/adafruit-trellis-diy-open-source-led-keypad.md)
- [Arduino Lesson 9. Sensing Light](https://learn.adafruit.com/adafruit-arduino-lesson-9-sensing-light.md)
- [36mm LED Pixels](https://learn.adafruit.com/36mm-led-pixels.md)
- [Adafruit 16-channel PWM/Servo Shield](https://learn.adafruit.com/adafruit-16-channel-pwm-slash-servo-shield.md)
- [Naughty or Nice Machine](https://learn.adafruit.com/naughty-or-nice-machine.md)
- [Wireless Gardening with Arduino + CC3000 WiFi Modules](https://learn.adafruit.com/wireless-gardening-arduino-cc3000-wifi-modules.md)
- [LSM303 Accelerometer + Compass Breakout](https://learn.adafruit.com/lsm303-accelerometer-slash-compass-breakout.md)
---
# Source: https://learn.adafruit.com/2-8-tft-touchscreen/touchscreen.md
# 2.8" TFT Touchscreen
## Touchscreen
Danger:
The LCD has a 2.8" 4-wire resistive touch screen glued onto it. You can use this for detecing finger-presses, stylus', etc. You'll need 4 pins to talk to the touch panel **but** you can **reuse** some of the pins for the TFT LCD! This is because the resistance of the panel is high enough that it doesn't interfere with the digital input/output and we can query the panel in between TFT accesses, when the pins are not being used.
You can wire up the 4 remaining pins as follows. the one on the very left ( **Y-** orange) can connect to digital **9** , the next one over ( **X-** green) connects to **Analog 2** , The next one over ( **Y+** blue) connects to **Analog 3** and the last one ( **X+** gray) connects to digital **8**. The X- and Y+ pins pretty much have to connect to those analog pins (or to analog 4/5) but Y-/X+ can connect to any digital or analog pins.

# Download Library
Begin by opening up the Arduino library manager

Search for the **Adafruit TouchScreen** library and install it

We also have a great tutorial on Arduino library installation at:
[http://learn.adafruit.com/adafruit-all-about-arduino-libraries-install-use](http://learn.adafruit.com/adafruit-all-about-arduino-libraries-install-use "Link: http://learn.adafruit.com/adafruit-all-about-arduino-libraries-install-use")
Now start up the **tftpaint** example in the Arduino library. The right hand side will have 'color boxes' you can press to select which color you want to draw with. If you press the area to the **left** where the screen ends, it will erase the screen.

You can use your fingertip to draw.


If you press the area to the **left** where the screen ends, it will erase the screen.
- [Previous Page](https://learn.adafruit.com/2-8-tft-touchscreen/graphics-library.md)
- [Next Page](https://learn.adafruit.com/2-8-tft-touchscreen/bitmaps.md)
## Featured Products
### Adafruit METRO 328 Fully Assembled - Arduino IDE compatible
[Adafruit METRO 328 Fully Assembled - Arduino IDE compatible](https://www.adafruit.com/product/50)
We sure love the ATmega328 here at Adafruit, and we use them _a lot_ for our own projects. The processor has plenty of GPIO, Analog inputs, hardware UART SPI and I2C, timers and PWM galore - just enough for most simple projects. When we need to go small, we use a
Out of Stock
[Buy Now](https://www.adafruit.com/product/50)
[Related Guides to the Product](https://learn.adafruit.com/products/50/guides)
### Breadboarding wire bundle
[Breadboarding wire bundle](https://www.adafruit.com/product/153)
75 flexible stranded core wires with stiff ends molded on in red, orange, yellow, green, blue, brown, black and white. These are a major improvement over the "box of bent wires" that are sometimes sold with breadboards, and faster than stripping your own solid core wires. Makes...
In Stock
[Buy Now](https://www.adafruit.com/product/153)
[Related Guides to the Product](https://learn.adafruit.com/products/153/guides)
### Half Sized Premium Breadboard - 400 Tie Points
[Half Sized Premium Breadboard - 400 Tie Points](https://www.adafruit.com/product/64)
This is a cute, half-size breadboard with 400 tie points, good for small projects. It's 3.25" x 2.2" / 8.3cm x 5.5cm with a standard double-strip in the middle and two power rails on both sides. You can pull the power rails off easily to make the breadboard as...
In Stock
[Buy Now](https://www.adafruit.com/product/64)
[Related Guides to the Product](https://learn.adafruit.com/products/64/guides)
### MicroSD card breakout board+
[MicroSD card breakout board+](https://www.adafruit.com/product/254)
Not just a simple breakout board, this microSD adapter goes the extra mile - designed for ease of use.
- Onboard 5v-\>3v regulator provides 150mA for power-hungry cards
- 3v level shifting means you can use this with ease on either 3v or 5v systems
- Uses a proper level...
In Stock
[Buy Now](https://www.adafruit.com/product/254)
[Related Guides to the Product](https://learn.adafruit.com/products/254/guides)
## Related Guides
- [Adafruit Motor Shield](https://learn.adafruit.com/adafruit-motor-shield.md)
- [Photocells](https://learn.adafruit.com/photocells.md)
- [Circuit Playground: D is for Diode](https://learn.adafruit.com/circuit-playground-d-is-for-diode.md)
- [Micro SD Card Breakout Board Tutorial](https://learn.adafruit.com/adafruit-micro-sd-breakout-board-card-tutorial.md)
- [0.96" mini Color OLED](https://learn.adafruit.com/096-mini-color-oled.md)
- [Halloween Pumpkin](https://learn.adafruit.com/halloween-pumpkin.md)
- [Multi-tasking the Arduino - Part 1](https://learn.adafruit.com/multi-tasking-the-arduino-part-1.md)
- [Low Power WiFi Datalogger](https://learn.adafruit.com/low-power-wifi-datalogging.md)
- [Arduino Lesson 3. RGB LEDs](https://learn.adafruit.com/adafruit-arduino-lesson-3-rgb-leds.md)
- [Create an Internet of Things Dashboard with Adafruit IO](https://learn.adafruit.com/create-an-internet-of-things-dashboard-with-adafruit-dot-io.md)
- [Adafruit 4-Channel ADC Breakouts](https://learn.adafruit.com/adafruit-4-channel-adc-breakouts.md)
- [Trinket Audio Player](https://learn.adafruit.com/trinket-audio-player.md)
- [TTL Serial Camera](https://learn.adafruit.com/ttl-serial-camera.md)
- [Wave Shield Voice Changer](https://learn.adafruit.com/wave-shield-voice-changer.md)
- [All About Arduino Libraries](https://learn.adafruit.com/adafruit-all-about-arduino-libraries-install-use.md)
---
# Source: https://learn.adafruit.com/creating-accurate-footprints-in-eagle/tracing-your-footprint.md
# Creating Accurate Footprints in Eagle
## Tracing Your Footprint
The most labour intensive part is here, since you need to trace the image out on an appropriate layer (I use layer 51 for this kind of information, but some people may prefer layer 21 for certain parts).
There's no real shortcut (that I've found) to just zooming in and starting to trace the image out using the different variations of the line tool to draw angles, arcs, etc., where appropriate. Obviously the level of detail you need will vary, but at the very least be sure to create an accurate mechanical outline of the outer-most borders since those are the most important.
Info:
A lot of the outline can be done with the line options (curves, angles, etc.):

Some more complex angles, however, may need to drawn as straight line segments, and then you'll need to do a bit of guesswork with the curve option, which you can see by right-clicking on a line segment and clicking 'properties' in the popup dialogue box:


After about 25 minutes of work (again the level of detail you need or want depends on how severe your OCD is), you should end up with something similar to this:

Next you need to delete all the garbage left over on layer 200 (or whatever you selected during import) to only leave your outline ... importing bitmaps is incredibly wasteful since there are hundreds and hundreds of lines versus a couple dozen for even a reasonably complex part traced during this method.
Go into your 'Display' options by clicking the display icon the the top-left corner (three filled squares) and disabling layer 51 (or 21 if you used that) as follows:

Click OK, and then select everything on the screen using the 'Group' tool (dotted rectangle):

Then select the 'Delete' tool (an X), right click on your group and select 'delete group':

Now if you go back and turn layer 51 back on, you should see only a reasonably efficient part outline (in terms of data stored in the library) that is a very close approximation of the part in question. Now you simply need to add in your pads as you would for any other footprint, save the part, and you'll have a far better sense of the mechanical boundaries of your parts and connectors.
Info:

# OK, nice outline .. but what about the pads?
The actual pads for your part should still be defined solely from the footprint suggestions in the datasheet, and not based on the graphical outline used here since this is only a graphical representation and may have some segments exaggerated for illustration purposes. Be sure to follow the datasheet exactly to place the pads, based on numerical entry for size and position, and then align the part outline created above as accurately as possible over the pads.- [Previous Page](https://learn.adafruit.com/creating-accurate-footprints-in-eagle/importing-the-bitmap-into-eagle.md)
- [Next Page](https://learn.adafruit.com/creating-accurate-footprints-in-eagle/results.md)
## Related Guides
- [How to Sign Windows Drivers & Executables](https://learn.adafruit.com/how-to-sign-windows-drivers-installer.md)
- [Make your own PCB with Eagle, OSH Park, and Adafruit!](https://learn.adafruit.com/making-pcbs-with-oshpark-and-eagle.md)
- [Metal Parts from 3D Prints](https://learn.adafruit.com/metal-parts-from-3d-prints.md)
- [All About Laser Cutters](https://learn.adafruit.com/all-about-laser-cutters.md)
- [Adafruit Pinguin for EAGLE CAD](https://learn.adafruit.com/adafruit-pinguin-for-eagle-cad.md)
- [Maker Business & Manufacturing Software - Our Tips & Tricks](https://learn.adafruit.com/maker-business-manufacturing-software-our-tips-and-tricks.md)
- [SMT Manufacturing](https://learn.adafruit.com/smt-manufacturing.md)
- [How to Make a Pogo Pin Test Jig](https://learn.adafruit.com/how-to-make-a-pogo-pin-test-jig.md)
- [How we designed an injection-molded case](https://learn.adafruit.com/how-we-designed-an-injection-molded-case-for-raspberry-pi.md)
- [How to convert Eagle PCBs to 3D Models in Fusion 360](https://learn.adafruit.com/how-to-convert-eagle-pcbs-to-3d-models-in-fusion-360.md)
- [DIY 3D Printing Filament](https://learn.adafruit.com/diy-3d-printing-filament.md)
- [Laser-Cut Enclosure Design](https://learn.adafruit.com/laser-cut-enclosure-design.md)
- [Shop Tips & Tricks](https://learn.adafruit.com/shop-tips-and-tricks.md)
- [Standalone AVR Chip Programmer](https://learn.adafruit.com/standalone-avr-chip-programmer.md)
- [KTOWN's Ultimate Creating Parts in Eagle Tutorial](https://learn.adafruit.com/ktowns-ultimate-creating-parts-in-eagle-tutorial.md)
---
# Source: https://learn.adafruit.com/power-supplies/transformer-based-ac-dc-converters.md
# Power Supplies
## Transformer-based AC/DC converters
The most common and inexpensive plugpack power supply type you'll see is the chunky transformer based plug. Whenever you buy some consumer electronics you'll be getting one of these:
These guys are **everywhere** - all sorts of voltage and current ratings. They're available for sale at any store just about, but there are some big things to watch out for! One is that the output voltage is not going to be 9V (for example) out of the box, that voltage rating is just the minimum output for the current rating (200mA for example). And also, the output is going to have a lot of ripple on it!
Before we talk precisely about these guys, lets go back in time to when engineers had to build their power supplies with their bare hands!
## The good old days!
Back a couple decades ago, the only way to build a power supply was to start a big chunky 120VAC/12VAC transformer. The transformer was used to bring the high voltage from the wall down to a less dangerous level. Then diodes and capacitors were used to turn the AC into DC.
## Transformers

We aren't going to get into the heavy detail of the electromagnetic theory behind transformers except to say that they are made of two coils of wire around a chunk of iron. If the number of coils are the same on both sides then the AC voltage is the same on both sides. If one side has twice the coils, it has twice the voltage. They can be used 'backwards' or 'forwards'! For more detailed information, be sure to [check out the wikipedia page](http://en.wikipedia.org/wiki/Transformer). 
To use it, one half would get wired up to the wall (the 'primary' 'high side')
and the other half would output 12V AC (the 'secondary' 'low side'). The transformer functioned in two ways: one it took the dangerous high voltage and **transformed** it to a much safer low voltage, second it **isolated** the two sides. That made it even safer because there was no way for the hot line to show up in your electronics and possibly electrocute you.
We'll use a schematic symbol to indicate a transformer, its two coils inside which are drawn out, the schematic symbol will have the same number of coils on either side so use common sense and any schematic indicators to help you out in figuring which is primary and which is secondary!

## Half wave rectification
Now that the voltage is at a non-electrocutey level of around 12VAC it can be converted into DC. The easiest and cheapest way to convert (also called **rectify** ) AC to DC is to use a single diode. A diode is a simple electronic 'valve' - it only lets current flow one way. Since AC voltage cycles from positive to negative and we only want positive, we can connect it up so that the circuit only receives the **positive half** of the AC cycle.

You'll want to use a [power diode such as a 1N4001](http://www.adafruit.com/partfinder/diodes#power_blocking) , they're extremely common and can put up with a lot of abuse. The side with the silver stripe matches the schematic symbol side that the 'arrow' in the diode symbol is pointing to. That's the only direction that current can flow. The output is then chopped in half so that the voltage only goes positive.
This will convert
into
What we have now isnt really AC and isn't really DC, its this lumpy wave. The good news is that it's only positive voltage'd now, which means its safe to put a capacitor on it.
This is a 2200 microFarad (0.0022 Farad) capacitor, one leg has (-) signs next to it, this is the negative side. The other side is positive, and there should never be a voltage across is so that the negative pin is 'higher' than the positive pin or it'll go POOF!

A capacitor **smooths** the voltage out, taking out the lumps, sort of how spring shocks in car or mountain bike reduce the bumpiness of the road. Capacitors are great at this, but the big capacitors that are good at this (electrolytic) can't stand negative voltages - they'll explode!

Because the voltage is very uneven (big ripples), we need a really big electrolytic-type capacitor. How big? Well, [there's a lot of math behind it which you can read about](http://en.wikipedia.org/wiki/Ripple_%28electrical%29) but the rough formula you'll want to keep in mind is:
**Ripple voltage = Current draw / ( (Ripple frequency) \* (Capacitor size) )**
or written another way
**Capacitor size = Current draw / ( (Ripple frequency) \* (Ripple Voltage) )**
For a half wave rectifier (single diode) the frequency is 60 Hz (or 50 Hz in europe). The current draw is how much current your project is going to need, maximum. The ripple voltage is how much rippling there will be in the output which you are willing to live with and the capacitor size is in Farads.
So lets say we have a current draw of 50 mA and a maximum ripple voltage of 10mV we are willing to live with. For a half wave rectifier, the capacitor should be **at least** = 0.05 / (60 \* 0.01) = 0.085 Farads = **85,000 uF**! This is a **massive** and expensive capacitor. For that reason, its rare to see ripple voltages as low as 10mV. Its more common to see maybe 100mV of ripple and then some other technique to reduce the ripple, such as a linear regulator chip.
You don't have to memorize that formula, but you should keep the following in mind: When the current goes **up** and the capacitor stays the same, the ripple goes **up**. If the current goes **up** and you want the ripple the same, the capacitor must also **increase**.
## Full wave rectifiers
One thing that can be done to reduce the ripple/capacitor size by half is to use a full wave rectifier instead of a half wave. A full wave rectifier uses 4 diodes arranged in a peculiar way so that it both lets the positive voltage through **and** manages to 'flip over' the negative voltages into positive.

So now we get:
As you can see, there are twice as many humps - there isnt that "half the time, no voltage" thing going on. This means we can divide the calculated capacitor size to half of what it was in the previous.
Basically, a full wave rectifier is way better than a half wave! So why even talk about half-wave type rectifiers? Well, because they're useful for a few other purposes. In general, you're unlikely to see an AC/DC converter that uses a half wave as the cost of the diodes makes up for the saving in capacitor size and cost!## The transformer AC/DC in practice

OK now that we've reviewed transformers, diodes when used as rectifiers and big capacitors, lets look at a chunky plugpack again. This time, we'll look inside by cutting it in half! This power supply is rated at **9VDC @ 200mA.**

We can pull it out completely to see the circuit board parts.
Wow so this looks really familiar, right? From left to right, you can see the wires that come into the transformer from the wall plug, the transformer output has two power diodes on it and a big capacitor (2,200uF). You might be a little puzzled at the **two** diodes - shouldn't there be **four** for a full-wave rectifier? It turns out that [if you have a special transformer made with a 'center tap' (a wire that goes to the center) you can get away with using only two diodes](http://en.wikipedia.org/wiki/Full_wave_rectifier#Full-wave_rectification) . So it really is a full wave rectifier, just one with a center-tap transformer.
These transformer-based plug-packs are **really cheap** to make - like on the order of under $1!
## Testing the 9V supply
So now we will take a fresh power supply (don't use one you sawed in half, of course) and measure the output voltage with a multimeter.

Yow! 14V? That's not anything like the 9V on the package, is this a broken wall wart? No! Its totally normal! Transformer-based wall adapters are not designed to have precision outputs. For one thing, the transformer, if you remember, is made of coils of wire. The coils for the most part act like inductors but they still have some small resistance. For example, if the coil is 10 ohms of resistance, then 200 mA of current will cause V = I \* R = (0.2 Amps) \* (10 ohms) = 2 Volts to be lost just in the copper winding! Another thing that causes losses is the metal core of the transformer becomes less efficient as the amount of current being transformed increases. Altogether, there are many inefficiencies that will make the output fluctuate. In general, the output can be as high as **twice** the 'rated' voltage when there is less than 10mA of current being drawn.## Let's look in detail
Lets look on an oscilloscope, that way we can see in detail what is going on.

With no current being drawn on the supply, the voltage output is about 14V
When I connected a 100 ohm resistor (110 mA draw) from the positive pin to the negative pin, it dropped to 11.2V
Connecting a 60 ohm resistor (~160 mA draw), it goes down to 10.3V
With 35 ohms (230 mA draw) the voltage plummets to 7.7V!
As the resistance gets smaller and smaller, the current draw gets higher and higher and the voltage **droops** (that's the technical term for it!) You can also see the ripple increase as the current goes up.
Now we can at least understand the thinking behind saying "9V 200mA" on the label. As long as we are drawing **less than 200mA** the voltage will be **higher than 9V.**
## What does this mean for you?
OK so after all that work, you're wondering why does this even matter? The reason it matters is that everywhere you look are these wall warts that are 'unregulated' and thus extremely suspicious. You simply can't trust 'em to give you the voltage you want!
For example, let's say you have a microcontroller project and it requires 5V power as many DIY projects do. You shouldn't go out and buy a 5V transformer supply like the one above and just stick the power output into your microcontroller - you'll destroy it! Instead, you will need to build a 5V regulator like the common LM7805 that will take the somewhere-around-9V from the transformer and convert it to a nice steady 5V with almost no ripple.
So here is what you should always do:
1. Always check your power supply brick with a multimeter to see what the maximum voltage is
2. Assume that the voltage can be twice as high as you expect
3. Assume that the voltage will droop as you draw more and more current
4. If you're using a brick for low-power usage, say your circuit draws 100mA max, find one that has a very similar current rating.
You might be wondering well why on earth doesn't someone make a power plug that takes a transformer and some diodes and a LM7805 and that will give you a nice 5V output instead of having everyone build it into the project circuit? While it's an interesting idea there are a few reasons they don't do that. One is that the enclosed wall adapter would overheat. Another is that some projects need more than one voltage, say 5V and 3.3V both. But in the end, its probably for manufacturing simplicity. The factory that makes the wall plugs makes 100's of thousands in predictable sizes and rates, each country has plenty of factories to make the right plug packs for the wall voltage and plug style. The designers of, say, the DVD player have an easier time of it when they can just say "anything above 7V and below 20V input will work for us" and the plug-pack maker matches them up with the closest thing they already make.
Nowadays, there are switch-mode power plugs that solve much of this problem. They are thinner and lighter than transformers and have almost no heating problems so they can have precise outputs that don't fluctuate. However, circuit-wise they are much more complex which means they're also much more expensive than transformer-supplies, perhaps 5-10x the price, and have a downside that they're 'noisier' electrically. But, because the parts and assembly cost is going down, they're much more popular than they were even 10 years ago.
- [Previous Page](https://learn.adafruit.com/power-supplies/overview.md)
## Featured Products
### 12V 5A switching power supply
[12V 5A switching power supply](https://www.adafruit.com/product/352)
This is a beefy switching supply, for when you need a lot of power! It can supply 12V DC up to 5 Amps, running from 110V or 220V power (the plug it comes with is for US/Canada/Japan but you can use any plug adapter for your country, or just replace the cable with a standard 'figure-8'...
In Stock
[Buy Now](https://www.adafruit.com/product/352)
[Related Guides to the Product](https://learn.adafruit.com/products/352/guides)
### 5V 10A switching power supply
[5V 10A switching power supply](https://www.adafruit.com/product/658)
This is a beefy switching supply, for when you need a lot of power! It can supply 5V DC up to 10 Amps, running from 110V or 220V power (the plug it comes with is for US/Canada/Japan but you can use any plug adapter for your country, or just replace the cable with a standard computer/appliance...
Out of Stock
[Buy Now](https://www.adafruit.com/product/658)
[Related Guides to the Product](https://learn.adafruit.com/products/658/guides)
### 5V 1A (1000mA) USB port power supply - UL Listed
[5V 1A (1000mA) USB port power supply - UL Listed](https://www.adafruit.com/product/501)
Need a USB jack for charging or powering a project, but don't want to lug around a computer? This switching supply gives a clean regulated output at up to 1000mA! 110 or 240 input, so it works in any country. The plugs are "US 2-prong" style so you may need a plug adapter, but...
In Stock
[Buy Now](https://www.adafruit.com/product/501)
[Related Guides to the Product](https://learn.adafruit.com/products/501/guides)
### 5V 2A (2000mA) switching power supply - UL Listed
[5V 2A (2000mA) switching power supply - UL Listed](https://www.adafruit.com/product/276)
This is an FCC/CE certified and UL listed power supply. Need a lot of 5V power? This switching supply gives a clean regulated 5V output at up to 2000mA. 110 or 240 input, so it works in any country. The plugs are "US 2-prong" style so you may need a plug adapter, but you can pick one...
In Stock
[Buy Now](https://www.adafruit.com/product/276)
[Related Guides to the Product](https://learn.adafruit.com/products/276/guides)
### 9 VDC 1000mA regulated switching power adapter - UL listed
[9 VDC 1000mA regulated switching power adapter - UL listed](https://www.adafruit.com/product/63)
This is a really nice power supply. It's a switching DC supply so it's small and light and efficient. It is thin so it fits in power strips without blocking other outlets. The output is regulated so you'll get a steady 9V up to 1000mA (1 Amp) of current draw. 5.5mm/2.1mm barrel...
Out of Stock
[Buy Now](https://www.adafruit.com/product/63)
[Related Guides to the Product](https://learn.adafruit.com/products/63/guides)
## Related Guides
- [Adafruit CH334F Mini USB Hub Breakouts](https://learn.adafruit.com/adafruit-ch334f-mini-4-port-usb-hub-breakout.md)
- [Arduino Lesson 3. RGB LEDs](https://learn.adafruit.com/adafruit-arduino-lesson-3-rgb-leds.md)
- [Debug Header for the Feather [M0]](https://learn.adafruit.com/make-a-simple-debugging-featherwing-for-the-m0.md)
- [Adafruit SPI FRAM Breakouts](https://learn.adafruit.com/adafruit-spi-fram-breakout.md)
- [Circuit Playground Analog Input](https://learn.adafruit.com/circuit-playground-analog-input.md)
- [Press Your Button for Raspberry Pi](https://learn.adafruit.com/press-your-button-for-raspberry-pi.md)
- [Step Switch Party](https://learn.adafruit.com/step-switch-party.md)
- [Boomy Pi Airplay Boombox](https://learn.adafruit.com/boomy-pi-airplay.md)
- [Pro Trinket Tachometer](https://learn.adafruit.com/pro-trinket-tachometer.md)
- [Arduino Lesson 4. Eight LEDs and a Shift Register](https://learn.adafruit.com/adafruit-arduino-lesson-4-eight-leds.md)
- [Conductive Thread](https://learn.adafruit.com/conductive-thread.md)
- [Adafruit UPDI Friend](https://learn.adafruit.com/adafruit-updi-friend.md)
- [Arduino Yun Temboo Twitter Tracker](https://learn.adafruit.com/arduino-yun-temboo-twitter-tracker.md)
- [Arduino Lesson 8. Analog Inputs](https://learn.adafruit.com/adafruit-arduino-lesson-8-analog-inputs.md)
- [USB to Eurorack Power Supply](https://learn.adafruit.com/usb-to-eurorack-power-supply.md)
---
# Source: https://learn.adafruit.com/flora-tv-b-gone/transistors.md
# Source: https://learn.adafruit.com/adafruit-arduino-lesson-13-dc-motors/transistors.md
# Arduino Lesson 13. DC Motors
## Transistors
The small DC motor, is likely to use more power than an Arduino digital output can handle directly. If we tried to connect the motor straight to an Arduino pin, there is a good chance that it could damage the Arduino.
A small transistor like the PN2222 can be used as a switch that uses just a little current from the Arduino digital output to control the much bigger current of the motor.

The transistor has three leads. Most of the electricity flows from the Collector to the Emitter, but this will only happen if a small amount is flowing into the Base connection. This small current is supplied by the Arduino digital output.
The diagram below is called a schematic diagram. Like a breadboard layout, it is a way of showing how the parts of an electronic project are connected together.

The pin D3 of the Arduino is connected to the resistor. Just like when using an LED, this limits the current flowing into the transistor through the base.
There is a diode connected across the connections of the motor. Diodes only allow electricity to flow in one direction (the direction of their arrow).
When you turn the power off to a motor, you get a negative spike of voltage, that can damage your Arduino or the transistor. The diode protects against this, by shorting out any such reverse current from the motor.
- [Previous Page](https://learn.adafruit.com/adafruit-arduino-lesson-13-dc-motors/arduino-code.md)
- [Next Page](https://learn.adafruit.com/adafruit-arduino-lesson-13-dc-motors/other-things-to-do.md)
## Featured Products
### NPN Bipolar Transistors (PN2222) - 10 pack
[NPN Bipolar Transistors (PN2222) - 10 pack](https://www.adafruit.com/product/756)
Transistors are powerful little electronic switches, and we really like these NPN transistors whenever we need to control medium-power electronics such as small motors, solenoids, or IR LEDs. We find them so handy, they come in a pack of 10!
Each transistor is a general-purpose...
In Stock
[Buy Now](https://www.adafruit.com/product/756)
[Related Guides to the Product](https://learn.adafruit.com/products/756/guides)
### DC Toy / Hobby Motor - 130 Size
[DC Toy / Hobby Motor - 130 Size](https://www.adafruit.com/product/711)
These are standard '130 size' DC hobby motors. They come with a wider operating range than most toy motors: from 4.5 to 9VDC instead of 1.5-4.5V. This range makes them perfect for controlling with an Adafruit Motor Shield, or with an Arduino where you are more likely to have 5 or 9V...
In Stock
[Buy Now](https://www.adafruit.com/product/711)
[Related Guides to the Product](https://learn.adafruit.com/products/711/guides)
### Premium Male/Male Jumper Wires - 40 x 6" (150mm)
[Premium Male/Male Jumper Wires - 40 x 6" (150mm)](https://www.adafruit.com/product/758)
Handy for making wire harnesses or jumpering between headers on PCB's. These premium jumper wires are 6" (150mm) long and come in a 'strip' of 40 (4 pieces of each of ten rainbow colors). They have 0.1" male header contacts on either end and fit cleanly next to each other...
In Stock
[Buy Now](https://www.adafruit.com/product/758)
[Related Guides to the Product](https://learn.adafruit.com/products/758/guides)
### Half Sized Premium Breadboard - 400 Tie Points
[Half Sized Premium Breadboard - 400 Tie Points](https://www.adafruit.com/product/64)
This is a cute, half-size breadboard with 400 tie points, good for small projects. It's 3.25" x 2.2" / 8.3cm x 5.5cm with a standard double-strip in the middle and two power rails on both sides. You can pull the power rails off easily to make the breadboard as...
In Stock
[Buy Now](https://www.adafruit.com/product/64)
[Related Guides to the Product](https://learn.adafruit.com/products/64/guides)
### Adafruit METRO 328 Fully Assembled - Arduino IDE compatible
[Adafruit METRO 328 Fully Assembled - Arduino IDE compatible](https://www.adafruit.com/product/50)
We sure love the ATmega328 here at Adafruit, and we use them _a lot_ for our own projects. The processor has plenty of GPIO, Analog inputs, hardware UART SPI and I2C, timers and PWM galore - just enough for most simple projects. When we need to go small, we use a
Out of Stock
[Buy Now](https://www.adafruit.com/product/50)
[Related Guides to the Product](https://learn.adafruit.com/products/50/guides)
## Related Guides
- [Reverse Geocache Box](https://learn.adafruit.com/reverse-geocache-engagement-box.md)
- [Programming Arduino with Android and Windows Tablets](https://learn.adafruit.com/programming-arduino-with-android-and-windows-tablets.md)
- [Arduino Lesson 16. Stepper Motors](https://learn.adafruit.com/adafruit-arduino-lesson-16-stepper-motors.md)
- [Arduino Lesson 4. Eight LEDs and a Shift Register](https://learn.adafruit.com/adafruit-arduino-lesson-4-eight-leds.md)
- [Arduino Lesson 3. RGB LEDs](https://learn.adafruit.com/adafruit-arduino-lesson-3-rgb-leds.md)
- [2.2" TFT Display](https://learn.adafruit.com/2-2-tft-display.md)
- [Arduino Lesson 17. Email Sending Movement Detector](https://learn.adafruit.com/arduino-lesson-17-email-sending-movement-detector.md)
- [Wave Shield Talking Clock](https://learn.adafruit.com/wave-shield-talking-clock.md)
- [Using NeoPixels and Servos Together](https://learn.adafruit.com/neopixels-and-servos.md)
- [Ladyada's Bento Box](https://learn.adafruit.com/lady-adas-bento-box.md)
- [Memories of an Arduino](https://learn.adafruit.com/memories-of-an-arduino.md)
- [Arduino Lesson 7. Make an RGB LED Fader](https://learn.adafruit.com/adafruit-arduino-lesson-7-make-an-rgb-led-fader.md)
- [Arduino Ethernet + SD Card](https://learn.adafruit.com/arduino-ethernet-sd-card.md)
- [1,500 NeoPixel LED Curtain with Raspberry Pi and Fadecandy](https://learn.adafruit.com/1500-neopixel-led-curtain-with-raspberry-pi-fadecandy.md)
- [Bluetooth Controlled Motorized Camera Slider](https://learn.adafruit.com/bluetooth-motorized-camera-slider.md)
---
# Source: https://learn.adafruit.com/tron-bag.md
# TRON Bag
## Overview
http://www.youtube.com/watch?v=PNvBM9JSeN0
This video overviews the process of soldering and sewing EL wire to make a TRON-inspired bag! We carry many colors of EL wire, tape, and panel as well as all the accessories for any EL project you can dream up -- check out the [EL section of the Adafruit shop](http://www.adafruit.com/category/50)!

- [Next Page](https://learn.adafruit.com/tron-bag/tools.md)
## Featured Products
### Heat Shrink Pack
[Heat Shrink Pack](https://www.adafruit.com/product/344)
Heat shrink is the duct tape of electronics, it keeps your stuff all safe and kept together. Especially when wiring and soldering, use heat shrink to add mechanical strength to cables. We use this stuff all the time and having a zip-lock bag of all the possible sizes is super...
In Stock
[Buy Now](https://www.adafruit.com/product/344)
[Related Guides to the Product](https://learn.adafruit.com/products/344/guides)
### In-line wire 1-to-4 splitter
[In-line wire 1-to-4 splitter](https://www.adafruit.com/product/402)
If you want to connect multiple EL wires/strips/panels up to one inverter, these splitters are quite useful. There is one male connector (goes to the inverter) and then 4 female connectors (which will connect to each wire/strip/panel. You can even cascade them! Only thing to watch for is make...
In Stock
[Buy Now](https://www.adafruit.com/product/402)
[Related Guides to the Product](https://learn.adafruit.com/products/402/guides)
### EL wire starter pack - Blue 2.5 meter (8.2 ft)
[EL wire starter pack - Blue 2.5 meter (8.2 ft)](https://www.adafruit.com/product/583)
A little bundle to get you started! This project pack contains:
- [2.5 meters (over 8 ft) of high-brightness, long-life EL wire in Blue](http://www.adafruit.com/products/408). 2.5 meters is the maximum amount for the pocket driver - it is cut and soldered so it's ready...
Out of Stock
[Buy Now](https://www.adafruit.com/product/583)
[Related Guides to the Product](https://learn.adafruit.com/products/583/guides)
## Related Guides
- [Battery Powering Wearable Electronics](https://learn.adafruit.com/battery-powering-wearable-electronics.md)
- [3D Printed Daft Punk Helmet with Bluetooth ](https://learn.adafruit.com/3d-printed-daft-punk-helmet-with-bluetooth.md)
- [3D Printed Wearable Video Goggles](https://learn.adafruit.com/3d-printed-wearable-video-goggles.md)
- [Decorative Pointy Elf Ear Bud Holders](https://learn.adafruit.com/elf-ears.md)
- [LED Friendship Bracelet](https://learn.adafruit.com/nautical-led-bracelet.md)
- [Make a Zelda Master Sword with the RP2040 Prop-Maker Feather](https://learn.adafruit.com/master-sword-rp2040.md)
- [USB Locket](https://learn.adafruit.com/usb-locket.md)
- [Light Up your Costume with Noods](https://learn.adafruit.com/light-up-your-costume-with-noods.md)
- [Pac Man Pixel Suspenders](https://learn.adafruit.com/pac-man-pixel-suspenders.md)
- [3D Printed LED Buckle](https://learn.adafruit.com/3d-printed-led-buckle.md)
- [Adafruit Flora Bluefruit LE](https://learn.adafruit.com/adafruit-flora-bluefruit-le.md)
- [Textile Potentiometer Hoodie](https://learn.adafruit.com/textile-potentiometer-hoodie.md)
- [Cynaps Bone Conduction Headset Teardown](https://learn.adafruit.com/cynaps-bone-conduction-headset-teardown.md)
- [Glowing Bean Bags with EL Wire](https://learn.adafruit.com/glowing-bean-bags-with-el-wire.md)
- [3D Printed Gunblade](https://learn.adafruit.com/3d-printed-gunblade.md)
---
# Source: https://learn.adafruit.com/monochrome-oled-breakouts/troubleshooting-2.md
# Monochrome OLED Breakouts
## Troubleshooting
###
The OLED driver circuit needs a small amount of time to be ready after initial power. If your code tries to write to the display too soon, it may not be ready. It will work on reset since that typically does not cycle power. If you are having this issue, try adding a small amount of delay before trying to write to the OLED.
In Arduino, use **delay()** to add a few milliseconds before calling **oled.begin()**. Adjust the amount of delay as needed to see how little you can get away with for your specific setup.
###
The display can have image burn in for any pixels left on over a long period of time - many days. Try to avoid having the display on constantly for that length of time.
- [Previous Page](https://learn.adafruit.com/monochrome-oled-breakouts/python-usage-2.md)
- [Next Page](https://learn.adafruit.com/monochrome-oled-breakouts/downloads.md)
## Featured Products
### Monochrome 1.3" 128x64 OLED graphic display - STEMMA QT / Qwiic
[Monochrome 1.3" 128x64 OLED graphic display - STEMMA QT / Qwiic](https://www.adafruit.com/product/938)
These displays are small, only about 1.3" diagonal, but very readable due to the high contrast of an OLED display. This display is made of 128x64 individual white OLED pixels, each one is turned on or off by the controller chip. Because the display makes its own light, no backlight is...
In Stock
[Buy Now](https://www.adafruit.com/product/938)
[Related Guides to the Product](https://learn.adafruit.com/products/938/guides)
### Monochrome 0.96" 128x64 OLED Graphic Display - STEMMA QT
[Monochrome 0.96" 128x64 OLED Graphic Display - STEMMA QT](https://www.adafruit.com/product/326)
These displays are small, only about 1" diagonal, but very readable due to the high contrast of an OLED display. This display is made of 128x64 individual white OLED pixels, each one is turned on or off by the controller chip. Because the display makes its own light, no backlight is...
Out of Stock
[Buy Now](https://www.adafruit.com/product/326)
[Related Guides to the Product](https://learn.adafruit.com/products/326/guides)
### Monochrome 128x32 SPI OLED graphic display
[Monochrome 128x32 SPI OLED graphic display](https://www.adafruit.com/product/661)
These displays are small, only about 1" diagonal, but very readable due to the high contrast of an OLED display. This display is made of 128x32 individual white OLED pixels, each one is turned on or off by the controller chip. Because the display makes its own light, no backlight is...
In Stock
[Buy Now](https://www.adafruit.com/product/661)
[Related Guides to the Product](https://learn.adafruit.com/products/661/guides)
### Monochrome 128x32 I2C OLED graphic display
[Monochrome 128x32 I2C OLED graphic display](https://www.adafruit.com/product/931)
These displays are small, only about 1" diagonal, but very readable due to the high contrast of an OLED display. This display is made of 128x32 individual white OLED pixels, each one is turned on or off by the controller chip. Because the display makes its own light, no backlight is...
No Longer Stocked
[Buy Now](https://www.adafruit.com/product/931)
[Related Guides to the Product](https://learn.adafruit.com/products/931/guides)
### Monochrome 0.91" 128x32 I2C OLED Display - STEMMA QT / Qwiic
[Monochrome 0.91" 128x32 I2C OLED Display - STEMMA QT / Qwiic](https://www.adafruit.com/product/4440)
These displays are small, only about 1" diagonal, but very readable due to the high contrast of an OLED display. This display is made of 128x32 individual white OLED pixels, each one is turned on or off by the controller chip. Because the display makes its own light, no backlight is...
In Stock
[Buy Now](https://www.adafruit.com/product/4440)
[Related Guides to the Product](https://learn.adafruit.com/products/4440/guides)
## Related Guides
- [OLED TRON Clock](https://learn.adafruit.com/oled-tron-clock.md)
- [I2C Addresses and Troublesome Chips](https://learn.adafruit.com/i2c-addresses.md)
- [Monitor Your Greenhouse with a No-Code Environmental Sensor](https://learn.adafruit.com/monitor-your-greenhouse-with-a-no-code-environmental-sensor.md)
- [SSD1306 OLED Displays with Raspberry Pi and BeagleBone Black](https://learn.adafruit.com/ssd1306-oled-displays-with-raspberry-pi-and-beaglebone-black.md)
- [Adafruit FT232H With SPI & I2C Devices](https://learn.adafruit.com/adafruit-ft232h-with-spi-and-i2c-libraries.md)
- [MIDI Melody Maker](https://learn.adafruit.com/midi-melody-maker.md)
- [Steampunk Cameo Necklace with OLED Display](https://learn.adafruit.com/steampunk-cameo-necklace.md)
- [Using QMK on RP2040 Microcontrollers](https://learn.adafruit.com/using-qmk-on-rp2040-microcontrollers.md)
- [CircuitPython OLED and Dual Knob Sketcher](https://learn.adafruit.com/circuitpython-oled-knob-sketcher.md)
- [Gravity Falls Memory Gun](https://learn.adafruit.com/gravity-falls-memory-gun.md)
- [Pico W HTTP Server with CircuitPython](https://learn.adafruit.com/pico-w-http-server-with-circuitpython.md)
- [Adafruit Trinkey QT2040](https://learn.adafruit.com/adafruit-trinkey-qt2040.md)
- [Adafruit Airlift Bitsy Add-On - ESP32 WiFi Co-Processor](https://learn.adafruit.com/adafruit-airlift-bitsy-add-on-esp32-wifi-co-processor.md)
- [Animated Flying Toaster OLED Jewelry](https://learn.adafruit.com/animated-flying-toaster-oled-jewelry.md)
- [Adafruit TCA9548A 1-to-8 I2C Multiplexer Breakout](https://learn.adafruit.com/adafruit-tca9548a-1-to-8-i2c-multiplexer-breakout.md)
---
# Source: https://learn.adafruit.com/adalight-diy-ambient-tv-lighting/troubleshooting.md
# Source: https://learn.adafruit.com/internet-of-things-printer/troubleshooting.md
# Source: https://learn.adafruit.com/digital-led-strip/troubleshooting.md
# Source: https://learn.adafruit.com/36mm-led-pixels/troubleshooting.md
# Source: https://learn.adafruit.com/20mm-led-pixels/troubleshooting.md
# Source: https://learn.adafruit.com/12mm-led-pixels/troubleshooting.md
# 12mm LED Pixels
## Troubleshooting
###
It's pretty easy! Simply drill a 12mm hole into any material up to 1.5mm/0.06" thick. Then push the LED bulb first into the hole. It takes a little wiggling but there are four flanges molded in so that you can 'push' them thru and the flanges will keep the LED pixel in place
Many support issues arise from eager users getting ahead of themselves, changing the code and wiring before confirming that all the pieces work in the standard configuration. We recommend always starting out with the examples as shown. Use the pinouts and wiring exactly as in the tutorial, and run the stock, unmodified “strandtest” example sketch. Only then should you start switching things around.
Here are the most common issues and solutions…
###
- Double-check all wiring. Are the clock and data wires swapped? Is ground connected to the Arduino?
- Confirm the Arduino is connected to the input end of the strand.
- Check power supply polarity and voltage. Are + and – swapped? If you have a multimeter, confirm 5V DC output (±10%) from the power supply.
- Are the power wires at the opposite end of the strand insulated or trimmed? They should not be left exposed where they might make contact with metal, or each other.
- Is the correct board type selected in the Arduino Tools→Board menu?
###
The power supply is probably OK. Check for any of the following:
- Double-check all wiring. Are the clock and data wires swapped? Is ground connected to the Arduino?
- Confirm the Arduino is connected to the input end of the strand.
- Is the correct board type selected in the Arduino Tools→Board menu?
- Did the strandtest code successfully compile and upload?
###
- Confirm that the number of LEDs in the Adafruit\_WS2801() constructor match the number of LEDs in the strand (both will be 25 if using the strandtest example and a single strand of LEDs).
- Inside each pixel there’s a small circuit board. Give the first bad pixel (and the one immediately before it) a firm squeeze where the ribbon cable joins the board — it may simply be a dodgy connection. If that works, you can either cut out the offending pixel and join the two sub-strands, or arrange for a replacement strand if new.
###
Are the clock and data wires swapped? Is ground connected to the Arduino?
###
- This can happen when trying to power too long of a strand from one end. Voltage will drop along the length of the strand and the furthest pixels will “brown out.” Connect power to _every_ 25 pixel strand.
###
- Confirm the library is unzipped prior to installation.
- Confirm the library is properly named and located. The folder should be called Adafruit\_WS2801, and placed inside your personal Documents/Arduino/Libraries folder — _not_ inside the Arduino application folder!
- After installation, the Arduino IDE needs to be restarted for new libraries to be used.
- [Previous Page](https://learn.adafruit.com/12mm-led-pixels/circuitpython-usage.md)
- [Next Page](https://learn.adafruit.com/12mm-led-pixels/dimensions.md)
## Featured Products
### 12mm Diffused Flat Digital RGB LED Pixels (Strand of 25)
[12mm Diffused Flat Digital RGB LED Pixels (Strand of 25)](https://www.adafruit.com/product/738)
RGB Pixels are digitally-controllable lights you can set to any color, or animate. Each RGB LED and controller chip is molded into a 'dot' of silicone. The dots are weatherproof and rugged. There are four flanges molded in so that you can 'push' them into a 12mm drill hole in...
In Stock
[Buy Now](https://www.adafruit.com/product/738)
[Related Guides to the Product](https://learn.adafruit.com/products/738/guides)
### 12mm Diffused Thin Digital RGB LED Pixels (Strand of 25)
[12mm Diffused Thin Digital RGB LED Pixels (Strand of 25)](https://www.adafruit.com/product/322)
RGB Pixels are digitally-controllable lights you can set to any color, or animate. Each RGB LED and controller chip is molded into a 'dot' of silicone. The dots are weatherproof and rugged. There are four flanges molded in so that you can 'push' them into a 12mm drill hole in...
No Longer Stocked
[Buy Now](https://www.adafruit.com/product/322)
[Related Guides to the Product](https://learn.adafruit.com/products/322/guides)
### 5V 10A switching power supply
[5V 10A switching power supply](https://www.adafruit.com/product/658)
This is a beefy switching supply, for when you need a lot of power! It can supply 5V DC up to 10 Amps, running from 110V or 220V power (the plug it comes with is for US/Canada/Japan but you can use any plug adapter for your country, or just replace the cable with a standard computer/appliance...
Out of Stock
[Buy Now](https://www.adafruit.com/product/658)
[Related Guides to the Product](https://learn.adafruit.com/products/658/guides)
### 5V 2A (2000mA) switching power supply - UL Listed
[5V 2A (2000mA) switching power supply - UL Listed](https://www.adafruit.com/product/276)
This is an FCC/CE certified and UL listed power supply. Need a lot of 5V power? This switching supply gives a clean regulated 5V output at up to 2000mA. 110 or 240 input, so it works in any country. The plugs are "US 2-prong" style so you may need a plug adapter, but you can pick one...
In Stock
[Buy Now](https://www.adafruit.com/product/276)
[Related Guides to the Product](https://learn.adafruit.com/products/276/guides)
### Female DC Power adapter - 2.1mm jack to screw terminal block
[Female DC Power adapter - 2.1mm jack to screw terminal block](https://www.adafruit.com/product/368)
If you need to connect a DC power wall wart to a board that doesn't have a DC jack - this adapter will come in very handy! There is a 2.1mm DC jack on one end, and a screw terminal block on the other. The terminals are labeled with positive/negative assuming a positive-tip configuration...
In Stock
[Buy Now](https://www.adafruit.com/product/368)
[Related Guides to the Product](https://learn.adafruit.com/products/368/guides)
### 4-pin JST SM Plug + Receptacle Cable Set
[4-pin JST SM Plug + Receptacle Cable Set](https://www.adafruit.com/product/578)
These 4-wire cables are 15cm long and come as a set, one side has a JST SM type connector plug on the end. The other side has a matching JST SM type receptacle connector. They are good for whenever you have 4 wires you want to be able to plug and unplug. We like the solid and compact nature of...
In Stock
[Buy Now](https://www.adafruit.com/product/578)
[Related Guides to the Product](https://learn.adafruit.com/products/578/guides)
## Related Guides
- [Bluefruit Controlled Macetech RGB LED Shades](https://learn.adafruit.com/ledshades.md)
- [Make it Glow: NeoPixel and LED Diffusion Tips & Tricks](https://learn.adafruit.com/make-it-glow-neopixel-and-led-diffusion-tips-tricks.md)
- [Starduino: 8-Bit Super Mario Tree Topper](https://learn.adafruit.com/starduino-neopixel-8-bit-mario-star-tree-topper.md)
- [NeoPixel Ring Clock](https://learn.adafruit.com/neopixel-ring-clock.md)
- [Star Fragment IoT Lamp](https://learn.adafruit.com/star-fragment-iot-lamp.md)
- [Talking Musical NeoPixel Clock with Infrared, BLE and Touch Controls](https://learn.adafruit.com/talking-musical-neo-pixel-clock-with-infrared-ble-and-touch-controls.md)
- [Perfect Pitch Machine](https://learn.adafruit.com/perfect-pitch-machine.md)
- [CheerLights](https://learn.adafruit.com/cheerlights.md)
- [NeuroDreamer Teardown](https://learn.adafruit.com/neurodreamer-teardown.md)
- [Holiday Lights: Easy DIY Christmas Wreath & Garland with WLED](https://learn.adafruit.com/holiday-garland-decor-app-control-with-no-coding.md)
- [Adafruit IO Home: Security ](https://learn.adafruit.com/adafruit-io-home-security.md)
- [Adafruit NeoPot](https://learn.adafruit.com/adafruit-neopot.md)
- [NeoKey Socket Breakout with NeoPixel for MX and CHOC Key Switches](https://learn.adafruit.com/neokey-breakout.md)
- [NeoPixie Dust Bag](https://learn.adafruit.com/neopixel-pixie-dust-bag.md)
- [Multi-tasking the Arduino - Part 3](https://learn.adafruit.com/multi-tasking-the-arduino-part-3.md)
---
# Source: https://learn.adafruit.com/tsl2561.md
# TSL2561 Luminosity Sensor
## Overview

The TSL2561 luminosity sensor is an advanced digital light sensor, ideal for use in a wide range of light situations. Compared to low cost CdS cells, this sensor is more precise, allowing for exact Lux calculations and can be configured for different gain/timing ranges to detect light ranges from up to 0.1 - 40,000+ Lux on the fly. The best part of this sensor is that it contains **both infrared and full spectrum diodes**! That means you can seperately measure infrared, full-spectrum or human-visible light. Most sensors can only detect one or the other, which does not accurately represent what human eyes see (since we cannot perceive the IR light that is detected by most photo diodes).


The sensor has a digital (i2c) interface. You can select one of three addresses so you can have up to three sensors on one board - each with a different i2c address. The built in ADC means you can use this with any microcontroller, even if it doesn't have analog inputs. The current draw is extremely low, so its great for low power data-logging systems. about 0.5mA when actively sensing, and less than 15 uA when in powerdown mode.
Some Stats
- **Approximates Human eye Response**
- **Precisely Measures Illuminance in Diverse Lighting Conditions**
- **Temperature range:** -30 to 80 \*C
- **Dynamic range (Lux): **0.1 to 40,000 Lux
- **Voltage range:** 2.7-3.6V
- **Interface:** I2C
[**Pick one up today from the Adafruit shop!**](http://www.adafruit.com/products/439)
- [Next Page](https://learn.adafruit.com/tsl2561/wiring-the-tsl2561-sensor.md)
## Featured Products
### Adafruit TSL2561 Digital Luminosity/Lux/Light Sensor Breakout
[Adafruit TSL2561 Digital Luminosity/Lux/Light Sensor Breakout](https://www.adafruit.com/product/439)
The TSL2561 luminosity sensor is an advanced digital light sensor, ideal for use in a wide range of light situations. Compared to low cost CdS cells, this sensor is more precise, allowing for exact lux calculations and can be configured for different gain/timing ranges to detect light ranges...
No Longer Stocked
[Buy Now](https://www.adafruit.com/product/439)
[Related Guides to the Product](https://learn.adafruit.com/products/439/guides)
### Flora Lux Sensor - TSL2561 Light Sensor
[Flora Lux Sensor - TSL2561 Light Sensor](https://www.adafruit.com/product/1246)
Add light-reactive sensing to your wearable Flora project with this high precision Lux sensor. The TSL2561 luminosity sensor is an advanced digital light sensor, ideal for use in a wide range of light situations. Compared to low cost CdS cells, this sensor is more precise, allowing for exact...
No Longer Stocked
[Buy Now](https://www.adafruit.com/product/1246)
[Related Guides to the Product](https://learn.adafruit.com/products/1246/guides)
## Related Guides
- [Adafruit Metro M7 with microSD](https://learn.adafruit.com/adafruit-metro-m7-microsd.md)
- [Adafruit Qualia High Res Displayport Desktop Monitor](https://learn.adafruit.com/qualia-high-res-displayport-desktop-monitor.md)
- [Adafruit NeoPixel Breakout](https://learn.adafruit.com/adafruit-neopixel-breakout.md)
- [3D Printed Flexible LED Glove with Conductive Filament](https://learn.adafruit.com/3d-printed-flexible-conductive-filament-led-glove.md)
- [DC & USB Boarduino Kits](https://learn.adafruit.com/boarduino-kits.md)
- [Adafruit PDM Microphone Breakout](https://learn.adafruit.com/adafruit-pdm-microphone-breakout.md)
- [Adafruit LSM6DS33 6-DoF IMU Breakout](https://learn.adafruit.com/lsm6ds33-6-dof-imu-accelerometer-gyro.md)
- [Adafruit 7-Segment LED FeatherWings](https://learn.adafruit.com/adafruit-7-segment-led-featherwings.md)
- [Adafruit Mini TFT with Joystick Featherwing](https://learn.adafruit.com/adafruit-mini-tft-featherwing.md)
- [Adafruit QT Py CH32V203](https://learn.adafruit.com/adafruit-qt-py-ch32v203.md)
- [Pro Trinket Tachometer](https://learn.adafruit.com/pro-trinket-tachometer.md)
- [Open Sesame! A SMS-controlled door lock](https://learn.adafruit.com/open-sesame-a-sms-controlled-door-lock.md)
- [Adafruit Circuit Playground Tri-Color E-Ink Gizmo](https://learn.adafruit.com/adafruit-circuit-playground-tri-color-e-ink-gizmo.md)
- [Tent Lantern](https://learn.adafruit.com/tent-lantern.md)
- [Adafruit SCD-30 - NDIR CO2 Temperature and Humidity Sensor](https://learn.adafruit.com/adafruit-scd30.md)
---
# Source: https://learn.adafruit.com/ttl-serial-camera.md
# TTL Serial Camera
## Overview
This tutorial is for our new TTL serial camera module with NTSC video output. These modules are a nice addition to a microcontroller project when you want to take a photo or control a video stream. The modules have a few features built in, such as the ability to change the brightness/saturation/hue of images, auto-contrast and auto-brightness adjustment, and motion detection.

Since it is a little confusing how this is both a snapshot and video camera, we'd like to explain it in detail now. The module was initially designed for surveillance purposes. Its meant to constantly stream TV-resolution video out of the Video pin (this is NTSC monochrome format) and also take commands from the serial port. The serial port commands can request that the module freeze the video and then download a JPEG color image. So for example, normally its just displaying video to a security monitor. When motion is detected, it would take a photo and save it to a disk for later analysis.
The module is admittedly not extremely high resolution - the maximum image size it can take is 640x480 pixels. And it is sensitive to infrared light, which alters the color rendition somewhat. The reason for all this is that it's meant for surveillance, not for nature photography. However, as far as we can tell, this is the best module on the market.
- **Module size:** 32mm x 32mm
- **Image sensor:** CMOS 1/4 inch
- **CMOS Pixels:** 0.3M
- **Pixel size:** 5.6um\*5.6um
- **Output format:** Standard JPEG/M-JPEG
- **White balance:** Automatic
- **Exposure:** Automatic
- **Gain:** Automatic
- **Shutter:** Electronic rolling shutter
- **SNR:** 45DB
- **Dynamic Range:** 60DB
- **Max analog gain:** 16DB
- **Frame speed:** 640\*480 30fps
- **Scan mode:** Progressive scan
- **Viewing angle:** 60 degrees
- **Monitoring distance:** 10 meters, maximum 15meters (adjustable)
- **Image size:** VGA (640\*480), QVGA (320\*240), QQVGA (160\*120)
- **Baud rate:** Default 38400 (the datasheet claims you can change the baud rate with a command but it does not work reliably)
- **Current draw:** 75mA
- **Operating voltage:** DC +5V
- **Communication:** 3.3V TTL (Three wire TX, RX, GND)
## Sample Images
Here are two example images, one of outside during a cloudy day, and one inside on a sunny day.


- [Next Page](https://learn.adafruit.com/ttl-serial-camera/wiring-the-camera.md)
## Featured Products
### TTL Serial JPEG Camera with NTSC Video
[TTL Serial JPEG Camera with NTSC Video](https://www.adafruit.com/product/397)
This camera module can be a pretty neat project addition. It was designed to be used in security systems and does two main things - it outputs NTSC video and can take snapshots of that video (in color) and transmit them over the TTL serial link. You can snap pictures at 640x480, 320x240 or...
In Stock
[Buy Now](https://www.adafruit.com/product/397)
[Related Guides to the Product](https://learn.adafruit.com/products/397/guides)
### Miniature TTL Serial JPEG Camera with NTSC Video
[Miniature TTL Serial JPEG Camera with NTSC Video](https://www.adafruit.com/product/1386)
This tiny little camera module can be a pretty neat project addition, it is just like [our other JPEG cameras (same chipset/software)](http://www.adafruit.com/category/35_68), but much smaller and slimmer. It was designed to be used in security systems and does two main things - it...
In Stock
[Buy Now](https://www.adafruit.com/product/1386)
[Related Guides to the Product](https://learn.adafruit.com/products/1386/guides)
### Adafruit METRO 328 Fully Assembled - Arduino IDE compatible
[Adafruit METRO 328 Fully Assembled - Arduino IDE compatible](https://www.adafruit.com/product/50)
We sure love the ATmega328 here at Adafruit, and we use them _a lot_ for our own projects. The processor has plenty of GPIO, Analog inputs, hardware UART SPI and I2C, timers and PWM galore - just enough for most simple projects. When we need to go small, we use a
Out of Stock
[Buy Now](https://www.adafruit.com/product/50)
[Related Guides to the Product](https://learn.adafruit.com/products/50/guides)
### Weatherproof TTL Serial JPEG Camera with NTSC Video and IR LEDs
[Weatherproof TTL Serial JPEG Camera with NTSC Video and IR LEDs](https://www.adafruit.com/product/613)
This weatherproof camera module is [a classy upgrade to the basic camera module we already stock in the shop](http://www.adafruit.com/products/397). The main differences is that this one comes in a nice metal case with a mounting hinge, a 1 meter long cable with the TTL & NTSC...
In Stock
[Buy Now](https://www.adafruit.com/product/613)
[Related Guides to the Product](https://learn.adafruit.com/products/613/guides)
### MicroSD card breakout board+
[MicroSD card breakout board+](https://www.adafruit.com/product/254)
Not just a simple breakout board, this microSD adapter goes the extra mile - designed for ease of use.
- Onboard 5v-\>3v regulator provides 150mA for power-hungry cards
- 3v level shifting means you can use this with ease on either 3v or 5v systems
- Uses a proper level...
Out of Stock
[Buy Now](https://www.adafruit.com/product/254)
[Related Guides to the Product](https://learn.adafruit.com/products/254/guides)
### Half Sized Premium Breadboard - 400 Tie Points
[Half Sized Premium Breadboard - 400 Tie Points](https://www.adafruit.com/product/64)
This is a cute, half-size breadboard with 400 tie points, good for small projects. It's 3.25" x 2.2" / 8.3cm x 5.5cm with a standard double-strip in the middle and two power rails on both sides. You can pull the power rails off easily to make the breadboard as...
In Stock
[Buy Now](https://www.adafruit.com/product/64)
[Related Guides to the Product](https://learn.adafruit.com/products/64/guides)
### SD/MicroSD Memory Card (8 GB SDHC)
[SD/MicroSD Memory Card (8 GB SDHC)](https://www.adafruit.com/product/1294)
Add mega-storage in a jiffy using this 8 GB class 4 micro-SD card. It comes with a SD adapter so you can use it with any of our shields or adapters. Preformatted to FAT so it works out of the box with our projects. Tested and works great with our
In Stock
[Buy Now](https://www.adafruit.com/product/1294)
[Related Guides to the Product](https://learn.adafruit.com/products/1294/guides)
## Related Guides
- [Making Adabot: Part 2](https://learn.adafruit.com/making-adabot-part-2.md)
- [3D Printed Animatronic Robot Head](https://learn.adafruit.com/3d-printed-animatronic-robot-head.md)
- [Arduino Lesson 14. Servo Motors](https://learn.adafruit.com/adafruit-arduino-lesson-14-servo-motors.md)
- [Arduino Lesson 15. DC Motor Reversing](https://learn.adafruit.com/adafruit-arduino-lesson-15-dc-motor-reversing.md)
- [Programming Arduino with Android and Windows Tablets](https://learn.adafruit.com/programming-arduino-with-android-and-windows-tablets.md)
- [LSM303 Accelerometer + Compass Breakout](https://learn.adafruit.com/lsm303-accelerometer-slash-compass-breakout.md)
- [Adafruit VS1053 MP3/AAC/Ogg/MIDI/WAV Codec Breakout Tutorial](https://learn.adafruit.com/adafruit-vs1053-mp3-aac-ogg-midi-wav-play-and-record-codec-tutorial.md)
- [Naughty or Nice Machine](https://learn.adafruit.com/naughty-or-nice-machine.md)
- [Adafruit Ultimate GPS Logger Shield](https://learn.adafruit.com/adafruit-ultimate-gps-logger-shield.md)
- [Arduino "Hunt The Wumpus"](https://learn.adafruit.com/arduino-hunt-the-wumpus.md)
- [Track Your Treats: Halloween Candy GPS Tracker](https://learn.adafruit.com/track-your-treats-halloween-candy-gps-tracker.md)
- [WiFi Weather Station](https://learn.adafruit.com/wifi-weather-station-arduino-cc3000.md)
- [Bluetooth Controlled Motorized Camera Slider](https://learn.adafruit.com/bluetooth-motorized-camera-slider.md)
- [TMP36 Temperature Sensor](https://learn.adafruit.com/tmp36-temperature-sensor.md)
- [Babel Fish](https://learn.adafruit.com/babel-fish.md)
---
# Source: https://learn.adafruit.com/smt-manufacturing/tweezers.md
# SMT Manufacturing
## Tweezers
If you're doing SMT, you're doing rework and anything that makes rework suck less is a big win. We use hot air for reworking some SMT parts but if you have leaded parts, especially big ones, hot air can take a really long time. If you want fast component removal/reworking we suggest getting a hot tweezer jig!
The [MX500 soldering station](http://www.ladyada.net///metcaliron.html) is particularly good for hot tweezing, it has two ports on the front. One connects to the iron and the other we connect to a hot tweezer. You can switch out tips just like with the soldering wand. [The system is called MX-PTZ](http://www.okinternational.com/product_soldering/mxPTZ) and you can check out Metcal's page for all the various tips you can get for reworking different-sized parts.
## Removing a SOIC
Our favorite use for tweezers is to remove or rework SOIC and such. These are big chips, hard to heat up evenly and quickly but the large **PTTC-x06** or **PTTC-x07 ** cartridges make em easy!
For example, I want to remove this 14-SOIC chip:

Simply wait for the tweezers to heat up, then grab both sides of the SOIC.
and voila! The chip comes off easily, cleanly and without affecting the rest of the circuit.
- [Previous Page](https://learn.adafruit.com/smt-manufacturing/resistor-packs.md)
- [Next Page](https://learn.adafruit.com/smt-manufacturing/microscope-inspection.md)
## Featured Products
### Fine tip curved tweezers - ESD safe
[Fine tip curved tweezers - ESD safe](https://www.adafruit.com/product/422)
When soldering small surface-mount (SMD/SMT) components, one thing you'll need is a good pair of tweezers. These are a great pair of every-day tweezers. They're anti-static, anti-magnetic and made of hard stainless steel. The tips are fine and pointy to pick up any size component. This...
In Stock
[Buy Now](https://www.adafruit.com/product/422)
[Related Guides to the Product](https://learn.adafruit.com/products/422/guides)
### Fine tip straight tweezers - ESD safe
[Fine tip straight tweezers - ESD safe](https://www.adafruit.com/product/421)
When soldering small surface-mount (SMD/SMT) components, one thing you'll need is a good pair of tweezers. These tweezers are a great pair of every-day tweezers. They're anti-static, anti-magnetic and made of hard stainless steel. The tips are fine and pointy to pick up any size...
In Stock
[Buy Now](https://www.adafruit.com/product/421)
[Related Guides to the Product](https://learn.adafruit.com/products/421/guides)
### USB Microscope - 5MP interpolated 220x magnification / 8 LEDs
[USB Microscope - 5MP interpolated 220x magnification / 8 LEDs](https://www.adafruit.com/product/636)
As electronics get smaller and smaller, you'll need a hand examining PCBs and this little USB microscope is the perfect tool. Its smaller and lighter than a large optical microscope but packs quite a bit of power in its little body. There's a 2 megapixel sensor inside and an optical...
Out of Stock
[Buy Now](https://www.adafruit.com/product/636)
[Related Guides to the Product](https://learn.adafruit.com/products/636/guides)
## Related Guides
- [Reindeer Solder Kit by Phyx](https://learn.adafruit.com/reindeer-solder-kit-by-phyx.md)
- [3D-Printed Solder Paste Dispenser Hand Switch ](https://learn.adafruit.com/3d-printed-solder-paste-dispenser-hand-switch.md)
- [USB Rechargeable Mini Solder Fume Extractor](https://learn.adafruit.com/usb-rechargeable-mini-solder-fume-extractor.md)
- [How to Sign Windows Drivers & Executables](https://learn.adafruit.com/how-to-sign-windows-drivers-installer.md)
- [Desktop Fume Extractor](https://learn.adafruit.com/desktop-fume-extractor.md)
- [Chinese Dragon Puppet with Motion-Reactive Flame Effect](https://learn.adafruit.com/chinese-dragon-puppet-with-motion-reactive-flame-effect.md)
- [16-Step Drum Sequencer](https://learn.adafruit.com/16-step-drum-sequencer.md)
- [Color Sensing Music Player](https://learn.adafruit.com/color-sensing-music-player.md)
- [Light-Up Costumes in Harsh Environments](https://learn.adafruit.com/light-up-costumes-in-harsh-environments.md)
- [Garden Path Lights with WLED and a Sunset Timer](https://learn.adafruit.com/garden-path-lights-with-sunset-timer.md)
- [CNC Rotary Macropad](https://learn.adafruit.com/cnc-rotary-macropad.md)
- [Blinka Says Tabletop Arcade Game](https://learn.adafruit.com/blinka-says-tabletop-arcade-game.md)
- [IoT Moon Phase Guide](https://learn.adafruit.com/moon-phase.md)
- [KTOWN's Ultimate Creating Parts in Eagle Tutorial](https://learn.adafruit.com/ktowns-ultimate-creating-parts-in-eagle-tutorial.md)
- [Shop Tips & Tricks](https://learn.adafruit.com/shop-tips-and-tricks.md)
---
# Source: https://learn.adafruit.com/internet-of-things-printer/twitter-setup.md
# Internet of Things Printer
## Twitter Setup
Our example application prints an ongoing timeline of live “tweets” from Twitter. Even if you don’t use the Twitter service yourself, you’ll still need to sign up for an account to use the search function in software. If you don’t yet have one, begin at the [Twitter homepage](https://twitter.com "Link: https://twitter.com") and use the sign-up form:

In addition to some basic account information, you’ll need to provide a real email address in order to confirm and activate the account. Within a few minutes you should receive an email with an activation link.
Once you have an account and have logged in, you can then proceed to [dev.twitter.com](https://dev.twitter.com "Link: https://dev.twitter.com") (the Twitter Developers home page). At the top right is a pull-down menu including the option “My applications”:

From this page, select the “Create a new application” button:

You’ll be asked for some basic information about your application — the tweet-printing program we’ll be loading on the Arduino. Provide a reasonable name and description…we don’t know if applications are audited, but being honest and descriptive here would be helpful. You also need to provide a Website URL. If you have a personal or company web site, enter that on the form, else you can use Adafruit’s home page.

You’ll need to agree to the developer terms of service and complete a CAPTCHA before finalizing your application. Read, agree, complete the puzzle and click “Create your Twitter application”:

Once your application is created, there will be a long screen full of information about it (shown abbreviated here). At the bottom of this page, click the button labeled “Create my access token”:

Once you complete these steps, you’ll have the full set of credentials needed to authorize your application. In a moment we’ll copy and paste these four strings into an Arduino sketch: Consumer key, Consumer secret, Access token, and Access token secret.

**Do not share these strings with anyone** —they’re for the secure and exclusive use of your application. If you’re sharing source code via Github or other management system, remember to **remove these before posting the code**!- [Previous Page](https://learn.adafruit.com/internet-of-things-printer/download.md)
- [Next Page](https://learn.adafruit.com/internet-of-things-printer/program-arduino.md)
## Primary Products
### Adafruit IoT Printer Project Pack "Internet of Things" printer
[Adafruit IoT Printer Project Pack "Internet of Things" printer](https://www.adafruit.com/product/717)
Build an "Internet of Things" connected mini printer that will do your bidding! This is a fun weekend project that comes with a beautiful laser cut case. Once assembled, the little printer connects to Ethernet to get Internet data for printing onto 2 1/4" wide receipt paper. The example sketch...
No Longer Stocked
[Buy Now](https://www.adafruit.com/product/717)
[Related Guides to the Product](https://learn.adafruit.com/products/717/guides)
## Featured Products
### Mini Thermal Receipt Printer
[Mini Thermal Receipt Printer](https://www.adafruit.com/product/597)
Add a mini printer to any microcontroller project with this very cute thermal printer. Thermal printers are also known as receipt printers, they're what you get when you go to the ATM or grocery store. Now you can embed a little printer of your own into an enclosure. This printer is ideal...
No Longer Stocked
[Buy Now](https://www.adafruit.com/product/597)
[Related Guides to the Product](https://learn.adafruit.com/products/597/guides)
### Thermal paper roll - 50' long, 2.25" wide
[Thermal paper roll - 50' long, 2.25" wide](https://www.adafruit.com/product/599)
A mini roll of thermal paper, this fits very nicely into our mini thermal printer. 2.25" wide (about 57mm) and 50 feet long (15 meters). BPA-free.
[Perfect for use with our mini thermal printer!](http://www.adafruit.com/products/597)
No Longer Stocked
[Buy Now](https://www.adafruit.com/product/599)
[Related Guides to the Product](https://learn.adafruit.com/products/599/guides)
### Adafruit METRO 328 - Arduino Compatible - with Headers
[Adafruit METRO 328 - Arduino Compatible - with Headers](https://www.adafruit.com/product/2488)
This is the **Adafruit METRO Arduino-Compatible - with headers. ** It's a fully assembled and tested microcontroller and physical computing board with through-hole headers attached. If you don't want a Metro with the headers attached for...
In Stock
[Buy Now](https://www.adafruit.com/product/2488)
[Related Guides to the Product](https://learn.adafruit.com/products/2488/guides)
### Ethernet Shield for Arduino - W5500 Chipset
[Ethernet Shield for Arduino - W5500 Chipset](https://www.adafruit.com/product/2971)
The W5500 Ethernet Shield for Arduino from Seeed Studio is a great way to set up your projects with internet connectivity with just a single chip. Similar to the[Arduino Ethernet Shield](https://www.adafruit.com/product/201), but with a newer chipset, this ethernet shield...
No Longer Stocked
[Buy Now](https://www.adafruit.com/product/2971)
[Related Guides to the Product](https://learn.adafruit.com/products/2971/guides)
### FTDI Friend with Micro USB Port + extras
[FTDI Friend with Micro USB Port + extras](https://www.adafruit.com/product/284)
Long gone are the days of parallel ports and serial ports. Now the USB port reigns supreme! But USB is hard, and you just want to transfer your every-day serial data from a microcontroller to computer. What now? Enter the FTDI Friend!
The FTDI Friend is a tweaked out FTDI FT232RL chip...
In Stock
[Buy Now](https://www.adafruit.com/product/284)
[Related Guides to the Product](https://learn.adafruit.com/products/284/guides)
### Rugged Metal On/Off Switch with Green LED Ring
[Rugged Metal On/Off Switch with Green LED Ring](https://www.adafruit.com/product/482)
These chrome-plated metal buttons are rugged and look real good while doing it! Simply drill a 16mm hole into any material up to 1/2" thick and you can fit these in place, there's even a rubber gasket to keep water out of the enclosure. On the front of the button is a flat metal...
In Stock
[Buy Now](https://www.adafruit.com/product/482)
[Related Guides to the Product](https://learn.adafruit.com/products/482/guides)
### Arduino Ethernet shield R3 with micro SD connector - Assembled
[Arduino Ethernet shield R3 with micro SD connector - Assembled](https://www.adafruit.com/product/201)
The Arduino Ethernet Shield R3 (assembled) allows an Arduino board to connect to the internet. It is based on the Wiznet W5100 ethernet chip (datasheet). The Wiznet W5100 provides a network (IP) stack capable of both TCP and UDP. It supports up to four simultaneous socket connections. Use the...
No Longer Stocked
[Buy Now](https://www.adafruit.com/product/201)
[Related Guides to the Product](https://learn.adafruit.com/products/201/guides)
### Arduino Uno Ethernet
[Arduino Uno Ethernet](https://www.adafruit.com/product/418)
**As of 9/20/2012 Adafruit is currently shipping R3 of the Arduino Uno Ethernet**
Deep in the Swiss Alps, the top secret Arduino Super-collider has accelerated both an [Arduino UNO](https://www.adafruit.com/products/50) and
No Longer Stocked
[Buy Now](https://www.adafruit.com/product/418)
[Related Guides to the Product](https://learn.adafruit.com/products/418/guides)
## Related Guides
- [XBee Radios](https://learn.adafruit.com/xbee-radios.md)
- [Adafruit VCNL4040 Proximity Sensor](https://learn.adafruit.com/adafruit-vcnl4040-proximity-sensor.md)
- [Trinket / Gemma IR Control](https://learn.adafruit.com/trinket-gemma-ir-remote-control.md)
- [IR Sensor](https://learn.adafruit.com/ir-sensor.md)
- [Adafruit MENTA Kit](https://learn.adafruit.com/adafruit-menta-kit-mint-tin-arduino-compatible.md)
- [A Z80 CP/M emulator for the SAMD51](https://learn.adafruit.com/z80-cpm-emulator-for-the-samd51-grand-central.md)
- [How to Find Hidden COM Ports](https://learn.adafruit.com/how-to-find-hidden-com-ports.md)
- [CircuitPython Libraries on Linux and ODROID C2](https://learn.adafruit.com/circuitpython-libaries-linux-odroid-c2.md)
- [Bootloading Basics](https://learn.adafruit.com/bootloader-basics.md)
- [Overwatch Prop Gun: Lucio's Blaster Pt. 2](https://learn.adafruit.com/overwatch-lucio-gun-pt-2.md)
- [Adafruit HUZZAH ESP8266 breakout](https://learn.adafruit.com/adafruit-huzzah-esp8266-breakout.md)
- [Ladyada's Learn Arduino - Lesson #2](https://learn.adafruit.com/ladyadas-learn-arduino-lesson-number-2.md)
- [Motorized Camera Slider MK3 ](https://learn.adafruit.com/motorized-camera-slider-mk3.md)
- [Echo 2-XL](https://learn.adafruit.com/echo-2-xl.md)
- [Building and Running MicroPython on the ESP8266](https://learn.adafruit.com/building-and-running-micropython-on-the-esp8266.md)
---
# Source: https://learn.adafruit.com/conductive-thread/tying-knots.md
# Conductive Thread
## Tying knots

Before cutting anything, tie the threads in a tight square knot at the back of the fabric.

Seal this knot by applying a drop of clear nail polish or Fray Check.

When dry, trim the tail end of the thread very closely to the sealed knot. Now you can continue stitching with the long tail to connect up different parts of your circuit!
- [Previous Page](https://learn.adafruit.com/conductive-thread/stitching-around-circuit-boards.md)
- [Next Page](https://learn.adafruit.com/conductive-thread/connecting-components.md)
## Featured Products
### Stainless Medium Conductive Thread - 3 ply - 18 meter/60 ft
[Stainless Medium Conductive Thread - 3 ply - 18 meter/60 ft](https://www.adafruit.com/product/641)
After months of searching, we finally have what we consider to be the ultimate conductive thread. It's thin, strong, smooth, and made completely of 316L stainless steel. Once you start working with this thread you'll quickly agree its optimal for any wearables work!
This...
Out of Stock
[Buy Now](https://www.adafruit.com/product/641)
[Related Guides to the Product](https://learn.adafruit.com/products/641/guides)
### Stainless Thin Conductive Thread - 2 ply - 23 meter/76 ft
[Stainless Thin Conductive Thread - 2 ply - 23 meter/76 ft](https://www.adafruit.com/product/640)
After months of searching, we finally have what we consider to be the ultimate conductive thread. It's thin, strong, smooth, and made completely of 316L stainless steel. Once you start working with this thread you'll quickly agree its optimal for any wearables work!
This...
In Stock
[Buy Now](https://www.adafruit.com/product/640)
[Related Guides to the Product](https://learn.adafruit.com/products/640/guides)
### Stainless Thin Conductive Yarn / Thick Conductive Thread - 30 ft
[Stainless Thin Conductive Yarn / Thick Conductive Thread - 30 ft](https://www.adafruit.com/product/603)
This 316L stainless steel thread falls somewhere between a thick thread and a thin yarn. Most sewing machines wouldn't be happy with this thread since its thick, and it has the 'furry' soft feel of yarn which makes it poor for most e-textiles/wearables projects. However, the high...
In Stock
[Buy Now](https://www.adafruit.com/product/603)
[Related Guides to the Product](https://learn.adafruit.com/products/603/guides)
### Conductive thread ribbon cable - White - 1 yard
[Conductive thread ribbon cable - White - 1 yard](https://www.adafruit.com/product/1139)
This lightweight, flexible fabric ribbon cable contains four channels of conductive thread, perfect for wiring up wearables where flexibility is key. Use it to connect your conductive fabric gamepad to your microcontroller or computer!
Features:
- Low resistance: ~16...
No Longer Stocked
[Buy Now](https://www.adafruit.com/product/1139)
[Related Guides to the Product](https://learn.adafruit.com/products/1139/guides)
### Needle set - 3/9 sizes - 20 needles
[Needle set - 3/9 sizes - 20 needles](https://www.adafruit.com/product/615)
Mighty needles, sew like the wind! This needle set is the only one you'll need for any sort of hand sewing, especially using our conductive thread and wearable electronics parts.
Each pack contains 20 gold-eye sharps, with eye sizes ranging from #3 (1.75" long) to #9...
Out of Stock
[Buy Now](https://www.adafruit.com/product/615)
[Related Guides to the Product](https://learn.adafruit.com/products/615/guides)
### Small Alligator Clip Test Lead (set of 12)
[Small Alligator Clip Test Lead (set of 12)](https://www.adafruit.com/product/1008)
Connect this to that without soldering using these handy mini alligator clip test leads. 15" cables with alligator clip on each end, color coded. You get 12 pieces in 6 colors. Strong and grippy, these always come in handy! We often use these in conjunction with a multimeter so we...
In Stock
[Buy Now](https://www.adafruit.com/product/1008)
[Related Guides to the Product](https://learn.adafruit.com/products/1008/guides)
### Sewable Snaps - 5mm Diameter - Card of 24
[Sewable Snaps - 5mm Diameter - Card of 24](https://www.adafruit.com/product/1126)
The small 5mm size of these tin-plated brass snaps means they fit perfectly on Flora's pads! Snaps make a great connector for wearables-- solder one side to the board and sew the other to your project with conductive thread! This card comes with 24 complete snaps (socket and stud...
In Stock
[Buy Now](https://www.adafruit.com/product/1126)
[Related Guides to the Product](https://learn.adafruit.com/products/1126/guides)
### FLORA - Wearable electronic platform: Arduino-compatible
[FLORA - Wearable electronic platform: Arduino-compatible](https://www.adafruit.com/product/659)
FLORA is Adafruit's fully-featured wearable electronics platform. It's a round, sewable, Arduino-compatible microcontroller designed to empower amazing wearables projects.FLORA comes with Adafruit's support, [tutorials and...](http://learn.adafruit.com/category/flora)
In Stock
[Buy Now](https://www.adafruit.com/product/659)
[Related Guides to the Product](https://learn.adafruit.com/products/659/guides)
## Related Guides
- [Capacitive Touch with Conductive Fabric & Flora](https://learn.adafruit.com/capacitive-touch-with-conductive-fabric-and-flora.md)
- [Fiber Optic Pixie Skirt](https://learn.adafruit.com/fiber-optic-pixie-princess-skirt.md)
- [Haptic Headband](https://learn.adafruit.com/haptic-headband.md)
- [EEG Costume Cap](https://learn.adafruit.com/eeg-costume-cap.md)
- [Zipper Switch](https://learn.adafruit.com/zipper-switch.md)
- [Adafruit Arduino IDE Setup](https://learn.adafruit.com/adafruit-arduino-ide-setup.md)
- [Sewable NeoPixels](https://learn.adafruit.com/flora-rgb-smart-pixels.md)
- [FLORA TV-B-Gone](https://learn.adafruit.com/flora-tv-b-gone.md)
- [Experimenting with NeverWet + Electronics](https://learn.adafruit.com/neverwet-electronics.md)
- [LED Stego Flex Spike Hoodie](https://learn.adafruit.com/led-stego-flex-spike-hoodie.md)
- [Getting Started with FLORA](https://learn.adafruit.com/getting-started-with-flora.md)
- [Sunscreen Reminder Hat](https://learn.adafruit.com/sunscreen-reminder-hat.md)
- [Mailbox Notification Service](https://learn.adafruit.com/mailbox-notification-service.md)
- [FLORA + FONA](https://learn.adafruit.com/flora-plus-fona.md)
- [Flora TSL2561 Lux Sensor](https://learn.adafruit.com/flora-lux-sensor.md)
---
# Source: https://learn.adafruit.com/skill-badge-guide-3d-printing/understanding-the-technology.md
# Skill Badge Guide: 3D Printing
## Understanding the technology
Today's 3D printers are typically made up of 6 main components. There are multiple methods for configuring the machine and this guide features a machine whose build platform moves on the X and Y, and the Z carries the extruder.

**The Structure (B):**
The role of the structure is to provide a rigid platform for the machines components to be secured to. The material of the structure can be as unique as the machine itself. Some common materials are plywood, acrylic, and metal.
**The XY axis (E):**
The XY axis provides stable, linear movement in the X & Y directions. This mechanism is controlled by either a belt or screw interface to a stepper or servo motor. The amount of XY movement per step correlates to the machines resolution.
**The Z axis (A):**
The Z axis elevates the extruder above the build platform and moves perpendicular to the XY axis. This mechanism is typically controlled by a linear screw interface to a stepper or servo motor. The amount of +Z movement correlates to the thickness of each layer. Some machines move the extruder with the XY axis and the Z axis moves the build platform. Regardless of the configuration, all three axis are required to construct a 3D object.
**The Build Platform (D):**
The build platform is the surface that supports the extruded material while the machine completes each layer. There are two types of build platforms, heated and not heated. A heated platform is optimal for larger parts as it helps to eliminate the problem of thermal contraction of the extruded material which leads to part deformation and warping. Printers that print ABS often require a heated platform while those that use PLA do not.
**The Extruder (C):**
The extruder is the heart of the 3D printer. This mechanism is responsible for accurately depositing the desired feed stock onto the build platform. There are numerous designs and types of materials the extruder can handle. If it is extruding plastic feed stock, the extruder relies on a toothed feed wheel that feeds the plastic filament into a heated chamber. This chamber is thermally regulated to the desired melting point of the plastic and once molten, the filament is forced through a small nozzle. The diameter of the nozzle dictates the detail that can be replicated by the machine and are generally ~0.4mm - 0.5mm in diameter.
**The Electronics & Software (F, G):**
The electronics and software make up the brain of the 3D printer. Designs are produced on a computer as a solid model and are deconstructed by a G-Code processor (Skeinforge, Slicr, Miracle Grue, etc.). This piece of software takes the solid model and "slices" it into a series of layers. Each layer is then converted into a series of coordinate movements that are fed into the machines controller by the control software (ReplicatorG, MakerWare, Repeiter-Host, Pronterface, etc.).
- [Previous Page](https://learn.adafruit.com/skill-badge-guide-3d-printing/3d-printing-overview.md)
- [Next Page](https://learn.adafruit.com/skill-badge-guide-3d-printing/filament-types.md)
## Featured Products
### 3D printing - Skill badge, iron-on patch
[3D printing - Skill badge, iron-on patch](https://www.adafruit.com/product/490)
You can 3D print! Adafruit offers a fun and exciting "badges" of achievement for electronics, science and engineering. We believe everyone should be able to be rewarded for learning a useful skill, a badge is just one of the many ways to show and share.
This is the "I...
No Longer Stocked
[Buy Now](https://www.adafruit.com/product/490)
[Related Guides to the Product](https://learn.adafruit.com/products/490/guides)
### 3D printing - Sticker!
[3D printing - Sticker!](https://www.adafruit.com/product/649)
You can 3D print! Adafruit offers a fun and exciting stickers to celebrate achievement for electronics, science and engineering. We believe everyone should be able to be rewarded for learning a useful skill, a sticker is just one of the many ways to show and share.
This is the...
No Longer Stocked
[Buy Now](https://www.adafruit.com/product/649)
[Related Guides to the Product](https://learn.adafruit.com/products/649/guides)
### Flashforge Creator PRO
[Flashforge Creator PRO](https://www.adafruit.com/product/2742)
The **Flashforge Creator Pro** is the latest addition to FlashForge’s Creator family, built upon an open source platform.
Based on proven design of the Creator X chassis, the Pro is now enclosed so you can print ABS better and more efficient than ever. The upgraded...
No Longer Stocked
[Buy Now](https://www.adafruit.com/product/2742)
[Related Guides to the Product](https://learn.adafruit.com/products/2742/guides)
### PrintrBot Simple Metal 3D Printer - Black - Assembled
[PrintrBot Simple Metal 3D Printer - Black - Assembled](https://www.adafruit.com/product/1760)
New from Printrbot, the Metal Simple is a brand new rock solid, all metal, fully-assembled Printrbot Simple! As opposed to the [Printrbot Simple Kit](http://www.adafruit.com/products/1735), all of the laser cut wood parts have been replaced by rock solid metal and assembled. In...
No Longer Stocked
[Buy Now](https://www.adafruit.com/product/1760)
[Related Guides to the Product](https://learn.adafruit.com/products/1760/guides)
### Ultimaker 2+ 3D Printer
[Ultimaker 2+ 3D Printer](https://www.adafruit.com/product/2673)
The **Ultimaker 2+** is one of our favorite 3D printers on the market. It's a well-built open-source compact machine with an excellent UX. Every inch of the Ultimaker 2+ is designed to create the most effortless and reliable 3D printing experience ever!
No Longer Stocked
[Buy Now](https://www.adafruit.com/product/2673)
[Related Guides to the Product](https://learn.adafruit.com/products/2673/guides)
### Micro 3D Printer - Black - Retail Edition
[Micro 3D Printer - Black - Retail Edition](https://www.adafruit.com/product/2933)
The magic of 3D printing is now more affordable and accessible than ever! Meet The **Micro 3D Printer** by [M3D](https://printm3d.com/), the first truly consumer 3D printer. Sporting a compact design, user-friendly software, and replaceable print beds and nozzles,...
No Longer Stocked
[Buy Now](https://www.adafruit.com/product/2933)
[Related Guides to the Product](https://learn.adafruit.com/products/2933/guides)
### Filament for 3D Printers in Various Colors and Types
[Filament for 3D Printers in Various Colors and Types](https://www.adafruit.com/product/2080)
Having a 3D printer without filament is sort of like having a regular printer without paper or ink. And while a lot of printers come with some filament there's a good chance you've been printing up a storm and need something new. That's why we've started carrying a...
Out of Stock
[Buy Now](https://www.adafruit.com/product/2080)
[Related Guides to the Product](https://learn.adafruit.com/products/2080/guides)
## Related Guides
- [Mario Magic Wand](https://learn.adafruit.com/mario-magic-wand.md)
- [Case for HUSB238 Breakout](https://learn.adafruit.com/case-for-husb238.md)
- [3D Printed RFID NFC Rings](https://learn.adafruit.com/3d-printed-rfid-nfc-rings.md)
- [AI 3D Printed Figure](https://learn.adafruit.com/ai-figure.md)
- [Ultrasonic Ruler](https://learn.adafruit.com/ultrasonic-ruler.md)
- [Magnet Bottle Holder](https://learn.adafruit.com/magnet-bottle-holder.md)
- [Printy Boost: Reimagining a Classic Adafruit Kit](https://learn.adafruit.com/printy-boost-reimagining-a-classic-adafruit-kit.md)
- [CYBERDECK Expansion Plate](https://learn.adafruit.com/cyberdeck-plate.md)
- [PyPortal Case](https://learn.adafruit.com/pyportal-case.md)
- [3D Printed LED Buckle](https://learn.adafruit.com/3d-printed-led-buckle.md)
- [CLUE Slim Case](https://learn.adafruit.com/clue-slim-case.md)
- [Adafruit Desktop 3D Printer Buyers Guide](https://learn.adafruit.com/adafruit-desktop-3d-printer-selection-guide.md)
- [3D Printed Animatronic Robot Head](https://learn.adafruit.com/3d-printed-animatronic-robot-head.md)
- [New Years Eve Ball Drop](https://learn.adafruit.com/new-years-eve-ball-drop.md)
- [3D Printed Battery Adapter for Camera-Mount LED Panel](https://learn.adafruit.com/3d-printed-battery-adapter-for-camera-mount-led-panel.md)
---
# Source: https://learn.adafruit.com/furby-2012-teardown/unhook-sensors.md
# Furby 2012 Teardown
## Unplug wires

The belly sensor is attached with a tiny plug. Unplug it.


The speaker (brown wires) can be unplugged from its circuit board.

The microphone (inside the pink circle) can be removed from its nesting spot in the front of Furby's body.
- [Previous Page](https://learn.adafruit.com/furby-2012-teardown/remove-back-and-face-plates.md)
- [Next Page](https://learn.adafruit.com/furby-2012-teardown/remove-face-plate.md)
## Featured Products
### Precision screwdriver set (6 pieces)
[Precision screwdriver set (6 pieces)](https://www.adafruit.com/product/424)
Break seals! Void warranties! With this handy screwdriver set at your hands, all hardware you touch will open up and reveal their secret innards.
This set contains 6 screwdrivers, 3 Phillips (#1, #0 and #00) and 3 flat (2.4mm, 1.8mm and 1.4mm). These sizes will open up pretty much...
In Stock
[Buy Now](https://www.adafruit.com/product/424)
[Related Guides to the Product](https://learn.adafruit.com/products/424/guides)
## Related Guides
- [ScoutMakes Robot Kit](https://learn.adafruit.com/scoutmakes-robot-kit.md)
- [Make it Glow: NeoPixel and LED Diffusion Tips & Tricks](https://learn.adafruit.com/make-it-glow-neopixel-and-led-diffusion-tips-tricks.md)
- [How To Homebrew Game Boy Games](https://learn.adafruit.com/homebrew-game-boy-games.md)
- [PyGamer - Gaming Handheld Crank](https://learn.adafruit.com/gaming-handheld-crank.md)
- [Crayola Scented Candle](https://learn.adafruit.com/crayola-scented-candle.md)
- [Bluefruit Controlled Macetech RGB LED Shades](https://learn.adafruit.com/ledshades.md)
- [Hacking the Kinect](https://learn.adafruit.com/hacking-the-kinect.md)
- [Rotary Phone Dial Keypad](https://learn.adafruit.com/rotary-phone-dial-keypad.md)
- [Computer Perfection Synthesizer](https://learn.adafruit.com/computer-perfection-synthesizer.md)
- [Sideloading Apps on Oculus Quest](https://learn.adafruit.com/sideloading-on-oculus-quest.md)
- [USB-PD Hacks](https://learn.adafruit.com/usb-pd-hacks.md)
- [Adafruit DRV2605L Haptic Controller Breakout](https://learn.adafruit.com/adafruit-drv2605-haptic-controller-breakout.md)
- [RGB Matrix Dreidel Game](https://learn.adafruit.com/rgb-matrix-dreidel-game.md)
- [Darth Faders](https://learn.adafruit.com/darth-faders.md)
- [Making PCB Jewelry & Art with Gingerbread and KiCad](https://learn.adafruit.com/making-pcb-art-with-gingerbread-and-kicad.md)
---
# Source: https://learn.adafruit.com/using-the-adafruit-library-with-fritzing/updating-to-the-latest-version-of-the-library.md
# Using the Adafruit Library with Fritzing
## Updating to the Latest Version of the Library

Fritzing doesn't have dynamic updates for external parts libraries. Nor does it make provision for manual updates which will automatically download and install new versions.
The easiest way to update the Adafruit Library is to simply delete the current version from your parts palette ("Delete Bin" -- see above), and then go through the steps shown earlier in this tutorial to install the new one.
- [Previous Page](https://learn.adafruit.com/using-the-adafruit-library-with-fritzing/using-the-adafruit-parts-in-a-fritzing-design.md)
## Related Guides
- [Adafruit TSSP77038 38KHz Infrared IR Demodulator Breakout](https://learn.adafruit.com/adafruit-tssp77038-38khz-infrared-ir-demodulator-breakout.md)
- [Adafruit INA228 I2C Power Monitor](https://learn.adafruit.com/adafruit-ina228-i2c-power-monitor.md)
- [Adafruit TMC2209 Stepper Motor Driver Breakout Board](https://learn.adafruit.com/adafruit-tmc2209-stepper-motor-driver-breakout-board.md)
- [Adafruit ADXL375](https://learn.adafruit.com/adafruit-adxl375.md)
- [Adafruit 15x7 CharliePlex FeatherWing](https://learn.adafruit.com/adafruit-15x7-7x15-charlieplex-led-matrix-charliewing-featherwing.md)
- [Adafruit Proto Doubler PiCowbell](https://learn.adafruit.com/adafruit-proto-doubler-picowbell.md)
- [Adafruit TSMP96000 IR Receiver Breakout](https://learn.adafruit.com/adafruit-tsmp96000-ir-receiver-breakout.md)
- [Adafruit PCA9546 4-Channel STEMMA QT Multiplexer](https://learn.adafruit.com/adafruit-pca9546-4-channel-stemma-qt-multiplexer.md)
- [AWS IoT and Adafruit WICED Feather](https://learn.adafruit.com/aws-iot-and-adafruit-wiced-feather.md)
- [Adafruit Sensirion SHTC3 - Temperature & Humidity Sensor Breakout](https://learn.adafruit.com/adafruit-sensirion-shtc3-temperature-humidity-sensor.md)
- [Expressive Pixels for Adafruit Matrix Portal](https://learn.adafruit.com/expressive-pixels-for-matrix-portal.md)
- [MCP4725 12-Bit DAC Tutorial](https://learn.adafruit.com/mcp4725-12-bit-dac-tutorial.md)
- [Ladyada's Toolkit](https://learn.adafruit.com/ladyadas-toolkit.md)
- [Adafruit 16-channel PWM/Servo Shield](https://learn.adafruit.com/adafruit-16-channel-pwm-slash-servo-shield.md)
- [Adafruit TE MS8607 PHT Sensor](https://learn.adafruit.com/adafruit-te-ms8607-pht-sensor.md)
---
# Source: https://learn.adafruit.com/arduino-tips-tricks-and-techniques/upgrade.md
# Arduino Tips, Tricks, and Techniques
## Upgrade
## Introduction
The 'brains' of the Arduino is a microcontroller called an ATmega. It is a product line from [ATMEL](http://www.atmel.com/) (a Norweigen chip company). Just like Intel & AMD release new & better chips each year, so does Atmel. The first versions of the Arduino (up to the NG) used an ATmega8 - a chip with 8K of flash memory and 1K of RAM. Then Atmel released the [ATmega168](http://www.adafruit.com/index.php?main_page=product_info&cPath=17&products_id=56), a drop-in replacement with 16K of flash and 1K of RAM - a really big improvement! Now there is the [ATmega328](http://www.adafruit.com/index.php?main_page=product_info&cPath=17&products_id=123) with 32K of flash and 2K of RAM.
Updating and replacing your Arduino is easy and painless and costs only a few dollars. Your sketches will work just as before but with a little more breathing room.
In order to perform this upgrade you will have to either purchase [a preprogrammed chip](http://www.adafruit.com/index.php?main_page=product_info&cPath=17&products_id=123) or program it yourself with a [AVR programmer](http://www.adafruit.com/index.php?main_page=product_info&cPath=16&products_id=46) or by 'bitbanging' it.
## Replace the Chip
First, **gently** pry the Arduino microcontroller from its socket using a small flat screwdriver or similar. Try to make sure the pins dont get bent. Put it in a safe place. Preferably in an anti-static bag.

Next, prepare the new chip. The pins of ICs are a little skewed when they come from the factory, so they need to be bent in just a tiny bit, to be parallel. Grip the chip from the ends and use a table.
Finally, replace the old chip, lining up all the pins and making sure that the notch in the chip matches the notch in the socket!## Download an Arduino IDE with ATmega328 compatibility
[Version 13 and up of the Arduino software supports the 328!](http://code.google.com/p/arduino/downloads/list)
If you purchased a chip from Adafruit that shipped before Feb 5, 2009 the chip will have the baudrate set at 19200 (same as the older Arduinos). After Feb 5 the upgrade chips were changed to 57600 baud rate (3 times faster!) in order to be compatible with new Arduinos. If you have a 19200 baud rate chip you will have difficulty uploading. Simply quit the Arduino application and edit the file in the **hardware** folder named **boards.txt** and change the line from:
```
atmega328.upload.speed=57600
```
to:```
atmega328.upload.speed=19200
```
If you're having problems please try BOTH just in case!- [Previous Page](https://learn.adafruit.com/arduino-tips-tricks-and-techniques/bootloader.md)
- [Next Page](https://learn.adafruit.com/arduino-tips-tricks-and-techniques/3-3v-conversion.md)
## Featured Products
### Adafruit METRO 328 Fully Assembled - Arduino IDE compatible
[Adafruit METRO 328 Fully Assembled - Arduino IDE compatible](https://www.adafruit.com/product/50)
We sure love the ATmega328 here at Adafruit, and we use them _a lot_ for our own projects. The processor has plenty of GPIO, Analog inputs, hardware UART SPI and I2C, timers and PWM galore - just enough for most simple projects. When we need to go small, we use a
Out of Stock
[Buy Now](https://www.adafruit.com/product/50)
[Related Guides to the Product](https://learn.adafruit.com/products/50/guides)
### Arduino bootloader-programmed chip (Atmega328P)
[Arduino bootloader-programmed chip (Atmega328P)](https://www.adafruit.com/product/123)
This is a preprogrammed Atmega328P chip, useful if you want to make your own Arduino-compatible or repair a damaged chip on an exisiting Arduino UNO, Duemilanove, Diecimila, or NG!
This chip is programmed with 'ADAboot', my version of the bootloader that is...
Out of Stock
[Buy Now](https://www.adafruit.com/product/123)
[Related Guides to the Product](https://learn.adafruit.com/products/123/guides)
## Related Guides
- [NeoPixel Painter](https://learn.adafruit.com/neopixel-painter.md)
- [Adafruit Proto Shield for Arduino](https://learn.adafruit.com/adafruit-proto-shield-arduino.md)
- [Deciphering Strange Arduino Code](https://learn.adafruit.com/deciphering-strange-arduino-code.md)
- [Affordable HAL 9000 Replica](https://learn.adafruit.com/hal-9000-replica.md)
- [WiFi Candy Bowl Monitor](https://learn.adafruit.com/wifi-candy-bowl.md)
- [Arduino Lesson 1. Blink](https://learn.adafruit.com/adafruit-arduino-lesson-1-blink.md)
- [Using NeoPixels and Servos Together](https://learn.adafruit.com/neopixels-and-servos.md)
- [Adafruit 2.8" TFT Touch Shield v2 - Capacitive or Resistive](https://learn.adafruit.com/adafruit-2-8-tft-touch-shield-v2.md)
- [LSM303 Accelerometer + Compass Breakout](https://learn.adafruit.com/lsm303-accelerometer-slash-compass-breakout.md)
- [1,500 NeoPixel LED Curtain with Raspberry Pi and Fadecandy](https://learn.adafruit.com/1500-neopixel-led-curtain-with-raspberry-pi-fadecandy.md)
- [Arduino Lesson 8. Analog Inputs](https://learn.adafruit.com/adafruit-arduino-lesson-8-analog-inputs.md)
- [8BitBox](https://learn.adafruit.com/8bitbox.md)
- [Animating Multiple LED Backpacks](https://learn.adafruit.com/animating-multiple-led-backpacks.md)
- [WiFi Controlled LED Christmahanukwanzaa Tree](https://learn.adafruit.com/wifi-controlled-led-christmahanukwanzaa-tree.md)
- [Reverse Geocache Box](https://learn.adafruit.com/reverse-geocache-engagement-box.md)
---
# Source: https://learn.adafruit.com/digital-led-belt/upload-the-test-sketch.md
# Digital LED Belt
## Upload the Test Sketch
Now its time to get BLINKY!
We'll have to install a version of the Arduino IDE called Teensyduino and our LED strip library, so we can program the controller chip.
**[If you're running Windows, you can just download this ready-to-go zip package. Uncompress it and inside will be an Arduino IDE](http://learn.adafruit.com/system/assets/assets/000/010/149/original/teensyduinov21b.zip "Link: http://learn.adafruit.com/system/assets/assets/000/010/149/original/teensyduinov21b.zip")**
**[If you're running Mac OS X, you can just download this ready-to-go dmg package. Uncompress it and inside will be an Arduino IDE](http://learn.adafruit.com/system/assets/assets/000/010/150/original/teensyduino_v21.dmg "Link: http://learn.adafruit.com/system/assets/assets/000/010/150/original/teensyduino\_v21.dmg")**
Download and install whichever matches your setup. Uncompress it onto your desktop or where ever you want to store the IDE folder. This will take a while so we'll wait here for you.
OK welcome back! Now you will install the 'library' for the Digital LED strip.
Open up the Arduino library manager:

Search for the **LPD8806** library and install it

We also have a great tutorial on Arduino library installation at:
[http://learn.adafruit.com/adafruit-all-about-arduino-libraries-install-use](http://learn.adafruit.com/adafruit-all-about-arduino-libraries-install-use "Link: http://learn.adafruit.com/adafruit-all-about-arduino-libraries-install-use")
You should now see a new **example** folder called **LPD8806** and inside, an example called **LEDbeltKit**. Open up the LEDbeltKit example.
Be sure to select **Atmega32u4 breakout** in the **Board** menu. Also select the Serial Port that is made when you plug in the Atmega32u4 board to USB.


To upload the LEDbeltKit sketch, simply have the board plugged in, click the Upload button in the IDE and press the **RESET** button on the breakout board.
Danger:

Once you've uploaded you should see the LED belt perform the blinky test! It will look a little similar to this:http://www.flickr.com/photos/adafruit/5387932657/
- [Previous Page](https://learn.adafruit.com/digital-led-belt/connect-the-led-strip.md)
- [Next Page](https://learn.adafruit.com/digital-led-belt/battery-protection-diode.md)
## Featured Products
### Digital programmable LED belt kit
[Digital programmable LED belt kit](https://www.adafruit.com/product/332)
By popular demand, we now have a project tutorial for how to make your own programmable, ultra-blinky LED belt. Perfect for parties, raves, parades, weddings, funerals, and bar mitzvahs. Wear it with pride, wear it with blinky! Follow our soldering tutorial to build your own heirloom LED belt,...
No Longer Stocked
[Buy Now](https://www.adafruit.com/product/332)
[Related Guides to the Product](https://learn.adafruit.com/products/332/guides)
## Related Guides
- [LED Sequin Bow Tie](https://learn.adafruit.com/led-sequin-bowtie.md)
- [Bluetooth-Controlled NeoPixel Goggles](https://learn.adafruit.com/bluetooth-neopixel-goggles.md)
- [Light Painting with Raspberry Pi](https://learn.adafruit.com/light-painting-with-raspberry-pi.md)
- [Glowing Viking Rune wayFinder](https://learn.adafruit.com/glowing-viking-rune-artifact.md)
- [3D Printing with Bamboo Wood Filament](https://learn.adafruit.com/3d-printing-with-bamboo-wood-filament.md)
- [Jellyfish Umbrella with easy WLED WiFi Control](https://learn.adafruit.com/jellyfish-umbrella-with-easy-wled-wifi-control.md)
- [Bandolier of Light](https://learn.adafruit.com/bandolier-of-light.md)
- [Electron Bow](https://learn.adafruit.com/electron-bow.md)
- [Steven Universe Cosplay Shirt & Gem](https://learn.adafruit.com/steven-universe-cosplay-shirt-gem.md)
- [CLUE Vertical Garden Weather Visualizer](https://learn.adafruit.com/clue-vertical-garden-weather-visualizer.md)
- [Cast a 3d Printed Necklace in Metal](https://learn.adafruit.com/cast-a-3d-printed-necklace-in-metal.md)
- [3D Printed Wearable Video Goggles](https://learn.adafruit.com/3d-printed-wearable-video-goggles.md)
- [Bunny Ears with MakeCode](https://learn.adafruit.com/bunny-ears-with-makecode.md)
- [Roll-up Video Light](https://learn.adafruit.com/roll-up-video-light.md)
- [1,500 NeoPixel LED Curtain with Raspberry Pi and Fadecandy](https://learn.adafruit.com/1500-neopixel-led-curtain-with-raspberry-pi-fadecandy.md)
---
# Source: https://learn.adafruit.com/electroknit/upload.md
# Electro-knit
## Upload Custom Patterns
This step will show how to upload the custom patterns to the knitting machine memory from your computer. This is just for the 'custom' patterns, it wont overwrite the 'built in' patterns that are shown in the manual (those are built into the "ROM").
Start up the disk drive emulator in the command line.

When "ready" lamp is lit, reset the machine's memory by pressing CE key, then type in 888, then press STEP key. **This deletes all stored patterns** , so [be sure to back up first](http://www.ladyada.net/wiki/tutorials/knittingmachine/backup.html) if you have patterns on the machine you want to save! (The patterns included with the machine are stored on non-rewritable chips and can never be deleted through this method).
Clear display with CE key, then prepare to load new data into memory by typing 551, then STEP.

Display should go blank, then "ready" and "pattern no" lamps should illuminate.

Press 1 to indicate which "track" to load from the disk drive emulator, then press STEP.

Machine will beep when finished. Pick a pattern and knit as normal, according to the machine manual for knitting a pattern from memory.

- [Previous Page](https://learn.adafruit.com/electroknit/insert.md)
- [Next Page](https://learn.adafruit.com/electroknit/faq.md)
## Featured Products
### FTDI Serial TTL-232 USB Cable
[FTDI Serial TTL-232 USB Cable](https://www.adafruit.com/product/70)
Just about all electronics use TTL serial for debugging, bootloading, programming, serial output, etc. But it's rare for a computer to have a serial port anymore. This is a USB to TTL serial cable, with a FTDI FT232RL usb/serial chip embedded in the head. It has a 6-pin socket at the end...
In Stock
[Buy Now](https://www.adafruit.com/product/70)
[Related Guides to the Product](https://learn.adafruit.com/products/70/guides)
## Related Guides
- [Open Source Protective Face Shield Designs](https://learn.adafruit.com/open-source-face-shield-designs.md)
- [Pico Bluetooth Keyboard Bridge](https://learn.adafruit.com/pico-bluetooth-keyboard-bridge.md)
- [Dimmable Li-Ion Halogen Bike Light](https://learn.adafruit.com/dimmable-li-ion-halogen-bike-light.md)
- [Installing IronOS on an MHP30 Mini Hot Plate (DEPRECATED)](https://learn.adafruit.com/installing-ironos-on-a-mhp30-mini-hotplate.md)
- [Getting Started with Braille Output for CircuitPython REPL](https://learn.adafruit.com/getting-started-braille-output-circuitpython-repl.md)
- [Meowsic Cat Piano Line Out](https://learn.adafruit.com/meowsic-line-out.md)
- [Instagram Photo Frame](https://learn.adafruit.com/instagram-photo-frame.md)
- [ESP32 PlayStation Controller](https://learn.adafruit.com/esp32-playstation-controller.md)
- [NeoPIO: Drive lots of LEDs with Raspberry Pi Pico](https://learn.adafruit.com/neopio-drive-lots-of-leds-with-raspberry-pi-pico.md)
- [Ikea Vindriktning Hack with QT Py ESP32-S3 and Adafruit IO](https://learn.adafruit.com/ikea-vindriktning-hack-with-qt-py-esp32-s3-and-adafruit-io.md)
- [See N Say Brain Transplant](https://learn.adafruit.com/see-n-say-brain-transplant.md)
- [DIY Welded Bike Stand](https://learn.adafruit.com/diy-welded-bike-stand.md)
- [Setting up an Open Speech Recording Website](https://learn.adafruit.com/setting-up-an-open-speech-recording-website.md)
- [Authoring Playground Books with Bluefruit for iOS ](https://learn.adafruit.com/create-a-swift-playgroundbook-with-bluetooth-le.md)
- [Adafruit Feather RP2040 with USB Type A Host](https://learn.adafruit.com/adafruit-feather-rp2040-with-usb-type-a-host.md)
---
# Source: https://learn.adafruit.com/adafruit-arduino-lesson-1-blink/uploading-blink-to-the-board.md
# Arduino Lesson 1. Blink
## Uploading Blink to the Board
Attach your Arduino board to your computer with the USB cable and check that the 'Board Type' and 'Serial Port' are set correctly. You may need to refer back to Lesson 0.
The Arduino IDE will show you the current settings for board at the bottom of the window.

Click on the 'Upload' button. The second button from the left on the toolbar.

If you watch the status area of the IDE, you will see a progress bar and a series of messages. At first it will say 'Compiling Sketch..'. This converts the sketch into a format suitable for uploading to the board.

Next, the status will change to 'Uploading'. At this point, the LEDs on the Arduino should start to flicker as the sketch is transferred.

Finally, the staus will change to 'Done'.

The other message tells us that the sketch is using 1,084 bytes of the 32,256 bytes available.After the 'Compiling Sketch..' stage you could get the following error message:

The clue is at the top here, it probably means that your board is not connected at all, or the drivers have not been installed (if necessary) or that the wrong serial port is selected.
If you get this, go back to Lesson 0 and check your installation.
Once the upload has completed, the board should restart and start blinking.
- [Previous Page](https://learn.adafruit.com/adafruit-arduino-lesson-1-blink/saving-a-copy-of-blink.md)
- [Next Page](https://learn.adafruit.com/adafruit-arduino-lesson-1-blink/how-blink-works.md)
## Featured Products
### Adafruit METRO 328 Fully Assembled - Arduino IDE compatible
[Adafruit METRO 328 Fully Assembled - Arduino IDE compatible](https://www.adafruit.com/product/50)
We sure love the ATmega328 here at Adafruit, and we use them _a lot_ for our own projects. The processor has plenty of GPIO, Analog inputs, hardware UART SPI and I2C, timers and PWM galore - just enough for most simple projects. When we need to go small, we use a
Out of Stock
[Buy Now](https://www.adafruit.com/product/50)
[Related Guides to the Product](https://learn.adafruit.com/products/50/guides)
### USB Cable - Standard A-B
[USB Cable - Standard A-B](https://www.adafruit.com/product/62)
This here is your standard A-B USB cable, for USB 1.1 or 2.0. Perfect for connecting a PC to your Arduino, USBtinyISP (among other things).
3 feet / 1 meter long
Color may vary!
In Stock
[Buy Now](https://www.adafruit.com/product/62)
[Related Guides to the Product](https://learn.adafruit.com/products/62/guides)
## Related Guides
- [WiFi Weather Station](https://learn.adafruit.com/wifi-weather-station-arduino-cc3000.md)
- [Naughty or Nice Machine](https://learn.adafruit.com/naughty-or-nice-machine.md)
- [Adafruit VS1053 MP3/AAC/Ogg/MIDI/WAV Codec Breakout Tutorial](https://learn.adafruit.com/adafruit-vs1053-mp3-aac-ogg-midi-wav-play-and-record-codec-tutorial.md)
- [How to program a Zumo Robot with Simulink](https://learn.adafruit.com/zumo-robot-control-with-simulink.md)
- [DIY 8x2 LCD Shield](https://learn.adafruit.com/diy-8x2-lcd-shield.md)
- [3D Printed Animatronic Robot Head](https://learn.adafruit.com/3d-printed-animatronic-robot-head.md)
- [Arduino Lesson 7. Make an RGB LED Fader](https://learn.adafruit.com/adafruit-arduino-lesson-7-make-an-rgb-led-fader.md)
- [WiFi Controlled LED Christmahanukwanzaa Tree](https://learn.adafruit.com/wifi-controlled-led-christmahanukwanzaa-tree.md)
- [Light Meter](https://learn.adafruit.com/light-meter.md)
- [1,500 NeoPixel LED Curtain with Raspberry Pi and Fadecandy](https://learn.adafruit.com/1500-neopixel-led-curtain-with-raspberry-pi-fadecandy.md)
- [Trellis 3D Printed Enclosure](https://learn.adafruit.com/trellis-3d-printed-enclosure.md)
- [Deciphering Strange Arduino Code](https://learn.adafruit.com/deciphering-strange-arduino-code.md)
- [Collin's Lab: MIDI](https://learn.adafruit.com/collins-lab-midi.md)
- [Tiny Arduino Music Visualizer](https://learn.adafruit.com/piccolo.md)
- [Adafruit Music Maker Shield](https://learn.adafruit.com/adafruit-music-maker-shield-vs1053-mp3-wav-wave-ogg-vorbis-player.md)
---
# Source: https://learn.adafruit.com/timesquare-watch-kit/uploading-new-firmware.md
# TIMESQUARE Watch Kit
## Uploading New Firmware
Now you've had your watch for a few days/weeks/months and you want to come up with your own watch designs. Lucky for you, this watch is designed specifically to be super easy to hack! If you know how to program Arduino, you're basically already there.
You'll need the Arduino IDE, and also some knowledge of how to read and write Arduino code.
To program the watch itself, you'll need an [FTDI cable](https://www.adafruit.com/products/70) o[r FTDI Friend](https://www.adafruit.com/products/284). This will connect your computer to the watch. If you're using an FTDI cable or anything other than the Friend, you'll also need some [extra long header](https://www.adafruit.com/products/400) to press-fit.
Simply place a 6-pin extra long header into the FTDI connector and slip the other end into the top of the watch PCB, to match this photo. Be sure to have a battery in the watch, as it does need to be powered while programming!

Next, download the TIMESQUARE watch codebase from github. [Visit the github page and click on](https://github.com/adafruit/TIMESQUARE-Watch)**[DOWNLOAD](https://github.com/adafruit/TIMESQUARE-Watch)****[](https://github.com/adafruit/TIMESQUARE-Watch)**[to download the ZIP file](https://github.com/adafruit/TIMESQUARE-Watch) and uncompress the folder.
Rename the folder to **Watch** (check that the renamed folder contains the **Watch**.cpp and **Watch**.h files) and install into the **arduinosketches/libraries** folder. [For information how to use and install libraries, see our tutorial](http://learn.adafruit.com/arduino-tips-tricks-and-techniques/arduino-libraries)!
Restart the IDE
When programming, select **Lilypad Arduino w/ ATmega328** as the "board" type
- [Previous Page](https://learn.adafruit.com/timesquare-watch-kit/time-display-modes.md)
- [Next Page](https://learn.adafruit.com/timesquare-watch-kit/downloads.md)
## Featured Products
### TIMESQUARE DIY Watch Kit - Red Display Matrix
[TIMESQUARE DIY Watch Kit - Red Display Matrix](https://www.adafruit.com/product/1106)
Show up stylish AND on time to any event with this awesome looking DIY watch. We have a few watch kits here at Adafruit but we finally have one that looks good and fits well, even for ladies and kids and others with smaller wrists and hands. Its got an 8x8 bit matrix display and a repurposed...
No Longer Stocked
[Buy Now](https://www.adafruit.com/product/1106)
[Related Guides to the Product](https://learn.adafruit.com/products/1106/guides)
### TIMESQUARE DIY Watch Kit - Tangerine Display Matrix
[TIMESQUARE DIY Watch Kit - Tangerine Display Matrix](https://www.adafruit.com/product/1223)
Show up stylish AND on time to any event with this awesome looking DIY watch. We have a few watch kits here at Adafruit but we finally have one that looks good and fits well, even for ladies and kids and others with smaller wrists and hands. Its got an 8x8 bit matrix display and a repurposed...
No Longer Stocked
[Buy Now](https://www.adafruit.com/product/1223)
[Related Guides to the Product](https://learn.adafruit.com/products/1223/guides)
### TIMESQUARE DIY Watch Kit - Lime Display Matrix
[TIMESQUARE DIY Watch Kit - Lime Display Matrix](https://www.adafruit.com/product/1224)
Show up stylish AND on time to any event with this awesome looking DIY watch. We have a few watch kits here at Adafruit but we finally have one that looks good and fits well, even for ladies and kids and others with smaller wrists and hands. Its got an 8x8 bit matrix display and a repurposed...
No Longer Stocked
[Buy Now](https://www.adafruit.com/product/1224)
[Related Guides to the Product](https://learn.adafruit.com/products/1224/guides)
### TIMESQUARE DIY Watch Kit - Blue Display Matrix
[TIMESQUARE DIY Watch Kit - Blue Display Matrix](https://www.adafruit.com/product/1225)
Show up stylish AND on time to any event with this awesome looking DIY watch. We have a few watch kits here at Adafruit but we finally have one that looks good and fits well, even for ladies and kids and others with smaller wrists and hands. Its got an 8x8 bit matrix display and a repurposed...
No Longer Stocked
[Buy Now](https://www.adafruit.com/product/1225)
[Related Guides to the Product](https://learn.adafruit.com/products/1225/guides)
### TIMESQUARE DIY Watch Kit - White Display Matrix
[TIMESQUARE DIY Watch Kit - White Display Matrix](https://www.adafruit.com/product/1226)
Show up stylish AND on time to any event with this awesome looking DIY watch. We have a few watch kits here at Adafruit but we finally have one that looks good and fits well, even for ladies and kids and others with smaller wrists and hands. Its got an 8x8 bit matrix display and a repurposed...
No Longer Stocked
[Buy Now](https://www.adafruit.com/product/1226)
[Related Guides to the Product](https://learn.adafruit.com/products/1226/guides)
### TIMESQUARE silver parts bag
[TIMESQUARE silver parts bag](https://www.adafruit.com/product/1227)
No Longer Stocked
[Buy Now](https://www.adafruit.com/product/1227)
[Related Guides to the Product](https://learn.adafruit.com/products/1227/guides)
## Related Guides
- [MicroLipo v2 Case](https://learn.adafruit.com/microlipo-case.md)
- [Adafruit DotStar FeatherWing](https://learn.adafruit.com/adafruit-dotstar-featherwing-adafruit.md)
- [The Pixif](https://learn.adafruit.com/the-pixif.md)
- [Adafruit VL53L0X Time of Flight Micro-LIDAR Distance Sensor Breakout](https://learn.adafruit.com/adafruit-vl53l0x-micro-lidar-distance-sensor-breakout.md)
- [Adafruit MENTA Kit](https://learn.adafruit.com/adafruit-menta-kit-mint-tin-arduino-compatible.md)
- [Adafruit RGB Matrix Bonnet for Raspberry Pi](https://learn.adafruit.com/adafruit-rgb-matrix-bonnet-for-raspberry-pi.md)
- [Raspberry Pi Care and Troubleshooting](https://learn.adafruit.com/raspberry-pi-care-and-troubleshooting.md)
- [Adafruit FONA 808 Cellular + GPS Shield for Arduino](https://learn.adafruit.com/adafruit-fona-808-cellular-plus-gps-shield-for-arduino.md)
- [Adafruit PCM5122 I2S DAC](https://learn.adafruit.com/adafruit-pcm5122-i2s-dac.md)
- [Use an art canvas to diffuse an RGB matrix](https://learn.adafruit.com/use-an-art-canvas-to-diffuse-rgb-matrix.md)
- [Bluetooth-Controlled Matrix LED Sign using Bluefruit Connect](https://learn.adafruit.com/bluetooth-controlled-matrix-led-sign-using-bluefruit-connect.md)
- [Adafruit AW9523 GPIO Expander and LED Driver](https://learn.adafruit.com/adafruit-aw9523-gpio-expander-and-led-driver.md)
- [Adafruit DPI Display Kippah](https://learn.adafruit.com/adafruit-dpi-display-kippah-ttl-tft.md)
- [DIY Pocket LED Gamer - Tiny Tetris!](https://learn.adafruit.com/diy-3d-printed-handheld-pocket-game-tiny-tetris-snake.md)
- [Adafruit MagTag](https://learn.adafruit.com/adafruit-magtag.md)
---
# Source: https://learn.adafruit.com/rgb-led-strips/usage.md
# RGB LED Strips
## Usage
Because these LED strips are very simple, we can easily use them with any microcontroller. We suggest using PWM dimming techniques to control the strip. Since each 'LED' pin may end up requiring an Amp or more to sink to ground, power transistors are **required**! Don't try to connect the pins directly to your everyday microcontroller, they will burn out and/or not work.
You can use any power NPN or N-Channel MOSFET, make sure the transistor is rated to be able to pass as much current as you need. For example, since we draw about 0.2Amps per channel per meter, if you have a 5 meter strip you will need to pass up to 1 Ampere per transistor. Get the beefy "TO-220" packages, not the dinky little guys. Make sure they look like this:

For basic, low-cost usage we suggest using [N-channel MOSFETs](http://www.adafruit.com/partfinder/transistors#mosfet) such as the [IRLB8721](https://www.adafruit.com/product/355) - they are very popular and inexpensive and work with 3.3V or 5V logic. If you can't get those, [TIP120](https://www.adafruit.com/products/976) are also good but there is more voltage loss in a transistor than in a MOSFET which is why we suggest those first (less heat loss, more light!)
This diagram shows connecting up with N-Channel MOSFETs where the Gate is pin 1, the Drain is pin 2 and the Source is pin 3
The **IRLB8721**'s can handle up to **16 Amps** of continuous current - so that's at least 750 LEDs, and if you don't have them all on bright white, 1500 LEDs. You may need to heat sink depending on the continuous/overall power draw/dissipation
Danger:

This diagram shows connecting up with power NPN transistors such as TIP120, where Base is pin 1, Collector is pin 2 and Emitter is pin 3. Its very similar except this time we have 100-220 ohm resistors between the PWM output pin and the base.Danger:

Connect a 9-12V power supply to the Arduino so that **Vin** supplies the high voltage to the LED strip. If you want, you can also just use a separate wire that connects to a power supply that provides about +12V. Make sure to connect the ground of that supply to the ground of the Arduino/MOSFETs!
TIP120's can handle up to **5 Amps** of continuous current - so that's at least 250 LEDs, and if you don't have them all on bright white, 500 LEDs.
- [Previous Page](https://learn.adafruit.com/rgb-led-strips/wiring.md)
- [Next Page](https://learn.adafruit.com/rgb-led-strips/arduino-code.md)
## Featured Products
### Flexible RGB Neon-like LED Strip 120 LEDs - 1 meter long
[Flexible RGB Neon-like LED Strip 120 LEDs - 1 meter long](https://www.adafruit.com/product/4245)
Here at Adafruit we love discovering new and exotic glowing things. Like moths to the flame, we were intrigued by these fresh **Flexible Silicone Neon-Like LED Strips**! They _look_ a lot like neon, but without the need for expensive transformers, glass tubing or inert...
In Stock
[Buy Now](https://www.adafruit.com/product/4245)
[Related Guides to the Product](https://learn.adafruit.com/products/4245/guides)
### RGB LED weatherproof flexi-strip - 30 LED/m - 5m
[RGB LED weatherproof flexi-strip - 30 LED/m - 5m](https://www.adafruit.com/product/285)
These LED strips are fun and glowy. There are **30** RGB LEDs per meter, and you can control the entire strip at once with any microcontroller and three transistors. The way they are wired, you will need a 9-12VDC power supply and then ground the R/G/B pins to turn on the three colors. Use...
In Stock
[Buy Now](https://www.adafruit.com/product/285)
[Related Guides to the Product](https://learn.adafruit.com/products/285/guides)
### RGB LED Weatherproof flexi-strip 60 LED/m- 5m
[RGB LED Weatherproof flexi-strip 60 LED/m- 5m](https://www.adafruit.com/product/346)
These LED strips are fun and glowy. There are **60** RGB LEDs per meter - twice as many as our other strip, and you can control the entire strip at once with any microcontroller and three transistors. The way they are wired, you will need a 9-12VDC power supply and then ground the R/G/B...
In Stock
[Buy Now](https://www.adafruit.com/product/346)
[Related Guides to the Product](https://learn.adafruit.com/products/346/guides)
### Analog RGBW LED Strip - RGB plus Cool White - 60 LED/m
[Analog RGBW LED Strip - RGB plus Cool White - 60 LED/m](https://www.adafruit.com/product/2440)
_A dream come true...an analog LED strip with both RGB and Cool White LEDs...It's so........bbbeeeaaaaauuuttttiiiifuuulllll!!!_
These LED strips are fun and glowy. There are **60** RGB and Cool White LEDs per meter - you can control the entire strip at once with any...
In Stock
[Buy Now](https://www.adafruit.com/product/2440)
[Related Guides to the Product](https://learn.adafruit.com/products/2440/guides)
### Analog RGBW LED Strip - RGB plus Warm White - 60 LED/m
[Analog RGBW LED Strip - RGB plus Warm White - 60 LED/m](https://www.adafruit.com/product/2439)
_A dream come true...an analog LED strip with both RGB and Warm White LEDs...It's so........bbbeeeaaaaauuuttttiiiifuuulllll!!!_
These LED strips are fun and glowy. There are **60** RGB and Warm White LEDs per meter - you can control the entire strip at once...
In Stock
[Buy Now](https://www.adafruit.com/product/2439)
[Related Guides to the Product](https://learn.adafruit.com/products/2439/guides)
### Solderless DotStar and Analog RGB LED Strip Clip Sampler
[Solderless DotStar and Analog RGB LED Strip Clip Sampler](https://www.adafruit.com/product/1004)
These ingenious little clips make it easier than ever to use our analog RGB LED strips - no need to solder! The clips snap onto the ends of the LED strip and hold securely. They're not waterproof but you could cover them in heat-shrink to make them weatherproof.
You get one...
In Stock
[Buy Now](https://www.adafruit.com/product/1004)
[Related Guides to the Product](https://learn.adafruit.com/products/1004/guides)
### TIP120 Power Darlington Transistors - 3 pack
[TIP120 Power Darlington Transistors - 3 pack](https://www.adafruit.com/product/976)
Transistors are powerful little electronic switches, and when our little NPN transistors aren't power enough for your project, we have been known to use these beefy TIP120 Darlington transistors. Great for whenever you need to control medium to high-power electronics such as motors,...
In Stock
[Buy Now](https://www.adafruit.com/product/976)
[Related Guides to the Product](https://learn.adafruit.com/products/976/guides)
### Breadboarding wire bundle
[Breadboarding wire bundle](https://www.adafruit.com/product/153)
75 flexible stranded core wires with stiff ends molded on in red, orange, yellow, green, blue, brown, black and white. These are a major improvement over the "box of bent wires" that are sometimes sold with breadboards, and faster than stripping your own solid core wires. Makes...
In Stock
[Buy Now](https://www.adafruit.com/product/153)
[Related Guides to the Product](https://learn.adafruit.com/products/153/guides)
## Related Guides
- [Wakanda Forever Game](https://learn.adafruit.com/wakanda-forever-game.md)
- [NeoPixel Cyber Falls Wig](https://learn.adafruit.com/neopixel-cyber-falls.md)
- [Halloween Skeleton Transformation Illusion Prop](https://learn.adafruit.com/halloween-skeleton-transformation-illusion-prop.md)
- [Alohamora Bottle](https://learn.adafruit.com/alohamora-bottle.md)
- [NeoPixel Aquarium with Submersible Lights](https://learn.adafruit.com/neopixel-aquarium-with-submersible-lights.md)
- [Adafruit Sparkle Motion](https://learn.adafruit.com/adafruit-sparkle-motion.md)
- [NeoPixel Painter](https://learn.adafruit.com/neopixel-painter.md)
- [Cosplay Glow Fur Raver Bandolier](https://learn.adafruit.com/cosplay-glow-fur-raver-bandolier.md)
- [Make it Glow: NeoPixel and LED Diffusion Tips & Tricks](https://learn.adafruit.com/make-it-glow-neopixel-and-led-diffusion-tips-tricks.md)
- [LIGHTSHIP: LED Animation over WiFi](https://learn.adafruit.com/lightship-led-animation-over-wifi.md)
- [DRAFT PUNK](https://learn.adafruit.com/draft-punk.md)
- [NeoPixel LED Heart Necklace](https://learn.adafruit.com/neopixel-led-heart-necklace.md)
- [Stick Person Costume with Neon LED Strips](https://learn.adafruit.com/led-neon-stick-person-costume.md)
- [FunHouse Parking Assistant](https://learn.adafruit.com/funhouse-parking-assistant.md)
- [Sparkle Motion Dance Shoes](https://learn.adafruit.com/sparkle-motion-dance-shoes.md)
---
# Source: https://learn.adafruit.com/hacking-the-kinect/usb-analyzer.md
# Hacking the Kinect
## USB Analyzer
Reverse-engineering the Kinect is a little easier since we have a known-working system (Xbox 360). Instead of guessing commands, we can just see what commands the Xbox sends and 'replay them'
This requires being able to listen into those commands, however. With protocols such as SPI, Serial, Parallel and i2c, you can listen in with any logic analyzer or oscilloscope. USB is fast/complex enough to require its own kind of logic analyzer. The one we'll be using is called the[ Beagle480 from TotalPhase.](http://www.totalphase.com/products/beagle_usb480/) This is the 'high speed' USB analyzer, which we splurged on. (For many devices, Low/Full speed is fast enough, and there's a lower cost analyzer available.)
The USB analyzer acts as a 'tap' that plugs in between the Xbox and the Kinect. A computer is conneted as well. The computer receives all the data being transmitted into memory and logs it.
Info:

From left to right there is a **DIN ** connector, ** USB A** connector and **USB B** connector. The Xbox connects to the USB B and the Kinect connects to the USB A. The DIN connector is for other kinds of data sniffing (like SPI or i2c).
On the other side, a single B connector which goes to the listening computer
The best way we've found to get the right data is to make sure to get even the 'enumeration' (initialization) packets so plug in the listening computer and start up the software. Then plug in the other end to the devices you want to sniff.

## Lookin' at Logs
Since you probably don't have a USB analyzer, we have some logs that you can use to follow along with us. [Visit the GitHub repository and click the \*\*Downloads\*\* button](https://github.com/adafruit/Kinect/tree/master/USBlogs/)
Make yourself a sandwich, its a big file!
[Also download the Beagle Data Center software (Mac/Win/Linux)](http://www.totalphase.com/products/beagle_usb480/) and install it
OK now that you've eaten, lets open up the **enuminit**.tdc file. This is the full enumeration and initialization.

Remember that when we log the data, there's **a lot** of it that we can then pare down!
Let start by remembering that there are **four devices** (hub, camera, mic, motor) but we only need to listen to one (motor). Click on the **Bus ** tab on the lower right

We have a few devices. Lets explore each one
If you click on **Unconfigured device (0) **you'll see that it was not captured. This is probably because I jiggled the cable when inserting it so it started to create a device and then got disconnected. Its not important.

Click on **(1)** This device is a **Class** device type USB Hub. That's the internal hub. We can ignore this as well.

Device #4 has a PID of 688, that's in decimal. If we convert it to hex we get **0x02b0** - this is the Motor device!
Now we can filter so that only this device's logs are shown.
Our log screen is much shorter now.
You can see that there's some initialization and then just two repeating motifs: a 1 byte message alternated with a 10 byte message.
For the motor to move according to the xbox's wishes, there must be some command sent from the xbox to the kinect. Lets filter some more to see just commands sent **to ** the device

Go to the LiveFilter and select Host-to-Device.
Now we've really pared it down. There are only **four ** commands sent to the kinect motor, since the motor moves during initialization we can just try each one. Lets look at each command
Command 1 has a **bRequest** of 0x06 and a **wValue** of 4, the **wLength ** is 0 which means no data is written, the entire command is the **Request** and **Value.**

Command #2 uses the same **bRequest** but with a different **wValue** of 0x01.
Command #3 is a different **bRequest** of 0x31 and a **wValue** of 0xffd0.
Command #4 is the same **bRequest** and a **wValue** of 0xfff0.
Now we've determined there are two request commands we can send. One is 0x06 and the other is 0x31
Time to experiment!
- [Previous Page](https://learn.adafruit.com/hacking-the-kinect/fuzzing.md)
- [Next Page](https://learn.adafruit.com/hacking-the-kinect/command-number-1-and-2-led-blinky.md)
## Featured Products
### Hacked Kinect - Skill badge, iron-on patch
[Hacked Kinect - Skill badge, iron-on patch](https://www.adafruit.com/product/582)
You can made a cool project using the (hacked) Kinect! Adafruit offers a fun and exciting "badges" of achievement for electronics, science and engineering. We believe everyone should be able to be rewarded for learning a useful skill, a badge is just one of the many ways to show and...
No Longer Stocked
[Buy Now](https://www.adafruit.com/product/582)
[Related Guides to the Product](https://learn.adafruit.com/products/582/guides)
### Beagle USB 12 - Low/Full Speed USB Protocol Analyzer
[Beagle USB 12 - Low/Full Speed USB Protocol Analyzer](https://www.adafruit.com/product/708)
USB complexity got you down? Need a hand with enumeration? Reverse engineering a USB device? You will fall in love with the Beagle 12 USB Analyzer. This hardware analyzer is completely non-intrusive, and is much better than flaky software analyzers. Perfect for when a problem is bad enough it...
No Longer Stocked
[Buy Now](https://www.adafruit.com/product/708)
[Related Guides to the Product](https://learn.adafruit.com/products/708/guides)
### Reverse Engineer - Skill badge, Lenticular printing + pin-on
[Reverse Engineer - Skill badge, Lenticular printing + pin-on](https://www.adafruit.com/product/489)
You can reverse engineer! This is the first lenticular (two-stage image) skill badge that we know of! It says reverse engineer forwards and backwards depending on the angle you view it at!
**Note:** The edges of the badge will appear "white" at an angle,...
No Longer Stocked
[Buy Now](https://www.adafruit.com/product/489)
[Related Guides to the Product](https://learn.adafruit.com/products/489/guides)
### Reverse Engineer - Sticker!
[Reverse Engineer - Sticker!](https://www.adafruit.com/product/673)
You can reverse engineer! Adafruit offers fun and exciting stickers to celebrate achievement for electronics, science and engineering. We believe everyone should be able to be rewarded for learning a useful skill and a sticker is just one of the many ways to show and share.
No Longer Stocked
[Buy Now](https://www.adafruit.com/product/673)
[Related Guides to the Product](https://learn.adafruit.com/products/673/guides)
## Related Guides
- [Guitar Hero MIDI Controller](https://learn.adafruit.com/guitar-hero-midi-controller.md)
- [Commodore 64 - The Most Popular Retro Computer of All Time](https://learn.adafruit.com/commodore-64-retro-guide.md)
- [Use Docker to Compile Linux for ESP32-S3](https://learn.adafruit.com/docker-esp32-s3-linux.md)
- [Feather Guitar Hero Adapter](https://learn.adafruit.com/feather-guitar-hero-adapter.md)
- [BLE Cat Thermal Printer with MEMENTO](https://learn.adafruit.com/ble-cat-thermal-printer-with-memento.md)
- [Fruit Jam Mac Emulator](https://learn.adafruit.com/fruit-jam-mac-emulator.md)
- [How to Make Animated Graphics for Hologram Displays](https://learn.adafruit.com/how-to-make-animated-graphics-for-hologram-displays.md)
- [LED Matrix Wall Arcade for Pico-8](https://learn.adafruit.com/led-matrix-wall-arcade.md)
- [Run an X-Carve CNC Machine Wirelessly with a Raspberry Pi](https://learn.adafruit.com/control-an-xcarve-cnc-machine-wirelessly-with-a-raspberry-pi.md)
- [CircuitPython 2FA TOTP Authentication Friend](https://learn.adafruit.com/circuitpython-totp-otp-2fa-authy-authenticator-friend.md)
- [Flippy Floppy Drive Modification](https://learn.adafruit.com/flippy-floppy-drive-modification.md)
- [Authoring Playground Books with Bluefruit for iOS ](https://learn.adafruit.com/create-a-swift-playgroundbook-with-bluetooth-le.md)
- [SerenityOS - The dream of the '90s is alive!](https://learn.adafruit.com/serenityos-build-and-run-keep-the-90s-dream-alive.md)
- [Stand-alone programming AVRs using CircuitPython](https://learn.adafruit.com/stand-alone-programming-avrs-using-circuitpython.md)
- [Protect Your Online Accounts with Strong Passwords & Password Managers](https://learn.adafruit.com/protect-your-social-media-online-accounts-with-a-strong-password-manager.md)
---
# Source: https://learn.adafruit.com/usb-dc-and-solar-lipoly-charger.md
# USB, DC & Solar Lipoly Charger
## Overview
Make your projects to go green this summer with our specialized USB/Solar Lithium Ion Polymer Battery charger! This charger is a very unique design, perfect for outdoor projects, or DIY iPod chargers. We've spent over a year testing and tinkering with this charger to come up with a plug and play solution to charging batteries with the sun and we're really pleased with what we ended up with.
Easy to use! [Pick up any of our many 3.7V/4.2V LiIon batteries](http://www.adafruit.com/category/44), and a [6V solar panel](http://www.adafruit.com/category/67). Plug the battery into the **BATT** port using a 2-pin JST cable and the solar panel into the DC jack. Put the solar panel outside (and keep the battery out of the sun, it needs to be kept shaded!) to start charging. You can power another project like a Mintyboost at the same time by connecting to the **LOAD** output port
- **3.7V/4.2V Lithium Ion or Lithium Polymer battery charger**
- **Charge with 5-6V DC, USB or 6V solar panel!**
- **Too dark out?** Use a [USB mini-B cable](http://www.adafruit.com/products/260) or a [5V DC adapter](http://www.adafruit.com/products/276)
- **Automatic charging current tracking for high efficiency use of any wattage solar panel**
- **Use any 6V solar panel ** (6V seems to work best, 5.5V may work, 5V does not work)
- **Three color indicator LEDs ** - Power good, Charging and Done
- **Low Battery Indicator ** (fixed at 3.1V) with LED output on (labeled CHRG)
- **Set for 500mA max charge rate** , can be adjusted from 50mA up to 1A by soldering in a resistor
- **Will always draw the most current possible from a solar cell** - up to the max charge rate!
- **Smart load sharing** automatically uses the input power when available, to keep battery from constantly charging/discharging
- **Temperature monitoring ** of battery by [soldering in a 10K NTC thermistor](http://www.adafruit.com/products/372) (not included) - suggested for outdoor projects where the battery may get hot (50°C) or cold (0°C).


- [Next Page](https://learn.adafruit.com/usb-dc-and-solar-lipoly-charger/faq.md)
## Featured Products
### Lithium Ion Battery Pack - 3.7V 4400mAh
[Lithium Ion Battery Pack - 3.7V 4400mAh](https://www.adafruit.com/product/354)
Need a big battery for your project? This lithium-ion pack is made of 2 balanced 2200mAh cells for a total of 4400mA capacity! The cells are connected in parallel and spot-welded to a protection circuit that provides over-voltage, under-voltage, and over-current protection.
Each cell can...
In Stock
[Buy Now](https://www.adafruit.com/product/354)
[Related Guides to the Product](https://learn.adafruit.com/products/354/guides)
### USB / DC / Solar Lithium Ion/Polymer charger
[USB / DC / Solar Lithium Ion/Polymer charger](https://www.adafruit.com/product/390)
Make your projects to go green this summer with our specialized USB/Solar Lithium Ion Polymer Battery charger! This charger is a very unique design, perfect for outdoor projects, or DIY iPod chargers. We've spent over a year testing and tinkering with this charger to come up with a plug...
In Stock
[Buy Now](https://www.adafruit.com/product/390)
[Related Guides to the Product](https://learn.adafruit.com/products/390/guides)
### Lithium Ion Polymer Battery - 3.7v 1200mAh
[Lithium Ion Polymer Battery - 3.7v 1200mAh](https://www.adafruit.com/product/258)
Lithium-ion polymer (also known as 'lipo' or 'lipoly') batteries are thin, light, and powerful. The output ranges from 4.2V when completely charged to 3.7V. This battery has a capacity of 1200mAh for a total of about 4.5 Wh. If you need a larger battery,
In Stock
[Buy Now](https://www.adafruit.com/product/258)
[Related Guides to the Product](https://learn.adafruit.com/products/258/guides)
### Male DC Power adapter - 2.1mm plug to screw terminal block
[Male DC Power adapter - 2.1mm plug to screw terminal block](https://www.adafruit.com/product/369)
If you need to connect a battery pack or wired power supply to a board that has a DC jack - this adapter will come in very handy! There is a 2.1mm DC plug on one end, and a screw terminal block on the other. The terminals are labeled with positive/negative assuming a positive-tip configuration...
In Stock
[Buy Now](https://www.adafruit.com/product/369)
[Related Guides to the Product](https://learn.adafruit.com/products/369/guides)
### MintyBoost Kit
[MintyBoost Kit](https://www.adafruit.com/product/14)
The world's first and only open-source hardware charger: The MintyBoost®!
**New version!** Works with the new iPhone 4 & 5 and more! **Please review the [Minty Boost project page(s)](//learn.adafruit.com/minty-boost) before purchase and...**
No Longer Stocked
[Buy Now](https://www.adafruit.com/product/14)
[Related Guides to the Product](https://learn.adafruit.com/products/14/guides)
### 10K Precision Epoxy Thermistor
[10K Precision Epoxy Thermistor](https://www.adafruit.com/product/372)
Need to measure something damp? This epoxy-coated precision 1% 10K thermistor is an inexpensive way to measure temperature in weather or liquids. The resistance in 25 °C is 10K (+- 1%). The resistance goes down as it gets warmer and goes up as it gets cooler.
In Stock
[Buy Now](https://www.adafruit.com/product/372)
[Related Guides to the Product](https://learn.adafruit.com/products/372/guides)
### Large 6V 3.7W Solar Panel
[Large 6V 3.7W Solar Panel](https://www.adafruit.com/product/417)
Harness even more power from the sun with this nice big solar panel. We had these custom made for us when customers let us know they needed more than what our 2W panel could provide. This panel is a 12-cell (6V) assembly mounted onto a fiberglass PCB and covered with PET plastic which protects...
No Longer Stocked
[Buy Now](https://www.adafruit.com/product/417)
[Related Guides to the Product](https://learn.adafruit.com/products/417/guides)
### Large 6V 3.5W Solar panel
[Large 6V 3.5W Solar panel](https://www.adafruit.com/product/500)
These panels come to us from Voltaic Systems, makers of fine solar-powered bags and packs. These are waterproof, scratch resistant, and UV resistant. They use a high efficiency monocrystalline cell. They output 6V at 530 mA via 3.5mm x 1.1mm DC jack connector - a nice upgrade to the 2W panels...
Out of Stock
[Buy Now](https://www.adafruit.com/product/500)
[Related Guides to the Product](https://learn.adafruit.com/products/500/guides)
## Related Guides
- [Collin's Lab: Solar](https://learn.adafruit.com/collins-lab-solar.md)
- [Compost Friend!](https://learn.adafruit.com/compost-optimization-machine.md)
- [Portable Solar Charging Tracker](https://learn.adafruit.com/portable-solar-charging-tracker.md)
- [Mailbox Notification Service](https://learn.adafruit.com/mailbox-notification-service.md)
- [Solar Charging Handbag](https://learn.adafruit.com/solar-charging-handbag.md)
- [Solar Boost Bag](https://learn.adafruit.com/solar-boost-bag.md)
- [Adafruit MCP4728 I2C Quad DAC](https://learn.adafruit.com/adafruit-mcp4728-i2c-quad-dac.md)
- [Adafruit LiIon or LiPoly Charger BFF Add-On for QT Py](https://learn.adafruit.com/adafruit-qt-py-charger-bff.md)
- [Adafruit TPS61169 Constant Current Boost Converter for LEDs](https://learn.adafruit.com/adafruit-tps61169-constant-current-boost-converter-for-leds.md)
- [Adafruit MAX17048 LiPoly / LiIon Fuel Gauge and Battery Monitor](https://learn.adafruit.com/adafruit-max17048-lipoly-liion-fuel-gauge-and-battery-monitor.md)
- [Magical Light-up Dreidel](https://learn.adafruit.com/magical-light-up-dreidel.md)
- [Adafruit USB Type C Power Delivery Switchable Breakout](https://learn.adafruit.com/adafruit-usb-type-c-power-delivery-switchable-breakout.md)
- [Controlling Devices with RFID Wiz](https://learn.adafruit.com/controlling-devices-with-rfid-wiz.md)
- [Adafruit INA23x DC Current Voltage Power Monitor](https://learn.adafruit.com/adafruit-ina237-dc-current-voltage-power-monitor.md)
- [Adafruit TPL5110 Power Timer Breakout](https://learn.adafruit.com/adafruit-tpl5110-power-timer-breakout.md)
---
# Source: https://learn.adafruit.com/barcode-scanner/usb-interfacing.md
# Barcode Scanner
## USB Interfacing
We like USB best for business/work usage because it has power and data and is fairly simple to use. USB can act in two modes:
- HID **keyboard** mode
- HID **raw data** mode
As you can imagine, keyboard mode the scanner shows up just as a keyboard and when you scan a barcode it 'types it in' to whatever window you're currently viewing. This is the default mode and its very easy to test and get started.
However, it requires that the user always has the right window up and in the right location for data-entry. For programs with windows, this is a little tough because dialog boxes can pop-up and its easy to click in the wrong place. We like using the raw data mode although its a little tougher to use. In this mode, we literally open up the raw USB connection to the scanner and grab the barcode data directly. This means we can run our scanner software in the background
Neither need drivers for any operating system which is handy.
**[For more details on raw USB connections, check out our Kinect hacking tutorial](http://learn.adafruit.com/hacking-the-kinect "Link: http://learn.adafruit.com/hacking-the-kinect")**
[Our code is adapted from this Wiimote project to read Wiimotes accelerometer/sensor data](http://pywiimote.googlecode.com/) . We only ported the windows part - hopefully someone who is inspired will port the mac/linux version.
You can download our code from our GitHub repo, see the Downloads section below.
Install Python 2.5, win32file and any other extras you need. Plug in your scanner, open up a command line and run **python test.py** in the uncompressed folder

- [Previous Page](https://learn.adafruit.com/barcode-scanner/configure.md)
- [Next Page](https://learn.adafruit.com/barcode-scanner/stand.md)
## Related Guides
- [Digital Shipping Scales](https://learn.adafruit.com/digital-shipping-scales.md)
---
# Source: https://learn.adafruit.com/usb-next-keyboard-with-arduino-micro.md
# USB NeXT Keyboard with an Arduino Micro
## Overview


Ladyada and pt had an old [NeXT](http://en.wikipedia.org/wiki/NeXT "Link: http://en.wikipedia.org/wiki/NeXT") keyboard with a strong desire to get it running on a modern computer. These keyboards are durable, super clicky, and very satisfying to use! However, they are very old designs, specifically made for NeXT hardware, pre-ADB and pre-USB! That means you can't just plug the keyboard into an ADB or PS/2 port or PS/2 to USB converter (even though it looks similar). In fact, I have no idea what the protocol or pinout is named, so we'll just call it "non-ADB NeXT Keyboard"
There is no existing adapter for sale, and no code out there for getting these working, so we spent a few days and with a little research we got it working perfectly using an Arduino Micro as the go between. Now this lovely black deck works like any other USB keyboard. Sure it weighs more than our Macbook, but its worth it!

This project is for people with a little soldering and Arduino experience - we'll assume you've built some electronics before and have installed & uploaded code to an Arduino. If you haven't, check out many of the tutorials here at learn.adafruit.com for tons of ideas for practice!
- [Next Page](https://learn.adafruit.com/usb-next-keyboard-with-arduino-micro/parts.md)
## Featured Products
### Arduino Micro without Headers - 5V 16MHz ATmega32u4 - Assembled
[Arduino Micro without Headers - 5V 16MHz ATmega32u4 - Assembled](https://www.adafruit.com/product/1315)
Squee! It's the cutest, tiniest little Arduino yet! The Arduino Micro packs all of the power of the Arduino Leonardo in a 1.9" x 0.7" (48mm x 18mm) size. Although it may look like a stick of gum, its actually a USB-native 8-bit microcontroller, with 32K of flash, and 2.5K of RAM....
No Longer Stocked
[Buy Now](https://www.adafruit.com/product/1315)
[Related Guides to the Product](https://learn.adafruit.com/products/1315/guides)
### Arduino Micro with Headers - 5V 16MHz - (ATmega32u4 - assembled)
[Arduino Micro with Headers - 5V 16MHz - (ATmega32u4 - assembled)](https://www.adafruit.com/product/1086)
_Squee_! It's the cutest, tiniest little Arduino yet! The Arduino Micro packs all of the power of the Arduino Leonardo in a 1.9" x 0.7" (48mm x 18mm) size. Although it may look like a stick of gum, its actually a USB-native 8-bit microcontroller, with 32K of flash, and...
No Longer Stocked
[Buy Now](https://www.adafruit.com/product/1086)
[Related Guides to the Product](https://learn.adafruit.com/products/1086/guides)
### Altoids Gum sized tin
[Altoids Gum sized tin](https://www.adafruit.com/product/16)
Ever since Altoids discontinued the Gum version, its been hard to get tins. So we went and got a whole mess of them custom made! These tins are exactly the same shape and size as the old Altoids gum tins but they are blank and we got the bottom flattened instead of rounded (so it fits things...
In Stock
[Buy Now](https://www.adafruit.com/product/16)
[Related Guides to the Product](https://learn.adafruit.com/products/16/guides)
### USB cable - USB A to Micro-B
[USB cable - USB A to Micro-B](https://www.adafruit.com/product/592)
This here is your standard A to micro-B USB cable, for USB 1.1 or 2.0. Perfect for connecting a PC to your Metro, Feather, Raspberry Pi or other dev-board or microcontroller
Approximately 3 feet / 1 meter long
In Stock
[Buy Now](https://www.adafruit.com/product/592)
[Related Guides to the Product](https://learn.adafruit.com/products/592/guides)
## Related Guides
- [Adafruit PCA9546 4-Channel I2C Multiplexer](https://learn.adafruit.com/adafruit-pca9546-4-channel-i2c-multiplexer.md)
- [Blinking an LED with the Zephyr RTOS](https://learn.adafruit.com/blinking-led-with-zephyr-rtos.md)
- [Qualia S3 Fireplace](https://learn.adafruit.com/qualia-s3-fireplace.md)
- [Arduino GPS Clock](https://learn.adafruit.com/arduino-clock.md)
- [Adafruit 4-Channel ADC Breakouts](https://learn.adafruit.com/adafruit-4-channel-adc-breakouts.md)
- [Reverse Geocache Box](https://learn.adafruit.com/reverse-geocache-engagement-box.md)
- [ESPHole Ad Blocker](https://learn.adafruit.com/esphole-ad-blocker.md)
- [Adafruit QT Py and NeoPixel LEDs](https://learn.adafruit.com/qt-py-and-neopixel-leds.md)
- [The Pixif](https://learn.adafruit.com/the-pixif.md)
- [Quickstart IoT - Raspberry Pi Pico RP2040 with WiFi ](https://learn.adafruit.com/quickstart-rp2040-pico-with-wifi-and-circuitpython.md)
- [Atmega32u4 Breakout](https://learn.adafruit.com/atmega32u4-breakout.md)
- [Introducing Adafruit ItsyBitsy M4](https://learn.adafruit.com/introducing-adafruit-itsybitsy-m4.md)
- [Adafruit Metro M7 with microSD](https://learn.adafruit.com/adafruit-metro-m7-microsd.md)
- [Adafruit Infrared IR Remote Receiver](https://learn.adafruit.com/adafruit-infrared-ir-remote-receiver.md)
- [Adafruit Feather M4 CAN Express](https://learn.adafruit.com/adafruit-feather-m4-can-express.md)
---
# Source: https://learn.adafruit.com/usb-snes-gamepad.md
# USB SNES Gamepad
## Overview
This project tutorial will show you how you can convert a console game pad into a USB keyboard mouse for playing games on your PC. The USB game pad can be used with nearly any software, such as a MAME emulator, game, simulation software, or for custom user interfaces.
We'll start by turning the buttons of the game pad into keyboard buttons, so that pressing 'up' is converted into the 'U' key, for example. The firmware is easily adaptable, so you can adjust it for whatever software it will be used with.
Then we'll make the project more interesting by adding an accelerometer. This will allow the game pad to be used as a mouse by tilting it!
This tutorial including the original code and Portal video is by [Devlin Thyne](http://thyne.net/)! Rock!

## What you'll need:
You'll need the following in order to build the project:
- [Game Pad Controller](http://www.adafruit.com/products/131) - We'll be using an SNES Controller
- [Teensy](http://www.adafruit.com/products/199) - This is a very small microcontroller board that can act as a keyboard/mouse
- [Triple-axis accelerometer](http://www.adafruit.com/products/163) - We'll be using the nice ADXL335 on a breakout board. You can skip this if you're not planning to add in the mouse capability
- [USB cable with mini-b connector](http://www.adafruit.com/products/260) - to attach to the Teensy for plugging into a computer!
- Ribbon cable - for all the soldering connections. Rainbow cable is the easiest to work with as its color coded
**If you want to build the entire project, [we have a project pack in the shop with all the parts listed above!](http://www.adafruit.com/products/241)**
You'll also need some basic hand tools such as screwdrivers, wire strippers, [soldering iron](http://www.adafruit.com/products/180), [solder](http://www.adafruit.com/products/145), [diagonal cutters](http://www.adafruit.com/products/152), vise or third hand tool, etc.
[All the code is on GitHub, including some extra sketches we've written](https://github.com/adafruit/Adafruit_Learning_System_Guides/tree/master/USB_SNES_Gamepad) so be sure to look there!
- [Next Page](https://learn.adafruit.com/usb-snes-gamepad/disassemble-the-snes-controller.md)
## Featured Products
### SNES Controller
[SNES Controller](https://www.adafruit.com/product/131)
A third-party SNES (Super Nintendo/Famicom) controller. Works great with Fuzeboxen as well!
No Longer Stocked
[Buy Now](https://www.adafruit.com/product/131)
[Related Guides to the Product](https://learn.adafruit.com/products/131/guides)
### ADXL335 - 5V ready triple-axis accelerometer (+-3g analog out)
[ADXL335 - 5V ready triple-axis accelerometer (+-3g analog out)](https://www.adafruit.com/product/163)
We've updated our favorite triple-axis accelerometer to now have an on-board 3.3V regulator - making it a perfect choice for interfacing with a 5V microcontroller such as the Arduino. This breakout comes with 3 analog outputs for X, Y and Z axis measurements on a 0.75"x0.75"...
In Stock
[Buy Now](https://www.adafruit.com/product/163)
[Related Guides to the Product](https://learn.adafruit.com/products/163/guides)
### USB cable - A/MiniB
[USB cable - A/MiniB](https://www.adafruit.com/product/260)
This here is your standard A-miniB USB cable, for USB 1.1 or 2.0. Perfect for connecting a PC to your Teensy v2, USB Lipo charger w/Mini B connector, among other things.
Approximately 3 feet / 1 meter long
Color may vary!
No Longer Stocked
[Buy Now](https://www.adafruit.com/product/260)
[Related Guides to the Product](https://learn.adafruit.com/products/260/guides)
### Teensy (ATmega32u4 USB dev board) 2.0
[Teensy (ATmega32u4 USB dev board) 2.0](https://www.adafruit.com/product/199)
Discontinued - **you can grab** [Adafruit ItsyBitsy 32u4 - 5V 16MHz](https://www.adafruit.com/product/3677) **instead!**
The Teensy 2.0 is a complete USB-based microcontoller development system, in a very small footprint! All programming is done via the USB port. No...
No Longer Stocked
[Buy Now](https://www.adafruit.com/product/199)
[Related Guides to the Product](https://learn.adafruit.com/products/199/guides)
### Premium Female/Male 'Extension' Jumper Wires - 20 x 6"
[Premium Female/Male 'Extension' Jumper Wires - 20 x 6"](https://www.adafruit.com/product/1954)
These Female/Male Extension jumper wires are handy for making wire harnesses or jumpering between headers on PCB's. These premium jumper wires are 6" (150mm) long and come in a 'strip' of 20 (2 pieces of each of ten rainbow colors). They have 0.1" male header...
In Stock
[Buy Now](https://www.adafruit.com/product/1954)
[Related Guides to the Product](https://learn.adafruit.com/products/1954/guides)
## Related Guides
- [Adafruit Analog Accelerometer Breakouts](https://learn.adafruit.com/adafruit-analog-accelerometer-breakouts.md)
- [HID Reporter](https://learn.adafruit.com/hid-reporter.md)
- [Gravatars: What they are and how to add or change one](https://learn.adafruit.com/gravatars-what-they-are-and-how-to-add-or-change-one.md)
- [Two Player Game System for PyGamer and RFM69HCW Radio Wing](https://learn.adafruit.com/two-player-game-system-for-pygamer-and-rfm69hcw-radio-wing.md)
- [PyPortal 2FA TOTP Authentication Friend](https://learn.adafruit.com/pyportal-2fa-totp-authentication-friend.md)
- [Dragon Drop: a CircuitPython Game for MacroPad](https://learn.adafruit.com/dragon-drop-a-circuitpython-game-for-macropad.md)
- [NeoTrellis M4 Animated Dice Roller](https://learn.adafruit.com/neotrellis-dice.md)
- [Instagram Photo Frame](https://learn.adafruit.com/instagram-photo-frame.md)
- [BlueLive: Livestream Studio switcher controller](https://learn.adafruit.com/bluelive.md)
- [DIY Turbo Button Controller - HID Remapper](https://learn.adafruit.com/diy-turbo-button-controller-hid-remapper.md)
- [ESP32 PlayStation Controller](https://learn.adafruit.com/esp32-playstation-controller.md)
- [Fruit Jam Chyron](https://learn.adafruit.com/fruit-jam-chyron.md)
- [Custom Color Palettes for MakeCode Arcade Games](https://learn.adafruit.com/custom-color-palettes-for-makecode-arcade-games.md)
- [DIY Welded Bike Stand](https://learn.adafruit.com/diy-welded-bike-stand.md)
- [CircuitPython Stage game library](https://learn.adafruit.com/circuitpython-stage-game-library.md)
---
# Source: https://learn.adafruit.com/biometric-security-box/use-it.md
# Source: https://learn.adafruit.com/adafruit-motor-shield/use-it.md
# Source: https://learn.adafruit.com/babel-fish/use-it.md
# Source: https://learn.adafruit.com/internet-of-things-printer/use-it.md
# Internet of Things Printer
## Use It!
- Attach Ethernet and power cables to the back of the unit. The other ends should be connected to your network router and the included DC power adapter, respectively.
- Install a roll of thermal receipt paper in the printer. This is accessed by pulling up the lever to the left side of the paper slot. Install the paper to unroll "underhand" as it passes up through the slot.

- Press the power button on top — it's somewhat recessed and you'll need to press it in with a fingertip. If everything is working correctly, the green power light should pulse, then shine steadily during network access, and then the most recent Adafruit Tweet will be printed.
- Once per minute, the printer will contact the Twitter server and print any new Tweets.
## Other IoT Printer Software
- The [Internet of Things Assistant](http://newsinternational.github.com/iot-assistant/ "Link: http://newsinternational.github.com/iot-assistant/") is a self-hosted Ruby on Rails-based application that turns your IoT Printer into a handy assistant that will print out snippets of information you tell it to at a certain time of day. For example you could set it to print your unread emails, calendar, and recent tweets at 8am.
- [Previous Page](https://learn.adafruit.com/internet-of-things-printer/program-arduino.md)
- [Next Page](https://learn.adafruit.com/internet-of-things-printer/troubleshooting.md)
## Primary Products
### Adafruit IoT Printer Project Pack "Internet of Things" printer
[Adafruit IoT Printer Project Pack "Internet of Things" printer](https://www.adafruit.com/product/717)
Build an "Internet of Things" connected mini printer that will do your bidding! This is a fun weekend project that comes with a beautiful laser cut case. Once assembled, the little printer connects to Ethernet to get Internet data for printing onto 2 1/4" wide receipt paper. The example sketch...
No Longer Stocked
[Buy Now](https://www.adafruit.com/product/717)
[Related Guides to the Product](https://learn.adafruit.com/products/717/guides)
## Featured Products
### Mini Thermal Receipt Printer
[Mini Thermal Receipt Printer](https://www.adafruit.com/product/597)
Add a mini printer to any microcontroller project with this very cute thermal printer. Thermal printers are also known as receipt printers, they're what you get when you go to the ATM or grocery store. Now you can embed a little printer of your own into an enclosure. This printer is ideal...
No Longer Stocked
[Buy Now](https://www.adafruit.com/product/597)
[Related Guides to the Product](https://learn.adafruit.com/products/597/guides)
### Thermal paper roll - 50' long, 2.25" wide
[Thermal paper roll - 50' long, 2.25" wide](https://www.adafruit.com/product/599)
A mini roll of thermal paper, this fits very nicely into our mini thermal printer. 2.25" wide (about 57mm) and 50 feet long (15 meters). BPA-free.
[Perfect for use with our mini thermal printer!](http://www.adafruit.com/products/597)
No Longer Stocked
[Buy Now](https://www.adafruit.com/product/599)
[Related Guides to the Product](https://learn.adafruit.com/products/599/guides)
### Adafruit METRO 328 - Arduino Compatible - with Headers
[Adafruit METRO 328 - Arduino Compatible - with Headers](https://www.adafruit.com/product/2488)
This is the **Adafruit METRO Arduino-Compatible - with headers. ** It's a fully assembled and tested microcontroller and physical computing board with through-hole headers attached. If you don't want a Metro with the headers attached for...
In Stock
[Buy Now](https://www.adafruit.com/product/2488)
[Related Guides to the Product](https://learn.adafruit.com/products/2488/guides)
### Ethernet Shield for Arduino - W5500 Chipset
[Ethernet Shield for Arduino - W5500 Chipset](https://www.adafruit.com/product/2971)
The W5500 Ethernet Shield for Arduino from Seeed Studio is a great way to set up your projects with internet connectivity with just a single chip. Similar to the[Arduino Ethernet Shield](https://www.adafruit.com/product/201), but with a newer chipset, this ethernet shield...
No Longer Stocked
[Buy Now](https://www.adafruit.com/product/2971)
[Related Guides to the Product](https://learn.adafruit.com/products/2971/guides)
### FTDI Friend with Micro USB Port + extras
[FTDI Friend with Micro USB Port + extras](https://www.adafruit.com/product/284)
Long gone are the days of parallel ports and serial ports. Now the USB port reigns supreme! But USB is hard, and you just want to transfer your every-day serial data from a microcontroller to computer. What now? Enter the FTDI Friend!
The FTDI Friend is a tweaked out FTDI FT232RL chip...
In Stock
[Buy Now](https://www.adafruit.com/product/284)
[Related Guides to the Product](https://learn.adafruit.com/products/284/guides)
### Rugged Metal On/Off Switch with Green LED Ring
[Rugged Metal On/Off Switch with Green LED Ring](https://www.adafruit.com/product/482)
These chrome-plated metal buttons are rugged and look real good while doing it! Simply drill a 16mm hole into any material up to 1/2" thick and you can fit these in place, there's even a rubber gasket to keep water out of the enclosure. On the front of the button is a flat metal...
In Stock
[Buy Now](https://www.adafruit.com/product/482)
[Related Guides to the Product](https://learn.adafruit.com/products/482/guides)
### Arduino Ethernet shield R3 with micro SD connector - Assembled
[Arduino Ethernet shield R3 with micro SD connector - Assembled](https://www.adafruit.com/product/201)
The Arduino Ethernet Shield R3 (assembled) allows an Arduino board to connect to the internet. It is based on the Wiznet W5100 ethernet chip (datasheet). The Wiznet W5100 provides a network (IP) stack capable of both TCP and UDP. It supports up to four simultaneous socket connections. Use the...
No Longer Stocked
[Buy Now](https://www.adafruit.com/product/201)
[Related Guides to the Product](https://learn.adafruit.com/products/201/guides)
### Arduino Uno Ethernet
[Arduino Uno Ethernet](https://www.adafruit.com/product/418)
**As of 9/20/2012 Adafruit is currently shipping R3 of the Arduino Uno Ethernet**
Deep in the Swiss Alps, the top secret Arduino Super-collider has accelerated both an [Arduino UNO](https://www.adafruit.com/products/50) and
No Longer Stocked
[Buy Now](https://www.adafruit.com/product/418)
[Related Guides to the Product](https://learn.adafruit.com/products/418/guides)
## Related Guides
- [Mystery Box: NeoMatrix Mk I](https://learn.adafruit.com/mystery-box-neomatrix-mk-i.md)
- [A Z80 CP/M emulator for the SAMD51](https://learn.adafruit.com/z80-cpm-emulator-for-the-samd51-grand-central.md)
- [Echo 2-XL](https://learn.adafruit.com/echo-2-xl.md)
- [DC & USB Boarduino Kits](https://learn.adafruit.com/boarduino-kits.md)
- [Portable Solar Charging Tracker](https://learn.adafruit.com/portable-solar-charging-tracker.md)
- [Ladyada's Learn Arduino - Lesson #2](https://learn.adafruit.com/ladyadas-learn-arduino-lesson-number-2.md)
- [Motorized Camera Slider MK3 ](https://learn.adafruit.com/motorized-camera-slider-mk3.md)
- [Adafruit VCNL4040 Proximity Sensor](https://learn.adafruit.com/adafruit-vcnl4040-proximity-sensor.md)
- [Ladyada's Learn Arduino - Lesson #1](https://learn.adafruit.com/ladyadas-learn-arduino-lesson-number-1.md)
- [Trinket / Gemma IR Control](https://learn.adafruit.com/trinket-gemma-ir-remote-control.md)
- [Adafruit HUZZAH32 – ESP32 Breakout Board](https://learn.adafruit.com/huzzah32-esp32-breakout-board.md)
- [Adafruit HUZZAH ESP8266 breakout](https://learn.adafruit.com/adafruit-huzzah-esp8266-breakout.md)
- [FTDI Friend](https://learn.adafruit.com/ftdi-friend.md)
- [Ladyada's Learn Arduino - Lesson #0](https://learn.adafruit.com/ladyadas-learn-arduino-lesson-number-0.md)
- [IR Sensor](https://learn.adafruit.com/ir-sensor.md)
---
# Source: https://learn.adafruit.com/webide/use.md
# Adafruit WebIDE
## Using the WebIDE
Danger:
The Adafruit Learning System Raspberry Pi WebIDE is packed with neat features. Many of which aren't all that obvious. Here is a running list of all of those features, and how they work.
Danger:
[https://github.com/adafruit/Adafruit-WebIDE/issues](https://github.com/adafruit/Adafruit-WebIDE/issues)
When you first load up the WebIDE for the first time, you should see something similar to what you see above (click on the image to view it in its full size).
1. Here is where you can view your editor settings.
2. Here is a list of all of your repositories. The Adafruit Raspberry Pi Python Code repository ([https://github.com/adafruit/Adafruit-Raspberry-Pi-Python-Code.git](https://github.com/adafruit/Adafruit-Raspberry-Pi-Python-Code.git)) is automatically cloned into your Bitbucket account. We have also created a my-pi-projects repository. If it has the little folder icon, that means there are files contained within. If it has an arrow icon, that means it is a file that can be viewed in the WebIDE.
3. Click here to clone a repository from Github or Bitbucket. Follow the instructions in the popup.
4. No matter where you are in the WebIDE, there will always be a terminal button. Click this to talk directly to your Raspberry Pi, or do things like install libraries without leaving the WebIDE. Handy!
5. When you first log in (or refresh your WebIDE in your browser), you will be greeted with a nice message. Read this for any news on the WebIDE.

When you view any of the included code examples from Adafruit, there are a couple unique items.
1. As with any piece of code, you can simply click the Run button to execute the code on your Raspberry Pi. The terminal will automatically open when you click Run.
2. The Adafruit code is read only, but you can easily copy this code to your my-pi-projects repository. Just click this link and it will automatically copy the folder, and all of its contents over.

Once you have copied, imported, or created code from scratch in your my-pi-projects (or other repository), this is the screen you will see.
1. If you want to create a new file, press this button, and name your file (make sure to add a proper file type, like .py to the end of your name, otherwise the editor won't know what to do with it). Then click save to add your new file to the current folder.
2. You can also upload a premade file. Once again, make sure it is named properly before importing. You can also import images to the folder (and view those images right in the IDE).
3. Make sure to click save after making any changes to code. This will then update the files in your Bitbucket account.

Renaming and deleting files is easy!
1. Just right click on any of the files that you want to change and the following box will pop up. Click delete to permanently delete that file. If you click rename, you will be asked what name you want the file to change to. Make the change, then click save.

In the upper right of the WebIDE, you will see this.
1. If it is green, and says 'Connected', that means the WebIDE is communicating with your Raspberry Pi. If it is disconnected, the WebIDE will keep trying to make contact with your Pi for awhile, then it will finally give up. It will then ask you to reconnect your Pi, and refresh the browser.
2. You can log out of your Bitbucket account at any time by clicking Log out.
What isn't shown in the image above is our auto-update feature. If we push out a new update for the WebIDE, you will see it pop up between 'Connected' and 'Log out'. Simply click the link, sit back, and the WebIDE will automatically download, unpack, install, restart your Raspberry Pi, and even refresh your browser for you. It doesn't get any easier than that.
In order to see if there are updates available, refresh your browser every day.
Once the WebIDE is installed, you can shutdown (shutdown -h now) or restart (shutdown -r now) your Pi anytime. The next time you want to use it, just start your Pi, and reload **raspberrypi.local** to log back into the WebIDE. - [Previous Page](https://learn.adafruit.com/webide/getting-started.md)
- [Next Page](https://learn.adafruit.com/webide/using-the-debugger.md)
## Featured Products
### Raspberry Pi Model B 512MB RAM
[Raspberry Pi Model B 512MB RAM](https://www.adafruit.com/product/998)
Adafruit ships the **Raspberry Pi Model B 512MB RAM** as of 10/18/2012.
The Raspberry Pi® is a single-board computer developed in the UK by the Raspberry Pi Foundation with the intention of stimulating the teaching of basic computer science in schools. The Raspberry...
No Longer Stocked
[Buy Now](https://www.adafruit.com/product/998)
[Related Guides to the Product](https://learn.adafruit.com/products/998/guides)
### BeagleBone Black - Rev B
[BeagleBone Black - Rev B](https://www.adafruit.com/product/1278)
**[Adafruit is no longer shipping the BeagleBone Black Rev B, it has been replaced with the Rev C as of 5/12/14](https://www.adafruit.com/products/1876) - the Rev C now has 4G flash and also comes with Debian, it also costs slightly more. There are no exchanges or...**
No Longer Stocked
[Buy Now](https://www.adafruit.com/product/1278)
[Related Guides to the Product](https://learn.adafruit.com/products/1278/guides)
### Adafruit Pi Box - Enclosure for Raspberry Pi Model A or B
[Adafruit Pi Box - Enclosure for Raspberry Pi Model A or B](https://www.adafruit.com/product/859)
**Discontinued** - you can grab [Adafruit Pi Box Plus - Enclosure for RasPi Model B+/Pi 2/ Pi 3](https://www.adafruit.com/product/1985) instead!
**We're still selling this classic Adafruit case for those who specifically want it but **
No Longer Stocked
[Buy Now](https://www.adafruit.com/product/859)
[Related Guides to the Product](https://learn.adafruit.com/products/859/guides)
### Miniature WiFi (802.11b/g/n) Module: For Raspberry Pi and more
[Miniature WiFi (802.11b/g/n) Module: For Raspberry Pi and more](https://www.adafruit.com/product/814)
Make your Internet of Things device cable-free by adding WiFi. Take advantage of the Raspberry Pi and Beagle Bone's USB port to add a low cost, but high-reliability wireless link. We tried half a dozen modules to find one that works well with the Pi and Bone without the need of recompiling...
No Longer Stocked
[Buy Now](https://www.adafruit.com/product/814)
[Related Guides to the Product](https://learn.adafruit.com/products/814/guides)
## Related Guides
- [Trellis Python Library](https://learn.adafruit.com/trellis-python-library.md)
- [Adafruit DVI Sock for Pico](https://learn.adafruit.com/adafruit-dvi-sock-for-pico.md)
- [Introducing Adafruit ItsyBitsy M4](https://learn.adafruit.com/introducing-adafruit-itsybitsy-m4.md)
- [SMT Breadboard Prototyping Using Breakout PCBs](https://learn.adafruit.com/smt-prototyping-using-breakout-pcbs.md)
- [Getting Started with RTL-SDR and SDR-Sharp and CubicSDR](https://learn.adafruit.com/getting-started-with-rtl-sdr-and-sdr-sharp.md)
- [Adafruit STEMMA Reflective Photo Interrupt Sensor](https://learn.adafruit.com/adafruit-stemma-reflective-photo-interrupt-sensor.md)
- [Adafruit 9-DOF Orientation IMU Fusion Breakout - BNO085](https://learn.adafruit.com/adafruit-9-dof-orientation-imu-fusion-breakout-bno085.md)
- [Adafruit I2C to 8 Channel Solenoid Driver](https://learn.adafruit.com/adafruit-i2c-to-8-channel-solenoid-driver.md)
- [Controlling Motors using the Raspberry Pi and RasPiRobot Board V2](https://learn.adafruit.com/controlling-motors-using-the-raspberry-pi-and-raspirobot-board-v2.md)
- [Adafruit Feather 32u4 FONA](https://learn.adafruit.com/adafruit-feather-32u4-fona.md)
- [Adafruit Pi Stemma QT Breakout](https://learn.adafruit.com/adafruit-pi-stemma-qt-breakout.md)
- [Adafruit's Raspberry Pi Lesson 8. Using a Servo Motor](https://learn.adafruit.com/adafruits-raspberry-pi-lesson-8-using-a-servo-motor.md)
- [IoT Bird Feeder with Camera](https://learn.adafruit.com/iot-window-bird-feeder-with-camera.md)
- [Using the BMP085/180 with Raspberry Pi or Beaglebone Black](https://learn.adafruit.com/using-the-bmp085-with-raspberry-pi.md)
- [AR1100 Resistive Touch Screen Controller Guide](https://learn.adafruit.com/ar1100-resistive-touch-screen-controller-guide.md)
---
# Source: https://learn.adafruit.com/adafruit-prototyping-pi-plate/user-manual.md
# Adafruit Prototyping Pi Plate
## User Manual
Using the Prototyping Pi Plate is really easy and we designed to to be as simple as possible so it should work for any sort of Pi project. First up, keep in mind we did not add any extra power regulator systems or pin buffers. We did this because we wanted to keep the design simple and inexpensive: there's plenty of space to add any extra circuitry that you desire!
All the GPIO (General Purpose Input/Output) pins are broken in into two locations. The pins are connected to the 0.1" breakout pins as well as the terminal blocks. The pins are labeled by their 'names' if available and their GPIO # if not. [http://elinux.org/Rpi\_Low-level\_peripherals](http://elinux.org/Rpi_Low-level_peripherals "Link: http://elinux.org/Rpi\_Low-level\_peripherals") has a lot more details on what pins can be used for additional purposes (for example, the SPI pins can turn into GPIO's if desired.

The layout of the board is a mix between 'breadboard style' (top middle) - with two 'rails' down the center and then 5-pin connected rows along-side. This layout is familiar for anyone who has used a breadboard. The remaining holes are 'perf' style - no connection between them. This allows for more flexibility.
There's an SOIC breakout area in the bottom left, handy if you have an SOIC part you want to add. In the bottom right there's a 4-pin terminal block with 4 x 0.1" spaced pads right above it, these are for 'free wiring' - they aren't connected to any GPIO so useful if you want to simply connect some wires or sensors that don't go directly to a GPIO/power pin

We designed the plates so you can fit a ['tiny breadboard'](http://www.adafruit.com/products/65) on top and still see the pin labels on the breakouts. This makes it easy to do fast prototyping!

For more permanent projects, you can just place parts in and solder directly into the proto plate

The terminal blocks make it easy to connect to wires for installations. Simply use a small Phiiips or flathead to open up the block, insert a stranded or solid core wire, then tighten it down.
If you want have it inside a case, we suggest one of our[Adafruit Pi boxes](http://www.adafruit.com/products/859)(as long as the top is removed)

- [Previous Page](https://learn.adafruit.com/adafruit-prototyping-pi-plate/solder-it.md)
- [Next Page](https://learn.adafruit.com/adafruit-prototyping-pi-plate/downloads.md)
## Featured Products
### Raspberry Pi - Skill badge, iron-on patch
[Raspberry Pi - Skill badge, iron-on patch](https://www.adafruit.com/product/906)
You are learning to use the small Linux based board, the Raspberry Pi! Adafruit offers a fun and exciting "badges" of achievement for electronics, science and engineering. We believe everyone should be able to be rewarded for learning a useful skill, a badge is just one of the many...
In Stock
[Buy Now](https://www.adafruit.com/product/906)
[Related Guides to the Product](https://learn.adafruit.com/products/906/guides)
### Adafruit Pi Box - Enclosure for Raspberry Pi Model A or B
[Adafruit Pi Box - Enclosure for Raspberry Pi Model A or B](https://www.adafruit.com/product/859)
**Discontinued** - you can grab [Adafruit Pi Box Plus - Enclosure for RasPi Model B+/Pi 2/ Pi 3](https://www.adafruit.com/product/1985) instead!
**We're still selling this classic Adafruit case for those who specifically want it but **
No Longer Stocked
[Buy Now](https://www.adafruit.com/product/859)
[Related Guides to the Product](https://learn.adafruit.com/products/859/guides)
### Adafruit Prototyping Pi Plate Kit for Raspberry Pi
[Adafruit Prototyping Pi Plate Kit for Raspberry Pi](https://www.adafruit.com/product/801)
Now that you've finally got your hands on a [Raspberry Pi®](http://www.raspberrypi.org/), you're probably itching to make some fun embedded computer projects with it. What you need is an add on prototyping Pi Plate from Adafruit, which can snap onto the Pi PCB (and is...
No Longer Stocked
[Buy Now](https://www.adafruit.com/product/801)
[Related Guides to the Product](https://learn.adafruit.com/products/801/guides)
## Related Guides
- [Skill Badge Requirements: Raspberry Pi](https://learn.adafruit.com/skill-badge-requirements-raspberry-pi.md)
- [Adafruit Raspberry Pi Educational Linux Distro](https://learn.adafruit.com/adafruit-raspberry-pi-educational-linux-distro.md)
- [Internet of Things Printer for Raspberry Pi](https://learn.adafruit.com/pi-thermal-printer.md)
- [piBeacon - DIY Beacon with a Raspberry Pi](https://learn.adafruit.com/pibeacon-ibeacon-with-a-raspberry-pi.md)
- [Adafruit Shield Compatibility Guide](https://learn.adafruit.com/adafruit-shield-compatibility.md)
- [Adafruit Powerboost 1000 Basic](https://learn.adafruit.com/adafruit-powerboost-1000-basic.md)
- [3.5" PiTFT OctoPrint Rig](https://learn.adafruit.com/3-dot-5-pitft-octoprint-rig.md)
- [Wave Shield](https://learn.adafruit.com/adafruit-wave-shield-audio-shield-for-arduino.md)
- [How we designed an injection-molded case](https://learn.adafruit.com/how-we-designed-an-injection-molded-case-for-raspberry-pi.md)
- [Micro SD Card Breakout Board Tutorial](https://learn.adafruit.com/adafruit-micro-sd-breakout-board-card-tutorial.md)
- [Adafruit HX711 24-bit ADC](https://learn.adafruit.com/adafruit-hx711-24-bit-adc.md)
- [NextBus transit clock for Raspberry Pi](https://learn.adafruit.com/nextbus-transit-clock-for-raspberry-pi.md)
- [Adafruit LSM9DS0 Accelerometer + Gyro + Magnetometer 9-DOF Breakouts](https://learn.adafruit.com/adafruit-lsm9ds0-accelerometer-gyro-magnetometer-9-dof-breakouts.md)
- [Best Beginner Boards for Teachers](https://learn.adafruit.com/best-beginner-boards-for-teachers.md)
- [PM2.5 Air Quality Sensor](https://learn.adafruit.com/pm25-air-quality-sensor.md)
---
# Source: https://learn.adafruit.com/digital-shipping-scales/using-a-7010sb-scale.md
# Digital Shipping Scales
## Using a 7010SB Scale
Reading from the 7010SB is really easy, its just plain serial at 2400 baud 8N1 no flow control. The scale spits out data every 1/10 second so you just need to listen for the latest weight.
There are two possible formats for the data, one for each measurement scale. The second byte indicates what scale you are in.| | First | | | | | | | | | Last |
| --- | --- | --- | --- | --- | --- | --- | --- | --- | --- | --- |
| Lbs/Oz. | 0x02 | **0x0B** | 0x80 | 0x80 | lb1 | lb2 | lb3 | oz1 | oz2 | 0x0D |
| Grams | 0x02 | **0x0C** | 0x80 | 0x80 | g1 | g2 | g3 | g4 | g5 | 0x0D |
- **STX** character - Hex **0x02** , indicates "Start of TeXt"
- Scale indicator - Hex **0xB0** for lb/oz and **0xC0** for grams
- Hex 0x80 (placeholder)
- Hex 0x80 (placeholder)
- First character of weight, ascii format
- Second character of weight, ascii format
- Third character of weight, ascii format
- Fourth character of weight, ascii format - single Ounces in Lb/Oz weight
- Fifth character of weight, ascii format - 1/10th Ounces in Lb/Oz weight
- Finishing carriage return - Hex **0x0D**
For example, if we are weighing a box that is **1 lb 4.1 oz** this is the output:

Note that the weight shows up in **ascii** character format (so its **0x31 0x34 0x31 ** not **0x01 0x04 0x01** ) If you need to convert to raw number, just subtract hex 0x30
Grams is a little simpler since its metric. It weighs about 390 grams.

You can see the 390 (385-395 g.) printed out. There is no fractional/decimals.## Code Examples for the 7010SB
We like to use python for its cross-platform compatibility. You'll need to install **pySerial** extension to access the serial port. Under windows the **COM port ** will be whatever the USB adapter shows up as or **COM1** or **COM2** if using the built-in ports. For Macs/Linux check under **/dev/cu\* ** or **/dev/ttyusb** \* - or run **dmesg** after plugging in the adapter for hints about what the device is called.```
SERIALPORT = "COM1"
# this uses pySerial found here http://pyserial.sourceforge.net/
# it currently exists for python 2.5
import serialser = serial.Serial(SERIALPORT, 2400, timeout=1)
while True:
while True:x = ser.read()
if (ord(x) == 13):
breakstart = ord(ser.read()) # this is always 2 if the scale is on (i think - not totally sure what this is)
mode = ord(ser.read()) # 176 = oz/lbs #192 = grams
nonce1 = ord(ser.read())
nonce2 = ord(ser.read())
if start != 2 or nonce1 != 128 or nonce2 != 128:
continue
value0 = int(ser.read()) # only used for lbs * 10
value1 = int(ser.read())
value2 = int(ser.read())
value3 = int(ser.read())
value4 = int(ser.read())
if mode == 176: #oz
weight = ((value0 * 10 + value1) * 16) + (value2 * 10 + value3) + (value4 * 0.1)
unit = 'oz'
elif mode == 192: #grams
weight = value1 * 1000 + value2 * 100 + value3 * 10 + value4
unit = 'g'
print str(weight) + unit
ser.close(
```
- [Previous Page](https://learn.adafruit.com/digital-shipping-scales/smaller-scale-0-10-lb.md)
- [Next Page](https://learn.adafruit.com/digital-shipping-scales/larger-scales.md)
## Related Guides
- [Barcode Scanner](https://learn.adafruit.com/barcode-scanner.md)
---
# Source: https://learn.adafruit.com/dht/using-a-dhtxx-sensor-with-arduino.md
# DHT11, DHT22 and AM2302 Sensors
## Using a DHTxx Sensor with Arduino
To test the sketch, we'll use an Arduino. You can use any micrcontroller that can do microsecond timing, but since its a little tricky to code it up, we suggest verifying the wiring and sensor work with an Arduino to start.
You should have the [**Arduino IDE**](https://www.arduino.cc/en/Main/Software) software running at this time. Next it’s necessary to install our DHT library, which can be done though the Arduino Library Manager:
**Sketch→Include Library→Manage Libraries…**
Enter “ **dht** ” in the search field and look through the list for “ **DHT sensor library** by **Adafruit**.” Click the “Install” button, or “Update” from an earlier version.

**IMPORTANT:** As of version 1.3.0 of the DHT library you will also need to install the **Adafruit Unified Sensor** library, which is also available in the Arduino Library Manager:

Now load up the **Examples→DHT→DHTtester** sketch

If you're using a **DHT11** sensor, comment out the line that sets the type:```
//#define DHTTYPE DHT22 // DHT 22 (AM2302)
```
and uncomment the line that says:```
#define DHTTYPE DHT11 // DHT 11
```
This will make the data appear correctly for the correct sensor. Upload the sketch!
You should see the temperature and humidity. You can see changes by breathing onto the sensor (like you would to fog up a window) which should increase the humidity.You can add as many DHT sensors as you line on individual pins, just add new lines such as
`DHT dht2 = DHT(pin, type);`
below the declaration for the initial `dht` object, and you can reference the new `dht2` whenever you like.
- [Previous Page](https://learn.adafruit.com/dht/connecting-to-a-dhtxx-sensor.md)
- [Next Page](https://learn.adafruit.com/dht/dht-circuitpython-code.md)
## Featured Products
### DHT22 temperature-humidity sensor + extras
[DHT22 temperature-humidity sensor + extras](https://www.adafruit.com/product/385)
The DHT22 is a basic, low-cost digital temperature and humidity sensor. It uses a capacitive humidity sensor and a thermistor to measure the surrounding air and spits out a digital signal on the data pin (no analog input pins needed). It's fairly simple to use but requires careful timing...
No Longer Stocked
[Buy Now](https://www.adafruit.com/product/385)
[Related Guides to the Product](https://learn.adafruit.com/products/385/guides)
### DHT11 basic temperature-humidity sensor + extras
[DHT11 basic temperature-humidity sensor + extras](https://www.adafruit.com/product/386)
**Discontinued -** **you can grab the ** [DHT20 - AHT20 Pin Module - I2C Temperature and Humidity Sensor](https://www.adafruit.com/product/5183) **instead! **
The DHT11 is a basic, ultra low-cost digital temperature and humidity sensor. It uses...
No Longer Stocked
[Buy Now](https://www.adafruit.com/product/386)
[Related Guides to the Product](https://learn.adafruit.com/products/386/guides)
### AM2302 (wired DHT22) temperature-humidity sensor
[AM2302 (wired DHT22) temperature-humidity sensor](https://www.adafruit.com/product/393)
Discontinued - [**you can grab** AM2301B - Wired Enclosed AHT20 - Temperature and Humidity Sensor **instead!**](https://www.adafruit.com/product/5181)
The AM2302 is a wired version of the [DHT22](http://www.adafruit.com/products/385), in a large plastic...
No Longer Stocked
[Buy Now](https://www.adafruit.com/product/393)
[Related Guides to the Product](https://learn.adafruit.com/products/393/guides)
## Related Guides
- [Adafruit SGP30 TVOC/eCO2 Gas Sensor](https://learn.adafruit.com/adafruit-sgp30-gas-tvoc-eco2-mox-sensor.md)
- [Adafruit BME680](https://learn.adafruit.com/adafruit-bme680-humidity-temperature-barometic-pressure-voc-gas.md)
- [Using LoraWAN and The Things Network with CircuitPython](https://learn.adafruit.com/using-lorawan-and-the-things-network-with-circuitpython.md)
- [Adafruit BME280 Humidity + Barometric Pressure + Temperature Sensor Breakout](https://learn.adafruit.com/adafruit-bme280-humidity-barometric-pressure-temperature-sensor-breakout.md)
- [Trinket Temperature & Humidity LCD Display](https://learn.adafruit.com/trinket-temperature-humidity-lcd-display.md)
- [PyLeap CLUE Barometer](https://learn.adafruit.com/pyleap-clue-barometer.md)
- [Adafruit CC3000 WiFi and Xively](https://learn.adafruit.com/adafruit-cc3000-wifi-and-xively.md)
- [CLUE Vertical Garden Weather Visualizer](https://learn.adafruit.com/clue-vertical-garden-weather-visualizer.md)
- [Adafruit BMP183 SPI Barometric Pressure & Altitude Sensor](https://learn.adafruit.com/adafruit-bmp183-spi-barometric-pressure-and-altitude-sensor.md)
- [Weather Display Matrix](https://learn.adafruit.com/weather-display-matrix.md)
- [ESP8266 WiFi Weather Station with Color TFT Display](https://learn.adafruit.com/wifi-weather-station-with-tft-display.md)
- [Adafruit VEML6070 UV Sensor Breakout](https://learn.adafruit.com/adafruit-veml6070-uv-light-sensor-breakout.md)
- [Adafruit HTU21D-F Temperature & Humidity Sensor](https://learn.adafruit.com/adafruit-htu21d-f-temperature-humidity-sensor.md)
- [IoT Temperature Logger with Analog Devices ADT7410, Feather and Adafruit IO](https://learn.adafruit.com/iot-temperature-logger-with-arduino-and-adafruit-io.md)
- [Adafruit BMP280 Barometric Pressure + Temperature Sensor Breakout](https://learn.adafruit.com/adafruit-bmp280-barometric-pressure-plus-temperature-sensor-breakout.md)
---
# Source: https://learn.adafruit.com/digital-shipping-scales/using-a-hd-150-scale.md
# Digital Shipping Scales
## Using a HD-150 Scale
The format of the HD-150 is different than that of the smaller scale. By default the scale is in **WorldShip** mode (a piece of UPS software). Its not a great format, and you need to press the **Data** button to have the transmisison occur. We suggest putting it into **SCI.3** mode which is continuous data transmission with higher resolution. Check the manual in the download section for how to get it into that mode
You will then be able to read from the data stream at **9600** baud, 8N1 no flow control.

As you can see the format is a little longer but its also human readable.| First | | | | | | | | | | | | | Last |
| --- | --- | --- | --- | --- | --- | --- | --- | --- | --- | --- | --- | --- | --- |
| **:** | **W** | ' ' or ** '-**' | lb1 | lb2 | lb3 | '.' | lb5 | lb6 | **l** | **b** | **S** if stable | **L** if lowbatt | 0x0D |
| **:** | **W** | ' ' or ** '-**' | kg1 | kg2 | kg3 | '.' | kg5 | kg6 | **k** | **g** | **S** if stable | **L** if lowbatt | 0x0D |
Basically, its " **:W**" followed by a space or minus sign, then 3 digits of whole lb/kg, a decimal point and two fractional digits. The data format scale is indicated by two characters, **lb** or **kg'** and then two status characters that will indicate if the reading has **Stabilized** and if the battery/power is **Low**
We don't have this scale with example code yet but you can probably adapt the python code above for the HD-150 or HD-300 without too much difficulty (and if you do please edit the wiki page to add it!)
- [Previous Page](https://learn.adafruit.com/digital-shipping-scales/larger-scales.md)
- [Next Page](https://learn.adafruit.com/digital-shipping-scales/downloads.md)
## Related Guides
- [Barcode Scanner](https://learn.adafruit.com/barcode-scanner.md)
---
# Source: https://learn.adafruit.com/photocells/using-a-photocell.md
# Photocells
## Using a Photocell
## Analog Voltage Reading Method
The easiest way to measure a resistive sensor is to connect one end to Power and the other to a **pull-down** resistor to ground. Then the point between the fixed pulldown resistor and the variable photocell resistor is connected to the analog input of a microcontroller such as an Arduino (shown)


For this example I'm showing it with a 5V supply but note that you can use this with a 3.3v supply just as easily. In this configuration the analog voltage reading ranges from 0V (ground) to about 5V (or about the same as the power supply voltage).
The way this works is that as the resistance of the photocell decreases, the total resistance of the photocell and the pulldown resistor decreases from over 600KΩ to 10KΩ. That means that the current flowing through both resistors _increases_ which in turn causes the voltage across the fixed 10KΩ resistor to increase. It's quite a trick!
| Ambient light like… | Ambient light (lux) | Photocell resistance (Ω) | LDR + R (Ω) | Current thru LDR +R | Voltage across R |
| --- | --- | --- | --- | --- | --- |
| Dim hallway | 0.1 lux | 600KΩ | 610 KΩ | 0.008 mA | 0.1 V |
| Moonlit night | 1 lux | 70 KΩ | 80 KΩ | 0.07 mA | 0.6 V |
| Dark room | 10 lux | 10 KΩ | 20 KΩ | 0.25 mA | 2.5 V |
| Dark overcast day / Bright room | 100 lux | 1.5 KΩ | 11.5 KΩ | 0.43 mA | 4.3 V |
| Overcast day | 1000 lux | 300 Ω | 10.03 KΩ | 0.5 mA | 5V |
_This table indicates the approximate analog voltage based on the sensor light/resistance w/a 5V supply and 10K__Ω pulldown resistor._
If you're planning to have the sensor in a bright area and use a 10KΩ pulldown, it will quickly _saturate_. That means that it will hit the 'ceiling' of 5V and not be able to differentiate between kinda bright and really bright. In that case, you should replace the 10KΩ pulldown with a 1KΩ pulldown. In that case, it will not be able to detect dark level differences as well but it will be able to detect bright light differences better. This is a tradeoff that you will have to decide upon!
You can also use the "Axel Benz" formula by first measuring the minimum and maximum resistance value with the multimeter and then finding the resistor value with: Pull-Down-Resistor = squareroot(Rmin \* Rmax), this will give you slightly better range calculations
| Ambient light like… | Ambient light (lux) | Photocell resistance (?) | LDR + R (?) | Current thru LDR+R | Voltage across R |
| --- | --- | --- | --- | --- | --- |
| Moonlit night | 1 lux | 70 KΩ | 71 KΩ | 0.07 mA | 0.1 V |
| Dark room | 10 lux | 10 KΩ | 11 KΩ | 0.45 mA | 0.5 V |
| Dark overcast day / Bright room | 100 lux | 1.5 KΩ | 2.5 KΩ | 2 mA | 2.0 V |
| Overcast day | 1000 lux | 300 Ω | 1.3 KΩ | 3.8 mA | 3.8 V |
| Full daylight | 10,000 lux | 100 Ω | 1.1 KΩ | 4.5 mA | 4.5 V |
_This table indicates the approximate analog voltage based on the sensor light/resistance w/a 5V supply and 1K pulldown resistor._
Note that our method does not provide linear voltage with respect to brightness! Also, each sensor will be different. As the light level increases, the analog voltage goes up even though the resistance goes down:
**Vo = Vcc ( R / (R + Photocell) )**
That is, the voltage is proportional to the **inverse** of the photocell resistance which is, in turn, inversely proportional to light levels.
- [Previous Page](https://learn.adafruit.com/photocells/connecting-a-photocell.md)
- [Next Page](https://learn.adafruit.com/photocells/arduino-code.md)
## Featured Products
### Photo cell (CdS photoresistor)
[Photo cell (CdS photoresistor)](https://www.adafruit.com/product/161)
CdS cells are little light sensors. As the squiggly face is exposed to more light, the resistance goes down. When it's light, the resistance is about ~1KΩ, when dark it goes up to ~10KΩ.
To use, connect one side of the photocell (either one, it's symmetric) to power...
In Stock
[Buy Now](https://www.adafruit.com/product/161)
[Related Guides to the Product](https://learn.adafruit.com/products/161/guides)
### Adafruit METRO 328 Fully Assembled - Arduino IDE compatible
[Adafruit METRO 328 Fully Assembled - Arduino IDE compatible](https://www.adafruit.com/product/50)
We sure love the ATmega328 here at Adafruit, and we use them _a lot_ for our own projects. The processor has plenty of GPIO, Analog inputs, hardware UART SPI and I2C, timers and PWM galore - just enough for most simple projects. When we need to go small, we use a
Out of Stock
[Buy Now](https://www.adafruit.com/product/50)
[Related Guides to the Product](https://learn.adafruit.com/products/50/guides)
### Digital Multimeter
[Digital Multimeter](https://www.adafruit.com/product/71)
This is a basic multimeter, I've played with it a bunch and I think its a great addition to a toolbox. It's low cost and simple to use with a big clear display and all the measurements you need:
- AC/DC Voltage measurement
- Current measurement, from 1uA up to...
No Longer Stocked
[Buy Now](https://www.adafruit.com/product/71)
[Related Guides to the Product](https://learn.adafruit.com/products/71/guides)
### Half Sized Premium Breadboard - 400 Tie Points
[Half Sized Premium Breadboard - 400 Tie Points](https://www.adafruit.com/product/64)
This is a cute, half-size breadboard with 400 tie points, good for small projects. It's 3.25" x 2.2" / 8.3cm x 5.5cm with a standard double-strip in the middle and two power rails on both sides. You can pull the power rails off easily to make the breadboard as...
In Stock
[Buy Now](https://www.adafruit.com/product/64)
[Related Guides to the Product](https://learn.adafruit.com/products/64/guides)
## Related Guides
- [Halloween Pumpkin](https://learn.adafruit.com/halloween-pumpkin.md)
- [Adafruit Proto Screw Shield](https://learn.adafruit.com/adafruit-proto-screw-shield.md)
- [Arduino Lesson 11. LCD Displays - Part 1](https://learn.adafruit.com/adafruit-arduino-lesson-11-lcd-displays-1.md)
- [Program an AVR or Arduino Using Raspberry Pi GPIO](https://learn.adafruit.com/program-an-avr-or-arduino-using-raspberry-pi-gpio-pins.md)
- [Arduino Lesson 12. LCD Displays - Part 2](https://learn.adafruit.com/adafruit-arduino-lesson-12-lcd-displays-part-2.md)
- [Silicone Robo-Tentacle](https://learn.adafruit.com/silicone-robo-tentacle.md)
- [Babel Fish](https://learn.adafruit.com/babel-fish.md)
- [Arduino Lesson 10. Making Sounds](https://learn.adafruit.com/adafruit-arduino-lesson-10-making-sounds.md)
- [Arduino Lesson 16. Stepper Motors](https://learn.adafruit.com/adafruit-arduino-lesson-16-stepper-motors.md)
- [Line Following Zumo Robot Using Simulink](https://learn.adafruit.com/line-following-zumo-robot-programmed-with-simulink.md)
- [Bluefruit LE Connect for iOS and Android](https://learn.adafruit.com/bluefruit-le-connect.md)
- [Adafruit 16-channel PWM/Servo Shield](https://learn.adafruit.com/adafruit-16-channel-pwm-slash-servo-shield.md)
- [8BitBox](https://learn.adafruit.com/8bitbox.md)
- [Tiny Arduino Music Visualizer](https://learn.adafruit.com/piccolo.md)
- [Adafruit 1.14" 240x135 Color TFT Breakout LCD Display](https://learn.adafruit.com/adafruit-1-14-240x135-color-tft-breakout.md)
---
# Source: https://learn.adafruit.com/pir-passive-infrared-proximity-motion-sensor/using-a-pir-w-arduino.md
# PIR Motion Sensor
## Using a PIR w/Arduino
## Reading PIR Sensors
Connecting PIR sensors to a microcontroller is really simple. The PIR acts as a digital output, it can be high voltage or low voltage, so all you need to do is listen for the pin to flip high (detected) or low (not detected) by listening on a digital input on your Arduino
Its likely that you'll want retriggering, so be sure to put the jumper in the **H** position!
Power the PIR with 5V and connect ground to ground. Then connect the output to a digital pin. In this example we'll use pin 2.
The code is very simple, and is basically just keeps track of whether the input to pin 2 is high or low. It also tracks the _state_ of the pin, so that it prints out a message when motion has started and stopped.```
/*
* PIR sensor tester
*/
int ledPin = 13; // choose the pin for the LED
int inputPin = 2; // choose the input pin (for PIR sensor)
int pirState = LOW; // we start, assuming no motion detected
int val = 0; // variable for reading the pin status
void setup() {
pinMode(ledPin, OUTPUT); // declare LED as output
pinMode(inputPin, INPUT); // declare sensor as input
Serial.begin(9600);
}
void loop(){
val = digitalRead(inputPin); // read input value
if (val == HIGH) { // check if the input is HIGH
digitalWrite(ledPin, HIGH); // turn LED ON
if (pirState == LOW) {
// we have just turned on
Serial.println("Motion detected!");
// We only want to print on the output change, not state
pirState = HIGH;
}
} else {
digitalWrite(ledPin, LOW); // turn LED OFF
if (pirState == HIGH){
// we have just turned of
Serial.println("Motion ended!");
// We only want to print on the output change, not state
pirState = LOW;
}
}
}
```
Don't forget that there are some times when you don't need a microcontroller. A PIR sensor can be connected to a relay (perhaps with a transistor buffer) without a micro!- [Previous Page](https://learn.adafruit.com/pir-passive-infrared-proximity-motion-sensor/testing-a-pir.md)
- [Next Page](https://learn.adafruit.com/pir-passive-infrared-proximity-motion-sensor/circuitpython-code.md)
## Primary Products
### PIR (motion) sensor
[PIR (motion) sensor](https://www.adafruit.com/product/189)
PIR sensors are used to detect motion from pets/humanoids from about 20 feet away (possibly works on zombies, not guaranteed). This one has an adjustable delay before firing (approx 2-4 seconds), adjustable sensitivity **and** we include a 1 foot (30 cm) cable with a socket so you...
In Stock
[Buy Now](https://www.adafruit.com/product/189)
[Related Guides to the Product](https://learn.adafruit.com/products/189/guides)
## Related Guides
- [HalloWing All-Seeing Skull](https://learn.adafruit.com/hallowing-all-seeing-skull.md)
- [Magical Mistletoe](https://learn.adafruit.com/magical-mistletoe.md)
- [Screaming Cauldron](https://learn.adafruit.com/screaming-cauldron.md)
- [IoT Bird Feeder with Camera](https://learn.adafruit.com/iot-window-bird-feeder-with-camera.md)
- [No-Code WipperSnapper Summoning Horn](https://learn.adafruit.com/adafruit-io-wippersnapper-summoning-horn.md)
- [Motion Controlled Matrix Bed Clock](https://learn.adafruit.com/motion-controlled-matrix-bed-clock.md)
- [Adafruit VCNL4020 Proximity and Light Sensor](https://learn.adafruit.com/adafruit-vcnl4020-proximity-and-light-sensor.md)
- [Fog Machine with Motion Sensor and Adafruit IO](https://learn.adafruit.com/fog-machine-remote-trigger.md)
- [Feather Freezer Door Alarm](https://learn.adafruit.com/feather-door-alarm.md)
- [MIDI Laser Harp with Time of Flight Distance Sensors](https://learn.adafruit.com/midi-laser-harp-time-of-flight-sensors.md)
- [Using Adafruit IO Actions to Make an IoT Door Detector](https://learn.adafruit.com/using-adafruit-io-actions-to-make-an-iot-door-detector.md)
- [Quadcopter Spray Can Mod](https://learn.adafruit.com/quadcopter-spray-can-mod.md)
- [Adafruit VCNL4040 Proximity Sensor](https://learn.adafruit.com/adafruit-vcnl4040-proximity-sensor.md)
- [Using ItsaSNAP for HomeKit PIR Motion Detection](https://learn.adafruit.com/itsasnap-homekit-pir-motion-detection.md)
- [No-Code Room Occupancy Status ](https://learn.adafruit.com/no-code-room-occupancy-status.md)
---
# Source: https://learn.adafruit.com/tmp36-temperature-sensor/using-a-temp-sensor.md
# TMP36 Temperature Sensor
## Using a Temp Sensor
## Connecting to a Temperature Sensor
These sensors have little chips in them and while they're not that delicate, they do need to be handled properly. Be careful of static electricity when handling them and make sure the power supply is connected up correctly and is between 2.7 and 5.5V DC - so don't try to use a 9V battery!
They come in a "TO-92" package which means the chip is housed in a plastic hemi-cylinder with three legs. The legs can be bent easily to allow the sensor to be plugged into a breadboard. You can also solder to the pins to connect long wires. [If you need to waterproof the sensor, you can see below for an Instructable for how to make an excellent case.](https://www.instructables.com/Waterproof-a-LM35-Temperature-Sensor/)
## Reading the Analog Temperature Data
Unlike the FSR or photocell sensors we have looked at, the TMP36 and friends doesn't act like a resistor. Because of that, there is really only one way to read the temperature value from the sensor, and that is plugging the output pin directly into an Analog (ADC) input.

Remember that you can use anywhere between 2.7V and 5.5V as the power supply. For this example I'm showing it with a 5V supply but note that you can use this with a 3.3v supply just as easily. No matter what supply you use, the analog voltage reading will range from about 0V (ground) to about 1.75V.
If you're using a 5V Arduino, and connecting the sensor directly into an Analog pin, you can use these formulas to turn the 10-bit analog reading into a temperature:
**Voltage at pin in milliVolts = (_reading from ADC_) \* (5000/1024)**
This formula converts the number 0-1023 from the ADC into 0-5000mV (= 5V)
If you're using a 3.3V Arduino, you'll want to use this:
**Voltage at pin in milliVolts = (_reading from ADC_) \* (3300/1024)**
This formula converts the number 0-1023 from the ADC into 0-3300mV (= 3.3V)
Then, to convert millivolts into temperature, use this formula:
**Centigrade temperature = [(analog voltage in mV) - 500] / 10**
# Arduino Sketch - Simple Thermometer
This example code for Arduino shows a quick way to create a temperature sensor, it simply prints to the serial port what the current temperature is in both Celsius and Fahrenheit.
```
//TMP36 Pin Variables
int sensorPin = 0; //the analog pin the TMP36's Vout (sense) pin is connected to
//the resolution is 10 mV / degree centigrade with a
//500 mV offset to allow for negative temperatures
/*
* setup() - this function runs once when you turn your Arduino on
* We initialize the serial connection with the computer
*/
void setup()
{
Serial.begin(9600); //Start the serial connection with the computer
//to view the result open the serial monitor
}
void loop() // run over and over again
{
//getting the voltage reading from the temperature sensor
int reading = analogRead(sensorPin);
// converting that reading to voltage, for 3.3v arduino use 3.3
float voltage = reading * 5.0;
voltage /= 1024.0;
// print out the voltage
Serial.print(voltage); Serial.println(" volts");
// now print out the temperature
float temperatureC = (voltage - 0.5) * 100 ; //converting from 10 mv per degree wit 500 mV offset
//to degrees ((voltage - 500mV) times 100)
Serial.print(temperatureC); Serial.println(" degrees C");
// now convert to Fahrenheit
float temperatureF = (temperatureC * 9.0 / 5.0) + 32.0;
Serial.print(temperatureF); Serial.println(" degrees F");
delay(1000); //waiting a second
}
```
## Getting Better Precision
For better results, using the 3.3v reference voltage as ARef instead of the 5V will be more precise and less noisy
This example from the light&temp datalogging tutorial has a photocell but you can ignore it
**Note we've changed the TMP36 to A1**

Danger:
```python
/* Sensor test sketch
for more information see http://www.ladyada.net/make/logshield/lighttemp.html
*/
#define aref_voltage 3.3 // we tie 3.3V to ARef and measure it with a multimeter!
//TMP36 Pin Variables
int tempPin = A1; //the analog pin the TMP36's Vout (sense) pin is connected to
//the resolution is 10 mV / degree centigrade with a
//500 mV offset to allow for negative temperatures
int tempReading; // the analog reading from the sensor
void setup(void) {
// We'll send debugging information via the Serial monitor
Serial.begin(9600);
// If you want to set the aref to something other than 5v
analogReference(EXTERNAL);
}
void loop(void) {
tempReading = analogRead(tempPin);
Serial.print("Temp reading = ");
Serial.print(tempReading); // the raw analog reading
// converting that reading to voltage, which is based off the reference voltage
float voltage = tempReading * aref_voltage;
voltage /= 1024.0;
// print out the voltage
Serial.print(" - ");
Serial.print(voltage); Serial.println(" volts");
// now print out the temperature
float temperatureC = (voltage - 0.5) * 100 ; //converting from 10 mv per degree wit 500 mV offset
//to degrees ((volatge - 500mV) times 100)
Serial.print(temperatureC); Serial.println(" degrees C");
// now convert to Fahrenheight
float temperatureF = (temperatureC * 9.0 / 5.0) + 32.0;
Serial.print(temperatureF); Serial.println(" degrees F");
delay(1000);
}
```
- [Previous Page](https://learn.adafruit.com/tmp36-temperature-sensor/testing-a-temp-sensor.md)
- [Next Page](https://learn.adafruit.com/tmp36-temperature-sensor/tmp36-with-circuitpython.md)
## Featured Products
### Adafruit METRO 328 Fully Assembled - Arduino IDE compatible
[Adafruit METRO 328 Fully Assembled - Arduino IDE compatible](https://www.adafruit.com/product/50)
We sure love the ATmega328 here at Adafruit, and we use them _a lot_ for our own projects. The processor has plenty of GPIO, Analog inputs, hardware UART SPI and I2C, timers and PWM galore - just enough for most simple projects. When we need to go small, we use a
Out of Stock
[Buy Now](https://www.adafruit.com/product/50)
[Related Guides to the Product](https://learn.adafruit.com/products/50/guides)
### Half Sized Premium Breadboard - 400 Tie Points
[Half Sized Premium Breadboard - 400 Tie Points](https://www.adafruit.com/product/64)
This is a cute, half-size breadboard with 400 tie points, good for small projects. It's 3.25" x 2.2" / 8.3cm x 5.5cm with a standard double-strip in the middle and two power rails on both sides. You can pull the power rails off easily to make the breadboard as...
In Stock
[Buy Now](https://www.adafruit.com/product/64)
[Related Guides to the Product](https://learn.adafruit.com/products/64/guides)
### TMP36 - Analog Temperature sensor
[TMP36 - Analog Temperature sensor](https://www.adafruit.com/product/165)
Wide range, low power temperature sensor outputs an analog voltage that is proportional to the ambient temperature. To use, connect pin 1 (left) to power (between 2.7 and 5.5V), pin 3 (right) to ground, and pin 2 to analog in on your microcontroller. The voltage out is 0V at -50°C and...
In Stock
[Buy Now](https://www.adafruit.com/product/165)
[Related Guides to the Product](https://learn.adafruit.com/products/165/guides)
## Related Guides
- [Circuit Playground Sound-Controlled Robot](https://learn.adafruit.com/circuit-playground-sound-controlled-robot.md)
- [Multi-tasking the Arduino - Part 1](https://learn.adafruit.com/multi-tasking-the-arduino-part-1.md)
- [NeoPixel Painter](https://learn.adafruit.com/neopixel-painter.md)
- [Ladyada's Bento Box](https://learn.adafruit.com/lady-adas-bento-box.md)
- [WiFi Controlled LED Christmahanukwanzaa Tree](https://learn.adafruit.com/wifi-controlled-led-christmahanukwanzaa-tree.md)
- [Adafruit 2.8" TFT Touch Shield v2 - Capacitive or Resistive](https://learn.adafruit.com/adafruit-2-8-tft-touch-shield-v2.md)
- [SMS Texting Pet Food Dish](https://learn.adafruit.com/sms-texting-pet-food-dish.md)
- [Ladyada's Learn Arduino - Lesson #1](https://learn.adafruit.com/ladyadas-learn-arduino-lesson-number-1.md)
- [Arduino Lesson 17. Email Sending Movement Detector](https://learn.adafruit.com/arduino-lesson-17-email-sending-movement-detector.md)
- [Nokia 5110/3310 Monochrome LCD](https://learn.adafruit.com/nokia-5110-3310-monochrome-lcd.md)
- [Arduino Lesson 8. Analog Inputs](https://learn.adafruit.com/adafruit-arduino-lesson-8-analog-inputs.md)
- [Wave Shield Voice Changer](https://learn.adafruit.com/wave-shield-voice-changer.md)
- [Arduino Lesson 13. DC Motors](https://learn.adafruit.com/adafruit-arduino-lesson-13-dc-motors.md)
- [Low Power WiFi Datalogger](https://learn.adafruit.com/low-power-wifi-datalogging.md)
- [DS1307 Real Time Clock Breakout Board Kit](https://learn.adafruit.com/ds1307-real-time-clock-breakout-board-kit.md)
---
# Source: https://learn.adafruit.com/thermistor/using-a-thermistor.md
# Thermistor
## Using a Thermistor
## Connecting to a Thermistor
These thermistors are pretty hardy, you can strip the PVC insulation and stick the wires into a breadboard or solder to them directly. Of course you can cut or extend the wires. Since the resistance is pretty high (10Kohm) the wire resistance won't make a huge difference.

## Analog Voltage Reading Method
To measure the temperature, we need to measure the resistance. However, a microcontroller does not have a resistance-meter built in. Instead, it only has a voltage reader known as a analog-digital-converter. So what we have to do is convert the resistance into a voltage, and we'll do that by adding another resistor and connecting them in series. Now you just measure the voltage in the middle, as the resistance changes, the voltage changes too, according to the simple voltage-divider equation. We just need to keep one resistor fixed
Say the fixed resistor is **10K** and the variable resistor is called **R** - the voltage output ( **Vo** ) is:
**Vo = R / (R + 10K) \* Vcc**
Where **Vcc** is the power supply voltage (3.3V or 5V)
Now we want to connect it up to a microcontroller. Remember that when you measure a voltage ( **Vi** ) into an Arduino ADC, you'll get a number.
**ADC value = Vi \* 1023 / Varef**
So now we combine the two ( **Vo** = **Vi** ) and get:
ADC value = **R / (R + 10K) \* Vcc \* 1023 / Varef**
What is nice is that if you notice, if Vcc (logic voltage) is the same as the ARef, analog reference voltage, the values cancel out!
ADC value = **R / (R + 10K) \* 1023**
It doesn't matter what voltage you're running under. Handy!
Finally, what we really want to do is get that **R** (the unknown resistance). So we do a little math to move the **R** to one side:
**R = 10K / (1023/ADC - 1)**
_Lots of people have emailed me to tell me the above equation is wrong and the correct calculation is **R = 10K\*ADC / (1023 - ADC)**. Their equivalence is left as an exercise for the reader! ;)_
Great, lets try it out. Connect up the thermistor as shown:

Connect one end of the 10K resistor to 5V, connect the other end of the 10K 1% resistor to one pin of the thermistor and the other pin of the thermistor to ground. Then connect Analog 0 pin to the 'center' of the two.
Now run the following sketch:
https://github.com/adafruit/Adafruit_Learning_System_Guides/blob/main/Themistor/Example1/Example1.ino
You should get responses that correspond to the resistance of the thermistor as measured with a multimeter
If you are not getting correct readings, check that the 10K resistor is placed between VCC and A0, and the thermistor is between A0 and ground. Check you have a 10K Thermistor and that you are using a 'standard' NTC thermistor. On a "5V" microcontroller like classic Arduino or Metro 328, use 5V for the VCC pin. On 3.3V microcontrollers like Feather or Arduino Zero, use 3.3V for the VCC pin.
If, when you heat up the thermistor, the temperature reading goes down, check that you don't have the two resistors swapped and check that you are using an NTC not PTC thermistor.
## Better Readings
When doing analog readings, especially with a 'noisy' board like the arduino, we suggest two tricks to improve results. One is to use the 3.3V voltage pin as an analog reference and the other is to take a bunch of readings in a row and average them.
The first trick relies on the fact that the 5V power supply that comes straight from your computer's USB does a lot of stuff on the Arduino, and is almost always much noisier than the 3.3V line (which goes through a secondary filter/regulator stage!) It's easy to use, simply connect 3.3V to AREF and use that as the VCC voltage. Because our calcuations don't include the VCC voltage, you don't have to change your equation. You do have to set the analog reference but that's a single line of code
Taking multiple readings to average out the result helps get slightly better results as well, since you may have noise or fluctuations, we suggest about 5 samples.
Rewire as shown, the 10K resistor is still connected to the higher voltage, and the thermistor to ground

This sketch takes those two improvements and integrates them into the demo, you will have better, more precise readings.Info:
https://github.com/adafruit/Adafruit_Learning_System_Guides/blob/main/Themistor/Example2/Example2.ino
## Converting to Temperature
Finally, of course, we want to have the temperature reading, not just a resistance! If you just need to do a quick comparison circuit (if temperature is below X do this, if its above Y do that), you can simply use the temperature/resistance table which correlates the resistance of the thermistor to the temperature.
However, you probably want actual temperature values. [To do that we'll use the Steinhart-Hart equation](http://en.wikipedia.org/wiki/Steinhart%E2%80%93Hart_equation) , which lets us do a good approximation of converting values. Its not as exact as the thermistor table (it is an approximation) but its pretty good around the temperatures that this thermistor is used.

However, this equation is fairly complex, and requires knowing a lot of variables that we don't have for this thermistor. [Instead we will use the simplified B parameter equation](http://en.wikipedia.org/wiki/Thermistor). 
For this one we only need to know **To ** (which is room temperature, 25 °C = 298.15 K) **B** (in this case 3950, the coefficient of the thermistor), and **Ro** (the resistance at room temp, in this case 10Kohm). We plug in **R** (resistance measured) and get out **T** (temperature in Kelvin) which is easy to convert to °C
The following sketch will calculate °C for you
https://github.com/adafruit/Adafruit_Learning_System_Guides/blob/main/Themistor/Example3/Example3.ino

For better precision, we suggest reading the exact value of the 'series 10K' it should be nearly exactly 10K but if you can get a better reading that will reduce your error.## How Accurate is the Reading?
You may notice that above, the temperature reading is 28.16°C - does that mean we have 0.01°C accuracy? Unfortunately no! The thermistor has error and the analog reading circuitry has error.
We can approximate the expected error by first taking into account the thermistor resistance error. The thermistor is correct to 1%, which means that at 25°C it can read 10,100 to 9900 ohms. At around 25°C a difference of 450 ohms represents 1°C so 1% error means about +-0.25°C (you may be able to calibrate this away by determining the resistance of the thermistor in a 0°C ice bath and removing any offset). You can also spring for a 0.1% thermistor which will reduce the possible resistance error down to +-0.03°C
Then there is the error of the ADC, for every bit that it is wrong the resistance (around 25°C) can be off by about 50 ohms. This isn't too bad, and is a smaller error than the thermistor error itself +-(0.1°C) but there is no way to calibrate it 'away' - a higher precision ADC (12-16 bits instead of 10) will give you more precise readings
In general, we think thermistors are higher precision than thermocouples, or most low cost digital sensors, but you will not get better than +-0.1°C accuracy on an Arduino with a 1% thermistor and we would suggest assuming no better than +-0.5°C.
# Self-Heating
If you have a 10K thermistor + 10K resistor connected between 5V and ground, you'll get about 5V / (10K + 10K) = 0.25mA flowing at all times. While this isn't a lot of current, it will heat up your thermistor as the 10K thermistor will be dissipating about 0.25mA \* 2.5V = 0.625 mW.
To avoid this heating, you can try connecting the 'top' of the resistor divider to a GPIO pin and set that pin HIGH when you want to read (thus creating the divider) and then LOW when you are in low power mode (no current will flow from 0V to ground)
- [Previous Page](https://learn.adafruit.com/thermistor/testing-a-thermistor.md)
- [Next Page](https://learn.adafruit.com/thermistor/circuitpython.md)
## Featured Products
### 10K Precision Epoxy Thermistor
[10K Precision Epoxy Thermistor](https://www.adafruit.com/product/372)
Need to measure something damp? This epoxy-coated precision 1% 10K thermistor is an inexpensive way to measure temperature in weather or liquids. The resistance in 25 °C is 10K (+- 1%). The resistance goes down as it gets warmer and goes up as it gets cooler.
In Stock
[Buy Now](https://www.adafruit.com/product/372)
[Related Guides to the Product](https://learn.adafruit.com/products/372/guides)
## Related Guides
- [reef-pi Guide 1: Setup and Demonstration](https://learn.adafruit.com/reef-pi-installation-and-configuration.md)
- [Adafruit MCP9600 I2C Thermocouple Amplifier](https://learn.adafruit.com/adafruit-mcp9600-i2c-thermocouple-amplifier.md)
- [Calibrating Sensors](https://learn.adafruit.com/calibrating-sensors.md)
- [EMC2101 Fan Controller and Temperature sensor](https://learn.adafruit.com/emc2101-fan-controller-and-temperature-sensor.md)
- [Arm-based IoT Kit for Cloud IoT Core - Getting Started](https://learn.adafruit.com/raspberry-pi-3-and-sensor-kit-for-google-cloud-iot-core.md)
- [AM2315 - Encased I2C Temperature/Humidity Sensor](https://learn.adafruit.com/am2315-encased-i2c-temperature-humidity-sensor.md)
- [TMP006 Infrared Sensor Breakout](https://learn.adafruit.com/infrared-thermopile-sensor-breakout.md)
- [Adafruit MLX90640 IR Thermal Camera](https://learn.adafruit.com/adafruit-mlx90640-ir-thermal-camera.md)
- [MAX31855 Thermocouple Sensor Python Library](https://learn.adafruit.com/max31855-thermocouple-python-library.md)
- [Storage humidity and temperature monitor](https://learn.adafruit.com/storage-humidity-and-temperature-monitor.md)
- [Kombucha Thermostat with CircuitPython and Feather ](https://learn.adafruit.com/kombucha-thermostat-with-circuitpython-and-feather.md)
- [TMP36 Temperature Sensor](https://learn.adafruit.com/tmp36-temperature-sensor.md)
- [Monitor Your Greenhouse with a No-Code Environmental Sensor](https://learn.adafruit.com/monitor-your-greenhouse-with-a-no-code-environmental-sensor.md)
- [Adafruit TE MS8607 PHT Sensor](https://learn.adafruit.com/adafruit-te-ms8607-pht-sensor.md)
- [Using Melexis MLX90614 Non-Contact Sensors](https://learn.adafruit.com/using-melexis-mlx90614-non-contact-sensors.md)
---
# Source: https://learn.adafruit.com/tilt-sensor/using-a-tilt-sensor.md
# Tilt Sensor
## Using a Tilt Sensor
Danger:
## Simple Tilt-Activated LED
This is the most basic way of connecting to a tilt switch, but can be handy while one is learning about them. Simply connect it in series with an LED, resistor and battery. Tilt to turn on and off.


## Reading Switch State with a Microcontroller
Note that the layout above shows a 10K pullup resistor but for the code I use the 'built-in' pullup resistor that you can turn on by setting an input pin to HIGH output (its quite neat!) If you use the internal pull-up you can skip the external one.

```
/* Better Debouncer
*
* This debouncing circuit is more rugged, and will work with tilt switches!
*
* http://www.ladyada.net/learn/sensor/tilt.html
*/
int inPin = 2; // the number of the input pin
int outPin = 13; // the number of the output pin
int LEDstate = HIGH; // the current state of the output pin
int reading; // the current reading from the input pin
int previous = LOW; // the previous reading from the input pin
// the following variables are long because the time, measured in miliseconds,
// will quickly become a bigger number than can be stored in an int.
long time = 0; // the last time the output pin was toggled
long debounce = 50; // the debounce time, increase if the output flickers
void setup()
{
pinMode(inPin, INPUT);
digitalWrite(inPin, HIGH); // turn on the built in pull-up resistor
pinMode(outPin, OUTPUT);
}
void loop()
{
int switchstate;
reading = digitalRead(inPin);
// If the switch changed, due to bounce or pressing...
if (reading != previous) {
// reset the debouncing timer
time = millis();
}
if ((millis() - time) > debounce) {
// whatever the switch is at, its been there for a long time
// so lets settle on it!
switchstate = reading;
// Now invert the output on the pin13 LED
if (switchstate == HIGH)
LEDstate = LOW;
else
LEDstate = HIGH;
}
digitalWrite(outPin, LEDstate);
// Save the last reading so we keep a running tally
previous = reading;
}
```
- [Previous Page](https://learn.adafruit.com/tilt-sensor/connecting-to-a-tilt-sensor.md)
- [Next Page](https://learn.adafruit.com/tilt-sensor/example-projects.md)
## Featured Products
### Tilt ball switch
[Tilt ball switch](https://www.adafruit.com/product/173)
The "poor man's" accelerometer! Tilt sensors are switches that can detect basic motion/orientation. The metal tube has a little metal ball that rolls around in it, when its tilted upright, the ball rolls onto the contacts sticking out of end and shorts them together.
In Stock
[Buy Now](https://www.adafruit.com/product/173)
[Related Guides to the Product](https://learn.adafruit.com/products/173/guides)
## Related Guides
- [Force Sensitive Resistor (FSR)](https://learn.adafruit.com/force-sensitive-resistor-fsr.md)
- [Basic Resistor Sensor Reading on Raspberry Pi](https://learn.adafruit.com/basic-resistor-sensor-reading-on-raspberry-pi.md)
- [Calibrating Sensors](https://learn.adafruit.com/calibrating-sensors.md)
- [Wireless ESP32-S2 Touch Screen Controller for Pure Data](https://learn.adafruit.com/wireless-esp32-s2-controller-for-pure-data.md)
- [Hang out your washing reminder - Adafruit IO + Vibration switch](https://learn.adafruit.com/hang-out-your-washing-reminder-adafruit-io-vibration-switch.md)
- [Circuit Playground Bike Glove](https://learn.adafruit.com/circuit-playground-bike-glove.md)
- [ICEdot Teardown](https://learn.adafruit.com/icedot-teardown.md)
- [Adafruit VEML6070 UV Sensor Breakout](https://learn.adafruit.com/adafruit-veml6070-uv-light-sensor-breakout.md)
- [NAU7802 Pet Food Scale](https://learn.adafruit.com/nau7802-pet-food-scale.md)
- [Adafruit HX711 24-bit ADC](https://learn.adafruit.com/adafruit-hx711-24-bit-adc.md)
- [Power Glove Wireless MIDI Controller](https://learn.adafruit.com/power-glove-bluetooth-midi-controller.md)
- [Clue Coffee Scale](https://learn.adafruit.com/clue-coffee-scale.md)
- [Adafruit NAU7802 24-Bit ADC - STEMMA QT / Qwiic](https://learn.adafruit.com/adafruit-nau7802-24-bit-adc-stemma-qt-qwiic.md)
- [Flora MIDI Drum Glove](https://learn.adafruit.com/midi-drum-glove.md)
- [Arcade Stick Conversion](https://learn.adafruit.com/arcade-stick-conversion.md)
---
# Source: https://learn.adafruit.com/adafruit-raspberry-pi-lesson-7-remote-control-with-vnc/using-a-vnc-client.md
# Adafruit's Raspberry Pi Lesson 7. Remote Control with VNC
## Using a VNC Client
Again, there are many VNC clients, of which “VNCViewer” ([http://www.realvnc.com](http://www.realvnc.com/)) is available for most platforms and I have found it to work well with TightVNC.
When you first run VNCViewer, you will see the following:

Enter the IP address of your Raspberry Pi, **append :1** (to indicate the port) and click on “Connect”. You will then get a warning message. Just click 'Continue'.

The following window will then popup for you to enter your password (“raspberr”).

Finally, the VNC window itself should appear. You will be able to use the mouse and do everything as if you were using the Pi's keyboard mouse and monitor, except through your other computer.
As with SSH, since this is working over your network, your Pi could be situated anywhere, as long as it is connected to your network.

## Built in Screen Sharing
There's also a built in VNC app for the Mac OS X that you may be able to use without installing any software
From the Finder, select **Go -\> Connect to Server…** and type **vnc://192.168.1.10** (or whatever the IP is) to connect.
- [Previous Page](https://learn.adafruit.com/adafruit-raspberry-pi-lesson-7-remote-control-with-vnc/installing-vnc.md)
- [Next Page](https://learn.adafruit.com/adafruit-raspberry-pi-lesson-7-remote-control-with-vnc/running-vncserver-at-startup.md)
## Featured Products
### Budget Pack for Raspberry Pi 1 Model B (Doesn't include RasPi)
[Budget Pack for Raspberry Pi 1 Model B (Doesn't include RasPi)](https://www.adafruit.com/product/965)
An optimized collection of parts and pieces to experiment with Raspberry Pi at home, school or work. Great for students and those that want to get their feet wet, no soldering required! **THIS PACK DOES NOT INCLUDE A RASPBERRY PI 1 MODEL B and is NOT compatible with Model B+ or Raspberry Pi...**
No Longer Stocked
[Buy Now](https://www.adafruit.com/product/965)
[Related Guides to the Product](https://learn.adafruit.com/products/965/guides)
### Programming the Raspberry Pi: Getting Started with Python
[Programming the Raspberry Pi: Getting Started with Python](https://www.adafruit.com/product/1089)
**Program your own Raspberry Pi projects!**
An updated guide to programming your own Raspberry Pi projects. Learn to create inventive programs and fun games on your powerful Raspberry Pi--with no programming experience required. **This practical book has been revised...**
In Stock
[Buy Now](https://www.adafruit.com/product/1089)
[Related Guides to the Product](https://learn.adafruit.com/products/1089/guides)
## Related Guides
- [Using a Mini PAL/NTSC Display with a Raspberry Pi](https://learn.adafruit.com/using-a-mini-pal-ntsc-display-with-a-raspberry-pi.md)
- [Arm-based IoT Kit for Cloud IoT Core - Getting Started](https://learn.adafruit.com/raspberry-pi-3-and-sensor-kit-for-google-cloud-iot-core.md)
- [Windows IoT Core Application Development: Headless Blinky](https://learn.adafruit.com/windows-iot-application-development-headless-application.md)
- [Simple Raspberry Pi Robot](https://learn.adafruit.com/simple-raspberry-pi-robot.md)
- [NeoPixels on Raspberry Pi](https://learn.adafruit.com/neopixels-on-raspberry-pi.md)
- [Portable 5in Monitor with HDMI](https://learn.adafruit.com/portable-5in-monitor-with-hdmi.md)
- [2.2" PiTFT HAT Enclosure](https://learn.adafruit.com/3d-printed-2-2-pitft-raspberry-pi-a-plus-enclosure.md)
- [Bluefruit LE Python Library](https://learn.adafruit.com/bluefruit-le-python-library.md)
- [Adafruit Pi Cobbler Kit](https://learn.adafruit.com/adafruit-pi-cobbler-kit.md)
- [Naughty or Nice Machine](https://learn.adafruit.com/naughty-or-nice-machine.md)
- [DHT Humidity Sensing on Raspberry Pi or Beaglebone Black with GDocs Logging](https://learn.adafruit.com/dht-humidity-sensing-on-raspberry-pi-with-gdocs-logging.md)
- [Adafruit's Raspberry Pi Lesson 1. Preparing an SD Card for your Raspberry Pi](https://learn.adafruit.com/adafruit-raspberry-pi-lesson-1-preparing-and-sd-card-for-your-raspberry-pi.md)
- [Mini Raspberry Pi Handheld Notebook](https://learn.adafruit.com/mini-raspberry-pi-handheld-notebook-palmtop.md)
- [Pi Box](https://learn.adafruit.com/pi-box.md)
- [Running Programs Automatically on Your Tiny Computer](https://learn.adafruit.com/running-programs-automatically-on-your-tiny-computer.md)
---
# Source: https://learn.adafruit.com/adafruits-raspberry-pi-lesson-3-network-setup/using-a-wired-network.md
# Adafruit's Raspberry Pi Lesson 3. Network Setup
## Using a Wired Network
The quickest way to get your Raspberry Pi connected is to use an Ethernet patch cable and just plug it into the back of your home network router.

As soon as you plug your Pi in, you should see the network LEDs start to flicker.

For most home networks, you should also be able to connect to the Internet without any further configuration. For this to work, your router should be configured for DHCP (Dynamic Host Configuration Protocol). This service runs on your home network router, dishing out IP addresses to any device that connects to it either through WiFi or by cable.
If DHCP is not turned on, on your home network router, then connect to its management console using a different computer that is already connected.
You should be able to find a setting somewhere that turns it on.

- [Previous Page](https://learn.adafruit.com/adafruits-raspberry-pi-lesson-3-network-setup/overview.md)
- [Next Page](https://learn.adafruit.com/adafruits-raspberry-pi-lesson-3-network-setup/buying-a-usb-wifi-adapter.md)
## Featured Products
### Raspberry Pi 3 - Model B+ - 1.4GHz Cortex-A53 with 1GB RAM
[Raspberry Pi 3 - Model B+ - 1.4GHz Cortex-A53 with 1GB RAM](https://www.adafruit.com/product/3775)
The Raspberry Pi 3 Model B is the most popular Raspberry Pi computer made, and the Pi Foundation knows you can always make a good thing _better_! And what could make the Pi 3 better? How about a _faster_ processor, 5 GHz WiFi, and updated Ethernet chip with PoE capability?...
In Stock
[Buy Now](https://www.adafruit.com/product/3775)
[Related Guides to the Product](https://learn.adafruit.com/products/3775/guides)
### Budget Pack for Raspberry Pi 1 Model B (Doesn't include RasPi)
[Budget Pack for Raspberry Pi 1 Model B (Doesn't include RasPi)](https://www.adafruit.com/product/965)
An optimized collection of parts and pieces to experiment with Raspberry Pi at home, school or work. Great for students and those that want to get their feet wet, no soldering required! **THIS PACK DOES NOT INCLUDE A RASPBERRY PI 1 MODEL B and is NOT compatible with Model B+ or Raspberry Pi...**
No Longer Stocked
[Buy Now](https://www.adafruit.com/product/965)
[Related Guides to the Product](https://learn.adafruit.com/products/965/guides)
### USB WiFi (802.11b/g/n) Module: For Raspberry Pi and more
[USB WiFi (802.11b/g/n) Module: For Raspberry Pi and more](https://www.adafruit.com/product/1012)
Make your Internet of Things device cable-free by adding WiFi. Take advantage of the Raspberry Pi and Beagle Bone's USB port to add a low cost, but high-reliability wireless link. We tried half a dozen modules to find one that works well with the Pi and Bone without the need of recompiling...
In Stock
[Buy Now](https://www.adafruit.com/product/1012)
[Related Guides to the Product](https://learn.adafruit.com/products/1012/guides)
### USB WiFi (802.11b/g/n) Module with Antenna for Raspberry Pi
[USB WiFi (802.11b/g/n) Module with Antenna for Raspberry Pi](https://www.adafruit.com/product/1030)
Discontinued - [**you can grab** USB WiFi (802.11b/g/n) Module: For Raspberry Pi and more **instead! **](https://www.adafruit.com/product/1012)
Make your Internet of Things device cable-free by adding super WiFi. Take advantage of the Raspberry Pi and Beagle...
No Longer Stocked
[Buy Now](https://www.adafruit.com/product/1030)
[Related Guides to the Product](https://learn.adafruit.com/products/1030/guides)
### Miniature WiFi (802.11b/g/n) Module: For Raspberry Pi and more
[Miniature WiFi (802.11b/g/n) Module: For Raspberry Pi and more](https://www.adafruit.com/product/814)
Make your Internet of Things device cable-free by adding WiFi. Take advantage of the Raspberry Pi and Beagle Bone's USB port to add a low cost, but high-reliability wireless link. We tried half a dozen modules to find one that works well with the Pi and Bone without the need of recompiling...
No Longer Stocked
[Buy Now](https://www.adafruit.com/product/814)
[Related Guides to the Product](https://learn.adafruit.com/products/814/guides)
### Programming the Raspberry Pi: Getting Started with Python
[Programming the Raspberry Pi: Getting Started with Python](https://www.adafruit.com/product/1089)
**Program your own Raspberry Pi projects!**
An updated guide to programming your own Raspberry Pi projects. Learn to create inventive programs and fun games on your powerful Raspberry Pi--with no programming experience required. **This practical book has been revised...**
In Stock
[Buy Now](https://www.adafruit.com/product/1089)
[Related Guides to the Product](https://learn.adafruit.com/products/1089/guides)
### Ethernet Cable - 3 ft long
[Ethernet Cable - 3 ft long](https://www.adafruit.com/product/995)
We have so many Internet-connected goodies in the shop, we figured it's time to carry a cable so you can easily connect them up! This cable is 3 feet long, comes in Adafruit black and has all 8 wires installed. Perfect for use with the
No Longer Stocked
[Buy Now](https://www.adafruit.com/product/995)
[Related Guides to the Product](https://learn.adafruit.com/products/995/guides)
### USB 2.0 Powered Hub - 7 Ports with 5V 2A Power Supply
[USB 2.0 Powered Hub - 7 Ports with 5V 2A Power Supply](https://www.adafruit.com/product/961)
Add lots more USB capability to your Raspberry Pi or computer using this powered USB 2.0 hub. It adds a full **seven powered ports** , all at USB 2.0 speeds so you can use video cameras and other high speed devices (cheaper hubs are v1.1 and not as fast!)
The extra sauce...
No Longer Stocked
[Buy Now](https://www.adafruit.com/product/961)
[Related Guides to the Product](https://learn.adafruit.com/products/961/guides)
## Related Guides
- [Introducing the Raspberry Pi Zero](https://learn.adafruit.com/introducing-the-raspberry-pi-zero.md)
- [Cloud Cam: Internet-Connected Security Camera](https://learn.adafruit.com/cloud-cam-connected-raspberry-pi-security-camera.md)
- [Resizing the Raspberry Pi Boot Partition](https://learn.adafruit.com/resizing-raspberry-pi-boot-partition.md)
- [Raspberry Pi as an Ad Blocking Access Point](https://learn.adafruit.com/raspberry-pi-as-an-ad-blocking-access-point.md)
- [Web Enabled PIXEL on Raspberry Pi](https://learn.adafruit.com/web-enabled-pixel-on-raspberry-pi.md)
- [Adafruit Raspberry Pi Educational Linux Distro](https://learn.adafruit.com/adafruit-raspberry-pi-educational-linux-distro.md)
- [Arm-based IoT Kit for Cloud IoT Core - Getting Started](https://learn.adafruit.com/raspberry-pi-3-and-sensor-kit-for-google-cloud-iot-core.md)
- [Adafruit's Raspberry Pi Lesson 10. Stepper Motors](https://learn.adafruit.com/adafruits-raspberry-pi-lesson-10-stepper-motors.md)
- [A Sillier Mousetrap: Logging Mouse Data to Adafruit IO with the Raspberry Pi](https://learn.adafruit.com/a-sillier-mousetrap-logging-mouse-data-to-adafruit-io-with-the-raspberry-pi.md)
- [Cupcade: the Raspberry Pi Micro Arcade Cabinet](https://learn.adafruit.com/cupcade-raspberry-pi-micro-mini-arcade-game-cabinet.md)
- [Adafruit 128x64 OLED Bonnet for Raspberry Pi](https://learn.adafruit.com/adafruit-128x64-oled-bonnet-for-raspberry-pi.md)
- [Controlling Motors using the Raspberry Pi and RasPiRobot Board V2](https://learn.adafruit.com/controlling-motors-using-the-raspberry-pi-and-raspirobot-board-v2.md)
- [Adafruit PiTFT 3.5" Touch Screen for Raspberry Pi](https://learn.adafruit.com/adafruit-pitft-3-dot-5-touch-screen-for-raspberry-pi.md)
- [Processing on the Raspberry Pi & PiTFT](https://learn.adafruit.com/processing-on-the-raspberry-pi-and-pitft.md)
- [Large Pi-based Thermometer and Clock](https://learn.adafruit.com/large-pi-based-thermometer-and-clock.md)
---
# Source: https://learn.adafruit.com/force-sensitive-resistor-fsr/using-an-fsr.md
# Force Sensitive Resistor (FSR)
## Using an FSR
## Analog Voltage Reading Method
The easiest way to measure a resistive sensor is to connect one end to Power and the other to a **pull-down** resistor to ground. Then the point between the fixed pulldown resistor and the variable FSR resistor is connected to the analog input of a microcontroller such as an Arduino (shown).


For this example I'm showing it with a 5V supply but note that you can use this with a 3.3v supply just as easily. In this configuration the analog voltage reading ranges from 0V (ground) to about 5V (or about the same as the power supply voltage).
The way this works is that as the resistance of the FSR decreases, the total resistance of the FSR and the pulldown resistor decreases from about 100Kohm to 10Kohm. That means that the current flowing through both resistors _increases_ which in turn causes the voltage across the fixed 10K resistor to increase. Its quite a trick!
| Force (lb) | Force (N) | FSR Resistance | (FSR + R) ohm
| Current thru FSR+R | Voltage across R |
| --- | --- | --- | --- | --- | --- |
| None | None | Infinite | Infinite! | 0 mA | 0V |
| 0.04 lb | 0.2 N | 30 Kohm | 40 Kohm | 0.13 mA | 1.3 V |
| 0.22 lb | 1 N | 6 Kohm | 16 Kohm | 0.31 mA | 3.1 V |
| 2.2 lb | 10 N | 1 Kohm | 11 Kohm | 0.45 mA | 4.5 V |
| 22 lb | 100 N | 250 ohm
| 10.25 Kohm | 0.49 mA | 4.9 V |
_This table indicates the approximate analog voltage based on the sensor force/resistance w/a 5V supply and 10K pulldown resistor._
Note that our method takes the somewhat linear resistivity but does not provide linear voltage! That's because the voltage equasion is:
**Vo = Vcc ( R / (R + FSR) )**
That is, the voltage is proportional to the **inverse** of the FSR resistance.
## Simple Demonstration of Use
Wire the FSR as same as the above example, but this time lets add an LED to pin 11.


This sketch will take the analog voltage reading and use that to determine how bright the red LED is. The harder you press on the FSR, the brighter the LED will be! Remember that the LED has to be connected to a PWM pin for this to work, I use pin 11 in this example.
These examples assume you know some basic Arduino programming. If you don't, [maybe spend some time reviewing the basics at the Arduino tutorial?](http://www.ladyada.net/learn/arduino/index.html)
```
/* FSR testing sketch.
Connect one end of FSR to 5V, the other end to Analog 0.
Then connect one end of a 10K resistor from Analog 0 to ground
Connect LED from pin 11 through a resistor to ground
For more information see www.ladyada.net/learn/sensors/fsr.html */
int fsrAnalogPin = 0; // FSR is connected to analog 0
int LEDpin = 11; // connect Red LED to pin 11 (PWM pin)
int fsrReading; // the analog reading from the FSR resistor divider
int LEDbrightness;
void setup(void) {
Serial.begin(9600); // We'll send debugging information via the Serial monitor
pinMode(LEDpin, OUTPUT);
}
void loop(void) {
fsrReading = analogRead(fsrAnalogPin);
Serial.print("Analog reading = ");
Serial.println(fsrReading);
// we'll need to change the range from the analog reading (0-1023) down to the range
// used by analogWrite (0-255) with map!
LEDbrightness = map(fsrReading, 0, 1023, 0, 255);
// LED gets brighter the harder you press
analogWrite(LEDpin, LEDbrightness);
delay(100);
}
```
## Simple Code for Analog FSR Measurements
Here is a code example for measuring the FSR on an analog pin.


This code doesn't do any calculations, it just prints out what it interprets as the amount of pressure in a qualitative manner. For most projects, this is pretty much all thats needed!```
/* FSR simple testing sketch.
Connect one end of FSR to power, the other end to Analog 0.
Then connect one end of a 10K resistor from Analog 0 to ground
For more information see www.ladyada.net/learn/sensors/fsr.html */
int fsrPin = 0; // the FSR and 10K pulldown are connected to a0
int fsrReading; // the analog reading from the FSR resistor divider
void setup(void) {
// We'll send debugging information via the Serial monitor
Serial.begin(9600);
}
void loop(void) {
fsrReading = analogRead(fsrPin);
Serial.print("Analog reading = ");
Serial.print(fsrReading); // the raw analog reading
// We'll have a few threshholds, qualitatively determined
if (fsrReading < 10) {
Serial.println(" - No pressure");
} else if (fsrReading < 200) {
Serial.println(" - Light touch");
} else if (fsrReading < 500) {
Serial.println(" - Light squeeze");
} else if (fsrReading < 800) {
Serial.println(" - Medium squeeze");
} else {
Serial.println(" - Big squeeze");
}
delay(1000);
}
```
## In-Depth Code for Analog FSR Measurements
This Arduino sketch that assumes you have the FSR wired up as above, with a 10K? pull down resistor and the sensor is read on Analog 0 pin. It is pretty advanced and will measure the approximate Newton force measured by the FSR. This can be pretty useful for calibrating what forces you think the FSR will experience.


```
/* FSR testing sketch.
Connect one end of FSR to power, the other end to Analog 0.
Then connect one end of a 10K resistor from Analog 0 to ground
For more information see www.ladyada.net/learn/sensors/fsr.html */
int fsrPin = 0; // the FSR and 10K pulldown are connected to a0
int fsrReading; // the analog reading from the FSR resistor divider
int fsrVoltage; // the analog reading converted to voltage
unsigned long fsrResistance; // The voltage converted to resistance, can be very big so make "long"
unsigned long fsrConductance;
long fsrForce; // Finally, the resistance converted to force
void setup(void) {
Serial.begin(9600); // We'll send debugging information via the Serial monitor
}
void loop(void) {
fsrReading = analogRead(fsrPin);
Serial.print("Analog reading = ");
Serial.println(fsrReading);
// analog voltage reading ranges from about 0 to 1023 which maps to 0V to 5V (= 5000mV)
fsrVoltage = map(fsrReading, 0, 1023, 0, 5000);
Serial.print("Voltage reading in mV = ");
Serial.println(fsrVoltage);
if (fsrVoltage == 0) {
Serial.println("No pressure");
} else {
// The voltage = Vcc * R / (R + FSR) where R = 10K and Vcc = 5V
// so FSR = ((Vcc - V) * R) / V yay math!
fsrResistance = 5000 - fsrVoltage; // fsrVoltage is in millivolts so 5V = 5000mV
fsrResistance *= 10000; // 10K resistor
fsrResistance /= fsrVoltage;
Serial.print("FSR resistance in ohms = ");
Serial.println(fsrResistance);
fsrConductance = 1000000; // we measure in micromhos so
fsrConductance /= fsrResistance;
Serial.print("Conductance in microMhos: ");
Serial.println(fsrConductance);
// Use the two FSR guide graphs to approximate the force
if (fsrConductance <= 1000) {
fsrForce = fsrConductance / 80;
Serial.print("Force in Newtons: ");
Serial.println(fsrForce);
} else {
fsrForce = fsrConductance - 1000;
fsrForce /= 30;
Serial.print("Force in Newtons: ");
Serial.println(fsrForce);
}
}
Serial.println("--------------------");
delay(1000);
}
```
## BONUS! Reading FSR Measurements Without Analog Pins.
Because FSR's are basically resistors, its possible to use them even if you don't have any analog pins on your microcontroller (or if say you want to connect more than you have analog input pins. The way we do this is by taking advantage of a basic electronic property of resistors and capacitors. It turns out that if you take a capacitor that is initially storing no voltage, and then connect it to power through a resistor, it will charge up to the power voltage slowly. The bigger the resistor, the slower it is.

_This capture from an oscilloscope shows whats happening on the digital pin (yellow). The blue line indicates when the sketch starts counting and when the couting is complete, about 1.2ms later._
This is because the capacitor acts like a bucket and the resistor is like a thin pipe. To fill a bucket up with a very thin pipe takes enough time that you can figure out how wide the pipe is by timing how long it takes to fill the bucket up halfway.


In this case, our 'bucket' is a 0.1uF ceramic capacitor. You can change the capacitor nearly any way you want but the timing values will also change. 0.1uF seems to be an OK place to start for these FSRs.```
/* FSR simple testing sketch.
Connect one end of FSR to power, the other end to pin 2.
Then connect one end of a 0.1uF capacitor from pin 2 to ground
For more information see www.ladyada.net/learn/sensors/fsr.html */
int fsrPin = 2; // the FSR and cap are connected to pin2
int fsrReading; // the digital reading
int ledPin = 13; // you can just use the 'built in' LED
void setup(void) {
// We'll send debugging information via the Serial monitor
Serial.begin(9600);
pinMode(ledPin, OUTPUT); // have an LED for output
}
void loop(void) {
// read the resistor using the RCtime technique
fsrReading = RCtime(fsrPin);
if (fsrReading == 30000) {
// if we got 30000 that means we 'timed out'
Serial.println("Nothing connected!");
} else {
Serial.print("RCtime reading = ");
Serial.println(fsrReading); // the raw analog reading
// Do a little processing to keep the LED blinking
fsrReading /= 10;
// The more you press, the faster it blinks!
digitalWrite(ledPin, HIGH);
delay(fsrReading);
digitalWrite(ledPin, LOW);
delay(fsrReading);
}
delay(100);
}
// Uses a digital pin to measure a resistor (like an FSR or photocell!)
// We do this by having the resistor feed current into a capacitor and
// counting how long it takes to get to Vcc/2 (for most arduinos, thats 2.5V)
int RCtime(int RCpin) {
int reading = 0; // start with 0
// set the pin to an output and pull to LOW (ground)
pinMode(RCpin, OUTPUT);
digitalWrite(RCpin, LOW);
// Now set the pin to an input and...
pinMode(RCpin, INPUT);
while (digitalRead(RCpin) == LOW) { // count how long it takes to rise up to HIGH
reading++; // increment to keep track of time
if (reading == 30000) {
// if we got this far, the resistance is so high
// its likely that nothing is connected!
break; // leave the loop
}
}
// OK either we maxed out at 30000 or hopefully got a reading, return the count
return reading;
}
```

It is possible to calculate the actual resistance from the reading but unfortunately, variations in the IDE and arduino board will make it inconsistant. Be aware of that if you change IDE versions of OS's, or use a 3.3V arduino instead of 5V, or change from a 16mhz Arduino to a 8Mhz one (like a lilypad) there may be differences due to how long it takes to read the value of a pin. Usually that isn't a big deal but it can make your project hard to debug if you aren't expecting it!- [Previous Page](https://learn.adafruit.com/force-sensitive-resistor-fsr/connecting-to-an-fsr.md)
- [Next Page](https://learn.adafruit.com/force-sensitive-resistor-fsr/example-projects.md)
## Featured Products
### Round Force-Sensitive Resistor (FSR) - 0.3 ~ 10 Newton Force
[Round Force-Sensitive Resistor (FSR) - 0.3 ~ 10 Newton Force](https://www.adafruit.com/product/166)
FSRs are sensors that allow you to detect physical pressure, squeezing and weight. They are simple to use and low cost. This sensor is an Alpha MF01A-N-221-A01 with 1/2 diameter sensing region.
We used to stock the Interlink model 402 FSR - the Alpha version is almost half the price...
In Stock
[Buy Now](https://www.adafruit.com/product/166)
[Related Guides to the Product](https://learn.adafruit.com/products/166/guides)
### Square Force-Sensitive Resistor (FSR)
[Square Force-Sensitive Resistor (FSR)](https://www.adafruit.com/product/1075)
FSRs are sensors that allow you to detect physical pressure, squeezing and weight. They are simple to use and low cost. This sensor is an Alpha MF02A-N-221-A01 FSR with a 38mm square sensing region. Note that this sensor can't detect _where_ on the square you pressed (for that,
In Stock
[Buy Now](https://www.adafruit.com/product/1075)
[Related Guides to the Product](https://learn.adafruit.com/products/1075/guides)
### Extra-long force-sensitive resistor (FSR)
[Extra-long force-sensitive resistor (FSR)](https://www.adafruit.com/product/1071)
FSRs are sensors that allow you to detect physical pressure, squeezing and weight. They are simple to use and low cost. This sensor is a Interlink model 408 FSR with a massive 1/4-inch x 24-inch sensing region. You can press anywhere along the strip and the pressure will be recognized. Note...
No Longer Stocked
[Buy Now](https://www.adafruit.com/product/1071)
[Related Guides to the Product](https://learn.adafruit.com/products/1071/guides)
### Terminal Block - 2-pin 3.5mm - pack of 5!
[Terminal Block - 2-pin 3.5mm - pack of 5!](https://www.adafruit.com/product/724)
Nothing makes a project harder to maintain than a lot of loose wiring. That's why we like to use terminal blocks whenever making PCB-to-Wire connections. These particular 3.5mm terminal blocks are our favorite: big enough for a range of wire gauges, easy to adjust with a screwdriver, and...
In Stock
[Buy Now](https://www.adafruit.com/product/724)
[Related Guides to the Product](https://learn.adafruit.com/products/724/guides)
## Related Guides
- [Hang out your washing reminder - Adafruit IO + Vibration switch](https://learn.adafruit.com/hang-out-your-washing-reminder-adafruit-io-vibration-switch.md)
- [ReBoots Animated LED Boot Laces](https://learn.adafruit.com/re-boots-animated-dancing-boot-laces.md)
- [Circuit Playground Bike Glove](https://learn.adafruit.com/circuit-playground-bike-glove.md)
- [CuteCircuit Twirkle Shirt Teardown](https://learn.adafruit.com/cutecircuit-twirkle-shirt-teardown.md)
- [Tilt Sensor](https://learn.adafruit.com/tilt-sensor.md)
- [ICEdot Teardown](https://learn.adafruit.com/icedot-teardown.md)
- [Wireless LED Juggling Balls with ESP-NOW](https://learn.adafruit.com/wireless-juggling-balls-esp-now.md)
- [Adafruit HX711 24-bit ADC](https://learn.adafruit.com/adafruit-hx711-24-bit-adc.md)
- [Arcade Stick Conversion](https://learn.adafruit.com/arcade-stick-conversion.md)
- [Basic Resistor Sensor Reading on Raspberry Pi](https://learn.adafruit.com/basic-resistor-sensor-reading-on-raspberry-pi.md)
- [Adafruit VEML6070 UV Sensor Breakout](https://learn.adafruit.com/adafruit-veml6070-uv-light-sensor-breakout.md)
- [NAU7802 Pet Food Scale](https://learn.adafruit.com/nau7802-pet-food-scale.md)
- [Flora MIDI Drum Glove](https://learn.adafruit.com/midi-drum-glove.md)
- [Adafruit NAU7802 24-Bit ADC - STEMMA QT / Qwiic](https://learn.adafruit.com/adafruit-nau7802-24-bit-adc-stemma-qt-qwiic.md)
- [Clue Coffee Scale](https://learn.adafruit.com/clue-coffee-scale.md)
---
# Source: https://learn.adafruit.com/ir-sensor/using-an-ir-sensor.md
# IR Sensor
## Using an IR Sensor
The good news is that it is very easy to hook up this sensor. Just connect the output to a digital pin. The bad news is that the Arduino's friendly **digitalRead()** procedure is a tad too slow to reliably read the fast signal as its coming in. Thus we use the hardware pin reading function directly from pin D2, that's what the line "IRpin\_PIN & BV(IRpin))" does. This trick is specific to ATmega328 based boards such as Arduino Uno, Adafruit Metro, etc.
### Adafruit METRO 328 Fully Assembled - Arduino IDE compatible
[Adafruit METRO 328 Fully Assembled - Arduino IDE compatible](https://www.adafruit.com/product/50)
We sure love the ATmega328 here at Adafruit, and we use them _a lot_ for our own projects. The processor has plenty of GPIO, Analog inputs, hardware UART SPI and I2C, timers and PWM galore - just enough for most simple projects. When we need to go small, we use a
Out of Stock
[Buy Now](https://www.adafruit.com/product/50)
[Related Guides to the Product](https://learn.adafruit.com/products/50/guides)


https://github.com/adafruit/Adafruit_Learning_System_Guides/blob/main/IR_Sensor/Arduino/Raw_IR/Raw_IR.ino
If you run this while pointing a Sony IR remote and pressing the ON button you will get the following...
If you ignore the first OFF pulse (its just the time from when the Arduino turned on to the first IR signal received) and the last ON pulse (it the beginning of the next code) you'll find the Sony power code:| **PWM ON** | **OFF** |
| 2.5 ms | 0.6 ms |
| 1.2 ms | 0.6 ms |
| 0.6 ms | 0.6 ms |
| 1.2 ms | 0.6 ms |
| 0.6 ms | 0.6 ms |
| 1.2 ms | 0.6 ms |
| 0.6 ms | 0.6 ms |
| 0.6 ms | 0.6 ms |
| 1.2 ms | 0.6 ms |
| 0.6 ms | 0.6 ms |
| 0.6 ms | 0.6 ms |
| 0.6 ms | 0.6 ms |
| 0.6 ms | 27.2 ms |
- [Previous Page](https://learn.adafruit.com/ir-sensor/ir-remote-signals.md)
- [Next Page](https://learn.adafruit.com/ir-sensor/making-an-intervalometer.md)
## Featured Products
### Adafruit METRO 328 Fully Assembled - Arduino IDE compatible
[Adafruit METRO 328 Fully Assembled - Arduino IDE compatible](https://www.adafruit.com/product/50)
We sure love the ATmega328 here at Adafruit, and we use them _a lot_ for our own projects. The processor has plenty of GPIO, Analog inputs, hardware UART SPI and I2C, timers and PWM galore - just enough for most simple projects. When we need to go small, we use a
Out of Stock
[Buy Now](https://www.adafruit.com/product/50)
[Related Guides to the Product](https://learn.adafruit.com/products/50/guides)
### IR (Infrared) Receiver Sensor
[IR (Infrared) Receiver Sensor](https://www.adafruit.com/product/157)
IR sensor tuned to 38KHz, perfect for receiving commands from a TV remote control. Runs at 3V to 5V so it's great for any microcontroller.
To use, connect pin 3 (all the way to the right) to 5V power, pin 2 (middle) to ground and listen on pin 1. It doesn't do any decoding...
In Stock
[Buy Now](https://www.adafruit.com/product/157)
[Related Guides to the Product](https://learn.adafruit.com/products/157/guides)
### Super-bright 5mm IR LED
[Super-bright 5mm IR LED](https://www.adafruit.com/product/387)
Infrared LEDs are used for remote controls (they're the little LED in the part you point at your TV) and 'night-vision' cameras, and these little blue guys are high powered ones! They are 940nm wavelength, which is what nearly all devices listen to. They're 20 degree beamwidth,...
In Stock
[Buy Now](https://www.adafruit.com/product/387)
[Related Guides to the Product](https://learn.adafruit.com/products/387/guides)
### Mini Remote Control
[Mini Remote Control](https://www.adafruit.com/product/389)
This little remote control would be handy for controlling a robot or other project from across the room. It has 21 buttons and a layout we thought was handy: directional buttons and number entry buttons. The remote uses the NEC encoding type and sends data codes 0 thru 26 (it skips #3, #7,...
In Stock
[Buy Now](https://www.adafruit.com/product/389)
[Related Guides to the Product](https://learn.adafruit.com/products/389/guides)
### Super-bright 5mm IR LED (25 pack)
[Super-bright 5mm IR LED (25 pack)](https://www.adafruit.com/product/388)
Infrared LEDs are used for remote controls (they're the little LED in the part you point at your TV) and 'night-vision' cameras, and these little blue guys are high powered ones! They are 940nm wavelength, which is what nearly all devices listen to. They're 20 degree beamwidth,...
In Stock
[Buy Now](https://www.adafruit.com/product/388)
[Related Guides to the Product](https://learn.adafruit.com/products/388/guides)
### Adafruit METRO 328 - Arduino Compatible - with Headers
[Adafruit METRO 328 - Arduino Compatible - with Headers](https://www.adafruit.com/product/2488)
This is the **Adafruit METRO Arduino-Compatible - with headers. ** It's a fully assembled and tested microcontroller and physical computing board with through-hole headers attached. If you don't want a Metro with the headers attached for...
In Stock
[Buy Now](https://www.adafruit.com/product/2488)
[Related Guides to the Product](https://learn.adafruit.com/products/2488/guides)
## Related Guides
- [RePaper eInk Development Board](https://learn.adafruit.com/repaper-eink-development-board.md)
- [Adafruit MSA301 Triple Axis Accelerometer](https://learn.adafruit.com/msa301-triple-axis-accelerometer.md)
- [Bluetooth Controlled Motorized Camera Slider](https://learn.adafruit.com/bluetooth-motorized-camera-slider.md)
- [Adafruit PCA9685 16-Channel Servo Driver](https://learn.adafruit.com/16-channel-pwm-servo-driver.md)
- [Adalight Project Pack](https://learn.adafruit.com/adalight-diy-ambient-tv-lighting.md)
- [Reverse Geocache Box](https://learn.adafruit.com/reverse-geocache-engagement-box.md)
- [Introducing Adafruit Trellis ](https://learn.adafruit.com/adafruit-trellis-diy-open-source-led-keypad.md)
- [Sending an SMS with Temboo](https://learn.adafruit.com/sending-an-sms-with-temboo.md)
- [20mm LED Pixels](https://learn.adafruit.com/20mm-led-pixels.md)
- [Remote controlled door lock using a fingerprint sensor & Adafruit IO](https://learn.adafruit.com/remote-controlled-door-lock-using-a-fingerprint-sensor-and-adafruit-io.md)
- [Character LCDs](https://learn.adafruit.com/character-lcds.md)
- [Smart Measuring Cup](https://learn.adafruit.com/smart-measuring-cup.md)
- [Memories of an Arduino](https://learn.adafruit.com/memories-of-an-arduino.md)
- [Arduino Lesson 2. LEDs](https://learn.adafruit.com/adafruit-arduino-lesson-2-leds.md)
- [Smart Cocktail Shaker](https://learn.adafruit.com/smart-cocktail-shaker.md)
---
# Source: https://learn.adafruit.com/ttl-serial-camera/using-commtool.md
# TTL Serial Camera
## Using CommTool
To use the Comm Tool, a windows utility, we need to set up a serial link to the camera. There's two ways we suggest doing this. One is to use something like an FTDI friend or other USB/TTL serial converter. If you have an Arduino you can 'hijack' the serial chip (FTDI chip or similar) by uploading a blank sketch to the Arduino:
```
// empty sketch
void setup()
{
}
void loop()
{
}
```
Danger:
If you're using a Leonardo, Micro, Yun, or other ATmega32U4-based controller, use this Leo\_passthru sketch instead of the "blank" sketch.
```
//Leo_passthru
// Allows Leonardo to pass serial data between
// fingerprint reader and Windows.
//
// Red connects to +5V
// Black connects to Ground
// Green goes to Digital 0
// White goes to Digital 1
void setup() {
Serial1.begin(57600);
Serial.begin(57600);
}
void loop()
{
while (Serial.available())
Serial1.write(Serial.read());
while (Serial1.available())
Serial.write(Serial1.read());
}
```
Now, wire it up as follows:

Danger:
Note the 10K resistor divider, the camera's serial data pins are 3.3v logic and its a good idea to divide the 5V down so that its 2.5V. Normally the ouput from the digital 0 pin is 5V high, the way we connected the resistors is so the camera input (white wire) never goes above 3.3V
Now download and install the VC0706 CommTool software (see below in the Download section)
Start up the software and select the COM port that the Arduino is on.

Then **Open** the port and click **Get Version**

Note it says VC0703 - we don't know precisely why the DSP is programmed with a different number - its one of those mysteries! Still, you should get a response
The next button you should press is near the bottom **FBUF CTRL**.

This is quite a panel, but we can use this to get images directly from the camera which is good for debugging.
- Point the camera at something you want to take a photo of
- Click **Stop FBuf** to freeze the frame buffer
- Click **Sel File** to select the file to save the JPG as

Next press **Read** (next to **Sel Fil**** e**) to read the jpeg image off the camera
Thats it! You can now easily test reading camera images. To take another photo. Press **Resume** up at the top to have the video start up again. Then click **Stop CFbuf** when you want to snap another photo. Finally you can select the **Compression Ratio** which will improve or degrade the image quality but also change the image transfer time. There's no way to change the image size from this program (easily) but we can do it using the Arduino sketch so just try it out here to start.
You might notice there's a dropdown for changing the baud rate. By default the baudrate is 38400 baud.
## **Despite the software letting you change the baud rate this is a very flaky setting and even if it works, when you power up the camera again it will reset. Some experimenters have accidentally disabled their cameras by trying to change the baud rate. We do not suggest you mess with the baud rate settings. If you do, you may permanently disable your camera and we will not replace it!**
##

The only other thing we suggest checking out is the **Image Property** button, which will let you adjust settings for the camera, we bumped up our saturation a bit to get better images. Dragging the sliders will make the video output change immediately so this is a handy place to get a TV connected up so you can check out how it works

There are many options for this software, here's what we think of the other buttons. Personally, we don't suggest going in to any of them unless you really need to.
- **Config - see above**
- **Get Version - see above**
- **R/W**** Data** - this is for writing raw data to the DSP chip processor. Don't do this unless you're sure you know what you're doing since it will mess with the camera's ability. Even we don't know what it would be good for
- **Color Ctrl -** this is for selecting Color or Black&White or Auto select (probably based on lighting conditions). You probably want to keep it at Auto
- **Mirror Ctrl** - we think this is so you can flip the display (if its bouncing off a mirror)
- **Power Ctrl ** - this is for testing the power down mode, and it seems like you might be able to have it auto-power down when there's no motion.
- **Timer Ctrl** - there is an RTC built into the DSP which you can set, however there's no battery backup so if power is lost the RTC will be reset so we don't think its terribly useful
- **AE**** Ctrl** - this is for controlling the auto-contrast/brightness. By default its set to auto-select for indoor or outdoor use. Probably best to leave it as is
- **Motion Ctrl** - this is for the motion detection system. You can tweak the settings and also test it. We have an Arduino sketch for interacting with the motion detection system. By default it works pretty good but you can super tweak it out if you want to.
- **OSD Config - ** The protocol sheet and this seem to imply you can do on-screen-display but after much time spent on it, we determined its not activated somewhere in the DSP. We've never seen a VC0706 camera that could do it. :(
- **Image property - see above**
- **Gamma - ** this is for more precise gamma control of the CMOS sensor. It seems to be preset to be OK but you can mess with this if you'd like
- **SPI Flash** - for reading/writing to the SPI storage? Not sure if its a good idea to mess with this
- **Other Ctrl ** - for playing with the DAC? No idea what this is for.
- **Up/Down Load** - this is for reading and writing to the flash probably to upload new DSP code. We dont suggest messing with this
- **System Reset - ** does a reset of the module. Press this if its not responding
- **FBuff Ctrl - see above**
- **Zoom Ctrl - ** The module has built in 'Pan Tilt Zoom' ability BUT its for video only and wont affect photos snapped. You can play with the PTZ here, its pretty basic but could be useful for someone
- [Previous Page](https://learn.adafruit.com/ttl-serial-camera/testing-the-camera.md)
- [Next Page](https://learn.adafruit.com/ttl-serial-camera/arduino-usage.md)
## Featured Products
### TTL Serial JPEG Camera with NTSC Video
[TTL Serial JPEG Camera with NTSC Video](https://www.adafruit.com/product/397)
This camera module can be a pretty neat project addition. It was designed to be used in security systems and does two main things - it outputs NTSC video and can take snapshots of that video (in color) and transmit them over the TTL serial link. You can snap pictures at 640x480, 320x240 or...
In Stock
[Buy Now](https://www.adafruit.com/product/397)
[Related Guides to the Product](https://learn.adafruit.com/products/397/guides)
### Miniature TTL Serial JPEG Camera with NTSC Video
[Miniature TTL Serial JPEG Camera with NTSC Video](https://www.adafruit.com/product/1386)
This tiny little camera module can be a pretty neat project addition, it is just like [our other JPEG cameras (same chipset/software)](http://www.adafruit.com/category/35_68), but much smaller and slimmer. It was designed to be used in security systems and does two main things - it...
In Stock
[Buy Now](https://www.adafruit.com/product/1386)
[Related Guides to the Product](https://learn.adafruit.com/products/1386/guides)
### Adafruit METRO 328 Fully Assembled - Arduino IDE compatible
[Adafruit METRO 328 Fully Assembled - Arduino IDE compatible](https://www.adafruit.com/product/50)
We sure love the ATmega328 here at Adafruit, and we use them _a lot_ for our own projects. The processor has plenty of GPIO, Analog inputs, hardware UART SPI and I2C, timers and PWM galore - just enough for most simple projects. When we need to go small, we use a
Out of Stock
[Buy Now](https://www.adafruit.com/product/50)
[Related Guides to the Product](https://learn.adafruit.com/products/50/guides)
### Weatherproof TTL Serial JPEG Camera with NTSC Video and IR LEDs
[Weatherproof TTL Serial JPEG Camera with NTSC Video and IR LEDs](https://www.adafruit.com/product/613)
This weatherproof camera module is [a classy upgrade to the basic camera module we already stock in the shop](http://www.adafruit.com/products/397). The main differences is that this one comes in a nice metal case with a mounting hinge, a 1 meter long cable with the TTL & NTSC...
In Stock
[Buy Now](https://www.adafruit.com/product/613)
[Related Guides to the Product](https://learn.adafruit.com/products/613/guides)
### MicroSD card breakout board+
[MicroSD card breakout board+](https://www.adafruit.com/product/254)
Not just a simple breakout board, this microSD adapter goes the extra mile - designed for ease of use.
- Onboard 5v-\>3v regulator provides 150mA for power-hungry cards
- 3v level shifting means you can use this with ease on either 3v or 5v systems
- Uses a proper level...
Out of Stock
[Buy Now](https://www.adafruit.com/product/254)
[Related Guides to the Product](https://learn.adafruit.com/products/254/guides)
### Half Sized Premium Breadboard - 400 Tie Points
[Half Sized Premium Breadboard - 400 Tie Points](https://www.adafruit.com/product/64)
This is a cute, half-size breadboard with 400 tie points, good for small projects. It's 3.25" x 2.2" / 8.3cm x 5.5cm with a standard double-strip in the middle and two power rails on both sides. You can pull the power rails off easily to make the breadboard as...
In Stock
[Buy Now](https://www.adafruit.com/product/64)
[Related Guides to the Product](https://learn.adafruit.com/products/64/guides)
### SD/MicroSD Memory Card (8 GB SDHC)
[SD/MicroSD Memory Card (8 GB SDHC)](https://www.adafruit.com/product/1294)
Add mega-storage in a jiffy using this 8 GB class 4 micro-SD card. It comes with a SD adapter so you can use it with any of our shields or adapters. Preformatted to FAT so it works out of the box with our projects. Tested and works great with our
In Stock
[Buy Now](https://www.adafruit.com/product/1294)
[Related Guides to the Product](https://learn.adafruit.com/products/1294/guides)
## Related Guides
- [Making Adabot: Part 2](https://learn.adafruit.com/making-adabot-part-2.md)
- [3D Printed Animatronic Robot Head](https://learn.adafruit.com/3d-printed-animatronic-robot-head.md)
- [Arduino Lesson 14. Servo Motors](https://learn.adafruit.com/adafruit-arduino-lesson-14-servo-motors.md)
- [Arduino Lesson 15. DC Motor Reversing](https://learn.adafruit.com/adafruit-arduino-lesson-15-dc-motor-reversing.md)
- [Programming Arduino with Android and Windows Tablets](https://learn.adafruit.com/programming-arduino-with-android-and-windows-tablets.md)
- [LSM303 Accelerometer + Compass Breakout](https://learn.adafruit.com/lsm303-accelerometer-slash-compass-breakout.md)
- [Adafruit VS1053 MP3/AAC/Ogg/MIDI/WAV Codec Breakout Tutorial](https://learn.adafruit.com/adafruit-vs1053-mp3-aac-ogg-midi-wav-play-and-record-codec-tutorial.md)
- [Naughty or Nice Machine](https://learn.adafruit.com/naughty-or-nice-machine.md)
- [Adafruit Ultimate GPS Logger Shield](https://learn.adafruit.com/adafruit-ultimate-gps-logger-shield.md)
- [Arduino "Hunt The Wumpus"](https://learn.adafruit.com/arduino-hunt-the-wumpus.md)
- [Track Your Treats: Halloween Candy GPS Tracker](https://learn.adafruit.com/track-your-treats-halloween-candy-gps-tracker.md)
- [WiFi Weather Station](https://learn.adafruit.com/wifi-weather-station-arduino-cc3000.md)
- [Bluetooth Controlled Motorized Camera Slider](https://learn.adafruit.com/bluetooth-motorized-camera-slider.md)
- [TMP36 Temperature Sensor](https://learn.adafruit.com/tmp36-temperature-sensor.md)
- [Babel Fish](https://learn.adafruit.com/babel-fish.md)
---
# Source: https://learn.adafruit.com/adafruit-motor-shield/using-dc-motors.md
# Adafruit Motor Shield
## Using DC Motors
Warning:

## DC motors are used for all sort of robotic projects.
The motor shield can drive up to 4 DC motors bi-directionally. That means they can be driven forwards and backwards. The speed can also be varied at 0.5% increments using the high-quality built in PWM. This means the speed is very smooth and won't vary!
Note that the H-bridge chip is not meant for driving loads over 0.6A or that peak over 1.2A so this is for _small_ motors. Check the datasheet for information about the motor to verify its OK.
To connect a motor, simply solder two wires to the terminals and then connect them to either the **M1, M2, M3,** or **M4**. Then follow these steps in your sketch
1. Make sure you #include \
2. Create the AF\_DCMotor object with **AF\_DCMotor(_motor#, frequency_)**, to setup the motor H-bridge and latches. The constructor takes two arguments.
The first is which port the motor is connected to, **1, 2, 3** or **4**.
**_frequency_** is how fast the speed controlling signal is.
For motors 1 and 2 you can choose **MOTOR12\_64KHZ** , **MOTOR12\_8KHZ** , **MOTOR12\_2KHZ** , or **MOTOR12\_1KHZ**. A high speed like 64KHz wont be audible but a low speed like 1KHz will use less power. Motors 3 & 4 are only possible to run at 1KHz and will ignore any setting given
3. Then you can set the speed of the motor using **setSpeed(_speed_)** where the _ **speed** _ ranges from 0 (stopped) to 255 (full speed). You can set the speed whenever you want.
4. To run the motor, call **run(_direction_)** where _ **direction** _ is **FORWARD** , **BACKWARD** or **RELEASE**. Of course, the Arduino doesn't actually know if the motor is 'forward' or 'backward', so if you want to change which way it thinks is forward, simply swap the two wires from the motor to the shield.
```
#include <AFMotor.h>
AF_DCMotor motor(2, MOTOR12_64KHZ); // create motor #2, 64KHz pwm
void setup() {
Serial.begin(9600); // set up Serial library at 9600 bps
Serial.println("Motor test!");
motor.setSpeed(200); // set the speed to 200/255
}
void loop() {
Serial.print("tick");
motor.run(FORWARD); // turn it on going forward
delay(1000);
Serial.print("tock");
motor.run(BACKWARD); // the other way
delay(1000);
Serial.print("tack");
motor.run(RELEASE); // stopped
delay(1000);
}
```
- [Previous Page](https://learn.adafruit.com/adafruit-motor-shield/using-stepper-motors.md)
- [Next Page](https://learn.adafruit.com/adafruit-motor-shield/af-dcmotor-class.md)
## Featured Products
### Adafruit METRO 328 Fully Assembled - Arduino IDE compatible
[Adafruit METRO 328 Fully Assembled - Arduino IDE compatible](https://www.adafruit.com/product/50)
We sure love the ATmega328 here at Adafruit, and we use them _a lot_ for our own projects. The processor has plenty of GPIO, Analog inputs, hardware UART SPI and I2C, timers and PWM galore - just enough for most simple projects. When we need to go small, we use a
Out of Stock
[Buy Now](https://www.adafruit.com/product/50)
[Related Guides to the Product](https://learn.adafruit.com/products/50/guides)
## Related Guides
- [Adafruit Proto Shield for Arduino](https://learn.adafruit.com/adafruit-proto-shield-arduino.md)
- [Analog Feedback Servos](https://learn.adafruit.com/analog-feedback-servos.md)
- [All About Arduino Libraries](https://learn.adafruit.com/adafruit-all-about-arduino-libraries-install-use.md)
- [RePaper eInk Development Board](https://learn.adafruit.com/repaper-eink-development-board.md)
- [Multi-tasking the Arduino - Part 2](https://learn.adafruit.com/multi-tasking-the-arduino-part-2.md)
- [Bluetooth Controlled Motorized Camera Slider](https://learn.adafruit.com/bluetooth-motorized-camera-slider.md)
- [Electronic Demon Costume](https://learn.adafruit.com/electronic-demon-costume.md)
- [Adafruit INA219 Current Sensor Breakout](https://learn.adafruit.com/adafruit-ina219-current-sensor-breakout.md)
- [Ladyada's Learn Arduino - Lesson #2](https://learn.adafruit.com/ladyadas-learn-arduino-lesson-number-2.md)
- [Arduino Lesson 6. Digital Inputs](https://learn.adafruit.com/adafruit-arduino-lesson-6-digital-inputs.md)
- [2.2" TFT Display](https://learn.adafruit.com/2-2-tft-display.md)
- [Arduino Lesson 2. LEDs](https://learn.adafruit.com/adafruit-arduino-lesson-2-leds.md)
- [Collin's Lab: MIDI](https://learn.adafruit.com/collins-lab-midi.md)
- [1,500 NeoPixel LED Curtain with Raspberry Pi and Fadecandy](https://learn.adafruit.com/1500-neopixel-led-curtain-with-raspberry-pi-fadecandy.md)
- [Programming Arduino with Android and Windows Tablets](https://learn.adafruit.com/programming-arduino-with-android-and-windows-tablets.md)
---
# Source: https://learn.adafruit.com/el-wire/using-el-wire.md
# EL Wire
## Using EL Wire
## Drivers
To power EL, an AC source is required. It is not possible to light up EL with DC such as batteries or a wall-wart adapter! The output of the inverter must be a sine-wave with no DC component. It is not unusual to have an inverter run from batteries, such as this 'pocket' AA driver. The inverting circuitry is inside the box part to the left.

This pocket inverter can drive approximately 1 to 15 feet (0.3-5 meter) of 'classic' EL wire such as LyTec. Since we are using higher-brightness EL wire in the shop, it can only drive half as much, 1 to 7.5 feet (0.3 to 2.5 meter). We found that 2 meters gives a nice bright glow at good voltage and frequency. At 3 meters, its not as bright, it appears about the same as 'classic' EL.
Each meter of high brightness EL draws about 10-15mA at the high voltage, which means about 1.5 Watt/meter (at 100VAC). 2 AA batteries can provide 9 Watts, so you can drive 1 meter for about 6 hours or 2 meters for 3 hours. This is only approximate, as the voltage changes with the length. The best way to know how long the wire will last is to test it with batteries and time how long it takes to dim!
All EL drivers run at 'audible' frequencies which means that you can hear a squeaking noise emanating from the driver case. This is totally normal, but a little annoying. You can reduce the squeaking by opening up the driver case and padding it with foam tape. You can also try wrapping it in bubble-wrap or foam sheet to reduce the noise. We've usually found people wearing EL wire at parties where it's quite loud already.
## EL Wire Modeling
EL wire is **not** a resistive light (like an incandescent bulb) and it is **not** a diode light (like an LED), it acts more like a capacitor! The stiff inner wire is one 'plate' of the capacitor, the corona wire is the other 'plate' and the phosphor coating being the insulator/dielectric ([for more details on capacitors, see Wikipedia](http://en.wikipedia.org/wiki/Capacitor)). This means you cannot use dimming methods such as triac/chopping for resistive incandescents or PWM for LEDs.
In terms of thinking of how EL wire 'acts' you should model it as a capacitor that increases with the length of the wire. It is not a perfect capacitor, there is also some leakage which we will model as a resistor.

Adding another meter, we duplicate the RC model in **parallel.** 
Of course, we can simplify by calculating the new capacitance and resistance. Remember that capacitance _increases_ in parallel and resistance _decreases._

The capacitance and resistance per meter **depends on the 'thickness' of the EL wire, the brand and make, the voltage and frequency applied**
For ELAM Lytec 2.3mm EL wire (which is the most common EL wire) the parallel resistance per meter is:
| Voltage | 200 Hz | 400 Hz | 800 Hz | 1000 Hz | 2000 Hz |
| --- | --- | --- | --- | --- | --- |
| 5 | 1,504 KΩ | 1,043 KΩ | 663 KΩ | 569 KΩ | 314 KΩ |
| 20 | 1428 | 942 KΩ | 592 KΩ | 494 KΩ | 259 KΩ |
| 40 | 1175 KΩ | 691 KΩ | 393 KΩ | 316 KΩ | 165 KΩ |
| 60 | 886 KΩ | 510 KΩ | 280 KΩ | 235 KΩ | 123 KΩ |
| 80 | 709 KΩ | 435 KΩ | 243 KΩ | 200 KΩ | 107 KΩ |
| 100 | 572 KΩ | 374 KΩ | 226 KΩ | 184 KΩ | 101 KΩ |
| 120 | 480 KΩ | 323 KΩ | 210 KΩ | 174 KΩ | 94 KΩ |
And the ELAM Lytec 2.3mm EL wire capacitance per meter is:
| Voltage | 200 Hz | 400 Hz | 800 Hz | 1000 Hz | 2000 Hz |
| --- | --- | --- | --- | --- | --- |
| 5 | 5.1 nF | 5.0 nF | 4.9 nF | 4.9 nF | 4.7 nF |
| 20 | 5.1 nF | 5.0 nF | 4.9 nF | 4.9 nF | 4.8 nF |
| 40 | 5.3 nF | 5.1 nF | 5.0 nF | 5.0 nF | 4.9 nF |
| 60 | 5.6 nF | 5.4 nF | 5.4 nF | 5.3 nF | 5.2 nF |
| 80 | 5.9 nF | 5.8 nF | 5.7 nF | 5.7 nF | 5.6 nF |
| 100 | 6.3 nF | 6.2 nF | 6.1 nF | 6.1 nF | 6.0 nF |
| 120 | 6.4 nF | 6.3 nF | 6.2 nF | 6.2 nF | 6.1 nF |
The 'high brightness, long life' EL wire we carry is about twice as bright and has about twice the capacitance.
## Current Draw
We can use this information to determine the power draw.
Assuming you have LyTec EL wire, 2.3mm diameter 'standard'…if have one meter, that is 6nF and 100KΩ in parallel. The capacitance has an impedance of 1/(2πfC) so at 2000 Hz, the impedence per meter is 12 KΩ, in parallel with 100 KΩ it is 11 KΩ total. For a 100V AC power source, the current draw is 100V/11KΩ = 9mA per meter. 100V \* 9mA/meter = 0.9 Watts/meter!
If you are using our 'high brightness, long life' stuff, its about 1.5 Watts per meter.
Thus an inverter with a 100mA output capability can drive 10 meters or so of LyTec and 5 meter of 'high brightness' EL. The transformer and transistors used in an inverter are a big part of how much current an inverter can provide!
## Inverter / Driver Details
To power EL, an AC source is required. It is not possible to light up EL with DC such as batteries or a wall adapter! The output of the inverter must be a sine-wave with no DC component. It is not unusual to have an inverter run from batteries, such as this 'pocket' AA driver. The inverting circuitry is inside the box part to the left. 
The voltage should be between 50-120V AC RMS (150V-360V peak-to-peak). Higher voltages result in a brighter display (but lower overall wire-life).
The AC frequency can run from 60Hz to 2000Hz, higher frequency results in a brighter display (but lower overall wire-life). Most inverters run at around 100VAC and 2KHz. This will vary a little bit with how much wire is attached, as longer pieces will 'load' the output.
For example, this is the output of our pocket inverter with **no loading**. It is about 7KHz and 120V, the frequency is a bit high because the output is expecting a capacitive load that is not there.** (Don't do this yourself, it can damage the inverter!)**

Attaching 3 meters (10 feet) of high brightness EL wire, the frequency stabilizes at 2KHz and 65V, which means we've about maxed out what this driver can provide.
If you are comfortable using tools and want to optimize your driver and wire, you can do so by 'modeling' your EL wire with a capacitor and resistor and plugging that in, then measuring the frequency across the RC with a multimeter or scope, just watch out you don't zap yourself!
The most important thing to note is that without a load capacitance/resistance, the voltage output can peak very high, up to 400Vpp! This will damage the pass transistors and for this reason **you should never run an EL inverter without EL wire attached**
Another thing is that the more EL you add, the dimmer it will get as the voltage sags.
- [Previous Page](https://learn.adafruit.com/el-wire/soldering-to-el-wire.md)
- [Next Page](https://learn.adafruit.com/el-wire/el-projects.md)
## Featured Products
### EL Wire 12V Sound Activated Pocket Inverter
[EL Wire 12V Sound Activated Pocket Inverter](https://www.adafruit.com/product/832)
A small, portable inverter for EL wire with an audio input! This inverter has a little microphone and will light the connected EL according to the surrounding audio volume. Makes for an easy reactive project.
This inverter requires **12VDC input** (it works great with our 8xAA...
No Longer Stocked
[Buy Now](https://www.adafruit.com/product/832)
[Related Guides to the Product](https://learn.adafruit.com/products/832/guides)
### EL Wire Sound Activated Pocket Inverter - 5V USB Power
[EL Wire Sound Activated Pocket Inverter - 5V USB Power](https://www.adafruit.com/product/831)
A small, portable inverter for EL wire with an audio input! This inverter has a little microphone and will light the connected EL according to the surrounding audio volume. Makes for an easy reactive project.
This inverter requires 5V input (it works great with any USB power pack) and it...
No Longer Stocked
[Buy Now](https://www.adafruit.com/product/831)
[Related Guides to the Product](https://learn.adafruit.com/products/831/guides)
### EL wire 4xAAA pocket inverter
[EL wire 4xAAA pocket inverter](https://www.adafruit.com/product/564)
A small, portable inverter for EL wire. Powers off of 4 AAA batteries (not included!), it can drive 3-4 meters (10 to 13 feet) of our high-brightness EL wire OR 1 meter (3 feet) of EL tape OR a 10cmx10cm piece of EL panel for about 7 hours.
There is a switch for selecting...
In Stock
[Buy Now](https://www.adafruit.com/product/564)
[Related Guides to the Product](https://learn.adafruit.com/products/564/guides)
### 12V EL wire/tape inverter
[12V EL wire/tape inverter](https://www.adafruit.com/product/448)
This is an inverter for EL wire and tape, similar to our pocket inverters, except it is a brick that takes 12V input instead of 2 AA batteries. This means its good for 'fixed' installations since you can just plug it into a 12V wall adapter. It's also good for portable projects...
In Stock
[Buy Now](https://www.adafruit.com/product/448)
[Related Guides to the Product](https://learn.adafruit.com/products/448/guides)
### EL wire 2xAA pocket inverter
[EL wire 2xAA pocket inverter](https://www.adafruit.com/product/317)
A small, portable inverter for EL wire. Powers off of 2 AA batteries (not included!), it can drive 1 to 8 feet (about 2.5m) of our high-brightness EL wire for 10 hours. There is a button for selecting steady/blink/off modes. There's a removable clip on the back. Comes with a 2.5mm pitch...
Out of Stock
[Buy Now](https://www.adafruit.com/product/317)
[Related Guides to the Product](https://learn.adafruit.com/products/317/guides)
### Heat Shrink Pack
[Heat Shrink Pack](https://www.adafruit.com/product/344)
Heat shrink is the duct tape of electronics, it keeps your stuff all safe and kept together. Especially when wiring and soldering, use heat shrink to add mechanical strength to cables. We use this stuff all the time and having a zip-lock bag of all the possible sizes is super...
In Stock
[Buy Now](https://www.adafruit.com/product/344)
[Related Guides to the Product](https://learn.adafruit.com/products/344/guides)
## Related Guides
- [EL Wire Stocking](https://learn.adafruit.com/el-wire-stocking.md)
- [Light Up your Costume with Noods](https://learn.adafruit.com/light-up-your-costume-with-noods.md)
- [EL Wire Sign](https://learn.adafruit.com/el-wire-sign.md)
- [Glowing Star Chuck Taylor Sneakers](https://learn.adafruit.com/glowing-star-chucks.md)
- [TRON Hoodie](https://learn.adafruit.com/tron-hoodie.md)
- [TRON Bag](https://learn.adafruit.com/tron-bag.md)
- [EL Bowtie](https://learn.adafruit.com/el-bowtie.md)
- [Electron Bow](https://learn.adafruit.com/electron-bow.md)
- [EL Workshop](https://learn.adafruit.com/el-workshop.md)
- [EL Wire Animal Masks](https://learn.adafruit.com/el-wire-animal-masks.md)
- [EL Stick Figure](https://learn.adafruit.com/el-stick-figure.md)
- [Glowing Bean Bags with EL Wire](https://learn.adafruit.com/glowing-bean-bags-with-el-wire.md)
---
# Source: https://learn.adafruit.com/adafruit-gfx-graphics-library/using-fonts.md
# Adafruit GFX Graphics Library
## Using Fonts
More recent versions of the Adafruit GFX library offer the ability to use alternate fonts besides the one standard fixed-size and -spaced face that’s built in. Several alternate fonts are included, plus there’s the ability to add new ones.
The included fonts are derived from the [GNU FreeFont](https://www.gnu.org/software/freefont/) project. There are three faces: “Serif” (reminiscent of Times New Roman), “Sans” (reminiscent of Helvetica or Arial) and “Mono” (reminiscent of Courier). Each is available in a few styles (bold, italic, etc.) and sizes. The included fonts are in a bitmap format, not scalable vectors, as it needs to work within the limitations of a small microcontroller.

Located inside the “Fonts” folder inside Adafruit\_GFX, the included files (as of this writing) are:
```
FreeMono12pt7b.h FreeSansBoldOblique12pt7b.h
FreeMono18pt7b.h FreeSansBoldOblique18pt7b.h
FreeMono24pt7b.h FreeSansBoldOblique24pt7b.h
FreeMono9pt7b.h FreeSansBoldOblique9pt7b.h
FreeMonoBold12pt7b.h FreeSansOblique12pt7b.h
FreeMonoBold18pt7b.h FreeSansOblique18pt7b.h
FreeMonoBold24pt7b.h FreeSansOblique24pt7b.h
FreeMonoBold9pt7b.h FreeSansOblique9pt7b.h
FreeMonoBoldOblique12pt7b.h FreeSerif12pt7b.h
FreeMonoBoldOblique18pt7b.h FreeSerif18pt7b.h
FreeMonoBoldOblique24pt7b.h FreeSerif24pt7b.h
FreeMonoBoldOblique9pt7b.h FreeSerif9pt7b.h
FreeMonoOblique12pt7b.h FreeSerifBold12pt7b.h
FreeMonoOblique18pt7b.h FreeSerifBold18pt7b.h
FreeMonoOblique24pt7b.h FreeSerifBold24pt7b.h
FreeMonoOblique9pt7b.h FreeSerifBold9pt7b.h
FreeSans12pt7b.h FreeSerifBoldItalic12pt7b.h
FreeSans18pt7b.h FreeSerifBoldItalic18pt7b.h
FreeSans24pt7b.h FreeSerifBoldItalic24pt7b.h
FreeSans9pt7b.h FreeSerifBoldItalic9pt7b.h
FreeSansBold12pt7b.h FreeSerifItalic12pt7b.h
FreeSansBold18pt7b.h FreeSerifItalic18pt7b.h
FreeSansBold24pt7b.h FreeSerifItalic24pt7b.h
FreeSansBold9pt7b.h FreeSerifItalic9pt7b.h
```
Each filename starts with the face name (“FreeMono”, “FreeSerif”, etc.) followed by the style (“Bold”, “Oblique”, none, etc.), font size in points (currently 9, 12, 18 and 24 point sizes are provided) and “7b” to indicate that these contain 7-bit characters (ASCII codes “ ” through “~”); _8-bit fonts (supporting symbols and/or international characters) are not yet provided but may come later._
# Using GFX Fonts in Arduino Sketches
After #including the Adafruit\_GFX and display-specific libraries, include the font file(s) you plan to use in your sketch. For example:
```
#include <Adafruit_GFX.h> // Core graphics library
#include <Adafruit_TFTLCD.h> // Hardware-specific library
#include <Fonts/FreeMonoBoldOblique12pt7b.h>
#include <Fonts/FreeSerif9pt7b.h>
```
Each font takes up a bit of program space; larger fonts typically require more room. This is a finite resource (about 32K max on an Arduino Uno for font data and _all of your sketch code_), so choose carefully. Too big and the code will refuse to compile (or in some edge cases, may compile but then won’t upload to the board). If this happens, use fewer or smaller fonts, or use the standard built-in font.
Inside these .h files are several data structures, including one main font structure which will usually have the same name as the font file (minus the .h). To select a font for subsequent graphics operations, use the setFont() function, passing the _address_ of this structure, such as:
```
tft.setFont(&FreeMonoBoldOblique12pt7b);
```
Subsequent calls to tft.print() will now use this font. Most other attributes that previously worked with the built-in font (color, size, etc.) work similarly here.
To return to the standard fixed-size font, call setFont(), passing either NULL or no arguments:
```
tft.setFont();
```
You can see a complete example of custom fonts in action in the [MagTag Quotes Example](https://learn.adafruit.com/adafruit-magtag/quotes-example) source code. It’s really just a few extra lines compared to a “normal” GFX text program.
Some text attributes behave a little differently with these new fonts. Not wanting to break compatibility with existing code, the “classic” font continues to behave as before.
For example, whereas the cursor position when printing with the classic font identified the _top-left corner_ of the character cell, with new fonts the cursor position indicates the _baseline_ — the bottom-most row — of subsequent text. Characters may vary in size and width, and don’t necessarily begin at the exact cursor column (as in below, this character starts one pixel _left_ of the cursor, but others may be on or to the right of it).
When switching between built-in and custom fonts, the library will automatically shift the cursor position up or down 6 pixels as needed to continue along the same baseline.

**One “gotcha” to be aware of with new fonts: there is no “background” color option…you can set this value but it will be ignored.**
### **_This is on purpose and by design._**
**The background color feature is sometimes used with the “classic” font to overwrite old screen contents with new data. This only works because those characters are a uniform size; that won’t work with proportionally-spaced fonts, where the bounds of a string can vary, and an indeterminate number of characters may overlap the same region.**
**To replace previously-drawn text when using a custom font, either:**
- **Use getTextBounds() to determine the smallest rectangle encompassing a string, erase the area using fillRect(), then draw new text:**
```
int16_t x1, y1;
uint16_t w, h;
tft.getTextBounds(string, x, y, &x1, &y1, &w, &h);
```
getTextBounds expects a string, a starting cursor X&Y position (the current cursor position will not be altered), and addresses of two signed and two unsigned 16-bit integers. These last four values will then contain the upper-left corner and the width & height of the area covered by this text — these can then be passed directly as arguments to fillRect().
This will unfortunately “blink” the text when erasing and redrawing, but is unavoidable. The old scheme of drawing background pixels in the same pass only creates a new set of problems.
**or:**
- **Create a GFXcanvas1 object (an offscreen bitmap) for a fixed-size area, draw custom text in there and copy to the screen using drawBitmap().**
```cpp
// In global declarations:
GFXcanvas1 canvas(128, 32); // 128x32 pixel canvas
// In code later:
canvas.println("I like cake");
tft.drawBitmap(x, y, canvas.getBuffer(), 128, 32, foreground, background); // Copy to screen
```
_This is illustrative of syntax, not a complete program — change `x`, `y`, `foreground` and `background` to the desired coordinates and color values suited to the display. Some displays also require an explicit display() or show() call to refresh the screen contents._
This will be flicker-free but requires more RAM (about 512 bytes for the 128x32 pixel canvas shown above), so it’s not always practical on AVR boards with only 2K. Arduino Mega or any 32-bit board should manage fine.
**See the “Minimizing Redraw Flicker” page for more info on using canvases.**
# Adding New Fonts
If you want to create new font sizes not included with the library, or adapt entirely new fonts, we have a command-line tool (in the “fontconvert” folder) for this. It should work on many Linux- or UNIX-like systems (Raspberry Pi, Mac OS X, maybe Cygwin for Windows, among others).
Building this tool requires the gcc compiler and [FreeType](http://www.freetype.org) library. Most Linux distributions include both by default. For others, you may need to install developer tools and download and [build FreeType from the source](http://download.savannah.gnu.org/releases/freetype/). Then edit the Makefile to match your setup before invoking “make”.
_fontconvert_ expects at least two arguments: a font filename (such as a scalable TrueType vector font) and a size, in points (72 points = 1 inch; the code presumes a screen resolution similar to the Adafruit 2.8" TFT displays). The output should be redirected to a .h file…you can call this whatever you like but I try to be somewhat descriptive:
```
./fontconvert myfont.ttf 12 > myfont12pt7b.h
```
The GNU FreeFont files are not included in the library repository [but are easily downloaded](http://savannah.gnu.org/projects/freefont/). Or you can convert most any font you like.
**The name assigned to the font structure within this file is based on the _input_ filename and font size, not the output.** This is why I recommend using descriptive filenames incorporating the font base name, size, and "7b". Then the .h filename and font structure name can match.
The resulting .h file can be copied to the Adafruit\_GFX/Fonts folder, or you can import the file as a new tab in your Arduino sketch using the Sketch→Add File… command.
If in the Fonts folder, use this syntax when #including the file:
```
#include <Fonts/myfont12pt7b.h>
```
If a tab within your sketch, use this syntax:
```
#include "myfont12pt7b.h"
```
- [Previous Page](https://learn.adafruit.com/adafruit-gfx-graphics-library/rotating-the-display.md)
- [Next Page](https://learn.adafruit.com/adafruit-gfx-graphics-library/loading-images.md)
## Related Guides
- [AdaBox 019](https://learn.adafruit.com/adabox019.md)
- [Sous-vide controller powered by Arduino - The SousViduino!](https://learn.adafruit.com/sous-vide-powered-by-arduino-the-sous-viduino.md)
- [Adafruit 128x64 OLED Bonnet for Raspberry Pi](https://learn.adafruit.com/adafruit-128x64-oled-bonnet-for-raspberry-pi.md)
- [Adafruit IO IOT Hub with the Adafruit FunHouse](https://learn.adafruit.com/adafruit-io-hub-with-the-adafruit-funhouse.md)
- [HalloWing Flapping Bat](https://learn.adafruit.com/hallowing-flapping-bat.md)
- [CircuitPython OLED and Dual Knob Sketcher](https://learn.adafruit.com/circuitpython-oled-knob-sketcher.md)
- [Monochrome OLED Breakouts](https://learn.adafruit.com/monochrome-oled-breakouts.md)
- [4x4 Rotary Encoder MIDI Messenger](https://learn.adafruit.com/4x4-rotary-encoder-midi-messenger.md)
- [Pico W HTTP Server with CircuitPython](https://learn.adafruit.com/pico-w-http-server-with-circuitpython.md)
- [Capturing Camera Images with CircuitPython](https://learn.adafruit.com/capturing-camera-images-with-circuitpython.md)
- [WiFi OLED Display Badge](https://learn.adafruit.com/digital-display-badge.md)
- [Trinket Ultrasonic Rangefinder](https://learn.adafruit.com/trinket-ultrasonic-rangefinder.md)
- [PyPortal Adafruit Quote Book](https://learn.adafruit.com/pyportal-adafruit-quote-board.md)
- [2.8" TFT Touchscreen](https://learn.adafruit.com/2-8-tft-touchscreen.md)
- [Magic Storybook with ChatGPT](https://learn.adafruit.com/magic-storybook-with-chatgpt.md)
---
# Source: https://learn.adafruit.com/adafruit-arduino-lesson-3-rgb-leds/using-internet-colors.md
# Arduino Lesson 3. RGB LEDs
## Using Internet Colors
If you have done any Internet programming, you will probably be aware that colors are often represented as a 'hex' number. For example the color red has the number #FF0000. You can find the numbers associated with a particular color using tables like these: [https://htmlcolorcodes.com/color-names/](https://htmlcolorcodes.com/color-names/)
The six digits of the number are actually three pairs of numbers; the first pair being the red component of the color, the next two digits the green part and the final pair the blue part. Red is #FF0000, because its maximum red (FF is 255 in hex) and it has no green or blue part.
It would be pretty useful to be able to dial up one of these color numbers so that it is displayed on the RGB LED.
Let's try and make the color indigo (#4B0082).

The red, green and blue parts of indigo are (in hex) 4B, 00 and 82 respectively. We can plug those into the 'setColor' function like this:
```
setColor(0x4B, 0x0, 0x82); // indigo
```
We have used hex numbers for the three parts of the color by putting '0x' in front of them.
Try adding a few colors of your own to the 'loop' function. Don't forget to add a delay after each one.
- [Previous Page](https://learn.adafruit.com/adafruit-arduino-lesson-3-rgb-leds/arduino-sketch.md)
- [Next Page](https://learn.adafruit.com/adafruit-arduino-lesson-3-rgb-leds/theory-pwm.md)
## Featured Products
### Adafruit METRO 328 Fully Assembled - Arduino IDE compatible
[Adafruit METRO 328 Fully Assembled - Arduino IDE compatible](https://www.adafruit.com/product/50)
We sure love the ATmega328 here at Adafruit, and we use them _a lot_ for our own projects. The processor has plenty of GPIO, Analog inputs, hardware UART SPI and I2C, timers and PWM galore - just enough for most simple projects. When we need to go small, we use a
Out of Stock
[Buy Now](https://www.adafruit.com/product/50)
[Related Guides to the Product](https://learn.adafruit.com/products/50/guides)
### Premium Male/Male Jumper Wires - 40 x 6" (150mm)
[Premium Male/Male Jumper Wires - 40 x 6" (150mm)](https://www.adafruit.com/product/758)
Handy for making wire harnesses or jumpering between headers on PCB's. These premium jumper wires are 6" (150mm) long and come in a 'strip' of 40 (4 pieces of each of ten rainbow colors). They have 0.1" male header contacts on either end and fit cleanly next to each other...
In Stock
[Buy Now](https://www.adafruit.com/product/758)
[Related Guides to the Product](https://learn.adafruit.com/products/758/guides)
### Half Sized Premium Breadboard - 400 Tie Points
[Half Sized Premium Breadboard - 400 Tie Points](https://www.adafruit.com/product/64)
This is a cute, half-size breadboard with 400 tie points, good for small projects. It's 3.25" x 2.2" / 8.3cm x 5.5cm with a standard double-strip in the middle and two power rails on both sides. You can pull the power rails off easily to make the breadboard as...
In Stock
[Buy Now](https://www.adafruit.com/product/64)
[Related Guides to the Product](https://learn.adafruit.com/products/64/guides)
### Diffused RGB (tri-color) LED
[Diffused RGB (tri-color) LED](https://www.adafruit.com/product/159)
Diffused 5mm tri-color LED with separate red, green and blue LED chips inside! Nice indicator, and fun to color-swirl. 60 degree viewing angle. We like diffused RGB LEDs because they color mix inside instead of appearing as 3 distinct LEDs.
These are Common-Anode type which means you...
In Stock
[Buy Now](https://www.adafruit.com/product/159)
[Related Guides to the Product](https://learn.adafruit.com/products/159/guides)
## Related Guides
- [Geofencing with the FONA 808 & Adafruit IO](https://learn.adafruit.com/geofencing-with-the-fona-808-and-adafruit-io.md)
- [Adafruit Motor Shield](https://learn.adafruit.com/adafruit-motor-shield.md)
- [Sous-vide controller powered by Arduino - The SousViduino!](https://learn.adafruit.com/sous-vide-powered-by-arduino-the-sous-viduino.md)
- [Wave Shield Voice Changer](https://learn.adafruit.com/wave-shield-voice-changer.md)
- [Arduino Lesson 5. The Serial Monitor](https://learn.adafruit.com/adafruit-arduino-lesson-5-the-serial-monitor.md)
- [Trinket Audio Player](https://learn.adafruit.com/trinket-audio-player.md)
- [Circuit Playground: D is for Diode](https://learn.adafruit.com/circuit-playground-d-is-for-diode.md)
- [Wave Shield](https://learn.adafruit.com/adafruit-wave-shield-audio-shield-for-arduino.md)
- [Arduino Lesson 0. Getting Started](https://learn.adafruit.com/lesson-0-getting-started.md)
- [Current Limiting Stepper Driver with DRV8871](https://learn.adafruit.com/current-limiting-stepper-driver-with-drv8871.md)
- [RePaper eInk Development Board](https://learn.adafruit.com/repaper-eink-development-board.md)
- [Adafruit AirLift Shield - ESP32 WiFi Co-Processor](https://learn.adafruit.com/adafruit-airlift-shield-esp32-wifi-co-processor.md)
- [Low Power WiFi Datalogger](https://learn.adafruit.com/low-power-wifi-datalogging.md)
- [Babel Fish](https://learn.adafruit.com/babel-fish.md)
- [Arduino Lesson 2. LEDs](https://learn.adafruit.com/adafruit-arduino-lesson-2-leds.md)
---
# Source: https://learn.adafruit.com/adafruit-motor-shield/using-rc-servos.md
# Adafruit Motor Shield
## Using RC Servos
Warning:

Hobby servos are the easiest way to get going with motor control. They have a 3-pin 0.1" female header connection with +5V, ground and signal inputs. The motor shield simply brings out the 16bit PWM output lines to two 3-pin headers so that its easy to plug in and go. They can take a lot of power so a 9V battery wont last more than a few minutes!
The nice thing about using the onboard PWM is that its very precise and goes about its business in the background. You can use the built in **Servo** library
[Using the servos is easy, please read the official Arduino documentation for how to use them and see the example Servo sketches in the IDE](http://www.arduino.cc/en/Reference/Servo).
**Power for the Servos comes from the Arduino's on-board 5V regulator, powered directly from the USB or DC power jack on the Arduino**. If you need an external supply, cut the trace right below the servo pins (on v1.2 boards) and connect a 5V or 6V DC supply directly. Using an external supply is for advanced users as you can accidentally destroy the servos by connecting a power supply incorrectly!
Danger:
- [Previous Page](https://learn.adafruit.com/adafruit-motor-shield/power-requirements.md)
- [Next Page](https://learn.adafruit.com/adafruit-motor-shield/using-stepper-motors.md)
## Featured Products
### Adafruit METRO 328 Fully Assembled - Arduino IDE compatible
[Adafruit METRO 328 Fully Assembled - Arduino IDE compatible](https://www.adafruit.com/product/50)
We sure love the ATmega328 here at Adafruit, and we use them _a lot_ for our own projects. The processor has plenty of GPIO, Analog inputs, hardware UART SPI and I2C, timers and PWM galore - just enough for most simple projects. When we need to go small, we use a
Out of Stock
[Buy Now](https://www.adafruit.com/product/50)
[Related Guides to the Product](https://learn.adafruit.com/products/50/guides)
## Related Guides
- [Adafruit Proto Shield for Arduino](https://learn.adafruit.com/adafruit-proto-shield-arduino.md)
- [Analog Feedback Servos](https://learn.adafruit.com/analog-feedback-servos.md)
- [All About Arduino Libraries](https://learn.adafruit.com/adafruit-all-about-arduino-libraries-install-use.md)
- [RePaper eInk Development Board](https://learn.adafruit.com/repaper-eink-development-board.md)
- [Multi-tasking the Arduino - Part 2](https://learn.adafruit.com/multi-tasking-the-arduino-part-2.md)
- [Bluetooth Controlled Motorized Camera Slider](https://learn.adafruit.com/bluetooth-motorized-camera-slider.md)
- [Electronic Demon Costume](https://learn.adafruit.com/electronic-demon-costume.md)
- [Adafruit INA219 Current Sensor Breakout](https://learn.adafruit.com/adafruit-ina219-current-sensor-breakout.md)
- [Ladyada's Learn Arduino - Lesson #2](https://learn.adafruit.com/ladyadas-learn-arduino-lesson-number-2.md)
- [Arduino Lesson 6. Digital Inputs](https://learn.adafruit.com/adafruit-arduino-lesson-6-digital-inputs.md)
- [2.2" TFT Display](https://learn.adafruit.com/2-2-tft-display.md)
- [Arduino Lesson 2. LEDs](https://learn.adafruit.com/adafruit-arduino-lesson-2-leds.md)
- [Collin's Lab: MIDI](https://learn.adafruit.com/collins-lab-midi.md)
- [1,500 NeoPixel LED Curtain with Raspberry Pi and Fadecandy](https://learn.adafruit.com/1500-neopixel-led-curtain-with-raspberry-pi-fadecandy.md)
- [Programming Arduino with Android and Windows Tablets](https://learn.adafruit.com/programming-arduino-with-android-and-windows-tablets.md)
---
# Source: https://learn.adafruit.com/adafruits-raspberry-pi-lesson-6-using-ssh/using-ssh-on-a-mac-or-linux.md
# Adafruit's Raspberry Pi Lesson 6. Using SSH
## Using SSH on a Mac or Linux
Now switch over to using the computer from which you wish to control the Pi.
If you are using a Mac or Linux PC then open a Terminal. On the Mac, you can find this in the Utilities folder of your Applications folder.
Enter the following command into the Terminal window. _That's a lowercase L after the dash!_
```
ssh 192.168.1.13 -l pi
```
You can also use `ssh pi@192.168.1.13`
Note that you will need to replace the IP address above with that of your Pi. You can find this by running the command “sudo ifconfig” from the Terminal.


The option “-l pi' specifies that we want to **l** og into the Pi as the user “pi”. The first time you run the command, you will get a security warning about not being able to verify the identity of the machine, say that you want to continue and enter your password (“raspberry” by default) when prompted.
You will notice that the command prompt will change to indicate that you are now connected to your Pi. Try using the “ls” command to show the contents of the current folder on the Pi.
- [Previous Page](https://learn.adafruit.com/adafruits-raspberry-pi-lesson-6-using-ssh/enabling-ssh.md)
- [Next Page](https://learn.adafruit.com/adafruits-raspberry-pi-lesson-6-using-ssh/ssh-under-windows.md)
## Featured Products
### Budget Pack for Raspberry Pi 1 Model B (Doesn't include RasPi)
[Budget Pack for Raspberry Pi 1 Model B (Doesn't include RasPi)](https://www.adafruit.com/product/965)
An optimized collection of parts and pieces to experiment with Raspberry Pi at home, school or work. Great for students and those that want to get their feet wet, no soldering required! **THIS PACK DOES NOT INCLUDE A RASPBERRY PI 1 MODEL B and is NOT compatible with Model B+ or Raspberry Pi...**
No Longer Stocked
[Buy Now](https://www.adafruit.com/product/965)
[Related Guides to the Product](https://learn.adafruit.com/products/965/guides)
### Programming the Raspberry Pi: Getting Started with Python
[Programming the Raspberry Pi: Getting Started with Python](https://www.adafruit.com/product/1089)
**Program your own Raspberry Pi projects!**
An updated guide to programming your own Raspberry Pi projects. Learn to create inventive programs and fun games on your powerful Raspberry Pi--with no programming experience required. **This practical book has been revised...**
In Stock
[Buy Now](https://www.adafruit.com/product/1089)
[Related Guides to the Product](https://learn.adafruit.com/products/1089/guides)
## Related Guides
- [Raspberry Gear](https://learn.adafruit.com/raspberry-gear.md)
- [Raspberry Pi Thermal Printer One Time Pads](https://learn.adafruit.com/raspberry-pi-thermal-printer-one-time-pads.md)
- [A DigitalOcean droplet in 10 minutes](https://learn.adafruit.com/a-digitalocean-droplet-in-10-minutes.md)
- [Raspberry Pi Kernel-o-Matic](https://learn.adafruit.com/raspberry-pi-kernel-o-matic.md)
- [7" Portable HDMI Monitor](https://learn.adafruit.com/7-hdmi-portable-monitor.md)
- [Using OSC to Communicate with a Raspberry Pi](https://learn.adafruit.com/raspberry-pi-open-sound-control.md)
- [DotStar Pi Painter](https://learn.adafruit.com/dotstar-pi-painter.md)
- [Raspberry Pi Computer Quick-Start](https://learn.adafruit.com/raspberry-pi-computer-quick-start.md)
- [Wood Case for Raspberry Pi 3](https://learn.adafruit.com/wood-case-for-raspberry-pi-3.md)
- [Using an External Drive as a Raspberry Pi Root Filesystem](https://learn.adafruit.com/external-drive-as-raspberry-pi-root.md)
- [Getting Started With Windows IoT Core on Raspberry Pi](https://learn.adafruit.com/getting-started-with-windows-iot-on-raspberry-pi.md)
- [Pi Box](https://learn.adafruit.com/pi-box.md)
- [Kali Linux on the Raspberry Pi with the PiTFT](https://learn.adafruit.com/kali-linux-on-the-raspberry-pi-with-the-pitft.md)
- [Raspberry Pi RGB LED Matrix Webapp](https://learn.adafruit.com/raspberry-pi-rgb-led-matrix-webapp.md)
- [Raspberry Pi Pygame UI basics](https://learn.adafruit.com/raspberry-pi-pygame-ui-basics.md)
---
# Source: https://learn.adafruit.com/adafruit-motor-shield/using-stepper-motors.md
# Adafruit Motor Shield
## Using Stepper Motors
Warning:

Stepper motors are great for (semi-)precise control, perfect for many robot and CNC projects. This motor shield supports up to 2 stepper motors. The library works identically for bi-polar and uni-polar motors
For unipolar motors: to connect up the stepper, first figure out which pins connected to which coil, and which pins are the center taps. If its a 5-wire motor then there will be 1 that is the center tap for both coils. [Theres plenty of tutorials online on how to reverse engineer the coils pinout.](http://learn.adafruit.com/adafruit-motor-shield/resources) The center taps should both be connected together to the GND terminal on the motor shield output block. then coil 1 should connect to one motor port (say M1 or M3) and coil 2 should connect to the other motor port (M2 or M4).
For bipolar motors: its just like unipolar motors except theres no 5th wire to connect to ground. The code is exactly the same.
Running a stepper is a little more intricate than running a DC motor but its still very easy
1. Make sure you #include \
2. Create the stepper motor object with **AF\_Stepper(_steps_**_, **stepper#** _**)** to setup the motor H-bridge and latches. _ **Steps** _ indicates how many steps per revolution the motor has. a 7.5degree/step motor has 360/7.5 = 48 steps. _ **Stepper#** _ is which port it is connected to. If you're using M1 and M2, its port 1. If you're using M3 and M4 it's port 2
3. Set the speed of the motor using **setSpeed(_rpm_)** where _ **rpm** _ is how many revolutions per minute you want the stepper to turn.
4. Then every time you want the motor to move, call the **step(_#steps_, _direction_, _steptype_)** procedure._ **#steps** _ is how many steps you'd like it to take **. _direction_** is either **FORWARD** or **BACKWARD** and the step type is **SINGLE, DOUBLE. INTERLEAVE** or **MICROSTEP**.
"Single" means single-coil activation, "double" means 2 coils are activated at once (for higher torque) and "interleave" means that it alternates between single and double to get twice the resolution (but of course its half the speed). "Microstepping" is a method where the coils are PWM'd to create smooth motion between steps. Theres tons of [information about the pros and cons of these different stepping methods in the resources page.](http://learn.adafruit.com/adafruit-motor-shield/resources "Link: http://learn.adafruit.com/adafruit-motor-shield/resources")
You can use whichever stepping method you want, changing it "on the fly" to as you may want minimum power, more torque, or more precision.
5. By default, the motor will 'hold' the position after its done stepping. If you want to release all the coils, so that it can spin freely, call **release()**
6. The stepping commands are 'blocking' and will return once the steps have finished.
Because the stepping commands 'block' - you have to instruct the Stepper motors each time you want them to move. If you want to have more of a 'background task' stepper control, [check out AccelStepper library](https://github.com/adafruit/AccelStepper) (install similarly to how you did with AFMotor) which has some examples for controlling two steppers simultaneously with varying accelleration
```
#include <AFMotor.h>
AF_Stepper motor(48, 2);
void setup() {
Serial.begin(9600); // set up Serial library at 9600 bps
Serial.println("Stepper test!");
motor.setSpeed(10); // 10 rpm
motor.step(100, FORWARD, SINGLE);
motor.release();
delay(1000);
}
void loop() {
motor.step(100, FORWARD, SINGLE);
motor.step(100, BACKWARD, SINGLE);
motor.step(100, FORWARD, DOUBLE);
motor.step(100, BACKWARD, DOUBLE);
motor.step(100, FORWARD, INTERLEAVE);
motor.step(100, BACKWARD, INTERLEAVE);
motor.step(100, FORWARD, MICROSTEP);
motor.step(100, BACKWARD, MICROSTEP);
}
```
- [Previous Page](https://learn.adafruit.com/adafruit-motor-shield/using-rc-servos.md)
- [Next Page](https://learn.adafruit.com/adafruit-motor-shield/using-dc-motors.md)
## Featured Products
### Adafruit METRO 328 Fully Assembled - Arduino IDE compatible
[Adafruit METRO 328 Fully Assembled - Arduino IDE compatible](https://www.adafruit.com/product/50)
We sure love the ATmega328 here at Adafruit, and we use them _a lot_ for our own projects. The processor has plenty of GPIO, Analog inputs, hardware UART SPI and I2C, timers and PWM galore - just enough for most simple projects. When we need to go small, we use a
Out of Stock
[Buy Now](https://www.adafruit.com/product/50)
[Related Guides to the Product](https://learn.adafruit.com/products/50/guides)
## Related Guides
- [Adafruit Proto Shield for Arduino](https://learn.adafruit.com/adafruit-proto-shield-arduino.md)
- [Analog Feedback Servos](https://learn.adafruit.com/analog-feedback-servos.md)
- [All About Arduino Libraries](https://learn.adafruit.com/adafruit-all-about-arduino-libraries-install-use.md)
- [RePaper eInk Development Board](https://learn.adafruit.com/repaper-eink-development-board.md)
- [Multi-tasking the Arduino - Part 2](https://learn.adafruit.com/multi-tasking-the-arduino-part-2.md)
- [Bluetooth Controlled Motorized Camera Slider](https://learn.adafruit.com/bluetooth-motorized-camera-slider.md)
- [Electronic Demon Costume](https://learn.adafruit.com/electronic-demon-costume.md)
- [Adafruit INA219 Current Sensor Breakout](https://learn.adafruit.com/adafruit-ina219-current-sensor-breakout.md)
- [Ladyada's Learn Arduino - Lesson #2](https://learn.adafruit.com/ladyadas-learn-arduino-lesson-number-2.md)
- [Arduino Lesson 6. Digital Inputs](https://learn.adafruit.com/adafruit-arduino-lesson-6-digital-inputs.md)
- [2.2" TFT Display](https://learn.adafruit.com/2-2-tft-display.md)
- [Arduino Lesson 2. LEDs](https://learn.adafruit.com/adafruit-arduino-lesson-2-leds.md)
- [Collin's Lab: MIDI](https://learn.adafruit.com/collins-lab-midi.md)
- [1,500 NeoPixel LED Curtain with Raspberry Pi and Fadecandy](https://learn.adafruit.com/1500-neopixel-led-curtain-with-raspberry-pi-fadecandy.md)
- [Programming Arduino with Android and Windows Tablets](https://learn.adafruit.com/programming-arduino-with-android-and-windows-tablets.md)
---
# Source: https://learn.adafruit.com/using-the-bmp085-with-raspberry-pi/using-the-adafruit-bmp-python-library.md
# Using the BMP085/180 with Raspberry Pi or Beaglebone Black
## Using the Adafruit BMP Python Library (Updated)
Danger:
Using the BMP sensor with a Raspberry Pi or Beaglebone Black is easy with the [Adafruit Python BMP sensor library](https://github.com/adafruit/Adafruit_Python_BMP "Link: https://github.com/adafruit/Adafruit\_Python\_BMP"). First make sure your device is powered on and has access to the internet (through a wired or wireless connection). Then connect to your device in a terminal and navigate to a directory where you want to download the library (like /home/pi on a Raspberry Pi or /root on a Beaglebone Black). Finally execute the following commands to download dependencies and install the library:
```
sudo apt-get update
sudo apt-get install git build-essential python-dev python-smbus
git clone https://github.com/adafruit/Adafruit_Python_BMP.git
cd Adafruit_Python_BMP
sudo python setup.py install
```
If you already have git or python-smbus installed you can ignore the message about the package already being installed.
Once the library is installed it will be accessible to any Python script on your device. You can see a few example scripts included in the library source's **examples** folder. Try running the **simpletest.py** example which grabs a single reading from the BMP sensor and displays it by executing:
```
cd examples
sudo python simpletest.py
```
If you receive an error message, carefully check that the library was installed correctly in the previous steps and try again. Note that the command needs to be run as root with sudo so that it can access the hardware's I2C bus.
After running the script you should see an output such as:
> Temp = 20.20 \*C
> Pressure = 101667.00 Pa
> Altitude = -28.27 m
> Sealevel Pressure = 101665.00 Pa
Open the **simpletest.py** code in a text editor to see how to use the library to read the BMP sensor. First the library is imported with this command:
```
import Adafruit_BMP.BMP085 as BMP085
```
Next a BMP085 sensor instance is created with this command:
```
# Default constructor will pick a default I2C bus.
#
# For the Raspberry Pi this means you should hook up to the only exposed I2C bus
# from the main GPIO header and the library will figure out the bus number based
# on the Pi's revision.
#
# For the Beaglebone Black the library will assume bus 1 by default, which is
# exposed with SCL = P9_19 and SDA = P9_20.
sensor = BMP085.BMP085()
# Optionally you can override the bus number:
#sensor = BMP085.BMP085(busnum=2)
# You can also optionally change the BMP085 mode to one of BMP085_ULTRALOWPOWER,
# BMP085_STANDARD, BMP085_HIGHRES, or BMP085_ULTRAHIGHRES. See the BMP085
# datasheet for more details on the meanings of each mode (accuracy and power
# consumption are primarily the differences). The default mode is STANDARD.
#sensor = BMP085.BMP085(mode=BMP085.BMP085_ULTRAHIGHRES)
```
You can see from the comments there are a few ways to create the sensor instance. By default if you pass no parameters the library will try to find the right I2C bus for your device. For a Raspberry Pi the library will detect the revision number and use the appropriate bus (0 or 1). For a Beaglebone Black there are multiple I2C buses so the library defaults to bus 1, which is exposed with pin P9\_19 as SCL clock and P9\_20 as SDA data. You can explicitly set the bus number by passing it in the busnum parameter.
**Note if you're using a BeagleBone Black with the Ubuntu operating system you might need to change busnum to 2 to use the P9\_19 & P9\_20 pin I2C connection.** Just change the line to look like: **sensor = BMP.BMP085(busnum=2)**
The library will also choose by default to use the BMP sensor's standard operation mode. You can override this by passing a mode parameter with an explicit mode value--check the [BMP datasheet](http://www.adafruit.com/datasheets/BMP085_DataSheet_Rev.1.0_01July2008.pdf) for more information on its modes.
Once the BMP sensor instance is created, you can read its values by calling the **read\_temperature** , **read\_pressure** , **read\_altitude** , and **read\_sealevel\_pressure** functions like below:
```
print 'Temp = {0:0.2f} *C'.format(sensor.read_temperature())
print 'Pressure = {0:0.2f} Pa'.format(sensor.read_pressure())
print 'Altitude = {0:0.2f} m'.format(sensor.read_altitude())
print 'Sealevel Pressure = {0:0.2f} Pa'.format(sensor.read_sealevel_pressure())
```
That's all you need to do to read BMP sensor values using the Adafruit Python BMP library!
For another example of using the BMP library, check out the **google\_spreadsheet.py** example. This code is similar to the [DHT sensor Google Docs spreadsheet logging code](https://learn.adafruit.com/dht-humidity-sensing-on-raspberry-pi-with-gdocs-logging/overview "Link: https://learn.adafruit.com/dht-humidity-sensing-on-raspberry-pi-with-gdocs-logging/overview"), but is modified to use the BMP sensor and write the temperature, pressure, and altitude to a Google Docs spreadsheet. Check out the [page on configuring Google Docs](https://learn.adafruit.com/dht-humidity-sensing-on-raspberry-pi-with-gdocs-logging/connecting-to-googles-docs-updated "Link: https://learn.adafruit.com/dht-humidity-sensing-on-raspberry-pi-with-gdocs-logging/connecting-to-googles-docs-updated") to see more details on how to create the spreadsheet and configure the username, password, and spreadsheet name.
- [Previous Page](https://learn.adafruit.com/using-the-bmp085-with-raspberry-pi/hooking-everything-up.md)
- [Next Page](https://learn.adafruit.com/using-the-bmp085-with-raspberry-pi/using-the-adafruit-bmp085-python-library.md)
## Featured Products
### BMP180 Barometric Pressure/Temperature/Altitude Sensor- 5V ready
[BMP180 Barometric Pressure/Temperature/Altitude Sensor- 5V ready](https://www.adafruit.com/product/1603)
This precision sensor from Bosch is the best low-cost sensing solution for measuring barometric pressure and temperature. Because pressure changes with altitude you can also use it as an altimeter! The sensor is soldered onto a PCB with a 3.3V regulator, I2C level shifter and pull-up resistors...
No Longer Stocked
[Buy Now](https://www.adafruit.com/product/1603)
[Related Guides to the Product](https://learn.adafruit.com/products/1603/guides)
### Raspberry Pi Model B 512MB RAM
[Raspberry Pi Model B 512MB RAM](https://www.adafruit.com/product/998)
Adafruit ships the **Raspberry Pi Model B 512MB RAM** as of 10/18/2012.
The Raspberry Pi® is a single-board computer developed in the UK by the Raspberry Pi Foundation with the intention of stimulating the teaching of basic computer science in schools. The Raspberry...
No Longer Stocked
[Buy Now](https://www.adafruit.com/product/998)
[Related Guides to the Product](https://learn.adafruit.com/products/998/guides)
### Adafruit Assembled Pi Cobbler Breakout + Cable for Raspberry Pi
[Adafruit Assembled Pi Cobbler Breakout + Cable for Raspberry Pi](https://www.adafruit.com/product/914)
Now that you've finally got your hands on a [Raspberry Pi® Model B](http://www.raspberrypi.org/), you're probably itching to make some fun embedded computer projects with it. What you need is an add on prototyping Pi Cobbler from Adafruit, which can break out all those...
No Longer Stocked
[Buy Now](https://www.adafruit.com/product/914)
[Related Guides to the Product](https://learn.adafruit.com/products/914/guides)
### BeagleBone Black Rev C - 4GB Flash - Pre-installed Debian
[BeagleBone Black Rev C - 4GB Flash - Pre-installed Debian](https://www.adafruit.com/product/1876)
Note: As of May 12, 2014 Adafruit is shipping Rev C. We have discontinued selling Rev B. There are no exchanges or "upgrades" for Rev B to Rev C.
If you liked the BeagleBone Black Rev B, you will love the Rev C! The Rev C still has a blistering 1GHz processor and 512MB...
No Longer Stocked
[Buy Now](https://www.adafruit.com/product/1876)
[Related Guides to the Product](https://learn.adafruit.com/products/1876/guides)
### BeagleBone Black Rev C - 4GB - Pre-installed Debian
[BeagleBone Black Rev C - 4GB - Pre-installed Debian](https://www.adafruit.com/product/1996)
If you liked the BeagleBone Black Rev B, you will love the Rev C! The Rev C has a blistering 1GHz AM3358 processor and 512MB onboard DDR3 RAM, two 46-pin headers, micro HDMI for audio/video output, USB ports, 10/100 Ethernet and other I/O features. The Rev C is an ultra-powered embedded...
Out of Stock
[Buy Now](https://www.adafruit.com/product/1996)
[Related Guides to the Product](https://learn.adafruit.com/products/1996/guides)
## Related Guides
- [Capacitive Touch Sensors on the Raspberry Pi](https://learn.adafruit.com/capacitive-touch-sensors-on-the-raspberry-pi.md)
- [Modern Replacements for DHT11 and DHT22 Sensors](https://learn.adafruit.com/modern-replacements-for-dht11-dht22-sensors.md)
- [Adding a Real Time Clock to Raspberry Pi](https://learn.adafruit.com/adding-a-real-time-clock-to-raspberry-pi.md)
- [Adafruit AHT20 Temperature & Humidity Sensor](https://learn.adafruit.com/adafruit-aht20.md)
- [Wood Case for Raspberry Pi 3](https://learn.adafruit.com/wood-case-for-raspberry-pi-3.md)
- [Adafruit DPI Display Kippah](https://learn.adafruit.com/adafruit-dpi-display-kippah-ttl-tft.md)
- [Adafruit's Raspberry Pi Lesson 6. Using SSH](https://learn.adafruit.com/adafruits-raspberry-pi-lesson-6-using-ssh.md)
- [3.5" PiTFT OctoPrint Rig](https://learn.adafruit.com/3-dot-5-pitft-octoprint-rig.md)
- [Adafruit TMP117 High Accuracy I2C Temperature Monitor](https://learn.adafruit.com/adafruit-tmp117-high-accuracy-i2c-temperature-monitor.md)
- [Instant Camera using Raspberry Pi and Thermal Printer](https://learn.adafruit.com/instant-camera-using-raspberry-pi-and-thermal-printer.md)
- [User-space SPI TFT Python Library - ILI9341](https://learn.adafruit.com/user-space-spi-tft-python-library-ili9341-2-8.md)
- [USB Audio Cards with a Raspberry Pi ](https://learn.adafruit.com/usb-audio-cards-with-a-raspberry-pi.md)
- [micro:bit Lesson 4. Sensing Light](https://learn.adafruit.com/micro-bit-lesson-4-sensing-light-and-temperature.md)
- [No-Code Indoor Grow Monitor with PPFD and VPD Measurements](https://learn.adafruit.com/no-code-indoor-grow-monitor.md)
- [PyBadge Thermal Camera Case](https://learn.adafruit.com/pybadge-thermal-camera-case.md)
---
# Source: https://learn.adafruit.com/using-the-bmp085-with-raspberry-pi/using-the-adafruit-bmp085-python-library.md
# Using the BMP085/180 with Raspberry Pi or Beaglebone Black
## Using the Adafruit BMP085 Python Library
Danger:
Warning:
The BMP085 Python code for Pi is available on Github at [https://github.com/adafruit/Adafruit-Raspberry-Pi-Python-Code](https://github.com/adafruit/Adafruit-Raspberry-Pi-Python-Code)
While many of these drivers and classes are works in progress -- we're still trying to figure out how we can make accessing HW as painless as possible on the Pi -- the current code should serve as a good starting point to understanding how you can access SMBus/I2C devices with your Pi, and getting some basic data out of your BMP085.
# Downloading the Code from Github
The easiest way to get the code onto your Pi is to hook up an Ethernet cable, and clone it directly using 'git', which is installed by default on most distros. Simply run the following commands from an appropriate location (ex. "/home/pi"): ```
$ git clone https://github.com/adafruit/Adafruit-Raspberry-Pi-Python-Code.git
$ cd Adafruit-Raspberry-Pi-Python-Code
$ cd Adafruit_BMP085
```

# Testing the Library
If you're using a version 2 Pi (512 M) then you'll have to change the I2C bus as it flipped from #0 to #1 in the version 2.
Edit Adafruit\_I2C.py with **nano Adafruit\_I2C.py** and change this line
> **def \_\_init\_\_(self, address, bus=smbus.SMBus(0), debug=False):**
to
> **def \_\_init\_\_(self, address, bus=smbus.SMBus(1), debug=False)**
Once the code has be downloaded to an appropriate folder, and you have your BMP085 properly connected, you can start reading some data via the following command (the driver includes a simple demo program):
```
sudo python Adafruit_BMP085_example.py
```
Which should give you something similar to the following:

# Modifying the Code
The BMP085 library is organized as two seperate classes. There is one class to handle the low-level SMBus/I2C calls (Adafruit\_I2C), and another class that handles the BMP085-specific functionality.
The library includes the basic example shown above, but you can also customize the code a bit to provide full debug output if you're having any problems, change the address, or use the BMP085 in one of it's four different modes (ULTRALOWPOWER, STANDARD, HIRES, and ULTRAHIRES), as seen in the commented out initializors in the sample code below: ```
#!/usr/bin/python
from Adafruit_BMP085 import BMP085
# ===========================================================================
# Example Code
# ===========================================================================
# Initialise the BMP085 and use STANDARD mode (default value)
# bmp = BMP085(0x77, debug=True)
bmp = BMP085(0x77)
# To specify a different operating mode, uncomment one of the following:
# bmp = BMP085(0x77, 0) # ULTRALOWPOWER Mode
# bmp = BMP085(0x77, 1) # STANDARD Mode
# bmp = BMP085(0x77, 2) # HIRES Mode
# bmp = BMP085(0x77, 3) # ULTRAHIRES Mode
temp = bmp.readTemperature()
pressure = bmp.readPressure()
altitude = bmp.readAltitude()
print "Temperature: %.2f C" % temp
print "Pressure: %.2f hPa" % (pressure / 100.0)
print "Altitude: %.2f" % altitude
```
- [Previous Page](https://learn.adafruit.com/using-the-bmp085-with-raspberry-pi/using-the-adafruit-bmp-python-library.md)
- [Next Page](https://learn.adafruit.com/using-the-bmp085-with-raspberry-pi/faqs.md)
## Featured Products
### BMP180 Barometric Pressure/Temperature/Altitude Sensor- 5V ready
[BMP180 Barometric Pressure/Temperature/Altitude Sensor- 5V ready](https://www.adafruit.com/product/1603)
This precision sensor from Bosch is the best low-cost sensing solution for measuring barometric pressure and temperature. Because pressure changes with altitude you can also use it as an altimeter! The sensor is soldered onto a PCB with a 3.3V regulator, I2C level shifter and pull-up resistors...
No Longer Stocked
[Buy Now](https://www.adafruit.com/product/1603)
[Related Guides to the Product](https://learn.adafruit.com/products/1603/guides)
### Raspberry Pi Model B 512MB RAM
[Raspberry Pi Model B 512MB RAM](https://www.adafruit.com/product/998)
Adafruit ships the **Raspberry Pi Model B 512MB RAM** as of 10/18/2012.
The Raspberry Pi® is a single-board computer developed in the UK by the Raspberry Pi Foundation with the intention of stimulating the teaching of basic computer science in schools. The Raspberry...
No Longer Stocked
[Buy Now](https://www.adafruit.com/product/998)
[Related Guides to the Product](https://learn.adafruit.com/products/998/guides)
### Adafruit Assembled Pi Cobbler Breakout + Cable for Raspberry Pi
[Adafruit Assembled Pi Cobbler Breakout + Cable for Raspberry Pi](https://www.adafruit.com/product/914)
Now that you've finally got your hands on a [Raspberry Pi® Model B](http://www.raspberrypi.org/), you're probably itching to make some fun embedded computer projects with it. What you need is an add on prototyping Pi Cobbler from Adafruit, which can break out all those...
No Longer Stocked
[Buy Now](https://www.adafruit.com/product/914)
[Related Guides to the Product](https://learn.adafruit.com/products/914/guides)
### BeagleBone Black Rev C - 4GB Flash - Pre-installed Debian
[BeagleBone Black Rev C - 4GB Flash - Pre-installed Debian](https://www.adafruit.com/product/1876)
Note: As of May 12, 2014 Adafruit is shipping Rev C. We have discontinued selling Rev B. There are no exchanges or "upgrades" for Rev B to Rev C.
If you liked the BeagleBone Black Rev B, you will love the Rev C! The Rev C still has a blistering 1GHz processor and 512MB...
No Longer Stocked
[Buy Now](https://www.adafruit.com/product/1876)
[Related Guides to the Product](https://learn.adafruit.com/products/1876/guides)
### BeagleBone Black Rev C - 4GB - Pre-installed Debian
[BeagleBone Black Rev C - 4GB - Pre-installed Debian](https://www.adafruit.com/product/1996)
If you liked the BeagleBone Black Rev B, you will love the Rev C! The Rev C has a blistering 1GHz AM3358 processor and 512MB onboard DDR3 RAM, two 46-pin headers, micro HDMI for audio/video output, USB ports, 10/100 Ethernet and other I/O features. The Rev C is an ultra-powered embedded...
Out of Stock
[Buy Now](https://www.adafruit.com/product/1996)
[Related Guides to the Product](https://learn.adafruit.com/products/1996/guides)
## Related Guides
- [Capacitive Touch Sensors on the Raspberry Pi](https://learn.adafruit.com/capacitive-touch-sensors-on-the-raspberry-pi.md)
- [Modern Replacements for DHT11 and DHT22 Sensors](https://learn.adafruit.com/modern-replacements-for-dht11-dht22-sensors.md)
- [Adding a Real Time Clock to Raspberry Pi](https://learn.adafruit.com/adding-a-real-time-clock-to-raspberry-pi.md)
- [Adafruit AHT20 Temperature & Humidity Sensor](https://learn.adafruit.com/adafruit-aht20.md)
- [Wood Case for Raspberry Pi 3](https://learn.adafruit.com/wood-case-for-raspberry-pi-3.md)
- [Adafruit DPI Display Kippah](https://learn.adafruit.com/adafruit-dpi-display-kippah-ttl-tft.md)
- [Adafruit's Raspberry Pi Lesson 6. Using SSH](https://learn.adafruit.com/adafruits-raspberry-pi-lesson-6-using-ssh.md)
- [3.5" PiTFT OctoPrint Rig](https://learn.adafruit.com/3-dot-5-pitft-octoprint-rig.md)
- [Adafruit TMP117 High Accuracy I2C Temperature Monitor](https://learn.adafruit.com/adafruit-tmp117-high-accuracy-i2c-temperature-monitor.md)
- [Instant Camera using Raspberry Pi and Thermal Printer](https://learn.adafruit.com/instant-camera-using-raspberry-pi-and-thermal-printer.md)
- [User-space SPI TFT Python Library - ILI9341](https://learn.adafruit.com/user-space-spi-tft-python-library-ili9341-2-8.md)
- [USB Audio Cards with a Raspberry Pi ](https://learn.adafruit.com/usb-audio-cards-with-a-raspberry-pi.md)
- [micro:bit Lesson 4. Sensing Light](https://learn.adafruit.com/micro-bit-lesson-4-sensing-light-and-temperature.md)
- [No-Code Indoor Grow Monitor with PPFD and VPD Measurements](https://learn.adafruit.com/no-code-indoor-grow-monitor.md)
- [PyBadge Thermal Camera Case](https://learn.adafruit.com/pybadge-thermal-camera-case.md)
---
# Source: https://learn.adafruit.com/using-the-adafruit-library-with-fritzing.md
# Using the Adafruit Library with Fritzing
## Download the Fritzing Library from GitHub
[Download Adafruit Fritzing Library!](https://github.com/adafruit/Fritzing-Library/archive/master.zip)
The first step is to download the [latest version of the Adafruit Fritzing Library from GitHub](https://github.com/adafruit/Fritzing-Library "Link: https://github.com/adafruit/Fritzing-Library")
The easiest way to do that is to click that big nice button up there, otherwise [you can also go to the GitHub repository](https://github.com/adafruit/Fritzing-Library/ "Link: https://github.com/adafruit/Fritzing-Library/")and manually download or clone.
Next, open the archive and extract the file "AdaFruit.fzbz" to a convenient spot (I use the Desktop). After you import the library to Fritzing and save it, it will copy over all the necessary files to your Fritzing user directory, and you'll be able to delete the FZBZ file from wherever you extracted it.
The next step is to import the library into Fritzing...
- [Next Page](https://learn.adafruit.com/using-the-adafruit-library-with-fritzing/import-the-library-into-fritzing.md)
## Related Guides
- [Adafruit TSSP77038 38KHz Infrared IR Demodulator Breakout](https://learn.adafruit.com/adafruit-tssp77038-38khz-infrared-ir-demodulator-breakout.md)
- [Adafruit INA228 I2C Power Monitor](https://learn.adafruit.com/adafruit-ina228-i2c-power-monitor.md)
- [Adafruit TMC2209 Stepper Motor Driver Breakout Board](https://learn.adafruit.com/adafruit-tmc2209-stepper-motor-driver-breakout-board.md)
- [Adafruit ADXL375](https://learn.adafruit.com/adafruit-adxl375.md)
- [Adafruit 15x7 CharliePlex FeatherWing](https://learn.adafruit.com/adafruit-15x7-7x15-charlieplex-led-matrix-charliewing-featherwing.md)
- [Adafruit Proto Doubler PiCowbell](https://learn.adafruit.com/adafruit-proto-doubler-picowbell.md)
- [Adafruit TSMP96000 IR Receiver Breakout](https://learn.adafruit.com/adafruit-tsmp96000-ir-receiver-breakout.md)
- [Adafruit PCA9546 4-Channel STEMMA QT Multiplexer](https://learn.adafruit.com/adafruit-pca9546-4-channel-stemma-qt-multiplexer.md)
- [AWS IoT and Adafruit WICED Feather](https://learn.adafruit.com/aws-iot-and-adafruit-wiced-feather.md)
- [Adafruit Sensirion SHTC3 - Temperature & Humidity Sensor Breakout](https://learn.adafruit.com/adafruit-sensirion-shtc3-temperature-humidity-sensor.md)
- [Expressive Pixels for Adafruit Matrix Portal](https://learn.adafruit.com/expressive-pixels-for-matrix-portal.md)
- [MCP4725 12-Bit DAC Tutorial](https://learn.adafruit.com/mcp4725-12-bit-dac-tutorial.md)
- [Ladyada's Toolkit](https://learn.adafruit.com/ladyadas-toolkit.md)
- [Adafruit 16-channel PWM/Servo Shield](https://learn.adafruit.com/adafruit-16-channel-pwm-slash-servo-shield.md)
- [Adafruit TE MS8607 PHT Sensor](https://learn.adafruit.com/adafruit-te-ms8607-pht-sensor.md)
---
# Source: https://learn.adafruit.com/matrix-7-segment-led-backpack-with-the-raspberry-pi/using-the-adafruit-library.md
# Source: https://learn.adafruit.com/mcp4725-12-bit-dac-with-raspberry-pi/using-the-adafruit-library.md
# Source: https://learn.adafruit.com/adafruit-16-channel-servo-driver-with-raspberry-pi/using-the-adafruit-library.md
# Adafruit 16 Channel Servo Driver with Raspberry Pi
## Using the Adafruit Library
It's easy to control servos with the Adafruit 16-channel servo driver. There are multiple CircuitPython libraries available to work with the different features of this board including [Adafruit CircuitPython PCA9685](https://github.com/adafruit/Adafruit_CircuitPython_PCA9685), and [Adafruit CircuitPython ServoKit](https://github.com/adafruit/Adafruit_CircuitPython_ServoKit). These libraries make it easy to write Python code to control servo motors.
You can use this breakout with your Raspberry Pi and Python [thanks to Adafruit\_Blinka, our CircuitPython-for-Python compatibility library](https://learn.adafruit.com/circuitpython-on-raspberrypi-linux).
# Python Installation of ServoKit Library
You'll need to install the Adafruit\_Blinka library that provides the CircuitPython support in Python. This may also require enabling I2C on your platform and verifying you are running Python 3. [Since each platform is a little different, and Linux changes often, please visit the CircuitPython on Linux guide to get your computer ready](https://learn.adafruit.com/circuitpython-on-raspberrypi-linux)!
Once that's done, from your command line run the following command:
- `sudo pip3 install adafruit-circuitpython-servokit`
If your default Python is version 3 you may need to run 'pip' instead. Just make sure you aren't trying to use CircuitPython on Python 2.x, it isn't supported!
# Controlling Servos
We've written a handy CircuitPython library for the various PWM/Servo boards called [Adafruit CircuitPython ServoKit](https://github.com/adafruit/Adafruit_CircuitPython_ServoKit) that handles all the complicated setup for you. All you need to do is import the appropriate class from the library, and then all the features of that class are available for use. We're going to show you how to import the `ServoKit` class and use it to control servo motors with the Adafruit 16-chanel servo driver breakout.
First you'll need to import and initialize the `ServoKit` class. You must specify the number of channels available on your board. The breakout has 16 channels, so when you create the class object, you will specify `16`.
```
from adafruit_servokit import ServoKit
kit = ServoKit(channels=16)
```
Now you're ready to control both standard and continuous rotation servos.
# Standard Servos
To control a standard servo, you need to specify the channel the servo is connected to. You can then control movement by setting `angle` to the number of degrees.
For example to move the servo connected to channel `0` to `180` degrees:
```
kit.servo[0].angle = 180
```
To return the servo to `0` degrees:
```
kit.servo[0].angle = 0
```
With a standard servo, you specify the position as an angle. The angle will always be between 0 and the actuation range. The default is 180 degrees but your servo may have a smaller sweep. You can change the total angle by setting `actuation_range`.
For example, to set the actuation range to 160 degrees:
```
kit.servo[0].actuation_range = 160
```
Often the range an individual servo recognises varies a bit from other servos. If the servo didn't sweep the full expected range, then try adjusting the minimum and maximum pulse widths using `set_pulse_width_range(min_pulse, max_pulse)`.
To set the pulse width range to a minimum of 1000 and a maximum of 2000:
```
kit.servo[0].set_pulse_width_range(1000, 2000)
```
That's all there is to controlling standard servos with the PWM/Servo HAT or Bonnet, Python and `ServoKit`!
# Continuous Rotation Servos
To control a continuous rotation servo, you must specify the channel the servo is on. Then you can control movement using `throttle`.
For example, to start the continuous rotation servo connected to channel `1` to full throttle forwards:
```
kit.continuous_servo[1].throttle = 1
```
To start the continuous rotation servo connected to channel `1` to full reverse throttle:
```
kit.continuous_servo[1].throttle = -1
```
To set half throttle, use a decimal:
```
kit.continuous_servo[1].throttle = 0.5
```
And, to stop continuous rotation servo movement set `throttle` to `0`:
```
kit.continuous_servo[1].throttle = 0
```
That's all there is to controlling continuous rotation servos with the PWM/Servo breakout, Python and `ServoKit`!
http://www.youtube.com/watch?v=3Rj1Fep9Ap0
- [Previous Page](https://learn.adafruit.com/adafruit-16-channel-servo-driver-with-raspberry-pi/hooking-it-up.md)
- [Next Page](https://learn.adafruit.com/adafruit-16-channel-servo-driver-with-raspberry-pi/library-reference.md)
## Featured Products
### 5V 2A (2000mA) switching power supply - UL Listed
[5V 2A (2000mA) switching power supply - UL Listed](https://www.adafruit.com/product/276)
This is an FCC/CE certified and UL listed power supply. Need a lot of 5V power? This switching supply gives a clean regulated 5V output at up to 2000mA. 110 or 240 input, so it works in any country. The plugs are "US 2-prong" style so you may need a plug adapter, but you can pick one...
Out of Stock
[Buy Now](https://www.adafruit.com/product/276)
[Related Guides to the Product](https://learn.adafruit.com/products/276/guides)
### Female DC Power adapter - 2.1mm jack to screw terminal block
[Female DC Power adapter - 2.1mm jack to screw terminal block](https://www.adafruit.com/product/368)
If you need to connect a DC power wall wart to a board that doesn't have a DC jack - this adapter will come in very handy! There is a 2.1mm DC jack on one end, and a screw terminal block on the other. The terminals are labeled with positive/negative assuming a positive-tip configuration...
In Stock
[Buy Now](https://www.adafruit.com/product/368)
[Related Guides to the Product](https://learn.adafruit.com/products/368/guides)
### Standard servo - TowerPro SG-5010
[Standard servo - TowerPro SG-5010](https://www.adafruit.com/product/155)
This high-torque standard servo can rotate approximately 180 degrees (90 in each direction). You can use any servo code, hardware, or library to control these servos. Good for beginners who want to make stuff move without building a motor controller with feedback & gearbox. Comes with 3...
In Stock
[Buy Now](https://www.adafruit.com/product/155)
[Related Guides to the Product](https://learn.adafruit.com/products/155/guides)
### Continuous Rotation Servo
[Continuous Rotation Servo](https://www.adafruit.com/product/154)
This servo rotates fully forward or backward instead of moving to a position. You can use any servo code, hardware, or library to control these servos. Good for making simple moving robots. Comes with four different horns, as shown.
To control with an Arduino, we suggest connecting...
In Stock
[Buy Now](https://www.adafruit.com/product/154)
[Related Guides to the Product](https://learn.adafruit.com/products/154/guides)
### Adafruit 16-Channel 12-bit PWM/Servo Driver - I2C interface
[Adafruit 16-Channel 12-bit PWM/Servo Driver - I2C interface](https://www.adafruit.com/product/815)
You want to make a cool robot, maybe a hexapod walker, or maybe just a piece of art with a lot of moving parts. Or maybe you want to drive a lot of LEDs with precise PWM output. Then you realize that your microcontroller has a limited number of PWM outputs! What now? You could give up OR you...
In Stock
[Buy Now](https://www.adafruit.com/product/815)
[Related Guides to the Product](https://learn.adafruit.com/products/815/guides)
### Half Sized Premium Breadboard - 400 Tie Points
[Half Sized Premium Breadboard - 400 Tie Points](https://www.adafruit.com/product/64)
This is a cute, half-size breadboard with 400 tie points, good for small projects. It's 3.25" x 2.2" / 8.3cm x 5.5cm with a standard double-strip in the middle and two power rails on both sides. You can pull the power rails off easily to make the breadboard as...
In Stock
[Buy Now](https://www.adafruit.com/product/64)
[Related Guides to the Product](https://learn.adafruit.com/products/64/guides)
### Breadboarding wire bundle
[Breadboarding wire bundle](https://www.adafruit.com/product/153)
75 flexible stranded core wires with stiff ends molded on in red, orange, yellow, green, blue, brown, black and white. These are a major improvement over the "box of bent wires" that are sometimes sold with breadboards, and faster than stripping your own solid core wires. Makes...
In Stock
[Buy Now](https://www.adafruit.com/product/153)
[Related Guides to the Product](https://learn.adafruit.com/products/153/guides)
## Related Guides
- [Adafruit PCA9685 16-Channel Servo Driver](https://learn.adafruit.com/16-channel-pwm-servo-driver.md)
- [MIDI Controlled Robot Lyre with CircuitPython](https://learn.adafruit.com/midi-controlled-robot-lyre-with-circuitpython.md)
- [Raspberry Pi Wifi-Controlled Cat Laser Toy](https://learn.adafruit.com/raspberry-pi-wifi-controlled-cat-laser-toy.md)
- [CircuitPython Hardware: PCA9685 PWM & Servo Driver](https://learn.adafruit.com/micropython-hardware-pca9685-pwm-and-servo-driver.md)
- [Adafruit IO Basics: Analog Output](https://learn.adafruit.com/adafruit-io-basics-analog-output.md)
- [Adafruit Motor Selection Guide](https://learn.adafruit.com/adafruit-motor-selection-guide.md)
- [LED Tricks: Gamma Correction](https://learn.adafruit.com/led-tricks-gamma-correction.md)
- [PiGRRL 2](https://learn.adafruit.com/pigrrl-2.md)
- [Retro Gaming with Raspberry Pi](https://learn.adafruit.com/retro-gaming-with-raspberry-pi.md)
- [Arduino Lesson 6. Digital Inputs](https://learn.adafruit.com/adafruit-arduino-lesson-6-digital-inputs.md)
- [Playing sounds and using buttons with Raspberry Pi](https://learn.adafruit.com/playing-sounds-and-using-buttons-with-raspberry-pi.md)
- [Let’s Put LEDs in Things!](https://learn.adafruit.com/lets-put-leds-in-things.md)
- [ Adafruit DRV8833 DC/Stepper Motor Driver Breakout Board](https://learn.adafruit.com/adafruit-drv8833-dc-stepper-motor-driver-breakout-board.md)
- [Arduino Yun Temboo Twitter Tracker](https://learn.adafruit.com/arduino-yun-temboo-twitter-tracker.md)
- [Adafruit 16-Channel PWM/Servo HAT & Bonnet for Raspberry Pi](https://learn.adafruit.com/adafruit-16-channel-pwm-servo-hat-for-raspberry-pi.md)
---
# Source: https://learn.adafruit.com/using-the-adafruit-library-with-fritzing/using-the-adafruit-parts-in-a-fritzing-design.md
# Using the Adafruit Library with Fritzing
## Using the Adafruit Parts in a Fritzing Design

Parts in the Adafruit Fritzing Library work exactly like other Fritzing parts, and you can use them with parts from other libraries as well.
The image above shows an example circuit: a barometric logger with a 7-segment readout. It uses 5 Adafruit parts: the [blue 7-segment I2C backpack](https://www.adafruit.com/products/881 "Link: https://www.adafruit.com/products/881"), the [BMP085 baro sensor](https://www.adafruit.com/products/391 "Link: https://www.adafruit.com/products/391"), the [DS1307 real-time clock](https://www.adafruit.com/products/264 "Link: https://www.adafruit.com/products/264"), and the [microSD breakout](https://www.adafruit.com/products/254), along with the [2.1mm barrel jack to terminal block adapter](https://www.adafruit.com/products/368 "Link: https://www.adafruit.com/products/368"). It also uses the [Arduino UNO](http://arduino.cc/en/Main/ArduinoBoardUno "Link: http://arduino.cc/en/Main/ArduinoBoardUno") from the Arduino library.
Most of the parts in the Adafruit library are designed to plug into breadboards, just like their real-life counterparts! We've tried to make the Fritzing parts as close as possible to the real parts, so the pin layouts and physical footprints are identical. Any layout you devise in Fritzing can be translated directly to a real-world breadboard (or one of our [permaproto boards](https://www.adafruit.com/products/591))!
Fritzing is super handy for drafting up a nice, clean breadboard layout before you actually build your circuit.
Some of the parts, like the 2.1mm to term block adapter, don't plug directly into the breadboard. Just like the real adapter part, you instead connect wires to the terminal block and then you can run them wherever you like. On the bottom of the terminal block in Fritzing, you'll see two little boxes, one for each terminal. Mouse over one of these boxes and simply drag the wire to wherever you want it to go.
- [Previous Page](https://learn.adafruit.com/using-the-adafruit-library-with-fritzing/import-the-library-into-fritzing.md)
- [Next Page](https://learn.adafruit.com/using-the-adafruit-library-with-fritzing/updating-to-the-latest-version-of-the-library.md)
## Related Guides
- [Adafruit TSSP77038 38KHz Infrared IR Demodulator Breakout](https://learn.adafruit.com/adafruit-tssp77038-38khz-infrared-ir-demodulator-breakout.md)
- [Adafruit INA228 I2C Power Monitor](https://learn.adafruit.com/adafruit-ina228-i2c-power-monitor.md)
- [Adafruit TMC2209 Stepper Motor Driver Breakout Board](https://learn.adafruit.com/adafruit-tmc2209-stepper-motor-driver-breakout-board.md)
- [Adafruit ADXL375](https://learn.adafruit.com/adafruit-adxl375.md)
- [Adafruit 15x7 CharliePlex FeatherWing](https://learn.adafruit.com/adafruit-15x7-7x15-charlieplex-led-matrix-charliewing-featherwing.md)
- [Adafruit Proto Doubler PiCowbell](https://learn.adafruit.com/adafruit-proto-doubler-picowbell.md)
- [Adafruit TSMP96000 IR Receiver Breakout](https://learn.adafruit.com/adafruit-tsmp96000-ir-receiver-breakout.md)
- [Adafruit PCA9546 4-Channel STEMMA QT Multiplexer](https://learn.adafruit.com/adafruit-pca9546-4-channel-stemma-qt-multiplexer.md)
- [AWS IoT and Adafruit WICED Feather](https://learn.adafruit.com/aws-iot-and-adafruit-wiced-feather.md)
- [Adafruit Sensirion SHTC3 - Temperature & Humidity Sensor Breakout](https://learn.adafruit.com/adafruit-sensirion-shtc3-temperature-humidity-sensor.md)
- [Expressive Pixels for Adafruit Matrix Portal](https://learn.adafruit.com/expressive-pixels-for-matrix-portal.md)
- [MCP4725 12-Bit DAC Tutorial](https://learn.adafruit.com/mcp4725-12-bit-dac-tutorial.md)
- [Ladyada's Toolkit](https://learn.adafruit.com/ladyadas-toolkit.md)
- [Adafruit 16-channel PWM/Servo Shield](https://learn.adafruit.com/adafruit-16-channel-pwm-slash-servo-shield.md)
- [Adafruit TE MS8607 PHT Sensor](https://learn.adafruit.com/adafruit-te-ms8607-pht-sensor.md)
---
# Source: https://learn.adafruit.com/bmp085/using-the-bmp085-api-v2.md
# Bosch BMP085 Breakout Board
## Using the BMP (API v2)
This page is based on the new v2 of the BMP085 driver, which uses Adafruit's new [Unified Sensor Driver](http://learn.adafruit.com/using-the-adafruit-unified-sensor-driver/introduction). The driver provides better support for altitude calculations, and makes it easy to switch between the BMP085 and any other supported pressure sensor in your projects.
If you haven't already done so, you'll need to install the [Adafrut\_Sensor library](https://github.com/adafruit/Adafruit_Sensor) on your system as well, since Adafruit\_BMP085 relies on this library to generate the sensor data in a universal manner.
# Using the BMP085 / BMP180
To use this sensor and calculate the altitude and barometric pressure, there's a lot of very hairy and unpleasant math. You can check out the math in the datasheet but really, its not intuitive or educational - its just how the sensor works. So we took care of all the icky math and wrapped it up into a nice Arduino library.
[You can find the Arduino library repository on github](https://github.com/adafruit/Adafruit_BMP085_Unified "Link: https://github.com/adafruit/Adafruit\_BMP085\_Unified") To install it, click this button to download the compressed ZIP file then install it. [This guide](http://learn.adafruit.com/adafruit-all-about-arduino-libraries-install-use) will help you with the install process if you have never installed an Arduino library.
[Download the Adafruit_BMP085 Arduino Library (API v2)](https://github.com/adafruit/Adafruit_BMP085_Unified/archive/master.zip)
The same code is used for both the BMP085 and BMP180 (they are compatible!)
Restart the IDE
Now you can run this first example sketch
```
#include <Wire.h>
#include <Adafruit_Sensor.h>
#include <Adafruit_BMP085_U.h>
Adafruit_BMP085_Unified bmp = Adafruit_BMP085_Unified(10085);
void setup(void)
{
Serial.begin(9600);
Serial.println("Pressure Sensor Test"); Serial.println("");
/* Initialise the sensor */
if(!bmp.begin())
{
/* There was a problem detecting the BMP085 ... check your connections */
Serial.print("Ooops, no BMP085 detected ... Check your wiring or I2C ADDR!");
while(1);
}
}
void loop(void)
{
/* Get a new sensor event */
sensors_event_t event;
bmp.getEvent(&event);
/* Display the results (barometric pressure is measure in hPa) */
if (event.pressure)
{
/* Display atmospheric pressure in hPa */
Serial.print("Pressure: "); Serial.print(event.pressure); Serial.println(" hPa");
}
else
{
Serial.println("Sensor error");
}
delay(250);
}
```
Then open up the serial monitor at 9600 baud. The sketch will continuously print out the pressure in **hPa** (hectoPascals). You can test that the sensor is measuring variations in pressure by placing your fingertip over the open port hole in the top of the sensor. The pressure will increase as you can see here:

## Altitude Measurements
Since we know that pressure drops as we gain altitude (that's why air is so thin on mountain-tops) we can compute the current altitude knowing the pressure and temperature. Again, there's a bit of hairy math involved, [you can read about the calculations on wikipedia (where this graph is from)](http://en.wikipedia.org/wiki/Barometric_pressure). 
With the Arduino library, we take care of that for you! Simply **update the 'void loop()' function above with the code below to get the altitude based on the pressure and temperature:**
```
void loop(void)
{
/* Get a new sensor event */
sensors_event_t event;
bmp.getEvent(&event);
/* Display the results (barometric pressure is measure in hPa) */
if (event.pressure)
{
/* Display atmospheric pressue in hPa */
Serial.print("Pressure: ");
Serial.print(event.pressure);
Serial.println(" hPa");
/* Calculating altitude with reasonable accuracy requires pressure *
* sea level pressure for your position at the moment the data is *
* converted, as well as the ambient temperature in degress *
* celcius. If you don't have these values, a 'generic' value of *
* 1013.25 hPa can be used (defined as SENSORS_PRESSURE_SEALEVELHPA *
* in sensors.h), but this isn't ideal and will give variable *
* results from one day to the next. *
* *
* You can usually find the current SLP value by looking at weather *
* websites or from environmental information centers near any major *
* airport. *
* *
* For example, for Paris, France you can check the current mean *
* pressure and sea level at: http://bit.ly/16Au8ol */
/* First we get the current temperature from the BMP085 */
float temperature;
bmp.getTemperature(&temperature);
Serial.print("Temperature: ");
Serial.print(temperature);
Serial.println(" C");
/* Then convert the atmospheric pressure, SLP and temp to altitude */
/* Update this next line with the current SLP for better results */
float seaLevelPressure = SENSORS_PRESSURE_SEALEVELHPA;
Serial.print("Altitude: ");
Serial.print(bmp.pressureToAltitude(seaLevelPressure,
event.pressure,
temperature));
Serial.println(" m");
Serial.println("");
}
else
{
Serial.println("Sensor error");
}
delay(1000);
}
```
Run the sketch to see the calculated altitude.

The data above is reasonably close to what I'd expect at my location, but we can improve the accuracy by changing the reference sea level pressure, which will change depending on the weather conditions. **Every 1 hPa that we are off on the sea level pressure equals about 8.5 m of error in the altitude calculations!**
Many weather sites, (particularly near major airports) will provide pressure readings. If you happened to be near Paris, France, for example, you might look up the [current air pressure at Charles de Gaulle airport](http://pt.weather-forecast.com/weather-stations/Charles-De-Gaulle-International-Airport), which we can see is 1009 hPa (a meaningful difference from the generoc 1013.25 hPa value we are plugging in via the **SENSORS\_PRESSURE\_SEALEVELHPA** macro):

Updating the following line to 1009 will give us a more accurate altitude:
```
float seaLevelPressure = 1009;
```
Danger:
This now gives us the following results, which shows that calibrating for your local conditions is often worthwhile when working with low altitudes!

Just be careful looking for local mean pressure at sea level values, since the functions in the driver are expecting hPa units, not one of the dozens of other values you may encounter, but you should be able to [convert anything you find to hPa](http://www.engineeringtoolbox.com/pressure-units-converter-d_569.html) which is a standard SI unit.
- [Previous Page](https://learn.adafruit.com/bmp085/wiring-the-bmp085.md)
- [Next Page](https://learn.adafruit.com/bmp085/using-the-bmp085.md)
## Featured Products
### BMP180 Barometric Pressure/Temperature/Altitude Sensor- 5V ready
[BMP180 Barometric Pressure/Temperature/Altitude Sensor- 5V ready](https://www.adafruit.com/product/1603)
This precision sensor from Bosch is the best low-cost sensing solution for measuring barometric pressure and temperature. Because pressure changes with altitude you can also use it as an altimeter! The sensor is soldered onto a PCB with a 3.3V regulator, I2C level shifter and pull-up resistors...
No Longer Stocked
[Buy Now](https://www.adafruit.com/product/1603)
[Related Guides to the Product](https://learn.adafruit.com/products/1603/guides)
### BMP085 Barometric Pressure/Temperature/Altitude Sensor- 5V ready
[BMP085 Barometric Pressure/Temperature/Altitude Sensor- 5V ready](https://www.adafruit.com/product/391)
This precision sensor from Bosch is the best low-cost sensing solution for measuring barometric pressure and temperature. Because pressure changes with altitude you can also use it as an altimeter! The sensor is soldered onto a PCB with a 3.3V regulator, I2C level shifter and pull-up resistors...
No Longer Stocked
[Buy Now](https://www.adafruit.com/product/391)
[Related Guides to the Product](https://learn.adafruit.com/products/391/guides)
### Adafruit 10-DOF IMU Breakout - L3GD20H + LSM303 + BMP180
[Adafruit 10-DOF IMU Breakout - L3GD20H + LSM303 + BMP180](https://www.adafruit.com/product/1604)
This inertial-measurement-unit combines 3 of the best quality sensors available on the market to give you 11 axes of data: 3 axes of accelerometer data, 3 axes gyroscopic, 3 axes magnetic (compass), barometric pressure/altitude and temperature. We tested many different 'combination'...
No Longer Stocked
[Buy Now](https://www.adafruit.com/product/1604)
[Related Guides to the Product](https://learn.adafruit.com/products/1604/guides)
## Related Guides
- [Adafruit NeoKey 5x6 Ortho Snap-Apart](https://learn.adafruit.com/adafruit-neokey-5x6-ortho-snap-apart.md)
- [No-Code DS18B20 Temperature Sensor with WipperSnapper](https://learn.adafruit.com/using-ds18b20-temperature-sensor-with-wippersnapper.md)
- [Storage humidity and temperature monitor](https://learn.adafruit.com/storage-humidity-and-temperature-monitor.md)
- [4x4 Rotary Encoder MIDI Messenger](https://learn.adafruit.com/4x4-rotary-encoder-midi-messenger.md)
- [Adafruit STEMMA Soil Sensor - I2C Capacitive Moisture Sensor](https://learn.adafruit.com/adafruit-stemma-soil-sensor-i2c-capacitive-moisture-sensor.md)
- [CircuitPython BLE Multi-Temperature Monitoring](https://learn.adafruit.com/circuitpython-multi-temperature-ble-monitoring.md)
- [Adafruit CAN Pal](https://learn.adafruit.com/adafruit-can-pal.md)
- [Huzzah Weather Display](https://learn.adafruit.com/huzzah-weather-display.md)
- [Adafruit AHT20 Temperature & Humidity Sensor](https://learn.adafruit.com/adafruit-aht20.md)
- [Adafruit LPS33/LPS35 Water Resistant Pressure Sensor](https://learn.adafruit.com/lps35hw-water-resistant-pressure-sensor.md)
- [DHT Humidity Sensing on Raspberry Pi or Beaglebone Black with GDocs Logging](https://learn.adafruit.com/dht-humidity-sensing-on-raspberry-pi-with-gdocs-logging.md)
- [Adafruit STEMMA Non-Latching Mini Relay](https://learn.adafruit.com/adafruit-stemma-non-latching-mini-relay.md)
- [IoT Temperature Logger with Analog Devices ADT7410, Feather and Adafruit IO](https://learn.adafruit.com/iot-temperature-logger-with-arduino-and-adafruit-io.md)
- [Adafruit OV5640 Camera Breakouts](https://learn.adafruit.com/adafruit-ov5640-camera-breakout.md)
- [Adafruit SI1145 Breakout Board - UV index / IR / Visible Sensor](https://learn.adafruit.com/adafruit-si1145-breakout-board-uv-ir-visible-sensor.md)
---
# Source: https://learn.adafruit.com/using-the-bmp085-with-raspberry-pi.md
# Using the BMP085/180 with Raspberry Pi or Beaglebone Black
## Overview
Danger:

The Raspberry Pi and Beaglebone Black include support for Python, which makes it easy to get access to a lot of low-level hardware and software stacks -- USB, TCP/IP, multiple file systems etc. This is a good thing since it means you don't need to wrap your head around all the obscure details that go along with these complex stacks or the implementation details of various serial buses: you can focus on getting your data off your sensor and into your project as quickly as possible. Hurray for abstraction!
Most sensors tend to communicate with other devices based on one of three well-defined mechanisms: **I2C** , **SPI** or good old **analog output**. There are dozens of other serial buses and communication protocols out there (CAN, 1-Wire, etc.), and they all have their strengths and weaknesses, but I2C, SPI and analog cover the overwhelming majority of sensors you're likely to hook up to your development board.
I2C is a particularly useful bus with the for two main reasons:
- It only requires two shared lines: **SCL** for the clock signal, and **SDA** for the bi-direction data transfers.
- Each I2C device uses a unique 7-bit address, meaning you can have more than 120 unique I2C devices sharing the bus, and you can freely communicate with them one at a time on an as-needed basis.
This tutorial will show you how you can read data from the I2C-based BMP085 or BMP180 Barometric Pressure Sensor using Python on a Raspberry Pi or Beaglebone Black.
# A Note on Distributions
Please note for the Raspberry Pi that this tutorial is based on [Occidentalis](http://learn.adafruit.com/adafruit-raspberry-pi-educational-linux-distro/overview "Link: http://learn.adafruit.com/adafruit-raspberry-pi-educational-linux-distro/overview"), Adafruit's own educational Linux distro for Pi. It should work just as well with the latest Wheezy distro, etc., but it hasn't yet been tested on anything else.
For the Beaglebone Black this tutorial is based on the [Debian distribution](http://beagleboard.org/project/debian/) that's shipping with recent Beaglebone Black boards. If you're using an older Beaglebone Black with the Angstrom distribution it's highly recommended that you grab a micro SD card and load it with Debian! - [Next Page](https://learn.adafruit.com/using-the-bmp085-with-raspberry-pi/configuring-the-pi-for-i2c.md)
## Featured Products
### BMP180 Barometric Pressure/Temperature/Altitude Sensor- 5V ready
[BMP180 Barometric Pressure/Temperature/Altitude Sensor- 5V ready](https://www.adafruit.com/product/1603)
This precision sensor from Bosch is the best low-cost sensing solution for measuring barometric pressure and temperature. Because pressure changes with altitude you can also use it as an altimeter! The sensor is soldered onto a PCB with a 3.3V regulator, I2C level shifter and pull-up resistors...
No Longer Stocked
[Buy Now](https://www.adafruit.com/product/1603)
[Related Guides to the Product](https://learn.adafruit.com/products/1603/guides)
### Raspberry Pi Model B 512MB RAM
[Raspberry Pi Model B 512MB RAM](https://www.adafruit.com/product/998)
Adafruit ships the **Raspberry Pi Model B 512MB RAM** as of 10/18/2012.
The Raspberry Pi® is a single-board computer developed in the UK by the Raspberry Pi Foundation with the intention of stimulating the teaching of basic computer science in schools. The Raspberry...
No Longer Stocked
[Buy Now](https://www.adafruit.com/product/998)
[Related Guides to the Product](https://learn.adafruit.com/products/998/guides)
### Adafruit Assembled Pi Cobbler Breakout + Cable for Raspberry Pi
[Adafruit Assembled Pi Cobbler Breakout + Cable for Raspberry Pi](https://www.adafruit.com/product/914)
Now that you've finally got your hands on a [Raspberry Pi® Model B](http://www.raspberrypi.org/), you're probably itching to make some fun embedded computer projects with it. What you need is an add on prototyping Pi Cobbler from Adafruit, which can break out all those...
No Longer Stocked
[Buy Now](https://www.adafruit.com/product/914)
[Related Guides to the Product](https://learn.adafruit.com/products/914/guides)
### BeagleBone Black Rev C - 4GB Flash - Pre-installed Debian
[BeagleBone Black Rev C - 4GB Flash - Pre-installed Debian](https://www.adafruit.com/product/1876)
Note: As of May 12, 2014 Adafruit is shipping Rev C. We have discontinued selling Rev B. There are no exchanges or "upgrades" for Rev B to Rev C.
If you liked the BeagleBone Black Rev B, you will love the Rev C! The Rev C still has a blistering 1GHz processor and 512MB...
No Longer Stocked
[Buy Now](https://www.adafruit.com/product/1876)
[Related Guides to the Product](https://learn.adafruit.com/products/1876/guides)
### BeagleBone Black Rev C - 4GB - Pre-installed Debian
[BeagleBone Black Rev C - 4GB - Pre-installed Debian](https://www.adafruit.com/product/1996)
If you liked the BeagleBone Black Rev B, you will love the Rev C! The Rev C has a blistering 1GHz AM3358 processor and 512MB onboard DDR3 RAM, two 46-pin headers, micro HDMI for audio/video output, USB ports, 10/100 Ethernet and other I/O features. The Rev C is an ultra-powered embedded...
Out of Stock
[Buy Now](https://www.adafruit.com/product/1996)
[Related Guides to the Product](https://learn.adafruit.com/products/1996/guides)
## Related Guides
- [Capacitive Touch Sensors on the Raspberry Pi](https://learn.adafruit.com/capacitive-touch-sensors-on-the-raspberry-pi.md)
- [Modern Replacements for DHT11 and DHT22 Sensors](https://learn.adafruit.com/modern-replacements-for-dht11-dht22-sensors.md)
- [Adding a Real Time Clock to Raspberry Pi](https://learn.adafruit.com/adding-a-real-time-clock-to-raspberry-pi.md)
- [Adafruit AHT20 Temperature & Humidity Sensor](https://learn.adafruit.com/adafruit-aht20.md)
- [Wood Case for Raspberry Pi 3](https://learn.adafruit.com/wood-case-for-raspberry-pi-3.md)
- [Adafruit DPI Display Kippah](https://learn.adafruit.com/adafruit-dpi-display-kippah-ttl-tft.md)
- [Adafruit's Raspberry Pi Lesson 6. Using SSH](https://learn.adafruit.com/adafruits-raspberry-pi-lesson-6-using-ssh.md)
- [3.5" PiTFT OctoPrint Rig](https://learn.adafruit.com/3-dot-5-pitft-octoprint-rig.md)
- [Adafruit TMP117 High Accuracy I2C Temperature Monitor](https://learn.adafruit.com/adafruit-tmp117-high-accuracy-i2c-temperature-monitor.md)
- [Instant Camera using Raspberry Pi and Thermal Printer](https://learn.adafruit.com/instant-camera-using-raspberry-pi-and-thermal-printer.md)
- [User-space SPI TFT Python Library - ILI9341](https://learn.adafruit.com/user-space-spi-tft-python-library-ili9341-2-8.md)
- [USB Audio Cards with a Raspberry Pi ](https://learn.adafruit.com/usb-audio-cards-with-a-raspberry-pi.md)
- [micro:bit Lesson 4. Sensing Light](https://learn.adafruit.com/micro-bit-lesson-4-sensing-light-and-temperature.md)
- [No-Code Indoor Grow Monitor with PPFD and VPD Measurements](https://learn.adafruit.com/no-code-indoor-grow-monitor.md)
- [PyBadge Thermal Camera Case](https://learn.adafruit.com/pybadge-thermal-camera-case.md)
---
# Source: https://learn.adafruit.com/bmp085/using-the-bmp085.md
# Bosch BMP085 Breakout Board
## Using the BMP (API v1)
Danger:
To use this sensor and calculate the altitude and barometric pressure, there's a lot of very hairy and unpleasant math. You can check out the math in the datasheet but really, its not intuitive or educational - its just how the sensor works. So we took care of all the icky math and wrapped it up into a nice Arduino library.
[You can find the Arduino library repository on github](https://github.com/adafruit/Adafruit-BMP085-Library) To install it, click this button to download the compressed ZIP file then install it. [This guide](http://learn.adafruit.com/adafruit-all-about-arduino-libraries-install-use) will help you with the install process if you have never installed an Arduino library.
[Download the Adafruit_BMP085 Arduino Library (API v1)](https://github.com/adafruit/Adafruit-BMP085-Library/archive/master.zip)
The same driver is used for both the BMP085 and BMP180!
Restart the IDE
Now you can run this first example sketch
```
#include "Wire.h"
#include "Adafruit_BMP085.h"
Adafruit_BMP085 bmp;
void setup() {
Serial.begin(9600);
bmp.begin();
}
void loop() {
Serial.print("Temperature = ");
Serial.print(bmp.readTemperature());
Serial.println(" *C");
Serial.print("Pressure = ");
Serial.print(bmp.readPressure());
Serial.println(" Pa");
Serial.println();
delay(500);
}
```
Then open up the serial monitor at 9600 baud. The sketch will continuously print out the temperature in **°C** and pressure in **Pa** (Pascals). You can test that the sensor is measuring variations in temperature and pressure by placing your fingertip over the open port hole in the top of the sensor. The temperature and pressure will increase as you can see here:

## Altitude Measurements
Since we know that pressure drops as we gain altitude (that's why air is so thin on mountain-tops) we can compute the current altitude knowing the pressure and temperature. Again, there's a bit of hairy math involved, [you can read about the calculations on wikipedia (where this graph is from)](http://en.wikipedia.org/wiki/Barometric_pressure "Link: http://en.wikipedia.org/wiki/Barometric\_pressure"). 
With the Arduino library, we take care of that for you! Simply run this sketch which will return the current altitude based on the pressure.```
#include "Wire.h"
#include "Adafruit_BMP085.h"
Adafruit_BMP085 bmp;
void setup() {
Serial.begin(9600);
bmp.begin();
}
void loop() {
Serial.print("Temperature = ");
Serial.print(bmp.readTemperature());
Serial.println(" *C");
Serial.print("Pressure = ");
Serial.print(bmp.readPressure());
Serial.println(" Pa");
// Calculate altitude assuming 'standard' barometric
// pressure of 1013.25 millibar = 101325 Pascal
Serial.print("Altitude = ");
Serial.print(bmp.readAltitude());
Serial.println(" meters");
Serial.println();
delay(500);
}
```
Run the sketch to see the calculated altitude.
For example, according to the sensor we are 21.5m below sea level. Only problem is, I know for a fact that our current location is not below sea level! So what's wrong with the sensor? Turns out the sensor is just fine. The problem is that the pressure at sea level changes with the weather. So we need to 'normalize' the sensor, and let it know what the sea-level pressure is. You can look up the current sea level pressure on any weather site.
Unfortunately there are half-dozen different units of pressure. here we see it in inches, that's technically "Mercury Inches" or "Hg Inches We need it in Pascals,[so we'll convert it!](http://www.engineeringtoolbox.com/pressure-units-converter-d_569.html)

OK so that's 101,964 Pascals. Open up the **Examples-\>BMP085test** example from the Arduino IDE menubar and edit the line where you pass in the 'corrected' altitude.

Now it will print out the correct altitude! 30 meters which is a lot better.
- [Previous Page](https://learn.adafruit.com/bmp085/using-the-bmp085-api-v2.md)
- [Next Page](https://learn.adafruit.com/bmp085/downloads.md)
## Featured Products
### BMP180 Barometric Pressure/Temperature/Altitude Sensor- 5V ready
[BMP180 Barometric Pressure/Temperature/Altitude Sensor- 5V ready](https://www.adafruit.com/product/1603)
This precision sensor from Bosch is the best low-cost sensing solution for measuring barometric pressure and temperature. Because pressure changes with altitude you can also use it as an altimeter! The sensor is soldered onto a PCB with a 3.3V regulator, I2C level shifter and pull-up resistors...
No Longer Stocked
[Buy Now](https://www.adafruit.com/product/1603)
[Related Guides to the Product](https://learn.adafruit.com/products/1603/guides)
### BMP085 Barometric Pressure/Temperature/Altitude Sensor- 5V ready
[BMP085 Barometric Pressure/Temperature/Altitude Sensor- 5V ready](https://www.adafruit.com/product/391)
This precision sensor from Bosch is the best low-cost sensing solution for measuring barometric pressure and temperature. Because pressure changes with altitude you can also use it as an altimeter! The sensor is soldered onto a PCB with a 3.3V regulator, I2C level shifter and pull-up resistors...
No Longer Stocked
[Buy Now](https://www.adafruit.com/product/391)
[Related Guides to the Product](https://learn.adafruit.com/products/391/guides)
### Adafruit 10-DOF IMU Breakout - L3GD20H + LSM303 + BMP180
[Adafruit 10-DOF IMU Breakout - L3GD20H + LSM303 + BMP180](https://www.adafruit.com/product/1604)
This inertial-measurement-unit combines 3 of the best quality sensors available on the market to give you 11 axes of data: 3 axes of accelerometer data, 3 axes gyroscopic, 3 axes magnetic (compass), barometric pressure/altitude and temperature. We tested many different 'combination'...
No Longer Stocked
[Buy Now](https://www.adafruit.com/product/1604)
[Related Guides to the Product](https://learn.adafruit.com/products/1604/guides)
## Related Guides
- [Adafruit NeoKey 5x6 Ortho Snap-Apart](https://learn.adafruit.com/adafruit-neokey-5x6-ortho-snap-apart.md)
- [No-Code DS18B20 Temperature Sensor with WipperSnapper](https://learn.adafruit.com/using-ds18b20-temperature-sensor-with-wippersnapper.md)
- [Storage humidity and temperature monitor](https://learn.adafruit.com/storage-humidity-and-temperature-monitor.md)
- [4x4 Rotary Encoder MIDI Messenger](https://learn.adafruit.com/4x4-rotary-encoder-midi-messenger.md)
- [Adafruit STEMMA Soil Sensor - I2C Capacitive Moisture Sensor](https://learn.adafruit.com/adafruit-stemma-soil-sensor-i2c-capacitive-moisture-sensor.md)
- [CircuitPython BLE Multi-Temperature Monitoring](https://learn.adafruit.com/circuitpython-multi-temperature-ble-monitoring.md)
- [Adafruit CAN Pal](https://learn.adafruit.com/adafruit-can-pal.md)
- [Huzzah Weather Display](https://learn.adafruit.com/huzzah-weather-display.md)
- [Adafruit AHT20 Temperature & Humidity Sensor](https://learn.adafruit.com/adafruit-aht20.md)
- [Adafruit LPS33/LPS35 Water Resistant Pressure Sensor](https://learn.adafruit.com/lps35hw-water-resistant-pressure-sensor.md)
- [DHT Humidity Sensing on Raspberry Pi or Beaglebone Black with GDocs Logging](https://learn.adafruit.com/dht-humidity-sensing-on-raspberry-pi-with-gdocs-logging.md)
- [Adafruit STEMMA Non-Latching Mini Relay](https://learn.adafruit.com/adafruit-stemma-non-latching-mini-relay.md)
- [IoT Temperature Logger with Analog Devices ADT7410, Feather and Adafruit IO](https://learn.adafruit.com/iot-temperature-logger-with-arduino-and-adafruit-io.md)
- [Adafruit OV5640 Camera Breakouts](https://learn.adafruit.com/adafruit-ov5640-camera-breakout.md)
- [Adafruit SI1145 Breakout Board - UV index / IR / Visible Sensor](https://learn.adafruit.com/adafruit-si1145-breakout-board-uv-ir-visible-sensor.md)
---
# Source: https://learn.adafruit.com/diy-wifi-raspberry-pi-touch-cam/using-the-camera.md
# DIY WiFi Raspberry Pi Touchscreen Camera
## Using the Camera
You briefly saw the camera interface during testing. We can explain in more detail now how it works and what options are available.
Upon startup, the camera program presents a live viewfinder and a couple of buttons. The majority of the screen itself functions as the shutter “button” — tap to take a still photo.
At the bottom of the screen are two buttons. The left button (with the gear icon) will take you to various settings. The right button (with the “play” symbol) lets you review previously-taken photos (if no photos have been taken yet, the camera will let you know it’s “empty”).

The _Settings_ menu provides access to camera settings. This is not an exhaustive list of every feature possible with the Raspberry Pi camera, just a few essentials to get you started.
The left/right arrow buttons at the top of the screen select among the settings options:
The _Storage_ screen selects between three different options, each with some pros and cons:
- **Photos Folder:** images will be saved inside a “Photos” folder in your Raspberry Pi home directory (the folder will be created if it doesn’t exist). They can be easily accessed from other programs on the Pi, but this partition isn’t easily accessed when inserting the SD card in other computers.
- **Boot Partition:** images will be saved in the folder “/boot/DCIM/CANON999” on the boot partition. When the SD card is inserted in another computer, it mimics a card from a digital camera and may import photos automatically, depending on system settings. The downside is that space in the boot partition is very limited; you might only store a dozen or so photos there.
- **Dropbox:** as previously discussed, images are saved in the Photos folder as well as uploaded to Dropbox (if WiFi is connected and Dropbox configured).

The _Size_ screen selects from three different image sizes:
- **Large (2592x1944, 4:3 ratio):** this is the largest size (5 megapixels) supported by the Raspberry Pi camera. The actual area captured stretches well beyond what’s shown in the live viewfinder though.
- **Medium (1920x1080, 16:9 ratio):** HD resolution, widescreen, 2 megapixels.
- **Small (1440x1080, 4:3 ratio):** 1.5 megapixels.
The latter two modes _should_ display the actual full photo boundaries in the live viewfinder mode, but don’t yet (something in the camera library documentation doesn’t correspond to reality). This is a work in progress and will be addressed once its understood.
The _Effect_ screen is where all the fun happens.
There are 16 different artistic effects that can be applied to photos (plus “normal,” no effect). Make your photos look like an oil painting, or a pen sketch, or turn the colors weird! These all operate on the live preview as well.

The _ISO_ setting adjusts the camera’s sensitivity to light.
This is a tradeoff…more sensitive settings (higher numbers) work better in low light, but the resulting image may be grainy.
ISO has no effect on the live viewfinder, only captured photos.

The last screen is an option to quit the camera program, returning to the command line.
Tap the red button to exit, the arrow buttons for other settings, or the Done button to cancel.

The “Done” button returns to viewfinder mode.
All the camera settings will be saved; next time you run the script, all prior settings will be as you left them.
- [Previous Page](https://learn.adafruit.com/diy-wifi-raspberry-pi-touch-cam/dropbox-setup.md)
- [Next Page](https://learn.adafruit.com/diy-wifi-raspberry-pi-touch-cam/next-steps-dot-dot-dot.md)
## Featured Products
### Raspberry Pi DIY Camera Pack
[Raspberry Pi DIY Camera Pack](https://www.adafruit.com/product/3275)
If the holidays promise anything, it’s almost certainly a deluge of photographs. Instead of taking out your smartphones, why not build your own camera?
With one of Adafruit’s best selling screens and an official Raspberry Pi camera, you’ll be ready to set up your very...
Out of Stock
[Buy Now](https://www.adafruit.com/product/3275)
[Related Guides to the Product](https://learn.adafruit.com/products/3275/guides)
### PiTFT Plus Assembled 320x240 2.8" TFT + Resistive Touchscreen
[PiTFT Plus Assembled 320x240 2.8" TFT + Resistive Touchscreen](https://www.adafruit.com/product/2298)
Is this not the cutest little display for the Raspberry Pi? It features a 2.8" display with 320x240 16-bit color pixels and a resistive touch overlay. The plate uses the high speed SPI interface on the Pi and can use the mini display as a console, X window port, displaying images or...
Out of Stock
[Buy Now](https://www.adafruit.com/product/2298)
[Related Guides to the Product](https://learn.adafruit.com/products/2298/guides)
### PiTFT Plus 320x240 3.2" TFT + Resistive Touchscreen
[PiTFT Plus 320x240 3.2" TFT + Resistive Touchscreen](https://www.adafruit.com/product/2616)
Is this not the cutest little display for the Raspberry Pi? It features a 3.2" display with 320x240 16-bit color pixels and a resistive touch overlay. The plate uses the high speed SPI interface on the Pi and can use the mini display as a console, X window port, displaying images or...
Out of Stock
[Buy Now](https://www.adafruit.com/product/2616)
[Related Guides to the Product](https://learn.adafruit.com/products/2616/guides)
### Adafruit PiTFT 2.4" HAT Mini Kit - 320x240 TFT Touchscreen
[Adafruit PiTFT 2.4" HAT Mini Kit - 320x240 TFT Touchscreen](https://www.adafruit.com/product/2455)
Is this not the cutest little display for the Raspberry Pi? It features a 2.4" display with 320x240 16-bit color pixels and a resistive touch overlay. The HAT uses the high speed SPI interface on the Pi and can use the mini display as a console, X window port, displaying images or video...
Out of Stock
[Buy Now](https://www.adafruit.com/product/2455)
[Related Guides to the Product](https://learn.adafruit.com/products/2455/guides)
### Adafruit PiTFT - 320x240 2.8" TFT+Touchscreen for Raspberry Pi
[Adafruit PiTFT - 320x240 2.8" TFT+Touchscreen for Raspberry Pi](https://www.adafruit.com/product/1601)
Is this not the cutest little display for the Raspberry Pi? It features a 2.8" display with 320x240 16-bit color pixels and a resistive touch overlay. The plate uses the high speed SPI interface on the Pi and can use the mini display as a console, X window port, displaying images or video...
Out of Stock
[Buy Now](https://www.adafruit.com/product/1601)
[Related Guides to the Product](https://learn.adafruit.com/products/1601/guides)
### Raspberry Pi 3 - Model B - ARMv8 with 1G RAM
[Raspberry Pi 3 - Model B - ARMv8 with 1G RAM](https://www.adafruit.com/product/3055)
Did you really think the Raspberry Pi would stop getting better? At this point, we sound like a broken record, extolling on the new Pi’s myriad improvements like we’re surprised that the folks at the Raspberry Pi Foundation are continuously making their flagship board better. ...
In Stock
[Buy Now](https://www.adafruit.com/product/3055)
[Related Guides to the Product](https://learn.adafruit.com/products/3055/guides)
### Raspberry Pi 2 - Model B v1.2 - ARM Cortex-A53 with 1G RAM
[Raspberry Pi 2 - Model B v1.2 - ARM Cortex-A53 with 1G RAM](https://www.adafruit.com/product/2358)
Didn't think the Raspberry Pi could get any better? You're in for a big surprise! The Raspberry Pi 2 Model B is out and it's amazing! With an upgraded ARM Cortex-A53 quad-core processor, Dual Core VideoCore IV Multimedia coprocessor, and a full Gigabyte of RAM, this...
No Longer Stocked
[Buy Now](https://www.adafruit.com/product/2358)
[Related Guides to the Product](https://learn.adafruit.com/products/2358/guides)
### Raspberry Pi Model A+ 512MB RAM
[Raspberry Pi Model A+ 512MB RAM](https://www.adafruit.com/product/2266)
**Note:** As of August 10th, 2016 the Raspberry Pi A+ now includes 512 MB of RAM!
The Raspberry Pi Model A+ is the perfect board for the minimalist Pi fan. This low-cost Pi uses the same processor as the model B+, but does away with the Ethernet jack and three of the USB...
No Longer Stocked
[Buy Now](https://www.adafruit.com/product/2266)
[Related Guides to the Product](https://learn.adafruit.com/products/2266/guides)
## Related Guides
- [Kali Linux on the Raspberry Pi with the PiTFT](https://learn.adafruit.com/kali-linux-on-the-raspberry-pi-with-the-pitft.md)
- [PiPhone - A Raspberry Pi based Cellphone](https://learn.adafruit.com/piphone-a-raspberry-pi-based-cellphone.md)
- [Processing on the Raspberry Pi & PiTFT](https://learn.adafruit.com/processing-on-the-raspberry-pi-and-pitft.md)
- [PiGRRL 2](https://learn.adafruit.com/pigrrl-2.md)
- [RasPipe: A Raspberry Pi Pipeline Viewer, Part 2](https://learn.adafruit.com/raspipe-a-raspberry-pi-pipeline-viewer-part-2.md)
- [Monitor PiCam and temperature on a PiTFT via adafruit.io](https://learn.adafruit.com/monitor-picam-and-temperature-on-a-pitft-via-adafruit-dot-io.md)
- [AstroPrint 3D Printing](https://learn.adafruit.com/astroprint-3d-printing.md)
- [Touchscreen Pi Timelapse Controller](https://learn.adafruit.com/touchscreen-pi-timelapse-controller.md)
- [Using the Slamtec RPLIDAR on a Raspberry Pi](https://learn.adafruit.com/slamtec-rplidar-on-pi.md)
- [Adafruit AMG8833 8x8 Thermal Camera Sensor](https://learn.adafruit.com/adafruit-amg8833-8x8-thermal-camera-sensor.md)
- [Pi Hole Ad Detection Display with PiTFT](https://learn.adafruit.com/pi-hole-ad-pitft-tft-detection-display.md)
- [SnapPiCam Raspberry Pi Camera](https://learn.adafruit.com/snappicam-raspberry-pi-camera.md)
- [JOY of Arcada — USB Game Pad for Adafruit PyGamer and PyBadge](https://learn.adafruit.com/joy-of-arcada-usb-game-pad-for-adafruit-pygamer-pybadge.md)
- [Go Fishing with Rotary Encoders](https://learn.adafruit.com/gone-fishing-game.md)
- [Set up and Blink - MATLAB and Simulink with Raspberry Pi](https://learn.adafruit.com/how-to-use-matlab-and-simulink-with-raspberry-pi.md)
---
# Source: https://learn.adafruit.com/usb-dc-and-solar-lipoly-charger/using-the-charger.md
# USB, DC & Solar Lipoly Charger
## Using the Charger
## Solar Charging

Solar charging is easy, [don't forget to prepare your solar panel and solder in the electrolytic capacitor beforehand!](http://learn.adafruit.com/usb-dc-and-solar-lipoly-charger/solar-charger-preparation "Link: http://learn.adafruit.com/usb-dc-and-solar-lipoly-charger/solar-charger-preparation")
Once you've done that, you can simply plug in the solar panel into the DC jack - look for the **PWR GOOD** LED to indicate that the solar panel is providing power and then plug the battery into the **BATT** slot in the left. Use only 3.7V/4.2V lithium ion/polymer batteries.
W[e have a tutorial about the batteries in case you have some questions about how to use them.](http://learn.adafruit.com/li-ion-and-lipoly-batteries)
When the **CHRG ** charging light is lit, the battery is being charged. Make sure to have the panel facing direct sunlight **not** shaded and not behind any glass or plastic! when the battery is full, you'll see the green **DONE ** LED light up.
## USB & DC Charging
Of course, sometimes is just really dark out and you can't solar charger, so there's a USB port on the board as well. Use any mini-B cable to plug in and charge.
If there is something connected to the DC jack, it will mechanically disconnect the mini USB connector so be sure to unplug the solar panel when USB charging

You can also connect a DC wall plug adapter directly into the jack, just make sure its a 5.5mm/2.1mm inner diameter connector, which is very common!

If you need the DC power for something else, you can also connect to the DC input via the 0.1" breakout. While you can feed power into the breakout pins as well, it's not polarity protected so make sure you use a schottky diode or just be really careful.## Indicator LEDs
There are three status LEDs on the charger, which you'll find very handy!
The red **PWR** LED indicates that there is good power connected to the charger. If this LED is not lit, something is wrong with the power supply
The orange **CHRG** LED indicates current charging status. When this LED is lit, the charger is working to charge up a battery! It also acts as a low battery indicator (fixed at 3.1V) when no power is connected. So, if you don't have USB/Solar wired up, when the battery voltage drops below 3.1V, the orange LED will come on.
The green **DONE** LED is pretty easy to understand as well - when it's lit the battery is charged up! Very handy for when you want to know that everything is done.
If you need to connect larger LEDs or a microcontroller up to these status pins, you can us the STATUS 0.1" breakout on the bottom edge of the PCB. The pins are open drain, so they will short to ground when 'active' and float when 'inactive' - you'll want to use a pullup resistor if you need a digital signal or connect LEDs just like shown below on the schematic, if you want bigger lights.

# Load Sharing
The MCP73871 chip in the usb/solar charger has a very nifty feature called 'load sharing.' Say you have an every day lipoly charger and you want to use the battery _while_ its charging. To do this, you might connect the project directly to the battery output. This means, however, that the charger is both charging a battery and driving your project at the same time. The charger is working extra hard and the battery is being charged and discharged constantly.

As an improvement, this design has a pass transistor inside the chip, connected to the output load from the input voltage, so that you dont lose efficiency from charging/discharging the battery. When the USB/Solar charger is powered from a USB port or panel, the load current goes directly from the input voltage to the output. If the current required is higher than what the panel or USB port can provide, the current is supplemented by the lipo battery, up to 1.8ADanger:

This is all managed at the same time as the solar current maximization. Simply plug in the lipoly battery on the left into the **BATT** port and connect your project up thru the **LOAD** port on the right.## Temperature Monitoring
If you plan to have your project outside or unattended, we suggest adding temperature sensing to keep the charger from overheating the battery or attempting to charge when the battery is too hot or cold.

Simply remove the 10K surface mount resistor from the **THERM** pads (or cut the trace going to it), and [solder in a 10K NTC thermistor](http://www.adafruit.com/products/372). Test out the system by trying to charge while you place the thermistor in a freezer or against some ice, as well as in a cup of \> 50°C hot water. The charger should stop charging the battery. Once you are sure it is working, attach the sensing element (the epoxy bulb in this case) so it is resting against the battery.## Adjusting the Max Charge Current
The USB/Solar charger comes with a preset rate of 500mA which will work great for USB ports, USB wall adapters and solar panels up to 3 Watts. If you have a project that uses a larger panel, or perhaps some other sort of setup, you can easily adjust the current by soldering a resistor into the **PROG** pads.

The current is set by 1000/ **RPROG** Amps, where **RPROG** is the resistance. So for 2 Kohms, that would make it 1000/2000 = 0.5 A = 500 mA. If you want 1A, you would use a 1K ohm resistor. If you want to_ increase the current_, you need to _decrease the resistance_, so you can just solder **over** the existing 2K. So for example, soldering another 2K resistor into **RPROG ** will give you 1K total resistance and 1000 mA current draw. See above for a 2.2K resistor soldered for about 950mA of max current draw. If you want to set the max current draw lower, you'll need to remove the 2K resistor.
# Adding External LEDs
If you are placing the charger in a box, you may want to have external LEDs for indicating charge state. This is easy! Simply use any 3mm, 5mm or 10mm LEDs you wish and 1K resistors and wire them like so:

- [Previous Page](https://learn.adafruit.com/usb-dc-and-solar-lipoly-charger/solar-panel-preparation.md)
- [Next Page](https://learn.adafruit.com/usb-dc-and-solar-lipoly-charger/design-notes.md)
## Featured Products
### Lithium Ion Battery Pack - 3.7V 4400mAh
[Lithium Ion Battery Pack - 3.7V 4400mAh](https://www.adafruit.com/product/354)
Need a big battery for your project? This lithium-ion pack is made of 2 balanced 2200mAh cells for a total of 4400mA capacity! The cells are connected in parallel and spot-welded to a protection circuit that provides over-voltage, under-voltage, and over-current protection.
Each cell can...
In Stock
[Buy Now](https://www.adafruit.com/product/354)
[Related Guides to the Product](https://learn.adafruit.com/products/354/guides)
### USB / DC / Solar Lithium Ion/Polymer charger
[USB / DC / Solar Lithium Ion/Polymer charger](https://www.adafruit.com/product/390)
Make your projects to go green this summer with our specialized USB/Solar Lithium Ion Polymer Battery charger! This charger is a very unique design, perfect for outdoor projects, or DIY iPod chargers. We've spent over a year testing and tinkering with this charger to come up with a plug...
In Stock
[Buy Now](https://www.adafruit.com/product/390)
[Related Guides to the Product](https://learn.adafruit.com/products/390/guides)
### Lithium Ion Polymer Battery - 3.7v 1200mAh
[Lithium Ion Polymer Battery - 3.7v 1200mAh](https://www.adafruit.com/product/258)
Lithium-ion polymer (also known as 'lipo' or 'lipoly') batteries are thin, light, and powerful. The output ranges from 4.2V when completely charged to 3.7V. This battery has a capacity of 1200mAh for a total of about 4.5 Wh. If you need a larger battery,
In Stock
[Buy Now](https://www.adafruit.com/product/258)
[Related Guides to the Product](https://learn.adafruit.com/products/258/guides)
### Male DC Power adapter - 2.1mm plug to screw terminal block
[Male DC Power adapter - 2.1mm plug to screw terminal block](https://www.adafruit.com/product/369)
If you need to connect a battery pack or wired power supply to a board that has a DC jack - this adapter will come in very handy! There is a 2.1mm DC plug on one end, and a screw terminal block on the other. The terminals are labeled with positive/negative assuming a positive-tip configuration...
In Stock
[Buy Now](https://www.adafruit.com/product/369)
[Related Guides to the Product](https://learn.adafruit.com/products/369/guides)
### MintyBoost Kit
[MintyBoost Kit](https://www.adafruit.com/product/14)
The world's first and only open-source hardware charger: The MintyBoost®!
**New version!** Works with the new iPhone 4 & 5 and more! **Please review the [Minty Boost project page(s)](//learn.adafruit.com/minty-boost) before purchase and...**
No Longer Stocked
[Buy Now](https://www.adafruit.com/product/14)
[Related Guides to the Product](https://learn.adafruit.com/products/14/guides)
### 10K Precision Epoxy Thermistor
[10K Precision Epoxy Thermistor](https://www.adafruit.com/product/372)
Need to measure something damp? This epoxy-coated precision 1% 10K thermistor is an inexpensive way to measure temperature in weather or liquids. The resistance in 25 °C is 10K (+- 1%). The resistance goes down as it gets warmer and goes up as it gets cooler.
In Stock
[Buy Now](https://www.adafruit.com/product/372)
[Related Guides to the Product](https://learn.adafruit.com/products/372/guides)
### Large 6V 3.7W Solar Panel
[Large 6V 3.7W Solar Panel](https://www.adafruit.com/product/417)
Harness even more power from the sun with this nice big solar panel. We had these custom made for us when customers let us know they needed more than what our 2W panel could provide. This panel is a 12-cell (6V) assembly mounted onto a fiberglass PCB and covered with PET plastic which protects...
No Longer Stocked
[Buy Now](https://www.adafruit.com/product/417)
[Related Guides to the Product](https://learn.adafruit.com/products/417/guides)
### Large 6V 3.5W Solar panel
[Large 6V 3.5W Solar panel](https://www.adafruit.com/product/500)
These panels come to us from Voltaic Systems, makers of fine solar-powered bags and packs. These are waterproof, scratch resistant, and UV resistant. They use a high efficiency monocrystalline cell. They output 6V at 530 mA via 3.5mm x 1.1mm DC jack connector - a nice upgrade to the 2W panels...
Out of Stock
[Buy Now](https://www.adafruit.com/product/500)
[Related Guides to the Product](https://learn.adafruit.com/products/500/guides)
## Related Guides
- [Collin's Lab: Solar](https://learn.adafruit.com/collins-lab-solar.md)
- [Compost Friend!](https://learn.adafruit.com/compost-optimization-machine.md)
- [Portable Solar Charging Tracker](https://learn.adafruit.com/portable-solar-charging-tracker.md)
- [Mailbox Notification Service](https://learn.adafruit.com/mailbox-notification-service.md)
- [Solar Charging Handbag](https://learn.adafruit.com/solar-charging-handbag.md)
- [Solar Boost Bag](https://learn.adafruit.com/solar-boost-bag.md)
- [Adafruit MCP4728 I2C Quad DAC](https://learn.adafruit.com/adafruit-mcp4728-i2c-quad-dac.md)
- [Adafruit LiIon or LiPoly Charger BFF Add-On for QT Py](https://learn.adafruit.com/adafruit-qt-py-charger-bff.md)
- [Adafruit TPS61169 Constant Current Boost Converter for LEDs](https://learn.adafruit.com/adafruit-tps61169-constant-current-boost-converter-for-leds.md)
- [Adafruit MAX17048 LiPoly / LiIon Fuel Gauge and Battery Monitor](https://learn.adafruit.com/adafruit-max17048-lipoly-liion-fuel-gauge-and-battery-monitor.md)
- [Magical Light-up Dreidel](https://learn.adafruit.com/magical-light-up-dreidel.md)
- [Adafruit USB Type C Power Delivery Switchable Breakout](https://learn.adafruit.com/adafruit-usb-type-c-power-delivery-switchable-breakout.md)
- [Controlling Devices with RFID Wiz](https://learn.adafruit.com/controlling-devices-with-rfid-wiz.md)
- [Adafruit INA23x DC Current Voltage Power Monitor](https://learn.adafruit.com/adafruit-ina237-dc-current-voltage-power-monitor.md)
- [Adafruit TPL5110 Power Timer Breakout](https://learn.adafruit.com/adafruit-tpl5110-power-timer-breakout.md)
---
# Source: https://learn.adafruit.com/webide/using-the-debugger.md
# Adafruit WebIDE
## Using the Debugger
The python debugger in the WebIDE can be quite useful for many situations. The debugger allows you to step through your python program in realtime. This is in contrast to the visualizer, which runs the program fully, and then allows you to step through it.
When would you use the debugger? One scenario would be if you're just not getting the right values returned out of your functions. Or your variables aren't being set to the values you'd expect. You could then debug it, set a breakpoint to where you think it's broken, and see exactly what the values are at that given moment in your program. Also, you could use the GPIO pins to light various LED's. As you step through your program, you'll see them turn on and off as you'd expect.
To use the debugger, open a python file, and click the "Debug" link in the toolbar:

Once you've clicked the link, the toolbar will change with a new debugging bar. It should open within a couple of seconds. The editor will still display, and you can make changes to your code while debugging.
Once the debugger is ready, you'll see the following:

There is quite a bit more to the debugger than just running a program, or even than using the visualizer.
The first think you'll notice is the toolbar (#1) has new buttons available:
1. Save/Restart allows you to save your file, and restart the debugger for that file in one click. You can initiate that by hitting control-s, or command-s (on OS X).
2. The Exit link will exit the debugger.
3. The Run link will continue execution of your program either to the end, or to the next breakpoint you have enabled. If there is a breakpoint enabled (clicking in the gutter (#6)), it will stop there, and wait for your instruction.
4. Step Over will step through your program line-by-line until it hits the end. This option will skip any function calls. So, if you have a function called foo(), it will just run the entire function, and move to the next line.
5. Step In will step through your program as well, but it will jump into many of the functions, instead of skipping over them.
The editor is also displayed (#2). You can edit your file at any time. If you do change your file, you'll need to click the Save/Restart link in the toolbar in order to let the debugger pick up any of the changes you've made.
At the bottom two panels, you'll see the Debug Output (#3), and the Debug Variables (#4). The Debug Output displays anything from stdout or stderr that your program would output (such as print statements). The Debug Variables displays the live variables as they're being assigned.
The red line in the editor (#5) moves as you step through your program. It is the line that will execute next, and will stay centered in the editor window as you step through your program.
At the far left of the editor (#6), there is a blank space to the left of the line numbers. This is called the gutter. If you click in the gutter when the debugger is in a "Ready" state, you can add breakpoints. A breakpoint is useful for many situations, such as if you have a longer script, and there is a certain troubling section that is buggy. Instead of slowly stepping through your program you would set the breakpoint (a red square will appear in the gutter), and then click "Run". The script will execute to the breakpoint, and the red line will stop, and wait for you to continue stepping through it.
The last feature you'll want to be aware of is the debug status messages (#7). These will show you what the debugger is doing. For example, when it initially loads, or when you click "Save/Restart", it will be in an "Initializing..." state. When it's ready for your input, it will be "Ready". Some parts of your script will cause it to appear locked up, but it's really waiting for the server to return a response from your script (a long sleep() statement could cause this, for example).
In the screen shot above, you can see what the debugger looks like in the middle of running a program. The debugger is currently one step after the breakpoint that was set on line #13. You can see the 'print "Bonjour, World"' in the Debug Output, and the variables as they are in that given state of the program execution.
At this point in the debug cycle, you could edit your file, and Save/Restart. You could continue stepping through the program, or you could Exit the debugger.
- [Previous Page](https://learn.adafruit.com/webide/use.md)
- [Next Page](https://learn.adafruit.com/webide/using-the-visualizer.md)
## Featured Products
### Raspberry Pi Model B 512MB RAM
[Raspberry Pi Model B 512MB RAM](https://www.adafruit.com/product/998)
Adafruit ships the **Raspberry Pi Model B 512MB RAM** as of 10/18/2012.
The Raspberry Pi® is a single-board computer developed in the UK by the Raspberry Pi Foundation with the intention of stimulating the teaching of basic computer science in schools. The Raspberry...
No Longer Stocked
[Buy Now](https://www.adafruit.com/product/998)
[Related Guides to the Product](https://learn.adafruit.com/products/998/guides)
### BeagleBone Black - Rev B
[BeagleBone Black - Rev B](https://www.adafruit.com/product/1278)
**[Adafruit is no longer shipping the BeagleBone Black Rev B, it has been replaced with the Rev C as of 5/12/14](https://www.adafruit.com/products/1876) - the Rev C now has 4G flash and also comes with Debian, it also costs slightly more. There are no exchanges or...**
No Longer Stocked
[Buy Now](https://www.adafruit.com/product/1278)
[Related Guides to the Product](https://learn.adafruit.com/products/1278/guides)
### Adafruit Pi Box - Enclosure for Raspberry Pi Model A or B
[Adafruit Pi Box - Enclosure for Raspberry Pi Model A or B](https://www.adafruit.com/product/859)
**Discontinued** - you can grab [Adafruit Pi Box Plus - Enclosure for RasPi Model B+/Pi 2/ Pi 3](https://www.adafruit.com/product/1985) instead!
**We're still selling this classic Adafruit case for those who specifically want it but **
No Longer Stocked
[Buy Now](https://www.adafruit.com/product/859)
[Related Guides to the Product](https://learn.adafruit.com/products/859/guides)
### Miniature WiFi (802.11b/g/n) Module: For Raspberry Pi and more
[Miniature WiFi (802.11b/g/n) Module: For Raspberry Pi and more](https://www.adafruit.com/product/814)
Make your Internet of Things device cable-free by adding WiFi. Take advantage of the Raspberry Pi and Beagle Bone's USB port to add a low cost, but high-reliability wireless link. We tried half a dozen modules to find one that works well with the Pi and Bone without the need of recompiling...
No Longer Stocked
[Buy Now](https://www.adafruit.com/product/814)
[Related Guides to the Product](https://learn.adafruit.com/products/814/guides)
## Related Guides
- [Trellis Python Library](https://learn.adafruit.com/trellis-python-library.md)
- [Adafruit DVI Sock for Pico](https://learn.adafruit.com/adafruit-dvi-sock-for-pico.md)
- [Introducing Adafruit ItsyBitsy M4](https://learn.adafruit.com/introducing-adafruit-itsybitsy-m4.md)
- [SMT Breadboard Prototyping Using Breakout PCBs](https://learn.adafruit.com/smt-prototyping-using-breakout-pcbs.md)
- [Getting Started with RTL-SDR and SDR-Sharp and CubicSDR](https://learn.adafruit.com/getting-started-with-rtl-sdr-and-sdr-sharp.md)
- [Adafruit STEMMA Reflective Photo Interrupt Sensor](https://learn.adafruit.com/adafruit-stemma-reflective-photo-interrupt-sensor.md)
- [Adafruit 9-DOF Orientation IMU Fusion Breakout - BNO085](https://learn.adafruit.com/adafruit-9-dof-orientation-imu-fusion-breakout-bno085.md)
- [Adafruit I2C to 8 Channel Solenoid Driver](https://learn.adafruit.com/adafruit-i2c-to-8-channel-solenoid-driver.md)
- [Controlling Motors using the Raspberry Pi and RasPiRobot Board V2](https://learn.adafruit.com/controlling-motors-using-the-raspberry-pi-and-raspirobot-board-v2.md)
- [Adafruit Feather 32u4 FONA](https://learn.adafruit.com/adafruit-feather-32u4-fona.md)
- [Adafruit Pi Stemma QT Breakout](https://learn.adafruit.com/adafruit-pi-stemma-qt-breakout.md)
- [Adafruit's Raspberry Pi Lesson 8. Using a Servo Motor](https://learn.adafruit.com/adafruits-raspberry-pi-lesson-8-using-a-servo-motor.md)
- [IoT Bird Feeder with Camera](https://learn.adafruit.com/iot-window-bird-feeder-with-camera.md)
- [Using the BMP085/180 with Raspberry Pi or Beaglebone Black](https://learn.adafruit.com/using-the-bmp085-with-raspberry-pi.md)
- [AR1100 Resistive Touch Screen Controller Guide](https://learn.adafruit.com/ar1100-resistive-touch-screen-controller-guide.md)
---
# Source: https://learn.adafruit.com/diy-8x2-lcd-shield/using-the-lcd-shield.md
# DIY 8x2 LCD Shield
## Using the LCD Shield
Our first test will be just to connect it up to power and see what happens. Plug it into an Arduino and power it up. You should see the following:
Make sure you tweak the contrast potentiometer, if the contrast is all the way down you may not see anything.
## Arduino Sketch
Now we must upload some sketch to the Arduino to talk to the LCD. Luckily the **LiquidCrystal** library is already built in. So we just need to load one of the examples and modify it for the pins we used.
If you've changed the pins, you'll want to make a handy table so you can update the sketch properly.
| **LCD pin name** | RS | EN | DB4 | DB5 | DB6 | DB7 |
| **Arduino pin #** | 11 | 12 | 7 | 8 | 9 | 10 |
Open up the ** File-\>Examples-\>LiquidCrystal-\>HelloWorld ** example sketch
Now we'll need to update the pins. Look for this line:
```
LiquidCrystal lcd(12, 11, 5, 4, 3, 2);
```
And change it to:```
LiquidCrystal lcd(11, 12, 7, 8, 9, 10);
```
To match the pin table we just made.
Now you can compile and upload the sketch, adjusting the contrast if necessary. (The image below is from a different fruity sketch but it will look similar).
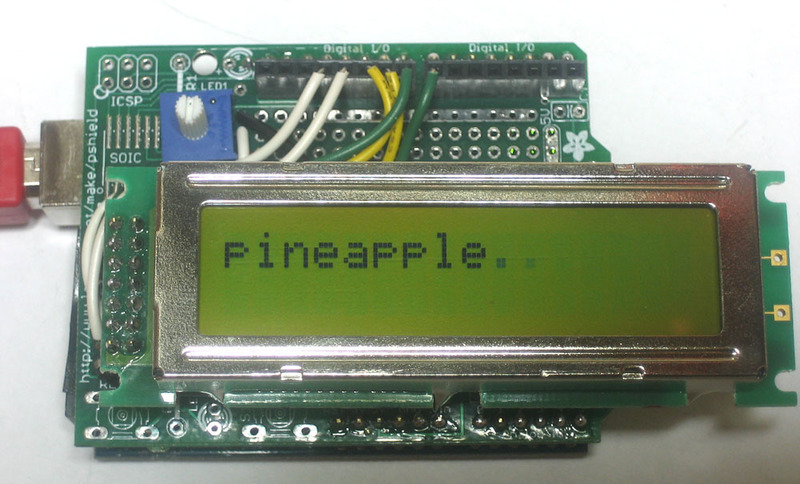
- [Previous Page](https://learn.adafruit.com/diy-8x2-lcd-shield/headers-and-wiring.md)
## Featured Products
### Solid-Core Wire Spool - 25ft - 22AWG - Yellow
[Solid-Core Wire Spool - 25ft - 22AWG - Yellow](https://www.adafruit.com/product/289)
Perfect for bread-boarding, free wiring, etc. This spool of solid-core wire is easy to solder to. When bent it keeps its shape pretty well. We like to have a few spools of this stuff around. We suggest picking up wire strippers to match. Wire gauge is 22 AWG which we've found is the best...
In Stock
[Buy Now](https://www.adafruit.com/product/289)
[Related Guides to the Product](https://learn.adafruit.com/products/289/guides)
### 36-pin 0.1" Female header - pack of 5!
[36-pin 0.1" Female header - pack of 5!](https://www.adafruit.com/product/598)
Female header is like the duct tape of electronics. Its great for connecting things together, soldering to perf-boards, sockets for wires or break-away header, etc. We go through these guys real fast, and thought that given how handy they are, we'd offer them in a pack of five!
In Stock
[Buy Now](https://www.adafruit.com/product/598)
[Related Guides to the Product](https://learn.adafruit.com/products/598/guides)
### Break-away 0.1" 36-pin strip male header - Black - 10 pack
[Break-away 0.1" 36-pin strip male header - Black - 10 pack](https://www.adafruit.com/product/392)
Breakaway header is like the duct tape of electronics. It's great for connecting things together, soldering to perf-boards, fits into any breakout or breadboard, etc. We go through these guys real fast, and thought that given how handy they are, we'd offer them in a pack of ten!
In Stock
[Buy Now](https://www.adafruit.com/product/392)
[Related Guides to the Product](https://learn.adafruit.com/products/392/guides)
### Adafruit Proto Shield for Arduino Kit
[Adafruit Proto Shield for Arduino Kit](https://www.adafruit.com/product/51)
Works with the Uno! This prototyping shield is the best out there (well, we think so, at least). It works with UNO, NG, Diecimila and Duemilanove Arduinos. You can use it with a Leonardo but it will not break out the hardware SPI pins (they're only on the ISP connector underneath) or the...
No Longer Stocked
[Buy Now](https://www.adafruit.com/product/51)
[Related Guides to the Product](https://learn.adafruit.com/products/51/guides)
### Adafruit METRO 328 Fully Assembled - Arduino IDE compatible
[Adafruit METRO 328 Fully Assembled - Arduino IDE compatible](https://www.adafruit.com/product/50)
We sure love the ATmega328 here at Adafruit, and we use them _a lot_ for our own projects. The processor has plenty of GPIO, Analog inputs, hardware UART SPI and I2C, timers and PWM galore - just enough for most simple projects. When we need to go small, we use a
Out of Stock
[Buy Now](https://www.adafruit.com/product/50)
[Related Guides to the Product](https://learn.adafruit.com/products/50/guides)
## Related Guides
- [Geofencing with the FONA 808 & Adafruit IO](https://learn.adafruit.com/geofencing-with-the-fona-808-and-adafruit-io.md)
- [Wireless Game Show Poppers for the Classroom!](https://learn.adafruit.com/wireless-game-show-poppers.md)
- [Adafruit Ultimate GPS](https://learn.adafruit.com/adafruit-ultimate-gps.md)
- [Arduino Lesson 4. Eight LEDs and a Shift Register](https://learn.adafruit.com/adafruit-arduino-lesson-4-eight-leds.md)
- [Adafruit CC3000 WiFi and Xively](https://learn.adafruit.com/adafruit-cc3000-wifi-and-xively.md)
- [FTDI Friend](https://learn.adafruit.com/ftdi-friend.md)
- [A REST API for Arduino & the CC3000 WiFi Chip](https://learn.adafruit.com/a-rest-api-for-arduino-and-the-cc3000-wifi-chip.md)
- [Bluetooth Controlled Motorized Camera Slider](https://learn.adafruit.com/bluetooth-motorized-camera-slider.md)
- [Bluefruit LE Connect for iOS and Android](https://learn.adafruit.com/bluefruit-le-connect.md)
- [Babel Fish](https://learn.adafruit.com/babel-fish.md)
- [Animating Multiple LED Backpacks](https://learn.adafruit.com/animating-multiple-led-backpacks.md)
- [Light Meter](https://learn.adafruit.com/light-meter.md)
- [Adafruit 16-channel PWM/Servo Shield](https://learn.adafruit.com/adafruit-16-channel-pwm-slash-servo-shield.md)
- [Halloween Pumpkin](https://learn.adafruit.com/halloween-pumpkin.md)
- [Naughty or Nice Machine](https://learn.adafruit.com/naughty-or-nice-machine.md)
---
# Source: https://learn.adafruit.com/mcp230xx-gpio-expander-on-the-raspberry-pi/using-the-library.md
# MCP230xx GPIO Expander on the Raspberry Pi
## Using the library
Danger:
Never one to leave you with just a breakout board or an IC and a goodbye, Adafruit provides a library for the MCP23008 and MCP23017 in our [Pi repository on github](https://github.com/adafruit/Adafruit-Raspberry-Pi-Python-Code/tree/legacy "Link: https://github.com/adafruit/Adafruit-Raspberry-Pi-Python-Code"). The easiest way to use it is with our convenient [WebIDE](http://learn.adafruit.com/webide), which will automatically point to the Adafruit github repository.
Once you've opened up the WebIDE in the browser, you simply need to click in the left-hand navigation on the following folders and filenames:
- Adafruit-Raspberry-Pi-Python-Code
- Adafruit\_MCP230xx
- Adafruit\_MCP230xx.py
This should give you something similar to the following:

```
# Use busnum = 0 for older Raspberry Pi's (256MB)
mcp = Adafruit_MCP230XX(busnum = 0, address = 0x20, num_gpios = 16)
# Use busnum = 1 for new Raspberry Pi's (512MB with mounting holes)
# mcp = Adafruit_MCP230XX(busnum = 1, address = 0x20, num_gpios = 16)
# Set pins 0, 1 and 2 to output (you can set pins 0..15 this way)
mcp.config(0, OUTPUT)
mcp.config(1, OUTPUT)
mcp.config(2, OUTPUT)
# Set pin 3 to input with the pullup resistor enabled
mcp.pullup(3, 1)
# Read pin 3 and display the results
print "%d: %x" % (3, mcp.input(3) >> 3)
# Python speed test on output 0 toggling at max speed
while (True):
mcp.output(0, 1) # Pin 0 High
mcp.output(0, 0) # Pin 1 Low
```
This file contains both the base MCP230xx class that makes it easy to use the chip, along with a very simple demo that will toggle a single pin as fast as possible. The example code shows how you can set pins to both input and output:
# Instantiating an instance of Adafruit\_MCP230xx
To instantiate an instance of the wrapper class that allows you to access the MCP230xx, you need to uncomment one of the two lines at the top of the above code. There are two options because earlier versions of the Pi Model B (pre 512MB SDRAM) used I2C0, whereas the latest Model B devices (with 512MB SDRAM) use I2C1.
The address assumes you are using an MCP23017 with all three address pins set to GND. If you are using a different address pin configuration, you can open up the datasheet to see how the address scheme works ([MCP23017 datasheet](http://ww1.microchip.com/downloads/en/devicedoc/21952b.pdf) or .the [MCP23008 datasheet](http://ww1.microchip.com/downloads/en/DeviceDoc/21919e.pdf).)
```
# Use busnum = 0 for older Raspberry Pi's (pre 512MB)
mcp = Adafruit_MCP230XX(busnum = 0, address = 0x20, num_gpios = 16)
# Use busnum = 1 for new Raspberry Pi's (512MB)
# mcp = Adafruit_MCP230XX(busnum = 1, address = 0x20, num_gpios = 16)
```
# Pin Numbering
The MCP23008 has 8 pins - A0 thru A7. **A0** is called **0** in the library, and **A7** is called **7** (the rest follow the same pattern)
The MCP23017 has 16 pins - A0 thru A7 + B0 thru B7. **A0** is called **0** in the library, and **A7** is called **7** , then **B0** continues from there as is called **8** and finally **B7** is pin **15** # Setting a pin as Input
You can enable or disable the internal pullup resistor and set the pins as input with the following lines of code: ```
# Set pin 3 to input with the pullup resistor enabled
mcp.pullup(3, 1)
# Read pin 3 and display the results
print "%d: %x" % (3, mcp.input(3) >> 3)
```
The second line reads pin 3, and shifts the value left 3 bits so that it will equal 0 or 1 depending on whether the pin is high or low when it is sampled. This will results in output similar to the following: "3: 0" or "3: 1" (depending on the pin state).
# Setting a pin as Output
To set a pin as output, you also need two lines of code: ```
# Set pin 0 to output (you can set pins 0..15 this way)
mcp.config(0, OUTPUT)
# Set pin 0 High
mcp.output(0, 1)
# Set pin 0 Low
mcp.output(0, 0)
```
That's all there is to it! The default sample code will toggle the GPIO pin as fast as possible, and if you hooked it up to an oscilloscope you'd end up with something similar to the following:
http://youtu.be/zBuMJ-R40N0
# Interrupts & Callbacks
As it currently stands, the library does not support any sort of interrupt or call back functionality (there is a hardware interrupt pin on the MCP but we don't use it in this code). Only polling is currently supported!
- [Previous Page](https://learn.adafruit.com/mcp230xx-gpio-expander-on-the-raspberry-pi/hooking-it-all-up.md)
## Featured Products
### MCP23017 - i2c 16 input/output port expander
[MCP23017 - i2c 16 input/output port expander](https://www.adafruit.com/product/732)
Add another 16 pins to your microcontroller using an MCP23017 port expander. The MCP23017 uses two i2c pins (these can be shared with other i2c devices), and in exchange gives you 16 general purpose pins. You can set each of 16 pins to be input, output, or input with a pullup. There's even...
In Stock
[Buy Now](https://www.adafruit.com/product/732)
[Related Guides to the Product](https://learn.adafruit.com/products/732/guides)
### MCP23008 - i2c 8 input/output port expander
[MCP23008 - i2c 8 input/output port expander](https://www.adafruit.com/product/593)
Add another 8 pins to your microcontroller using an MCP23008 port expander. The MCP23008 uses two i2c pins (these can be shared with other i2c devices), and in exchange gives you 8 general purpose pins. You can set each of 8 pins to be input, output, or input with a pullup. There's even...
In Stock
[Buy Now](https://www.adafruit.com/product/593)
[Related Guides to the Product](https://learn.adafruit.com/products/593/guides)
### Adafruit Assembled Pi Cobbler Breakout + Cable for Raspberry Pi
[Adafruit Assembled Pi Cobbler Breakout + Cable for Raspberry Pi](https://www.adafruit.com/product/914)
Now that you've finally got your hands on a [Raspberry Pi® Model B](http://www.raspberrypi.org/), you're probably itching to make some fun embedded computer projects with it. What you need is an add on prototyping Pi Cobbler from Adafruit, which can break out all those...
No Longer Stocked
[Buy Now](https://www.adafruit.com/product/914)
[Related Guides to the Product](https://learn.adafruit.com/products/914/guides)
## Related Guides
- [Animated Snake Eyes Bonnet for Raspberry Pi](https://learn.adafruit.com/animated-snake-eyes-bonnet-for-raspberry-pi.md)
- [Bluefruit LE Python Library](https://learn.adafruit.com/bluefruit-le-python-library.md)
- [Running Minecraft on a Raspberry Pi](https://learn.adafruit.com/running-minecraft-on-a-raspberry-pi.md)
- [Basic Resistor Sensor Reading on Raspberry Pi](https://learn.adafruit.com/basic-resistor-sensor-reading-on-raspberry-pi.md)
- [Connecting a 16x32 RGB LED Matrix Panel to a Raspberry Pi](https://learn.adafruit.com/connecting-a-16x32-rgb-led-matrix-panel-to-a-raspberry-pi.md)
- [Battery Powered Raspberry Pi Displays w/RaspiRobot Shield](https://learn.adafruit.com/raspirobot-battery-powered-raspberry-pi-displays.md)
- [Trellis Python Library](https://learn.adafruit.com/trellis-python-library.md)
- [Adafruit Prototyping Pi Plate](https://learn.adafruit.com/adafruit-prototyping-pi-plate.md)
- [A Sillier Mousetrap: Logging Mouse Data to Adafruit IO with the Raspberry Pi](https://learn.adafruit.com/a-sillier-mousetrap-logging-mouse-data-to-adafruit-io-with-the-raspberry-pi.md)
- [Raspberry Pi Pygame UI basics](https://learn.adafruit.com/raspberry-pi-pygame-ui-basics.md)
- [Raspberry Pi E-mail Notifier Using LEDs](https://learn.adafruit.com/raspberry-pi-e-mail-notifier-using-leds.md)
- [Bonjour (Zeroconf) Networking for Windows and Linux](https://learn.adafruit.com/bonjour-zeroconf-networking-for-windows-and-linux.md)
- [Using a Mini PAL/NTSC Display with a Raspberry Pi](https://learn.adafruit.com/using-a-mini-pal-ntsc-display-with-a-raspberry-pi.md)
- [TMP006 Temperature Sensor Python Library](https://learn.adafruit.com/tmp006-temperature-sensor-python-library.md)
- [Controlling Motors using the Raspberry Pi and RasPiRobot Board V2](https://learn.adafruit.com/controlling-motors-using-the-raspberry-pi-and-raspirobot-board-v2.md)
---
# Source: https://learn.adafruit.com/rgb-lcd-shield/using-the-rgb-lcd-shield.md
# RGB LCD Shield
## Arduino Usage
The shield is really easy to use. Once you have attached the LCD of choice, plug it onto the Arduino and [download our library from GitHub](https://github.com/adafruit/Adafruit-RGB-LCD-Shield-Library). The example included shows how to use the RGB backlight control and reading from the keypad.
# Download the Library
To interface with the LCD and buttons you must use our library which translates the commands through the port expander
Open up the Arduino library manager:

Search for the **Adafruit RGB LCD Shield** library and install it

We also have a great tutorial on Arduino library installation at:
[http://learn.adafruit.com/adafruit-all-about-arduino-libraries-install-use](http://learn.adafruit.com/adafruit-all-about-arduino-libraries-install-use "Link: http://learn.adafruit.com/adafruit-all-about-arduino-libraries-install-use")
# Adjusting Contrast
The shield uses a character LCD with an external contrast potentiometer. The first time you use it, adjust the potentiometer in the bottom right until you see the text clearly. If you don't upload code to the Arduino, some boxes will appear instead
Danger:
# Shared Pins
**The I2C pins are shared with other pins, and each Arduino type has a different sharing scheme. Those pins cannot be used for anything else than I2C when this shield is used!**
**Uno** /Duemilanove/Diecimila - I2C pins are also the same pins as **Analog 4** and **Analog 5**
**Mega** 1280 and 2560 - I2C pins are also the same pins as **Digital 20** and **21**
**Leonardo** and other 32u4-based - I2C pins are also the same pins as **Digital 2** and **3**
# Writing Your Own Sketches
The **Adafruit\_RGBLCDShield** library is a derivative of the **LiquidCrystal** library that comes with Arduino so you can call any of the functions that you're used to and they'll work just the same.
There are two extra functions you may want to use. One is **lcd.setBacklight(_color_);** which will change the backlight color assuming you have an RGB LCD on. At this time, the library does not do any PWM on the RGB backlight, so you can select from 8 different colors (inlcuding OFF) - if you place these #define's at the top of your sketch you can simply call whichever color you want to appear.
```
// These #defines make it easy to set the backlight color
#define OFF 0x0
#define RED 0x1
#define YELLOW 0x3
#define GREEN 0x2
#define TEAL 0x6
#define BLUE 0x4
#define VIOLET 0x5
#define WHITE 0x7
```
Another extra of the shield is a 4-way directional keypad plus select button. This will let you design your own control interface for 'stand-alone' Arduino projects. All the buttons are read at once when you call **lcd.readButtons();** which returns a variable that has individual bits set for the buttons. You can easily test for which buttons were held down at the time of the readButtons() call by using bitwise & as seen in this code snippet.
Note that the library handles button debouncing internally. There is **no need to debounce the buttons** in your code.
```
uint8_t buttons = lcd.readButtons();
if (buttons) {
if (buttons & BUTTON_UP) {
lcd.setBacklight(RED);
}
if (buttons & BUTTON_DOWN) {
lcd.setBacklight(YELLOW);
}
if (buttons & BUTTON_LEFT) {
lcd.setBacklight(GREEN);
}
if (buttons & BUTTON_RIGHT) {
lcd.setBacklight(TEAL);
}
if (buttons & BUTTON_SELECT) {
lcd.setBacklight(VIOLET);
}
}
```
# Using with Monochrome Displays
Displays with monochrome backlights are controlled by the RED pin and will only respond to colors that have RED in them (RED, YELLOW, VIOLET). For these displays, you can use ON and OFF instead as in the snippet below:
```auto
uint8_t buttons = lcd.readButtons();
if (buttons) {
lcd.clear();
lcd.setCursor(0,0);
if (buttons & BUTTON_UP) {
lcd.print("UP ");
lcd.setBacklight(HIGH);
}
if (buttons & BUTTON_DOWN) {
lcd.print("DOWN ");
lcd.setBacklight(LOW);
}
```
# Detached Usage
If you want to have the shield disconnected from the Arduino (say to panel mount it) or if you want to use it with a different type of processor board, its very easy!
Just power the **5V ** pin with 5V, common ground to **GND** and then connect the ** SCL** labeled pin (top left) to I2C clock and ** SDA ** to I2C data. Those are the only four wires you need to control the entire shield.
- On Uno-shaped Arduinos, **SCL** is also connected to Analog 5 and **SDA ** is connected to Analog 4.
- On Mega Arduinos, **SCL** is also connected to Digital 21 and **SDA ** is connected to Digital 20.
- On Leonardo Arduinos, **SCL** is also connected to Digital 3 and **SDA ** is connected to Digital 2.
Danger:
Warning:

- [Previous Page](https://learn.adafruit.com/rgb-lcd-shield/assembly.md)
- [Next Page](https://learn.adafruit.com/rgb-lcd-shield/circuitpython.md)
## Primary Products
### Adafruit I2C Controlled + Keypad Shield Kit for 16x2 LCD
[Adafruit I2C Controlled + Keypad Shield Kit for 16x2 LCD](https://www.adafruit.com/product/715)
We really like the range of LCDs we stock in the shop, such as our classic [blue & white](http://www.adafruit.com/products/181) and the fancy [RGB negative](http://www.adafruit.com/products/399) and [RGB positive](http://www.adafruit.com/products/398)....
In Stock
[Buy Now](https://www.adafruit.com/product/715)
[Related Guides to the Product](https://learn.adafruit.com/products/715/guides)
## Featured Products
### RGB backlight negative LCD 16x2 + extras
[RGB backlight negative LCD 16x2 + extras](https://www.adafruit.com/product/399)
This is a fancy upgrade to standard 16x2 LCDs, instead of just having blue and white, or red and black, this LCD has full color RGB characters on a dark/black background! That means you can change the character display colors to anything you want - red, green, blue, pink, white, purple yellow,...
In Stock
[Buy Now](https://www.adafruit.com/product/399)
[Related Guides to the Product](https://learn.adafruit.com/products/399/guides)
### RGB backlight positive LCD 16x2 + extras
[RGB backlight positive LCD 16x2 + extras](https://www.adafruit.com/product/398)
This is a fancy upgrade to standard 16x2 LCDs, instead of just having blue and white, or red and black, this LCD has black characters on a full color RGB-backlight background! That means you can change the background color to anything you want - red, green, blue, pink, white, purple yellow,...
In Stock
[Buy Now](https://www.adafruit.com/product/398)
[Related Guides to the Product](https://learn.adafruit.com/products/398/guides)
### LCD Shield Kit w/ 16x2 Character Display - Only 2 pins used!
[LCD Shield Kit w/ 16x2 Character Display - Only 2 pins used!](https://www.adafruit.com/product/772)
This new Adafruit shield makes it easy to use a 16x2 Character LCD. We really like the [Blue & White 16x2 LCDs we stock in the shop](http://www.adafruit.com/products/181). Unfortunately, these LCDs do require quite a few digital pins, 6 to control the LCD and then another pin to...
In Stock
[Buy Now](https://www.adafruit.com/product/772)
[Related Guides to the Product](https://learn.adafruit.com/products/772/guides)
### RGB LCD Shield Kit w/ 16x2 Character Display - Only 2 pins used!
[RGB LCD Shield Kit w/ 16x2 Character Display - Only 2 pins used!](https://www.adafruit.com/product/716)
This new Adafruit shield makes it easy to use a 16x2 Character LCD. We really like the RGB LCDs we stock in the shop both the [RGB negative](http://www.adafruit.com/products/399) and [RGB positive](http://www.adafruit.com/products/398). Unfortunately, these LCDs do...
Out of Stock
[Buy Now](https://www.adafruit.com/product/716)
[Related Guides to the Product](https://learn.adafruit.com/products/716/guides)
### RGB LCD Shield Kit w/ 16x2 Character Display - Only 2 pins used!
[RGB LCD Shield Kit w/ 16x2 Character Display - Only 2 pins used!](https://www.adafruit.com/product/714)
This new Adafruit shield makes it easy to use a 16x2 Character LCD. We really like the RGB LCDs we stock in the shop both the [RGB negative](http://www.adafruit.com/products/399) and [RGB positive](http://www.adafruit.com/products/398). Unfortunately, these LCDs do...
In Stock
[Buy Now](https://www.adafruit.com/product/714)
[Related Guides to the Product](https://learn.adafruit.com/products/714/guides)
## Related Guides
- [Character LCDs](https://learn.adafruit.com/character-lcds.md)
- [Simple Arduino-based USB VID & PID tester](https://learn.adafruit.com/simple-arduino-based-usb-vid-and-pid-tester.md)
- [Arduino "Hunt The Wumpus"](https://learn.adafruit.com/arduino-hunt-the-wumpus.md)
- [Sous-vide controller powered by Arduino - The SousViduino!](https://learn.adafruit.com/sous-vide-powered-by-arduino-the-sous-viduino.md)
- [Trinket Ultrasonic Rangefinder](https://learn.adafruit.com/trinket-ultrasonic-rangefinder.md)
- [Trinket RGB Shield Clock](https://learn.adafruit.com/trinket-rgb-shield-clock.md)
- [Adafruit Capacitive Touch Sensor Breakouts](https://learn.adafruit.com/adafruit-capacitive-touch-sensor-breakouts.md)
- [Trinket Temperature & Humidity LCD Display](https://learn.adafruit.com/trinket-temperature-humidity-lcd-display.md)
- [Character LCD with Raspberry Pi or BeagleBone Black](https://learn.adafruit.com/character-lcd-with-raspberry-pi-or-beaglebone-black.md)
- [eInk Literature Quotes Clock for MagTag](https://learn.adafruit.com/eink-literary-quotes-clock-for-magtag.md)
- [Adafruit Feather RP2040 with DVI Output Port](https://learn.adafruit.com/adafruit-feather-rp2040-dvi.md)
- [Portable Solar Charging Tracker](https://learn.adafruit.com/portable-solar-charging-tracker.md)
- [Adafruit E-Ink Bonnet for Raspberry Pi](https://learn.adafruit.com/adafruit-e-ink-bonnet-for-raspberry-pi.md)
- [What’s Fresh Today? In-Season Produce Reminder for Adafruit MagTag](https://learn.adafruit.com/seasonal-produce-for-adafruit-magtag.md)
- [No-Solder Visualizer Capacitive Touch Controller](https://learn.adafruit.com/no-solder-visualizer-capacitive-touch-controller.md)
---
# Source: https://learn.adafruit.com/webide/using-the-visualizer.md
# Adafruit WebIDE
## Using the Visualizer
The visualizer is a feature designed to help understand how a Python program is working at a more basic level. It let's you see what the python interpreter is doing as it steps through your program, such as variables being assigned, objects being created, etc.
Generally, the visualizer is a good tool to use if you have simpler scripts that you'd like to understand. Some of the questions it will help you with are: "How does recursion work?", "How does a function call work?", "How do various methods, such as append, work when working with lists?".
## Starting the visualizer
In order to start the visualizer, open a python script that you're able to run. In the menu, there will be a link with the title "Visualize". Click the "Visualize" link.

Once you've clicked the link, it will take from a couple of seconds, to a few minutes to load, depending on what your python script is doing. Something simple, like lighting a few LED's, or printing out a few lines will load very quickly. One thing to watch out for is that you don't have any infinite loops in your code, such as if you have a script that is designed to just keep running while periodically checking the temperature.
The next screen you'll see is the following:

The toolbar (#1) allows you to step through your program. You can navigate any way you'd like, forward, back, and jump to the start, or end.
The code (#2) is listed to the left. As you step through your program, you'll see two arrows in the left gutter that will show you what line has just executed (green), and what will be executing once you click "Forward" (red).
The right column displays the stack (#3) as your program executes. You'll see your variables getting assigned, objects being created, etc.
The bottom pane is your program output (#4). Anytime you have a print statement, or any other type of output, you'll see it displayed in this section.
Here is a screen shot of how it looks while stepping through a program:

One thing to note about the visualizer is that it runs your entire script on the server, then sends the playback of your script to the WebIDE. It's not a real-time debugger (but the WebIDE has one of those as well!). For example, if you have an LED that lights up in your program, it will light up quick and then send back the response, and when you step through your program, the LED won't light up as it has already run.
Credit to the visualizer is given to Philip Guo at [pythontutor.com](http://pythontutor.com). We forked, tweaked, converted, and modified his open source creation to work as a streamlined feature within the WebIDE.
- [Previous Page](https://learn.adafruit.com/webide/using-the-debugger.md)
- [Next Page](https://learn.adafruit.com/webide/faq.md)
## Featured Products
### Raspberry Pi Model B 512MB RAM
[Raspberry Pi Model B 512MB RAM](https://www.adafruit.com/product/998)
Adafruit ships the **Raspberry Pi Model B 512MB RAM** as of 10/18/2012.
The Raspberry Pi® is a single-board computer developed in the UK by the Raspberry Pi Foundation with the intention of stimulating the teaching of basic computer science in schools. The Raspberry...
No Longer Stocked
[Buy Now](https://www.adafruit.com/product/998)
[Related Guides to the Product](https://learn.adafruit.com/products/998/guides)
### BeagleBone Black - Rev B
[BeagleBone Black - Rev B](https://www.adafruit.com/product/1278)
**[Adafruit is no longer shipping the BeagleBone Black Rev B, it has been replaced with the Rev C as of 5/12/14](https://www.adafruit.com/products/1876) - the Rev C now has 4G flash and also comes with Debian, it also costs slightly more. There are no exchanges or...**
No Longer Stocked
[Buy Now](https://www.adafruit.com/product/1278)
[Related Guides to the Product](https://learn.adafruit.com/products/1278/guides)
### Adafruit Pi Box - Enclosure for Raspberry Pi Model A or B
[Adafruit Pi Box - Enclosure for Raspberry Pi Model A or B](https://www.adafruit.com/product/859)
**Discontinued** - you can grab [Adafruit Pi Box Plus - Enclosure for RasPi Model B+/Pi 2/ Pi 3](https://www.adafruit.com/product/1985) instead!
**We're still selling this classic Adafruit case for those who specifically want it but **
No Longer Stocked
[Buy Now](https://www.adafruit.com/product/859)
[Related Guides to the Product](https://learn.adafruit.com/products/859/guides)
### Miniature WiFi (802.11b/g/n) Module: For Raspberry Pi and more
[Miniature WiFi (802.11b/g/n) Module: For Raspberry Pi and more](https://www.adafruit.com/product/814)
Make your Internet of Things device cable-free by adding WiFi. Take advantage of the Raspberry Pi and Beagle Bone's USB port to add a low cost, but high-reliability wireless link. We tried half a dozen modules to find one that works well with the Pi and Bone without the need of recompiling...
No Longer Stocked
[Buy Now](https://www.adafruit.com/product/814)
[Related Guides to the Product](https://learn.adafruit.com/products/814/guides)
## Related Guides
- [Trellis Python Library](https://learn.adafruit.com/trellis-python-library.md)
- [Adafruit DVI Sock for Pico](https://learn.adafruit.com/adafruit-dvi-sock-for-pico.md)
- [Introducing Adafruit ItsyBitsy M4](https://learn.adafruit.com/introducing-adafruit-itsybitsy-m4.md)
- [SMT Breadboard Prototyping Using Breakout PCBs](https://learn.adafruit.com/smt-prototyping-using-breakout-pcbs.md)
- [Getting Started with RTL-SDR and SDR-Sharp and CubicSDR](https://learn.adafruit.com/getting-started-with-rtl-sdr-and-sdr-sharp.md)
- [Adafruit STEMMA Reflective Photo Interrupt Sensor](https://learn.adafruit.com/adafruit-stemma-reflective-photo-interrupt-sensor.md)
- [Adafruit 9-DOF Orientation IMU Fusion Breakout - BNO085](https://learn.adafruit.com/adafruit-9-dof-orientation-imu-fusion-breakout-bno085.md)
- [Adafruit I2C to 8 Channel Solenoid Driver](https://learn.adafruit.com/adafruit-i2c-to-8-channel-solenoid-driver.md)
- [Controlling Motors using the Raspberry Pi and RasPiRobot Board V2](https://learn.adafruit.com/controlling-motors-using-the-raspberry-pi-and-raspirobot-board-v2.md)
- [Adafruit Feather 32u4 FONA](https://learn.adafruit.com/adafruit-feather-32u4-fona.md)
- [Adafruit Pi Stemma QT Breakout](https://learn.adafruit.com/adafruit-pi-stemma-qt-breakout.md)
- [Adafruit's Raspberry Pi Lesson 8. Using a Servo Motor](https://learn.adafruit.com/adafruits-raspberry-pi-lesson-8-using-a-servo-motor.md)
- [IoT Bird Feeder with Camera](https://learn.adafruit.com/iot-window-bird-feeder-with-camera.md)
- [Using the BMP085/180 with Raspberry Pi or Beaglebone Black](https://learn.adafruit.com/using-the-bmp085-with-raspberry-pi.md)
- [AR1100 Resistive Touch Screen Controller Guide](https://learn.adafruit.com/ar1100-resistive-touch-screen-controller-guide.md)
---
# Source: https://learn.adafruit.com/adafruits-raspberry-pi-lesson-2-first-time-configuration/using-the-whole-screen.md
# Adafruit's Raspberry Pi Lesson 2. First Time Configuration
## Using the Whole Screen
Being designed to work with TVs, you may find that your Pi is only using the middle portion of the screen and there is a big unused area all round the screen.

This is not true of all TVs and monitors, but if it's happening for you then selecting the option to Disable Overscan may fix this for you.

Use the left and right cursor keys to make your selection and then hit Return.
If after disabling overscan, you cannot see the left edge of the screen then see the section 'Running Raspi\_Config After Booting'.
- [Previous Page](https://learn.adafruit.com/adafruits-raspberry-pi-lesson-2-first-time-configuration/using-the-whole-sd-card.md)
- [Next Page](https://learn.adafruit.com/adafruits-raspberry-pi-lesson-2-first-time-configuration/changing-timezone.md)
## Featured Products
### Raspberry Pi 1 Model B Starter Pack - Includes a Raspberry Pi
[Raspberry Pi 1 Model B Starter Pack - Includes a Raspberry Pi](https://www.adafruit.com/product/1014)
You want to get hacking with your Pi fast, right? Get everything you need to start with the Adafruit Starter Pack for Raspberry Pi. It's the perfect accompaniment to your new Pi, everything you need to boot up your Pi Model B and get going. **We pre-assemble the Cobbler for you, no...**
No Longer Stocked
[Buy Now](https://www.adafruit.com/product/1014)
[Related Guides to the Product](https://learn.adafruit.com/products/1014/guides)
### Programming the Raspberry Pi: Getting Started with Python
[Programming the Raspberry Pi: Getting Started with Python](https://www.adafruit.com/product/1089)
**Program your own Raspberry Pi projects!**
An updated guide to programming your own Raspberry Pi projects. Learn to create inventive programs and fun games on your powerful Raspberry Pi--with no programming experience required. **This practical book has been revised...**
In Stock
[Buy Now](https://www.adafruit.com/product/1089)
[Related Guides to the Product](https://learn.adafruit.com/products/1089/guides)
### Budget Pack for Raspberry Pi 1 Model B (Doesn't include RasPi)
[Budget Pack for Raspberry Pi 1 Model B (Doesn't include RasPi)](https://www.adafruit.com/product/965)
An optimized collection of parts and pieces to experiment with Raspberry Pi at home, school or work. Great for students and those that want to get their feet wet, no soldering required! **THIS PACK DOES NOT INCLUDE A RASPBERRY PI 1 MODEL B and is NOT compatible with Model B+ or Raspberry Pi...**
No Longer Stocked
[Buy Now](https://www.adafruit.com/product/965)
[Related Guides to the Product](https://learn.adafruit.com/products/965/guides)
### Miniature Wireless USB Keyboard with Touchpad
[Miniature Wireless USB Keyboard with Touchpad](https://www.adafruit.com/product/922)
Add a miniature wireless controller to your computer project with this combination keyboard and touchpad. We found the smallest wireless USB keyboard available, a mere 6" x 2.4" x 0.5" (152mm x 59mm x 12.5mm)! It's small but usable to make a great accompaniment to a computer...
In Stock
[Buy Now](https://www.adafruit.com/product/922)
[Related Guides to the Product](https://learn.adafruit.com/products/922/guides)
### NTSC/PAL (Television) TFT Display - 4.3" Diagonal
[NTSC/PAL (Television) TFT Display - 4.3" Diagonal](https://www.adafruit.com/product/946)
Yes, this is an adorable small television! The visible display measures only 4.3" (11cm) diagonal, the TFT comes with a NTSC/PAL driver board, enclosure and stand. The display is very easy to use - simply connect 12VDC to the 2.1mm center-positive DC jack (or use the cable and connect to...
No Longer Stocked
[Buy Now](https://www.adafruit.com/product/946)
[Related Guides to the Product](https://learn.adafruit.com/products/946/guides)
### NTSC/PAL (Television) TFT Display - 7" Diagonal
[NTSC/PAL (Television) TFT Display - 7" Diagonal](https://www.adafruit.com/product/947)
Yes, this is an adorable small television! The visible display measures only 7" (17.8cm) diagonal, the TFT comes with a NTSC/PAL driver board, enclosure and stand. The display is very easy to use - simply connect the included 12VDC adapter to the 2.1mm center-positive DC jack, then...
No Longer Stocked
[Buy Now](https://www.adafruit.com/product/947)
[Related Guides to the Product](https://learn.adafruit.com/products/947/guides)
## Related Guides
- [Adafruit RGB Matrix + Real Time Clock HAT for Raspberry Pi](https://learn.adafruit.com/adafruit-rgb-matrix-plus-real-time-clock-hat-for-raspberry-pi.md)
- [Adafruit PiTFT 3.5" Touch Screen for Raspberry Pi](https://learn.adafruit.com/adafruit-pitft-3-dot-5-touch-screen-for-raspberry-pi.md)
- [Raspberry Pi Hosting Node-Red](https://learn.adafruit.com/raspberry-pi-hosting-node-red.md)
- [Windows IoT Core Application Development: Headed Blinky](https://learn.adafruit.com/windows-iot-application-development-headed-blinky.md)
- [Bonjour (Zeroconf) Networking for Windows and Linux](https://learn.adafruit.com/bonjour-zeroconf-networking-for-windows-and-linux.md)
- [Raspberry Pi Thermal Printer One Time Pads](https://learn.adafruit.com/raspberry-pi-thermal-printer-one-time-pads.md)
- [10" Raspberry Pi Desktop](https://learn.adafruit.com/10-raspberry-pi-desktop.md)
- [What is the Command Line?](https://learn.adafruit.com/what-is-the-command-line.md)
- [Adafruit's Raspberry Pi Lesson 6. Using SSH](https://learn.adafruit.com/adafruits-raspberry-pi-lesson-6-using-ssh.md)
- [Adafruit Prototyping Pi Plate](https://learn.adafruit.com/adafruit-prototyping-pi-plate.md)
- [CircuitPython Libraries on Linux and the 96Boards DragonBoard 410c](https://learn.adafruit.com/circuitpython-libraries-on-linux-and-the-96boards-dragonboard-410c.md)
- [Getting Started With Windows IoT Core on Raspberry Pi](https://learn.adafruit.com/getting-started-with-windows-iot-on-raspberry-pi.md)
- [Raspberry Pi Computer Quick-Start](https://learn.adafruit.com/raspberry-pi-computer-quick-start.md)
- [Adafruit Ultimate GPS with gpsd](https://learn.adafruit.com/adafruit-ultimate-gps-on-the-raspberry-pi.md)
- [Adafruit's Raspberry Pi Lesson 9. Controlling a DC Motor](https://learn.adafruit.com/adafruit-raspberry-pi-lesson-9-controlling-a-dc-motor.md)
---
# Source: https://learn.adafruit.com/adafruits-raspberry-pi-lesson-2-first-time-configuration/using-the-whole-sd-card.md
# Adafruit's Raspberry Pi Lesson 2. First Time Configuration
## Using the Whole SD Card
This may seem a bit strange, but by default the Raspberry Pi only uses as much of the SD card as the operating system requires. This means that even though you might have used a large SD card, the operating system won't use it.

To fix this so that all the space on the SD card can be used, use up / down cursor keys to select the 'expand\_rootfs' menu option and hit return.
Once you do that, there will be some screen flashing as a script is run and then you will see the following confirmation.

Press Return again to return to the main menu.
- [Previous Page](https://learn.adafruit.com/adafruits-raspberry-pi-lesson-2-first-time-configuration/overview.md)
- [Next Page](https://learn.adafruit.com/adafruits-raspberry-pi-lesson-2-first-time-configuration/using-the-whole-screen.md)
## Featured Products
### Raspberry Pi 1 Model B Starter Pack - Includes a Raspberry Pi
[Raspberry Pi 1 Model B Starter Pack - Includes a Raspberry Pi](https://www.adafruit.com/product/1014)
You want to get hacking with your Pi fast, right? Get everything you need to start with the Adafruit Starter Pack for Raspberry Pi. It's the perfect accompaniment to your new Pi, everything you need to boot up your Pi Model B and get going. **We pre-assemble the Cobbler for you, no...**
No Longer Stocked
[Buy Now](https://www.adafruit.com/product/1014)
[Related Guides to the Product](https://learn.adafruit.com/products/1014/guides)
### Programming the Raspberry Pi: Getting Started with Python
[Programming the Raspberry Pi: Getting Started with Python](https://www.adafruit.com/product/1089)
**Program your own Raspberry Pi projects!**
An updated guide to programming your own Raspberry Pi projects. Learn to create inventive programs and fun games on your powerful Raspberry Pi--with no programming experience required. **This practical book has been revised...**
In Stock
[Buy Now](https://www.adafruit.com/product/1089)
[Related Guides to the Product](https://learn.adafruit.com/products/1089/guides)
### Budget Pack for Raspberry Pi 1 Model B (Doesn't include RasPi)
[Budget Pack for Raspberry Pi 1 Model B (Doesn't include RasPi)](https://www.adafruit.com/product/965)
An optimized collection of parts and pieces to experiment with Raspberry Pi at home, school or work. Great for students and those that want to get their feet wet, no soldering required! **THIS PACK DOES NOT INCLUDE A RASPBERRY PI 1 MODEL B and is NOT compatible with Model B+ or Raspberry Pi...**
No Longer Stocked
[Buy Now](https://www.adafruit.com/product/965)
[Related Guides to the Product](https://learn.adafruit.com/products/965/guides)
### Miniature Wireless USB Keyboard with Touchpad
[Miniature Wireless USB Keyboard with Touchpad](https://www.adafruit.com/product/922)
Add a miniature wireless controller to your computer project with this combination keyboard and touchpad. We found the smallest wireless USB keyboard available, a mere 6" x 2.4" x 0.5" (152mm x 59mm x 12.5mm)! It's small but usable to make a great accompaniment to a computer...
In Stock
[Buy Now](https://www.adafruit.com/product/922)
[Related Guides to the Product](https://learn.adafruit.com/products/922/guides)
### NTSC/PAL (Television) TFT Display - 4.3" Diagonal
[NTSC/PAL (Television) TFT Display - 4.3" Diagonal](https://www.adafruit.com/product/946)
Yes, this is an adorable small television! The visible display measures only 4.3" (11cm) diagonal, the TFT comes with a NTSC/PAL driver board, enclosure and stand. The display is very easy to use - simply connect 12VDC to the 2.1mm center-positive DC jack (or use the cable and connect to...
No Longer Stocked
[Buy Now](https://www.adafruit.com/product/946)
[Related Guides to the Product](https://learn.adafruit.com/products/946/guides)
### NTSC/PAL (Television) TFT Display - 7" Diagonal
[NTSC/PAL (Television) TFT Display - 7" Diagonal](https://www.adafruit.com/product/947)
Yes, this is an adorable small television! The visible display measures only 7" (17.8cm) diagonal, the TFT comes with a NTSC/PAL driver board, enclosure and stand. The display is very easy to use - simply connect the included 12VDC adapter to the 2.1mm center-positive DC jack, then...
No Longer Stocked
[Buy Now](https://www.adafruit.com/product/947)
[Related Guides to the Product](https://learn.adafruit.com/products/947/guides)
## Related Guides
- [Adafruit RGB Matrix + Real Time Clock HAT for Raspberry Pi](https://learn.adafruit.com/adafruit-rgb-matrix-plus-real-time-clock-hat-for-raspberry-pi.md)
- [Adafruit PiTFT 3.5" Touch Screen for Raspberry Pi](https://learn.adafruit.com/adafruit-pitft-3-dot-5-touch-screen-for-raspberry-pi.md)
- [Raspberry Pi Hosting Node-Red](https://learn.adafruit.com/raspberry-pi-hosting-node-red.md)
- [Windows IoT Core Application Development: Headed Blinky](https://learn.adafruit.com/windows-iot-application-development-headed-blinky.md)
- [Bonjour (Zeroconf) Networking for Windows and Linux](https://learn.adafruit.com/bonjour-zeroconf-networking-for-windows-and-linux.md)
- [Raspberry Pi Thermal Printer One Time Pads](https://learn.adafruit.com/raspberry-pi-thermal-printer-one-time-pads.md)
- [10" Raspberry Pi Desktop](https://learn.adafruit.com/10-raspberry-pi-desktop.md)
- [What is the Command Line?](https://learn.adafruit.com/what-is-the-command-line.md)
- [Adafruit's Raspberry Pi Lesson 6. Using SSH](https://learn.adafruit.com/adafruits-raspberry-pi-lesson-6-using-ssh.md)
- [Adafruit Prototyping Pi Plate](https://learn.adafruit.com/adafruit-prototyping-pi-plate.md)
- [CircuitPython Libraries on Linux and the 96Boards DragonBoard 410c](https://learn.adafruit.com/circuitpython-libraries-on-linux-and-the-96boards-dragonboard-410c.md)
- [Getting Started With Windows IoT Core on Raspberry Pi](https://learn.adafruit.com/getting-started-with-windows-iot-on-raspberry-pi.md)
- [Raspberry Pi Computer Quick-Start](https://learn.adafruit.com/raspberry-pi-computer-quick-start.md)
- [Adafruit Ultimate GPS with gpsd](https://learn.adafruit.com/adafruit-ultimate-gps-on-the-raspberry-pi.md)
- [Adafruit's Raspberry Pi Lesson 9. Controlling a DC Motor](https://learn.adafruit.com/adafruit-raspberry-pi-lesson-9-controlling-a-dc-motor.md)
---
# Source: https://learn.adafruit.com/mcp4725-12-bit-dac-tutorial/using-with-arduino.md
# MCP4725 12-Bit DAC Tutorial
## Arduino Code
## Library Installation
Once wired up, to start using the MCP4725, you'll need to install the [Adafruit\_MCP4725 library](https://github.com/adafruit/Adafruit_MCP4725). The library is available through the Arduino library manager so we recommend taking that approach.
From the Arduino IDE, open up the Library Manager:

Click the **Manage Libraries ...** menu item, search for **Adafruit MCP4725** , and select the **Adafruit MCP4725** library and click **Install** :

Next up, download the Adafruit MCP4725 library. This library does all of the interfacing, so you can just "set and forget" the DAC output. It also has some examples to get you started
[The library is available on GitHub](https://github.com/adafruit/Adafruit_MCP4725). You can download it by clicking the button below.
[Download Adafruit_MCP4725 Library](https://github.com/adafruit/Adafruit_MCP4725/archive/master.zip)
## Triangle Wave Example
Open up the **File→Examples→Adafruit\_MCP4725→trianglewave** sketch and upload it to the Arduino. Then connect your oscilloscope (or an LED + resistor if you don't have access to an oscilloscope)

We also have a sine wave version showing how to use a lookup table to create a more complex waveform.
## Using the library
The library is very simple, so you can adapt it very quickly.
First, be sure to call **begin(addr)** where **addr** is the i2c address (default is 0x62, if A0 is connected to VCC its 0x63). Then call **setVoltage(value, storeflag****) **to set the DAC output.** value **should range from 0 to 0x0FFF.** storeflag** indicates to the DAC whether it should store the value in EEPROM so that next time it starts, it'll have that same value output. You shouldn't set the flag to true unless you require it as it will take longer to do, and you could wear out the EEPROM if you write it over 20,000 times.
# Increasing the speed
One thing thats a little annoying about the Arduino Wire library in this case is it is set for 100KHz transfer speed. In the MCP4725 library we update the speed to 400KHz by setting the TWBR
> TWBR = 12; // 400 khz
You can speed this up a bit more, if you'd like, check the ATmega328 datasheet for how to calculate the **TWBR** register.
- [Previous Page](https://learn.adafruit.com/mcp4725-12-bit-dac-tutorial/wiring.md)
- [Next Page](https://learn.adafruit.com/mcp4725-12-bit-dac-tutorial/python-circuitpython.md)
## Featured Products
### MCP4725 Breakout Board - 12-Bit DAC with I2C Interface
[MCP4725 Breakout Board - 12-Bit DAC with I2C Interface](https://www.adafruit.com/product/935)
Your microcontroller probably has an ADC (analog -\> digital converter) but does it have a DAC (digital -\> analog converter)??? Now it can! This breakout board features the easy-to-use MCP4725 12-bit DAC. Control it via I2C and send it the value you want it to output, and the VOUT pin...
In Stock
[Buy Now](https://www.adafruit.com/product/935)
[Related Guides to the Product](https://learn.adafruit.com/products/935/guides)
## Related Guides
- [I2C Addresses and Troublesome Chips](https://learn.adafruit.com/i2c-addresses.md)
- [MCP4725 12-Bit DAC with Raspberry Pi](https://learn.adafruit.com/mcp4725-12-bit-dac-with-raspberry-pi.md)
- [CircuitPython MIDI to CV Skull](https://learn.adafruit.com/circuitpython-midi-to-cv-skull.md)
- [NeoPixel Manicure](https://learn.adafruit.com/neopixel-manicure.md)
- [Adafruit TPS61169 Constant Current Boost Converter for LEDs](https://learn.adafruit.com/adafruit-tps61169-constant-current-boost-converter-for-leds.md)
- [Adafruit Floppy FeatherWing with 34-Pin IDC Connector](https://learn.adafruit.com/adafruit-floppy-featherwing-with-34-pin-idc-connector.md)
- [Remote Control with the Huzzah + Adafruit.io](https://learn.adafruit.com/remote-control-with-the-huzzah-plus-adafruit-io.md)
- [Adafruit ENS160 MOX Gas Sensor](https://learn.adafruit.com/adafruit-ens160-mox-gas-sensor.md)
- [Hallowing Minotaur Maze](https://learn.adafruit.com/hallowing-minotaur-maze.md)
- [DIY Google's "Physical Web" UriBeacons with the Bluefruit LE Friend](https://learn.adafruit.com/google-physical-web-uribeacon-with-the-bluefruit-le-friend.md)
- [Larsio Paint Music](https://learn.adafruit.com/larsio-paint-music.md)
- [Make It Talk](https://learn.adafruit.com/make-it-talk.md)
- [Introducing Gemma](https://learn.adafruit.com/introducing-gemma.md)
- [3D-Printed Bionic Eye](https://learn.adafruit.com/3d-printed-bionic-eye.md)
- [Adafruit PCF8591 Basic 4 x ADC + DAC Breakout](https://learn.adafruit.com/adafruit-pcf8591-adc-dac.md)
---
# Source: https://learn.adafruit.com/adafruit-arduino-lesson-8-analog-inputs/variable-resistors-pots.md
# Arduino Lesson 8. Analog Inputs
## Variable Resistors (Pots)
For historical reasons, variable resistors are often called 'pots' which is short for 'potentiometers'.
In our experiment with the Serial Monitor, the pot is somehow varying the voltage at A0 and the little test sketch is converting this voltage into a number between 0 and 1023.

Your pot has a circular 'track' that acts as a resistor, in our case it's a 10 kΩ resistor. However, the difference with a pot, is that there is also a middle connection called the 'slider'. This connection is rotated when you turn the pot. So if you connect one end of the pot to 5V and the other to GND, then the voltage at the slider will vary between 0 and 5V as you turn it.
- [Previous Page](https://learn.adafruit.com/adafruit-arduino-lesson-8-analog-inputs/an-experiment.md)
- [Next Page](https://learn.adafruit.com/adafruit-arduino-lesson-8-analog-inputs/breadboard-layout.md)
## Featured Products
### Breadboard trim potentiometer
[Breadboard trim potentiometer](https://www.adafruit.com/product/356)
These are our favorite trim pots, perfect for breadboarding and prototyping. They have a long grippy adjustment knob and with 0.1" spacing, they plug into breadboards or perfboards with ease.
This is the same pot that comes with our character LCDs and tutorial...
In Stock
[Buy Now](https://www.adafruit.com/product/356)
[Related Guides to the Product](https://learn.adafruit.com/products/356/guides)
### Diffused Red 5mm LED (25 pack)
[Diffused Red 5mm LED (25 pack)](https://www.adafruit.com/product/299)
Need some indicators? We are big fans of these diffused red LEDs, in fact we use them exclusively in our kits. They are fairly bright so they can be seen in daytime, and from any angle. They go easily into a breadboard and will add that extra zing to your project.
- Pack of 25...
In Stock
[Buy Now](https://www.adafruit.com/product/299)
[Related Guides to the Product](https://learn.adafruit.com/products/299/guides)
### 74HC595 Shift Register - 3 pack
[74HC595 Shift Register - 3 pack](https://www.adafruit.com/product/450)
Add lots more outputs to a microcontroller system with chainable shift registers. These chips take a serial input (SPI) of 1 byte (8 bits) and then output those digital bits onto 8 pins. You can chain them together so putting three in a row with the serial output of one plugged into the serial...
In Stock
[Buy Now](https://www.adafruit.com/product/450)
[Related Guides to the Product](https://learn.adafruit.com/products/450/guides)
### Premium Male/Male Jumper Wires - 40 x 6" (150mm)
[Premium Male/Male Jumper Wires - 40 x 6" (150mm)](https://www.adafruit.com/product/758)
Handy for making wire harnesses or jumpering between headers on PCB's. These premium jumper wires are 6" (150mm) long and come in a 'strip' of 40 (4 pieces of each of ten rainbow colors). They have 0.1" male header contacts on either end and fit cleanly next to each other...
In Stock
[Buy Now](https://www.adafruit.com/product/758)
[Related Guides to the Product](https://learn.adafruit.com/products/758/guides)
### Half Sized Premium Breadboard - 400 Tie Points
[Half Sized Premium Breadboard - 400 Tie Points](https://www.adafruit.com/product/64)
This is a cute, half-size breadboard with 400 tie points, good for small projects. It's 3.25" x 2.2" / 8.3cm x 5.5cm with a standard double-strip in the middle and two power rails on both sides. You can pull the power rails off easily to make the breadboard as...
In Stock
[Buy Now](https://www.adafruit.com/product/64)
[Related Guides to the Product](https://learn.adafruit.com/products/64/guides)
### Adafruit METRO 328 Fully Assembled - Arduino IDE compatible
[Adafruit METRO 328 Fully Assembled - Arduino IDE compatible](https://www.adafruit.com/product/50)
We sure love the ATmega328 here at Adafruit, and we use them _a lot_ for our own projects. The processor has plenty of GPIO, Analog inputs, hardware UART SPI and I2C, timers and PWM galore - just enough for most simple projects. When we need to go small, we use a
Out of Stock
[Buy Now](https://www.adafruit.com/product/50)
[Related Guides to the Product](https://learn.adafruit.com/products/50/guides)
## Related Guides
- [74HC595 Shift Register](https://learn.adafruit.com/74hc595.md)
- [8BitBox](https://learn.adafruit.com/8bitbox.md)
- [Adafruit Data Logger Shield](https://learn.adafruit.com/adafruit-data-logger-shield.md)
- [Adafruit Music Maker Shield](https://learn.adafruit.com/adafruit-music-maker-shield-vs1053-mp3-wav-wave-ogg-vorbis-player.md)
- [Adalight Project Pack](https://learn.adafruit.com/adalight-diy-ambient-tv-lighting.md)
- [OLED TRON Clock](https://learn.adafruit.com/oled-tron-clock.md)
- [Arduino "Hunt The Wumpus"](https://learn.adafruit.com/arduino-hunt-the-wumpus.md)
- [Arduino Tips, Tricks, and Techniques](https://learn.adafruit.com/arduino-tips-tricks-and-techniques.md)
- [NeoPixel Painter](https://learn.adafruit.com/neopixel-painter.md)
- [1,500 NeoPixel LED Curtain with Raspberry Pi and Fadecandy](https://learn.adafruit.com/1500-neopixel-led-curtain-with-raspberry-pi-fadecandy.md)
- [Arduin-o-Phone](https://learn.adafruit.com/arduin-o-phone-arduino-powered-diy-cellphone.md)
- [LED Lightbox](https://learn.adafruit.com/led-lightbox.md)
- [Arduino Lesson 3. RGB LEDs](https://learn.adafruit.com/adafruit-arduino-lesson-3-rgb-leds.md)
- [Wave Shield](https://learn.adafruit.com/adafruit-wave-shield-audio-shield-for-arduino.md)
- [Making Adabot: Part 2](https://learn.adafruit.com/making-adabot-part-2.md)
- [RePaper eInk Development Board](https://learn.adafruit.com/repaper-eink-development-board.md)
---
# Source: https://learn.adafruit.com/hacking-the-kinect/verify-the-vid-and-pid.md
# Hacking the Kinect
## Verify the VID & PID
The first place to start is to see what devices and "interfaces" or "configurations" are available for the USB device. The nicest way to do this is to use **lsusb** (Linux) or **system\_profiler** (Mac) which is a "list usb" program available for Linux and mac. Sadly, it does not exist for windows, so find a mac or linux computer or friend, you'll only need it for a minute! [[edit: a reader has notified us that [http://www.nirsoft.net/utils/usb\_devices\_view.html](http://www.nirsoft.net/utils/usb_devices_view.html) may do the trick!]]
For linux, run **lsusb -vv** (ultra verbose) for Mac, run **system\_profiler SPUSBDataType**

There's a bunch more stuff like USB keys and such installed but this is a good starting point. Note that the Kinect is actually 4 USB devices - a hub, a camera, a microphone (audio) and a motor. The hub is just an easy way for the device to combine three separate chips into a single cable. We'll be investigating the **Xbox NUI Motor** since its the simplest. Note the **Vendor ID = 0x045e** and **Product ID = 0x2b0. ** Every type USB device must have a unique VID and PID. The VID is the manufacturer. In this case, **0x045e** is the VID for Microsoft. All Microsoft products will have that VID. Each product has a different PID, so all Kinect Motors use PID **0x02b0** this doesn't differ between two Kinects, they'll both have the same PID. The VID/PID are used as a way to have the proper driver find the product. Its a lot better than serial COM ports because COM ports change names but VID/PID are burned into the device firmware.- [Previous Page](https://learn.adafruit.com/hacking-the-kinect/overview.md)
- [Next Page](https://learn.adafruit.com/hacking-the-kinect/determine-the-descriptors.md)
## Featured Products
### Hacked Kinect - Skill badge, iron-on patch
[Hacked Kinect - Skill badge, iron-on patch](https://www.adafruit.com/product/582)
You can made a cool project using the (hacked) Kinect! Adafruit offers a fun and exciting "badges" of achievement for electronics, science and engineering. We believe everyone should be able to be rewarded for learning a useful skill, a badge is just one of the many ways to show and...
No Longer Stocked
[Buy Now](https://www.adafruit.com/product/582)
[Related Guides to the Product](https://learn.adafruit.com/products/582/guides)
### Beagle USB 12 - Low/Full Speed USB Protocol Analyzer
[Beagle USB 12 - Low/Full Speed USB Protocol Analyzer](https://www.adafruit.com/product/708)
USB complexity got you down? Need a hand with enumeration? Reverse engineering a USB device? You will fall in love with the Beagle 12 USB Analyzer. This hardware analyzer is completely non-intrusive, and is much better than flaky software analyzers. Perfect for when a problem is bad enough it...
No Longer Stocked
[Buy Now](https://www.adafruit.com/product/708)
[Related Guides to the Product](https://learn.adafruit.com/products/708/guides)
### Reverse Engineer - Skill badge, Lenticular printing + pin-on
[Reverse Engineer - Skill badge, Lenticular printing + pin-on](https://www.adafruit.com/product/489)
You can reverse engineer! This is the first lenticular (two-stage image) skill badge that we know of! It says reverse engineer forwards and backwards depending on the angle you view it at!
**Note:** The edges of the badge will appear "white" at an angle,...
No Longer Stocked
[Buy Now](https://www.adafruit.com/product/489)
[Related Guides to the Product](https://learn.adafruit.com/products/489/guides)
### Reverse Engineer - Sticker!
[Reverse Engineer - Sticker!](https://www.adafruit.com/product/673)
You can reverse engineer! Adafruit offers fun and exciting stickers to celebrate achievement for electronics, science and engineering. We believe everyone should be able to be rewarded for learning a useful skill and a sticker is just one of the many ways to show and share.
No Longer Stocked
[Buy Now](https://www.adafruit.com/product/673)
[Related Guides to the Product](https://learn.adafruit.com/products/673/guides)
## Related Guides
- [Guitar Hero MIDI Controller](https://learn.adafruit.com/guitar-hero-midi-controller.md)
- [Commodore 64 - The Most Popular Retro Computer of All Time](https://learn.adafruit.com/commodore-64-retro-guide.md)
- [Use Docker to Compile Linux for ESP32-S3](https://learn.adafruit.com/docker-esp32-s3-linux.md)
- [Feather Guitar Hero Adapter](https://learn.adafruit.com/feather-guitar-hero-adapter.md)
- [BLE Cat Thermal Printer with MEMENTO](https://learn.adafruit.com/ble-cat-thermal-printer-with-memento.md)
- [Fruit Jam Mac Emulator](https://learn.adafruit.com/fruit-jam-mac-emulator.md)
- [How to Make Animated Graphics for Hologram Displays](https://learn.adafruit.com/how-to-make-animated-graphics-for-hologram-displays.md)
- [LED Matrix Wall Arcade for Pico-8](https://learn.adafruit.com/led-matrix-wall-arcade.md)
- [Run an X-Carve CNC Machine Wirelessly with a Raspberry Pi](https://learn.adafruit.com/control-an-xcarve-cnc-machine-wirelessly-with-a-raspberry-pi.md)
- [CircuitPython 2FA TOTP Authentication Friend](https://learn.adafruit.com/circuitpython-totp-otp-2fa-authy-authenticator-friend.md)
- [Flippy Floppy Drive Modification](https://learn.adafruit.com/flippy-floppy-drive-modification.md)
- [Authoring Playground Books with Bluefruit for iOS ](https://learn.adafruit.com/create-a-swift-playgroundbook-with-bluetooth-le.md)
- [SerenityOS - The dream of the '90s is alive!](https://learn.adafruit.com/serenityos-build-and-run-keep-the-90s-dream-alive.md)
- [Stand-alone programming AVRs using CircuitPython](https://learn.adafruit.com/stand-alone-programming-avrs-using-circuitpython.md)
- [Protect Your Online Accounts with Strong Passwords & Password Managers](https://learn.adafruit.com/protect-your-social-media-online-accounts-with-a-strong-password-manager.md)
---
# Source: https://learn.adafruit.com/electroknit/view.md
# Electro-knit
## Viewing Patterns
The **file-01.dat** file contains any pattern data that you entered into the machine by hand. You can use the **dumppattern.py** software to view patterns and see which patterns are in which slot. Not all information is printed, like memo data, just the stitches.
Using it is simple, and you don't need to be connected to the knitting machine to perform this step. Open up that terminal program and navigate to your directory where the software is. Type in **python dumppattern.py img/file-01.dat** (that's assuming that the folder you chose before is called img).

The software will tell you how many patterns are in the memory and their sizes
You can view individual patterns by running **python dumppattern.py img/file-01.dat PATTNUMBER** where PATTNUMBER is the name of the pattern, usually starting with 901 and going up to 999.

- [Previous Page](https://learn.adafruit.com/electroknit/backup.md)
- [Next Page](https://learn.adafruit.com/electroknit/insert.md)
## Featured Products
### FTDI Serial TTL-232 USB Cable
[FTDI Serial TTL-232 USB Cable](https://www.adafruit.com/product/70)
Just about all electronics use TTL serial for debugging, bootloading, programming, serial output, etc. But it's rare for a computer to have a serial port anymore. This is a USB to TTL serial cable, with a FTDI FT232RL usb/serial chip embedded in the head. It has a 6-pin socket at the end...
In Stock
[Buy Now](https://www.adafruit.com/product/70)
[Related Guides to the Product](https://learn.adafruit.com/products/70/guides)
## Related Guides
- [Open Source Protective Face Shield Designs](https://learn.adafruit.com/open-source-face-shield-designs.md)
- [Pico Bluetooth Keyboard Bridge](https://learn.adafruit.com/pico-bluetooth-keyboard-bridge.md)
- [Dimmable Li-Ion Halogen Bike Light](https://learn.adafruit.com/dimmable-li-ion-halogen-bike-light.md)
- [Installing IronOS on an MHP30 Mini Hot Plate (DEPRECATED)](https://learn.adafruit.com/installing-ironos-on-a-mhp30-mini-hotplate.md)
- [Getting Started with Braille Output for CircuitPython REPL](https://learn.adafruit.com/getting-started-braille-output-circuitpython-repl.md)
- [Meowsic Cat Piano Line Out](https://learn.adafruit.com/meowsic-line-out.md)
- [Instagram Photo Frame](https://learn.adafruit.com/instagram-photo-frame.md)
- [ESP32 PlayStation Controller](https://learn.adafruit.com/esp32-playstation-controller.md)
- [NeoPIO: Drive lots of LEDs with Raspberry Pi Pico](https://learn.adafruit.com/neopio-drive-lots-of-leds-with-raspberry-pi-pico.md)
- [Ikea Vindriktning Hack with QT Py ESP32-S3 and Adafruit IO](https://learn.adafruit.com/ikea-vindriktning-hack-with-qt-py-esp32-s3-and-adafruit-io.md)
- [See N Say Brain Transplant](https://learn.adafruit.com/see-n-say-brain-transplant.md)
- [DIY Welded Bike Stand](https://learn.adafruit.com/diy-welded-bike-stand.md)
- [Setting up an Open Speech Recording Website](https://learn.adafruit.com/setting-up-an-open-speech-recording-website.md)
- [Authoring Playground Books with Bluefruit for iOS ](https://learn.adafruit.com/create-a-swift-playgroundbook-with-bluetooth-le.md)
- [Adafruit Feather RP2040 with USB Type A Host](https://learn.adafruit.com/adafruit-feather-rp2040-with-usb-type-a-host.md)
---
# Source: https://learn.adafruit.com/multimeters/voltage.md
# Multimeters
## Voltage
## What is Voltage?
So what is voltage anyhow? Well, its a pretty abstract term but a lot of people like to use the term "potential energy" which is that thing you heard about in high school physics and then forgot immediately.
Some people like to draw an [analogy to water](http://en.wikipedia.org/wiki/Hydraulic_analogy) to describe voltage. [A water pump is like a voltage supply ](http://hyperphysics.phy-astr.gsu.edu/hbase/electric/watcir.html#c1)(also known as a **battery** ).
The pump pushes water through a hydraulic system, and the voltage supply pushes electrons through an electronic system.
The higher the rated pressure of the pump, the more 'work' the water can do.
Likewise, the higher the voltage the more 'work' (Watts) the electrons can do.
Voltage is used to provide power (via a battery or wall plug) and its also used as a way of transmitting data. For example, music is recorded from a microphone as an analog voltage signal, if that voltage waveform is applied to a speaker the voltage performs the work of making air move and produces sound.
Voltage is also used to in digital circuits to talk back and forth in binary, usually 5V or 3.3V is a "1" and 0V is a "0", by alternating the 1's and 0's millions of times a second, data can be moved around rather quickly.
## AC/DC
Not just an 80's hair metal band! Voltage comes in two flavors (yum): **Alternating Current** (AC) and **Direct Current ** (DC). Here is a _quick_ tour of the differences.
**Direct current voltage is what comes out of batteries**. The battery is at 9V, and it pretty much keeps that voltage constant, until it dies. The chemical reactions inside the battery creates DC voltage.
Electronic circuits really like DC voltage.
**Alternating current voltage is what comes out of the wall**. We call it 120 VAC (Volts Alternating Current) because the generator at the US power plant creates a voltage that oscillates (alternates). At the outlet in your home, the voltage is _not constant_ but goes from about -120V to 0 to +120V to 0 again, 60 times a second. In Europe, it's referred to as 240VAC because the voltage goes from about -240V to +240V at 50 times a second.
_Technically_ the voltage is truly +170V to -170V in the US, which would make 120VAC we're mentioning -\> 340Volts peak to peak. Since multimeters tend to show RMS voltages, its easier to just refer to it as 120VAC and remember that the peak postive and negative voltage are each ~1.5x the RMS voltage and the peak-to-peak is going to be ~3x as what the multimeter is displaying for sinusoidal/wall outlet waveforms! [You can read all about peak to peak vs RMS voltages here](https://en.wikipedia.org/wiki/Amplitude)
AC voltage is great for power plants because its easy to transform AC voltages (using a [transformer](http://en.wikipedia.org/wiki/Transformer) ) up to 50KVAC for long distance travel and then down to 240VAC or 120VAC to safely power your home. Those big honking grey things that you see next to buildings that hum are the huge transformers.
Motors (like your washing machine and refrigerator compressor pump) also like running off of AC voltage.
You can turn AC voltage into DC voltage very easily by using a very small transformer to bring the 120VAC down to a reasonable level like say 16VAC and then [rectify it](http://en.wikipedia.org/wiki/Rectifier). This is basically what's inside a [wall wart plug](http://en.wikipedia.org/wiki/Wall_wart) or your laptop power supply.
Its much harder to turn DC into AC, you will need an inverter which are more expensive than transformers/rectifiers.
Batteries only supply DC voltage and wall plugs only supply AC voltage. However, it is totally possible to have **both** AC and DC voltage at a certain point:
If an AC voltage is oscillating between -60V and +60V it has 120Vpp AC and 0V DC because the **average** voltage of -60V and +60V is 0V.
If an AC voltage is oscilating between 0V and 120V then it has 120Vpp AC and 60V DC because the average voltage of 0V and 120V is 60V.

In the above oscilloscope image, the dashed horizontal line in the center is ground (0V) and each dashed division is 5V. The scope is displaying a signal that has both AC and DC components. There is an alternating voltage (a square wave) that is about 4V high at about 100Hz and a DC (mean average) voltage that is around 7V. Use the dashed divisions to verify for yourself that this is so.## What is voltage testing good for?
Voltage testing is very common, you'll use it a lot
- Test if your power supply is working, are you getting 5V out of that 7805 regulator?
- Verify that your circuit is getting enough power: when all of the blinky lights are on, is the power supply drooping too low?
- Verify signals to and from chips to make sure they are what you expect once the circuit is up and running
- Testing batteries, solar cells, wall plugs, and power outlets (carefully!)
- With a **current sense resistor** you can perform current testing on a project without possibly damaging your meter.
## Remember!
**You can only test voltage when the ciruit is powered** If there is no voltage coming in (power supply) then there will be no voltage in the circuit to test! It must be plugged in (even if it doesn't seem to be working)
**Voltage is always measured between two points** There is no way to measure voltage with only one probe, it is like trying to check continuity with only one probe. You must have two probes in the circuit. If you are told to **test at a point** or **read the voltage at this or that location ** what it really means is that you should put the negative (reference, ground, black) probe at **ground** (which you must determine by a schematic or somewhere else in the instructions) and the positive (red) probe at the point you would like to measure.
**If you're getting odd readings** , **use a** **reference voltage** (even a 9V battery is a reasonable one) to check your voltage readings. Old meter batteries and wonky meters are the bane of your existence but they will eventually strike! Good places to take reference voltages are regulated wall plugs such as those for cell phones. Two meters might also be good :)
**Voltage is directional** If you measure a battery with the red/positive probe on the black/negative contact and the black probe on the positive contact you will read a negative voltage. If you are reading a negative voltage in your ciruit and you're nearly positive (ha!) that this cannot be, then make sure you are putting the black probe on the reference voltage (usually ground)
**DC voltage and AC voltage are very different** Make sure you are testing the right kind of voltage. This may require pressing a mode button or changing the dial.
**Unless otherwise indicated, assume DC voltages**
**Multimeters have different input impedences that affect readings of high impedence circuits** For example, measuring a sensor that has 1Mohm impedence with a 1Mohm impedence meter will give you only half the correct reading
## Get into the right mode.
There are often two seperate modes for AC and DC voltage. Both will have a V but one will have two lines, one dashed and one solid (DC) and one with have a wave next to it (AC).

This meter has the double line for DC voltage, and 5 ranges, from 200mV to 600V. The lightning bolt symbol is a gentle reminder that this voltage is extremely dangerous.
There is also the V-wave symbol for AC, and two ranges since most AC voltages that are measured are power voltages and are pretty big. (For small AC waveforms, a scope is best since you will be able to see the waveform itself).
This autoranging meter makes it pretty clear which mode you want to be in.
This ranged meter has 5 ranges, the top range is 750 VAC or 1000 VDC, to switch between DC and AC you need to press the DC/AC button on the upper right.
When the probes are not connected to anything, they should display 0V. They might flicker a bit if they pick up ambient voltage (your home is a big radiator of 60Hz voltage which can couple into your meter probes).

## Example 1: Testing Batteries
Testing batteries is a super useful skill and is one of the best ways to practice with your multimeter
The first battery we'll test is a new 1.5V alkaline. This one is a AAA but a AA, C or D cell will be the same voltage. Set the range to **2V DC**.

We read 1.588V, which you may think is a mistake, after all its a 1.5V battery so shouldn't it be 1.5V? Not quite, the 1.5V written on the side is just a **nominal voltage** , or the "average" you may expect from the battery.In reality, an alkaline battery starts out higher, and then slowly drifts down to 1.3V and then finally to 1.0V and even lower. [Check out this graph from Duracell's page about alkaline battery voltage](http://ww2.duracell.com/en-US/Global-Technical-Content-Library/Product-Data-Sheets.jspx).

Using this graph you can easy tell how fresh your battery is and how long you can expect it to last.
Next, we measure a 9V alkaline battery. If we still have the range set to 2VDC we will get a mysterious " **1.** " display, indicating is it over-range.

Fix the range so that it's 20V, and try again.
For this new battery we get 9.6V. Remember that battery voltage is _nominal_, which means that the "9V" is just the **average voltage** of the battery. In reality, it starts out as high as 9.5V and then drops down to 9 and then slowly drifts to 7V. [You can check out the discharge curve in the Duracell 9V datasheet](http://ww2.duracell.com/en-US/Global-Technical-Content-Library/Product-Data-Sheets.jspx)
If we want to check a rechargeable AA battery, and it's set to a 20VDC range, we will read 1.3V, which is about what a fully charged NiMH battery will measure.

If we fix the range so it's **2VDC** , we can get an extra digit of precision. This meter probably isnt more than 0.5% accurate so the precision may not mean much.
Finally, I test a lithium 3V coin cell, its at 2.7V which means it's getting near the end of it's life.
## Example 2: Testing wall wart (adapter) plugs
Testing wall adapters is also very handy, especially when you build your own circuits.
The first kind we will test is a **transformer-based ** adapter.


Note that the label says **Transformer** , its also blocky and heavy which indicates a transformer as well. It requires 120VAC input, US power only. The nominal output is 9VDC at 300mA. The polarity symbol shows that the middle is positive, the outside is negative, thus we place the ground (black) probe on the outside and the positive (red) probe on the inside.
Yow! 14V? That's not anything like the 9V on the package, is this a broken wall wart? Turns out, its totally normal. Transformer-based wall adaptors are (almost always) **unregulated** , which means that the output is not guaranteed to be a particular value, only that it will be **at least** what is printed on the box. For example, with this adapter it means that when drawing 300mA, the voltage is guaranteed to be higher than 9V.
Since the output is unregulated, the voltage supplied will droop as more current is pulled from it, which means that open-circuit (connected to nothing) the measured output can be as high as 14V. [Our power supply tutorial on transformer-based wall adapters covers this in detail](http://learn.adafruit.com/power-supplies)
Next, lets check out a **Switch-mode** adapter.

Notice that it's not square, its much thinner and although you cant feel it, its quite light for its size: There is no big honking transformer inside!
Note that it says Switching (not Transformer) on the label, and you can input US or European power. Like the transformer adapter, it is center-positive polarity.
Switch-mode wall adapters are **regulated** which means that the output doesn't droop from open-circuit to full load. Its not an ultra-high quality supply, the voltage is 12.2V which is less than 5% error. Still, its much better than the transformer's 50% error!
Lastly, we'll test a 9VAC adaptor, which outputs AC voltage instead of DC. Basically this means that there's still a transformer inside, but no rectifier. This is also an unregulated supply.

Note that is is similar to the transformer-based DC supply we checked out first.
Note again that the label says transformer. It requires 120VAC input, US power only. The nominal output is 9VAC at 300mA. The output is indicated twice, once at the top "AC/AC" and then again in the output designator "9V AC"
There is no polarity because AC adaptors are not polarized: AC power oscillates between positive and negative voltages.
We test the output, but get 0V! That's when we remember that the multimeter has to be in AC voltage mode.

Switching over to AC, we get a good reading, 10.5VAC. This is an unregulated supply so again we are going to get a voltage higher than 9V.
## Bonus Example: Testing a circuit with AC and DC
If you're trying to measure something that is just DC or just AC its very easy, just get into the right mode and measure away! The hardest thing to do is measure a circuit with both AC and DC voltages.
For example, here is a few attempts to measure the VCO output of a x0xb0x as seen in the oscilloscope output shown here (its the same one from above).

The DC portion is the easy part to measure, most multimeters just average out the input measurement.
We read 6.75V DC, which is about right.
However, when trying to measure AC, this multimeter gives us a seemingly random number. (Maybe the DC voltage \* 2 ?).

The Extech meter reads 1.65V
The Wavetek does the same
The lesson? You can't depend on your multimeter to measure AC voltages when there is a DC component!- [Previous Page](https://learn.adafruit.com/multimeters/resistance.md)
- [Next Page](https://learn.adafruit.com/multimeters/current.md)
## Featured Products
### Extech EX330 12-function autoranging multimeter
[Extech EX330 12-function autoranging multimeter](https://www.adafruit.com/product/308)
**Discontinued** - [you can grab this Digital Multimeter - Model 9205B+ instead!](https://www.adafruit.com/product/2034)
If you're looking for one of the best multimeters, we're proud to now offer our personal favorite! The Extech EX330 "12...
No Longer Stocked
[Buy Now](https://www.adafruit.com/product/308)
[Related Guides to the Product](https://learn.adafruit.com/products/308/guides)
### Digital Multimeter
[Digital Multimeter](https://www.adafruit.com/product/71)
This is a basic multimeter, I've played with it a bunch and I think its a great addition to a toolbox. It's low cost and simple to use with a big clear display and all the measurements you need:
- AC/DC Voltage measurement
- Current measurement, from 1uA up to...
No Longer Stocked
[Buy Now](https://www.adafruit.com/product/71)
[Related Guides to the Product](https://learn.adafruit.com/products/71/guides)
### Digital Multimeter - Model 9205B+
[Digital Multimeter - Model 9205B+](https://www.adafruit.com/product/2034)
This massive multimeter has everything but the kitchen sink included. It's a great addition to any workbench or toolbox. It's low cost, simple to use, and has a big clear display with all the measurements you need and more!
The multimeter includes:
- AC/DC Voltage...
In Stock
[Buy Now](https://www.adafruit.com/product/2034)
[Related Guides to the Product](https://learn.adafruit.com/products/2034/guides)
### Pocket Autoranging Digital Multimeter
[Pocket Autoranging Digital Multimeter](https://www.adafruit.com/product/850)
When we're on the go, we like to keep a multimeter in our purse and this model is by far the best pocket meter we've found. It's so good you'll end up using it as your main multimeter!
First up, this meter can measure nearly everything: it's got DC and AC...
Out of Stock
[Buy Now](https://www.adafruit.com/product/850)
[Related Guides to the Product](https://learn.adafruit.com/products/850/guides)
### Multi-Meter! - Skill badge, iron-on patch
[Multi-Meter! - Skill badge, iron-on patch](https://www.adafruit.com/product/502)
You can use a multi-meter! Adafruit offers a fun and exciting "badges" of achievement for electronics, science and engineering. We believe everyone should be able to be rewarded for learning a useful skill, a badge is just one of the many ways to show and share.
This is...
No Longer Stocked
[Buy Now](https://www.adafruit.com/product/502)
[Related Guides to the Product](https://learn.adafruit.com/products/502/guides)
### Multi-Meter! - Sticker!
[Multi-Meter! - Sticker!](https://www.adafruit.com/product/646)
You can use a multi-meter! Adafruit offers a fun and exciting stickers to celebrate achievements in electronics, science and engineering. We believe everyone should be able to be rewarded for learning a useful skill, a great sticker is just one of the many ways to show and share.
No Longer Stocked
[Buy Now](https://www.adafruit.com/product/646)
[Related Guides to the Product](https://learn.adafruit.com/products/646/guides)
## Related Guides
- [USB-PD Hacks](https://learn.adafruit.com/usb-pd-hacks.md)
- [Energy Budgets](https://learn.adafruit.com/energy-budgets.md)
- [Ladyada's Toolkit](https://learn.adafruit.com/ladyadas-toolkit.md)
- [Collin's Lab: Multimeters](https://learn.adafruit.com/collins-lab-multimeters.md)
---
# Source: https://learn.adafruit.com/li-ion-and-lipoly-batteries/voltages.md
# Li-Ion & LiPoly Batteries
## Voltages
Depending on the design and chemistry of your lithium cell, you may see them sold under different nominal "voltages". For example, almost all lithium polymer batteries are **3.7V** or **4.2V ** batteries. What this means is that the **maximum** voltage of the cell is **4.2v** and that the "nominal" (average) voltage is **3.7V**. As the battery is used, the voltage will drop lower and lower until the minimum which is around 3.0V. You should see the number **3.7V** written on the battery itself somewhere.
For example, here is a profile of the voltage for a 'classic' **3.7V/4.2V** battery. The voltage starts at 4.2 maximum and quickly drops down to about 3.7V for the majority of the battery life. Once you hit 3.4V the battery is dead and at 3.0V the cutoff circuitry disconnects the battery (more on that later.
You may also run across **4.1V/3.6V** batteries. These are older than 4.2V/3.7V - they use a slightly different chemistry and you'll see the 3.6V marking on the cell.
Nowadays you may also be able to purchase **4.35V** cells! These are the latest chemistry, they have a little more power as indicated by the voltage being higher than **4.2V**. They tend to be cylinder lithium ion's used for laptop batteries, and lights so its not terribly likely you'll just run into one unless you're looking for it.
Make sure when you're buying batteries and chargers to match them up! Overcharging a 3.6V battery by attaching it to a 4.2V battery charger can at the very least permanently damage your battery and at worst cause a fire!
Info:
- [Previous Page](https://learn.adafruit.com/li-ion-and-lipoly-batteries/rechargeable-lithiums-names.md)
- [Next Page](https://learn.adafruit.com/li-ion-and-lipoly-batteries/protection-circuitry.md)
## Featured Products
### Adafruit Micro Lipo - USB LiIon/LiPoly charger
[Adafruit Micro Lipo - USB LiIon/LiPoly charger](https://www.adafruit.com/product/1304)
Oh so adorable, this is the tiniest little lipo charger, so handy you can keep it any project box! Its also easy to use. Simply plug in the gold plated contacts into any USB port and a 3.7V/4.2V lithium polymer or lithium ion rechargeable battery into the JST plug on the other end. There are...
In Stock
[Buy Now](https://www.adafruit.com/product/1304)
[Related Guides to the Product](https://learn.adafruit.com/products/1304/guides)
### USB LiIon/LiPoly charger
[USB LiIon/LiPoly charger](https://www.adafruit.com/product/259)
This is a Lithium Ion and Lithium Polymer battery charger based on the [MCP73833](http://www.microchip.com/wwwproducts/Devices.aspx?dDocName=en027785). It uses a USB mini-B for connection to any computer or 'USB wall adapter'. Charging is performed in three stages: first a...
In Stock
[Buy Now](https://www.adafruit.com/product/259)
[Related Guides to the Product](https://learn.adafruit.com/products/259/guides)
### USB/DC Lithium Polymer battery charger 5-12V
[USB/DC Lithium Polymer battery charger 5-12V](https://www.adafruit.com/product/280)
Charge your single-cell lithium ion/polymer battery any which way you like with this board. Have a USB connection? No problem, just plug into the miniUSB connector. Only have a wall adapter? Any standard 2.1mm DC adapter which puts out 5 to 12VDC will work fine. If both are plugged in, the...
No Longer Stocked
[Buy Now](https://www.adafruit.com/product/280)
[Related Guides to the Product](https://learn.adafruit.com/products/280/guides)
### Lithium Ion Battery Pack - 3.7V 6600mAh
[Lithium Ion Battery Pack - 3.7V 6600mAh](https://www.adafruit.com/product/353)
Need a massive battery for your project? This lithium-ion pack is made of 3 balanced 2200mAh cells for a total of 6600mA capacity! The cells are connected in parallel and spot-welded to a protection circuit that provides over-voltage, under-voltage, and over-current protection.
Each cell...
In Stock
[Buy Now](https://www.adafruit.com/product/353)
[Related Guides to the Product](https://learn.adafruit.com/products/353/guides)
### Lithium Ion Battery Pack - 3.7V 4400mAh
[Lithium Ion Battery Pack - 3.7V 4400mAh](https://www.adafruit.com/product/354)
Need a big battery for your project? This lithium-ion pack is made of 2 balanced 2200mAh cells for a total of 4400mA capacity! The cells are connected in parallel and spot-welded to a protection circuit that provides over-voltage, under-voltage, and over-current protection.
Each cell can...
In Stock
[Buy Now](https://www.adafruit.com/product/354)
[Related Guides to the Product](https://learn.adafruit.com/products/354/guides)
### Lithium Ion Polymer Battery - 3.7v 2500mAh
[Lithium Ion Polymer Battery - 3.7v 2500mAh](https://www.adafruit.com/product/328)
Lithium-ion polymer (also known as 'lipo' or 'lipoly') batteries are thin, light, and powerful. The output ranges from 4.2V when completely charged to 3.7V. This battery has a capacity of **2500mAh** for a total of about 10 Wh. If you need a smaller battery,
In Stock
[Buy Now](https://www.adafruit.com/product/328)
[Related Guides to the Product](https://learn.adafruit.com/products/328/guides)
### Lithium Ion Polymer Battery - 3.7v 1200mAh
[Lithium Ion Polymer Battery - 3.7v 1200mAh](https://www.adafruit.com/product/258)
Lithium-ion polymer (also known as 'lipo' or 'lipoly') batteries are thin, light, and powerful. The output ranges from 4.2V when completely charged to 3.7V. This battery has a capacity of 1200mAh for a total of about 4.5 Wh. If you need a larger battery,
In Stock
[Buy Now](https://www.adafruit.com/product/258)
[Related Guides to the Product](https://learn.adafruit.com/products/258/guides)
### Lithium Ion Polymer Battery - 3.7v 500mAh
[Lithium Ion Polymer Battery - 3.7v 500mAh](https://www.adafruit.com/product/1578)
Lithium-ion polymer (also known as 'lipo' or 'lipoly') batteries are thin, light, and powerful. The output ranges from 4.2V when completely charged to 3.7V. This battery has a capacity of 500mAh for a total of about 1.9 Wh. If you need a larger (or smaller!) battery,
In Stock
[Buy Now](https://www.adafruit.com/product/1578)
[Related Guides to the Product](https://learn.adafruit.com/products/1578/guides)
## Related Guides
- [Sound Activated Shark Mask](https://learn.adafruit.com/sound-activated-shark-mask.md)
- [SNES EZ Key Bluefruit Game Pad](https://learn.adafruit.com/snes-ez-key-bluefruit-game-pad.md)
- [Color-sensor Driven NeoPixel Dress](https://learn.adafruit.com/color-sensor-driven-neopixel-dress.md)
- [Adafruit MicroLipo and MiniLipo Battery Chargers](https://learn.adafruit.com/adafruit-microlipo-and-minilipo-battery-chargers.md)
- [Cartoon Network and Make Code - Rose Quartz Shield Umbrella](https://learn.adafruit.com/cartoon-network-and-make-code-rose-quartz-shield-umbrella.md)
- [Ursula's Seashell Necklace](https://learn.adafruit.com/ursulas-seashell-necklace.md)
- [Wireless Control Button for WLED Projects](https://learn.adafruit.com/wireless-control-button-for-wled-projects.md)
- [Bunny Ears with MakeCode](https://learn.adafruit.com/bunny-ears-with-makecode.md)
- [VU Meter Baseball Hat](https://learn.adafruit.com/vu-meter-baseball-hat.md)
- [Glowing Fascinator Hat with Gemma M0 and MakeCode](https://learn.adafruit.com/glowing-fascinator-hat-gemma-m0-makecode.md)
- [LED Masquerade Masks](https://learn.adafruit.com/led-masquerade-masks.md)
- [Han Solo Blaster Cosplay](https://learn.adafruit.com/han-solo-blaster-cosplay.md)
- [Convert your Model M Keyboard to Bluetooth with Bluefruit EZ-Key HID](https://learn.adafruit.com/convert-your-model-m-keyboard-to-bluetooth-with-bluefruit-ez-key-hid.md)
- [Chameleon Scarf](https://learn.adafruit.com/chameleon-scarf.md)
- [Kaleidoscope Eyes (Trinket-Powered NeoPixel LED Ring Goggles)](https://learn.adafruit.com/kaleidoscope-eyes-neopixel-led-goggles-trinket-gemma.md)
---
# Source: https://learn.adafruit.com/wave-shield-voice-changer.md
# Wave Shield Voice Changer
## Overview
The [Wave Shield for Arduino](http://adafruit.com/products/94) is one of Adafruit's earliest shield kits and remains a perennial favorite. And for good reason — it's among the easiest and most flexible means of adding quality sound effects to an Arduino project!
Like a fine wine, open source projects improve with age. We've taught this classic shield a new trick: a _realtime voice changer!_ Speak like everyone's favorite baritone Sith lord or sing along with the Lollipop Guild. The Wave Shield has long been a staple among makers' Halloween projects. This latest addition really cinches it!
http://youtu.be/eRdSi4gJz98
# Core Parts List
There are three central components to this project:
- [Adafruit Metro 328 or Arduino Uno](https://www.adafruit.com/product/2488) (an older Arduino Duemilanove or “328” Diecimila can be used as well…but not an Arduino Mega nor Leonardo, sorry).
- [Adafruit Wave Shield](https://www.adafruit.com/products/94 "Link: https://www.adafruit.com/products/94") (also available as part of the [Music & sound add-on pack for Arduino](https://www.adafruit.com/product/175)).
- [Adafruit Microphone Amplifier Breakout.](http://www.adafruit.com/products/1063)
You’ll also need basic soldering tools, wire and bits & bobs.

# Additional Parts
This is an “open ended” project and the exact components for completion will depend on where you want to take it. Read through the full tutorial for ideas and recommendations on specific parts.
- For sound output you’ll want headphones, portable MP3 player speakers or our [Class D Audio Amplifier](https://www.adafruit.com/products/987 "Link: https://www.adafruit.com/products/987").
- The example sketch uses a [12-button keypad](http://adafruit.com/products/419 "Link: http://adafruit.com/products/419") for triggering pre-recorded sounds. But your application might need just a few simple [buttons](http://adafruit.com/products/476 "Link: http://adafruit.com/products/476")…or none at all, if you’re only using the voice effect.
- If adding pre-recorded sounds, you’ll also need an [SD card](http://adafruit.com/products/102) containing WAV files.
- A [10K potentiometer](http://adafruit.com/products/562 "Link: http://adafruit.com/products/562") is used for setting the voice pitch…or you can simply rig the code for a permanent setting.
- If you want to noodle around with wiring, [an extra prototyping shield](http://www.adafruit.com/products/51 "Link: http://www.adafruit.com/products/51") and [stacking headers can come in very handy](http://www.adafruit.com/products/85) - solder the wave shield with stacking headers and put the proto shield on top
- For portable use (such as costumes and props), add batteries, [battery holders](http://adafruit.com/products/771 "Link: http://adafruit.com/products/771"), etc.

To reiterate, it’s a very good idea to read through the full tutorial and firm up your own project concept before making a shopping list. We’ll demonstrate a couple of examples, but these aren’t the last word. That’s really the essence of Arduino, isn’t it? Make it your own!
# First Things First…
We also very strongly recommend…no, make that require…that you work through the [original Wave Shield tutorial](http://learn.adafruit.com/adafruit-wave-shield-audio-shield-for-arduino "Link: http://learn.adafruit.com/adafruit-wave-shield-audio-shield-for-arduino") before commencing with this project. It’s a good way to verify the core pieces are working before adding extra layers of complexity. ###
Afraid not. Realtime voice changing requires issuing data directly to the audio DAC bit-by-bit on the fly. MP3 and the decoder on the associated shield work with prerecorded audio (ditto for OGG format audio).
- [Next Page](https://learn.adafruit.com/wave-shield-voice-changer/principles-of-operation.md)
## Featured Products
### Stereo 3.7W Class D Audio Amplifier - MAX98306
[Stereo 3.7W Class D Audio Amplifier - MAX98306](https://www.adafruit.com/product/987)
This incredibly small stereo amplifier is surprisingly powerful - able to deliver 2 x 3.7W channels into 3 ohm impedance speakers. Inside the miniature chip is a class D controller, able to run from 2.7V-5.5VDC. Since the amp is a class D, its incredibly efficient (over 90% efficient when...
In Stock
[Buy Now](https://www.adafruit.com/product/987)
[Related Guides to the Product](https://learn.adafruit.com/products/987/guides)
### Electret Microphone Amplifier - MAX4466 with Adjustable Gain
[Electret Microphone Amplifier - MAX4466 with Adjustable Gain](https://www.adafruit.com/product/1063)
Add an ear to your project with this well-designed electret microphone amplifier. This fully assembled and tested board comes with a 20-20KHz electret microphone soldered on. For the amplification, we use the Maxim MAX4466, an op-amp specifically designed for this delicate task! The amplifier...
In Stock
[Buy Now](https://www.adafruit.com/product/1063)
[Related Guides to the Product](https://learn.adafruit.com/products/1063/guides)
### Adafruit Wave Shield for Arduino Kit
[Adafruit Wave Shield for Arduino Kit](https://www.adafruit.com/product/94)
Adding quality audio to an electronic project is surprisingly difficult. Here is a shield for Arduino 328's that solves this problem. It can play up to 22KHz 12bit uncompressed audio files of any length. It's low cost, available as an easy-to-make kit. It has an onboard DAC, filter and...
Out of Stock
[Buy Now](https://www.adafruit.com/product/94)
[Related Guides to the Product](https://learn.adafruit.com/products/94/guides)
### Music & sound add-on pack for Arduino
[Music & sound add-on pack for Arduino](https://www.adafruit.com/product/175)
Its a Wave shield party pack! Just add an Arduino to create your own iPod-killer, audio art, sound-effects box...
Comes with:
- Latest [Wave shield kit](http://www.adafruit.com/products/94), works with more SD cards and with older NG Arduinos! Unassembled
- 8 GB...
Out of Stock
[Buy Now](https://www.adafruit.com/product/175)
[Related Guides to the Product](https://learn.adafruit.com/products/175/guides)
### Adafruit Proto Shield for Arduino Kit
[Adafruit Proto Shield for Arduino Kit](https://www.adafruit.com/product/51)
Works with the Uno! This prototyping shield is the best out there (well, we think so, at least). It works with UNO, NG, Diecimila and Duemilanove Arduinos. You can use it with a Leonardo but it will not break out the hardware SPI pins (they're only on the ISP connector underneath) or the...
No Longer Stocked
[Buy Now](https://www.adafruit.com/product/51)
[Related Guides to the Product](https://learn.adafruit.com/products/51/guides)
### Adafruit METRO 328 Fully Assembled - Arduino IDE compatible
[Adafruit METRO 328 Fully Assembled - Arduino IDE compatible](https://www.adafruit.com/product/50)
We sure love the ATmega328 here at Adafruit, and we use them _a lot_ for our own projects. The processor has plenty of GPIO, Analog inputs, hardware UART SPI and I2C, timers and PWM galore - just enough for most simple projects. When we need to go small, we use a
Out of Stock
[Buy Now](https://www.adafruit.com/product/50)
[Related Guides to the Product](https://learn.adafruit.com/products/50/guides)
### Shield stacking headers for Arduino (R3 Compatible)
[Shield stacking headers for Arduino (R3 Compatible)](https://www.adafruit.com/product/85)
_“How could something so simple be so useful?” _
We heard once that in the 4th millennium B.C. some guy asked the person who invented the wheel that question. The person who invented the wheel’s answer, we were told, was...
In Stock
[Buy Now](https://www.adafruit.com/product/85)
[Related Guides to the Product](https://learn.adafruit.com/products/85/guides)
### 6 x AA battery holder with 5.5mm/2.1mm plug
[6 x AA battery holder with 5.5mm/2.1mm plug](https://www.adafruit.com/product/248)
Make a portable power brick with plenty of juice! Use Alkaline AA's for a 9V 3000-4000mAh power supply, or rechargeable NiMH for 2000mAh 7.5V supply. Either one is good for running electronics that have a 5V voltage regulator (thus requiring a 7V+ supply). Will last about 10 times longer...
In Stock
[Buy Now](https://www.adafruit.com/product/248)
[Related Guides to the Product](https://learn.adafruit.com/products/248/guides)
## Related Guides
- [Boombox Beach Bag with Audio Amp and Speakers](https://learn.adafruit.com/boombox-beach-bag-with-audio-amp-and-speakers.md)
- [DIY 8x2 LCD Shield](https://learn.adafruit.com/diy-8x2-lcd-shield.md)
- [3D Printed Animatronic Robot Head](https://learn.adafruit.com/3d-printed-animatronic-robot-head.md)
- [Arduino Lesson 17. Email Sending Movement Detector](https://learn.adafruit.com/arduino-lesson-17-email-sending-movement-detector.md)
- [Arduino Lesson 11. LCD Displays - Part 1](https://learn.adafruit.com/adafruit-arduino-lesson-11-lcd-displays-1.md)
- [Line Following Zumo Robot Using Simulink](https://learn.adafruit.com/line-following-zumo-robot-programmed-with-simulink.md)
- [3D Printed Bone Conduction Transducer Box](https://learn.adafruit.com/3d-printed-bone-conduction-transducer-box.md)
- [Affordable HAL 9000 Replica](https://learn.adafruit.com/hal-9000-replica.md)
- [Electronic Demon Costume](https://learn.adafruit.com/electronic-demon-costume.md)
- [Arduino Lesson 13. DC Motors](https://learn.adafruit.com/adafruit-arduino-lesson-13-dc-motors.md)
- [Naughty or Nice Machine](https://learn.adafruit.com/naughty-or-nice-machine.md)
- [Nokia 5110/3310 Monochrome LCD](https://learn.adafruit.com/nokia-5110-3310-monochrome-lcd.md)
- [Track Your Treats: Halloween Candy GPS Tracker](https://learn.adafruit.com/track-your-treats-halloween-candy-gps-tracker.md)
- [Smart Measuring Cup](https://learn.adafruit.com/smart-measuring-cup.md)
- [Wave Shield](https://learn.adafruit.com/adafruit-wave-shield-audio-shield-for-arduino.md)
---
# Source: https://learn.adafruit.com/skill-badge-sash/wear-it.md
# Skill Badge Sash
## Wear It!

Iron on your [skill badges](http://adafruit.com/category/70) and wear your sash with pride.

Use a safety pin or a favorite button to secure the ends of the sash together. In this way the sash is adjustable!

The sash is designed to fit most kids but may also fit some smaller ladies. Thanks to Liberty for modeling!
- [Previous Page](https://learn.adafruit.com/skill-badge-sash/finishing.md)
## Featured Products
### LEDs - Skill badge, iron-on patch
[LEDs - Skill badge, iron-on patch](https://www.adafruit.com/product/479)
You learned LEDs! (Light-emitting diodes)... Adafruit offers a fun and exciting "badges" of achievement for electronics, science and engineering. We believe everyone should be able to be rewarded for learning a useful skill, a badge is just one of the many ways to show and share.
No Longer Stocked
[Buy Now](https://www.adafruit.com/product/479)
[Related Guides to the Product](https://learn.adafruit.com/products/479/guides)
### Learn to program "Hello world" - Skill badge, iron-on patch
[Learn to program "Hello world" - Skill badge, iron-on patch](https://www.adafruit.com/product/478)
You can write code! Adafruit offers a fun and exciting "badges" of achievement for electronics, science and engineering. We believe everyone should be able to be rewarded for learning a useful skill, a badge is just one of the many ways to show and share.
This is the...
No Longer Stocked
[Buy Now](https://www.adafruit.com/product/478)
[Related Guides to the Product](https://learn.adafruit.com/products/478/guides)
### Learn to solder - Skill badge, iron-on patch
[Learn to solder - Skill badge, iron-on patch](https://www.adafruit.com/product/465)
You can solder! Adafruit offers a fun and exciting "badges" of achievement for electronics, science and engineering. We believe everyone should be able to be rewarded for learning a useful skill, a badge is just one of the many ways to show and share.
This is the "I...
No Longer Stocked
[Buy Now](https://www.adafruit.com/product/465)
[Related Guides to the Product](https://learn.adafruit.com/products/465/guides)
## Related Guides
- [Collin's Lab: Solar](https://learn.adafruit.com/collins-lab-solar.md)
- [Cartoon Network MakeCode: Garnet's Palm Gems from Steven Universe](https://learn.adafruit.com/cartoon-network-makecode-garnet-s-palm-gems-from-steven-universe.md)
- [No-Sew LED Wristband](https://learn.adafruit.com/no-sew-led-wristband.md)
- [MicroCode for micro:bit](https://learn.adafruit.com/microcode-for-microbit.md)
- [Adafruit New York and NYC DOE vendor information ](https://learn.adafruit.com/educational-orders-for-educators-based-in-new-york.md)
- [Getting Started With Steven Universe](https://learn.adafruit.com/getting-started-with-steven-universe.md)
- [Visual Studio Code for Education... and CircuitPython](https://learn.adafruit.com/visual-studio-code-for-education-and-circuitpython.md)
- [Makecode para la Circuit Playground Express](https://learn.adafruit.com/makecode-es.md)
- [Share your work with Adafruit Playground!](https://learn.adafruit.com/adafruit-playground-notes.md)
- [Buttermilk Boat with Circuit Playground Express](https://learn.adafruit.com/boat-with-circuit-playground-express.md)
- [Mouse Painter: Emulate Mice with MakeCode ](https://learn.adafruit.com/mouse-painter-emulate-mice-with-makecode.md)
- [Best Beginner Boards for Teachers](https://learn.adafruit.com/best-beginner-boards-for-teachers.md)
- [Anatomical 3D Printed Beating Heart with MakeCode](https://learn.adafruit.com/anatomical-3d-printed-beating-heart-with-makecode.md)
- [MakeCode for Circuit Playground Express](https://learn.adafruit.com/makecode.md)
- [Trash Panda](https://learn.adafruit.com/trash-panda-circuit-python-crickit.md)
---
# Source: https://learn.adafruit.com/flora-pixel-brooch/wear-your-pixel-brooch.md
# FLORA Pixel Brooch
## Wear your Pixel Brooch!

Affix an adhesive or magnetic pinback to your FLORA so you can wear it as a brooch!

Pin it on and tuck the battery in your pocket, or use double-stick tape to affix it to the back of FLORA.

Wear and enjoy!
- [Previous Page](https://learn.adafruit.com/flora-pixel-brooch/power-it-up.md)
## Featured Products
### FLORA - Wearable electronic platform: Arduino-compatible
[FLORA - Wearable electronic platform: Arduino-compatible](https://www.adafruit.com/product/659)
FLORA is Adafruit's fully-featured wearable electronics platform. It's a round, sewable, Arduino-compatible microcontroller designed to empower amazing wearables projects.FLORA comes with Adafruit's support, [tutorials and...](http://learn.adafruit.com/category/flora)
In Stock
[Buy Now](https://www.adafruit.com/product/659)
[Related Guides to the Product](https://learn.adafruit.com/products/659/guides)
### Flora RGB Smart NeoPixel version 3 - Pack of 4
[Flora RGB Smart NeoPixel version 3 - Pack of 4](https://www.adafruit.com/product/1260)
What's a wearable project without LEDs? Our favorite part of the Flora platform is these tiny smart pixels. Designed specifically for wearables, these updated Flora NeoPixels have ultra-cool technology: these ultra-bright LEDs have a constant-current driver cooked right into the LED...
In Stock
[Buy Now](https://www.adafruit.com/product/1260)
[Related Guides to the Product](https://learn.adafruit.com/products/1260/guides)
### Solid-Core Wire Spool - 25ft - 22AWG - Black
[Solid-Core Wire Spool - 25ft - 22AWG - Black](https://www.adafruit.com/product/290)
Perfect for bread-boarding, free wiring, etc. This spool of solid-core wire is easy to solder to. When bent it keeps its shape pretty well. We like to have a few spools of this stuff around. We suggest picking up wire strippers to match. Wire gauge is 22 AWG which we've found is the best...
In Stock
[Buy Now](https://www.adafruit.com/product/290)
[Related Guides to the Product](https://learn.adafruit.com/products/290/guides)
### Lithium Ion Polymer Battery - 3.7v 150mAh
[Lithium Ion Polymer Battery - 3.7v 150mAh](https://www.adafruit.com/product/1317)
Lithium-ion polymer (also known as 'lipo' or 'lipoly') batteries are thin, light, and powerful. The output ranges from 4.2V when completely charged to 3.7V. This battery has a capacity of 150mAh for a total of about 0.6 Wh. If you need a larger battery,
Out of Stock
[Buy Now](https://www.adafruit.com/product/1317)
[Related Guides to the Product](https://learn.adafruit.com/products/1317/guides)
### Magnetic Pin Back
[Magnetic Pin Back](https://www.adafruit.com/product/1170)
These magnetic pin backs have two pieces: a metal bar with adhesive strip and a plastic piece with two strong rare-earth magnets. Affix the metal bar to your FLORA projects-- it's just the right size! Then attach your FLORA project to any garment without poking holes in your clothes. The...
In Stock
[Buy Now](https://www.adafruit.com/product/1170)
[Related Guides to the Product](https://learn.adafruit.com/products/1170/guides)
### Hakko Professional Quality 20-30 AWG Wire Strippers
[Hakko Professional Quality 20-30 AWG Wire Strippers](https://www.adafruit.com/product/527)
These are the finest wire strippers we have used, and if you have to do a lot of wiring, you will agree! They have soft rounded grips - very comfortable to use, and precision ground notches that do a perfect job every time. No more yanking or twisting to strip wires cleanly and quickly.
In Stock
[Buy Now](https://www.adafruit.com/product/527)
[Related Guides to the Product](https://learn.adafruit.com/products/527/guides)
### Simple pliers
[Simple pliers](https://www.adafruit.com/product/146)
Simple needlenose pliers for twisting, pulling and pliering your project.
In Stock
[Buy Now](https://www.adafruit.com/product/146)
[Related Guides to the Product](https://learn.adafruit.com/products/146/guides)
### Getting Started with Adafruit FLORA
[Getting Started with Adafruit FLORA](https://www.adafruit.com/product/1839)
**Making Wearables with an Arduino-Compatible Electronics Platform**
This book introduces readers to building wearable electronics projects using Adafruit's tiny FLORA board: at 4.4 grams, and only 1.75 inches in diameter, and featuring Arduino compatibility, it's the...
No Longer Stocked
[Buy Now](https://www.adafruit.com/product/1839)
[Related Guides to the Product](https://learn.adafruit.com/products/1839/guides)
## Related Guides
- [Chameleon Scarf](https://learn.adafruit.com/chameleon-scarf.md)
- [Washing Wearable Electronics](https://learn.adafruit.com/washing-wearable-electronics.md)
- [Light-Up Angler Fish Embroidery](https://learn.adafruit.com/light-up-angler-fish-embroidery.md)
- [Flora TSL2561 Lux Sensor](https://learn.adafruit.com/flora-lux-sensor.md)
- [Glowing Skullcandy Headphones Mod](https://learn.adafruit.com/glowing-skullcandy-headphones-mod.md)
- [Flora Snaps](https://learn.adafruit.com/flora-snaps.md)
- [Heart Rate Badge](https://learn.adafruit.com/heart-rate-badge.md)
- [Memories of an Arduino](https://learn.adafruit.com/memories-of-an-arduino.md)
- [VU Meter Baseball Hat](https://learn.adafruit.com/vu-meter-baseball-hat.md)
- [Flora Wearable GPS](https://learn.adafruit.com/flora-wearable-gps.md)
- [Light of Your Life Wedding Bouquet](https://learn.adafruit.com/light-of-your-life-wedding-bouquet.md)
- [Flora Accelerometer](https://learn.adafruit.com/flora-accelerometer.md)
- [Mailbox Notification Service](https://learn.adafruit.com/mailbox-notification-service.md)
- [Pac Man Pixel Suspenders](https://learn.adafruit.com/pac-man-pixel-suspenders.md)
- [Adafruit NeoPot](https://learn.adafruit.com/adafruit-neopot.md)
---
# Source: https://learn.adafruit.com/webide.md
# Adafruit WebIDE
## Overview

Warning:
We finally have the Adafruit WebIDE in a place where we think it's solid enough for a beta release. First, a disclaimer: this release will likely have bugs, and minor issues.
The Adafruit WebIDE is by far the easiest way to run code on your Raspberry Pi or BeagleBone. Just connect your Pi or BeagleBone to your local network, and log on to the WebIDE in your web browser to edit Python, Ruby, JavaScript, or anything and easily send it over to your Pi. The WebiDE includes a terminal, so you can easily send various commands to your Pi right from the browser. Also, your code will be versioned in a local git repository, and pushed remotely out to any remote git repository so you can access it from anywhere, and any time.
- [Next Page](https://learn.adafruit.com/webide/installation.md)
## Featured Products
### Raspberry Pi Model B 512MB RAM
[Raspberry Pi Model B 512MB RAM](https://www.adafruit.com/product/998)
Adafruit ships the **Raspberry Pi Model B 512MB RAM** as of 10/18/2012.
The Raspberry Pi® is a single-board computer developed in the UK by the Raspberry Pi Foundation with the intention of stimulating the teaching of basic computer science in schools. The Raspberry...
No Longer Stocked
[Buy Now](https://www.adafruit.com/product/998)
[Related Guides to the Product](https://learn.adafruit.com/products/998/guides)
### BeagleBone Black - Rev B
[BeagleBone Black - Rev B](https://www.adafruit.com/product/1278)
**[Adafruit is no longer shipping the BeagleBone Black Rev B, it has been replaced with the Rev C as of 5/12/14](https://www.adafruit.com/products/1876) - the Rev C now has 4G flash and also comes with Debian, it also costs slightly more. There are no exchanges or...**
No Longer Stocked
[Buy Now](https://www.adafruit.com/product/1278)
[Related Guides to the Product](https://learn.adafruit.com/products/1278/guides)
### Adafruit Pi Box - Enclosure for Raspberry Pi Model A or B
[Adafruit Pi Box - Enclosure for Raspberry Pi Model A or B](https://www.adafruit.com/product/859)
**Discontinued** - you can grab [Adafruit Pi Box Plus - Enclosure for RasPi Model B+/Pi 2/ Pi 3](https://www.adafruit.com/product/1985) instead!
**We're still selling this classic Adafruit case for those who specifically want it but **
No Longer Stocked
[Buy Now](https://www.adafruit.com/product/859)
[Related Guides to the Product](https://learn.adafruit.com/products/859/guides)
### Miniature WiFi (802.11b/g/n) Module: For Raspberry Pi and more
[Miniature WiFi (802.11b/g/n) Module: For Raspberry Pi and more](https://www.adafruit.com/product/814)
Make your Internet of Things device cable-free by adding WiFi. Take advantage of the Raspberry Pi and Beagle Bone's USB port to add a low cost, but high-reliability wireless link. We tried half a dozen modules to find one that works well with the Pi and Bone without the need of recompiling...
No Longer Stocked
[Buy Now](https://www.adafruit.com/product/814)
[Related Guides to the Product](https://learn.adafruit.com/products/814/guides)
## Related Guides
- [Trellis Python Library](https://learn.adafruit.com/trellis-python-library.md)
- [Adafruit DVI Sock for Pico](https://learn.adafruit.com/adafruit-dvi-sock-for-pico.md)
- [Introducing Adafruit ItsyBitsy M4](https://learn.adafruit.com/introducing-adafruit-itsybitsy-m4.md)
- [SMT Breadboard Prototyping Using Breakout PCBs](https://learn.adafruit.com/smt-prototyping-using-breakout-pcbs.md)
- [Getting Started with RTL-SDR and SDR-Sharp and CubicSDR](https://learn.adafruit.com/getting-started-with-rtl-sdr-and-sdr-sharp.md)
- [Adafruit STEMMA Reflective Photo Interrupt Sensor](https://learn.adafruit.com/adafruit-stemma-reflective-photo-interrupt-sensor.md)
- [Adafruit 9-DOF Orientation IMU Fusion Breakout - BNO085](https://learn.adafruit.com/adafruit-9-dof-orientation-imu-fusion-breakout-bno085.md)
- [Adafruit I2C to 8 Channel Solenoid Driver](https://learn.adafruit.com/adafruit-i2c-to-8-channel-solenoid-driver.md)
- [Controlling Motors using the Raspberry Pi and RasPiRobot Board V2](https://learn.adafruit.com/controlling-motors-using-the-raspberry-pi-and-raspirobot-board-v2.md)
- [Adafruit Feather 32u4 FONA](https://learn.adafruit.com/adafruit-feather-32u4-fona.md)
- [Adafruit Pi Stemma QT Breakout](https://learn.adafruit.com/adafruit-pi-stemma-qt-breakout.md)
- [Adafruit's Raspberry Pi Lesson 8. Using a Servo Motor](https://learn.adafruit.com/adafruits-raspberry-pi-lesson-8-using-a-servo-motor.md)
- [IoT Bird Feeder with Camera](https://learn.adafruit.com/iot-window-bird-feeder-with-camera.md)
- [Using the BMP085/180 with Raspberry Pi or Beaglebone Black](https://learn.adafruit.com/using-the-bmp085-with-raspberry-pi.md)
- [AR1100 Resistive Touch Screen Controller Guide](https://learn.adafruit.com/ar1100-resistive-touch-screen-controller-guide.md)
---
# Source: https://learn.adafruit.com/adafruit-raspberry-pi-lesson-1-preparing-and-sd-card-for-your-raspberry-pi/what-next.md
# Adafruit's Raspberry Pi Lesson 1. Preparing an SD Card for your Raspberry Pi
## Test & Configure
If you plan to use multiple SD cards, it is not a bad idea to label the card, or for microSD cards label the little plastic case they usually come in.
Testing the card is easy - insert it into your Pi, then connect a keyboard to the USB port and a NTSC/PAL TV to the composite port or an HDMI monitor to the HDMI Port. Then power it by connecting a Micro USB cable to the Pi and powering it via a computer or a USB wall charger.
For Raspbian, you should see something like the following, an Adafruit/Raspberry logo in the top left, and a ton of text filling up the screen:

In the next tutorial, you will find out how to configure your Raspberry Pi the first time you boot it up.
[Click Here for the Next Lesson](http://learn.adafruit.com/adafruits-raspberry-pi-lesson-2-first-time-configuration)
- [Previous Page](https://learn.adafruit.com/adafruit-raspberry-pi-lesson-1-preparing-and-sd-card-for-your-raspberry-pi/making-an-sd-card-using-a-mac.md)
## Featured Products
### Raspberry Pi 3 - Model B+ - 1.4GHz Cortex-A53 with 1GB RAM
[Raspberry Pi 3 - Model B+ - 1.4GHz Cortex-A53 with 1GB RAM](https://www.adafruit.com/product/3775)
The Raspberry Pi 3 Model B is the most popular Raspberry Pi computer made, and the Pi Foundation knows you can always make a good thing _better_! And what could make the Pi 3 better? How about a _faster_ processor, 5 GHz WiFi, and updated Ethernet chip with PoE capability?...
In Stock
[Buy Now](https://www.adafruit.com/product/3775)
[Related Guides to the Product](https://learn.adafruit.com/products/3775/guides)
### Raspberry Pi 2 Model B Starter Pack - Includes a Raspberry Pi 2
[Raspberry Pi 2 Model B Starter Pack - Includes a Raspberry Pi 2](https://www.adafruit.com/product/2380)
Why not trick out your fresh new board with some accessories? The Pi 2 is a big deal - a big, big deal. It has an upgraded ARMv7 multicore procssor and a full Gigabyte of RAM - meaning you're going to see ~2x the performance on processor-upgrade only and 4x on average for...
No Longer Stocked
[Buy Now](https://www.adafruit.com/product/2380)
[Related Guides to the Product](https://learn.adafruit.com/products/2380/guides)
### Budget Pack for Raspberry Pi 1 Model B (Doesn't include RasPi)
[Budget Pack for Raspberry Pi 1 Model B (Doesn't include RasPi)](https://www.adafruit.com/product/965)
An optimized collection of parts and pieces to experiment with Raspberry Pi at home, school or work. Great for students and those that want to get their feet wet, no soldering required! **THIS PACK DOES NOT INCLUDE A RASPBERRY PI 1 MODEL B and is NOT compatible with Model B+ or Raspberry Pi...**
No Longer Stocked
[Buy Now](https://www.adafruit.com/product/965)
[Related Guides to the Product](https://learn.adafruit.com/products/965/guides)
### USB MicroSD Card Reader/Writer - microSD / microSDHC / microSDXC
[USB MicroSD Card Reader/Writer - microSD / microSDHC / microSDXC](https://www.adafruit.com/product/939)
This is the cutest little microSD card reader/writer - but don't be fooled by its adorableness! It's wicked fast and supports up to 64 GB SDXC cards! Simply slide the card into the edge and plug it into your computer. No drivers are required, it shows up as a standard 'Mass...
No Longer Stocked
[Buy Now](https://www.adafruit.com/product/939)
[Related Guides to the Product](https://learn.adafruit.com/products/939/guides)
### SD/MicroSD Memory Card - 16GB Class 10 - Adapter Included
[SD/MicroSD Memory Card - 16GB Class 10 - Adapter Included](https://www.adafruit.com/product/2693)
Add speedy mega-storage in a jiffy using this 16 GB Class 10 micro-SD card. It comes with a SD adapter so you can use it with any of our shields or adapters! Preformatted to FAT so it works out of the box with our projects. Works great with any device in the Adafruit shop that uses micro-SD...
No Longer Stocked
[Buy Now](https://www.adafruit.com/product/2693)
[Related Guides to the Product](https://learn.adafruit.com/products/2693/guides)
### SD/MicroSD Memory Card (8 GB SDHC)
[SD/MicroSD Memory Card (8 GB SDHC)](https://www.adafruit.com/product/1294)
Add mega-storage in a jiffy using this 8 GB class 4 micro-SD card. It comes with a SD adapter so you can use it with any of our shields or adapters. Preformatted to FAT so it works out of the box with our projects. Tested and works great with our
In Stock
[Buy Now](https://www.adafruit.com/product/1294)
[Related Guides to the Product](https://learn.adafruit.com/products/1294/guides)
### Raspberry Pi 1 Model B Starter Pack - Includes a Raspberry Pi
[Raspberry Pi 1 Model B Starter Pack - Includes a Raspberry Pi](https://www.adafruit.com/product/1014)
You want to get hacking with your Pi fast, right? Get everything you need to start with the Adafruit Starter Pack for Raspberry Pi. It's the perfect accompaniment to your new Pi, everything you need to boot up your Pi Model B and get going. **We pre-assemble the Cobbler for you, no...**
No Longer Stocked
[Buy Now](https://www.adafruit.com/product/1014)
[Related Guides to the Product](https://learn.adafruit.com/products/1014/guides)
### Low-profile microSD card adapter for Raspberry Pi
[Low-profile microSD card adapter for Raspberry Pi](https://www.adafruit.com/product/966)
Make your Pi a little slimmer with this microSD card adapter board. It slides in where the SD card goes but is half the length. Pop in a microSD card for a sleeker machine. The microSD card holder is a push-push type so you can push on the edge that sticks out to remove the card when...
No Longer Stocked
[Buy Now](https://www.adafruit.com/product/966)
[Related Guides to the Product](https://learn.adafruit.com/products/966/guides)
## Related Guides
- [Press Your Button for Raspberry Pi](https://learn.adafruit.com/press-your-button-for-raspberry-pi.md)
- [Adafruit's Raspberry Pi Lesson 5. Using a Console Cable](https://learn.adafruit.com/adafruits-raspberry-pi-lesson-5-using-a-console-cable.md)
- [Adafruit's Raspberry Pi Lesson 2. First Time Configuration](https://learn.adafruit.com/adafruits-raspberry-pi-lesson-2-first-time-configuration.md)
- [Raspberry Pi as an Ad Blocking Access Point](https://learn.adafruit.com/raspberry-pi-as-an-ad-blocking-access-point.md)
- [Set up and Blink - MATLAB and Simulink with Raspberry Pi](https://learn.adafruit.com/how-to-use-matlab-and-simulink-with-raspberry-pi.md)
- [Pi Video Output Using pygame](https://learn.adafruit.com/pi-video-output-using-pygame.md)
- [Drive a 16x2 LCD with the Raspberry Pi](https://learn.adafruit.com/drive-a-16x2-lcd-directly-with-a-raspberry-pi.md)
- [Adafruit's Raspberry Pi Lesson 4. GPIO Setup](https://learn.adafruit.com/adafruits-raspberry-pi-lesson-4-gpio-setup.md)
- [Windows IoT Core Application Management](https://learn.adafruit.com/windows-iot-application-management.md)
- [Read-Only Raspberry Pi](https://learn.adafruit.com/read-only-raspberry-pi.md)
- [Getting Started With Windows IoT Core on Raspberry Pi](https://learn.adafruit.com/getting-started-with-windows-iot-on-raspberry-pi.md)
- [Adafruit NFC/RFID on Raspberry Pi](https://learn.adafruit.com/adafruit-nfc-rfid-on-raspberry-pi.md)
- [Windows IoT Core Application Development: Headless Blinky](https://learn.adafruit.com/windows-iot-application-development-headless-application.md)
- [USB Audio Cards with a Raspberry Pi ](https://learn.adafruit.com/usb-audio-cards-with-a-raspberry-pi.md)
- [Node.js Embedded Development on the Raspberry Pi](https://learn.adafruit.com/node-embedded-development.md)
---
# Source: https://learn.adafruit.com/i2c-spi-lcd-backpack/which-lcd-to-use.md
# I2C/SPI LCD Backpack
## Which LCD to Use?

This backpack will work with any 'standard'/'classic' **character** LCD. It does not work with **graphic** LCDs. Character LCDs come in sizes ranging from 8x1 (8 characters, one line) to 40x4 (40 characters, four lines). The backpack will also only fit LCDs that have a single line of pins at the top, not the ones that have a 2x10 or 2x8 connector on the side. Those are much rarer these days but just keep a look out for that!
The backpack will work with RGB LCDs. Just be aware that you won't be able to control the backlight pin, you can do that separately from the LCD control with your microcontroller.
The backpack **won't** work with 40x4 LCDs because they have a second Enable pin.
## Wait - the backpack has 16 holes, but my LCD only has 14 pins!
As long as your LCD has a HD44780 driver chip, you're OK. The extra two pins are for the backlight. Your LCD doesn't have a backlight.
We'll show you which holes to ignore in the Assembly section of this guide.
- [Previous Page](https://learn.adafruit.com/i2c-spi-lcd-backpack/pinouts.md)
- [Next Page](https://learn.adafruit.com/i2c-spi-lcd-backpack/assembly.md)
## Primary Products
### i2c / SPI character LCD backpack - STEMMA QT / Qwiic
[i2c / SPI character LCD backpack - STEMMA QT / Qwiic](https://www.adafruit.com/product/292)
Character LCDs are a fun and easy way to have your microcontroller project talk back to you. They are also common, and easy to get, available in tons of colors and sizes. [We've written tutorials on using character LCDs with an Arduino](http://learn.adafruit.com/character-lcds)...
In Stock
[Buy Now](https://www.adafruit.com/product/292)
[Related Guides to the Product](https://learn.adafruit.com/products/292/guides)
## Featured Products
### Standard LCD 20x4 + extras
[Standard LCD 20x4 + extras](https://www.adafruit.com/product/198)
Standard HD44780 LCDs are useful for creating standalone projects.
- 20 characters wide, 4 rows
- White text on blue background
- Connection port is 0.1" pitch, single row for easy breadboarding and wiring
- Single LED backlight with a resistor included, you can...
In Stock
[Buy Now](https://www.adafruit.com/product/198)
[Related Guides to the Product](https://learn.adafruit.com/products/198/guides)
### Standard LCD 16x2 + extras
[Standard LCD 16x2 + extras](https://www.adafruit.com/product/181)
Standard HD44780 LCDs are useful for creating standalone projects.
- 16 characters wide, 2 rows
- White text on blue background
- Connection port is 0.1" pitch, single row for easy breadboarding and wiring
- Pins are documented on the back of the LCD to assist...
In Stock
[Buy Now](https://www.adafruit.com/product/181)
[Related Guides to the Product](https://learn.adafruit.com/products/181/guides)
## Related Guides
- [ Faz-Wrench - Five Nights at Freddy's](https://learn.adafruit.com/faz-wrench.md)
- [Trinket Ultrasonic Rangefinder](https://learn.adafruit.com/trinket-ultrasonic-rangefinder.md)
- [No-Code Indoor Air Quality Monitor with Separate Display](https://learn.adafruit.com/no-code-indoor-air-quality-monitor-with-separate-display.md)
- [Trinket Temperature & Humidity LCD Display](https://learn.adafruit.com/trinket-temperature-humidity-lcd-display.md)
- [Light Meter](https://learn.adafruit.com/light-meter.md)
- [CircuitPython Hardware: ILI9341 TFT & FeatherWing](https://learn.adafruit.com/micropython-hardware-ili9341-tft-and-featherwing.md)
- [Raspberry Pi Thermal Camera](https://learn.adafruit.com/raspberry-pi-thermal-camera.md)
- [Adafruit NeoKey BFF](https://learn.adafruit.com/adafruit-neokey-bff.md)
- [Mini LED Matrix Audio Visualizer](https://learn.adafruit.com/mini-led-matrix-audio-visualizer.md)
- [Adafruit ISO1540 Bidirectional I2C Isolator](https://learn.adafruit.com/adafruit-iso1540-bidirectional-i2c-isolator.md)
- [Raspberry Pi Low-Light Long-Exposure Photography](https://learn.adafruit.com/raspberry-pi-hq-camera-low-light-long-exposure-photography.md)
- [Adafruit Radio Bonnets with OLED Display - RFM69 or RFM9X](https://learn.adafruit.com/adafruit-radio-bonnets.md)
- [PicoDVI Arduino Library: Video Out for RP2040 Boards](https://learn.adafruit.com/picodvi-arduino-library-video-out-for-rp2040-boards.md)
- [reef-pi Guide 5: Light Controller](https://learn.adafruit.com/reef-pi-lighting-controller.md)
- [Adafruit VL53L4CD Time of Flight Distance Sensor](https://learn.adafruit.com/adafruit-vl53l4cd-time-of-flight-distance-sensor.md)
---
# Source: https://learn.adafruit.com/beaglebone/wifi.md
# BeagleBone
## WiFi
Info:
Now that you have your Bone up and running, and Ethernet works, wouldn't it be nice to get rid of that Ethernet cable? Yeah, let's go WiFi! This tutorial is specifically for the verified **[WiFi adapter for Beagle Bone](http://www.adafruit.com/products/814) **adapter in the Adafruit shop. It will not work with other WiFi adapters, as they all have different chipsets!
For this tutorial you will need:
- **[Beagle Bone](http://www.adafruit.com/products/513)**
- **[WiFi adapter](http://www.adafruit.com/products/814)**
- **[5V 2000mA Power Adapter](http://www.adafruit.com/products/276)**
Pick these parts up at the Adafruit shop!
## Power and WiFi
The BeagleBone has the neat ability to power itself just through the mini USB port. However, this can cause some problems because the USB port cannot supply enough power for BOTH the Bone and a WiFi adapter.
Info:
## Driver Install
You'll need to have [Internet connectivity using Ethernet](http://learn.adafruit.com/beaglebone) , and also be logged into the terminal to install the WiFi
adpater's driver, so make sure to complete those tutorials first!
While logged in with Internet working, run **opkg update**
Then run **mkdir /home/root/tmp** to make a new temp directory then run **opkg** **-t /home/root/tmp upgrade**

then type in **opkg list 'linux-firmware-rt** \*' and hit return.

Finally type in **opkg install linux-firmware-rtl8192cu** and press return. Plug in the WiFi dongle, then type in **reboot** and return to reboot the machine.
Now that its rebooted, check **dmesg** - you should see the following

And if you type in **ifconfig wlan0** there should be a link, it wont be connected yet so there's a lot of 0's and no **inet addr** 
Now we can set up the connection manager to automatically manage the wifi. Edit **/var/lib/connman/settings ** (I use vi but nano is also installed) and change WiFi from false to true, save it.
Create a file ** /var/lib/connman/wifi.config** with your settings as shown below, starting with the **[service\_home]** line and with a return after the ** Passphrase ** line, of course this should match your home network, not the adafruit one!

Restart connman to get it to accept the new settings:
**root@beaglebone:~# systemctl restart connman.service**

After less than 30 seconds or so, you should be connected:
**root@beaglebone:~# ifconfig wlan0**

There should now be an **inet addr ** You can then test pinging an IP address and a domain name.

Finally, if you want more detailed information about your link you can **opkg install wireless-tools** to get the **iwconfig** command, which will give you tons of details.

## Troubleshooting
If you get an error device descriptor read/64, error -71, reboot and stop the boot process with the space bar. Then add the following boot option with the follow at the U-Boot prompt
setenv bootargs irqpoll RETURN
boot RETURN
- [Previous Page](https://learn.adafruit.com/beaglebone/ethernet.md)
- [Next Page](https://learn.adafruit.com/beaglebone/downloads.md)
## Featured Products
### Adafruit Beagle Bone Black Starter Pack
[Adafruit Beagle Bone Black Starter Pack](https://www.adafruit.com/product/703)
If you've heard about the Beagle Bone Black and you want to hit the ground running, this starter pack is for you. We've picked out everything you need to start out, with essential parts and accessories to save on a bundle.
Includes:
-
No Longer Stocked
[Buy Now](https://www.adafruit.com/product/703)
[Related Guides to the Product](https://learn.adafruit.com/products/703/guides)
### Miniature WiFi (802.11b/g/n) Module: For Raspberry Pi and more
[Miniature WiFi (802.11b/g/n) Module: For Raspberry Pi and more](https://www.adafruit.com/product/814)
Make your Internet of Things device cable-free by adding WiFi. Take advantage of the Raspberry Pi and Beagle Bone's USB port to add a low cost, but high-reliability wireless link. We tried half a dozen modules to find one that works well with the Pi and Bone without the need of recompiling...
No Longer Stocked
[Buy Now](https://www.adafruit.com/product/814)
[Related Guides to the Product](https://learn.adafruit.com/products/814/guides)
### Ethernet Cable - 10 ft long
[Ethernet Cable - 10 ft long](https://www.adafruit.com/product/730)
We have so many Internet-connected goodies in the shop, we figured it's time to carry a cable so you can easily connect them up! This cable is 10 feet long, black and has all 8 wires installed. Perfect for use with the [BeagleBone](http://www.adafruit.com/products/513),
No Longer Stocked
[Buy Now](https://www.adafruit.com/product/730)
[Related Guides to the Product](https://learn.adafruit.com/products/730/guides)
### 5V 2A (2000mA) switching power supply - UL Listed
[5V 2A (2000mA) switching power supply - UL Listed](https://www.adafruit.com/product/276)
This is an FCC/CE certified and UL listed power supply. Need a lot of 5V power? This switching supply gives a clean regulated 5V output at up to 2000mA. 110 or 240 input, so it works in any country. The plugs are "US 2-prong" style so you may need a plug adapter, but you can pick one...
In Stock
[Buy Now](https://www.adafruit.com/product/276)
[Related Guides to the Product](https://learn.adafruit.com/products/276/guides)
## Related Guides
- [MPR121 Capacitive Touch Sensor on Raspberry Pi & BeagleBone Black](https://learn.adafruit.com/mpr121-capacitive-touch-sensor-on-raspberry-pi-and-beaglebone-black.md)
- [BNO055 Absolute Orientation Sensor with Raspberry Pi & BeagleBone Black](https://learn.adafruit.com/bno055-absolute-orientation-sensor-with-raspberry-pi-and-beaglebone-black.md)
- [Setting up WiFi with BeagleBone Black](https://learn.adafruit.com/setting-up-wifi-with-beaglebone-black.md)
- [SSD1306 OLED Displays with Raspberry Pi and BeagleBone Black](https://learn.adafruit.com/ssd1306-oled-displays-with-raspberry-pi-and-beaglebone-black.md)
- [Fading a RGB LED on BeagleBone Black](https://learn.adafruit.com/fading-a-rgb-led-on-beaglebone-black.md)
- [DHT Humidity Sensing on Raspberry Pi or Beaglebone Black with GDocs Logging](https://learn.adafruit.com/dht-humidity-sensing-on-raspberry-pi-with-gdocs-logging.md)
- [Running Programs Automatically on Your Tiny Computer](https://learn.adafruit.com/running-programs-automatically-on-your-tiny-computer.md)
- [Blinking an LED with BeagleBone Black](https://learn.adafruit.com/blinking-an-led-with-beaglebone-black.md)
- [MAX31855 Thermocouple Sensor Python Library](https://learn.adafruit.com/max31855-thermocouple-python-library.md)
- [Character LCD with Raspberry Pi or BeagleBone Black](https://learn.adafruit.com/character-lcd-with-raspberry-pi-or-beaglebone-black.md)
- [Connecting a Push Button to BeagleBone Black](https://learn.adafruit.com/connecting-a-push-button-to-beaglebone-black.md)
- [Bone Box](https://learn.adafruit.com/bone-box.md)
- [Nokia 5110/3310 LCD Python Library](https://learn.adafruit.com/nokia-5110-3310-lcd-python-library.md)
- [Controlling a Servo with a BeagleBone Black](https://learn.adafruit.com/controlling-a-servo-with-a-beaglebone-black.md)
- [Bonjour (Zeroconf) Networking for Windows and Linux](https://learn.adafruit.com/bonjour-zeroconf-networking-for-windows-and-linux.md)
---
# Source: https://learn.adafruit.com/getting-started-with-flora/windows-setup.md
# Getting Started with FLORA
## Windows Driver Installation
Info:
Info:
Before you plug in your board, you'll need to possibly install a driver!
Click below to download our Driver Installer.
[Download Latest Adafruit Windows Driver Installer](https://github.com/adafruit/Adafruit_Windows_Drivers/releases/latest/adafruit_drivers_*.exe)
Download and run the installer.

Run the installer! Since we bundle the SiLabs and FTDI drivers as well, you'll need to click through the license

Select which drivers you want to install, we suggest selecting all of them so you don't have to do this again!

As of version 2.5.0.0, the Adafruit drivers package is no longer signed, and some of the drivers it contains are also no longer signed. You'll need to click the second item in this dialog box when it appears:

On Windows 7, by default, we install a single driver for most of Adafruit's boards, including the **Feather 32u4, the Feather M0, Feather M0, Express, Circuit Playground, Circuit Playground Express, Gemma M0, Trinket M0, Metro M0 Express**. On Windows 10 and 11 that driver is not necessary (it's built in to Windows) and it will not be listed.
The **Trinket / Pro Trinket / Gemma / USBtinyISP** drivers are also installed by default.
You can also, optionally, install the **Arduino Gemma** (different than the Adafruit Gemma!), **Huzzah and Metro 328** drivers.
Click **Install** to do the installin'.
Info:

# Manual Driver Installation
If windows needs the driver files (inf/cat) for some reason you can get all the drivers by downloading the source code zip file from this link:
[Latest Adafruit Windows Drivers release](https://github.com/adafruit/Adafruit_Windows_Drivers/releases/latest)
And point windows to the **Drivers** folder when it asks for the driver location
- [Previous Page](https://learn.adafruit.com/getting-started-with-flora/flora-pinout-diagram.md)
- [Next Page](https://learn.adafruit.com/getting-started-with-flora/download-software.md)
## Featured Products
### FLORA - Wearable electronic platform: Arduino-compatible
[FLORA - Wearable electronic platform: Arduino-compatible](https://www.adafruit.com/product/659)
FLORA is Adafruit's fully-featured wearable electronics platform. It's a round, sewable, Arduino-compatible microcontroller designed to empower amazing wearables projects.FLORA comes with Adafruit's support, [tutorials and...](http://learn.adafruit.com/category/flora)
In Stock
[Buy Now](https://www.adafruit.com/product/659)
[Related Guides to the Product](https://learn.adafruit.com/products/659/guides)
### 3 x AAA Battery Holder with On/Off Switch and 2-Pin JST
[3 x AAA Battery Holder with On/Off Switch and 2-Pin JST](https://www.adafruit.com/product/727)
This battery holder connects 3 AAA batteries together in series for powering all kinds of projects. We spec'd these out because the box is slim, and 3 AAA's add up to about 3.3-4.5V, a very similar range to Lithium Ion/polymer (Li-Ion) batteries and have an on-off switch. That makes...
In Stock
[Buy Now](https://www.adafruit.com/product/727)
[Related Guides to the Product](https://learn.adafruit.com/products/727/guides)
### USB cable - USB A to Micro-B
[USB cable - USB A to Micro-B](https://www.adafruit.com/product/592)
This here is your standard A to micro-B USB cable, for USB 1.1 or 2.0. Perfect for connecting a PC to your Metro, Feather, Raspberry Pi or other dev-board or microcontroller
Approximately 3 feet / 1 meter long
In Stock
[Buy Now](https://www.adafruit.com/product/592)
[Related Guides to the Product](https://learn.adafruit.com/products/592/guides)
### Getting Started with Adafruit FLORA Book Pack
[Getting Started with Adafruit FLORA Book Pack](https://www.adafruit.com/product/2404)
Pickup a copy of [Getting Started with Adafruit FLORA](https://www.adafruit.com/products/1839) and then hit the ground running with everything that you need to become an [Adafruit FLORA](https://www.adafruit.com/products/659) supreme being!
This pack is...
No Longer Stocked
[Buy Now](https://www.adafruit.com/product/2404)
[Related Guides to the Product](https://learn.adafruit.com/products/2404/guides)
### Getting Started with Adafruit FLORA
[Getting Started with Adafruit FLORA](https://www.adafruit.com/product/1839)
**Making Wearables with an Arduino-Compatible Electronics Platform**
This book introduces readers to building wearable electronics projects using Adafruit's tiny FLORA board: at 4.4 grams, and only 1.75 inches in diameter, and featuring Arduino compatibility, it's the...
No Longer Stocked
[Buy Now](https://www.adafruit.com/product/1839)
[Related Guides to the Product](https://learn.adafruit.com/products/1839/guides)
### FLORA Budget Pack
[FLORA Budget Pack](https://www.adafruit.com/product/1405)
Get started with the fabulous Adafruit Flora platform with this lovely budget kit, just enough to get you started with this fun wearable computer. Included are enough parts to make your first wearable electronic project. There's a Flora motherboard, four ultra-bright chainable RGB pixels,...
Out of Stock
[Buy Now](https://www.adafruit.com/product/1405)
[Related Guides to the Product](https://learn.adafruit.com/products/1405/guides)
### FLORA GPS Starter Pack
[FLORA GPS Starter Pack](https://www.adafruit.com/product/1090)
Get started with the fabulous Adafruit Flora platform with this lovely starter kit. Included are plenty of parts to make a few different fun projects! There's a Flora motherboard, a GPS module that can also perform location datalogging, eight ultra-bright chainable RGB pixels, a battery...
No Longer Stocked
[Buy Now](https://www.adafruit.com/product/1090)
[Related Guides to the Product](https://learn.adafruit.com/products/1090/guides)
### FLORA Sensor Pack
[FLORA Sensor Pack](https://www.adafruit.com/product/1458)
Sense the world around you! The FLORA Sensor Pack includes many types of sensors for your wearable enjoyment. Sense motion, direction, color, light levels, touch, and connections with FLORA sensor breakouts and conductive materials, and a few NeoPixels for experimenting with displaying your...
No Longer Stocked
[Buy Now](https://www.adafruit.com/product/1458)
[Related Guides to the Product](https://learn.adafruit.com/products/1458/guides)
## Related Guides
- [Datalogging Hat with FLORA BLE](https://learn.adafruit.com/datalogging-hat-with-flora-ble.md)
- [Experimenting with NeverWet + Electronics](https://learn.adafruit.com/neverwet-electronics.md)
- [Flora GPS Jacket](https://learn.adafruit.com/flora-gps-jacket.md)
- [SMSsenger Bag](https://learn.adafruit.com/smssenger-bag.md)
- [Conductive Thread](https://learn.adafruit.com/conductive-thread.md)
- [3D Printed Wireless MIDI Controller Guitar](https://learn.adafruit.com/ez-key-wireless-midi-controller-guitar.md)
- [Mailbox Notification Service](https://learn.adafruit.com/mailbox-notification-service.md)
- [GPS Logging Dog Harness](https://learn.adafruit.com/gps-logging-dog-harness.md)
- [NeoPixel Matrix Snowflake Sweater](https://learn.adafruit.com/neopixel-matrix-snowflake-sweater.md)
- [Chameleon Scarf](https://learn.adafruit.com/chameleon-scarf.md)
- [Adafruit Arduino Selection Guide](https://learn.adafruit.com/adafruit-arduino-selection-guide.md)
- [Citi Bike Helmet](https://learn.adafruit.com/citi-bike-helmet.md)
- [FLORA TV-B-Gone](https://learn.adafruit.com/flora-tv-b-gone.md)
- [Flora Wearable GPS](https://learn.adafruit.com/flora-wearable-gps.md)
- [Flora Accelerometer](https://learn.adafruit.com/flora-accelerometer.md)
---
# Source: https://learn.adafruit.com/adafruit-ina219-current-sensor-breakout/wippersnapper.md
# Adafruit INA219 Current Sensor Breakout
## WipperSnapper
group_elements = page.element_group_for(element).try(:elements) || []
group_elements.each_with_index do |group_element, i|
markdown.partial("elements/#{group_element.element_type}", locals: {
page: page,
element: present(group_element),
elements: group_elements,
i: i,
add_links: true
})
end
## What is WipperSnapper
WipperSnapper is a firmware designed to turn any WiFi-capable board into an Internet-of-Things device without programming a single line of code. WipperSnapper connects to [Adafruit IO](https://io.adafruit.com/), a web platform designed ([by Adafruit!](https://www.adafruit.com/about)) to _display_, _respond_, and _interact_ with your project's data.
Simply load the WipperSnapper firmware onto your board, add credentials, and plug it into power. Your board will automatically register itself with your Adafruit IO account.
From there, you can add _components_ to your board such as buttons, switches, potentiometers, sensors, and more! Components are _dynamically _added to hardware, so you can immediately start interacting, logging, and streaming the data your projects produce without writing code.
If you've never used WipperSnapper, click below to read through the quick start guide before continuing.
[Quickstart: Adafruit IO WipperSnapper](https://learn.adafruit.com/quickstart-adafruit-io-wippersnapper)
## Wiring
group_elements = page.element_group_for(element).try(:elements) || []
group_elements.each_with_index do |group_element, i|
markdown.partial("elements/#{group_element.element_type}", locals: {
page: page,
element: present(group_element),
elements: group_elements,
i: i,
add_links: true
})
end
## Usage
Connect your board to Adafruit IO Wippersnapper and **[navigate to the WipperSnapper board list](https://io.adafruit.com/wippersnapper).**
On this page, **select the WipperSnapper board you're using** to be brought to the board's interface page.
group_elements = page.element_group_for(element).try(:elements) || []
group_elements.each_with_index do |group_element, i|
markdown.partial("elements/#{group_element.element_type}", locals: {
page: page,
element: present(group_element),
elements: group_elements,
i: i,
add_links: true
})
end
If you do not see your board listed here - you need [to connect your board to Adafruit IO](https://learn.adafruit.com/quickstart-adafruit-io-wippersnapper) first.
group_elements = page.element_group_for(element).try(:elements) || []
group_elements.each_with_index do |group_element, i|
markdown.partial("elements/#{group_element.element_type}", locals: {
page: page,
element: present(group_element),
elements: group_elements,
i: i,
add_links: true
})
end
Next, make sure the sensor is plugged into your board and click the ** I2C Scan ** button.

group_elements = page.element_group_for(element).try(:elements) || []
group_elements.each_with_index do |group_element, i|
markdown.partial("elements/#{group_element.element_type}", locals: {
page: page,
element: present(group_element),
elements: group_elements,
i: i,
add_links: true
})
end
group_elements = page.element_group_for(element).try(:elements) || []
group_elements.each_with_index do |group_element, i|
markdown.partial("elements/#{group_element.element_type}", locals: {
page: page,
element: present(group_element),
elements: group_elements,
i: i,
add_links: true
})
end
### I don't see the sensor's I2C address listed!
First, double-check the connection and/or wiring between the sensor and the board.
Then, reset the board and let it re-connect to Adafruit IO WipperSnapper.
With the sensor detected in an I2C scan, you're ready to add the sensor to your board.
**Click the New Component button or the + button** to bring up the component picker.
group_elements = page.element_group_for(element).try(:elements) || []
group_elements.each_with_index do |group_element, i|
markdown.partial("elements/#{group_element.element_type}", locals: {
page: page,
element: present(group_element),
elements: group_elements,
i: i,
add_links: true
})
end

group_elements = page.element_group_for(element).try(:elements) || []
group_elements.each_with_index do |group_element, i|
markdown.partial("elements/#{group_element.element_type}", locals: {
page: page,
element: present(group_element),
elements: group_elements,
i: i,
add_links: true
})
end
group_elements = page.element_group_for(element).try(:elements) || []
group_elements.each_with_index do |group_element, i|
markdown.partial("elements/#{group_element.element_type}", locals: {
page: page,
element: present(group_element),
elements: group_elements,
i: i,
add_links: true
})
end
Your device interface should now show the sensor components you created. After the interval you configured elapses, WipperSnapper will automatically read values from the sensor(s) and send them to Adafruit IO.
group_elements = page.element_group_for(element).try(:elements) || []
group_elements.each_with_index do |group_element, i|
markdown.partial("elements/#{group_element.element_type}", locals: {
page: page,
element: present(group_element),
elements: group_elements,
i: i,
add_links: true
})
end
To view the data that has been logged from the sensor, click on the graph next to the sensor name.
group_elements = page.element_group_for(element).try(:elements) || []
group_elements.each_with_index do |group_element, i|
markdown.partial("elements/#{group_element.element_type}", locals: {
page: page,
element: present(group_element),
elements: group_elements,
i: i,
add_links: true
})
end
Here you can see the feed history and edit things about the feed such as the name, privacy, webhooks associated with the feed and more. If you want to learn more about how feeds work, [check out this page](https://learn.adafruit.com/all-the-internet-of-things-episode-four-adafruit-io/advanced-feeds).
group_elements = page.element_group_for(element).try(:elements) || []
group_elements.each_with_index do |group_element, i|
markdown.partial("elements/#{group_element.element_type}", locals: {
page: page,
element: present(group_element),
elements: group_elements,
i: i,
add_links: true
})
end
- [Previous Page](https://learn.adafruit.com/adafruit-ina219-current-sensor-breakout/python-circuitpython.md)
- [Next Page](https://learn.adafruit.com/adafruit-ina219-current-sensor-breakout/downloads.md)
## Featured Products
### INA219 High Side DC Current Sensor Breakout - 26V ±3.2A Max
[INA219 High Side DC Current Sensor Breakout - 26V ±3.2A Max](https://www.adafruit.com/product/904)
This breakout board will solve all your power-monitoring problems. Instead of struggling with two multimeters, you can just use the handy INA219 chip on this breakout to both measure both the high side voltage and DC current draw over I2C with ±1% precision.
**Please...**
In Stock
[Buy Now](https://www.adafruit.com/product/904)
[Related Guides to the Product](https://learn.adafruit.com/products/904/guides)
### STEMMA QT / Qwiic JST SH 4-pin Cable - 100mm Long
[STEMMA QT / Qwiic JST SH 4-pin Cable - 100mm Long](https://www.adafruit.com/product/4210)
This 4-wire cable is a little over 100mm / 4" long and fitted with JST-SH female 4-pin connectors on both ends. Compared with the chunkier JST-PH these are 1mm pitch instead of 2mm, but still have a nice latching feel, while being easy to insert and remove.
In Stock
[Buy Now](https://www.adafruit.com/product/4210)
[Related Guides to the Product](https://learn.adafruit.com/products/4210/guides)
### STEMMA QT / Qwiic JST SH 4-pin to Premium Male Headers Cable
[STEMMA QT / Qwiic JST SH 4-pin to Premium Male Headers Cable](https://www.adafruit.com/product/4209)
This 4-wire cable is a little over 150mm / 6" long and fitted with JST-SH female 4-pin connectors on one end and premium Dupont male headers on the other. Compared with the chunkier JST-PH these are 1mm pitch instead of 2mm, but still have a nice latching feel, while being easy to insert...
Out of Stock
[Buy Now](https://www.adafruit.com/product/4209)
[Related Guides to the Product](https://learn.adafruit.com/products/4209/guides)
### Premium Male/Male Jumper Wires - 40 x 6" (150mm)
[Premium Male/Male Jumper Wires - 40 x 6" (150mm)](https://www.adafruit.com/product/758)
Handy for making wire harnesses or jumpering between headers on PCB's. These premium jumper wires are 6" (150mm) long and come in a 'strip' of 40 (4 pieces of each of ten rainbow colors). They have 0.1" male header contacts on either end and fit cleanly next to each other...
Out of Stock
[Buy Now](https://www.adafruit.com/product/758)
[Related Guides to the Product](https://learn.adafruit.com/products/758/guides)
### Full Sized Premium Breadboard - 830 Tie Points
[Full Sized Premium Breadboard - 830 Tie Points](https://www.adafruit.com/product/239)
This is a 'full-size' premium quality breadboard, 830 tie points. Good for small and medium projects. It's 2.2" x 7" (5.5 cm x 17 cm) with a standard double-strip in the middle and two power rails on both sides. You can pull the power rails off easily to make the...
In Stock
[Buy Now](https://www.adafruit.com/product/239)
[Related Guides to the Product](https://learn.adafruit.com/products/239/guides)
### Adafruit INA219 FeatherWing
[Adafruit INA219 FeatherWing](https://www.adafruit.com/product/3650)
The **INA219 FeatherWing** makes power-monitoring problems a thing of the past. Instead of struggling with two multimeters, you can just use the handy INA219 chip on this breakout to measure both the high side voltage and DC current draw over I2C with 1% precision....
In Stock
[Buy Now](https://www.adafruit.com/product/3650)
[Related Guides to the Product](https://learn.adafruit.com/products/3650/guides)
### Adafruit METRO 328 Fully Assembled - Arduino IDE compatible
[Adafruit METRO 328 Fully Assembled - Arduino IDE compatible](https://www.adafruit.com/product/50)
We sure love the ATmega328 here at Adafruit, and we use them _a lot_ for our own projects. The processor has plenty of GPIO, Analog inputs, hardware UART SPI and I2C, timers and PWM galore - just enough for most simple projects. When we need to go small, we use a
Out of Stock
[Buy Now](https://www.adafruit.com/product/50)
[Related Guides to the Product](https://learn.adafruit.com/products/50/guides)
## Related Guides
- [Remote controlled door lock using a fingerprint sensor & Adafruit IO](https://learn.adafruit.com/remote-controlled-door-lock-using-a-fingerprint-sensor-and-adafruit-io.md)
- [WiFi Controlled Mobile Robot](https://learn.adafruit.com/wifi-controlled-mobile-robot.md)
- [Arduino Lesson 14. Servo Motors](https://learn.adafruit.com/adafruit-arduino-lesson-14-servo-motors.md)
- [Geofencing with the FONA 808 & Adafruit IO](https://learn.adafruit.com/geofencing-with-the-fona-808-and-adafruit-io.md)
- [Let’s Put LEDs in Things!](https://learn.adafruit.com/lets-put-leds-in-things.md)
- [Adafruit CC3000 WiFi and Xively](https://learn.adafruit.com/adafruit-cc3000-wifi-and-xively.md)
- [Adafruit AirLift Shield - ESP32 WiFi Co-Processor](https://learn.adafruit.com/adafruit-airlift-shield-esp32-wifi-co-processor.md)
- [Wave Shield Talking Clock](https://learn.adafruit.com/wave-shield-talking-clock.md)
- [Ladyada's Learn Arduino - Lesson #0](https://learn.adafruit.com/ladyadas-learn-arduino-lesson-number-0.md)
- [2.2" TFT Display](https://learn.adafruit.com/2-2-tft-display.md)
- [LED Lightbox](https://learn.adafruit.com/led-lightbox.md)
- [Arduino Prototyping Mounting Plate](https://learn.adafruit.com/arduino-prototyping-mounting-plate.md)
- [How to Choose a Microcontroller](https://learn.adafruit.com/how-to-choose-a-microcontroller.md)
- [Arduino Lesson 16. Stepper Motors](https://learn.adafruit.com/adafruit-arduino-lesson-16-stepper-motors.md)
- [Arduino Lesson 8. Analog Inputs](https://learn.adafruit.com/adafruit-arduino-lesson-8-analog-inputs.md)
---
# Source: https://learn.adafruit.com/sitcom-sfx-door-trigger/wire-it.md
# Sitcom SFX Door Trigger
## Wire it

Warning:
## **Connections on Prototyping Pi Plate:**
> **PIR Sensor**
>
> - Red -\> 5V
> - Yellow Data -\> input 24
> - Black -\> Ground
>
> **Door Switch**
>
> - One wire to ground, the other to input 23, with a 10k pull-up resistor to 3v3
>
> **Indicator LEDs**
>
> - Green connected to output 18 through a 220ohm resistor, will correspond to motion detection
> - Red connected to output 25 through a 220ohm resistor, will correspond to an open magnetic door switch
And of course, some sort of stereo or portable speaker in the 1/8in jack so you can hear it!
That's it! Now on to the code...
- [Previous Page](https://learn.adafruit.com/sitcom-sfx-door-trigger/getting-started.md)
- [Next Page](https://learn.adafruit.com/sitcom-sfx-door-trigger/code.md)
## Featured Products
### Raspberry Pi 3 - Model B+ - 1.4GHz Cortex-A53 with 1GB RAM
[Raspberry Pi 3 - Model B+ - 1.4GHz Cortex-A53 with 1GB RAM](https://www.adafruit.com/product/3775)
The Raspberry Pi 3 Model B is the most popular Raspberry Pi computer made, and the Pi Foundation knows you can always make a good thing _better_! And what could make the Pi 3 better? How about a _faster_ processor, 5 GHz WiFi, and updated Ethernet chip with PoE capability?...
In Stock
[Buy Now](https://www.adafruit.com/product/3775)
[Related Guides to the Product](https://learn.adafruit.com/products/3775/guides)
### Adafruit Prototyping Pi Plate Kit for Raspberry Pi
[Adafruit Prototyping Pi Plate Kit for Raspberry Pi](https://www.adafruit.com/product/801)
Now that you've finally got your hands on a [Raspberry Pi®](http://www.raspberrypi.org/), you're probably itching to make some fun embedded computer projects with it. What you need is an add on prototyping Pi Plate from Adafruit, which can snap onto the Pi PCB (and is...
No Longer Stocked
[Buy Now](https://www.adafruit.com/product/801)
[Related Guides to the Product](https://learn.adafruit.com/products/801/guides)
### USB Powered Speakers
[USB Powered Speakers](https://www.adafruit.com/product/1363)
Add some extra boom to your audio project with these powered loudspeakers. We sampled half a dozen different models to find ones with a good frequency response, so you'll get quality audio output for music playback. Simply connect the standard 3.5mm stereo plug into your Raspberry Pi model...
In Stock
[Buy Now](https://www.adafruit.com/product/1363)
[Related Guides to the Product](https://learn.adafruit.com/products/1363/guides)
### Magnetic contact switch (door sensor)
[Magnetic contact switch (door sensor)](https://www.adafruit.com/product/375)
This sensor is essentially a reed switch, encased in an ABS plastic shell. Normally the reed is 'open' (no connection between the two wires). The other half is a magnet. When the magnet is less than 13mm (0.5") away, the reed switch closes. They're often used to detect when a...
In Stock
[Buy Now](https://www.adafruit.com/product/375)
[Related Guides to the Product](https://learn.adafruit.com/products/375/guides)
### PIR (motion) sensor
[PIR (motion) sensor](https://www.adafruit.com/product/189)
PIR sensors are used to detect motion from pets/humanoids from about 20 feet away (possibly works on zombies, not guaranteed). This one has an adjustable delay before firing (approx 2-4 seconds), adjustable sensitivity **and** we include a 1 foot (30 cm) cable with a socket so you...
In Stock
[Buy Now](https://www.adafruit.com/product/189)
[Related Guides to the Product](https://learn.adafruit.com/products/189/guides)
### VESA mount for Raspberry Pi Model A and Model B
[VESA mount for Raspberry Pi Model A and Model B](https://www.adafruit.com/product/986)
This basic VESA mount allows you to attach a Raspberry Pi Model A or B computer to the back of most HDMI monitors. It is cut out of clear 3mm acrylic so you can see the LEDs, and has a cut out for the GPIO pins in case you want to connect a GPIO cable or Cobbler to it. The Pi is held in place...
No Longer Stocked
[Buy Now](https://www.adafruit.com/product/986)
[Related Guides to the Product](https://learn.adafruit.com/products/986/guides)
### SD/MicroSD Memory Card (8 GB SDHC)
[SD/MicroSD Memory Card (8 GB SDHC)](https://www.adafruit.com/product/1294)
Add mega-storage in a jiffy using this 8 GB class 4 micro-SD card. It comes with a SD adapter so you can use it with any of our shields or adapters. Preformatted to FAT so it works out of the box with our projects. Tested and works great with our
In Stock
[Buy Now](https://www.adafruit.com/product/1294)
[Related Guides to the Product](https://learn.adafruit.com/products/1294/guides)
### Raspberry Pi 3 Model B+ Starter Pack - Includes a Pi 3 Model B+
[Raspberry Pi 3 Model B+ Starter Pack - Includes a Pi 3 Model B+](https://www.adafruit.com/product/3783)
The Raspberry Pi 3 Model B is the most popular Raspberry Pi computer made, and the Pi Foundation knows you can always make a good thing _better_! And what could make the Pi 3 better? How about a _faster_ processor, 5 GHz WiFi, and updated Ethernet chip with PoE...
Out of Stock
[Buy Now](https://www.adafruit.com/product/3783)
[Related Guides to the Product](https://learn.adafruit.com/products/3783/guides)
## Related Guides
- [PIR Motion Sensor](https://learn.adafruit.com/pir-passive-infrared-proximity-motion-sensor.md)
- [Optical Sensor Drum Track Sequencer](https://learn.adafruit.com/drum-track-sequencer.md)
- [Raspberry Pi Pygame UI basics](https://learn.adafruit.com/raspberry-pi-pygame-ui-basics.md)
- [Raspberry Pi SelfieBlock](https://learn.adafruit.com/selfieblock.md)
- [Ultrasonic Ruler](https://learn.adafruit.com/ultrasonic-ruler.md)
- [ScoutMakes DRV5032 Hall Sensor](https://learn.adafruit.com/scoutmakes-drv5032-hall-sensor.md)
- [Magical Mistletoe](https://learn.adafruit.com/magical-mistletoe.md)
- [Motion Activated Outlet with the Adafruit FunHouse](https://learn.adafruit.com/motion-activated-outlet-with-the-adafruit-funhouse.md)
- [Adafruit VL53L0X Time of Flight Micro-LIDAR Distance Sensor Breakout](https://learn.adafruit.com/adafruit-vl53l0x-micro-lidar-distance-sensor-breakout.md)
- [Adafruit APDS9960 breakout](https://learn.adafruit.com/adafruit-apds9960-breakout.md)
- [Raspberry Pi as a Media Center](https://learn.adafruit.com/raspberry-pi-as-a-media-center.md)
- [Raspberry Pi radio player with touchscreen](https://learn.adafruit.com/raspberry-pi-radio-player-with-touchscreen.md)
- [Arm-based IoT Kit for Cloud IoT Core - Getting Started](https://learn.adafruit.com/raspberry-pi-3-and-sensor-kit-for-google-cloud-iot-core.md)
- [Piezo Ring Tones with Raspberry Pi](https://learn.adafruit.com/piezo-ring-tones-with-raspberry-pi.md)
- [LPC824 NeoPixel IR Distance Sensor](https://learn.adafruit.com/lpc824-neopixel-ir-distance-sensor.md)
- [Track a Turtle with WipperSnapper](https://learn.adafruit.com/track-a-turtle-with-wippersnapper.md)
---
# Source: https://learn.adafruit.com/raspberry-pi-e-mail-notifier-using-leds/wire-leds.md
# Raspberry Pi E-mail Notifier Using LEDs
## Wire the Cobbler to the LEDs
Modern Raspberry Pi's use a 40-pin header. The first generation of Pi's used a 26-pin header. This tutorial works with all of these versions using the same code and GPIO pins. We have provided wiring examples of both types using the same GPIO pins (#18 and #23).
When connecting the GPIO cable, make sure that you note the red or white wire on the ribbon, that's pin #1 of the cable. That end goes at the side closest to the SD Card and is labeled **P1** on the Pi. The other side connects to the cobbler and can only be inserted one way due to the notch in the cable.
Place the cobbler onto the bread board straddling the center line. Connect the **GND** pin (ground) to the blue power rail on the side of the breadboard. You'll need two resistors (any values from 330 ohm up to 1000 ohm are fine).
Connect the first resistor to the cobbler row marked **#18** , and the other end to a row that isn't used by the cobbler.
Connect the second resistor to the cobbler row marked # **23** and the other end to another empty row.
# Raspberry Pi Cobbler Plus - 40-pin for Pi v2, v3, Zero

# Raspberry Pi Cobber - 26-pin - for Pi v1 only

# Step-by-Step Hookup on a 26-pin Pi Cobbler

Now grab a red LED and a green LED. Look for the long pins on the LEDs; those are the positive (+) legs.
Connect the long (+) leg of the red LED to the resistor connected to **#23** (GPIO #23), and the long leg of the green LED to the resistor connected to **#18**.
The short legs plug into the blue striped rail on the side of the breadboard.
The above images are for an original Pi Cobbler. For newer, 40-pin models like the A+/B+/Pi 2, you'll probably want to do something more like this, using wires to connect the resistors to the LEDs (click for a larger image):
That's it! You've just wired two LEDs with current-limiting resistors to the GPIO pins of the Pi.
- [Previous Page](https://learn.adafruit.com/raspberry-pi-e-mail-notifier-using-leds/overview.md)
- [Next Page](https://learn.adafruit.com/raspberry-pi-e-mail-notifier-using-leds/necessary-packages.md)
## Featured Products
### Raspberry Pi Starter Pack
[Raspberry Pi Starter Pack](https://www.adafruit.com/product/3049)
You're going to work hard with your Raspberry Pi 2 Model B or Raspberry Pi 1 Model B+. You're going to have to solder, code, and Linux your Maker heart out. That's why we've tried to make it as easy as possible to start...
In Stock
[Buy Now](https://www.adafruit.com/product/3049)
[Related Guides to the Product](https://learn.adafruit.com/products/3049/guides)
### Raspberry Pi 3 - Model B+ - 1.4GHz Cortex-A53 with 1GB RAM
[Raspberry Pi 3 - Model B+ - 1.4GHz Cortex-A53 with 1GB RAM](https://www.adafruit.com/product/3775)
The Raspberry Pi 3 Model B is the most popular Raspberry Pi computer made, and the Pi Foundation knows you can always make a good thing _better_! And what could make the Pi 3 better? How about a _faster_ processor, 5 GHz WiFi, and updated Ethernet chip with PoE capability?...
In Stock
[Buy Now](https://www.adafruit.com/product/3775)
[Related Guides to the Product](https://learn.adafruit.com/products/3775/guides)
### Full Sized Premium Breadboard - 830 Tie Points
[Full Sized Premium Breadboard - 830 Tie Points](https://www.adafruit.com/product/239)
This is a 'full-size' premium quality breadboard, 830 tie points. Good for small and medium projects. It's 2.2" x 7" (5.5 cm x 17 cm) with a standard double-strip in the middle and two power rails on both sides. You can pull the power rails off easily to make the...
In Stock
[Buy Now](https://www.adafruit.com/product/239)
[Related Guides to the Product](https://learn.adafruit.com/products/239/guides)
### 5V 2.5A Switching Power Supply with 20AWG MicroUSB Cable
[5V 2.5A Switching Power Supply with 20AWG MicroUSB Cable](https://www.adafruit.com/product/1995)
Our all-in-one 5V 2.5 Amp + MicroUSB cable power adapter is the perfect choice for powering single-board computers like Raspberry Pi, BeagleBone, or anything else that's power-hungry!
This adapter was specifically designed to provide 5.25V, not 5V, but we still call it a 5V USB...
Out of Stock
[Buy Now](https://www.adafruit.com/product/1995)
[Related Guides to the Product](https://learn.adafruit.com/products/1995/guides)
### Assembled Pi Cobbler Plus - Breakout Cable
[Assembled Pi Cobbler Plus - Breakout Cable](https://www.adafruit.com/product/2029)
The Raspberry Pi B+ / Pi 2 / Pi 3 / Pi 4 has landed on the Maker World like a 40-GPIO pinned, quad-USB ported, credit card sized bomb of DIY joy. And while you can use most of our great Model B accessories by hooking up our [downgrade...](https://www.adafruit.com/product/1986)
In Stock
[Buy Now](https://www.adafruit.com/product/2029)
[Related Guides to the Product](https://learn.adafruit.com/products/2029/guides)
### Assembled Pi T-Cobbler Plus - GPIO Breakout
[Assembled Pi T-Cobbler Plus - GPIO Breakout](https://www.adafruit.com/product/2028)
**This is the assembled version of the Pi T-Cobbler Plus. It only works with the Raspberry Pi Model Zero, A+, B+, Pi 2, Pi 3 & Pi 4!** (Any Pi with 2x20 connector)
The Raspberry Pi has landed on the Maker World like a 40-GPIO pinned, quad-USB ported, credit...
In Stock
[Buy Now](https://www.adafruit.com/product/2028)
[Related Guides to the Product](https://learn.adafruit.com/products/2028/guides)
### Diffused Red 10mm LED (25 pack)
[Diffused Red 10mm LED (25 pack)](https://www.adafruit.com/product/845)
Need some big indicators? We are big fans of these huge diffused red LEDs. They are fairly bright so they can be seen in daytime, and from any angle. They go easily into a breadboard and will add that extra zing to your project.
- Pack of 25 diffused red LEDs
- 10mm...
No Longer Stocked
[Buy Now](https://www.adafruit.com/product/845)
[Related Guides to the Product](https://learn.adafruit.com/products/845/guides)
### Diffused Green 10mm LED (25 pack)
[Diffused Green 10mm LED (25 pack)](https://www.adafruit.com/product/844)
Need some big indicators? We are big fans of these huge 10mm diffused green LEDs. They are fairly bright so they can be seen in daytime, and from any angle. They go easily into a breadboard and will add that extra zing to your project.
- Pack of 25 diffused green LEDs
- 10mm...
No Longer Stocked
[Buy Now](https://www.adafruit.com/product/844)
[Related Guides to the Product](https://learn.adafruit.com/products/844/guides)
## Related Guides
- [Speech Synthesis on the Raspberry Pi](https://learn.adafruit.com/speech-synthesis-on-the-raspberry-pi.md)
- [Circadian Pi Desk Light](https://learn.adafruit.com/circadian-pi-desk-light.md)
- [Adafruit's Raspberry Pi Lesson 11. DS18B20 Temperature Sensing](https://learn.adafruit.com/adafruits-raspberry-pi-lesson-11-ds18b20-temperature-sensing.md)
- [Drive a 16x2 LCD with the Raspberry Pi](https://learn.adafruit.com/drive-a-16x2-lcd-directly-with-a-raspberry-pi.md)
- [Adding Basic Audio Ouput to Raspberry Pi Zero](https://learn.adafruit.com/adding-basic-audio-ouput-to-raspberry-pi-zero.md)
- [Single Channel LoRaWAN Gateway for Raspberry Pi](https://learn.adafruit.com/raspberry-pi-single-channel-lorawan-gateway.md)
- [Playing sounds and using buttons with Raspberry Pi](https://learn.adafruit.com/playing-sounds-and-using-buttons-with-raspberry-pi.md)
- [Program an AVR or Arduino Using Raspberry Pi GPIO](https://learn.adafruit.com/program-an-avr-or-arduino-using-raspberry-pi-gpio-pins.md)
- [IoT Temperature Logger with Analog Devices ADT7410, Raspberry Pi, and Adafruit IO](https://learn.adafruit.com/iot-temperature-logger-with-python-and-adafruit-io.md)
- [Capacitive Touch Sensors on the Raspberry Pi](https://learn.adafruit.com/capacitive-touch-sensors-on-the-raspberry-pi.md)
- [Matrix and 7-Segment LED Backpack with the Raspberry Pi](https://learn.adafruit.com/matrix-7-segment-led-backpack-with-the-raspberry-pi.md)
- [Windows IoT Core Application Development: Headed Blinky](https://learn.adafruit.com/windows-iot-application-development-headed-blinky.md)
- [Basic Resistor Sensor Reading on Raspberry Pi](https://learn.adafruit.com/basic-resistor-sensor-reading-on-raspberry-pi.md)
- [Large Pi-based Thermometer and Clock](https://learn.adafruit.com/large-pi-based-thermometer-and-clock.md)
- [PiPhone - A Raspberry Pi based Cellphone](https://learn.adafruit.com/piphone-a-raspberry-pi-based-cellphone.md)
---
# Source: https://learn.adafruit.com/monochrome-oled-breakouts/wiring-096-128x64-oled-display.md
# Monochrome OLED Breakouts
## Wiring OLD 0.96" 128x64 OLED
Info:
## 128x64 Version 1.0 OLED
The version 1 128x64 OLED runs at 3.3V and does not have a built in level shifter so you'll need to use a level shifting chip to use with a 5V microcontroller. The following will assume that is the case. If you're running a 3.3V microcontroller system, you can skip the level shifter.We'll assume you want to use this in a breadboard, take a piece of 0.1" header 10 pins long.

Place the header in a breadboard and then place the left hand side of the OLED on top.
And solder the pins

We'll be using the internal charge pump so connect **VDD** and **VBAT ** together (they will connect to 3.3V) **. ** GND goes to ground.
Place a CD4050 level shifter chip so pin one is at the top.
Connect pin 10 to **D/C** pin 12 to ** CLK ** (SPI clock) and pin 15 to **DAT ** (SPI data).
Connect pin 2 to **RES** (reset) and pin 4 to **CS** (chip select). Pin 1 goes to 3.3V and pin 8 to ground.
_( **Note** : If using the display with other SPI devices, D/C, CLK and DAT may be shared, but CS must be unique for each device.)_

You can connect the inputs of the level shifter to any pins you want but in this case we connected digital I/O **13** to pin 3 of the level shifter, **12** to pin 5, **11 ** to pin 9, **10** to pin 11 and **9 ** to pin 14. This matches the example code we have written. Once you get this working, you can try another set of pins.
- [Previous Page](https://learn.adafruit.com/monochrome-oled-breakouts/wiring-128x32-i2c-display.md)
- [Next Page](https://learn.adafruit.com/monochrome-oled-breakouts/circuitpython-wiring.md)
## Featured Products
### Monochrome 1.3" 128x64 OLED graphic display - STEMMA QT / Qwiic
[Monochrome 1.3" 128x64 OLED graphic display - STEMMA QT / Qwiic](https://www.adafruit.com/product/938)
These displays are small, only about 1.3" diagonal, but very readable due to the high contrast of an OLED display. This display is made of 128x64 individual white OLED pixels, each one is turned on or off by the controller chip. Because the display makes its own light, no backlight is...
In Stock
[Buy Now](https://www.adafruit.com/product/938)
[Related Guides to the Product](https://learn.adafruit.com/products/938/guides)
### Monochrome 0.96" 128x64 OLED Graphic Display - STEMMA QT
[Monochrome 0.96" 128x64 OLED Graphic Display - STEMMA QT](https://www.adafruit.com/product/326)
These displays are small, only about 1" diagonal, but very readable due to the high contrast of an OLED display. This display is made of 128x64 individual white OLED pixels, each one is turned on or off by the controller chip. Because the display makes its own light, no backlight is...
Out of Stock
[Buy Now](https://www.adafruit.com/product/326)
[Related Guides to the Product](https://learn.adafruit.com/products/326/guides)
### Monochrome 128x32 SPI OLED graphic display
[Monochrome 128x32 SPI OLED graphic display](https://www.adafruit.com/product/661)
These displays are small, only about 1" diagonal, but very readable due to the high contrast of an OLED display. This display is made of 128x32 individual white OLED pixels, each one is turned on or off by the controller chip. Because the display makes its own light, no backlight is...
In Stock
[Buy Now](https://www.adafruit.com/product/661)
[Related Guides to the Product](https://learn.adafruit.com/products/661/guides)
### Monochrome 128x32 I2C OLED graphic display
[Monochrome 128x32 I2C OLED graphic display](https://www.adafruit.com/product/931)
These displays are small, only about 1" diagonal, but very readable due to the high contrast of an OLED display. This display is made of 128x32 individual white OLED pixels, each one is turned on or off by the controller chip. Because the display makes its own light, no backlight is...
No Longer Stocked
[Buy Now](https://www.adafruit.com/product/931)
[Related Guides to the Product](https://learn.adafruit.com/products/931/guides)
### Monochrome 0.91" 128x32 I2C OLED Display - STEMMA QT / Qwiic
[Monochrome 0.91" 128x32 I2C OLED Display - STEMMA QT / Qwiic](https://www.adafruit.com/product/4440)
These displays are small, only about 1" diagonal, but very readable due to the high contrast of an OLED display. This display is made of 128x32 individual white OLED pixels, each one is turned on or off by the controller chip. Because the display makes its own light, no backlight is...
In Stock
[Buy Now](https://www.adafruit.com/product/4440)
[Related Guides to the Product](https://learn.adafruit.com/products/4440/guides)
## Related Guides
- [OLED TRON Clock](https://learn.adafruit.com/oled-tron-clock.md)
- [I2C Addresses and Troublesome Chips](https://learn.adafruit.com/i2c-addresses.md)
- [Monitor Your Greenhouse with a No-Code Environmental Sensor](https://learn.adafruit.com/monitor-your-greenhouse-with-a-no-code-environmental-sensor.md)
- [SSD1306 OLED Displays with Raspberry Pi and BeagleBone Black](https://learn.adafruit.com/ssd1306-oled-displays-with-raspberry-pi-and-beaglebone-black.md)
- [Adafruit FT232H With SPI & I2C Devices](https://learn.adafruit.com/adafruit-ft232h-with-spi-and-i2c-libraries.md)
- [MIDI Melody Maker](https://learn.adafruit.com/midi-melody-maker.md)
- [Steampunk Cameo Necklace with OLED Display](https://learn.adafruit.com/steampunk-cameo-necklace.md)
- [Using QMK on RP2040 Microcontrollers](https://learn.adafruit.com/using-qmk-on-rp2040-microcontrollers.md)
- [CircuitPython OLED and Dual Knob Sketcher](https://learn.adafruit.com/circuitpython-oled-knob-sketcher.md)
- [Gravity Falls Memory Gun](https://learn.adafruit.com/gravity-falls-memory-gun.md)
- [Pico W HTTP Server with CircuitPython](https://learn.adafruit.com/pico-w-http-server-with-circuitpython.md)
- [Adafruit Trinkey QT2040](https://learn.adafruit.com/adafruit-trinkey-qt2040.md)
- [Adafruit Airlift Bitsy Add-On - ESP32 WiFi Co-Processor](https://learn.adafruit.com/adafruit-airlift-bitsy-add-on-esp32-wifi-co-processor.md)
- [Animated Flying Toaster OLED Jewelry](https://learn.adafruit.com/animated-flying-toaster-oled-jewelry.md)
- [Adafruit TCA9548A 1-to-8 I2C Multiplexer Breakout](https://learn.adafruit.com/adafruit-tca9548a-1-to-8-i2c-multiplexer-breakout.md)
---
# Source: https://learn.adafruit.com/adalight-diy-ambient-tv-lighting/wiring-1.md
# Adalight Project Pack
## Wiring
The LED strand has a specific “input” and “output” end. The Arduino _must_ connect to the “input” end! This is the smaller of the two plastic end connectors, the one with the triangular “arms”:

You can press wires directly into the plug connector. This works best with breadboarding jumper wires or solid-core (not stranded) copper wire.
Only three wires will be used. **The red wire does not connect to the Arduino.**

Alternately, if you don’t want to use the “jammed wires” trick, an optional mating connector is [available in the Adafruit shop](http://adafruit.com/products/579 "Link: http://adafruit.com/products/579"). This has a plug housing at one end and four tinned wires at the opposite end…strip a little more insulation to press these into Arduino pin sockets.
**The red wire does not connect to the Arduino.** You can trim this wire from the mating connector or insulate it with tape or heat-shrink tube.
Three wires connect the Arduino UNO to the input end of the LED strand: the **BLUE** wire can connect to any Arduino **GND** pin. **GREEN** should connect to **PIN 13** (SPI clock), and **YELLOW** to **PIN 11** (SPI MOSI). The **RED** wire is **NOT CONNECTED**.
Even though we don't suggest it, you can use an Arduino Mega, connect Green to **52** (SPI Clock) and Yellow to **51** (SPI MOSI), red and blue are the same as above. With the Leonardo, unfortunately the SPI pins are on the 6 pin programming header in the center of the board, so its _really_ not suggested.
The extra red and blue wires are for connecting power, but we’ll do this at the other end of the strand.
Info:
Power will be connected to the same red and blue wires at the output end of the strand. Data can only go one direction, but power can flow either way! The DC power jack has embossed “+” and “–” symbols on the top face. Connect the **RED** wire to **+** and the **BLUE** wire to **–**. Insert the wires into the “jaws” of the jack and cinch down the screws to hold the wires securely.

(Click to embiggen)
- [Previous Page](https://learn.adafruit.com/adalight-diy-ambient-tv-lighting/pieces.md)
- [Next Page](https://learn.adafruit.com/adalight-diy-ambient-tv-lighting/download-and-install.md)
## Featured Products
### Adalight - DIY Ambient Monitor Lighting Project Pack
[Adalight - DIY Ambient Monitor Lighting Project Pack](https://www.adafruit.com/product/461)
Build your own ambient-light addition for a monitor or media PC television with the Adalight project pack! This project pack is for our ["Adalight" project tutorial](http://learn.adafruit.com/adalight-diy-ambient-tv-lighting). By running the Processing code on your...
No Longer Stocked
[Buy Now](https://www.adafruit.com/product/461)
[Related Guides to the Product](https://learn.adafruit.com/products/461/guides)
### 12mm Diffused Thin Digital RGB LED Pixels (Strand of 25)
[12mm Diffused Thin Digital RGB LED Pixels (Strand of 25)](https://www.adafruit.com/product/322)
RGB Pixels are digitally-controllable lights you can set to any color, or animate. Each RGB LED and controller chip is molded into a 'dot' of silicone. The dots are weatherproof and rugged. There are four flanges molded in so that you can 'push' them into a 12mm drill hole in...
No Longer Stocked
[Buy Now](https://www.adafruit.com/product/322)
[Related Guides to the Product](https://learn.adafruit.com/products/322/guides)
### 12mm Diffused Flat Digital RGB LED Pixels (Strand of 25)
[12mm Diffused Flat Digital RGB LED Pixels (Strand of 25)](https://www.adafruit.com/product/738)
RGB Pixels are digitally-controllable lights you can set to any color, or animate. Each RGB LED and controller chip is molded into a 'dot' of silicone. The dots are weatherproof and rugged. There are four flanges molded in so that you can 'push' them into a 12mm drill hole in...
In Stock
[Buy Now](https://www.adafruit.com/product/738)
[Related Guides to the Product](https://learn.adafruit.com/products/738/guides)
### Adafruit METRO 328 Fully Assembled - Arduino IDE compatible
[Adafruit METRO 328 Fully Assembled - Arduino IDE compatible](https://www.adafruit.com/product/50)
We sure love the ATmega328 here at Adafruit, and we use them _a lot_ for our own projects. The processor has plenty of GPIO, Analog inputs, hardware UART SPI and I2C, timers and PWM galore - just enough for most simple projects. When we need to go small, we use a
Out of Stock
[Buy Now](https://www.adafruit.com/product/50)
[Related Guides to the Product](https://learn.adafruit.com/products/50/guides)
### Female DC Power adapter - 2.1mm jack to screw terminal block
[Female DC Power adapter - 2.1mm jack to screw terminal block](https://www.adafruit.com/product/368)
If you need to connect a DC power wall wart to a board that doesn't have a DC jack - this adapter will come in very handy! There is a 2.1mm DC jack on one end, and a screw terminal block on the other. The terminals are labeled with positive/negative assuming a positive-tip configuration...
In Stock
[Buy Now](https://www.adafruit.com/product/368)
[Related Guides to the Product](https://learn.adafruit.com/products/368/guides)
### 5V 2A (2000mA) switching power supply - UL Listed
[5V 2A (2000mA) switching power supply - UL Listed](https://www.adafruit.com/product/276)
This is an FCC/CE certified and UL listed power supply. Need a lot of 5V power? This switching supply gives a clean regulated 5V output at up to 2000mA. 110 or 240 input, so it works in any country. The plugs are "US 2-prong" style so you may need a plug adapter, but you can pick one...
In Stock
[Buy Now](https://www.adafruit.com/product/276)
[Related Guides to the Product](https://learn.adafruit.com/products/276/guides)
### Breadboarding wire bundle
[Breadboarding wire bundle](https://www.adafruit.com/product/153)
75 flexible stranded core wires with stiff ends molded on in red, orange, yellow, green, blue, brown, black and white. These are a major improvement over the "box of bent wires" that are sometimes sold with breadboards, and faster than stripping your own solid core wires. Makes...
In Stock
[Buy Now](https://www.adafruit.com/product/153)
[Related Guides to the Product](https://learn.adafruit.com/products/153/guides)
## Related Guides
- [2.2" TFT Display](https://learn.adafruit.com/2-2-tft-display.md)
- [Arduin-o-Phone](https://learn.adafruit.com/arduin-o-phone-arduino-powered-diy-cellphone.md)
- [Adafruit CC3000 WiFi and Xively](https://learn.adafruit.com/adafruit-cc3000-wifi-and-xively.md)
- [Analog Feedback Servos](https://learn.adafruit.com/analog-feedback-servos.md)
- [Ladyada's Learn Arduino - Lesson #0](https://learn.adafruit.com/ladyadas-learn-arduino-lesson-number-0.md)
- [Adafruit 1.27" and 1.5" Color OLED Breakout Board](https://learn.adafruit.com/adafruit-1-5-color-oled-breakout-board.md)
- [Bluetooth Temperature & Humidity Sensor](https://learn.adafruit.com/bluetooth-temperature-and-humidity-sensor.md)
- [Arduino Lesson 7. Make an RGB LED Fader](https://learn.adafruit.com/adafruit-arduino-lesson-7-make-an-rgb-led-fader.md)
- [Wave Shield](https://learn.adafruit.com/adafruit-wave-shield-audio-shield-for-arduino.md)
- [Adafruit 1.14" 240x135 Color TFT Breakout LCD Display](https://learn.adafruit.com/adafruit-1-14-240x135-color-tft-breakout.md)
- [Adafruit Arduino Selection Guide](https://learn.adafruit.com/adafruit-arduino-selection-guide.md)
- [Arduino Lesson 3. RGB LEDs](https://learn.adafruit.com/adafruit-arduino-lesson-3-rgb-leds.md)
- [Character LCDs](https://learn.adafruit.com/character-lcds.md)
- [Arduino Lesson 11. LCD Displays - Part 1](https://learn.adafruit.com/adafruit-arduino-lesson-11-lcd-displays-1.md)
- [RGB LED Matrix Basics](https://learn.adafruit.com/32x16-32x32-rgb-led-matrix.md)
---
# Source: https://learn.adafruit.com/monochrome-oled-breakouts/wiring-128x32-i2c-display.md
# Monochrome OLED Breakouts
## Wiring 128x32 I2C Display
## 128x32 I2C OLED
The 128x32 I2C OLED is very easy to get up and running because it has built in level shifting and regulator. First up, take a piece of 0.1" header 6 pins long.
Plug the header long end down into a breadboard
Place the OLED on top

Solder the short pins into the OLED PCB.

Finally, connect the pins to your Arduino
- **GND** goes to ground
- **Vin** goes to 5V
- **SDA** to I2C Data **SDA** pin (on the Uno, this is **A4** on the Mega it is **20 ** and on the Leonardo digital **2** )
- **SCL** to I2C Clock **SCL** pin (on the Uno, this is **A5** on the Mega it is **21 ** and on the Leonardo digital **3** )
- **RST** to digital **4** (you can change this pin in the code, later)
This matches the example code we have written. Once you get this working, you can change the RST pin. You cannot change the I2C pins, those are 'fixed' in hardware
Finally you can run the **File→Sketchbook→Libraries→Adafruit\_SSD1306→SSD1306\_128x32\_i2c ** example. If you wired the RST pin to a GPIO pin, change `#define OLED_RESET -1` to the new pin number.
https://github.com/adafruit/Adafruit_SSD1306/blob/master/examples/ssd1306_128x32_i2c/ssd1306_128x32_i2c.ino
- [Previous Page](https://learn.adafruit.com/monochrome-oled-breakouts/wiring-128x32-spi-oled-display.md)
- [Next Page](https://learn.adafruit.com/monochrome-oled-breakouts/wiring-096-128x64-oled-display.md)
## Featured Products
### Monochrome 1.3" 128x64 OLED graphic display - STEMMA QT / Qwiic
[Monochrome 1.3" 128x64 OLED graphic display - STEMMA QT / Qwiic](https://www.adafruit.com/product/938)
These displays are small, only about 1.3" diagonal, but very readable due to the high contrast of an OLED display. This display is made of 128x64 individual white OLED pixels, each one is turned on or off by the controller chip. Because the display makes its own light, no backlight is...
In Stock
[Buy Now](https://www.adafruit.com/product/938)
[Related Guides to the Product](https://learn.adafruit.com/products/938/guides)
### Monochrome 0.96" 128x64 OLED Graphic Display - STEMMA QT
[Monochrome 0.96" 128x64 OLED Graphic Display - STEMMA QT](https://www.adafruit.com/product/326)
These displays are small, only about 1" diagonal, but very readable due to the high contrast of an OLED display. This display is made of 128x64 individual white OLED pixels, each one is turned on or off by the controller chip. Because the display makes its own light, no backlight is...
Out of Stock
[Buy Now](https://www.adafruit.com/product/326)
[Related Guides to the Product](https://learn.adafruit.com/products/326/guides)
### Monochrome 128x32 SPI OLED graphic display
[Monochrome 128x32 SPI OLED graphic display](https://www.adafruit.com/product/661)
These displays are small, only about 1" diagonal, but very readable due to the high contrast of an OLED display. This display is made of 128x32 individual white OLED pixels, each one is turned on or off by the controller chip. Because the display makes its own light, no backlight is...
In Stock
[Buy Now](https://www.adafruit.com/product/661)
[Related Guides to the Product](https://learn.adafruit.com/products/661/guides)
### Monochrome 128x32 I2C OLED graphic display
[Monochrome 128x32 I2C OLED graphic display](https://www.adafruit.com/product/931)
These displays are small, only about 1" diagonal, but very readable due to the high contrast of an OLED display. This display is made of 128x32 individual white OLED pixels, each one is turned on or off by the controller chip. Because the display makes its own light, no backlight is...
No Longer Stocked
[Buy Now](https://www.adafruit.com/product/931)
[Related Guides to the Product](https://learn.adafruit.com/products/931/guides)
### Monochrome 0.91" 128x32 I2C OLED Display - STEMMA QT / Qwiic
[Monochrome 0.91" 128x32 I2C OLED Display - STEMMA QT / Qwiic](https://www.adafruit.com/product/4440)
These displays are small, only about 1" diagonal, but very readable due to the high contrast of an OLED display. This display is made of 128x32 individual white OLED pixels, each one is turned on or off by the controller chip. Because the display makes its own light, no backlight is...
In Stock
[Buy Now](https://www.adafruit.com/product/4440)
[Related Guides to the Product](https://learn.adafruit.com/products/4440/guides)
## Related Guides
- [OLED TRON Clock](https://learn.adafruit.com/oled-tron-clock.md)
- [I2C Addresses and Troublesome Chips](https://learn.adafruit.com/i2c-addresses.md)
- [Monitor Your Greenhouse with a No-Code Environmental Sensor](https://learn.adafruit.com/monitor-your-greenhouse-with-a-no-code-environmental-sensor.md)
- [SSD1306 OLED Displays with Raspberry Pi and BeagleBone Black](https://learn.adafruit.com/ssd1306-oled-displays-with-raspberry-pi-and-beaglebone-black.md)
- [Adafruit FT232H With SPI & I2C Devices](https://learn.adafruit.com/adafruit-ft232h-with-spi-and-i2c-libraries.md)
- [MIDI Melody Maker](https://learn.adafruit.com/midi-melody-maker.md)
- [Steampunk Cameo Necklace with OLED Display](https://learn.adafruit.com/steampunk-cameo-necklace.md)
- [Using QMK on RP2040 Microcontrollers](https://learn.adafruit.com/using-qmk-on-rp2040-microcontrollers.md)
- [CircuitPython OLED and Dual Knob Sketcher](https://learn.adafruit.com/circuitpython-oled-knob-sketcher.md)
- [Gravity Falls Memory Gun](https://learn.adafruit.com/gravity-falls-memory-gun.md)
- [Pico W HTTP Server with CircuitPython](https://learn.adafruit.com/pico-w-http-server-with-circuitpython.md)
- [Adafruit Trinkey QT2040](https://learn.adafruit.com/adafruit-trinkey-qt2040.md)
- [Adafruit Airlift Bitsy Add-On - ESP32 WiFi Co-Processor](https://learn.adafruit.com/adafruit-airlift-bitsy-add-on-esp32-wifi-co-processor.md)
- [Animated Flying Toaster OLED Jewelry](https://learn.adafruit.com/animated-flying-toaster-oled-jewelry.md)
- [Adafruit TCA9548A 1-to-8 I2C Multiplexer Breakout](https://learn.adafruit.com/adafruit-tca9548a-1-to-8-i2c-multiplexer-breakout.md)
---
# Source: https://learn.adafruit.com/monochrome-oled-breakouts/wiring-128x32-spi-oled-display.md
# Monochrome OLED Breakouts
## Wiring 128x32 SPI OLED display
## 128x32 SPI OLED
The 128x32 SPI OLED is very easy to get up and running because it has built in level shifting. First up, take a piece of 0.1" header 8 pins long.

Plug the header long end down into a breadboard and place the OLED on top. Solder the short pins into the OLED PCB.
Finally, connect the pins to your Arduino - **GND** goes to ground, **Vin** goes to 5V, **DATA** to digital **9** , **CLK** to digital **10** , **D/C** to digital **11** , **RST** to digital **13** and finally **CS** to digital **12.**
_( **Note** : If using the display with other SPI devices, D/C, CLK and DAT may be shared, but CS must be unique for each device.)_
This matches the example code we have written. Once you get this working, you can try another set of pins.
Finally you can run the **File→Sketchbook→Libraries→Adafruit\_SSD1306→SSD1306\_128x32\_SPI example**
Info:
- [Previous Page](https://learn.adafruit.com/monochrome-oled-breakouts/wiring-128x64-oleds.md)
- [Next Page](https://learn.adafruit.com/monochrome-oled-breakouts/wiring-128x32-i2c-display.md)
## Featured Products
### Monochrome 1.3" 128x64 OLED graphic display - STEMMA QT / Qwiic
[Monochrome 1.3" 128x64 OLED graphic display - STEMMA QT / Qwiic](https://www.adafruit.com/product/938)
These displays are small, only about 1.3" diagonal, but very readable due to the high contrast of an OLED display. This display is made of 128x64 individual white OLED pixels, each one is turned on or off by the controller chip. Because the display makes its own light, no backlight is...
In Stock
[Buy Now](https://www.adafruit.com/product/938)
[Related Guides to the Product](https://learn.adafruit.com/products/938/guides)
### Monochrome 0.96" 128x64 OLED Graphic Display - STEMMA QT
[Monochrome 0.96" 128x64 OLED Graphic Display - STEMMA QT](https://www.adafruit.com/product/326)
These displays are small, only about 1" diagonal, but very readable due to the high contrast of an OLED display. This display is made of 128x64 individual white OLED pixels, each one is turned on or off by the controller chip. Because the display makes its own light, no backlight is...
Out of Stock
[Buy Now](https://www.adafruit.com/product/326)
[Related Guides to the Product](https://learn.adafruit.com/products/326/guides)
### Monochrome 128x32 SPI OLED graphic display
[Monochrome 128x32 SPI OLED graphic display](https://www.adafruit.com/product/661)
These displays are small, only about 1" diagonal, but very readable due to the high contrast of an OLED display. This display is made of 128x32 individual white OLED pixels, each one is turned on or off by the controller chip. Because the display makes its own light, no backlight is...
In Stock
[Buy Now](https://www.adafruit.com/product/661)
[Related Guides to the Product](https://learn.adafruit.com/products/661/guides)
### Monochrome 128x32 I2C OLED graphic display
[Monochrome 128x32 I2C OLED graphic display](https://www.adafruit.com/product/931)
These displays are small, only about 1" diagonal, but very readable due to the high contrast of an OLED display. This display is made of 128x32 individual white OLED pixels, each one is turned on or off by the controller chip. Because the display makes its own light, no backlight is...
No Longer Stocked
[Buy Now](https://www.adafruit.com/product/931)
[Related Guides to the Product](https://learn.adafruit.com/products/931/guides)
### Monochrome 0.91" 128x32 I2C OLED Display - STEMMA QT / Qwiic
[Monochrome 0.91" 128x32 I2C OLED Display - STEMMA QT / Qwiic](https://www.adafruit.com/product/4440)
These displays are small, only about 1" diagonal, but very readable due to the high contrast of an OLED display. This display is made of 128x32 individual white OLED pixels, each one is turned on or off by the controller chip. Because the display makes its own light, no backlight is...
In Stock
[Buy Now](https://www.adafruit.com/product/4440)
[Related Guides to the Product](https://learn.adafruit.com/products/4440/guides)
## Related Guides
- [OLED TRON Clock](https://learn.adafruit.com/oled-tron-clock.md)
- [I2C Addresses and Troublesome Chips](https://learn.adafruit.com/i2c-addresses.md)
- [Monitor Your Greenhouse with a No-Code Environmental Sensor](https://learn.adafruit.com/monitor-your-greenhouse-with-a-no-code-environmental-sensor.md)
- [SSD1306 OLED Displays with Raspberry Pi and BeagleBone Black](https://learn.adafruit.com/ssd1306-oled-displays-with-raspberry-pi-and-beaglebone-black.md)
- [Adafruit FT232H With SPI & I2C Devices](https://learn.adafruit.com/adafruit-ft232h-with-spi-and-i2c-libraries.md)
- [MIDI Melody Maker](https://learn.adafruit.com/midi-melody-maker.md)
- [Steampunk Cameo Necklace with OLED Display](https://learn.adafruit.com/steampunk-cameo-necklace.md)
- [Using QMK on RP2040 Microcontrollers](https://learn.adafruit.com/using-qmk-on-rp2040-microcontrollers.md)
- [CircuitPython OLED and Dual Knob Sketcher](https://learn.adafruit.com/circuitpython-oled-knob-sketcher.md)
- [Gravity Falls Memory Gun](https://learn.adafruit.com/gravity-falls-memory-gun.md)
- [Pico W HTTP Server with CircuitPython](https://learn.adafruit.com/pico-w-http-server-with-circuitpython.md)
- [Adafruit Trinkey QT2040](https://learn.adafruit.com/adafruit-trinkey-qt2040.md)
- [Adafruit Airlift Bitsy Add-On - ESP32 WiFi Co-Processor](https://learn.adafruit.com/adafruit-airlift-bitsy-add-on-esp32-wifi-co-processor.md)
- [Animated Flying Toaster OLED Jewelry](https://learn.adafruit.com/animated-flying-toaster-oled-jewelry.md)
- [Adafruit TCA9548A 1-to-8 I2C Multiplexer Breakout](https://learn.adafruit.com/adafruit-tca9548a-1-to-8-i2c-multiplexer-breakout.md)
---
# Source: https://learn.adafruit.com/monochrome-oled-breakouts/wiring-128x64-oleds.md
# Monochrome OLED Breakouts
## Wiring 128x64 OLEDs
## Solder Header
Before you start wiring, a strip of header must be soldered onto the OLED. It is not possible to "press-fit" the header, it must be attached!
Start by placing an 8-pin piece of header with the **long** ends down into a breadboard for stability

Place the OLED on top so all the short ends of the header stick thru the header pads

Finish by soldering each of the 8 pins to the 8 pads!

# I2C or SPI
The nice thing about the 128x64 OLEDs is that they can be used with I2C (+ an optional reset line) or SPI. SPI is generally faster than I2C but uses more pins. It's also easier for some microcontrollers to use SPI. Anyways, you can use either one with this display
## Using with I2C
The display can be used with any I2C microcontroller. Because the I2C interface is for 'writing' to the display only, you'll still have to buffer the entire 512 byte frame in the microcontroller RAM - you can't read data from the OLED (even though I2C is a bidirectional protocol).
If you have the older non-STEMMA version of the OLED, you'll need to solder the two jumpers on the back of the OLED. **Both** must be soldered 'closed' for I2C to work!

For the new STEMMA-capable version, the **J1** and **J2** jumpers are closed so that the display is **by default in I2C mode!**
**There's a typo on the board, to put it into SPI, _open_ the two jumpers (as they're closed by default)**

## Converting From I2C to SPI Mode
The original version of this display was SPI by default, and you could convert to I2C with some light soldering. Many folks using these displays did not know how to solder, didn't own an iron or were not comfortable with soldering, so we converted the board to STEMMA QT 'plug and play' I2C so no soldering is required to use in I2C mode.
To convert it back to SPI is very easy, and requires a thin screwdriver or other sharp-tipped item **be careful not to cut towards you as always so you do not accidentally cut yourself!**
https://youtu.be/SXfV4e_jpf8
## Wiring It Up!
Info:
Warning:
Finally, connect the pins to your Arduino
- **GND** goes to ground **(black wire on STEMMA QT version)**
- **Vin** goes to 5V **(red wire on STEMMA QT version)**
- **Data** to I2C SDA (on the Uno, this is **A4** on the Mega it is **20** and on the Leonardo digital **2** ) **(blue wire on STEMMA QT version)**
- **Clk** to I2C SCL (on the Uno, this is **A5** on the Mega it is **21** and on the Leonardo digital **3** ) **(yellow wire on STEMMA QT version)**
- **RST** to digital **4** (you can change this pin in the code, later) (Not necessary on 0.96" STEMMA QT version)
This matches the example code we have written. Once you get this working, you can try a different Reset pin (you can't change the SDA and SCL pins).
Finally you can run the **File→Sketchbook→Libraries→Adafruit\_SSD1306→SSD1306\_128x64\_i2c** example. If you wired the RST pin to a GPIO pin, change `#define OLED_RESET -1` to the new pin number.
https://github.com/adafruit/Adafruit_SSD1306/blob/master/examples/ssd1306_128x64_i2c/ssd1306_128x64_i2c.ino
## Using with SPI
The breakouts are ready for SPI by default, but if you used them for I2C at some point, you'll need to remove the solder jumpers. Use wick or a solder sucker to make sure both are clear!
If you have the older non-STEMMA version of the OLED, the breakouts are ready for SPI by default.
If you used them for I2C at some point, you'll need to remove the solder jumpers. Use wick or a solder sucker to make sure both are clear!

If you have the newer STEMMA QT version **cut** the two jumpers instead!
Finally, connect the pins to your Arduino -
- **GND** goes to ground
- **Vin** goes to 5V
- **DATA** to digital **9**
- **CLK** to digital **10**
- **D/C** to digital **11**
- **RST** to digital **13**
- **CS** to digital **12**
_( **Note** : If using the display with other SPI devices, D/C, CLK and DAT may be shared, but CS must be unique for each device.)_
This matches the example code we have written. Once you get this working, you can try another set of pins.
Finally you can run the **File→Sketchbook→Libraries→Adafruit\_SSD1306→SSD1306\_128x64\_spi** example
https://github.com/adafruit/Adafruit_SSD1306/blob/master/examples/ssd1306_128x64_spi/ssd1306_128x64_spi.ino
- [Previous Page](https://learn.adafruit.com/monochrome-oled-breakouts/arduino-library-and-examples.md)
- [Next Page](https://learn.adafruit.com/monochrome-oled-breakouts/wiring-128x32-spi-oled-display.md)
## Featured Products
### Monochrome 1.3" 128x64 OLED graphic display - STEMMA QT / Qwiic
[Monochrome 1.3" 128x64 OLED graphic display - STEMMA QT / Qwiic](https://www.adafruit.com/product/938)
These displays are small, only about 1.3" diagonal, but very readable due to the high contrast of an OLED display. This display is made of 128x64 individual white OLED pixels, each one is turned on or off by the controller chip. Because the display makes its own light, no backlight is...
In Stock
[Buy Now](https://www.adafruit.com/product/938)
[Related Guides to the Product](https://learn.adafruit.com/products/938/guides)
### Monochrome 0.96" 128x64 OLED Graphic Display - STEMMA QT
[Monochrome 0.96" 128x64 OLED Graphic Display - STEMMA QT](https://www.adafruit.com/product/326)
These displays are small, only about 1" diagonal, but very readable due to the high contrast of an OLED display. This display is made of 128x64 individual white OLED pixels, each one is turned on or off by the controller chip. Because the display makes its own light, no backlight is...
Out of Stock
[Buy Now](https://www.adafruit.com/product/326)
[Related Guides to the Product](https://learn.adafruit.com/products/326/guides)
### Monochrome 128x32 SPI OLED graphic display
[Monochrome 128x32 SPI OLED graphic display](https://www.adafruit.com/product/661)
These displays are small, only about 1" diagonal, but very readable due to the high contrast of an OLED display. This display is made of 128x32 individual white OLED pixels, each one is turned on or off by the controller chip. Because the display makes its own light, no backlight is...
In Stock
[Buy Now](https://www.adafruit.com/product/661)
[Related Guides to the Product](https://learn.adafruit.com/products/661/guides)
### Monochrome 128x32 I2C OLED graphic display
[Monochrome 128x32 I2C OLED graphic display](https://www.adafruit.com/product/931)
These displays are small, only about 1" diagonal, but very readable due to the high contrast of an OLED display. This display is made of 128x32 individual white OLED pixels, each one is turned on or off by the controller chip. Because the display makes its own light, no backlight is...
No Longer Stocked
[Buy Now](https://www.adafruit.com/product/931)
[Related Guides to the Product](https://learn.adafruit.com/products/931/guides)
### Monochrome 0.91" 128x32 I2C OLED Display - STEMMA QT / Qwiic
[Monochrome 0.91" 128x32 I2C OLED Display - STEMMA QT / Qwiic](https://www.adafruit.com/product/4440)
These displays are small, only about 1" diagonal, but very readable due to the high contrast of an OLED display. This display is made of 128x32 individual white OLED pixels, each one is turned on or off by the controller chip. Because the display makes its own light, no backlight is...
In Stock
[Buy Now](https://www.adafruit.com/product/4440)
[Related Guides to the Product](https://learn.adafruit.com/products/4440/guides)
## Related Guides
- [OLED TRON Clock](https://learn.adafruit.com/oled-tron-clock.md)
- [I2C Addresses and Troublesome Chips](https://learn.adafruit.com/i2c-addresses.md)
- [Monitor Your Greenhouse with a No-Code Environmental Sensor](https://learn.adafruit.com/monitor-your-greenhouse-with-a-no-code-environmental-sensor.md)
- [SSD1306 OLED Displays with Raspberry Pi and BeagleBone Black](https://learn.adafruit.com/ssd1306-oled-displays-with-raspberry-pi-and-beaglebone-black.md)
- [Adafruit FT232H With SPI & I2C Devices](https://learn.adafruit.com/adafruit-ft232h-with-spi-and-i2c-libraries.md)
- [MIDI Melody Maker](https://learn.adafruit.com/midi-melody-maker.md)
- [Steampunk Cameo Necklace with OLED Display](https://learn.adafruit.com/steampunk-cameo-necklace.md)
- [Using QMK on RP2040 Microcontrollers](https://learn.adafruit.com/using-qmk-on-rp2040-microcontrollers.md)
- [CircuitPython OLED and Dual Knob Sketcher](https://learn.adafruit.com/circuitpython-oled-knob-sketcher.md)
- [Gravity Falls Memory Gun](https://learn.adafruit.com/gravity-falls-memory-gun.md)
- [Pico W HTTP Server with CircuitPython](https://learn.adafruit.com/pico-w-http-server-with-circuitpython.md)
- [Adafruit Trinkey QT2040](https://learn.adafruit.com/adafruit-trinkey-qt2040.md)
- [Adafruit Airlift Bitsy Add-On - ESP32 WiFi Co-Processor](https://learn.adafruit.com/adafruit-airlift-bitsy-add-on-esp32-wifi-co-processor.md)
- [Animated Flying Toaster OLED Jewelry](https://learn.adafruit.com/animated-flying-toaster-oled-jewelry.md)
- [Adafruit TCA9548A 1-to-8 I2C Multiplexer Breakout](https://learn.adafruit.com/adafruit-tca9548a-1-to-8-i2c-multiplexer-breakout.md)
---
# Source: https://learn.adafruit.com/character-lcds/wiring-a-character-lcd.md
# Character LCDs
## Wiring a Character LCD
## Installing the Header Pins

OK now you've got your LCD, you'll also need a couple other things. First is a 10K potentiometer. This will let you adjust the contrast. Each LCD will have slightly different contrast settings so you should try to get some sort of trimmer. You'll also need some 0.1" header - 16 pins long.
If the header is too long, just cut/snap it short!
Next you'll need to solder the header to the LCD. **You must do this, it is not OK to just try to 'press fit' the LCD!**
Also watch out not to apply too much heat, or you may melt the underlying breadboard. You can try 'tacking' pin 1 and pin 16 and then removing from the breadboard to finish the remaining solder points

The easiest way we know of doing this is sticking the header into a breadboard and then sitting the LCD on top while soldering. this keeps it steady.## Power and Backlight
K now we're onto the interesting stuff! Get your LCD plugged into the breadboard.
Now we'll provide power to the breadboard. Connect +5V to the red rail, and Ground to the blue rail.
Next we'll connect up the backlight for the LCD. Connect pin 16 to ground and pin 15 to +5V. On the vast majority of LCDs (including ones from Adafruit) the LCD includes a series resistor for the LED backlight.
If you happen to have one that does not include a resistor, you'll need to add one between 5V and pin 15. To calculate the value of the series resistor, look up the maximum backlight current and the typical backlight voltage drop from the data sheet. Subtract the voltage drop from 5 volts, then divide by the maximum current, then round up to the next standard resistor value. For example, if the backlight voltage drop is 3.5v typical and the rated current is 16mA, then the resistor should be (5 - 3.5)/0.016 = 93.75 ohms, or 100 ohms when rounded up to a standard value. If you can't find the data sheet, then it should be safe to use a 220 ohm resistor, although a value this high may make the backlight rather dim.
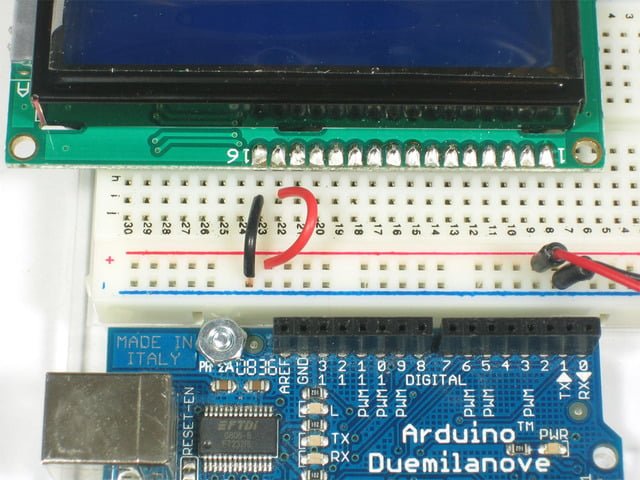
Connect the Arduino up to power, you'll notice the backlight lights up.
Note that some low-cost LCDs dont come with a backlight. Obviously in this case you should just keep going.## Contrast Circuit
Next, lets place the contrast pot, it goes on the side near pin 1.
Connect one side of the pot to +5V and the other to Ground (it doesn't matter which goes on what side). The middle of the pot (wiper) connects to pin 3 of the LCD.

Now we'll wire up the logic of the LCD - this is seperate from the backlight! Pin 1 is ground and pin 2 is +5V.
Now turn on the Arduino, you'll see the backlight light up (if there is one), and you can also twist the pot to see the first line of rectangles appear.

This means you've got the logic, backlight and contrast all worked out. Don't keep going unless you've got this figured out!## Bus Wiring
Now we'll finish up the wiring by connecting the data lines. There are 11 bus lines: **D0** through **D7** (8 data lines) and **RS** , **EN** , and **RW**. D0-D7 are the pins that have the raw data we send to the display. The **RS** pin lets the microcontroller tell the LCD whether it wants to display that data (as in, an ASCII character) or whether it is a command byte (like, change posistion of the cursor). The **EN** pin is the 'enable' line we use this to tell the LCD when data is ready for reading. The **RW** pin is used to set the direction - whether we want to write to the display (common) or read from it (less common)
The good news is that not all these pins are necessary for us to connect to the microcontroller (Arduino). **RW** for example, is not needed if we're only writing to the display (which is the most common thing to do anyways) so we can 'tie' it to ground. There is also a way to talk to the LCD using only 4 data pins instead of 8. This saves us 4 pins! Why would you ever want to use 8 when you could use 4? We're not 100% sure but we think that in some cases its faster to use 8 - it takes twice as long to use 4 - and that speed is important. For us, the speed isn't so important so we'll save some pins!
So to recap, we need 6 pins: **RS, EN, D7, D6, D5, ** and **D4** to talk to the LCD.
We'll be using the **LiquidCrystal** library to talk to the LCD so a lot of the annoying work of setting pins and such is taken care of. Another nice thing about this library is that you can use **any** Arduino pin to connect to the LCD pins. So after you go through this guide, you'll find it easy to swap around the pins if necessary
As mentioned, we'll not be using the **RW** pin, so we can tie it go ground. That's pin 5 as shown here.
Next is the **RS** pin #4. We'll use a brown wire to connect it to Arduino's digital pin # **7.** 
Next is the **EN** pin #6, we'll use a white wire to connect it to Arduino digital # **8.** 
Now we will wire up the data pins. **DB7** is pin #14 on the LCD, and it connects with an orange wire to Arduino # **12.** 
Next are the remaining 3 data lines, **DB6** (pin #13 yellow) **DB5** (pin #12 green) and **DB4** (pin #11 blue) which we connect to Arduino # **11, 10** and **9.
You should have four 'gap' pins on the LCD between the 4 data bus wires and the control wires.**

This is what you'll have on your desk.
- [Previous Page](https://learn.adafruit.com/character-lcds/lcd-varieties.md)
- [Next Page](https://learn.adafruit.com/character-lcds/arduino-code.md)
## Featured Products
### Standard LCD 16x2 + extras
[Standard LCD 16x2 + extras](https://www.adafruit.com/product/181)
Standard HD44780 LCDs are useful for creating standalone projects.
- 16 characters wide, 2 rows
- White text on blue background
- Connection port is 0.1" pitch, single row for easy breadboarding and wiring
- Pins are documented on the back of the LCD to assist...
In Stock
[Buy Now](https://www.adafruit.com/product/181)
[Related Guides to the Product](https://learn.adafruit.com/products/181/guides)
### Assembled Standard LCD 16x2 + extras - White on Blue
[Assembled Standard LCD 16x2 + extras - White on Blue](https://www.adafruit.com/product/1447)
Standard HD44780 LCDs are useful for creating standalone projects. This product is similar to our [Standard LCD 16x2 display **but comes with the header soldered on!**](https://www.adafruit.com/products/181)
- 16 characters wide, 2 rows
- White text...
In Stock
[Buy Now](https://www.adafruit.com/product/1447)
[Related Guides to the Product](https://learn.adafruit.com/products/1447/guides)
### RGB backlight positive LCD 16x2 + extras
[RGB backlight positive LCD 16x2 + extras](https://www.adafruit.com/product/398)
This is a fancy upgrade to standard 16x2 LCDs, instead of just having blue and white, or red and black, this LCD has black characters on a full color RGB-backlight background! That means you can change the background color to anything you want - red, green, blue, pink, white, purple yellow,...
In Stock
[Buy Now](https://www.adafruit.com/product/398)
[Related Guides to the Product](https://learn.adafruit.com/products/398/guides)
### RGB backlight negative LCD 16x2 + extras
[RGB backlight negative LCD 16x2 + extras](https://www.adafruit.com/product/399)
This is a fancy upgrade to standard 16x2 LCDs, instead of just having blue and white, or red and black, this LCD has full color RGB characters on a dark/black background! That means you can change the character display colors to anything you want - red, green, blue, pink, white, purple yellow,...
In Stock
[Buy Now](https://www.adafruit.com/product/399)
[Related Guides to the Product](https://learn.adafruit.com/products/399/guides)
### Standard LCD 20x4 + extras
[Standard LCD 20x4 + extras](https://www.adafruit.com/product/198)
Standard HD44780 LCDs are useful for creating standalone projects.
- 20 characters wide, 4 rows
- White text on blue background
- Connection port is 0.1" pitch, single row for easy breadboarding and wiring
- Single LED backlight with a resistor included, you can...
In Stock
[Buy Now](https://www.adafruit.com/product/198)
[Related Guides to the Product](https://learn.adafruit.com/products/198/guides)
### RGB backlight positive LCD 20x4 + extras
[RGB backlight positive LCD 20x4 + extras](https://www.adafruit.com/product/499)
This is a fancy upgrade to standard 20x4 LCDs, instead of just having blue and white, or red and black, this LCD has black characters on a full color RGB background! That means you can change the display background color to anything you want - red, green, blue, pink, white, purple yellow,...
In Stock
[Buy Now](https://www.adafruit.com/product/499)
[Related Guides to the Product](https://learn.adafruit.com/products/499/guides)
### RGB backlight negative LCD 20x4 + extras
[RGB backlight negative LCD 20x4 + extras](https://www.adafruit.com/product/498)
This is a fancy upgrade to standard 20x4 LCDs, instead of just having blue and white, or red and black, this LCD has full color RGB characters on a dark/black background! That means you can change the character display colors to anything you want - red, green, blue, pink, white, purple yellow,...
In Stock
[Buy Now](https://www.adafruit.com/product/498)
[Related Guides to the Product](https://learn.adafruit.com/products/498/guides)
### Adafruit METRO 328 Fully Assembled - Arduino IDE compatible
[Adafruit METRO 328 Fully Assembled - Arduino IDE compatible](https://www.adafruit.com/product/50)
We sure love the ATmega328 here at Adafruit, and we use them _a lot_ for our own projects. The processor has plenty of GPIO, Analog inputs, hardware UART SPI and I2C, timers and PWM galore - just enough for most simple projects. When we need to go small, we use a
Out of Stock
[Buy Now](https://www.adafruit.com/product/50)
[Related Guides to the Product](https://learn.adafruit.com/products/50/guides)
## Related Guides
- [Trinket Temperature & Humidity LCD Display](https://learn.adafruit.com/trinket-temperature-humidity-lcd-display.md)
- [Circuit Playground Sound-Controlled Robot](https://learn.adafruit.com/circuit-playground-sound-controlled-robot.md)
- [TTL Serial Camera](https://learn.adafruit.com/ttl-serial-camera.md)
- [Digital Circuits 7: MCUs... how do they work?](https://learn.adafruit.com/mcus-how-do-they-work.md)
- [Adafruit Data Logger Shield](https://learn.adafruit.com/adafruit-data-logger-shield.md)
- [Arduino "Hunt The Wumpus"](https://learn.adafruit.com/arduino-hunt-the-wumpus.md)
- [Arduino Lesson 2. LEDs](https://learn.adafruit.com/adafruit-arduino-lesson-2-leds.md)
- [Mini Thermal Receipt Printers](https://learn.adafruit.com/mini-thermal-receipt-printer.md)
- [Bluetooth Temperature & Humidity Sensor](https://learn.adafruit.com/bluetooth-temperature-and-humidity-sensor.md)
- [Character LCD with Raspberry Pi or BeagleBone Black](https://learn.adafruit.com/character-lcd-with-raspberry-pi-or-beaglebone-black.md)
- [DIY 8x2 LCD Shield](https://learn.adafruit.com/diy-8x2-lcd-shield.md)
- [Arduino Ethernet + SD Card](https://learn.adafruit.com/arduino-ethernet-sd-card.md)
- [Trellis 3D Printed Enclosure](https://learn.adafruit.com/trellis-3d-printed-enclosure.md)
- [Adafruit AirLift Shield - ESP32 WiFi Co-Processor](https://learn.adafruit.com/adafruit-airlift-shield-esp32-wifi-co-processor.md)
- [2.2" TFT Display](https://learn.adafruit.com/2-2-tft-display.md)
---
# Source: https://learn.adafruit.com/thermocouple/wiring-a-thermocouple.md
# MAX31855 Thermocouple
## Wiring a Thermocouple
As we mentioned before, trying to actually measure the voltage across the wires will be very difficult for most people, which is why we strongly suggest using a thermocouple interface chip. The nicest one we've seen so far is the MAX6675 (and its replacement version called the MAX31855) which unfortunately is only available in SOIC package. While not too difficult to solder, [we nevertheless have in the shop a breakout board that is ready to go](http://www.adafruit.com/products/269 "Link: http://www.adafruit.com/products/269") .
First thing to determine is which wire is which. As you recall, thermocouples are made by welding together two wires, the chip reads the voltage difference between the two. One is the negative (for K-type its made of Alumel) and the other positive (ditto, Chromel). Luckily the wires are color coded, and almost all of the time you'll find the Alumel is red and the Chromel is yellow.
Connect the leads as required to your amplifier:
Danger:
Danger:

- [Previous Page](https://learn.adafruit.com/thermocouple/overview.md)
- [Next Page](https://learn.adafruit.com/thermocouple/arduino-code.md)
## Primary Products
### Adafruit Universal Thermocouple Amplifier MAX31856 Breakout
[Adafruit Universal Thermocouple Amplifier MAX31856 Breakout](https://www.adafruit.com/product/3263)
Thermocouples are very sensitive, requiring a good amplifier with a cold-compensation reference, as well as calculations to handle any non-linearities. For a long time we've [suggested our MAX31855K breakout, which works great but is only for...](https://www.adafruit.com/products/269)
Out of Stock
[Buy Now](https://www.adafruit.com/product/3263)
[Related Guides to the Product](https://learn.adafruit.com/products/3263/guides)
## Featured Products
### Thermocouple Amplifier MAX31855 breakout board (MAX6675 upgrade)
[Thermocouple Amplifier MAX31855 breakout board (MAX6675 upgrade)](https://www.adafruit.com/product/269)
Thermocouples are very sensitive, requiring a good amplifier with a cold-compensation reference. The MAX31855K does everything for you, and can be easily interfaced with any microcontroller, even one without an analog input. This breakout board has the chip itself, a 3.3V regulator with 10uF...
In Stock
[Buy Now](https://www.adafruit.com/product/269)
[Related Guides to the Product](https://learn.adafruit.com/products/269/guides)
### Thermocouple Type-K Glass Braid Insulated
[Thermocouple Type-K Glass Braid Insulated](https://www.adafruit.com/product/270)
Thermocouples are best used for measuring temperatures that can go above 100 °C. This is a bare wires bead-probe which can measure air or surface temperatures. Most inexpensive thermocouples have a vinyl covering which can melt at around 200 °C, this one uses a fiberglass braid so it...
Out of Stock
[Buy Now](https://www.adafruit.com/product/270)
[Related Guides to the Product](https://learn.adafruit.com/products/270/guides)
### Thermocouple Type-K Glass Braid Insulated Stainless Steel Tip
[Thermocouple Type-K Glass Braid Insulated Stainless Steel Tip](https://www.adafruit.com/product/3245)
Thermocouples are best used for measuring temperatures that can go above 100°C. This is a bare wires stainless-steel tip probe which can measure air or surface temperatures. Most inexpensive thermocouples have a vinyl covering which can melt at around 200°C, this one uses a fiberglass...
In Stock
[Buy Now](https://www.adafruit.com/product/3245)
[Related Guides to the Product](https://learn.adafruit.com/products/3245/guides)
## Related Guides
- [Adafruit FT232H With SPI & I2C Devices](https://learn.adafruit.com/adafruit-ft232h-with-spi-and-i2c-libraries.md)
- [MicroPython Hardware: SPI Devices](https://learn.adafruit.com/micropython-hardware-spi-devices.md)
- [Connecting the MAX31855 Thermocouple Amplifier breakout to an Electric Imp](https://learn.adafruit.com/connecting-the-max31855-thermocouple-amplifier-breakout-to-an-electric-imp.md)
- [Google Docs Sensor Logging From Your PC](https://learn.adafruit.com/gdocs-sensor-logging-from-your-pc.md)
- [CircuitPython Libraries on Linux and the 96Boards DragonBoard 410c](https://learn.adafruit.com/circuitpython-libraries-on-linux-and-the-96boards-dragonboard-410c.md)
- [MAX31855 Thermocouple Sensor Python Library](https://learn.adafruit.com/max31855-thermocouple-python-library.md)
- [Adding a Single Board Computer to Blinka](https://learn.adafruit.com/adding-a-single-board-computer-to-blinka.md)
- [CircuitPython I2C and SPI Under the Hood](https://learn.adafruit.com/circuitpython-basics-i2c-and-spi.md)
- [ Analog IC Insights On-the-Go by Maxim Integrated](https://learn.adafruit.com/maxim-app.md)
- [Adafruit 1-Wire Thermocouple Amplifier - MAX31850K](https://learn.adafruit.com/adafruit-1-wire-thermocouple-amplifier-max31850k.md)
- [Calibrating Sensors](https://learn.adafruit.com/calibrating-sensors.md)
- [Adafruit TE MS8607 PHT Sensor](https://learn.adafruit.com/adafruit-te-ms8607-pht-sensor.md)
- [Adafruit Sensirion SHT40, SHT41 & SHT45 Temperature & Humidity Sensors](https://learn.adafruit.com/adafruit-sht40-temperature-humidity-sensor.md)
- [Adafruit SHT4x Trinkey](https://learn.adafruit.com/adafruit-sht4x-trinkey.md)
- [Adafruit's Raspberry Pi Lesson 11. DS18B20 Temperature Sensing](https://learn.adafruit.com/adafruits-raspberry-pi-lesson-11-ds18b20-temperature-sensing.md)
---
# Source: https://learn.adafruit.com/usb-next-keyboard-with-arduino-micro/wiring-case.md
# USB NeXT Keyboard with an Arduino Micro
## Wiring & Case
The wiring for this project is actually really easy - we used an Arduino micro to keep the size small. We just have to power the keyboard and connect the two data pins.
Watch out here, because the DIN wire colors do not correspond to classical wire coloring!
1. **Brown - VCC +5**
2. **Black - data to KBD**
3. Green - data from KBD
4. Yellow - power SW **(unused)**
5. **Red - Ground**
Solder the Brown wire to the +5V on the micro, the Red wire goes to the Ground pin. Then connect The green and black wires to two digital pins (I used 2 and 3)

Using this mint tin made for a nice case. A little dremel work, and the DIN connector would fit nicely at one end, the wiring inside, and the microUSB connector on the other end.


Use two small screws to attach the DIN connector. After the header pins have been cut off the Micro, it will fit nicely in the tin, be sure to use some thick foam tape to both hold down the board and keep the pins from shorting. A slot in the tin makes it easy to plug in a micro USB cable


- [Previous Page](https://learn.adafruit.com/usb-next-keyboard-with-arduino-micro/research.md)
- [Next Page](https://learn.adafruit.com/usb-next-keyboard-with-arduino-micro/code.md)
## Featured Products
### Arduino Micro without Headers - 5V 16MHz ATmega32u4 - Assembled
[Arduino Micro without Headers - 5V 16MHz ATmega32u4 - Assembled](https://www.adafruit.com/product/1315)
Squee! It's the cutest, tiniest little Arduino yet! The Arduino Micro packs all of the power of the Arduino Leonardo in a 1.9" x 0.7" (48mm x 18mm) size. Although it may look like a stick of gum, its actually a USB-native 8-bit microcontroller, with 32K of flash, and 2.5K of RAM....
No Longer Stocked
[Buy Now](https://www.adafruit.com/product/1315)
[Related Guides to the Product](https://learn.adafruit.com/products/1315/guides)
### Arduino Micro with Headers - 5V 16MHz - (ATmega32u4 - assembled)
[Arduino Micro with Headers - 5V 16MHz - (ATmega32u4 - assembled)](https://www.adafruit.com/product/1086)
_Squee_! It's the cutest, tiniest little Arduino yet! The Arduino Micro packs all of the power of the Arduino Leonardo in a 1.9" x 0.7" (48mm x 18mm) size. Although it may look like a stick of gum, its actually a USB-native 8-bit microcontroller, with 32K of flash, and...
No Longer Stocked
[Buy Now](https://www.adafruit.com/product/1086)
[Related Guides to the Product](https://learn.adafruit.com/products/1086/guides)
### Altoids Gum sized tin
[Altoids Gum sized tin](https://www.adafruit.com/product/16)
Ever since Altoids discontinued the Gum version, its been hard to get tins. So we went and got a whole mess of them custom made! These tins are exactly the same shape and size as the old Altoids gum tins but they are blank and we got the bottom flattened instead of rounded (so it fits things...
In Stock
[Buy Now](https://www.adafruit.com/product/16)
[Related Guides to the Product](https://learn.adafruit.com/products/16/guides)
### USB cable - USB A to Micro-B
[USB cable - USB A to Micro-B](https://www.adafruit.com/product/592)
This here is your standard A to micro-B USB cable, for USB 1.1 or 2.0. Perfect for connecting a PC to your Metro, Feather, Raspberry Pi or other dev-board or microcontroller
Approximately 3 feet / 1 meter long
In Stock
[Buy Now](https://www.adafruit.com/product/592)
[Related Guides to the Product](https://learn.adafruit.com/products/592/guides)
## Related Guides
- [Adafruit PCA9546 4-Channel I2C Multiplexer](https://learn.adafruit.com/adafruit-pca9546-4-channel-i2c-multiplexer.md)
- [Blinking an LED with the Zephyr RTOS](https://learn.adafruit.com/blinking-led-with-zephyr-rtos.md)
- [Qualia S3 Fireplace](https://learn.adafruit.com/qualia-s3-fireplace.md)
- [Arduino GPS Clock](https://learn.adafruit.com/arduino-clock.md)
- [Adafruit 4-Channel ADC Breakouts](https://learn.adafruit.com/adafruit-4-channel-adc-breakouts.md)
- [Reverse Geocache Box](https://learn.adafruit.com/reverse-geocache-engagement-box.md)
- [ESPHole Ad Blocker](https://learn.adafruit.com/esphole-ad-blocker.md)
- [Adafruit QT Py and NeoPixel LEDs](https://learn.adafruit.com/qt-py-and-neopixel-leds.md)
- [The Pixif](https://learn.adafruit.com/the-pixif.md)
- [Quickstart IoT - Raspberry Pi Pico RP2040 with WiFi ](https://learn.adafruit.com/quickstart-rp2040-pico-with-wifi-and-circuitpython.md)
- [Atmega32u4 Breakout](https://learn.adafruit.com/atmega32u4-breakout.md)
- [Introducing Adafruit ItsyBitsy M4](https://learn.adafruit.com/introducing-adafruit-itsybitsy-m4.md)
- [Adafruit Metro M7 with microSD](https://learn.adafruit.com/adafruit-metro-m7-microsd.md)
- [Adafruit Infrared IR Remote Receiver](https://learn.adafruit.com/adafruit-infrared-ir-remote-receiver.md)
- [Adafruit Feather M4 CAN Express](https://learn.adafruit.com/adafruit-feather-m4-can-express.md)
---
# Source: https://learn.adafruit.com/nokia-5110-3310-monochrome-lcd/wiring-fewer-pins.md
# Nokia 5110/3310 Monochrome LCD
## Wiring (fewer pins)

You can save some pins by connecting the CS pin to **ground** (this means you cant reuse the LCD's pins between screen updates but maybe thats OK. You can also connect the **RST** pin to the Arduino **reset** so that it will reset the screen automatically.
- [Previous Page](https://learn.adafruit.com/nokia-5110-3310-monochrome-lcd/graphics-library.md)
- [Next Page](https://learn.adafruit.com/nokia-5110-3310-monochrome-lcd/circuitpython-quickstart.md)
## Featured Products
### Nokia 5110/3310 monochrome LCD + extras
[Nokia 5110/3310 monochrome LCD + extras](https://www.adafruit.com/product/338)
These displays were used in old Nokia 5110/3310 cell phones (before the smart-phone fad turned every cell phone into a TV). It's a 84x48 pixel monochrome LCD display. These displays are small, only about 1.5" diagonal, but very readable and come with a white backlight. This...
No Longer Stocked
[Buy Now](https://www.adafruit.com/product/338)
[Related Guides to the Product](https://learn.adafruit.com/products/338/guides)
### Adafruit METRO 328 Fully Assembled - Arduino IDE compatible
[Adafruit METRO 328 Fully Assembled - Arduino IDE compatible](https://www.adafruit.com/product/50)
We sure love the ATmega328 here at Adafruit, and we use them _a lot_ for our own projects. The processor has plenty of GPIO, Analog inputs, hardware UART SPI and I2C, timers and PWM galore - just enough for most simple projects. When we need to go small, we use a
Out of Stock
[Buy Now](https://www.adafruit.com/product/50)
[Related Guides to the Product](https://learn.adafruit.com/products/50/guides)
### Half Sized Premium Breadboard - 400 Tie Points
[Half Sized Premium Breadboard - 400 Tie Points](https://www.adafruit.com/product/64)
This is a cute, half-size breadboard with 400 tie points, good for small projects. It's 3.25" x 2.2" / 8.3cm x 5.5cm with a standard double-strip in the middle and two power rails on both sides. You can pull the power rails off easily to make the breadboard as...
In Stock
[Buy Now](https://www.adafruit.com/product/64)
[Related Guides to the Product](https://learn.adafruit.com/products/64/guides)
### Breadboarding wire bundle
[Breadboarding wire bundle](https://www.adafruit.com/product/153)
75 flexible stranded core wires with stiff ends molded on in red, orange, yellow, green, blue, brown, black and white. These are a major improvement over the "box of bent wires" that are sometimes sold with breadboards, and faster than stripping your own solid core wires. Makes...
In Stock
[Buy Now](https://www.adafruit.com/product/153)
[Related Guides to the Product](https://learn.adafruit.com/products/153/guides)
## Related Guides
- [Babel Fish](https://learn.adafruit.com/babel-fish.md)
- [Adafruit PN532 RFID/NFC Breakout and Shield](https://learn.adafruit.com/adafruit-pn532-rfid-nfc.md)
- [Program an AVR or Arduino Using Raspberry Pi GPIO](https://learn.adafruit.com/program-an-avr-or-arduino-using-raspberry-pi-gpio-pins.md)
- [Deciphering Strange Arduino Code](https://learn.adafruit.com/deciphering-strange-arduino-code.md)
- [Arduino Lesson 1. Blink](https://learn.adafruit.com/adafruit-arduino-lesson-1-blink.md)
- [36mm LED Pixels](https://learn.adafruit.com/36mm-led-pixels.md)
- [Analog Feedback Servos](https://learn.adafruit.com/analog-feedback-servos.md)
- [Using NeoPixels and Servos Together](https://learn.adafruit.com/neopixels-and-servos.md)
- [RePaper eInk Development Board](https://learn.adafruit.com/repaper-eink-development-board.md)
- [Adafruit Proto Shield for Arduino](https://learn.adafruit.com/adafruit-proto-shield-arduino.md)
- [Animating Multiple LED Backpacks](https://learn.adafruit.com/animating-multiple-led-backpacks.md)
- [Create an Internet of Things Dashboard with Adafruit IO](https://learn.adafruit.com/create-an-internet-of-things-dashboard-with-adafruit-dot-io.md)
- [Arduino Lesson 16. Stepper Motors](https://learn.adafruit.com/adafruit-arduino-lesson-16-stepper-motors.md)
- [Metal Inlay Capacitive Touch Buttons](https://learn.adafruit.com/metal-inlay-capacitive-touch-buttons.md)
- [How to Find Hidden COM Ports](https://learn.adafruit.com/how-to-find-hidden-com-ports.md)
---
# Source: https://learn.adafruit.com/adafruit-optical-fingerprint-sensor/wiring-for-use-with-arduino.md
# Adafruit Optical Fingerprint Sensor
## Wiring for use with Arduino
Once you've tested the sensor, you can now use it within a sketch to verify a fingerprint. We'll need to rewire the sensor. Disconnect the green and white wires and plug the green wire into digital **2** and the white wire to digital **3**. (For ESP8266 use **4** & **5** , for devices with Hardware UART use **0** & **1** )
Danger:
If your [fingerprint sensor has individual socket wires (its this one)](https://www.adafruit.com/product/4690) then use the following wire setup:
- Red Wire to 3.3V
- Yellow wire is Serial TX
- White wire is Serial RX
- Black wire is ground


If your cable has a single slim connector on the end and has different color wires:
- The first wire from the left should be the black wire ground
- then the two data pins: Serial RX is the white wire
- Serial TX is the green wire
- Then the red power wire (3 or 5V)
You'll have to cut, strip and solder the wires.


If your sensor is an older one and has all the same-color wires, The first wire from the left is ground, then the two data pins, then power. You'll have to cut, strip and solder the wires.
RX is the same as the White wire
TX is the same as the Green wire

On the "rugged" fingerprint sensor:
- Red wire is connected to 3.3V for power
- Black wire is connected to ground
- Yellow to Microcontroller RX (data _in_ to microcontroller)
- Green to Microcontroller TX (data _out_ from microcontroller)

On the 'slim' fingerprint sensor
- Black to GND
- Yellow to Microcontroller TX (data _out_ from microcontroller)
- Green to Microcontroller RX (data _in_ from microcontroller)
- Red to 3.3V VIN

# Arduino UNO & Compatible Wiring
This example sketch uses pins **2** and **3** for software serial (on ATmega328P type boards by default) - Not all boards support Software Serial on all pins so check board documentation! For example on ESP8266 we used **4** & **5**
You can power the sensor from **3.3V** or **5V** - some sensors require 3.3V, see above!
Warning:

# Hardware Serial Wiring
If you have a device with hardware serial, you should use that instead. Often this is pins #0 and #1

Next, you'll need to install [the Adafruit Fingerprint sensor library (also available from github)](https://github.com/adafruit/Adafruit-Fingerprint-Sensor-Library).
Open up the Arduino Library Manager:

Type in **Fingerprint** until you see the **Adafruit Fingerprint library** show up!

Click Install! That's it. Now you should be able to select the **File→Examples→Adafruit\_Fingerprint→fingerprint** example sketch.
# Soft & Hard Serial
By default the sketch uses software serial (Arduino UNO & compatibles). If you are using a device with Hardware Serial, e.g does not have a USB-Serial converter chip, use that instead! Usually those are on pins 0 & 1
```
// On Leonardo/Micro or others with hardware serial, use those! #0 is green wire, #1 is white
// uncomment this line:
#define mySerial Serial1
// For UNO and others without hardware serial, we must use software serial...
// pin #2 is IN from sensor (GREEN wire)
// pin #3 is OUT from arduino (WHITE wire)
// comment these two lines if using hardware serial
//#include <SoftwareSerial.h>
//SoftwareSerial mySerial(2, 3);
```
If necessary, uncomment/comment lines for hardware serial support
# Upload
Upload it to your Arduino as usual. Open up the serial monitor at 9600 baud and when prompted place your finger against the sensor that was already enrolled.
You should see the following:

Info:
The 'confidence' is a score number (from 0 to 255) that indicates how good of a match the print is, higher is better. Note that if it matches at all, that means the sensor is pretty confident so you don't have to pay attention to the confidence number unless it makes sense for high security applications.
Of course you have to have **enrolled** a fingerprint first! If you did this using the Windows program, that's good to go. If you have not yet, you should at least have gotten a `Found fingerprint sensor!` printout. You can go ahead to the next step to enroll fingerprints.
If you get `Did not find fingerprint sensor :(` check your wiring, maybe swap the RX and TX wire as that's a common issue
If you want to have a more detailed report, change the **loop()** to run **getFingerprintID()** instead of **getFingerprintIDez()** - that will give you a detailed report of exactly what the sensor is detecting at each point of the search process.
- [Previous Page](https://learn.adafruit.com/adafruit-optical-fingerprint-sensor/searching-with-the-software.md)
- [Next Page](https://learn.adafruit.com/adafruit-optical-fingerprint-sensor/enrolling-with-arduino.md)
## Featured Products
### Fingerprint sensor
[Fingerprint sensor](https://www.adafruit.com/product/751)
Secure your project with biometrics - this all-in-one optical fingerprint sensor will make adding fingerprint detection and verification super simple. These modules are typically used in safes - there's a high powered DSP chip that does the image rendering, calculation, feature-finding and...
No Longer Stocked
[Buy Now](https://www.adafruit.com/product/751)
[Related Guides to the Product](https://learn.adafruit.com/products/751/guides)
### Rugged Panel Mount Fingerprint Sensor with Bi-Color LED Ring
[Rugged Panel Mount Fingerprint Sensor with Bi-Color LED Ring](https://www.adafruit.com/product/4651)
Secure your project with biometrics - this all-in-one optical fingerprint sensor will make adding fingerprint detection and verification super simple. It even has an LED ring built around the detection pad, which can be set to red, blue or purple (as well as some fading/blinking effects) for a...
In Stock
[Buy Now](https://www.adafruit.com/product/4651)
[Related Guides to the Product](https://learn.adafruit.com/products/4651/guides)
### Adafruit METRO 328 Fully Assembled - Arduino IDE compatible
[Adafruit METRO 328 Fully Assembled - Arduino IDE compatible](https://www.adafruit.com/product/50)
We sure love the ATmega328 here at Adafruit, and we use them _a lot_ for our own projects. The processor has plenty of GPIO, Analog inputs, hardware UART SPI and I2C, timers and PWM galore - just enough for most simple projects. When we need to go small, we use a
Out of Stock
[Buy Now](https://www.adafruit.com/product/50)
[Related Guides to the Product](https://learn.adafruit.com/products/50/guides)
### Breadboarding wire bundle
[Breadboarding wire bundle](https://www.adafruit.com/product/153)
75 flexible stranded core wires with stiff ends molded on in red, orange, yellow, green, blue, brown, black and white. These are a major improvement over the "box of bent wires" that are sometimes sold with breadboards, and faster than stripping your own solid core wires. Makes...
In Stock
[Buy Now](https://www.adafruit.com/product/153)
[Related Guides to the Product](https://learn.adafruit.com/products/153/guides)
## Related Guides
- [A REST API for Arduino & the CC3000 WiFi Chip](https://learn.adafruit.com/a-rest-api-for-arduino-and-the-cc3000-wifi-chip.md)
- [Analog Feedback Servos](https://learn.adafruit.com/analog-feedback-servos.md)
- [Adafruit 4-Channel ADC Breakouts](https://learn.adafruit.com/adafruit-4-channel-adc-breakouts.md)
- [Collin's Lab: MIDI](https://learn.adafruit.com/collins-lab-midi.md)
- [Adafruit PN532 RFID/NFC Breakout and Shield](https://learn.adafruit.com/adafruit-pn532-rfid-nfc.md)
- [Adafruit AirLift Shield - ESP32 WiFi Co-Processor](https://learn.adafruit.com/adafruit-airlift-shield-esp32-wifi-co-processor.md)
- [8BitBox](https://learn.adafruit.com/8bitbox.md)
- [Geofencing with the FONA 808 & Adafruit IO](https://learn.adafruit.com/geofencing-with-the-fona-808-and-adafruit-io.md)
- [1,500 NeoPixel LED Curtain with Raspberry Pi and Fadecandy](https://learn.adafruit.com/1500-neopixel-led-curtain-with-raspberry-pi-fadecandy.md)
- [Photocells](https://learn.adafruit.com/photocells.md)
- [Automatic Monitor Color Temperature Adjustment](https://learn.adafruit.com/automatic-monitor-color-temperature-adjustment.md)
- [Arduino Lesson 15. DC Motor Reversing](https://learn.adafruit.com/adafruit-arduino-lesson-15-dc-motor-reversing.md)
- [Adafruit 1.14" 240x135 Color TFT Breakout LCD Display](https://learn.adafruit.com/adafruit-1-14-240x135-color-tft-breakout.md)
- [How to Find Hidden COM Ports](https://learn.adafruit.com/how-to-find-hidden-com-ports.md)
- [Low Power Coin Cell Voltage Logger](https://learn.adafruit.com/low-power-coin-cell-voltage-logger.md)
---
# Source: https://learn.adafruit.com/bmp085/wiring-the-bmp085.md
# Bosch BMP085 Breakout Board
## Wiring the BMP
Since the BMP085 is a i2c sensor, its very easy to wire up. We'll be using an Arduino as an example but any microcontroller with i2c can be used. To start using with a solderless breadboard, we need to solder the header pins onto the breakout board.
We suggest plugging the header into a breadboard so the long pins are in the breadboard, and then laying the BMP085 breakout board on top. The photos show a v1 BMP085 sensor but this part is identical for both versions!

Then solder all of the pins!


That's it! Now we can wire the board up to the microcontroller.
Connect the **VCC** pin to a **3.3V** power source. The V1 of the sensor breakout cannot be used with anything higher than 3.3V so don't use a 5V supply! V2 of the sensor board has a 3.3V regulator so you can connect it to either 3.3V or 5V if you do not have 3V available.
Connect **GND** to the ground pin.
Connect the **i2c SCL clock** pin to your i2c clock pin. On the classic Arduino Uno/Duemilanove/Diecimila/etc this is **Analog pin #5**
Connect the **i2c SDA data** pin to your i2c data pin. On the classic Arduino Uno/Duemilanove/Diecimila/etc this is **Analog pin #4**
Unfortunately, the i2c lines on most microcontrollers are fixed so you're going to have to stick with those pins.
You don't need to connect the **XCLR** (reset) or **EOC** (end-of-conversion) pins. If you need to speed up your conversion time, you can use the EOC as a indicator - in our code we just hang out and wait the maximum time possible.
- [Previous Page](https://learn.adafruit.com/bmp085/overview.md)
- [Next Page](https://learn.adafruit.com/bmp085/using-the-bmp085-api-v2.md)
## Featured Products
### BMP180 Barometric Pressure/Temperature/Altitude Sensor- 5V ready
[BMP180 Barometric Pressure/Temperature/Altitude Sensor- 5V ready](https://www.adafruit.com/product/1603)
This precision sensor from Bosch is the best low-cost sensing solution for measuring barometric pressure and temperature. Because pressure changes with altitude you can also use it as an altimeter! The sensor is soldered onto a PCB with a 3.3V regulator, I2C level shifter and pull-up resistors...
No Longer Stocked
[Buy Now](https://www.adafruit.com/product/1603)
[Related Guides to the Product](https://learn.adafruit.com/products/1603/guides)
### BMP085 Barometric Pressure/Temperature/Altitude Sensor- 5V ready
[BMP085 Barometric Pressure/Temperature/Altitude Sensor- 5V ready](https://www.adafruit.com/product/391)
This precision sensor from Bosch is the best low-cost sensing solution for measuring barometric pressure and temperature. Because pressure changes with altitude you can also use it as an altimeter! The sensor is soldered onto a PCB with a 3.3V regulator, I2C level shifter and pull-up resistors...
No Longer Stocked
[Buy Now](https://www.adafruit.com/product/391)
[Related Guides to the Product](https://learn.adafruit.com/products/391/guides)
### Adafruit 10-DOF IMU Breakout - L3GD20H + LSM303 + BMP180
[Adafruit 10-DOF IMU Breakout - L3GD20H + LSM303 + BMP180](https://www.adafruit.com/product/1604)
This inertial-measurement-unit combines 3 of the best quality sensors available on the market to give you 11 axes of data: 3 axes of accelerometer data, 3 axes gyroscopic, 3 axes magnetic (compass), barometric pressure/altitude and temperature. We tested many different 'combination'...
No Longer Stocked
[Buy Now](https://www.adafruit.com/product/1604)
[Related Guides to the Product](https://learn.adafruit.com/products/1604/guides)
## Related Guides
- [Adafruit NeoKey 5x6 Ortho Snap-Apart](https://learn.adafruit.com/adafruit-neokey-5x6-ortho-snap-apart.md)
- [No-Code DS18B20 Temperature Sensor with WipperSnapper](https://learn.adafruit.com/using-ds18b20-temperature-sensor-with-wippersnapper.md)
- [Storage humidity and temperature monitor](https://learn.adafruit.com/storage-humidity-and-temperature-monitor.md)
- [4x4 Rotary Encoder MIDI Messenger](https://learn.adafruit.com/4x4-rotary-encoder-midi-messenger.md)
- [Adafruit STEMMA Soil Sensor - I2C Capacitive Moisture Sensor](https://learn.adafruit.com/adafruit-stemma-soil-sensor-i2c-capacitive-moisture-sensor.md)
- [CircuitPython BLE Multi-Temperature Monitoring](https://learn.adafruit.com/circuitpython-multi-temperature-ble-monitoring.md)
- [Adafruit CAN Pal](https://learn.adafruit.com/adafruit-can-pal.md)
- [Huzzah Weather Display](https://learn.adafruit.com/huzzah-weather-display.md)
- [Adafruit AHT20 Temperature & Humidity Sensor](https://learn.adafruit.com/adafruit-aht20.md)
- [Adafruit LPS33/LPS35 Water Resistant Pressure Sensor](https://learn.adafruit.com/lps35hw-water-resistant-pressure-sensor.md)
- [DHT Humidity Sensing on Raspberry Pi or Beaglebone Black with GDocs Logging](https://learn.adafruit.com/dht-humidity-sensing-on-raspberry-pi-with-gdocs-logging.md)
- [Adafruit STEMMA Non-Latching Mini Relay](https://learn.adafruit.com/adafruit-stemma-non-latching-mini-relay.md)
- [IoT Temperature Logger with Analog Devices ADT7410, Feather and Adafruit IO](https://learn.adafruit.com/iot-temperature-logger-with-arduino-and-adafruit-io.md)
- [Adafruit OV5640 Camera Breakouts](https://learn.adafruit.com/adafruit-ov5640-camera-breakout.md)
- [Adafruit SI1145 Breakout Board - UV index / IR / Visible Sensor](https://learn.adafruit.com/adafruit-si1145-breakout-board-uv-ir-visible-sensor.md)
---
# Source: https://learn.adafruit.com/ttl-serial-camera/wiring-the-camera.md
# TTL Serial Camera
## Wiring the Camera
The module comes without any connector so you'll need to solder wires into the connection pads. The good news is the pads are not too close togehter (about 2mm) and you can use any stranded or solid-core wire.
If you aren't planning to use the video output abilities, you can use 4 wires. We will use red for the +5V pin, black for the Ground pin, white for the RX pin (data **_into_** the module) and green for the TX pin (data from the module)


If you'd like to get NTSC video out to connect to a TV or monitor, solder another black wire to the second Ground pin, and a yellow wire to the CVBS pin.


If you have the weatherproof version of this camera, it comes prewired with the following:
- Red is connected to +5V in
- Black is connected to Ground
- **Green is RX**
- **White is TX**
- Yellow is NTSC Video signal out
- Brown is NTSC Video ground
- [Previous Page](https://learn.adafruit.com/ttl-serial-camera/overview.md)
- [Next Page](https://learn.adafruit.com/ttl-serial-camera/testing-the-camera.md)
## Featured Products
### TTL Serial JPEG Camera with NTSC Video
[TTL Serial JPEG Camera with NTSC Video](https://www.adafruit.com/product/397)
This camera module can be a pretty neat project addition. It was designed to be used in security systems and does two main things - it outputs NTSC video and can take snapshots of that video (in color) and transmit them over the TTL serial link. You can snap pictures at 640x480, 320x240 or...
In Stock
[Buy Now](https://www.adafruit.com/product/397)
[Related Guides to the Product](https://learn.adafruit.com/products/397/guides)
### Miniature TTL Serial JPEG Camera with NTSC Video
[Miniature TTL Serial JPEG Camera with NTSC Video](https://www.adafruit.com/product/1386)
This tiny little camera module can be a pretty neat project addition, it is just like [our other JPEG cameras (same chipset/software)](http://www.adafruit.com/category/35_68), but much smaller and slimmer. It was designed to be used in security systems and does two main things - it...
In Stock
[Buy Now](https://www.adafruit.com/product/1386)
[Related Guides to the Product](https://learn.adafruit.com/products/1386/guides)
### Adafruit METRO 328 Fully Assembled - Arduino IDE compatible
[Adafruit METRO 328 Fully Assembled - Arduino IDE compatible](https://www.adafruit.com/product/50)
We sure love the ATmega328 here at Adafruit, and we use them _a lot_ for our own projects. The processor has plenty of GPIO, Analog inputs, hardware UART SPI and I2C, timers and PWM galore - just enough for most simple projects. When we need to go small, we use a
Out of Stock
[Buy Now](https://www.adafruit.com/product/50)
[Related Guides to the Product](https://learn.adafruit.com/products/50/guides)
### Weatherproof TTL Serial JPEG Camera with NTSC Video and IR LEDs
[Weatherproof TTL Serial JPEG Camera with NTSC Video and IR LEDs](https://www.adafruit.com/product/613)
This weatherproof camera module is [a classy upgrade to the basic camera module we already stock in the shop](http://www.adafruit.com/products/397). The main differences is that this one comes in a nice metal case with a mounting hinge, a 1 meter long cable with the TTL & NTSC...
In Stock
[Buy Now](https://www.adafruit.com/product/613)
[Related Guides to the Product](https://learn.adafruit.com/products/613/guides)
### MicroSD card breakout board+
[MicroSD card breakout board+](https://www.adafruit.com/product/254)
Not just a simple breakout board, this microSD adapter goes the extra mile - designed for ease of use.
- Onboard 5v-\>3v regulator provides 150mA for power-hungry cards
- 3v level shifting means you can use this with ease on either 3v or 5v systems
- Uses a proper level...
Out of Stock
[Buy Now](https://www.adafruit.com/product/254)
[Related Guides to the Product](https://learn.adafruit.com/products/254/guides)
### Half Sized Premium Breadboard - 400 Tie Points
[Half Sized Premium Breadboard - 400 Tie Points](https://www.adafruit.com/product/64)
This is a cute, half-size breadboard with 400 tie points, good for small projects. It's 3.25" x 2.2" / 8.3cm x 5.5cm with a standard double-strip in the middle and two power rails on both sides. You can pull the power rails off easily to make the breadboard as...
In Stock
[Buy Now](https://www.adafruit.com/product/64)
[Related Guides to the Product](https://learn.adafruit.com/products/64/guides)
### SD/MicroSD Memory Card (8 GB SDHC)
[SD/MicroSD Memory Card (8 GB SDHC)](https://www.adafruit.com/product/1294)
Add mega-storage in a jiffy using this 8 GB class 4 micro-SD card. It comes with a SD adapter so you can use it with any of our shields or adapters. Preformatted to FAT so it works out of the box with our projects. Tested and works great with our
In Stock
[Buy Now](https://www.adafruit.com/product/1294)
[Related Guides to the Product](https://learn.adafruit.com/products/1294/guides)
## Related Guides
- [Making Adabot: Part 2](https://learn.adafruit.com/making-adabot-part-2.md)
- [3D Printed Animatronic Robot Head](https://learn.adafruit.com/3d-printed-animatronic-robot-head.md)
- [Arduino Lesson 14. Servo Motors](https://learn.adafruit.com/adafruit-arduino-lesson-14-servo-motors.md)
- [Arduino Lesson 15. DC Motor Reversing](https://learn.adafruit.com/adafruit-arduino-lesson-15-dc-motor-reversing.md)
- [Programming Arduino with Android and Windows Tablets](https://learn.adafruit.com/programming-arduino-with-android-and-windows-tablets.md)
- [LSM303 Accelerometer + Compass Breakout](https://learn.adafruit.com/lsm303-accelerometer-slash-compass-breakout.md)
- [Adafruit VS1053 MP3/AAC/Ogg/MIDI/WAV Codec Breakout Tutorial](https://learn.adafruit.com/adafruit-vs1053-mp3-aac-ogg-midi-wav-play-and-record-codec-tutorial.md)
- [Naughty or Nice Machine](https://learn.adafruit.com/naughty-or-nice-machine.md)
- [Adafruit Ultimate GPS Logger Shield](https://learn.adafruit.com/adafruit-ultimate-gps-logger-shield.md)
- [Arduino "Hunt The Wumpus"](https://learn.adafruit.com/arduino-hunt-the-wumpus.md)
- [Track Your Treats: Halloween Candy GPS Tracker](https://learn.adafruit.com/track-your-treats-halloween-candy-gps-tracker.md)
- [WiFi Weather Station](https://learn.adafruit.com/wifi-weather-station-arduino-cc3000.md)
- [Bluetooth Controlled Motorized Camera Slider](https://learn.adafruit.com/bluetooth-motorized-camera-slider.md)
- [TMP36 Temperature Sensor](https://learn.adafruit.com/tmp36-temperature-sensor.md)
- [Babel Fish](https://learn.adafruit.com/babel-fish.md)
---
# Source: https://learn.adafruit.com/adding-a-real-time-clock-to-raspberry-pi/wiring-the-rtc.md
# Adding a Real Time Clock to Raspberry Pi
## Wiring the RTC
To keep costs low, the Raspberry Pi does not include a Real Time Clock module. Instead, users are expected to have it always connected to WiFi or Ethernet and keep time by checking the network. Since we want to include an external module, we'll have to wire one up.
We have three different RTC we suggest, PCF8523 is inexpensive, DS1307 is most common, and DS3231 is most precise. Any of them will do!
While the DS1307 is historically the most common, its not the best RTC chipset, we've found!
### Adafruit PiRTC - PCF8523 Real Time Clock for Raspberry Pi
[Adafruit PiRTC - PCF8523 Real Time Clock for Raspberry Pi](https://www.adafruit.com/product/3386)
This is a great battery-backed real time clock (RTC) that allows your Raspberry Pi project to keep track of time if the power is lost. Perfect for data-logging, clock-building, time-stamping, timers and alarms, etc. Equipped with **PCF8523** RTC, it works great with the...
In Stock
[Buy Now](https://www.adafruit.com/product/3386)
[Related Guides to the Product](https://learn.adafruit.com/products/3386/guides)

### Adafruit PCF8523 Real Time Clock Assembled Breakout Board
[Adafruit PCF8523 Real Time Clock Assembled Breakout Board](https://www.adafruit.com/product/3295)
This is a great battery-backed real time clock (RTC) that allows your microcontroller project to keep track of time even if it is reprogrammed, or if the power is lost. Perfect for datalogging, clock-building, time stamping, timers and alarms, etc. Equipped...
In Stock
[Buy Now](https://www.adafruit.com/product/3295)
[Related Guides to the Product](https://learn.adafruit.com/products/3295/guides)

### Adafruit DS1307 Real Time Clock Assembled Breakout Board
[Adafruit DS1307 Real Time Clock Assembled Breakout Board](https://www.adafruit.com/product/3296)
This is a great battery-backed real time clock (RTC) that allows your microcontroller project to keep track of time even if it is reprogrammed, or if the power is lost. Perfect for datalogging, clock-building, time stamping, timers and alarms, etc. The **DS1307** is the most...
In Stock
[Buy Now](https://www.adafruit.com/product/3296)
[Related Guides to the Product](https://learn.adafruit.com/products/3296/guides)

### Adafruit DS3231 Precision RTC Breakout
[Adafruit DS3231 Precision RTC Breakout](https://www.adafruit.com/product/3013)
The datasheet for the **DS3231** explains that this part is an "Extremely Accurate I²C-Integrated RTC/TCXO/Crystal". And, hey, it does exactly what it says on the tin! This **Real Time Clock (RTC)** is the most precise you can get in a small, low power...
In Stock
[Buy Now](https://www.adafruit.com/product/3013)
[Related Guides to the Product](https://learn.adafruit.com/products/3013/guides)

Don't forget to also install a CR1220 coin cell. In particular the DS1307 wont work at all without it and none of the RTCs will keep time when the Pi is off and no coin battery is in place.
### CR1220 12mm Diameter - 3V Lithium Coin Cell Battery
[CR1220 12mm Diameter - 3V Lithium Coin Cell Battery](https://www.adafruit.com/product/380)
These are the highest quality & capacity batteries, the same as shipped with the iCufflinks, iNecklace, Datalogging and GPS Shields, GPS HAT, etc. One battery per order (you'll want one battery per cufflink or pendant.)
Brand may vary but all battery brands are verified...
In Stock
[Buy Now](https://www.adafruit.com/product/380)
[Related Guides to the Product](https://learn.adafruit.com/products/380/guides)

Wiring is simple:
1. Connect **VCC** on the breakout board to the **5.0V** pin of the Pi (if using DS1307)
Connect **VCC** on the breakout board to the **3.3V** pin of the Pi (if using PCF8523 or DS3231)
2. Connect **GND** on the breakout board to the **GND** pin of the Pi
3. Connect **SDA** on the breakout board to the **SDA** pin of the Pi
4. Connect **SCL** on the breakout board to the **SCL** pin of the Pi

For the PiRTC, just place it on the header away from the USB ports.

- [Previous Page](https://learn.adafruit.com/adding-a-real-time-clock-to-raspberry-pi/overview.md)
- [Next Page](https://learn.adafruit.com/adding-a-real-time-clock-to-raspberry-pi/set-up-and-test-i2c.md)
## Featured Products
### Adafruit PiRTC - PCF8523 Real Time Clock for Raspberry Pi
[Adafruit PiRTC - PCF8523 Real Time Clock for Raspberry Pi](https://www.adafruit.com/product/3386)
This is a great battery-backed real time clock (RTC) that allows your Raspberry Pi project to keep track of time if the power is lost. Perfect for data-logging, clock-building, time-stamping, timers and alarms, etc. Equipped with **PCF8523** RTC, it works great with the...
In Stock
[Buy Now](https://www.adafruit.com/product/3386)
[Related Guides to the Product](https://learn.adafruit.com/products/3386/guides)
### Adafruit PiRTC - Precise DS3231 Real Time Clock for Raspberry Pi
[Adafruit PiRTC - Precise DS3231 Real Time Clock for Raspberry Pi](https://www.adafruit.com/product/4282)
This is the best battery-backed real time clock (RTC) you can get that allows your Raspberry Pi project to keep track of time if the power is lost. Perfect for data-logging, clock-building, NTP servers, time-stamping, timers and alarms, etc. Equipped with **a genuine DS3231** RTC,...
In Stock
[Buy Now](https://www.adafruit.com/product/4282)
[Related Guides to the Product](https://learn.adafruit.com/products/4282/guides)
### Adafruit PCF8523 Real Time Clock Assembled Breakout Board
[Adafruit PCF8523 Real Time Clock Assembled Breakout Board](https://www.adafruit.com/product/3295)
This is a great battery-backed real time clock (RTC) that allows your microcontroller project to keep track of time even if it is reprogrammed, or if the power is lost. Perfect for datalogging, clock-building, time stamping, timers and alarms, etc. Equipped...
In Stock
[Buy Now](https://www.adafruit.com/product/3295)
[Related Guides to the Product](https://learn.adafruit.com/products/3295/guides)
### Adafruit DS1307 Real Time Clock Assembled Breakout Board
[Adafruit DS1307 Real Time Clock Assembled Breakout Board](https://www.adafruit.com/product/3296)
This is a great battery-backed real time clock (RTC) that allows your microcontroller project to keep track of time even if it is reprogrammed, or if the power is lost. Perfect for datalogging, clock-building, time stamping, timers and alarms, etc. The **DS1307** is the most...
In Stock
[Buy Now](https://www.adafruit.com/product/3296)
[Related Guides to the Product](https://learn.adafruit.com/products/3296/guides)
### ChronoDot - Ultra-precise Real Time Clock
[ChronoDot - Ultra-precise Real Time Clock](https://www.adafruit.com/product/255)
The **ChronoDot V3** is the latest version of macetech’s popular ChronoDot line of products. Designed during the Great Chip Shortage, it uses the newly-released MAX31328 temperature-compensated real-time clock chip. However, it remains pin- and code-compatible with the older...
In Stock
[Buy Now](https://www.adafruit.com/product/255)
[Related Guides to the Product](https://learn.adafruit.com/products/255/guides)
### Adafruit DS3231 Precision RTC Breakout
[Adafruit DS3231 Precision RTC Breakout](https://www.adafruit.com/product/3013)
The datasheet for the **DS3231** explains that this part is an "Extremely Accurate I²C-Integrated RTC/TCXO/Crystal". And, hey, it does exactly what it says on the tin! This **Real Time Clock (RTC)** is the most precise you can get in a small, low power...
In Stock
[Buy Now](https://www.adafruit.com/product/3013)
[Related Guides to the Product](https://learn.adafruit.com/products/3013/guides)
### CR1220 12mm Diameter - 3V Lithium Coin Cell Battery
[CR1220 12mm Diameter - 3V Lithium Coin Cell Battery](https://www.adafruit.com/product/380)
These are the highest quality & capacity batteries, the same as shipped with the iCufflinks, iNecklace, Datalogging and GPS Shields, GPS HAT, etc. One battery per order (you'll want one battery per cufflink or pendant.)
Brand may vary but all battery brands are verified...
In Stock
[Buy Now](https://www.adafruit.com/product/380)
[Related Guides to the Product](https://learn.adafruit.com/products/380/guides)
### DS1307 Real Time Clock breakout board kit
[DS1307 Real Time Clock breakout board kit](https://www.adafruit.com/product/264)
**[We've upgraded this RTC breakout and made it even easier to use! Now available as a fully assembled board, it has the same components, chip, size, etc but you don't have to put it together. It's also less expensive! Check out...](https://www.adafruit.com/product/3296)**
No Longer Stocked
[Buy Now](https://www.adafruit.com/product/264)
[Related Guides to the Product](https://learn.adafruit.com/products/264/guides)
## Related Guides
- [I2C Addresses and Troublesome Chips](https://learn.adafruit.com/i2c-addresses.md)
- [DS1307 Real Time Clock Breakout Board Kit](https://learn.adafruit.com/ds1307-real-time-clock-breakout-board-kit.md)
- [NeoPixel 60 Ring Wall Clock](https://learn.adafruit.com/neopixel-60-ring-clock.md)
- [NeoMatrix 8x8 Word Clock](https://learn.adafruit.com/neomatrix-8x8-word-clock.md)
- [Adafruit DS3231 Precision RTC Breakout](https://learn.adafruit.com/adafruit-ds3231-precision-rtc-breakout.md)
- [MacroPad 2FA TOTP Authentication Friend](https://learn.adafruit.com/macropad-2fa-totp-authentication-friend.md)
- [Plotting Offline Data - JSONL to CSV files, filters and graphs](https://learn.adafruit.com/plotting-offline-data-jsonl-to-csv-files-filters-and-graphs.md)
- [Large Pi-based Thermometer and Clock](https://learn.adafruit.com/large-pi-based-thermometer-and-clock.md)
- [Blahaj Alarm and Lamp](https://learn.adafruit.com/blahaj-alarm.md)
- [Prop-Maker Feather Talking Adabot Clock](https://learn.adafruit.com/prop-maker-feather-talking-adabot-clock.md)
- [Playing sounds and using buttons with Raspberry Pi](https://learn.adafruit.com/playing-sounds-and-using-buttons-with-raspberry-pi.md)
- [Monitor PiCam and temperature on a PiTFT via adafruit.io](https://learn.adafruit.com/monitor-picam-and-temperature-on-a-pitft-via-adafruit-dot-io.md)
- [DotStar Pi Painter](https://learn.adafruit.com/dotstar-pi-painter.md)
- [NextBus transit clock for Raspberry Pi](https://learn.adafruit.com/nextbus-transit-clock-for-raspberry-pi.md)
- [Wood Case for Raspberry Pi 3](https://learn.adafruit.com/wood-case-for-raspberry-pi-3.md)
---
# Source: https://learn.adafruit.com/tsl2561/wiring-the-tsl2561-sensor.md
# TSL2561 Luminosity Sensor
## Wiring the TSL2561 Sensor
# Breakout Board Prep
This is an easy sensor to get started with. If you have the Breakout board version, it comes with a 6-pin header strip that you can use to plug the sensor into a breadboard or perfboard. Simply plug the header into a solderless breadboard with the long pins down and short pins up. Place the sensor on top so each pad has a header pin in it and solder the two together.

# Wiring up the sensor
Next we will connect it to our microcontroller. In this case we'll be using an Arduino but nearly any microcontroller can be used by adapting our code
- Connect the **VCC ** pin to a **3.3V** or **5v** power source (Whatever the logic level of your microcontroller is!)
- Connect **GND** to the ground pin.
- Connect the **i2c SCL clock ** pin to your i2c clock pin. On the classic Arduino Uno/Duemilanove/Diecimila/etc this is **Analog pin #5**
- Connect the **i2c SDA data ** pin to your i2c data pin. On the classic Arduino Uno/Duemilanove/Diecimila/etc this is **Analog pin #4**
The i2c lines on most microcontrollers are fixed so you're going to have to stick with those pins.

[uno + tsl2561 Fritzing diagram](https://cdn-learn.adafruit.com/assets/assets/000/036/110/original/unotsl2561.fzz?1475165730)
You don't need to connect the **ADDR** (i2c address change) or **INT** (interrupt output) pins.
The **ADDR** pin can be used if you have an i2c address conflict, to change the address. Connect it to ground to set the address to **0x29** , connect it to 3.3V (vcc) to se t the address to **0x49** or leave it floating (unconnected) to use address **0x39**.
The **INT ** pin is an ouput _from_ the sensor used when you have the sensor configured to signal when the light level has changed. We don't have that code written in this tutorial so you don't have to use it. If you do end up using it, use a 10K-100K pullup from **INT** to 3.3V (vcc)
- [Previous Page](https://learn.adafruit.com/tsl2561/overview.md)
- [Next Page](https://learn.adafruit.com/tsl2561/arduino-code.md)
## Featured Products
### Adafruit TSL2561 Digital Luminosity/Lux/Light Sensor Breakout
[Adafruit TSL2561 Digital Luminosity/Lux/Light Sensor Breakout](https://www.adafruit.com/product/439)
The TSL2561 luminosity sensor is an advanced digital light sensor, ideal for use in a wide range of light situations. Compared to low cost CdS cells, this sensor is more precise, allowing for exact lux calculations and can be configured for different gain/timing ranges to detect light ranges...
No Longer Stocked
[Buy Now](https://www.adafruit.com/product/439)
[Related Guides to the Product](https://learn.adafruit.com/products/439/guides)
### Flora Lux Sensor - TSL2561 Light Sensor
[Flora Lux Sensor - TSL2561 Light Sensor](https://www.adafruit.com/product/1246)
Add light-reactive sensing to your wearable Flora project with this high precision Lux sensor. The TSL2561 luminosity sensor is an advanced digital light sensor, ideal for use in a wide range of light situations. Compared to low cost CdS cells, this sensor is more precise, allowing for exact...
No Longer Stocked
[Buy Now](https://www.adafruit.com/product/1246)
[Related Guides to the Product](https://learn.adafruit.com/products/1246/guides)
## Related Guides
- [Adafruit Metro M7 with microSD](https://learn.adafruit.com/adafruit-metro-m7-microsd.md)
- [Adafruit Qualia High Res Displayport Desktop Monitor](https://learn.adafruit.com/qualia-high-res-displayport-desktop-monitor.md)
- [Adafruit NeoPixel Breakout](https://learn.adafruit.com/adafruit-neopixel-breakout.md)
- [3D Printed Flexible LED Glove with Conductive Filament](https://learn.adafruit.com/3d-printed-flexible-conductive-filament-led-glove.md)
- [DC & USB Boarduino Kits](https://learn.adafruit.com/boarduino-kits.md)
- [Adafruit PDM Microphone Breakout](https://learn.adafruit.com/adafruit-pdm-microphone-breakout.md)
- [Adafruit LSM6DS33 6-DoF IMU Breakout](https://learn.adafruit.com/lsm6ds33-6-dof-imu-accelerometer-gyro.md)
- [Adafruit 7-Segment LED FeatherWings](https://learn.adafruit.com/adafruit-7-segment-led-featherwings.md)
- [Adafruit Mini TFT with Joystick Featherwing](https://learn.adafruit.com/adafruit-mini-tft-featherwing.md)
- [Adafruit QT Py CH32V203](https://learn.adafruit.com/adafruit-qt-py-ch32v203.md)
- [Pro Trinket Tachometer](https://learn.adafruit.com/pro-trinket-tachometer.md)
- [Open Sesame! A SMS-controlled door lock](https://learn.adafruit.com/open-sesame-a-sms-controlled-door-lock.md)
- [Adafruit Circuit Playground Tri-Color E-Ink Gizmo](https://learn.adafruit.com/adafruit-circuit-playground-tri-color-e-ink-gizmo.md)
- [Tent Lantern](https://learn.adafruit.com/tent-lantern.md)
- [Adafruit SCD-30 - NDIR CO2 Temperature and Humidity Sensor](https://learn.adafruit.com/adafruit-scd30.md)
---
# Source: https://learn.adafruit.com/basic-resistor-sensor-reading-on-raspberry-pi/wiring.md
# Source: https://learn.adafruit.com/hl1606-led-strip/wiring.md
# Source: https://learn.adafruit.com/digital-led-strip/wiring.md
# Source: https://learn.adafruit.com/20mm-led-pixels/wiring.md
# Source: https://learn.adafruit.com/12mm-led-pixels/wiring.md
# Source: https://learn.adafruit.com/096-mini-color-oled/wiring.md
# Source: https://learn.adafruit.com/gps-dog-collar/wiring.md
# Source: https://learn.adafruit.com/adafruit-ina219-current-sensor-breakout/wiring.md
# Adafruit INA219 Current Sensor Breakout
## Wiring
The INA219 breakout board can be powered by the 5V or 3V pin on your Arduino and communicates via I2C.
To wire up the STEMMA QT version:
- Connect **board VIN (red wire)** to **Arduino 5V** if you are running a **5V** board Arduino (Mega, etc.). If your board is **3V,** connect to that instead.
- Connect **board GND (black wire) **to **Arduino** **GND**
- Connect **board SCL (yellow wire) **to **Arduino** **SCL**
- Connect **board SDA (blue wire) **to **Arduino** **SDA**
- Connect **Vin+** to the **positive terminal of the power supply for the circuit under test**
- Connect **Vin-** to the **positive terminal or lead of the load**


To wire up the original version:
## Connect to the microcontroller
- Connect **GND** to **GND**
- Connect **VCC** to **5v**
- Then connect **SDA** to **SDA** (Analog pin 4 on pre-R3 Arduinos)
- And connect **SCL** to **SCL** (Analog pin 5 on pre-R3 Arduinos)

On R3 and later Arduinos, you can connect to the new dedicated SDA & SCL pins next to the AREF pin. On pre-R3 Megas, SDA & SCL are on pins 20 & 21.
Next we must insert the INA219 current sensor into the circuit we want to measure: 
Danger:
## Connect to the circuit
- Connect V+ to the positive terminal of the power supply for the circuit under test.
- Connect V- to the positive terminal or lead of the load. This puts the sense resistor in-line with the circuit.
- Finally, connect a wire from the negative terminal of the power supply to GND. This allows the sensor to measure the load voltage as well as the load current.
The photo below shows an INA219 breakout board configured to measure the motor supply current on an Adafruit Motor Shield.
Primary:

- [Previous Page](https://learn.adafruit.com/adafruit-ina219-current-sensor-breakout/assembly.md)
- [Next Page](https://learn.adafruit.com/adafruit-ina219-current-sensor-breakout/arduino-code.md)
## Featured Products
### INA219 High Side DC Current Sensor Breakout - 26V ±3.2A Max
[INA219 High Side DC Current Sensor Breakout - 26V ±3.2A Max](https://www.adafruit.com/product/904)
This breakout board will solve all your power-monitoring problems. Instead of struggling with two multimeters, you can just use the handy INA219 chip on this breakout to both measure both the high side voltage and DC current draw over I2C with ±1% precision.
**Please...**
In Stock
[Buy Now](https://www.adafruit.com/product/904)
[Related Guides to the Product](https://learn.adafruit.com/products/904/guides)
### STEMMA QT / Qwiic JST SH 4-pin Cable - 100mm Long
[STEMMA QT / Qwiic JST SH 4-pin Cable - 100mm Long](https://www.adafruit.com/product/4210)
This 4-wire cable is a little over 100mm / 4" long and fitted with JST-SH female 4-pin connectors on both ends. Compared with the chunkier JST-PH these are 1mm pitch instead of 2mm, but still have a nice latching feel, while being easy to insert and remove.
In Stock
[Buy Now](https://www.adafruit.com/product/4210)
[Related Guides to the Product](https://learn.adafruit.com/products/4210/guides)
### STEMMA QT / Qwiic JST SH 4-pin to Premium Male Headers Cable
[STEMMA QT / Qwiic JST SH 4-pin to Premium Male Headers Cable](https://www.adafruit.com/product/4209)
This 4-wire cable is a little over 150mm / 6" long and fitted with JST-SH female 4-pin connectors on one end and premium Dupont male headers on the other. Compared with the chunkier JST-PH these are 1mm pitch instead of 2mm, but still have a nice latching feel, while being easy to insert...
Out of Stock
[Buy Now](https://www.adafruit.com/product/4209)
[Related Guides to the Product](https://learn.adafruit.com/products/4209/guides)
### Premium Male/Male Jumper Wires - 40 x 6" (150mm)
[Premium Male/Male Jumper Wires - 40 x 6" (150mm)](https://www.adafruit.com/product/758)
Handy for making wire harnesses or jumpering between headers on PCB's. These premium jumper wires are 6" (150mm) long and come in a 'strip' of 40 (4 pieces of each of ten rainbow colors). They have 0.1" male header contacts on either end and fit cleanly next to each other...
Out of Stock
[Buy Now](https://www.adafruit.com/product/758)
[Related Guides to the Product](https://learn.adafruit.com/products/758/guides)
### Full Sized Premium Breadboard - 830 Tie Points
[Full Sized Premium Breadboard - 830 Tie Points](https://www.adafruit.com/product/239)
This is a 'full-size' premium quality breadboard, 830 tie points. Good for small and medium projects. It's 2.2" x 7" (5.5 cm x 17 cm) with a standard double-strip in the middle and two power rails on both sides. You can pull the power rails off easily to make the...
In Stock
[Buy Now](https://www.adafruit.com/product/239)
[Related Guides to the Product](https://learn.adafruit.com/products/239/guides)
### Adafruit INA219 FeatherWing
[Adafruit INA219 FeatherWing](https://www.adafruit.com/product/3650)
The **INA219 FeatherWing** makes power-monitoring problems a thing of the past. Instead of struggling with two multimeters, you can just use the handy INA219 chip on this breakout to measure both the high side voltage and DC current draw over I2C with 1% precision....
In Stock
[Buy Now](https://www.adafruit.com/product/3650)
[Related Guides to the Product](https://learn.adafruit.com/products/3650/guides)
### Adafruit METRO 328 Fully Assembled - Arduino IDE compatible
[Adafruit METRO 328 Fully Assembled - Arduino IDE compatible](https://www.adafruit.com/product/50)
We sure love the ATmega328 here at Adafruit, and we use them _a lot_ for our own projects. The processor has plenty of GPIO, Analog inputs, hardware UART SPI and I2C, timers and PWM galore - just enough for most simple projects. When we need to go small, we use a
Out of Stock
[Buy Now](https://www.adafruit.com/product/50)
[Related Guides to the Product](https://learn.adafruit.com/products/50/guides)
## Related Guides
- [Remote controlled door lock using a fingerprint sensor & Adafruit IO](https://learn.adafruit.com/remote-controlled-door-lock-using-a-fingerprint-sensor-and-adafruit-io.md)
- [WiFi Controlled Mobile Robot](https://learn.adafruit.com/wifi-controlled-mobile-robot.md)
- [Arduino Lesson 14. Servo Motors](https://learn.adafruit.com/adafruit-arduino-lesson-14-servo-motors.md)
- [Geofencing with the FONA 808 & Adafruit IO](https://learn.adafruit.com/geofencing-with-the-fona-808-and-adafruit-io.md)
- [Let’s Put LEDs in Things!](https://learn.adafruit.com/lets-put-leds-in-things.md)
- [Adafruit CC3000 WiFi and Xively](https://learn.adafruit.com/adafruit-cc3000-wifi-and-xively.md)
- [Adafruit AirLift Shield - ESP32 WiFi Co-Processor](https://learn.adafruit.com/adafruit-airlift-shield-esp32-wifi-co-processor.md)
- [Wave Shield Talking Clock](https://learn.adafruit.com/wave-shield-talking-clock.md)
- [Ladyada's Learn Arduino - Lesson #0](https://learn.adafruit.com/ladyadas-learn-arduino-lesson-number-0.md)
- [2.2" TFT Display](https://learn.adafruit.com/2-2-tft-display.md)
- [LED Lightbox](https://learn.adafruit.com/led-lightbox.md)
- [Arduino Prototyping Mounting Plate](https://learn.adafruit.com/arduino-prototyping-mounting-plate.md)
- [How to Choose a Microcontroller](https://learn.adafruit.com/how-to-choose-a-microcontroller.md)
- [Arduino Lesson 16. Stepper Motors](https://learn.adafruit.com/adafruit-arduino-lesson-16-stepper-motors.md)
- [Arduino Lesson 8. Analog Inputs](https://learn.adafruit.com/adafruit-arduino-lesson-8-analog-inputs.md)
---
# Source: https://learn.adafruit.com/delorean-time-circuit/wrap-up-and-resources.md
# DeLorean Time Circuit
## Wrap-Up and Resources
Go for it! If you don’t own a DeLorean, this will still impress your co-workers and look great on your desk. Or maybe you can devise a scheme around Halloween or a cosplay geek-fest like [Dragon\*Con](http://dragoncon.org/). Bolt it just below the arc reactor on your Iron Man suit (you _do_ have an Iron Man suit, right?). Or if you have a young son in a stroller, attach the time circuit to the tray, dress junior in mirrored shades and a “life preserver” down vest, while dad dons a Doc Brown getup…you’ll take home _all the candy in the neighborhood!_

Even if you don’t build this exact item, if it inspires any nifty electronics projects (\*cough\*Proton Pack\*cough\*), please share them in the [forums](http://forums.adafruit.com/), bring them to the Saturday night [show-and-tell](https://plus.google.com/u/0/108772200278976934119/posts) or document your build on a site like [Instructables](http://www.instructables.com/ "Link: http://www.instructables.com/"). Customer projects are frequently showcased on the Adafruit blog!
## Resources
Parts from the Adafruit store include:
- [Teensy (ATmega32u4 USB dev board)](https://www.adafruit.com/products/199 "Link: https://www.adafruit.com/products/199")
- [ChronoDot Ultra-precise Real Time Clock](https://www.adafruit.com/products/255)
- [0.56″ 4-Digit 7-Segment Display w/I2C Backpack – Red](http://www.adafruit.com/products/878 "Link: http://www.adafruit.com/products/878")
- [0.56″ 4-Digit 7-Segment Display w/I2C Backpack – Green](http://www.adafruit.com/products/880)
- [0.56″ 4-Digit 7-Segment Display w/I2C Backpack – Yellow](http://www.adafruit.com/products/879 "Link: http://www.adafruit.com/products/879")
- [Diffused Red 3mm LED](https://www.adafruit.com/products/777) (note: film prop used _yellow_ LEDs on destination time)
- [Diffused Green 3mm LED](https://www.adafruit.com/products/779)
Additional parts acquired from Digi-Key include:
- [Diffused Yellow 3mm LED](http://www.digikey.com/product-detail/en/SSL-LX3044YD "Link: http://www.digikey.com/product-detail/en/SSL-LX3044YD")
- [SN74HC138N 3-to-8 line decoder/demultiplexer IC](http://www.digikey.com/product-detail/en/SN74HC138N/296-1575-5-ND/277221 "Link: http://www.digikey.com/product-detail/en/SN74HC138N/296-1575-5-ND/277221")
Elsewhere:
- Here’s an excellent [DIY flux capacitor tutorial](http://www.instructables.com/id/Flux-Capacitor/).
- The [Replica Prop Forum](http://www.therpf.com/ "Link: http://www.therpf.com/") is a great resource for build assistance, hard-to-find parts and to show off your finished work.
- [YourProps](http://www.yourprops.com/ "Link: http://www.yourprops.com/") likewise for original movie prop reference pics.
- At Maker Faire Bay Area 2012, Adam Savage (of Mythbusters fame) gave [an entertaining and impassioned talk](http://www.youtube.com/watch?v=_otrgJ8Lmx4 "Link: http://www.youtube.com/watch?v=\_otrgJ8Lmx4") (YouTube) about our compulsion to recreate our favorite big-screen icons.
## Code
[Here’s the Arduino sketch](https://github.com/adafruit/Adafruit_Learning_System_Guides/tree/master/BTTF_Clock) that runs the show.
https://github.com/adafruit/Adafruit_Learning_System_Guides/blob/main/BTTF_Clock/BTTF/BTTF.ino
- [Previous Page](https://learn.adafruit.com/delorean-time-circuit/fabrication.md)
## Featured Products
### Adafruit 0.56" 4-Digit 7-Segment Display with I2C Backpack - Red
[Adafruit 0.56" 4-Digit 7-Segment Display with I2C Backpack - Red](https://www.adafruit.com/product/878)
What's better than a single LED? Lots of LEDs! A fun way to make a small display is to use an [8x8 matrix](https://www.adafruit.com/category/37_88) or a [4-digit 7-segment display](https://www.adafruit.com/category/37_103). Matrices like these are...
In Stock
[Buy Now](https://www.adafruit.com/product/878)
[Related Guides to the Product](https://learn.adafruit.com/products/878/guides)
### Adafruit 0.56" 4-Digit 7-Segment Display w/ I2C Backpack - Green
[Adafruit 0.56" 4-Digit 7-Segment Display w/ I2C Backpack - Green](https://www.adafruit.com/product/880)
What's better than a single LED? Lots of LEDs! A fun way to make a small display is to use an [8x8 matrix](https://www.adafruit.com/category/37_88) or a [4-digit 7-segment display](https://www.adafruit.com/category/37_103). Matrices like these are...
No Longer Stocked
[Buy Now](https://www.adafruit.com/product/880)
[Related Guides to the Product](https://learn.adafruit.com/products/880/guides)
### Adafruit 0.56" 4-Digit 7-Segment Display w/I2C Backpack - Yellow
[Adafruit 0.56" 4-Digit 7-Segment Display w/I2C Backpack - Yellow](https://www.adafruit.com/product/879)
What's better than a single LED? Lots of LEDs! A fun way to make a small display is to use an [8x8 matrix](https://www.adafruit.com/category/37_88) or a [4-digit 7-segment display](https://www.adafruit.com/category/37_103). Matrices like these are...
In Stock
[Buy Now](https://www.adafruit.com/product/879)
[Related Guides to the Product](https://learn.adafruit.com/products/879/guides)
### ChronoDot - Ultra-precise Real Time Clock
[ChronoDot - Ultra-precise Real Time Clock](https://www.adafruit.com/product/255)
The **ChronoDot V3** is the latest version of macetech’s popular ChronoDot line of products. Designed during the Great Chip Shortage, it uses the newly-released MAX31328 temperature-compensated real-time clock chip. However, it remains pin- and code-compatible with the older...
In Stock
[Buy Now](https://www.adafruit.com/product/255)
[Related Guides to the Product](https://learn.adafruit.com/products/255/guides)
### Teensy (ATmega32u4 USB dev board) 2.0
[Teensy (ATmega32u4 USB dev board) 2.0](https://www.adafruit.com/product/199)
Discontinued - **you can grab** [Adafruit ItsyBitsy 32u4 - 5V 16MHz](https://www.adafruit.com/product/3677) **instead!**
The Teensy 2.0 is a complete USB-based microcontoller development system, in a very small footprint! All programming is done via the USB port. No...
No Longer Stocked
[Buy Now](https://www.adafruit.com/product/199)
[Related Guides to the Product](https://learn.adafruit.com/products/199/guides)
### Diffused Green 5mm LED (25 pack)
[Diffused Green 5mm LED (25 pack)](https://www.adafruit.com/product/298)
Need some indicators? We are big fans of these diffused green LEDs, in fact we use them exclusively in our kits. They are fairly bright so they can be seen in daytime, and from any angle. They go easily into a breadboard and will add that extra zing to your project.
- Pack of 25...
In Stock
[Buy Now](https://www.adafruit.com/product/298)
[Related Guides to the Product](https://learn.adafruit.com/products/298/guides)
### Diffused Red 5mm LED (25 pack)
[Diffused Red 5mm LED (25 pack)](https://www.adafruit.com/product/299)
Need some indicators? We are big fans of these diffused red LEDs, in fact we use them exclusively in our kits. They are fairly bright so they can be seen in daytime, and from any angle. They go easily into a breadboard and will add that extra zing to your project.
- Pack of 25...
In Stock
[Buy Now](https://www.adafruit.com/product/299)
[Related Guides to the Product](https://learn.adafruit.com/products/299/guides)
## Related Guides
- [Adafruit LED Backpacks](https://learn.adafruit.com/adafruit-led-backpack.md)
- [Mindfulness Clock OF DOOM](https://learn.adafruit.com/mindfulness-clock-of-doom.md)
- [Fidget Spinner Tachometer](https://learn.adafruit.com/fidget-spinner-tachometer.md)
- [Arduino GPS Clock](https://learn.adafruit.com/arduino-clock.md)
- [Collin's Lab: Binary & Hex](https://learn.adafruit.com/collins-lab-binary-and-hex.md)
- [Personalized NextBus ESP8266 Transit Clock](https://learn.adafruit.com/personalized-esp8266-transit-clock.md)
- [Trinket React Counter](https://learn.adafruit.com/trinket-react-counter.md)
- [CircuitPython Hardware: LED Backpacks & FeatherWings](https://learn.adafruit.com/micropython-hardware-led-backpacks-and-featherwings.md)
- [Tap Tempo Trinket](https://learn.adafruit.com/tap-tempo-trinket.md)
- [Raspberry Pi Physical Dashboard](https://learn.adafruit.com/raspberry-pi-physical-dashboard.md)
- [LED Backpack Displays on Raspberry Pi and BeagleBone Black](https://learn.adafruit.com/led-backpack-displays-on-raspberry-pi-and-beaglebone-black.md)
- [Cartoon Character Clock](https://learn.adafruit.com/cartoon-character-clock.md)
- [Feather ESP32-S3 TFT CircuitPython Day 2024 Countdown Clock](https://learn.adafruit.com/feather-esp32-s3-tft-circuitpython-day-2024-countdown-clock.md)
- [Moto 360 Teardown](https://learn.adafruit.com/moto-360-smartwatch-teardown.md)
- [Articulating Retina Monitor](https://learn.adafruit.com/articulating-retina-monitor.md)
---
# Source: https://learn.adafruit.com/adafruits-raspberry-pi-lesson-5-using-a-console-cable/you-will-need.md
# Source: https://learn.adafruit.com/adafruit-raspberry-pi-lesson-1-preparing-and-sd-card-for-your-raspberry-pi/you-will-need.md
# Adafruit's Raspberry Pi Lesson 1. Preparing an SD Card for your Raspberry Pi
## You Will Need
To prepare an SD card for your computer, you will need:
A 'regular' computer with a built-in SD card reader, or an add-on USB SD card reader. The instructions here are for Windows and Mac. You can pick up a [tiny microSD card reader/writer that is nice and fast and works with all USB ports](http://adafruit.com/products/939) at the Adafruit shop.

An SD card at least 8GB in capacity. You can [pick one up that is tested and guaranteed to work with the Raspberry Pi](http://adafruit.com/products/102) at the Adafruit shop. (If buying elsewhere, remember that for the Pi 2, 3 and Zero you'll need microSD.)

- [Previous Page](https://learn.adafruit.com/adafruit-raspberry-pi-lesson-1-preparing-and-sd-card-for-your-raspberry-pi/overview.md)
- [Next Page](https://learn.adafruit.com/adafruit-raspberry-pi-lesson-1-preparing-and-sd-card-for-your-raspberry-pi/raspberry-pi-imager.md)
## Featured Products
### Raspberry Pi 3 - Model B+ - 1.4GHz Cortex-A53 with 1GB RAM
[Raspberry Pi 3 - Model B+ - 1.4GHz Cortex-A53 with 1GB RAM](https://www.adafruit.com/product/3775)
The Raspberry Pi 3 Model B is the most popular Raspberry Pi computer made, and the Pi Foundation knows you can always make a good thing _better_! And what could make the Pi 3 better? How about a _faster_ processor, 5 GHz WiFi, and updated Ethernet chip with PoE capability?...
In Stock
[Buy Now](https://www.adafruit.com/product/3775)
[Related Guides to the Product](https://learn.adafruit.com/products/3775/guides)
### Raspberry Pi 2 Model B Starter Pack - Includes a Raspberry Pi 2
[Raspberry Pi 2 Model B Starter Pack - Includes a Raspberry Pi 2](https://www.adafruit.com/product/2380)
Why not trick out your fresh new board with some accessories? The Pi 2 is a big deal - a big, big deal. It has an upgraded ARMv7 multicore procssor and a full Gigabyte of RAM - meaning you're going to see ~2x the performance on processor-upgrade only and 4x on average for...
No Longer Stocked
[Buy Now](https://www.adafruit.com/product/2380)
[Related Guides to the Product](https://learn.adafruit.com/products/2380/guides)
### Budget Pack for Raspberry Pi 1 Model B (Doesn't include RasPi)
[Budget Pack for Raspberry Pi 1 Model B (Doesn't include RasPi)](https://www.adafruit.com/product/965)
An optimized collection of parts and pieces to experiment with Raspberry Pi at home, school or work. Great for students and those that want to get their feet wet, no soldering required! **THIS PACK DOES NOT INCLUDE A RASPBERRY PI 1 MODEL B and is NOT compatible with Model B+ or Raspberry Pi...**
No Longer Stocked
[Buy Now](https://www.adafruit.com/product/965)
[Related Guides to the Product](https://learn.adafruit.com/products/965/guides)
### USB MicroSD Card Reader/Writer - microSD / microSDHC / microSDXC
[USB MicroSD Card Reader/Writer - microSD / microSDHC / microSDXC](https://www.adafruit.com/product/939)
This is the cutest little microSD card reader/writer - but don't be fooled by its adorableness! It's wicked fast and supports up to 64 GB SDXC cards! Simply slide the card into the edge and plug it into your computer. No drivers are required, it shows up as a standard 'Mass...
No Longer Stocked
[Buy Now](https://www.adafruit.com/product/939)
[Related Guides to the Product](https://learn.adafruit.com/products/939/guides)
### SD/MicroSD Memory Card - 16GB Class 10 - Adapter Included
[SD/MicroSD Memory Card - 16GB Class 10 - Adapter Included](https://www.adafruit.com/product/2693)
Add speedy mega-storage in a jiffy using this 16 GB Class 10 micro-SD card. It comes with a SD adapter so you can use it with any of our shields or adapters! Preformatted to FAT so it works out of the box with our projects. Works great with any device in the Adafruit shop that uses micro-SD...
No Longer Stocked
[Buy Now](https://www.adafruit.com/product/2693)
[Related Guides to the Product](https://learn.adafruit.com/products/2693/guides)
### SD/MicroSD Memory Card (8 GB SDHC)
[SD/MicroSD Memory Card (8 GB SDHC)](https://www.adafruit.com/product/1294)
Add mega-storage in a jiffy using this 8 GB class 4 micro-SD card. It comes with a SD adapter so you can use it with any of our shields or adapters. Preformatted to FAT so it works out of the box with our projects. Tested and works great with our
In Stock
[Buy Now](https://www.adafruit.com/product/1294)
[Related Guides to the Product](https://learn.adafruit.com/products/1294/guides)
### Raspberry Pi 1 Model B Starter Pack - Includes a Raspberry Pi
[Raspberry Pi 1 Model B Starter Pack - Includes a Raspberry Pi](https://www.adafruit.com/product/1014)
You want to get hacking with your Pi fast, right? Get everything you need to start with the Adafruit Starter Pack for Raspberry Pi. It's the perfect accompaniment to your new Pi, everything you need to boot up your Pi Model B and get going. **We pre-assemble the Cobbler for you, no...**
No Longer Stocked
[Buy Now](https://www.adafruit.com/product/1014)
[Related Guides to the Product](https://learn.adafruit.com/products/1014/guides)
### Low-profile microSD card adapter for Raspberry Pi
[Low-profile microSD card adapter for Raspberry Pi](https://www.adafruit.com/product/966)
Make your Pi a little slimmer with this microSD card adapter board. It slides in where the SD card goes but is half the length. Pop in a microSD card for a sleeker machine. The microSD card holder is a push-push type so you can push on the edge that sticks out to remove the card when...
No Longer Stocked
[Buy Now](https://www.adafruit.com/product/966)
[Related Guides to the Product](https://learn.adafruit.com/products/966/guides)
## Related Guides
- [Press Your Button for Raspberry Pi](https://learn.adafruit.com/press-your-button-for-raspberry-pi.md)
- [Adafruit's Raspberry Pi Lesson 5. Using a Console Cable](https://learn.adafruit.com/adafruits-raspberry-pi-lesson-5-using-a-console-cable.md)
- [Adafruit's Raspberry Pi Lesson 2. First Time Configuration](https://learn.adafruit.com/adafruits-raspberry-pi-lesson-2-first-time-configuration.md)
- [Raspberry Pi as an Ad Blocking Access Point](https://learn.adafruit.com/raspberry-pi-as-an-ad-blocking-access-point.md)
- [Set up and Blink - MATLAB and Simulink with Raspberry Pi](https://learn.adafruit.com/how-to-use-matlab-and-simulink-with-raspberry-pi.md)
- [Pi Video Output Using pygame](https://learn.adafruit.com/pi-video-output-using-pygame.md)
- [Drive a 16x2 LCD with the Raspberry Pi](https://learn.adafruit.com/drive-a-16x2-lcd-directly-with-a-raspberry-pi.md)
- [Adafruit's Raspberry Pi Lesson 4. GPIO Setup](https://learn.adafruit.com/adafruits-raspberry-pi-lesson-4-gpio-setup.md)
- [Windows IoT Core Application Management](https://learn.adafruit.com/windows-iot-application-management.md)
- [Read-Only Raspberry Pi](https://learn.adafruit.com/read-only-raspberry-pi.md)
- [Getting Started With Windows IoT Core on Raspberry Pi](https://learn.adafruit.com/getting-started-with-windows-iot-on-raspberry-pi.md)
- [Adafruit NFC/RFID on Raspberry Pi](https://learn.adafruit.com/adafruit-nfc-rfid-on-raspberry-pi.md)
- [Windows IoT Core Application Development: Headless Blinky](https://learn.adafruit.com/windows-iot-application-development-headless-application.md)
- [USB Audio Cards with a Raspberry Pi ](https://learn.adafruit.com/usb-audio-cards-with-a-raspberry-pi.md)
- [Node.js Embedded Development on the Raspberry Pi](https://learn.adafruit.com/node-embedded-development.md)